Expanding your Hideout in Assassin’s Creed Shadows and upgrading it is important for your progression. This guide explains everything you need to know, including how to level it up most efficiently, what rooms to build first and why.
Table of contents
What is the Hideout
If you have played Assassin’s Creed Valhalla, you will feel in familiar waters when it comes to the Hideout in Assassin’s Creed Shadows.
On English soil, you build and expand the Ravensthorpe settlement. Here, in feudal Japan, you will once again be busy building and upgrading the home of you and your allies, all while reaping various benefits for spending both time and resources to expand and upgrade the Hideout.
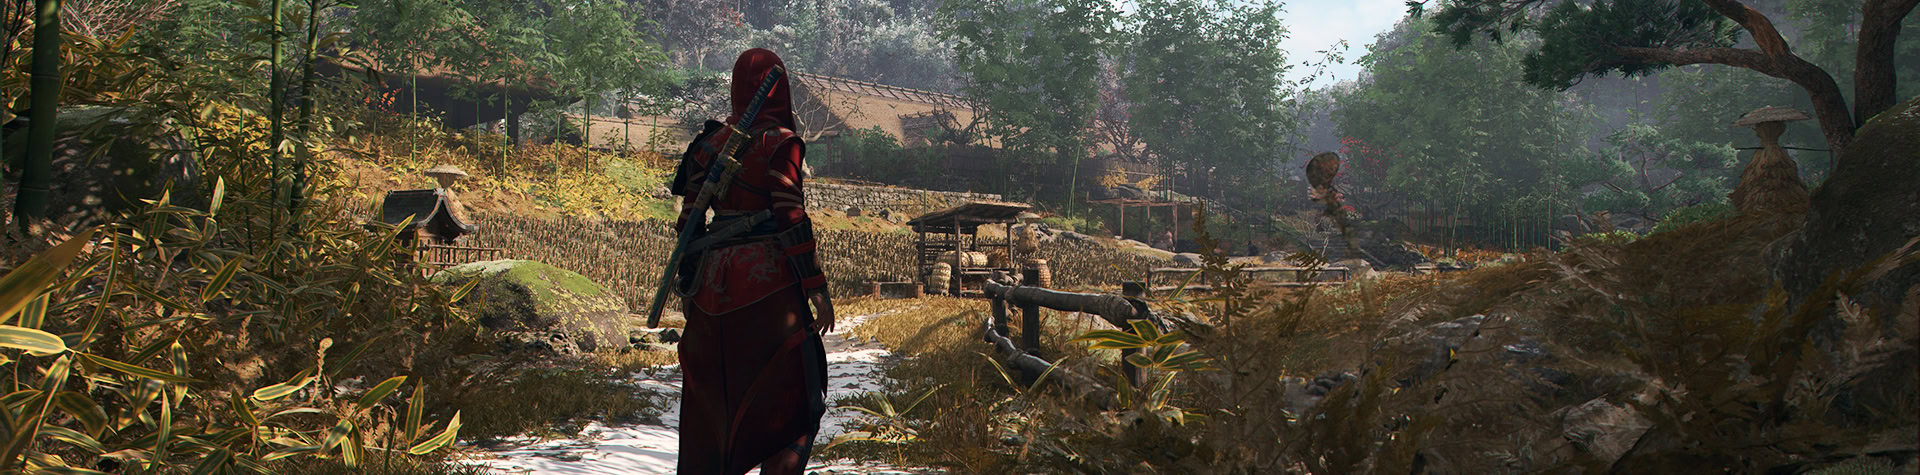
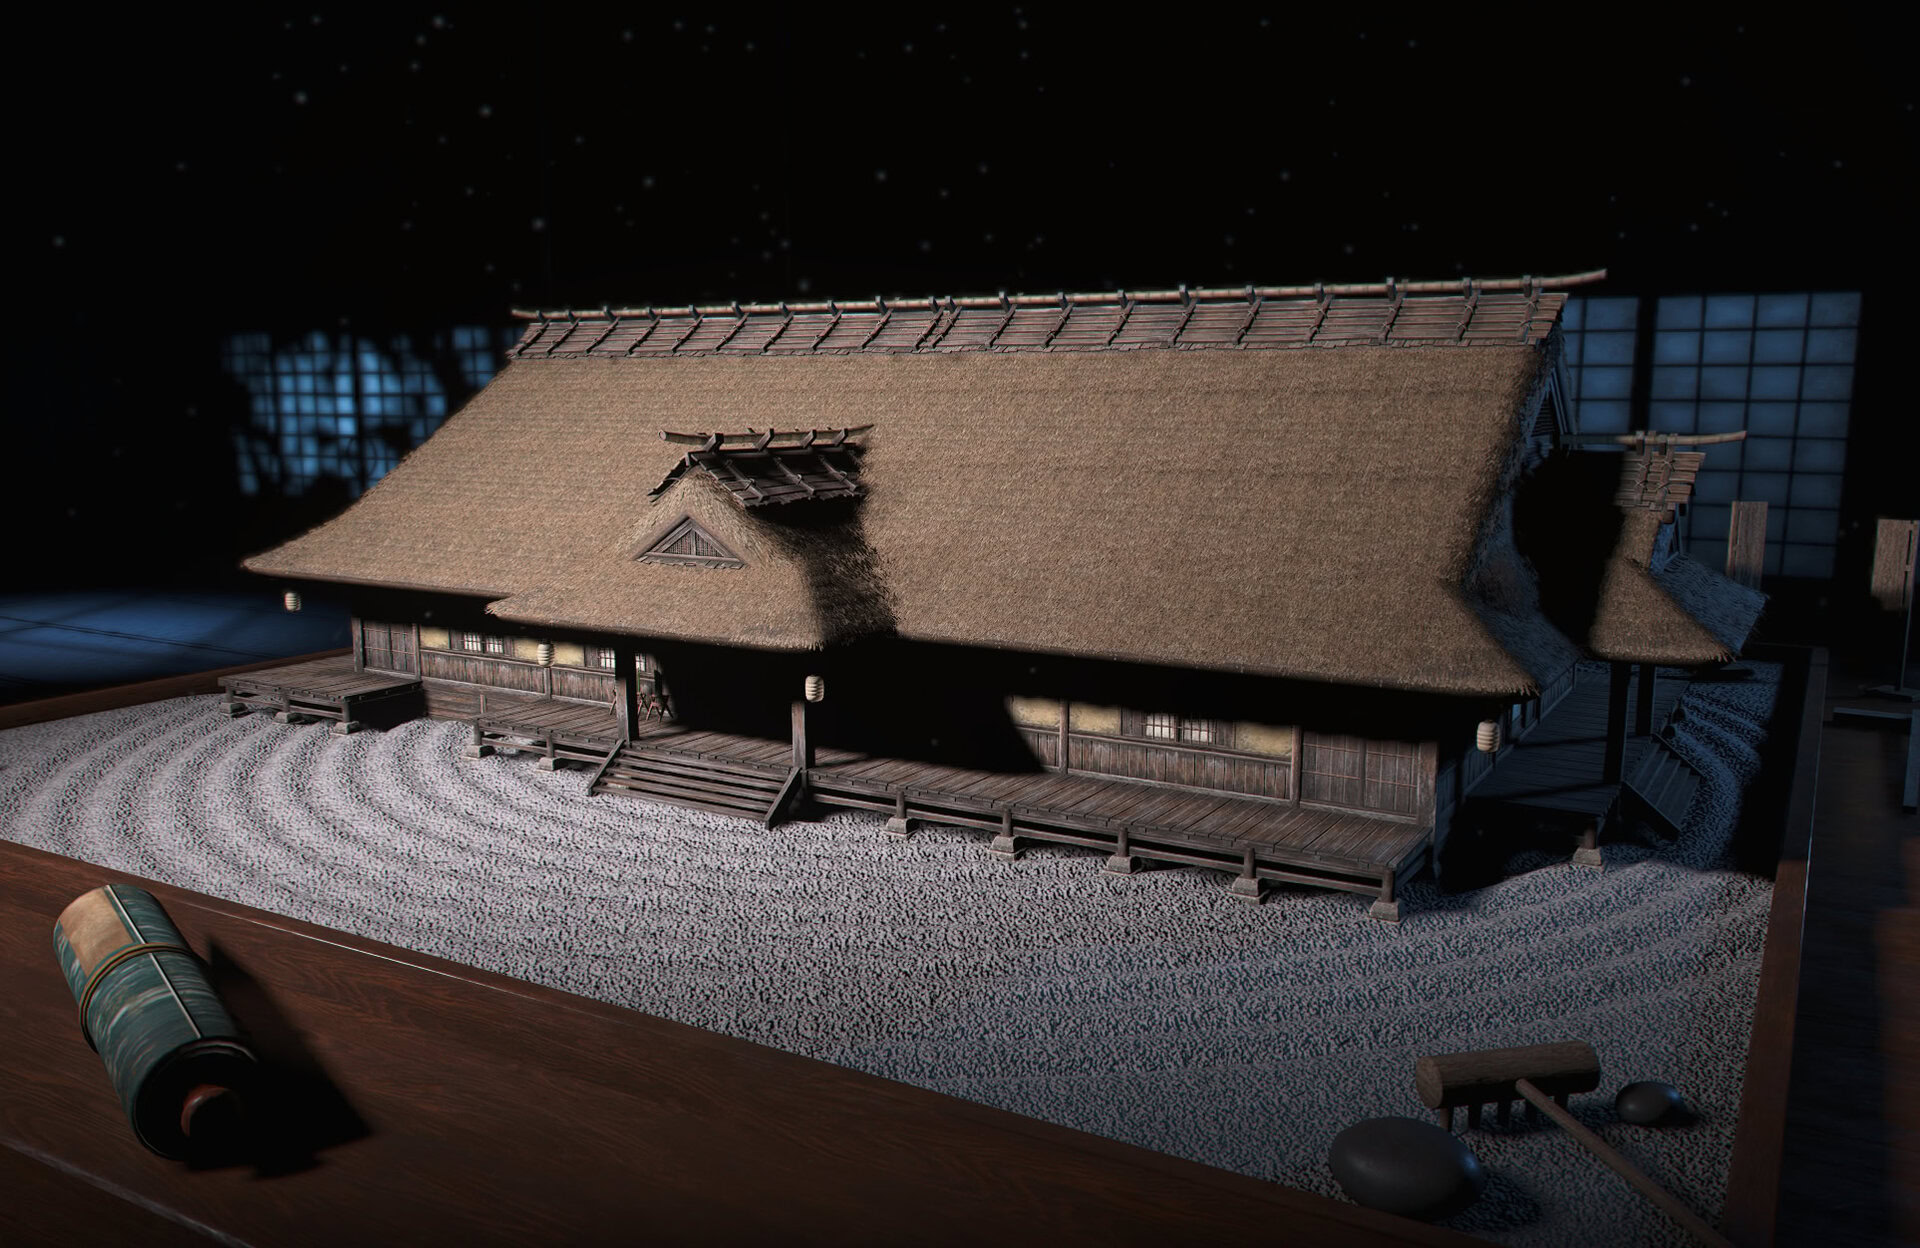
The Hideout is a safe zone, located in the first open world region, Izumi Settsu. It is an important part of the game’s story and you will be returning to it frequently. The Hideout is actually Tomiko’s Homestead, which you turn into a base of operations, of sorts.
How to unlock the Hideout
You unlock the Hideout very early in the game, shortly after the linear and story-heavy tutorial. During the quest “From Spark to Flame”, you have to go to Tomiko at her Homestead.
During the conversation, Tomiko decides to help Naoe with everything she needs and is willing to turn her home into a base for the greater good.
At the end of the conversation, you will go through a short tutorial of what the Hideout is, what you can do with it and how to expand it.
How to access the Hideout
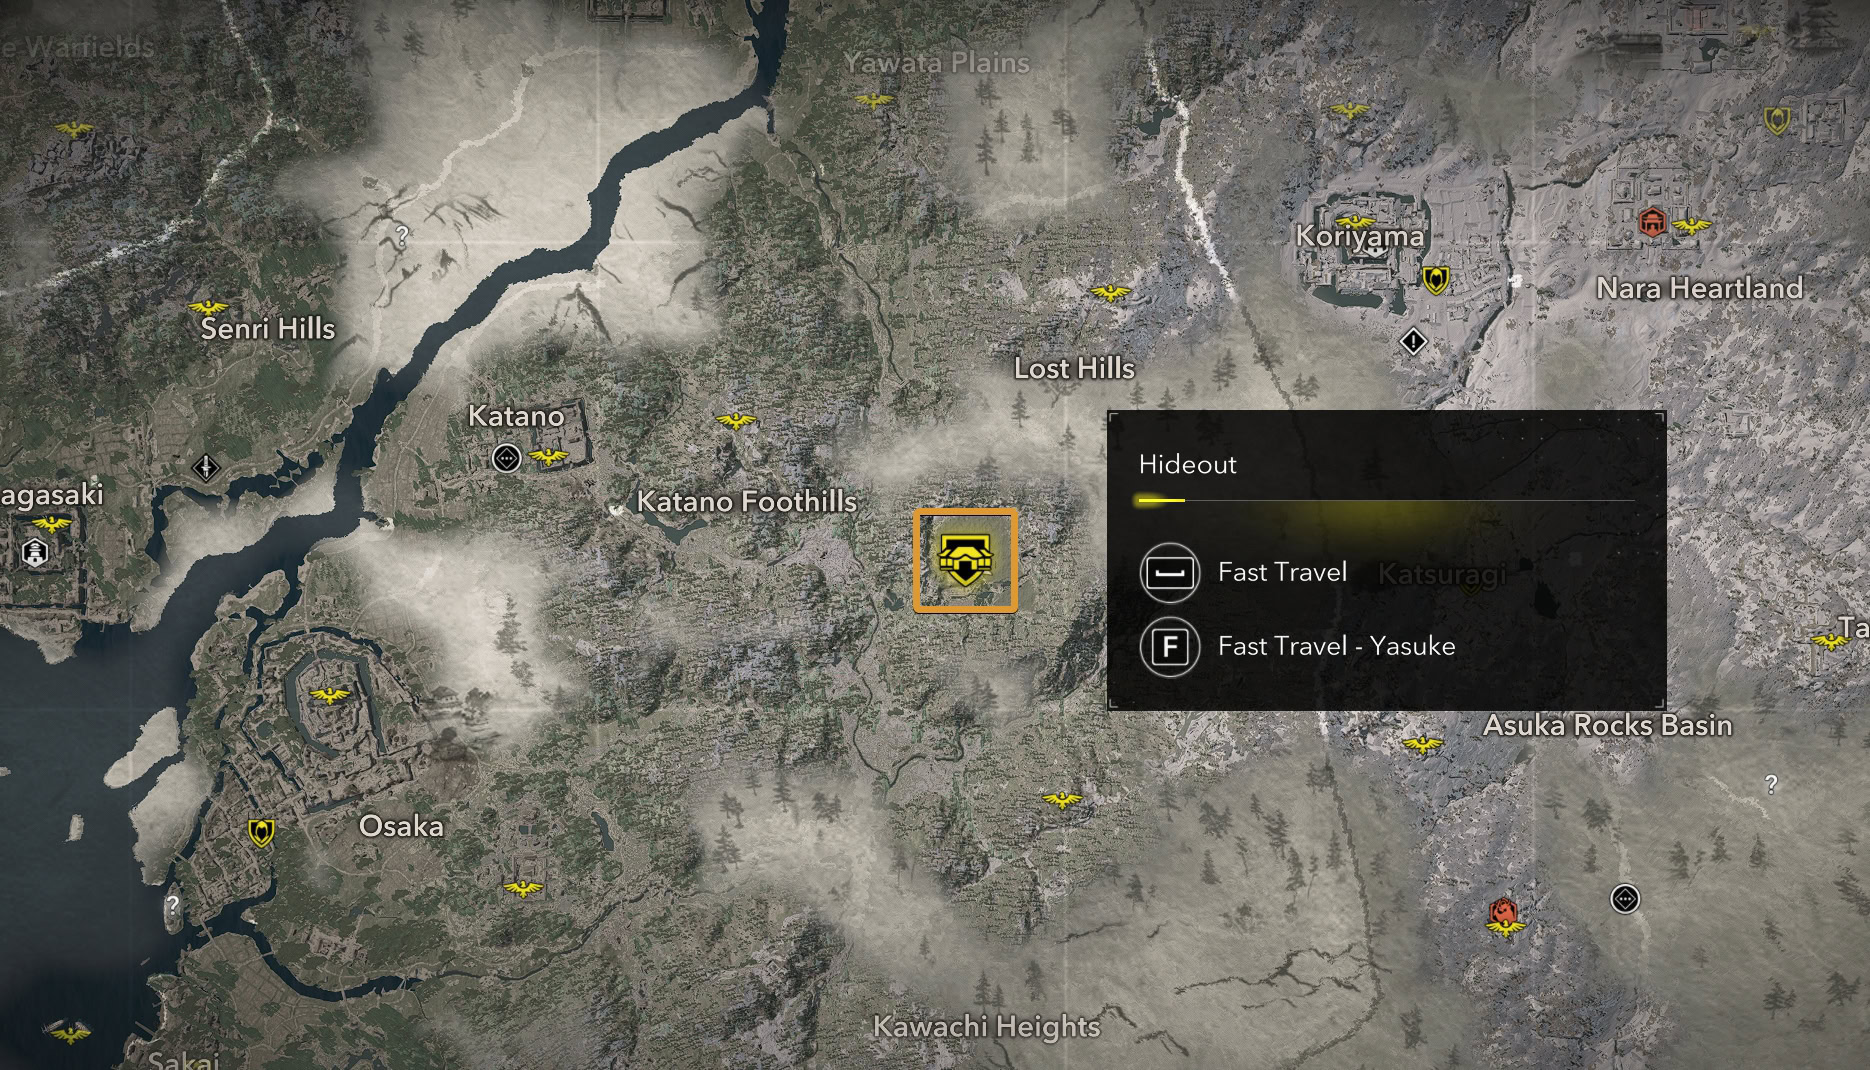
After you have completed the quest “From Spark to Flame”, you will be able to return to the Hideout by fast travelling from anywhere in the world.
The Hideout is located in the Lost Hills subregion or Izumi Settsu. It is represented by a unique and rather large bright yellow icon on the map.
You can walk in and out of the area from the southwestern corner. When you approach the place, the camera will turn stationary, and your character will disappear between the rocks as a transition.
You can also use the Objectives screen to check and use various parts of the Hideout, including fast travel. Keep in mind that regardless of what segment you press to fast travel to, you will always spawn at the Stables in the Hideout.
Hideout UI and Layout
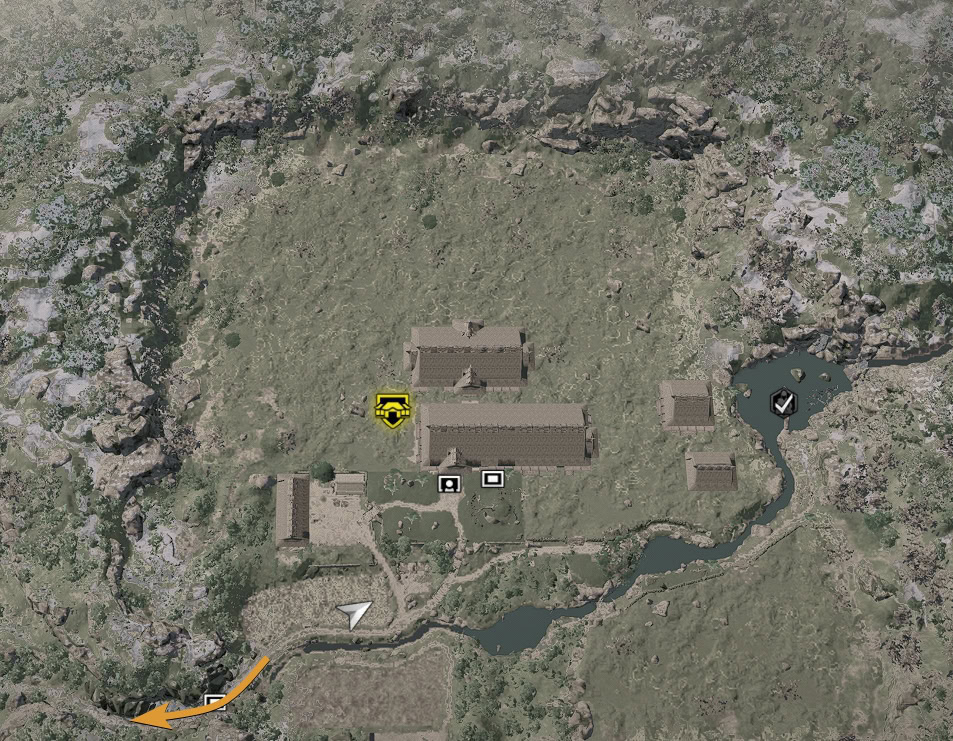
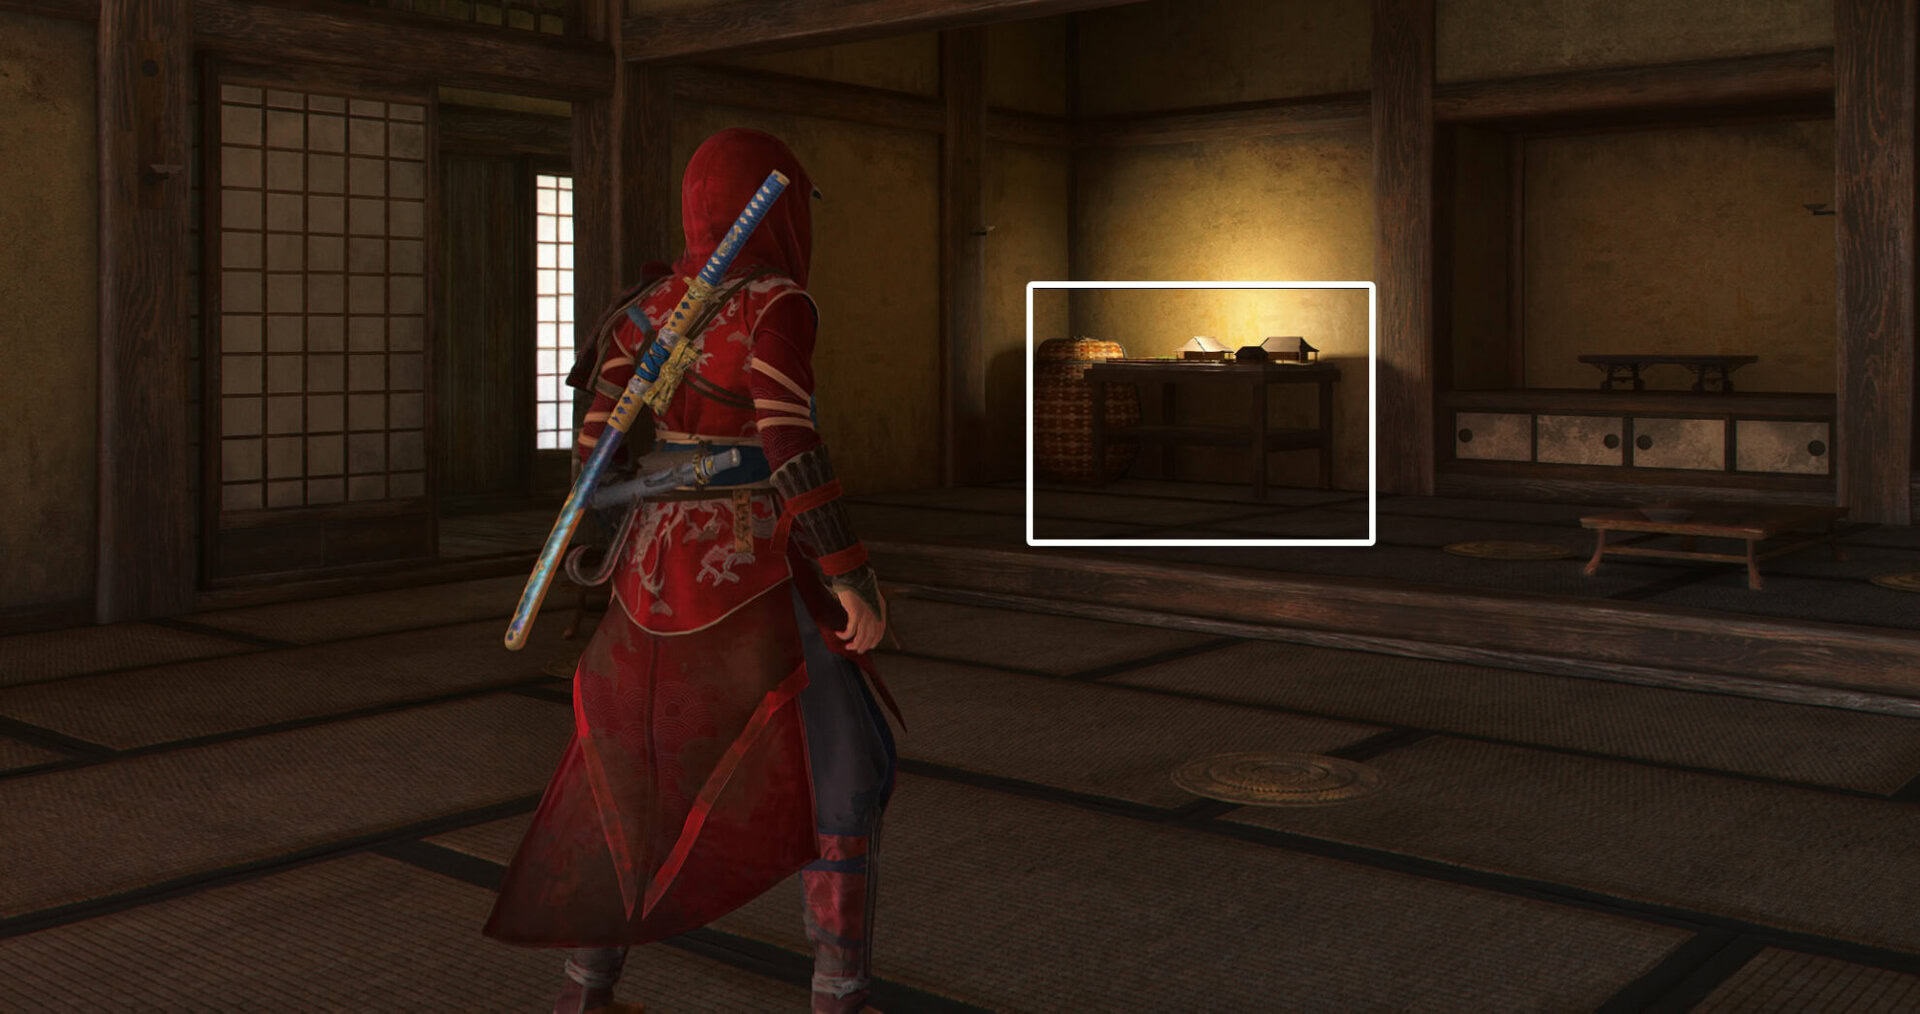
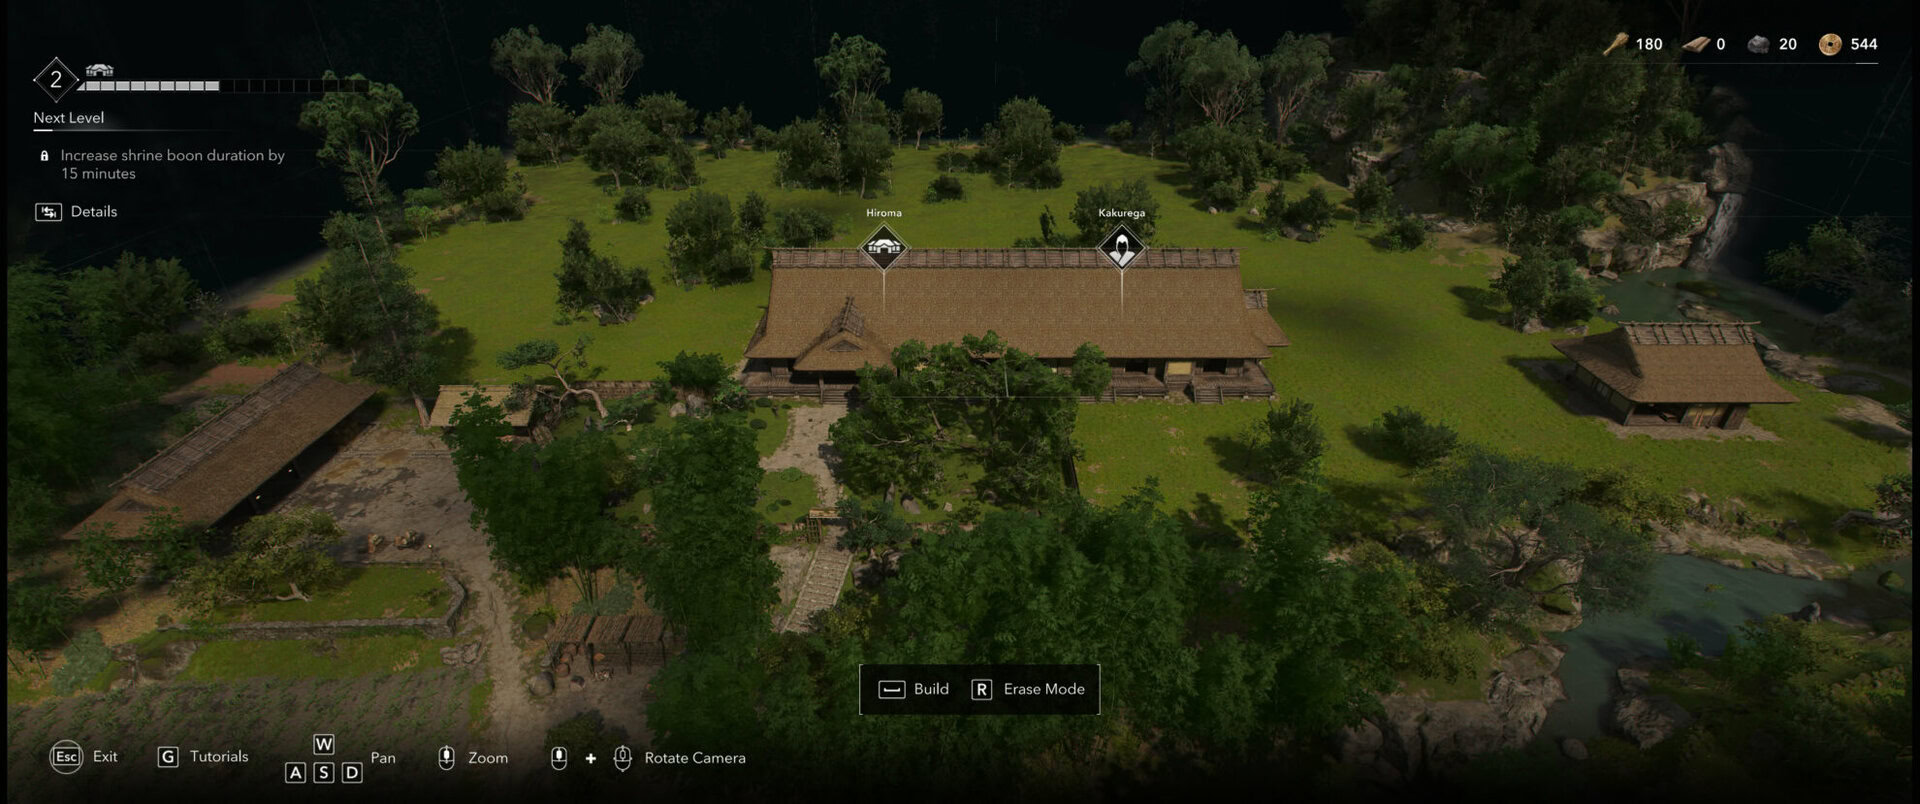
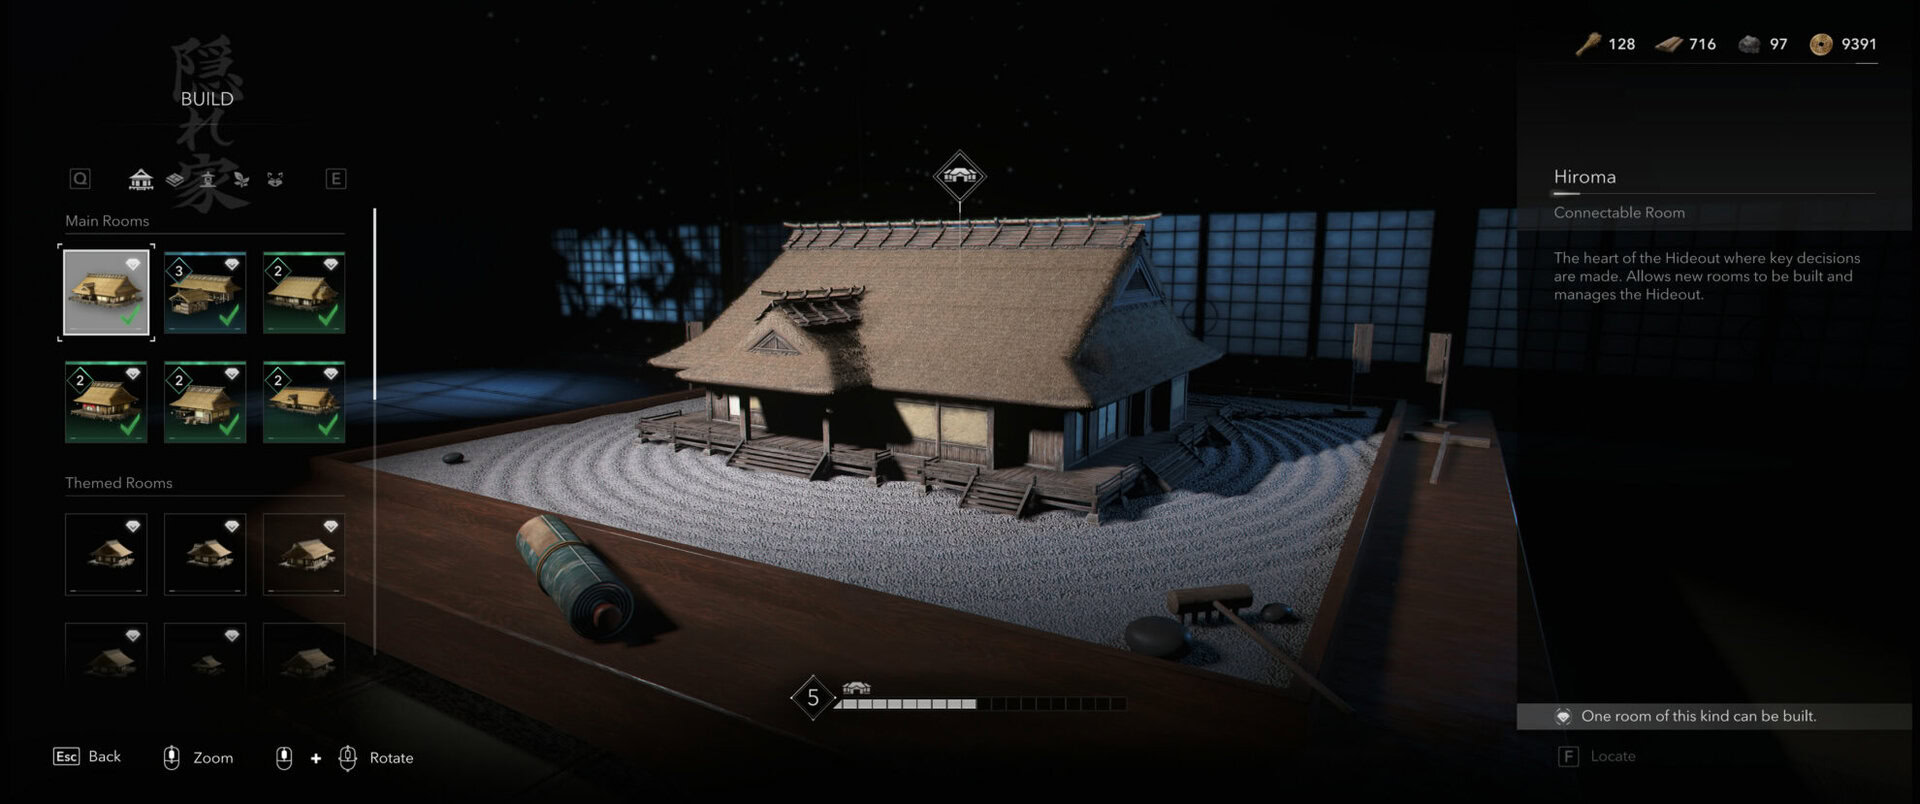
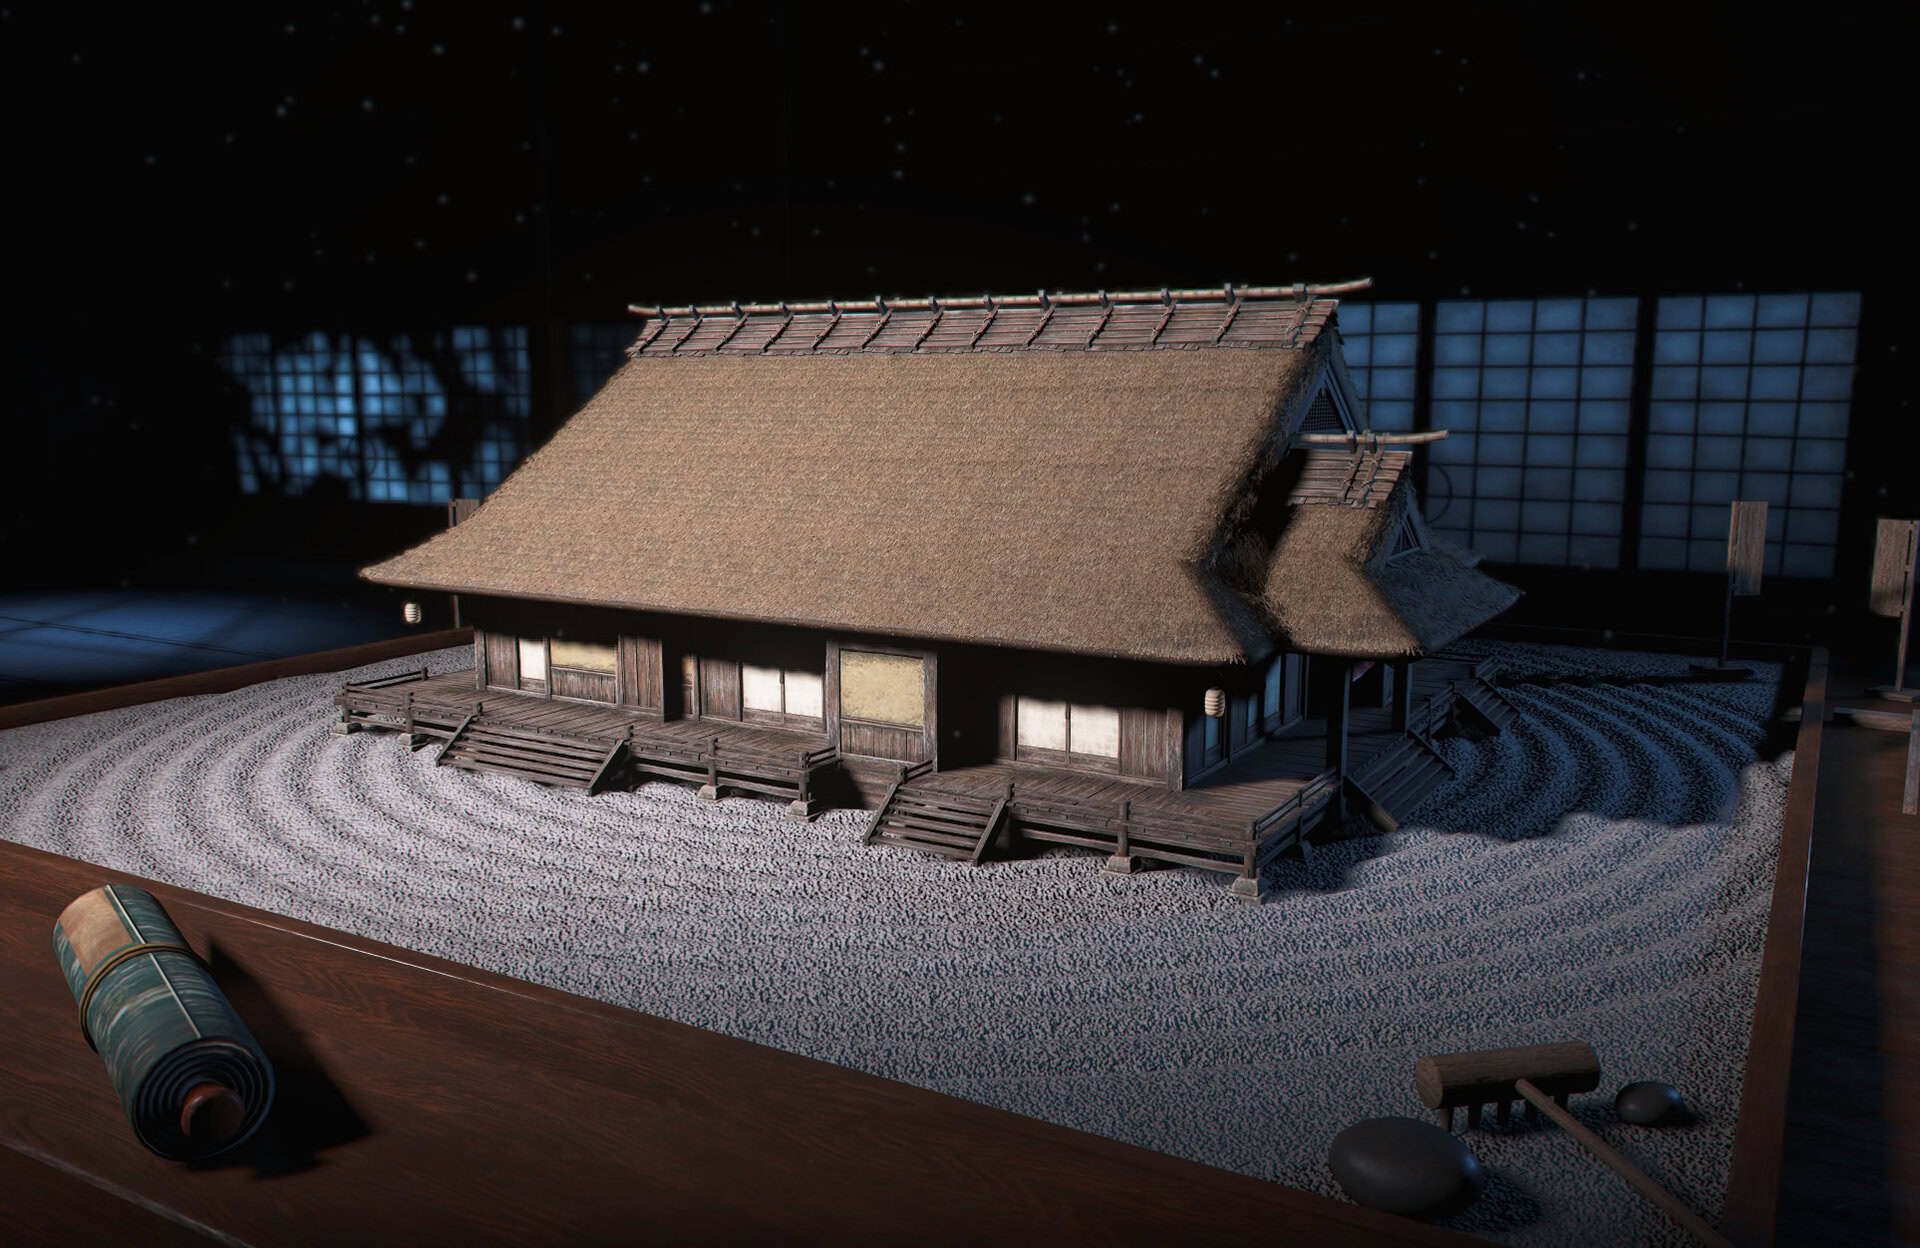
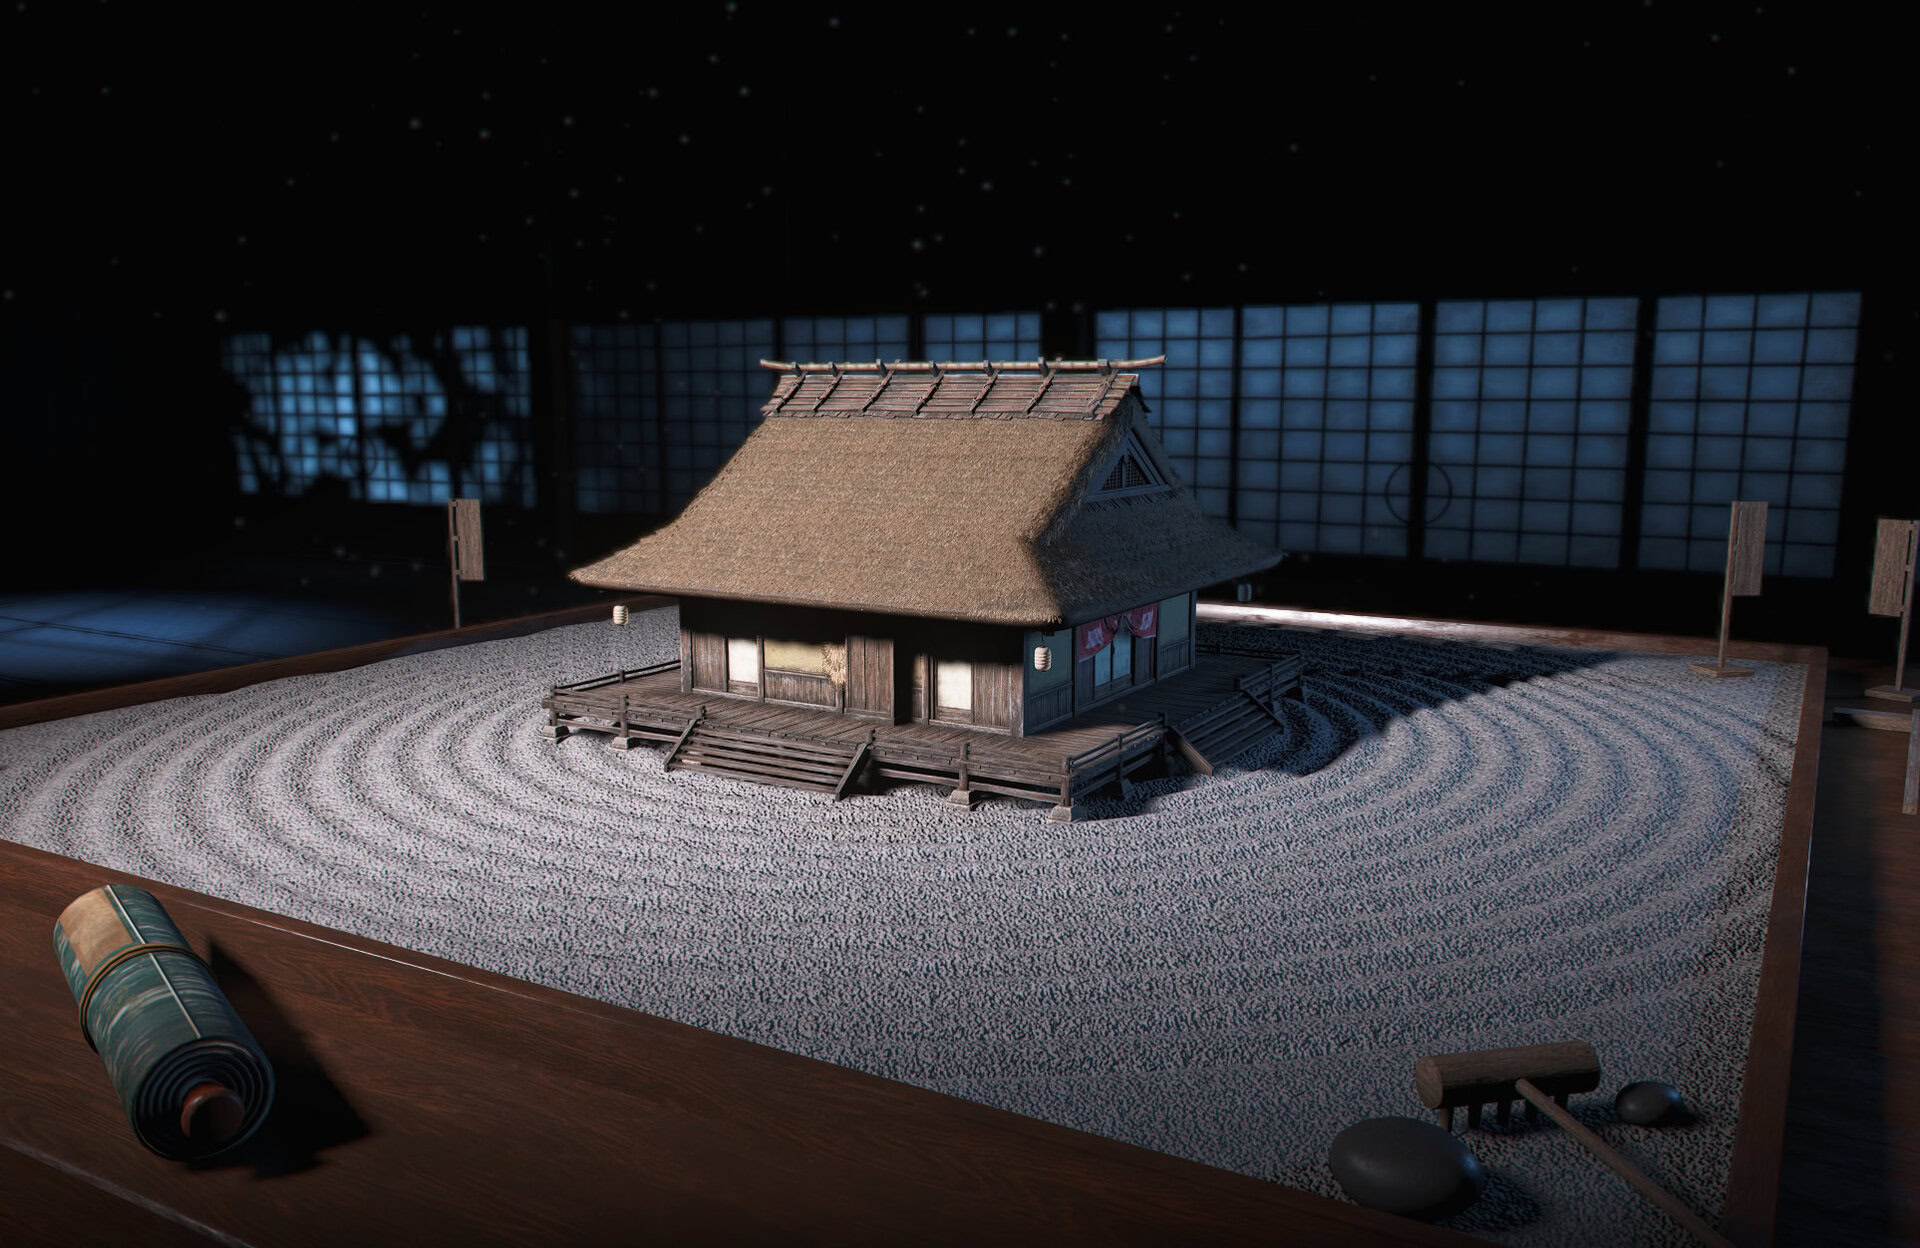
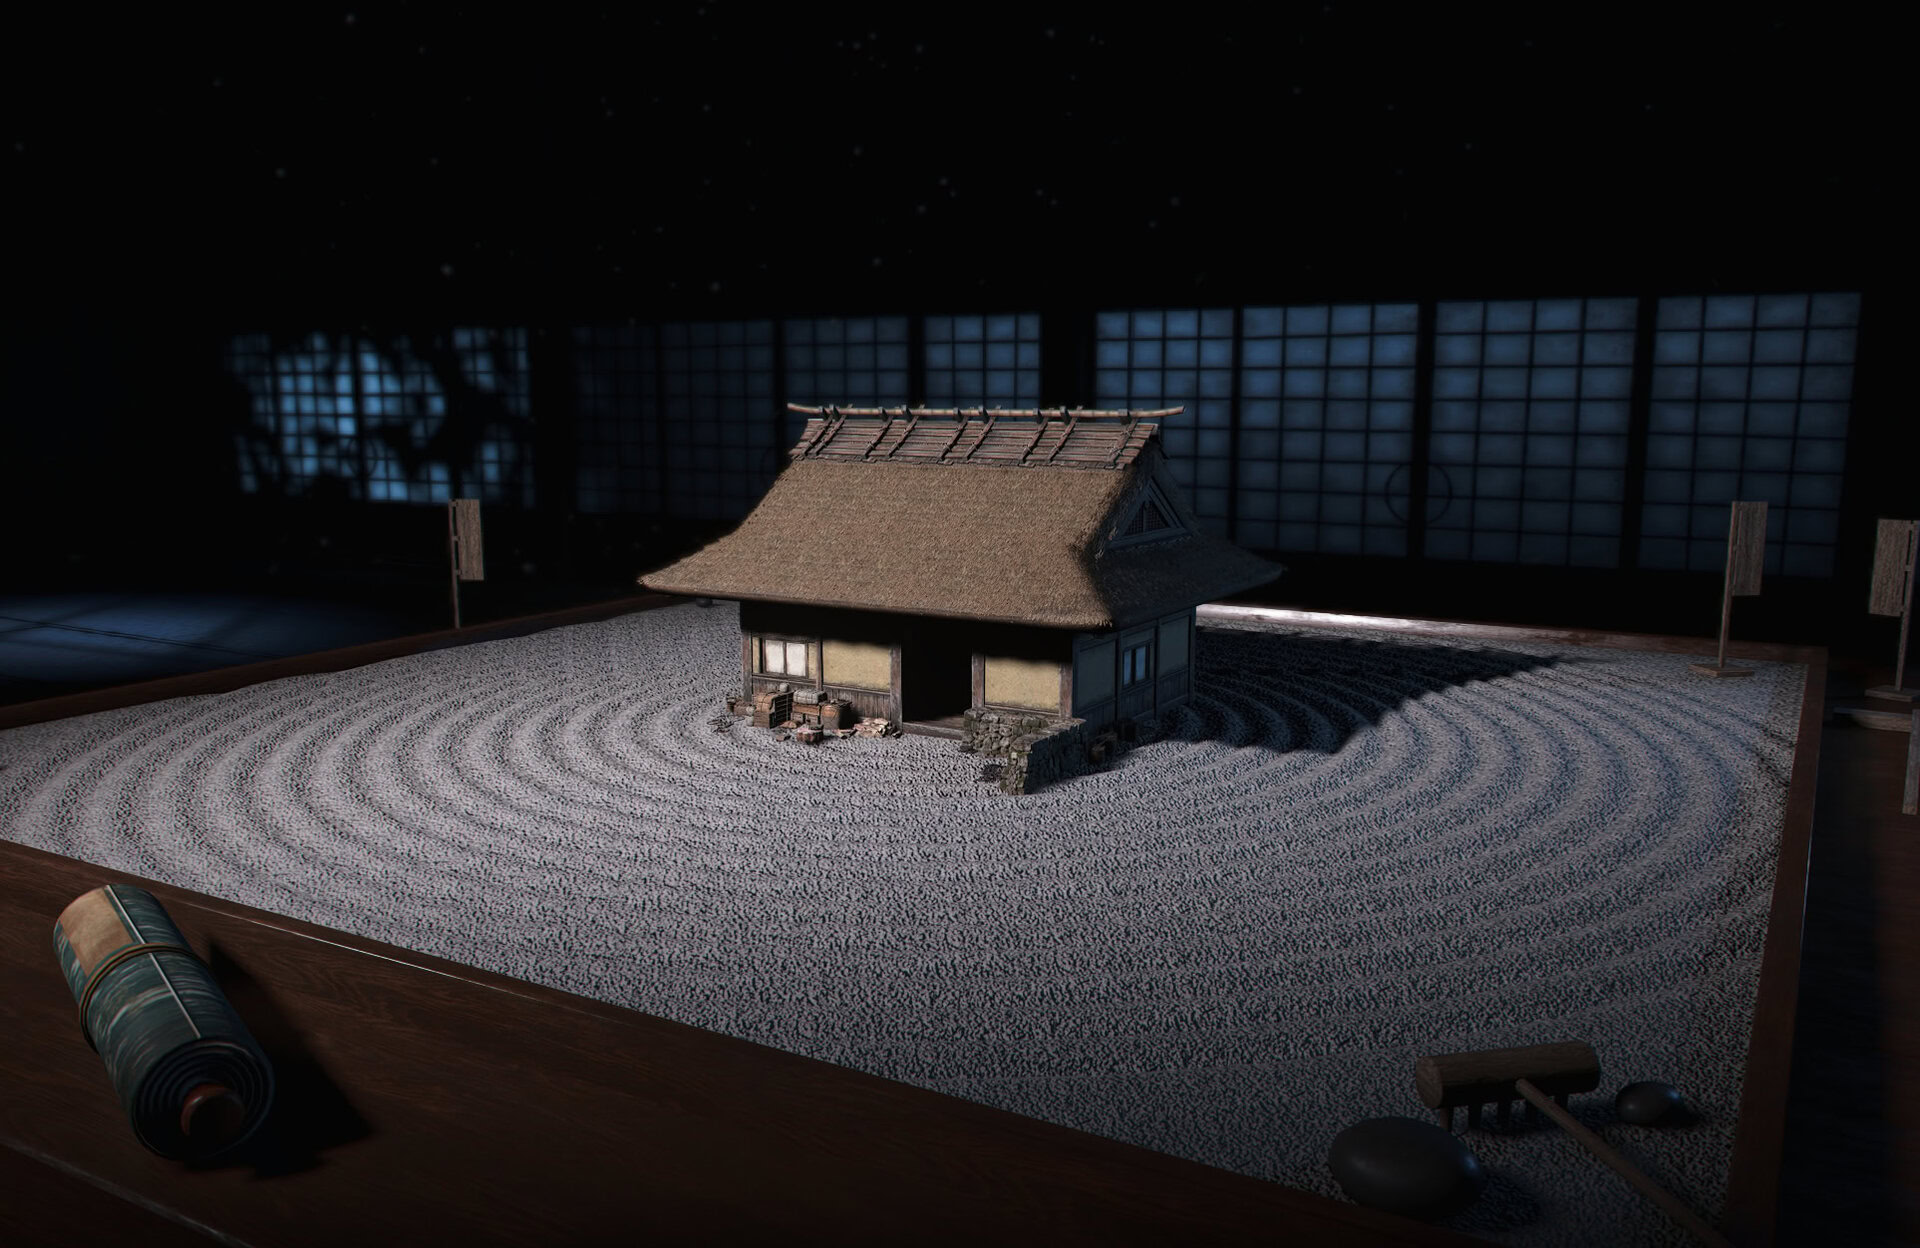
The area on which you can build, is a square-ish flat land with only one building to start with – the main building (the Hiroma), which used to be Tomiko’s house.
To access the building menu and UI, interact with the table in the corner of the main building. This will open up a new menu for you where you can overview and build new things.
To start building, you can press the corresponding keybind (SPACE on keyboard) and this will open a layout where you can choose and place a new building.
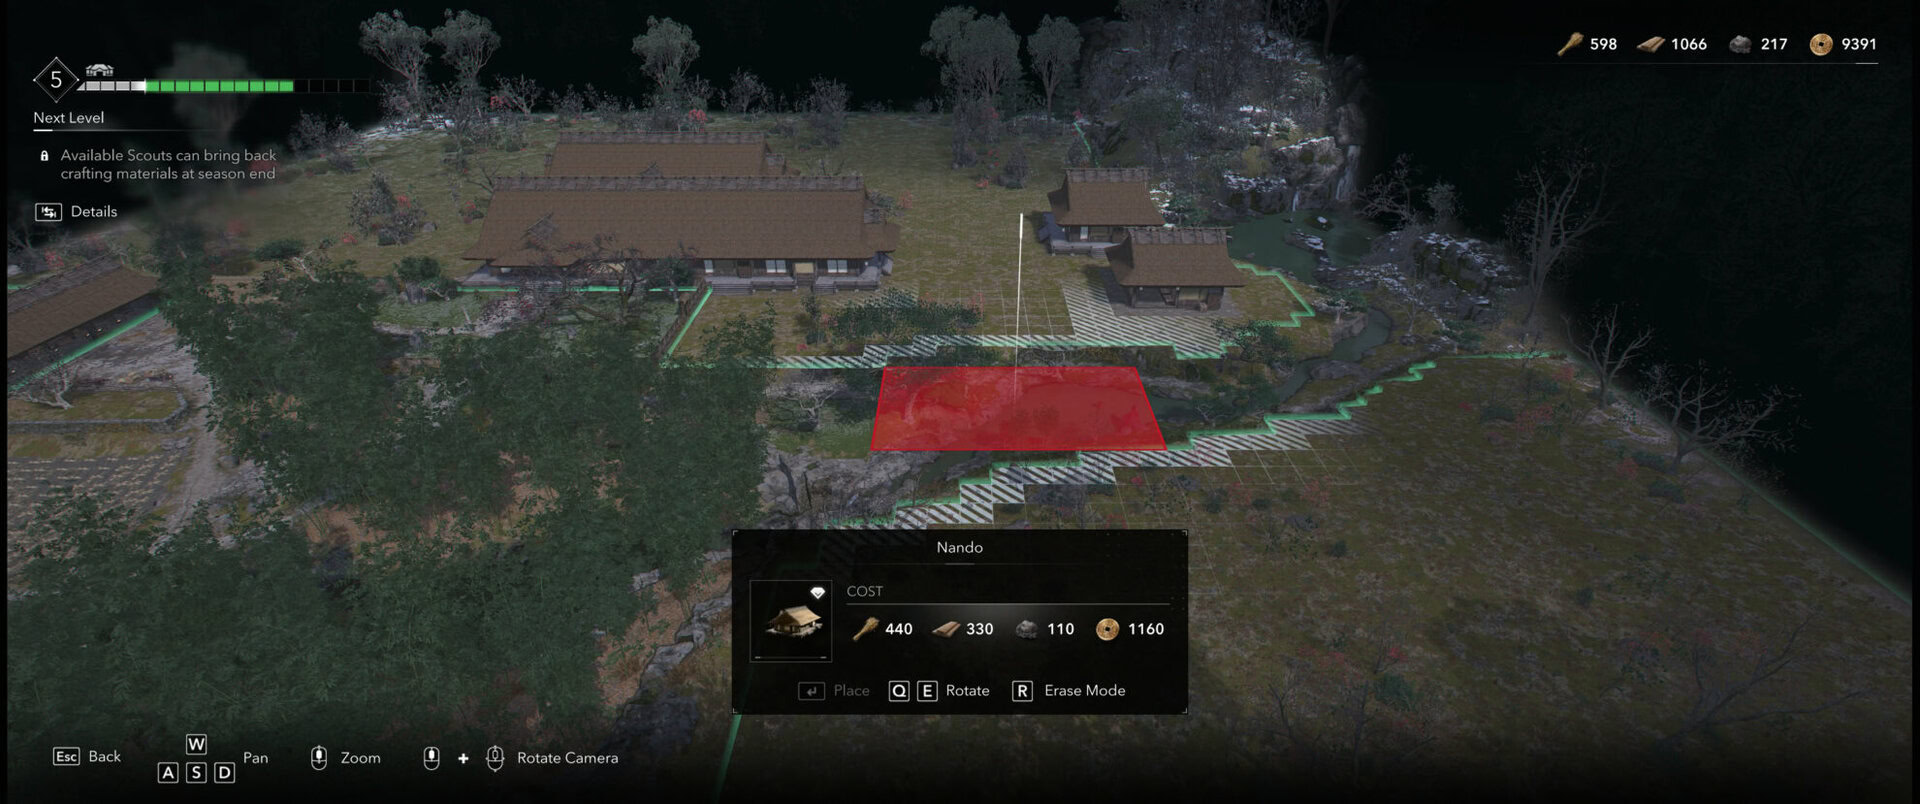
You can place buildings, supporting structures, and decorations only within the area marked as allowed. If you are not allowed to do something, the game will show that to you by turning the shape of the building into a red rectangle.

From the Build menu, you can choose to build the entire layout, not just buildings. You can use various terrain textures such as dirt and gravel, you can place all kinds of decorations, such as statues, lights and banners. You can even place pets that will be roaming around.
Here is everything you can build in the Hideout:
- 6 Main Rooms
- 9 Themed Rooms
- 6 Engawa
You can place the following decorative items in the Hideout:
- Dirt
- Gravel
- Cobblestone
- Forest
- Statues
- Lights
- Banners
- Fences
- Rocks
- Set Pieces
- Miscellaneous objects
- Beech Trees
- Birch Trees
- Pine Trees
- Bamboo Trees
- Flowers
- Bushes
- Wisteria Trees
- Large Flora
- Dogs
- Cats
- Miscellaneous Animals
We have a detailed breakdown of each building, its purpose and available upgrades and associated costs in another segment further down this guide.
You can earn decorative elements by purchasing them from merchants all over the map. You can earn them from quests, as gifts and you can find some in treasure chests.
You can manage buildings individually from the Build screen or from the Build menu. Select the building you want and use the UI tools to build or upgrade it.
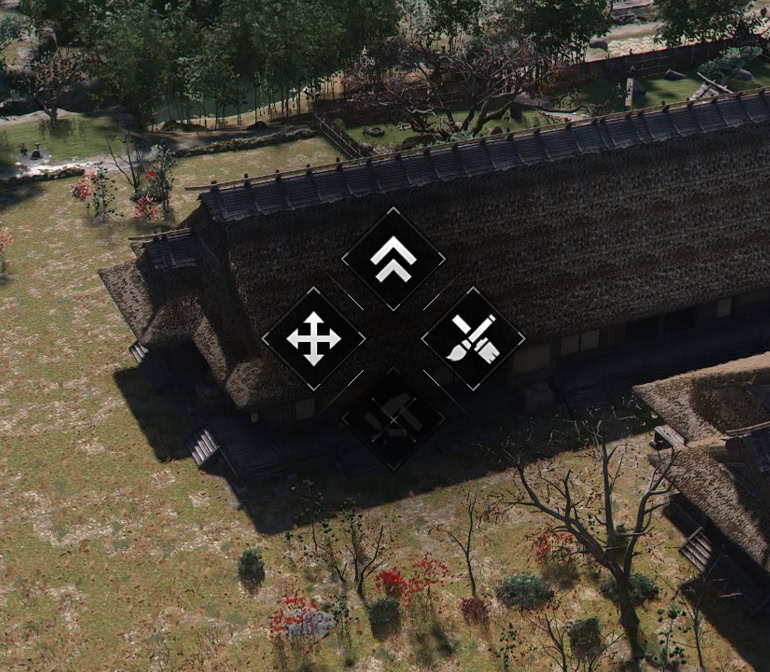
You can play digital house here as much as you want. The game allows you to even customize the appearance of the buildings you have. To change a structure’s appearance, select it in the Build screen and choose the Customize button.
How to level up the Hideout
Every new building you build and every new building you upgrade to a higher tier, will increase the level of your Hideout. There are ten levels in total. Each building can be upgraded twice from Tier 1 to Tier 3.
Hideout levels
When you select a building in the Build menu, a meter will show you exactly how much this new building or upgrade of an existing one, will benefit your Hideout’s level.
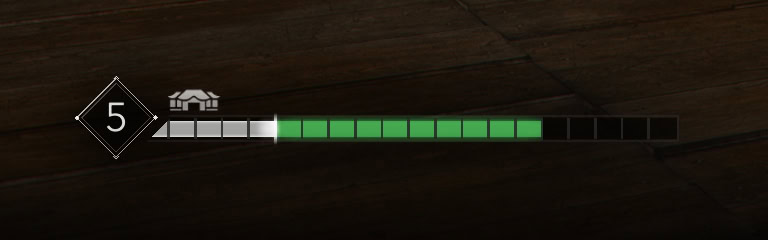
The Hideout can reach maximum level 10. Each level unlocks different bonus.
| Level | Benefits |
|---|---|
| 1. | Unlocking the Hideout |
| 2. | Available Scouts can bring back Mon at season end |
| 3. | Increase shrine boon duration by 15 minutes |
| 4. | Available Scouts can bring back Hideout resources at season end |
| 5. | Reduced engraving costs at the Forge by 20% |
| 6. | Available Scouts can bring back crafting materials at season end |
| 7. | Refill Health and Adrenaline in Kakurega safehouses and the Hideout |
| 8. | Available Scouts can bring gear at season end |
| 9. | Reduce gear upgrade costs at the Forge by 20% |
| 10. | Stockpiles also reward crafting materials |
| 11. | Epic items have 10% chance to be looted at Mythic quality when level 50 or above |
| 12. | Reduce Quality Enhance costs at the Forge by 20% |
| 13. | Available Scouts can bring back Gold at season’s end |
How to get Hideout Resources
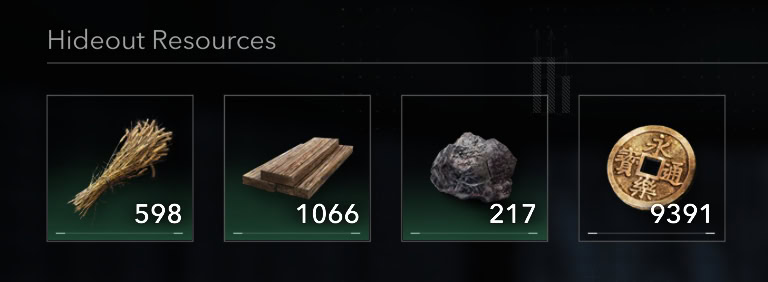
Building and upgrading cost Hideout Resources. There are four types of crafting resources in the game. You can check the amount you have by opening your bag from the inventory screen. When in the Build menu, you can also see your current resources in the top right corner.
Some rooms and structures are only with decorative purposes, and they will not increase your Hideout’s level. The rooms that will improve your hideout, can be built only once and they have additional boosts that alter and improve your gameplay and performance in some ways.
The best methods of getting resources fast to build and upgrade the Hideout, are Castles, Forts and other guarded camps. At those locations you will find plenty of crops, wood and minerals. You can use your scouts to smuggle the big packs of resources.
An alternative option is to check the Contracts when you are visiting your safehouses (Kakurega). They are also a great source of materials. But raiding Castles is by far the most profitable as it also grants you more XP, Mastery Points and a whole lot of items, including a Legendary when you clear the Samurai Daisho and loot the legendary chest.
Unless you are starving for Mon, you should always replenish at least a couple of Scouts at a Kakurega when you can afford it.
Main Rooms and their Benefits
There are six main rooms you can build and improve in the Hideout. Below you can find a full list with each of their tiers, provided effects when built and upgrade costs. Some rooms and upgrades become available after you reach a certain threshold in the main story progression.
Hiroma
The Hiroma is the main building. This is Tomiko’s house. You cannot upgrade it and it is already built Inside the Hiroma, in the far corner from the entrance, is the table that you interact with to manage the entire base of operations.

Stables
The stables are also an existing structure. It can be upgraded twice and will provide additional bonuses related to smuggling stockpiles using your scouts. This is a non-connectable room.
Each time you travel to the Hideout, check the chest right behind you to see if there are new resources your scouts have brought since the last time you were home.
The Salvage chest can get full and when it happens, your scouts will no longer be able to bring resources to it. The game will give you a warning if it happens. Remember to empty it regularly, each time you visit the Hideout.
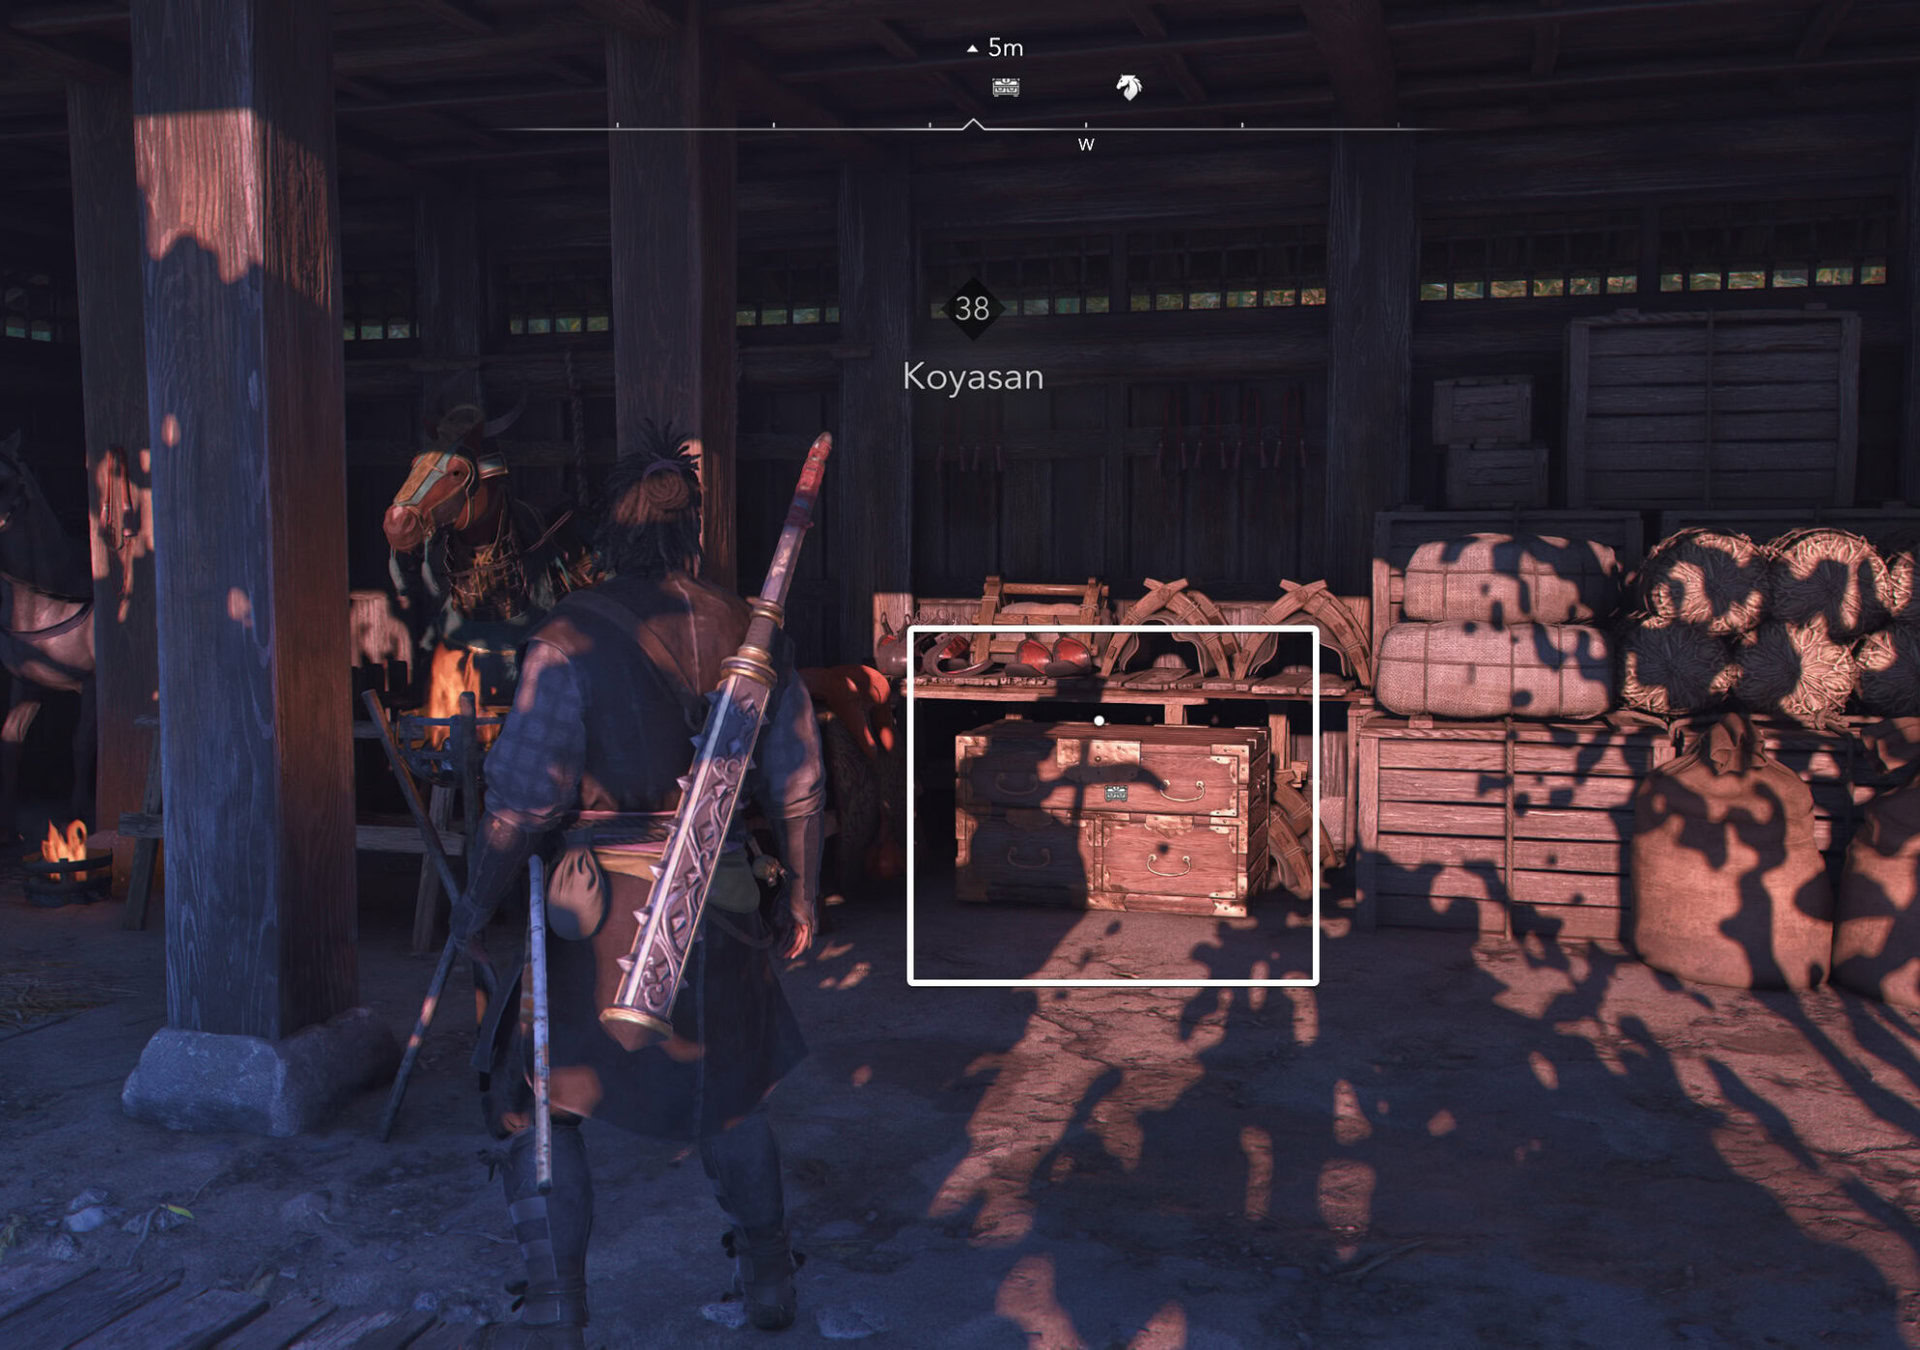
This structure is a hub for transportation animals and materials. When you explore castles or other guarded and wealthy areas, you can tag stockpiles and have your available scouts deliver the goods at the Hideout each season’s end.
| Tiers | Perks | |||
|---|---|---|---|---|
| Stockpiles can be tagged at the cost of 2 Scouts, providing resources at the end of the season. | – | – | – | |
| Stockpiles can be tagged at the cost of 1 Scout, providing resources at the end of the season. | 70 | 50 | 20 | |
| Scouts smuggle 20% more resources from stockpiles | 350 | 260 | 90 | |
| Scouts smuggle 30% more resources from Stockpiles. | 2200 | 1650 | 550 | |
| Stockpile have 10% chance to reward 1 Gold | 2290 | 2240 | 750 |
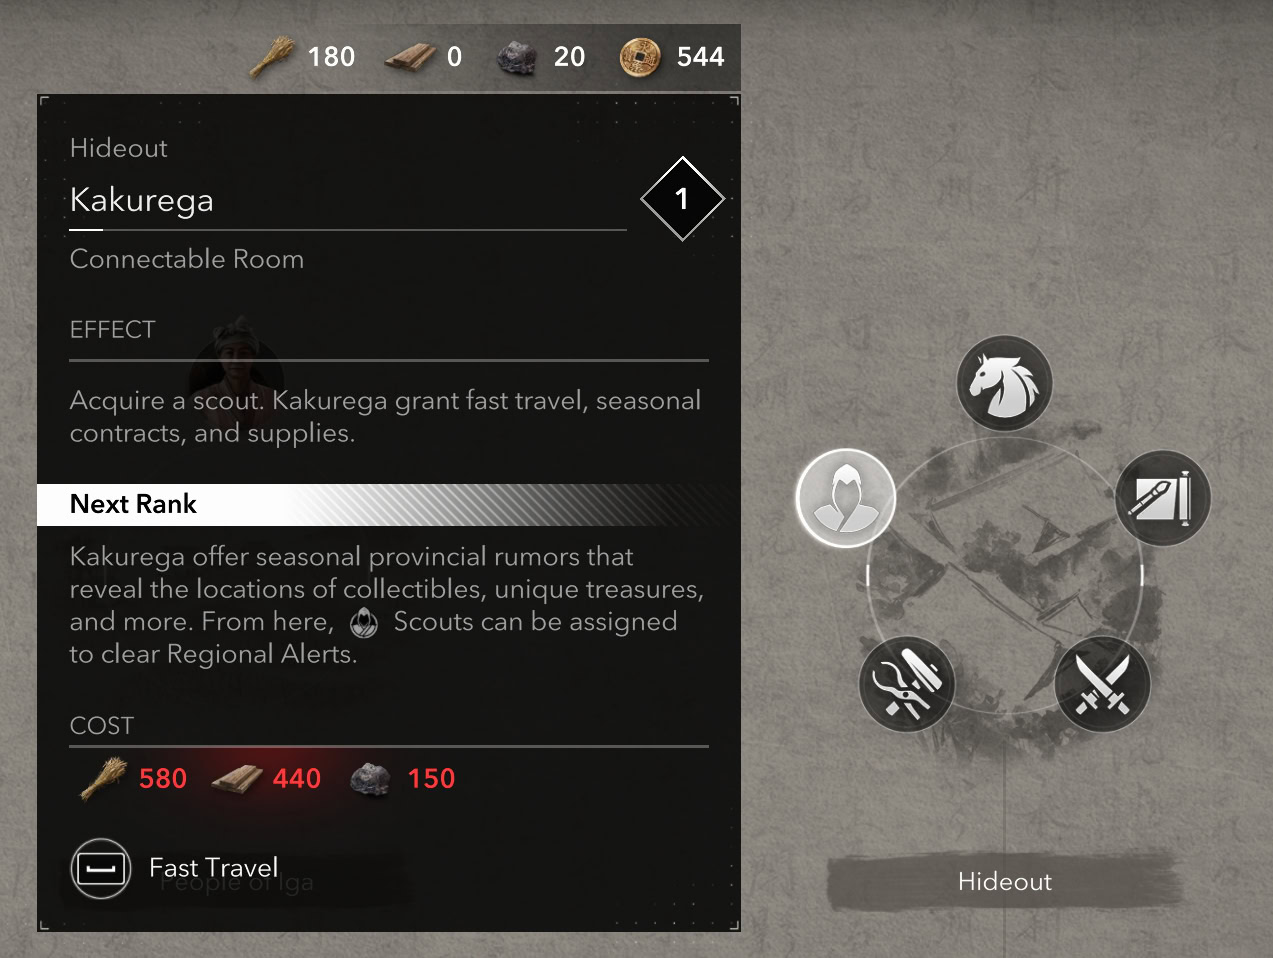
Kakurega
Kakurega is a connectible room you can build to improve your scouts and the effects and benefits of unlocking other kakurega in the open world. These safe houses are very convenient to travel to and from.
You are allowed to only build one Kakurega in the Hideout. When upgraded, the kakurega will offer additional benefits such as the ability to remove your Wanted status at the cost of scouts.
| Tiers | Perks | |||
|---|---|---|---|---|
| Acquire a scout. Kakurega grant fast travel, seasonal contracts, and supplies. | 60 | 30 | 5 | |
| Kakurega offer seasonal provincial rumors that reveal the locations of collectibles, treasures, and more. From here, Scouts can be assigned to clear Regional Alerts. | 580 | 440 | 150 | |
| Adds additional Kakurega locations in Japan and reduces Kakurega unlock costs by 30%. | 930 | 700 | 230 | |
| Scouts will reveal the whole province if all its Viewpoints are synchronized. | 2200 | 1650 | 550 | |
| Contracts rewards 30% more Crafting Resources and Mon. | 3050 | 2290 | 760 |
Study
The Study room adds new scouts and improves their performance when you order them to look for a specific location or person. You can only build one Study room in the Hideout.
| Tiers | Perks | |||
|---|---|---|---|---|
| An additional scout joins the league. Reduce search zone for quests by 25%. | 60 | 40 | 10 | |
| An Additional scout joins the league. | 350 | 260 | 90 | |
| An additional scout joins the league. Reduce search zone for quests by 60% | 810 | 610 | 200 | |
| Scouts can reveal Kakurega and Viewpoints | 1890 | 1420 | 470 | |
| Tagging Stockpiles has 25% chance to not use a Scout. | 2630 | 1970 | 660 |
Forge
You build the Forge as part of the main story when you recruit the Blacksmith Heiji following Tomiko’s recommendation. The Forge is the most important building when it comes to gear and combat upgrades. To learn more about how gear works in Assassin’s Creed Shadows, use our beginner-friendly and spoiler-free guide.
Here you can level up your weapons and armor and apply new engravings to them. Here you can also dismantle gear you no longer need or want.
| Tiers | Perks | |||
|---|---|---|---|---|
| Weapons and armor can be upgraded to level 20 and dismantled | 40 | 30 | 10 | |
| Weapons and armor can be upgraded to level 40 and non-Legendary engravings can be applied to them. | 350 | 260 | 90 | |
| Weapons and armor can be upgraded to level 60 and Legendary engravings can be applied to them. | 700 | 520 | 170 | |
| Weapons, Armors, and Trinkets can be upgraded to level 80. | 1830 | 1370 | 460 | |
| Weapons, Armors, and Trinkets can be upgraded to level 100. | 2140 | 1600 | 530 | |
| Epic and Legendary Weapons, Armors, and Trinkets can be enhanced with new qualities. | 2440 | 1830 | 610 |
Dojo
The Dojo is the place where you train and upgrade the capabilities of your recruited allies. You have the ability to call upon an ally to aid you in combat and act as something like a companion temporary. Upgrading the Dojo will allow you to call two allies at a time.
| Tiers | Perks | |||
|---|---|---|---|---|
| Allies can be trained up to Initiate rank. | 350 | 260 | 90 | |
| Two allies can assist you instead of one. | 470 | 350 | 120 | |
| Allies can be trained up to Veteran rank. | 700 | 520 | 170 | |
| Stealth Ally cooldown is reduced by 50% | 2020 | 1510 | 500 | |
| Call a Fight Ally to replenish 100% Health and 2 Adrenaline Chunks. | 2810 | 2110 | 700 |
Themed Rooms
There are nine Themed Rooms available. Five of them have an added effect when built. The last four are for cosmetic purposes only and you can build more than one of them.
Themed Rooms cannot be upgraded. They cost significantly more crafting materials to build them and they also cost Mon. Some of their bonuses are somewhat questionable, but more on that later in the guide.
Tera
The Tera is a Buddhist shrine that will grant you bonuses to experience gained. This is always a great investment as you can never have enough experience gained.
| Tiers | Perks | ||||
|---|---|---|---|---|---|
| Experience gained is increased by 10% | 740 | 550 | 180 | 1930 | |
| All Assassination now grants a bonus experience based on your Current Health Segment Removal. | 2500 | 1870 | 620 | 6400 | |
| Experience gained is now increased by 20% | 3490 | 2620 | 870 | 8930 |
Jinja
The Jinja is a Shinto Shrine that boosts the effects granted by praying at shrines. A useful effect but this is a lower priority as there are more useful upgrades to purchase first.
| Tiers | Perks | ||||
|---|---|---|---|---|---|
| Praying grants a boon for the next 15 minutes. All effects of shrine boons are increased by 20%. | 690 | 510 | 170 | 1800 | |
| All effects of Shrine Boons are increased by 30%. | 2350 | 1760 | 590 | 6020 | |
| Duration of Shrine Boons are increased by 15 minutes. | 3310 | 2480 | 830 | 8460 |
Nando
The Nando acts as the sleeping quarters for your scouts. Investing in this will help decrease costs for replenishing Scouts and can allow you to skip time.
| Tiers | Perks | ||||
|---|---|---|---|---|---|
| Replenishing scouts in a Kakurega costs 30% less resources. | 440 | 330 | 110 | 1160 | |
| Meditate to shift time to the next 6 o’clock. | 1840 | 1380 | 460 | 4700 | |
| Replenishing Scouts in a Kakurega now costs 50% less Mon. | 2790 | 2090 | 700 | 7150 |
Zashiki
When you invest in the Zashiki, you’ll increase the effectiveness of your Rations and open opportunities to find more. To unlock this building, you’ll need to assassinate Merchant Kin-no-suke, part of The Iron Hand Guild questline.
The third level effect is great if you’re playing as Yasuke. If you main Naoe, you’ll want to focus on the Tea Room’s upgrades.
| Tiers | Perks | ||||
|---|---|---|---|---|---|
| Ration efficiency increased by 15%. | 90 | 370 | 280 | 960 | |
| Ration have 10% chance to not get consumed on use. | 1950 | 1460 | 490 | 4980 | |
| Ammo caches now also refill 3 rations. | 2870 | 2150 | 720 | 7340 |
Tea Room
Like the Zashiki, the Tea Room helps increase the effectiveness of Rations. It can allow rations to restore Adrenaline Chunks and its final upgrade is more geared towards Naoe.
| Tiers | Perks | ||||
|---|---|---|---|---|---|
| Ration efficiency increased by 15%. | 640 | 480 | 160 | 1670 | |
| Rations now also restore 1 Adrenaline Chunk. | 2060 | 1540 | 510 | 5270 | |
| Tool caches now also refill 3 rations. | 3050 | 2290 | 760 | 7810 |
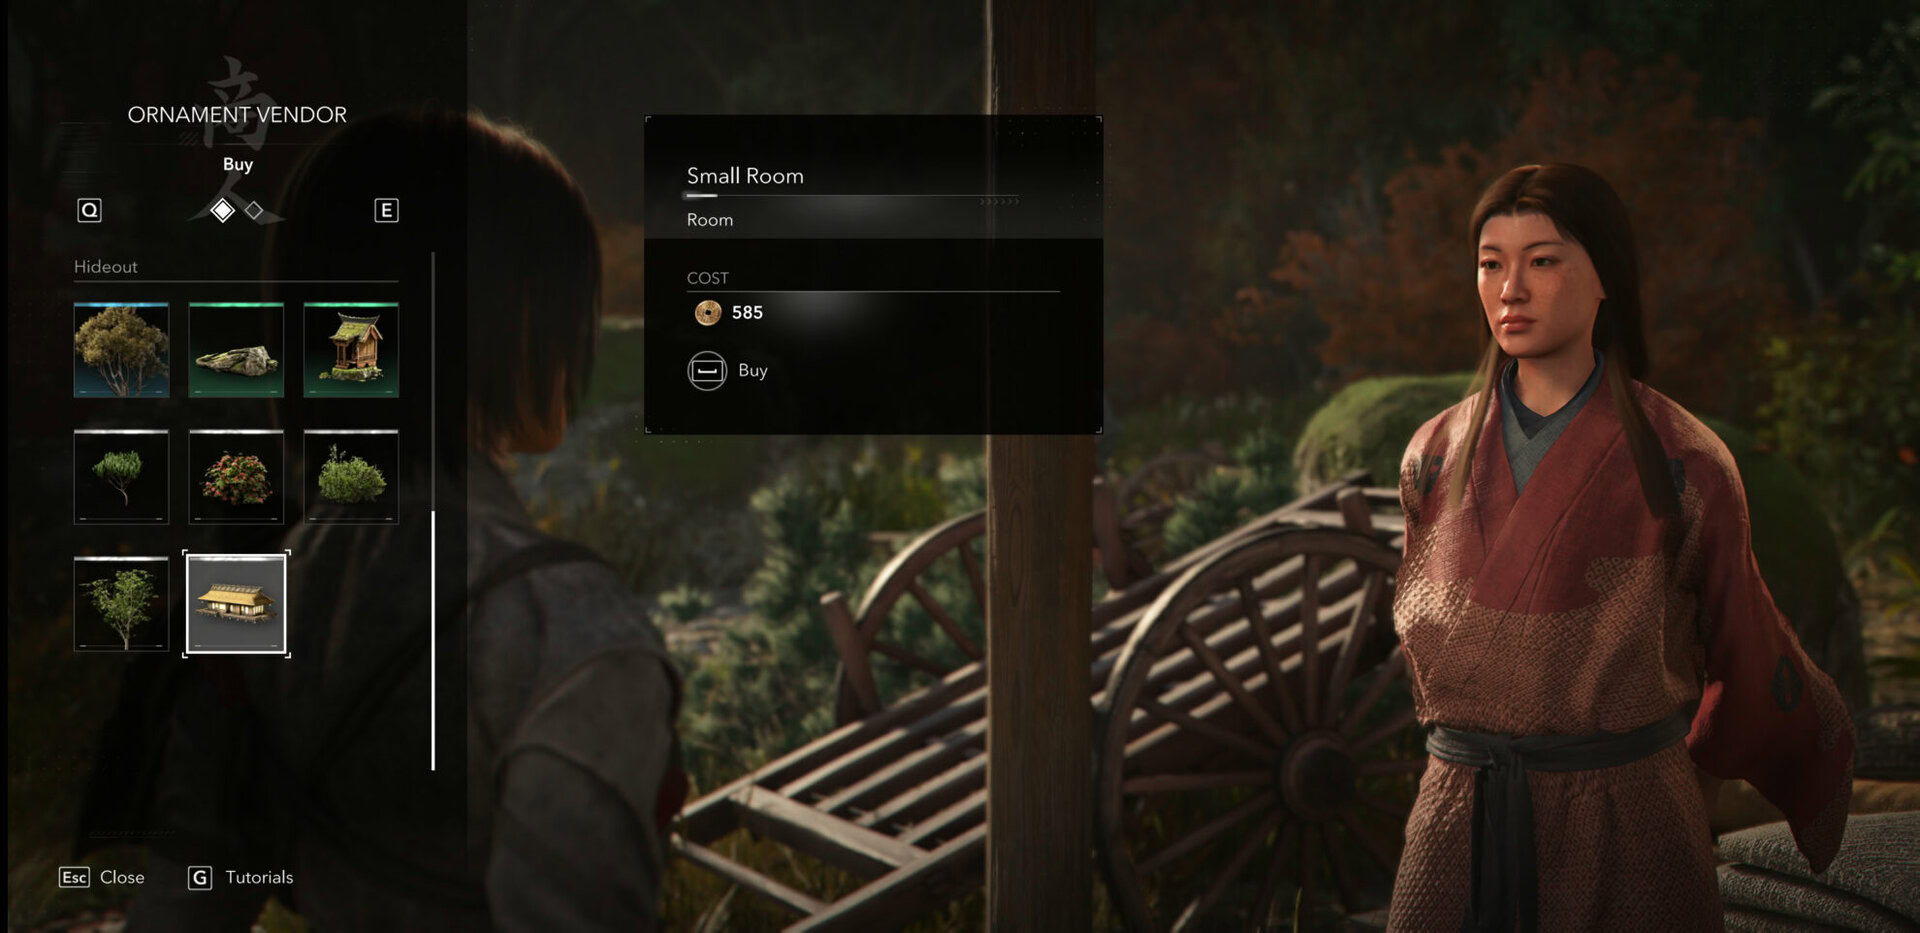
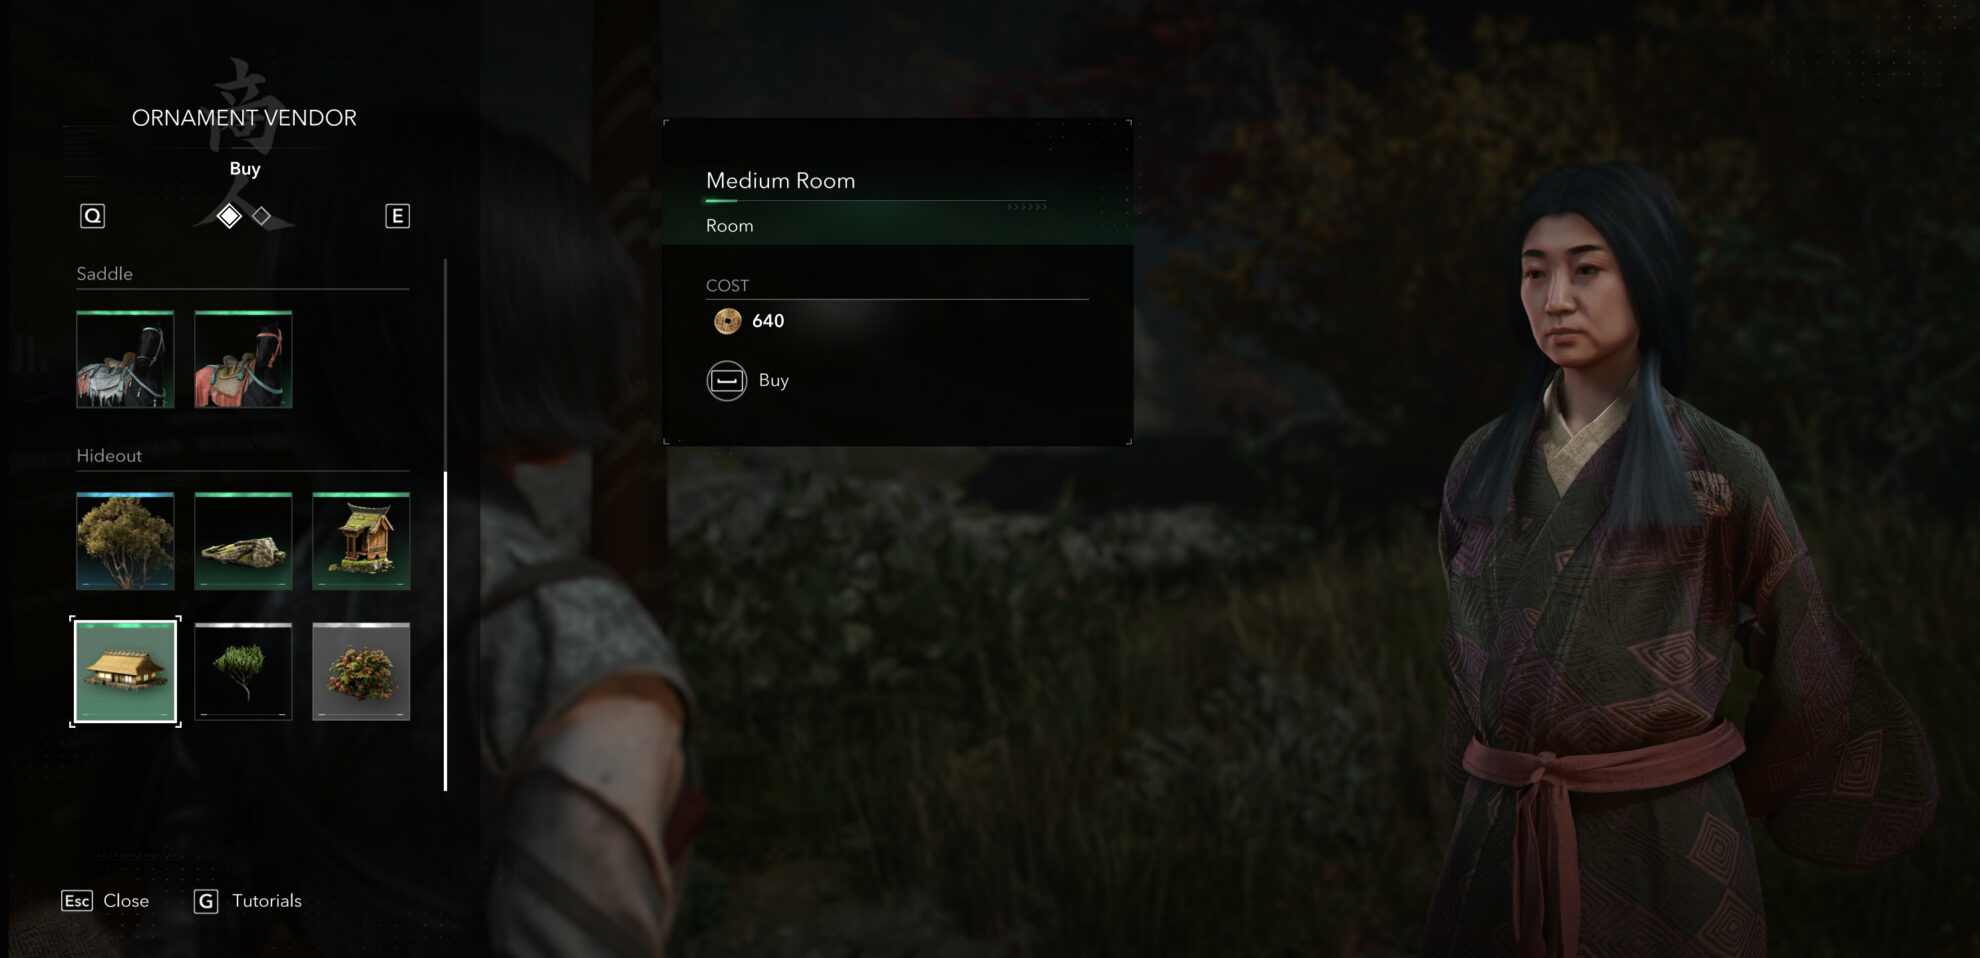
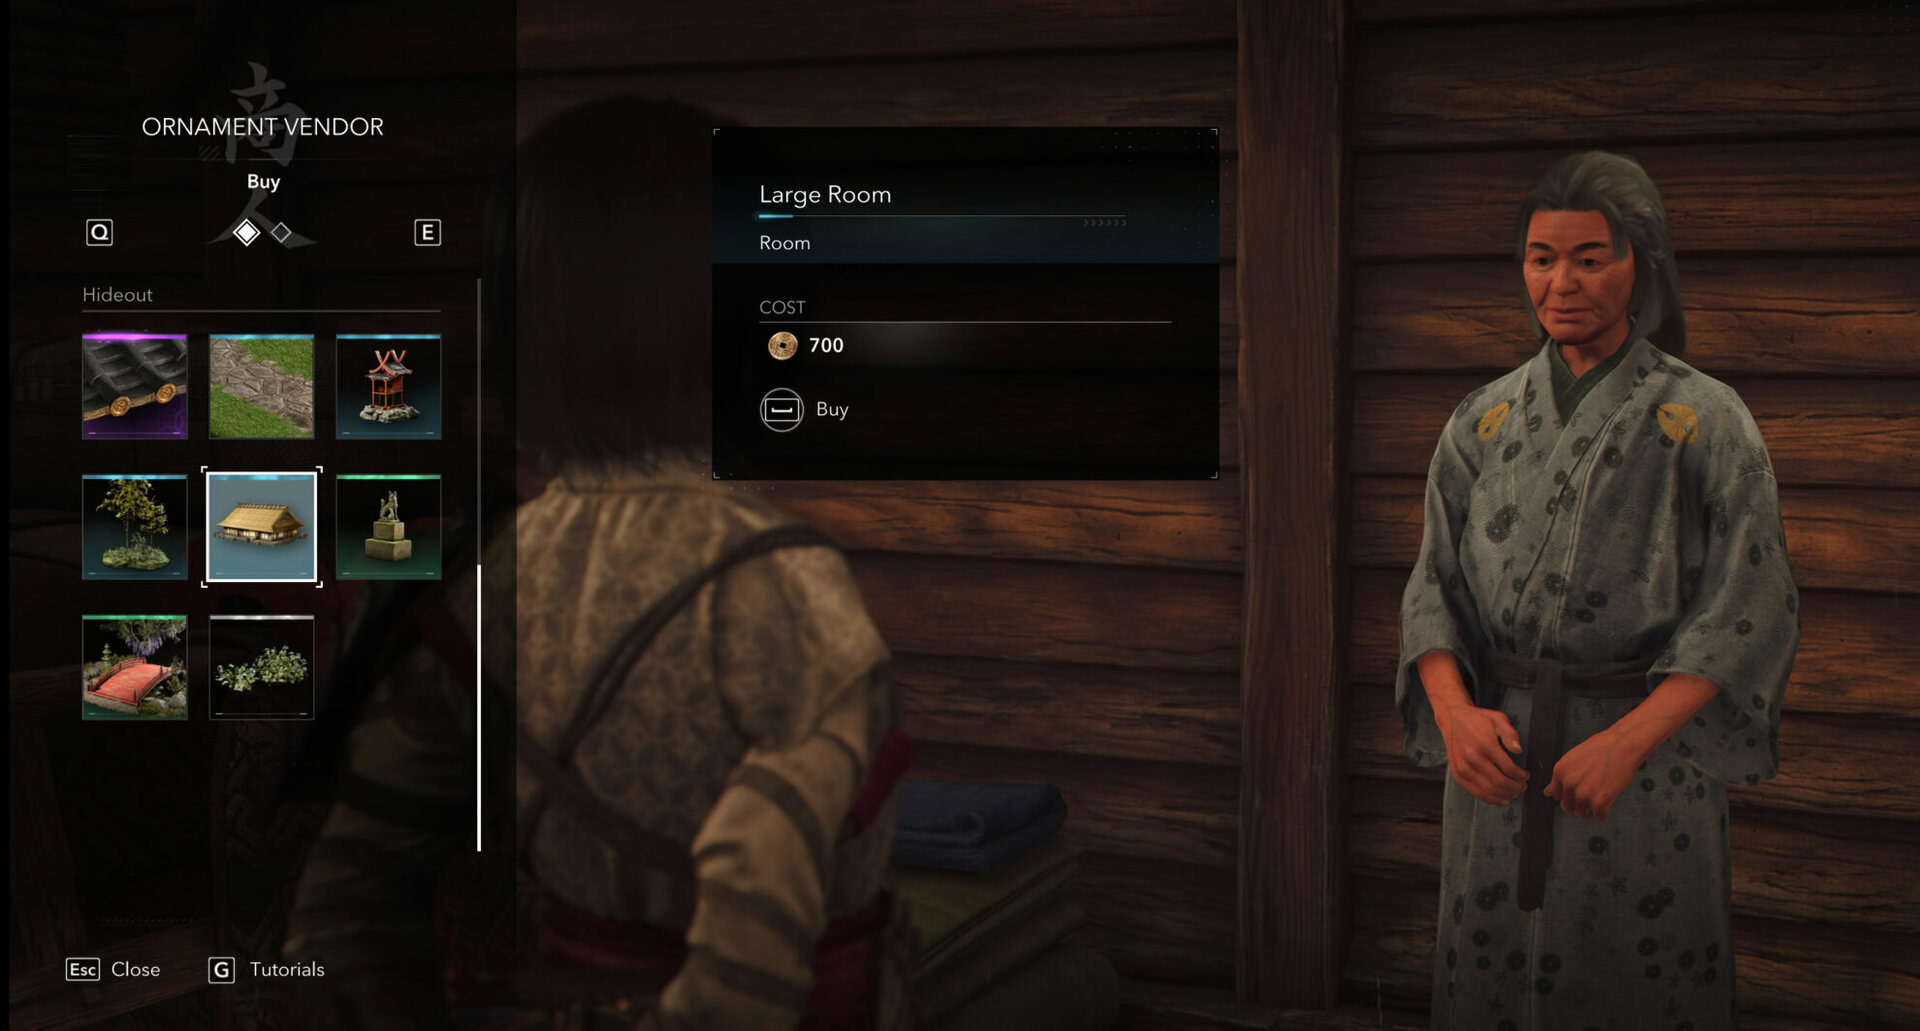
Other Themed Rooms
You can purchase the blueprints for the remaining three buildings in this category from Ornament Vendors in the open world. They have no effects but will increase considerably the rank of your Hideout when you build them. Here is where you can find each one
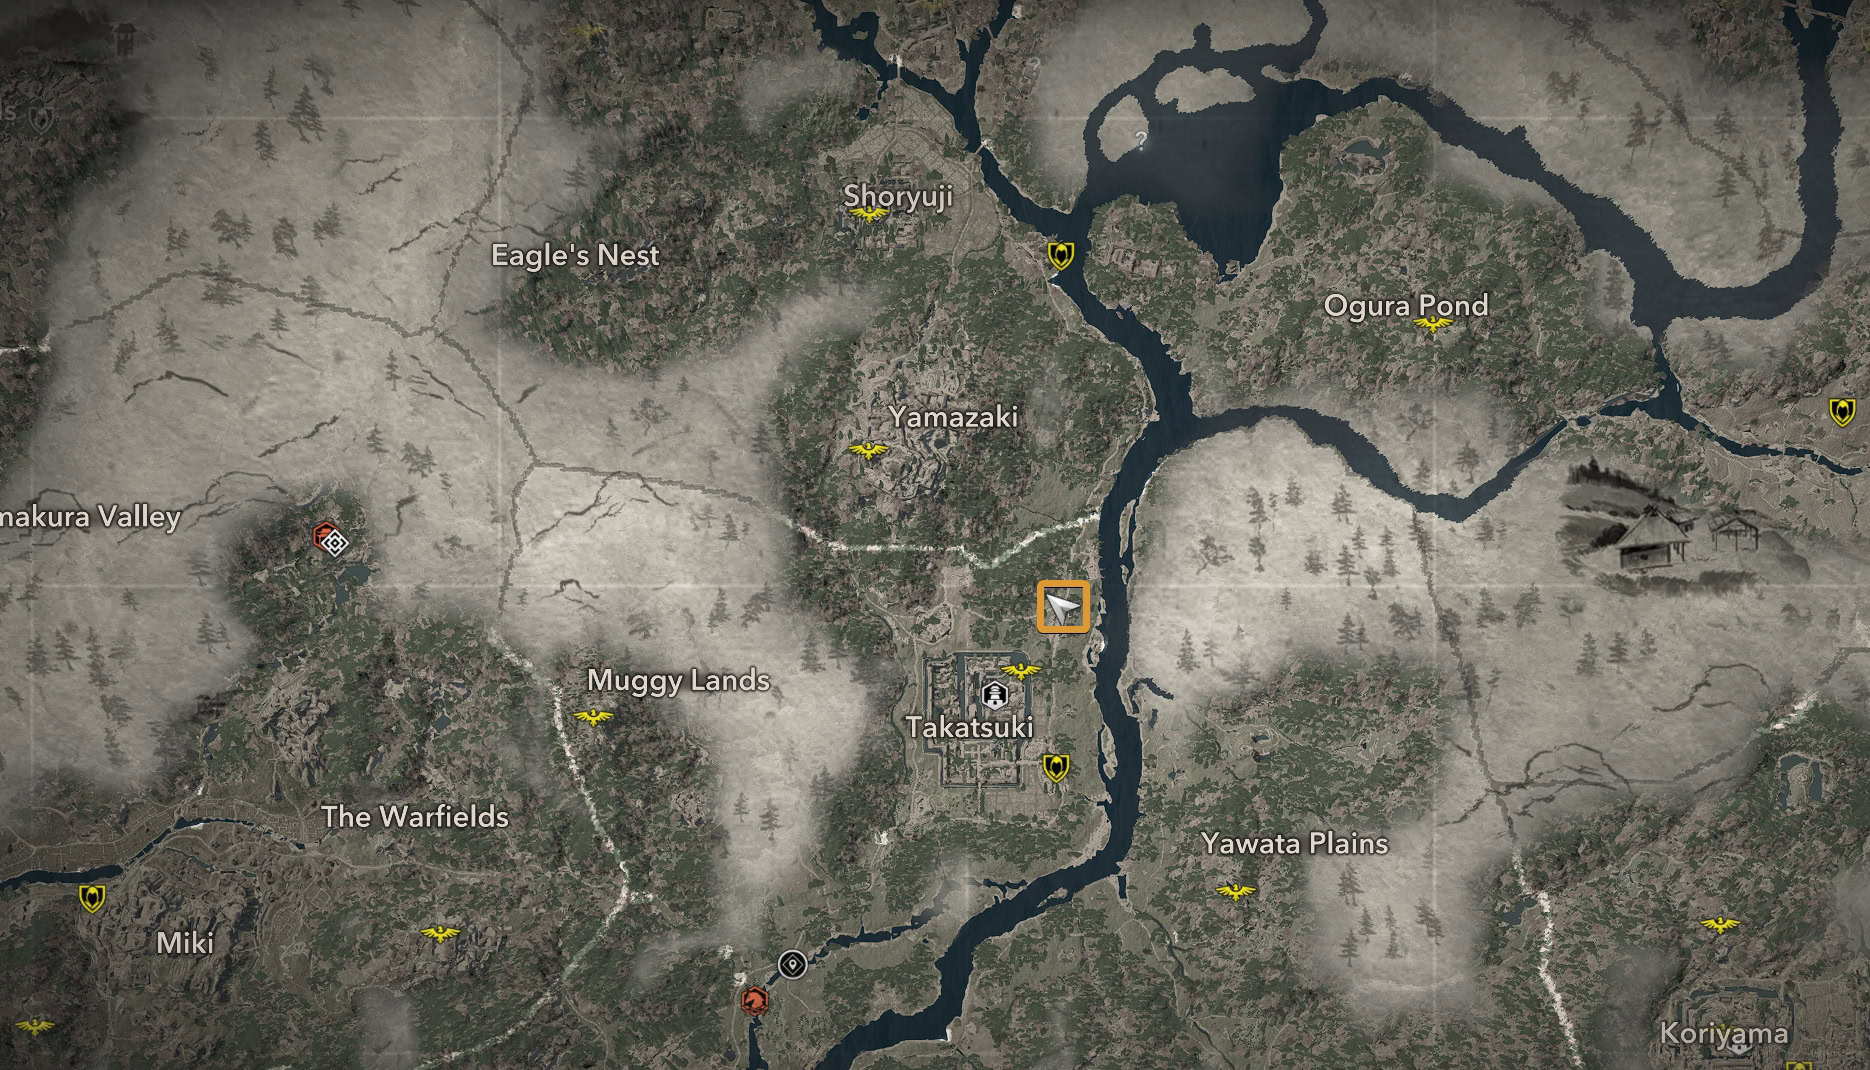
Small Room
You can purchase the blueprints from the Ornament Vendor northeast of Takatsuki and southeast of Yamazaki, in Izumi Settsu.
Medium Room
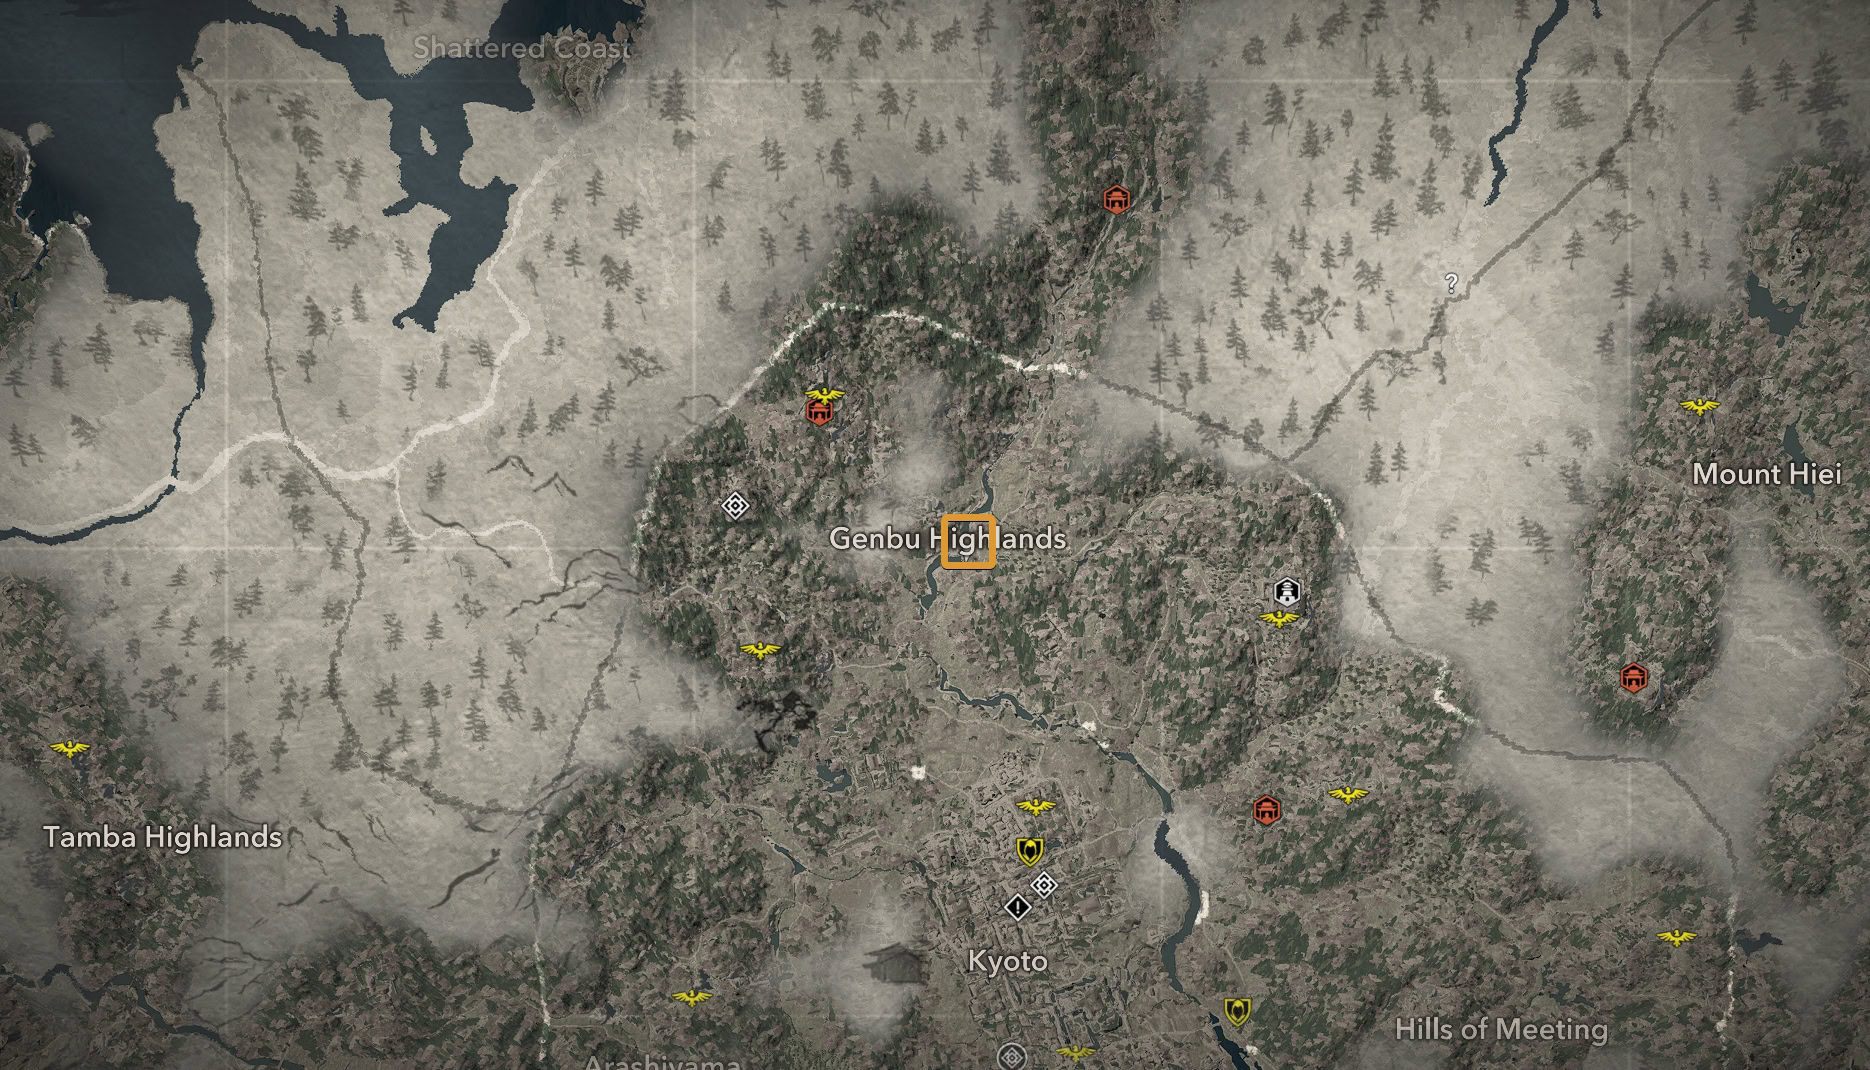
You can purchase the blueprint from the Ornament Vendor near the bridge in the middle of Genbu Highlands, in Yamarshiro.
Large Room
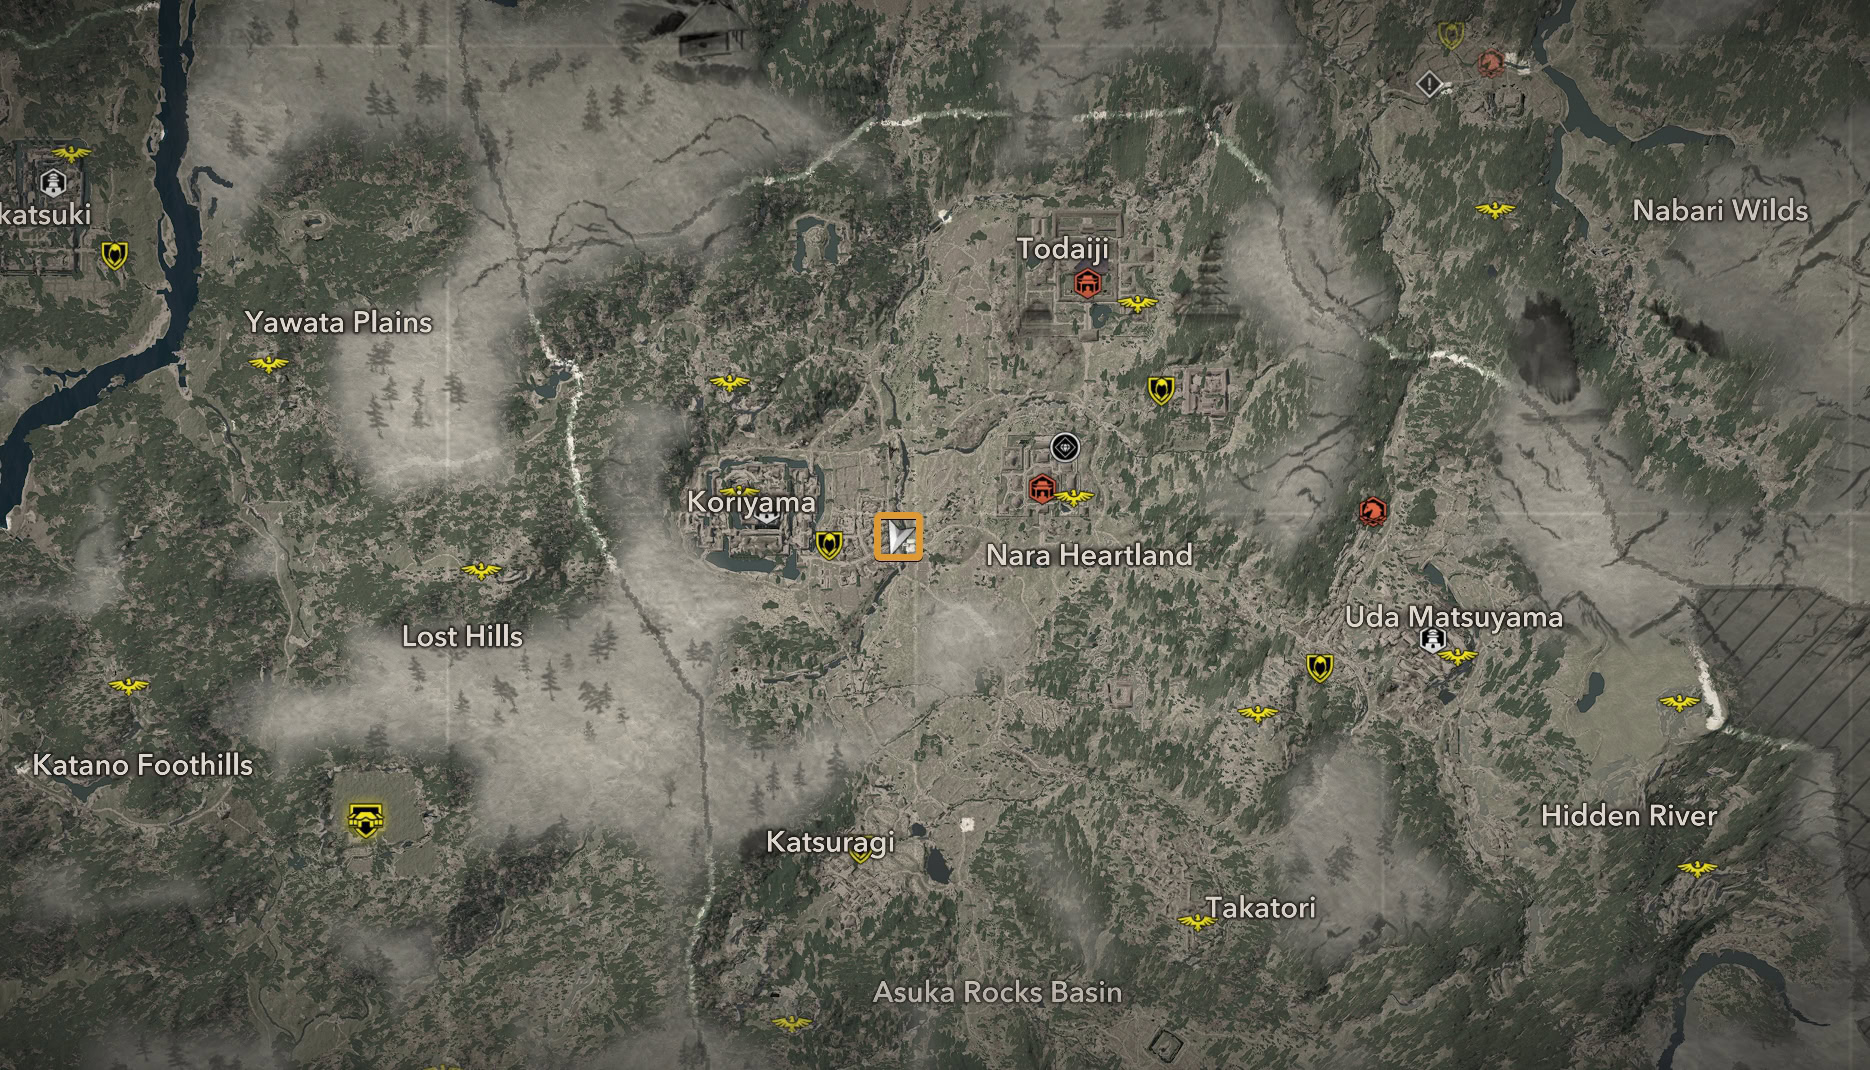
You can purchase the blueprint from the Ornament Vendor on the eastern end of Koriyama, in Yamato.
Gallery
You can unlock this blueprint after collecting your first piece of Legendary Gear.
What to build and upgrade first
Unless you play on a higher difficulty, many of the effects the rooms provide are not of critical importance to you. Even on normal difficulty, you would not really need better ration effects (from the Tear Room and Zashiki, for example).
You should improve the stables as soon as possible. At least to Tier 2. Next on the list should be the Study. Scouts are very important in Assassin’s Creed Shadows. They can both save you time and make you rich (in resources).
Upgrading the Forge to Tier 2 is a good idea if you play on Expert difficulty level. This is where customized builds using engravings that compliment your style really matter.
Building the Tera room early is expensive and considering how much content Assassin’s Creed Shadows has, you are highly unlikely to ever feel starved for XP and levels. There are so many side activities you can do to unlock and earn various bonuses and cool items. I would not recommend spending resources early on on Tera.
You will likely finish the main story of the game before you reach level 40. You do not need the ability to upgrade gear past that level until you can really actually benefit from the perk.
I find the allies very underwhelming and extremely situational. They are a little more useful to Naoe to distract and create opportunities for her. When upgraded to Veteran, they get better. If you don’t play on Expert Difficulty, it’s a bit of a waste to improve the allies by upgrading the Dojo. If you choose to play on Expert, you likely don’t want or need their help anyway.
If you play and progress through the game in a proper way, meaning you don’t just follow The Shinbakufu quest chain and skip huge chunks of the regions you pass through, you will have enough resources for everything you need, when you need it.
Clearing Castles can be challenging and time-consuming, but it is one of the most rewarding activities when it comes to gaining resources for the Hideout’s expansion.
I recommend this order of building and upgrading for your first steps:
| № | Icon | Action |
|---|---|---|
| 1. | Upgrade Stables to Tier 2 | |
| 2. | Build the Study | |
| 3. | Build Kakurega | |
| 4. | Upgrade the Study to Tier 2 | |
| 5. | Upgrade Stables to Tier 3 | |
| 6. | Upgrade the Study to Tier 3 | |
| 7. | Upgrade the Forge to Tier 2 |
This is by no means a mandatory order. It is the order I established for myself for my second playthrough. It works best for my progression and my needs. I developed it based on my first playthrough, which took about 80 hours.
Achievements
There are seven achievements related to the Hideout. The list below contains all of them with their requirements.
| Icon | Achievement | Requirements |
|---|---|---|
 | Sole Sanctum | Unlock the Hideout |
 | Chase the Morning | Add a sumi-e to the Hideout |
 | Against Wood and Stone | Fully upgrade a building in the Hideout |
 | Made You look! | Look for treasure behind the waterfall in the Hideout |
 | Make it Personal | Engrave your first weapon |
 | Zen Master | Complete all Kuji-kiri (one is near the waterfall behind the Hideout) |
 | Front of the Pack | Fully train an ally |