This Spark Build uses the Sorcereress’ Stormweaver to allow for an easy and safe leveling experience and not lack any endgame scaling.
Table of contents
Build Overview
This is an effective caster build for almost any Intelligence class, but is ideally played as a Sorceress. We suggest not trying to run it on any class that isn’t an Intelligence or Intelligence Hybrid Class, as more of the passives will be out of reach.
It’s not quite the Premier League Starter it was in 0.1.0, but Spark is still a fairly strong League Starter Build despite its heavy nerfs in 0.2.0. It will require better gear to truly reach its peak performance, but outside of that, it’s mostly unchanged save for more investment in Energy Shield Recharge.
Spark is the main star of the build, being able to quickly and easily demolish large groups of enemies and bosses alike once it gets going. If we happen to have Kitoko’s Current available for use, or if it drops while leveling, the leveling experience will be ultra-safe by granting crowd control via Electrocution.
Supporting Spark is the highly recommended Archmage and Mana Tempest bonuses. Archmage will allow us to scale our damage through Mana, in addition to raw damage bonuses. Mana Tempest does much the same, with additional supports that increase damage further, as well as enable Culling Strike to finish off enemies quickly.
The last bit of our damage bonuses will come from Conductivity and Flame Wall. Conductivity will primarily only be used on bosses, lowering their Lightning Resistance significantly. Flame Wall will allow us to boost our Spark Projectiles with some added Fire Damage, which can provide a sizable boost to damage, especially while leveling.
Supporting us defensively will be Convalescence. As an Energy Shield build, Convalescence is incredibly helpful for keeping us up and letting us shrug off a ton of small hits. This will continually get stronger as we level and scales with our Energy Shield stats.
The grid below is fully interactive. If this is your first visit, we recommend you skip that grid and keep reading the guide in its intended order. If you prefer, you can click or tab on an item and it will take you to a dedicated section of the guide explaining everything you need to know it.
Playstyle
The majority of the build’s playstyle boils down to casting Flame Wall, and then casting Spark to clear screens easily. Mana Tempest can be used after Flame Wall is placed, but it often isn’t needed unless there are Rare or otherwise incredibly bulky enemies on screen.
When it comes to Bossing, the only real change comes from Conductivity, which also needs to be cast before Mana Tempest. There are other useful tools we can add here, like Sigil of Power, but it extends the opening and ultimately isn’t necessary for normal play and is used exclusively for bosses.
Skills
Below are the Skills we use for the build, including its Support Gem Links

Spark
Spark is our main skill, which is great for clearing both packs of enemies and bosses.

Pierce
Pierce is necessary early on to help deal with groups of enemies by passing through them. Without it, our Sparks would instantly stop when they hit a target. We’ll drop this for Inspiration later after picking up Branching Bolts in around Act 2 for some free Chain instead.

Arcane Tempo
Cast Speed makes a huge difference in our Spark DPS, so any cast speed we can get is crucial.

Controlled Destruction
Controlled Destruction removes Spark’s ability to Critically Strike, which in turn grants a huge damage bonus. Unless we get the gear to make Critical Strikes a strong option, it’s never worth dropping this.

Considered Casting
Considered Casting is one of the strongest damage supports we can get for Spark. While this does reduce your Cast Speed a bit, we’re aiming to get a ton on our gear so this end up being pretty minor

Energy Barrier
Energy Barrier is a great final link for Spark, allowing us to get a shorter duration Convalescence-like effect, allowing us to continuously regen Energy Shield even while taking damage. It can make us deceptively tanky against bosses or other enemies that regularly stun us.
Alternatively, for a more damage-heavy option, Lighting Exposure is a good fit here as we often Shock. Scouring Winds alongside our passive Tree makes it a solid damage boost without the need to Curse.

Flame Wall
Flame Wall isn’t here for the direct damage or the Ignite this provides. Instead, this provides a large chunk of damage when our Spark projectiles pass through it. This is the only way we can currently get any amount of flat damage added to Spells, which is quite valuable.

Fortress
Fortress transforms Flame Wall from a line to a ring-shaped AoE, which when cast around us ensures all of our Spark projectiles deal increased damage. We can also place this ring around an enemy if we only care about the added damage on a single enemy or boss.

Spell Cascade
Spell Cascade is optional, but alongside Fortress will create multiple rings for our Spark projectiles to pass through. While this doesn’t add more damage, it does increase the area covered by Flame Walls, without having to use a more valuable support like Magnified Effect.

Mana Tempest
Mana Tempest does a lot for us. Not only will it increase our Damage, it allows our Spark to gain Culling Strike through its links. This massively improves its clear speed, which helps to have make Spark one of the most dominant starter builds out there.

Premeditation
Premeditation acts like another damage link for Spark. In culmination with Mana Tempest’s base effect, it’s a massive increase in damage while active.

Murderous Intent
Murderous Intent enables Culling Strike for Spark while Mana Tempest is Active. This effectively reduces an enemy’s Life by a percentage, based on their rarity.

Conductivity
Conductivity is our curse of Choice, allowing us to reduce an enemy’s Resistance and even make it negative. We’ll often only need it for Bosses or other very durable enemies.

Heightened Curse
Heightened Curse allows Conductivity to reduce Lightning Resistance further, further increasing our damage.

Focused Curse
Focused Curse makes our Curse easier to apply, being applied immediately once we pick up the Impending Doom curse cluster on the passive Tree.

Cursed Ground
Cursed Ground is an optional support here but allows us to pre-emptively cast Conductivity before a boss Spawns so we can immediately just start damage as soon as they spawn in.

Ritualistic Curse
Ritualistic Curse will take away the instant Curse, but that’s fine, as it’s meant to be used with Cursed Ground anyways. This makes it easier to keep more mobile bosses inside the Cursed Ground Effect.

Archmage
Archmage allows us to very heavily scale our damage through our Mana and, by extension Intelligence. This will require multiple Mana on Kill Jewels to not be a detriment, but a great boost once it’s not

Lightning Mastery
Lighting Mastery isn’t super important, but it will help us reach breakpoint levels earlier. Once we finally get it to level 20, it will allow us to hit one final breakpoint.

Clarity
If we have the spare Spirit, Clarity is a great way to make use of it. It will go a long way in helping alleviate the extra mana costs Archmage has applied. Before having access to Archmage more consistently, this can be slotted on Convalescence instead.

Convalescence
Convalescence is one of our more important defensive tools, allowing us a brief period where our Energy Shield Recharge cannot be interrupted. While this effect has a cooldown, we fix that with Support Gems though.

Ingenuity
With a massive 30-second base cooldown, we want to have access to this buff more often which we do by reducing it.

Persistence
Persistence extends the duration of the Buff effect, giving it a very generous duration and helping us mitigate more damage.

Second Wind
Second Wind is an optional support here, which grants us a second charge of the Buff, but doubles the cooldown, making it a heavy trade-off.

Mobility Options
Using Weapon Swaps, we’re able to make use of a variety of Mobility options as we level. Below are the three main options we’ll use and why.

Disengage
Disengage is the earliest mobility skill we can use, but requires practice to make good use of due to the need to consistently cancel the ending animation with Dodge Roll.

Leap Slam / Shield Charge
While Leap Slam requires a swap to a Mace, it’s a far more consistent option that can clear gaps and ledges. Shield Charge is a good alternative to Disengage when swapping to a Mace, clearing a similar distance and working best when used in open areas.
Keep an early-level Mace and Shield on hand, or head to Act 1 and buy one to swap. We’ll need to move the early Weapon Set Points to Strength to use this until we get a Belt with Strength.

Blink
Blink is our late-game mobility, and with a Weapon Swap to a Staff with High Cast Speed, which we can also use for our Curse, we’ll be able to make use of it without heavy Spirit stacking.
Like Disengage, it requires practice as we need to either manually weapon swap or dodge after using our Curse to weapon swap instead, which needs to be done quickly to avoid the mana cost.

Soul Offering
Soul Offering is an optional endgame addition, but provides a good amount of damage to be worth mentioning. We’ll want to make sure our second weapon set doesn’t have Archmage active, instead replacing it with summoning Skeletal Clerics. Unlike other offerings, this doesn’t have a range limit so we can cast it way out of reach of danger.

Ablation
Ablation is the only support we need, to increase the effectiveness of the Offering. This normally comes with a Life Cost, but with a Maximum Life of 1 with Chaos Innoculation, this downside is mitigated.

Danse Macabre
If we want to squeeze out every bit of damage we can from this buff, we can make sure we have a minimum of two minions to make use of Danse Macabre to further increase its effect.

Meat Shield
There are rare cases where our offering may take incidental AoE Damage, causing it to end early. Meat Shield can help ensure this runs its full duration. Highly optional but useful. Alternatively, this can be linked to Skeletal Cleric so they can stay alive easier.

Elemental Army
Much like Meat Shield, this can be used to make sure our offering isn’t getting one-shot and ending early. Alternatively, this can also be linked to Skeletal Cleric so they can stay alive easier.

Skeletal Cleric
These are mandatory for using Soul Offering but otherwise unnecessary and provide nothing to the build. We use them unlinked as their only purpose it to be sacrificed as an Offering. These are fit in by turning off Archmage for our Weapon Swap and instead summoning these Clerics with the Spirit
Passive Tree
Below is the Passive Tree we use for this Skill, and an Act-by-Act breakdown of how we progress the skill tree.
This passive tree uses Weapon Set Passives to take full advantage of the tools the build can offer. Points for Weapon Set 1 have RED paths, while Points for Weapon Set 2 have GREEN paths. We’ll use this same notation when talking about these passives below

Act 1


We’ll head out the Spell damage side of the Sorceress’ starting area, grabbing Raw Power and Path of Storms. This gets us a ton of damage up front to carry us through most of the act.

We’ll make early use of Weapon Set passives, allocating Breath of Lightning on Weapon Set 1 and some Attributes on Weapon Set 2.
Breath of Lightning gives us some Early Lightning Penetration to deal with the Lightning Resistant enemy affix. These Attributes will be a mix of Strength and Dexterity early to allow us to use Disengage with a Spear as Weapon Set 2 for early mobility.

Finally, we’ll grab Practiced Signs for the Cast Speed and Pure Energy for the Intelligence and Energy Shield.
Act 2


We’ll continue to use our Weapon Set passives. We’ll take Branching Bolts on Weapon Set 1 for the free chain, replacing Pierce for Inspiration on Spark.

Then we’ll grab Master of Hexes on Weapon Set 2 to start buffing Conductivity. We’ll want to supplement our Curse with Persistence for now to offset the hit to duration.
Act 3


Now we’ll head off to the left, and grab Touch The Arcane. By this point, we should also have completed one Trial of Ascendancy and taken the Constant Gale Ascendancy for permanent Arcane Surge.

Following this, we’ll grab All Natural for some free Resistance and a good boost of damage. Breaking Point is a great grab here too, boosting the power and duration of our Shocks.

We’ll round off this Act by grabbing Dependable Ward. This almost halves our Energy Shield Recharge Delay, letting early Energy Shield gear be more reliable. While we’re still mostly leaning on our Life to stay alive yet, this helps a lot to mitigate damage consistently even with a smaller Energy Shield Pool.

By the end of this Act we should also be able to grab a second set of Ascendancy points, this time taking Force of Will. It won’t be super impactful immediately, but it allows us to scale Arcane Surge with our Mana getting more Cast Speed and Mana Regeneration.
Act 4


Back to more weapon Set passives, this time we’ll grab Lightning Amplification on Weapon Set 1 and most of the points before Pure Power. Lightning Amplification replaces Breath of Lightning from early, but is only a minor upgrade if we still need the Dexterity yet. We don’t need Pure Power just yet, as we don’t have enough Intelligence to scale it to make it worth the pick up

For Weapon Set 2, we’ll grab Lingering Whispers to fully offset the duration reduction from Master of Hexes. This also comes with some bonus Curse effect for an even stronger Conductivity.
Act 5


At this point, we also need to start building up our Energy Shield, as we’ll barely be getting by with what our Armor gives us naturally. We’ll take the points leading up to Enhanced Barrier, use the top path to connect our other passives, rather than the middle.

We’ll further invest in Energy Shield Recharge and pick up Refocus near our Curse passives, as well as pathing down to Rapid Recharge near the start of the tree. This results in a 2-second delay and roughly 25% of our Energy Shield Recharging per second after the delay.

We’ll also take the points out of Practiced Signs, instead of moving them path through Dampening Shield to keep Pure Energy. By this point, we should have decent Cast Speed on gear, and this small amount won’t set our DPS back too much.
Act 6


Before we grab the last of our Damage we get before maps, We’ll pick up Convalescence for the Energy Shield Recharge Rate and Patient Barrier for the larger boost to Energy Shield.

Now we’ll look to allocate most of our Weapon Set Passives. We’ll grab Pure Power, Potent Incantation, and Turn the Clock Forward on Weapon Set 1. This is a good damage boost, while the Projectile Speed helps Spark travel farther to work better on most Map layouts.
On Weapon Set 2, we’ll grab our remaining Curse clusters, Impending Doom and Fated End. Impending Doom, combined with Focused Curse, gives us an instant cast Curse, making it very easy to apply as needed. Fated End helps counter multiple affixes that can appear on Monsters, particularly the Life Regen and Energy Shield affixes.
Early to Mid Maps


We’ll take care of the last handful of Weapon Set passives now. We’ll take Preservation on Weapon Set 1 so our Spark projectiles last a bit longer. On Weapon Set 2, we grab Zone of Control. This makes our curse cover a much larger area.

Before we grab Chaos Inoculation, we’ll want to boost out Energy Shield up a bit more. So we’ll grab Insightfulness and Melding to do that. Though Melding comes with a Mana Penalty, it’s still very useful at this stage.

Shortly after entering maps, we’ll get access to a third set of Ascendancy points. This time we’ll take Strike Twice, allowing us to potentially shock enemies up to twice. We’ll want to invest in Shock through Jewels to allow this to be worth taking.
Endgame Maps


We have one last Energy Shield pitstop before we can consider taking Chaos Inoculation, and it’s arguably the most important. First we need to grab Eldritch Will near Enhanced Barrier then make our way to Austerity Measures. These two clusters will allow us to rely on Energy Shield to prevent Stuns and Ailments more consistently.

Now, we can grab Chaos Inoculation safely. Sicne we already grabbed Austerity Measures, we’ll also grab Calibration for more Energy Shield. Essence Infusion is also incredibly useful as well, giving a huge boost to Energy Sheidl Recharge Rate.
With all of these Passives, we’ll recover around 35% of our Energy Shield every second after just over 1 second delay. This means we’ll be able to consistently save the Convalescence skill for emergencies.

For our Jewels we’ll mainly use Sapphires. Regardless of our choice of Affixes we’ll always want 2 Sapphires that have % Mana On Kill, anywhere 3%+ is typically good enough to sustain our Mana while clearing.
Outside of Mana on Kill, we’ll want to look to stack up bonuses to Shock. This means Shock and Ailment Magnitude, Shock or Ailment Chance, and Shock Duration. Bonuses to Energy Shield or Cast Speed are also fine settles here.

For our final two Ascendancy Points, we have decent options. Scouring Winds in the highest Damage, but requires us to use the Lightning Exposure Support on Spark. Electric Amplification also boost this to a 40% Exposure, making it a great damage bonus
If we want something a bit more Defensive, Heart of the Storm is also a great pick-up. While it’s only Elemental Damage, the Recoup can still be nice in combination with potions, especially for heavier hits.
Endgame with Diamonds


This last passive tree is virtually unchanged, only swapping one of our Sapphires for a Prism of Belief. The Extra Spell Levels give us a nice bump in damage that’s hard to say no to. Unfortunately, most of the other Diamonds don’t benefit us enough to be worth using.
Gear and Stat Priorities
This section lists and explains the recommended stats for our gear, and any Uniques we recommend. Click or tap on an item to read the recommendations for it. The items with a lighter border are uniques and are explained at the top of the segment right below this grid.
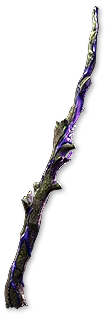
Our Main Hand is a Wand, the particular type doesn’t matter as we’re never using its built-in skill. A Perfect Wand would have Gain Damage as Lightning, Spell Damage, and Mana for Prefixes what having at least Lightning Spell Levels and Cast Speed as Suffixes. Mana Regen or Intelligence, both for the final affix.
For our Second Weapon Set, we’d want a Staff, particularly a Chiming Staff to get access to Sigil of Power. It’s just another bonus to add to our set up. The only thing important here is Cast Speed and Spell Levels..

Our off-hand is a Focus, with a Sacred Focus being the best option. We’ll want to get Energy Shield and Mana for our Prefixes, with Spell Levels, Cast Speed, and Intelligence as Suffixes. We can also get Resistance here if we need it, but Level of Spell Skills and Cast Speed are ideal here as a bare minimum.
While it lacks offensive power, Apep’s Supremacy can be an interesting defensive option for this slot. The biggest thing it provides is making us take 20% of Elemental Damage as Chaos, which we’re immune to.

Our Helm is a standard Energy Shield Helmet, so a Kamasan Tiara is ideal. For Affixes, we’re looking for much the same as our Focus. Energy Shield, Mana, and Intelligence as a bare minimum. Then we get Resistance here to round off the Suffixes.

We’ll want to stick with a basic Energy Shield Body Armour here, prioritizing High Energy Shield like that of a Havoc Raiment or Vile Robe. Sacrmental Robes and Arcane Robes can be great too, saving some passive points that’d be spent in Recharge Delay, but at the cost of less Energy Shield, making them slightly less ideal
Alongside this, Resistances are Great to have, just keep in mind that we won’t need Chaos Resistance in the late game thanks to Chaos Inoculation.

Gloves are Standard Energy Shield Gloves, so Vaal Gloves are the best option. For Affixes, The best we can get is a high Flat and a Percent Energy Shield with High mana for Prefixes wth intelligence and Resistances for suffixes.

Our Choice of Belt doesn’t matter too much here. A Utility Belt for a bit of instant recover with Flasks is generally ideal. The most important things we can pick up from a Rare belt are Strength, Mana, and Resistances. Belts don’t offer use much as and Energy Shield build.
As with any build, if we really want to push all aspects of the belt, getting the Ingenuity Belt is always a good way to do that. Our belt isn’t anywhere near as valuable to use as our Rings can be.

For Boots, we’re looking at Sandsworn Sandals. For Affixes, Movement Speed is Mandatory. Beyond that, we’re looking for a High Energy Shield and Resistances.

For Rings, we have some options. Prismatic Rings, or other resist rings, can help with any missing Resistances we need. The other main option is a good Breach Ring. In both cases, the most ideal situation is that we end up with a ring that has High Mana, Cast Speed, Lightning Damage, and Rarity alongside the resistances we need.

For Amulets, the base item doesn’t matter too much. A Lunar Amulet is the best defensive option while Solar saves us the hassle of getting a perfect Spirit Affix, as we need 150 for the final endgame setup.
Level of all Spell Skills and Spirit are Mandatory here, ideal at the maximum values. Outside of this, %Energy Shield, Maximum Mana, Cast Speed and Resistances are all desirable.
For our Anointment choices, Heavy Ammunition is great for a second character to get through the campaign a bit faster. Otherwise, Arcane Intensity is the ideal option here for the endgame.
Unbound Forces is worth consideration once we pick up Strike Twice. This gives us a good amount of Shock Magnitude as well as Shock Duration.

While our Mana Flask isn’t anything too special, just being an Ultimate Mana Flask with Increased Recovery and Charges gained, there is, however, a potent endgame option in the Melting Maelstrom.
This powerful Unique flask will instantly refill our entire mana pool, which normally comes with the downside of taking Chaos damage based on the damage we deal. However Chaos inoculation negates this making it a very powerful option for a build stackign Mana as we are.
Path of Building 2
This Path of Building includes the full Leveling Tree Progression and suggested gear above. To import into Path of Building, select Import/Export Build and paste the link below into the import section at the bottom.
https://pobb.in/zR3rtheeI4fI
This does not include the full details of what we take, what we use, or why, as this written guide does. As such, it’s only recommended for use by a more veteran player.

