This guide covers the Disciple of Varashta Ascendancy for the Sorceress, including Unique Skills and Skill Interactions.
Table of contents
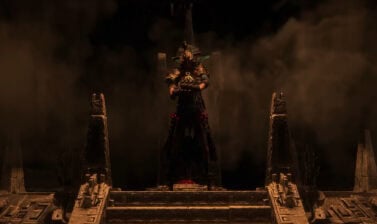
Disciple of Varashta Overview
Disciples of Varashta have full command over multiple Djinn, granting them access to a wide array of options for combat.
The core of the Disciple of Varashta are the Djinn they command, each coming with up to 4 different command skills if we allocate them. This allows for a huge assortment of combinations and flexibility.

In addition to the Djinn they command, they also have Ascendancy that more directly affects their combat capability, ranging from turning Energy Shield into Armour, to being able to wield a Staff and Focus together.
The Fourth Teaching
The Fourth Teaching grants 40% more Energy Shield Recharge Rate while on Low Energy Shield. Additionally, Energy Shield Recharge Delay is reduced by 1 second.
The Fourth Teaching is powerful for the flat reduction to Energy Shield Delay, reducing the base value to 3 seconds. While this will cost Two Ascendancy Points, this makes all Faster Start of Energy Shield Recharge bonuses 25% stronger, while also reducing the impact of the negative version of this stat.
Below is a comparison between multiple levels of Faster Start of Energy Shield Recharge with and without this bonus.
| Bonus | Fourth Teaching (3s) | Base (4s) |
|---|---|---|
| 50% | 2 Seconds | 2.67 Seconds |
| 100% | 1.5 Seconds | 2 Seconds |
| 150% | 1.2 Seconds | 1.6 Seconds |
| 200% | 1 Second | 1.33 Seconds |
| 250% | 0.85 Seconds | 1.14 Seconds |
| 300% | 0.75 Seconds | 1 Second |
Combined with other bonuses offered by the Disciple of Varashta, as well as existing uniques, such as Prayers for Rain, to fully leverage this shorter delay and get the most out of our Energy Shield.
Sacred Rituals
Sacred Rituals grants 60% of Current Energy Shield is added to Armour when determining Physical Damage reduction from Armour.
This effect is incredibly powerful, as this means we get a ton of free Armour based on our Energy Shield. With Energy Shield often breaking 10,000, it’s a substantial amount of Armour to get to mitigate the otherwise painful Physical Hits.
While it won’t come close to capping our Physical Damage Reduction, we still get plenty of value. It’s also worth noting that it’s CURRENT Energy Shield, meaning as we take hits, our Armour Bonus is also going lower and lower.
This means that effects like Convalescence or the bonus from Prayer of Rain that prevent Recharge interruption are both incredibly powerful synergies with this effect. If we can keep our Energy Shield high without having these effects expire early, it’s a huge jump in defensive power.
Varashta’s Intuition
Varashta’s Intuition grants 100% of Elemental Damage taken from Mana Before Life.
On its own, this effect is pretty strong. It’s Mind Over Matter for Elemental Damage, without a downside. Plus, Physical and Chaos Damage will end up being taken by our Life/Energy Shield, effectively splitting the damage.
This has insanely good Synergy with Waveshaper, letting Mana Regeneration pull double duty here, increasing our Mana Regen to take Elemental Damage and also applying that to Energy Shield Recharge for Physical and Chaos Hits.
Once again, our friend Convalescence can hop in and push this combo even further, giving us a way to start Energy Shield Recharge on demand and letting us soak up a ton of damage.
Instruments of Power
Instruments of Power allows us to equip a Focus as well as a Staff; however, bonuses from the Focus are halved.
It cannot be understated how powerful this passive actually is. This is just free stats that a Staff Build otherwise wouldn’t have access to. This grants more Energy Shield, Spell Damage, Cast Speed, Resistances, and Crit Chance.
Of course, this also means that if we roll +2 Levels of All Spells, we’ll still be able to gain another Level on top of what Staves already offer. However, the +1 variant of this stat will not provide any bonus, due to being rounded down.
For Disciples of Varashta looking to focus more on Spell Casting rather than the Djinns, this is easily the best passive of the Ascendancy.
Baryanic Leylines
Baryanic Leylines grants 40% increased radius of non-Unique Time Lost Jewels.
Getting more Radius for a Time Lost Jewel is incredibly helpful, in some cases it may even allow us to forgo upgrading the radius and opening a Prefix for the Jewel. Of course, it will still have the greatest effect in combination with that prefix, but some jewel sockets may have more than enough stuff in range by default to really make this shine.
It’s very likely that later in a league, people may genuinely be trying to perfect jewels to utilize this effect. Whether that means actually dropping Radius for other bonuses, or using the max radius to hit a bunch of passives that work for their build.
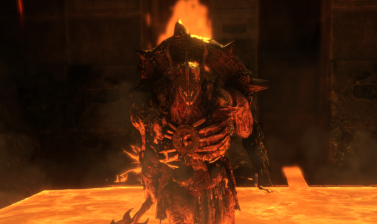
Ruzhan, the Blazing Sword
Ruzhan, the Blazing Sword grants the Minion skill of the same name. While summoned, he will attack with Ruzhan’s Zelaory and apply Exposure every 4 seconds when we cast Damaging Skill. Additionally, he has a command skill that deals greater damage.

Ruzhan is a great Djinn to pair with any Elemental Skill, as he will passively be applying Exposure as well as contributing additional damage on top of this. Since he also scales his damage based on the number of damaging skills used recently, he’ll benefit the most from builds with high Attack or Cast Speed.
His command skill is a spell that deals high Fire Damage, though we don’t have full information at the current time on potential ways to scale this.
Ruzhan’s Trap
Ruzhan’s Trap grants the Command skill of the same name. THis will have Ruzhan throw his greatsword to a location, creating several Hazard that spawn Fiery Tornadoes that deal Spell Damage when triggered. 8 second cooldown.
While there’s not much in terms of Hazard support currently, there is easily enough to get a lot of value out of this skill. Being a Command skill also uniquely gives it access to some Minion supports as well, in addition to other Cooldown support options.
With the main Skill also being a Projectile, we’ll also likely be able to use support gems like Multishot to create multiple swords and cap out the number of runes we can create with each cast.
Ruzhan’s Reckoning
Ruzhan’s Reckoning grants the Command Skill of the same name. When used, Ruzhan will teleport to the targeted location, dealing AoE Fire damage and unleashing a Fire Wave. 12 second cooldown.
The base part of this command skill is the equivalent of a Fire Nova, being a decent AoE tool, if not for the long cooldown. It’s damage looks pretty respectable as well, offering a much stronger hit than something like Fireball. This makes it great for applying powerful Igniites.
We don’t have full details on the Fire Wave, but assuming its a Projectile and can be scaled by those supports, Nova Projectiles is an easy call for a powerful support option. This will likely result in a ton of AoE potential between both parts of the skill.
Ruzhan’s Fury
Ruzhan’s Fury grants the Command Skill of the same name. This skill has Ruzhan conjure two volleys of fire projectiles and sends them forward, exploding on impact. 7 second cooldown.
This creates 20 Projectiles per cast, all just a bit weaker than a Fireball. Combined with Nova Projectiles, it’s likely to be a fantastic clearing skill. All the joys of Fireball, without the extra steps.
Without Nova Projectile though, assuming multiple projectiles can hit a single target, it will also be an exceptionally good Bossing skill. If placed just right, even getting half of the projectiles to hit will produce very high damage output. If we invest in Bonuses that allow it to Chain from Terrain, certain boss arenas will just make this skill absolutely shred.
Navira, the Last Mirage
Navira, the Last Mirage, grants the Minion Skill of the same name. Navira will only act when commanded to do so, granting Mana Regeneration to us and our allies with her initial Command Skill.

With just her base skill, Navira already has strong synergy with Mana-stacking builds and works well as a support for most other builds. Seems like an easy way to solve early mana issues.
The only unknown here is how long the delay between Command Skill uses is. If it’s not an effect we can keep up 100% of the time, it may fall short compared to other options.
Navira’s Fracturing
Navira’s Fracturing grants the Command Skill of the same name. This skill detonates Chilled ground, dealing insanely high Cold Damage with increased Freeze Buildup.
There aren’t too many ways to really lean into this skill and set it up, but there are more than enough to make it viable as a potential main skill.
Let’s start with the obvious, Cold-infused ice Nova. By default, this creates massive patches of Chilled Ground. By focusing on Freeze Buildup and Area, we’re able to cover a wide area with each cast. We can even take this a step further by using supports such as Spell Cascade to cerate multiple areas at once, provided we have the Infusions
Another powerful synergy here is Lunar Assault from the Wolf Form. By pairing its high Cold Damage and Freeze potential with Frost Nexus, we can create areas of Chilled Ground. We can pair this with Encroaching Ground and other AoE increases to quickly and easily set up a clearing combo.
The high Freeze Multiplier of the skill also makes it a nice combo piece for skills like Snap, Fragmentation Rounds, or Snipe, which have benefits for being used against Frozen enemies. In a lot of cases, the combo effect here is another Cold explosion, which could be combined with Freeze and Frost Nexus to be able to cycle between these skills.
Navira’s Oasis
Navira’s Oasis grants the Command Skill of the same name. When used, this skill converts Chilled Ground into an Oasis. We and Allies standing in the Oasis recover Flask Charges as well as Damage Taken Recouped as Life and Mana. Additionally, any Plants in an Oasis become overgrown.
Navira’s Oasis is a very strong, defensive, support skill. The strongest part of this effect is the Life and Mana Recoup, which, combined with other bonuses, can make it very easy to fully recoup any damage we take while in an oasis. While this would still require plenty of AoE to scale the area and make it comfortable to use, it’s a solid effect.
The Flask Charges per second are also a nice bonus, making it a skill we can use between combat or during certain boss phases, to recover our Flask Charges. It’s not a super potent effect, but it could also be a solid way to support a Pathfinder using Flask Skills too.
Overgrowing Plants is a nice bonus if you’re looking to support a Plant build, but it could be done as a replacement for Thunderstorm in solo play. It’s very unlikely that it’d outweigh the extra AoE of simply using Navira’s Fracturing, however.
Navira’s Well
Navira’s Well grants the Command Skill of the same name. When used this skill grants increased Energy Shield Recharge Rate and causes Energy Shield to immediately begin recharging.
Again, a solid supportive effect. It’s like a second Convalescence, but only kicks off recharge and doesn’t prevent it from being interrupted. However, we could just heavily reduce it’s cooldown and pair it with Prayers for Rain and more or less achieve the same effect.
It doesn’t quite feel worthy of a whole Ascendancy point, though, even paired with the Disciple of Varashta’s other Energy Shield bonuses. There are just better options even for a supporting role.
Kelari, the Tainted Sands
Kelari, the Tainted Sands, grants the Minion Skill of the same name. Kelari will only attack on command, but will inflict Critical Weakness on a hit as well as deal damage with an increased Critical Damage bonus. Kelari is not a targetable Minion.

Critical Weakness is an insane bonus to get from a minion. While it will still highly depend on the cooldown of the skill that applies it, it will be by far one of the easiest ways to add it to a build, either as a supporting tool, or by utilizing it ourselves. If it applies across all of Kelari’s Skills, it will be exceptionally busted.
The only downside is that we don’t have the cooldown for it just yet. With Critical Weakness stacks only lasting 4 seconds by default, it’d need to be able to apply it consistently to be highly beneficial. Even a flat 1% Crit Rate from two stacks can be pretty meaningful.
Assuming each skill doesn’t get its own Supports, there’s no doubt that Kelari will demand Bidding III and Commandment to be used with him. This will drastically improve his cooldowns, and the best part is there’s no downside to this either, as Kelari doesn’t passively deal damage.
Kelari’s Malediction
Kelari’s Malediction grants the Command Skill of the same name. Kelari will passive consume corpses to spawn up to 8 Corpse Beetles. When Commanded, the Corpse Beetles will rush a target and explode.
We don’t have damage numbers on this skill yet, so it’s hard to gauge the amount of damage it can do currently. However, based on it consumption corpses, it sounds like it may synergize very well with Sacrifice and some Skeletal Clerics.
However, if the Critical Weakness baked into Kelari extends to this skill, this will easily be one of the better skills to apply that Critical Weakness. This is especially true if the mentioned synegy with Sacrifice also works, as we’ll always have beetles so send out off cooldown.
Kelari’s Judgment
Kelari’s Judgment grants the Command Skill of the same name. This is a channeling skill that ramps up its damage and area while channeled, dealing high Physical Spell Damage when released. This skill applies 4 addtional stacks of Critical Weakness on hit. 12 second cooldown.
Despite its long Cooldown, this will synergize insanely well with both Bleed and Poison builds. Having a powerful skill on a cooldown rather than tied to Glory or some other mechanic to gate it gives real potential to builds that want a single, high-damage ailment applicator.
However, the downside to this is it needs to be channeled for its maximum damage. While I’m sure this cna be accelerated with Cast Speed or some other means, it will mean we’ll need a solid window where our target isn’t moving to get its full damage off reliably.
This means it’ll pair very well with Navira, as well as other sources of Freeze, Electrocute, or pin to prevent movement.
Kelari’s Deception
Kelari’s Deception grants the Command Skill of the same name. When used, it will deal AoE Damage at a target location, leaving behind a clone. Casting the Skill again with a Clone active causes the previous clone to explode for greater damage. 3 charges, 5 second cooldown between charges.
Where Judgement is a strong single hit, this is a great spammable damage tool, also able to ramp up to high damage values. This skill has the potential to ramp up quite well if we manage our cooldowns and the clones don’t immediately explode to enemy damage.
Much like Kelari’s other skills, very strong synergy with Bidding and Commandment, even more so with it’s short cooldown. Depending on what the game considers consecutively, this could potentially ramp indefinitely.