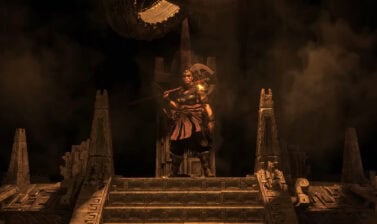
Doryani is one of three Atlas Masters available in Path of Exile 2. Learn how to unlock his passives and the best ways to use them.
What are Atlas Masters
Upon completion of the campaign in Path of Exile 2, you’ll move into the Atlas. Once there, as you complete Waystones you’ll be able to unlock each of the three Atlas Masters, who act as a pseudo-ascendancy for the endgame Atlas content.
Doryani is one of three Atlas Masters, alongside Hilda and Jado, that are able to influence your Atlas. Doryani in particular has more direct influence over your Atlas itself, being able to terraform it in multiple ways while still having some strong options for farming in general.
Atlas Masters Guide: The Basics ExplainedUnlocking and Upgrading Doryani’s Science
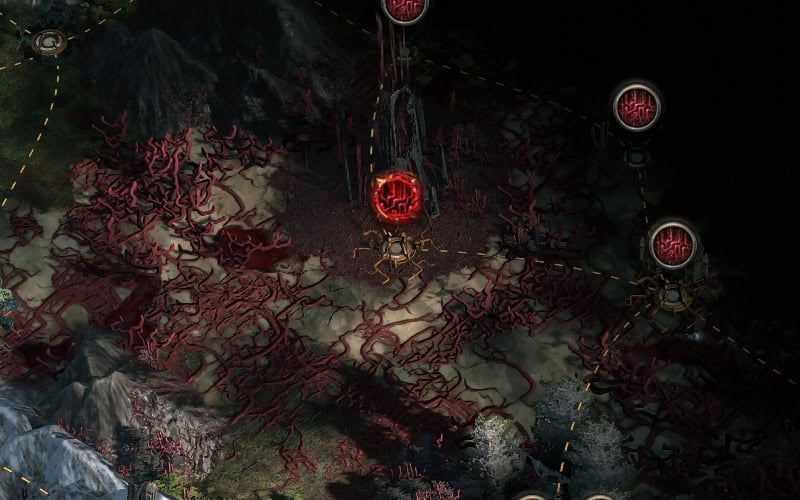
The Questline for Doryani’s Science will task you to complete multiple Corrupted Nexus across your Atlas as well as defeat the Immured Fury to unlock each set of Passives as well as a Atlas Master Point for each.
Unfortunately, unlike the other Atlas Masters, Doryani does not point you towards the next nearest Corrupted Nexus on completion. This often means that Doryani’s Science will be the last master you get all the points for in most cases.
Doryani’s Science Passives
Below are the 12 Passives available for Doryani, going left to right across each row.

Evolutionary Pressure
For Each Explicit Modifier on the Map:
2% increased Effectiveness of Monsters.
Rare Monsters have a 3% chance to have additional Modifiers.
1% of Item Rarity from Monsters.
In general, this is great for when you’re comfortably running Waystones with 6 Modifiers, granting the full bonus of this upgrade. This means a total of 12% Effectiveness, 18% Additional Modifier Chance, and 6% Item Rarity for these maps.
When used this way it can be incredibly powerful, offering multiple layers of making monsters more rewarding. Effectiveness grants additional Item Quantity and Experience, while Additional Modifiers increases Item Quantity and Rarity.
Stitch the Flesh
Your Maps have an additional Revival.
This is also a nice safety net for 5-6 Modifier Maps, giving you an extra portal/revive to clear the content and boss before being kicked out and having to run it without any extra content. It won’t prevent your map from getting bricked if the Map Boss does manage to kill you.

Refined Formula
150% increased Expedition Explosive Radius
100% increased Expedition Explosive Placement Range
Expeditions have only 1 Explosive
If you’re familiar with Extreme Archeology from prior to the 0.5 Update (or even POE1), that’s what this is. You get a single big bomb to place and everything spawns with all modifiers in range applied.
If it’s one-to-one with that effect, it also will not be active for the Grand Expeditions, or the maps that are just one massive Expedition. This makes it so those can still be meaningful and rewarding to complete.
This is great for when you’re doing Maps with Expedition on them, and just want to get them done and over with quickly. It does carry the inherent risk of spawning a large amount of enemies at once, especially if there are many monster flags around, but these monsters aren’t quite as powerful as they used to be.

Disengaged Safeties
All Map Areas are Irradiated, increasing Monster Level by 1.
This really won’t have a ton of value until you reach Tier 15 Waystones, or even are corrupting for Tier 16 Waystones. This is because this extra Level from Irradiating the Map Area (normally provided by Irradiated Tablets) allows you drop items of a higher Item level, with many of the highest tiers of damage modifiers requiring this boost to reach.
In this particular case, this lets you swap an Irradiated Tablet out for one providing additional content (and items) while still hitting these important breakpoints:
- T16 Maps become Level 81.
- Rare Enemies will drop Item Level 82 (T1 Damage Modifers)
- All enemies to drop Item Level 81 as well. (T1 Skill Level Modifiers)
- T15 Maps become Area Level 80.
- Bosses will Drop Item Level 82 Items.
- Rares will drop Item Level 81 Items.
- All enemies other enemies will drop Item level 80. (T1 Caster Modifers)
- T14 Maps become area Level 79
- Allows Ritual to offer the high end Omens
- Bosses can drop Item Level 81 Items.
- Rares can drop Item Level 80 Items.

Improved Calibration
Waystones have 25% more effect of Prefix Modifiers or Suffix Modifiers when opening a Map.
With one of the big endgame goal for increasing the rewards of a Map to stack as much Item Rarity on a Map as possible, this only helps with that. Granted it’s a 50/50 chance on which set of modifiers get hit, it’s possible to get rarity on both Prefixes and Suffixes now, making it a consistent bonus.

Careful Procurement
Magic Monster Packs a 35% chance to have an additional Modifier.
Additional Modifiers are a way to scale monster rewards. While this only puts some Magic packs on par with the lowest rare Rare Monster, it’ll still be a noticeable increased, especially since it applies to a whole pack rather than one monster.
Ideally, this bonus is used alongside bonuses to Pack Size and Monster Rarity, to increased the odds of finding Magic Packs and making them larger. While Rare will likely remain the better option, this will at least improve the overall loot of a map, particularly when it comes to currency.

Mechanical Guardians
Mechanical Guardians grants Strongboxes 2% increased Item Quantity per Modifier.
Non-Unique Strongboxes are guarded by a Dormant Construct and only roll modifiers that apply to that construct, which becomes active upon opening.
This is a fairly interesting choice, effectively turning Strongboxes into Monsters. This in theory would also mean that bonuses to Monster drops would apply to them, in addition to Strongbox bonuses. Assuming it does work in that way, it might be an interesting farming method to experiment with.
This obviously means that the ideal scenario is pairing this alongside plenty of Monster and Strongbox Modifiers, from both the Atlas Passive Tree and Precursor Tablets. This would have the most potential alongside the Special Map Modifiers that add more Strongboxes.

Hidden Patterns
When completing a Map there is a 10% chance to make nearby Maps accessible.
This may sound confusing at first, but this means that surrounding map will able to be run, even if not directly connect to a completed map. Similar to how The Grand Project Unique Tablet works, without the restriction of needing to be used when running a Precursor Tower.
This is a great bonus if you’re looking to cross a large span of your atlas quickly, occasionally letting you skip a handful of maps as your travel. It’s not insanely strong, but will also be of benefit when hunting Citadels, Anomaly Maps, and other rare occurences.

Volatile Connection
Map Areas have a 15% chance to be Cleansed or Corrupted.
Both of these Map Effects have their uses if you wanted to lean into them, especially with late game atlas points.
Corrupted Map Areas come with the benefit of Coalesced Corruption, spawning additional monsters as you defeat monsters close together. With Atlas Passives, Rare monsters in Corrupted Areas can also be given a chance for increased Monster Modifiers.
Cleansed Maps have a chance to spawn the Immured Fury, awarding a Fracturing Orb when defeated. There’s also a small chance for Obelisks of Cleaning to appear, granting a short duration buff that provides a whopping 100% increased Item Rarity, as well as some added offensive and defensive bonuses. With Atlas Passives, all monsters in Cleansed Areas can be granted a chance to drop Fracturing Orbs.

Head of the Snake
Pinnacle Bosses have 25% chance to drop an additional Unique item
Pinnacle Bosses have a single Revive
Powerful Map Bosses have 5% chance when defeated to reveal a nearby Citadel
This is a great bonus to have when farming Pinnacle Bosses, the chance for Extra drops alone makes this worth taking. Not all Pinnacle Boss Drops are made equal, so having more chances at getting the rarest ones is always beneficial.
This does have a downside though, being that you need to be absolutely sure that Pinnacle boss will go down deathless. With a handful of exceptions, Many of these
Combined with Overseer Tablets, the chance to find Citadels will definitely accelerate your path towards farming the Arbiter of Ash or Divinity. Not super helpful for other Pinnacle bosses though.

Dam the River
Azmeri Spirits only possess enemies when they reach Maximum Empowerment.
This a a really good boost to consistency of the rewards from Azmeri Sprits. While it’s still situational at best, it will at the very least ensure you see more idols dropping, particularly the rare ones.
The downside however, is that without the Hunt the Apex Atlas Notable Passive, if you exhaust the Rare monsters before it reaches max empowerment, they will just disappear. Though by the time you unlock this upgrade for Doryani, you should have a lot of your Atlas Passives completed.

Remnants of Greatness
Map Bosses have 20% chance to be guarding a Precursor Terraformer which can be used to change the biome of a group of maps nearby
This is exceptionally powerful when focusing on certain Atlas Mechanics, particularly those that gain benefits from a Biome. As a rough guidelines, here are the biomes and what they have bonuses for currently on the Atlas Passive Tree.
- Water – Shrines and Magic Monsters
- Desert – Essences and Rare Monsters
- Forest – Rogue Exiles and Rare Monsters (especially Beasts)
- Grass – Summoning Circles and Azmeri Spirits
- Swamp – Essences and Unique Monsters
- Mountain – Chests and Shrines
Doryani’s Science Point Allocations
Below are our recommendations to use at each stage of unlocking the passives for Doryani’s Science. Keep in mind that not all passives are available at all time, and are unlocked alongside each point.
Single Point
Realistically, if you’re sitting on Doryani with just one point for a long period of time, you’ll have use for all three passives in the first row of options.
Refined Formula is arguably the best option early on, making the otherwise slower Expedition content much faster when it does show up. That’s also the problem, as the actual Expeditions in Maps are quite infrequent outside of it’s general area. However if you choose to focus on that area of the endgame, it will be very beneficial.
Once you start running harder or more difficult Waystones, the other two options will be more appealing. Stitch the Flesh grants an extra safety net if you’re not feeling confident, while Evolutionary Pressure increases your rewards when you are.
Two Points
When you have two points, you should be much closer to a point where you’re deeper into endgame and trying to push for better rewards from your maps.
This makes the combination of Disengaged Safeties with either Evolutionary Pressure or Improved Calibration a very strong option. Higher Monster Level means better loot, and pairing wither either option to increase loot further is a great option. This is a general enough option to work with most anything you want to pair it with.
Three Points
The Third point doesn’t come with any outwardly strong generic bonuses, so you just stick with Disengaged Safeties, and use both Evolutionary Pressure and Improved Calibration alongside it.
Another option here is to consider Careful Procurement over Evolutionary Pressure. This provides a more consistent bonus across a map by focusing on Magic Monsters, rather than Rare Monsters, as well as not requiring you to always run 6 Modifier Maps
Four Points
One solid generic strategy for this point is to combine Disengaged Safeties, Remnants of Greatness, and Improved Calibrations alongside either Evolutionary Pressure or Careful Procurement. This allows for some interesting strategies that are specific to a biome, by hopefully creating more maps of that biome to run. Running Evolutionary Pressure in the Desert biome with heavy investment into Essences and Rare monsters is a fairly strong option among these.
The other option we have access to now in the combination of Head of the Snake alongside Hidden Patterns to quickly locate and head towards Citadels and farm their resulting Keys for Pinnacle Bosses. This can be paired with Improved Calibration and Disengaged Safeties for their generic loot increases to make the non-Citadel maps more worthwhile. Of course, Hilda offers better passives for the Citadels and and Pinnacle Bosses, unless you’re after a specific Lineage Support, which Jado can help with to some extent.