With the Rise of the Abyssal League came a new form of endgame crafting, Desecration Crafting. Learn how to utilize this new system to create powerful items fit for Endgame.
Table of contents
What is Desecration Crafting?
Desecration Crafting is our term for utilizing the Desecration mechanic added in the Rise of the Abyssal League. Everything from simply applying the various Desecrated Bones to using all manner of currency in combination with them.
This powerful mechanic allows us to pick from our choice of three modifiers to place on a piece of gear, giving us a ton of control over the outcome. While the choices presented are random, there are plenty of desirable Modifiers that are common enough to get use out of.
We’ll share a few tips to get the most out of this system, including some early game tips for using the system and the endgame crafting process that can create Best-in-Slot Gear, or in most cases at least as near to such as possible.
Early Game Tips for Desecration Crafting
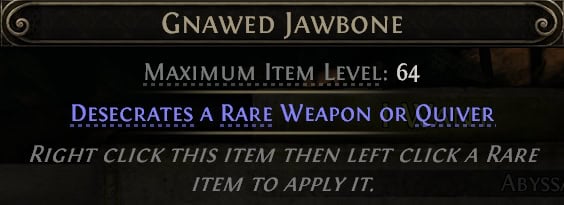
First and foremost, don’t be afraid to use Gnawed Bones. These are only useful in the campaign due to the Maximum Item Level restriction, so there’s no point in holding on to them. They’re a great way to add extra Life, Defences, and resistances to gear, as these options show up frequently.
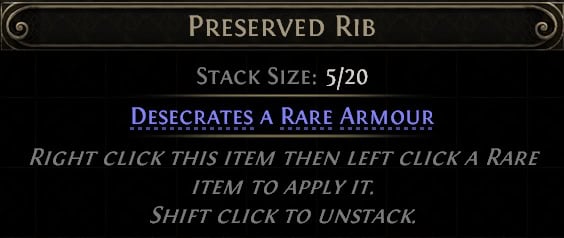
As we progress and start finding Preserved Bones, don’t be too scared to use these either. We’ll find these as we near the end of the campaign, and they can really jump-start our mapping progress if applied to a good drop.
When upgrading our gear, make sure to Desecrate good Armour and Weapons if they have an open Modifier slot. Just by having control over one Modifier, we’ll be able to make the item even stronger and have it last for way longer.
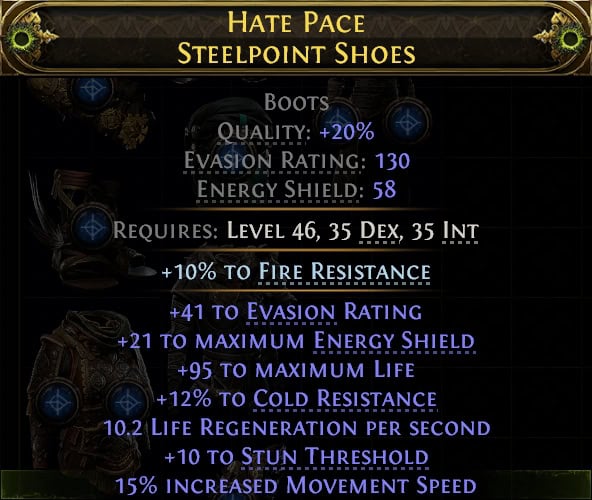
Ideally, we’re looking for at least 3 other good modifiers. We may even hit a missing mod that would be considered mandatory, like Movement Speed for Boots.
While we strongly encourage using Desecrated Bones often, it’s also recommended to keep at least 1 Preserved Jawbone, 2 Preserved Ribs, and 3 Preserved Collarbones on hand at all times.
This ensures that if we find a drop worth using them on, we always have what we need. We’re being extra conservative with Collarbones as they are much rarer than the other two types.
Don’t forget about the Currency Exchange either! Consider selling excess Desecrated Bones for Exalted Orbs or Chaos Orbs. This will make it easier to swap them out as well as provide plenty of currency for other items.
Endgame Desecration Crafting
There are multiple ways to go about this process and many currencies we can use, but what’s the best way to ensure we’re getting the most out of them? Let’s outline the general process of a crafting sequence and cover the different ways to approach it.
Before we dive into the method, here’s a quick shopping list of sorts of everything mentioned in the process, if you want to buy everything before following along. All of this totals to around 3 or so Divine Orbs (in SC Trade), but trust us, the cost is worth it if we need a good upgrade.
 | Preserved Collarbone (for Jewelry) |
 | Preserved Jawbone (For Weapons) |
 | Preserved Rib (for Armor) |
| Exalted Orbs (Greater or Perfect recommended) | |
 | Omen of Abyssal Echoes |
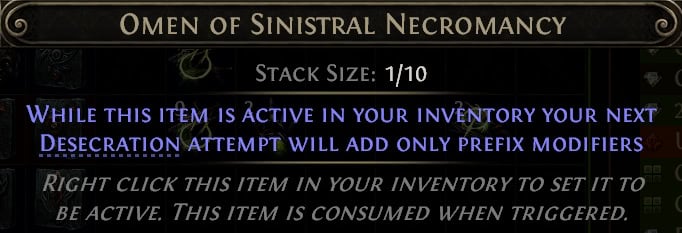
 | Omen of Sinistral Necromancy (For Prefixes) |
 | Omen of Sinistral Exaltation (Prefixes) |
 | Omen of Dextral Necromancy (For Suffixes) |
 | Omen of Dextral Exaltation (Suffixes) |
 | Greater Essences (varies by item) |
| Regal Orb (optional, Greater or Perfect if possible) | |
| Fracturing Orb (optional, but reocmmended) |
Step 1: Find a Magic Base
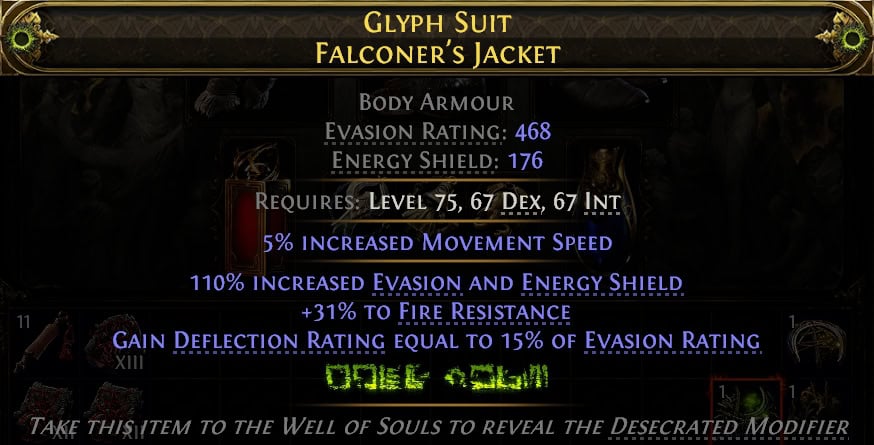
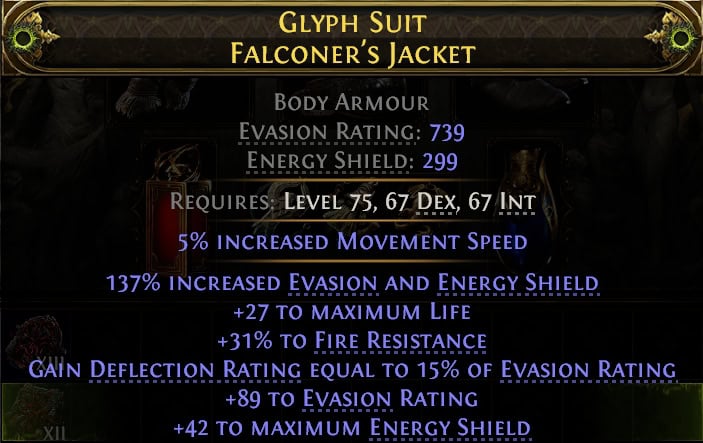
First, we need to find an item to start with. Our Ideal item here would be a Magic Item, ideally Item Level 82 for the highest potential or 78 at minimum for most T1 Modifiers, with only the Modifiers we want on it. We can trade for one, which gets very pricey, find one as a drop, or, like the item for this example, buy it off Rog.
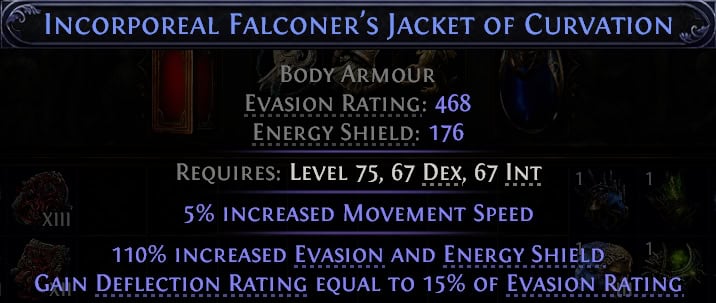
Both of these modifiers are desirable for me, though the Deflection Rating is a lower tier. However, the absolutely perfect roll Defence roll makes up for that.
The last option, which is more for the very late game, is finding an Exceptional Item, which drops as a Normal Rarity item. Then we’ll use a Perfect Orb of Transmutation to give it the best possible modifier we can to start, and if it lands something good, carry on from there.
We can technically do this with any Normal Item, but this will take time, patience, and many Perfect Orbs of Transmutation to get to the starting point. It’s generally not worth it outside of the Exceptional Items.
So we have our base Item, what’s next?
Step 2: Make it Rare
Now there are two excellent ways to go about doing this: Essences and Regal Orbs. There is a third way that is far more risky as well, but can be worth trying. Both will take the item we’re working on and make it rare, and both allow us to control the outcome in different ways. In the case of our example piece, we chose to go with an Essence just to ensure we’re getting something valuable.
Essences
Essences give us the most control as they guarantee a specific Modifier, but can only be applied to certain items. The most common to use for this are Resistance Essences for Armour pieces, and the Attack or Cast Speed Essences for Weapons. Of course, we’ll want to use a Greater Essence where possible for this for the strongest result.
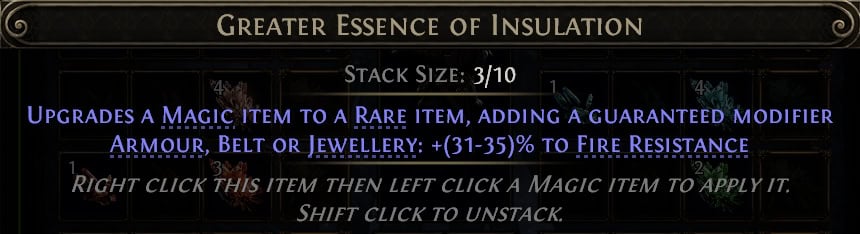
This leaves us with an item that has 2-3 Modifiers, all of which we want. Of the methods here, this is by far the safest option. No risk, no hassle, just settling for a slightly lower roll on one modifier.
Regal Orbs
Regal Orbs are less reliable overall. If we do opt for using a Regal orb, we’ll want to use nothing less than a Perfect Regal Orb. Similar to the previous steps, there’s a lot of RNG here and next to no control. This is because just like the Omen of Homogenising Exaltation, the Omen of Homogenising Coronation was also removed in 0.4.
However, there is a situation where Regal Orbs can be a good idea. This would be a case where no Essences offer anything desired on a specific item, and simply provides a modifier to fill out the options for applying Fracturing Orb alongside Desecration. Or for an easy target for an Omen of Crystallisation
Recombination
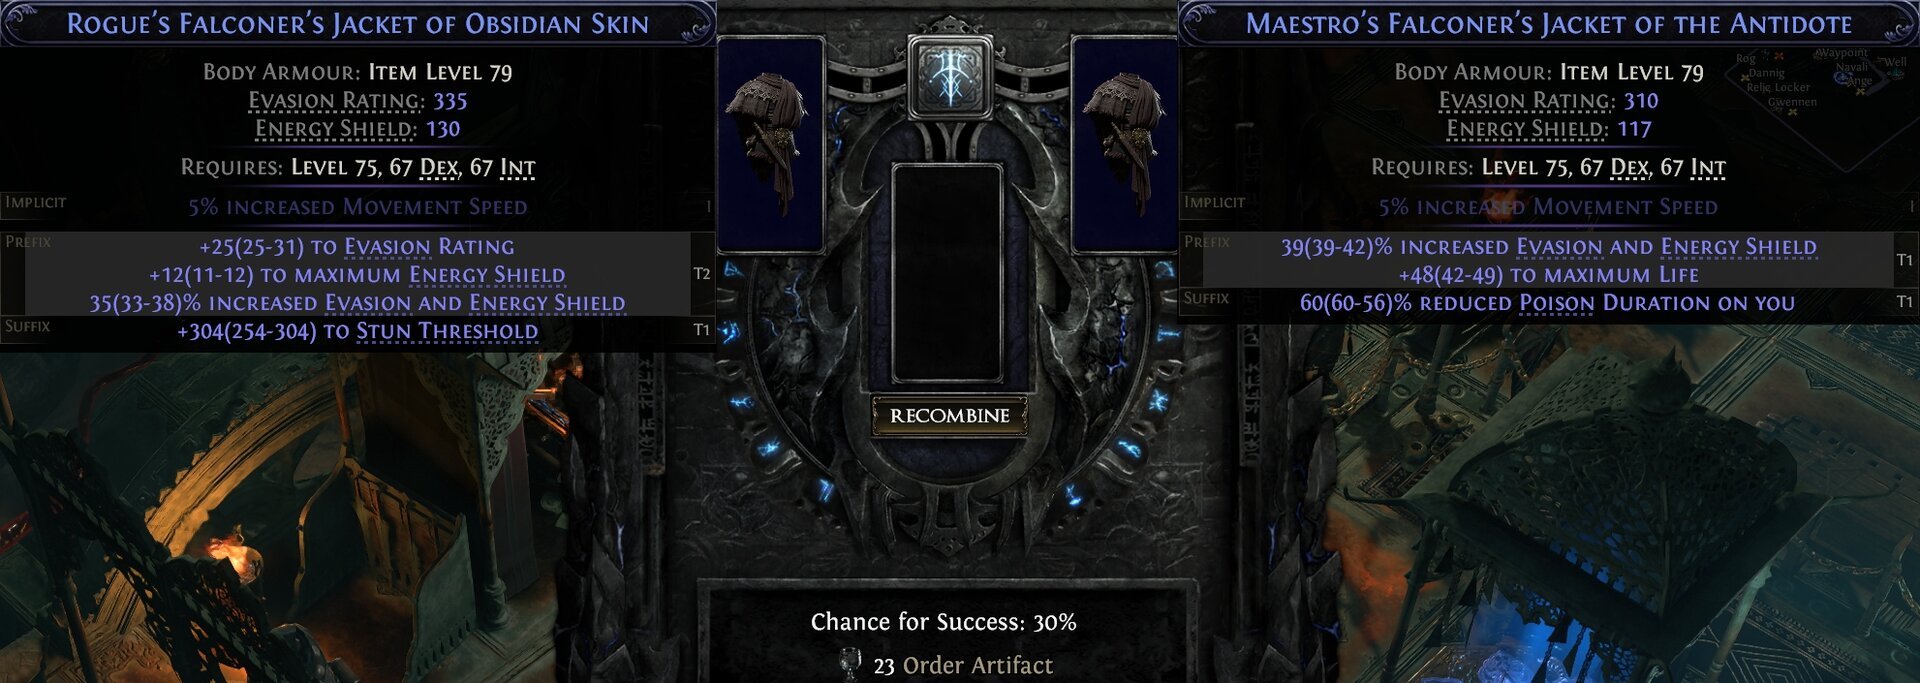
The Recombinator can be an okay option for endgame, but it comes with a lot of risk. This requires two non-unique items to start, ideally two items with relatively high-tier modifiers. There are ways to make use of a lower-tier modifier as well, via Omens of Crystallisation, but it is very costly.
We’ll also need Expedition currency based on the item we’re trying to recombinate. Broken Circle Artifacts for Weapon, Order Artifacts for Armour, or Black Scythe Artifacts for Jewelry.
If we’re starting with Normal Items, we’ll start with Perfect Orbs of Transmutation and Perfect Orbs of Augmentation. This gets us two Magic items with high-tier modifiers on them. This is just one part of the risk, however, as these orbs may not always land the modifiers we want or need. If both roll two different modifiers, though, we can recombine them.
Recombining these two items will turn them into a single rare; this, of course, is risky as recombination isn’t guaranteed and will destroy the items on failure. Due to this inherent risk, if the items resulting from the Perfect Orb of Transmutation have a modifier we’re looking to get more of (Defences, Resistance, Damage) then we’re better off starting there.
What this does allow us to do however, is effectively salvage an attempt at a good craft if we get an item with a good Modifier, but the rest of the modifiers are either weaker or undesirable.
Some things to note with Recombinations, as if they didn’t have enough risk already, modifiers that have several Tiers will be much harder to recombine with high-tier modifiers.
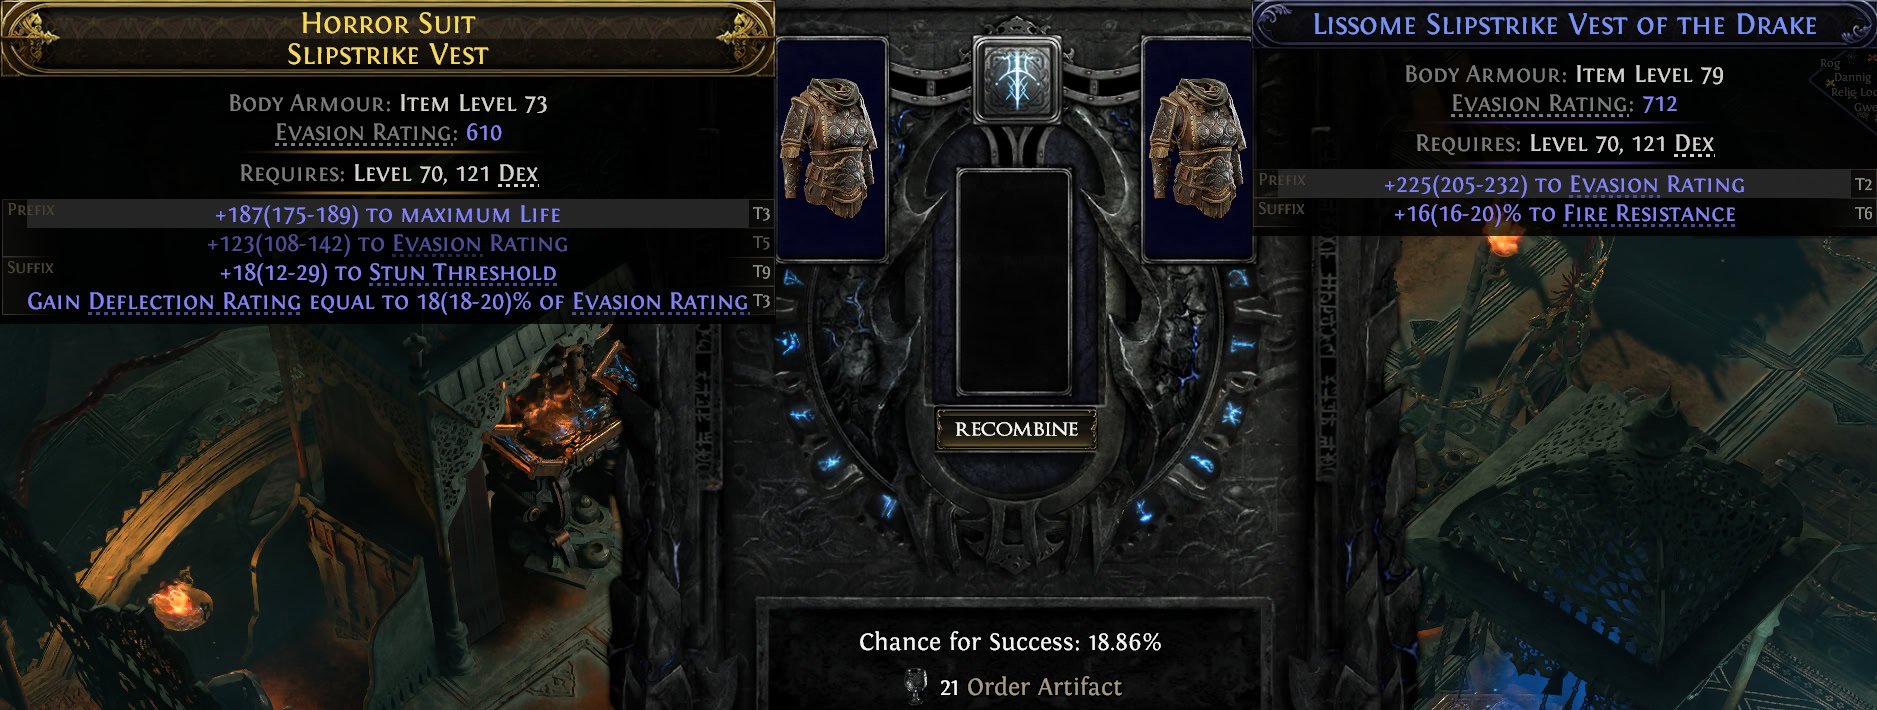
This is because the chance is determined by the weight of the modifier rolling. This makes modifiers like Life, Defences, Resistances much harder to pass on, at least at Tier 3+. However, modifiers with small pools, like Hybrid Life and Defences, will be easier to pass on as shown in the examples for this section.
We can use the Omen of Recombination to mitigate some of the risk here. This will make two rolls at the Recombination succeed, and if either result succeeds, we keep the item.
As another recommendation for Recombination, we should seldom use two different item bases with Recombination. This is because if the item base is different, which base we get is a 50/50 chance. This could mean losing a Fractured Modifier (if the item has one) or the implicit Movement Speed modifier of a Falconer’s Jacket, for example. Many item bases are considered the best options because of these implicit modifiers, so use caution.
However, when using two different bases, we can heavily influence the outcome by the Modifiers we’re putting together. The item that has the higher-tier Modifier is more likely to be chosen.
As a final note, we can get even more out of Recombination through the use of Fractured Modifiers. If the selected base has a Fractured Modifier, it will carry over to the resulting item. In a similar vein to a lot of POE2’s crafting, this can be very costly to make use of, but when it works out can easily result in some of the best outcomes.
Step 3: Applying Desecration
Now that our item is Rare, we can apply our Desecration to it. But before we go slapping a Desecrated Bone on it, there are five very important Omens to keep in mind for this step: the Omens of Sinistral Necromancy, Dextral Necromancy, Blackblooded, Liege, and Soverign.
Starting with the Omens of Sinistral and Dextral Necrmancy, these powerful Omens allow us to pick which side the Desecrated Mod will appear on, and as a result, more control over the outcome of our crafting. It’s very important to ensure this Omen is in our inventory and activated before using the Desecrated Bone, or we will not get the benefit of the control this offers. This can absolutely make or break a craft.
The Sinistral version is the most commonly used, as a lot of our character power is found there. Dextral has its uses, particularly if we’re looking to get a specific Lich modifier for a Weapon, but it is also generally a risk to the outcome.
Continuing the Example, we opted for Sinistral Necromancy, as the Prefixes are far more important to get right. Yes, it looks like a Suffix, but Desecrated mods always seem to be listed last by default.
When it comes to Weapons and Jewelry, however, this is where the Omens of the Blackblooded, Liege, and Soverign come in. This influences the special Lich Modifiers that appear in the pool, guaranteeing we hit a given one. Be sure to look up and double-check which, if any, of these modifiers work for the item you’re crafting and which Lich they belong to. I recommend the POE2 Wiki for this, as they have a full list of the Desecrated modifiers that help prevent any potential confusion.
It’s important to note that using Ancient Desecrated Bone over Preserved ones will almost always result in items that are worth keeping, barring landing a dead modifier at the very end of crafting. However, this comes at a significantly higher cost and is only recommended for Exceptional Item bases.
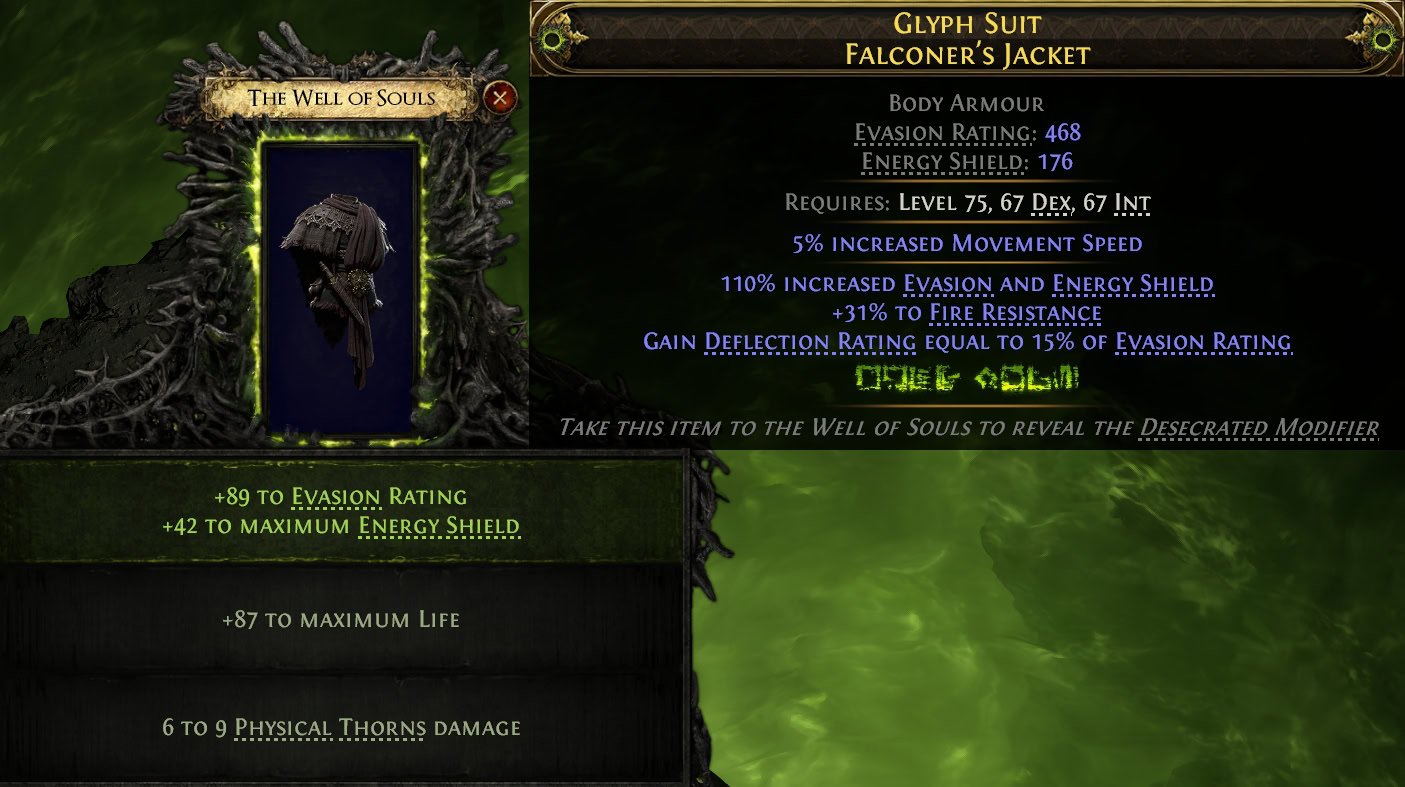
Step 4: Revealing the Desecrated Modifier
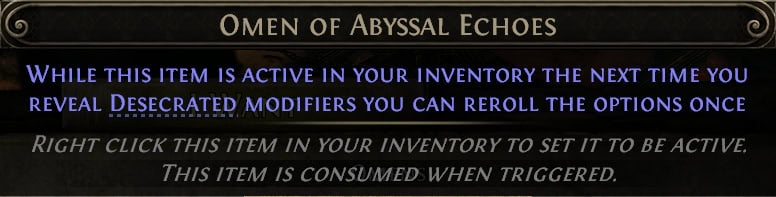
This step is pretty simple, but just like the previous, we have an Omen we can make use of here. This time, it’s the Omen of Abyssal Echoes, which allows us to re-roll our Desecrated Modifier Selections once while choosing. Make sure this Omen is active before choosing to Reveal the Modifier.
This helps us land stronger modifiers without having to always use an Ancient Desecrated Bone. In the case of our continued example, without the re-roll, we would have been stuck with a very weak modifier and had a weaker resulting item.
We highly recommend referring to the list of Modifiers for gear on POE2DB to compare to what shows. This will help determine what tier of mod we land, and which is the strongest of the options. Ideally, we’ll land a Tier 1 (strongest) or Tier 2 (runner-up) version of the modifier, or whichever is the highest on the particular item being crafted.
If all modifiers are undesirable or end up being under Tier 3 (or less effective than an Ancient Bone in most cases), then use the re-roll provided by the Omen. Tier 3 is as far as we want to stray from the top, so re-rolling anything below that is a good call. This, however, doesn’t have guaranteed success, but the odds are fairly high when the number of affixes is limited.
Step 5: Finishing the Modifiers
Now, for the last thing, we’ll want to do, finish up our Modifiers. With the Omen of Homogenising Exlatation previously being a big part of this step and now removed as of 0.4, Exalted Orbs won’t be the first step anymore; instead, we’ll look to the methods we can use for more control first. This means a combination of Fracturing Orbs, Orbs of Annulment, and Perfect Essences where applicable. Then, we can gamble on an Exalt to finish the item off.
Fracturing Orbs and Perfect Essence
Now, if we want to use a Fracturing Orb, we ideally want to use it just after filling the Prefixes. But this only works if we have a Suffix as well, as 4 Modifiers are required. This locks one Modifier in place, preventing it from being removed through Chaos Orbs, Orbs of Annulment, or similar effects.
It’s important to note that an unrevealed Desecrated Modifier will count towards the required 4 modifiers needed for Fracturing, but not actually be able to be fractured itself. This makes Fracturing a specific modifier a 33% chance instead of a 25% in this case. So we can have our ideal prefixes and an improved chance at fracturing a lone suffix.
For Weapons, the absolute best outcome is hitting that Suffix as well due to perfect Essences. This allows us to fill the suffixes with junk, and repeated use of Perfect Essences to fill the remaining suffixes.
This is because with full Suffixes, the Perfect Essences of Battle and Haste (for Martial Weapons) or Sorcery and Alacrity (for Magical Weapons) allow us to pick up two really great stats, assuming they’re not already on them to start. This is because they’re both Suffixes, which means that they have to remove a Suffix to apply. This protects any prefixes we may have crafted on as a result.
There are pairs of essences that work well for this situation for most items and builds. Feel free to experiment and adjust accordingly.
If we do not have a full 6 Modifiers on an item when using a Perfect Essence, they will have a chance of hitting the side that has our ideal and crafted modifiers. This can be prevented with the use of Omens of Dextral (or Sinistral) Crystallisation. These allow you to pick which modifier will be hit first. Of course, on some items, we may not care about one side of the item at all, allowing us to Exalt on garbage modifiers to then sacrifice them to be replaced by the much stronger Perfect Essence Modifier.
Annulment Orbs
If we land the Fracture on the lone modifier, we can also opt to invest beyond Perfect Essences and try to make it a perfect 6-mod item. As a word of warning, this is not worth doing if you’re not looking to make an absolutely perfect item. This can get very expensive, very quickly.
The safest way we can do this is by combining our Orbs of Annulment with Omens of Sinistral Annulment or Omens of Dextral Annulment. This allows us to take a 50/50 chance of removing one of the two modifiers that are not fractured. Again, these Omens must be in our inventory and activated before applying the Orb of Annulment. We can continuously do this, as well as using Greater or Perfect Exalts to hit the exact Modifiers we want on our item.
Should we want to, we can also use the very expensive Omen of Light to target our Desecrated Modifier. This can allow us to re-roll it over and over until we hit a desired result. This can also allow us to “block” a modifier from appearing with an Exalted Orb, such as Accuracy on weapons, and still have a safe way to remove it when that block isn’t needed. Though this second case is less useful without careful research and testing.
Exalted Orbs
Exalted Orbs will remain a good way to round out the modifiers, but the Omen of Homogenising Exalation being removed also means that we have FAR LESS control over our Modifiers compared to 0.3.
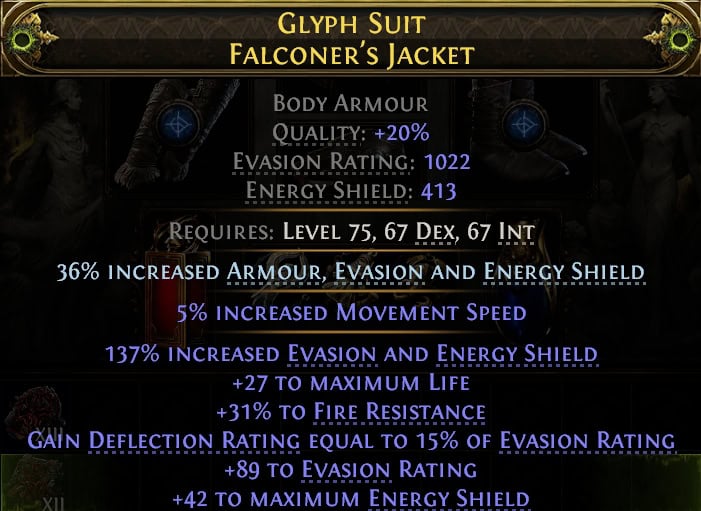
Once this is done, our current item will be a 4-5 Modifier Rare item, all with (hopefully) desirable modifiers. In the case of our running example craft, we decided to just leave it as a 5-mod item.
Depending on our crafting, we can continue to use additional Omens of Homogenising Exaltation alongside (preferably) Greater or Perfect Exalted Orbs.
This will fill our Suffixes with mostly desirable modifiers. We’ll just need to be cautious of potentially dead modifiers that we may roll, like Leech on Martial Weapons, or Ailment duration on Armour.
For Martial Weapons, the more desirable Suffixes share the Attack Tag, or Attack Modifier Category, with the Attack or Cast Speed we added with an Essence. The same goes for the Caster Tag on Wands and Staves as well as Resistances for Armours. Our Defences filling the other side will also enable Evasion Armours to still Deflection as well.
Step 6: Finishing Touches
It’s time for the final touches to our item, mainly Quality, and Sockets. What socket we will vary from item to item and build to build. It’d be best to look over the available options for Socketables to see what works. However, we’ll always want the maximum number of Sockets and Quality when possible.
Safe options for most sockets tend to be Greater Iron Runes or Greater Desert, Glacial, or Storm Runes. These tend to be plentiful and easy to get more of, while providing great offensive and defensive effects.
To finish up our example throughout this guide, we’ve gone with Greater Iron Runes. Since the build we’re crafting for is a Hollow Palm Technique Build, the defences double as offences for us.
This full crafting process works exceptionally well and can be adapted to any item with ease. Just be sure that when starting that the item we start with has similar modifiers that can be rolled with the Omen of Homogenising Coronation or Exaltation.
Step 7: Corruption and Sanctification
Assuming the steps up to now have been followed, there is one final step that can be taken to push our items even further. We can choose to Corrupt or Sanctify our item to try and push its value higher.
Both of these options run the risk of ruining the item, but have benefits that can outweigh the risk.
Corruption
As with some other steps, there is a risk of ruining the item by corrupting it. We should never corrupt an item we’re not willing to lose. Once Corruption is applied, the item cannot be modified further.
To do this, we’ll simply need a Vaal Orb to apply to the item. This will always do one of the following things to Rare Armour and Weapons, at a 25% Chance each:
- Reroll up to three modifiers
- Adds a Vaal Implicit Modifier (referred to as an Enchantment)
- Adds a Socket to the item, bypassing the normal limit
- No Change applied
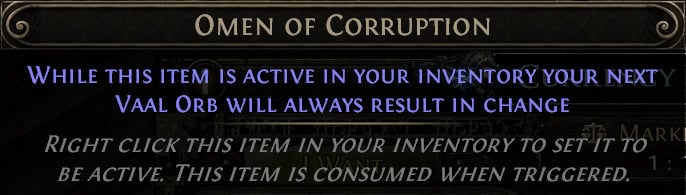
We can also add in the Omen of Corruption to this, which, while in our inventory and activated before using the Vaal Orb, removes the chance for the “No Change” effect. This boosts the odds of the other effects to a ~33% chance, up from the previous 25%. This gives us a ~66% chance to hit the desirable effects, up from 50%.
Adding Sockets is the ideal and strongest outcome in most situations, as it allows the use of an additional Socketable item. Many Socketable items add to our character power and improve the item. Even if in most cases, the best option is to simply boost the defences via Greater Iron Runes.
There are some Vaal Implicit Modifiers that can be incredibly good for some builds, often outweighing any benefits of an extra socket. There’s a significant number of Modifiers in this pool of each item type, so getting an exact one is often a very low chance.
Then there’s the reoll modifier, where all of the risk comes from. Hitting this outcome will likely ruin the item beyond repair.
Sanctification
Sanctification is also an option for some items, allowing us to further boost the modifiers already on the item, while risking the values going down instead. Much like with Corruption, the item cannot be modified further after Sanctification, so we should not perform this on an item we cannot afford to lose.
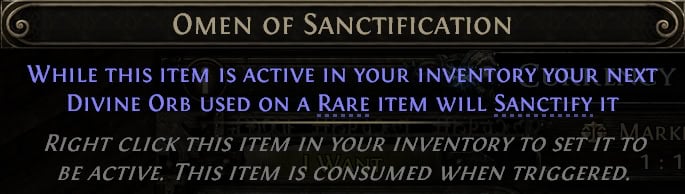
Sanctification is inherently more expensive than Corruption, which ends up making it riskier, despite the only negative outcome being a worse item instead of a totally different one. This is the result of the cost of a raw Divine Orb, on top of the ~2 Divine Orb price tag currently on the Omen of Sanctification that is required.
When sanctifying an item, all of its modifier values will be re-rolled, then multiplied by 80-120%. With each Modifier rolling independently, it’s roughly a 2% chance our item ends up with an entirely positive (or negative) result. Each Modifier is a 1:41 chance to hit the max (or min) value, making hitting the absolute of each end for every modifier about a 1-in-4.75 Billion chance.
There are very few situations where this will provide more value than the additional socket offered by corruption. However, the rare cases of landing that small jackpot across all modifiers, Weapons in particular, will gain an additional +1 to Skill Levels if their current bonus is at least +5, alongside a huge jump in physical damage.