Everything you need to know about playing as Recluse, the pure ranged spellcaster class, in Elden Ring: Nightreign.
Table of contents
Abilities and Relic Effects
Unlike most other Nightfarers, Recluse’s Passive Ability and Character Skill work together and rely on each other to function. Their in-game descriptions also barely explain anything.
 Passive Ability: Elemental Defense
Discover affinity residues that can be collected to replenish FP.
Affinity residues are just little colored circles that appear around the target reticle of players and enemies after they’ve taken damage from an attack that deals affinity damage.
Affinity residues never fall off, but they are overwritten as soon as the target takes affinity damage from another source. There are 4 affinity damage types:
![]() Magic
Magic![]() Lightning
Lightning![]() Fire
Fire![]() Holy
Holy
When you use your Character Skill, you replenish a small, flat amount of FP (mana) and collect the affinity type for your Magical Cocktail.
This passive means you have effectively infinite FP, but because it only recovers a flat amount, it doesn’t scale as well with the amount of mana you will want to expend in the late game.
There are 2 exclusive Relic effects that passively change your stats and 2 that strengthen Elemental Defense:
- [Recluse] Improved Intelligence and Faith (+12), Reduced Mind (-13)
- [Recluse] Improved Vigor (+4), Endurance (+5), and Dexterity (+20), Reduced Intelligence and Faith (-10)
- [Recluse] Collecting affinity residue activates (a weaker version of) Terra Magica (for 30s)
- [Deep][Recluse] Collect affinity residues to negate affinity (collected affinity residues grant damage negation for the associated affinity for 30s)
Terra Magica is also a spell, but it just puts a blue circle on the ground where you cast it that increases your magic damage while you stand in it. The spell version offers a 20% magic damage boost, while this Relic version only offers a 16% magic damage boost.
Despite one being worse, you can only put down one at a time, so one will overwrite the other. The Relic version also has a 30s rate limit, so you can’t put it down again until it wears off.
Keep in mind that Terra Magica only boosts magic damage, not holy, fire, or lightning. As Recluse, you will have the capability to cast spells of all types, so the Relic effect isn’t as great as it sounds.
Still, it synergizes with the Deep Relic effect, which is a lot better. The terrible wording just means that when you collect an affinity residue, your damage negation against that affinity is increased for 30s.
Collecting multiple of the same affinity does not seem to stack the damage negation, but you can get damage negation from multiple different affinities at the same time. Be sure you harvest affinity residue from your allies during boss fights so you can protect yourself from the damage type dealt by the boss.
It’s a little weird to differentiate the Recluse’s capabilities like this, but that’s the extent of her Passive Ability.
Character Skill: Magic Cocktail
Collect affinity residues of targets to fire an affinity-exploiting magic cocktail.
Your Character Skill has 2 phases. First, you collect 3 affinity residues, recovering FP each time thanks to the Passive Ability. Second, you release the 3 affinity residues as a Magic Cocktail spell. The spell you cast is determined by and related to those 3 affinities you collected.
All Magic Cocktails have their uses, but the spells that combine more affinities are stronger than the ones that combine fewer (i.e. Magic Cocktail with different 3 affinities > 2 > 1).
Holy affinities tend to create buff/debuff effects. Lightning and magic both mainly contribute damage. Fire tends to amplify and extend the attributes of other affinities.
Single Affinity Cocktails
These cocktails require you to combine 3 of the same affinity. They’re the easiest to make because you just have to spam the same attack in quick succession.
Magic
Mixing 3 magic affinities lets you fling a flurry of magical sparks that deals a moderate amount of magic damage over time to the target and closeby enemies. The spell tracks well and has very long range.
Holy
Grants buffs to your damage negation and poise for 30s.
Fire
Sends a short-range flame swirl towards the target that deals fire damage and ignites the surrounding area for a moment.
Lightning
Replaces your dodge with effect from Ash of War: Bloodhound’s Step for 20s.
Dual Affinity Cocktails
These cocktails combine 2 different affinities, so you’ll have 2 of one affinity and 1 of the other affinity. It does not matter which affinity is contributing 2 vs 1, the effect is the same regardless.
Magic + Holy
Mixing magic and holy affinities grants a buff to you and your nearby teammates that temporarily eliminates all FP costs (like Cerulean Hidden Tear) for 8s. The multiple icons displayed cover both spell and Skill costs.
Magic + Fire
Conjures a will-o’-the-wisp that seeks the target and deals fire damage periodically as it passes through them. It’s basically a fire version of the magic-only cocktail.
Magic + Lightning
Conjures a blue magical sword that can be held until you want to swing it and release a blue arc that deals lightning damage. It’s the same thing as the Storm Ruler, but with less range.
Holy + Fire
Lights a candle in the air, which grants players a max HP buff and reduces the max HP of nearby enemies.
The HP debuff to enemies only lasts as long as they are bathed in the light of the candle, which remains lit for 15s, but the HP buff to players lasts 65s and persists regardless of whether you remain in the light.
Holy + Lightning
Conjures a barrier that automatically parries attacks for the next 15s.
Fire + Lightning
After a brief moment, you blink towards your target, leaving a trail of flame and reappearing with a lightning strike. It’s basically Blinkbolt, but with fire.
Triple-Affinity Cocktails
These cocktails require 3 distinct affinities to cast. They’re difficult to make in the early game because you won’t have reliable access to 3 affinities and will be more focused on recovering mana with the ability.
As you get more FP, you can afford to be more selective with your affinity collection and be opportunistic about picking up 3 different affinities to make the best cocktails.
Magic + Holy + Fire
Channels a flame cone for several seconds that burns enemies and recovers significant HP and FP.
Magic + Holy + Lightning
Encases Recluse in ice that brings forth a blizzard, causing frost buildup and dealing damage over time. The ice makes her immune to damage for the duration of the blizzard.
Magic + Lightning + Fire
Conjures a gravity sphere at the target location that does moderate ticks of damage as it gently pulls enemies to the center, ending with a large explosion.
Holy + Lightning + Fire
Calls down a holy lightning rod at the target location, dealing a substantial amount of initial damage. After several seconds pass, a white bolt of Gransax comes down dealing high damage in the telegraphed area.
Ultimate Art: Soulblood Song
Unleash forbidden blood chant to brand nearby foes with blood sigils.
Like all Ultimate Arts, you are immune to damage during the activation animation, but the base effect deals a small amount of damage and applies a debuff to all nearby enemies for 13s that makes them take ~15% more damage.
Whenever any player hits one of these debuffed enemies, they recover a small amount of HP and FP, similar to the Crimson and Cerulean-Sapping Cracked Tears from SotE.
The AoE radius is roughly the same as the maximum range of most sorceries and it can chew through a little more than the first third of the purple revival gauge of incapacitated players.
There are 2 exclusive Relic effects that strengthen Soulblood Song:
- [Recluse] Activating Ultimate Art raises Max HP (by 50% for 30s or until you lose the bonus health)
- [Recluse] Suffer blood loss and increase attack power (by ~17%) upon Art activation (for 30s)
The blood loss effect can trigger things like the Lord of Blood’s Exultation, but your Arcane stat isn’t anything to write home about and you aren’t reliably going to be in range of anyone else’s bleed triggers, and you won’t ever get killed by using it.
All of the effects combined make it ideal to activate your Ultimate Art when you have 30-60% of both HP and FP, a slow acting or multi-tick Magic Cocktail ready to go, and a teammate who is either dead or popping off, and the boss is in the middle of attacking you.
If you have too much HP and FP, you basically waste the recovery effect for yourself, but if your HP and FP are too low, you run into other problems, especially if you’re using the blood loss Relic.
The FP recovery effect is strong, but not enough to cover the entire cost of most spells. You need enough mana left to cast 2-3 spells in a row even if Soulblood Song wasn’t active so you don’t stall out right at the starting line.
Likewise, if your health is too low going into it and the boss is about to attack, you won’t be able to survive an initial hit and will have to spend more time dodging. That’s part of why it’s important to use it when the boss is in the middle of attacking you.
Recluse Unique Relics
Recluse has 2 unique Relics you get from her remembrance quest, and you can purchase a few Relics with Recluse-exclusive effects from the Collector Signboard for 3 Sovereign Sigils.
 Vestige of Night
![]() [Recluse] Collecting affinity residue activates Terra Magica
[Recluse] Collecting affinity residue activates Terra Magica![]() Magic Attack power Up +2
Magic Attack power Up +2
Bone-Like Stone
![]() [Recluse] Suffer blood loss and increase attack power upon Art activation
[Recluse] Suffer blood loss and increase attack power upon Art activation![]() [Recluse] Activating Ultimate Art raises Max HP
[Recluse] Activating Ultimate Art raises Max HP![]() Intelligence +3
Intelligence +3
Grand Tranquil Scene
![]() Max FP Up with 3+ Staves Equipped
Max FP Up with 3+ Staves Equipped![]() Max FP increased for each Sorcerer’s Rise unlocked
Max FP increased for each Sorcerer’s Rise unlocked![]() Magic Attack Power Up
Magic Attack Power Up
Grand Drizzly Scene
![]() [Recluse] Improved Vigor, Endurance, and Dexterity; Reduced Intelligence, Faith
[Recluse] Improved Vigor, Endurance, and Dexterity; Reduced Intelligence, Faith![]() Vigor +3
Vigor +3![]() Endurance +3
Endurance +3
Grand Tranquil Scene
![]() [Recluse] Improved Intelligence and Faith, Reduced Mind
[Recluse] Improved Intelligence and Faith, Reduced Mind![]() Intelligence +3
Intelligence +3![]() Faith +3
Faith +3
The Grand Tranquil Scene with the Max FP boosts is the only one I use, and I’ve been very unlucky with rolls.
Attributes and Weapons
A Nightfarer’s attribute scaling, described with tier letters, determines which weapons they will be most effective with, defining their playstyle. Everyone wants to use weapons that scale well with their stats.
Recluse Attribute Scaling
Recluse is a spellcaster and a bit of a glass cannon. She can deal high damage with Sorceries and Incantations alike and afford to cast them as much as she wants.
However, she’s not built to use melee weapons thanks to her lower survivability, poor damage scaling with melee stats, and limited stamina.
Numbers in parentheses depict the actual stat value Recluse has at level 15.
- S: Intelligence (51), Faith (51)
- A: Mind (30)
- C: Dexterity (19), Arcane (10), Endurance (23)
- D: Strength (12), Vigor (33)
Weapon Types
As a Recluse, you’ll be almost exclusively casting spells using catalysts, namely, staves and seals. Melee weapons are primarily for other Nightfarers, though you’ll still want a single melee weapon that can deal affinity damage.
It’s more important for Recluse to find the right spells than finding the right weapon.
It’s important to note that while the Recluse wants these weapons, she doesn’t have any Preferences listed, so loot tables are not modified to increase the drop rate of these weapon types.
Staves
Staves allow you to cast Sorceries, which scale with your Intelligence stat. A purple or gold staff can make a low tier Sorcery more usable, but good spells don’t need as much to be great.
Unlike past FromSoftware games where you had to attune spells at a Site of Grace or Bonfire, each staff just has 2 Sorceries it can cast as its light and heavy attack. The Incantation shown is the one you cast with the heavy attack.
One of the Sorceries is guaranteed to match the school of magic associated with the staff and the other one seems to be random. For example, the Crystal Staff always has at least 1 Crystalian Sorcery.
Seals
Seals allow you to cast Incantations, which scale with your Faith stat. You’ll probably be built to take better advantage of Sorceries, but keep your Shabriri Grapes peeled for any exceptional Incantations.
Unlike past FromSoftware games where you had to attune spells at a Site of Grace or Bonfire, each seal just has 2 Incantations it can cast as its light and heavy attack. The Incantation shown is the one you cast with the heavy attack.
One of the Incantations is guaranteed to match the religion associated with the seal and the other one seems to be random. For example, the Frenzied Flame Seal will always have at least 1 Frenzied Flame Incantation.
Single Melee Weapon with Affinity Damage
As Recluse, you only need a single melee weapon that can deal affinity damage. It’s your backup method to regenerate mana in case you ever run out and lack a Starlight Shard.
Recluse isn’t built to deal melee damage, so will hardly ever use it once you have a few quality spells under your belt. Give your teammates any legendary melee weapons and you pick up whatever scraps they leave behind.
Weapon passives make this a bit more complicated, but we’ll get to that later.
I want to emphasize that your teammates get first dibs, but if you get to pick, your Recluse will do slightly better with the following weapon classes, assuming the weapon deals affinity damage:
- Whips
- Straight Swords
- Curved (Great)Swords
- Spears
- Halberds
- Flails
Torches are also a safe bet for Recluse since they always deal affinity damage and sometimes have a bonus passive effect.
I still like to put my staves on the left and melee weapon and seals on the right, but unlike in other FromSoftware games, it does not matter if melee weapons are equipped in the left or right hand. It does the same damage either way.
Recommended Relic Effects
We’re going with an ice cream sundae metaphor for Relic effects. You have your foundational effects that you really need to have as the ice cream, followed by the fudge and sprinkles as necessary to make them worthy of use, and finished with the cherries on top turning them into the delicious god roll sundae.
The sundae metaphor only applies to Recluse-specific Relic effects. Generic or universally useful effects will be listed afterwards.
Ice Cream
These are the foundational Relic effects you should seek out and equip as Recluse. If the Relic does not have at least one of these buffs, your Relic probably isn’t all that great.
Max FP Up with 3+ Staves | Seals Equipped
This Relic effect gives you a flat 50 additional FP for having 3 staves (or seals) equipped. At level 3, that’s a whopping 50% boost to your total FP, and even at level 15, it’s still an effective 25% boost that all the percentage-based buffs build upon.
It is absolutely worthwhile to swing by a castle or Sorcerer’s Rise right away and just pick up all 3 staves even if they don’t have good spells.
It does restrict your weapon selection a bit, but it’s definitely worth it. I highly recommend buying and equipping the Grand Tranquil Scene sold by the Collector’s Signboard.
The FP boost from each Relic type only applies once, so you can double the FP you get by equipping one for both Staves and Seals, but if you have two effects with Staves or Seals, only one does anything.
I think it’s worth equipping both a Staves and Seals FP boost for reliability, but it’s only worth trying to attain one. You don’t need that much FP and won’t be able to cast all those spells anyway. Your choice for weapon passives is too heavily restricted as well.
Improved Affinity Attack Power (+1 | +2)
Recluse differentiates herself from the likes of Duchess, Revenant, and Undertaker by being equally proficient with casting both Sorceries and Incantations. Since spells have such variable affinities, as do her Magical Cocktails, Improved Affinity Attack Power gives you the most versatility.
Improved Sorceries | Incantations (+1 | +2)
Just like Improved Affinity Attack Power, these high-level buffs lend themselves to maximum versatility. You’ll do better on average than you would if you sought out a specific spell.
[Recluse] Activating Ultimate Art raises Max HP
This is the only mainline Recluse-exclusive Relic effect that you ought to seek out. The health buff is substantial (+50% for 30s) and doesn’t get removed until your health drops below the granted amount.
It’s so significant that it’s worthwhile to seek out Ultimate Art Auto Charge just to increase the uptime on this effect.
Make sure to top yourself off before the buff falls off so the health sticks around for the next hit!
[Deep][Recluse] Collecting Affinity Residues to Negate Affinity
This is a Recluse-exclusive Deep Relic effect that makes it so the affinity residues you have collected for your next cocktail improve your damage negation against that affinity. For example, if you’ve collected a magic affinity residue, you get a buff to your magic damage negation.
Fudge and Sprinkles
If a Relic has one of these effects, on top of the ice cream, it’s a pretty solid roll and may be worth equipping even if there isn’t a third effect.
Max FP increased for each Sorcerer’s Rise unlocked
More FP is nice, but the amount isn’t as significant as that from having 3 catalysts equipped and as valuable as they are, sometimes they just don’t appear in practical locations.
Improved [School] Sorcery | Improved [Religion] Incantations
There are buff effects for select schools of Sorcery and religions of Incantations, though not all schools of Sorcery | religions of Incantations have a Relic buff. It’s unclear why some exist while others don’t.
If you prefer spells of a specific school | religion, I highly recommend getting the equivalent buff. Some of the best include:
- Improved Crystalian Sorcery
- Improved Gravity Sorcery
- Improved Giant’s Flame Incantations (red flame)
- Improved Godslayer Incantations (black flame)
- Improved Dragon Communion Incantations (dragon breath)
- Improved Dragon Cult Incantations (lightning)
- Improved Fundamentalist Incantations (holy)
I don’t recommend equipping every single one of these, just pick 1-2 of your favorites. The rest are cherries on top. Crystalian Sorcery is a popular choice, though it’s harder to find a staff with Shattering Crystal nowadays.
It’s worth noting that these buffs stack additively at +12% per instance, so if you get a bunch of buffs like this, you can really crank the damage on a specific spell.
Magic Attack Power Up (+1 | +2 | +3 | +4)
Most Sorceries deal magic damage, so this is a pretty solid and universal buff to your damage output. Keep in mind that this does not apply to Incantations (cast with Seals). You’ll only find +3 and +4 on Deep Relics and those always come with drawbacks.
Cherries on Top
The following are nice to have, and while they don’t contribute enough to be worth seeking out on their own, they are probably necessary to qualify as a god roll if they come in concert with the ice cream, the fudge, and the sprinkles.
Fire | Lightning | Holy Attack Power Up (+1 | +2 | +3 | +4)
Magic is your “main” affinity, but getting damage boosts to other types of affinities is valuable as well. Just like with Magic Attack Power Up, you’ll only see +3 and +4 with downsides on Deep Relics.
[Recluse] Collecting affinity residue activates Terra Magica
Terra Magica is nifty, especially when paired with Holy Ground, but it won’t improve the strength of your Incantations at all since they don’t deal Magic damage. Also, bosses move around a whole lot and Terra Magica lasts 30s.
[Recluse] Suffer blood loss and increase attack power upon Art activation
The effect lets you trade 20% of your HP as a bleed proc (like Seppuku) in exchange for ~17% more damage for 30s. Since it’s blood loss, you’ll also trigger Lord of Blood’s Exultation and the Blood Loss in Vicinity boosts for additional +20% damage each for 30s.
Those synergies are what make this passive worth considering, since the HP loss makes your Ultimate Art a lot harder to use. You’re largely prevented you from activating it responsively and really have to plan it out to make the most of it.
Intelligence | Faith | Arcane | Mind +X
Recluse “only” has 51 Intelligence and Faith, and catalysts do have S scaling with those attributes, so they’re not useless, but you are past the soft cap. Increasing Arcane is nice for the Thorn Sorceries, and more Mind means more FP.
Banana Split
If you want to shoot for a banana split instead of a regular old ice cream sundae, you can check out the stat-modifying Recluse-exclusive Relics that seem like they are meant to be used together:
- [Recluse] Improved Vigor (+4), Endurance (+5), and Dexterity (+20), Reduced Intelligence and Faith (-10)
- [Recluse] Improved Intelligence and Faith (+12), Reduced Mind (-13)
You’re likely meant to use both together, so you trade Mind for Vigor, Endurance, and Dexterity, and then you get to use Dexterity weapons with the Recluse and her FP regen capabilities.
This makes her more performant with many of the best weapons for Sorcerers in base Elden Ring, like Moonveil, Wing of Astel, and Glintstone Kris. Still, unless you really want that FP regen, I think you’d be better off just playing Duchess.
Generic Useful Relic Effects
These Relic effects are useful regardless of what Nightfarer you’re using:
- Ultimate Art Auto Charge +X
- Increased Maximum HP
- Increased Maximum FP
- Increased Maximum Stamina
- Vigor | Mind | Endurance +3
- Attack power increased for each Night Invader defeated
- Attack power increased for each evergaol prisoner defeated
- Improved Poise and Damage Negation when knocked back by damage
- Increased Rune acquisition for self and allies
Partial HP Restoration upon Post-Damage attacks- Character Skill Cooldown Reduction +X (if your skill has a cooldown)
- Continuous HP Recovery
- Slowly Restore HP for self and allies when HP is low
Improved Skill Attack PowerImproved Melee Attack PowerPhysical Attack Up
The Double Balancers Relics are not useful to Recluse, but she can make great use of Dark Night of the Fathom.
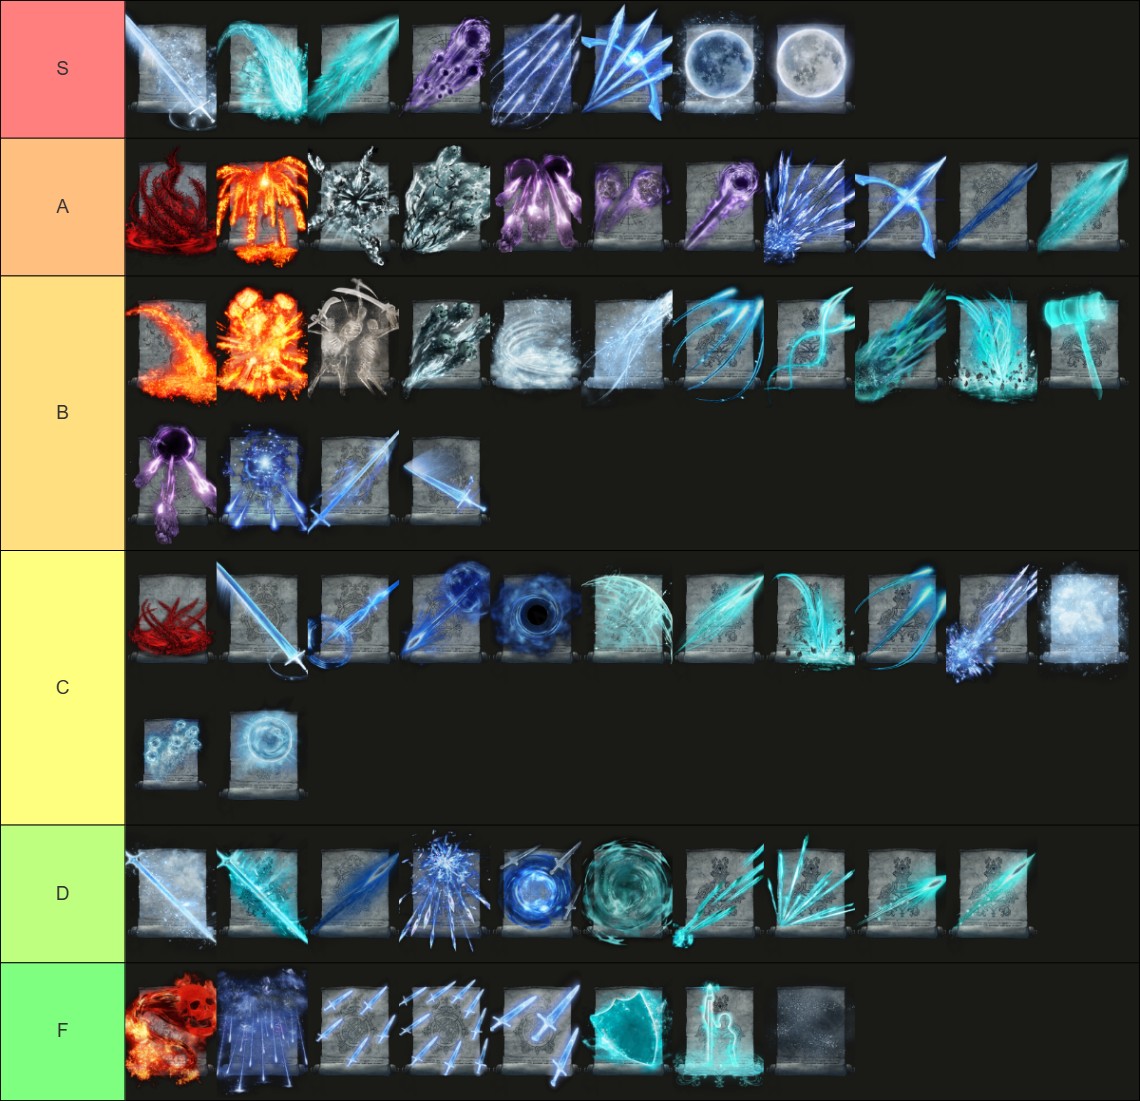
Spells and Talismans Tier Lists
Below, you’ll find tier lists for all spells in Nightreign as they apply to Recluse. Range, reliability, relative effectiveness, and utility largely determine a spell’s tier.
Recluse has low survivability and an everflowing wellspring of mana, so short range spells are a lot riskier and need to be extremely powerful to be worth using.
In particular, you may notice that Carian Sword Sorceries are not ranked very high compared to their popularity. This is because the Recluse doesn’t need to care about FP efficiency, but survivability and stamina come at a premium.
Spell Differences Between Nightreign and Elden Ring
Many spells that were weak or unpopular in regular Elden Ring tend to be stronger or at least on par with the best in Nightreign.
Crystalian Sorceries are the clearest example of this, with Shatter Crystal being one of the best and most common Sorceries in the game. Meanwhile, channeled spells like Comet Azur and Meteorite (of Astel) have had their damage and posture damage nerfed considerably.
Since Recluse is forced to be squishy and everything moves faster, it’s more important to minimize your vulnerability and get damage out as soon as possible. Bosses will jump out of range or might not be safe to get close, so you need spells that can handle that.
Due to this mobility and the fact that you have team members, groupwide buff and enemy debuff effects are more valuable, particularly healing, damage reduction, Scarlet Rot, and Frostbite.
Spell damage scaling is simplified to Intelligence (INT) for Sorceries and Faith (FTH) for Incantations. As Recluse, you don’t have to care about that because you have S scaling for both stats.
The fact that you can mix and match both Sorceries and Incantations is also notable. Assuming you have good spells, it’s absolutely worthwhile to use multiple Staves and Seals to cast both types of spells.
Tier Legend
- S: These are the best spells in the game. If you ever find a catalyst with one, it does not matter what the other spell is. It’s worth picking up and upgrading this catalyst to purple or gold for this spell alone.
- A: Great spells that might be the best you’ll find in your run. They are second only to the exceptional.
- B: Good spells with an issue like long cast time, short range, or low damage. They may have a direct upgrade forcing them down to B tier.
- C: Weak spells you find in the early to mid-game. They’re typically either weaker versions of what you’ll find on nicer catalysts or are super situational.
- D: Barely useful for Recluse and weaker versions of lower-tier spells.
- F: Problematic spells that can cause problems for you or your teammates. Some effects might be powerful, but they will be placed here if they have any adverse or conflicting effects whatsoever.
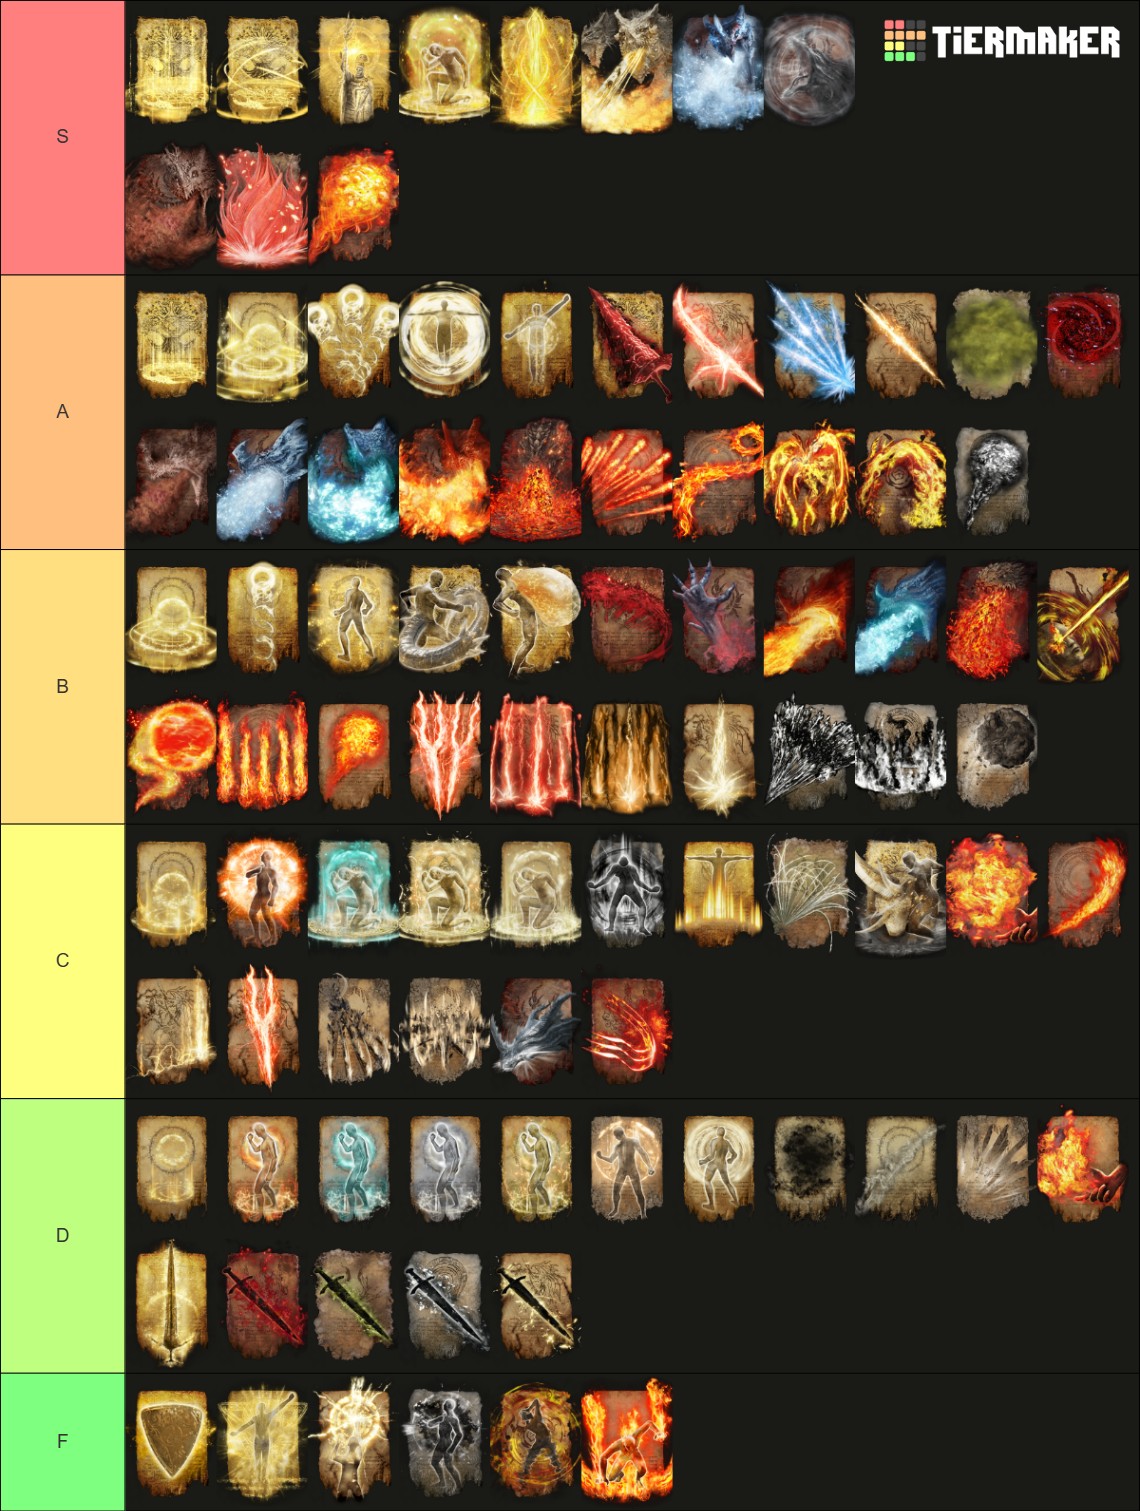
All Spells
If this list looks a bit overwhelming, don’t worry, keep scrolling to see how only Sorceries and only Incantations compare to each other.
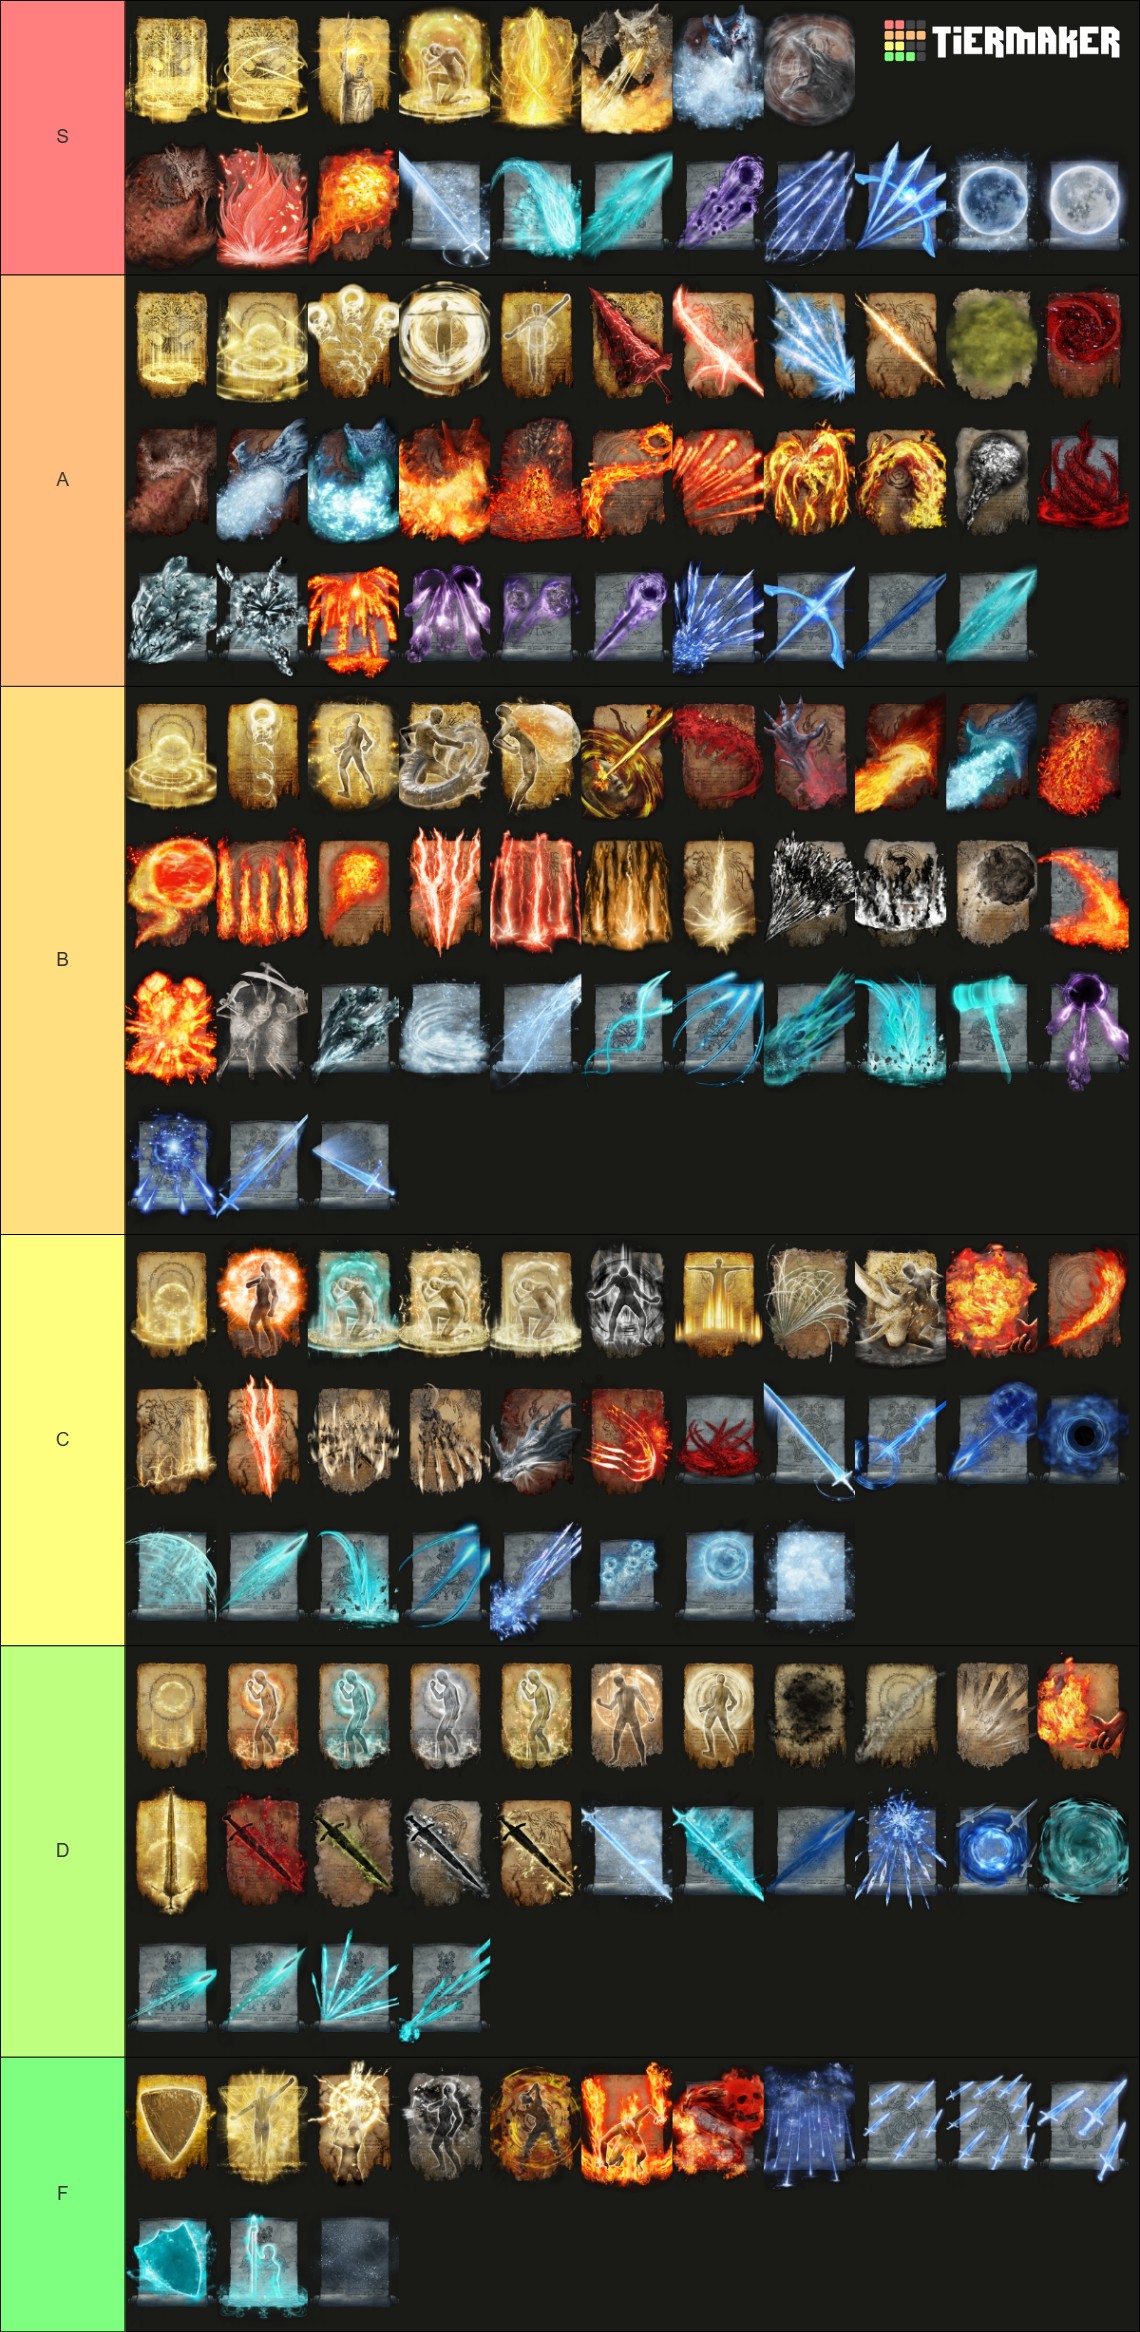
I want to comment on a few hot takes embedded in this tier list:
- Carian Sword Sorceries are ranked lower than some expect. I think you’ll be far better off playing as Duchess if you want to use those spells. Weapon buff spells are similarly useful to Duchess (and Undertaker and Revenant), but not so much for Recluse.
- Law of Regression is trolling. You will purge all of your group mates’ buffs along with your own. Genuinely, FromSoftware needs to remove it from Nightreign.
- Bosses move too fast for spells like Flame of the Fell God or Rykard’s Rancor to deal reliable damage, but they’re really pretty.
- Some of you like parrying, but I think most of you are playing Executor or something, not Recluse, which is why Thops’ Barrier and Carian Retaliation are ranked so low.
Sorceries Only
Below, you’ll find the same spells tier list for Recluse with only Sorceries shown.
Incantations Only
Below, you’ll find the same spells tier list for Recluse with only Incantations shown.
Talismans Tier List
Below, you’ll find the tier list for Talismans. Keep in mind that this is just a default list. Recluse does skew a bit towards Sorcery and Magic damage, which is why I ranked those talismans above Incantation-oriented ones.
I only recommend holding onto S, A, and, situationally, B tier Talismans. Everything below that should be given to whoever else in the group can use it more right now.
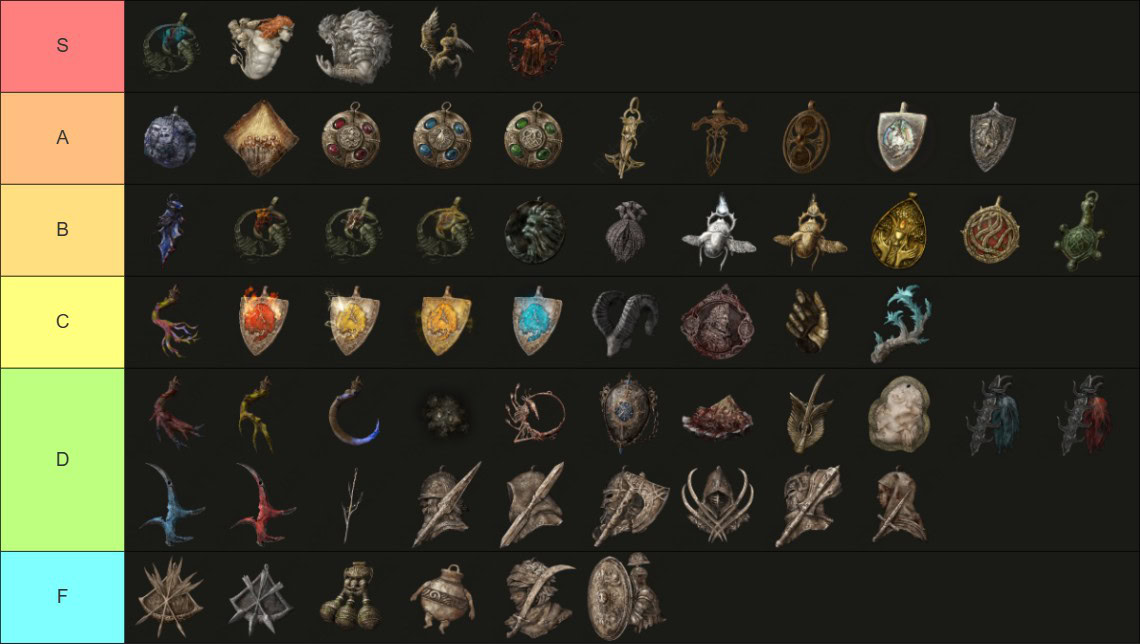
The Crucible Feather Talisman and Primal Glintstone Blade were buffed to have weaker penalties in line with the Scorpion Charms, improving their utility.
Recluse does not need the FP cost reduction as much as the other casters and the HP reduction is more problematic in concert with her Ult, but the improved dodging is pretty nice.
It’s important to note that the placement of some Talismans in this tier list assume that you can actually make use of their effects:
- Lord of Blood’s Exultation is only useful if you have the Relic effect that causes blood loss with your Ult
- Faithful Canvas’s Talisman and Graven-School Talisman are only useful if you’re casting Incantations and Sorceries, respectively.
- Magic Scorpion Charm requires that you have good Sorceries that deal Magic damage. Otherwise, one of the other Scorpion Charms should take its place.
- You should try to seek out spells that the Nightlord is weak to and pair them with that Scorpion Charm.
- Millicent’s Prosthesis has to be positioned higher than the Winged Sword Insignia, but you will basically never be eligible for either unless you’re playing with a Raider and Guardian or something and you have nothing else that’s better.
Charged vs Uncharged Spells in Nightreign
Some spells can be charged and held indefinitely by holding down the associated casting button and releasing after the animation flourish occurs, at your discretion. Stars of Ruin is an example of a chargedable spell.
Charging allows you to increase the damage dealt of relevant spells by 25%, notably resulting in greater damage per hit and superior mana efficiency, and maximize your damage ouput following a period of downtime.
Please note that channeling a spell is different from charging one. Channeled spells will automatically fire when the animation finishes and continue to fire until you run out of mana or let go of the button. Comet Azur is an example of a channeled spell.
Due to factors like game pacing and mana recovery, the calculus for charging a spell in Nightreign is different from what it is in Elden Ring.
In Elden Ring, charging spells is only worthwhile beneficial in specific openings against bosses and as an initial hit against enemies because mana is practically limitless.
In Nightreign, charging spells is usually better whenever you have enough time to do it because mana is more limited. Damage per FP is far more relevant than it is in Elden Ring. Also, charged spell damage boosts are more ubiquitous.
Keep in mind that you often don’t have enough time to charge a spell before needing to move. Getting your cast off without taking damage is better than getting whacked for a damage boost.
Priority Locations for Recluse
Recluse benefits more than others from visiting Sorcerer’s Rises, Mines, Forts, and Cathedrals. To be clear, other locations are fine, but these places are particularly worth visiting as Recluse.
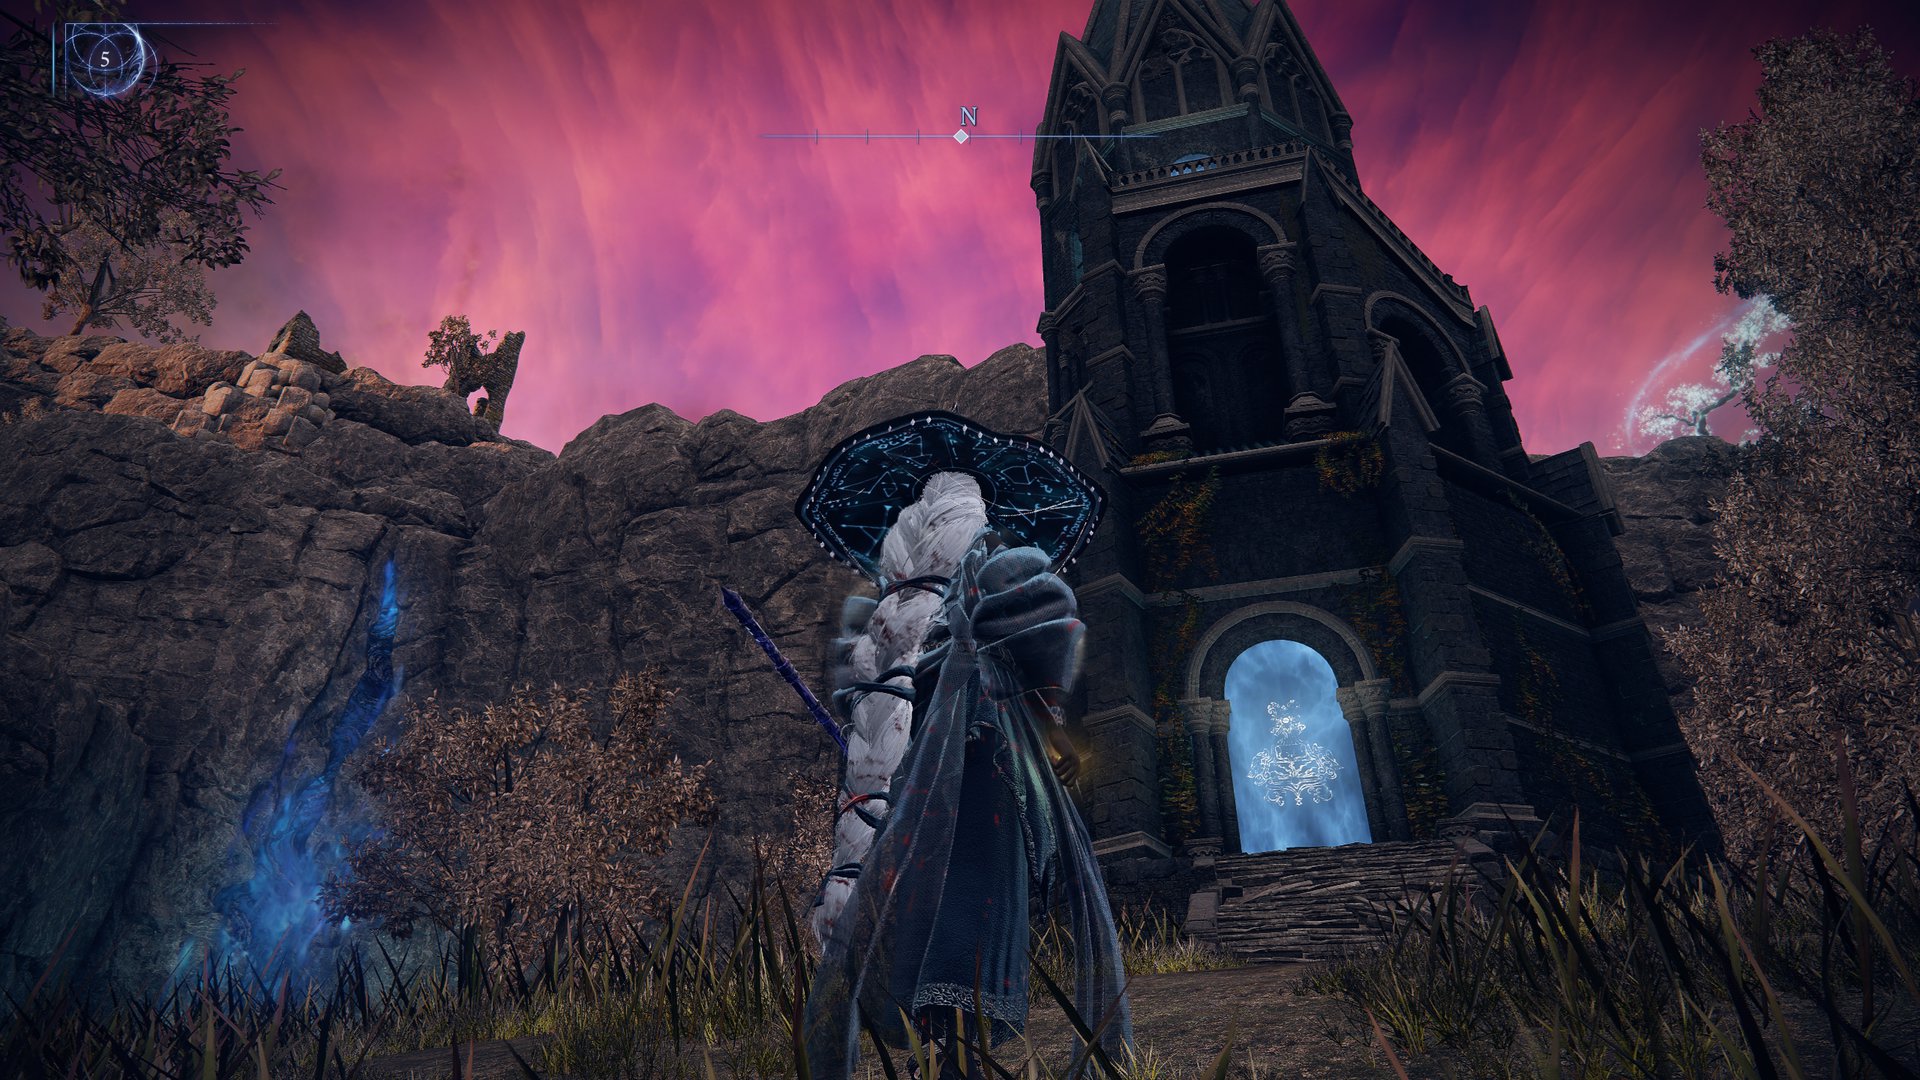
Sorcerer’s Rises
Sorcerer’s Rises contain 3-4 Starlight Shards and a free item. The loot pool always contains 2 magical weapons, at least one of which is usually a blue or purple staff, along with either an [affinity]-Shrouding Cracked Tear Physick or a caster-focused talisman.
The specialized loot pool is more important for Recluses because they don’t have a weapon drop preference, unlike most other Nightfarers.
If you’re playing Recluse, you need to know how to quickly unlock the Sorcerer’s Rise by breaking the Seal in or around the tower.
It’s worth noting that even though you can technically recover an infinite amount of mana with your Character Skill, the amount recovered is a flat amount.
Meanwhile, Starlight Shards recover 60% of your max FP immediately, making them way more valuable in the late game.
Mines
It is worthwhile to visit a Mine if it’s on the way to somewhere else you want to go, or if you find an A or S-tier spell on a white or blue catalyst.
Always pick the Smithing Stone [2] that drops from the mini-boss in there. You can find upgrade anvills next to merchants, which are located at all Forts, War Camps, and Castles.
If you don’t end up needing it for a catalyst, you may want to use it to upgrade your backup melee weapon or give it to a group member who had bad luck.
Forts
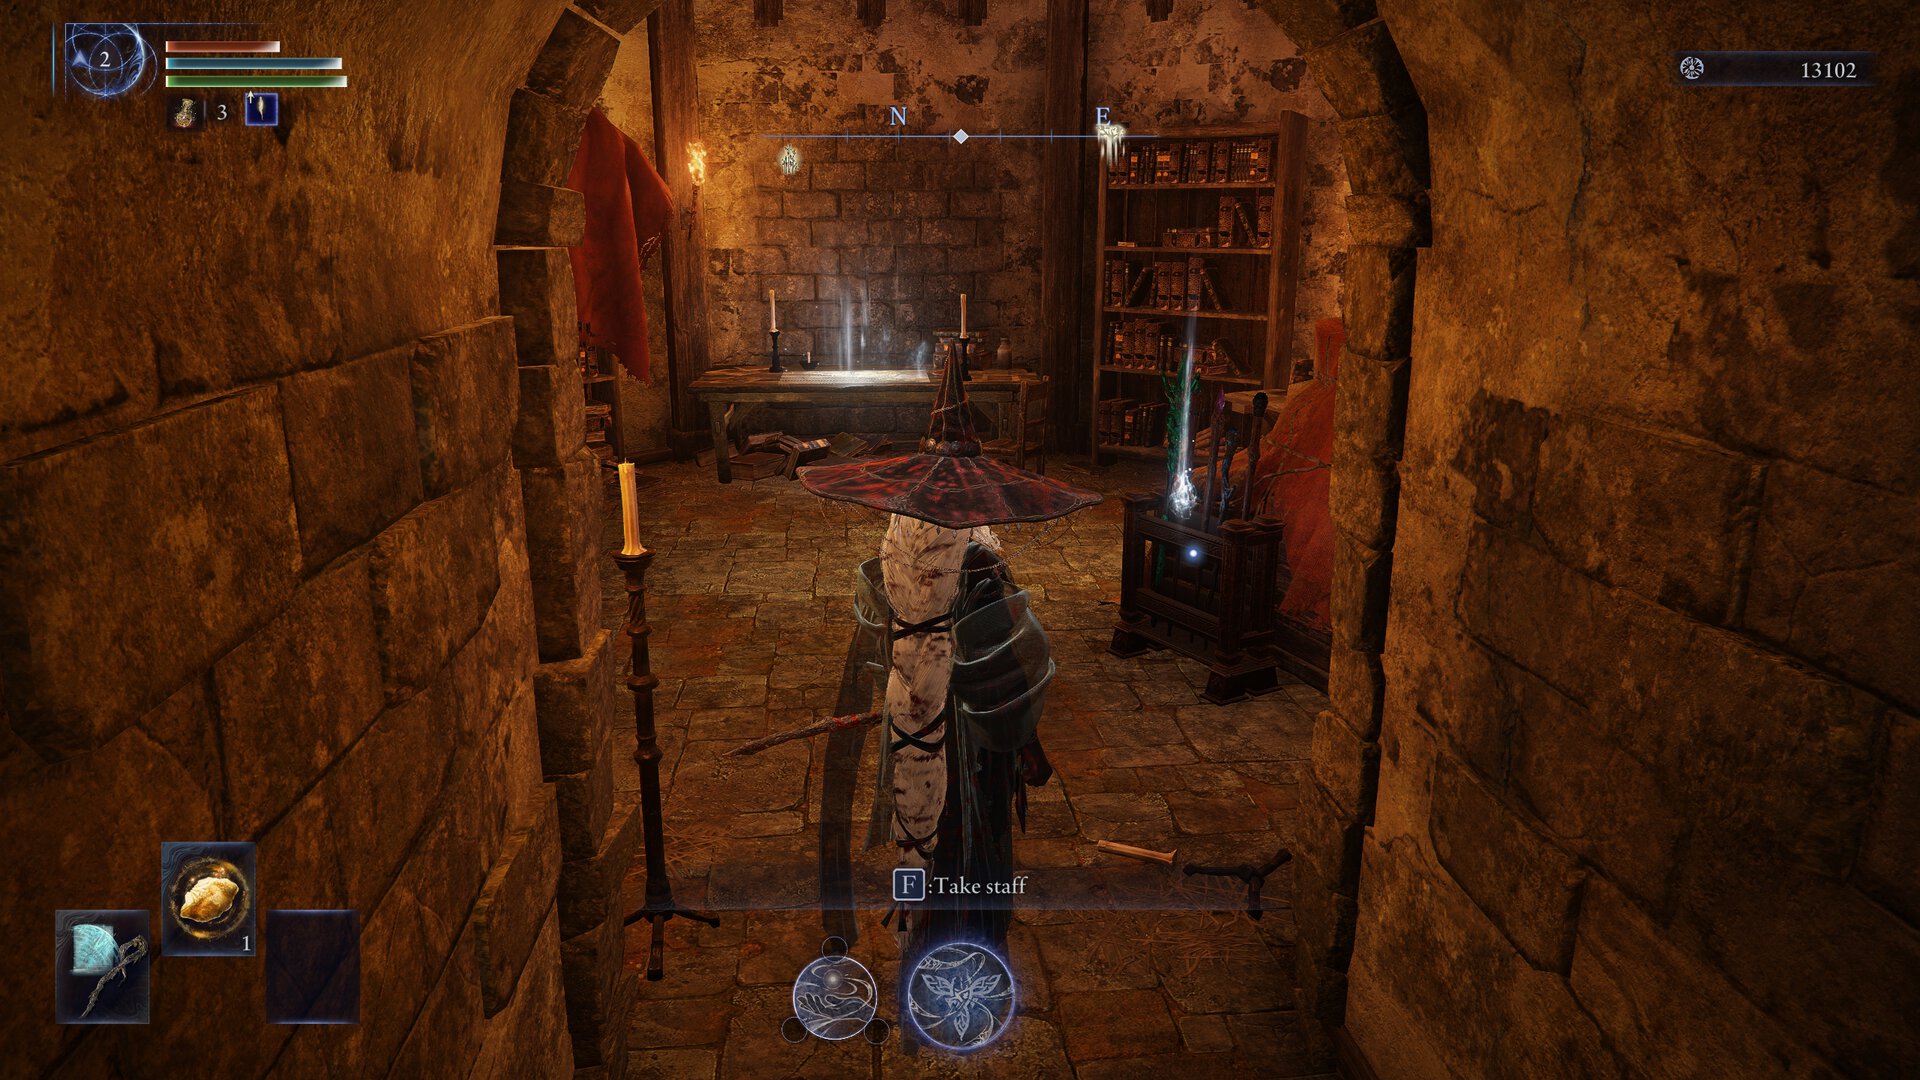
Forts each have a lootable holder containing 3 staves in the tallest tower. If you’re using a Relic that grants Increased Max FP for 3+ Staves (and you totally should be), try to swing by a Fort early on to get the FP boost ASAP and fish for good Sorceries.
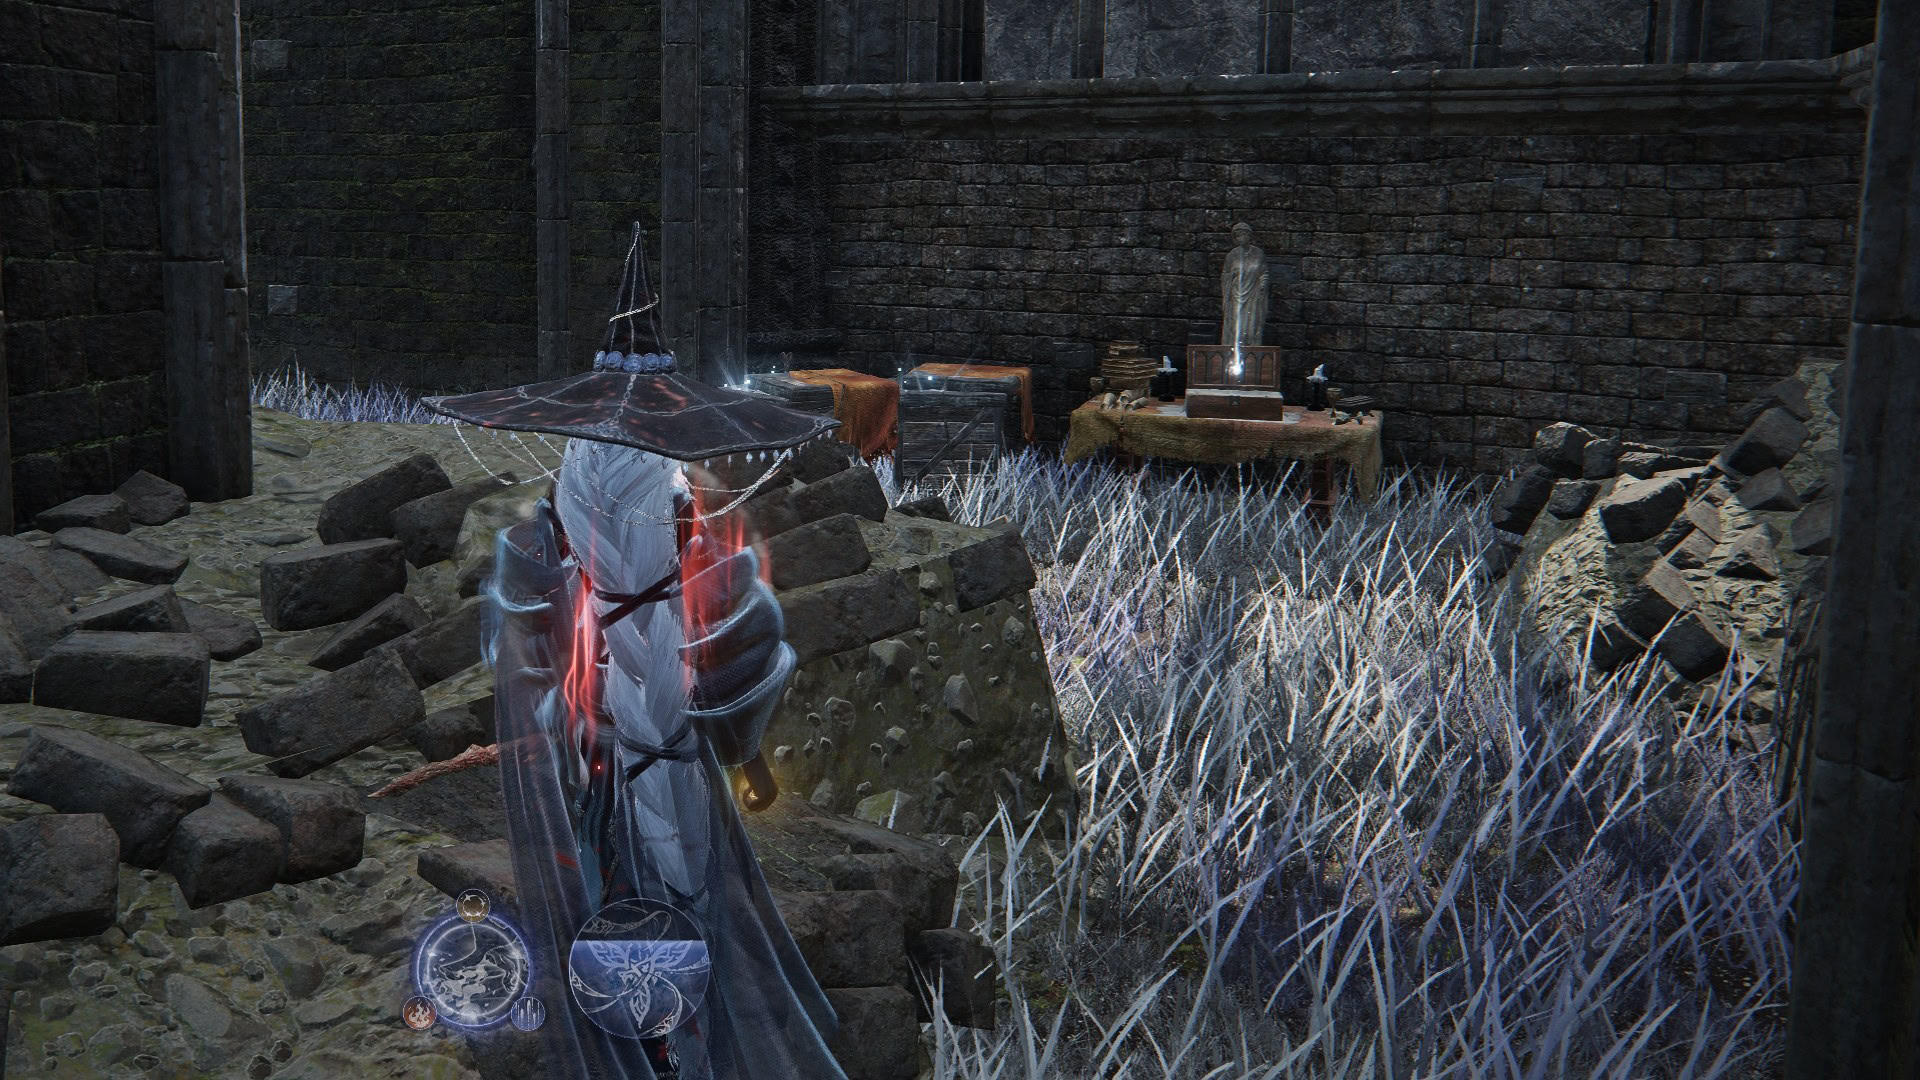
Cathedrals
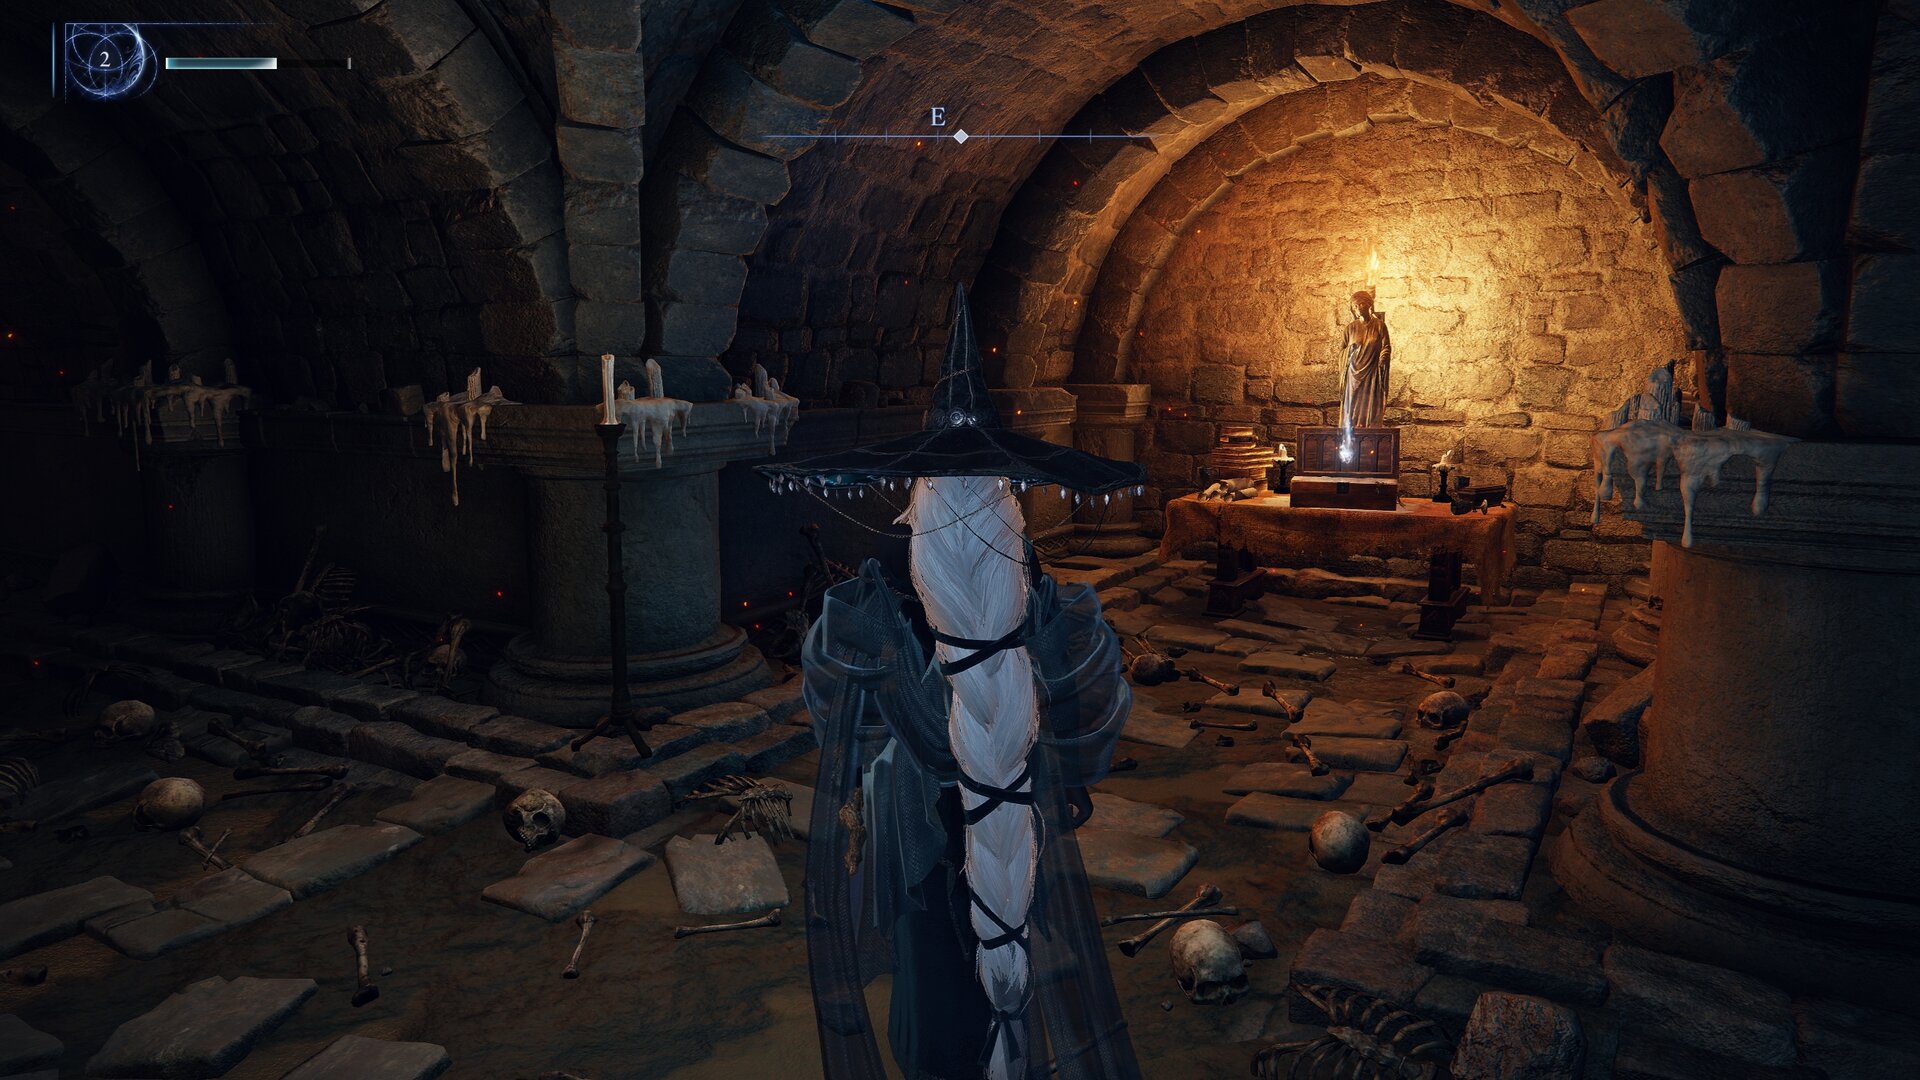
Cathedrals each have a lootable altar containing 3 seals. If you’re using a Relic that grants Increased Max FP for 3+ Seals, be sure to swing by a Cathedral (or shack) early in the game to get that FP boost and fish for good Incantations.
Unlike with Forts, there are 2 different locations for the altar depending on the location of the miniboss. If the miniboss is in the basement, you’ll find the altar in an alcove directly across from the arena.
If the miniboss is on the main level, the altar will be on the upper level, which you can reach by climbing up the scaffolding along the outside. Be prepared to fight a colony of bats or procession of Oracle Envoys.
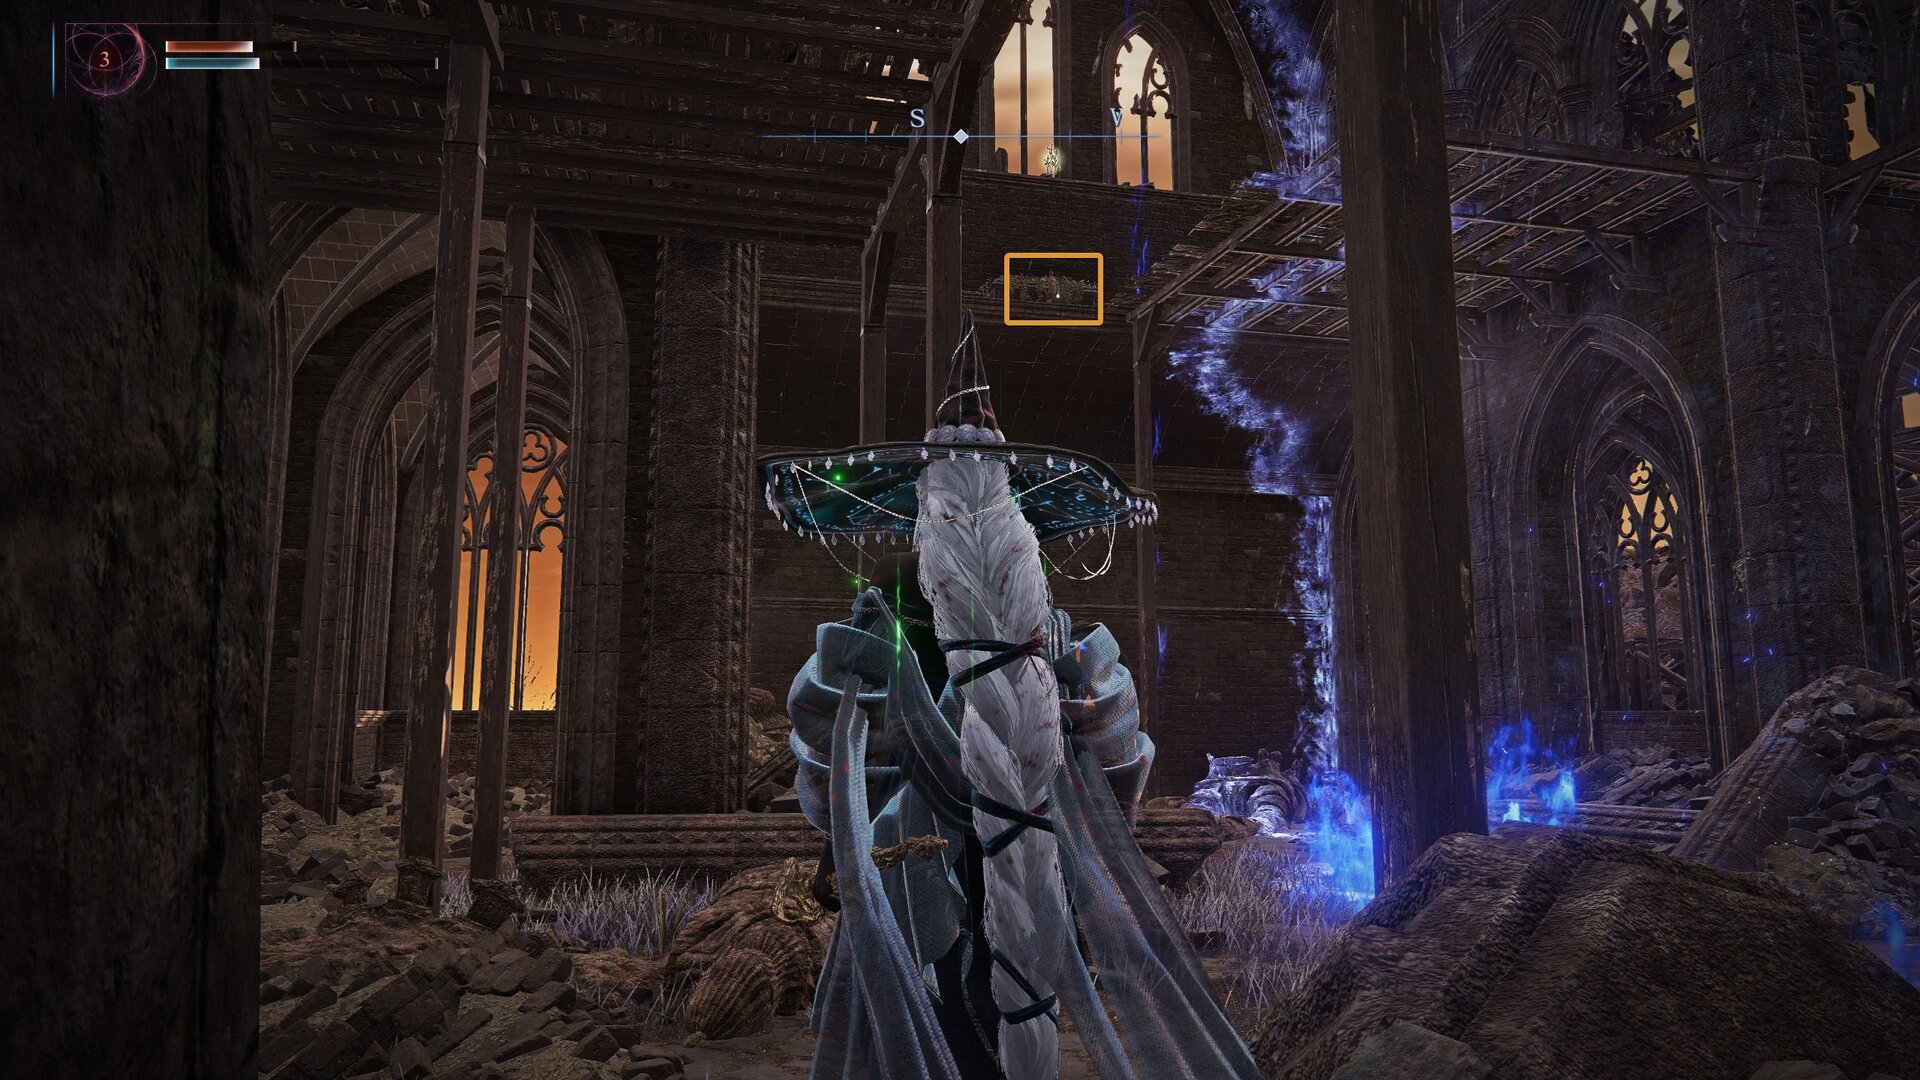
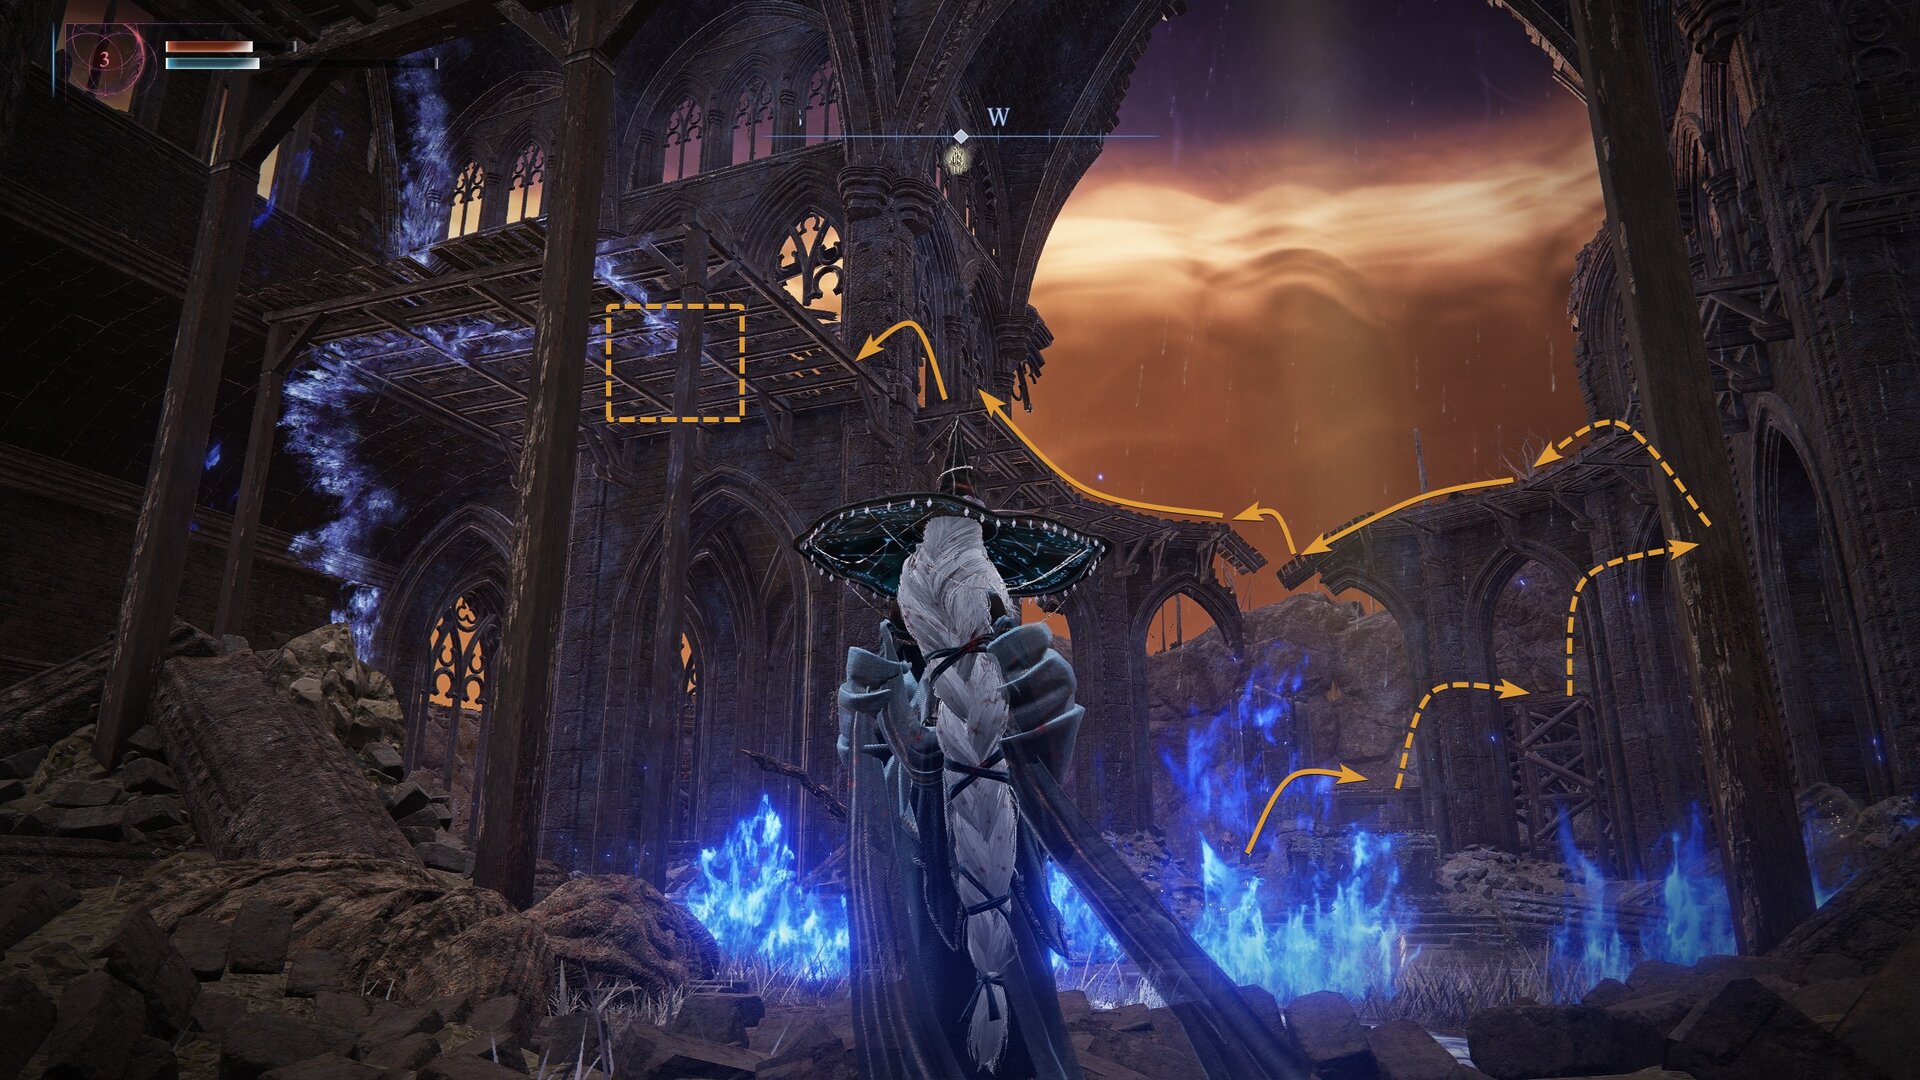
If there’s a chest up in the rafters instead of a box of seals, you’ll find Incantations in a corner on the main floor.
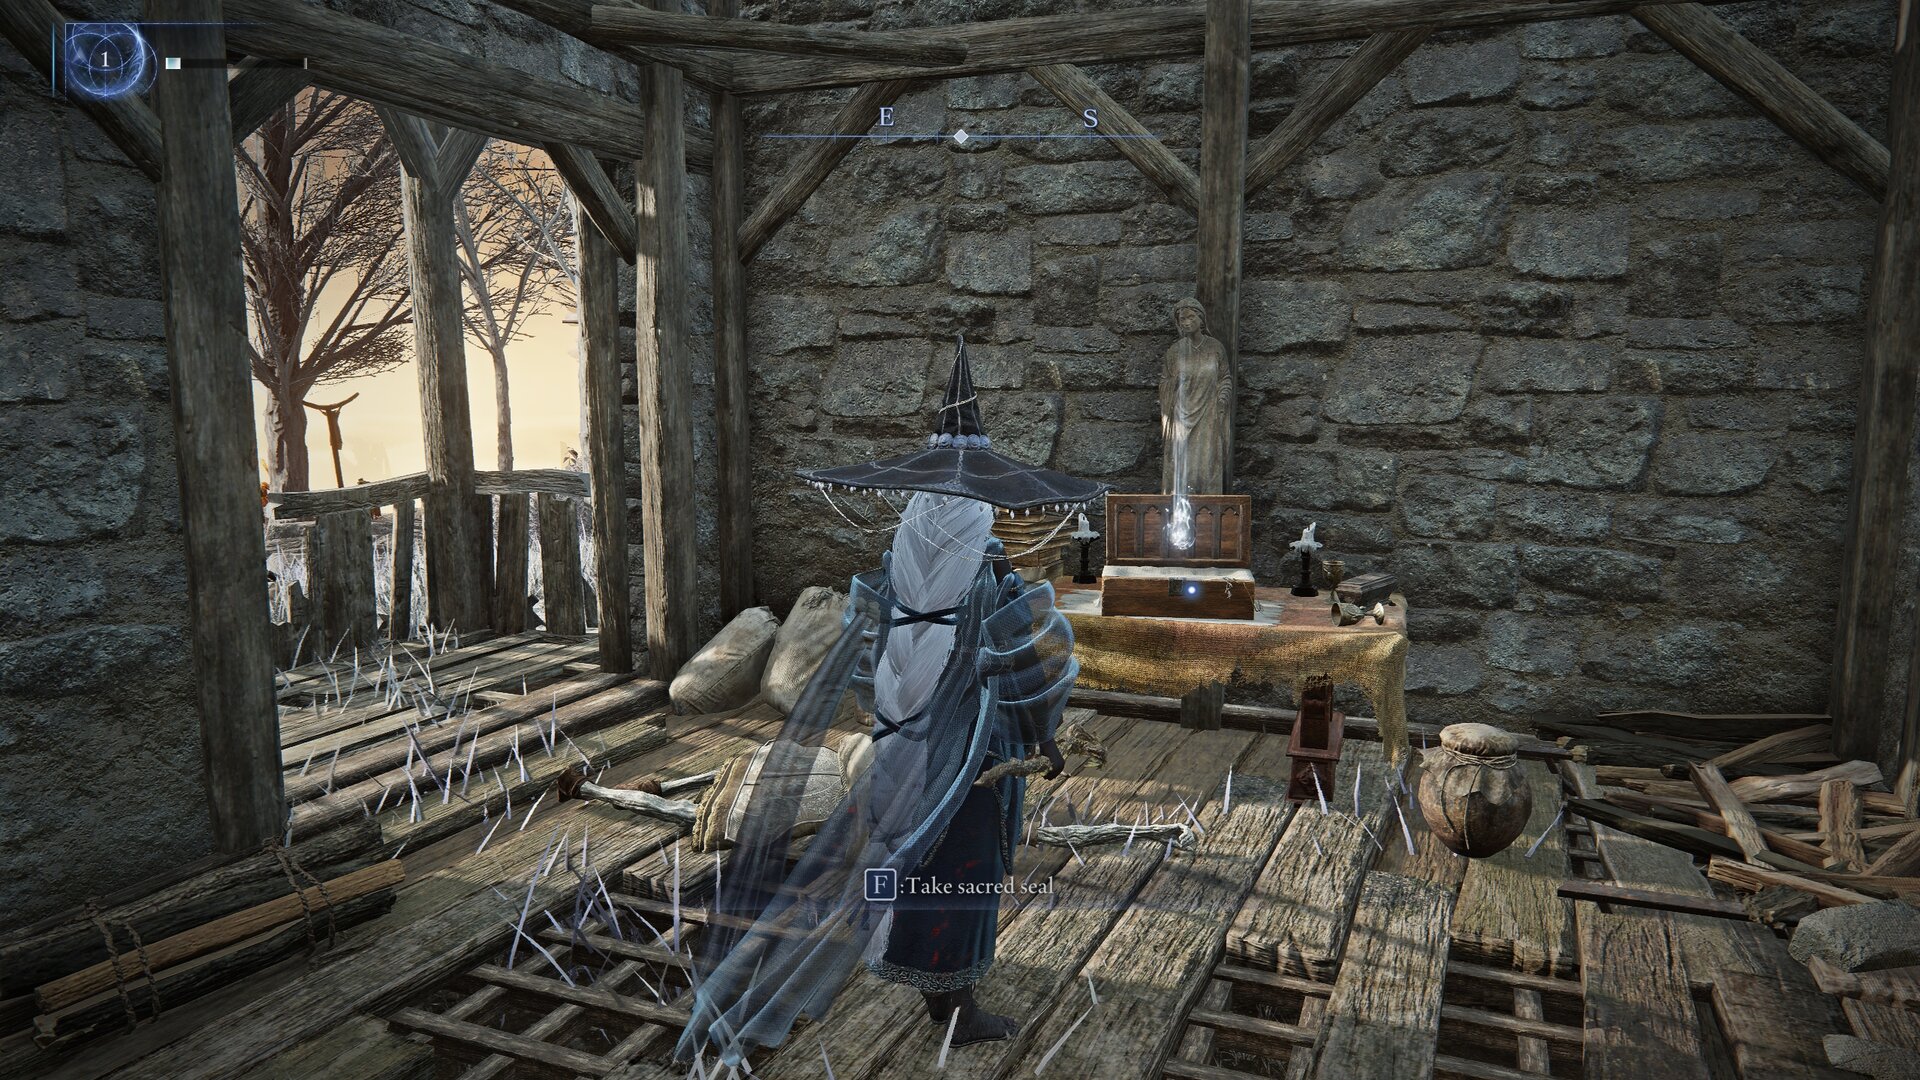
Shacks
Wood shacks contain a box with multiple seals in it. They don’t have any sort of puzzle, but they aren’t listed on the map as relevant locations. Once you learn the layout, I guess you just need to have a bit of faith that they’re there…
Marshes
Marshes are the ailment-ridden forts sinking into the ground exclusive to the Forsaken Hollows DLC. They always have both an altar for Sacred Seals on the way down to the boss and a holder for Staves after beating said boss.
I do not recommend ever visiting Poison Marshes because those always have Spider-Scorpions in them and troll pareidolia like broken chandeliers. If you get warped there for the Balancers raid, may the Greater Will have mercy on your soul.
Essential Weapon Passives for Recluse
Weapon passives are buffs granted to so long as they’re in your inventory. Unless they have the little hand next to the icon, your Nightfarer doesn’t need to be physically holding them in their hands. In most cases, these buffs will increase your chances of success than Relic effects.
Top Priority
You really need to get at least one of each of these if you want to maximize your effectiveness in combat. It is more important to have these effects than it is to have a bunch of legendaries with effects you don’t care about.
I’m hesitant to say this, but it may be worthwhile to hold onto a weapon that is more useful but not top tier to someone else in your group if it provides one of these buffs.
Probably don’t hold onto something like a Rivers of Blood if there’s an Executor in the group and they’re still using a blue weapon, but if you don’t expect them to use it as their main weapon, I say hold onto it for one of these passives.
Casting Speed +2
Casting Speed +1/+2 reduces the time it takes to cast spells by increasing your virtual dexterity by 30/60, the same way the Radagon Icon and Beloved Stardust talismans work in Elden Ring.
Since you have 19 Dexterity at level 15, you only need a combined +2 Casting Speed passive(s).
Damage Negation Up While Casting Spells
I know, I know; you would never get hit by an attack while casting a spell because you just never make any mistakes but hear me out.
Sometimes, the boss switches targets in the middle of a cast or they’ll start and finish an attack after your cast as begun, leaving you trapped in the animation and otherwise doomed without this.
Less Likely to Be Targeted
Enemies tend to attack whoever has dealt the most damage to them. Recluse has immense damage potential and can be the first one to hit an enemy, so it’s easy to build threat and keep aggro.
Since Recluse has such horrible survivability and is vulnerable while casting, you really need a way to give the poor Guardians, Raiders, and Wylders a chance to get aggro.
Reduced Spell FP Cost
Reducing your FP consumption is valuable in general, but it helps immensely with allowing you to channel spells like Comet Azur and Meteorite of Astel for a longer period.
Improved Damage Negation at Full HP
For the most part, you’re either at max health, barely alive after taking a single hit from a boss, or you’re crawling around on the floor like your weird human(?) baby.
Improved Damage Negation at Full HP enables you to survive heavier hits and increase the likelihood that your Flask will return you to full health.
Secondary Priority
Hold onto these as much as you can, but don’t let them interfere with more important buffs.
Continued Guarding Grants Increased Potency of Sorceries/Incantations and Faster Casting
If you hold Guard (L2 | LT when two-handing), you’ll increase your spell damage by 10% for the next 2s (basically the next cast) and give yourself Casting Speed +1 for the next 30s.
The longer you hold Guard, the stronger the effect and you’ll see it can stack 3 times for +30% spell damage and +3 Casting Speed for the next 30s.
It’s really nice for when you accidentally two-hand your staff while you were trying to make a Magical Cocktail, but I gotta say, it’s insane that FromSoft decided to implement this instead of fixing their control scheme.
Failing to Cast Spell Restores FP
You restore 13% of your max FP if you fail to cast a spell because you didn’t have enough FP. It’s nice protection if you accidentally stall out and your teammates aren’t applying Affinity Residues or you’re waiting for the right moment.
It also means you don’t need to hold onto a melee weapon, which is nice.
Improved Sorceries | Incantations
Improved Sorceries | Incantations buffs the damage dealt by the given spell type. It goes without saying that you should only pick one up if you have the relevant catalysts.
It’s an excellent, flat buff to your damage output, but it doesn’t really expand your capabilities, so it’s not as valuable as some of the other weapon buffs.
Improved Charged Sorceries | Incantations
Improved Charged Sorceries | Incantations buffes the damage dealt by charged versions of the associated spell type, just like Godfrey Icon. In exchange for being more specialized, the damage boost is larger than the one that applies regardless of whether the spell is charged or not.
Just like the unspecialized version, it’s nice to have, assuming you have chargeable spells. Channeled spells like Comet Azur and Meteorite of Astel do not benefit from this effect.
Essential Non-Weapon Passives (Dormant Powers)
These passives drop directly from defeating bosses and are the only thing that drop from the end-of-day bosses. You can pick up one of them instead of a weapon, which is usually the way to go.
Top Priority
You should prioritize these Dormant Powers as Recluse whenever you see them.
Increased Maximum FP
More FP is always good, and the fact that it’s an additive percentage means you can make that blue bar stretch to the moon!
Reduced FP Consumption
Reduced FP Consumption means you become less reliant on your non-scaling Character Skill and can spend more time fighting the boss. It’s particularly helpful with channeled spells because it means you can capitalize more effectively on those long openings.
Improved Dodging
Recluse is very squishy. It’s imperative that you avoid taking damage as much as possible. Improved Dodging increases your reliability. Keep in mind that this effect does not stack.
Improved Affinity | Physical Damage Negation
Recluse is still very squishy. You really need all the Damage Negation you can get, though I recommend focusing more on getting these passives and using weapon slots for damage boosts.
Improved Poise
A little bit of poise is actually valuable for Recluse. Without any Poise, you’ll get interrupted from spellcasting if a Wandering Noble so much as blinks in your direction.
With a little bit of poise, like the +25% you can get from a single boss drop, you’ll be able to trade hits without getting interrupted. You don’t need any more than that because you just won’t survive any hit that requires more poise anyway.
Violent Deluge of Rain While Walking
Violent Deluge of Rain is just the Founding Rain of Stars. Since it’s free and is cast automatically, it’s way better than the spell version. You will spend a lot of time walking as a Recluse because that’s the only kind of movement you can do while casting spells, so you’ll get a lot of mileage out of this perk.
It gets bumped up into the essential category because it also has a pretty strong stagger effect, which helps to slow the enemy’s advance when you get aggro.
Secondary Priority
If you can’t select one of the Top Priority options, consider one of these instead.
Periodical Giant Glintblade
Periodical Giant Glintblade is similar to the Violent Deluge of Rain While Walking. Instead of automatically casting Founding Rain of Stars, it casts Greatblade Phalanx on a short timer.
Keep in mind that all floating projectiles occupy the same slot and overwrite each other, so this passive conflicts with things like:
- Power of a Demon (floating Frenzied goat eye)
- Multiple Periodical Glintblades
- Many Periodical Glintblades
- Phalanx Sorceries
- Wraiths
I recommend it only if you don’t have another source and don’t think you’d benefit more from an alternative available.
Improved Stamina Recovery
While Stamina isn’t quite as essential to Recluse as it is to melee Nightfarers like Guardian and Raider, you’ll still be draining that green bar to cast spells and dodge, and Improved Stamina Recovery helps to reduce downtime where you can’t deal or avoid damage.
If you’re a big fan of the Carian Sword Sorceries, this is effect is a bit more important.
Increased Maxumum HP | Stamina
More HP means you can survive bigger hits. More stamina means you can have higher uptime on the boss and have a greater chance to have some stamina left when you need to dodge.
Increased Sorcery & Incantation Duration
Buff spells are more worthwhile in Nightreign, so making them last longer is better. It’s important to note that this buff (and the similar effect found on the Old Lord’s Talisman) do not extend the duration of your Ultimate Art.
Flame of Frenzy While Walking
Flame of Frenzy While Walking is comparable to the Violent Deluge of Rain While Walking, but it doesn’t have as much uptime, requires more aiming, and does cause Madness buildup, all of which make it less useful. Libra doesn’t like it though.
Lightning upon Dodging
Lightning cocktails (the things you make with your mana recovery skill) are among the most powerful in the game, so having a consistent source yourself without needing to juggle so many catalysts is nice.
It’s less useful if you’re able to stay away from enemies reliably or your fellow Nightfarers are doing a little too good of a job of wailing on the boss, resulting in the affinity residue getting replaced before you have a chance to grab it.
Improved Affinity Attack Power
Recluse deals almost exclusively affinity damage, so this is almost always just a flat damage boost. It’s worth noting that in Nightreign, Gravity Sorceries seem to deal magic damage rather than physical.
Spells that apply bleed, poison, or rot, including Thorn Sorceries, Servants of Rot Incantations, and some Dragon Communion Incantations, do not deal affinity damage.
Improved Sorceries & Incantations
Improved Sorceries and Improved Incantations are separate effects that apply to spells cast with a staff or a seal, respectively. Prioritize whichever you use most. Their damage boost is higher than that of Affinity Attack Power because it’s more specialized.
This buff applies to both charged and uncharged versions, just like the Graven/Canvas Talismans.
Improved Charged Sorceries & Charged Incantations
Improved Charged Sorceries and Improved Charge Incantations are separate effects just like the non-charged versions. The buff is stronger because it’s more specialized, but you won’t use it as much.
Improved Charged buffs are more valuable to more mana-constrained Nightfarers like Revenant and Duchess.
Blood Loss in Vicinity Increases Attack Power
If you use a Relic with the effect [Recluse] Suffer blood loss and increase attack power upon (Ultimate) Art activation, this passive is just free damage when you are most at liberty to spam.
The trigger raidus is pretty short though, like you probably won’t benefit from this effect if you have an Executor in the group or are using Briars of Punishment.
Creates Holy Ground at Low HP
Holy Ground is kind of the Faith equivalent of Terra Magica. It gives you a little recovery cushion and makes you safer inside Terra Magica, assuming you survive the initial hit.
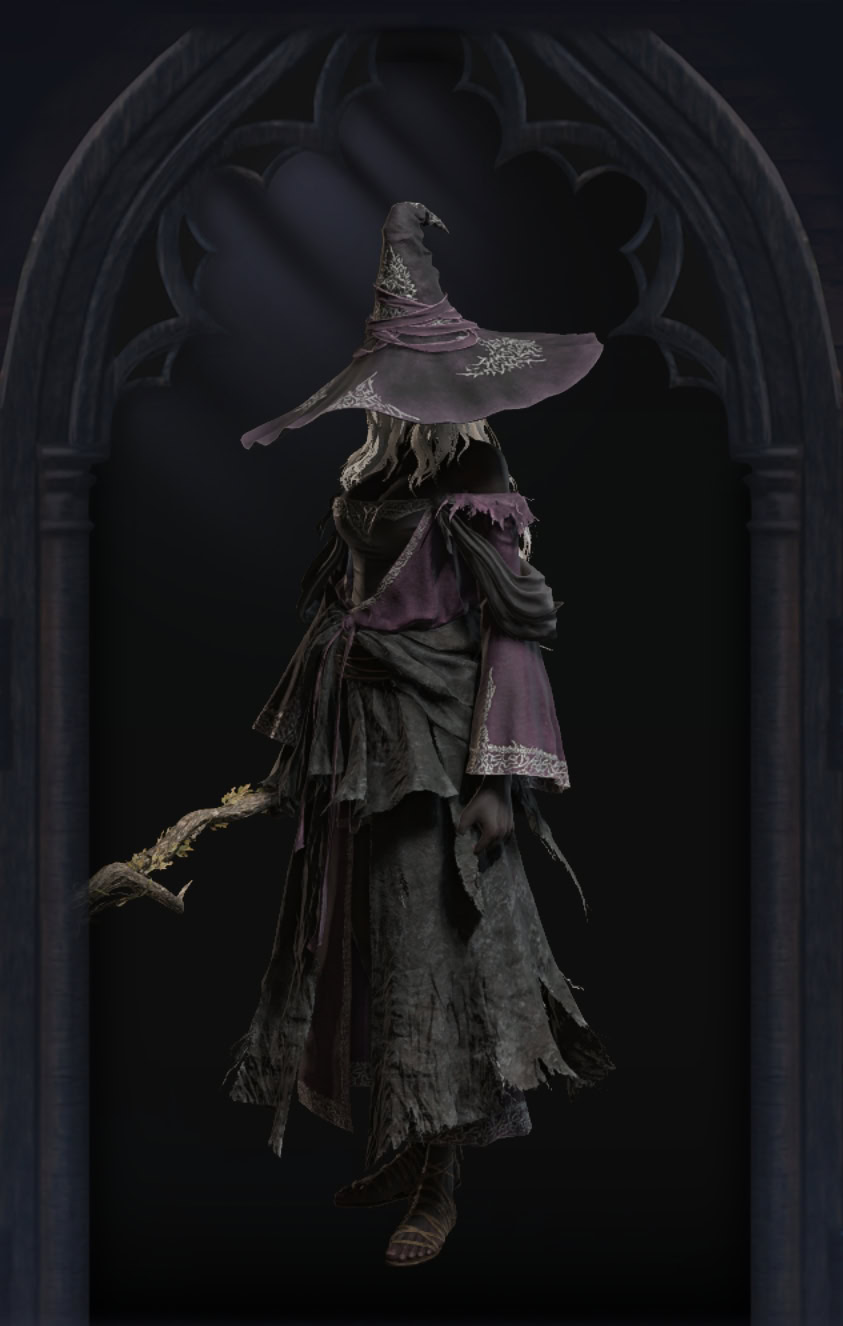
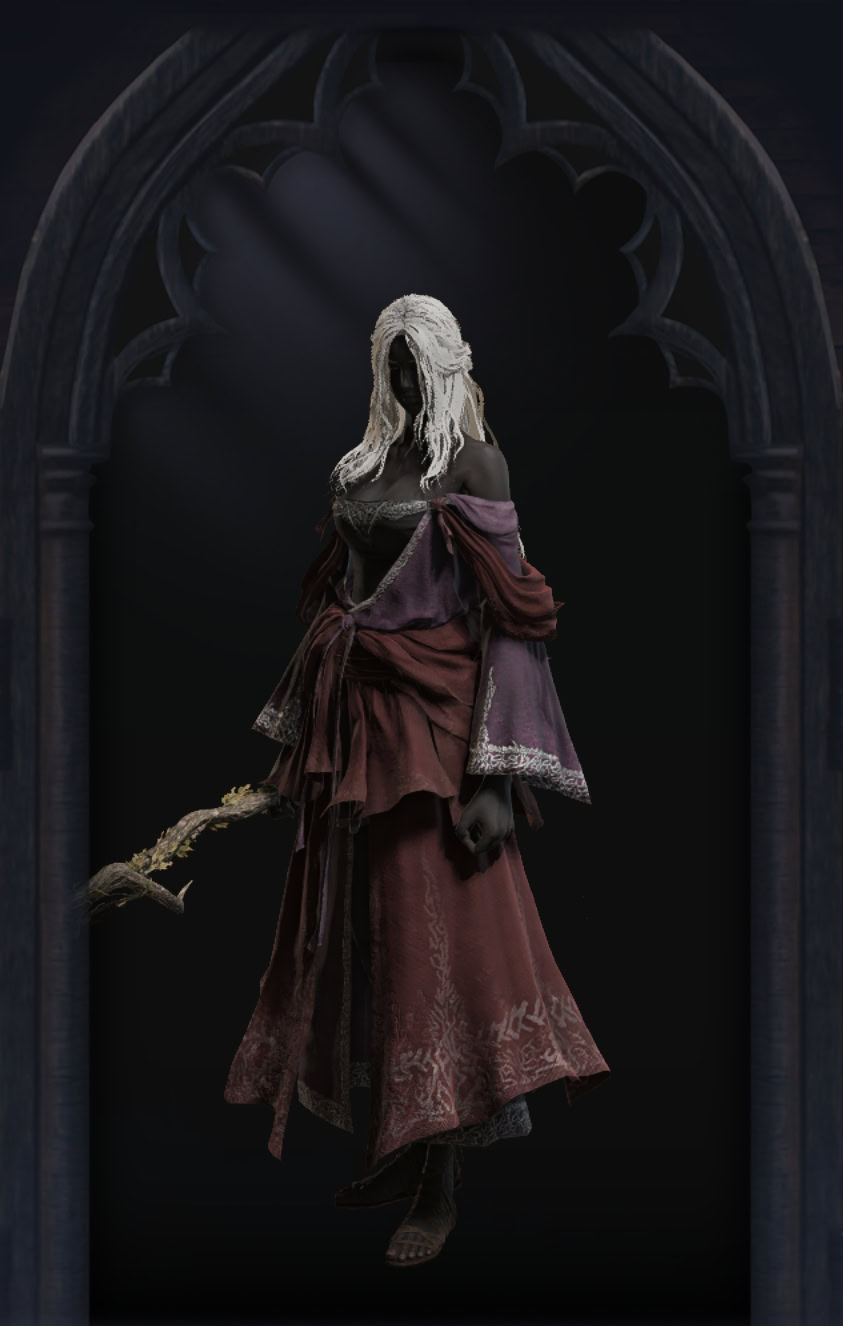
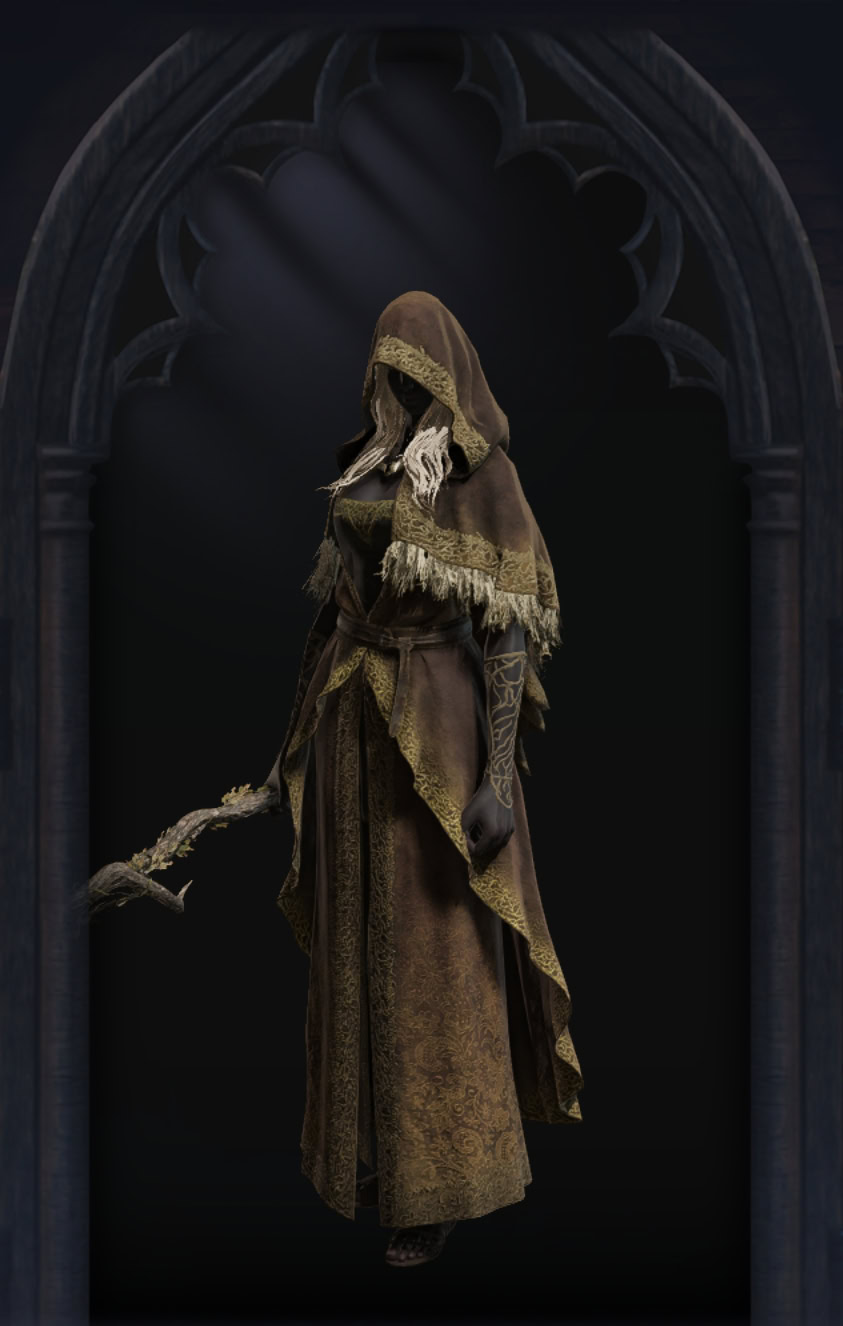
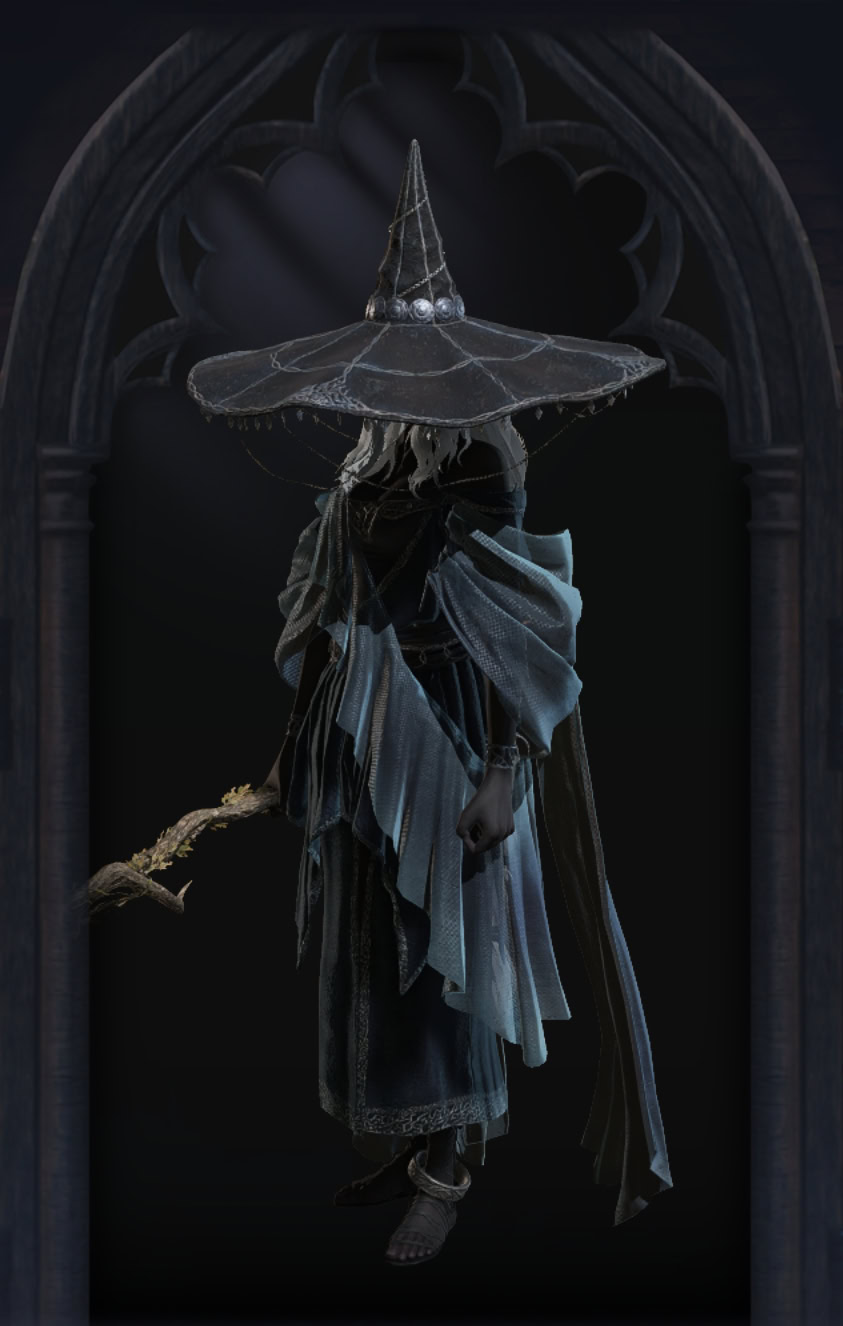
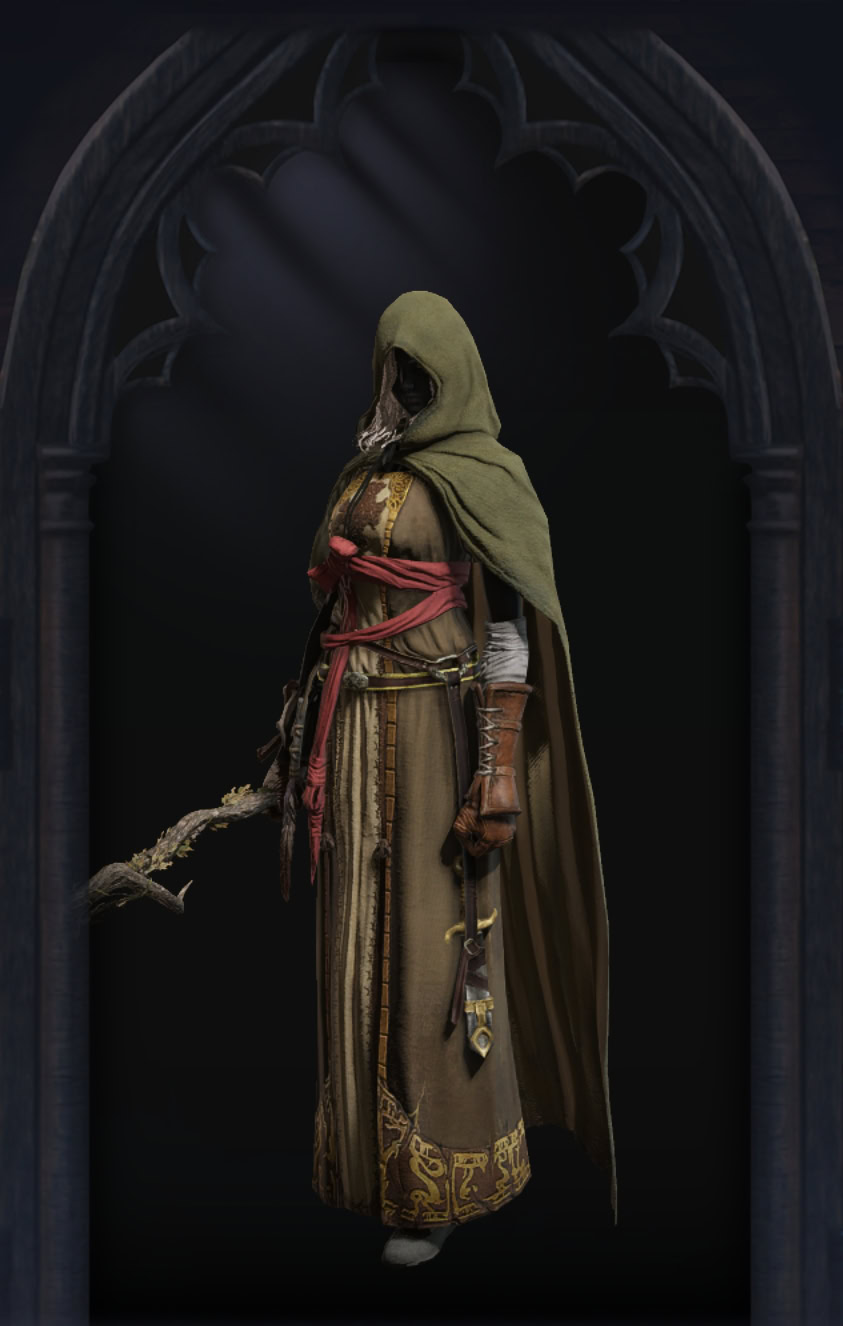
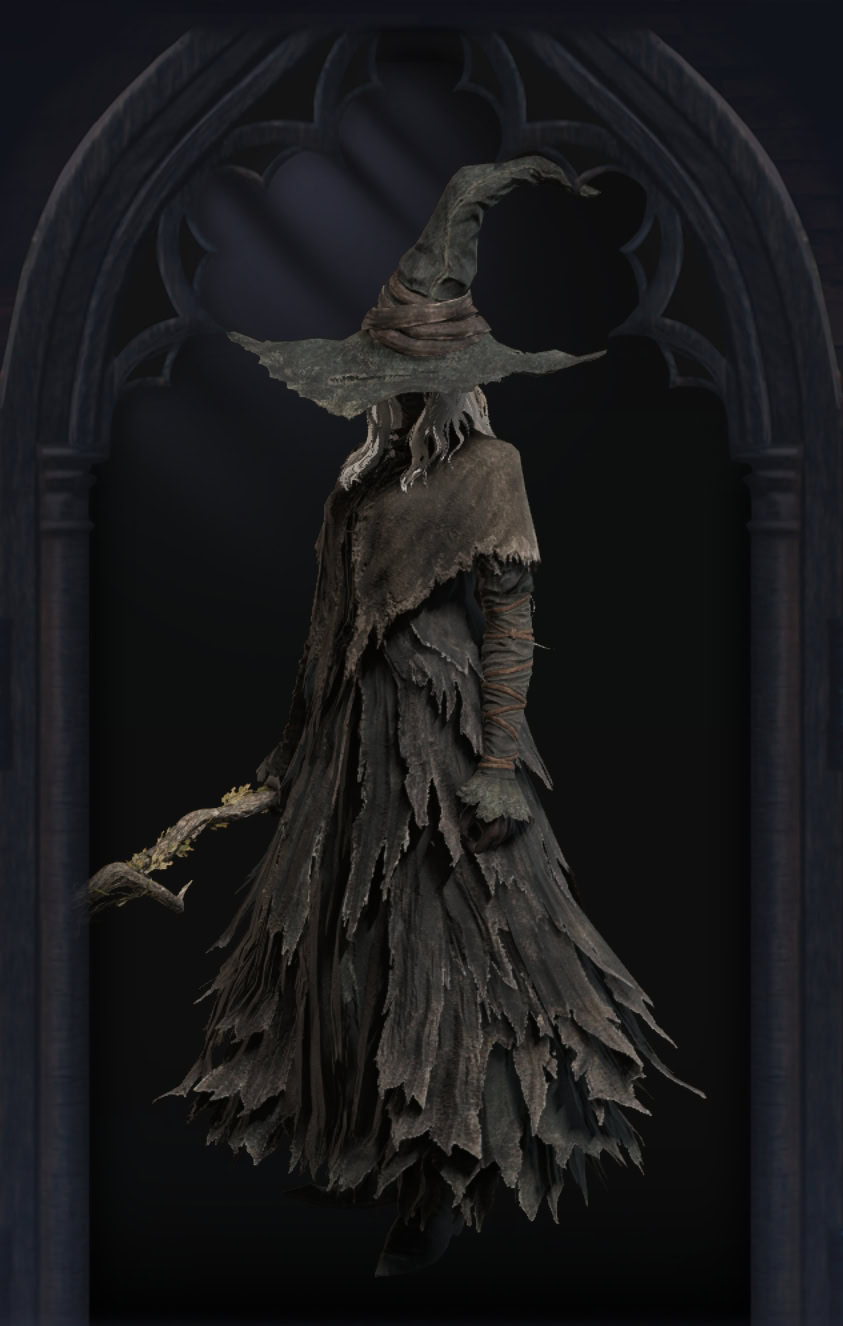
Recluse Costumes
Below are all 6 of Recluse’s appearances. Remembrance skins are unlocked after completing her quest. Dawn and Darkness skins are available as soon as you unlock the appearance changer. The named outfits are based on characters from Dark Souls and unlocked after you defeat Heolstor for the first time.