Everything you need to know about playing as Scholar, the ultimate support class, in Elden Ring Nightreign from The Forsaken Hollows DLC.
Abilities and Relic Effects
Scholar’s abilities and Relic effects enable him to buff his team, debuff his enemies, and greatly improve his performance with consumables.
Passive Ability: Bagcraft
Carry more items, and level-up items by using them.
Each item category is leveled up independently.
Level 2: Effect strengthened.
Level 3: Bonus effect added.
Bagcraft significantly improves the effectiveness of consumable items as you “learn” how to use them each run and doubles the amount you can carry per Small Pouch from 2 to 4.
Unlike some other Nightfarers’ Passive Abilities, Bagcraft plays a massive role in shaping the Scholar’s general gameplay.
While the Scholar does still the use of his legs, you’ll spend so much time scrambling around on the ground hunting for consumables, you’re basically one of his tortured Albinauric gremlin brethren at the Volcano Manor.
Consumable items are divided up into 1 of 9 mostly intuitive categories based on shared attributes and physical appearance.
The only weird category is Stones, which comprises the Gravity Stones and Glintstones along with Warming Stones and Starlight Shards.
You can upgrade their effectiveness by consuming a specific number of a given category.
You’ll typically need to consume 2 or 3 items from a given category to go from Level 1 to Level 2. Then, you’ll need to consume an additional 4 or 6 of that category to go from Level 2 to Level 3. It always takes twice as many consumables to go from Level 2 to 3 as it did to go from Level 1 to 2.
If you are viewing this table on a small screen, scroll horizontally to see the full contents.
| Icon & Category | Uses to Lvl 2▲3 | Basic Effect | Lvl 2 Upgrade | Lvl3 Upgrade |
|---|---|---|---|---|
Darts | 6x ▲ 12x (18 total) | Deals Immediate Damage and Can be Thrown in Quick Succession | 100% More Damage | 2% Damage Negation Debuff per Stack, 10 Stacks Max, -20% Damage Negation Max for 40s |
Pots | 2x ▲ 4x (6 total) | Deals Explosive Affinity Damage or Applies Status Ailment | 70% More Damage | L2 Damage + 45% More Damage as Lingering Effect |
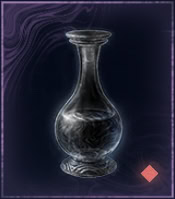
Crystal Tears | 1x ▲ 2x (3 total) | Provides a buff for a set time | 50% Stronger Effect | Also Grants Improved Attributes |
Grease | 2x ▲ 4x (6 total) | 30s of +21 Affinity Damage or Ailment Buildup | 100% Longer Duration | L2 Duration + 50% Boost to Effect |
Stones | 3x ▲ 6x (9 total) | Deals Damage or Regenerates HP/FP | 50% More Damage | 90% More Damage as Bonus Behavior |
Special Tools | 20x ▲ 40x (60 total) | Deals Damage at Cost of FP | 10% More Damage | 33% More Damage |
Boluses | 2x ▲ 4x (6 total) | Cures Status Ailment | Stronger Gradual Healing | Resist Ailment Buildup |
Food | 3x ▲ 6x (9 total) | Stat Buff for 60s | Stronger Buff | L2 Buff + Additional Buff |
| 2x ▲ 4x (6 total) | Grants Buff to Player or Debuff to Enemy | Stronger Effect | Adds one-time explosion when you get hit (buff) or affected enemies (debuff) |
The effects you get from reaching Level 3 tend to be a lot stronger than the ones you get at Level 2, so it’s ideal to save the better/rarer consumables until you reach Level 3, but you do have to balance that with inventory space and shop access.
I don’t recommend saving anything for more than a night unless the boss is specifically weak to it. Spend what you have on the night’s boss.
For example, you want to use all of your Boiled Prawns before you use any Boiled Crabs but spend them all by the end of Night 1 or Night 2. If you’re going for Adel/Gaping Jaw, only save Poison Grease and Poison Pots for him.
Keep emptying your schoolbag. You want to reach Level 3 with all types of consumables ASAP.
If it’s weak, just eat it immediately. If you have space, just pick things up without thinking about them. Clean up and organize on the way.
You will probably fall behind but just try to keep your team buffed and focus on your Bagcraft instead of attacking.
Whenever you see a Merchant, buy the Small Pouch if you haven’t already and stock up on 8 Fire Pots, 24 Throwing Knives, 8 Pickled Turtle Necks. Get some Warming Stones, Starlight Shards, or more Fire Pots if you have Small Pouches to spare.
There are no Scholar-exclusive Relic effects that strengthen Bagcraft, a bundle of extremely synergistic generic Relic effects and a pair of passive stat modification Relics:
- Items confer effect to all nearby allies
- Small Pouch in possession at start of expedition
- HP restored when using medicinal boluses, etc.
- Improved X Consumable Damage
- Physical attack power increases after using grease items
- [Scholar] Improved Mind, Reduced Vigor
- [Scholar] Improved Endurance and Dexterity, Reduced Intelligence and Arcane
It’s essential that you distribute your buffed consumables with Items confer effect to all nearby allies. Scholar needs this Relic effect more than any other Nightfarer needs anything else.
More Small Pouches means you can hold more items. You can have up to 8 Small Pouches, and you can buy 1 from Merchants and another from the rare Merchant at the Township.
Buffs to the consumable items themselves are nice, but the uptime on said buff is low relative to when you need it, and you have a lot of other Relic effects that you need to contend with.
The stat modifying relics allow you to sacrifice some HP, magic damage, and Ailment proccing for more Stamina, Thrusting Sword damage, and FP. You become less about proccing status effects and more of a regular melee fighter.
They’re useful if you don’t care for Bagcraft or supporting your team and synergize better with the Greases and Pots. I don’t know why you wouldn’t just play Executor or (melee) Ironeye or even Undertaker instead.
Character Skill: Analyse
See target with monocle and note findings which linger as spirit symbols to various effect.
Continue observing to advance Analysis. Improve rate of progress by using Analyse on more enemy specimens, discovering special notes, and including allies in analysis.
Activating Analyse makes you walk slowly and sticks a big reticle shaped like glintstone monocle on the screen. Any enemy inside the monocle reticle builds up its Analyse meter. Progress decays whenever they aren’t in the reticle.
Progress supposedly builds faster the more unique specimens and “special notes” you find, but in my experience, the main factors contributing to Analyse progress are:
- Enemy proximity to you; the more of the screen they take up, the faster progress builds
- Remaining enemy HP; the less HP remaining, the faster progress builds
- Enemy movement and animation speed; the faster they are or if they’re mid-attack, the faster progress builds
Faster enemies closer to you with less remaining HP will build up progress the fastest.
Pressing LT | L2 concludes your Analysis and applies debuffs to every enemy inside the monocle when you pressed the button.
| Analyse Progress Visual | Analyse Progress | LT | L2 Debuff Icon(s) | LT | L2 Debuff Effect(s) |
|---|---|---|---|
 | 1% to 49% | -10% Attack Power | |
 | 50% to 99% | -20% Attack Power | |
 | 100% | -20% Attack Power +60% Damage, Ailment Buildup from Next Hit |
Pressing RT | R2 concludes your Analysis and applies a buff(s) to you.
| Analyse Progress Visual | Analyse Progress | RT | R2 Buff Icon(s) | RT | R2 Buff Effect(s) |
|---|---|---|---|
| 1% to 49% | +20% Stamina Recovery Rate [Relic]-15% FP Consumption | |
| 50% to 99% | +40% Stamina Recovery Rate [Relic] -30% FP Consumption | |
| 100% | +40% Stamina Recovery Rate [Relic] -45% FP Consumption Parry Bubble for 1.5s |
If you have the Relic, either button will buff the Physical | Affinity Attack Power allies inside the reticle. There are 3 tiers to the effect based on completion percentage:
It’s usually not worth going to 100% unless it’s safe and you can’t do anything else, so just hit either button when it passes over the 50% mark unless you know you can leverage 100% or have nothing better to do.
With a Character Skill Cooldown Reduction Relic, you should get pretty close to 100% uptime on both the debuffs and buffs if you alternate them on cooldown.
You can also dodge to cancel out of it. This will cause the Analyse progress to decay, but that’s better than getting hit or not applying the debuffs/buffs to something crucial.
The Parry you can do as Scholar functions as a 1.5s bubble buff that you get after reaching 100% Analyse progress against any enemy in the reticle and pressing RT | R2. If an enemy hits you while the bubble, you take no damage from your next hit and the bubble pops, knocking down everything in the immediate vicinity and dealing a decent chunk of damage.
Analyse is the main focus of Scholar’s exclusive Relic effects:
- [Scholar] Allies targeted by Character Skill gain boosted attack
- [Scholar] Prevent slowing of Character Skill progress
- [Scholar] Earn runes for each additional specimen acquired with Character Skill
- [Deep][Scholar] Reduced FP consumption when using Character Skill on self
Allies targeted by Character Skill gain boosted attack grants +20% Physical Damage and +15% Affinity Damage for 30s to allies who are in focus of your monocle when you activate it. An enemy always needs to be in focus as well, regardless of whether you choose to apply buffs or debuffs.
Unlike any of the others, this buff to teammates does not depend on Analyse progress, so if you’re planning on scrounging for consumables, just apply this buff to both of them and the tier 1 debuff to as many enemies as you can before you go crate smashing.
Prevent slowing of Character Skill progress just reduces the amount that progress decays if the target is no longer in focus. It improves your flexibility and reduces the time you’ll spend waiting for buffs to build up.
Earn runes for each additional specimen acquired with Character Skill just gives you money for Analysing different enemies. It’s nice, but it’s not necessary if you have Improved rune acquisition for self and allies and Rune discount for shop purchases while on expedition, both of which will be easier to find.
Reduced FP consumption when using Character Skill on self is a Deep-exclusive Relic effect that gives a stacking 15% FP cost reduction when you use RT | R2 with Analyse. It stacks up to 3 times with progress.
Ultimate Art: Communion
Scatter pages of taboo tome to thread enemies and damage simultaneously.
Damage inflicted on threaded enemy affects other enemies. Also, can heal HP of threaded allies. Attacks received from threaded enemy also damage attacker.
Like all Ultimate Arts, you are immune to damage during the activation animation, but the base effect makes it so damaging one enemy damages all enemies while healing you and your teammates. It’s a shared leech and reflect.
The radius is quite wide, making Communion better suited for dealing with large groups of enemies rather than bosses and has fantastic synergy with Defeating enemies fills more of the Art gauge.
Uptime is more important than anything while Scholar’s Ultimate Art is active, so just make sure you’re hitting something. You don’t have to worry about healing. Try to refresh the damage buff from Analyse on your teammates before you cast it if possible.
There is 1 Scholar-exclusive Relic effect that strengthens Communion:
- [Scholar] Continuous damage inflicted on targets threaded by Ultimate Art
This sole exclusive Relic effect doesn’t hit too hard, but it takes the edge off each enemy’s health bar while offering some passive healing. Combined with this DoT, you’ll wipe out practically everything by the time you finish a single attack sequence.
Scholar Unique Relics
Scholar has 2 unique Relics you get from his remembrance quest. You can purchase 4 supporting Grand Scene Relics from the Collector’s Signboard for 3 Sovereign Sigils each.
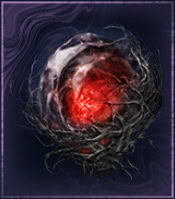
 Cleansing Tear
![]() [Scholar] Continuous damage inflicted on targets threaded by Ultimate Art
[Scholar] Continuous damage inflicted on targets threaded by Ultimate Art![]() Improved Affinity Damage Negation
Improved Affinity Damage Negation![]() Defeating enemies fills more of the Art gauge
Defeating enemies fills more of the Art gauge
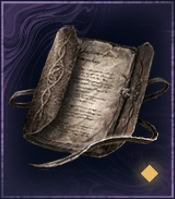 Note “My Dear Successor”
![]() [Scholar] Allies targeted by Character Skill gain boosted attack
[Scholar] Allies targeted by Character Skill gain boosted attack![]() [Scholar] Prevent slowing of Character Skill progress
[Scholar] Prevent slowing of Character Skill progress![]() Character Skill Cooldown Reduction +3
Character Skill Cooldown Reduction +3
 Grand Burning Scene
![]() HP restored when using medicinal boluses, etc.
HP restored when using medicinal boluses, etc.![]() Items confer effect to all nearby allies
Items confer effect to all nearby allies![]() Small Pouch in possession at start of expedition
Small Pouch in possession at start of expedition
 Grand Luminous Scene
![]() [Scholar] Earn runes for each additional specimen acquired with Character Skill
[Scholar] Earn runes for each additional specimen acquired with Character Skill![]() Small Pouch in possession at start of expedition
Small Pouch in possession at start of expedition![]() Small Pouch in possession at start of expedition
Small Pouch in possession at start of expedition
 Grand Burning Scene
![]() [Scholar] Improved Mind, Reduced Vigor
[Scholar] Improved Mind, Reduced Vigor![]() Vigor +3
Vigor +3![]() Mind +3
Mind +3
 Grand Luminous Scene
![]() [Scholar] Improved Endurance and Dexterity, Reduced Intelligence and Arcane
[Scholar] Improved Endurance and Dexterity, Reduced Intelligence and Arcane![]() Endurance +3
Endurance +3![]() Dexterity +3
Dexterity +3
Scholar really likes red and yellow Relics, so prioritize getting Urns and Chalices that have those slots.
Attributes and Weapons
A Nightfarer’s attribute scaling, described with tier letters, determines which weapons they will be most effective with, defining their playstyle. Everyone wants to use weapons that scale well with their stats.
Scholar Attribute Scaling
The Scholar’s greatest strength is his Arcane knowledge, making him best suited to applying Status Ailments. However, his health, mana, and stamina stats are solid as well. Numbers in parentheses depict base stat values at level 15.
- S: Arcane (50)
- B: Vigor (900 HP), Mind (145 FP), Endurance (98 Stamina),
- C: Intelligence (28), Faith (15), Dexterity (18)
- D: Strength (14)
Weapon Types
As Scholar, your top priority is to find weapons that scale with Arcane and apply Status Ailments. It needs to do one of those things or you should give it to someone else.
It’s worth noting that in Nightreign, all Status Ailments scale their application rate with Arcane. It’s not like base Elden Ring where some do and some don’t.
That being said Arcane damage scaling remains unchanged from base Elden Ring, so you’ll never see a weapon that applies Frost that also scales with Arcane.
Thrusting Swords
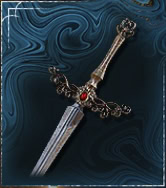
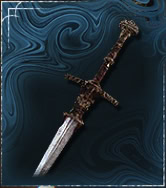
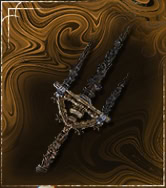
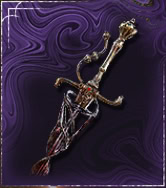
Scholar has a unique moveset with Thrusting Swords, including when dual wielding (AKA powerstancing). It’s a small weapon class and lacks a legendary. Both purples apply a unique Ailment, though unfortunately, neither’s damage scales with Arcane.
![]()
Antspur Rapier
![]()
Frozen Needle
![]() |
| ![]()
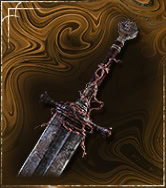
Rogier’s Rapier
![]() |
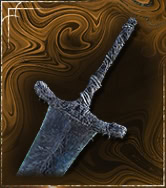
| ![]()
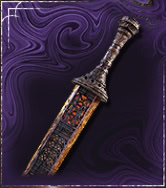
Cleanrot Knight’s Sword
You will get a lot of Rogier’s Rapiers and Cleanrot Knight’s Swords, especially at the beginning of the run. Rogier’s Rapier deals a teensy bit more base damage and has stronger critical hits, but whichever applies a Status Ailment is better.
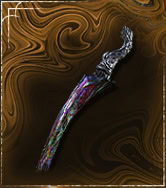
Arcane Scaling + Ailment Weapons
The following weapons scale with Arcane to deal damage AND apply an Ailment. The top row is better for Scholar than it is for other Nightfarers. The bottom row is good for Scholar, but other Nightfarers can take better advantage of them.
![]()
![]()
Morgott’s Cursed Sword
![]()
![]()
Mohgwyn’s Sacred Spear
![]()
![]()
Eleonora’s Poleblade
![]()
Bloody Helice
![]()
![]()
Rivers of Blood
![]()
Reduvia
![]()
Serpent Bow
If you’ve got an Executor, definitely give them Rivers of Blood. If you have an Ironeye, definitely give them Serpent Bow. If you’ve got a Duchess and they’ve got garbage, give them Reduvia.
Arcane Scaling Only
There are a few weapons that scale with Arcane but do not apply any status effects. They all have at least B scaling, except for the Ripple weapons, which have S scaling!
![]()
Marais Executioner’s Sword
![]()
Regalia of Eochaid

![]()
Clinging Bone
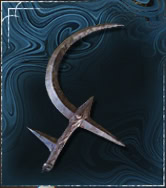
Ripple Crescent Halberd
Ripple Blade
It’s worth noting that Ripple Crescent Halberd and Ripple Blade are arguably the Scholar’s most damaging weapons, especially if you upgrade them to purple or gold.
Marais Executioner’s Sword is also pretty amazing, but Wylder will be more effective with it since it’s a greatsword. Other melee Nightfarers are also in a much better position to build for melee damage and can benefit more from the permanent damage boost.
Along with the Ripple weapons, Regalia of Eochaid and Clinging Bone are more solidly within the realm of being best for Scholar.
Yes, Executor and Ironeye also have high Arcane, but they have different ideal weapon classes. Give them Rivers of Blood and Serpent Bow and you keep these.
These weapons are pretty rare. I don’t think it’s worthwhile to build for melee with your weapon passives unless you’ve already found one of these.
Special Cases
Below are a few weapons that don’t have any Arcane scaling but offer some unique benefit that make them worth consideration.
![]()
![]()
Dark Moon Greatsword

![]()
![]()
Eclipse Shotel
![]()
![]()
Sword of St. Trina

![]()
Scepter of the All-Knowing
![]()
Scorpion’s Stinger
Dark Moon Greatsword is the only Legendary to apply Frost buildup, but Wylder and Recluse also have strong claims to it.
Eclipse Shotel is the only weapon to apply Death Blight buildup, and Scholar should be able to build it faster than others, but I haven’t spent much time testing it
Sword of St. Trina is the only weapon to apply Sleep buildup. You can often find this one on vendors. It’s a solid purchase, especially against the Balancers.
Scepter of the All-Knowing is both an RP choice and also just fits thematically with a support build. You’re already worrying about maintaining a bunch of buffs and debuffs, so it’s better to have this on your plate rather than someone else’s.
Scorpion’s Stinger is the only other purple weapon that can apply Scarlet Rot buildup, but it scales hard with Dexterity, not Arcane, so it an Executor, Ironeye, or Duchess (because it’s a Dagger) can make better use of it.
Honorable Mentions
The following weapons are decent picks for Scholar because they have some sort of built-in status effect scaling, so they’re solid options until you find something better.
- Scythes
- Claws
- Katanas
- “Rotten” Weapons
- Hoslow’s Petal Whip
- Zamor Curved Sword
- Ghiza’s Wheel (maybe)
No Catalysts
Despite being a member of the nomadic Hierodas conspectus, the Scholar is not a caster. Give your Staves to Recluse and Duchess and your Sacred Seals to Recluse, Undertaker, and Revenant. If you want to cast, play a caster.
Okay maybe you can keep a Sacred Seal if it has Poison Armament, Blood Blade, or Golden Vow, but that’s it!
Recommended Relic Effects
We’re going with an ice cream sundae metaphor for Relic effects. You have your foundational effects that you really need to have as the ice cream, followed by the fudge and sprinkles as necessary to make them worthy of use, and finished with the cherries on top turning them into the delicious god roll sundae.
The sundae metaphor only applies to Scholar-specific Relic effects. Generic or universally useful effects will be listed afterwards.
The Bowl
You can’t have a sundae without the bowl. What are you gonna do? Eat the ice cream off the floor? These effects are so essential to Scholar that I changed the format of this section of the guide and bothered to add little icons just to emphasize my point.
 Items confer effect to all nearby allies
 [Scholar] Allies targeted by Character Skill gain boosted attack
Play someone else if you aren’t going to take Items confer effect to all nearby allies and [Scholar] Allies targeted by Character Skill gain boosted attack. Seriously.
Ice Cream
These are the foundational Relic effects you should seek out and equip as Scholar. If the Relic does not have at least one of these buffs, your Relic probably isn’t all that great.
- [Scholar] Continuous damage inflicted on targets threaded by Ultimate Art
- Small Pouch in possession at start of expedition
- Increased rune acquisition for self and allies
- Defeating enemies fills more of the Art gauge
- Attack power up when facing poison-afflicted enemy
- Attack power up when facing scarlet rot-afflicted enemy
- Poison & Rot in Vicinity Increases Attack Power
Fudge and Sprinkles
If a Relic has one of these effects, on top of the ice cream, it’s a pretty solid roll and may be worth equipping even if there isn’t a third effect.
- [Deep][Scholar] Reduced FP consumption when using Character Skill on self
- [Scholar] Earn runes for each additional specimen acquired with Character Skill
- [Scholar] Prevent slowing of Character Skill progress
- Rune discount for shop purchases while on expedition
- Improved Throwing Pot Damage
- Improved Throwing Knife Damage
- HP restored when using medicinal boluses, etc.
- Physical attack power increases after using grease items
- Stamina Recovery Upon Landing Attacks
- Wraith Calling Bell in possession at start of expedition
Cherries on Top
The following are nice to have, and while they don’t contribute enough to be worth seeking out on their own, they are probably necessary to qualify as a god roll if they come in concert with the ice cream, the fudge, and the sprinkles (and the bowl).
- Attack power up when facing frostbite-afflicted enemy
- X consumable in possession at start of expedition
- Treasure marked upon map
- Raised stamina recovery for nearby allies, but not for self
- Defeating enemies restores HP for allies but not for self
- Improved Thrusting Sword Attack Power
- Starting armament inflicts blood loss | poison | frost
- Runes and Item Discovery increased for each great enemy defeated at a Fort
Generic Useful Relic Effects
These Relic effects are useful regardless of what Nightfarer you’re using:
- Ultimate Art Auto Charge
- Increased Maximum HP
- Increased Maximum FP
- Increased Maximum Stamina
- Vigor | Mind | Endurance +3
- Attack power increased for each Night Invader defeated
- Attack power increased for each evergaol prisoner defeated
- Improved Poise and Damage Negation when knocked back by damage
- Increased Rune acquisition for self and allies
- Partial HP Restoration upon Post-Damage attacks
- Character Skill Cooldown Reduction +X (if your skill has a cooldown)
- Continuous HP Recovery
- Slowly Restore HP for self and allies when HP is low
- Improved Skill Attack Power
- Improved Melee Attack Power
- Physical Attack Up
Don’t forget about Items confer effect to all nearby allies and [Scholar] Allies targeted by Character Skill gain boosted attack!!!
Talismans Tier List
Below, you’ll find the tier list for Talismans. Keep in mind that this is just a default list. Scholar can make the most of Talismans that increase damage based on triggering bleed | poison, boost the damage from consumables, or offer more stamina, or survivability.
Tier Legend
Many of you probably know how tier lists work, but there’s more meaning you can glean from one of my lists than simple “S is better than A is better than B and so on”.
- S: These are the best talismans in the game for Scholar. If you ever find one of these, it’s always worth equipping. Non-Scholar players should consider giving these to you if they ever find them.
- A: Great talismans that might be the best you’ll find in your run. They are second only to the exceptional.
- B: Good talismans for Scholar, but they are more situational or have less impact than A or S-tier options.
- C: Weak talismans for Scholar that are better than nothing but have limited impact and situational.
- D: Minimally useful for Scholar, likely far more useful for another Nightfarer.
- F: Talismans that are useless or detrimental to Scholar.
Talismans Tier List
I only recommend holding onto S, A, and, situationally, B tier Talismans. Everything below that should be given to whoever else in the group can use it more right now.

I contemplated putting the caster talismans in F tier, but they’re not technically detrimental unless you’re hoarding them from a caster on your team.
The Fire Scorpion Charm is a bit better than the others because you can get effectively unlimited Fire Pots from Merchants.
Priority Locations for Scholar
Scholar benefits slightly more than others from visiting Main Encampments, Forts, and the Castle, but it’s more important to go wherever your team needs. The Township is also worth swinging by.
Wherever Your Team Needs
Scholar is a support class. What you need is for your teammates to be as effective as possible so that they can benefit as much as possible from your buffs.
You’re gonna be so focused on scrounging for items you won’t have much time to think about routing anyway.
Main Encampments, Forts, and the Castle
These locations all have a high density of enemies and crates, and have a Merchant nearby. You can clear out most enemies with a well-placed Ult in the middle of the POI, so they don’t take as long and will net your team extra Runes because you’ll be defeating more enemies than usual.
It’s not worth going out of your way to visit these places, but if you have your Ult ready and it’s on the way to something else, ping it for a brief detour.
Township
This is the place where the rare Merchant is. You care more about consumables, and this guy doesn’t have anything special in that department. The key benefit is that he sells another Small Pouch.
Essential Weapon Passives for Scholar
Weapon passives are buffs granted to so long as they’re in your inventory. Unless they have the little hand next to the icon, your Nightfarer doesn’t need to be physically holding them in their hands. In most cases, these buffs will increase your chances of success more than Relic effects.
- Attacks Inflict X Status Ailment
- Example: Attacks Inflict Blood Loss
- Improved Skill Attack Power
- Reduced Skill FP Cost
- Wraiths While Walking
- Storm of Red Lightning While Walking
- More Runes from Defeated Enemies
- Improved Item Discovery
- Improved Stamina Recovery
- Less Likely to Be Targeted
- Successive Attacks Negate Damage
- Improved Attack Power | Damage Negation at Full HP
- X Status Ailment Produces a Mist of X Status Ailment
- Example: Poison Produces a Mist of Poison
- Improved Physical | Affinity Damage Negation
- Increased Maximum HP | FP | Stamina
If you find a good damage-focused one like Improved Melee | Physical | Affinity Attack Power, it’s better to give it to one of your teammates because they can make more use of it than you.
Essential Non-Weapon Passives (Dormant Powers)
These passives drop directly from defeating bosses and are the only thing that drop from the end-of-day bosses. You can pick up one of them instead of a weapon, which is usually the way to go. You should prioritize these Dormant Powers as Scholar whenever you see them.
- Blood Loss in Vicinity Increases Attack Power
- Poison and Rot Trigger Continuous HP Recovery
- More Runes from Defeated Enemies
- Rune of the Strong
- Improved Dodging
- Critical Hits Inflict Blood Loss
- Improved Stamina Recovery
- Improved Physical | Affinity Attack Power
- Improved Flask HP Restoration
- Ultimate Art Gauge Charge Speed Up
- Increased Maximum HP | FP | Stamina
- Improved Physical | Affinity Damage Negation
- Creates Holy Ground at Low HP
- Periodical Giant Glintblades
- Flame of Frenzy While Walking
- Violent Deluge of Rain While Walking
Scholar benefits the most from Dormant Powers related to Status Ailments, Rune acquisition, and survivability.
Scholar Costumes
Below are all 6 of Scholar’s appearances. Remembrance skins are unlocked after completing his quest. Dawn and Darkness skins are available as soon as you unlock the appearance changer. The named outfits are based on characters from Dark Souls and unlocked after you defeat Heolstor for the first time.


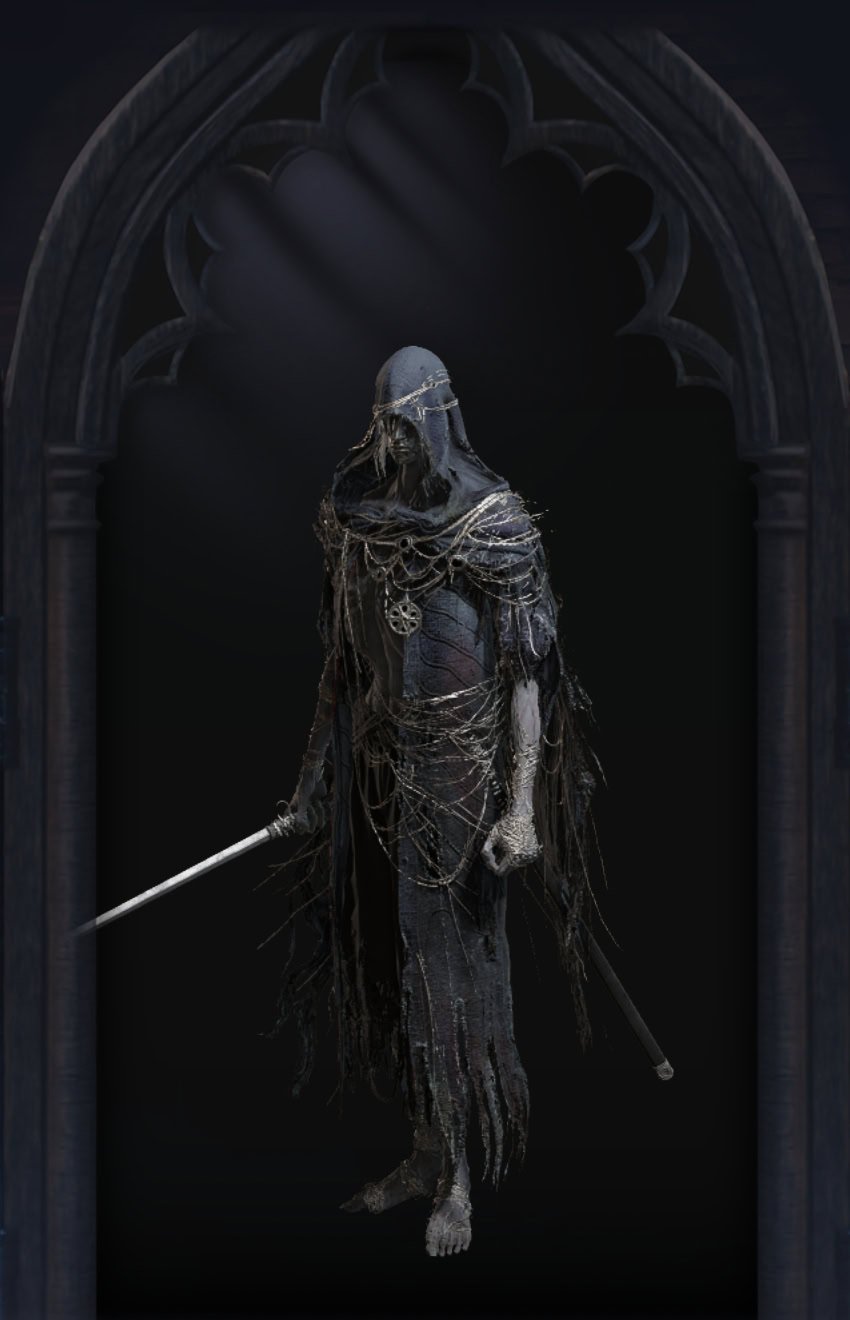


The only difference between Scholar’s Default and Remembrance Garb is a little crown.