This Firestorm Build uses the Sorceress’ Stormweaver Ascendancy to decimate foes with raw Elemental damage.
Table of contents
Build Overview
This build uses the power of a fully infused Firestorm to deal high single-target DPS. This is backed up by the sheer AoE of Fireball to help clear packs, mitigating one of the biggest weaknesses of Firestorm. These two skills make up the core of our general playstyle.
Alongside these, we have a combination of Living Bomb, Orb of Storms, and Frost Bomb that power us up in different ways. All three of these together allow for consistent generation of Infusions, allowing us to very easily empower both Fireball and Firestorm. Orb of Storm can easily provide us with fairly consistent Shocks while Frost Bomb provides some Exposure to amp our damage further. If that isn’t enough damage already, we also leverage Trinity and as well as Elemental Weakness to deal insane damage.
Defensively, we’re leaning into a Mana-stacking build, including investing in having the effects of Mind over Matter without the downsides. This means using the Cloak of Defiance (or a Feathered Raiment) in combination with Runes, jewels, and passives to reach 100% of damage taken as Mana before life. We can get away with less, but this helps to mitigate a ton of damage and quickly recover from it.
The build summary card below is fully interactive – click or tap on an item to read its full description and recommendations. If this is your first visit, we recommend you skip that card and keep reading the guide in its intended order.
Overview
Build Type
Elemental Caster w/ infusions
As expected of a Stormweaver, we’re going heavy on the Elemental Damage and utilize Infusions to boost our damage
Playstyle
Combo Heavy
We’re utilizing many skills. Not only for Infusion generation but also to get the most out of all of our skills with Rising Tempest.
Build Difficulty
Easy to play
While there are a lot skills to manage, a lot of it doesn’t need to be done constantly. Most of the Combo pieces just contribute extra damage and aren’t always necessary.
Gearing Difficulty
SSF Viable
With only one fairly common Unique being required, and the rest of the gear being easy enough to craft, it’s possible to gear up in an SSF environment. A lot of farming for Jewels and Runes will be required.
Click on a tap on each segment to expand it.
Ratings
Ease of Use
Progression Speed
Ease of Gearing
Mobbing Power
Bossing Power
Defences
Expedition Farming
Breach Farming
Ritual
Ease of Use
- Very Hard to play, Fragile and relies on damage to stay alive
- Hard to play, may require multiple combos or rapid sequence of skills
- Balanced, requires some knowledge or precise positioning
- Easy to Play, may require simple combos or automatic weapon swaps
- Very Easy, requires minimal experience to play optimally
Progression Speed
- Use a Leveling Build. It will require Skill Points, Ascendancy Points, or Unique items not available early on.
- Barely Viable, will be slow and may require alternative Ascendancy ordering.
- Viable, Levels with some issues.
- Decent Leveling Option, smooth leveling, but not the fastest.
- League Starter Potential, levels very quickly with the main skill.
Ease of Gearing
- Trade Required, make use of a harder-to-obtain unique.
- Trade Recommended, requires at least one uncommon unique.
- Trading Helps, uses common uniques or very specific items.
- SSF Viable, Can be geared easily without trading, may require farming.
- SSF Friendly, No Uniques and very easy to gear without trading.
Mobbing Power
- Poor, clearing isn’t the best due to lack of AoE.
- Okay, Clears slowly due to limited AoE.
- Decent, clears well, but takes effort or set up.
- Great, take very little effort to clear enemies.
- Amazing, clears screens of enemies with ease.
Bossing Power
- Requires high investment and respec for decent damage.
- Requires Investment or respec for decent.
- Decent damage with minimal investment.
- Low Investment and great damage.
- Low Investment and high damage.
Defences
- Low Hit pool, mainly relies on damage to protect it.
- Decent Hit pool or has enough avoidance or mitigation .
- Good Hit Pool, may not reliably take hits from strong foes.
- Reliably tanks multiple hits from most foes.
- Able to tank most hits comfortably, even from bosses.
Expedition Farming
- Several modifiers are highly risky.
- Just a couple risky modifiers.
- Low risk, but some modifiers can mess up the build.
- Situationally able to deal with most modifiers.
- Able to deal with most modifiers without thought.
Breach Farming (Mostly tied to AoE)
- Struggles to survive tougher breach mobs.
- Survives, but clears slow, usually from a lack of AoE.
- Has an easier time on certain map layouts.
- Easily clears out breach mobs, regardless of map.
- Quickly and easily clears out breach mobs.
Ritual Farming
- Hard to survive, Doesn’t handle the cramped spaces well.
- Does well on some layouts and certain ritual types.
- Handles most rituals well enough.
- Most Rituals are completed easily.
- Rituals are completed easily and quickly.
The Good
Very high Single Target Damage
Decent Clear Speed
Deceptively durable
The Bad
Uses multiple skills to combo and get all of its damage out
Infusion generation cannot be easily automated
Prone to being stunlocked without a Stone Charm
Playstyle
For general Mapping, we’ll mainly use Living Bomb in combination with Orb or Storms to do most of the work. If we get Surrounded or there are many enemies on screen at once, we can instead use a Fire-infused Fireball to clear most everything on the screen.
For bosses, we have a whole set rotation we’ll want to do to get the most damage out. This mean applying our Curse, Exposure from Frost Bomb, Orb of Storms for Shock, then Firestorm empowered by Unleash followed by repeatedly casting Living Bomb and replacing Orb of Storms as needed.
This rotation weakens our foe, then sets up all of our damage being dealt. By casting Living Bomb while Firestorm is going on, they’ll detonate about as quickly as we cast them, sustaining our Infusions and adding even more damage on top.
Skills
Below are the Skills we use for the build, including their Support Gem Links

Firestorm
Firestorm is our main skill for dealing with Rares and bosses by fully charging it will all three Infusions. Alongside Elemental Equilibrum and Living Bomb it can very easily sustain its own charges, but we’ll still use our other tools on top of this to make it easier.
The tooltip damage for Firestorm is incredibly misleading as well, since it’s only showing average hit damage of just the unempowered Firestorm. Just remember that over the 3.5 second duration of the storm (accounting for our supports), it will hit roughly 55 times per type of bolt

Overabundance II
Overabundance allows us to have multiple Firestorms active at once, up to 3 with our Ascendnacy. This may come with a reduction in duration, but helps to ensure that when we’re able to use Unleash in combination with Firestorm, no casts are overwritten and we get massive burst potential from it.

Considered Casting
Considered Casting is far and away the best DPS increase we can get. The cast speed penalty isn’t a huge concern either as this isn’t our main clearing skill.

Fire Mastery
Since we stack plenty of Skill Levels, this helps to give us a more significant boost of damage by pushing it further. Compared to a lot of other options, it’s very consistent.

Rising Tempest
Almost every cast of Firestorm will be preceded by our three Infusion Generating Skills, we’ll always get the maximum bonus out of this in this case. It can be a little inconsistent due to Frost Bomb’s Cooldown, but even with two bonuses active, it’s still powerful enough to warrant the slot.

Deliberation
Deliberation is a great damage boost that has a very small downside. This downside is a non-issue since we’re not spamming Firestorm. Once we make the end game swap to a Crit heavy build, we’ll instead want to swap this out for Elemental Focus, as we’ll drop the passive that allow Deliberation to be a great boost.
We will swap this out for Concentrated Area for bosses, as we’ll want every bit of extra damage we can squeeze out of Firestorm for bosses, which we get twofold from Concentrated Area.

Fireball
Fireball is here to help cover Firestorm and Living Bomb’s general weakness of lacking AoE. We’ll allow this to use some Fire Infusions to provide significant AoE clearing power.

Nova Projectiles
This makes us cast 5 Fireballs in different directions, and more importantly, create even more of the smaller fireballs with a single cast.

Unleash
We’re not using the skill constantly; generally only when there are a ton of enemies on the screen. So adding even more coverage area to the skill this way works amazingly.

Projectile Acceleration III
This not only boosts our Projectile Speed, but also our damage with the skill. Without this Fireball is a pretty slow projectile and we don’t want that for a clear skill.

Rising Tempest
We’re likely to have used at least Orb of Storms and Living Bomb recently for the extra damage.

Fire Mastery
Being our main clearing tool it’s definitely worth investing an extra Perfect Jeweller’s Orb into if we have one. Fire Mastery happens to be the strongest bonus we can get without a downside after Rising Tempest.

Living Bomb
Living Bomb is our main way of sustaining Infusions and ramping our single-target damage even more. Between helping to quickly burn Orb of Storms and their own detonations it’s a pretty vital skill to get used to using.

Overabundance II
This allows us to have up to three Living Bombs active at once, allowing for insane Infusion generation during bosses.

Harmonic Remnants II
We cast this so often that it will trigger the bonus infusion often. The Pickup range is nice too.

Rapid Casting II
We stick with Rapid Casting II as we’re not constantly using every single skill we have, and we need this to be as fast as possible to cast for both DPS and infusion generation.

Efficiency II
We’ll be casting frequently enough, or outright even chain casting it during bosses, to the point it can be a huge drain on our Mana even with our insane regen. This help cut its cost and keep it reasonable.

Rising Tempest
If you have the extra Perfect Jeweller’s Orb to invest into a skill, this is a great option as it’s our second biggest source of Boss DPS.

Orb of Storms
Orb of Storms is mainly here as an Infusion Generator, but does a great job at providing Shock as well when there are three instance active at a time. We can even spam Living Bomb to quickly get our charges at the start of a map or when setting up for a boss.

Overabundance I / II
We don’t care about the duration of this skill, as less duration means it simply expires faster and grants infusion faster. In fact we keep it even when we no longer need it to reach three Orbs just for that reason.

Unleash
Unleash allows us to instantly get three Orb of Storms setup with one cast. This allow us to very quickly get our Infusions going.

Shock
More chance to Shock lets our Orb of Storm more consistently provide its extra utility. We really only need the base Shock effect, but this can used with Overload to make it a bit stronger, at the cost of reflecting the Shock.

Harmonic Remnants II
This gives our orbs a chance to grant additional Infusions. While it’s only a 20% chance, across three orbs each time we cast, it’ll average out to be once every other set. This is very optional, but a nice bonus either way

Rising Tempest
Much like our other skills, this is a great damage inclusion as we’ll almost always have two stacks of its effect. The Extra damage also helps us to shock easier.

Frost Bomb
Frost Bomb we’re mainly using for the Exposure effect to help shred bosses even faster. It will still provide Infusions as well, but it’s far from our main generator.

Potent Exposure
This boosts the effect of the Exposure applied. In combination with our passive tree, it’s a pretty significant boost in our single-target damage.

Cooldown Recovery II
This helps to cut down the cooldown of Frost Bomb, letting us use it more consistently.

Harmonic Remnants II
While Frost Bomb has a cooldown and won’t trigger the bonus infusion often, the extra pickup range is still nice.

Short Fuse I / II
This is an optional support choice that allows us to trade the total exposure Frost Bomb applies in favor of having it detonate quicker. Tier 1 is pretty balanced, only giving up a small amount, while the Tier 2 version essentially only applies the larger initial cast Exposure.
We don’t personally recommend this, but it’s an option to consider if not leaning into the Exposure effect as this build does. It can help with Infusion generation more, but not a ton, as it’s still gated by the cooldown.

Unleash
This skill comes from our Staff and will allow us to cast some skills three times consecutively. We’ll only ever use this bonus for Firestorm, and this sets up all three of our Firestorms with a single cast.

Cooldown Recovery II
This helps to cut the cooldown of Unleash to very closely match the duration of Firestorm. It’s good to have this combo ready as needed.

Rapid Casting II
More cast Speed allows us to cast this and Firestorm in quick succession.

Elemental Weakness
Elemental Weakness is our curse of choice and alongside the Exposure provided by Frost Bomb will boost our overall damage immensely.

Heightened Curse
This boost the power of our curse, allowing it to heavily reduce the resistance of our enemies.

Focused Curse
Alongside the Impending Doom Notable, this allows our curses to be nearly instant allowing for quickly and easily placing our cursed ground

Cursed Ground
This allows us to pre-cast our curse on bosses or for other events like Rituals, where having it set up ahead of time is very helpful.
If desired, Doedre’s Undoing can be used instead, letting us squeeze a little extra damage into our build. It’s not all that significant with our current setup.

Magnified Area II
This increases the size of our curse without the penalty to its activation speed. The damage penalty of this does not affect the magnitude of our curse.

Trinity
Trinity is our sole Spirit gem, greatly boosting our damage for using all of our skills. Due to Frost Bomb’s Cooldown, we won’t have the cold portion of this maxed out out side of when we use Fire Storm but that’s fine.
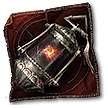
Uthred’s Omen
Getting the extra +3 Skills levels here is nice and allows us to very cleanly hit a level breakpoint for the boost this provides, pushing the bonus to 7% more damage per 30 Resonance. With a fully charged Firestorm hitting a boss, this will cap out at a staggering 70% more damage bonus very consistently.
We use the Omen version of this Lineage Support to still be able to add in Clarity.

Clarity I
The Extra Mana Regen is nice if we pick up any spirit anywhere. Generally, this would be on our Amulet

Elemental Storm
Elemental Storm is a skill we get from our Ascendancy. It’s nice for the extra damage or ailments, but not necessary to even link supports to.

Controlled Destruction
Elemental Storm is unable to critically strike by default, so this is just free damage.

Concentrated Area
The initial size of the Storm is small and lets us easily slot this with very little downside.

Cooldown Recovery II
This allows us to spawn storms a bit more frequently, getting more out of it.

Elemental Focus
If we choose not to care about any ailment we may get from this skill, Elemental Focus is a great way to get more damage out of it. This is optional

Rising Tempest
Much like with our other skills, Rising Tempest can be slotted in for extra damage. We can’t guarantee the full bonus will be active for it, but it will be a consistent boost.
Passive Tree
Below is the Passive Tree we use for this Skill, and an Act-by-Act breakdown of how we progress the skill tree
Gear and Stat Priorities
This section lists and explains the recommended stats for our gear and any Uniques we recommend.
The grid is interactive. You can click or tap on an item to read its recommendations. Or scroll past it to read everything in order.
If a slot is left empty, it’s because there is no special item recommended for it and you can opt to populate it with whatever you prefer.

Our Staff is deterministically craftable, well, the important parts at least. As a result, we’re able to consistently have the following Modifiers:
- 5% increased Spell Damage per 100 Maximum Mana
- +7 to All Fire Spells
- Increased Critical Hit Chance for Spells
We do this by starting with a Magic +7 Staff, as it’s the hardest modifier to guarantee in any capacity. Then we use a Greater Essence of Seeking to add the Critical Hit Chance, and we use a Preserved Jawbone alongside Omen of Sinistral Necromancy and Omen of the Blackblooded to virtually guarantee the Damage per 100 Mana.
By using Omens of Homogenising Exaltation, Sinistral Exaltation, and Greater Exaltation, we’re guaranteed to hit any two mods from the pool of Damage as Extra, Elemental Damage, Spell Damage and Mana Hybrid, or Mana. Hitting Mana and a Damage as Extra here is the best outcome.
For our remaining Suffix, another Homogenised Exaltation will net us either Mana Regen, Cast Speed, Crit Damage as ideal hits. We can still hit Mana per Enemy killed, which is a miss in terms of being perfect.

Our Helmet is fairly Standard, going for High Energy Shield to turn into Mana with Eldritch Battery. We can also get a Mana roll on our Prefixes. We’ll generally use Greater Iron Runes for pure ES bonuses, and %Mana Soul Cores if we get a good mana roll alongside high Energy Shield bonuses.
We do have some choices we can make with our Suffixes. We can go purely defensive with Resistances, but Intelligence is also very usable and gives a mix of offense and defense.
Using Idigon is also a strong consideration here, since Mana Regeneration is all of our Mana Recovery already, and this gives us another potential avenue for scaling our damage. This will, however, put a heavy tax on our Mana in combination with Eldritch Battery, especially since we’ll have far less mana with this helmet.

For the most part, we’ll want to use a Cloak of Defiance with the Damage Taken as Mana Runes in it. The runes are a little pricey, but not often too high in demand to where they’re unaffordable.
Much later, we’ll want to craft a much Better Feathered Raiment, once we can get more Damage Taken as Mana from our Tree and Jewels. This lets us get far more Mana, meaning a much larger hit pool as well as more damage. Still the same runes though unless we don’t mind being under 100% Damage taken as Mana.

Our Gloves are going to be the same as our Helmet, High Energy Shield, and a high Mana Roll on top. There are, however, some options for Suffixes. Dexterity is a good pick up here, as we need a fair bit to make use of a high-level Trinity. Crit Damage is okay later on, but Intelligence is still preferable overall.
If we really want to invest in making a good pair of gloves, we can consider going for the 100% Socket effect from Essence of Horror. If the gloves have at least two sockets from either being Exceptional or Corrupted, we can either boost rune for Greater Iron or Greater Mind Runes. Mind Runes work better here when we have at least two sockets.
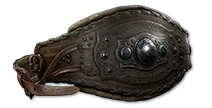
For our Belt, we’re looking for a Heavy Belt with Life, Mana, Strength, and Resistance on it. We can also pursue a good desecrated mod here to make it more rounded, getting either of the Dexterity hybrid rolls to help our Dexterity needs.
The Heavy Belt base is almost non-negotiable, as we don’t pick up much life outside of our Belt and Rings, leaving us with a horrible Stun Threshold.
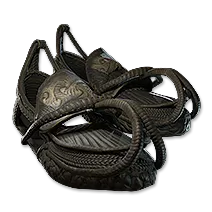
Our Boots are much like our Gloves, having similar options. Though we have one less Prefix to work with because of the mandatory Movement Speed. This means we have to give up the Mana roll here, as two energy Shield rolls beat the flat mana in terms of value.
Much like with our Gloves, we can also use Essence of Horror on our Boots. Again, it’s really only worth it if we have two or more sockets. We also have the option to use these sockets for extra movement speed over extra Mana, which can help with mapping speeds.
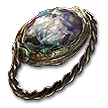
For our Rings, to get the absolute most out of them, we’re looking to specifically end up with Life, Flat Mana, Mana Regeneration, and % Mana from a Perfect Essence of the Mind. Alongside these, we’ll want a combination of Resistances and Dexterity if we don’t have enough for a Level 20 Trinity.

Since we’re actively looking to use Neural Catalysts to boost all of the Mana Bonuses on our Rings, a Breach Ring is the preferred base, but getting all of that on a Breach Ring is easier said than done. Outside of Breach Rings, Amethyst or Prismatic Rings would be the best options. Lazuli is an okay option as well, but lacks any resistances, and we’re already pretty tight on Suffixes.
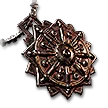
Our Amulet is another item we can almost deterministically craft. Of the modifiers on it, we can guarantee the following:
- +3 to all Spell Skills
- Spell Damage
- Cast Speed
We do this by taking a Rare Amulet, using Orbs of Annulment to bring it down to one mod, and using Orbs of Chaos until we hit any Cast Speed roll, T1 is preferable.
Then, with an Omen of Homogenising Exaltation and Greater Exaltation, with a Perfect Exalted Orb, we’re guaranteed to hit +3 to all Spells and Cast Speed.
Then we’ll use an Omen of the Blackblooded and Desecrate, looking for either Mana Regen or Mana on Kill on the reveal with Abyssal Echoes. From here, we can use another pair of Greater Exaltation and Homogenising Exaltation to guarantee we hit both Mana Rolls.
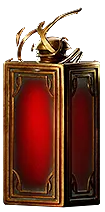
Our Life Flask really doesn’t matter much. We may need it occasionally, but often, if enemies are getting through our Mana Pool and Mana Regen, chances are we’re dead before we ever get to use it.

With our Mana Regen being as high as it is, we don’t really need a Mana Flask either. Just in case we do want to make it more useful, we’ll want More Recovery on Low Mana as well as Increased Charges. This enables us to make strong use of Ambrosia on Firestorm if we so choose, and can result in very high damage for bosses, while also letting it give a strong boost of recovery if we need to use it while low on mana.

