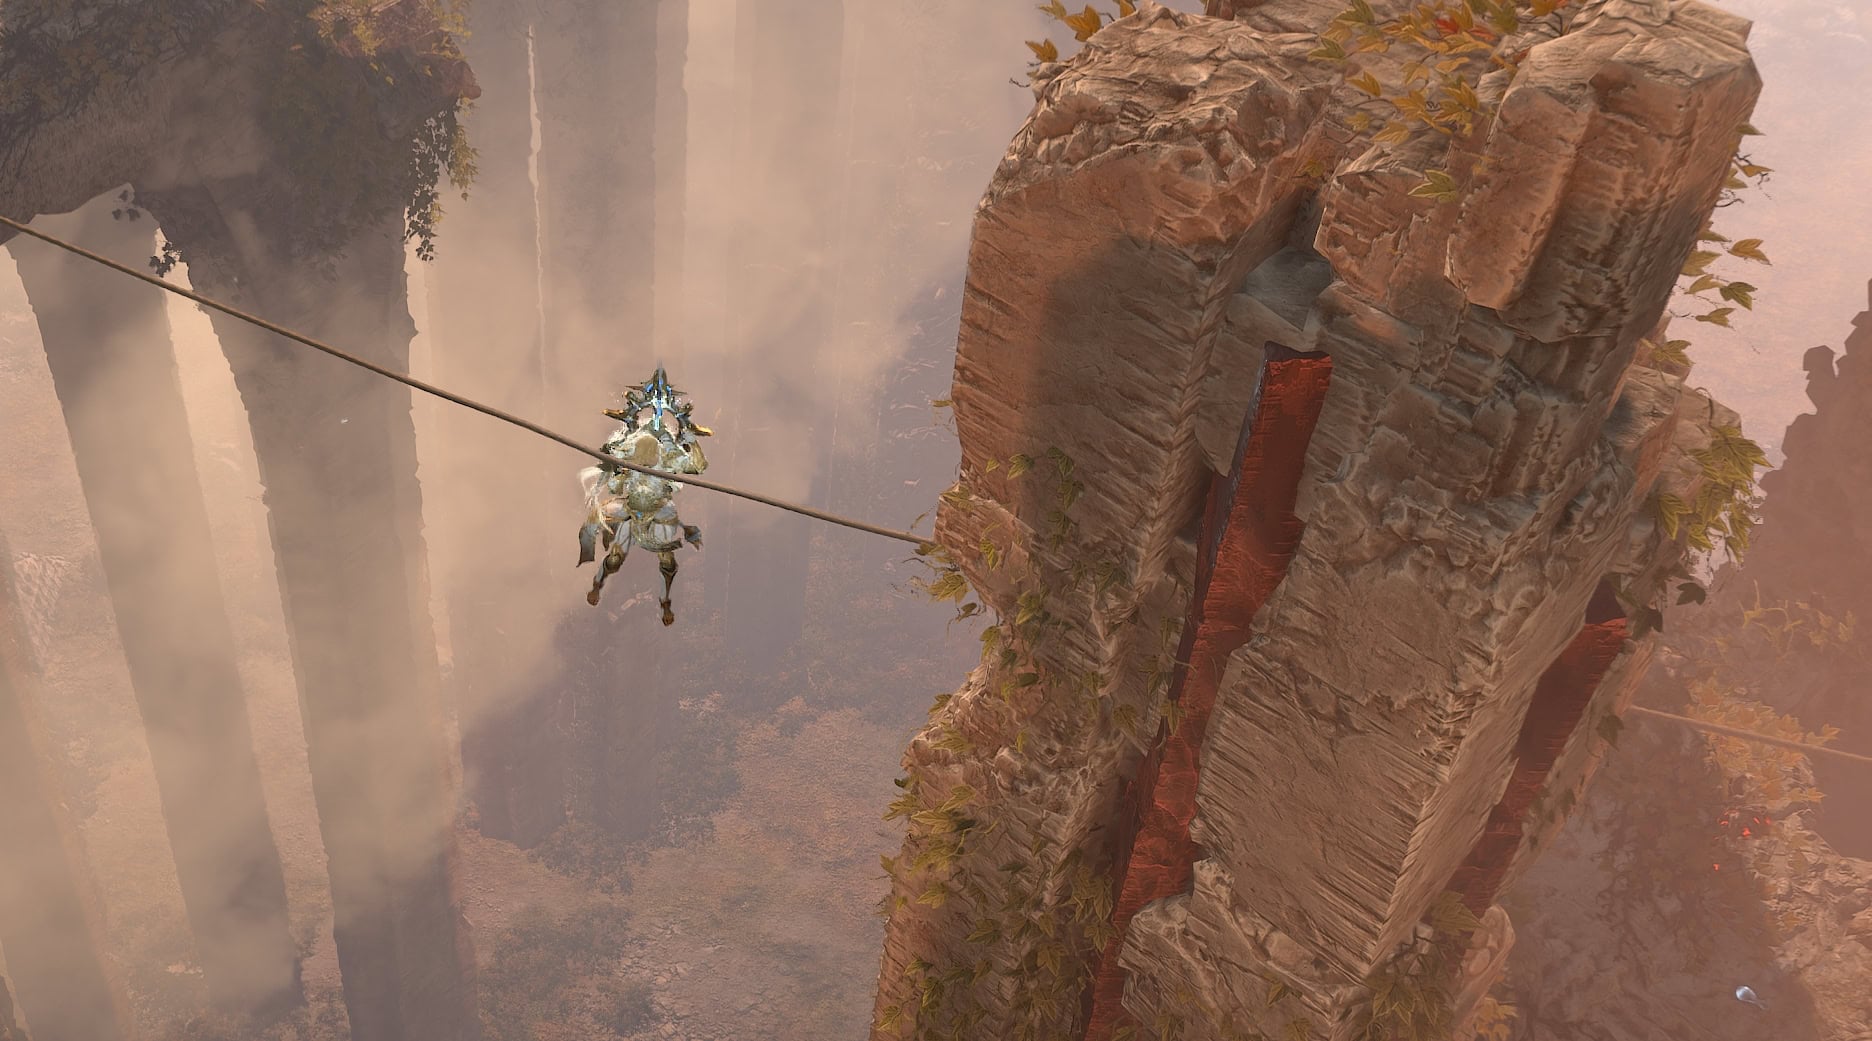
With the Lord of Hatred expansion came the Secret Cow Level. This guide will walk you through the process of unlocking it yourself.
This guide covers all three sections of the process to unlock the Secret Cow Level in Diablo 4. Feel free to use the left panel (top left button on mobile) to skip to the relevant section for your quest state.
Since each main step and the relics they use are their own self-contained mini quests, the order in which you tackle the process is entirely up to you. There’s no need to even do all of one main step in one sitting if you don’t have the time to do it all at once.
ALL RELICS AND SOME QUEST PIECES WILL DROP AS COMMON ITEMS, WHICH CAN RESULT IN THEM BEING FILTERED OUT BY A LOOT FILTER! Please make Common items visible before following any of the steps below!
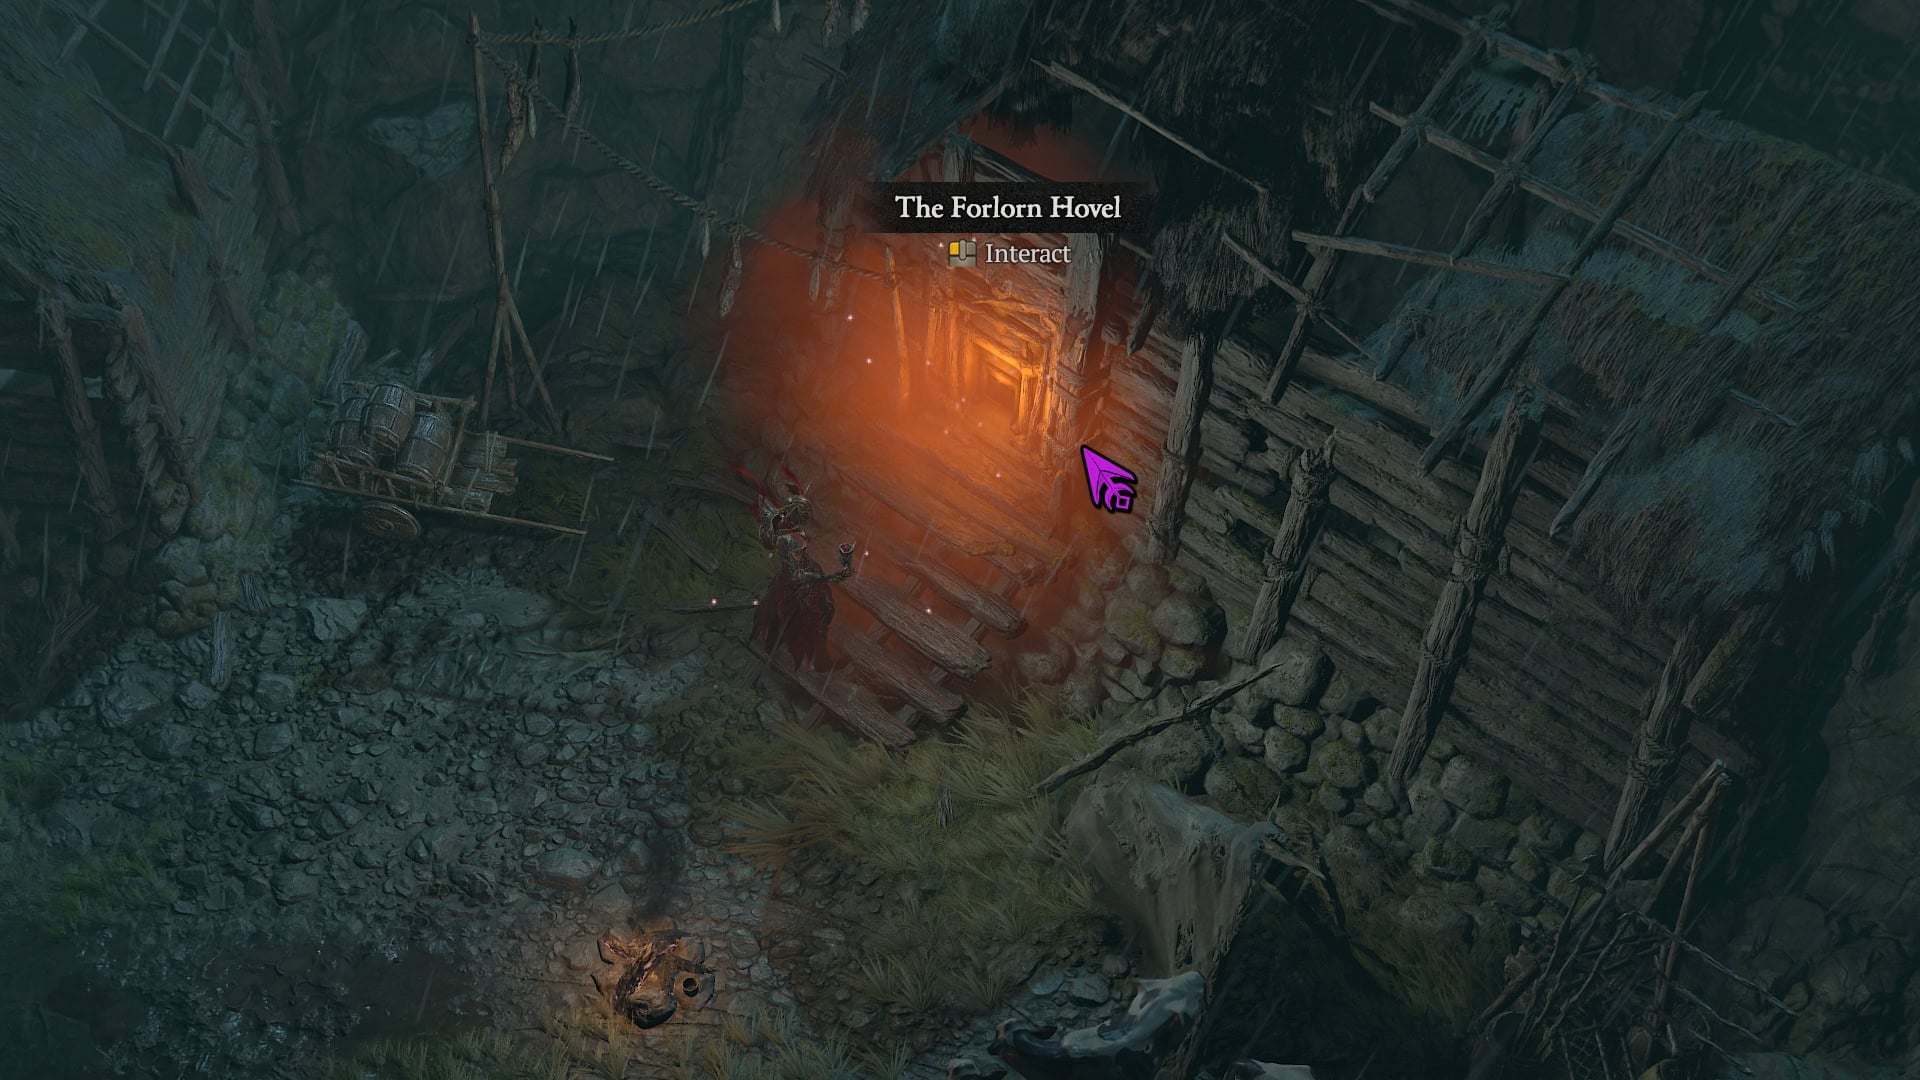
The Forlorn Hovel of Scosglen
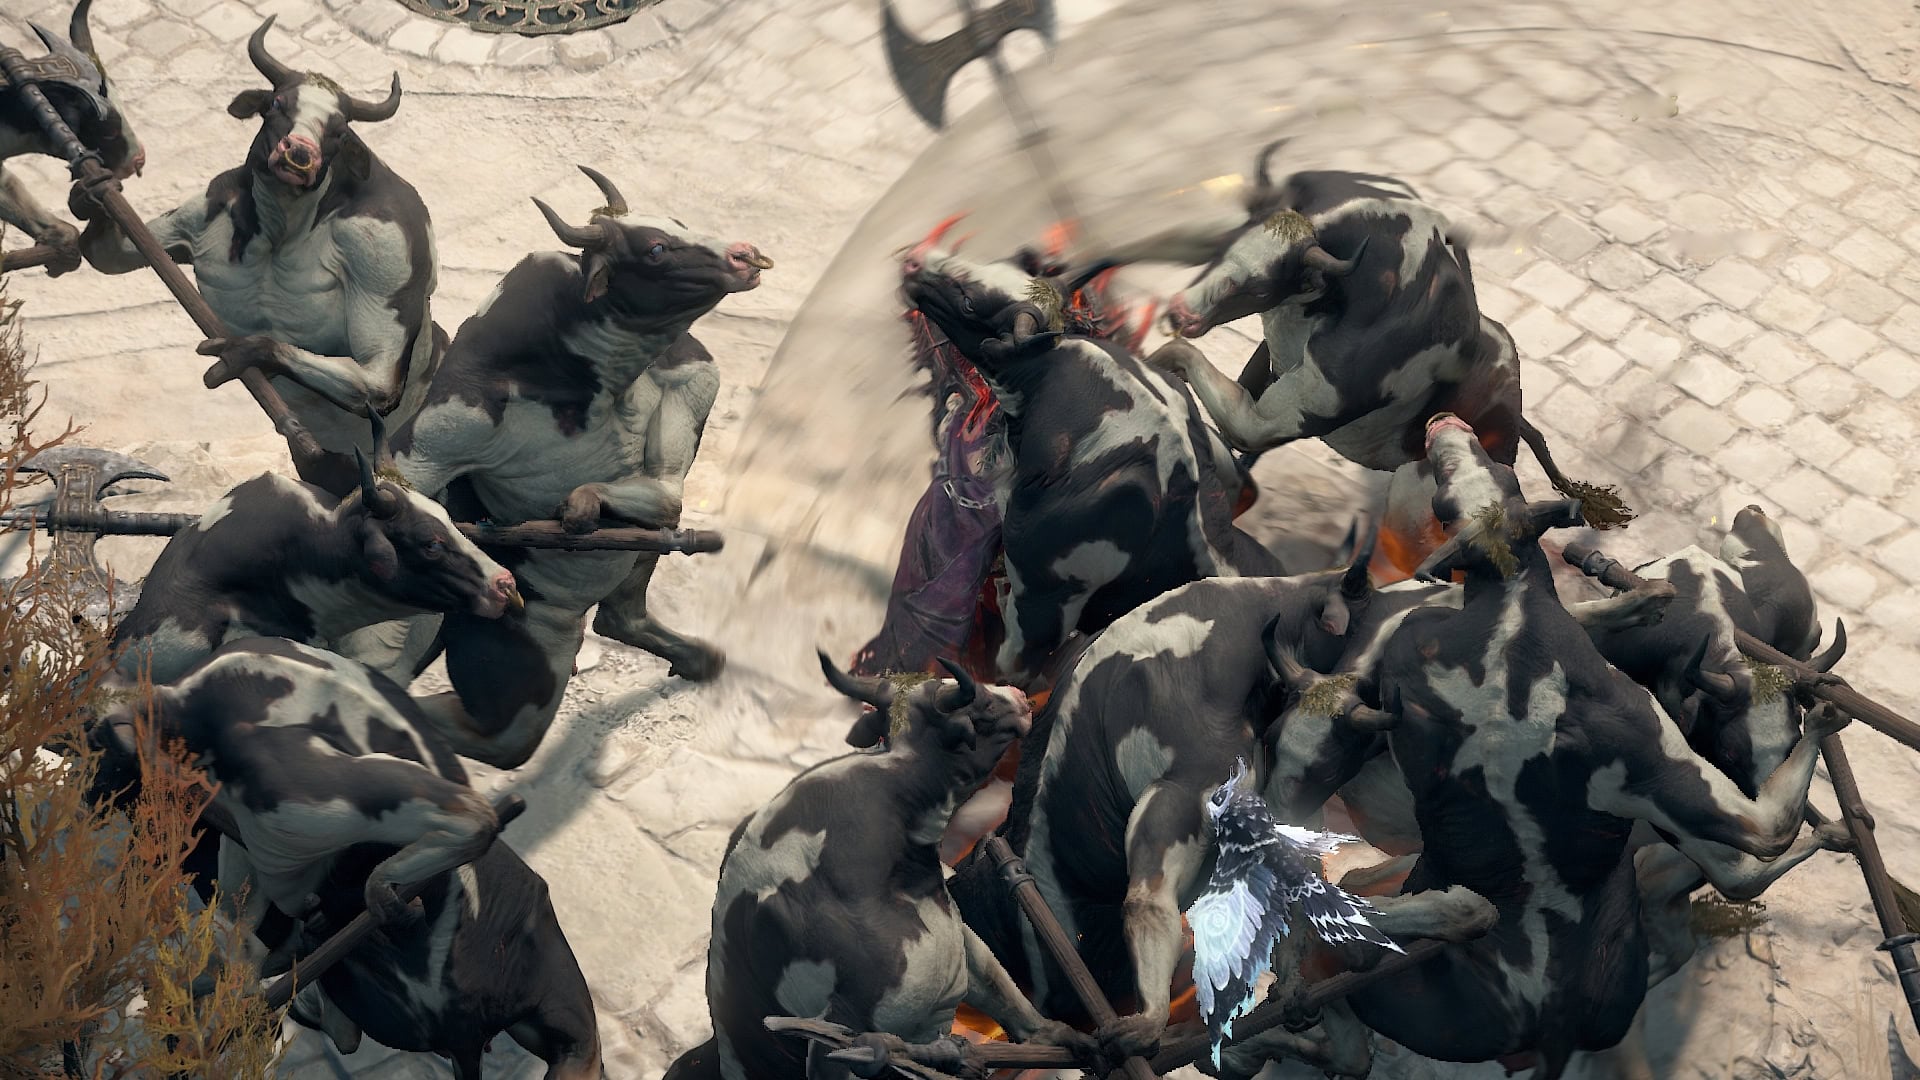
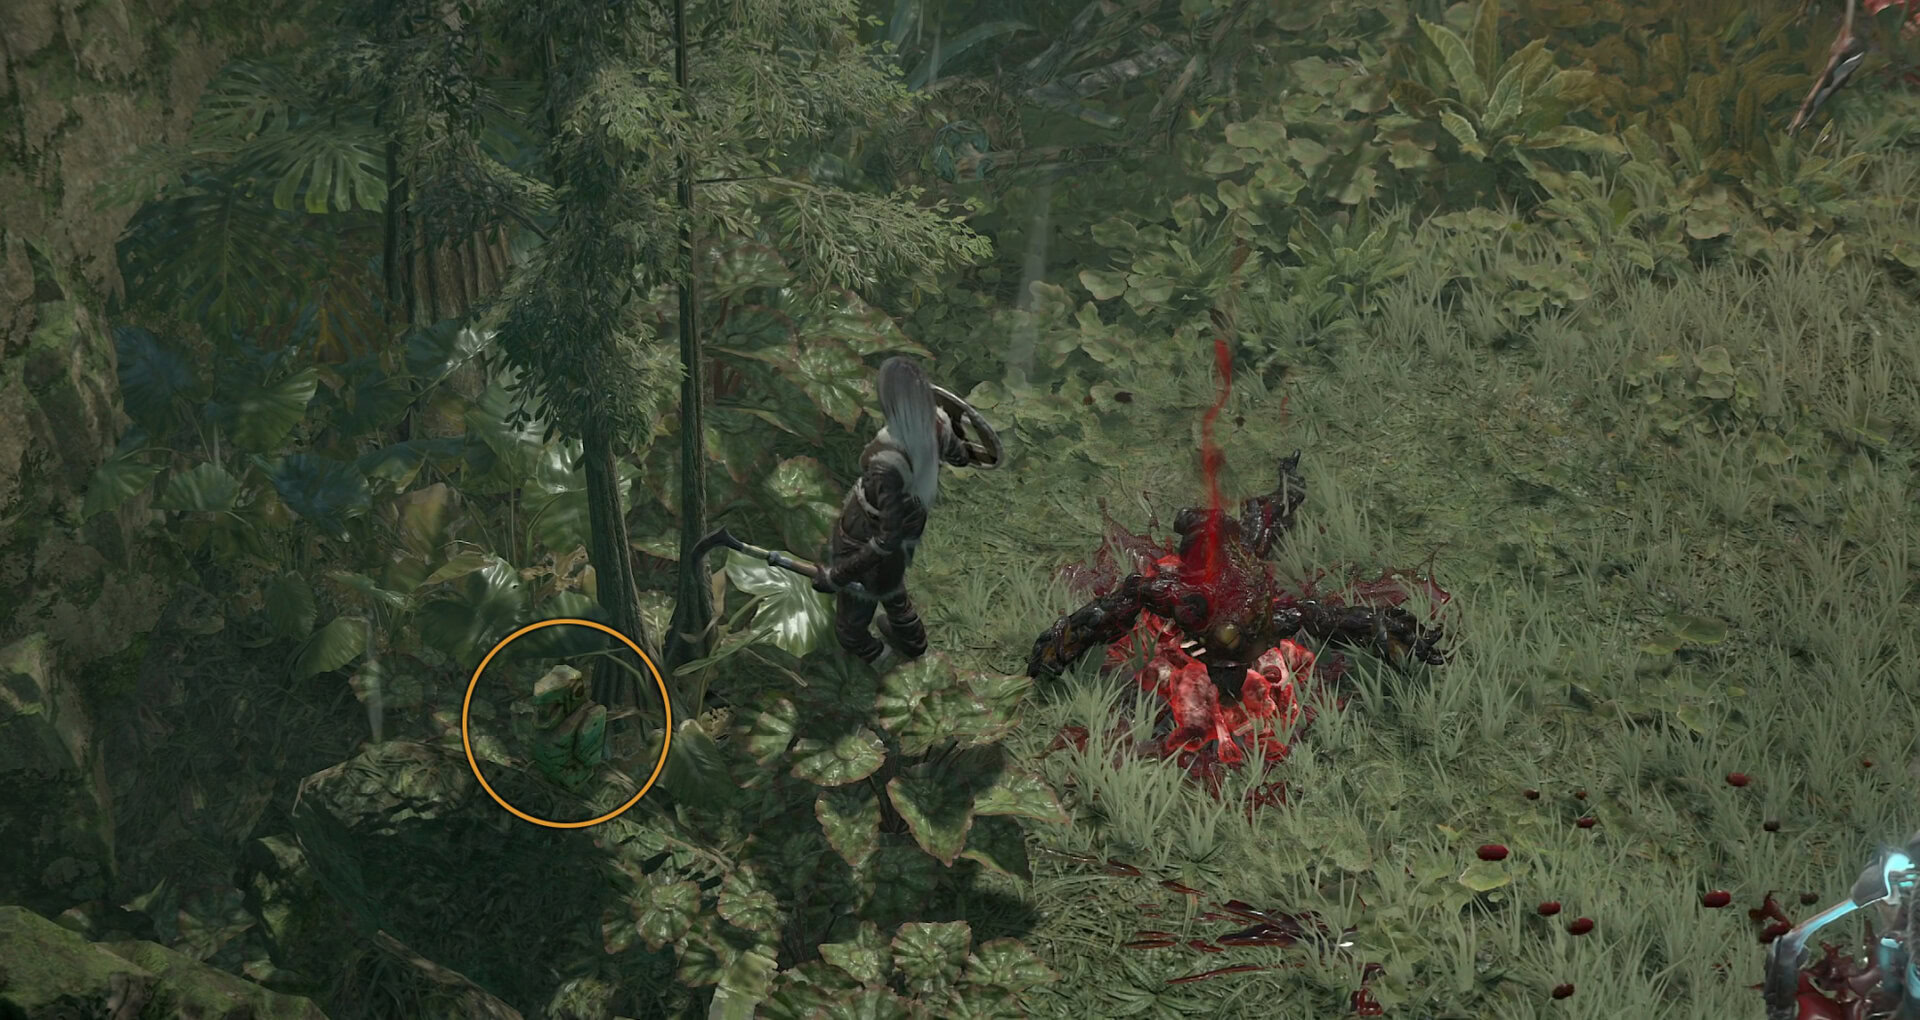
The Forlorn Hovel is the simplest, but most time-consuming step of the process, involving slaying many cows, over 666 to be precise. Why do you need to do this? Because the Oxen Gods demand it.
This does not need to be done all at once, although a hidden timer is still counting down 666,666 seconds (just over 7 days), which suggests a time limit for completing the task.

Getting the Relics
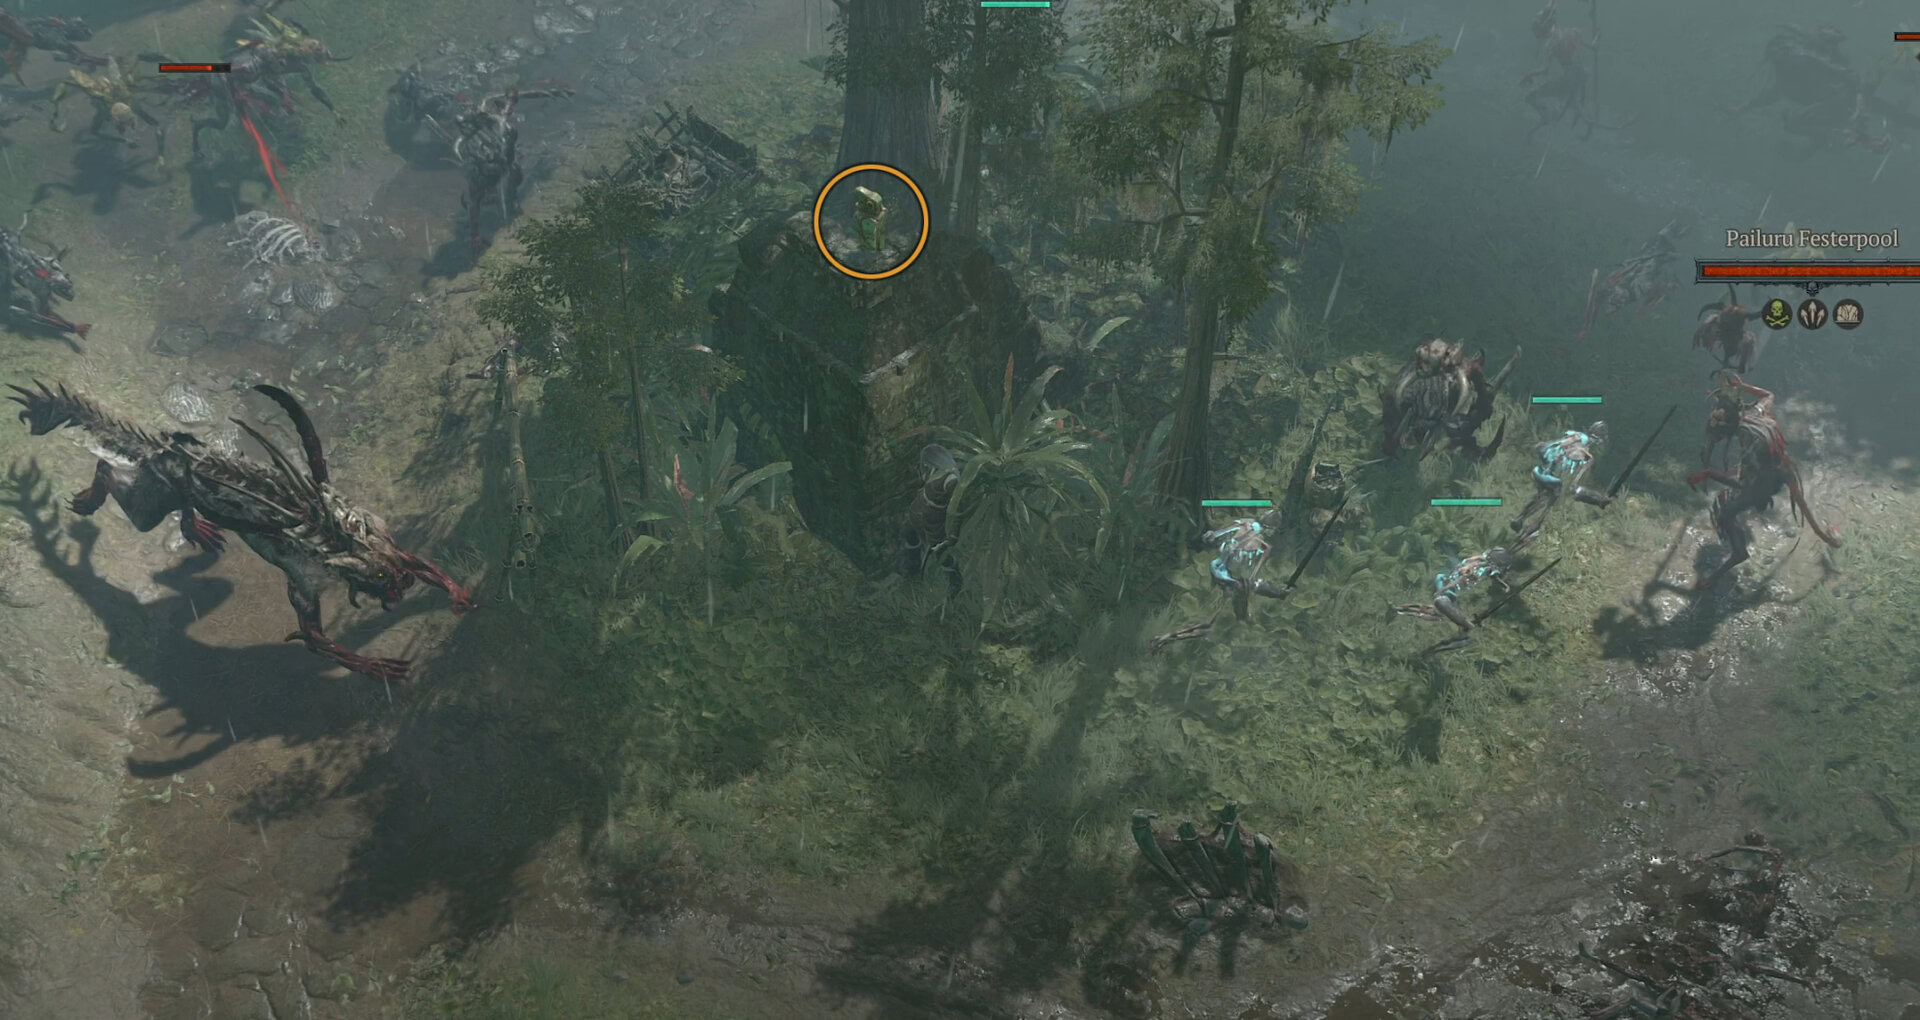
The first 666 cows you defeat will provide you with one of three “Key Relics”, each belonging to a different region:
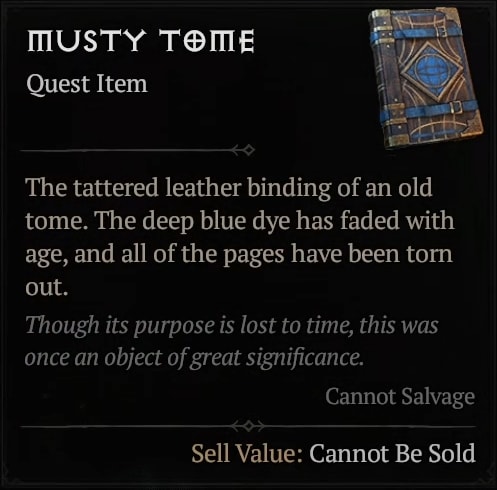
- The Musty Tome from Scosglen
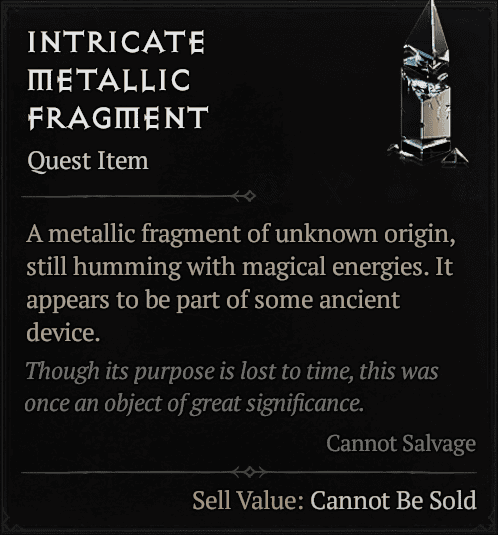
- The Intricate Metallic Fragment from Dry Steppes
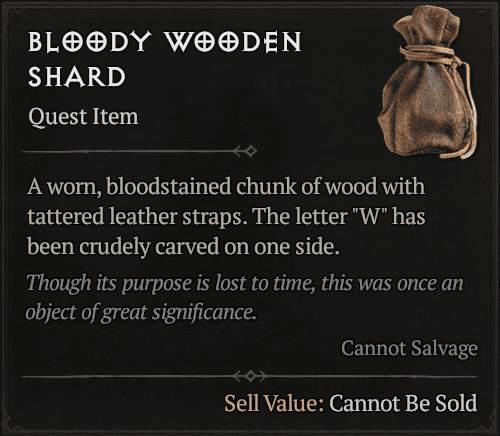
- The Bloody Wooden Shard from Hawezar
After receiving one of these relics, killing cows in the remaining regions will have a chance to drop their respective relic. For example, if you were to get the Musty Tome first, then killing cows in Dry Steppes and Hawezar will get the remaining relics. The time it takes to get all three can vary wildly. Thankfully, there are great community-made and shared routes that help speed up the process of unlocking the Forlorn Hovel.
If you feel like you don’t want to try your luck with RNG, you can also make additional characters and redo the 666 count in the remaining regions, though the RNG method is still much faster overall.
Getting the Key and Opening the Cellar
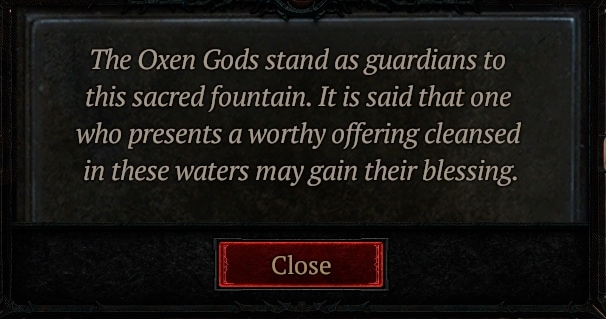
With all three relics in hand, it’s time to return to Ked Bardu and drop the relics into the fountain to cleanse them, as included in the Oxen God’s instructions.
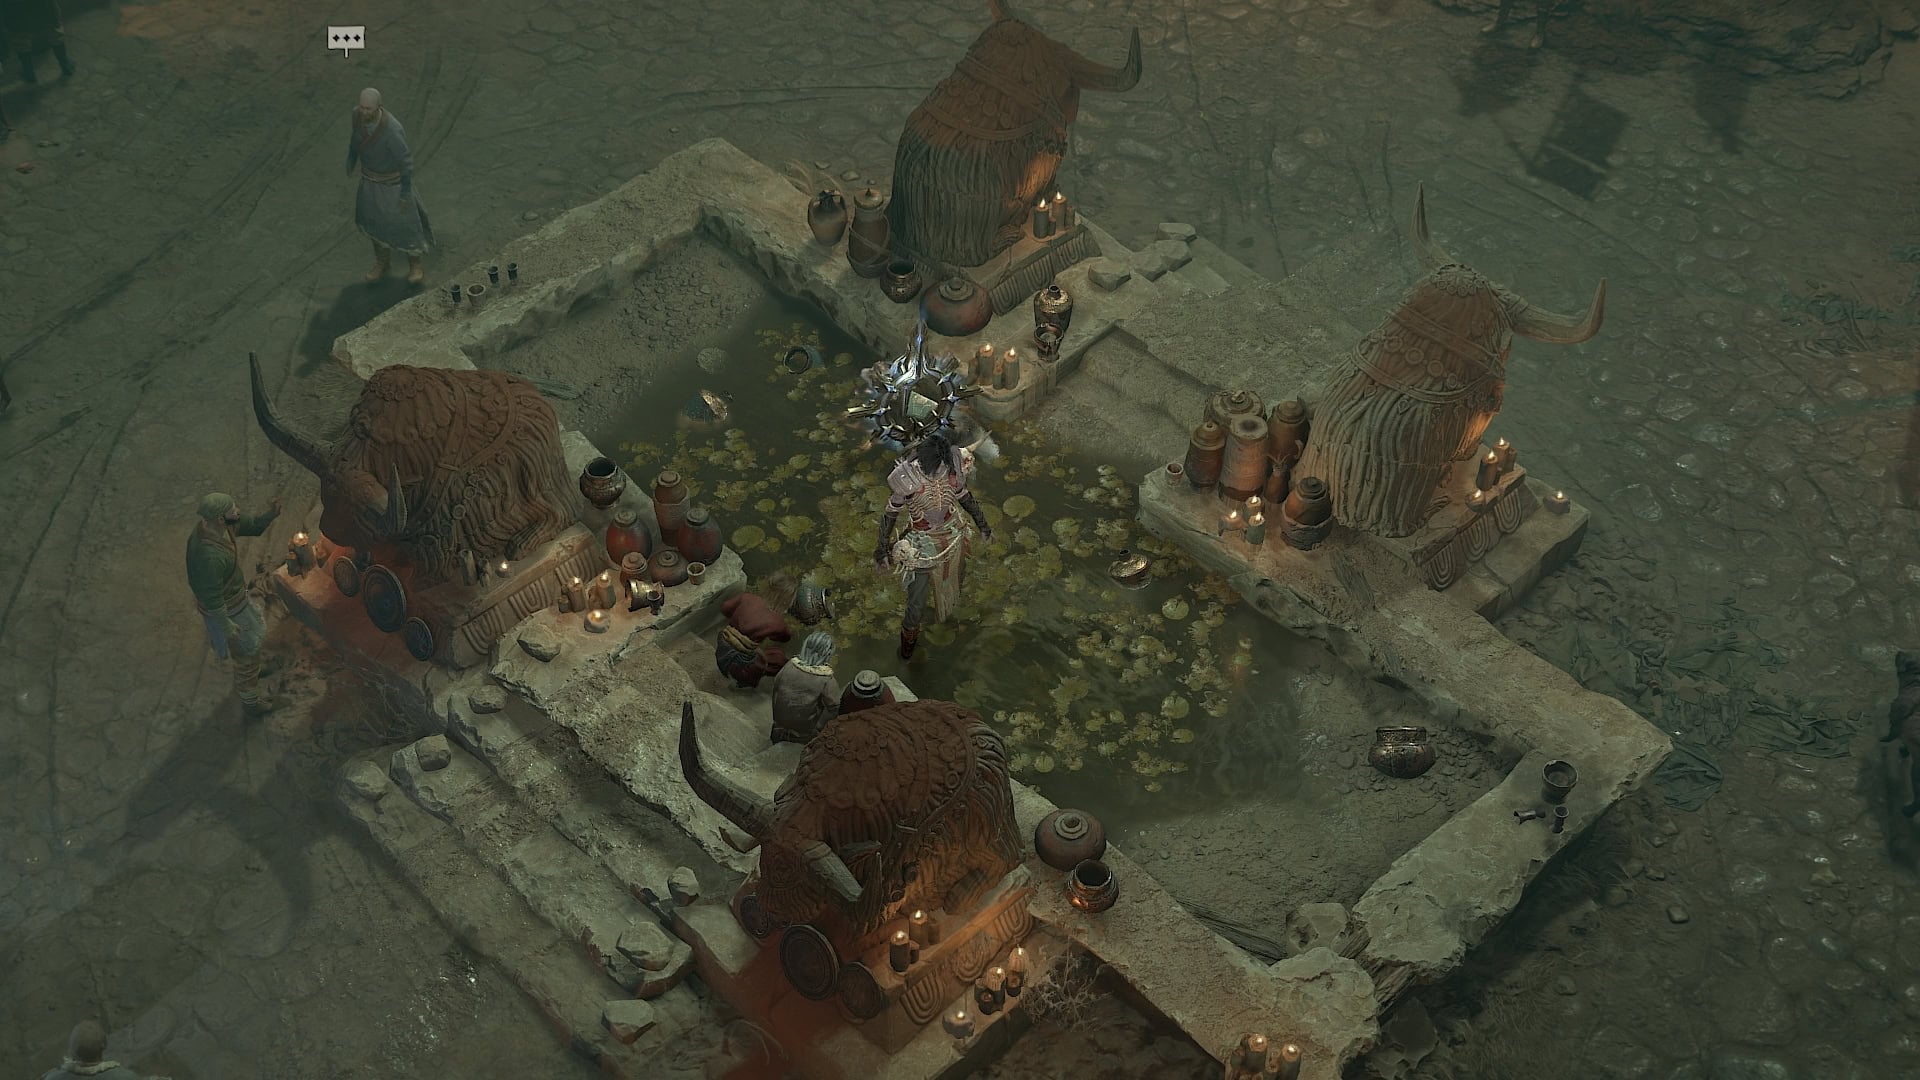
Once all three have been cleansed and reclaimed, present them to the remaining three Oxen Gods around the Fountain. Upon doing so, the Strange Key will drop.
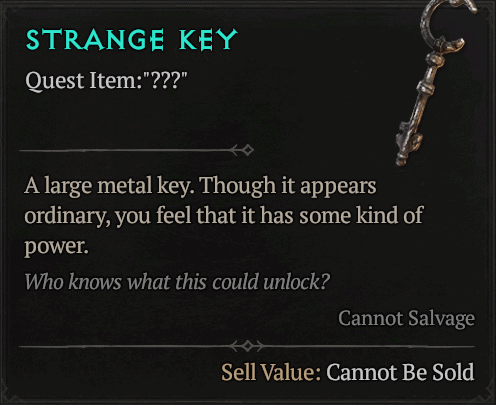
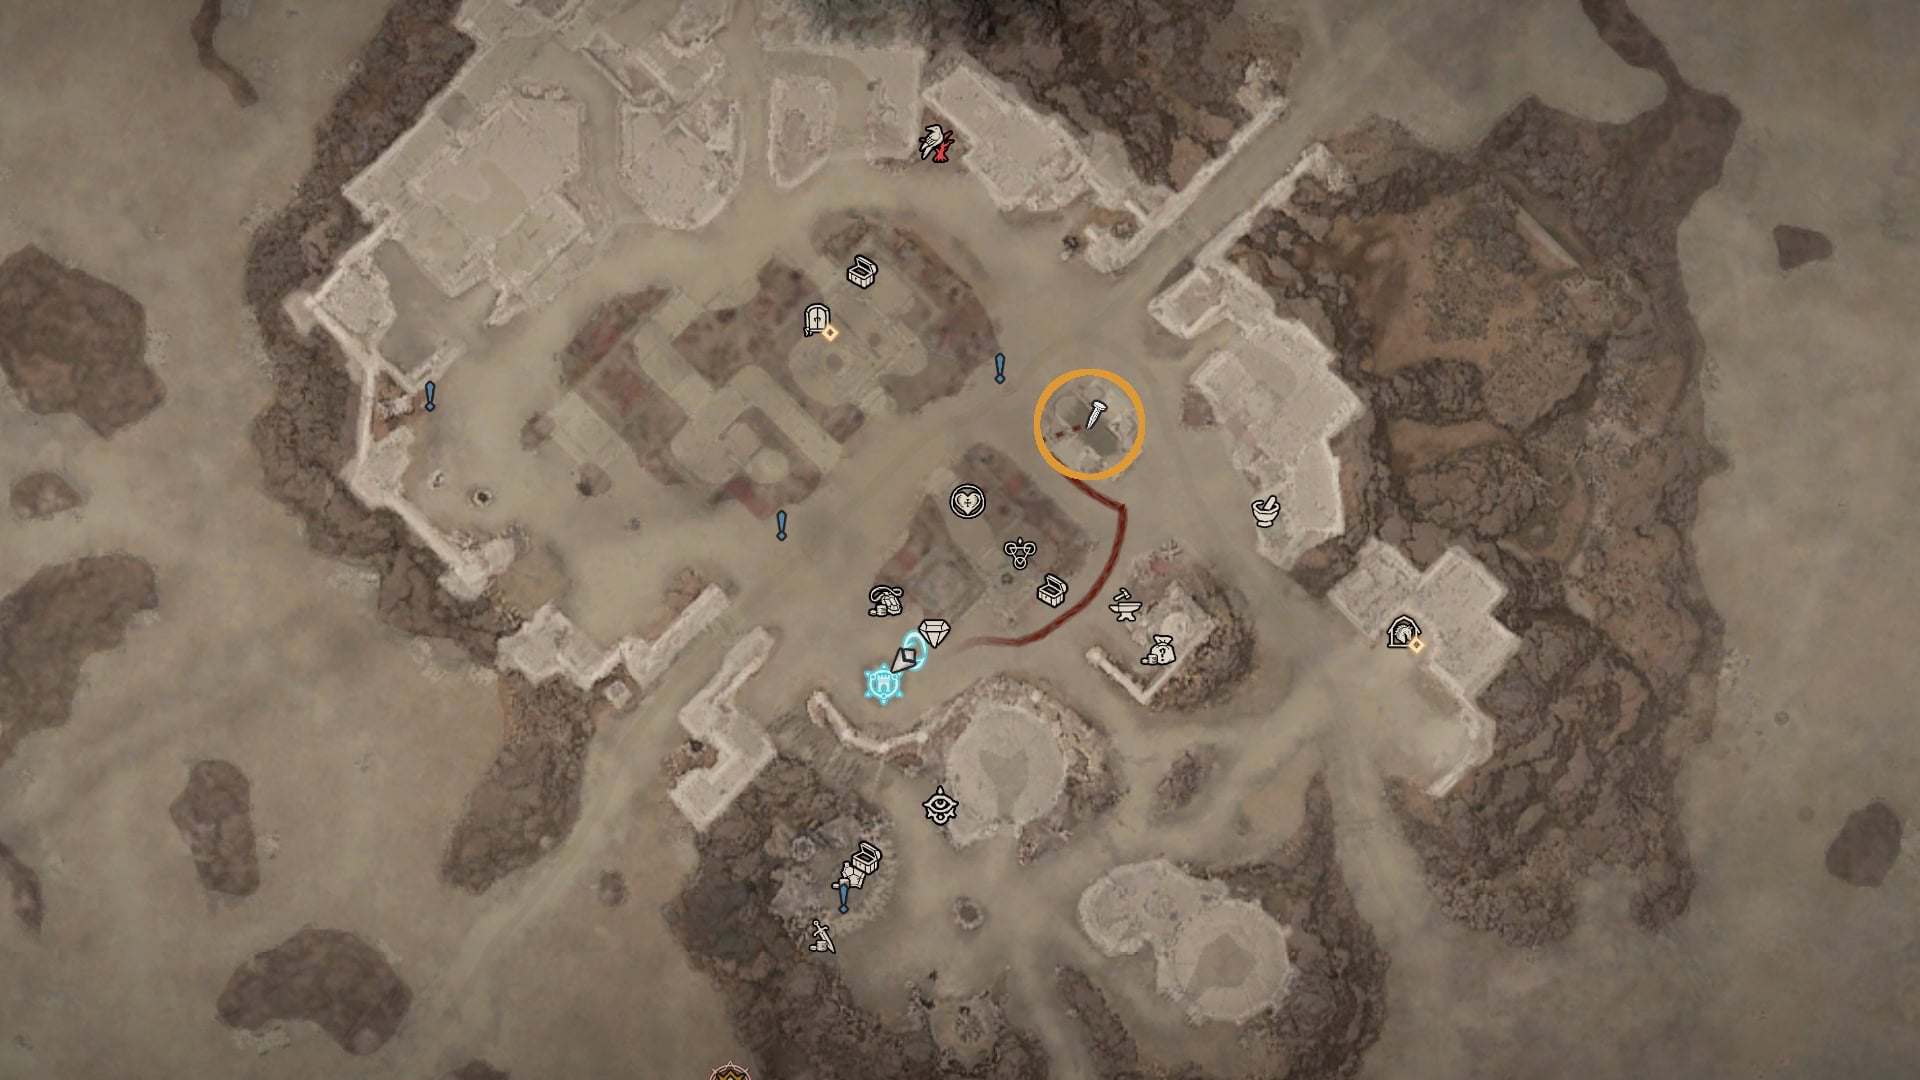
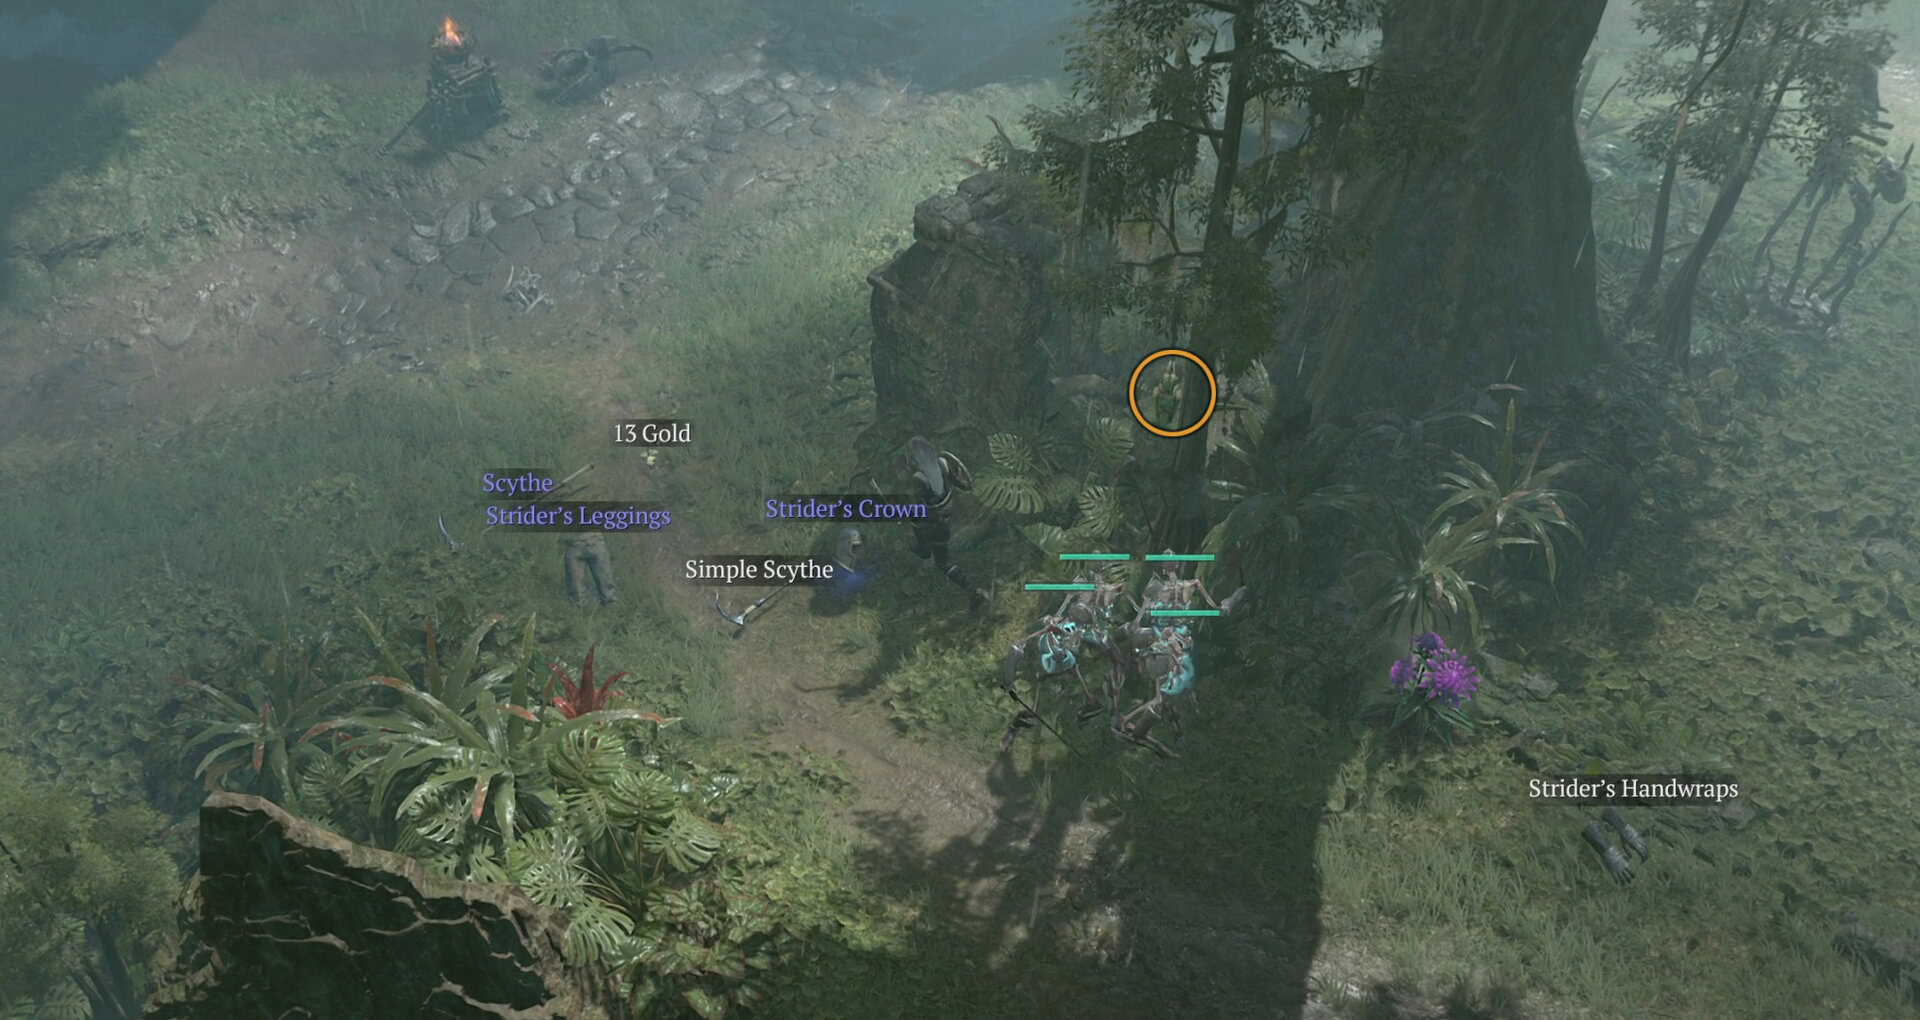
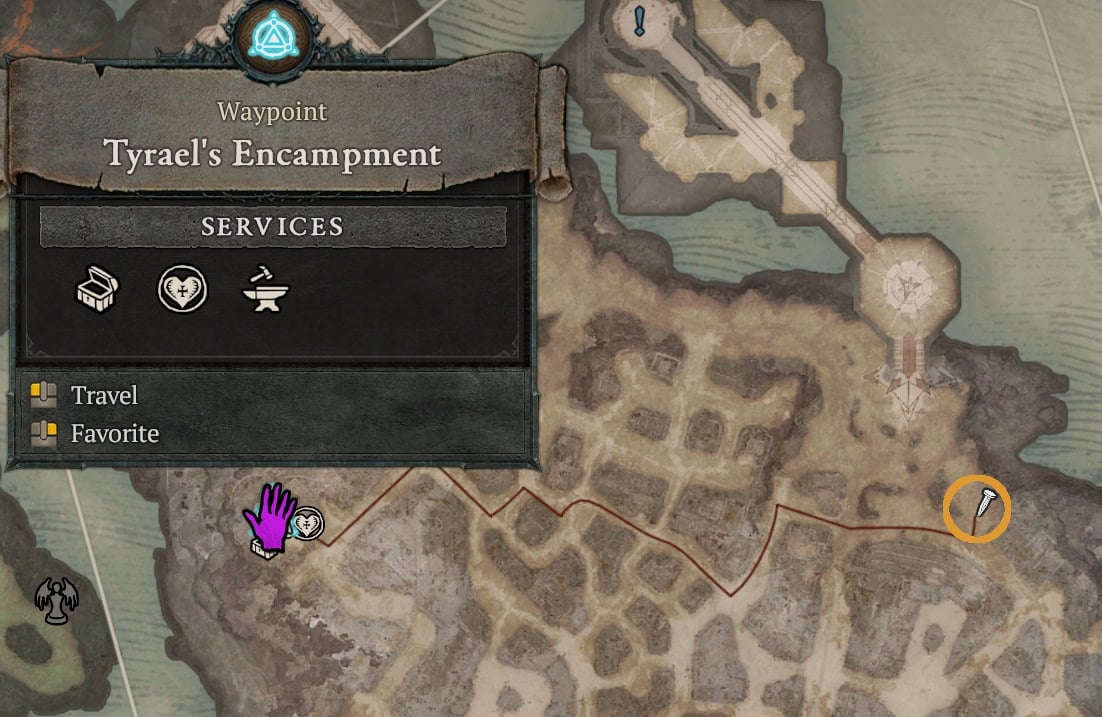
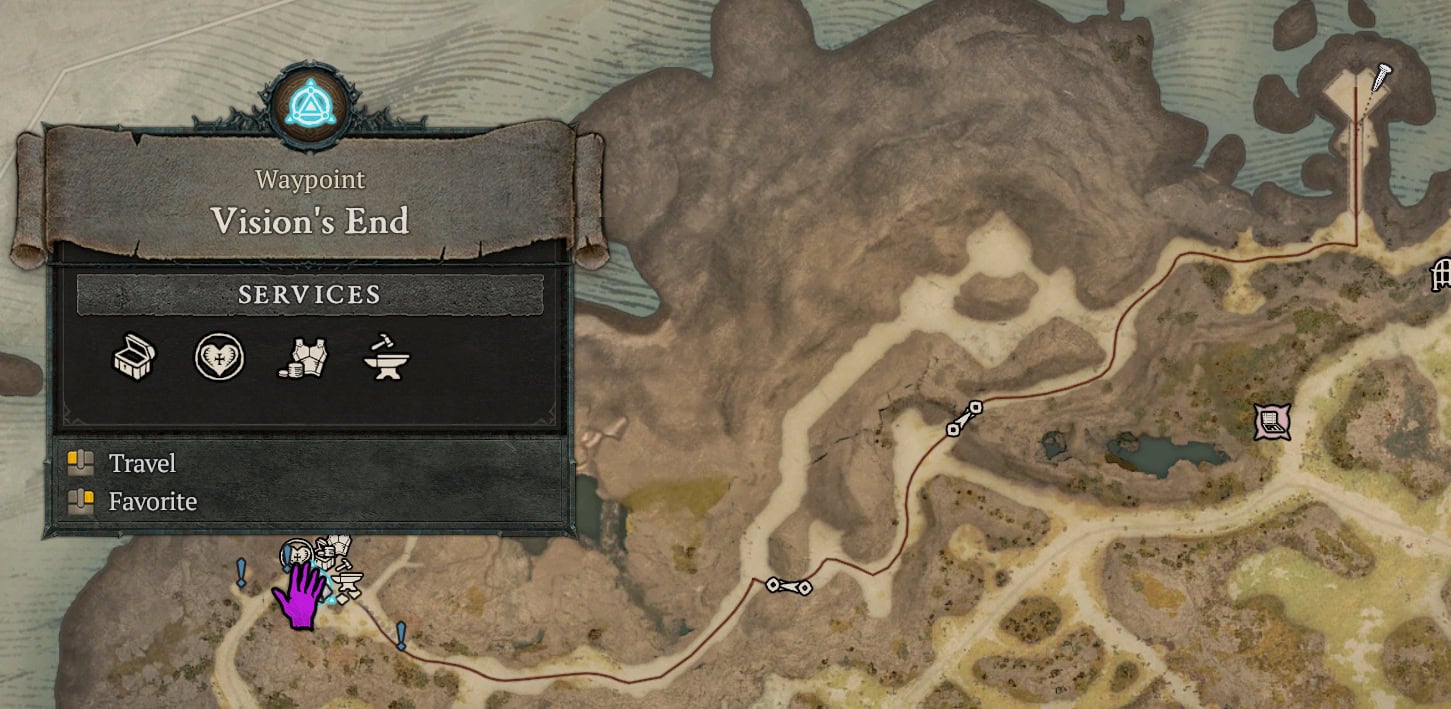
With the Strange Key in hand, you’ll need to head to Scosglen. The Forlorn Hovel awaits you at the eastern tip of the Scosglen Highlands. Use the Key to permanently unlock the Forlorn Hovel for the character.

Inside, you’ll find 28 cows. Upon defeating them, you’ll be awarded a Stamina Potion. This is one of three “Cellar Relics” required to access the Cow Level.
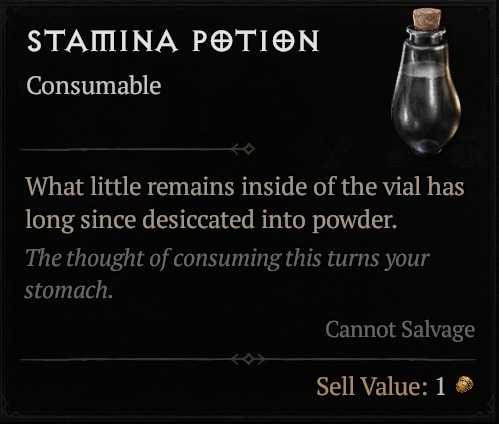
With the cellar being repeatable using the Dungeon Reset option, it is possible to farm multiple Stamina Potions and trade them to other players after getting access to the Forlorn Hovel.
The Forlorn Burrow of Nahantu
The next step picks up in Nahantu, requiring you to earn another three relics. This time, however, there are more puzzles and less RNG involved in the process. This will have you following in the steps of “Lord Uacax”.
Getting the Relics
For each of these relics, there is a direct hint to be found within the same region as the relic, typically in towns with waypoints. Each of these will give you the directions you need, but not specifically where they are.
Jabbering Gemstone
The easiest of the three key relics for this round is the Jabbering Gemstone. This coincides with the Reverence of Lord Uacax, found in the Kurast Docks.
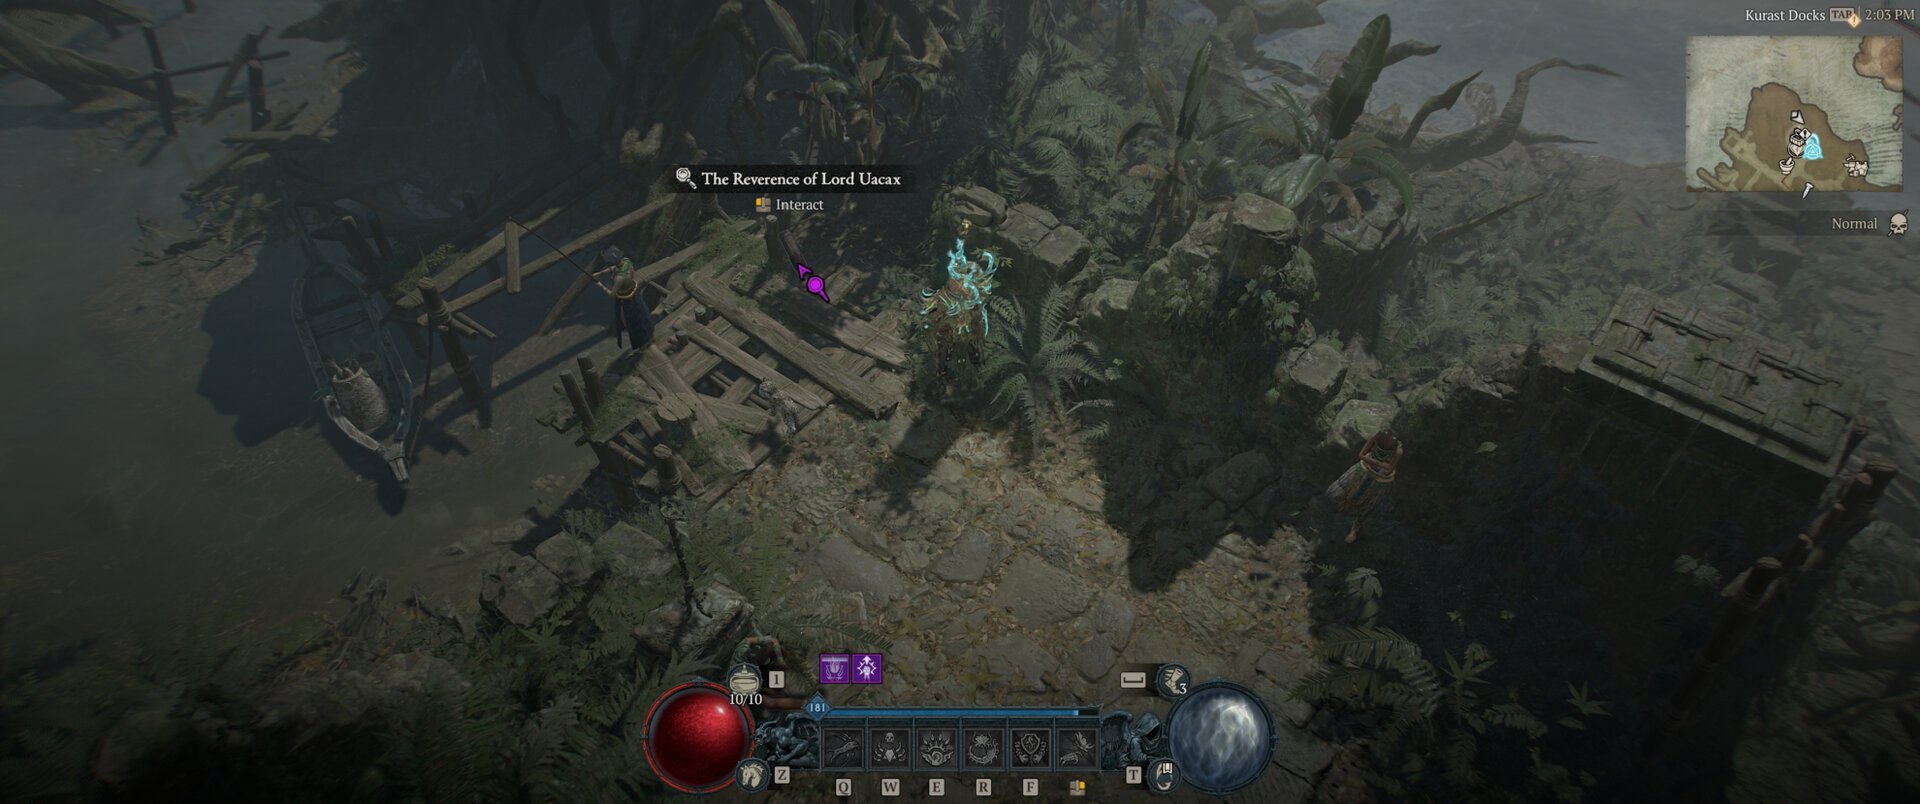
This asks you to pay respects to the ancestors, as Uacax did. You’ll do this by visiting the graves to the South of the Kurast Docks.
Here you’ll need to emote “Thanks” to the grave along the Northeast wall. Start with the larger one in the middle, then the one to its immediate left, then the one to its immediate right.
Be sure to get as close to each grave as possible to ensure the emote registers!
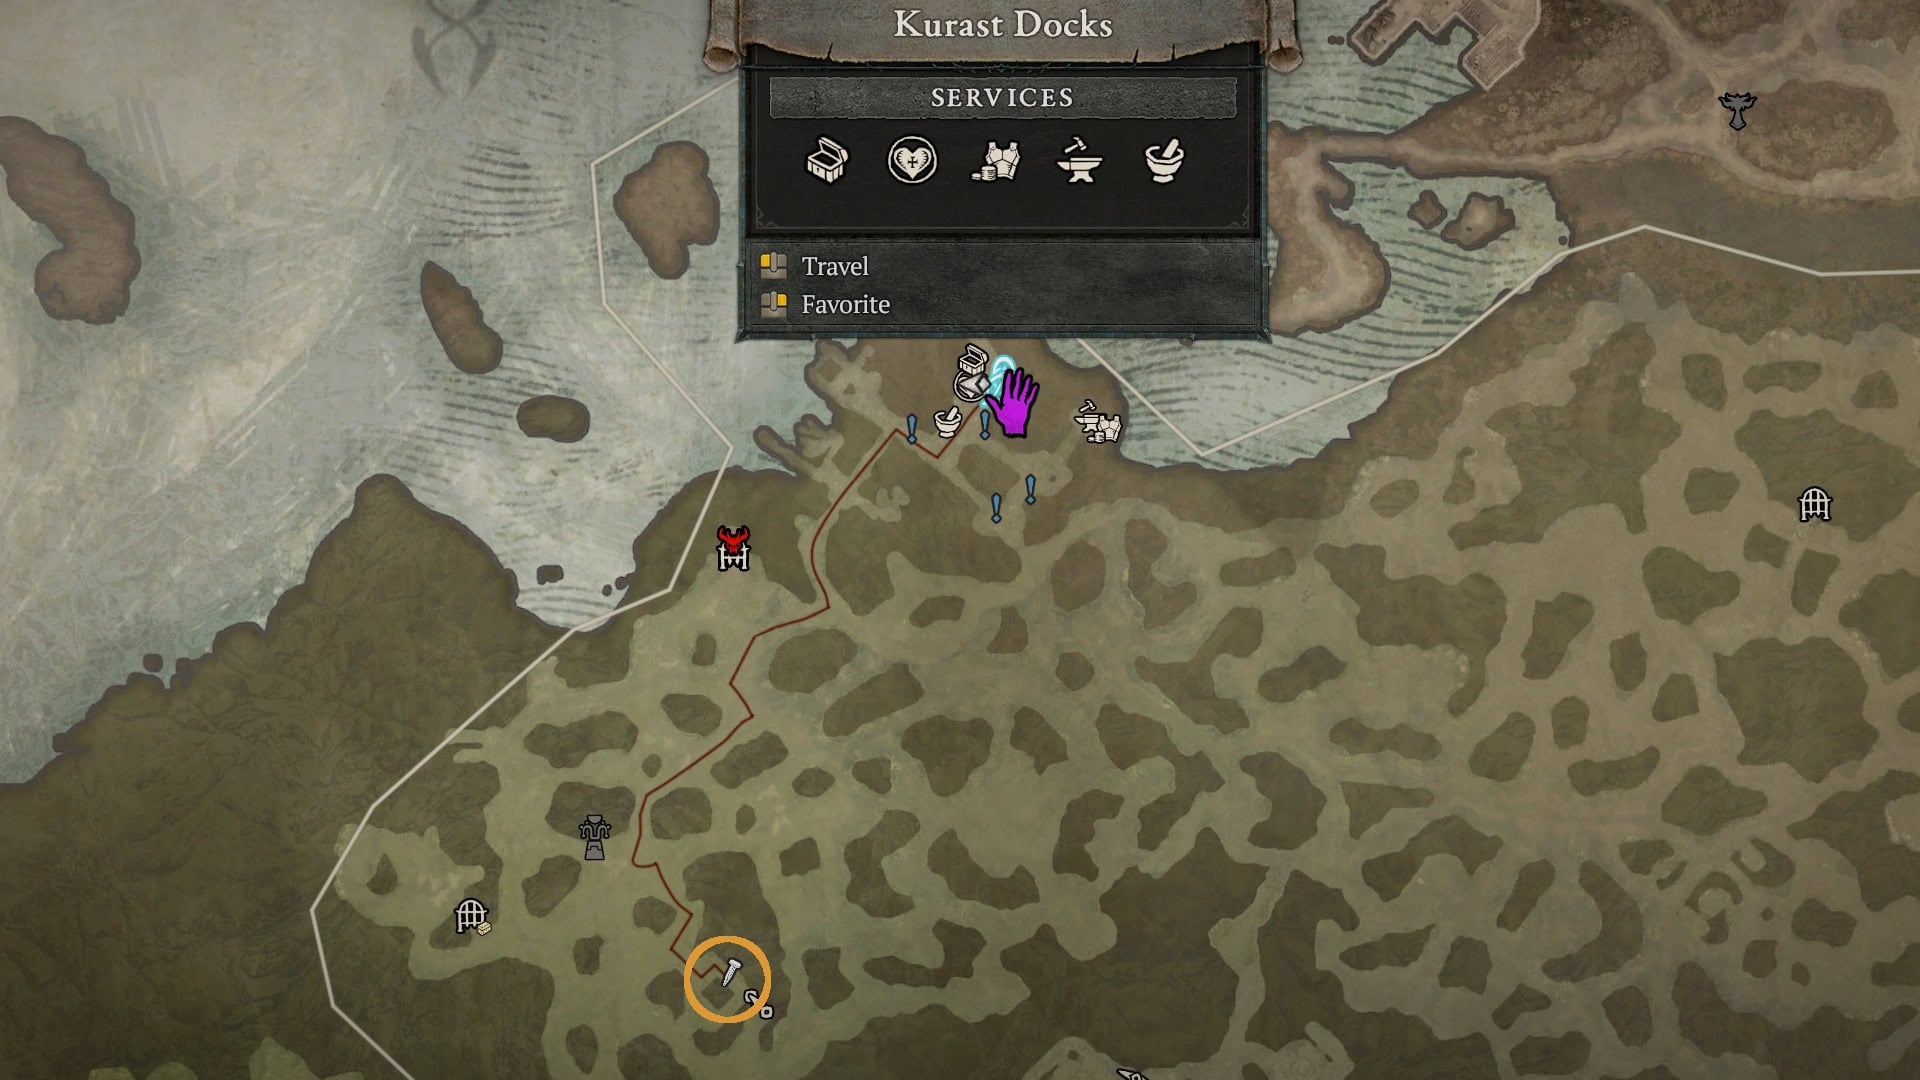
Following the third emote, the Jabbering Gemstone will drop for you to claim. Hold on to it for now.

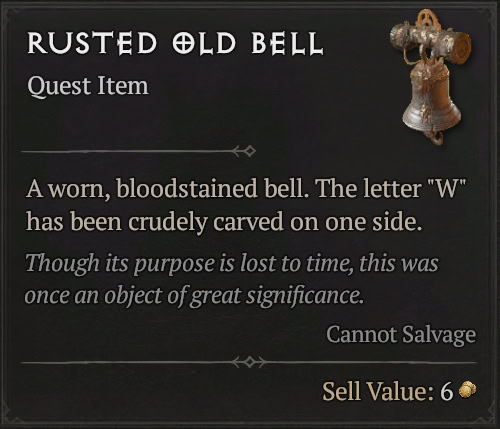
Rusted Old Bell
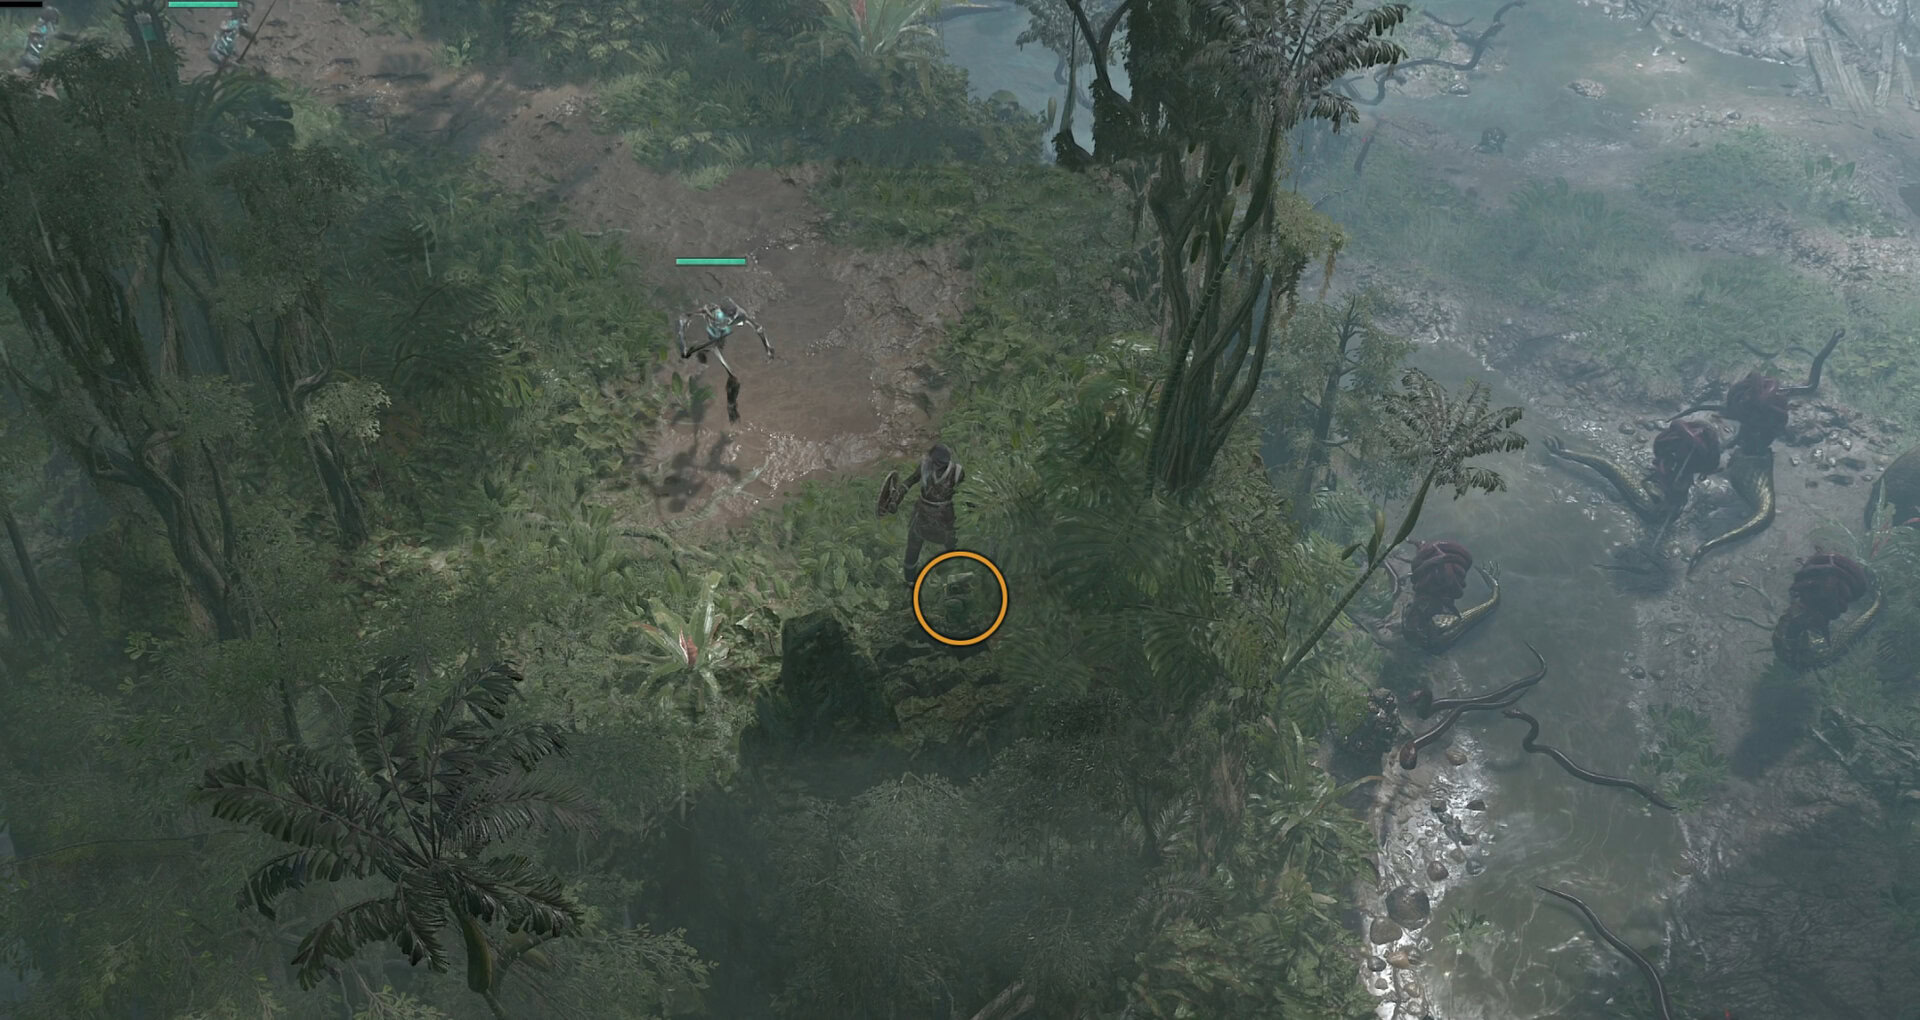
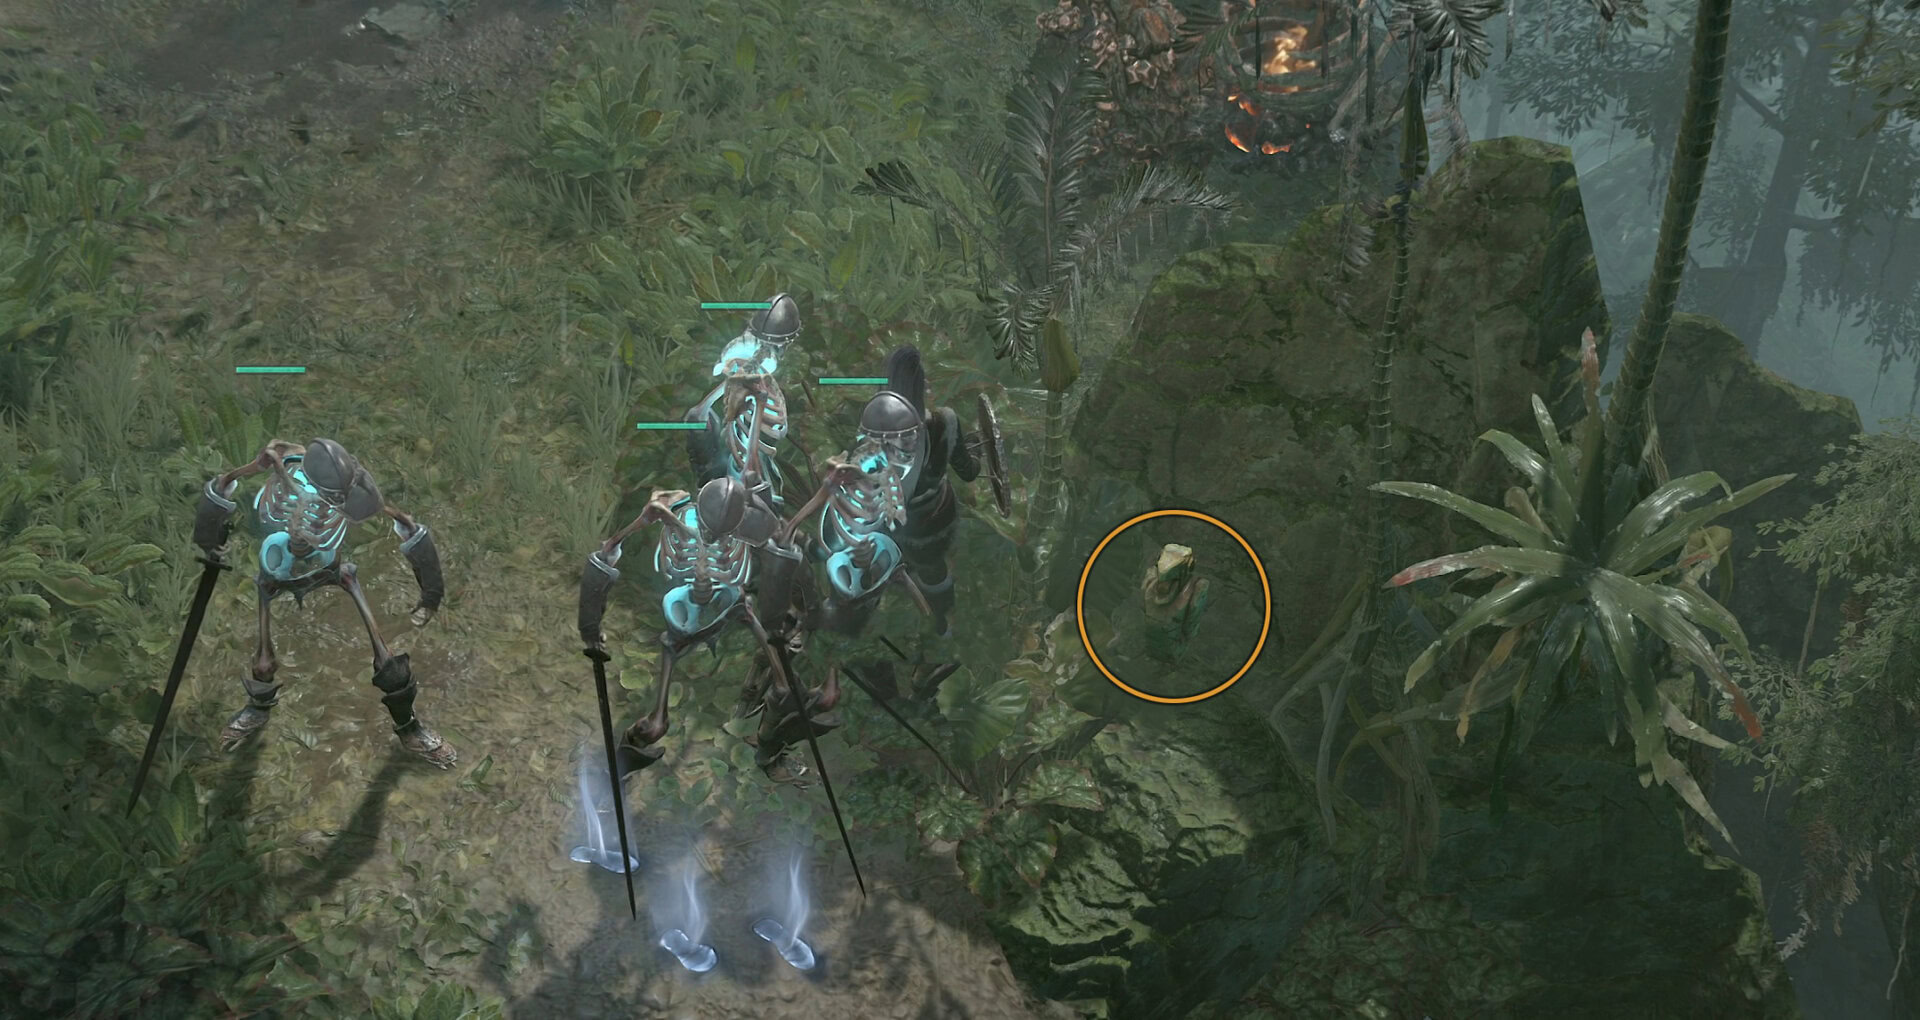
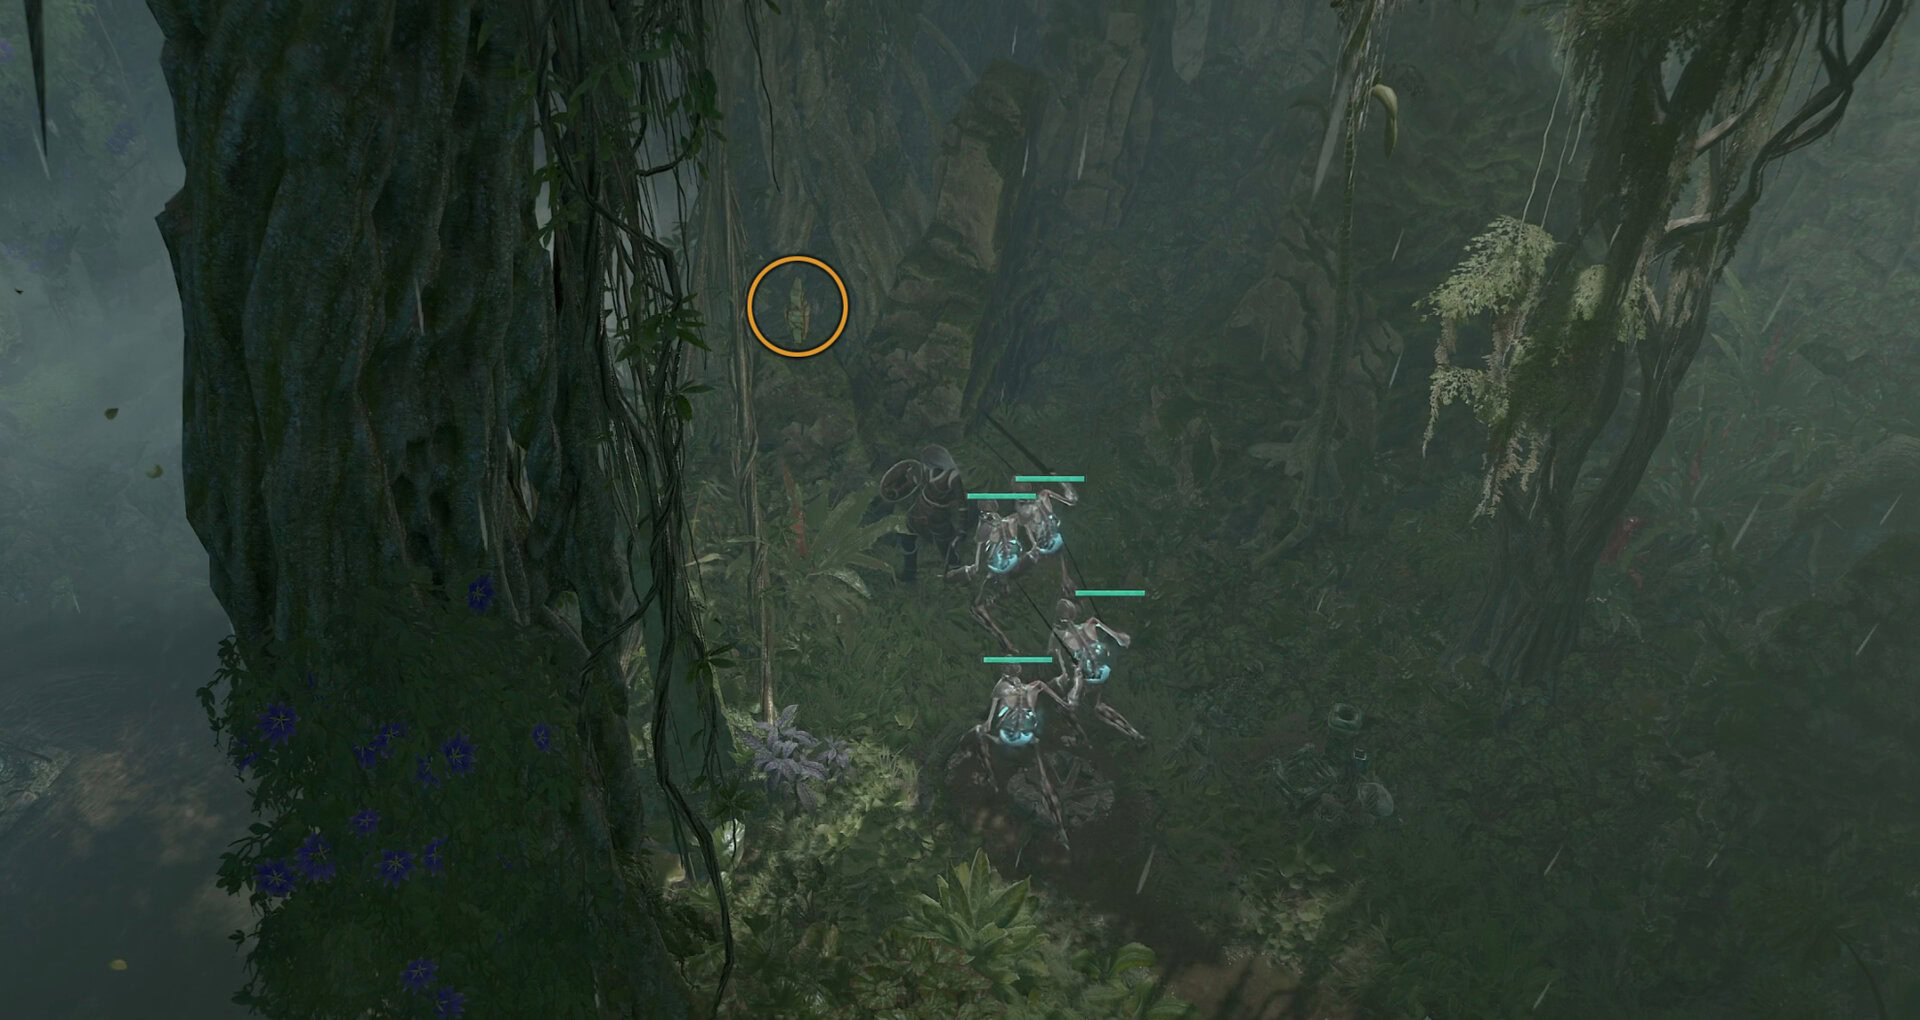
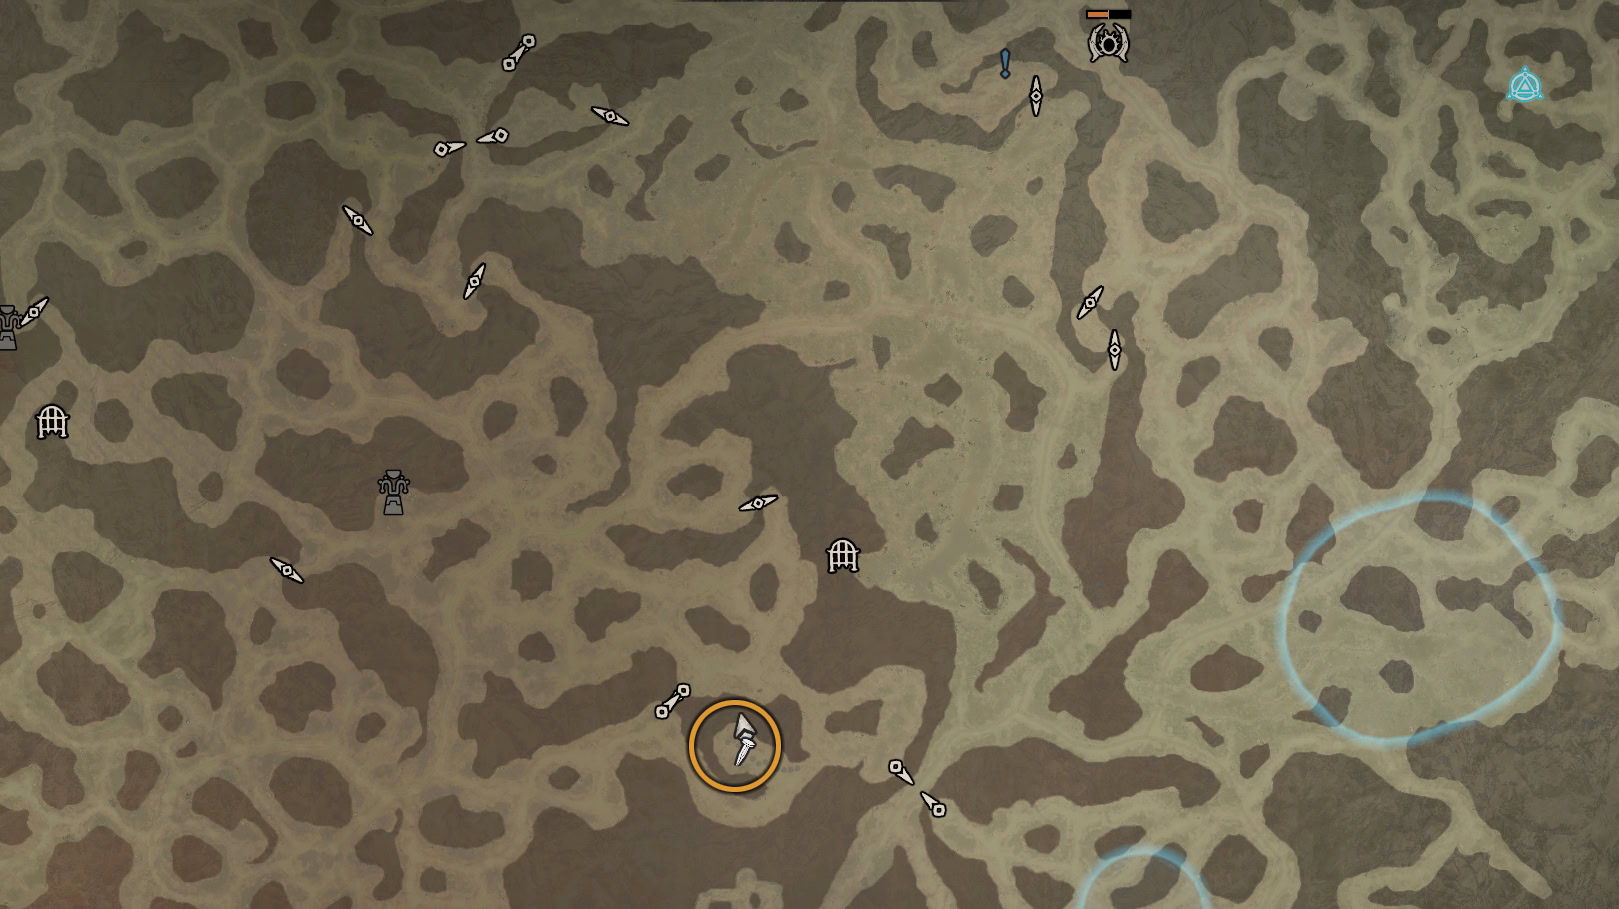
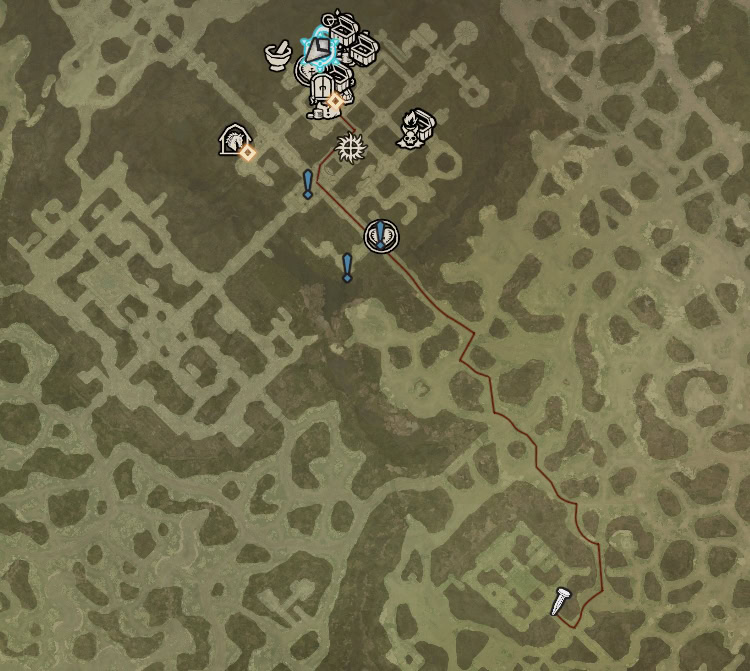
The next relic is the Rusted Old Bell. This requires us to navigate the jungle of Nahantu, to “Follow the morning birds” as stated in the Accession of Lord Uacax.
You’ll be following a route to visit 12 different statues across the jungle of Nahantu. Below is the route and its locations.
Be sure to dismount and get as close to them as possible to ensure the game registers you’ve visited them!
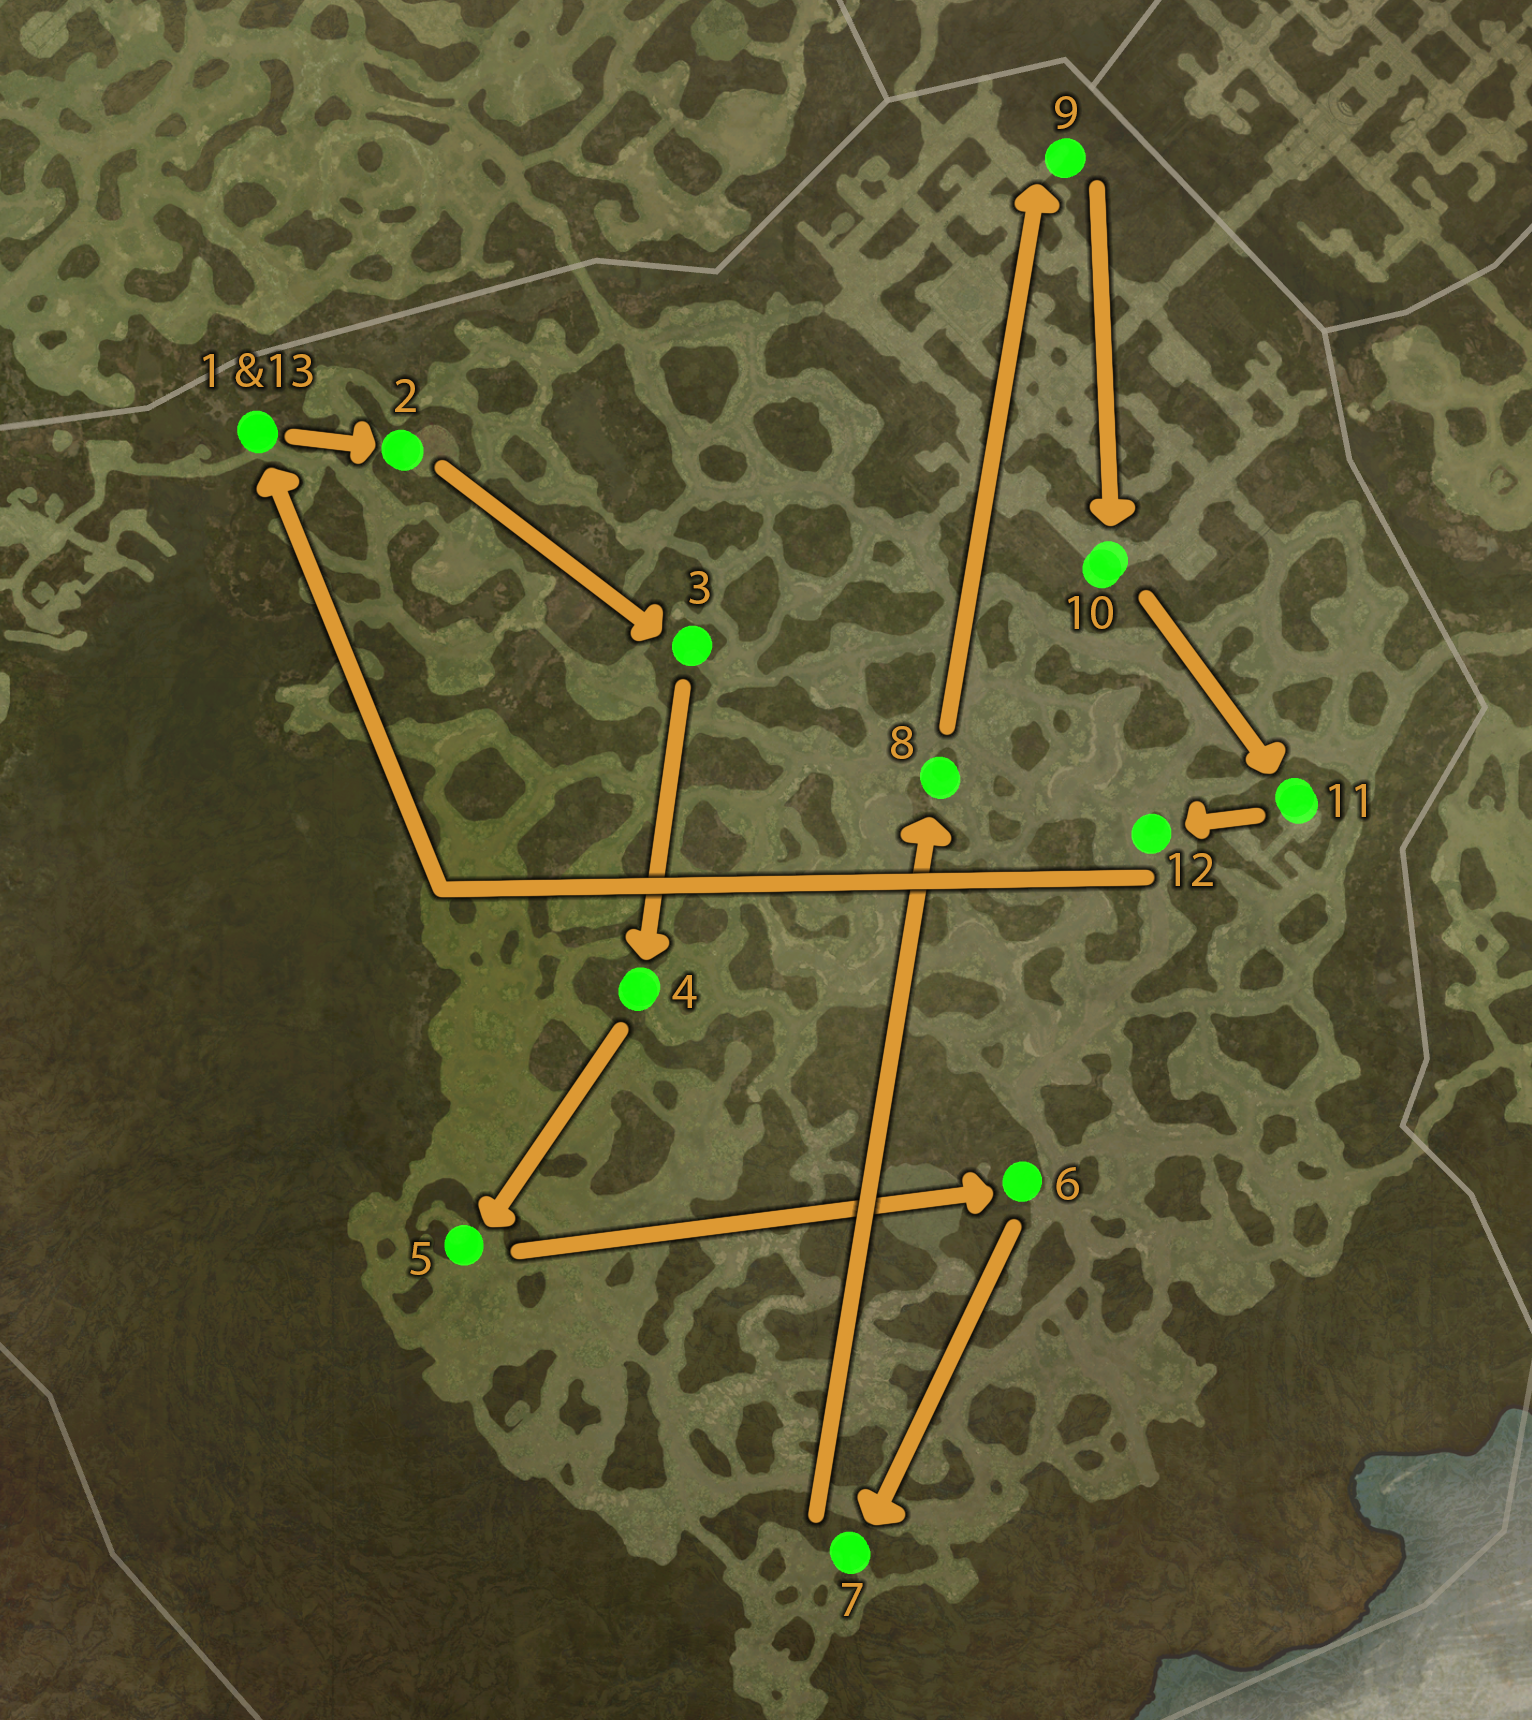
For a visual reference, here are all 12 of the statues and their closest point near them to know if you’ve properly triggered them or not. A couple of them are very hard to spot without any reference.
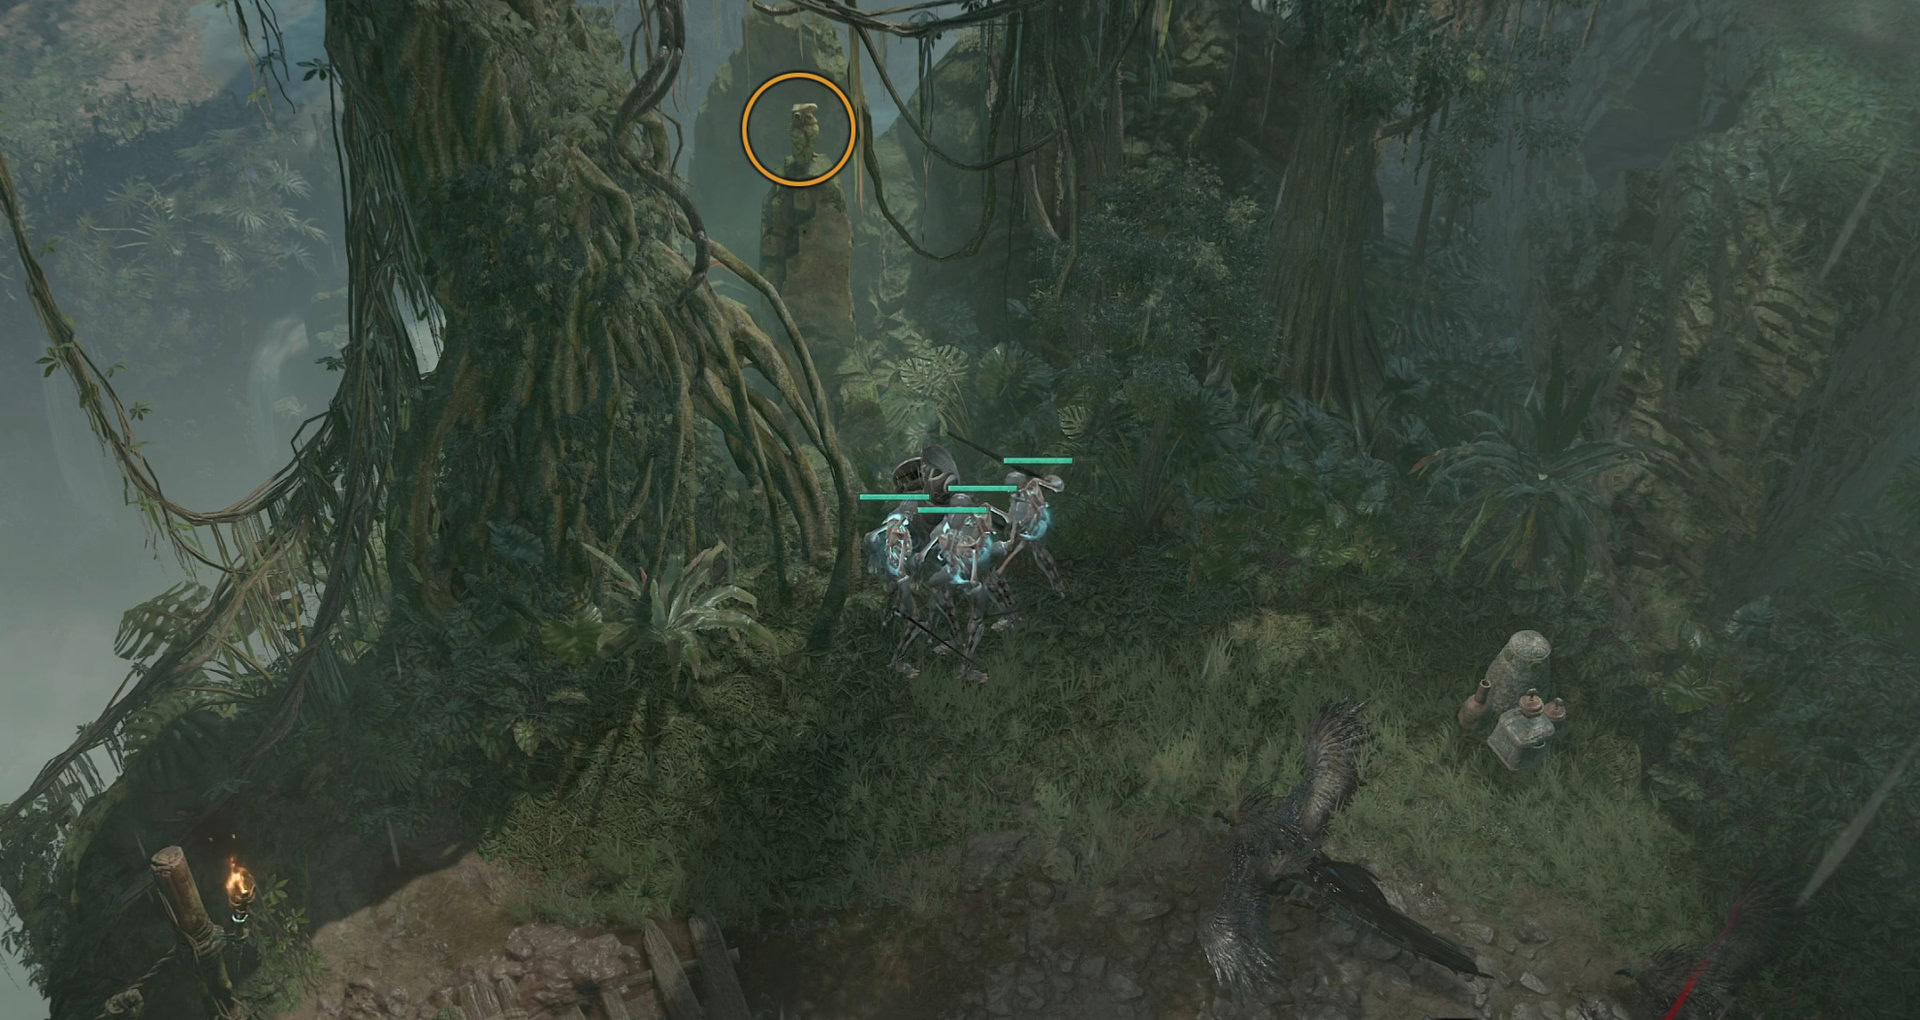
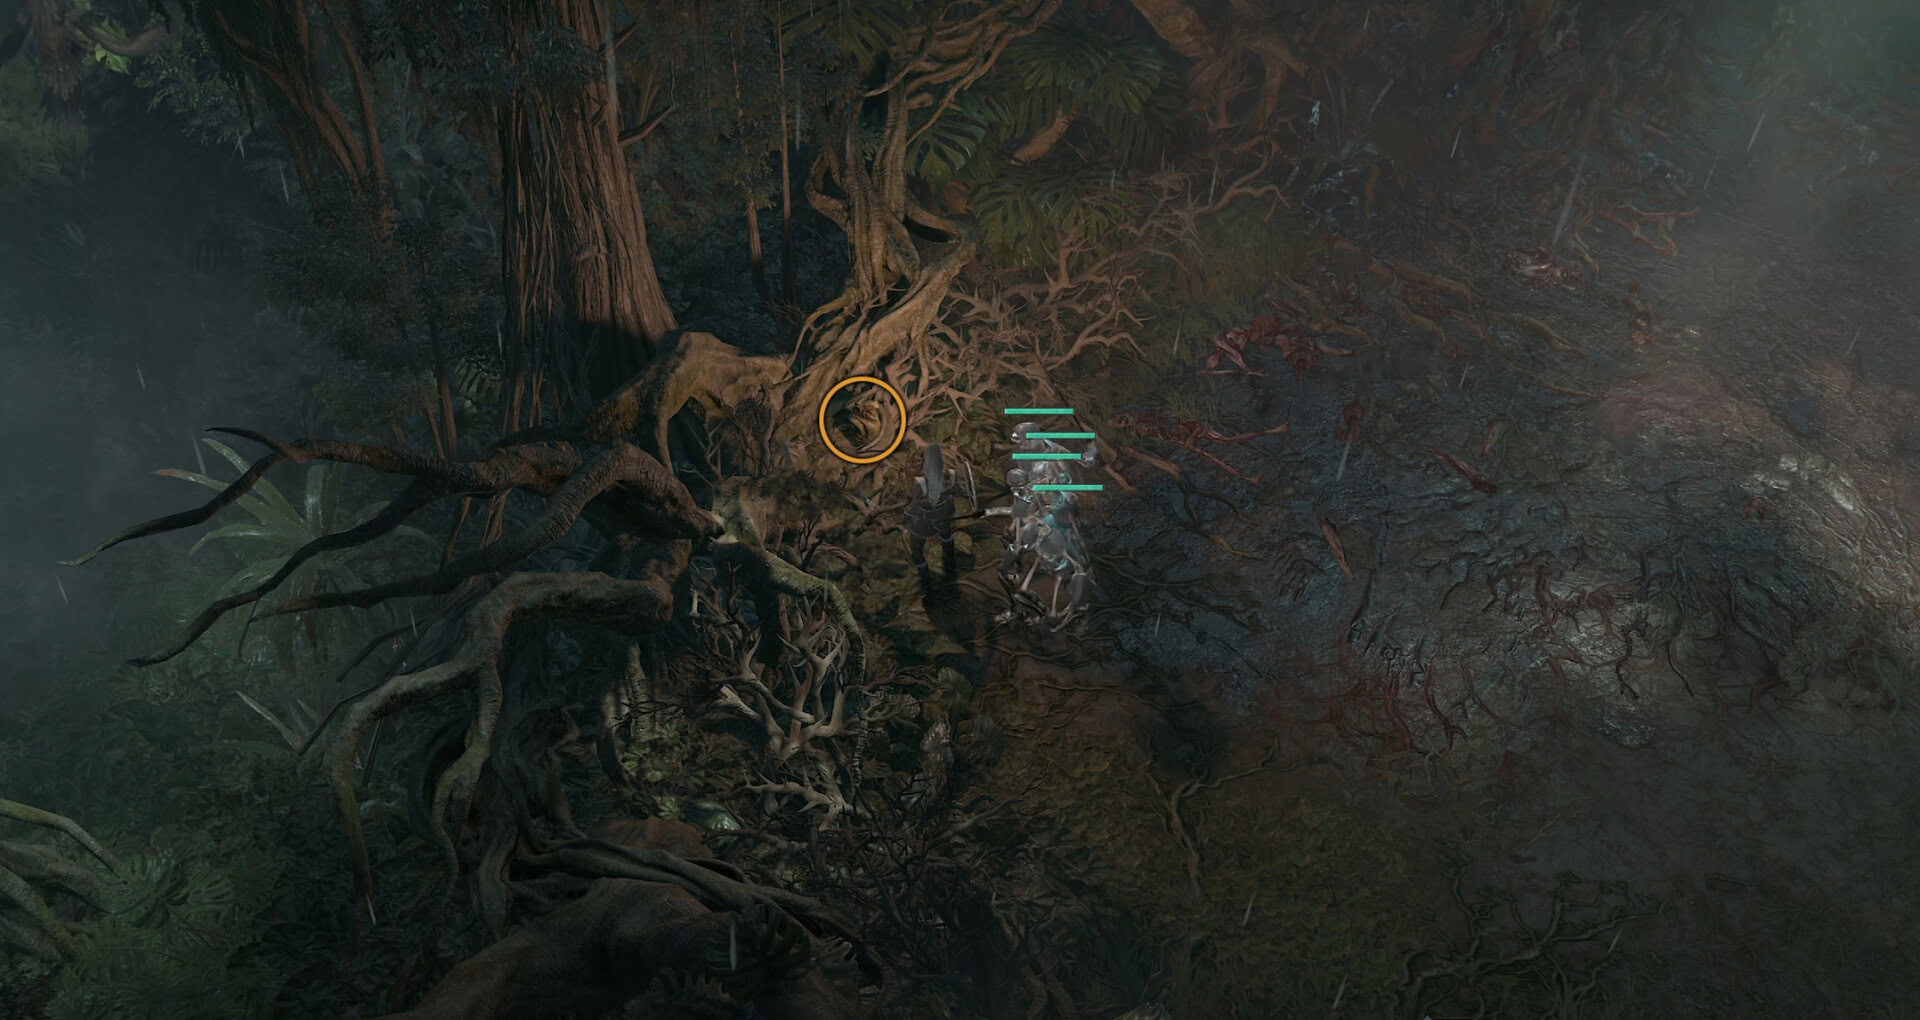
Upon completing the loop successfully, the Rusted Old Bell will drop when you return to the starting point. Hold on to it for now.
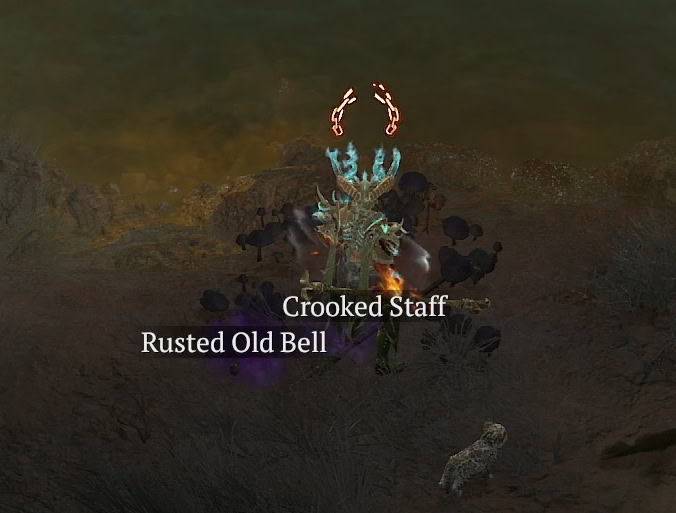
Crooked Staff
The Crooked Staff is the last relic, and has a very specific requirement that has a lot of ways to prevent it from working properly. As stated by the Triumph of Lord Uacax, located in Kichuk, you’ll need to defeat a “cunning beast” while being “untrained”.
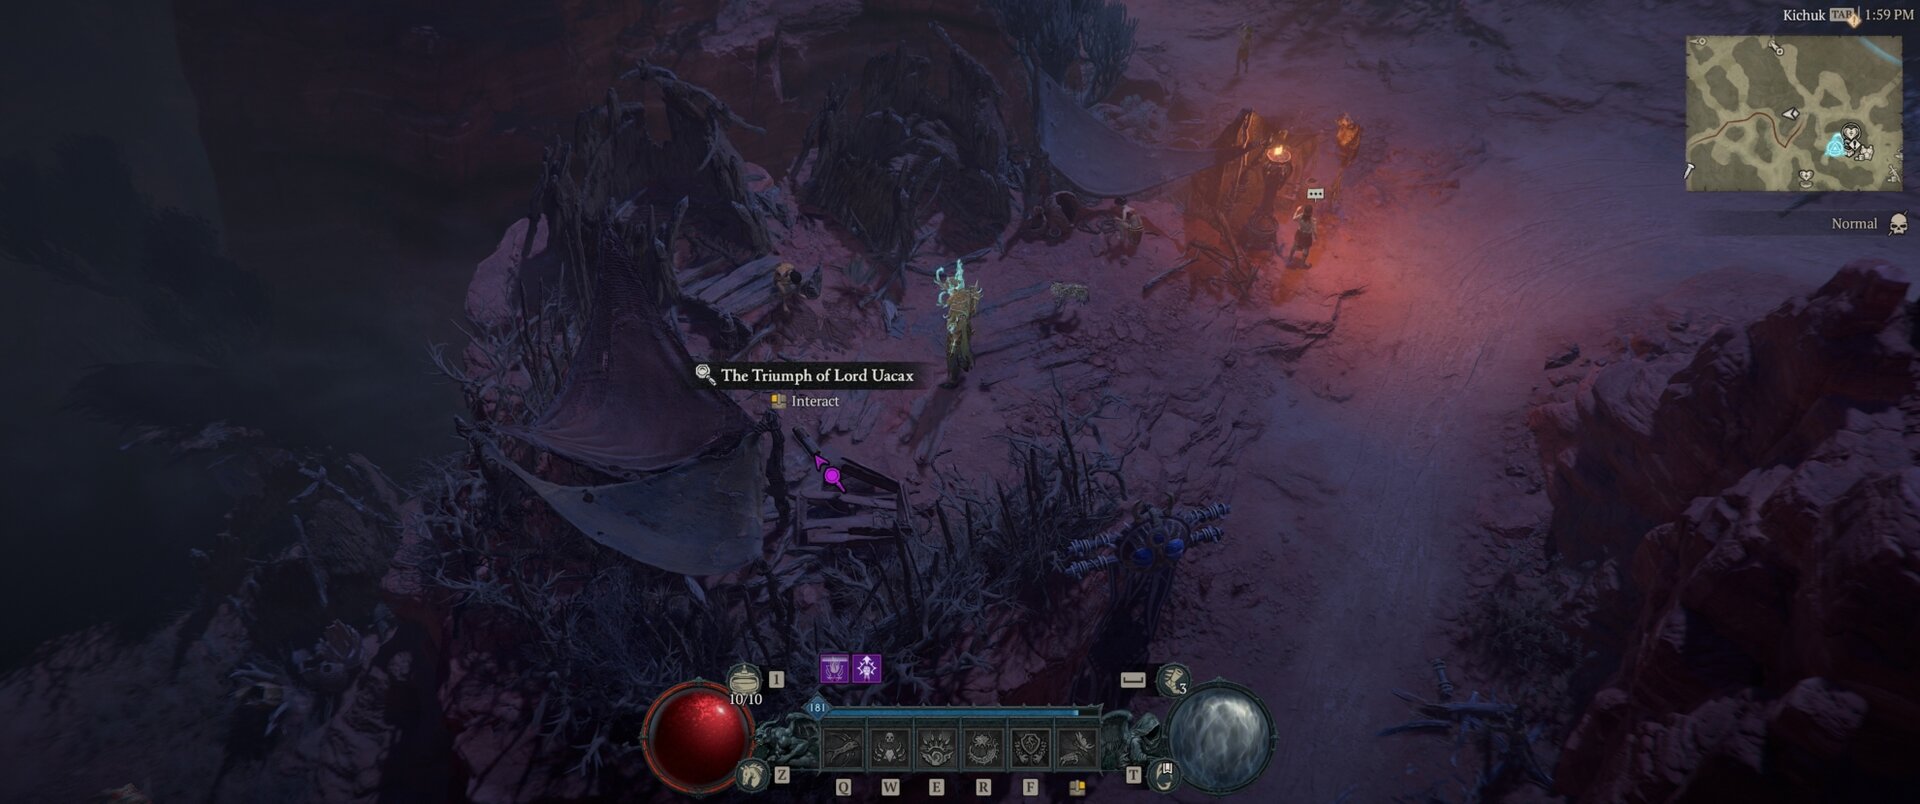
The cunning beast in question is the Super Elite mob named Blood Lightning, found Southwest of Kichuk.
The untrained part, however, requires you to defeat him using only the “Attack” Skill. This means you cannot have any Skill Points invested. This includes removing all Armor and Talismans with +Skill Ranks affixes.

The complications from this step arise when you realize that nothing else can deal damage either. This means other tools like Thorns, Mercenaries, or Class bonuses that grant skills or deal damage also cannot be used.
This unfortunately means the new classes to the Lord of Hatred Expansion, Paladin and Warlock, cannot complete this step, as Oaths and Soul Shards cannot be unequipped.
Once defeated, he will drop the Crooked Staff. If you’ve been following in order, this means you now have all three relics, so it’s time to get the key.
Getting the Key and Opening the Cellar
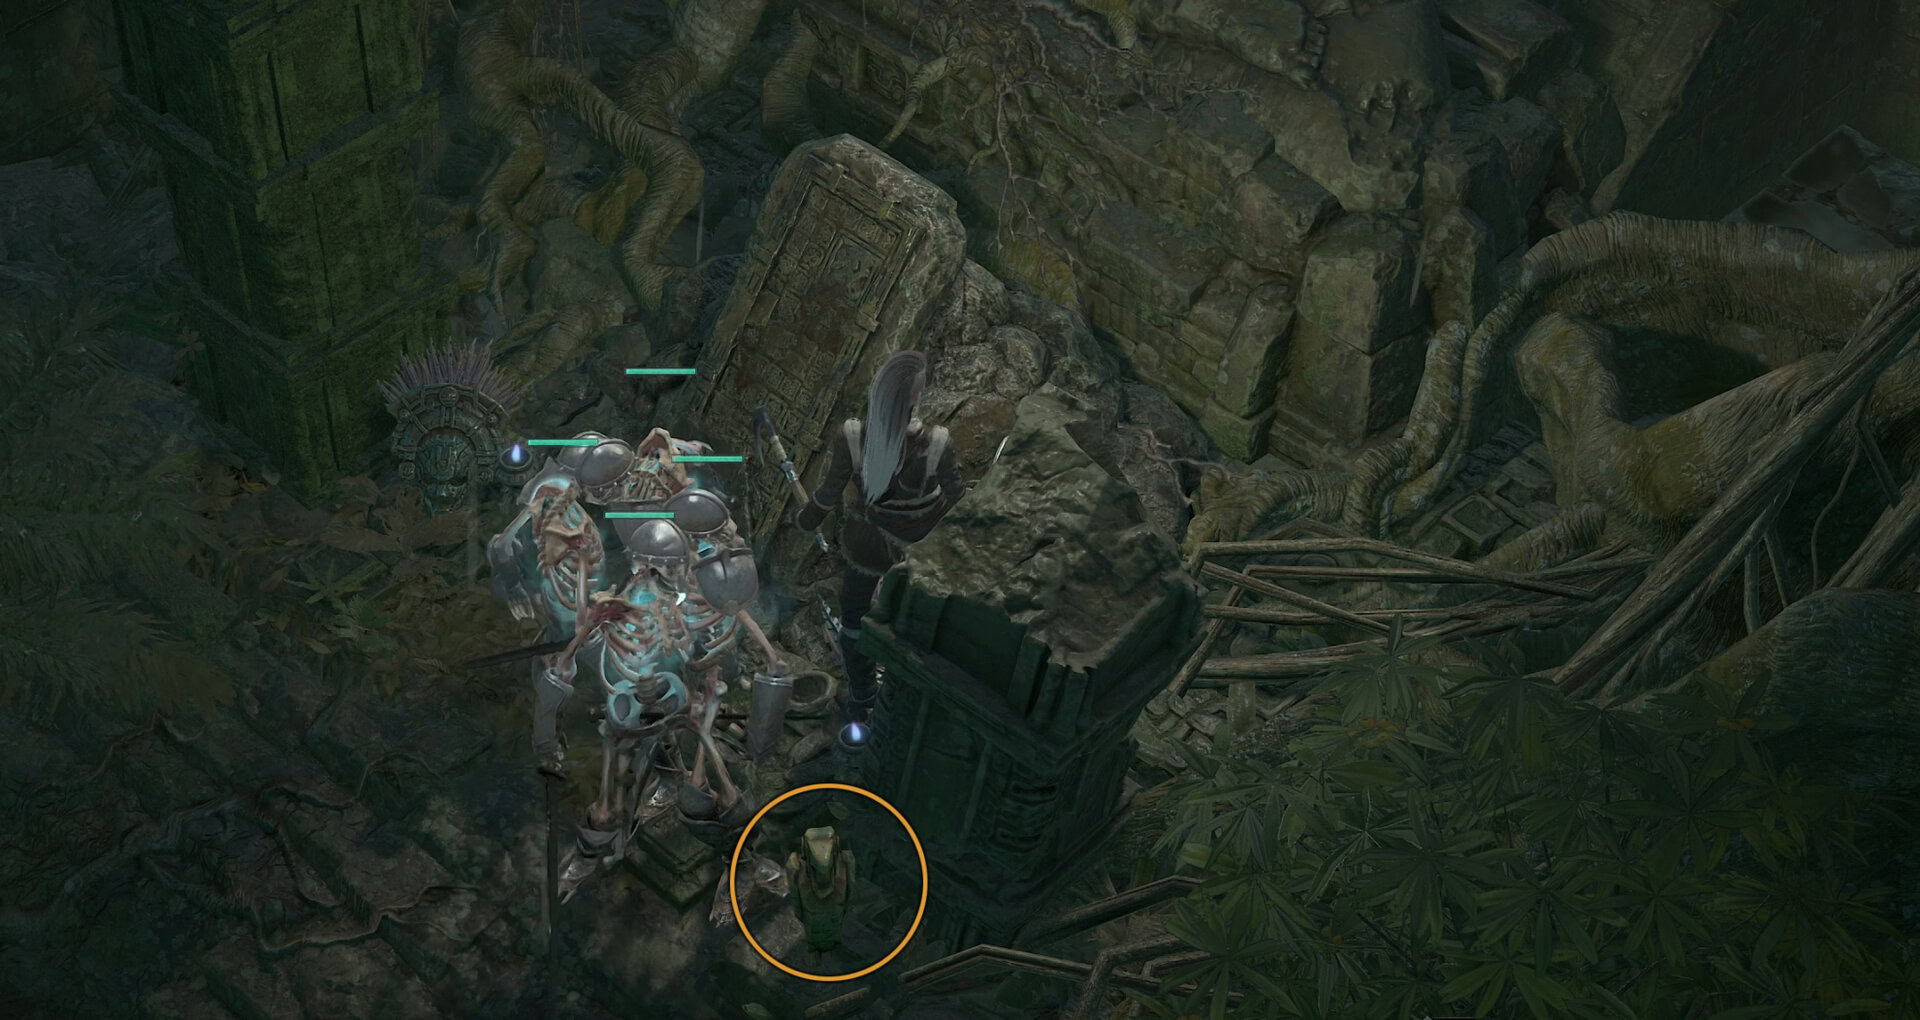
With all the relics in Hand, you’ll need to head to the Field of Giants, north of Ichor Falls to find three Cordycepic Zombies. You’ll need to round them up together to create the corruption location.
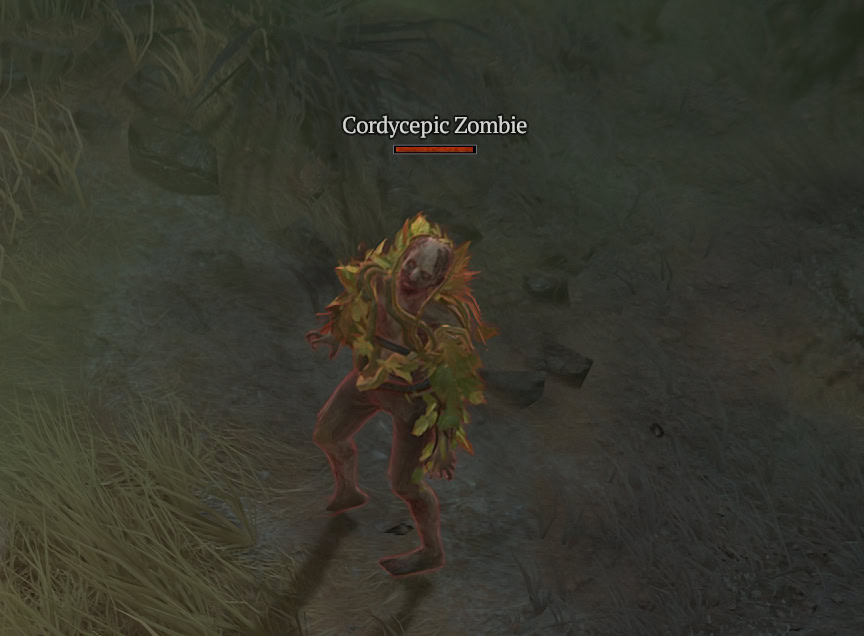
Start by clearing the area out; being on Normal Difficulty helps with this due to lower spawn count. Make sure to unequip any Minions or other forms of passive damage when grouping the Zombies together; they need to stay alive until all three are gathered.
When finally grouping the zombies, let them group around you and use an AoE to kill all three at once. Then without moving, drop all three relics into the mushrooms. If you see the Purple Smoke effect, they’re corrupted for sure, though some graphics settings may hide this effect.
With all three relics corrupted, you’ll need to take them to Oka’bo Temple, south of the Kurast Bazaar and deposit them into the brazier at the entrance.
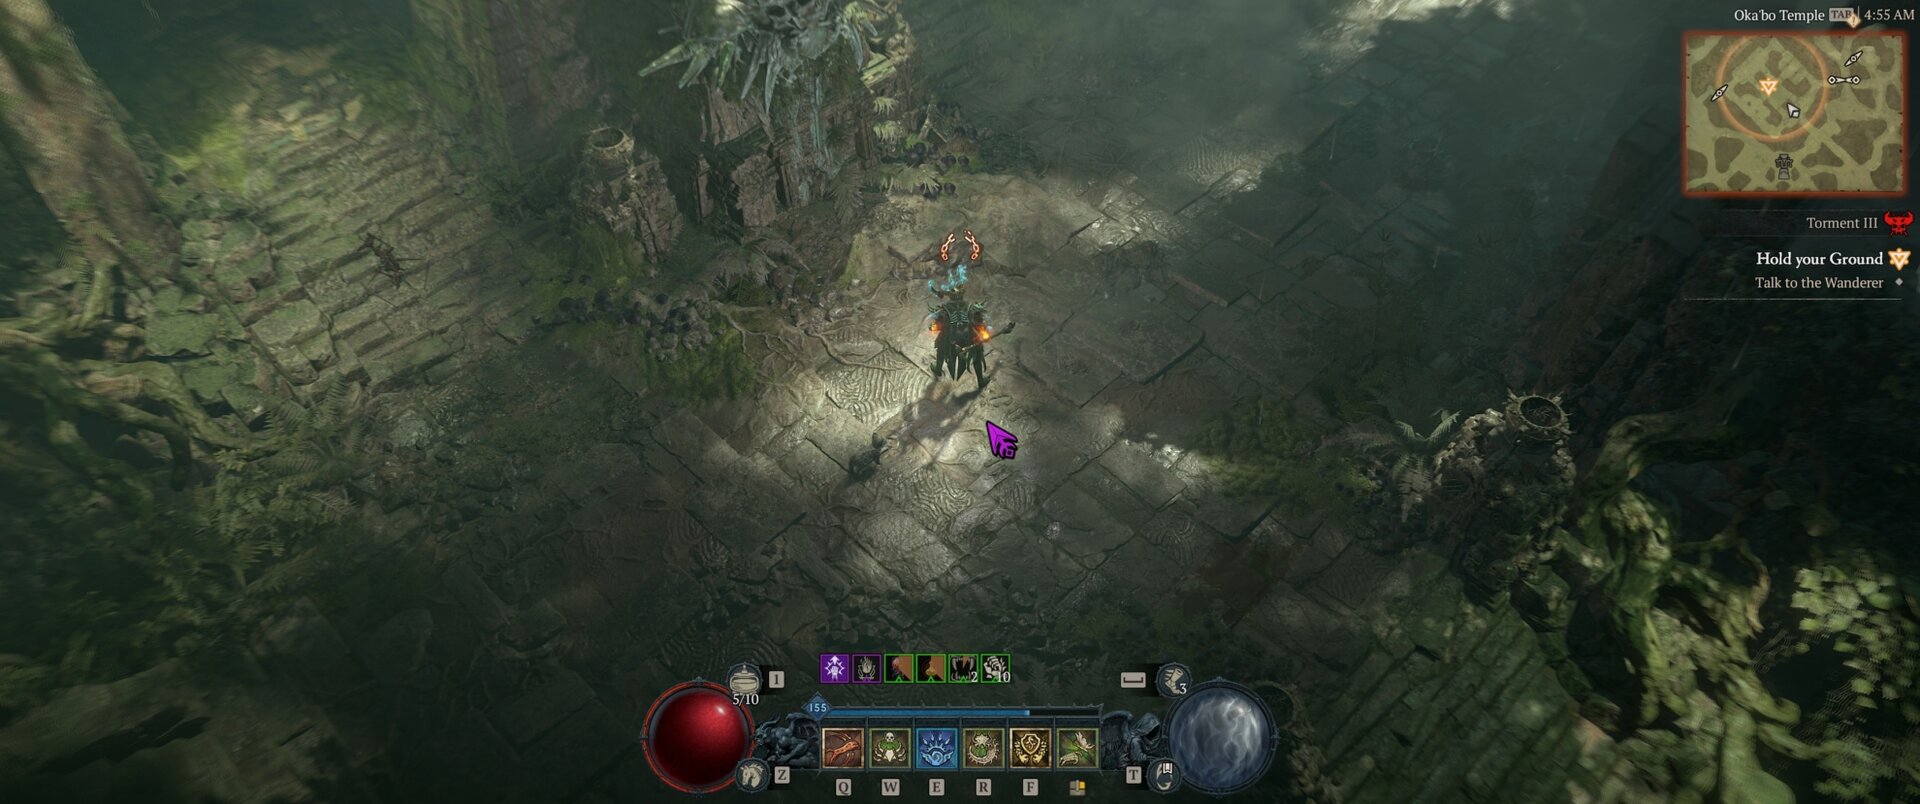
Once all corrupted relics are dropped off, you’ll be given the Unusual Key, which allows you to access the hidden section of the Forlorn Burrow.
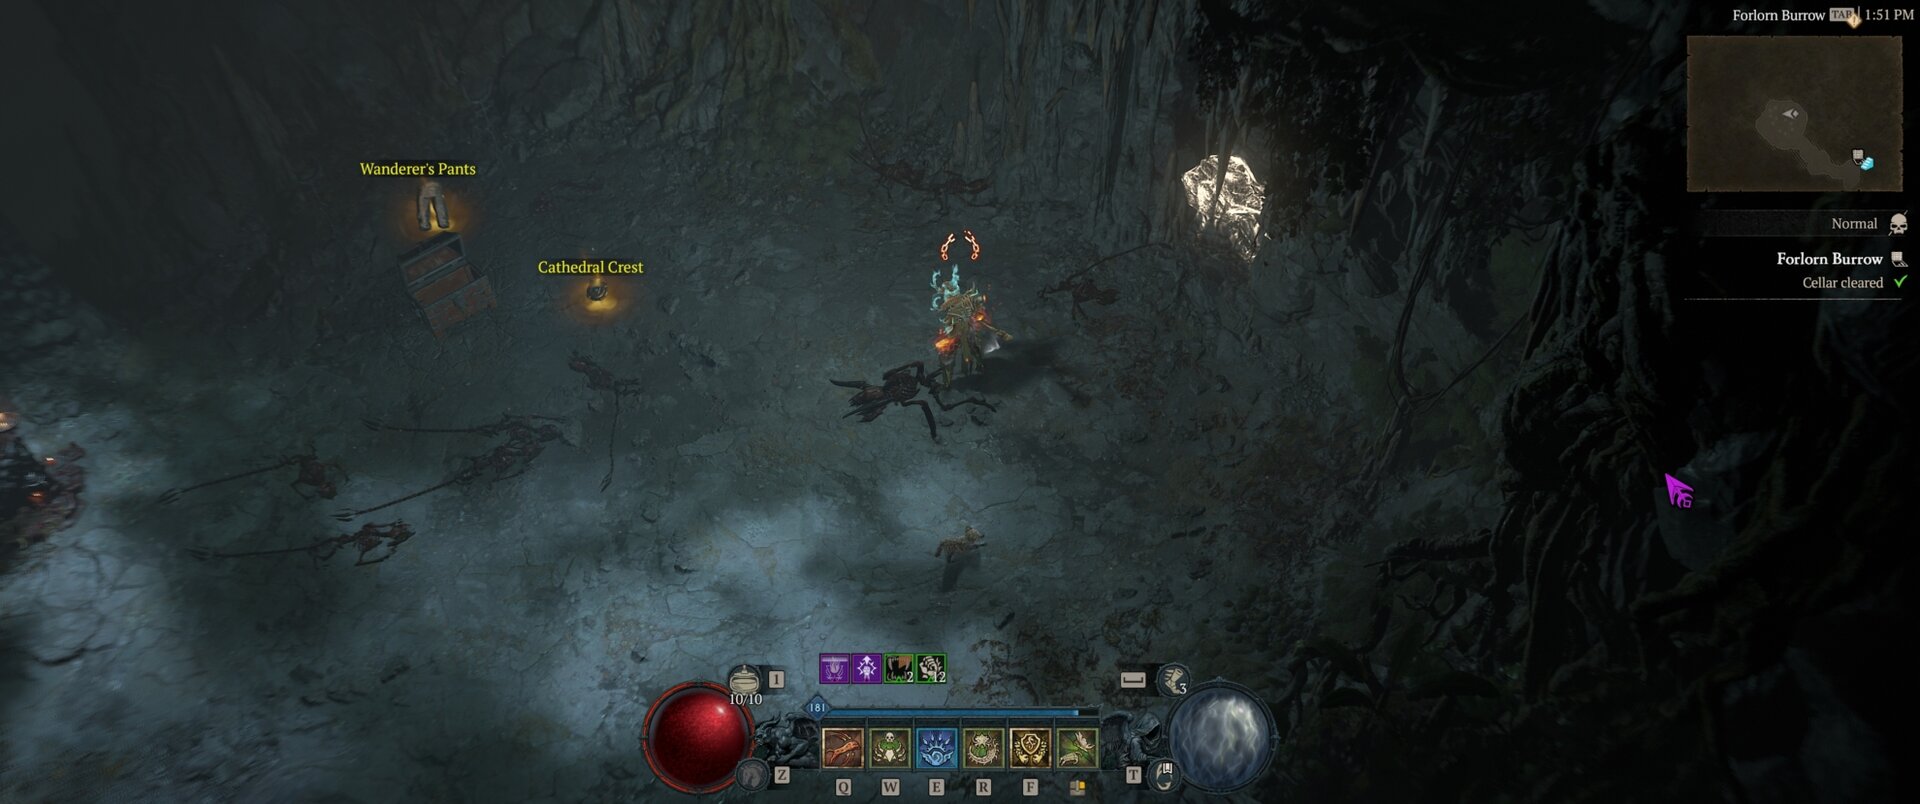
Once inside, slay the 28 familiar-looking cows, and you’ll be rewarded with the Rusted Bardiche as this section’s Cellar Relic.
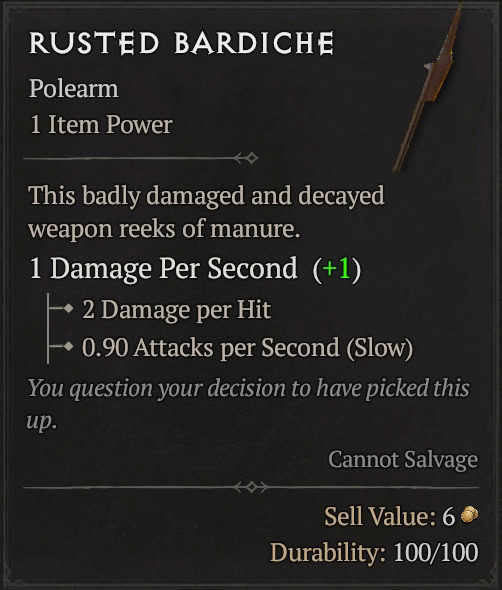
Much like the Stamina Potion, the cellar that drops the Rusted Bardiche can be reset using the Reset Dungeon option, allowing you to collect multiple Rusted Bardiches, which can be traded to other players.
Skovos Relics and Hawezar’s Cellar
The newest and possibly final cellar in the quest for the Secret Cow Level has arrived with the release of the Lord of Hatred Expansion. Much like the two main steps before it, you’ll be after a set of three relics that get turned in for a key.
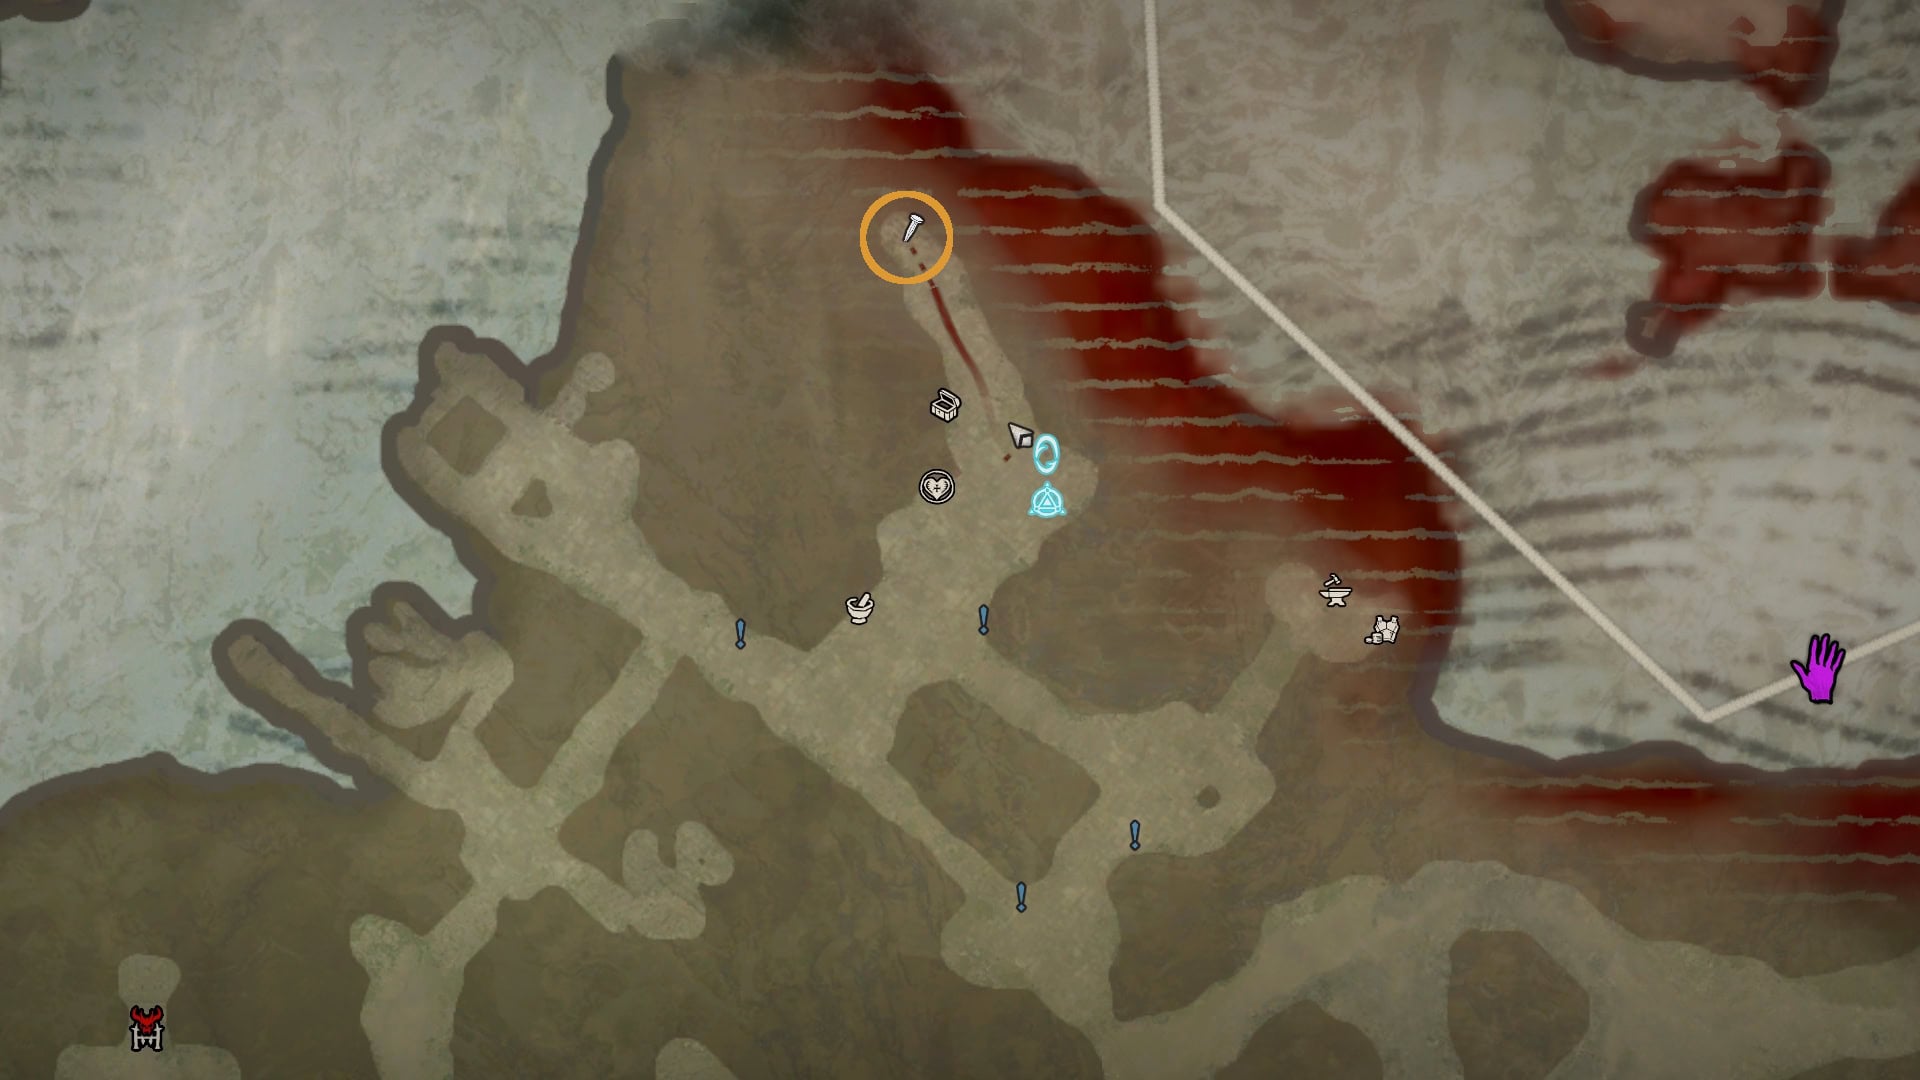
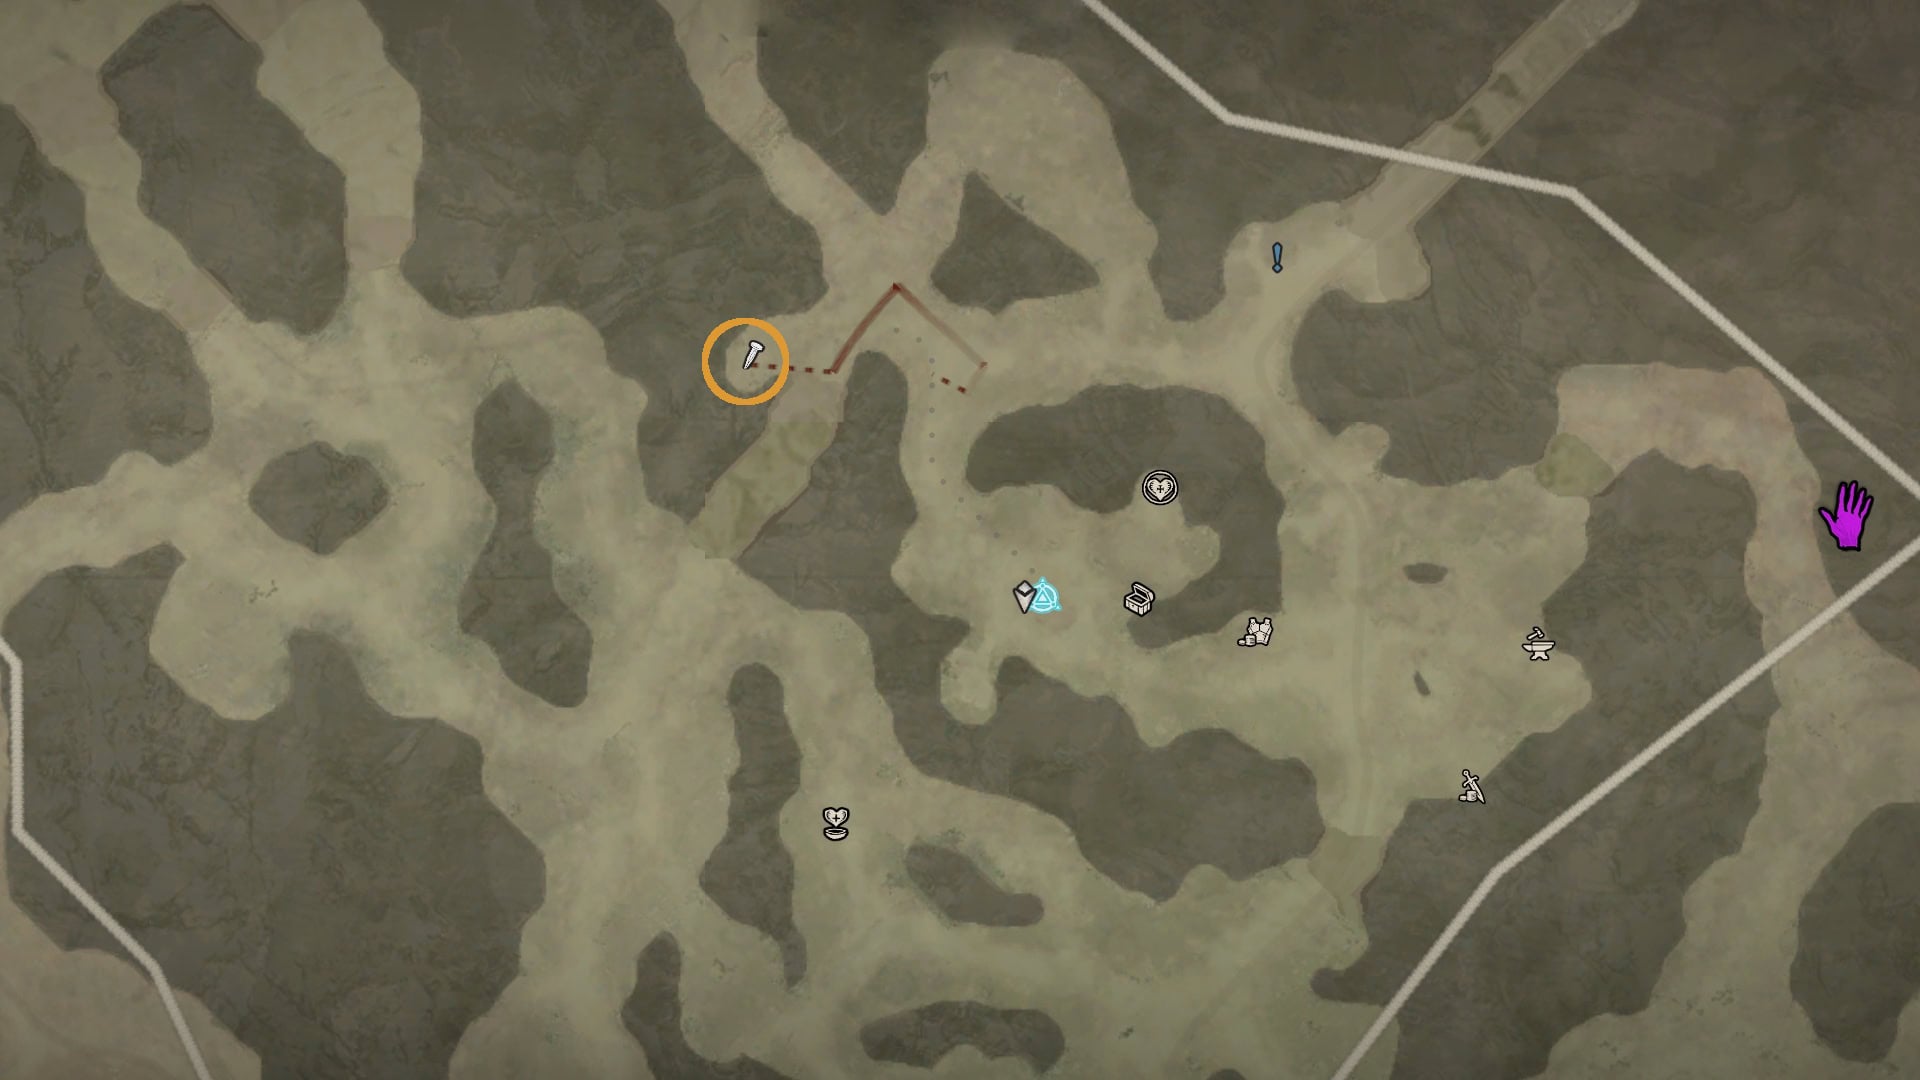
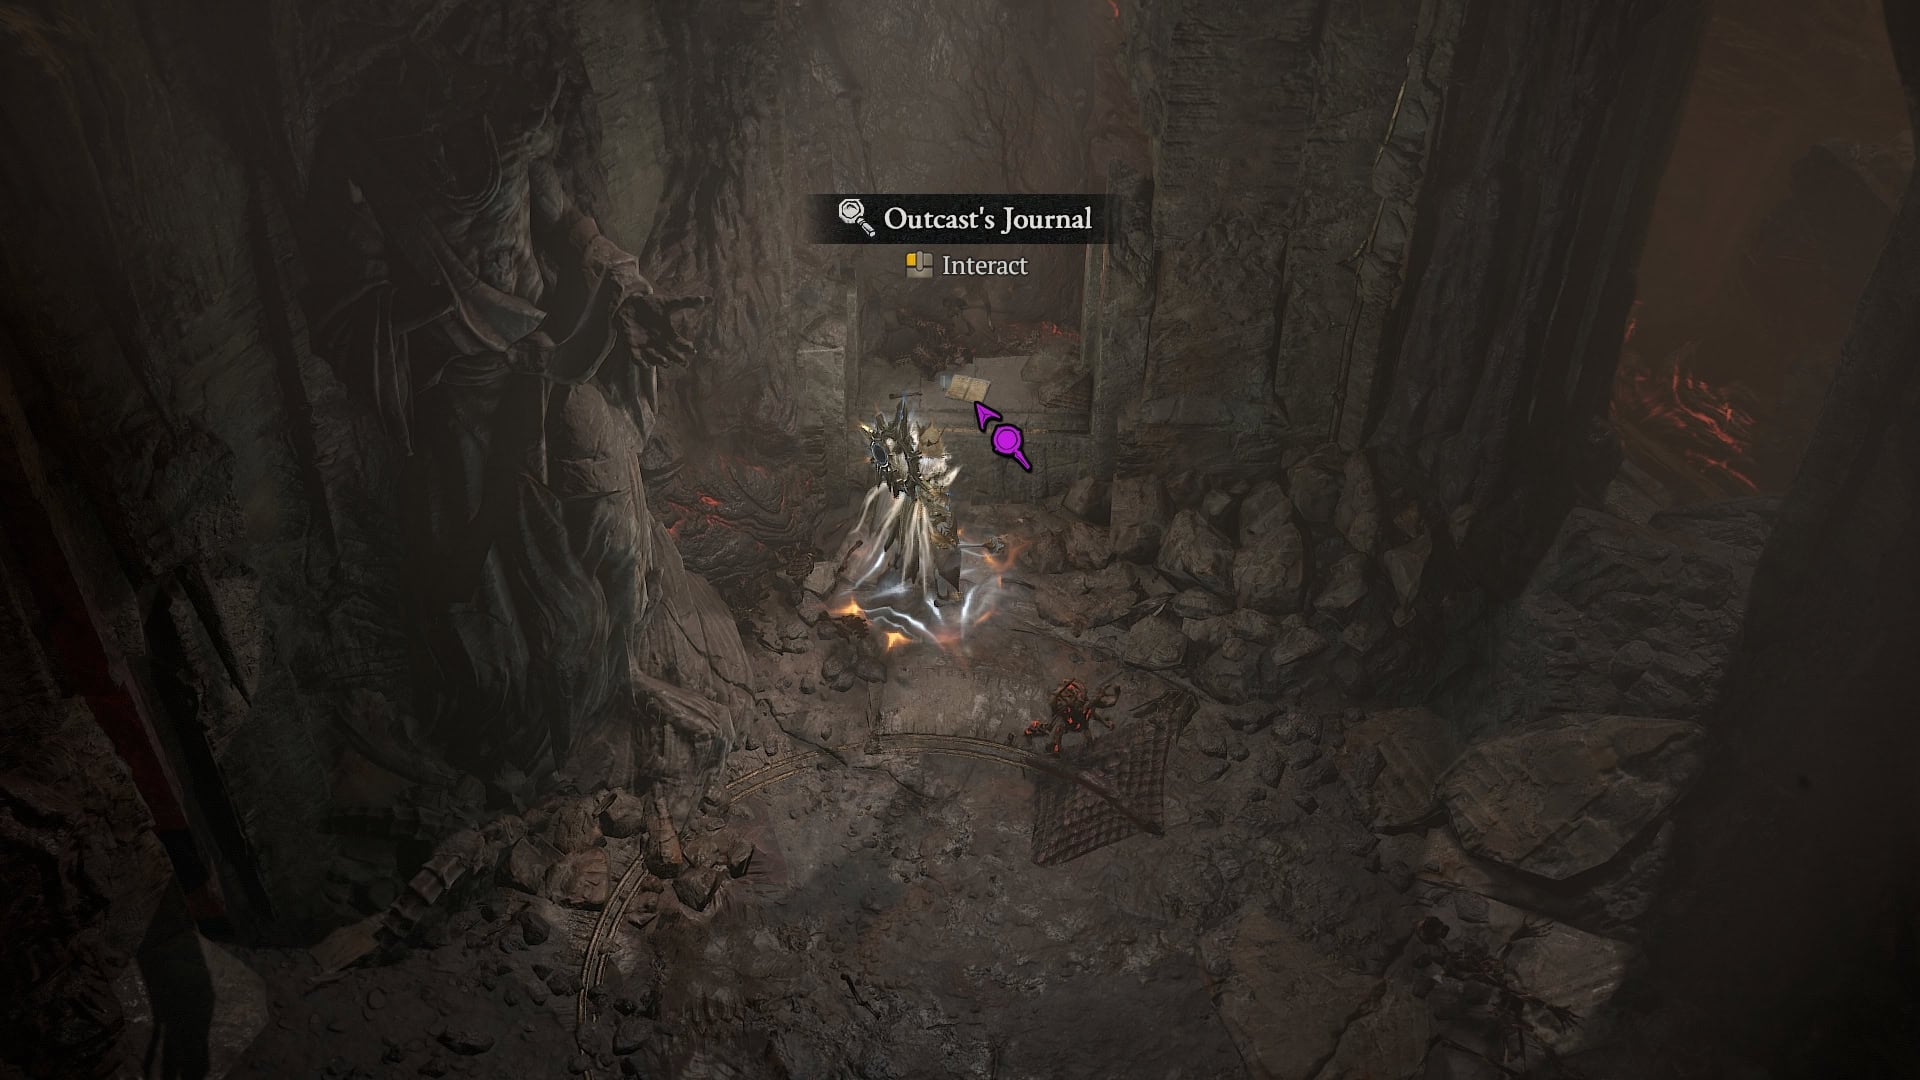
The Outcast’s Journal
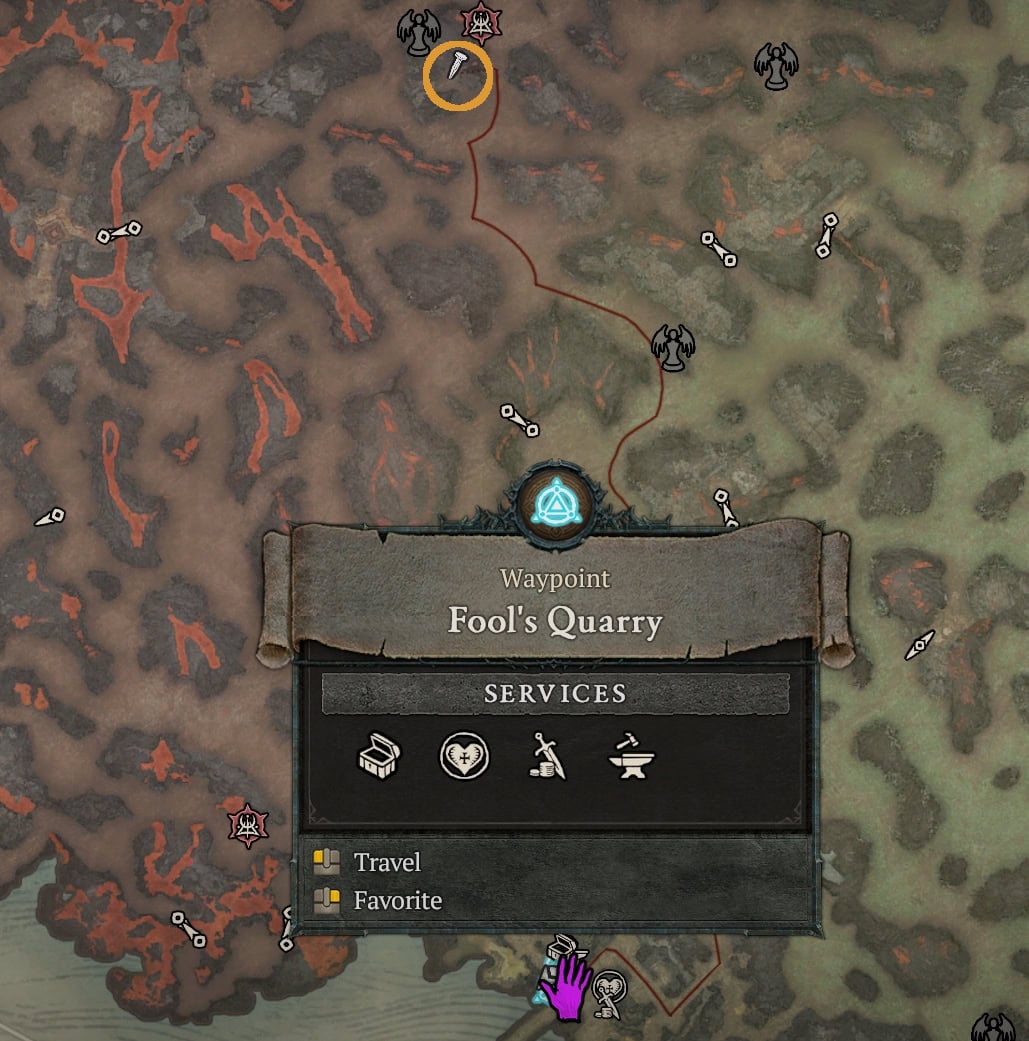
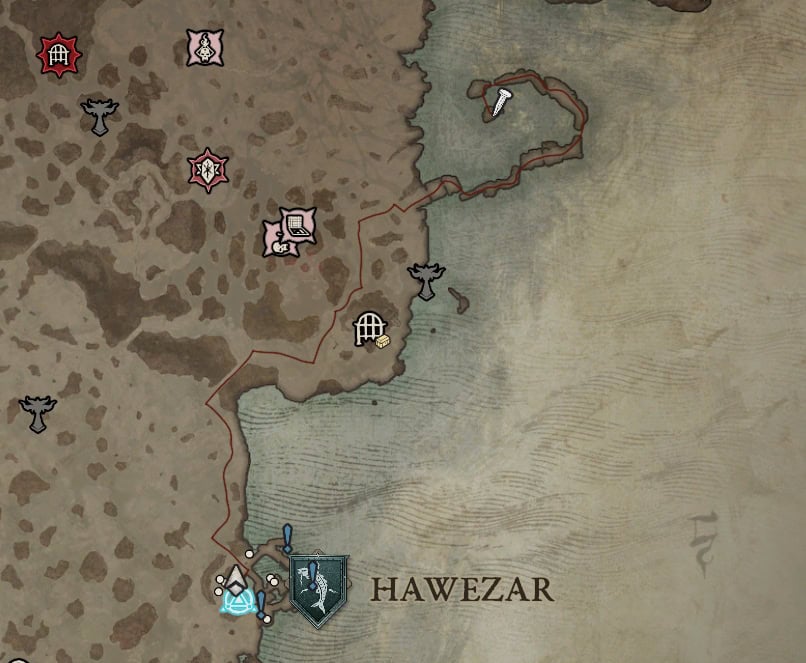
The Outcasts Journal is tucked away into a small nook in Skartara, a fair bit north of Fool’s Quarry.
This is where your hunt starts, and it will be far from the last time you’re here in the process, as it’s recommended to revisit the journal and view the hint to ensure no bugs happen throughout the steps.
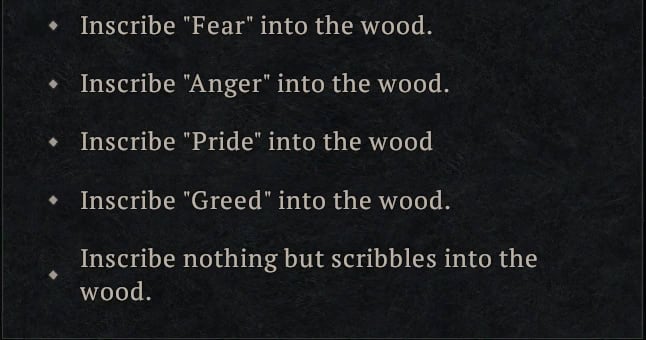
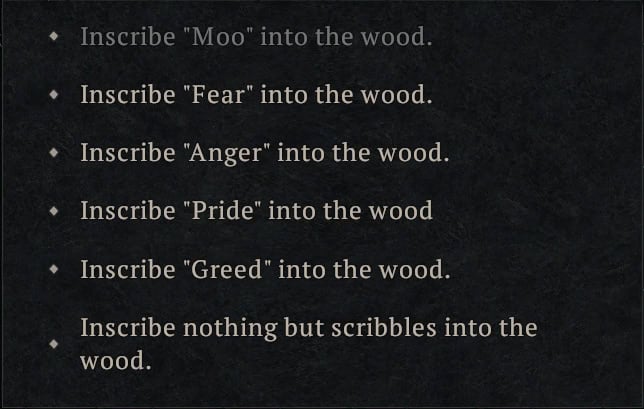
When viewing it for the first time, assuming you’ve skipped at least the base game’s campaign, it will provide the following hint message: “Blind are those that deny their own sins”

If you recall from the base game, you were asked to carve a sin into a Cedar Tablet before entering Kyovashad.
Each of the sins here (outside of scribbles, which provide the default response above) corresponds to a step toward reaching the Cellar for this section. It’s recommended to do them in this order to keep it simple. As such, the steps below will be in that order
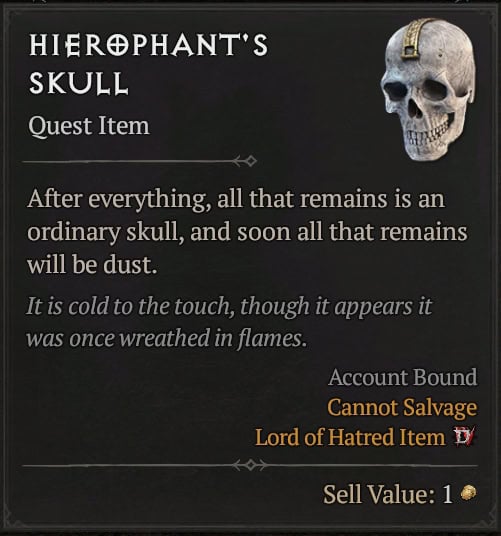
Getting the Hierophant’s Skull
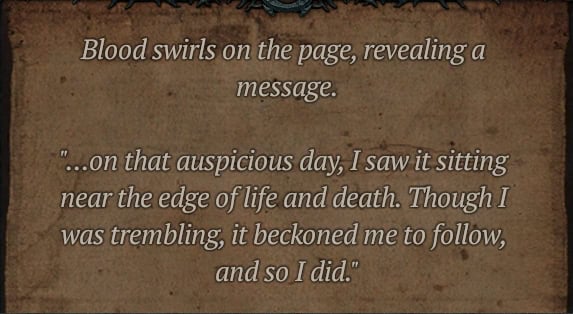
The journey for the Hierophant’s Skull begins by selecting the Fear Sin in Kyovashad. Returning to the Outcast’s Journal will provide the following hint: “… on that auspicious day, I saw it sitting near the edge of life and death. Though I was trembling, it beckoned me to follow, and so I did.”
Reading the Outcast’s Journal is not required for this step, but recommended to ensure the proper flags are set and the step proceeds without issue.
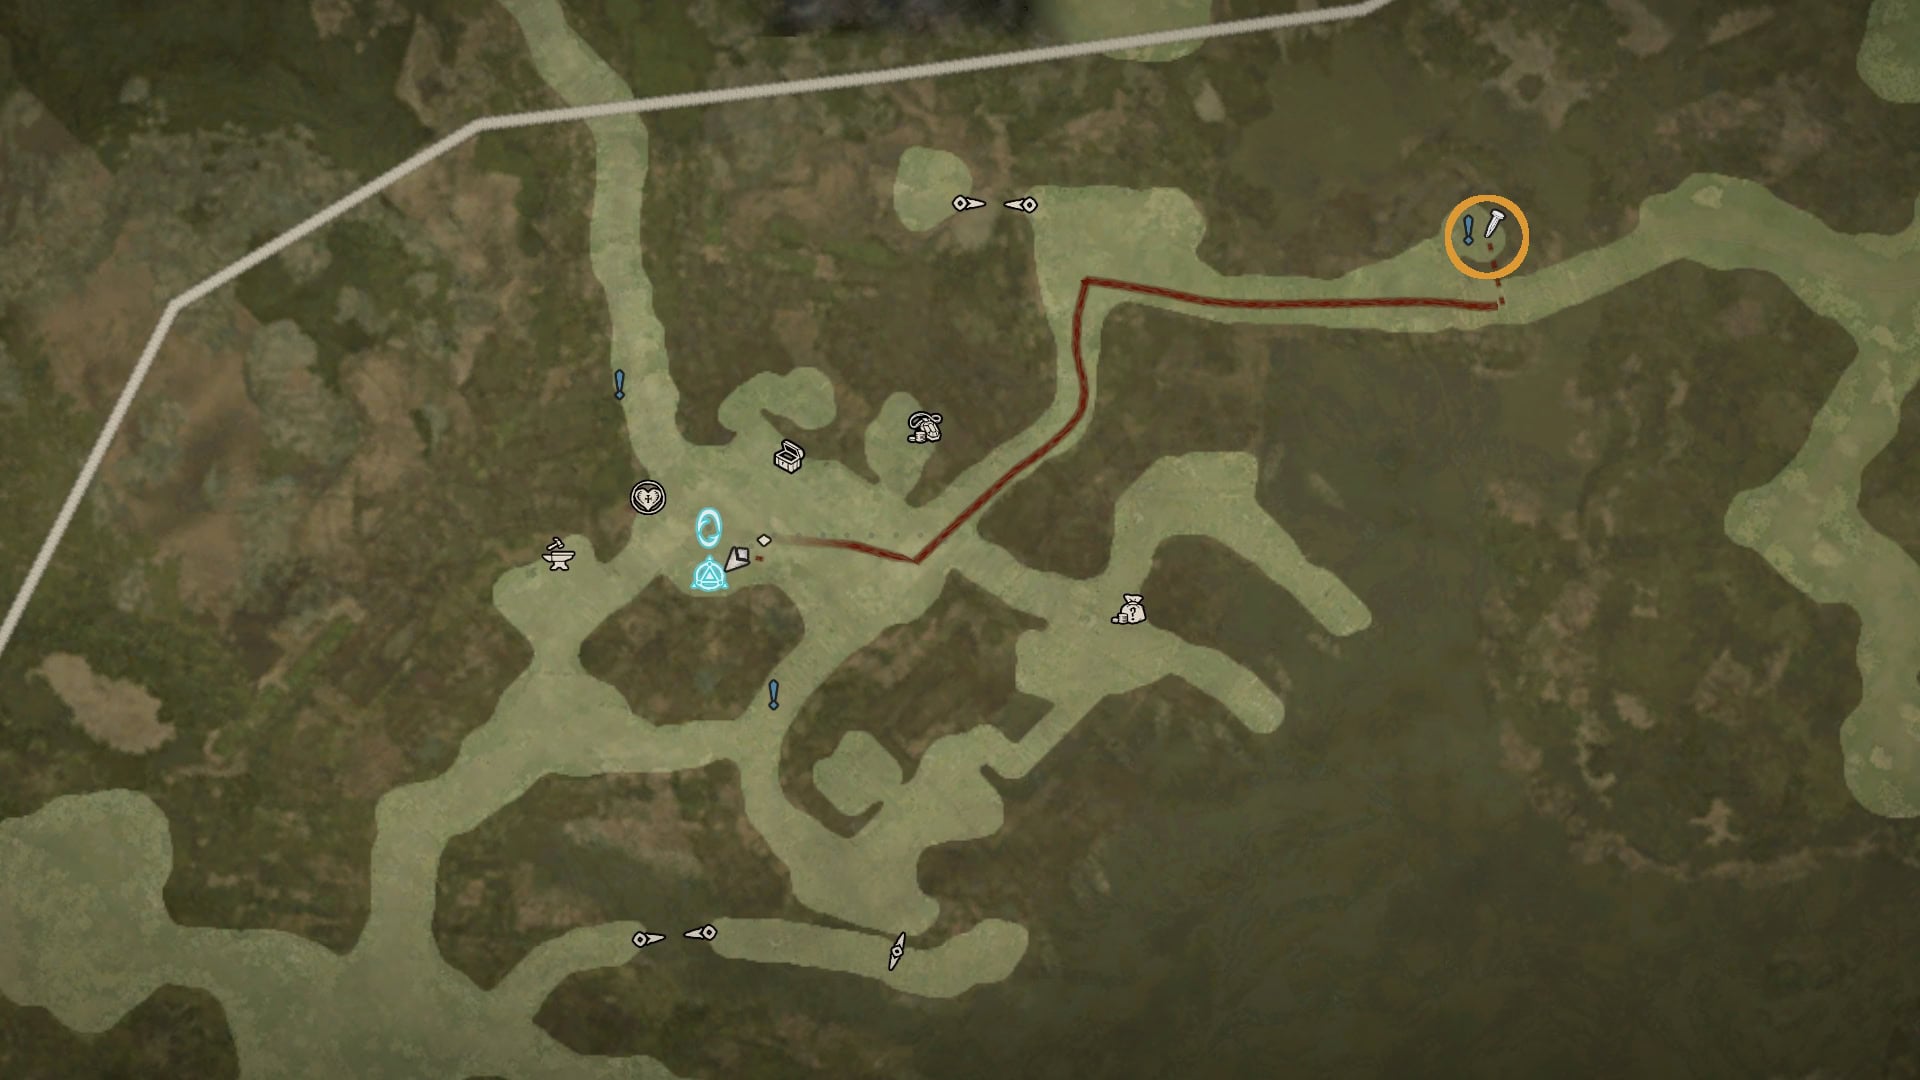
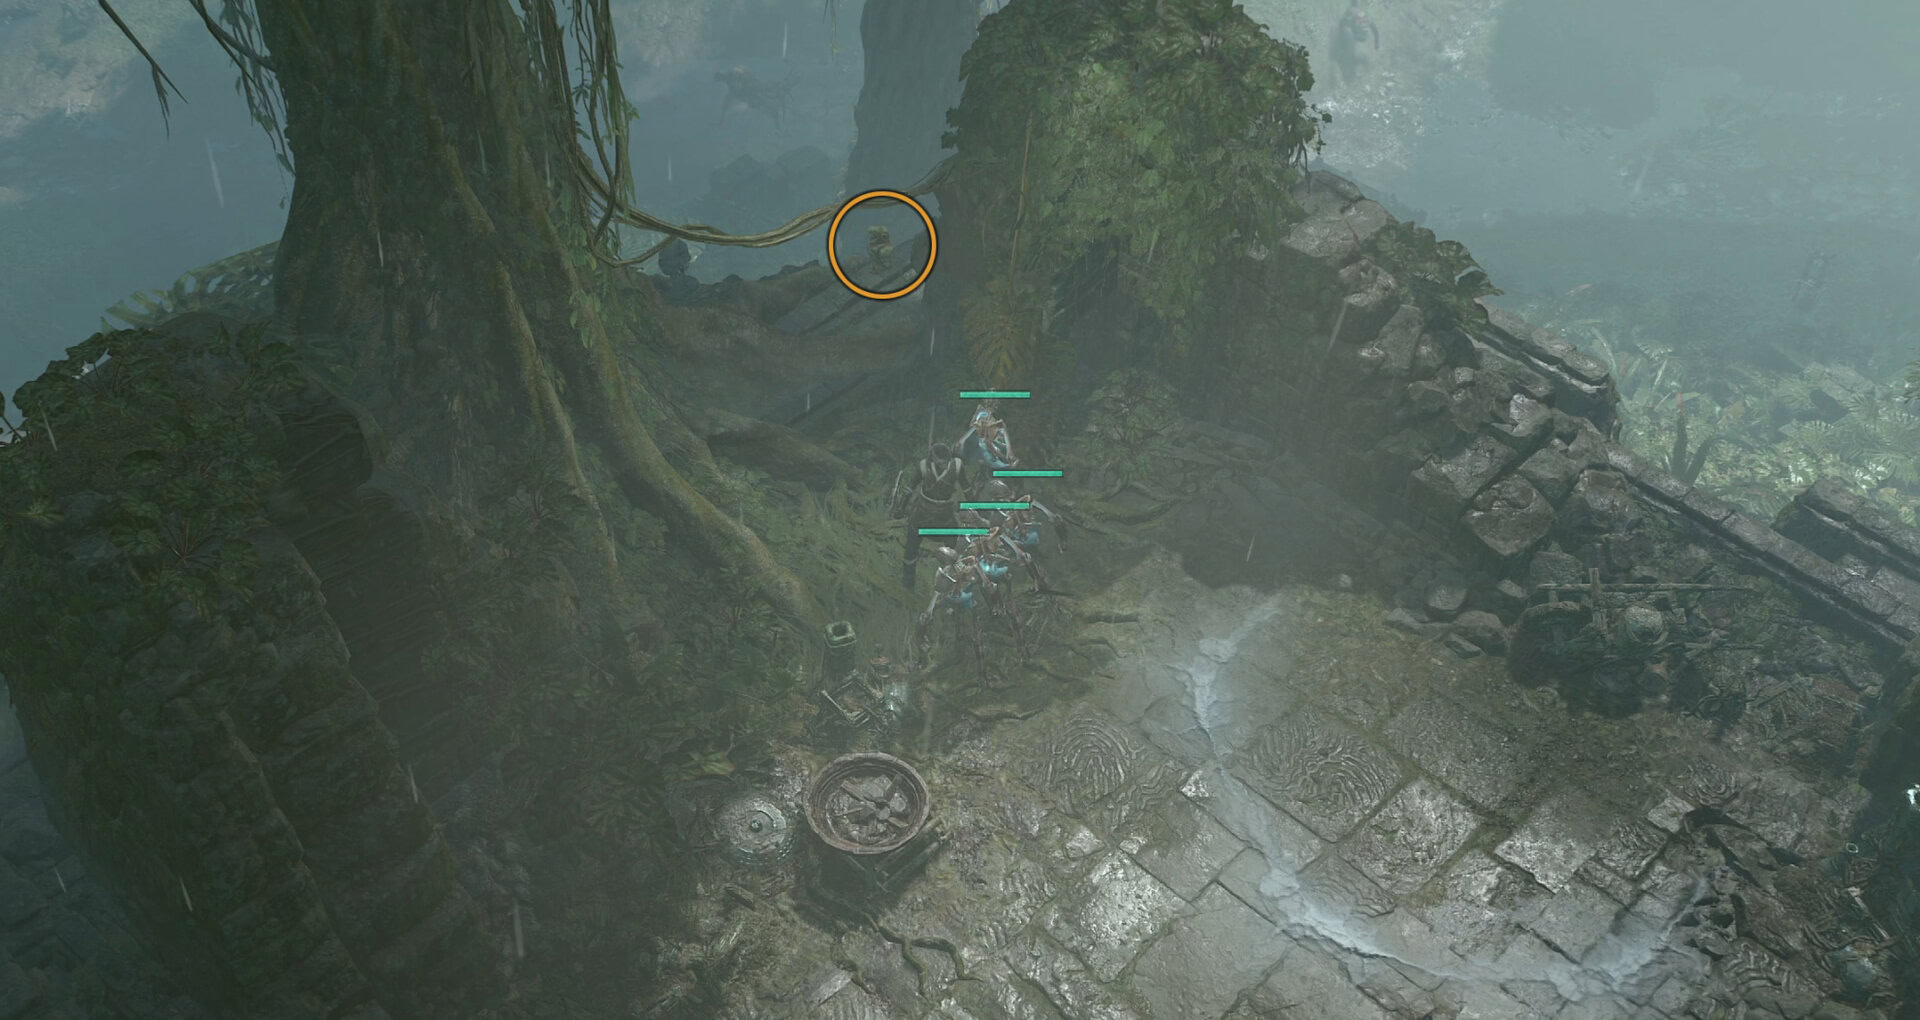
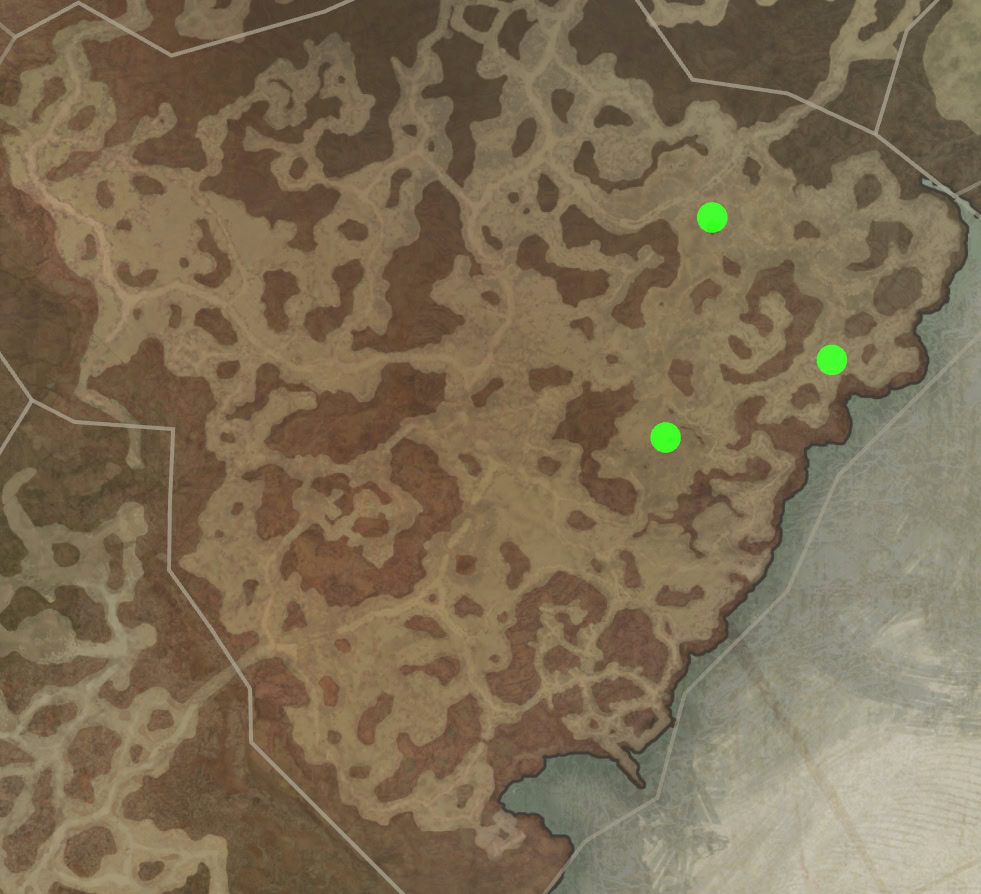
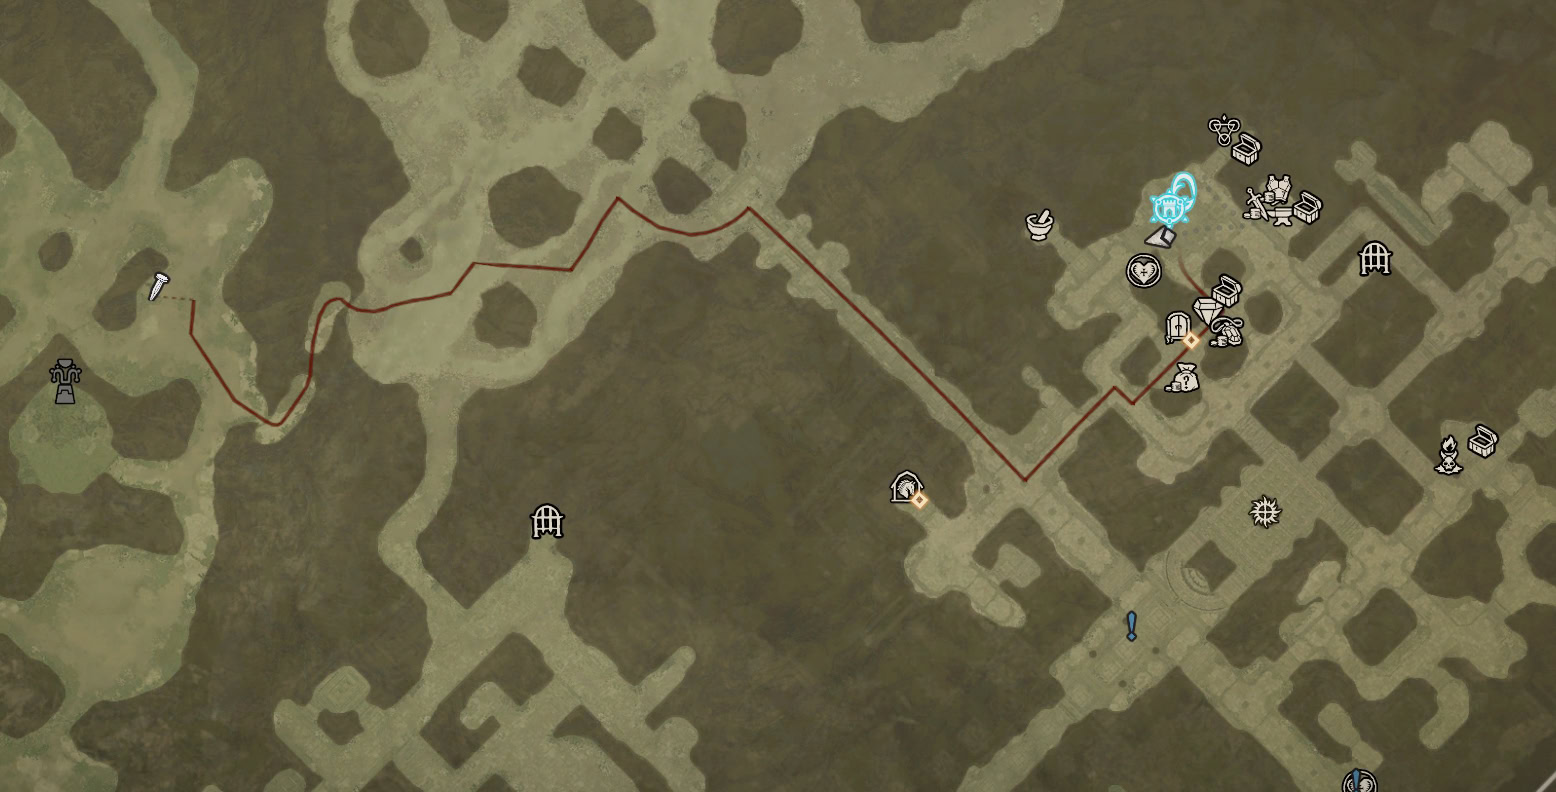
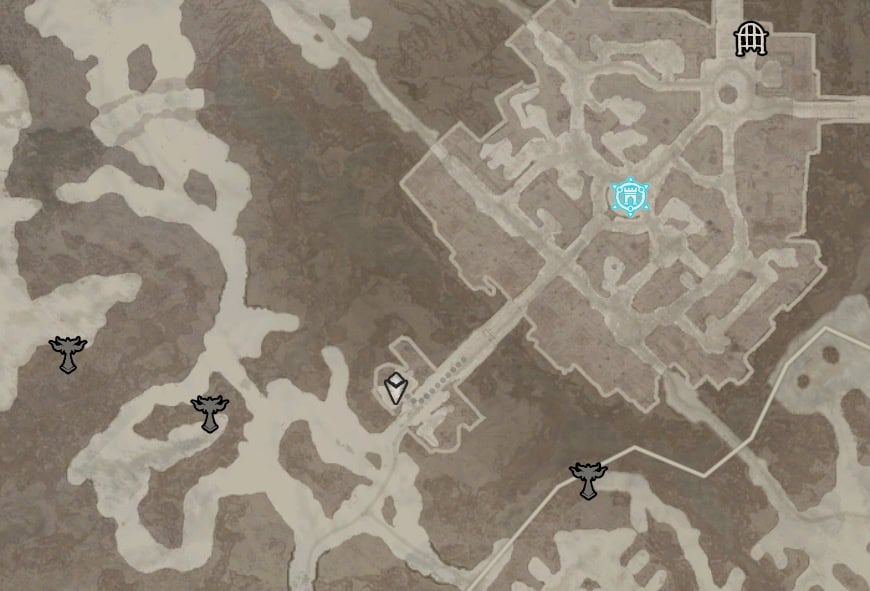
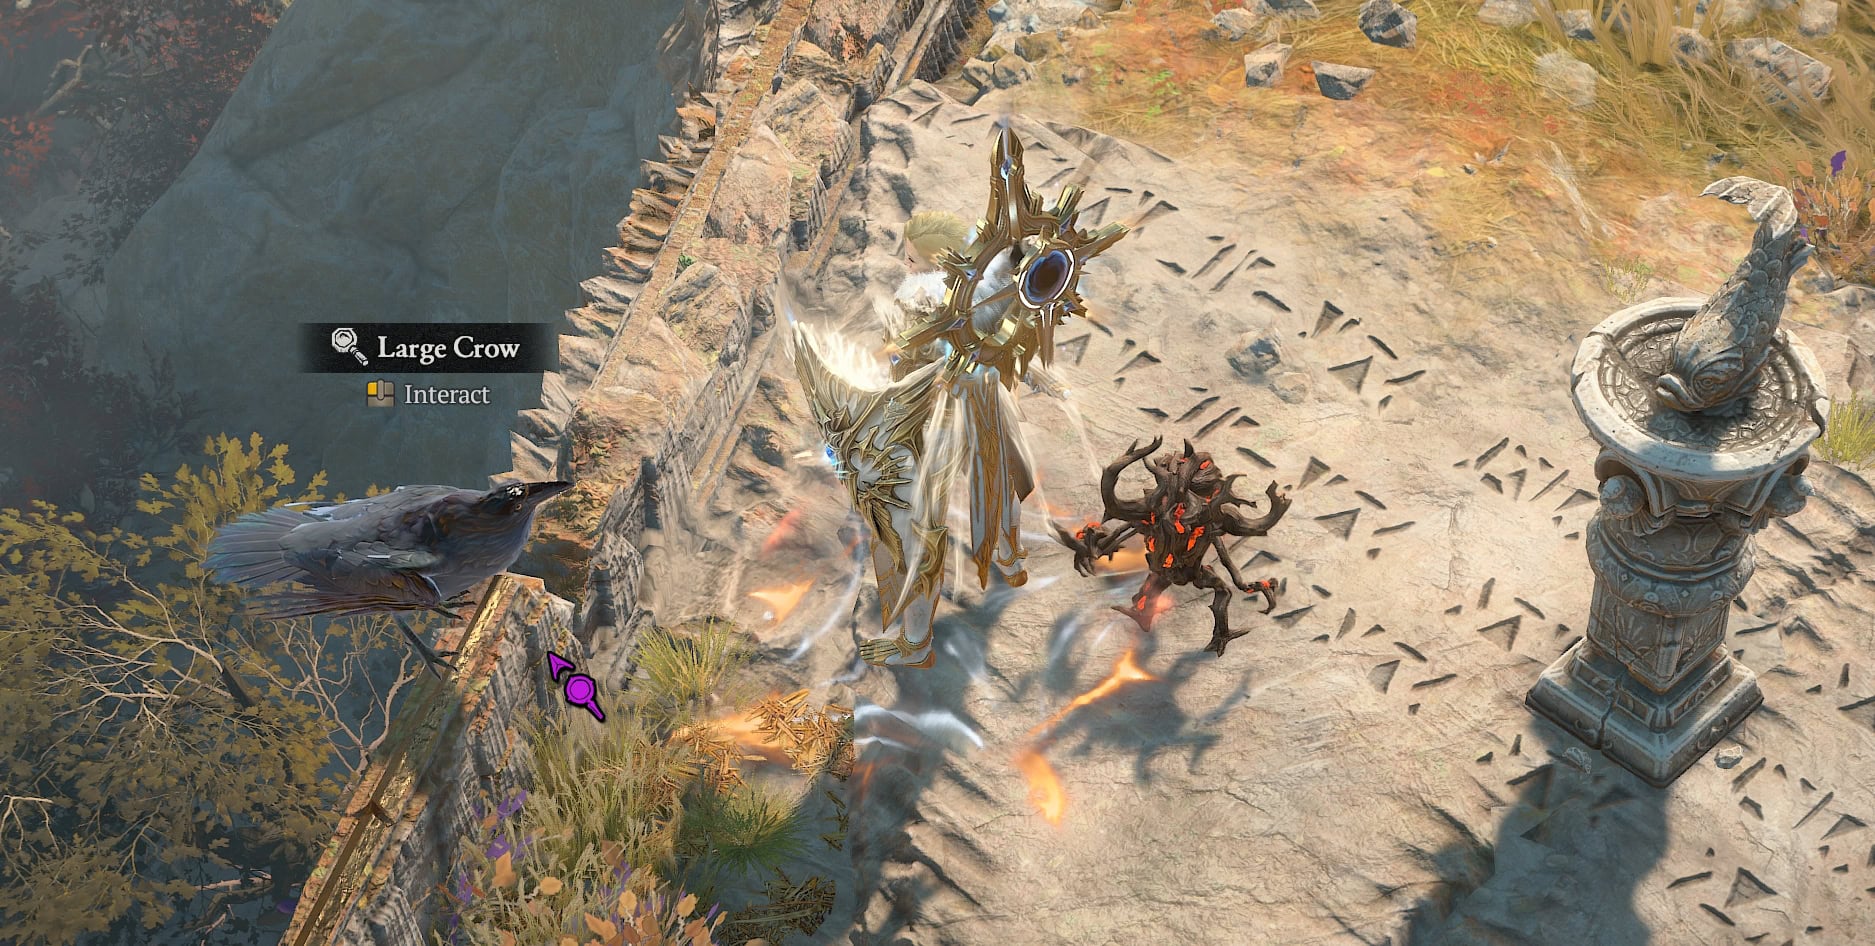
Next, you’ll need to head to the Lyncander region, specifically to the Ruins of Broken Reason. Here, there will be a Large Crow you’ll need to interact with for this step.
For quicker travel, if the Xanderos Stronghold is complete, the Waypoint will bring you just to the West of this location
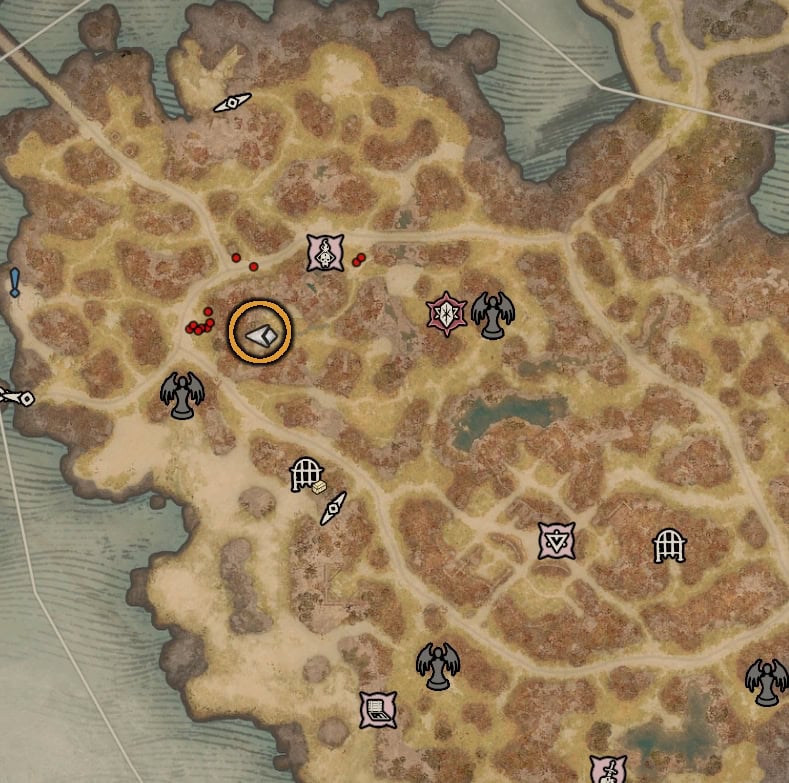
After interacting with the Crow, it will fly along a set path, and you’ll need to stay near the Large Crow as it flies a loop around the surrounding area. Failing to do so will see the Crow reset to its original location. Below is a map that outlines its path, as well as the recommended path to take when following it.
In the locations on the map below where the Crow’s path loops, it will circle that area a couple of times before moving on. Don’t accidentally get ahead of it, or you’ll have to restart!
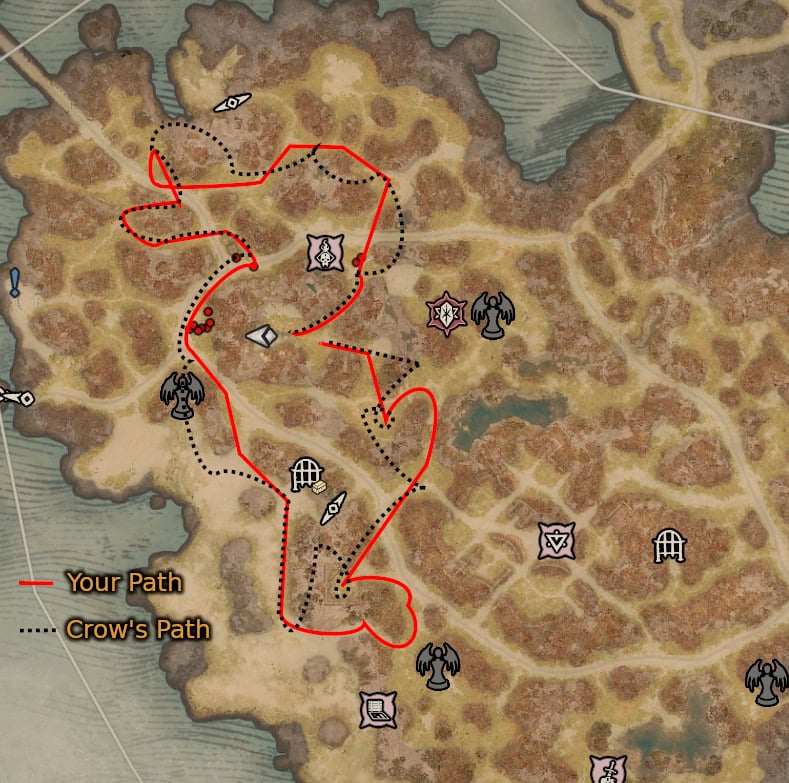
After completing the loop successfully, the crow will disappear and leave behind the Hierophant’s Skull. Hold on to it, as you’ll need to turn it in later.
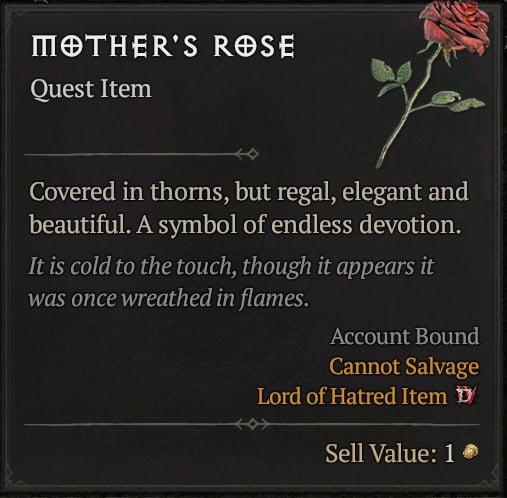
Getting the Mother’s Rose
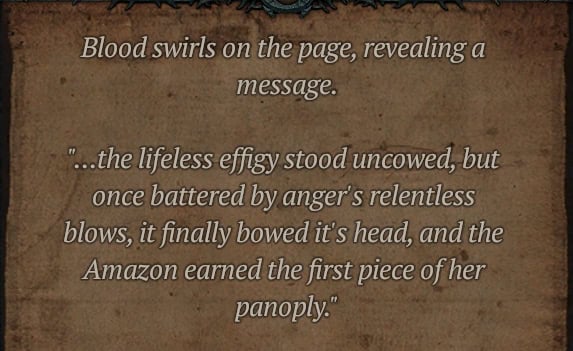
The Mother’s Rose is the only RNG step of this process and requires the Anger Sin to be selected in Kyovashad. Upon returning to the Outcast’s Journal, it will present the following hint: “… the lifeless effigy stood uncowed, but once battered by anger’s relentless blows, it finally bowed its head, and the Amazon earned the first piece of her panoply.”
Reading the Outcast’s Journal is not required for this step, but recommended to ensure the proper flags are set and the step proceeds without issue.
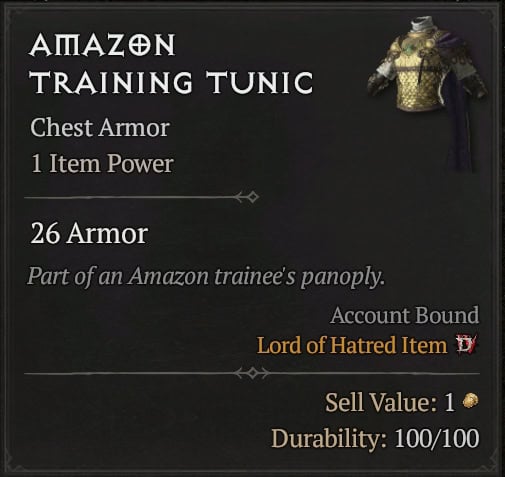
From this, as you may have already guessed, we need to go to the Training Grounds in Temis and continuously attack the dummy there.
While Kyovashad does have a Training Ground as well, this drop appears to be restricted to the one in Temis.
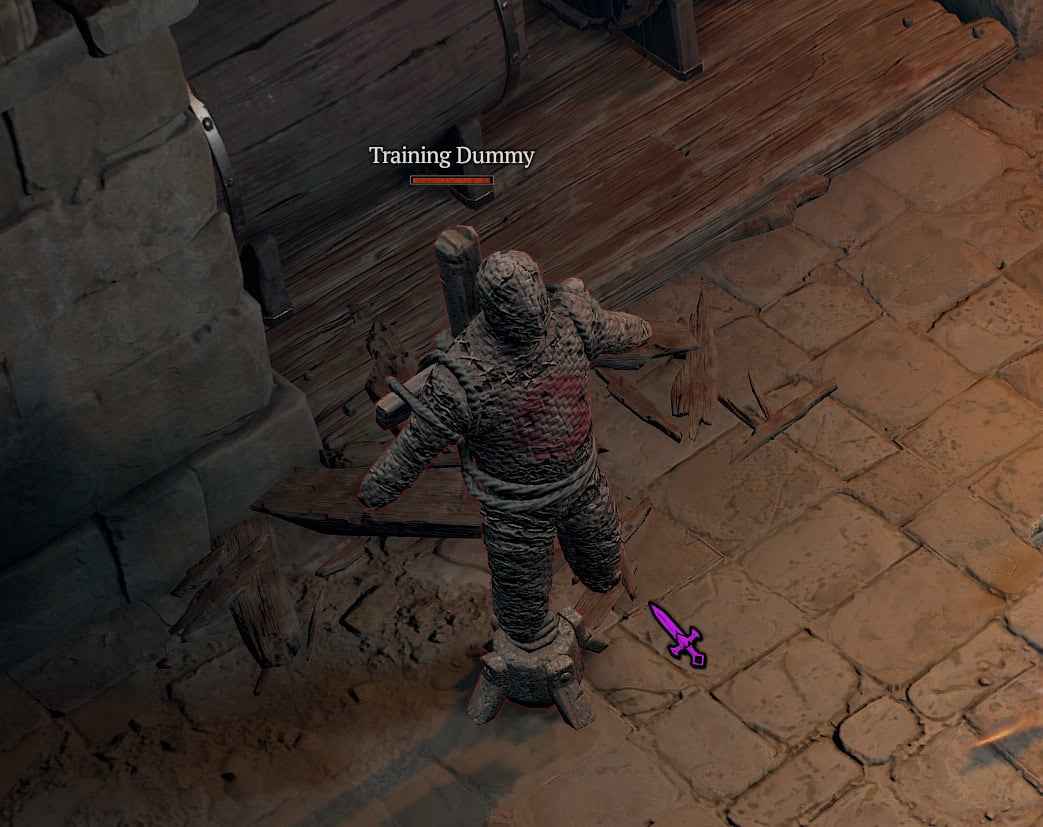
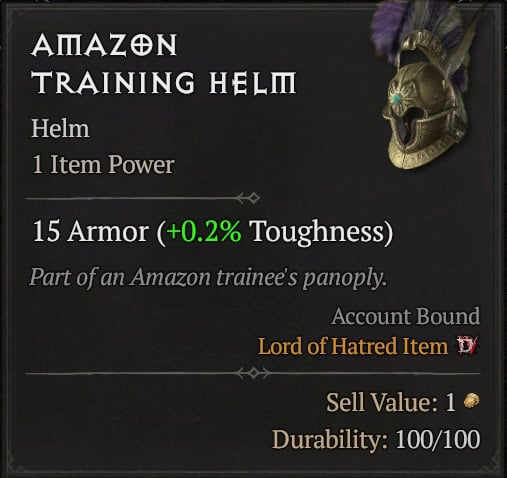
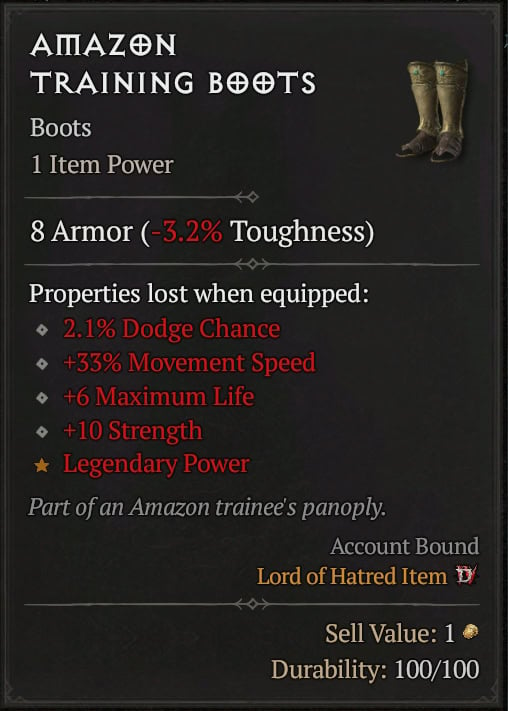
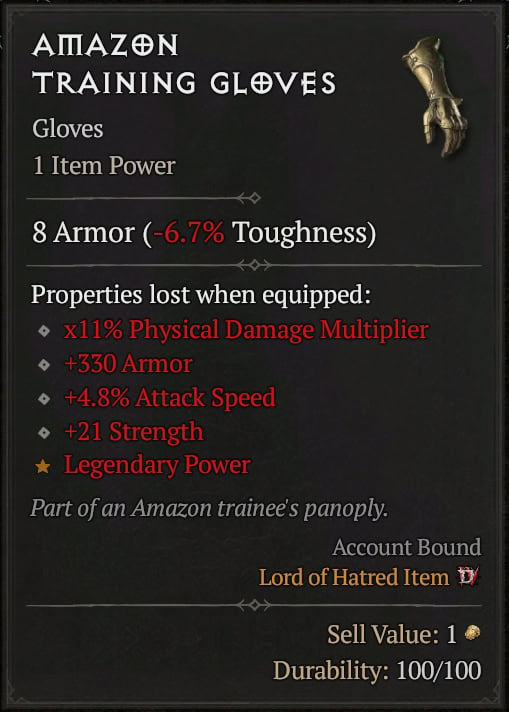
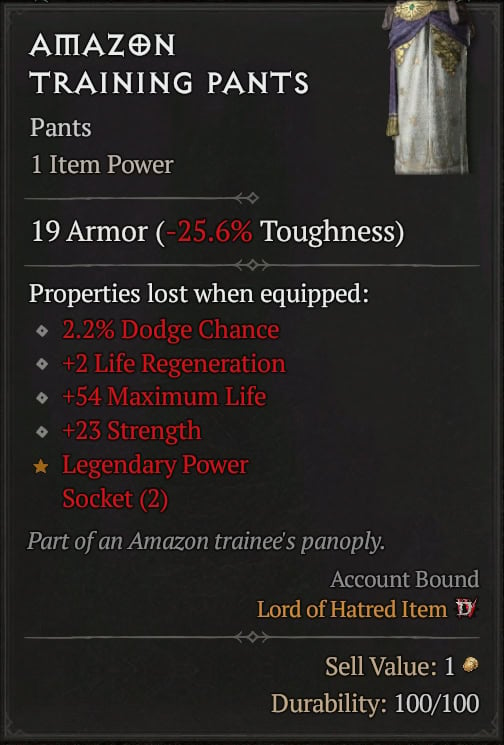
Once we hit the dummy enough times, it will eventually relinquish the Amazon’s Training Helm, which, as its flavor text states, is part of an Amazon’s panoply (armor set). Equip the Helm, and you can move on to the next piece.
If the dummy refuses to drop the helm, you can adjust the dummy settings or reset the zone to try again. I’ve had the most success with multiple Normal Dummies active. Of course, make sure your loot filter is off, or at least not hiding white items.
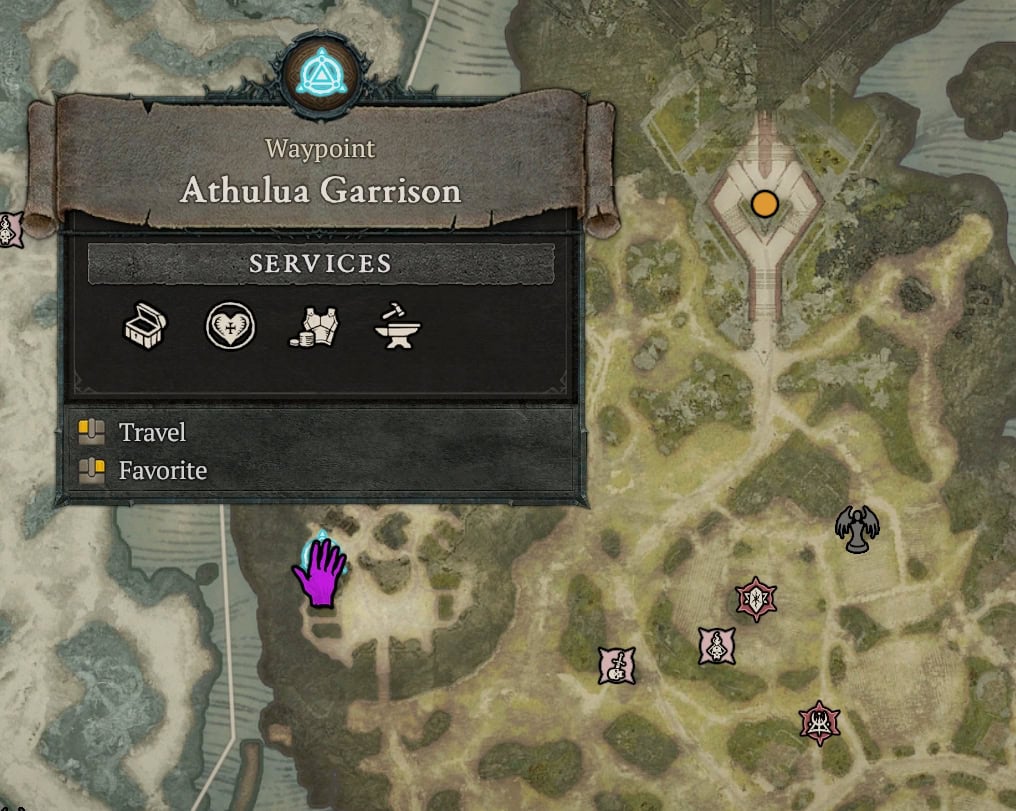
So you now know you’re after a set of Amazon Armor. To get the rest of the pieces, you’ll need to head to the area around Athalua’s Observatory.
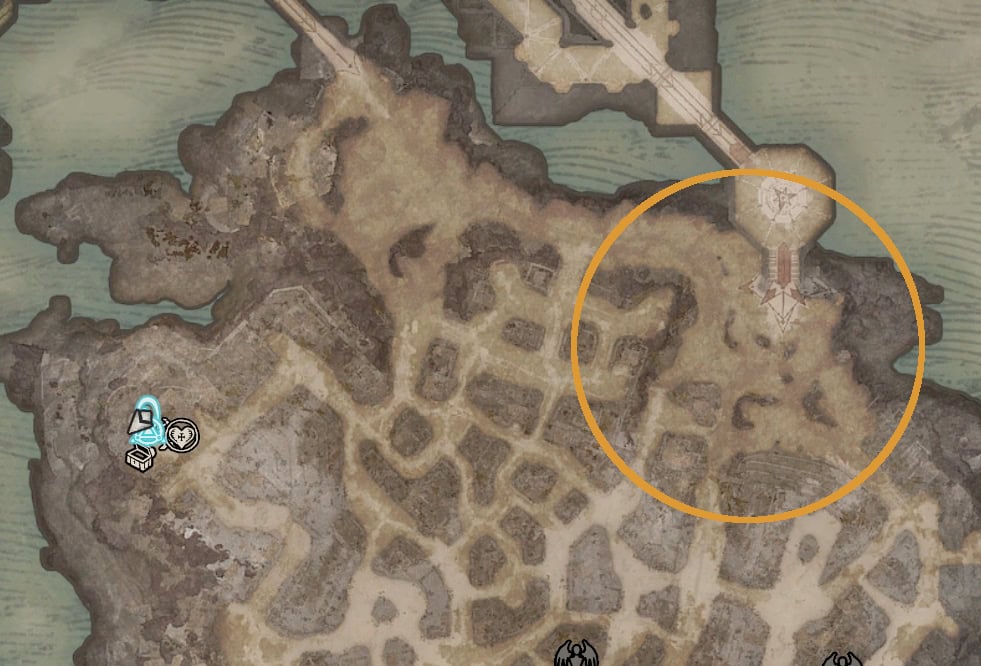
In this area, you’ll find many Corrupted Amazons. Each kill is RNG to drop the next piece of the set. You’ll need to collect the Tunic, Legs, Gloves, and Boots as you drop them. Be sure to equip each piece as it drops or the Mother’s Rose will not drop.
With all five pieces equipped, you’ll need to defeat the nearby Super Elite, Vasha the Unbroken.

With the full set equipped, the Mother’s Rose will drop upon her defeat. Hold on to it, as you’ll need to turn it in later.
A number of people have reported the Mother’s Rose not being a guaranteed drop, or even dropping early in other cases. I’ve not had either bug occur over multiple attempts to support these claims.
Getting the Father’s Chains
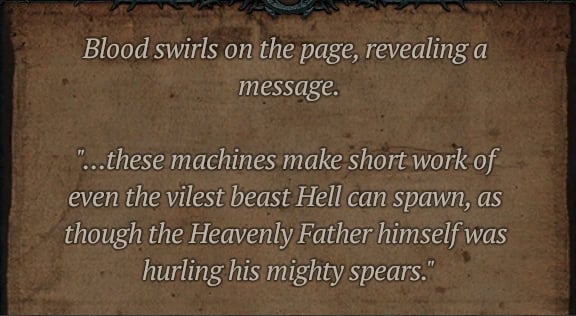
The last relic to get from Skovos is the Father’s Chains. This will require your sin in Kyovashad to be set to Pride. Upon visiting the Outcast’s Journal once more, it will provide the following hint: “… these machines make short work of even the vilest beast hell can spawn, as though the Heavenly Father himself was hurling his mighty spears.”
Unlike the previous steps, visiting the Outcast’s Journal is mandatory for this step. The other two do not explicitly require the journal to be read.
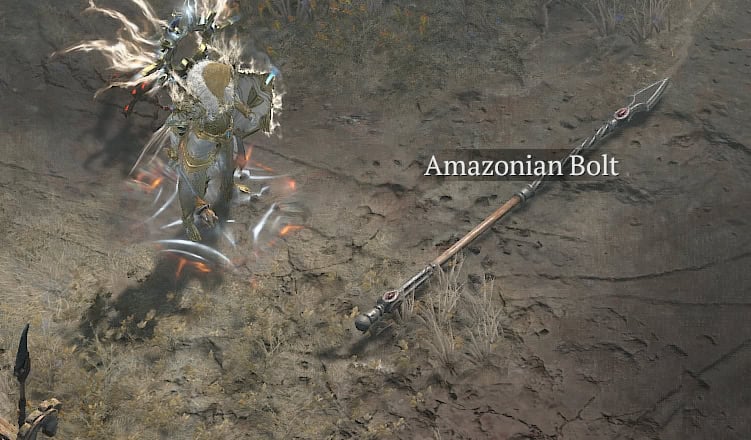
If your first thought was about the Ballista enemies near Athalua’s Observatory, you’d be correct. Head there and take them out.
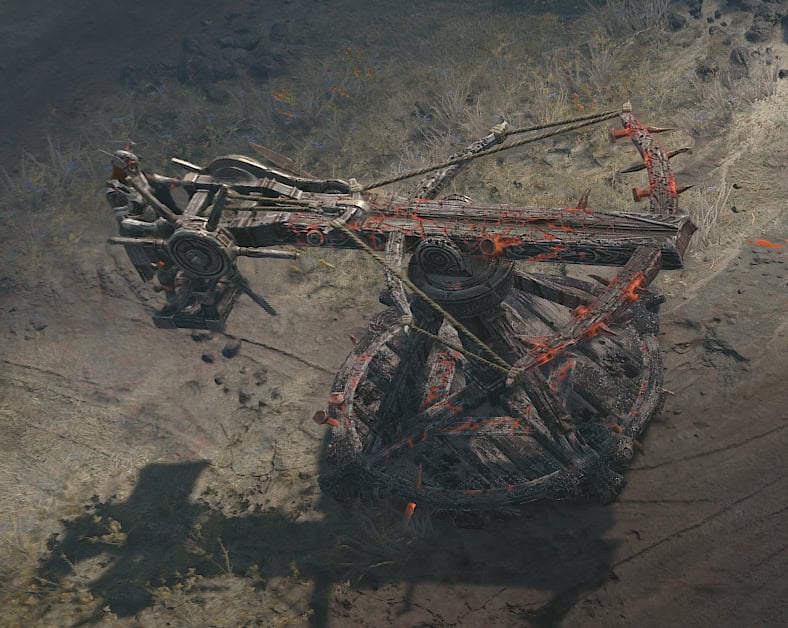
The first Ballista you destroy should always drop the Amazonian Bolt, assuming you heeded the warning and read the Outcast’s Journal for this step.
This is one of many items that will get sorted out by a loot filter. If you see one on the ground as shown below, adjust your filter to pick it up.
So now that you have a bolt, now you need to find the Ballista to fire it. For that, you’ll need to head to the Idyllic Reach Cellar located in Philios.

Immediately inside the Cellar, you’ll spot the Unloaded Ballista. Interact with it to load the Amazonian Bolt and cross the gap.
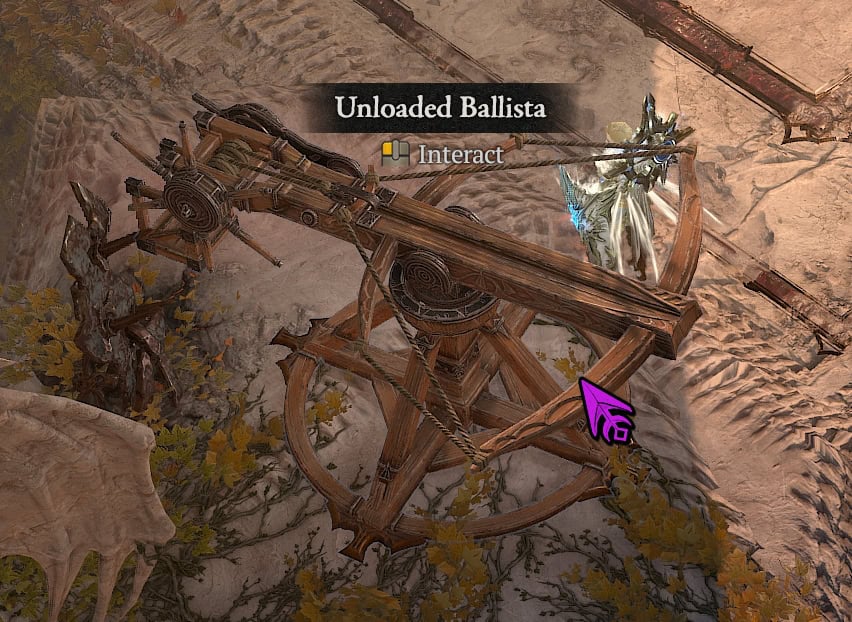
Follow the path here to reach the Statue of the Heavenly Father. Interact with it to summon an Elite mob, N’facl the Jailer of Angels.
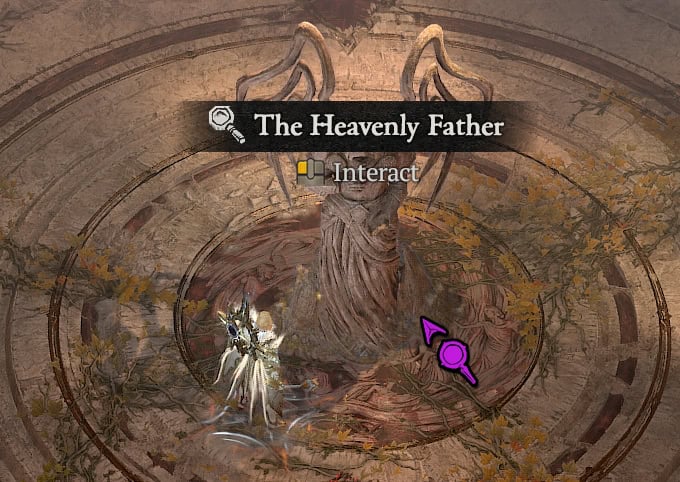
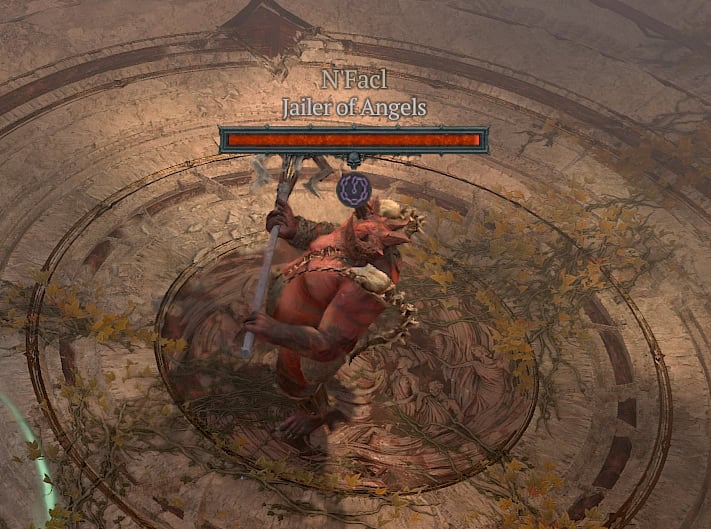
Upon his defeat, N’Facl will drop the Father’s Chains. Hold on to these, as you’ll need to turn them in shortly.
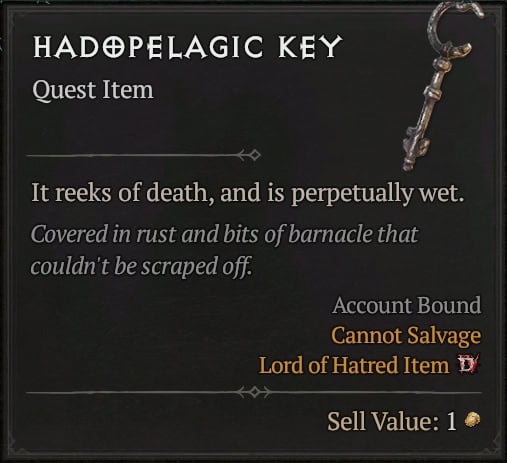
Getting the Hadopelagic Key
With all three relics in hand, you can go turn them in to the large Signal Braziers found in the three regions related to each relic.
First is Antia’s Flame, located in Philios. This is where you’ll turn in the Father’s Chains.
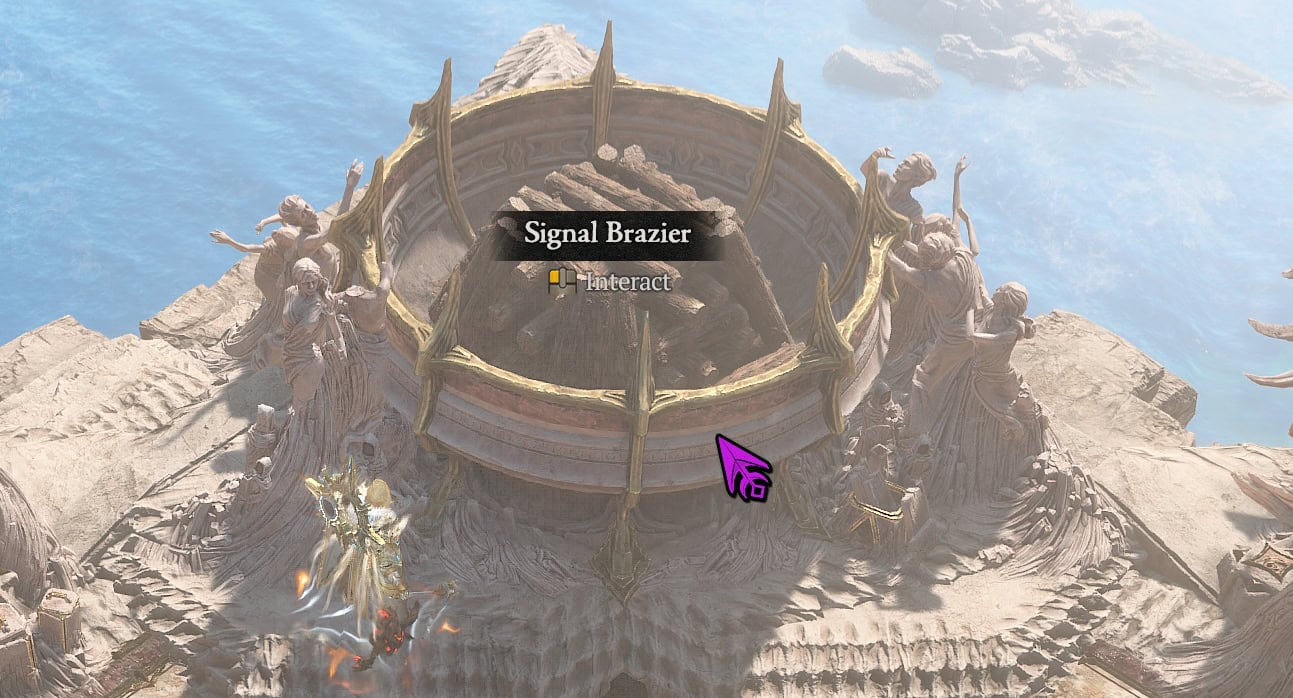
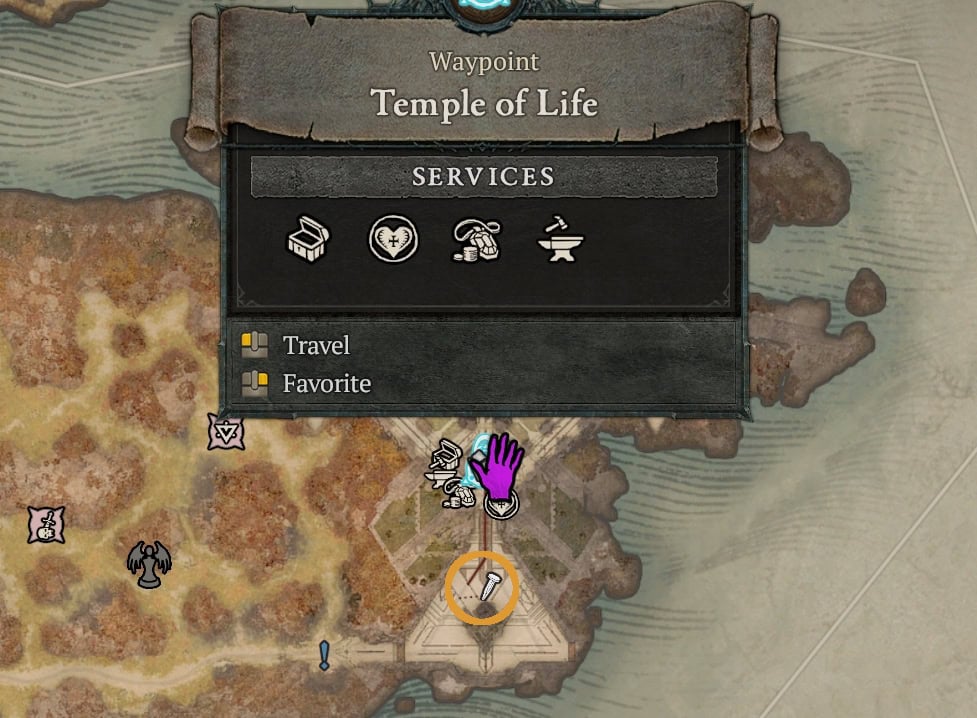
The next Brazier is found at the Temple of Life in Lycander. Here you’ll turn in the Hierophant’s Skull.
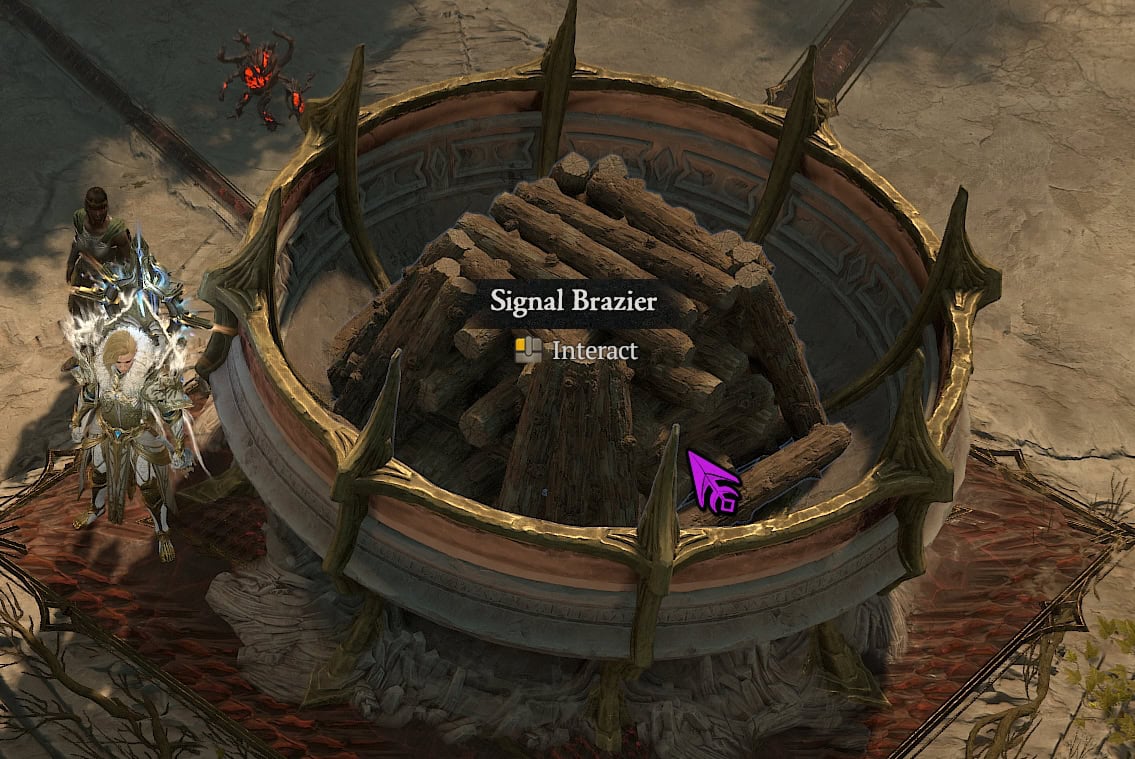
The final Brazier is located at the Temple of Courage in Athalua. This is where you’ll drop off the Mother’s Rose.
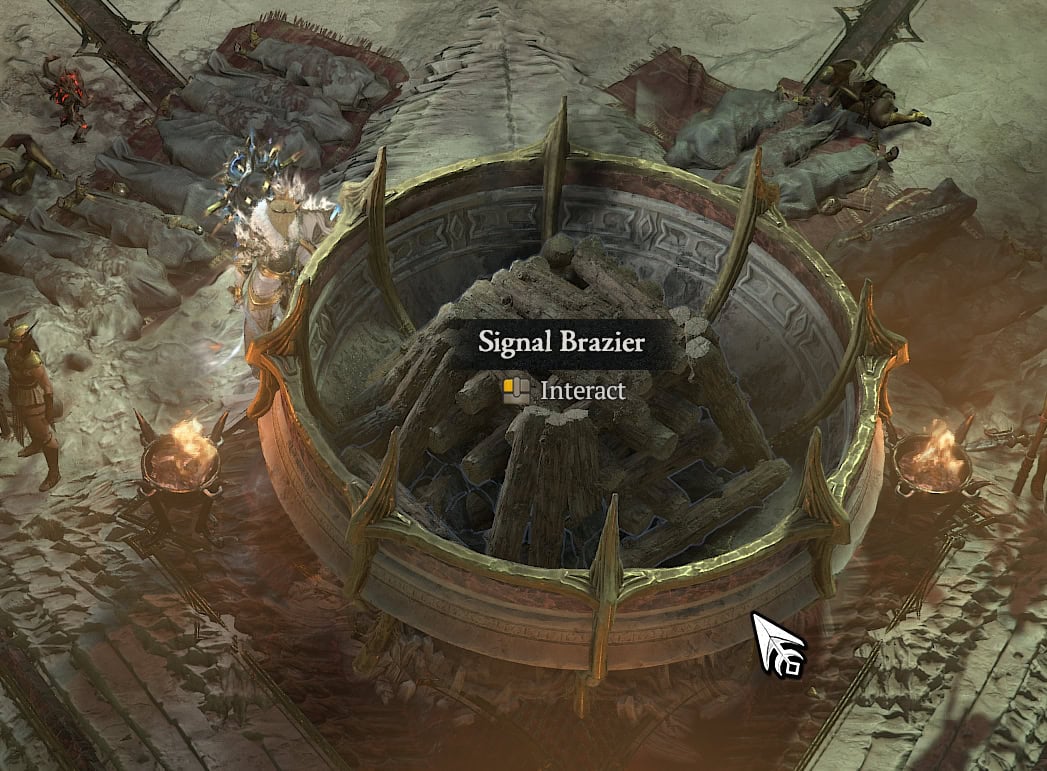
When the third relic is dropped off, the Hadopelagic Key will drop from the Brazier in front of you. The order they are turned in and when they are turned in does not matter.
Using the Hadopelagic Key
Now that you have the Hadopelagic Key, there’s just one last step remaining: using it to claim the Cellar Relic. This requires your sin in Kyovashad to be set to Greed, which offers the following hint at the Outcast’s Journal: “…knowing it existed wasn’t enough. I wanted more. I needed more. To see with my own eyes.”

The Key itself offers a myriad of hints from its name, description, and flavor text. All of which suggests a very deep section of water associated with death. There’s nothing like that on Skovos, though, so where do you go?
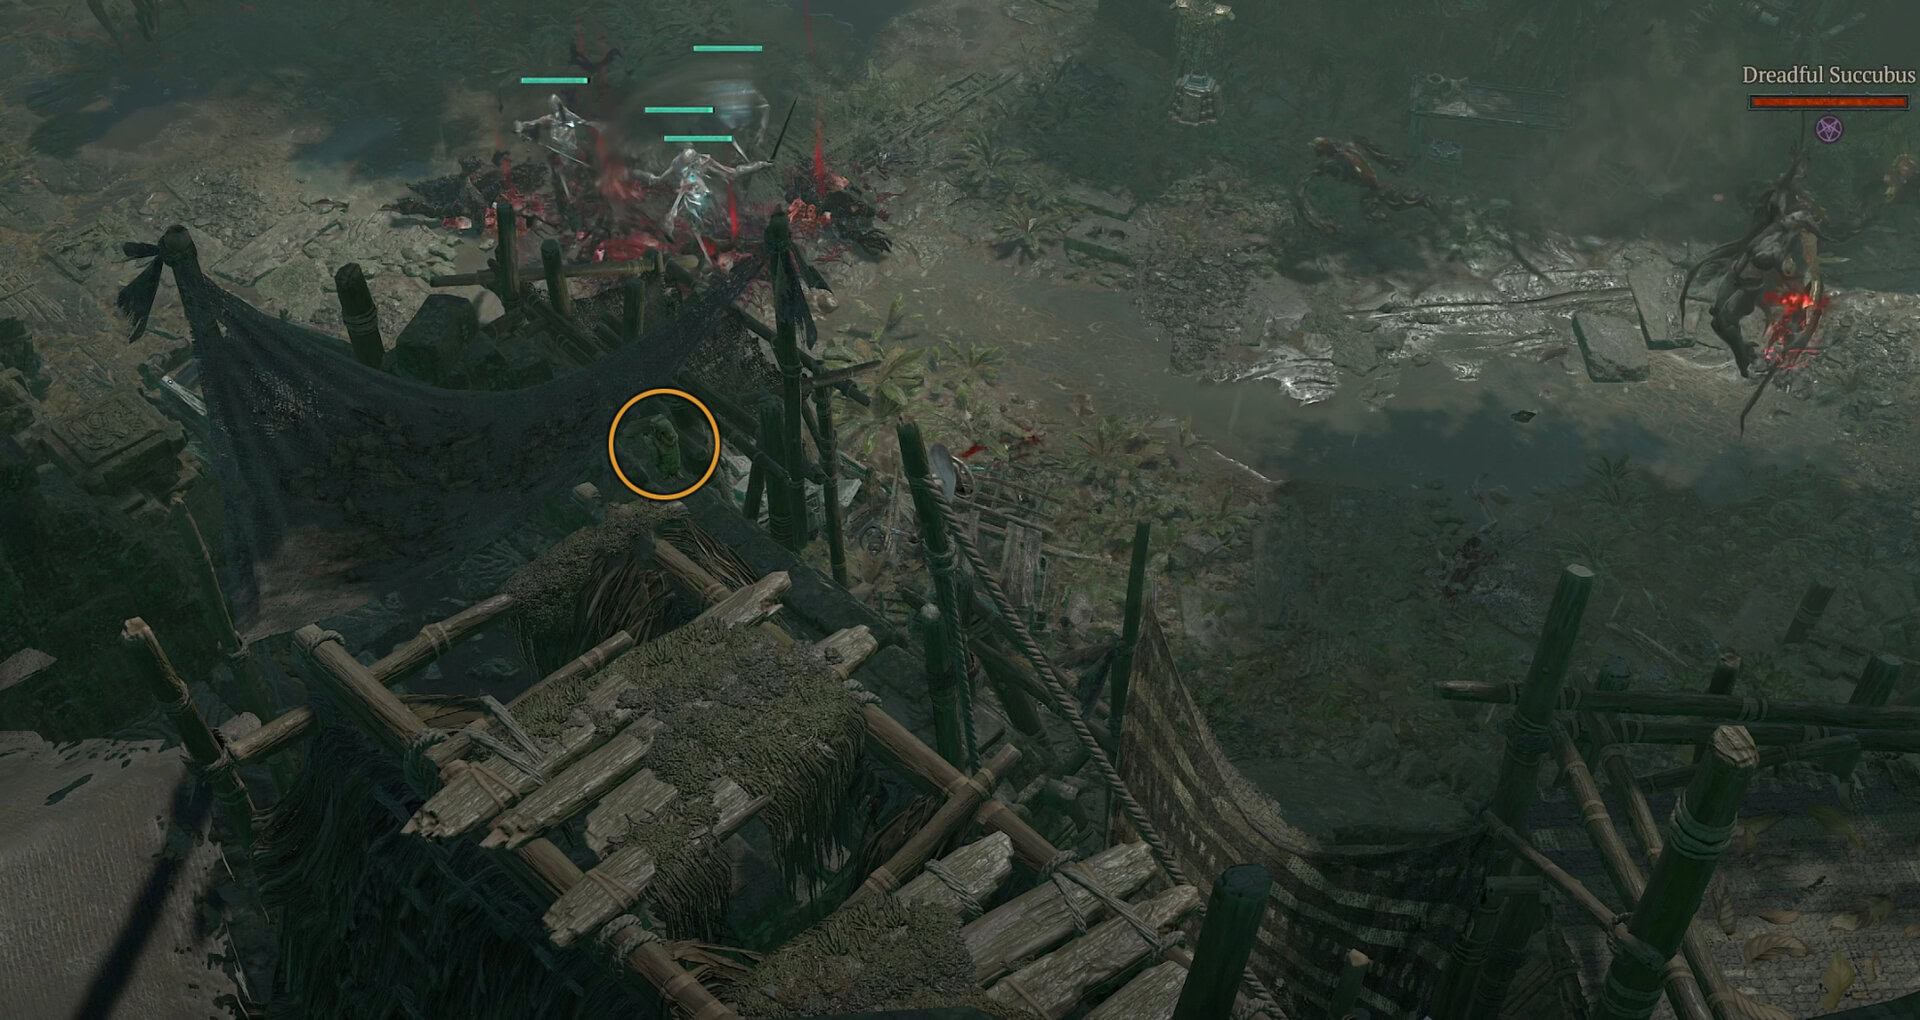
You’re headed to the Temple of the Deathspeaker, you know, where you fought Elias in the Campaign. Head there and all the way to the very end of the path, where you originally entered the Temple of the Deathspeaker.
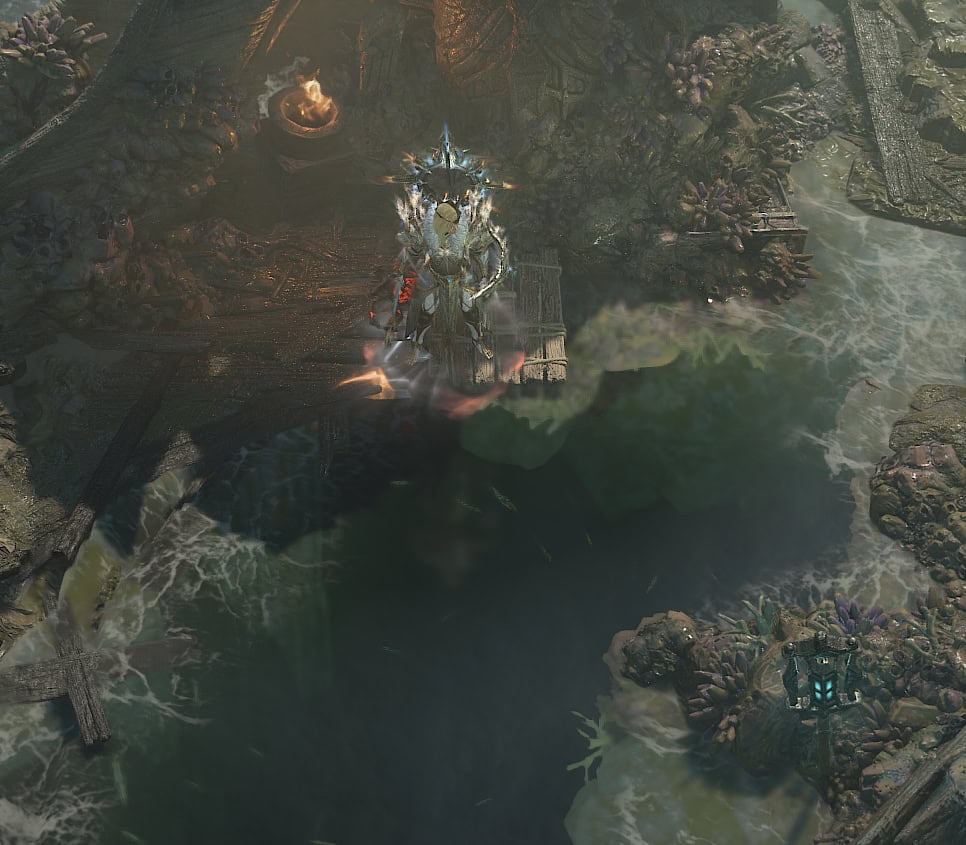
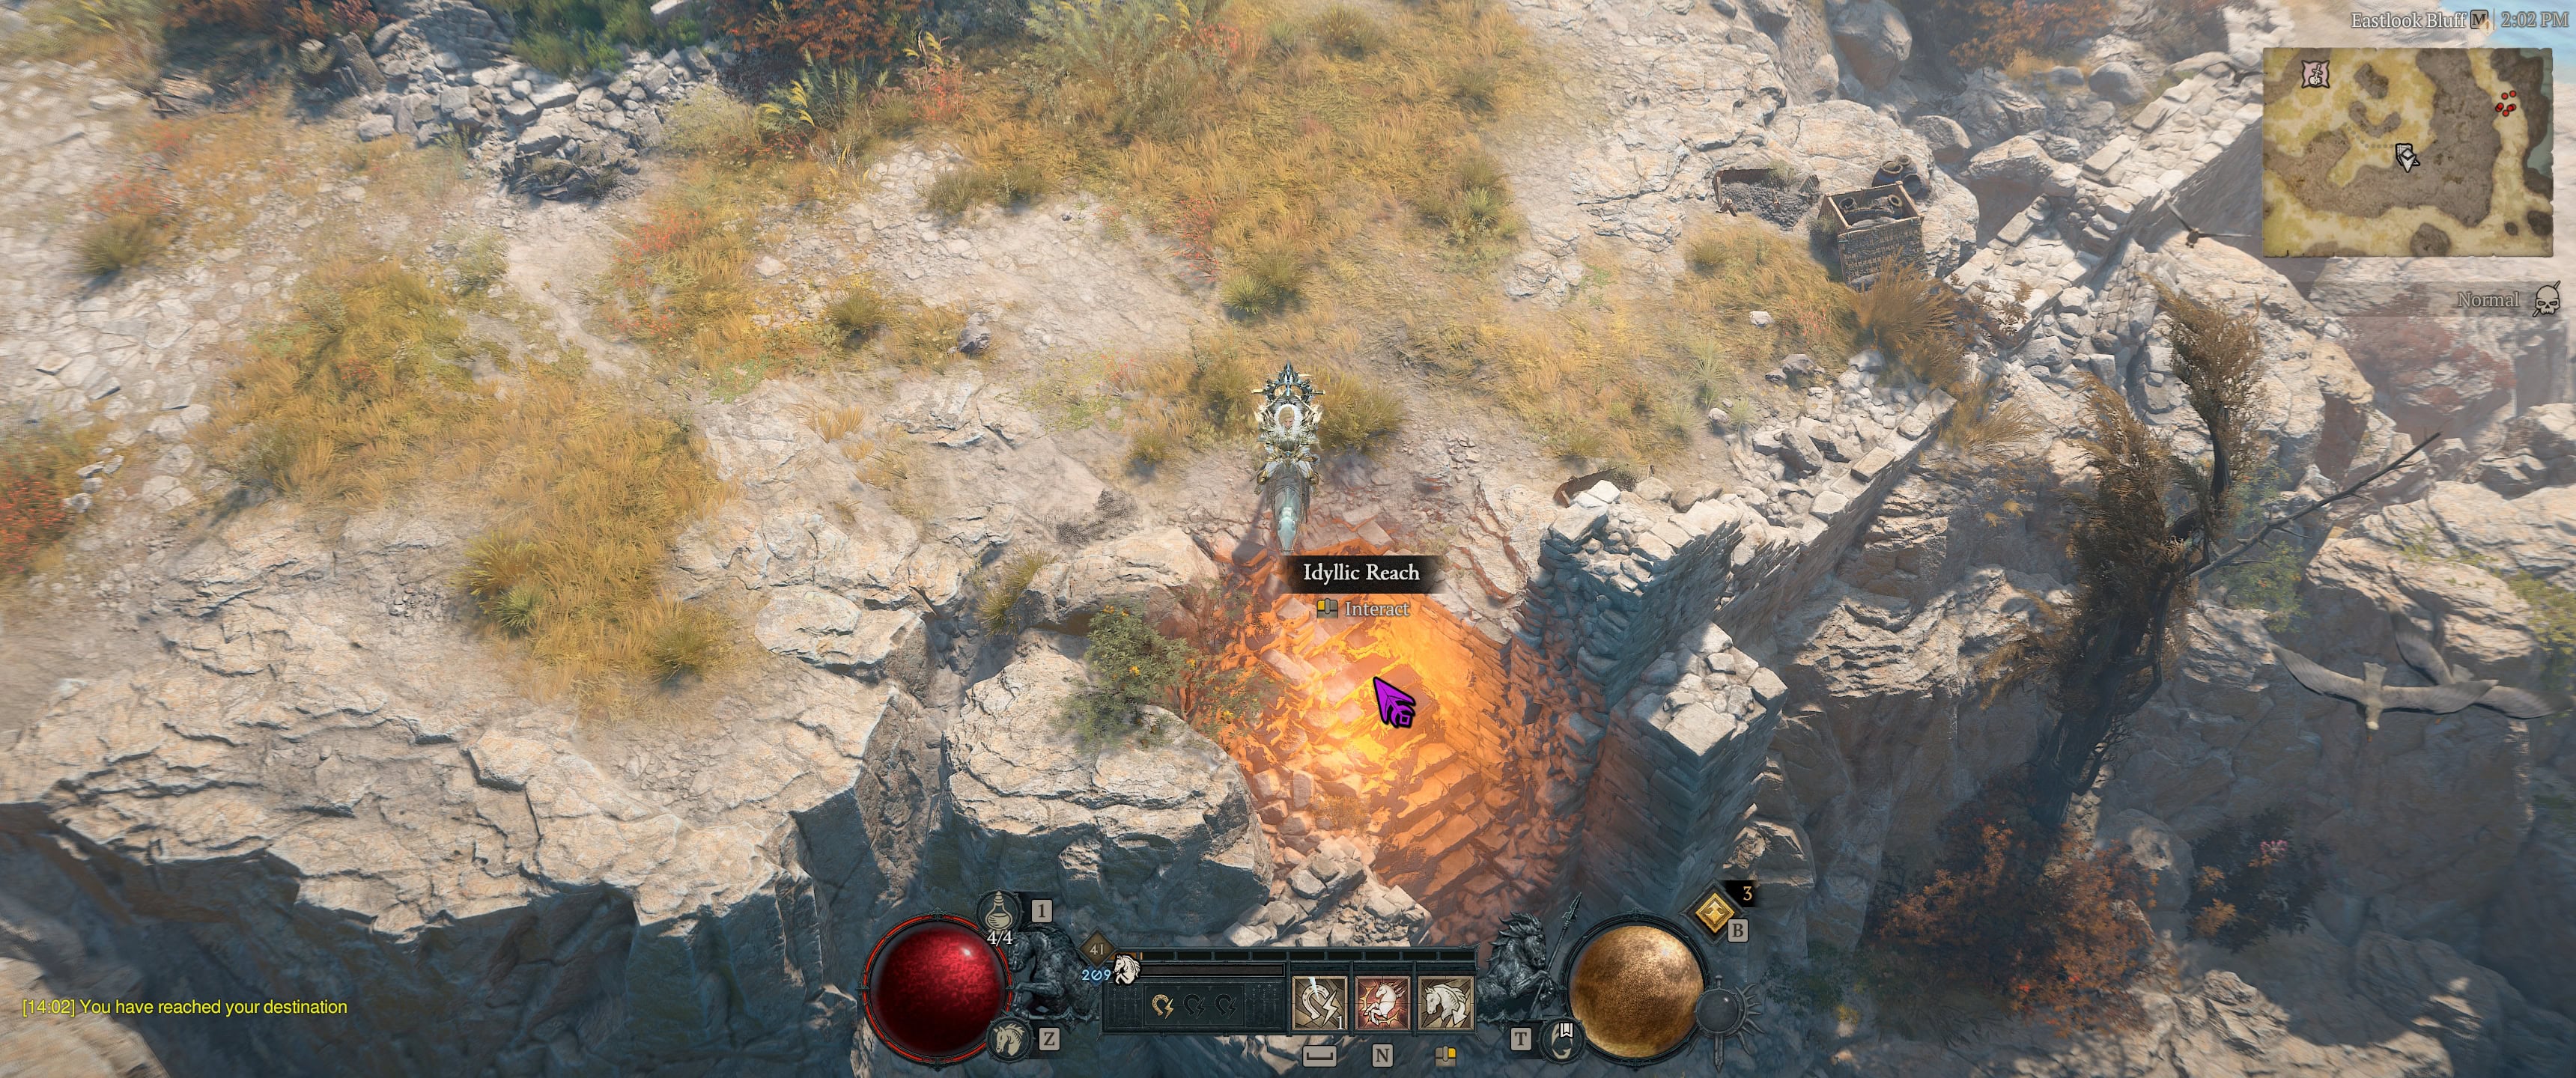
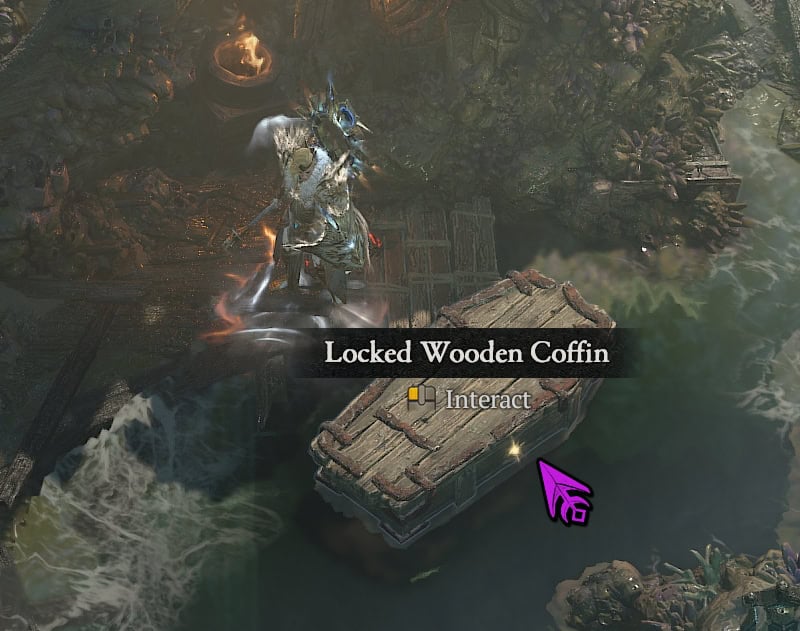
There’s nothing here as you arrive, so you’ll need to fish it up.
Make sure to fish from the location in the image above, as being in the incorrect area will result in just normal fishing.
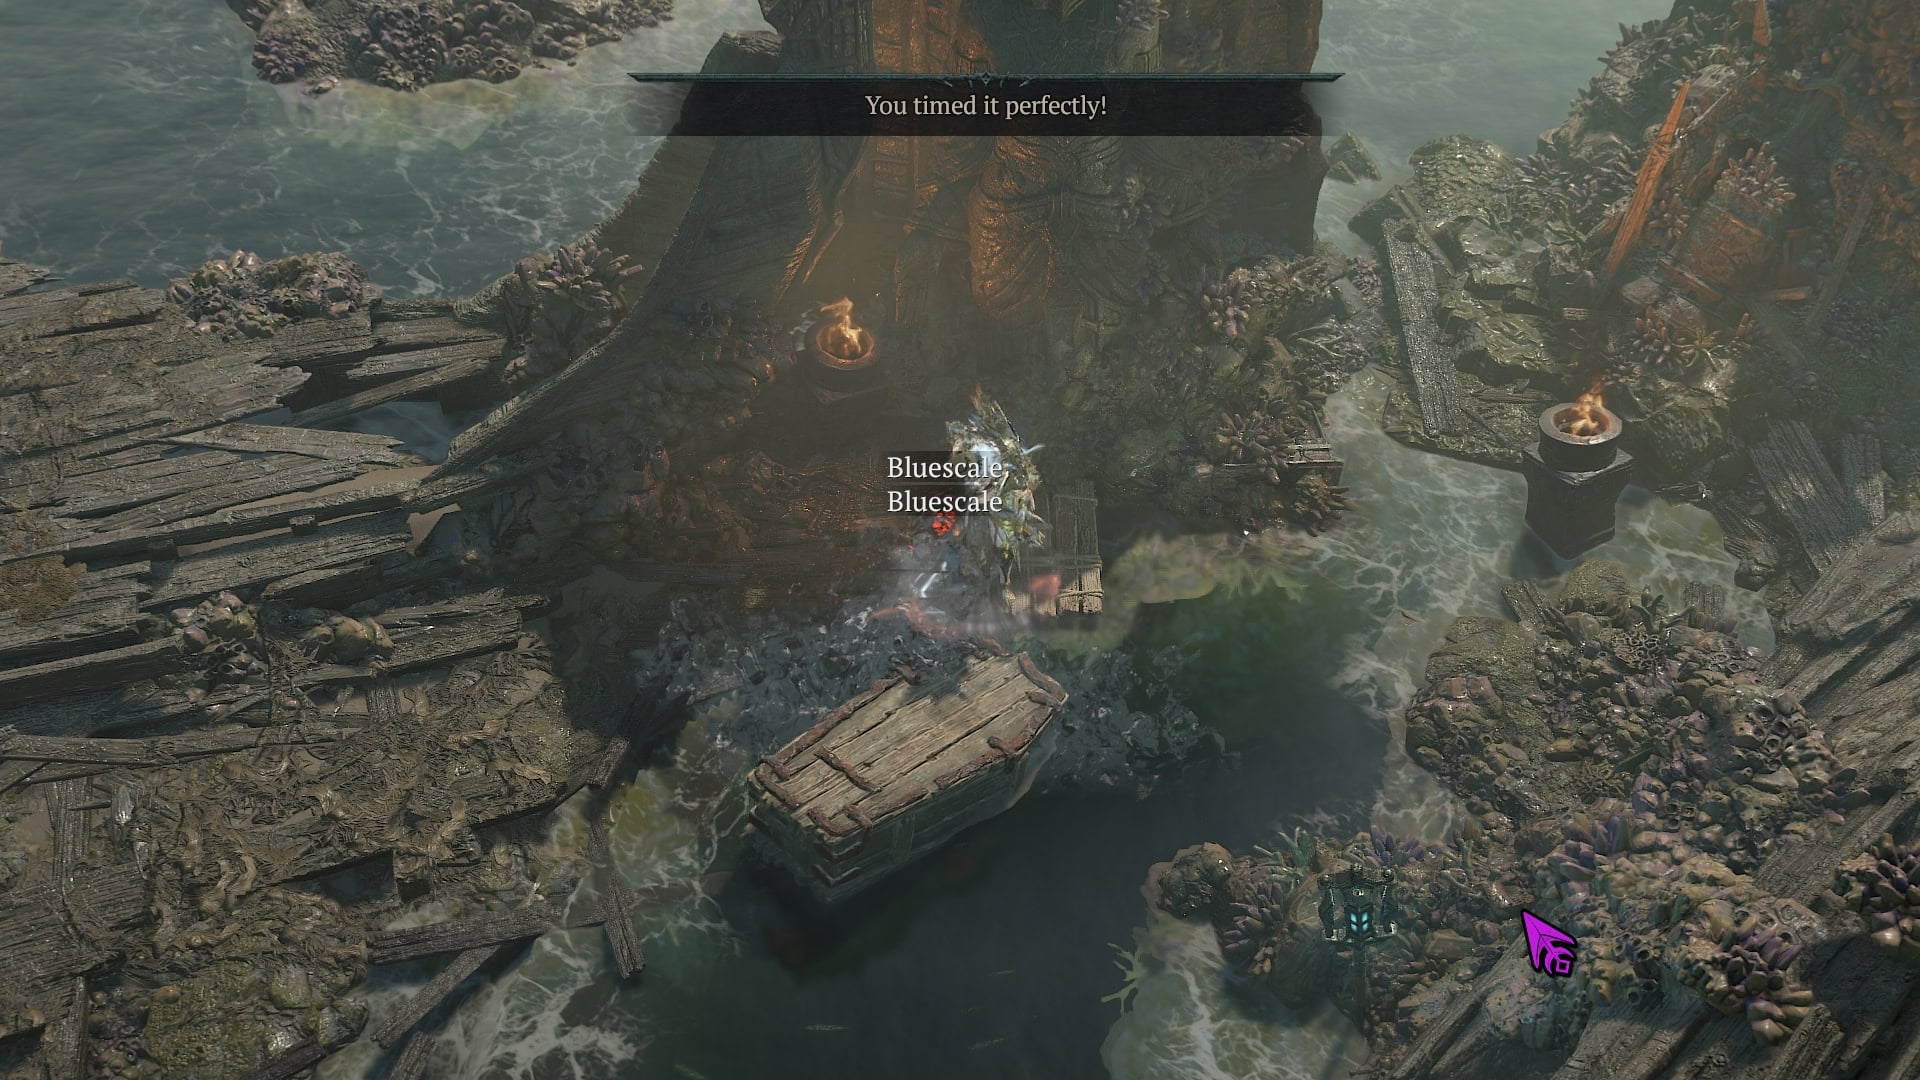
Upon fishing up the coffin, you’ll need to use the Hadopelagic Key to unlock it and head inside.
If you invite other players once inside the Temple of the Deathspeaker, they will also be able to claim their own Cellar Relic at the end, regardless of quest progress.
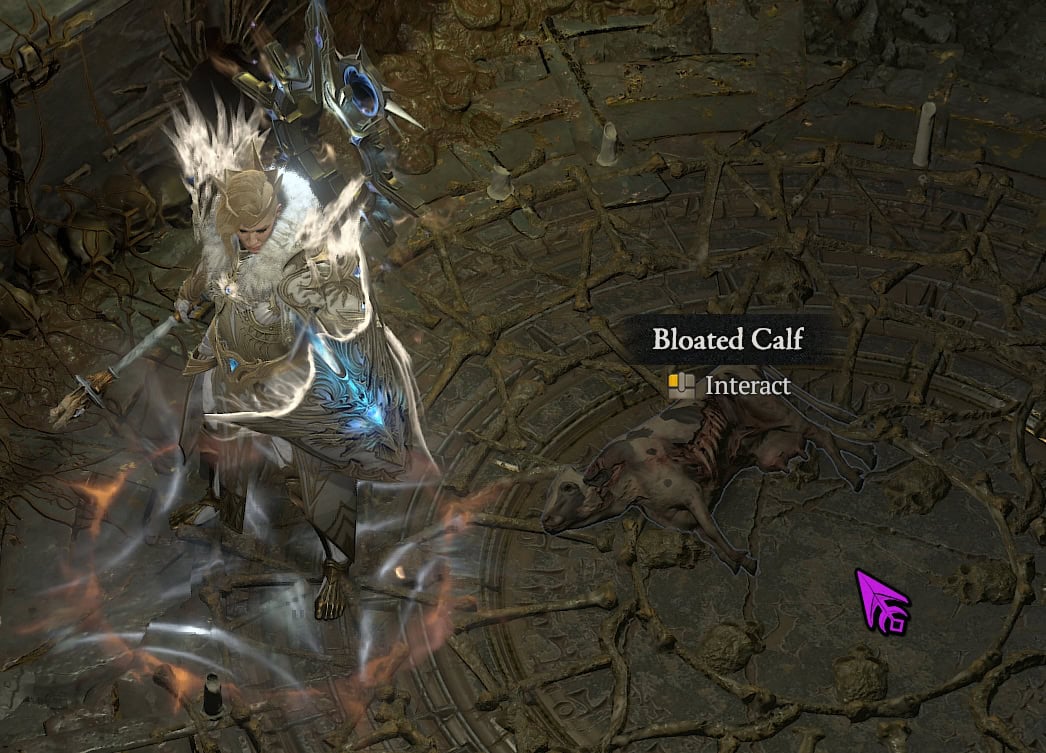
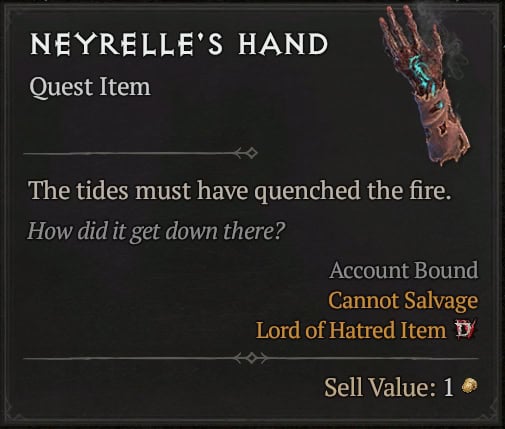
At the very end of this mostly linear dungeon area, you’ll find a Bloated Calf. Interact with it to claim the Cellar Relic of this section, Neyrelle’s Hand.

If you’ve already gotten the other Cellar Relics, either by doing their quests, or by having them traded to you, feel free to skip ahead to the Isle of Scylara section of the guide.
The Isle of Scylara’s Forlorn Cellar
With all three Cellar Relics in hand, you’ll want to shove all three of them into the Horadric Cube, which prompts you with the “???” recipe.
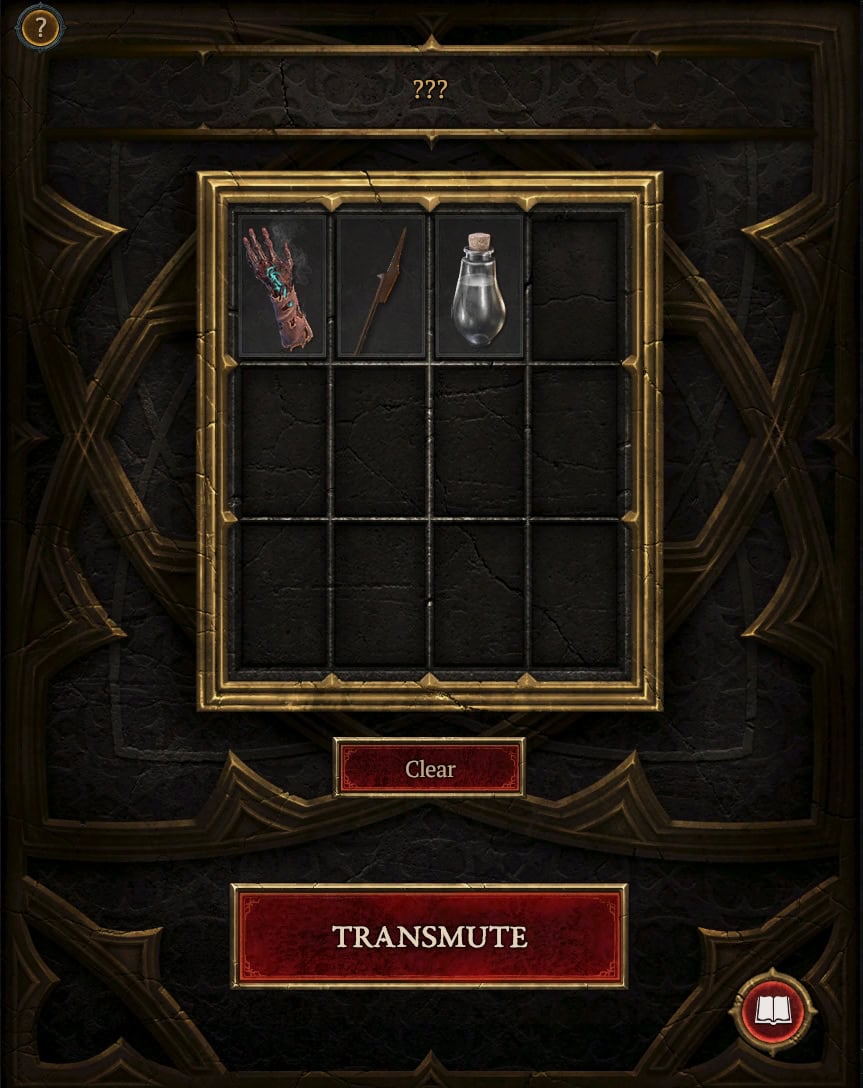
Upon hitting Transmute, you’ll receive the Trophy of the Faithful Cache.
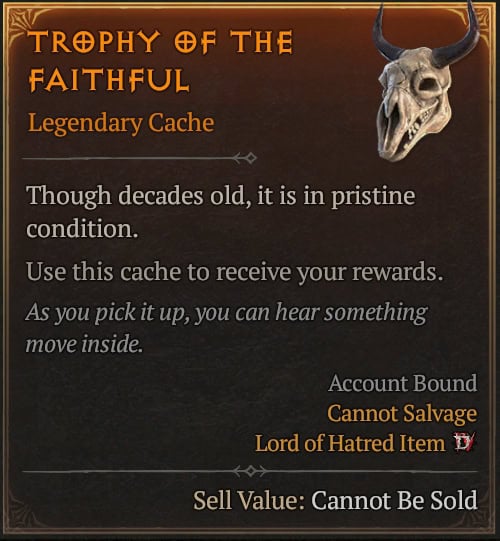
Opening this Cache will grant you the Torn Page Unique Quest Item, the “There is No Cow Level” Achievement, as well as the Moo Emote.
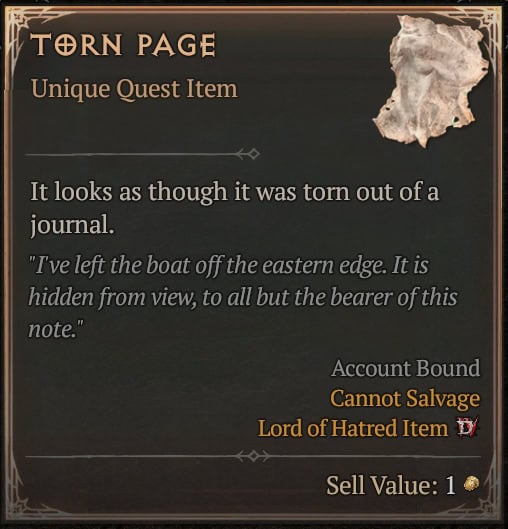
But it doesn’t end there. The Torn Page mentions a boat hidden from view to all but the bearer of this note. So you’ll need to find the boat, which happens to be located on the Eastern shore of Philios in Skovos.
Upon interacting with the boat, a long, reference-heavy cutscene will play as you travel to the Isle of Scylara.
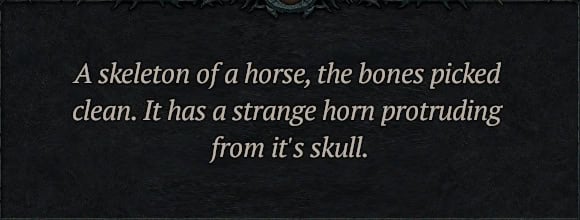
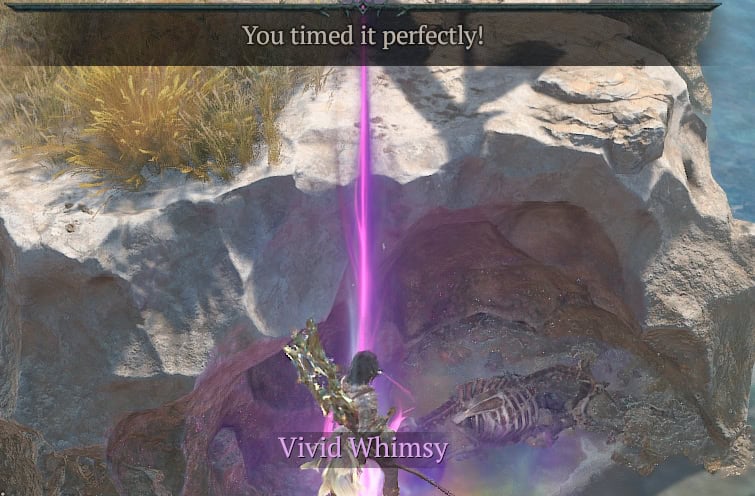
Upon arriving at the dock, one thing you may spot immediately to the right is a Horse Skeleton in a pool of Rainbow Liquid.
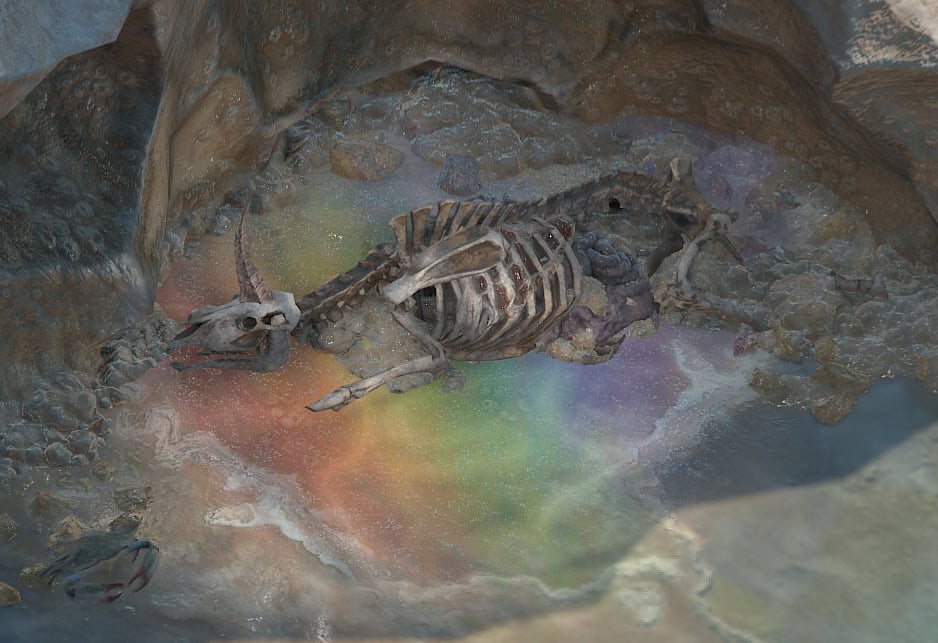
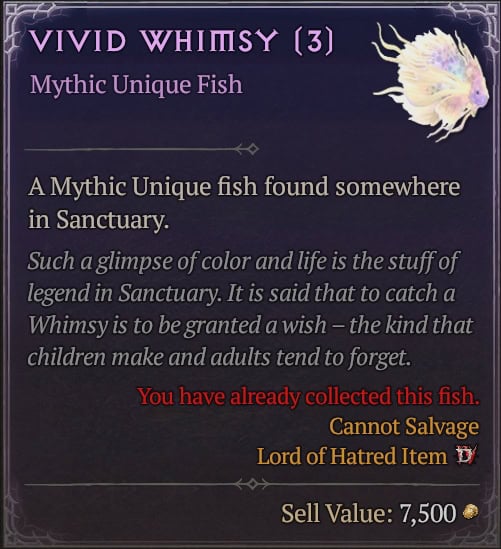
Fishing here will net you the exclusive Vivid Whimsy Mythic Fish.
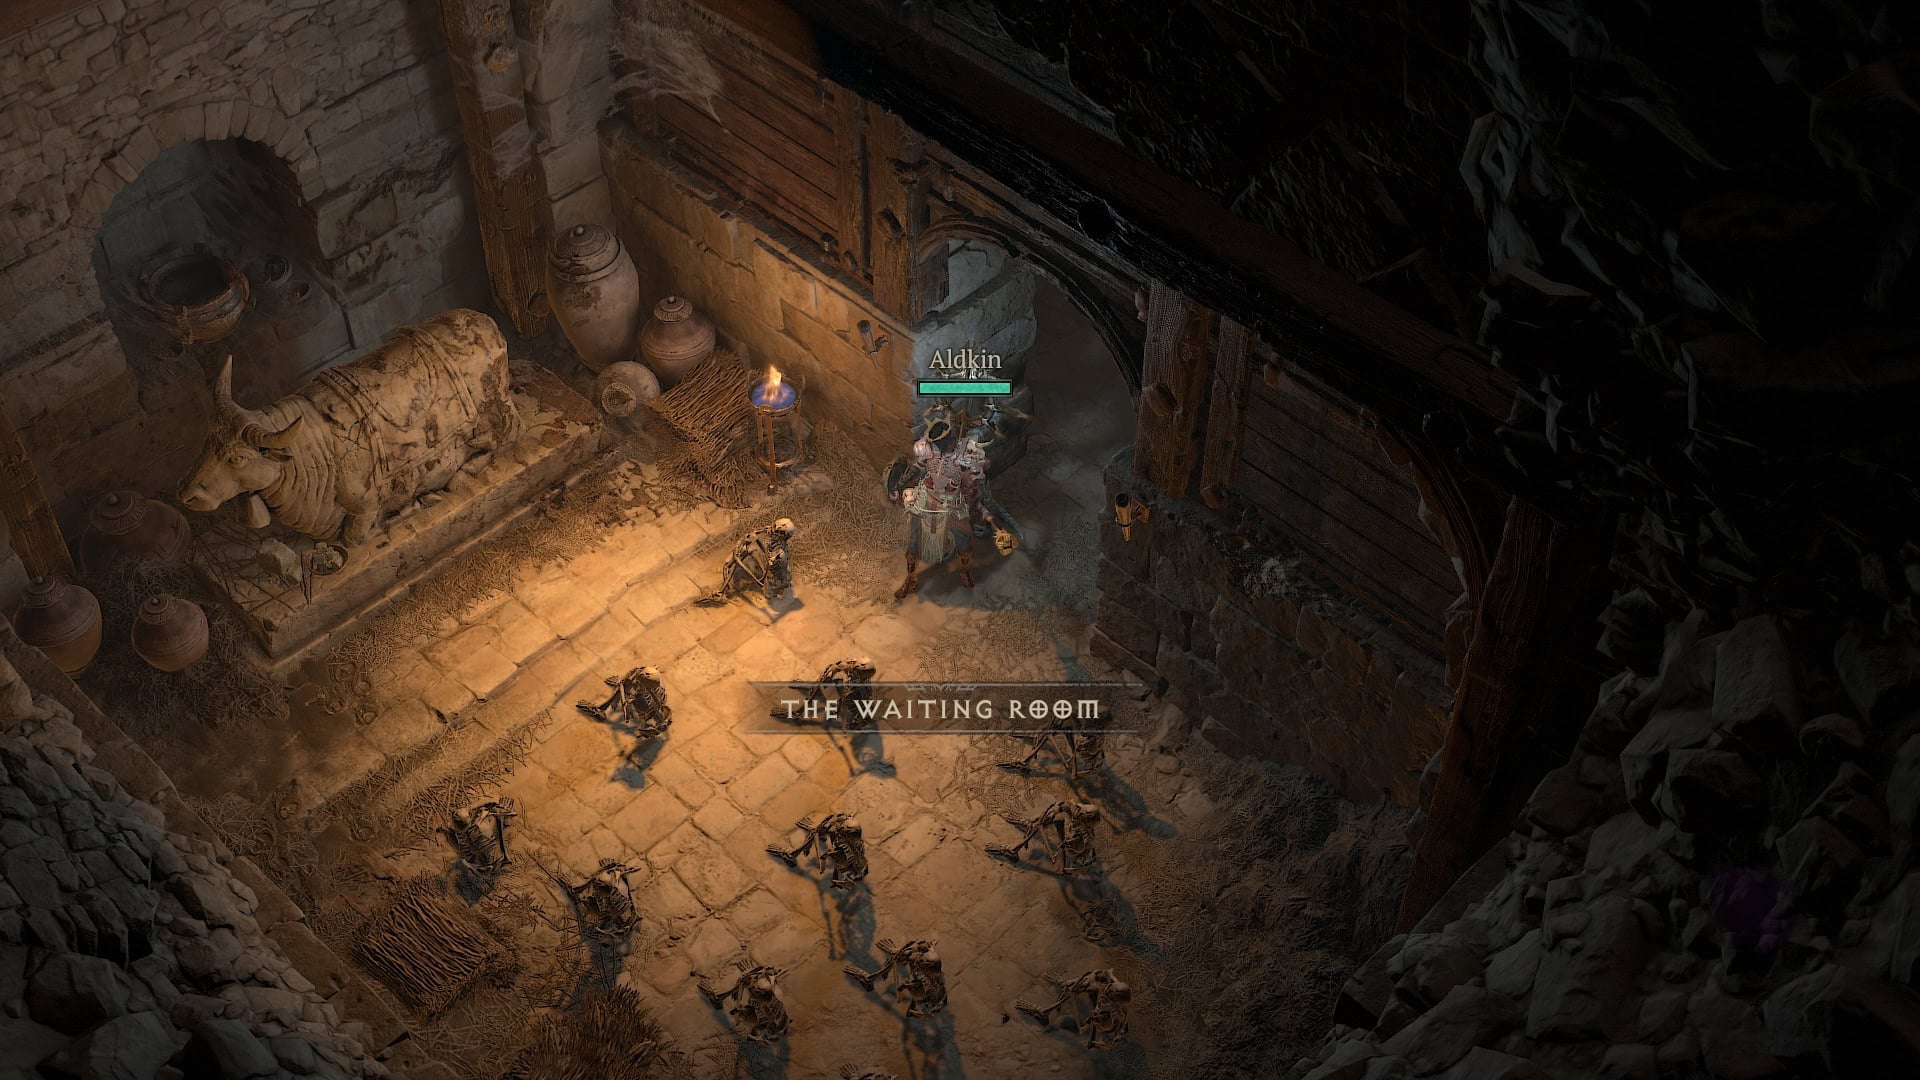
Upon entering the cellar on the Isle of Scylara, you’ll immediately see a Healing Well labeled Fresh Milk. This is just a normal healing well with added flavor for the area. To the left, you’ll find a small room with skeletons simply called The Waiting Room.
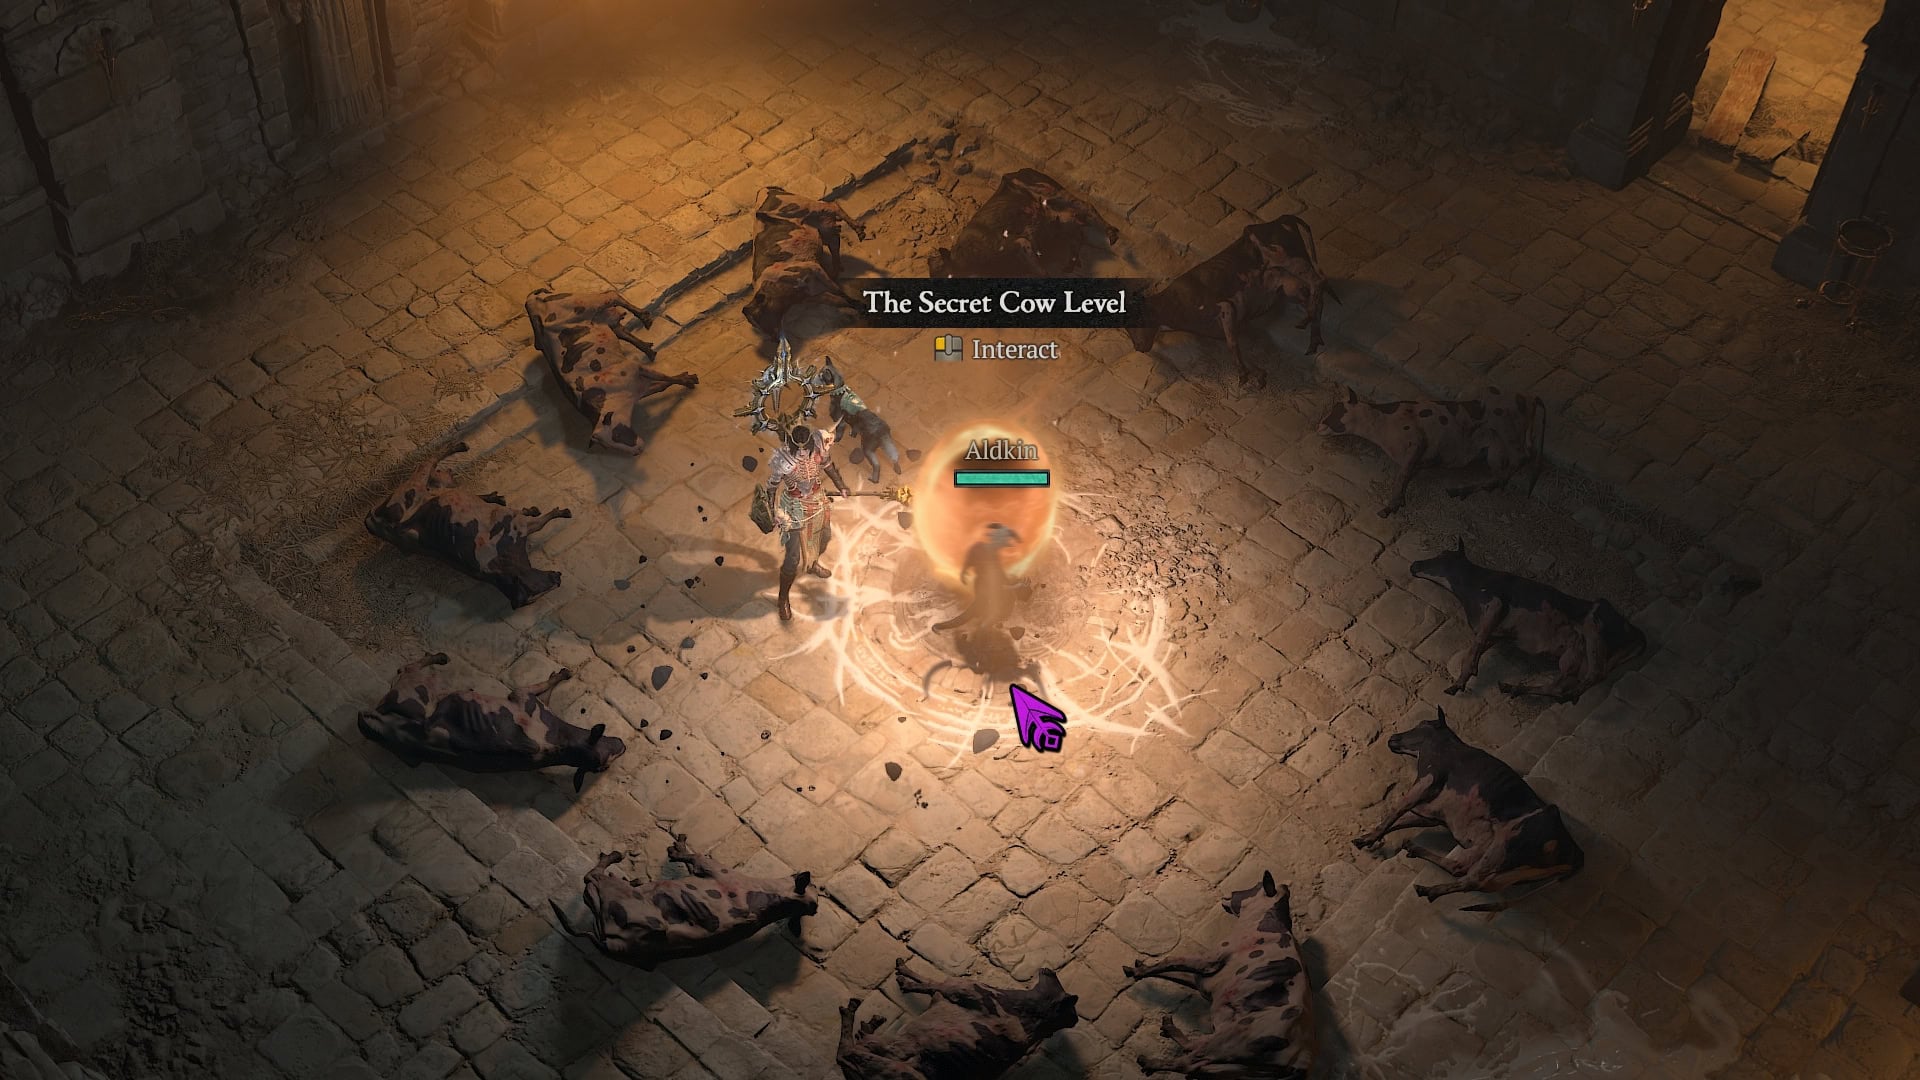
Accessing the Secret Cow Level
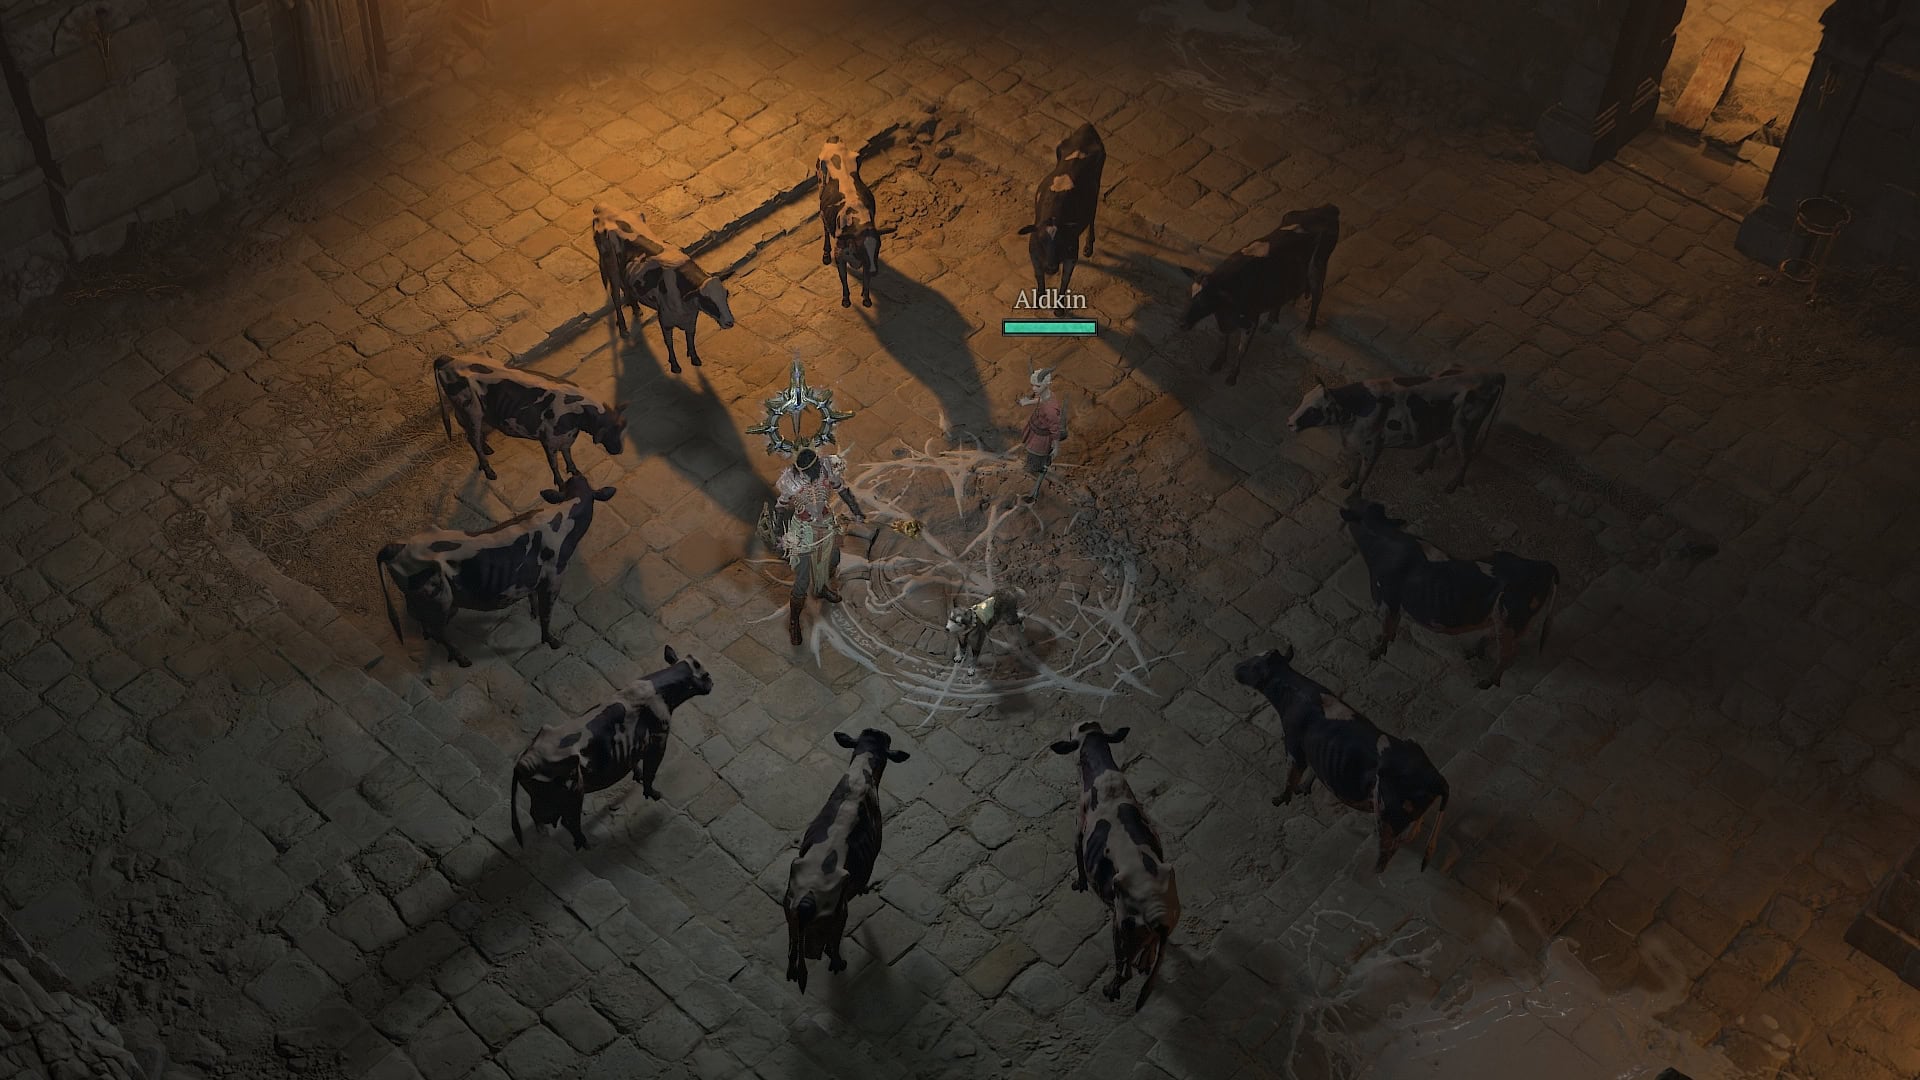
To the North, you’ll find a circle of cows, but depending on the actual day of your arrival, you might find them to be unkillable.
Finally, there’s a small room to the northeast of the circle of cows, granting additional hints and teasers.
The one to focus on here is Gonnagal’s Guide to the Hecatomb, shown below.
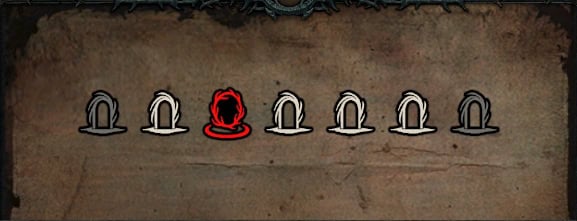
With there being seven portals and the two on the very end being greyed out, you’d be correct to assume this is a representation of the American week (Sun-Sat format). With the red portal falling on what would be Tuesday, that can mean only one thing. The Cow Level is only accessible (from this location) on Tuesdays!
Returning on a Tuesday will allow you to slay the cows, and open the way to the Secret Cow Level!
The Power of Moo
If you thought they’d make this long-sought-after level only available on Tuesdays, you’d only be half right. While that in the traditional way to access the level, there’s also a secret second way to access it.
Remember the Moo Emote given by opening the Trophy of the Faithful? Well, that grants a hidden “Moo Sin” to the Kyovashad Sin Tablets if someone uses it in the vicinity of any of your characters.
This only works when the character mooing has completed the Secret Cow Level, or has the Moo Sin selected for themselves.
This opens a portal on Skovos, in the small nook where the Outcast’s Journal is.
This method of accessing the Secret Cow Level is always available, every day of the week. This also bypasses the need to do any of the relics and gives account-wide access to the level. Like the normal entrance, you can also reset it using the Dungeon Reset Feature.
You can also leave the portal after entering to visit the Forlorn Cellar on Scylara. This allows you to catch the Mythic Fish, Vivid Whimsy, without doing the whole questline.
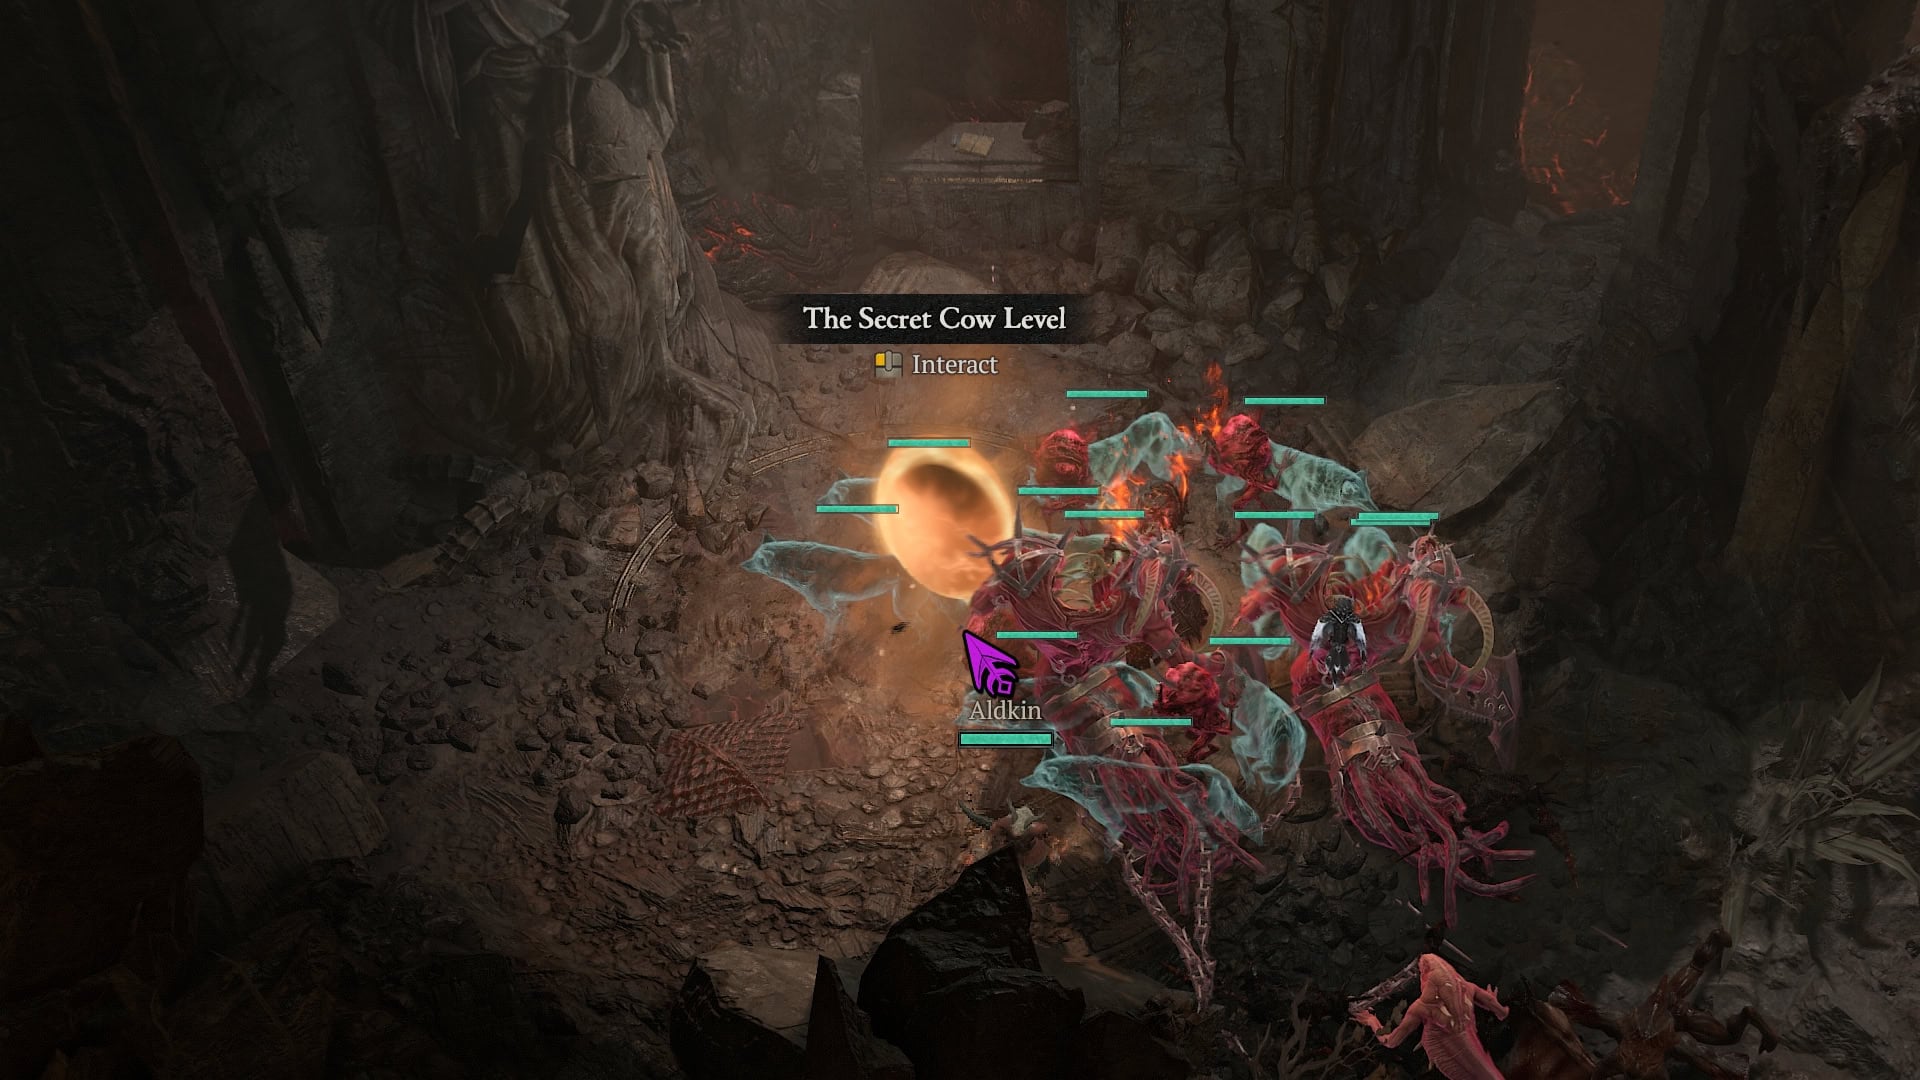
The Secret Cow Level
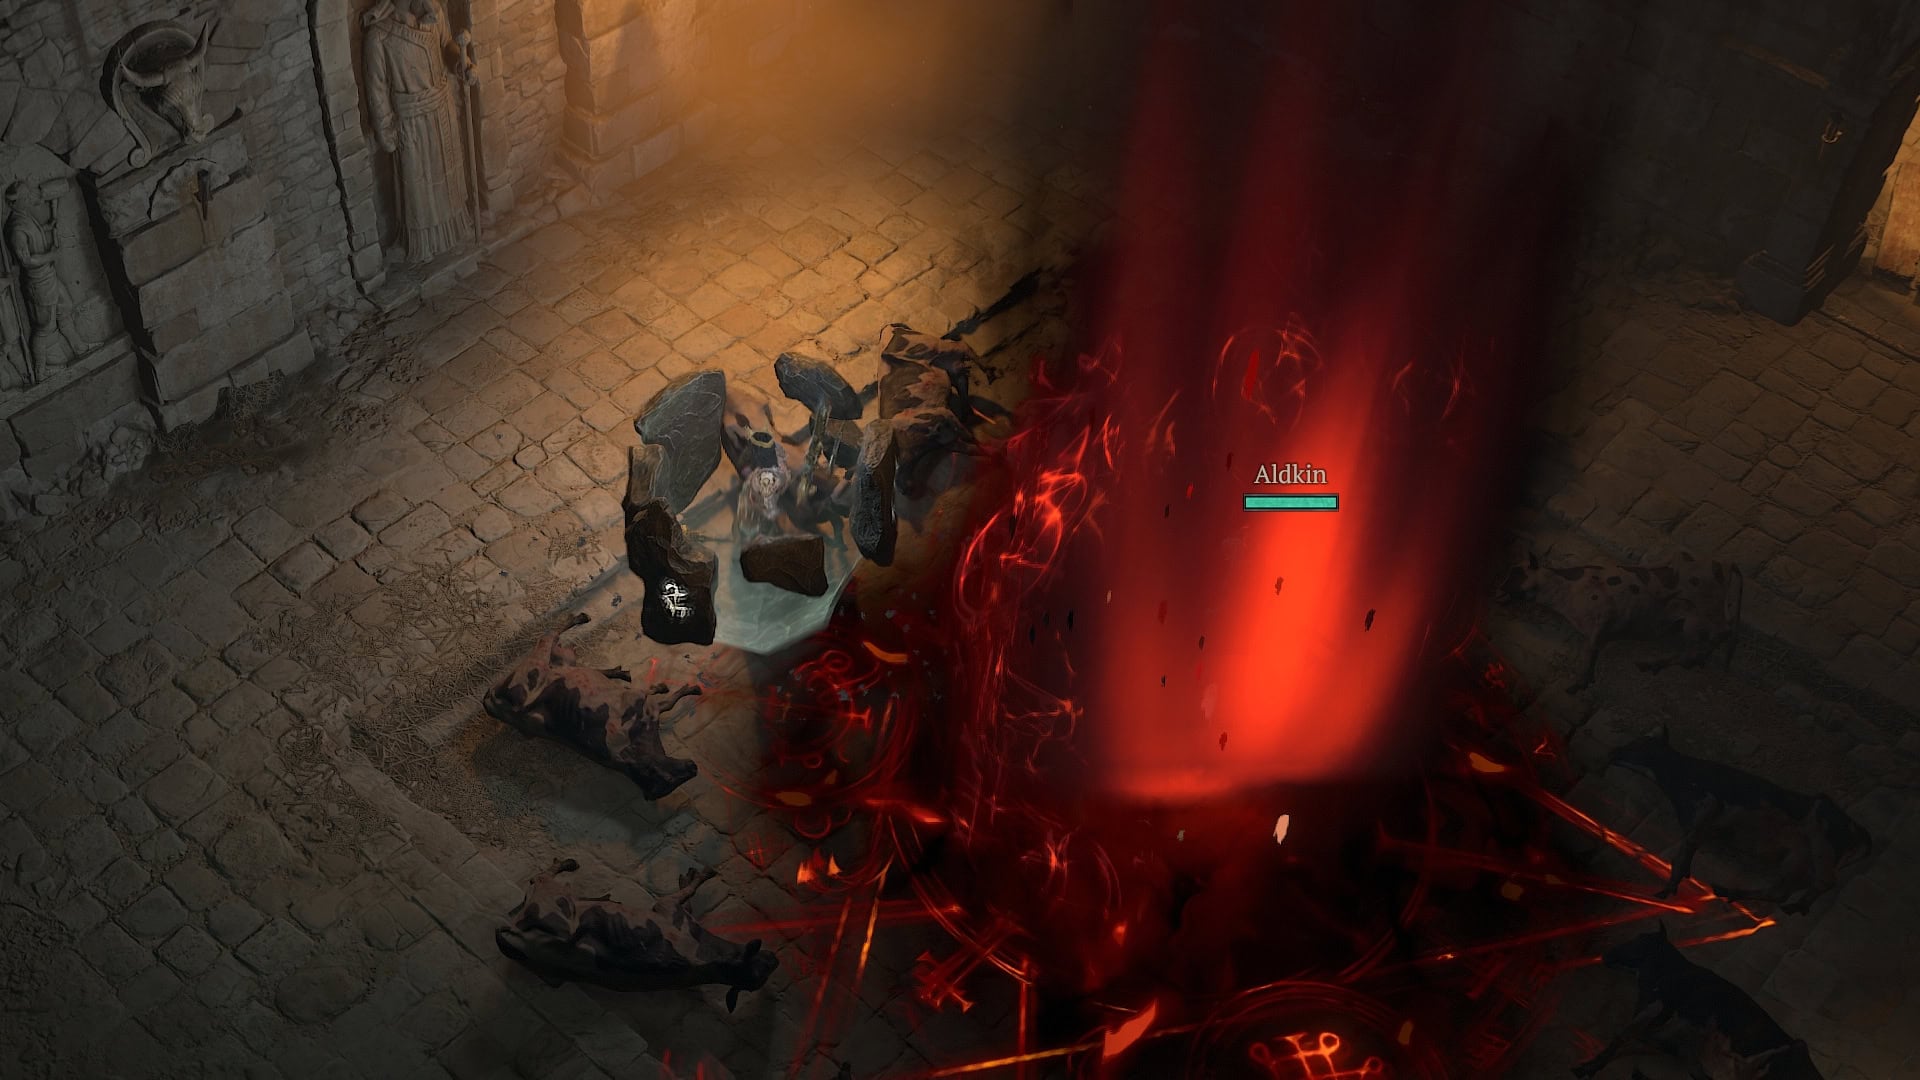
After entering the portal and leaving the starting room, you’ll find Tormented Bovines aplenty.
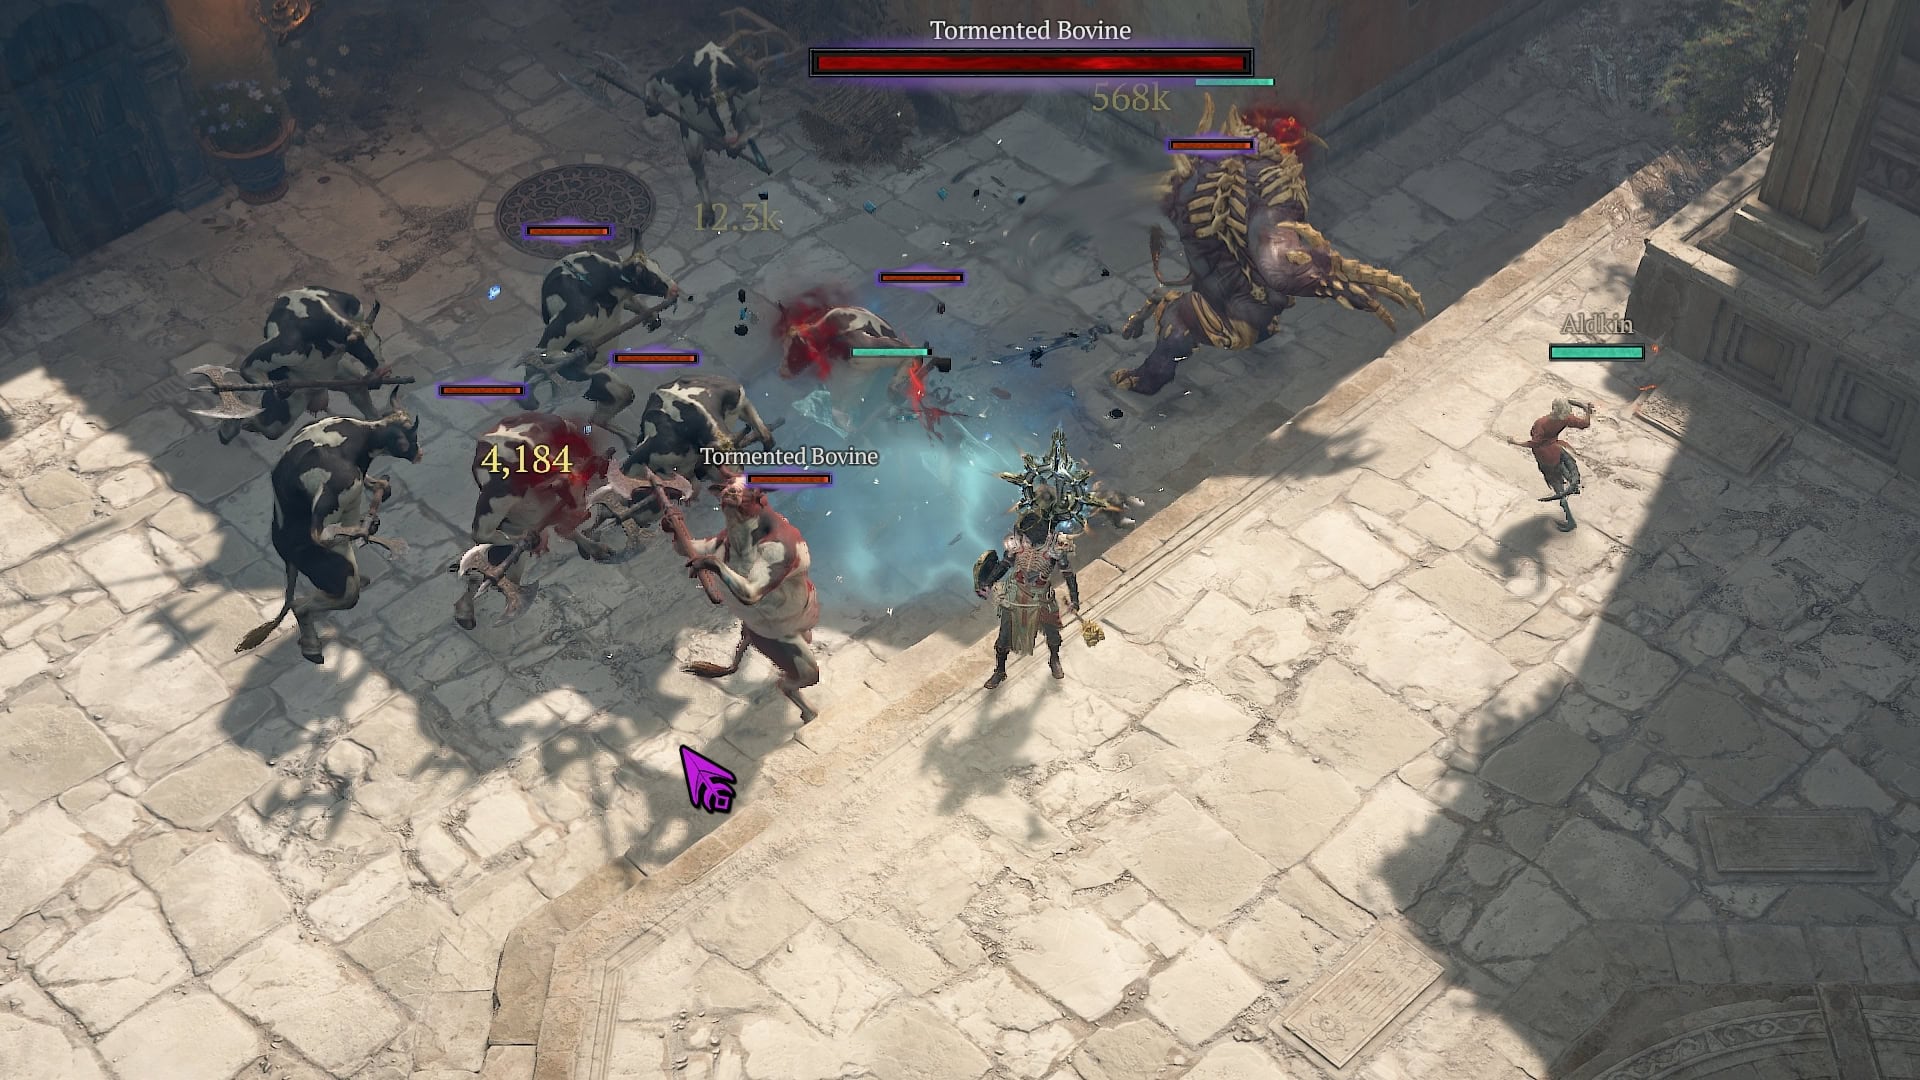
After running around and slaying a ton of them, the Cow King will spawn. Much like his Diablo 2 counterpart, he always spawns as a Lightning Enchanted Elite.
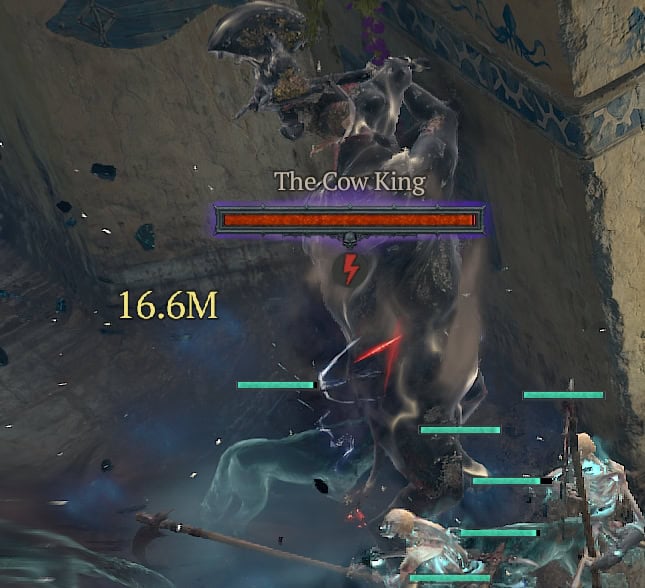
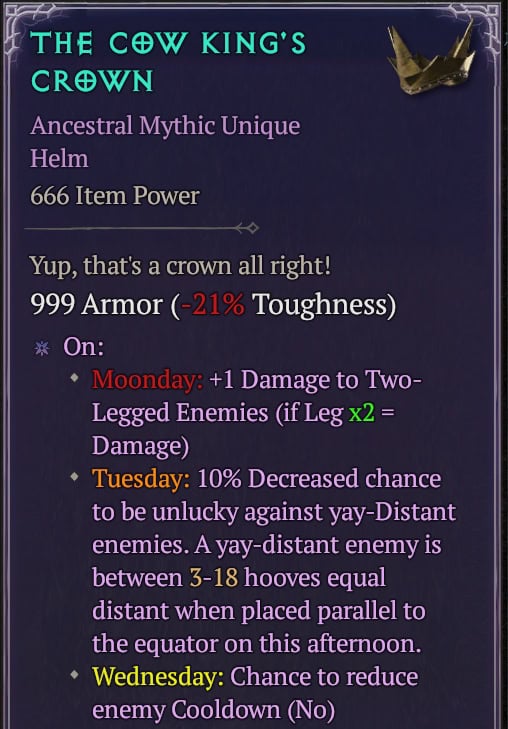
Upon his defeat, he will drop the Mythic Unique, The Cow King’s Crown. This will count for equipping a Mythic unique for challenges, but doesn’t offer much else other than a transmog option and 666 Rawhide for dismantling.
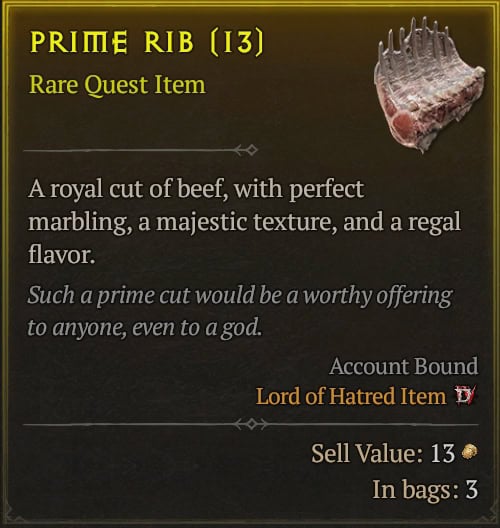
Additionally, he’ll drop 1-4 Prime Ribs. These currently don’t have a use, but may be hinting at more to come in the future. An Uber Cow Level perhaps?
Credits
Massive thanks to the “D4 – Not Finding a Cow Level” Discord Server for the collaborative effort in the hunt, going all the way back to launch. Y’all are a great bunch, and I hope I get to continue hunting with y’all for future secrets.
Hidden References
Diablo 4’s Journey to the Secret Cow Level is not short on fan service. It’s packed with plenty of obvious references to previous iterations of the series, as well as memes and in-jokes surrounding the early days of the hunt and the Discord server focused on it.
As a whole, the secret Cow Level has always been about the community surrounding the game. Start to finish, it’s the community’s memes and in-jokes that started it all back in Diablo 1.
The Relics
It’s likely not a surprise that the first two sets of relics, or even their steps in some cases, all reference the Cow Levels of the past. Below is a quick list of those references.
- “Clicking (Killing) Hundreds of Cows” – Original Diablo 1 Rumor to access the Secret Cow Level.
- First Relic Set – Tome of Town Portal, Wirt’s Leg, and Horadric Cube used to open D2’s Secret Cow Level.
- Stamina Potion – The Cow King of D2 dropped several on death, as they are white like milk.
- Second Relic Set – Wirt’s Bell, Staff of Herding, and Gibbering Gemstone; steps of Diablo 3’s path to unlocking Whimsyshire (Unicorn Level).
- Corrupting Black Mushrooms – Another step of Whimsyshire’s access.
- Rusted Bardiche – Bovine Bardiche from Diablo 3’s eventual “Not the Cow Level”.
- Trophy of the Faithful – Cubing opens the way, like Diablo 2
Gaspar Stilbian, Verdani Outcast
It is strongly believed that the Outcast mentioned in the text is a reference to Gaspar Stilbian’s title as Verdani Outcast. This is also believed to be the case due to the easter egg in the Mefishto Advertisement, which allows you to speak to “Gaspar Stilbian” who plays into the “There is no cow level” joke.
This is enough of an in-joke to the Not finding the Cow Level Discord that Gaspar was immortalized as a server emote there.
Scylara Cutscene
Nearly every single line of text from the Cutscene on the way to Scylara is a reference to the hunt and the community surrounding it.
- “Holy Oxen” – Ked Bardu Fountain’s Oxen Gods.
- “Orphan becomes a lord” – Lord Uacax from Nahantu steps.
- “A father, mother, and child burned on a pyre” – Skovos Steps
- “I saw a bovine carcass, and from its mouth crawled a magpie” – Neyrelle’s Hand
- “a thousand discordant voices, whisping of a realm that did not exist” – Not Finding a Cow Level Discord server.
Vivid Whimsy
This Mythic Fish, as well as the unicorn corpse it gets fished from, are references to the Whimsyshire level of Diablo 3.
The Waiting Room
This joke addition to the final cellar references the many memes made about it taking far too long and “being dead before the Secret Cow Level arrives.”
With each set of steps only being added with a new expansion, that made for a three-year wait for the current state of the Cow Level, where it’s complete and has a definitive end goal.
Spreading the Cows by Mooing
Very early on, it was common for folks, both inside the “Not Finding a Cow Level” server as well as outside, to adopt names like Cow, and Moo at people to draw attention to themselves and the hunt.
Seems like a natural fit to have a Moo Emote be the way to pass access to the level to other players.
Scosglen Cellar
Alongside Gonnagal’s Guide to the Hecatomb is a map of the Scosglen Highlands. This references the very early days of the hunt, where people suspected that the Secret Cow Level would be located in Scosglen, as the Eastern Highlands area looks very close to a cow’s head.
Gonnagal’s Guide to the Hecatomb
This small bit of text that provides us with a useful hint from earlier is, in fact, a reference to an old screenshot referencing “Gonnagal the Cow King”. I was unable to find the original source of the image.
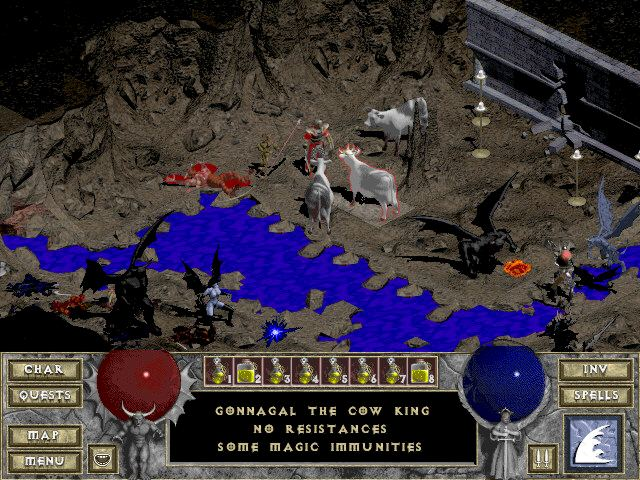
This name is also referenced in Diablo 2 Items, like Gonnagal’s Dirk, so it could just as easily be a developer’s in-joke or reference.
The term Hecatomb itself references an old ritual of sacrificing livestock, specifically cattle. So, yet another call back to the Scosglen Cellar.
The hint that Gonnagal’s guide to the Hecatomb actually provides is in part a reference to the “Damage on Tuesdays” meme for the early Dialbo 4 days, where many damage bonuses were very conditional. This is also the primary reference of the Cow King’s Crown.
The Cow King’s Crown
The Cow King’s Crown itself is a heavy reference to the Damage on Tuesdays meme in the community. There’s a chance that each line here is a reference to community jokes, but it’ll take a while to track all of these down and re-confirm them.
Here are the current thoughts on what these actually reference.
- “Moonday” – Playing off the hyper specificity of Damage on Tuesdays
- Tuesday – Early disputes over what constitutes an enemy being Close or Far
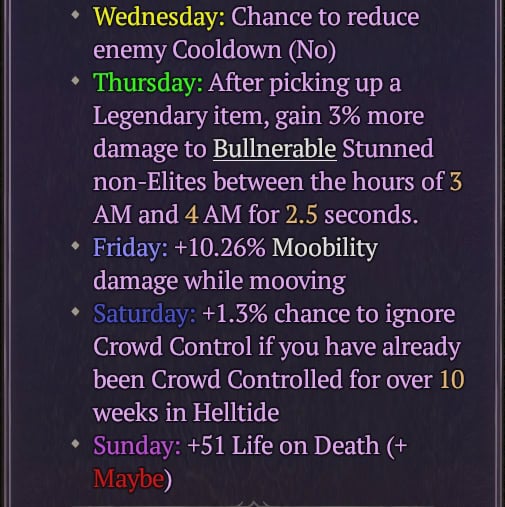
- Wednesday – no known reference
- Thursday – Carbot Animations’ “Best Item Ever” animation, which utilized a similar phrasing
- Friday – Possible reference to old Mobility Skills having strange conditionals for damage.
- Saturday – Reference to how Helltide Mobs used to be able to chain crowd control on you until you died if you had no protection from it.
- Sunday – no known reference
- “final Decade to pass” flavor text – Diablo’s 30th anniversary in December


