This guide will show you how to steal the Ion Blaster Part in Star Wars Outlaws. Whether you’re stealing from the Pykes or Crimson Dawn, you’ll know where to go and what to watch out for.
Table of contents
How to get the New Tricks Quest
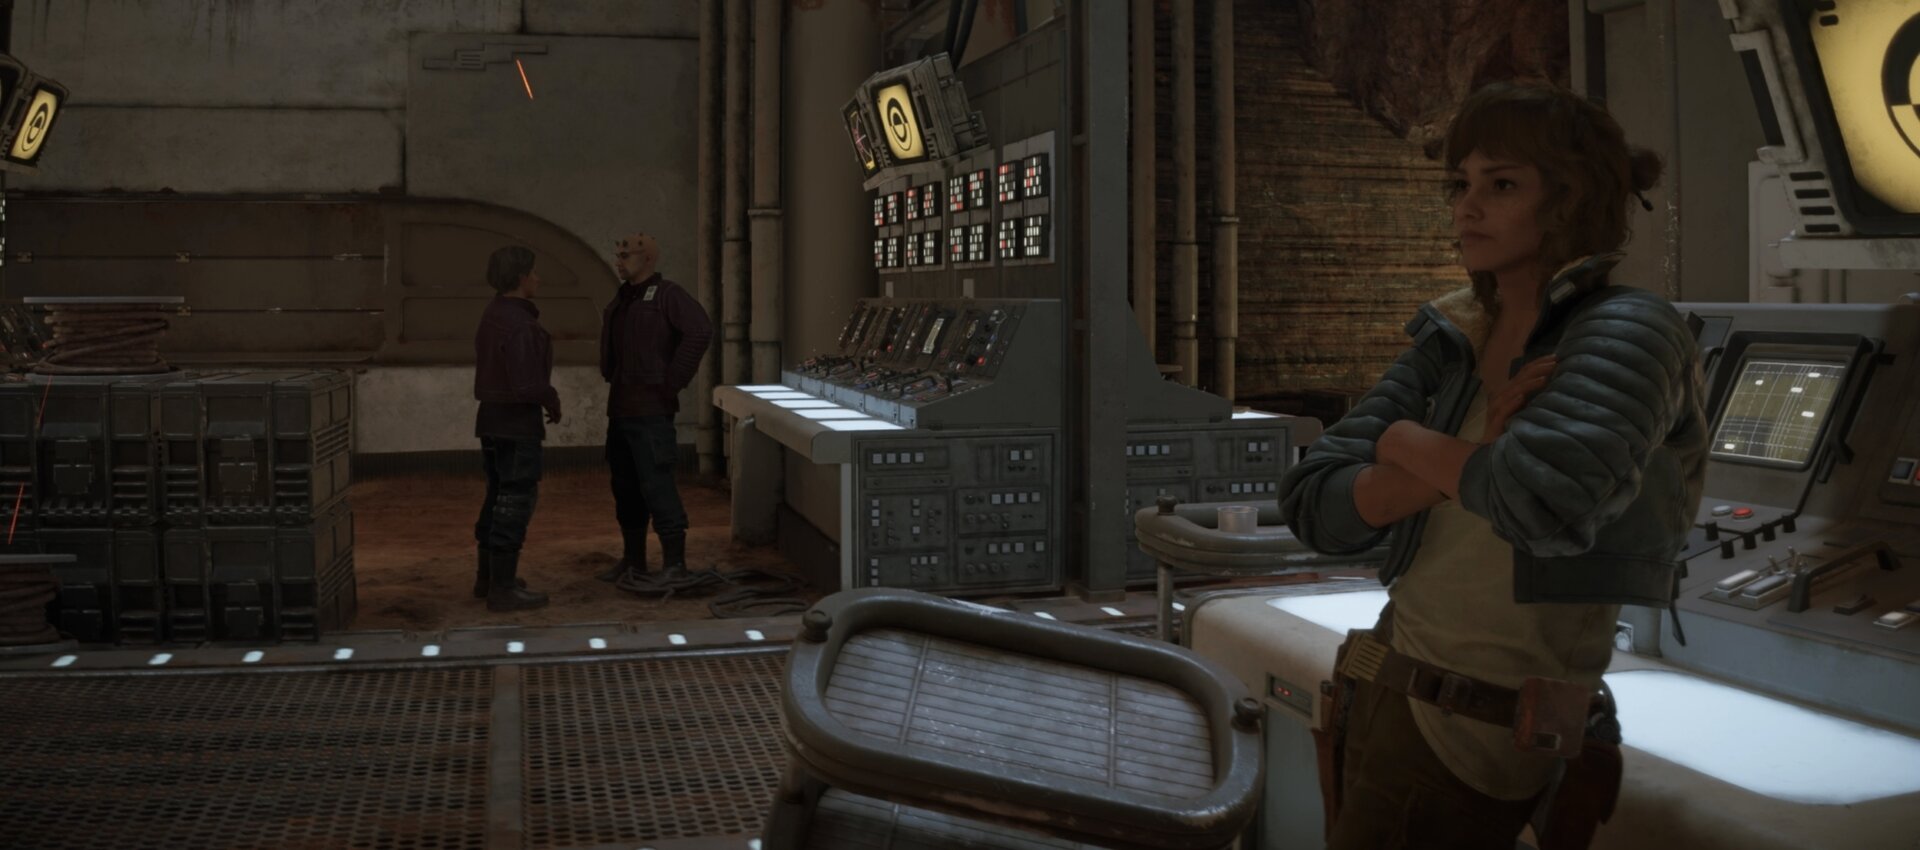
After successfully infiltrating Gorak’s Base, you can talk to Danka again about a new job. She needs you to have an Ion Blaster to pull it off, so your first task is to obtain the parts to modify your blaster to fire Ion shots.
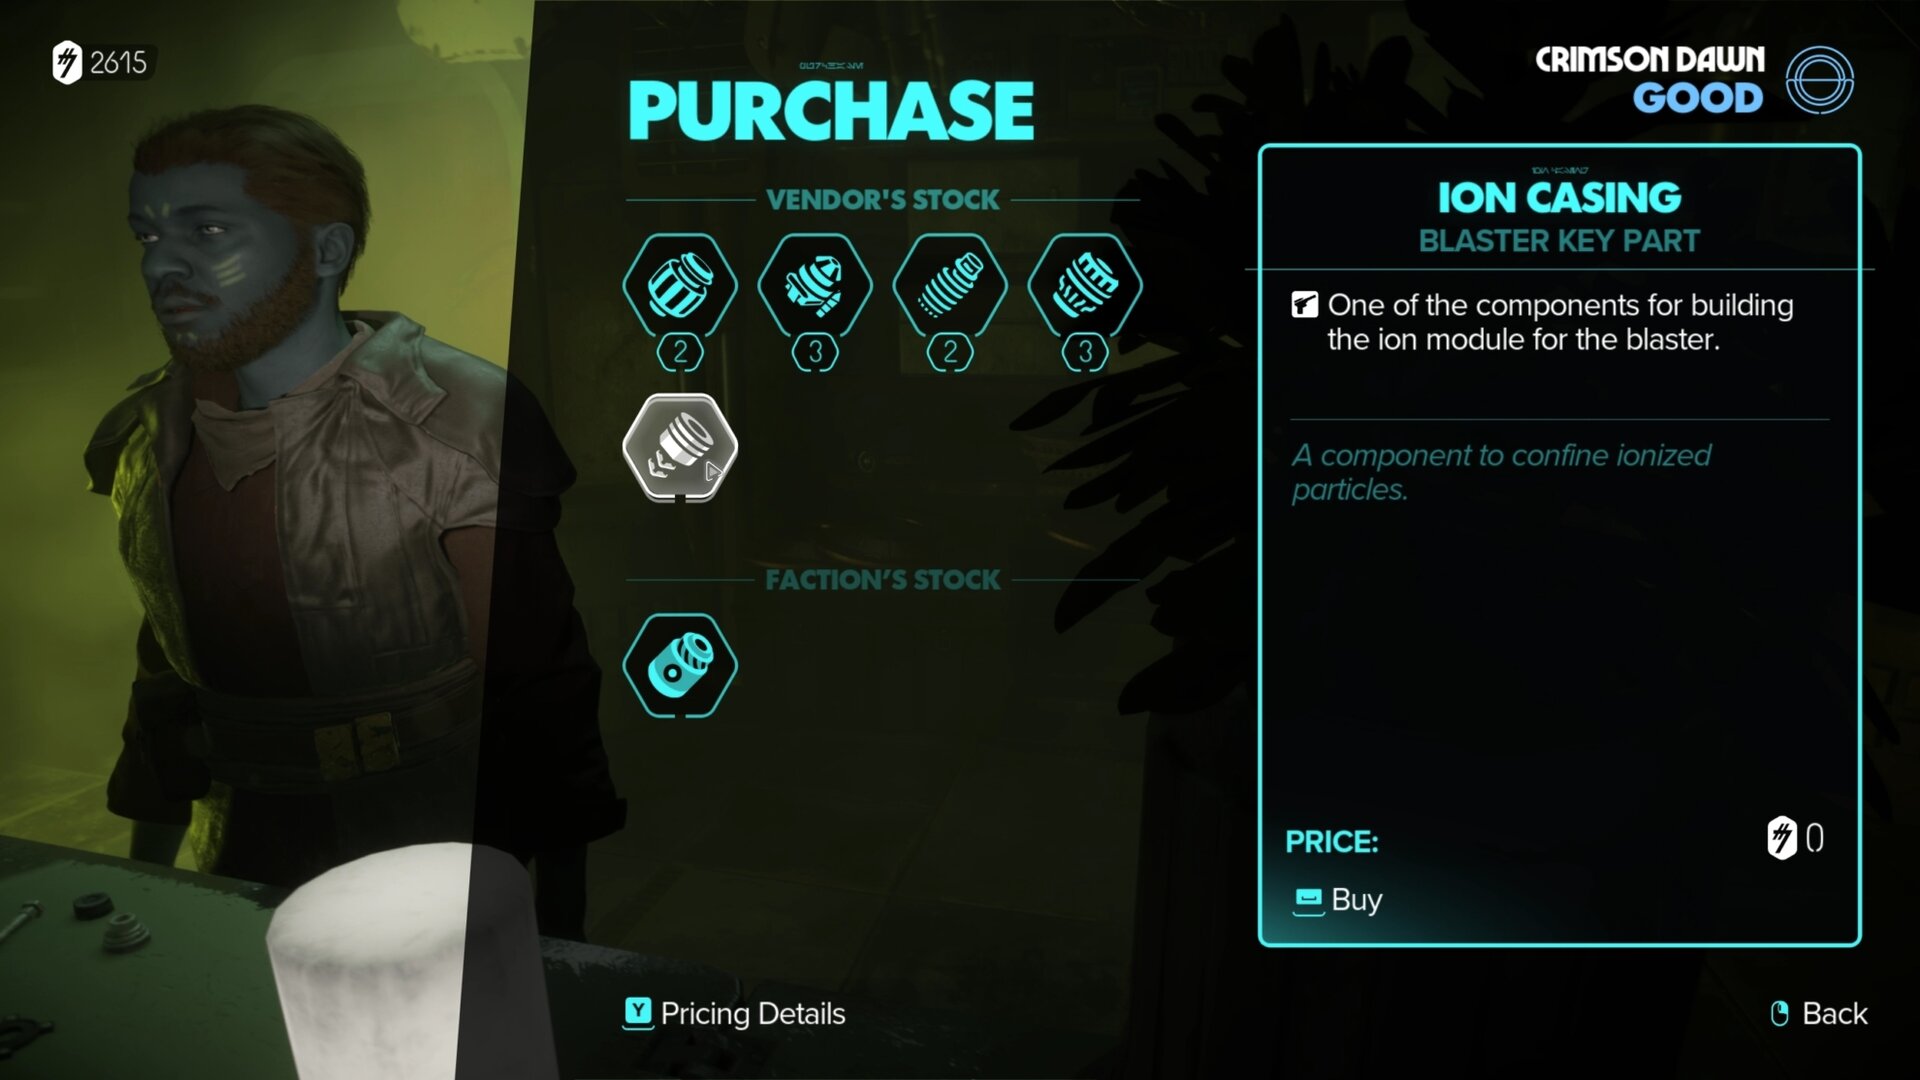
Buy an Ion Casing from the Pawn Shop
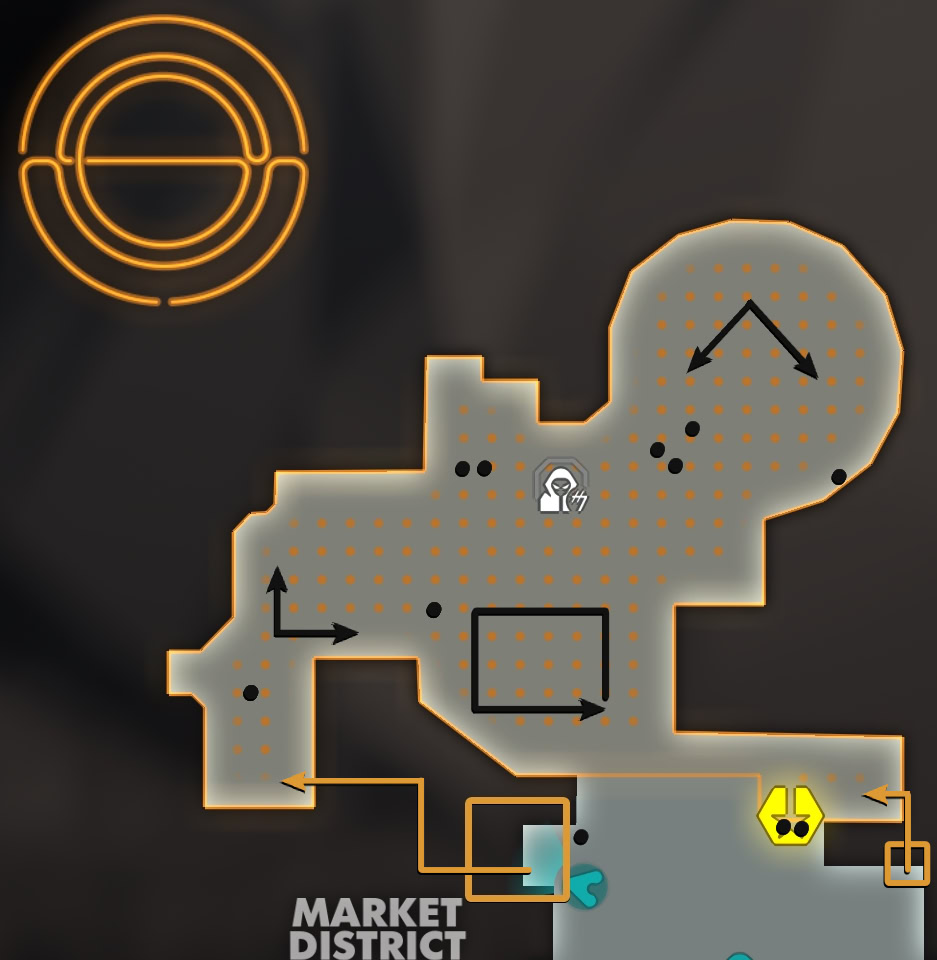
Head to the Mirogana Market, a little southeast of the Market District. You’ll want to look for the store seen below. It’ll have a sign with credit symbols and a Pantoran on the side of the building.
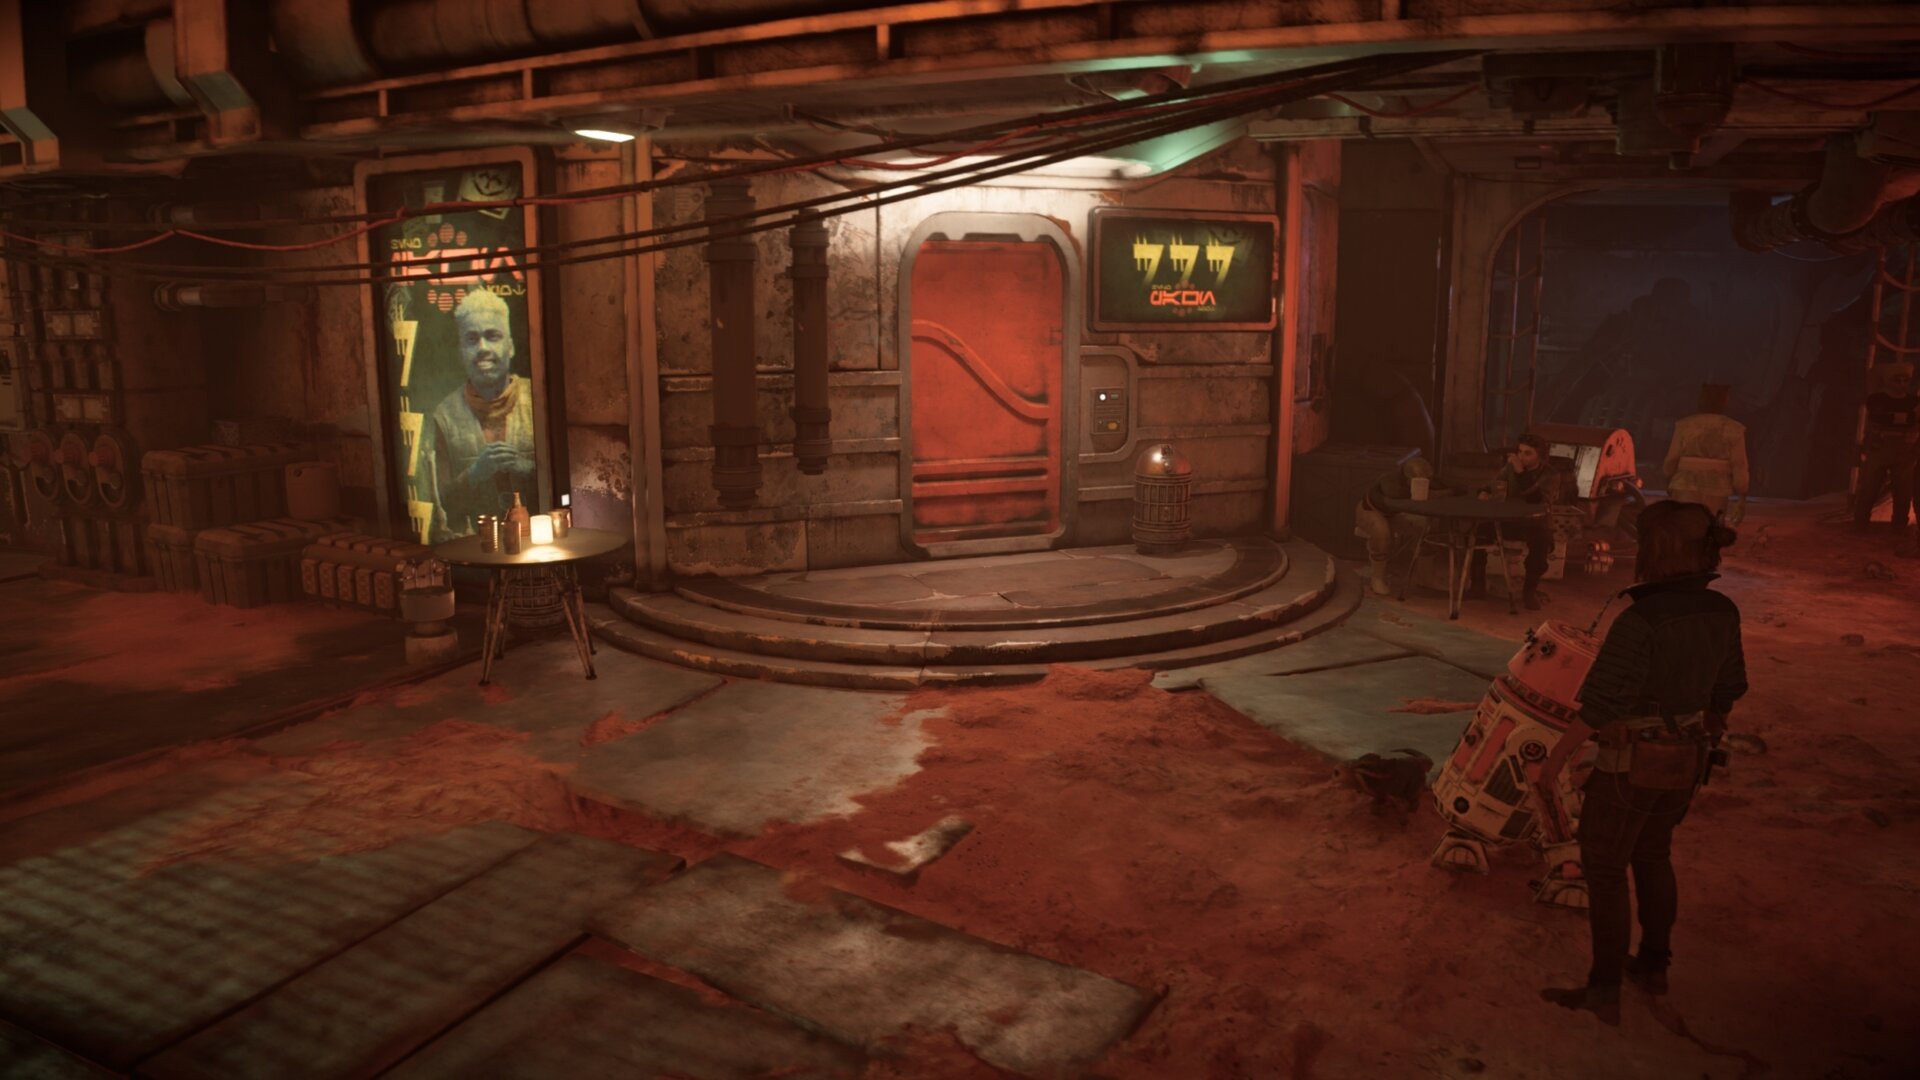
Talk to the shopkeep inside to purchase an Ion Casing. Fortunately, he’s selling the part to you for the best price, free!
Decision: Steal from the Pykes or Crimson Dawn
You can steal the ion blaster components from the Pyke or Crimson Dawn district in Mirogana on Toshara. In this section, we’ll be stealing it from the Pyke Syndicate District.
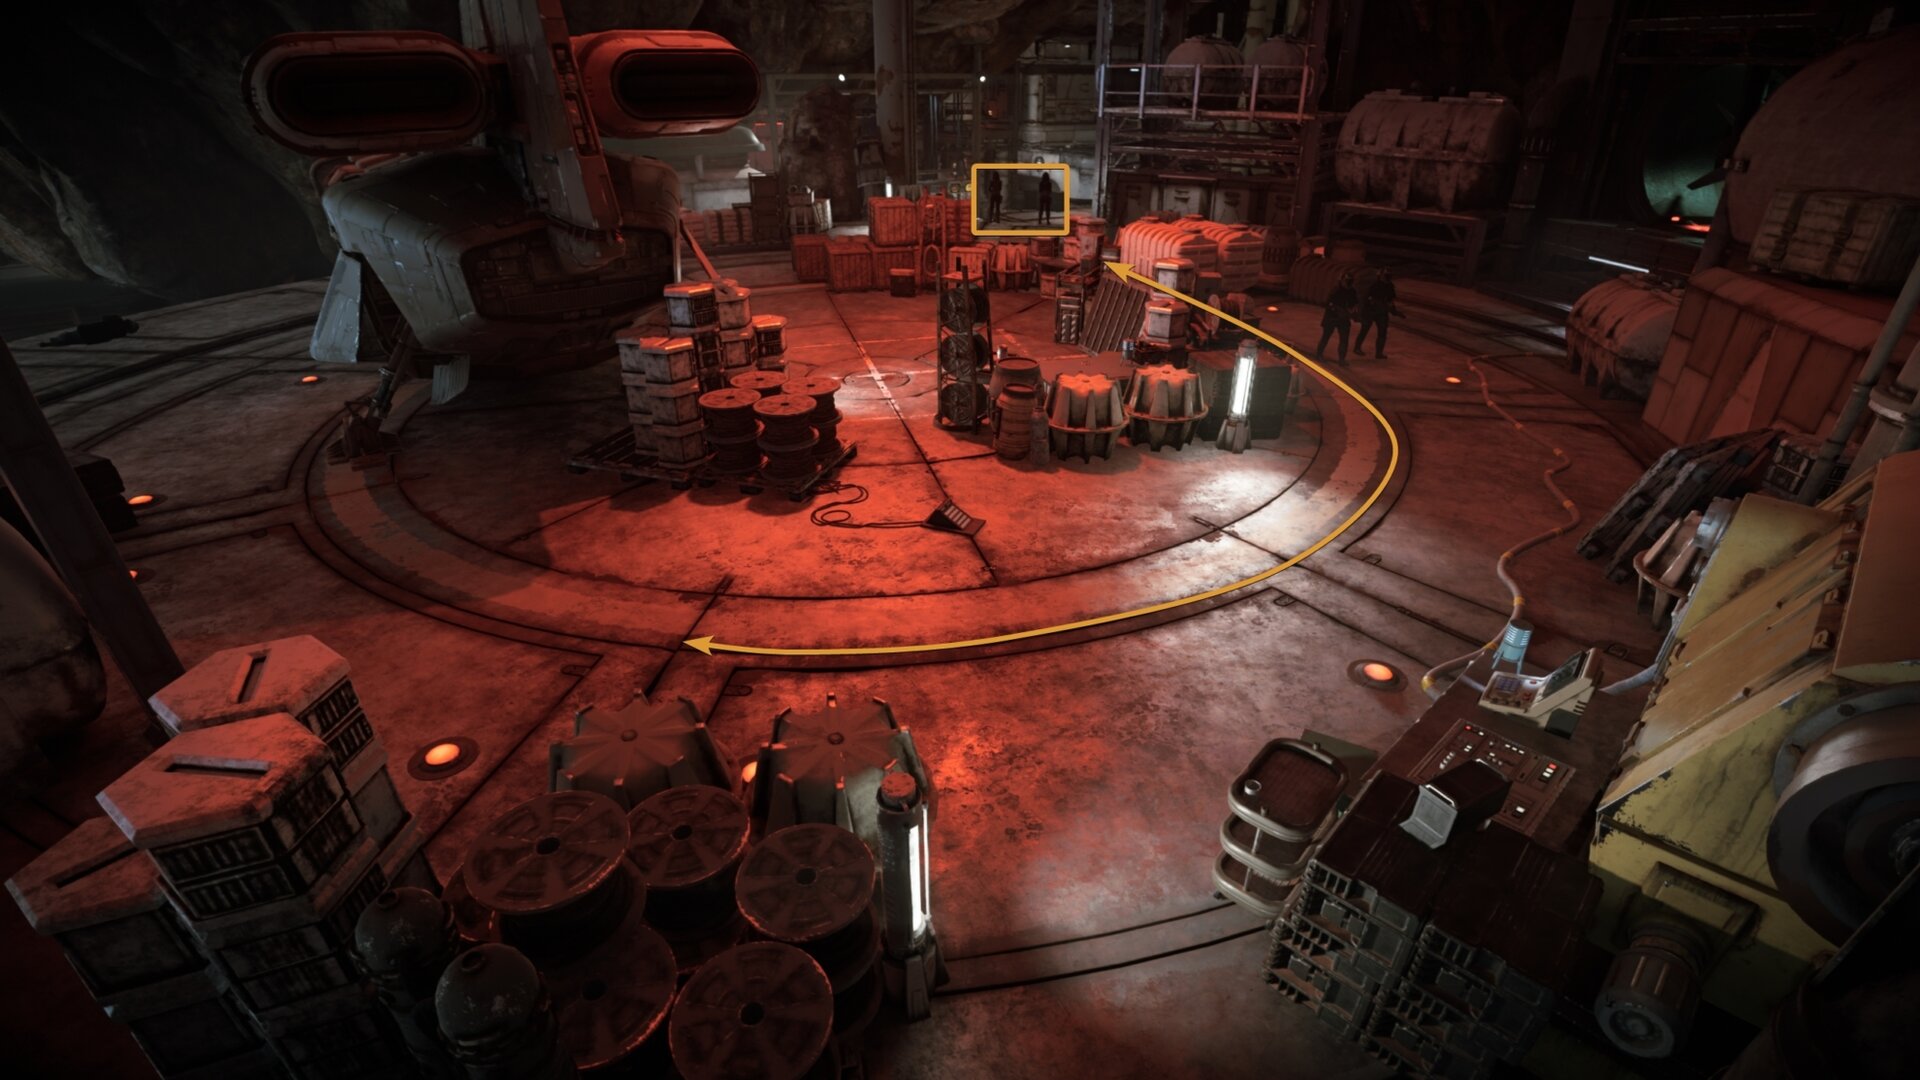
Stealing from the Pyke Syndicate District is the easier district to choose from. You have a new shortcut, there’s more cover to hide behind, and you’re already familiar with the area.
Whether you’re stealing from the Pykes or Crimson Dawn, it can be made easier by increasing your reputation with these syndicates. If you are in Good or Excellent standing with a faction, you will be able to freely roam the district. This does not apply to any restricted areas, of course.
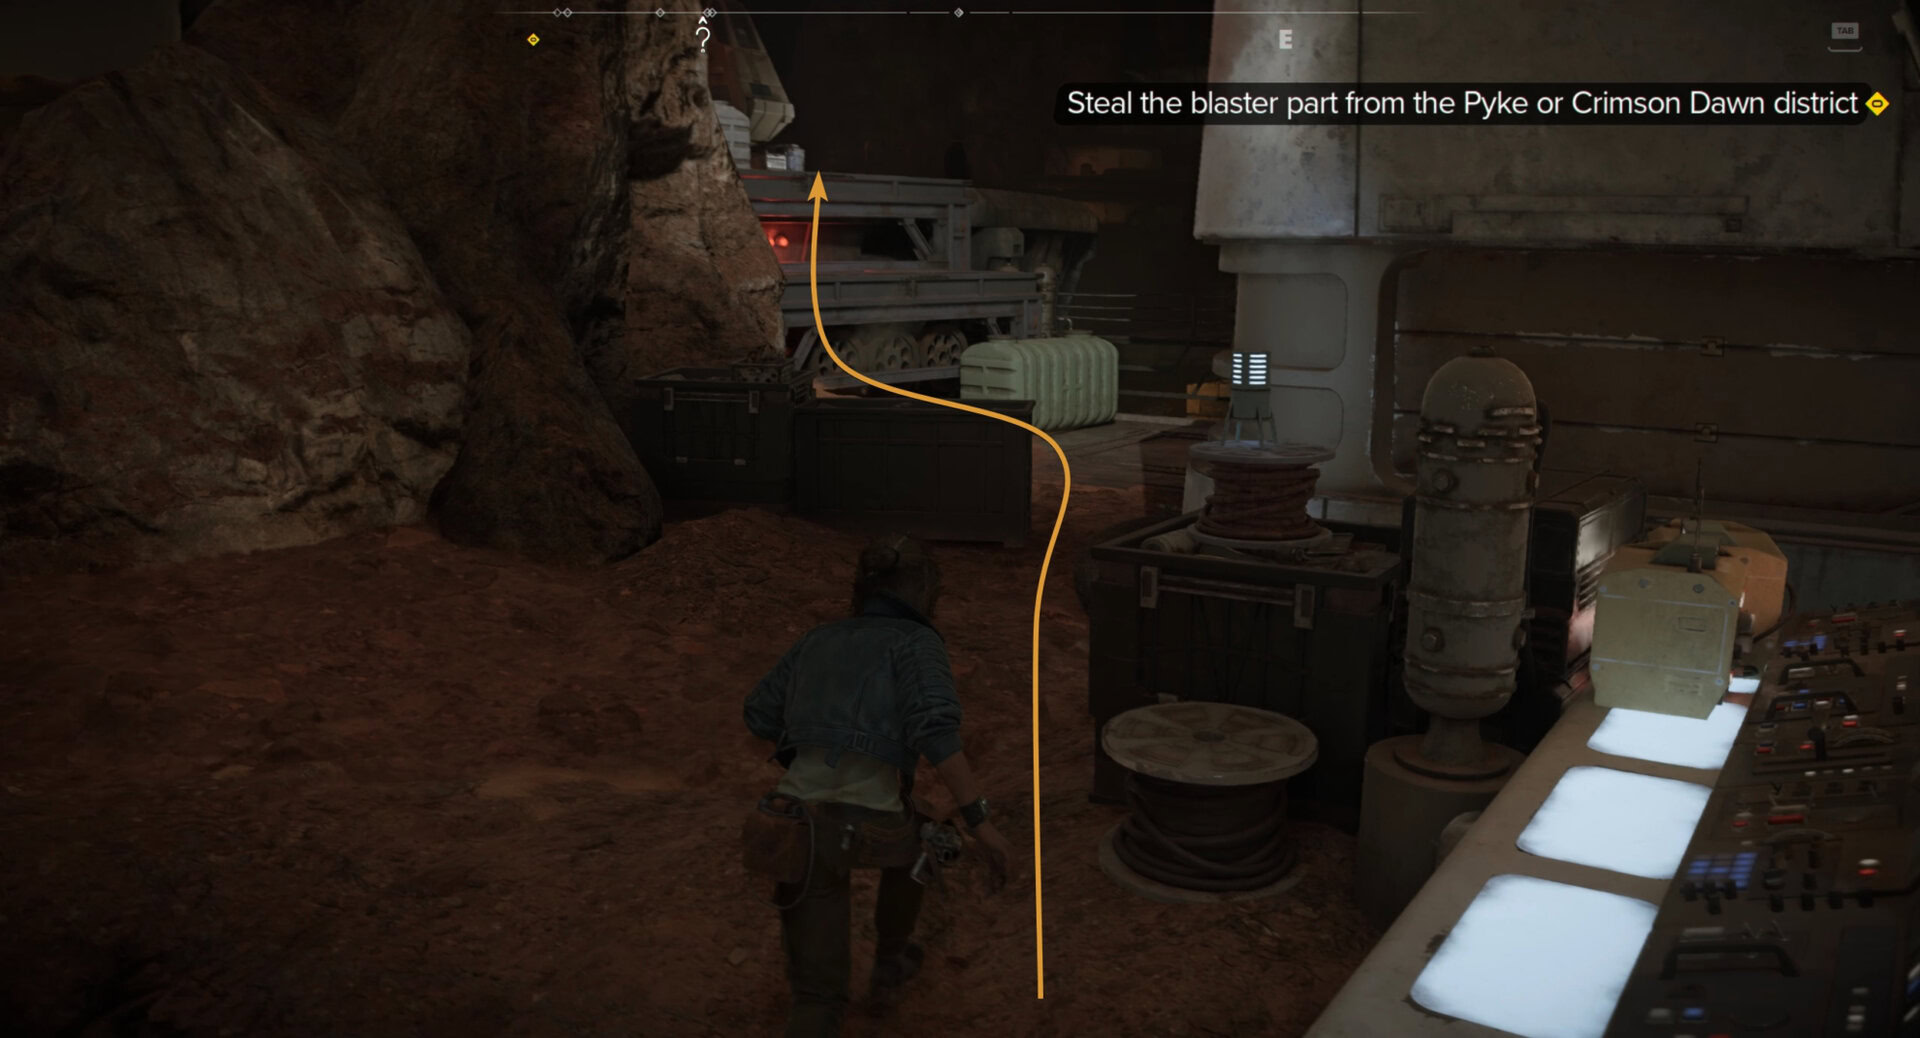
How to steal the Blaster Part from the Pyke district
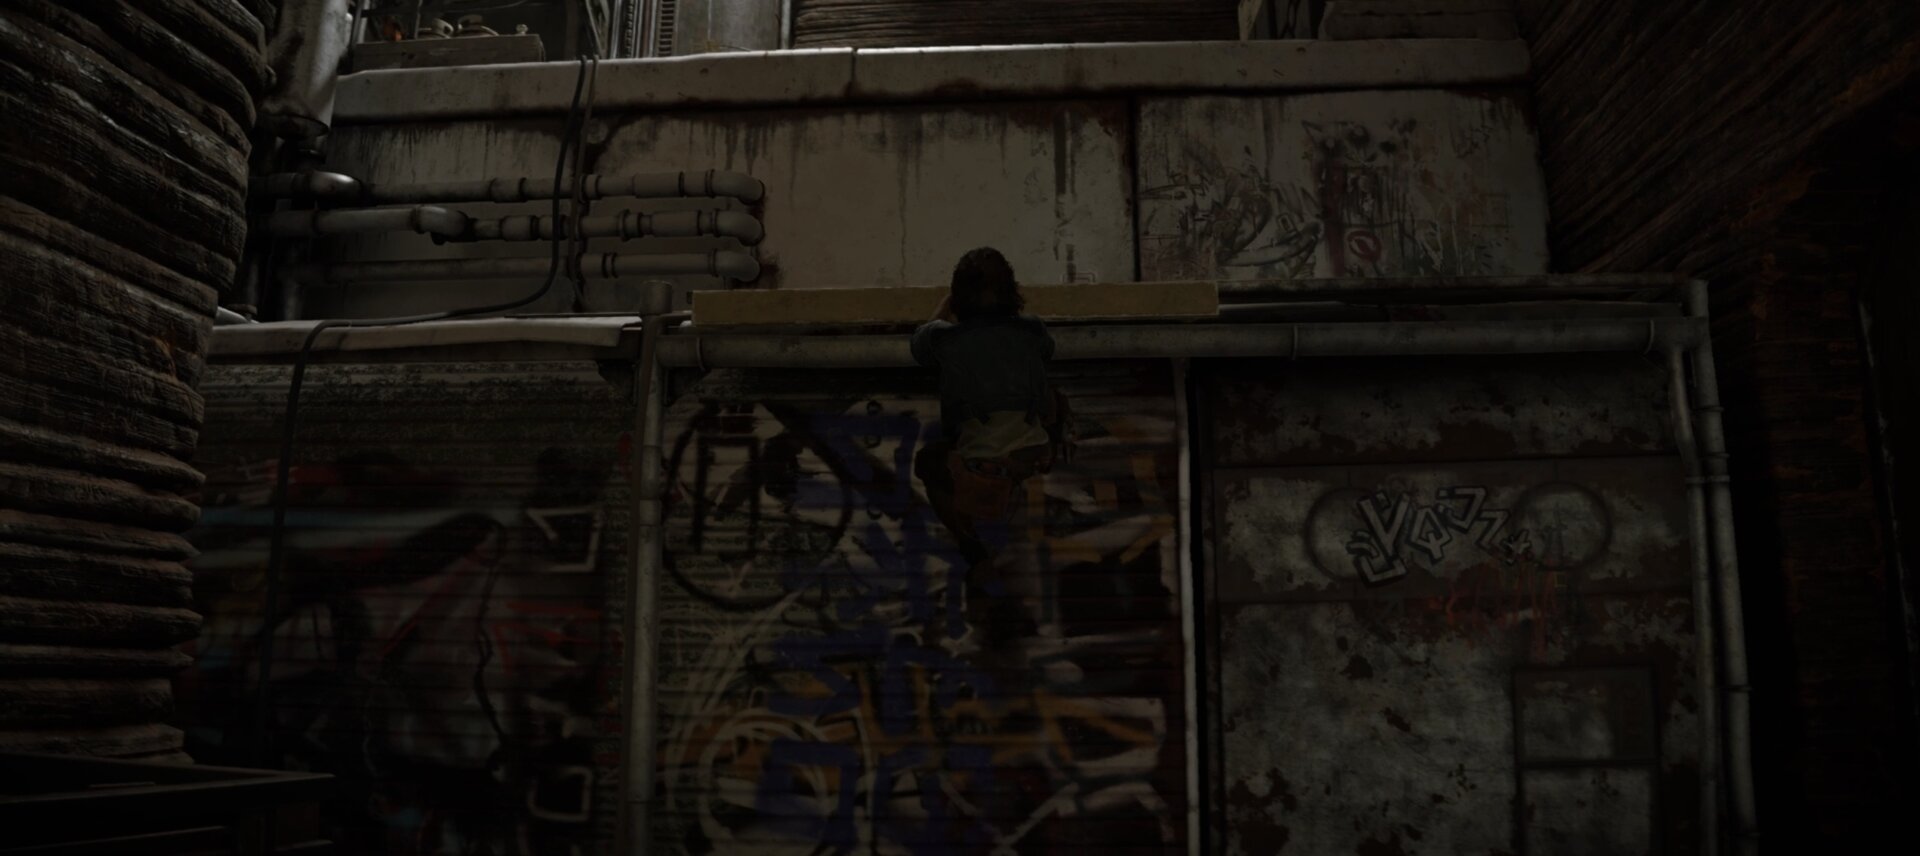
You can sneak into the Pyke District using the same vent when you were here to sneak into Gorak’s Base. Since then, a shortcut has appeared that cuts down your travel time.
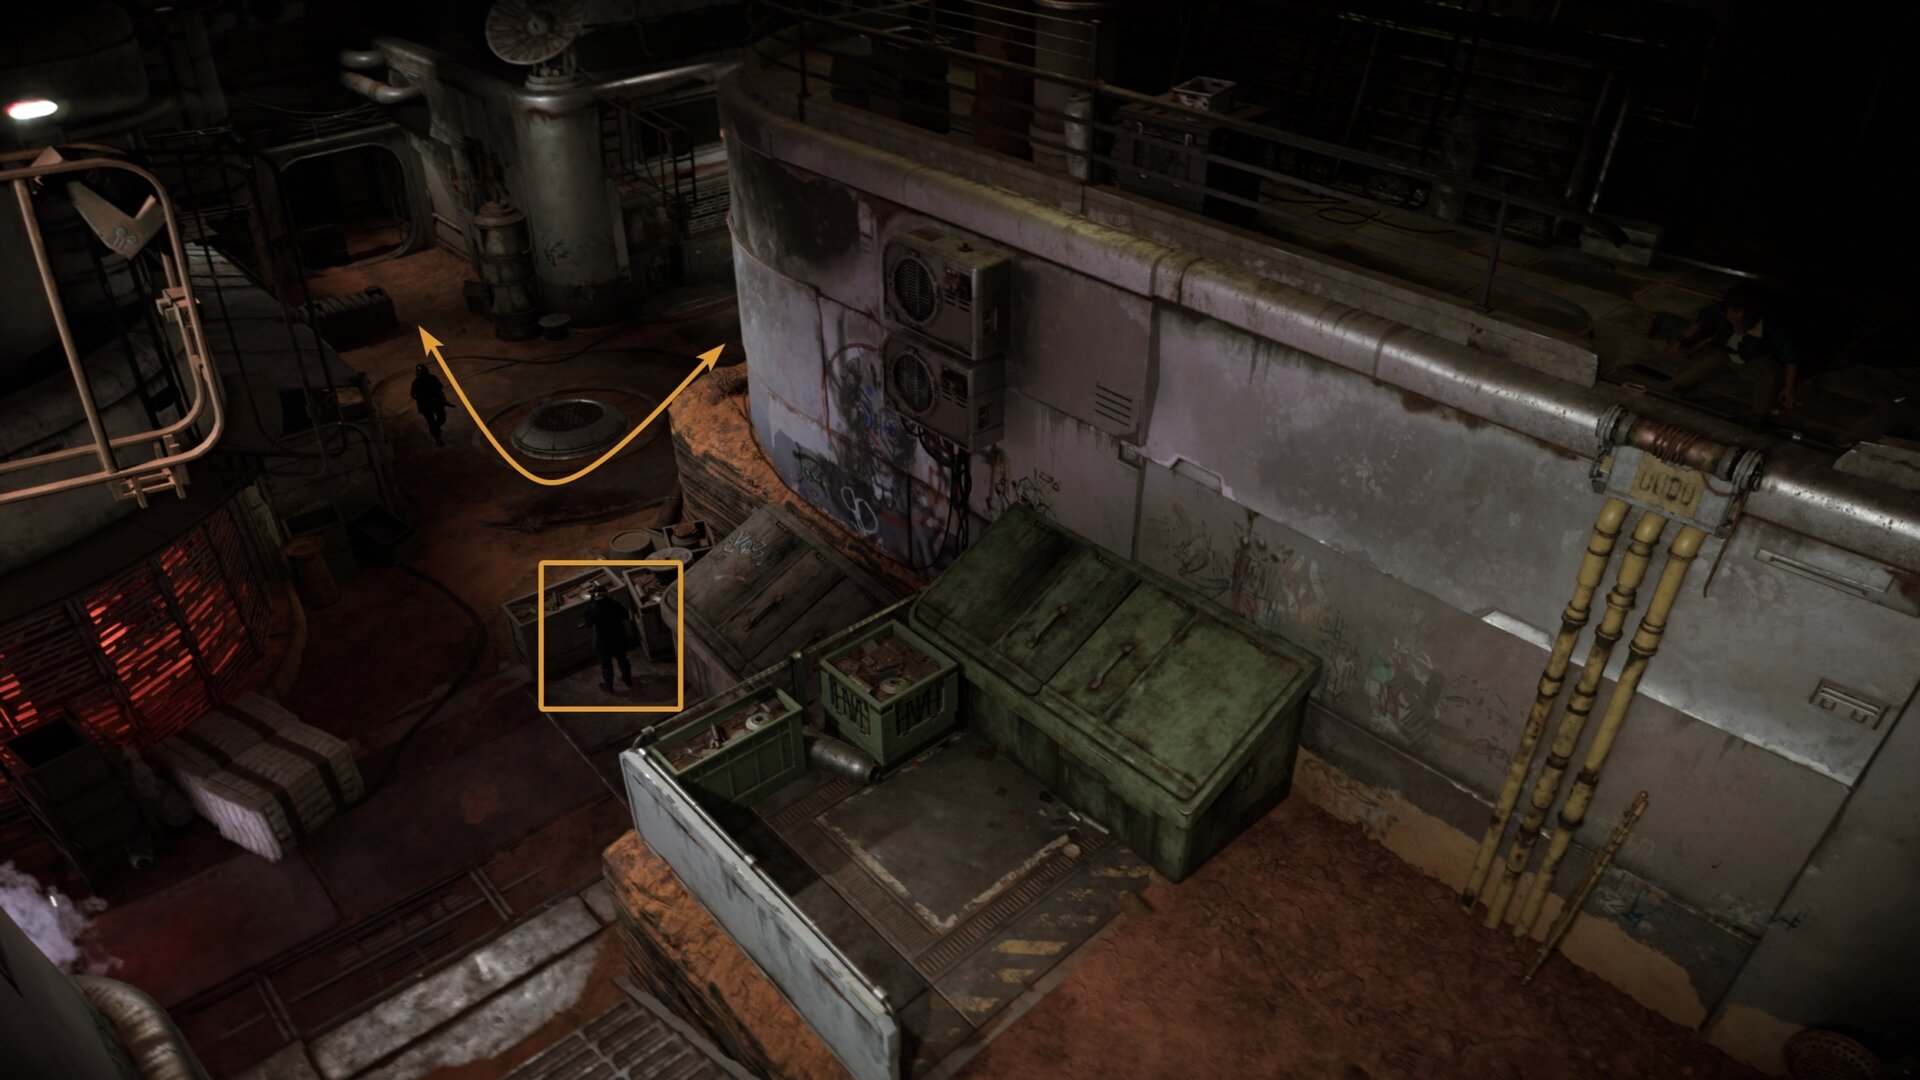
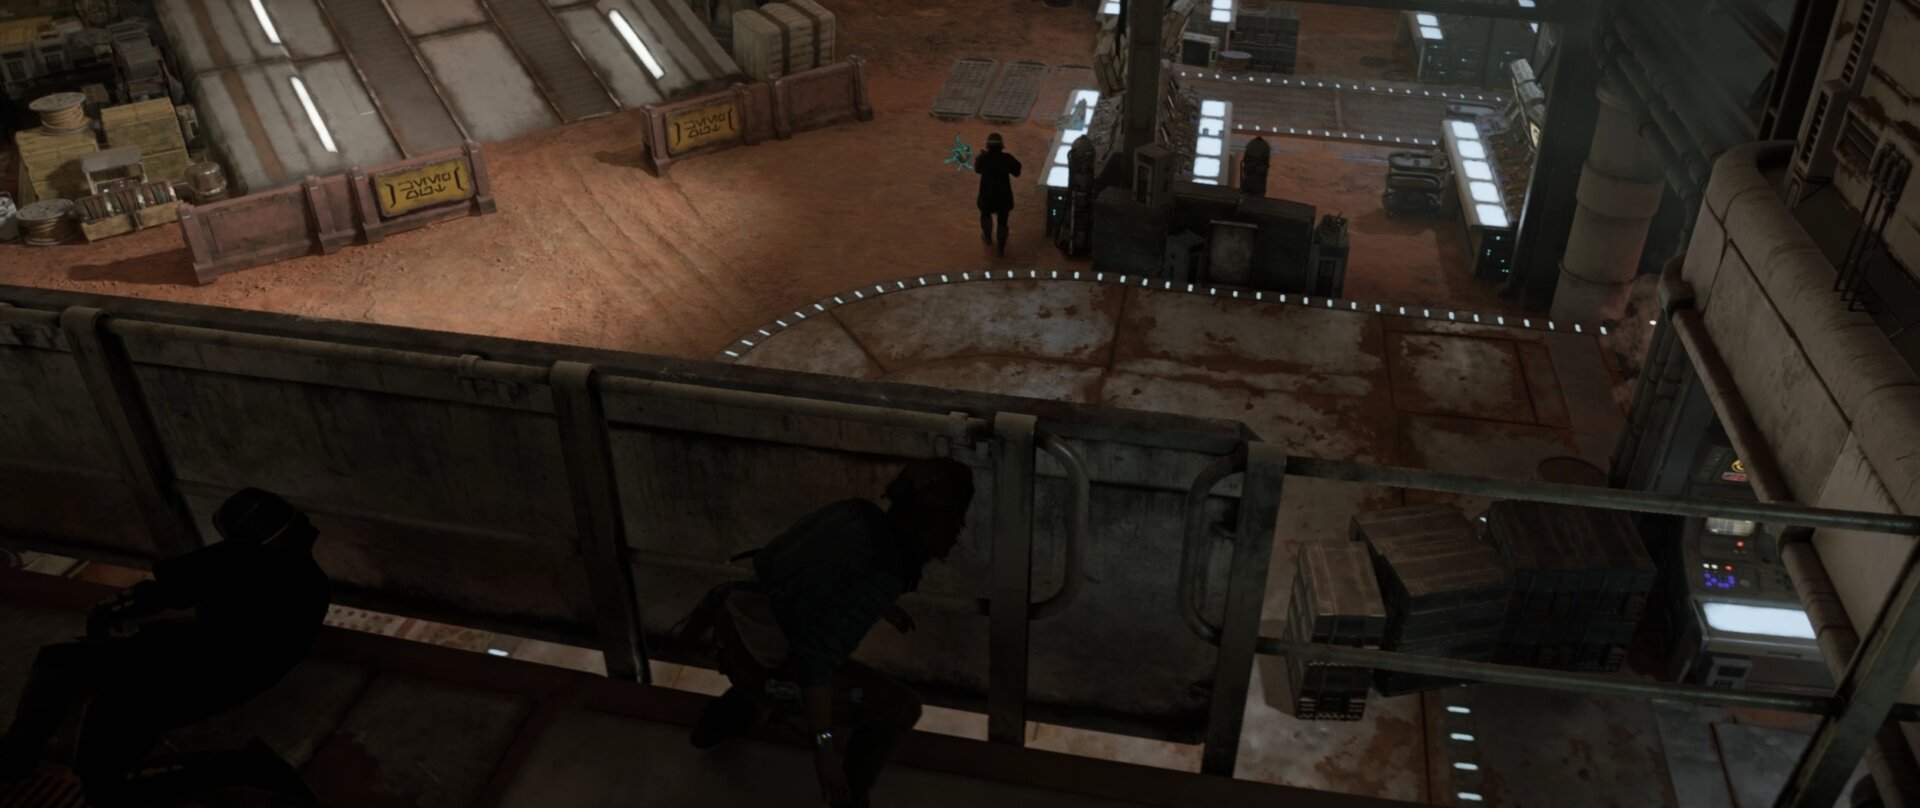
Go to the Mirogana Market and go into the east alleyway. You’ll find a store that won’t sell to you without a password. Look for the crack in the wall and go through it, then immediately crouch behind some cover.
The Pykes added a few new guards in the area since you here last here. This makes your original route through here a bit more tricky to get through. This is why I recommend using the new shortcut on the west side.
Look for the pair of Pyke Enforcers on patrol. Wait until they start walking south then run to an alleyway across the road. Don’t go too deep into the alleyway as there’s a security camera there.
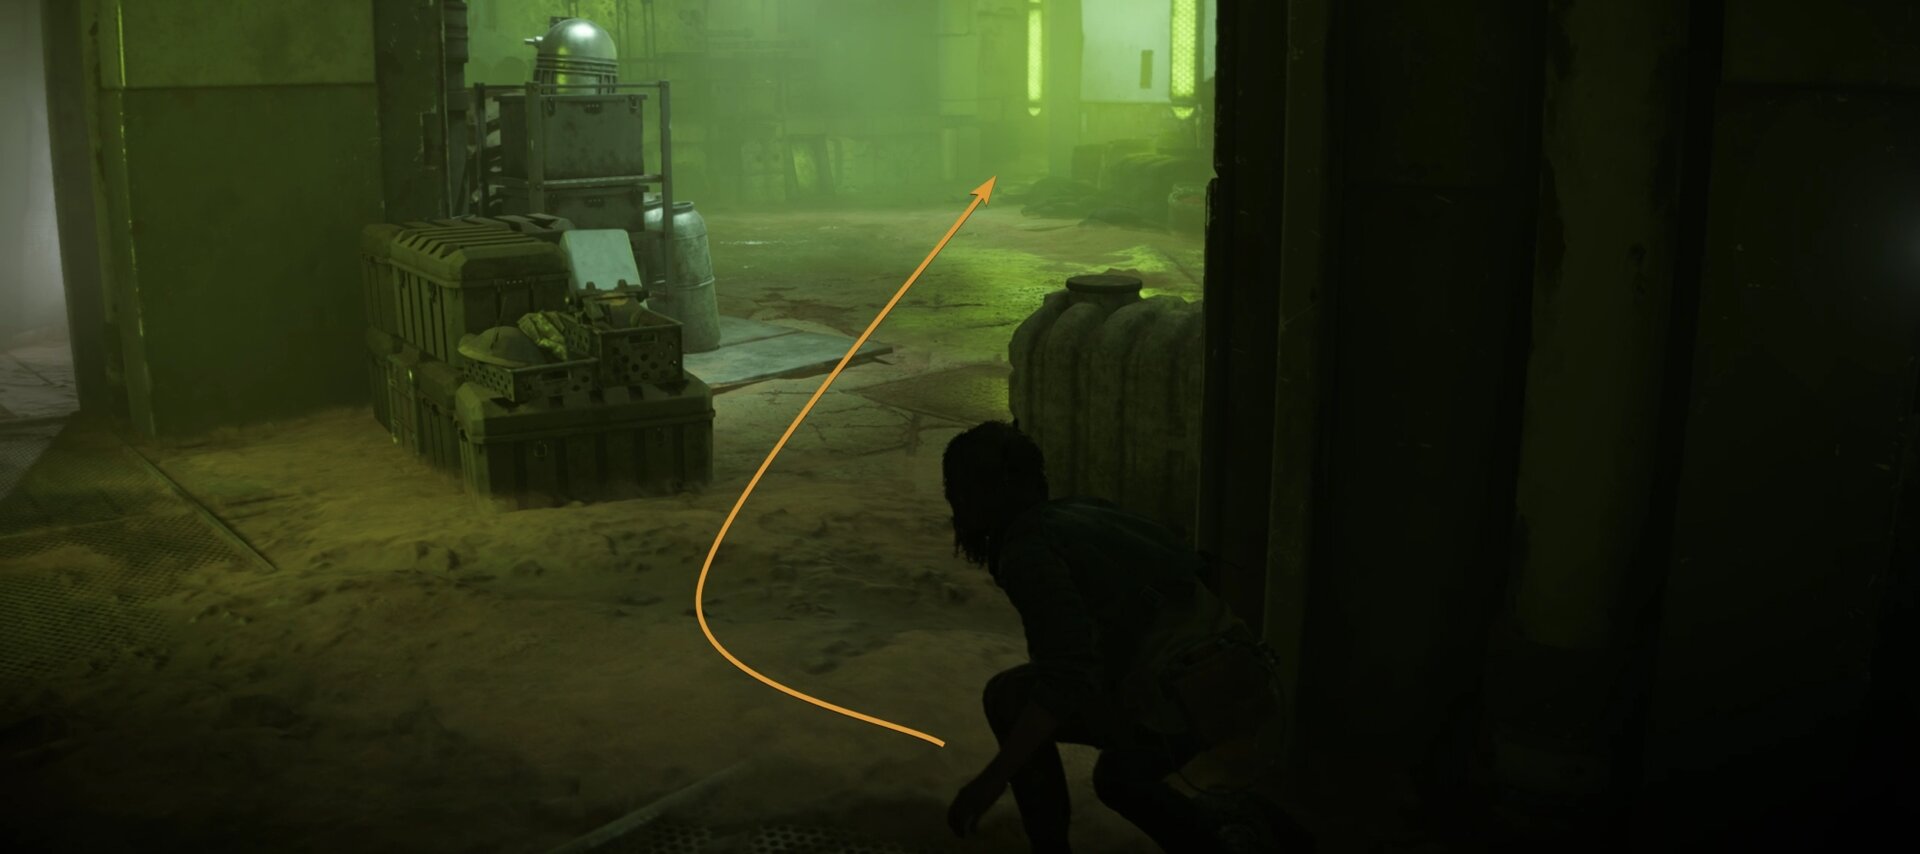
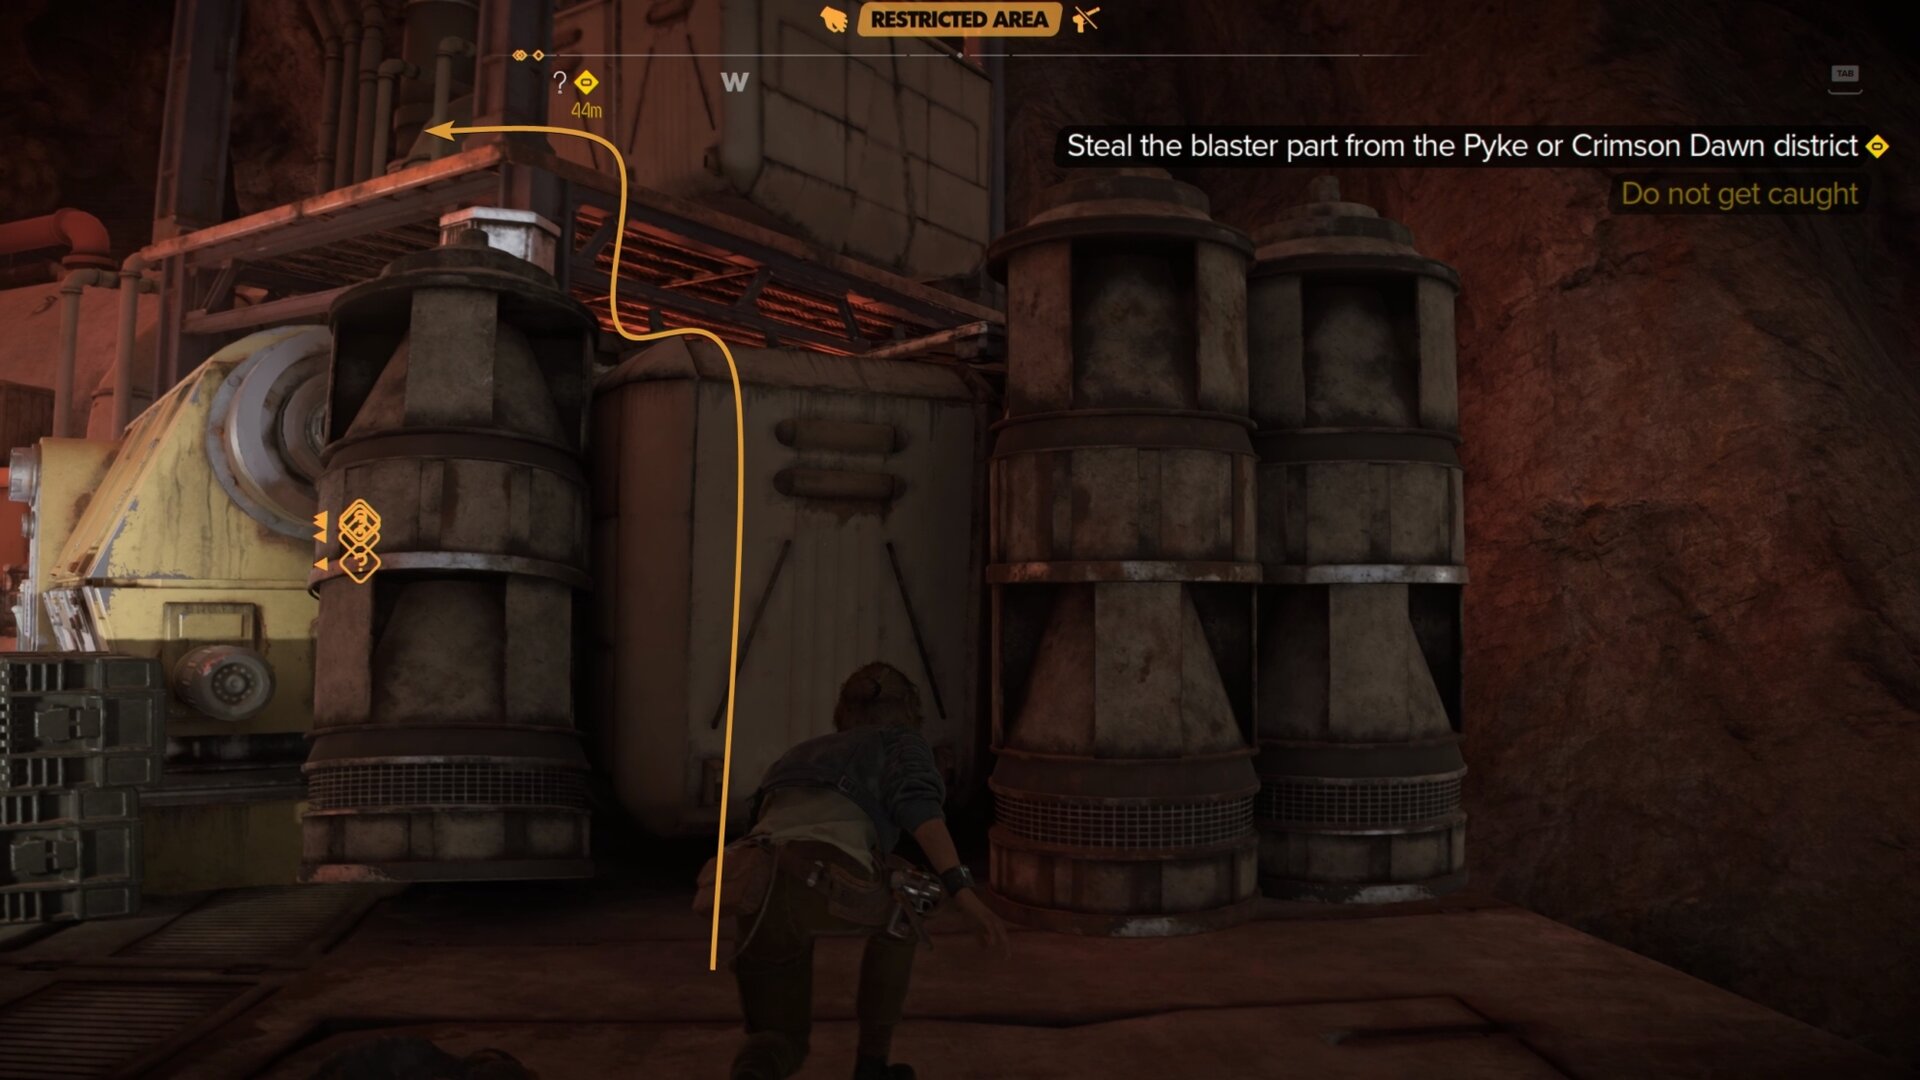
Disable the Security Camera
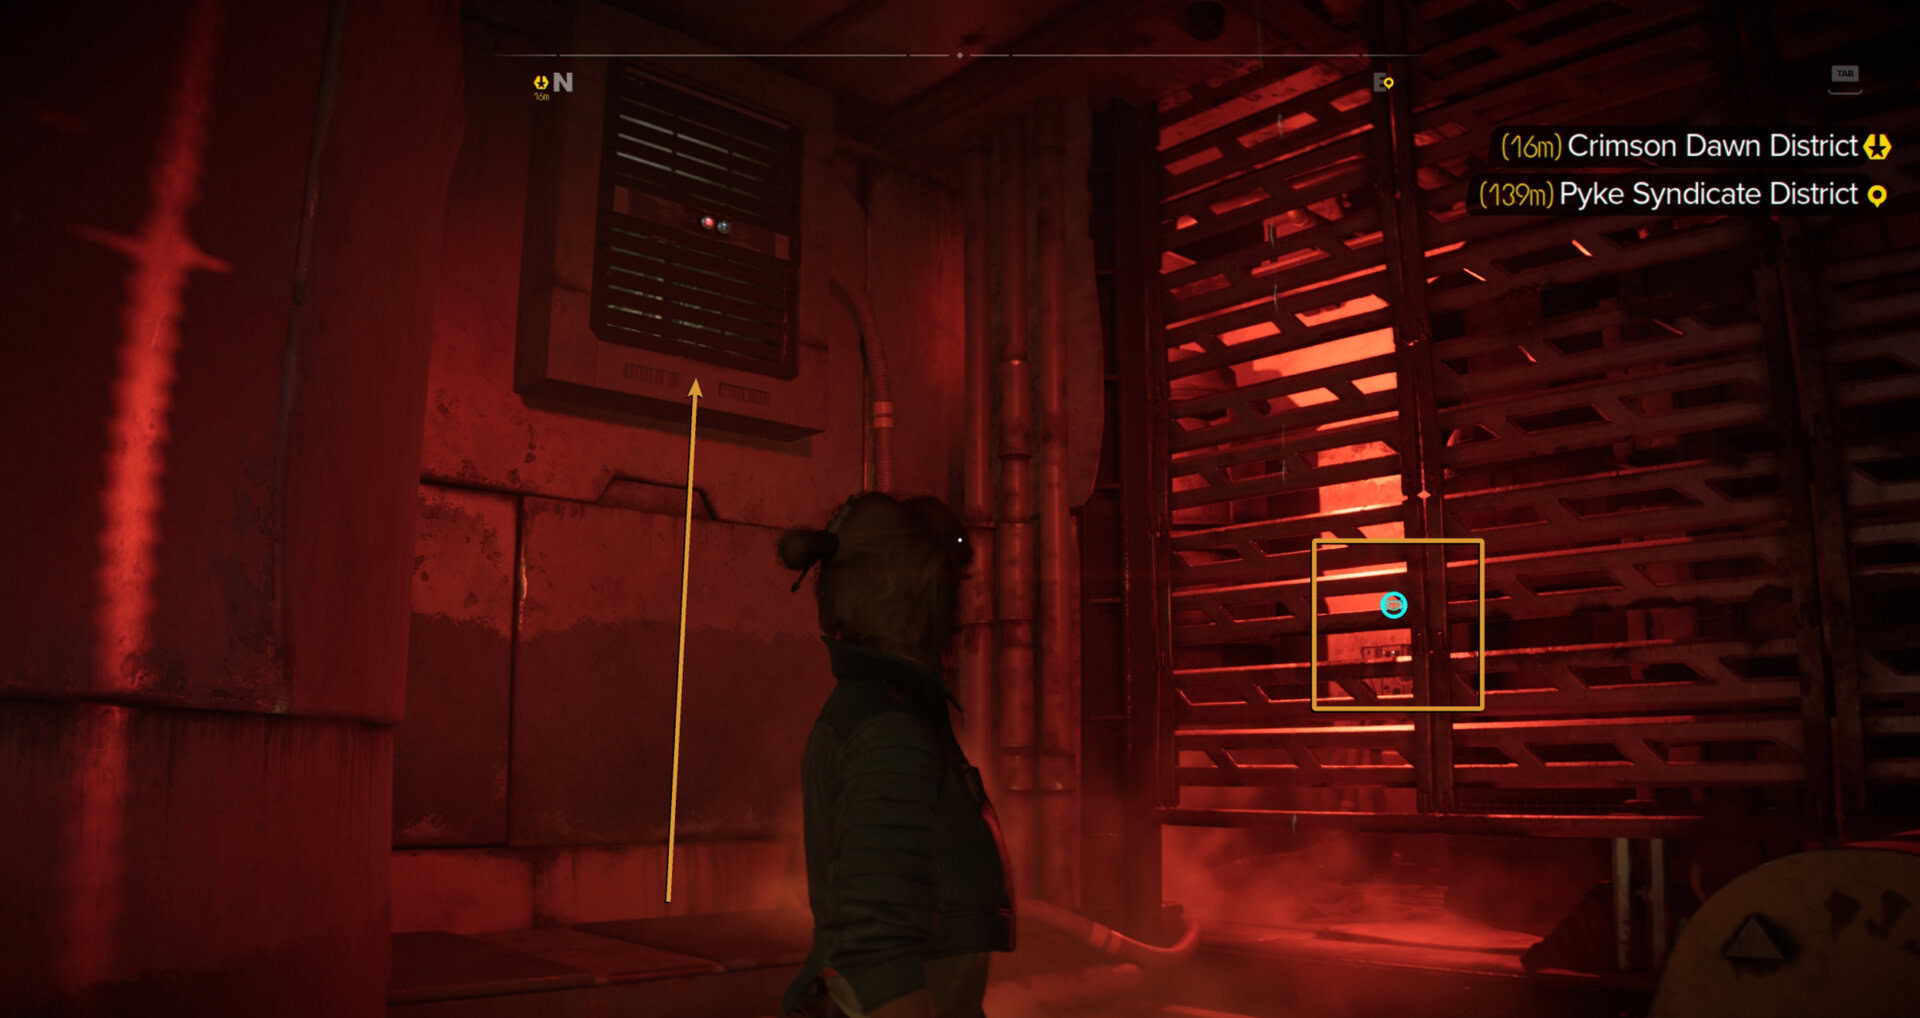
Don’t get in the security camera’s line of sight or it’ll alarm the Pykes. To get past it, send Nix to turn off the camera’s power at the panel.
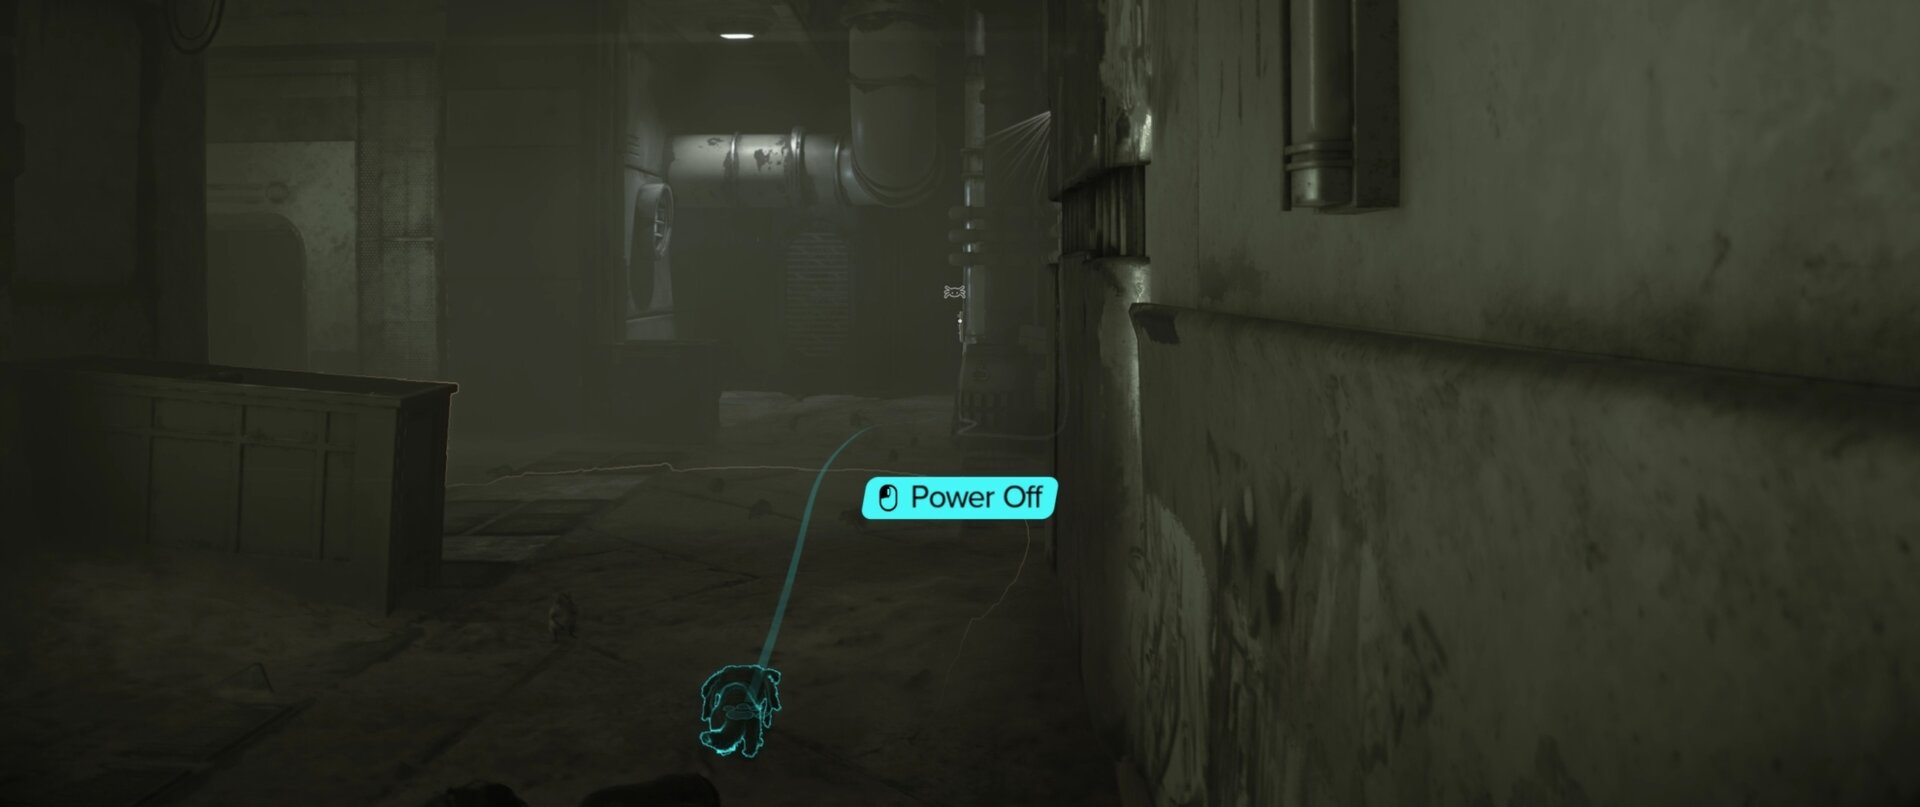
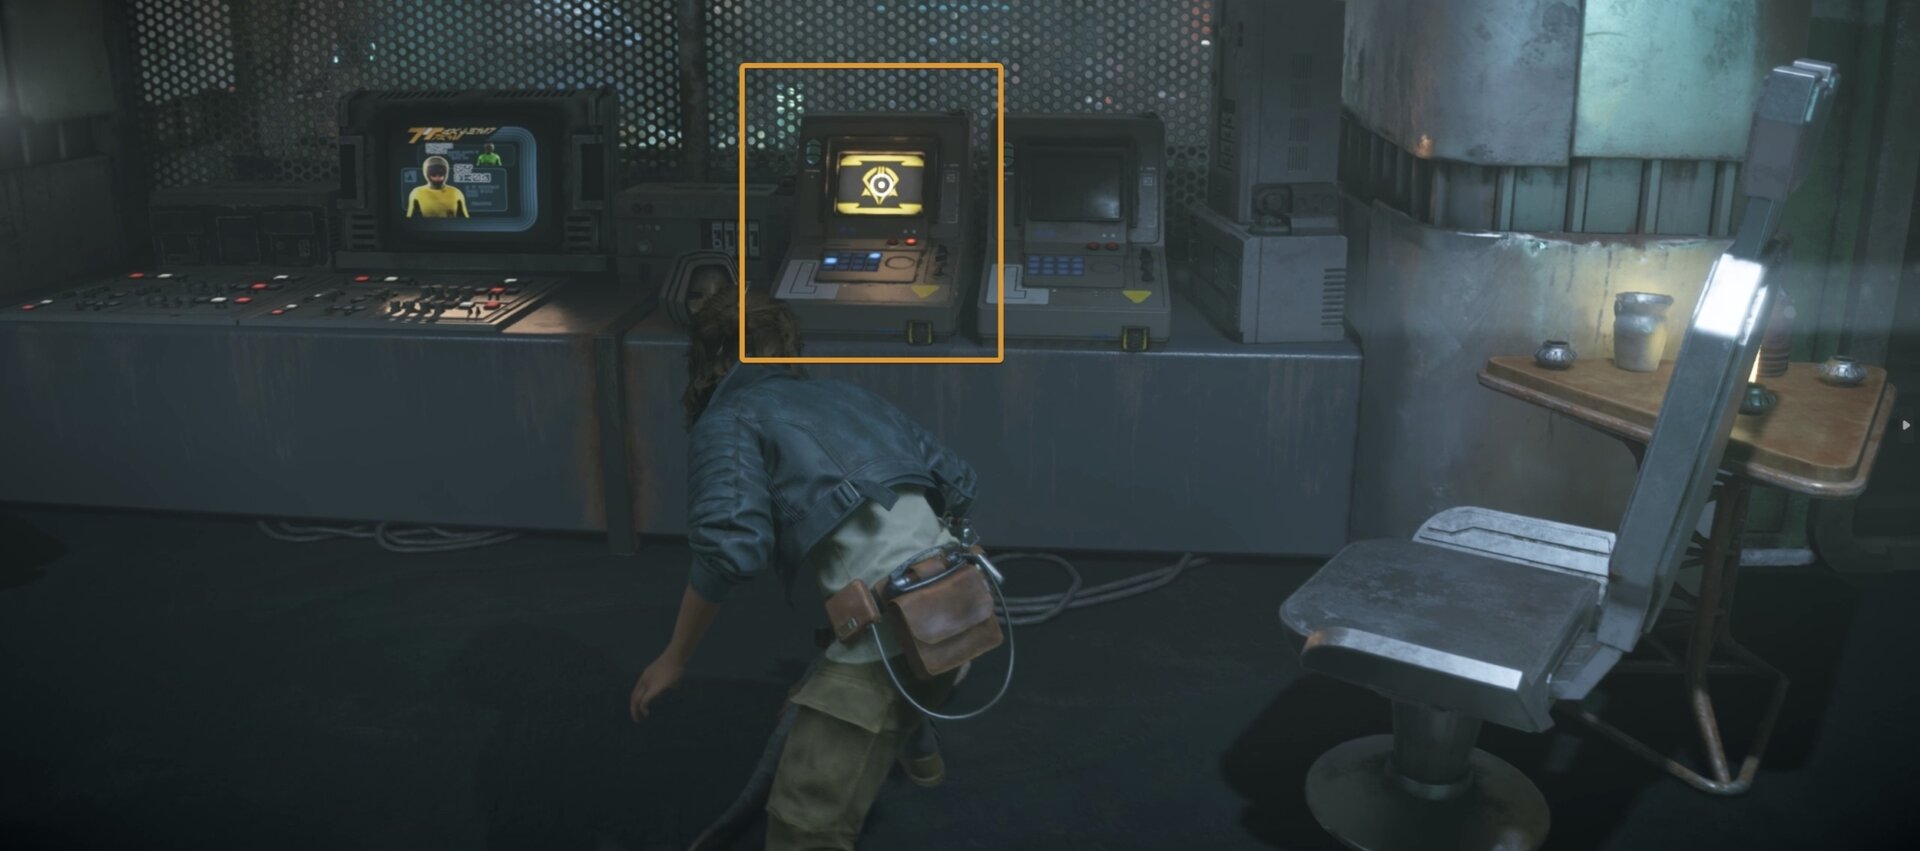
With the camera now down, go forward and on the right wall you’ll find a locked vent. Lockpick the vent to enter the Pyke safehouse.
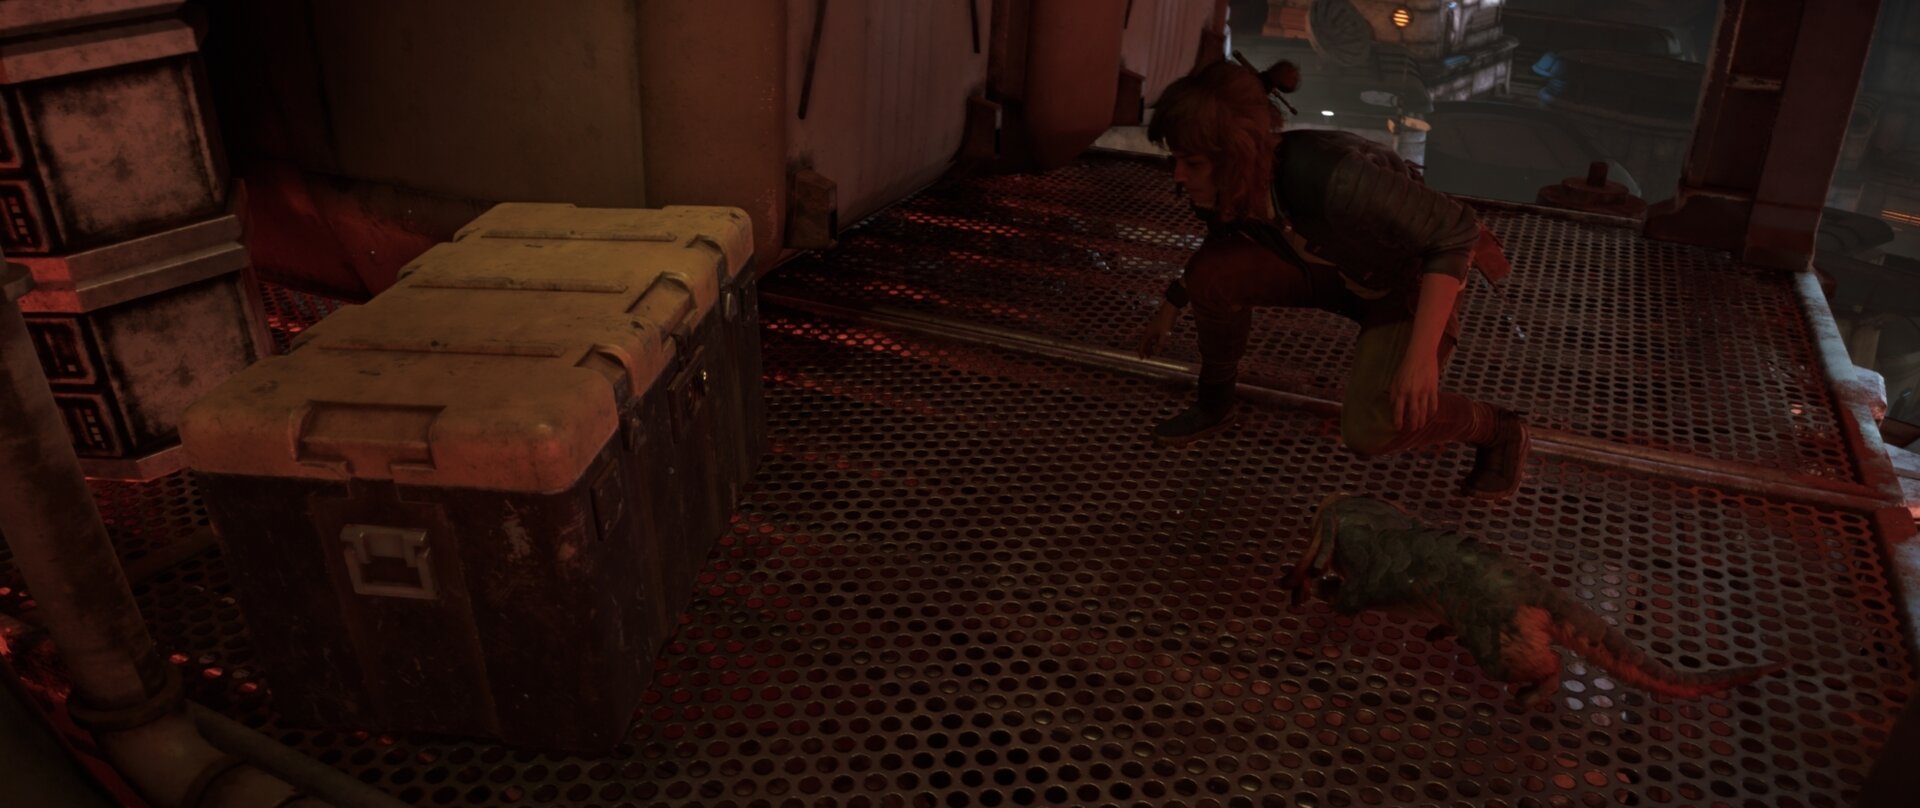
Take the Loot and leave the Pyke District
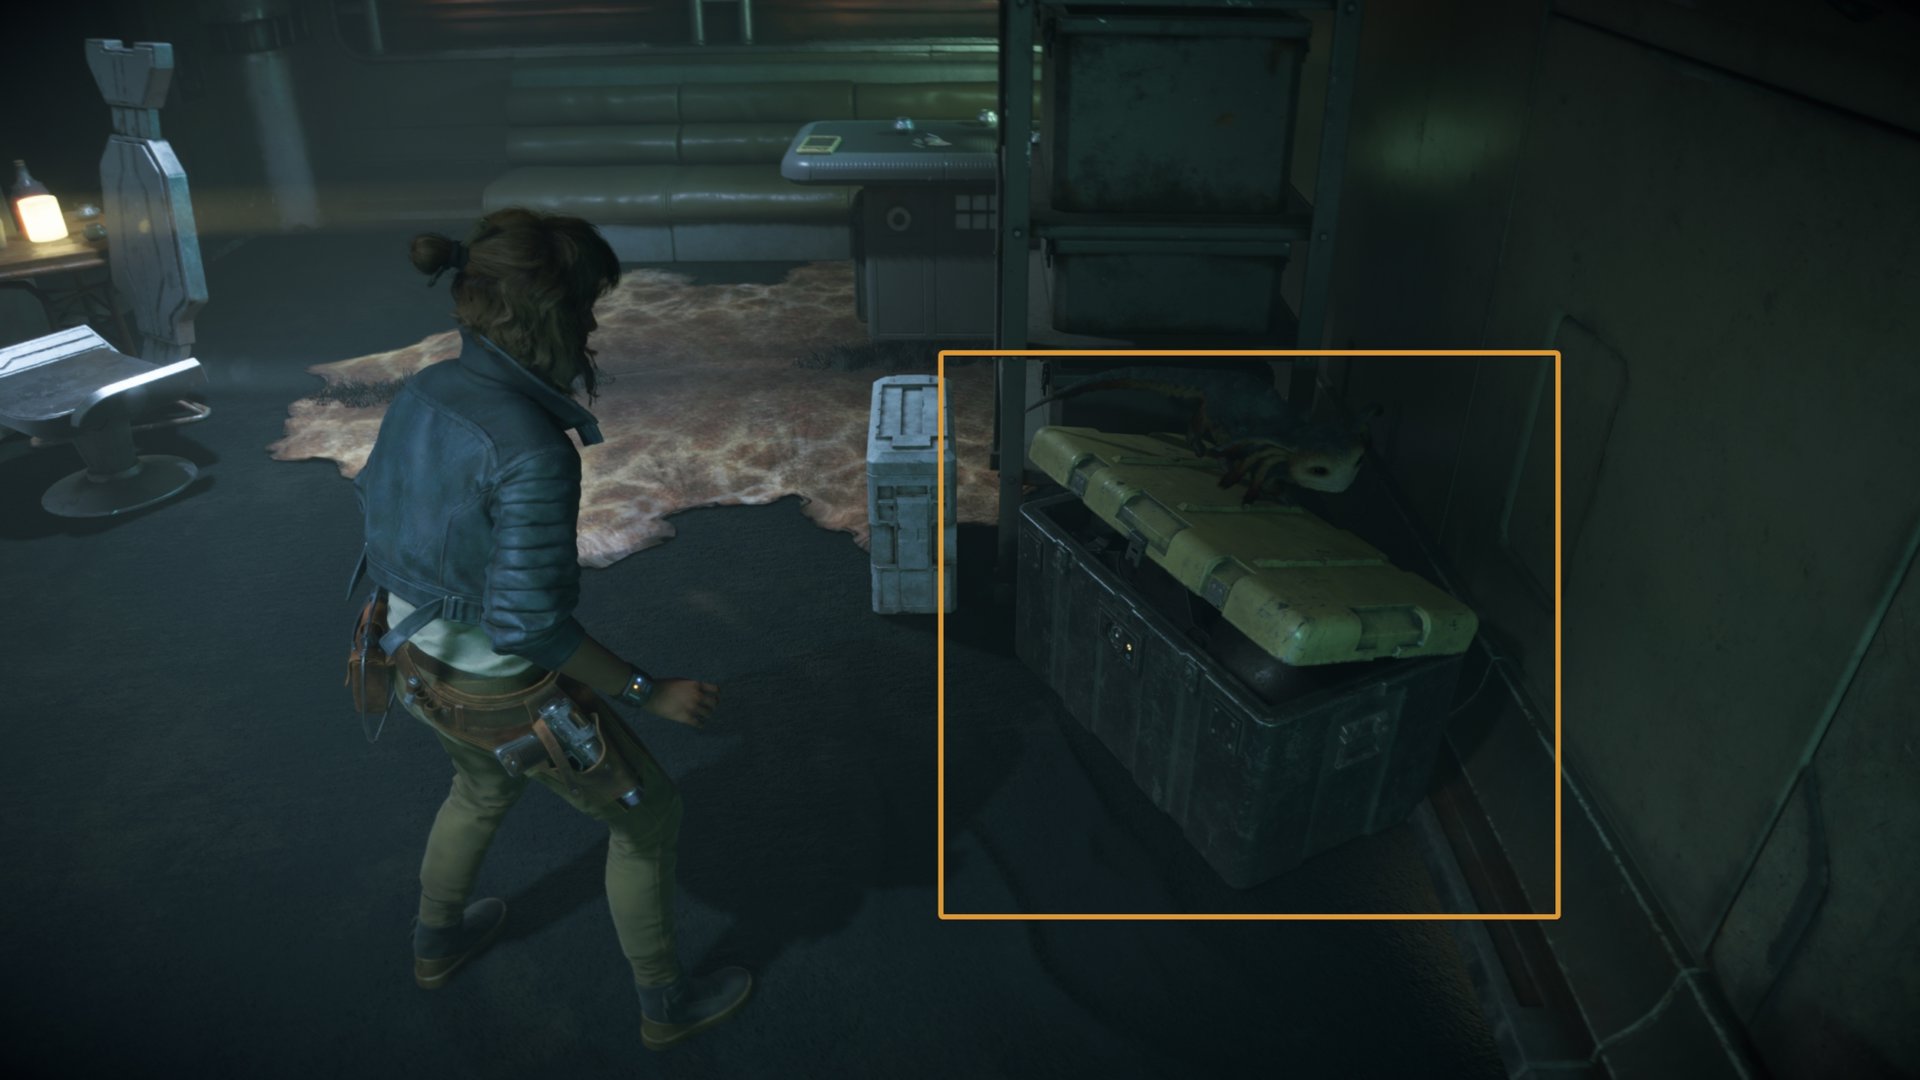
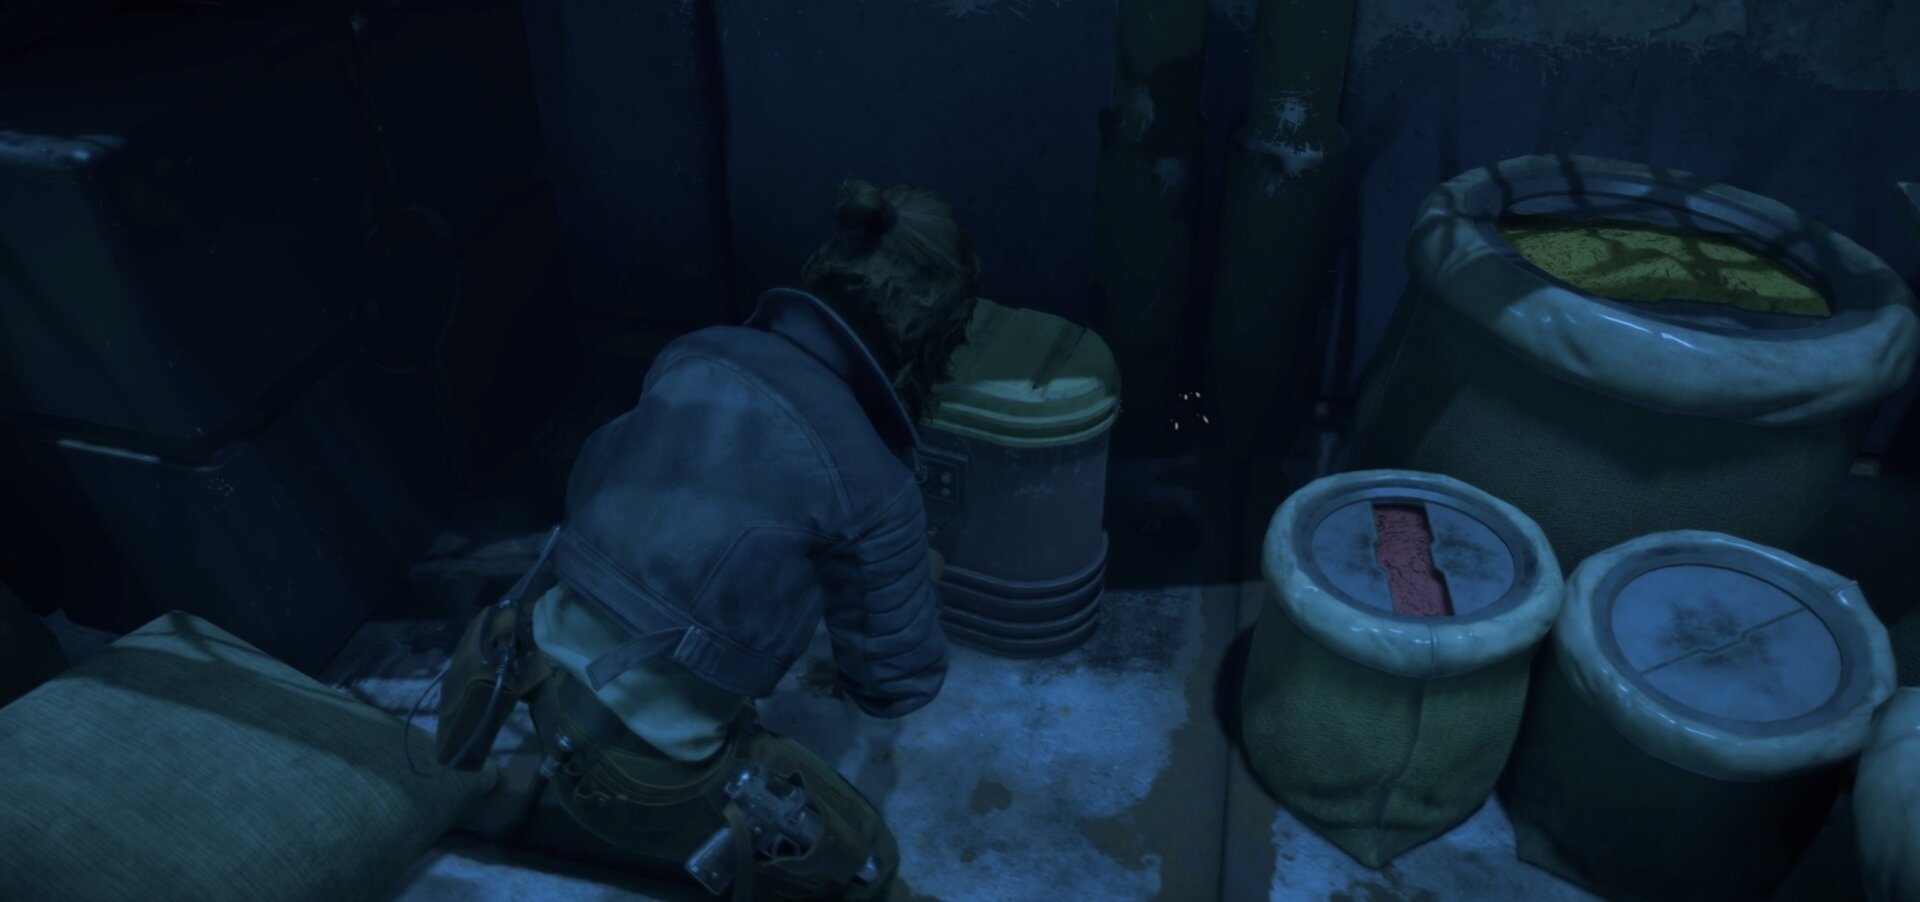
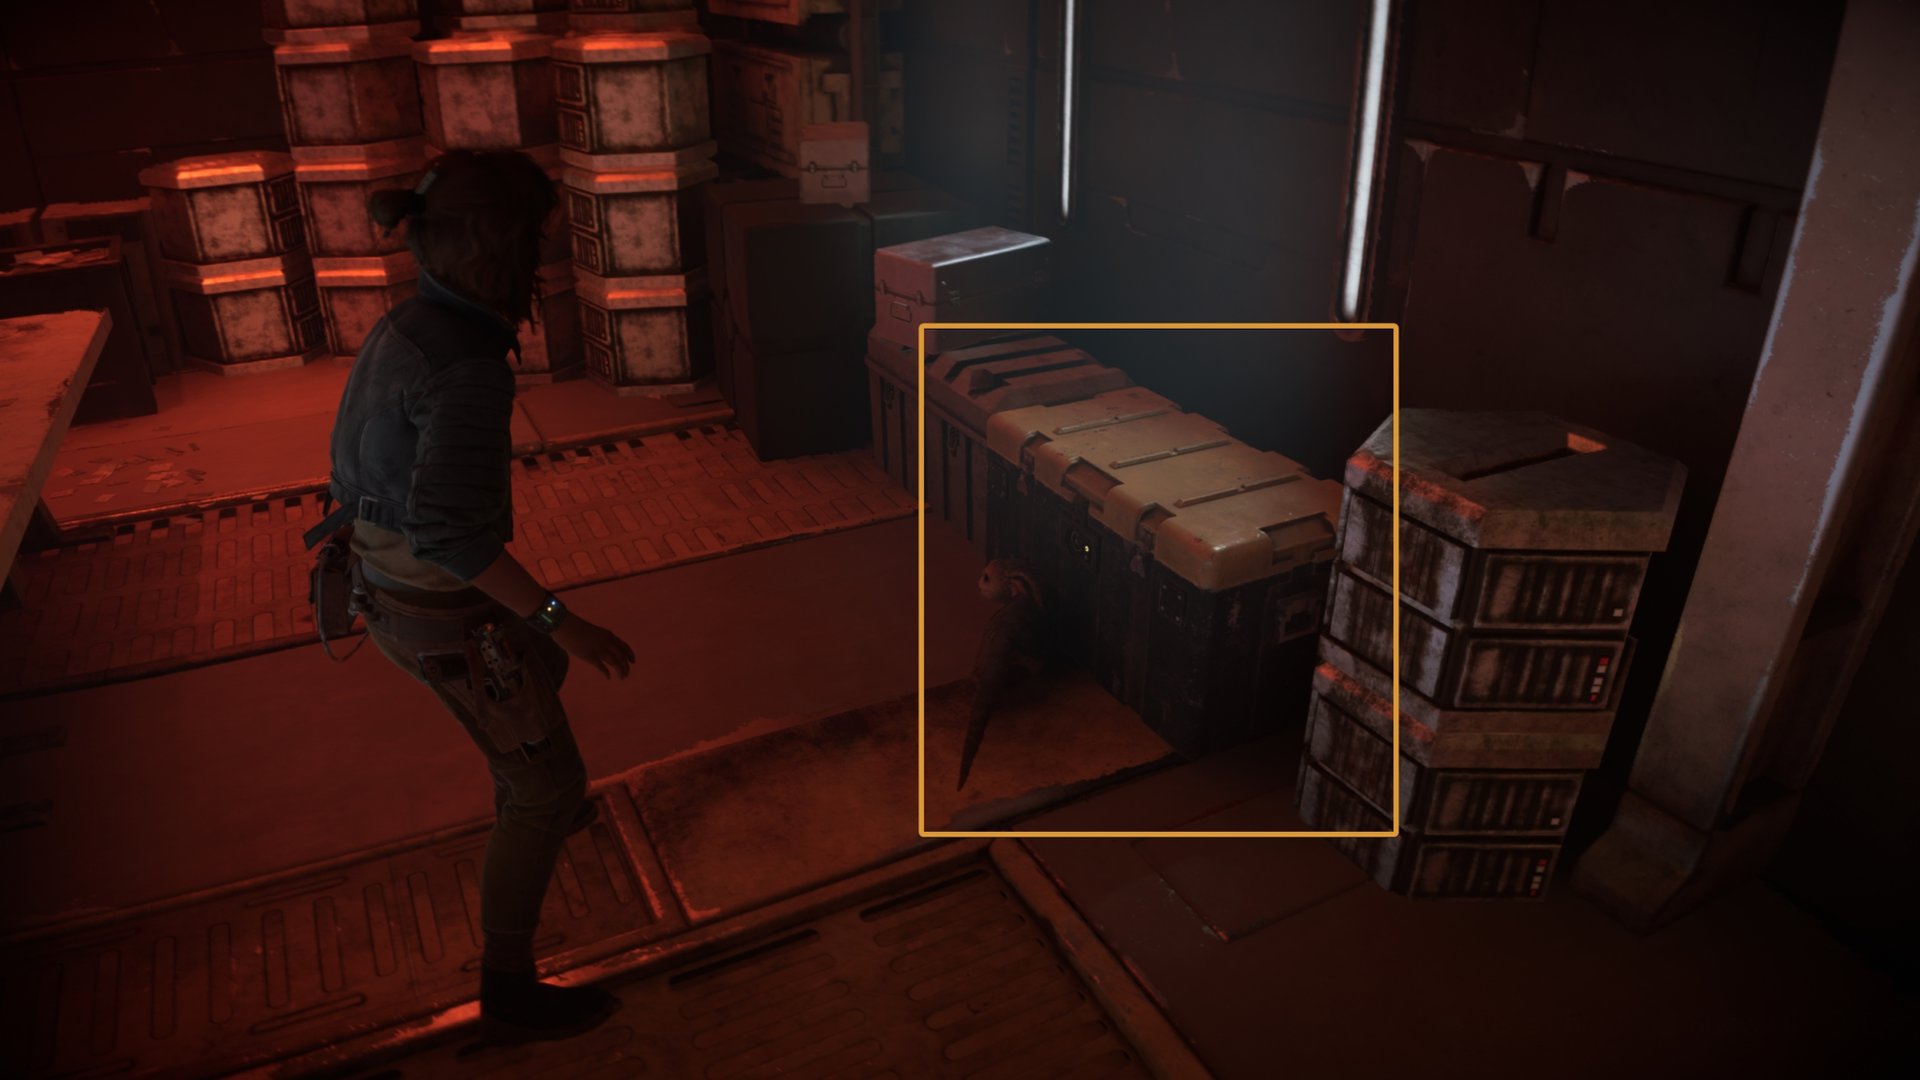
There are a few amount of goodies in the safe house, but the ion blaster parts will be in a large chest. Loot the chest to pick up the Ion Energy Converter.
Don’t be so hasty to leave, there’s are some good things around here that you’ll want your hands on. Grab everything you can find, credits are always nice to have.
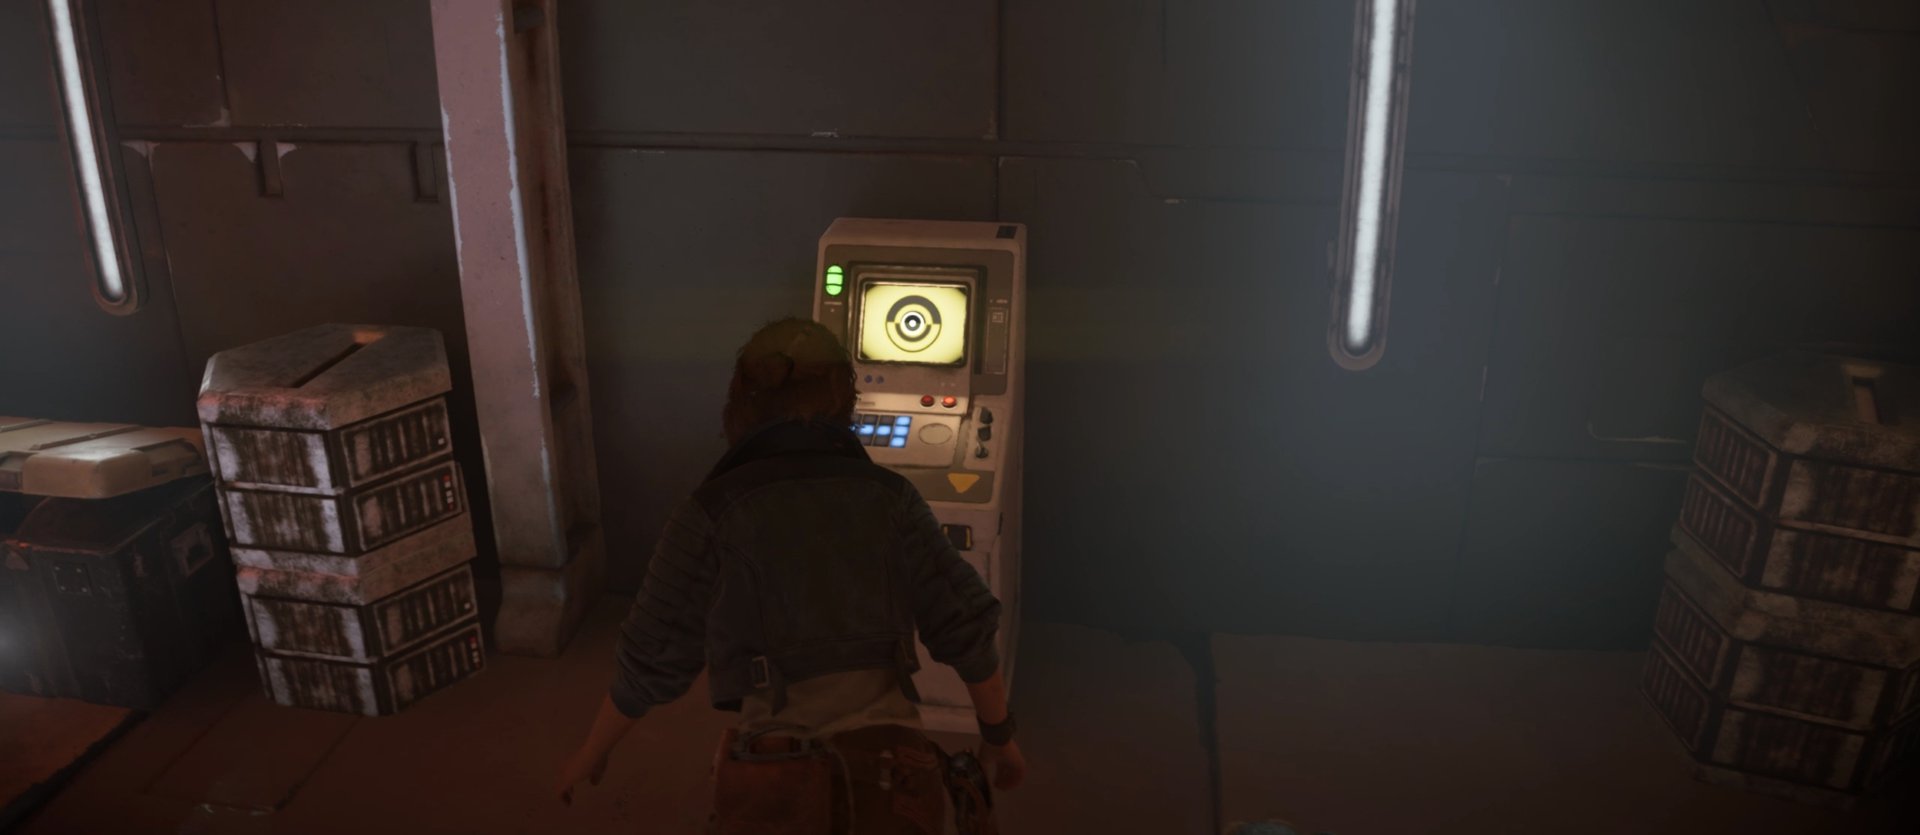
Look around for the computer you can slice. Slicing into it will reveal information about the Mirogana Pyke Syndicate Vault and where to find the keys to unlock it.
Optionally, you can remove the red barrier and loot the treasure in the vault. You will have intel about the locations of three keycards you need to obtain. You can obtain the keycards and come back to the vault later for the chest’s contents:
- 5000 Credits
- Imperial Paint Job for your Speeder
- Target Tarrif Collectible item
After looting the vault, exit through the vent. As soon as you are out of the restricted area, you can fast travel to somewhere else. This is a good trick to use if you don’t want to sneak your way back out.
How to steal the Blaster Part from the Crimson Dawn district
Head to the Market District on the north side of Mirogana and look for the restaurant. There will be two paths you can take here to sneak into the Crimson Dawn District.
Depending on which path, you can end up with a slightly shorter route that’s a bit dangerous. The other route is a little bit longer but it can make sneaking around a bit easier.
West Route in the Crimson Dawn District
The west route is the longer yet safer route. To start it, look for a vent on the west side of the restaurant. There will be a Crimson Dawn guard nearby that you’ll need to distract with Nix. Once he’s distracted, open the vent and crawl inside.
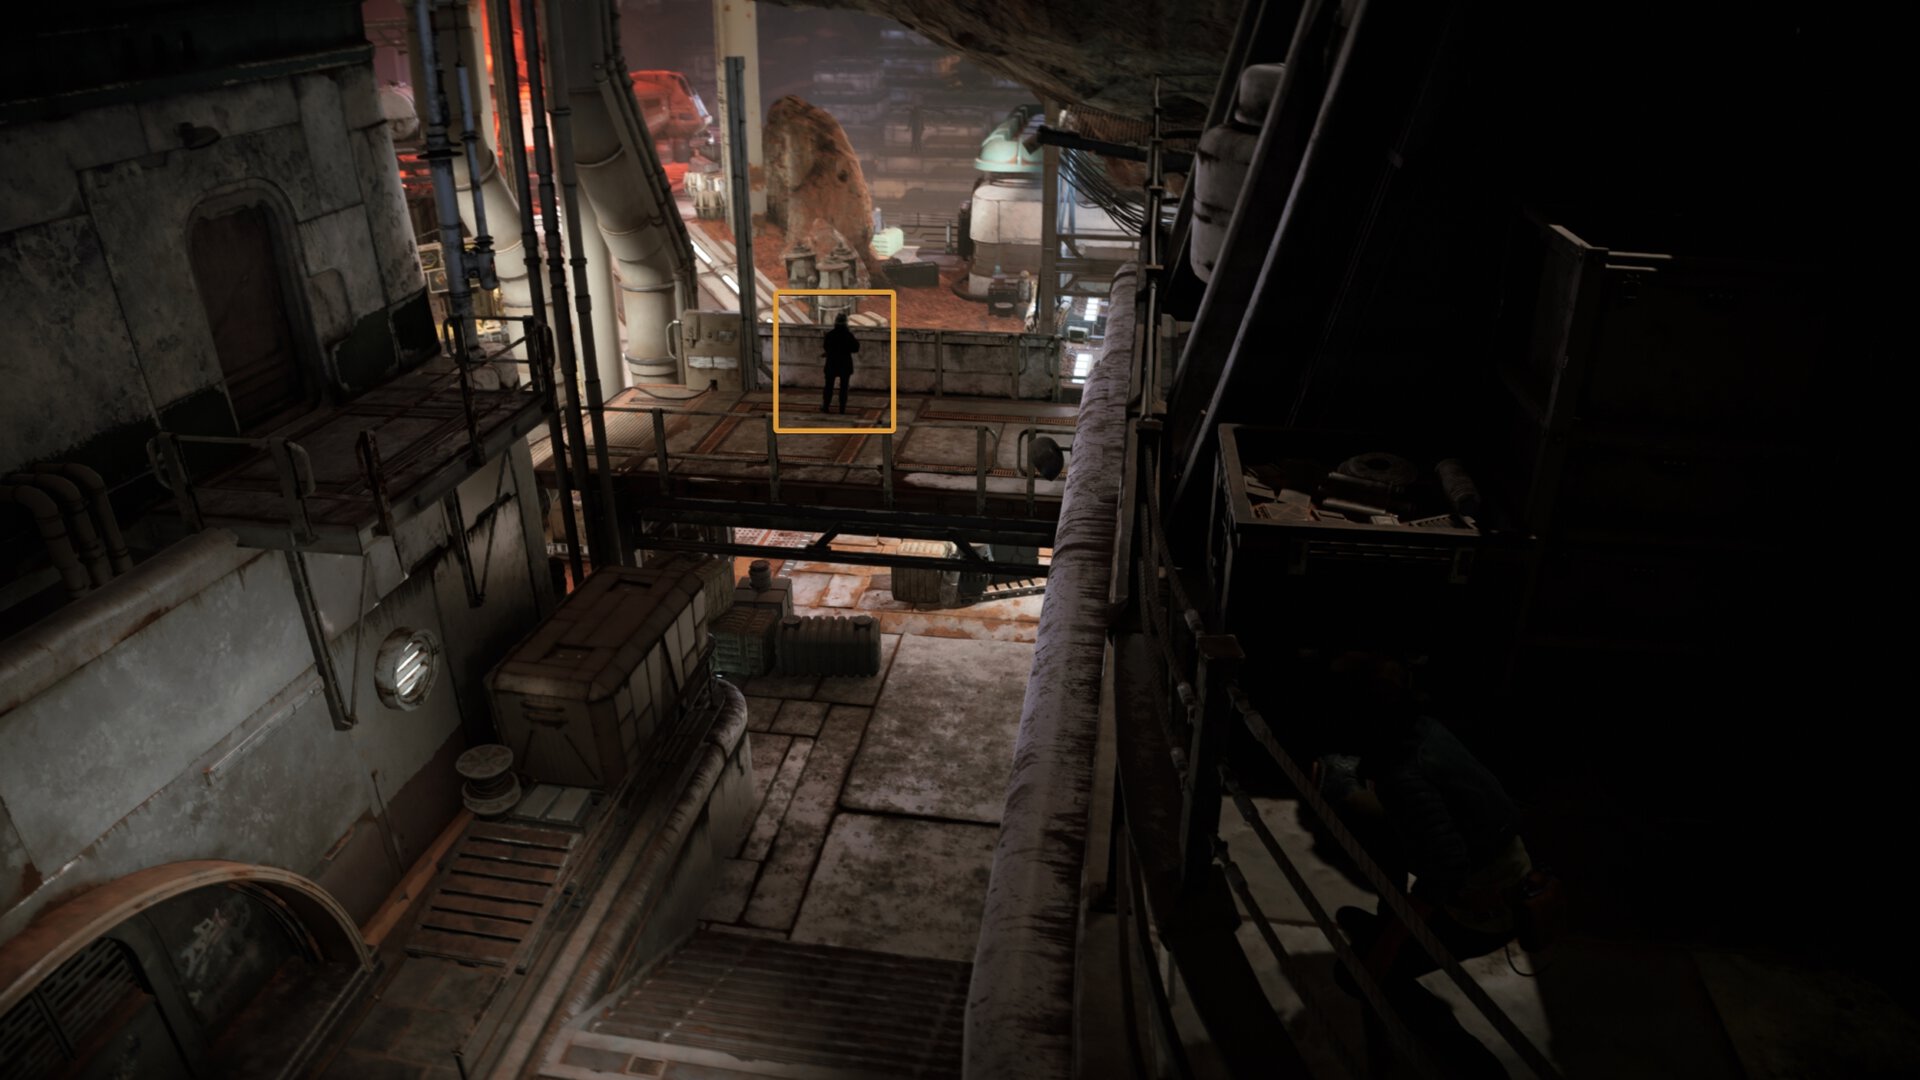
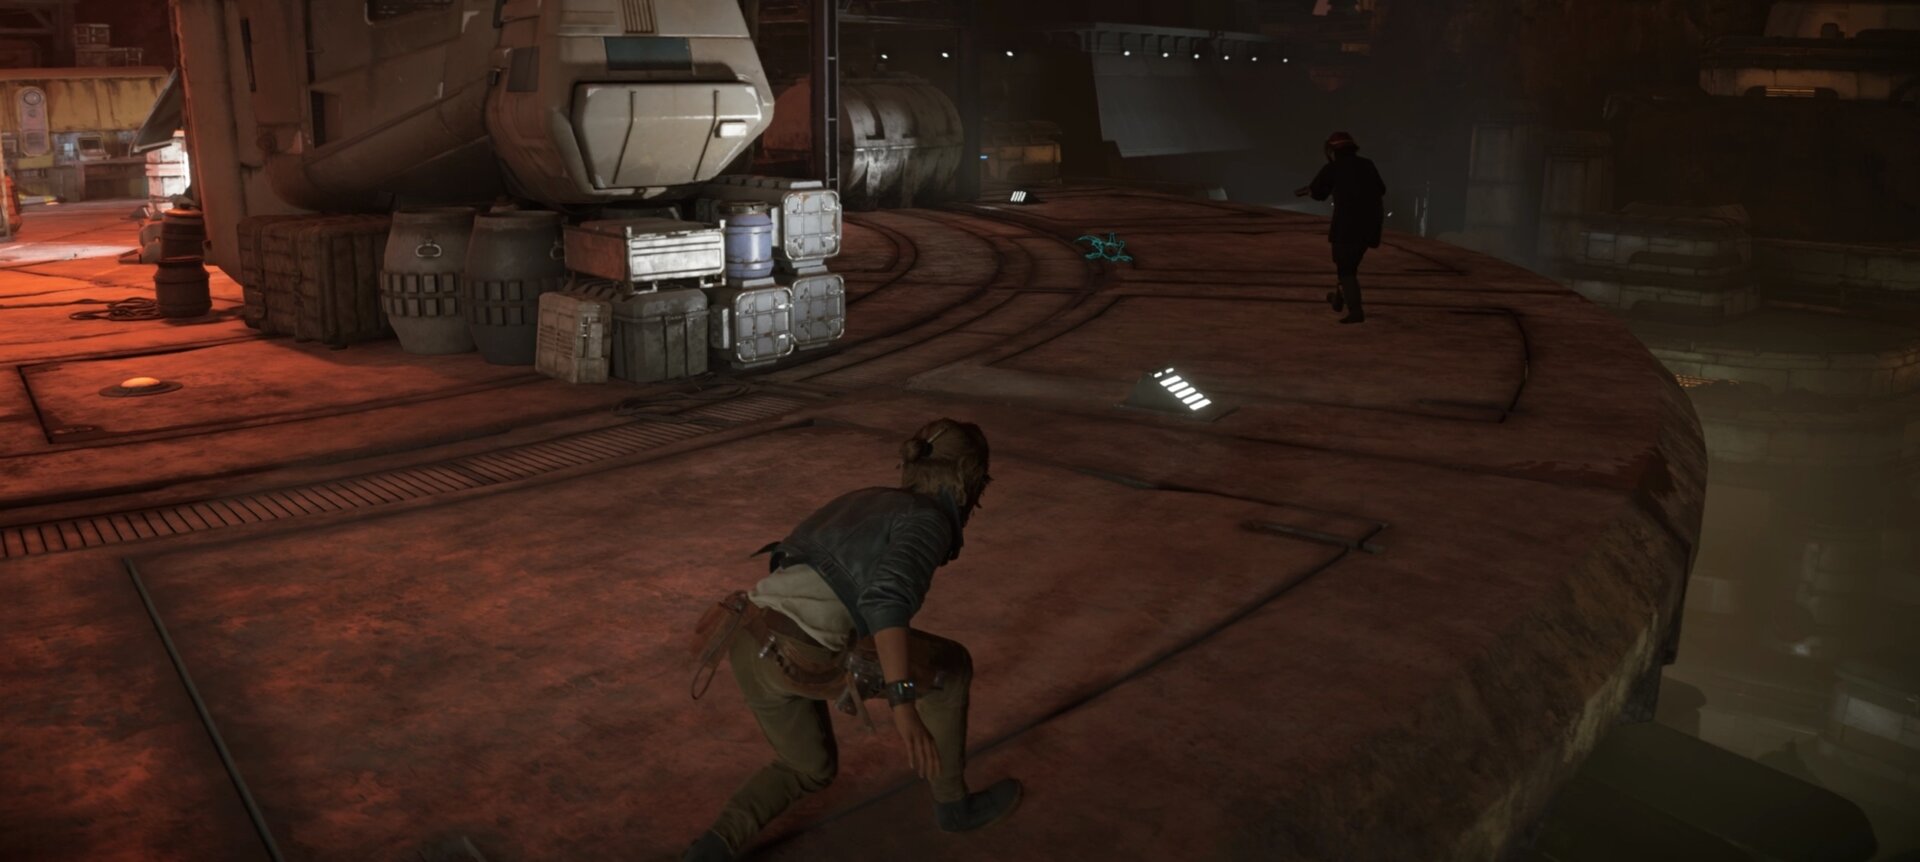
After going through the vent and climb up the ledges. You’ll be on a platform with a grapple point. Don’t rappel down just yet, take some time to get a look at your surroundings.

Below you are two guards, one is stationary and the other is patrolling the area. You can also find another guard facing toward the main area on a raised walkway.
Rappel down and have Nix distract the patrolling guard. Position him so that he faces away from you as you take down the other guard.
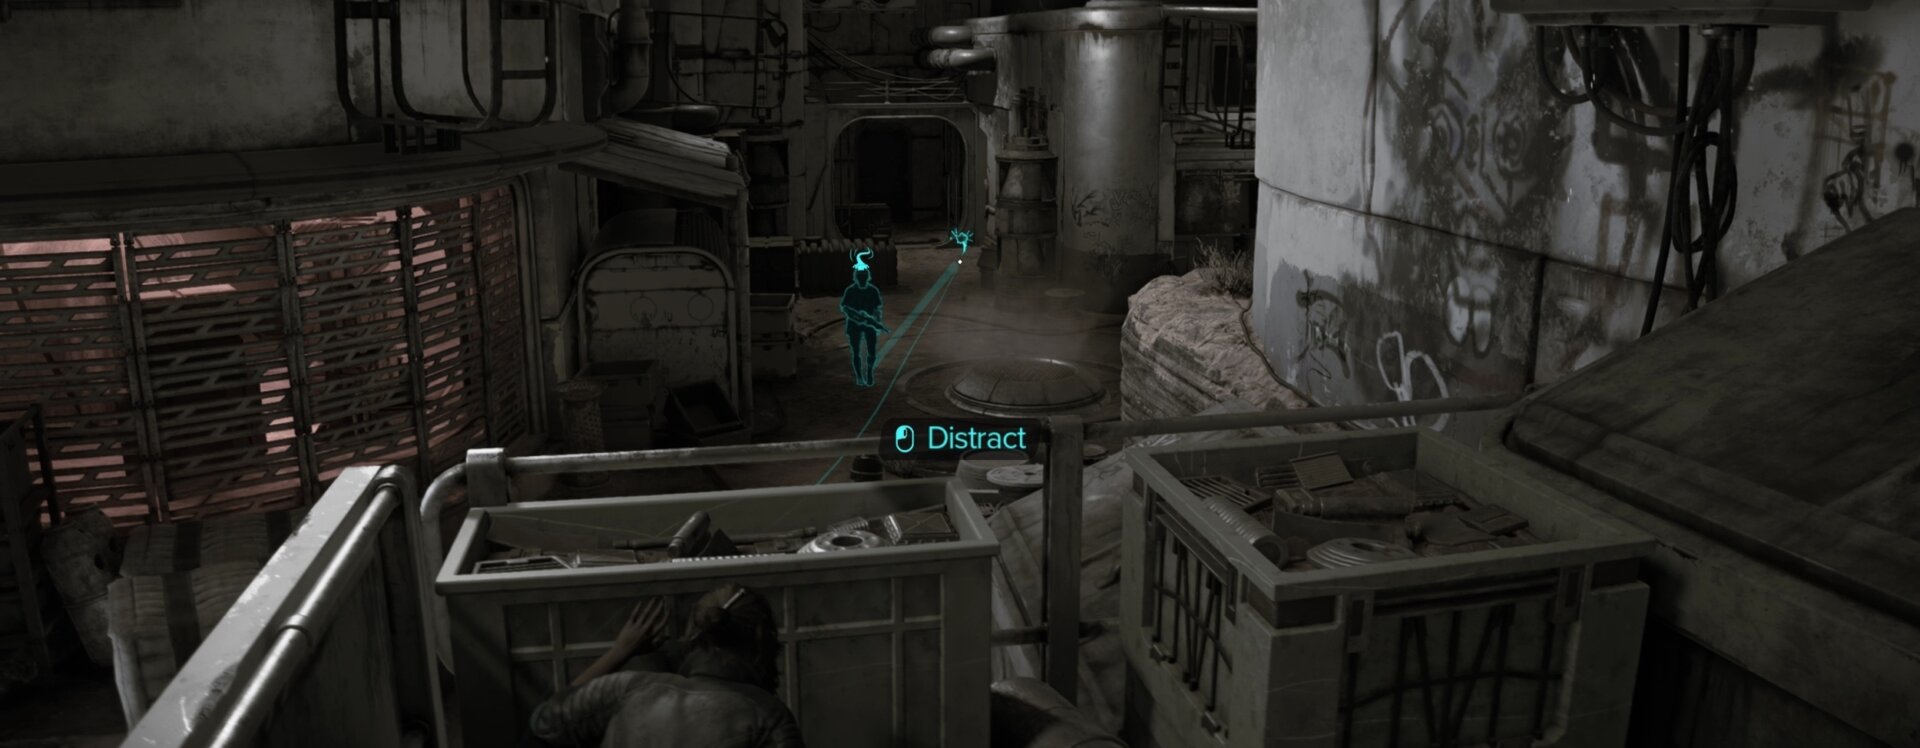
After taking down the first guard, take down the distracted one. Go towards the guard on the raised walkway above by climbing up the boxes. When you get up there, take down the guard.

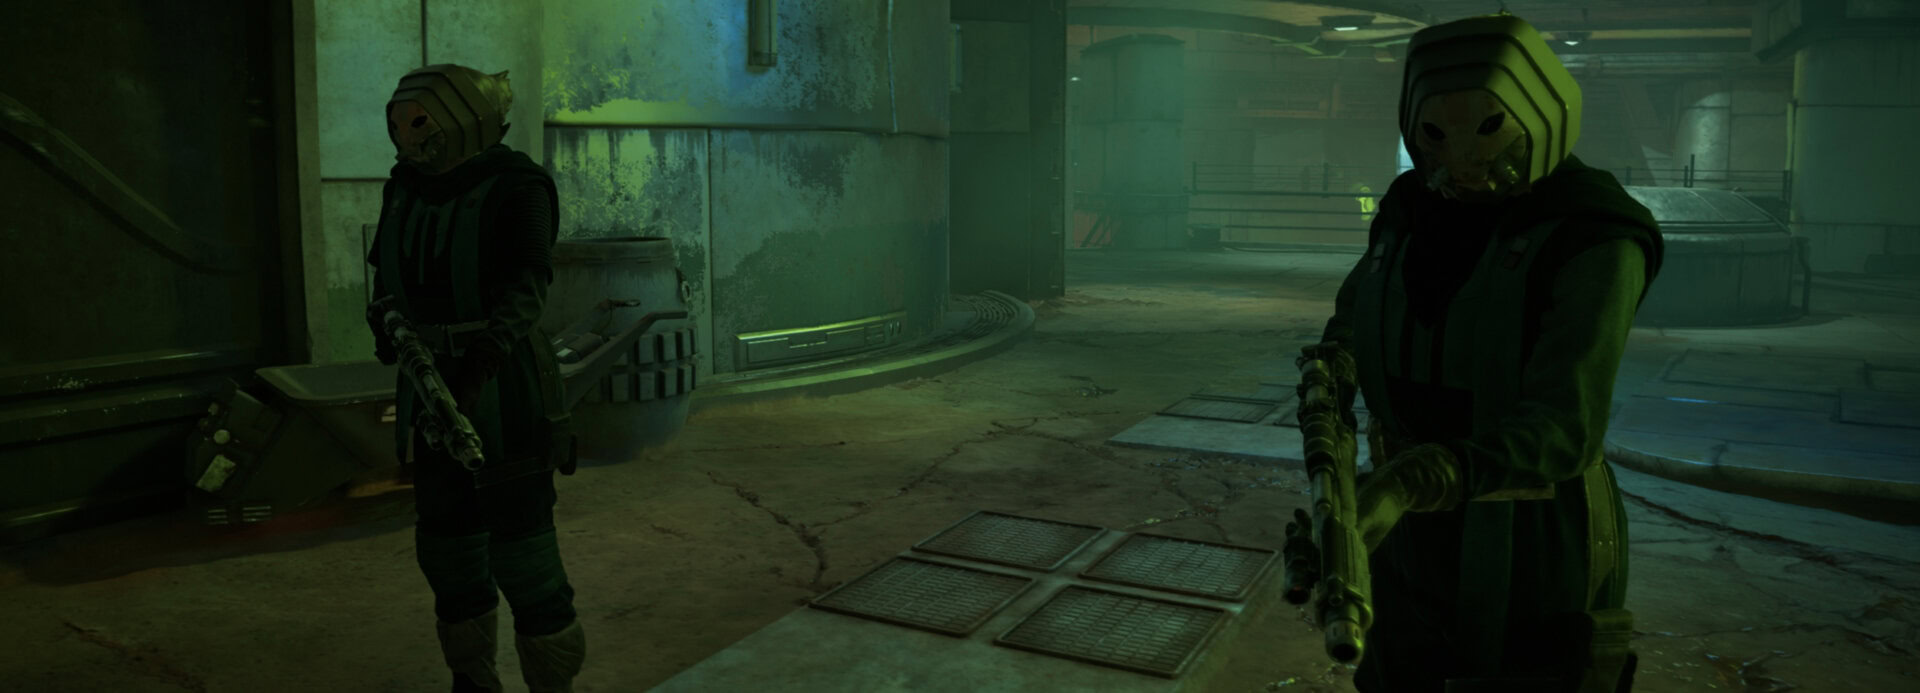
Now it’s time to survey the area from above. There are two pairs of red guards, a pair at the safe house and the other pair on the landing pad. Below you is a black guard that’s patrolling in a loop.
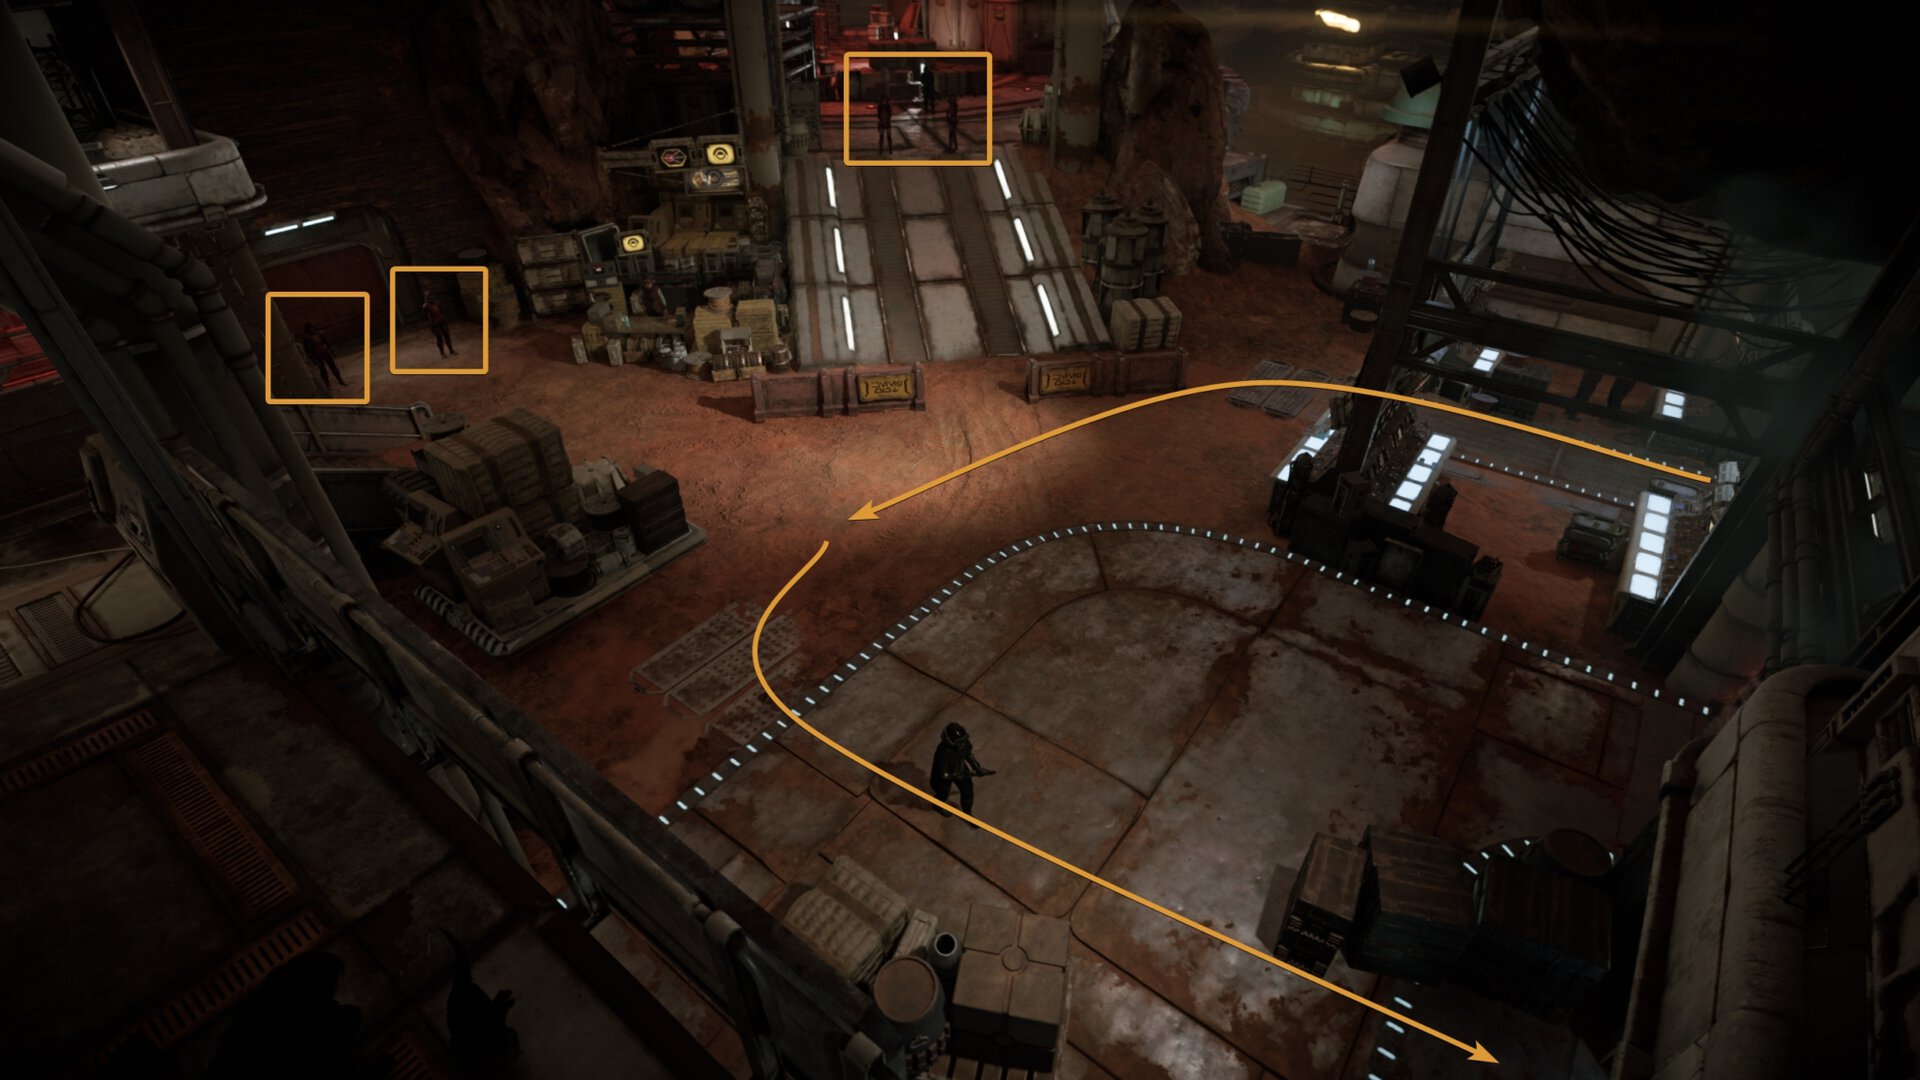
Taking the long route makes the quest a bit safer because the two guards from earlier might have heard you knock out the guard on the raised walkway.
East Route into the Crimson Dawn District
This is the shorter but slightly more dangerous route to enter the Crimson Dawn District. It’ll get you where you need to go a bit faster if you’re willing to take the risk.
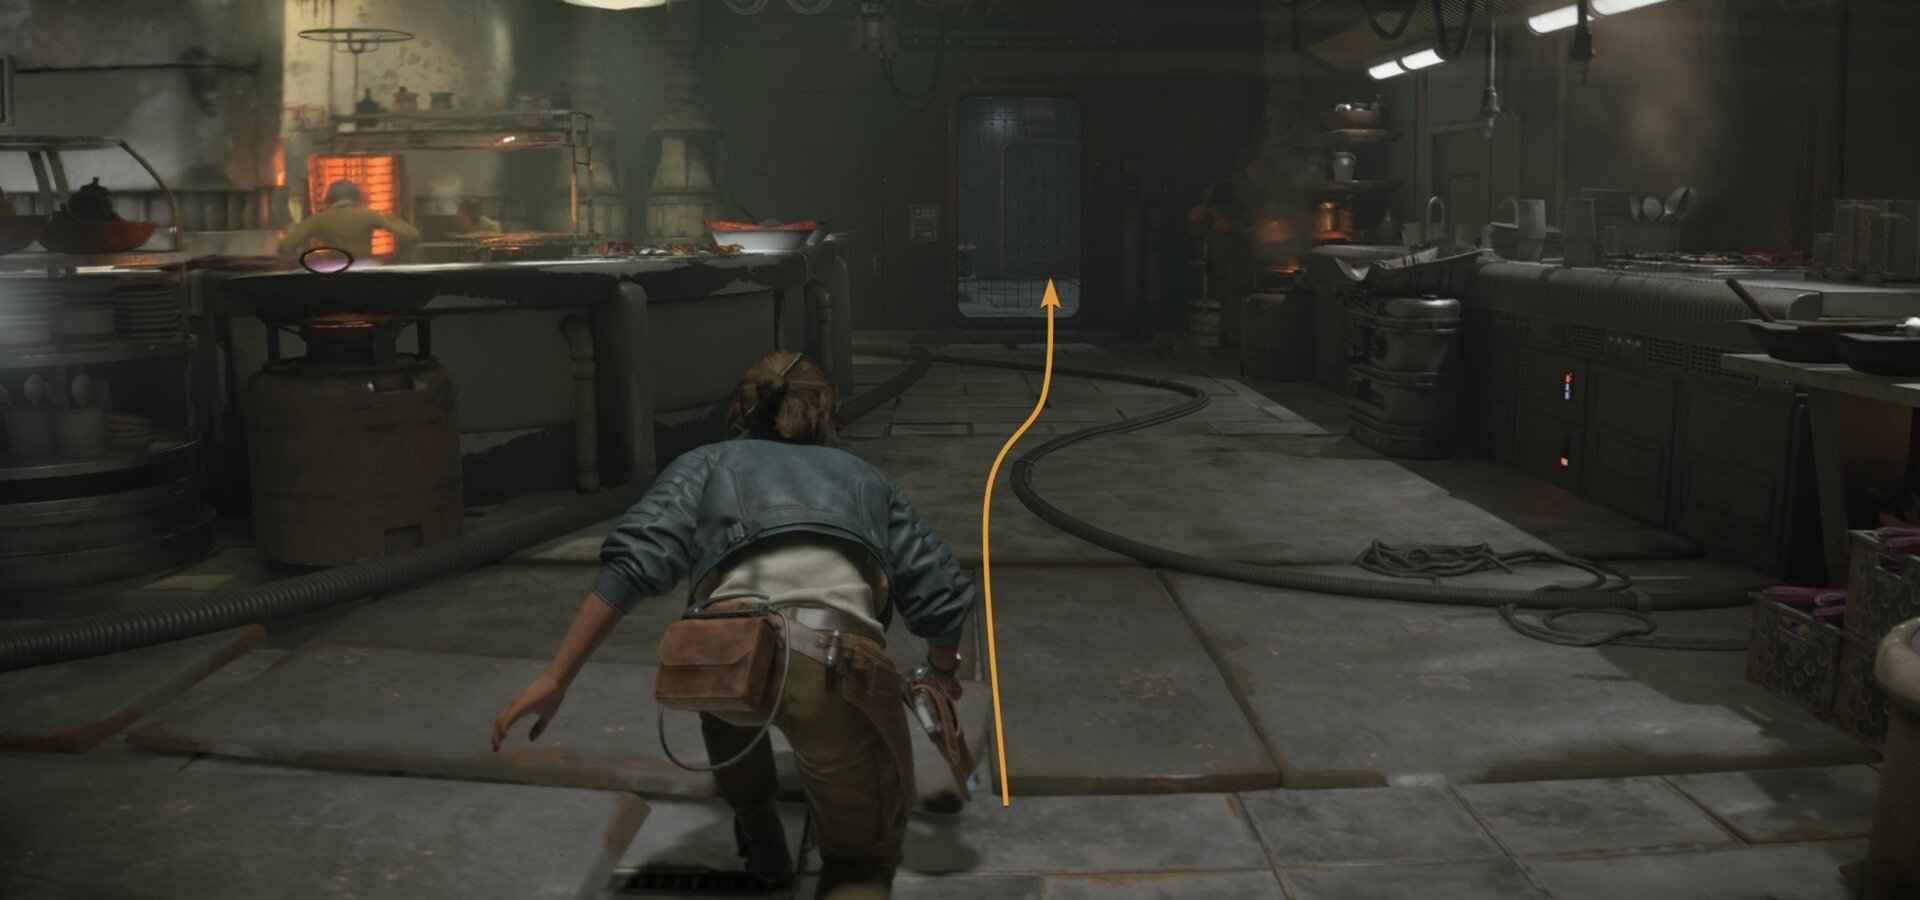
You’ll find a vent in the east side of the restaurant. Use Nix to open the vent at a panel behind some crates. Crawl into the vent and you’ll end up in the kitchen’s fridge.
Before you leave the fridge, be sure to lockpick the locked container to get some credits. Lockpick the door to exit the fridge then sneak through the kitchen.
You’ll find yourself on a raised walkway with a guard looking out. Knocking out the guard here can alert some guards behind you and they may go looking around. You can hide in the kitchen again until the heat dies down or rush to the restricted area.
Get to the Restricted Area
You can jump down from the pathway or sneak down the stairs, jump over the side, then into the building on the right.
Keep in mind that jumping straight down can draw the other guards to the area, but that also means all their eyes will be pointing away from where you’re going.

When the patrolling guard exits the building, distract him with Nix and make sure he’s facing away from you.
Go into the building on the right, don’t worry too much if the other guards check out the area you land in. Chances are they won’t see anything and return to their posts while you’re inside.
You can listen in on some Crimson Dawn members talking about a recording device they can’t pick up at Makal’s Gambling Parlor. This intel will be added to your journal and the parlor’s location can be found on your map.
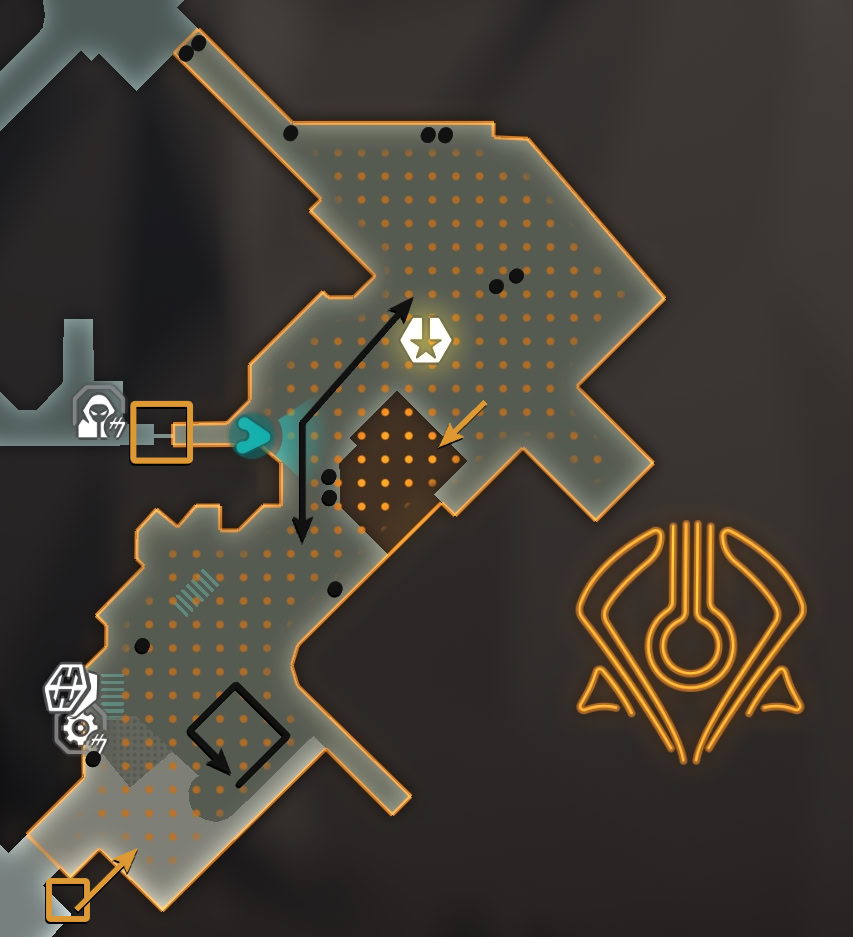
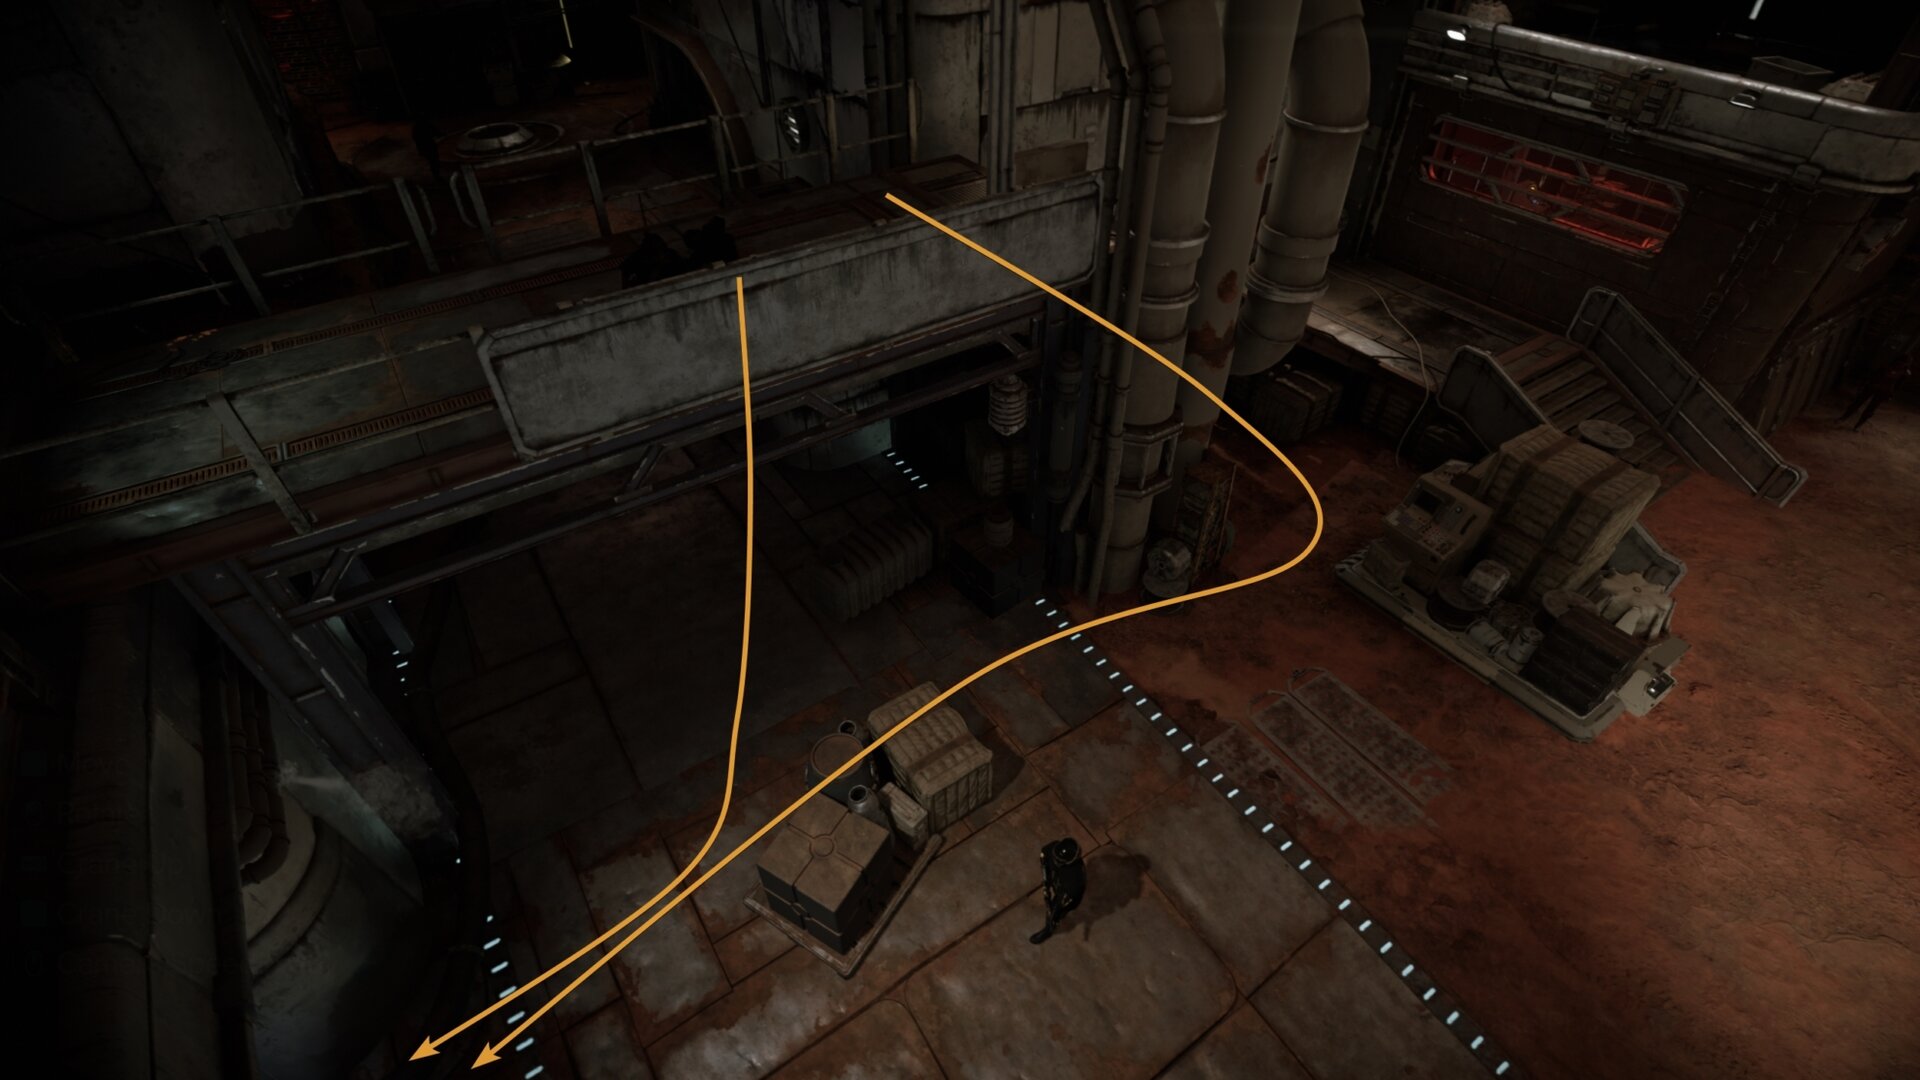
Go through the building until you see the outside area again, to the right will be some crates and ledges you can climb to reach the restricted area.
The Restricted Area
To your left will be three stationary guards, and to your right will be one stationary guard. Have Nix distract the guard to your right and take them out. Be careful moving forward as there’s a pair of guards patrolling the next area.
Hide behind some cover and figure out where the patrolling guards are. When they walk back towards the front, follow behind them and get behind a crate near the fan.
If you’re sneaky enough, you can climb up some boxes while the guards are walking away. You’ll find Jodara’s Stash at the top which contains the Commando Helmet Speeder Trophy.
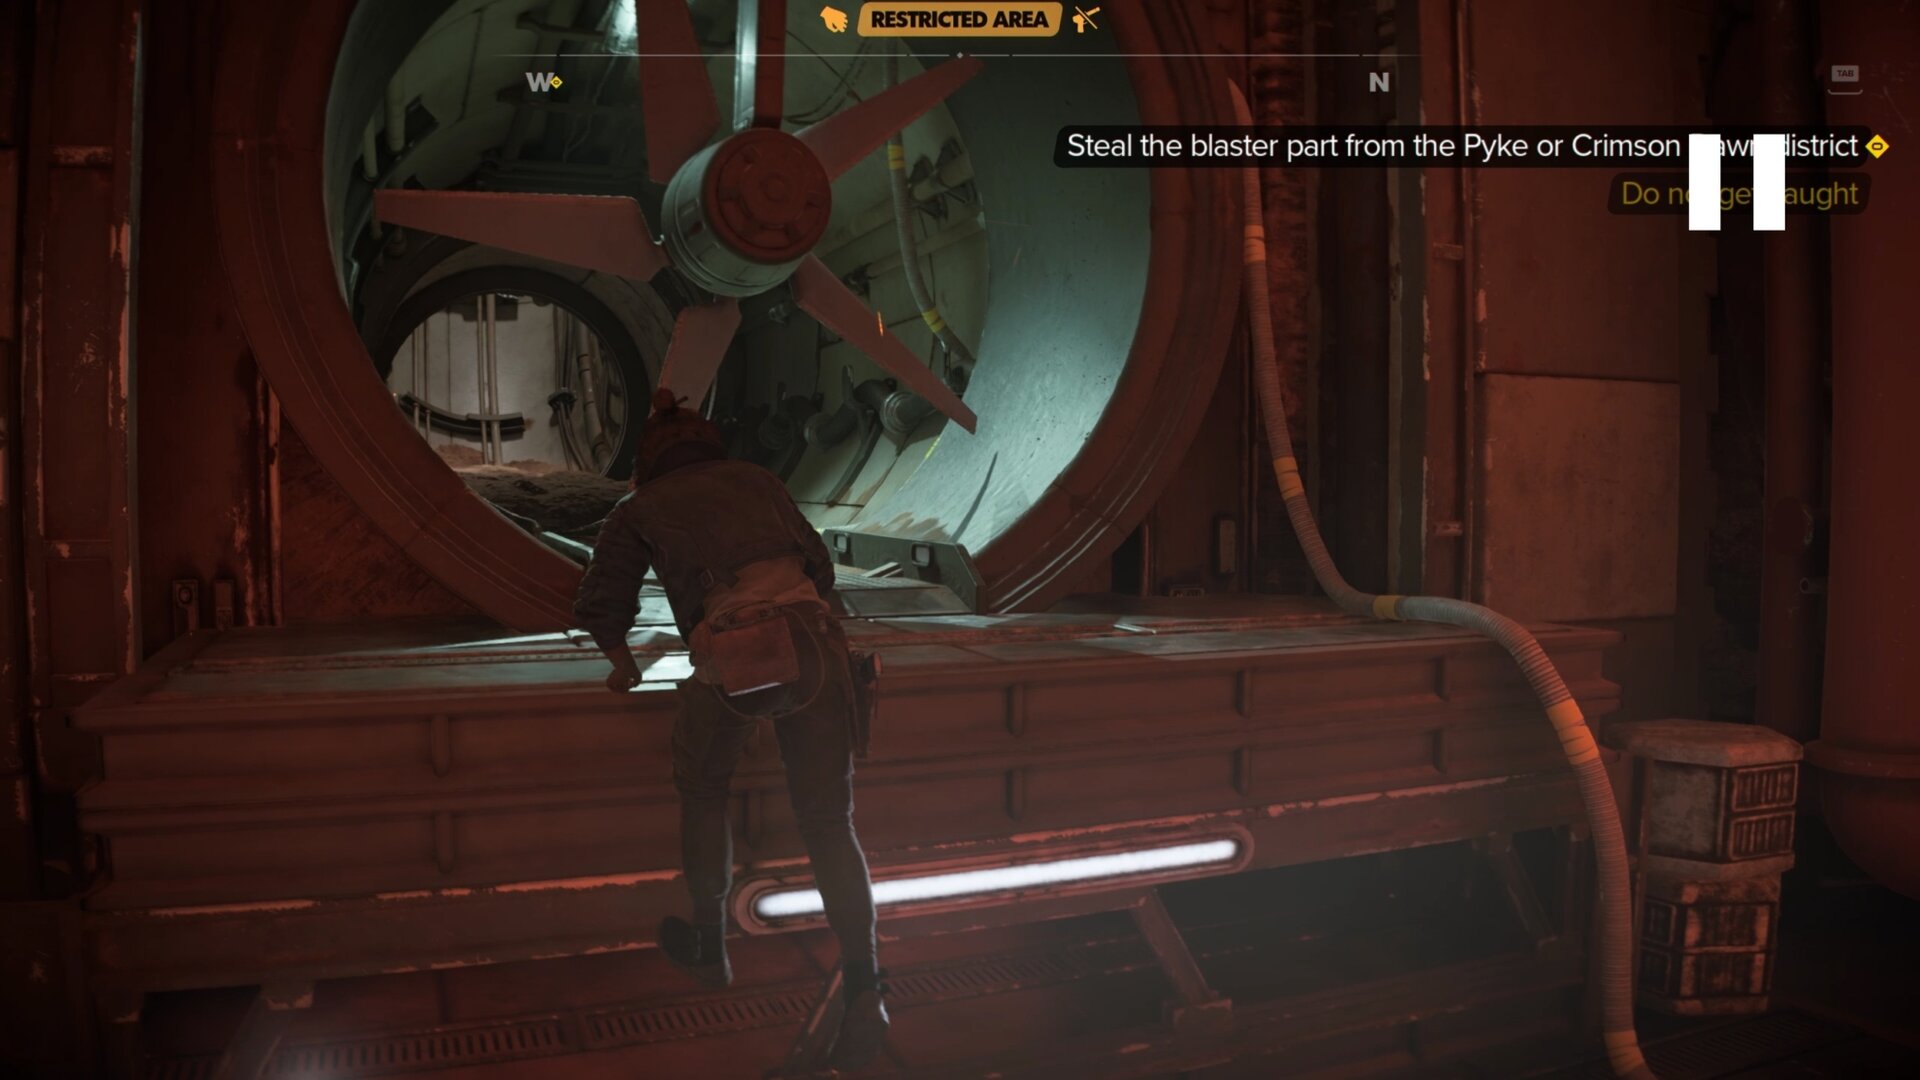
Getting through the Fan
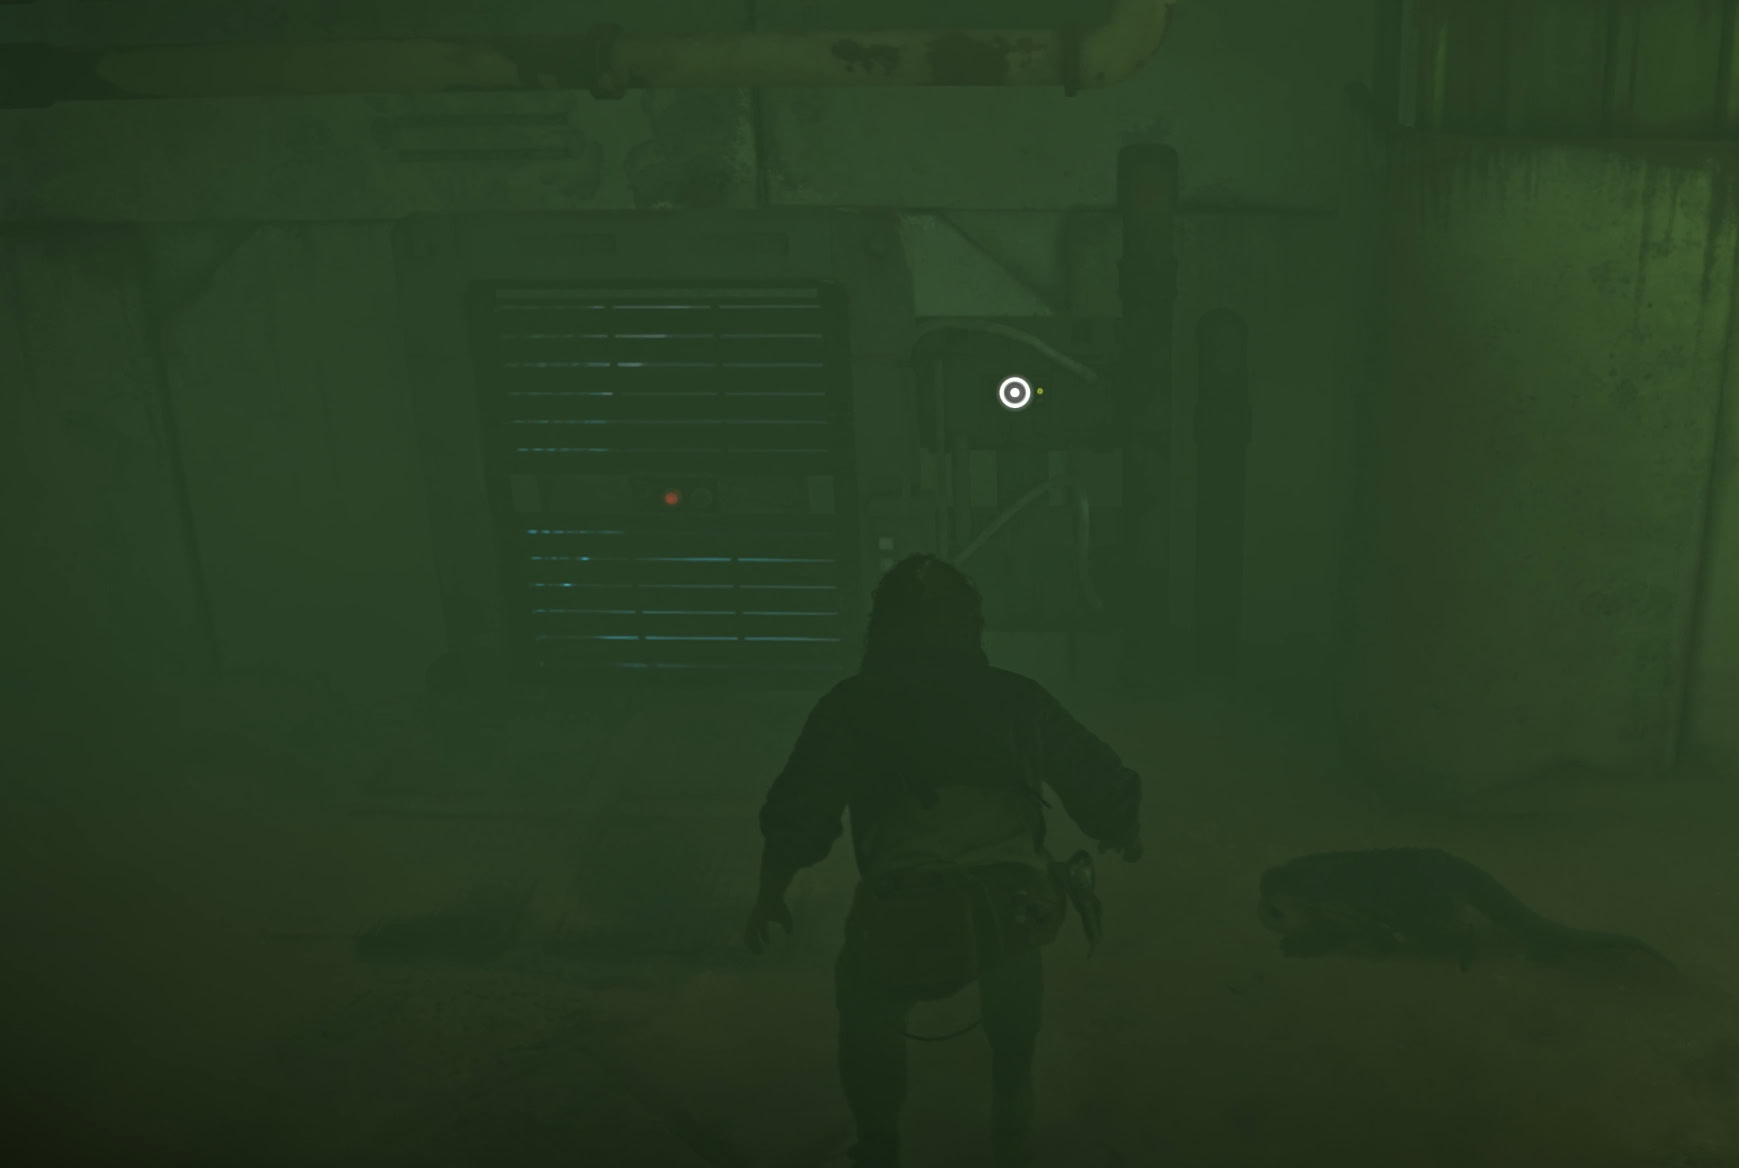
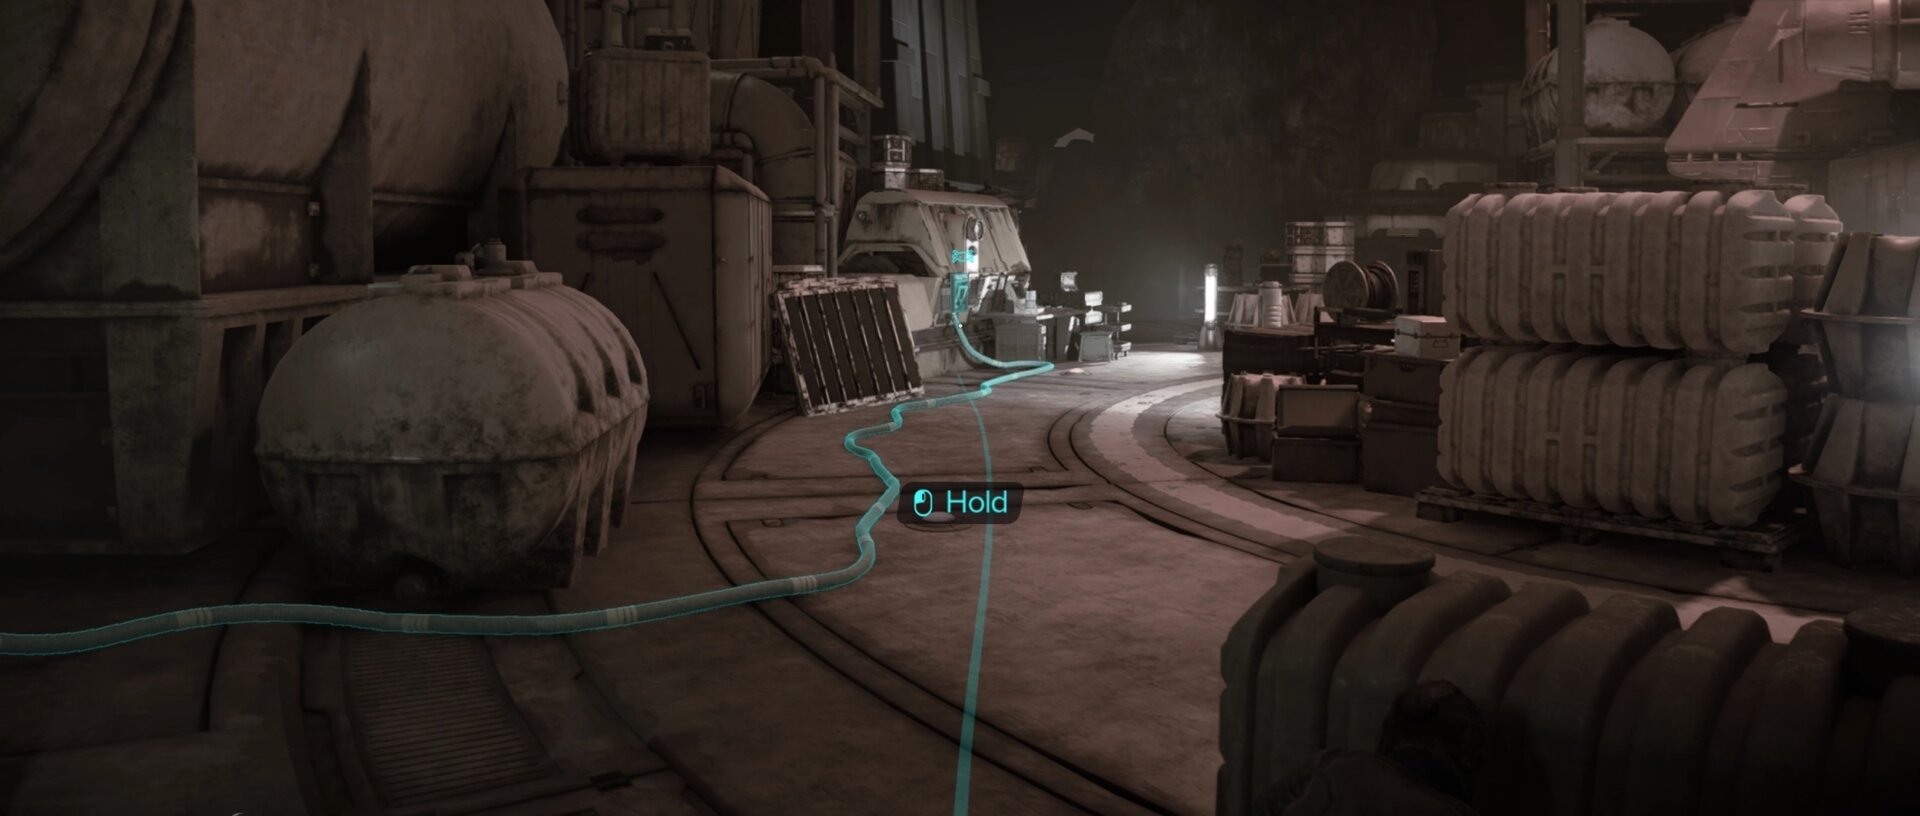
Once you’re behind cover near the fan, wait for the guards to patrol the area you came from. Have Nix hold the power lever to turn off the fan. You won’t have long to get through, so quickly climb up and roll through the fan before it powers back up.
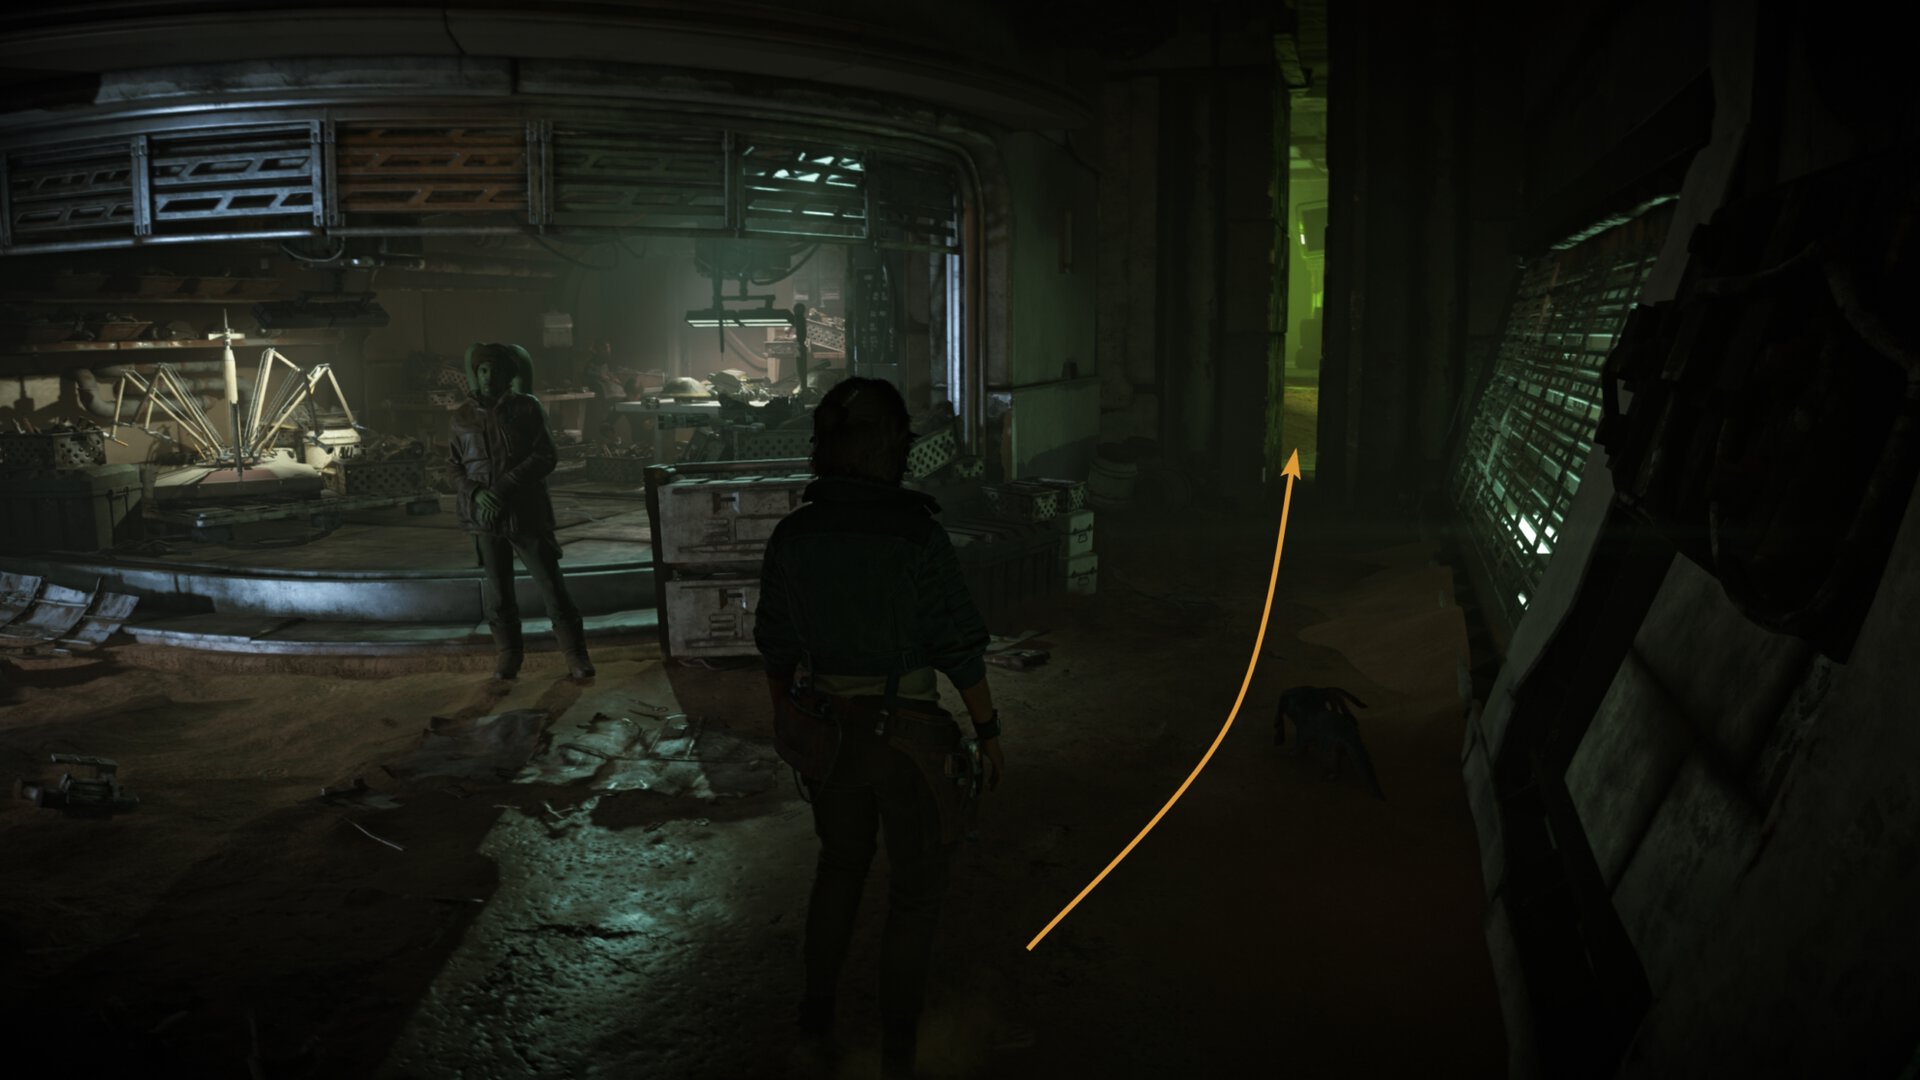
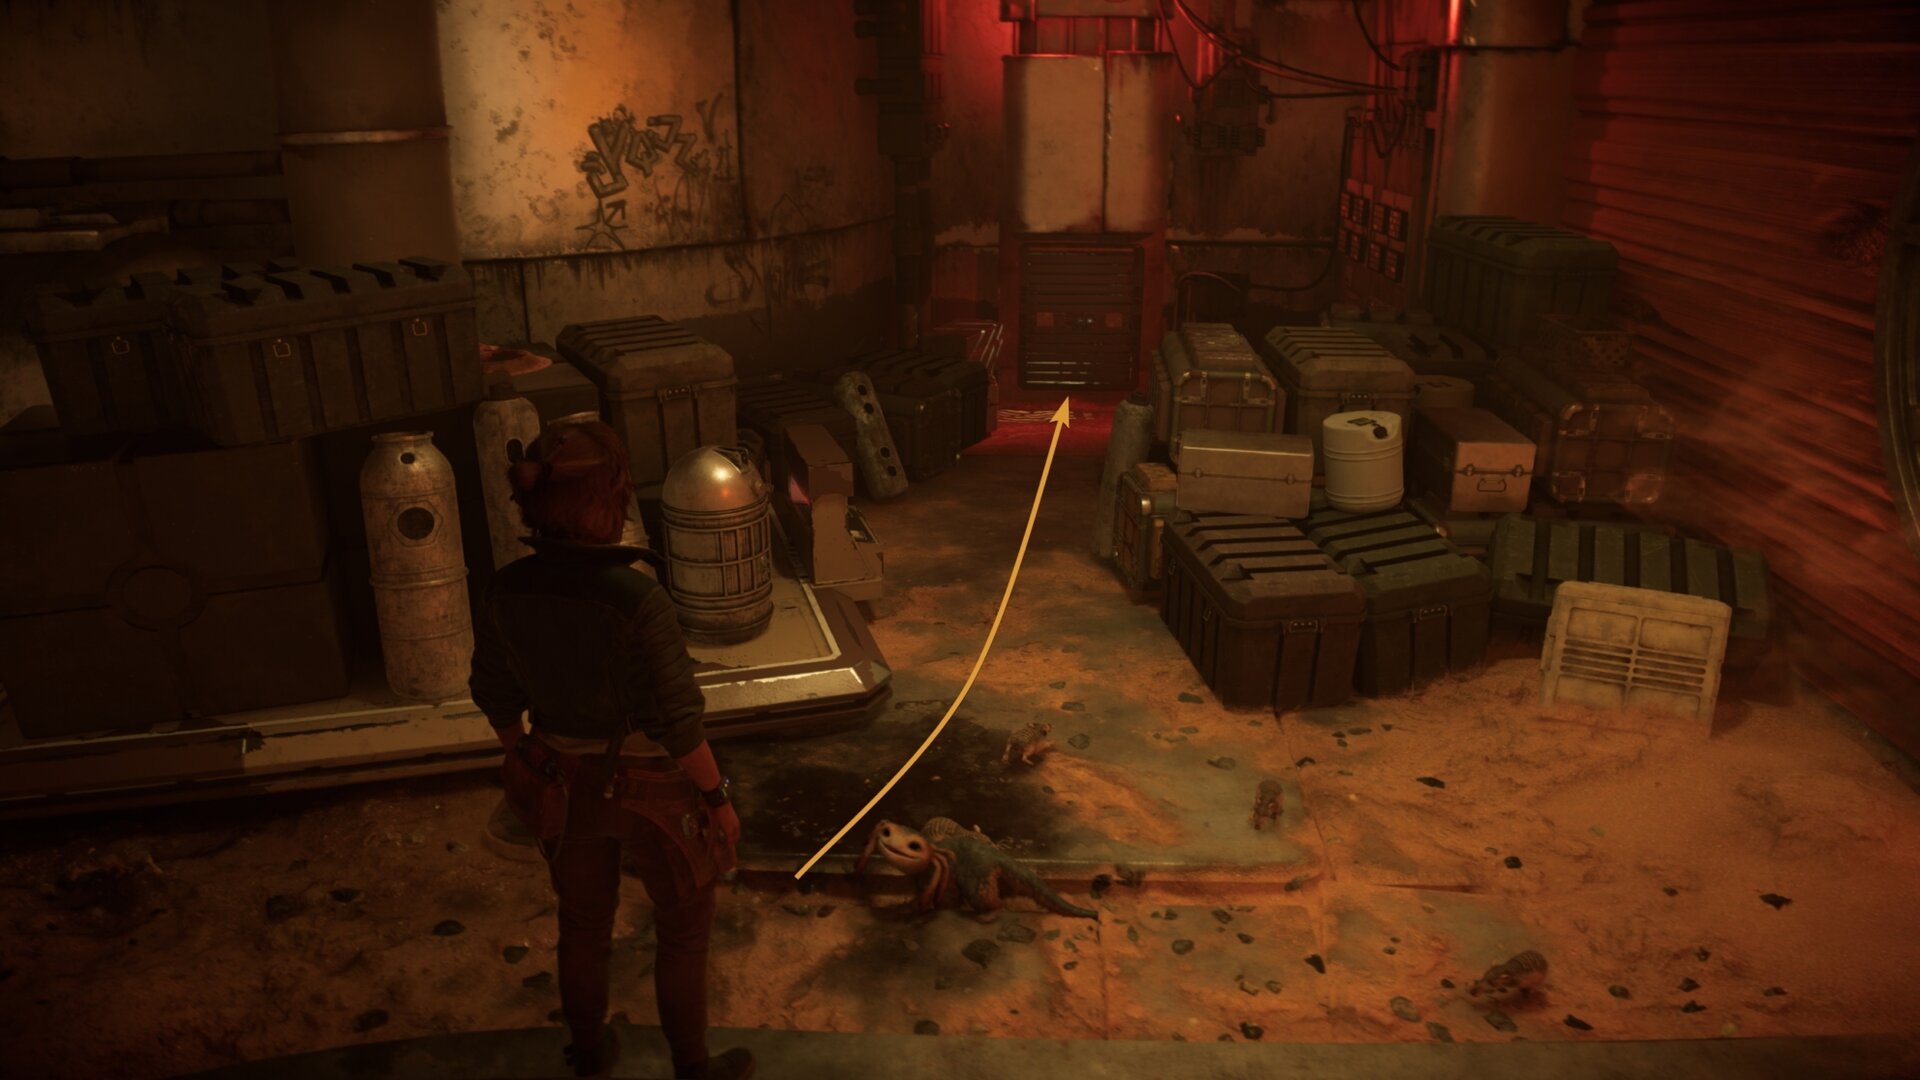
Pick up the Loot and Leave the Crimson Dawn District
Climb down the ladder you find and start looting the safe house. A large chest will contain the Ion Blaster Part you’ve been searching for, the Ion Energy Converter.
There will be a computer nearby that you can slice into. Slice into it and you’ll learn the location of three keys needed to unlock the Crimson Dawn Mirogana Vault. Two of the cards are on Toshara, the third one is in space. Obtain them to unlock the treasure chest containing the following:
- 5000 Credits
- Crimson Reign Paint Job for your Speeder
Now for one final tricky part, getting out without being caught.
Go back up the ladder and look outside the fan before proceeding. Make sure the guards aren’t near the fan when you try to make your escape.
Have Nix power off the fan, then exit the pipe to return the way you came in. Once you’re out of the restricted area, you can fast travel out and get to your ship to upgrade your blaster.
Completing the main mission New Tricks
You’ll get a call from Waka after retrieving the part and learn that you’ll need to find him and the ship at Jaunta’s Hope. Travel there with your speeder and use the workbench on your ship to upgrade the blaster with an Ion mode.
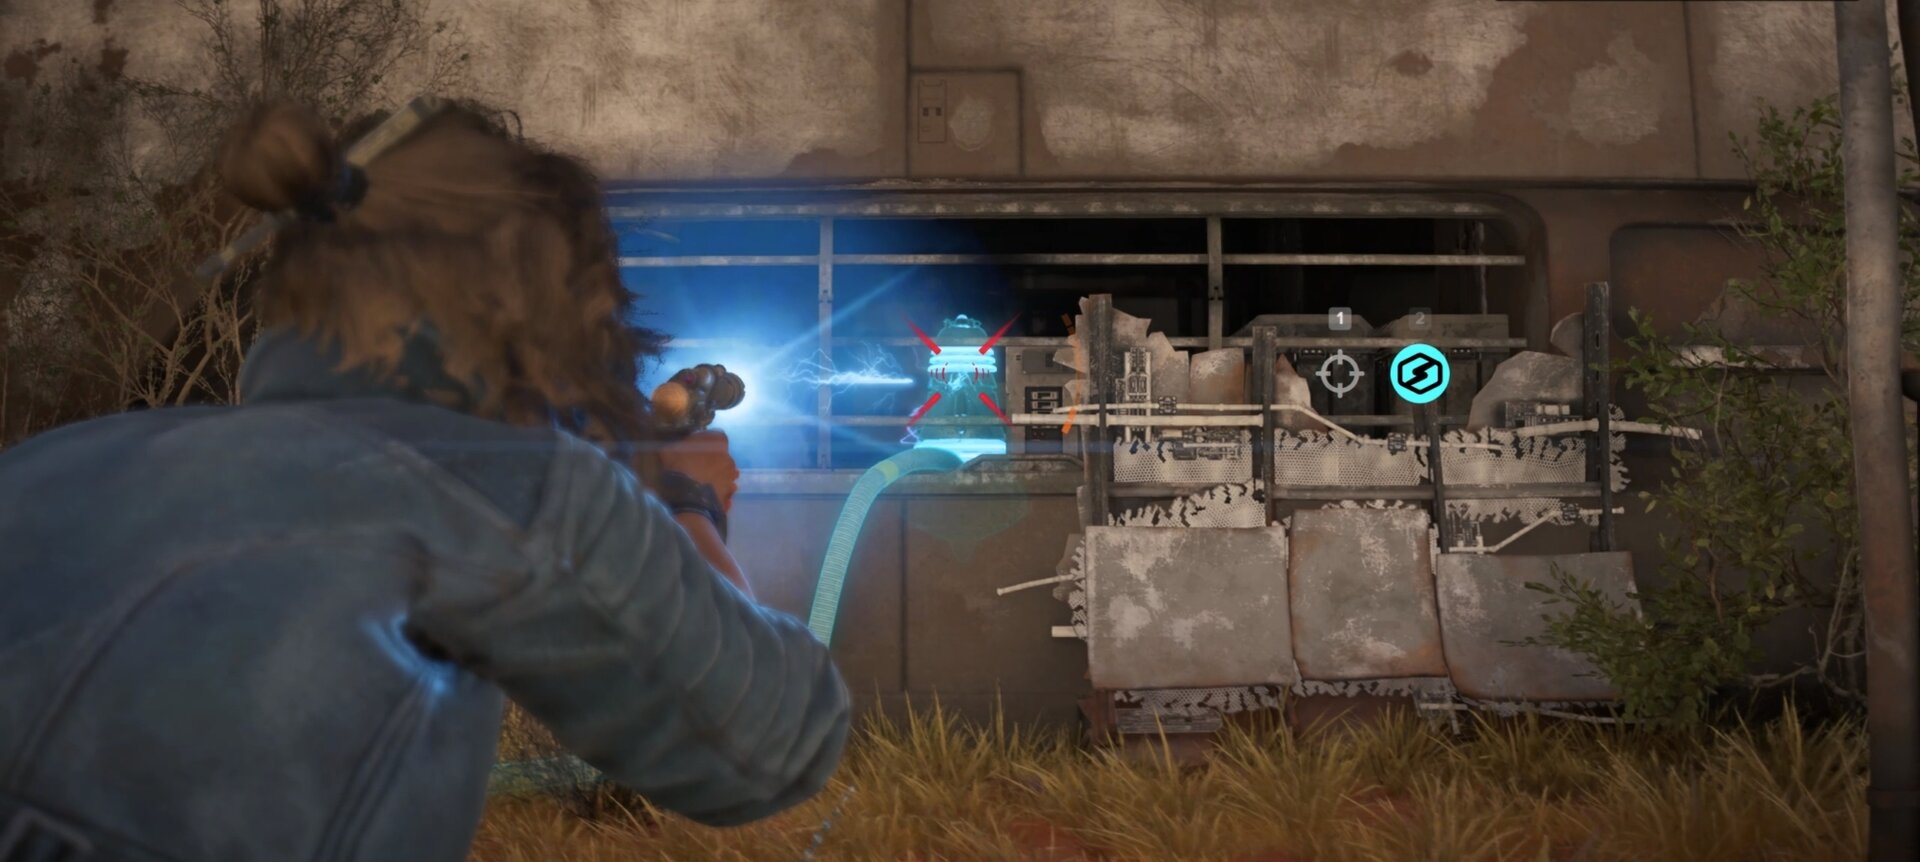
Once you’ve upgraded your blaster, follow your map marker and you’ll find a Hutt Cartel Safehouse. The power is out, so you’ll need to shoot a power conduit with the ion blaster to power it up and go inside.
Loot the chest in the safe house then return to Danka at Jaunta’s Hope. Talk to her and you’ll complete the quest, New Tricks.
When you are ready, check out our detailed walkthrough for the False Flag main mission. In it you will find out what you have to do, where you need to go and how to get all the valuable items along the main path to your objectives.
Keep up to date with VULKK’s coverage of Star Wars Outlaws! Check in often to see any new articles or guides our team publishes.