This Fulminating Concoction Build uses the Path of Exile 2’s Ranger Pathfinder Ascendancy to turn their flasks into Lightning-charged AoE damage.
Table of contents
Build Overview
The main skill for this build is Fulminating Concoction, a skill unique to the Ranger’s Pathfinder Ascendancy. This allows us to consume Mana Flask Charges instead of our Mana to deal high, consistent damage.
This build uses Life, Evasion, and its Flasks for its defenses and leans heavily into going for the Acrobatics Keystone in the late game. This allows the character to be deceptively durable while not having any shortage of damage.
It’s a fantastic mapper and bosser, even on a budget. The Quiver will often be the most expensive part of the build, outside of the chase uniques we recommend for the final build.
The grid below is fully interactive. If this is your first visit, we recommend you skip that grid and keep reading the guide in its intended order. If you prefer, you can click or tab on an item and it will take you to a dedicated section of the guide explaining everything you need to know about it.
Playstyle
The playstyle for this build is about as simple as it gets, we just run around and toss our Fulminating Concoction at enemies. We don’t have a curse to worry about, Fulminating Concoction even Shocks and applies Exposure for us as well. This makes it very beginner-friendly.
The only complicated part of this build’s playstyle is utilizing Ball Lightning and Lightning Warp for Mobility. This is great for getting out of sticky positions or crossing gaps more easily. It’s great mobility and worth having, though we don’t need it much.
It’s a great mapper, albeit it is a bit slow without good boots or a potential Cast Speed weapon swap for Ball Lightning. I’ve personally had no issues out of it even during Breaches as it clears enemies out quick enough to get good value out of them.
It’s also fantastic at Bossing, so long as you don’t run out of charges before they go down. With our Passive Tree and gear, we should be right around 1 charge a second, which at least means if we’re stuck doing a Boss Mechanic, we’ll be able to regen charges and continue the fight after.
Skills
Fulminating Concoction
Fulminating Concoction may be a bit of a string choice for a main skill, but it’s deceptively powerful. Its high damage clears weak enemies quickly while consistently applying Shock and Lightning Exposure to tougher targets.
Unlike standard Skills, Fulminating Concoction’s sockets open up as we finish each Ascendancy. If we get carried through our final ascendancy early, we’ll have all 5 links available sooner, though just 4 links works well enough.

Martial Tempo increases our damage significantly, allowing us to attack faster and counteract the downsides of Scattershot. It’s the only Attack we use in the build, so it’s best to use this skill.

Scattershot is a boost to both our damage and Area of Effect. This allows for better single-target damage through overlapping AoE and better clear by creating additional projectiles for us.

Mana Bounty is handy for sustaining our Mana Flask Charges, which we can easily run dry on in high-density maps and Breaches. Eventually, we can solve this with Gear allowing for another damage link, but that’s a late-game optimization.

Lightning Mastery is by far the best option for damage support should we have to choose. Fulmination Conconction, like many skills, scales extremely well with Skill Levels, which also heavily influences our gear.

Lightning Infusion is the last good damage link we can use, giving us a hefty damage boost. Concentrated Effect would be better, but this does not seem to affect it outside of shrinking the AoE, which could just be a tooltip error, but it’s hard to test.
Ball Lightning
Ball Lightning is primarily here to provide some much-needed mobility alongside Lightning Warp. This also allows Lightning Warp to be a consistent source of Shock, should Fulminating Flask not be able to do so consistently. As such, we want to use this at the lowest level possible.

Arcane Tempo is used to increase the Cast Speed of the spell and remove much of the delay after the cast so we can still Lightning Warp to it easily even with high.

Inspiration is used to reduce the mana cost of the skill. We don’t have the Mana or Mana Recovery to use this consistently otherwise.

Acceleration is an optional third link for Ball Lightning. It’s very useful if we opt to use a weapon swap to cast Ball Lightning, as we’ll lose any Projectile Speed bonuses we have from our Quiver which already makes it quite fast.
Lightning Warp
Lightning Warp is used with Ball Lightning to provide consistent mobility. This can also be used to quickly finish off low enemies if Fulminating Concoction leaves them at low enough Life to Cull them.

Overcharge is a great option here, as this will create Shocked Ground when cast on an enemy or Ball Lightning projectile. This will apply Shock to all enemies within its Area of Effect with greater Magnitude.

Life Drain is a great filler support here, as we will be able to occasionally Cull enemies with the skill and get some Life Recovery with this. Sadly, this does not trigger when cast on Ball Lightning Projectiles.
Herald of Thunder
Herald of Thunder is primarily used for the huge damage increase we can get from the Coming Calamity Notable on the Passive Tree. It will contribute some damage, and often enough to finish off some enemies while also increasing our general AoE a fair bit.

Innervate provides us with another huge damage boost, for the fairly frequent occasions where this will finish off weakened enemies. Once we reach our final setup, this will be more consistent on Fulminating Concoction. This is due to Herald of Thunder scaling off our Weapon

Magnified Effect helps to boost the AoE of the lightning bolts, allowing them to hit larger groups of enemies and improve our clear speed. This in turn gives us more opportunities to trigger Innervate.

Persistence does nothing for the Herald itself but will increase the duration of Innervate when it triggers, extending it by about a second.
Combat Frenzy
Paired with the Kitoko’s Current Unique Gloves, this gives us consistent Frenzy Charge generation to use with Charge Infusion. These last quite a while, though we won’t be able to generate nearly as many during most boss encounters.

Profusion gives this a chance to create two Frenzy Charges instead of just a single one each time. Since we’re unable to adjust the cooldown of this effect outside of leveling it, this helps to upkeep our Frenzy Charges easily while mapping.
Charge Infusion
Charge Infusion we use as-is and no links. This will consume our Frenzy Charge to allow our remaining Frenzy Charges to grant a multiplicative bonus to our Attack Speed. It will also boost our Evasion due to some Frenzy Charge passives.
We should keep this at level 14, this allows us to get the longest duration of its effects while also keeping it as close as possible to the 4-second timer of “Recent” to have high uptime on the Frenzy Charge Bonuses.
Wind Dancer
This is a great defensive buff for an Evasion-based character, granting a stacking bonus to Evasion Rating. This is also one of the few gems that is worth adding quality to as 20% Quality allows it to build an extra stage of the bonus.
Lightning Arrow
Lightning Arrow is our Leveling skill, as it will use the same scaling stats as Fulminating Concoction. We won’t over-invest in it, but it handles itself pretty well. We can opt for the Lightning Rod and Orb of Storm Combo for early boss damage if needed as well.

Martial Tempo allows us to attack faster, and increases our overall DPS with this leveling skill.

Pierce allows Lightning Arrow to hit multiple targets and create multiple chains off those targets for solid AoE clearing.
Passive Tree
Below is the full Passive Tree we use for this Skill. This tree focuses on three main stats: Projectile Damage, Attack Speed, and Area of Effect. There are a few very late-game optimizations that can be done, but this results in the build being far more expensive.


For Passive Order, we’ll head out to the Projectile Damage side of the Ranger’s start and take Honed Instincts and Clean Shot. This gets us going with plenty of Projectile Damage to speed up the early game.

Then we’ll make our way over to Escape Velocity, followed by Blur. This gets us some movement Speed so we’re not fully reliant on Boots to move faster. This also starts building up our Evasion as well, which helps us avoid damage.

Then we’ll make our way over to Maiming Strike and Acceleration. Both of these move us closer to our massive power spikes. Maiming Strike nets us some damage and Movement Speed, while Acceleration nets us Skill Speed and Movement Speed.

Following this, we’ll head to Coming Calamity. This gives us a pretty sizable damage boost just for having Herald of Thunder reserved. Do not allocate Acrobatics at this point as it will only do more harm than good for us.

Next, we’ll wrap around to grab Falcon Technique and Proficiency. This gives us a large boost of Dexterity and more Attack Speed as we gain additional Dexterity.

By this point, we should have completed at least one Trial of Ascendancy and have taken Fulminating Concoction from the Pathfinder Ascendancy Tree. We’ll want to grab nodes to improve our Flasks and AoE.

We’ll want to grab Flurry first, it’s just above Coming Calamity as well as Catapult over by Prolonged Assault. Both of these increase our DPS and Area of Effect for our main skill.

Then we’ll head over near Prolonged Assault to grab Arcane Alchemy and Waters of Life. These are taken for the Mana Flask Charge per second line. These help us sustain our flasks passively, without heavy reliance on gear or Flask rolls.

By this point we’ll have our second Ascendancy, where we’ll grab Connected Chemistry. This dramatically improves our Flask Charge sustain, especially combined with the previous passives.

Now we’ll go for our two biggest damage passives, Lightning Rod and Wild Storms. Lightning Rod makes our Lightning Damage Lucky, meaning the damage is rolled twice and we deal the highest roll. Wild Storms pushes the already high Max hit of Lightning even higher.
Then we take Exposed by the Storm for the little bit of Penetration we need to help deal with any enemy Resistance. Combined with Lightning Exposure from the Fulminating Flask itself, enemy Resistance is rarely an issue.

Now we’ll start to pile on Evasion to eventually take Acrobatics. One of the single biggest nodes for this is Beastial Skin, located near Acrobatics. This doubles the Evasion we get from our Body Armour, which will always be the largest source of our Evasion.
While we’re here, we’ll also pick up Enhanced Reflexes. This is a nice bump of Evasion, but also grants a percentage increase to our Dexterity. This grants us an additional 8 Dexterity per 100 we get. It’s not fully necessary, but it’s close enough to Bestial Skin that it’s not a bad pick-up.

We can also take Savagery, near Prolonged Assault, and Frenetic to scale our Frenzy Charge count as well as our Evasion. This makes Charge Infusion not only grant us more Attack Speed, but also consistently provide this boost of Evasion. We can then follow this by taking Fervour for more Frenzy Charges.

Now we’ll quickly cover our Jewels for the build. For Basic Jewels, we’ll want to get any combination of Elemental Damage, Lightning Damage, Attack Speed, Shock Magnitude, Ailment Magnitude, and Increase Mana FLask Charges Gained. All of these are great options to have.
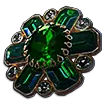
Time-Lost Jewels have potential to be very strong, though we have limited options for them. Ideally we get one that has a Large Radius and a high roll for Shock Magnitude. Combined with the From Nothing mentioned below

When considering unique Jewels, Prism of Belief with +3 Levels to Fulminating Concoction is a fantastic endgame choice as the skill scales incredibly well with levels. It makes up for not being able to get Skill levels directly from our Bow.

From Nothing is also a great option for saving Passive points, as being able to take point around Oasis allows us to grab Water of Life, Catapult, and Careful Consideration. Optionally we can pick up Catapult’s AoE, the small Evasion nodes near Careful Consideration and some optional Ailment Magnitude.

Controlled Metamorphosis can be tricky to fit in and use, the best spot I’ve found is a Medium-Small Ring in the socket near Unbound Forces. This allows us to allocate Unbounded Forces, Sharp Sight, and Kite Runner. This Gives us Shock magnitude, Attack Speed, Projectile Damage, and a bit of movement speed.
Now we have two things to cover quickly, Acrobatics and Master Fletching. When we take these are entirely gear-dependent. They can be taken as we meet the requirements mentioned below.

Master Fletching we’ll want to take after we get a Widowhail with at least 220% Bonuses from Quiver. Combined with the Bow, this cluster makes a +2 Projectile Skill Level Quiver grants 8 Levels instead. This is our single largest offensive boost once its setup.

Acrobatics we’ll take when we have a ton of Evasion. We’ll want to have enough Evasion to be around 50-60% Evade chance after the swap. This allows Evasion to avoid all hits, including AoE that weren’t avoidable previously. This is a huge consistency boost for our defenses.
Gear and Stat Priorities
This section lists and explains the recommended stats for our gear, and any Uniques we recommend. Click or tap on an item to read the recommendations for it. The items with a lither border are uniques and are at explained at the top of the segment right below this grid.

Being a Concoction Build, let’s cover our Mana Flask first since it’s a big part of our skill usage. The only Affix that matters here is the Suffix. Increased Charges gained is ideal for Mapping, as the density is usually enough to sustain us and this can free up the slot used by Mana Bounty with a good roll. Charges per second is ideal for Bosses, as we don’t have much passive recovery. Between this roll and our Flask Charges Gained, it’s enough to sustain our charges in most encounters.

Widowhail is our Main-Hand Weapon of choice. This allows us to dramatically boost the power of any quiver we use, which gives us a lot of our main stats. This Unique Bow is very common and very cheap. We’ll want at least 220% Bonuses from Quivers on it to get a total of 300% bonus combined with our passive tree. This multiplies the effects of any Quiver affixes by four. We can hit the same breakpoint with two fewer Passive points with a 250% roll instead. A Good corruption on a high roll will allow us to hit the breakpoints without any additional bonus.
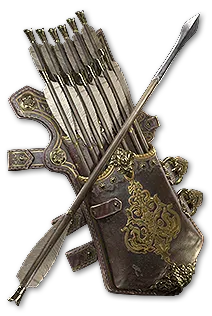
Our Off-hand Weapon is a Quiver. Ideally, this is on a Primed Quiver base for extra Attack Speed. For Affixes, we’ll want +2 Levels of Projectile Skills, Added Damage as Lightning, and Attack Speed as the high priority Affixes. Dexterity and Projectile Speed are also great rolls, as Dexterity gives us more Attack Speed and Projectile Speed helps the skill feel better overall.
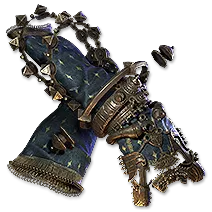
We’ll cover our Gloves next, as those are also Unique. We use Kitoko’s Current to be able to Electrocute as well as Shock. This saves us a Skill Link, allowing us to get more damage out of our skill. We get enough Attack Speed in general that even a bad roll on the penalty is typically fine, but less penalty is better. This enables us to use Combat Frenzy as well, which becomes a huge DPS and Defensive boost for us.
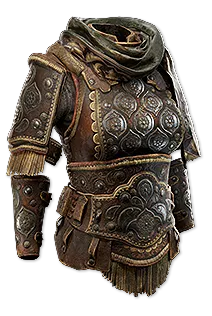
Our Body Armour makes up a large part of our defenses. We’ll want this to be an Expert Studded Vest to be able to get the most Evasion out of it. We’ll want Maximum Life, Resistances, and as much Evasion Rating as it can get.

The Helmet is much the same as our Body Armour. An Expert Hunter Hood or Expert Swathed Cap is the ideal base here for maximum Evasion Rating. Life and Resistance are mostly what we need from this slot. If we get Rarity as a Suffix, it’s usable, we do not want it as a Prefix though as it limits the Life and Evasion we can get.
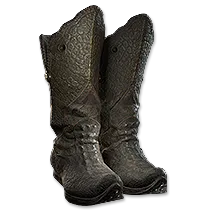
Next up are our Boots. Expert Steeltoe Boots or Expert Lizard Scale Boots are the ideal bases here. High Movement Speed is mandatory, so we’ll want at least 25% Movement Speed. Alongside this, we want Maximum Life and a High tier of Flat Evasion. For Suffixes, Resistances, Dexterity, and Rarity are all nice to have.

For Rings, our priority Affixes are Life, Added Lightning to Attacks, and Resistances. Evasion, Rarity, %Lightning Damage, and Dexterity are all acceptable rolls too so long as we’re resistance-capped. Most bases are acceptable here, Breach Rings are the best option here.
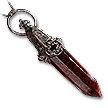
For Amulets, we’ll want a Bloodstone Amulet or Solar Amulet as our base. The priority Affixes here are %Maximum Life, Spirit, and Level of Projectile Skills. Flat Life, Evasion, Dexterity and Resistances are all also good affixes here. Spirit is important as we need a total of 120 Spirit for all of out Buffs and this is the best place we can get it outside of a lucky Helmet corruption.

Finally, for Belt, Ingenuity is the best-in-slot here as it can make our rings even better and give us more Life, Damage, and Resistance. Since that option is more on the pricey end of things, a Fine Belt or Wide Belt is the ideal base to help with Flask sustain. Maximum Life is a must here, as it’s the only Prefix that matters for us. Both Reduced Flask Charges Used and Increase Flask Charges Gained are great for Flask sustain here, and help significantly with bosses.


