This Ice Strike Build for Path of Exile 2 uses the Invoker Monk Ascendancy and two heralds to blast its way through the campaign in a quick and comfy fashion.
Table of contents
Build Overview
This build requires multiple uniques to be viable on many classes, outside of Monk Monk. As such this guide is intended for leveling an alternative character, rather than a first character during a league. However, Monk doesn’t specifically require these uniques for the build function in a similar capacity as it has early access to bonuses that help the build work without reliance on uniques.
Ice Strike is our Main Skill, and a large part of using this skill is its Physical-to-Cold Damage Conversion, which enables easy Chills, Freezes, and Herald of Ice Explosion when paired with the Polcirkeln Ring. The Herald of Ice Explosions will quickly and easily clear most enemies from our screen with this ring equipped.
Due to the Attribute-Stacking, or Stat Stacker, archetype used for this build, it’s viable to run on any class if we so choose, even Witch or Sorceress. Monk’s Invoker and Mercenary’s Gemling Legionnaire are usually the best Ascendancies for the very endgame setup. This also allows it to scale extremely well with any investments we make into gear.
Being a Leveling build, we’ll mainly rely on just Life and a bit of Evasion and Energy Shield to stay alive. Later on, we can fully transition into Energy Shield and Chaos Innoculation(CI) to really up our defenses if we have the gear to do so.
A lot of our early damage will come from Rings with Damage to Attacks rolls on them in combination with Pillar of the Caged God’s Strength scaling.
We’ll be able to make use of many Leveling Uniques to help make the leveling process quicker and more comfortable. Many of the Uniques used for this Build are featured in our Best Leveling Uniques guide, and for а good reason.
The grid below is fully interactive. If this is your first visit, we recommend you skip that grid and keep reading the guide in its intended order. If you prefer, you can click or tab on an item and it will take you to a dedicated section of the guide explaining everything you need to know it.
Playstyle
This build utilizes the physical-to-cold damage conversion of Ice Strike to reliably chill and freeze enemies and trigger Herald of Ice to destroy packs of enemies quickly. Combined with the Polcirkeln Unique Ring, and the scaling of the Pillar of the Caged God.
The Jargriepr Unique Gloves allow us to freely stack Strength early on for damage, without preventing us from leveling our Main Skill Gems. We’ll still want to get plenty of Dexterity and Intelligence on Gear, to take full advantage of the build’s endgame power.
Then the playstyle is as simple as blasting through packs with Ice Strike and Herald of Ice, dropping a Tempest Bell as it comes off cooldown for tanky Rares and Bosses.
Skills
Below are the Skills we use for the build, including its Support Gem Links
Ice Strike
Ice Strike is our Main Skill for the build. It allows us to easily and comfortably Chill and Freeze enemies for Herald of Ice, which becomes our pack-clearing power. Its quick attacks also allow it to easily shred bosses alongside the support of Tempest Bell. Quality is great on this Skill, as it increases the Attack Speed.

Martial Tempo is mandatory, as the third hit is the one that will deal a ton of damage. The faster we get to and use that attack, the more DPS we do overall.

Rage is used here to passively Build Rage as we Attack, which increases our damage quite a bit. This can also be gotten on Gems, or later moved to Tempest Bell when we do enough damage without it linked and Tempest Bell has the sockets open for it.

Primal Armament is an easy choice for damage boosting here. This will help scale the Elemental Damage we get from the Runes we socket into Pillar of the Caged God. It’s listed third here as it’s the least important of the links for damage until we get more scaling going.
Tempest Bell
Tempest Bell is a secondary damage skill focused on boosting our Single Target Damage. Each time we hit it, it will echo this damage to nearby enemies. With Ice Strike’s quick attacks, we can trigger this quickly for a big DPS boost against Bosses.

Overabundance improves the ease of use of Tempest Bell. It normally has a Limit of 1, but this will double that and shorten its duration. This makes it so that we can freely replace it when we reach the four combo points required to cast it.

Close Combat is easily the best Damage link to go for first, as it will only hit enemies in a small radius around it. This doesn’t hurt its early AoE either, letting it still help with pack clearing when necessary.

Concetrated Effect is another no-brainer choice here. Since we’re using this as a single target DPS increase, we don’t need the AoE to be large. This also keeps the radius closely aligned with Close Combat’s bonus.
Herald of Ice
Herald of Ice is our main Spirit Skill, which helps to clear packs incredibly well. Any time we Freeze and Enemy with Ice Strike, or Chill with Polcirkeln equipped, enemies will Shatter and explode for huge damage. We also set this up to enable and trigger Herald of Thunder

Longshot helps Herald of Ice to cause chains of explosions if the damage is high enough. Every explosion beyond the initial one will benefit from this damage.

Magnified Effect increases the Area of Effect of Herald of Ice which further improves its ability to chain and overlap its explosion to deal high damage to packs.

Lightning Infusion may seem like an odd choice, but it helps to also shock enemies that get hit by Herald of Ice Explosion. This in turn will active Herald of Thunder for more AoE.

Conduction further improves the ability of this skill to Shock and trigger Herald of Thunder. It’s not necessary until much later into progression, hence why it’s listed fourth.
Herald of Thunder
Much like Herald of Ice, we’re setting up Herald of Thunder to help actively trigger Herald of Ice. Combined, these two Heralds will help us power clear the campaign.

Cold Infusion helps make Cold Damage a larger majority of Herald of Thunder’s damage. This allows it to easily Chill enemies to enable Polcirkeln to do its thing even easier.

Glaciation allows Herald of Thunder to Freeze more readily instead of just relying on Chill. More Freezing means more Herald of Ice pops.

Cold Penetration helps the Cold Damage we add to Herald of Thunder get through Enemy REsistances to more easily Chill and Freeze.
Charged Staff
Charged Staff we use to provide some base Lightning Damage to our Attacks so we’re not fully reliant on gear for it. With consistent Freezing, Combat Frenzy combined with Resonance on the Passive Tree will supply us with the Charges we need. Though we’ll need it less for damage later on, it can still be an effective damage boost.

Lightning Exposure will apply Lightning Exposure for us any time we Shock. This will happen often due to the base Lightning damage it provides.

Cold Exposure will apply Cold Exposure when we Critically Strike with Cold Damage. We’ll end up attacking fast enough that our base Critical Strike Chance will be more than enough to provide uptime on this and increase our damage.

Innervate will add additional Lightning Damage to our Attacks when we defeat shocked enemies. This is helpful for ensuring we Shock more often early on.
Combat Frenzy
With the consistent Freezing we’ll do, this will help generate Power Charge to use Charged Staff. Of course, this Requires Resonance, which makes this and Charged Staff much later additions.

Profusion allows Combat Frenzy to occasionally generate an additional Charge for us to use. Overall it makes it a more effective skill.

Clarity is nice for the extra Mana Regeneration and should perfectly into our first 100 Spirit.
Glacial Cascade
Glacial Cascade is a slightly longer-range version of Ice Strike, but one we only use prior to Ice Strike for the first handful of levels. It uses the same links for the same reasons, and

Martial Tempo is mandatory, as the third hit is the one that will deal a ton of damage. The faster we get to and use that attack, the more DPS we do overall.

Rage is used here to passively Build Rage as we Attack, increasing our damage quite a bit. This is slightly more effective on Glacial Cascade due to its higher and more consistant damage ratio.

Primal Armament is an easy choice for damage boosting here. This will help scale the Elemental Damage we get from the Runes we socket into Pillar of the Caged God. It’s listed third here as it’s the least important of the links for damage until we get more scaling going.
Tempest Flurry
Tempest Flurry is the go-to endgame skill for this build, which is why we’re including it here. The only change we’ll need to make to the starter tree listed here is picking up Lightning Rod and Wild Storms to massively boost the overall DPS of the skill. Both of these are right off our current tree and require just 10 additional points.

Martial Tempo is a given here once again. More Attack Speed more more DPS. In the case of Tempest Flurry, this can also mean a ton of “fake” movement speed, as Tempest Flurry moves us forward as we attack.

Rage is another obvious inclusion here. It’s a huge damage boost to get from just one socket. Our high Attack Speed also means we’ll stack it insanely quick.

Lightning Exposure this skill will shock often, so getting Exposure from it is a huge damage increase for both this skill and our Heralds.

Overcharge is another strong inclusion here to amp our Shocks even more. Since we Attack and Shock at a high rate, the shorter duration isn’t even a downside here.

Inspriation is a necessary inclusion. As we scale our Attack Speed through Dexterity, it will get harder and harder to maintain the Mana Cost of it. Without this support Gem as well as Mana Gain on Kill on a couple jewels to sustain very high Attack Speed without mana issues.
Passive Tree
Below is the Passive Tree we use for this Skill. This Passive Tree Focuses on just three Main priorities: Attributes, Attack Speed, and Jewel Sockets. Attributes give us a lot of our damage scaling as well as some defenses. There are plenty of places we can take this tree after significant gearing upgrades that make it shine.


We’ll start by heading out the Skill Speed side of the tree, taking Flow like Water and Flow State. This will help give us some early Skill Speed to offset the delay in grabbing Dexterity.

After this, we’ll pick up Essence of the Storm, Essence of the Mountain, and Step Like Mist. These help to more consistently spread our damage between Cold and Lightning and improve our ability to Shock and Freeze.

After this, it’s all about the Attributes. We’ll want to beeline it down to Falcon Technique and Proficiency. Falcon Technique further enhances our ability to gain Attack Speed from Dexterity, in addition to Pillar of the Caged God. Proficiency provides a ton of Dexterity.

Now, we’re headed down to the bottom of the tree to grab Polymathy and Jack of All Trades. Polymathy is a sizeable multiplier to any Attributes we already have or will pick up on gear. Jack of All Trades increases our damage further based on our lowest Attribute.

Next, we can grab our quick damage boosts. For just three points, Coming Calamity is a sizeable damage bonus to help us clear enemies out faster.

Then we’ll pick up the Quarterstaff nodes. Martial Artistry gives a ton of Dexterity. Whirling Assault will get us more Attack Speed and a small chance to knockback enemies when we critically strike. Finally, One with the River gives us a ton of extra freeze build-up while also improving our defenses, as in Armour, Energy Shield, and Evasion.

Now we should be at a point where we can run Charged Staff, meaning we’ll need to also grab Resonance over near where we started. This will convert the Frenzy Charges generated by Combat Frenzy to Power Charges.

With more consistent and stable Lightning Damage, we can now zoom up to the top to grab Pure Power and we can even grab Ingenuity along the way for a ton of Intelligence.

For the remaining points, we can lean into the standard Evasion and Energy Shield Hybrid. This means getting nodes like Mindful Awareness near our starting area, Spectral Ward and Inner Faith near Resonance, Subterfuge Mark and Beastial Skin found near Falcon Technique.
These allow us to heavily benefit from the Lead Me Through Grace… And Protect me from Harm passives on the Invoker’s Ascendancy tree for massive Spirit gain and Physical Damage Reduction. These would be the first two Ascendnacies we want to take Non-Invokers are better off going for Pure Energy Shield as detailed below.

Alternatively, we can invest these towards going pure Energy Shield, grabbing Patient Barrier near the top as well as Melding, Insightfulness, Dampening Shield, and Pure Energy over near the Intellgence start, just above our starting point.
This gives us enough to swap to Chaos Innoculation with the use of Ghostwrithe. Thanks to all the Strength that we pick up on our Passive Tree and gear, we’ll have plenty of life to convert to ES. Just make sure to also grab Icebreaker for near-immunity to Freeze, and Eternal Youth to be able to recover ES with Life Flasks.

For the final transition to using Tempest Flurry, we’ll go and pick up Lightning Rod and Wild Storm. These nodes boost the damage of our new main skill by so much for just 10 extra points over our starter tree. It’s a worthwhile investment.
Gear and Stat Priorities
This section lists and explains the recommended stats for our gear, and any Uniques we recommend. Click or tap on an item to read the recommendations for it. If a slot is left empty, it is because there is nothing extraordinary or highly recommended for it to improve the build in any significant ways.
Pillar of the Caged God is an insanely strong item, even when used for leveling as this build does. This gives us Attack Damage for every 5 Stength, scaling the damage of Ice Strike and our Heralds. Every 5 Dexterity will also boost our Attack Speed, while every 5 Intelligence will increase our Area of Effect.
Greymake is a huge increase in Attributes which makes Pillar of the Caged God insanely strong early on. The Attributes it grants make the early acts quick and easy.
We’ll need to swap it out around Late Act 2 or Early Act 3 as the attributes on it slowly decrease over time. Swap to either a Goldrim or a Rare Helmet with Resistances on it instead.
Foxshade is great for leveling, as it’s the only Body Armour that’s a net positive for Movement Speed while equipped. The only caveat is we need to be on Full Life. Not very hard when nothing gets to touch us outside of Bosses or occasionally Rares.
After the Campaign we’ll want to switch to Ghostwrithe if we’re going for Energy Shield, or a strong Evasion and Energy Shield base if we’re going for the standard defensive route.
Jarngreipr is a powerful but Niche set of Unique Gloves. We’ll use these early on to stack Strength for more damage and be able to ignore our attribute requirements for our skills, save for our Spirit Skills.
The endgame chase item for this slot is the Unique Gloves Hand of Wisdom and Action. Thee provide a ton of Attributes, as well as a ton of flat Lightning Damage from Intelligence, which goes crazy with the Lightning Nodes we mentioned alongside Tempest Flurry.
Meginord’s Girdle is a massive increase to our Strength, which means a lot of early damage for Pillar of the Caged God. The bit of resistance is also nice, but not a big deal.
When it comes to the endgame version, we’ll want to use Ingenuity if we can get our hands on it. Rings can provide us with a huge amount of Attributes and Flat Damage to really scale the build to insane levels.
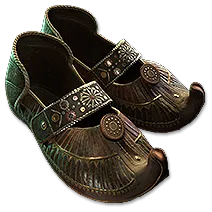
Wanderlust are the Boots we’ll use until we can use something with equal movement Speed and provide more Life or defenses. Well rolled Briarpatch Boots will work just as well here and come with Life.
Polcirkeln is what enables consistent Shattering for Herald of Ice. It can be a little pricey but not unaffordable. It can be replaced with another ring like the basic one detailed below.

Our other ring can be really any ring we want, though like most builds, a good Breach Ring can do a lot for us.
Early on we’ll want a ring that’s heavy on flat damage to Attacks, specifically Lightning or Cold.
Later on, we’ll also want All Attributes, Intelligence, and Rеsistance on top of this. Reaver Catalyst are good for the early rings, while Adaptive Catalysts arе better for the more endgame options.

For our Amulet, we’ll want a Stellar Amulet as a base. This gives us a mix of attributes to start with. We’ll want the same Attribute rolls as our Rings, so All Attributes and Intelligence are preferred for endgame.
On our Prefixes, We’ll be looking to get %Evasion, %Life, or %Energy Shield rolls. Pick according to the defensive options listed at the end of the Skill Tree description.
The endgame version of this build would want to use an Astramentis, an insanely rare Stellar Amulet that gives a ton of Attributes, up to 100 of each. Much like Hand of Wisdom and Action or Ingenuity this is a very expensive chase unique for this slot.


