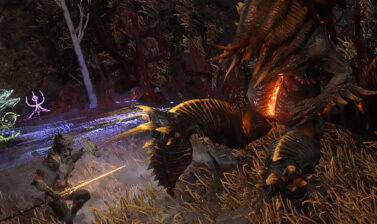
This Gas Arrow Build uses the Ranger’s Pathfinder Ascendancy to clear dense packs and bosses, utilizing powerful Poison Damage Over Time.
Build Overview
This build’s main Skills are Poisonburst Arrow and Gas Arrow. Both skills are excellent for applying Poison, which gives us very consistent damage while progressing the campaign. We’ll support these wth Vine Arrow and Toxic Growth for better single-target DPS.
Defensively, at least early on, we’ll be quite fragile, but that’s just how Rangers tend to be anyway. Once we get access to better item bases and modifiers, it gets much easier to have powerful gear that makes us much less fragile. Wind Dancer and Ghost Dance will do a lot to help our defense be more stable late game.
While this build is written with Pathfinder in mind, it can be played on other Classes or Ascendancies. Just note that without Pathfinder’s Overwhelming Toxicity Ascendancy, we won’t have nearly as many poisons available.
The build summary card below is fully interactive – click or tap on an item to read its full description and recommendations. If this is your first visit, we recommend you skip that card and keep reading the guide in its intended order.
Overview
Ranged Poison
Build Type
The bulk of our damage is dealt as Poison by using ranged skills. This makes the build very safe and comfortable
Damage Over Time
Playstyle
With Poison being our main source of damage, enemies may not die instantly early on, but we also don’t have to repeatedly spam attacks.
Easy to Play
Build Difficulty
With a Ranged “fire and forget” style, we’re often in very little danger. making the build very comfortable and approachable. The fragility does hurt this slightly
SSF Viable
Gearing Difficulty
We have only one truly required Unique, but thankfully, it’s a fairly common one, so we can get it though farming realtively easy. It also makes it very inexpensive to trade for most times as well.
Click on a tap on each segment to expand it.
Ratings
Ease of Use
Progression Speed
Ease of Gearing
Mobbing Power
Bossing Power
Defences
Expedition Farming
Breach Farming
Ritual
Ease of Use
- Very Hard to play, Fragile and relies on damage to stay alive
- Hard to play, may require multiple combos or rapid sequence of skills
- Balanced, requires some knowledge or precise positioning
- Easy to Play, may require simple combos or automatic weapon swaps
- Very Easy, requires minimal experience to play optimally
Progression Speed
- Use a Leveling Build. It will require Skill Points, Ascendancy Points, or Unique items not available early on.
- Barely Viable, will be slow and may require alternative Ascendancy ordering.
- Viable, Levels with some issues.
- Decent Leveling Option, smooth leveling, but not the fastest.
- League Starter Potential, levels very quickly with the main skill.
Ease of Gearing
- Trade Required, make use of a harder-to-obtain unique.
- Trade Recommended, requires at least one uncommon unique.
- Trading Helps, uses common uniques or very specific .
- SSF Viable, Can be geared easily without trading, may require farming.
- SSF Friendly, No Uniques and very easy to gear without trading.
Mobbing Power
- Poor, clearing isn’t the best due to lack of AoE.
- Okay, Clears slowly due to limited AoE.
- Decent, clears well, but takes effort or set up.
- Great, take very little effort to clear enemies.
- Amazing, clears screens of enemies with ease.
Bossing Power
- Requires high investment and respec for decent damage.
- Requires Investment or respec for decent.
- Decent damage with minimal investment.
- Low Investment and great damage.
- Low Investment and high damage.
Defences
- Low Hit pool, mainly relies on damage to protect it.
- Decent Hit pool or has enough avoidance or mitigation .
- Good Hit Pool, may not reliably take hits from strong foes.
- Reliably tanks multiple hits from most foes.
- Able to tank most hits comfortably, even from bosses.
Expedition Farming
- Several modifiers are highly risky.
- Just a couple risky modifiers.
- Low risk, but some modifiers can mess up the build.
- Situationally able to deal with most modifiers.
- Able to deal with most modifiers without thought.
Breach Farming (Mostly tied to AoE)
- Struggles to survive tougher breach mobs.
- Survives, but clears slow, usually from a lack of AoE.
- Has an easier time on certain map layouts.
- Easily clears out breach mobs, regardless of map.
- Quickly and easily clears out breach mobs.
Ritual Farming
- Hard to survive, Doesn’t handle the cramped spaces well.
- Does well on some layouts and certain ritual types.
- Handles most rituals well enough.
- Most Rituals are completed easily.
- Rituals are completed easily and quickly.
The Good
High Damage output
Very few buttons needed
The Bad
Can be fragile until lategame

Playstyle
Poisonburst Arrow is a great leveling skill, alongside the other poison skills we have easy access to, we’re set for essentially all content. This build uses so few skills that it keeps our overall skill use very simple.
In most cases, we can get away with Poisonburst Arrow and Toxic Growth for general clear, or simply just Poisonburst once we get Plaguefinger and good gear. For bosses, we can pre-emptively set up both Gas Arrow and Vine Arrow, though with Update 0.4 added a defense boost to bosses at the start of a fight can make this less effective.
Skills
Below are the Skills we use for the build, including their Support Gem Links.
Poisonburst Arrow
Poisonburst Arrow is our Main skill for everything, including being the bulk of our clearing power.
Chain / Fork
Early on, we’ll use Chain to ensure our Poisonburst Arrow hit multiple targets, which helps to get Poison on multiple targets. Later, we can replace this with Fork for better area coverage.
Deadly Poison I/II
All of our damage comes from the Poison we apply, and this provides a Multiplier to its damage. We’ll want to upgrade from Tier I to Tier II ASAP when it become available with level 4 Supports.
Bursting Plague
This essentially acts like yet another poison stack, but also allows some extra AoE Damage for groups.
Poison III
We only care about Poison III as it adds more Poison Magnitude. Using any lower version is a waste.
Bleed III
This enables Herald of Blood for us, improving our clear speed. We can use a lower version of this skill, but Herald of Plague will work fine enough through the Campaign for improving clear.
Gas Arrow
Gas Arrow is mainly used for setting up Toxic Growth and Vine Arrow for Bossing. In doing so, we’re only focused on its AoE coverage.
Deadly Poison I/II
This still needs Deadly Poison to help trigger Toxic Growth faster, but it’s the only damage support we use here
Persistent Ground
This heavily increases the duration of the Poison Cloud created, allowing us to not have to set it down as often.
Encroaching Ground
Encroaching Ground allow the Poison Cloud to Expand aas it sits out, letting it cover a vastly larger area.
Prolonged Duration
The second-best way to increase the duration of the Poison Cloud, stack it with Persistent Ground as sockets alow.
Magnified Area I/II
The second-best way to increase the size of the Poison Cloud, stack it with Encroaching Ground as sockets allow.
Vine Arrow
Vine Arrow is an important skill for our bossing power, as itwill not directly Poison, but instead deal Chaos Damage over Time, which can stack on top of our Poisons, while pulling some its damage from our Poisons.
Swift Affliction I/II
This makes Vine Arrow last less time, but also compress its damage into a shorter window, resulting in higher DPS.
Deliberation
We don’t need to use this skill often, and often set it up before starting a boss, making the movement penalty a non-issue and getting essentially free damage.
Chaos Attunement
Since the bulk of Vine Arrow’s Damage is the Chaos DoT, this is a great way to boost that. It will result in a weaker hit damage, but we don’t care too much about that.
Magnified Area I/II
Increased AoE mean thje Vine and by extension the Chaos DoT are more consistently applied.
Rapid Attacks I/II
While we don’t need to replace them too often, Rapid Attacks is a comfortable QoL option. Feel free to replace with a damage support if desired.
Toxic Growth
Toxic Growth is our secondary clearing skill, but more importantly, our main bossing DPS.
Long Fuse
Since the skill isn’t a grenade and our Poison causes it to burst early, this is free damage with no downsides.
Concentrated Area
This not only spreads out the damage less, but also amplifies it, which is good for a single-target skill.
Deadly Poison
While this skill doesn’t poison naturally, the number of projectiles it creates alongside the small bits of Poison Chance from the Passive tree and Plaguefinger allow it to do so consistently.
Heft
For a skill that mainly relies on its hit damage, this goes a long way toward boosting that damage.

Arakaali’s Lust
By far one of the best Lineage Support to use in the large game. This grants more damage for each poison we apply, and by the endgame gives us one of the largest damage multipiers we can get.
Herald of Plague
Herald of Plague is mainly here to spread our poisons and nothing else. This is required now due to Pathfinder losing their ascendancy version of this skill.
Chaos Mastery
At its max level of 20, Chaos Mastery gives us just enough of a boost to increase the spread range just a bit.
Wind Dancer
Getting more Evasion Rating for essentially free does so much for our defenses.
Knockback
While Wind Dancer already pushes enemies away when we get hit, this allows it to push them further and create more space for us to move.
Blind
Having the skill Blind anything it hits while pushing them away, giving a nice added layer of protection to offset the temporary loss of Evasion.
Poison III
Being a skill that will deal Physical Damage, adding Poison here isn’t a bad choice either, as it will result in a stong enough poison to defeat weaker enemies.
Ghost Dance
Ghost Dance is an imporant Defensive tool once we make the jump to Evasion and Energy Shield Hybrid in the late game.
Compressed Duration
Reduced duration allows us to regain Ghost Shroud quicker, making this even more reliable.
Herald of Blood
Herald of Blood is a strong optional Spirit Skill, which can vastly improve our Clear speed throughout progression and mapping. This is due to an interaction between it and Plague Burst, which allows it to chain endlessly.
Bursting Plague
Since Herald of Blood can’t apply, Bleed by itself, we use Bursting Plague as a secondary damage effect to apply it instead.
Poison III
Combined with plaguefinger, this ensure we’ll always poison, enabling Bursting Plague.
Bleed III
This ensures that Bursting Plague will always Bleed, allowing the chain effect this combo is known for.
Passive Tree
Below is the Final Passive Tree we use for this build, followed by an Act-by-Act progression used to reach it.

Act 1


Since we’re focusing on Poison right out of the gate, we’ll head straight from the start to Lasting Toxins and Stacking Toxin, only making a brief detour to grab Vile Wounds along the way.
Act 2

We’ll pick up Escape Velocity for the Movement, then we’re heading back toward the start to grab Crippling Toxins to continue scaling our poisons. If we get lucky with the Trial of the Sekhemas while unlocking Pathfinder’s Overwhelming Toxicity, we can also grab the Jewel socket near Escape Velocity.

We’ll also grab Agile Succession and Blinding Strike here to scale up our Attack Damage and Attack Speed. These are very important for Toxic Growth.
Act 3

Guess what, time for more Poison nodes! This time we’re grabbing Low Tolerance for the DPS boost, and Leeching Toxins and Life recovery. We’ll also make the short detour for Kite Runner for more movement speed and damage.

From the Trial of Chaos, we’ll pick up Relentless Pursuit. Being able to ignore Slows will be very useful going forward. Alternatively, we can take Path Seeker for now for Passive Points, but since we don’t make full use of the passive, it doesn’t seem quite worth taking just yet.
Act 4

Might have already assumed it, but yep, more Poison Nodes. This time, Escalating Poisons and Building Toxins for a huge damage boost. We also grab Toxic Tolerance here too, which is a nice quality of life as well in the form of being immune to poison.
Interludes


We’re finally running low on useful Poison Nodes, so we’ll grab this Ailment cluster instead. Between Intense Dose, Wasting, and Fast-Acting Toxins, we’re getting a bunch of Magnitude and Ailment duration.

We can also pick up Master Fletching and Wrapped Quiver at this point as well, but they won’t do all too much if we haven’t invested in (or lucked into) a good quiver just yet.
Early Maps


As we’re getting into maps now, we need to really beef up our defenses, so we’ll grab Bestial Skin, Enhanced Reflexes, and Subterfuge Mask. With Subterfuge Mask, we’ll also want to start hunting for a high Energy Shield Helm.
Endgame


As for our final Tree, the key notes here are that we’re grabbing Crit Nodes as we don’t have much else to really pick up. We’ve also dropped the Ailment cluster from earlier and a couple other attack nodes to make this swap work.

For our Jewels, we’ll want to get a Heart of the Well and Against the Darkness with Gain as Extra rolls. This helps to really push our DPS with Toxic Growth for bosses. When we get one, Against the Darkness should be placed in the right-most socket.
Otherwise Jewels that give Ailment Magnitude, or Crit Chance would be decent until we can manage to get them.
Gear and Stat Priorities
This section lists and explains the recommended stats for our gear, and any Uniques we recommend. Click or tap on an item to read the recommendations for it. The items with a lighter border are uniques and are at explained at the top of the segment right below this grid.


Our Bow of Choice here is an Obliterator Bow. This gives us the highest possible base damage to scale.
For its Modifiers, we’ll be looking for high Flat and percent Physical Damage and Crit Chance primarily. This helps us to scale our Poison as high as we can. We can also look for Flat Elemental Damage, as Plaguefinger allow this to contribute to pur Poison as well.
Our Quiver of choice is a Primed Quiver for the inherent Attack Speed. As for Affixes, the most important ones we want are Level to Projectile Skills, Increased Damage with Bow Skills, Any Flat Damage, and Attack Speed. Dexterity and Projectile Speed are also great, but not super necessary.
Since our endgoal is a hybrid Evasion and Energy Shield setup, we’re looking to go after a high Energy Shield Helmet, preferably an Ancestral Tiara.
For it’s Modifiers, we’re looking for as high an Energy Shield as possible, alongside Resistances and Rarity. This is to make full use of Subterfuge Mask and make it a powerful Hybrid armor.
Much like our Helmet, we’re making use of a passive, Spectral Ward in this case, to make a Hybrid piece out of a non-hybrid piece. So to best fit our needs, we’ll want a Slipstrike Vest for it’s high Evasion rating.
For its modifiers, we’ll want to push its Evasion Rating as high as we possibly can while also picking up Deflection Rating and Resistances. Deflection is insanely strong paired with the hitpool we get from Energy Shield.
For our Gloves, we’ll want to use Plaguefinger. These unique gloves allow all damage types to contribute to poison, not just Physical and Chaos. This allows us to make use of Flat Elemental Damage Modifiers to really give us a high scaling potential for lategame.
To push what these offer our build, we can also make use of the Courtesan Mannan’s Rune of Cruelty to get more Poison Magnitide from them as well.
Belt is the typical Maximum Life, Strength, and Resistance on a Utility Belt for the bit of instant recovery from Flasks. We can try for additional Charm slots too, but Charms aren’t super impactful at the current moment.
Ingenuity is still THE chase unique for this slot. We get far more value from Rings than we do from our Belt anyways. But it’s also a very late-game upgrade.
Wanderlust is one of the Best Leveling Uniques for our Boots Slot. 20% Movement Speed combined with immunity to Slows is incredibly good.
When upgrading from Wanderlust, we’ll want a Hybrid Evasion and Energy Shield Boots. We’ll be aiming for 30% Movement Speed and high defences at a minimum. Resistances and Rarity are all good here to fill out the Affixes.
For our Rings, just about any base will do, but a Breach, Gold, or Prismatic Ring would be preferred. Our Ideal Modifiers here are Life, Flat Damage Modifiers, Resistances, and Rarity.
With Plaguefinger, getting as much Flat Damage as we can from our rings is the best damage we can possibly get. Until we get Plaguefinger, however, only Flat Physical will help our Poisons!
For our Amulet, the base doesn’t particularly matter, making Gold Amulet a standout for its Rarity.
We’ll be looking Spirit primarily, just enough to keep all of our main Spirit Gems up. Level of all Projectile Skills, Evasion, Energy Shield, and Crit are all good rolls here. If we want to push our luck and risk the Spirit we need, we can also try to land a good Perfect Essence of Enhancement for Global Defenses.
For our Anointment, Lasting Trauma (Suffering, Paranoia, Envy) comes in as the best DPS option, without being all too expensive to add. For a more defensive option, Melding (Guilt, Envy, Suffering) is a great choice as well.