This Essence Drain Build uses the Witch’s Infernalist Ascendancy to deal with enemies using a powerful Chaos DoT and focuses on Energy Shield for defense.
This guide is written for VULKK.com by Vuk Radulovic
Edited and currently maintained by RubyRose.
Table of contents
Build Overview
This build is designed around the endgame and, as a result, may require unique items to function. While this guide is specific to the Infernalist, this build also performs very well on a Lich, and we’ll note any major differences for that version as well.
This build focuses around Essence Drain, utilizing its powerful DoT to wipe out large groups of monsters when paired with Contagion. This combo leads to very high damage and can be very satifying to watch as the packs just melt away.
With Support from Withering Presence and Dark Effigy, this build easily clears harder content. It’s not quite a strong boss killer, as the DoT effect means we’ll be waiting for the enemy’s life to slowly drain away, giving them ample time to fight back. Thankfully, we have strong defenses backing us up.
Much of our Spirit is dedicated towards these defensive options, though we can make use of it offensively if we have the spare Spirit later on. Convalescence does the bulk of the protection when used well, with all of the Skill Effect Duration we end up with, its often more than to keep us up in tight situations.
The grid below is fully interactive. If this is your first visit, we recommend you skip that grid and keep reading the guide in its intended order. If you prefer, you can click or tab on an item and it will take you to a dedicated section of the guide explaining everything you need to know it.
Playstyle
For most packs, we’ll want to apply Contagion, then Essence Drain to a target. Once enemies start falling, we can use Profane Ritual to further add to the damage being spread around. For particularly tough enemies, we may want to cage them with Frost Wall, or use Frost Wall to protect our Dark Effigy as they melt away.
For bosses, it’s much the same. Though we’ll more heavily rely on Withering Presence for our Withering as opposed to Dark Effigy. Then we’ll just maintain all of our DoT skills on the boss and keep them cursed with Despair for maximum damage.
This build is designed to be very durable, leaning heavily into Energy Shield Recharge as its main defense, with Convalescence to support that. This allows the DoT damage to take over while we’re comfortably able to take hits.
Skills
Below are the Skills we use for the build, including their Support Gem Links

Essence Drain
Essence Drain is our Primary Skill, and traditionally, there are two ways to build around it, either for its hit damage or its Damage over Time. For the purpose of this build, we’ll be looking to lean into the Damage over Time for high, consistent damage.

Swift Affliction
Swift Affliction allows our Essence Drain to deal higher damage in less time. This means we’ll need to cast it more often and drain our mana a bit more, but it will defeat enemies faster.

Chain
Chain allows Essence Drain to hit multiple enemies, especially when they clump together. This also helps us to more reliably hit our Contagion target, even if the middle of a pack.
We’ll swap this for Derange when we need extra damage, like when Bossing.

Considered Casting
Considered Casting is a great damage boost, but comes with a Cast Speed Penalty. Since we don’t need to cast Essence Drain often, it’s a great fit. We can easily overcome this with gear.

Drain Ailments
Drain Ailments is one of our strongest support links, aiming to make use of the free Ignite provided by our Infernal Hound Companion. It will also consume the occasional Freeze from Chaotic Freeze as well, but it’s minor overall.

Intense Agony
Intense Agony is an extremely powerful support that adds a ton of damage, so long as we cast Essence Drain on them first. This makes it great for clearing, but a bit weaker if we need to cast it more than once.
Recommended to swap for Zenith for Bosses, where we’ll likely need multiple casts.

Contagion
Contagion is here to do its duty of spreading our Chaos DoTs through packs of enemies. We’ll be bumping up its duration and utility to get the most out of it. We don’t need this to be a high level, though a higher level will add more damage.

Persistence
We want Contagion to last as long as possible, giving us more time to group enemies and allow the DoT to spread after.

Magnified Effect
We want Contagion to be able to spread to as many enemies as possible, so increasing its range is an easy choice.

Hinder
Hinder will slow any mob that is currently affected by Contagion, making a nice defensive support.

Chaotic Freeze
Since this is being set up to last a long time, this is the way to utilize Chaotic Freeze as well. It’s not super consistent for most enemies as Dark Effigy will do much of the heavy lifting in terms of applying it.

Dark Effigy
Dark Effigy fits well into the build, as we’ll be looking to apply multiple Chaos DoTs to have this firing off a barrage of projectiles.

Withering Touch
This is our main source of Wither (increasing Chaos Damage taken) and is a must-have.

Arcane Tempo
Since this skill relies on a Cast Speed and we’re not using it else where, Arcane Tempo is a good boost to everything we need. This allows it to stack up Chaotic Freeze and Wither much faster.

Acceleration
Acceleration helps to speed up our projectiles, allowing them to more reliably hit faster targets when we need them to.

Profane Ritual
Profane Ritual is another Chaos DoT, almost in line with how powerful Essence Drain it, but its main drawback requires the skill to consume a corpse. This makes it harder to use early on, but a great way to create a large damage zone on top of a pack after one enemy dies. This will then be spread alongside Essence Drain

Profanity
Since Profane Ritual already consumes corpses, we’ll likely have multiple to make use of. Overall, this is a great damage boost.

Spell Echo
This is an optional support link for later, which will create two Rituals instead of one. It can make the skill more costly, but it’s not a massive issue.

Despair
Despair is our main curse for increasing damage, removing some Chaos Resistance from enemies it’s on. Decaying Hex allows it to have some offensive potential as well.

Decaying Hex
Decaying Hex adds a DoT to our Curse, and with high Intelligence, the damage is decent too. We’ll use this early, but the damage doesn’t scale super well without heavy investment. It does still, however, provide another DoT to spread with Contagion and for Dark Effigy to stack faster.
Eventually, we’ll swap this with Inspiration to reduce its heavy mana cost.

Heightened Curse
Getting a 25% increase in the efficiency of the Curse is nice to have, especially for Despair as we want to lower the enemy Chaos Resistance as much as we can. Once Decaying Hex and Impending Doom start to fall off, we’ll replace them with this and Ritualistic Curse.

Ritualistic Curse
For a price of 30% increased cast time, we get 50% more AOE of the Curse. We’ll want this to Blasphemy later on and replace this with Inspiration to keep Despair’s cost low, as Heightened Curse can make it quite costly.
After moving Ritualistic Curse to Blasphemy, replacing this with Focused Curse will be a strong option.

Cursed Ground
Cursed Ground is optional, but between the Curse Area and Skill Effect Duration, it gives us a larger, longer-lasting Curse Area that we can place down before a boss. We don’t need it for general mapping, though.

Frost Wall
Frost Wall is something we use defensively, either to trap enemies, protect ourselves, or protect our Dark Effigy, depending on the need in the moment.

Fortress
This support gem is mandatory as we want the wall to appear in a circle. This allow us to use it to protect Dark Effigy or even trap enemies as our DoTs drain their life away.

Glacier
We want the wall to last, so having more Life on it is nice, although this support is not mandatory to have. The downside to this is that if we do use it in a tight area, we’ll have trouble getting rid of it early and will need to wait for it to expire.

Fast Forward
This may be counterintuitive at first, but we stack so much Skill Effect Duration that this becomes necessary to keep Frost Wall’s Duration in check. Especially when using Glacier, they’ll be tough to break so making them expire faster is good to not impede our mapping.

Convalesence
Convalescence is our replacement for Grim Feast, granting us an instant Energy Shield Recharge that cannot be interrupted.

Ingenuity
Since this skill has a rather long cooldown, we’ll shorten it with Ingenuity.

Clarity
Clarity is an optional Support we can link here, should we have Mana issues.

Summon Infernal Hound
Infernal Hound is mainly used as a way to enable Drain Ailments, but we’ll also set it up to be a bit of a damage sponge for us. We’ll even Anoint Lifelong Friend onto our Amulet to help with its uptime.

Enormity
Enormity grants a boost to our Infernal Hound’s Maximum Life, as well as its damage.

Meat Shield
A nice 35% Damage Reduction helps to keep our Hound alive.

Loyalty
While Loyalty reduces the Infernal Hound’s life, it does restore a bit of the Damage Mitigation for us that was lost in 0.2.0.

Elemental Army
Getting +30% to all Resistances is a nice addition to the overall tankiness of the Hound.

Fire Mastery
Much like Minion Mastery, this is here to boost Skill Level for more Life.

Chaos Bolt
Chaos Bolt is our only non-DoT damage besides Dark Effigy, but we’re setting it up instead, just be comfortable filler between recasts of Essence Drain.

Glaciation
We want our single target enemy to build up that Freeze as soon as possible, Glaciation helps with this.

Mobility
When shooting Chaos Bolt, we need to keep moving at all times. Mobility gives us a boost for that as it decreases the movement penalty by 30%. Combined with tapping the skill instead of fully holding it, we can move more freely.

Blasphemy
Blasphemy allows us to passively apply a curse to nearby enemies. We opt for Temporal Chains, but if we wanted to go as far as to pick up Doedre’s Damning, we could also slot Enfeeble here too, if Spirit allows.
Quality is important here, reducing the Spirit Reservation.

Temporal Chains
Temporal Chains is the ideal curse to use as an Aura as it acts as both a defensive and an offensive buff for us. Its slowing effect will help us kite enemies, while the slow itself will make our Damage over Time effects expire slower and increase their overall damage.
If we have the Spirit necessary later on, we could also potentially use Deodre’s Damning to have a curse limit of three, allowing us to use both Enfeeble and Temporal Chains as auras.

Ritualistic Curse
Ritualistic Curse is the only support gem (besides the Curse itself which is socketed as a support gem) that we use. The reason is that we almost don’t get any penalties because we are not casting the curse, it is passive, and the curse itself gets a 50% wider AOE.

Encumbrance
As Temporal Chains is a Slowing effect, Encumbrance will boost its effect, further slowing enemies.

Withering Presence
Withering Presence is a nice way to apply Withering for the build, as we can’t always rely on Dark Effigy. With no investment in Totems, most bosses will just immediately wipe them out.

Clarity
This is an optional support link to help with any potential mana issues. This isn’t necessary or could be placed in Convalescence instead.
Passive Tree
Below is the Passive Tree we use for this Skill, and an Act-by-Act breakdown of how we progress the skill tree from Level 1.
This Passive Tree makes use of Weapon Set points. These will be color-coded to match their in-game colors. Weapon Set 1 in RED, Weapon Set 2 in GREEN.

Act 1 – 20 Passive Points


We’ll head out the left side to get as much early damage as we can. We’ll grab Raw Destruction, then Entropy, followed by Potent Incantation. This gets us a ton of Damage and Skill Effect Duration.

Next, go right, taking the increased Cast Speed, and proceed to Pure Energy. This gets us some more Energy Shield Bonus to help it keep pace with the campaign.
Act 2 – 30 Passive Points


Now, we’ll path from Potent Incantations to grab Lingering Horror. Much like Entropy, this nets us Chaos Damage and Skill Effect duration. Following this, we’ll begin making our way up the middle of the tree.

For our first Ascendancy, we’ll take Loyal Hellhound. The Hellhound won’t do much without support. So get Meat Shield and Elemental Army on it ASAP. Follow this with Loyalty and Enormity as sockets allow.
Playing as a Lich, Souless Form is a great first option here, just make sure we’re not losing too much Mana Regen and can still sustain our skills.
Act 3 – 50 Passive Points


For Act 3 we’ll make a rush toward Dark Entries and Void in that order, as they are the next most accessible damage nodes. We’ll also grab Refocus along the way to get better effectiveness out of Convalescence.

By this point, we should be able to comfortably take on our Second Ascendancy. In this case, we’ll want to consider taking Altered Flesh, but we’ll want to make sure we have a decent amount of Chaos Resistance first, as we’ll start taking Chaos alongside any Physical Damage, which will drain our Energy Shield quickly.
For those playing a Lich, Eldritch Empowerment is a great option here. We won’t quite have the Energy Shield at this point to take Eternal Life.
Act 4 – 70 Passive Points


We’ll invest a bit in our curses now, using some of our Weapon Set passives. We’ll start by moving Dark Entries, Lingering Horror, and their leading nodes for a total of 10 points on Weapon Set 1.
Then, for Weapon Set 2, we’ll allocate Lingering Whispers and Master of Hexes to give a massive boost to Despair.

Then we’ll use the points we earn in the Act to pick up Spiral Into Insanity and Patient Barrier. This is a good bit of damage and extra Energy Shield.
Act 5 – 75 Passive Points


More Energy Shield for this Act, starting with Heavy Buffer and Hallowed. Heavy Buffer gives us a boost to Energy Shield, but also allows some damage to bypass our Energy Shield. Hallowed helps us resist Stuns and Elemental Ailments, allowing our Energy Shield to contribute towards our Thresholds for them.

Then we’ll quickly grab Dependable Ward and Convalescence for More Energy Shield Recharge Rate.
Act 6 – 85 Passive Points


For this Act, we’ll fix up our Weapon Set Points to better distribute our points and get more out of them. First, we need to grab Whispers of Doom, so we can use Despair alongside Temporal Chains being on Blasphemy.

On Weapon Set 1, which we’ll use for everything that isn’t Despair, we’ll allocate the following: Spiral into Insanity, Potent Incantations, Dark Entries, Wither Away, and Lingering Horror. Any excess points can be put into Chaos damage near Wither away until Weapon Sets are equally spent.

On Weapon Set 2, we’ll allocate the following Passives: Zone of Control, Master of Hexes, Lingering Whispers, Impending Doom, and Fated End. This allows us to heavily juice up Despair without taking away from our damage. A fair number of the set points go toward getting Impending Doom, but it’s worth it.
Early to Mid Maps – 105 Passive Points


It’s time to invest even more into Energy Shield now that we’re into Maps. We’ll grab Enhanced Barrier, Insightfulness, and Melding for the raw Energy Shield. Then we’ll take Essence Infusion for the huge boost to Energy Shield Recharge.

We also should consider picking up Restless Dead and Crystalline Flesh as well, as for 7 points it makes our Infernal Hound more durable and reduces its downtime.

We should look into taking our Third Ascendancy. In this case we’ll want to take Beidat’s Hand. This will give us a bunch of extra Energy Shield, at the cost of reserving 25% of our life.
For those playing a Lich, now is the point we can easily and safely take Eternal Life.
Endgame Maps – 115 Passive Points


By this point, we should be able to afford Anointing Spiral into Insanity on our Amulet. We’ll take the points we save by doing so and use those to get more Energy Shield. This includes getting Dampening Shield, Quick Response, and some small %Energy Shield nodes.

As far as pushing the build further, the only thing we have left are Jewel Sockets. Unfortunately, there’s only one nearby to grab, but every bit helps.
For offensive Jewels, Any Combination of Chaos Damage, Spell Damage, Energy Shield, and Effect of Withered works for us. Just keep in mind that Wither has a breakpoint every 20%, or every 2 perfect affix rolls for Jewels.

For our final Ascendancy, Beidat’s Will is one of the better options, as it can net us a large amount of Spirit. There’s not really much else worth taking for this build in particular.
For those playing a Lich, take Crystalline Phylactery. It’s best to have 10% effect of Withered as one of the affixes, as this hits a full breakpoint on its own. Otherwise, take Spell Damage or Energy Shield bonuses for the Jewel here.
Endgame with Diamonds – 120 Passive Points


With Essence Drain being a spell, Prism of Belief is a great inclusion to improve its scaling. Any levels we get past Level 20 can significantly boost our damage potential, easily beating out anything we could get from a regular jewel.

From Nothing has one great offensive option for this build, Resonance. This allows us to pick up Event Horizon and Spaghettification for a huge boost of Chaos Damage we’d otherwise miss out on. Just note this will also attach an extra Life and Energy Shield cost to most of our skills, as well as a small penalty towards our Chaos Resistance.
Chaos Inoculation and Eternal Youth are solid runner-ups. Eternal Youth allows us to grab Ice Breaker to further mitigate Freeze, arguably the worst Elemental Ailment to be afflicted with.
Chaos Inoculation does much the same, allowing us to grab Shimmering Mirage and Abasement for Ailment and Stun Threshold based on Energy Shield. We can also take Wither Away and the Withered Effect without the need to fully path there. We can also grab Harsh Winter here for the Skill Effect Duration as a bonus.
Gear and Stat Priorities
This section lists and explains the recommended stats for our gear, and any Uniques we recommend. Click or tap on an item to read the recommendations for it. The items with a lighter border are unique and are explained at the top of the segment right below this grid.
For those playing this build as a Lich, replace any Life Affixes mentioned below with Energy Shield instead. Infernalists require the extra Life to make use of their Ascendancy, while a Lich does not.

Our main weapon of choice during the entire game will be Withered Wand. Chaos Bolt is a great filler skill, and we can have it do a lot for us in terms of utility.
The ideal Affixes we want to hit are Level of all Chaos Spells, Chaos Damage, Spell Damage, and Intelligence. Cast Speed and Mana are nice to round off the affixes.
We highly recommend using Essences of Ruin on Normal Item Level 81 Withering Wands until it lands Level of Chaos Spells, preferably +4 or higher. Then use an Orb of Alteration, hoping for Mana or Spell Damage, the follow this with a Greater Essence of Ruin to guarantee Chaos Damage. Finish it off with Exalted Orbs and take what we get.

A Sacred Focus is the way to go for this build, as it offers us a lot of power through Spell Damage and Levels of all Spell Skills, while also offering us a ton of extra defense through Energy Shield and Resistances.
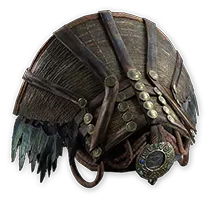
For our Helmet, we’re looking for Life, Energy Shield, Intelligence, and Resistances. Our ideal base for this is a Kamsaran Tiara.
For those playing this build as a Lich, Atziri’s Disdain is the best in Slot Helmet here. This is due to Eternal Life turning the downside of damage bypassing Energy Shield, into an upside by more or less turning into mitigation.
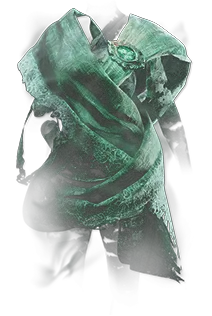
Our main body armor until endgame is Ghostwrithe, if we have one. This will give us a ton of Energy Shield, based fully on our Maximum Life. We’re not going for Chaos Inoculation either way.
In the later stages of progression, we can use a Rare Body Armour instead, as we’ll eventually want the Spirit and higher potential Energy Shield. We’ll still want Life despite this, as our Ascendancy converts it to Energy Shield as well. A Sacramental Robe is a great option here, as it comes with an additional bonus to Energy Shield Recharge Delay.

For gloves, we choose Vaal Gloves. As far as Affixes go, we’ll want Energy Shield, Life, Mana, Intelligence, and Resistances. This gives us the most defensive and offensive bang for our buck, as there’s nothing else noteworthy here.
As an early tie over until we get great gloves, Doedre’s Tenure are a great pair of Unique Gloves. These fairly common Unique Gloves give us a huge damage bonus, at the cost of a small amount of Cast Speed.
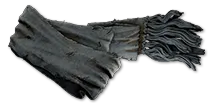
For our Belt, we’ll want a Linen Belt for the improved Mana Flasks. The only things we care about here are Life, Mana, and Resistances. Belts just don’t offer much to casters at all.
With insanely good Rings, Ingenuity can still be a great option. But this requires them to more or less be as close to perfect as they can be, at least in terms of Life, Cast Speed, and Resistances.
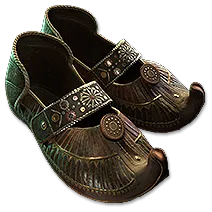
Wanderlust is great Unique to use early on, at least until we find better. The Movement Speed does more for keeping us safe than most other defensive stats do.
When we’re looking to upgrade, we’ll be looking for Boots with higher Movement Speed, Energy Shield, Life, and Resistances. Eventually, just having Energy Shield, Movement Speed, and Resistances will be more than enough.

For Rings, it depends on what we come across for gear, as we’re mostly only able to get Life, Mana, Intelligence, Resistance, Rarity, Mana Regeneration, and Cast Speed from them. Since we’re not frequently casting, Cast Speed is more of a quality-of-life thing here.

For our Amulet, we’ll mainly want a Solar Amulet for the extra Spirit or a Lunar Amulet for the Energy Shield. We can use a lot of Spirit for both offensive and defensive reasons. As a baseline, we’ll need 120 Spirit to fit everything we need, but more can allow us to fit in other tools.
Our Ideal Amulet would have Spirit, %Energy Shield, Mana, Level of All Spell Skills, Intelligence, and Cast Speed. If we get a Magic Amulet with Level of All Spells, paired with %Energy Shield or Spirit, we can use a Greater Essence of Haste to guarantee Cast Speed.
Our best Annointment here is Spiral Into Insanity. This only only allows us to keep this node which provide Offense and Defense, but open the travel points to be moved into somewhere else.
About Vuk
Vuk Radulović is a historian with a keen interest in the gaming industry. Some of his favorite games include Hearthstone, Path of Exile, Stellaris, and The Witcher. When he’s not working or gaming, he enjoys reading fantasy novels, with The Demon Cycle series being one of his favorites.
Vuk is the owner of Fantasy Warden. You can also catch him on Facebook.

