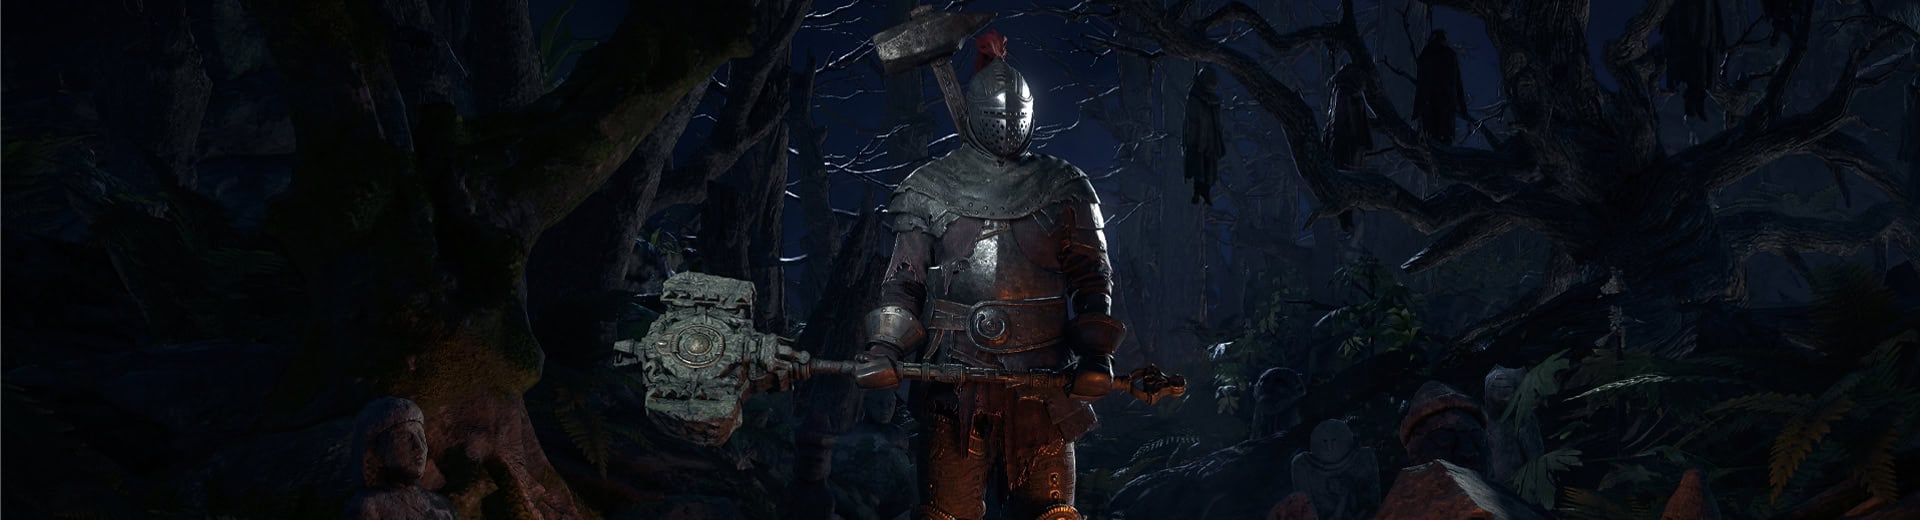
This Boneshatter Build uses the Warrior’s Titan Ascendancy to destroy large groups of enemies with a single combo.
Table of contents
Build Overview
Boneshatter is our main skill, and we’re building around one of its key aspects: the Heavy Stunning enemies that are Primed for Stun. This allows us to set off a cascade of explosions starting as early as Act 3.
We’ll enable this by utilizing our mobility skill, Leap Slam, as a setup. Even at its minimum level, Leap Slam will easily get Enemies primed for Stun. We’ll also make use of Brink to prevent it from Heavy Stunning enemies, while improving the chance that it always hits that threshold.
To improve our Single-target damage for bosses, we’ll rely on Earthquake and Shockwave Totem. This means we’ll need to swap gems for Act and Map Bosses, which can seem excessive, but the fight would otherwise be slow without doing so.
Defensively, like most Warriors, we’ll be stuck with Life, Armour, and Resistance as our main Defenses. This allows us to take a fair few hits, despite how we go about it, Armour is pretty lackluster against the physical attacks it’s supposed to help with. This means we’re effectively just relying on our Life and Resistances.
While this build is intended to be used alongside the Titan Ascendancy, it will work for other Warrior Ascendancies. We’ve included extra notes for playing this build as Smith of Kitava, including what Ascendancies to take and some small gear optimizations.
The grid below is fully interactive. If this is your first visit, we recommend you skip that grid and keep reading the guide in its intended order. If you prefer, you can click or tab on an item and it will take you to a dedicated section of the guide explaining everything you need to know it.
PaSSIVE tREE


Playstyle
For most content, we’ll simply be leaping around zones with Leap Slam and Dodge Rolling to cancel the ending animation. This will cause Enemies to be Primed for Stun, which we’ll then follow up with a quick Boneshatter to decimate packs, often leaving nothing behind if everything is grouped up. All of the overlapping AoE will dispatch most of the more durable enemies like Rares.
When it comes to bossing, we’ll want to swap our gems over to support Earthquake as our main DPS. We’ll set up a Shockwave Totem, which will cause extra pulses of damage from the Jagged Ground created by these Earthquakes. This, combined with the Aftershocks created by the Aftershock and Tremors Support, creates a ton of overlapping damage zones that will constantly pulse for damage.
We’ll still want to use Boneshatter when the boss is Primed for Stun, if only to swiftly remove their Armour, making our Physical Damage hit even harder. Once Heavy Stunned, we can toss out a Hammer of the Gods as well for a massive chunk of damage.
Skills
Below are the Skills we use for the build, including its Support Gem Links
Boneshatter
Boneshatter is our main mobbing Skill and our way of removing Armour from Bosses. We’ve set it up to cause a huge cascade of explosions when we prime just a couple enemies
Impact Shockwave
Impact Shockwave creates an Aftershock when we Heavy Stun an enemy. This effect allows Boneshatter to hit several enemies and chain Heavy Stuns inside packs.
Devastate
Since we’re Heavy Stunning, why not also remove the Armour of anything that lives. This not only helps with bosses, but also makes the second AoE of this combo trigger off each Heavy Stunned Enemy.
Armour Explosion
With Devastate instantly Armour Breaking enemies, this also means they’ll instantly explode into a secondary Fire Explosion with Armour Explosion. It’s this combo that allows this build to clear well.
Magnified Effect
Magnified Effect, alongside our Passive Tree, dramatically increases the AoE of Impact Shockwave and Armour Explosion, allowing these effects to more easily chain together.
Martial Tempo
Martial Tempo is optional here, but great quality-of-life as Boneshatter is very slow until we get more Attack Speed. If not using it here, it’ll instead be on Leap Slam, or Shockwave Totem when bossing.
Leap Slam
Leap Slam is our Mobility and the start of our Combo. With it’s inherent bonus to Stun Buildup, it’s not until very deep into the endgame that we even need Overpower or even Overwhelming Presence. We’ll often want to roll after landing to reposition and attack a bit sooner.
Martial Tempo
Great optional Quality of Life. Martial Tempo will increase our Attack Speed, allowing us to get around the map faster. This also helps reduce the slow animation at the end of the attack, almost removing the need to Dodge Roll after landing.
Brink
Brink is mandatory here, saving us the trouble of having to micromanage the amount of Heavy Stun Leap Slam does. Instead, we can maximize it so that it always sets up Boneshatter without issue.
Overpower
Combined with Brink and Leap Slam’s natural bonus to Stun, this allows us to consistently prime enemies for Stun, allowing Boneshatter to easily clear packs.
Perfect Strike
Perfect Strike is an incredibly powerful attack, capable of easily demolishing bosses. By practicing the Perfect Timing Window, it becomes one of the most consistent burst damage options we get as a Warrior.
Window of Opportunity
Window of Opportunity will make it harder to hit the Perfect Timing Window, but as Perfect Strike is already quite forgiving, it only gets slightly harder for a massive damage payoff.
Fire Infusion
Fire Infusion is great here as not only will it boost the damage of Perfect Strike’s Hit, it also significantly boosts the Ignite damage as well.
Searing Flame
Not only does Perfect Strike hit Hard, but paired with the near-guaranteed chance to Ignite, Searing Flame allows a single Perfect Strike to easily cut off a third or more of a Boss’ Life, depending on our weapon.
Unless playing as a second character, we won’t get access to this until Act 2 Cruel as it’s a Tier 3 Support, but it’s a significant boost to our damage output.
Earthquake
Earthquake creates Jagged ground that slows enemies for a duration before erupting as an Aftershock when it expires. Depending on our Attack Speed, we’ll be able to set up between two and four of these at a time to go along with our Shockwave Totem.
Fast Forward
Fast Forward makes the Jagged Ground expire faster, and therefore erupt faster. This alone makes the duration pretty short, but we’ll still supplement it with a few Passive Nodes to make it near-instant.
Aftershock
This grants a chance for Earthquake to generate an additional Aftershock. This just means an extra instance of damage, which is affected by all of our AoE.
Tremors
Tremors work just like Aftershock, though we’re trading raw damage for the chance at multiple additional Aftershocks. This overall nets us a ton of extra damage when it triggers higher rolls.
Concentrated Effect
With our Aftershocks being massive, we sacrifice some of their AoE to get more damage, almost offsetting the downside of Tremors.
Shockwave Totem
Shockwave Totem allows us to make use of the short-lived Jagged Ground created by Earthquake. We’ll also give this a chance to create its own Jagged Ground to create more AoE from it.
Jagged Ground
While Jagged Ground isn’t entirely necessary, it does improve the overall damage of the Shockwave Totem when it does trigger.
Ancestral Urgency
Ancestral Urgency is a great quality-of-life support that allows us to place our Totem much faster and not get locked in place too long in doing so.
Martial Tempo
If it’s not being used anywhere else, Martial Tempo is great here as it allows the Totem to attack faster. This means more damage from both the Totem and Earthquake.
Magnified Effect
We’ll want to move Magnified Effect here for Bosses. This allows our Totem to more easily hit the Boss and multiple Earthquakes at the same time.
Infernal Cry
Infernal Cry is another layer of AoE we can add on occasion and is very helpful early game before Boneshatter is fully set up. Later on it becomes a nice utility allowing us to increase the damage of an attack and allow it to Cull enemies.
Premeditation
Premeditation increases the damage of the skill we Empower. This is a nice boost to pop for Hammer of the Gods or after setting up Heavy Stun for Boneshatter
Tireless
Tireless grants a chance for our skills not to consume the Empowered Buff granted by Infernal Cry, extending not only the benefits of Infernal Cry, but Premeditation as well.
Murderous Intent
Murderous Intent allows the skill that Infernal Cry Empowers to have Culling Strike. This can help to quickly finish off a Rare enemy or Boss when they get to low health, but isn’t strictly necessary.
Berserk
Berserk boosts the effect of Rage, giving us more Attack Damage. With Rage giving us a multiplicative bonus, this results in a fairly large boost of power overall.
Cannibalism
Cannibalism is a great way to help us maintain our Life Pool, as we’ll restore large portions with each use of Boneshatter as it detonates multiple enemies, with each restoring Life as they are defeated.
Clarity
Clarity is optional, but it does help alleviate any Mana issues we may run into. This is more common when bossing and spamming Earthquakes.
Overwhelming Presence
Overwhelming Presence is one of the few ways we have to reduce enemy Stun Threshold, so it becomes helpful for the later stages of play, particularly with bosses.
Mace Strike
Mace Strike is our main filler damage when bossing or finishing off rares. It will also be our main way of quickly building Rage against Bosses, particularly those without summons.
Rage
Rage allows us to build our Rage Quickly, especially once we start investing in it with our passive Tree.
Martial Tempo
If we’d rather use Martial Tempo here over Shockwave Totem it is a good option. It feels like a waste here though as not every boss allows us to walk up and freely hit them as often as we’d like.
Overpower
Passive Tree
Below is the Passive Tree we use for this Skill, and an Act-by-Act breakdown of how we progress the skill tree.
This Passive Tree makes use of Weapon Set Passives. Passives allocated to Weapon Set 1 with have their pathing and Name in the section below highlighted in Red, while Weapon Set 2 will be in Green.

Act 1


We’ll start by heading out the Melee Damage side of the Tree, grabbing both Brutal and Smash. This gives us most of our early damage we’ll need.

Then we’ll swing up to grab Blood Rush, which gives us some much-needed early Attack Speed. This also helps to slightly alleviate our Mana Costs by converting a small bit to a Life Cost.

As we reach the end of the Act, we’ll want to pick up Aftershocks, which gives Earthquake, and later Boneshatter, a sizable boost of Area of Effect.
Act 2


To kick off the next Act, we’ll head straight for Resolute Technique. This will remove any reliance on Accuracy, making our damage consistent, at the cost of being unable to Critically Strike. It is possible to drop this later with investment into Dexterity if desired.

Next, we’ll grab Polished Iron to give us a good boost of Stun Threshold, making us far less reliant on a Stone Charm. This carries into the final Build, allowing us to also take the Elemental Threshold bonus in Act 3 Normal’s Venom Crypts.

We’ll round off this Act by grabbing Singular Purpose, which grants a ton of Two-Handed Weapon Damage at the cost of a bit of Attack Speed. If using a One-handed Mace, we can go for Impair and Reaving on the opposite side of the path instead.
Act 3

We’ll start this Act by grabbing Devastation for the Area of Effect and Area Damage it provides us. Bigger Shockwaves means better clearing.
Rounding off this Act, we’ll grab Blurred Motion, followed by Mass Hysteria. This gives us more Attack Speed and some much-needed Dexterity for any Dexterity Support links.

By this point, we should also be able to Ascend as a Titan. We can pick up Colossal Capacity to head toward Hulking Form ASAP. Earthbreaker isn’t recommended as it will often mess up Leap Slam’s priming duty, but can be taken for early damage instead if desired.
If we’re opting for Smith of Kitava as our Ascendnacy, take Coal Stoker first. This allows us to gain Cold and Lightning Resistance from Fire Resistance, allowing us to more easily cap our resistances.
Act 4


This Act goes by quickly, so we’ll just make a beeline to Skullcrusher. This is one of the few multiplicative Damage bonuses we can get, and it synergizes incredibly well with Boneshatter.

By this point, we should be able to clear our second Ascendancy. Hulking Form is the only way to go here. It will give us a ton of damage, AoE, and Attack Speed.
Smiths of Kitava will take Forged in Flame here. This allows us to scale our Maximum Cold and Lightning Resistance with Maximum Fire Resistance, making Unnatural Resilience an incredibly strong passive.
Act 5


We’ll kick this Act off by grabbing Pile On and Irreparable for Weapon Set 1. This doubles the duration of our Armour Break, which is especially important for Bosses going forward as well as some extra damage against Armour Broken enemies.
On Weapon Set 2, we’ll allocate Near at Hand to reduce the duration of our Earthquakes while ensuring it doesn’t impact any other skills.
We’ll round off this Act by heading up to Impact Force and Impact Area. The notables and the cluster they’re in provide a lot of Area of Effect and Area Damage.
Act 6


We’ll use this Act to make our way down to Battle Trance and Ignore Pain, to improve our Maximum Rage, and have it also provide Stun Threshold. Along the way, we’ll grab Brute Strength for a massive boost to our Strength.
Early to Mid Maps


First, we’ll head up to Near At Hand, but we’ll allocate this to Weapon Set two, which we’ll mainly use for Earthquake, This allows us to make Earthquake faster without being a huge detriment to other skills.
If we want to match these points on our second Weapon Set, we recommend moving the Armour Break cluster to Weapon Set 1 since we don’t need it for Earthquake.
Then we’ll grab Prolonged Fury. The nodes leading up to it allows all of our attacks to build Rage. Prolonged Fury itself make Rage decay slower, making it easier to maintain stacks.
Finally, we’ll wrap up this Act by grabbing Battle Fever. This gives us a boost of Physical Damage as well as more Attack Speed. Then we can focus on grabbing more small AoE Node to benefit from Titan’s Hulking Form Ascendancy. We can also add the Shockwaves Notable in the Two-Handed cluster for even more AoE.

For our Third set of Ascendancy Points, we’re going for Mysterious Lineage. With Life being the biggest determining factor for how much damage we can take in a single hit, we want as much of it as we can get.
For Smiths of Kitava, we’ll want to lean into using Smith’s Masterwork even more, taking Tantalum Alloy for the massive chunk of Fire Resistance and Kitavan Engraving for the Maxiumum Life.
Endgame Maps


We don’t have much left to grab, so we’ll grab Polymathy to boost our Strength and, by extension, our Life. Considering our final remaining Keystone to grab, it’ll be needed.

Giant’s Blood is a massive pickup for the build, though we need a ton of Strength to keep using the strongest weapons available. That or we need to roll Reduced Attributes on them to keep them manageable.
For the few Jewel Sockets we have, we have options depending on what jewels we find. The big ones would be Rubies with any combination of Area of Effect, Attack Damage, Damage with Maces, Rage on Melee Hit, Maximum Rage, or Weapon Swap Speed.
Sapphires can also be decent, though there’s less we’re interested in from these. Mainly an alternative source of Area of Effect. Aura Effect can improve Overwhelming Presence, though very marginally. Life and Mana on Kill are both useful rolls as well and can also alleviate any issues with have with those.
For our final set of Ascendancy Points, we have a couple of options as Titan. We can keep Mysterious Lineage and take Stone Skin for Armour, OR we can drop Mysterious Lineage and take Surprising Strength, letting us more easily capitalize on Heavy Stuns. The only downside here is that Crushing Impacts can cause us to easily miss Boneshatter hits.
As Smiths of Kitava, our best option to take will be Support Straps for increased Strength and Flowing Metal for Maximum Fire Resistance. We’ll eventually want to swap Flowing Metal for Molten Symbol to further decrease the Physical Damage we take, as we won’t have quite as much Armour due to our Body Armour being locked as a Normal Rarity item.
Endgame with Diamonds


As with many builds, Prism of Belief is an easy choice here. More levels for Boneshatter means it’s easier for the AoE to clear packs. Alternatively, we can choose to boost Perfect Strike for better bossing potential.

Next up is From Nothing. Getting the variant around Iron Reflexes allows us to save the points leading up to Polymathy, which we can use to pick up Defensive Reflexes and Unstoppable Barrier to help Cap our Block Chance with a good shield.
Alternatively, if we don’t mind pathing to Polymathy, we can go for Zealot’s Oath instead. This lets us get a huge damage boost from the current placeholder Shapeshifting Notables, which give 25% Attack Damage each.

Finally, there’s Controlled Metamorphosis, which has one decent spot in our tree. Our preferred one is a Medium-Small ring placed near Blood Magic. This allows us to get Prism Guard for Maximum Resistances as well as Bestial Rage and In Your Face for more Damage.
If we’re still pathing to Polymathy or going for the Zealot’s Oath From Nothing instead, we can make use of the same Medium-Small ring above Polymathy. This allows us to grab Polymathy, Sand in the Eyes, and Blinding Flash. This saves us fewer points compared to From Nothing in Iron Reflexes, but gives us Attack Speed and Blind for a minor added defensive layer.
Gear and Stat Priorities
This section lists and explains the recommended stats for our gear and any Uniques we recommend. Click or tap on an item to read the recommendations for it. The items with a lighter border are unique and are explained at the top of the segment right below this grid.
Our Weapon of Choice is a Two-Handed Mace, preferably a Massive Greathammer for the Raw damage it provides, and if we can get the Strength to use it with Giant’s Blood. We’ll want as much Physical damage on it as we can get, alongside Attack Speed and Levels to Melee Skills. Once we get Giant’s Blood, Reduced Attributes is also a nice roll, to keep the Strength we need in check.
Once we get Giant’s Blood, we’ll be able to use a Shield. We’ll want to use an Vaal Tower Shield with as high Block and Life as we can get. Outside of this, any increase to our Resistances or Physical Damage Reduction are what we’re after.
We’ll want as much Armour and Life as we can get on an Paragon Greathelm. Strength is important to get here too for Giant’s Blood as well, but outside of these, only Resistances are truly useful.
Much like our helmet, we’re going for Life, Strength, and Armour on a Glorious Plate, though any high-level base will do. Our Body Armour will make up the bulk of our Armour. We can optionally increase this with Sturdy Metal near the start of our passive tree.
For Smith of Kitava, this will need to be a Normal Rarity Body Armour. We can however, try to luck into a good Corruption on top of a high-level base to get some extra stats out of it. An Ideal Corruption would hit Physical Damage Reduction to make, but Chaos Resistance or Maximum Elemental Resistance are good enough settles.
Gloves are one of the few slots that get a lot of nice bonuses that can end up pushing resistances to lower Priority. Vaal Mitts with Life and Armour are still ideal here. The Suffixes have great options like Attack Speed, Levels of Melee Skills, and Strength that we can opt to prioritize over Resistance if our other gear caps us out.
For our Belt we’ll want a Utility Belt. Life and Strength are mandatory here as usual, alongside Resistances and as many Charm Slots as possible. Charms in particular allow us to ease a lot of pain points for the build, like dealing with Damage Over Time effects such as Bleed or Poison, or keeping us safe from Freeze.
As per usual, Ingenuity is a great option for a Unique Item if we can get one. Boosting our Rings will give us far more value if we have great Rings, and with the changes to Charm Slots, we’re not giving up a whole lot.
For our Boots, we’ll want Vaal Greaves. Movement Speed is mandatory here, and the more we get, the better. Outside of that, Life, Armour, and Resistances are the best options. Strength can also be good to have if we have our resistances capped.
The Ideal rings to have are Prismatic Rings for the inherent resistances they offer. Rings have a wide assortment of useful stats, most notable among these is additional Flat Physical Damage, which is a great boost of damage. Life, All Attributes, and Resistances are also great here, especially if we get our hands on an Ingenuity to replace our Rare Belt.
As a Smith of Kitava, consider Ruby Rings instead, as they’ll act as stronger alternatives to Prismatic Rings with Smith of Kitava’s Ascendancies.
For our Amulet, we’d ideally go with an Amber Amulet. The main things we want from an Amulet are Life, Spirit, Levels to Melee Skills, and Resistances. If our Resistances are covered elsewhere, we can opt to also grab All Attributes here to help cover support gem requirements.
Path of Building 2 Import
Path of Building 2 is a community-made tool that serves as an offline Character Planner for Path of Exile 2. To supplement our Builds, we include an import link to be able to view the build within Path of Building 2.
To view this Build in Path of Building 2, simply open Path of Building 2 and click ‘Import/Export Build’ in the upper left and paste the following link into the import section: https://pobb.in/Eh81BX0HiImR