This Hollow Palm Technique Build uses the Monk’s Invoker Ascendancy in Path of Exile 2 to deliver quick and powerful blows with their fists.
Table of contents
Build Overview
While Hollow Palm is most accessible to the Monk due to his starting location on the Passive Tree, this build can be adapted to work with alternative classes as well. The Huntress, Mercenary, and Ranger are the viable alternative starts if Monk doesn’t seem appealing enough. Each Ascendancy will need to make some adjustments to the build for their needs, particularly for Spirit.
Hollow Palm Technique gives us access to the whole suite of Quarterstaff Skills, opening a lot of different options. We’ll primarily focus on Ice Strike, Wind Blast, and Shattering Palm as our main focus for this guide. Everything in this guide will work for the majority of skills with some adjustments for each skill.
Ice Strike provides us with ample clear speed and, more importantly, a consistent way to generate Power Charges later on. Wind Blast offers a mix of Utility and damage to accelerate our early game and be a skill with more range to safely deal with large groups. Shattering Palm helps to drastically improve our AoE and ailment application.
Supporting these skills, we have Herald of Ice providing more AoE Damage on occasion. Tempest Bell provides Single-target Damage and some added utility. Of course, we also have Combat Frenzy, which we’ll pair with the Resonance keystone for generating Power Charges.
The build summary card below is interactive – click or tap on an item to read its full description and recommendations. If this is your first visit, we recommend you skip that card and keep reading the guide in its intended order.
Overview
Build Type
Unarmed Melee
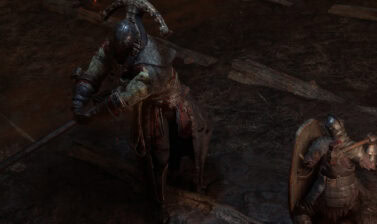
As a Melee fighter, we’ll be up close and personal with our foes. While this means we’ll have high damage and no accuracy concerns, we are at more risk. Thankfully, we have tools to mitigate this.
Playstyle
High Mobility Melee
Between Ice Strike and Shattering Palm, it’s very easy to close the gap and get on top of our foes. We just need to be cautious about when and how we engage in combat.
Build Difficulty
Beginner Friendly
Between easy overall gearing and simple playstyle, this build is very approachable for new players. The build’s only complexity comes from a simple combo used for tougher foes.
Gearing Difficulty
SSF Friendly
As a Build designed around League Starting, it works with minimal gear and scales well into endgame. All gear can be gotten in SSF with some farming and crafting.
Click on a tap on each segment to expand it.
Ratings
Ease of Use
Progression Speed
Ease of Gearing
Mobbing Power
Bossing Power
Defences
Expedition Farming
Breach Farming
Ritual
Ease of Use
- Very Hard to play, Fragile and relies on damage to stay alive
- Hard to play, may require multiple combos or rapid sequence of skills
- Balanced, requires some knowledge or precise positioning
- Easy to Play, may require simple combos or automatic weapon swaps
- Very Easy, requires minimal experience to play optimally
Progression Speed
- Use a Leveling Build. It will require Skill Points, Ascendancy Points, or Unique items not available early on.
- Barely Viable, will be slow and may require alternative Ascendancy ordering.
- Viable, Levels with some issues.
- Decent Leveling Option, smooth leveling, but not the fastest.
- League Starter Potential, levels very quickly with the main skill.
Ease of Gearing
- Trade Required, make use of a harder-to-obtain unique.
- Trade Recommended, requires at least one uncommon unique.
- Trading Helps, uses common uniques or very specific .
- SSF Viable, Can be geared easily without trading, may require farming.
- SSF Friendly, No Uniques and very easy to gear without trading.
Mobbing Power
- Poor, clearing isn’t the best due to lack of AoE.
- Okay, Clears slowly due to limited AoE.
- Decent, clears well, but takes effort or set up.
- Great, take very little effort to clear enemies.
- Amazing, clears screens of enemies with ease.
Bossing Power
- Requires high investment and respec for decent damage.
- Requires Investment or respec for decent.
- Decent damage with minimal investment.
- Low Investment and great damage.
- Low Investment and high damage.
Defences
- Low Hit pool, mainly relies on damage to protect it.
- Decent Hit pool or has enough avoidance or mitigation .
- Good Hit Pool, may not reliably take hits from strong foes.
- Reliably tanks multiple hits from most foes.
- Able to tank most hits comfortably, even from bosses.
Expedition Farming
- Several modifiers are highly risky.
- Just a couple risky modifiers.
- Low risk, but some modifiers can mess up the build.
- Situationally able to deal with most modifiers.
- Able to deal with most modifiers without thought.
Breach Farming (Mostly tied to AoE)
- Struggles to survive tougher breach mobs.
- Survives, but clears slow, usually from a lack of AoE.
- Has an easier time on certain map layouts.
- Easily clears out breach mobs, regardless of map.
- Quickly and easily clears out breach mobs.
Ritual Farming
- Hard to survive, Doesn’t handle the cramped spaces well.
- Does well on some layouts and certain ritual types.
- Handles most rituals well enough.
- Most Rituals are completed easily.
- Rituals are completed easily and quickly.
The Good
Relatively cheap due to being Unarmed.
Great damage, even with early gear.
Very simple and easy playstyle.
The Bad
Maximizing damage potential is expensive without crafting.
Can feel fragile early game.
Melee is a higher-risk playstyle.

Playstyle
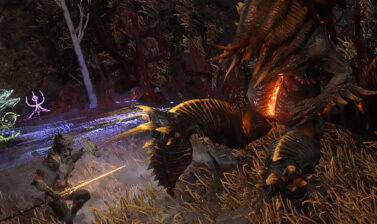
For most combat situations, we’ll simply be closing the gap with Shattering Palm and spamming Ice Strike until everything explodes. If the enemies are a bit tougher, like a Rare of Boss, we’ll do the same combo, just adding in tossing in Tempest Bells as we spam.
If the pack of enemies is quite dense and we may die trying to use Ice Strike, we’ll instead use Shattering Palm, then use Wind Blast while backing up. This lets us safely thin out packs without any risk.
A lot of damage in the mid-late game will come from maintaining Power Charges for Charged Staff. It’s a ton of flat damage added to all attacks, as well as a nice additional ranged damage source via the shockwaves now.
For our defenses, we’ll mainly rely on Life, Evasion, and Deflection until endgame, where we’ll add in Energy Shield as well. This allows us to maintain a comfortable Attack Speed throughout the campaign, where we can’t get enough Energy Shield to scale Crit Chance all too well
Evasion and Deflection are quite strong, especially at early levels, where good armour pieces can hold up for multiple acts. Deflect helps to mitigate the general lack of Life we’ll have, so long as we have the Evasion to back it up.
Skills
Below are the Skills we use for the build, including their Support Gem Links
Ice Strike / Glacial Cascade
Ice Strike is our main skill, dealing the bulk of our damage in most combat. Prior to getting access to it in late Act 1, we’ll use Glacial Cascade with the same links.
Rapid Attacks I / II
We’ll need the extra Attack Speed at all times to make our main skill more comfortable. At a later time, we can bump up from Rapid Attacks I to Rapid Attacks II for more attack speed. Do not use Rapid Attacks III.
Concentrated Area
Despite being melee skills, both skills use this early damage boost. This is one of the strongest damage boosts we get access to that is consistently active.
Crescendo I / III
Crescendo will make it harder to sustain our mana overall, but it provides a solid damage increase. Upgrading this as we get excess Uncut Support Gems is a good way to bump up our DPS. Crescendo III is the goal, as it makes the final hit Ancestrally Boosted, hitting multiple targets. This improves single-target, as we will reliably hit our Tempest Bell as well as AOE.
Rage I / III
Rage is a great damage boost we can get early on. Since our goal is to use Ice Strike as often as we can, this is a great addition. Upgrading to Rage III at a later time helps a lot, as it allows us to build Rage much faster.

Oisín’s Oath
For our final support, which we get much later in the game, we’ll use Oisín’s Oath. In combination with Mana Leech on our equipment, this replaces Walker of the Wilds, as it is no longer a Keystone.
As we increase our Attack Speed and Skill Levels, this becomes even more important for sustaining our high Mana costs easily. This makes it easier to sustain our mana with limited mana flask usage.
Wind Blast
Wind Blast we’ll primarily use for its Daze effect, getting some extra damage for tougher enemies from our Tree. Before we get Charged Staff, we’ll use this to set up Staggering Palm for a similar effect early on. We can add more support to this if desired, but we’re using this as a debuffing tool.
Brink I
Brink allows us to consistently use Wind Blast to set up Staggering Palm for extra early game damage. It also improves the rate at which it stuns to better facilitate this combo.
Once we get Charged Staff, we can swap this for Life Leech I to better leverage the Physical damage this deals.
Rapid Attacks I / II
We’ll need the extra Attack Speed at all times to make our main skill more comfortable. At a later time, we can bump up from Rapid Attacks I to Rapid Attacks II for more attack speed. Do not use Rapid Attacks III.
Brutality I / III
Brutality is a solid increase in damage for Wind Blast. Until we have Charged Staff, we’ll have fairly limited added elemental damage, so losing it is a very small price to pay.
Shattering Palm
Shattering Palm adds a ton of extra AoE damage to our Build and sets up Freeze more consistently when paired with Ice Strike.
Magnified Area I
Area of effect scale not only the range at which Shattering Palm will place its debuff, but also the size of the resulting explosions. This allows them to chain off each other and spread a ton of damage. Do not upgrade to Magnified Area II, the damage is important.
Freeze
Shattering Palm’s base damage is fairly low, so we use Freeze to help it freeze enemies more consistently for Herald of Ice.
Ancestral Call I / II
Ancestrally boosting Shattering Palm causes it to hit multiple targets, increasing its AoE. Since we’re not spamming it, this means the effect will be up almost as often as we actually need it.
Elemental Armament I / II
Elemental Armament is a great damage boost to use with this skill in the late game. This already does a great job of freezing without it, but this extra bit of oomph helps to get around any resistance.
Herald of Ice
Herald of Ice works in combination with Shattering Palm and Ice Strike to explode plenty of enemies, sometimes even wiping the screen all at once. It doesn’t even need much support to do this.
Magnified Area I
Magnified Area helps to greatly boost the AoE of the explosions. We could substitute this with Overreach later if we want to min-mix the range, but it’s a minor difference, and this is available earlier.
Elemental Armament I / II
Elemental Armament remains a solid damage option with no downside for using it.
Cold Mastery
Cold Mastery is a great option for increasing damage here. This is especially true for Hollow Palm, where it boosts the base damage further on top of the scaling.
Cold Attunement
This extra bit of damage isn’t necessary, but it does help our clear speed a fair bit when it comes to large packs.
Charged Staff
Previously, due to support constraints, Charged Staff was a buff and nothing else. With those restrictions lifted, it’s now capable of contributing meaningful damage.
Prolonged Duration I / II
Prolonged Duration takes our baseline of 6 seconds per Power Charge and bumps it up to 8 seconds. This makes it far easier to maintain this powerful buff. This duration increase does not display in the in-game skill data, but does work despite that.
Elemental Aramament I / II
Elemental Armament is a great way to boost our damage here, especially since the majority of our added flat damage will be focused on Cold and Physical outside of this.
Cold Exposure
Since we want Added Cold Damage on our Rings and we dip into crit in the late game, this is a nice damage bonus we can pick up to boost all of our damage.
Tempest Bell
Tempest Bell contributes hefty damage for Single target damage but also has some hidden utility in the fact that freezing it counts for Combat Frenzy. We’re not listing it in the supports below, but Rage I / II work best as a support here until we can get Rage III for Ice Strike.
Overabundance I
Overabundance grants us a second Bell at the cost of reducing the duration of any placed Bells. This allows us to always have a Bell active at all times while fighting rares and bosses.
Heavy Swing
Heavy Swing is a great damage bonus, as the skill itself is already quite quick.
Close Combat I / II
Close Combat’s bonus is based on the bell’s distance from an enemy. We’re usually dropping it as close to the enemy as we can so this effect will always be rather high.
Life Leech I / III
Life Leech is a nice comfort option for tough enemies. Since the Tempest Bell does mainly Physical Damage it’s a good option for adding a bit of Leech to.
Heft
Heft is the last big damage support we can put here. It’s a massive damage increase to our damage and by extension the sustain from Life Leech.
Wind Dancer
Wind Dancer helps us defensively by increasing our overall Evasion. We can set this up to provide additional utility. In the late game, Ghost Dance is better defensively if we have to choose between keeping one or the other due to Spirit.
Clarity I / II
Clarity helps our Mana Regen a ton. It’s optional once we get Mana Leech going, but still very useful between packs of enemies or boss phases.
Cannibalism I
Restoring a bunch of Life on Kill is great for us, since we tend to blow up pack. So long as enough enemies die, we can just shoot our Life right back up.
Ghost Dance
Once we reach the endgame and pivot to a more Evasion Energy Shield Hybrid, Ghost Dance becomes incredibly potent.
Compressed Duration I / II
Compressed Duration significantly shortens the time between gaining Ghost Shroud, increasing the uptime of this potent defensive option.
Cannibalism I
If we don’t have the Spirit for both Wind Dancer and Ghost Shroud, we take Ghost Shroud. This support is mandatory to have on for general sustain. If we have the excess spirit, we can even double up if we want.
Combat Frenzy
Combined with the Resonance Keystone, Combat Frenzy is our main source of Power Charges.
Charge Profusion I / II
Charge Profusion grants a chance that when generating a charge, we’ll instead generate two. Upgrading to Profusion II will grant a chance to generate a third charge, but of a random type.
Staggering Palm
Staggering Palm is almost like a “Charged Staff Lite”. It will provide the extra damage wave, just not the extra flat damage bonus. It’s good early on, but replace it with Charged Staff as soon as we have Combat Frenzy.
Brutality
Brutality is a great damage bonus for the skill overall. If we’re using gear that has a lot of Added Elemental Damage, consider Elemental Armament instead.
Mana Leech
Mana Leech is a nice addition as it allows the damage of the projectile to leech mana for us, and allow or more passive Mana recovery. The Projectiles are quite weak, though, so it’s not going to solve all mana issues alone.
Passive Tree
Below is the Passive Tree we use for this Skill, and an Act-by-Act breakdown of how we progress the skill tree

Act 1


To start, we’ll go for Flow Like Water and Flow State to boost our Skill Speed. This helps our early skills just flow better and makes the early game smoother.

Then we loop around through Mindful Awareness to boost our Defences on the way to Essence of the Mountain to have an easier time freezing and triggering Herald of Ice.

Then we’ll grab Concussive Attack, sticking to the left side for a nice increase in damage just in time for the Boss of Act 1. The bit of Daze Chance isn’t super important, but it can be helpful until we get Wind Blast.
Act 2


For Act two, we’ll head down to pick up Blinding Strike for damage and Agile Succession for the Attack Speed and Evasion. Make sure to take the extra evasion node of Agile Succession.

Once we do, we have what we need to safely dip into Hollow Palm Technique. It’s worth noting that early on, a decent Quarterstaff can be better. Be sure to compare DPS using the in-game skill info for a rough idea of what’s better.
If you’ve not gotten a decent Quarterstaff or an upgrade for one in a while, Hollow Palm usually comes out ahead so long as our gems are on-level.

We’ll also pick up our first Ascendancy at this point as well. We’ll take I Am The Blizzard for the increased Cold Damage, allowing all of our skill to at least Chill.
Act 3


For Act 3, we’ll pick up Conservative Casting, near Concussive Attack, for the extra Mana Regen. We can take either the Mana Regen side or the Reduce Skill Cost side, so see what works best for the gear we have on.

Next, we’ll quickly pick up Snowpiercer as our main damage for this section. The Cold Penetration helps greatly against bosses and rare mobs with Cold Resistance.

We should have very few issues doing our second Ascendancy. This time, we’ll pick up Lead Me Through Grace so we can start scaling our Spirit without having to pick it up on gear.
Act 4


By the time we reach Act 4, we should have access to Combat Frenzy and Charged Staff, so getting Resonance ASAP is recommended for building Power Charges.

Then we’ll head over to grab Stupefy, making Wind Blast stronger as well as turning it into a damage boost for Ice Strike.

Then we’ll make our way down to Beastial Skin and Enhanced Reflexes to give our Defences a solid bump heading into the Interludes.
Act 5


For the Interludes, we’ll get more damage going. Heading down to Reaching Strike and Rapid Strike will provide a solid amount of very few levels.

If we’re having mana trouble still, Siphon is also a great pick up here, as when we blow up packs of enemies, we’ll get a ton of mana back. Plus, it improves our Leech as a bonus.
Act 6

For the Remainder of the Interludes, we’ll want to work towards transitioning our gear to Evasion and Energy Shield Hybrid gear with an Energy Shield Helmet to get the most out of Immaterial and Subterfuge Mask.
If we have a comfortable amount of Energy Shield and Ghost Dance supporting us, we can also grab Tenfold Attacks and Killer Instinct for significant DPS increases.
Early to Mid Maps
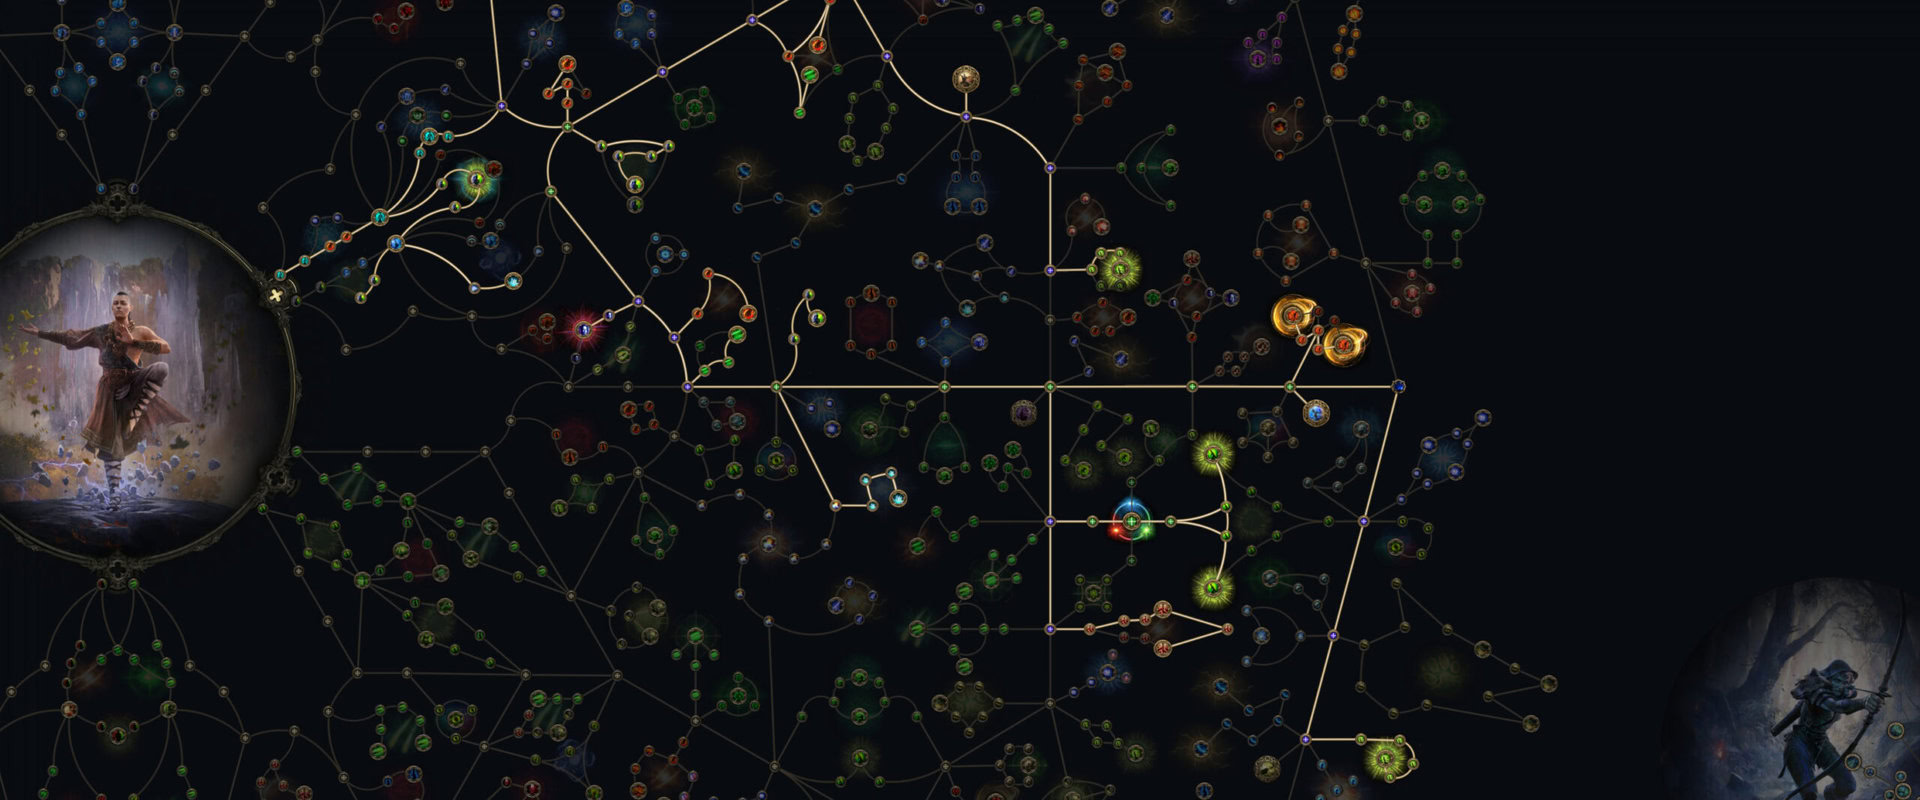

Going into Maps, we’ll want to prioritize picking up Deflection on the Passive tree, to take some pressure off our gear for now. So we’ll grab Trained Deflection and Energising Deflection to help out with that.
Since we’re more than capable of Chilling Enemies, we can also path up to Echoing Frost directly above our starting area, It’s a great bonus until we make the swap to Crit where we’ll need the points again. Since we’re pathing up there, we can also swap the small Freeze Buildup node near Essence of the Mountain for the small Skill Speed node near Flow State for a small DPS increase.

At this point, we should be able to comfortably take our third Ascendancy. This time we’ll pick up And I Shall Rage to get access to the Unbound Avatar buff for the powerful buff it will grant. Great for bosses.
Endgame Maps


For the Endgame, once we have the good enough gear to do so, we’ll swap Critical Strike bonuses. Which at the bare minimum means a good Helmet and Body Armour as they are our biggest sources of Energy Shield, and by extension, Critical Strike Chance.
To further boost that investment in gear, we’ll grab every Critical-related node within a short range. Heartstopping, Struck Through, Heartbreaking, Dizzying Hits, Distracted Target, Moment of Truth, True Strike, For the Jugular, and Deadly Force are everything we’ll grab here.
As another bonus to further boost our defences with the Swap, we can pick up High Alert. This boosts our Evasion and Stun Threshold while on Full Life. Our Evasion and Energy Shield in combination with Ghost Dance will make sure we’re on Full Life most of the time.

At this point, we’re set to take on any content we want. Especially after we pick up our final Ascendancy, Sunder my Enemies. This will work great until we manage to pick up Rakiata’s Flow.
Endgame with Diamonds


At this point, the only Diamond that works well and consistently for us is Prism of Belief. We’ll want this for Ice Strike, or the skill we have decided to be our main DPS if opting out of Ice Strike.
As for other Jewels, any combination of Evasion Rating, Attack Speed, Attack Damage, Elemental Damage, Crit Chance, or Crit Damage is perfectly acceptable.
We highly recommend also trying to get a Sapphire with Life and Mana on Kill, to make it super easy to sustain both. This can still get Energy Shield and Elemental Damage as well to fill it up.

If we find an insanely well-rolled Time-Lost Emerald, the Jewel Socket on the right side is the perfect place for it. Even as a small radius, thanks to our tree, we get 5 Notable passives and at least 7 Small passives, 8 if we grab the last crit node.
This means if we land both Notable crit bonuses, we can get 15-35% Critical Hit Chance and 25-50% Critical Damage from just this one jewel. Add in a small bonus for another 7-14% Damage or 14-21% increased Evasion, and we’re set.
It’s been mentioned several times already, but we’ll go over what changes we should make to our gear and tree to accommodate Rakiata’s Flow. This is an ultra-endgame thing, as this support is expensive but also very powerful.
First, we’ll drop Snowpiercer as Elemental Penetration will now reduce our damage. These can be re-allocated into Crit passives for more damage. We can even use the Monsters have increased Elemental Resistance Map Affix as a damage boost as well.
We can swap the Sunder my Enemies Ascendancy for I Am the Thunder to gain even more damage. This will also allow us to shock more often for another damage boost on top of this.
For Ice Strike, we’ll have to get our Mana sustain solved more reliably, likely through Mana on Kill Jewels. Until then, Oisín’s Oath will remain a better option. Using both together will ultimately be detrimental to our damage, and Rakiata’s Flow is easier to go without thanks to Dimensional Weakspot as an Amulet Anointment and our high attack speed.
Bonus Endgame Passive Trees
Below are Endgame Passive trees for Hollow Palm Technique for the Huntress and Mercenary. These reach the same basic tree completion roughly 4-6 levels after the Monk, and as a result, have fewer points to spend toward extra damage or defenses
These trees may also be able to be optimized further with different passive selections. We have chosen to keep the same core tree, so the guide is relevant regardless of class.
Huntress Endgame Variant

Mercenary Endgame Variant

Gear and Stat Priorities
This section lists and explains the recommended stats for our gear and any Uniques we recommend.
Click or tap on an item to read its recommendations.
Our Main weapon is our Fists, thus we’re unarmed and have no Weapon or Offhand to worry about. No need to worry about spending Exalts or Divines to make them better. They will scale with the Evasion and Energy Shield on our Armour instead, so we can invest more in the rest of our.

Prior to swapping to Hollow Palm Technique, though, we need to use a Quarterstaff. We really only care about Physical Damage and Attack Speed primarily. Elemental damage bonuses are nice, but not 100% necessary.
We can swap back to an Quarterstaff for the endgame, but Hollow Palm will work just fine until we can afford an insane weapon
While Leveling, we’ll want an Evasion Helm with High Life, Evasion, and Resists. Deflect is great to have as well if we can get it, but we don’t need a ton just yet.
For the endgame, we’ll swap to a pure Energy Shield Helmet. Here we’ll go for as high of Energy Shield as possible, forgoing Life. This is one of the main slots we’ll get Resistances from.
While leveling, we’re using a pure Evasion Body Armour. Much like our Helm, we’ll want High Life and Evasion alongside Deflection and Resistances where possible.
For the endgame, we’ll want to swap to an Evasion and Energy Shield Body Armour. In particular, a Falconer’s Jacket for Movement Speed or a Rambler Jacket for Chaos Resistance. We want our Evasion and Energy Shield as High as possible, while still getting some life. This is another slot we’ll fill out our Resistances with, Deflect is also nice.
We can also swap back to a Pure Evasion Body Armour much later on, but we’d want it to be nearly perfect in terms of evasion to really get value out of it. This change trades a little bit of Energy Shield and Crit Chance for a TON of Evasion and Attack Speed. The massive chunk of Evasion we get by doing this makes Ghost Shroud a much more effective defences. We will need Mana Leech on both rings to make this stable.
While Leveling our Gloves will be just like the rest of our gear: high Evasion and Life with Resistances and or Deflection.
For the endgame, we’ll drop resistance almost entirely. This is because we’re swapping to Evasion and Energy Shield Gloves with as you might assume, High Life and Defences. The Suffixes, however, we’ll want to prioritize Level of Melee Skills and Attack Speed to maximize our DPS. The remaining Suffix can be Deflection, Resistance, or Mana Leech if we want to open our Rings up for more Resistances.
We can also use an Exceptional pair of gloves with multiple Sockets to leverage the Essence of Horror modifier “100% increased effect of socketed items” to get even more power out of them with more powerful Greater Iron Runes, or the expensive Talisman of Sirrus for even more Attack Speed.

For our Belt, we’ll run a Heavy or Utility Belt with Life, Strength, and Resistances. Mana can be nice here as well, but it is entirely optional.
In the late game, we’ll want to consider an Ingenuity if we can shift around our Resistances enough. A lot of our Damage will be supplemented by our Rings.
Our Boots are very straightforward as well. As high of Movement Speed, Life, and Defences as possible with Resistance and or Deflection Suffixes. Pure Evasion while leveling, Evasion and Energy Shield Hybrid for Endgame.
Our Life Flask won’t do too much for us. An Ultimate Life Flask with Increased Recovery Amount and Charges per second is good enough to get by.
Our Rings are the most interesting pieces of gear we’ll have, honestly. Prismatic Rings are preferred here, but any Resistance ring will do, really. If we use Ingenuity, we’ll be especially tight on space for Resistances.
For the Prefixes on our Rings, we’ll want High Life in combination wth Added Cold and Added Phys. This helps both our offensive and defensive power.
For Suffixes, both rings with Mana Leech helps solve most of our Mana issues. Life Leech, on the other can be great, but we won’t always feel it due to the relatively low Phys damage we deal. Outside of this, Resistances and Rarity are what we want for the remaining suffixes.
For our Amulet, we’ll want to get either an Amber (STR/Life), or Lunar (ES) as a base. We’ll want Life, %Evasion, and % Energy Shield as our ideal Prefixes. For Suffixes, we’ll want to go after Level of All Melee Skills alongside Reistances or Rarity.
For Damage Anointments, our cheapest option is Critical Exploit (Envy, Paranoia, Ire) for Crit Chance. On the more expensive end, Endless Blizzard (Isolation, Suffering, Fear) grants us +1 Skill Gem Level to most of our skills. Alternatively, we can pick up Dimensional Weakspot (Greed, Suffering, Isolation), giving us a chance to trigger the same effect of Rakiata’s Flow without heavy investment.
For Defensive Anointments, some cheaper options are The Wild Cat (Disgust, Fear, Guilt) for extra Evasion and Deflect chance or Insightfulness (Guilt, Disgust, Fear) for Energy Shield. On the Expensive end, Enduring Deflection (Suffering, Greed, Despair) is great for Evasion and Deflection, while Patient Barrier (Suffering, Isolation, Fear) provides the most Energy Shield and, by extension, the most Hit Pool overall.

We try to avoid using our mana Flask if we can. However, for when we do need it, the Recovery Amount and Charges per Second on an Ultimate Mana Flask is the way to go.