This Druid Leveling Build allows the use of Spells and Shapeshifting for a flexible Druid Experience with a strong starting experience.
Table of contents
Build Overview
For our Damage output, we have two main modes, Shapeshifting and Spellcasting. For the Shapeghifting side, we’re leaning into the Werewolf for the speed and Crowd Control it offers. For Spellcasting, we’re leaning into Entangle and Trashing Vines.
With some slight adjustments, this tree can support any of the Shapeshifting forms, or even alternative spells. It is, however, designed with Oracle in mind for the endgame tree, which makes most of the tree possible with Shaman, but it may be harder to adapt to other classes without issue.
Defensively, we’ll mainly be relying on our damage and the Crowd Control offered by Lunar Assault and Entangle for defenses. Of course, we’ll still have Life, Armour, Energy Shield, and Barkskin supporting this. In the endgame, we can transition to a Recoup setup for very comfortable mapping.
We’ll also make use of Pounce for mobility, as well as its ability to apply Marks for added damage. Marks provide a ton of utility in Update 0.4 that allows them to do more than offer buffs to us. To further complement both playstyles, we’ll make use of Eternal Rage and some Rage passives to scale both sides.
The build summary card below is fully interactive – click or tap on an item to read its full description and recommendations. If this is your first visit, we recommend you skip that card and keep reading the guide in its intended order.
Overview
Hybrid Melee/Caster
Build Type
By utilizing both Melee and Spells, we have access to a wider variety of options. We get the safety of Spells and the damage of Melee.
Spell Weaving
Playstyle
We’re able to set up damage over time with our Spells, while jumping in and out as needed with our Shapeshifting Skills.
Easy to Play
Build Difficulty
While Melee builds can have a rough time in some cases, the Crowd Control we get access to makes this much more approachable.
SSF Viable
Gearing Difficulty
As the build doesn’t rely on any Unique Items, it’s possible to craft or find the items used, but trade can make it much easier, especially with leaning into two playstyles
Click on a tap on each segment to expand it.
Ratings
Ease of Use
Progression Speed
Ease of Gearing
Mobbing Power
Bossing Power
Defences
Expedition Farming
Breach Farming
Ritual
Ease of Use
- Very Hard to play, Fragile and relies on damage to stay alive
- Hard to play, may require multiple combos or rapid sequence of skills
- Balanced, requires some knowledge or precise positioning
- Easy to Play, may require simple combos or automatic weapon swaps
- Very Easy, requires minimal experience to play optimally
Progression Speed
- Use a Leveling Build. It will require Skill Points, Ascendancy Points, or Unique items not available early on.
- Barely Viable, will be slow and may require alternative Ascendancy ordering.
- Viable, Levels with some issues.
- Decent Leveling Option, smooth leveling, but not the fastest.
- League Starter Potential, levels very quickly with the main skill.
Ease of Gearing
- Trade Required, make use of a harder-to-obtain unique.
- Trade Recommended, requires at least one uncommon unique.
- Trading Helps, uses common uniques or very specific .
- SSF Viable, Can be geared easily without trading, may require farming.
- SSF Friendly, No Uniques and very easy to gear without trading.
Mobbing Power
- Poor, clearing isn’t the best due to lack of AoE.
- Okay, Clears slowly due to limited AoE.
- Decent, clears well, but takes effort or set up.
- Great, take very little effort to clear enemies.
- Amazing, clears screens of enemies with ease.
Bossing Power
- Requires high investment and respec for decent damage.
- Requires Investment or respec for decent.
- Decent damage with minimal investment.
- Low Investment and great damage.
- Low Investment and high damage.
Defences
- Low Hit pool, mainly relies on damage to protect it.
- Decent Hit pool or has enough avoidance or mitigation .
- Good Hit Pool, may not reliably take hits from strong foes.
- Reliably tanks multiple hits from most foes.
- Able to tank most hits comfortably, even from bosses.
Expedition Farming
- Several modifiers are highly risky.
- Just a couple risky modifiers.
- Low risk, but some modifiers can mess up the build.
- Situationally able to deal with most modifiers.
- Able to deal with most modifiers without thought.
Breach Farming (Mostly tied to AoE)
- Struggles to survive tougher breach mobs.
- Survives, but clears slow, usually from a lack of AoE.
- Has an easier time on certain map layouts.
- Easily clears out breach mobs, regardless of map.
- Quickly and easily clears out breach mobs.
Ritual Farming
- Hard to survive, Doesn’t handle the cramped spaces well.
- Does well on some layouts and certain ritual types.
- Handles most rituals well enough.
- Most Rituals are completed easily.
- Rituals are completed easily and quickly.
The Good
High Damage output
Consistent Crowd Control
Works with many Ascendancies
The Bad
Relies on Crowd Control and DPS as defensive mechanics
Maintaining two weapons through the campaign can be costly
Playstyle
We’ll primarily use Spellcasting for clearing, as Entangle does a fantastic job at clearing without issues. Alongside Accelerated Growth and Thunderstorm, it handles all but the toughest foes. This is where Pounce and Shred come in, as they’re much more effective with fewer targets around.
Skills
Below are the Skills we use for the build, including their Support Gem Links

Lunar Assault
Lunar Assault is our main Shapeshifting Skill, we’ll give it plenty of damage so it can consistently freeze in just 1-2 hits, provided our weapon is good enough.

Cold Attunement
A lot of our Damage is already converted to cold, so adding more on top of it allows it to scale better with Element Damage

Rapid Attacks I/II
Compared to some other melee Skills, Lunar Assault can feel quite slow, and Rapid Attacks is an easy fix for that.

Ice Bite I/II
With how consistently this skill will freeze, this just adds more Cold Damage to our Werewolf skills.

Elemental Armament I/II
With most of our damage converted to Cold, Elemental Armament is another great support to boost our damage.

Supercritical
Supercritical is a very powerful option once we get Forced Outcome, and becomes one of the best damage supports we have access to.

Shred
Shred is mainly a combo skill for Lunar Assault, allowing us to spawn a ton of extra Ice Fragments by hitting frozen enemies.

Rapid Attacks I/II
The faster we attack, the more Ice fragments we can create.

Rage I
Rage is primarily an early game option, before we get access to extra Rage on Hit from other sources. From Act 2 onwards, this will get replaced by Elemental Armaments. Much later on we cna also replce this with Supercritical.

Cold Attunement
More Cold damage, more scaling for a pure physical melee hit.

Long Fuse I
This allows us to stack up more Fragment before we pull them together with Cross Slash

Mana Leech
With this attack being mostly Physical Damage and having no mana cost itself, it’s a good skill to slot Mana Leech on to help with any mana woes.

Entangle
The main Clearing skill for the Spellcaster Side. Between the fissures and Accelerated Growth, it has plenty of damage going for it.

Branching Fissures I/II
Braching Fissures is mandatory for this skill to be able to clear larger groups. It provides a ton of AoE as well as more of a seeking effect for the fissures as well. Upheveal will do the same for us in Acts 1 and 2.

Accelerated Growth I/II
Accelerated Growth is also mandatory here, adding explosive plants on top of the fissures when Overgrown by Thunderstorm.

Considered Casting
One of the best Spell Damage Supports, despite the loss of Cast Speed.

Supercritical
With Forced Outcome, Supercritical is a very powerful support, boosting out already high Critical Damage Bonus even higher.

Magnified Area II
Magnified Area is optional, but does help Accelerated Growth to cover more area.

Thrashing Vines
Thrashing Vines is our Single-target Spell, dealing high damage over its duration

Concentrated Area
This makes the vines and their radius smaller, allowing the boosted damage to easily focus the arget we cast it on.

Considered Casting
We only need to cast this every few seconds or so when we actively use it, so the cast speed is a minor penalty.

Supercritical
Much like with Entangle, this will heavily benefit from the extra Critical Damage Bonus, especially with this being part of our main bossing setup.

Heft
As a Physical Damage Spell, this is one of the strongest supports we can slot in for damage, even beating out Physical Mastery.

Prolonged Duration II
This makes it much easier to have high uptime on this when we need it, as it will only last a few seconds without it.

Thunderstorm
Thunderstorm is here to provide the Drenched effect. This overgrows our plants, allows Thunderstorm to have 100% Shock Chance, and even helps the Werewolf form Freeze faster as well.
Needs to be Level 18 after +Gem Level bonuses to Drench in endgame.

Shock Conduction II
One of the lastest support we get, but the most important, as it provides us with very easy Access to shock.

Magnified Area II
A wider area to apply Shocks and the othe benefits of the skill.

Prolonged Duration II
A longer storm makes it a better combo piece for our whole kit.

Efficiency II
Since we’re required to have this at Level 18 minimum, this helps cut the costs down, even though we don’t need to cast it that frequently.

Living Lightning / Static Shocks
The optional last support slot can be used for Living Lightning or Static Shocks. Both provide extra damage. See which one fits best for you if you opt for it.

Pounce
We mainly use this for mobility, but the Mark it applies also comes with some nice benefits.

Cooldown Recovery I/II
The more we can use it, the easier it is to keep a Mark up as needed as well as more mobility.

Rapid Attacks I-III
A faster Pounce means better mobility.

Mark of Siphoning I/II
Mark of Siphoning might be a bit under-rated for a support, allowing us to Leech 5% of our Attack Damage to both Life and Mana. Just Generic Attack Damage, not Physical Attack damage as most other leech effects.

Mark for Death
Mark for Death allows all of our skills to break Armour, but more importantly our plants as they deal mostly physical damage.

Eternal Mark
Optional support choice, but Eternal Mark allows us to Pounce and then immediately Cross Slash and still maintain the bonuses from our chosen supports, or get more of our wolves out faster.

Cross Slash
Cross Slash is mainly here as a combo skill. It’;s main purpose will be to pull in all the Ice Fragments created by Shred to ensure they hit the boss. But it can also be used to trigger our Mark from pounce as well.

Rapid Attacks I-III
Faster Attacks means the faster we can get other skills out after. Since we’re not focused on the damage of this skill, we even get the rare opportunity to use Rapid Attacks III if we want.

Cooldown Recovery I/II
Cross Slash already has a short cooldown, but making it even shorter allows us to also use it for mobility.

Efficiency I/II
We’ll use this often enough that we can feel its mana cost over time. Combined with our Passive Tree, this removes most of the cost.

Eternal Rage
Eternal Rage is a strong Spirit Skill, offering passive Rage Generation. This allows us to free up our Melee Skills from having to be the Rage generators, while also ensuring we’re always at max Rage

Cannibalism I
If we get the extra Spirit For it, Cannibalism is a must for a Life Build. By far one of the best recovery tools available.

Barkskin / Consecrate
These are skills for use when making the leap to a Recoup setup. Paired with Sacrosanctum, these will heavily boost our survivability. We’ll get Consecrate as part of our Ideal Staff, so we don’t need insane amounts of INT later.

Prolonged Duration I/II
More Duration is great for both skills, extending the useful bonuses they provide.

Vitality I
A great addition to Barkskin if we have spare Spirit. If we drop Eternal Rage as well, Cannibalism can also be moved to Bark Skin.

Expand
Used for Consecrate to provide a larger area of Consecrated Ground, since we’ll use it prety infrequently.

Encroaching Ground
Paired with Expand, this creates a massive area of Consecreated Ground.

Herald of Ice
Herald of Ice is mainly used in the early game until mapping. We’ll need to drop it to fit Eternal Rage without extra Spirit on gear.

Cold Attunement
One of the best Early Damage Support for Herald of Ice, next to Elemental Armament. Both work just as well, so use what fitsyour support limits better.

Magnified Area I/II
Heralds have a rather small AoE. This helps to make it more reasonable.

Elemental Focus
Since it can’t apply freeze naturally, this is free damage.
Passive Tree
Below is the Passive Tree we use for this Skill, and an Act-by-Act breakdown of how we progress the skill tree.
This Passive Tree utilizes Weapon Set passives. Passives allocated to Weapon Set 1 are Red and Passives allocated to Weapon Set 2 are Green.

Act 1

For Act 1, we’re picking up early Damage to take out enemies quicker. Primal Spirit is a huge early DPS boost for our Werewolf Form, while Lasting Incantation is great for our Spells. And with Weapon Sett passives, we’re not forced to give one up for the other.
Act 2
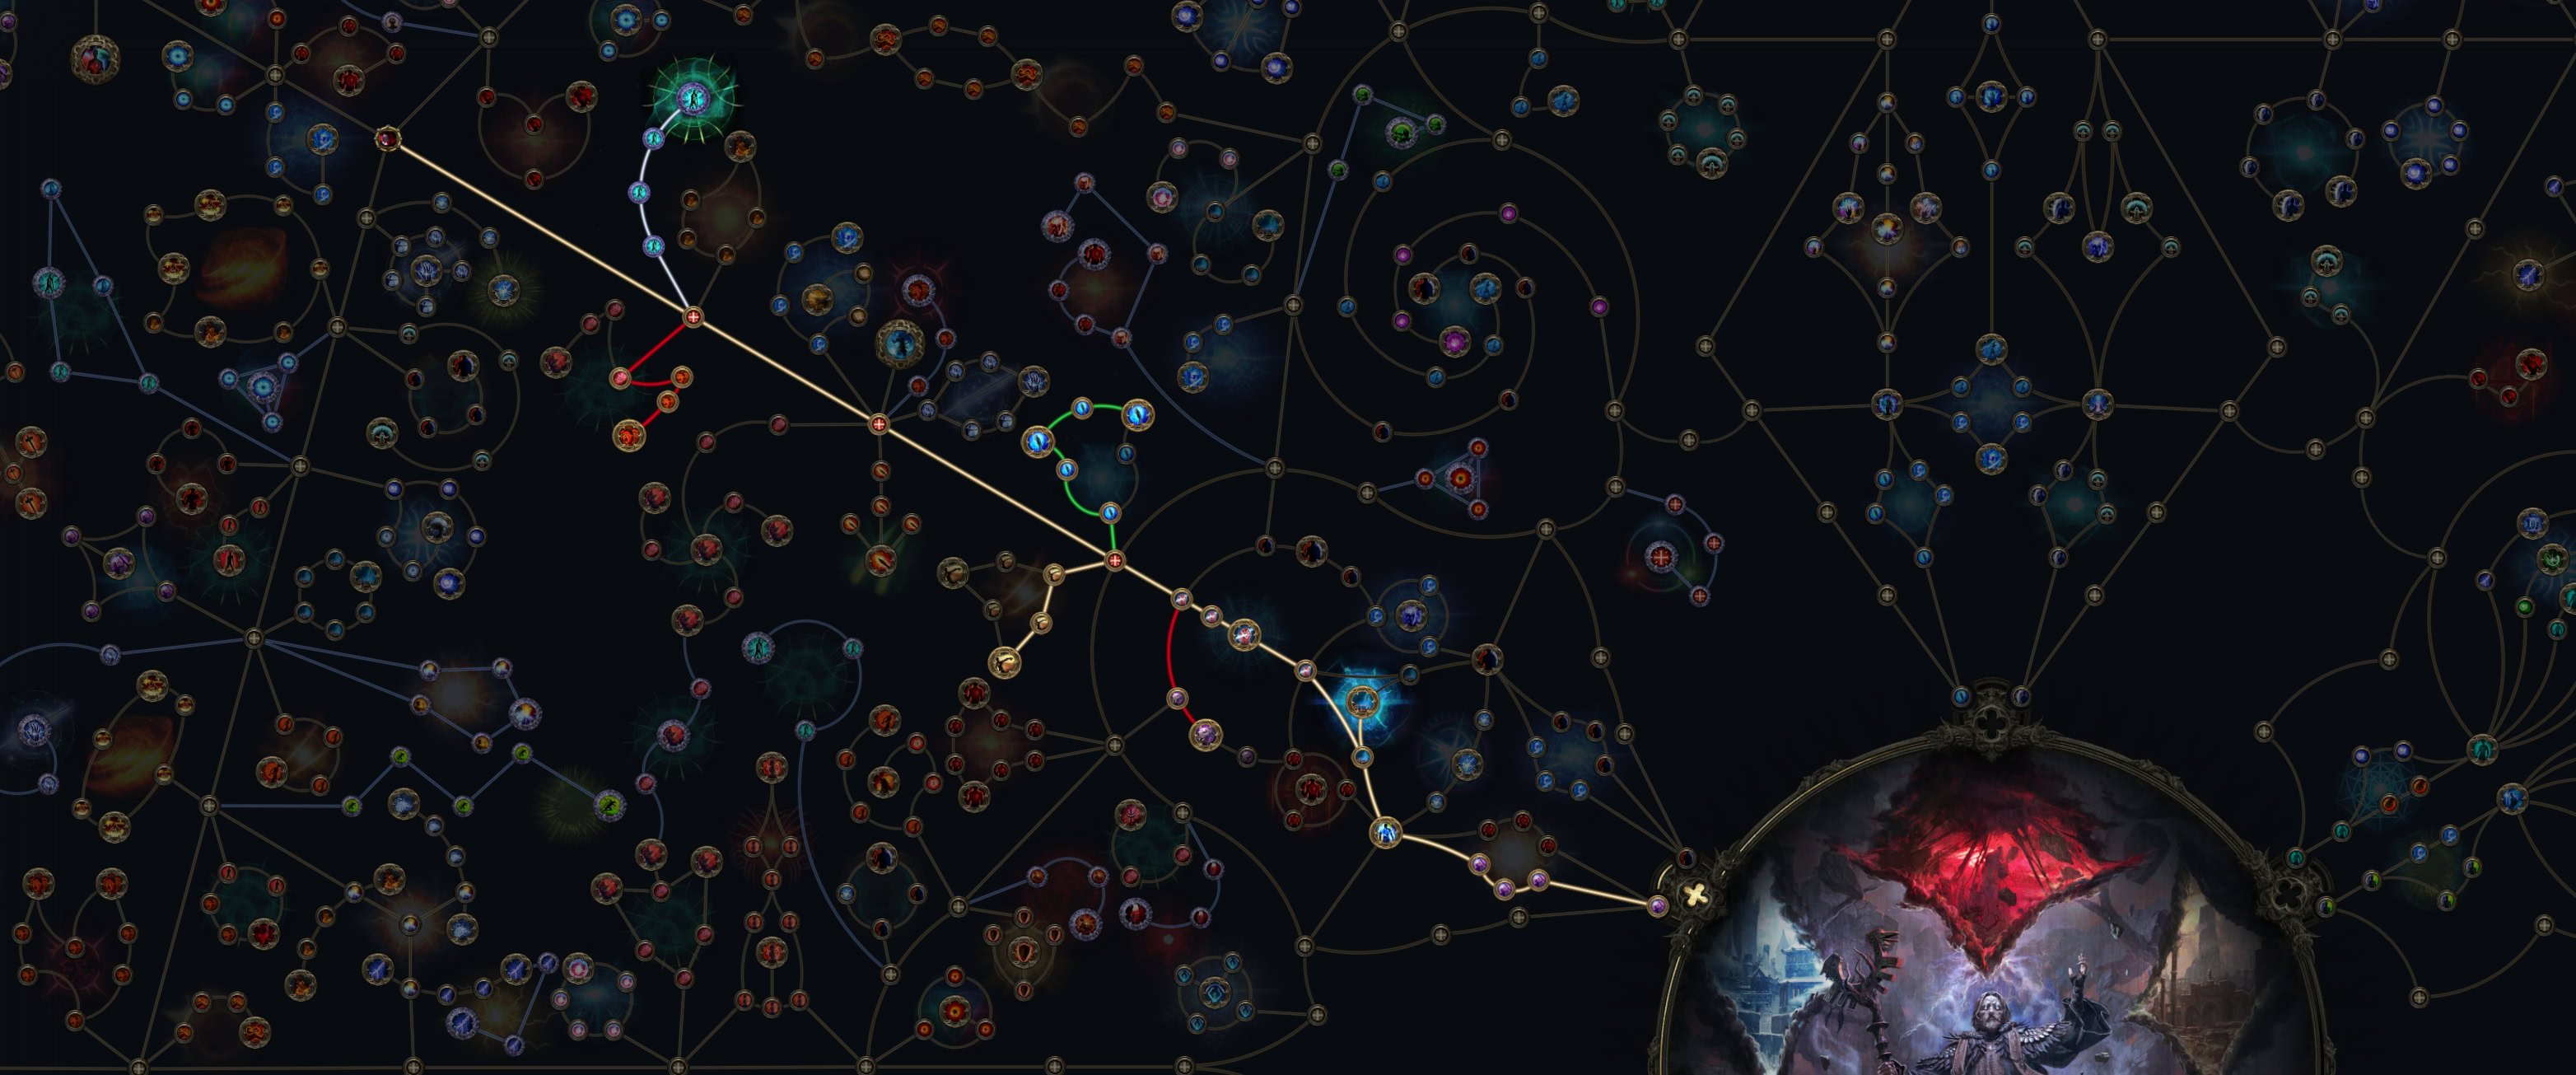
For Act 2, we’ll want to pick up Bestial Rage for our melee skills. We’ll take Viciousness for the Attack Speed for our Shapeshifting and Dexterity for Supports.
Once we Ascend after completing the Trial of Sekhemas, we’ll take The Paths Unseen to pick up Comradery. This is by far one of the strongest clusters available this early into the game. From this point on, it’s smooth sailing.
Act 3

For Act 3, we’ll start by rushing to Wildsurge Incantation. If our Plants we’re already clearing with ease, they absolutely will now. We’ll need to be more aware of the duration of Thunderstorm and Thrashing Vines.
Then we’ll grab Mind Eraser, as it’s a massive improvement to our Mana Sustain for this part of the game. Next is Power of the Storm, which we have both Pounce triggering a Mark and Entangle triggering Accelerated Growth to keep this up, regardless of how we use our skills.
Dangerous Blossom is our final cluster for the act, the Physical Damage As Extra which boosts the damage of all of our skills a bit. More importantly it helps Lunar Assault to leech better from any Leech we have on gear.
For our Second Ascendancy, we’ll take The Lesser Harm. It’s a nice defensive passive, but we’re really only after the node that comes after it for our third ascendancy.
Act 4

In Act 4, we’ll focus a bit more on Physical Damage, picking up Constricting and Deadly Thorns. This will scale everything thanks to picking up Deadly Blossom previously.
We’ll also grab Chronomancy (under Wildsurge Incantations), Everlasting Bloom, and Return to Nature, for Weapon Set 2. This extends the duration of Thunderstorm and Thrashing Vines, reducing how often they need to be cast.
We’ll also grab Shifted Strikes near the start of our passive tree for Weapon Set 1. This just gives us more benefit to swapping between spells and Shapeshifting more often.
Interludes
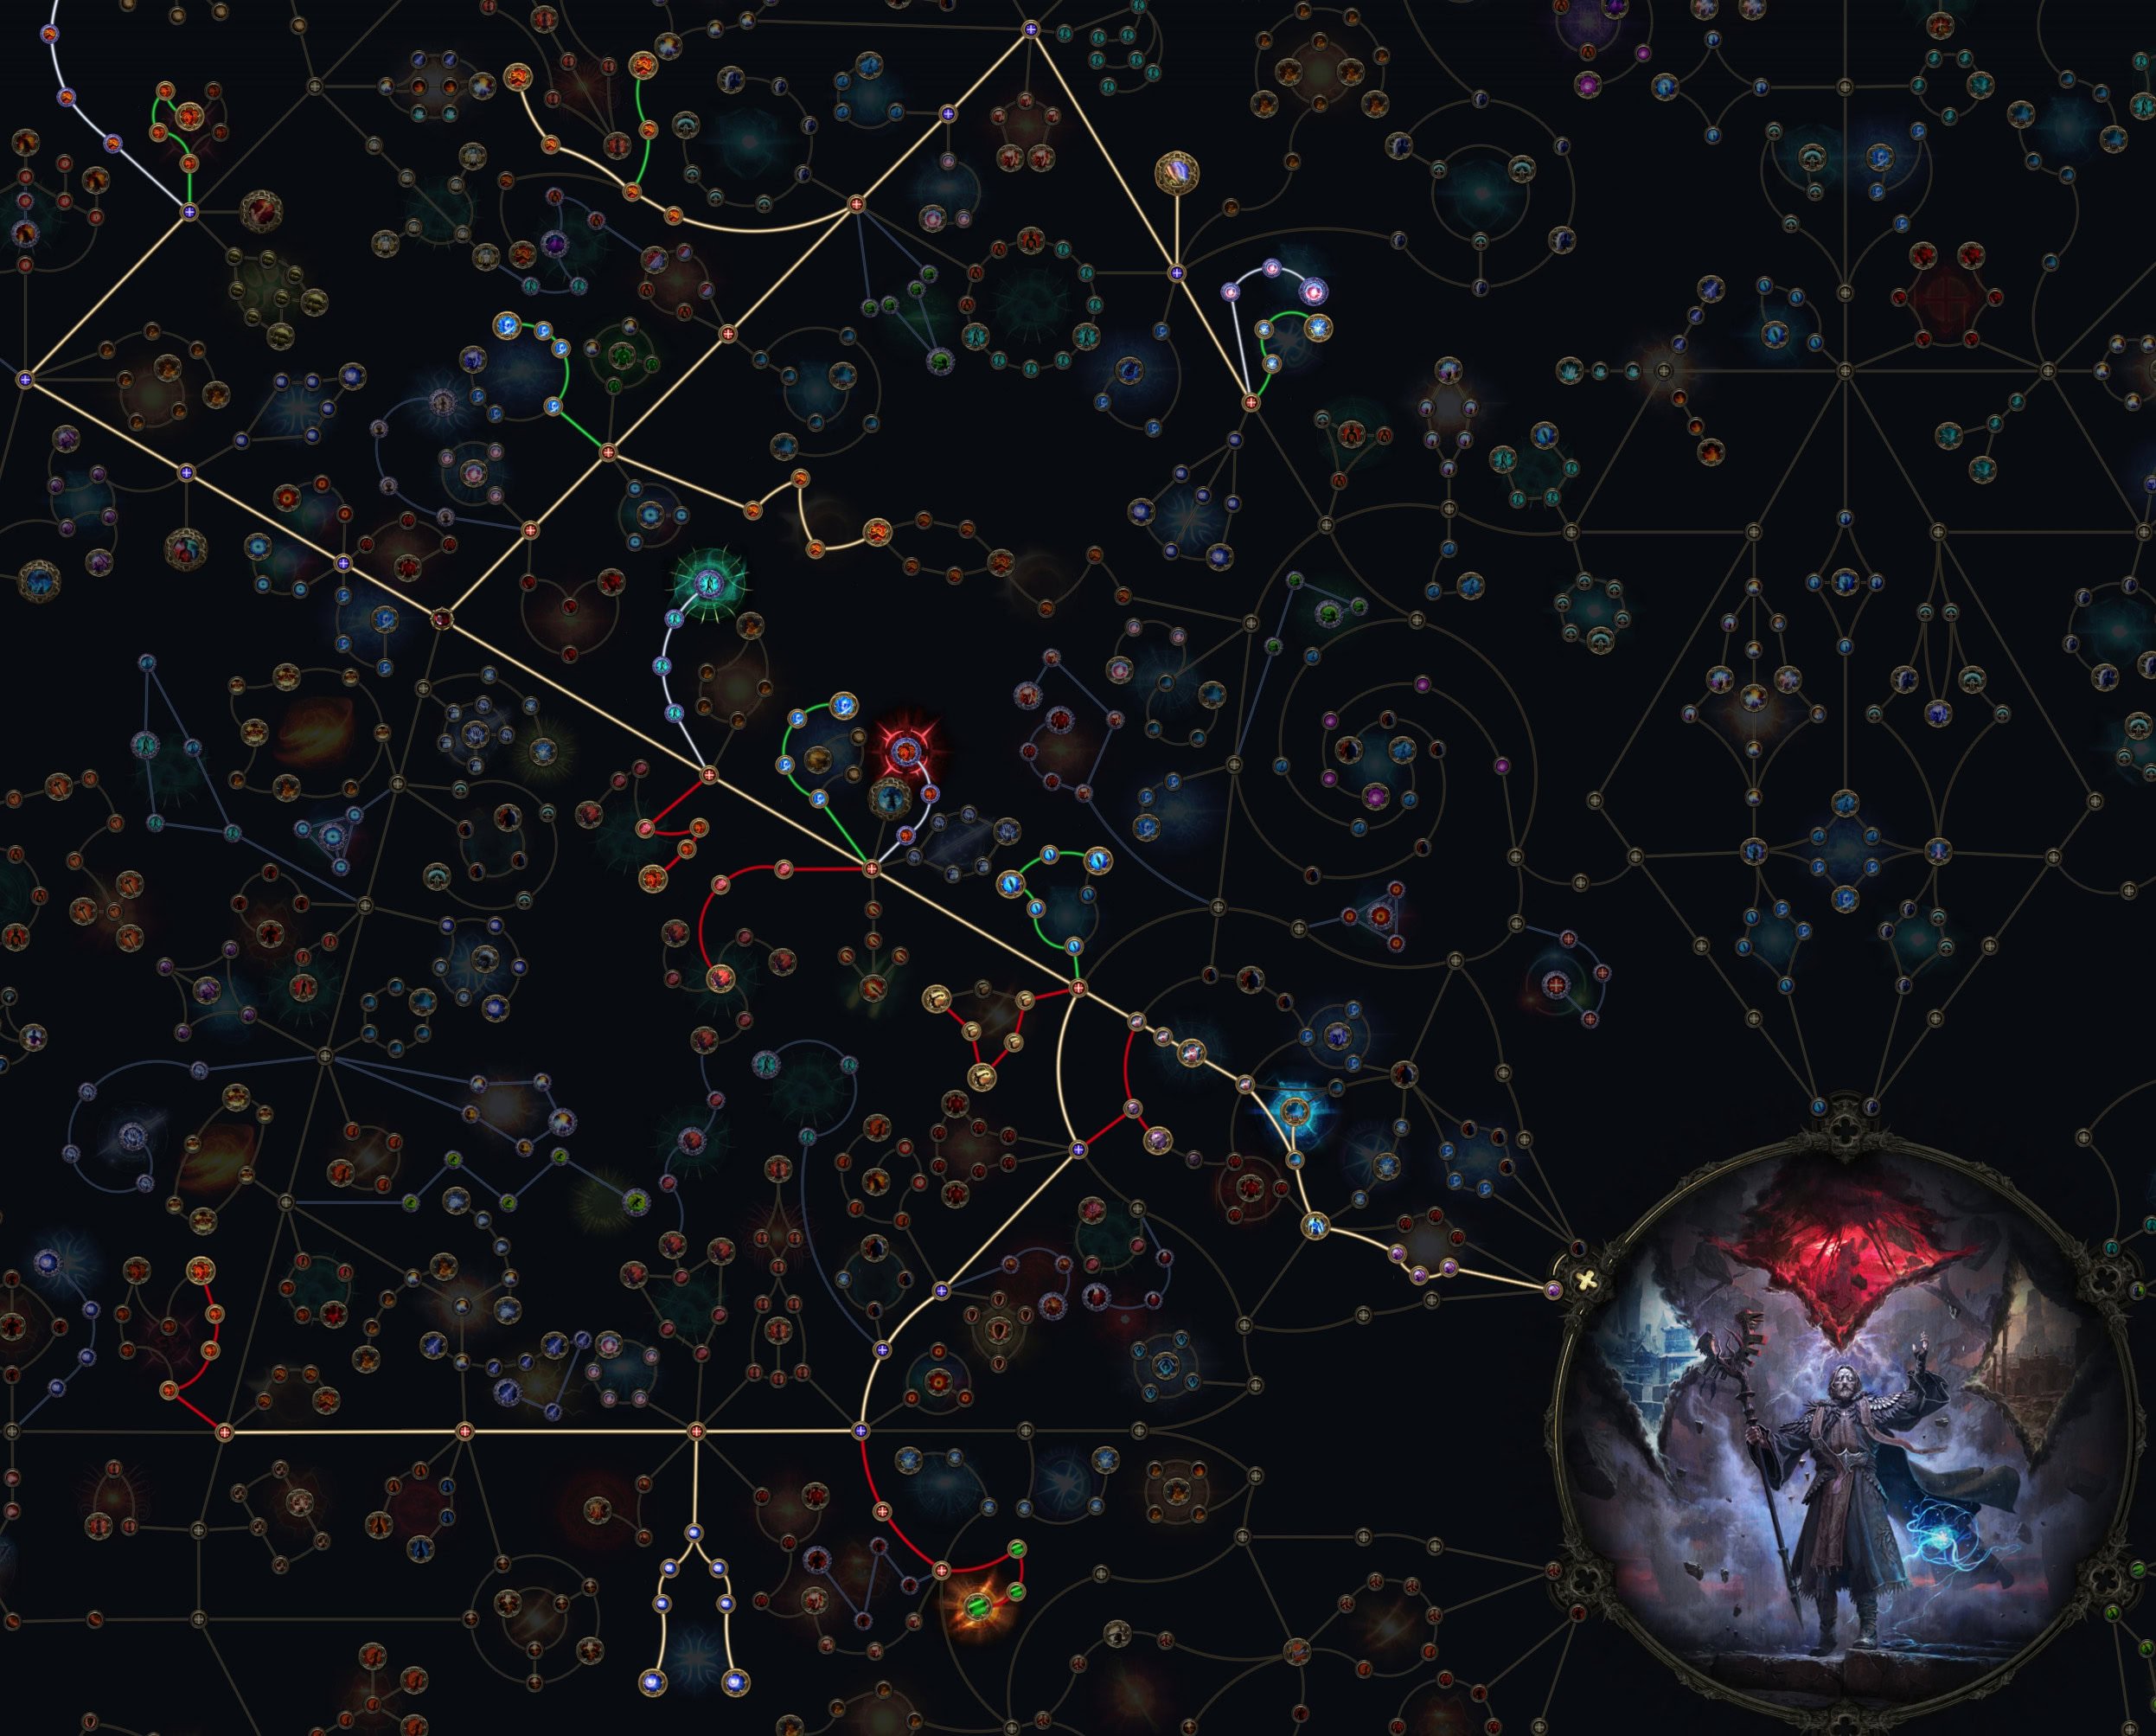
For the Interludes, we’ll start grabbing more bonuses for Rage, since we’ll be able to get Eternal Rage from the final Gembloom Skull.
Anger Management is extremely powerful, but we’ll need Eternal Rage to mitigate its downside. We also grab Primal Rage and Blood Rush on Weapon Set 1 to further boost our Shapeshifting, and Mystical Rage to help out Spellcasting with Weapon Set 2.
We’ll also grab Aspiring Genius, located next to Mind Eraser. Once we pick up Forced Outcome shortly after the Interludes, we’ll reliably have Arcance Surge up to help ensure we’ll rarely need to use our Mana Potion. We’ll supplement this with Arcane Nature to take advantage of the extra effects it offers for Weapon Set 2.
To round off this section, we’ll start preparing for the endgame by taking Barbaric Strength and Vulgar Methods. This gives us a huge boost of Critical Chance and Critical Damage Bonus to make better use of Forced Outcome.
Early Maps
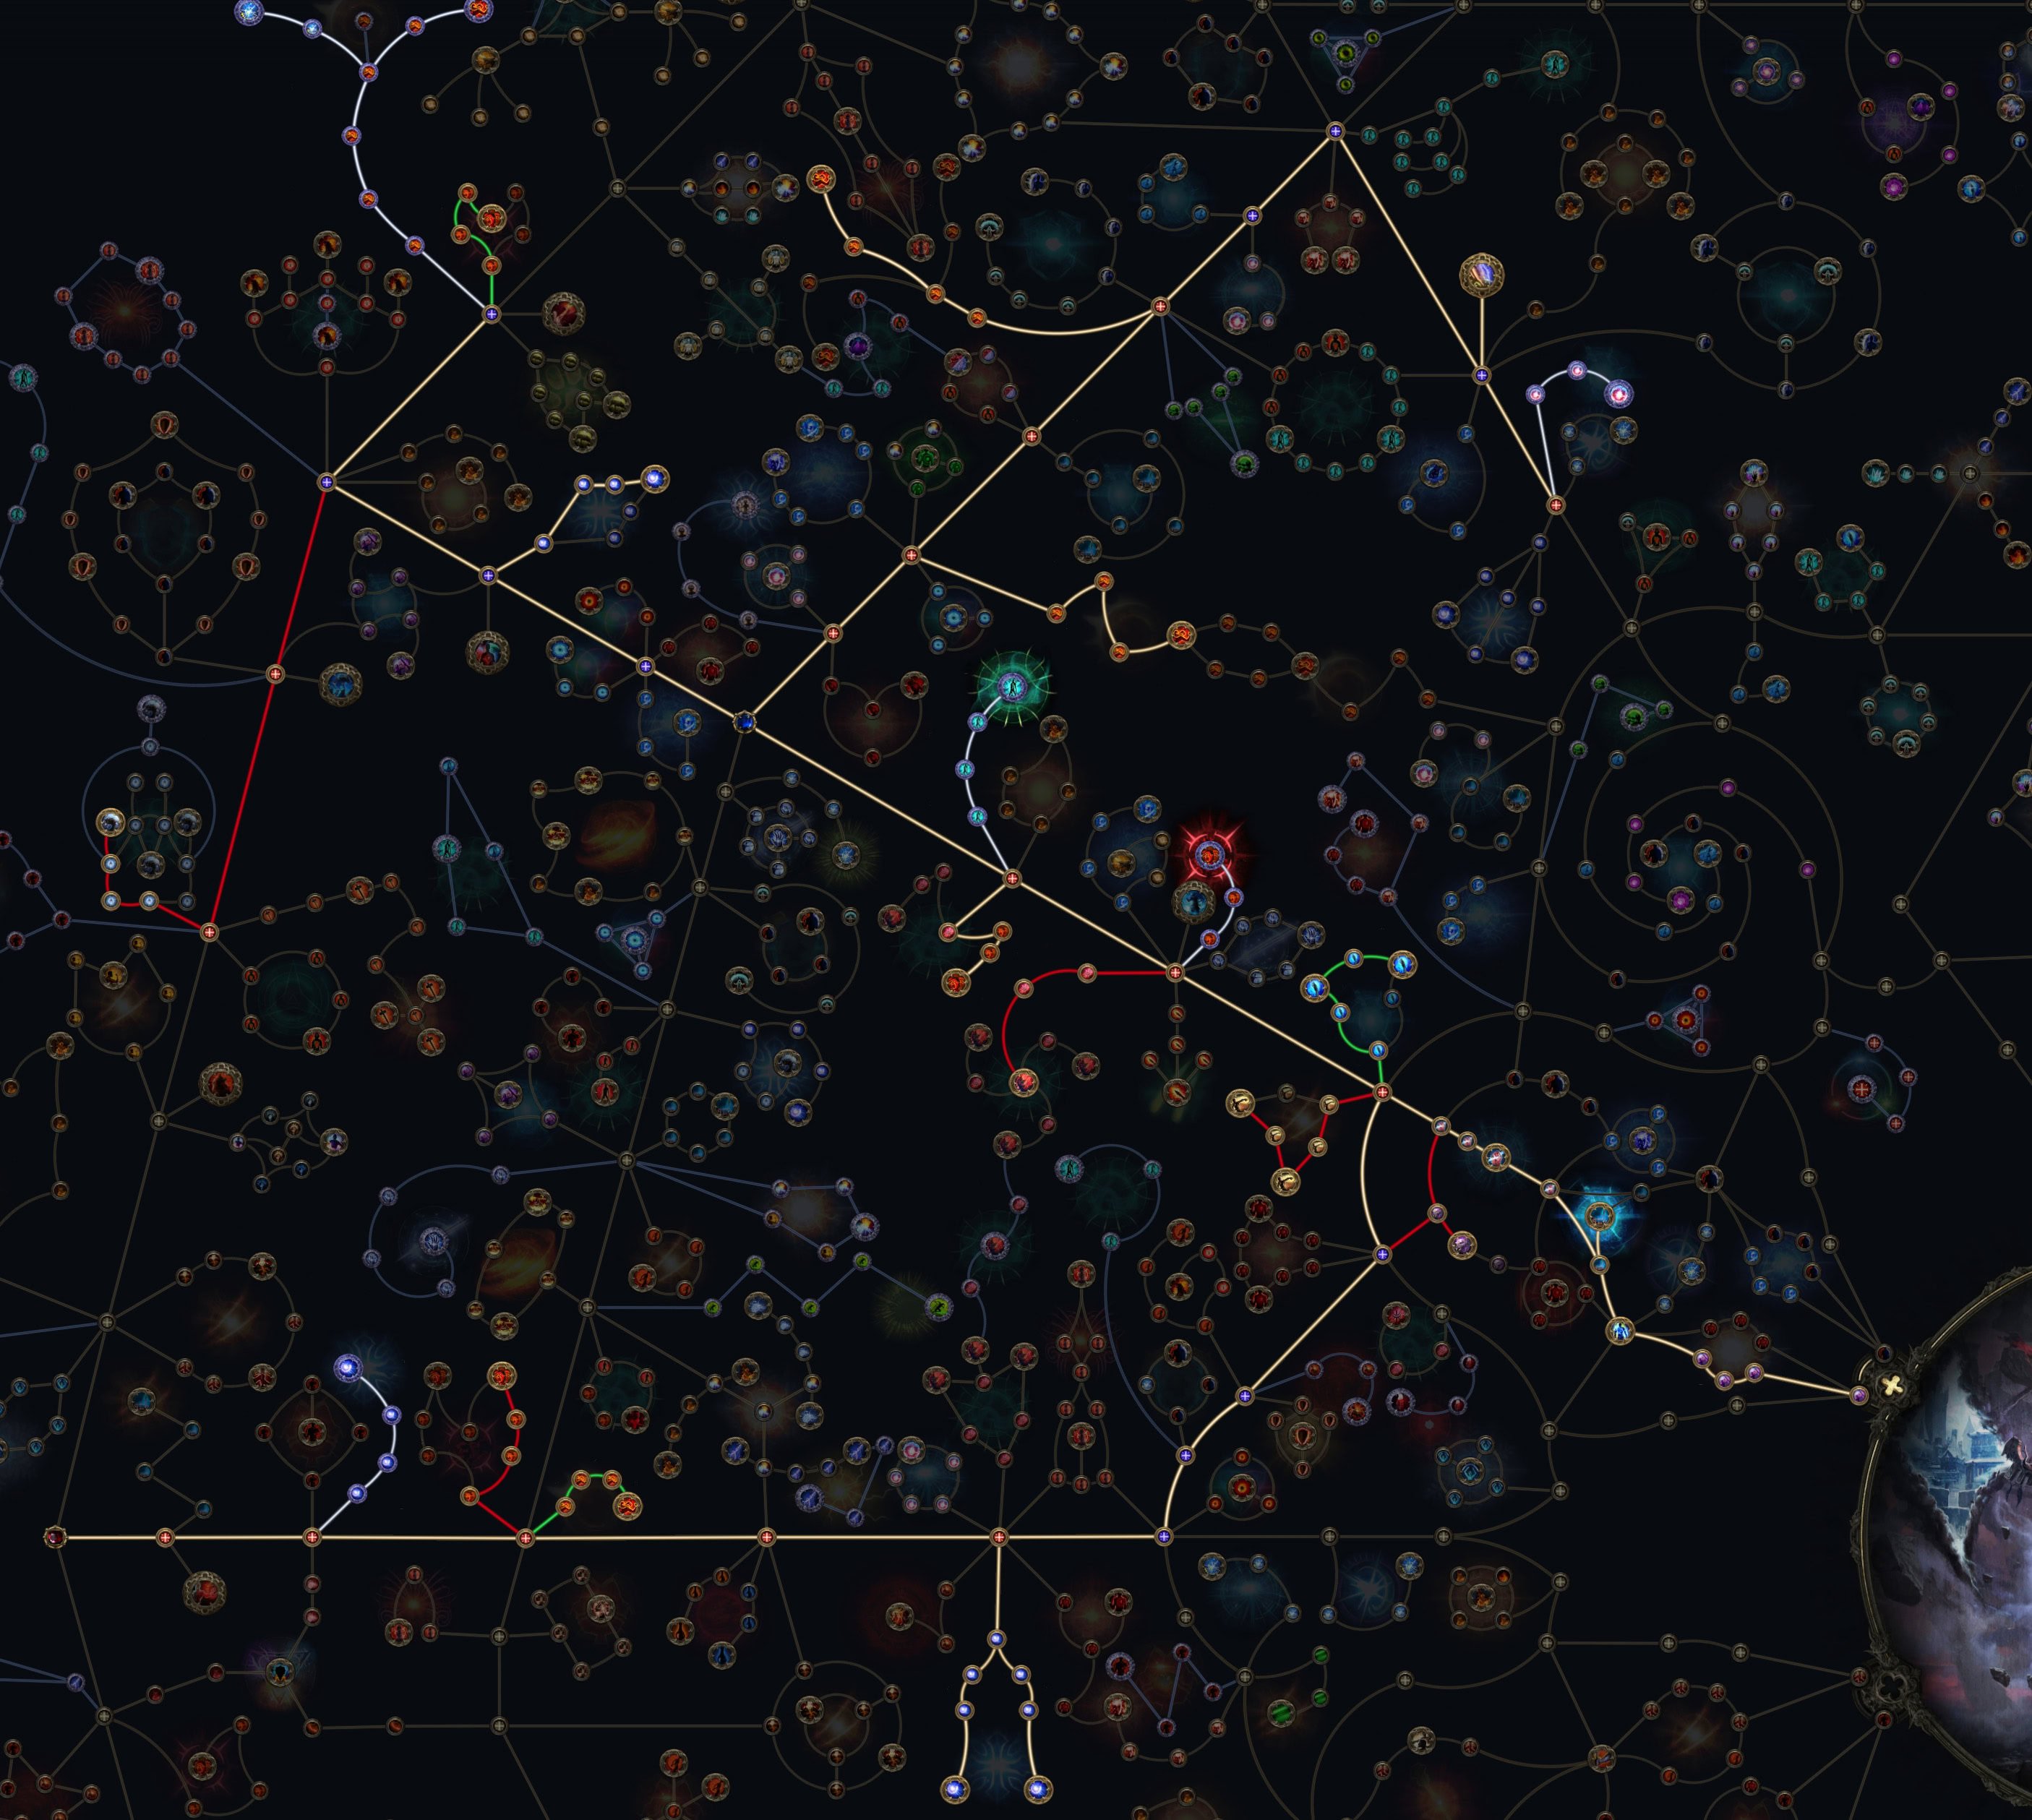
For Early Maps, we’re going all in on picking up Crit bonuses for Forced Outcome. Mainly, we’re after Calculated Hunter and Desensitisation. We’ll also pick up Spirit of the Wolf for our Shapeshifting Skills as well, trading it for Blood Rush to make use of the points elsewhere.
We’ll also grab Battle Fever for Weapon Set 2 as well, it’s very cheap and accessible Physical Damage and we’ll still have plenty of passives to work with later.
Endgame

By the endgame, we get our final Ascendancy, Entwined Realities, and whew, there are a lot of changes to accommodate it. To maximize the potential of this passive, we’ll pick up the Keystones below and what changes come with each. The majority of these Keystones don’t really hinder or help our build, outside of Wildsurgem, which we grabbed long ago.
Scarred Faith is first and saves us a bunch of travel points on the early section of the tree, allowing us to pick up Shifted Strikes, Personal Touch, and Wolf’s Howl for Weapon Set 1 as well as Wasting Casts and Lasting Incantations for Weapon Set 2.
Next is Pain Attunement, which is arguably the set I’d do last. This saves us the travel points for Mystical Rage on Weapon Set 2 and allows us to grab Dimensional Weakspot, Hide of the Bear, and Molten Claw for Weapon Set 1.
Then there is Ancestral Bond. This allows us to pick up Deadly Thorns and Dangerous Blossoms for Weapon Set 2 as well as Stormcharged, Electrified Claw, and Spirit of the Wyvern. This is a huge boost to our Elemental Damage, and if we opt out of Pain Attunement, we can also still pick up Dimensional Weakspot this way too.
Wildsurge Incantation is a quick one, only offering us Power of the Storm, which we’ll take as a general bonus for both sets. We could also squeeze in Illuminated Crown as well, but it’s not the most effective on an Armour and Energy Shield base; more ES is always useful.
The last two are primarily for our Spell of choice only. Starting with Elemental Equilibrium this lets us pick up Blood Tearing and Shredding Force for some extra Physical Damage and Spell Crit Chance and Damage Bonus
Finally, we have Blackflame Covenant, which allows us to pick up Cut to the Bone and Sudden Escalation for more Spell Crit as well as strong armour-breaking potential with our spells. We also have the option of taking Overexposure, if we want to drop something in our kit for Arctic Howl, which can use Exposing Cry to apply Exposure.
Outside of this, we’re mainly picking up Ruinic Helm and Iron Slippers, to get more value out of our Armour and Energy Shield items. Remaining points go toward getting extra Jewel sockets and Recoup Passives to pair with Sacrosanctum and make Scarred Faith less of an issue.
Gear and Stat Priorities
This section lists and explains the recommended stats for our gear and any Uniques we recommend.
The grid is interactive. You can click or tap on an item to read its recommendations. Or scroll past it to read everything in order.
If a slot is left empty, it’s because there is no special item recommended for it, and you can opt to populate it with whatever you prefer.
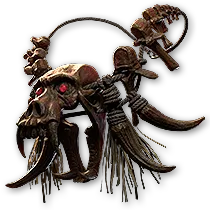
Our First Weapon Set is our Talisman, which we’ll prefer a Maji Talisman here for the extra Rage to scale our damage with.
For Modifiers, our Highest Priorities are Physical Damage, Attack Speed, and Level of all Melee Skills. Critical Hit Chance can be nice to get more damage out of Forced Outcome, by preventing extra damage rolls, but isn’t necessary.

Our Second Weapon Set is a Staff. We’ll want to go for a Sanctified staff here as it reduces the need to pick up extra Intelligence on the tree and works well with Recoup if we opt for that route defensively.
For Modifiers, we’ll be looking to get Spell Damage, Physical Spell Damage, and Damage as Extra Cold or Lightning for the Prefixes. As our Suffixes, we’ll want the Level of All Physical Spells, Cast Speed, and Critical Hit chance for Spells. This gets us the most damage with our passive setup.
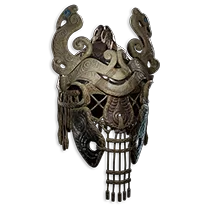
Our Helmet isn’t anything Special. We’re mainly looking for high Life, Armour and Energyu Shield from it. Resistances are also a must. Armour Applies to Elemental Damage is also a very good line to have, but this could also be Rarity if desired.
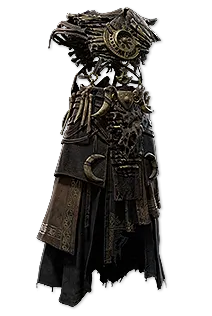
For our Body Armour, we have two options, a Rare Chest with Life, Armour, and Energy Shield, alongside Resistances and Armour applies to Elemental Damage.
Or Option B, Sacrosanctum, to go for a Recoup Setup, which we recommend for the very late game. This prevents Scarred Faith from being a hindrance to our overall Hit pool, allowing us to consistently Recoup Energy Shield, even if we have no other support for it yet. With investment into a good amulet for this purpose, it’s already a great defensive layer, but we can also invest remaining passive points into pushing it further.

For our Gloves, it’s pretty much the same high Life, Armour, and Energy Sheild Alongside Resistances and Armour Applies to Elemental.
If we want to really min-max the slot, though, we can drop the Resistances for Level of All Melee Skills and Rarity. This lets us also more freely take Level of Spells on our Amulet.
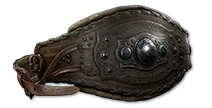
Out Belt is a pretty standard Belt. Life, Mana, Armour, and Resistances. Heavy Belt base is preferred here for the Stun Threshold to help make recoup a safer option.
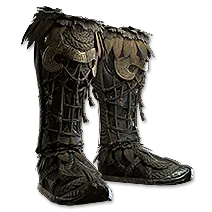
Our Boots are also pretty standard. Life, Movement Speed, and %Armour and Energy Shield for Prefixes. We can get all REsistances here if we want to or need to, but Rarit and Armour Applies to Elemental Damage are also worth taking.

Our Rings are pretty generic as well, and we take Life, Mana Rarity, and Resistances. We could drop the Prefix Rarity for Cold Damage as well, this boosts everything if we get Damage as Extra Cold on our Staff.

If we wanted to, drop Rarity from our rings entirely, we could also opt to pick up Cast Speed or Added Damage to Attack rolls. This would lean more into the full hybrid setup, but it isn’t really necessary.
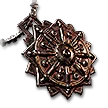
For our Amulet, we definitely want a Solar Amulet base, especially for the Sacrosanctum Recoup setup as it can help give us just enough Spirit to use Barkskin alongside Eternal Rage with the Spirit on Sacrosanctum and still make use of Vitality and Cannibalism.
For our Modifiers, the most important ones here are Life, Spirit, Level of All Spells, and, of course, Damage Taken Recouped as Life. If you’re not feeling the recoup setup, feel free to drop it from the amulet.
For the remaining Modifiers, getting increased Armour or Energy Shield rolls are great options for the Prefix. FOr the last Suffix, Rarity is always an option, but Critical Hit Chance or Critical Damage Bonus are both great too.
For Anointments, Pilable Flesh is the best option for the Recoup setup, making it far more reliable and effective.
For raw damage, Inspiring Ally is a great bonus, doubling the effect we get from the Comradery cluster, as well as allowing us to also pick up Bringer of Order with the area around Pain Attument for more easy damage.
As a Defensive Anoint, both Ancient Aegis and Spiral into Depression are great, as they both grant a ton of Armour and Energy Shield. On the high end, Patient Barrier is good too, since we don’t recharge Energy Shield, it effectively has no downside.
