
This Guide explains all new and modified abilities from the Baranor Skill Tree from Shadow of War’s second Story DLC – Desolation of Mordor!
With the release of the second Story Expansion to Middle-earth: Shadow of War – Desolation of Mordor, Monolith created several new abilities and upgrades for them, so the gameplay with Baranor would feel different and unique compared to Talion and Eltariel. This overview will show you all the main skills and their upgrades.
Baranor’s abilities are divided into four main categories: Torvin, Serka, Capacity and Legacy Skills. All Skill Upgrades stack, so you don’t have to choose which one to play with as an active upgrade like it was in the Core Game with Talion’s Skills.
Below you will find an in-depth overview of all skills and upgrades. After that I have a few tips and tricks for you to make your first steps into Lithlad a little easier and smoother.
Table of contents
TORVIN SKILL TREE

The three main abilities are unlocked automatically from the start. Each one of them has 3 available upgrades. To unlock these nine upgrades you have to find the nine artifacts. Torvin provides you with nine maps that show the locations of the items.
If you are having trouble discovering the locations, I have a guide that will help you: Desolation of Mordor: All Torvin Skill Upgrades Artifacts Locations Guide.
Torvin’s Skill Upgrades persist through defeats and completed campaigns. You only need to find the artifacts once in your first run, then you will start each next run with the Upgrades ready and available.
Now, let’s take a look at each one of the skills and what they do.
GRAPPLE
Grapple to a targeted point. Use this to climb quickly. If you are already climbing, by pressing the button for Grapple, you will pull yourself rapidly to the top of the climb.
- Catapult – Launch yourself past your target point. Your Kite will open automatically if needed.
- Grapple Pull – Grab a nearby Uruk with your Gauntlet’s chain, pulling them towards you and knocking them down.
- Cyclone – When your Might is full, sweep your Gauntlet’s chain in a powerful arc, knocking down and stunning enemies caught in its path
CROSSBOW
Enter Ranged Mode and fire a bolt or a bomb. You can cycle through all of your ammunitions – Steel Boltt and Concissoin Bombs by default. You can also quick-fire your currently selected ammo with a shortcut button without entering Ranged Mode (slow-mode enabled during Range Mode, if focus is available)
- Numenorean Fire – Gain the ability to use Fire Bolts and Fire Bombs.
- Wormrot Oils – Gain the ability to use Poison Bolts and Poison Bombs.
- Chain Kills – Use your crossbow to chain together multiple Stealth Kills or Executions. Target additional enemies during a Stealth Kill or Execution. Each additional target consumes Focus and the currently selected ammo.
SHIELD CHARGE
Charge forward, knocking and damaging enemies. This ability is more of a knocker than a damager in its original form.
- Mighty Shield – Shield Charge generates more Might.
- Blazing Shield – Holding LMB longer ignites your shield. Shield Charge sets enemies on Fire.
- Fatal Counter – Well-timed Counters instantly kill enemy grunts. Ineffective against Captains and Beasts.
SERKA SKILL TREE
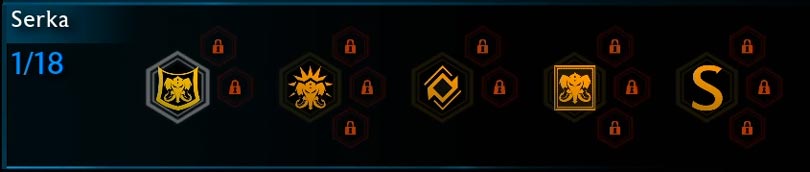
There are four main abilities here, given to you as you play and progress through the main story missions. The upgrades to the main abilities can be purchased with Skill Points.
The Main Skills in this category are persisting through defeats and new campaigns. Once you finish the main story and start a new run (if you wish to, of course), you will begin it with all previously unlocked Torvin Skill Upgrades and Serka’s main skills. All Upgrades that you have previously unlocked, however, will be reset.
BODYGUARD
Assign a Bodyguard and Summon him. Each Mercenary has two special Traits – a Combat Ability and a Stealth Ability. You can command them to use their skills and they will automatically perform them based on their current combat status. Their Combat Command Abilities have cooldowns.
- Honor Guard 1 – Allows you to assign a second bodyguard and control them
- Honor Guard 2 – Allows you to assign a third bodyguard and control them
RALLY
When your Command meter is full (the bar on the left side of the mininap), you can Heal and Enrage all nearby allies and refresh Named Mercenaries’ special Abilities. Any bodyguards you do not have currently summoned, will be called in, even if their cooldowns have not fully reset.
- Invigorate – Using Rally also fully restores your Health
- Strengthen – Using Rally also fully restored your Might
- Resupply – Using Rally also fully restores your Steel Bolts
LEADERSHIP INTEL
Allows you to gain intel on the Overlord and his Warchiefs, revealing their Weaknesses.
- Rank and File Intel – Gain intel on all Captains who are not Outpost Leaders, Warchiefs or the Overlord, revealing their weaknesses.
- Outpost Intel – Gain intel on all Outpost Leaders, revealing their weaknesses.
BLOOD FOR COIN
Gives you +20% discount on hiring Mercenaries.
- Logistics – Gives you +10% discount on hiring Mercenaries. Stacks with the other bonuses
- Logistics – Gives you +10% discount on hiring Mercenaries. Stacks with the other bonuses
- Logistics – Gives you +10% discount on hiring Mercenaries. Stacks with the other bonuses
SERKA THE COMMANDER
Serka will join you as an Assault Leader in the siege of Shindram (the Fortress in Lithlad).
- Sabotage Fort Walls – Serka and his men will plant explosives on the outer walls of the fortress. Shoot these to destroy the walls. You must purchase this skill upgrade before commencing the fort assault mission
- Sabotage Inner Gate – Serka and his men will plant explosives on the inner gate of the fortress. Shoot these to destroy the gate. You must purchase this skill upgrade before commencing the fort assault mission
- Sabotage Outer Gate – Serka and his men will plant explosives on the outer gate of the fortress. Shoot these to destroy the gate. You must purchase this skill upgrade before commencing the fort assault mission
CAPACITY SKILL TREE

In the Capacity category there are three main abilities with a total of seven upgrades. All of these can be purchased whenever you wish to by spending Skill Points.
HERBALIST’S KIT
Adds +1 Healing Elixir to your capacity (3 by default when you start the DLC).
- Salve Pouch – Adds +1 Healing Elixir Capacity
- Salve Pouch – Adds +1 Healing Elixir Capacity
- Salve Pouch – Adds +1 Healing Elixir Capacity
MARKSMAN’S QUIVER
Adds +4 to your Bolt Capacity. Very useful in conjunction with Chain Kills.
- Fire Bolt Quiver – Adds +4 to your Fire Bolt Capacity
- Poison Bolt Quiver – Adds +4 to your Poison Bolt Capacity
BOMBARDIER’S SATCHEL
Gives you +2 Concussion Bombs Capacity. Very useful in conjunction with Chain Kills.
- Fire Bolt Quiver – Adds +4 to your Fire Bomb Capacity
- Poison Bolt Quiver – Adds +4 to your Poison Bomb Capacity
LEGACY SKILLS
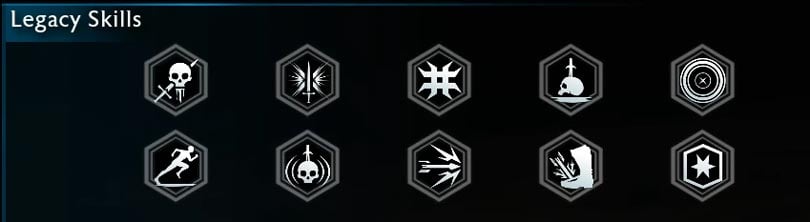
This is a list of the abilities that Baranor shares with Talion from the core game. You can a more detailed overview of all of them here: Shadow of War All Skills and Upgrades: The Ultimate Beginners Guide
- Execution
- Perfect Counter
- Critical Strike
- Ground Finisher
- Retaliation
- Surge
- Brutalize
- Detonate
- Pin
- Treasure Hunter
All of the Legacy abilities are available to you from the very beginning of the game. You do not need to spend skill points to re-learn them again.
BARANOR BUILDS, TIPS AND TRICKS
The best way to earn skill points in this DLC is through capturing Outposts and completing Nemesis Missions. I highly recommend you to do all Warchief missions around the Fortress before you start the assault. Of course, you can take up the higher challenge, but you will be missing on useful skill points.

Picking up the Intel Upgrades to allow you to see the Captains and Warchiefs Weaknesses is vital for the higher difficulties. However, if you are reading this guide, it probably means that you are about to start your first run through Lithlad.
Let me share this advice with you – run your first time at a lower than your preferred or favorite difficulty. Enjoy the story and complete all of it. You will have a chance to repeat the Outposts and Fortress Assault missions multiple times after that and experiment with the new Brutal difficulty, choosing different allies and fighting unique uruks each time.
Make sure you unlock one or more of the Discount Upgrades to be able to purchase higher-tier Mercenary Bodyguards to assist you in your next missions. These friendly NPCs can be life-savers in higher difficulties. I highly advice you to have at least 2 of your Bodyguards when you start clearing the Warchiefs and especially for the final assault of the fortress.
If you like Stealth, consider spending points to increase the capacity of your Bolts and combine that with Chain Kills Skill Upgrade from Torvin to clear multiple enemies at once.
Learn how to fly with the Kite. It will not only help you move quicker from one place to another, but it may also prove a great way out of a tough situation. The Grapple + Kite is also fantastic for attacking Captains and Warchiefs from the air. Just make sure they are vulnerable to Stealth first.


