A complete guide to SWTOR’s Nature of Progress Operation on Dxun in Veteran Mode. Learn about every mechanic of every boss encounter and find out the best working strategies to defeat them
Created for VULKK.com by Elssha
This is a very thorough guide explaining every last detail you need to know about the Operation. Please use the Table of Contents to navigate through the page easier if you are looking for a specific section or a boss encounter. Bosses are labeled with numbers from 1 to 5.
Looking for the Nature of Progress Story Mode Guide?
Table of contents
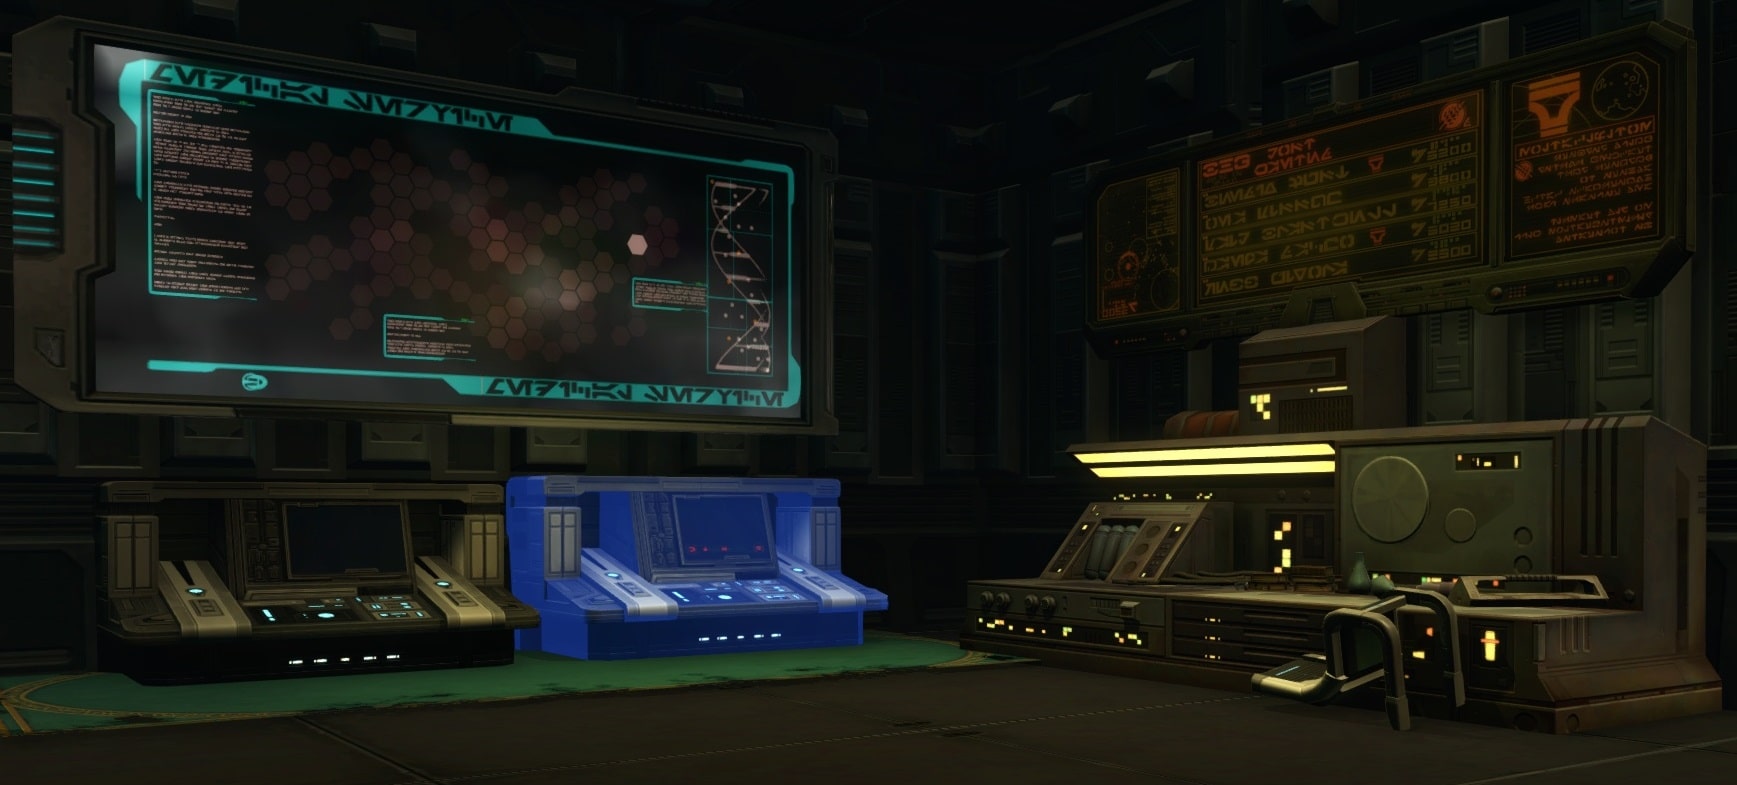
Jungle
First thing’s first; you can’t do an op if you can’t get to the op.
The entry for the operation is found on Onderon, where you board a shuttle to the moon of Dxun. The entrance is located a brisk walk from the spawn point in the following locations;


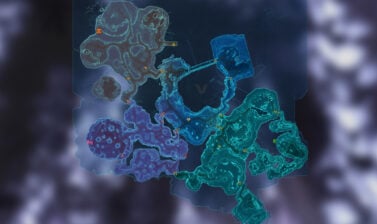
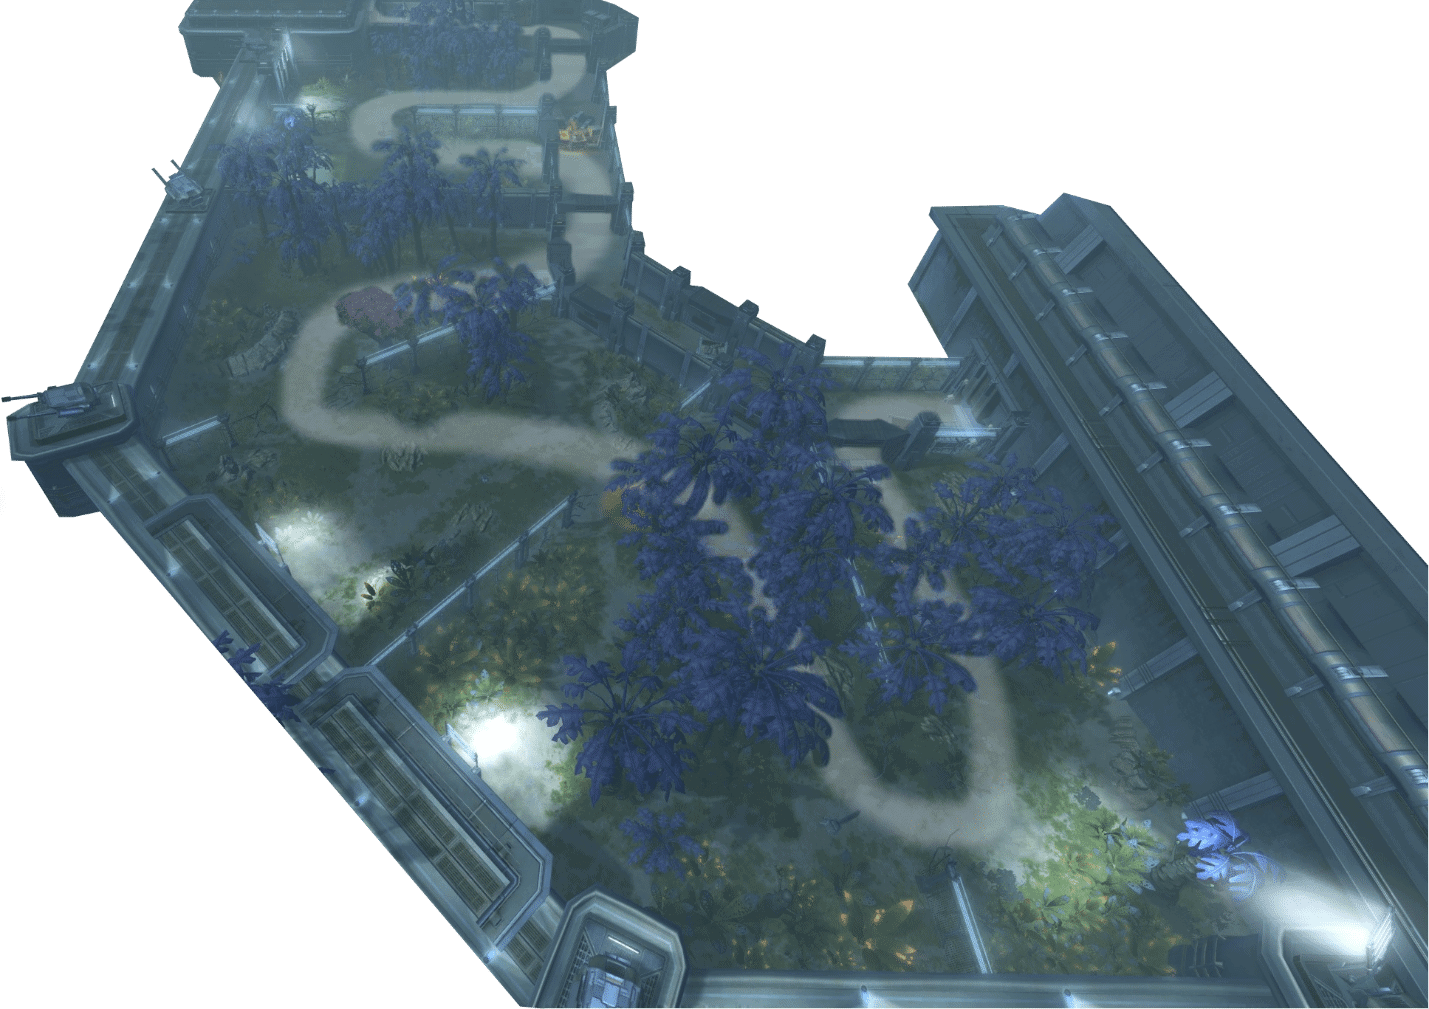
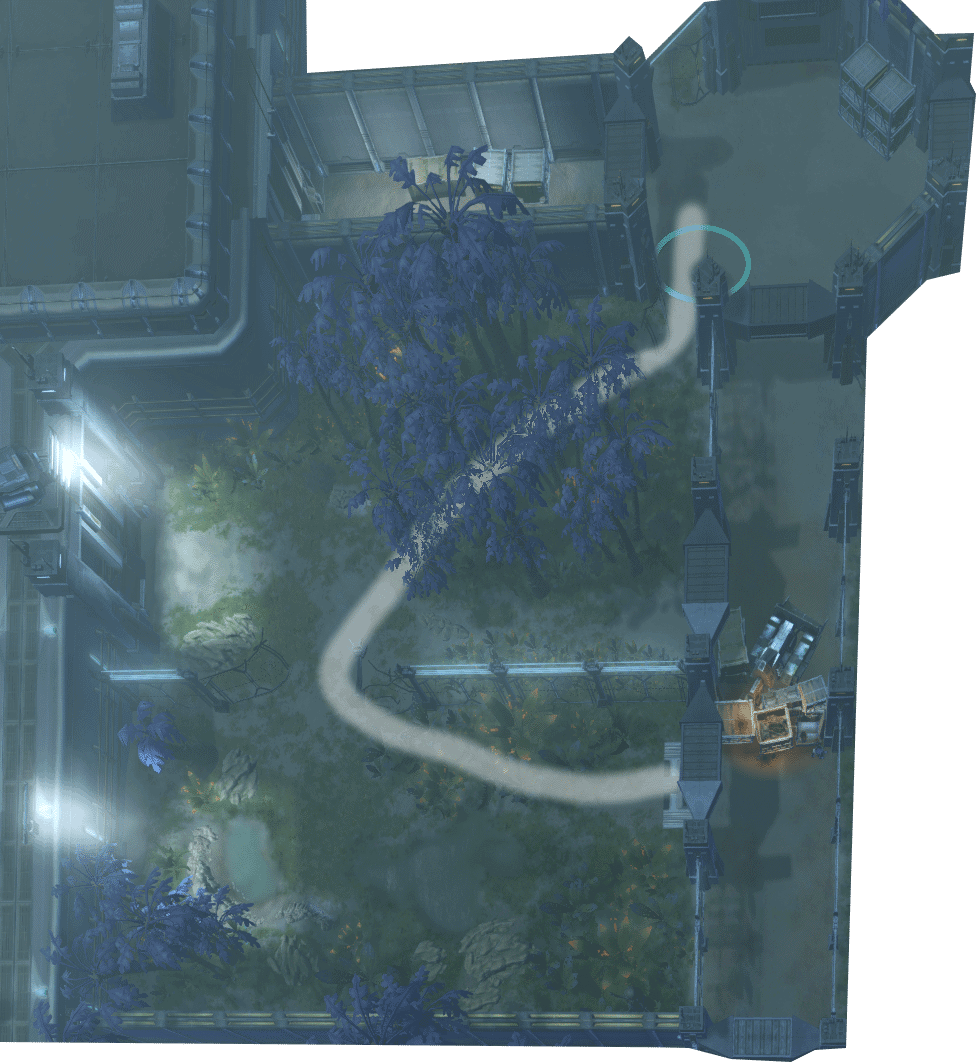
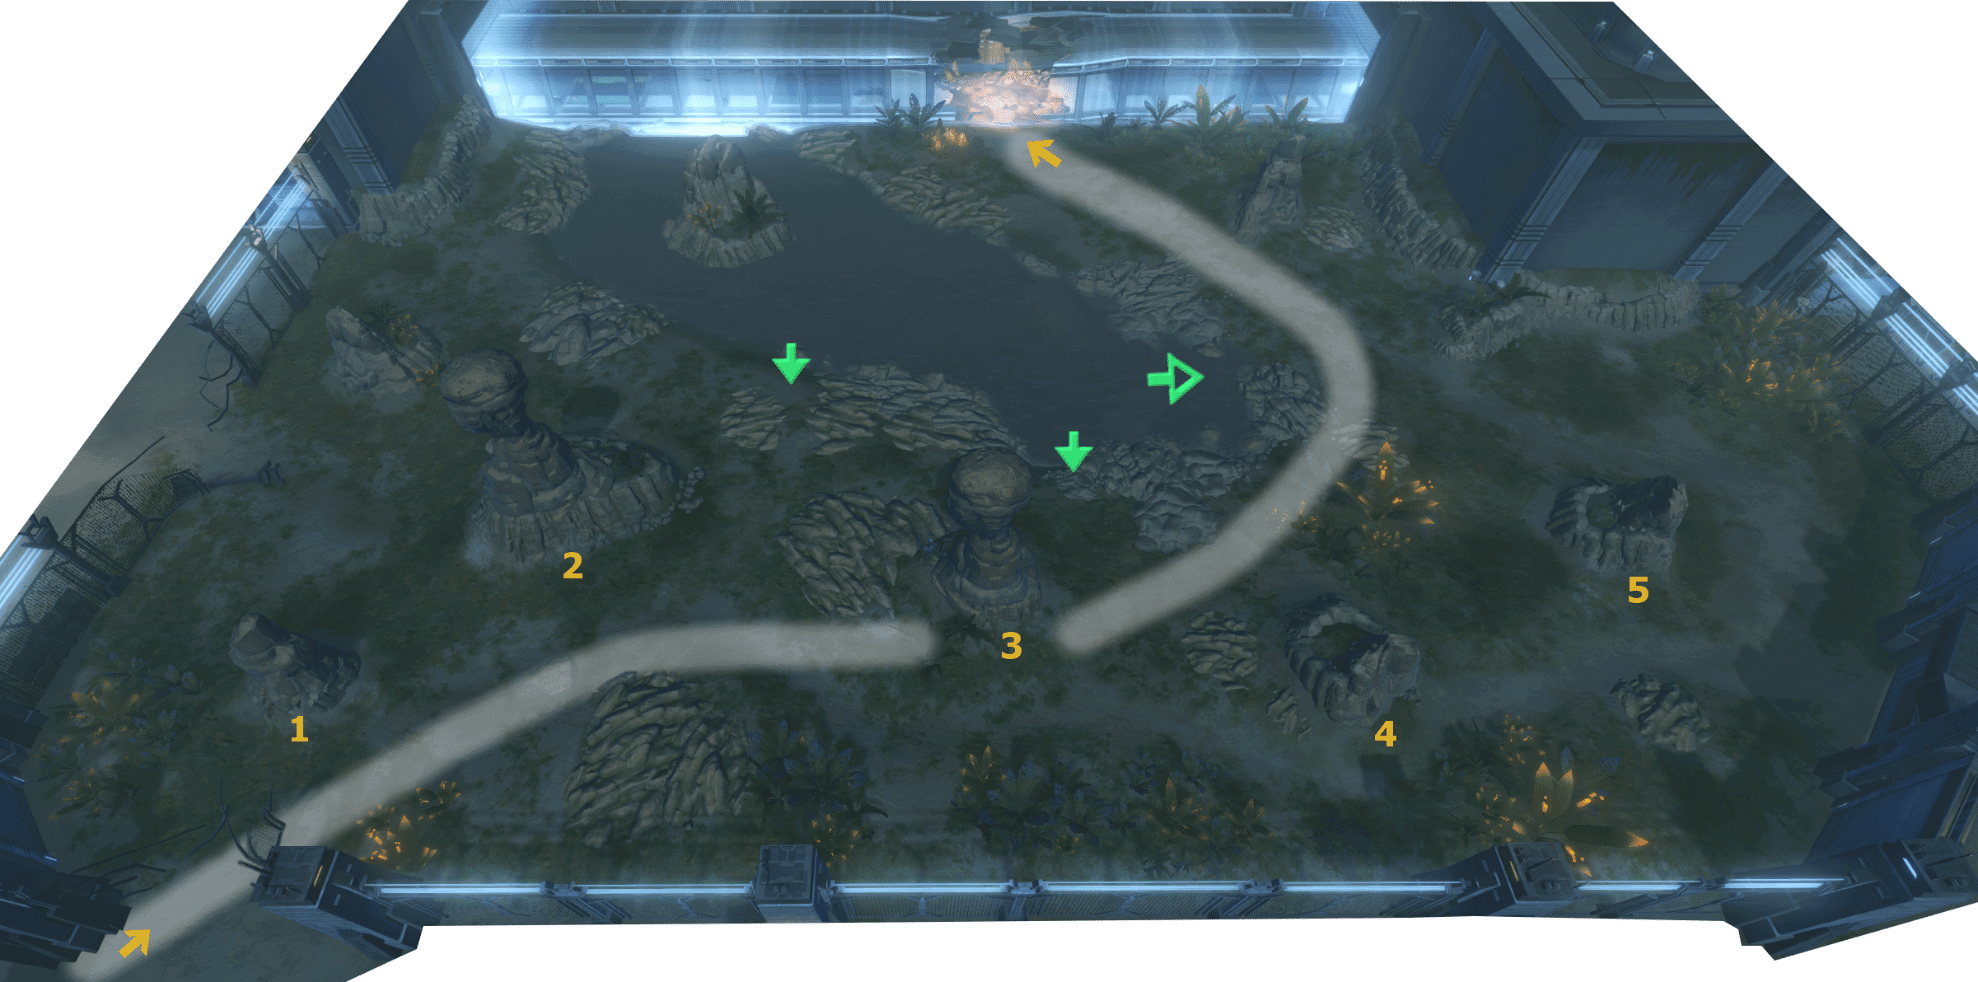
Once in phase, you’ll want to make your way to the northern part of the map, though the path is a bit convoluted, and has several places you can wander off in the wrong direction.
I’ve drawn the most-direct route to the first boss’s location on the area map:
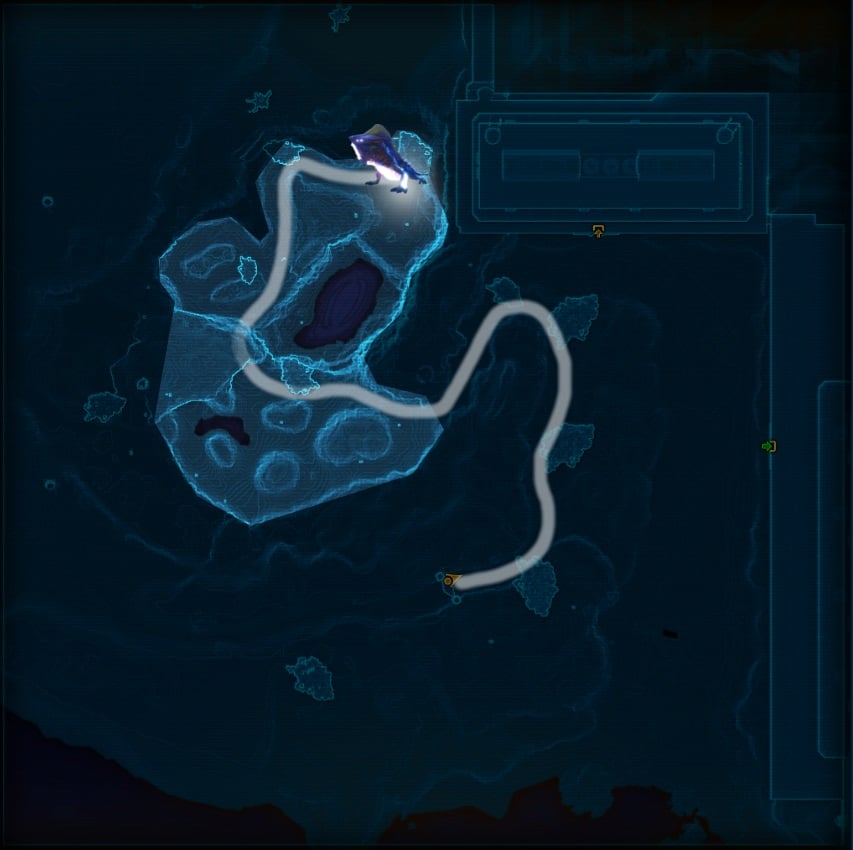
While the highlighted area is technically all usable space to fight the boss, you will really just hold him in the short straight section at the very top (unless you are going for a Mastery Achievement).
Making your way there will require clearing flying Flesh Eating Shrieks and crawling Venomous Stalker add packs as you go deeper into the jungle.
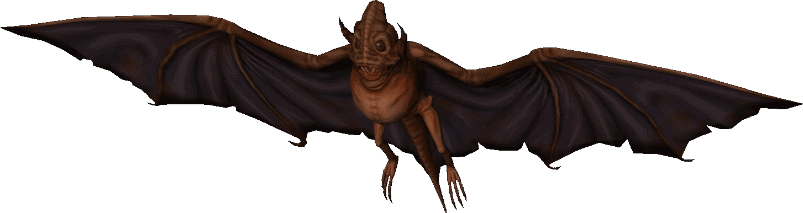
Flesh Eating Shrieks

| Envenomed Bite; 4m Weapon Damage; Applies Overwhelmed |
| 3s Debuff; Reduces defense by 1% per charge |
Venomous Stalker
| Envenomed Bite; 4m Weapon Damage; Applies Overwhelmed |
| Reduces movement speed by up to 70%. |
| AoE Sphere |
The Flesh Eating Shrieks reduce defense (1% per stack), and the Venomous Stalker adds hit with a slow (up to 70%, instead of the 40% in SM) and drop a pool that should be avoided, but are otherwise simple trash.
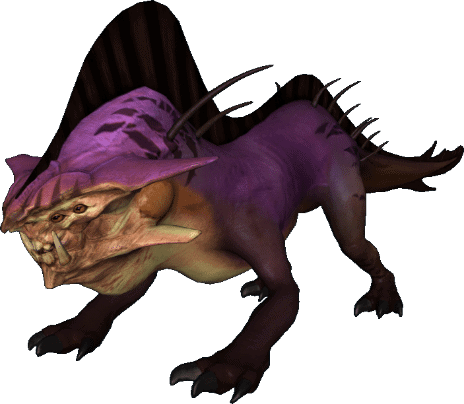
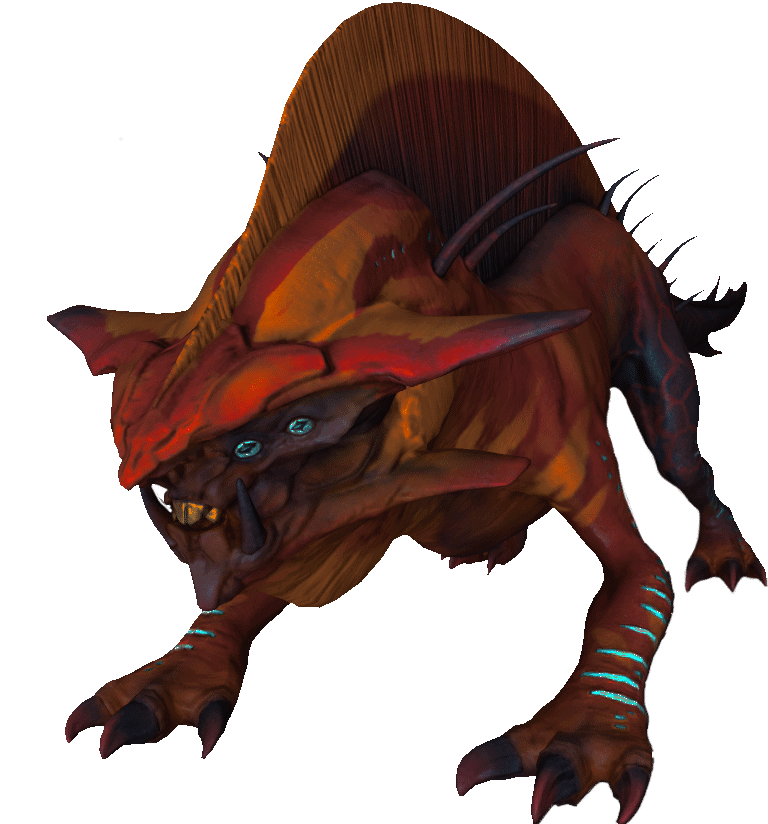
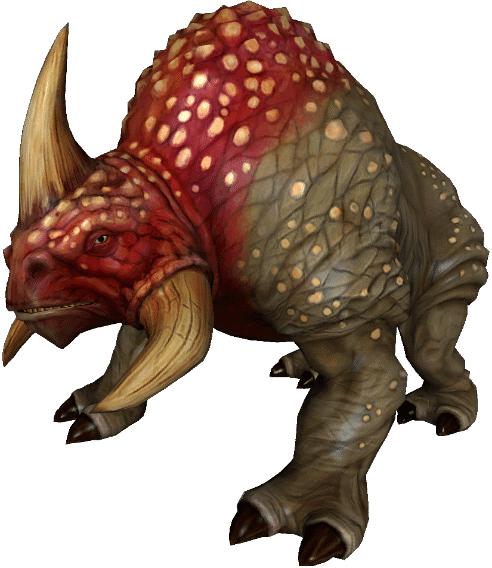
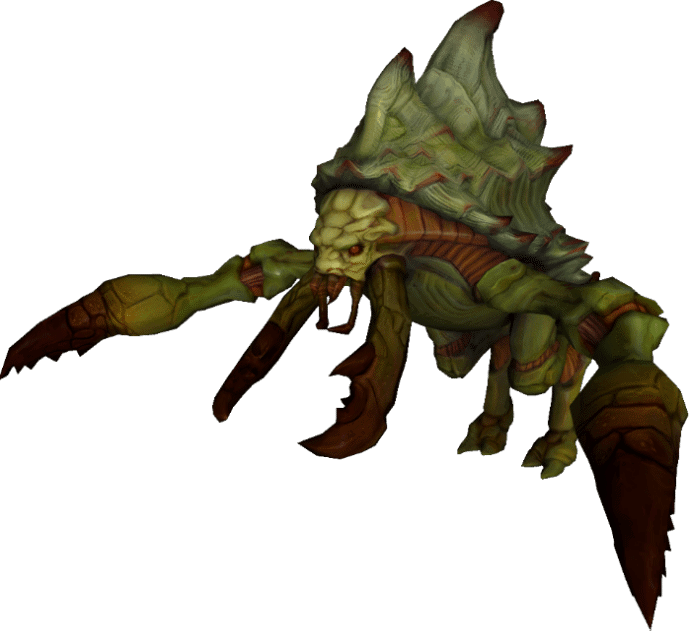
 1: Pack Leader Red
 1: Pack Leader Red
The first boss you encounter, after clearing the add packs, is Pack Leader Red. This is a fairly simple boss, the main mechanic involving using flowers located around the area to counter the poisonous cloud Red emits, while managing tank stacks and keeping Red’s AoE/conal attacks off the group.
Assuming your group isn’t going for any Marks of Mastery, you won’t encounter any adds.
Boss Details
Boss buffs:
 Feasting Feasting |
|---|
| GAINED IF: Red Eats a Bull |
| EFFECT: Moderately increases damage dealt. |
 Well Fed Well Fed |
|---|
| GAINED IF: 3 stacks of Feasting |
| EFFECT: Massive increase to physical attacks. |
![]() Feasting is a buff Red gains if he’s allowed to eat a bull (a bull dies by Acid Jet), each stack of which moderately increases how much damage he does. This is needed for Marks of Mastery, where Red gets
Feasting is a buff Red gains if he’s allowed to eat a bull (a bull dies by Acid Jet), each stack of which moderately increases how much damage he does. This is needed for Marks of Mastery, where Red gets ![]() Well Fed after eating 3 bulls, but should otherwise be avoided (since it increases the damage Red deals).
Well Fed after eating 3 bulls, but should otherwise be avoided (since it increases the damage Red deals).
Boss abilities
 Maul Maul |
|---|
| TYPE: Instant, melee (4m) |
| EFFECT: Basic attack |
 Melee Attack Melee Attack |
|---|
| TYPE: Instant, melee (4m) |
| EFFECT: Basic attack |
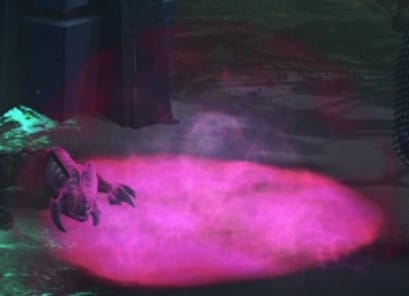
 Hydrochloric Pool Hydrochloric Pool |
|---|
| TYPE: AoE Debuff; 2s Cast; 30m range |
| EFFECT: Reduces outgoing damage, healing done, and defense By 30%. AoE placed on primary target. In Veteran Mode it can no longer be interrupted. |
 Hydrochloric Pool throws a large, red dome at the end of the channel, centered around where the tank (player with aggro) was when the cast started. It does no damage but lowers your damage output, defense, and healing taken. The tank should bait it away from the group, then move out of it as the cast goes out. |
 Acidic Jet Acidic Jet |
|---|
| TYPE: Elemental Conal; 6s Channel; 13m range |
| EFFECT: Periodically dealing elemental damage to all targets in a forward cone. The caustic digestive juices of the beast begins to melt your flesh. Ticks every 0.5s. In Veteran Mode it can no longer be interrupted. |
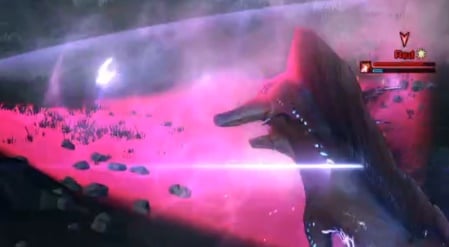 Acidic Jet is a forward-facing cone that does damage to anyone caught in it. The tank should aim it away from the group. Once placed, it will not move for the duration. |
 Eviscerate Eviscerate |
|---|
| TYPE: Weapon type; Instant, melee (4m) |
| EFFECT: Applies Festering Wound. TYPE: Debuff, stacks every 2s EFFECT: Reduces incoming healing by 1% per charge. When this effect expires the pustules will explode dealing damage for each stack. Festering Wound is a stacking debuff applied to tanks (or anyone , reducing heals received by 1% per stack. Tank swaps allow these stacks to fall off, taking the pressure off healers. When the stacks fall off, they explode dealing damage to the tank. |
 Red Venom Cloud Red Venom Cloud |
|---|
| TYPE: Internal Damage; AoE, Stacking |
| EFFECT: Deadly cloud of venom that afflicts all enemies within a 1 kilometer radius every 5 seconds. |
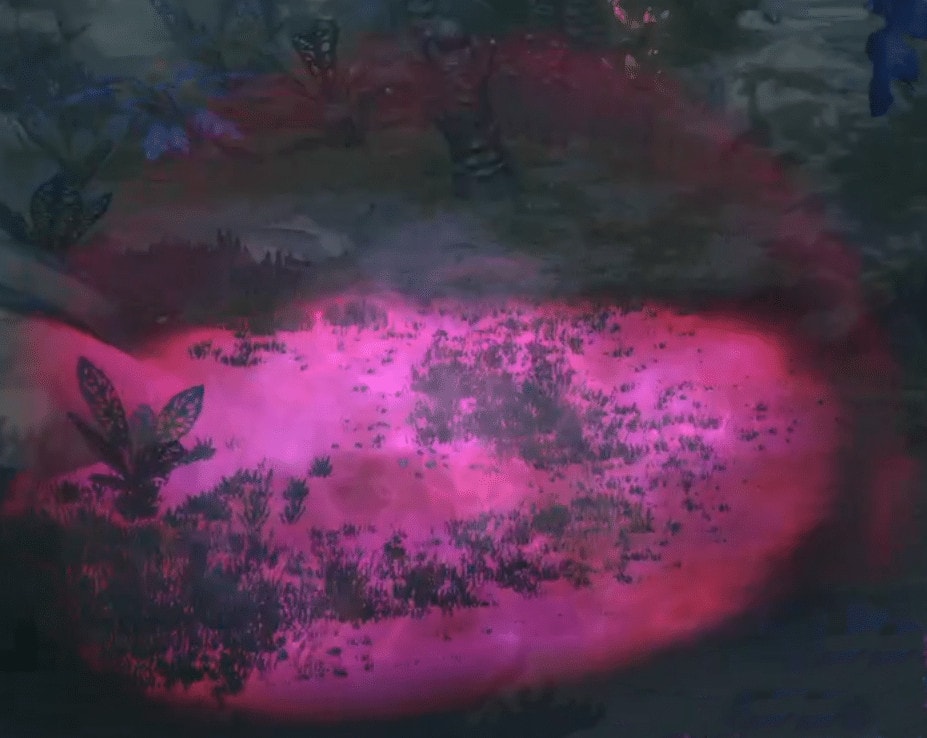
Red Venom Cloud is a raid-wide debuff that Red emits as long as he’s alive, and it stacks on all players. Each stack causes damage. These stacks can be halved by popping a flower and standing in the resulting circle continues to cut the stacks in half. Note; during the fight these flowers gain a blue glow, just like other clickables in SWTOR.  The circle applies the |
Strategy
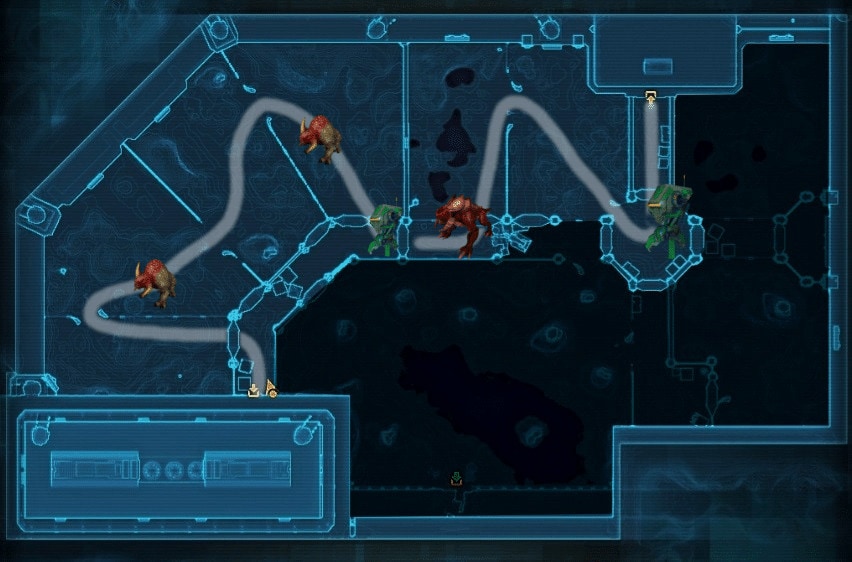
The simplest strategy for HM involves keeping Red north of the tree line that spawns the the adds, while juggling the raid stacks and tank stacks. The add-spawn cutoff is indicated by the red area on the screenshot below, and can be identified in-game by four flanking purple palm-like trees just past the first sharp bend.
Aim Red away from the group, which should be sitting fairly close to the flower.
Though a tank swap is suggested, it can be single-tanked, especially if you have a DwT able to hold Red for a short time to reset the tank’s Festering Wound stacks, or healed through with strong healers and good DCD usage. The tank baits the Pool away from the group, starts moving to a new spot as soon as the cast begins. The boss will not move during the pool cast or the jet channel, so the tank jumps out and away (usually sideways) as soon as the tank sees the Jet channel.
When the raid stacks hit 10-12, have someone click the flower and have everyone stand in the ring until it expires to remove all 12 stacks. You can play with stack count to conform to your healers’ ability, though note that there are only two flowers you can use before you’ll complicate the fight with adds You can cleanse at higher stacks, depending on healers, but know that you will be stuck with 1-2 stacks instead of cleansing to 0 if people aren’t in the circle when the flower is clicked (to get the first tick) or if the flower is clicked above 15 stacks. Note that these stacks can be reflected
It is best to time the flower click just after a pool cast to avoid dropping the large AoE over it, and be sure it is placed far enough away to not cover the circle. Have the tank keep the boss aimed away (while stayin in the circle), in case Red casts Jet.
If the timing seems to favor the Jet soon after the pool (rare), you can wait until after Jet instead to give yourself more time to reposition the boss
Once the flower buff expires, move Red toward the second flower, stopping about half way (in the narrowing) to point the jet and pool into the wall or back down the path you just came from (the group having run ahead).
Once the stacks start becoming an issue again, click the second flower. If the boss is still quite high, have the DPS move back down the path a bit, to have more room without needing to pass the trees.
If the DPS (or healing) is low enough to require a third flower; note that you will have to deal with adds. Though the adds spawn when the group passes the tree line, they will not reach you for some time.
If Red is low but pool placement prevents you from turning back toward the first flower, know that you can move a bit past the trees without immediately having to deal with the adds.
As stated previously, the red area in the picture (right upper end of the path), where four trees flank the path just past the turn, is the cutoff for where the adds begin to spawn. This is something that (in general) you want to avoid happening in SM as well as HM (VM). Also note that the first flower used to (I haven’t seen it do so in quite a while) have alternative spawn points (all within that first area, before the narrowing at the center of the image), so before pulling the boss make sure you see that the flower is in the usual spot, or elsewhere in the clearing so the group can adjust positioning before the pull.
After you beat Red and get the badge, you can now open the facility door on the northern edge of the jungle. Note that the eastern door often lights up as if that was the door you should go to, but that one will not open until after you secure the Control Center.
2a: Lights Out (Breach Cl-004: Part 1)
 2a: Lights Out (Breach Cl-004: Part 1)
The next boss in the operation is actually two “bosses” (or, more accurately, “encounters”) that are mostly glorified add packs. In the first encounter, you make your way through the holding pens to the Auxiliary Shield Generator, and secure it. In the second, you leave the Shield generator and retake the Control Center, which then gives you access to the compound itself. The tactics for this boss barely change from SM, but the adds are more punishing and require tighter coordination. Adds also have a few ‘extras’ tacked on.
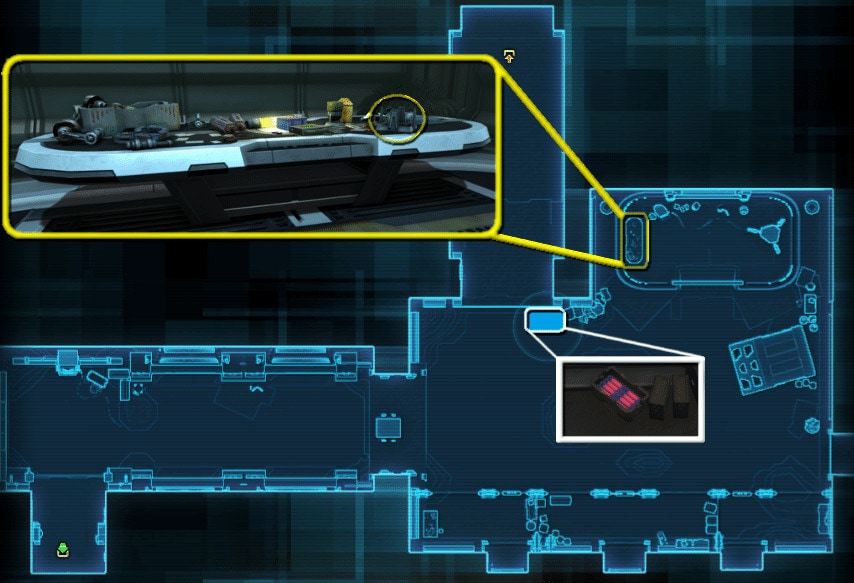
Once inside the room, you will find Stims and Flares.
The Flares will be in a crate on the floor (white box on the map), and the Stims will be in vials on a table deeper in the room (Yellow box detail).
This room is also the location of the first of the 5 books for the bonus achievement ( first book seen in the picture of the table), but these books have multiple spawns in each of the areas, and won’t be part of this guide. After you gather these, you can click the panel to open the door to the pens and begin the encounter.
Once the encounter starts, your group will face different kinds of Adds, many of which will continue to spawn while you remain in the pens, meaning that you will want to make your way to the Auxiliary Shield Generator room as quickly as possible.
Temporary Ability Details
 CI-Neutralizer Flare CI-Neutralizer Flare |
|---|
| This special flare used by the CI-Dark Project’s handlers contains a unique mixture of metallic oxidizers typically reserved for military grade explosives. Although it impractical as a light source due to a flame temperature of 3,400c and extremely short burn time, the light produced produced by these flares is one of the few known deterrents to CI-Dark’s genetically optimized lifeforms. 20s buff in AoE sphere |
 CI-M Synapse Accelerator Serum CI-M Synapse Accelerator Serum |
|---|
| Injects a target with a dose of the experimental CZ-M Synapse Accelerator Serum. When used as directed, this serum grants the user increased runspeed and immunity to movement impairing effects, while also halving tiredness. Injecting a second dose while the first is active will over Overclock and Overload the body. 12s buff Overclock: Grants a 100% bonus to Accuracy and Critical Chance, and for Tanking disciplines a 100% bonus to Defense Chance. 12s buff Accuracy and critical chance increased by 100%. Melee and Ranged defense increased by 100%. Immune to movement impairing effects, knockdowns, and physics. Movement speed increased. Your mind and body are heightened to an extent you never knew possible. You think and move with perfect precision through a world in slow motion around you. You also suddenly feel like you’re cooking in an oven. 30s duration Accuracy and critical chance increased by 100%. Melee and Ranged defense increased by 100%. Immune to movement impairing effects, knockdowns, and physics. Movement speed increased. Your mind and body are heightened to an extent you never knew possible. You think and move with perfect precision through a world in slow motion around you. You also suddenly feel like you’re cooking in an oven. |
The Flares create an AoE that nerfs the damage output of many of the adds, protecting you. They also outright kill the flying adds, though that leaves behind an exploding mini AoE.
The Stims do different things depending on how they are used. A single dose is basically super Hydraulics, giving you a speed boost and preventing pulls/knockdowns/etc. Using Two stims turns them into a powerful offensive/defensive cooldown, but a third dose kills.
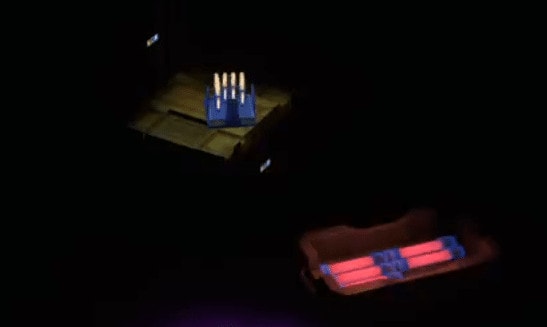
Anyone (assuming you were in the room when they got them) will have circles over their heads (and around their feet) along with the flare/stim buff. Flares will be a blue circle, while Stims will look like an orange ring.

Note that these abilities show up elsewhere in the operation as well, with the same (or almost same) function. Also, any unused Flares/Stims will will remain in the second encounter.
Adds Details
There are various adds that you will have to fight as you make your way to the Auxiliary Shield Generator.
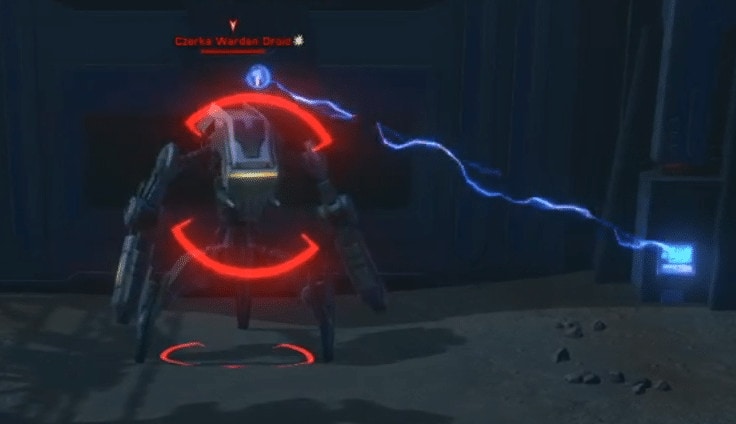
The more boss-like Adds are the Warden Droids which prevent opening security doors.
The second most note-worthy adds are the Rampaging Chargers that spawn in a couple locations, followed by the Felshade Reaper and Hunters, as well as Shadow Walkers, Crimson Stalkers and Incendiary Shrieks.
Warden Droids
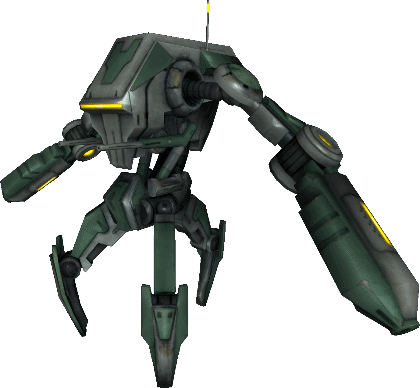
The only non-creature you will see, their main ability of note is a ![]() Containment Taser conal aimed at the target.
Containment Taser conal aimed at the target.
They need to be faced away from the group, or the conal interrupted.
These droids appear at two specific points along your route, and will need to be killed before the panel to open the door can be clicked.
Rampaging Chargers
These bulls likewise show up in specific points along your path, and need to be tanked.
They have the following special moves and buffs;
Buffs:
 Alertness (buff) Alertness (buff) |
|---|
| Buff Effect: Immune to crowd control effects that break on damage. |
| Buff Effect: Damages enemies within 2.2m and knocks them back. Knockback Distance increased by 25% The stampeding beasts cannot and will not stop! |
| Trample is a buff that damages enemies within 2.2m and knocks them back as it runs |
Abilities:
| Damage Type: 0.7s cast; 4m; Weapon Damage |
| Ability Explanation: AoE knockdown centered on target; 4s immobilization, followed by 3s speed buff |
| The Horns is an AoE knockdown and knockback – can be interrupted |
| Damage Type: 4m; Weapon Damage |
| Damage Type: 4m; Weapon Damage |
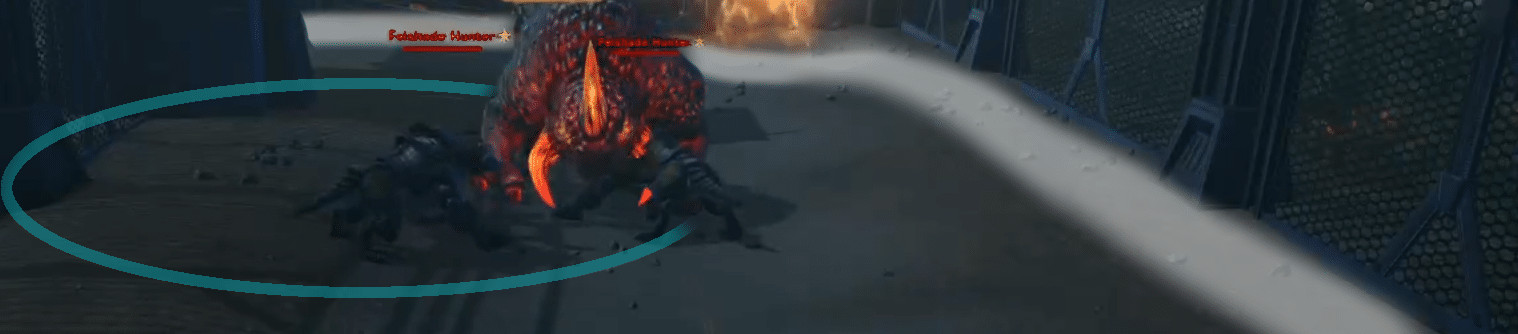
Felshade Reapers
These adds take increased damage when in the light (flare).
They also have a buff that increases all the damage they do when they exit stealth.
You always want to kill these in a flare
Buffs:
| Buff Effect: Increase damage from all sources by 10% per charge, maximum of 30%. Disoriented and unable to defend itself! |
| Buff Effect: Immune to incapacitating and movement-impairing effects. |
Abilities:
| Ability Explanation: All outgoing damage is significantly increased upon exiting stealth after an attack |
| Pounce |
|---|
| Damage Type: 9-25m attack |
| Ability Explanation: Adds a stun; Stunned, unable to act. Knocked off balance by the fury of a Felshade. |
| Damage Type: Weapon Damage; Up to 4m |
| Ability Explanation: Adds a 15s DoT “Reaper’s Claw” – Periodically taking internal damage. Nothing can survive the jaws of a reaper for long. |
| Damage Type: Weapon Damage; Up to 4m |
| Ability Explanation: Adds “Savage Claws” DoT – 15s Periodically taking internal damage. The razor-like claws of the Felstalker tear through flesh and armor effortlessly. |
Felshade Hunters
The smaller, nicer cousins of Reapers, are very similar, but elites instead of champions, and deals less damage.
They also don’t add a “Reaper’s Claw” DoT.
Buffs:
| Alertness |
|---|
| Buff Effect: Immune to crowd control effects that break on damage. |
| Buff Effect: Increase damage from all sources by 10% per charge, maximum of 30%. Disoriented and unable to defend itself! |
Abilities:
| Ability Explanation: All outgoing damage is significantly increased upon exiting stealth after an attack |
| Pounce |
|---|
| Damage Type: 9-25m attack |
| Ability Explanation: Adds a stun; Stunned, unable to act. Knocked off balance by the fury of a Felshade. |
| Damage Type: 15s DoT; Internal Damage; Up to 4m |
| Ability Explanation: Periodically taking internal damage. The razor-like claws of the Felstalker tear through flesh and armor effortlessly. |
| Damage Type: Weapon Damage; Up to 4m |
Shadow Walkers

These have an outright aversion to flares (they won’t go into them).
They spawn later on in the fight, and can be annoying when not mitigated with a flare.
Buffs:
| Buff Effect: Photosensitivity – Has an aversion to the light of CI-Dark control flares. |
| Buff Effect: Increase damage from all sources by 10% per charge, maximum of 30%. Disoriented and unable to defend itself! |
| Alertness |
|---|
| Buff Effect: Immune to crowd control effects that break on damage. |
Abilities:
| Buff Effect: 4m; Debuff |
| Ability Explanation: Stunned, periodically taking damage. You are being torn apart! |
| Damage Type: 8m |
| Damage Type: 4m; Weapon Damage |
| Damage Type: 4m; Weapon Damage |
| Damage Type: 4m; Weapon Damage |
Incendiary Shrieks
The only flying adds you’ll deal with here, these have a Photoreactive Hypergollicity passive, which means they violently react to bright light (flares). Entering one will kill them automatically. Killing these will leave a small yellow ring that explodes a few seconds later.
Buffs:
| Buff Effect: Immune to crowd control effects that break on damage. |
| Buff Effect: Violently reacts to increases in luminosity. Initiates Impending Burst when bird enters flare |
Abilities:
| Buff Effect: 4s Buff |
| Ability Explanation: Explodes into a cloud of acid when timer expires Applies Corrosive Rain. Also happens when shriek dies (without flare) |
| Buff Effect: Debuff |
| Ability Explanation: Taking periodic elemental damage. You are covered in a burning tar-like substance. |
| Damage Type: Weapon Damage |
| Damage Type: Weapon Damage |
Impending Burst looks like a yellow circle, which on exploding applies a Corrosive Rain DoT. This DoT can be applied to you, but can also go on Droids or other annoying adds caught in the circle.
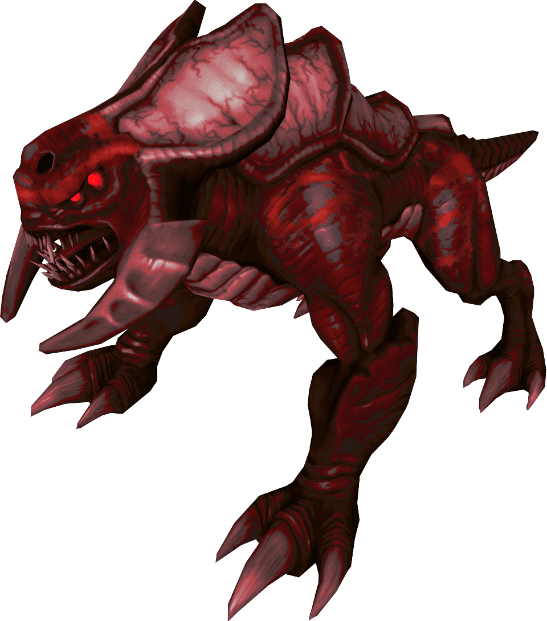
Crimson Stalkers
Stalkers are like mini Red’s. They drop mini Hydrochloric Pools that function the same way they did on Red (standing in the pools reduces outgoing damage, defense, and damage done). They also do a bite that progressively slows you (significantly more than it did in SM).
Buffs:
| Buff Effect: Immune to crowd control effects that break on damage. |
Abilities:
| Buff Effect: 4m range; 30s AoE |
| Ability Explanation: Reduces outgoing damage, healing done, and defense. A pungent odor of oxidizing durasteel overwhelms your senses… 30% |
 Envenomed Bite Envenomed Bite |
|---|
| Buff Effect: 4m range; Weapon Damage |
| Ability Explanation: Reduces movement speed by up to 90%. The crippling neurotoxin causes your limbs to go numb. |
| Damage Type: 4m; Weapon Damage |
| Damage Type: 4m; Weapon Damage |
Hydrochloric Pools look like small red domes. Standing in them reduces outgoing damage, healing taken, and defense.
Living Smoke
These are adds that only spawn if you’re taking too long in the final room. You should never have to deal with these, unless you’re going for the “RAMPAGE!” Mark of Mastery. They have a couple buffs that make them hard to see and hard to kill, but otherwise just pack a punch. Flares are protective.
Buffs:
| Buff Effect: Defense increased by 95%. The smoke-like creatures are nearly impossible to see and even harder to hit. |
| Buff Effect: Immune to incapacitating and movement-impairing effects. |
| Buff Effect: Increase damage from all sources by 10% per charge, maximum of 30%. Disoriented and unable to defend itself! |
Abilities:
| Damage Type: 4m; Weapon Damage |
| Damage Type: 4m; Weapon Damage |
| Damage Type: 4m; Weapon Damage |
Strategy
The main over-arching strategy for this boss is to keep moving and stay together to get through as quickly as possible without getting overwhelmed by adds. In general, the faster you finish this boss, the easier it will be and the less risk you run of being overwhelmed down the line.
Overview
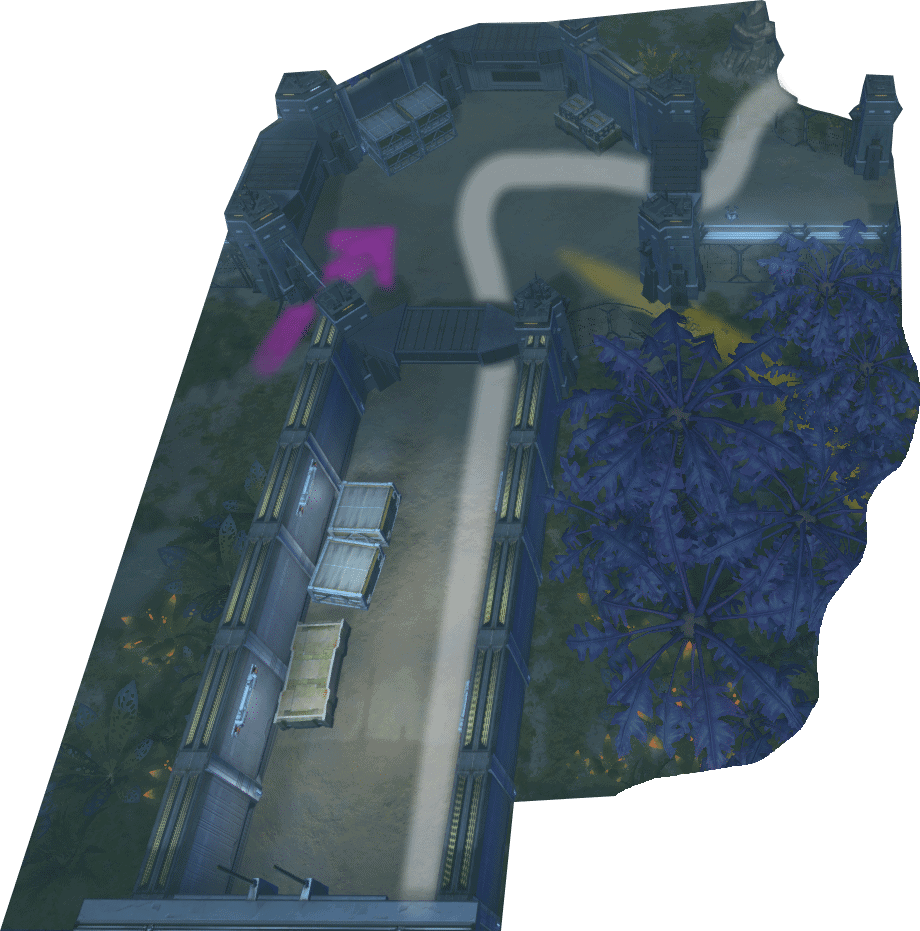
Here you see the path you’ll take through the holding pens. From below it gets a little confusing until you get used to it, so take note of the landmarks. Note; in the picture above the two gates the droids keep closed have already been opened.
There are several options on how to divvy up the flares and stims. Any unused Flares/Stims will stay until the next encounter.
- The easiest method is for one or two people to take the flares, while each person grabs a stim for the final run.
- The alternative is to allow each of the DPS to take two stims, giving them a big DPS boost for a short while, though note that the stims can be triple-clicked if done too quickly, killing you instantly.
The Flares should be used anytime a Felshade Reaper is in play or to protect from Walkers. Otherwise, they can be used to mitigate the knockdowns Felshade Hunters do or instantly-kill Shrieks. See strategy below for details.
Above, you see the rough spawn points for the first two Chargers and the locations of the two Warden droids, as well as the location where you encouter the Felshade Reapers in what many have dubbed “the Reaper Room”. The previously mentioned ‘final run’ is the path from just beyond the Felshade Reapers to the second Warden droid.
Ignore the darkened area of the map, as that is for the next encounter (part 2).
Lesser adds (Shrieks and Stalkers) spawn throughout the encounter. Stay out of the Stalkers’ purple puddles and the yellow explosions the Shrieks leave behind. The initial add spawns trigger based on the furthest forward player, so unless you are baiting a specific group, it is best to stick together. Gather the lesser adds on Warden Droids and/or Chargers for efficient killing.
Initial Stretch
The first Charger should be killed with any earlier add packs, facing him against a big tree or wall. He can also be push/pull/kited to the flaming area, killing it quicker. You can also use a flare here to get rid of the shrieks. The charger can be hard stunned to prevent his Horns attack.
The second Charger can be killed where it spawns as well, or it and the minor adds can be brought to the first warden droid for maximal AoE’s.
For even more efficient add management, the Droid can be brought to the entrance and faced out, with a flare popped to kill a wave of shrieks that spawns behind you. The circles the shrieks leave can put a DoT on the droid if they explode while he’s on them, helping you kill it. This requires some finessing by the tank, and the group will need to keep the droid’s channel interrupted.
The warden droid will be tethered to the panel that opens the door, so to continue on, you will have to kill it, first. The Warden Droid’s cast can be interrupted, but you should still keep him pointed away from the group to prevent extra damage to the party.
Reaper Room
In the room beyond this droid, there is a third charger fighting two Fleshade Reapers and two Hunters (Represented on the map with a Reaper). This will also mark the first time you will have to deal with either type of Felshade.
If no (lesser) adds have spawned behind you or are still alive when the door opens, you can skip these by hugging the right wall (path in image below), using no moves while near them and avoiding getting hit by the AoE knockdowns the Reapers do. If any adds spawn or are spawned (and aggroed to you) when the door opens, they will aggro the Reapers as they run past them to get to you. This is a big time-saving tactic in HM, where the Reapers pack a big punch.
If you accidentally end up aggroing them, this will be an important place to use flares. I suggest placing the first one to the left (the blue circle on the image above), and continuing until the Reapers are killed (and prioritize killing those as soon as possible).
If you plan for your group to aggro these adds, it would be advisable to give each DPS two stims and have them quickly delete these adds (and flaring, as above).
The Felshade Reapers are the highest damage-dealing adds you’ll encounter here, but are nerf’d significantly by the flare, and they take more damage as well (due to the Blinding Light debuff)… which is also a reason many groups try and skip aggroing them.
Final Run
After exiting this “reaper room” area, you want to run all the way to the next droid room (the path in the image above). If you gave everyone a single stim, this would be the best time to pop them, keeping you from being knocked down on your way there.
If the stims were given to the DPS, speed boosts and add CC’s (group stuns like carb, seismic grenades, etc) can be used to protect the group from getting knocked down by any straggling Hunters or captured (stunned) by the Walkers, which first appear on this final run.
Place the first flare at the entrance to the octagonal room where the second Warden is. This will protect the team from the adds you ran past.
Drag the droid into the circle and continue to drop more flares as needed while focusing the droid, moving slowing toward the middle of the door.
Aux Shield Generator Shed
As soon as the droid dies, one person should click the panel to open the door, and a designated player (off-tank right after a swap, or a DPS) should run through the hallway and into the room to click the panels that end the encounter.
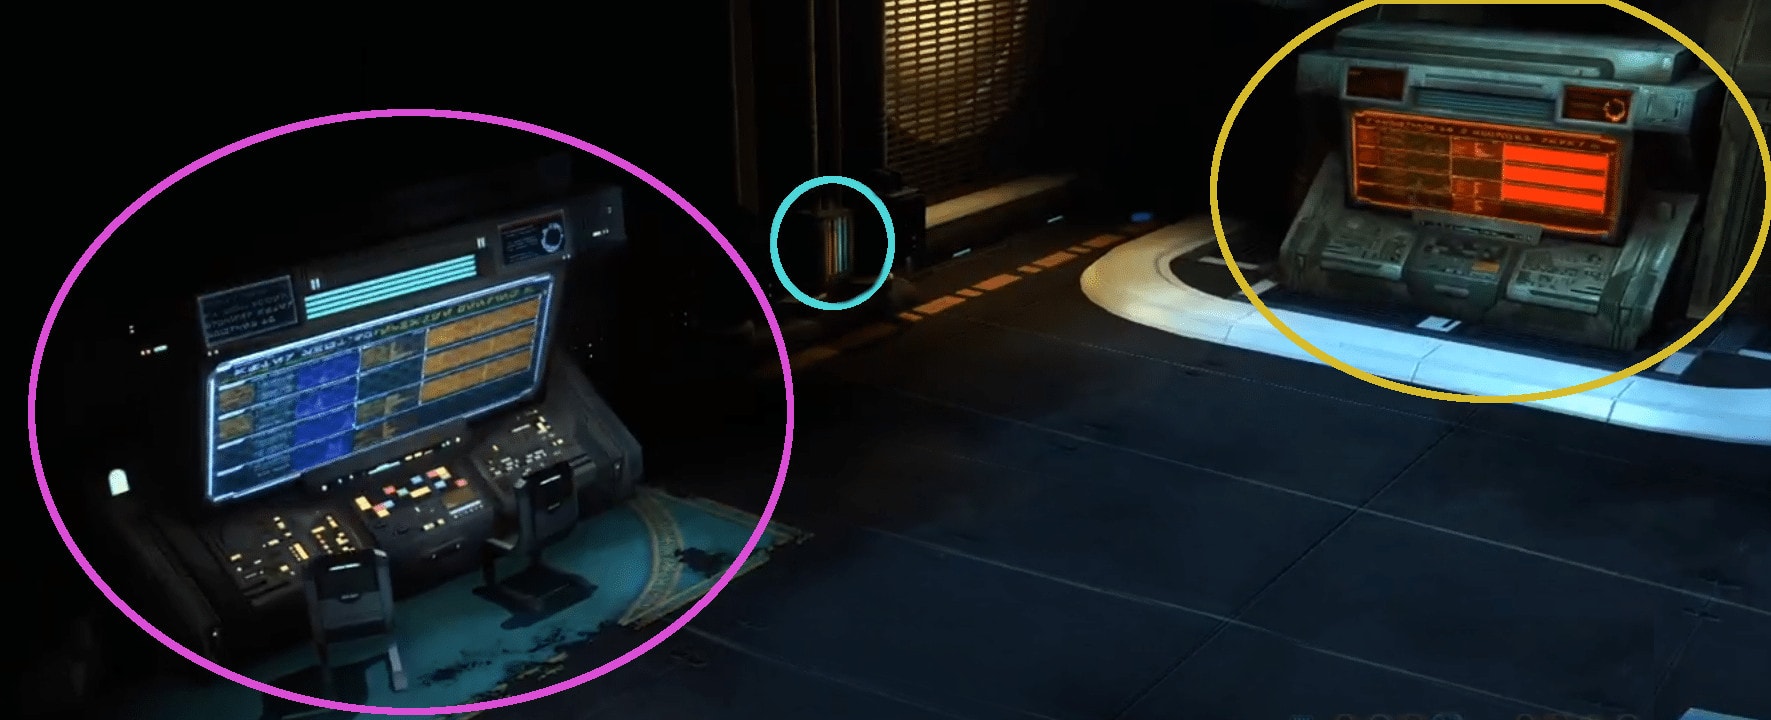
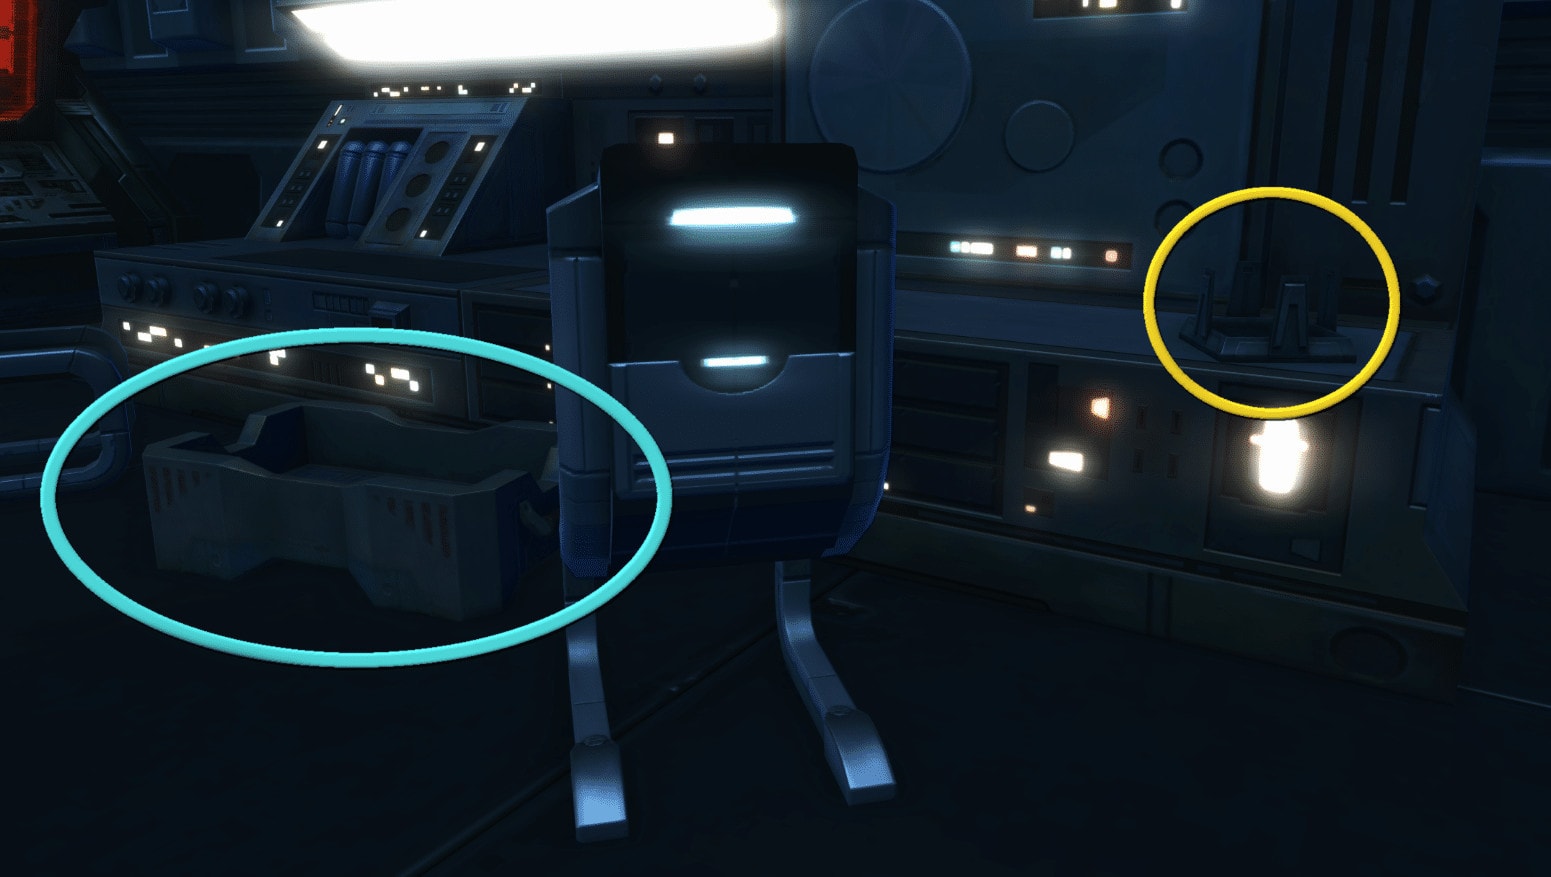
Once inside the room at the end of the now-open corridor, the far back wall will have two consoles and a “breaker box” panel that must be clicked sequentially. Only one will light up at a time as voice lines guide you through it, but the small panel (blue circle) can be a bit hard to notice, especially since you have to click it multiple times.
The order is:
- far (yellow circle) console
- the middle panel (to open it)
- the tubes inside the panel
- the ‘correct’ tube inside the panel (easiest to miss)
- finally the left console (pink circle).
The others should make their way inside the room while one person is clicking and hold the beasts on the empty side of the room. Once the sequence (slowed by the voice lines) is completed, a burst will kill all remaining adds and the encounter will end.
2b: According to Plan (Breach CI-004: Part 2)
 2b: According to Plan (Breach CI-004: Part 2)
Then second leg of this glorified add fight starts right where the first left off; by exiting back out of the same room you just fought your way into.
If starting from a lockout (or running back after a wipe), you enter this room the exact same way you did the start of the earlier encounter; at the north-most door from spawn. The panel you click will simply port you into the end room instead of the starter room from the previous encounter.
You will find more Stims and Flares near the door, and all of the adds encountered previously will show up again (as well as a few extra ones).
Temporary Ability Details
| CI-Neutralizer Flare |
|---|
| This special Flare used by the CI-Dark Project’s handlers contains a unique mixture of metallic oxidizers typically reserved for military grade explosives. Although it impractical as a light source due to a flame temperature of 3,400c and extremely short burn time, the light produced produced by these Flares is one of the few known deterrents to CI-Dark’s genetically optimized lifeforms. 20s buff in AoE sphere |
| CI-M Synapse Accelerator Serum |
|---|
| Injects a target with a dose of the experimental CZ-M Synapse Accelerator Serum. When used as directed, this serum grants the user increased runspeed and immunity to movement impairing effects, while also halving tiredness. Injecting a second dose while the first is active will over Overclock and Overload the body. 12s buff Overclock: Grants a 100% bonus to Accuracy and Critical Chance, and for Tanking disciplines a 100% bonus to Defense Chance. 12s buff Accuracy and critical chance increased by 100%. Melee and Ranged defense increased by 100%. Immune to movement impairing effects, knockdowns, and physics. Movement speed increased. Your mind and body are heightened to an extent you never knew possible. You think and move with perfect precision through a world in slow motion around you. You also suddenly feel like you’re cooking in an oven. 30s duration Accuracy and critical chance increased by 100%. Melee and Ranged defense increased by 100%. Immune to movement impairing effects, knockdowns, and physics. Movement speed increased. Your mind and body are heightened to an extent you never knew possible. You think and move with perfect precision through a world in slow motion around you. You also suddenly feel like you’re cooking in an oven. |
The Flares create an AoE that nerfs the damage output of many of the adds, protecting you. They also outright kill the flying adds, though that leaves behind an exploding mini AoE.
The Stims do different things depending on how they are used. A single dose is basically super Hydraulics, giving you a speed boost and preventing pulls/knockdowns/etc.
Note that these abilities show up elsewhere in the operation as well, with the same (or almost same) function.
Note that these abilities show up elsewhere in the operation as well, with the same (or almost same) function.
Adds Details
There are various adds that you will have to fight as you make your way to the Auxiliary Shield Generator.
The more boss-like Adds are the Warden Droids which prevent opening security doors.
The second most note-worthy adds are the Rampaging Chargers that spawn in a couple locations, followed by the Felshade Reaper and Hunters, as well as Shadow Walkers, Crimson Stalkers and Incendiary Shrieks.
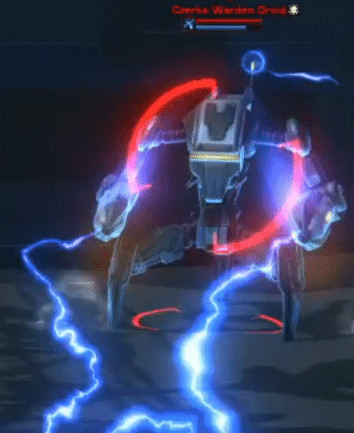
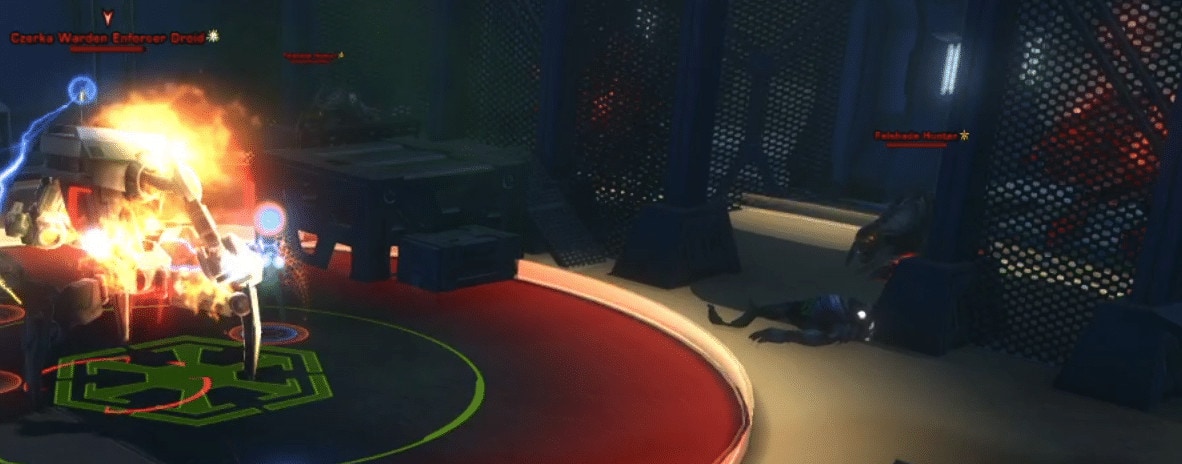
Warden Enforcer Droids

These have a few more moves here than their earlier versions, and are seen in the final room.
Like previously, they have to be killed before the final panel can be clicked.
Buffs:
| Buff Effect: Starts as passive 3s initiation channel |
Abilities:
 Optimization Protocol Optimization Protocol |
|---|
| Damage Type: 3s cooldown Weapon Damage |
| Ability Explanation: Casts Major and Perfect Optimization |
| Damage Type: AoE buff; 5m around droid |
| Ability Explanation: Massively increases all damage dealt and reduces all damage received. |
| Damage Type: AoE Ring buff between 5-10m around droid |
| Ability Explanation: Significantly increases all damage dealt and reduces all damage received. |
| Damage Type: 3s cooldown; 25m range; 1s channel; Weapon Damage |
| Blast Attack |
|---|
| Damage Type: 5-30m range; Weapon damage |
Optimization Protocol is a quick (1s) cast, which drops concentric circles around the droid. The outer yellow ring is Major Optimization, and the inner red ring is Perfect Optimization, both of which increase damage done and reduces damage received. This cast can be interrupted, but there are easier alternatives to dealing with it (see strategies section).
Containment Taster works the same way it did on the previous encounter.
Lake Crabs
Crabs come out of the lake at two points along your route, and have an annoying (and deadly, depending on the timing) Tongue Grab pull. A third crab spawns to pull you into the lake on the last leg of your run, which is when the Stim must be used as it spawns.9
Abilities:
| Damage Type: Debuff; 1.5s duration |
| Ability Explanation: Immobilizes target and pulls to Crab |
| Damage Type: 4m melee attack; Weapon Damage |
Rampaging Chargers
Bulls here show up at the start, and then at the end of the final run, though if you play your cards right, you won’t have to deal with any of them directly.
Buffs:
| Alertness (buff) |
|---|
| Buff Effect: Immune to crowd control effects that break on damage. |
| Buff Effect: Damages enemies within 2.2m and knocks them back. |
| Trample is a buff that damages enemies within 2.2m and knocks them back as it runs |
Abilities:
| Damage Type: 0.7s cast; 4m; Weapon Damage |
| Ability Explanation: AoE knockdown centered on target; 4s immobilization, followed by 3s speed buff |
| The Horns is an AoE knockdown and knockback – can be interrupted |
| Damage Type: 4m; Weapon Damage |
| Damage Type: 4m; Weapon Damage |
Felshade Reapers
These show up at the very start of the encounter, and more show up in the final room. Again, they take increased damage when in the light (Flare). You also don’t want to get too far away from them to prevent them pouncing on you. They also have a buff that increases all the damage they do when the exit stealth.
Buffs:
| Buff Effect: Increase damage from all sources by 10% per charge, maximum of 30%. Disoriented and unable to defend itself! |
| Buff Effect: Immune to incapacitating and movement-impairing effects. |
Abilities:
| Ability Explanation: All outgoing damage is significantly increased upon exiting stealth after an attack |
| Pounce |
|---|
| Damage Type: 9-25m attack |
| Ability Explanation: Adds a stun; Stunned, unable to act. Knocked off balance by the fury of a Felshade. |
| Damage Type: Weapon Damage; Up to 4m |
| Ability Explanation: Adds a 15s DoT “Reaper’s Claw” – Periodically taking internal damage. Nothing can survive the jaws of a reaper for long. |
| Damage Type: Weapon Damage; Up to 4m |
| Ability Explanation: Adds “Savage Claws” DoT – 15s Periodically taking internal damage. The razor-like claws of the Felstalker tear through flesh and armor effortlessly. |
Felshade Hunters
These are very similar, but elites instead of champions, and deals less damage.
They also don’t add a “Reaper’s Claw” DoT. You will see these throughout the encounter.
Buffs:
| Alertness |
|---|
| Buff Effect: Immune to crowd control effects that break on damage. |
| Buff Effect: Increase damage from all sources by 10% per charge, maximum of 30%. Disoriented and unable to defend itself! |
Abilities:
| Ability Explanation: All outgoing damage is significantly increased upon exiting stealth after an attack |
| Pounce |
|---|
| Damage Type: 9-25m attack |
| Ability Explanation: Adds a stun; Stunned, unable to act. Knocked off balance by the fury of a Felshade. |
| Damage Type: 15s DoT; Internal Damage; Up to 4m |
| Ability Explanation: Periodically taking internal damage. The razor-like claws of the Felstalker tear through flesh and armor effortlessly. |
| Damage Type: Weapon Damage; Up to 4m |
Shadow Reapers
These will show up in the final room. They have an outright aversion to Flares (they won’t go into them).
They spawn later on in the fight, and can be really annoying when not mitigated with a Flare.
Buffs:
| Buff Effect: Photosensitivity – Has an aversion to the light of CI-Dark control flares. |
| Buff Effect: Increase damage from all sources by 10% per charge, maximum of 30%. Disoriented and unable to defend itself! |
| Buff Effect: Immune to incapacitating and movement-impairing effects. |
Abilities:
| Buff Effect: 4m; Debuff |
| Ability Explanation: Stunned, periodically taking damage. You are being torn apart! |
| Buff Effect: 8m |
| Buff Effect: 4m Weapon Damage |
| Damage Type: 4m; Weapon Damage |
| Damage Type: 4m; Weapon Damage |
Incendiary Shrieks
Shrieks are the only flying adds you’ll deal with here, and they’ll spawn behind you, opposite your path out of the octagonal enclosure. Again, they have a Photoreactive Hypergollicity passive, which means they violently react to bright light (Flares). Entering one will kill them automatically.
Buffs:
| Buff Effect: Immune to crowd control effects that break on damage. |
| Buff Effect: Violently reacts to increases in luminosity. Initiates Impending Burst when bird enters flare |
Abilities:
| Buff Effect: 4s Buff |
| Ability Explanation: Explodes into a cloud of acid when timer expires Applies Corrosive Rain |
| Buff Effect: Debuff |
| Ability Explanation: Taking periodic elemental damage. You are covered in a burning tar-like substance. |
| Buff Effect: Weapon Damage |
| Damage Type: 4m; Weapon Damage |
Killing these will leave a small yellow ring of Impending Burst that explodes a few seconds later, leaving a Corrosive Rain DoT.
Crimson Stalkers
Stalkers will spawn at the beginning and behind you along with the Shrieks. They still drop mini Hydrochloric Pools that function the same way they did on Red. They also do a bite that progressively slows you.
Buffs:
| Buff Effect: Immune to crowd control effects that break on damage. |
Abilities:
| Buff Effect: 4m range; 30s AoE |
| Ability Explanation: Reduces outgoing damage, healing done, and defense. A pungent odor of oxidizing durasteel overwhelms your senses… 30% |
| Envenomed Bite |
|---|
| Buff Effect: 4m range; Weapon Damage |
| Ability Explanation: Reduces movement speed by up to 90%. The crippling neurotoxin causes your limbs to go numb. |
| Damage Type: 4m; Weapon Damage |
| Damage Type: 4m; Weapon Damage |
Hydrochloric Pools look like small red domes. Standing in them reduces outgoing damage, healing taken, and defense.
Strategy
The main over-arching strategy for this boss remains to keep moving and stay together.
Now, you must also juggle moving quickly with hiding from the deadly lightning zaps created by the rooftop coils.
There are 6 Flares and 8 Stims on the left side of the door of the room you start in (finished the last encounter in). Two people should grab the Flares (the split will depend on your group; I prefer 2:4) and drop them in specific spots depending on strategy. Every player should pick up one of the stims; this will prevent them from getting pulled by the crab at the end.
After you have the stims and flares sorted, stack in the right-most corner of the door. Have one person click the panel to open it.
If the group has any speed buffs, you will want to use them right before the door opens (predation, etc) so that you can run through the hallway and into the octagonal room.
The Octagon
The Octagon has three (open) entrances. The image above shows a detail of the path (white) you will want to take into the Octagon and out into the lake enclosure (upper right), as well as the previous path you took on the previous boss into to Octagon (fading yellow) and the spawn location of extra lesser adds (purple).
You will see a group of Stalkers at the mouth of the hallway, with a Bull further down. A pair of Felshade Reapers will spawn at the mouth of the hallway and attack the Bull. This Bull is different from the others you have seen, having more health and dealing less damage, and Reapers are attracted to it
You will want to hug the right wall of the hallway, trying not to aggro the Reapers as you run past (lower part of the white path in the image above). The Stalkers will follow. From experience, these almost always aggro on the first pull, as they spawn sooner than in subsequent pulls. You can either pull and /stuck it (losing any extra Flares/Stims retained from the previous encounter), or plan to wait in the Octagon for them to kill the bull before fighting them. Either way, you will want to run along the right wall to pass them and the bull (which they will be fighting and eat unless you hit/taunt them)
You will want to stay within the safety of the Octagon unless you are ready to run into the Lake Enclosure, which is protected by Electrified Coils – more on these later. For now, note that anything outside the Octagon’s right door is periodically deadly.
From this point on, there are a couple different Strategies groups can do on this boss, with various variations. I will go over these as they come, numbering alternatives.
- If you plan on trying to skip the Reapers, your group will have to move quickly and /stuck the first pull.
- Note, this forfeits any unused Flares/Stims from the previous boss fight
- Running quickly; the coils should power down right as you reach the right door, allowing you to continue directly through
- If you are planning to kill the Reapers, it is best to let them fight the bull in the hall as the group gathers in the lower middle of the Octagon above it. Once the bull is dead, hold the Reapers in a Flare , one tank taunting each, and depending on your DPS it may take 2 to kill them.
- If they are still alive after two, it’s best to use DCD’s instead of a third Flare, and preferably have only one still up.
- By the time the Reapers are dead, a wave of Shrieks should have spawned and gotten caught (killed) in the second Flare. A DPS or two CAN run over into the pen they spawn out of (purple path) while the group waits for the Reapers to kill the bull, in order to get the Shrieks to spawn sooner. Doing so brings them into the first flair, so they ideally put their Corrosive Rain DoT on the Reapers, making them faster to kill.
- When the Reapers die, move onto the lake enclosure as soon as the coils power down.
- Some groups also chose to kill the Reapers inside the hallway where you first encounter them
- A Flare needs to be dropped in the narrower area of the hallway (aka, where there are containers against the left wall) to make it easier to keep all the adds in the Flare(s)
- This method allows DPS to start hitting things right away (instead of waiting for the Reapers to kill the Bull), but also means the Bull will likewise have to be killed and tanked
Lake Enclosure
Once you leave the Octagon (where the white path leads), you will move into the Lake Enclosure. This is a large, open area with roof-top Electrified Coils that will quickly two-shot anyone caught out in the open.
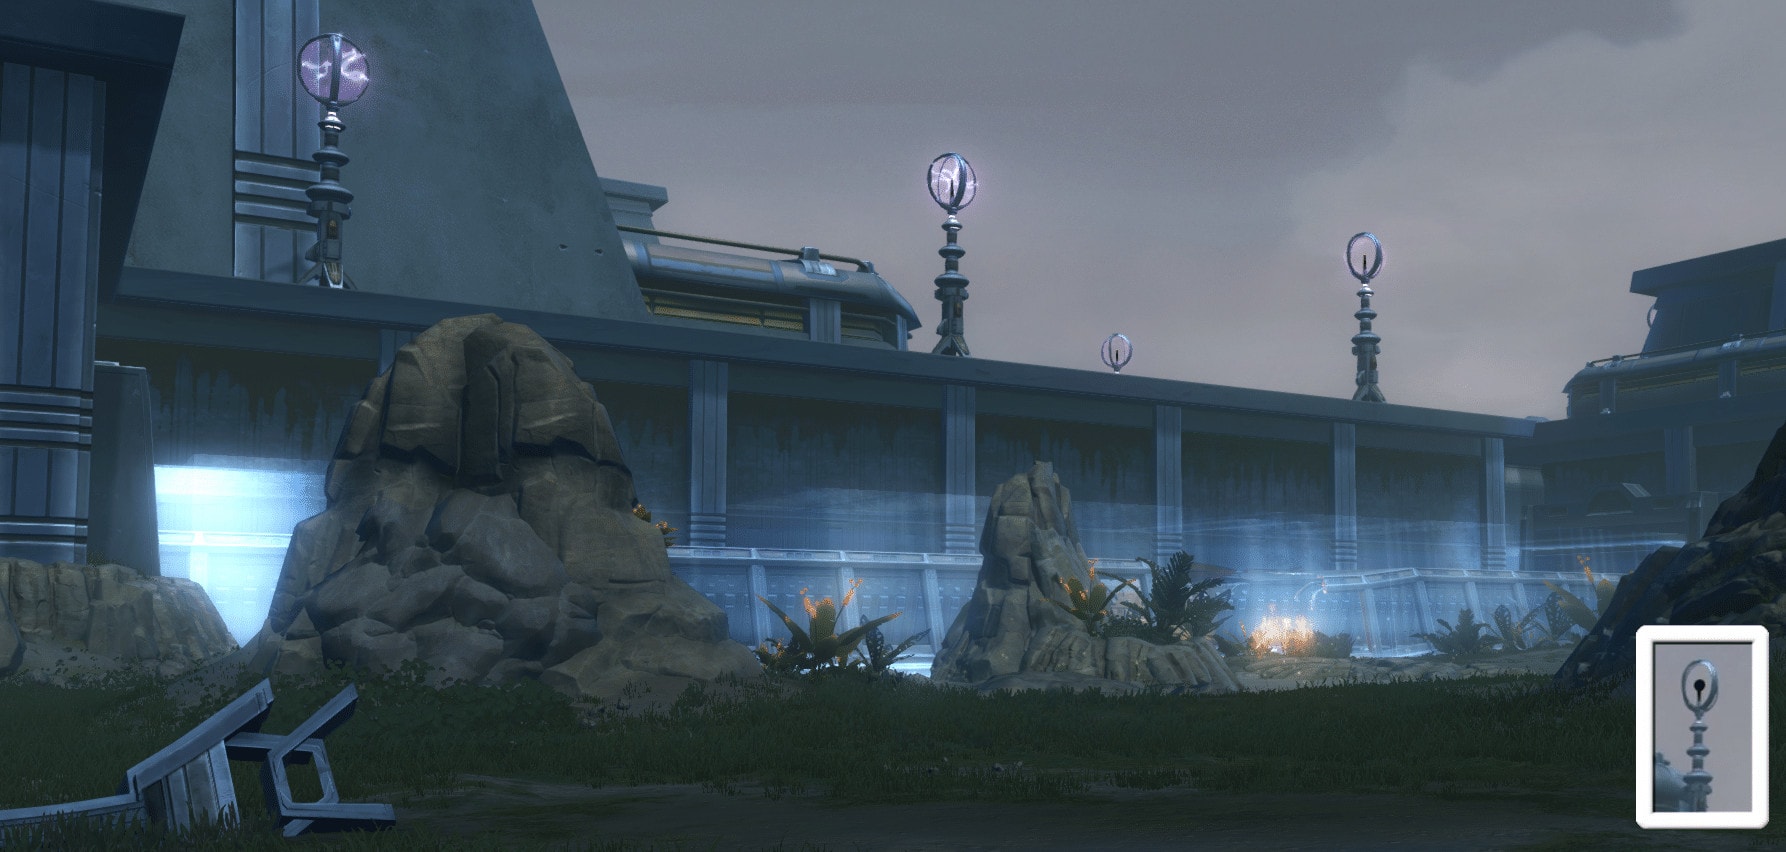
These coils are located on the roof of the far building, across from where you enter the Lake enclosure.
These coils will power down periodically, their status indicated by System Messages as well as a visual change; they surge with purple electricity when on (as seen in the image above); when they are off, they look black (detail in lower right corner of the image)
The Lake Enclosure has a series of large rocks scattered around it (a few visible in the previous image; and numbered in the one directly above). Additional adds (Felshade Hunters, most notably) will come from the breach in the fence on the right of the image (that area is likewise where the last of the 5 books is located).
This is also where you will first encounter Lake Crabs that have an affinity to pull players out into the open. They come out of the lake, roughly at the two small (filled-in) green arrows, with a third spawning at the rightmost (hollow) one.
The numbered rocks provide cover from the Coils, and your group should stack against them to not get zapped (roughly where the numbers are located). There are several patterns groups use, with the quickest (single stop) method drawn on the map
- The fastest way to transverse the room, and the only viable one if you plan to skip fighting the Reapers, is to run directly to rock 3 to wait out the power-up cycle, then sprint all the way into the hallway as soon as they power down
- If done properly, this method out-runs most adds, leaving you to deal with the first Crab as the main issue while at the rock. The Reapers either don’t aggro or despawn.
- A Flare should be dropped there to protect the group, moved further left (on the image) if Shrieks had spawned behind you, such that the group still has an area to stand outside the yellow circles they drop.
- AS SOON as the coils go down, players need to pop any speed boosts and run, regardless of what adds are still up at the rock. Stun abilities and speed boosts help here.
- Alternatively, many groups split this path into two stops; the first at rock 2 and the second at rock 4 (or 5)
- This strategy takes longer, and forces the group to deal with more adds than the first, but it allows the group to kill the adds before moving on, which some groups find safer/easier
- Flares should be used on Crabs, and a tank might want to bait the first crab to rock 2 to prevent both crabs from assaulting the group at rock 4/5
- Using this strategy, Felshade Hunters will catch up to the group at rock 2 and need to be controlled.
- This strategy is NOT compatible with skipping the Reapers, as they catch up to you at rock 2, making a mess of things.
- Other strategies exist, including ones that stop three times using rocks1,3 and 5, (and even 6, which is the unmarked rock between 5 and the top yellow arrow), however (IMHO) the longer you stay in this Enclosure, the messier things become… and these strategies unravel later on.
- These also use up more Flares , which will become scarce later on, and may cause group wipes in the very last phase (something progging groups won’t notice at first, so be wary of using too many Flares here)
Regardless of which strategy your group picks, every player will need to pop a Stim when the Crab at the right-most area of the lake spawns (green hollow arrow).
- This will prevent them from being pulled into the lake or knocked down by any Hunters that catch up to the group.
- Other speed boosts should be used before (if running from rock 3 or rock 5), and after the Stims to make the final rush as quickly as possible.
- The Stims act on the player, or whatever friendly the player is targeting, which is especially important for healers to watch out for; otherwise, they may Stim someone else and not have a Stim for themselves.
- If one player ‘accidentally’ took multiple Stims, this is also a way to fix the situation, though it may prove tricky.
- Some abilities (like Hydraulics/Hold the Line) will protect players from getting pulled back, but should only be used instead of a Stim in an emergency situation
Note that the force-field in the distance (of both images) will not be up – this is something that you engage once you enter the room beyond the breached hallway (yellow arrow at the top), inside which you will make a sharp left turn and continue on to the Security Center (more on this later).
As you run, more adds, including extra Crabs, Chargers and Hunters will try and catch you. Stuns/knockbacks and other crowd-control measures may prove helpful, especially in the actual hallway.
At the end of it (top left in the image above), just past the doorway, there will be a terminal you click to close the door. You will want to time this so that everyone gets in before the channel finishes, but no (or as few as possible) adds do.
You want to especially avoid getting any Crabs into the room, and preferrably no Chargers either. A Hunter or two can be quickly killed, and don’t pose much of a problem (though ideally you get a few seconds of breathing time when the door closes. People should move in and around the corner once inside the room, to prevent crabs from pulling anyone back out.
It is often better to sacrifice a lagging player ( anyone outside will automatically die) than getting lots of adds NOTE: their body will teleport (from anywhere in the Lake Enclosure, not just the hallway) to this door once it’s closed, and they can be rez’d/stealth rez’d in the short time before the first add spawn.
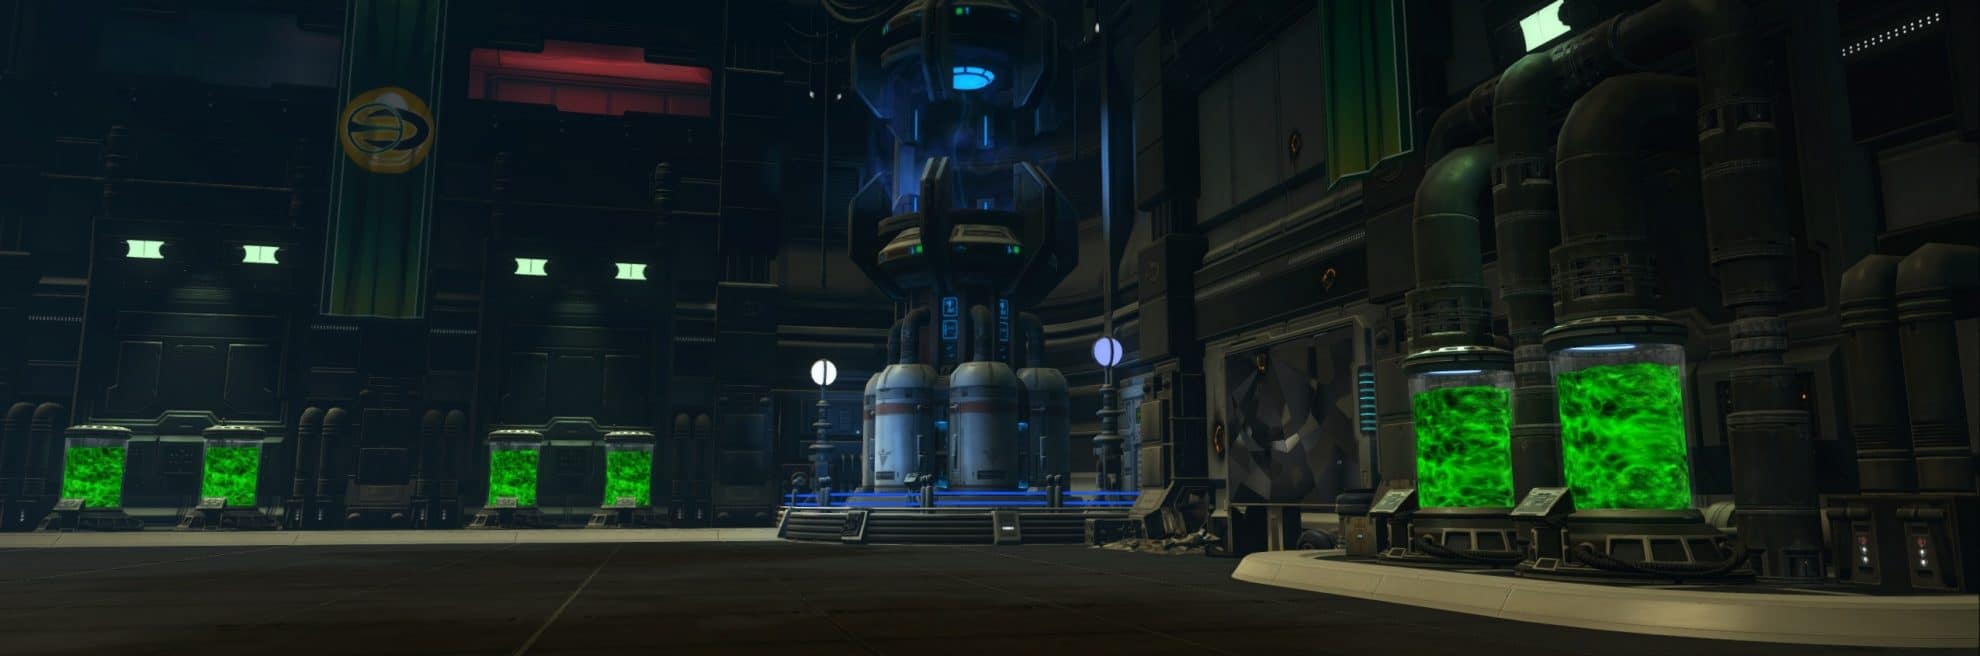
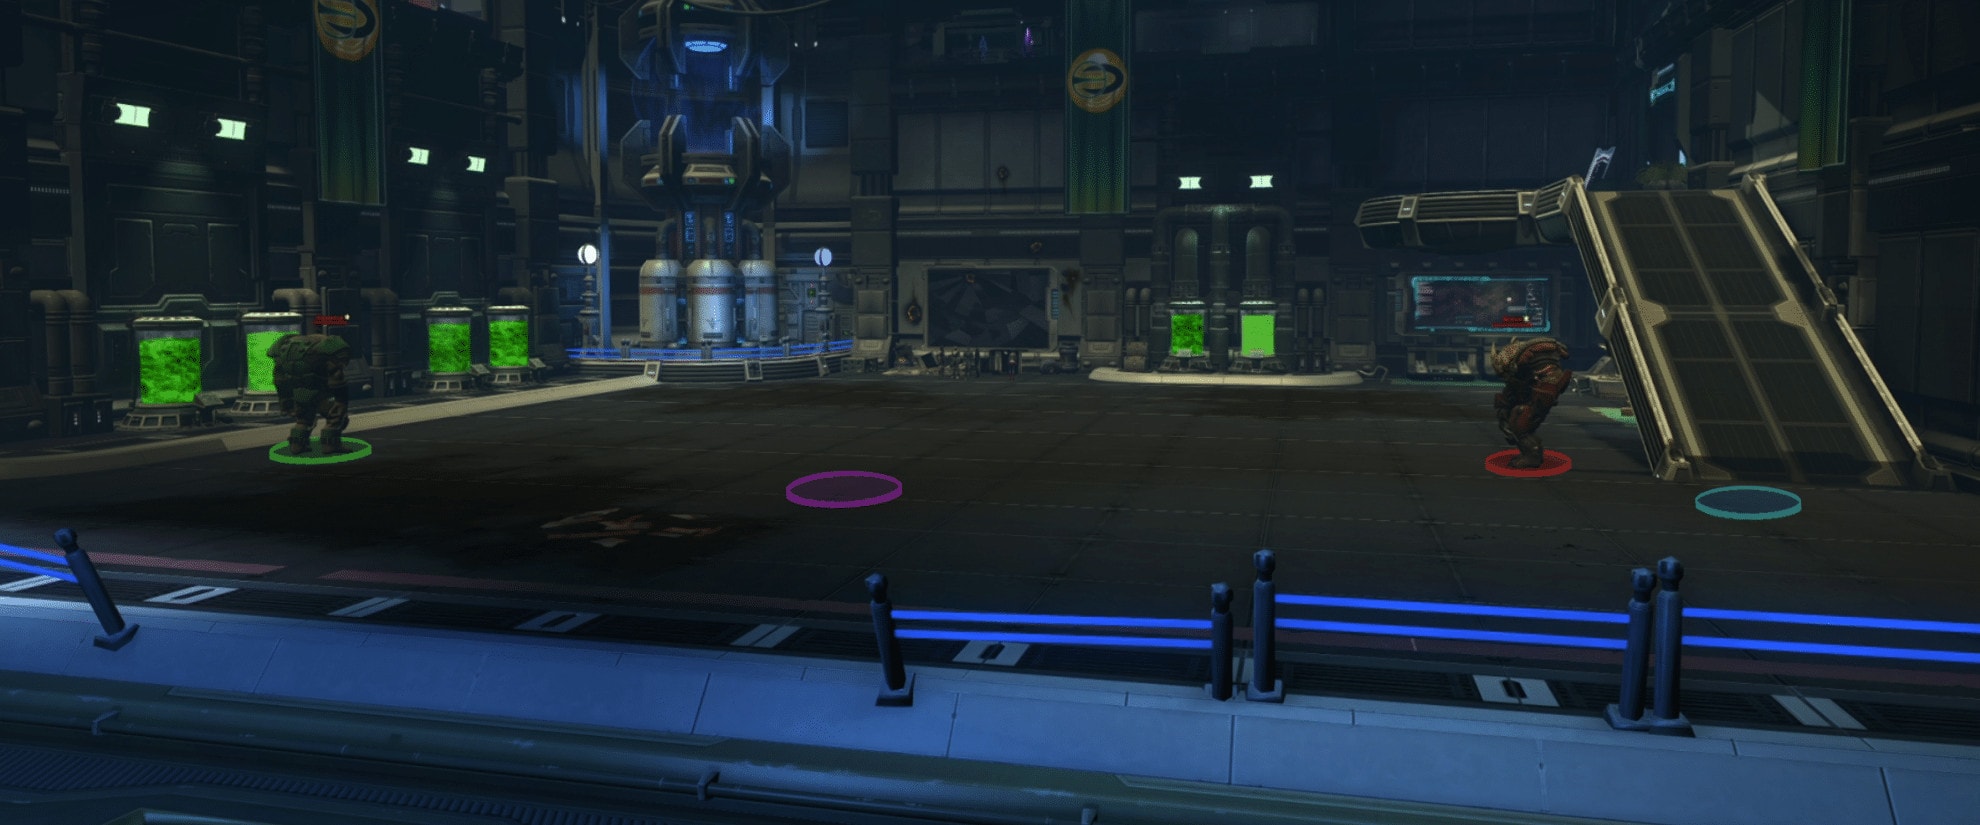
Security Control Center
The room beyond has two (currently inactive) Warden Enforcer droids along the south wall, flanking the door you will ultimately go through to enter the facility. The name of the game now becomes survival as you try to kill the droids and activate the forcefield. A map of the room is below;
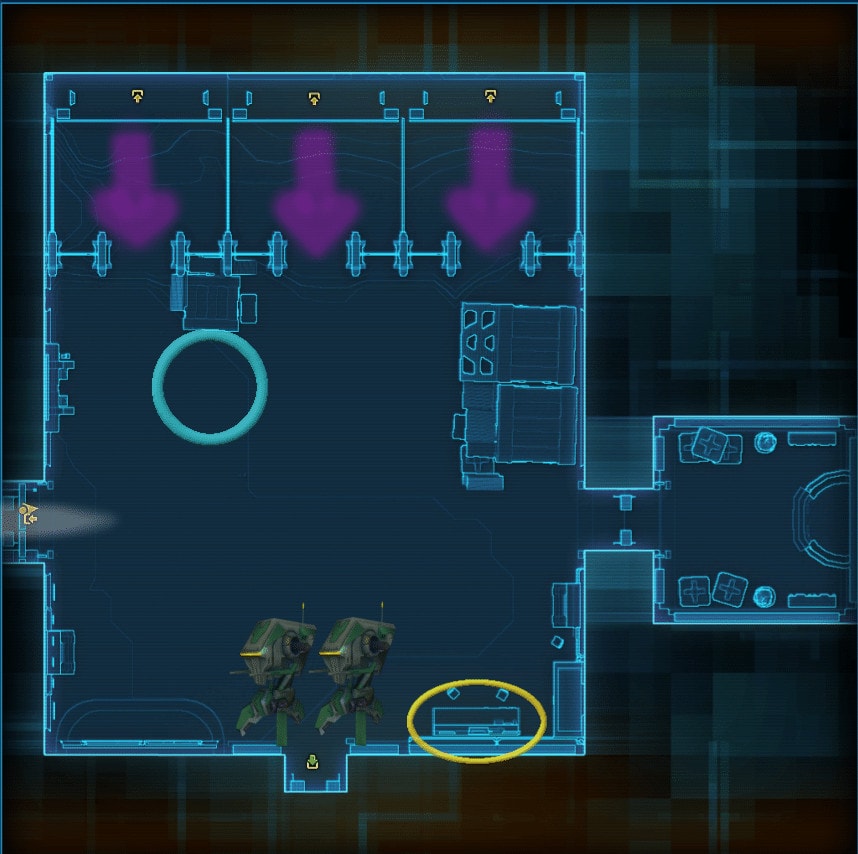
The small room (right outcrop on the map) has no function and can be ignored. On the right side of its entrance (bottom right corner of the map) is the terminal you will have to click to end the encounter. Between that terminal and the droids is a table with extra Stims and Flares (yellow ring on the map; detail image below); you want to have your DPS and/or tanks pick these up.
Soon after the door is shut, the shields will fail and several waves of adds will enter through the doors on the north side of the map (purple arrow paths), continuing until you can activate the terminal and activate the force-field.
The first wave will include some Felshade Hunters and Stalkers, the latter of which two DPS should bait (one in the left, one in the mid pen area (where the purple arrow is) so that their red puddles drop there, before running toward the middle of the room for a tank to pick them up.
Adds should be held against the crate between the left two entrances. This is the blue circle on the map; which also shows the approximate Flare position. These are also the two entrances the Stalkers will come through.
For healers, it’s best to not stand directly on the group of adds being killed throughout this phase. This will lower their damage taken, so they can focus on the DPS.
The second wave will consist of 4 Shadow Walkers, which need a Flare to mitigate.
After this second wave, the Enforcer Droids will power-up, and they will create two rings that buff adds around them (outer yellow, inner red) by casting the Optimization Protocol. This cast can be interrupted, though few groups go this route.
Shortly after, a third wave will spawn, with two Felshade Reapers and more Hunters.
There are several ways groups deal with these adds:
- The faster, more coordination-heavy method requires tanks to pick up the extra Stims while the DPS take all the Flares
- The tanks swap AoE taunts on the first two waves of adds, holding them against the crate, with two DPS baiting the Stalkers to drop their red puddles away from the group/main part of the room.
- First Flare should drop as the second wave spawns, with DPS focusing the Felshade Hunters
- When the Droids power-up, each tank should one and move them to the two lower corners of the map (one near the console, the other closer to the door you entered through), leaving the DPS to deal with adds.
- The tanks should also each pick up one of the two Felshade Reapers which spawn out of the left and middle entrance at the top of the map. They then need to pop a big Melee/Ranged cooldown (Deflection/Saber Ward/Explosive Fuel+Oil Slick/Battle Focus+Smoke Granade) or 2x Stim as the Reapers prepare to pounce, and (if necessary) the other option as the first is going down.
- Each tank needs to hold the Reaper and Enforcer Droid so that the Reaper’s cleave hits the Droid. Buffed by the Droid circles, they’ll make short work of the Droids, so that the panel can be clicked quickly.
- Once the Droids die, the Reapers need to be kited into the Flare (without going so quickly that they pounce), and the tanks trade off holding the adds while DPS keep flaring and focusing the Reapers, then any leftover adds.
- The fastest method is also the riskiest.
- One tank grabs two stims and has Deflection/Saber Ward/Explosive Fuel+Oil Slick( Battle Focus+Smoke Granade) ready to go
- The group, after killing the initial adds, moves to the lower-left corner of the map, as one tank picks up both droids and both Reapers. It’s imperative to have 2x Stim up to mitigate the Reaper damage, and a hard Melee/Ranged DCD popped when they go down
- They drag the Droids and Reapers to the crate (blue circle on the map) and have the two cleaves make short work of the Droids
- Someone needs to drop a Flare as soon as the Droids die, and someone else clicks.
- Make short work of the remaining adds, with plenty of flares to boot.
- The other method is to kill the droids one at a time, but never leave DPS without a tank holding the adds.
- The DPS take the Stims and Flares
- One tank picks up both Droids as they activate, the other the Reapers and holds them with the adds in the Flare .
- The Reapers are killed quickly with Stim-boosted DPS, and then one of the droids is taunted over to be killed. One of the droids can be brought in with the Reapers and adds from the start, but then it will require that the DPS keep the Optimization Protocol interrupted, to not buff the adds
- Once the Reapers are killed, a Droid is taunted over, and preferably the Optimization Protocol is interrupted (less time than the above variation).
- The second is then killed the same way, with the other tank taking over holding the adds as the first Tank’s DCD’s will have been used up, after finally the panel is clicked
- Only now will add waves (mostly Hunters) stop periodically coming
Only after the terminal is clicked and the forcefield activated will adds stop coming into the room, and unlike the previous encounter, you will have to kill any remaining adds before the fight is considered won. A healer is the best person to click the terminal. Second best is a ranged DPS. This is where a lack of Flares can wipe a group, as can improper positioning
Triple-Stimming is also a known issue, even if someone only has two Stims. The best counter to this is to add an ability between the first and second Stim applications.
Main Facility
Now that you finished getting to the facility, fighting through countless waves of adds… there’s a whole slew of new adds to fight on your way to the next boss.
The Czerka facility you’ve entered is crawling with guards that come in several flavors;
Adds Details
Combat Medic
These guys NEED to be chain stunned and focused until dead; they apply a stim that increases alacrity and speed while nerfing incoming heals. A second stack (applied rapidly) kills, so when these guys aren’t focused people die one after another.
Buffs:
| Buff Effect: Frequently Changes Targets |
| Overdose: Adrenaline |
|---|
| Buff Effect: 4m range; Stims player, granting INVINCIBLE! |
| Effect: Debuff 30s |
| Explanation: Alacrity increased by 25%, movement speed increased by 50%, incoming healing is greatly reduced (90%). If a second instance of this effect is applied to you it will cause your heart to explode. You feel invincible! Whether or not you actually are is up for debate. In SM, no kill on 2nd stack; healing reduced by 25%; HM/NIM Healing reduced by 90% |
Trandoshan Warrior
These aggro to the nearest player and attack them with two big vibro blades.
Buffs:
| Buff Effect: Passive Buff Focuses on nearest enemy |
| Effect: 4m – Weapon Damage |
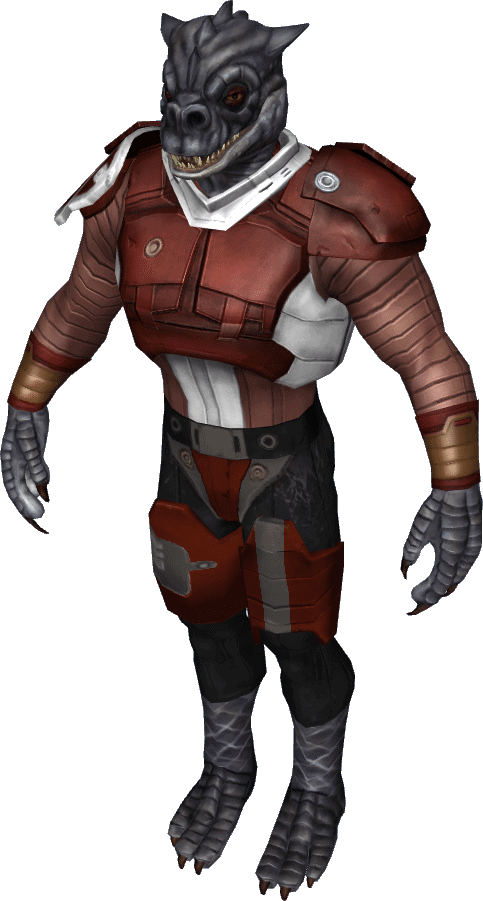
Trandoshan Tracker
Stealth periodically, use a double-sided vibro blade staff
Buffs:
| Buff Effect: While stealth is active the next attack will deal significantly increased damage |
| Effect: Renders target unable to act – 1.5s |
Ability:
| Damage Type: 4m Weapon Damage |
Trandoshan Deadeye
Ranged add, sniper rifle
| Explanationt: Prioritizing targets capable of healing. |
| Damage Type: 35m weapon damage attack |
Strategy
Battery
When you first come in from the last boss, you will enter via the north entrance on the (level 1) map below. Otherwise, you can now walk in from the East entrance of the starter zone (the one that’s been green since you defeated Red), which takes you to the lower left entrance on the map below (level 1).
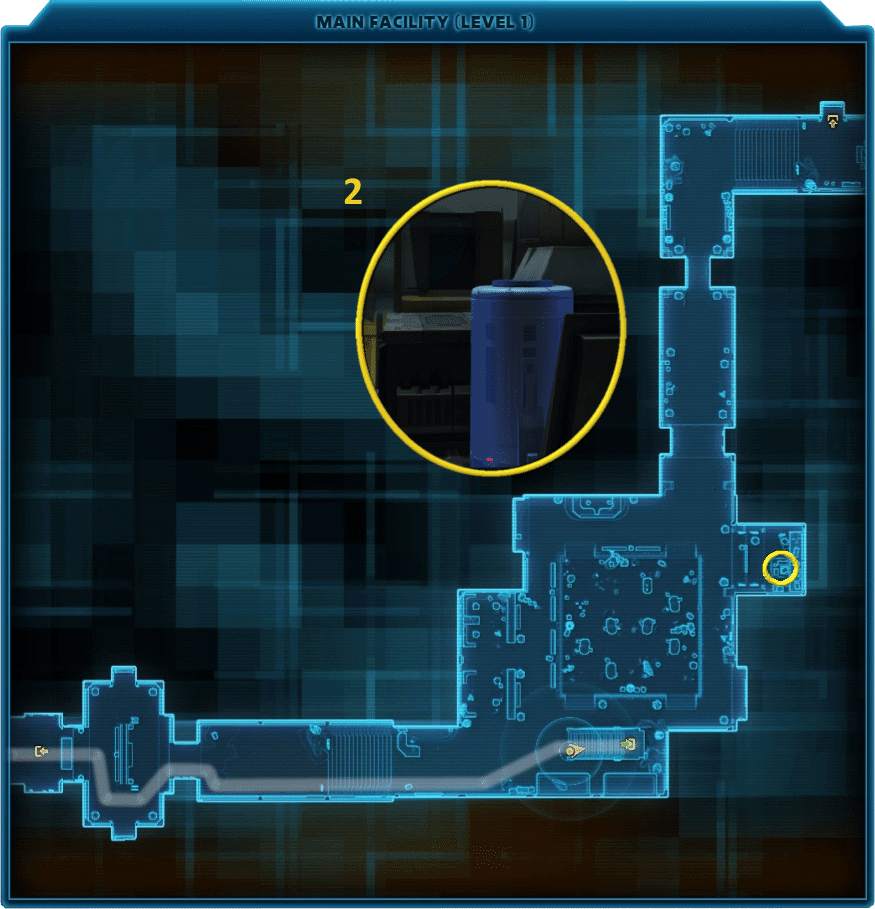
The main facility has two levels, and in order to get to the next boss (The Mutant Trandoshans), you will have to do another mini-puzzle. This will take you past a lot of adds, but can be cheesed.
The puzzle starts on level 2, where you have to click a pannel (white circle on lvl 2 map), then grab a battery from storage (yellow circle, lvl 1) and use it to replace the broken battery (pink circle, lvl 2).
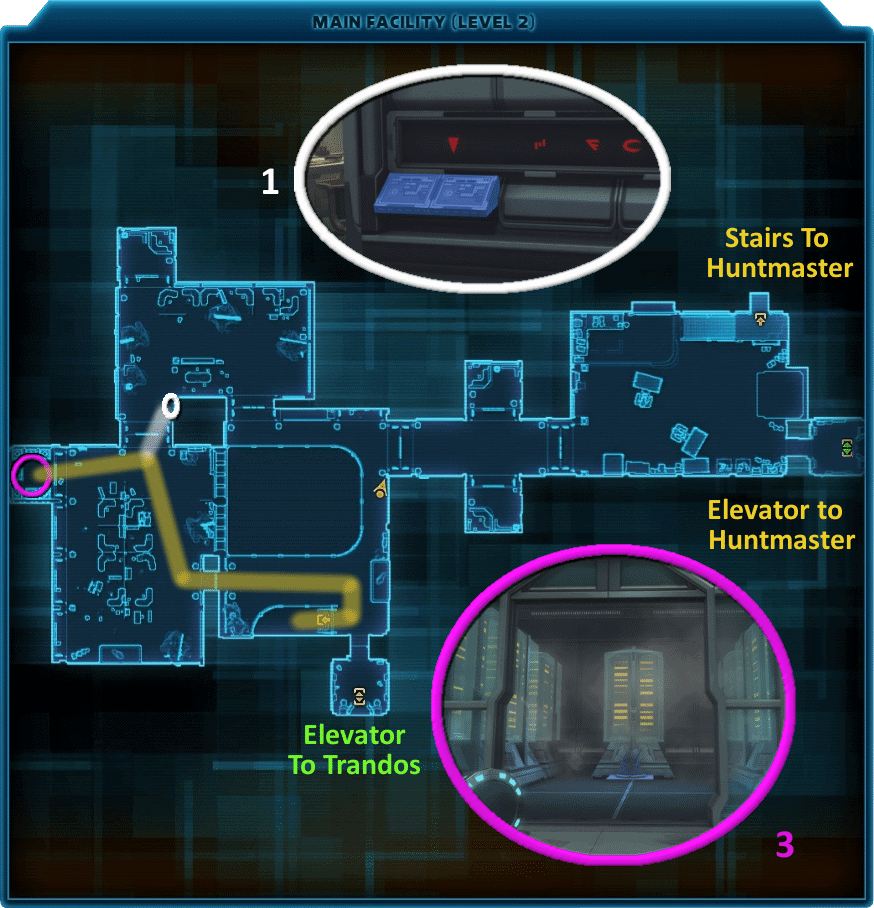
Doing this will cause the door to the elevator to open, allowing you access to the next part of the facility.
Later, after defeating the Trandoshans, the door to the right part of the upper facility (the door just past where the player arrow is in the lvl 2 map) and the path to the Huntmaster fight will open (more on that later).
The best way to cheese this puzzle is to have a stealther walk up the stairs and use the lower-left door to go and click the pannel (white thin circle #1 on the lvl 2 map) and immediately run into the room with the broken battery (pink circle #3). Waiting here will let the adds evade, at which point you can come back out. This is using the yellow path on the map above (the white bit shows the offshoot to click the panel), which will also be the path for the last step. It’s wise to sap (stealth CC) the medic in the pack next to the panel, then start channeling. They won’t kill you or break the channel before you complete this.
They (or another stealther) can then go back down and grab a battery (yellow circle #2, lvl 1 map) and run up the stairs and along the yellow path into the room with the broken battery (pink circle), waiting again for any aggro’d adds to evade before placing the battery and finishing the puzzle.
Care should be taken not to aggro anything you don’t need to (see yellow path on lvl 2 for how to carry the battery). Note also that any Deadeyes, when facing away, will not aggro unless you walk right up to them (they don’t have an aggro circle, but cone).
If this proves difficult, players may want to kill some of the adds on lvl 1, allowing someone to force pull the battery carrier from the bottom to the upper balcony, making things go faster. Worst case, the adds in the lvl 2 left room can be fought, but those shouldn’t be necessary.
Others should wait outside the facility (outside or in the Control Center from the last boss fight) so that the adds de-aggro instead of swapping to them (and thus forcing you all to fight them.
This can be done by a non-stealther, but the timings are a bit tighter. If a group does not want to cheese this, these same steps apply, except the others help kill the packs as they aggro instead of letting them evade.
Once the battery is inserted, the door to the bottom elevator room (marked “Elevator to Trandos” on the map) is open, and you can continue.
Evolutionary Warfare Lab
In the next room, there will be a short hallway and a pannel on the right side of the glass door that will open the stairs and room beyond. Past this glass door (so everywhere in the map below) you will get a debuff; Organic Purge , which reduces all healing received by 60%.
It is advisable to aggro the adds below and kite them up to the area above the stairs, where the debuff goes away; as healers won’t have as tough a time healing you.
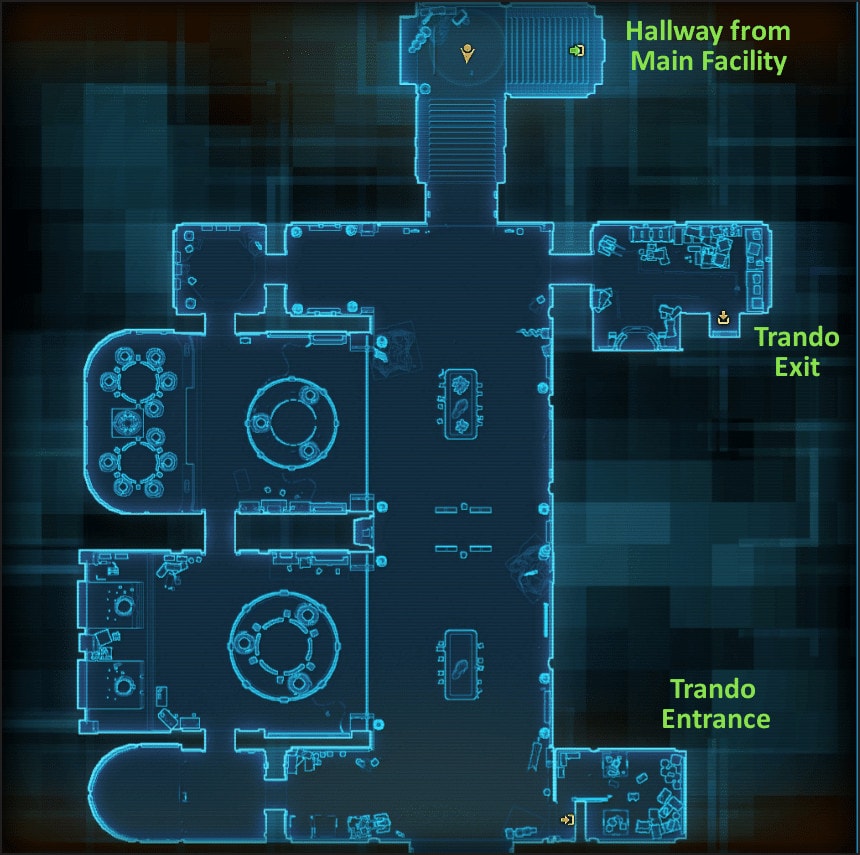
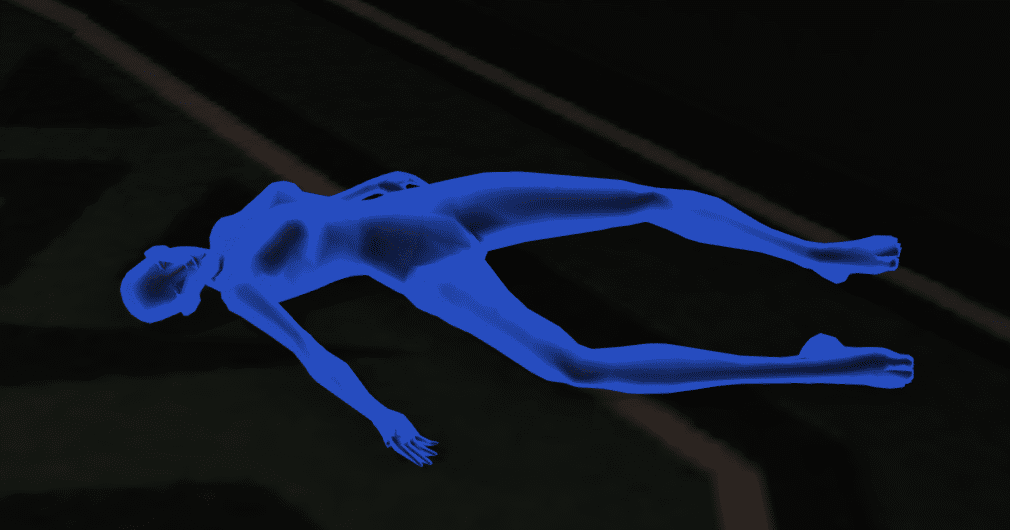
In this bottom room, you also want to click the glowing bodies until you find the access card. These will be located in various spots;
- One will usually be on the landing (where the player icon is, in the map above)
- One will be somewhere in the upper right room (the exit from the Trandos fight)
- One will be in each of the two middle rooms
- A couple more will be spread around the central hallway and/or the two small square areas through which you access the two middle rooms
Once the right one is found, you can go up the steps at the bottom right of the image, where you’ll jump through a broken window half-way down the hallway, to fall into the Train Station where you will face the Mutant Trandoshans.
3: Mutant Trandoshans
 3: Mutant Trandoshans
You’ll be happy to know, after the last two “encounters”, that this fight has no adds- just bosses.
Here, you will fight four beefed-up Trandoshans, two of which will be waiting to fight you, and another two will jump down a minute later.
Each has a unique affinity (Fire, Ice, Toxicity, Strength) and has to be dealt with a different way. They also have different health pools.
The Fire and Ice bosses (Greus and Kronissus) have significantly less health, then the Toxic (Hissyphus) has slightly less health than the Strength (Titax).
These Trandoshans become more powerful when one of them dies, and drop into a healing Torpor when pushed to 15% health. All of them suffer from separation anxiety (they’ll yank you back to them if you get too far) and affect each other in various ways.
They can only be killed if a literal train runs them over while in this regenerating state (otherwise, they’ll jump out of the way), so it’s a good thing you’re at a subway station.
Boss Details
Greus – Fire
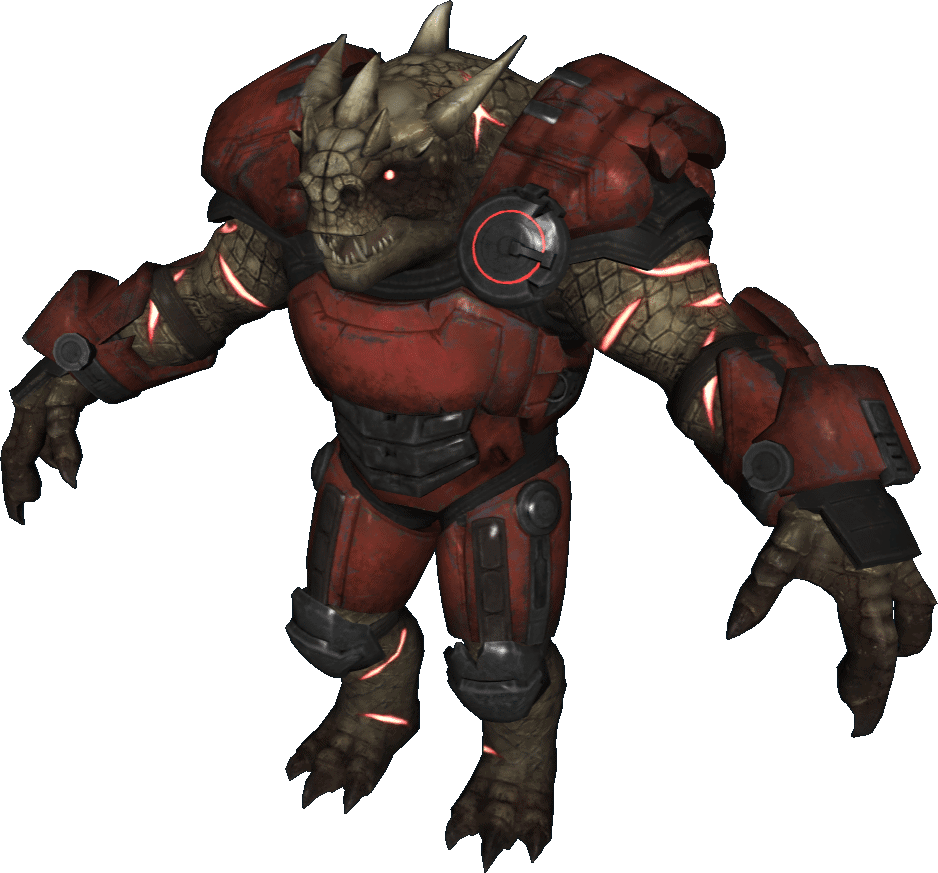
Lowest health pool (together with Kron) and a Thermal Chaotic Evolution (mutation). This boss emits a circle of fire around him and has several fire attacks. Otherwise, his and Kron’s attacks buff each other, so a player with Sublimation will take more damage from Greus’s two conals, and someone with Overheating will take extra damage if hit with Kron’s attacks.
A ranged DPS can easily kite him, staying in the fire circle but side-stepping the two conals.
| Boss Buff Effect: Death of an Ally buffs survivors; Increases all damage taken by 5%/10%/15% and all damage dealt by 15%/50%/300% |
| Death Pact is a stacking buff that any surviving trandos get when one is killed. This buff makes them do and take 20% more damage for each defeated Trandoshan. While this makes them faster to burn down, it also makes all their attacks more dangerous |
| Boss Buff Effect: Target will enter a regenerative state of Torpor if its health is reduced below 15% and damage dealt increased substantially for each stack of this effect. At 3 stacks, Greus gains “Final Form” |
| Boss Buff Effect: Regenerating 1.214% of maximum health every 0.5s, damage received from all sources reduced by 80%. Lasts 35sec Trandoshan reborn from Torpor will gain a charge of Chaotic Evolution. |
| At 15% health, he hunches over and gains the Torpor buff. When in this state, he will hunch over and not move until it drops. He will take far less damage and steadily regain health. When he does get up, he’ll gain a stack of Chaotic Evolution. At three stacks, he achieves “Final Form” necessary for the achievement. |
| Effect: Pulls target back, applies 1.5s stun |
| Effect: Periodically radiating elemental damage |
The Fires of Greus is a large ring around Greus (seen in the Fire Blast picture below)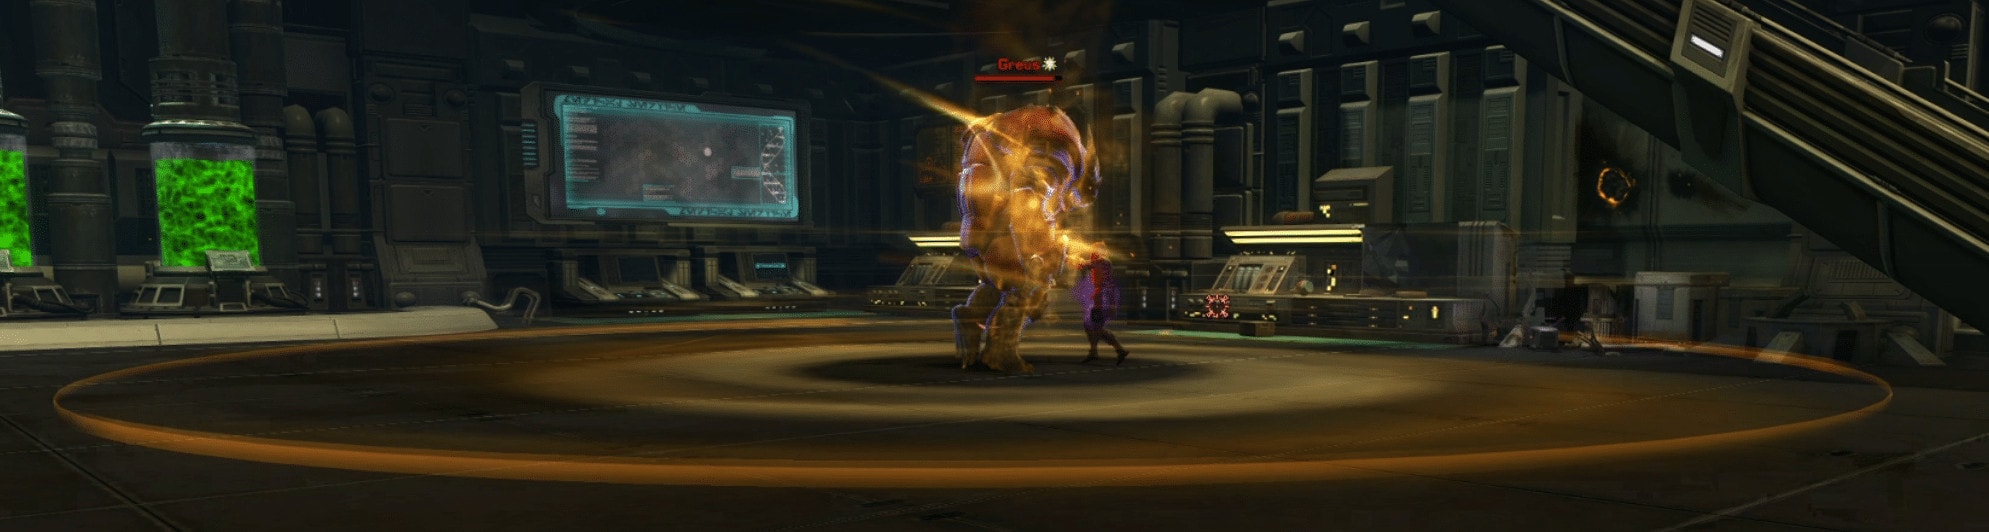 |
| Effect: Periodically dealing elemental damage to targets in a forward cone, applies Overheat. Knocks down target for 2s |
Fire Blast is a fireball shot at the target which damages anyone in the long cleave. Once placed, you can move out of it. If you don’t move out of Fire Blast in time, you will get the Overheating debuff; and get knocked back and down. If you have Overheating and Blistering Cold, this will also add the Thermal Shock debuff, which increases damage from all sources by 10% per stack (up to 40%) |
| Effect: Overheated, vulnerable to sudden changes in temperature. |
| Effect: Exposure to Blistering Cold (Endothermic Blast) and Overheating (Fire Blast) has placed you into a state of Thermal Shock. Taking 10% increased damage from all sources. |
| Effect: Pulls target back, applies 1.5s stun |
Ayhis & Eru is a flame conal. Once placed, you can move out of it. |
Kronissus – Ice
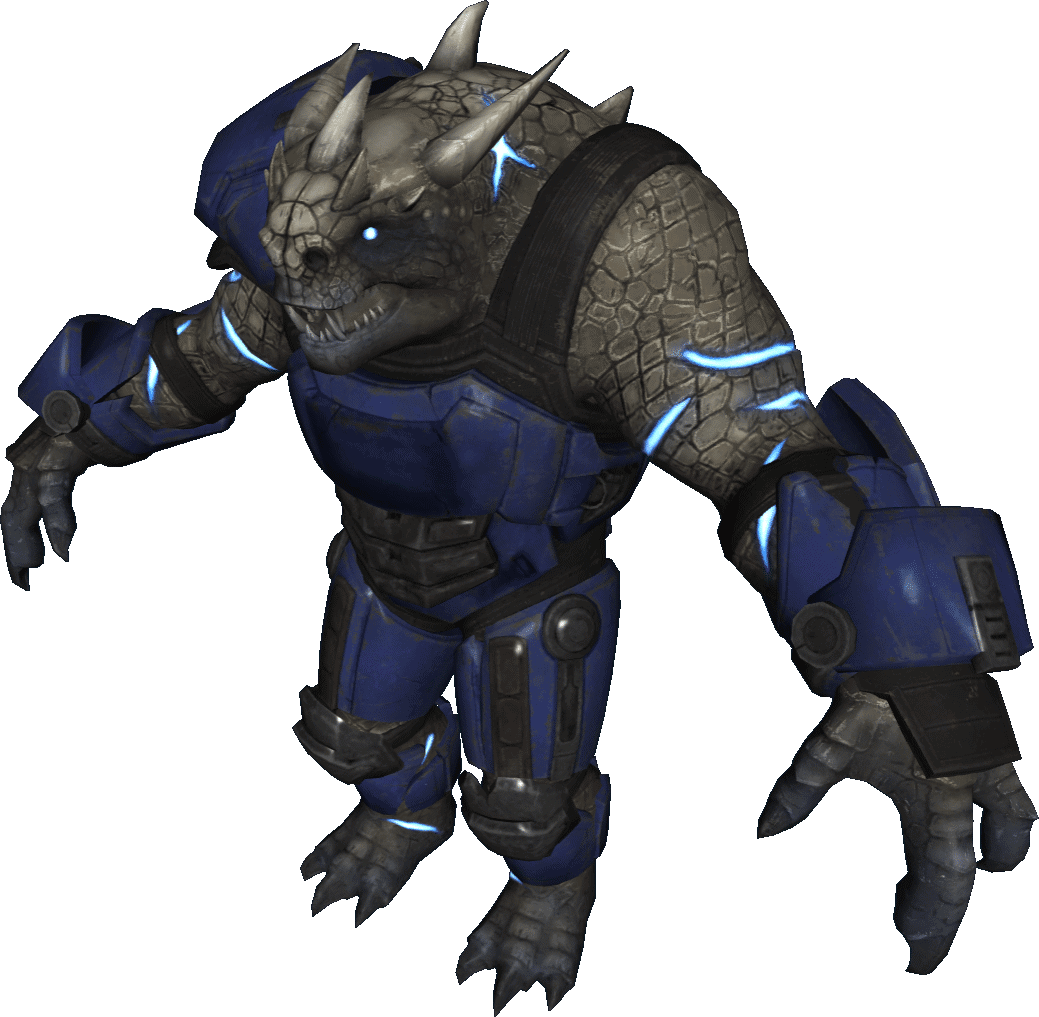
Lowest health pool (together with Greus) and Endothermic Chaotic Evolution. This guy periodically emits an ice conal (Endothermic Blast) that needs to be jumped out of. The slow he applies makes this more tricky, but doable. Otherwise, his and Greus’s attacks buff each other, so a player with Sublimation will take more damage from Greus’s two conals, and someone with Overheating will take extra damage if hit with Kron’s attacks. A tank needs to hold Kronus.
Here are the boss buffs explained:
| Buff Effect: Death of an Ally buffs survivors Increases all damage taken by 5%/10%/15% and all damage dealt by 15%/50%/300%. |
| Death Pact is a stacking buff that any surviving trandos get when one is killed. This buff makes them do and take 20% more damage for each defeated Trandoshan. While this makes them faster to burn down, it also makes all their attacks more dangerous. |
| Buff Effect: Target will enter a regenerative state of Torpor if its health is reduced below 15% and damage dealt increased substantially for each stack of this effect. At 3 stacks, Kronissus gains “Final Form” |
| Buff Effect: Regenerating 1.214% of maximum health every 0.5s, damage received from all sources reduced by 80%. Lasts 35sec Trandoshan reborn from Torpor will gain a charge of Chaotic Evolution. |
| At 15% health, he hunches over and gains the Torpor buff. When in this state, he will hunch over and not move until it drops. He will take far less damage and steadily regain health. When he does get up, he’ll gain a stack of Chaotic Evolution. At three stacks, he achieves “Final Form” necessary for the achievement. |
Boss abilities explained:
| Effect: Applies Sublimation |
| Frigid Claws is a basic attack that applies stacks of Sublimation. The animation for this is fairly slow and exaggerated, so the attack is easy to see. Effect: Movement speed reduced by 30/50/70% |
| Effect: Pulls target back, applies 1.5s stun |
| Effect:Periodically dealing elemental damage to targets in a forward cone, applies Blistering Cold. Applies Hypothermia, immobilizing target for 1.1s |
Endothermic Blast is a 2s conal. Every 5 attacks, he casts the conal (note that Sublimation only stacks to 3).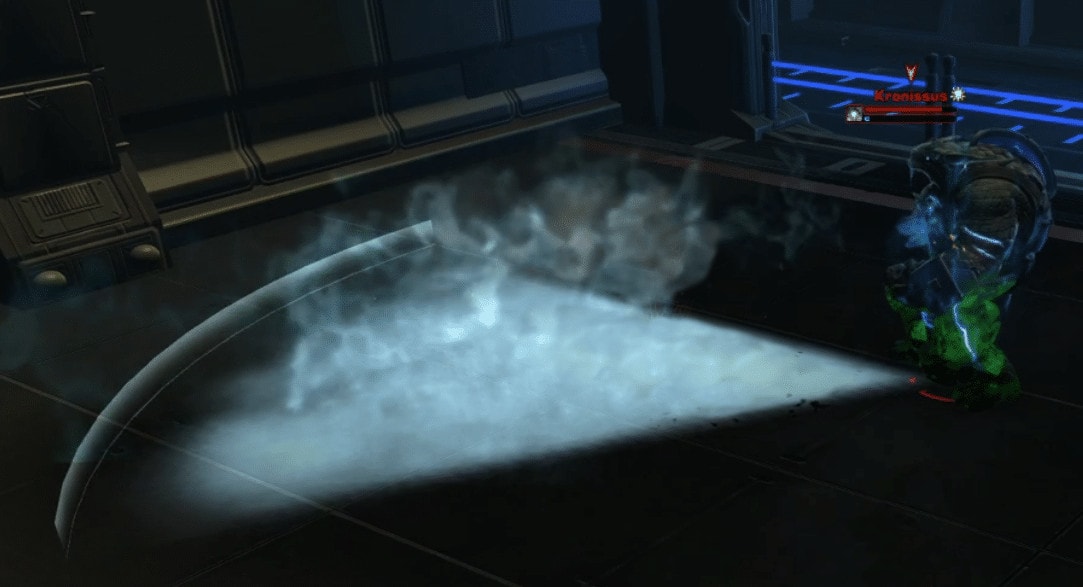 Standing in this conal (which you shouldn’t) applies Blistering Cold, which roots you and reduces alacrity. At 3 stacks, this applies Frozen, which prevents all actions. Effect: Movement speed reduced by 100%, Alacrity reduced by 15% per charge, threat generated increased by 15% per charge. Applies Frozen upon reaching 3 charges. |
| Effect: Exposure to Blistering Cold (Endothermic Blast) and Overheating (Fire Blast) has placed you into a state of Thermal Shock. Taking 10% increased damage from all sources, scales with each charge up to 40% |
| If you have Overheating and Blistering Cold, this will also add the Thermal Shock debuff, which increases damage from all sources by 10% per stack (up to 40%) |
Hissyphus – Toxic
Second highest health pool; significantly higher than Greus and Kron. He has the Caustic evolution, which manifests in several ways. He periodically drops a small(ish) green gas sphere and applies a DoT that needs cleansing. He also radiates a DoT that affects everyone within 20m, which makes stealth-rezing difficult while he is up.
Buffs:
| Buff Effect: Death of an Ally buffs survivors; increases all damage taken by 5%/10%/15% and all damage dealt by 15%/50%/300%. |
| Death Pact is a stacking buff that any surviving trandos get when one is killed. This makes them do and take 20% more damage for each defeated Trandoshan. While this makes them faster to burn down, it also makes all their attacks more dangerous. |
| Effect: Target will enter a regenerative state of Torpor if its health is reduced below 15% and damage dealt increased substantially for each stack of this effect. At 3 stacks, Hissy gains “Final Form” |
| Effect: Regenerating 1.214% of maximum health every 0.5s, damage received from all sources reduced by 80%. Lasts 35sec. Trandoshan reborn from Torpor will gain a charge of Chaotic Evolution. |
| At 15% health, he hunches over and gains the Torpor buff. When in this state he will hunch over and not move until it drops. He will take far less damage and steadily regain health. When he does get up, he’ll gain a stack of Chaotic Evolution. At three stacks, he achieves “Final Form” necessary for the achievement. |
| Effect: Stacking buff, Enables Envenomed Strike at 5 charges; also causes Hissy to drop Tx-1Ch E. Gas |
| Venom Synthesis is a stacking buff Hissy gains until spiting a cloud of Gas. |
Abilities and attacks:
| Effect: Pulls target back, applies 1.5s stun |
| Effect: Applies Venom of Hissyphis when Hissy has 10 stacks of Venom Synthesis |
| Effect: AoE sphere; Internal Damage; 15s duration 1sec tick |
Tx-1Ch E. Gas is a puddle dropped every 5 stacks of Venom Synthesis, resetting these stacks. The puddles drop centered on Hissy’s target and should be placed accordingly.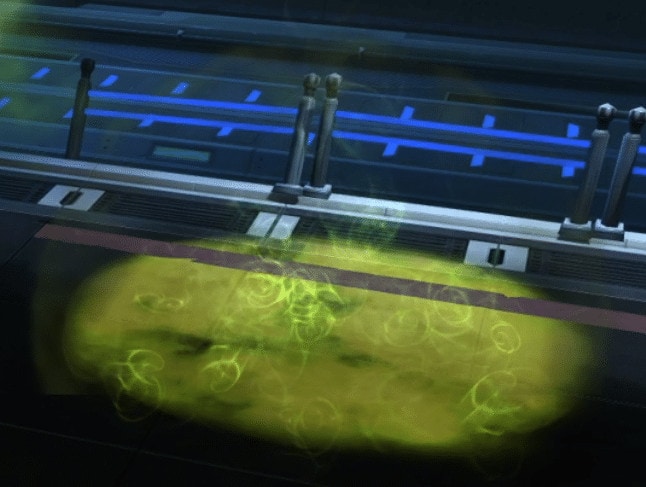 |
| Effect: Periodically afflicted by internal damage. This effect can be cleansed. Stacks; cleanse removes all stacks |
| Venom of Hissyphis debuff (seen on PLAYER; unlike Venom Synthesis which is a buff on HISSY) is a DoT that needs to be cleansed. This does a LOT of damage and needs to be cleansed ASAP. |
| Effect: Periodically radiating damage |
| Effect: Causes all sources of Kinetic damage to apply one charge of Damaged Defenses. |
| Effect: Decreases defense rating against melee and ranged attacks by 3% per stack when hit with Pummel/Brutal Fists/Frigid Claws/Titax Strike. |
| Effect: 5m attack |
Titax – Strength

Boss Buffs:
| Effect: Death of an Ally buffs survivors; Increases all damage taken by 5%/10%/15% and all damage dealt by 15%/50%/300%. |
| Death Pact is a stacking buff that any surviving trandos get when one is killed. This makes them do and take 20% more damage for each defeated Trandoshan. While this makes them faster to burn down, it also makes all their attacks more dangerous. |
| Effect: Target will enter a regenerative state of Torpor if its health is reduced below 15% and damage dealt increased substantially for each stack of this effect. Increases the Presence of Titax aura radius by 3m per charge. At 3 stacks, Titax gains “Final Form” |
| Effect: Regenerating 1.214% of maximum health every 0.5s, damage received from all sources reduced by 80%. Lasts 35sec. Trandoshan reborn from Torpor will gain a charge of Chaotic Evolution. |
| At 15% health, he hunches over and gains the Torpor buff. When in this state he will hunch over and not move until it drops. He will take far less damage and steadily regain health. When he does get up, he’ll gain a stack of Chaotic Evolution. At three stacks, he achieves “Final Form” necessary for the achievement. |
Abilities and Attacks:
| Effect: Pulls target back, applies 1.5s stun |
| Effect: Increases the effectiveness of nearby allies. Dramatically increases the potency of any existing mutagen affinity. |
Presence of Titax is an AoE that buffs allies. It is represented by four spinning fireballs, which outline the ring of effect.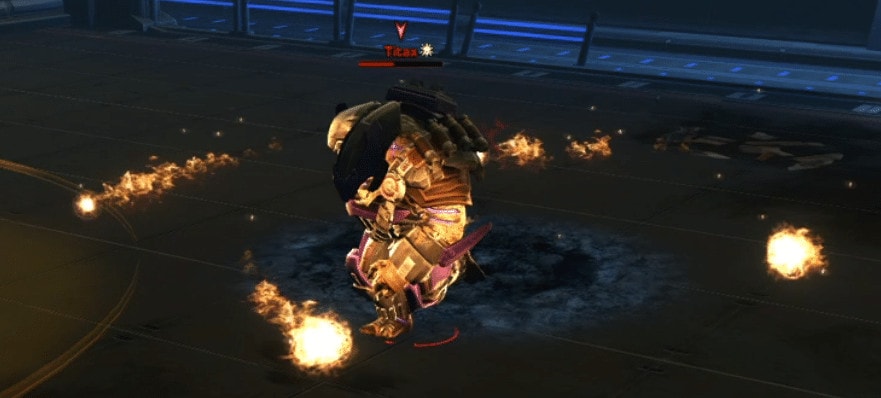 |
| Effect: Stuns then knocks target back. If knocked into canister, greatly reduces damage from impact, knocked down (stunned) for 3s |
Titax Strike is a powerful knockback, which stuns the target before punting them across the room. The person with aggro needs to aim themselves to hit one of the 6 green canisters to break their fall. Doing so spills the liquid inside, creating green rings of goo (left side container in the image below), which grows until the end of the fight. Try not to stand in them.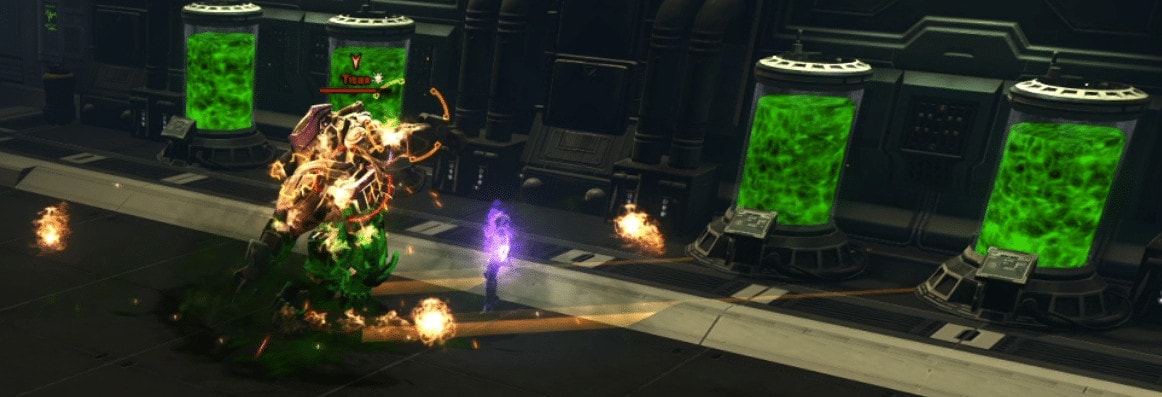  |
| Effect: Lunges toward the target nearest to death at the end of this channel, immobilizing target. Knocks down target for 1.3s |
Crush the Weak is a leap AoE attack, where Titax jumps on whoever has the lowest health when the channel starts. A ring shows up around that person, indicating the area of impact. Only the person Titax targets should be in this so that others don’t take unnecessary damage. |
| Effect: 3m weapon damage |
Area Details
The room you meet these Trandoshans can be seen on the map below. The right area is the train tracks, and standing anywhere on them (except for the alcoves, marked in white) when a train runs through will instantly kill you (as well as any regenerating Trandoshans).
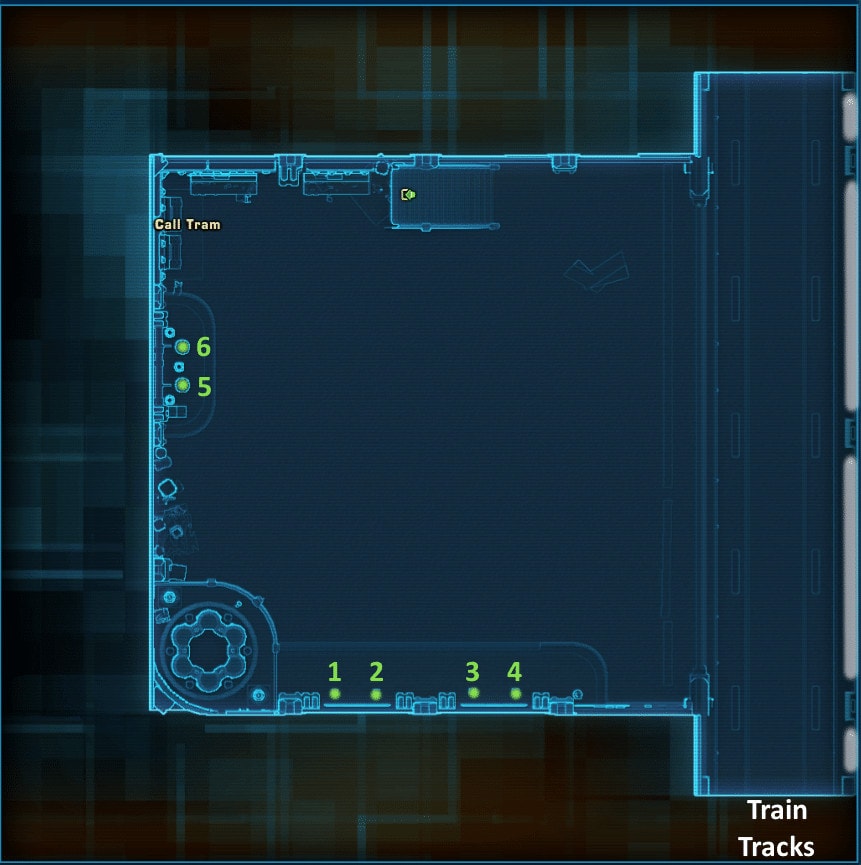
Note also that the seemingly insignificant blue barriers between the room and the tracks DO function as an actual wall, and LoS bosses as well as healers.
The left lower corner has a generator, which will kill anyone that walks into it (or gets knocked into, or pulled into, etc).
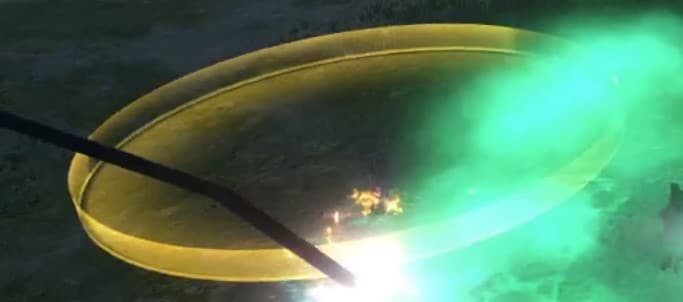
The terminal to call the train is found at the upper left of the image (marked “Call Tram” on the map, even in-game) and becomes active 1min into the fight. Once clicked, the train will rush through the station 45s later. Torpor lasts 35s, so you want to call this before your final push, or bosses will wake up and come back stronger!
There are six Canisters (on the map represented as green dots, numbered) along the walls. These are used to mitigate a lot of the damage from Titax Strike.
Strategy
There are several ways groups deal with these Trandoshans. Which works best for your group will depend on comp and other factors. I will start with some generalizations, then move on to specifics.
Two of the Bosses will be in the room as you pull; Greus and Hissyphus . The other two (Kronissus and Titax) drop 1 minute later. The four start locations are indicated in the image above with their respective colors.
- Kronissus drops in front of the ramp, towards the tracks.
- Titax drops in the middle, towards the tracks.
The 1 minute mark is also when you can start to summon a train.
The train takes 45s to plow through the station from when you click the button, with several audio queues, which help gauge how close it is to coming. This means that you need to call the train before pushing, unlike SM.
All strategies will require players (DPS especially) to watch boss health and coordinate; they need to be on the tracks before dropping to 15%.
All strategies will also require attentive healers cleansing Hissy’s debuff, which now only cleanses one stack at a time.
Unlike SM, Titax needs to be aimed to punt the player holding him into a canister (barring major layered cheeses) to survive.
The stacking buff from killing other trandoshans requires that the last two die together, or the last trandoshan starts one-shotting.
Besides the Greus kiter, and the tank holding Titax, people should be staying out of everything (conals/AoE’s/etc) to minimize damage.
Unlike SM, it’s far easier to fail a push (have them get back up from Torpor) since the train takes longer than the channel. Failing adds a stack of Chaotic Evolution, each stack changing how the bosses act and making them generally harder to deal with.
Suggested Strategy
I would strongly suggest a ranged DPS kite Greus throughout the fight, leaving him for last. A DPS Sorc/Sage is the best class for this, IMHO, as it is very mobile and can easily hit other bosses (after hitting Greus a bit to build aggro) while getting out of his conals. They can run out of the fire ring, though that does not do much damage, and can easily just stand there until he does a conal.
This DPS would bring Greus to the upper left of the map, near the train terminal once the other two bosses drop.
You’ll ideally point the attacks toward the corner (away from the others) and click the train when it’s called since you’ll be the closest.
If a Sage/Sorc cannot do this, a Slinger/Sniper can also do the job; a melee DPS can do this, but will likely want to be careful not to push him too low and won’t be able to hit the other bosses.
I’ve seen groups put a healer (Sorc/Sage) on Greus, but a DPS is a better choice.
When the fight starts, have everyone (except for the Greus kiter, though they can join in after a few GCD’s are thrown at Greus) focus Hissy and get him as low as possible.
If one of your tanks is a Shadow/Sin, they should hold Hissy, stealthing out when the other two drop.
If there is no Sin/Shadow, a DPS with a Taunt (DwT) taunts Hissy when the others come down, bringing him to the tracks.
Hissy should get pushed shortly after, so the DPS doesn’t have to hold him for long.
Ideally, the tank holding Hissy starts where the boss is waiting, then slowly walks him along the blue fence as green puddles drop so that the DPS that takes him is already near the tracks and ready to put him in position.
Push happens ASAP and the train is called as soon as it’s available, which should give DPS enough time to push Hissy before it comes.
Healers watch to cleanse the DoT quickly; the better you are at cleansing, the less healing you’ll have to do.
Once Hissy dies, everyone focuses Titax. The tanks grab Titax and Kron as they spawn. The Kron tank holds him at the upper right part of the main room (near the ramp).
I suggest a shadow/sin hold him, taking utilities that break movement impairing effects for Force Speed and Stride; though other tanks can do this as well.
Count basic attacks, which look like slow, exaggerated swings (aka, the move Kron does like a broken record when notchanneling his conal); Conal will start after the 5th attack. Start moving out of it as it’s about to start, not after you see it. Use movement cleansing effects before this, to not be slowed (Sublimation).
The Titax tank aims so that Titax Strike punts them into a new canister every time. The order in the image is (IMHO) the most logical, as it spares the train terminal and the right side of the tracks from green as much as possible by starting in the top left corner of the map, moving towards the tracks and finally (if necessary) using the two canisters near the train terminal.
An alternative order is to start at the train terminal (6 in the image) and go counter-clockwise, ending at 4.
This order is less ideal, as it forces the player calling the train (Greus kiter, usually) to walk through green. After dropping him to ~30%, the move to the tracks has to be timed with a Titax Strike, which might mean you have to hold and wait so as to not kill the tank when he holds him on the tracks too long.
Special care must be taken here, and everyone should be near the tracks in case a Crush the Weak drops right before the push (causing him to start Torpor off the tracks).
Call train as/right after Titax Strike goes out.
Note; sometimes the canister keeps looking unbroken. It IS broken, and trying to re-use it WILL kill you.
Kron and Greus are then pushed together (The Titax tank taking over holding Greus), moving them to opposing sides of the tracks so that their attacks don’t hit the other tank. Don’t forget that these have far less health than the others – adjust train call accordingly!
Show-off Strategy
This strategy should only be attempted by those familiar with the fight and with strong DPS and heals, it’s mostly included to show what’s possible, and is not an advised strategy for those progging the fight (use “suggested strategy” above). It’s also sometimes called the “two and two” strat, since you use only two trains, killing two trandos with each one.
- Each tank grabs one of the two already-spawned bosses, bringing Greus to Hissy, while the DPS all focus on burning down Hissy. The cleave should be enough to drop Greus low enough to where both can be pushed together.
- When the other two spawn, one tank AoE taunts and holds Greus and Hissy on the tracks. The other goes to pick up Kron, and a DPS (DwT) peels off to pick up Titax.
- A Healer (or ranged DPS) clicks the train, then Greus and Hissy are pushed.
- Once The tank holding the first two bosses is free, he picks up Titax and holds him for the remainder of the fight, eating canisters.
- DPS burn Titax low, one or two peeling off to drop Kron to 30%.
- Both are brought to the tracks, train is called and they are pushed.
Path to Huntmaster
After defeating the Trandoshans, you go up the ramp and exit back out onto the second level of the Main Facility. The previously closed door further down the hall will now be open, allowing you to pass. If you are coming from a lockout, you can enter the facility through the door on the right of spawn. You can go directly up the stairs and merge into the path in the image below (showing the path from the elevator to/from Trandoshans).

In the room past the hallway, you will see a Felshade Reaper and two Felshade Hunters waiting in the room. A second Felshade Reaper will spawn behind you in the hallway (the one with the two inaccessible outcrop rooms), and all four will have to be controlled as the DPS kill them.
Luckily, you will find three flares in a box in the middle of the room (yellow circle on the image below). These have to be tanked inside the flare, the same way you took care of them in the encounter fights.

Beyond this room, you make your way up the steps on the left-hand side (right on the image above), labeled “Steps to Huntmaster” on the earlier map.
These stairs slow you and feel like they take forever. You will keep getting wary stacks, and stopping will let you drop them.
At the top, there will be mines and adds waiting for you on the left and in the elevator room. These will be the same guards you’ve dealt with before fighting the Mutant Trandoshans. Killing the adds will unlock the elevator here, which you access from the room in the image above, except going around the crates and straight/right (far right in the map above). Further out, you have to fight one more pack of adds, pictured below.
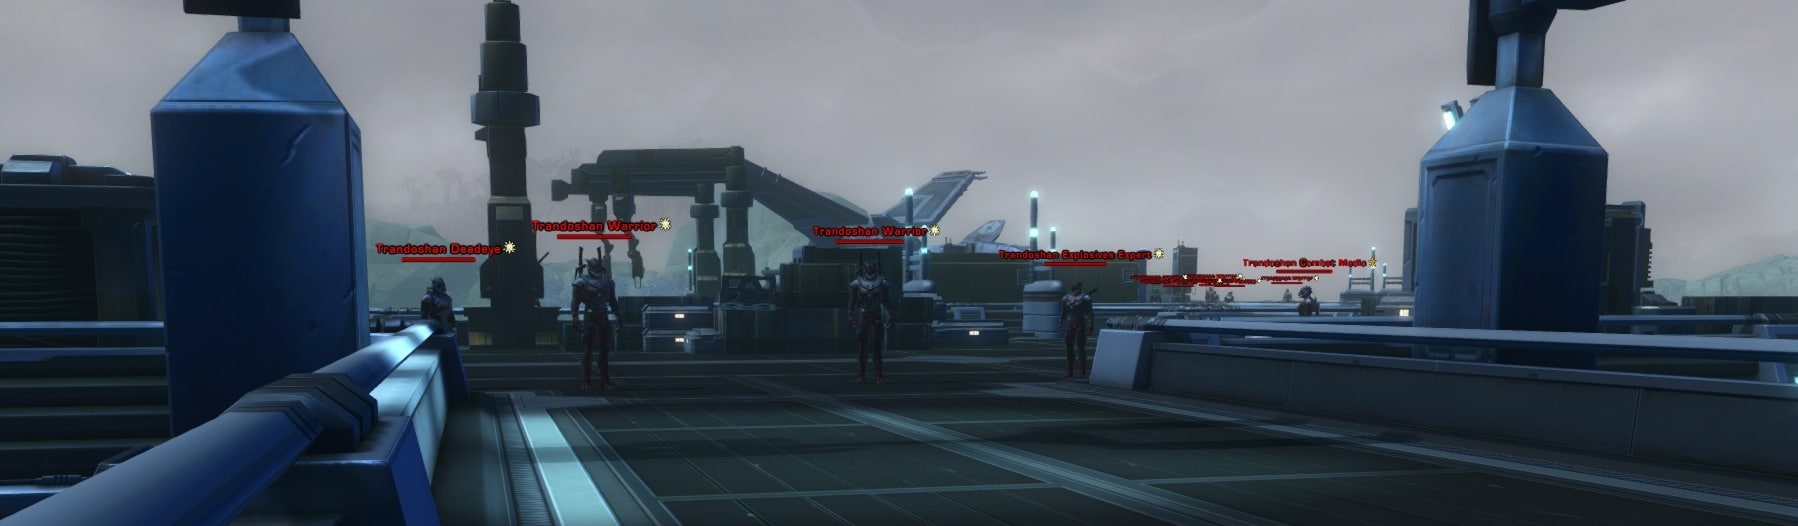
Once this pack is killed, IF you or someone in the group has an achievement, you can walk back to the elevator and take it to the other floor, labeled “Executive Lounge”.
If no one has the achievement (or if the elevator doesn’t pop for whatever reason), you will have to do an extra step.
Ideally, a stealther does this, so they don’t have to fight any more adds. The path across the roof is below, going from the lower left of the image to the upper right;

Beyond this is another set of stairs, just like the one you scaled up, except you can hop down these until you walk out and down the ramp in the following room. In the room below, the turrets (circled in yellow in the image below) fire at anything moving quickly, so you need to turn on RP walk (or Shadow/Sin pops deflection and speeds past ^_^) to get past it and into the final area before the boss.
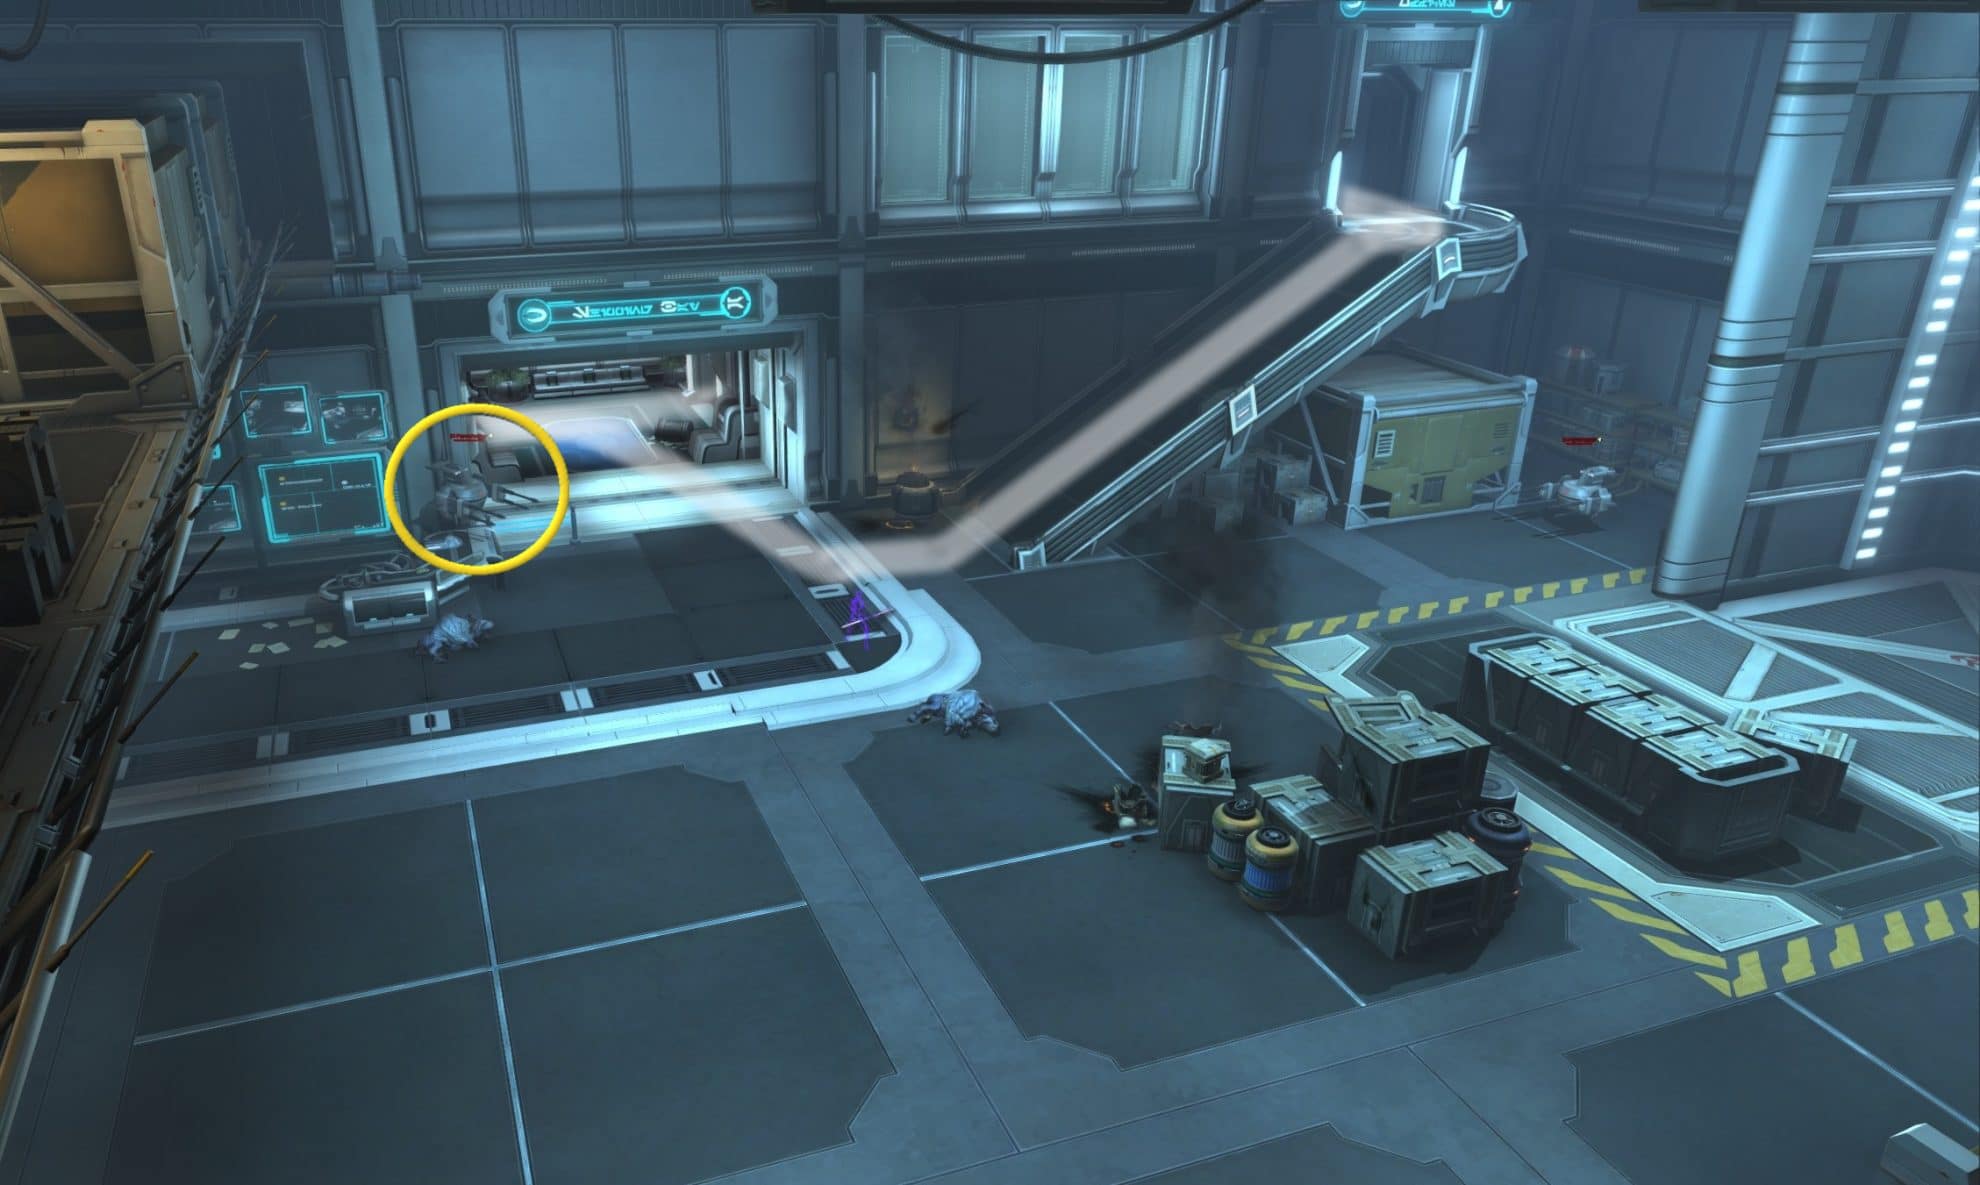
On the bottom right of the image, the path forks, and the right goes to the elevator room and left goes to the Executive Lounge. If walking into the Lounge doesn’t trigger the elevator, your stealther might have to track back to the elevator on the right.
Once the group can get to the Executive Lounge (shown below), you simply jump out the left broken window (right, if you want a laugh ^_^) and you’ll be at the next boss; the Huntmaster.
4: The Huntmaster
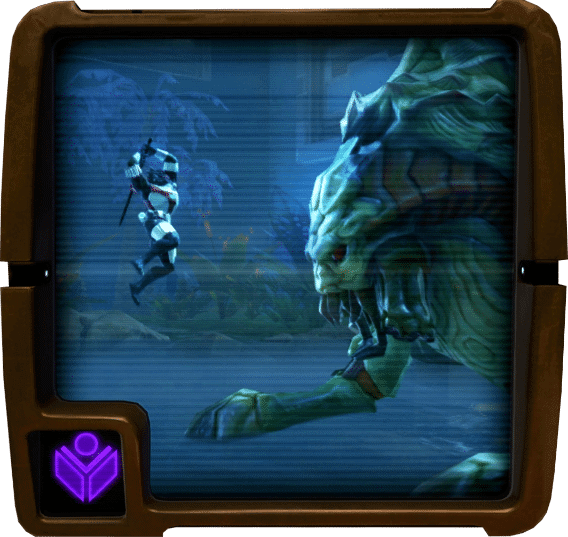 4: The Huntmaster
The Huntmaster is an entertaining fight, with some unique mechanics that build off things you saw earlier in the operation… but it suffers from fairly annoying de-sync, which (given the mechanics) can be quite frustrating.
The huntmaster is a boss you’ll have to burn down to 35%, while waves of Lurking Beasts (tweaked Felshade Reapers) spawn. A moving light keeps you (and the Huntmaster) safe from them, but you’ll have to venture out periodically, which gives them ample opportunity to pounce. At the end, the ‘true boss’ is revealed after snacking on the guy who’s been giving you so much trouble so far, and has to be killed in order to finish the fight.
Boss Details
The Huntmaster
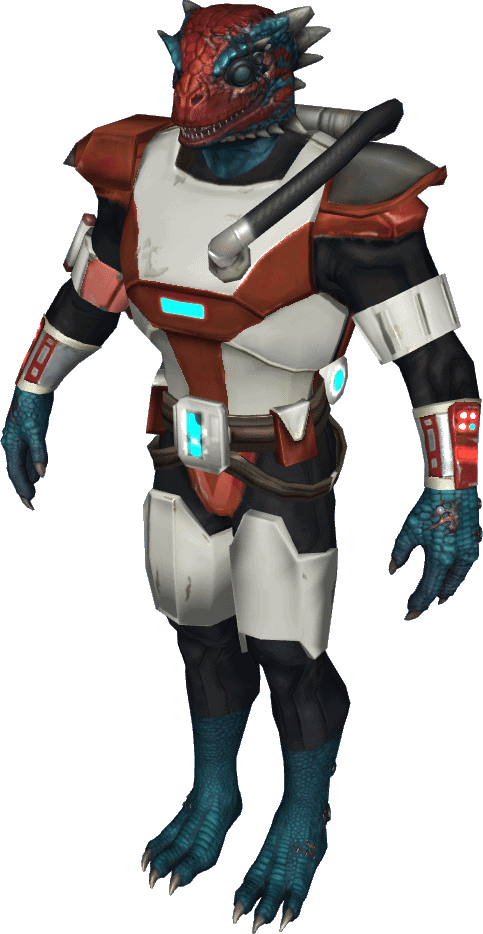
Huntmaster is the main boss for the majority of the fight; a glorified sniper aiming to kill anything around him, preferably you. You want to make sure he doesn’t kill too many adds, killing them yourself instead. The faster you burn him, the fewer adds you have to deal with (and the less likely he is to kill too many and enrage).
He mostly stays in ranged combat, even with a tank in his face, and you do NOT want to fight him if he swaps to melee mode (he does way more damage).
He has a lot of moves and automatically follows the light, unless channeling or calling beasts to him to snipe them all out of the way. The creatures that show up attack him as well if he gets caught outside the light.
 Master of the Hunt Master of the Hunt |
|---|
| Buff Effect: Destacking buff: Starts with 30 stacks. With every kill, Huntmaster’s senses sharpen. With enough kills he enters Transcendence. |
| Master of the Hunt is a de-stacking buff that counts down each time Huntmaster kills something (usually a Lurking Beast, but also players). If it reaches 0, he gains |
 Adrenaline Rush – Triggers sub 35%, heals and adds DR. Adrenaline Rush – Triggers sub 35%, heals and adds DR. |
|---|
| Buff Effect: Triggers sub 35%, heals and adds DR. |
| Adrenaline Rush is a buff when Huntmaster’s health gets low – preventing you from killing him. |
 Primal Fear – 6sec Buff Primal Fear – 6sec Buff |
|---|
| Damage dealt decreased by 70%; Tripled (12s) against beasts |
| Primal Fear is a 6second buff (debuff) that causes everyone/thing to do a lot less damage. This is very protective when dealing with adds – on which the debuff lasts 3x as long! |
 Scatterblast – 5s channel; conal Scatterblast – 5s channel; conal |
|---|
Scatterblast is a large, yellow conal that marks those hit by it – any beast/player that was marked and dies counts as a kill for the Huntmaster. Ideally, the player targeted for Scatterblast points it away from the group and any adds (or anyone BUT the person who this is on moves out of it).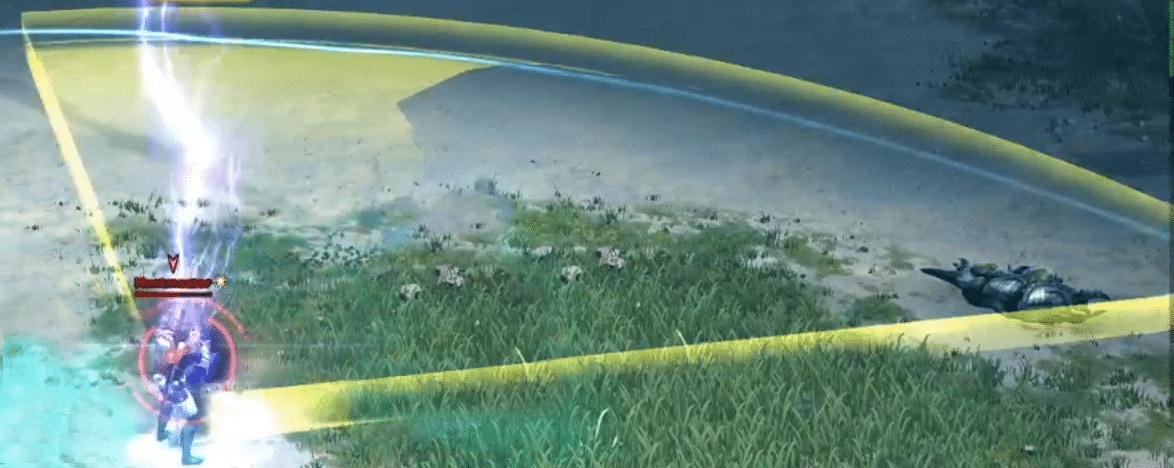 |
 Powershot Volley – 5s channel Powershot Volley – 5s channel |
|---|
| Series of shots, knocks back closest target directly in front of Huntmaster. Additional hits add Off-Balance. |
| Powershot Volley is a series of shots, aimed at a particular player. The player affected gets a thin X over their head, marking them. The closest player to Huntmaster, who is in between Huntmaster and the targeted player, gets shot and knocked back. Repeated knocks go further, and a full volley is basically a death sentence. It’s best to stack for this, each only taking one hit… or preferably behind a designated player that’s immune to knockback protecting others (god bubble sorc/sage, hydraulics/hold the line, etc). In HM additional shots also add Off Balance which knocks you down (not just back), making it harder to survive multiple shots. |
 Penetrating Shot – 5s channel; 24s debuff Penetrating Shot – 5s channel; 24s debuff |
|---|
| Armor reduced to 0 |
Penetrating Shot is a quick, powerful shot centered on a target (tank) that hits everyone in its path. The tank needs to point this away from the group. It drops armor to 0, and is the ability you immediately tank swap on.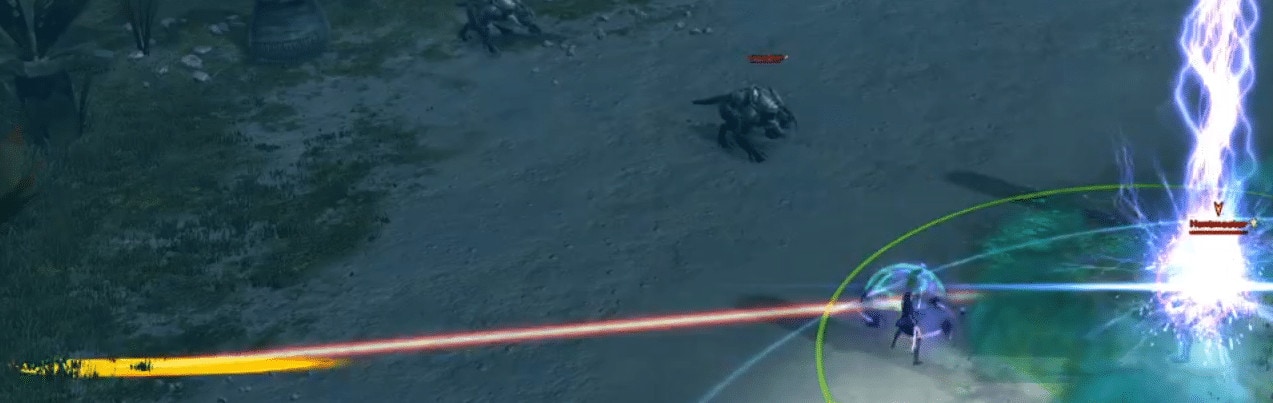 |
 Culling Shot – 30m range Culling Shot – 30m range |
|---|
| Attack |
 Firestorm Grenade – 3s channel; Elemental Damage Firestorm Grenade – 3s channel; Elemental Damage |
|---|
| Throws an incendiary grenade at the primary target’s location. Creates a large patch of immolated ground at the impact site, which deals continual elemental damage to all enemies within the area. |
| Firestorm Grenade is an AoE that gets placed where a player (randomly selected) stands at the end of the channel. The fire remains on the ground and hurts players and beasts. Going into it also leaves a DoT. In HM, beasts that die in the fire count for Huntmaster’s kill count (reduce stacks). This should be placed with caution, as it CAN ruin a pull if the light covers a grenade (leaving no safe spot). If you have trouble seeing it, having a healer place a marker on it (or the person who has it, right as the channel ends) will help people remember where these are.  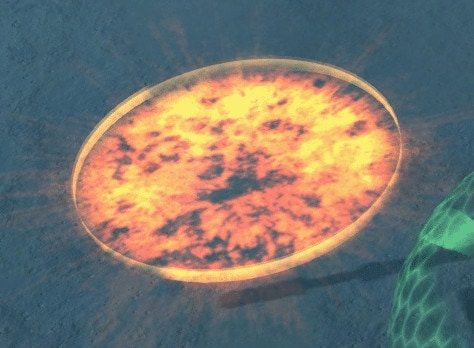 |
 Fortress – 30m range Fortress – 30m range |
|---|
| Deploys a powerful omnidirectional shield barrier around the caster, granting tremendous defensive bonuses so long as the user remains within the fortress boundary. |
Fortress looks like an omnidirectional Entrench/Hunker Down. The Fortress can only be broken with a powerful knock (Charger). When Huntmaster is in this, he uses Concussive Shockwave on anyone who gets too close, knocking them away and dealing significant damage.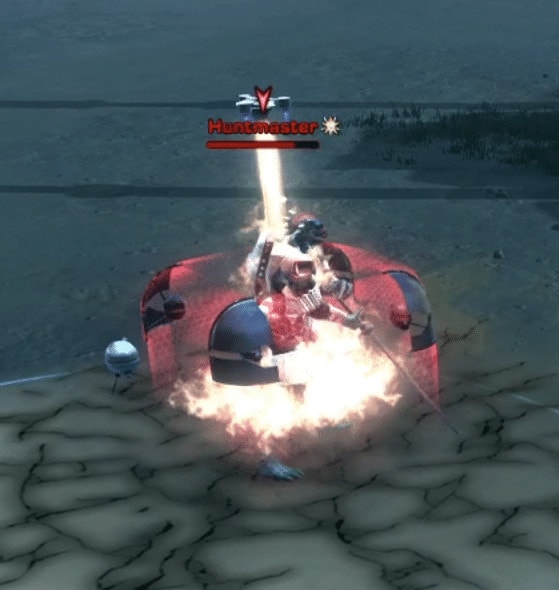 |
 Holdout Cover – Buff Holdout Cover – Buff |
|---|
| In cover and waiting to ambush whatever comes into range. Immune to taunts. |
| Holdout is when Huntmaster jumps to the lake, casting a huge 30m red circle showing his ‘kill zone.’ He also drops a flare that makes all adds attack him (not you, for once!). If you (or an add) step into this circle, you will get one-shot with his powerful Culling Shot. Outside of this ring of death, the Culling Shot still hurts, so the group will want to stack for AoE heals. 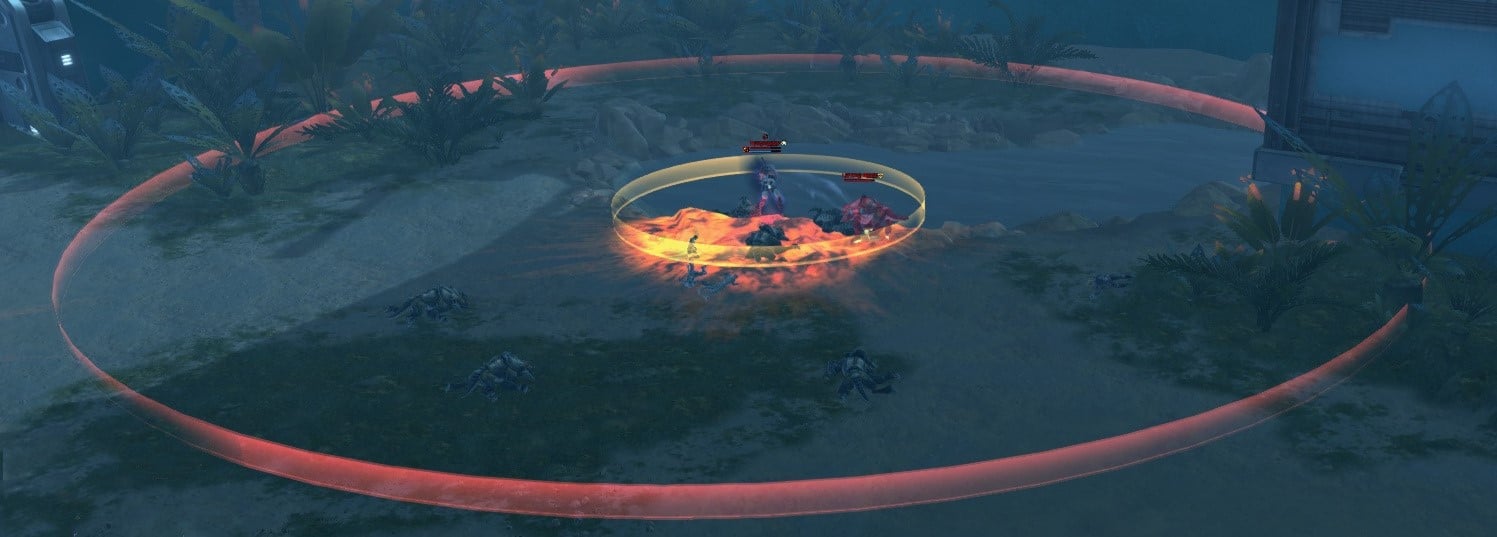 While in Holdout, Huntmaster reflects (but still takes) damage, which looks like lightning zaps.  |
 The Ultimate Hunter – Buff The Ultimate Hunter – Buff |
|---|
| In a transcendent state of lethal focus. Attacks cannot miss. Damage dealt massively increased. |
 Melee Frenzy – buff Melee Frenzy – buff |
|---|
| Damage and Alacrity increased substantially. Immune to taunts (not that you would want his attention right now). This ability taunts all enemies within 5m when used. |
 Concussive Shockwave – Kinetic knockback Concussive Shockwave – Kinetic knockback |
|---|
| Briefly overcharges the Fortress Bunker, knocking all nearby targets back several meters and dealing heavy kinetic damage. Only usable from Fortress cover. |
 Cyclone Strike – 5m range Cyclone Strike – 5m range |
|---|
 Holotraverse – buff Holotraverse – buff |
|---|
| Moves instantly to middle of the light or edge of the lake, depending on phase. |
Lurking Beast
These look and act a lot like Felshade Hunters from earlier fights. Unlike those, they do NOT have stealth. Instead, these guys have gained an outright aversion to the light; to the point where they won’t step into it. They attack anything (you, or Huntmaster!) that dares step out of the light.
These spawn in waves throughout the fight and have to be managed so that Huntmaster doesn’t kill too many of them.
List of abilities and attacks:
- Leap Attack – 6-20m range Force/Tech damage
- Melee Attack – 4m Weapon Damage
- Maul – 4m Weapon Damage
- Seek the Dark – Moves the caster away from the nearest light source. Only usable while in light.
 Seek the Dark means that these guys are allergic to light sources, and will be actively repelled by them.
 Leap Attack is their highest damage move, and hurts, so if possible you want to avoid getting lept to. Adds will leap on anyone leaving the light.
Charger
This Charger acts like earlier chargers, trampling through and doing a powerful knockback. If you move to put Huntmaster between yourself and this big guy when he fixates on you, he’ll knock the boss out of his protective bunker for you, stunning itself in the process! Note; this guy DOES have an annoying tendency to ‘drift’ – if caught in time, you CAN counter this by moving to keep the boss between you and the charger.
 Confused and Infuriated – buff Confused and Infuriated – buff |
|---|
| Damage dealt massively increased. This charger has no idea what just happened but it is VERY mad about it. Added with Charger knocked down and stunned |
| Knocking down Huntmaster will stun the Charger, and it will become Confused and Infuriated, which increases its damage output (and turns the bull an angry red). Ideally, you want to have the DPS kill it while it’s still stunned. Otherwise, it needs to be kited while DPS continue to focus it. |
 Deliberate Charge – 5s channel Deliberate Charge – 5s channel |
|---|
| Normal attack |
 Fixated Fixated |
|---|
| This creature is fixated on a player and its focus cannot be changed. Immune to taunts. Temporarily ignoring threat rules. |
Fixates on a player with arrows showing its path. It will Trample anything in its path to get to you, and Ram any obstacles (Huntmaster, hopefully). |
 Trample Trample |
|---|
| Knocking away anything underfoot. Enemies take damage in the process. Charging at a target, trampling everything on the way. |
 Charge Ram – 4m attack Charge Ram – 4m attack |
|---|
| Normal attack |
 Warning Roar – 4s channel Warning Roar – 4s channel |
|---|
| Normal attack |
Shelleigh

An over-grown Lake Crab, like you saw in earlier encounters. This one comes out of the lake and makes short work of Huntmaster before turning to munch on other snacks (your tanks). If you’re eaten, you can’t be rez’d (you’re eaten, duh!), so your tanks need to stay out of the Nom AoE she does right before going in for a snack. In HM, she stuns you first, preventing escape. Crafty little crab!
 Crabby Demeanor – buff Crabby Demeanor – buff |
|---|
| Increases maximum health a small amount with each stack. Perhaps you shouldn’t have fed the lake monster… Max health increased 1% per stack |
| Feeding Shelleigh (throwing beasts into her lake) gives her stacks of Crabby Demeanor, which increases her health. |
 Toxic Cloud – Internal Damage Toxic Cloud – Internal Damage |
|---|
| Passively emits a toxic cloud that deals ramping internal damage to enemies in a massive area |
| Toxic Cloud is raid-wide damage that goes out while Shelleigh is up. This stacks, so the longer she’s up, the more of a heal-check this becomes. |
 Nom – 6m range; AoE Sphere Nom – 6m range; AoE Sphere |
|---|
| Eats anything in AoE; Adds Lunch Debuff on target; Lunch -Target has been eaten, and cannot be resurrected. |
Nom casts a quick, small, pink ring on the ground, indicating the area where Shelleigh will eat whatever is still there. Quickly jump out of the circle, or get eaten. Anything eaten cannot be rez’d (you’re in Shelleigh’s belly). |
 Pulverize – 1s channel Pulverize – 1s channel |
|---|
| Pounds target and stuns them in the ground. Unable to act. This effect cannot be broken. |
Pulverize pounds the tank into the ground, preventing action. Can’t be broken. Requires a tank swap. |
Strategy
When the fight starts, a large circle of light (think spotlight) will shine over a significant portion of the map, and Huntmaster will immediately teleport into it.
The light will gradually make itself smaller, becoming quite cramped, then slowly oscillate around the map. Your goal is to stay in the light. It becomes the size of a grenade circle, so a poorly placed Grenade can rob you of any safe area.
Huntmaster will teleport to its center as soon as the light leaves him, but he will finish any ability/channel before doing so (like any good sniper).
Adds will start spawning almost as soon as the fight starts, and will continue to do so until Shelleigh scares them off.
The overhead view of the room is below, with the rough size of the starting light circled, as well as the general spawn locations adds might pop out of (basically, the brush in the corners).
The window you fall through is circled in yellow, and the 4 direction names are based on it, the lake, Apex entrance, with the last wall defaulting to “back”. Knowing these helps orient people when calling out which way mechanics are going, etc. The starting light area is also (very roughly) the confines the smaller circle will move around, giving you an idea of the usable area of the map for the majority of the fight.
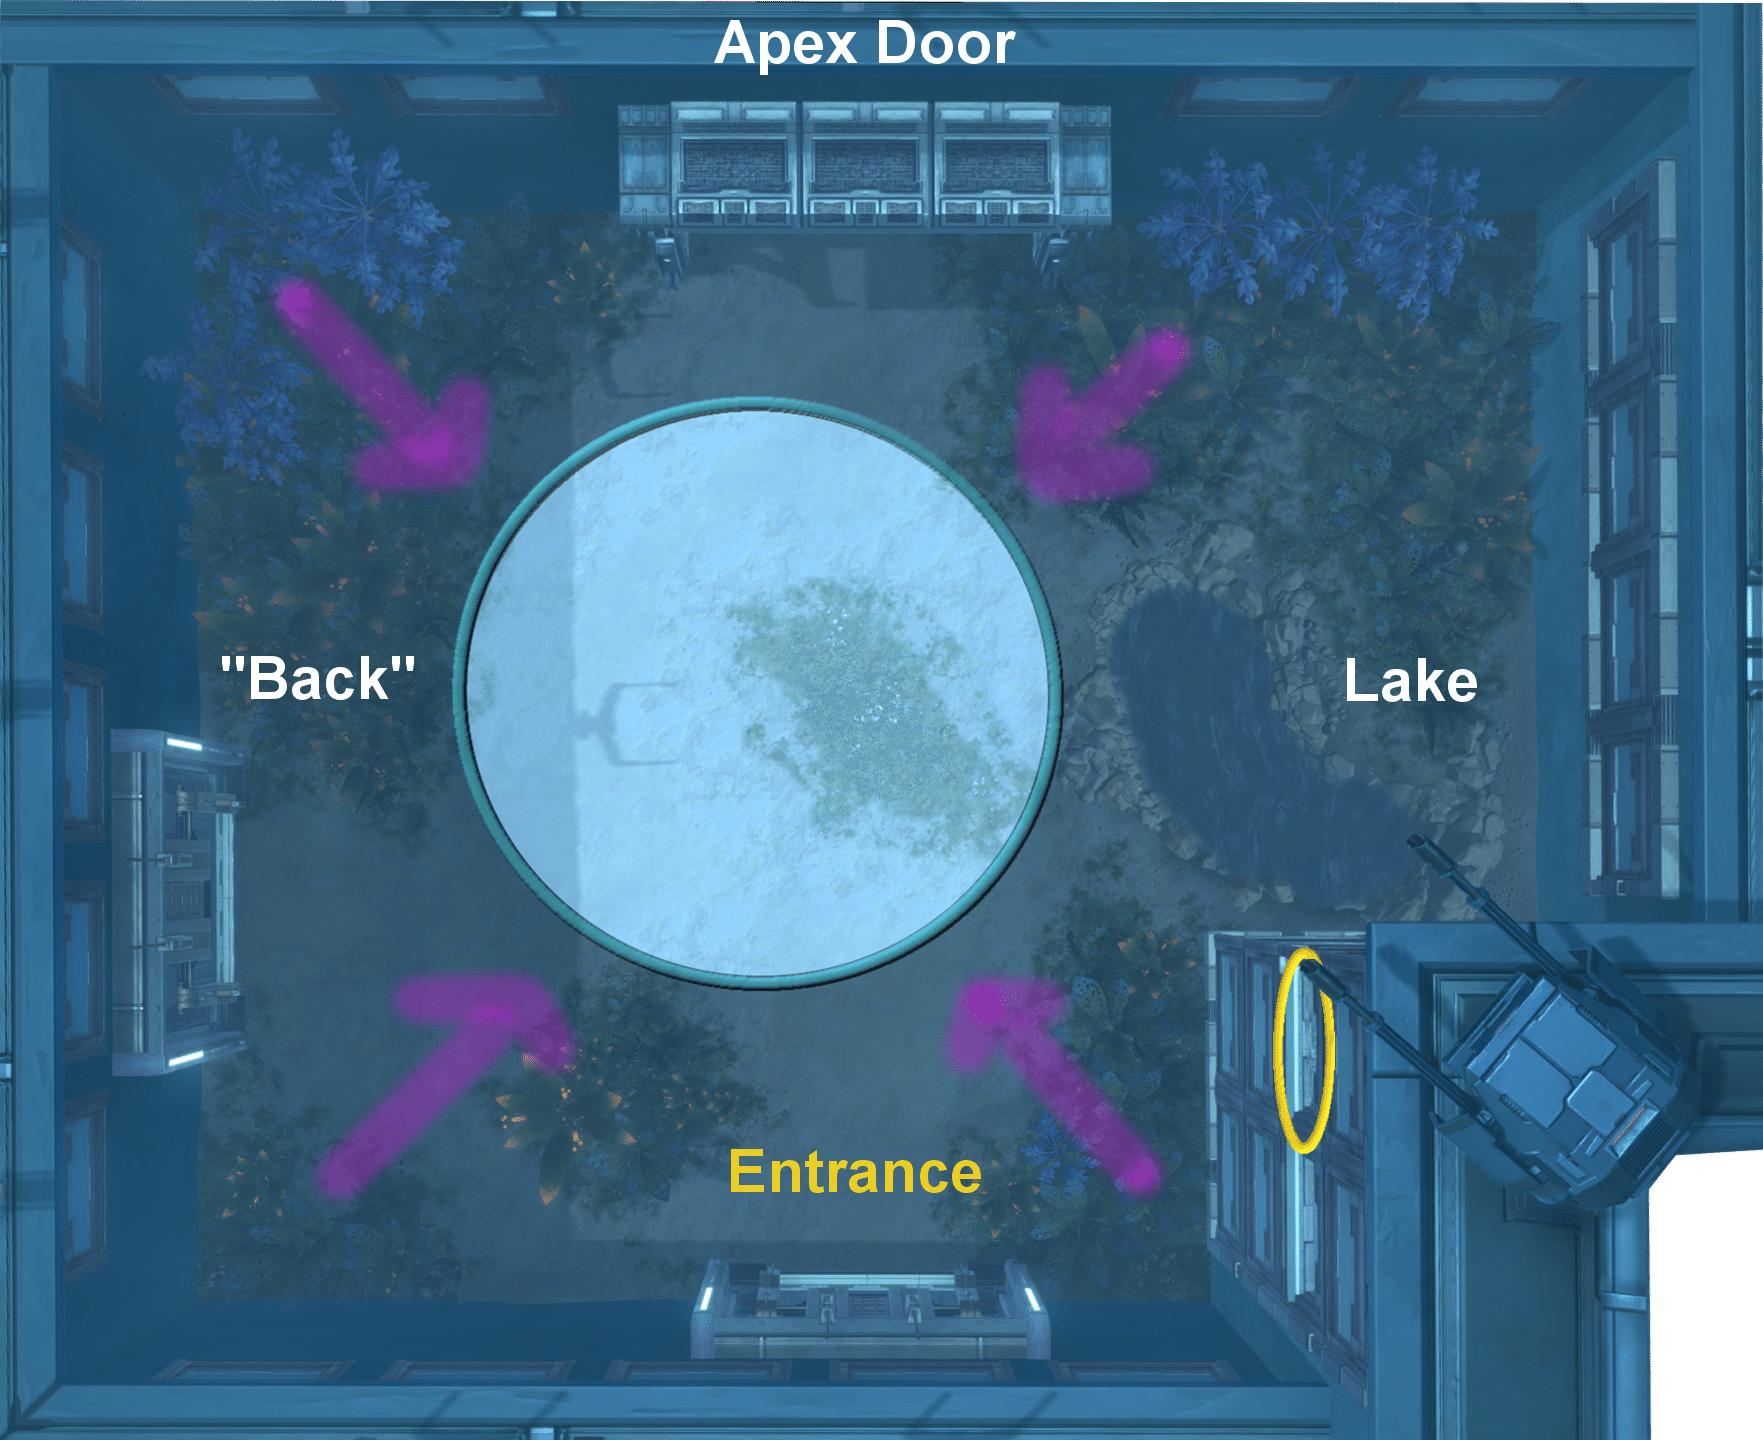
Your goal, ultimately, is to get Huntmaster to 35% before he loses all his Master of the Hunt Stacks. As you work on this, he will cycle between the Light phase and the Holdout phase.
Light Phase
In the Light phase, everyone will stay in the circle, and he will do the following moves;
You want the tank to face him away for Penetrating Shot (I like to point it to the left or up toward the Apex door). Penetrating Shot, as mentioned previously, is the tank swap, and the tank who swaps off him runs out with the first Primal Fear, taking care of adds.
Whomever Scatterblast is on takes the conal alone (pref not shooting any beasts, either).
The group stacks for Powershot Volley (including the tank), forming a line directly in front of the player Huntmaster targets. A designated player can pop a defensive and protect others from getting shot, taking all the hits. This would be sorc/sage god bubble, sniper/slinger entrench/hunker down, or merc/mando hydraulics/hold the line +reflect to prevent themselves from getting knocked back.
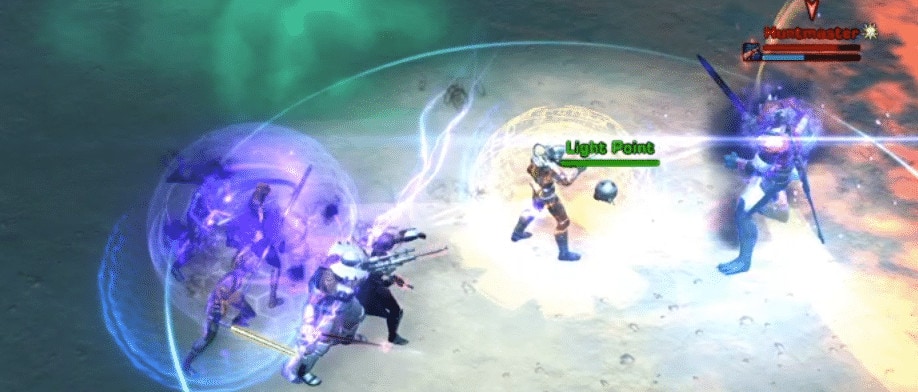
Grenade will get thrown in both phases. The person with Grenade tries to put them between the large circle and the Lower/Left doors. If dropped correctly, and you get lucky, it can help you kill the charger efficiently.
The general ability order for the fight (ignoring filler attacks) is the following (though note, he’s easily thrown off slightly, flipping abilities here or there), at least to start;
- Pwershot Volley > Firestorm Grenade > Penetrating Shot > Scattershot > Primal Fear
- Firestorm Grenade > Pen Shot > Powershot Volley > Primal Fear
Holdout Phase
Every second Primal Fear is followed quickly by Fortress, a Charger spawning, and (after knocking Huntmaster out of Fortress) a Holdout phase. While in Fortress, Huntmaster will continue shooting the tank with his ranged attack while reflecting damage.
A Charger can spawn at either of the two doors NOT leading to Apex (Top door on the overhead image above). Below is a detailed view of these two doors, with a red circle showing the (again, rough) position where Huntmaster will go into Fortress.
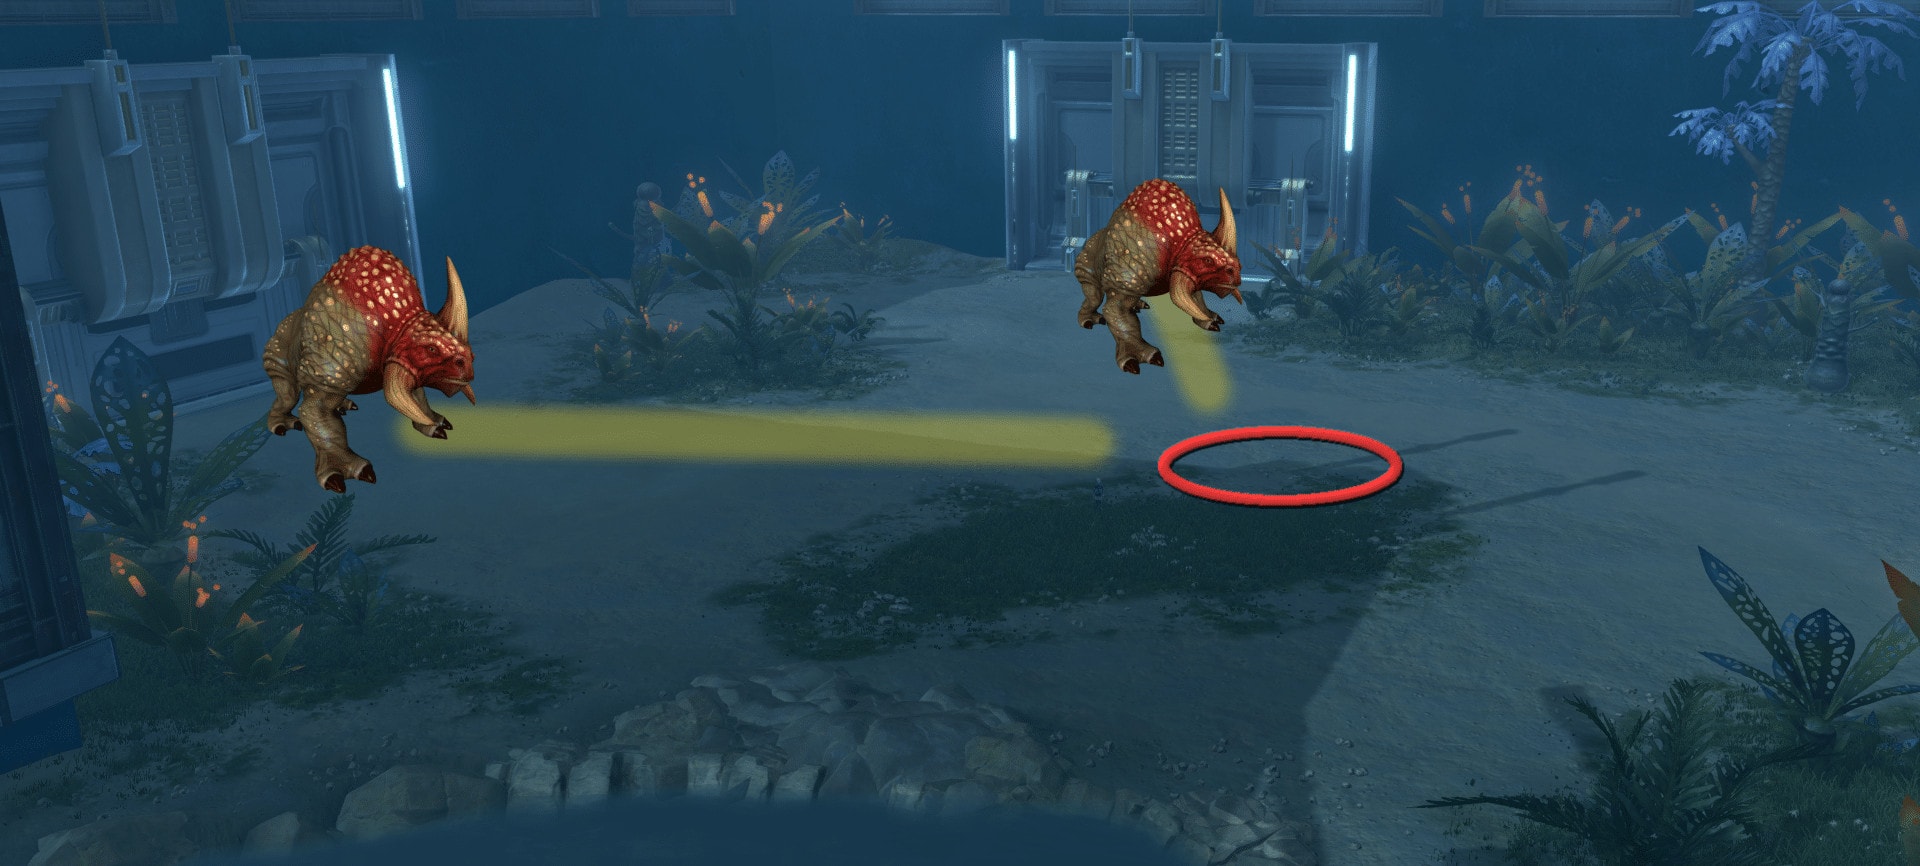
This is important for HM, where the Charger will fixate on a player, not Huntmaster (unless everyone is dead, at which point you get to watch him show off for a bit before resetting). This player is most often a healer, and groups can help a specific healer increase their chances if they guard the other one. Still, this is NOT a guarantee, and ALL players should be ready to aim the charger to break Huntmaster’s Fortress.
The player that the Charger Fixates on needs to aim the Charger’s path (indicated by yellow arrows) through Huntmaster. You also want to take care to be fairly close to Huntmaster (but NOT within his Concussive Shockwave zone) to avoid letting the Charger run around him on his way to you, failing the mechanic.
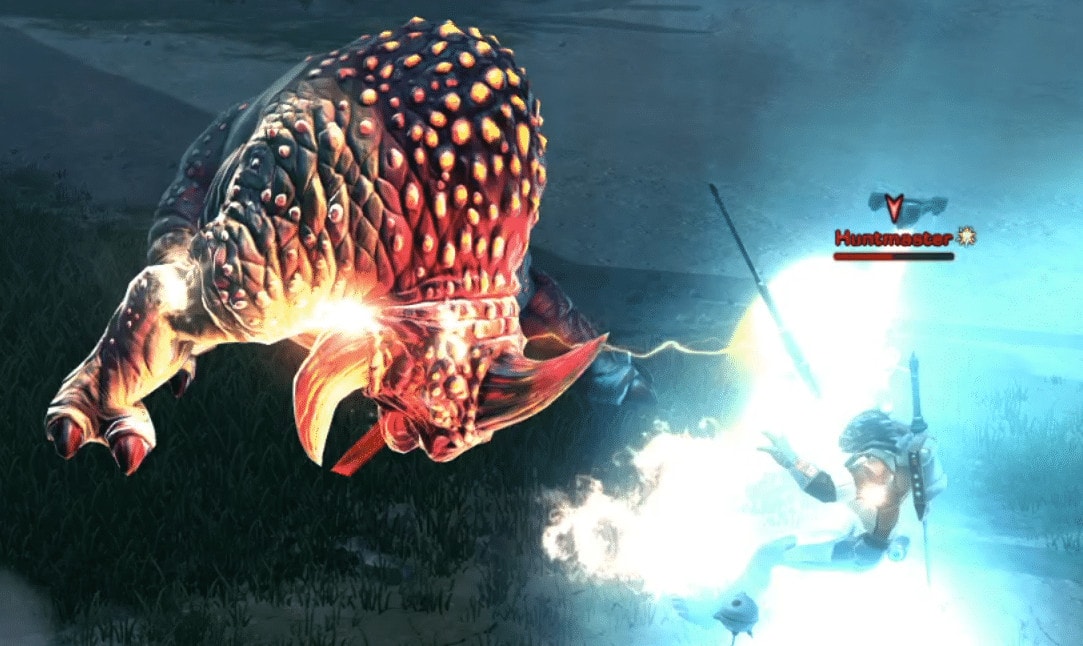
35m classes have a distinct advantage; being able to DPS Huntmaster while he’s in Holdout, as opposed to waiting and only being able to fight him during parts of the fight.
This repeats until he drops to 35%, making Fortress the end of each Light cycle. Depending on how desync’d Huntmaster gets, he might skip/flip abilities, the most annoying of which is NOT doing a Primal Fear. The adds will do damage to Huntmaster (not just to you) If they catch him out of the light. This can put him into Melee Mode, which makes him a FAR bigger annoyance and often results in a wipe if he doesn’t revert back when fighting players
Shelleigh
At 35% Huntmaster will jump to the Lake (as if to do another Holdout), at which point he starts rapidly regaining health, foiled when Shelleigh comes out to play.
There’s an obligatory swap after Pulverize so that the person on who the Nom circle drops is NOT the same one that’s still stunned from Pulverize. Anyone Shelleigh eats (anyone who dies to the Nom circle) CANNOT be rez’d (stealth or combat) until the fight ends. This makes it a quite important mechanic to get out of, ASAP.
Details
The Huntmaster DPS check centers around not letting his Master of the Hunt stacks drop to 0, which in practice means not letting him kill more than 30 things (down from 50 in SM) before he hits 35%.
Light Phase
In HM, this DPS check is therefore tighter than it was in SM and having an add strategy becomes key, as does minimizing the adds he counts as ‘his kills’ outside of Holdout.
Having enough adds for Holdout also means Huntmaster is not hitting you, adding some protection, so a balance must be made between getting rid of adds and minimizing Holdout damage.
Your options are as follows:
- Knock the adds into the lake – my personal preference, but this buffs Shelleigh’s health (which means the last leg of the fight becomes longer/harder).
- Have DPS swap to the adds – this makes Shellieigh easier (she dies fast), but also prolongs the fight with Huntmaster, potentially adding an extra Holdout (where he’s either shooting beasts or you)
If you go with the first option, the tactic will be to have the tank go out after Primal Fear (or right before, burning a cooldown) and bait the adds to the edge of the lake.
A Sin/Shadow tank can then just force speed backwards and knock them in, while the other two tank classes can mass-stun (i.e. PT/Van can Carb/Surge) them at the lake edge, then have someone else come over and knock them back (Inquisitor/Consular knockback is easiest – especially sage/sorc with phasewalk). This allows for DPS to focus and tunnel the boss, without ever really swapping to adds (except for the chargers!) – and the faster Huntmaster drops to 35%, the fewer adds Shelleigh eats and the lower the chance Huntmaster drops to 0. There’s a mark of mastery if you throw enough into the lake.
If you go with the second option, the tank gathers the adds (again, after Primal Fear) and calls for the DPS to hard swap, killing them. The tank can run them through a grenade, reducing their health (careful not to kill them!) so that the DPS can burn them down faster. Obviously, having to kill adds will lower the DPS on boss, meaning it’ll take longer to drop him to 35%.
Either way, as soon as the Adds are taken care of, the first tank runs back into the light. As a general rule, everyone should be in the light unless a mechanic requires you to get out. Tank 1 takes first Penetrating Shot, moves out to gather adds with first Primal Fear, either knocking them into the lake or gathering them up for DPS to kill. Tank 2 eats the second Penetrating Shot, so that Tank 1 can hold the Boss while waiting for the second Primal Fear and through Fortress. Which tank takes which shot often depends on the strategy and tank class, optimizing based on how the group plans to deal with the adds (i.e. if knocking adds in, a Sin/Shadow can do them himself, while the other classes need help).
Holdout Phase
When the second Primal Fear goes out, everyone prepares to move away for Fortress, so that they don’t take unnecessary punt damage from Concussive Shockwave.
The tank with Penetrating Shot gathers adds and brings them to the lake or gathers them to be Bursted down. The other tank holds boss until the the player the Charger Fixates on uses him to knock Huntmaster out of holdout. That tank then picks up any remaining and newly-spawned adds.
The DPS hard-swap to the Charger as soon as he drops, and try to kill it before it gets up. If it does, the tanks need to bounce the charger back and forth while DPS finish the job.
35m DPS continue to DPS Huntmaster as he goes into Holdout. Melee can DPS the charger or adds. If you have enough stacks, let all the adds through; if your group is struggling with stacks, you can stun them and wait to minimize his stack loss, though he WILL shoot players.
These phases repeat until he is pushed to 35%.
Shelleigh Phase
Shelleigh comes out, a tank should immediately taunt and start kiting or turn her, depending on strategy;
- If you want to kite her, the tank starts running in a large ring around the map (path in the image), with the other tank (or DwT) ready to taunt if she does Pulverize.This strategy is easiest on ranged-heavy groups, or tanks that are a bit slow on swaps.
- If you want to hold her in place, each tank takes one side of the lake, with the group further mid, keeping Shelleigh in the middle where she comes out (T1/T2 and Group in the image – ignore path). Tanks swap on Pulverize, with the tank that grabs her side-stepping the pink Nom circle quickly. This is great for melee groups, or just tanks that don’t want to run around.
 5: Apex Vanguard
 5: Apex Vanguard
Apex is located directly through the large door in the Huntmaster area.
There are no adds, and while there are a few more things for everyone to watch out for in HM, the most interesting job is still the battery carrier.
Boss Details
Abilities and Attacks explained:
 Peak Performance – buff Peak Performance – buff |
|---|
| The Apex Vanguard enrages whenever his health percentage is at or above the listed value. This value decreases over time so long as the Apex Vanguard is in combat. Start at 99, decrease by 5 every 45s |
| Peak Performance is a buff that starts at 99 stacks and drops by 5 stacks every 45 seconds (first drops to 95). If his health percentage is above his Peak Performance stacks, it causes Apex to enrage until it drops back below. This also means that Apex is enraged from the moment you pull until you drop his health 2%. |
| Darkness Overdrive – 10s Channel; Stacking Buff; (max 20) |
|---|
| Each stack increases outgoing damage and damage vulnerability. |
| Apex becomes increasingly more powerful as he’s left in the dark; due to stacking Darkness Overdrive stacks. Turning on the light makes the stacks drop slowly; but also regenerates his health due to Photogenesis. Keeping him in Flares prevents him from gaining stacks without regenerating health. |
 Photogenesis – 10s cast Photogenesis – 10s cast |
|---|
| Regenerates health when light is on, and loses stacks of Darkness Overdrive |
| Photogenesis happens when Apex drops to 93% and remains a mechanic for the remainder of the fight. Once this is cast, Apex will regain health while the light is on. |
 Contagion – 3s cast; Internal DoT (2s); Force/Tech Contagion – 3s cast; Internal DoT (2s); Force/Tech |
|---|
| AoE centered on every player; must be cleansed. Cleansing leaves puddle on the ground until Wash. Can re-infect by walking into player with it (or puddle) after cleansing (short immunity post-cleanse). |
Contagion places a green ring around each player. In HM, these will not drop off on their own, and need to be cleansed. Cleansing leaves a green puddle that will re-infect anyone who walks into it. Puddles only disappear when washed away, making it important to stack these properly. Most groups chose to make two puddle stacks; one for ranged/heals and another for Melee.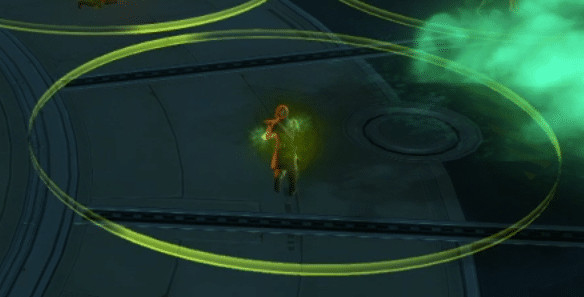 The Melee puddles don’t need to be stacked as well, as these will be covered by Orange Acid Blast puddles. The ranged ones either go against the center transformer (as pictured on the stack image below), or in the middle (between the inner lighter ring and the middle darker ring on the floor), just outside the orange Acid Blast puddles (details in strategy). 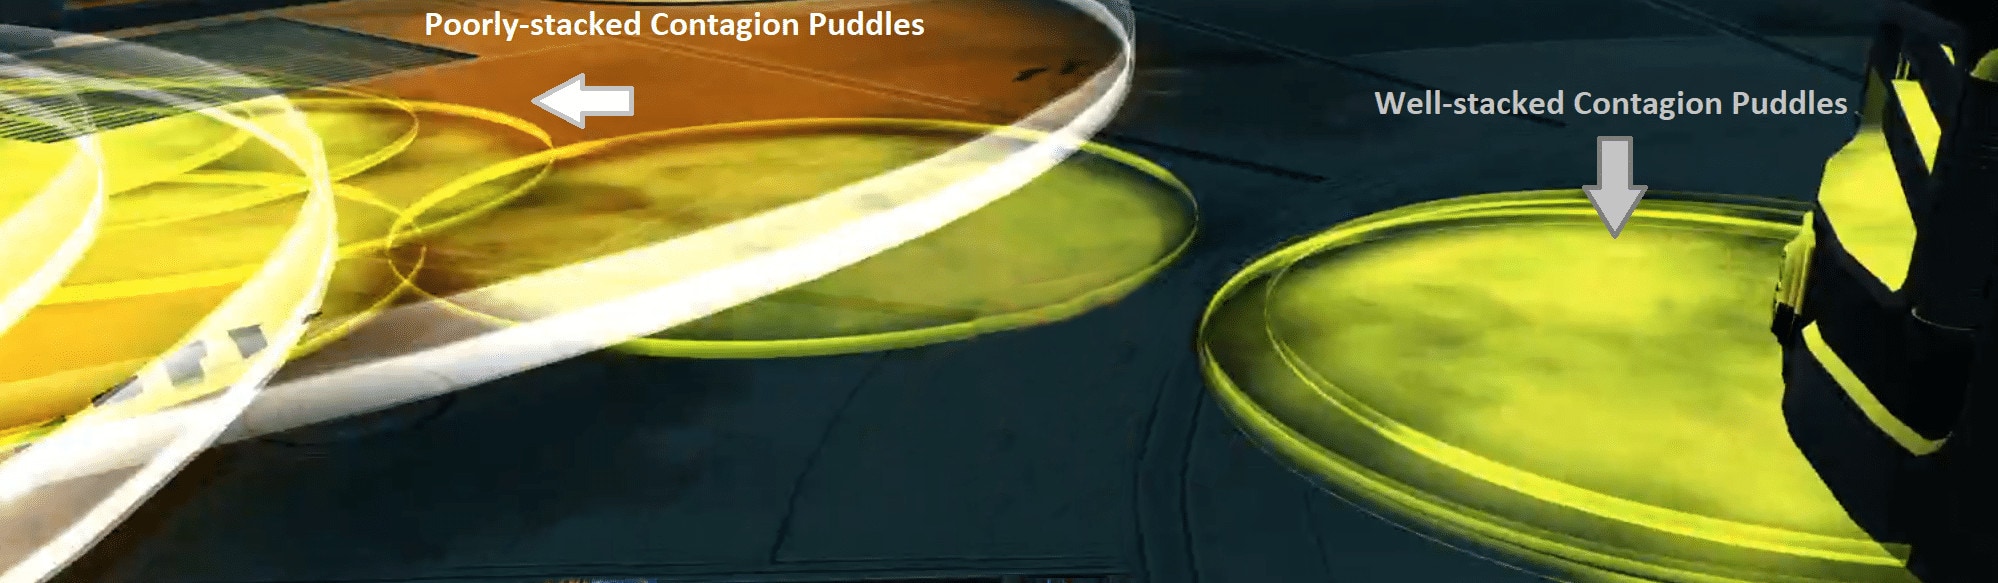 |
 Acid Blast – 0.5s cast, 100m range; Internal Force/Tech Acid Blast – 0.5s cast, 100m range; Internal Force/Tech |
|---|
| Drops large circle centered on target. Removed with wash, Circles grow over time |
Acid Blast spits out a yellow circle centered on the tank with aggro that grows progressively in HM. Like in SM, it remains on the floor until you wash the floor. The tank should remain against the outer wall, positioning themselves to place the circles properly. Since these progressively grow in HM, it becomes even more important to place them correctly. |
 Acid Deluge – 2s cast; 2min cooldown Acid Deluge – 2s cast; 2min cooldown |
|---|
| Stacks that allow for rapid Acid Blasts. Each Acid Blast consumes a stack |
| Acid Deluge is a stacking buff, which allows Apex to rapidly drop several Acid Blast circles. This happens at 30%. A tank should pop a big cooldown and let these drop in one stack before moving on, especially if doing the full-room strat (details in the strat section of the guide). |
| Rocket Salvo – Kinetic Force/Tech |
|---|
| Raidwide Damage |
Rocket Salvo is a raid-wide damage attack Apex does periodically. Players should spread out to take less damage.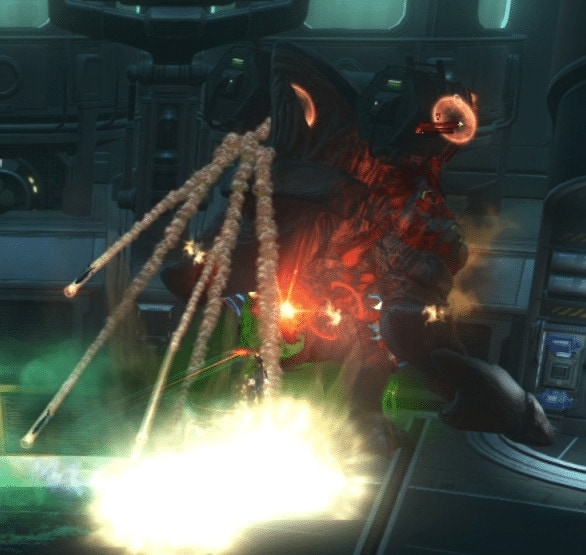 |
 Zone Defense – 3s Channel; Kinetic Force/Tech Zone Defense – 3s Channel; Kinetic Force/Tech |
|---|
| Gives each player a Left/Right debuff – then sends missiles if target remains on that side of Apex |
| Zone Defense is a position mechanic. Each player is marked as either left or right debuff. These appear as yellow/purple arrow debuffs, as well as icons over each player’s head. They correspond to the same icons the boss gains over his shoulders. When this happens, players need to go to the opposing side of their debuff to take no damage. 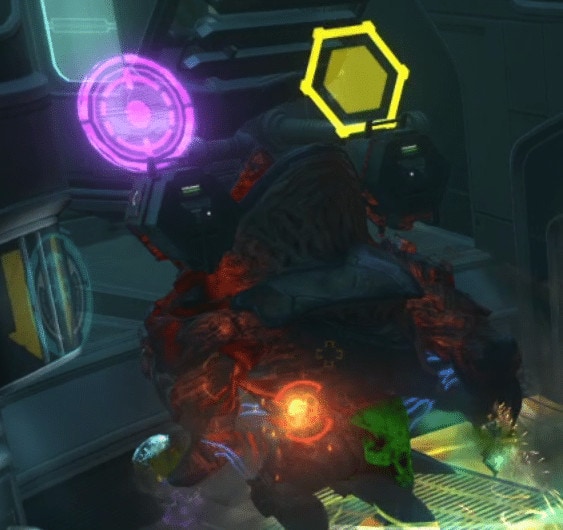 |
 Red Venom Cloud – 3s Cast; Raid-wide DoT; Internal Red Venom Cloud – 3s Cast; Raid-wide DoT; Internal |
|---|
| Unleashes a cloud of Red Venom, filling the room. Stacks up to 25 |
Red Venom Cloud is a purple mist Apex fills the entire room with, which can only be dispelled by using the fan station. As it stays on, it stacks, doing progressively more damage.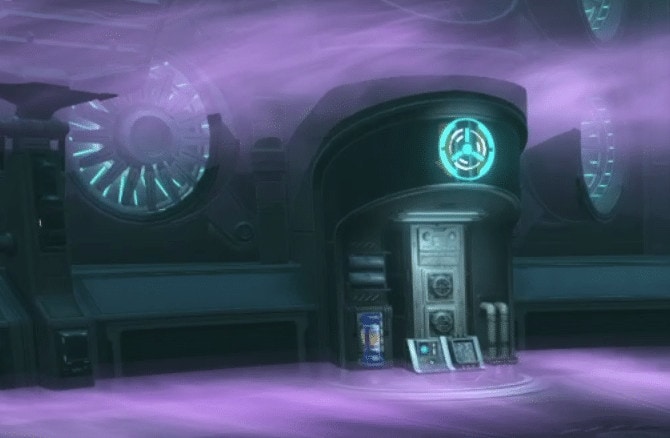 |
 Mass Target Lock – 2s Cast; 30s cooldown Mass Target Lock – 2s Cast; 30s cooldown |
|---|
| 30s Debuff, after which Bombardment starts. Canceled by EMP |
Mass Target Lock is a 30-second debuff that also shows up as a big red target over every player. Once this debuff expires, if it is not broken via EMP, Apex starts a high-damage Bombardment. This should never happen.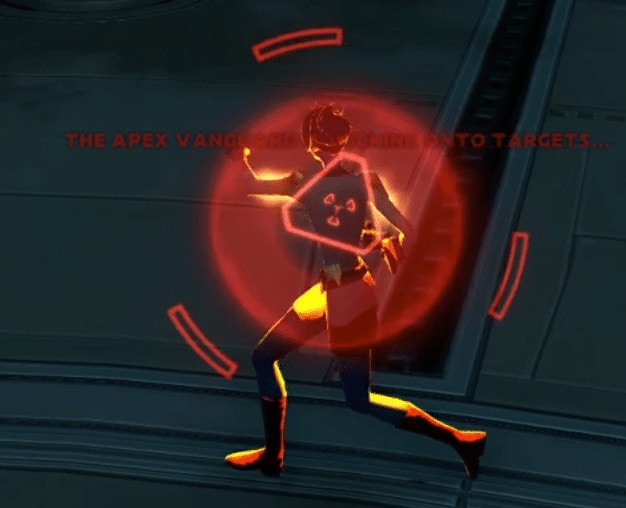  Bombardment – 6s channel Bombardment – 6s channelExplanation: Raid-wide damage. Happens IF Mass Target Lock is not countered in time (should not happen). |
 Voltinator – 20s Channel Voltinator – 20s Channel |
|---|
| Absorbing damage while charging The Voltinator. Breaking this Charged Barrier will disrupt The Voltinator’s charging process. |
| Voltenator is a new mechanic in HM, which is a 20-second channel that needs to be broken by damage. However, right before it Apex casts Blinding Spray, which reduces everyone’s accuracy by 100%. To counter this, enough DPS have to pop 2 |
 Blinding Spray – 1s cast; Cast immediately before Voltinator Blinding Spray – 1s cast; Cast immediately before Voltinator |
|---|
| Reduces accuracy by 100% for 18s |
 Last Ditch Effort – 3s Cast Last Ditch Effort – 3s Cast |
|---|
| Damage is Massively Increased (x3). Cast when he drops to 5% HP. Peak Performance effects are dispelled. |
| Last Ditch Effort is a cast Apex does when his health hits 5%, making him do THREE TIMES the damage he was doing previously. Tanks need to be ready for this with extra cooldowns, and DPS should be ready to burn the last 5% off his health as quickly as possible. |
 Last Ditch Leap Attack – 10-70m range Last Ditch Leap Attack – 10-70m range |
|---|
| High damage attack when Target leaves melee range |
Temporary Abilities
With the Flare and Stim stations, players now have access to these temporary abilities again.
| CI-Neutralizer Flare |
|---|
| Attained from the Flare Station Makes Apex unable to gain additional stacks of Darkness Overdrive. 32s duration, 2s tick |
| CI-M Synapse Accelerator Serum |
|---|
| Attained from Stim Station Injects a target with a dose of the experimental CZ-M Synapse Accelerator Serum. When used as directed, this serum grants the user increased runspeed and immunity to movement impairing effects, while also halving tiredness. Injecting a second dose while the first is active will over Overclock and Overload the body. 12s buff Overclock: Grants a 100% bonus to Accuracy and Critical Chance, and for Tanking disciplines a 100% bonus to Defense Chance. 12s buff Accuracy and critical chance increased by 100%. Melee and Ranged defense increased by 100%. Immune to movement impairing effects, knockdowns, and physics. Movement speed increased. Your mind and body are heightened to an extent you never knew possible. You think and move with perfect precision through a world in slow motion around you. You also suddenly feel like you’re cooking in an oven. 30s duration Accuracy and critical chance increased by 100%. Melee and Ranged defense increased by 100%. Immune to movement impairing effects, knockdowns, and physics. Movement speed increased. Your mind and body are heightened to an extent you never knew possible. You think and move with perfect precision through a world in slow motion around you. You also suddenly feel like you’re cooking in an oven. |
Flares look like they have previously, but doesn’t nerf any damage Apex does. They function as dark light; illuminating enough that Apex doesn’t gain Darkness Overdrive stacks, but dark enough that he doesn’t heal due to Photogenesis. They therefore allow you to minimize the amount of time the room is lit to a bare minimum (aka, the time needed to charge the battery).
Stims work the same way they have elsewhere, though the Accuracy boost becomes far more important than the crit boost (for countering Blinding Spray during Voltenator).
Both of these temp abilities give the same visual indicators that they did in previous bosses; blue circles for flares and orange rings for stims.
The Battery
The big mechanic here is managing the battery; an item you break out of the main (central) Power Transformer early-on in the fight. Placing it back in this transformer refills it to full, though unlike SM, the battery takes time to fully charge, gaining one bar at a time.
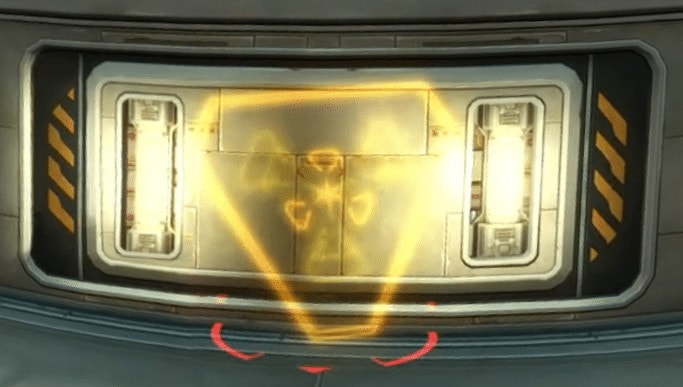
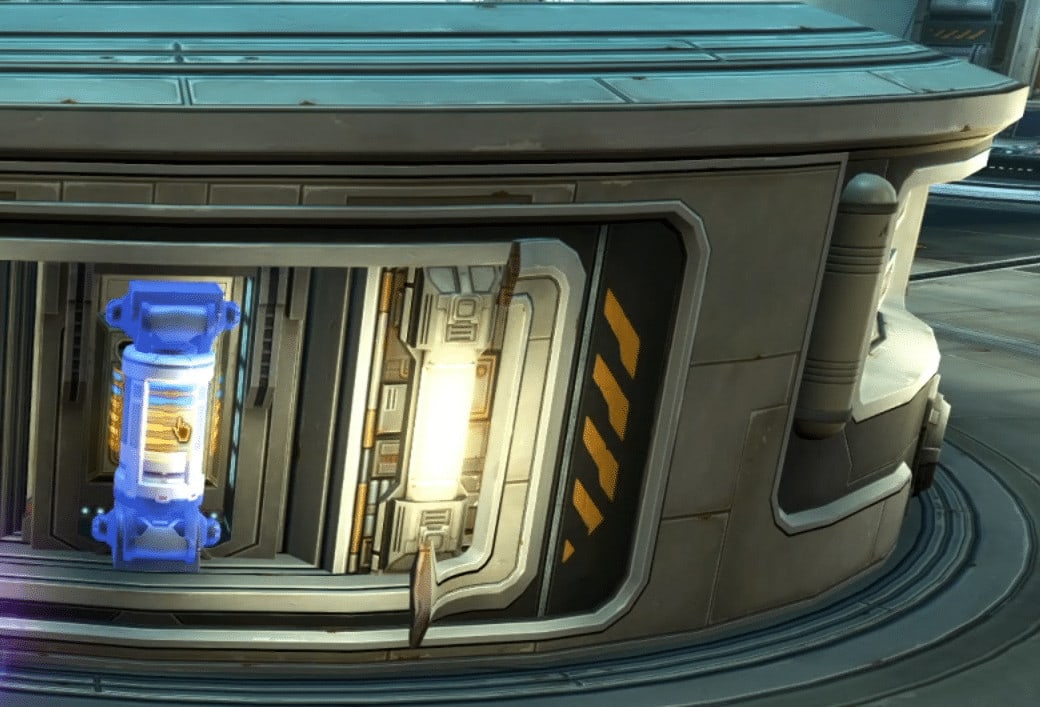
The battery holds a max of 6 charges, indicated on the battery itself as 2 blue, 3 yellow 1 red bar indicating each charge.
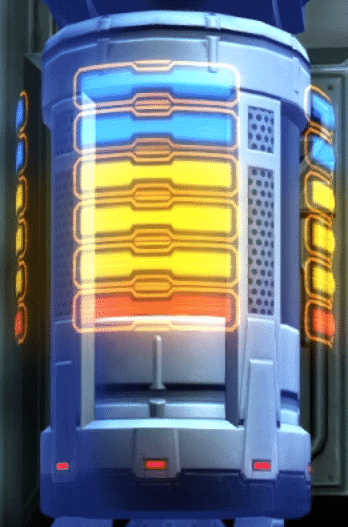
For the remainder of the fight, you use this battery to power various stations to counter the different mechanics the boss throws (usually shoots or spits) at you.
A carrier takes the battery out of the Central Transformer (top picture, after breaking the cover plate) and inserts it into the stations (blue clamps on the left of each station).
Once powered, each station does something different, and a different panel/console lights up that activates the station.
Stations
 | EMP Station: Ends Mass Target Lock. Fully drains battery, regardless of remaining Charges. Requires at least ONE charge. |
 | Flares Station: Make up to 3 flares. First flare uses ONE charge; next two each take TWO charges. The dots on the right turn green when Flares are ready. |
 | Fans Station: Vent the room of toxic fumes (Red Venom Cloud). Uses TWO Charges. |
 | Stims Station: Requires there to BE a battery with a charge to function. Continuously makes Stims until Tray is full (12 stims in tray). Uses NO Charges |
 | Wash Station: Washes the floor of Yellow Puddles. Click flat panel in the center of the station. |
EMP
The EMP station (called a disruptor in the voice-overs) functions exactly as it does in SM: it will drain any charges left in the battery and requires at least one charge to trigger.
To trigger the EMP, click the center console with the battery inserted (powered-up station seen below).
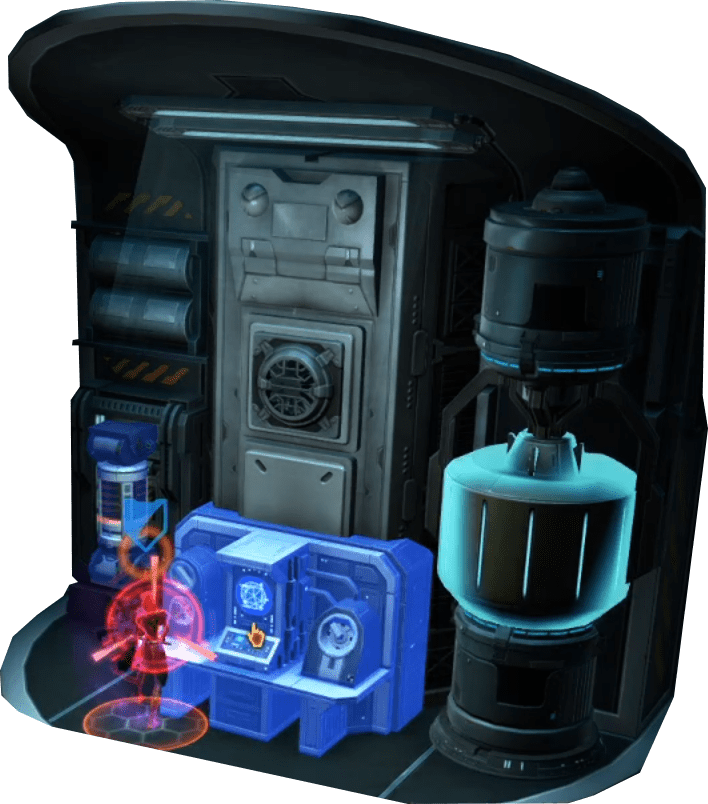
Flares
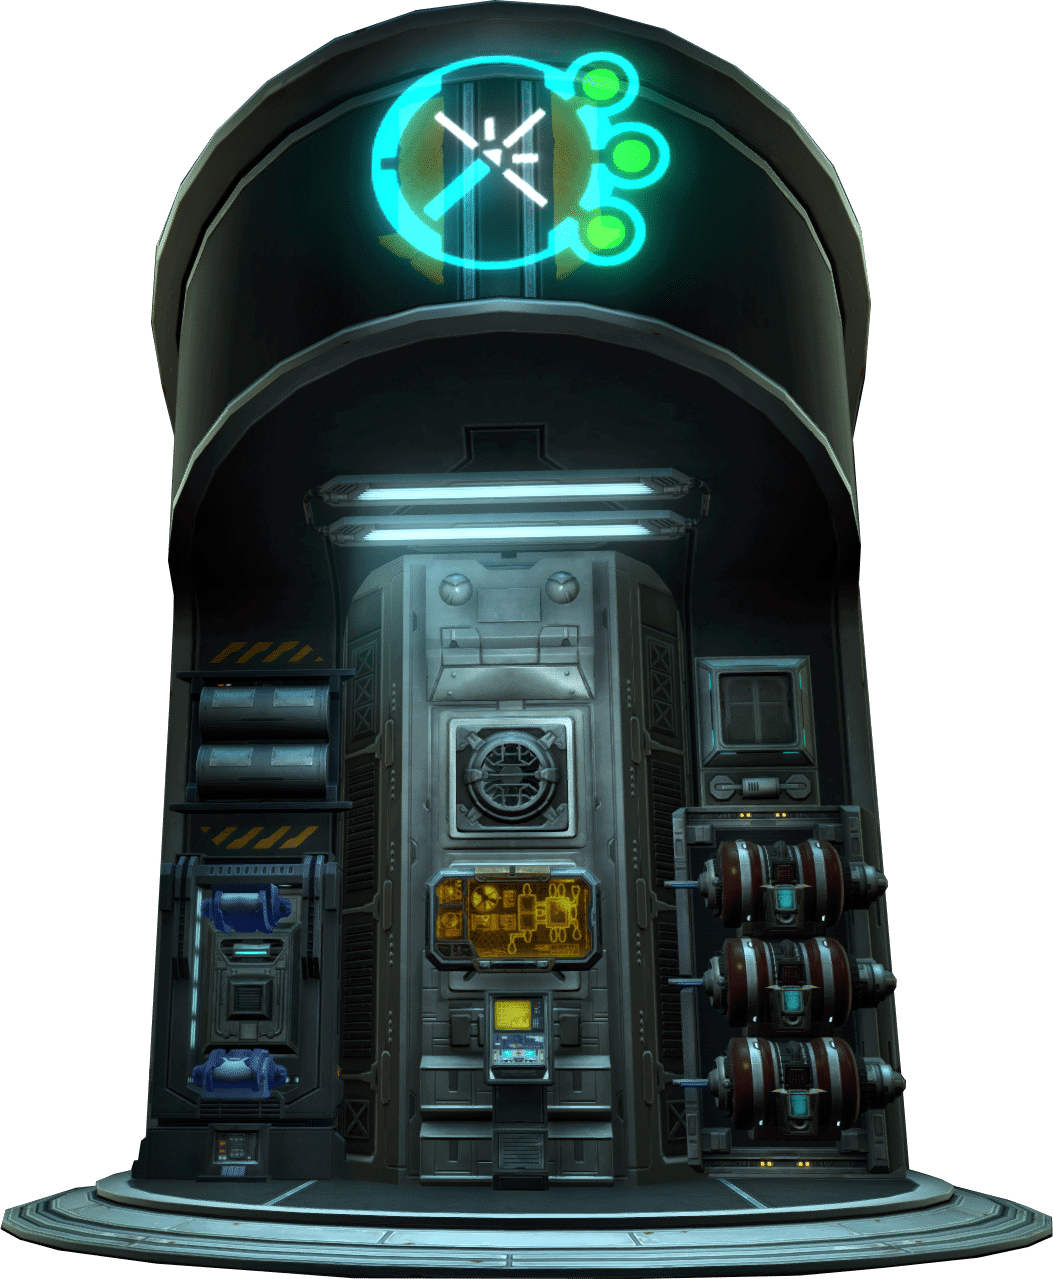
The Flares station has a terminal in the center of the station (right below the big yellow screen in the image above).
The battery carrier clicks this 1-3 times quickly to charge the flare canisters. A full set of 3 flares eats all but one battery charge if it starts fully charged.
- The first flare canister requires one charge.
- The second and third canister each require two charges.
The flares take some time to ‘cook’; meaning there’s time between starting the process and when someone can grab the finished flares. No more can be made until someone takes these flares. The color of the circles on the icon above the station shows if the flares are ready, cooking or empty.
- Green indicates ready (as seen in the big image above).
- Orange indicates cooking.
- A grayed-out red indicates an empty flare canister slot.
A small panel on each canister also indicates this, but these are hard to see when not right at the station. Green indicates done, the red spinning circle indicates they are still cooking (two lower vs the top canister display in the detail image below).
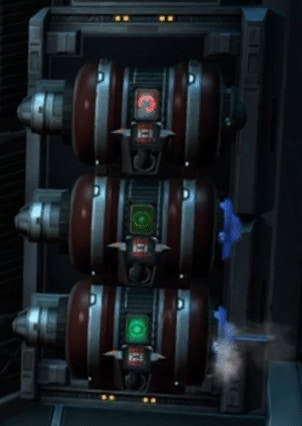
The flares are taken by the person who will throw flares at the boss by clicking on the flare canisters on the right of the station. The clickable area is actually the outer cap of each canister, on the far right when facing the station (bottom two canisters in the detail image above). The canister also emits a burst of steam as the flare finishes cooking (bottom canister in image above).
NOTE: There are three ready-made flares when the fight starts. The player using the flares should start at this station, and grab these right away.
Fan
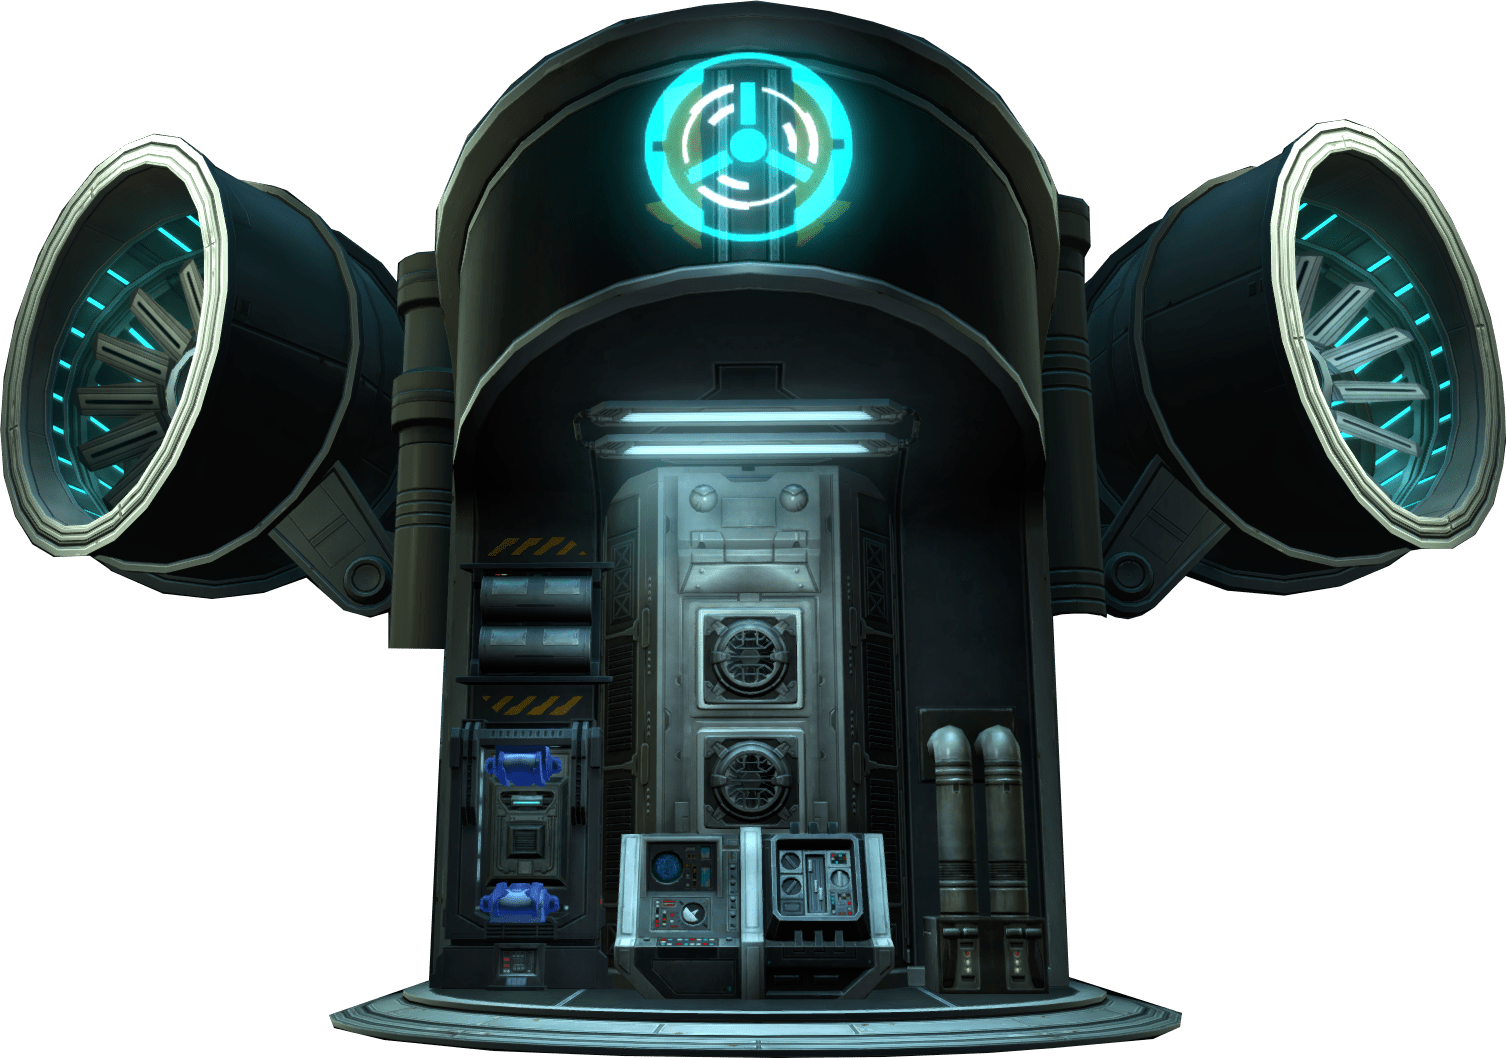
The Fan station works exactly as it does in SM, except it now uses TWO charges instead of one.
Click the center console to start the fans. The fans stay on for some time after activation.
Stims
The stims station does not eat any charges, but only functions while a battery is inserted and stays in. The battery must have at least one charge to create stims.
To start stim production, you click the small panel on the center console. The stims take about a second each.
To take stims, you click on the stim tray on the left of the console. As DPS, you always want an even number of stims.
Stim production will automatically stop when the tray fills up with 12 stims. The amount of stims is also indicated by yellow bars above the terminal (6 visible in the panel detail image).
People can rapidly click the stim tray to grab stims, and as long as the battery stays plugged in, this will allow for more stims to be made without interrupting production.
When production stops, the panel lights up again and clicking it will restart production (again, this station uses NO charges).
Wash Station
The wash station, again, functions as it did in SM, except it requires TWO charges.
You click the large (flat) center panel to wash the floor, causing a series of large sprinklers to come out of the floor, washing away yellow Acid Blast and green Contagion puddles.
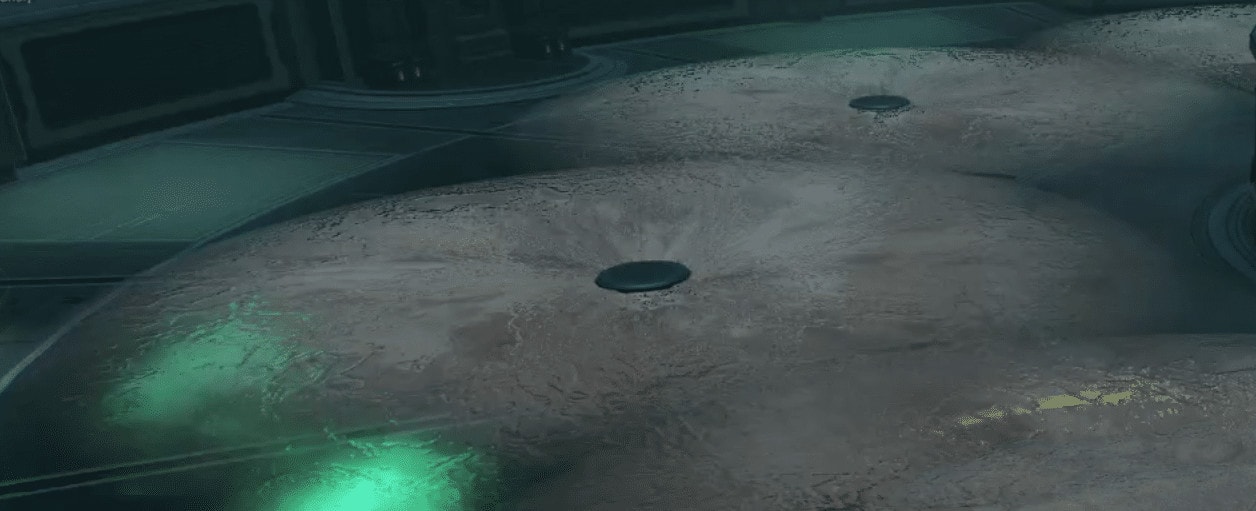
Strategy
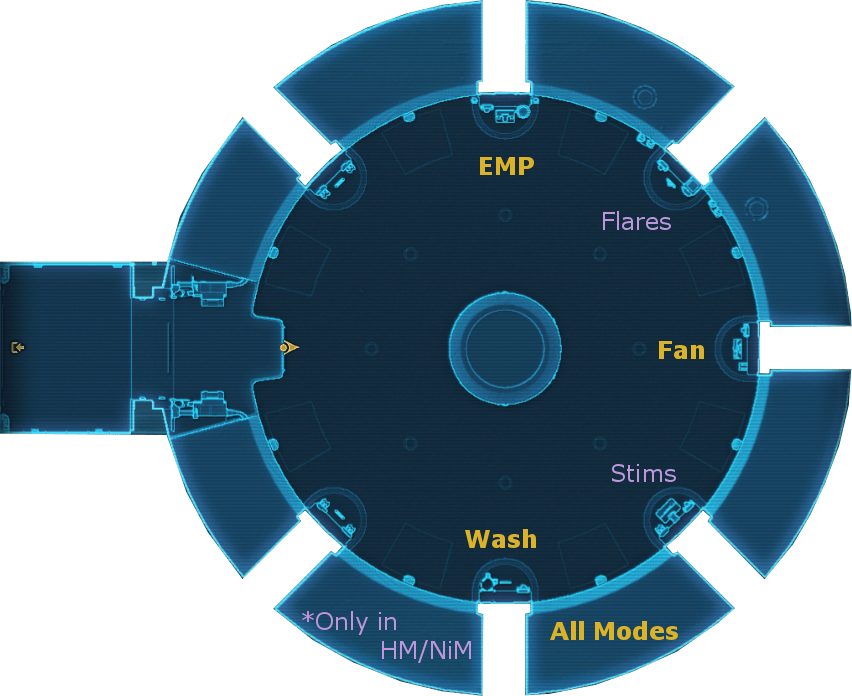
Again, as in SM, you spawn directly in front of Apex (the player icon on the map above) and need to make a sharp left or right) to not aggro Apex prematurely.
In HM, you can still have the tank hold Apex (facing the outer wall) between the EMP and WASH stations, moving just enough to get out of an Acid Blast circle as it gets placed. This is usually referred to as the “half room start.” Do note that the circles now grow substantially and hurt more when stood in.
Alternatively, you can use the whole room (referred to as the “whole-room start”), placing a single puddle in the middle of each grate between the stations.
The half-room strategy lets the battery carrier take less damage and greatly reduces the risk of things not showing up (yellow Acid Blast and green Contagion puddles sometimes disappear, especially in 16m), but makes prompt washings more important.
The full-room strategy makes flare-use easier and washing less time-specific (short of not washing too long) without negative side-effects. It does mean the battery carrier will be walking through orange to use stations. Washing in the middle of a half-room strategy wastes any unused area (since you must turn after every wash). An early wash simply changes the end spot in the full room strategy, letting the pattern continue without interruption.
Battery
Carrying the battery is a full-time job in HM.
The success of the battery carrier also relies on flares being picked up quickly, or they get behind. This will take some prog to get both players synced up.
The battery carrier will also take some time to get used to the pattern and become quick at the various stations, making this the most prog-intensive job.
A tank is best for this, and a sin/shadow can force-speed to boost their movement as they pick up the battery while the other tank classes do better on Apex (the split is suggested but NOT required for the fight).
This is done by using the ability as the battery pick-up is channeling, making it activate as soon as the battery channel ends. The tank must be careful not to move before the channel finishes though, so as to not break the channel and waste the speed boost.
The carrier will also need to grab stims to counter the stacks slowing them as the fight goes on. They also need to get a feel for the flow and be far more pro-active with the battery to not fall behind. The overarching sentiment is to get enough flares to keep Apex stacks low as possible while making enough stims for DPS (usually 2 in 8m) to counter Blinding Spray to break Voltenator, and still have enough charges for the other stations.
The battery order varies a bit as time goes on, so a full pattern isn’t possible. The beginning dance is always the same, but it varies between 8 and 16m.
The 8m battery pattern starts as follows:
- 3 Flares > Recharge
- Stims (until Apex channels ) > Fan > Wash > Recharge
- 3 Flares > EMP > Recharge
After the first EMP the pattern diverges somewhat, but the priorities remain the same:
- EMP before Bombardment goes out. NOTE that you have 30sec, and while not letting Bombardment happen is the highest priority; this does NOT mean you waste charges or turn back from a wash, or EMP without Flares cooking (assuming you have enough charges).
- Flares need to be available so that Apex doesn’t gain too many Darkness Overdrive stacks. If they’re not cooking, they better be getting picked up; and new ones started.
- There need to be enough Stims for the tank and DPS countering Voltenator.
- The floor needs to be Washed as needed, especially after Acid Deluge.
- The Fans can wait, within reason, though if left too long Red Venom Cloud stacks can over-stress the healers.
Care also needs to be taken to keep Apex from using Photogenesis to regenerate health above his Peak Performance stacks, therefore minimizing the amount of time the battery spends in the light.
The 16m pattern changes to further prioritize not charging the battery as long as possible, to give DPS as much time as possible to drop Apex below Peak Performance stacks and prevent early enrage by minimizing the amount of health regained by Photogenesis. The above starter-pattern changes to the following:
- 3 Flares > Stims > Recharge
- Fan > 2 Flares > Stims > Recharge
- 3 Flares > EMP > Recharge
With the Recharge happening right before Red Venom Cloud or as Mass Target Lock goes out.
Flares
Flares are the most efficient way to keep Apex’s Darkness Overdrive stacks, which directly buff his damage. There needs to be a dedicated player who drops the flares and needs to place these properly. This is usually done by a healer to allow all the DPS maximum uptime on the boss.
The station starts full, with (3) flares ready to be picked up, so this player should be at the station and pick them up as soon as the boss is pulled. This also allows the battery carrier to start cooking flares ASAP.
Placing Flares requires cooperation between the person dropping them and the tank holding Apex, as keeping him in the flares as much as possible becomes quite important. You also need to make the most of the flares, as wasting them might make it impossible for the battery carrier to make enough for the whole fight. The Flare dropper also needs to communicate with the Battery carrier, to make sure the flares are picked up promptly, and so that the battery carrier knows how many are left (to know if more are needed cooking immediately, or if they can afford to make more stims, etc).
When deciding which healer should be responsible for flares, there are a few responsibilities you need to consider. One thing is if the group has enough cleanses to counter the effects of contagion. If there is a Sniper/Slinger or Powertech/Vanguard in the group, a healer will need to cleanse them. If you have an operative/ healer in the group, they can cleanse themselves and a DPS in the same GCD. If they are doing flares, they may not be there for contagion cleanses, and could potentially wipe the group. The healer not doing flares will be doing most of the ‘heavy lifting’ with heals, especially when first learning where to place the flares. I suggest a sorcerer or sage healer be responsible for flares, as they have some of the best movement abilities in the game (force speed and phase walk). This will allow them to get flares and return to the group quickly.
Once it has been decided which healer is responsible for flares, there are a few key concepts you have to understand to be effective. Each flare is active for about 30 seconds, and each flare requires 45 seconds to make. This means that as long as each flare is being used effectively, you can get ahead and have excess fares in case something goes wrong (since 3 can be cooking at once). It is also important to understand which strategy the group is running, to know where to place the next flare.
To make sure a flare is always up, you can also make a simple Starparse timer to remind you when to drop the next flare. A sample timer from our healer is shown below (Ability= 4296410405011456);
One of the most important things you must remember to do is to pick flares up on time. This is because the flare station can only hold a maximum of 3 flares, and once a flare has been made a new one cannot start “cooking” until a slot is open. There is no maximum number of flares you can hold though.
Therefore, you want to pick up the flares as soon as possible once the flares are ready to be picked up. The battery carrier should call out when they start cooking, and if they see them as ready, but you need to keep an eye on the station icon while they cook to know in case the carrier is off using other stations. This will make life easier on the battery carrier and help your group progress through the fight. Overall, even though placing the flares may be annoying at first, once you understand the mechanic you should be able to complete it subconsciously.
The standard spot to place flares is on the grates between the stations (or station-less pylons). Since Flare circles are roughly the same size as the (initial) acid blast puddle, they need to be placed ahead of the boss (tank walks Apex into them) and dropped after an Acid Blast. Other placements exist, including placing them on the station/pylon outcrops, with the tank wiggling Apex to keep him in the flare while moving to the next location. Note also that (especially in half-room strategy) the healer dropping flares needs to adapt to how the tank is holding Apex and communicate any issues they run into (if the tank is moving Apex too much, for instance) to help the two synergize.
Common Strategy
Whichever room pattern you decide on, there’s a lot of common elements.
Until 93% the fight is a straight DPS burn, where Apex just casts Acid Blast and Contagion. Once the boss’s health drops below that, he casts Photogenesis andbegins healing in the light.
The Central Transformer Apex was standing in front of can now be broken open (which is a hard-swap, as it needs to be broken ASAP). This allows the battery carrier to grab and use the battery, while everyone else swaps back to the boss.
Soon after the battery is removed, the boss casts Darkness Overdrive and begins to gain stacks. THIS is when the first flare (picked up when the fight started) should be dropped.
Alternatively, in 8m HM (16m DPS check is too tight, so starter pattern is different), if the battery carrier is quick on making the flares and will re-charge the battery right after, you CAN wait and let him gain stacks until the light turns on (reducing/removing them), placing a flare right as it goes off.
This saves a flare, but requires a quick battery carrier (with good speed boost usage), or starting with higher stacks
Contagion puddles should be split into melee and ranged. REMEMBER that these puddles stay until a wash, and can re-infect players as long as they are up. Any DPS (and tank) capable of cleansing should cleanse themselves, leaving only Snipers/Gunslingers and PT’s/Vanguards to require a healer to cleanse them.
The melee drop their puddles in an Acid Blast puddle (or where one is about to drop), making stacking less important, but ideally, they should be placed close to the outer wall.
Ranged trail the boss, dropping their puddles in a tight stack; either against the Central Transformer or in the middle (inner half of the dark middle ring) to leave the inner-most (lighter gray) ring for the battery carrier.
The advantage of stacking them against the center is allowing ranged to remain more stationary. The advantage of placing them on the middle ring (just outside the orange) is giving the batter carrier the most direct route possible (important in 16m and NiM). Leaving the inner transformer wall clear also prevents accidentally placing puddles too close to the battery charging station.
If you chose to place them against the Central Transformer wall, be extra careful to leave the actual transformer (battery recharge) area clear for the battery carrier, and to stack them as tightly as possible, as the battery carrier will have to maneuver around them.
DPS should be fairly spread out since Rocket Salvo goes out frequently (and quickly), and stacking makes it do more damage to everyone.
There are two ways to deal with Zone Defense which comes out periodically; one requires DPS/Heals to move, while the other requires the tank to turn the boss pre-emptively one way (then the other).
- The DPS/healers moving is the intended way to do the mechanic. Apex gives everyone a yellow or purple debuff, and his cannons get the same symbols over them. Players move to the opposing side (if you have a purple debuff, you move to the side of the yellow canon, or vice versa) to prevent taking damage.
- Apex stops moving when he begins casting Zone Defense, and places the colors based on where people were when the cast Started. This means that the other strategy requires a bit of prediction and timing to do properly.
- The tank holding apex turns him sideways, waiting for the cast to begin.
- When the cast starts, he turns him 180° and keeps him facing that way until the mechanic (the buffs players gain) goes away.
- If done right, this method is simpler (the tank negates the whole mechanic, basically), but it takes a while to get right (and getting it wrong might mean the whole group eats a lot of unnecessary damage.
DPS (at least two) need to pop two Stims for the accuracy buff to break Voltenator before the channel ends.
Usually, two DPS grab stims early, to have them for the first Voltenator. The other two go grab stims during the first Voltenator, so they have it for the second. The tank running battery communicates when they’re making stims, and when the tray is full.
Acid Deluge happens when the boss hits 30%, and the tank holding Apex needs to pop a big cooldown and let all the Acid Blast circles drop in one spot (buff shows how many charges are left) before moving to the next location. A wash should happen soon after (ASAP).
Last Ditch Effort happens when Apex hits 5% health. He enrages, his damage goes up to 300% and you generally treat this as a DPS check. Tanks should run hard cooldowns, the battery carrier should drop what they’re doing (short of a Mass Target Lock that needs dispelling) and help DPS, any DPS with stims should pop them to boost damage, along with adrenals, other DPS boosts, etc. You should not re-charge the battery when Apex is close to this (sub-10%).
Half-Room Strategy
In this strat, you only tank Apex in the half of the room without stations. This strategy prevents Acid Blasts from eating most of the area the battery carrier uses to run between the various stations, and generally lowers the damage they take. The strategy requires more washes and more precision in Acid Blast and Contagion placements.
Start half an alcove away from the EMP station (left-most orange circle in the image below), working your way toBT the Wash station. Once the wash goes off, turn around and head the other way. Repeat for the duration of the fight.
The upside of this strategy (as mentioned earlier) is that the battery carrier takes very little damage. The downside is that you need to wash when the Apex tank reaches the EMP or Wash stations, at which point they turn around and make their way back the other way.
Apex is kept in flares placed along the route, and the next flare can be placed as the last one expires. Standing to the left or right of the flare lets the tank keep Apex in after an Acid blast.
Remember that the puddles grow in HM, so you want to pace them far against the outer wall. The pattern should be tight, but not so much so as to pinch melee DPS during Rocket Salvo, where they should be spread to not take extra damage.
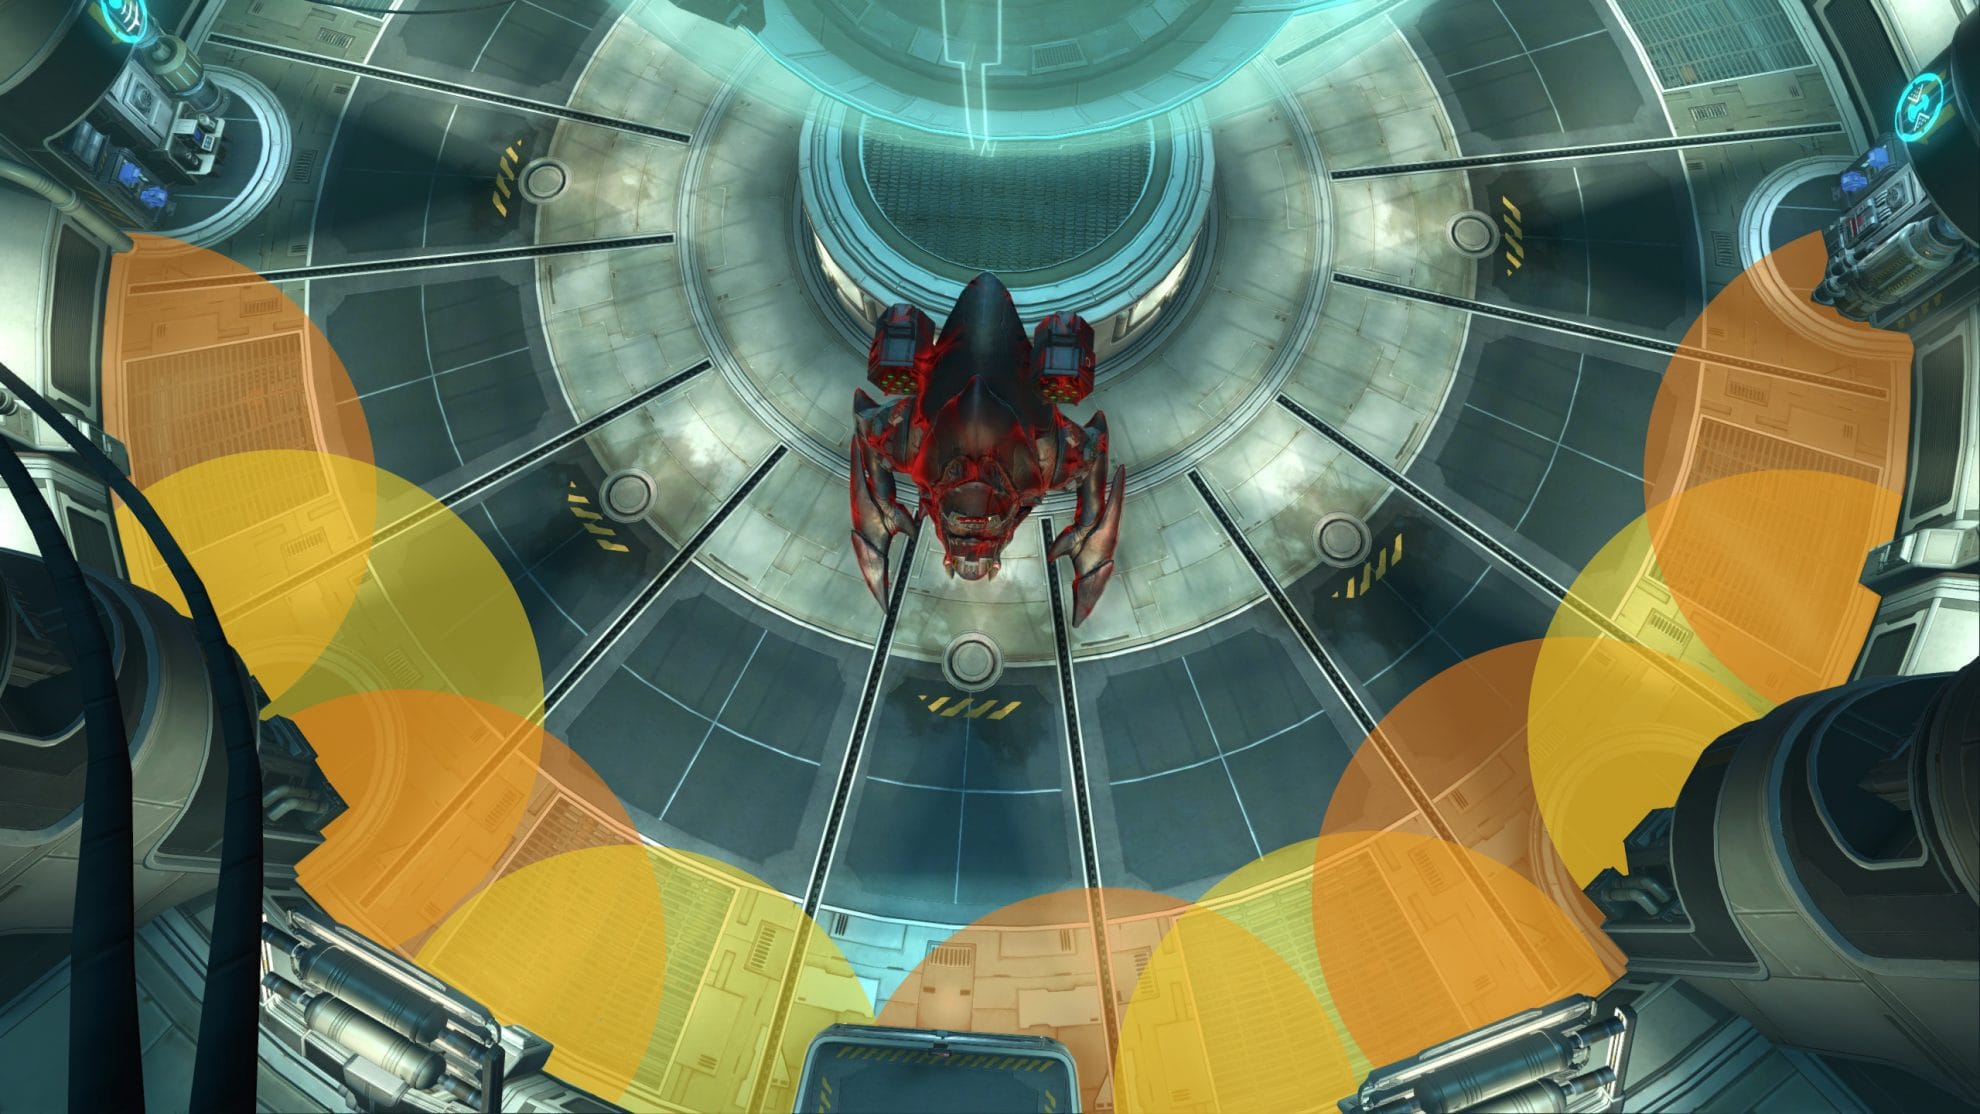
Full-Room Strategy
Full-room strat allows for a continuous circle around the room, placing extra circles in the front end of the room, while only dropping one acid blast between each station in the remaining side of the room. This means washes can be done at any point (within reason, and before the Apex tank runs into old puddles) without breaking the rhythm. It also gives melee more room to spread for Rocket Salvo.
There are also some opportunities for the battery carrier to DPS Apex, and DPS to pick up stims without running half-way across the room.
The downside of this strategy is that the battery carrier needs to maneuver around contagion puddles and walk through acid blast puddles to work the stations. This means they take damage as they run around, sometimes far away from the main group (so a healer needs to watch them, and break off to heal them as necessary).
Start in the same spot as the half-room start, near the EMP station, and go counter-clockwise. You can drop extra circles at the front, since there’s no stations there, but take care to remain against the wall, to keep the area immediately in-front of the charging station (central transformer) clear of yellow for as long as possible.
Flares here are placed on the grate in the middle of each slot, placed right after an acid blast in the next area, so that the tank walks into a freshly-placed flare as they move out of the acid blast.
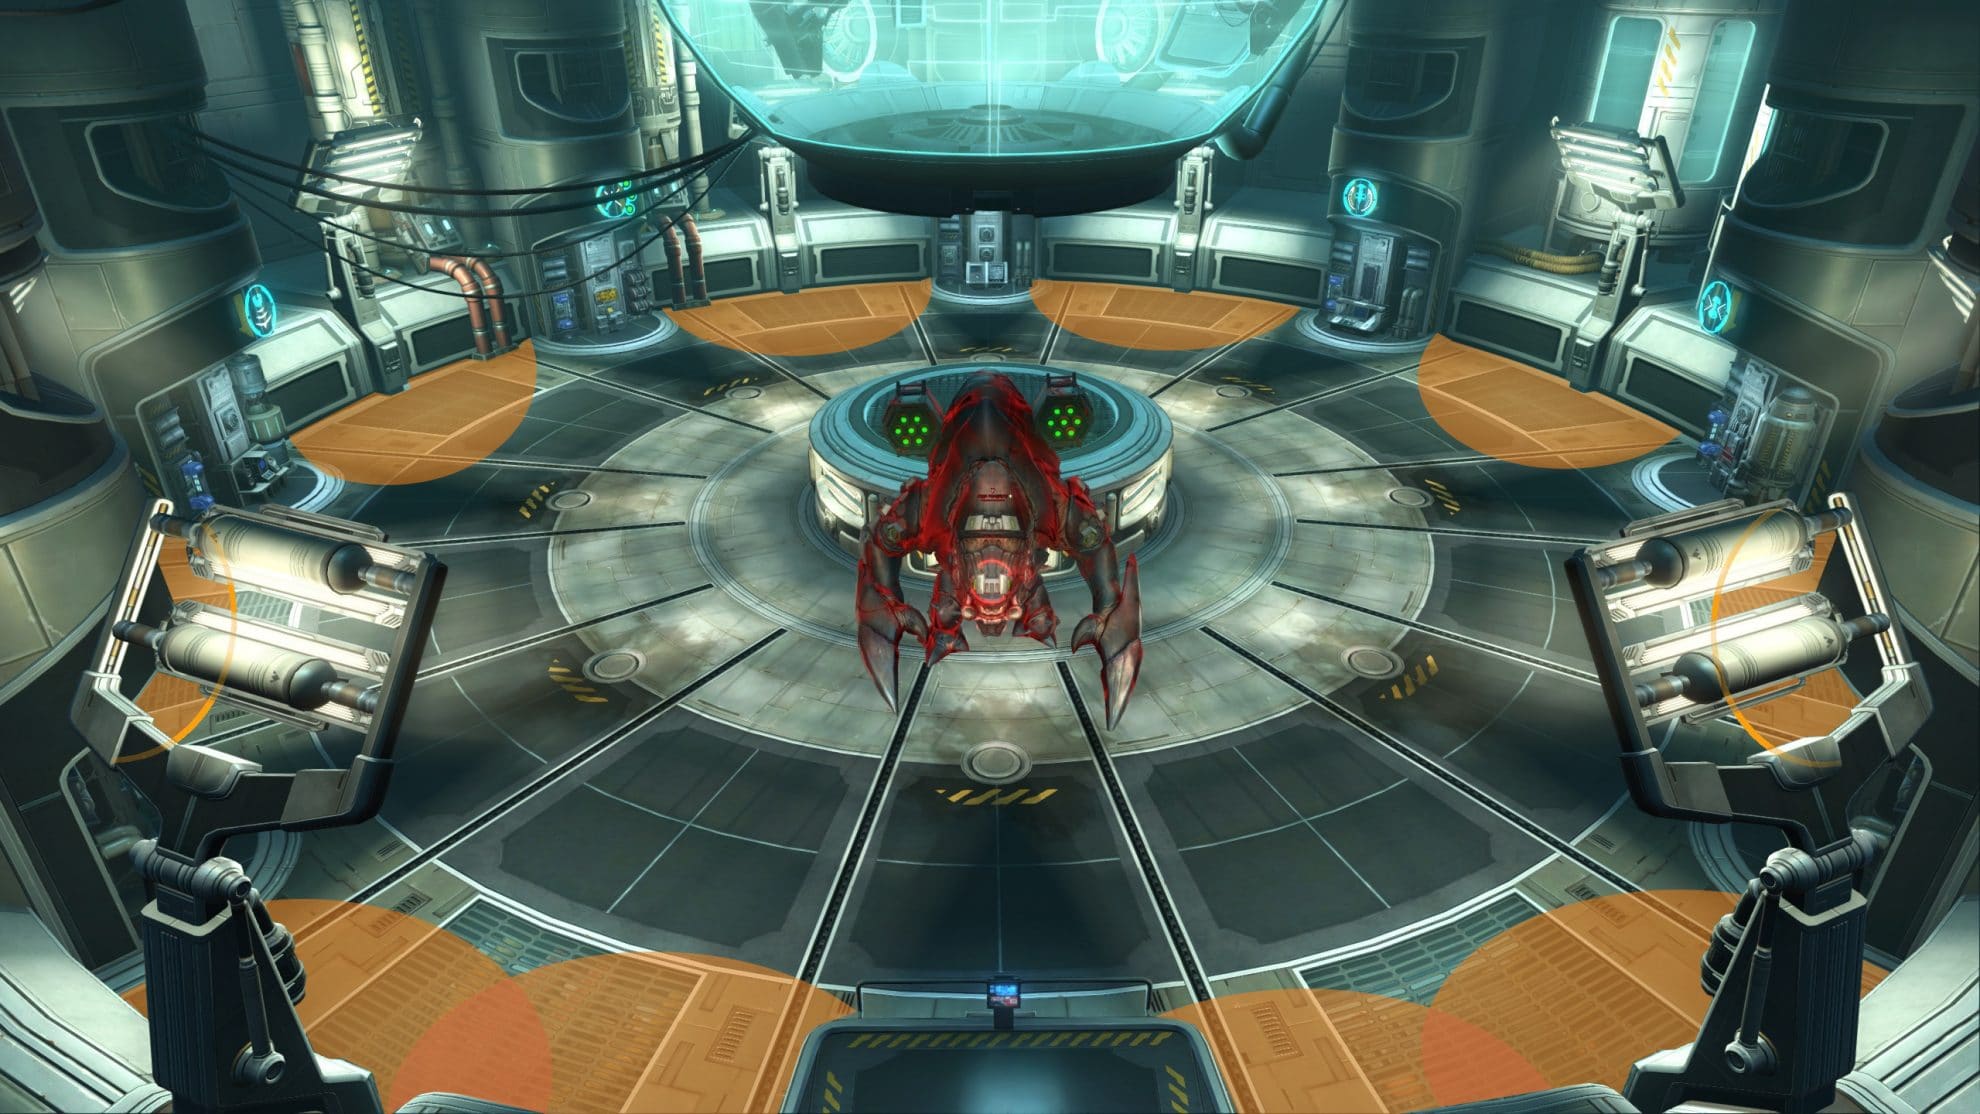
About the Author
I am a Sin tank main, and have been playing SWtOR since early 4.0. Most people know me as Elssha or El. I learned NiM Raiding with <Lightning Masters>, and mostly play on Imp Satele Shan.
I raid basically every day, and my main teams are currently working on NiM Apex and Gods timed run. Otherwise, I’ve successfully tanked all bosses in 5.0 and 6.0.
I’d like to take a moment to thank Wunderschon for helping me edit the guide, and giving his healer perspective on things, as well as the people who let me mess around, taking pictures and testing theories. I couldn’t have written this without them.
I think it’s very important to know the ‘why’ behind the tactics, which is why I’ve tried to give a lot of background info in this guide. Without it, you can’t adapt strategies to ones that fit you team best, nor can you come up with new ones (or apply what you learn in this op to other ones).
If you have any questions (or comments/corrections) please feel free to poke me on twitch (Elssha), twitter (@alortania) or on reddit (Alortania). I hope this guide serves you well!