This is a guide to the SWTOR Rishi Daily Missions. It shows you how to start the chain, how to pick up all Daily and Weekly Missions and a detailed walkthrough for each individual mission.
Table of contents
These quests have been available on Rishi since the release of the planet with Shadow of Revan in Update 3.0, but in Update 6.3 BioWare included Rishi to the Solo Activities Tab and included them in the Galactic Seasons System, thus they made them viable and important again.
Galactic Season 1’s second week objectives list contains two objective that send you to Rishi – one is with the task to defeat a number of enemies, the second one requires you to complete Daily Missions there. The Rishi Daily missions are quite easy, simple and quick to do. And you will find plenty of enemy NPCs involved in them.
Below is an excerpt from the Galactic Season 1 Week 2: Distant Outer Rim objectives list – the two that specifically relate to Rishi:
| Daily | Defeat Enemies across “Distant Outer Rim” planets (Belsavis, Hoth, Rishi, or Tatooine). |
| Daily | Complete Daily Missions across “Distant Outer Rim” planets (Rishi or Section X). |
How to start the Rishi Dailies
The Rishi content is designed for players of level 55 or higher. The default range is 55-57. You cannot do the Rishi Dailies before you complete the Rishi storyline, which is part of the Shadow of Revan expansion. The good news is that this expansion was made 100% free for all players with the release of SWTOR Game Update 6.0.
If you haven’t done the Rishi storyline yet, you can start it by either interacting with the Terminal on your personal ship or by directly going to Rishi and talking to the first NPC with a quest mark above its head.
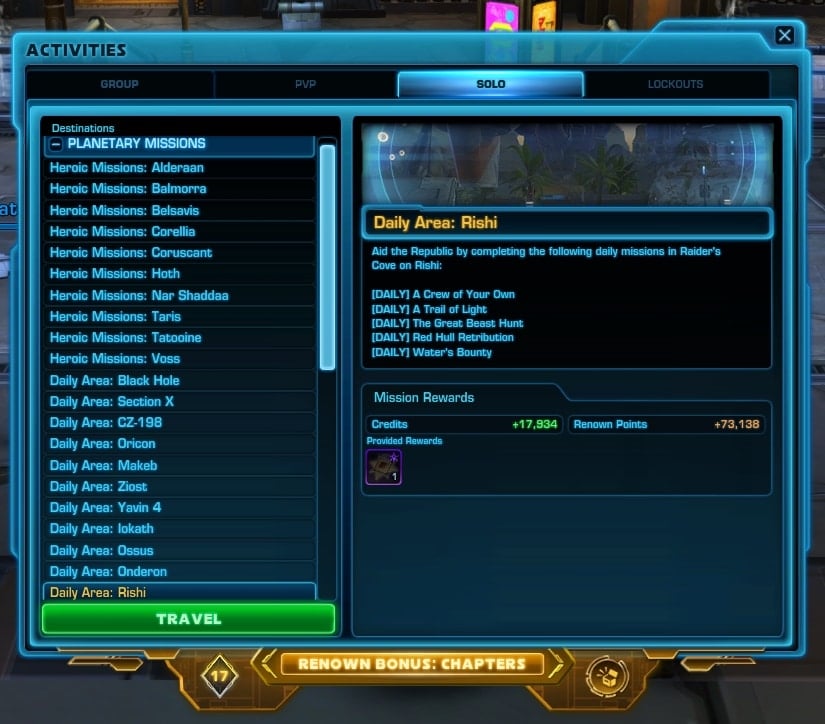
Rishi contains five daily missions and one weekly mission. They are identical for both Republic and Empire players. To start the chain, you can either select the Rishi Daily Area from the Solo tab in the Activities Window (button near the mini-map – see the SWTOR User Interface Orientation Guide for more info) , or you can travel to Rishi and interact with the Daily Missions Terminal there by yourself.
To start the Rishi Dailies from the Activities Window, click the “three people icon” next to the mini-map and navigate to the Solo tab. Click on “Daily Area” Rishi” under Planetary Missions. Then click on the “Travel” button.
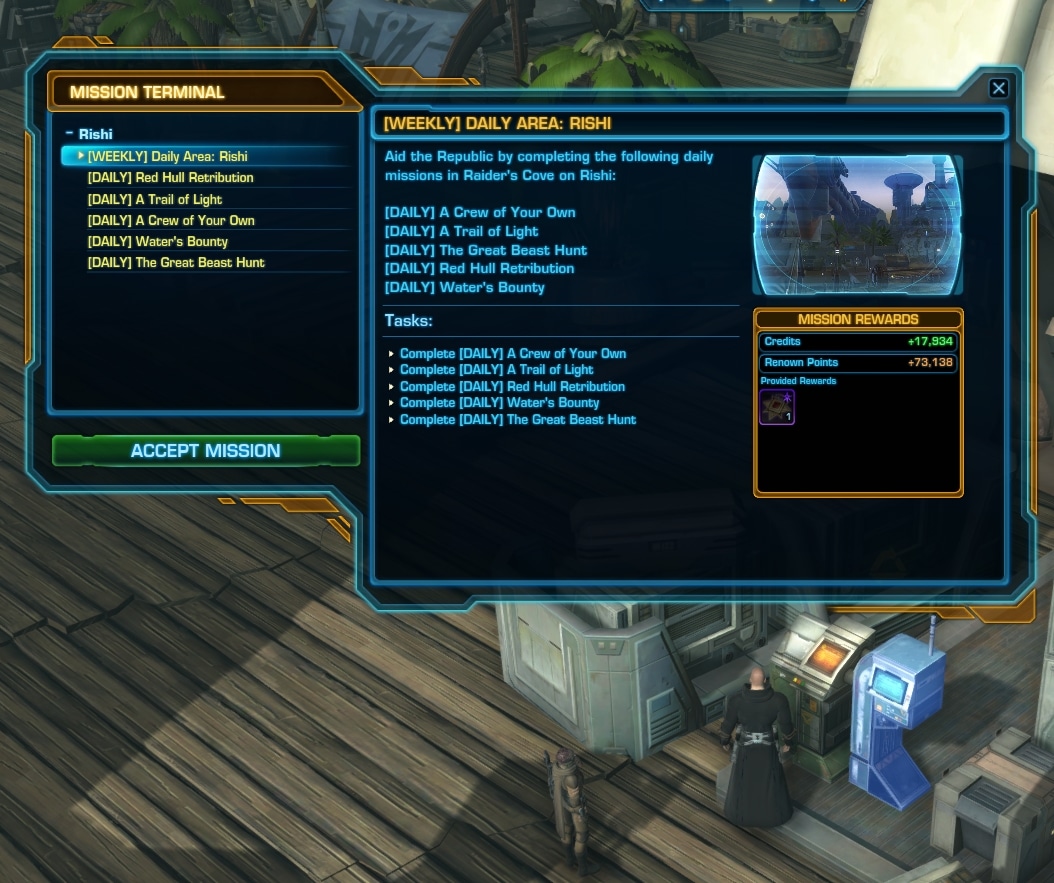
You can also go to the Daily and Weekly Missions Terminal on Rishi and pick up the missions from there. To do that select the planet from the Galaxy map and travel to it. The Terminal is available in Bootlegger’s Market, in Raider’s Cove Trademarket area, right next to the mail box.
If you use the Solo Activities Tab, it will teleport you right in front of the Terminal and save you time, and money. You will also get the Weekly Mission, so it will be in your Mission Log and unavailable from the Mission Terminal on Rishi.
When you do the Rishi storyline, you will encounter the NPCs that give you these dailies on your own. It doesn’t matter if you pick up the quests from the Terminal or by directly talking to the NPCs. In fact, if you care about these mini stories, it would be best to seek the NPCs out on Rishi.
Rishi Daily and Weekly Missions Walkthroughs
In this section I will show you the requirements for each mission and specific details on what you need to do and how to complete them.
Here is a quick list of all available repeatable missions:
- [Weekly] Daily Area: Rishi
- [Daily] Red Hull Retribution / Howling Tempest Retribution
- [Daily] A Trait of Light
- [Daily] A Crew of Your Own
- [Daily] Water’s Bounty
- [Daily] The great Beast Hunt
[Weekly] Daily Area: Rishi
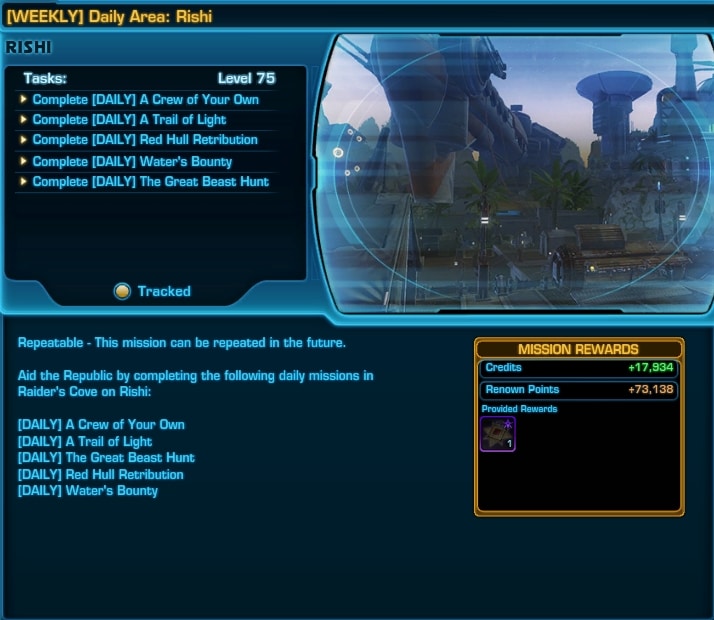
To finish the Weekly, you have to complete the five Daily Missions. The Rewards list include Credits, Renown Points and a Rishi Reputation Token.
After you complete all five Daily Missions, return to the Terminal to pick up your Weekly Reward. If you need help with any of the Dailies, I have detailed walkthroughs with instructions for each one below.
![[Weekly] Daily Area Rishi Rewards](https://vulkk.com/wp-content/uploads/2021/07/Weekly-Daily-Area-Rishi-Rewards.jpg)
[Daily] Red Hull Retribution / Howling Tempest Retribution
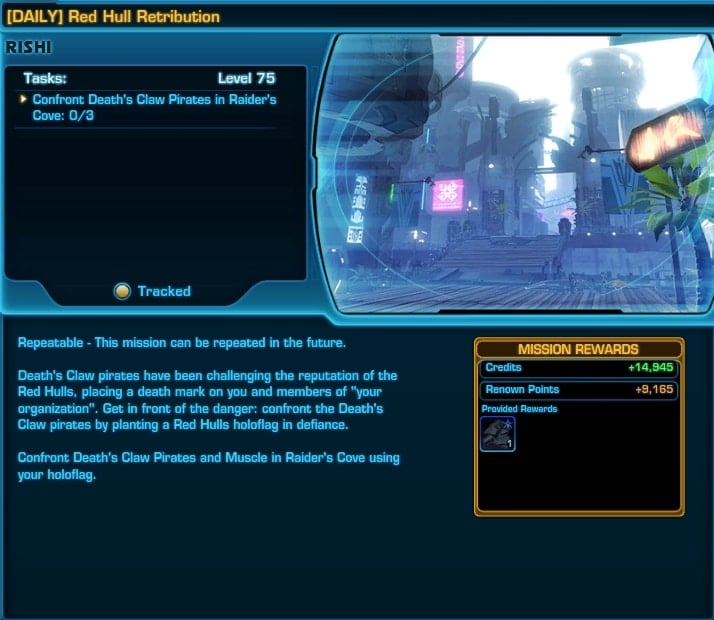
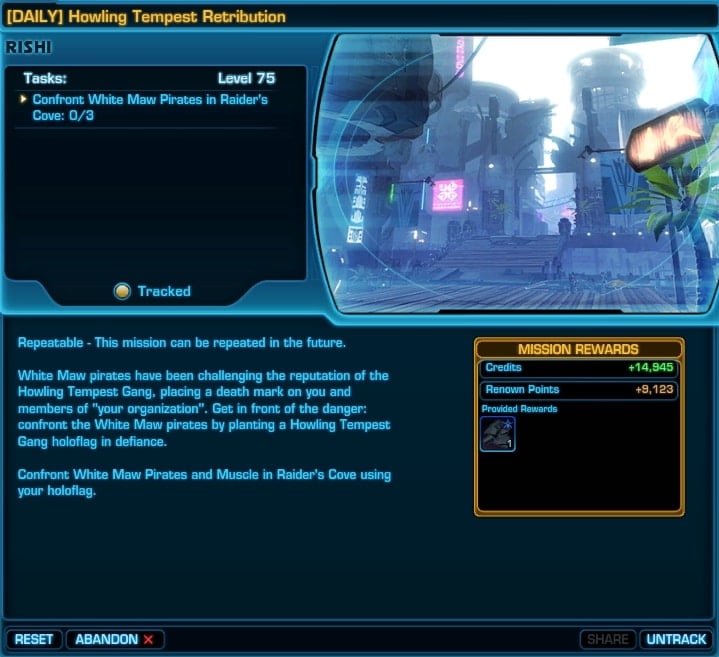
The two versions of the mission are identical with the only difference being the type of NPCs you are looking for. No matter which type of Pirates you are looking for, they are all Yellow (non-aggressive by default) and located in the Slums area under the Trade Market in Raider’s Cove.
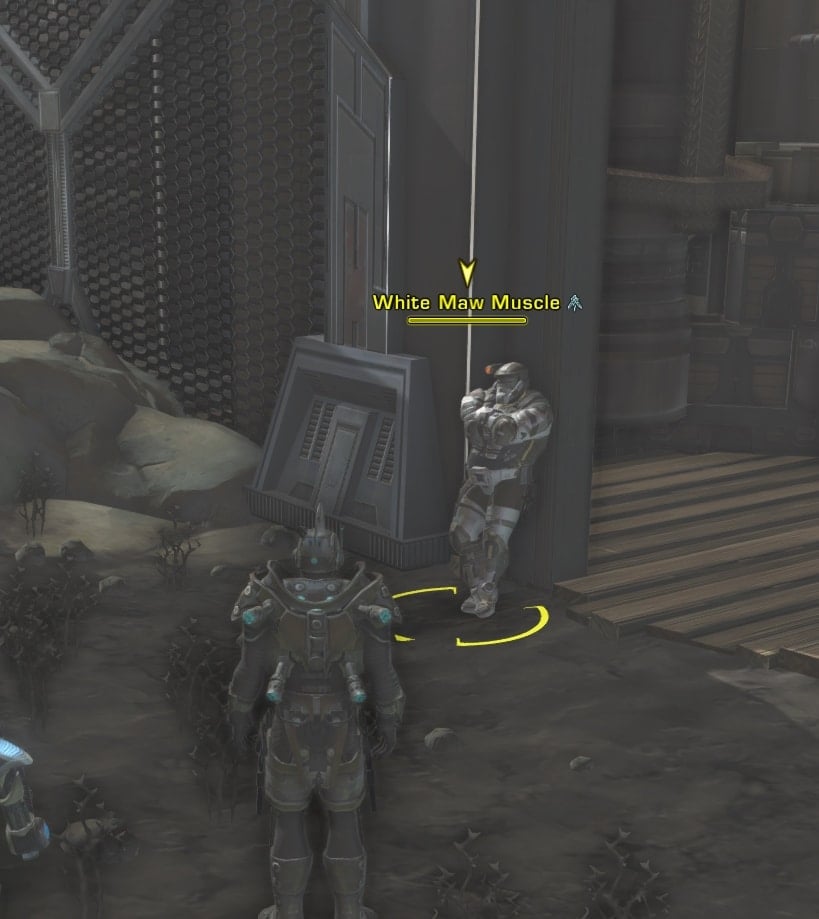
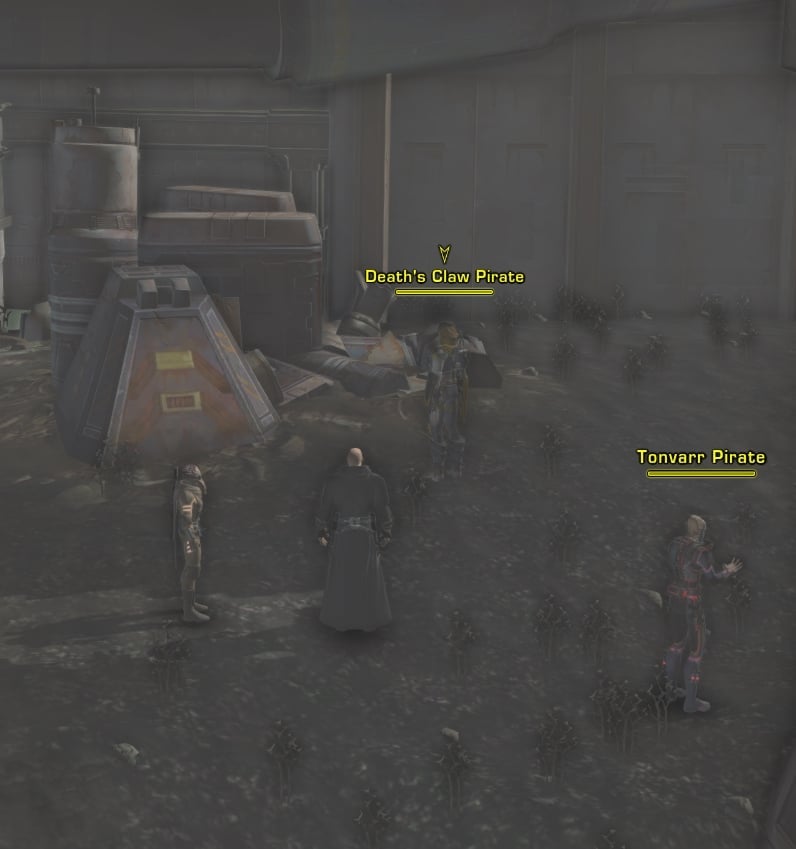
To complete this mission , you have to confront three Pirates in Raider’s Cove. You will find them in the Coastal Slums area, which is the lower level of the Raider Cove.
They are neutral and all you have to do is stand close to them and use the Quest item that is given to you.
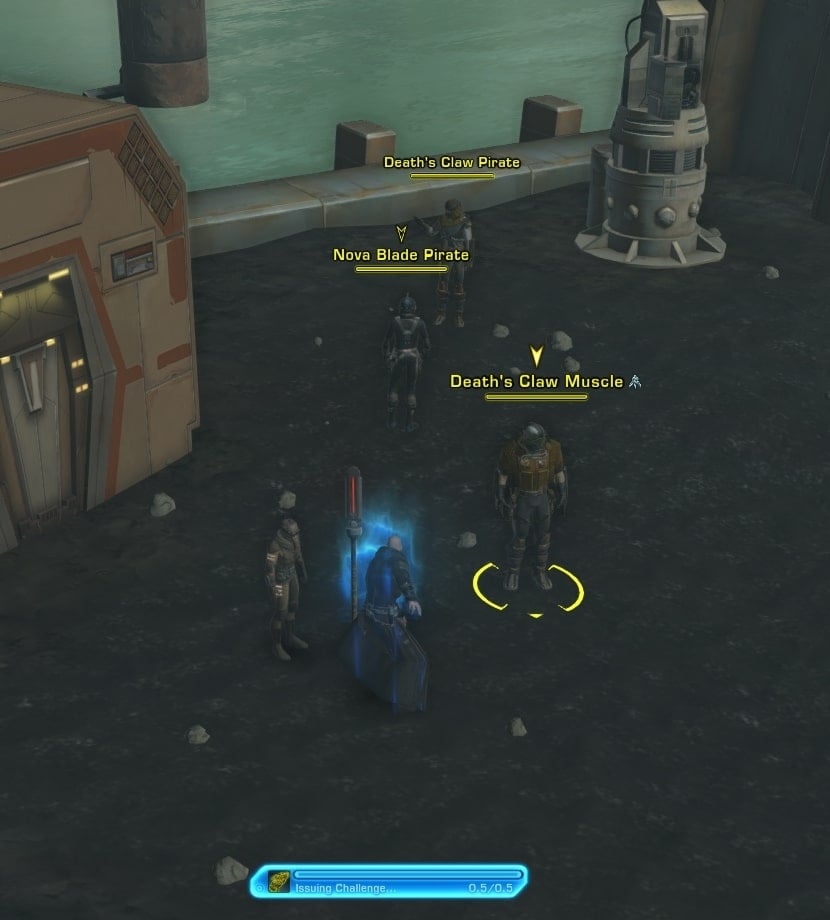
Simply click on the icon next to the quest objective in the Mission Tracker panel. Doing this, will of course make the NPCs angry.
![[Daily] Red Hull Retribution Rewards](https://vulkk.com/wp-content/uploads/2021/07/Daily-Red-Hull-Retribution-Rewards.jpg)
[Daily] A Crew of Your Own
![[Daily] A Crew of Your Own](https://vulkk.com/wp-content/uploads/2021/07/Daily-A-Crew-of-Your-Own.jpg)
This mission sends you to talk to Harlow Ricks. He is on the lower level of the Blaster’s Path Cantina in Raider’s Cove.
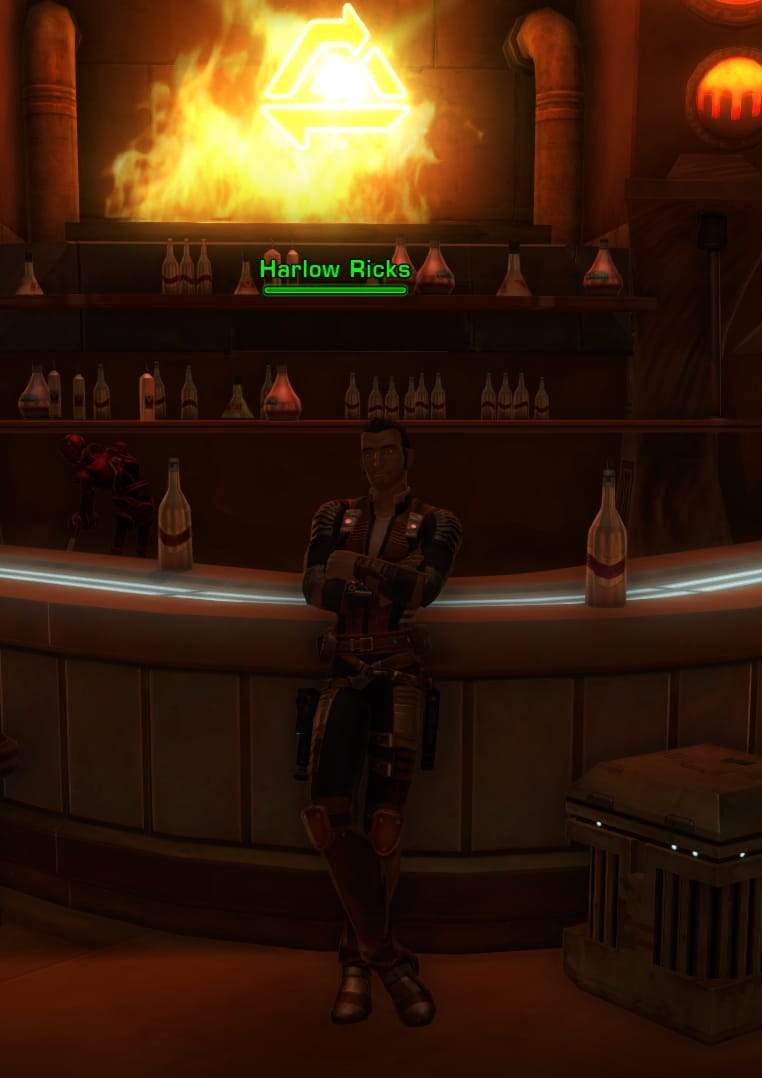
Here you will have a Dark or Light Side dialogue option, which will bring you alignment points on top of a moral choice you will have to make.
![[Daily] A Crew of Your Own Dark vs Light](https://vulkk.com/wp-content/uploads/2021/07/Daily-A-Crew-of-Your-Own-Dark-vs-Light.jpg)
Wait for them to finish the mission. It will take them about five minutes. When the timer expires, talk to Harlow Ricks again to complete the mission and get your reward.
![[Daily] A Crew of Your Own Light Side Rewards](https://vulkk.com/wp-content/uploads/2021/07/Daily-A-Crew-of-Your-Own-Light-Side-Rewards.jpg)
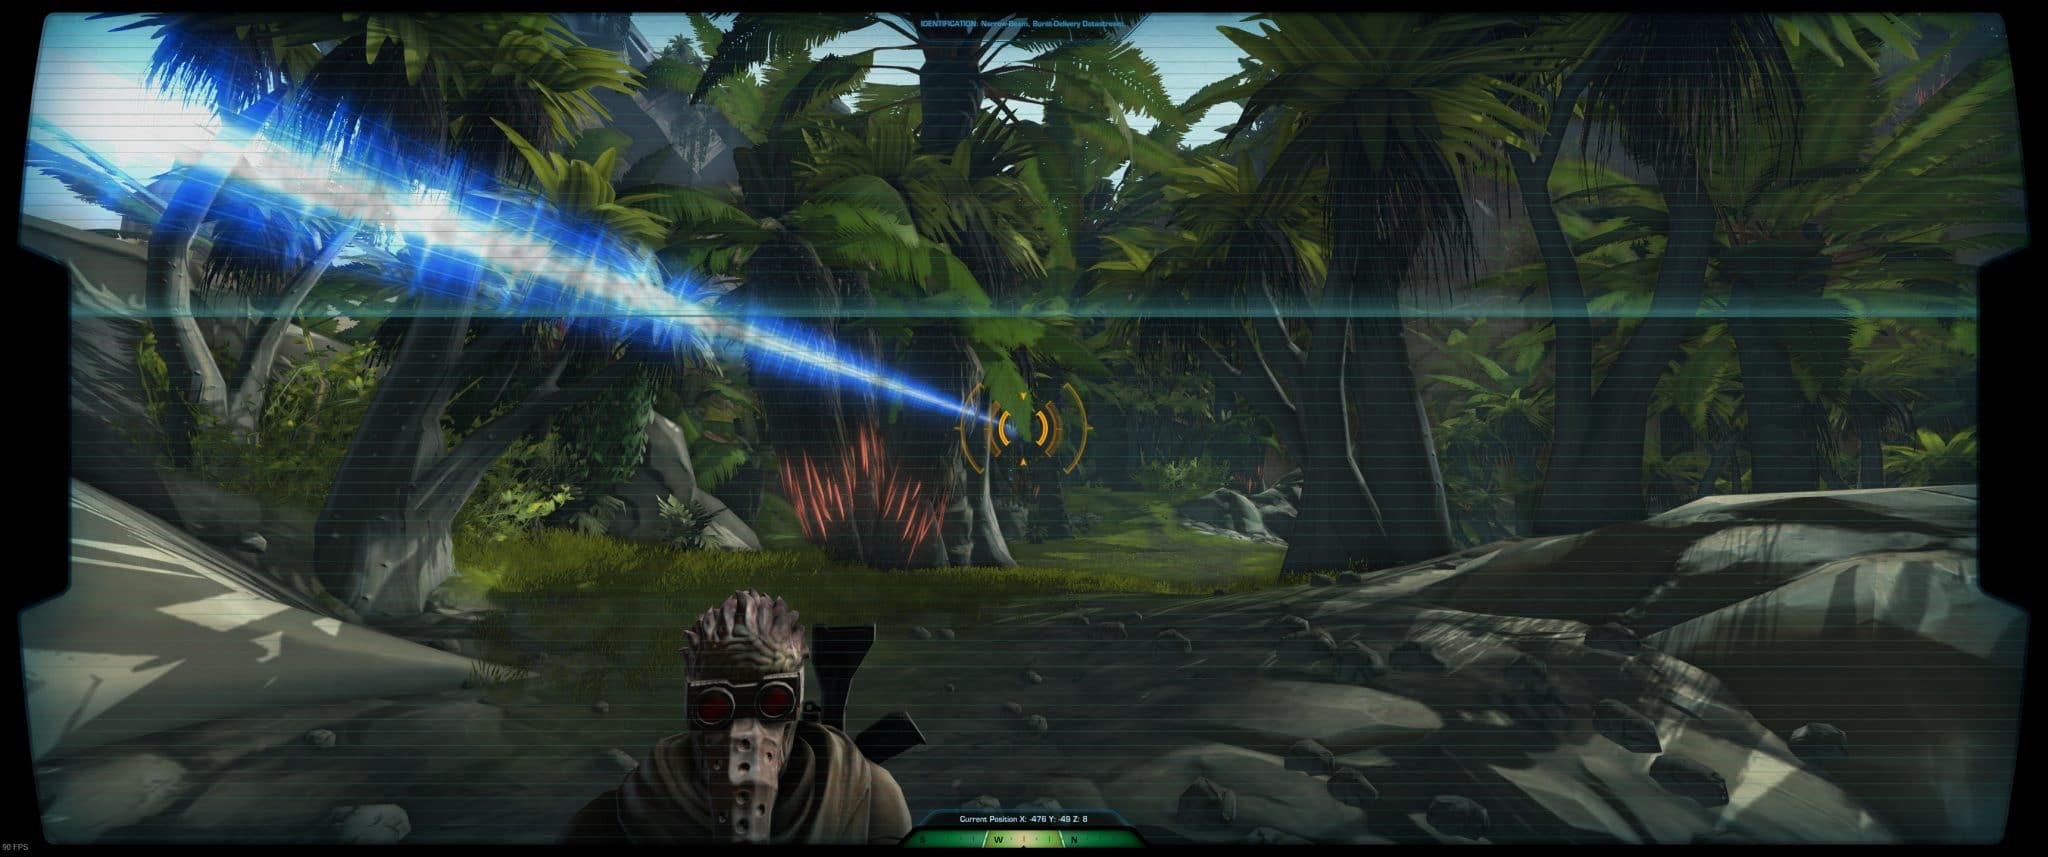
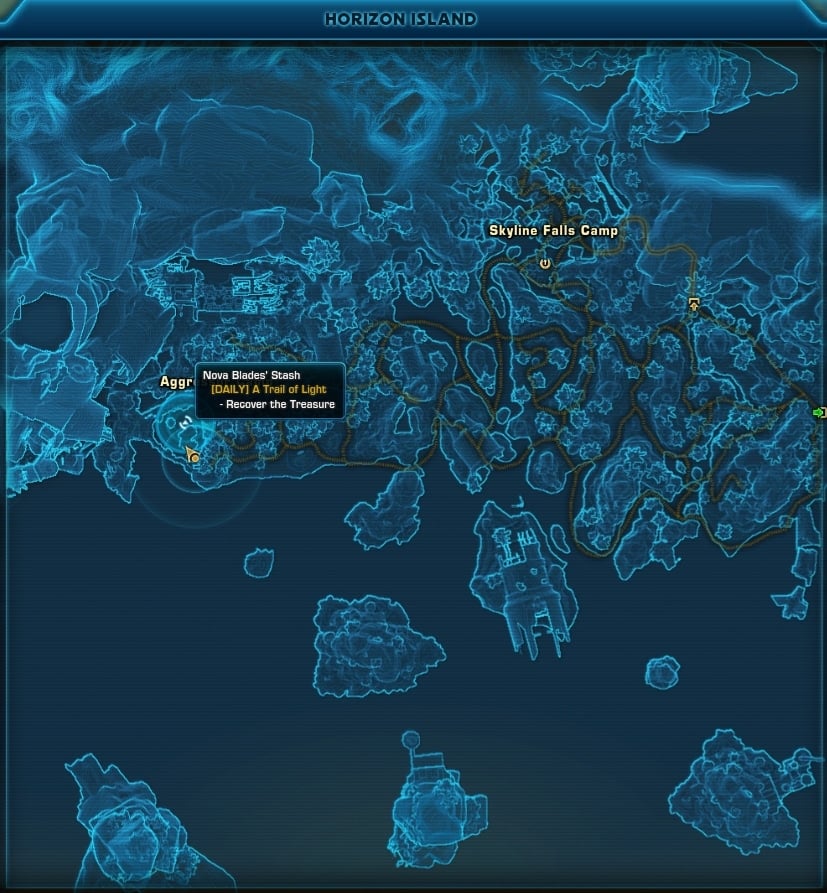
[Daily] A Trait of Light
![[Daily] A Trait of Light](https://vulkk.com/wp-content/uploads/2021/07/Daily-A-Trait-of-Light.jpg)
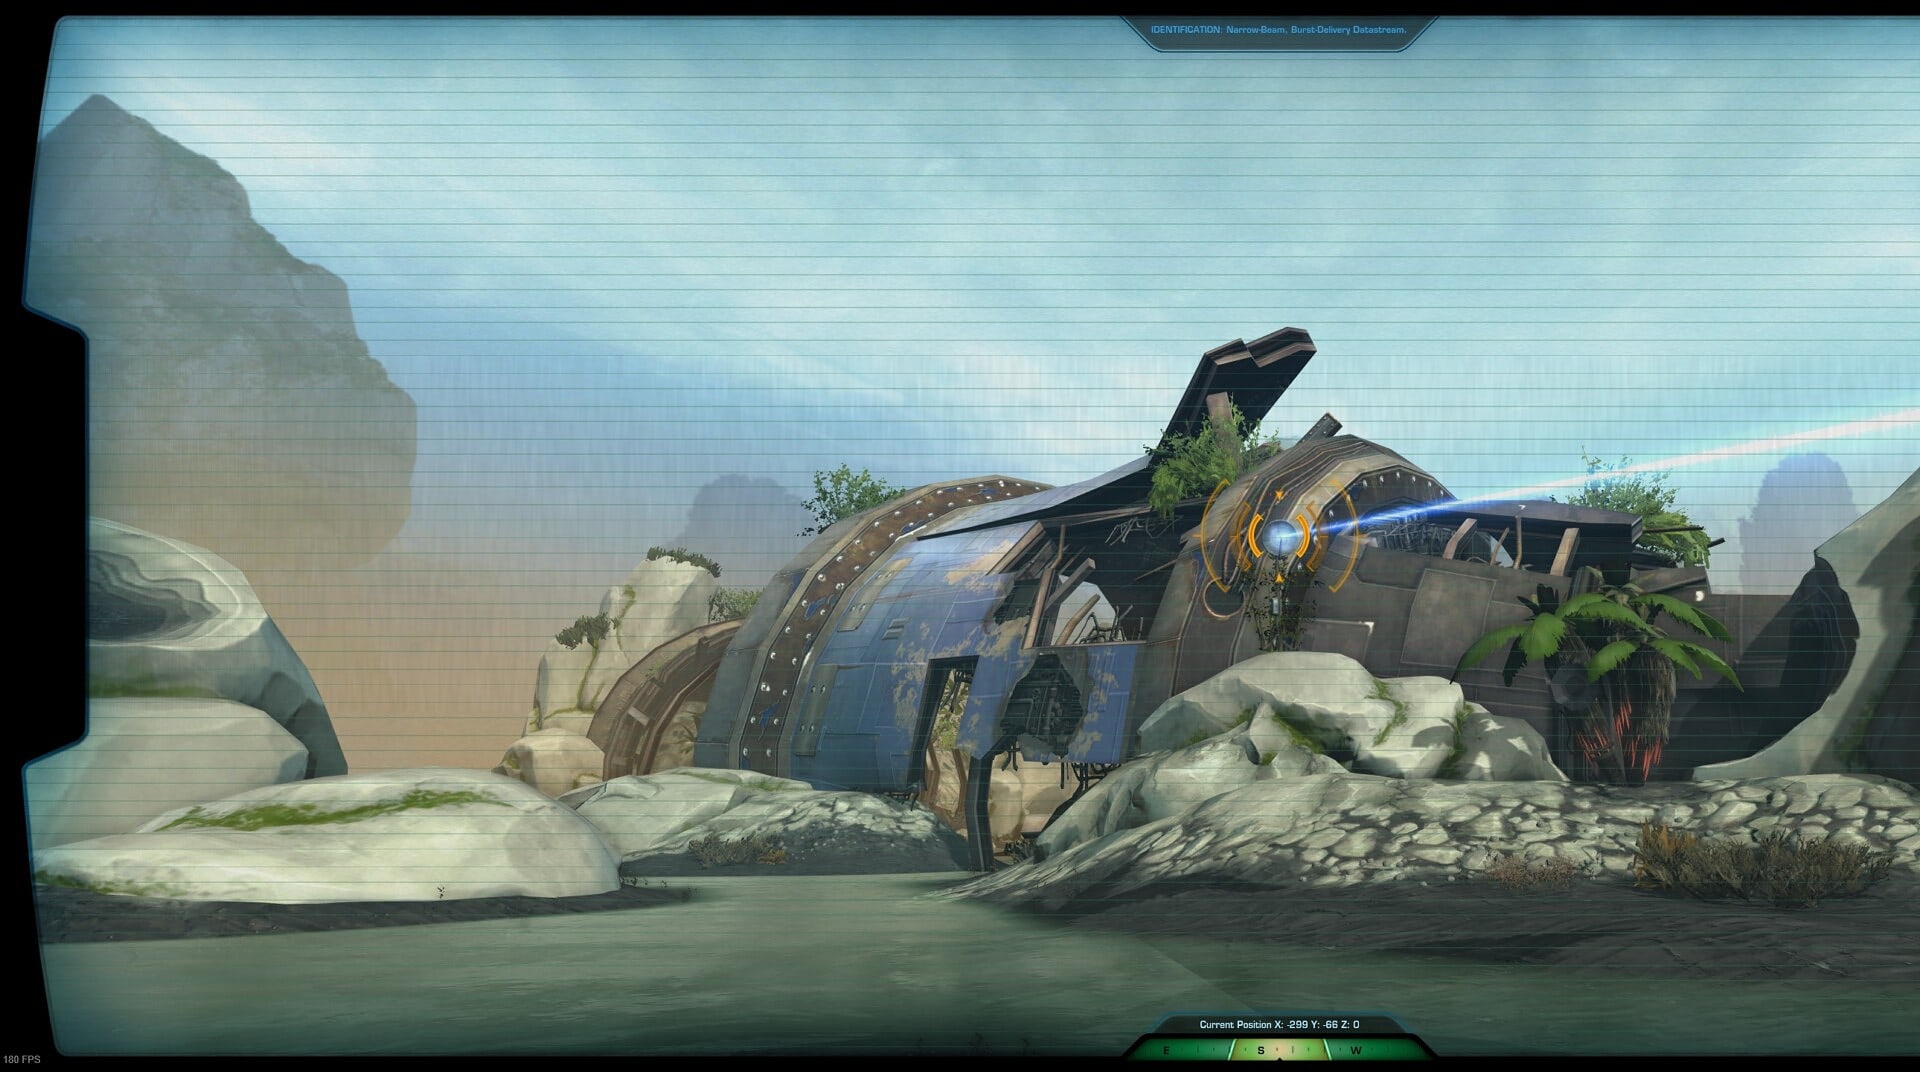
For A Trait of Light you may want to teleport directly to the Nov Blade Trade Depot in Horizon Island area. The first are you have to scan is south from there. When you get to the proper area, a red text will display on your screen reading “Datastream Detected”.
Get to the marked location on the map, click on the Macrobiunoculars (icon next to the mission objective in your Tracker) and inspect the item I am showing you below.
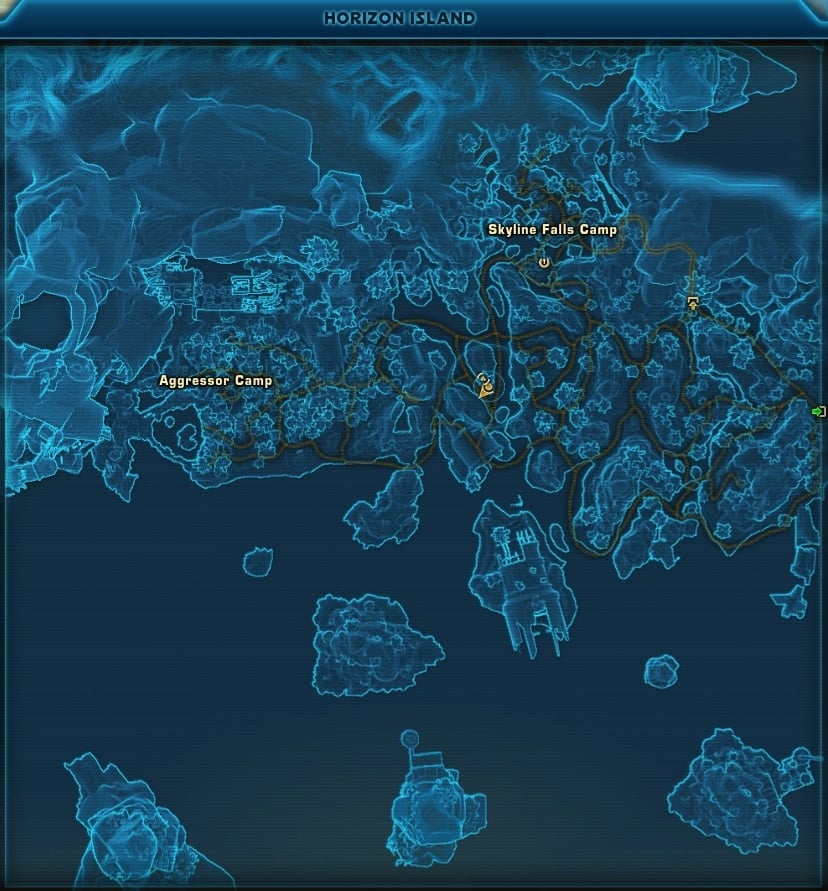
The second Datastream is directly west from the first location, inside the Western Jungle Expanse. Stand on the marked location and aim north.

The third Datastream is further west – deeper into the Western Jungle Expanse area. Stand on the marked location and look towards the west for the satellite dish.
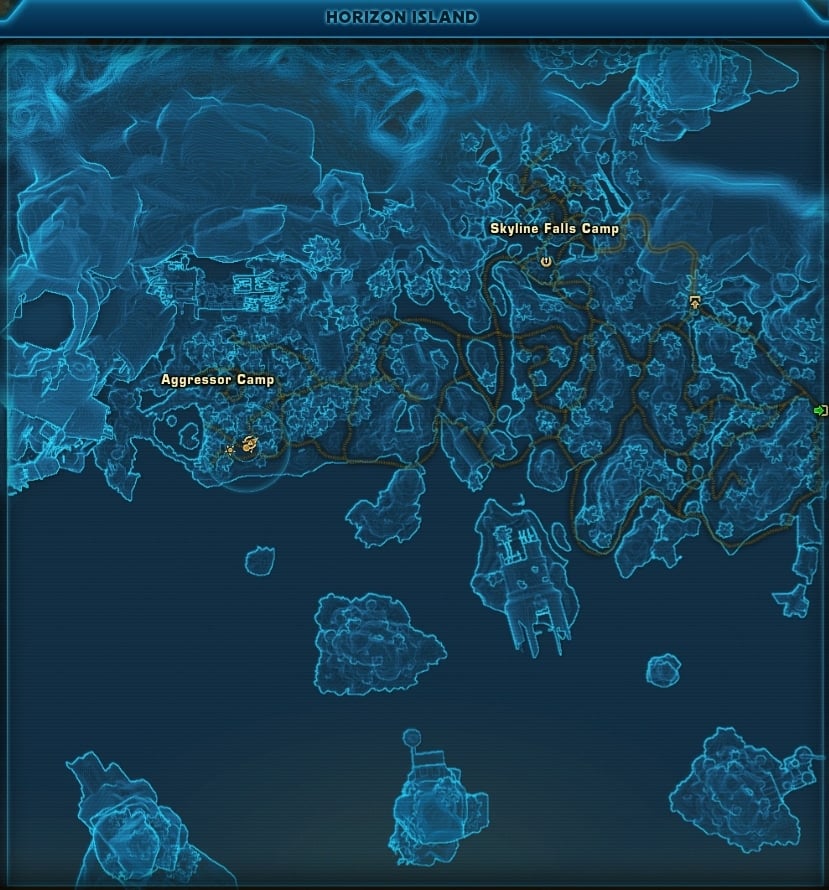
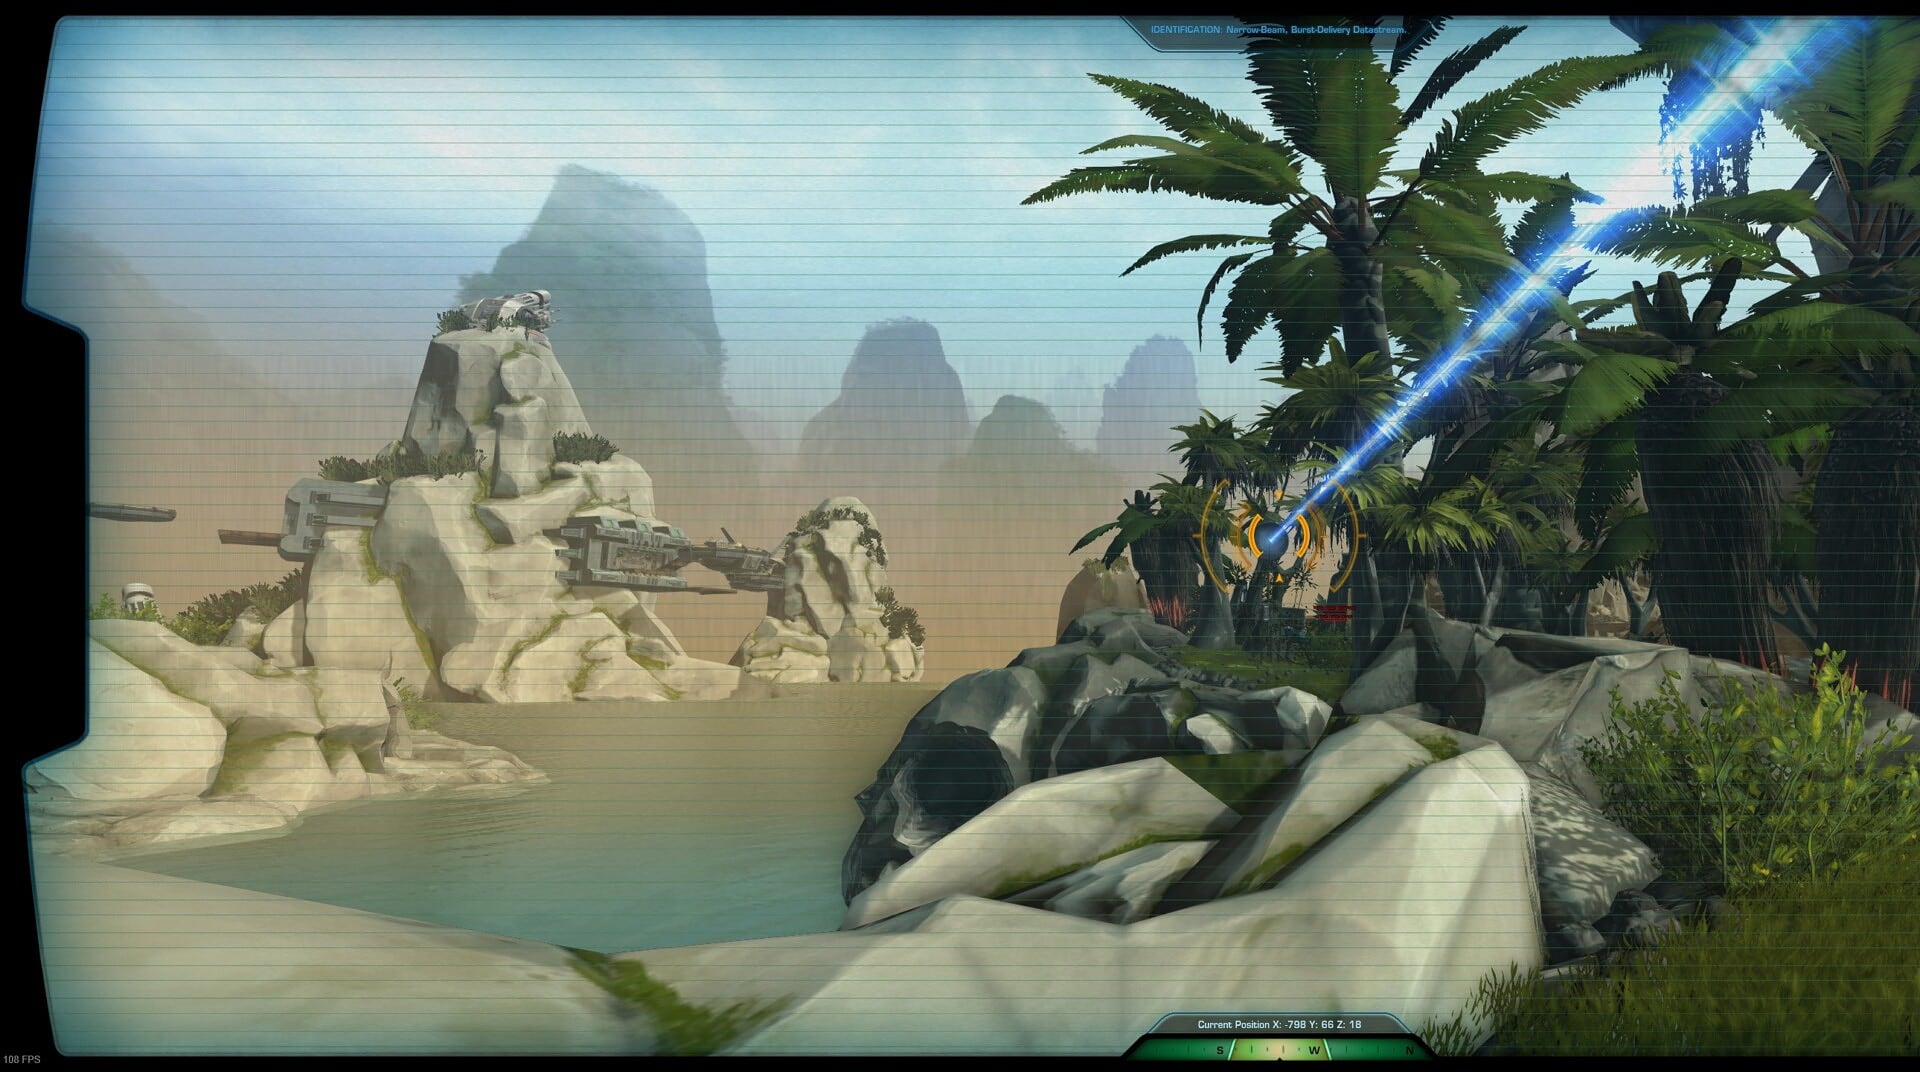
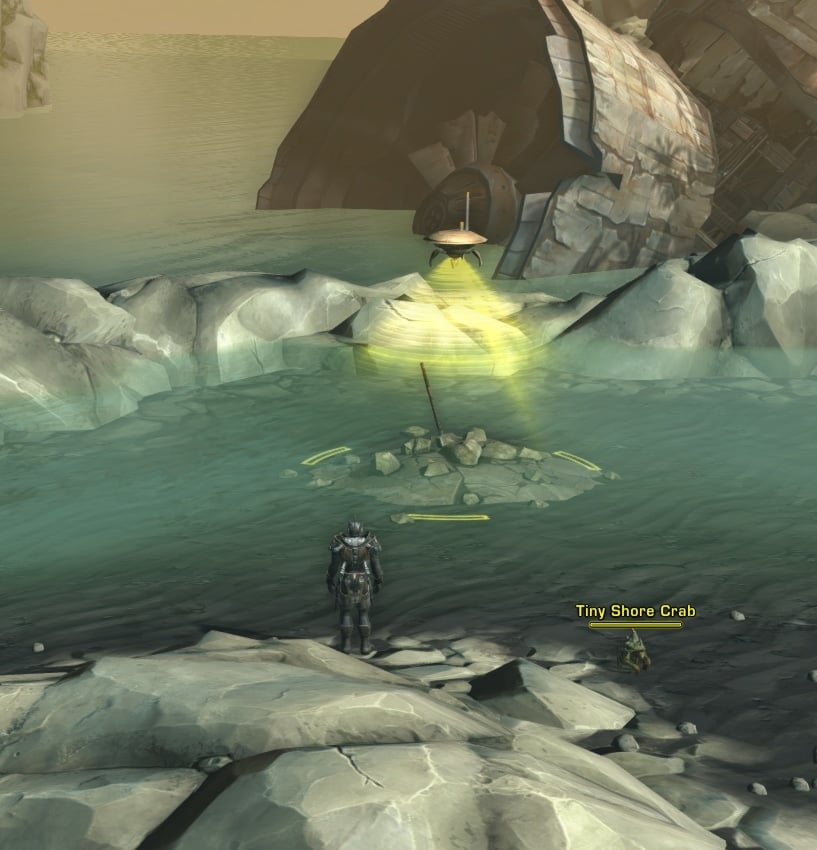
For the final step, head a little further west until you get to the waterfall and lake. Use your Seeker Droid (click on the icon next to the Objective Tracker) and deploy it on one of these spots. Wait for it to discover “a treasure”. You may have to try several spots in this area until the Probe finds it.
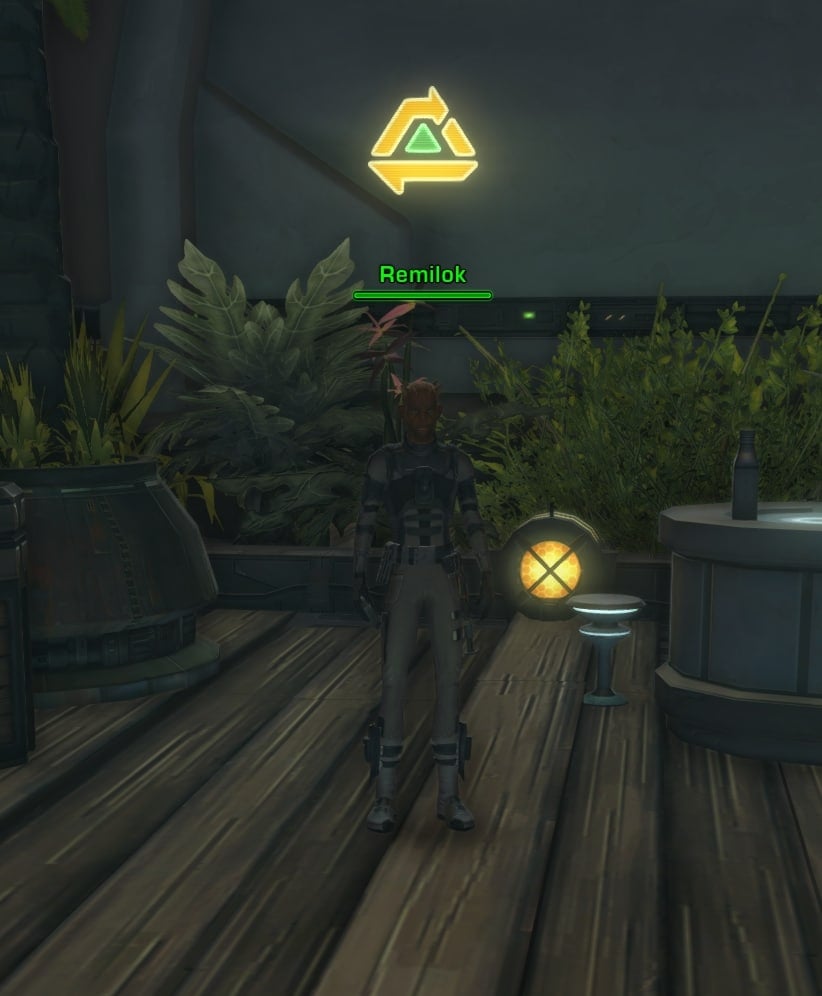
Go to Remilok to finish the mission. He is the original mission giver and is located right outside the Blaster’s Path Cantina in South Beach Boardwalk, in Raider’s Cove.
![[Daily] A Trait of Light Rewards](https://vulkk.com/wp-content/uploads/2021/07/Daily-A-Trait-of-Light-Rewards.jpg)
[Daily] Water’s Bounty
![[Daily] Water's Bounty](https://vulkk.com/wp-content/uploads/2021/07/Daily-Waters-Bounty.jpg)
This mission is on the northern island on the Rishi map – the original quest giver NPC is in the Rishi Village there. To get to the Island, you can use the Taxi services located near the Mission Terminal in the Raider’s Cove Marked area. Or teleport yourself directly to the Rishi Village. The final option to get there is to stuff yourself into the Transport Crate located in Skyline Falls Camp (the Nova Blade Trade Outpost), which will transport you to the Rishi Village in the north.
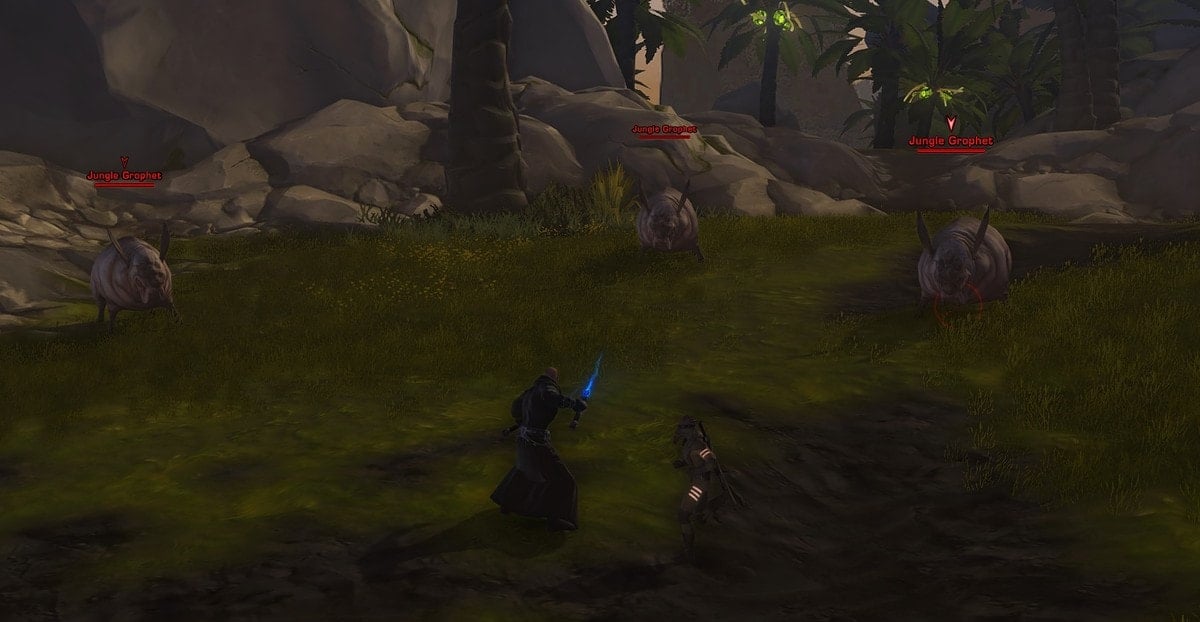
For the Water’s Bounty mission you need to defeat Jungle Grophets and loot them for their meet. You are looking for pig-sized animals. Sadly, not every “pig” will drop meet for your mission.
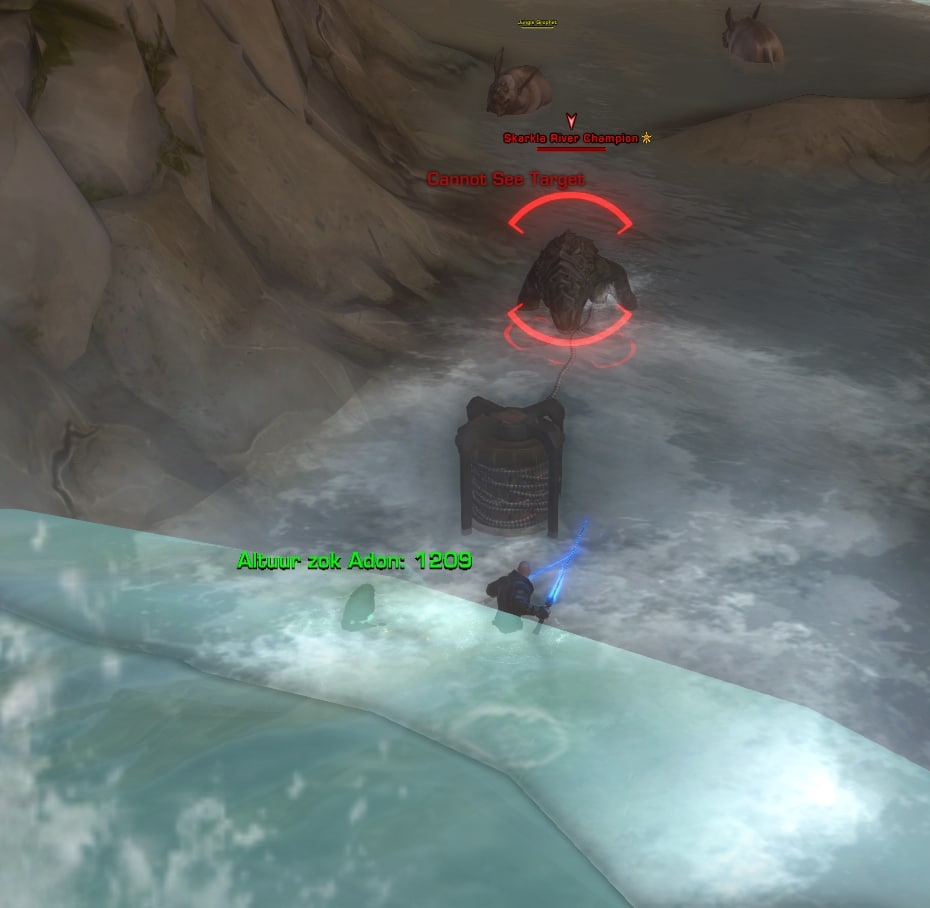
For the next objective, you are going to hunt the Skarklas for its teeth. Go to the marked location on your map, it’s in South Ridge Pass. Click on the Winch (blue-flashing item), located in the middle of the river right after a small waterfall (image below).
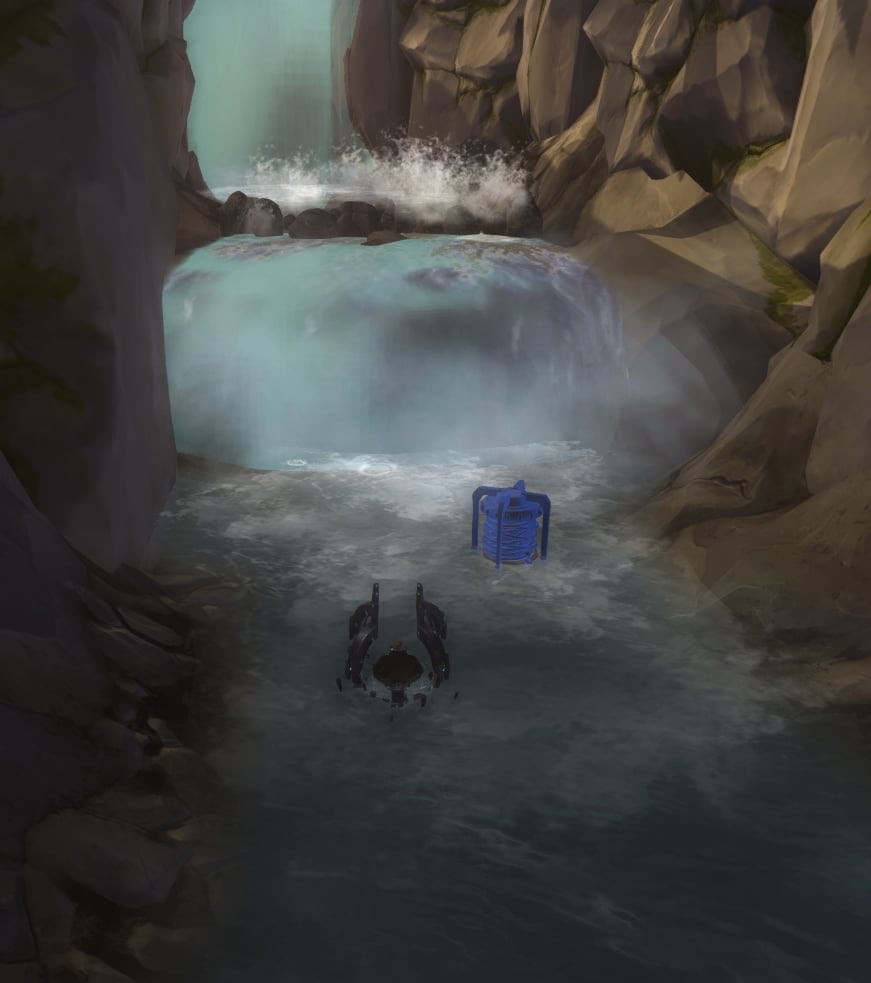
This will spawn a Skarkla River Champion. Defeat and loot it for the mission item.
Finally, report to Bez Martilla, who will complete the mission and give you your rewards.
![[Daily] Water's Bounty Rewards](https://vulkk.com/wp-content/uploads/2021/07/Daily-Waters-Bounty-Rewards.jpg)
[Daily] The great Beast Hunt
![[Daily] The great Beast Hunt](https://vulkk.com/wp-content/uploads/2021/07/Daily-The-great-Beast-Hunt.jpg)
Go to the Devouring Cavern in Sky Ridge Vale located on Sky Ridge Island and defeat She who Greedily Devours. To get to the Island, you can use the Taxi services located near the Mission Terminal in the Raider’s Cove Marked area. Or teleport yourself directly to the Rishi Village. The final option to get there is to stuff yourself into the Transport Crate located in Skyline Falls Camp (the Nova Blade Trade Outpost), which will transport you to the Rishi Village in the north.
Yeah, it’s a small instanced mini-boss monster that looks and behaves a little bit like the Kell Dragon from the Scum and Villainy’s final Boss Dread Master Styrak fight. This beast is not very dangerous, though and you should be able to take it down solo easily.
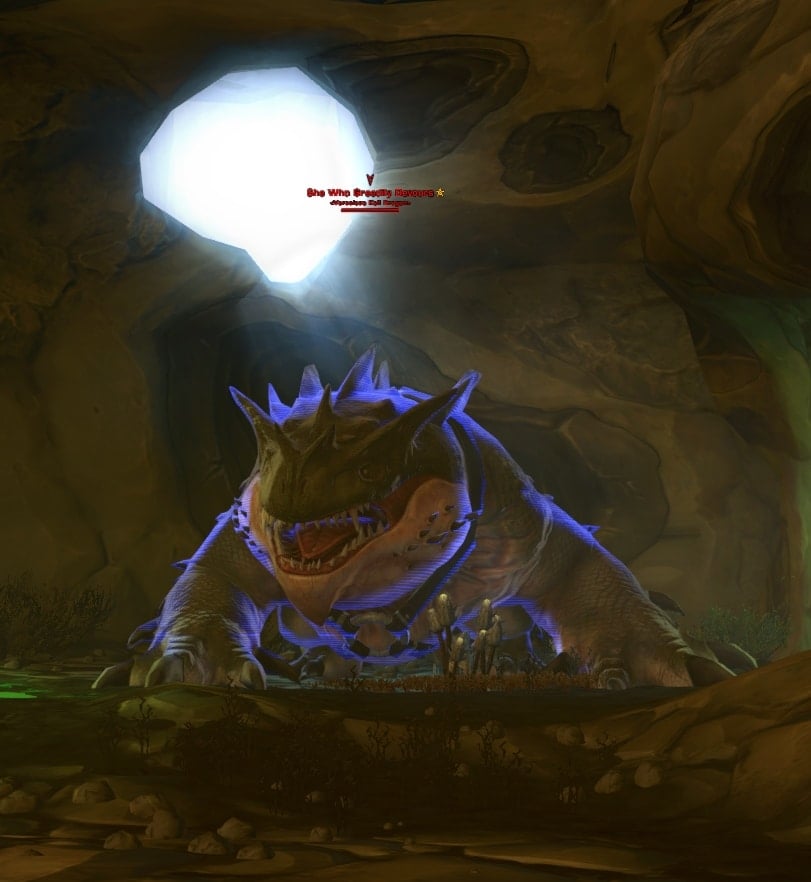
Hint: don’t step in the green waters in the cavern. It’s not exactly healthy in there.
When done, talk to Arankau, who is in the Rishi Village and get your reward for the completed mission.
![[Daily] The great Beast Hunt Rewards](https://vulkk.com/wp-content/uploads/2021/07/Daily-The-great-Beast-Hunt-Rewards.jpg)
Rishi Dailies best missions order for fastest completion
It doesn’t matter in what order you will complete the quests if your goal is to just have fun and get some rewards. If you want to do these missions as fast as possible, follow this path:
First, pick up all Dailies and the Weekly from the Terminal. Then head to the Slums (the lower level of the first area) and do the Red Hull Retribution (Republic) / Howling Tempest Retribution (Empire).
When you complete it, teleport to the Blaster’s Path Cantina and talk to Harlow Ricks for the A Crew of Your Own mission. Pick whichever side suits you and let the timer start. While waiting for the five minutes to expire, head to the Nova Blade Trade Post in the Skyline Falls Camp in the Horizon Island area and do the A Trait of Light.
By the time you are done, the timer for A Crew of Your Own should have expired. Teleport back to the Cantina to talk to Harlow again and while there, finish A Trait of Light by speaking to Remilok, who is just outside the Cantina.
Finally, teleport to the Rishi Village and complete Water’s Bounty and The Great Beast Hunt. Teleport back to the Rishi Village to hand-in both missions and this will allow you to return to the Mission Terminal in Raider’s Cove Trade Post to complete the Weekly Rishi Mission.
In short, here is the order I suggest you follow:
- Red Hull Retribution (Republic) / Howling Tempest Retribution (Empire)
- A Crew of Your Own
- A Trait of Light
- Water’s Bounty
- The Great Beast Hunt
- Rishi Weekly Mission
There are a lot of Daily Areas with Missions in SWTOR and if you are looking for diversity in your location farming for credits, reputations or just having fun, look them all up. I’ve got guides for them all!