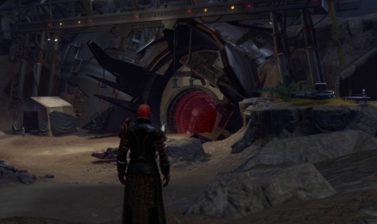
An in-depth guide to Lady Dominique Story Mode Boss – fourth and final encounter in the SWTOR R-4 Anomaly Operation. Includes path to the boss, mechanics breakdown, and strategy for all classes and roles!
Please keep in mind that this boss fight was released very recently, so new strategies are still developing. If you know of a different strategy that works well or is very popular, please share it in the comments!
Table of contents
Lady Dominique SM Mechanics and Strategy
Lady Dominique has a lot of mechanics, but none of them are all that complicated to deal with and many of them only happen at specific times in the fight. You also don’t have to worry about moving and DPSing at the same time very much.
If you’re feeling a bit overwhelmed by all the mechanics, read through the Phases and Mechanics Order section and then come back to look at the Individual mechanics.
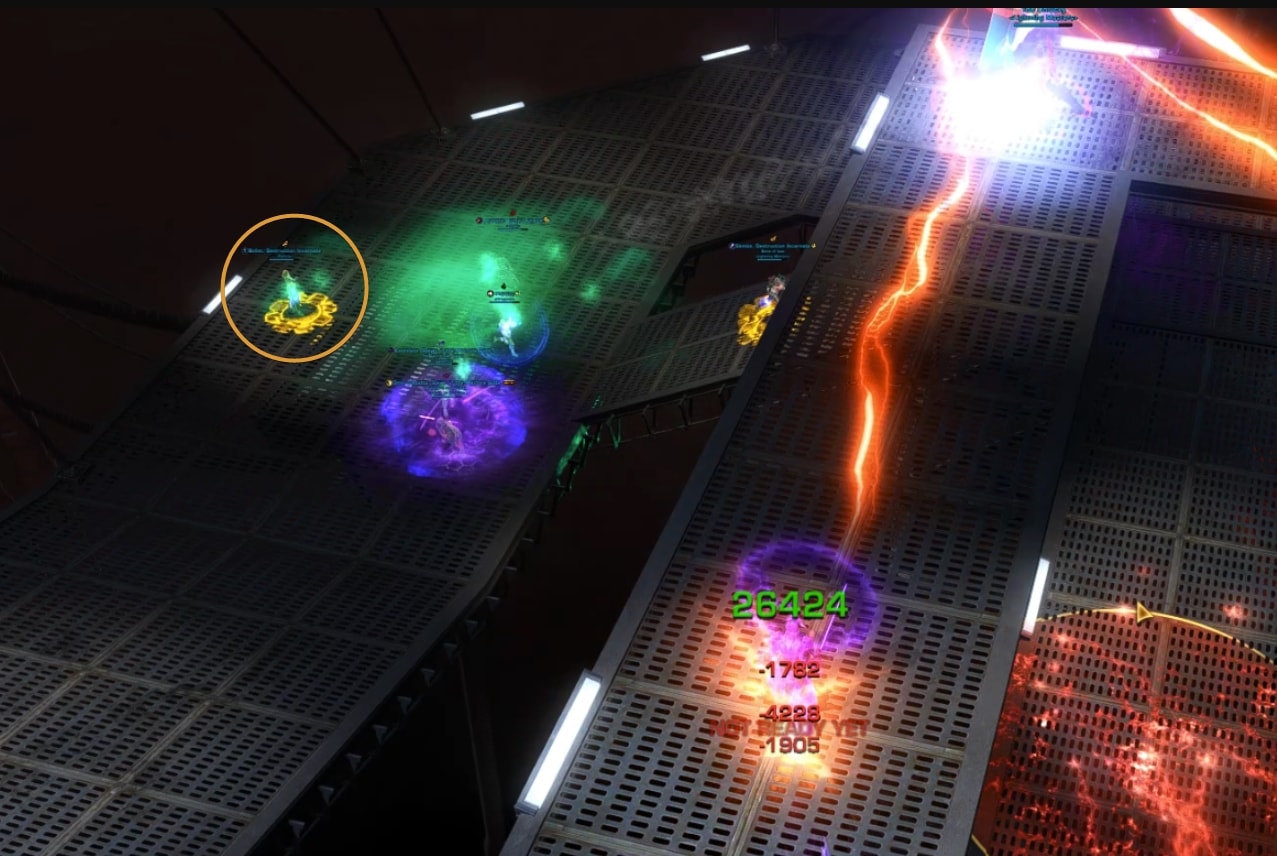
 Disturbance (Orange Circle)
Lady Dominique will apply a debuff to a random group member called  Disquiet which is accompanied by an orange circle that tracks your movement. Once the debuff expires after 8s, the circle’s position is locked in and a long-lasting circle with red sparks called Disturbance appears.
Disturbance doesn’t hurt too bad to stand in for a few seconds, but because you have such limited real estate in the 3 locations where you fight everything, it’s really bad to drop the circle in the group because healers can’t heal through the damage if a bunch of people are taking it for a long time, especially from multiple circles.
Strategy
When you get the Disquiet debuff, drop down to the lower catwalk and let the circle fall off there. Pop a DCD to mitigate the damage from standing in it for a moment. The circle takes a moment to spawn after the debuff falls off, but the tracking will continue even after the orange circle disappears.
You may notice that the circle will drop down before your character does, but this is just BioWare being generous by trying to mitigate position lag. The final circle will drop where your actual character is, so you can’t try and game the system by standing right on the edge of the top platform.
Pay especially close attention to your debuff bar when you’re destroying generators with the Drouk adds not to drop the orange circle in the group. It’s really hard to see the orange circles with all the adds running around.

Concussive Blast (Single Yellow Circle)
Similar to Disturbance, Lady Dominique will apply a 6s debuff called  Tremor to a random player in the group, which puts a tracking yellow circle around you. When the debuff expires, the player is knocked back.
The debuff description mentions it will affect all players in the circle, but the knockback only applies to the player with the debuff, at least in SM.
Strategy
Since the circle doesn’t affect anyone else, there is no need to drop down. You should not drop down when you have the yellow circle because it means losing uptime on the boss, resulting in lost DPS (or HPS).
Line yourself up such that you’ll be knocked backward but remain on the catwalk you want to be on. If there were a line connecting you and Lady Dominique, you would want that line to be parallel with the catwalk you are standing on so you don’t get knocked off. You should be fine if you stand in the center of the path.
She will wait until Force Barrier is over before knocking you back, but other types of CC immunity like Entrench / Hunker Down and Hydraulic Overrides / Hold the Line work. I think it has to do with the hidden benign presence the player has while Force Barrier is active.
Recursive Blast (Quad Yellow Circles with Arrows)
After all four generators have been destroyed, Lady Dominique will start channeling Recursive Blast instead of Concussive Blast. Recursive Blast places 4 circles on 4 different players in the group over the course of the 6s channel with arrows pointing from 1 player to the next. There is no debuff with Recursive Blast, just the yellow circle.
At the end of the channel, Lady Dominique sends out a knockback that ricochets through each player and gets emitted in the direction of the arrow. The direction of the arrow is determined by the current position of the previous player with the yellow circle. In other words, if you have a yellow circle, you’re gonna get knocked in the direction that the arrow that’s pointing at you is pointing to.
Unlike Concussive Blast, these circles will knock back other players that are standing inside them as well.
Strategy
You do not have much time to get things organized. You are probably gonna get knocked multiple times if you get a yellow circle on you and that’s fine. The main goal is just to prevent people from falling off the top catwalk where Lady Dominique is so no one has to run back.
In order to accomplish this, everyone with a yellow circle just needs to line up in the center of the catwalk and be on the same side of Lady Dominique (just like how you need to be on the same side with the ARIA droids) and stand about 15m or so away from the boss.
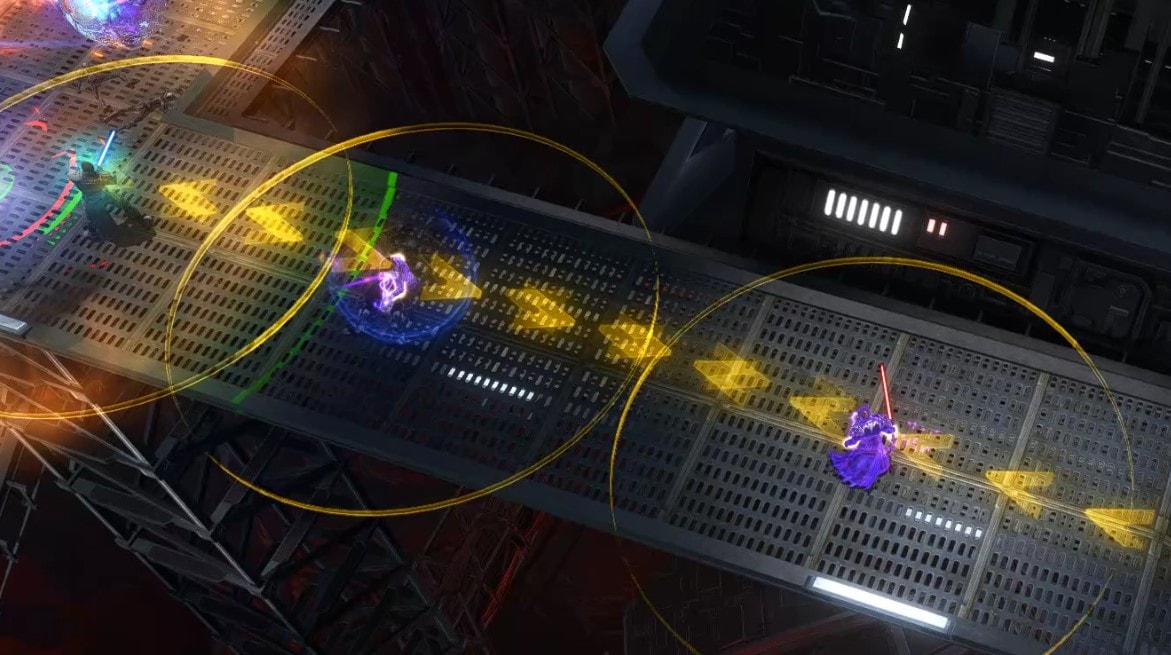
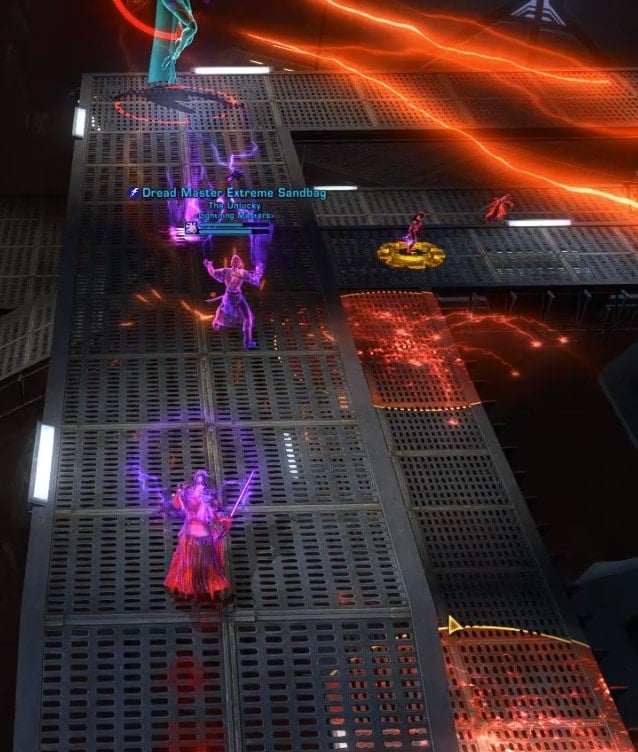
This shot isn’t perfect in terms of proximity to the boss, but illustrates my point of having the arrows pointing straight down the catwalk. By having everybody with yellow circles line up in the center of a single side of the catwalk, we guarantee that all of the knockback lines will be parallel to the direction of the catwalk path so no one will get knocked in a direction that will cause them to fall off.
You do not have enough time to reorient yourself nor give the next person enough time if someone else decides they’re too good to do what kindergarteners are capable of doing.
It’s important to line up a little bit away from Lady Dominique so that melee don’t have to deal with moving out of the yellow as much and helps to prevent players from getting knocked past her off the ledge.
It does not matter that much if your arrow is pointing towards or away from Lady Dominique, just so long as it’s pointing in one of those directions. All knockback immunity effects work here just like they do against Concussive Blast, though they only make you immune, not the people around you, or the people that will get knocked back after you, so just because you’re immune doesn’t mean you get excused from standing in line.
In summary: be a team player and get in line when you get a yellow circle no matter what!
ARIA Slicer Droids
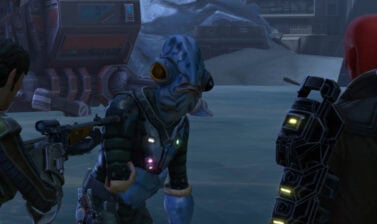
ARIA will send in droids to take out the lower 2 generators supplying power to Lady Dominique and the Mass Shadow Generator.
She will only send in 1 droid at a time and it takes time for each droid to slice into the generator.
If Lady Dominique sees the droids, she will use the Force to fling them off a ledge (causing you to fail the mechanic) and then cast Incite and Insulate.
Strategy
Lady Dominique needs to be physically turned away from the droid so she can’t see what we’re trying to do. Since she periodically targets other players with circle attacks, everyone needs to be facing the same direction so she doesn’t turn when she targets a non-tank.
Everyone should be standing on the catwalk opposite ARIA’s droid such that everyone that has their camera facing in the direction of their character can see the droid hack in progress.
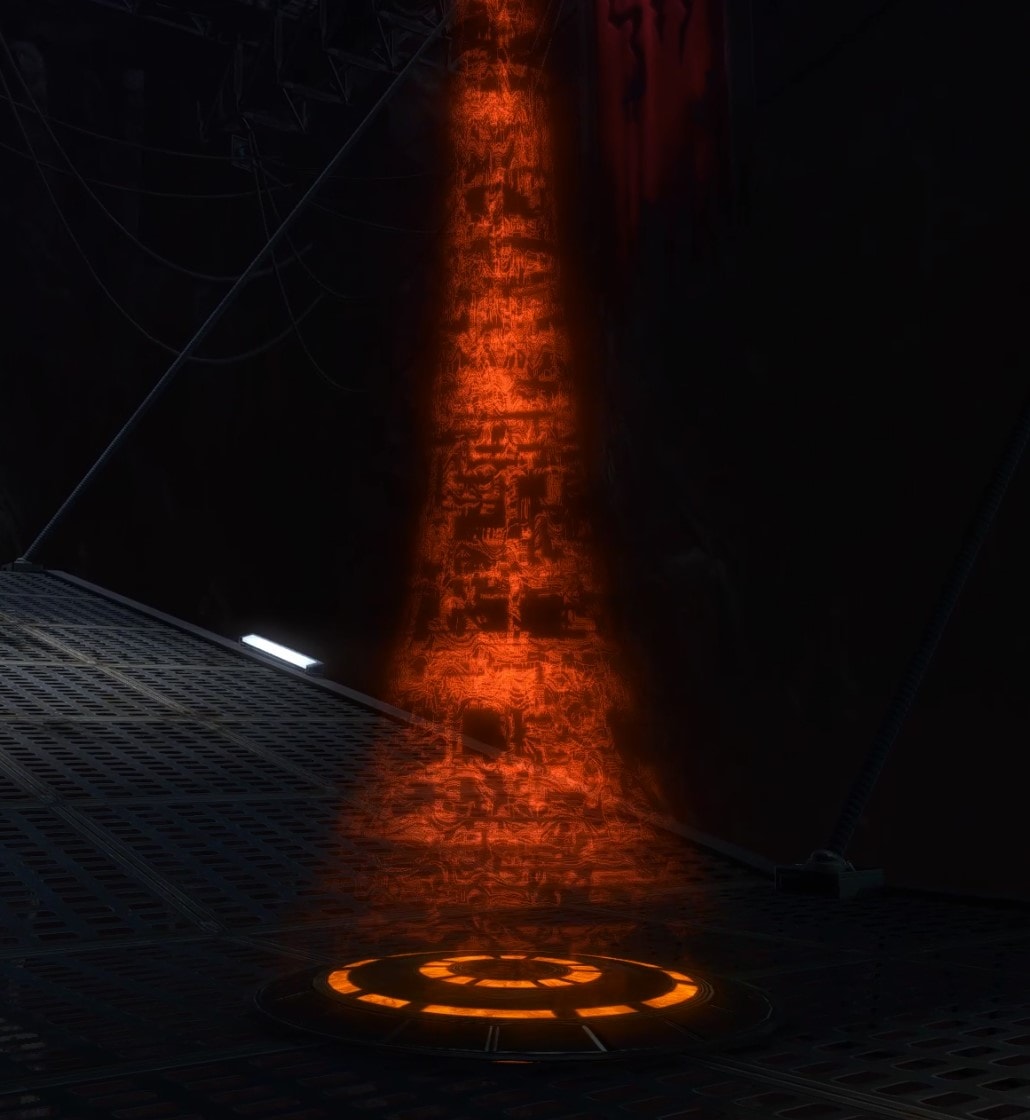
Incite and Insulate
 Incite is always used immediately before
  Insulate. Incite is a 0.5s cast that makes the Mass Shadow Generator create a roomwide knockback 5s later. While the knockback is generating, Lady Dominique casts Insulate (5s cast) which gives her a fancy shield that reflects all damage dealt from beyond 5m and absorbs 100% of damage dealt by players within 5m of her.
The shield has a finite amount of health and she gets stunned once it breaks. The knockback from the Mass Shadow Generator occurs right as the Insulate cast finishes and she begins to channel  Devastation (explained below).
Strategy
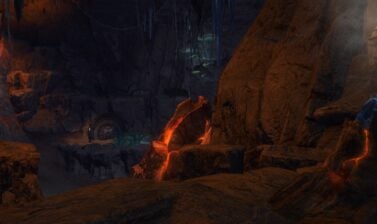
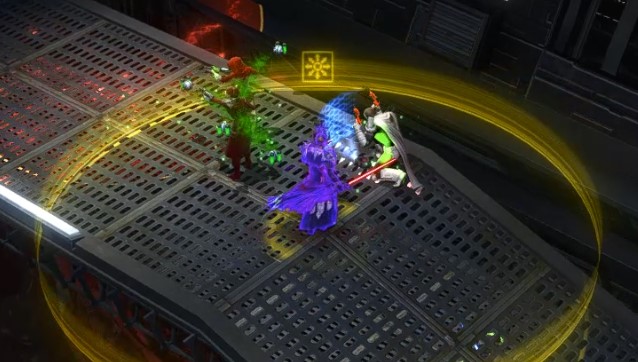
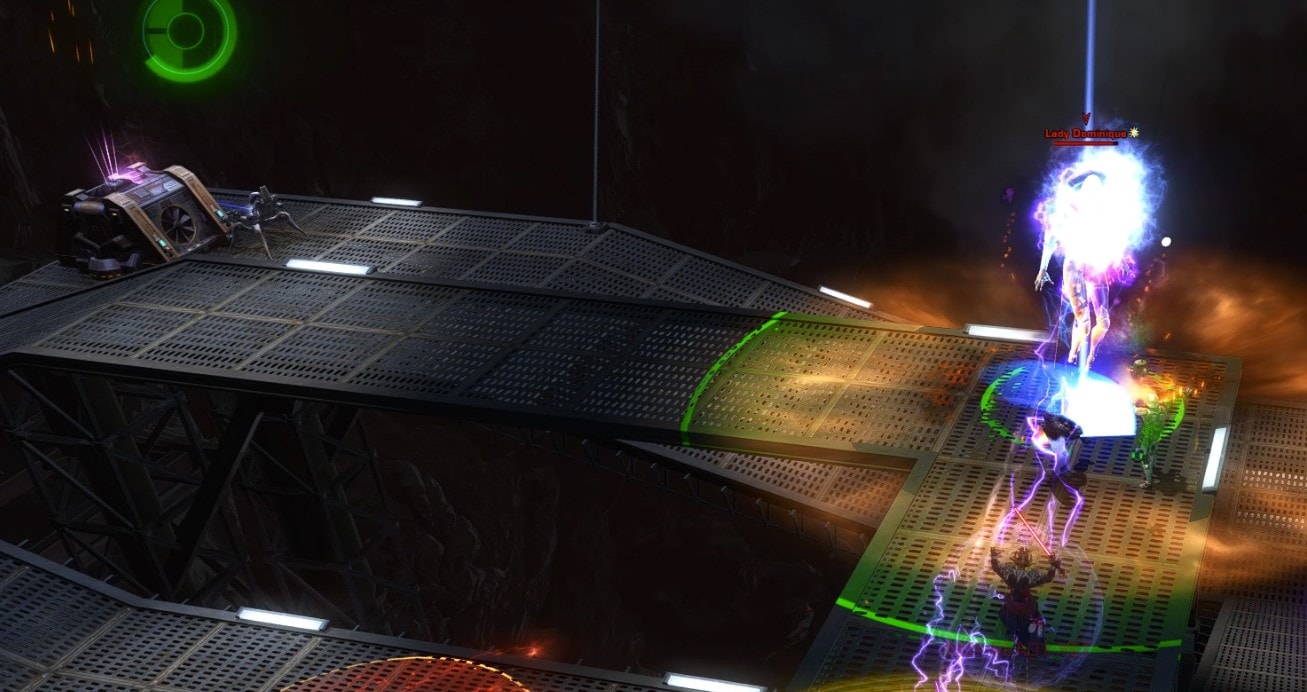
Everyone should run back up to the boss after getting knocked and stack up in melee range to break the shield and prevent receiving reflected damage. Melee can activate their 30m leaps and teleports while jumping in the air from specific locations on the bottom or middle level. Here is a shot of a spot on the bottom level:
Here is a clip of the magnificent Jayllan doing something similar from the middle level. Assassins / Shadows and Operatives / Scoundrels may have more trouble leaping from the bottom level compared to the middle one.
Ranged can utilize or benefit from the following abilities to avoid the long run back:
- Phase Walk
- Hololocate / Hideout
- Predation / Transcendence
- Extrication / Rescue
- Extraction Plan (friendly Grapple / Harpoon ability tree buff)
Mercenaries / Commandos will have the hardest time getting back up and are the only ones that lack something to get them back up, so they are the best targets for Extrication / Rescue and Extraction Plan.
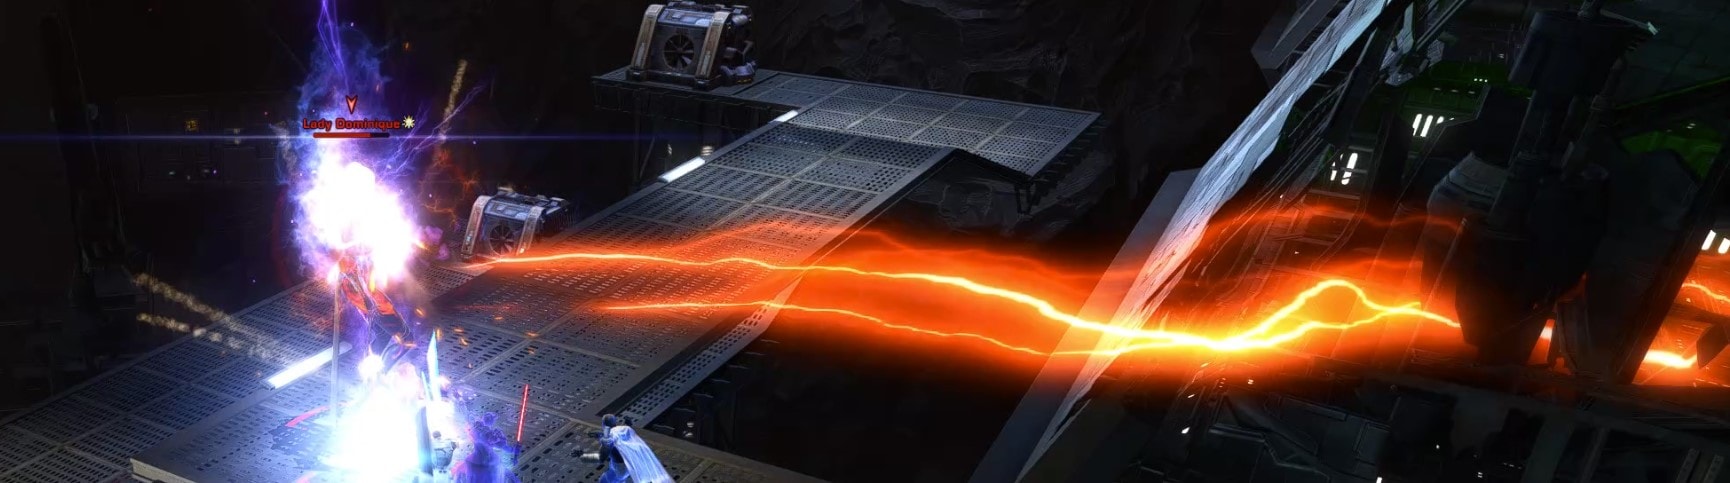
Devastation
Lady Dominique will begin channeling Devastation for 30s immediately after she finishes casting Insulate, which causes her to shoot orange lightning at the Mass Shadow Generator. The channel applies a debuff called Impending Devastation to the entire raid and will cause a wipe if it is allowed to complete.
Impending Devastation
Impending Devastation is a debuff applied to all players while Lady Dominique channels Devastation. The debuff makes each player take internal periodic damage and reduces healing received.
Strategy
The only way to interrupt Devastation is to deal enough damage to break her Insulate shield, which will stun her. Make sure to stand within 5m so you don’t take reflect damage.
Grey Swarm Detonator (Drouk Adds)

Grey Swarm Detonators are the Drouk adds. Their signature feature is a buff called  Unstable Augmentation that makes them explode when they are about to die. This explosion deals a small amount of damage to you, but it’s far more harmful to the generators and other enemies.
It takes 2 Grey Swarm Detonators to destroy each of the remaining generators and 5 will spawn by the time you’ve managed to destroy the second generator.
Strategy
Tanks should bring the Grey Swarm Detonators to the generators and everyone should focus them down once they get close. Do not kill the Grey Swarm Detonators if they are not near the generators. This is just like the bonus mission in the Dantooine FP. The Grey Swarm Detonators are fully vulnerable to CC, so they can be pulled close to the generator and stunned so they don’t run away before they die.
Be careful about using knockback abilities when they’re out. Also, they can clip into the generators which will block LoS, so it’s better if they’re 1-2m away.
Since the Gray Swarm Detonators deal damage to other enemies, you can wait to kill the first one on the second generator until the second one arrives if you want. The explosion will chew through most of the next one’s health.
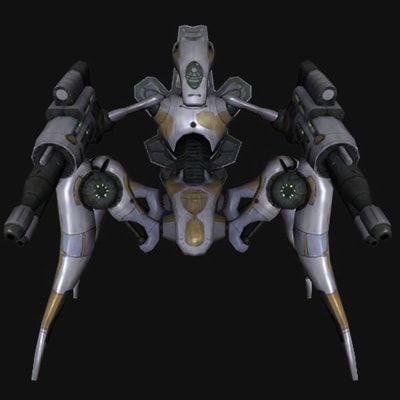
Attractors (Summoner Adds and Burn Phase)
Lady Dominique will cast Deploy Attractors (3s cast) which will spawn a pair of these Attractor machines down on the bottom level and then do a 30s channel of Force Barrier.
Each of them will continually summon a bunch of other adds for as long as they live. The third pair that she summons after her health drops below 25% will be shielded instead of her, so they’ll be immune to damage for the remainder of the fight.
Strategy
Defeat the first 2 pairs of Attractors ASAP so you can minimize the number of adds that spawn. Tanks should group up the adds on the Attractors while they’re still alive and then bring them to the boss afterward. Ranged DPS can hit the attractors from the edge of the top floor, but healers should drop down along with the melee because they’ll be the ones that initially get aggro on the adds.
Tank-Exclusive Mechanics
It is possible to solo tank Lady Dominique, though you’ll have your hands full and a tank swap is still required, so at the very least you’ll need a DPS with taunt (DWT) that knows what to do. Due to the high DPS check in the burn phase, a DWT will probably be required for most groups until it is nerfed.
Also, all the tank debuffs use the same debuff  icon, so I’m not going to spam it.
Separate, Relocate, Unify, and Force Blast
The phase of the fight governs Lady Dominique’s movement behavior and the casts  Separate,
  Relocate, and
  Unify are how she changes it at phase transitions. At the start of the fight, Lady Dominique is unified with the Mass Shadow Generator, so she doesn’t move. Once you move onto phase 2, she casts Separate and ignites her lightsabers.
When phase 2 ends, she casts Relocate to teleport back to the starting point and then Unify to reconnect herself to the Mass Shadow Generator so she doesn’t move anymore. After she reunifies, she will not separate for the remainder of the fight. Just so we’re clear, she doesn’t move when she’s unified but can move when she’s separated and has her lightsabers out.
Whether she’s unified or not determines her basic attack, which, in turn, determines what stacks you receive for tank swaps.
Force Blast
Force Blast deals frequent, massive amounts of raidwide damage similar to Thrasher’s Roar in S&V. I haven’t been able to confirm yet, but I think she repeatedly casts Force Blast whenever the player who has aggro is not in range of her, possibly only when she’s unified with the Mass Shadow Generator.
Strategy
Make sure not to get too far away from her when you have aggro and pay attention to phase transitions since you’ll be leading the group to the generators.
Energized Shot, Desublimating Shadows, and Shadow Mass
Energized Shot is Lady Dominique’s basic ranged attack which she’ll use when she’s unified with the Mass Shadow Generator and can’t move. She’ll be shooting Energized Shots at you for most of the fight.
Getting hit with Energized Shot applies a stack of the Desublimating Shadows debuff. Once you reach 4 stacks, you’ll get another debuff called Shadow Mass accompanied by a big purple circle. When that debuff runs out after 5s, the Shadow Mass detonates, dealing a significant amount of damage to everyone inside.
Strategy
Swap on getting a purple circle. Take the purple circle out of the group down to the lower level where everyone takes the orange circles. Be careful not to let the circle blow up on some other poor soul who’s just trying to drop their orange circle down there at the same time.
It’s a fairly big hit, so consider if you can delay activating a DCD for a few seconds such that it will still be active when Shadow Mass detonates. Alternatively, you can use your cheese DCD to negate the damage.
Shadow Mass is currently reflectable, including with Sonic Rebounders. If you have 2 PTs / VGs, you can stack up and use Sonic Rebounder for all of the purple circles. Please note that the radius for receiving Sonic Rebounders is smaller than the radius of the purple circle, so stack up tight!
Shadow Slash and Shadow Resonance
Shadow Slash is Lady Dominique’s basic melee attack with her lightsabers which she’ll use when she’s separated from the Mass Shadow Generator and following you around while you’re trying to destroy the generators with the Grey Swarm Detonator Adds in phase 2.
Lady Dominique applies stacks of Shadow Resonance with her Shadow Slashes. Each stack of Shadow Slash reduces your healing received by 10%, so at 10 stacks, any healing you receive is reduced to 0.
Strategy
Swap as often as your stacks fall off. You can technically hold for longer if you need to, but your healers will get mad and there won’t be much they can do to prevent you from dying.
Prioritize using DCDs that don’t heal you (but rather mitigate damage in other ways) since DCDs that heal you will be far less effective. Energy Yield / Infused Kolto Packs and Endure Pain / Enure are still fine, especially with low stacks, because they have a short cooldown, but you’re better off saving your Medpac, Enraged Defense / Focused Defense, and Overcharge Saber / Battle Readiness for other phases.
To be clear, it’s not that you can’t use DCDs that heal you during that phase, but they will be less effective than normal, so you have an incentive to pick something else.
Grey Swarm Adds
All of the Grey Swarm trash enemies you’ve seen in the operation are present in the Lady Dominique fight including Detonators (Drouks), Reapers (slow / root terrorists), Hulking Monstrosities (Subteroths), and Thralls (weaklings). They start appearing in phase 2 and alongside Attractors in phases 3 and 4.
Strategy
As tank, it’s your job to keep these adds grouped up on whatever the DPS are attacking. They should be stacked on the Grey Swarm Detonators near the generators, near the Attractors, or near Lady Dominique. If you can’t hit the primary target and the adds with your AoE, neither can the DPS.
Lady Dominique SM Phases and Mechanics Order
Like most other apex bosses in SWTOR, Lady Dominique features several different phases:
- ARIA Droid Generator Slicing -> Incite -> Devastation -> Repeat
- Separate -> Destroy 2 Generators with 4 Drouks
- Unify -> 2 Attractors x2, Recursive Blasts Begin
- Burn Phase,
 Shielded Attractors
 Shielded Attractors
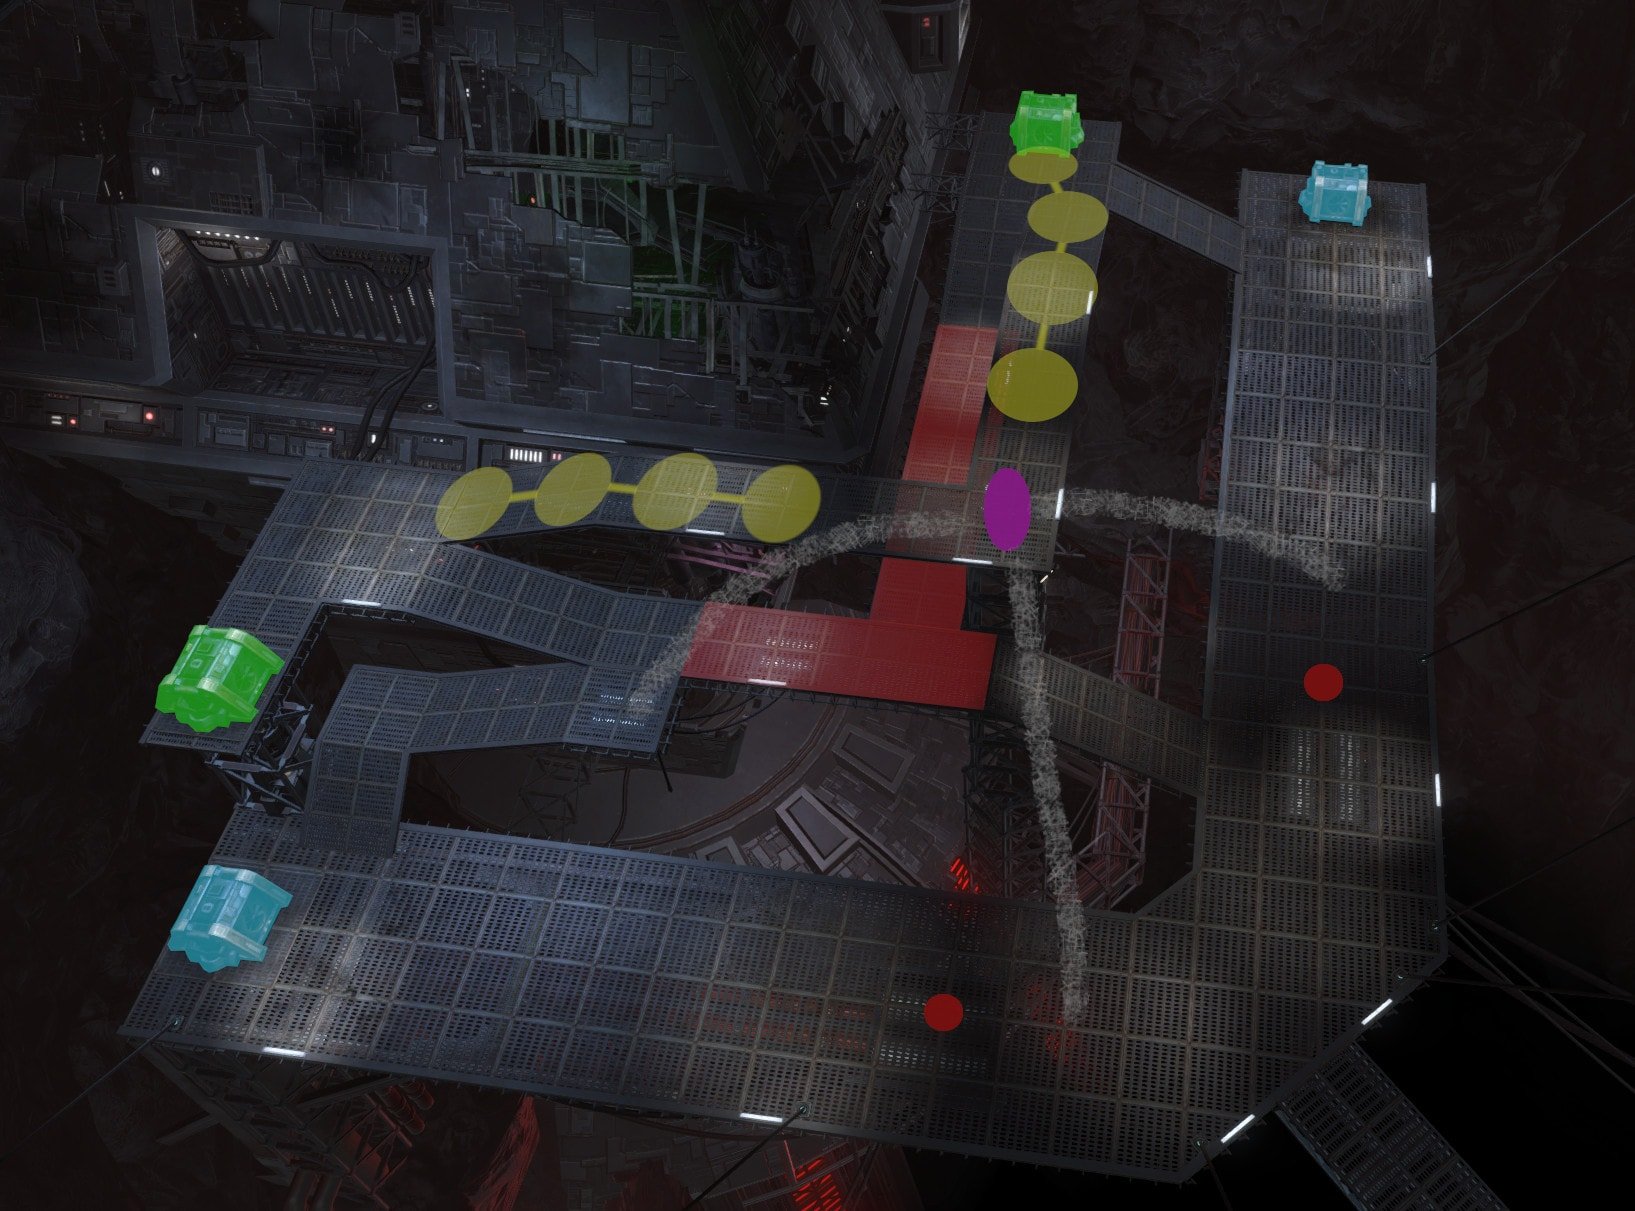
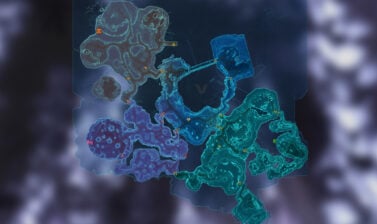
The generators in blue will be sliced by ARIA. The generators in green will be destroyed by Gray Swarm Detonators. The purple oval is where Lady Dominique is when she’s unified. The yellow circles show ideal placement for Recursive Blast, though remember the key is to have all the arrows pointing parallel to the catwalk path. The red section of the catwalk shows ideal placement for the red disturbance circles. The red dots show Attractor spawn locations. The white smoke shows roughly where you can jump from as a melee.
Phase 1: ARIA Droid Generator Slicing
Lady Dominique’s first phase is all about distracting her while ARIA’s droids slice into her generators and preventing her from creating a devastating explosion that would wipe the raid.
The 2 outer generators will be sliced by ARIA’s droids one at a time. If Lady Dominique sees the droid, she will destroy it and you will all get knocked off and must try to slice into the generator again.
After a generator has been sliced successfully or she notices and eliminates the droid, Lady Dominique will cast Incite (knockback) followed by Relocate (n/a) and Insulate (personal reflective shield).
Right as Insulate’s cast finishes, the knockback from the Mass Shadow Generator goes out and everyone has to run back up. Lady Dominique begins channeling Devastation, which can only be interrupted by dealing enough damage to break through her shield.
Phase 2: Drouk Generator Destruction
Once both outer generators have been sliced by ARIA Droids and you’ve broken through the final Insulation shield to interrupt Devastation, Lady Dominique will cast Separate, decoupling her from the Mass Shadow Generator, allowing her to move and ignite her lightsabers.
Since she has her lightsabers out, the tank debuffs will start reducing healing received instead of triggering purple circles.
Your job in this phase is to get 2 Grey Swarm Detonator adds to blow up near the inner 2 generators. The first Grey Swarm Detonator will take down the shield, the second takes out the generator itself.
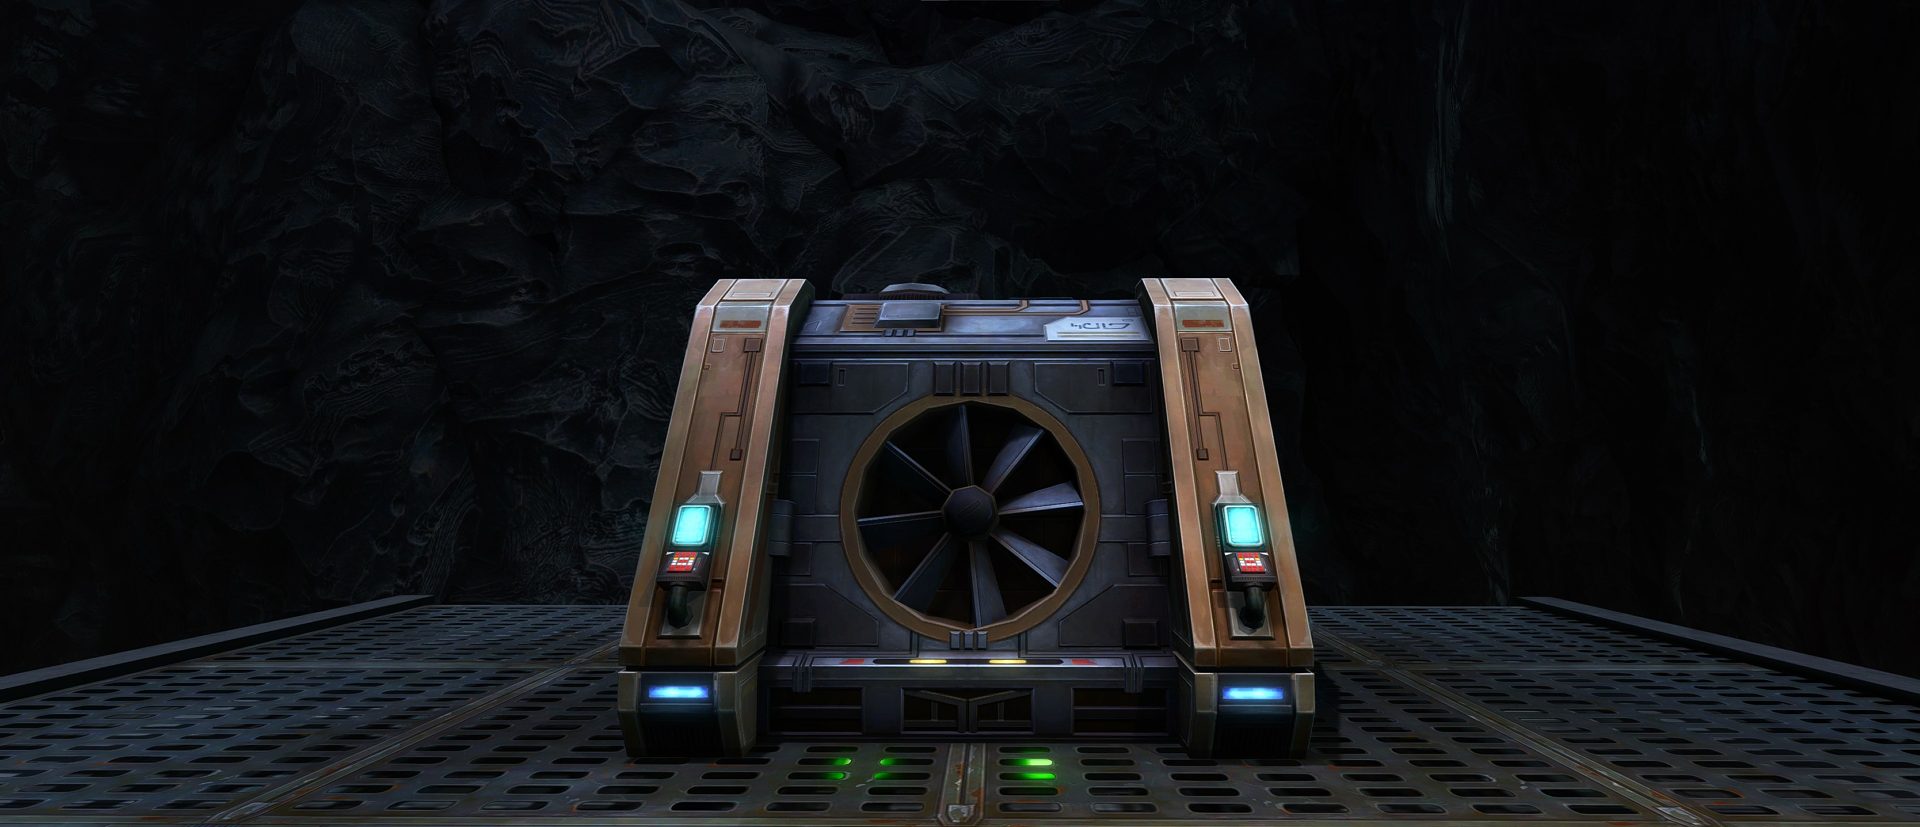
In SM, you have 7.5mins to destroy all 4 generators before Lady Dominique wipes the raid. Your total time remaining is shown by a shield generator buff  .
.
Phase 3: Attractors and Recursive Blasts
Once all 4 generators have been destroyed, Lady Dominique will cast Relocate and Unify to recouple herself to the Mass Shadow Generator. She’ll switch back to  Energized Shot and the tank stacks will return to generating a purple circle instead.
She’ll cast  Deploy Attractors, which will spawn 2 Attractor adds on the lowest level. The Attractor adds summon other adds which tanks need to keep near the Attractors for AoE. Lady Dominique is immune to damage for 30s once the Attractors are deployed, so focus them down.
During this phase, Lady Dominique will also begin using Recursive Blast instead of Concussive Blast, so if you get a yellow circle, remember to line up in the center of the catwalk on the same side of Lady Dominique about 15m away from her so no one gets knocked off the top platform.
She’ll be able to cast Deploy Attractors once more before the phase is over.
Phase 4: Burn
Once Lady Dominique drops below 25%, she’ll cast Deploy Attractors for the third and final time, but instead of shielding herself, the Attractors will be shielded. Since Attractors summon adds continually, you won’t be able to survive forever and just have to burn the boss before you get overrun by adds.
Tanks should try to keep the adds stacked on the boss for DoT spread and new echoing AoE damage from some DoT spec ability trees. All DPS should bring as much rotational AoE as possible to extend the amount of time before getting overrun by adds.
Acknowledgments and Special Thanks
First and foremost, I want to thank Elssha for creating all of the diagrams and infographics featured throughout the R-4 Anomaly guides. You can find Elssha and her content on twitch, twitter, and reddit.
I also want to thank my GM, Tsou, for helping to explain mechanics from the PTS and organizing many of the runs that allowed me to finish this guide so quickly. Finally, I want to thank my raid team, Time Turners, for all their amazing help in actually doing this operation.
Here is the full collection of my SWTOR R-4 Anomaly Guides: