An in-depth guide to Watchdog Story Mode – second boss encounter in the SWTOR R-4 Anomaly Operation. Includes path to the boss, mechanics breakdown, and strategy for all classes and roles!
Please keep in mind that this boss fight was released very recently, so new strategies are still developing. If you know of a different strategy that works well or is very popular, please share it in the comments!
Table of contents
Reaching the Watchdog
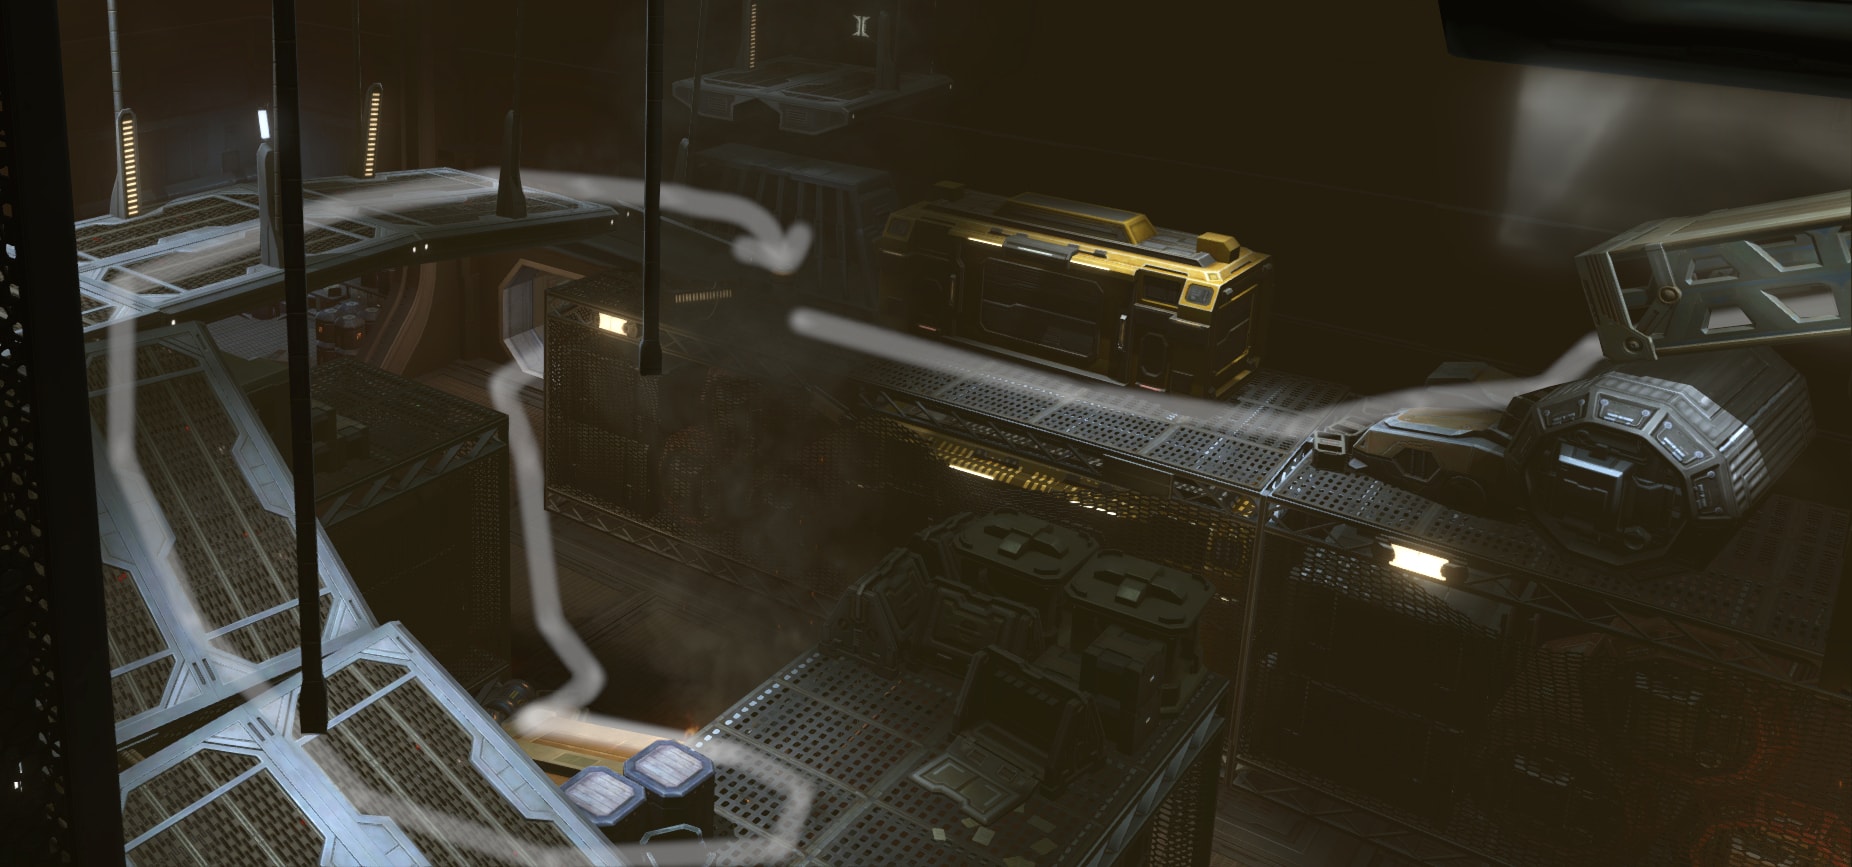
As you come out of the IP-CPT arena, you’ll end up in some sort of warehouse. There’s a bit of flaming debris near the entrance to this room you can use to get up to the top shelves and makeshift walkway.
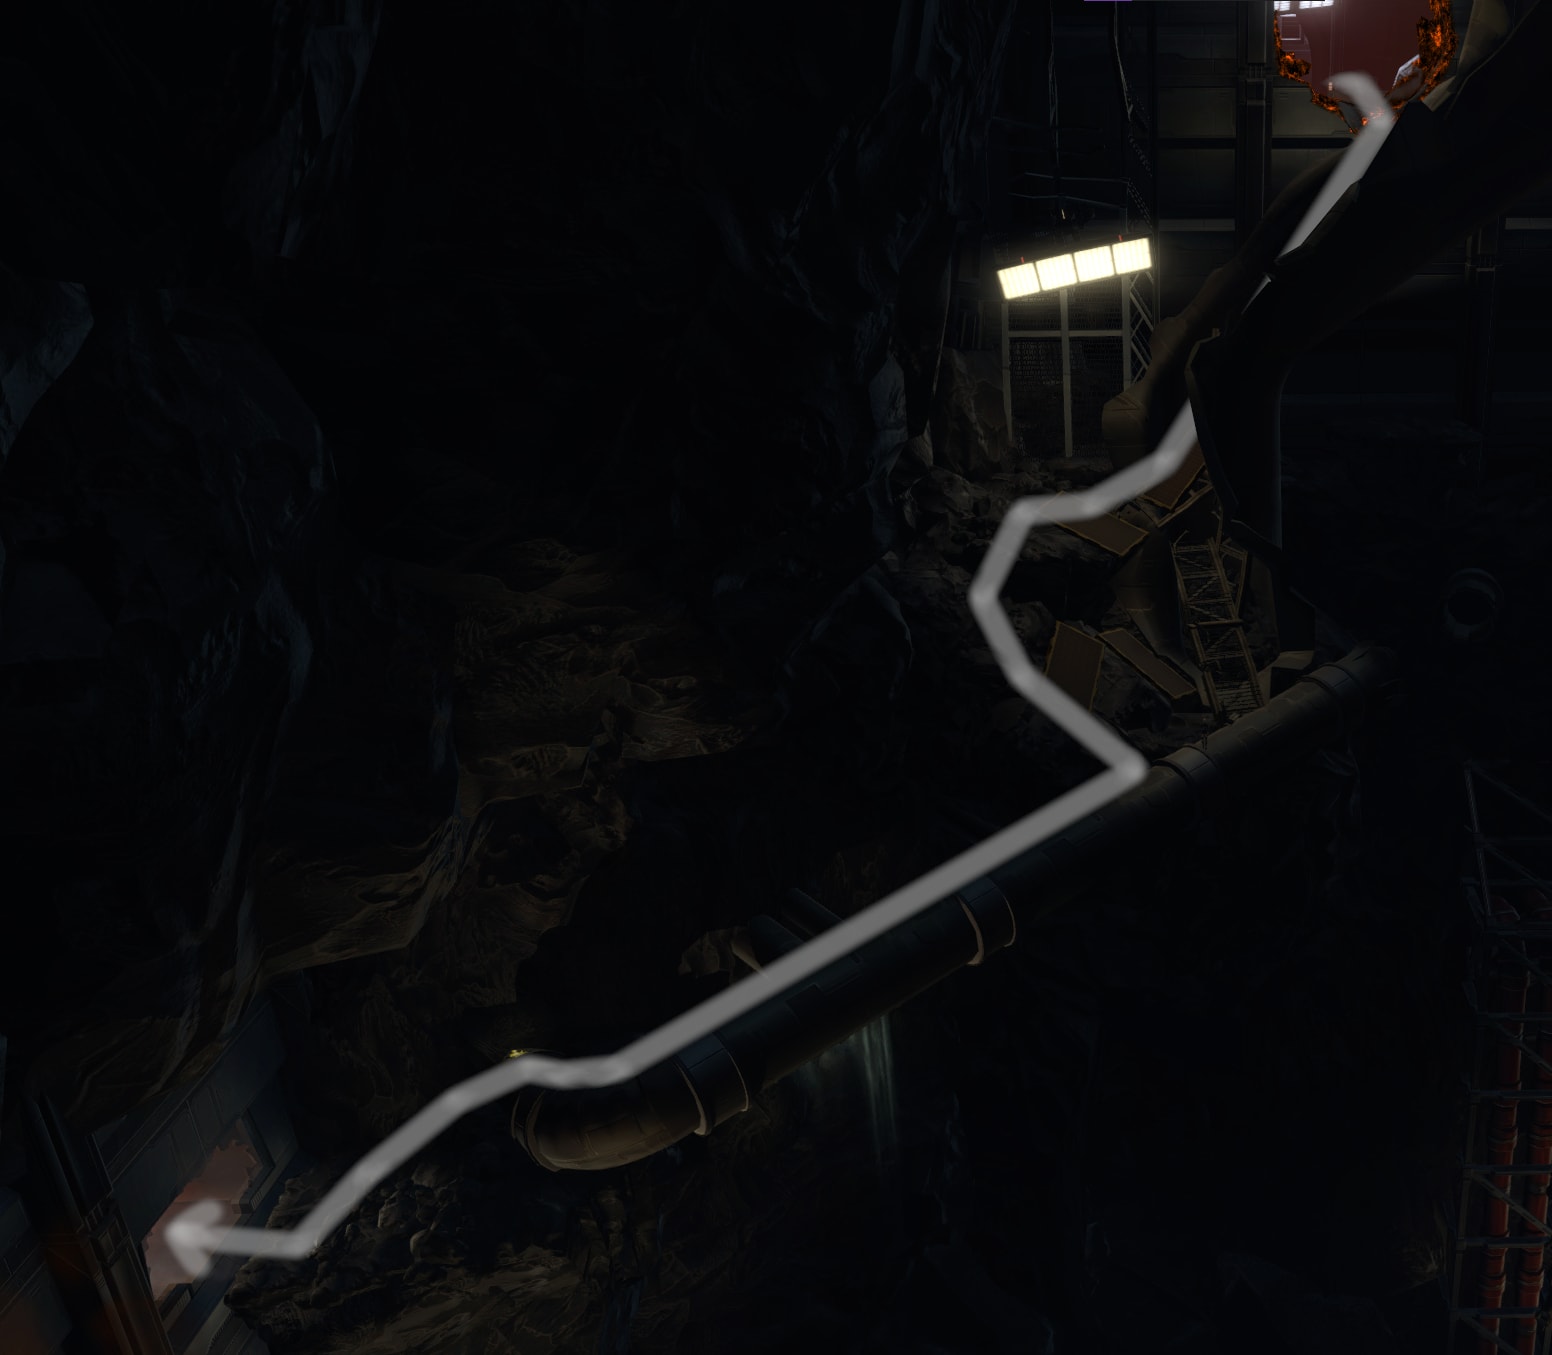
Afterward, drop down through some rubble and walk across a final pipe into what appears to be some sort of mess hall.
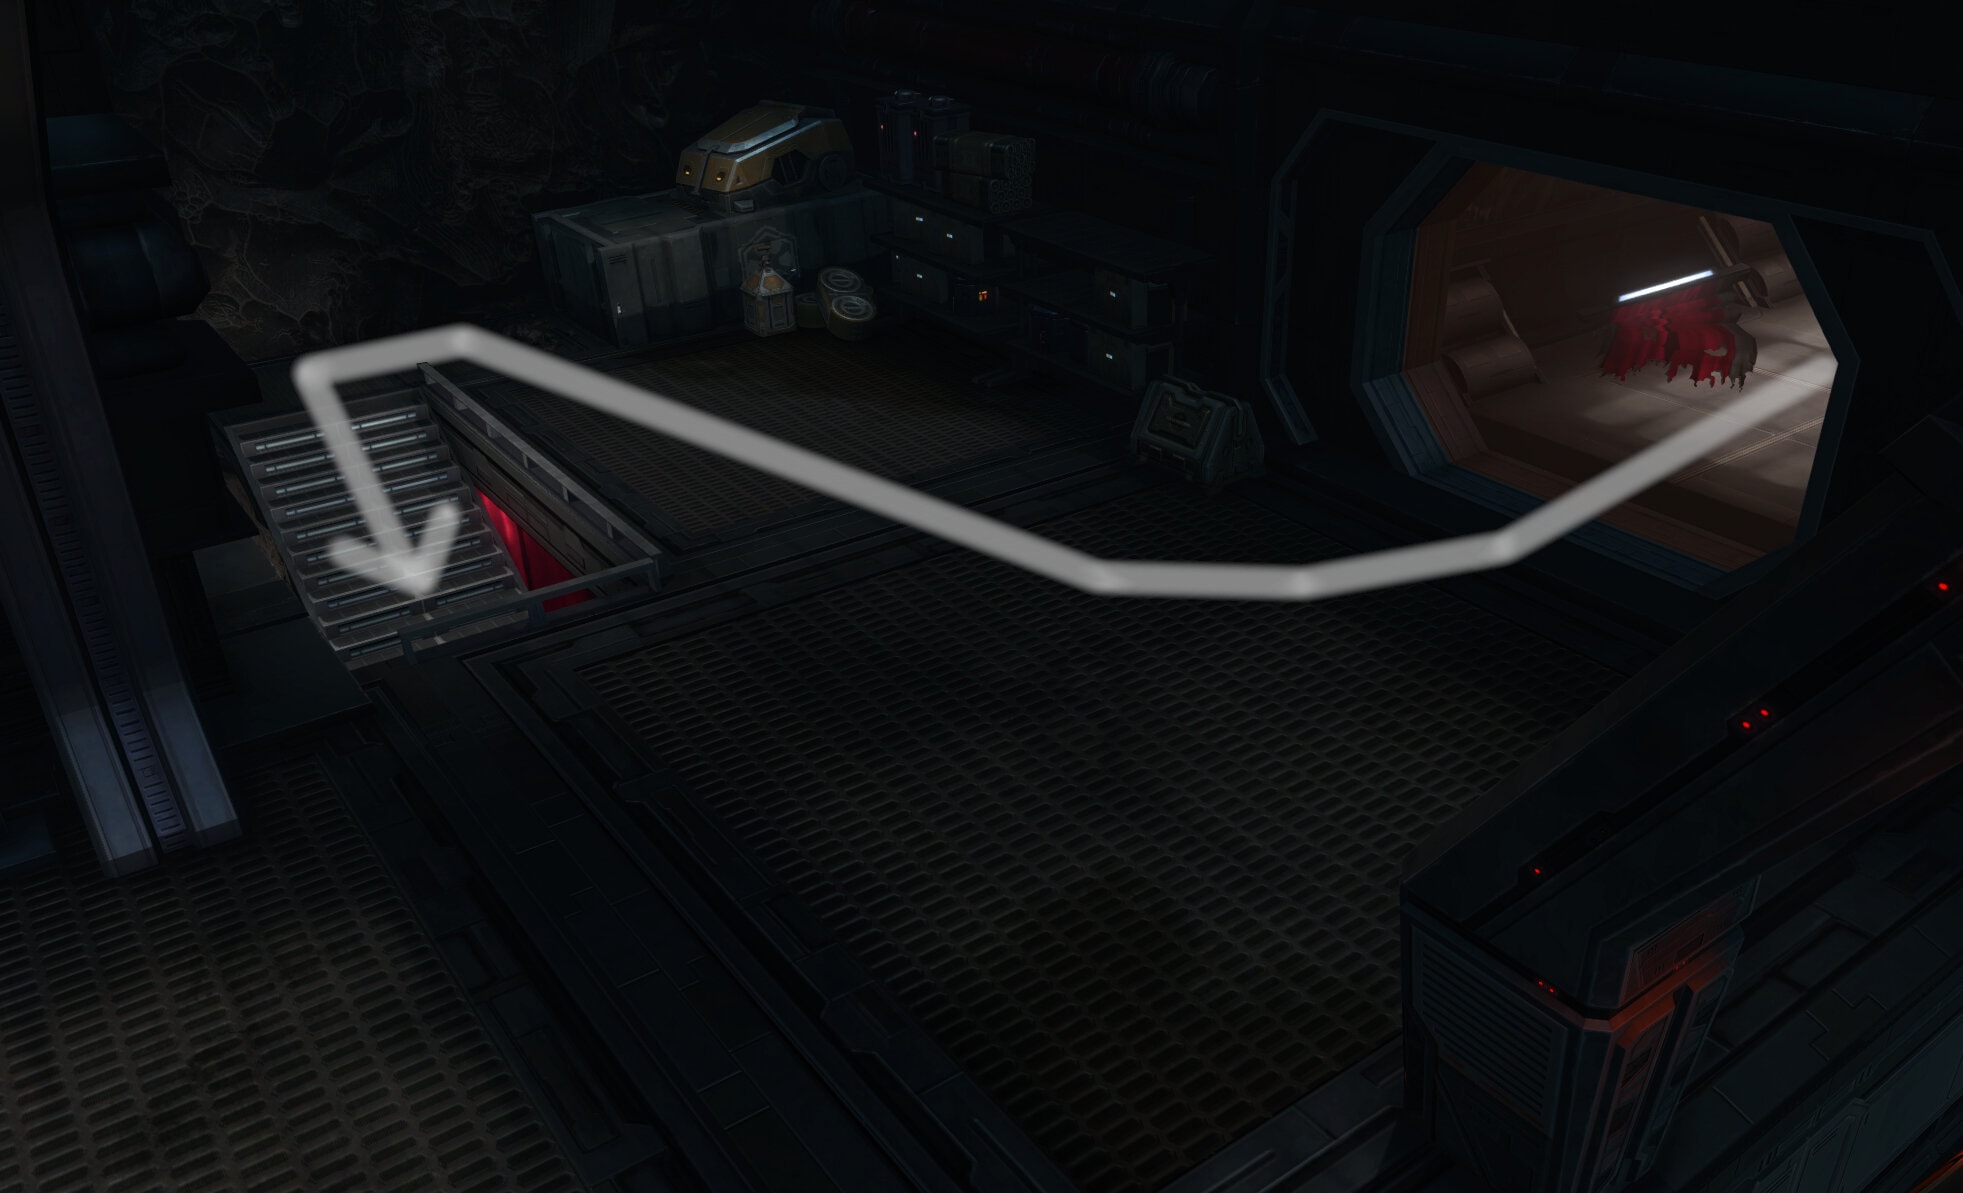
Ignore the kitchen and head into the tram station and walk down the stairs.
Watchdog Boss SM Mechanics and Strategy
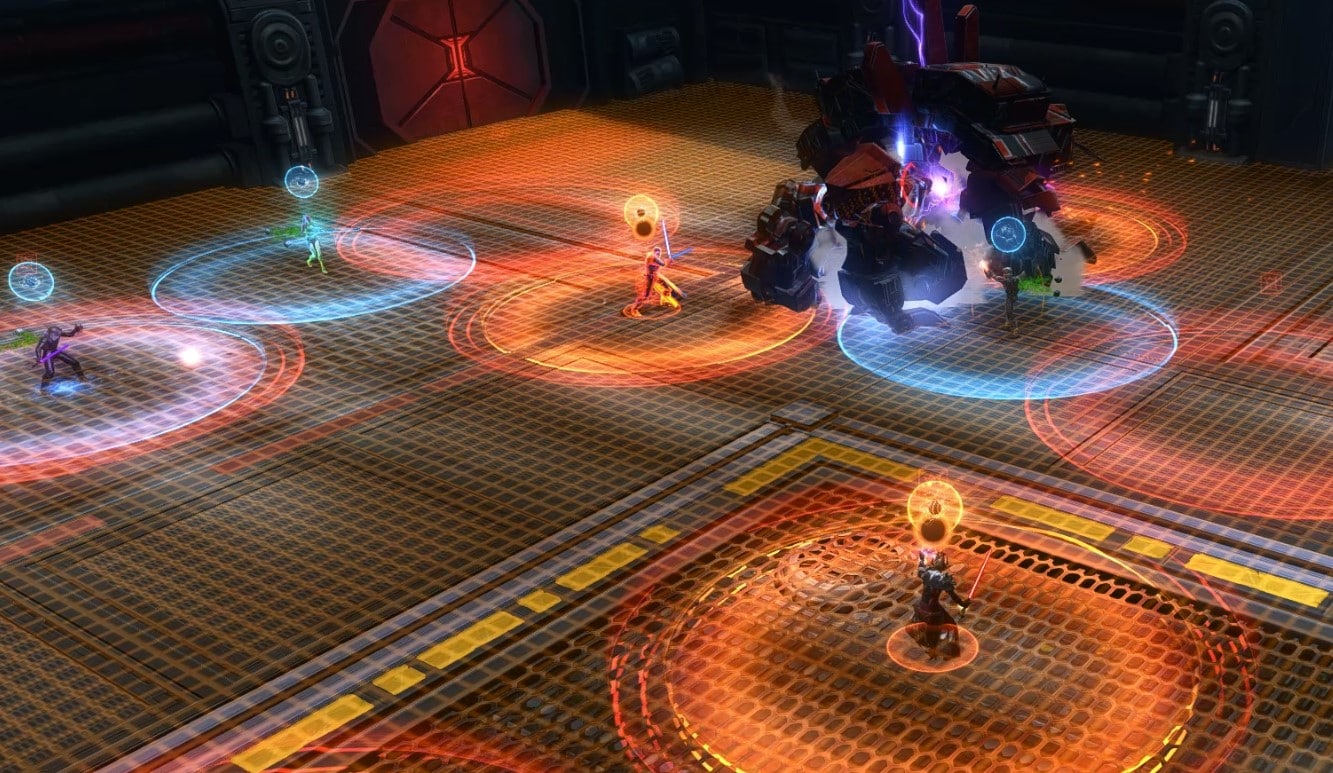
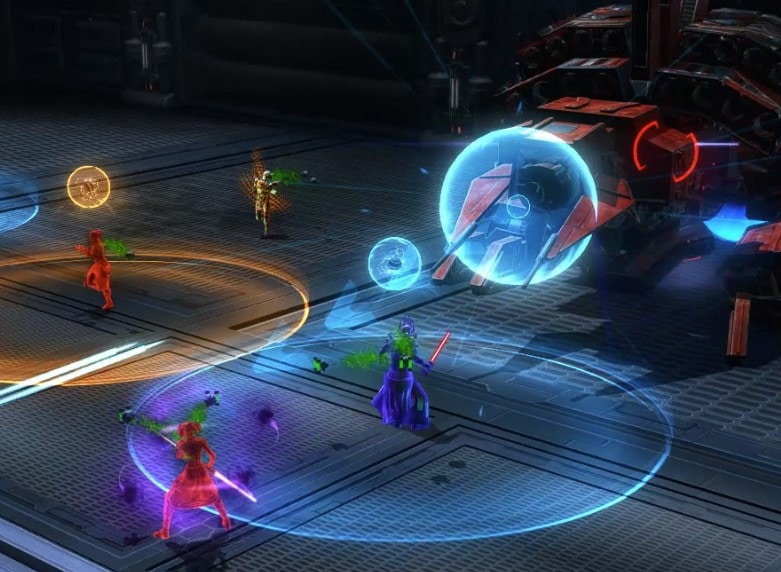
 PMX4 Polarized Proximity Bombs (Blue and Orange Circles)
The PMX4 Polarized Proximity Bombs combine the color mechanic from Aivela and Esne in GotM with the Resonant Explosive Probes (blue bomb circles) from Master and Blaster in Ravagers.
Watchdog uses the PMX4 Polarized Proximity Bombs to assign everyone an  orange (negative) or
  blue (positive) sticky bomb that detonates if it gets too close to another bomb.
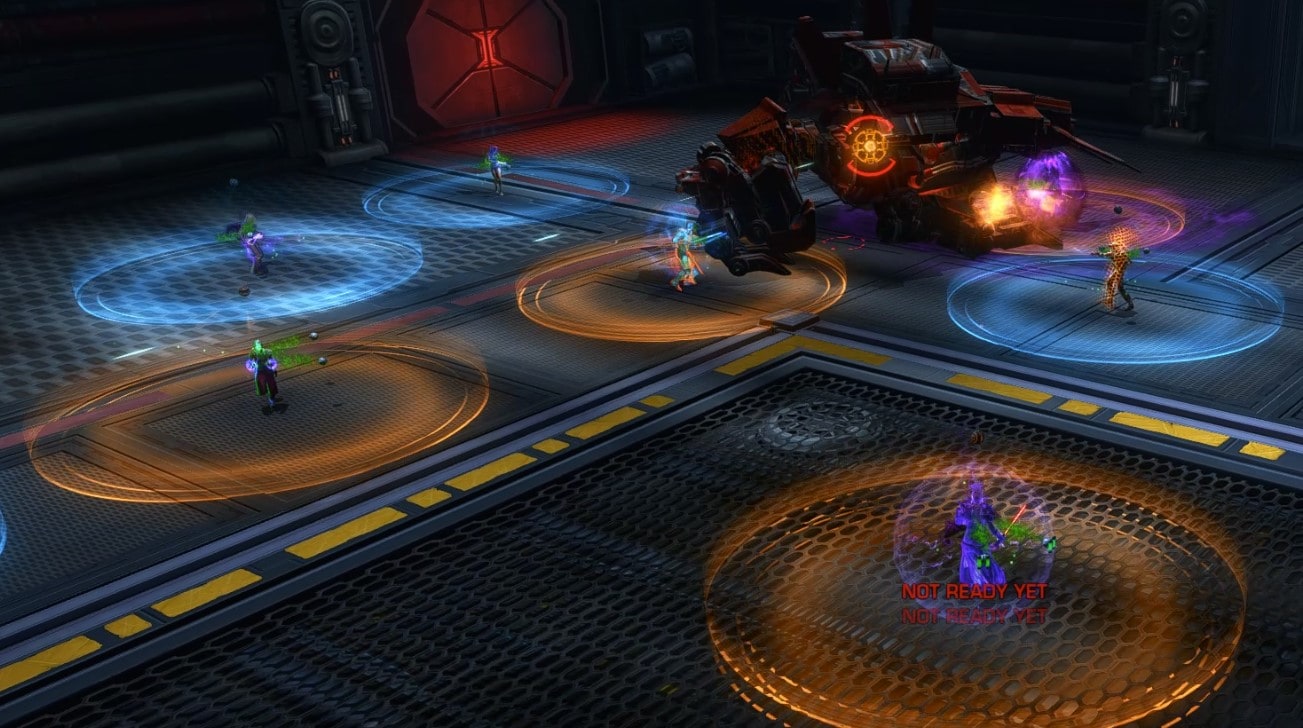
Unlike A&E, you don’t have to faff around with the Temporary Ability Bar changing your color in response to events; instead, you and your group members are assigned colors by the boss and have to react accordingly. Unlike M&B, your bomb won’t detonate after a certain amount of time.
You cannot stand inside someone else’s circle if you both have bombs or they’ll both detonate, causing you both to take damage and harm your group’s ability to deal with other mechanics. When these bombs are first applied, they take a few seconds to arm, so you have a short period of time to move away from other group members before you’ll blow each other up.
The polarity (color) of these bombs is mostly relevant to the  Polarized Beam and
  Stalker Protocol mechanics, though anytime both colors interact directly, including running into someone with the opposite color bomb, you’ll deal raidwide damage instead of just hurting you and the other player.
Strategy
Your goal with all polarity mechanics is to match the color of the bomb to the same color of some other polarity mechanic. Most of the mechanics force you to move around, so you have to deal with the polarity stuff while avoiding running into each other.
The Missiles (Red Circles)
Watchdog simultaneously fires missiles at each player’s current position, creating a red circle beneath each player.
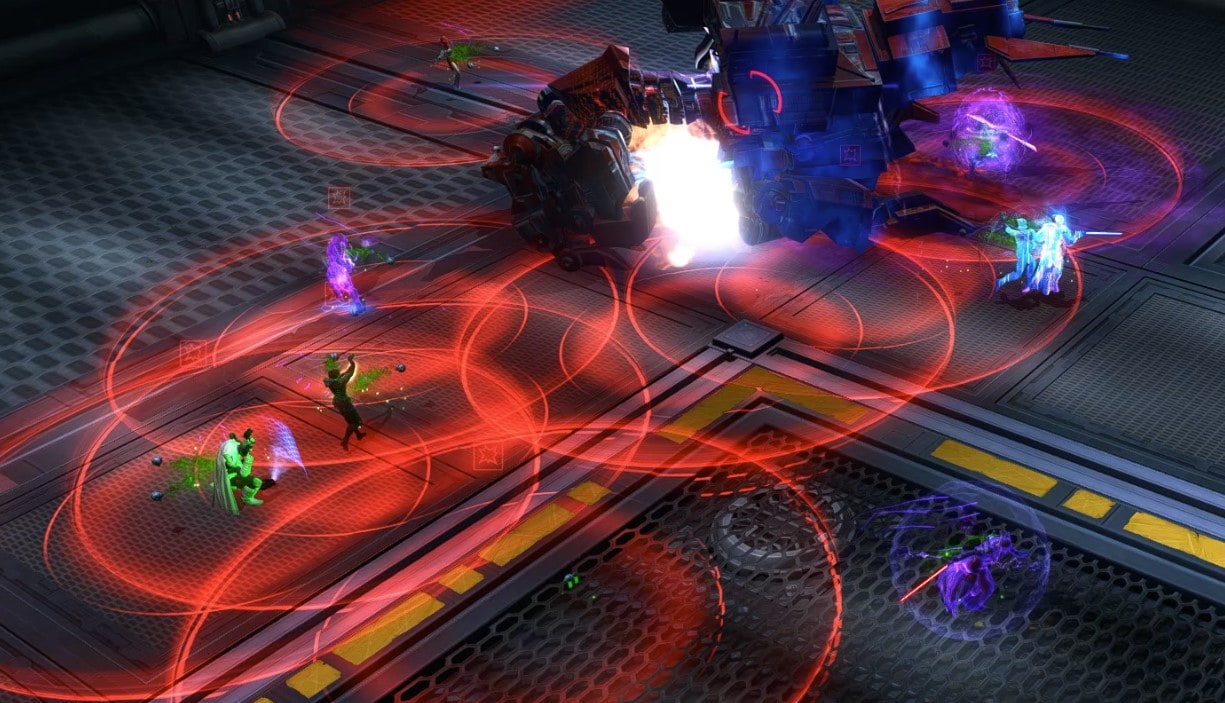
These missiles deal a lot of damage, but you have a fair bit of time to react and all you have to do is step out of the circle before the missile lands.
Strategy
The Missiles become harder to deal with because your movement is restricted. You don’t want to run into someone else while you both have a PMX4 Polarized Proximity Bomb while trying to avoid damage from the missile.
Targeted Watchdog Protocol
The boss will cast  Targeted Watchdog Protocol, which applies several debuffs to half the group at a time and changes the color of the floor. The floor color indicates which color mines the Watchdog is paying attention to, though you can also tell by an orange hand debuff called
  Watchdog Protocol, which makes you take significant periodic damage and generate stacks of
 ![]() Watchdog Violation if you move while you have the debuff.
Watchdog Violation if you move while you have the debuff.
If you get 5 stacks of ![]() Watchdog Violation, you will be killed. It only takes a few steps to generate 5 stacks and you can’t make it far enough to get out of
Watchdog Violation, you will be killed. It only takes a few steps to generate 5 stacks and you can’t make it far enough to get out of  The Missiles red circle. You do not generate stacks of
 ![]() Watchdog Violation by using your abilities, only moving, so you can continue to do your rotation.
Watchdog Violation by using your abilities, only moving, so you can continue to do your rotation.
Strategy
Stop moving. Don’t move until that orange debuff falls off. If the boss decides to cast The Missiles while Watchdog Protocol is active, too bad. You just gotta pop a DCD and eat the damage. Keep in mind that not everyone in the group gets the Watchdog Protocol debuff, so you can still move freely if you don’t have the debuff.
Since the mechanic is infrequent compared to the other ones and he only pays attention to people with bombs, you can also just deliberately detonate the first set of  PMX4 Polarized Proximity Bombs to avoid having to worry about it.
If you’re extremely careful, you can also utilize Targeted Watchdog Protocol to move to your assigned drop point for Degauss. It will be easier since half the group, including all of the other color, will be standing still.
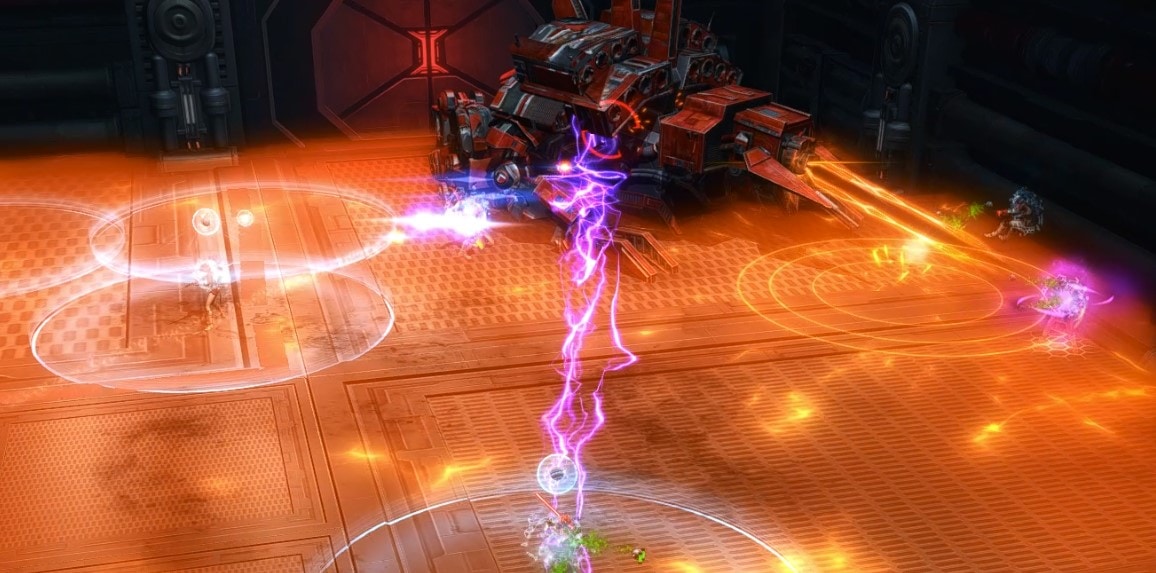
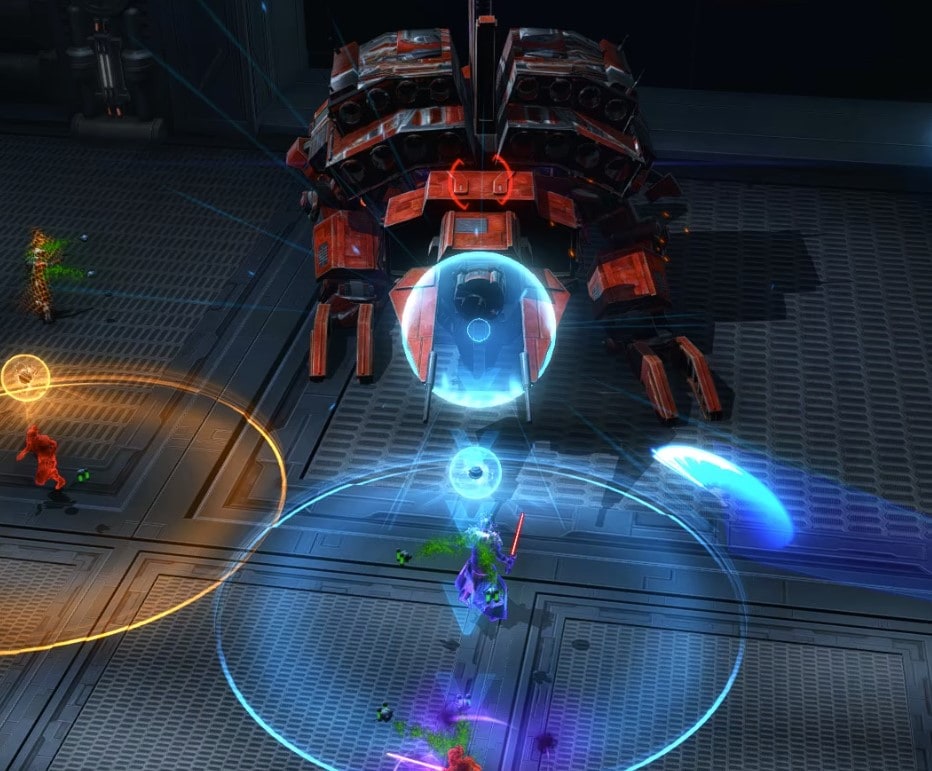
Degauss, Stalker Protocol,  Matter Disruption, Invert
Watchdog will cast  Degauss, which drops everybody’s PMX4 Polarized Proximity Bombs onto the floor, and then casts Stalker Protocol a bit later, which makes him glow blue or orange and deal more damage.
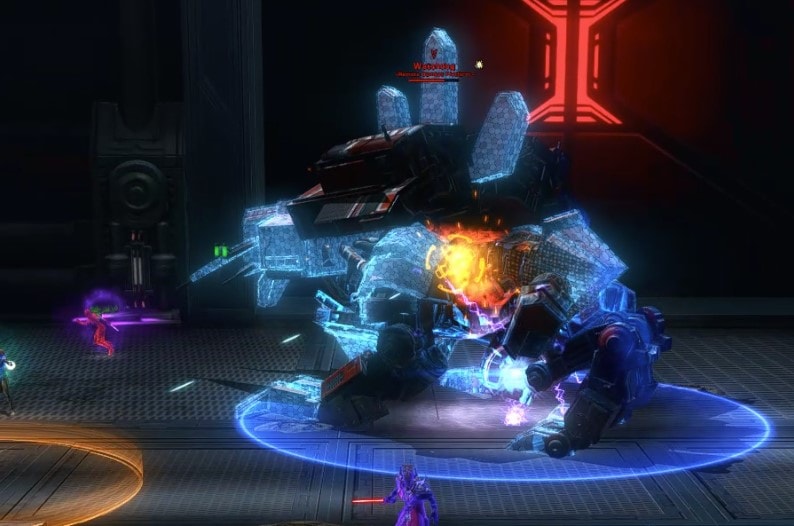
If he walks into a PMX4 Polarized Proximity Bomb on the floor that matches his active color, he’ll gain a stack of a buff called  Matter Disruption that makes him take more damage. After a while, he’ll cast
  Invert, which swaps him to the opposite color. If he walks into a bomb of the opposite color, raidwide damage goes out just like if anyone else were to step into a bomb of the opposite color.
Strategy
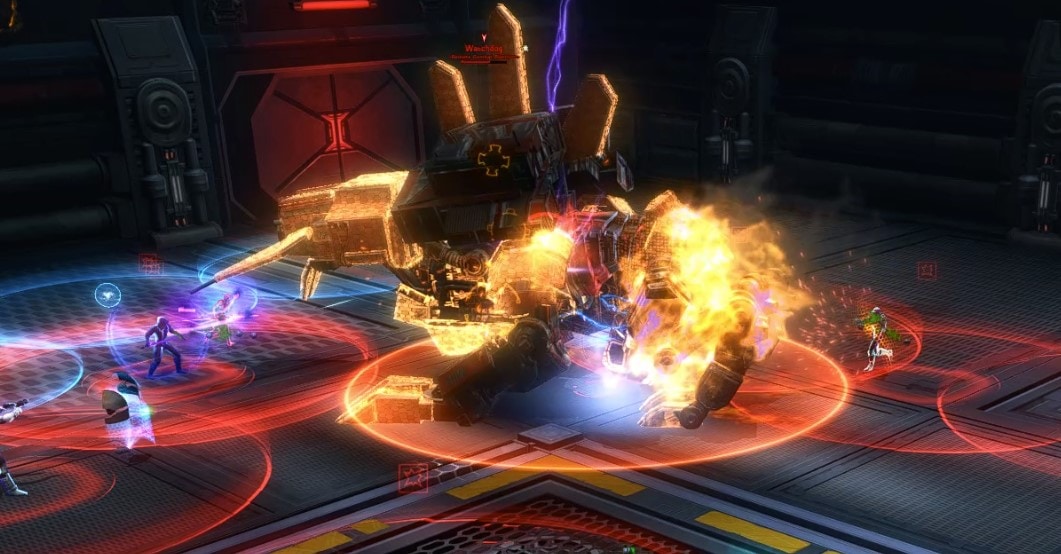
Since Watchdog deals more damage while Stalker Protocol is active, he needs to be kited. Since he takes more damage if he walks into a bomb that matches his color, it’s ideal to kite him into the bombs and pre-sort them for Degauss.
When you see the Degauss cast going out, you should go stand in a predetermined area depending on your color. Thankfully, BioWare has graciously provided 2 regions for players to stand in.
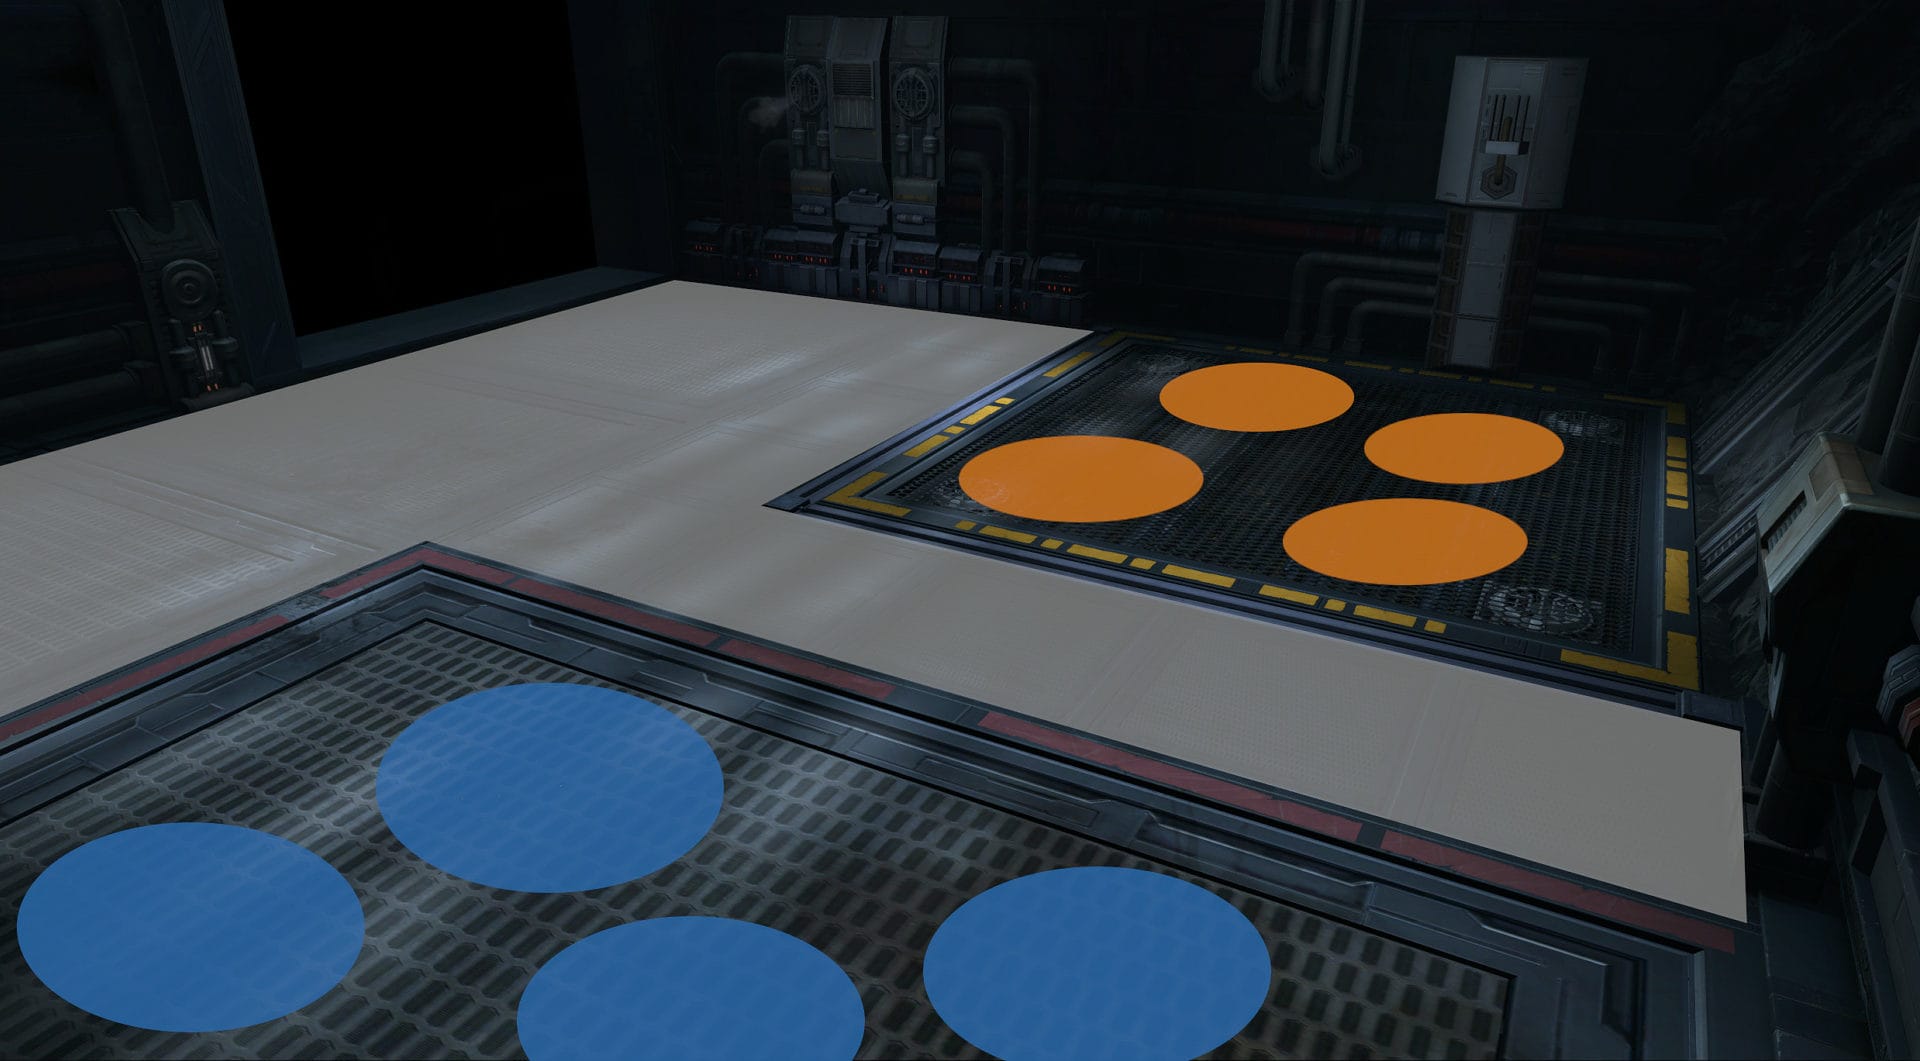
Purely for the sake of convention in PUGs, I recommend that orange circles always be dropped in the yellow square while blue circles should always be dropped in the red rectangle. The white shows where it should typically be safe to keep Watchdog.
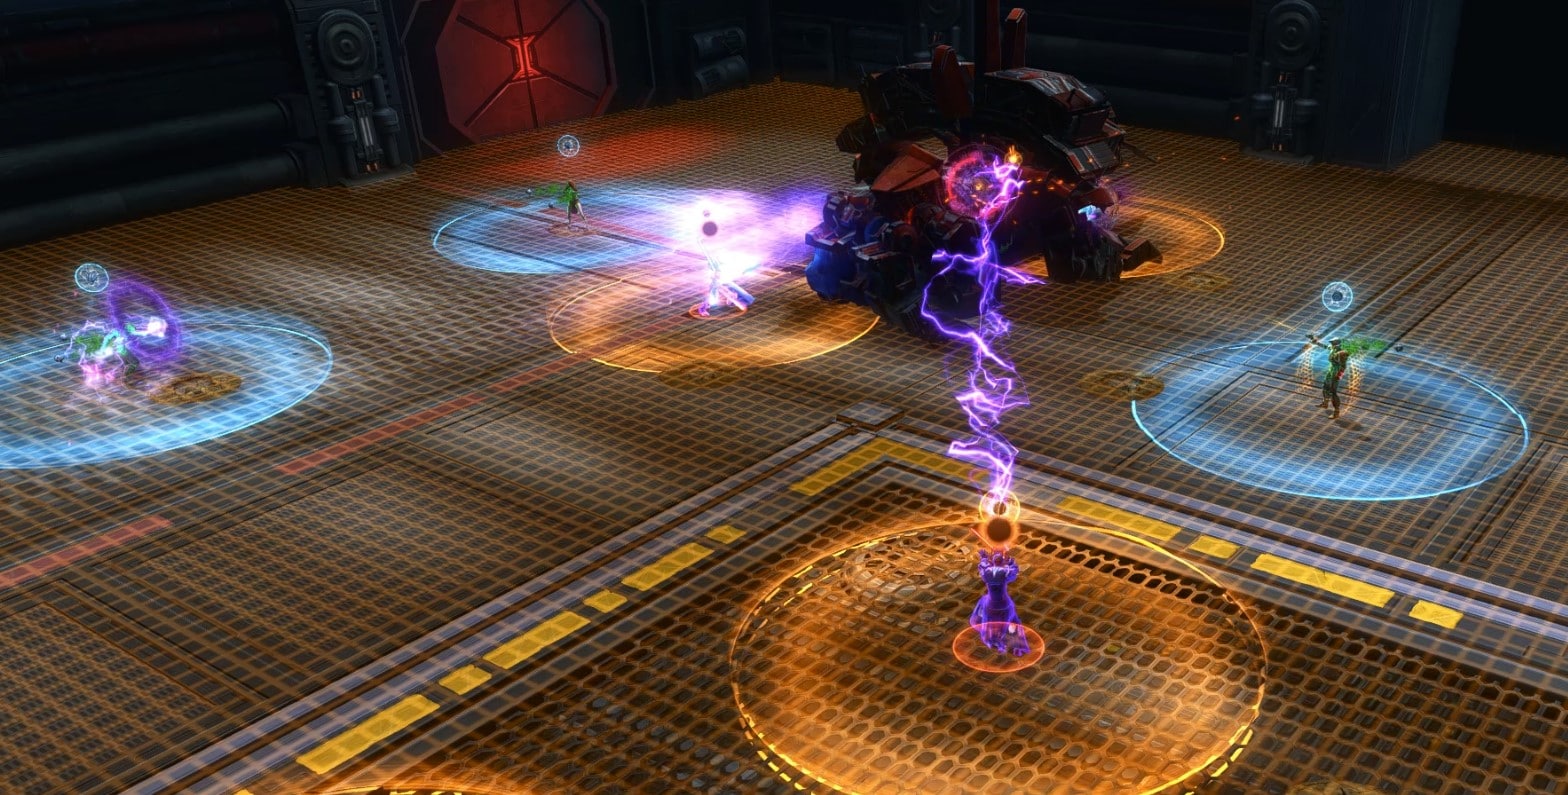
Polarized Beam
The boss will cast a Polarized Beam at the player with aggro that is the opposite color of whatever PMX4 Polarized Proximity Bomb color that the player with aggro was assigned. In other words, the beam has the opposite color of the tank’s bomb.
If the Polarized Beam hits a player with an opposite color bomb, it hurts really bad, but if it’s the same color, it only hurts a little. Polarized Beam has an 8s cast and can be blocked by another player standing in front of the target (if they have a bomb). Watchdog will cast Polarized Beam multiple times back to back. He does not move during the cast.
Strategy
The nearest player that matches the color of the beam (and is therefore opposite of the tank’s color) should stand in between the tank and the boss. The tank should back up to give the player some space.
Watchdog Phases and Mechanics Order
Watchdog doesn’t really have phases, but his mechanics do last a while and can feel a bit like phases. The general cycle of the fight will resemble the following:
- Apply PMX4 Proximity Bombs
- Targeted Watchdog Protocol
- Degauss -> Stalker Protocol -> Invert Signal
- Apply PMX4 Proximity Bombs
- Polarized Beams
Watchdog will fire The Missiles basically anytime except during Stalker Protocol. It’s your group’s job to deal with the mechanics as they come. You can kind of predict what he’ll do next based on what has happened recently. PMX4 Proximity Bombs need to have been applied recently on players in order for Stalker Protocol or Polarized Beams to happen.
If all of this seems too confusing to you, don’t worry. At least in SM, you can theoretically get through the fight if you don’t pay attention to the mechanics at all, but you’ll take a bunch more damage and make the fight take longer.
Acknowledgments and Special Thanks
First and foremost, I want to thank Elssha for creating all of the diagrams and infographics featured throughout the R-4 Anomaly guides. You can find Elssha and her content on twitch, twitter, and reddit.
I also want to thank my GM, Tsou, for helping to explain mechanics from the PTS and organizing many of the runs that allowed me to finish this guide so quickly. Finally, I want to thank my raid team, Time Turners, for all their amazing help in actually doing this operation.
Here is the full collection of my SWTOR R-4 Anomaly Guides: