This guide will explain how to unlock Hyde and Zeek in SWTOR and how to create a set of endgame gear using item modifications from them including optimal stats for every combat style and discipline in both PvE and PvP.
The guide is up-to-date for Patch 7.8
Note: Although the first segment of this guide is more tailored towards the Endgame players who are just starting this journey, you will have an even better experience with the later part of this guide if you are familiar with how Endgame gearing works in SWTOR.
Table of contents
Tertiary Stats in SWTOR Explained
Tertiary stats are granted exclusively by Enhancements and Augments, though they are also provided by unmoddable gear, including Implants and Earpieces.
Each Enhancement or Augment will only ever provide 1 Tertiary Stat. Since each piece of gear can only have 1 Enhancement and 1 Augment and there are 5 different Tertiary Stats, they are the main way to customize how you perform in combat.
Accuracy
The Accuracy Rating stat increases your Accuracy percentage beyond 100%. In general, Accuracy increases the chance that your attack will hit. Any Accuracy greater than 100% counts against your target’s chance to dodge/resist the attack, which refers to the target’s Defense Chance.
All attacks (except for offhand damage) start with a 100% chance to hit, so accuracy only becomes necessary as Defense Chance comes into play.
All players and some enemies have some sort of baseline defense chance that can be boosted by specific buffs like procs and abilities. Accuracy can also be directly reduced through specific debuffs.
Players can typically only dodge Melee/Ranged damage (AKA weapon damage), not Force/Tech, unless they have some sort of special buff active.
DCDs usually boost defense chance against all damage types unless they specify that they only work on specific types. NPC enemies differentiate themselves by typically being able to dodge/resist attacks from all 4 damage types.

All combat styles have 5% melee/ranged defense chance except for Sorcerers / Sages and Assassins / Shadows which have 10%. All bosses (and champions in general) have 10% defense chance against all damage types.
Since heals cannot miss and tanks get 10% Accuracy from their combat stance passive, DPS are typically the only ones to ever use Accuracy rating. Accuracy always has the highest priority for DPS because your other stats don’t do anything if your attack doesn’t land.
Rotations can also get messed up if you miss, further reducing DPS, because many procs and passives require you to actually deal damage with the attack, not just activate it.
Alacrity (and all its quirks)
The Alacrity Rating stat affects your Alacrity, which increases the rate at which you’re able to do your rotation. In order to make this happen, it reduces cast time, reduces GCD (global cooldown) duration, reduces cooldown duration, reduces DoT duration, increases DoT tick rate, and increases resource regeneration rate.
All of this is done proportionately such that your rotation won’t get ruined just because an ability’s cast time is reduced. In other words, the individual boosts don’t really offer advantages on their own; they only offer enough to compensate for the faster cast time.
Alacrity and Resource Regeneration
The only partial exceptions to this proportionality come from your resource (mana) regeneration rate. If you have 100% uptime, the increase to your resource regeneration rate from Alacrity is only enough to compensate for the fact that you’re activating abilities at a faster pace such that you don’t run out of energy as a result of consuming your resources at a faster rate than you passively regenerate them.
However, actual combat has actual variable downtime so you practically never have 100% uptime, so alacrity will let you slightly profit off of these downtime periods by letting you passively regenerate slightly more of your resource than you otherwise would without it.
The resource regeneration increase from Alacrity is miniscule both because a considerable portion of resource regeneration comes from your discipline (mainly procs), not your passive regeneration, and because Alacrity is only a fractional increase to begin with.
For example, specs that have 100 Force, Energy, Heat, etc. typically have a passive regeneration rate of 5 per second, so a 7.15% increase from alacrity is only 0.36 per second.

Since abilities from disciplines with that resource pool size usually cost 10-15 units of your resource, it takes about 35s of downtime to get a single extra ability’s worth of your resource back.
The point here is that you should absolutely never take alacrity to increase resource regeneration because it’s negligible.
Alacrity cooldowns and otherwise moving away from a GCD threshold can technically provide a more noticeable boost to resource regeneration because the former is often far more significant than what you can get with stat allocation while the latter will at least be active all the time, not just during downtime or while a buff is active.
That said, BioWare has taken additional measures to disincentivize players from using alacrity specifically to increase resource regeneration. The entire notion of strong vs weak fillers has been mostly eradicated in recent expansions and all healers are at least partially dependent on crit chance for resource regeneration.
GCD Rounding
For all components except the GCD, Alacrity rounds to the nearest 0.01. For the GCD, it rounds to the nearest 0.1. It seems this is some sort of technical limitation on BioWare’s end because they’re aware it exists, and it’s been this way for years.
Since the vast majority of abilities are instant and thereby follow the GCD, Alacrity in between the rounding thresholds doesn’t actually increase the rate you’re able to activate abilities. For example, having enough Alacrity to reduce your cast time to 1.36s is no different than having enough to 1.39s for instant abilities because both 1.36 and 1.39 are still gonna get rounded back to the 1.4s GCD.
The Alacrity thresholds for DPS and healer gearing come from when the GCD rounds to the next 0.1s. 7.15% alacrity corresponds to the 1.4s GCD while 15.38% corresponds to the 1.3s GCD. Which threshold gets recommended is dependent on how much stat it takes to reach the 1.3s GCD.
Unfortunately, that’s not all! As you approach the exact threshold, to within about 0.5%, you start getting a mixture of GCDs from either side of the associated threshold, so you really need about 0.5% more than the threshold to stop getting those unaffected GCDs. If you were previously >0.1% away from 7.15%, you should be able to hit the new target by just swapping out a Critical Augment for an Alacrity Augment.
Please note that casted abilities DO seem to round properly, so if a cast were to get reduced to 1.36s by alacrity, you could cast another ability immediately at the end of the cast instead of having to wait for the GCD to end.
Extremely cast-heavy disciplines where the vast majority of GCDs are casted or channeled like Arsenal / Gunnery, Virulence / Dirty Fighting, and maybe Corruption / Seer are technically less tethered to the Alacrity targets, but no discipline uses 100% casted abilities.
The stats are balanced such that Critical and Alacrity Rating provide similar amounts of DPS / HPS per point, so there’s never a reason to diverge from an Alacrity target unless you’re doing something semi-exploitative.
Alacrity and Lag
Contrary to what some believe, you should not change the amount of alacrity you have to compensate for the lag that comes from your proximity to SWTOR’s servers. The reason you don’t have to account for this is that “ping lag” is relatively constant. You’re just playing the game a few milliseconds in the past, so the time between you can activate one ability after the next isn’t changing.

Alacrity reduces the time in between ability activations, which is far greater than ping lag, so as long as your connection is relatively stable, you will still be able to fully benefit from alacrity. The only time it may technically be worth factoring in lag is when you have a really bad (unstable) internet connection where your ping is fluctuating significantly and constantly, but in that case, you’d be better off sticking to offline games until you can improve your connection because you’re gonna have a bad time.
Regarding the Zeal Alacrity Guild Perk Set Bonus
If your guild uses the Zeal (cyan) guild perk set bonus, which gives a passive +5% Alacrity boost, you won’t need nearly as much Alacrity stat to reach your desired Alacrity threshold. My recommendations do not factor in these boosts, so if you have one, you’ll need to pay attention to percentage thresholds rather than the stat amounts. Just keep adding one augment at a time until you reach the desired percentage.
Guild leaders, I recommend using the Fortune (yellow) guild perk set bonus instead. It grants +5% Critical Chance and also boosts the Critical Rate and Time Efficiency of all Crew Skills by 2%. The reason for this is that you don’t have to change the way you gear in order to benefit from the effect.
Neither effect works in MM raids or PvP, so if you or your guild members do either of those activities, you’ll need to tweak your gear to reach the desired threshold depending on the activity, which I find super tedious. Even if your guild doesn’t do those activities, leaders still need to actively maintain the set bonus because your gear will become suboptimal on top of losing the bonus, whereas it’s not a big deal if your crit is a little lower for a bit.
The Alacrity boost is much stronger than the Critical Chance boost. Still, PvE content isn’t balanced around these guild perk set bonuses anyway, so I find it better to have a smaller boost I don’t have to worry about than a larger boost I have to manage.
Critical
The Critical Rating stat affects both your chance to critically hit as well as the multiplier for critical hits. In other words, Critical Rating affects how frequent and how strong your critical hits are. It provides a similar DPS / HPS boost compared to Alacrity Rating, but because it doesn’t have a threshold associated with it like Accuracy or Alacrity to get the maximum benefit, it typically has a lower priority.
Regarding Supercrits
Attacks that automatically critically hit thanks to a singular buff have any excess Critical Chance added to the critical multiplier. This is colloquially referred to as Supercrit.
If an ability does not get 100% critical chance from a single buff, it is simply a guaranteed crit and excess Critical Chance does NOT get added to your critical multiplier (it does not Supercrit). Unlike Critical Rating, Critical Chance (granted by buffs and the Mastery stat) does not boost Critical Damage outside of Supercrits.

Recklessness / Force Potency is an excellent example of how all this works because it boosts the Critical Chance of Direct Force abilities by 60%, which is typically enough to make any relevant ability a guaranteed crit, but it won’t cause a Supercrit even if it makes your total Critical Chance surpass 100% because you’re not getting 100% Critical Chance from a single effect.
However, when Thundering Blast / Turbulence is paired with Recklessness / Force Potency, it will Supercrit, causing that 60% Critical Chance to get added to the Critical Multiplier because Thundering Blast / Turbulence autocrits against targets affected by Affliction / Weaken Mind.
Shield Chance
Shield Rating increases Shield Chance. Shield Chance is the chance that a tank’s personal shield generator will activate to absorb part of the damage of an incoming attack.
If the shield does not activate, no damage is mitigated by the personal shield generator. Just like armor, personal shield generators can only mitigate Energy/Kinetic damage, not Internal/Elemental.
Absorb
Absorb is the percentage of damage absorbed by a tank’s personal shield generator shown through the Absorb percentage stat. Absorb Rating increases the Absorb percentage.
Technically, there is an optimal ratio of Shield Chance and Absorb that will offer the lowest average DTPS, but from a stat allocation perspective, your Absorb Rating is doing nothing for you if the Shield doesn’t activate, so it’s hard to justify taking a lot of it.
Where to find Hyde and Zeek in SWTOR
Once you’ve obtained 4 pieces of 336-340 blue and purple gear, you can disintegrate them as part of a mission given to you by a Rodian fugitive named Hyde to be able to purchase item modifications from his partner in crime, Zeek.
Both vendors are located on the Fleet, in the Supplies section of the Fleet in the outer central alcove.
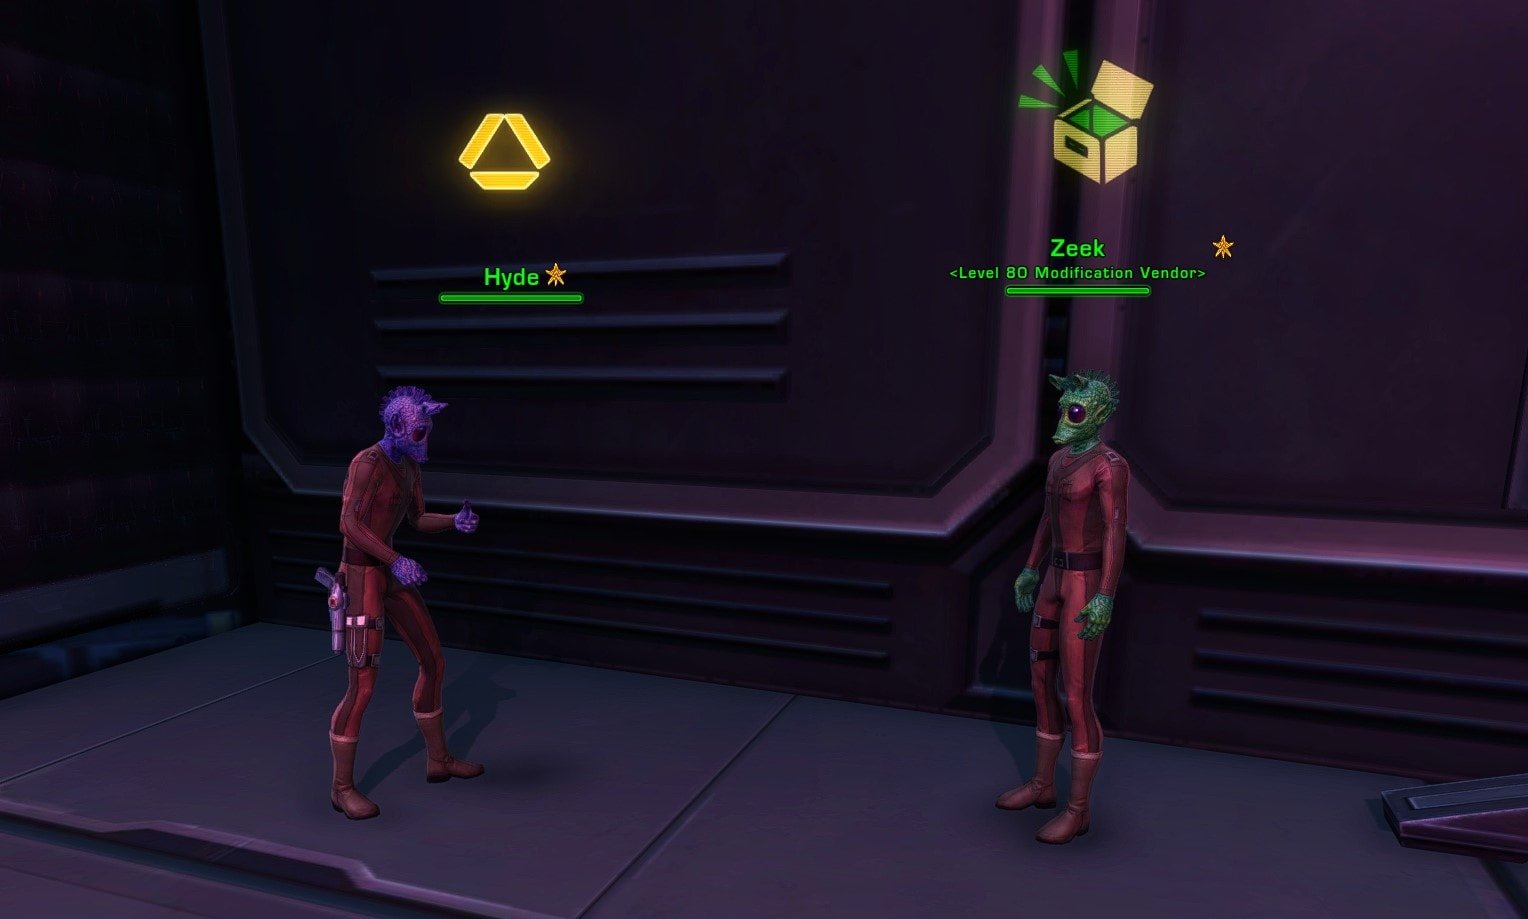
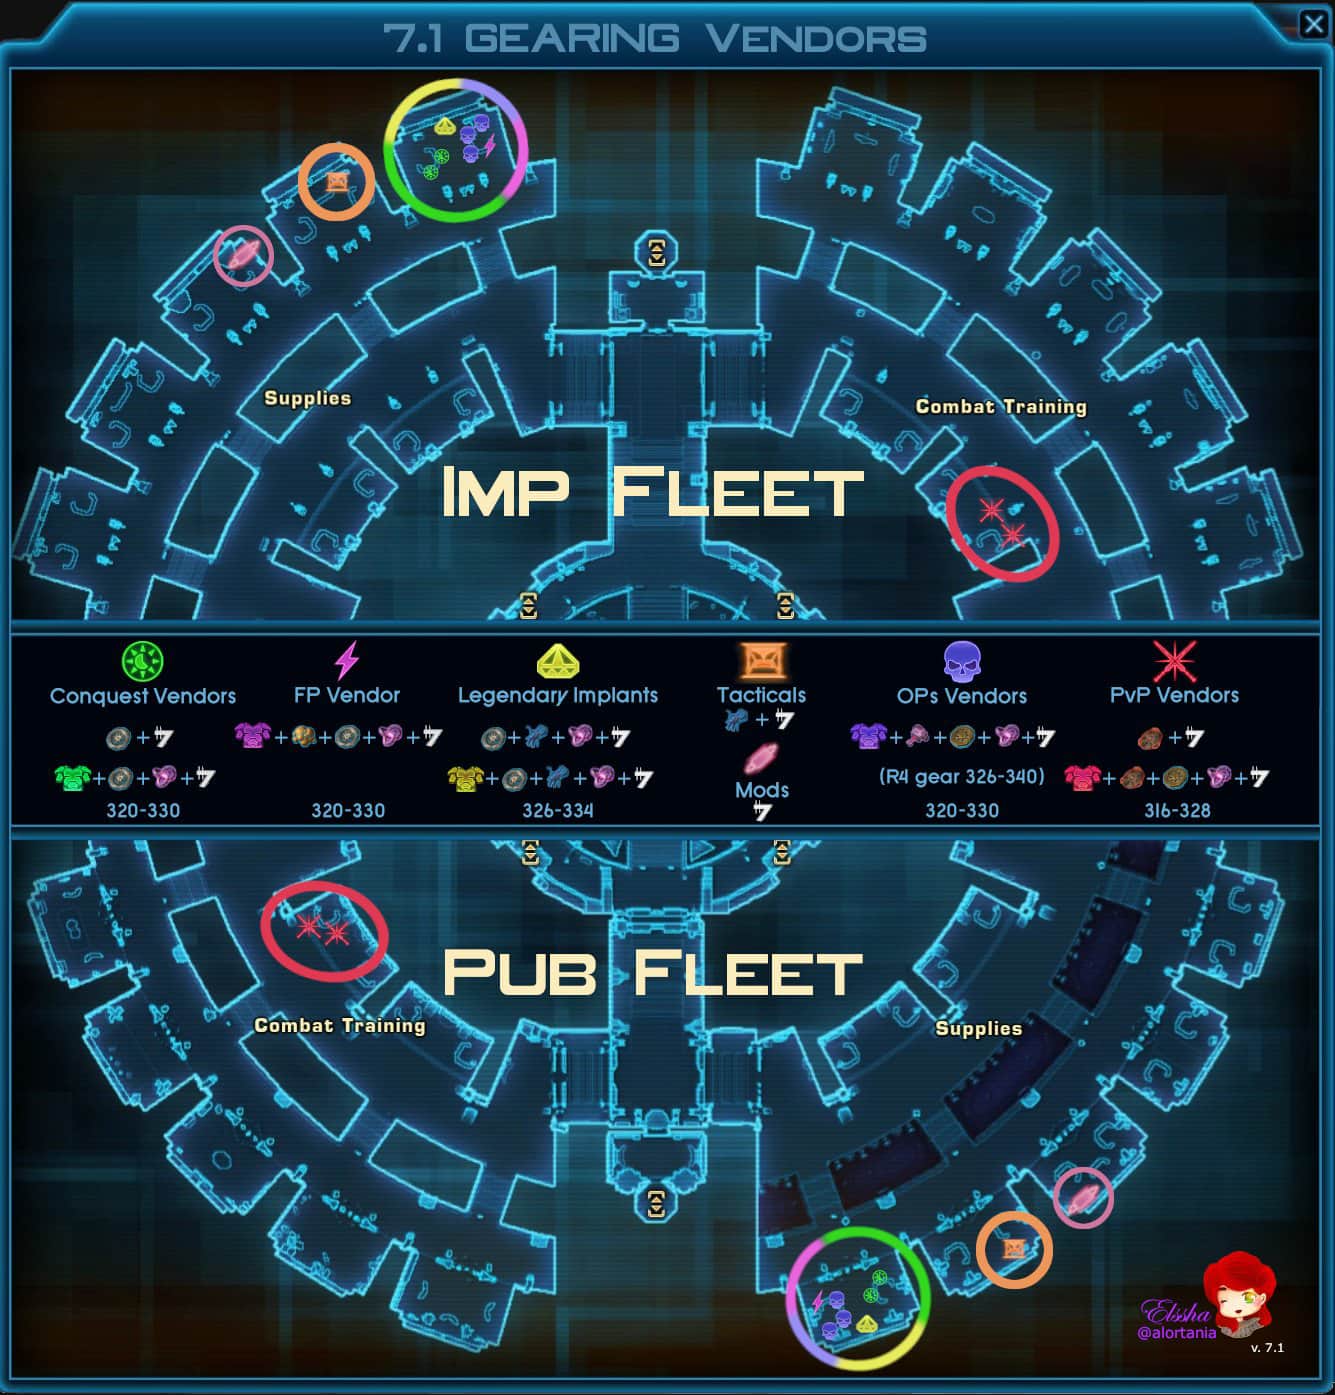
You can learn more about how to unlock Hyde and Zeek in the SWTOR 7.6 Endgame Gearing Guide.
General Stat Recommendations for all Roles
In this section, I’ll be going over general stat targets for each role in both PvE and PvP. Overall stat targets mostly only differ per role. However, different combat styles and disciplines require different amounts of some stats to reach those targets depending on passives and legendary implants.
These are meant to be general stat guidelines. Any gearing recommendations you see in a class guide trump what you see here.
DPS Disciplines
DPS gearing primarily differs between PvE and PvP content because Accuracy has a different value in each type of content and DPS are really the only ones to ever take Accuracy.
PvE Recommendations
In PvE, all DPS disciplines should prioritize reaching the following stat thresholds:
- Accuracy to 110.00%
Before investing in any other stats, make sure you hit 110% Accuracy because attacks that miss deal 0 damage, and no other stats matter if the attack doesn’t land. Furthermore, many procs require you to actually deal damage, not just activate the ability, so you can mess up your rotation if an attack misses. You need 110% Accuracy in PvE and not just 100% because bosses have a 10% chance to dodge/resist player attacks, and any percentage over 100% reduces this chance. Anything over 110% is not helpful in PvE, so you do want to go over 110%, but with as little excess as possible. - Alacrity to ~7.5%
Once your Accuracy is above 110.00%, it’s time to think about Alacrity. It has the second-highest priority because you do not get the full benefit of the stat unless you surpass one of the GCD thresholds. It’s less important than Accuracy because your attacks still need to hit. You need 7.15% Alacrity to get from the 1.5s GCD to the 1.4s GCD. However, as you approach 7.15%, you actually start getting a mix of 1.4s and 1.5s GCD, resulting in an experience that feels clunky and inconsistent. You need roughly 0.4-0.5% more Alacrity past the exact threshold to effectively eliminate those 1.5s GCDs. - Critical gets the rest
After you’ve got your thresholded stats sorted out, you can start investing in crit. To be clear, Critical Rating is still valuable; it just has the lowest priority because it does not have a threshold associated with it that you need to meet to get the most out of each point of stat as the other tertiary stats you care about do. Critical Rating increases both your Critical Chance and Critical Damage. If you have a single effect that increases your Critical Chance by 100% all on its own (it can’t be from multiple effects combined), all of the Critical Chance percentage for that attack gets added to your Critical Damage percentage, causing the attack to deal supercritical damage.
PvP Recommendations
In PvP, the overall stat priority is the same, but the exact amount of Accuracy you want will depend on your specific discipline.
- Accuracy to 105.00%
Most disciplines will want 105% Accuracy because almost all DPS and Healer Combat Styles have 5% Defense Chance against weapon damage only. Sorcerer / Sage and Assassin / Shadow get 10% Defense Chance instead, but it’s generally not considered worthwhile to give up so much stat just to be better against 2 combat styles (and tanks). Disciplines that deal almost exclusively Force/Tech damage including Sorcerer / Sage DPS and Pyrotech PT / Plasmatech VG don’t need any additional Accuracy in PvP because player Defense Chance only works against weapon damage. - Alacrity to ~7.5%
Just like in PvE, making sure your attacks land is more important than hitting the Alacrity target. There is a bit more debate around the value of Alacrity in PvP because fights tend to be shorter, and it takes time for the benefit of Alacrity to manifest. The existence of diminishing returns is the biggest argument for putting some stat into Alacrity. Remember, if your discipline offers some sort of Alacrity boost, you’ll need less stat to reach the 7.5% target that grants the consistent 1.4s GCDs. - Critical gets the rest
Because Accuracy and Alacrity are less important in PvP, you’ll end up with more Critical than you would in PvE.
Tank Disciplines
Tanks have 2 general stat builds available to them. One is structured around using mitigation stats to take less damage while the other boosts damage output when mitigation stats aren’t needed. In PvE, which gear you use is dependent on the fight and group. In PvP, the skank tank damage-focused build is generally preferred in Arenas (4v4s) while it’s really up to personal preference in Warzones (8v8).
Mitigation Recommendations
Tank mitigation stat recommendations have been hotly debated for a long time. The general consensus is that you want at least as much, if not more, Shield Chance than Absorb, and having a little bit of DPS gear is typically a good thing.
Tank mitigation stats don’t have exact thresholds, so just count in terms of enhancements and augments so you can roughly reach these values. Discipline-specific abilities and procs like Dark Ward / Kinetic Ward and Heat Blast / Energy Blast are not incorporated into these recommended values, so each tank discipline will end up with different mitigation values in actual combat. You can optimize around this if you want, but it’s not required.
- Shield Chance to ~50%
Shield Chance has the higher priority because Absorb does nothing if the shield doesn’t trigger. If you’re looking to make discipline-specific optimizations, Juggernauts / Guardians and especially Powertechs / Vanguards can lean more heavily into Shield Chance. - Absorb to ~35%
Some tanks advocate for very little Absorb while others advocate for equal amounts of Shield and Absorb. Having roughly equal amounts will result in lower average DTPS, but you’ll be more vulnerable to spike damage because your shield is less likely to trigger against an individual hit, so you have a higher chance of mitigating nothing against a big hit, which means a higher chance you won’t survive the spike. In fights without significant spikes, a more balanced build will likely perform better. If you want to optimize based on your discipline, Assassins / Shadows can afford to lean more heavily into Absorb compared to other tank disciplines. - Critical gets the rest
Add some critical rating once you’ve reached those thresholds to help with threat generation and off-DPS. Critical Rating is preferred compared to Alacrity Rating because it doesn’t have a threshold associated with it.
Please note that these numbers haven’t been heavily theorycrafted, at least not by me, but they’re in line with what I’ve seen from a lot of other tanks and achievable with level 80 330 gear. At the end of the day, proper DCD usage matters a whole lot more than gear.
Regarding Shield Generators
Your Shield Chance and Absorb stats do nothing if you don’t have a shield equipped. In addition, shield generators either grant Force Power or Tech Power that only boosts the damage dealt by the type of the same name. Don’t forget to use a shield generator that grants Force Power for Assassins / Shadows and Juggernauts / Guardians or Tech Power for Powertechs / Vanguards. Your threat generation will be hampered if you use the wrong type of shield.
Damage (Skank Tank) Recommendations
Not every fight has a lot of damage that can be mitigated by your shield or avoided with your Defense Chance, so it’s good to you have access to a set of full DPS gear (still equip your shield though). If you suspect that a fight doesn’t have much damage that’s mitigable by your shield, try swapping to DPS gear and see if you take more damage. If your DTPS stays roughly the same, your mitigation gear isn’t doing anything, so there’s no reason to keep using it.
You can also look at the Damage Taken tab in StarParse to see how much damage you’re mitigating. If you’re not seeing very much damage avoided or shielded compared to your total damage taken, mitigation gear is not useful to you.
- Alacrity to ~7.5%
Tank disciplines get 10% Accuracy from their combat stance passive, so there is no need to take any Accuracy and Alacrity takes priority over Crit since it has a threshold associated with it. 7.5% gives the consistent 1.4s GCDs. - Critical gets the rest
Since tanks don’t need to take Accuracy, they will have more Critical than DPS when using a skank tank build.
Damage-focused gear for tanks is the same as healer gear, though make sure you’re still meeting the Alacrity threshold and adjust accordingly. When DPSing as a tank, you should continue using the good tank legendary implants.
Healer Disciplines
There is no difference between PvE and PvP gearing for healers.
- Alacrity to ~7.5% (~2150 Alacrity Rating)
In 7.0+, it just takes too much Alacrity to reach the 1.3s GCD target (15.38% + ~0.5%) even when you don’t have to spend stat on Accuracy, so healers stick with the 1.4s GCD and Alacrity has the highest priority. However, it is not more valuable for healers compared to DPS. - Critical gets the rest
Since healers don’t need any Accuracy, they will have higher Critical Chance and Critical Multiplier than DPS.
Best Mods to Buy from Hyde and Zeek
The exact number of each item you’ll need will depend on which tier of augments you go for and whether you have gained access to the 340 or 336 enhancements.
The 336 is obtainable by fully upgrading the Thyrsian PvP gear, while the 340 requires you to disintegrate a piece of 340 Rakata or Virulent gear. If you aren’t a NiM raider, these are the easiest ways to come by a piece of 340 Purple gear:
- Reaching 340 blue gear and completing a Nefra or Dash’roode NiM, which will drop a piece of 340 Rakata
- Get an Accessory piece drop from any VM Operation Boss
- Win one of the 2 purple R-4 Gear Tokens that drop from Watchdog or Lord Kanoth in VM R-4 Anomaly
- Buying a piece of 324 Rakata from the vendor and upgrading all the way to 340 by saving up the random OP-1 Catalysts that you get from trash mobs and MM Chapters (no group content required)
The blue versions of non-tank enhancements have less Power and more Endurance while the blue versions of tank enhancements have less Endurance, but more Defense Rating.
Best DPS Mods
Armorings, Hilts, and Barrels
Versatile Armoring 105 (Armor Only)
Versatile Hilt 105 (Sabers Only)
Versatile Barrel 105 (Blasters Only)
Mods
Lethal Mod 105
Enhancements
Advanced Initiative Enhancement 101/99 (Accuracy)
Advanced Nimble Enhancement 101/99 (Alacrity)
Advanced Adept Enhancement 101/99 (Critical)
Best Mitigation Tank Mods
Armorings, Hilts, and Barrels
Resistive Armoring 105 (Armor Only)
Resistive Hilt 105 (Sabers Only)
Resistive Barrel 105 (Blasters Only)
Mods (Pick 1 Type)
Warding Mod 105B (More HP)
Lethal Mod 105 (More DPS)
Enhancements
Steadfast Enhancement 101/99 (Shield)
Vigilant Enhancement 101/99 (Absorb)
Best Healer and Skank Tank Mods
Armorings, Hilts, and Barrels
Versatile Armoring 105 (Armor Only)
Versatile Hilt 105 (Sabers Only)
Versatile Barrel 105 (Blasters Only)
Mods
Lethal Mod 105
Enhancements
Advanced Nimble Enhancement 101/99 (Alacrity)
Advanced Adept Enhancement 101/99 (Critical)
Other Gear Slot Recommendations
Augments
Augments allow you to put additional stats on every piece of gear except tactical items. Since tAugments allow you to put additional stats on every piece of gear except tactical items. Since the stats come in much smaller amounts, augments allow you to fine-tune your gear to provide almost as much of each total stat as you want.
To equip an augment, you must first use an Augmentation Kit that matches the crafting grade of the augment (ex. Grade 11 augments require MK-11 Kits).
The 296, 302, and 310 iRating augments released with 7.6 are BiS. The higher the iRating, the more stats they offer and the more expensive they are to make or buy, though most of the benefit is provided by having augments at all, and the base-rarity blue 296 augments are the cheapest.
Almost everyone should buy the blue 296 augments because they provide the greatest bang for the buck, but you do have multiple options:
- Purple 310 augments (Superior [Type] Augment + Augmentation Kit MK-11). These are overall best-in-slot (BiS). They offer ~13% more stat than gold 300 augments, which is roughly equivalent to 2 additional gold 300 augments worth of stat. They’re extremely expensive and completely unnecessary for all content in the game, so I only recommend them to the wealthiest individuals.
- Blue 302 augments ([Type] Augment 76 + Augmentation Kit MK-11) are the mid-tier augments. For all intents and purposes, these are equivalent to the gold 300 augments from 6.0. I only recommend them if you’re close to a stat threshold or don’t already have gold 300 augments and want something a bit better than the blue 296s.
- Blue 296 augments ([Type] Augment 83 + Augmentation Kit MK-11) are the most basic tier of augments from 7.6. They should be pretty cheap as only the schematic comes from the associated lair boss, Propagator Core XR-53. You don’t need any Corrupted Bioprocessors to craft these augments.
Check out our 7.6 New Augments Guide for more details.
Crystals
Advanced Eviscerating Crystals are best for almost everyone, though tanks can use Advanced Indestructible Crystals instead if they want more Endurance.
Relics
DPS
Slot 1
Relic of Focused Retribution (Mastery)
The first relic should always be Focused Retribution because it provides Mastery, and in equal amounts, Mastery provides more of a DPS increase than Power.
Slot 2
Relic of Serendipitous Assault (Power, Default)
Relic of Devastating Vengeance (Critical, Specific Disciplines Only)
Relic of Boundless Ages (Power, Clicky, alternative for PvP Only)
Serendipitous Assault is the default because it will always provide some benefit and is usually the strongest second choice. In 7.0, some specific disciplines can make better use of Devastating Vengeance because all of their crits hit harder or they have cooldown reductions that are dependent on critting.
In PvP, some players prefer to use the Relic of Boundless ages so that they have more control over their burst, though this requires you to actually remember to click the relic and be able to survive for 30s. You do not have to use Boundless Ages in PvP, and you should not use it if you’re gonna forget to activate it.
Tank
Relic of Avoidance
Relic of Shield Amplification
The Relics of Avoidance and Shield Amplification are recommended because they boost your mitigation stats directly rather than introducing an additional bit of RNG through a proc. It’s okay to use 2 of the same relic if that’s what you need to reach the recommended stat thresholds.
Healer and Skank Tank
Relic of Focused Retribution (Mastery)
Relic of Serendipitous Assault (Power)
The first relic should always be Relic of Focused Retribution because it provides Mastery, and in equal amounts, Mastery provides more of a DPS increase than Power. The second relic should be Relic of Serendipitous Assault because you don’t need to take accuracy as a healer or skank tank, so the crit proc pushes you too far into diminishing returns territory to sufficiently benefit from it.
PvE Biochem Items
DPS


The accuracy stim is more essential to DPS compared to the stims that tanks and healers use because they need it to reach the 110% accuracy threshold.
Tank


Healer and Skank Tank


DPS and healers can also both use the Advanced Kyrprax Critical Adrenal instead. It is a bit weaker and less consistent, but it enables you to only need to bother with 1 item and is definitely cheaper if you’re using reusables.
Class Guides List
Complete list of all SWTOR Class Guides for PvE and PvP for the Legacy of the Sith Expansion, ordered by Combat Style and Discipline! Everything you need to know about each Class!
Best Solo Builds Guides List
Complete list of guides to the Best Solo Builds for each Combat Style (Class) in SWTOR: how to optimize your character’s skill trees, gear and playstyle for the most enjoyable solo gameplay experience!
Endgame Gearing Guide
A complete guide to the entire SWTOR endgame gearing process from the perspective of someone who just hit level 80 in SWTOR
Galactic Threads Mission Walkthrough
Galactic Threads is a main mission in SWTOR, part of the Legacy of the Sith storyline. It takes you to Elom, Tatooine, Hoth and Ilum in pursuit of information about Darth Malgus and Shae Vizla.
Dantooine Crash Site Guide
A complete end-to-end guide to the Dantooine Crash Site in SWTOR, including all Biomes, every Dynamic Encounter, rewards, and achievements! Everything you should know.
Dantooine Stronghold: Unlocking, Layout and Rooms Overview
The Dantooine Farmstead is SWTOR’s newest Stronghold. It’s coming with Update 7.8 “Pursuit of Ruin” in December, but it’s now on the PTS and is mostly finished.

