Beginner-friendly guide to the Alderaan Civil War PvP Map in SWTOR. Details the rules of the game mode, the Map layout and its secrets, class-specific and general recommendations, tips and strategies!
The guide is up-to-date for Patch 7.8
Table of contents
Introduction
Alderaan is quite famous in the galaxy between its explosive conflicts with the Republic and Sith Empire. It is still a disputed world to this day with various noble houses having a civil war in an attempt to seize control to determine the future of Alderaan.
Will it end up remaining within the Republic or shall it become annexed by the Sith Empire? Does any of that even matter considering Alderaan is blown up in 3,000-ish years? For the time being it does! Welcome to the Alderaan Civil War PvP map!
Alderaan Civil War is a map that requires teams to compete for control of defense turrets that will fire upon the enemy’s dropships. Should a team’s ship end up with zero hit points, the opposing team wins the game!
At least two turrets are needed to be controlled throughout the match to gain a significant lead but well-coordinated combat and subterfuge from stealthers can always turn the tide of battle. Let’s get started by taking a close look at the rules and mechanics of the Alderaan Civil War warzone.
Rules of Alderaan Civil War PvP Match
Alderaan Civil War will have teams competing for control of at least two of the three turrets found on the map. In order to get to these turrets, players will need to take a speeder bike from their spawn and reach the ground.
From there they run to capture two of the turrets. More often than not, a team can only maintain two turrets instead of all three otherwise their numbers are spread too thin.
A turret guard will often find themselves alone at one of the side turrets while the bulk of the combat is typically found at the center turret. In order to capture a turret, one will need to stand next to its control console and interact with it.
This requires 8 seconds to complete and the capturer will need guarding in the event enemies are incoming. From there, the turret will shoot at the opposing team’s ship dealing 12 damage every 20 seconds.
Since each ship has 600 hit points, two turrets attacking the same ship will destroy it in a little over 8 minutes. That’s the basics of Alderaan Civil War but we’re not quite there for the basics, are we?
This all sounds well and good in theory however teamwork and communication are key to succeeding at this map. Later in the guide, you will find more details for role recommendations, how to act as an efficient Turret Guard, and how to utilize your surroundings and how to be aware of them.
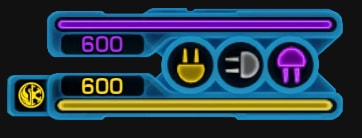
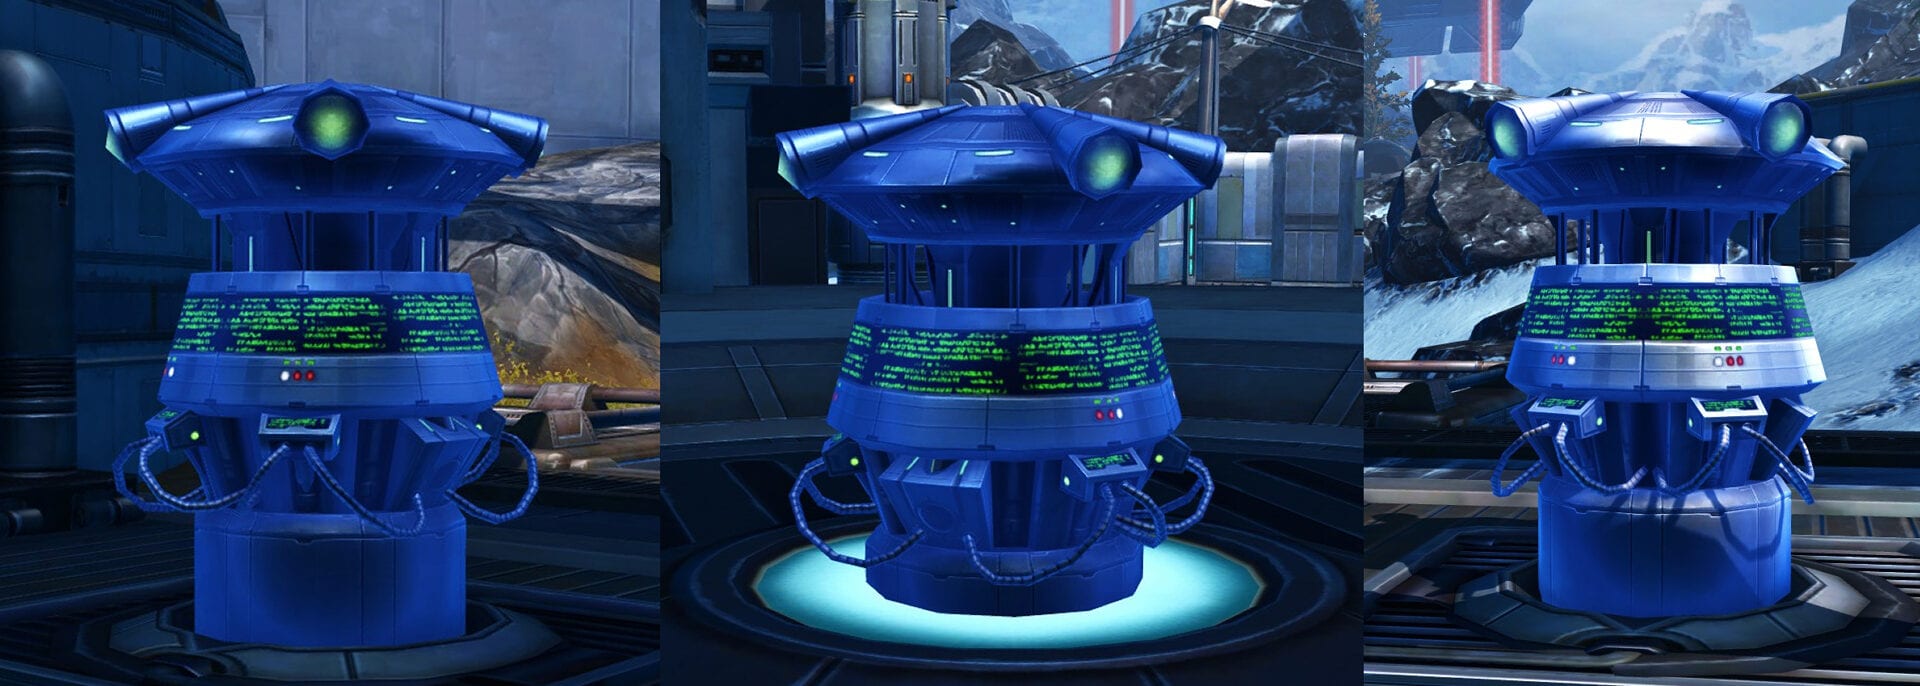
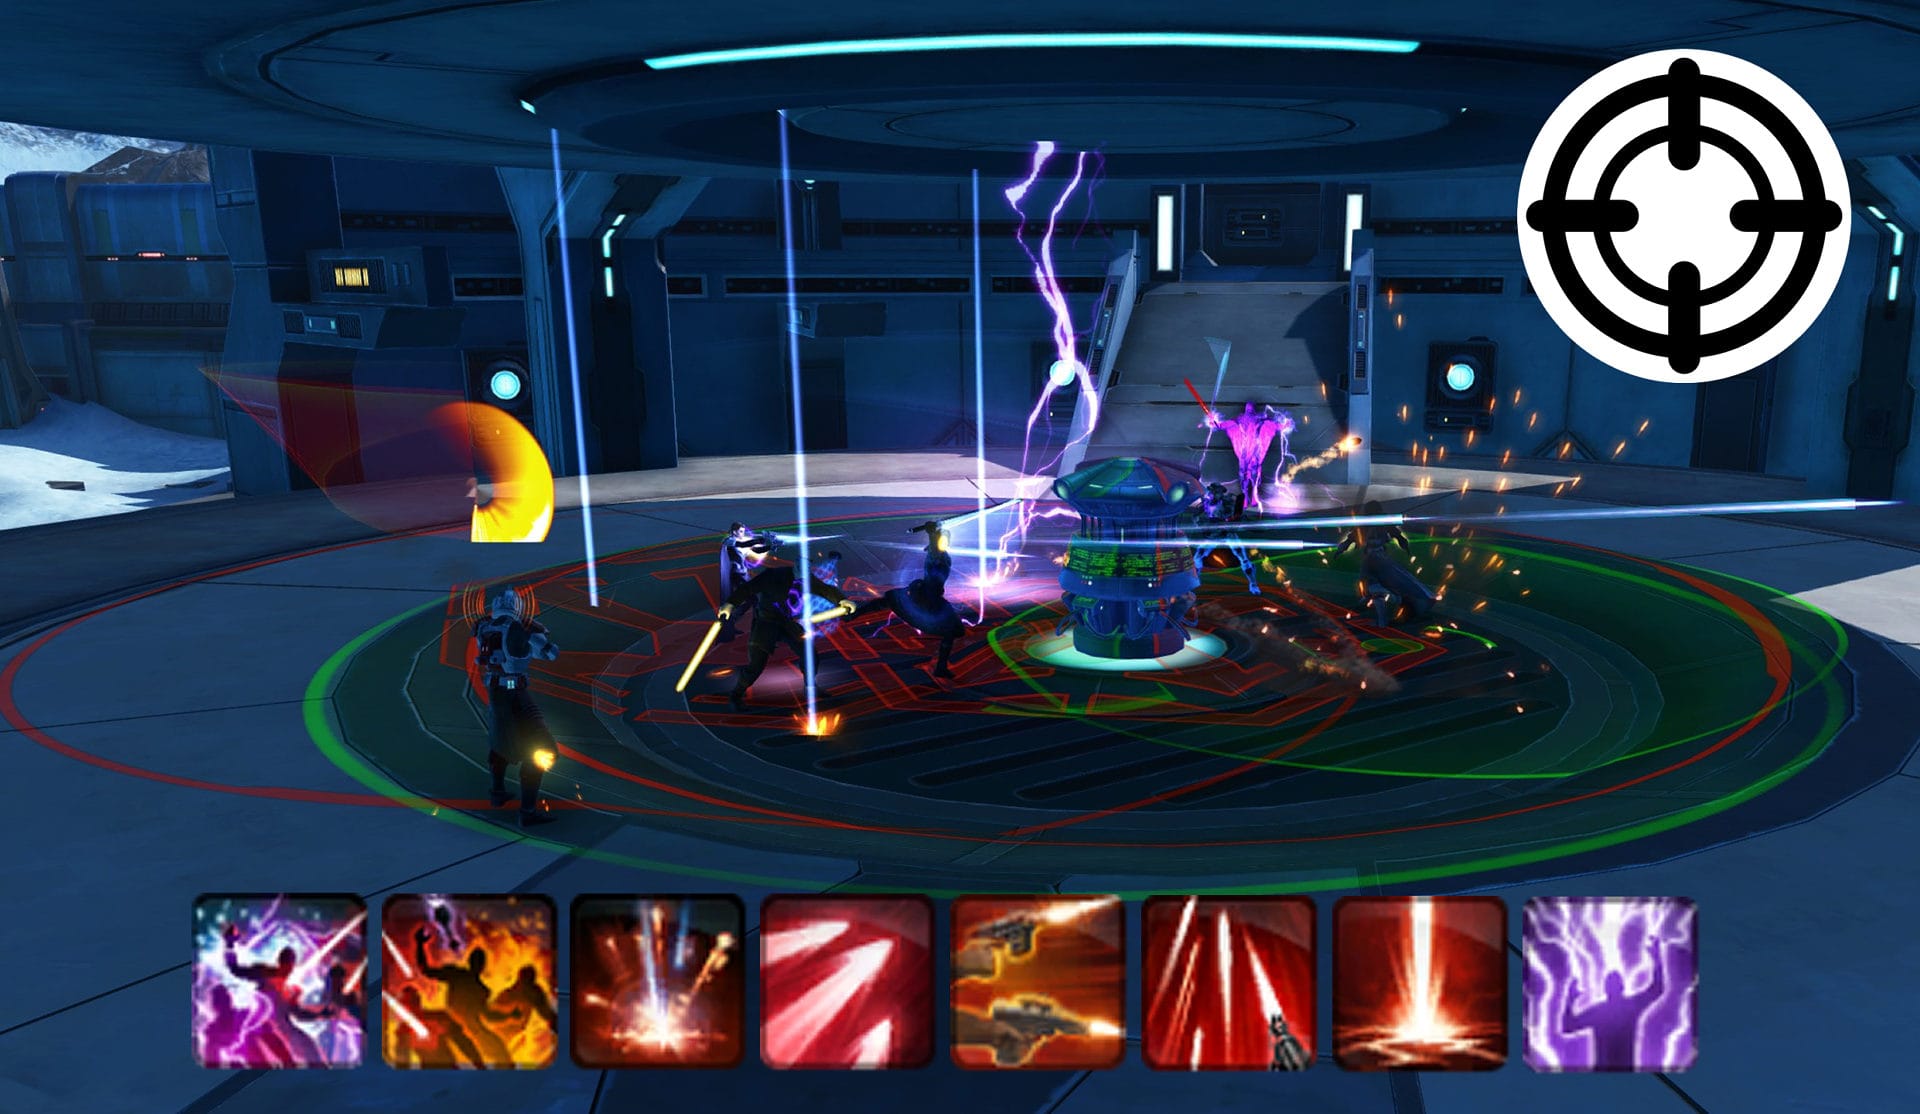
When you spawn into Alderaan Civil War, you’ll see this (image above) appear on your HUD. This is the scoreboard for Alderaan Civil War. An alliance symbol will appear next to the color of the team you belong to.
Each bar represents the health of the team’s ship while the turret symbols will change color to indicate which turret is under whose control. If a turret is grey, then it is under no one’s control. If the turrets begin to flash, that means someone is taking over them so be mindful of that.
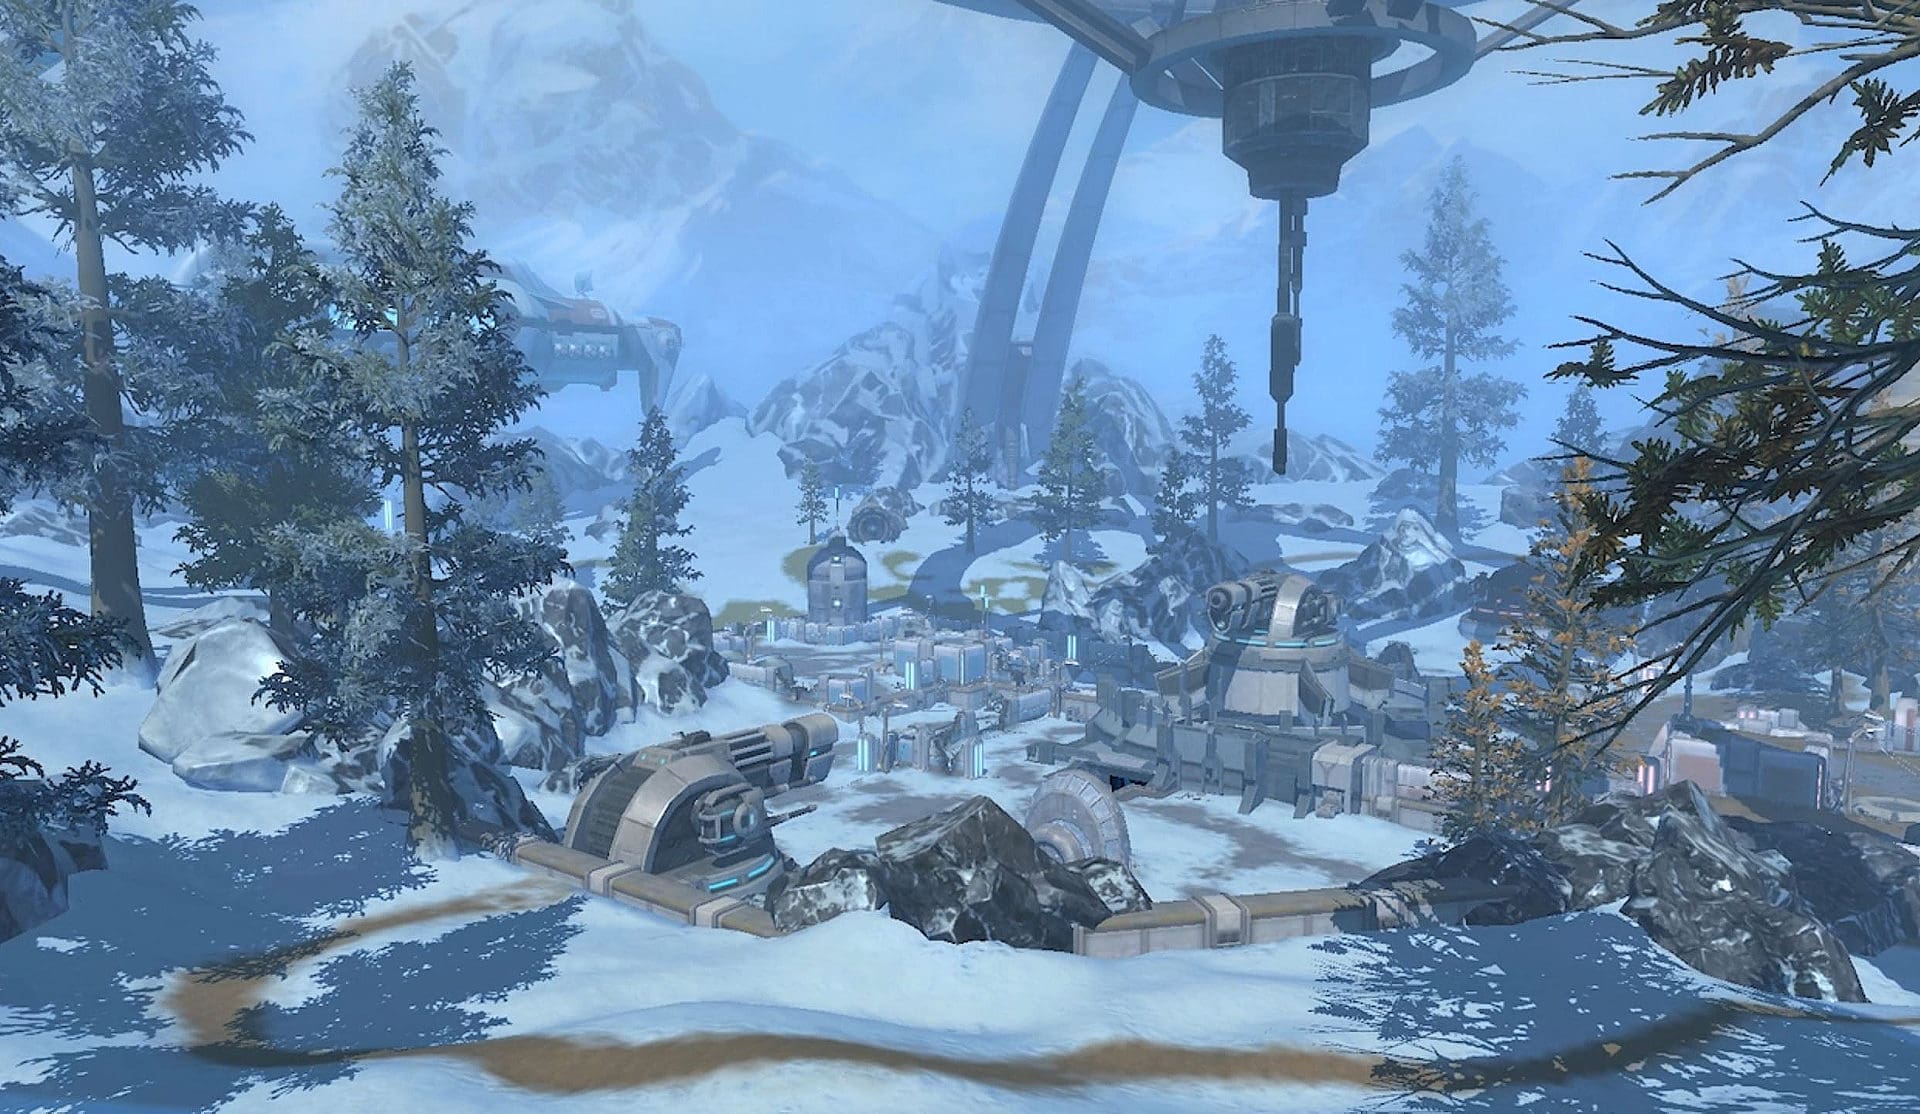
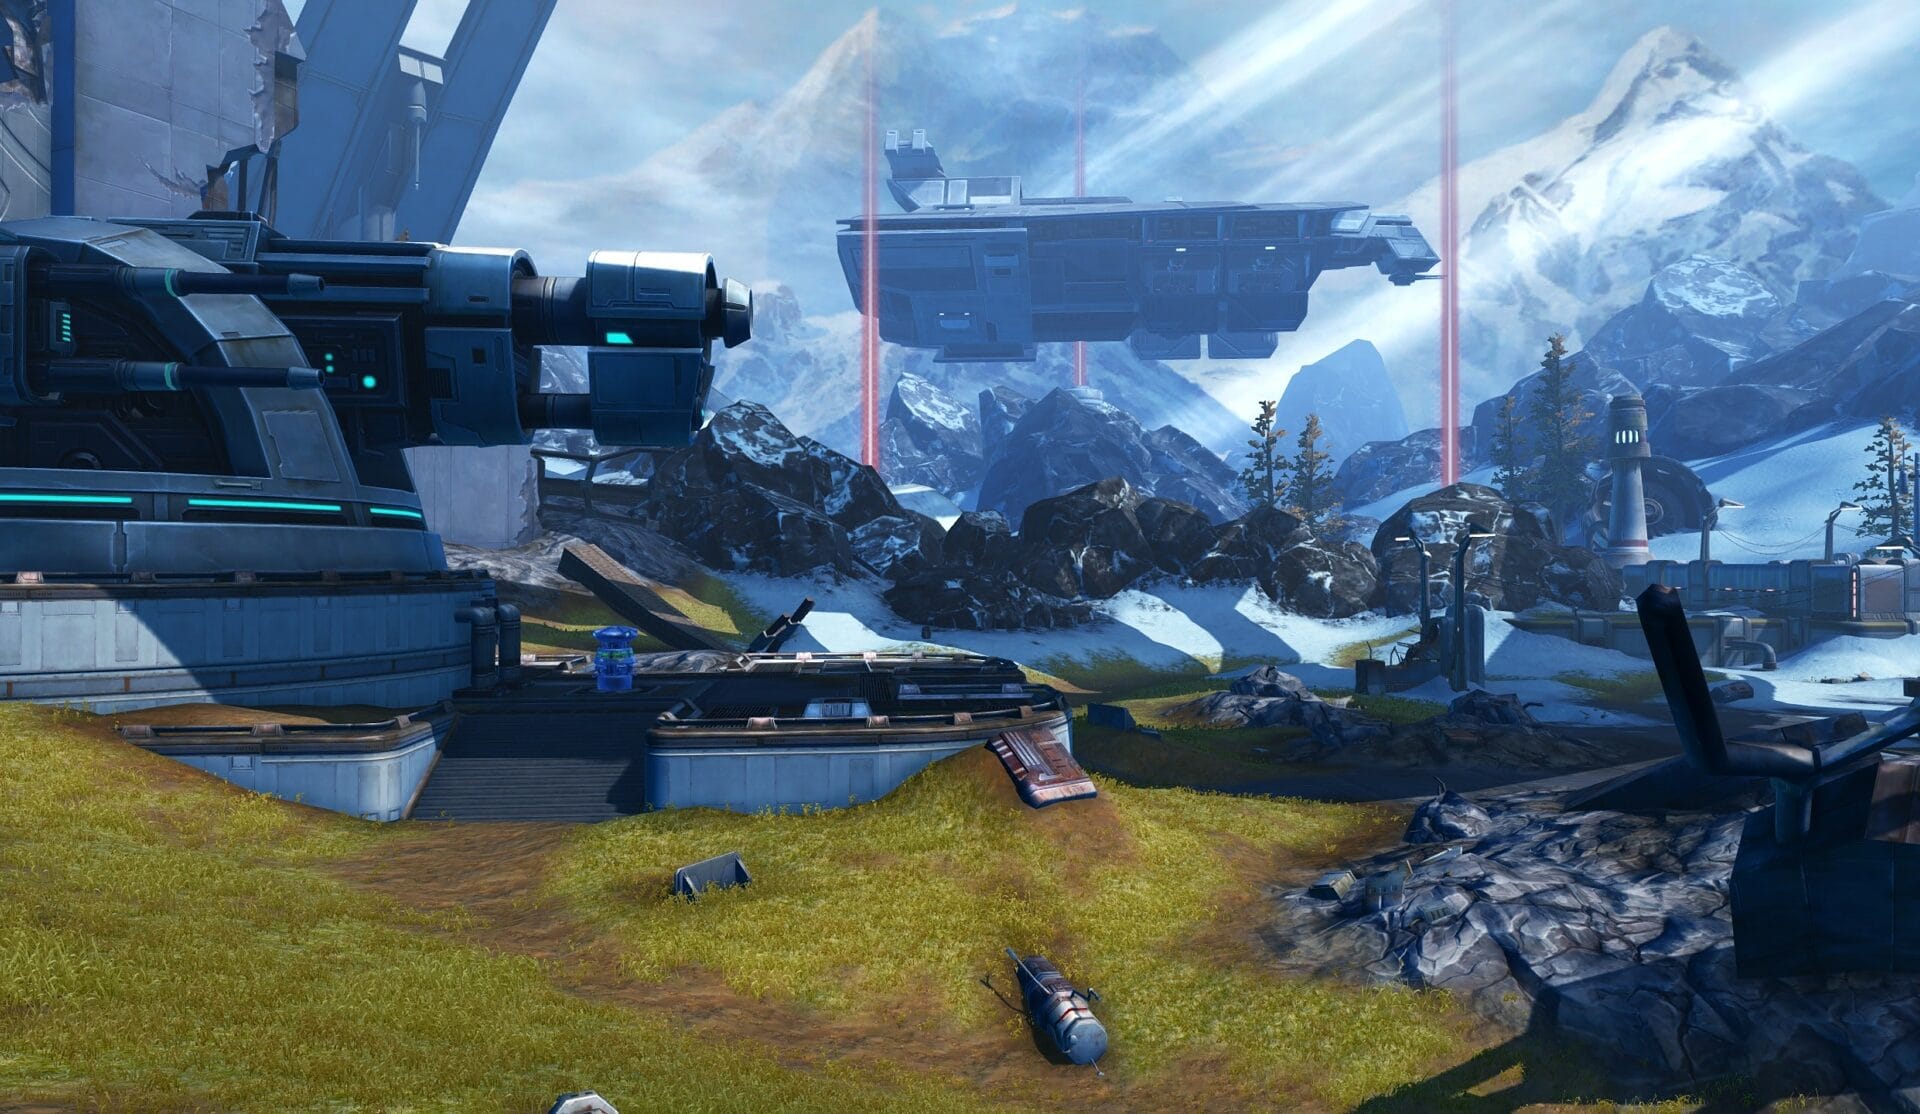
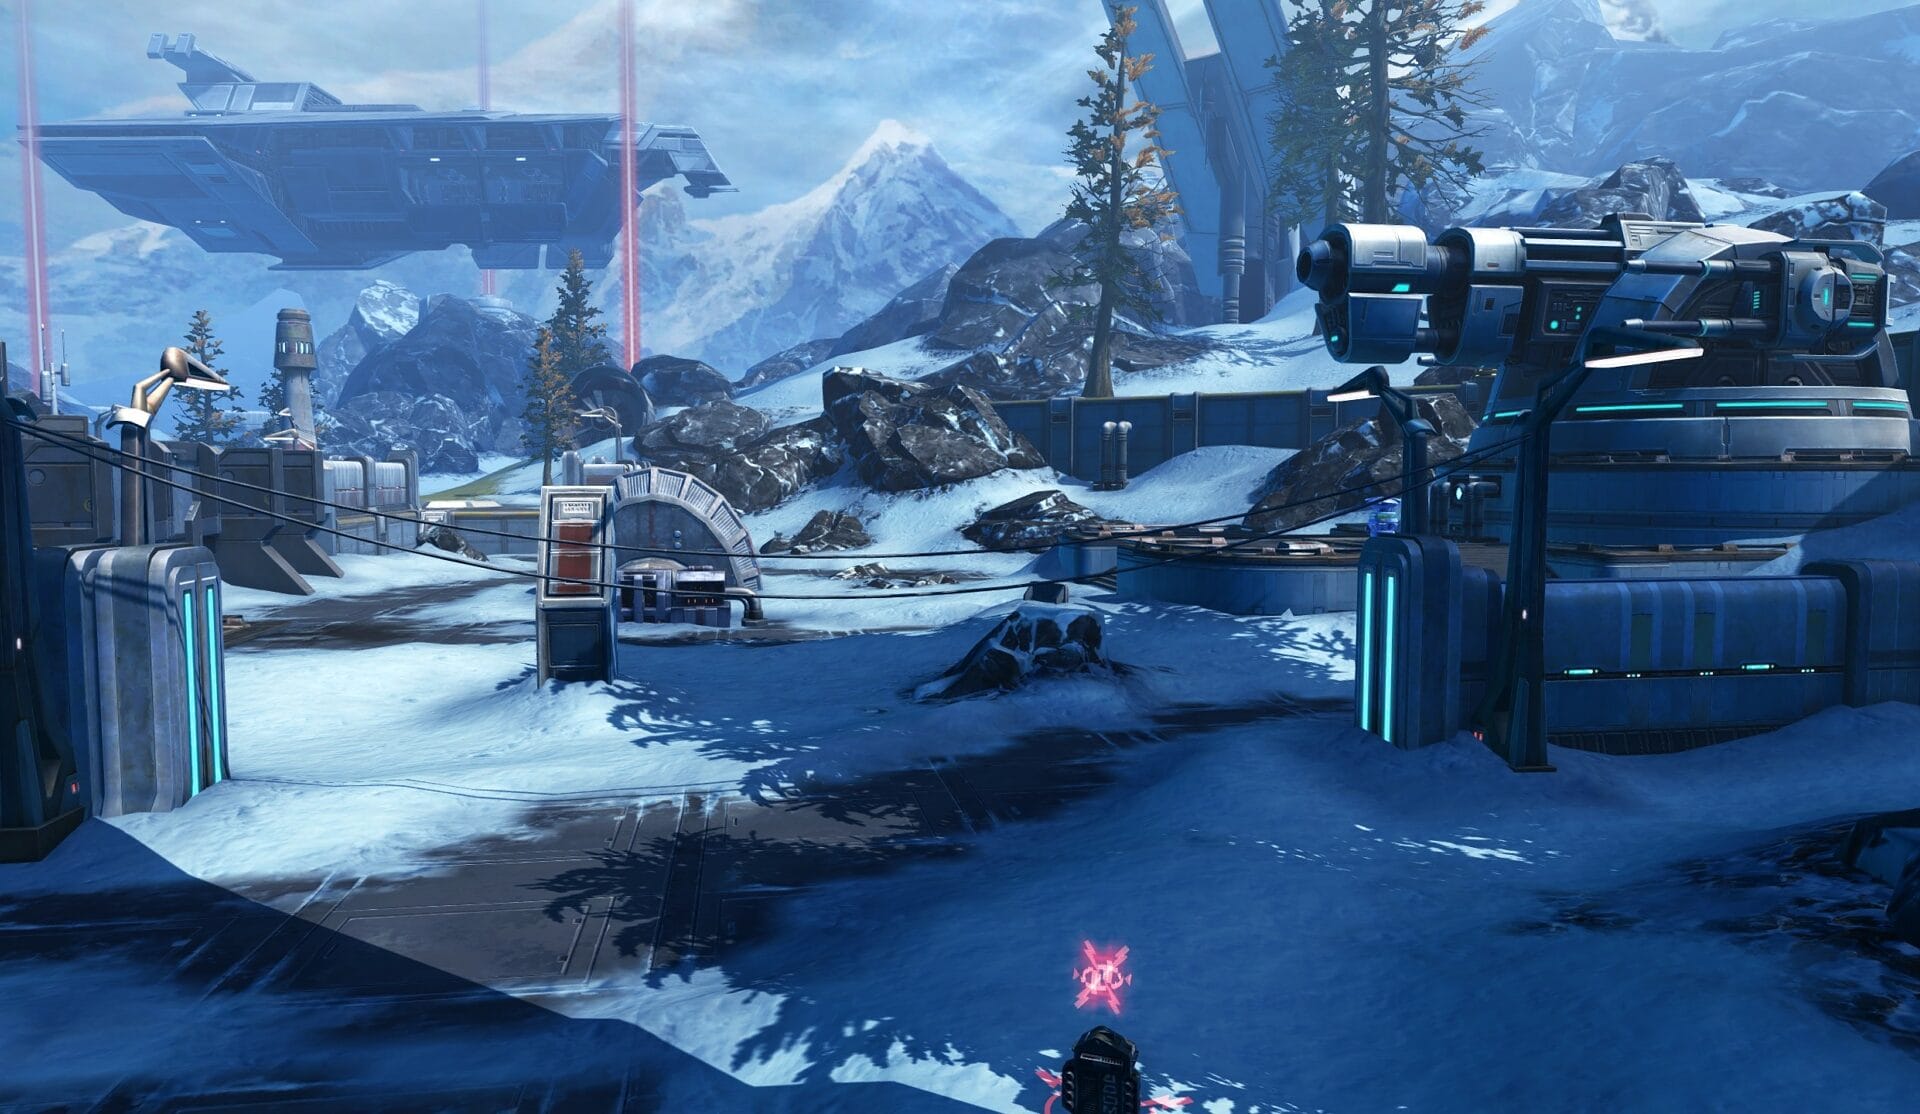
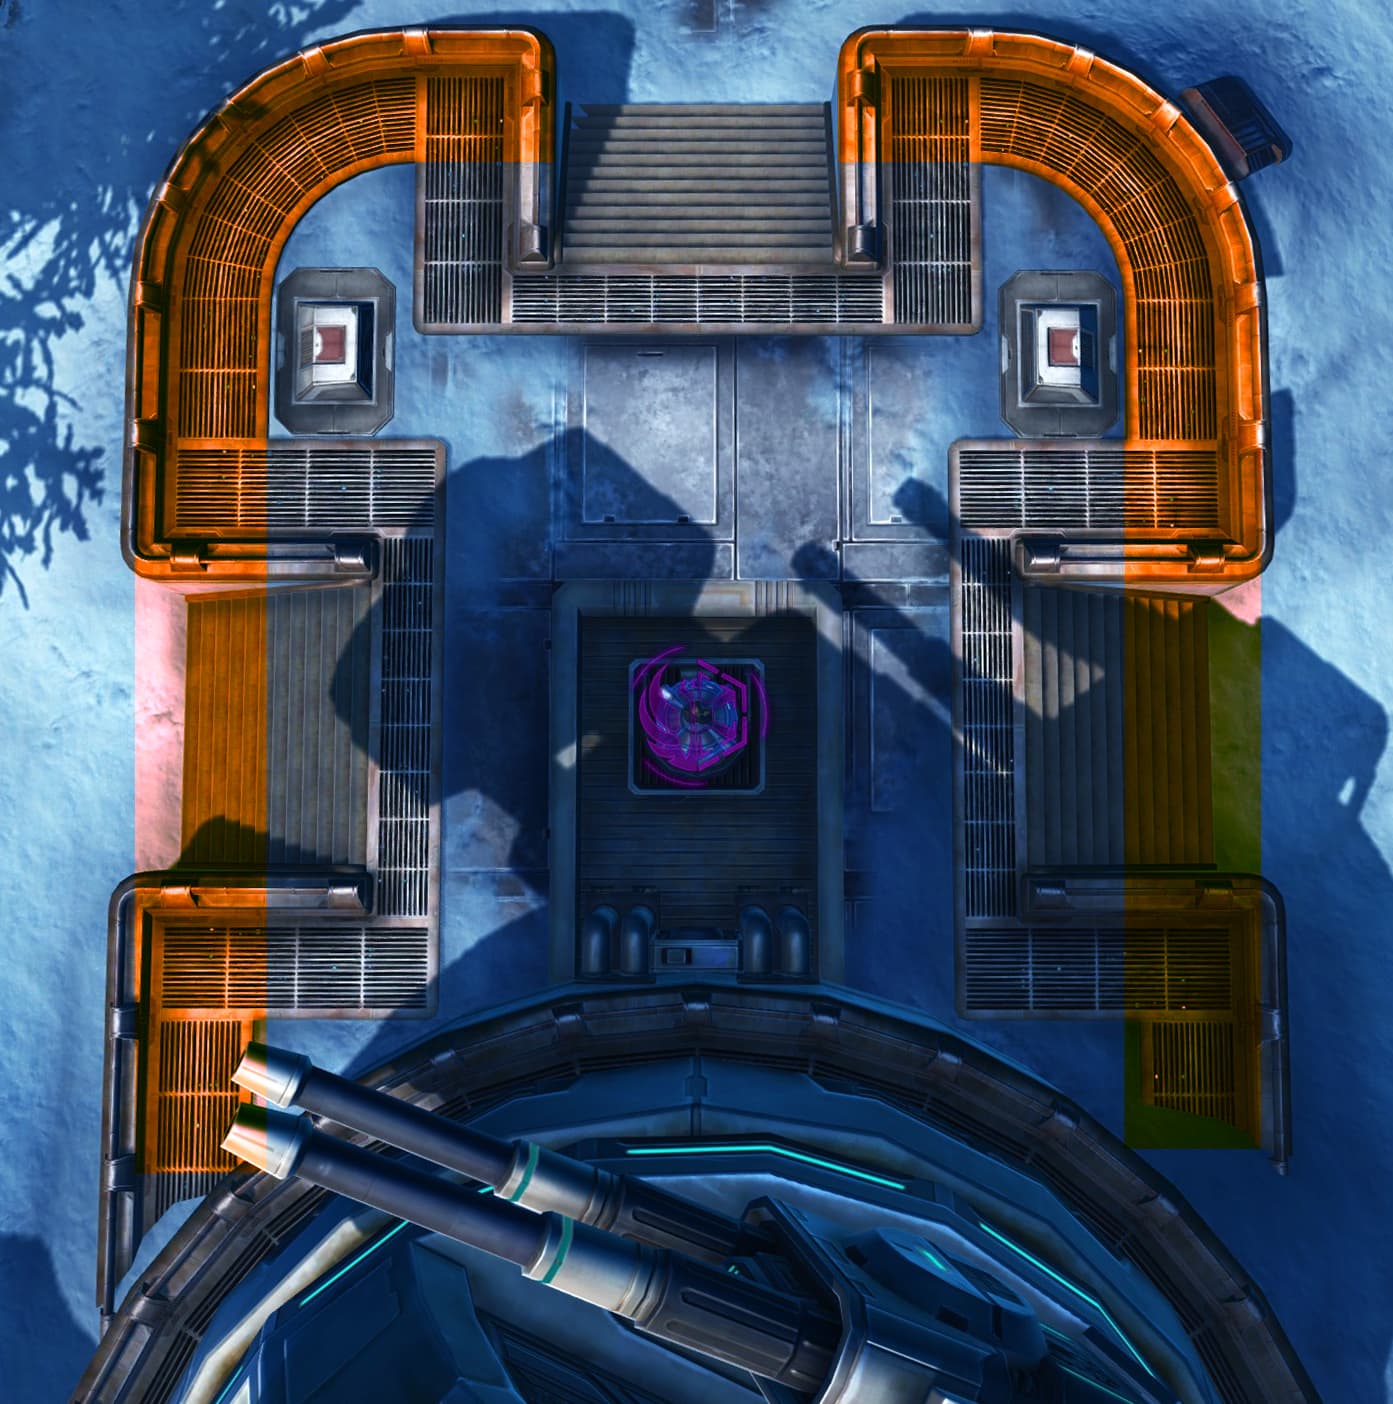
Alderaan Civil War Map Layout Overview
This is the map of the Planetary Cannon Facility found in the Alderaan Civil War warzone. The three turrets are often referred to as “Grass”, “Middle”, and “Snow” due to part of the map they are found at. Dotted throughout the map are various buffs you can use so memorize their locations.
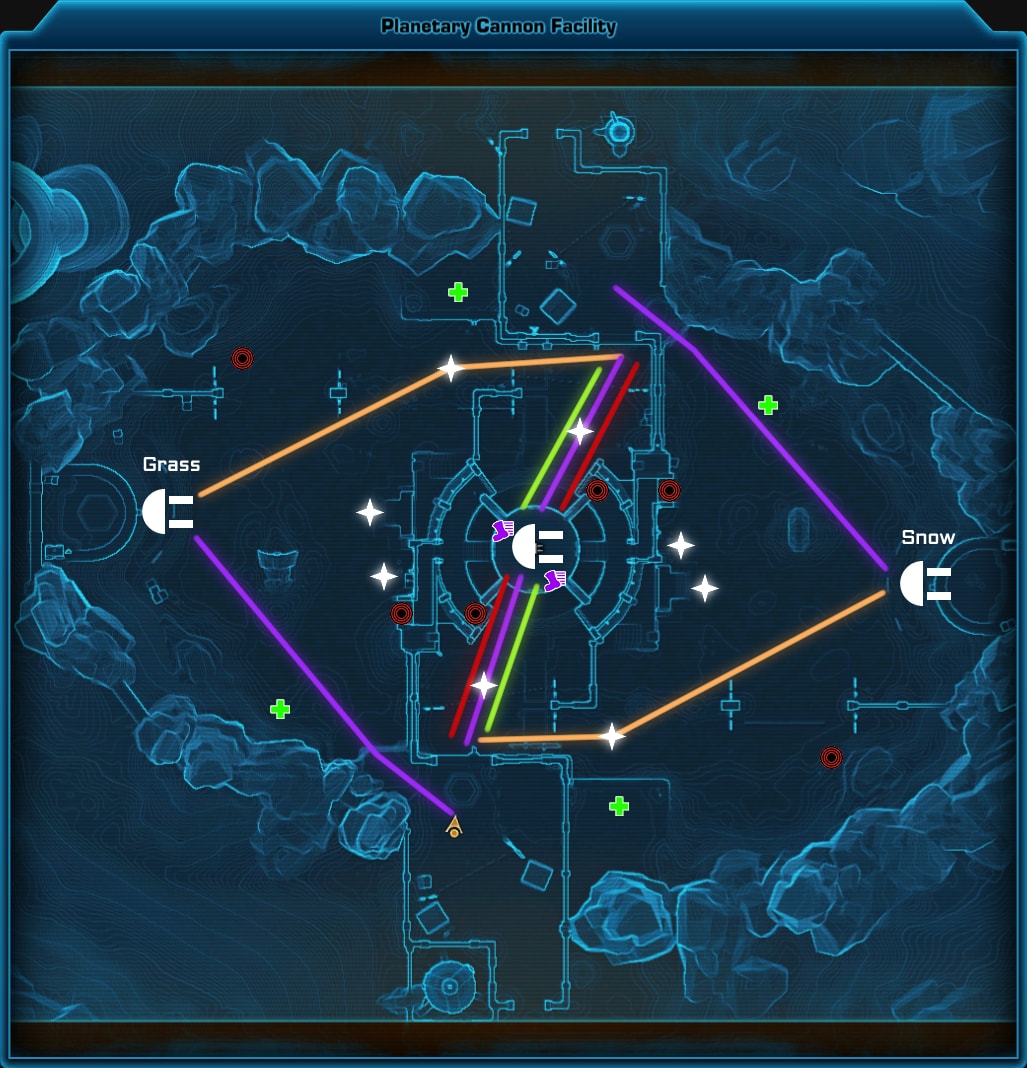
- Tank Movement: These lines indicate the typical paths tanks will take, usually one to guard an objective and another to fight on the front lines.
- DPS Movement: These lines indicate the typical paths DPS units will take, usually straight to the heat of the battle.
- Healer Movement: These lines indicate the typical paths healers will take.
- Cloaker Movement: This indicates where stealth units such as Shadows/Assassins and Scoundrels/Operatives move, typically at the start of the battle.
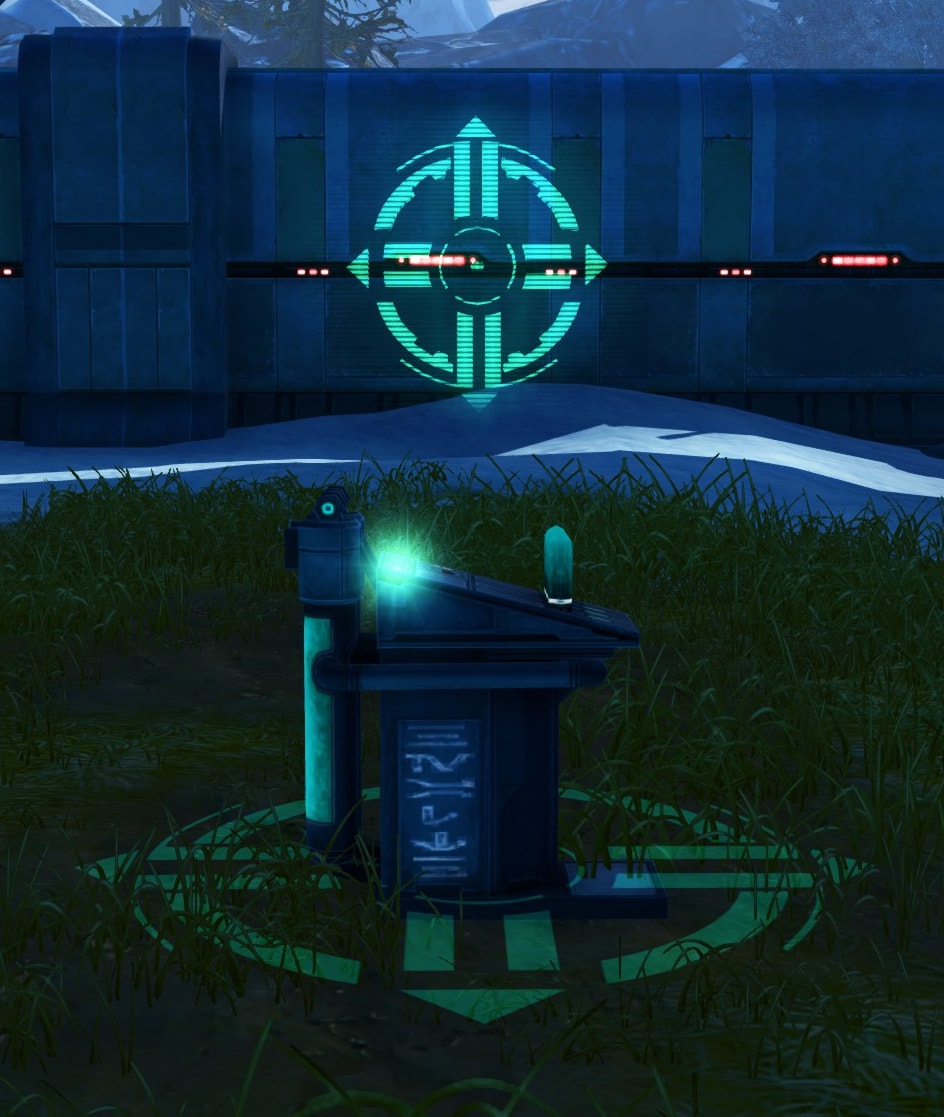
Healing Node
Touching this instantly restores a large chunk of your health.
PvP Buff
This is a buff that increases damage done, healing done and reduces damage taken vs players by 15% for a short time.
Movement Speed Buff
This increases your running speed for a short duration.
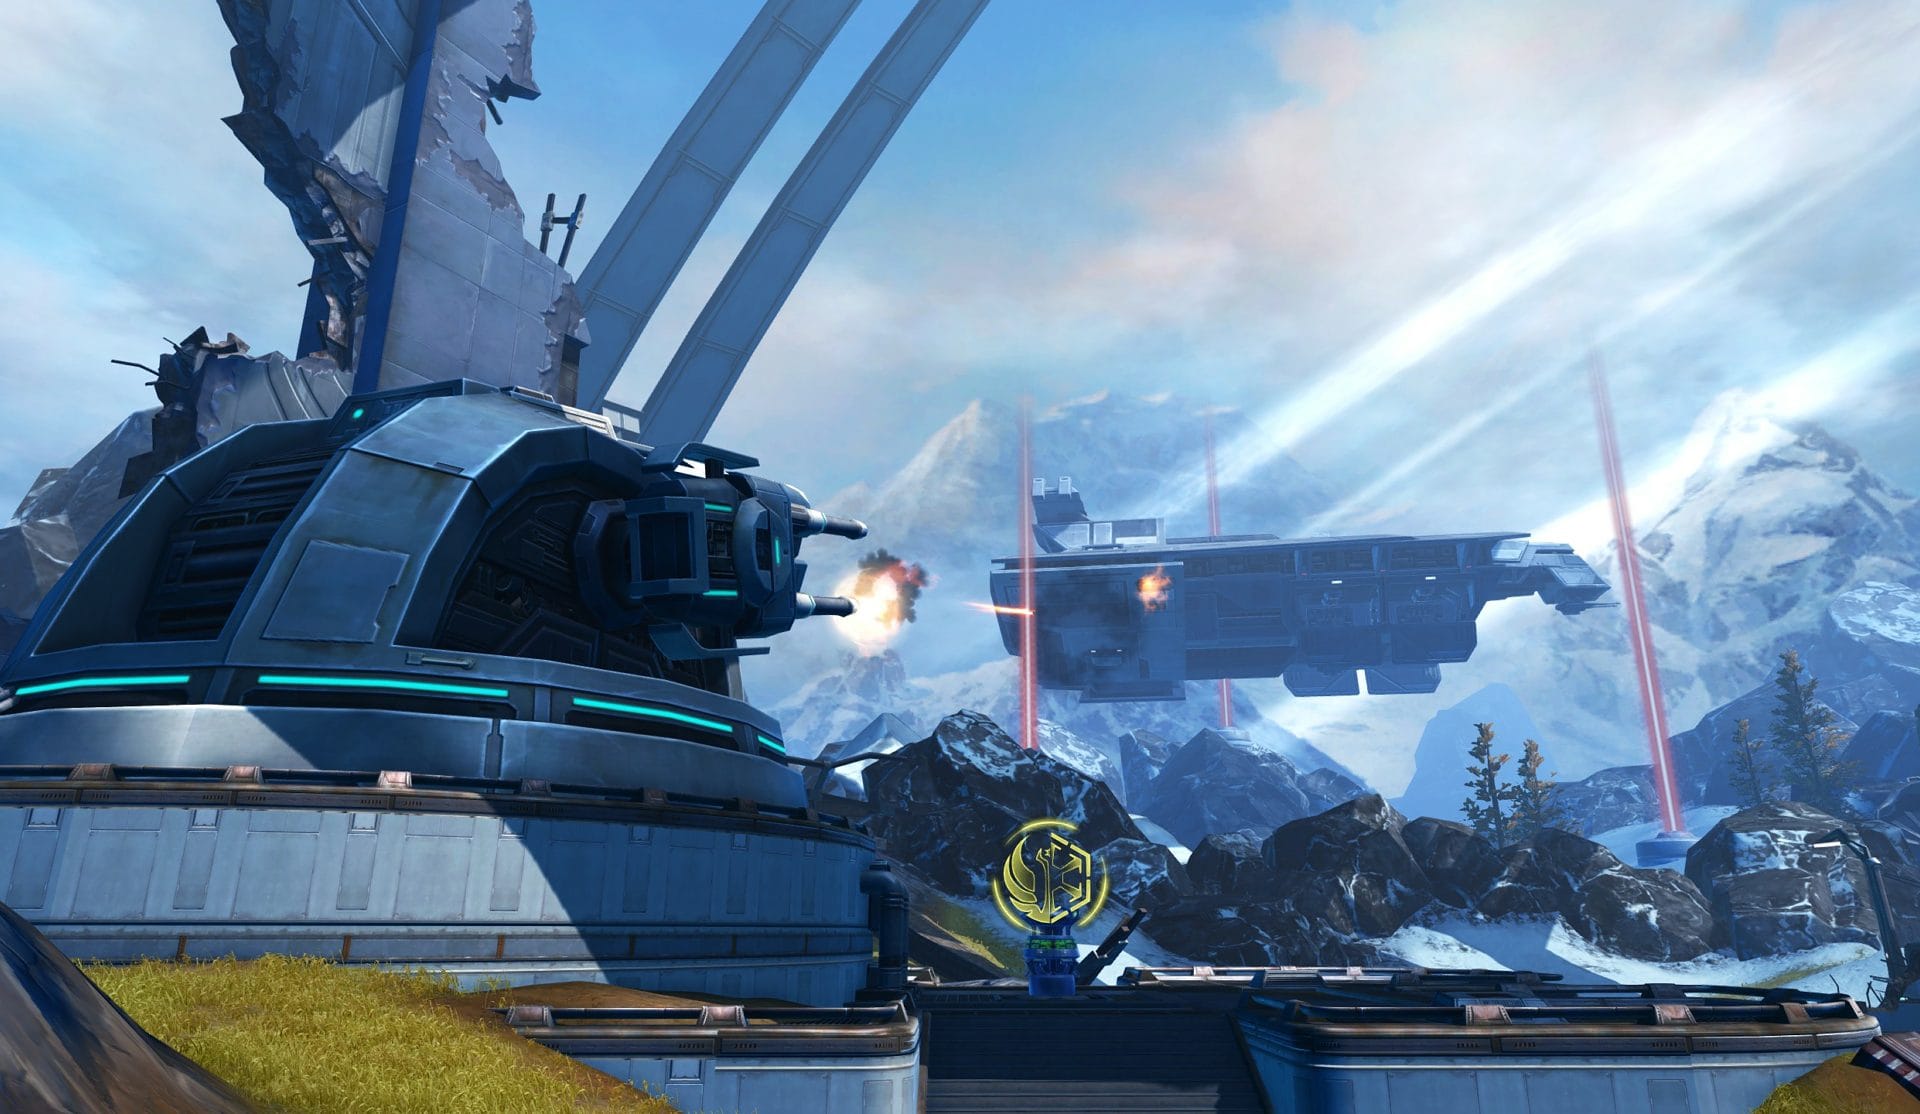
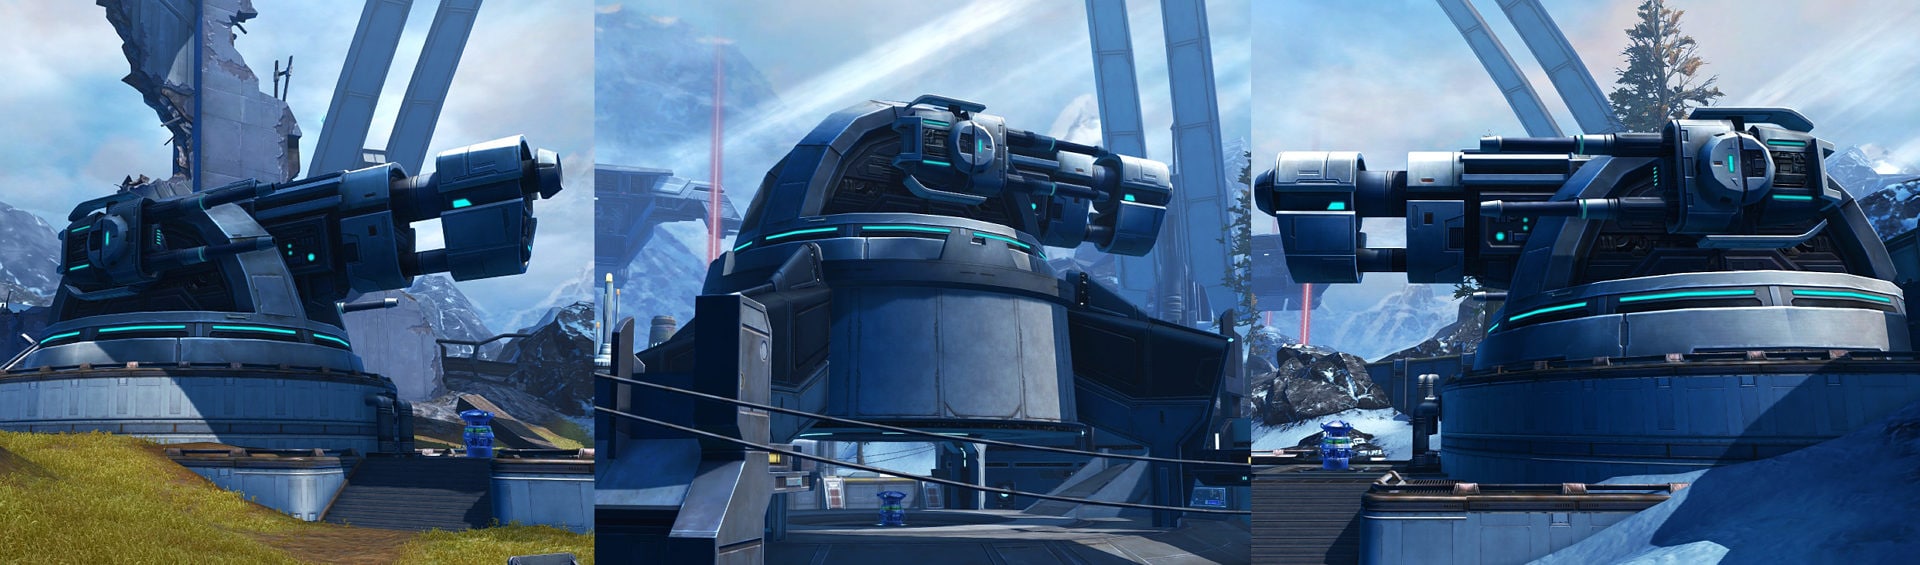
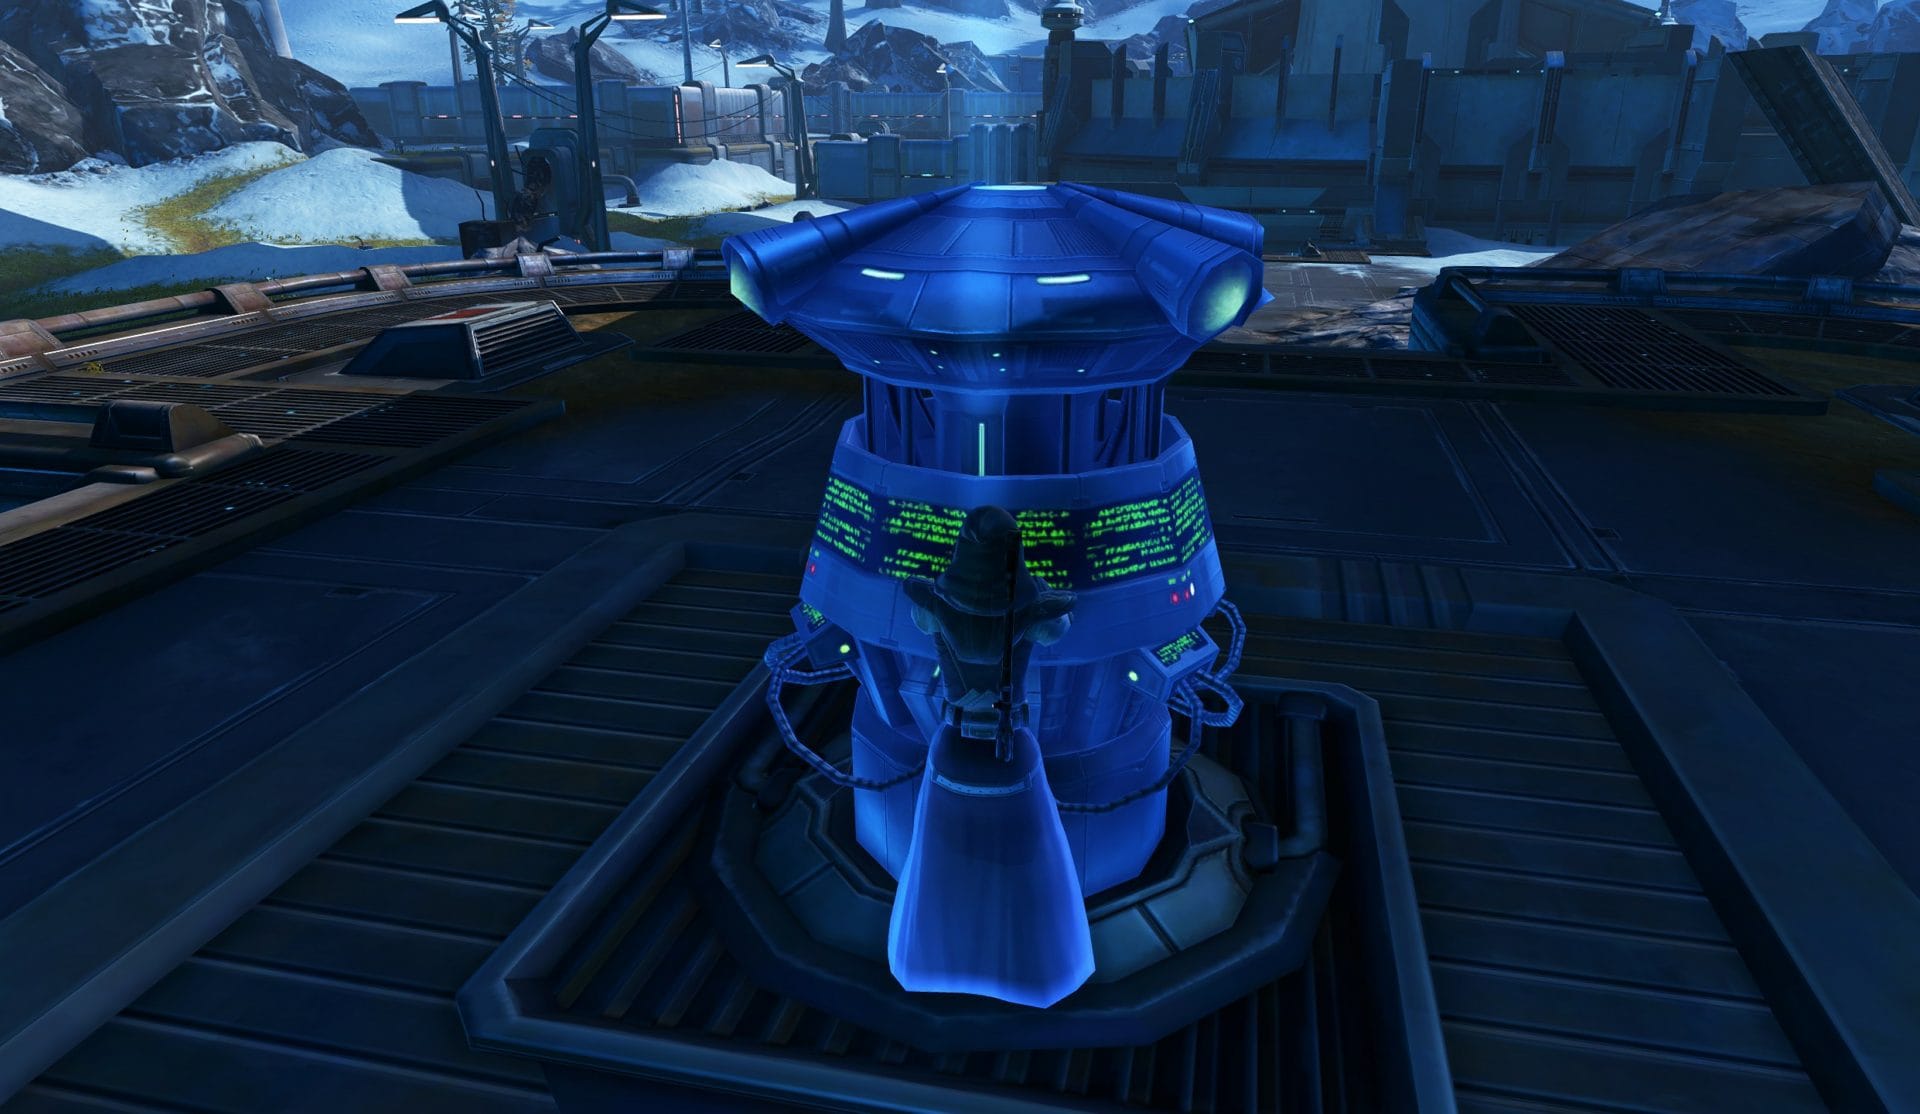
Turret
The Turrets are your primary objective to capture and maintain control of in the Alderaan Civil War. From left to right you’ll see the Grass Turret, Middle Turret, and Snow Turret. Never leave these unguarded.
High Traffic Zone
This is where you’ll often see a lot of movement, typically of incoming enemies or allies. You’ll want your eyes on these areas as this is where enemies will be going to or coming from.
Points of Interest on the Alderaan Map
This section of the guide details some of the unique segments of the map that you may hear being referenced by other players and would be a good thing to know them before you venture ahead and join the game.
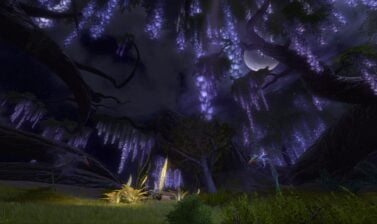
Grass Zone
The west side of the map is known as the Grass Zone or just Grass due to the abundance of grass in this area.
Middle Zone
In the center of the map is the Middle Zone or Mid as most people call it.
At the middle turret, you’ll find stairs that lead to elevated platforms. The east and west platforms both spawn a PvP buff.
This is a good spot for ranged units to fight at since you’ll be out of melee range and get a good view of targets below. In the event a melee unit comes up to you, you’re still helping your team by thinning the number of combatants below which can actually help your team capture the middle turret.
Either way it’s a win-win, just be sure to use your DCD’s efficiently to prolong your survival. Gunslingers and Snipers are able to use the walls found up here as cover.
You can also find a pathway up here that leads to a drop-off point that leads to either the Grass or Snow zones depending on which side you’re on.
The area in which you drop actually has a Warzone buff so whoever drops down there when it spawns is ready for battle whether it’s for Offensive or Defensive purposes.
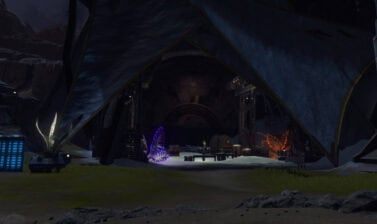
Snow Zone
At the east is the Snow Zone or Snow.
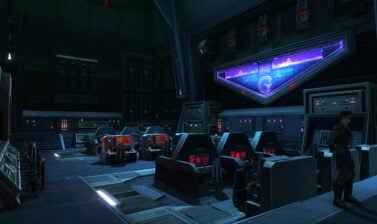
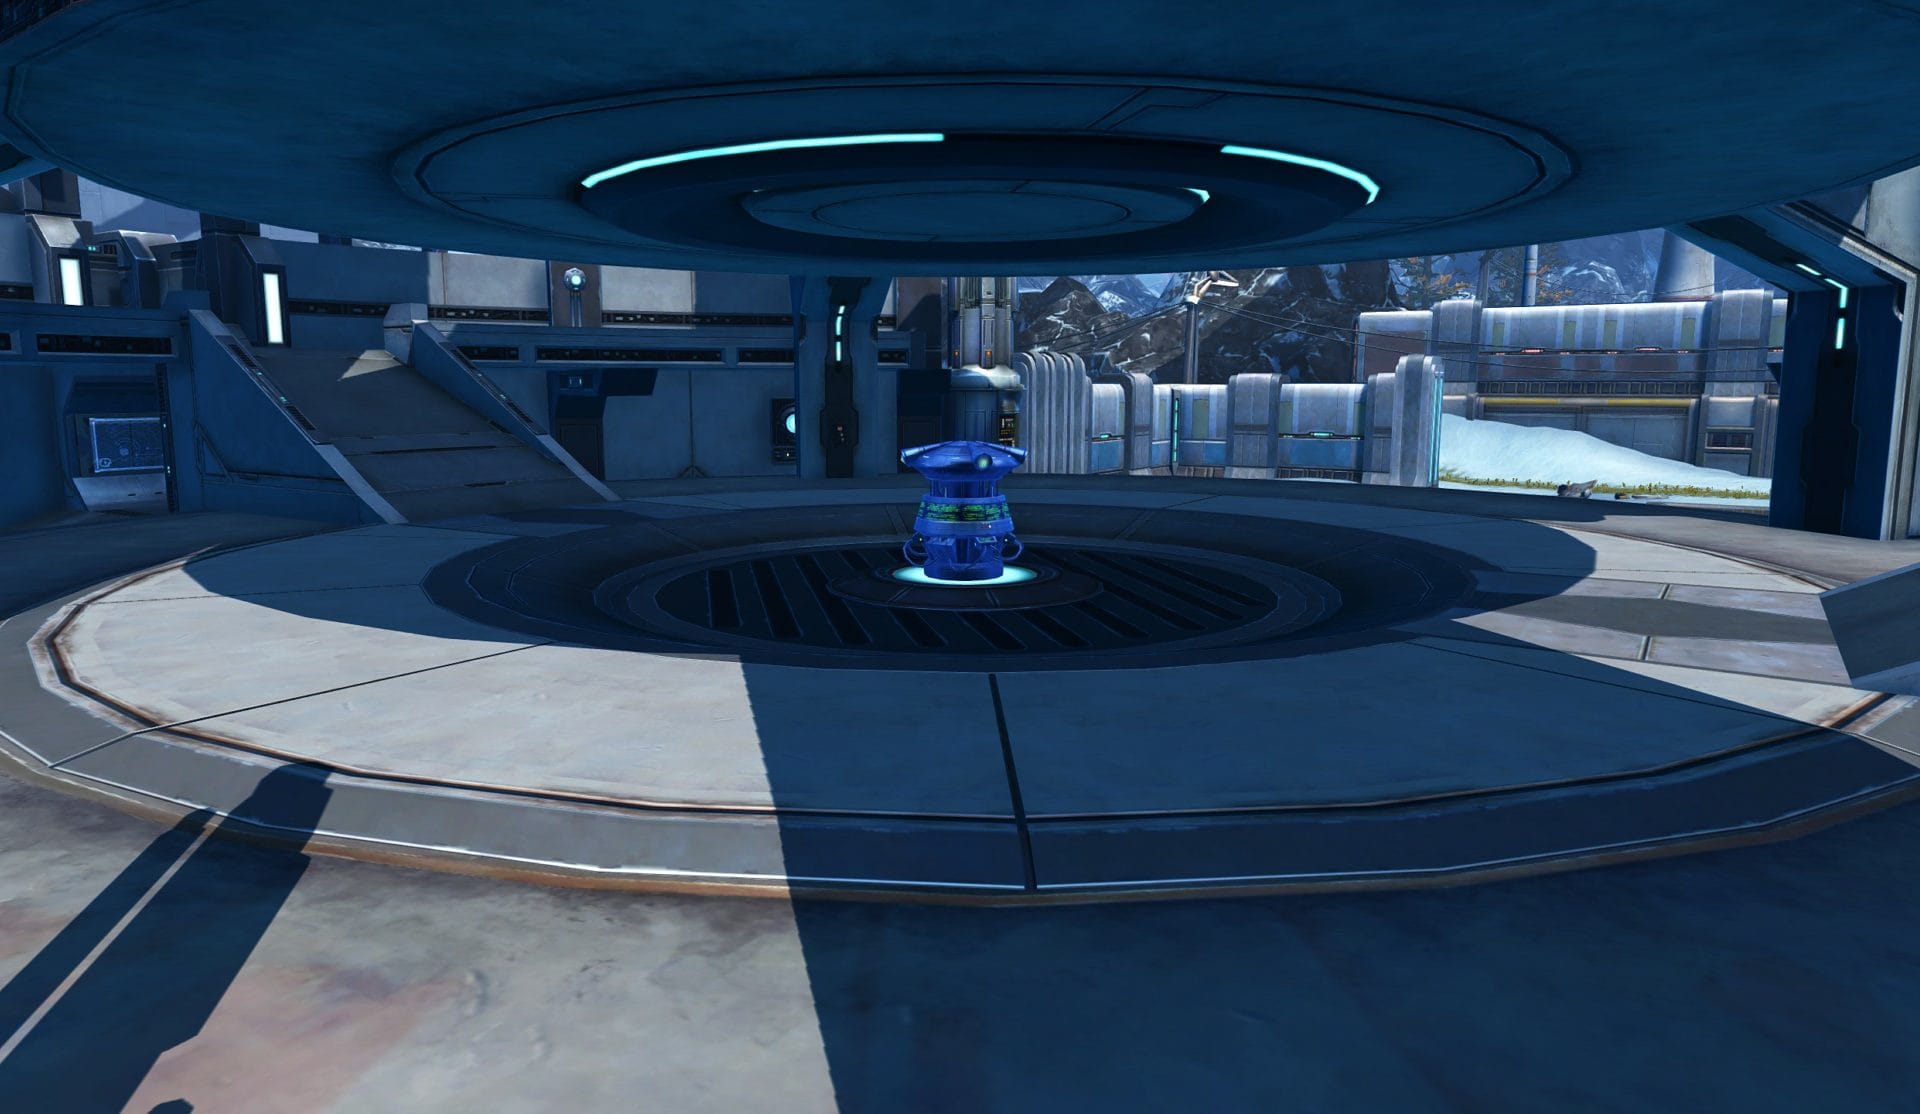
Spawn Zones
When you first start the game, you’ll spawn in either a Republic or Imperial ship. These are shown in the image below though I want you to study this carefully.
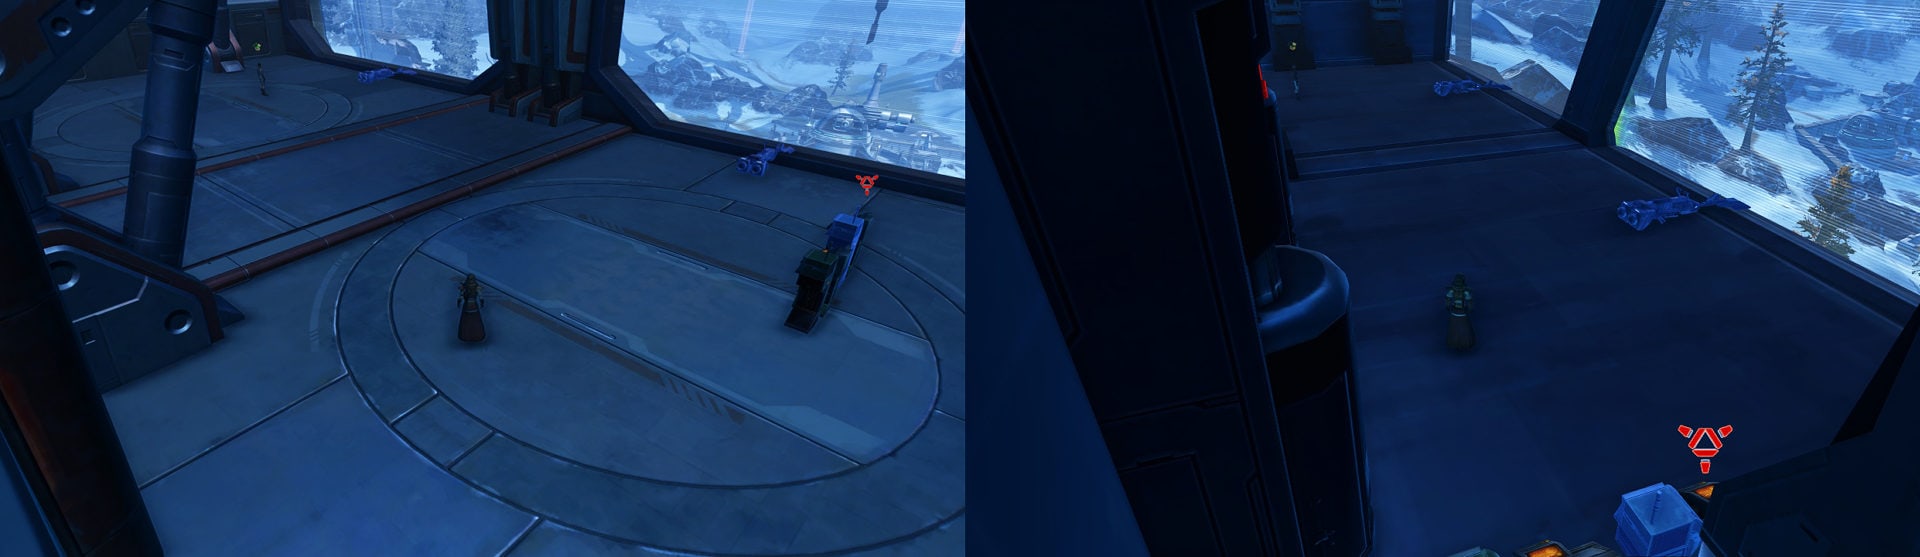
When the game starts, speeder bikes will spawn and so you will need to learn where they spawn so you can spam right-click the area a couple of seconds before the game starts so you can get transported to the ground as soon as possible. The first minute of the game is incredibly important to set up your turrets and defenses so you don’t have to struggle trying to capture an enemy’s turret.
Stairs and the underground level
Grass and Snow zones both have a set of stairs that lead to the Underground Chamber. Turret Guards should be keeping an eye on these stairs as enemies can come from here.
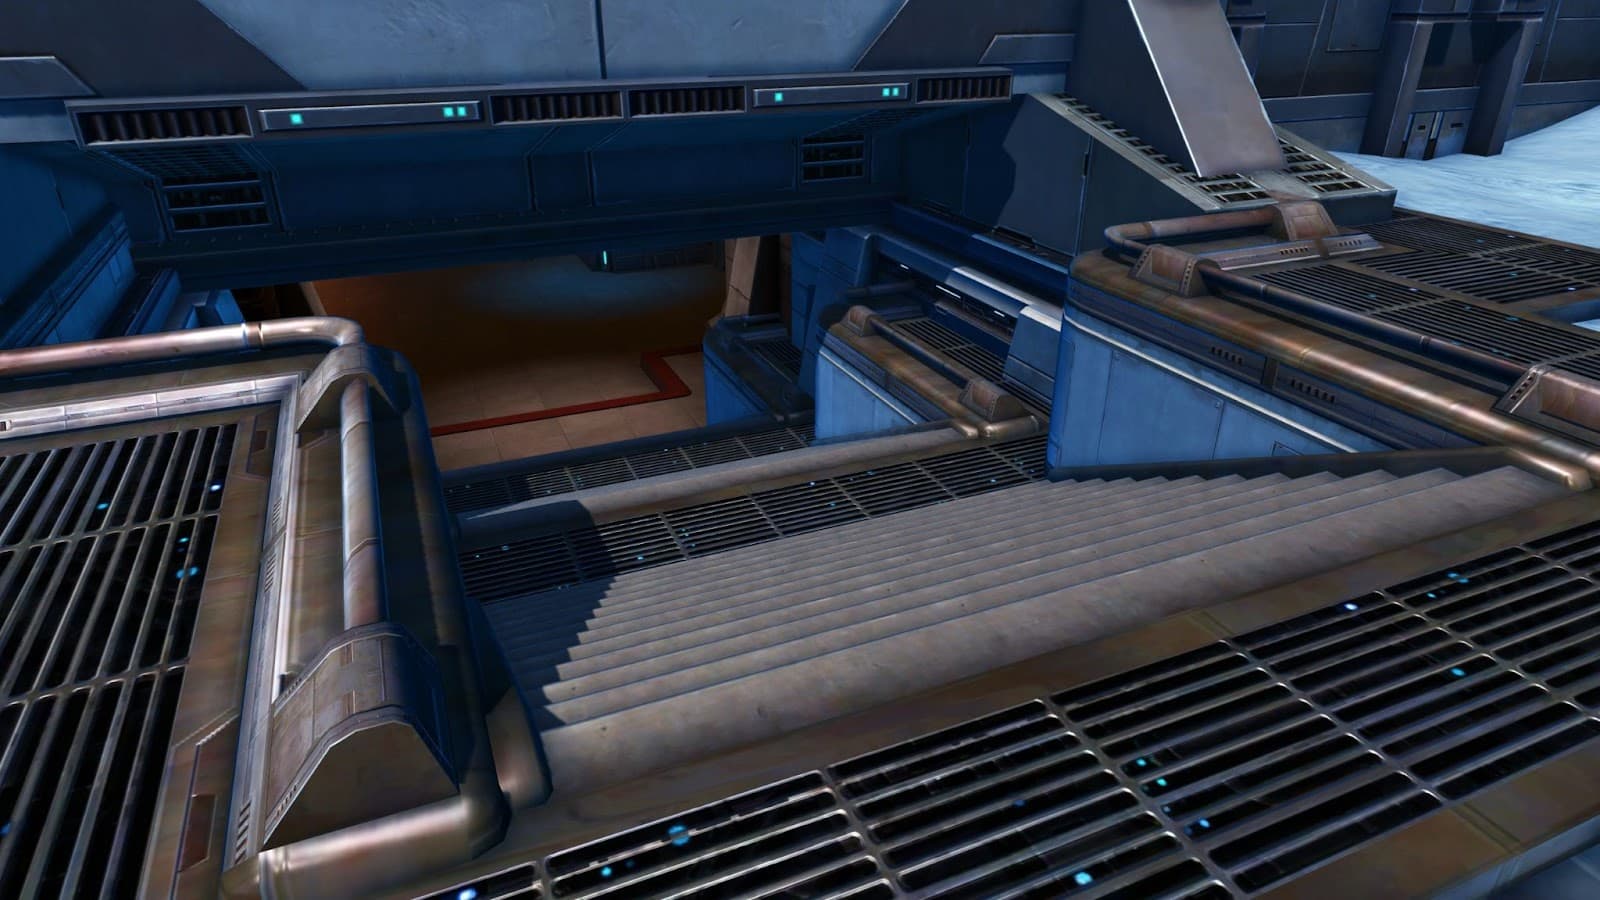
The Underground Chamber connects both Grass and Snow zones and allows one to beeline from one zone to the other. It’s also the only part of the map where you can find Movement Speed Buffs of which only two of them spawn here.
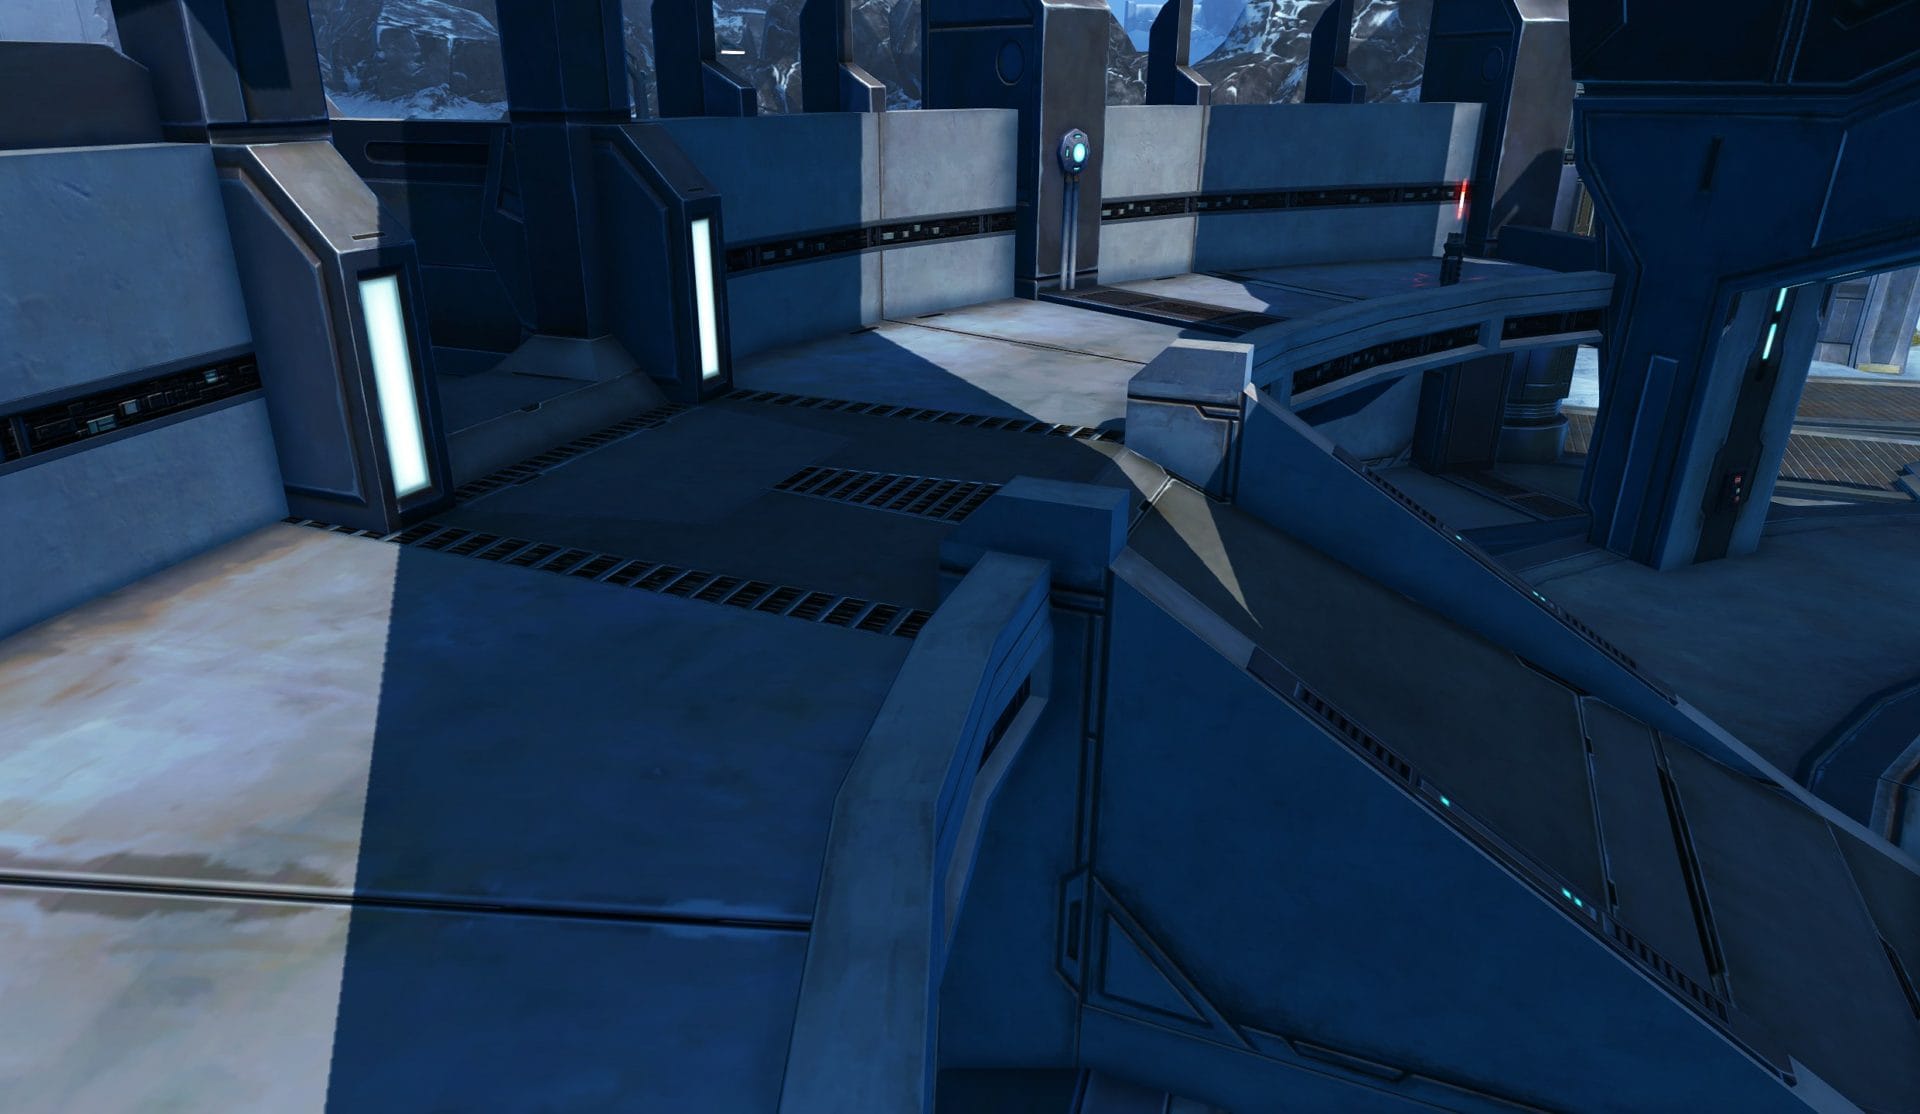
Teleport node location suggestions
Teleporting abilities such as Phasewalk, Hideout, and Hololocate are often used to gain distance from an opponent or to cut travel time. In the image below are location suggestions to put your teleportation node.
The locations at team drop off points can offer a way to reach Grass and Snow without having to run through the chaos of the Middle Zone. The four near the Middle Zone either lead right to a Warzone Buff or to the pathway that leads to Grass and Snow Zones. The latter of which is a good way to cut off an opponent’s line of sight and confuse them for a second or two as they try to figure out where you went.
At Grass and Snow, you have a teleport node on the turret itself and close to it. Either of these can be used to cut travel time when you’re making your way here from either a spawn zone, stairs, or the drop-off point.
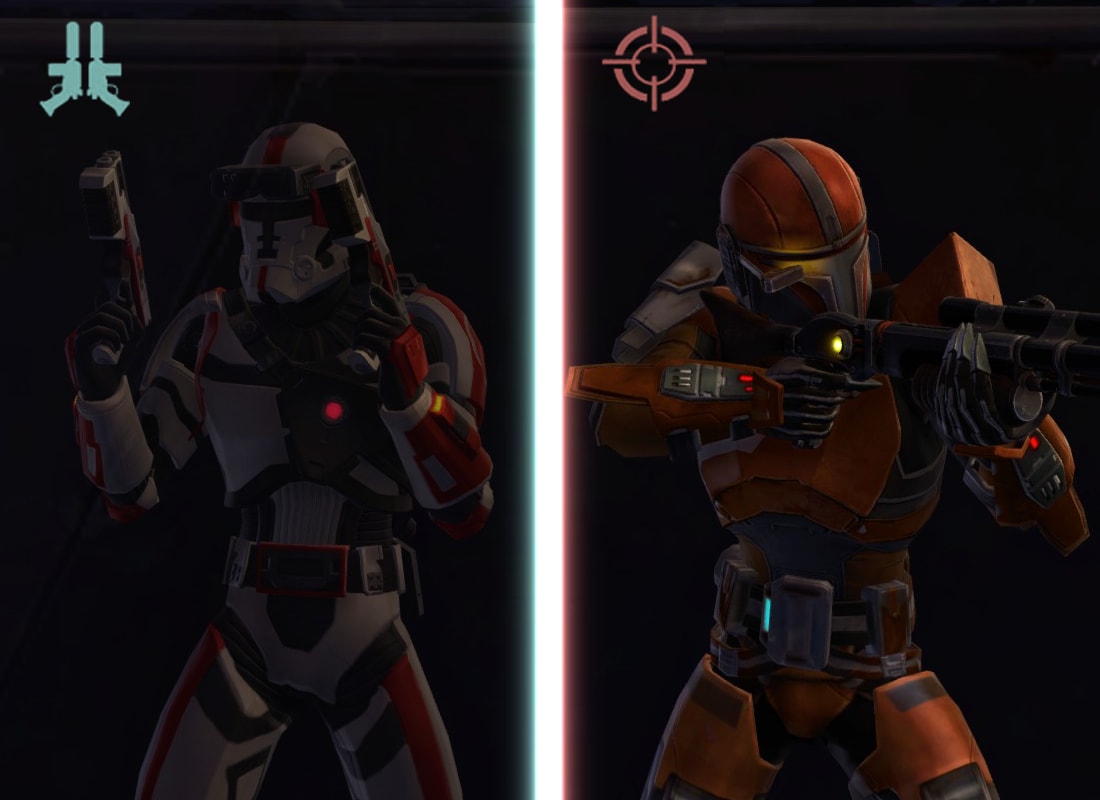
Role-Specific Tips and Strategies
Before we get into the nitty gritty of either defending or capturing a turret, let’s take a quick look at how you can help your team depending on your role! We all have our part to play to ensure victory so knowing your role, strengths, weaknesses, and limitations are vital to excel in PvP Warzones.
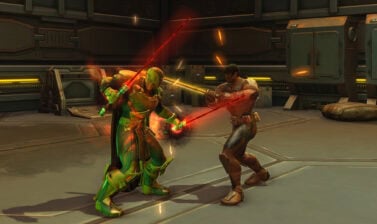
Some of the images in this segment of the guide are from the Rishi Stronghold PvP Area. They are used to more clearly and easily illustrate the scenarios and situations described below.
Tank Recommendations and Guard Swapping
As a tank, you should be doing one of two things. You’re either defending a turret from invaders or you’re in a conflict zone such as the Middle Zone. In either scenario, you should be guarding an ally that is nearby.
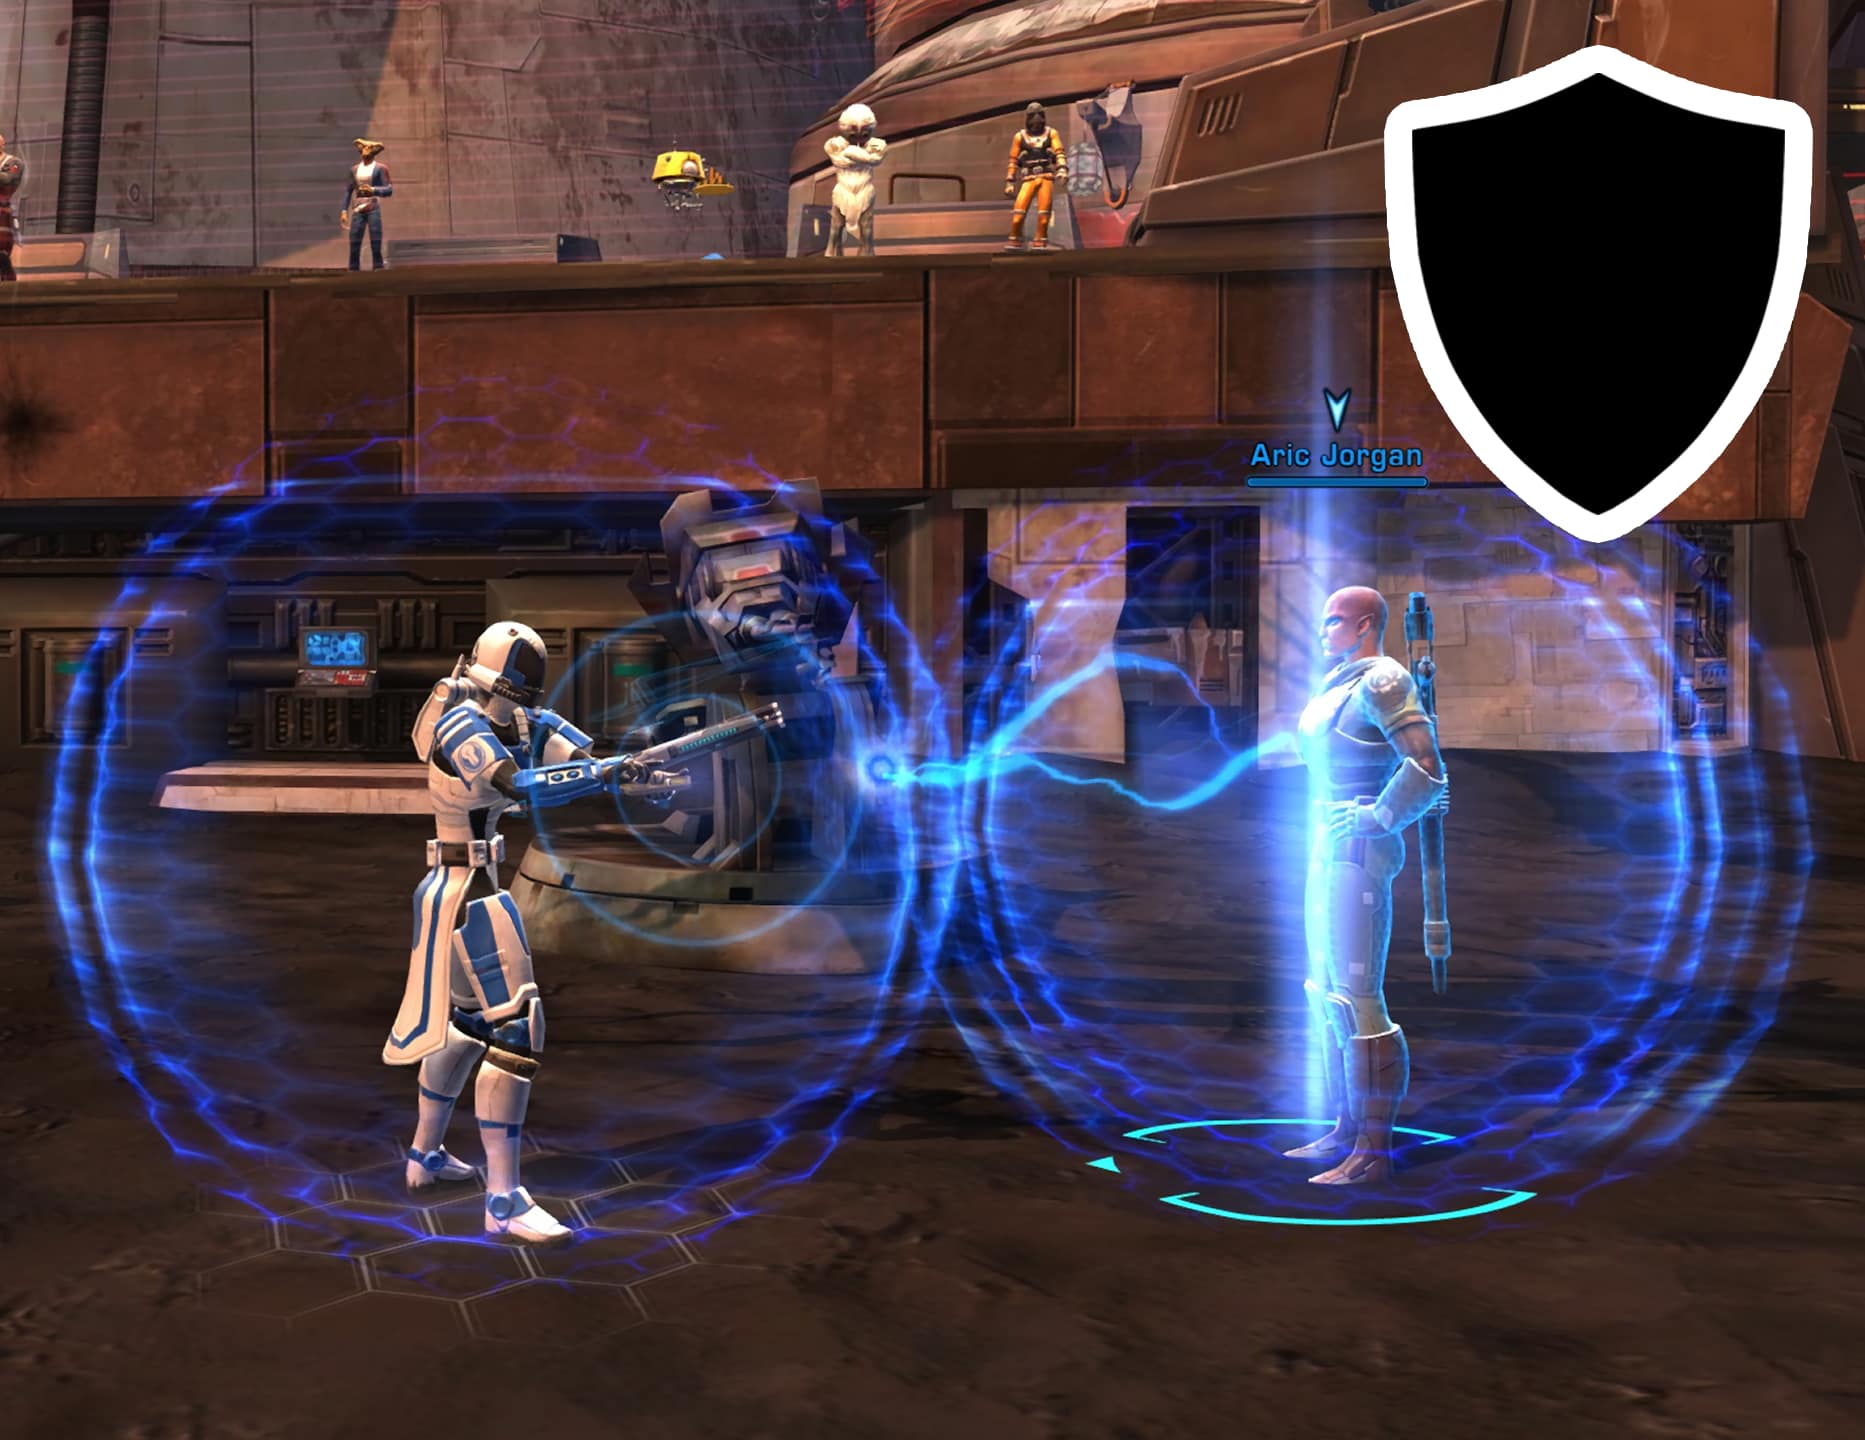
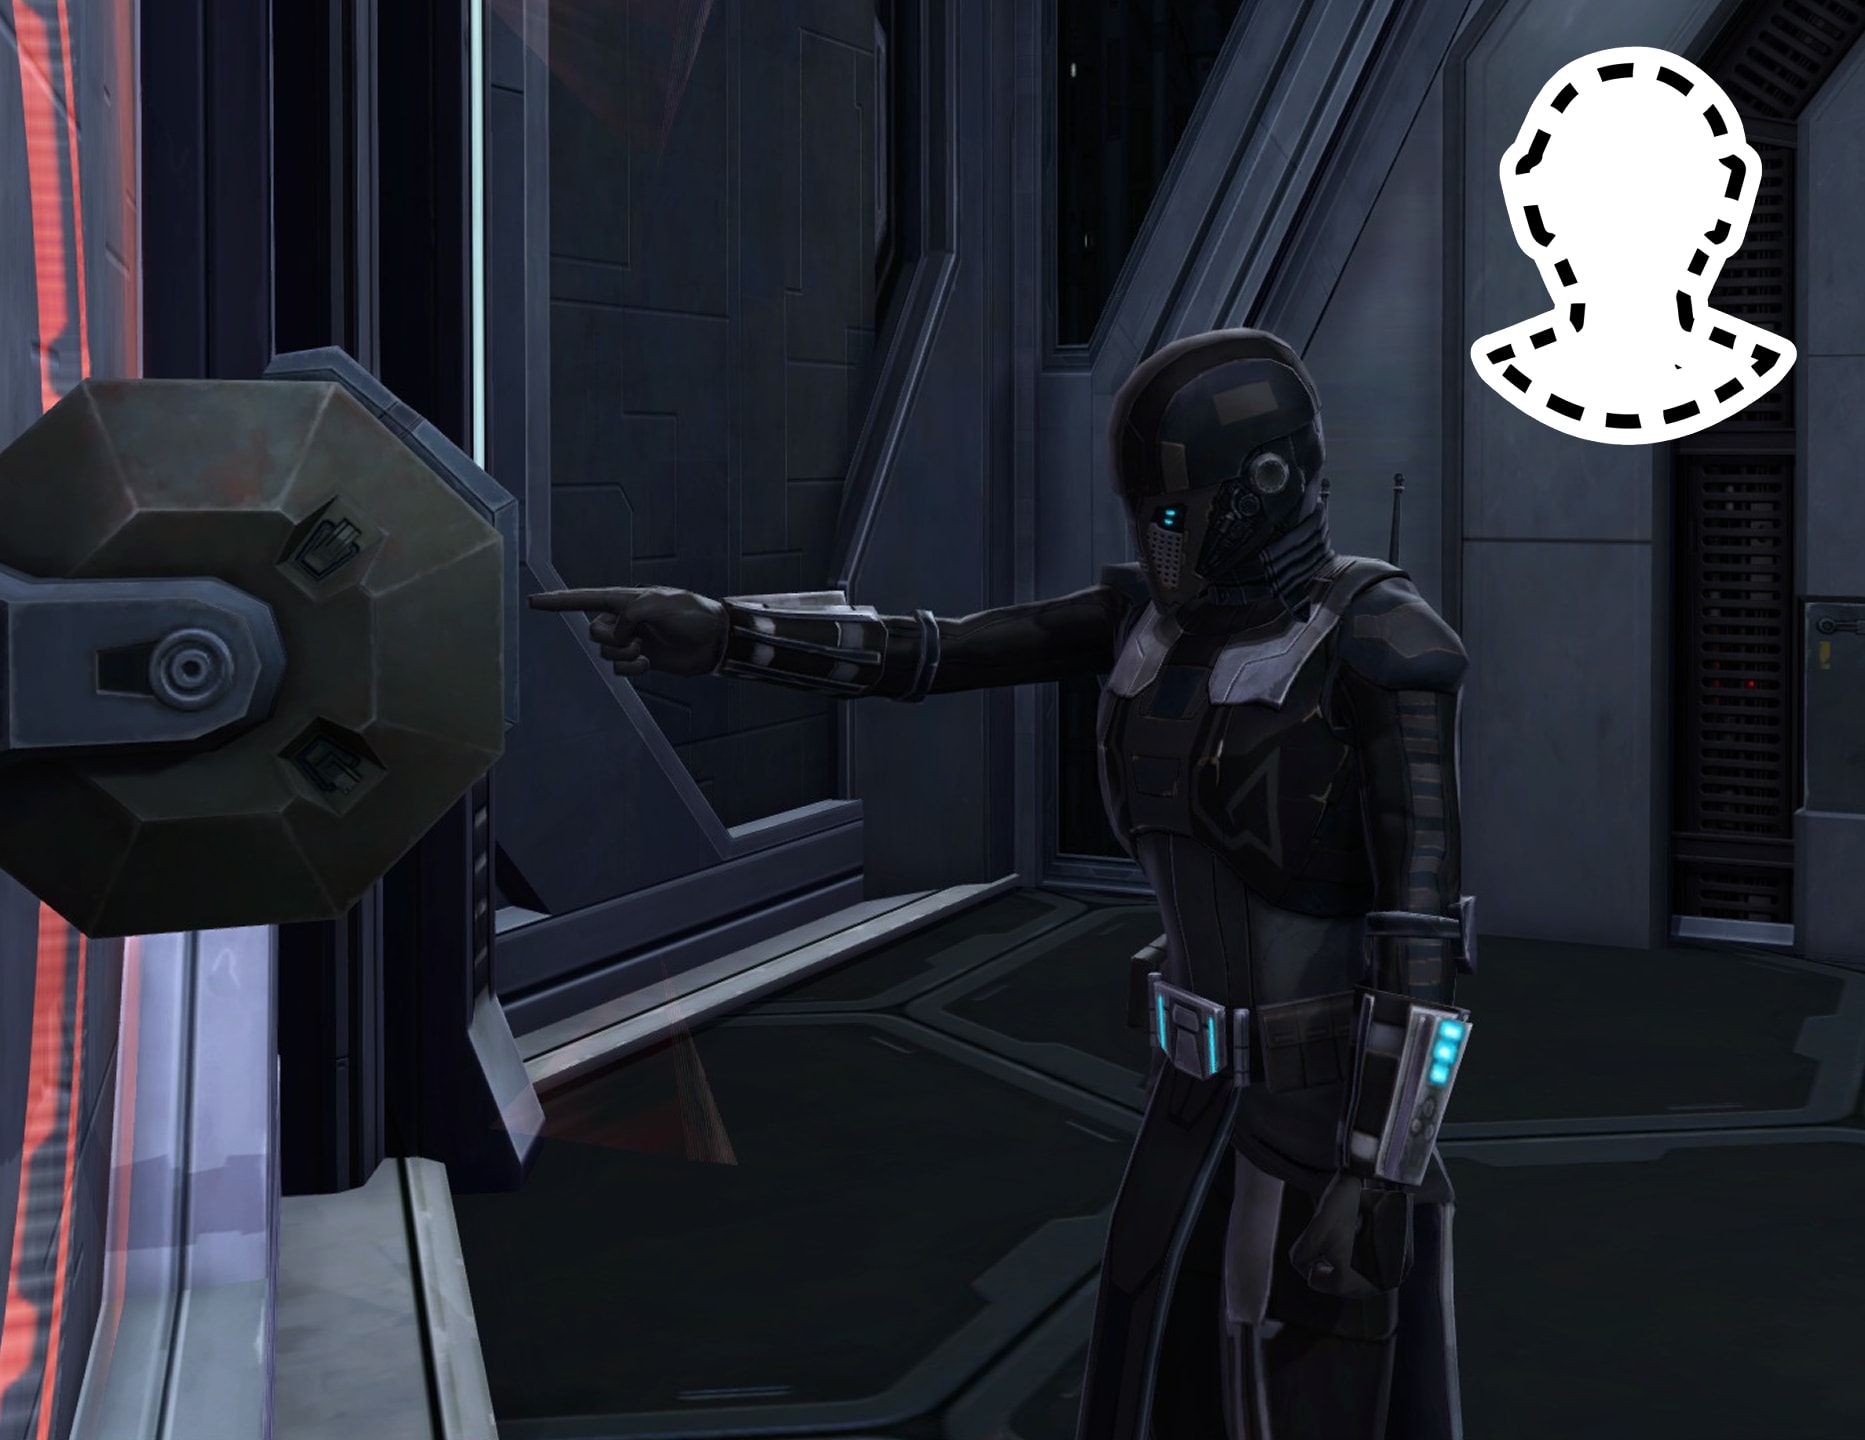
It is imperative to know how to swap Guard when fighting alongside two or more allies. To do this, you’ll need the Guard Ability set to something quick to access (I use the F key). Next you’ll need to open your Interface Editor to make sure the “Target of Target” window is enabled. This should allow you to see something like this:

Nadia is looking at me and her target (me) is on the far right. This is what the “Target of Target” window enables. So if you’re in a battlefield, you can press Tab to swap enemy targets in front of you to see who they’re targeting. If the enemy is someone like a Sentinel/Marauder, Shadow/Assassin, or other enemies that can deal high damage to your ally, you need to guard the ally they are targeting.
The fastest way to do this is to set a hotkey to acquire the target of your target. To set this hotkey, go to Preferences > Key Bindings > Targeting and scroll down until you find “Acquire Target’s Target”. Set the key to something you can quickly and easily access (I use the `~ key, the one right next to the 1 key). Now you have no excuse to NOT protect your allies in an efficient manner!
Stay within 15 meters of your guarded ally so their damage is reduced by 50%. The other 50% of that damage will be transferred to you. This damage can be reduced through your tank stats such as Damage Reduction, Defense Chance, and Shield Chance! Guard Damage will break Stealth. The enemy group will likely begin to focus on another target that you aren’t guarding. It is then your responsibility to find out who they’re focusing next, target their target, and guard that ally and repeat this process as necessary. The ability to Guard Swap is one of the core skills that separates the bad tanks from the good tanks in PvP alongside DCD timing and Resolve Bar management.
DPS Recommendations
Your job is simple, you just kill the enemy team to allow your team to secure a turret. Though it’s not as simple as it may seem, anyone can fire blaster bolts at someone all willy-nilly.
You must focus your fire on priority targets such as healers or squishier DPS units such as Sages, Sorcerers, DPS Shadows and Assassins, and DPS Vanguards and Powertechs.
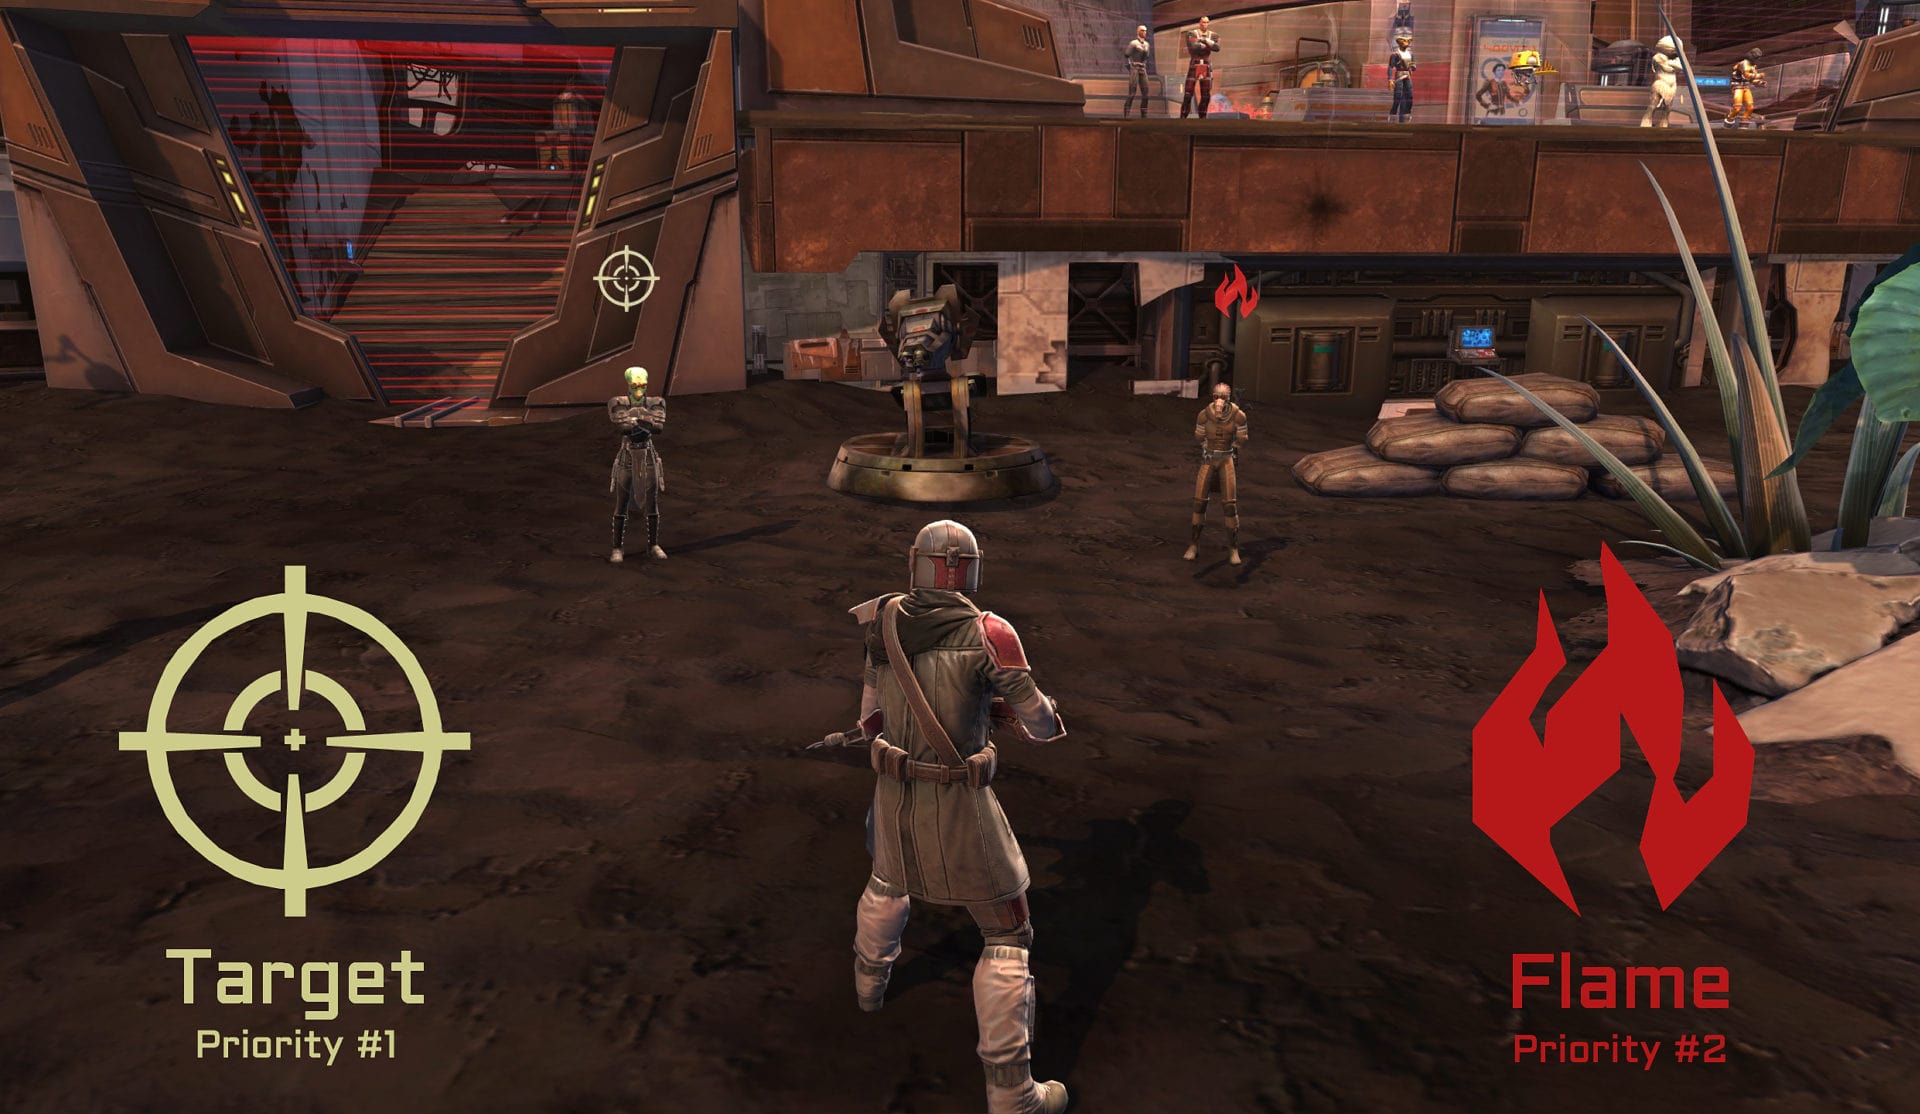
Utilize target markers to show teammates which target they should prioritize on. Typically a target with the Target symbol above their head takes first priority while a target with the Flame symbol above their head takes second priority.
Support Recommendations
Every combat style can provide support in some form or another as there is no dedicated support class outside of healers. Speaking of healers, you just need to heal your allies as usual with your priority being the tank if you have one (who should be guarding you).

Should all of your allied DPS fall in combat, you and the tank should have the means to stall hopefully long enough so your allies can respawn and run back. This is more easily done in the Middle Zone but can be harder to pull off in Snow or Grass if it’s being raided as it takes longer for everyone to reach there.
Let’s look at some of the many unique abilities among combat styles that offer great support for their team.
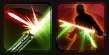
Sentinels/Marauders with access to the Transcendence/Predation ability are great to have at the start of the match.
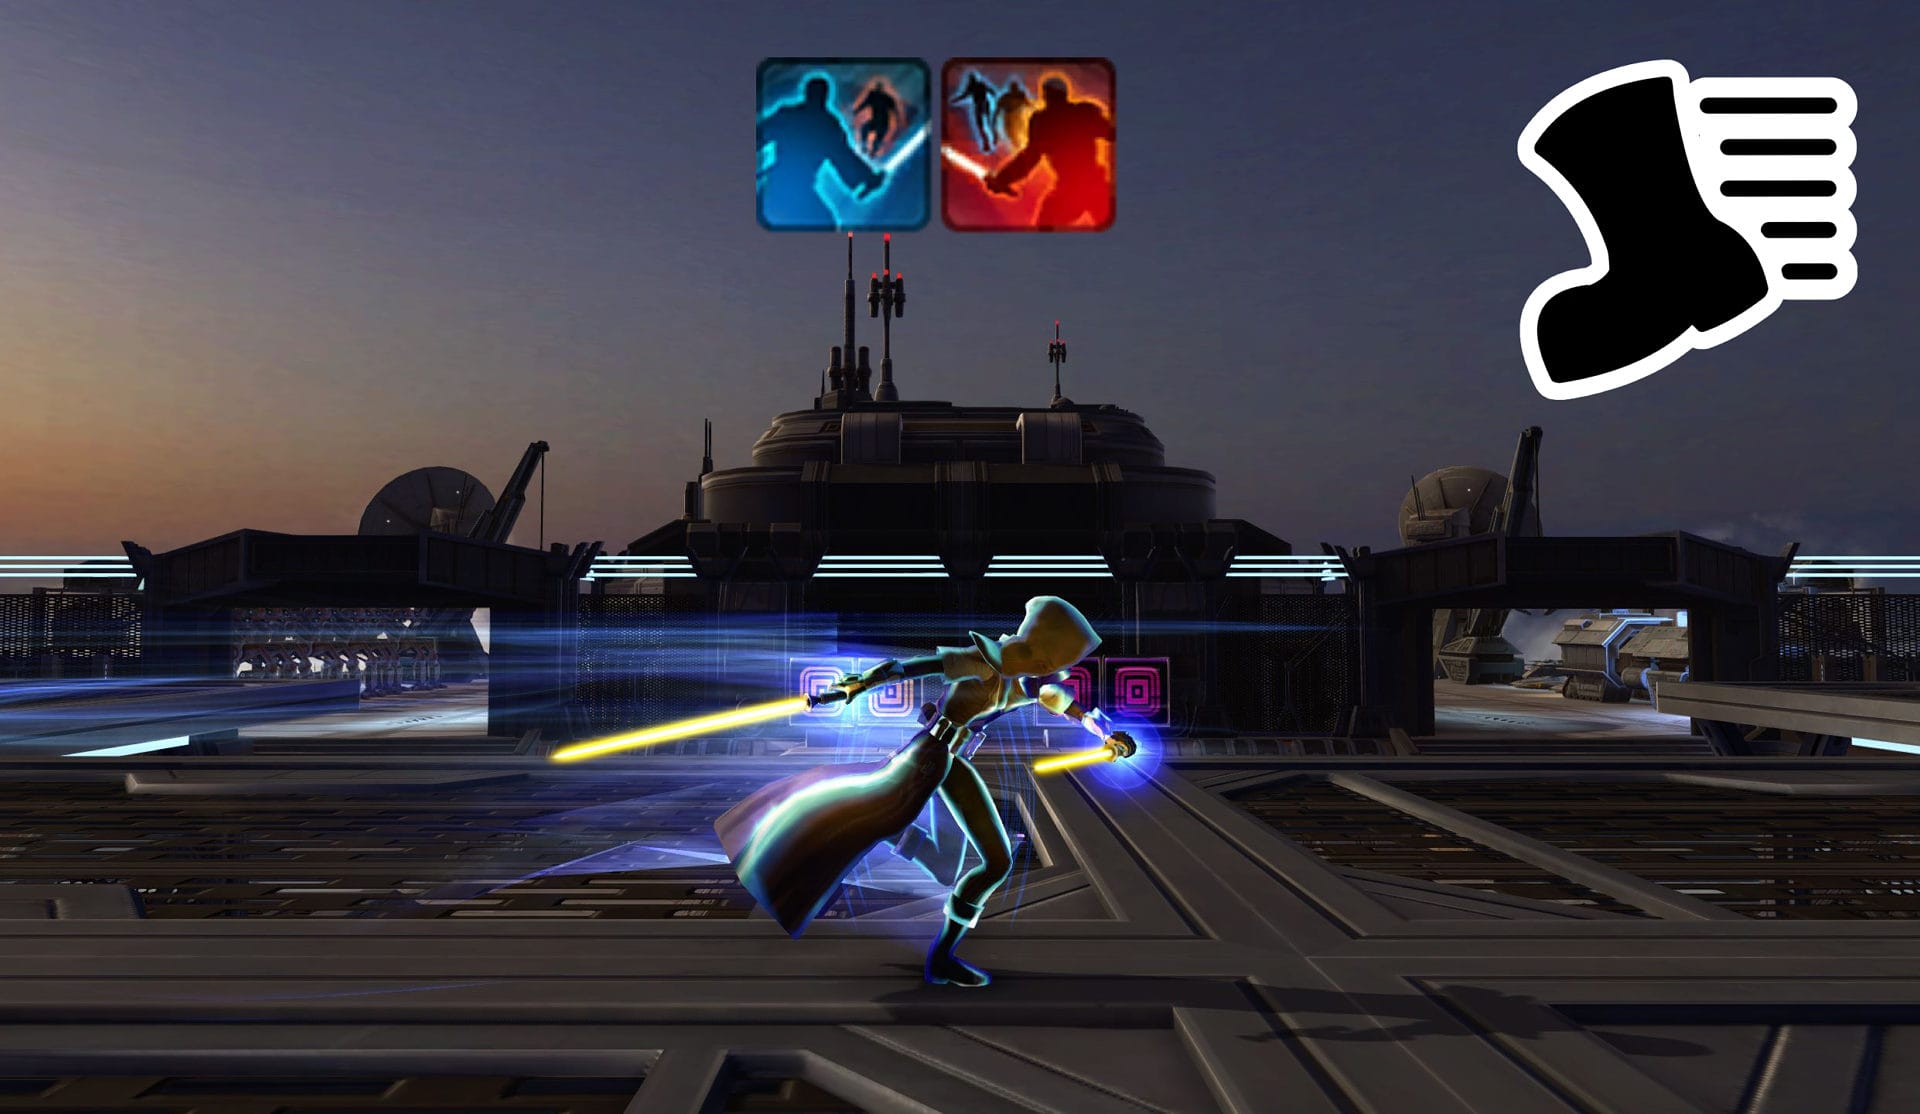
When used, this ability grants group members within 40 meters 80% more movement speed, 10% increased defense chance and purges movement impairing effects such as slows. This is great to use to help everyone reach the turrets sooner and hopefully secure them before the enemy does.
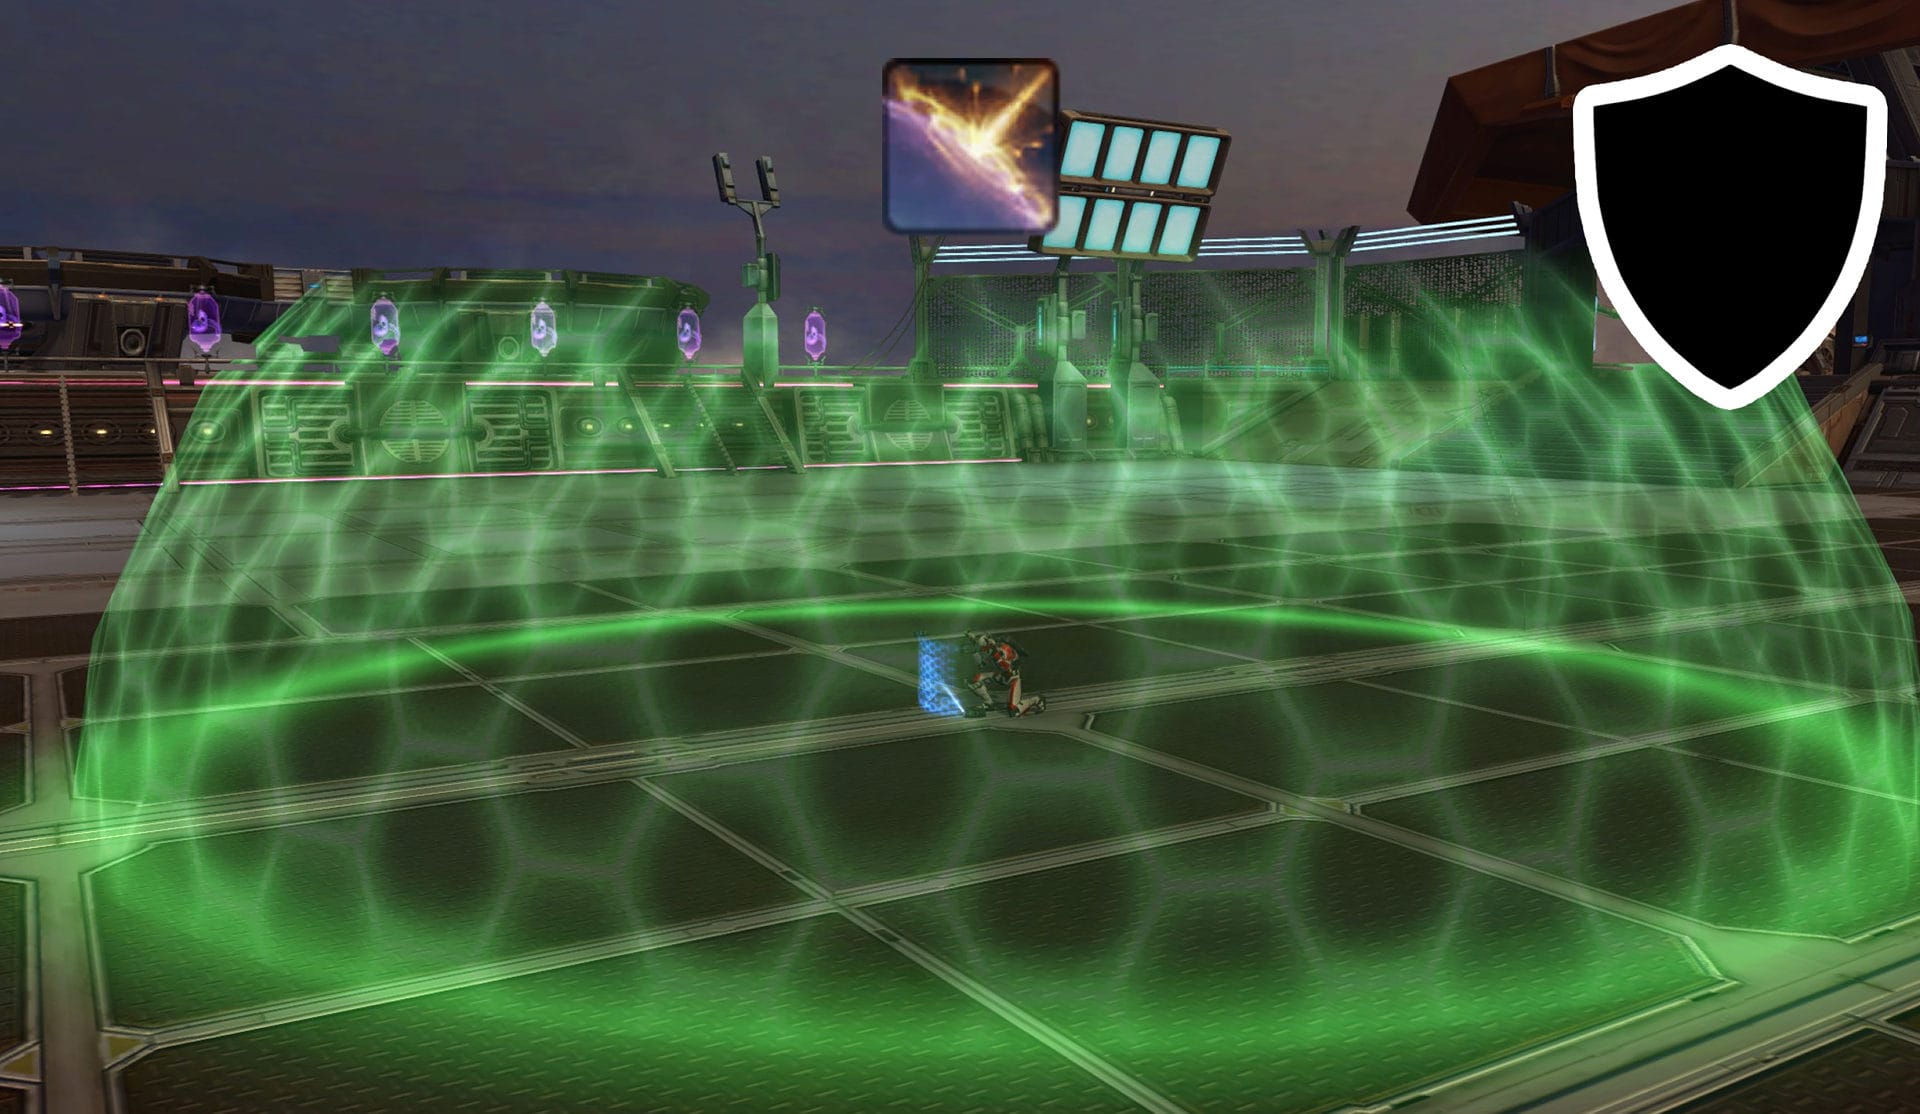
Gunslingers/Snipers have access to a great ability called Scrambling Field/Ballistic ShIeld. This creates a circular area with a 10 meter radius that reduces damage done to allies within the area by 20% for 20 seconds. With a 3 minute cooldown, this should be used wisely and during times when combat is very intense.
Stealth Scan is an ability that Troopers and Bounty Hunters can gain access to. When used, probe droids will scan an area for 15 seconds, detecting any enemy stealth units. If an enemy stealth unit is caught, they’ll be immobilized for 3 seconds.
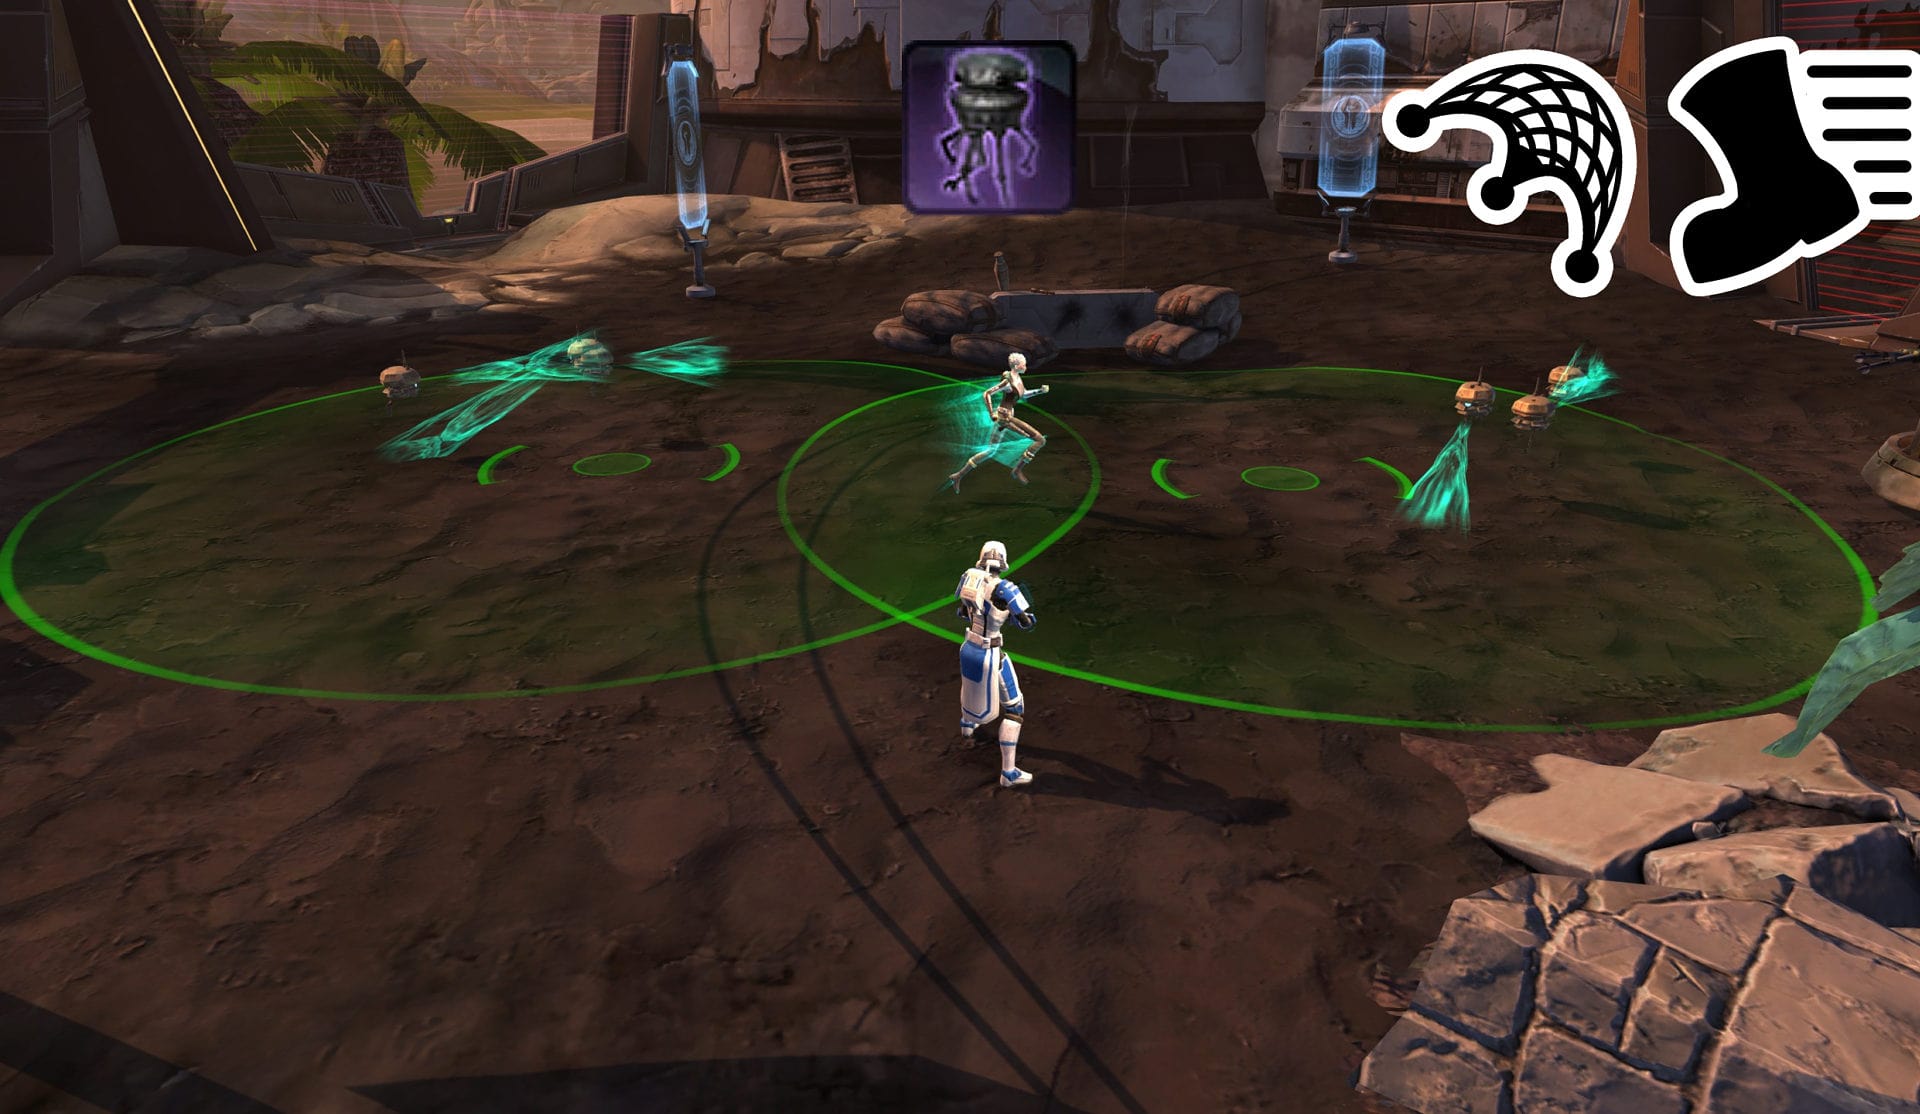
Allies within the area also gain 50% movement speed so long as they remain within it but will keep the effect for 6 seconds if they leave the area. This ability is great to use right after a stealth unit uses their combat stealth to disappear mid-combat.
Catching them will throw them off and ruin their momentum. Since this is on a 10 second cooldown with a 15 second duration, Stealth Scan can have a 100% uptime in an area. You can even link the two zones to increase the area where allies get increased movement speed.
Scoundrels/Operatives have access to the Smuggle/Infiltrate ability. When used, the caster creates a field around them with a 10 meter radius that lasts for 15 seconds.
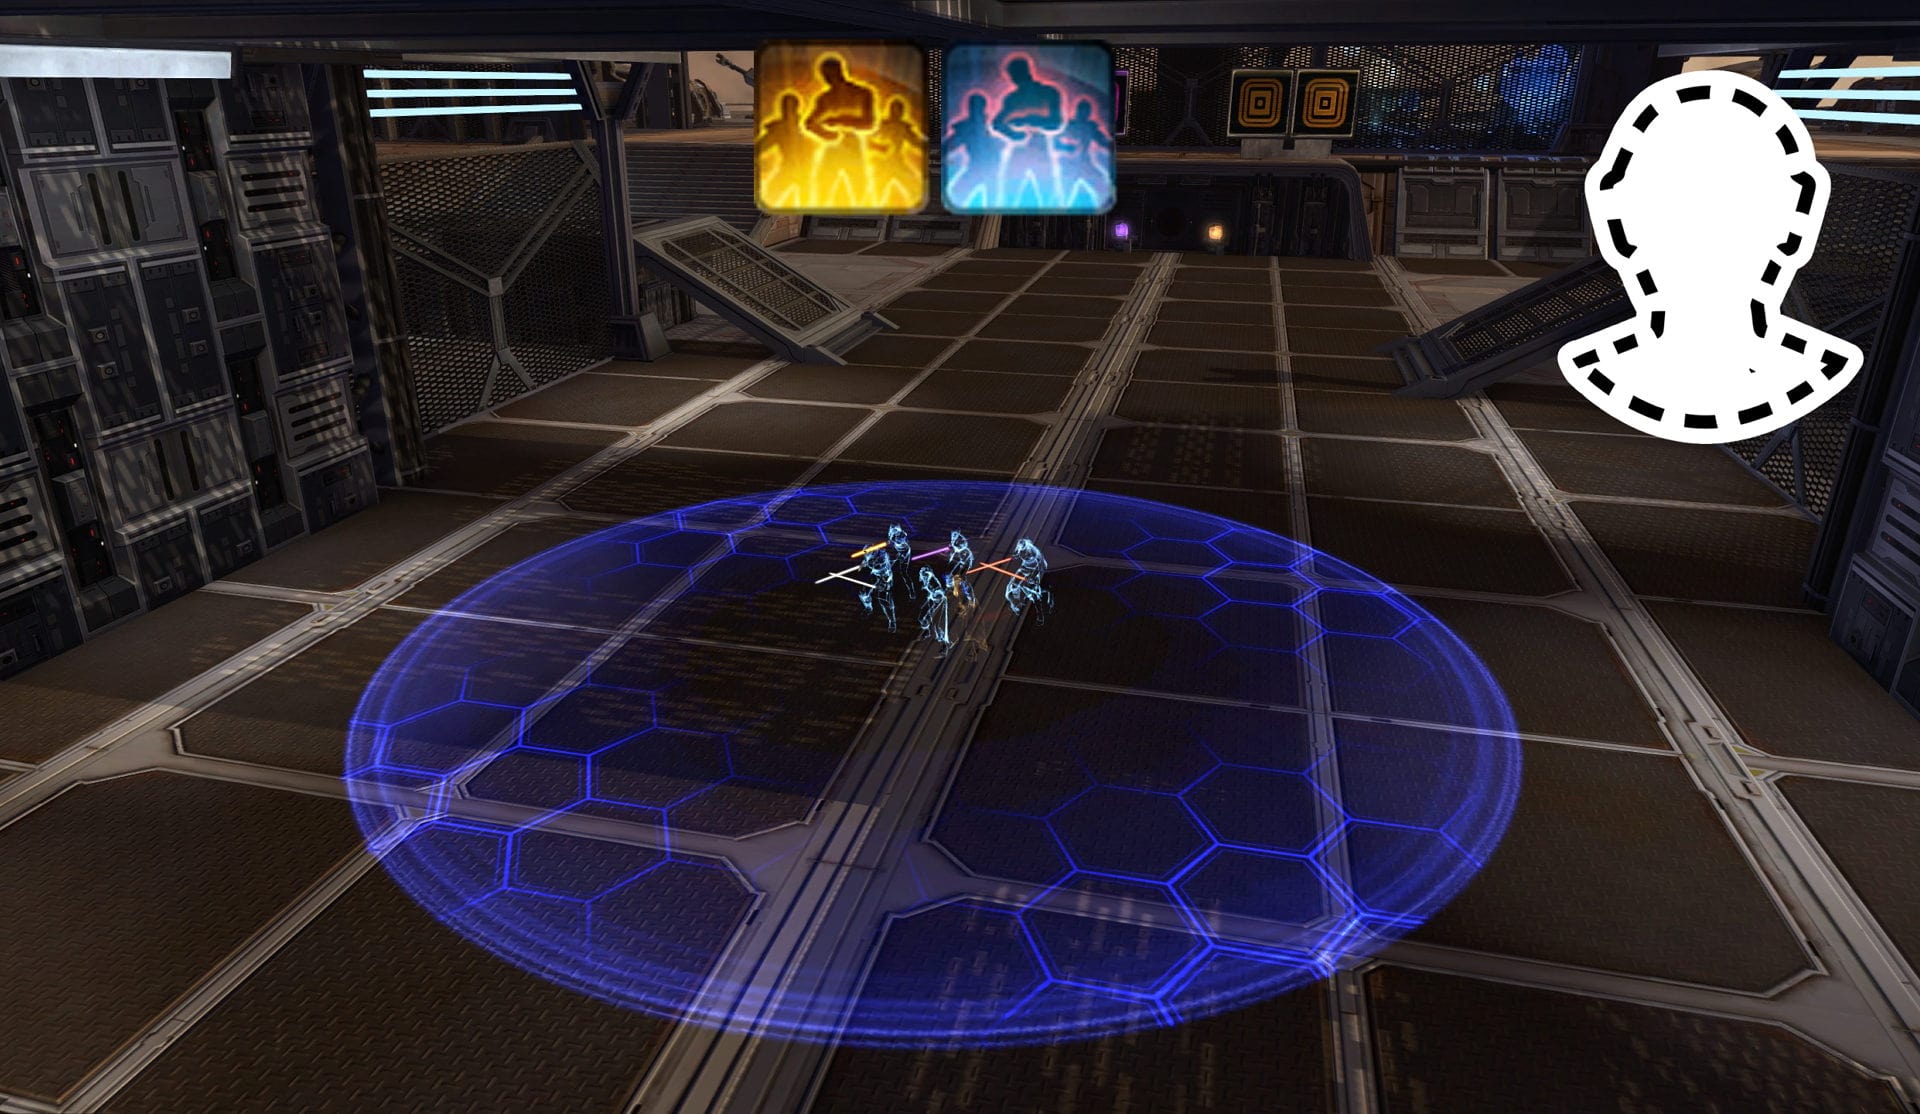
Any of their group members within this field will be cloaked as well for the duration of the ability. Assuming perfect coordination and no movement speed bonuses, the group can move up to 100 meters while stealthed. You will likely not see this being used as many Scoundrels/Operatives prefer the Trick Move/Holotraverse abilities for mobility. Regardless, get familiar with this ability as a well coordinated team can do serious damage with this ability.
If your combat style has access to an area ability that can be cast at a specific point, then you must keep an eye on the control point if you’re fighting near one.
Oftentimes someone attempting to capture one will hide behind the point to avoid targeted abilities. Area abilities will ignore this line of sight issue, so casting this on top of the control point will stop someone in the middle of capturing the point. Direct damage AoEs are needed to stop a channel so indirect damage AoEs will not stop the channel.
Stealth Recommendations
Stealth units have the luxury of entering combat on their terms. In Alderaan Civil War, their job is to act as recon, capture control points, and/or dispatch priority targets in group combat.
Non-stealth units will find it difficult to type in the midst of combat, meanwhile stealth units can tell their team about enemy movement while hidden away. While providing recon is important for your team, don’t let it be the only thing you do. Contribute to your team’s efforts by participating in group fights or capturing enemy turrets.
Communication is an important task for any stealth unit to perform. While they have the ability to type safely while cloaked, they should learn to abbreviate their words to cut down on their time typing.
Here are some common abbreviations and terms used for PvP communication:
- DPS = Damage Per Second, typically to refer to a damage focused player.
- Tank = A player who focuses on defense, typically tough to kill
- Heals/Healer = A player who focuses on healing other players, they are
- AoE = Area of Effect, typically a damaging ability that hits several targets in an area.
- CD = Cooldown
- DCD = Defensive Cooldown
- GCD = Global Cooldown
- CC = Crowd Control
- Mez/Mes = Mesmerize stun, typically lasts 8 seconds and breaks on damage taken.
- Sap/Sleep = A mesmerize stun used from stealth
- Rez/Res = Revive
- Omw = On my way
- Cap = Someone attempting to capture an objective
- MVP = Most Valuable Player
- Thrower = Someone who is intentionally throwing a match
- Farming/Inting = The act of intentionally getting killed to help the enemy team
- Carrying = The act of helping a team member or the whole team to win when they would not have been able to otherwise.
- Pocket Healer = A healer who only heals one person, typically someone who queued with that player.
Guarding A Turret
What separates the good turret guards from the bad turret guards? Vigilance, discipline, communication, and knowledge. This role is a very important one and sometimes, not the most exciting one, but one that should be filled regardless of the situation.
More often than not, the turret guard will end up having to fight a lot of 1v1s during their duties. Due to this, it is very important for them to know their rotations and how to use their abilities against certain enemies. For this portion of this guide, we’re looking at this role from the perspective of a side turret guard. The middle turret is more often than not the center of attention (literally) and will have constant combat. Let’s go over the various aspects of guarding a turret.
Lookout Duties and Communication
When you guard a turret, you must keep your eyes on the high traffic zones as that’s where enemies will come from. This can be seen as the most boring aspect of the job by many but it is by far the most important one. In the images above you can see highlighted areas.
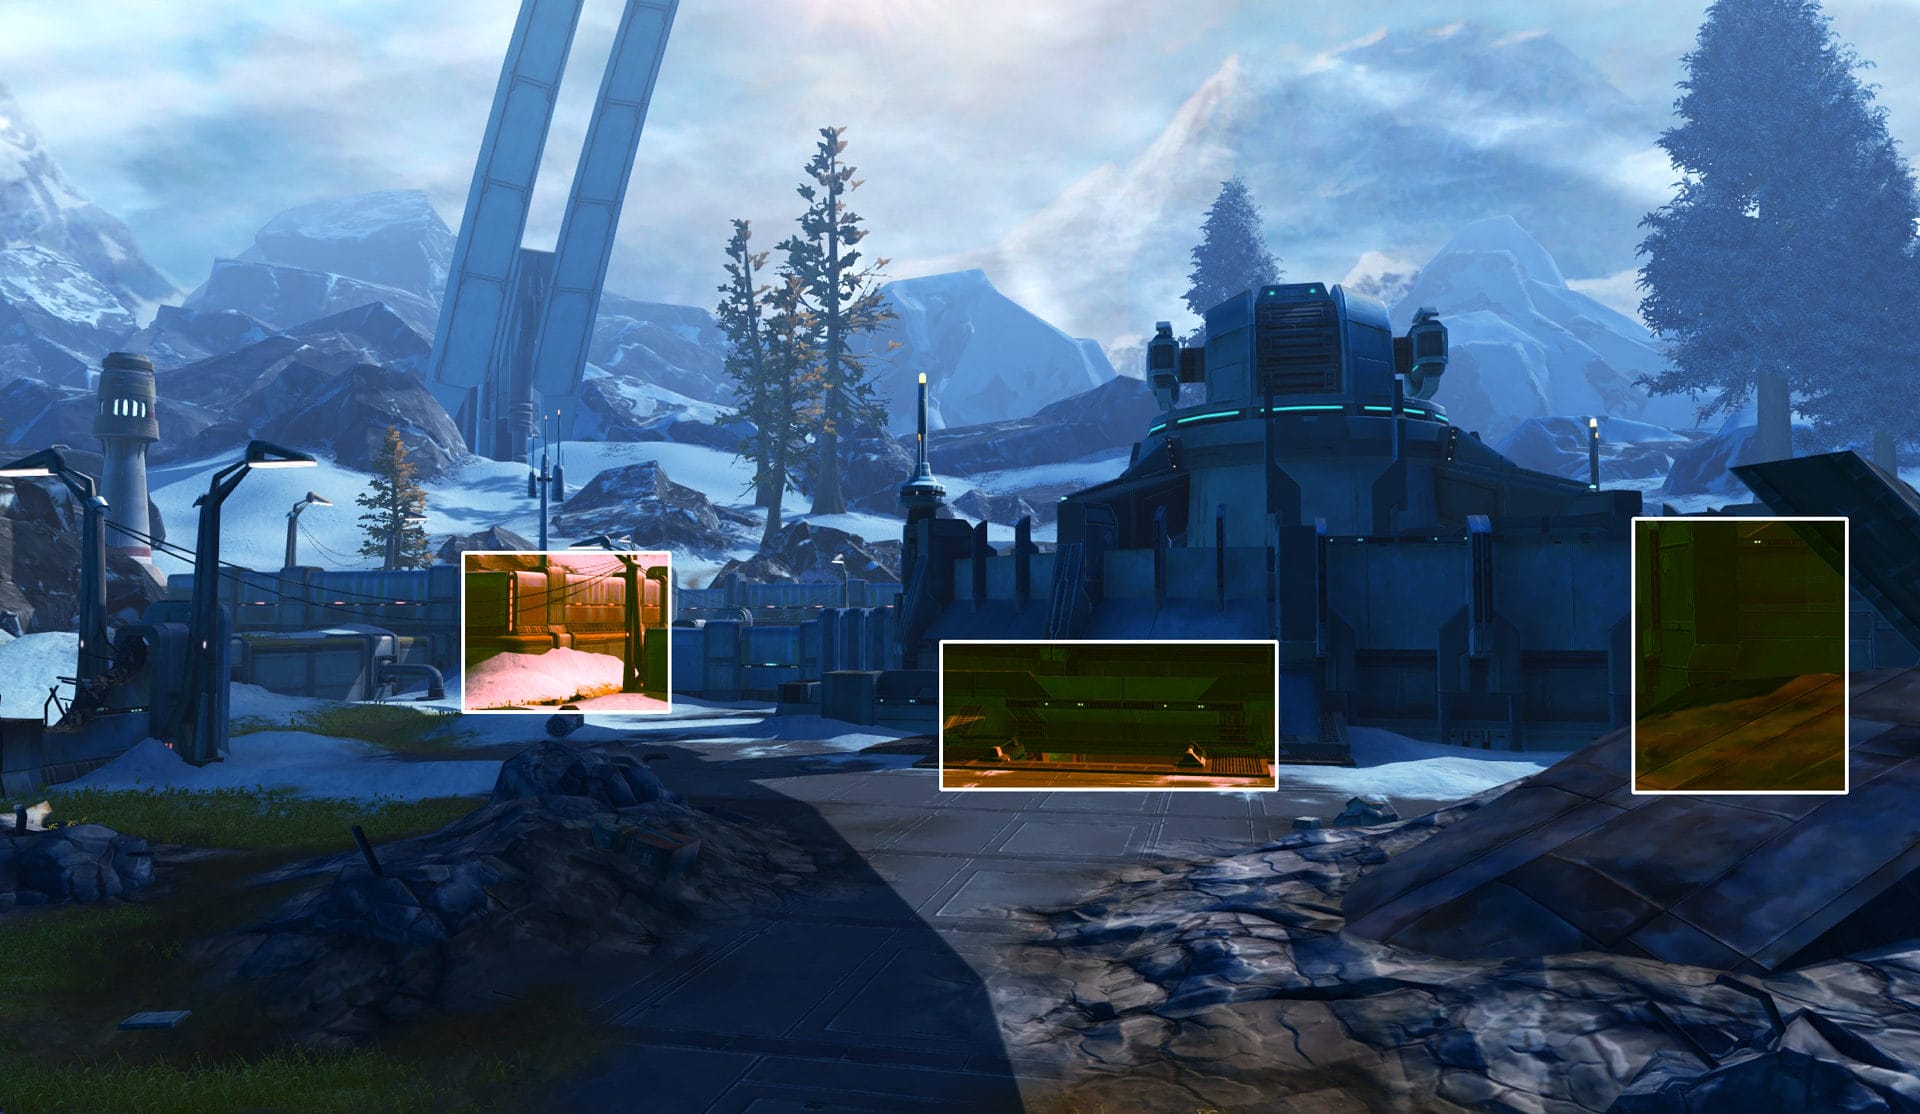
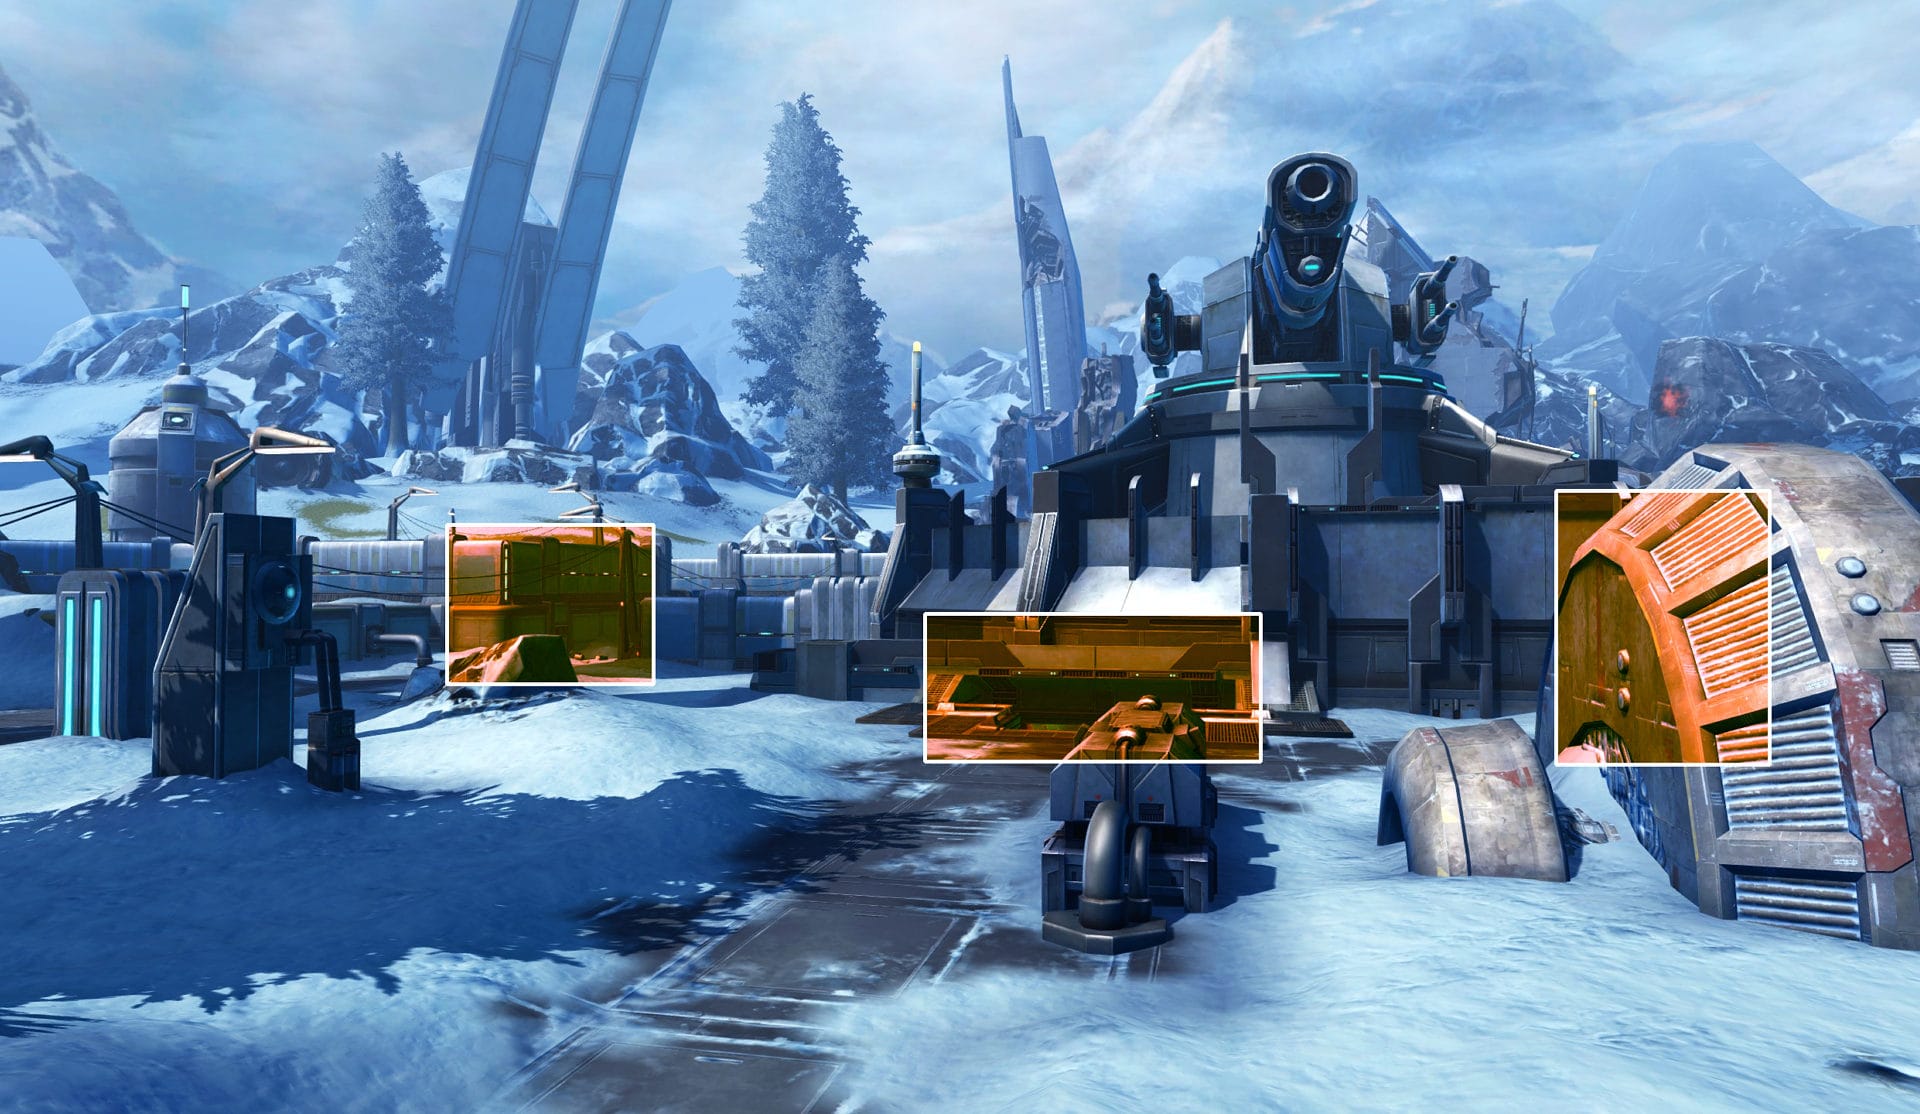
These areas are where you want to keep your eye on for incoming enemies. The moment you see an enemy coming, you need to type to your group how many are going to where. Let’s use an example scenario.
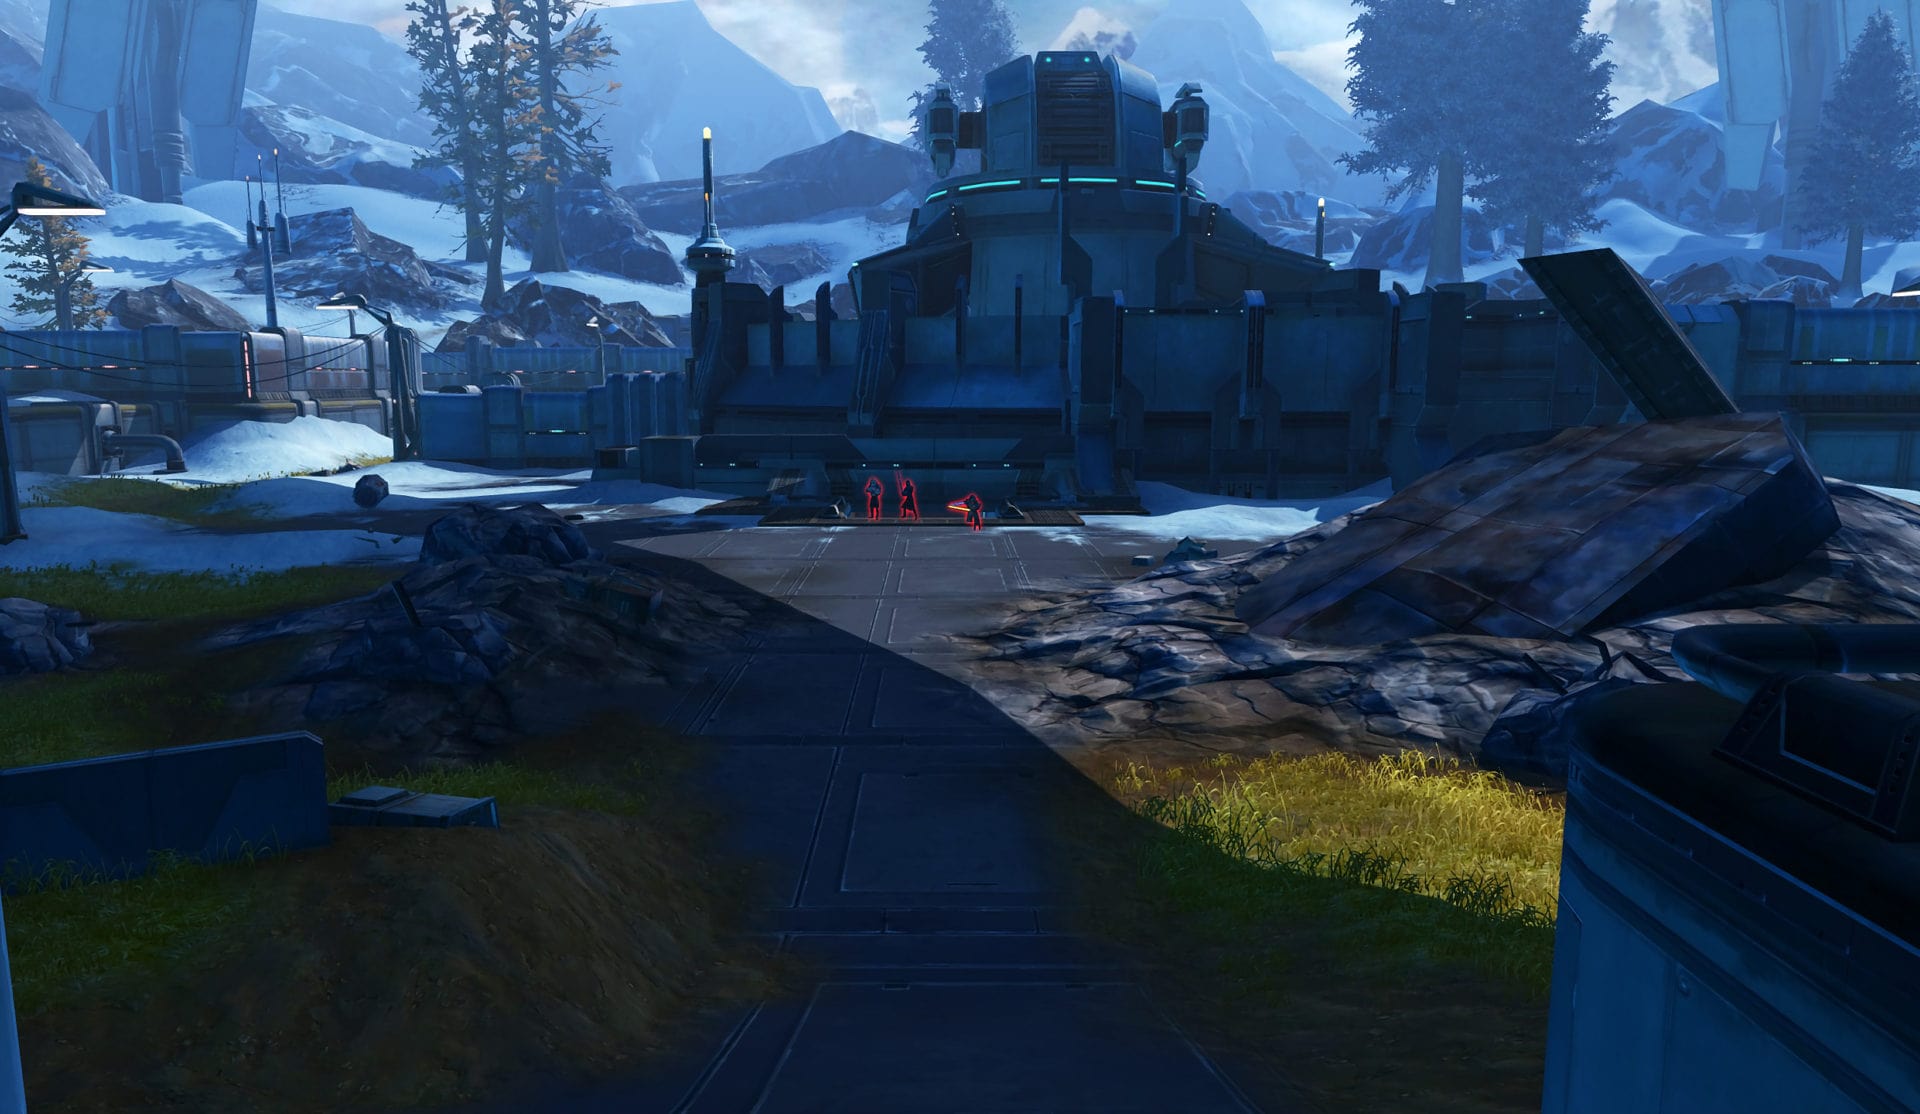
You’re at Grass and you see 3 enemy players (highlighted red in the image above) coming from the underground stairs. What do you type to your team?
While you could say “We got 3 enemies incoming to grass”, it’s inefficient. Instead, you must summarize that to something like “3 inc grass” or “3 INC GRASS”.
Whether or not you use caps or not is up to you, just limit the caps to recon chat remarks and not standard chat. This allows your team to quickly know how many are coming to snow and how many to send your way, in this case at least 2 people.
If you were to just say “INC GRASS”, this can cause your team to overreact and send the whole team there leaving another turret unguarded only to find out there were 2 invaders. Use your nouns and adjectives when typing because people can’t read your minds and often lack map awareness.
Do not be one of those people who doesn’t state incoming or states incoming after you were defeated or are about to be. You must be proactive with your lookout duties to ensure the best odds at maintaining control of your turret.

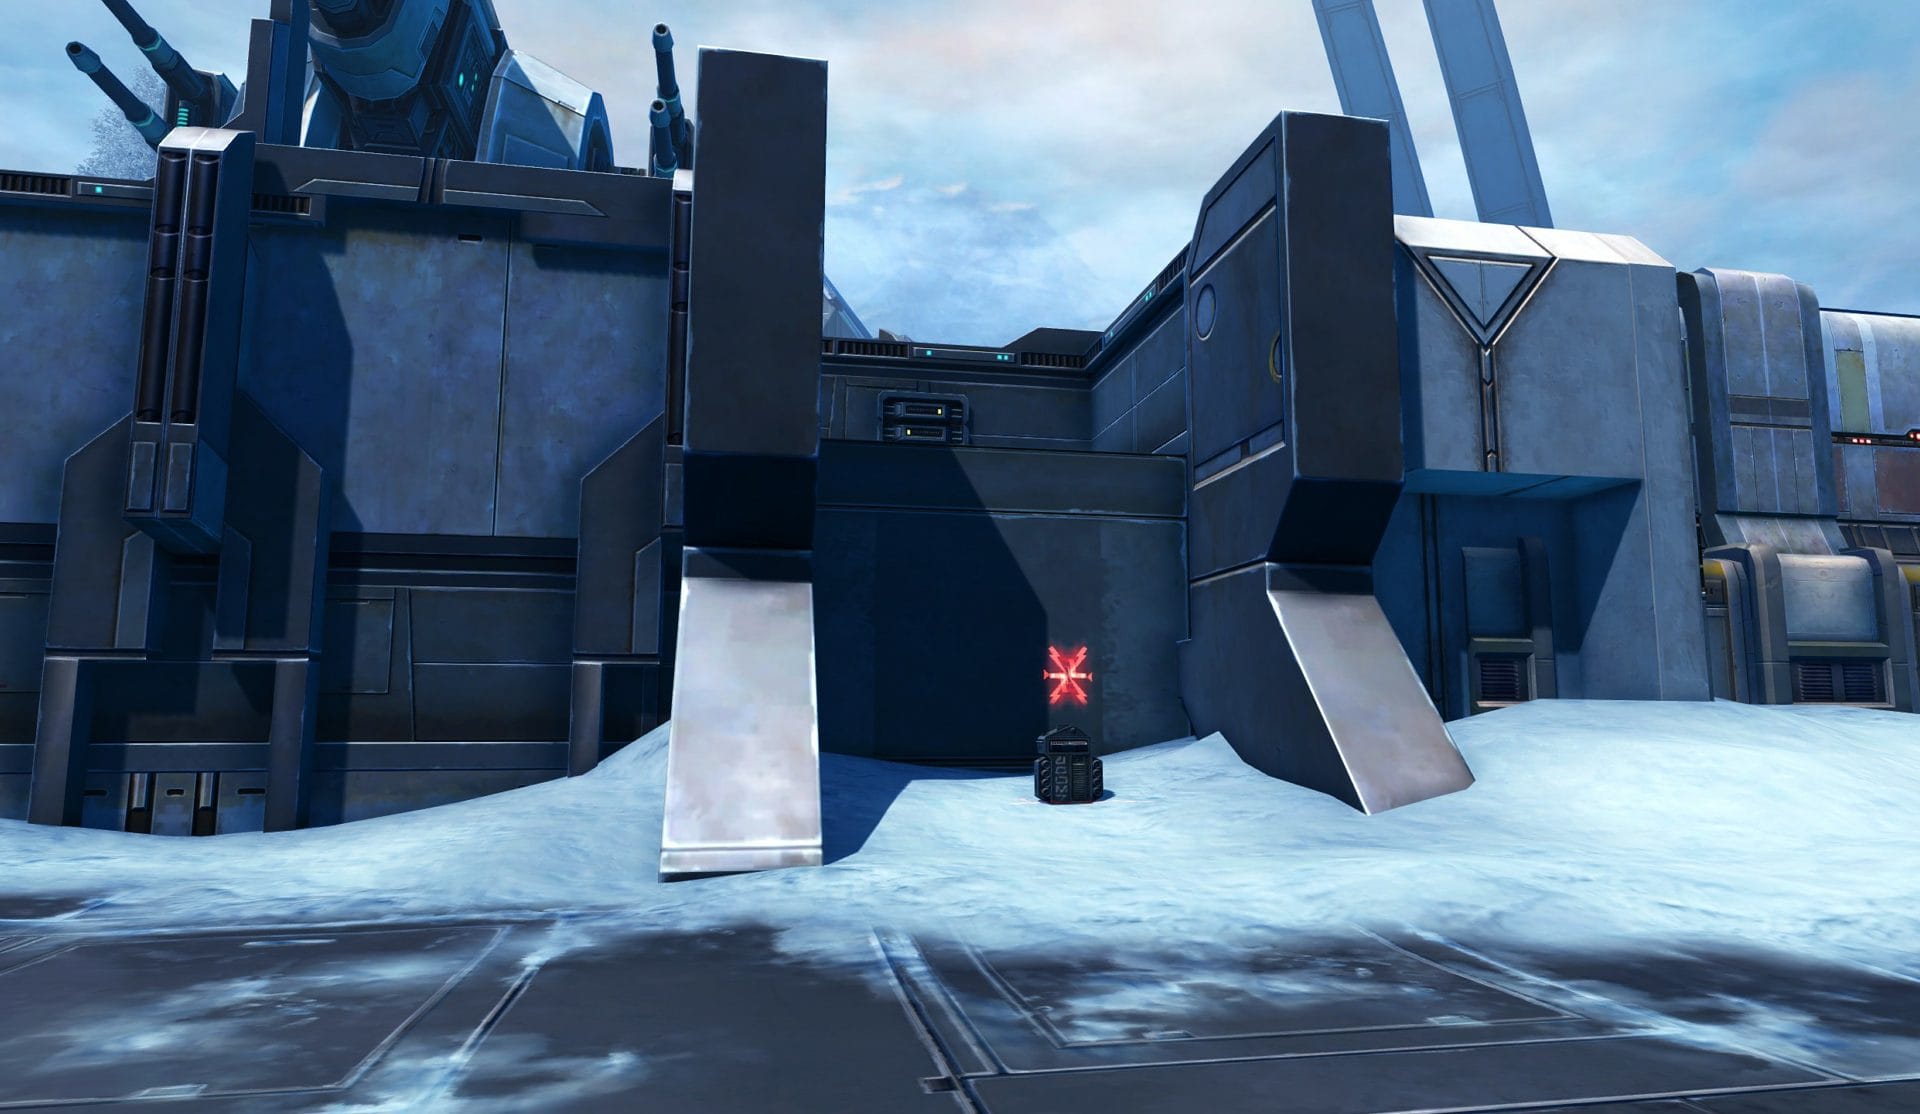
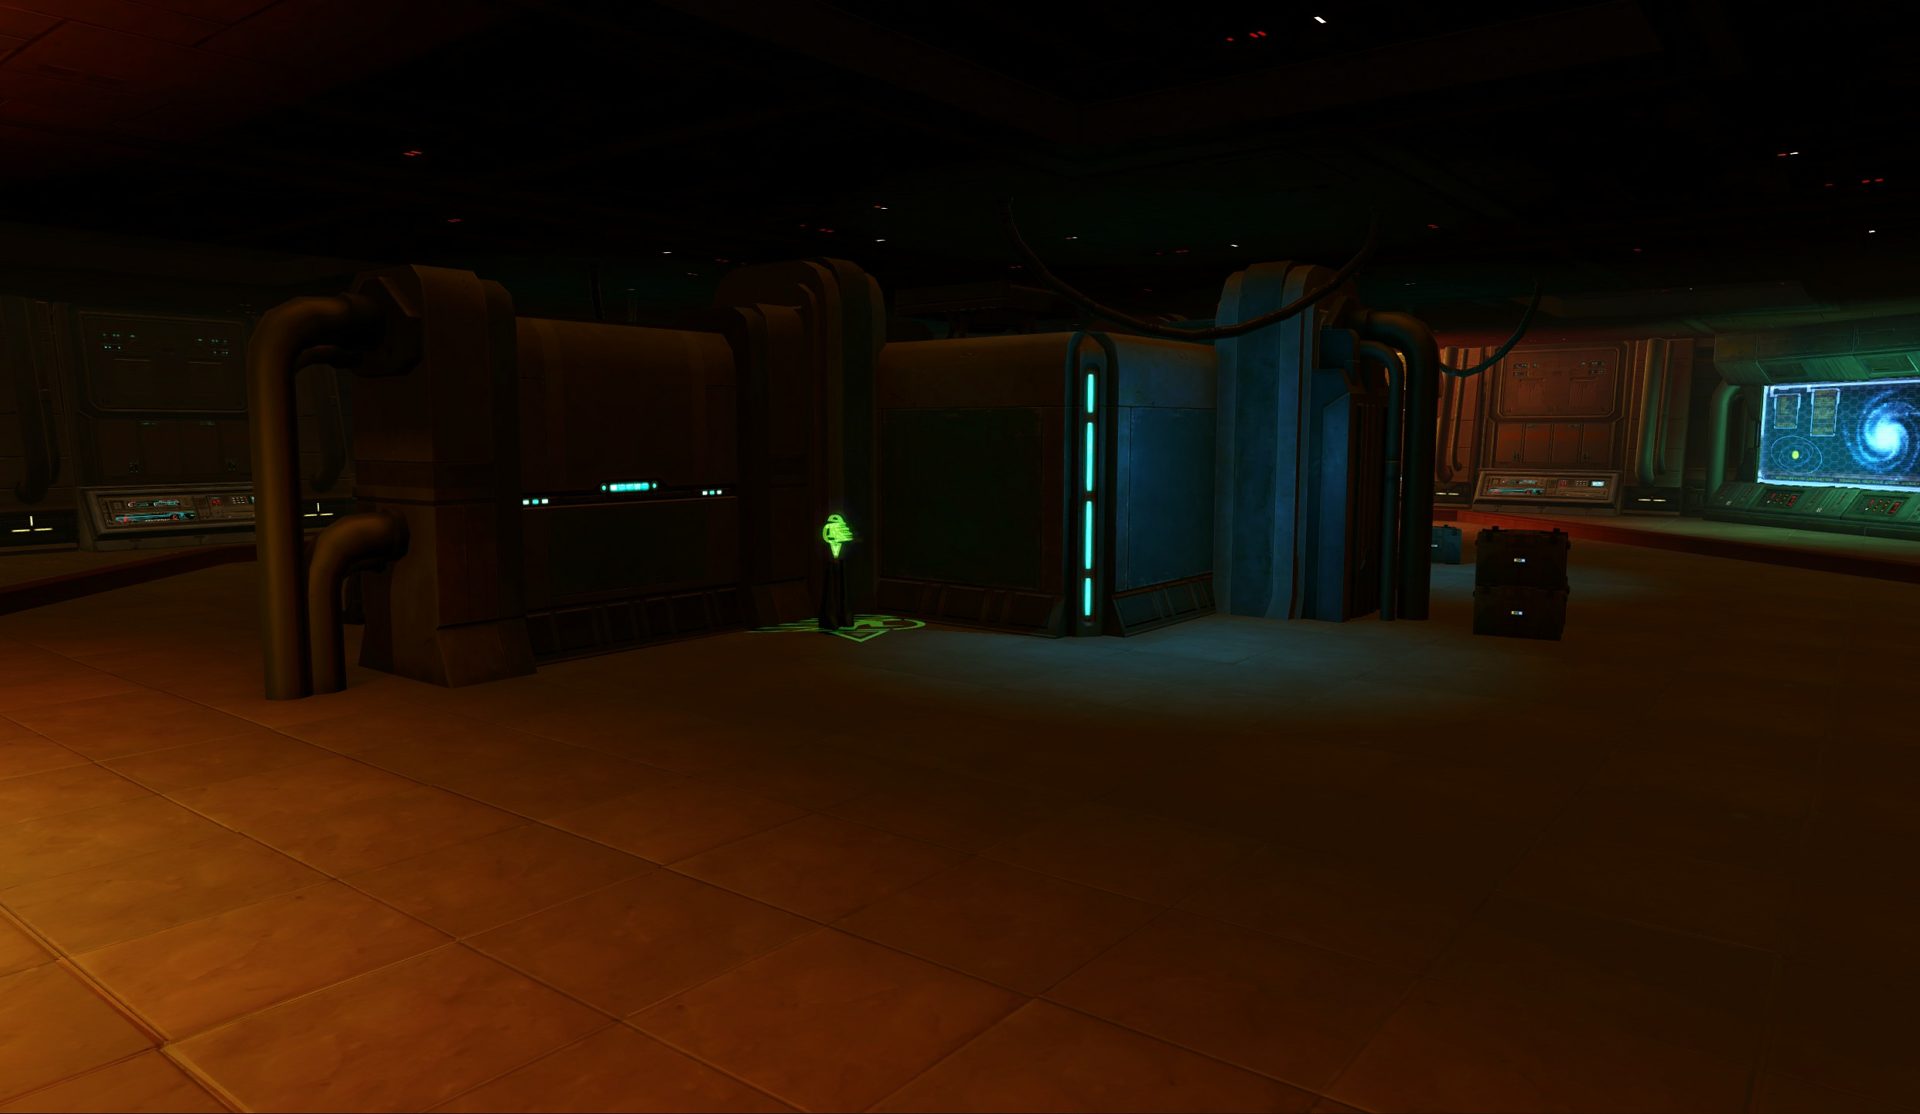
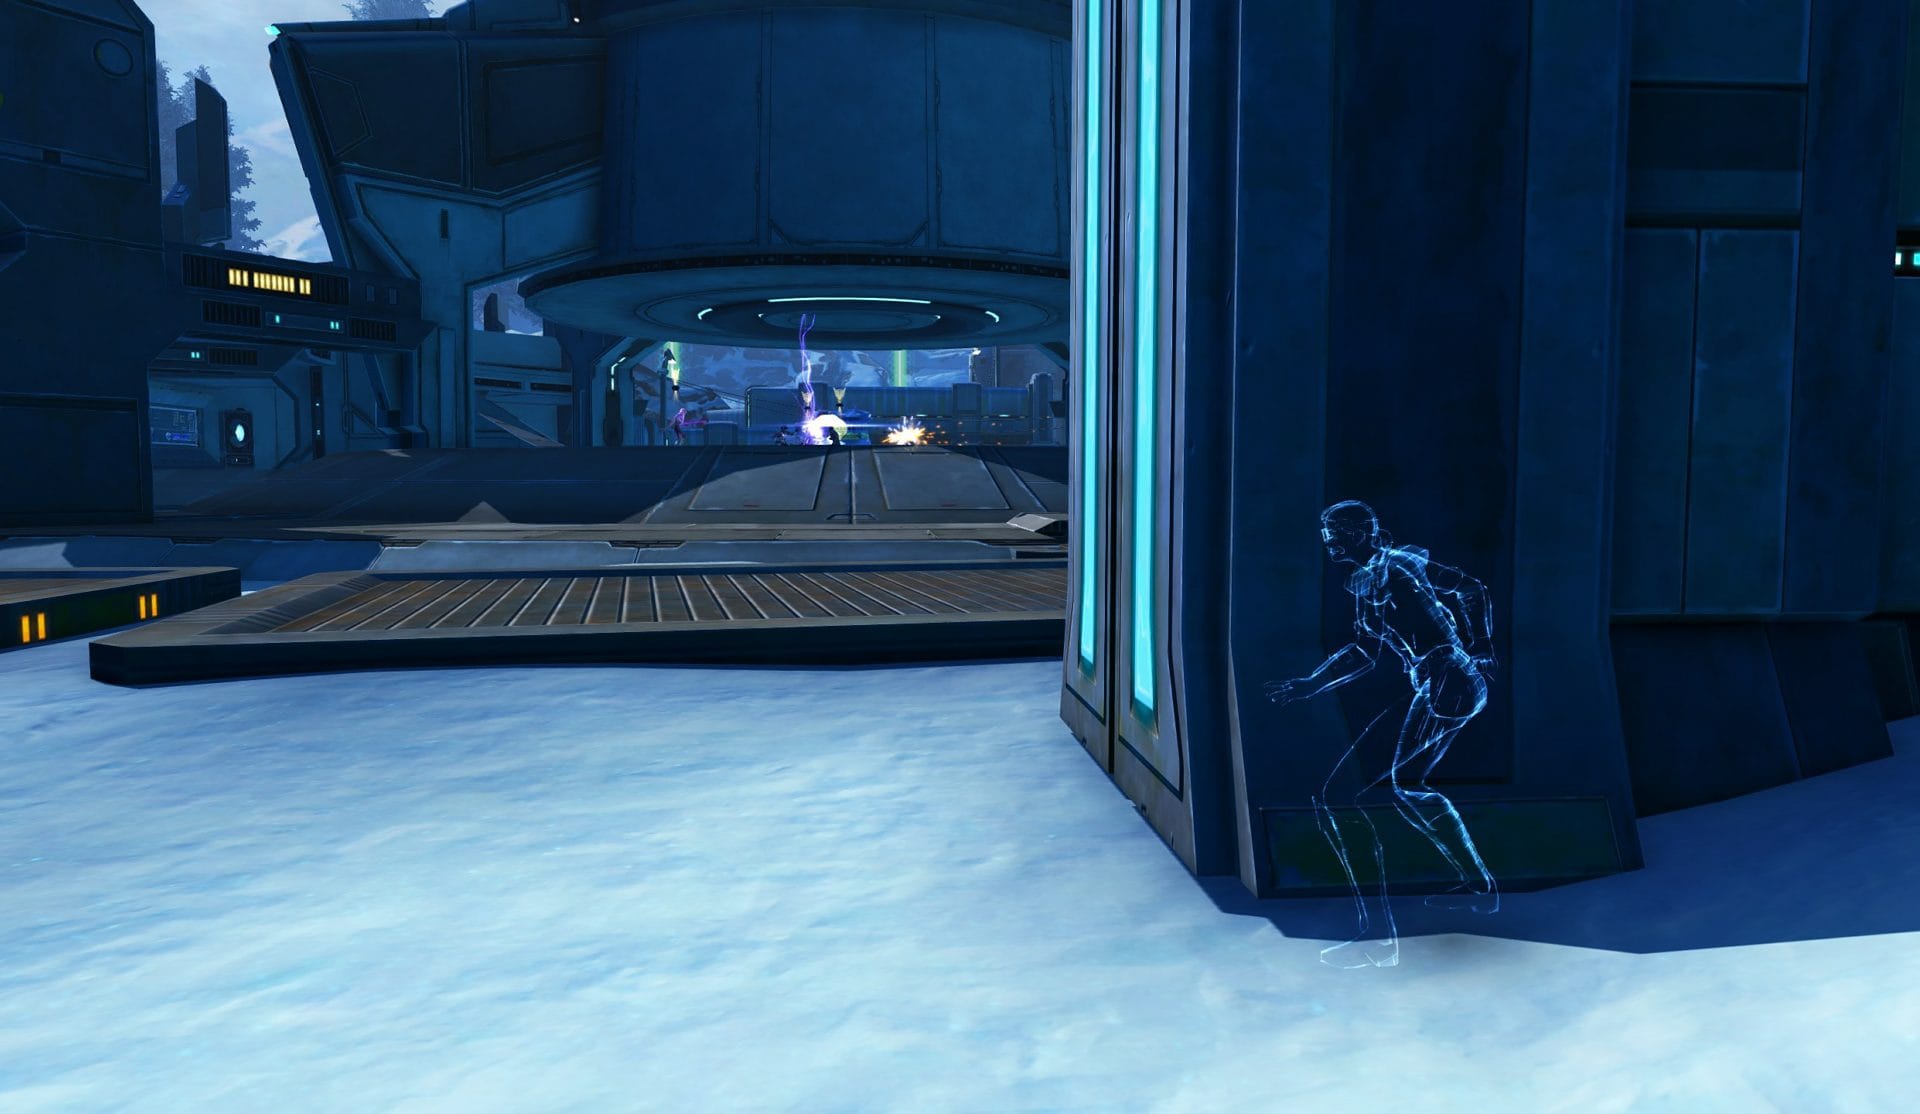
If you’re guarding a turret and lack stealth, this spot is a good place to hide so you cut off line of sight from enemies while still being able to keep an eye on the high-traffic zones.
Spacing
What is spacing? Spacing is your ability to keep your distance from your opponent when necessary. Why is this important? To deal with mesmerizes and incapacitated.
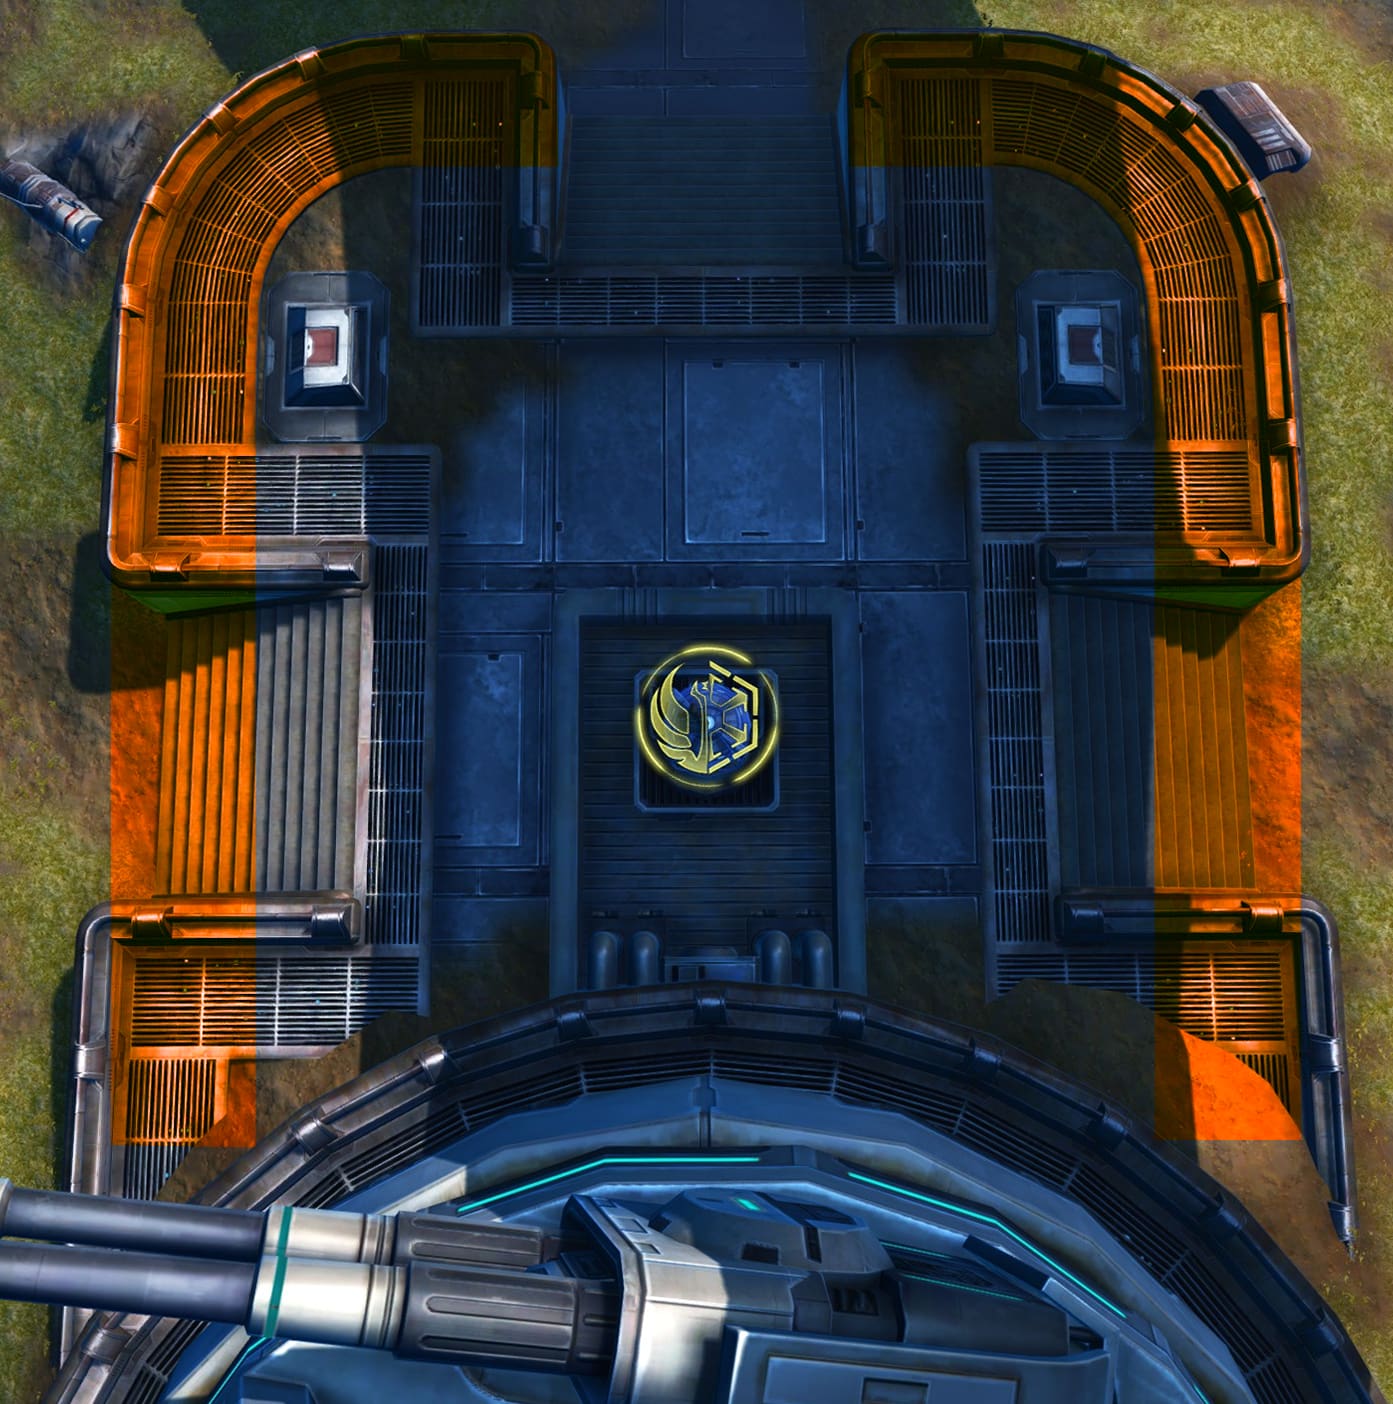
More often than not, the type of enemy that will be attempting to capture a turret from you will be a stealth unit. They have access to a stealth mesmerize which will leave you unable to act for 8 seconds, this is just enough time to allow them to capture the turret. In the image above are highlighted zones, these are the areas in which you want to stand in.
Standing out here will make the enemy spend a second or two running to get to the point if they incapacitate you, leaving you a second or two to react once the mesmerize wears off.
If they’re very dedicated to capturing your turret, they’ll have a backup incapacitate that can be used out of stealth. Spacing is very important so you can use that second or two to react in order to save your CC breaker ability for this second incapacitate. If you use it on the first, this makes you unable to get out of the second allowing them to capture the turret with ease.
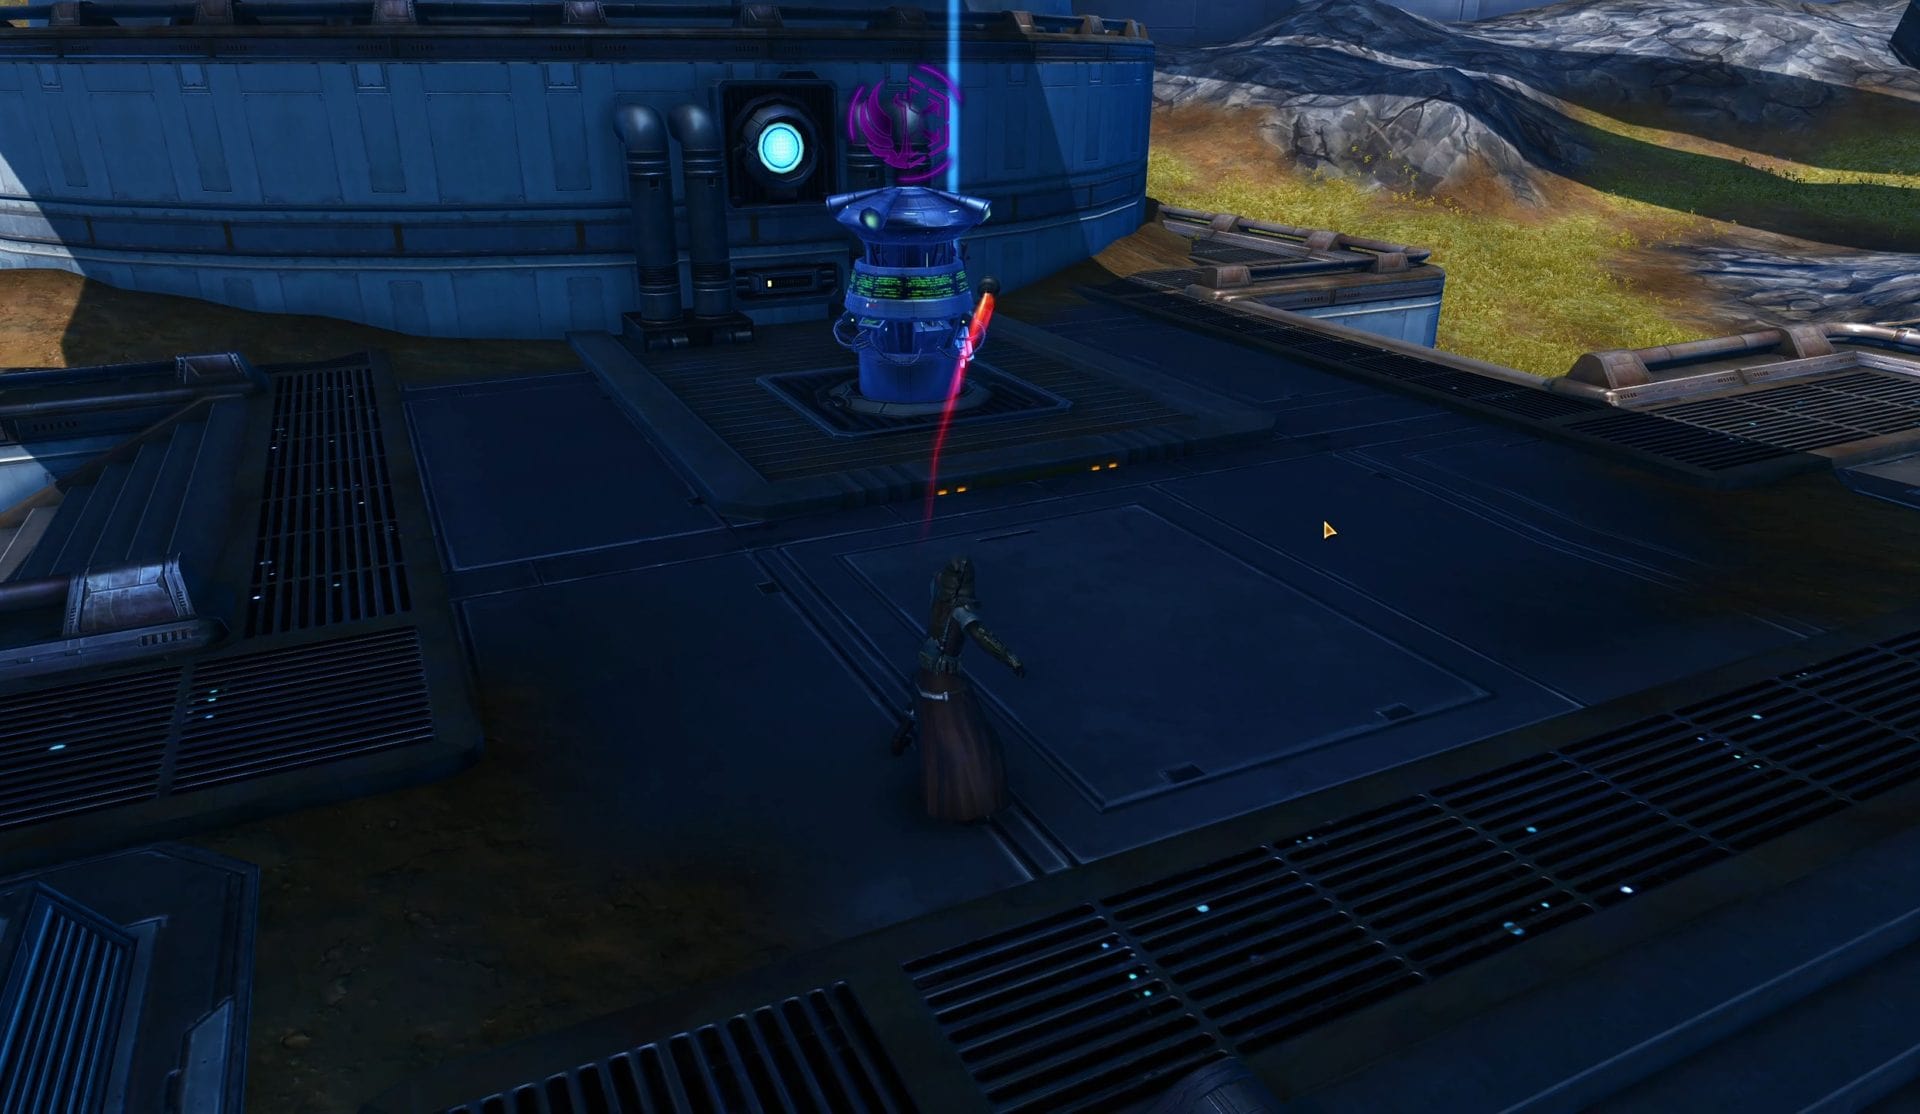
A common trick enemy will use is to hide behind the turret control point opposite the turret’s guard. This prevents the guard from using any targeted abilities to stop their channel.
Area abilities are a good way to get around this but if you lack a point-and-click area ability, a good substitute is to use the various V-9 Grenades made by Cybertech crafters.
I would recommend the V-9 Cartel Waste Grenade. These will deal the damage you need to stop a channel and not fill their Resolve Bar, all while slowing them by 70% for 9 seconds. This will allow you to fill their resolve bar with your own CC as you see fit.
Any of the Cybertech grenades work except the V-9 Pyro Grenade. That grenade deals indirect damage over time and will fail to stop someone from capturing the turret. Keep in mind that the grenades share a cooldown of 3 minutes, so if you use one you can’t use the others until the cooldown is finished.
Number of Guards
A common mistake people make is leaving too many people guarding a turret that doesn’t have a lot of activity, primarily Grass or Snow. For the most part, you only need one person guarding the turret.
This job is best suited for someone who has high durability, great dueling potential, stealth, or stealth detection. By having unnecessary guards, this leaves the other players participating in group combat at a disadvantage as they will be left outnumbered.
In some instances however, you can have at maximum two guards if the other six players are competent and able to hold a turret well. Though I would only recommend doing so if these two guards lack stealth or durability. Otherwise don’t be selfish and leave your team outnumbered because you think guarding a turret is “easy”.
Stalling and Sacrifice
If you find yourself outnumbered and waiting for reinforcements, focus less on trying to defeat your opponents and more on surviving for as long as you can. At one point or another during your duties as a turret guard, you’re going to run into a situation with you having zero odds of surviving.
While you wait for reinforcements you must use your DCDs, Warzone Medpacs and Adrenals, and use the terrain to cut off line of sight from your opponents. Cutting off line of sight can prevent targeted abilities from being used on you so they will need to waste time repositioning to use that ability again. With enough time, you might just live long enough to get help or at the very least, ensure allies can defend the turret as you respawn.
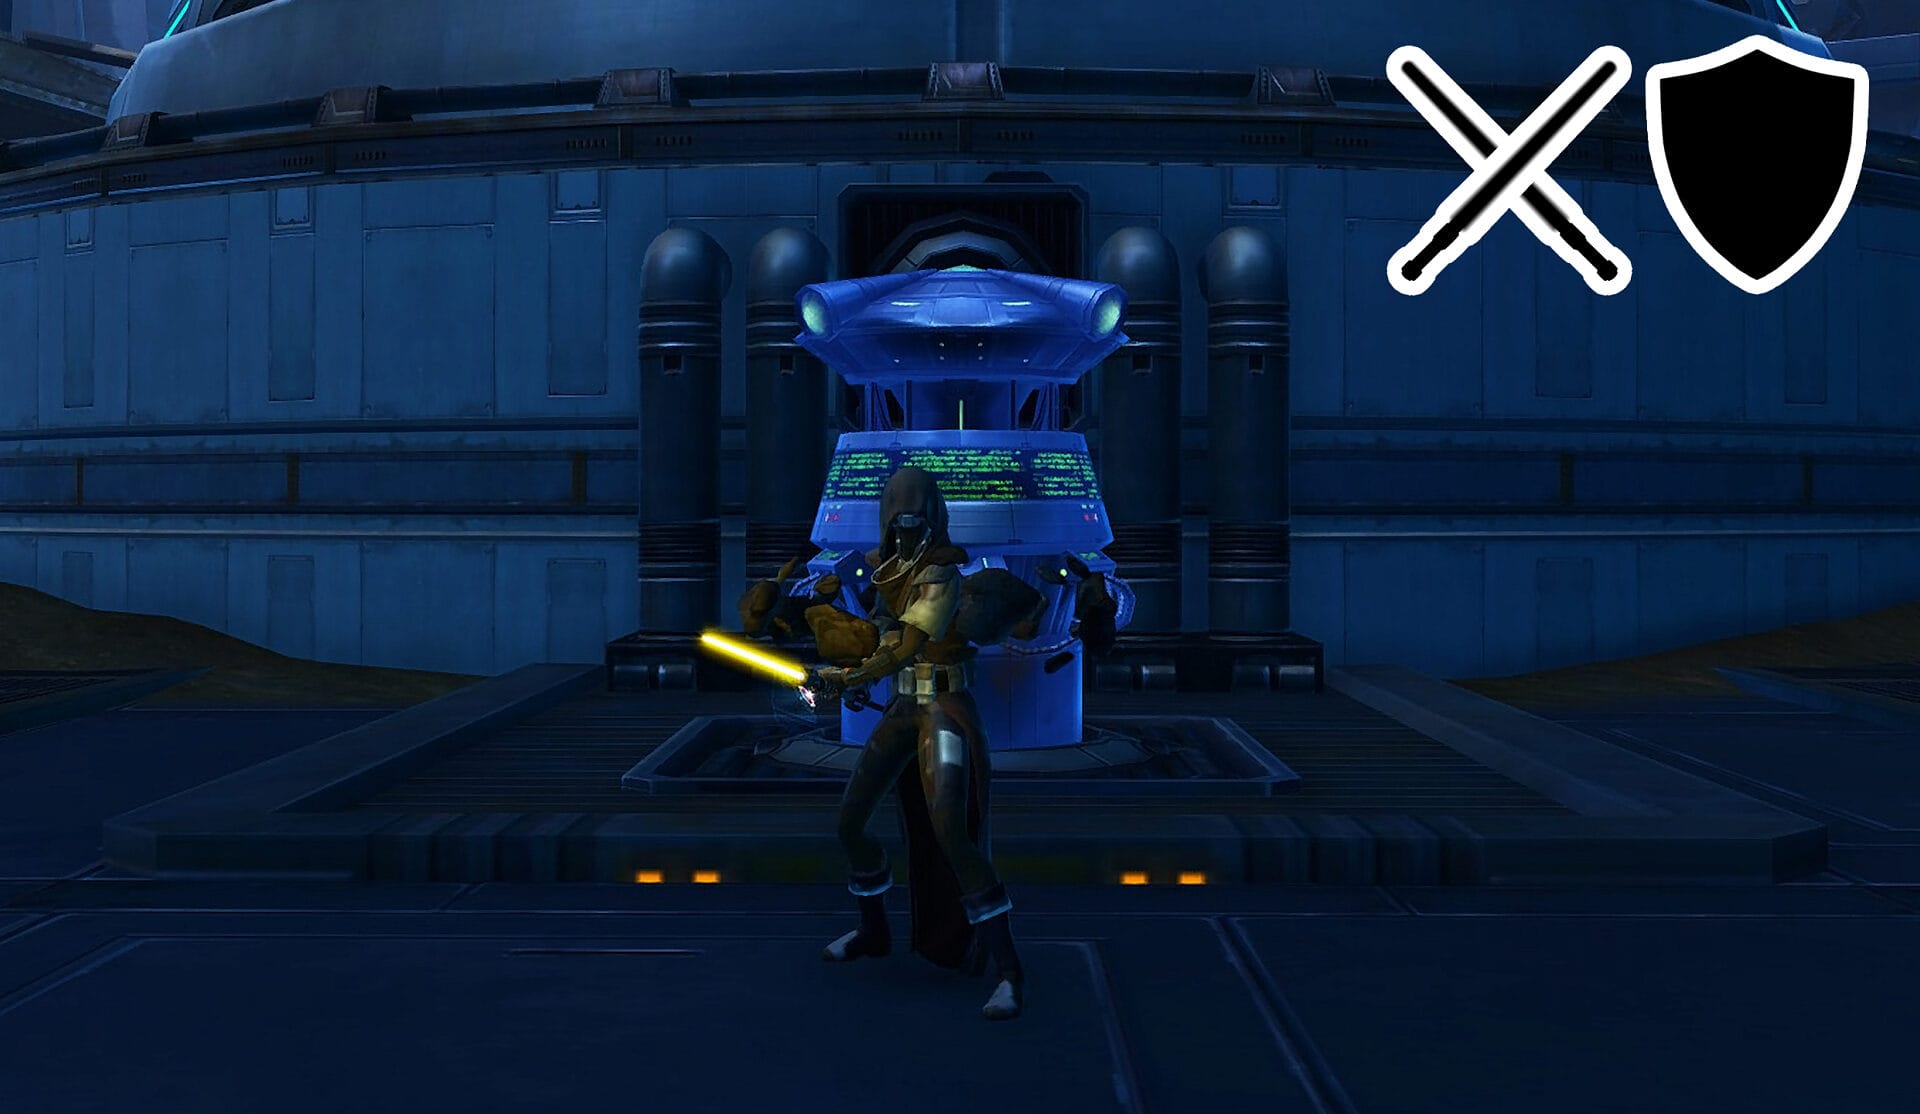
The Best Turret Guards
Before we look at the following combat styles, I want to emphasize that any combat style can act as a turret guard. It’s just that the following tend to excel more than others due to their kits and abilities. If you’re not one of these combat styles as a turret guard, remember the tips above to maximize your productivity!
Kinetic Combat Shadows and Darkness Assassins
From personal experience, I would argue that the best turret guards are Kinetic Combat Shadows and Darkness Assassins. They have the durability of a tank and the ability to communicate safely as a stealth unit.
These two aspects fuse very nicely when guarding a turret as they can move around while stealthed to get different viewing angles without revealing themselves. They also have a passive stealth detection buff from their combat style which can allow them to see enemy stealth units if they get close enough.
Though their strongest feature is the fact that they make excellent duelists and a well practiced Shadow/Assassin can take on just about anyone in the game. Let’s go over some of their useful abilities as to why they make such great turret guards.
The ability Deflection grants the Shadow/Assassin +50% Defense Chance for 12 seconds. On top of that, an area around them within an 8 meter radius decreases Force and Tech damage done to anyone caught within. Since Force and Tech damage is very prominent in PvP, this is an excellent ability for reducing damage from numerous caster classes.
The ability Force Wave/Overload is an AoE push that will knock up to 8 enemies back in a 15 meter cone. Targets hit by this ability will be immobilized for 5 seconds though direct damage after the first 2 seconds ends the immobilize effect. With this ability, they can stall an invading team for a good duration of time but even more so with a Rakata Freeze Bomb. The Rakata Freeze Bomb is a consumable grenade that when thrown, deals elemental damage and immobilizes up to 4 targets in the area for 6 seconds. When combined with Force Wave/Overload, the Shadow/Assassin can root 4 people for 11 seconds while barely filling their resolve bars.
If the Shadow/Assassin has the Dusk Ward passive from their ability tree choice, then even attacking them can prove counterproductive. Should all 15 stacks of their Kinetic Ward/Dark Ward break, all nearby enemies will receive a debuff that causes affected targets to lose 20% accuracy for 6 seconds.
DPS Stealth Units
Any stealth unit can serve as a great turret guard. With their ability to remain invisible, they can safely type incoming while being hidden from enemy eyes.
A foolish opponent may think the turret was left unguarded, dropping their guard. If it’s one thing stealth units love (particularly the DPS variants), it’s getting the drop on an unsuspecting foe. DPS Shadows/Assassins and Scoundrels/Operatives make excellent duelists and should be able to deal with any 1v1 scenario they encounter during guard duty. Though they will be at a disadvantage if they are outnumbered, they can at least stall by using their mesmerizes from stealth as they wait for reinforcements.
Gunslingers and Snipers
Gunslingers and Snipers can find themselves acting as turret guards due to their unique passive ability, Ready for Anything/Spotter.
When they enter cover, they build stacks of this ability with each stack granting them one level of stealth detection (up to 30 stacks). This is accumulated once per second over 30 seconds and is lost when they exit cover. The increased stealth detection allows the Gunslinger/Sniper to have better odds of detecting stealth units.
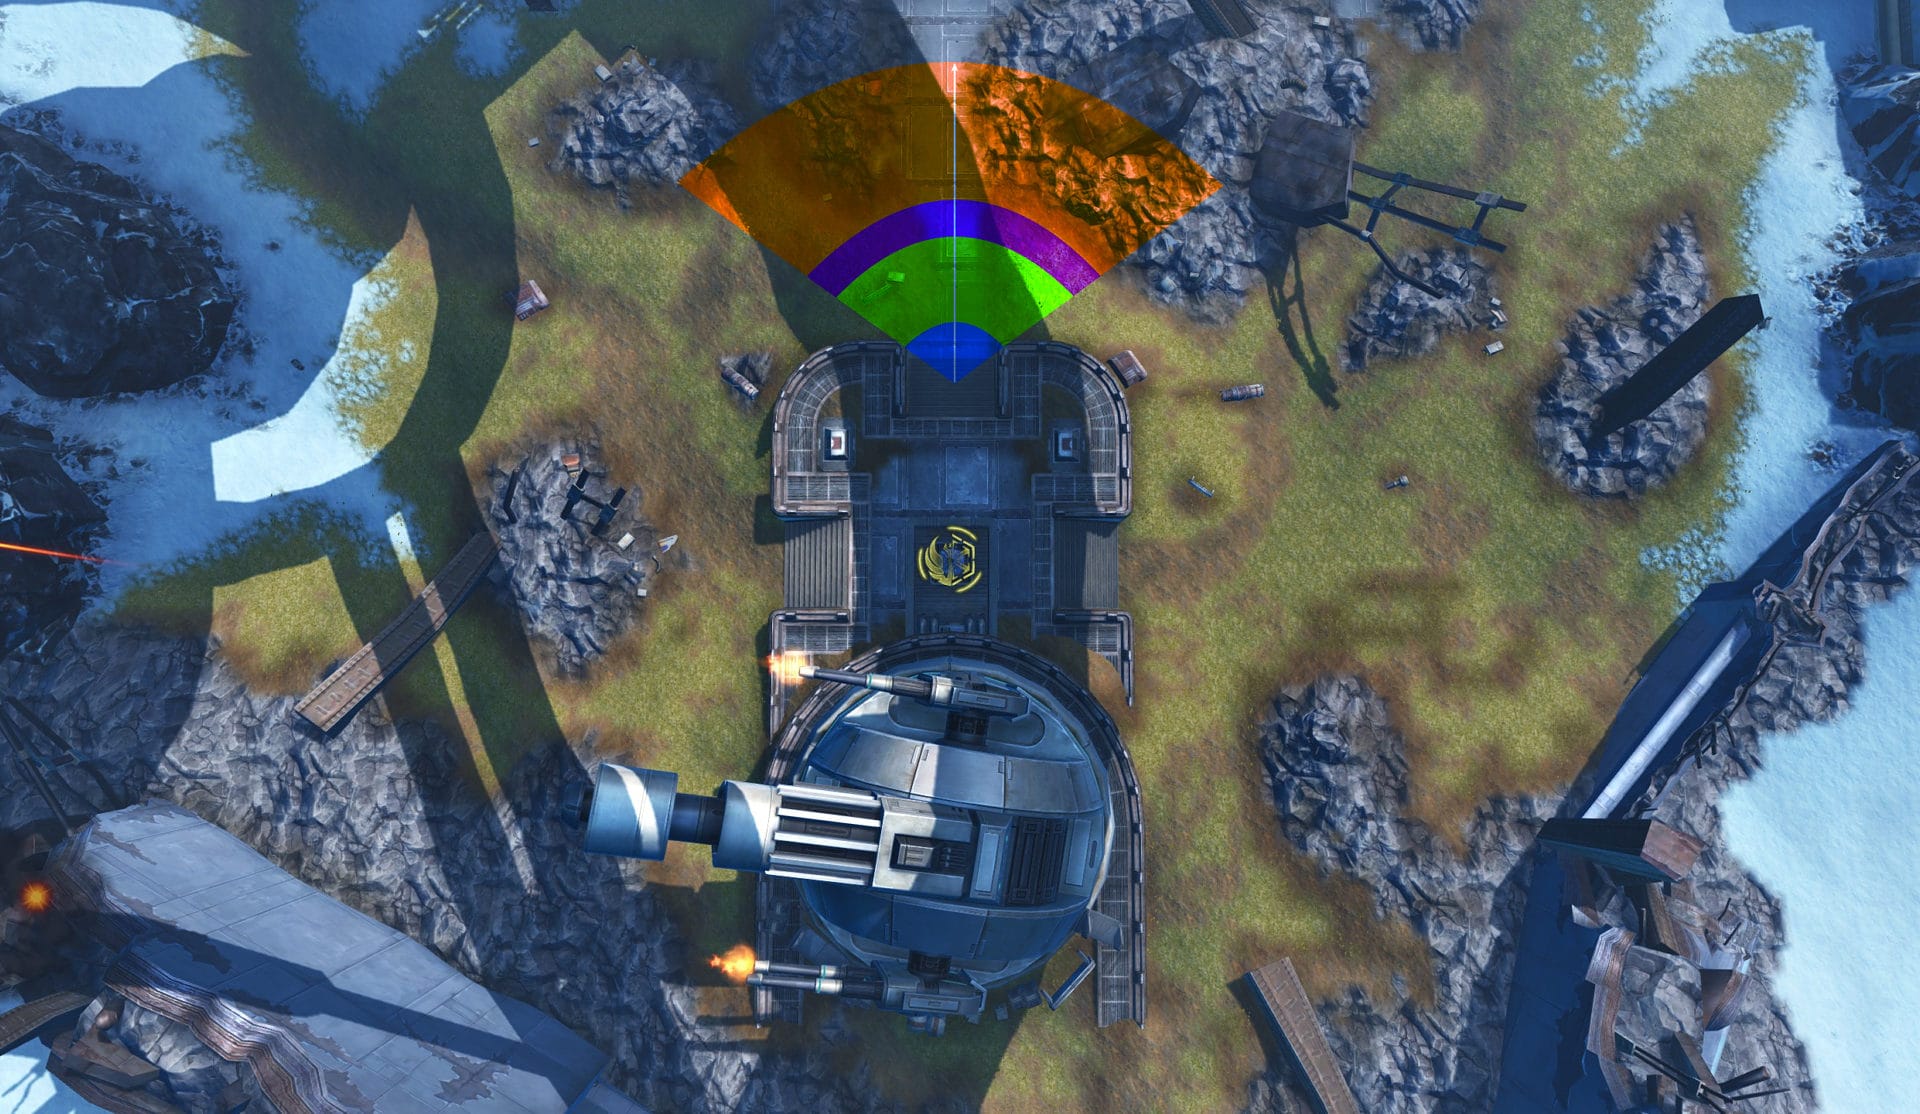
Let’s delve into the wonderful world of how stealth mechanics work in SWTOR for a little bit. Stealth units can enter stealth mode that makes them invisible while increasing their stealth level by 15. This is contested against an enemy’s stealth detection level, in this case 30 for the Gunslinger/Sniper.
This means the Gunslinger/Sniper will be capable of detecting a stealth unit within 15 meters, though even then there’s no guarantee. SWTOR uses a dice rolling system to determine if a stealth unit is seen or not by someone with stealth detection. This is done by rolling the stealth level vs stealth detection once every second. If the Gunslinger/Sniper wins the roll, they can see the stealth unit.
With that in mind, you can see the stealth detection ranges in the images above. Up to the orange zone is where a Gunslinger/Sniper can detect an untalented invisible unit such as a non-stealther under the effect of the Smuggle/Infiltrate ability.
Up to purple is where a Gunslinger/Sniper can detect an invisible Shadow/Assassin or Scoundrel/Operative who has the basic 15 stealth levels. The green zone is where a Gunslinger/Sniper can detect a Scoundrel/Operative who has an effective stealth level of 18 with the Sneaky/Infiltrator passive.
Last, the blue zone is where a Gunslinger/Sniper can detect a Shadow/Assassin with an effective stealth level of 25 with the Kinetic Surge/Obfuscating speed passive.
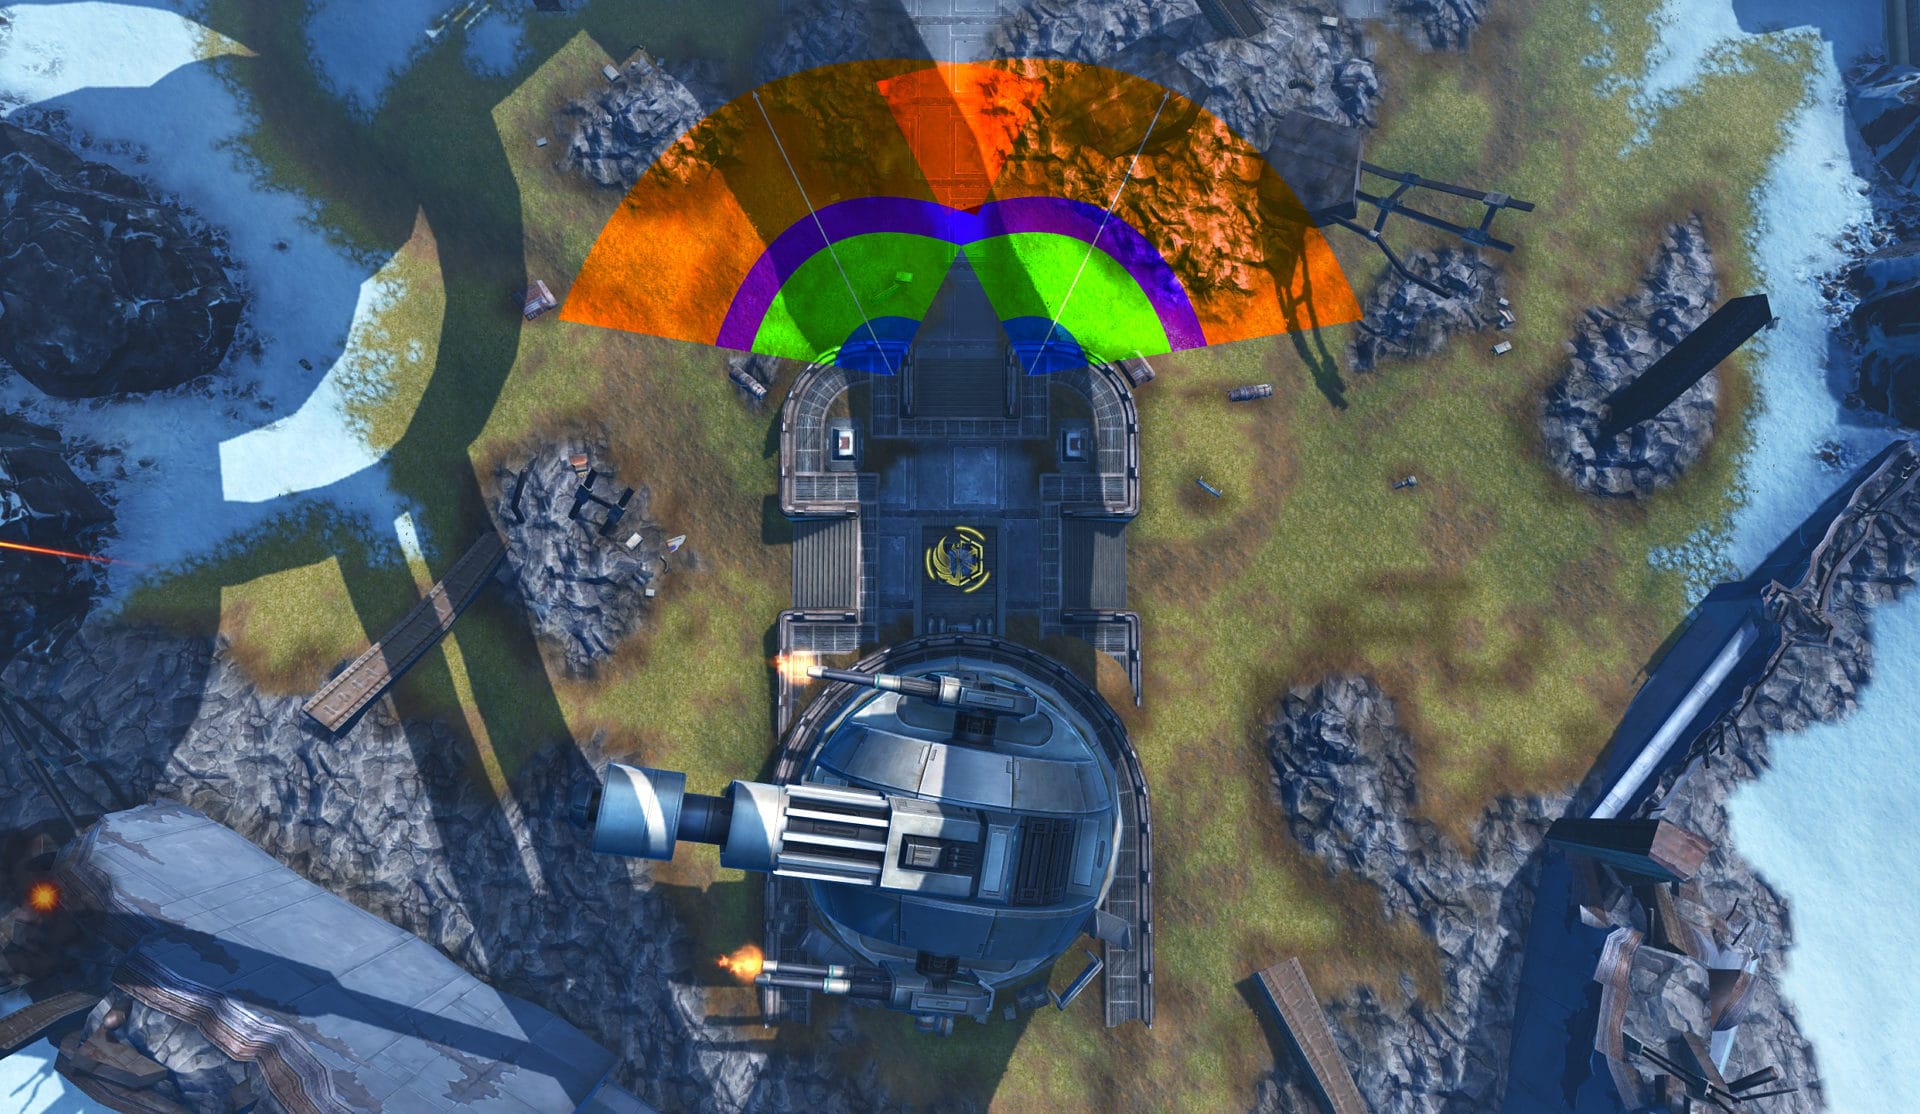
If there were two snipers guarding a turret, they could overlap their field of view like in the image above. They could get a wide view of the area and detect a large group of untalented invisible units while their stealth detection versus talented stealth units gets smaller.
A flaw with this setup is that a talented stealther could simply walk around and attack the snipers from behind. This does come at the cost of wasting time to position themselves which may work in the sniper’s favor. Still, gunslingers/snipers should pay just as much attention to their flanks as much as their front.
Stealth mechanics aside, Gunslingers/Snipers cannot be leapt to while under cover so they should be able to deal a large chunk of damage to someone coming their way. Assuming they aren’t already dispatched, it shouldn’t be too hard to finish them off. The only downside to having a Gunslinger/Sniper is that they work best when remaining stationary which might not always be a great option vs a mobile opponent or if their opponents closed the gap.
Capturing A Turret
Capturing a turret is also known as “capping” a turret or to “cap”, while capturers can be called “cappers”.
Oftentimes, a turret controlled by the enemy will have at least one person guarding it. Those who are confident in their dueling capabilities should be attempting to guard or capture a turret as it becomes a matter of skill when the fight between the guard and capper inevitably starts. Though we’ll be going over some dos and don’ts to improve your ability to take an enemy turret by force or subterfuge.
Do:
- Do assess the situation when making your way to a turret. Look all around your surroundings to see if there are any enemies also making their way there, how many enemies are already there, and what kind of enemy they are.
- Do understand your own limitations. Some combat styles naturally counter others, so knowledge of your combat style and other combat styles can vastly improve your ability to judge whether or not you can secure a turret.
- Do remember to communicate what you see to your team. If you see one enemy guarding a turret but 5 enemies are fighting somewhere else, that means there are 2 enemies unaccounted for.
- Do remember that it’s better to leave a turret guarded by 2 enemies to focus your efforts with the bulk of your team so you can outnumber the remaining enemies.
- Do remember that you need a minimum of 8 seconds to capture a turret, so a 4 second stun will not give you enough time to capture it.
Don’t:
- Don’t assume that an empty enemy turret is unguarded. It’s far more likely that it’s being guarded by a stealth unit meaning you should be on your guard. Most stealth units tend to get cocky and use their mesmerize the moment you’re in range. If they do this, take advantage of this if they fill your resolve bar making you immune to CC.
- Don’t needlessly spam click the turret hoping you can sneak it while under fire. Getting hit by ANY direct damage will stop the channel. If you’re with a group trying to capture a turret, spam clicking the turret and failing essentially leaves your team potentially outnumbered as you’re not actively participating in combat.
- Don’t assume your team will capture a side turret scot free. Oftentimes some enemies appear to a side turret just to stall your team from capturing it. If you can, deal with these people by slowing them, incapacitating them, mesmerizing them, whatever it takes to allow your allies to capture the turret.
- Don’t be selfish and try to be the only one to capture the turret. If someone else has already started capturing a turret, act as their bodyguard until the turret is captured and decide who will be on guard duty.
When it comes to which combat styles make the best cappers, it is no contest, not even by a longshot. The units best suited for the job are stealth units including Shadows, Assassins, Scoundrels, and Operatives.
While the DPS variants can quickly take out a target, healer and tank variants are just as capable of securing a turret. This is done by using two mesmerizes which can leave an opponent unable to move for up to 16 seconds.
For Shadows/Assassins, they’ll want to use the abilities Mind Maze/Mind Trap and Force Lift/Whirlwind. For Scoundrels/Operatives, they’ll be using Tranquilizer/Sleep Dart and Flash Grenade/Flashbang.
Mind Maze, Mind Trap, Tranquilizer, and Sleep Dart can only be used while stealthed, so they’ll be the first incapacitates to be used. In the event the target uses their CC breaker to stop the capper, the capper can follow up with Force Lift, Whirlwind, Flash Grenade, or Flashbang to leave the target unable to act for another 8 seconds.
As soon as they are incapacitated again, the capper must immediately interact with the turret controls to ensure that they capture it by the time the guard breaks free. If you’re a capper who just pulled this off, then congratulations! You are now the turret guard until further notice!
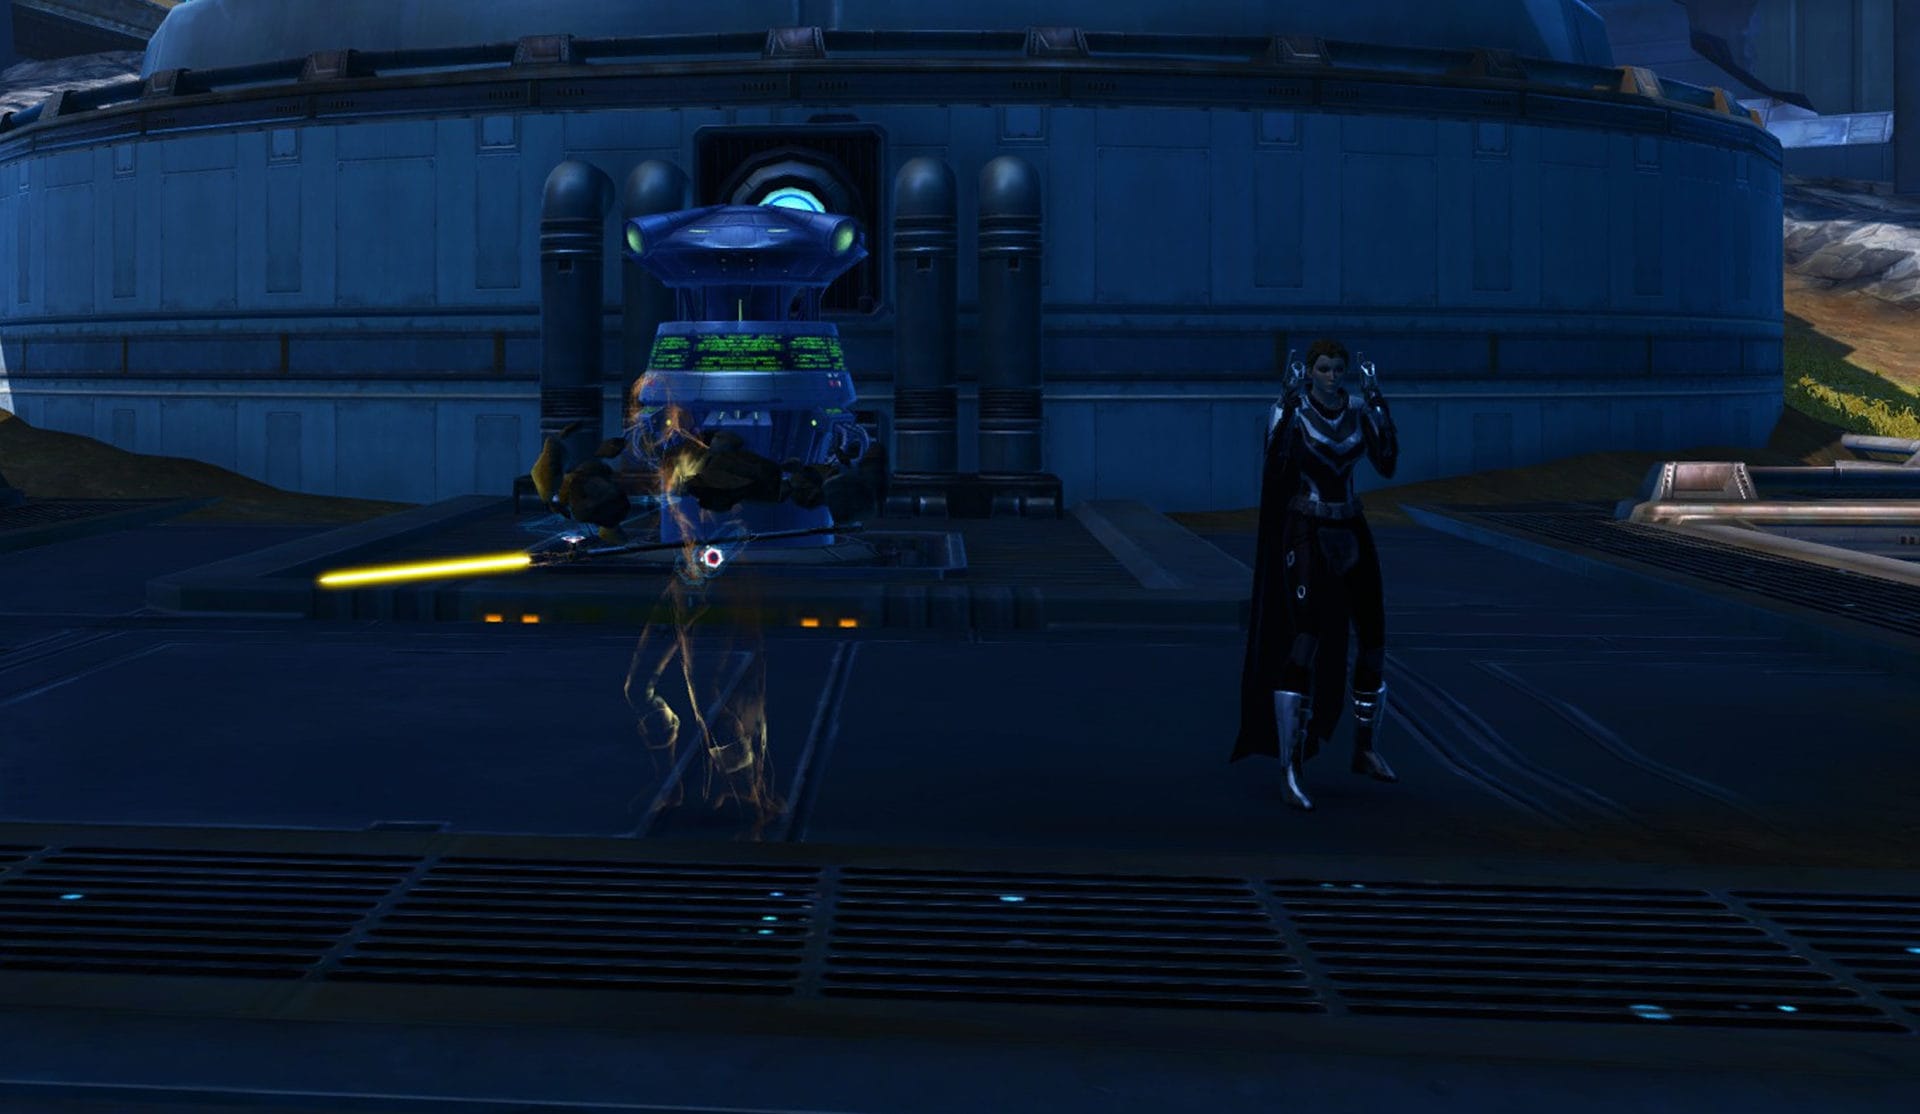
This type of combination isn’t limited to stealth units either. Commandos/Mercenaries have access to the Concussive Round/Concussion Missile ability which will incapacitate a target for 8 seconds.
When paired with a V-9 Seismic Grenade, they can also leave a target unable to act for up to 16 seconds.If you see an enemy under the effects seen in the image above, please DO NOT attack them. Whoever incapacitated them likely wanted them to remain incapacitated and all of these effects are broken by damage. The incapacitated player WANTS you to attack them so they can break free and defend the turret.
Alderaan Civil War Map Strategies
The following strategy scenarios are some that are rather common with their effectiveness depending on the placement of the enemy team. These will assume the enemy team follows the first strategy, the Standard Scenario, and explain how this can provide your team an advantage in the game.
These strategies will be seen from the Republic spawn’s side towards the south but can be mirrored on the north portion of the spawn zones.
Standard Scenario
The most common scenario you’ll see is that 1-2 people go towards the side turret (in this case Grass) while everyone else fights to gain control of the middle turret.
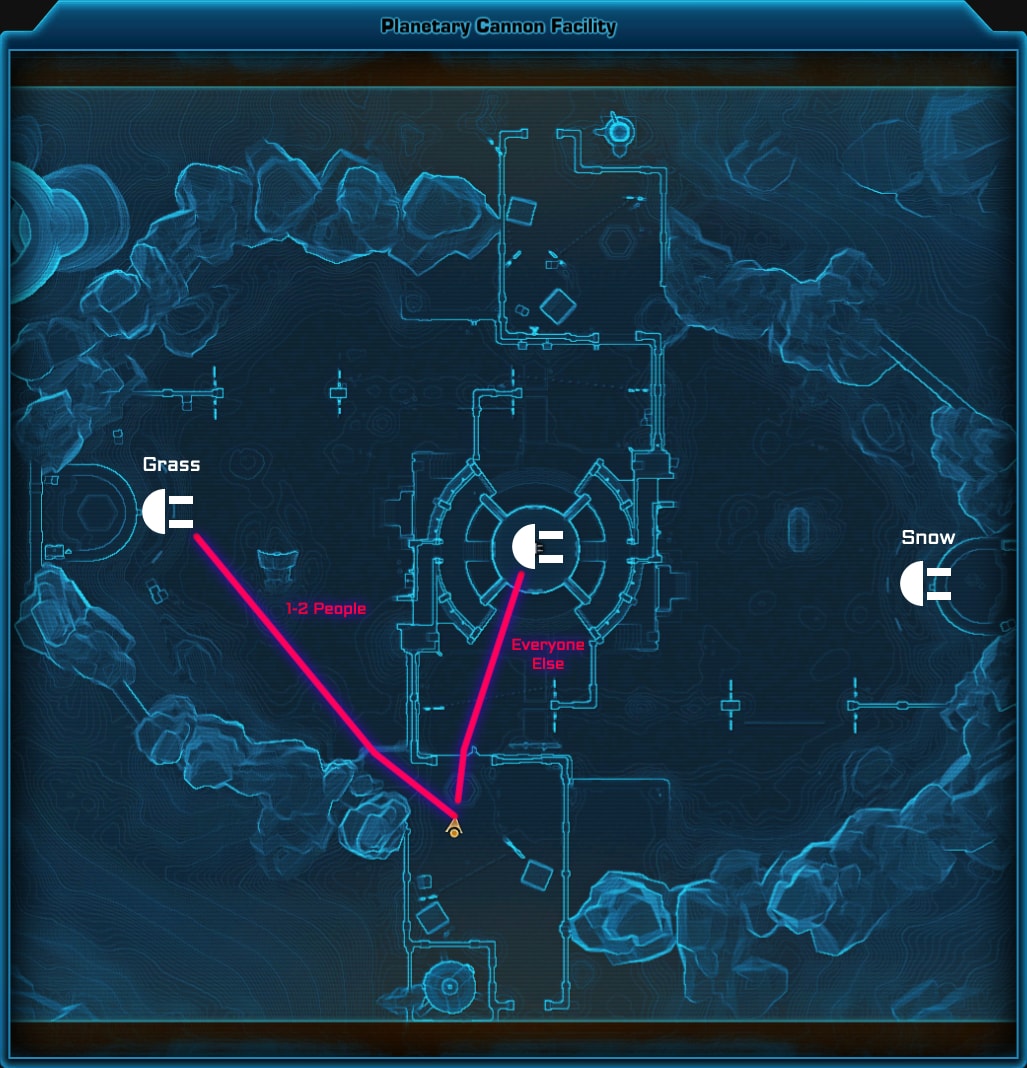
Typically the two going to the side will split their duties with the more mobile one going to capture the turret while the other provides support to keep off any intruders they can see from stopping their ally.
Once captured, one or both may take up guard duty depending on what they are capable of. From there it’s a matter of communicating with their team for incoming players while the majority of the conflict takes place in the middle zone.
Standard Scenario with Stealth
This scenario is essentially the same as the first though this time, one of the two side cappers is a stealth unit. They would then go down the stairs, get the movement speed buffs, and see if the other side turret can be captured.
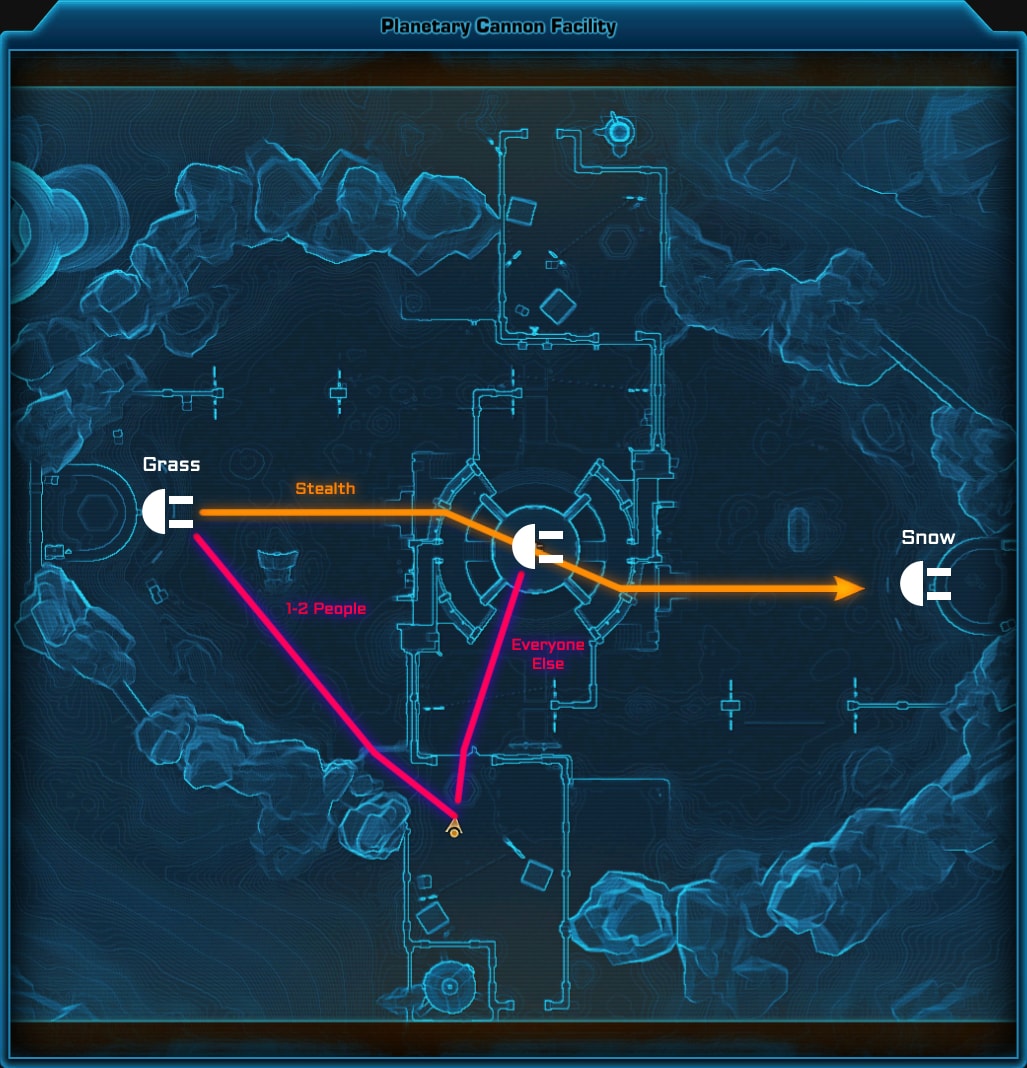
If able, they will dispatch the enemy guard and capture the other side turret to which then the group splits their forces to maintain control of both. Though this can mean sending reinforcements from one side to the other can take a bit longer than if they were to send them to the middle zone, so making a bee line using the stairs is a good way to cut down on travel time.
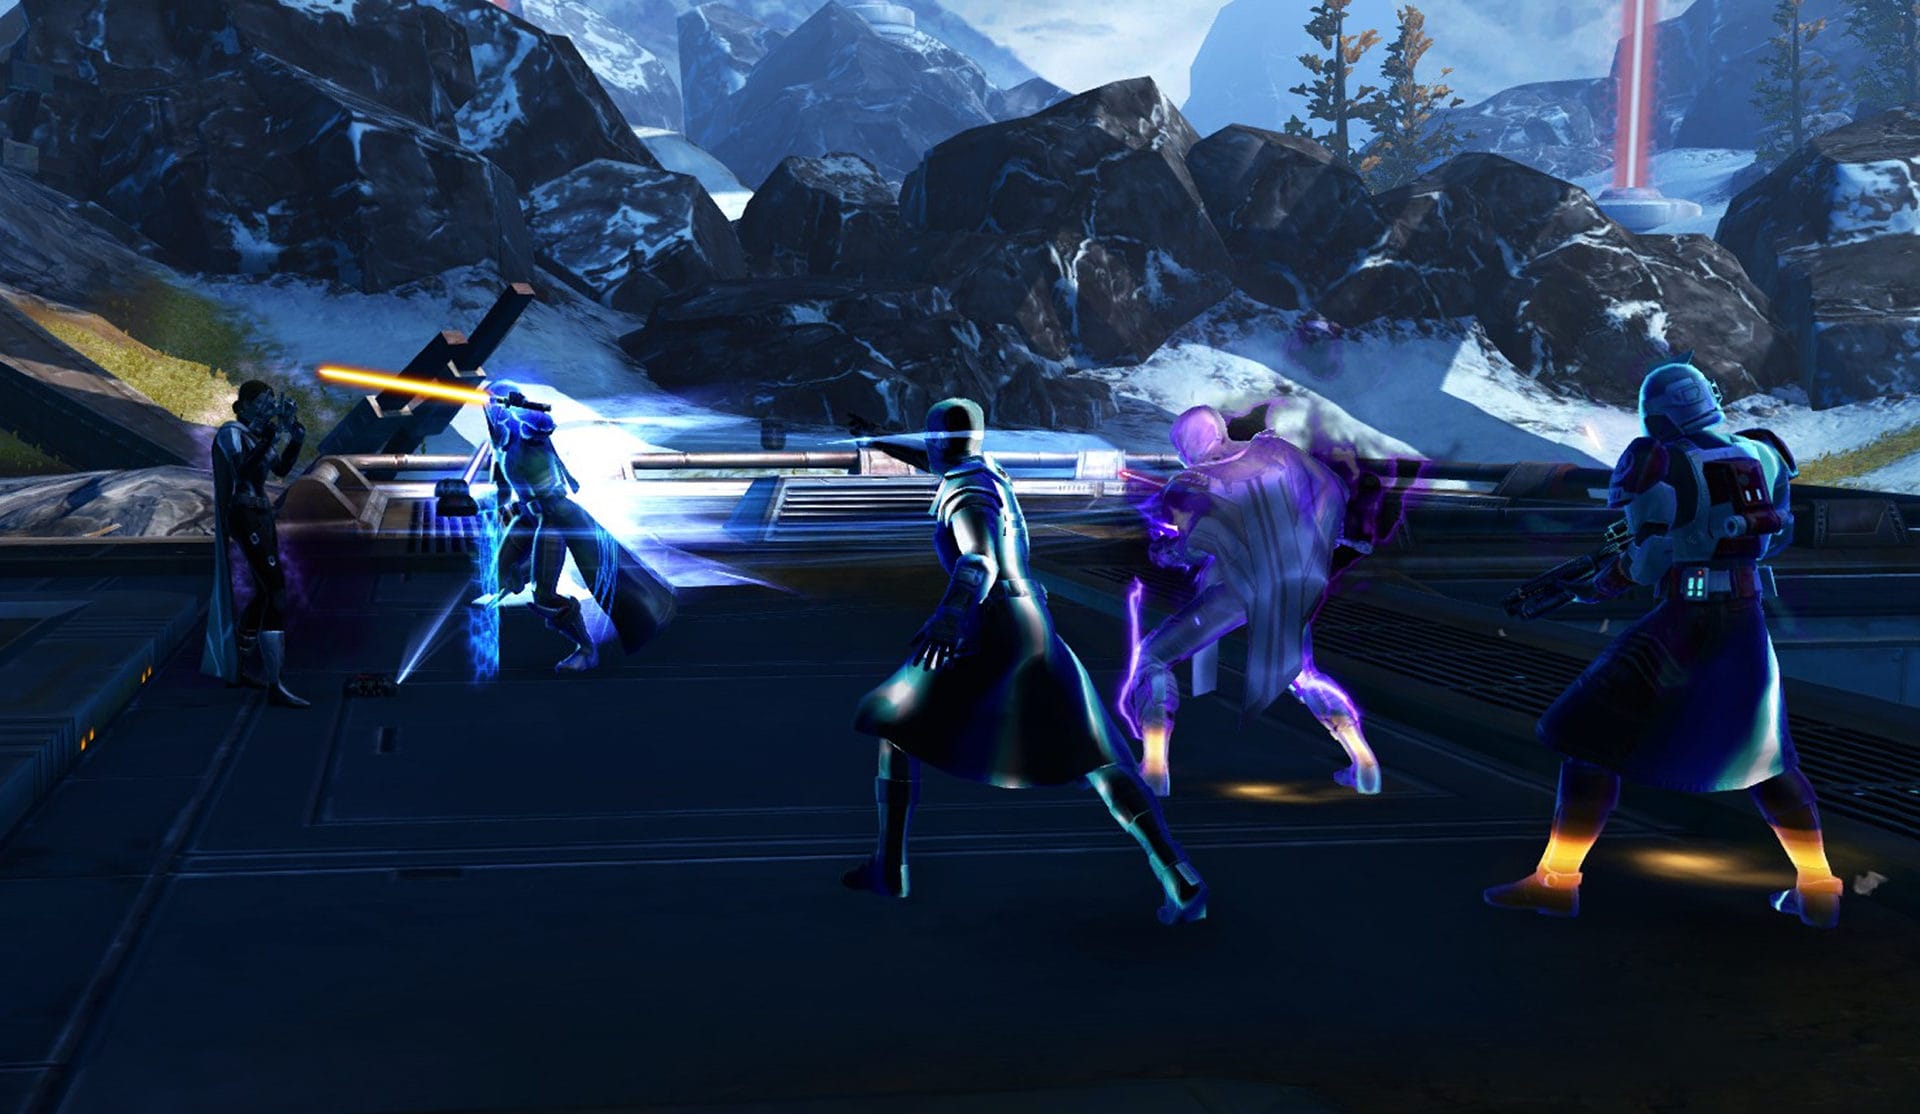
Overwhelm the Flanks
In this scenario, you send 1-2 people to the side turret that you have easy access to, 1-2 people to the middle turret, while the rest go to the other side turret.
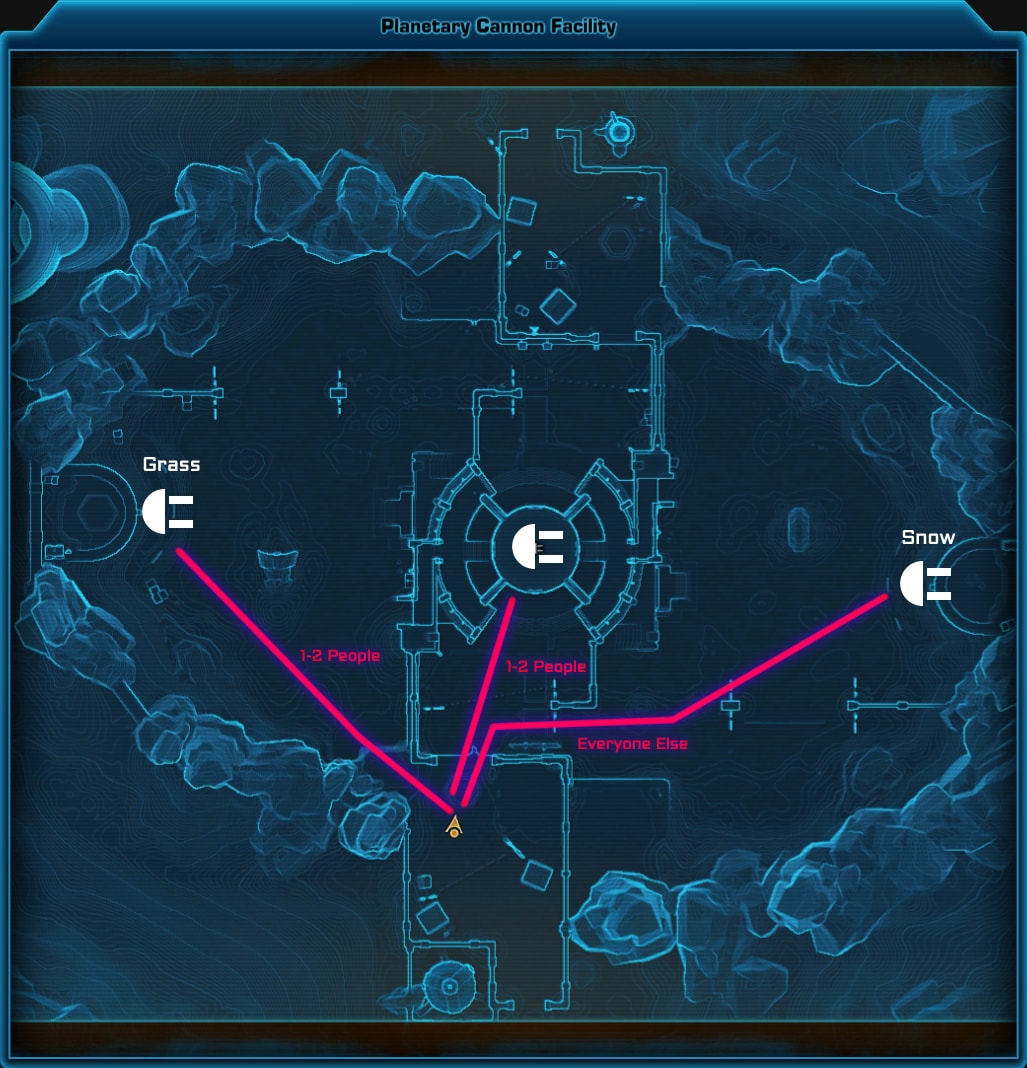
The easy access side turret group will continue as they would in a standard scenario, while the two going to the middle should be more durable units or ideally, a tank+healer combo. Their concern is to stall the enemy team for as long as possible to minimize the damage done to their own ship. The longer they can hold out, the sooner they can get their team a lead while the rest of the team overwhelms the enemy’s side turret.
Here are some good tank and healer combos:
Guardian/Juggernaut Tank + Sage/Sorcerer Healer
Guardian/Juggernaut tanks work really well with Sage/Sorcerer healers since they can actively reduce each other’s incoming damage using the Guardian Leap/Intercede and Static Armor/Barrier. If the healer needs to cast their Force Barrier to protect themselves when under heavy fire, the Guardian/Juggernaut can rely on their Focused/Enraged Defense to heal them for the time being.
Vanguard/Powertech Tank + Scoundrel/Operative Healer
Vanguard/Powertech tanks have the best passive mitigation and work well with Scoundrel/Operative Healers. The healer’s Heal Over Time abilities pair well with the tank’s high passive mitigation while allowing both to remain mobile. This allows both to apply their debuffs and CC in a group while being hard to pin down.
Shadow/Assassin Tank + Commando/Mercenary Healer
Shadow/Assassin Tanks work best with Commando/Mercenary healers because these healers are specialized in dealing large bursts of healing to a single target. Shadow/Assassin Tanks just so happen to be weak to burst damage so having burst healing is great to make up for this weakness. With the Commando’s/Mercenary’s powerful self heals, shields, and other DCDs, they make for low-maintenance healers for the Shadow/Assassin tank who can focus their efforts to delay the enemy team.