This guide will show you how to start and complete the three Relic Hunt Missions on Ruhnuk, released with SWTOR Game Update 7.2!
In the guide below I have explained everything step-by-step. If you are ready to spend some extra time, I have good news for you. These Relic Hunt missions will reward you with unique buffs available while on Ruhnuk.
They are also required for the Ruhnuk Datacron! I have a separate guide explaining how to get the Ruhnuk Datacron in SWTOR!
Table of contents
How to Unlock and access Ruhnuk
The Ruhnuk Daily Area and the Datacron in it are only available after you complete the 7.0 story arc, which means you have to finish the main story on Manaan, released with Legacy of the Sith on each character you wish to do Ruhnuk dailies with.
Since the Datacrons in SWTOR are Legacy-bound, you only need to get it on one character. All your other alts will benefit from the +10 Mastery Points boost.
Mission Walkthroughs
Each mission is a non-repeatable, incredibly long scavenger hunt where the mission items are the clues that lead you to the next objective.
If you do not like scavenger hunts, you’re gonna have a bad time because you need to do all 3 missions in order to access the new datacron (properly) since you need the third relic and have to do them in order.
All 3 missions come from the same datapad at Mandalore’s Encampment and each unlocks after you’ve done the previous one. On the bright side, after doing these scavenger hunts, you’ll know the labyrinth that is Ruhnuk like the back of your hand.
Each mission also grants access to a minor passive buff that you can use on Ruhnuk similar to the temporary abilities on Manaan and GSI healing on Makeb.
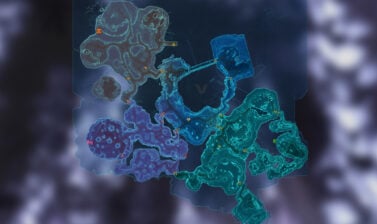
Although each location in the guide below is shown with a map, Ruhnuk’s map system is a bit of a puzzle and may be hard to navigate. At the bottom of the Ruhnuk Daily Area Guide, you can use the custom-made Ruhnuk Maps. High-resolution versions are also available for download to all Patreon supporters.
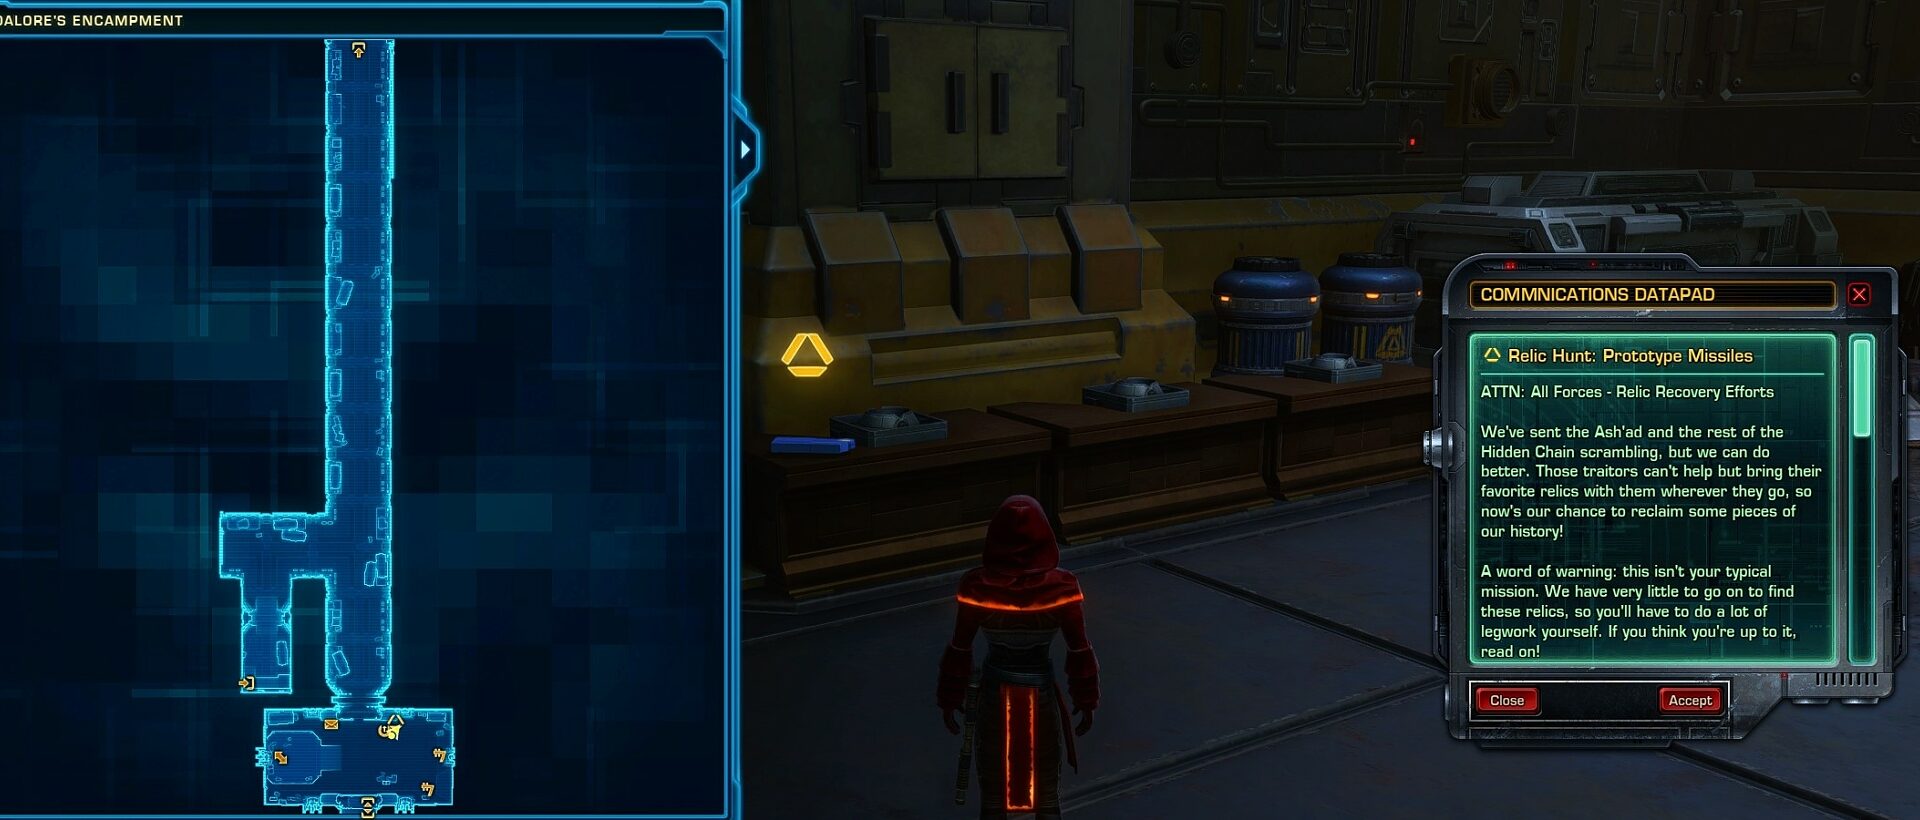
Relic Hunt: Prototype Missiles Mission Walkthrough
The first of three Relic Hunt missions starts at Mandalore’s Encampment, this is the second level of the Staging Area map on Ruhnuk, one level below where you pick up the Daily Missions.
The first step on the figurative mountain you’re about to climb asks you to recover an Ash’ad Datapad, which drops from Ash’ad Clan enemies.
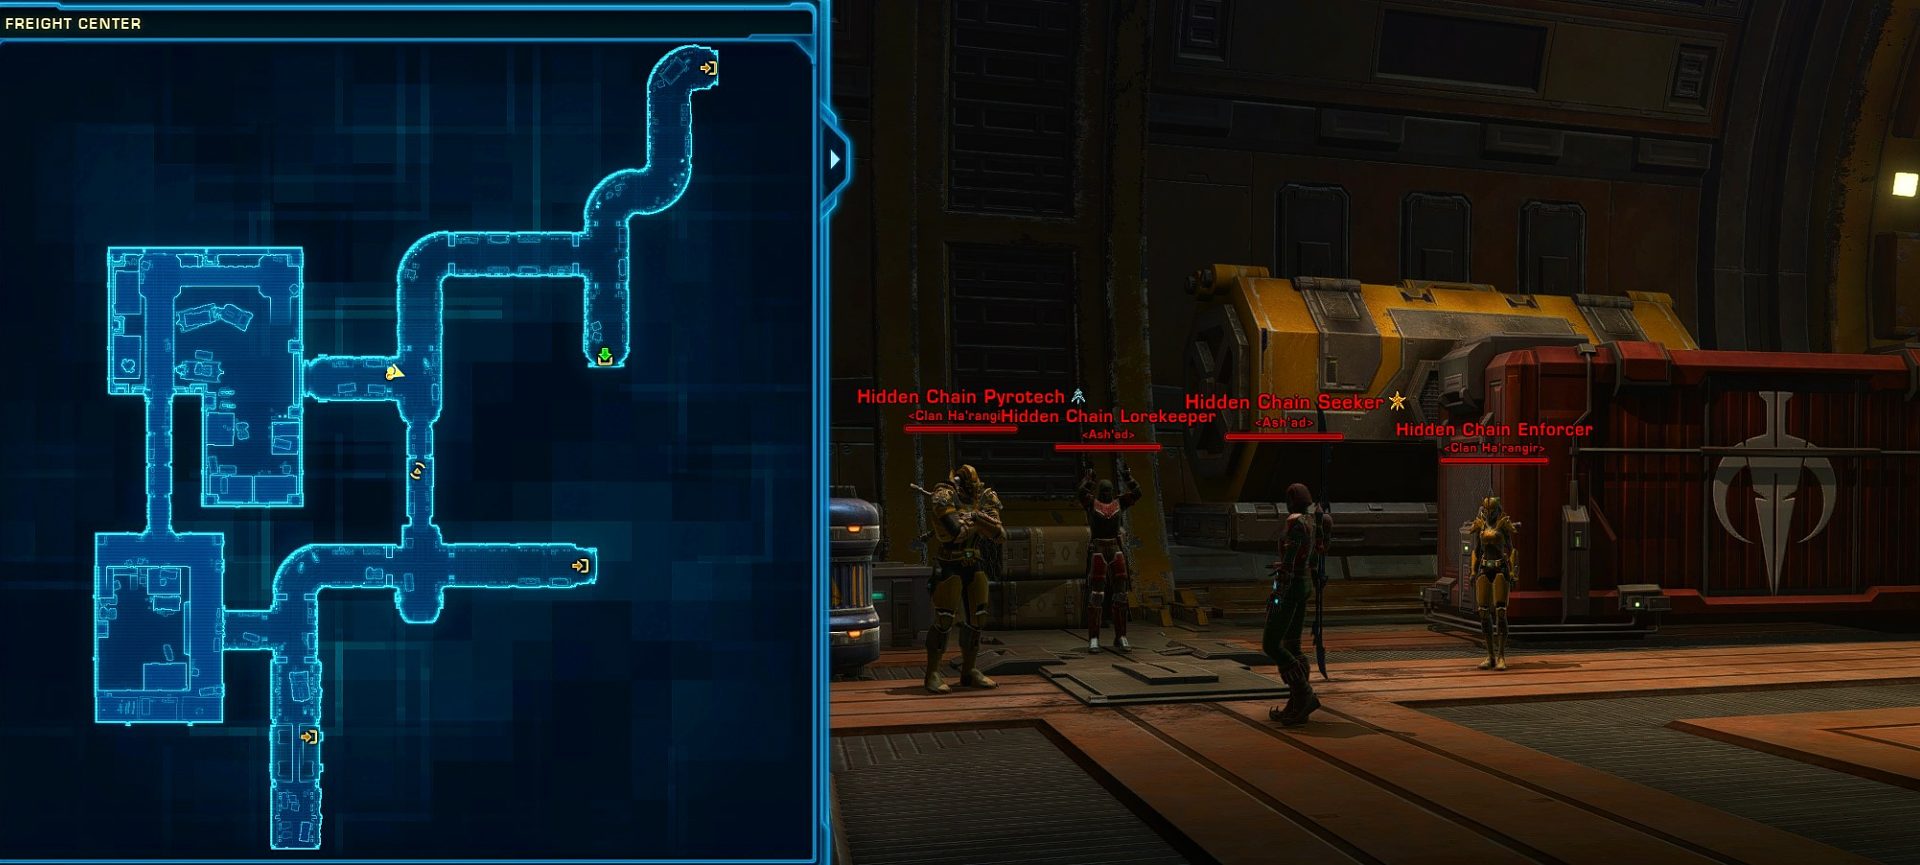
Here’s where mine dropped, but I think any enemy that’s part of the Ash’ad Clan can drop it.
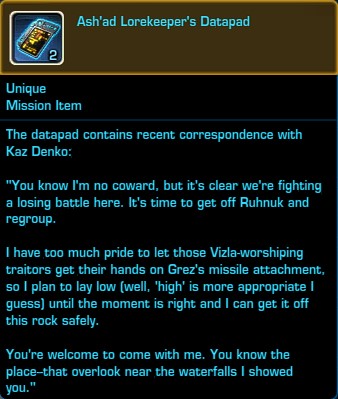
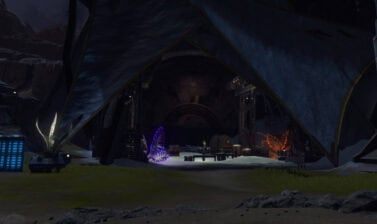
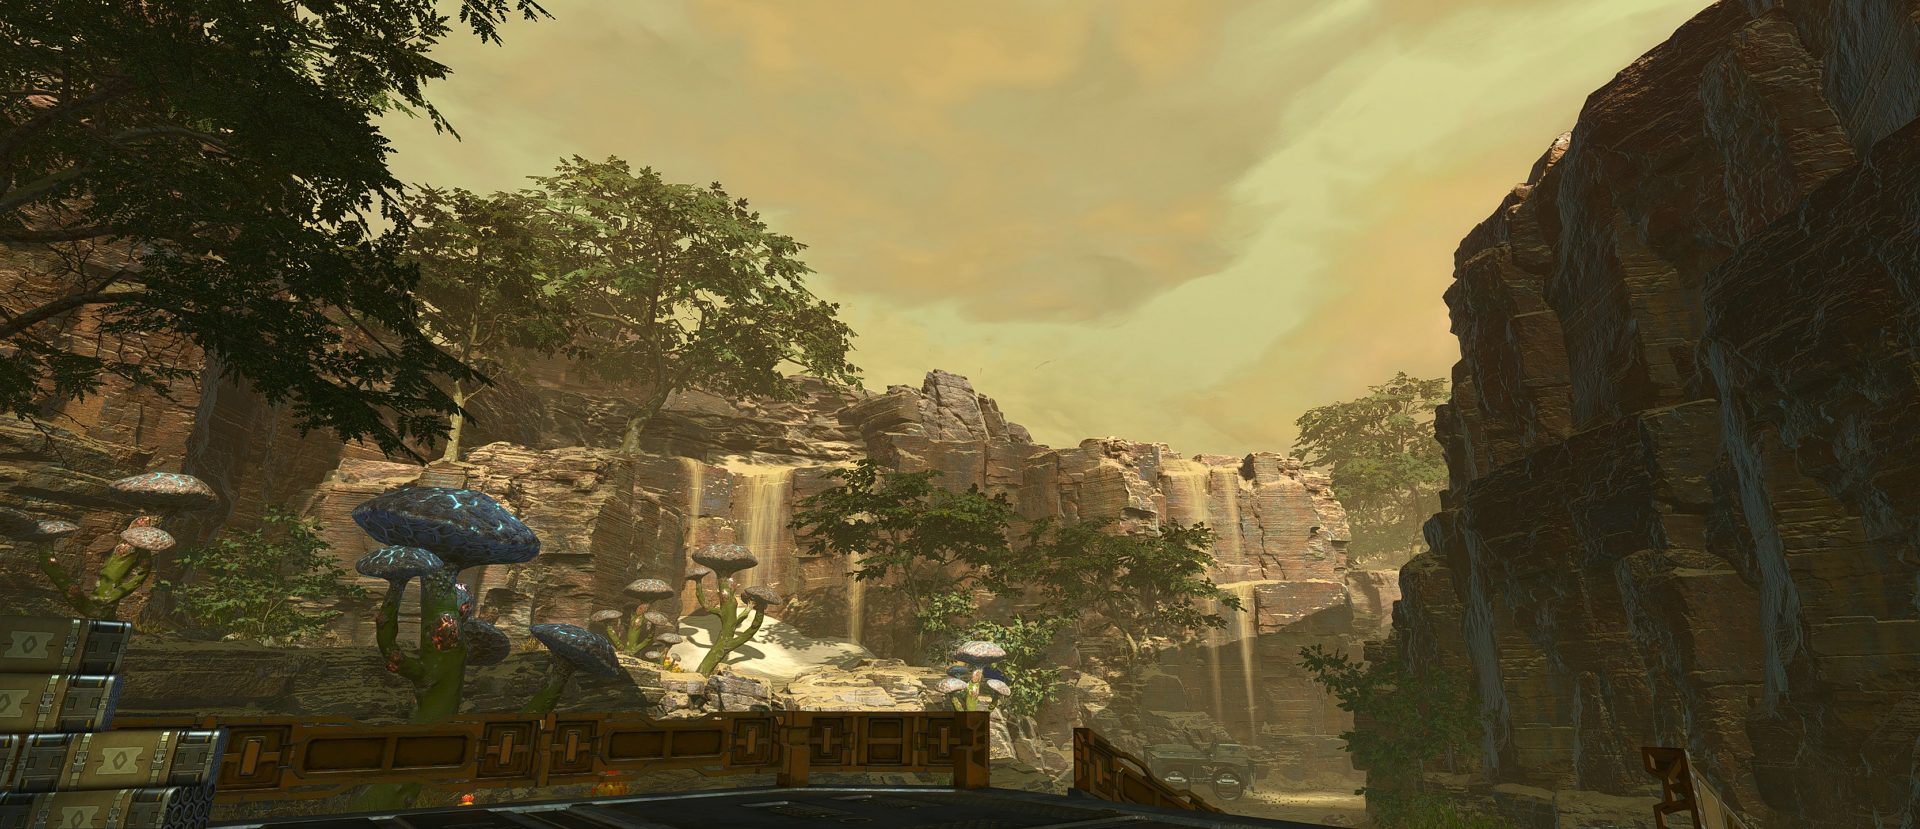
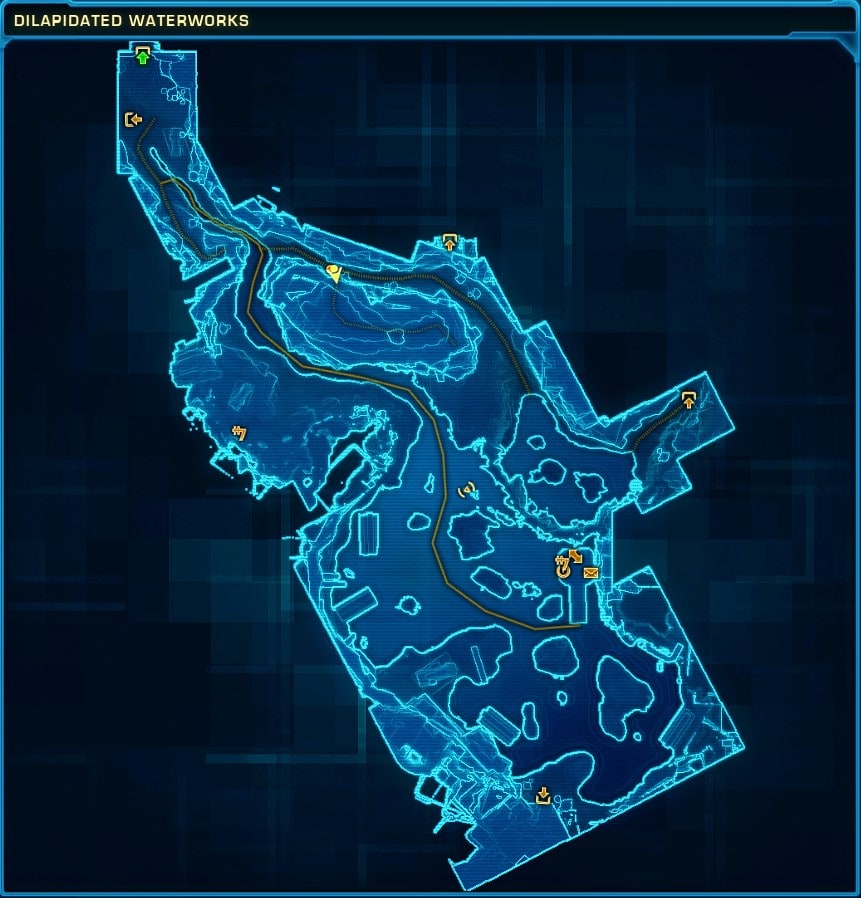
Datapad tells you to go to a specific high point in the Dilapidated Waterworks, though it’s not the same as the transmission location for the “What’s in the Works?” mission, though you can see it from that spot.
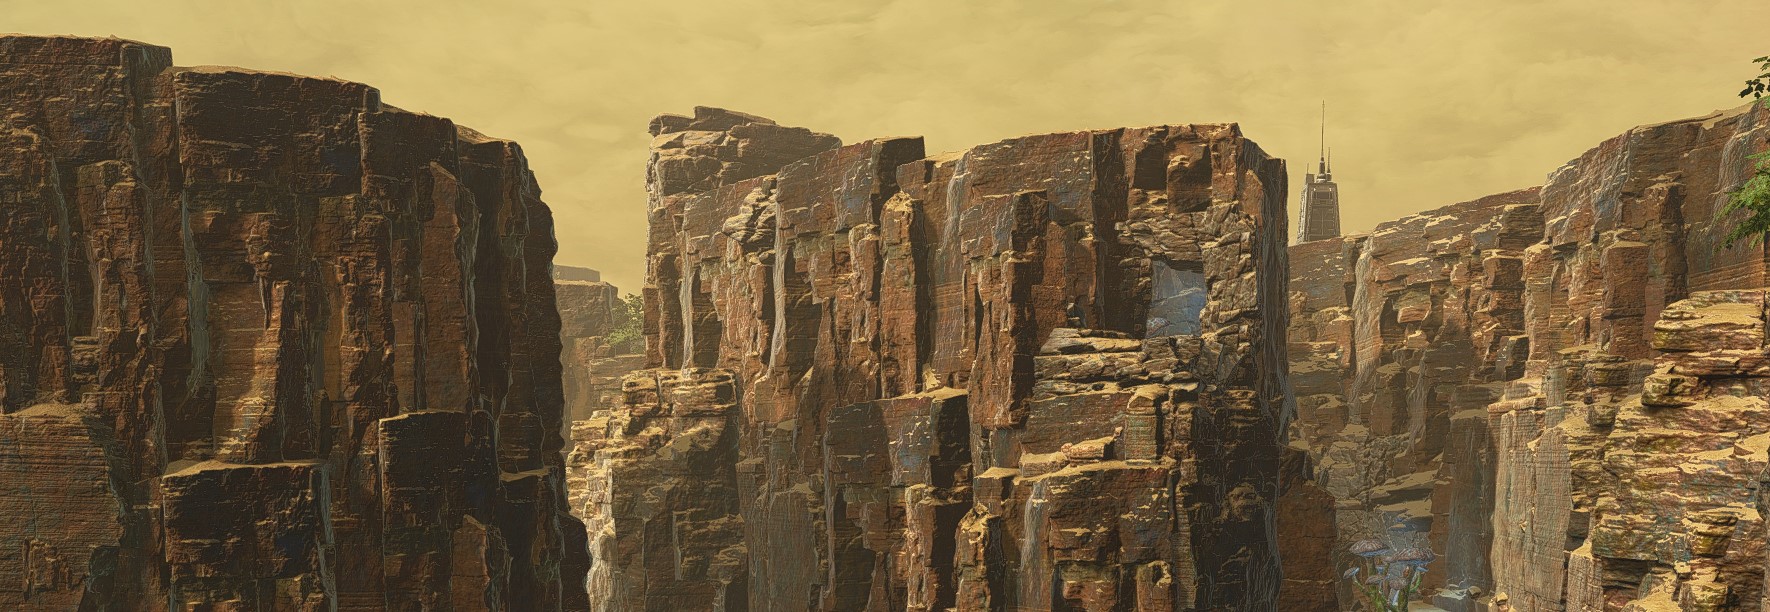
The above image contains the location you need to reach, so skip the next 2 images if you just wanted a hint.
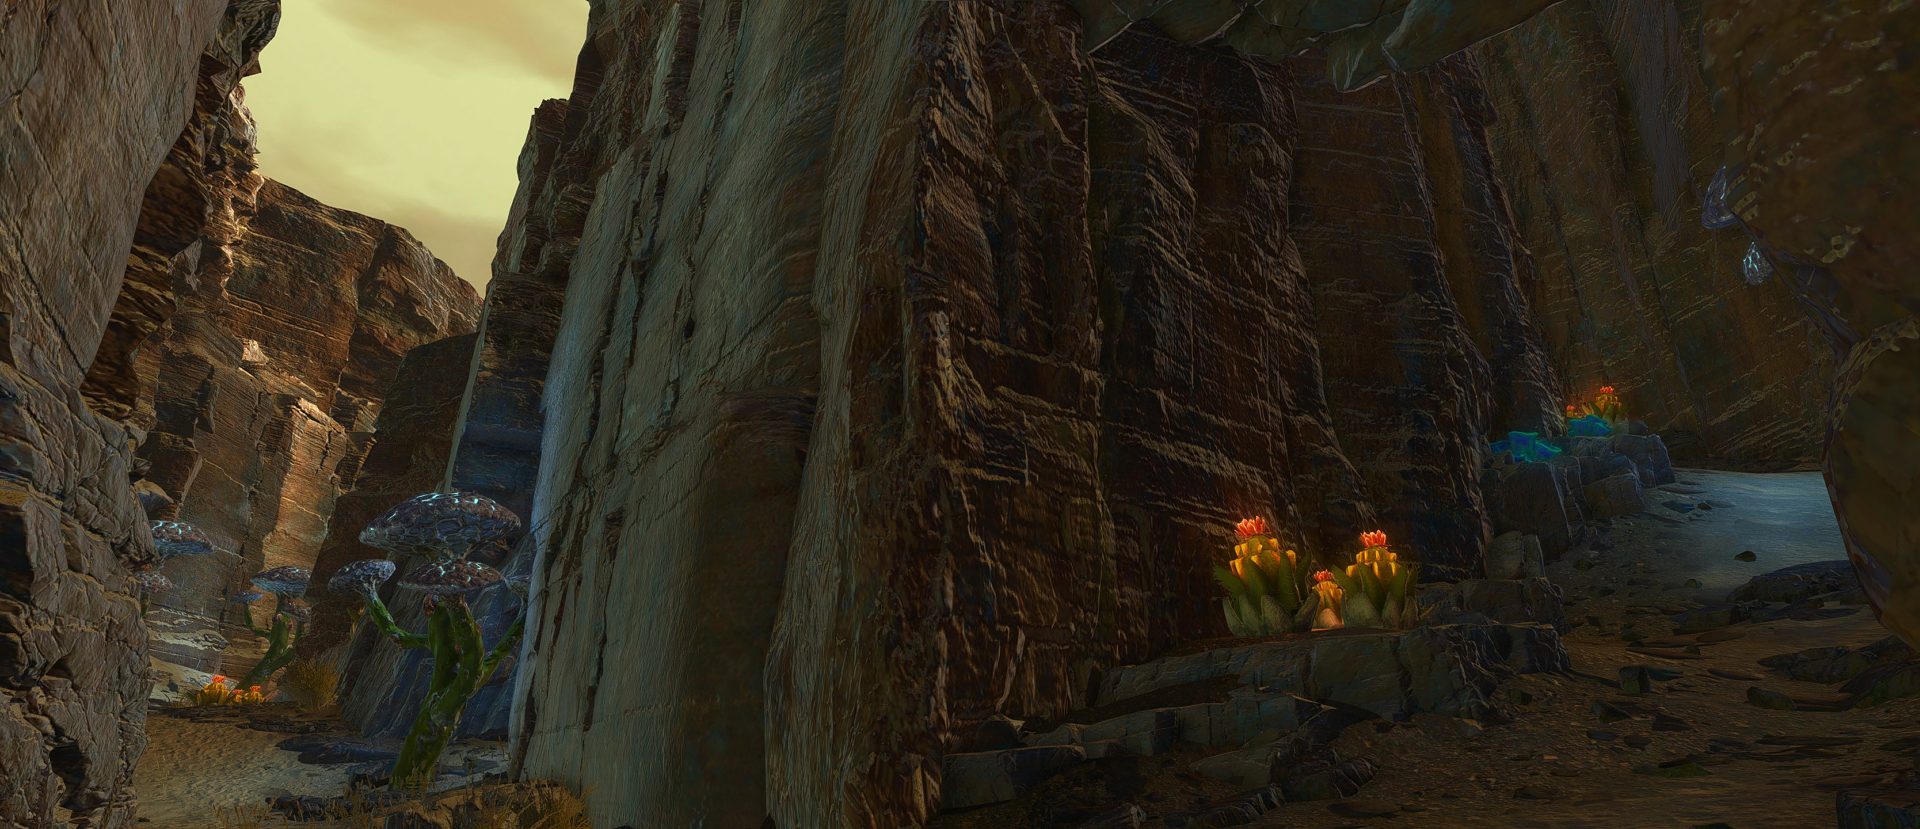
The entrance is at the Northern end of the Dilapidated Waterworks denoted by a faint path through one of the plateaus.
Kaz Denko is there, but he attacks you, so you have to defeat him and take his stuff, including Notes to Self, which gives you your next clue.
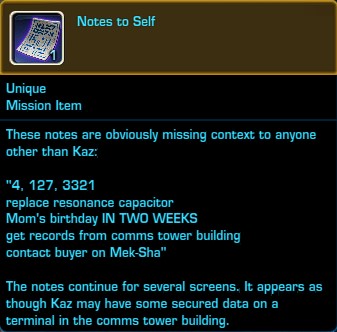
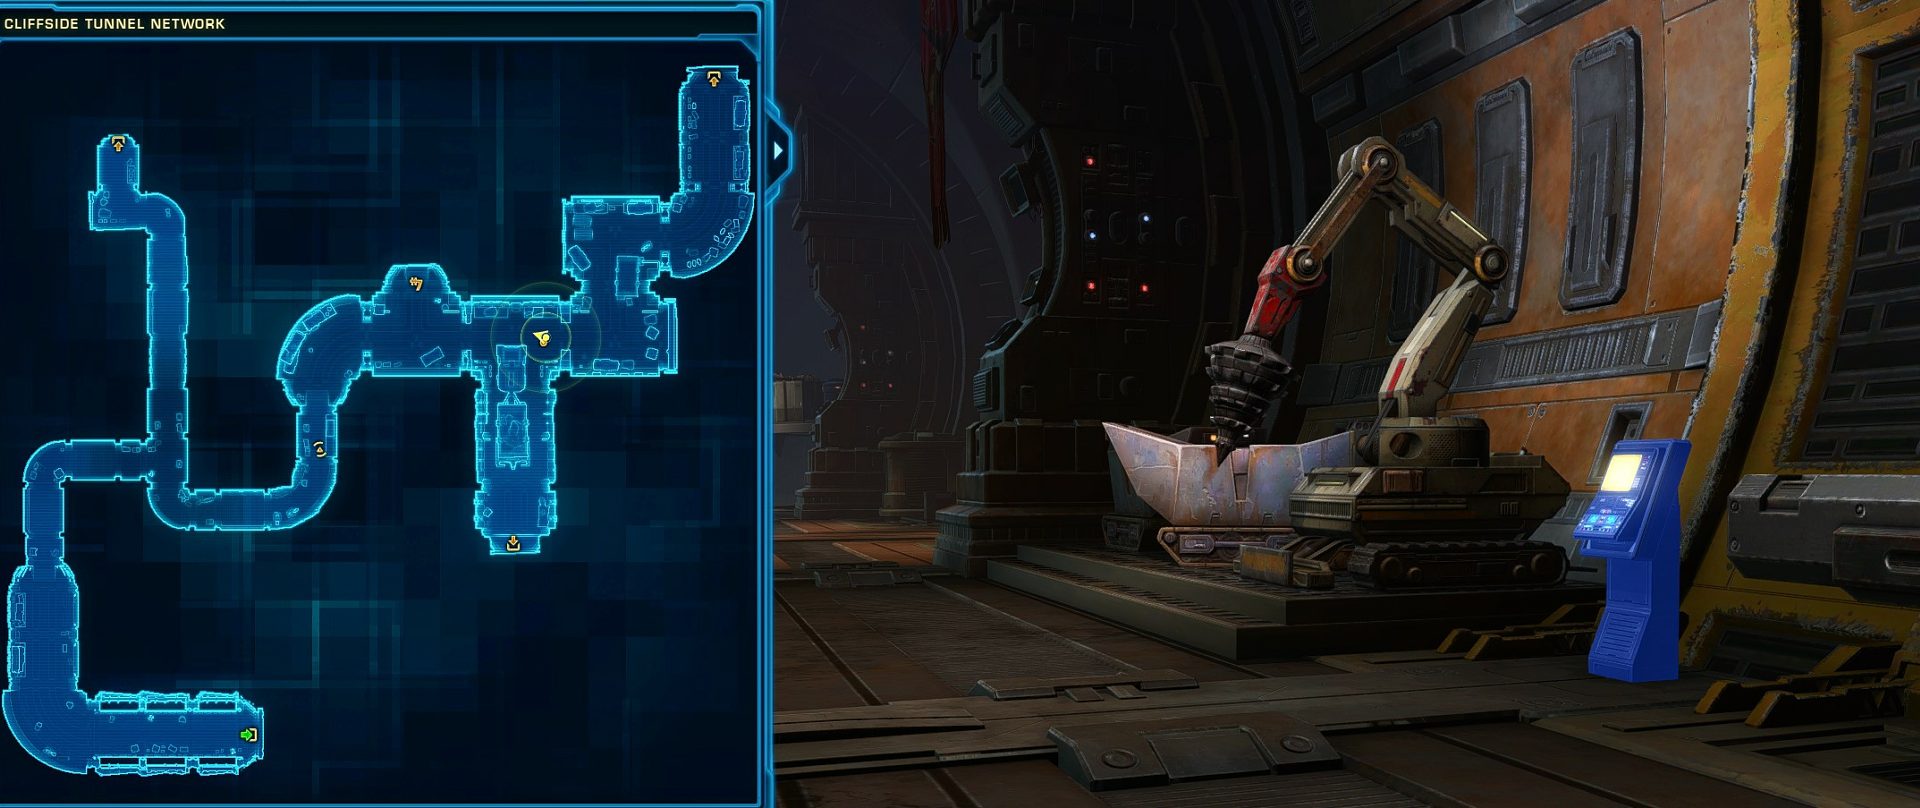
There are two pieces of relevant information here, though only one is useful now. You’ll want to head toward the Comms Tower in the Overgrown Mining Site, but you’ll find what you’re looking for at a Mainframe Terminal in the area that connects to the Comms Tower, the Reclaimed Mining Site.
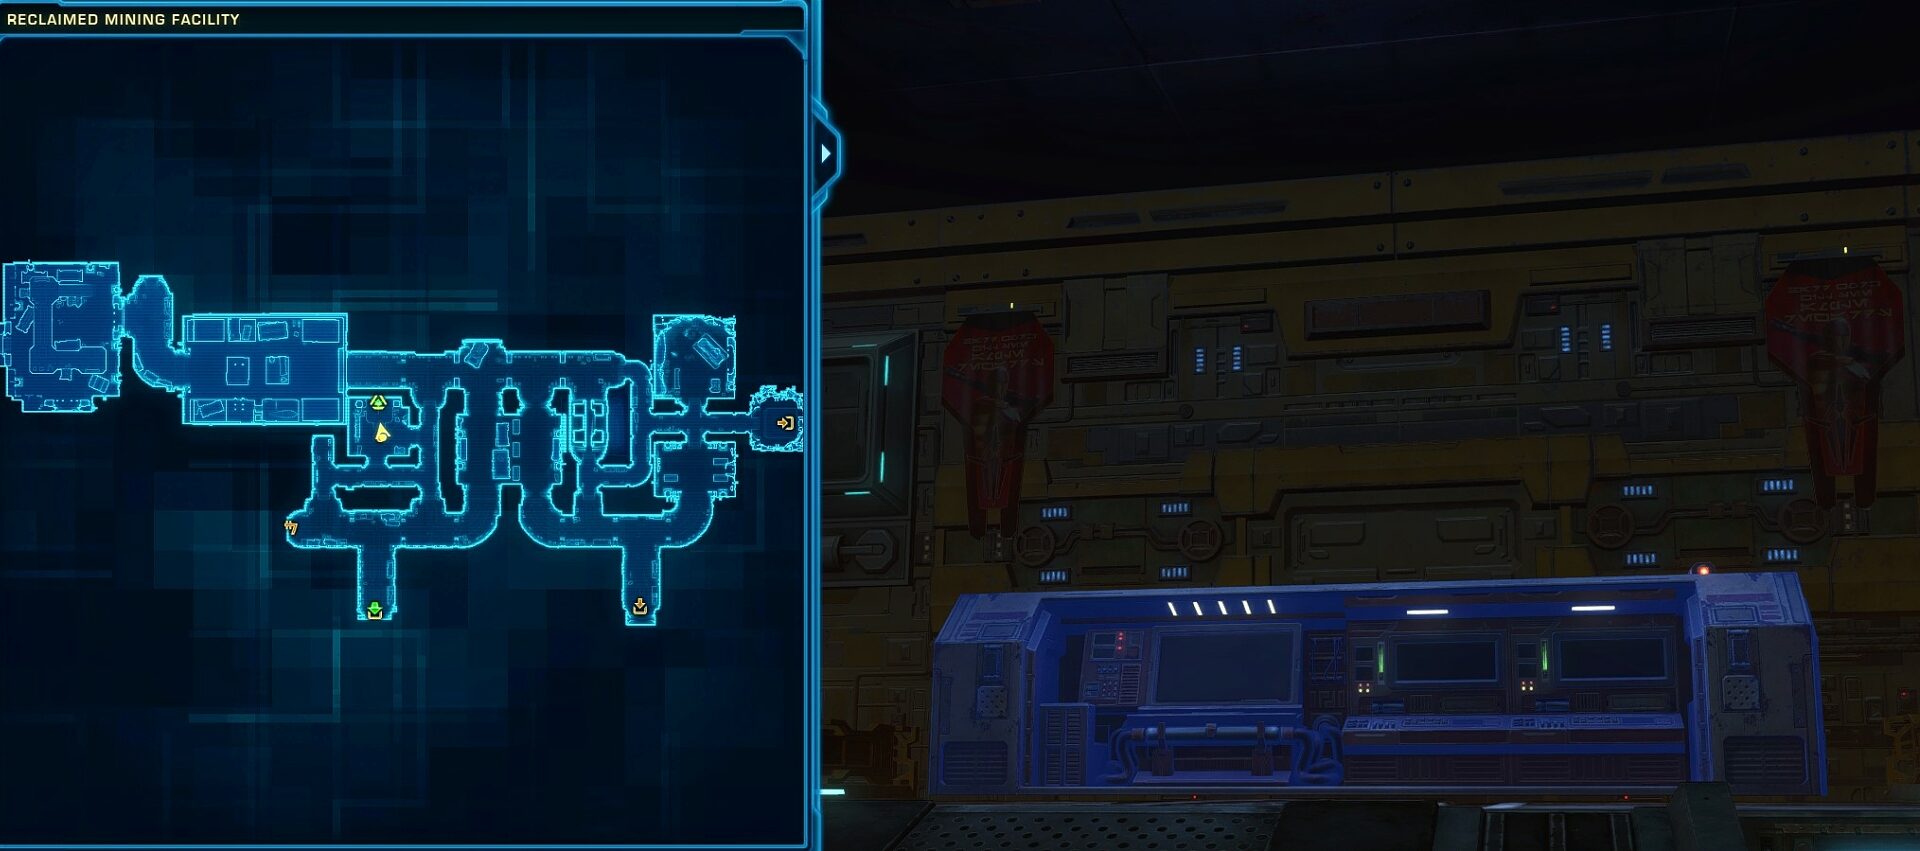
You don’t have access though, so you need to find Kaz’s Security Access Card, which is thankfully not too far away:
Once you have it, return to the Encrypted Network Access Terminal, in order to receive Personal Records: Kaz Denko.
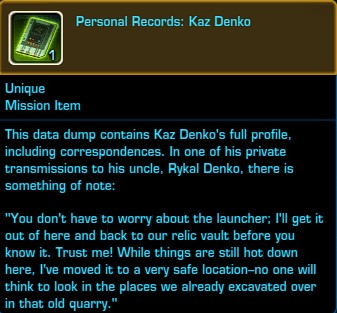
Right-click Personal Records in Mission Items to update Mission Objective and you’ll be directed to the Excavation Site where you’ll notice some blue dig spots. Here are 2 such locations, but there are a bunch of them.
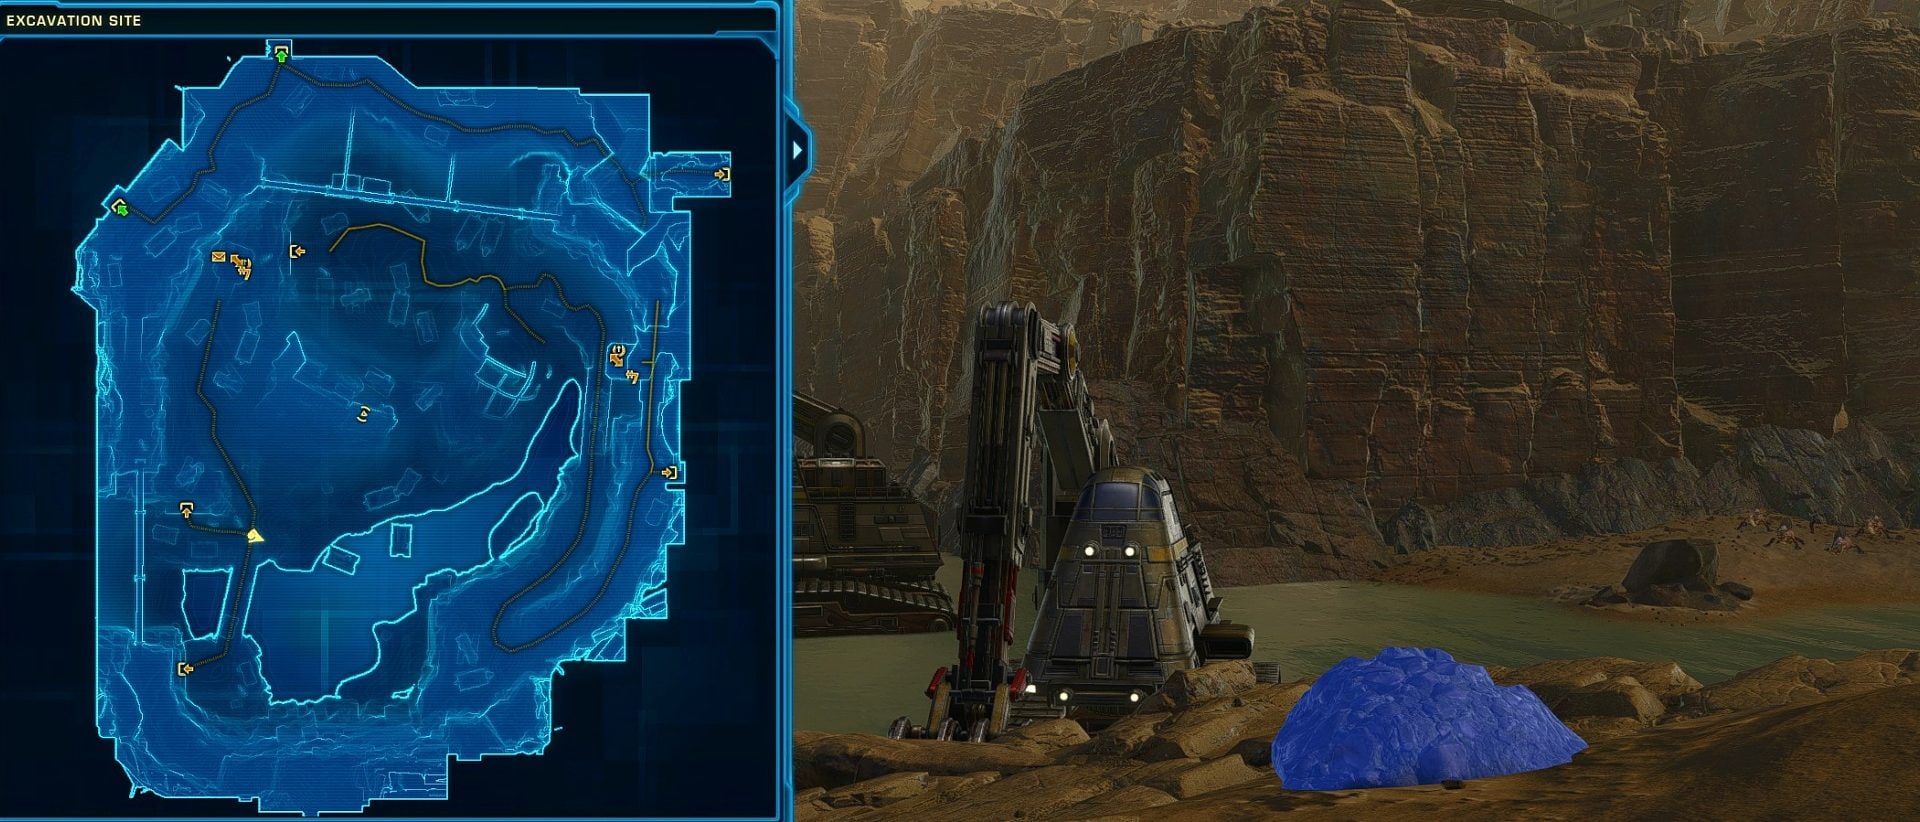
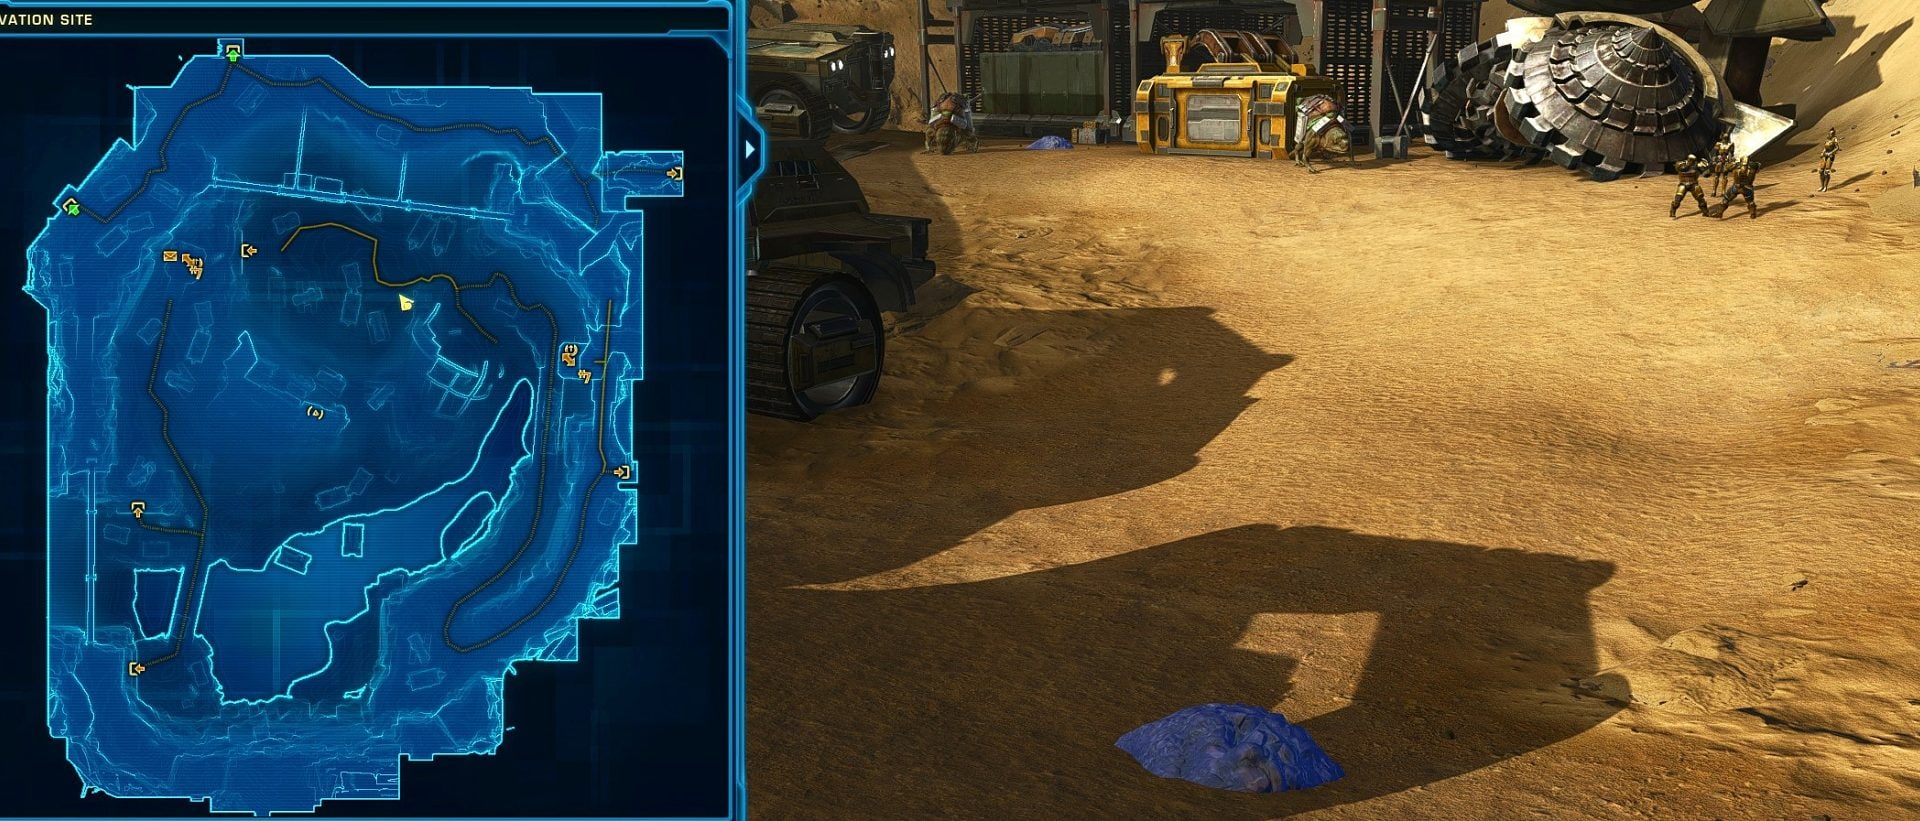
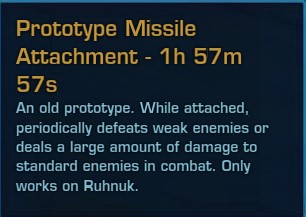
Keep digging through them until you find the Prototype Missile Attachment, which you can turn in to grant access to the Prototype Missile Attachment buff at the terminal:
Relic Hunt: Self-Replenishing Stim Mission Walkthrough
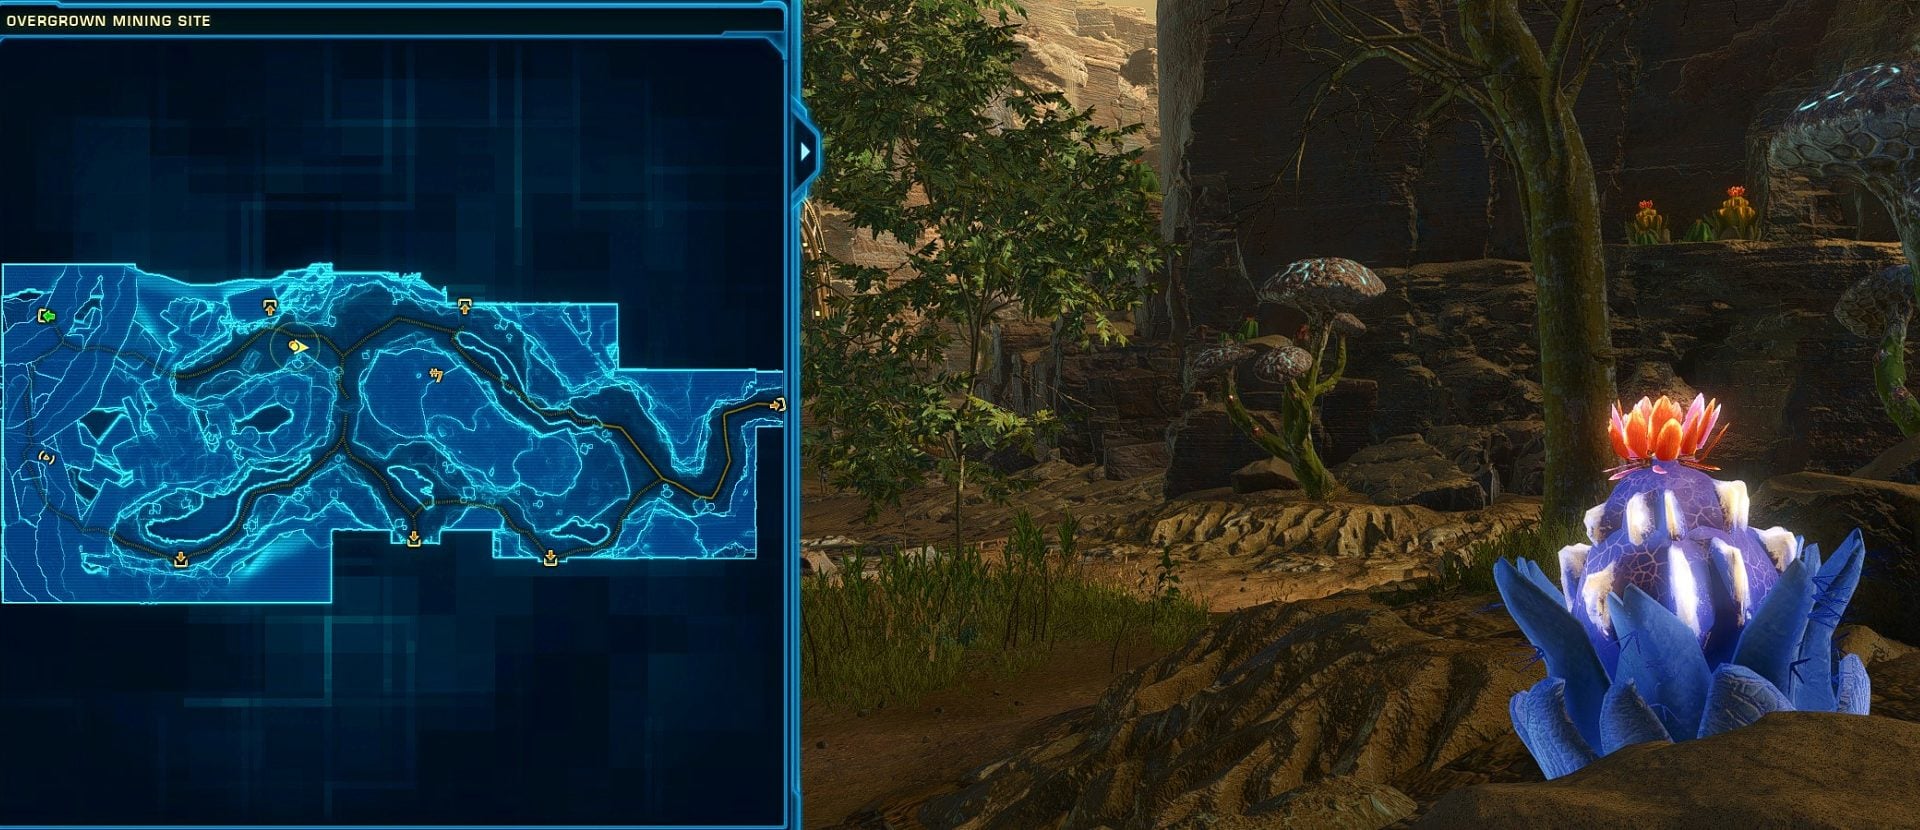
The second Relic Hunt mission isn’t quite as long. Your first objective is to locate Orm Kreg since he supposedly has the Self-Replenishing Stim you’re after. You’re given no information other than the fact that he’s somewhere at the Overgrown Mining Site. Here is his location:
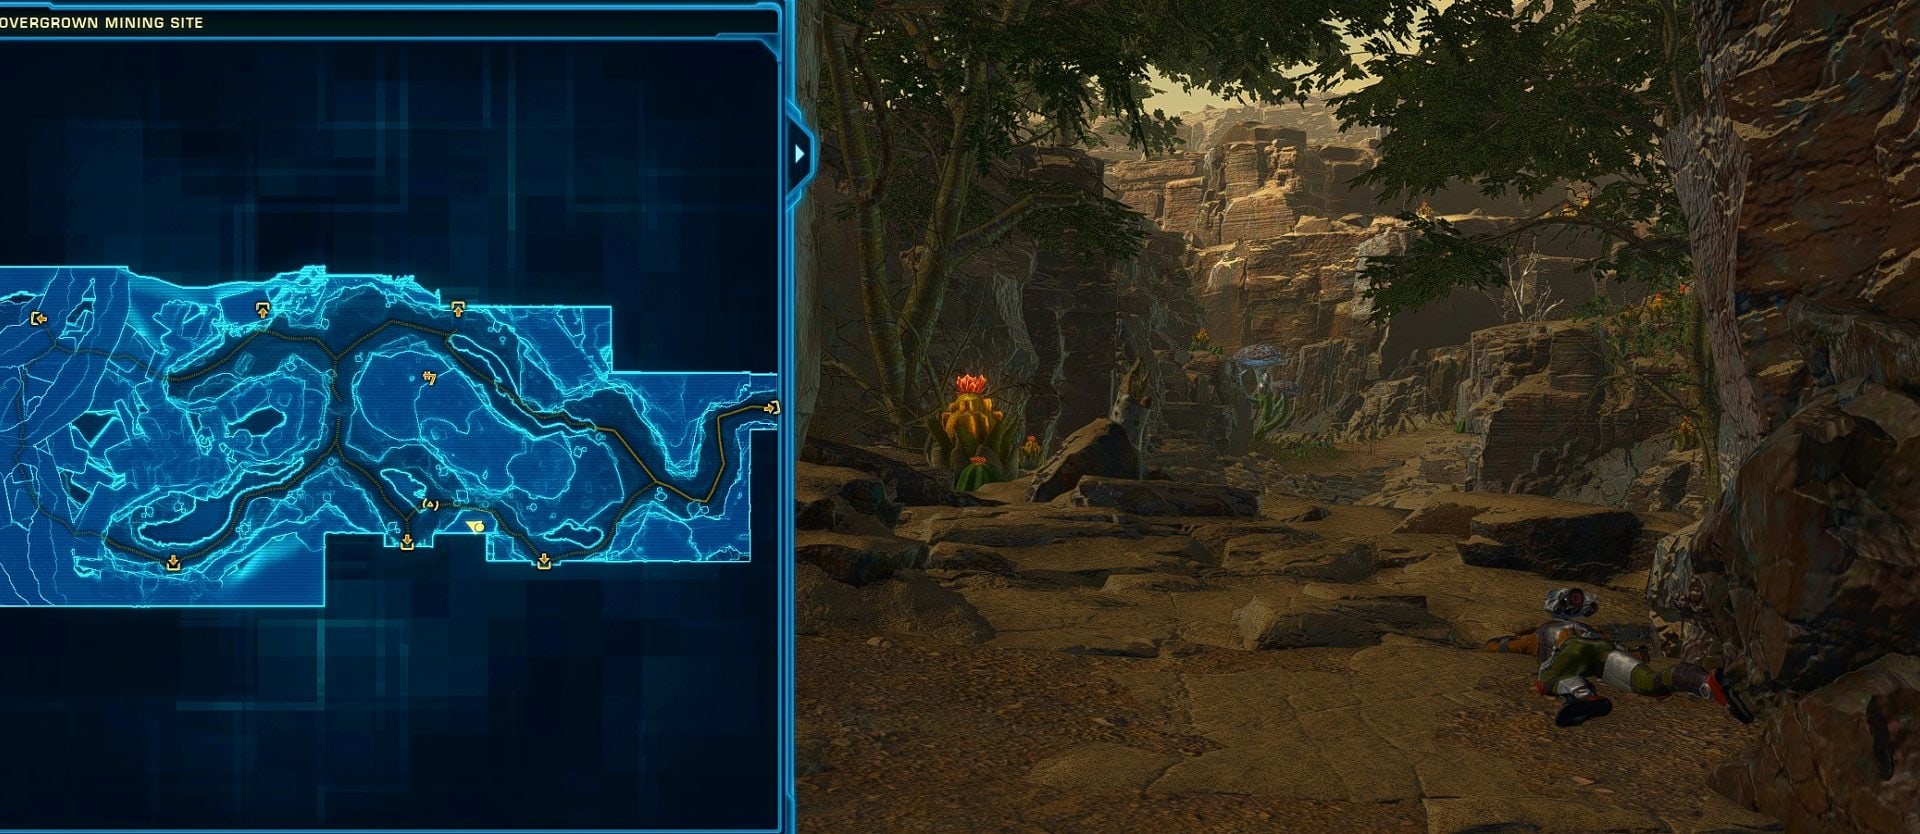
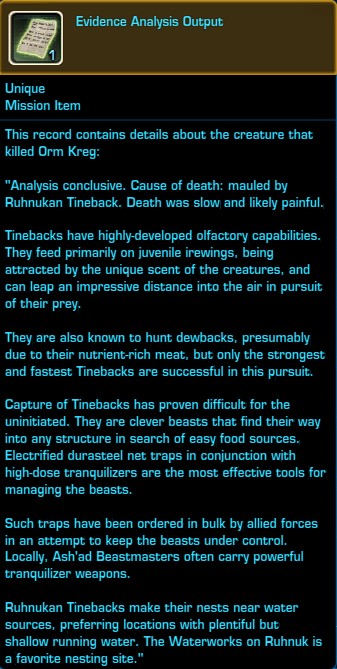
SURPRISE, he’s already dead! Your next objective is to determine the cause of death using your trusty ol’ Macrobinoculars. Once you’ve gathered enough evidence, return to Mandalore’s Encampment to use the Evidence Terminal, which will spit out this:
You’ll just need to follow the map to gather components for a trap. The first component, the Electrified Durasteel Net Trap can be picked up from a box near the Evidence Terminal at Mandalore’s Encampment.
Then, head to the Dilapidated Waterworks where you’ll need to defeat a Dewback to obtain a Perfectly Marbled Dewback Steak and Irewing Pheromones from Irewings.
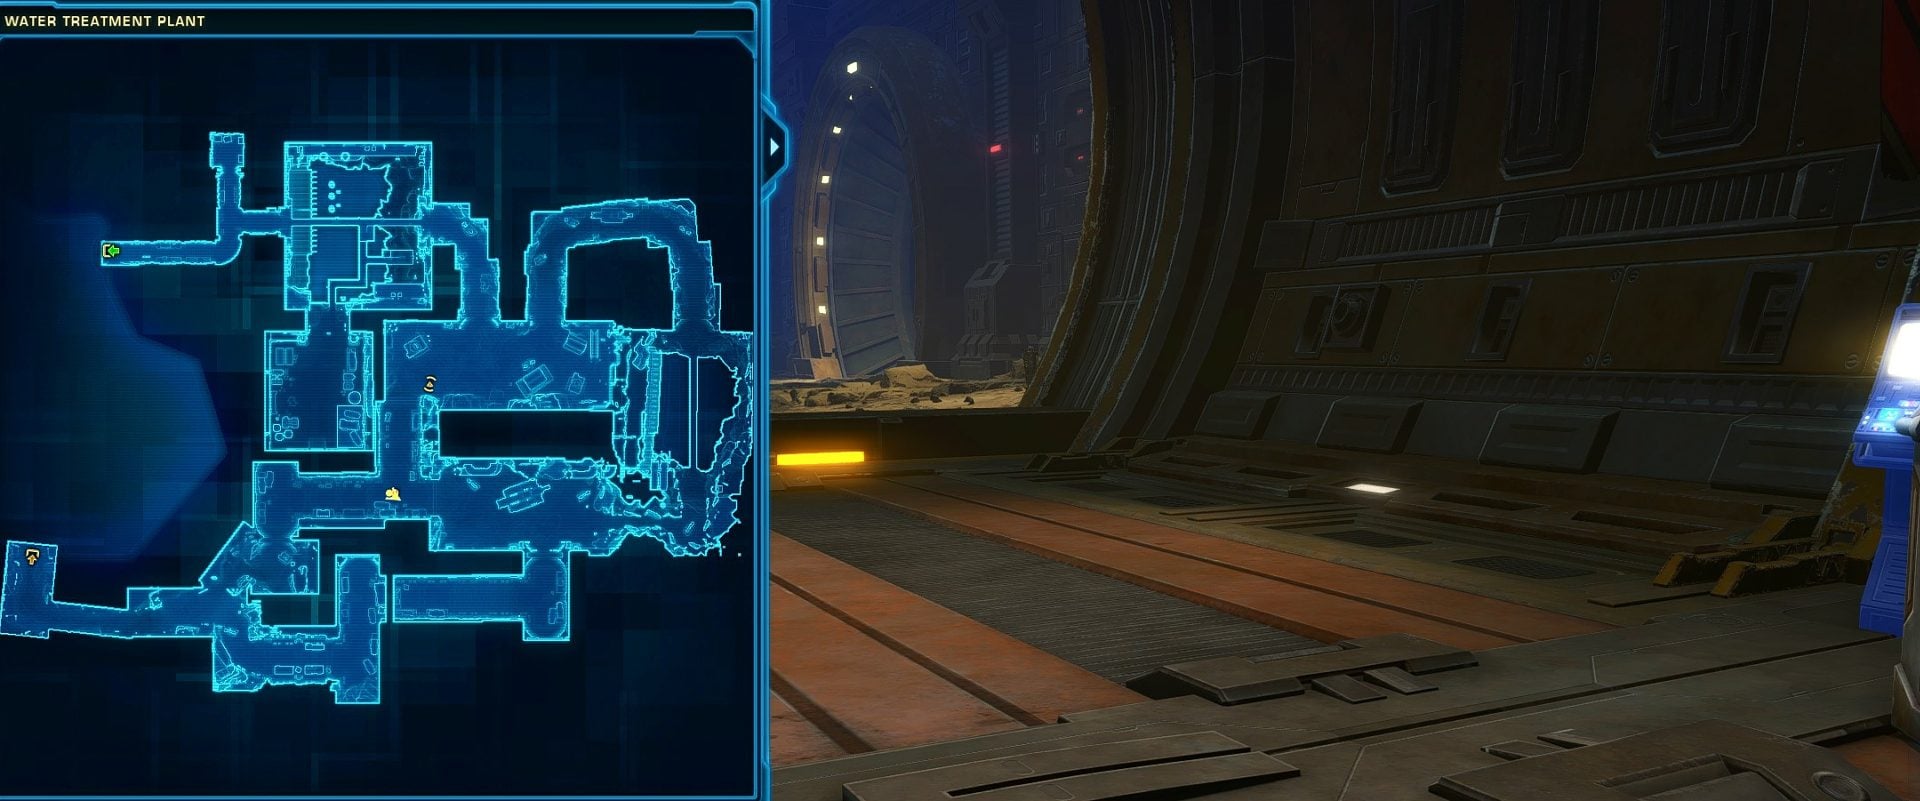
After that, head to the Water Treatment Plant and defeat Ash’ad Beastmasters (mobs composed of Mandalorians and Tinebacks) to get the Tranquilizer Bracers. Finally, you have everything you need to assemble the trap and can place it on The Scrabbler’s nest back at the Dilapidated Waterworks.
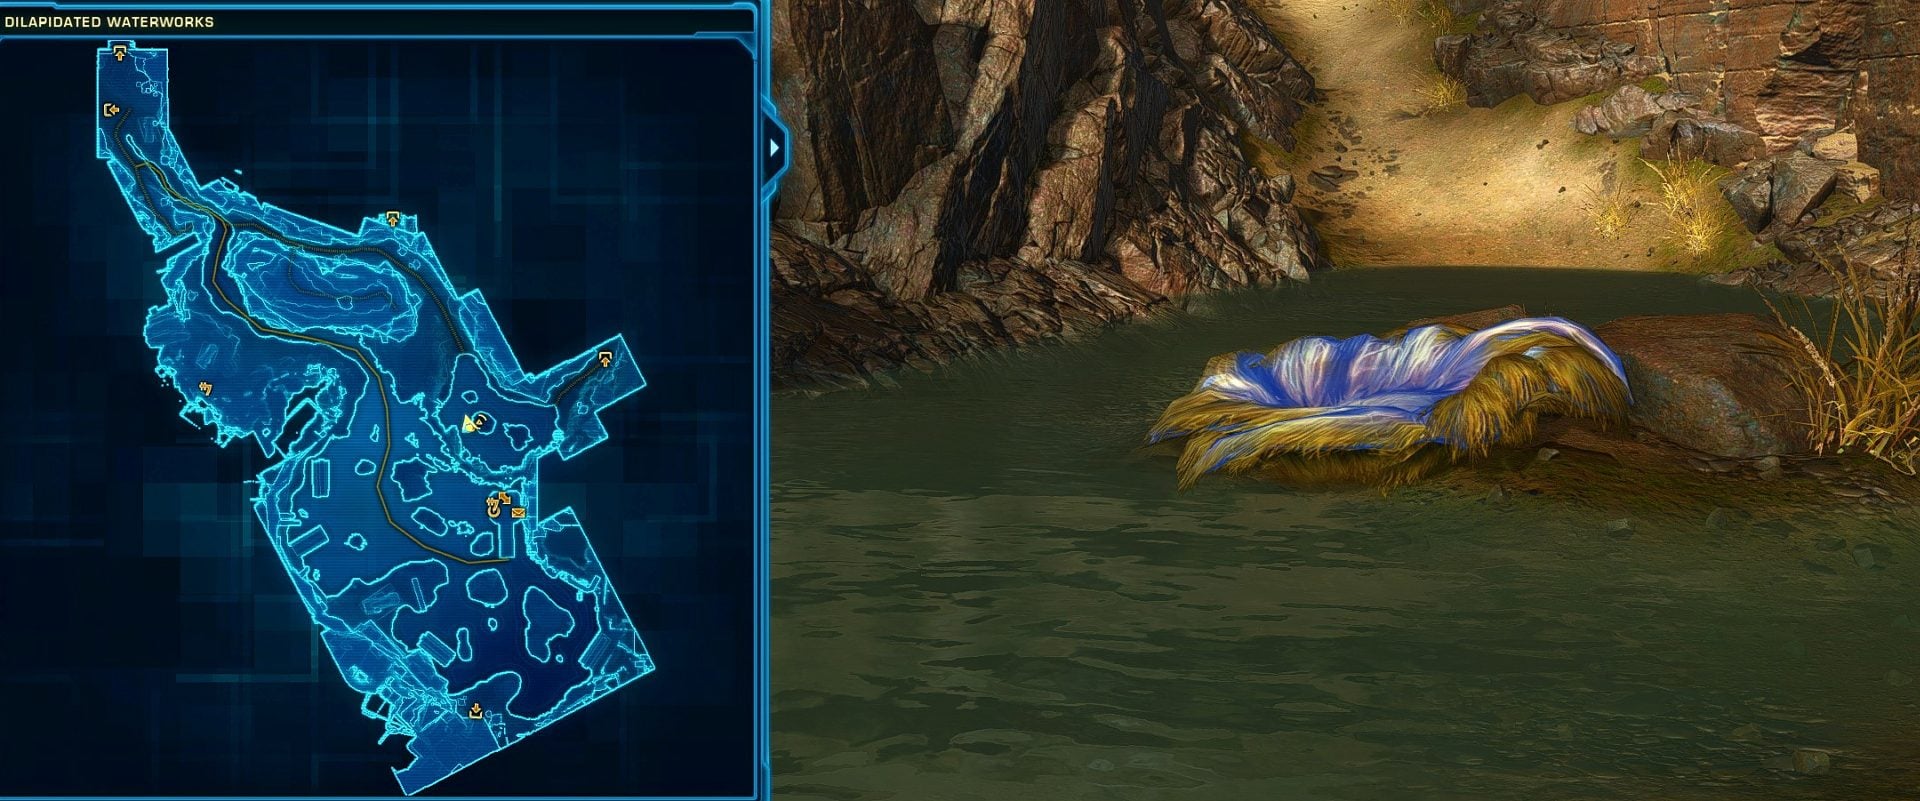
You’ll be instructed to step back and hide behind some rocks until the buzzed Scrabbler appears. Use the blaster ability on the temporary ability bar to tranquilize The Scrabbler. Then, walk up to it and use the other ability to reach into its mouth and retrieve the Stim.

Relic Hunt: Repulsor Unit Mission Walkthrough
Your first objective is to go find all 5 Manifest Terminals (Aurek through Cherek) located in different tunnels throughout Ruhnuk.
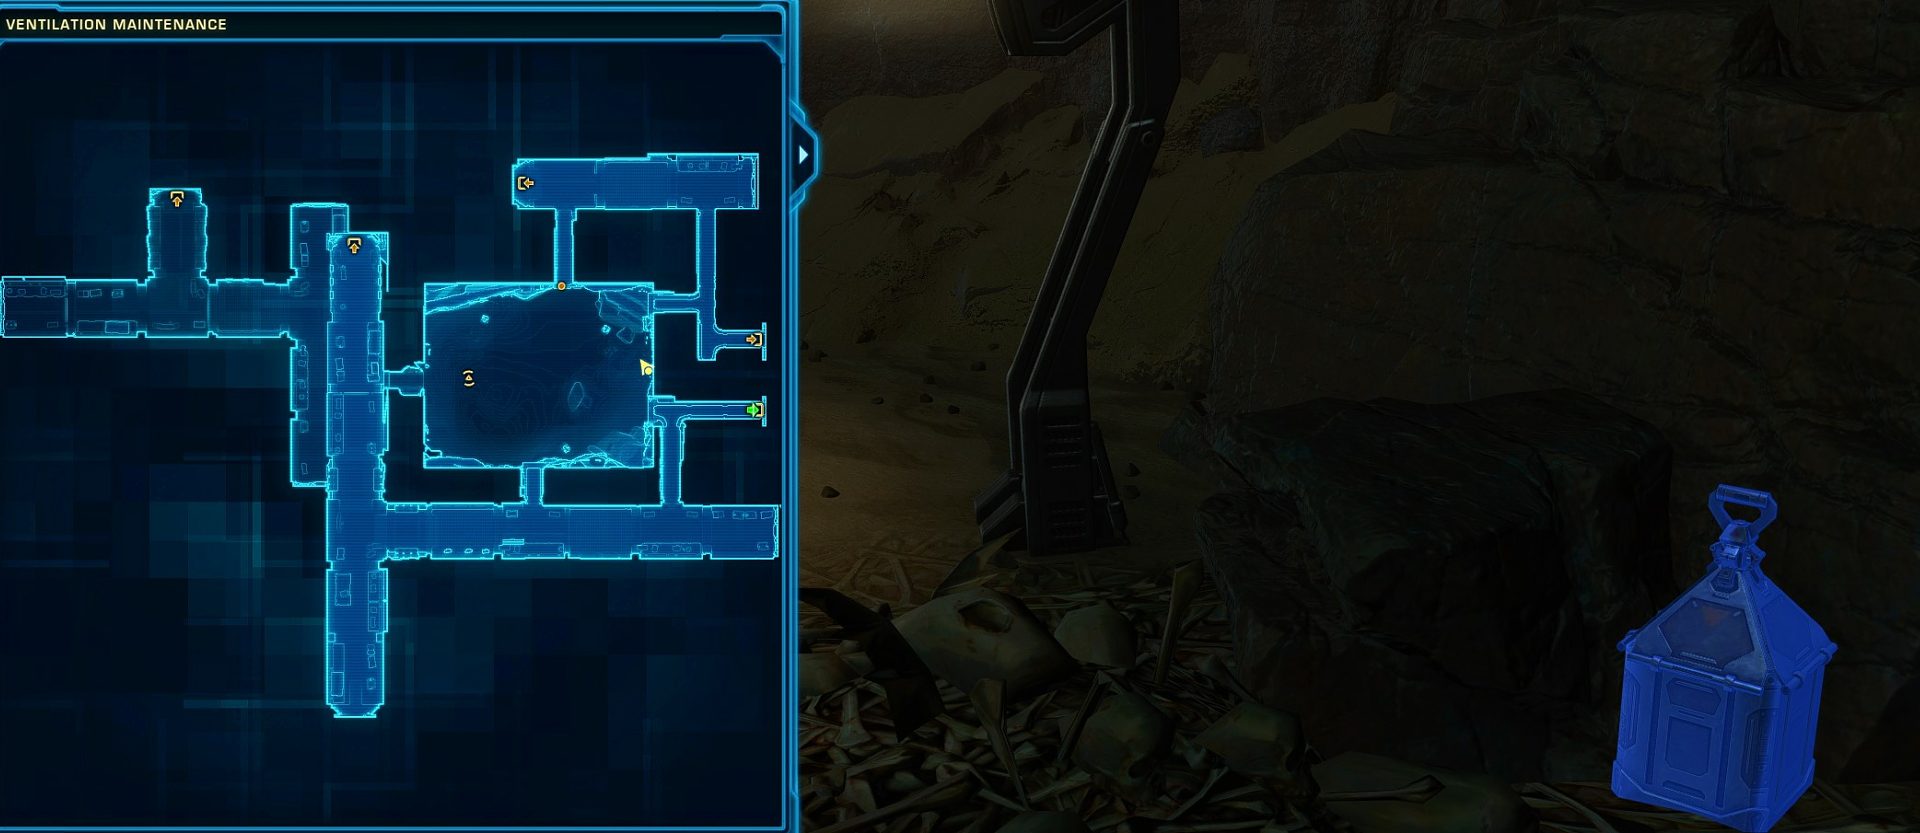
Return to cache, get heartbroken by receiving Dar’manda Datapad instead.
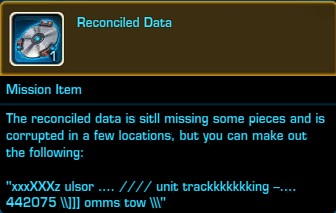
Marvel at the fact that you just did all that for a bunch of gibberish. Can you believe that you’re not even halfway done with this mission yet? In all seriousness, we can glean some information from that garbled mess: “Reupulsor Unit Tracking 442075 Comms Tower”. Since we were just looking at manifests, this information is pointing to a box at the Comms Tower.
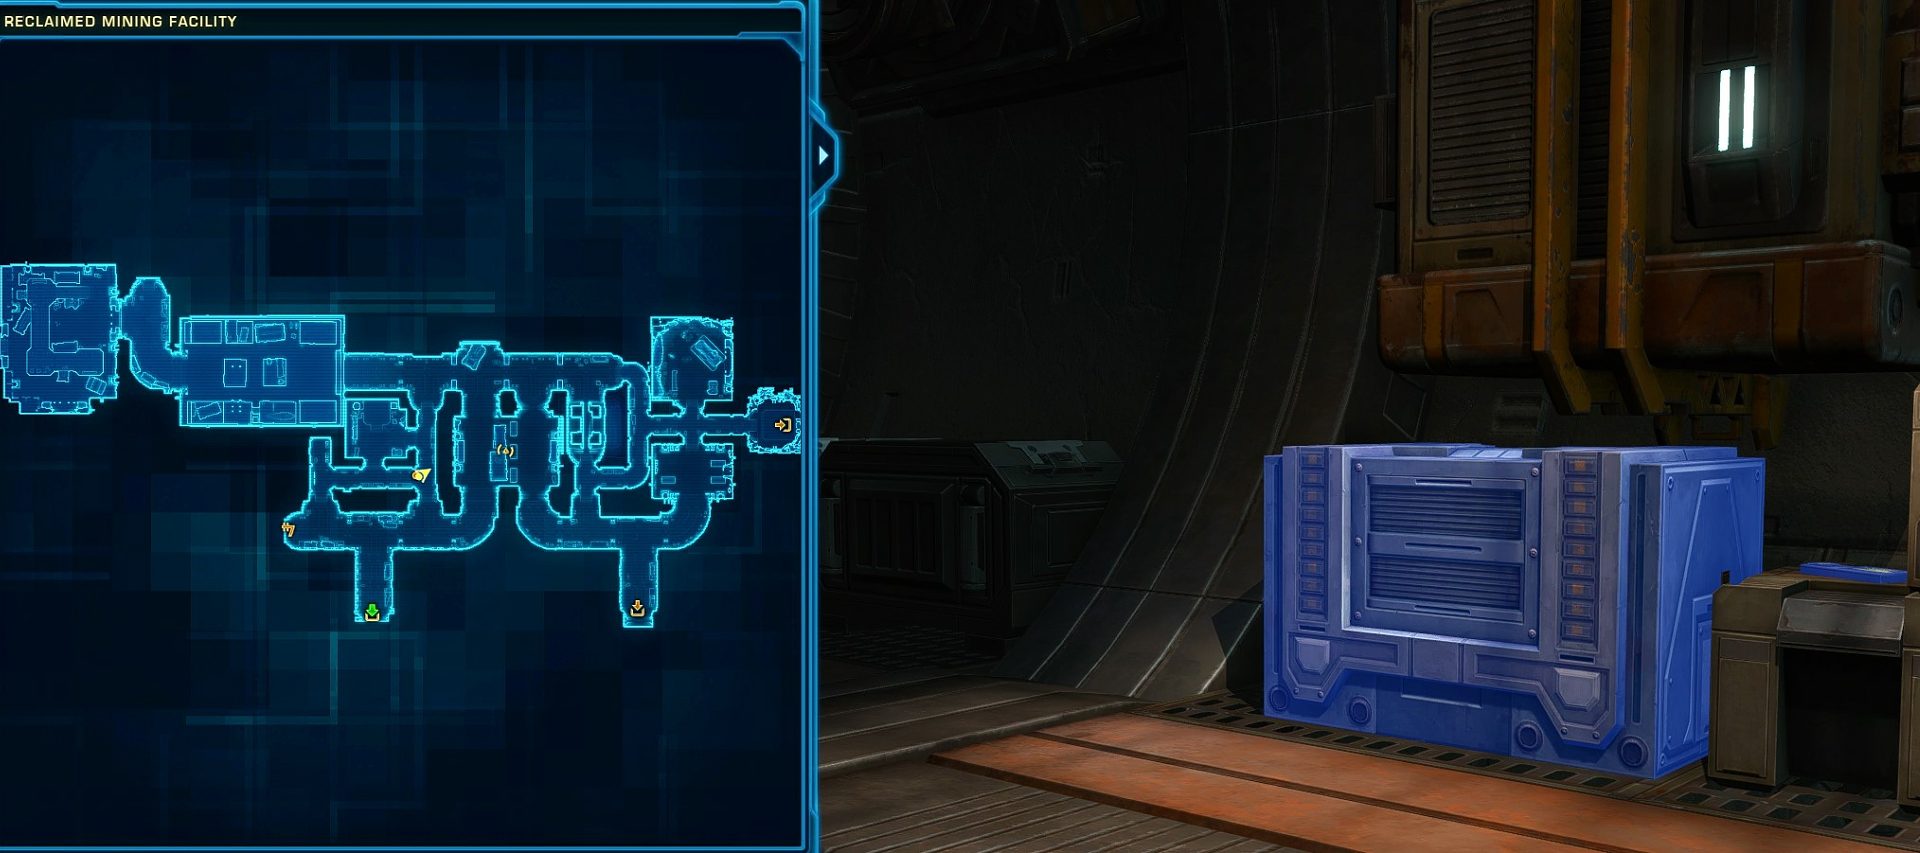
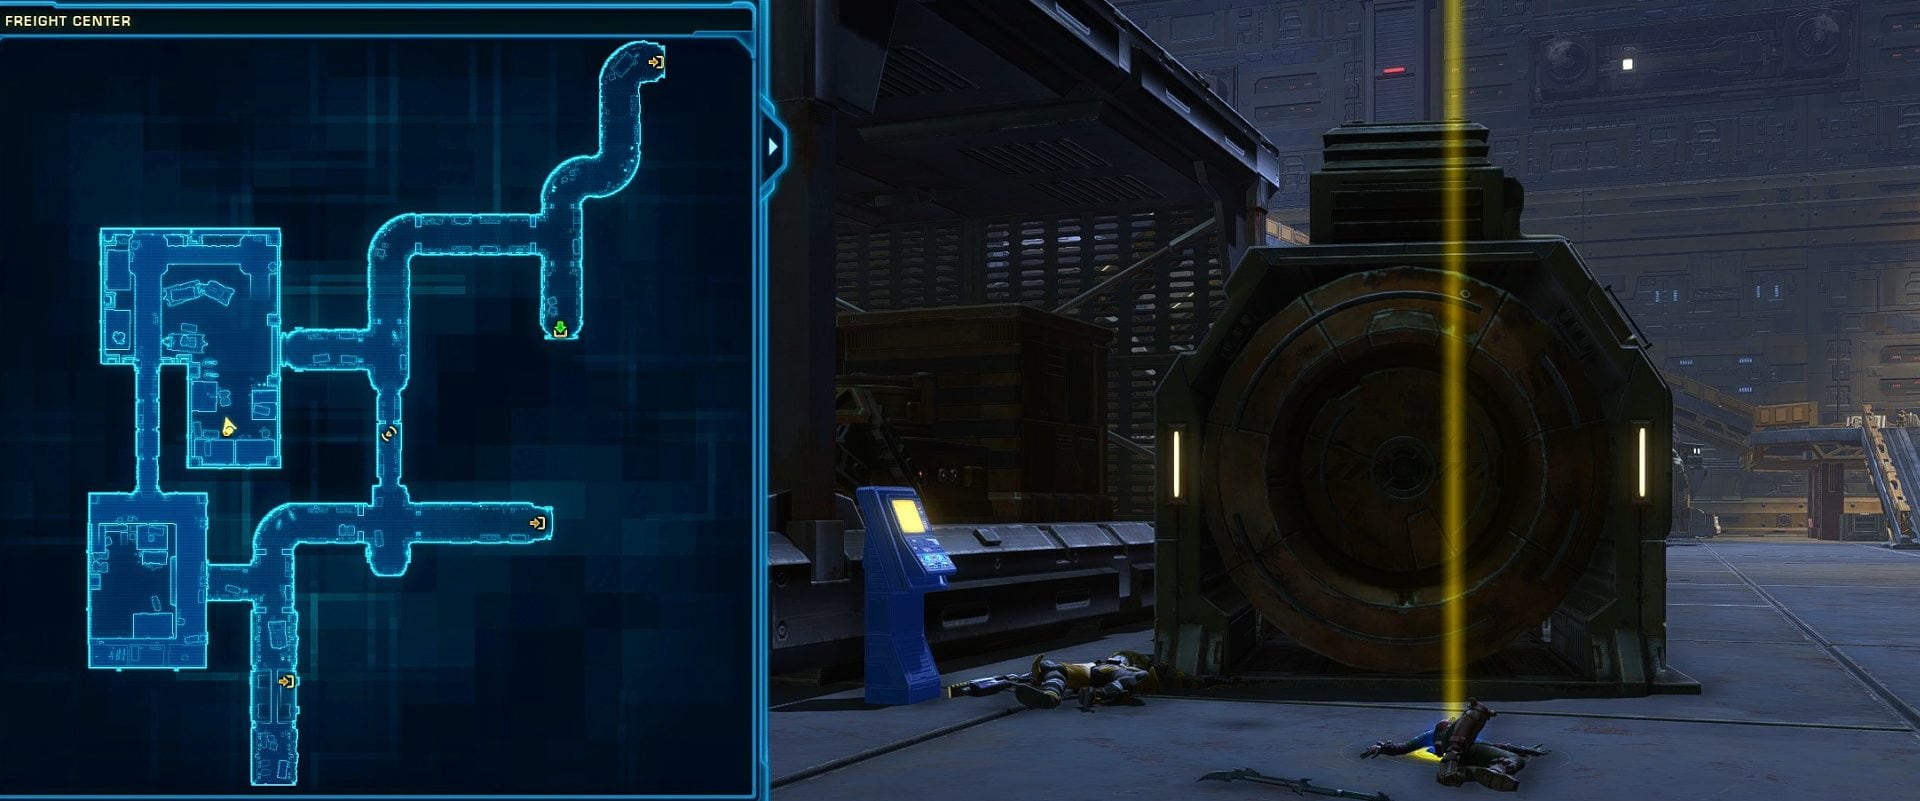
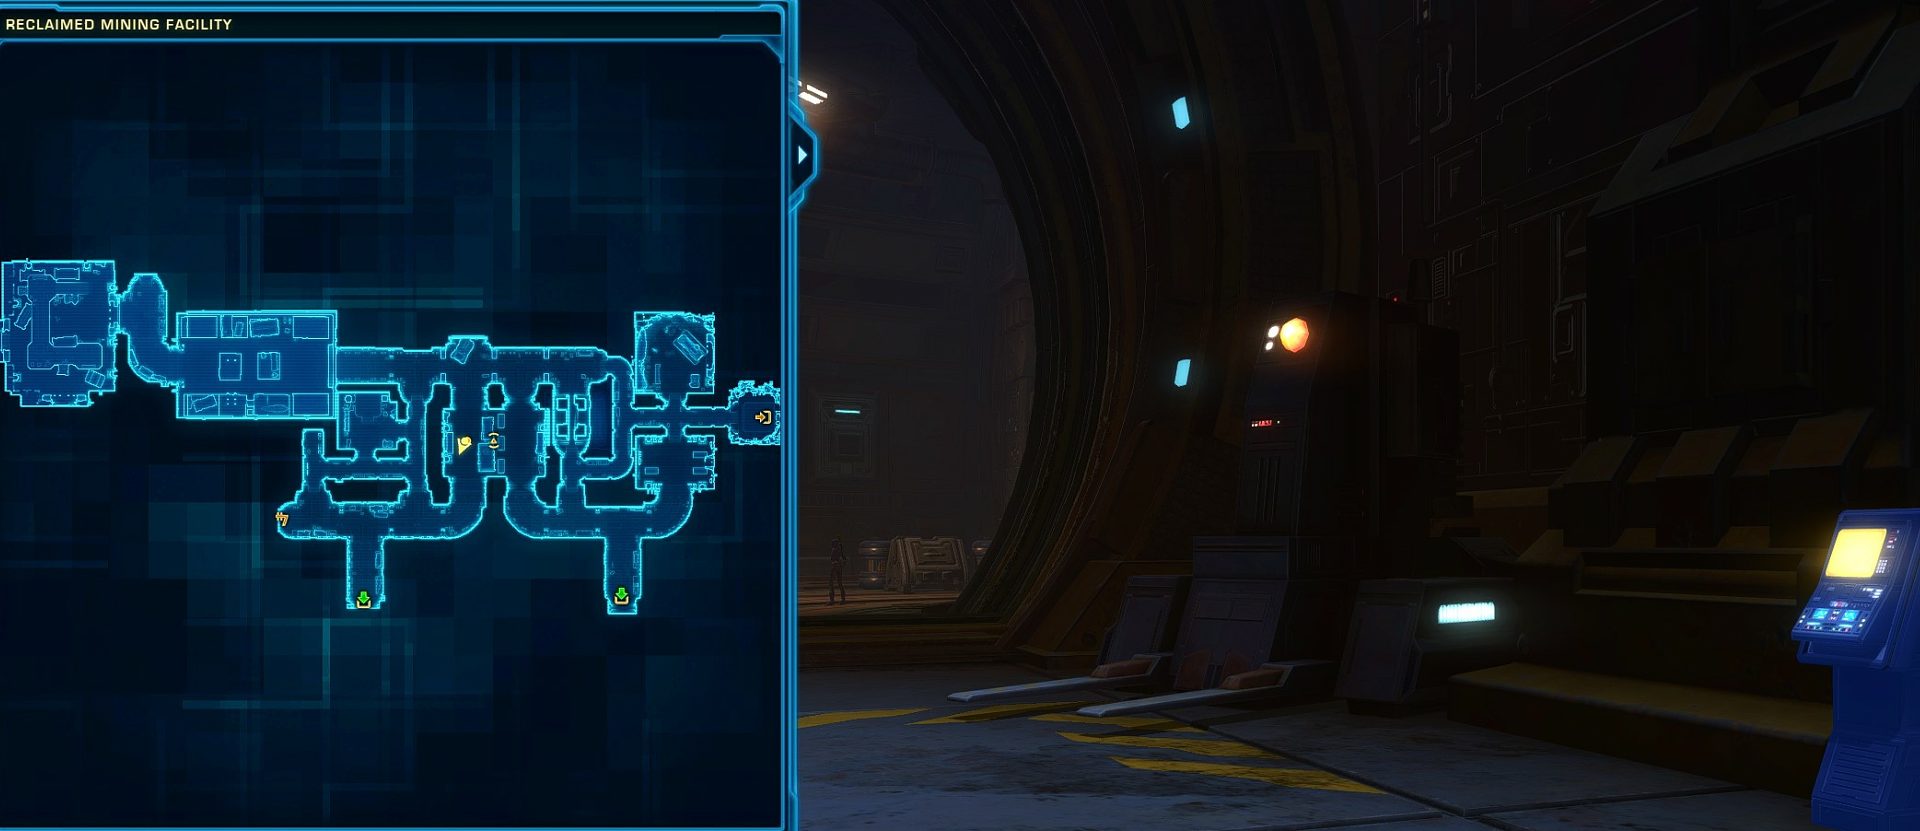
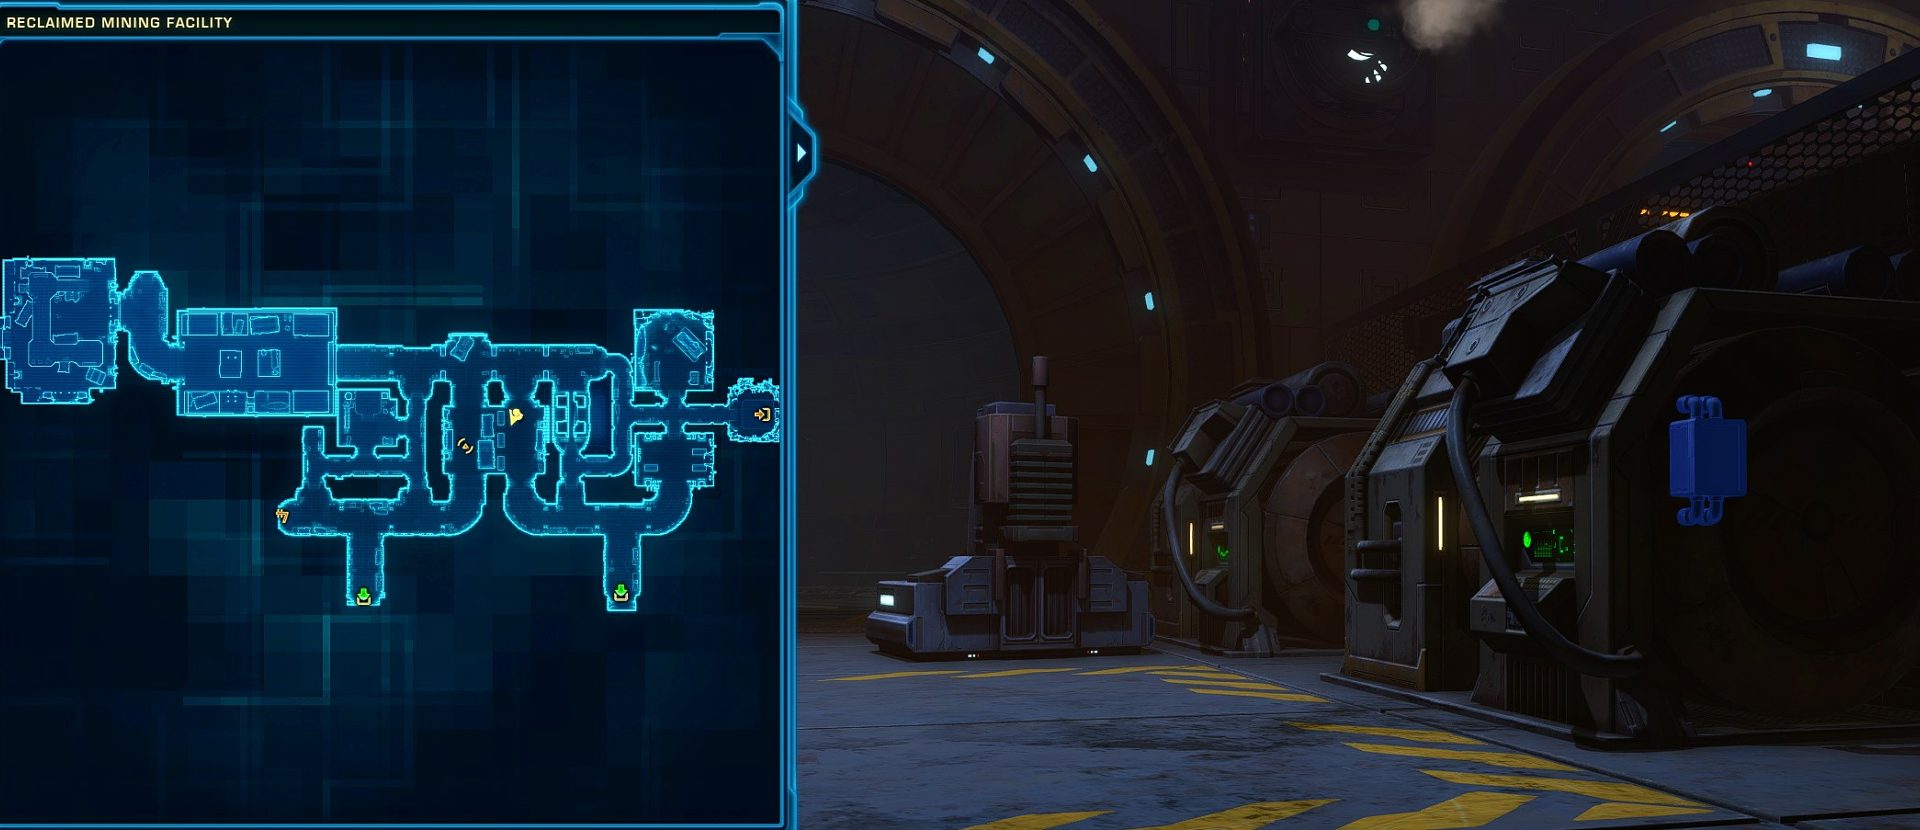
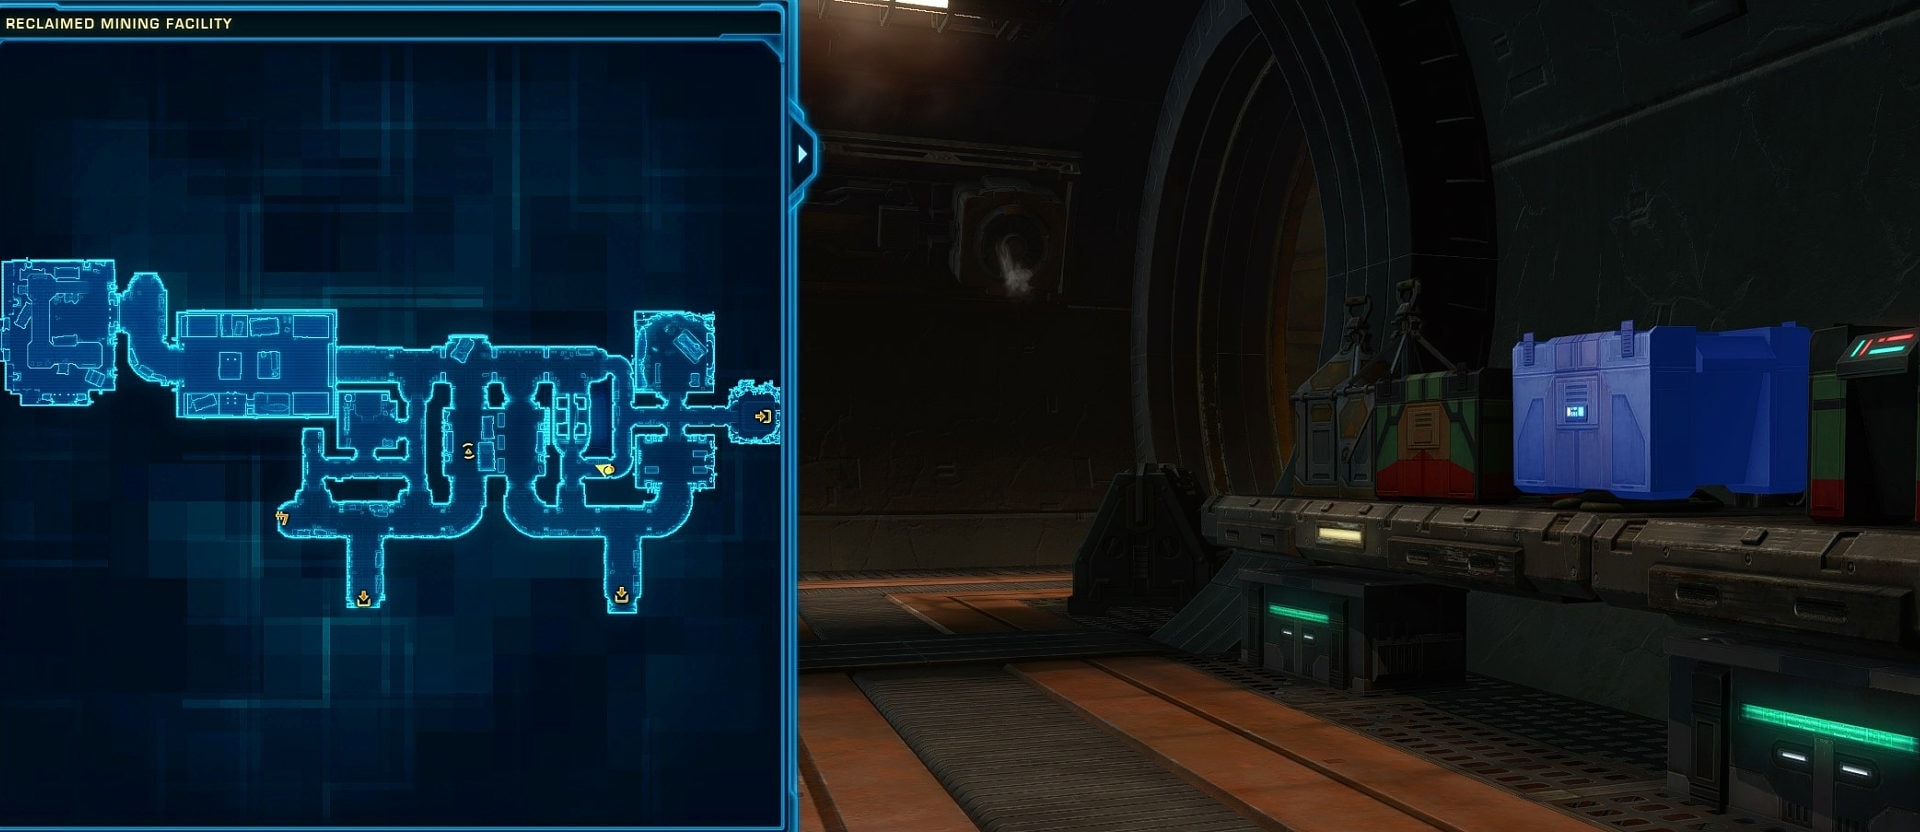
In reality, the box will be found in the Reclaimed Mining Facility which connects to the Comms Tower:

Aaaannnnndddd it’s locked, though you’re not gonna bother with hunting around for a key this time. Instead, you’re gonna just blow open the cache with a makeshift explosive, cobbled together from 3 items you’ll find throughout Ruhnuk.
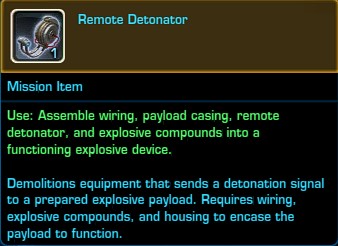
You need wiring, explosive compounds, and housing in order to blow open the crate. The materials can be found at the following locations:

Now, assemble the components and head back to the cache to pop that sucker open.
After all this work, what do you find? Not the Repulsor Unit, but a Dar’manda Datapad.
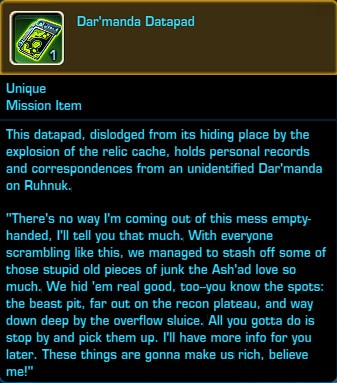

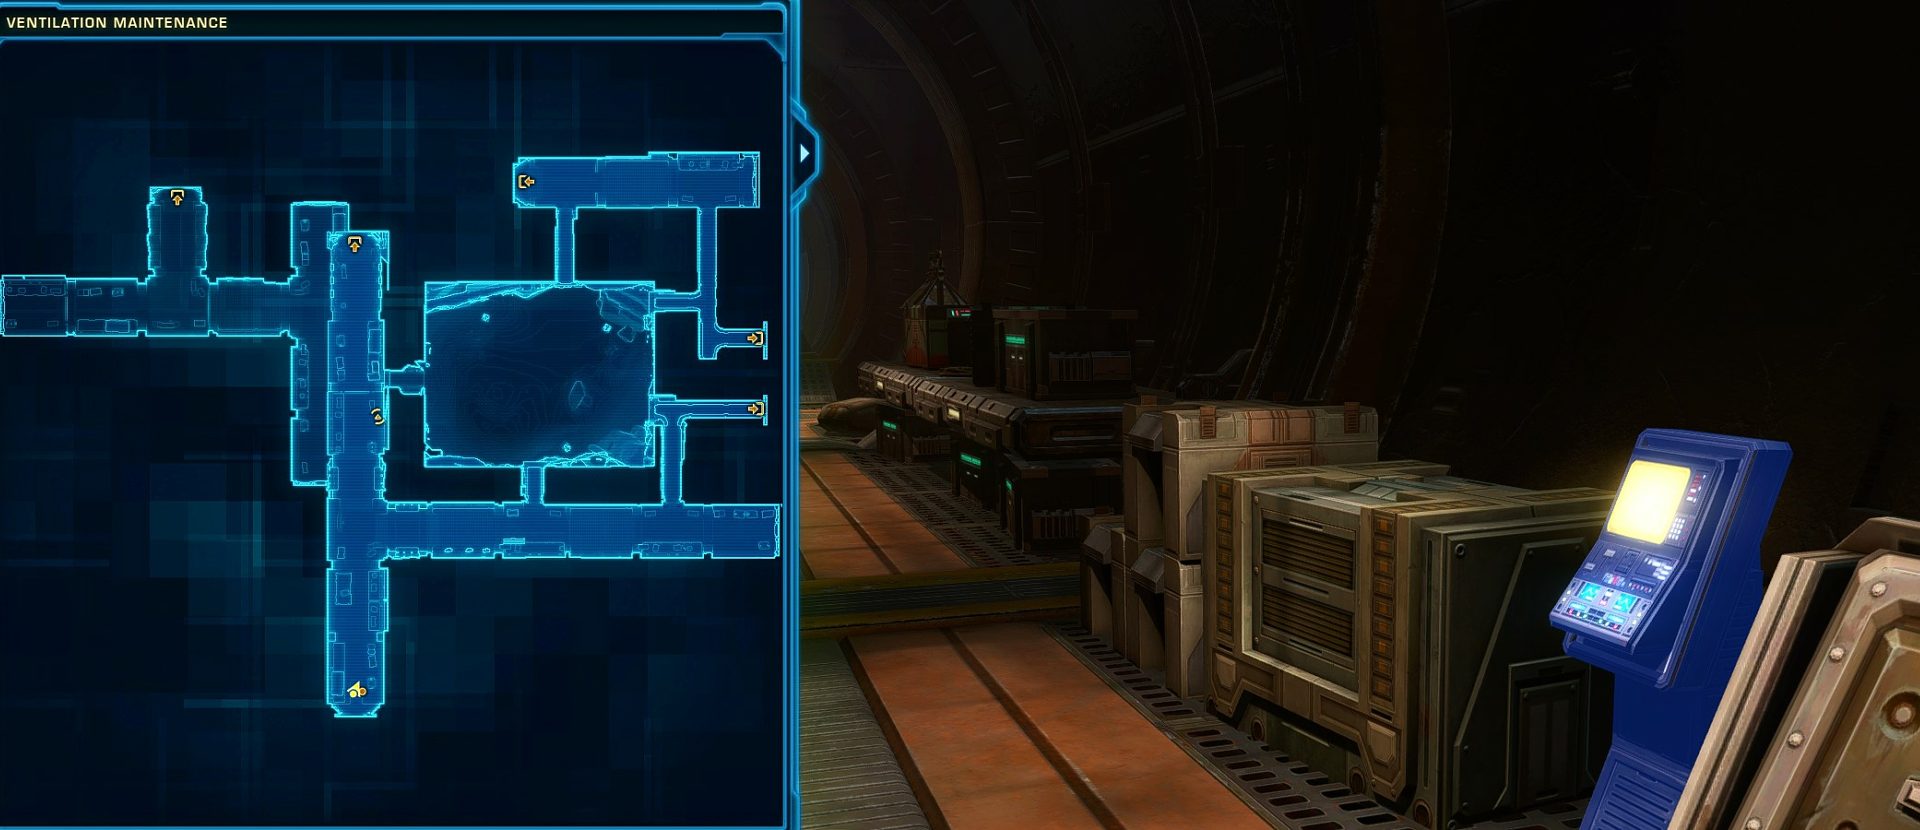
GO FIND 3 MORE CACHES! Thankfully, the datapad does give you fairly precise locations for your next objective. You’ll be heading to Ventilation Maintenance, the Water Treatment Plant, and the Arid Wastes.
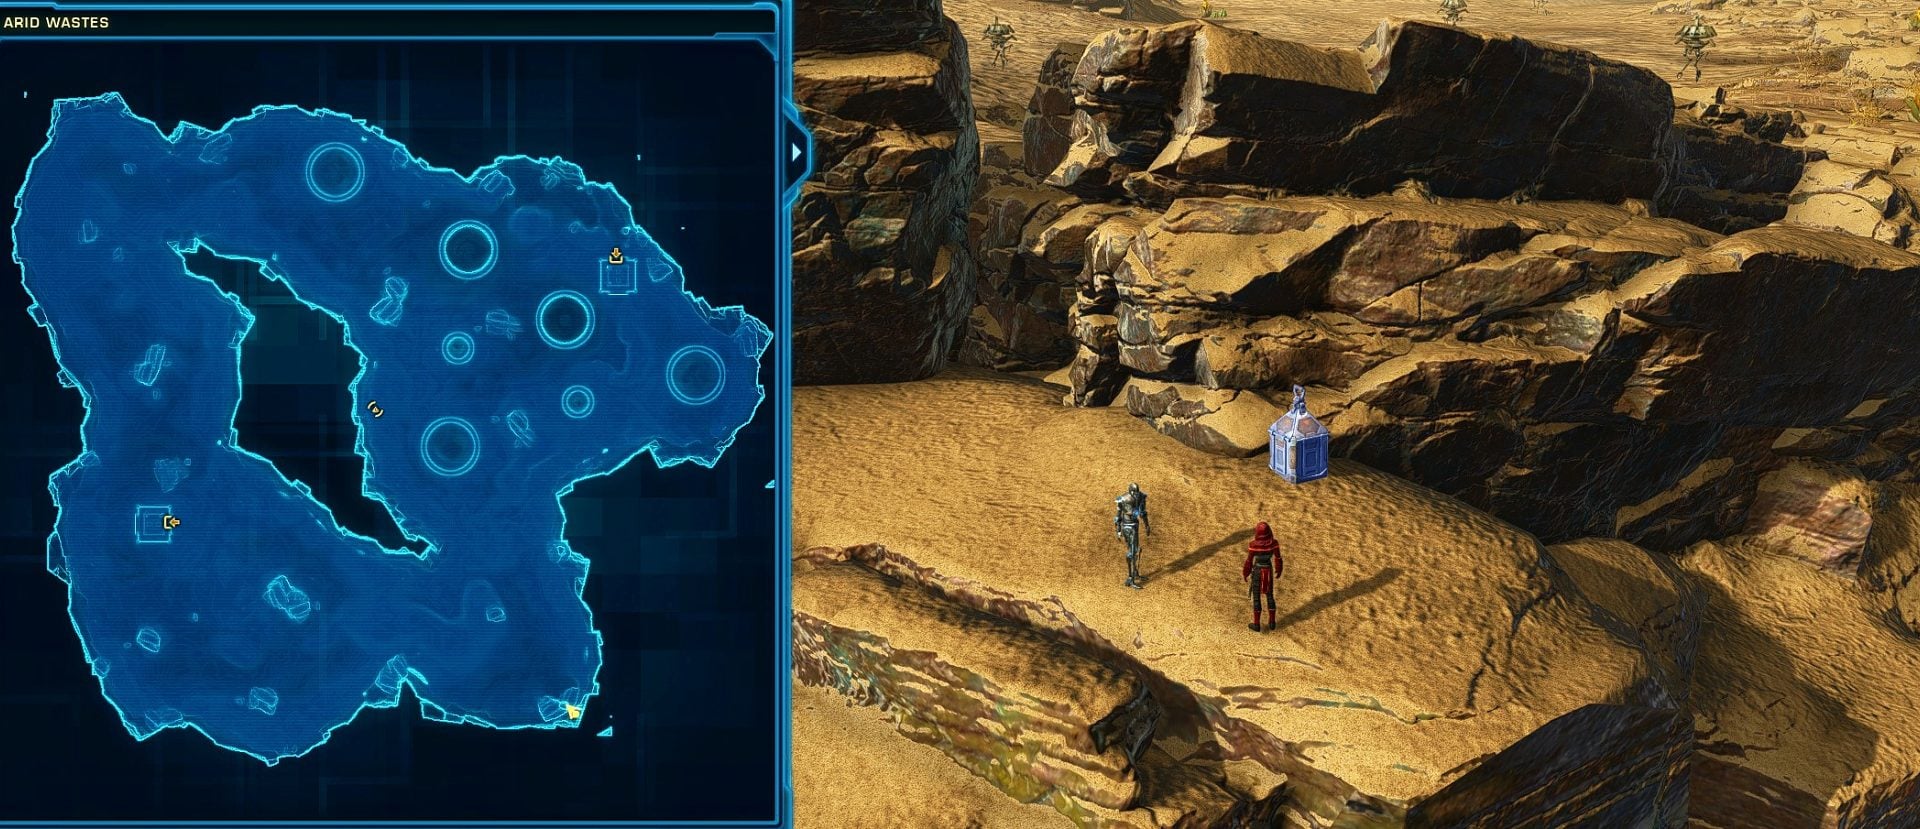
The mission marker for the cache at Arid Wastes is a LIAR because the cache is actually located outside of the marked area! Of course, the actual Repulsor wouldn’t be in any of the caches and instead, IT’S JUST ANOTHER CRYPTIC NOTE!
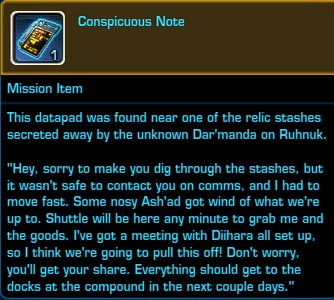
The key information from this note comes from the following words: Diihara, docks, and compound. Here’s your visual hint if you want to try and figure it out for yourself:
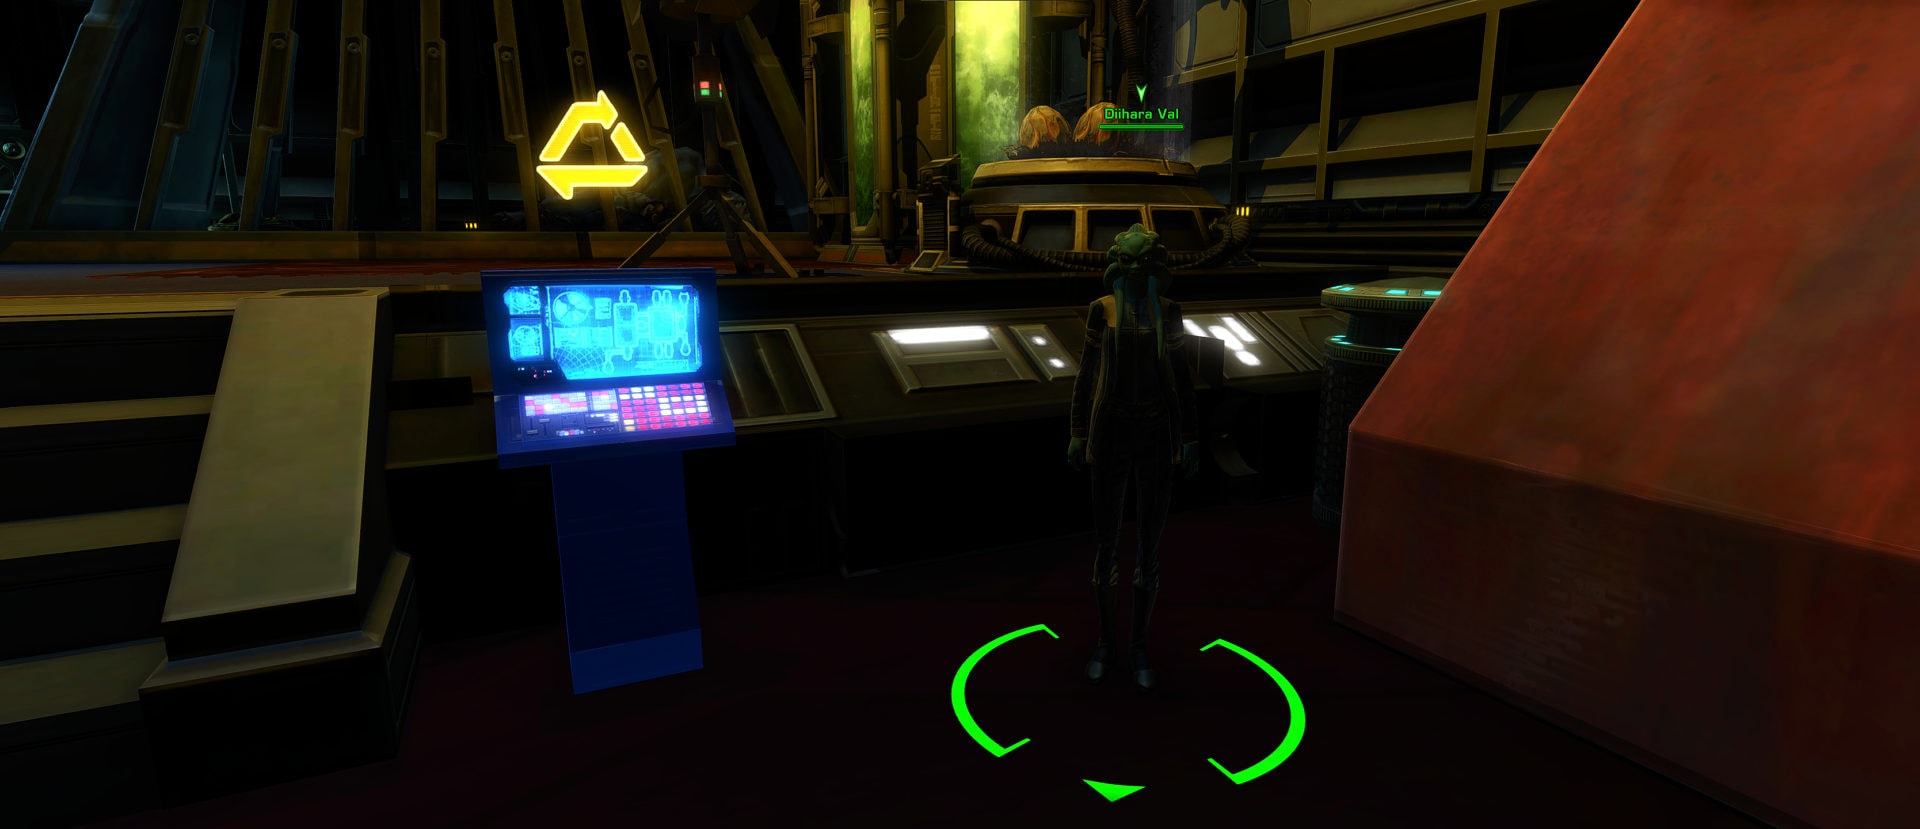
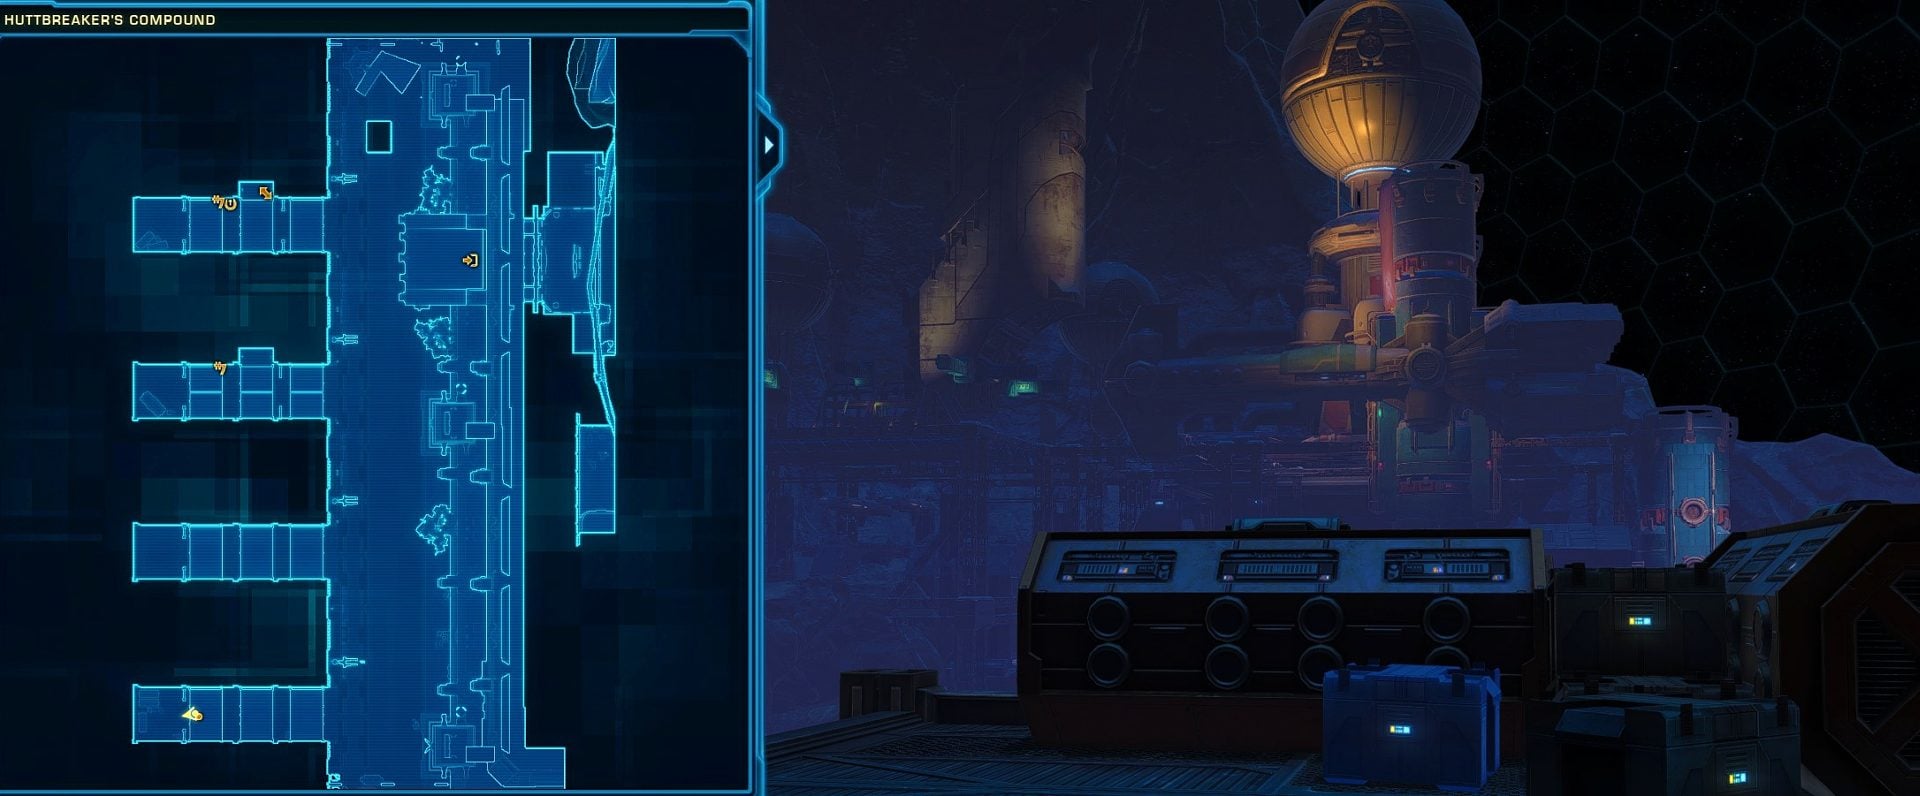
Don’t read the next sentence unless you want more information. Diihara Val is a Nautolan gal that works for Huttbreaker on Mek-Sha. She can be found on the main floor at Huttbreaker’s Compound, and you might think that our fancy schmancy repulsor relic is up for auction in that room as I did, but then you’d be forgetting about one of the keywords I mentioned: docks.
The repulsor unit can actually be found at end of the southernmost dock at the entrance to Huttbreaker’s Compound.
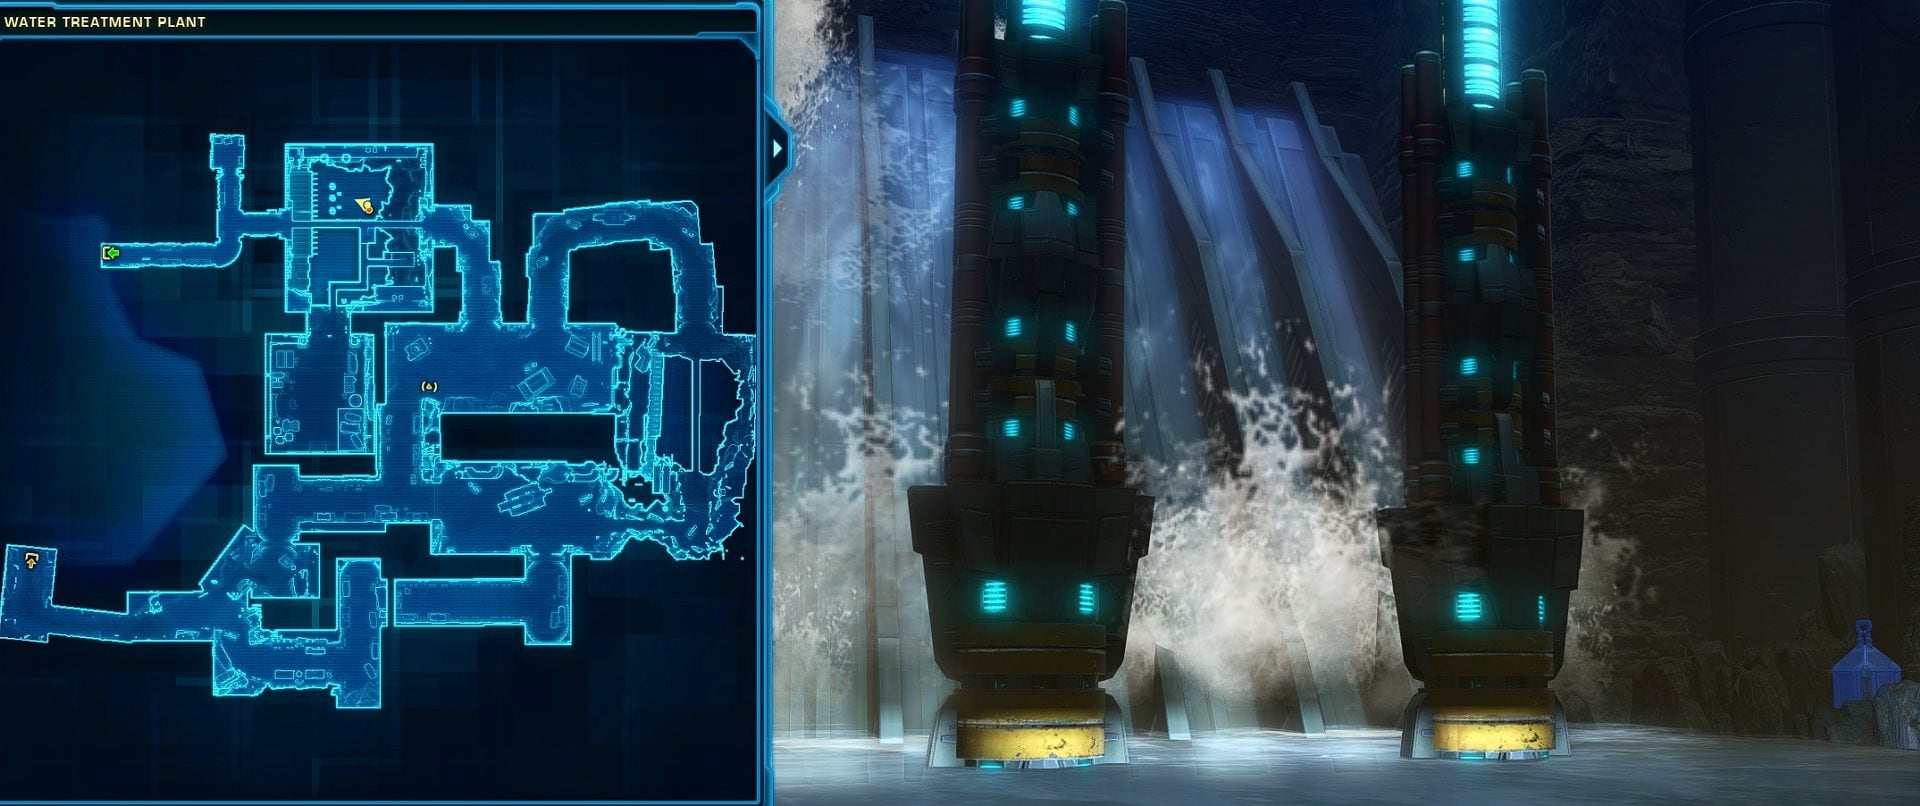
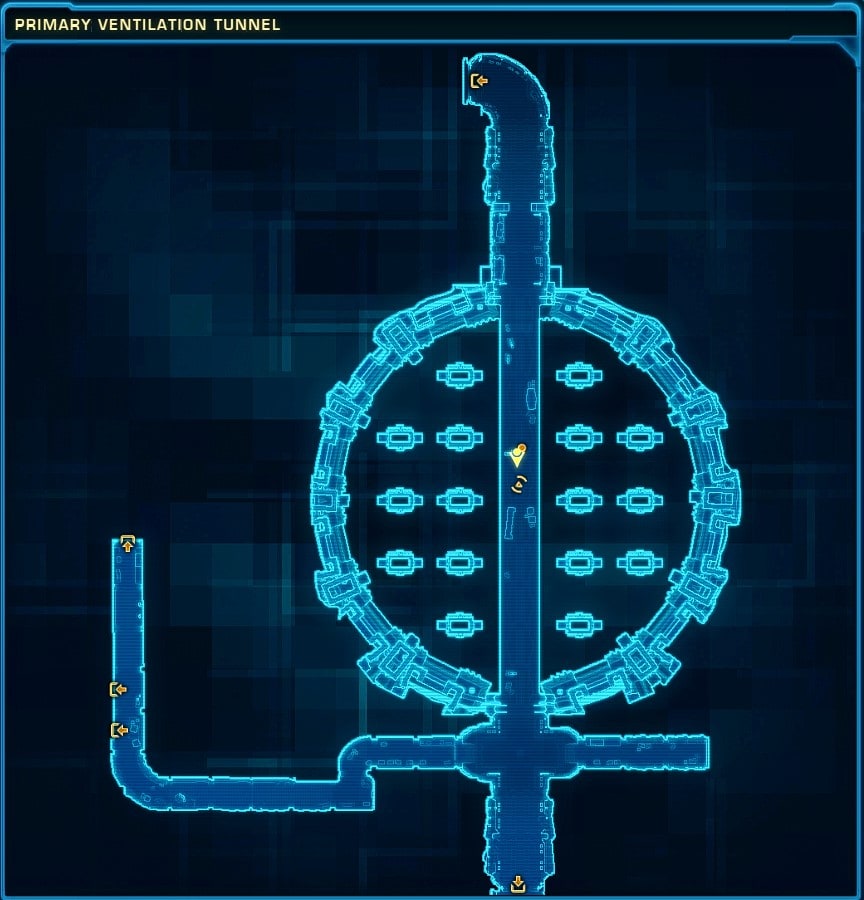
The nightmares are finally…not over; you have one final step before you can finish this mission. The Repulsor Unit needs to be recharged and you need to use Macrobinoculars to find Energy Anomalies.
These Anomalies can be found in the Primary Ventilation Tunnel, the one with the seemingly infinite towers of electricity.
Now, you’re actually done with the Ruhnuk Relic Hunt Missions and can turn in the mission and have what you need to obtain the Datacron.
How to get the Ruhnuk Datacron in SWTORAlderaan


Balmorra (Imperial)

Balmorra (Republic)
Belsavis
Corellia
Coruscant
Fleet
Dromund Kaas
Hoth
Hutta
Ilum
Korriban
Nar Shaddaa
Ord Mantell
Taris (Republic)
Taris (Imperial)
Tatooine
Tython
Voss
Quesh
Makeb
Rishi
Ossus
Onderon
Mek-Sha
Runuk
Kessan’s Landing