This article will cover the DPS balance changes coming with SWTOR Game Update 7.4 and their implications, along with an adjustment to my alacrity recommendations for DPS and healers.
Game Update 7.4 “Chains in the Dark” contains a small number of fairly impactful combat style balance changes for a few DPS disciplines including Pyrotech / Plasmatech, Vengeance / Vigilance, and Engineering / Saboteur. This article will go over the implications of those changes, including how related optimizations have changed.
Afterward, I’ll be going over a change to my own alacrity recommendations for DPS and healers. This part is unrelated to 7.4, but will be relevant to most people reading this article.
7.4 Balance Changes in Brief
Here are all of the combat style balance changes coming with 7.4. They have been rewritten for clarity and standardization:
Sniper / Gunslinger
- Engineering / Saboteur
- Reduced the critical damage bonus given to Explosive Probe / Explosive Charge from the Lazer Targeting / Sequential Targeting ability tree buff to 20% (from 25%).
Juggernaut / Guardian
- Vengeance / Vigilance
- Removing the cooldown reduction from the Major Fracture / Cauterizing Brand ability tree buff.
- Fixed an issue with the Deep Cuts ability tree buff where it wasn’t properly increasing periodic damage critical hit chance.
Powertech / Vanguard
- Pyrotech / Plasmatech
- Superheated Fuel now increases the critical chance and critical hit damage dealt by elemental attacks by 25% while Explosive Fuel / Battle Focus is active.
The changes to Pyrotech / Plasmatech and Vengeance / Vigilance are far more significant than that of Engineering / Saboteur, and the changes to those 2 combat styles have some things in common.
Superheated Fuel and Major Fracture / Cauterizing Brand are burst-oriented effects compared to their alternatives. Since those effects also offered the most sustained DPS and enabled players to use less strict rotations, they effectively invalidated the alternative choices.
There was never a reason to use the Flame Dissipation or Explosive Weaponry tacticals for Pyrotech / Plasmatech or the Deep Cuts ability tree buff for Vengeance / Vigilance before 7.4. Now, all of those effects have dedicated use cases, and players will be using the rotations that Broadsword likely intends them to use in PvE.
It’s essential for a given option to be the best in at least 1 type of situation. Otherwise, the devs are just wasting literally everybody’s time. Players don’t like making choices that don’t matter, and Broadsword doesn’t need to spend resources creating and maintaining things that don’t matter to anyone.
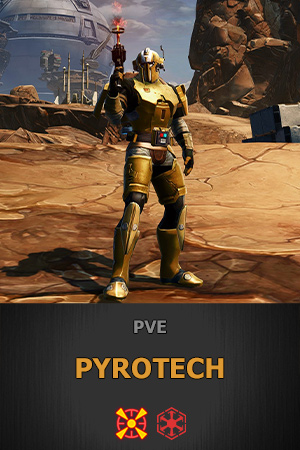
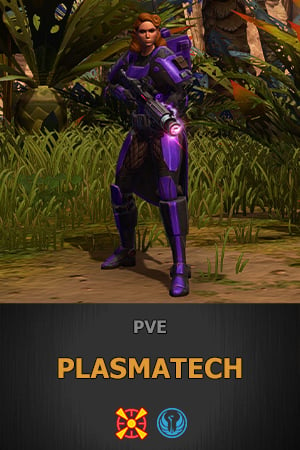
Pyrotech Powertech and Plasmatech Vanguard
The Superheated Fuel tactical has been redesigned. It now makes Explosive Fuel / Battle Focus also increase the critical chance and critical hit damage of your Elemental attacks by 25% instead of autocritting.
To clarify, Superheated Fuel is effectively getting nerfed. Prior to 7.4, Superheated Fuel would make almost all of your attacks autocrit with an insane +138% critical multiplier as a result of dealing supercritical damage while Explosive Fuel / Battle Focus was active. After the nerf, the total critical chance of those attacks will be just shy of ~90% and have a +100% critical multiplier while Explosive Fuel / Battle Focus is active.
Immolate / Plasma Flare innately has an additional +10% chance to crit thanks to a separate discipline passive, which enabled the attack to have a +148% crit multiplier pre-nerf. After 7.4, Superheated Fuel will still guarantee that the ability critically hits during Explosive Fuel / Battle Focus, though it won’t deal supercritical damage because it’s no longer gaining +100% critical chance from a single source, not that there would be any excess to benefit from in the first place.
Since you won’t be dealing supercritical damage anymore with Pyrotech / Plasmatech, it’s no longer worth using the Advanced Polybiotic Critical Adrenal either. Instead, you should use the Advanced Polybiotic Attack Adrenal just as you do for almost all other DPS specs in the game.
After 4 years, almost a third of the game’s entire lifetime, Superheated Fuel will no longer provide the greatest sustained DPS increase for Pyrotech / Plasmatech. It will finally be in the same camp as literally all of the other burst tacticals in the game, and Flame Dissipation will be optimal for sustained DPS situations.
That said, Superheated Fuel remains a cut above the rest of the burst tacticals. The sustained DPS loss compared to Flame Dissipation is rather small, only ~600 DPS from my limited testing on the PTS. The overall burst it provides will still make Superheated Fuel worth taking for the (arguably overtuned) burst checks in PvE.
All of the other burst tacticals in the game get overtaken by their sustained DPS brethren after just a couple of GCDs, meaning the others are only optimal when you need to maximize the amount of damage you can concentrate into a single GCD, which is only the case in PvP.
I wish that boss fights were balanced to require the use of burst (and AoE) tacticals, but that’s way too tall of an order for Broadsword at the moment since it would require all of the other burst tacticals or PvE burst checks to be completely redesigned. Even though Superheated Fuel still breaks the balance mold, it’s significantly more balanced than ever.
To reiterate, Superheated Fuel will only remain optimal for Pyrotech Powertechs / Plasmatech Vanguards for the most significant or burst DPS checks in all of PvE (or are carrying someone). I expect it will remain one of the best options in PvP, but don’t take my word for it.
In PvE, Flame Dissipation will be the optimal tactical for sustained DPS situations. Flame Dissipation has existed for just as long as Superheated Fuel, but it wasn’t worth taking until now.
| Effect: Reaching or refreshing 2 stacks of Superheated Flamethrower / Pulse Generator grants Flame Dissipation, which lowers the cost of Searing Wave / Ion Wave by 3. Stacks up to 5 times (-15 total). Activating Searing Wave / Ion Wave while you have 5 stacks of Flame Dissipation consumes all 5 stacks and grants another effect, also called Flame Dissipation, that increases your elemental damage dealt by 10% for 20s. |
I have significantly reworded the description of the tactical for the sake of clarity since it’s a bit confusing and doesn’t even work exactly as described.
Almost every time you activate Flame Burst / Ion Pulse, Flame Sweep / Explosive Surge, or Immolate / Plasma Flare, you’ll gain a stack of Flame Dissipation, which reduces the cost of Searing Wave / Ion Wave by 3. That cost reduction stacks all the way up to 15 (out of 20), and then once you activate Searing Wave / Ion Wave at 5 stacks, you’ll consume all stacks, get a new buff that increases your damage dealt, and have to rebuild those stacks again.
Take note that you only gain a stack of Flame Dissipation when activating one of those abilities if you already have 2 stacks of the main Searing Wave / Ion Wave proc, Superheated Flamethrower / Pulse Generator, or gain the second stack with the activation.
However, the tactical is bugged such that sometimes you’ll get the 10% damage boost proc if you activate Searing Wave / Ion Wave while you have only 4 stacks of the cost reduction proc. In combat, it only seems to do this until you let the damage boost fall off, so it may have something to do with both procs sharing the same name.
In practice, you can’t build 5 stacks in a single rotation cycle because you just don’t have that many filler slots available, and it’s too expensive to use that many Flame Bursts / Ion Pulses unless you have Thermal Yield / Durasteel Armor active or can use Vent Heat / Recharge Cells. You would have to delay Searing Wave / Ion Wave and destabilize your rotation if you wanted to get 100% uptime on the damage boost proc.
Flame Dissipation makes it harder to squeeze the most damage out of your rotation since you can afford to use more Flame Bursts / Ion Pulses, and some of the DPS gain is derived from using your strong filler more often. At the same time, resource management is more forgiving because your most expensive ability is consistently one of your cheapest, so you can overheat more frequently, but it is cheaper to cool off.
Thermal Yield / Durasteel Armor is also less valuable with Flame Dissipation since you can’t lower the cost of Searing Wave / Ion Wave below 0. It may be the case that Superheated Fuel provides more sustained DPS in fights where you have high or maximum uptime on Thermal Yield / Durasteel Armor, though this requires an impractical amount of testing to confirm.
Regardless, your resource costs will be significantly more variable and less clear-cut than they are with Superheated Fuel, so it’s more important to stick to the fully alternating version of the rotation where you follow every single “cooldown” ability with a filler.
Pyrotech Rotation
Scorch or
Filler
Filler
Incendiary Missile
Filler
Searing Wave
Filler
Immolate
Filler
Rail Shot
Filler
Repeat
Pyrotech Filler Priority
Flaming Fist
Flame Burst (w/
proc)
Rapid Shots (if >25 Heat)
Scorch (multi-DoT)
Incendiary Missile (multi-DoT)
Flame Burst
Plasmatech Rotation
Plasmatize or
Filler
Filler
Incendiary Round
Filler
Ion Wave
Filler
Plasma Flare
Filler
High Impact Bolt
Filler
Repeat
Plasmatech Filler Priority
Shockstrike
Ion Pulse (w/
proc)
Hammer Shot (if <75 Energy Cells)
Plasmatize (multi-DoT)
Incendiary Round (multi-DoT)
Ion Pulse
You can always swap any Flame Burst / Ion Pulse with Flame Sweep / Explosive Surge if you can hit at least 2 targets. You still want to use Explosive Fuel / Battle Focus immediately before Immolate / Plasma Flare in single-target situations, or immediately before Searing Wave / Ion Wave whenever you can hit multiple targets.
Rail Shot / High Impact Bolt is just as important as before with its ridiculously strong DoT, but it feels clunky to use earlier in the cycle as many do for Explosive Fuel given the stricter rotation. Since the DoT lasts for almost 15s, you’ll only miss out on 1-2 ticks in the very first rotation cycle.
Flaming Fist / Shockstrike has the highest filler priority and can be used completely on cooldown with this approach. It will float around to different spots since its cooldown doesn’t match that of your other attacks. You will always alternate using the free Flame Burst / Ion Pulse with Flaming Fist / Shockstrike before or after Rail Shot / High Impact Bolt, so whichever you didn’t use in the first slot, you’ll be using in the second on that cycle, and they’ll be swapped for the next go-around.
I do not consider Scorch / Plasmatize to be a filler on the primary target, though you could think of it that way if you want. Scorch / Plasmatize and Incendiary Missile / Incendiary Round are only listed in the Filler Priority for alternatives to Flame Burst / Ion Pulse, exclusively on secondary targets.
Incendiary Missile will typically only get manually applied to secondary targets if they are bosses that are far away from your primary target since you can spread it with Searing Wave / Ion Wave. Scorch / Plasmatize can be used more liberally, but there is never a need to use either ability on any secondary target outside of a filler slot.
As a note to more advanced players, you absolutely can still condense the rotation by separating out the fillers into their own half and treat it like a priority. It’s just harder to manage resources that way. In addition, there are numerous instances I haven’t mentioned here where it would be optimal to use a different filler ability. This structure is used for simplicity and ease of use.
Check out my Pyrotech Powertech and Plasmatech Vanguard guides for more detailed information. They are up-to-date for 7.4 now.
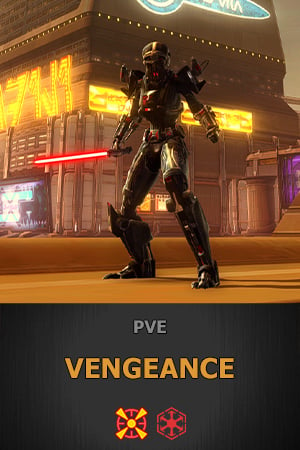
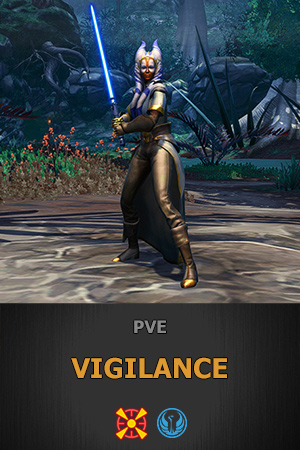
Vengeance Juggernaut and Vigilance Guardian
The Major Fracture / Cauterizing Brand ability tree buff no longer reduces the cooldown of Shatter / Plasma Brand. In addition, the Deep Cuts ability tree buff now properly increases the critical chance of your periodic effects.
The main consequence of these changes is that the 7.0 rotation for Vengeance / Vigilance, where you do all your strong abilities in a row followed by 2 fillers, is no longer optimal. The cooldown on Shatter / Plasma Brand is too long to justify delaying your other strong attacks just to facilitate that rotation, and you can already use all of your strong attacks on cooldown without delaying anything.
Major Fracture / Cauterizing Brand and Deep Cuts now offer practically identical single-target sustained DPS, so you can use whichever you want. Technically, Deep Cuts is superior whenever you can hit multiple targets, assuming it isn’t worth taking Shatter Burst / Branding Burst, since its DPS boost also applies to secondary targets.
Meanwhile, Major Fracture / Cauterizing Brand is slightly better for burst checks and fights with a lot of target swapping because the damage is more concentrated in the initial hit and goes out in a far more predictable and reliable manner. However, it doesn’t apply to secondary targets, and Vengeance / Vigilance has effectively no burst capability to begin with, and Major Fracture / Cauterizing Brand doesn’t change that.
If Broadsword wants to give Major Fracture / Cauterizing Brand a clearer purpose, they need to redistribute the vast majority of the damage dealt by the GCD to the direct damage component so that the initial hit is super strong and the Shatter / Plasma Brand DoT is as weak as the other bleed / burn effects.
If they were to take things a step further and throw in a proper burst tactical for the discipline and give Furious Power / Force Clarity as a baseline ability for all Warriors / Knights (with a longer cooldown), we might start to have something resembling an actual competive burst. The new vacancy in the ability tree could then be filled by a passive that lowers the cooldown of Furious Power / Force Clarity back to 10-15s, but I digress.
After 7.4, your rotation will only change when you use Cut to Pieces instead of Hemophilic Slash. Broadsword might be making these changes to standardize how often rotations can change while eliminating unintended ones. The optimal Hemophilic Slash rotation will return to what it was in 6.0 where you alternate activations of your 9s cooldown abilities with a filler priority:
Vengeance Rotation
Impale
Filler 1
Force Scream
Filler 2
Vengeful Slam
Filler 3
Repeat
Vengeance Filler Priority
Shatter
Ravage (Filler 2)
Ravage (Filler 3)
Sundering Assault (Rage-dependent)
Hew
Vicious Slash
Assault
Vigilance Rotation
Overhead Slash
Filler 1
Blade Storm
Filler 2
Vigilant Thrust
Filler 3
Repeat
Vigilance Filler Priority
Plasma Brand
Blade Barrage (Filler 2)
Blade Barrage (Filler 3)
Sundering Strike (Focus-dependent)
Whirling Blade
Slash
Strike
If you’re executing the rotation correctly, you should only use Sundering Assault when you can make use of 5-7 Rage / Focus, and you shouldn’t ever have to delay Shatter / Plasma Brand because you can’t afford it. You can just use both on cooldown and never have a problem, but you’re leaving Rage / Focus on the table since you’re using Bloodrage / Burning Focus.
It’s most important to use Shatter / Plasma Brand on cooldown and save Ravage for Filler 2 or Filler 3 to maximize the gain from Hemophilic Slash. Since Shatter / Plasma Brand will be used on cooldown and its cooldown is shorter than that of Ravage / Blade Barrage, you only need to use the latter before your next use of the former.
It is best to use Ravage / Blade Barrage for Filler 2, but Shatter / Plasma Brand will float around, so Ravage Blade Barrage won’t always be available at that point. If that’s the case, you’ll be using Shatter / Plasma Brand in Filler 2 and will use Ravage / Blade Barrage for Filler 3.
You can squeeze out even more damage by incorporating Saber Throw instead of Sundering Assault / Sundering Strike if you don’t need as much Rage / Focus, or use Retaliate / Riposte instead of Viciousl Slash / Slash if it’s available. I opted to leave them off of the list because they make things more complicated in exchange for a tiny DPS increase.
Check out my Vengeance Juggernaut and Vigilance Guardian 7.0 guides for more detailed information. They will be updated for 7.4 soon.
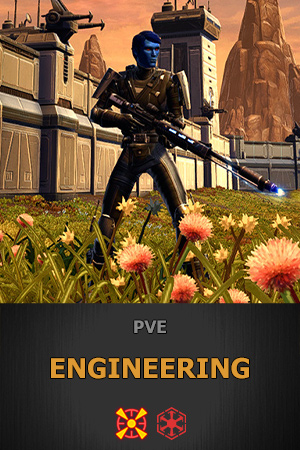
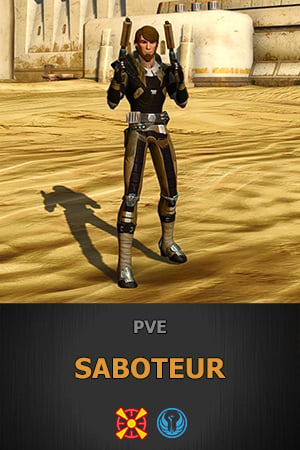
Engineering Sniper and Saboteur Gunslinger
Reduced the critical damage bonus given to Explosive Probe / Explosive Charge from the Lazer Targeting / Sequential Targeting ability tree buff to 20% (from 25%).
Unlike the other balance changes coming with this patch, the minor nerf to Engineering / Saboteur does not affect the rotation, or much of anything. The only reason I can think that this change would be needed in the first place is if the burst was or will become too powerful in PvP.
Check out my Engineering Sniper and Saboteur Gunslinger 7.0 guides for more detailed information. They will be updated for 7.4 soon.
“New” Recommended Alacrity Target
My recommendations for alacrity percentages have changed from [getting as close to 7.15% alacrity without going under] to [reaching approximately 7.5% alacrity, ±0.1%] for all disciplines that currently shoot for that target. In other words, if I previously recommended that your spec should use 7.15% alacrity, I now suggest you shoot for roughly 7.5%.
My new recommendation is not related to any changes coming with 7.4, but I wanted to mention it here since it’s relevant to most people reading this article. Basically, the effect that alacrity has on the GCD was altered a little while ago such that while you are close to an alacrity threshold, you’ll get a mix of GCDs that factor in the threshold.
For example, if you have 7.15% alacrity, you’ll get a mix of GCDs that last 1.4s and 1.5s. As you continue moving away from the threshold, you’ll get fewer and fewer 1.5s GCDs, and most of them will be 1.4s. By the time you reach ~7.5% alacrity, you’ll have practically all 1.4s GCDs. Similarly, if you approach 7.15% from below, like if you had 6.9% alacrity, you’d start seeing some 1.4s GCDs getting mixed in with your 1.5s GCDs.
This is pure speculation, but I suspect this change was made to get around the existing technical limitation that is responsible for the existence of 0.1s GCD thresholds in the first place. The newish GCD mixture effect could be an attempt to simulate the kind of continuity that the devs want from their stats.
Numbers output-wise, there’s not a huge difference between 7.15% and 7.5% because the slight reduction in critical chance negates some of the DPS gain. After all, the extra alacrity is only actually doing something to some of your GCDs, the ones that didn’t end up benefitting (ex. the ones that were 1.5s instead of 1.4s).
It will be less impactful to healers and some rDPS disciplines since they spend a portion of their time channeling abilities, and all channeled abilities last longer than a GCD. As far as I know, the GCD threshold is the only aspect of speed that alacrity affects that doesn’t have proper continuity.
Back when this change was discovered, sometime early in 7.0 if I recall correctly, I dismissed it as pointless and didn’t bother investigating further because I didn’t think we would be able to notice such a small difference where some portion of GCDs were 0.1s longer than desired. I was wrong.
The difference is still subtle, but it was a lot more noticeable than I expected. The experience reminds me of when I upgraded to a monitor with a higher refresh rate. I believe many players will be able to feel the increase in fluidity almost immediately, just like I did, and a smaller cohort will see a minor DPS/HPS increase. The main benefit is that it just feels better to do your rotation.
If you were already close to 7.15%, you should be able to hit ~ 7.5% by replacing 1 critical augment with 1 alacrity augment. I recommend doing a couple of test parses with each stat level before committing to confirm that you like notice and like it. If it hurts your DPS, you probably need to improve your APM.

 Scorch or
  Incendiary Missile
 Searing Wave
 Immolate
 Rail Shot
 Flaming Fist
 Flame Burst (w/
  proc)
proc) Rapid Shots (if >25 Heat)
 Plasmatize or
  Incendiary Round
 Ion Wave
 Plasma Flare
 High Impact Bolt
 Shockstrike
 Ion Pulse (w/
  Hammer Shot (if <75 Energy Cells)
 Impale
 Force Scream
 Vengeful Slam
 Shatter
 Ravage (Filler 2)
 Sundering Assault (Rage-dependent)
 Hew
Hew Vicious Slash
 Assault
 Overhead Slash
 Blade Storm
 Vigilant Thrust
 Plasma Brand
 Blade Barrage (Filler 2)
 Sundering Strike (Focus-dependent)
 Whirling Blade
 Slash
Slash Strike