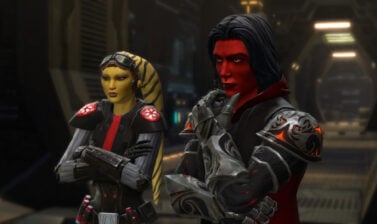
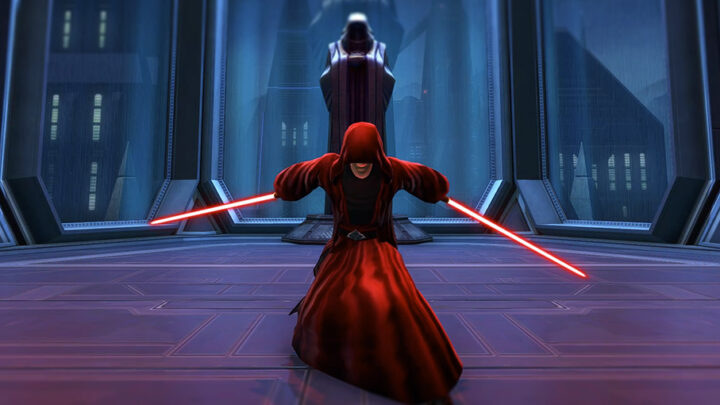
This SWTOR Dread Master Build Guide is designed to be as faithful to the lore and authentic as possible within the constraints of the game!
You’ll find everything you need to know in order to create a toon in SWTOR and play like a Dread Master. Since the Dread Masters were created for SWTOR and use in-game assets, you can match their appearance exactly, though due to the unique mask, your toon should be a unique Dread Master.
This build is not optimal for endgame content and should only be used when playing alone or role-playing with friends. It is beginner-friendly and does not require you to be at level cap to play it.
Physical Appearance
We only ever see the true face of a single Dread Master. At the end of the Republic storyline on Oricon, we learn that Dread Master Calphayus survived and sought the aid of the Republic. He is an old human male who has been heavily corrupted by the dark side.

You can make his face in the character creator, minus the senior citizen wrinkles that Broadsword jealously keeps from us. Also, it’s impossible to get the Dark V corruption markings on his skin without the eye color getting overwritten.
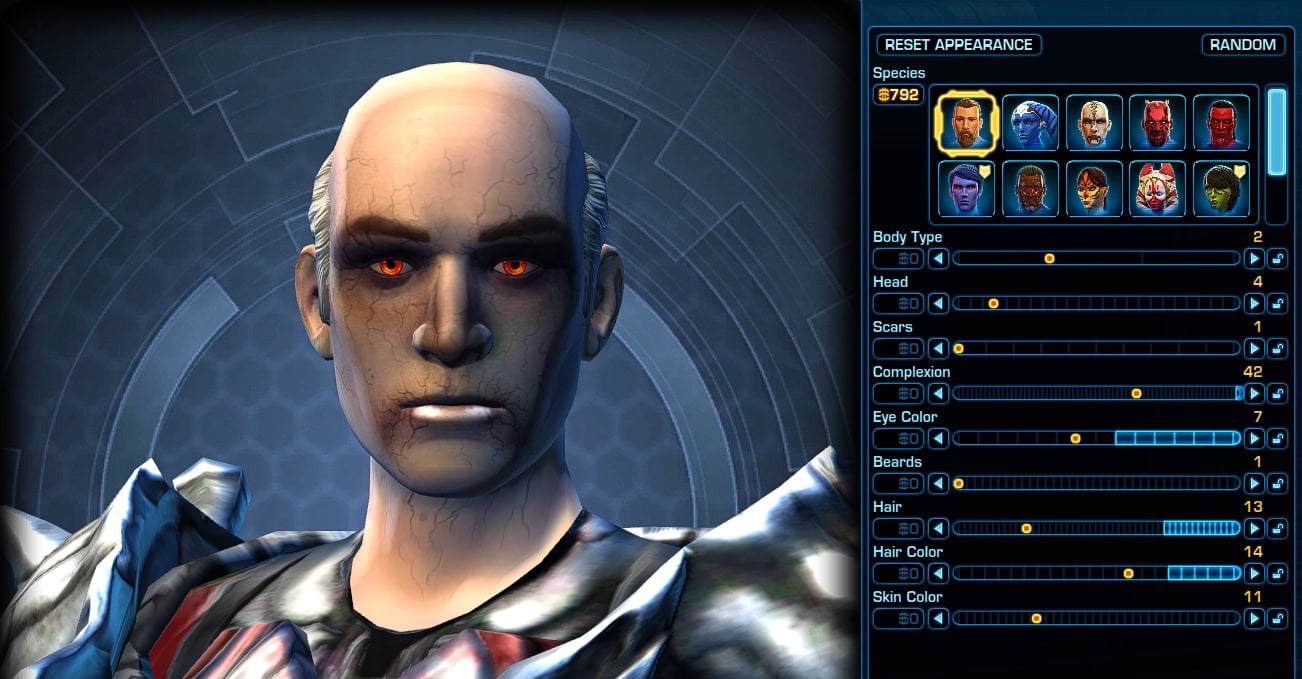
I’m not 100% sure if the eye or skin colors are correct because the lighting is so different, but it’s a moot point at the end of the day. The Crest of the Dread Master mask that you loot from the Hateful Entity has a unique design, and you are invited to join their union at the Watchtower, so it makes the most sense for you to join with a toon of your choosing, not RP as an existing one.
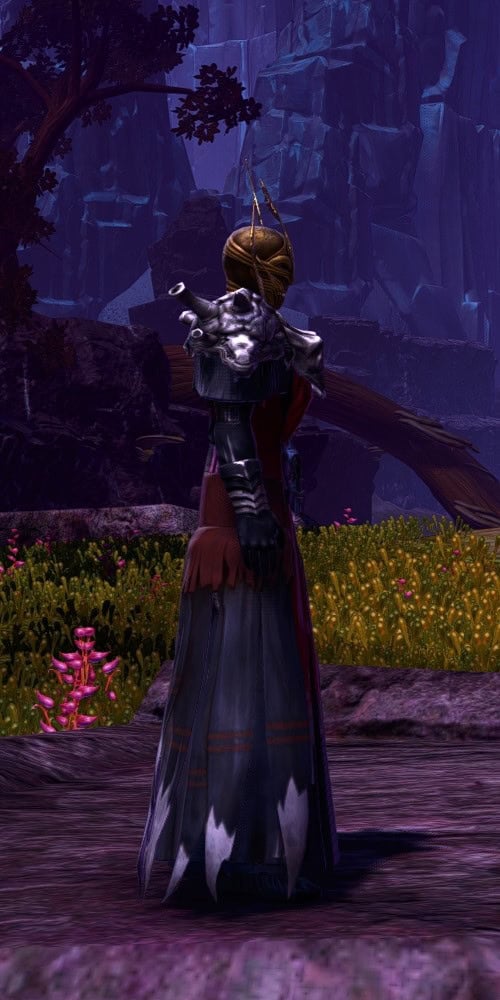
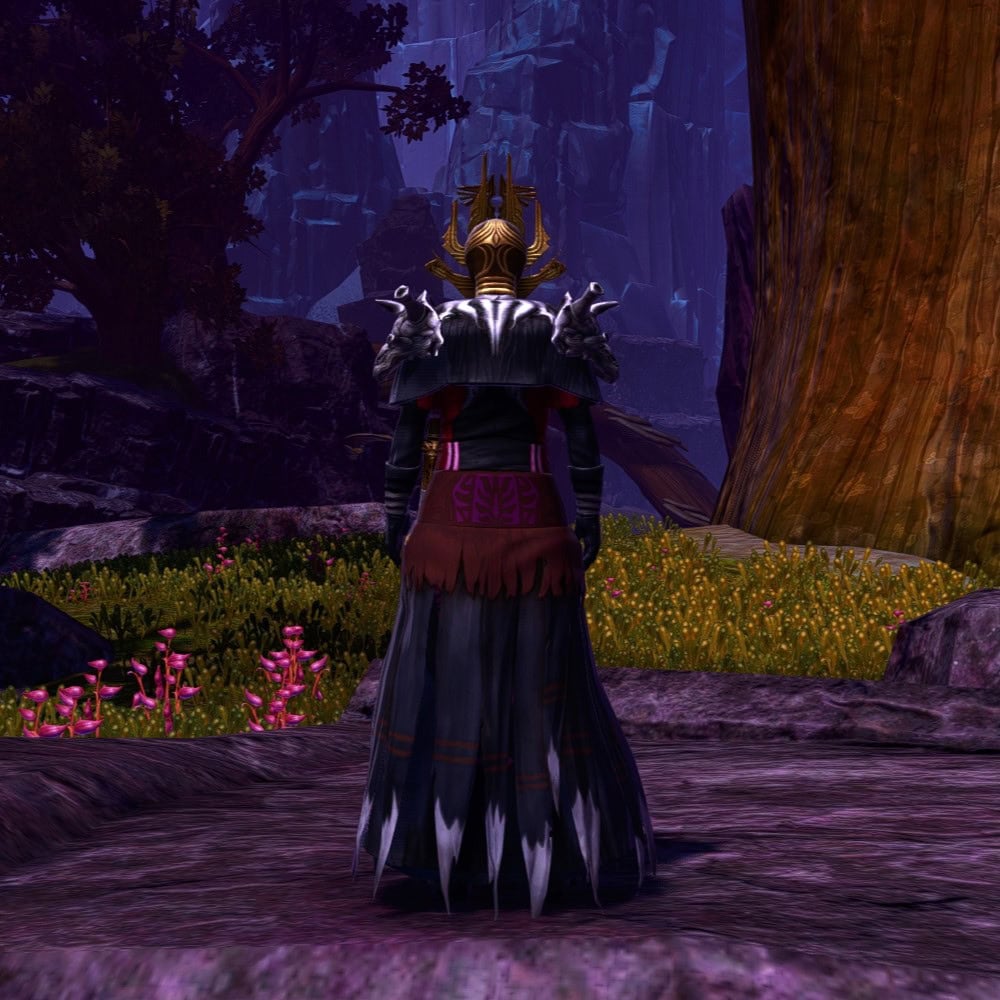
How to look like a Dread Master
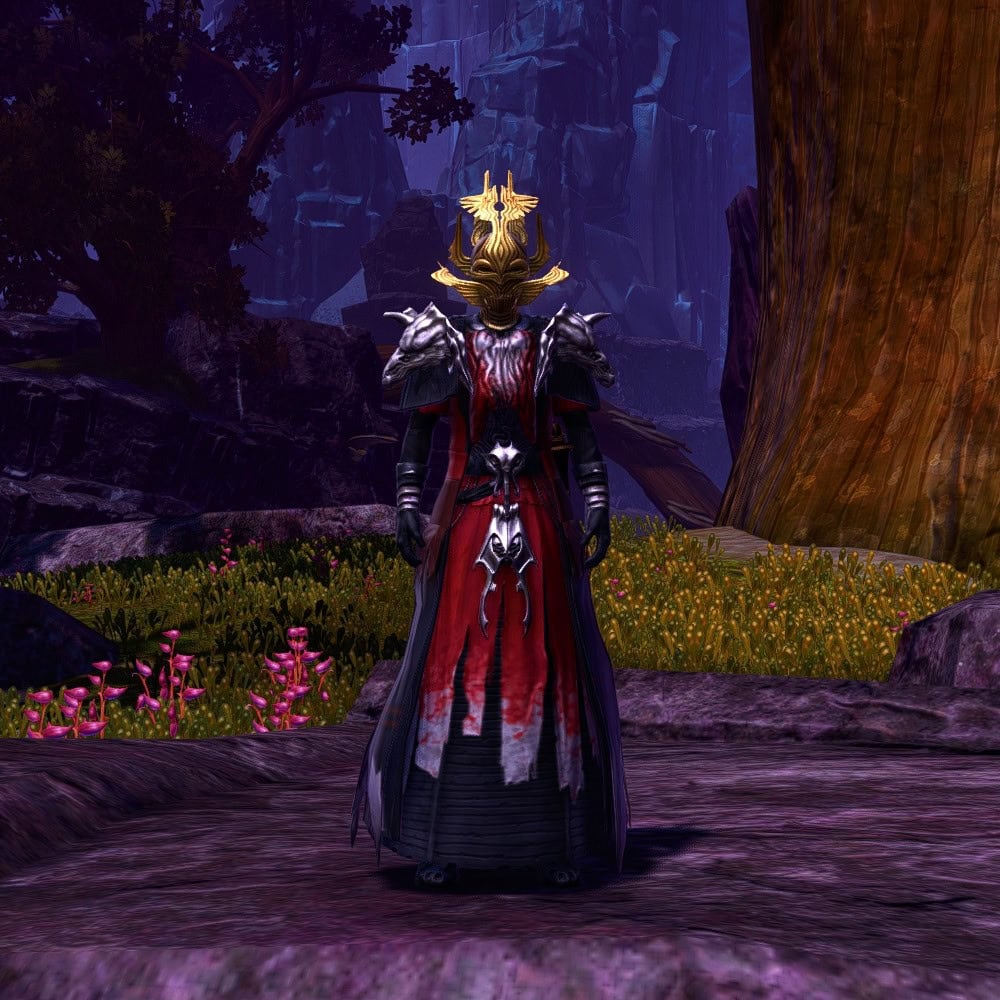
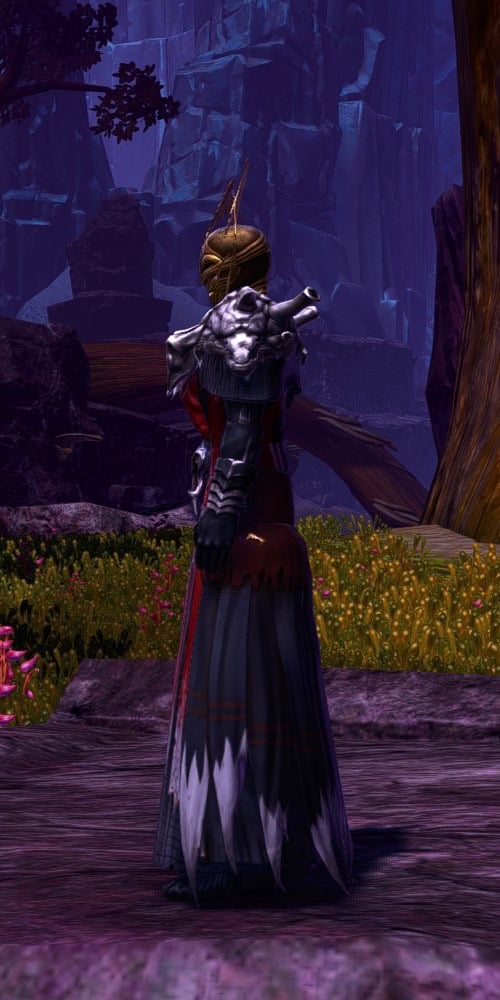
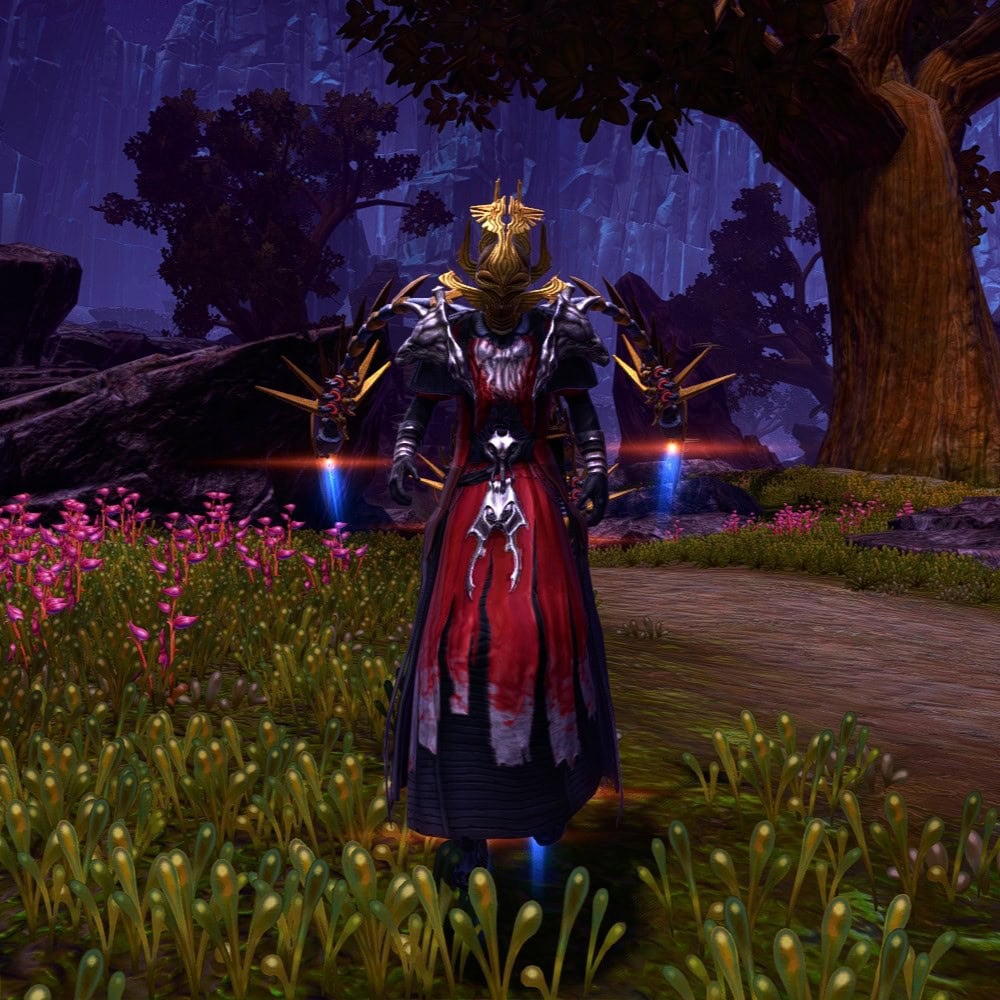
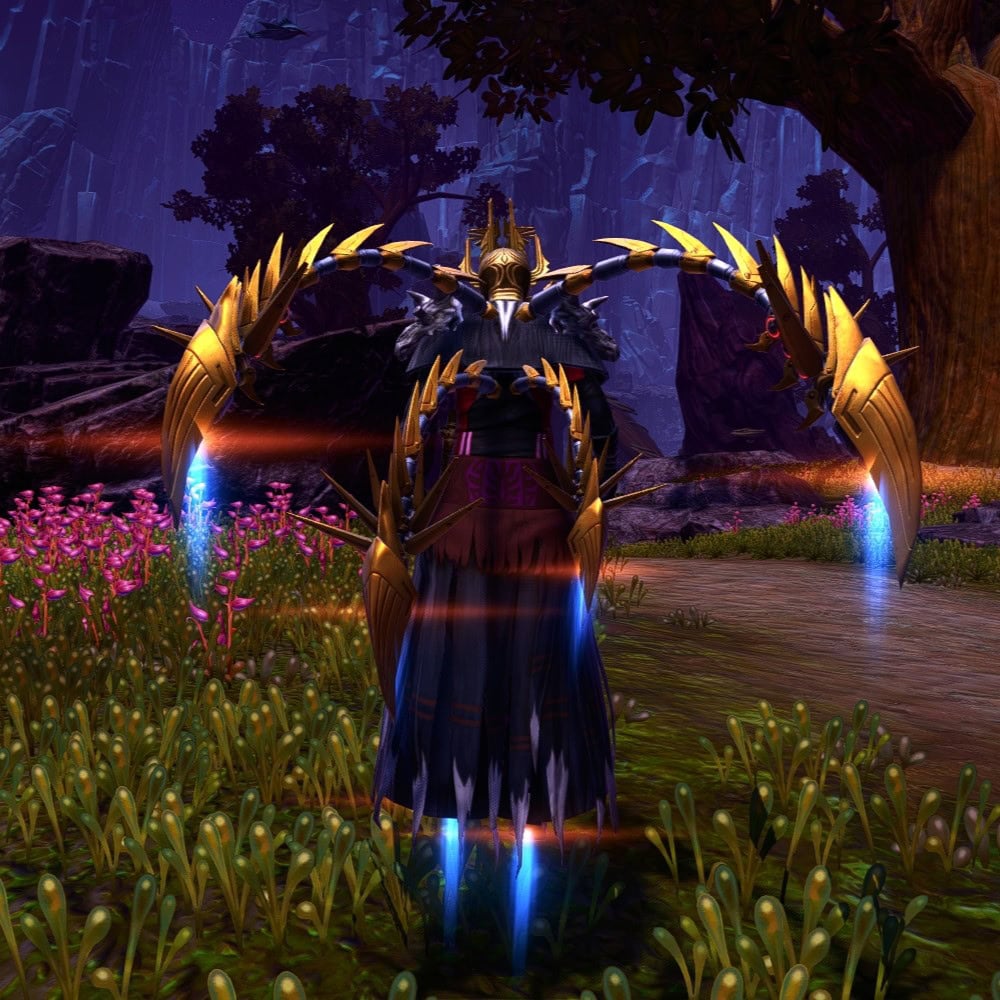
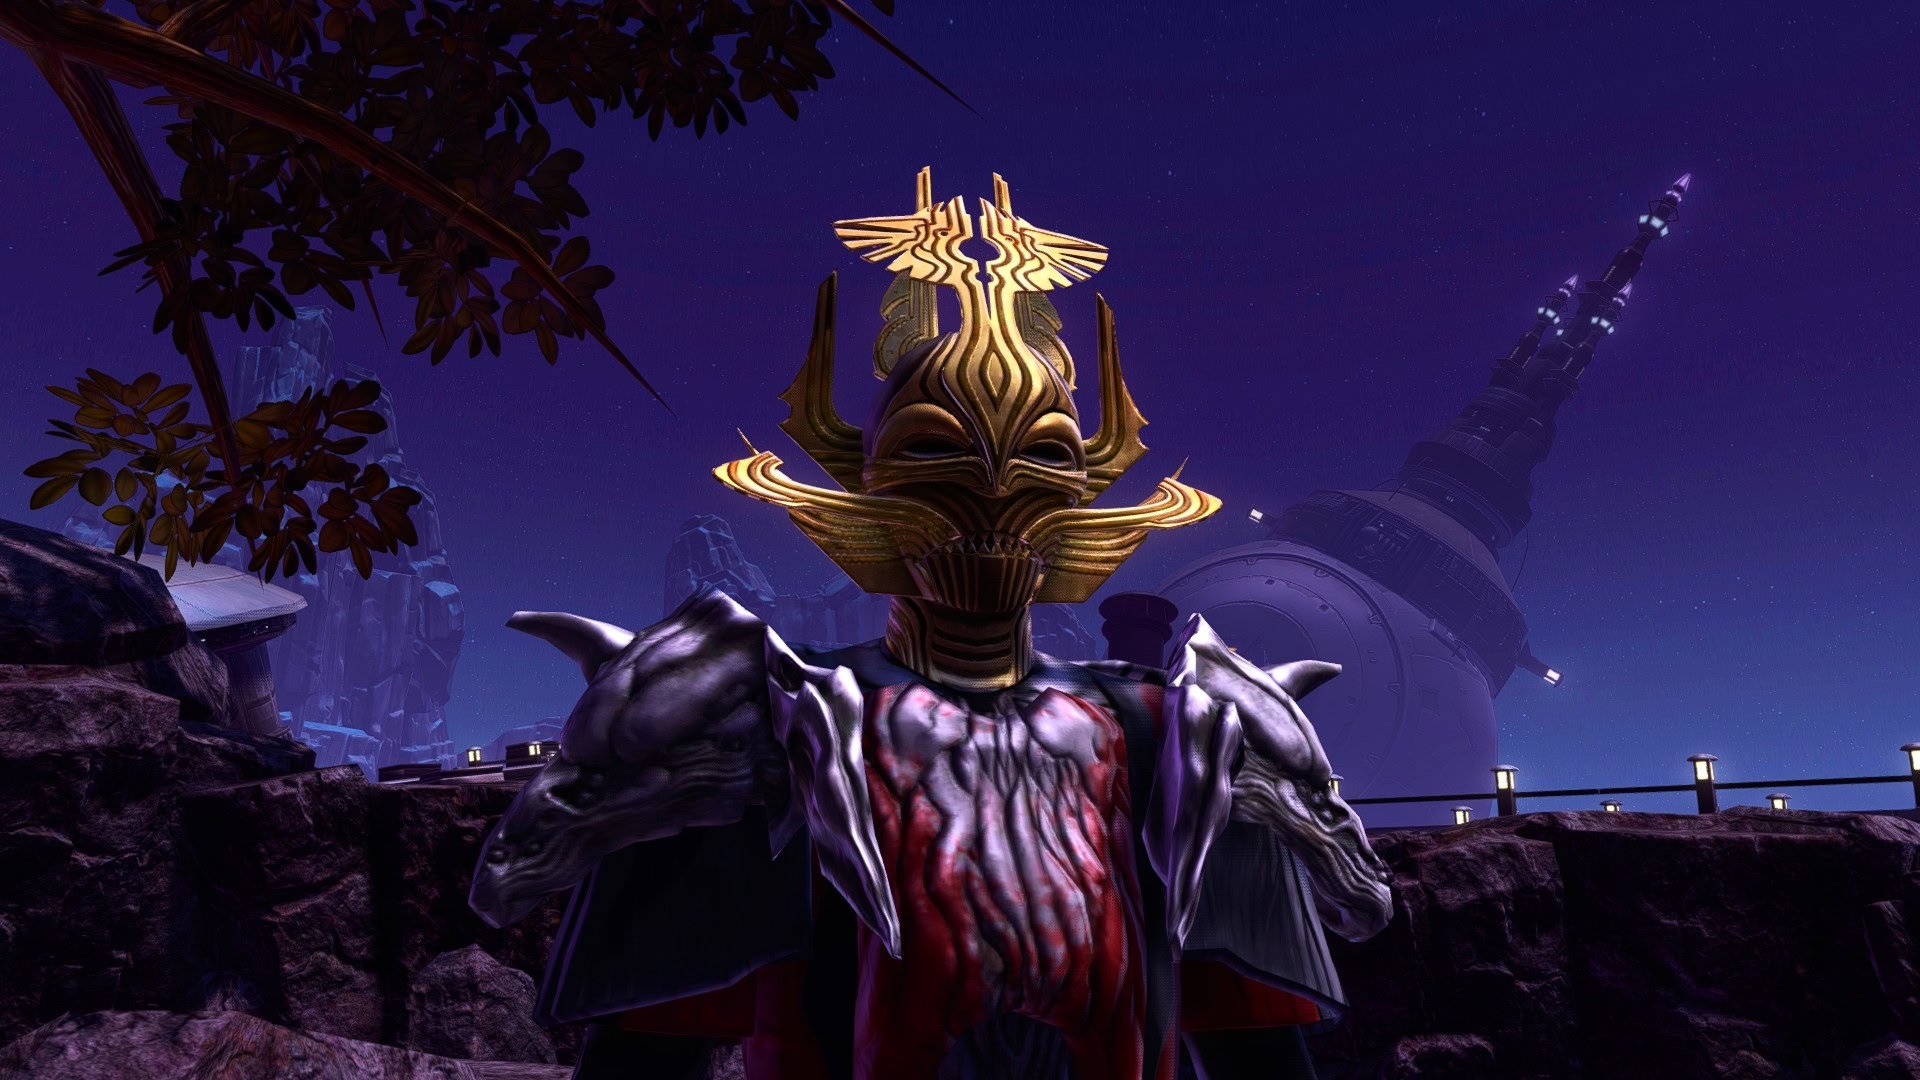
Becoming a Dread Master is a journey. You can’t just buy the entire set from the Cartel Market. Many of the pieces have very limited availability, with a few being completely unobtainable now, though those do have suitable alternatives. The core elements are the Battlemaster Force-Master Armor Set, Crest of the Dread Master, and your choice of lightsaber or saberstaff.
| Slot | Icon | Piece |
|---|---|---|
| Head | Crest of the Dread Master | |
| Chest | Battlemaster Force-Master’s Vestments | |
| Bracers | Covert Energy Wrist Armor* | |
| Gloves | Ghostly Magus Gloves | |
| Belt | Battlemaster Force-Master’s Sash* | |
| Pants | Battlemaster Force-Master’s Lower Robe | |
| Boots | Battlemaster Force-Master’s Boots | |
| Dye | None | |
| Lightsaber (Sorcerer) | Descendant’s Heirloom Saber* | |
| Dualsaber (Assassin) | Descendant’s Heirloom Dualsaber* | |
| Color Crystal | Purple* | |
| Mount | Wings of the Architect | |
| Character Title | Dread Master |
Battlemaster Force-Master and Force-Mystic Gear
When SWTOR first launched, the Battlemaster Force-Master armor set was the best endgame PvP gear in the game for Sorcerer and Sage DPS, akin to max-iRating Thyrsian today.
Please note that you can only equip Battlemaster gear on a toon that has at least 60 Valor. You can see your current Valor on the PvP Tab in the Activities window and can earn it by fighting in Warzones and Arenas, so be prepared to do a bunch of PvP if you want to become a Dread Master!
If you’re having trouble finding the Battlemaster Force-Master gear on the GTN, you can also use the Battle Force-Mystic pieces instead. They look identical; I only opted to mention one in the table for readability. Also, you’re a Dread Master, not a Dread Mystic.
The garb of the Dread Masters included the following pieces from these Battlemaster armor sets:
- Chest
- Belt (sometimes)
- Legs
- Boots
Notably, they wore less ornate gloves. The Ghostly Magus armor set is the only one that’s an exact match. It’s sometimes available on the Cartel Market, though usually only during Halloween, so you will likely have to purchase it from the GTN. You can also use the Ghostly Magus Belt and Boots with this set.
The only way to obtain a crafting schematic for a piece of Battlemaster gear was while those sets were available from vendors. You can only get the gear now by purchasing each piece on the GTN from a player who obtained the schematics way back then. Schematics were not available for Belts and Bracers, as they were not part of a Set Bonus and were always unmoddable.
Thankfully, the Gloves cover the Bracers completely, so you can just use Covert Energy Wrist Armor or any other low-profile Bracers you come across. In contrast, the Belt is featured pretty prominently, so you’ll need to use an alternative.
Alternative Belts
Unfortunately, the Battlemaster Force-Master and Force-Mystic’s Sashes (and visually identical Champion versions) are completely unobtainable. The only way to wear one now is if you got one back when they were available, though you have a few options available that look similar.
 Ghostly Magus Belt
The Ghostly Magus Belt lacks the iconic skull buckle, which is a major downside. However, Dread Master Calphayus’ belt also lacks this skull buckle and looks identical to the Ghostly Magus Belt. So, while it is less flashy, I believe it is the most accurate alternative.
Chaotic Force-Master’s Sash
The Chaotic Force-Master’s Sash has the same model as the Battlemaster version, though the skull is slightly darker and has glowing purple eyes instead of empty sockets. Some people prefer this belt because it looks cooler, even if it’s not 100% accurate.
The Chaotic Force-Master’s armor set is a Cartel Market rerelease (and slight recolor) of the Centurion Force Master and Force Mystic’s armor set, which was 2 tiers beneath the Battlemaster gear.
Ceremonial Mystic’s and Amended Mystic’s Belts
The only difference between the Ceremonial Mystic and Amended Mystic armor sets that I can discern is their default colors. Since you’ll want to unify colors, their associated belts are effectively identical, though the model, materials, and colors are different from that of the Battlemaster Force-Master and Force-Mystic Sashes.
These armor sets are recolored and partially retextured Cartel Market rereleases of the Battlemaster Assassin and Shadow PvP tank and DPS gear, Survivor and Stalker, respectively.
You’ll probably be able to find the Ceremonial and Amended Mystic’s Belts at lower prices than the alternatives, but they don’t match as well or look as cool, in my opinion.
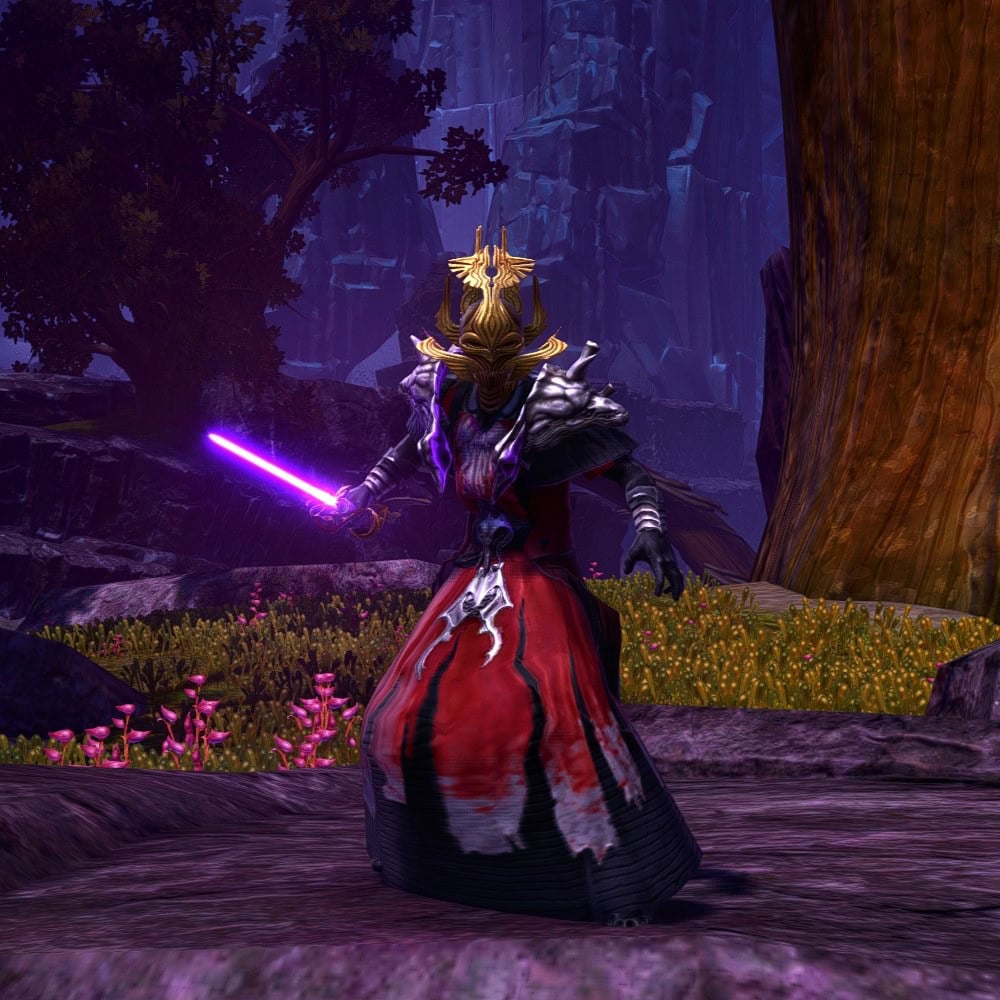
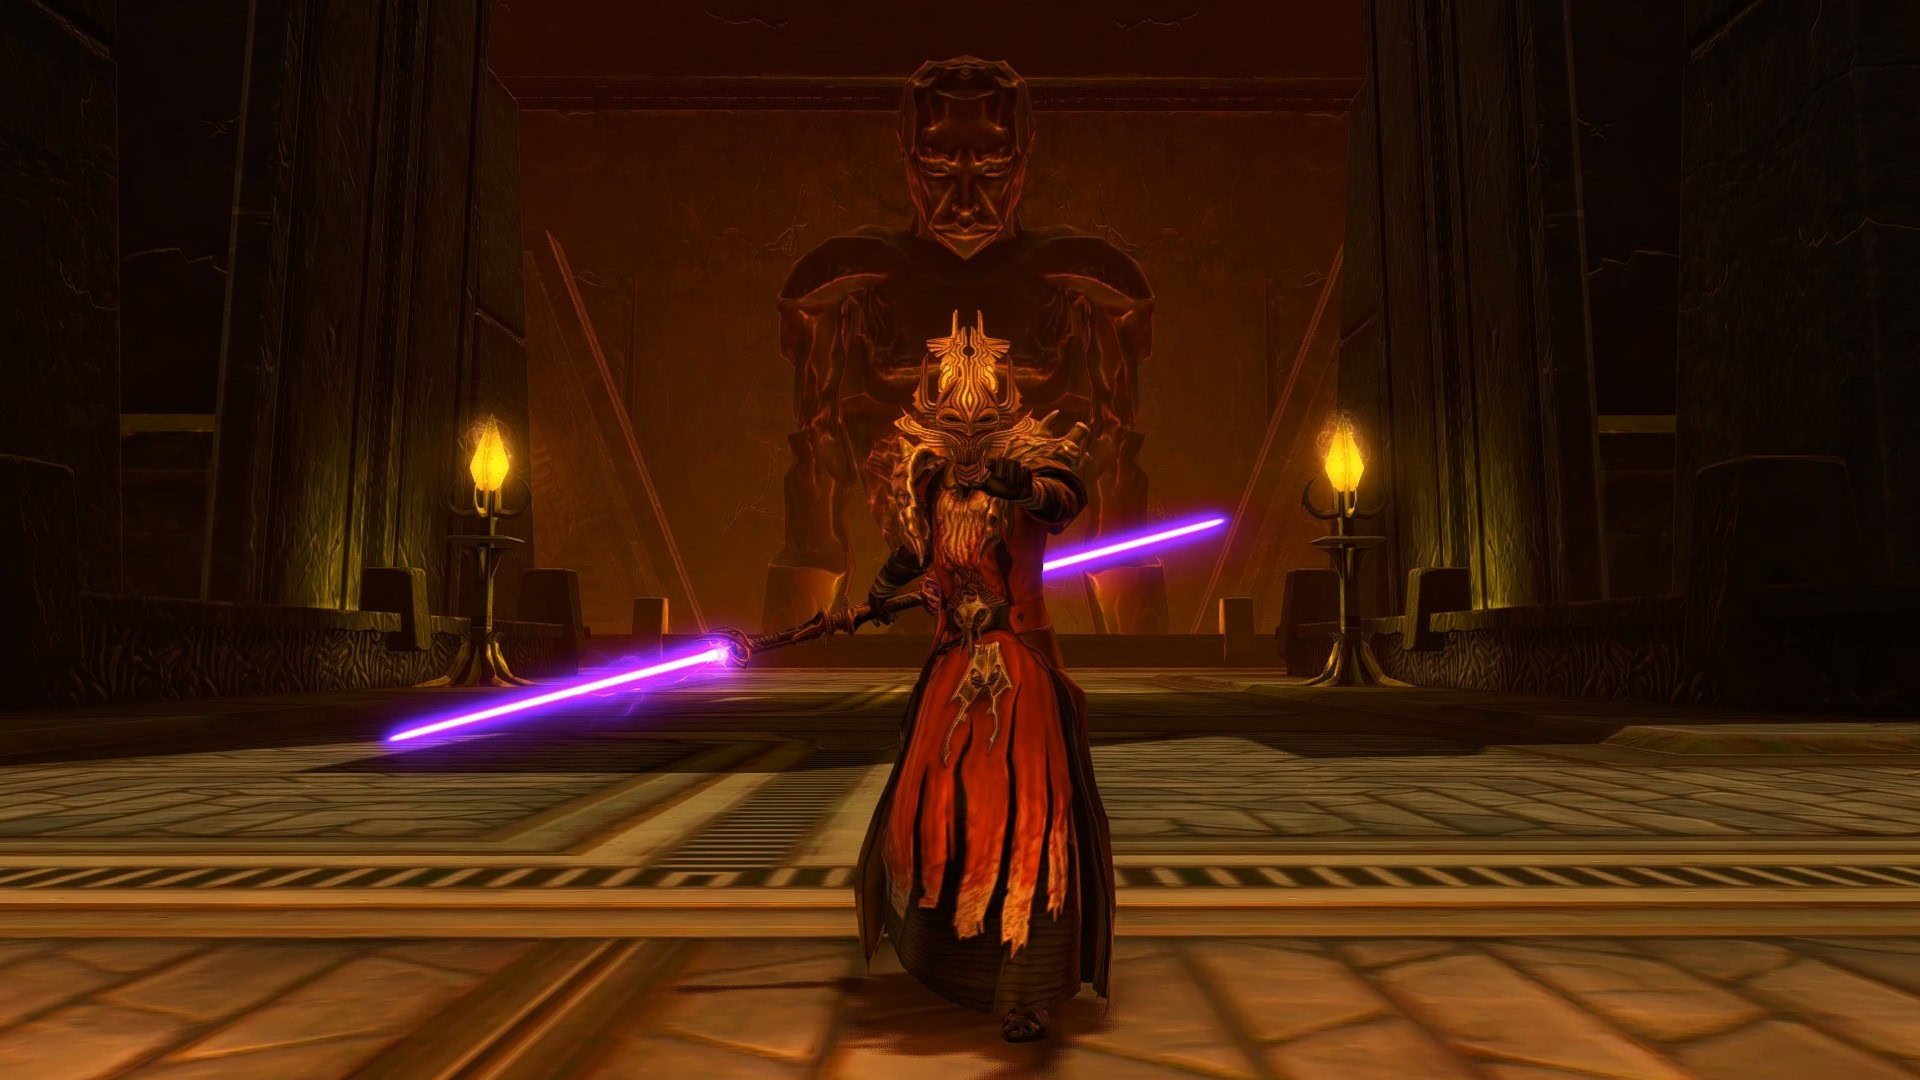
Weapons
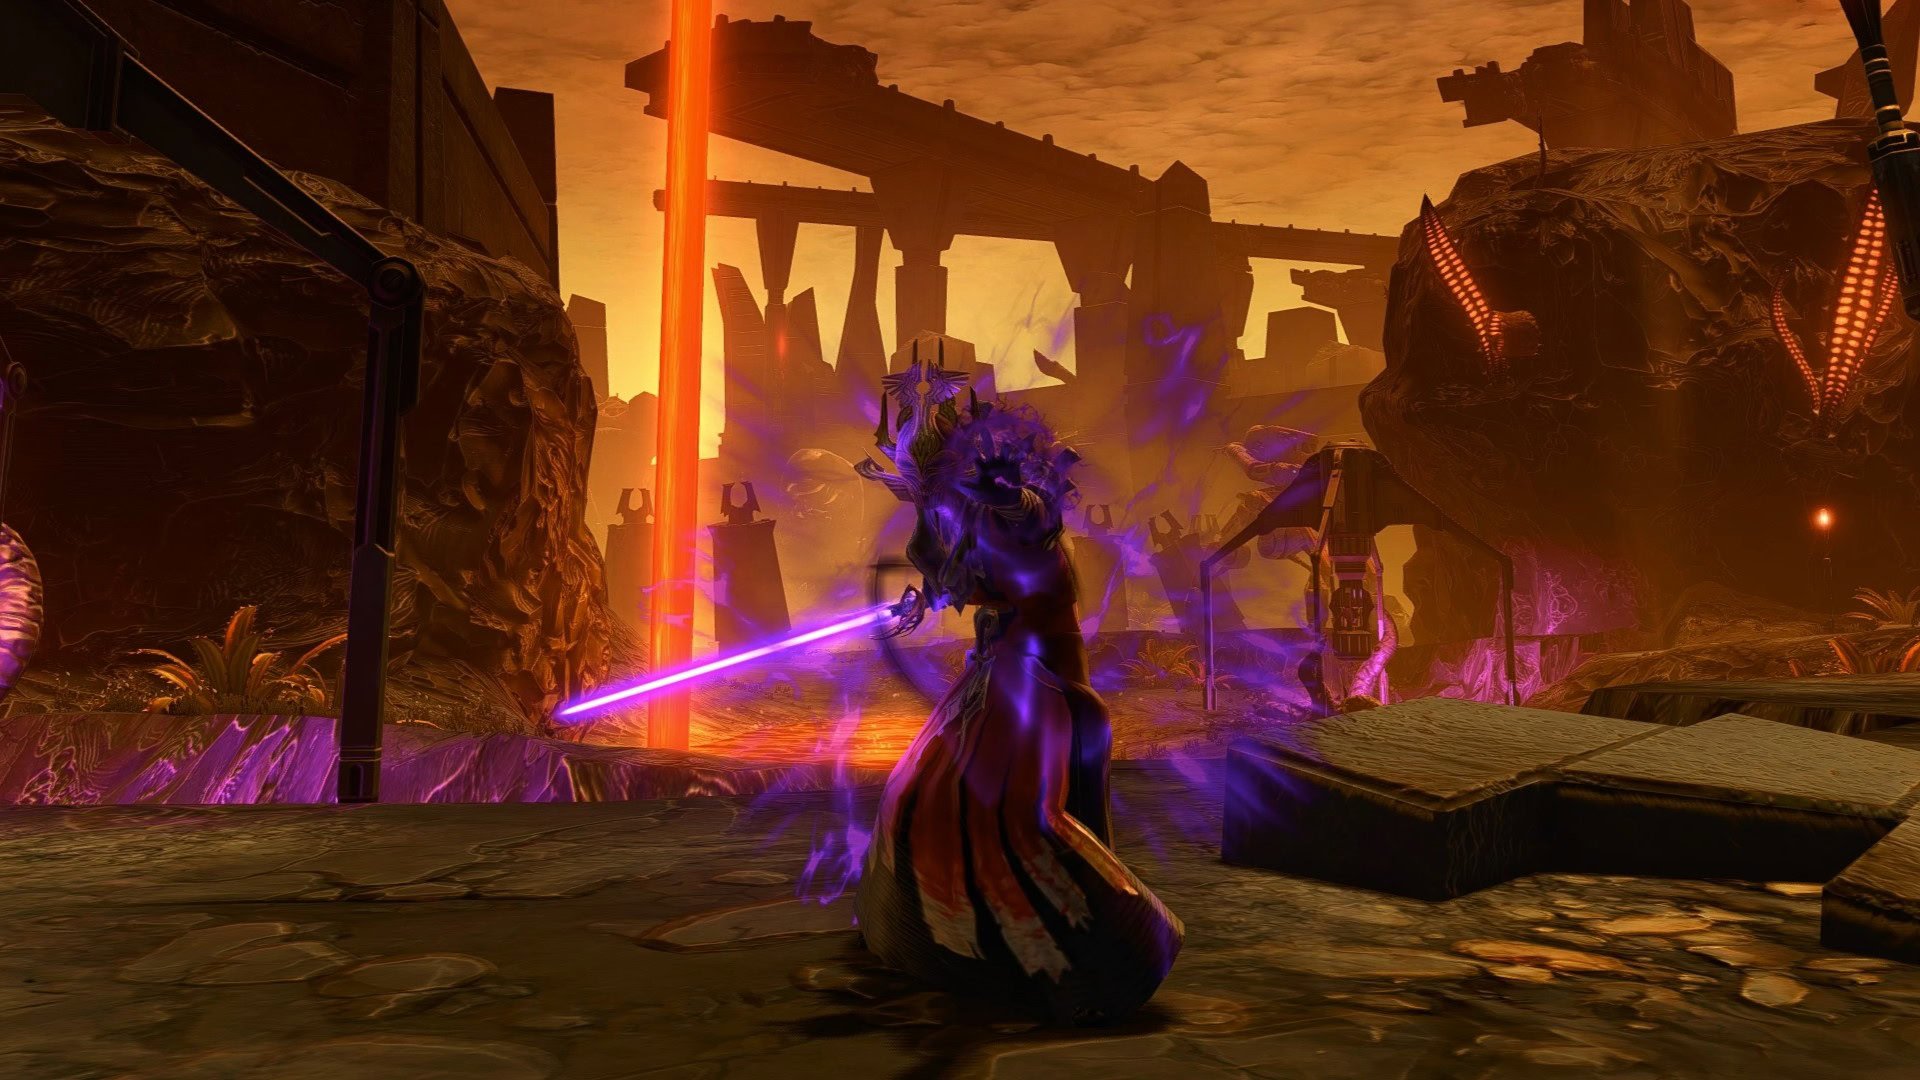
Each Dread Master uses a different lightsaber, with purple being the most common blade color, though red, white, and farmhand blue are also represented. Given the variety, I think using whichever lightsaber you like is fine, though I recommend sticking to the canonical Sith colors, red and purple.
Calphayus’ farmhand blue blade is an outlier, but the color matches the Focus Crystals he uses to aid his prophetic endeavors. Given that his saberstaff features a large crystal, he most likely uses one of those Focus Crystals in his lightsaber. If you want his exact saberstaff, use the Devastator’s Double-Bladed Lightsaber.
I personally use the Descendant’s Heirloom Saber and/or Dualsaber because they match the Crest of the Dread Master the best, with both featuring an ornate gold appearance.
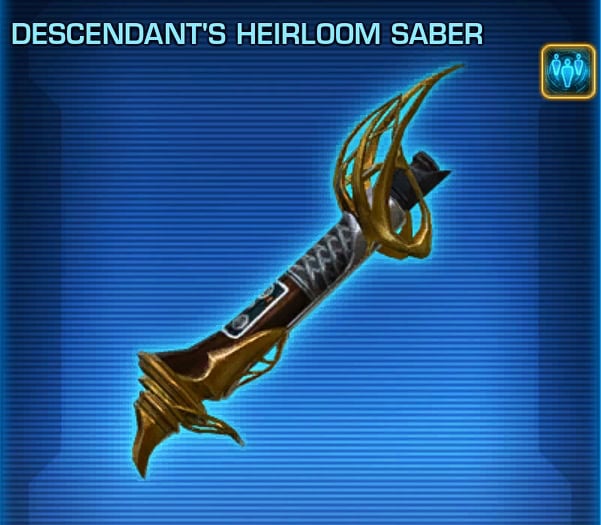
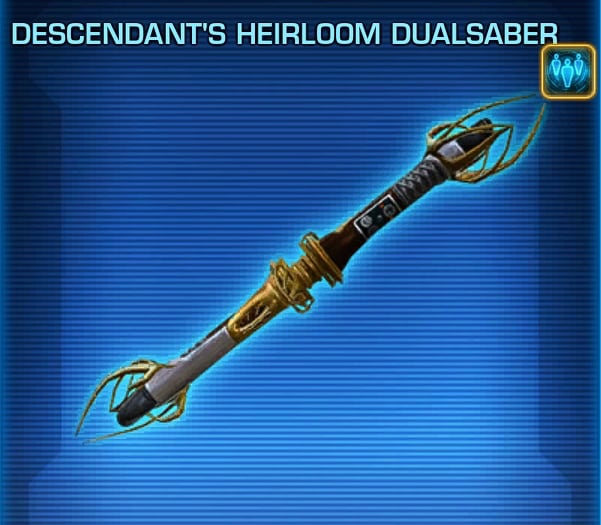
But again, each Dread Master uses a different saber, and none of theirs match the mask, so don’t feel pressured to use these sabers if you don’t want to. Since you’re joining their union as your toon, it’s most important that you use sabers that you personally like.
Master Mode-Only Items and Sale Runs
The Wings of the Architect mount and Dread Master character title are the final pieces of the puzzle. The mount drops from Dread Master Brontes in Dread Fortress MM, while the Dread Master title is given to your toon upon completing a timed run of the Dread Palace MM.
If you don’t plan to dedicate enough time to this game to become a NiM raider, you can still procure the Wings of the Architect mount and Dread Master title, as well as Crest of the Dread Master, by purchasing sale runs from a NiM raiding guild.
In order to participate in a sale run as a buyer, you’ll need to fork over a truly exorbitant sum of Hypercrates (or credits) to a group of typically 7 or 14 particularly skilled NiM raiders that will carry you through a given Operation so that you can get the desired cosmetic item, powerful gear, achievement, etc.
Broadsword doesn’t explicitly condone sale runs, but they aren’t unique to SWTOR and have existed in this game from the very beginning. The devs have always allowed advertisements for such services on the official forums.
However, some guilds will charge you real money (sometimes abbreviated RMT) instead of in-game credits and items. Real money trades are expressly against SWTOR’s Terms of Service (as outlined specifically in their Rules of Conduct), so I strongly recommend against paying real money for a sale run.
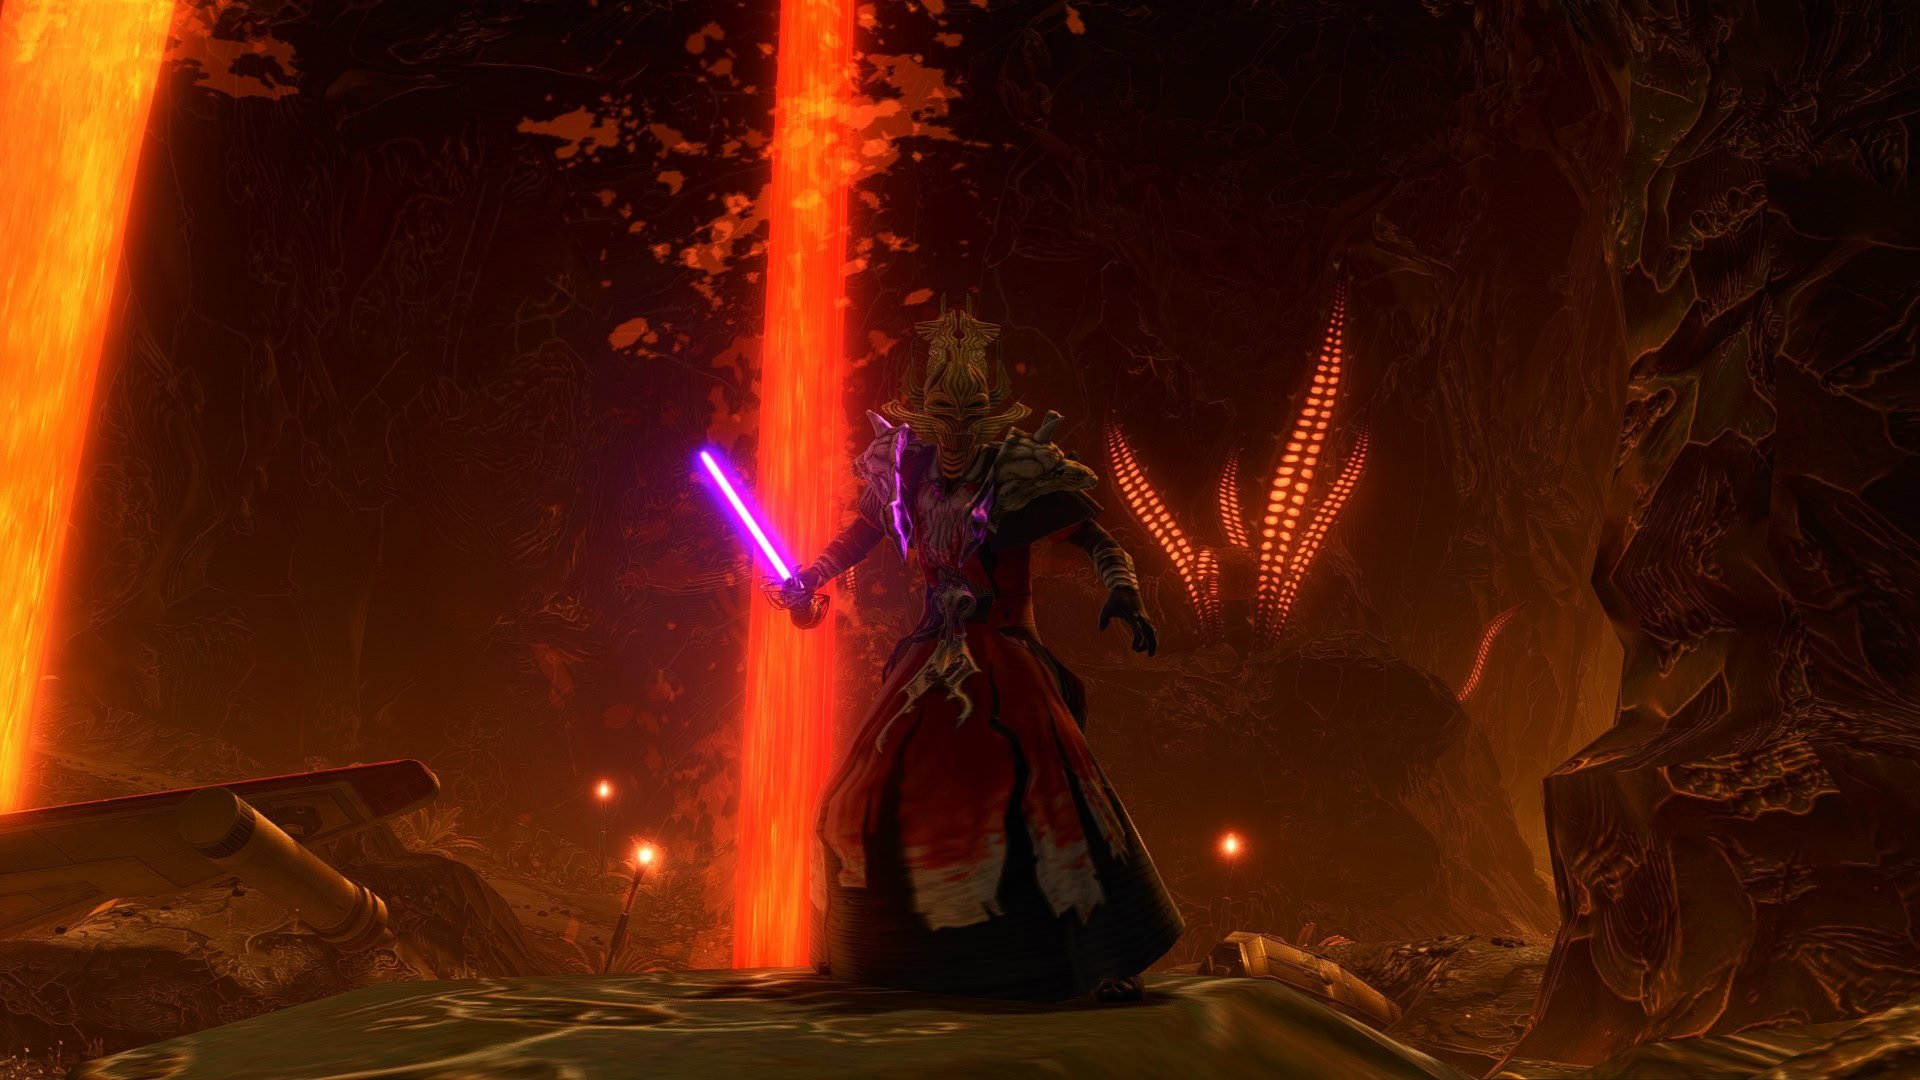
Crest of the Dread Master
The Crest of the Dread Master is the golden helmet with flowing groves that flow around the mask and out to various metal tendrils, forming unique shapes that help us distinguish each Dread Master.
You can only obtain the Crest of the Dread Master by defeating the Hateful Entity in the Scum and Villainy Operation. It can only be summoned in 16-man Master Mode. Each defeat of the Hateful Entity drops 4 Crests for the entire group and awards each toon in the group with the Character Title “[Character Name], The Eternal Warrior”.
To summon the Hateful Entity, you’ll need to complete several steps:
- Defeat the Dreadtooth World Boss at Section X on Belsavis enough times to get all 16 players Dread Guard’s Corrupted Masks and 9 Dreadful Essence.
- Defeat the Dreadtooth with 10 stacks of Dreadful Resurgence to obtain the Dreadful Amulet.
- Obtain the Dreadful Orb by defeating the Dreadful Entity boss in the Terror from Beyond Operation. The boss only exists in 16-man Veteran Mode. To summon the Dreadful Entity, use the Dreadful Amulet inside the cave beneath the bridge below the Dread Guards boss. All players must equip the Dread Guard’s Corrupted Mask to survive its Dread Touch attack.
- Summon the Hateful Entity in the Scum and Villainy Operation. The boss only exists in 16-man Master Mode. To summon the Hateful Entity, attack the group of trash at the top of the ruined stairs in the cave after the Titan 6 boss fight, but do not kill them, only bring them down to 20% HP. Once all enemies in that group of trash reach 20% HP, a Hateful Presence will appear and Devour their Essence. Using the Dreadful Orb on the Hateful Presence will summon the Hateful Entity.
While you’ll need to be a NiM raider to earn the Crest of the Dread Master (or recruit them and fund an expedition), though you can become a Dread Guard by simply defeating Dreadtooth and equipping the Dread Guard’s Corrupted Mask. It’s a guaranteed drop even at its base 1 stack of Dreadful Resurgence.
If you want to learn more about the relationship between and lore of Dreadtooth, the Dreadful and Hateful Entities, and the Dread Masters, check out SWTOR Dreadful Entity and Hateful Entity Lore Explained.
Story, Combat Styles, and Gearing Choices
This section will focus on key choices you’ll have to make in order to end up with a playstyle and storyline that befit a Dread Master.
Key Missions
The Dread Master storyline is separate from the origin stories and was one of the first post-launch story arcs in SWTOR’s history. You can do some of it on your own, but much of it takes place in the story mission cutscenes that take place before and after completing each relevant Operation in any difficulty.
- Imperial Planetary Story Arc on Belsavis
- Best Food Forward (Karagga’s Palace)
- Defection on Denova (Explosive Conflict)
- New Frontiers (Terror from Beyond)
- Horror on Belsavis (Section X)
- Emergency Dispatch (Scum and Villainy)
- A Path to Madness (Oricon)
- Descent into the Dark Fortress (Dread Fortress)
- The Palace of Fear (Dread Palace)
The Republic names for these missions are different, but you should do this on an Imperial character so that you can experience their introduction on Belsavis. Most of the Operation storylines can be found near the Quick Travel point on the Ziost Shadow at the Imperial Fleet.
Origin Story
Both the Sith Inquisitor and Sith Warrior Origin Stories are the best match for a Dread Master. The Sith Inquisitor delves into the mysteries of the Force, so there are a lot of parallels with how the Dread Masters are. However, the Sith Warrior interacts with the Sith Emperor, so it’s also a good fit as Vitiate was responsible for the formation of the Dread Masters, and they reported directly to him.
A Dark V Jedi Origin Story could also work, but you’ll be fighting the light-sided nature of those storylines the whole time and miss out on the introduction of the Dread Masters during the Belsavis Imperial Planetary Story Arc.
Combat Styles, Disciplines, and Ability Tree Choices
The Dread Masters are a group of 6 Sith that are strong with the Force. They are strongest together, but the Masters are individually some of the most powerful beings in the galaxy.
As bosses, most wield a single lightsaber and have their own unique fighting styles that heavily incorporate their specialty, many of which don’t align perfectly with specific combat style disciplines.
As a group, they are best for their terrifying mind tricks warped by the dark side of the Force and were strong enough to drive legions of opposing forces mad. The disciplines and combat styles most associated with these twisted Force powers are Madness Sorcerer and Hatred Assassin.
Since the Dread Masters were so formidable and capable of facing down armies as well as the Imperial and Republic’s finest, I recommend using the solo content PvE builds for each combat style because they excel at taking down groups of weaker enemies.
Madness Sorcerer
Sorcerers can employ many of the flashier and far-reaching Force abilities used by the Dread Masters, though they aren’t nearly as proficient with the lightsaber. Madness Sorcerer focuses on harming opponents with powerful Force afflictions that slowly drive the victim insane as they leech away their life essence.
The secondary emphasis on stealing life works well as a unique specialty for a new Dread Master and originated as ability used by Kel’Sara, one of the Dread Guards you fight on Asation.
Madness Sorcerer Dread Master Build
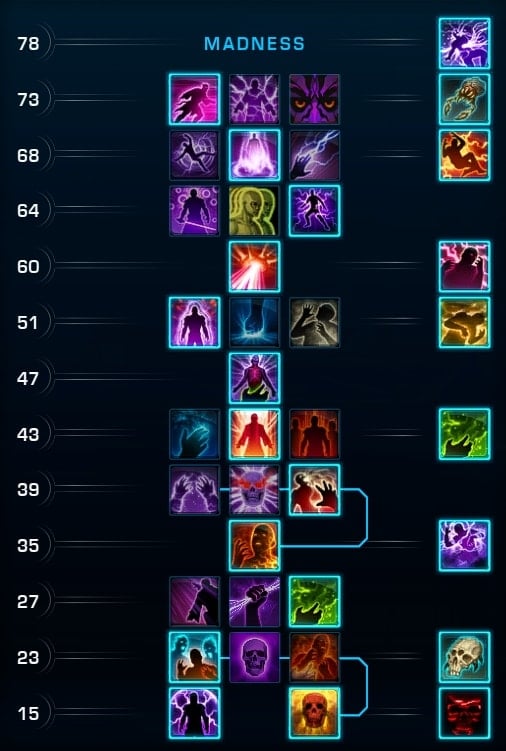
Build Essentials:
 Unrelenting Affliction
 Plague Master
 Downfall
 Lightning Barrier
 Backlash
 Emersion
 Killing Field Tactical
 Gathering Storm Implant
 Unmatched Haste Implant
This is the same as the solo build I recommend for Madness Sorcerers because it emphasizes strong AoE and finisher potential, just like the Dread Masters are capable of. It’s more effective in situations where the trash has high HP because it takes a fair bit of time to set up your Killing Field.
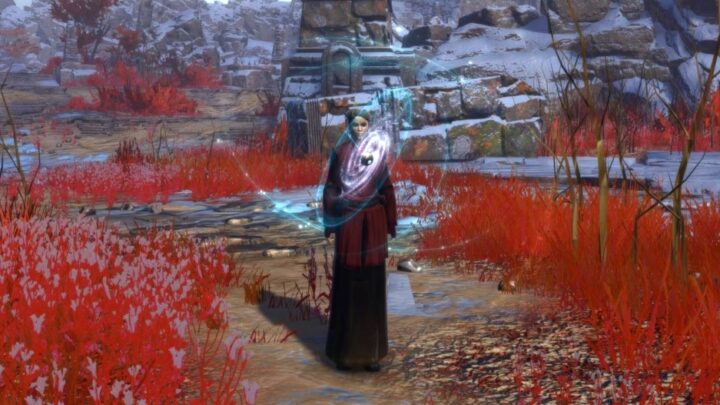
Your objective is to apply both Creeping Terror and Affliction, then spreading some of your Madness with Death Field. After that, you’ll need to complete a channel of Force Lightning to build 4 stacks of Wrath and then spend that Wrath on an empowered Demolish, which will spread to everything with a Deathmark nearby.
Madness Sorcerer Key Abilities
In this section, I’ll be going over key Madness Sorcerer abilities that are reminiscent of the attacks that the Dread Masters use. This is not a complete list of Madness Sorcerer abilities. I encourage you to check out the 7.0 Madness Sorcerer PvE Guide and Sith Sorcerer Solo Builds Guide for more information on how to play this spec.
Force Lightning Attacks
Sorcerers have numerous lightning attacks at their disposal, though Force Lightning and Force Storm are the closest matches:
| Icon | Ability | Description |
|---|---|---|
 | Force Lightning | This is your spammable, single-target, channeled Force Lighting attack. It lets you build up Wrath that you can use to make Demolish or Lighting Strike deal more damage and activate instantly. |
 | Force Storm | This is your spammable, AoE, channeled Force Lightning attack. |
 | Lightning Strike | This is your casted lightning attack, though the cast is removed when it’s lit up. You can make this ability (or Demolish) instant by using Force Lightning. |
 | Shock | This is your instant lightning attack. Unlike Dread Master Tyrans’ version, which is considered a melee attack, the Sorcerer’s Shock deals Force damage and will finish off all of your DoTs, dealing their remaining damage. |
 | Electrocute | This is your hard stun. It doesn’t deal much damage but prevents enemies from doing anything for several seconds. |
Force Barrier
 Force Barrier
The Dread Masters use Force Barrier liberally to prevent themselves from taking damage while using some of their most powerful abilities, and while they can use their version a lot more often and for longer durations, they still don’t have it active all the time.
They also sometimes use Force Barrier while actively attacking, though the closest Sorcerers can get to such a feat is Enduring Bastion, which is a weaker shield that persists a short time after Force Barrier ends. The longer you channel Force Barrier, the stronger that shield will be, though it doesn’t last any longer.
 Creeping Terror, Affliction, and
  Demolish
 Creeping Terror,
  Affliction, and
  Demolish
The Dread Masters are best known for their exceptional ability to induce madness by horrifying their victims with dark mind tricks. These are represented through damage-over-time abilities (DoTs) including Creeping Terror, Affliction, and Demolish.
Death Field, Deathmarks, and Plague Master
 Death Field,
  Deathmarks, and
 Death Field is the mechanism you use to spread your Madness to other nearby enemies. It also deals a decent chunk of damage itself and applies Deathmark, which makes enemies take more damage from your DoTs.
The Deathmarks the Dread Masters use are far more lethal and true to the name, but you can accomplish something similar with the Plague Master ability tree buff that enables Shock to finish off all of your DoTs, dealing a potentially huge chunk of damage all at once. It works best against targets affected by Deathmark since the huge Plague Master DoT ticks still count as DoTs.
Phase Walk
 Phase Walk
The Dread Masters make liberal use of Phase Walk to transport themselves around Oricon, especially within their Dread Palace. After you’ve injured each of them sufficiently in their individual chambers, they use Phase Walk to teleport back to the main throne room to recover and face off against you together.
If you want to be extra stylish, I recommend targeting yourself and then activating Death Field immediately after pressing Phase Walk to teleport.
Force Leech and Parasitism
 Force Leech and
 We don’t ever see the Dread Masters steal life from another being to sustain themselves. Instead, they rely on holocrons and special power crystals to recover their strength. That said, we do see one of the Dread Guards on Asation, Kel’sara, use an ability called Force Leech on Asation, and I doubt such a technique is beyond the understanding of the Masters.
It’s more likely that the Dread Masters are just so powerful that they can’t suck out enough life force from an individual for it to be worth the effort. Palpatine needed to drain 2 individuals strong with the Force and connected to each other through a special bond called a Force Dyad to recover.
It’s also possible that none of the Dread Masters specialize in such things. Stealing life with Force Leech and feeding off of those that you’ve driven insane with Parasitism is meant to be your specialization after joining their Union.
Hatred Assassin
Calphayus was the only Dread Master to use a double-bladed lightsaber, but the Dread Masters were far more capable with their lightsabers than the Sorcerer in general. In contrast, the Assassin incorporates their lightsaber with powerful Force abilities, so it works great if you want your saber to be more than just for show.
Hatred shares much of its DNA with Madness, as the two specs were once both called Madness and acted as the bridge between advanced classes of the Sith Inquisitor class.
Hatred Assassin Dread Master Build
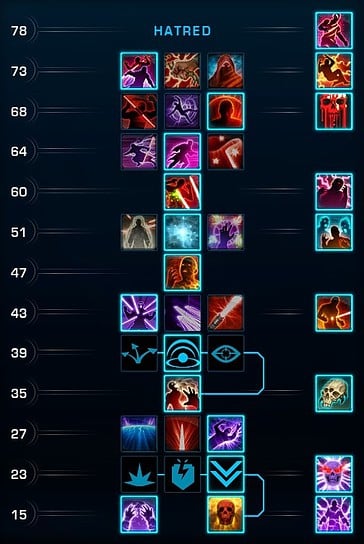
Build Essentials:
 Deadly Field
 Eradication Ray
 Maliciousness
 Force Phase
 Reaper’s Rush
 Two Time Trouble Tactical
 Shadowcraft Implant
 Force Training Implant
Just like with Madness, this is the same as the solo build I recommend for Hatred Assassins because it emphasizes strong AoE and finisher potential. It has a lot more up-front burst than Madness and can follow it up with overwhelming sustained AoE, but you have to be fast about activating your abilities.
The Shadowcraft implant allows you to deal extra damage because you caught your enemy off guard. In order to take advantage of this short window, you need to pop out of stealth after using Phantom Stride to teleport in. Then start blastin’ those Death Fields over and over again and finish off the stragglers with Eradication Rays.
If anything is still left standing, you can spook them to death with Discharge and Creeping Terror and then spread that fear with Lacerate if necessary.
Hatred Assassin Key Abilities
In this section, I’ll be going over key Hatred Assassin abilities that are reminiscent of the attacks that the Dread Masters use. This is not a complete list of Hatred Assassin abilities. I encourage you to check out the 7.0 Hatred Assassin PvE Guide and Sith Assassin Solo Builds Guide for more information on how to play this spec.
Lightning Charge
 Lightning Charge
Hatred lacks any direct lightning attacks, though all Assassins charge their dualsabers with Force Lightning instead, which enables each strike to deal additional damage. You’ll also be able to deal damage over time by discharging this electricity into your target.
Lightsaber Abilities
 Lightsaber Abilities
The Assassin combat style deals more of their damage with lightsaber strikes in the same way that the Sorcerer leans completely into the Force attacks to deal their damage. These are the Lightsaber abilities you’ll have at your disposal as a Dread Master.
- Thrash – Your stronger, spammable attack that costs Force and ticks your Creeping Terror.
- Saber Strike – Your weaker spammable attack that recovers Force. Sorcerers actually have this ability too, but it’s so weak that it isn’t worth using over Force Lightning.
- Lacerate – Multi-target where you spin your saberstaff. This ability costs Force. Instead of Death Field, Lacerate spreads your DoTs.
- Leeching Strike – This ability is analogous to Force Leech, but instead of pulling the lifeforce out of your opponent using the Force directly, you swing your saberstaff like a scythe to scoop the lifeforce out of your victim.
- Assassinate – Powerful and cheap attack, but can only be used as a finisher against enemies with low HP, should replace Double Strike when available.
- Deflection – Significantly improves your ability to deflect weapon attacks for a short period, preventing you from taking damage from those attacks.
 Thrash – Your stronger, spammable attack that costs Force and ticks your Creeping Terror.
 Saber Strike – Your weaker spammable attack that recovers Force. Sorcerers actually have this ability too, but it’s so weak that it isn’t worth using over Force Lightning.
 Lacerate – Multi-target where you spin your saberstaff. This ability costs Force. Instead of Death Field, Lacerate spreads your DoTs.
 Leeching Strike – This ability is analogous to Force Leech, but instead of pulling the lifeforce out of your opponent using the Force directly, you swing your saberstaff like a scythe to scoop the lifeforce out of your victim.
 Assassinate – Powerful and cheap attack, but can only be used as a finisher against enemies with low HP, should replace Double Strike when available.
 Deflection – Significantly improves your ability to deflect weapon attacks for a short period, preventing you from taking damage from those attacks.
 Creeping Terror, Discharge, and Eradicate
 Discharge, and
  Eradicate
In general, Assassins are oriented more toward lightsaber combat, and Hatred doesn’t rely as heavily on dark mind tricks to inflict pain as Madness does. Instead, the mind tricks are more focused on influencing or outright controlling your target, while those periodic shocks you discharge from your saberstaff supplement the damaging component.
Mind Control, Mass Mind Control, and Mind Trap
 Mind Control,
  Mass Mind Control, and
  Mind Trap
Mind Trap and (Mass) Mind Control are some of these other mind trick abilities I was referring to. They don’t deal any damage, but they limit what your target can do. Mind Control forces an enemy NPC to attack you specifically for the next several seconds, and Mass Mind Control makes enemy NPCs deal less damage to you for the same duration.
Mind Trap completely incapacitates an unaware target for a full minute, though they snap out of it if they take damage, and you can’t use the ability against an enemy that’s actively engaged in combat. You might have experienced a similar Force technique during your fight with Styrak on Darvannis when you were forced to experience a fight against one of your beloved companions.
Death Field, Deathmarks, and Lacerate
Death Field works a bit differently for Assassins compared to Sorcerers. It still applies the same Deathmarks, but it doesn’t spread your DoTs and can be used a lot more frequently. Its oppressive nature enables you to make your adversaries feel as if they had just set foot on Oricon without any sort of mental fortifications.
There isn’t as strong of a parallel to the lethality of the Dread Masters’ Deathmarks for Assassins as Sorcerers can achieve with Plague Master. Assassins make up for this by being able to spread their Force plague more easily with a spammable lightsaber attack, and they deal a ton of damage to targets at very low health, which is pretty reminiscent of how the Hateful Entity consumes the essence of those beasts on Darvannis.
Phantom Stride
 Phantom Stride
Phantom Stride is less versatile and has a longer range than Phase Walk, so it’s not as strong of a match for Dread Masters’ mobility, but it does still enable you to teleport to your enemy and is usable a lot more frequently. If you defeat your enemy with 10 seconds of teleporting to them, you’ll reset the cooldown.
For your next character, consider trying out some of the other Role-Playing Character Builds we have designed. For anything else, browse through our SWTOR Guides Master List.
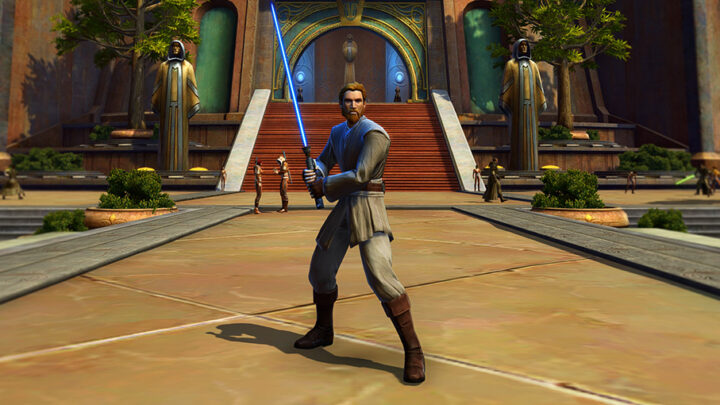
How to Create Obi-Wan Kenobi in SWTOR: Full Build Guide
This SWTOR Obi-Wan Build Guide will show you how to create a character as close and as authentic with Appearance, Outfits and Key Abilities! It replicates the Hero of the Republic, from before the events of Episode 4.
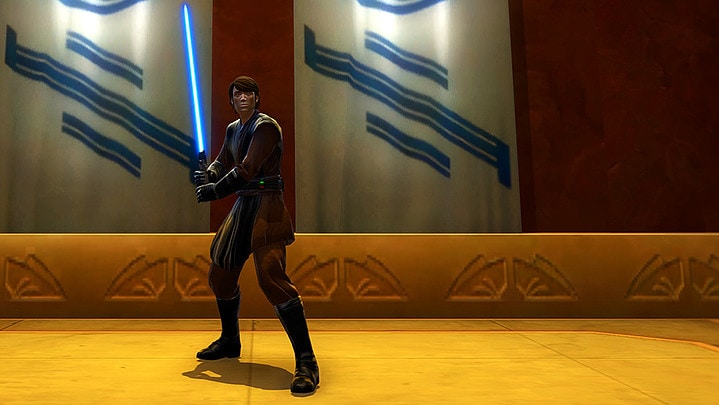
How to Create Anakin Skywalker in SWTOR: Full Build Guide
This SWTOR Anakin Skywalker Build Guide will show you how to create a character as close and as authentic with Appearance, Outfits, and Key Abilities to the iconic character from Clone Wars up until the events on Mustafar from Episode 3!
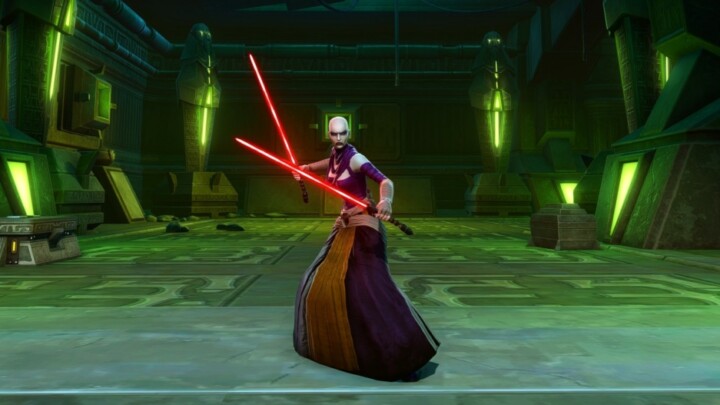
How to Create Asajj Ventress in SWTOR: Full Build Guide
This SWTOR Asajj Ventress Build Guide is designed to be as faithful to the lore and authentic as possible within the constraints of the game!
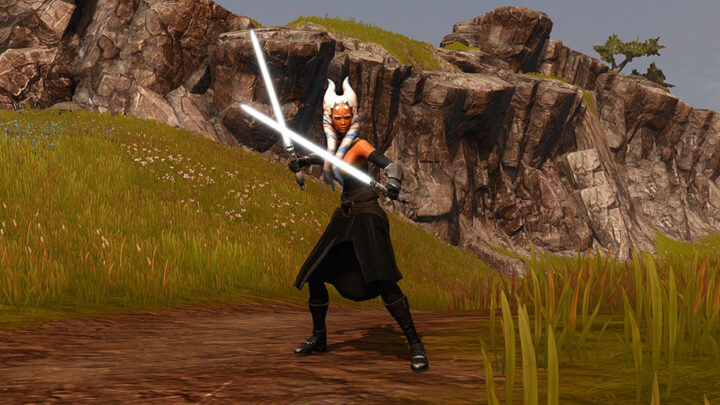
How to Create Ahsoka in SWTOR: Full Build Guide
This SWTOR Ahsoka Tano Build Guide recreates the legendary character as closely as possible on all fronts: Appearance, Outfit, Gear, Skills!
How to Create Darth Sidious in SWTOR: Full Build Guide
This SWTOR Darth Sidious Build Guide will show you how to create a character as close and as authentic with Appearance, Outfits and Key Abilities! It replicates the character from before the events of Episode 3.
How to Create Emperor Palpatine in SWTOR: Full Build Guide
This SWTOR Emperor Palpatine Build Guide on how to create a character as close and as authentic with Appearance, Outfits and Key Abilities!
How to Create Darth Vader in SWTOR: Full Build Guide
This SWTOR Darth Vader Build Guide recreates the legendary character as closely as possible on all fronts: Appearance, Outfit, Gear, Skills!
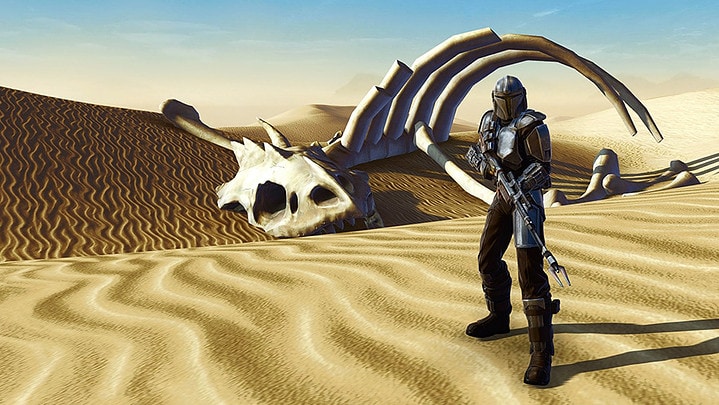
SWTOR Din Djarin (The Mandalorian) Build Guide
In this SWTOR Din Djarin Build Guide, you’ll find everything you need to know to create a toon in SWTOR and play like the Mandalorian. His outfit and appearance are based on Pedro Pascal’s portrayal in The Mandalorian and The Book of Boba Fett.
How to Create Morgan Elsbeth and the Blade of Talzin in SWTOR: Full Build Guide
This SWTOR Morgan Elsbeth Build Guide is designed to be as faithful to the lore and authentic as possible within the constraints of the game.