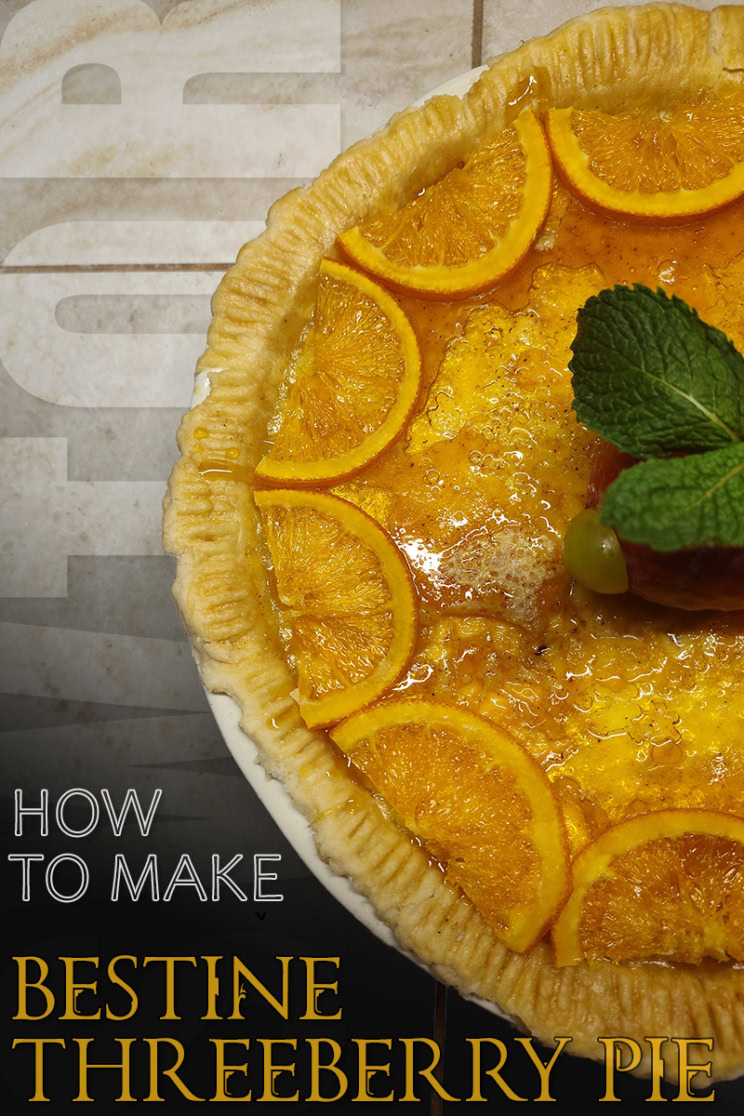
Celebrate the Spring Abundance Festival in person by baking your own SWTOR Bestine Threeberry Pie! In this article, I’ll share my experience with recreating this pie in real life and give you the full recipe so you can make it yourself!
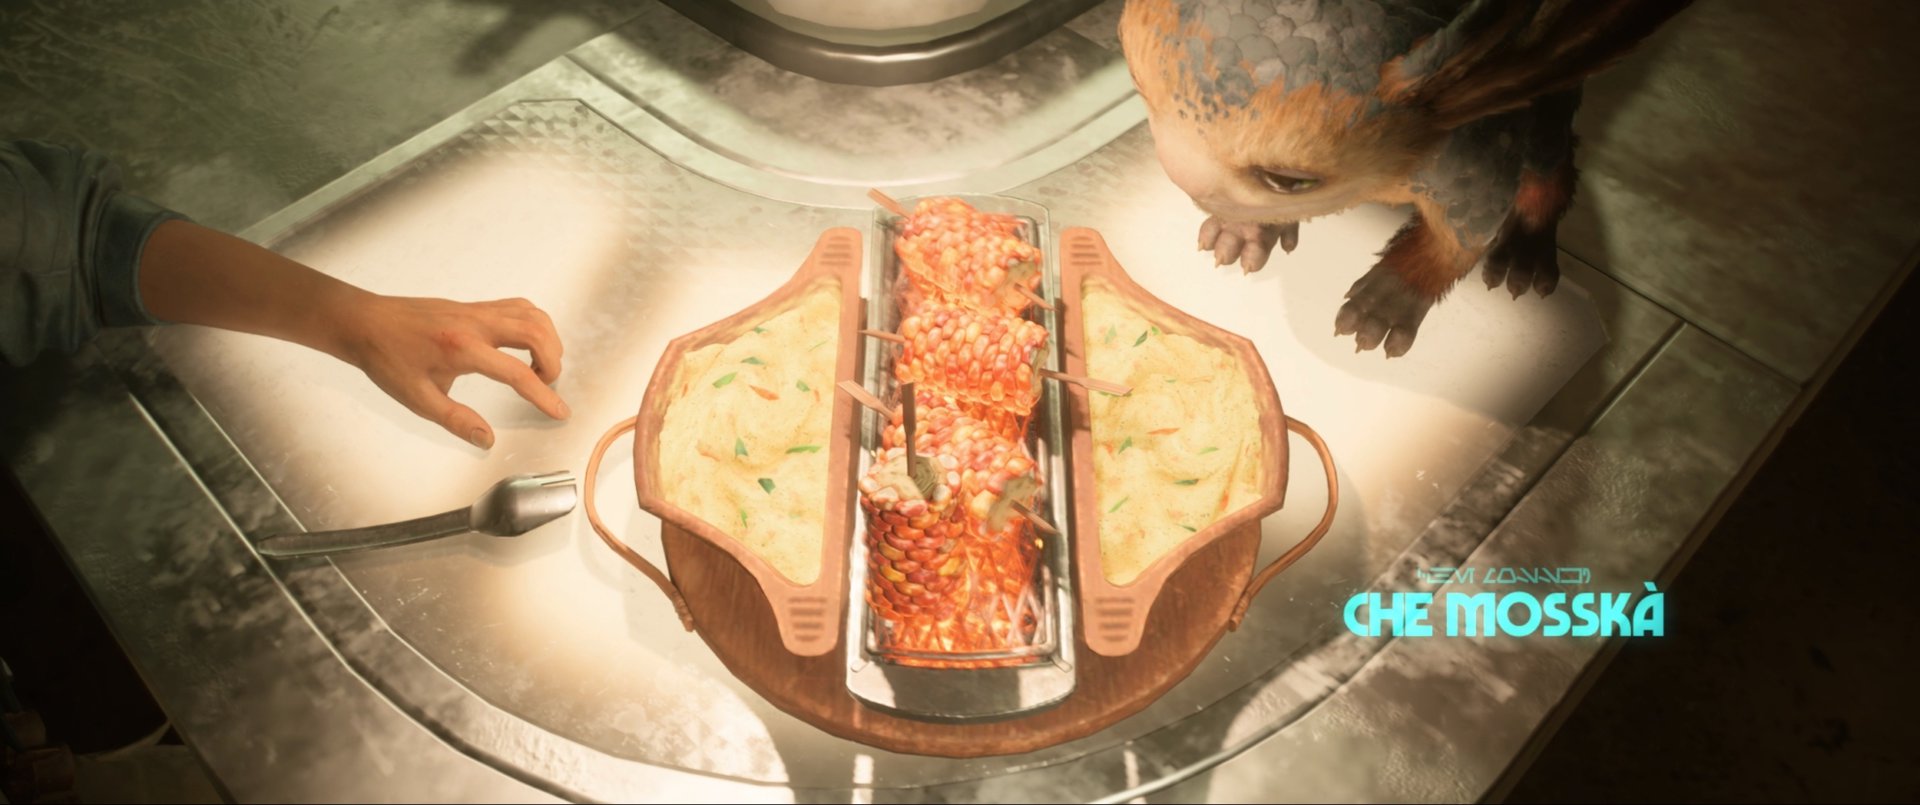
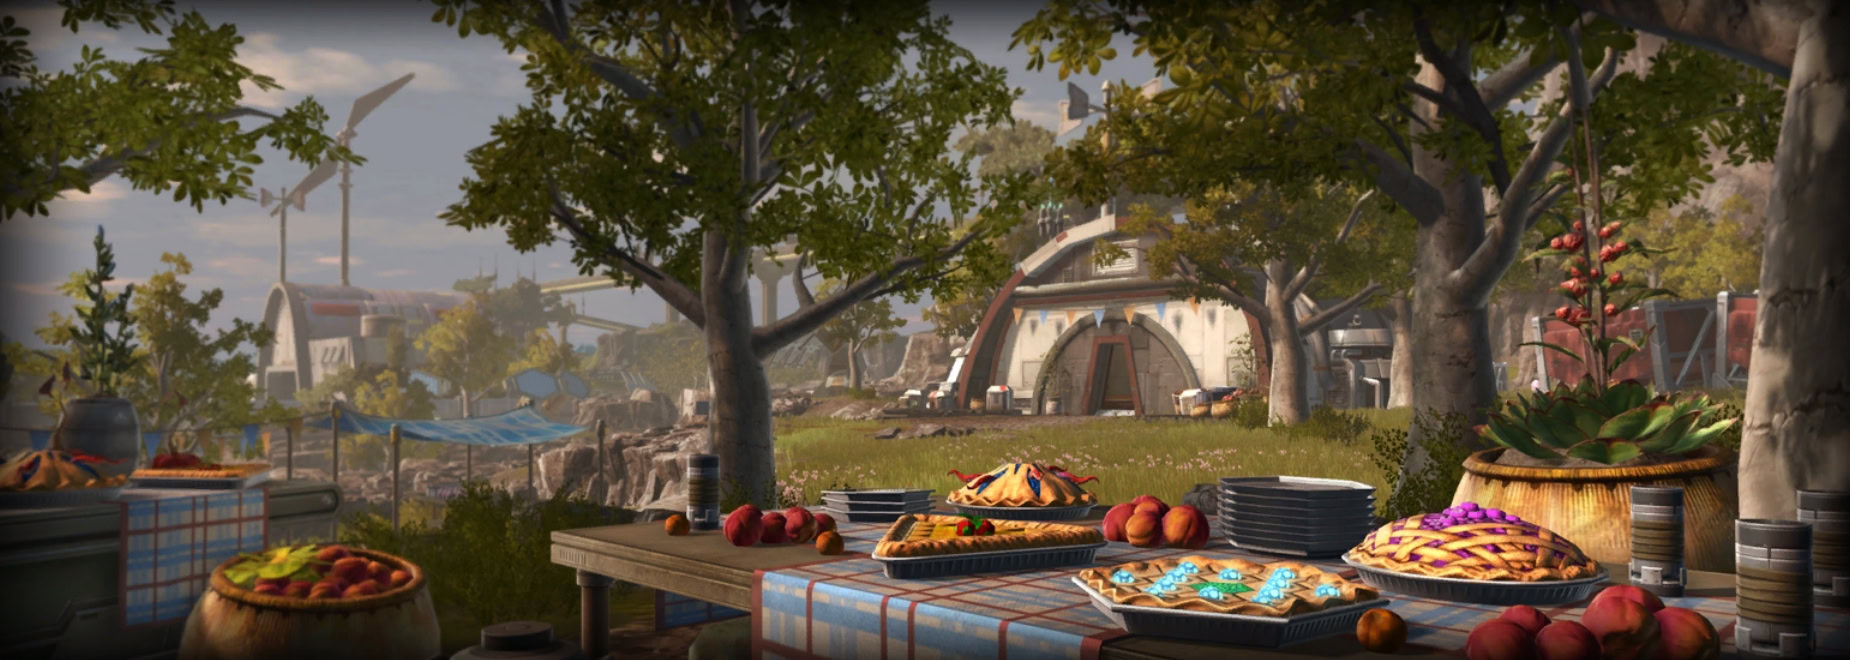
With the launch of SWTOR 7.5, we got access to the Spring Abundance Festival event. Here we can take a leisurely trip to Dantooine’s Blba Groves to do some dancing, fishing, farming, but more importantly, bake and eat delicious pies!
We are not a food blog. I did my best to provide very detailed instructions with high-quality photographs of the entire process along with a full list of all of the ingredients in the recipe at the end.
Table of contents
The Backstory: How We Decided To Make This Pie
During the PTS testing phase for SWTOR Update 7.5, I was working on some drafts and ideas on how I could construct the Spring Abundance Festival Guide and the Basilisk Prototype Ventures Guide.
I couldn’t help be a bit distracted yet inspired by the pies. I’ve received a culinary arts degree, and I love cooking and good food, so I felt something light inside me. This fire in my heart was a need to recreate one of these pies to the best of my ability.
Now I will admit, I’m a bit out of practice so the pie didn’t end up as pretty as it could have. I was mostly concerned with how it tasted and the techniques used so I could later refine it.
But the most important question had to be asked, “Which of these four pies can I reasonably recreate?”.
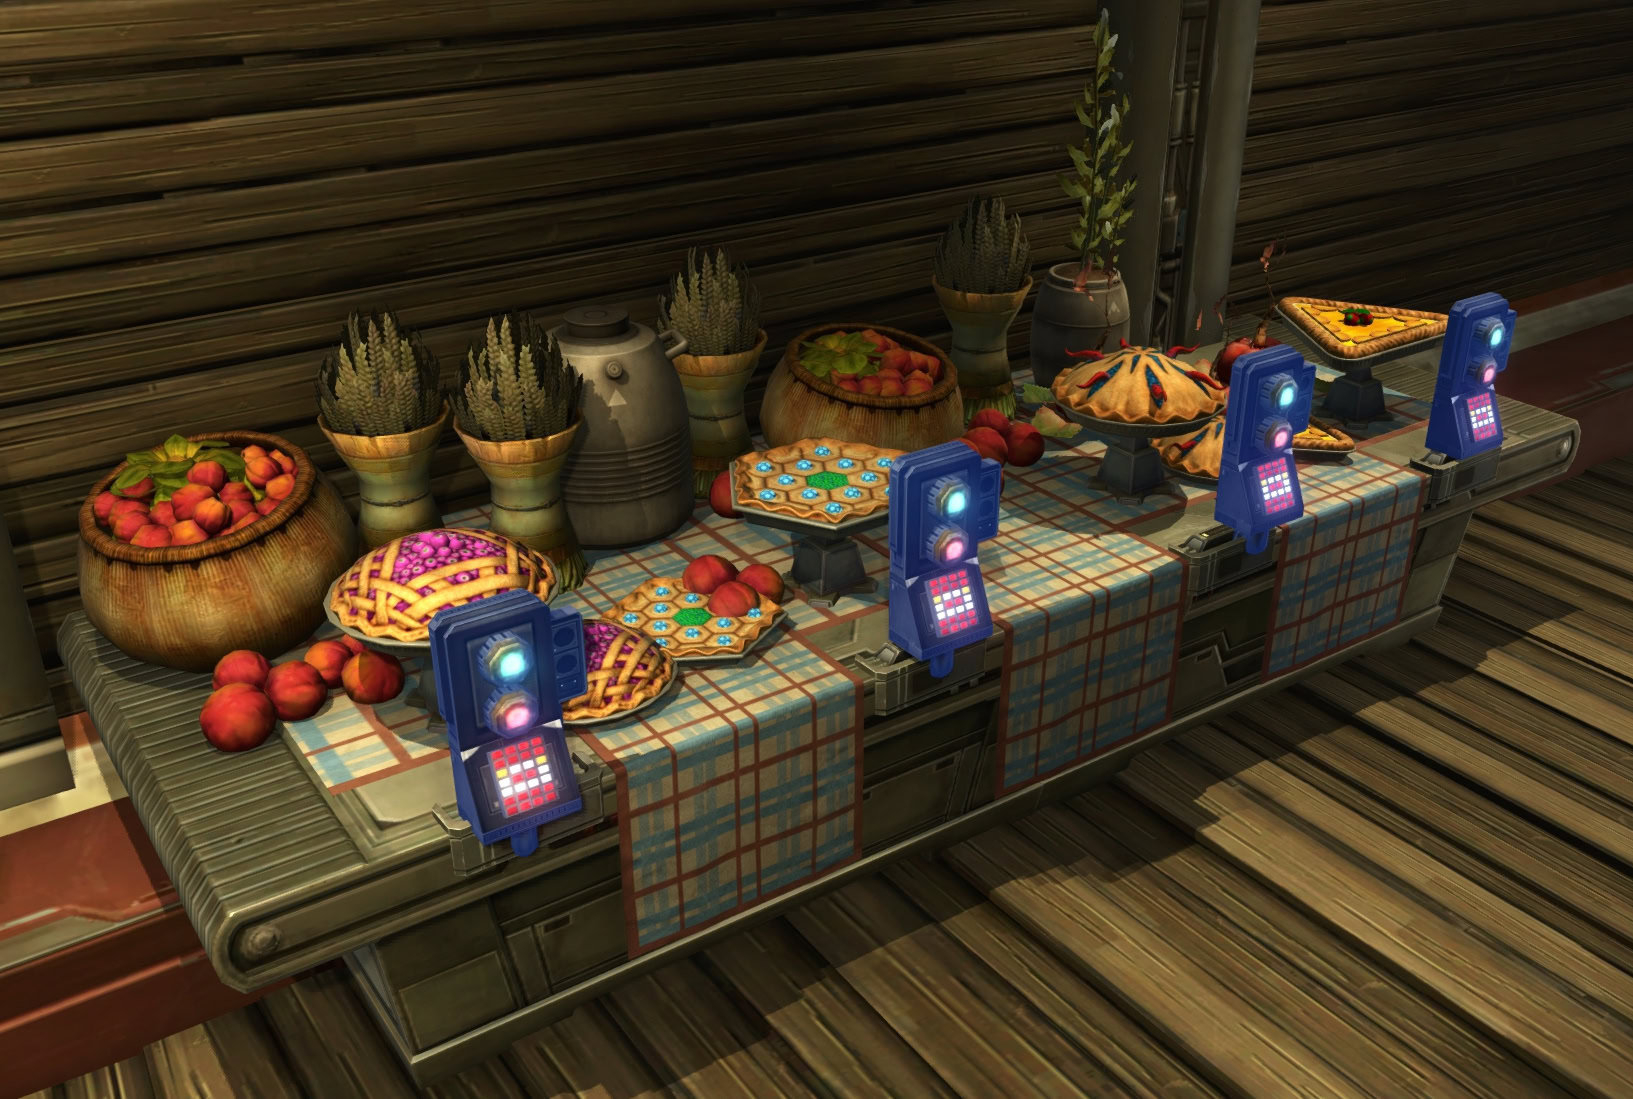
Determining the Pie and its Ingredients
I took the Patissier for a Day mission several times to learn what goes in each of these pies. Of course, these are fictional space ingredients. But that doesn’t mean I couldn’t try to find an Earth equivalent.
Here’s what I think would be the closest ingredient to those found in the kitchen at Blba Groves:
- Bar-Fish Gelatin = Fish Gelatin or Plain Gelatin
- Coarse Barkmeal = Oatmeal
- Ka-Olives = White Olives colored fuschia?
- Maraffa Sap = Maple Syrup
- Melted Sweetmallow = Marshmallow Creme?
- Pulverized Wulli Nut = Pulverized Walnut
- Slime Yeast = Yeast
- Spiced Eggmilk = Egg Custard Filling
- Threeberries = Some sort of Plum variant?
- Tinglespores = I have no clue
- Zoochberry Syrup = Mixed Berry Syrup with added Balsamic Vinegar and Ginger
The Zoochberry Syrup was quite easy to figure out as this is part of the Zoochberry Surprise from the official Star Wars Galaxy’s Edge cookbook.
I can tell you from first-hand experience that it’s quite delightful, as are many recipes from that cookbook. But perhaps that could be a story for another time. Let’s get back to the pies.
The Ka-Olive Pie
First off is the Ka-Olive Pie. I want to guess that this pie comes from Voss, home of the Voss-Ka people. It contains Ka-Olives, Phareen Flour, Maraffa Sap, and Bar-Fish gelatin.
Based off my guesses, mixing savory olives, maple syrup, and fish gelatin would make an… odd mix. Even if we use plain gelatin, I’m not sure if olives and syrups could go well together as olives are often pickled. The taste differences would be… a bit too alien for my tastes.
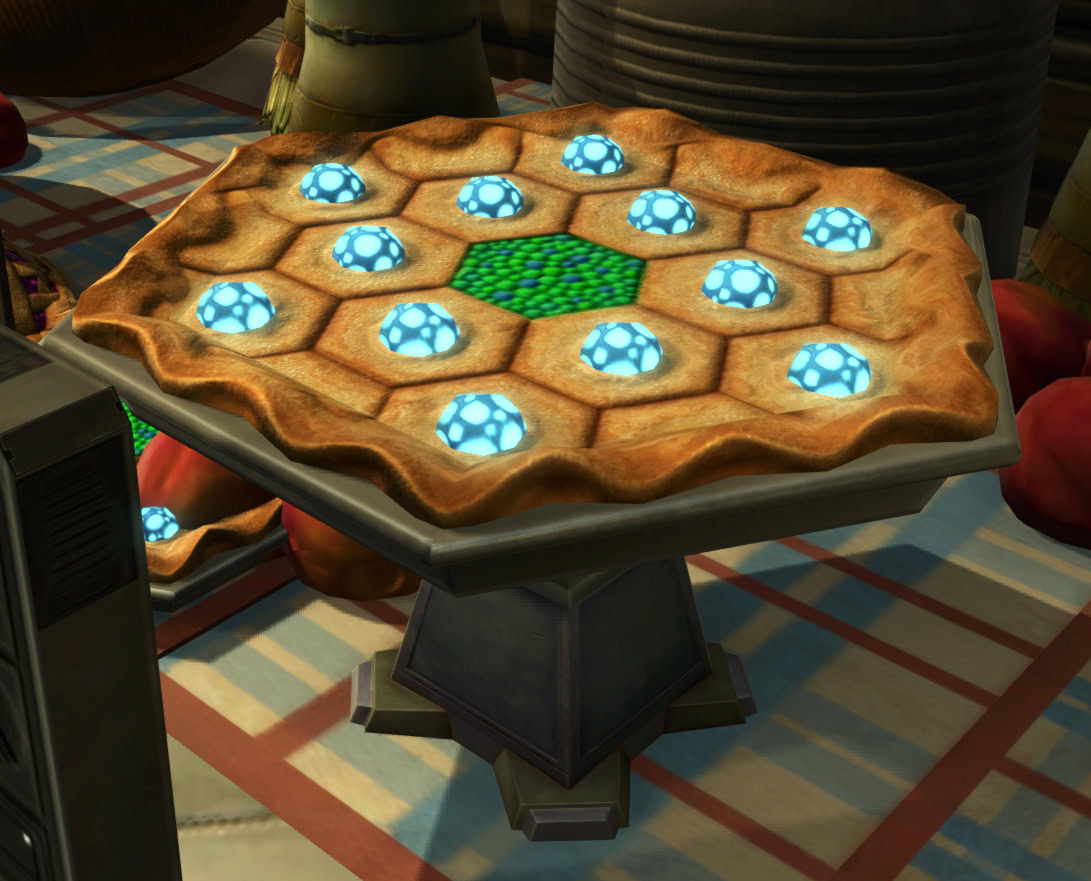
The Sweet Spore Tart
Next we have the Sweet Spore Tart. This features bioluminescent Tinglesports on top and includes Coarse Barkmeal, Zoochberry Syrup, and Spiced Eggmilk. Looking at this thing in-game, I doubt I could make anything remotely close to it due to the lack of glowing blue spores. So I’ll be skipping this one unfortunately.
The Deepwater Dac Pie
The Deepwater Dac Pie comes from the planet Dac (a.k.a. Mon Cala or Mon Calamari). Given how Dac is an ocean planet, it’s not surprising that you can find tentacles in this pie.
Right off the bat this leads me to think this would need octopus, but the addition of Slime Yeast, Coarse Barkmeal, and Melted Sweetmallow would not sit well with me.
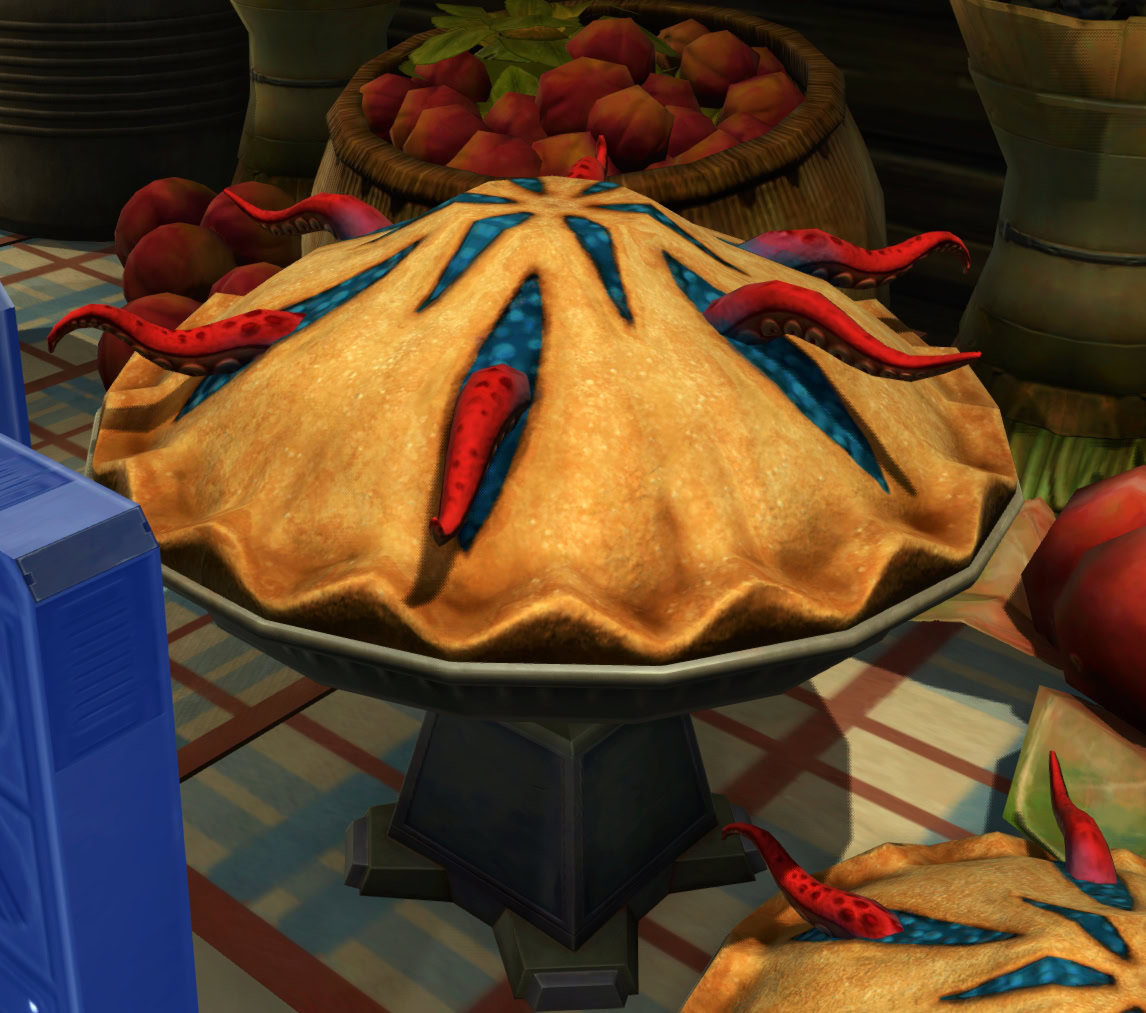
Would you want to mix octopus with oatmeal and marshmallow creme? Didn’t think so, also I’m in a land-locked part of the U.S. so octopus is expensive. Next!
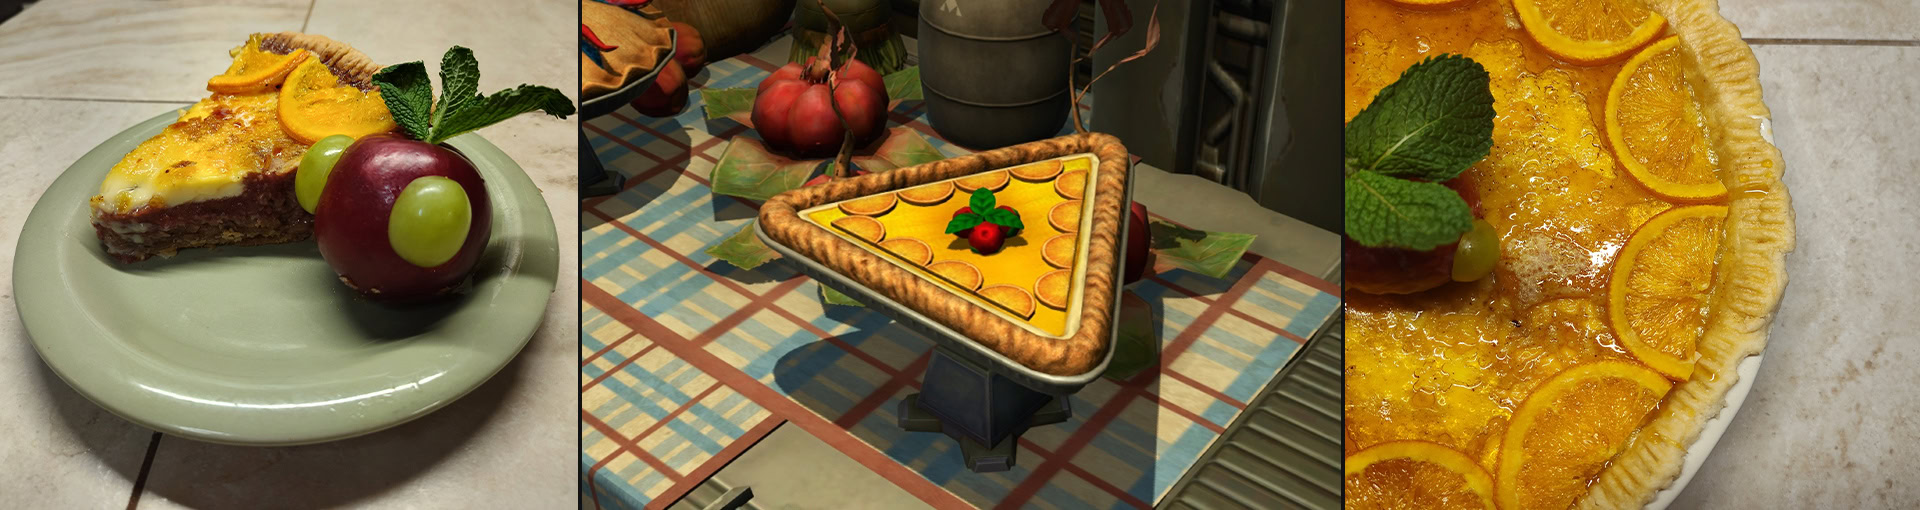
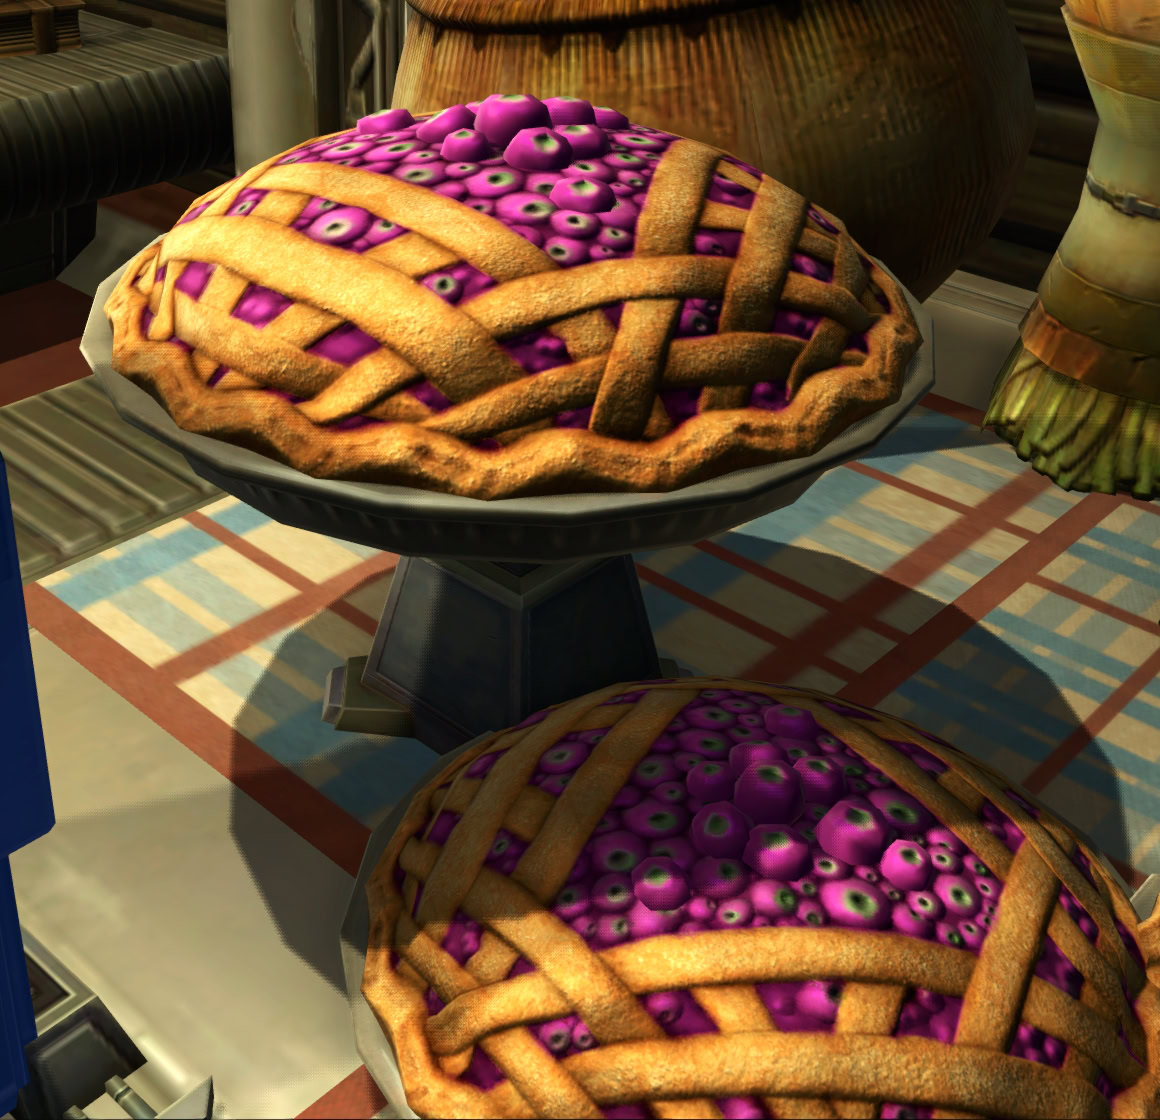
The Bestine Threeberry Pie
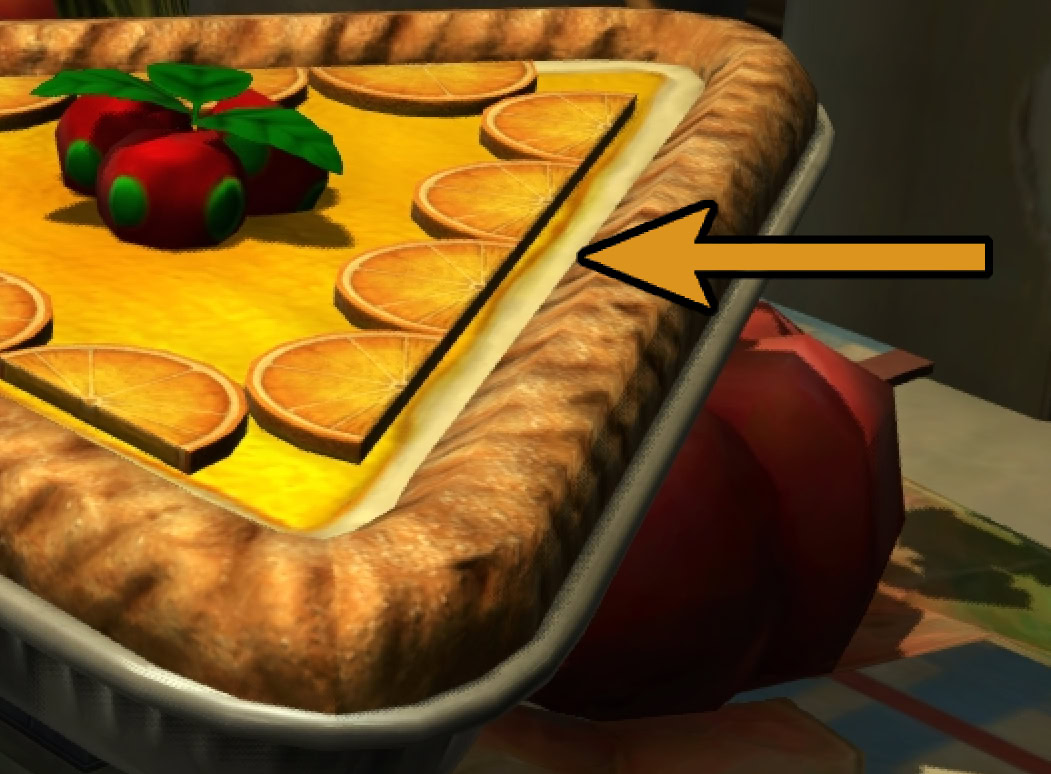
Last but certainly not least, we have the Bestine Threeberry Pie. This triangular pie incorporates Unripe Threeberries, Spiced Eggmilk, Maraffa Sap, and Pulverized Wulli Nut.
It also appears to be garnished with some threeberries and sliced oranges (or whatever passes as orange in Star Wars). Many fruit pies use tart fruit so the sourness is balanced out with the sugar incorporated later on.
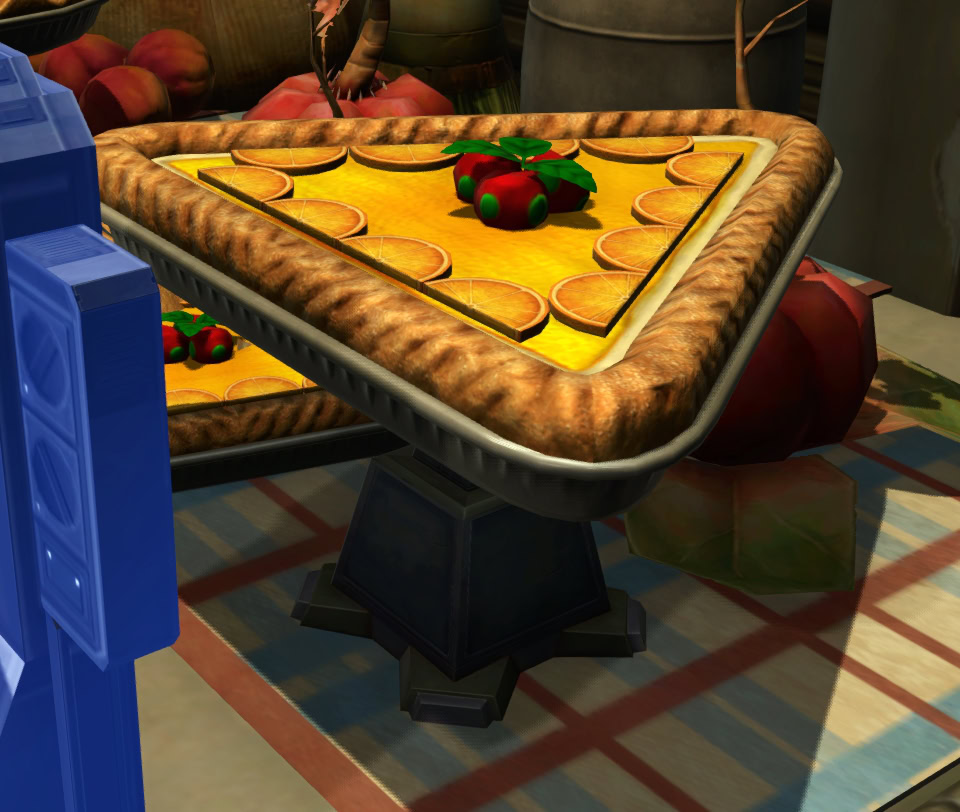
Based off the shape, size, and color of the threeberries, my best guess for the Earth equivalent of this fruit would be plums (minus the green bumps). So now we have a plum pie with walnuts, maple syrup, and egg custard. This sounded the most doable and appetizing, so this is the one we’ll be going over today!
How to make the Pie: Step-by-Step
One of the defining features of the Bestine Threeberry Pie is its triangle shape. Unfortunately, I was unable to find any good equilateral pie tins despite hours of searching online. Any that were made are either discontinued or came from sketchy websites. We’ll just have to use the classic round shape instead.
Given the amount of fillings we’re using, I would only suggest you do this with a deep dish pie. I will be including a recipe for pie crust later on, but there’s no shame in using a frozen deep dish pie crust from your supermarket. Good luck finding one that isn’t shattered and cracked though.
It would be best to take care of the most time-consuming parts of this recipe first, this would be the oranges and the plum filling. Why would the oranges take so long? Because I want to use candied oranges for this pie.
It would be poor form to have raw oranges on the pie as the rinds would be very bitter. There also appears to be hardened sugar on top of the custard, so raw oranges might melt through the sugar with their juices.
Candied Orange Slices
Candied orange slices are very simple to make but they will take around three hours to finish to finish. I recommend doing this the day before making your pie as the oranges also need a good amount of time to dry.
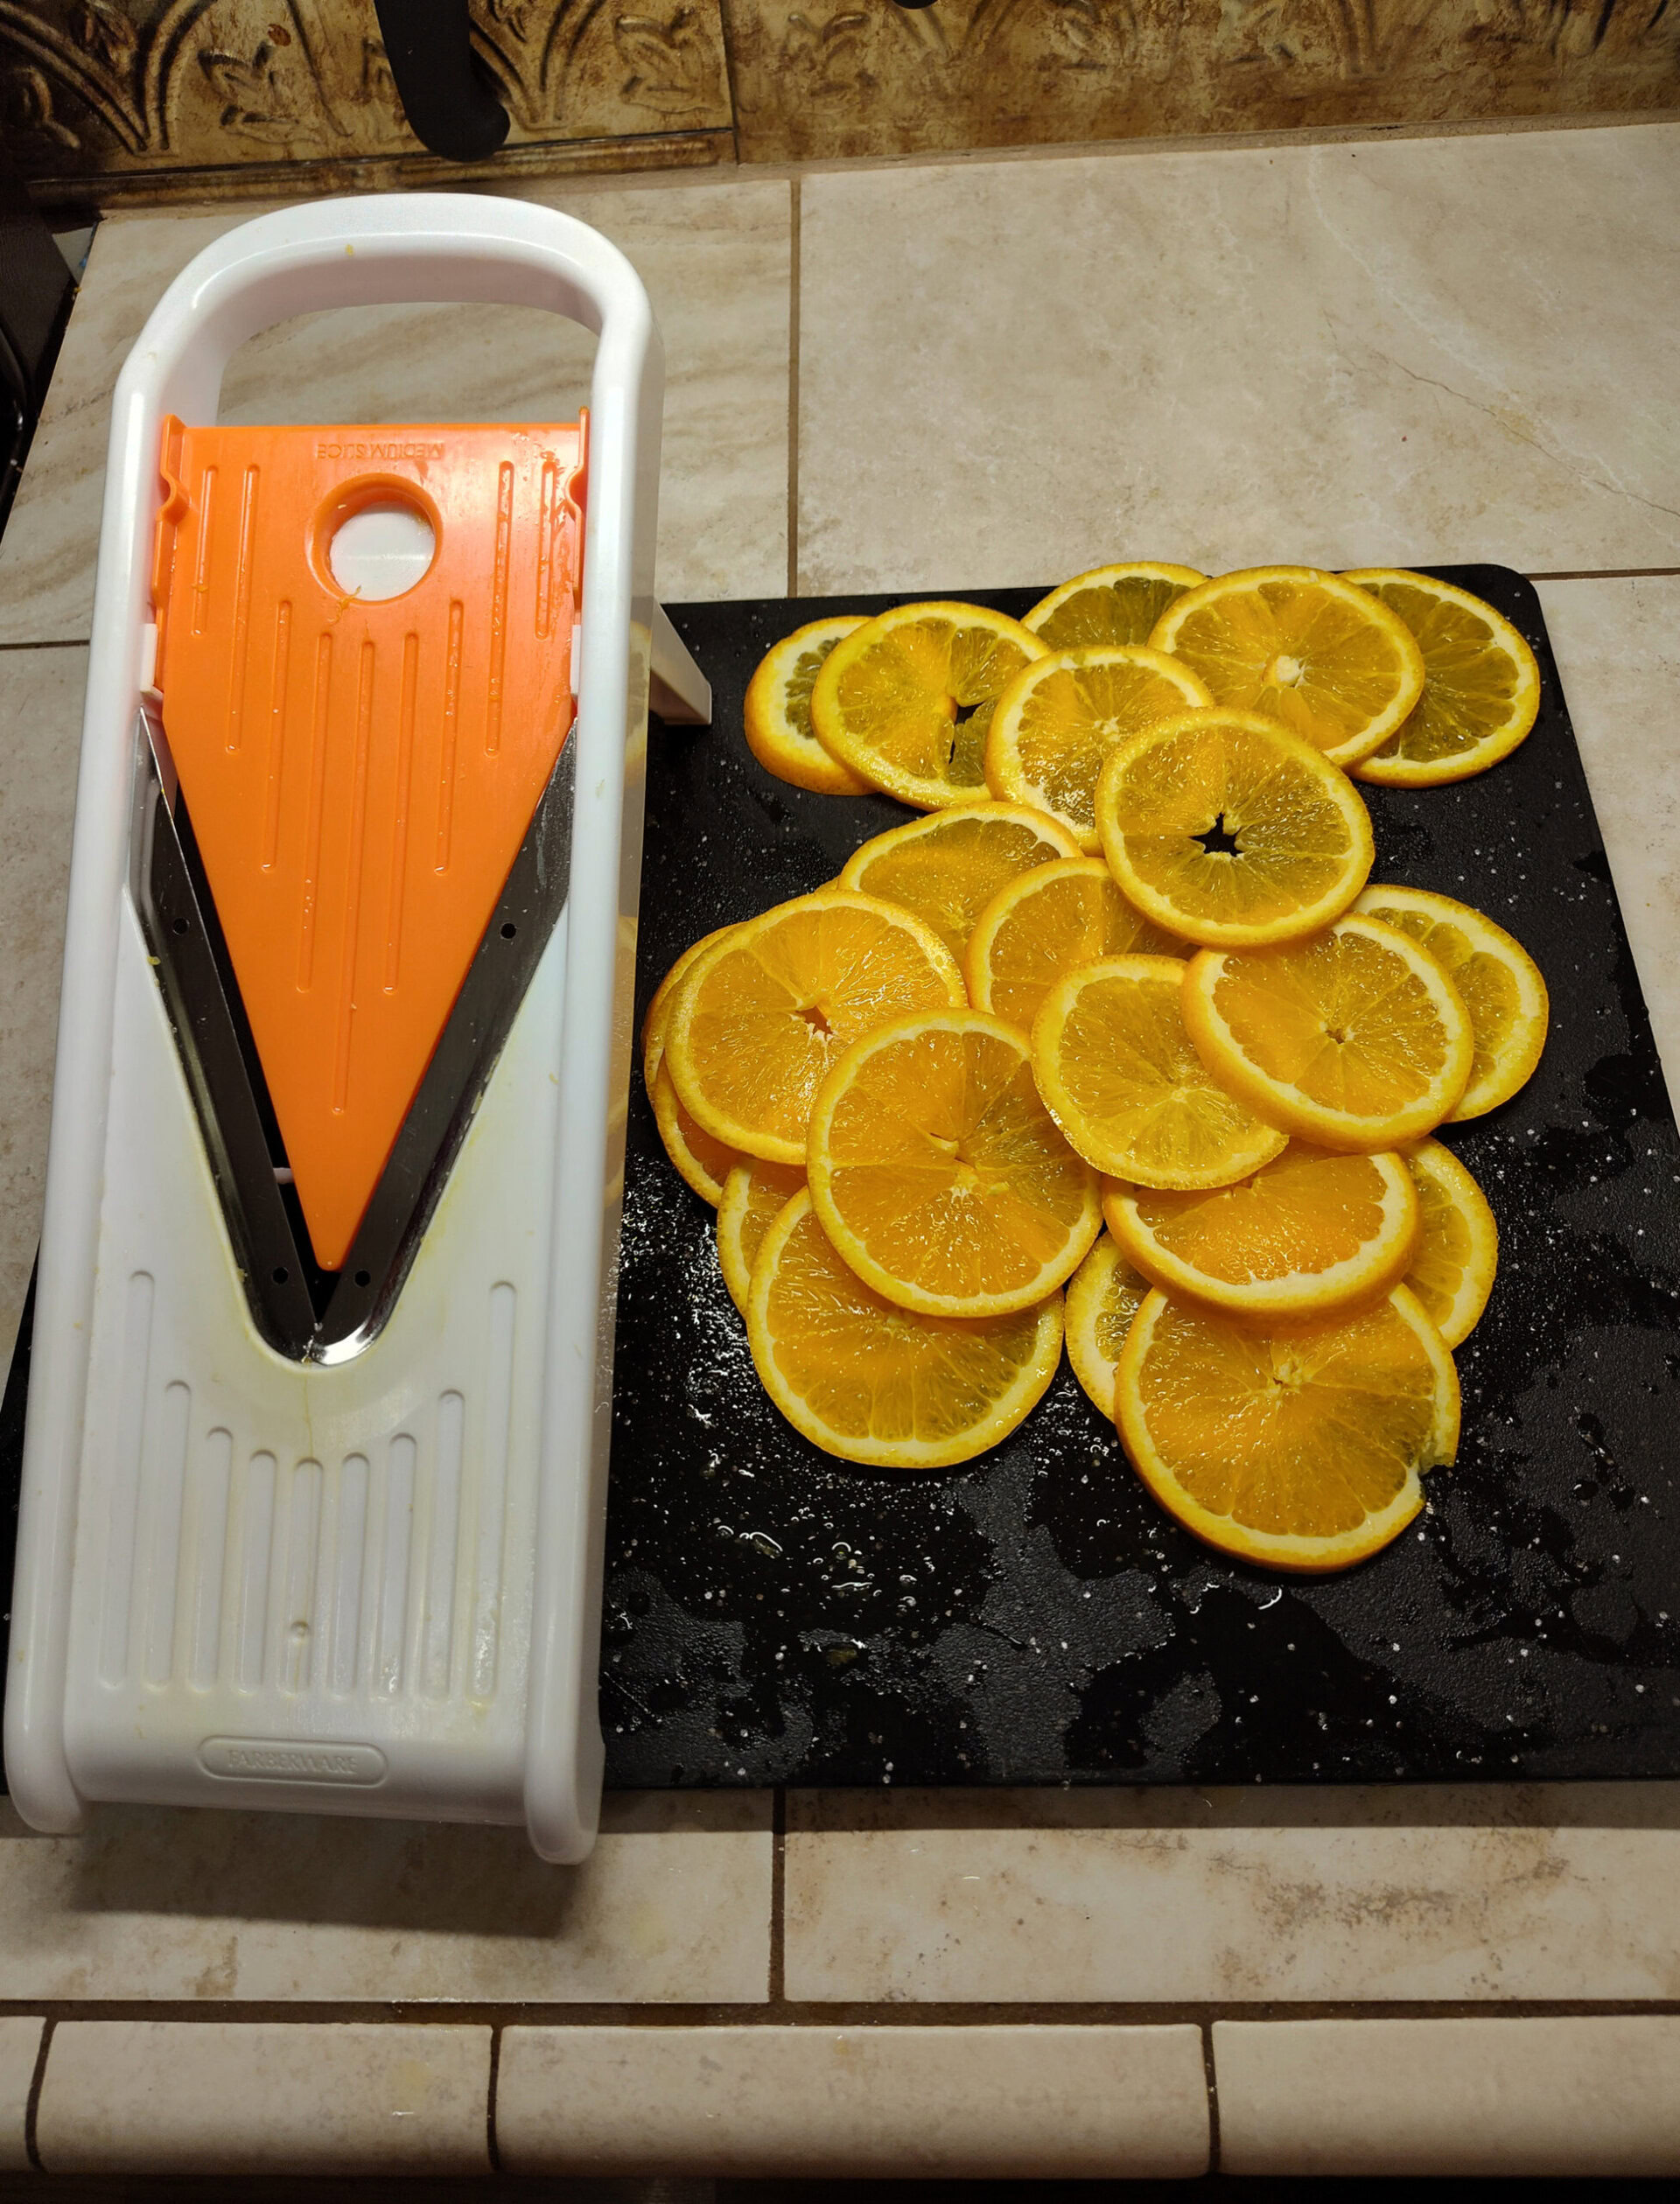
First, you’ll need to get 3 medium-sized oranges and slice them ¼” thick. I used a mandoline set for medium slices for this, but you can also slice them with a sharp knife.
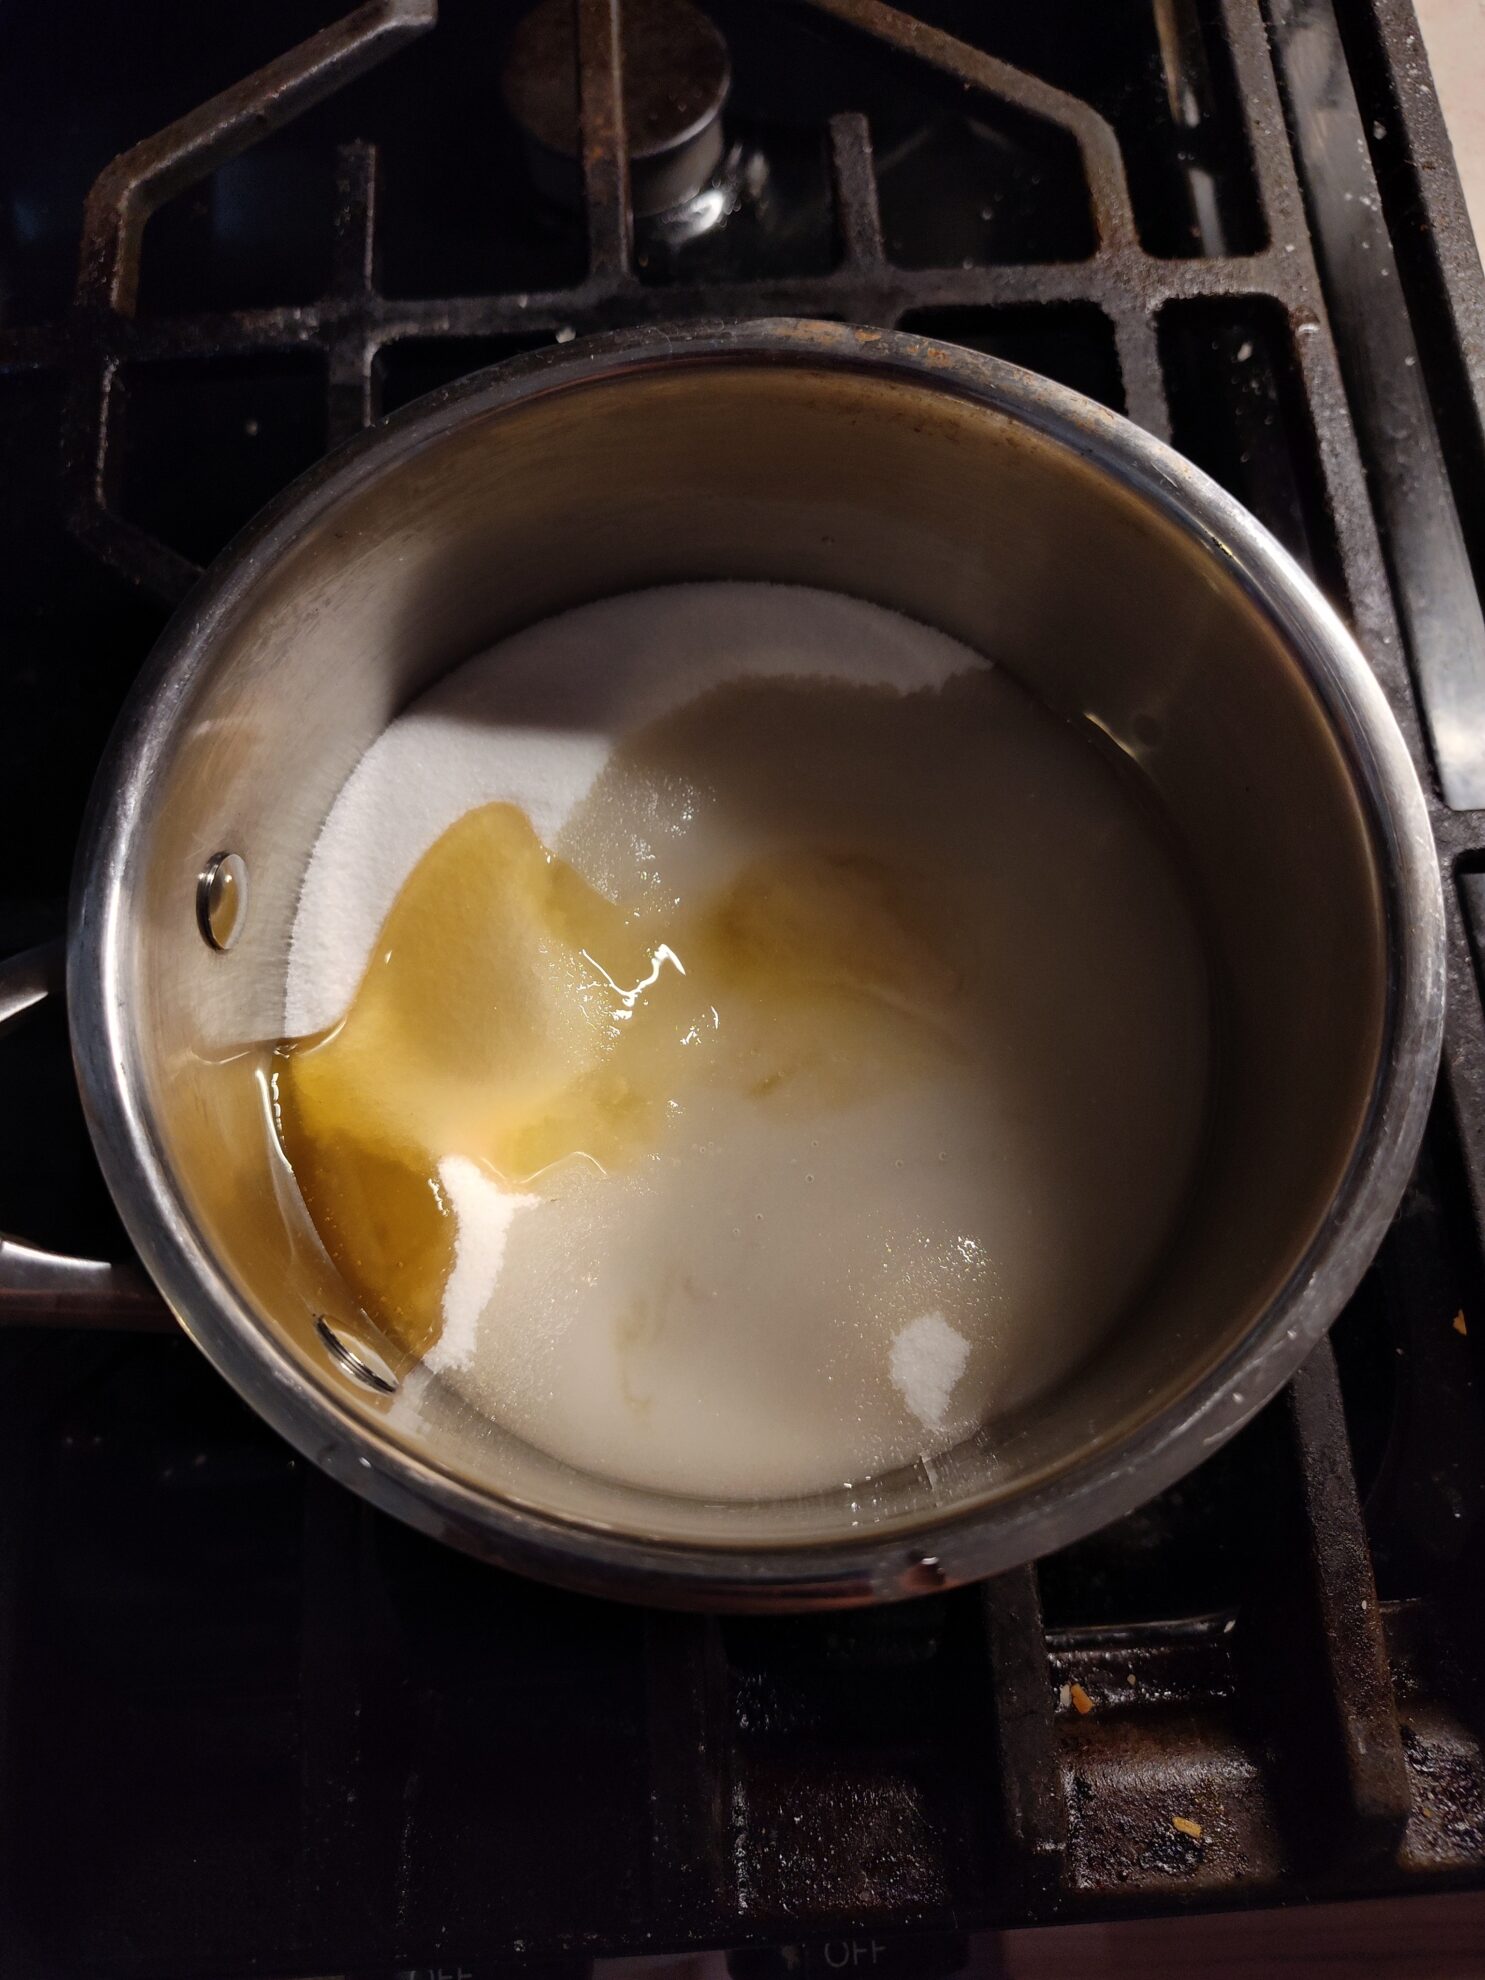
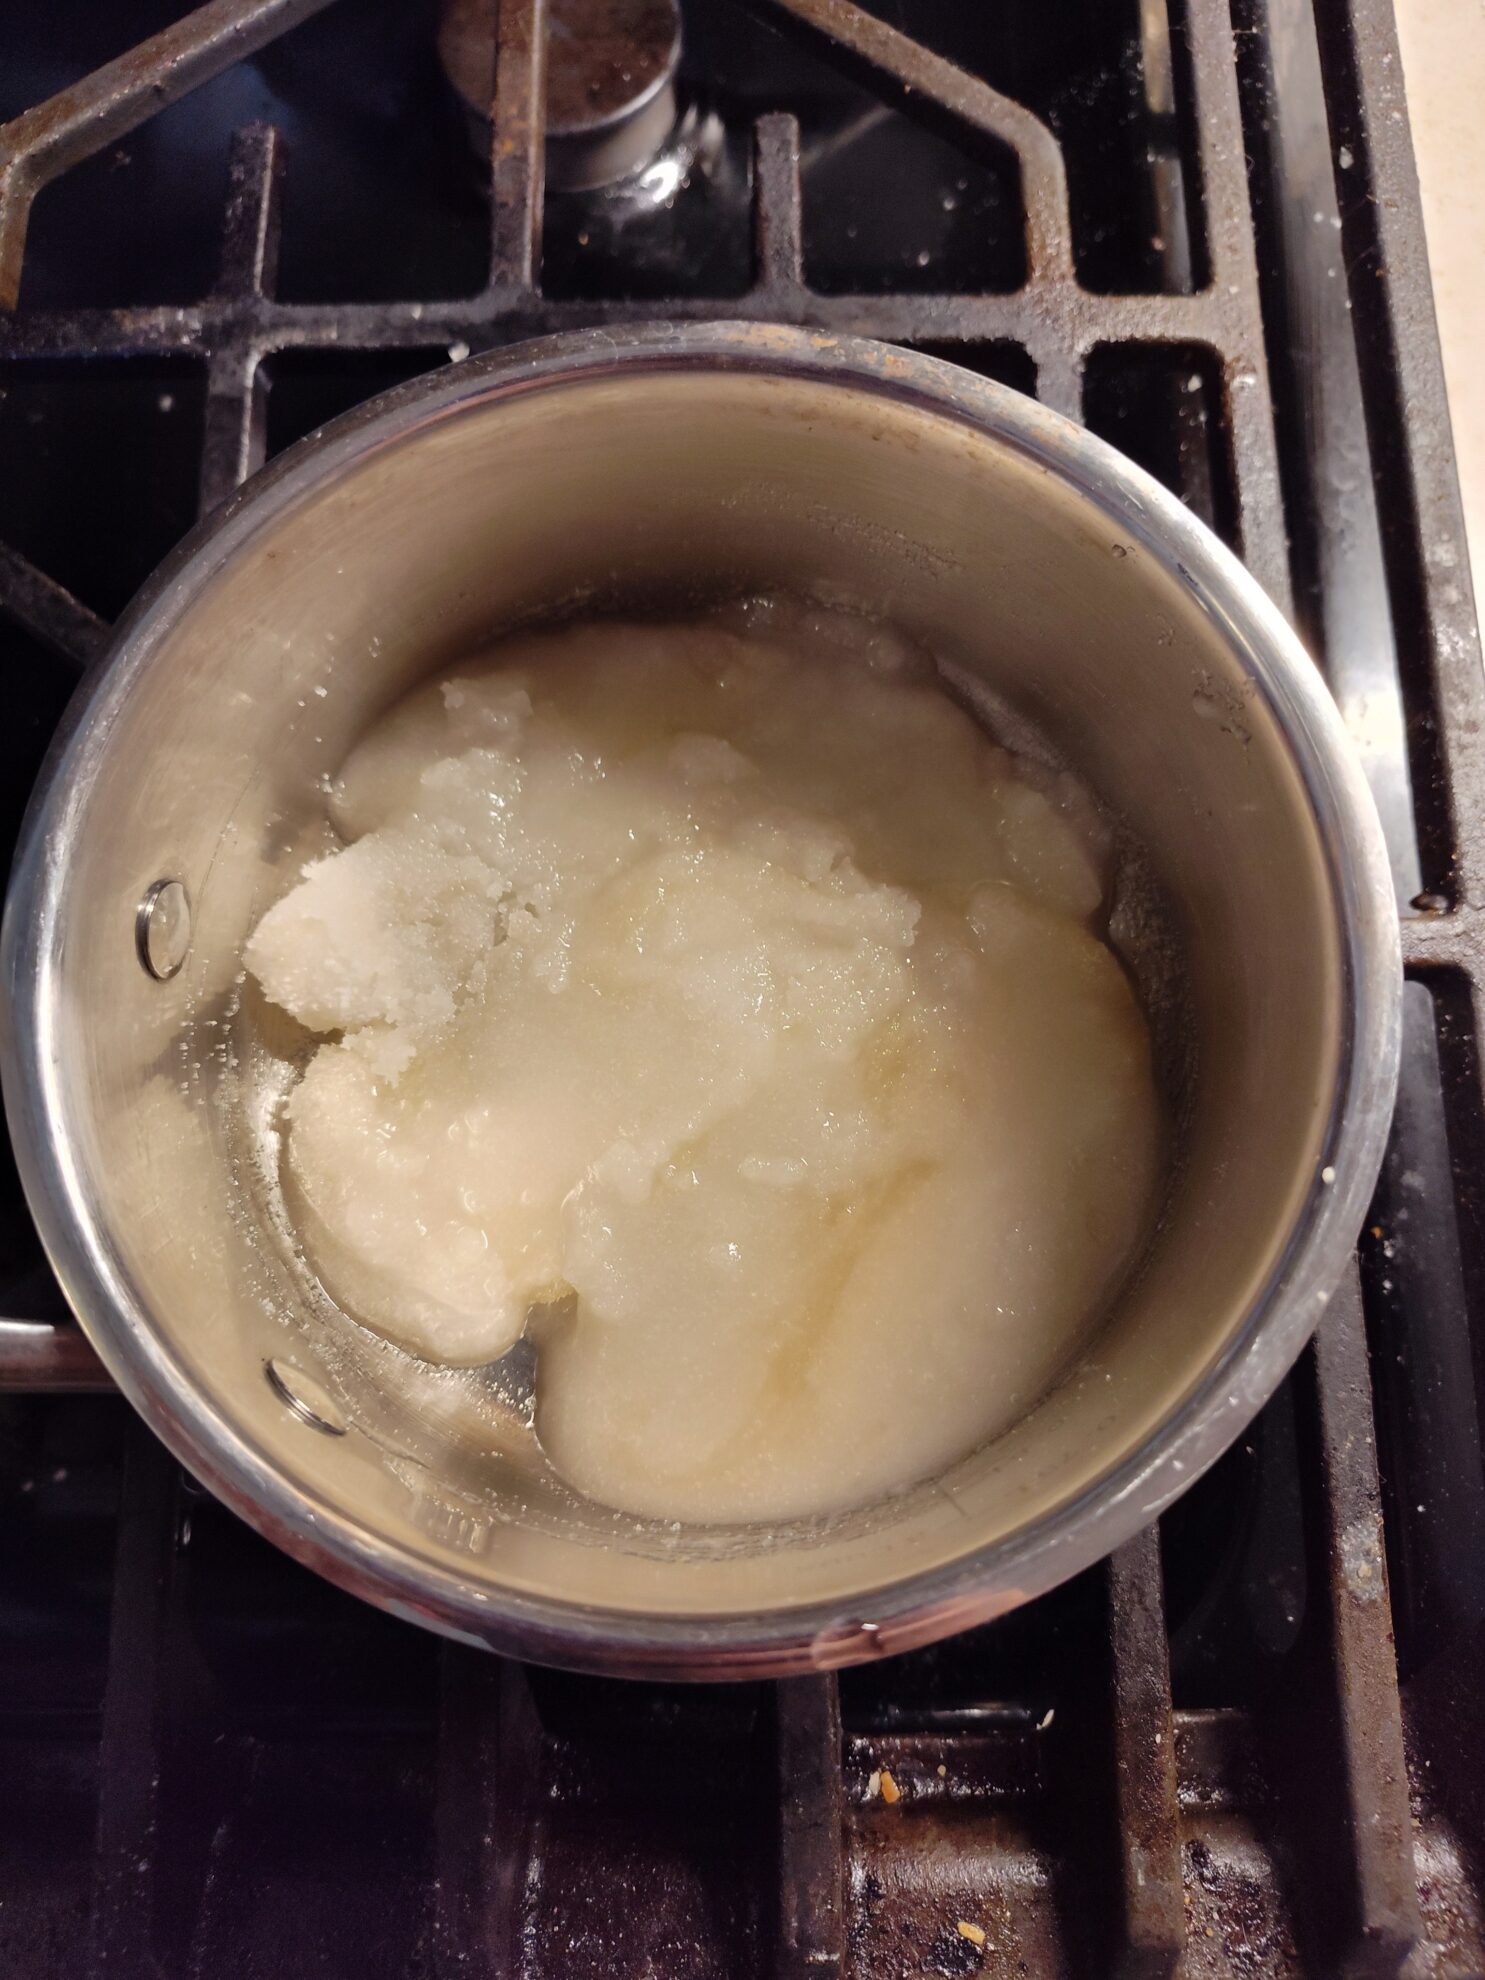
Place 3 cups of water and 3 cups of sugar in a pot and set to high. This equal mixture of sugar and water is known as a Simple Syrup.
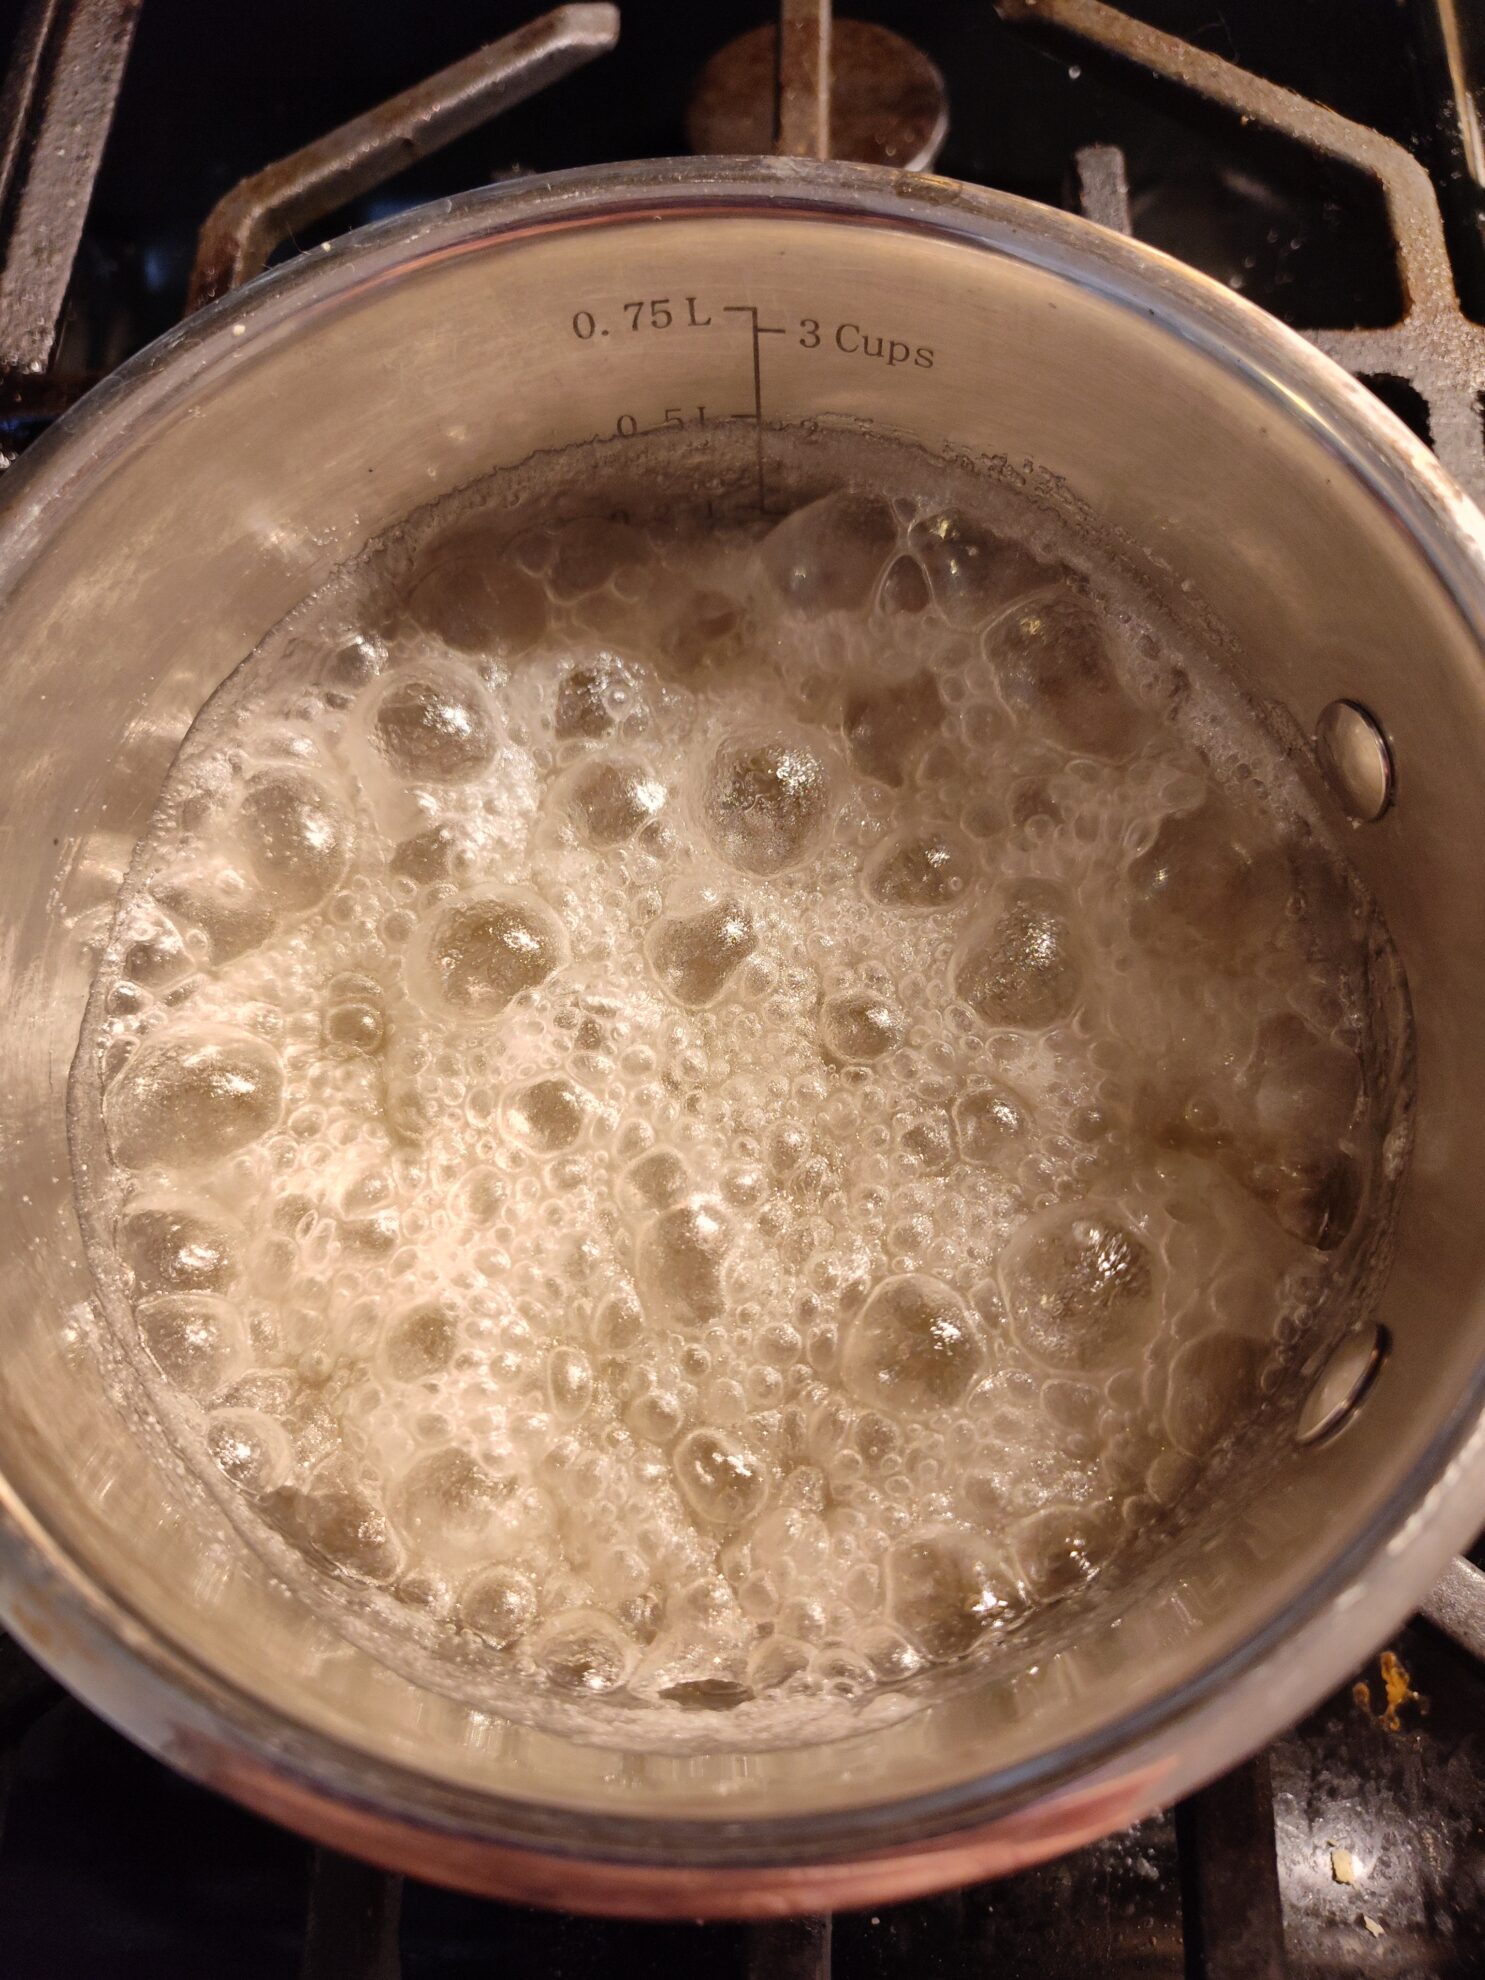
Once the sugar is melted and the syrup is boiling, immediately turn the heat to low and gently place your orange slices into the pot. You want this to simmer and not boil so the sugar doesn’t caramelize.
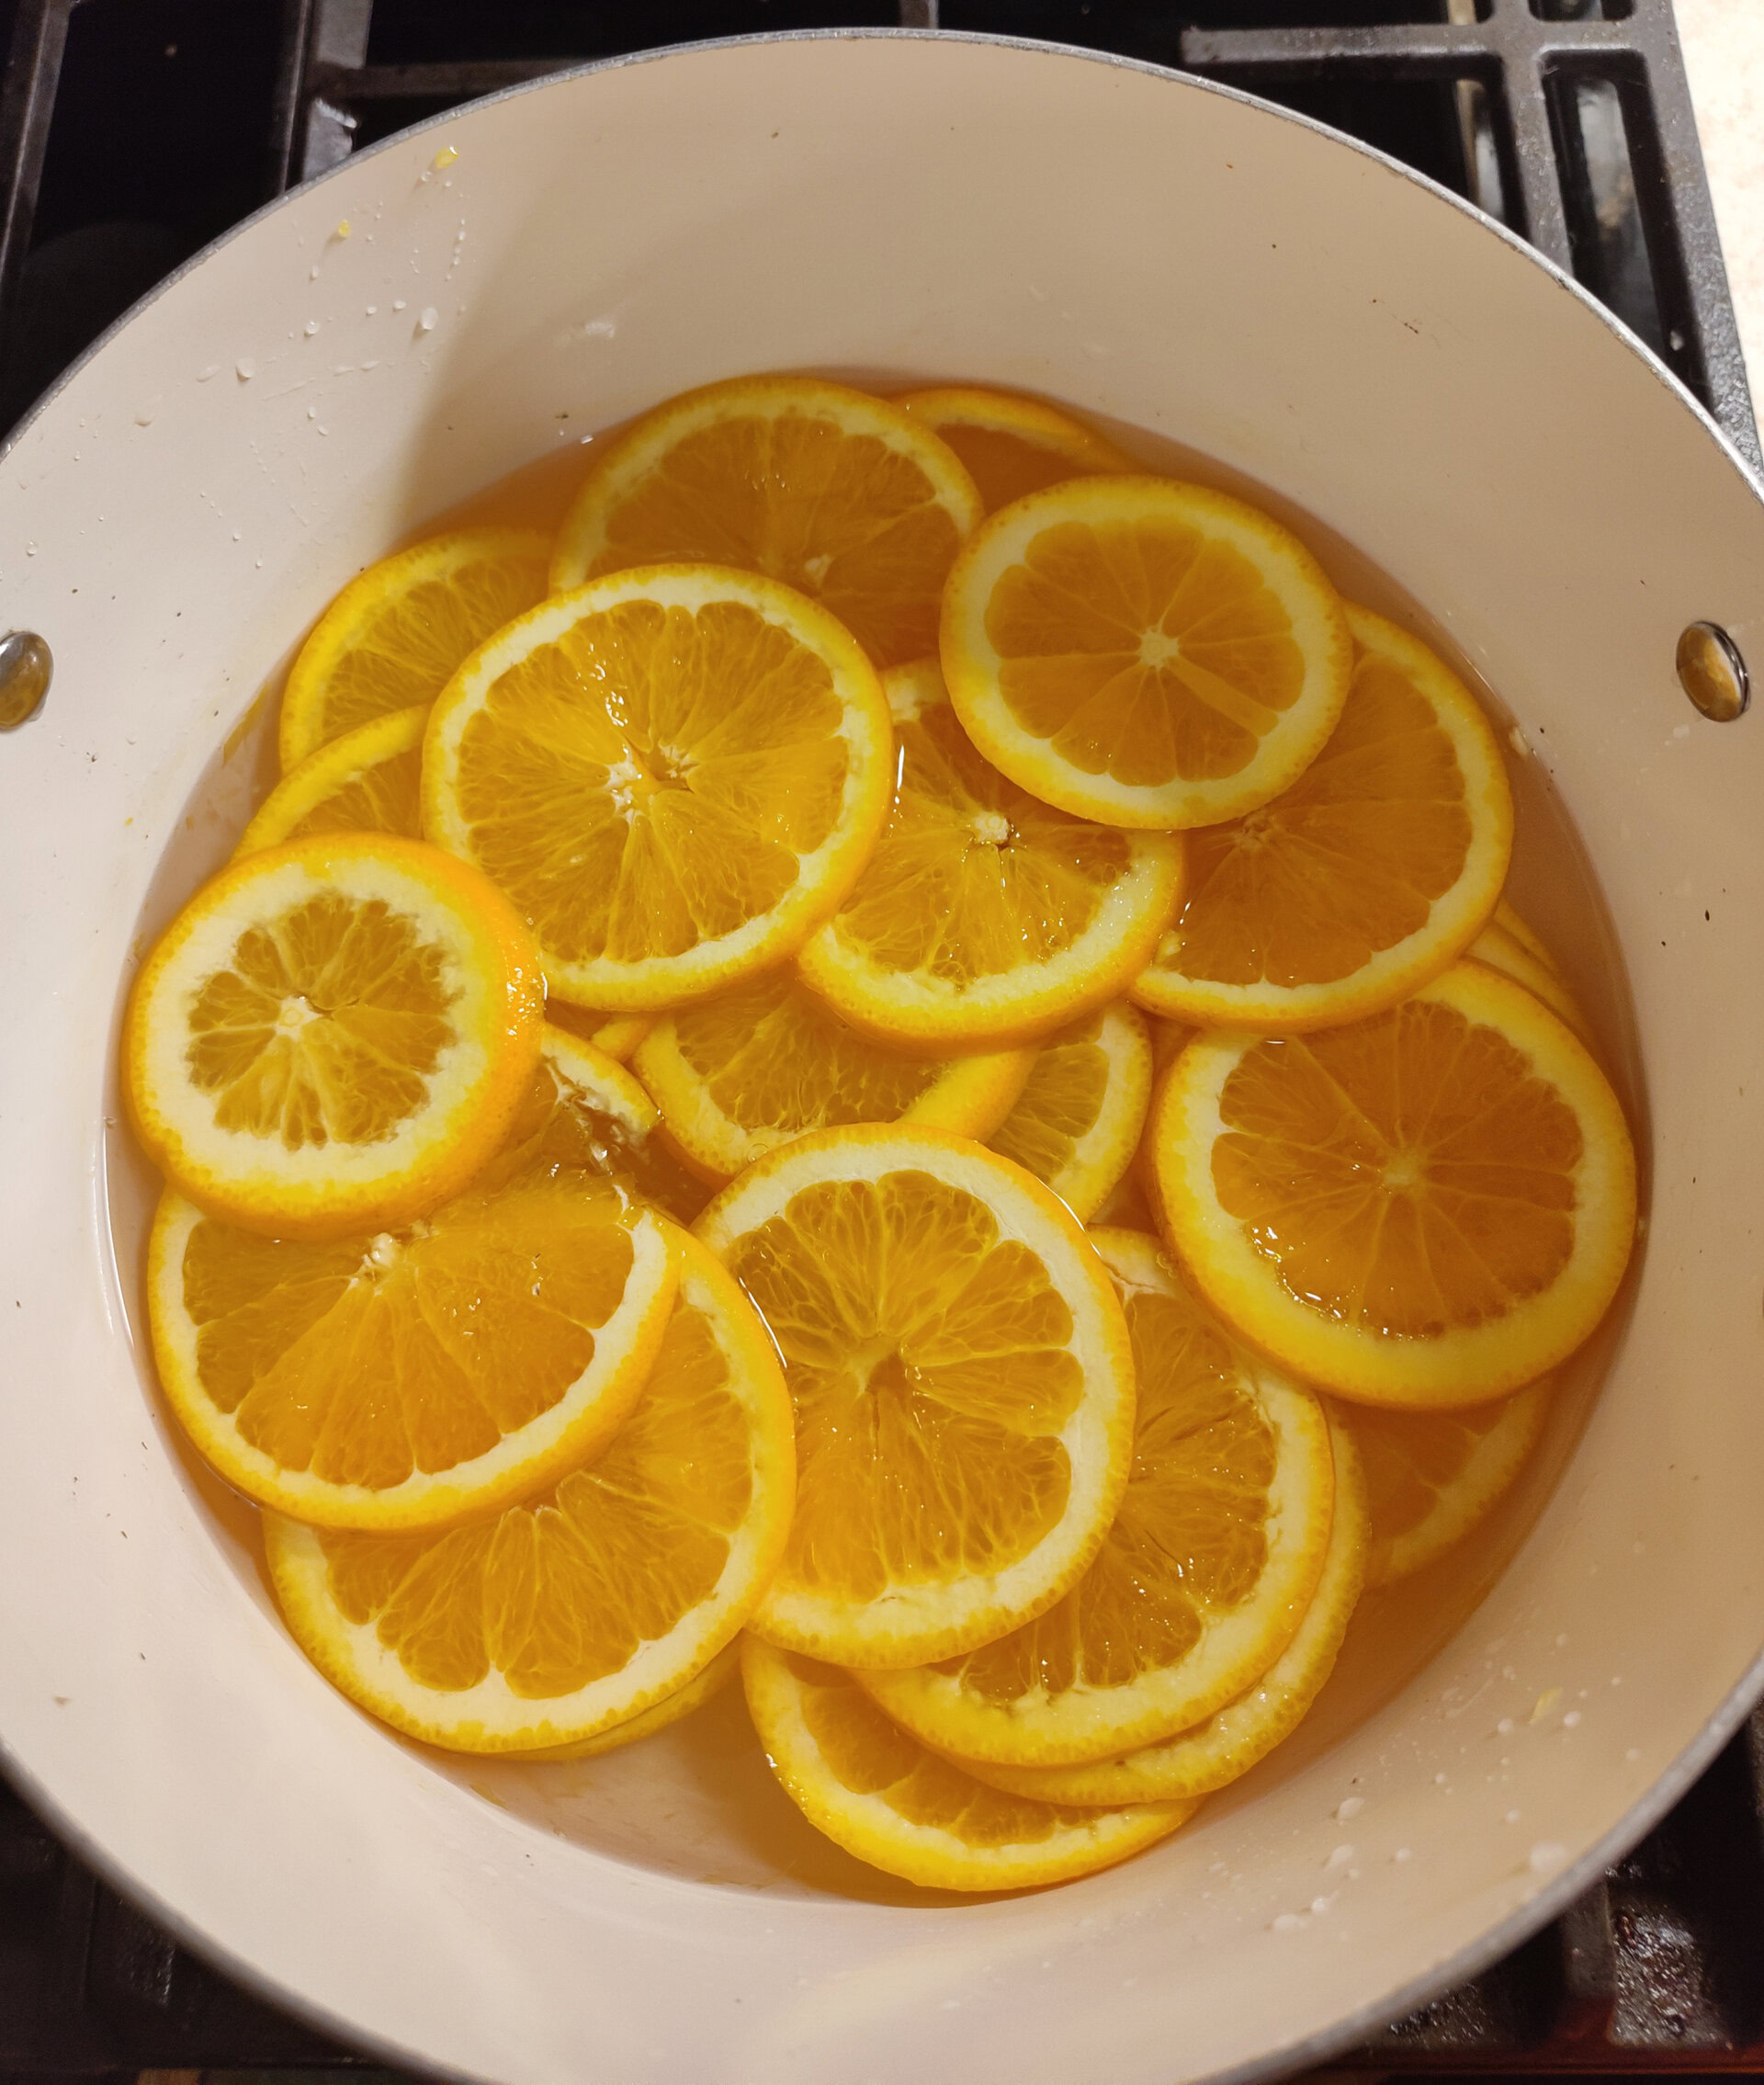
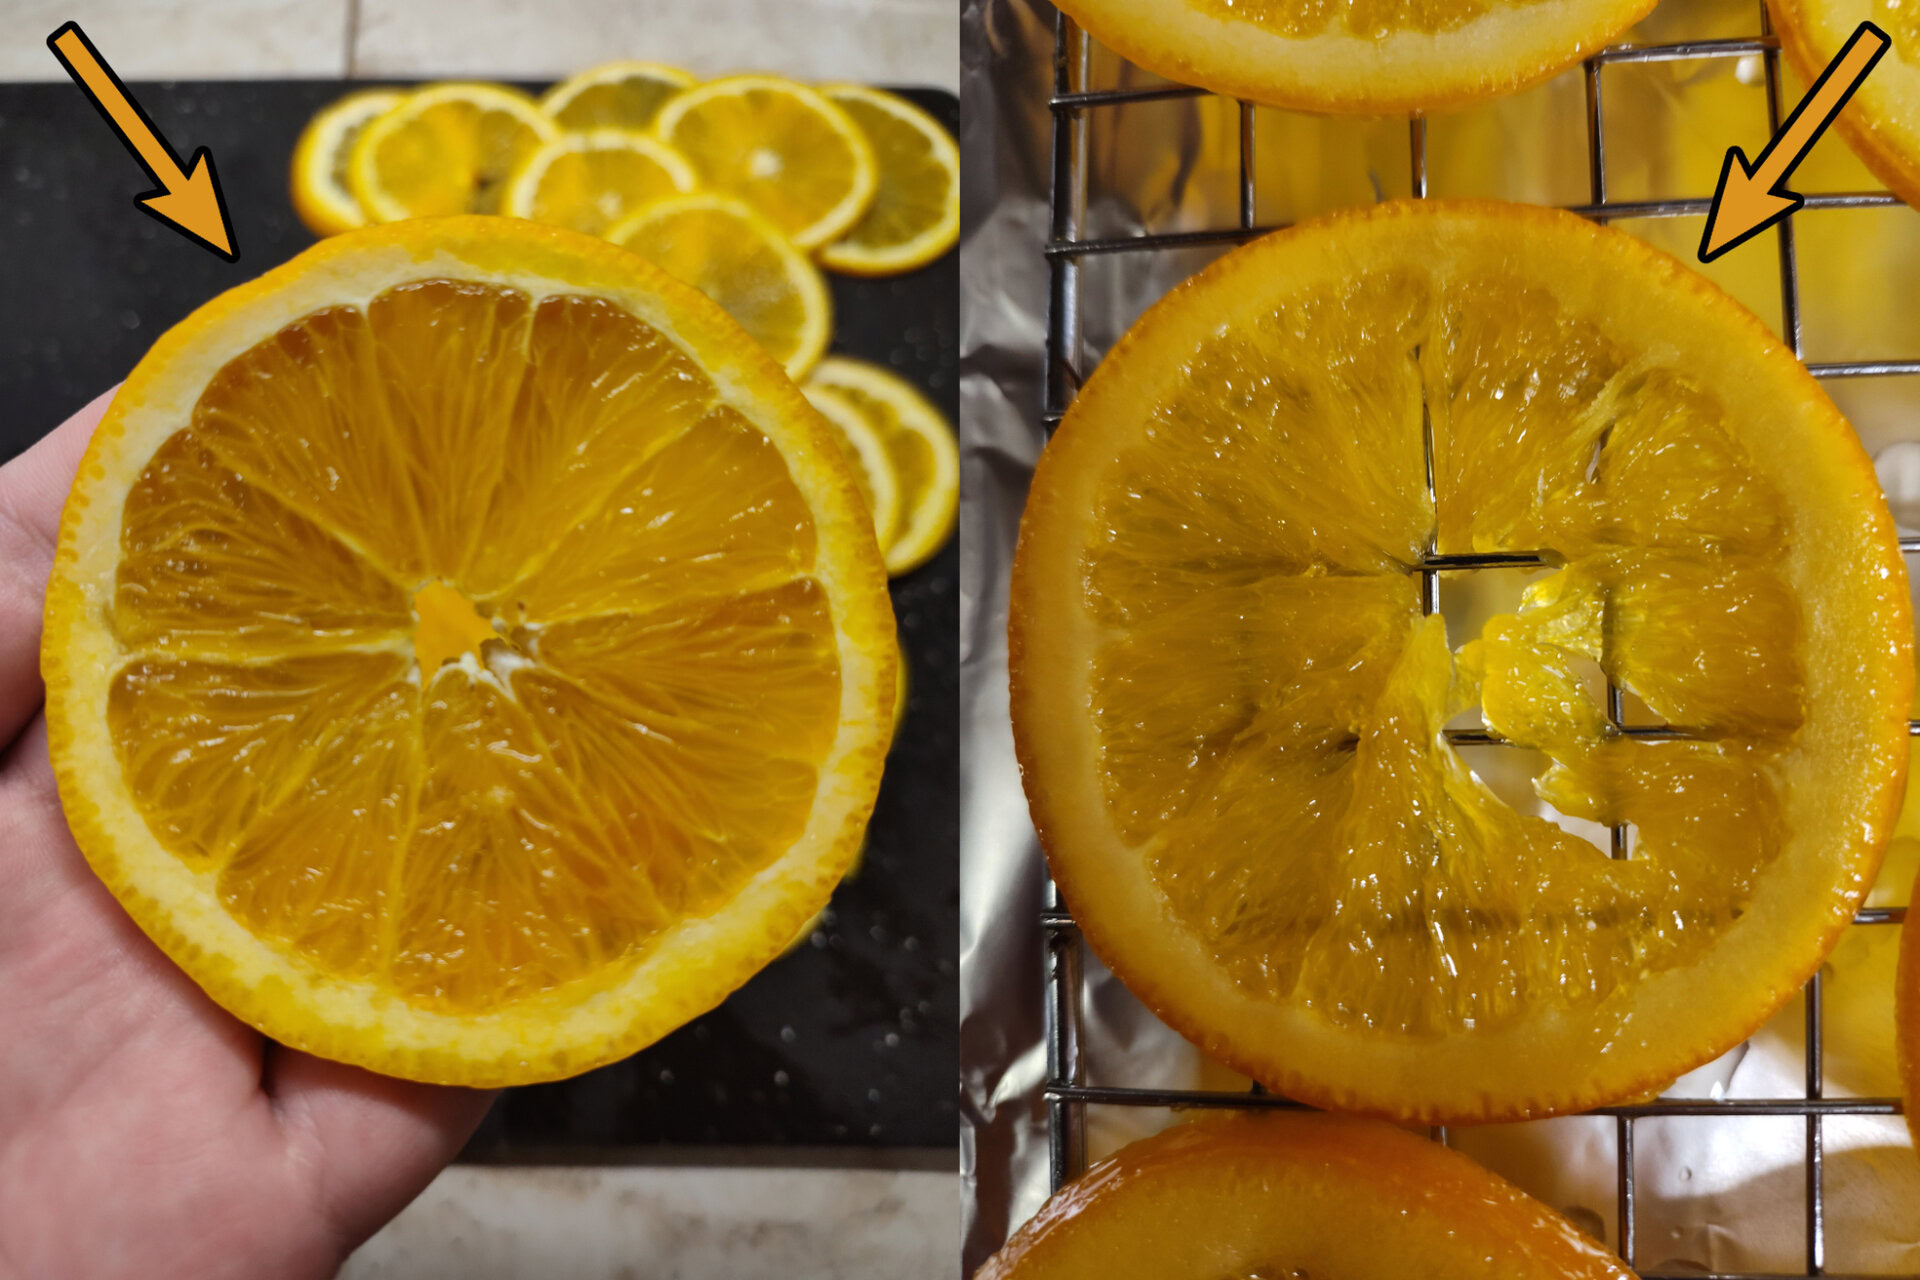
This process will take two to three hours depending on the amount of oranges you placed in the pot. The goal here is to cook them until their rinds turn transparent.
When this happens, the bitterness is removed from the rinds and is much more palatable. Keep a mental note of the syrup’s initial height in the pot. If it gets too low from evaporation, slowly mix in some boiling water. If you add cold water, you’ll ruin the temperature of the syrup and make this process take even longer.
You’ll want to flip the orange slices once in a while, I’d say every 30 minutes. This helps both sides of the rind get cooked. Don’t grab the slices by the pulp, you want those intact as much as possible. Instead, flip them with a rubber spatula or use silicone-wrapped tongs and grab them by the rind to flip (I used a rubber spatula).
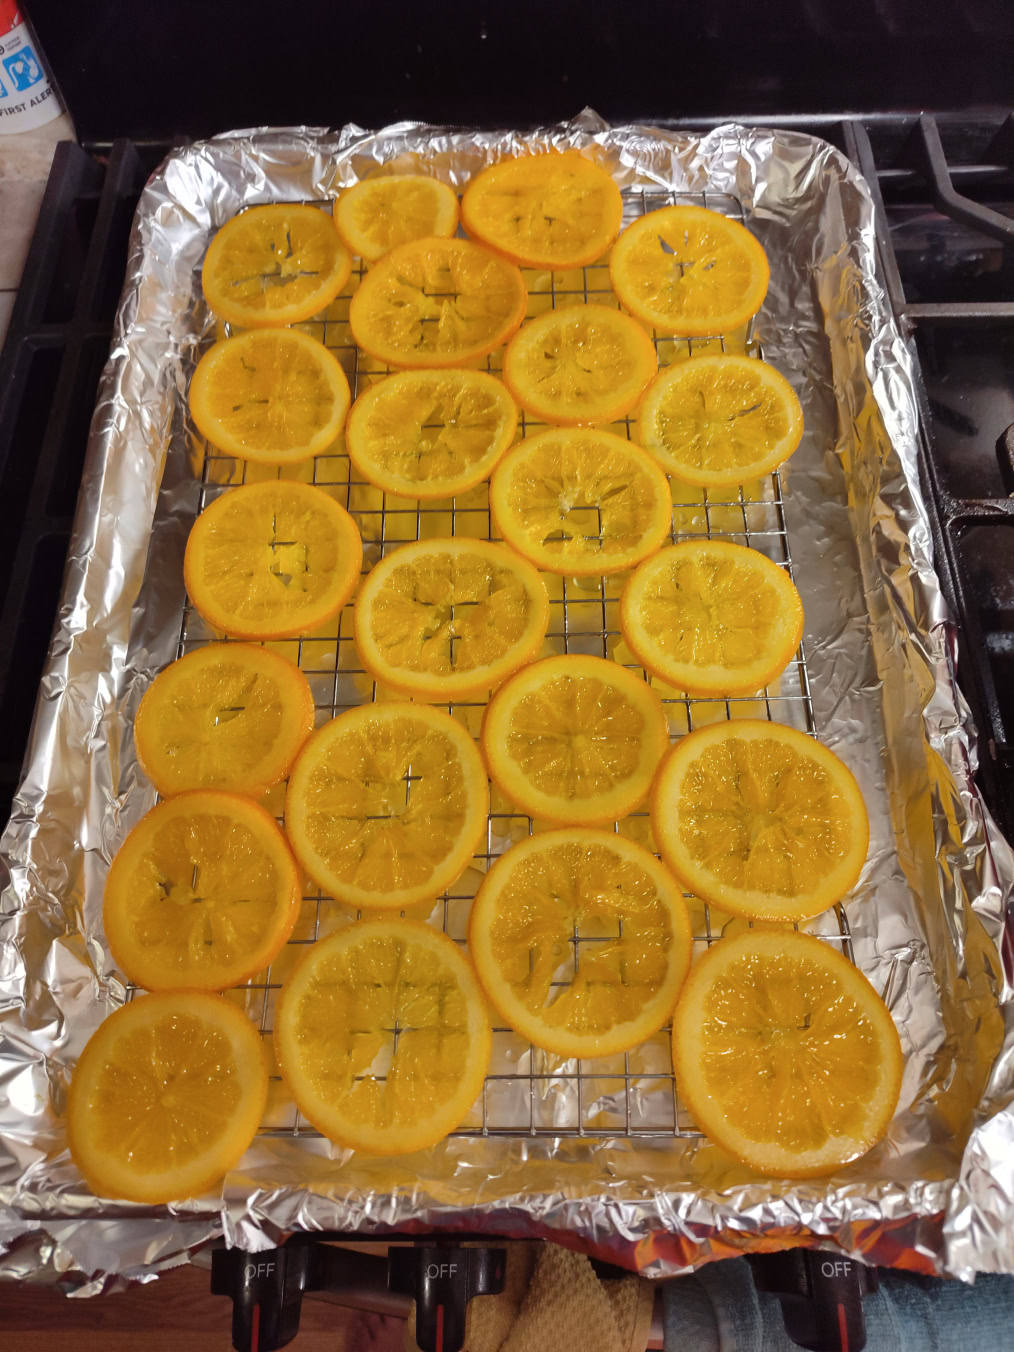
Once the rinds are transparent on both sides, gently place your orange slices on a wire rack on top of a sheet pan and let dry for 24 hours. If you’re in a rush, you can place these in an oven at 200°F for 30 minutes then let them air-dry outside the oven for a couple hours. I’ve tried both methods and I prefer the 24 hour method as it has a slightly better texture.
Plum Compote Filling
With our orange slices drying, we can now work on the plum filling. It’s really more of a plum compote which is just the fruit cooked with a sweetener. I’ll be using the Maple Syrup for the compote to represent the Maraffa Sap seen in-game.
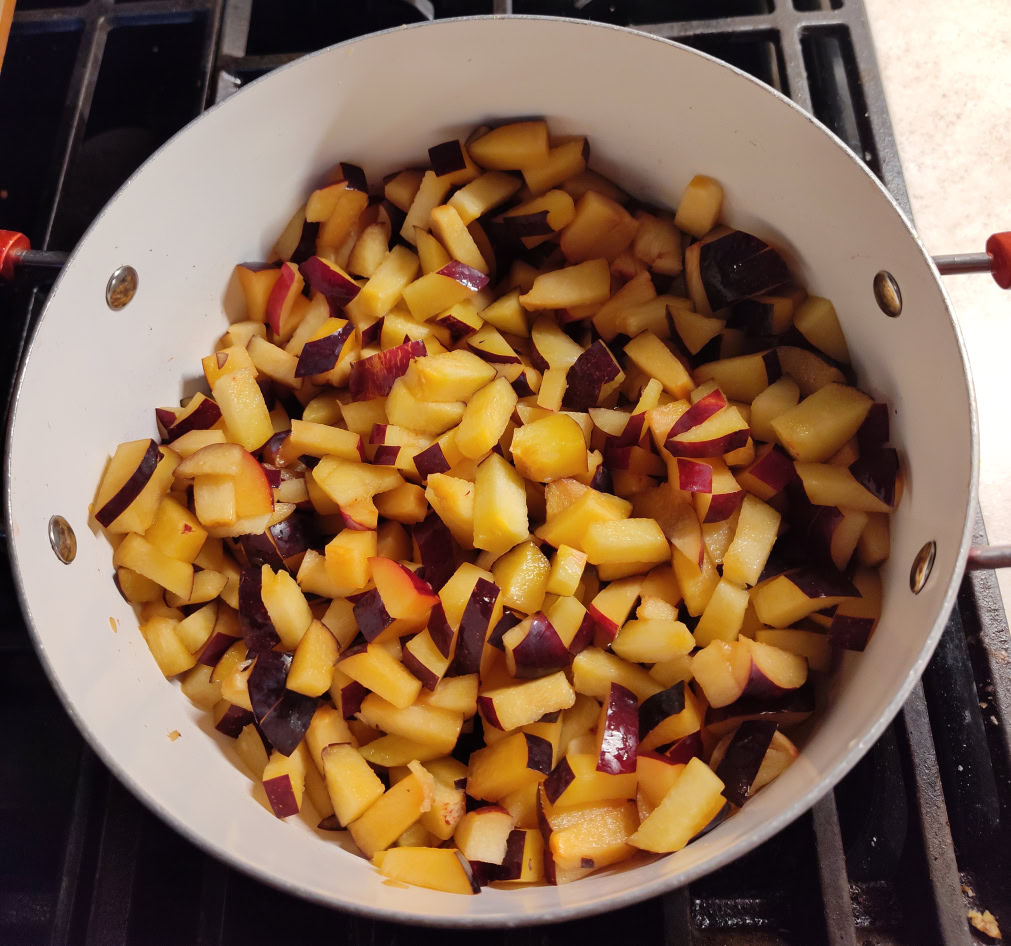
First, you’ll want to remove the pit and cut 6 plums into small chunks. Cook over medium heat until the plum flesh becomes soft.
Use an immersion blender (or a normal blender) on the chunks to turn it into a purée. Let this continue to cook over medium-low heat as we want excess moisture to cook off. If there’s too much moisture, the liquid will ruin the integrity of the egg custard being used later. Stir it occasionally to make sure it doesn’t burn at the bottom.
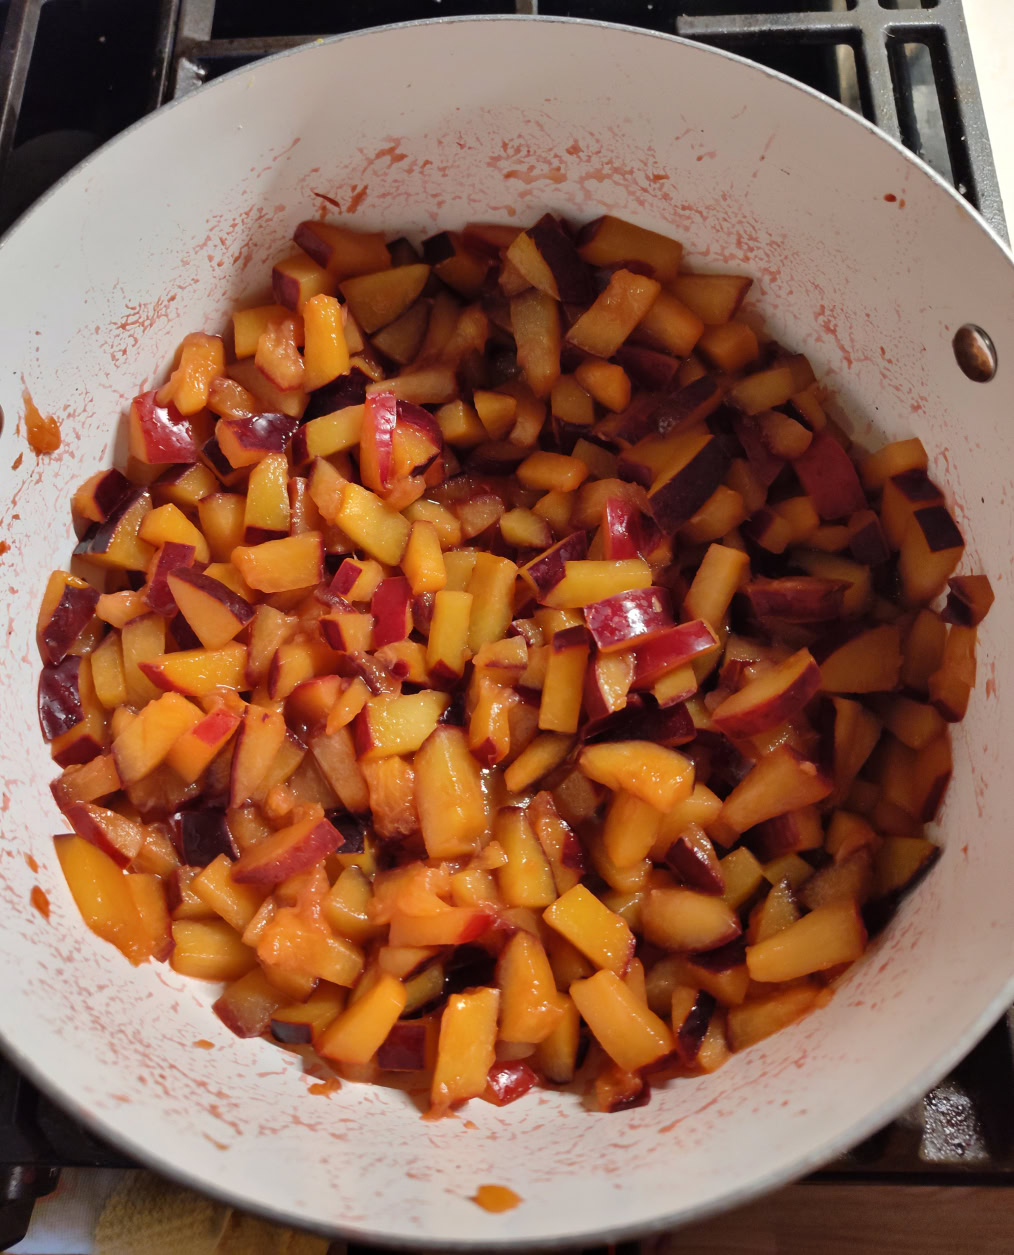

A good way to tell when the purée is thick enough is to run a spatula on the bottom of the pot. If the purée barely fills in the gap, you’re good to go. You can run a spoon across the top to make some shapes, the purée should maintain those shapes when it’s ready.
If it quickly fills in the gap, there’s too much liquid and will need to be cooked longer. Remove from the heat and stir in 3 ½ tablespoons of maple syrup.
Let the compote cool to room temperature and place it into a food storage bag in the freezer. We add a small amount of maple syrup in proportion to the plums as we don’t want to make the compote too sweet, you want to be able to taste the plums as well.
Pulverized Walnut Filling
Wulli Nut and Walnut sound very close, so this was an easy comparison. In an earlier rendition of the pie, I crushed walnuts and mixed it with butter and maple syrup.
I would later run into a jar of maple-flavored walnut butter at the store. I got this jar so the pie could have a smoother consistency overall.

Be sure to drain excess oil from the jar before using the walnut butter! You’ll likely want to mix in extra maple syrup to your taste as it wasn’t quite strong in the walnut butter to start.
Making the Pie Crust
I’ll be showing you how to make a pie crust, but I want to reiterate that there’s no shame in using premade pie shells or pie dough. It’s a pie shell, not a filet mignon, it’s not going to be ruined if you use cheaper ingredients.
That aside, you’re going to make this a mealy pie dough instead of a flaky dough. What’s the difference? The difference is how finely you cut the fat. Larger chunks of fat (butter) will make the crust more flakey which is better for pudding pies and cream pies. Mealy dough can better absorb moisture for baked pies such as fruit pies or egg custard pies.
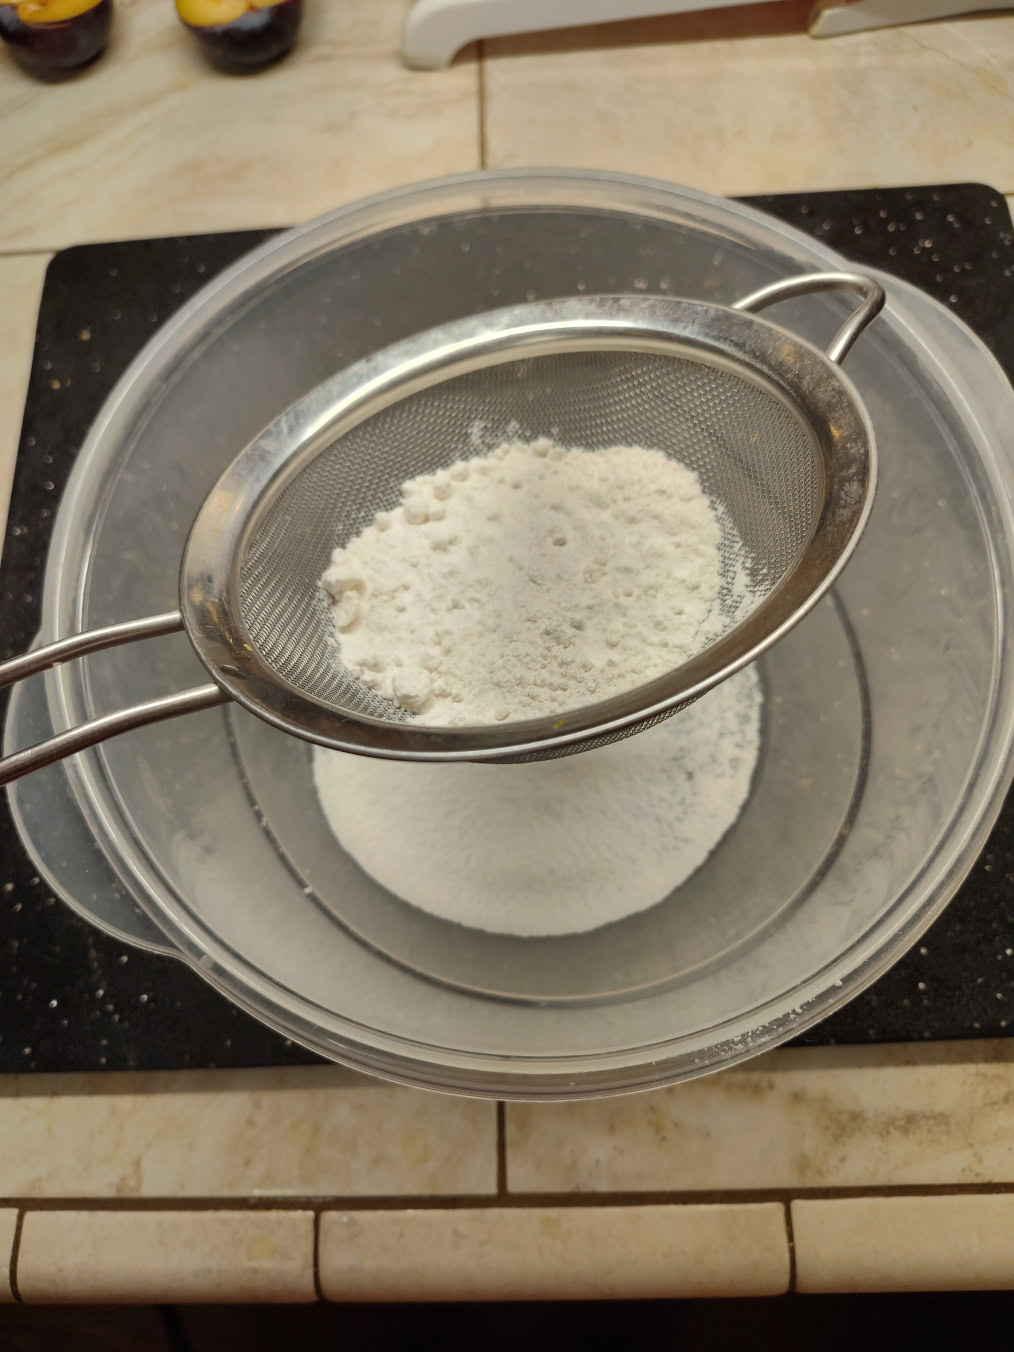
Sift your 7 oz of flour to ensure there are no chunks present. I don’t care if the flour you bought says its “Pre-Sifted”, sift it anyway. Mix together your water/buttermilk with the salt, sugar, and vanilla extract and stir until the salt and sugar dissolved. Set aside for later use.
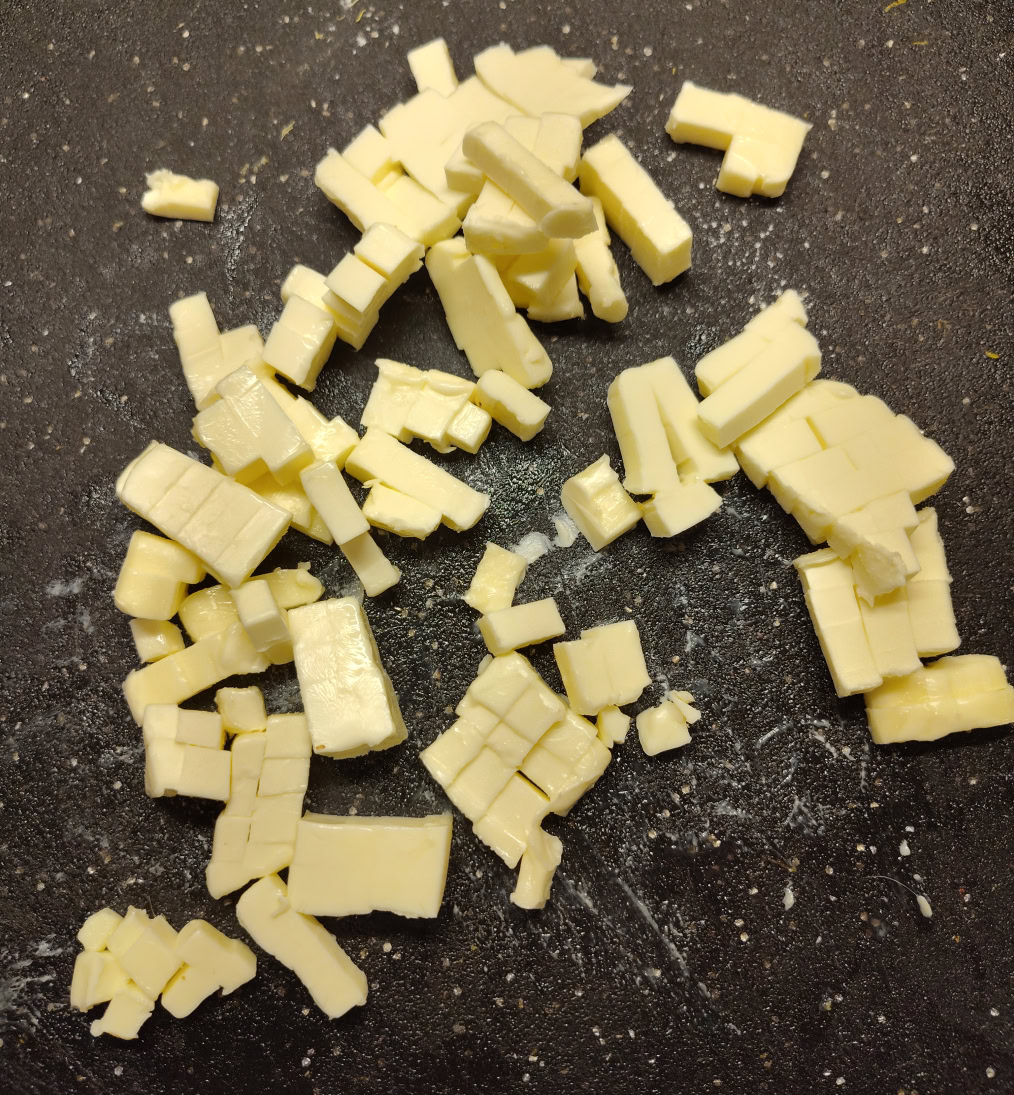
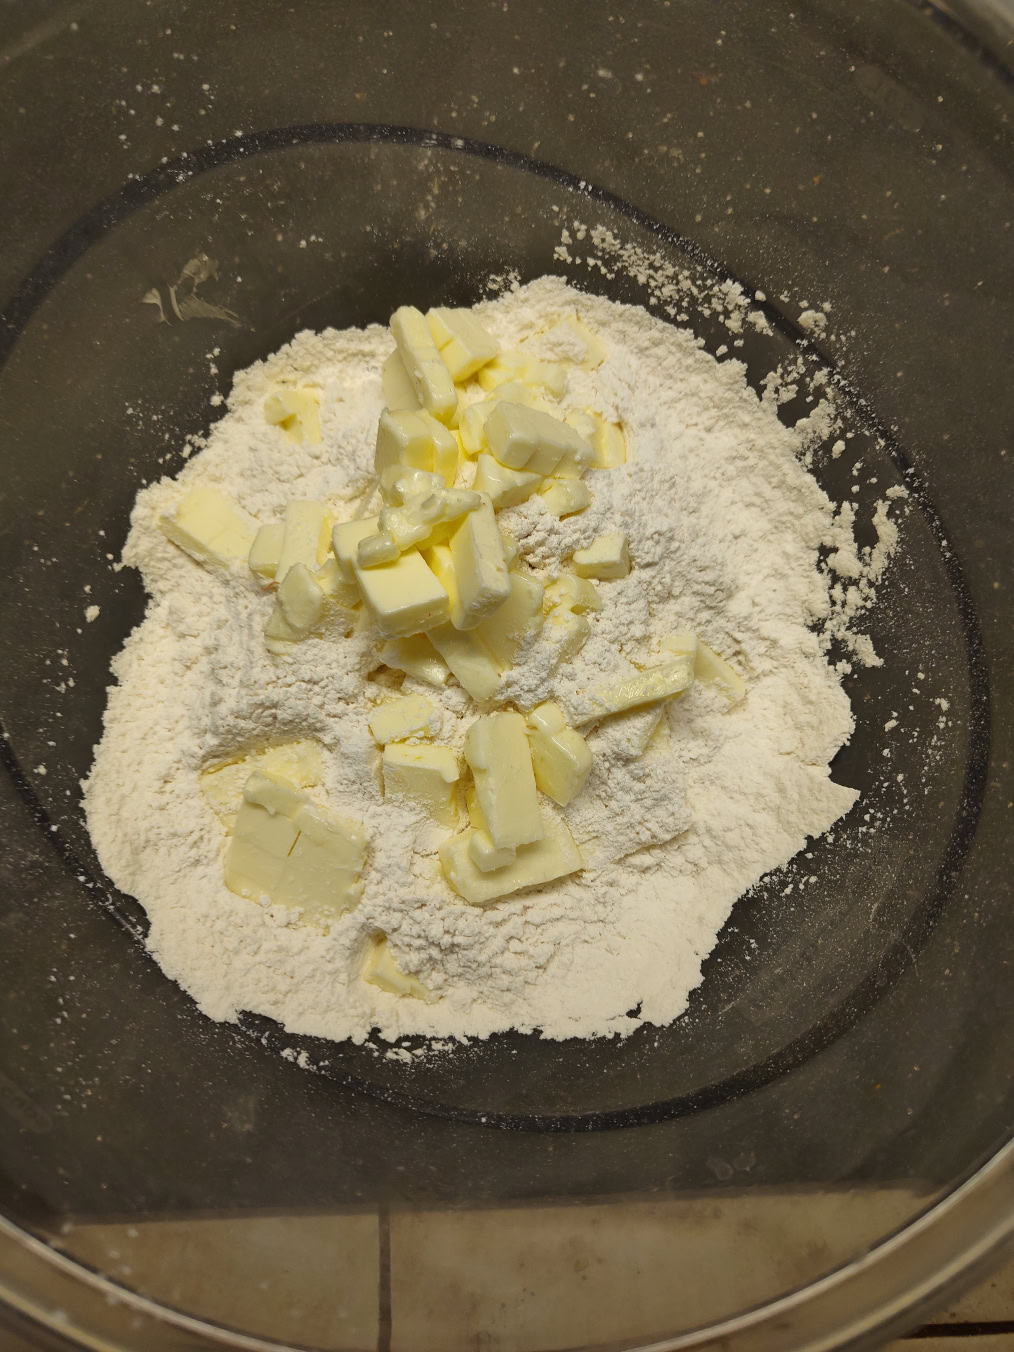
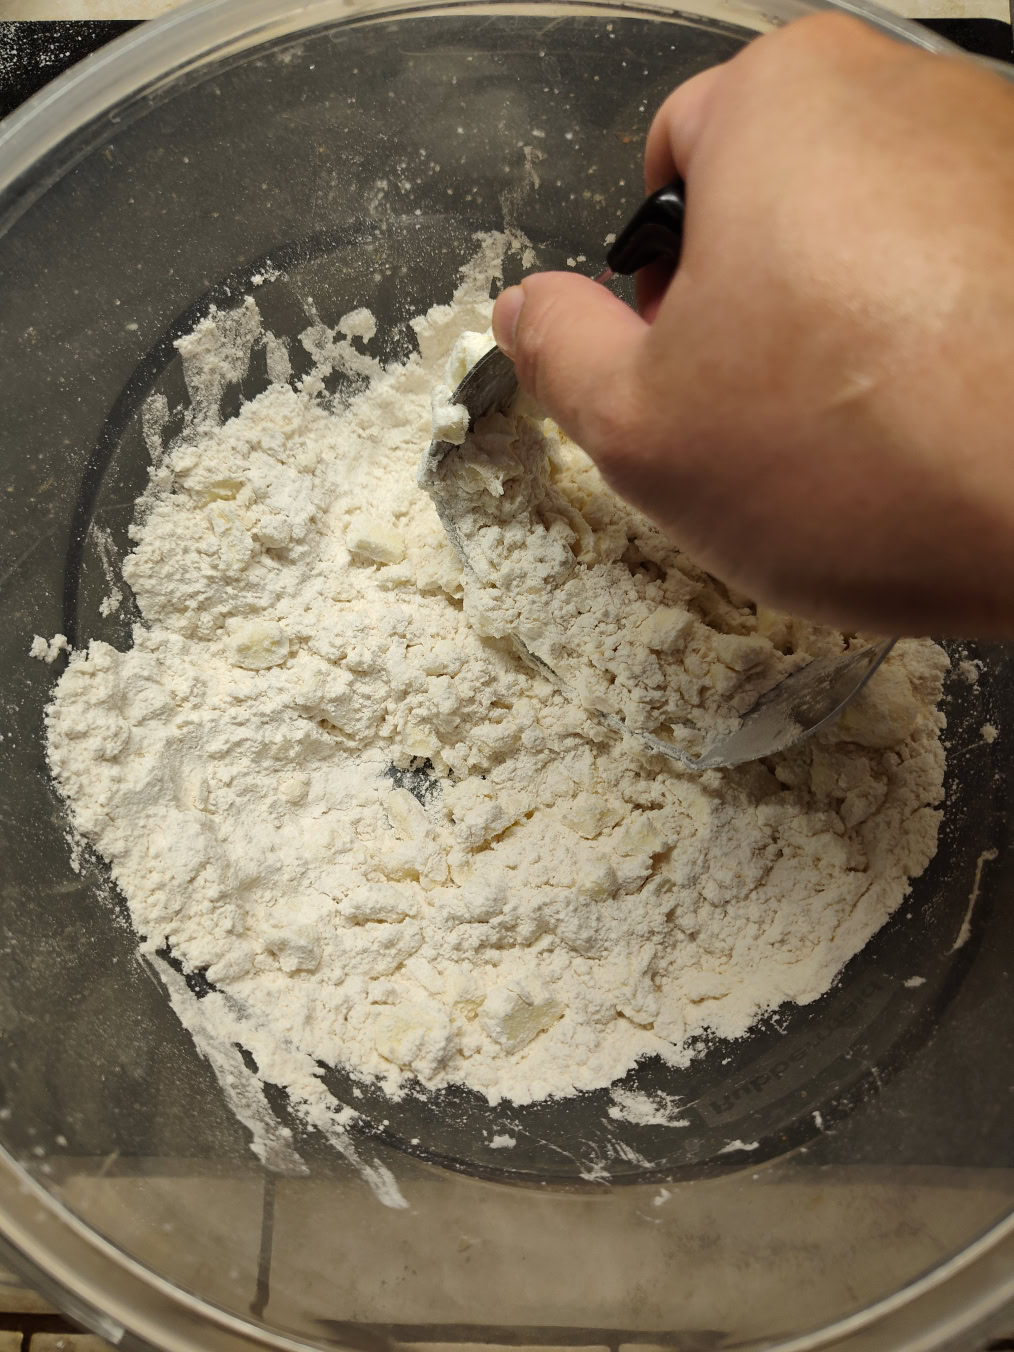
Get your 10 ½ tablespoons of cold butter and cut it into small chunks. Place the chunks into the flour and mix in with a pastry cutter. Once the butter is made into small chunks, gradually add your wet ingredients. Don’t overmix the pie dough or add too much liquid.
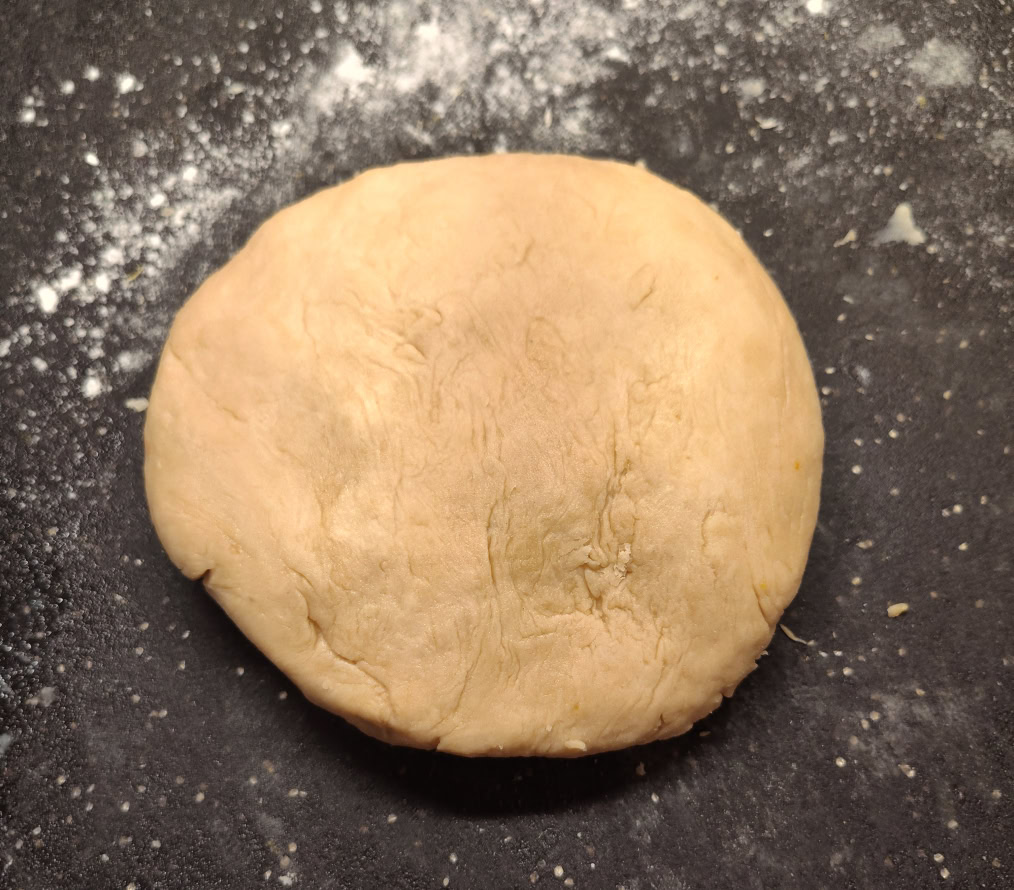
Mix your ingredients until the dough holds together. Cover it in plastic wrap and place it in the fridge to chill it thoroughly. You do this to ensure the butter inside doesn’t melt too much to allow a better texture for the final result.
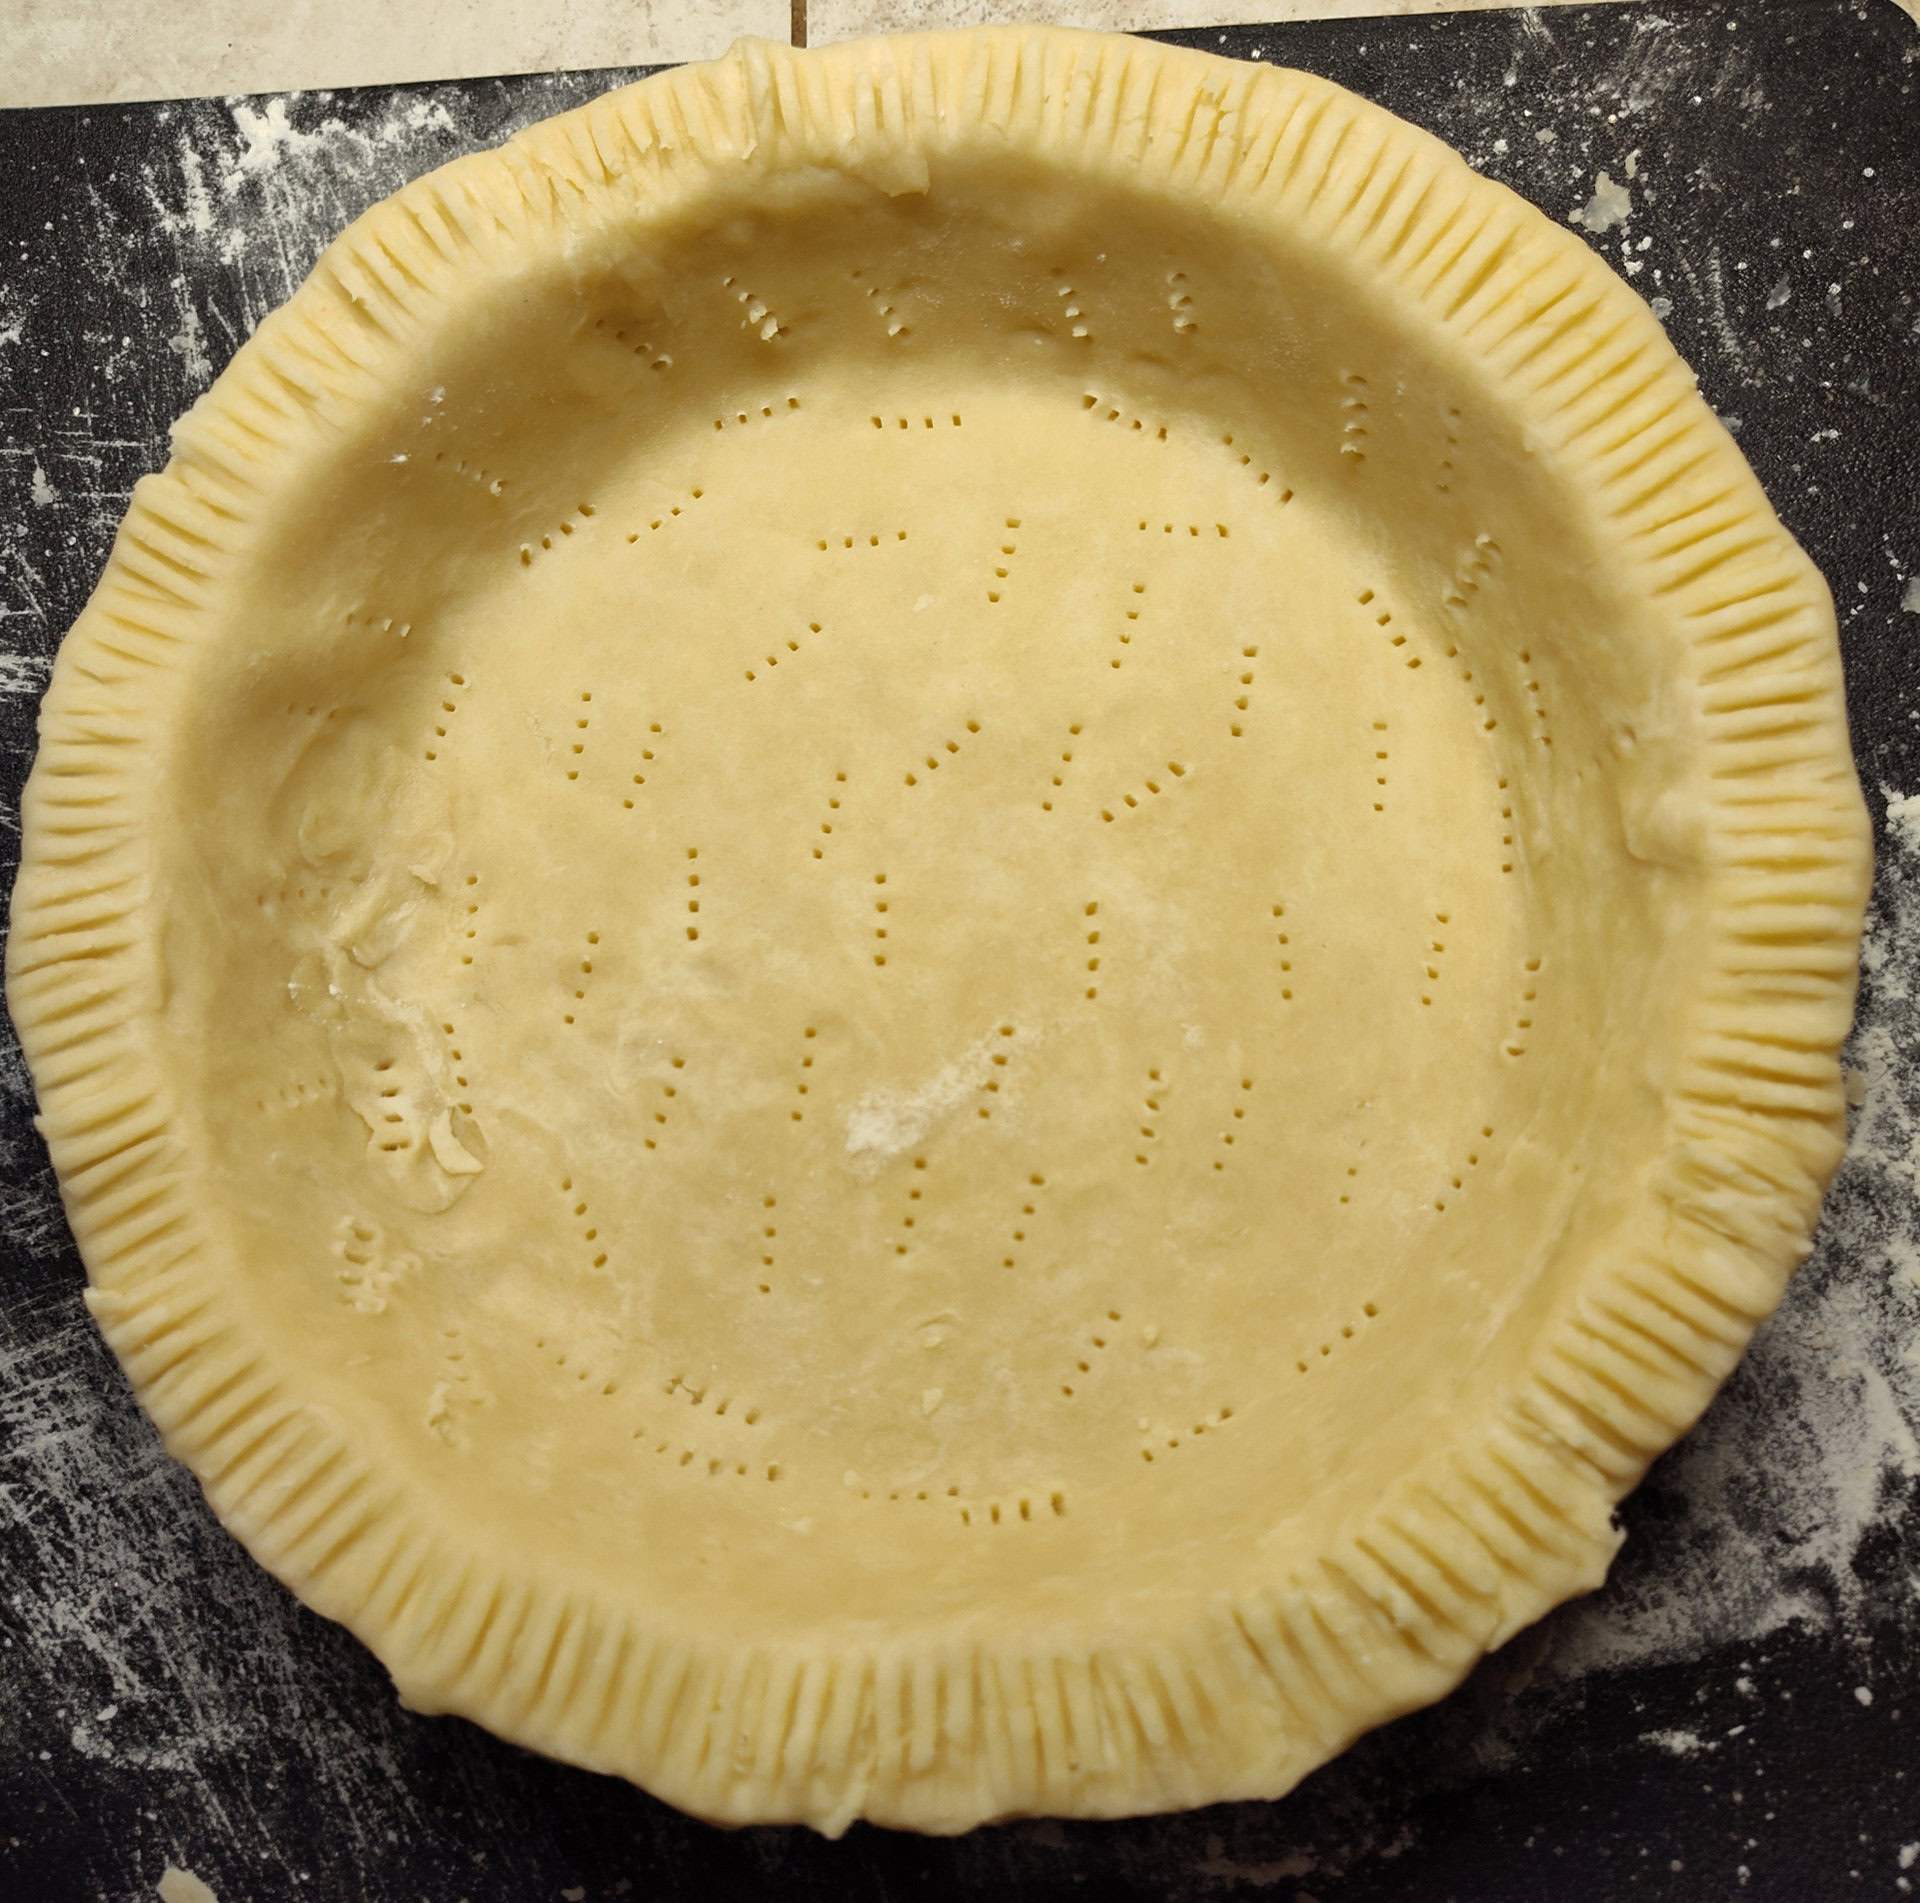
Lightly dust your surface in flour and roll out the pie dough. You’ll want to dust the top of the dough with some flour to make it easier to roll. Once it’s rolled out to fit your deep dish pie mold and remove any excess dough. Use a fork to poke holes on the bottom and the sides of the crust. If you wish, you can crimp the edge of the pie with your fork for decorative purposes.
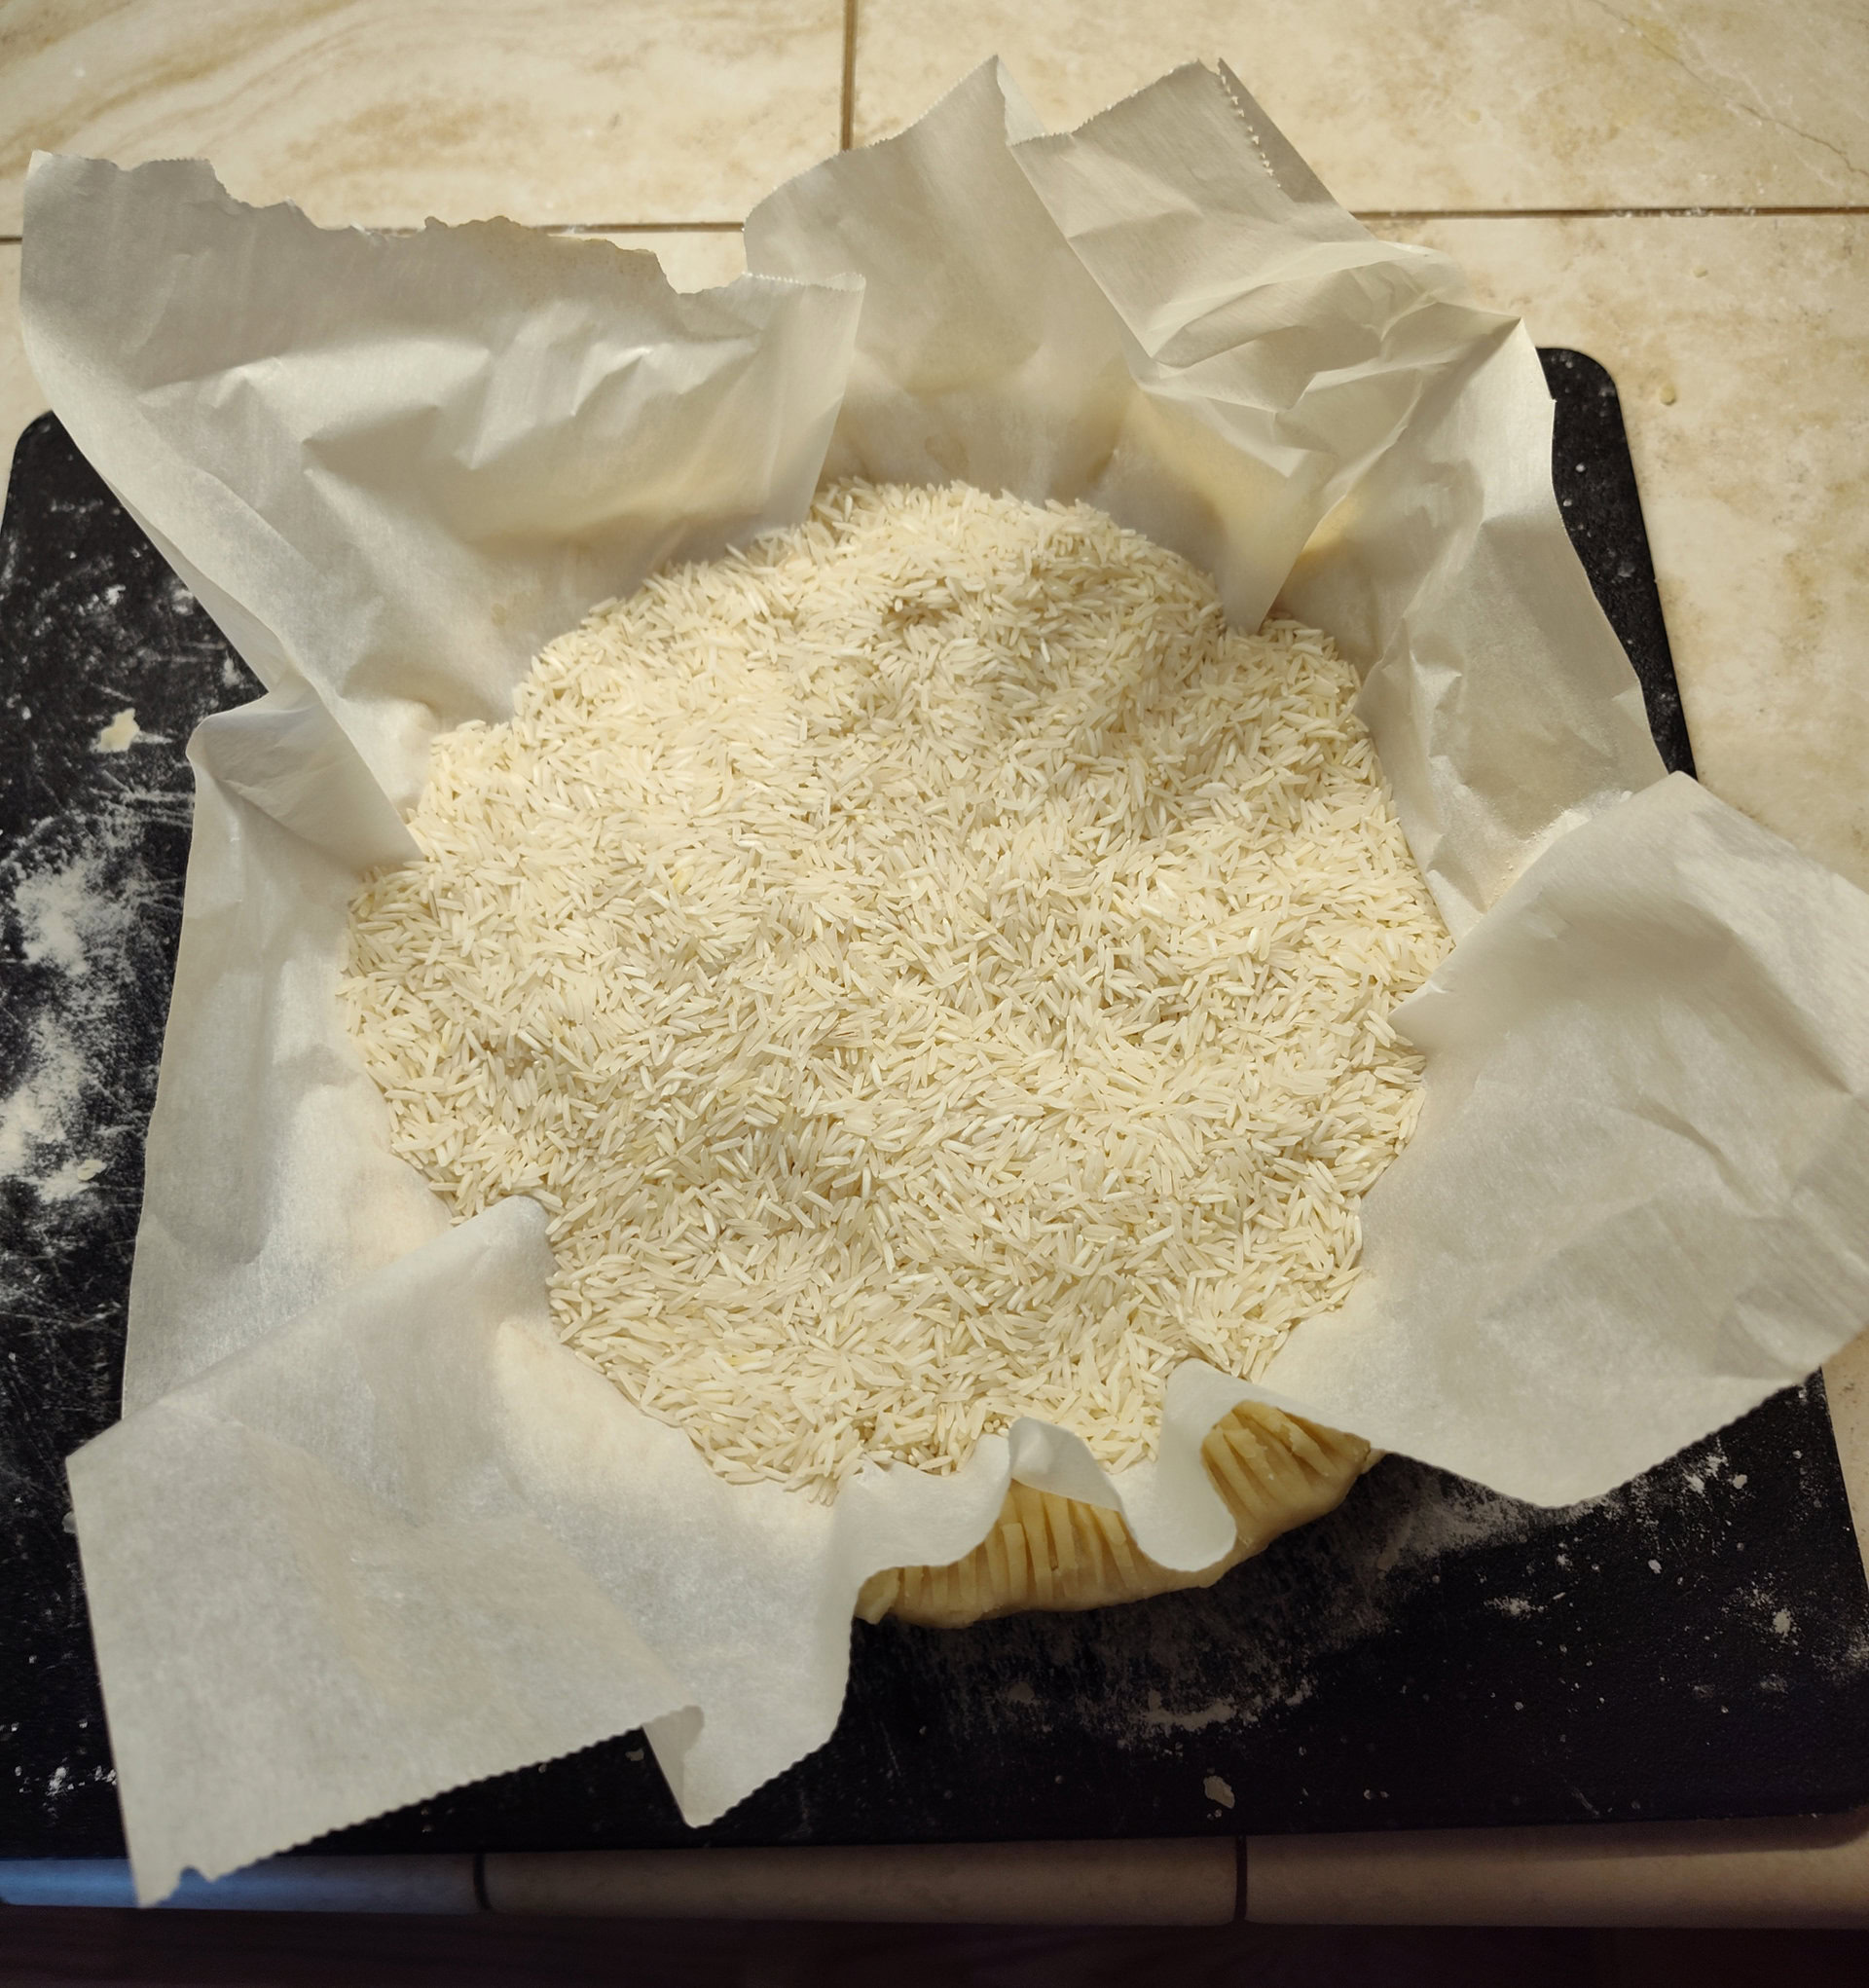
Place some foil or parchment paper (NOT wax paper) into the crust. Fill the pie with pie weights or dried beans. If you lack either, you can use rice. When using beans or rice, don’t bother cooking those later after the baking process as they’ll taste off. These are now dedicated for forming pie crusts.
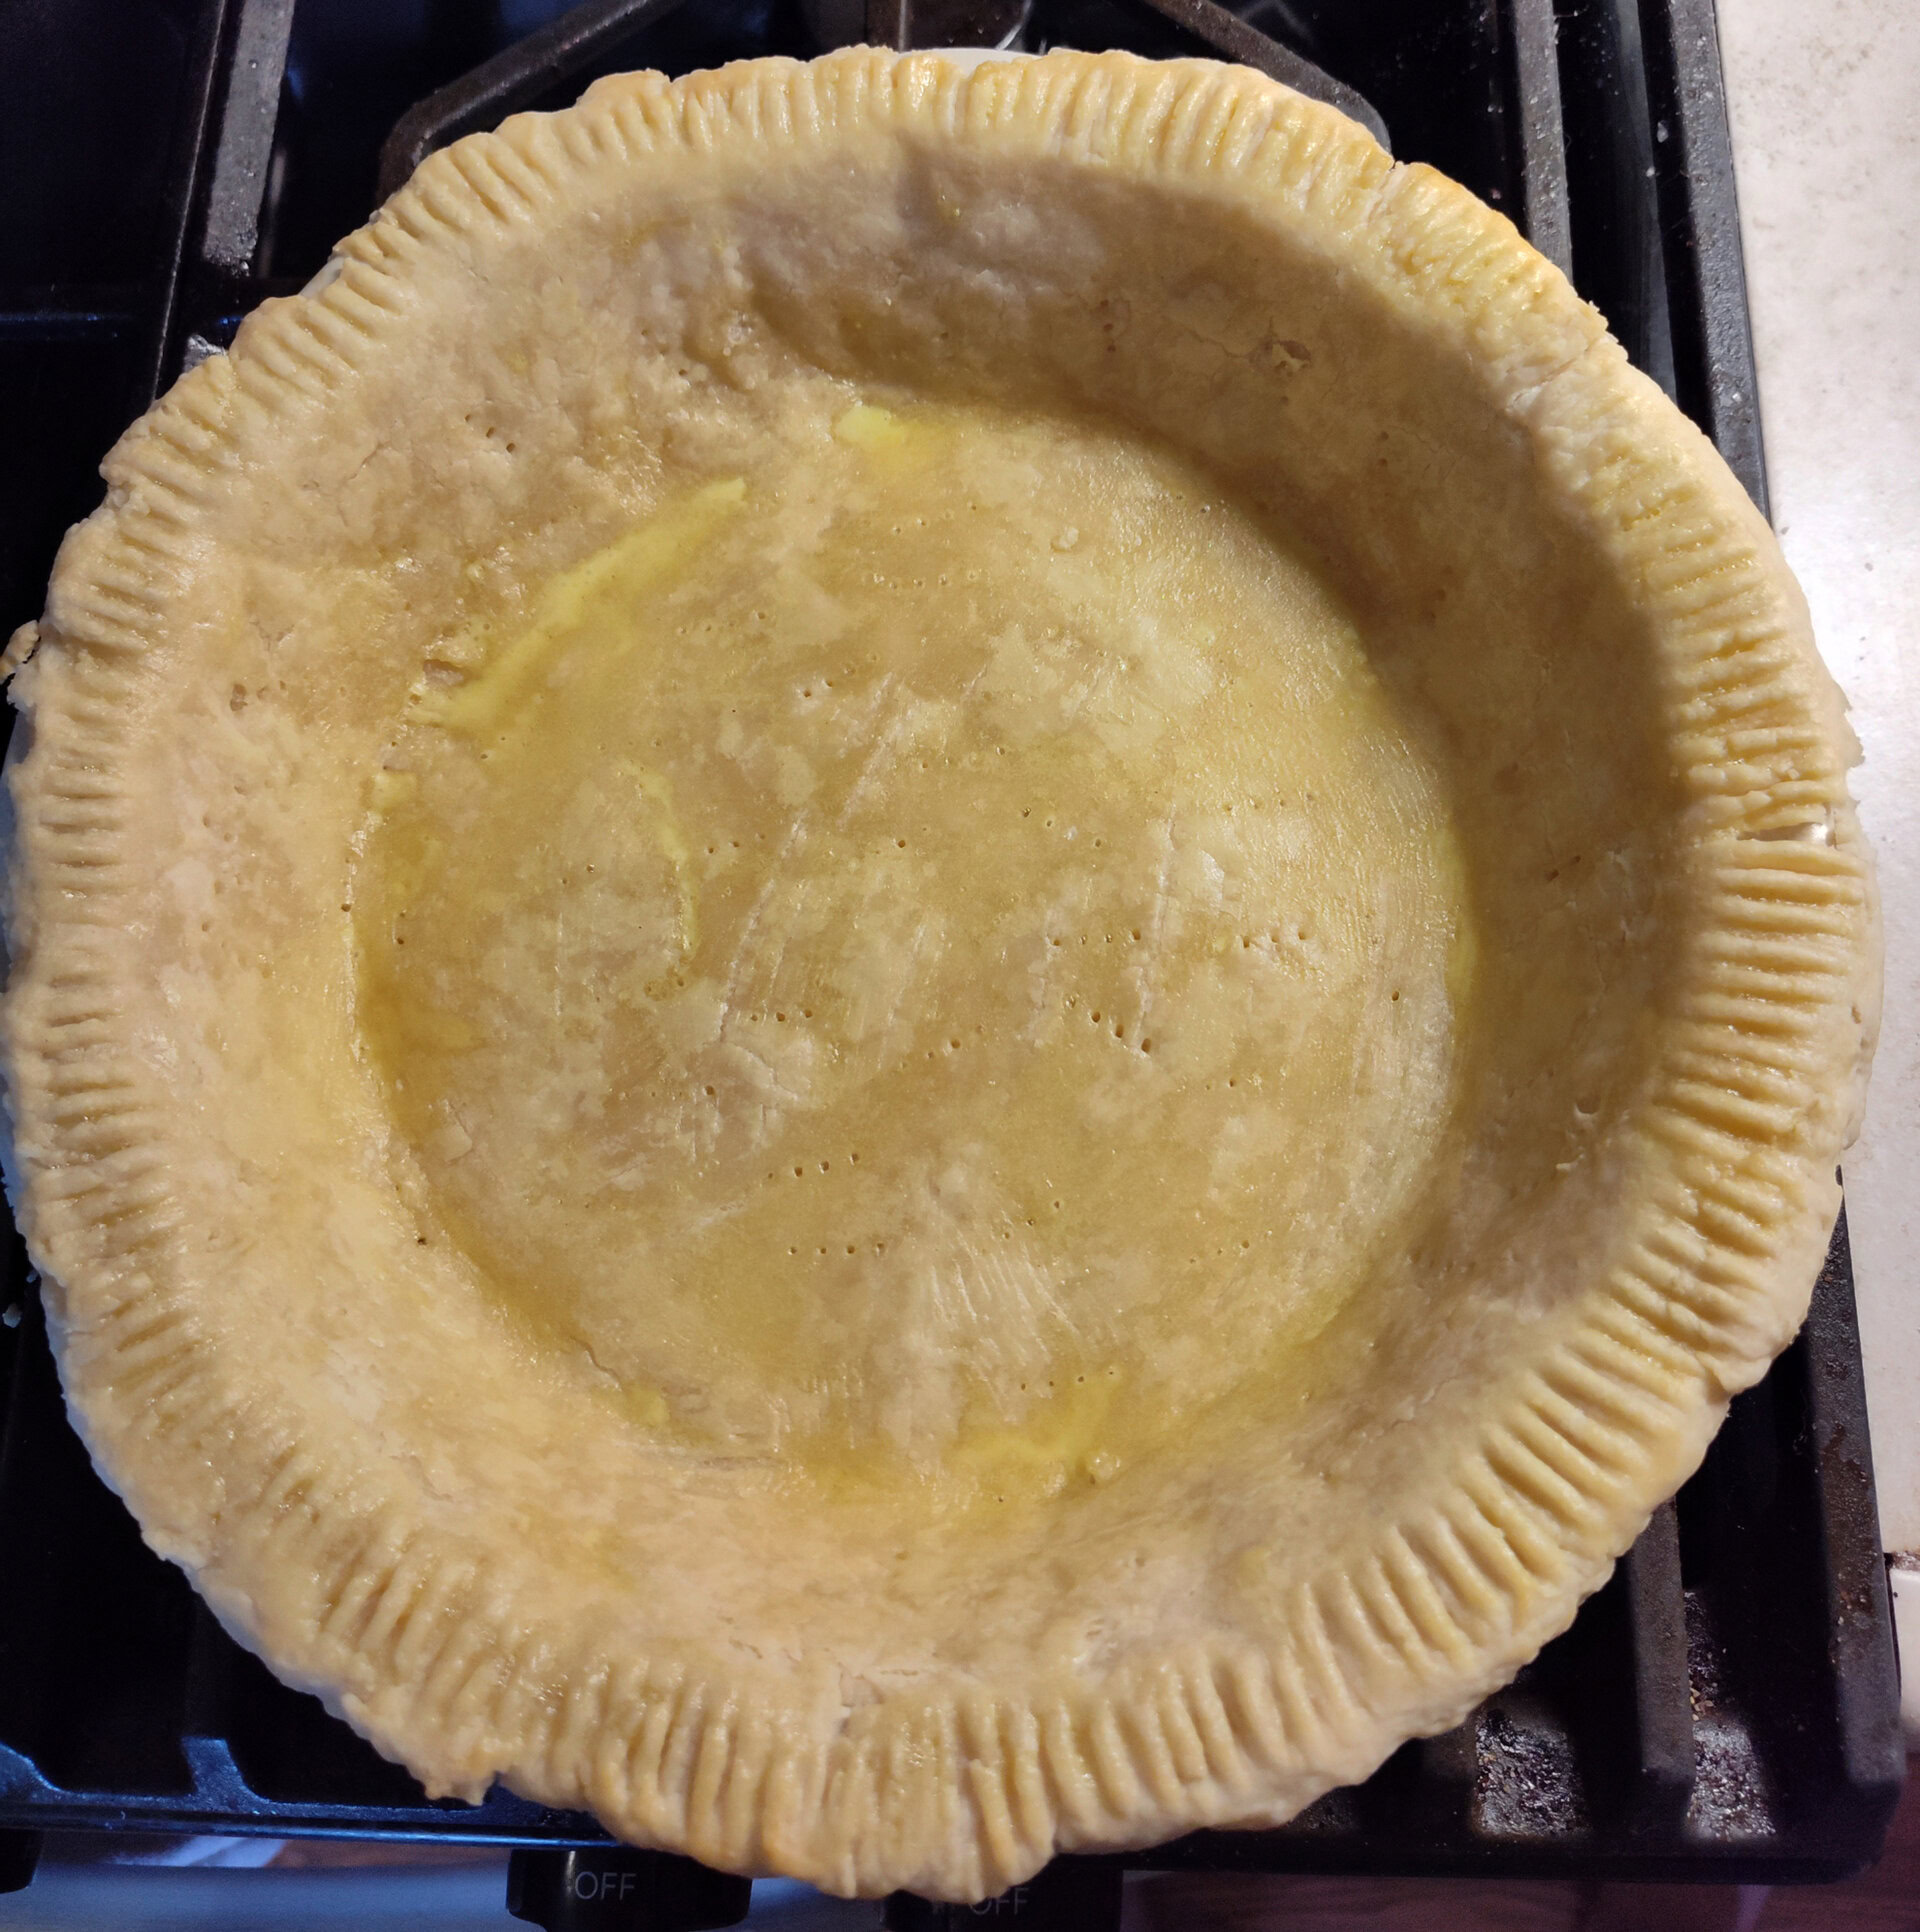
Place the pie crust into a 400°F oven for 10 minutes. Remove the weights and lining, then brush an egg wash over the pie crust. This will give it a better color and shine, simply mix an egg with a dash of water then brush it onto the pie crust. Put it back into the oven for 5 minutes, remove from the oven, then let it cool.
Egg Custard Filling
This egg custard filling will act as the “Spiced Eggmilk” from SWTOR. When I was testing out some custards, my initial test created one that was more savory and eggy, similar to a Japanese steamed pudding. It worked but I thought it could be richer and creamier. I opted for a more creme-brulee style custard with heavy cream and vanilla bean.
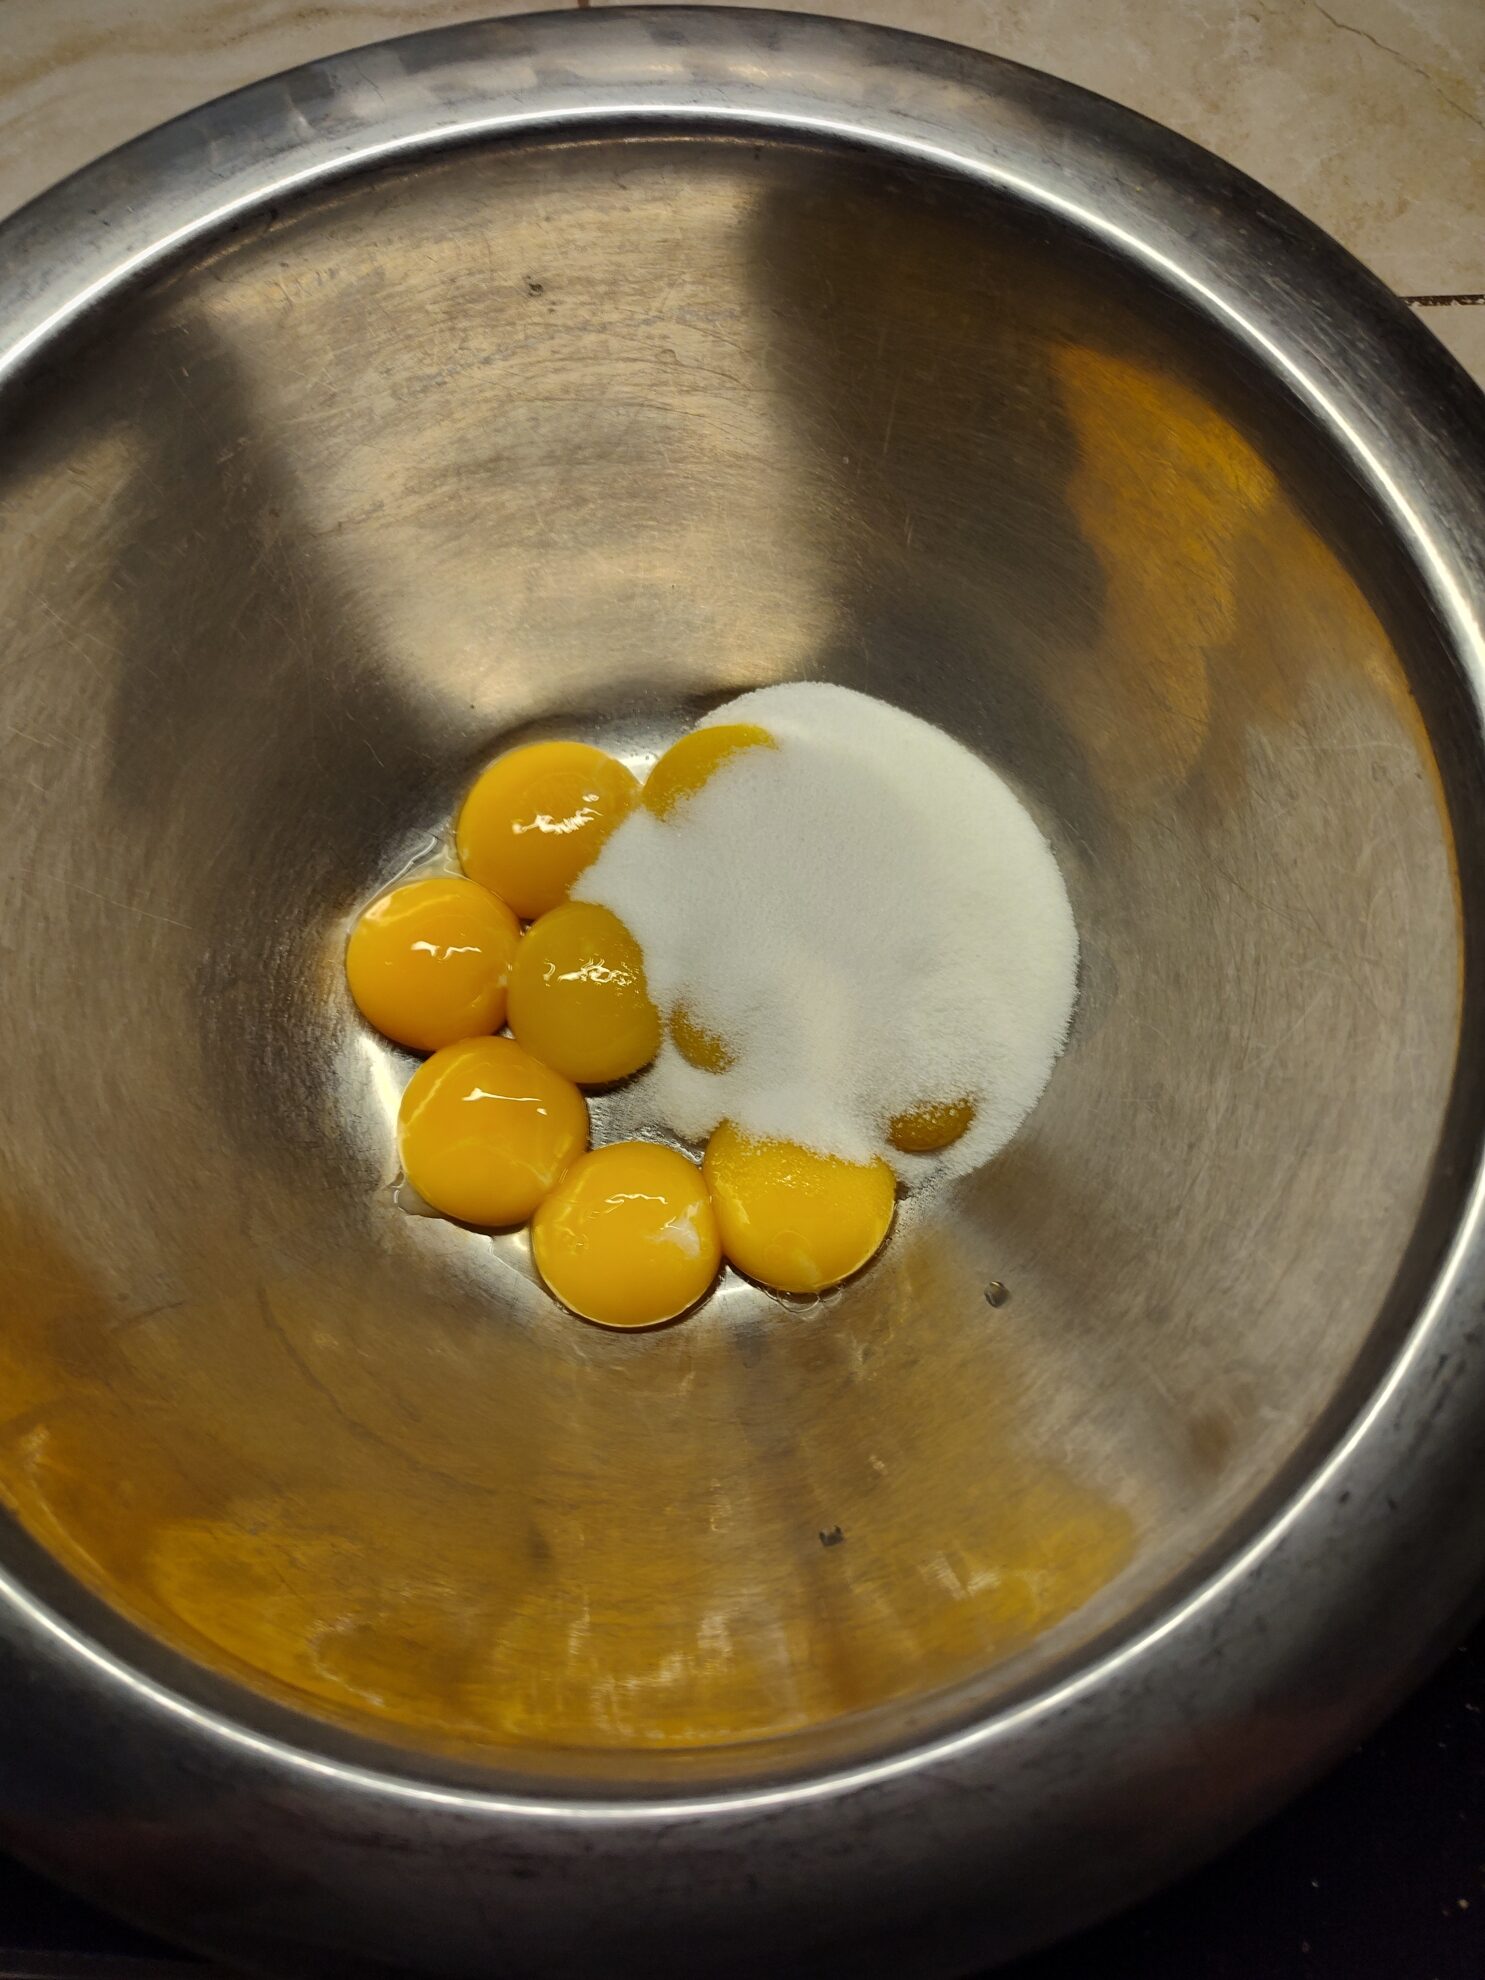
You’ll want to mix ⅓ cup of sugar with 9 egg yolks, whisk it enough until combined. You’ll want to avoid overmixing eggs to prevent it from getting frothy and foamy.
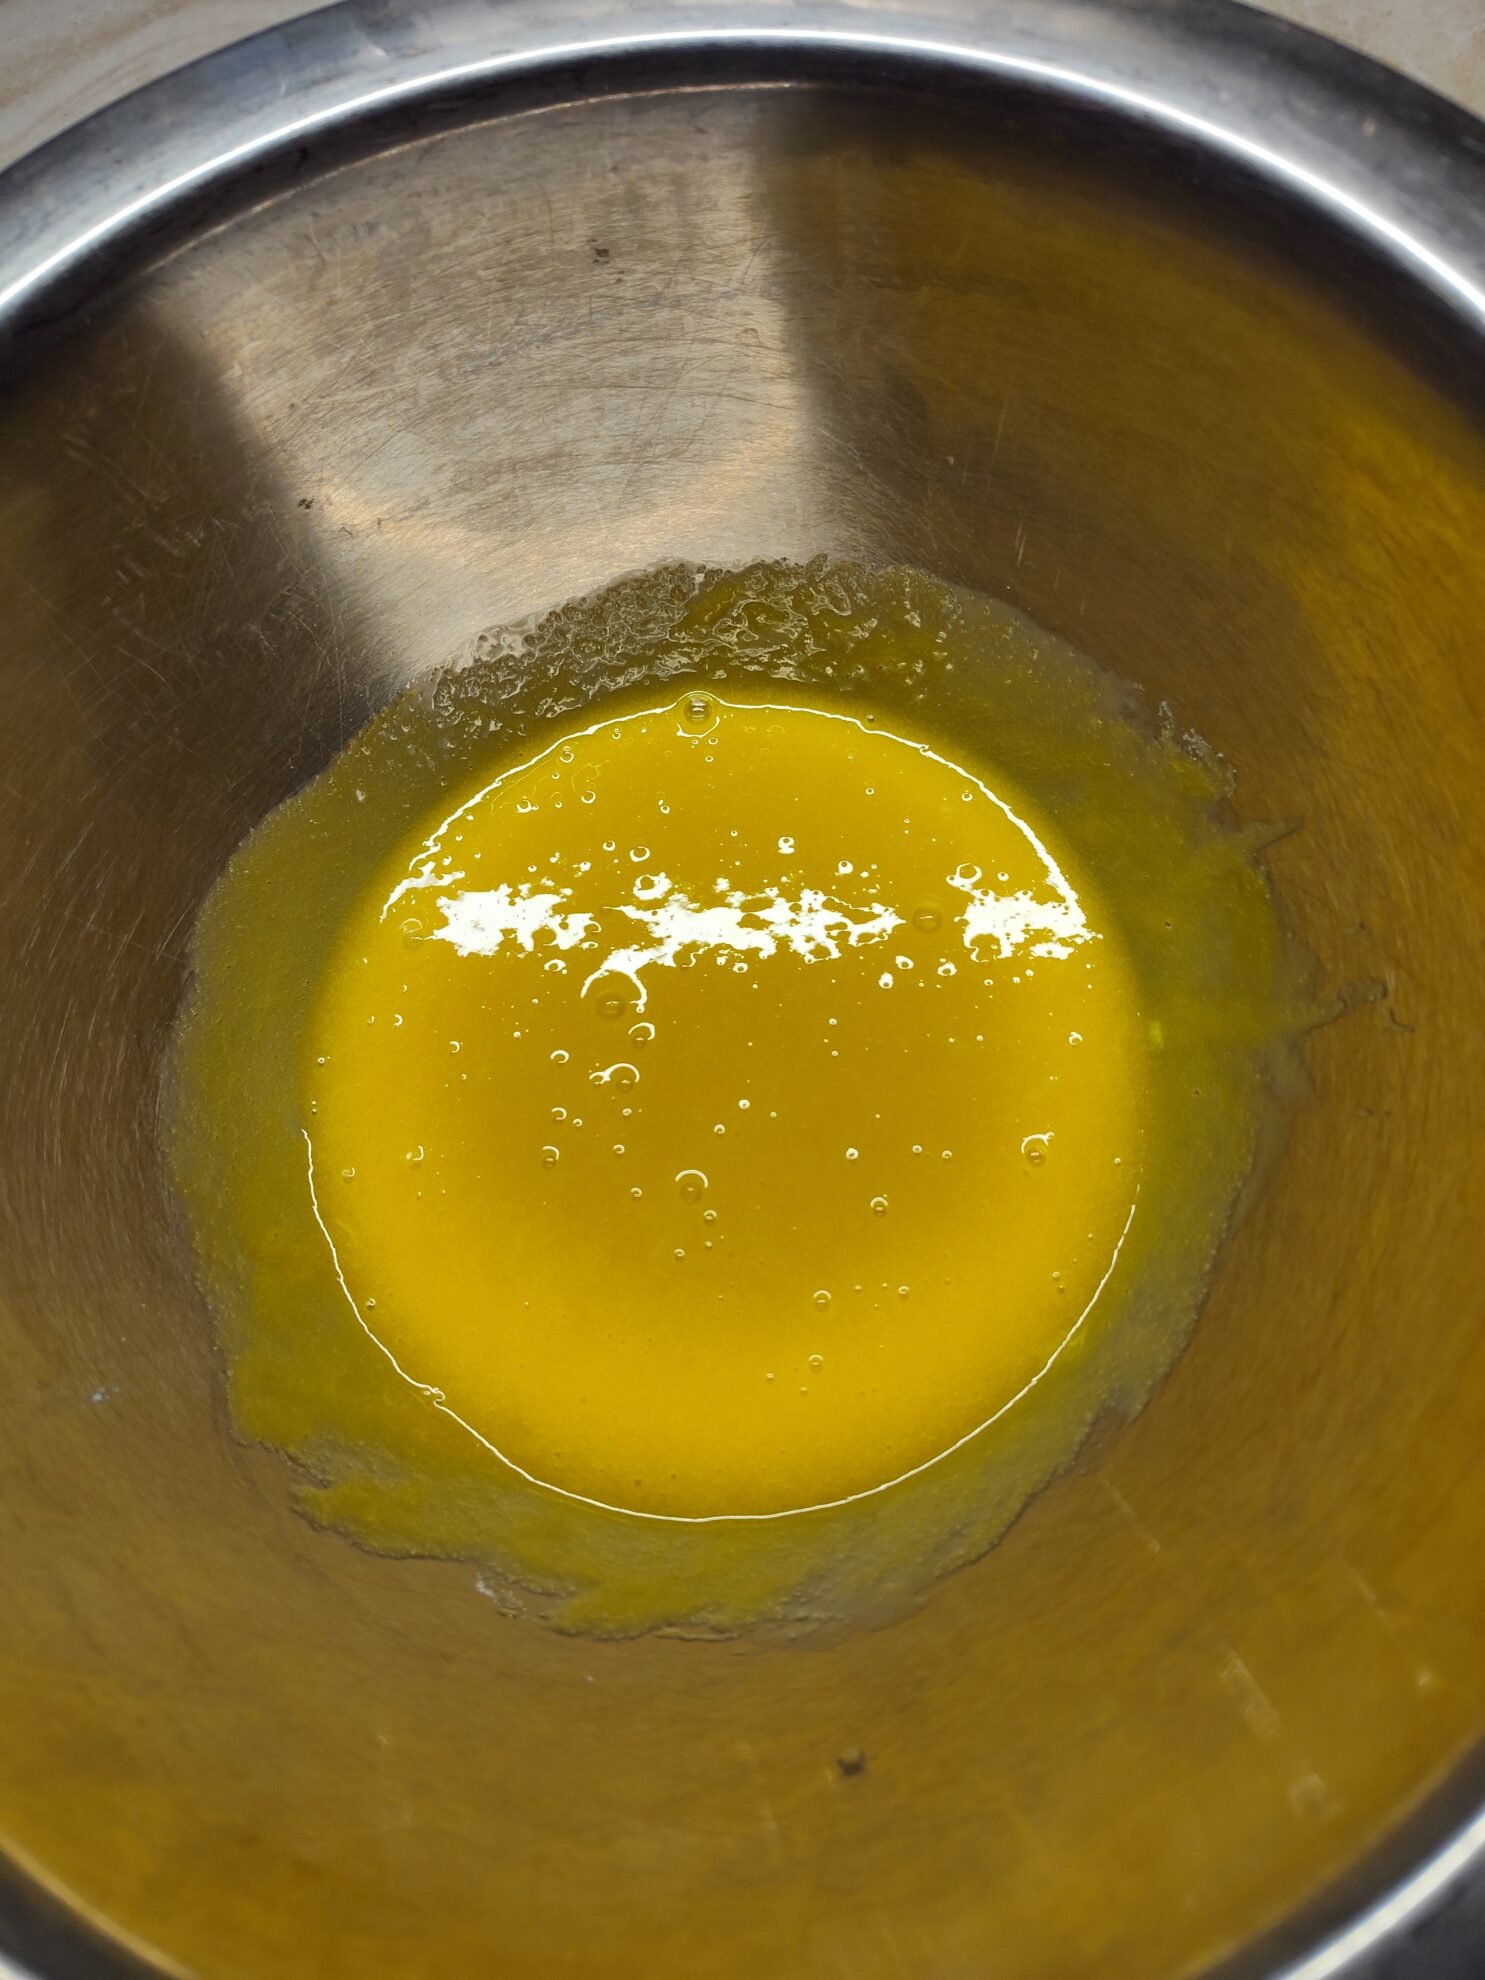
Meanwhile have 1 1/8 cups whole milk and 1 1/8 cups heavy cream set to boil in a small pot. Split a vanilla bean in half, scrape off the insides, and mix it into the milk and cream. Remove the milk and cream from the heat when it begins to boil, and GRADUALLY whisk into the egg and sugar mixture.
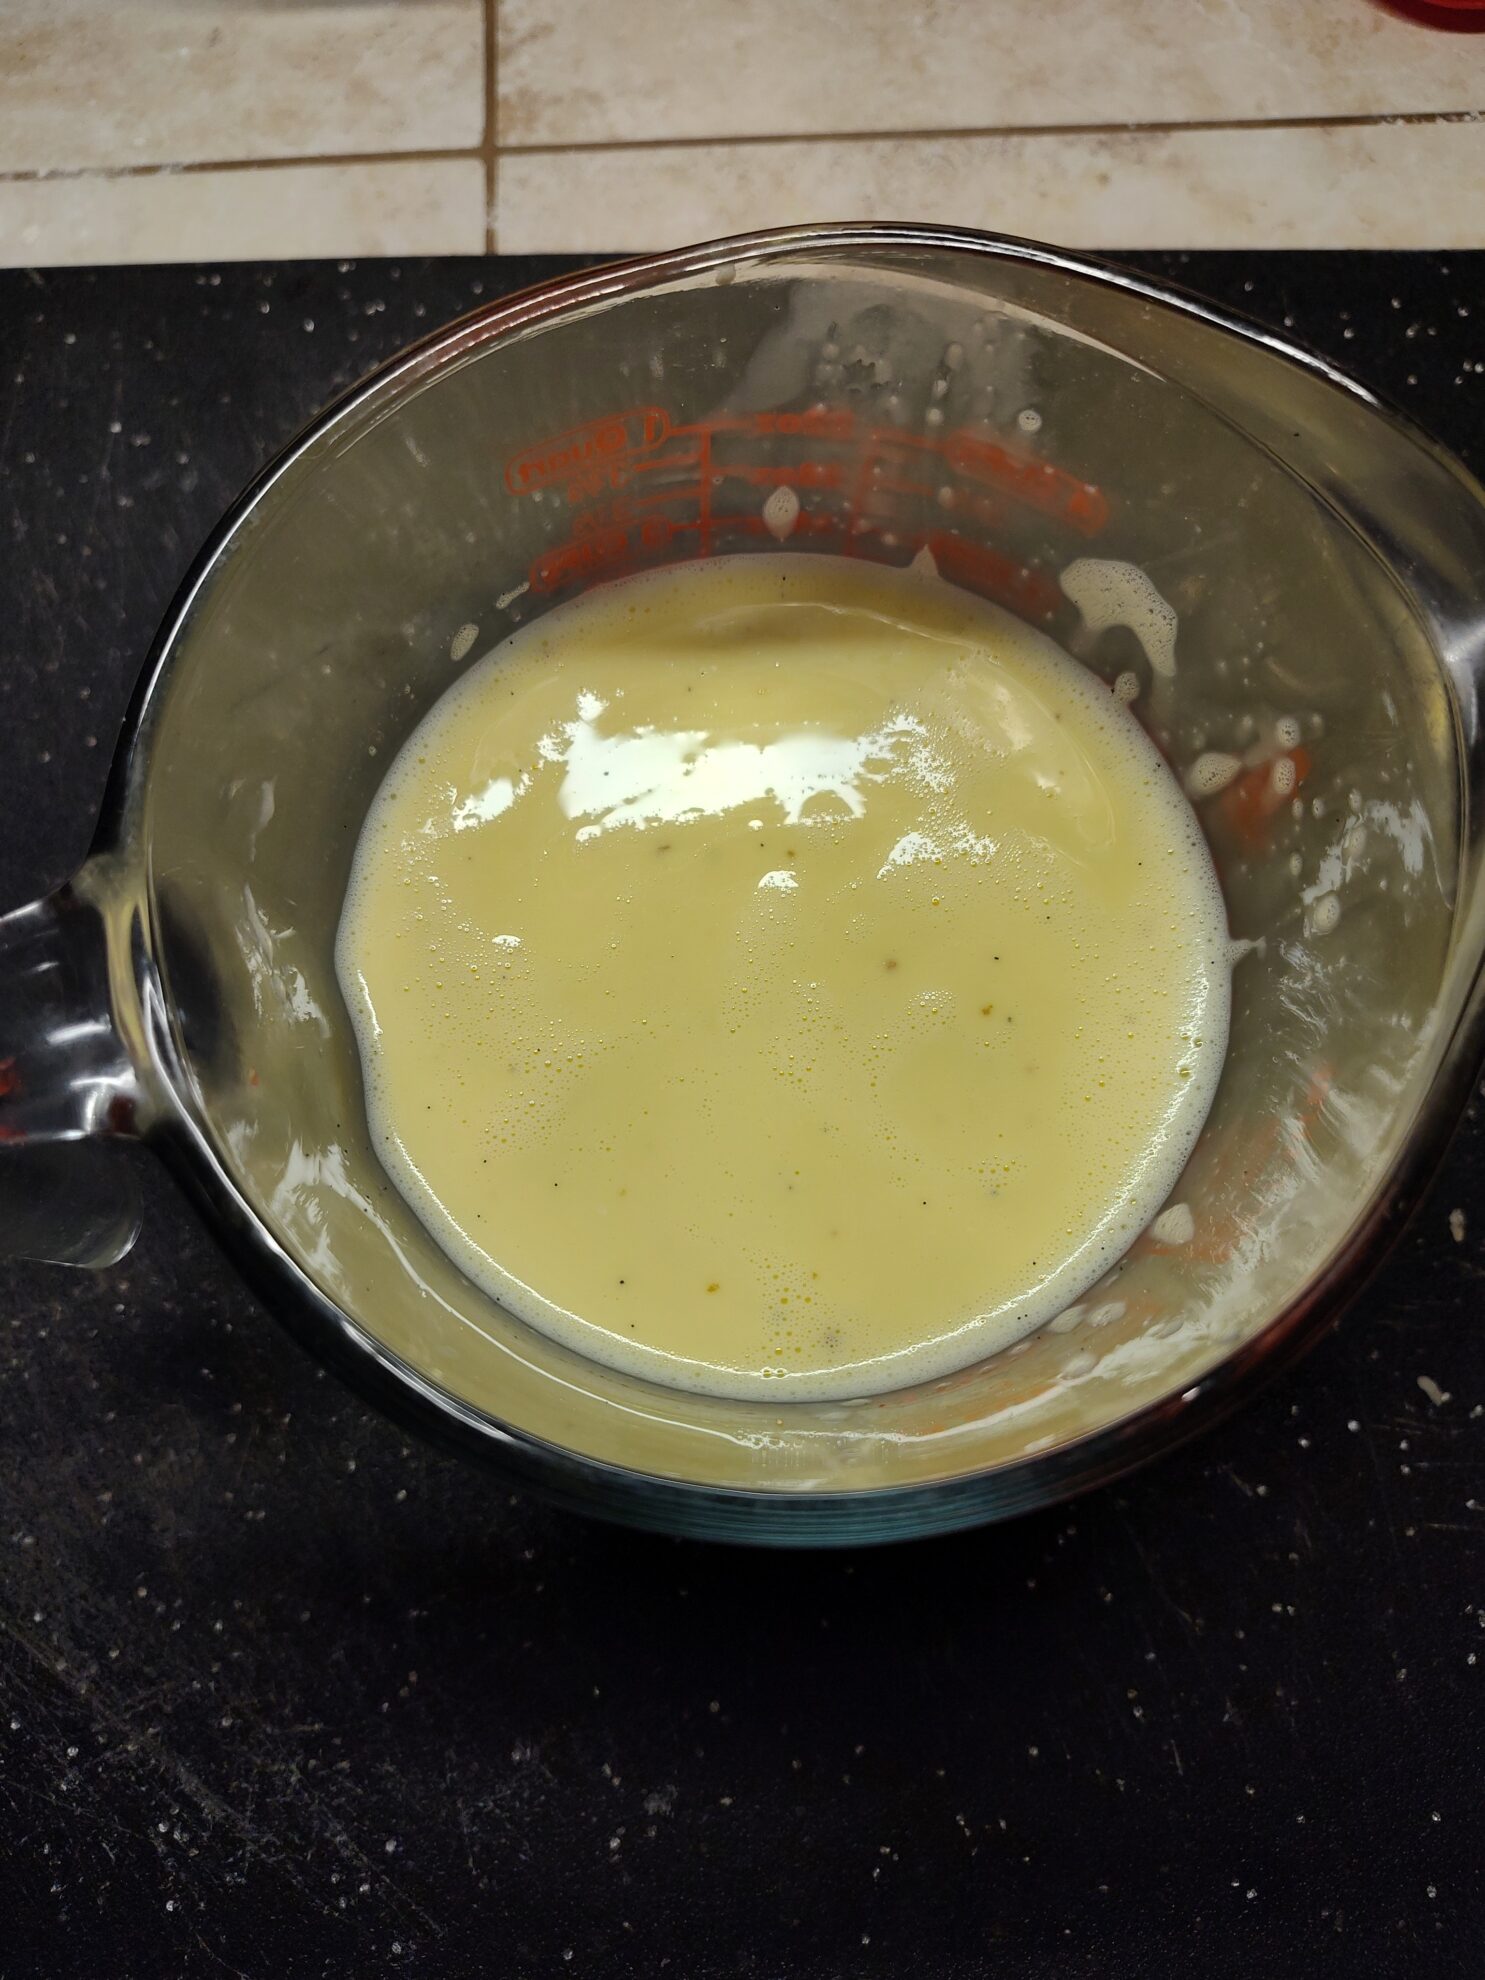
If you pour the hot milk too fast, you’ll end up with scrambled eggs. Add a little at a time and wish to temper the eggs. Once the milk and cream are combined with the eggs, you’ll want to put the mixture through a fine strainer. This will remove any unwanted chunks for a smoother custard. Scoop off any foam and bubbles with a spoon.

Assembling and Baking the Pie
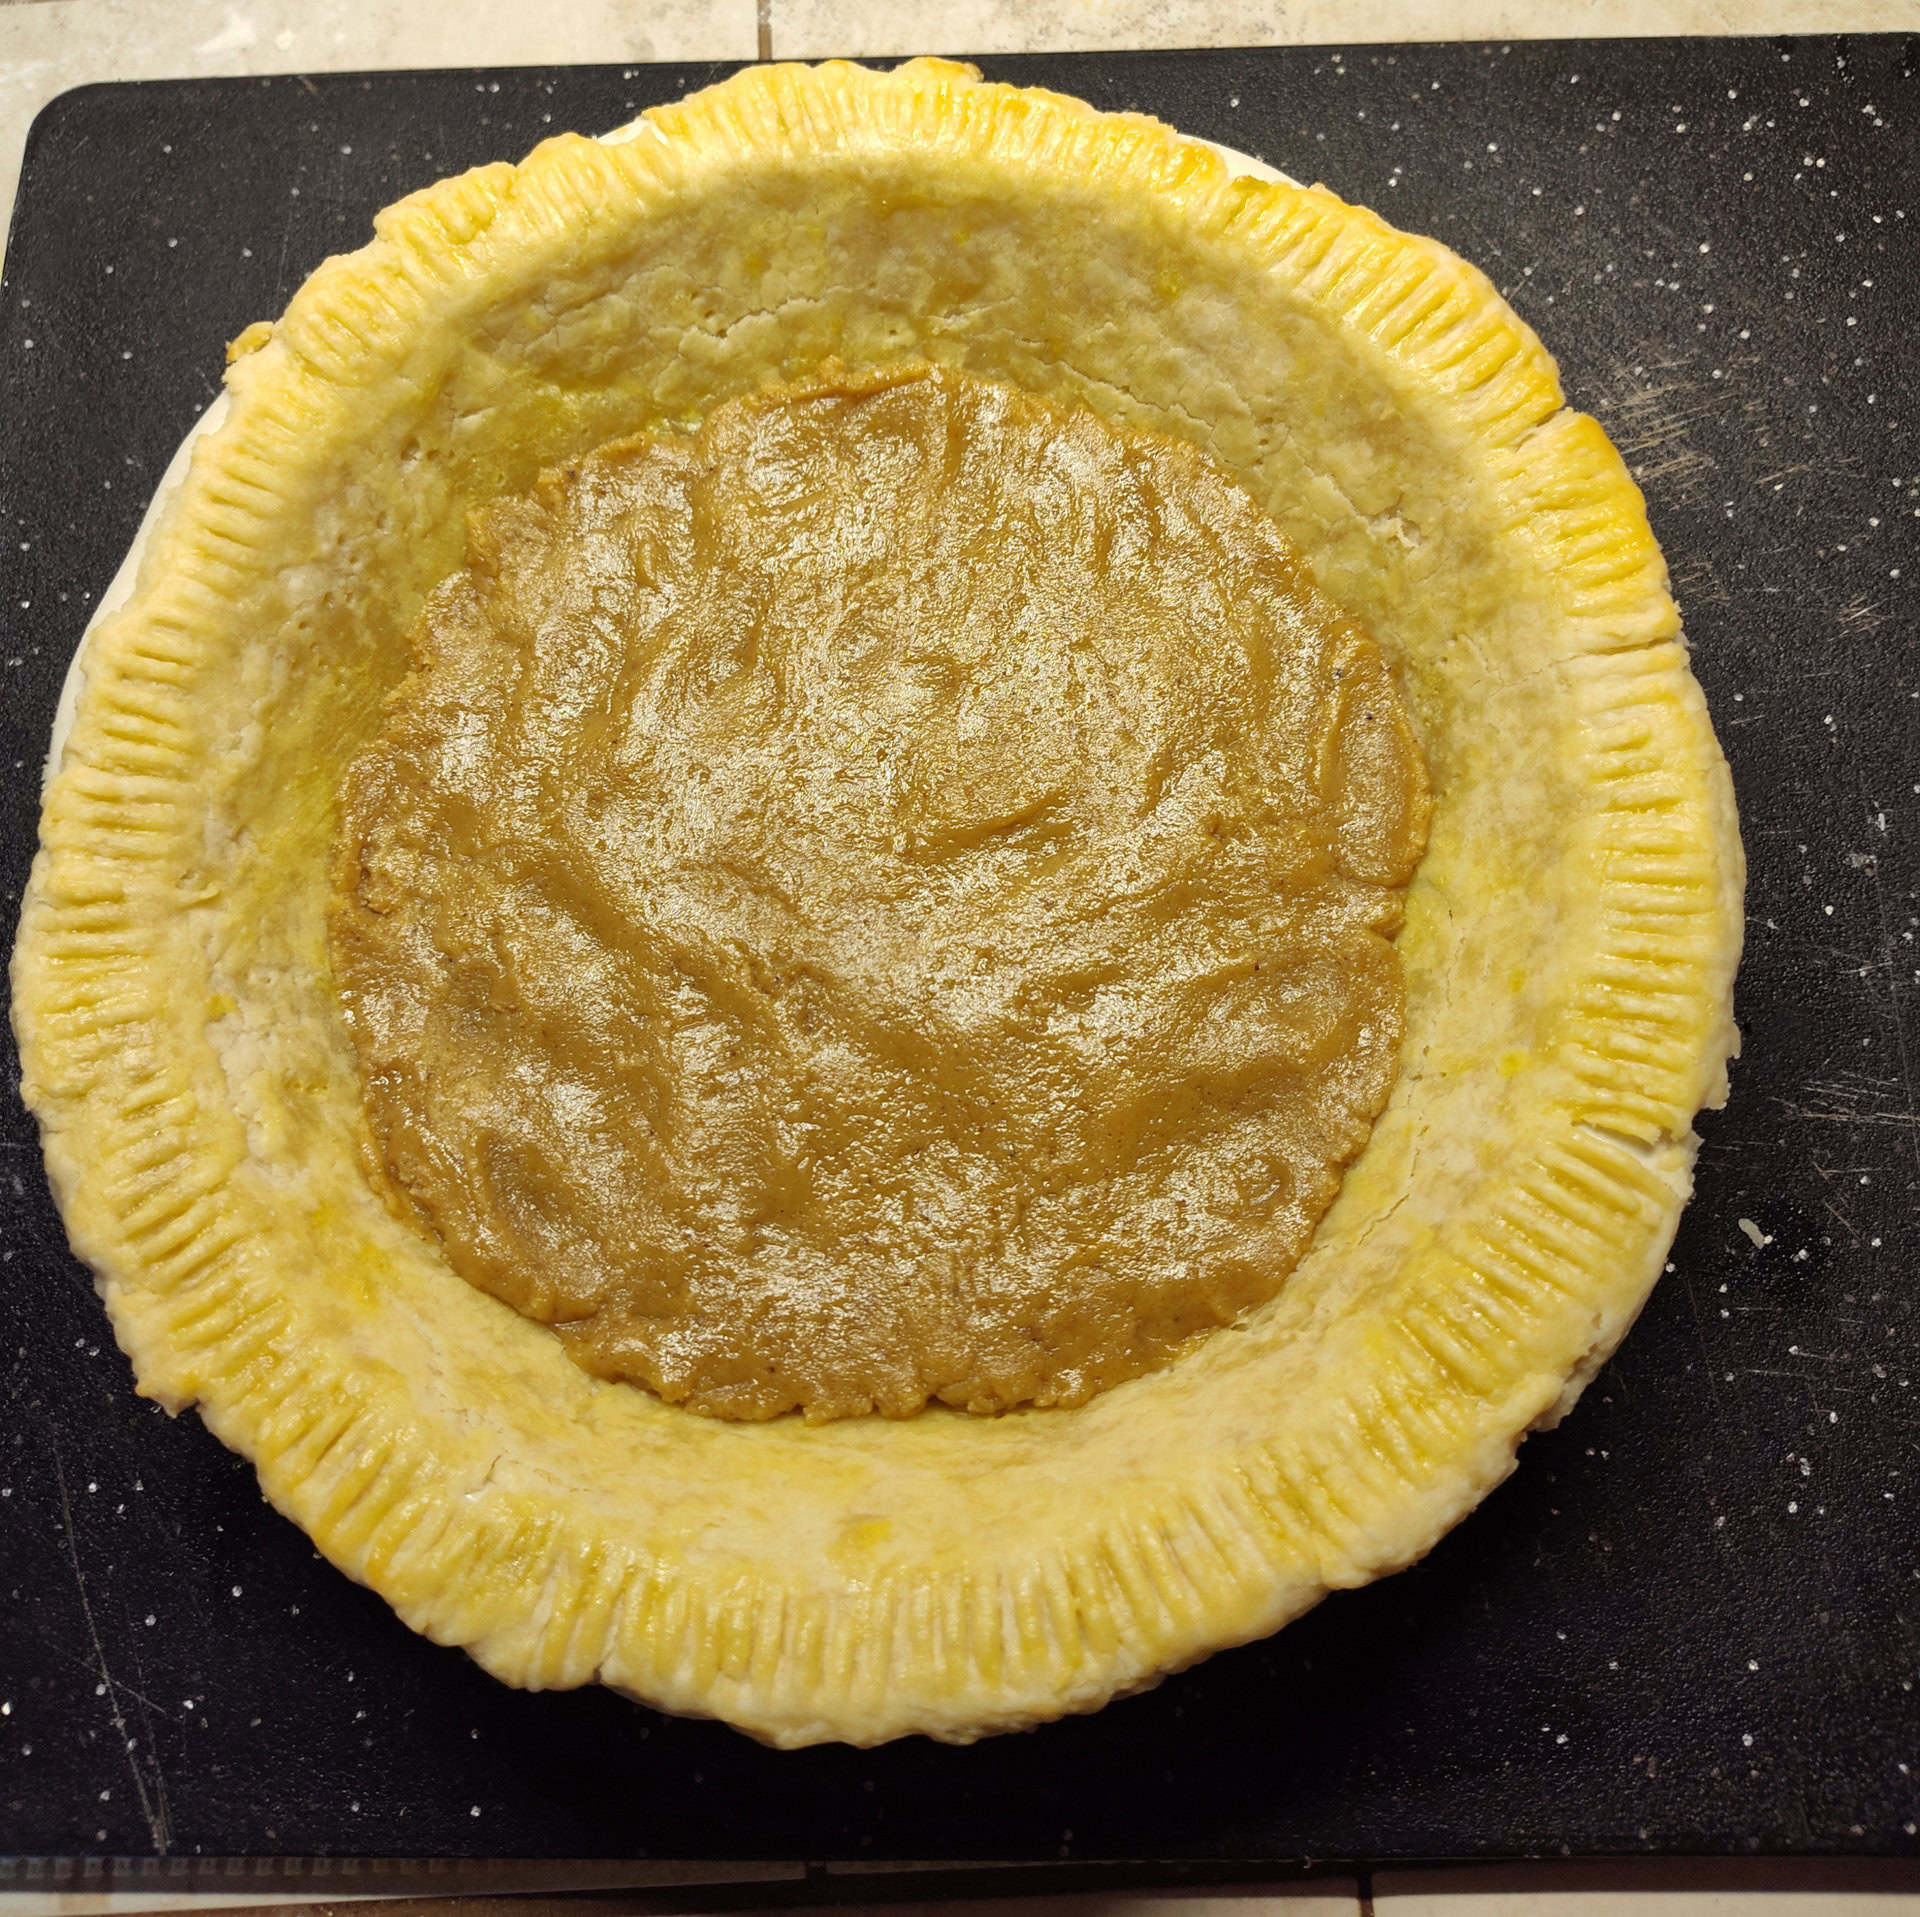
Once your pie crust is cool enough to handle, you’ll want to spread that walnut butter evenly across the bottom of the crust. Walnut butter is much stiffer than peanut butter, so you might want to use your fingers to spread it out and feel for an even surface.
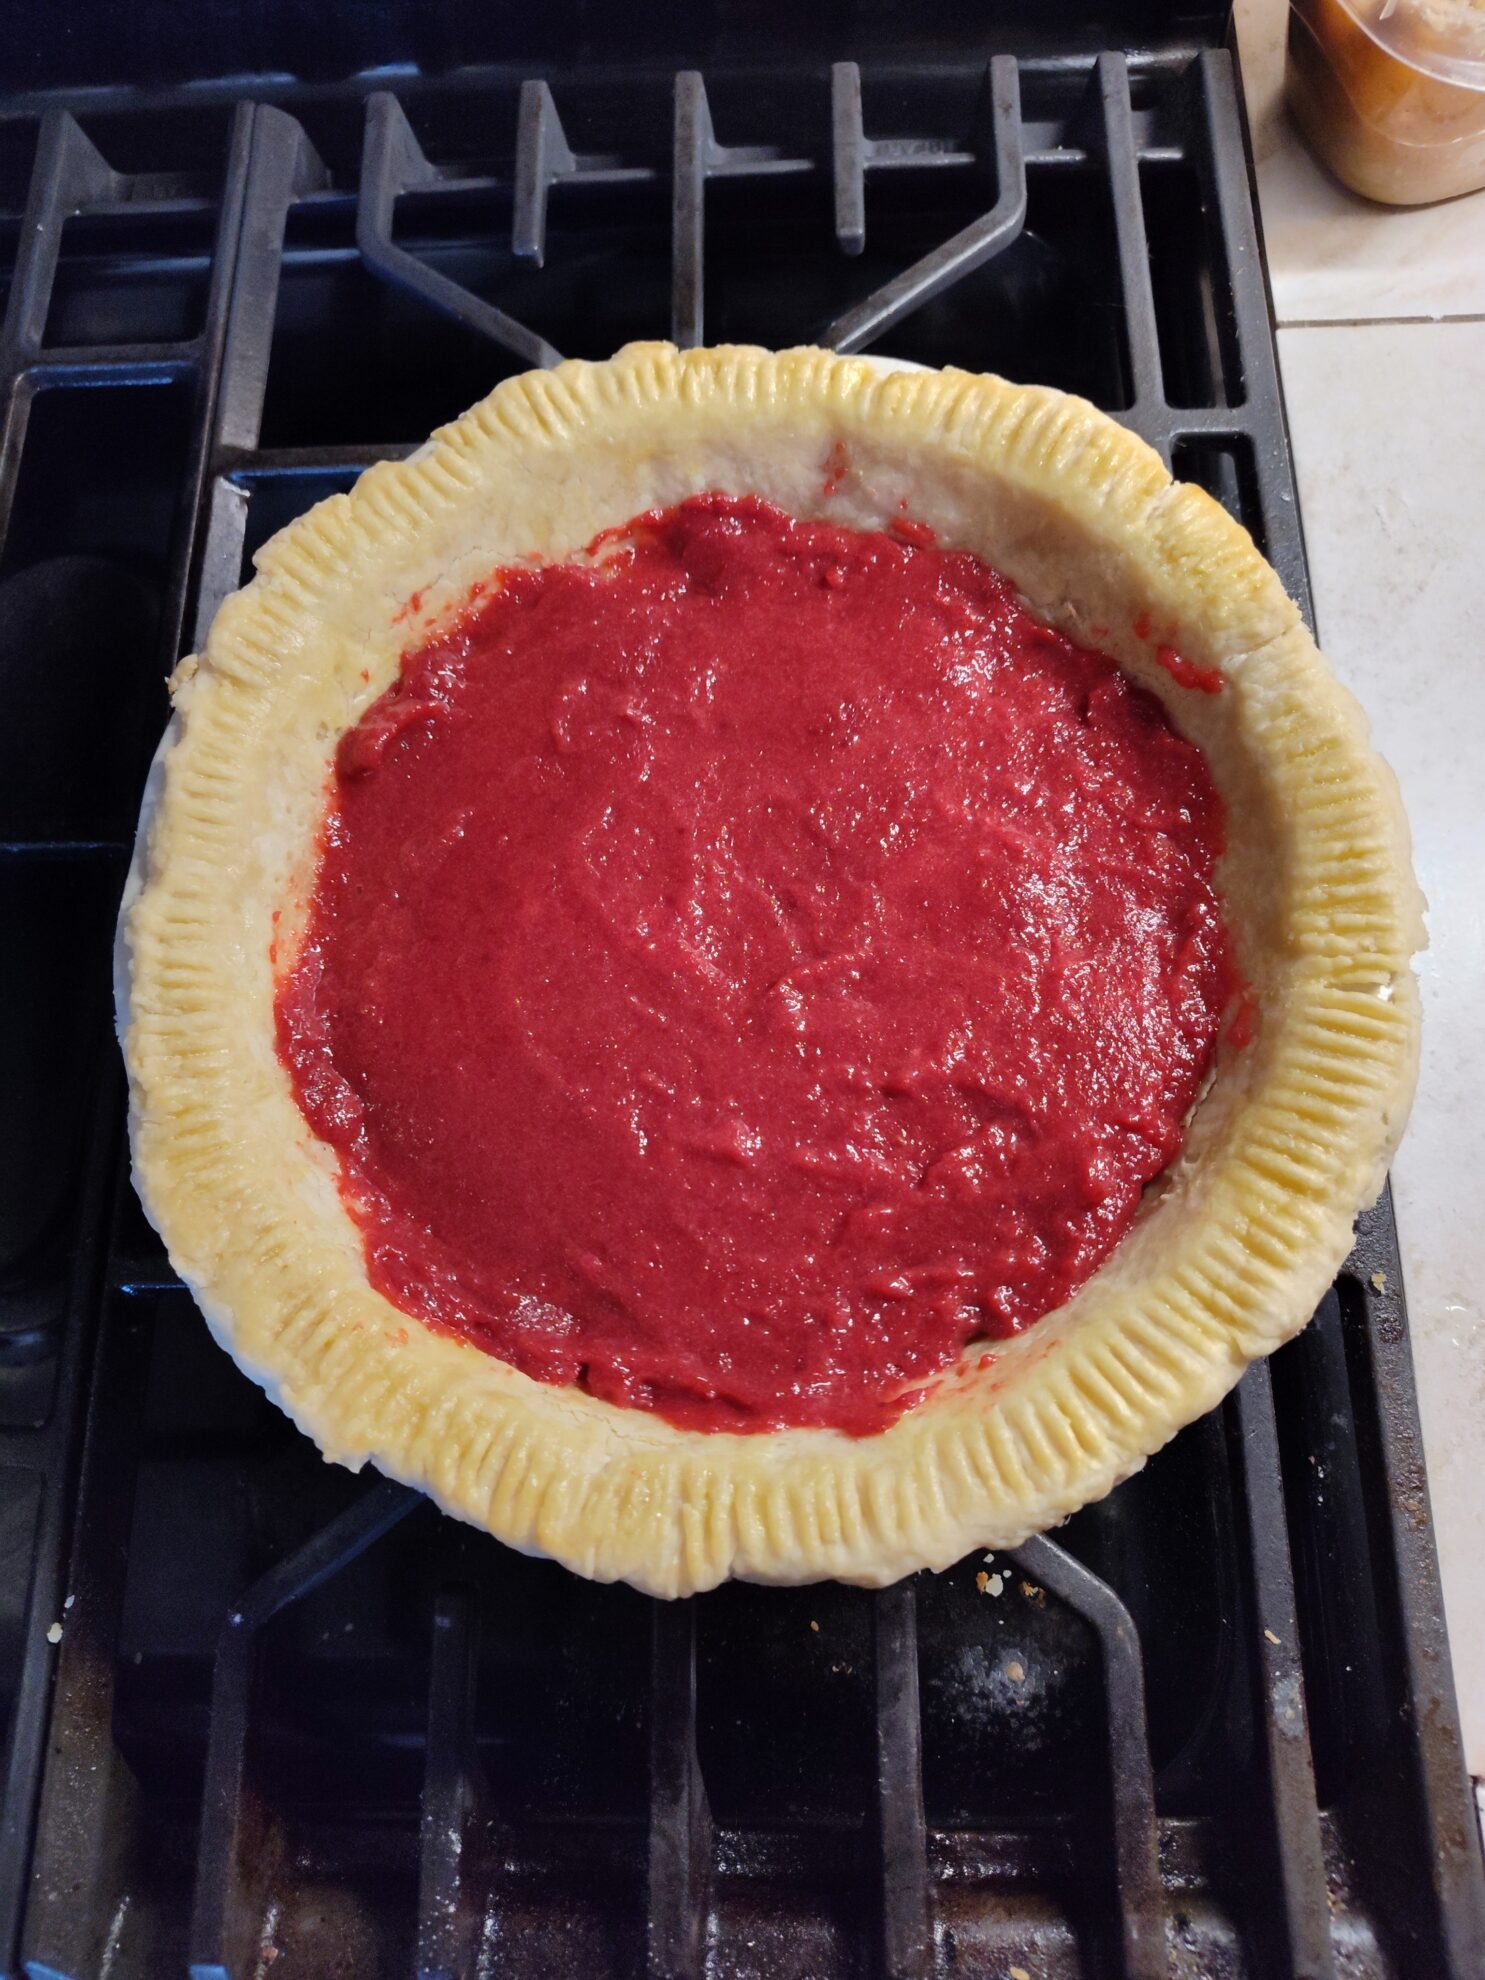
Take your frozen plum compote out of the freezer and let it that for a few minutes. You can use your rolling pin or the flat side of a meat tenderizer to pound it into a malleable sorbet without any chunks. We want this frozen and malleable to keep it stiff so it doesn’t mix with the egg custard filling later. Spread the plum compote evenly over the walnut filling.
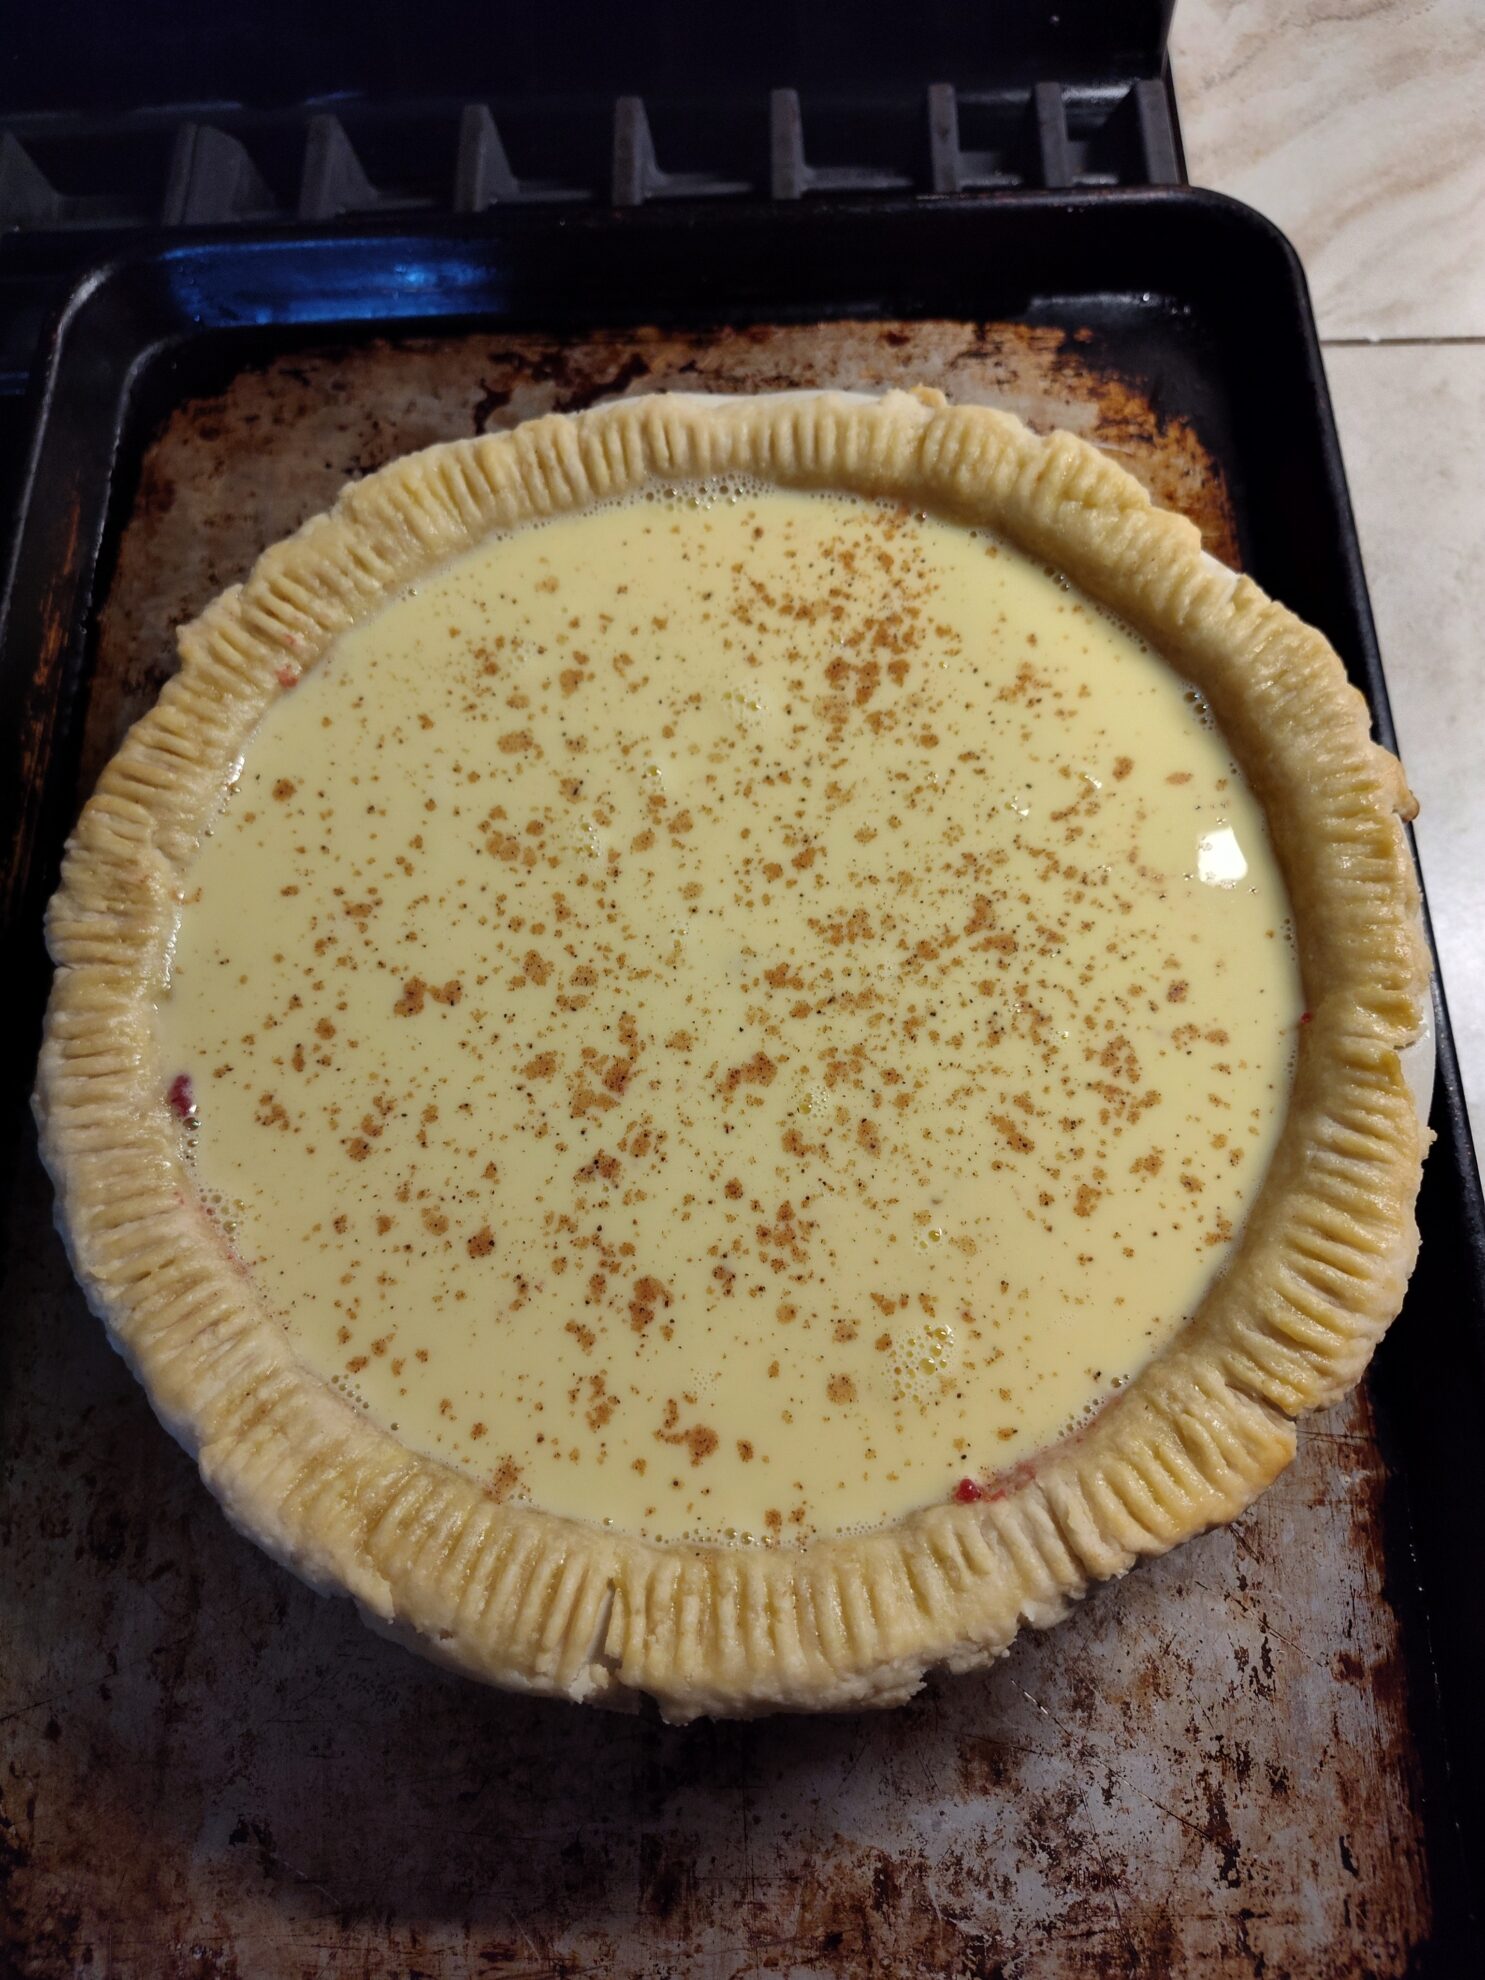
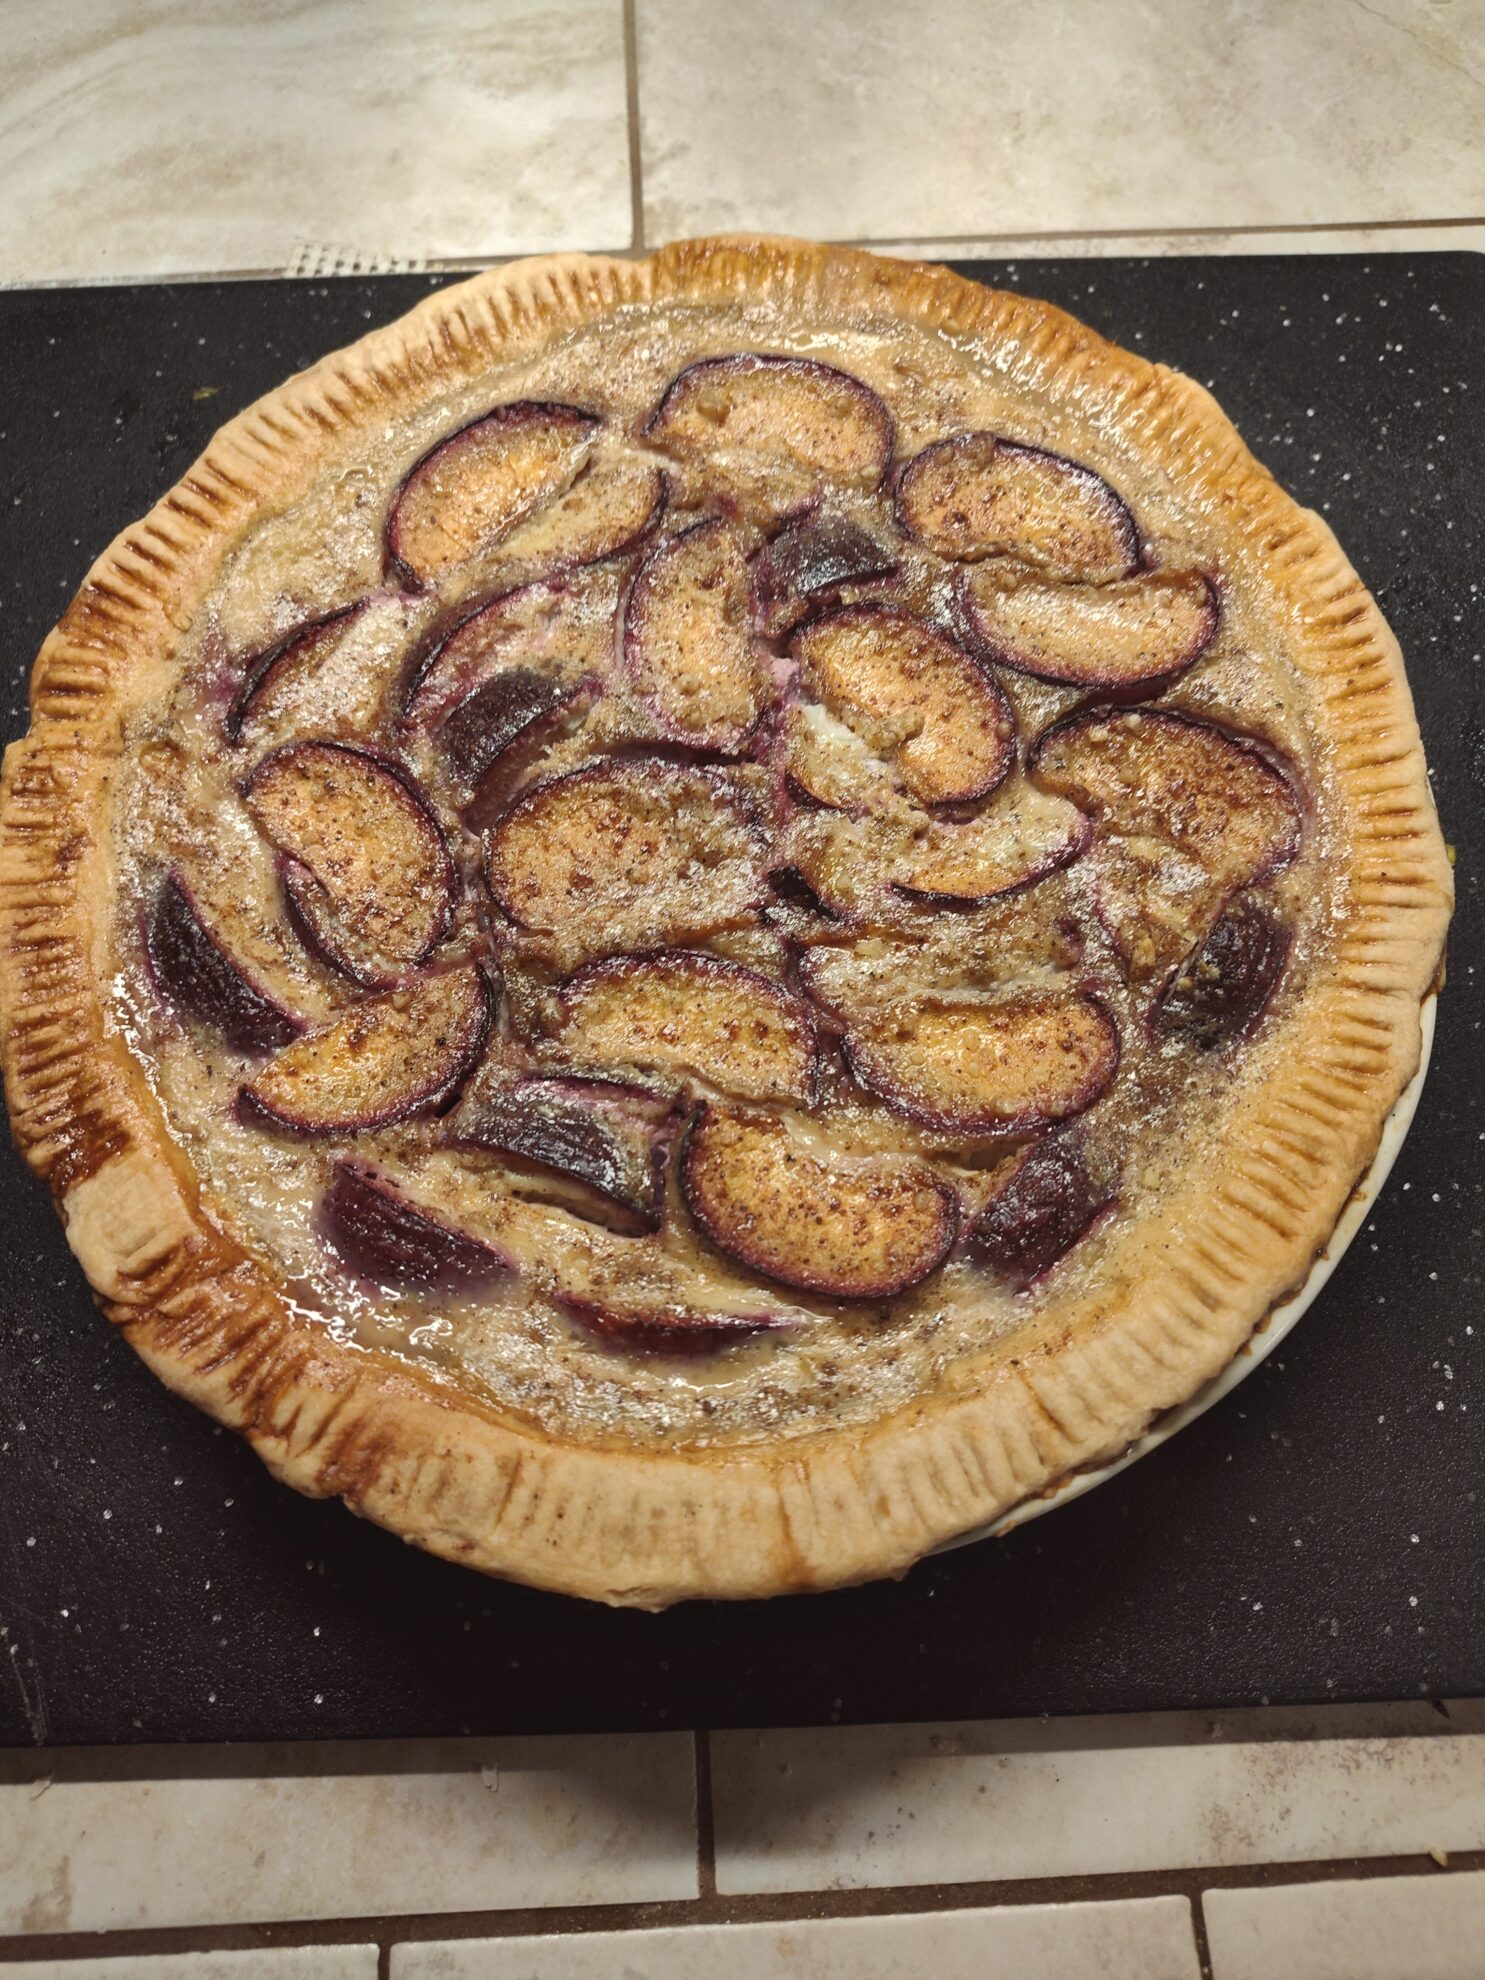
Place your pie onto a baking sheet (to prevent future spills and messes) and GENTLY fill in the remainder of the pie with the egg custard filling. Be careful to not pour in the same spot for too long or you risk the plum filling breaking apart and mixing into the egg custard. Sprinkle with nutmeg then carefully place into the oven set to 265°F for 2 hours or until the custard is set. We want this to be a slow cook to gently cook the custard or drying out the custard, while not over-browning the crust.
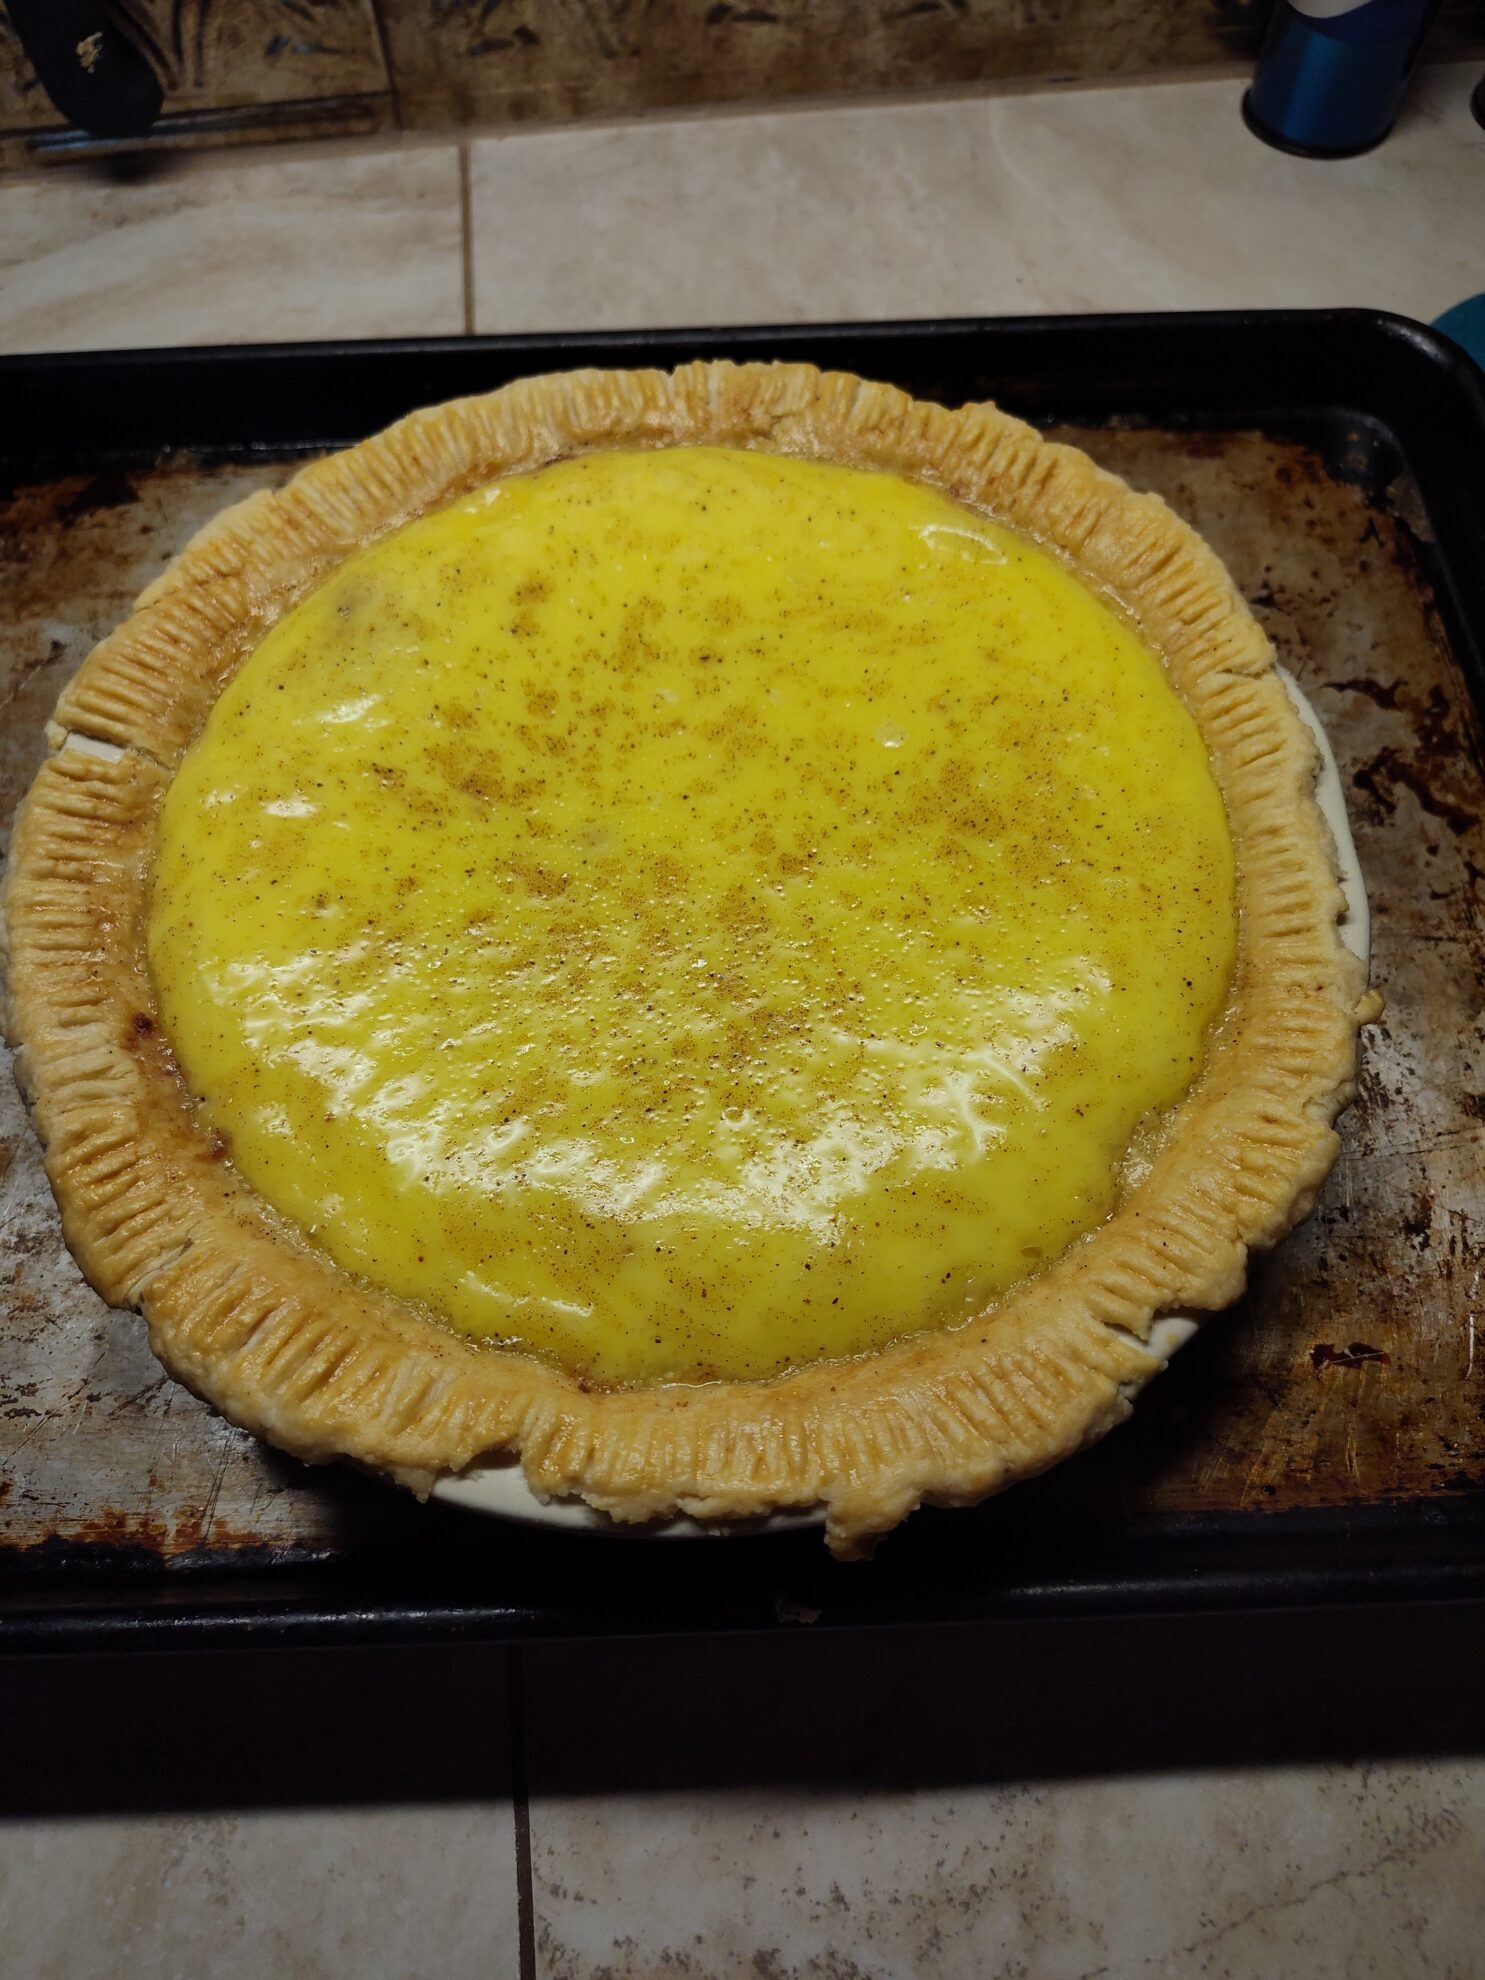
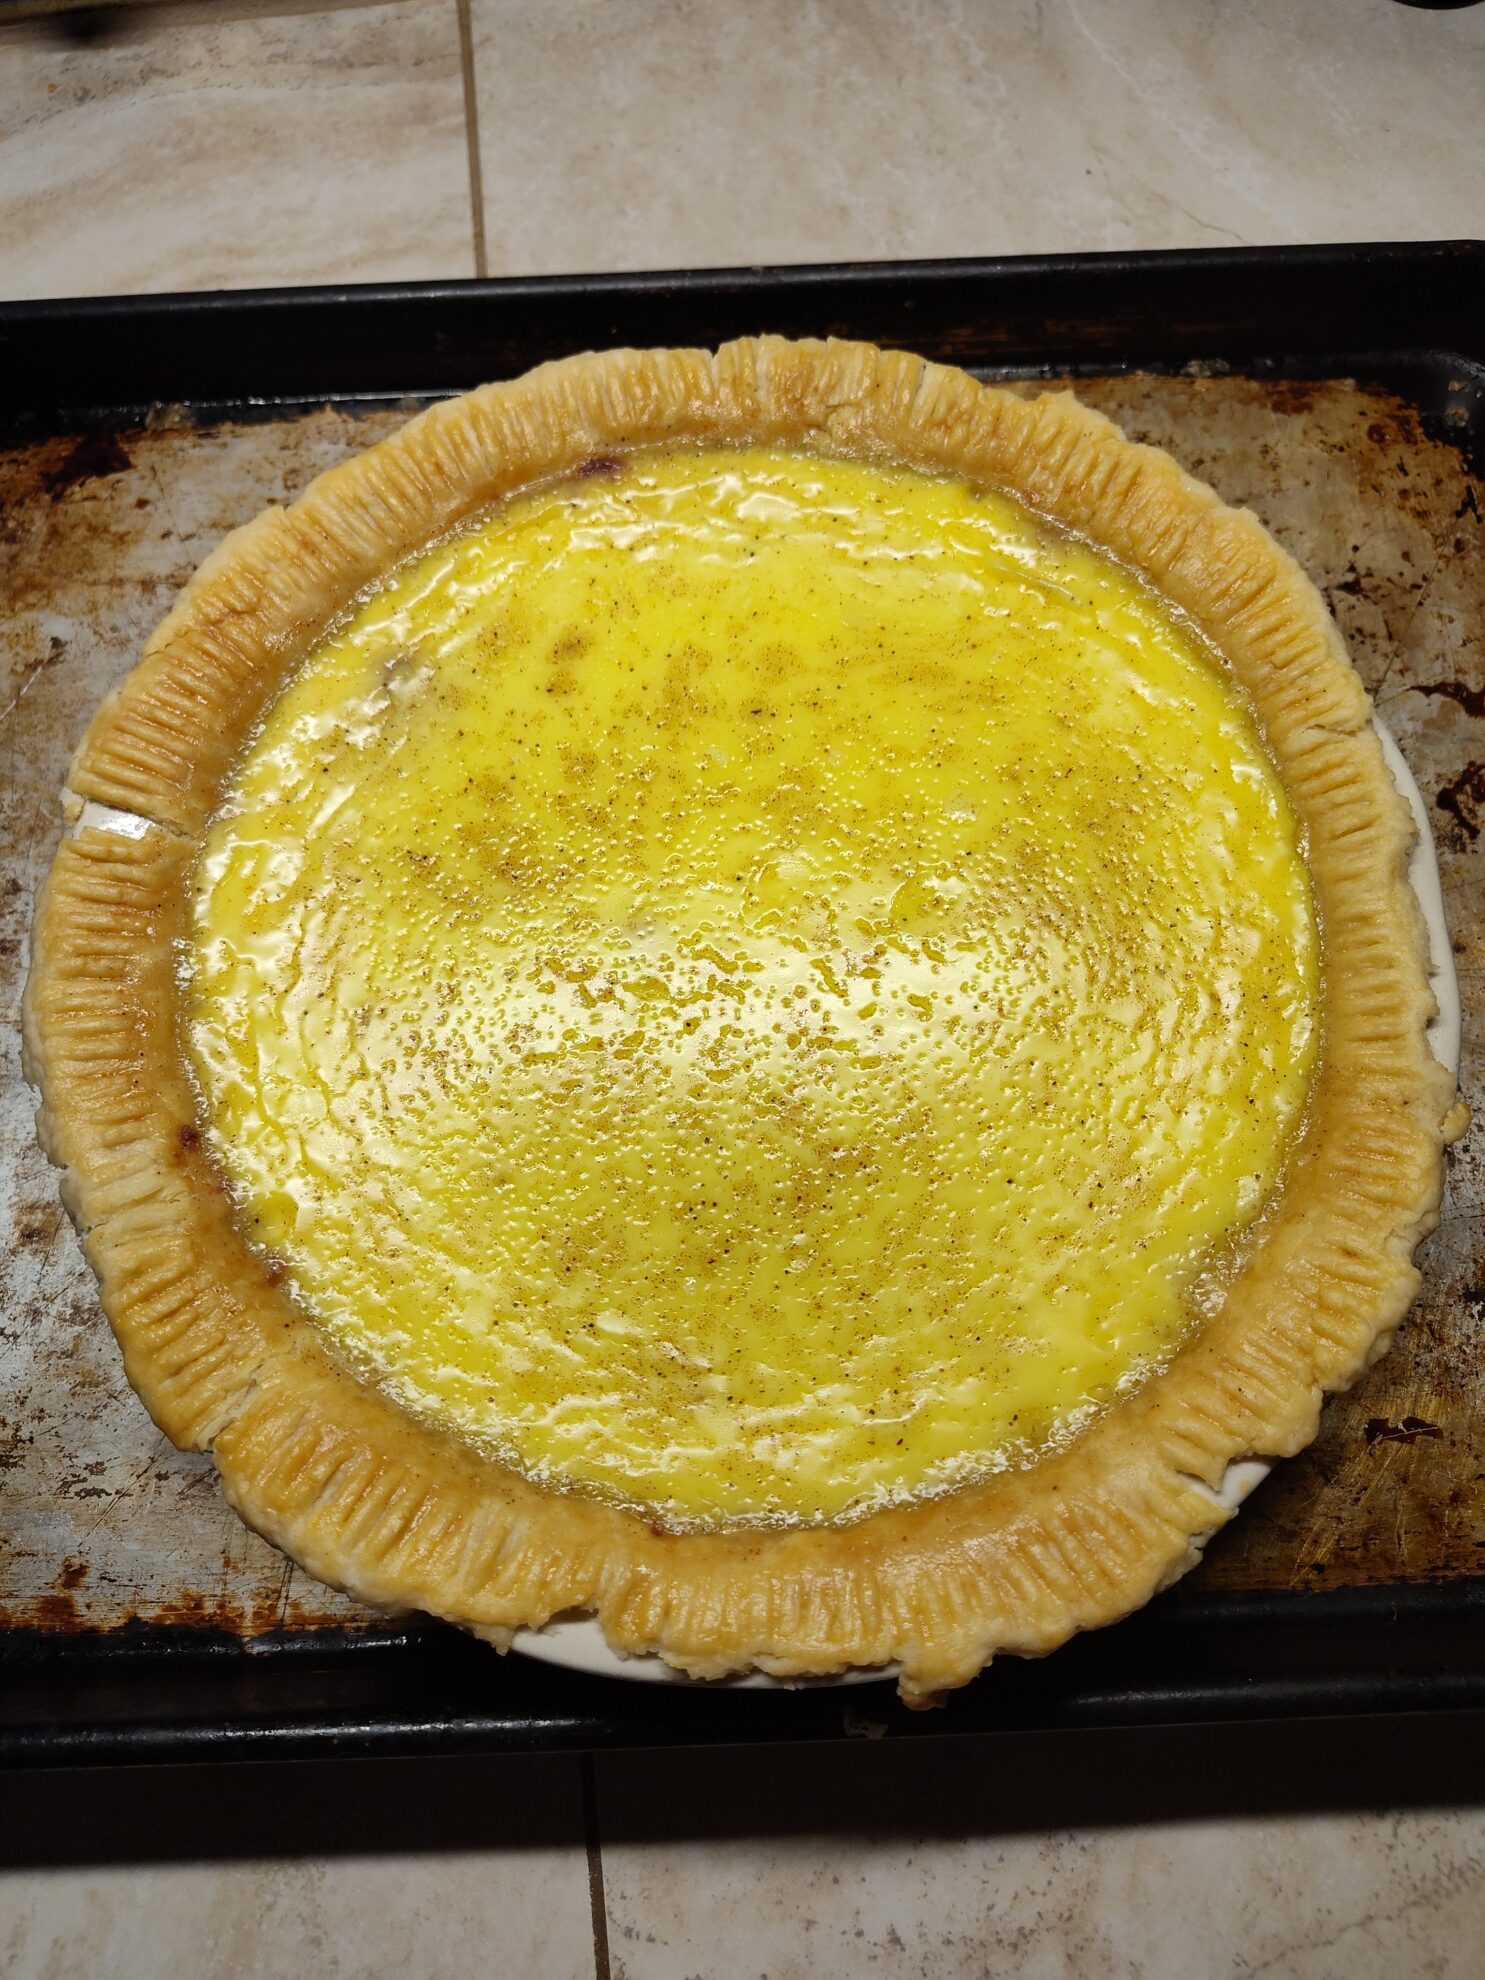
After about 2 hours, it will look like the custard is puffing up. This might be a bit too well done of a custard for some people’s tastes, but I’m cooking it like this so it’ll be easier to slice. After some time, the custard will cool and no longer puff up.
Making Sugar Glass
One detail I noticed on the pie in-game is that it appears to have a hardened sugar crust. This is the same kind of crust you would find on top of a crème brûlée, so this means we have to make sugar glass!
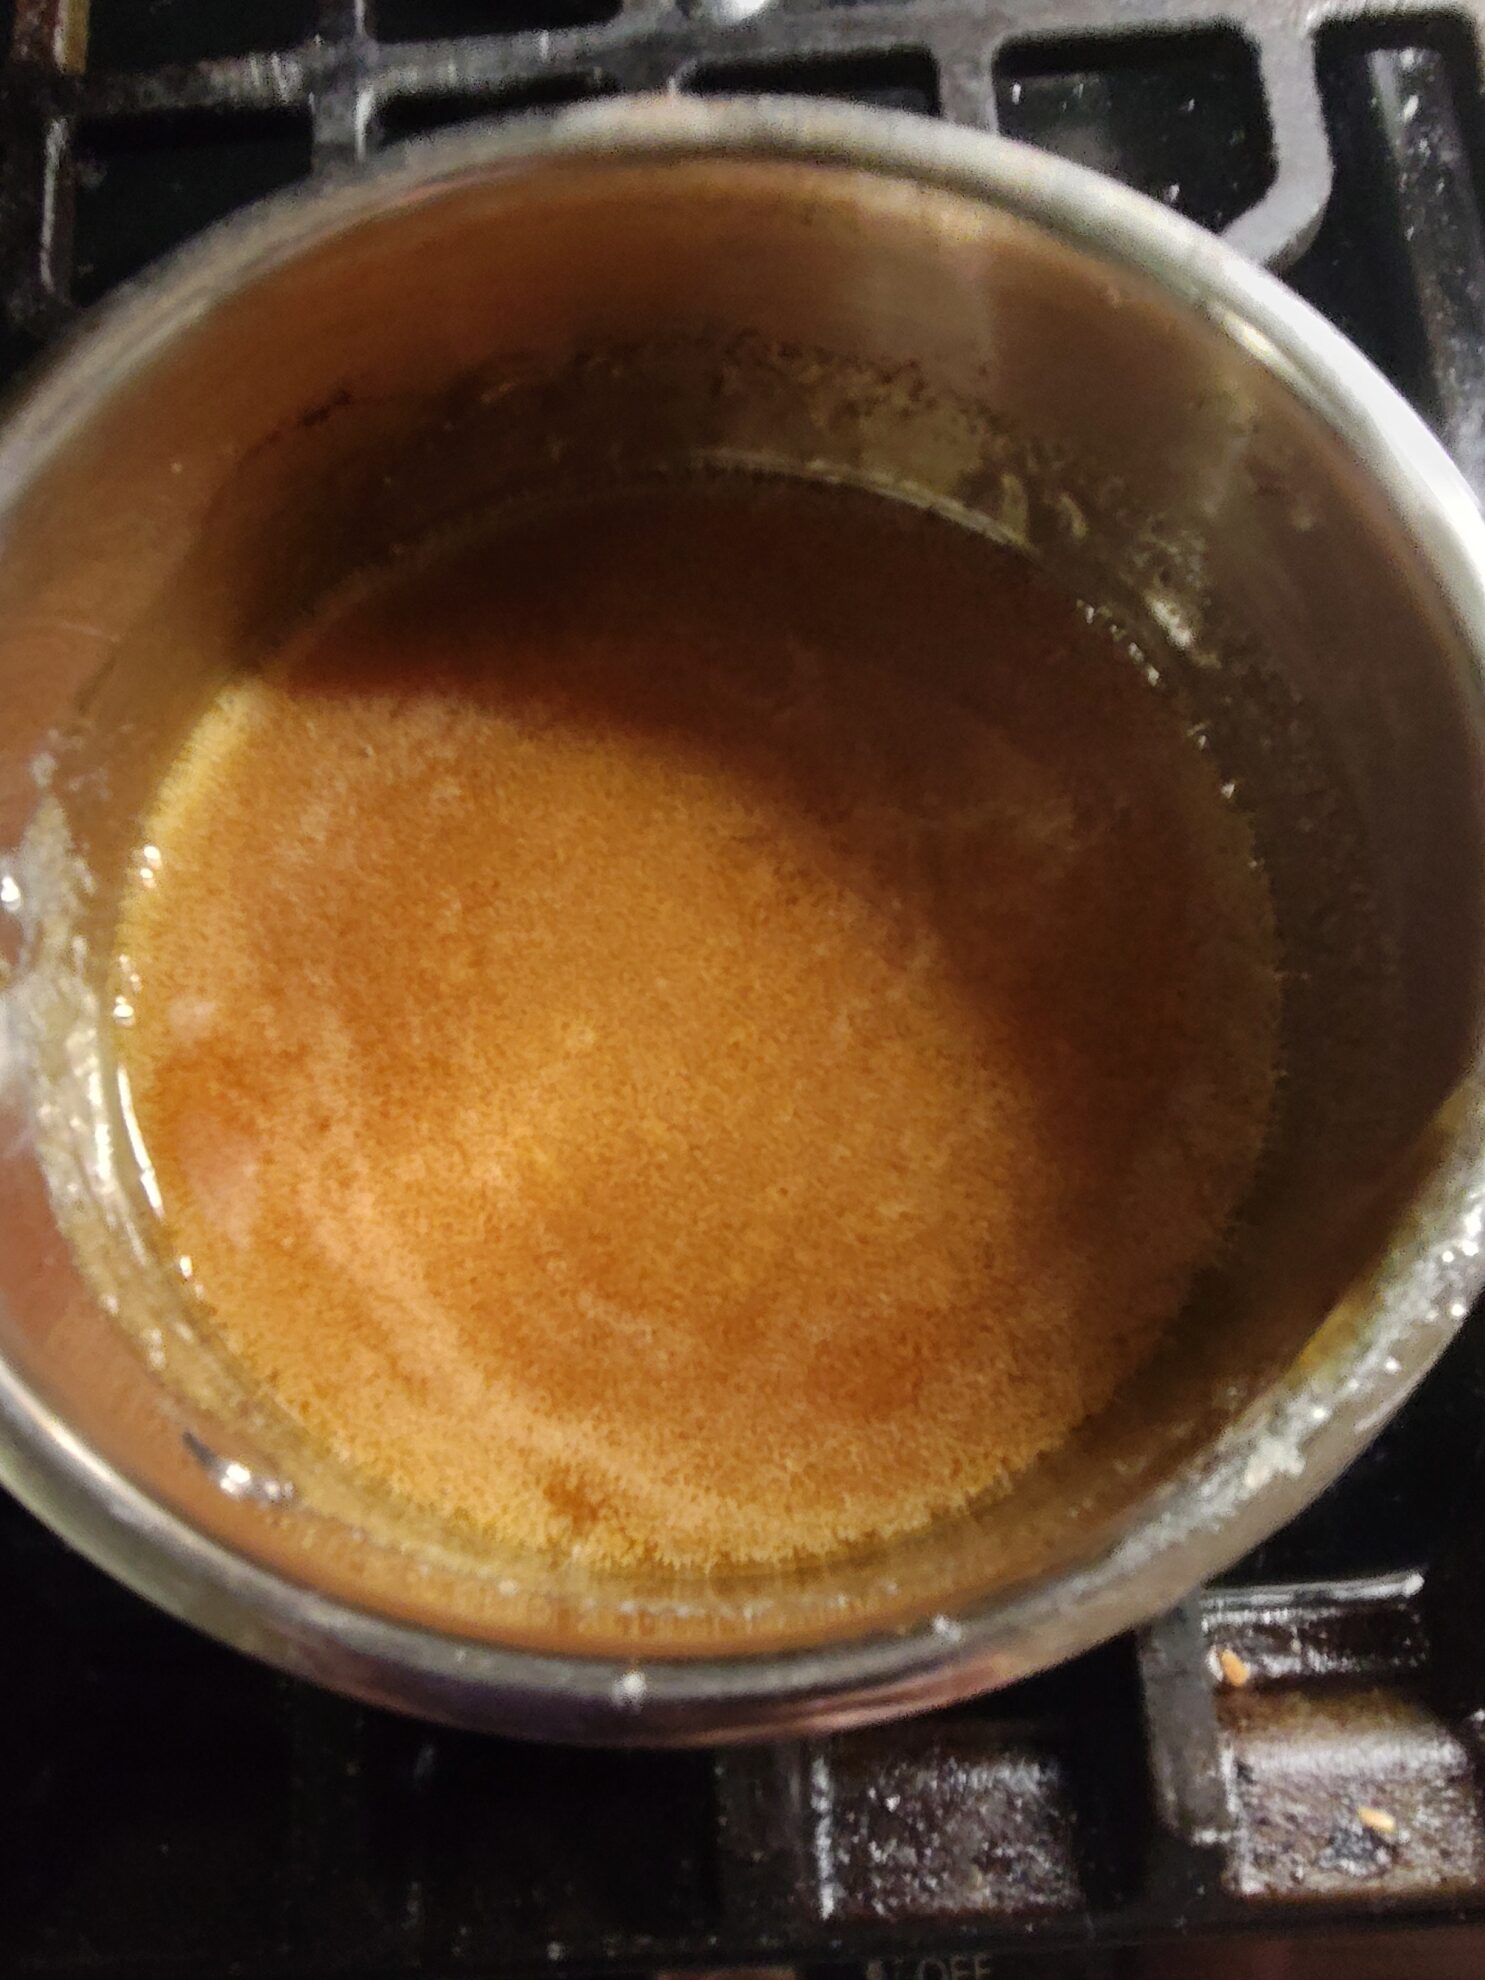
Working with sugar for the first time can be intimidating, as it should be. You’re working with what is essentially sugary napalm, be careful with handling it. Once you get a feel for it, it’s really not so bad. Get 1 cup of sugar and combine with 1 tablespoon of honey and 3 tablespoons of water. Combine in a small pot with a light bottom, a lighter bottom will help you see what color the sugar is which is VERY important.
Set your stove to medium-low, you do not want to rush this otherwise you’ll burn your sugar. From this point on, you’ll want to avoid stirring your sugar as this can form unwanted crystals that can inhibit the process.
If you’re new to working with melting sugar, you might think this is taking too long. Trust the process, the sugar will be bubbly and clear for a while. Eventually the water will evaporate, leaving the sugar and honey to better caramelize. The water helps start the melting process which is why we even add it at all.
As the moisture evaporates, it may look like you’re forming crystalline sugar bubbles. Don’t add more moisture, let the sugar melt. In time it’ll slowly begin to change color at the bottom of the pot. You may swirl the pot but do not stir it with a spoon. When it reaches an amber color, it’s ready for the pie.
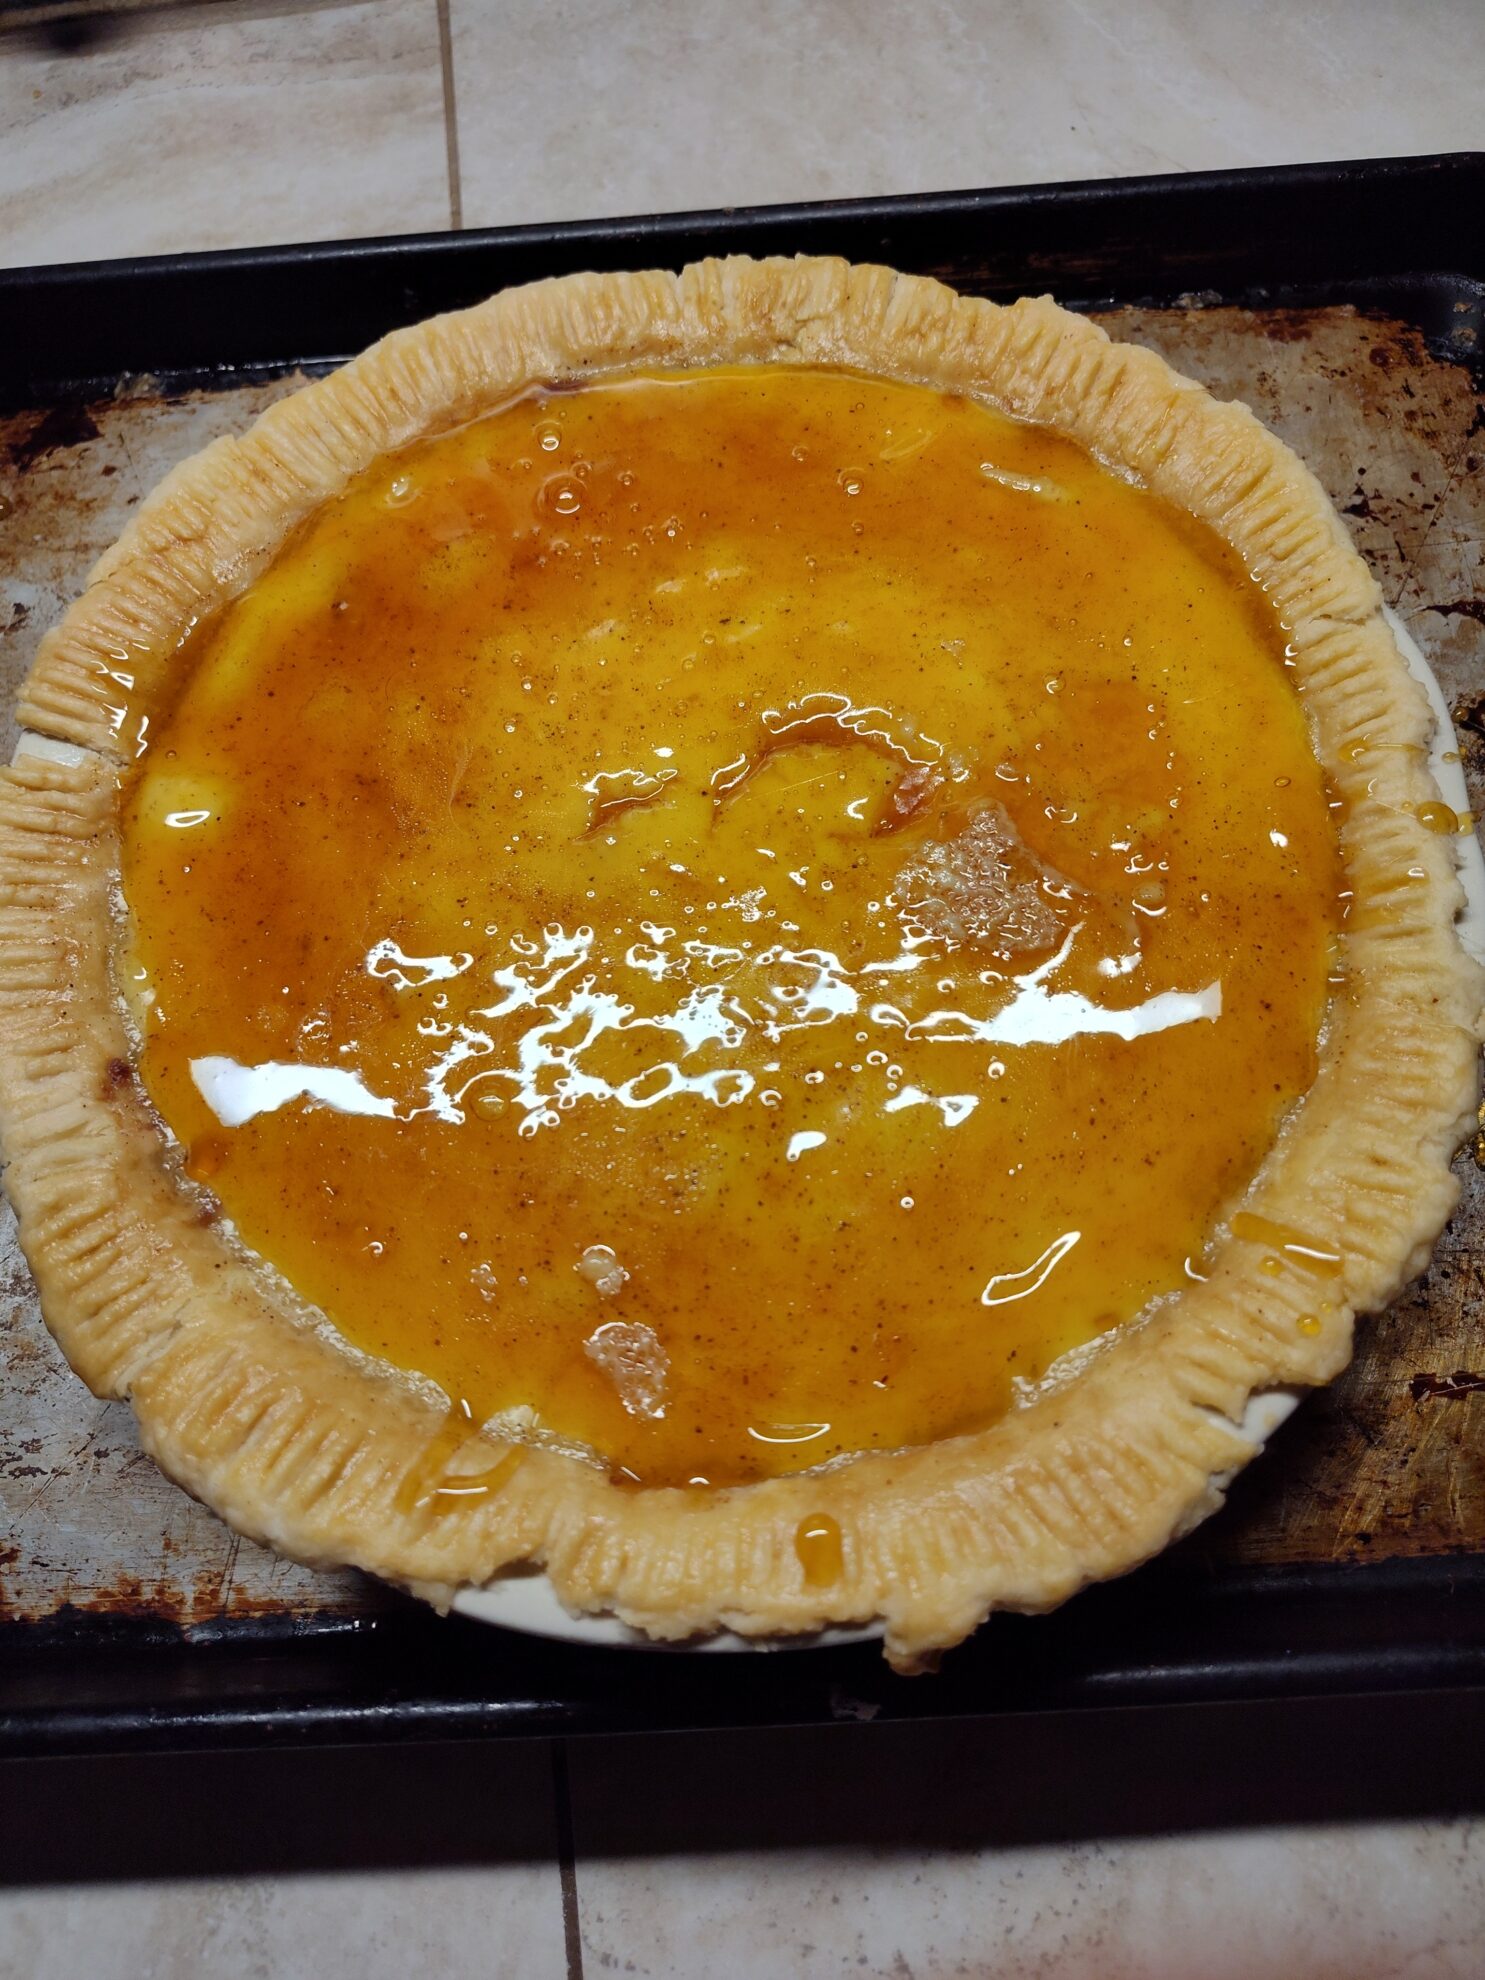
You’ll want to be careful with pouring the sugar. Make sure any children or pets you may have are not in the vicinity to prevent surprises and accidents. GENTLY pour the sugar over the still-warm pie to make a thin layer across the top. Making a thin layer this way is easier said than done, but do your best! If you pour it too quickly, you’ll poke a hole through the pie as I did in the following picture:
Now you’ll want to let the pie cool off, especially if it’s in a ceramic pie mold like mine. If you put it in the fridge too soon, you’ll risk the ceramic cracking and splitting. That, and you’ll warm up your entire fridge which can promote bacteria growth.
Once room temperature, gently and loosely wrap the pie in some foil or place it into some Tupperware. Using plastic wrap will risk damaging the crust as you unwrap it. Place into the fridge and let it cool thoroughly before proceeding. This will take several hours to overnight.
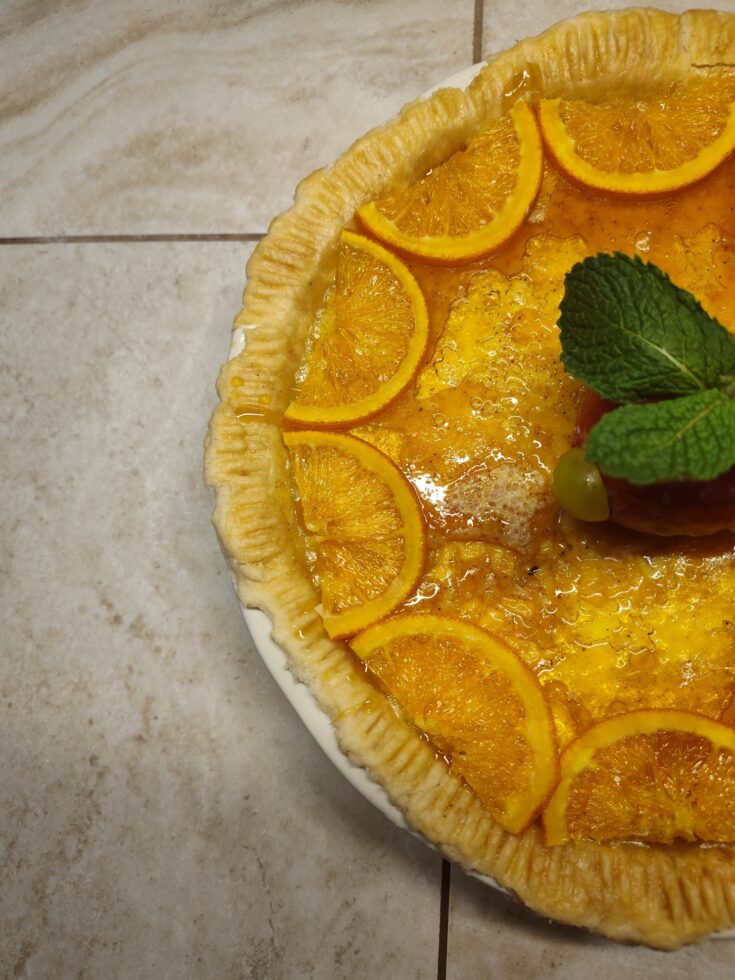
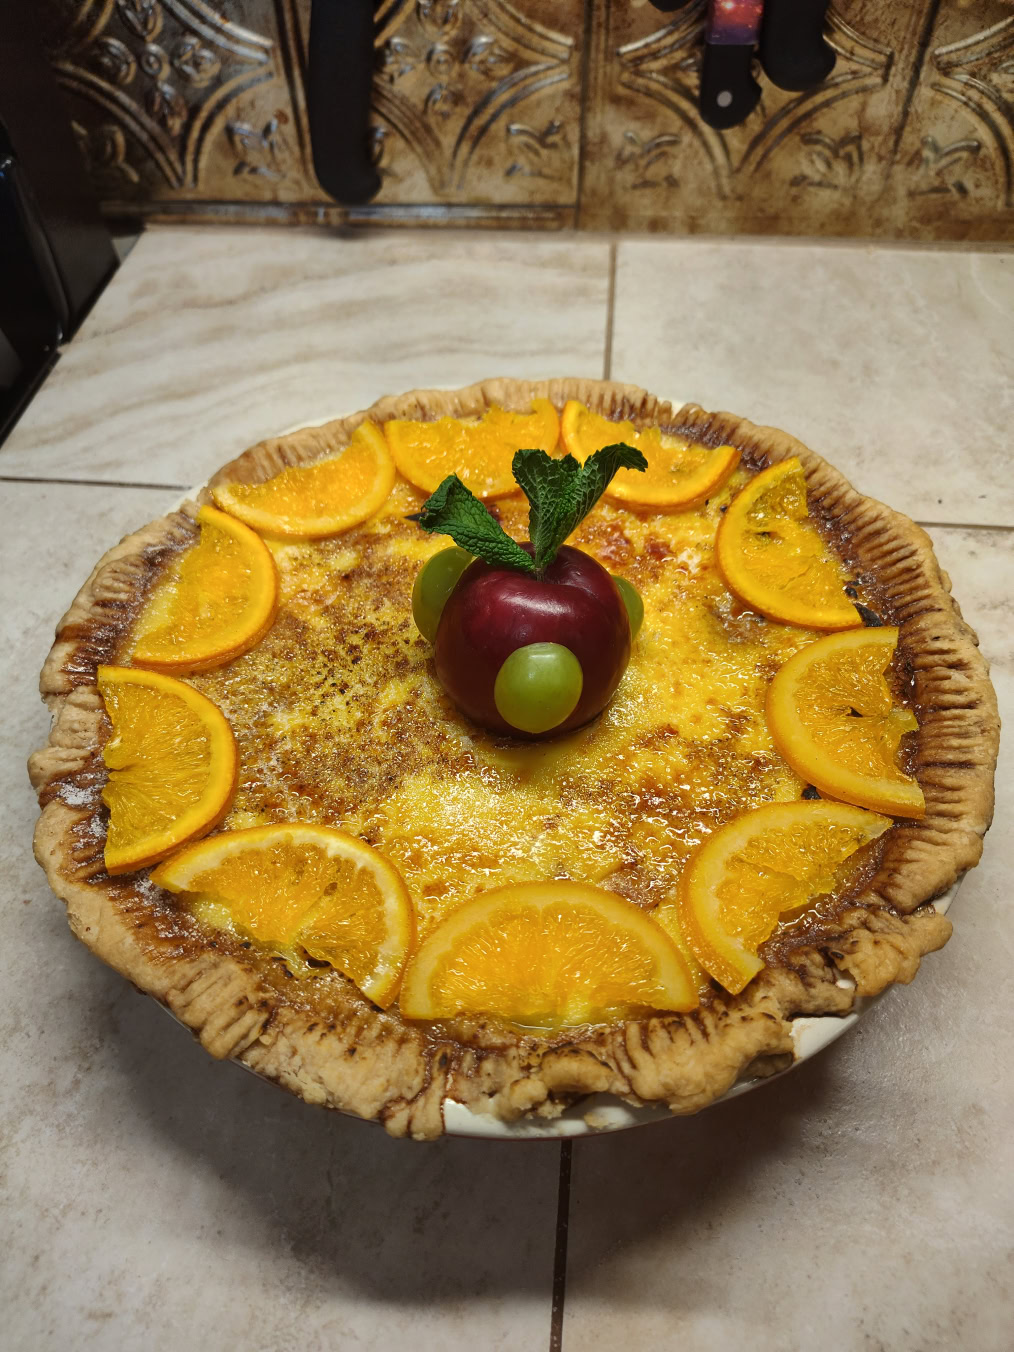
Finishing Touches
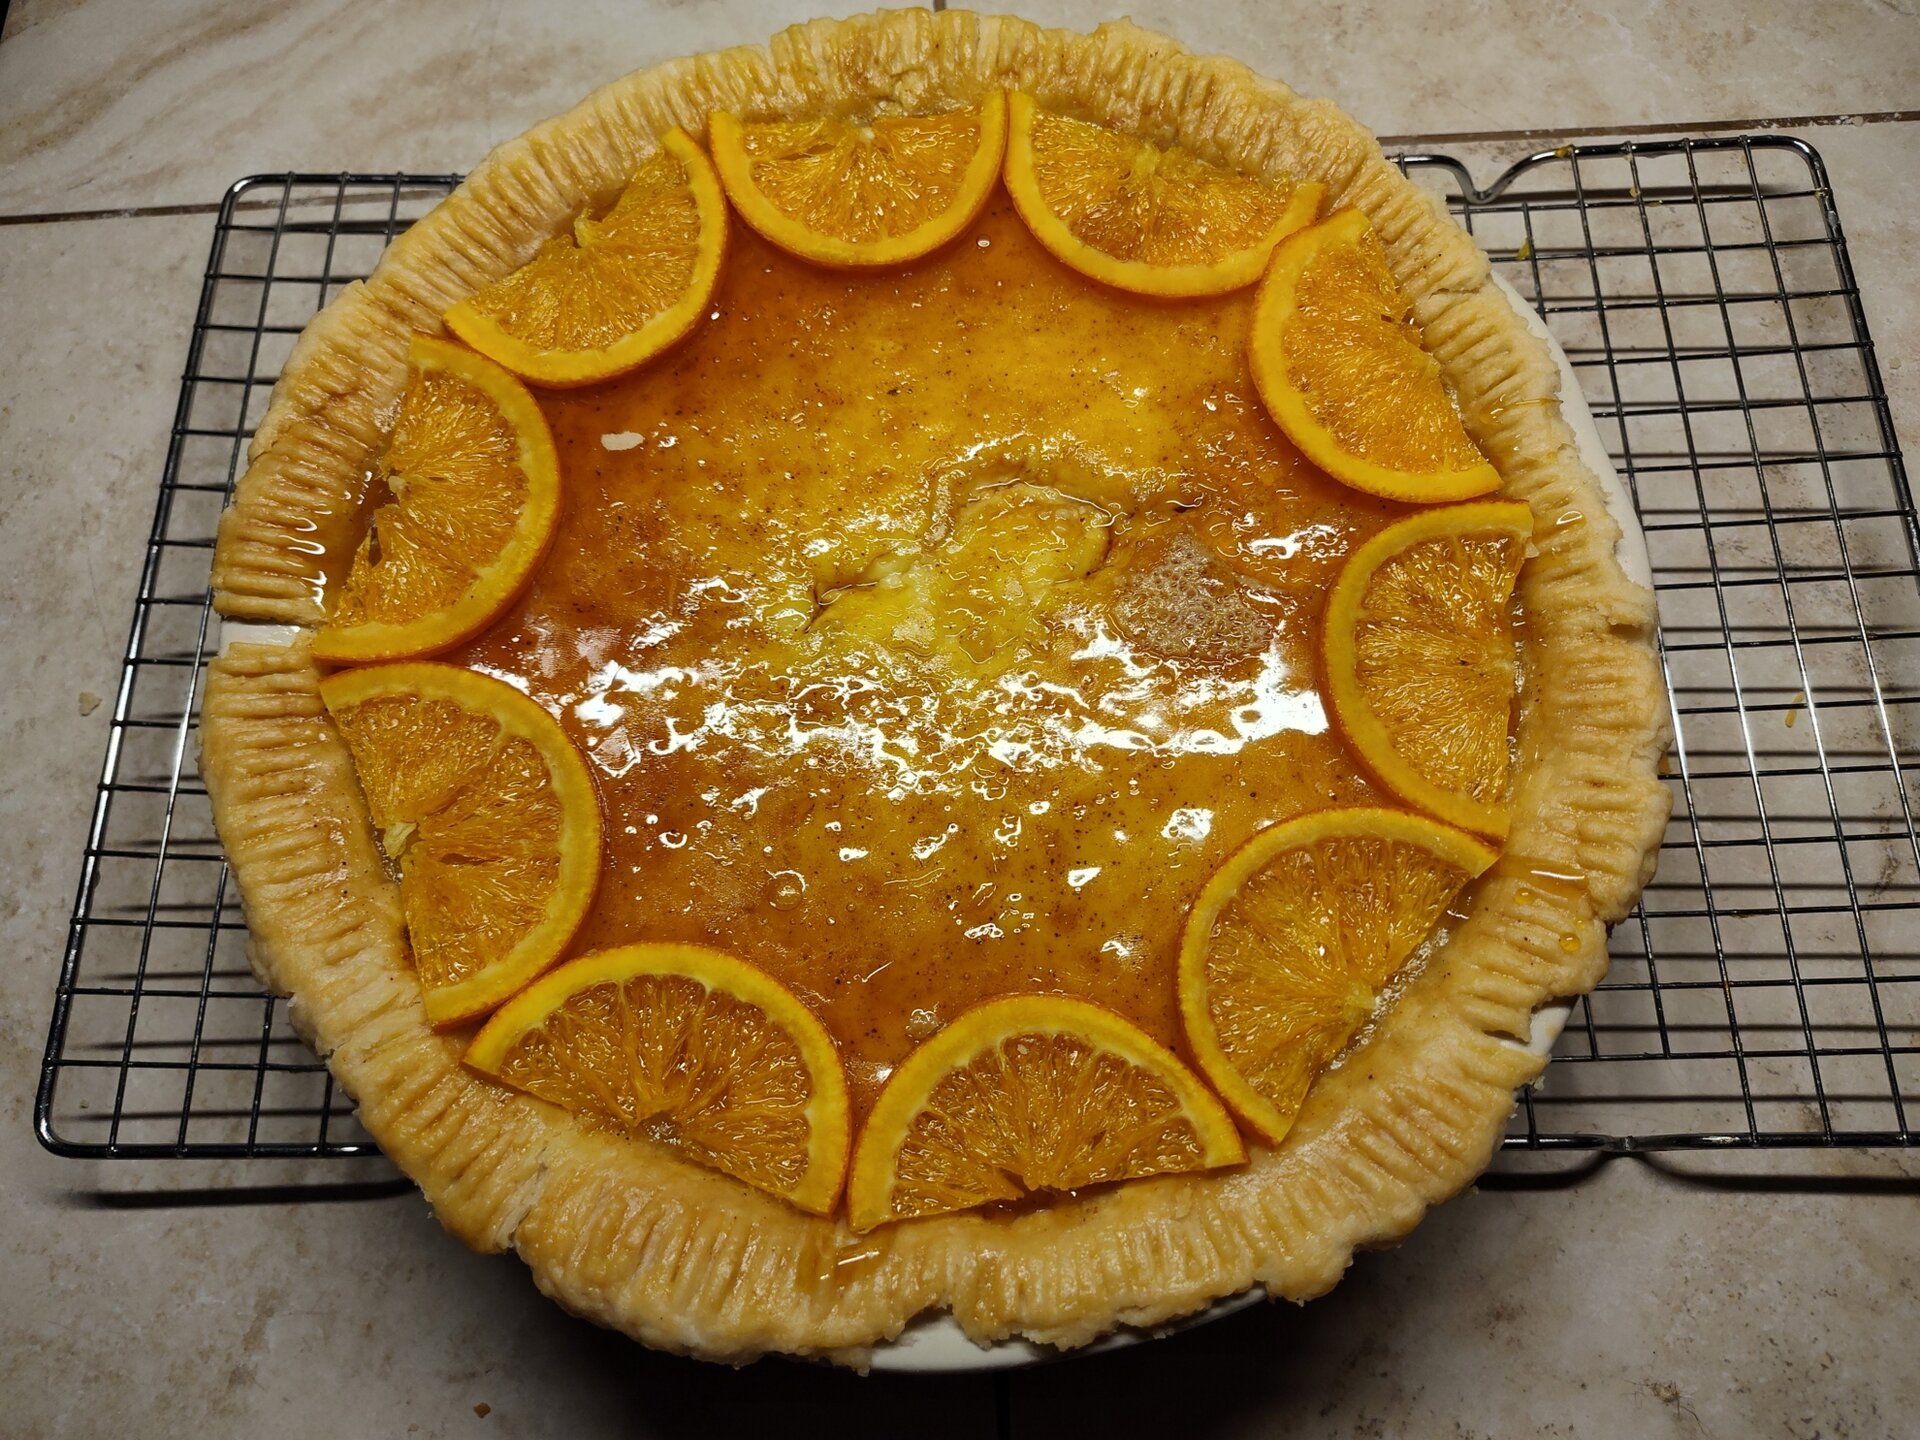
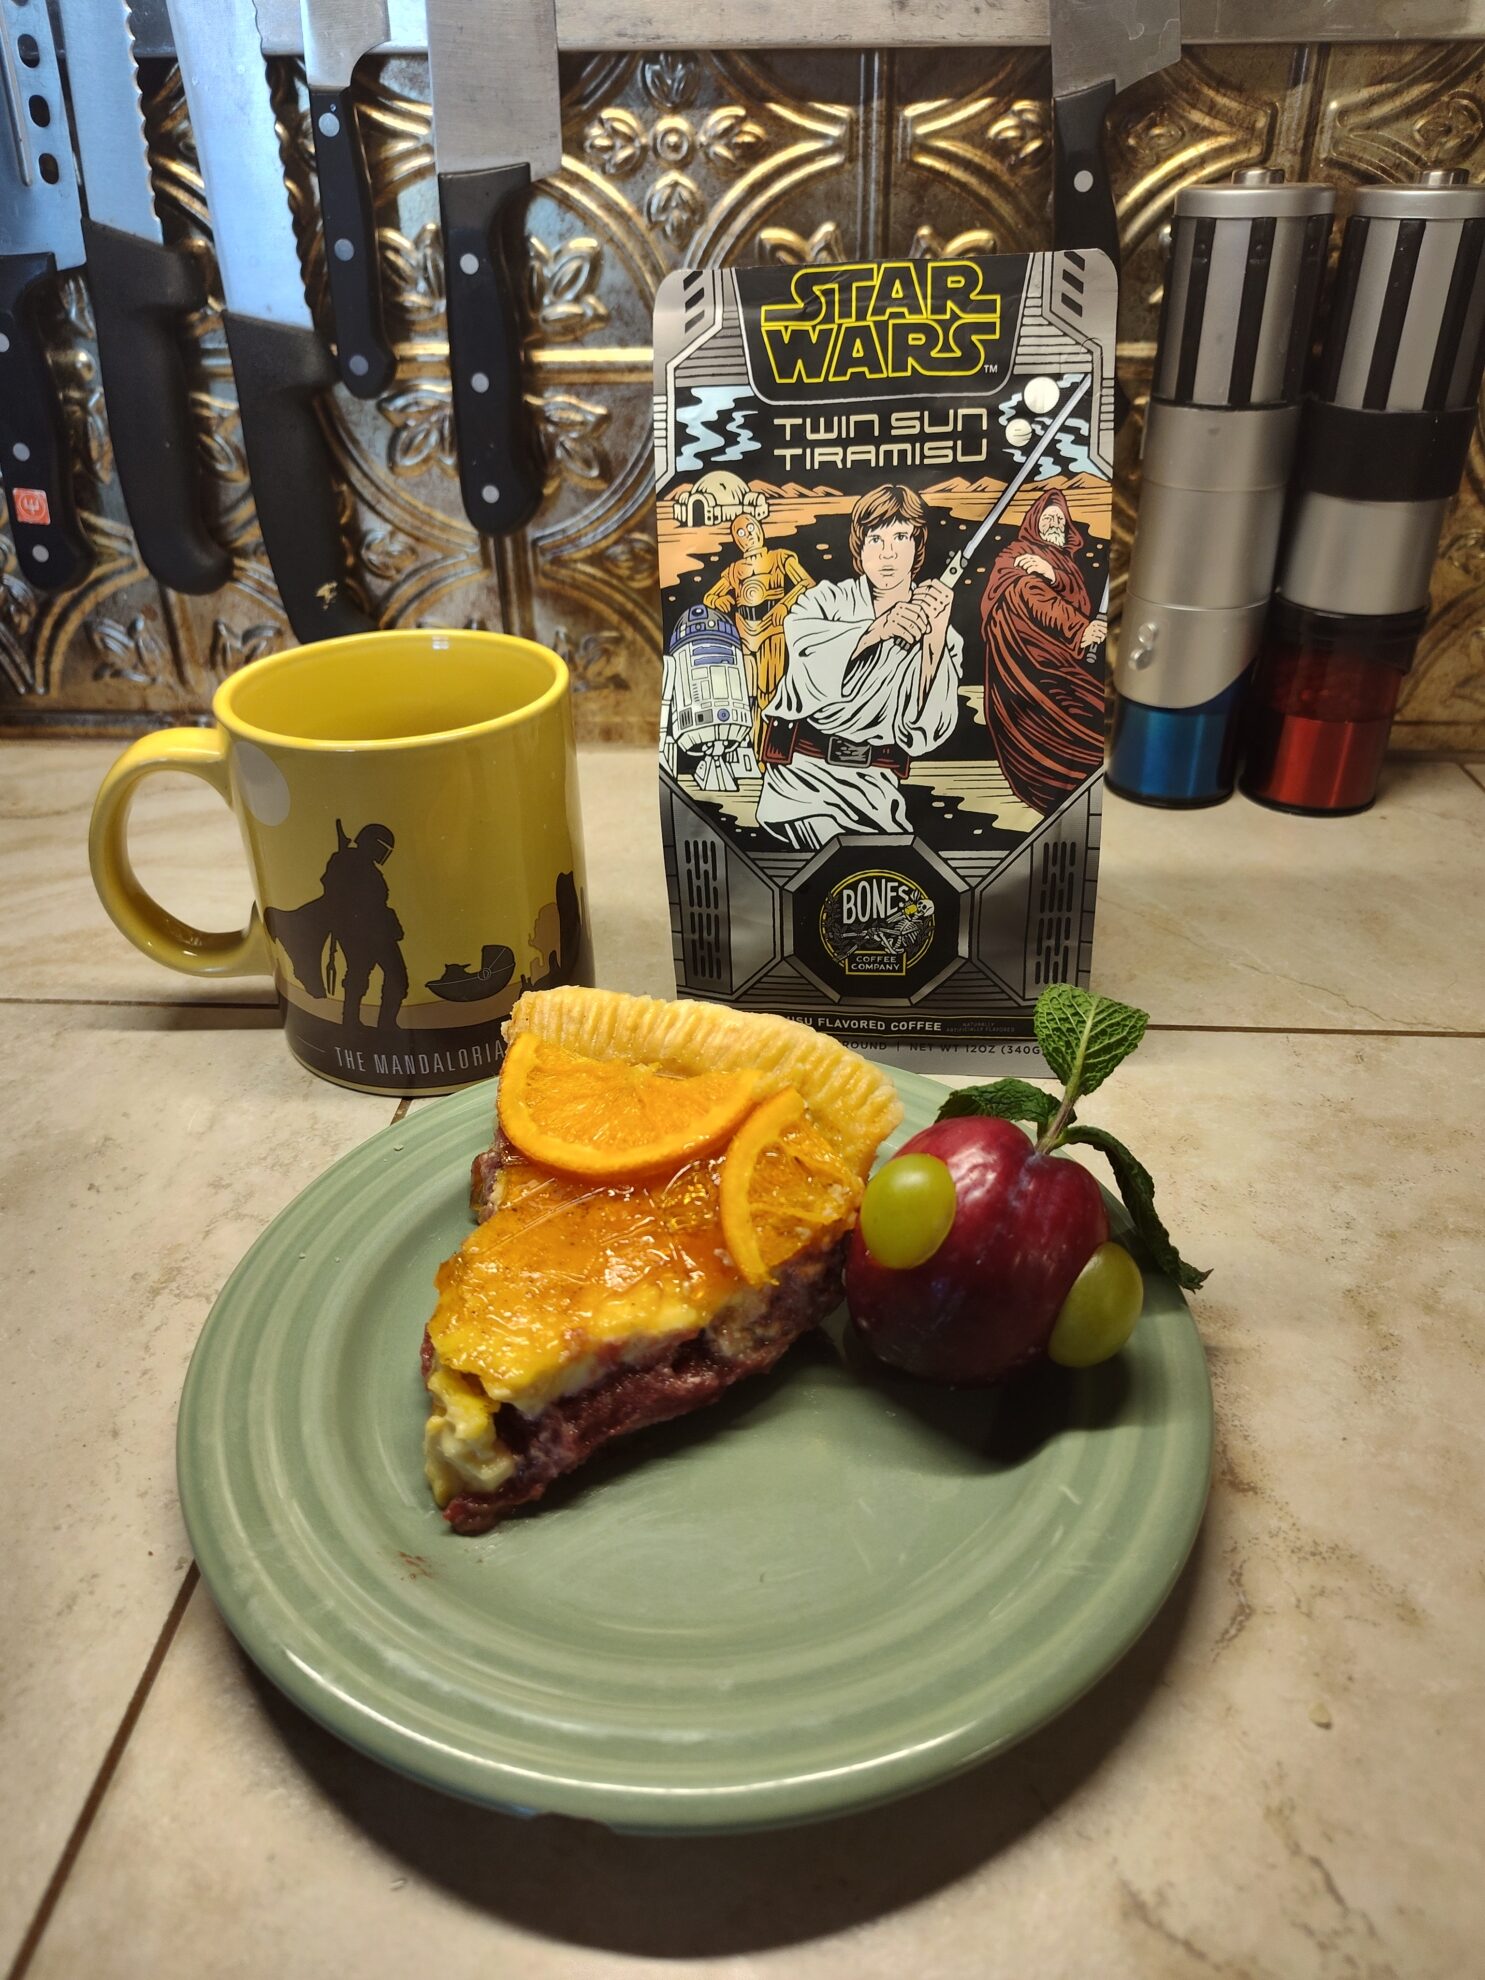
With your pie now cooled, you can add the garnish. Pick the most evenly sized candied orange slices, then slice them in half. Place them around the edge of the custard with the flat end facing the crust.
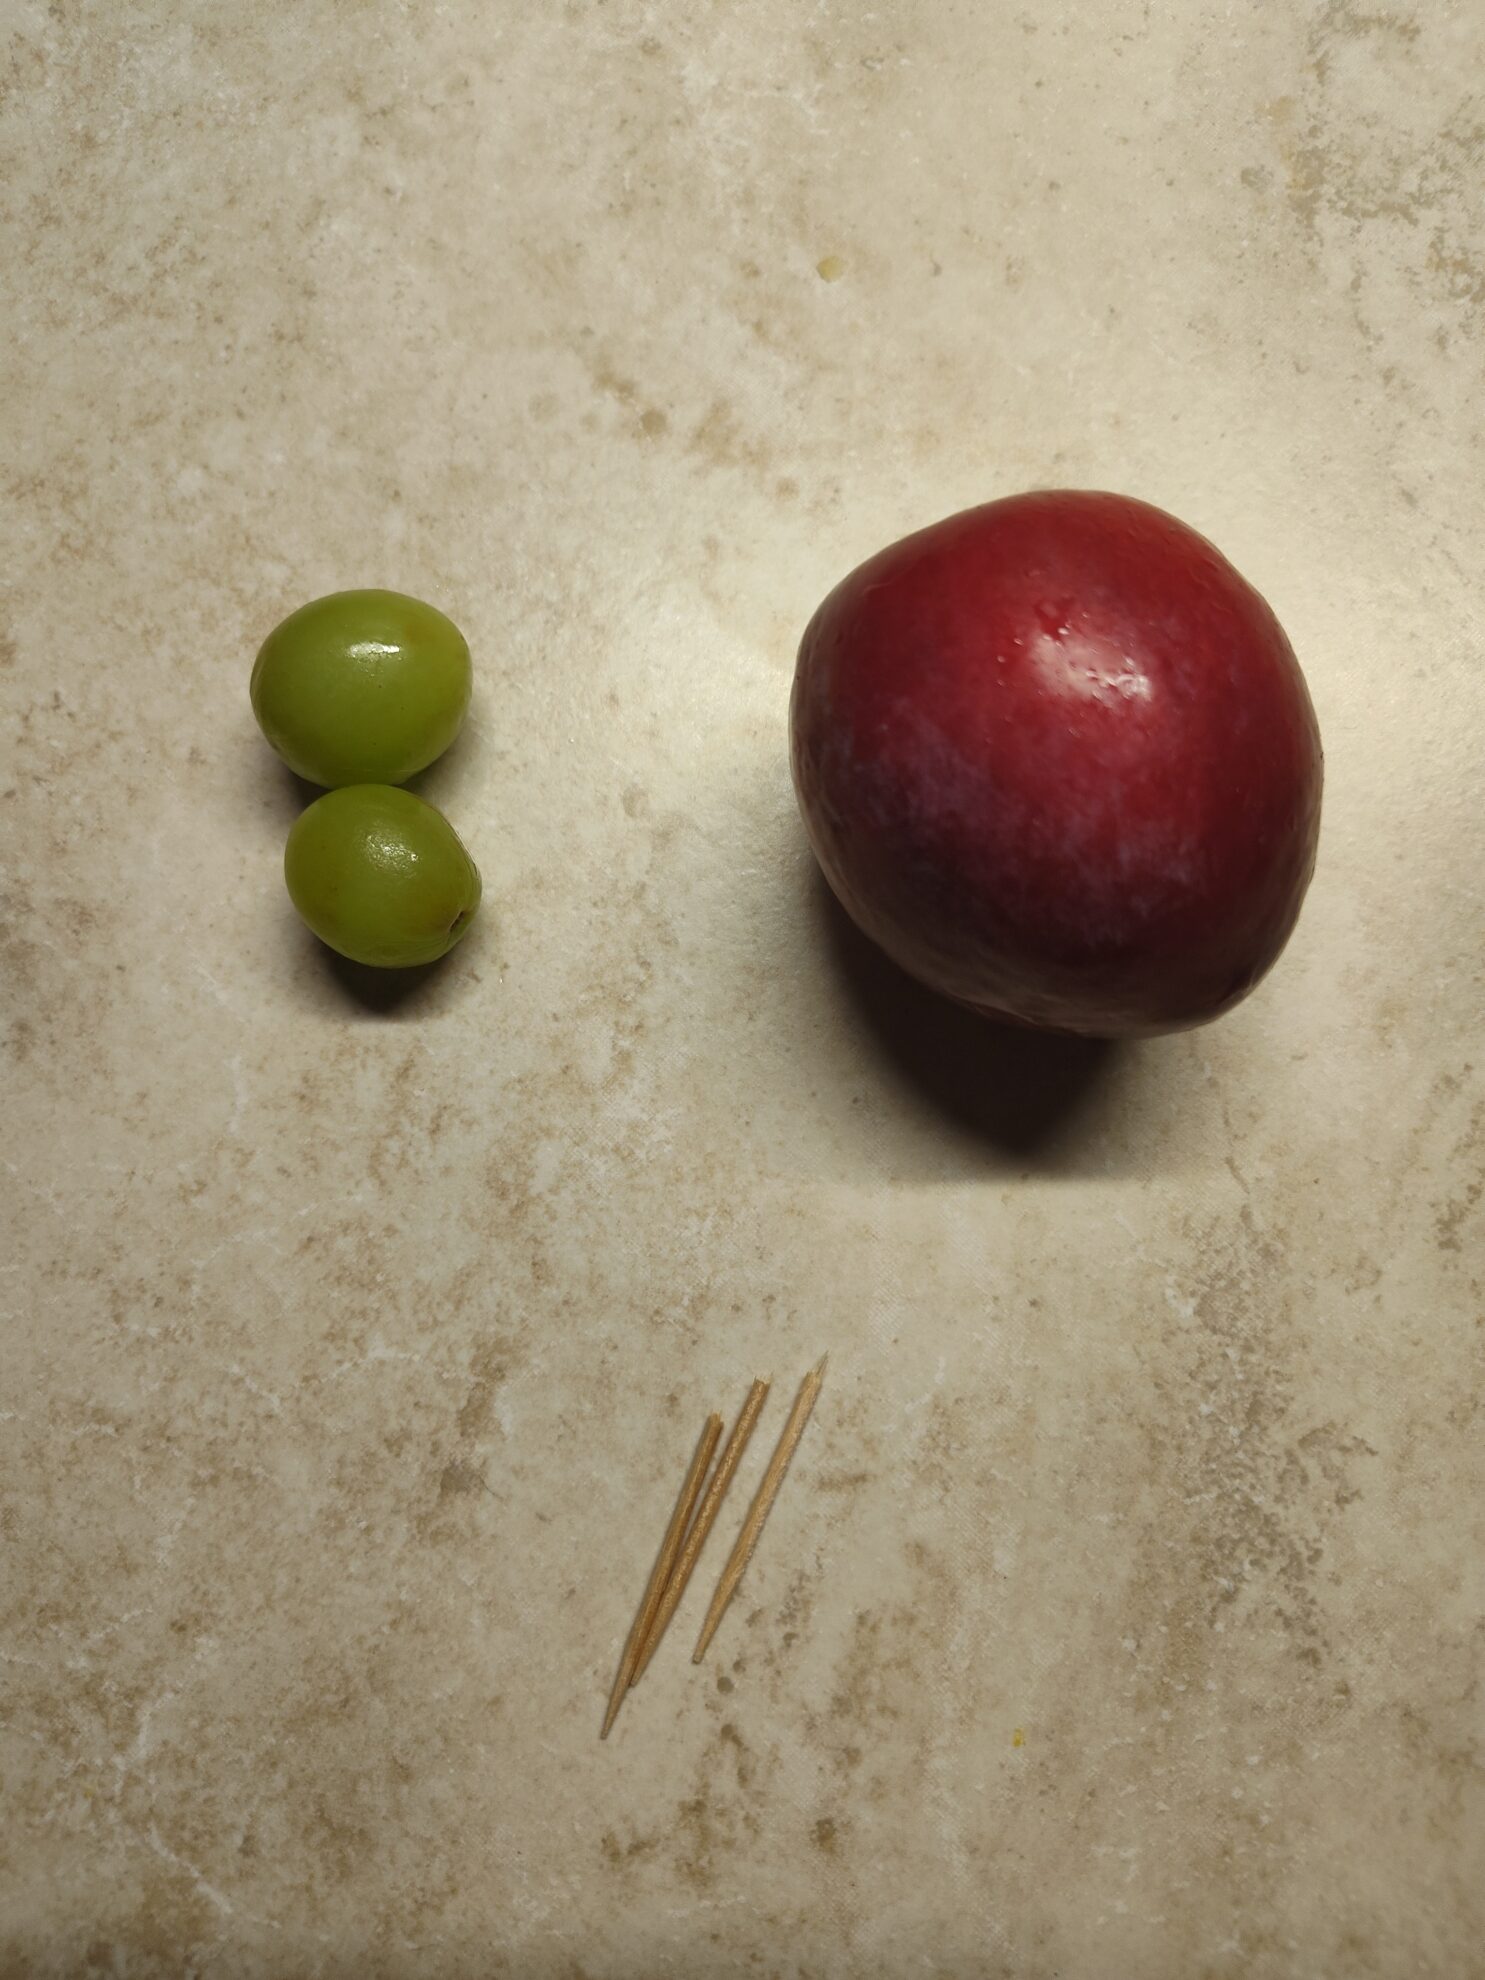
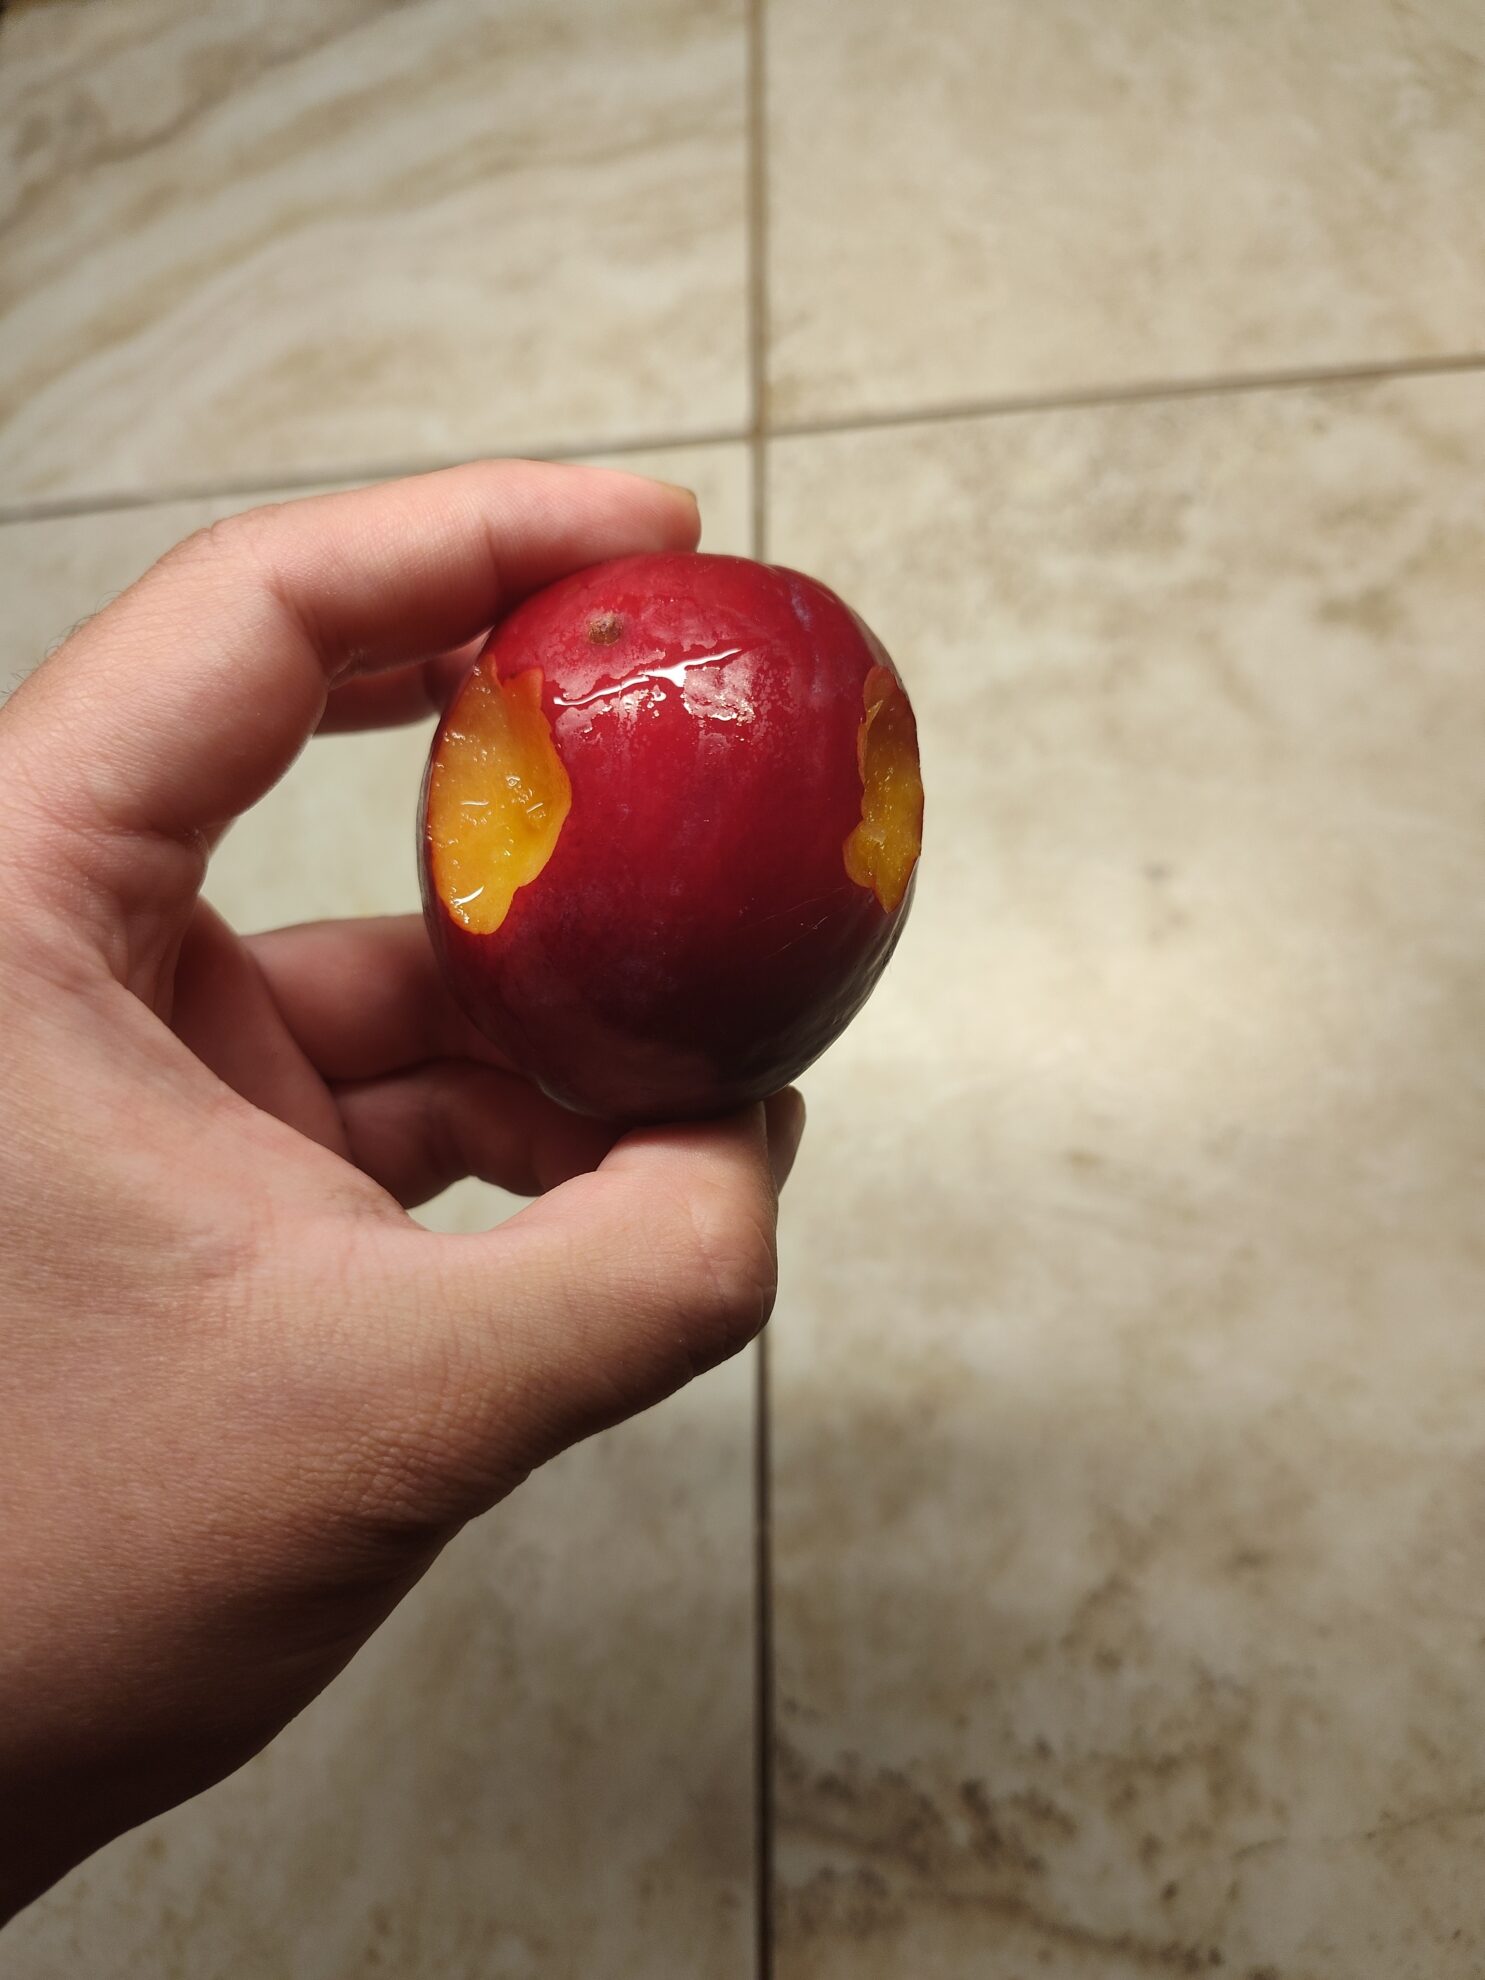
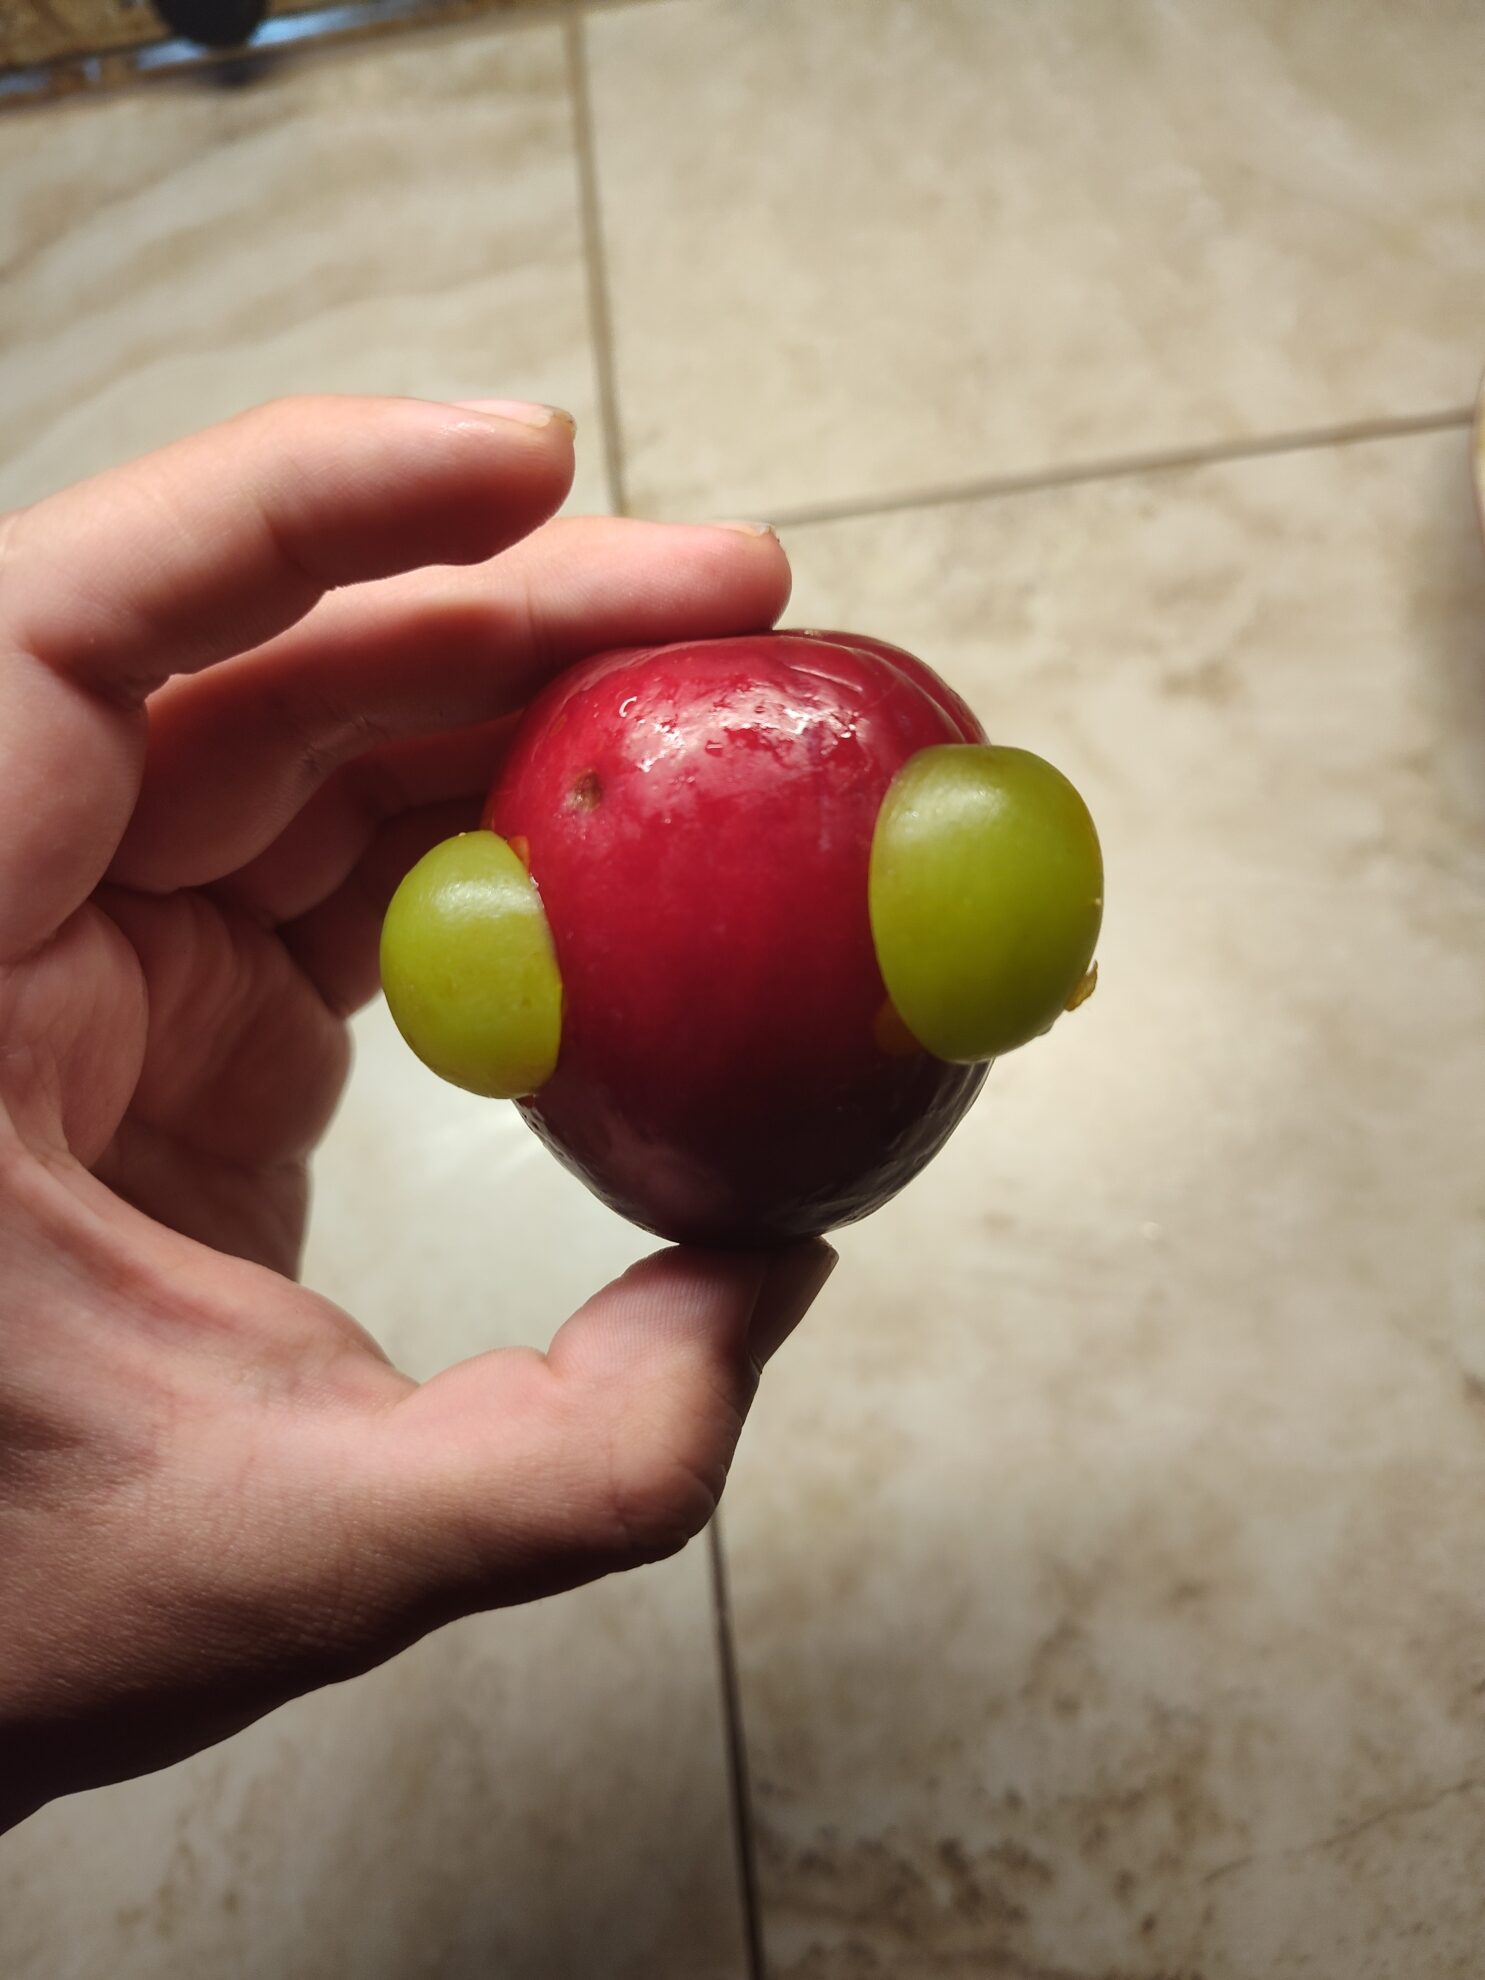
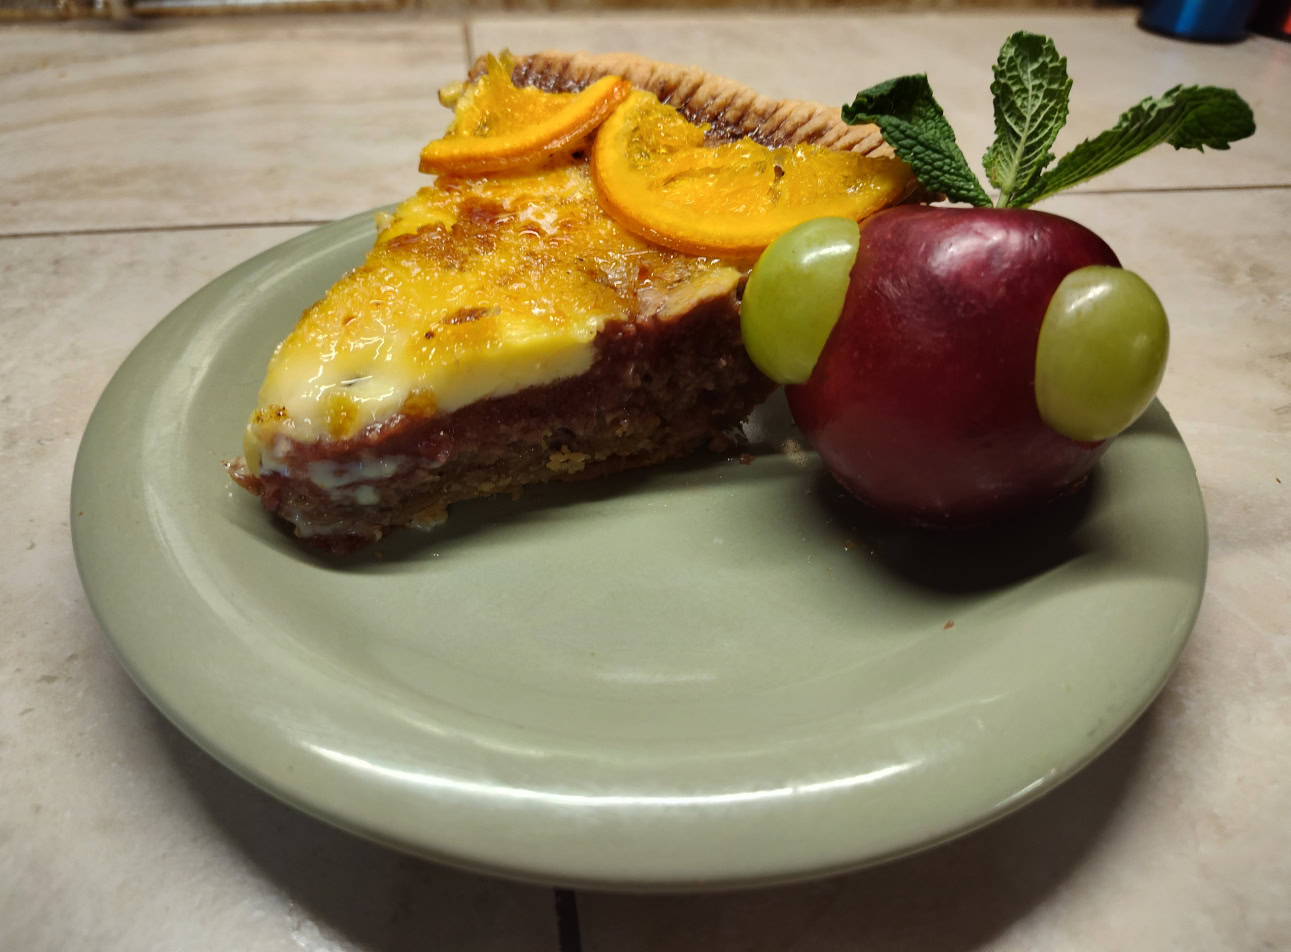
Next you’ll want a bright red plum and scoop out 3 holes around it. Break 2 toothpicks in half and slice 2 green grapes in half lengthwise. Stick a toothpick half into each hole, then stuck the grapes into the toothpick. Place a small bunch of mint leaves on top of the plum to finish your “Threeberry”. Place the “Threeberry” on top of the pie and you’re done!
Before you slice into the pie, you’ll need to break apart the sugar layer on top of the pie. All you need to do is use the back of a spoon to give it a good whack and you’ll break apart the sugar. Slice into 8 slices and serve!

Final Thoughts and Recipe
This is a time-consuming pie to make and it’s a rather advanced one at that. It’s mostly the candied oranges and the plum compote taking up most of the time. If you get those done the day before, you’ll make it much easier on yourself the next day.
As for the flavors, it’s pretty good while the plum and walnut butter are what you’ll primarily taste. In the future, I’d use salt-free walnut butter as the amount of salt in the walnut butter I used somewhat overpowers the other flavors at times. Use extra candied orange slices to throw onto your pie, they add some good citrus flavor.
The sugar glass on top could have been thinner on my end, but making a thin layer this way is a rather hard task. While the sugar glass tastes nice as it has the essence of honey, it’ll overpower the more subtle flavors of the filling if the sugar is too thick. You could just not do the sugar layer entirely and it’ll still be good.
Aside from the previously mentioned things, I need to work on making cleaner pie crusts. I prefer making a crust from scratch as the butter adds a better flavor.
Premade doughs tend to use lard or vegetable shortening and it won’t taste as good. Every frozen pie crust I’ve used has had the same issue, they stick into the tin and I can’t get a slice without them breaking apart. The extra effort of making your own crust is worth it.
I’m quite happy with how this recipe turned out. Are you planning to try this recipe out? Let us know what you think by leaving a comment here or tagging us on Twitter!
SWTOR Bestine Threeberry Pie Recipe
This is the full recipe for the Bestine Threeberry Pie, hailing from the in-game event Spring Abundance Festival in Star Wars The Old Republic. It contain step-by-step instructions as well as a full and very detailed list of all the ingredients you should use to make it by yourself.
Ingredients
Candied Orange Slices
- 3 cups white granulated sugar
- 3 cups water
- 3 medium oranges, sliced ¼" thick
Walnut Filling
- 9 oz salt-free walnut butter
- maple syrup (to taste)
Plum Compote
- 6 plums, chopped and pits removed
- 3 tablespoons maple syrup
Egg Custard Filling
- 9 egg yolks
- ⅓ cup white granulated sugar
- 2 teaspoons vanilla extract or 1 vanilla bean, split and scraped
- 1 ⅛ cups whole milk
- 1 ⅛ cups heavy cream
- Ground nutmeg, to taste
Pie Crust
- 7 oz all-purpose flour (approx. 1 ⅓ cups), sifted
- 10 ½ tablespoons chilled butter, cut into small pieces
- 1.33 fl oz (approx 7 tablespoons) buttermilk or water
- ½ teaspoon salt
- 1 teaspoon vanilla extract
The "Threeberry"
- A bright red plum
- 2 green grapes, halved lengthwise
- 2 toothpicks, halved
- Fresh mint leaves
Instructions
Candied Orange Slices
- Make Simple Syrup. Combine the sugar and water in a pot and place over medium heat until mixture is boiling. Reduce temperature to low.
- Simmer Oranges. Carefully add orange slices to simple syrup and let simmer until the rinds are transparent. Flip slices every 30 minutes, grabbing by the rind and not the pulp. If water gets too low, slowly add some boiling water.
- Dry Candied Orange Slices. Place the finished candied orange slices onto a wire rack or parchment paper on a sheet pan. Let dry for 24 hours, or place in oven at 200°F for 20 minutes and let air dry for 2 hours. Slice in half when cooled and tacky. This process is best done the day before baking the pie.
Plum Compote
- Cook Plum Chunks. Place plum chunks into a pot over medium heat and cook until softened.
- Purée the Plum Chunks. Place cooked plum chunks into a blender and blend into a purée. You may also use an immersion blender. Return to put and continue to cook over medium-low heat.
- Reduce Plum Purée. Reduce the plum purée to remove excess liquid. Stir occasionally. When the purée can maintain its shape when you run a spoon across the bottom of the pot, it's ready.
- Add Maple Syrup and Freeze. Stir in maple syrup into the hot purée until thoroughly mixed. Let cool to room temperature and place into a freezer food storage bag. Put into freezer until frozen
- Soften Frozen Compote. Once frozen, use a rolling pin or flat side of a meat tenderizer to break apart the frozen compote until it's smooth, malleable, and still frozen. It'll be similar in texture to a sorbet.
Walnut Butter Filling
- Remove Excess Oil. Drain excess walnut oil from the walnut butter, you do not want this in your pie.
- Mix in Maple Syrup. In a bowl, mix the walnut butter with maple syrup to taste.
Pie Crust
- Preheat oven to 400°F (~205°C).
- Using a pastry cutter, cut chilled butter into flour until they form small beads.
- Combine buttermilk/water, sugar, salt, and vanilla extract and stir until salt and sugar dissolve.
- Slowly mix in liquid ingredients and continue to mix gently until the dough holds. Do not overmix or add too much liquid.
- Wrap dough in plastic wrap and place in the fridge until thoroughly chilled.
- Roll out chilled dough onto a lightly floured surface until it's somewhat bigger than your pie tin. Be sure it has even thickness throughout.
- Place dough into pie mold, removing any excess dough. Using a fork, poke holes on the bottom and sides. You may crimp the edges with the fork for decorative purposes.
- Line with foil or parchment paper and place pie weights, dry beans, or rice. This prevents the crust from puffing up too much as it bakes.
- Bake at 400°F (205°C) for 10 minutes. Remove lining and pie weights, and continue to bake for another 5 minutes. Let cool for 10 minutes and begin forming egg custard filling. Reduce the oven temperature to 265°F (130°C).
Egg Custard Filling
- Combine Eggs Yolks and Sugar. Whisk together the egg yolks and sugar until combined
- Boil Milk and Heavy Cream. Add milk and heavy cream into a pot and place over medium heat. Place the scraped vanilla bean
- Gradually Combine with Egg Mixture. Gradually whisk the hot milk mixture to the egg mixture, adding a little of the hot liquid at a time. Adding too much will cause the eggs to coagulate.
- Strain Custard and Remove Foam. Strain the custard through a fine metal strainer into a measuring cup or pouring receptacle. Spoon off any foam that may be present on the custard liquid.
Assemble the Pie
- Place the pie tin with the crust onto a baking sheet.
- In par-baked pie crust, place in your walnut filling and even it out.
- Place malleable frozen compote above the walnut filling, evening out with a knife.
- Gently pour egg custard mixture on top of the frozen compote. Be sure to avoid adding the custard too quickly or too much in one spot, this can cause the compote below to break apart and get into the custard.
A good way to do this is gently is to pour the liquid on top of a spoon above the pie so it's less direct on the compote. This will help prevent the liquid from creating holes and mixing the layers. - Sprinkle the top of the custard with ground nutmeg to taste.
Bake the Pie
- Gently transfer the pie into the oven set to 265°F (~130°C). Cook for 2 hours or until the custard is set. The custard may appear puffy, it'll deflate as it cools down.
- Remove pie from the oven and place on a wire rack. Rest until custard has deflated if it puffed up.
- Melt and Caramelize Sugar. Heat sugar, water, and honey over medium heat. Once the sugar reaches an amber color, GENTLY poor over the pie, being careful not to pour too much at once as this can create holes in the custard. When you have a thin even layer of caramel on top, let the pie reach room temperature.
- Once the pie is at room temperature, loosely wrap in foil while being careful not to damage the crust. Place in the fridge for several hours or overnight.
- Once thoroughly chilled, remove pie from the fridge and carefully remove the foil.
Finishing Touches
- Place halved candied orange slices around the pie near the crust. The flat side should face the crust.
- Get your bright red plum and carve out 3 grape-sized holes around it.
- Using a toothpick half, stick a grape half onto a hole on the plum. Repeat for the remaining 2 holes.
- Place a small bunch of mint leaves on top of the plum.
- Place your "Threeberry" on the center of your pie.
- Slice and enjoy!
Notes
My ceramic pie mold was rather large and deep. The quantity of ingredients needed may vary depending on the size of your pie mold. You might even end up with 2 pies worth of ingredients with this, so you can likely halve the ingredients if using a standard pie tin. Each layer of the pie (walnut, plum, and custard) should take no more than 1/3 of the pie's volume. If you halve the quantity for 1 pie, don't halve the crust ingredients as it still only makes 1 pie's worth of crust.
Previous Renditions of the Pie
So this pie took me a couple attempts to make as closely as possible to how it is in the game. In the first rendition, I sliced plums into wedges then layered them into the pie. Unfortunately, it turns out that plums float. Despite my best efforts, I couldn’t have them remain submerged in the pie. The added moisture from the plums also ruined the egg custard layer.
My second attempt was made when I was rather sleepy. I had been juggling numerous things in life and the pie project was on and off. I was making a pie past midnight and I became so tired that the crust came out rather ugly.
This version used walnuts that were pulverized in a food processor mixed with butter and honey. Sugar was put on top and I used a blowtorch to melt it. However, this didn’t quite match the look of the pie in-game. It was still good, but I primarily tasted walnuts.
The egg custard was a lot more simple as it was eggs with milk and sugar topped with nutmeg. It gave the pie a more eggy and savory taste which was good. I don’t think everyone might like that eggy flavor, which is why I opted for a custard more akin to that used in a creme brulee.
Overall this was a fun experience. Do keep in mind that VULKK is not a food blog, this article is just for fun as I felt inspired to make the pie seen in SWTOR. It’s certainly been an experience trying to make Star Wars food in real life to the best of my ability. It wouldn’t be my first time however, and it will not be my last. Now if you’ll excuse me, I’m going to go enjoy my pie and caf.
I hope you enjoyed this article. Let me know how yours turns out and if you like it! For anything else SWTOR related, see our SWTOR Guides Master List.