
Everything you need to know about the Propagator Core XR-53 boss in SWTOR. We will explain every mechanic and provide strategies for how to beat the boss on Story Mode and Veteran Mode.
Table of contents
The lair boss on Ilum was added with Game Update 7.6 “Galactic Threads” in both Story Mode (SM) and Veteran Mode (VM).
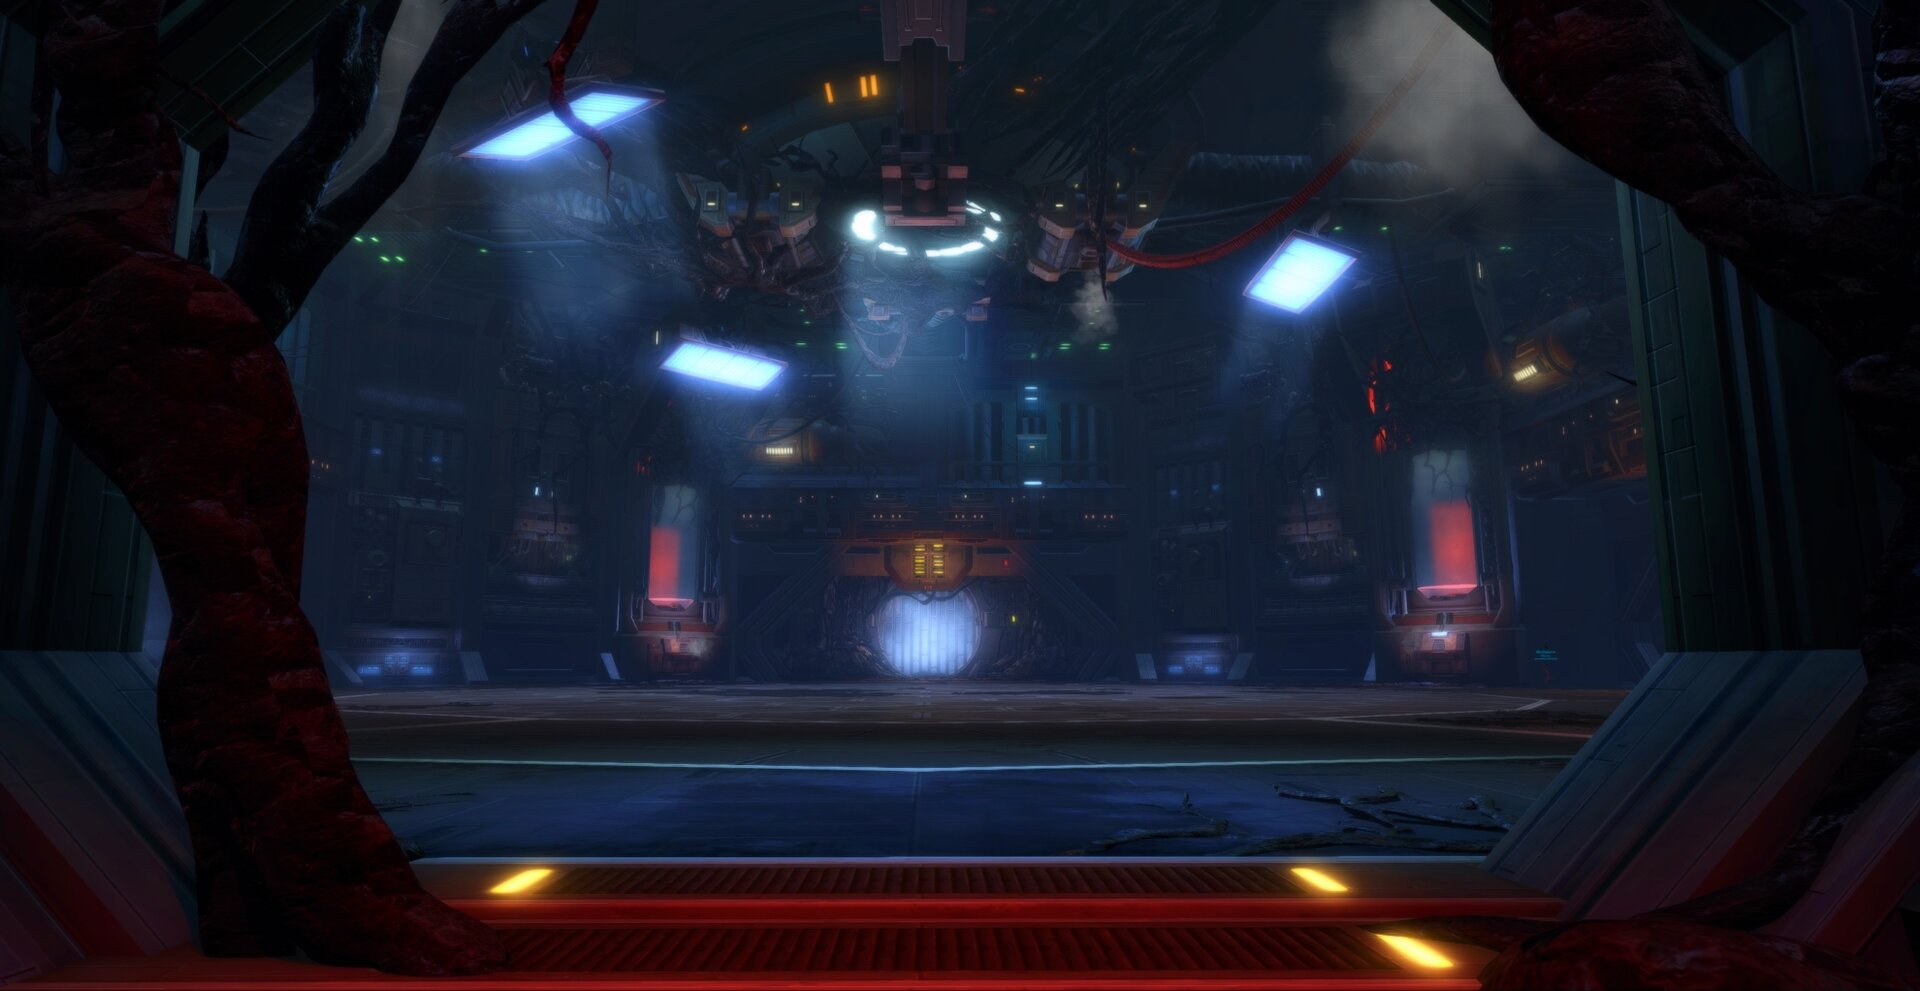
The Propagator Core XR-53 was installed inside a piece of the False Emperor’s space station that has become active again after crashing down on Ilum following Malgus’ failed coup all those years ago.
It’s a positioning-focused fight that combines a ton of familiar mechanics from the most played bosses in modern SWTOR. There are a ton of adds as well, but it doesn’t feel right to call it an add fight.
What Are Lair Bosses
For those who aren’t familiar, lair bosses are singular, instanced boss fights located on planted, basically a cross between an operations (raid) boss and a world boss. SWTOR’s lair bosses include:
- Xenoanalyst II (Gray Secant, Ilum)
- The Eyeless (Rakghoul Tunnels)
- Golden Fury (Toborro’s Courtyard, Makeb)
- Colossal Monolith (Ziost)
- Geonosian Hive Queen (Ossus)
- Propagator Core XR-53 (Ilum)
Lair bosses aren’t structurally different from operations bosses, though they only ever exist in Story Mode (SM) and Veteran Mode (VM/HM), not Master Mode/Nightmare (MM/NiM). However, they tend to be more unforgiving than operations bosses at equivalent difficulties.
Propagator Core XR-53 Locations
The Propagator Core XR-53 entrance to the instance is located inside each faction’s Base Camp on Ilum. You can pick up the story mission “Relentless Replication” right outside the entrance.
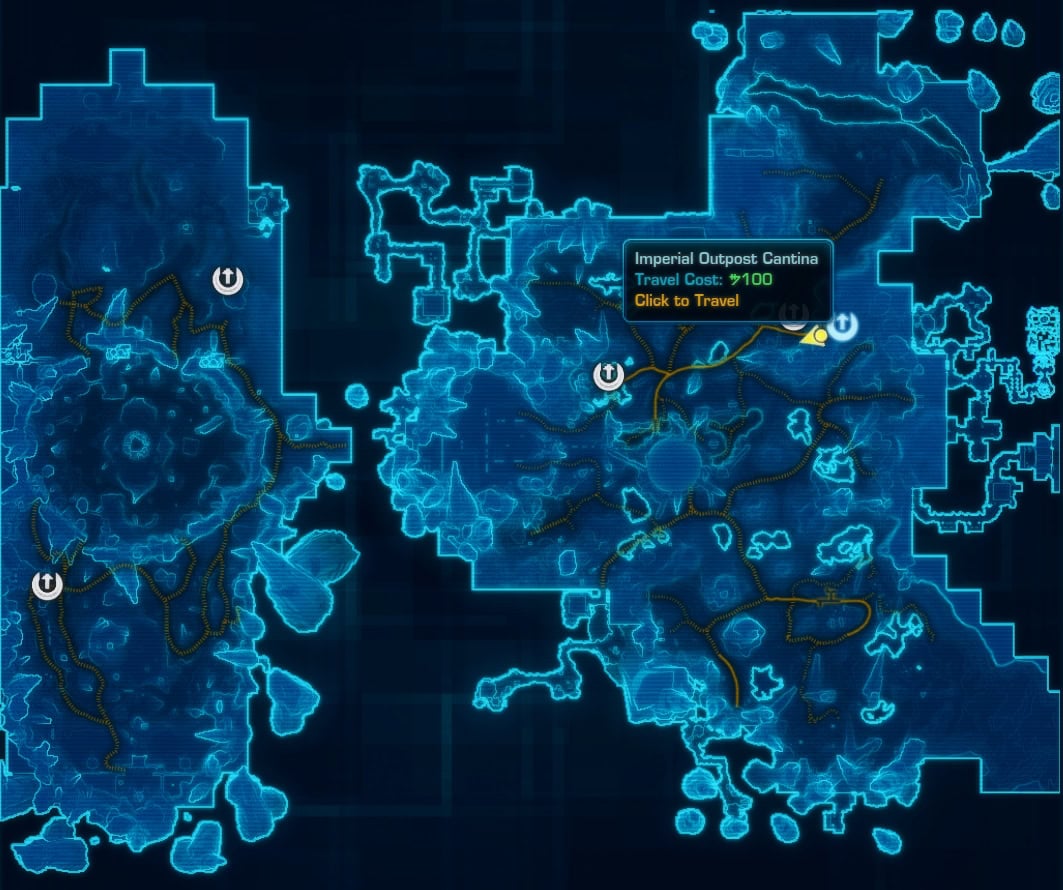
Imperial Location
The Imperial entrance to the Propagator Core XR-53’s lair is located next to the Mailbox on the underground level of the Imperial Outpost on the Eastern Ice Shelf on Ilum. The closest Quick Travel point is the Imperial Outpost Cantina.


Republic Location
The Republic entrance to the Propagator Core XR-53 lair is located next to the Cargo Hold on the main level of the Republic Outpost on the Eastern Ice Shelf on Ilum. The closest Quick Travel point is the Republic Outpost (not Cantina).


Recommended Group Compositions
Operations are typically balanced to require 8 players in a standard composition of 2 tanks, 2 healers, and 4 DPS, though many groups prefer to use 1 tank and/or 1 heal along with 5-6 DPS whenever possible in all 8m content.
Using more DPS makes the fight go faster, which can make some mechanics and checks easier, or enable you to skip phases. Even if there aren’t any clear benefits, making a fight shorter means there is a reduced amount of time for a mistake to occur.
Story Mode Propagator Core XR-53 Group Comp
In Story Mode (SM), you can get away with 1 tank, 1 healer, and 6 DPS. This will make the fight go faster without any significant downsides. However, there is technically a tank swap mechanic, so it is valuable to have an Assassin | Shadow tank or DPS with taunt (DWT).
Veteran Mode Propagator Core XR-53 Group Comp
In Veteran Mode (VM), you need 2 tanks but can get away with 1 healer and 5 DPS. The tanks can also use DPS gear (AKA “skank tank”). You need 2 tanks to deal with the tank swap mechanic.
If you need a refresher or want to learn more about your class and spec, check out our Combat Style SWTOR Guides. Each one has several build recommendations, including for operations and other group content.
Propagator Core XR-53 Mechanics
Propagator Core XR-53 is extremely similar to The Eyeless in every regard, including mechanics, fight structure, and pacing.
Every mechanic from VM Eyeless is present in SM Propagator Core in some capacity. However, the Rakghouls are far less dangerous and the green plague circles don’t stick around as the acid does. You also have to be more precise with kiting the Propagator Core in circles, as the boss frequently stops to cast.
Imperfect Construct (Add)
The most significant mechanic of the Propagator XR-53 are its Imperfect Constructs, a stream of constantly spawning kamikaze adds a` la Nefra.

These adds spawn every 15s, immediately leap to a random telegraphed player, and begin casting Imperfect Explosion, which detonates 15s later in a 10m radius.

It is possible to defeat the droids before they explode, but it’s a waste of time to attack them in SM because you have a ton of time to get out of the circles before they explode.
They also spawn from too far away and engage too quickly to reliably have someone sit out to aggro them. In other words, you can only stack them up and move the entire group away before they explode.
Imperfect Constructs in Veteran Mode
In VM, the droids have way more health and the explosion leaves behind a permanent pool of acid, covering the entire blast radius for the remainder of the fight.
You can absolutely kill them before they explode, but they spawn too frequently for it to be practical. You end up spending insufficient time DPSing the boss unless your entire group is super skilled, well-coordinated, and plays specs with incredible rotational AoE.
Standing in the acid applies a weak but high-stacking DoT debuff called Digestive Enzymes. We’ll discuss this DoT in greater detail in a moment, but suffice to say, you can run through it and even stand in it for a little bit if needed.
Dealing with these droids and the acid they leave behind is the most challenging part of the fight, as the boss has a ton of HP and the acid doesn’t disappear. You need to defeat the Propagator Core before you run out of space.

The trick is to stack on the boss and overlap the circles as much as possible.
Try to stand right on the outside of the red circle from the droid and the edge of the acid. It doesn’t have to be perfect, so don’t risk taking damage from the explosion or getting a stack of the Digestive Enzymes, but don’t be waste space either.
If everyone stacks up right outside of the red circle near the acid, you’ll be able to DoT spread and/or cleave to the Prey Seeker Droids and will defeat the boss before you run out of space.
 Digestive Enzymes and Skulls
 Digestive Enzymes and Skulls
Most of the Propagator Core’s attacks apply a stacking DoT called Digestive Enzymes, and standing in the acid on the ground will cause you to rapidly build stacks. A few stacks are harmless, but it does start to hurt eventually.
You have to be careful because once you feel the acid start to burn, it will remain burning. Other than Force Barrier, Digestive Enzymes aren’t cleansable by player abilities. The DoT lasts at least 20s in SM and refreshes every time you get a new stack. In VM, the DoT semi-permanent because it never falls off on its own.
The skulls above each player’s head is meant to give you an idea of how many stacks of the DoT they currently have without needing to rely on finding the exact debuff. More and redder skulls means higher stacks.
Hungering Bite
 Hungering Bite
The only way to get rid of Digestive Enzymes, the stacking DoT you get from standing in acid and such, is to stand in one of the Propagator Core’s telegraphed attacks called Hungering Bite.

Hungering Bite is an orange rectangular telegraphed attack with a 4s cast on a 25s cooldown that deals very little damage. Unlike with Extraneous Expulsion, the rectangular telegraph stays in place.
In SM, Hungering Bite removes all stacks of Digestive Enzymes at the end of the cast, but in VM, it only removes 10 stacks.
Be liberal about giving the boss a taste. The damage dealt by Hungering Bite is negligble, and you’ll take far more damage if you let those Digestive Enzymes stay on you.
Prey Seeker Droids
 Prey Seeker Droids
Prey Seekers are stun droids. You’ll find similar mechanics when fighting Jarg and Sorno, Soa (Mind Traps), and the final boss of Korriban Incursion. They spawn every 25s, target a random telegraphed player, and stun them for 20s. Just like the Imperfect Constructs, the Prey Seeker Droids will explode at the end of their channel.

They don’t hurt directly while stunning you, but with all the movement required in this fight, being stuck in place is quite dangerous. You can get chunked for 75% HP if you’re stacking when the entire group’s Acid Rocketry descends upon the entire group.

You take damage and get a stack of the Digestive Enzymes DoT for every circle you’re standing in when the missiles hit. I hope it goes without saying that Prey Seeker Droids should be defeated ASAP.
Prime Directive and Big Adds (Story Mode)
 Prime Directive and Big Adds (Story Mode)
This mechanic is the most complicated. In a nutshell, the boss builds stacks that correspond to amount of fluid and biomass in the vats around the outside of the room. When the vats full up, the boss uses it to spawn a stronger add that you have to take down. The boss is immobile the entire time.
Now that you see the big picture, we can go through the individual components that make up this mechanic, including the vats, Harvesting Biomass, Prime Directive, Regeneration Protocol, and the big add.
There are 4 vats around the outside of the room. Throughout the fight, these vats fill up with fluid in 25% increments and correspond to the number of ![]() Harvesting Materials buff stacks (1 stack = 25% full, 2 stacks =50% full, etc.).
Harvesting Materials buff stacks (1 stack = 25% full, 2 stacks =50% full, etc.).

Once the vats are full and the boss would gain its 5th stack of the Harvesting Materials buff, the boss can fulfill its Prime Directive and build a proper new construct instead of the explosive Imperfect Constructs it typically sends out.
The boss gains a stack of Harvesting Materials every 30s, and Prime Directive has a 165s cooldown, so shortly after it would gain the 5th stack, it begins channeling Prime Directive for 10s.

There’s an 8m yellow circle and orange shield effect that expands outwards over those 10s. The presence of a player inside this circle determines whether you get a Powerful Construct (good) or a Mistaken Construct (bad).
Powerful Constructs (SM Only)
The main add in SM is the Powerful Construct and has some of the Propagator Core’s attacks alongside a few of its own. It also shields the boss. Defeat it as soon as possible.

Once the Powerful Construct drops below 10%, it can become immune and begin channeling Explosive Finality for 15s, which is a larger circle with a 15m blast radius that leaves behind a large pool of acid.
It seems to take a moment for the explosive to get itself sorted on the back end, so it’s possible to defeat the droid before this effects apply, but once you see Explosive Finality, just get out of the way and return to the main boss.
Mistaken Constructs (SM)
The other add you can get (but shouldn’t) is a Mistaken Construct. It spawns on the opposite side of the room and constantly channels a roomwide AoE pulse that will cause a wipe.
This add can spawn in 2 different situations:
- If no one is standing in the yellow circle when the Prime Directive cast finishes.
- If the boss has the Depleted debuff when it casts Prime Directive.
You must have a player stand near the boss by the time the cast on Prime Directive finishes or you’ll get a Mistaken Construct.
After the 3rd Prime Directive cast, the boss will have depleted its resources, signified by a green buff called “Depleted”. When it casts Prime Directive for the 4th time, you’ll end up with a Mistaken Construct.
Prime Directive in Veteran Mode
In VM, the Powerful Construct add is swapped out for 1 of 3 types of role-dependent adds; namely, Rampaging, Defender, and Supplicant Constructs. The type of add spawns is determined by the role of the player who is standing in inside the yellow circle when Prime Directive ends.
| Sampled: DPS ▶ Rampaging Construct | |
| Sampled: Tank ▶ Defender Construct | |
| Sampled: Healer ▶ Supplicant Construct |
Once the player is “sampled”, the boss will get a buff that locks it out of making that role of droid. If you try to make a second Construct of the same type (i.e. a second Defender Construct), you’ll end up with a Mistaken Construct instead and wipe.
The selection is random, so in order to force it to make a certain role, you need to coordinate which role goes in for a given cast of Prime Directive. The Propagator Core can only build one of each type of droid.
Rampaging Construct (DPS Add, VM Only)
If Prime Directive selects a DPS who is standing inside the yellow circle, a Rampaging Construct will spawn. The sole attack of the Rampaging Construct is—wait for it—Rampage, which is a roomwide earthquake that deals progressively more damage each time it casts the ability.

Rampage has a 0.5s cast time and a 2s cooldown, so this big boy is gonna spam it like he has a blood feud with the floor. Each cast increases the damage dealt by subsequent Rampages by 25%.
The most healing intensive part of the fight is when this add is out, so everybody should be popping DCDs, preferably AoE DR, if available.
The Rampaging Construct moves around freely in between casts, so it’s best to bring it over to the boss. I recommend making it the third Construct that spawns because you won’t run into problems where it stands still in acid.
Defender Construct (Tank Add, VM Only)
If Prime Directive selects a tank who is standing inside the yellow circle, a Defender Construct will spawn.

The Defender Construct is immune to CC and interrupts and channels Preservation from the moment it spawns until the moment it dies. This channel makes the Propagator Core immune to all damage.
This add can’t move and always spawns next to the nearest vat on the outside of the room. In the picture above, you can see how the mDPS can’t hit the boss consistently without standing in acid.
I recommend sending a tank in for either the first or second Prime Directive. Until the tank add spawns, everyone should take care to stand away from the vat so the ground around it won’t be covered in acid.
Supplicant Construct (Healer Add, VM Only)
If Prime Directive selects a healer who is standing inside the yellow circle, a Supplicant Construct will spawn.

The Supplicant Construct spam channels Supplication, which heals likely uses has some sort of hyperspace tech to repair the Propagator Core because I don’t see how it could possibly heal the thing any faster.
You need to interrupt Supplication on cooldown. Your interrupt abilities will lock it out of casting for 4s, so either assign an interrupt order or call out “I’ve got next” if your interrupt will be up in time.
The Supplicant Construct can move around while it isn’t channeling Supplication, so it’s more mobile than the Defender Construct, but less mobile than the Rampaging Construct.
Tanks should Taunt the Supplicant Construct over to the Propagator Core so that everyone can cleave and DoT spread.
I recommend getting a Supplicant Construct to spawn with either the first or second Prime Directive cast.
If your group is bad at interrupts, it’s probably best to send in a healer for the first cast since that minimizes the amount of damage it can heal up. However, if your group is bad at positioning, you should probably do the Defender Construct first.
Mistaken Construct
Just like in SM, the Mistaken Construct will spawn if nobody stands in the yellow circle for Prime Directive or the ability is cast for a 4th time when the boss has the Depleted buff.
The Mistaken Construct will also spawn in VM, if you attempt to summon the same type of Construct more than once. It’s pretty easy to plan and coordinate, but I recommend giving out specific assignments to the most raid-aware group member in each role just to be safe.
Recommended Add Order
Technically, you can summon the adds in any order, but it’s important that everyone is on the same page and imperative that you don’t try to build the same type of Construct more than once.
- Defender (Tanks go in for first Prime Directive)
- Supplicant (Healers go in for second Prime Directive)
- Rampage (DPS go in for third Prime Directive)
For the sake of simplicity, I’m recommending the above default order based on the overall mobility of each Construct, but there is a strong argument for bringing out the healer droid first and then the tank droid.
Recovery Protocol
Once the Prime Directive cast finishes and the large Construct spawns, the boss begins channeling Recovery Protocol for 30s. Recovery Protocol does not heal the boss; it just resets the cooldowns on all its abilities. Imperfect Constructs and Prey Seeker Droids stop spawning during this phase.
This mechanic is similar to what happens when the Geonosian Hive Queen summons in her Royal Guards and then shouts for a bunch of other reinforcements for a while.
The boss cannot move and adds stop spawning during this time. If you can’t defeat the large Construct by the time Recovery Protocol ends, your DPS is likely too low (or too dead) for you to defeat the boss before the 4th cast of Prime Directive.
Lethal Strike and the
Softened Up Debuff (Tank Swap)
 Lethal Strike and the
Lethal Strike heavy leap attack that has no relationship to the Lethality Operative ability. It knocks you down, deals a whole bunch of damage, and applies a stack of a debuff called Softened Up, which has a different effect depending on the role of the victim.

The attack has a 1.5s cast and a 30s cooldown. Tanks should save their cheese ability to mitigate this attack and swap every time. Softened Up lasts 60s, so you will get multiple stacks if you take multiple Lethal Strikes in a row.
The unique effects weaken the main job of the affected role:
- Tanks: Increases damage taken from Lethal Strike by 250%
- DPS: Reduces damage dealt by 75%
- Healer: Reduces healing dealt by 75%
A single stack of the debuff is enough to invalidate the DPS gain from bringing a DPS instead of a tank. However, Lethal Strike is weak enough in SM, that the tank can survive 2-3 stacks of Softened Up.
Softened Up will fall off naturally in between each Prime Directive because the boss is just sitting there being the former Emperor’s high-tech trash can for 40s, so you can still solo tank it in SM.
That being said, it’s helpful to have a DWT take the boss if you don’t think you’ll survive the next Lethal Strike. You can also stealth it out and let it go to someone else.
In VM, it’s more necessary to use 2 (skank) tanks and swap after every single Lethal Strike by taunting during the cast.
Acidic Rocketry
 Acidic Rocketry
Every so often, the Propagator Core XR-53 will fire acidic missiles at each player’s feet as a red circle. If you stand in multiple, you’ll take damage from multiple and get a stack of Digestive Enzymes from each as well.
The acid persists for a moment, but doesn’t remain on the ground like it usually does from other sources.

You have enough time to finish your cast, but that assumes you have a safe place to stand immediately outside of your circle. Try not to stand near the person stunned by the Prey Seeker Droid.
Extraneous Expulsion
Extraneous Expulsion is a long red telegraphed attack with a 2.5s cast on a 25s cooldown. It tracks the target during the cast and applies a stack of Digestive Enzymes to everyone inside and leaves a permanent small pool of acid directly in front of itself.

The primary target (the tank with aggro), is guaranteed to get hit, but if you point the boss somewhat towards the wall as you move him and the DPS and healers stand off to the sides, you can minimize the number of players hit by this attack.
It’s quite similar to the Colossal Monolith’s Terrible Shout. The player with aggro should take care not to move the boss too erratically so that everyone else can get somewhere safe.
Prepare for Harvest
Prepare for Harvest applies a stack of Digestive Enzymes to everybody in the room. It has a 1.5s cast and a 17.5s cooldown.

Since the attack has a shorter cooldown than the duration of Digestive Enzymes (17.5s vs 20s) and is guaranteed to apply to everyone, Digestive Enzymes can only fall off naturally in SM occasionally. This means it’s worthwhile to stand the orange rectangle of Hungering Bite even in SM.
Hunting Grounds
 Hunting Grounds
Over the course of the 4s channel, Hunting Grounds targets the furthest player from the boss and fires what are basically 2 Acidic Rockets at the target’s feet in quick succession. These small pools of acid seem to be permanent.

Honestly, there’s so much going on that’s of greater consequence, you probably won’t even notice that Hunting Grounds does anything. Just move out of red circles as you always do.
Propagator Core XR-53 Overall Strategy
You’ll get a glimpse of the fundamentals in SM, and then VM adds some complexity to existing mechanics while making them less forgiving.
Story Mode Strategy
Attack the boss, but stay out of green acid and red circles on the ground. Don’t bother killing the Imperfect Constructs (exploding adds). Prioritize killing the Prey Seeker Droids (stun adds) whenever they spawn.
Stand in the orange circle around the boss for Prime Directive. Prioritize killing the Powerful Constructs (big adds) whenever they spawn. Stand in the orange rectangle in front of the boss (Hungering Bite) to cleanse your stacks of the DoT.
Veteran Mode Strategy Differences
Follow the Story Mode strategy with some additional considerations. Before the fight, make sure to assign which role goes to in for each of the 3 Prime Directives. I recommend Tank (1) ▶ Healer (2) ▶ DPS (3).
Everyone needs to stack up on the boss, even ranged DPS and healers. Make sure to stand near the acid and right outside of the existing red circles to overlap the acid as much as possible.
Move the boss around the outside of the room along the outer “track”, staying outside of the middle as much as you can. When you’ve made a full circuit around the room, start spiraling in towards the middle.
Propagator Core XR-53 Role-Specific Tips
Using these tips should help you to perform your role-specific duties better and increase your group’s chances of success.
Tanks
Remember to pop your cheese ability for Lethal Strike and swap every time. Cheese abilities include:
- Force Shroud (Assassin) | Resilience (Shadow)
- Saber Reflect (Juggernaut | Guardian)
- Energy Yield (Powertech) | Infused Kolto Packs (Vanguard) with Supercommando Implant
Pay attention to where you are as the boss reaches 4 stacks of Harvesting Materials. The boss will not be able to move for the next 40s, so you don’t want it to be surrounded by acid as your mDPS won’t be able to hit it.
Keep in mind that you will always have more space free from the acid on the floor than everyone else. You need to make sure that they have room, too. In general, try to stay 10m away from the boss as much as you can.
It’s ideal to stack the Propagator Core on the Prey Seekers and large Constructs that spawn after Prime Directive (Perfect/Rampaging/Defender/Supplicant) as much as possible for cleave/DoT spread damage.
It won’t always be possible because the boss spends a ton of time standing still, but try when you can.
You don’t need them to be exactly on top of each other, just enough for cleave/DoT spread. If you can hit both enemies with your AoE attacks, so can the DPS, and that’s all you need.
DPS
There is no need to defeat the Imperfect Constructs in either difficulty nor use dedicated AoE talents/tacticals.
The Prey Seekers (stun droids) and large Constructs that spawn after Prime Directive (Perfect/Rampaging/Defender/Supplicant) are your top priorities. Ideally, you want to cleave/spread to and from these adds and the boss by stacking with the group.
Save offensive cooldowns for the large Constructs. It’s really bad when the boss finishes its Recovery Protocol channel and the big add is still alive. These adds spawn every ~2 mins, so you you should be able to use your offensives 1 or 2 times per Prime Directive.
It is relatively safe to stand in front of the boss. The only thing you have to worry about is Extraneous Expulsion (red rectangle), which tracks its target (the tank).
If you have a source of Reactive Damage like Cloak of Pain | Rebuke or Thermal Yield | Durasteel Armor, make sure to keep at least 1 stack of Digestive Enzymes on yourself. Still, be liberal about standing in Hungering Bite.
It’s much better to drop down to 0 stacks for a moment and then dip your toe in the green goo to get a stack than it is to sit around with the DoT ticking with multiple stacks.
Healers
This should not be a super challenging fight to heal. If players are dying, it’s likely because they have too many stacks of Digestive Enzymes or the tank isn’t using their cheese ability for Lethal Strike.
Don’t get me wrong, this is not a free pass to be bad. It’s still your responsibility to keep people alive. Remember to stay stacked with the group!
In VM, the most healing-intensive portion of the fight is when the Rampaging Construct (DPS earthquake add) is out. Make sure you know when that’s happening so you can make your cooldowns available for it.
Propagator Core XR-53 Unique Rewards
Aside from the its incredible voice and the standard stuff you get from defeating a lair boss, the Propagator Core XR-53 offers several unique rewards including augment schematics, a guaranteed range of Corrupted Bioprocessors per player, and a chance for a bag or crate of additional Corrupted Bioprocessors.
| Icon | Propagator Core XR-53 Unique Drops | Story Mode | Veteran Mode |
|---|---|---|---|
| Individual chance for a random Augment Schematic of specified rating | [Stat] Augment 83 (296 blue) | [Stat] Augment 86 (302 blue) | |
| Amount (range) of Corrupted Bioprocessors guaranteed for each player | 1-4 | 12-18 | |
| Individual chance for a bag of 20 Corrupted Bioprocessors as personal loot | No | Yes | |
 | Individual chance for a crate of 50 Corrupted Bioprocessors as personal loot | No | Yes |
The augment schematics and mats are not bound, but everything is distributed individually as personal loot. The drop rates for schematics seem pretty low, and a lot more Corrupted Bioprocessors drop in VM compared to SM.
Relentless Replication Mission
The one-time wrapper mission called Relentless Replication gives you 5 copies of the Ancient Stepped Altar deco and a Bioprocessor Satchel, which contains 20 Corrupted Bioprocessors.

Since you’re only guaranteed at least 1 Corrupted Bioprocessor in SM and at least 12 in VM, it’s worthwhile to complete the Relentless Replication mission on all of your alts.
Check out our 7.6 New Augments Guide for more details on how to turn these Corrupted Bioprocessors into more stats on your gear or more credits in your pocket.