While some Unique Items enable powerful builds, these Uniques have their niche as exceptional Leveling Gear in Path of Exile 2. We’ll break down these Unique and what makes them practical.
Path of Exile 2 has quite a large variety of Unique Items available. Some of these are exceptionally powerful and enable extremely powerful builds. However, the ones here are known to be great leveling Items and are often incredibly cheap contributing to their accessibility and use.
As with most unique items, these can drop randomly as loot from defeating any monster. Higher rarity monsters will have a high chance to drop them. If you find yourself wanting or needing one of them but it’s not dropping, trading for them is the easiest way to get them.
For more information on Trading, check out our Trading Guide. This details everything you need to know about Trading, from Buying and Selling Items to Exchanging Currency.
We’ll break these items down by Category, explaining why each is useful and the situations in which they can be used.
The table below serves as a summary and table of contents. You can customize it however you wish, search through it for a specific item and click on the items’ names to read the full overview and description along with our recommendations for the best use cases.
| Icon | Item Name | Slot | Usage |
|---|---|---|---|
| The Devouring Diadem | Helmet | Early Recovery Option | |
| Elevore | Helmet | Additional Charm Slot for defenses | |
| Goldrim | Helmet | Tons of Elemental Resistance | |
| The Hollow Mask | Helmet | Increased Physical Damage Reduction | |
| Horns of Bynden | Helmet | Early Rage and Strength bonuses | |
| Leer Cast | Helmet | Useful for boosting Allies, like Minions | |
| Thrillsteel | Helmet | Onslaught Bonuses | |
| Wings of Caelyn | Helmet | Early Rage and Dexterity bonuses | |
| Belly of the Beast | Body Armor | Decent Life and Stun Threshold | |
| Blackbraid | Body Armor | Makes Armour’s early strength even better | |
| Enfolding Dawn | Body Armor | Tons of Spirit and decent resistacnces | |
| Foxshade | Body Armor | High early Evasion Rating | |
| Ghostwrithe | Body Armor | Converts Life to Energy Shield | |
| Necromantle | Body Armor | Better survivability for minions | |
| The Road Warrior | Body Armor | Great for Attributes and Resistances | |
| Sands of Silk | Body Armor | Early Mobility with Blink | |
| Tabula Rasa | Body Armor | Flexible stats with Jewels | |
| Tetzlpokal’s Desire | Body Armor | Decent defenses and Life Recharge | |
| Lochtonial Caress | Gloves | Decent Life and Skill Speed | |
| Northpaw | Gloves | Great for Attack Builds | |
| Painter’s Servant | Gloves | Good Elemental Resistance, but splits damage | |
 | Kitoko’s Current | Gloves | Added Crowd Control to all Lightning Skills via Electrocution |
| Plaguefinger | Gloves | Enables Poison to work with all Damage | |
| Treefingers | Gloves | Dual-wield 2H Melee Weapons | |
| Doedre’s Tenure | Gloves | Offers a ton of Early Spell Damage | |
| Birth of Fury | Boots | Movement Speed and Burning Ground | |
| Bones of Ullr | Boots | Cheaper Skeletal Minions | |
| Corpsewade | Boots | Movement Speed and passive Poison damage | |
| Ghostmarch | Boots | Pass through Enemies while Dodge Rolling | |
| Wake of Destruction | Boots | Movement Speed and Shocked Ground | |
| Wanderlust | Boots | Ton of Early Movement Speed and immunity to Slows | |
| Asphyxia’s Wrath | Weapons | Decent Attack Speed and good early Damage boost | |
| Hoghunt | Weapons | High Physical Damage and Critical Strike Chance | |
| Hrimnor’s Hymn | Weapons | High Physical Damage and Added Aftershocks | |
| Lifesprig | Weapons | Early Spell Levels and Cast Speed | |
| Matsya | Weapons | Reduced Spirit Reservation | |
| Quill Rain | Weapons | High Attack and Projectile Speed Bow, at the cost of Attack Damage | |
| Threaded Light | Weapons | Synergy with Enfolding Dawn | |
 | Mist Whisper | Weapons | Early Chain without a damage penalty |
| The Wicked Quill | Weapons | Early Spell Damage and Chaos Resistance | |
| Tangletongue | Weapons | Absurdly strong on a Lightning Spear Amazon | |
| Daevata’s Wind | Weapons | Decent Attack Speed and pairs well with a Twister Build | |
| Tyranny’s Grip | Weapons | Strong Physcal Damage and Strength, pairs well with Rake | |
| Splinter of Loratta | Weapons | Always Poison with Attacks with no Poison Limit | |
| Shyaba | Weapons | Ignores Accuracy | |
| Brain Rattler | Weapons | Added Crowd Control via Electrocution | |
| The Empty Roar | Weapons | Added Chaos Damage when paired with Volatile Power | |
| Rearguard | Weapons | Block Chance on a Quiver | |
| Silverthorne | Weapons | Early Access to Critical Weakness | |
| Lycosidae | Weapons | Alleviates any Accuracy concerns | |
| Window to Paradise | Weapons | Great Elemental Resistances and can apply Exposure | |
| Blackheart | Jewelry | Intimidate is a strong offensive and defensive buff | |
| Glowswarm | Jewelry | Mitigates a lot of early Mana Issues | |
| Meginord’s Girdle | Jewelry | Tons of Strength | |
| Surefooted Sigil | Jewelry | Great mobility, synergy with Ghostmarch | |
| Death Rush | Jewelry | Onslaught on kill for Skill and Movement Speed. | |
| Levinstone | Jewelry | Great for Lightning Skills | |
| Gore Girdle | Jewelry | Good Strength and makes Armour more effective early. |
Helmets
There are many notable Helmets for leveling, all of which aid leveling in different ways.
The Devouring Diadem
Devouring Diadem is only good at one thing, sustain. It does it well enough to make this list with it very low requirements.
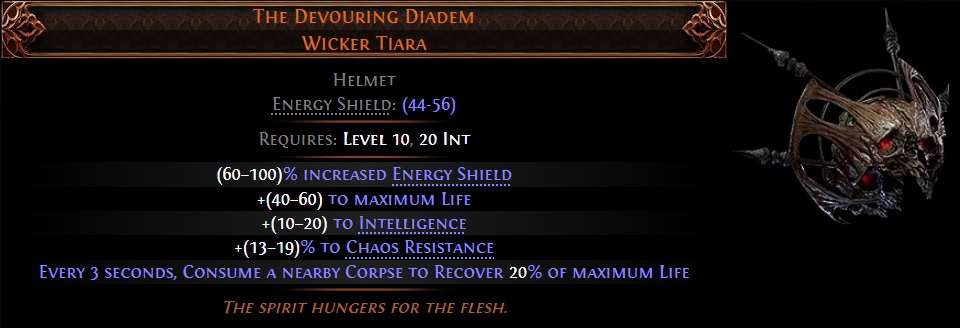
While 10% every few seconds may not seem like a lot, it’s more than enough to keep us going early game, especially if we’re running a Strength-heavy build that gets a lot of Maximum Life. Its only downside is that very few bosses feature minions to make use of this effect for their fights.
Elevore
Elevore may not be available right away during the Campaign, but when we do get access to it, having Extra Charms can be a flexible way to fix our defenses, especially with Charms getting an upgrade.
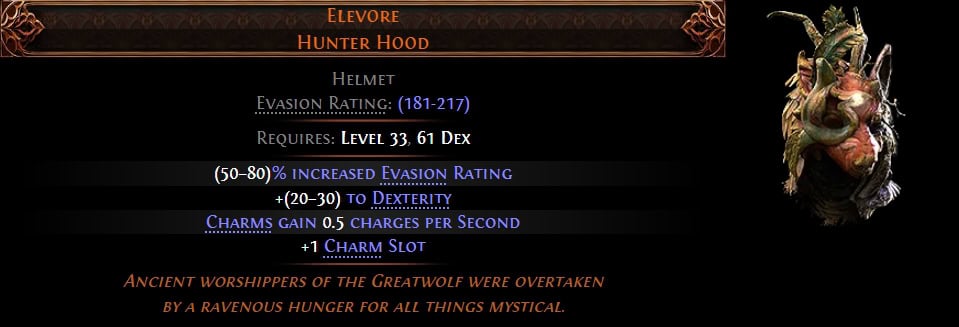
While Charms aren’t exactly the most exciting or reliable defensive option, this does a lot to bump up their consistency. It also comes with a bit of Dexterity and Evasion to go with it.
Goldrim
Goldrim is by far the best choice to invest in for leveling gear. It’s the only Leveing Unique that offers insanely high resistances, between 25-35% to All Elemental Resistances.
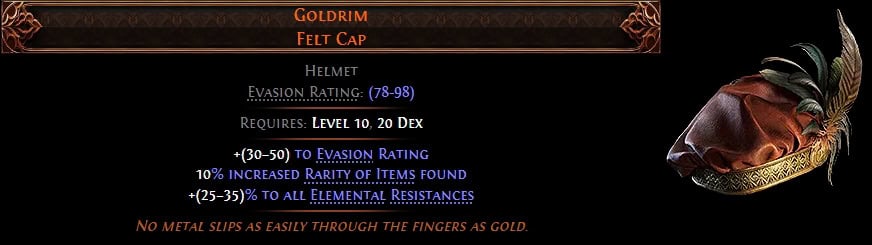
Due to just how powerful that single Affix is, this item alone can last until we find a suitable replacement with more stats in the Endgame. This also causes it to be a bit more expensive compared to other items in this guide early on.
The Hollow Mask
The Hollow Mask is almost like a Goldrim for Physical Damage, offering extra Physical Damage Reduction and some Life, but at the cost of Elemental Resistance.
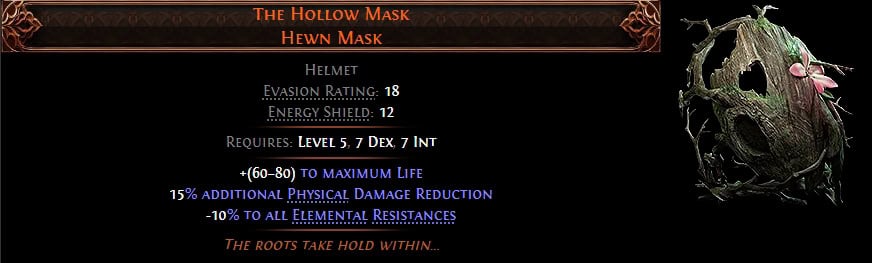
This is often cheap due to the resistance penalty that comes with it. Despite this, it will easily double your early Maximum Life while providing extra defense against the widespread Physical Damage in the early game.
Horns of Bynden
Horns of Bynden is an easy way to get a bit of Rage generation for melee builds early on. With no requirements, we can use right as soon as we have access to our stash if we have it. Rage, Rarity, and a nice chunk of Strength immediately is a great start.
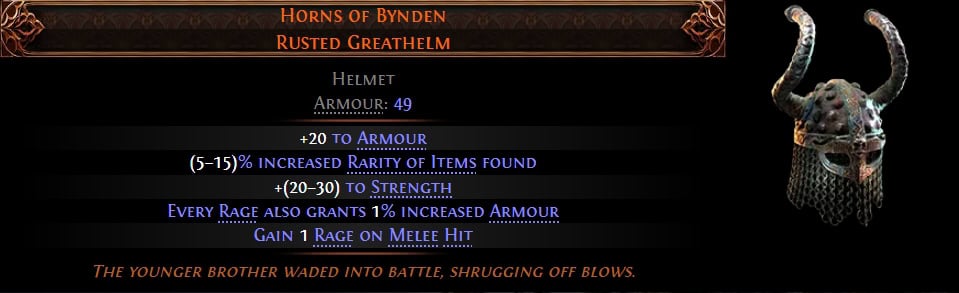
This Helmet also increases our Armour for every Rage we get, which can be good alongside other Armour Items. Armour is decent through the campaign, but falls apart quickly after. Hopefully by then we’ve got a nice replacement for this item.
Leer Cast
Leer Cast is one of those options we’d only consider as a build that relies on summoned allies, thanks to the reduced damage on it. However, Minions generally want all the help they can get early on.
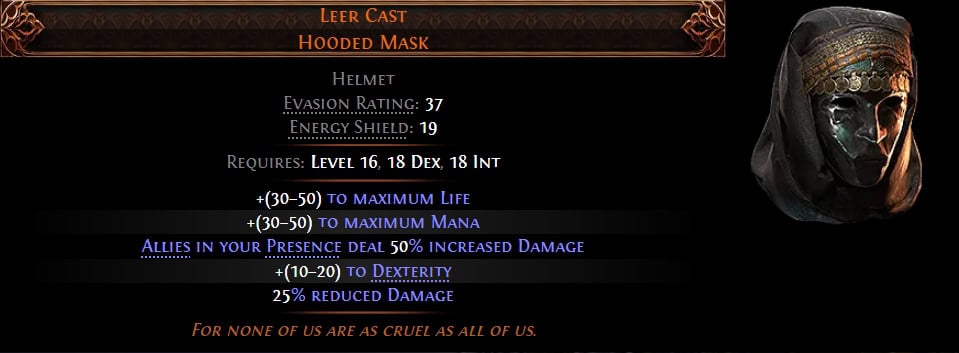
This can also be a great option for Party Play as well, should we want to play a more supportive role. If it wasn’t obvious enough already, if we are our main source of damage, then this is not a great choice.
Thrillsteel
Thrillsteel offers only one thing, permanent Onslaught. This powerful effect gives us a large boost of Attack and Cast Speed, and a bit of extra Movement Speed. The downside however is that is all it offers.
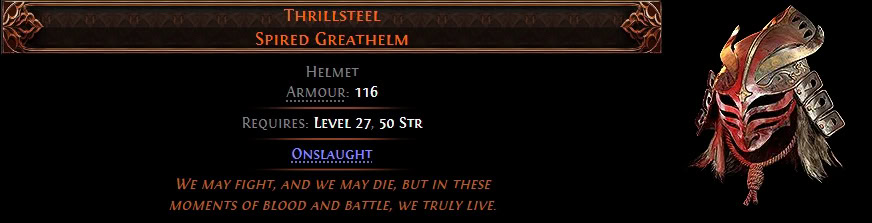
This can also have a fairly high price early on, but the early DPS boost makes it incredibly useful. It’s great for many builds, but a risker option over Goldrim.
Wings of Caelyn
Wings of Caelyn is very similar to the Horns of Bynden, offering the same Rage on Melee Hit and rarity. However, it differs by offering Dexterity instead of Strength and Stun Threshold per Rage instead.

By offering Dexterity, this offers a lot of early accuracy, which makes it especially good for strength-focused builds.
Body Armour
There are plenty of great Body Armours out there for leveling. Which ones we use depends on what kind of build we’re going for and how well we use its stats.
Belly of the Beast
Belly of the Beast is great for leveling thanks to all the benefits it offers us. Life, Stun Threshold, and a decent amount of Armour and Evasion to boot. It’s hard to go wrong by using this with a couple of Runes into it for Resistances.

It also comes with the bonus of making our Life Flasks instant. This means that for the majority of the campaign and even into endgame, our Flasks are just an instant full heal as long as we’re keeping them up.
Blackbraid
Blackbraid has one line that can make it particularly attractive as a leveling unique, Armour Applies to Elemental Damage. Having this affix can allow us to worry less about balancing early resistances and instead get a ton of Armour. It even comes with a good amount of Strength and Intelligence to boot.
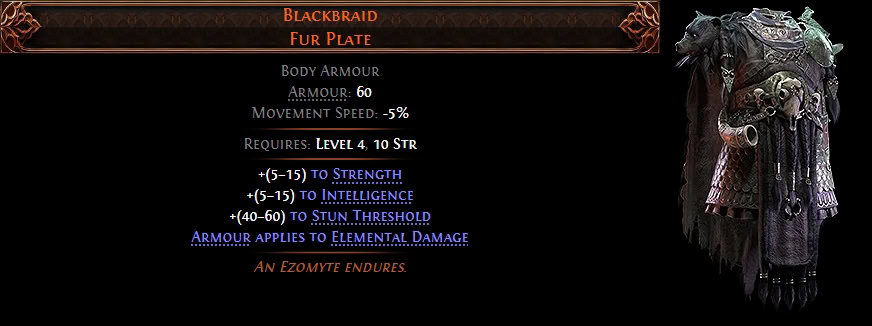
For a lot of cases, this isn’t the best-in-slot option, as there are multiple other ways to get Elemental Resistance, even from this list alone. However, it’s great for high-strength builds that will have a lot of Armour anyway.
Enfolding Dawn
Enfolding Dawn is THE leveling Body Armour, offering a ton of Spirit and some Elemental Resistances to boot. The only downside is that Intelligence doesn’t provide Maximum Mana.
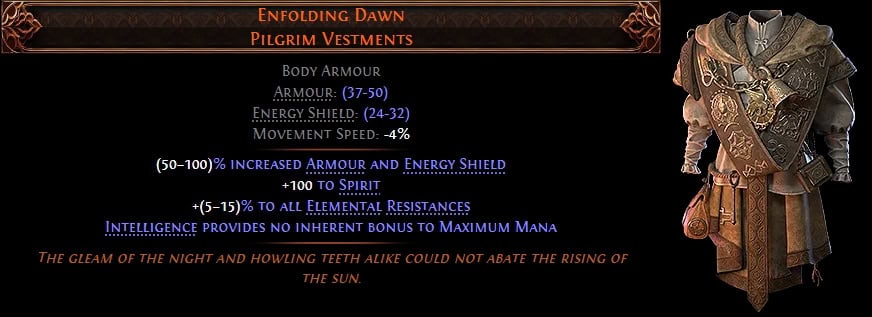
The Spirit opens a ton of early power to characters while leveling, giving us 130 Spirit in total by the time we get our first Spirit Gem. Due to the flexibility and often high demand, this tends to be a bit more expensive early on, but very worth it for most leveling builds.
Foxshade
Foxshade is a more niche inclusion but can be exceptionally powerful for what it offers. Between High Evasion, tons of Dexterity, and even some Movement Speed, it’s a decent all-round option.
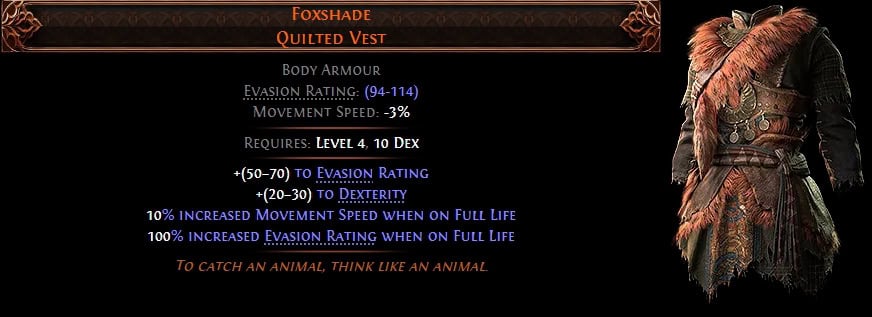
The big downside to this that makes it less attractive, and cheaper, is the requirement of being on Full Life. This makes it a less consistent bonus, but not one that’s particularly hard to maintain with the boosted Evasion.
Ghostwrithe
Ghostwrithe is an excellent choice if you wish to push a character’s Energy Shield high enough to make use of Chaos Innoculation (CI). This will continue to provide Energy Shield even after the swap to CI, due to how its unique Life to Energy Shield Conversion Works.
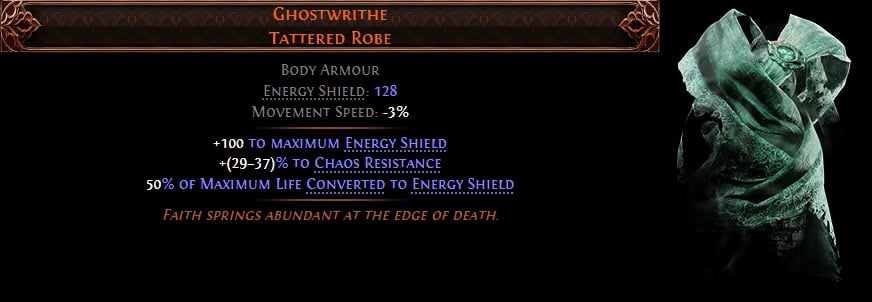
The only real downside to this Body Armour is that it’s not going to be as strong if we’re not looking to take Chaos Innoculation and make Energy Shield our main Defensive layer. It also becomes considerably weaker once a better ES Body Armour with resistances can be obtained.
Necromantle
Necromantle is an okay option for those wishing to go into minion builds, giving them more survivability and uptime overall. However, unlike Enfolding Dawn it does not offer increased Spirit to give us additional Minions.
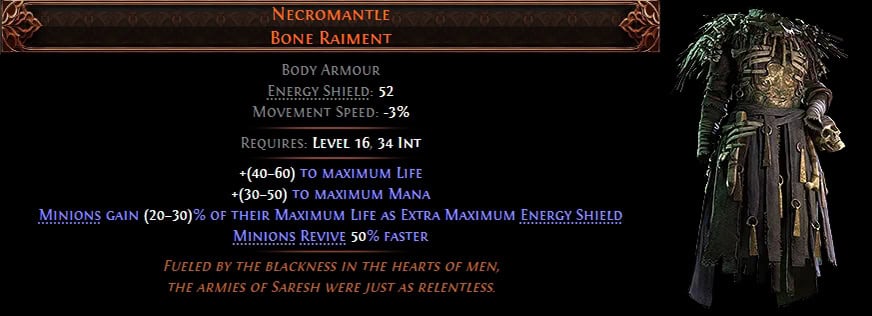
Necromantle is very niche and only serves well for minion builds, and even then it’s not the best option available. Its biggest advantage is that it will be considerably cheaper early on compared to Enfolding Dawn.
The Road Warrior
The Road Warrior is a very nice early game Body Armour, as it offers All Attributes, Plenty of Resists, and a bit of Life Regen which can help a lot early on. While the reduced Bleeding Damage doesn’t come into play too often, it can still be a nice benefit.
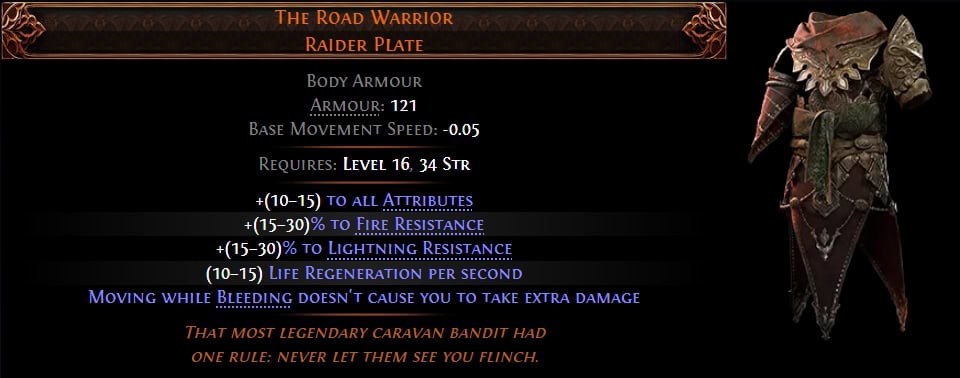
By socketing this item with Glacial Runes and pairing it with the Goldrim Helmet, we’ll have most of our resistances taken care of until we find better items. If both are well rolled as we’re putting Greater Glacial runes in for a second character, we’re starting with ~65% in all elemental Resistances.
Sands of Silk
Sands of Silk is an interesting inclusion here, as it’s a very good chest on its own, at least for the early game, with its mix of stats. It offering Blink for free is a massive upside, but can also be a huge downside as well.
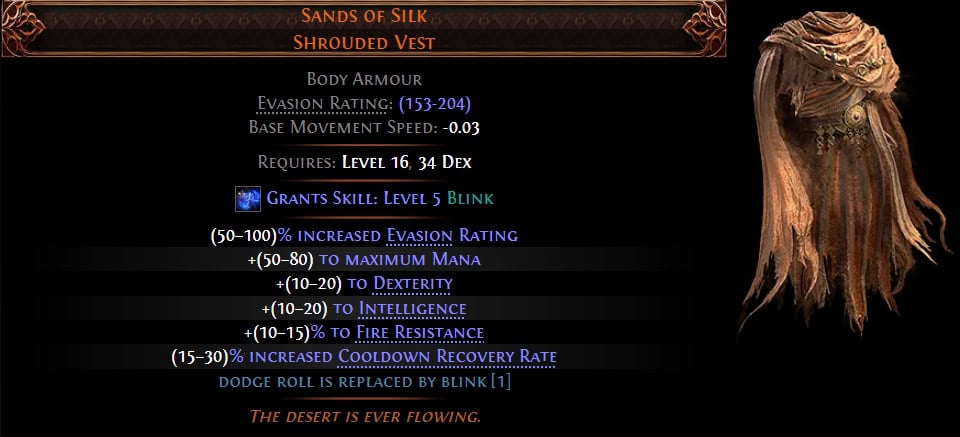
Blink itself is a great reason to want to use this chest, as it makes us very mobile. However, unless it drops in a low-level zone, the chances of getting to use it early are nonexistent. This is because Blink’s Level, and by extension, level requirement, increases based on its Item Level.
Tabula Rasa
Tabula Rasa is very interesting and incredibly flexible. While it has no requirements and offers no stats, it comes with six Jewel Sockets. This makes it insanely powerful, able to load up any character with a ton of damage and defenses, making it powerful in either a Leveling setting or endgame setting.
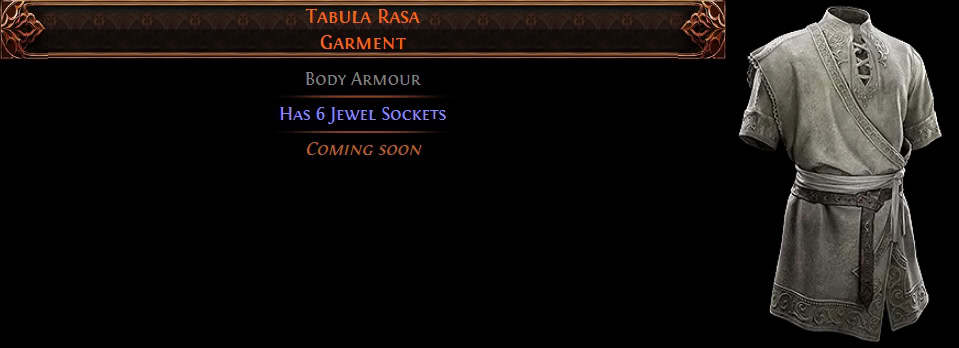
However, compared to most of the items on this, it’s extremely rare and it’s what is referred to as a Tier Zero Unique. This means it is part of a pool of incredibly rare and powerful Unique items. Despite this huge downside, which also makes it prohibitively expensive to trade for, there are a lot of ways this can be used.
Tetzlapokal’s Desire
Tetzlapokal’s Desire is an interesting inclusion here. What this offers is a relatively high amount of Energy Shield for its level, Chaos Resistance, and a good amount of Strength and Intelligence, mainly. It also has the Unique Property of making Life Recharge, which makes it great for hybrid Life and Energy Shield set ups.
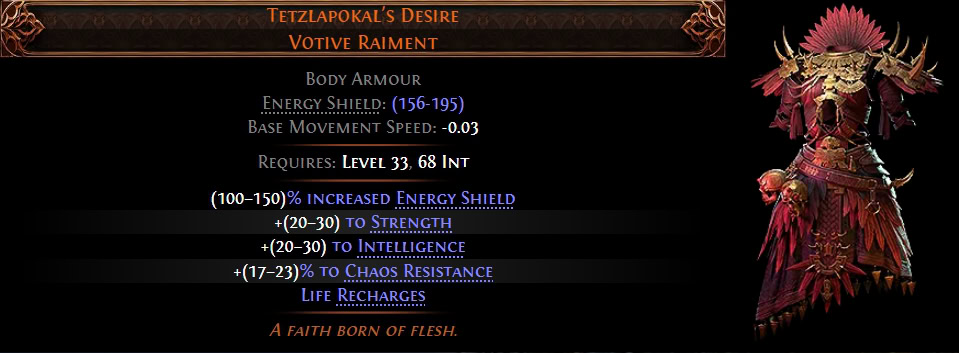
While Life Recharge is also offered by the Eternal Youth Keystone Passive, which also comes with the benefit of Life Flasks affecting Energy Shield. Despite this, this does mean that assuming we have no issues surviving in combat, we can start most or even all encounters with Full Life and Energy Shield. If we avoid damage, this also means less flask use in general.
Gloves
There aren’t too many options for Leveling Gloves, but the few that exist do have their uses and work fairly well.
Lochtonial Caress
Lochtonial Caress are great for the Maximum Life and Skill Speed they offer. While they come with a penalty to total Mana, this is very minor early due to our limited Mana Pool.
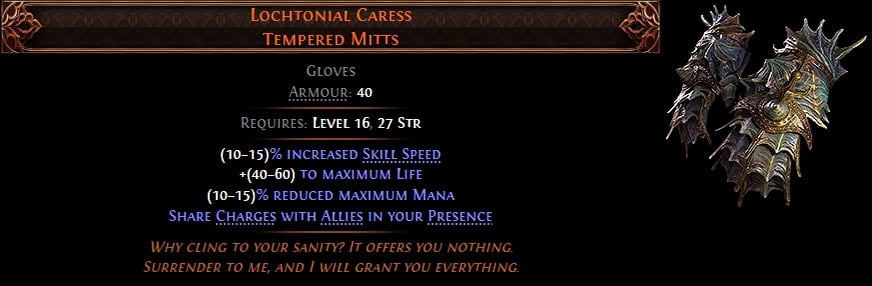
These can also be a bit expensive very early on, as they are occasionally also used for group play to share Charges. They’re common enough though that their price will drop very quickly.
Northpaw
Northpaw are a very niche option, but can be great for some attack builds. The biggest benefit they offer is making Weapon Base Critical Strike Chance 8%, which makes it easier to build and scale with Critical Strikes.
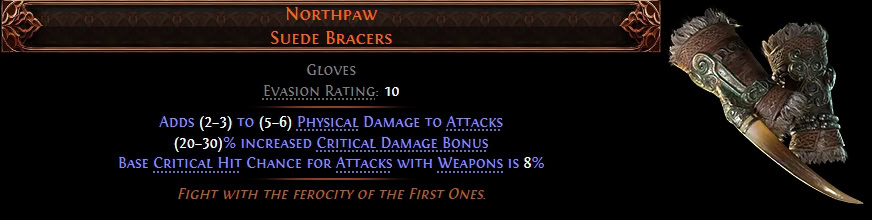
This niche effect makes them impactful, but not to such a high degree to make them a go-to option. This ends up keeping them fairly cheap.
Painter’s Servant
Painter’s Servant are here mainly for the Elemental Resistance they offer. A good roll of them offers quite a bit of resistance, as the cost of splitting our Elemental Damage between Cold, Fire, and Lightning.
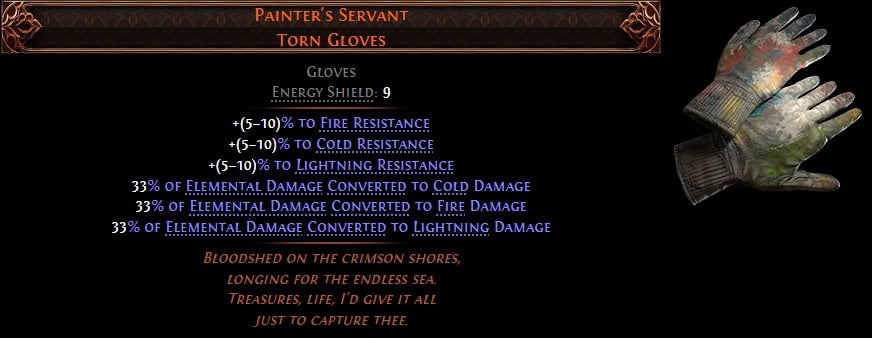
The downside is easy enough to work around and can be considered an upside in some cases. While it will be generally harder to build up any one Ailment, opening any elemental build to Chill, Freeze, Shock, and Ignite early on can have its benefits.
Kitoko’s Current
Kitoko’s Current doesn’t offer a whole lot, with its main draw being that it allows all Lightning Damage to Electrocute. With many Lightning Skills being able to hit many enemies and build this up quickly, it’s a great effect to have defensively. It does, however, come at a penalty to Skill Speed.
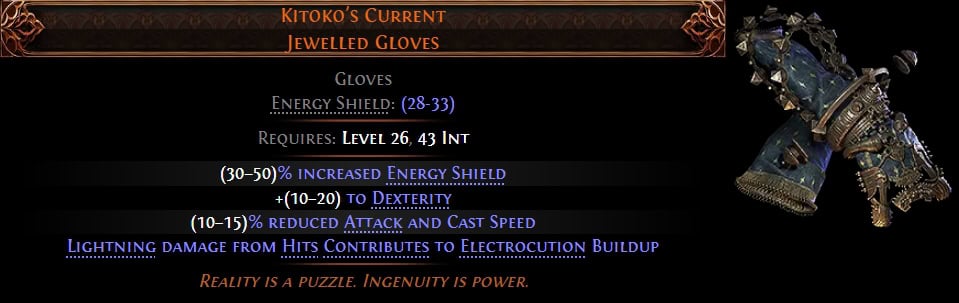
The great thing about these gloves is that they often find their way into a lot of Dexterity-based Lightning Builds in the endgame, simply because the Electrocute allows Combat Frenzy to be a fairly reliable means of generating Frenzy Charges.
Plaguefinger
Plaguefigue is here as it opens more skills up to the Poison archetype of build, which, combined with any decently powerful skill, can mean a ton of early damage.
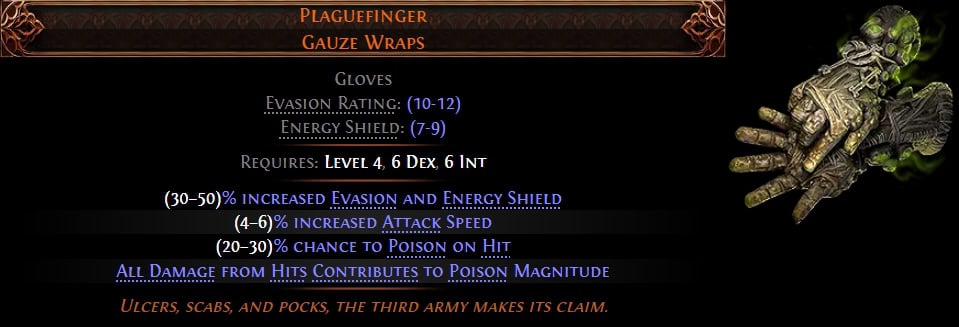
The downside is that defensively, they’re quite bad. However, if built around, this is hardly a downside compared to allowing any skill to Poison.
Treefingers
Treefingers make this list specifically because Attribute Runes exist now, making it easier to get the required Strength of our weapons. Getting early access to Giant’s Blood opens a lot of defenses for Early Strength builds, so long as they have the gear to keep up with the increased requirements.

Giant’s Blood may heavily increase our Strength Requirements, but a Two-Handed Mace and a Shield offer a good mix of early damage and defense that can be hard to pass up.
Doedre’s Tenure
Doedre’s Tenure are a very good pair of gloves to level a caster with. They offer a ton of early power, at the cost of early cast speed. The Amout of Energy Shield they provide isn’t terrible either.
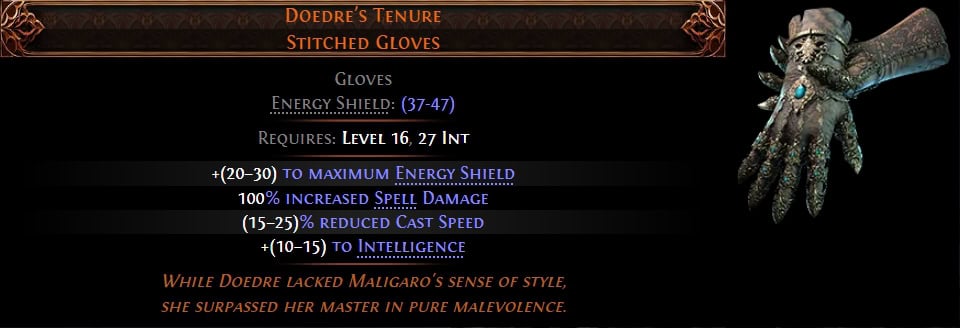
The REduced Cast Speed often makes these less desirable for many skills. However, skill with considerable AoE or strong Damage over Time effects make great use of this extra damage, while feeling this downside less.
Boots
There’s one main thing a good pair of Leveling Boots can offer, and that’s Movement Speed. There are a few that are decent options for certain builds and worth considering, but may not have any Movement Speed.
Birth of Fury
Birth of Fury are here mainly due to the increasing number of skills that can play off the ground effects. They even come with a decent amount of Movement Speed to not slow us done nearly as much.
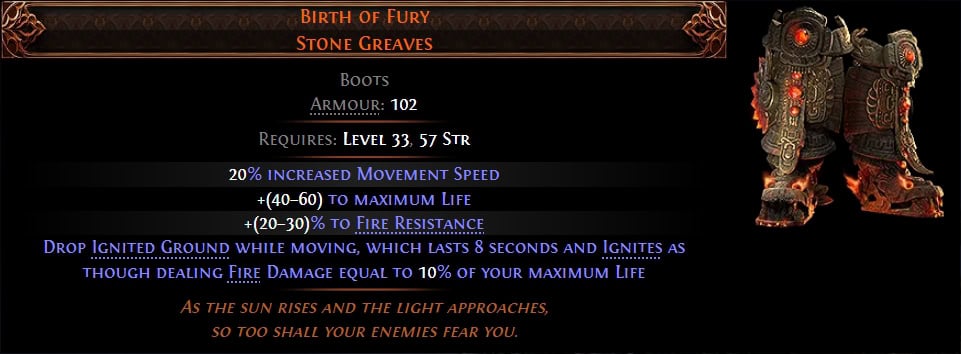
As a bonus, these even come with Maximum Life and a high Fire Resistance. The Ground Effect also scales decently well for Strength builds. The downside being that their strength requirement is a bit steep for a non-Strength build.
Bones of Ullr
Bones of Ullr makes the list specifically for Minion builds. Minions having Reduced Reservation means we get more minions and by extension more Damage.

Their highlight feature keeps them fairly niche and inexpensive, making them a decent option. However, without Movement Speed on them, they quickly get outpaced.
Corpsewade
Corpsewade are mostly here for the movement Speed, but they do offer a unique synergy with certain skills by producing Gas Clouds that can be detonated. This provides some early AoE to builds that may not have any at all.
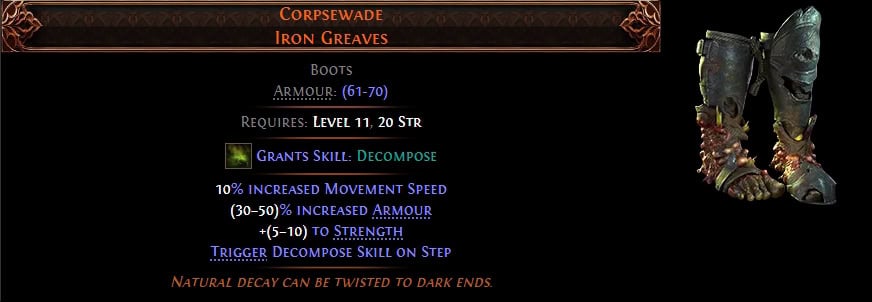
Despite the synergy it has with some skills, there aren’t enough skills that really can play off this effect to make a consistent option. The Movement speed is still nice if they’re the only option we have.
Ghostmarch
Ghostmarch are here for two main reasons; Chaos Resistance and the ability to pass through enemies on dodge roll. Chaos Resistance is harder to get early game making them fairly useful, especially for mobs in Act 3. Passing through enemies when Dodge Rolling is what makes them decent for leveling.

Combined with another item on this list, the Surefooted Sigil, this allows for Dodge Rolling to be a quick and safe way to get around zones. Even without it, having a consistent way to prevent enemies from body-blocking us can be very useful.
Wake of Destruction
Similarly to Birth of Fury, these are here due to the increasing prevalence of skills that use Ground Effects. These are essentially a Lightning Birth of Fury, but tuned to be a very strong offensive option early game.
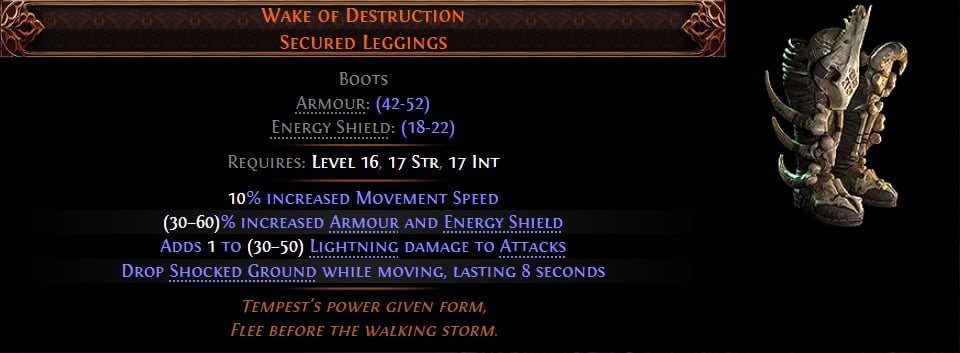
Unlike Birth of Fury, however, these also heavily lack any major defensive bonuses outside of Evasion and Energy Shield. They do at least come with lower requirements that make them easier to use.
Wanderlust
Wanderlust is the go-to option for multi-purpose leveling Boots. Not only do they grant 20% Movement Speed, but they also prevent Slows from making us move slower.
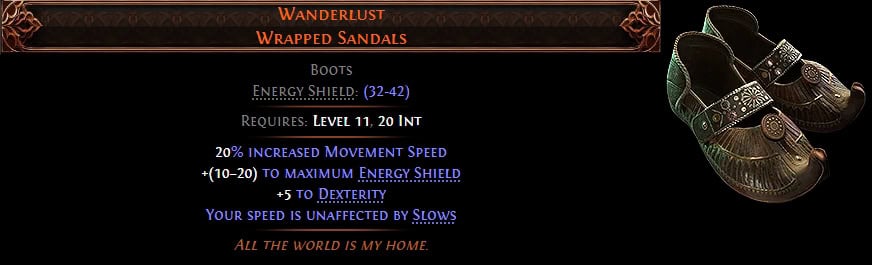
Wanderlust is much like Goldrim, being useful for their Movement Speed until they’re replaced by an item that grants us additional stats. Their consistency and versatility for build choice is what makes them the go-to option.
Weapons
There is a wide variety of Weapon Types with Uniques available. Unfortunately, not all of them offer much early-game power. These are the ones that are worth considering if they fit the build we choose.
Asphyxia’s Wrath
Asphxia’s Wrath is a great leveling Quiver, as it offers Attack Speed, Cold Resistance, and plenty of Damage. While it only works with Bows, it’s a very consistent option for leveling.
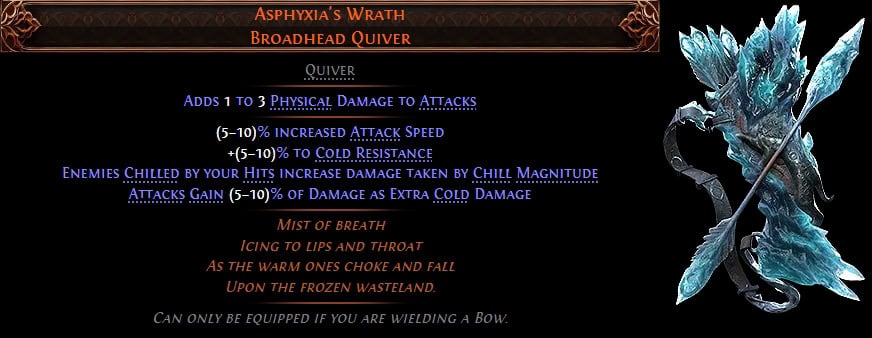
Not only does it offer Damage as Extra Cold Damage, but it also makes Chills function similarly to Shocks, without removing the Slowing part of its effect. This makes it both incredibly good offensively and Defensively and secures its place as a Leveling Unique.
Hoghunt
Hoghunt is a Two-handed Mace that offers incredibly high Physical Damage and Critical Strike Chance at the cost of Attack Speed. It also offers the ability to Inflict Maiming on Crit, heavily slowing enemies and reducing their Evasion.
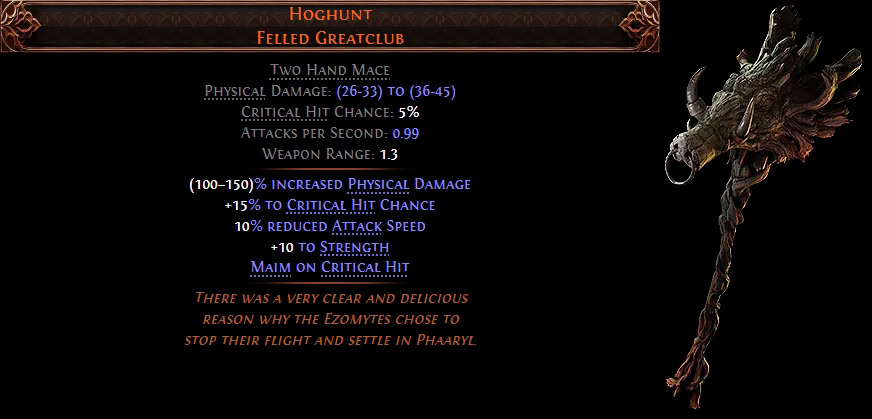
The Reduced Attack Speed can make this harder to use, but it offers so much early-game power that it’s rarely a downside. It’s very powerful if we want to lean into a Critical Strike Build early on.
Hrimnor’s Hymn
Hrimnor’s Hymn is another powerful Two-handed Mace, with more of a focus on Slam Skills. The Guaranteed Aftershock for Slam Skills we use is incredibly powerful, effectively doubling our damage on top of the fairly high weapon damage for early game.

If it lacked the added Aftershock effect, it wouldn’t quite make this list due to Hoghunt being a better option.
Lifesprig
Lifespring is the go-to leveling weapon for Casters, offering everything they need. Spell Levels, Cast Speed, Mana, and even some recovery. It even has the Mana Drain skill on it to help alleviate any Mana issues.
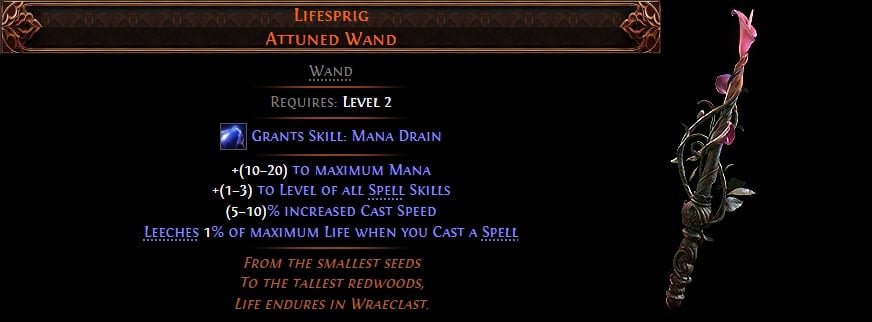
The Spell Levels are really what make this the go-to option for leveling a caster of any kind. The only thing that needs to be accounted for is that increasing the level of skill also increases its cost and attribute requirement, which often leaves little room for picking up other attributes.
Matsya
Matsya is a Quarterstaff that offers a lot of power for how early it can be used. Having a very high Base Critical Strike Chance, alongside Attack Sped and Reduced Spirit Reservation is incredibly powerful.
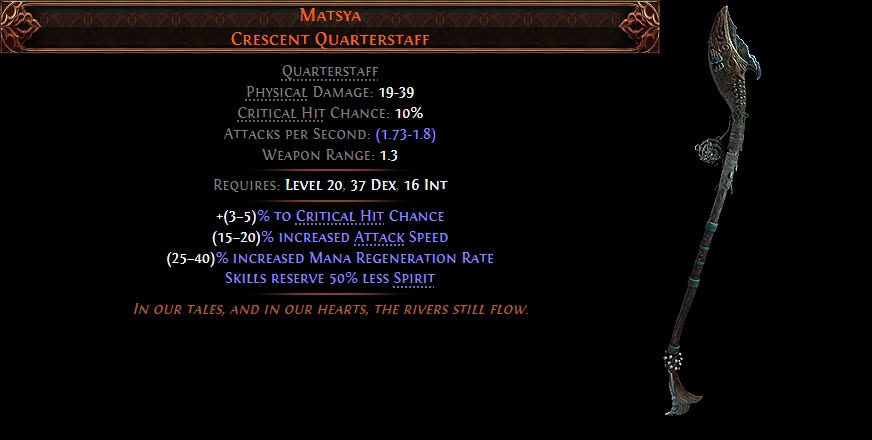
The big downside to this weapon is that it offers very little base damage. This means it falls off fairly quickly, but the Spirit Reservation helps it last a fair bit longer than expected.
Quill Rain
Quill Rain is a Bow that possesses extremely high Attack Speed and Projectile Speed for Arrows, at the heavy cost of a multiplicative damage decrease.
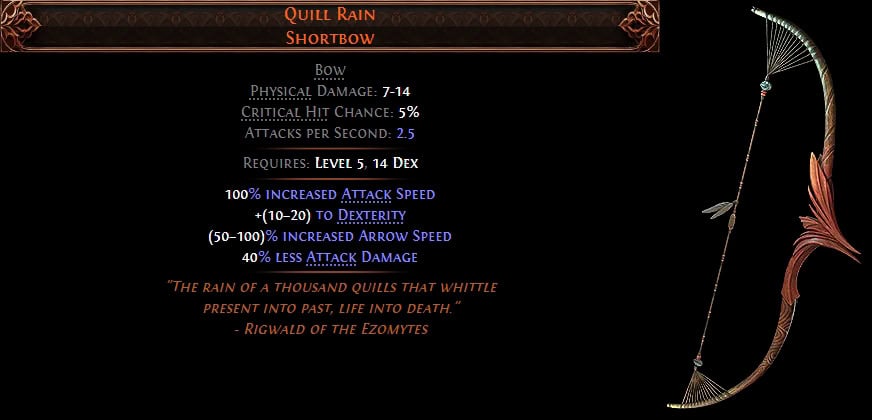
Despite its heavy penalty, this can still be a strong option for skills that don’t rely on their direct hit damage for their damage at all.
Threaded Light
Threaded Light is a Focus that is an incredibly power Leveling option for casters, especially when combined with Enfolding Dawn. This is due to the affix that grants Increased Spell Damage per 10 Spirit offering a ton of power.
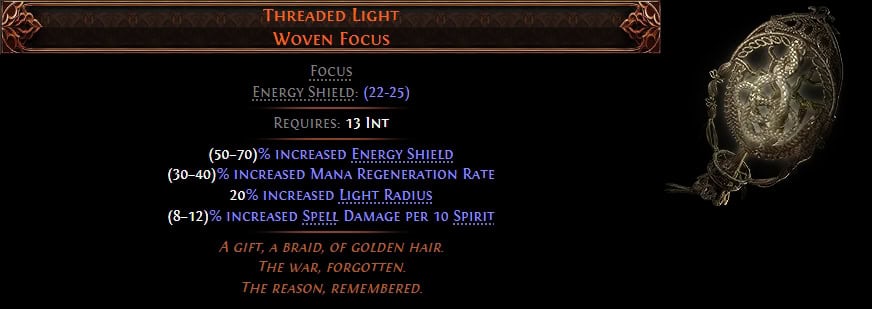
If not for the synergy it has with Enfolding Dawn, this wouldn’t be nearly as powerful, but would still be usable. It’d have a harder time competing with any half-decent Rare Focus without heavy investment into Spirit.
Mist Whisper
Mist Whisper is a decently Leveling unique for the Additional Chains it provides. Many of the early crossbow skills are good, but giving them a chain without a penalty makes them great.
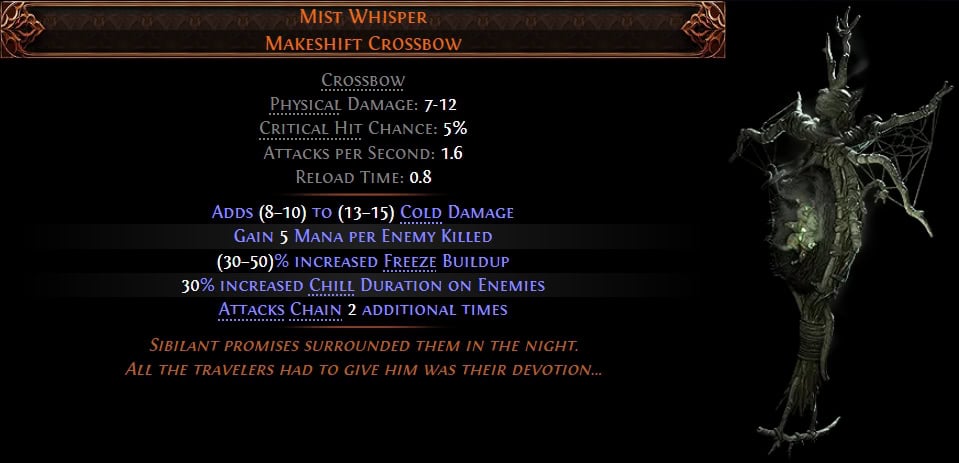
This heavily requires Elemental Runes to be decent, but when socketed with Greater Runes, it will provide enough damage to speed up the first few Acts. However, it will quickly fall behind on damage after.
The Wicked Quill
The Wicked Quill is targeted as being used with Chaos DoT builds, like Essence Drain. Very similar to Doedre’s Tenure, it provides far more damage than we can often get early on.
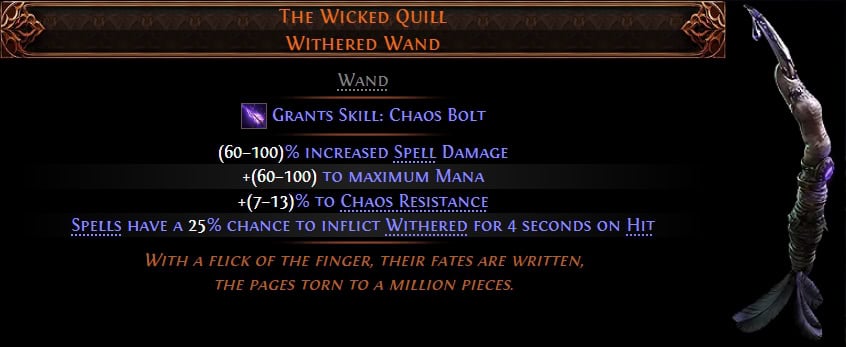
As an added bonus, the last line it has allows us to use other skills like Ball Lightning or Eye of Winter to quickly stack Withered. Dark Effigy with Withering Touch will often be more consistent, but alternative are nice.
Tangletongue
Tangletongue is an absurdly strong Spear for Leveling, especially when paired with Lightning Spear and any source of Frenzy Charge generation.
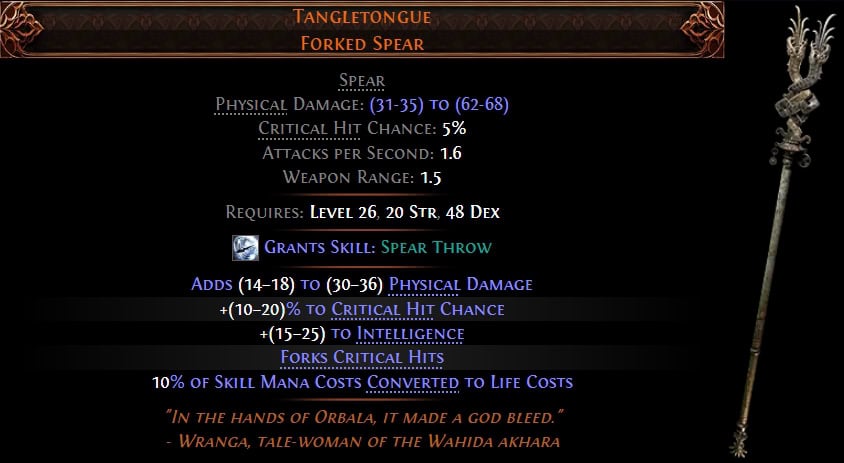
The only downside is the added Life cost. This is very manageable early on before Supports and Skill Speed start going up, but will need more work to manage it after this.
Daevata’s Wind
Daevata’s Wind is a great Spear for Leveling, so long as we’re playing into combo builds. More notably, due to the combination of Melee and Projectile skills getting the most benefit, Twister Builds make good use of this.
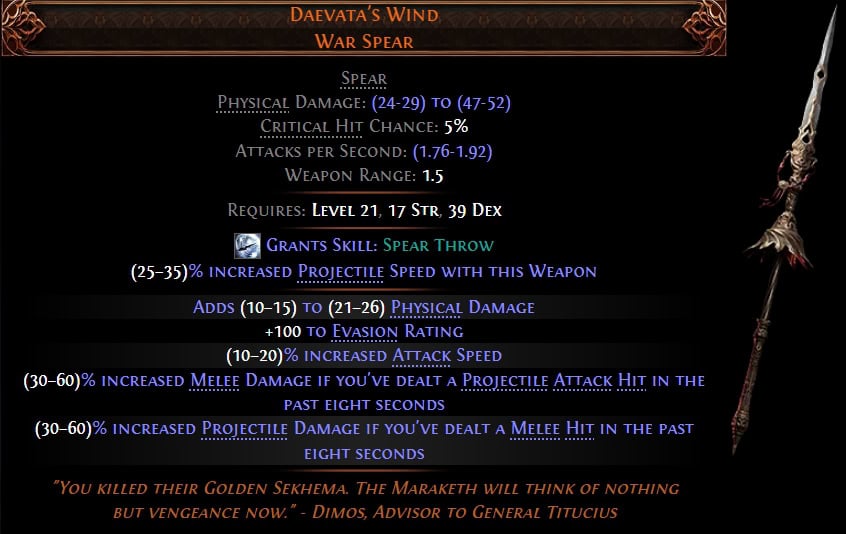
Despite this fairly limited niche of combinations, this weapon can be a great holdover until a more consistent weapon is obtained.
Tyranny’s Grip
Tyranny’s Grip is a Spear that disables the use of Projectile Skills, however, it’s high physical damage for the early game and Strength it provides.
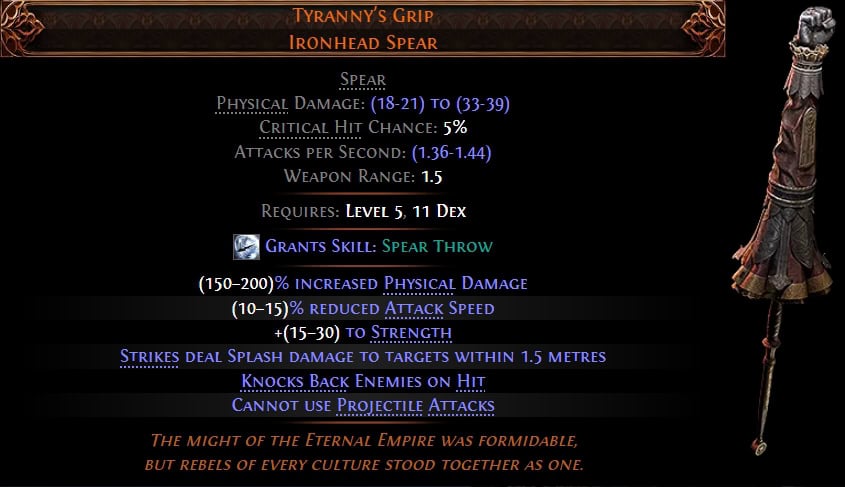
This sets it firmly in a niche, particularly the Rake and Stomping Ground Combo, which allows this early game weapon to really shine.
Splinter of Loratta
Splinter of Loratta may seem unassuming, or even weak at a glance. But two key things make this not only great for leveling but even a powerful endgame item: 100% Poison Chance for Spear Skills and no limit to Poison Stacks.
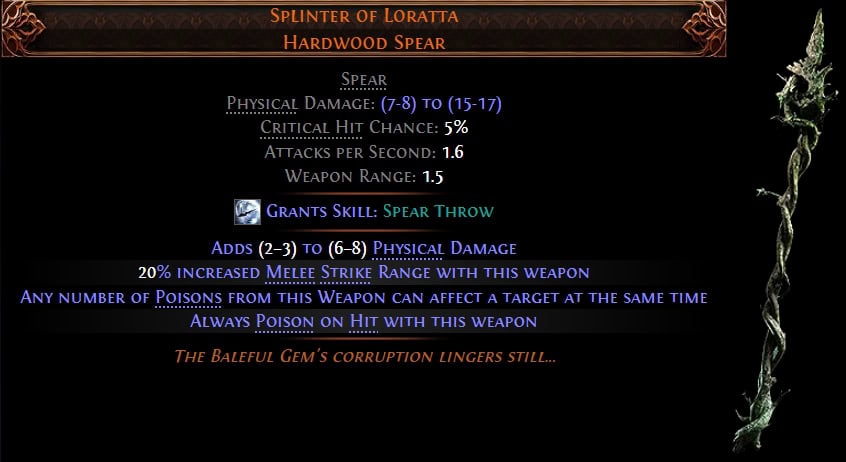
This combination of bonuses means only Poison Duration and Magnitude matter as bonuses. The only real problem with this is that it requires use of a High damage skill, or one that can stack Poison fast enough to deal reasonable damage.
Shyaba
Shyaba is a great leveling option due to it effectively having the bonus of the Resolute Technique Keystone, minus the downside, in combination with an unmatched attack speed for a Two-handed Mace.
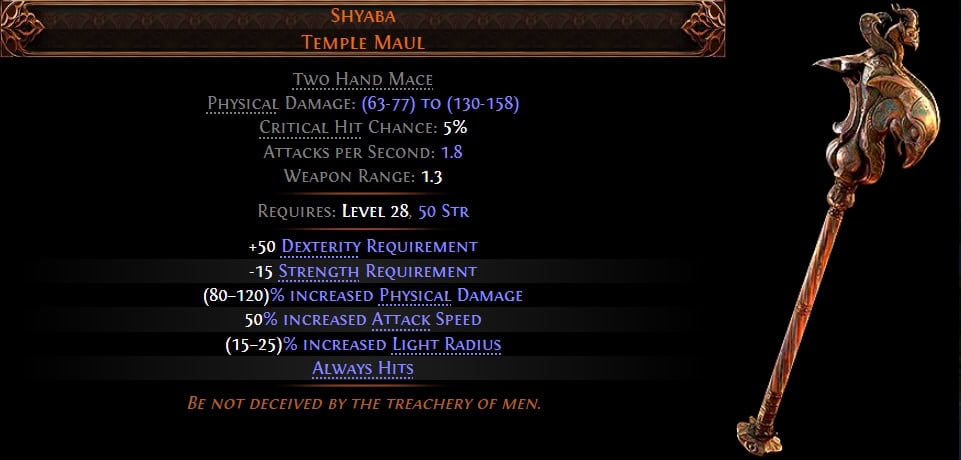
The one hurdle that comes with using this is its fairly steep requirement of Dexterity and Strength for how early it’s available. Though paired with Jarngreipr, this is hardly a downside.
Brain Rattler
Brain Rattler is a Two-handed Mace that packs decent Physical and Lightning Damage, as well as another option for Electrocution from a Unique besides just Kitoko’s Current. Its mostly fixed stats aren’t anything to write home about, but it’s still a solid early game weapon.
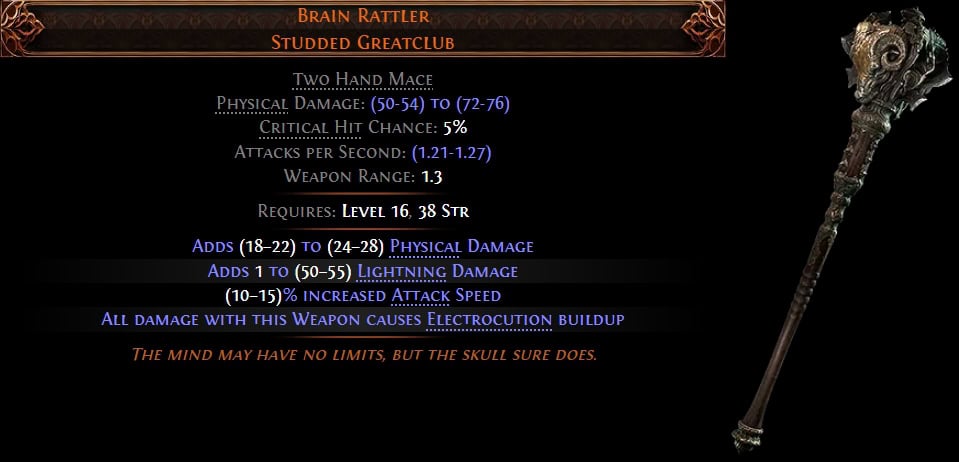
Electrocution Buildup, and not limited to Lightning Damage but all Mace Skills instead leaves this open to be a powerful and safe option for leveling. With many Mace Skills being able to deal damage in a large area, it makes the Campaign a breeze.
The Empty Roar
The Empty Roar is very unassuming, and by all accounts a terrible weapon outside of one niche application, easy access to Volatility through the Volatile Power Support Gem. However, this comes at the cost of disabling Warcries, at least while the weapon is equipped.
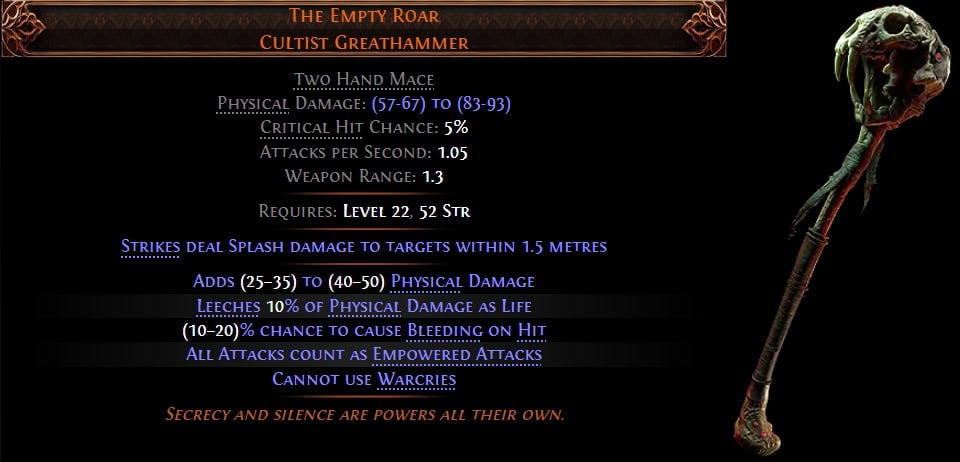
Volatility is a newer mechanic added, adding Chaos as Extra Damage to any skill, but at the cost of taking physical Damage per stack built up. This leads to very high damage potential, if properly mitigated.
Rearguard
Rearguard is by no means a great quiver in terms of most of its stats, but it does however, offer another layer of protection to eager Bow users, Block, which is normally limited to Shields and Bucklers.
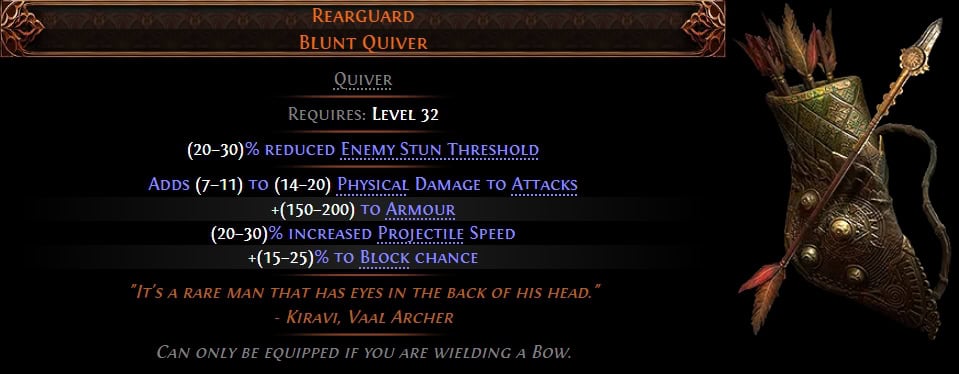
Due to their positioning, most classes that cna or do use Bows have access to Block Chance through Shield or Buckler clusters, allowing them to scale the bonus fairly well. The only downside is that, unlike a Shield or Buckler, a starting point of even 25% is fairly low, and that’s the top end of this quiver’s ability to block before passives. Most Shields and Bucklers start at 20-25%, but also roll modifiers to increase that to nearly 35%.
Silverthorne
Silverthorne is notable here for just one aspect it offers, Critical Weakness. Critical Weakness, in this case 10 stacks of Critical Weakness, results in a flat increase to Critical Strike Chance for any skill while it’s active.
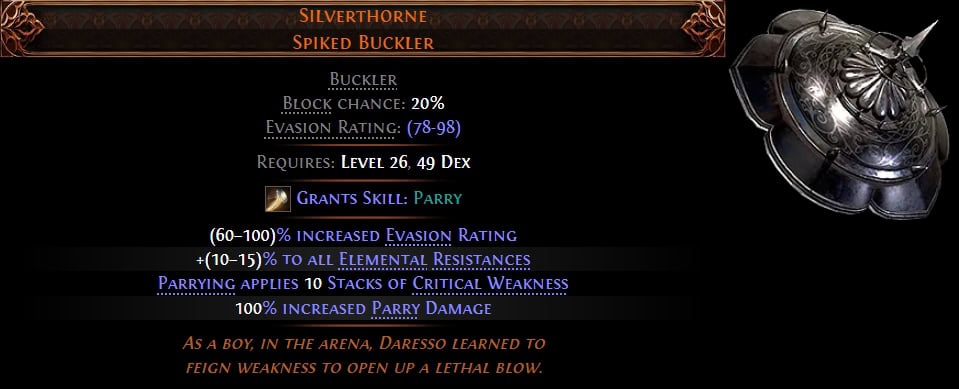
This is additive to any existing Critical Strike Chance we have, which makes it exceptionally powerful for enabling Critical Hit builds that want to combo off Parry.
Lycosidae
Lycosidae is a powerful shield for what it offers: Solid Block Chance, okay-ish Armour, and most importantly, Doubled Accuracy Rating. All of this together makes it a great option for many builds.
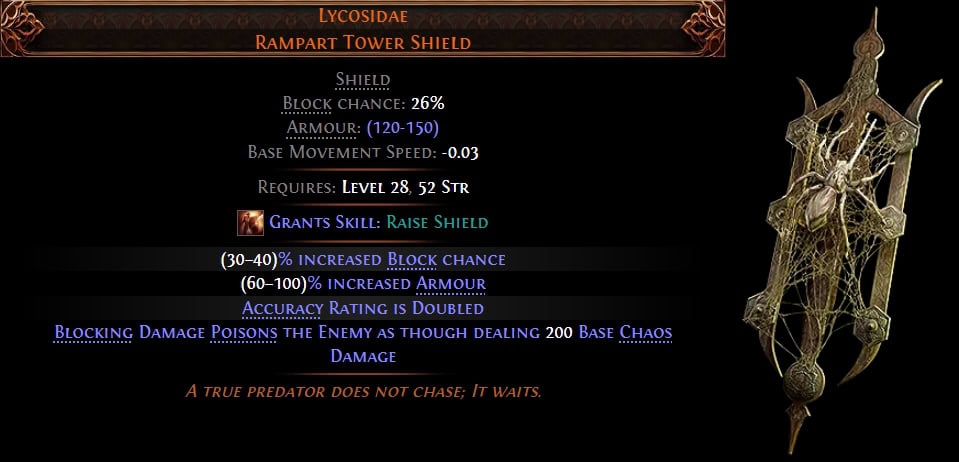
The Double Accuracy portion of this shield is very impactful for Amazons, particularly for their Critical Strike Ascendancy, giving them a massive Critical Strike Chance bonus very early on.
Window to Paradise
Window to Paradise is a Shield that not only offers a decent amount of Elemental Resistances, but uniquely offers easy and early access to Exposure, though within a small range.
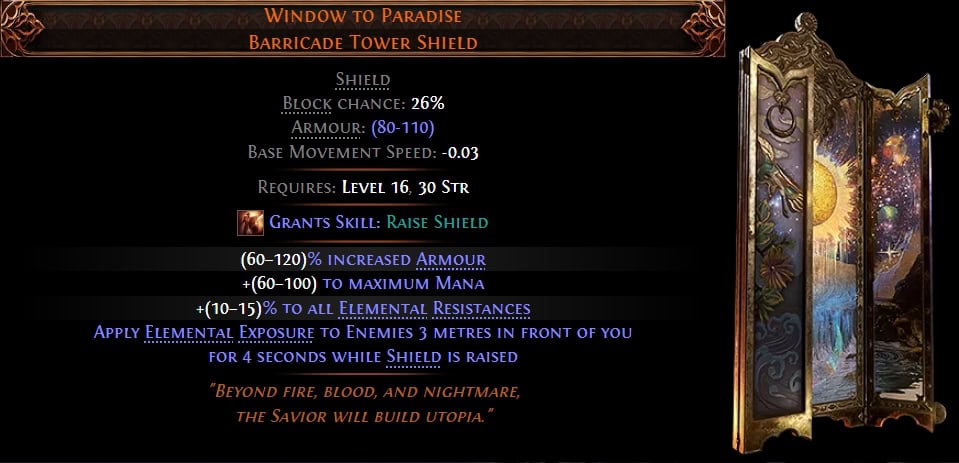
This exposure makes it an interesting option, potentially making Elementals weapons a a good bit stronger in the early game.
Jewelry
Jewelry tends to have far more powerful endgame options, but that doesn’t stop there from being any options at all.
Blackheart
Blackheart is a strong option for the Intimidation effect it offers, reducing an enemy’s damage and defenses. Life Regeneration can be fairly significant early on but becomes far weaker as we gain Maximum Life.
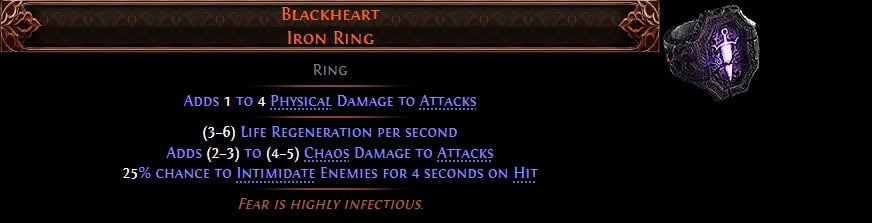
If not for the intimidating effect, this ring would not make the list. It just doesn’t offer enough to be used for long enough to be worth buying or even using.
Glowswarm
Glowswarm is another ring that is great early on. While it offers nothing in terms of defensive value, it can solve many early mana issues which helps it fit nicely into a caster setup.
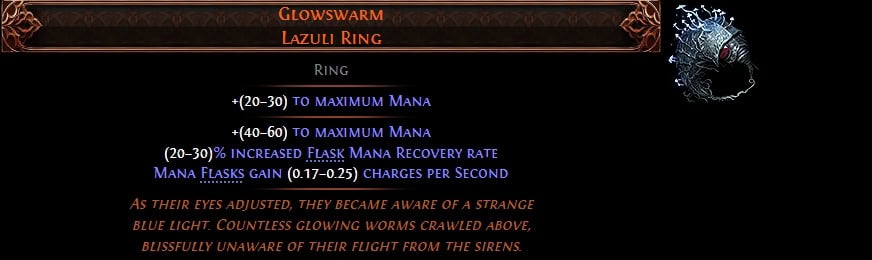
It providing Mana Flask Charges per second can also give it some value for Pathfinders that wish to build around Concotion Skills as well. It’s by no means a perfect solution for them, but does help the ring remain useful for a longer period for Pathfinders.
Meginord’s Girdle
Meginord’s Girdle is incredibly useful for the Strength it offers. Not only will this solve any issues with strength until a more permanent solution can be used, but the high amount of Strength also grants a high amount of Maximum Life as well, up to 200 on a maximum roll.
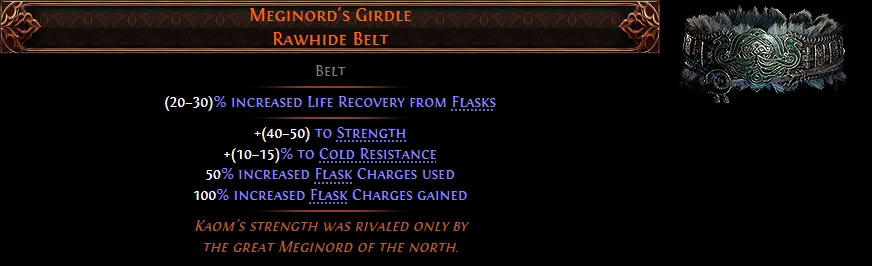
The added Cold Resistance and Flask Charge manipulation are also fantastic so long as we don’t need to chug options to maintain our Life or Mana.
Surefooted Sigil
Surefooted Sigil is here specifically for its Dodge Roll Distance modifier. This alone makes this Amulet worth using, but pairing it with Ghostmarch makes for an incredibly strong synergy that allows for quick and easy travel. The Maximum Life and potentially large amount of Dexterity are a nice bonus.
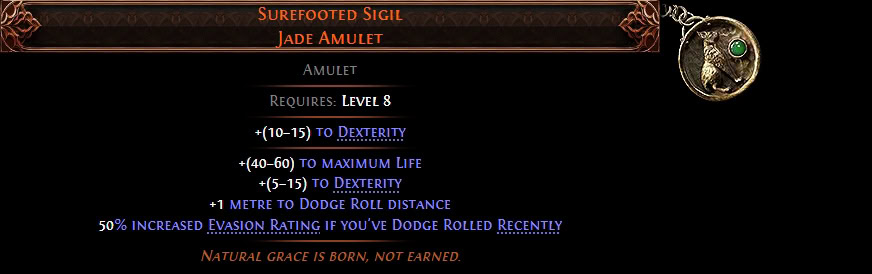
There’s a high chance that Surefooted Sigil and Ghostmarch become less relevant if effects that provide Phasing are ever added to Path of Exile 2. Until then, it’s the closest we can get to Phasing and it’s incredibly cheap at that.
Death Rush
Death Rush is notable for just one aspect: its Onslaught on Kill effect. This power effect grants Movement and Skill Speed. While not as reliable as Thrillsteel for gaining this effect, it’s still very consistent.
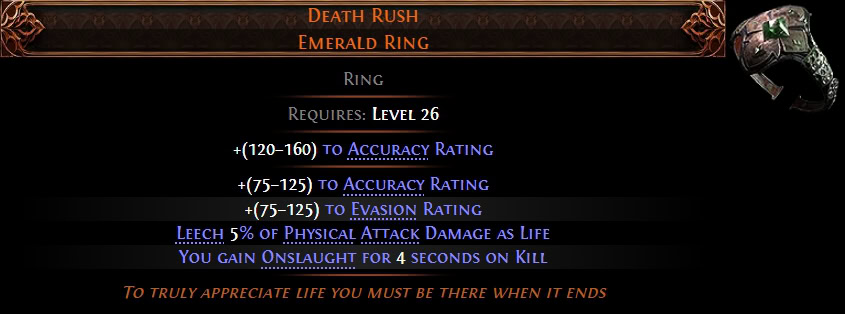
While the Accuracy and Evasion aren’t anything too special, they’re still a nice bonus to have on top of the Onslaught effect.
Levinstone
Levinstone is a Ring that’s great for leveling with Lightning skills, granting them all an additional level. The Additional mana also helps offset the increased Mana costs for using it as well.
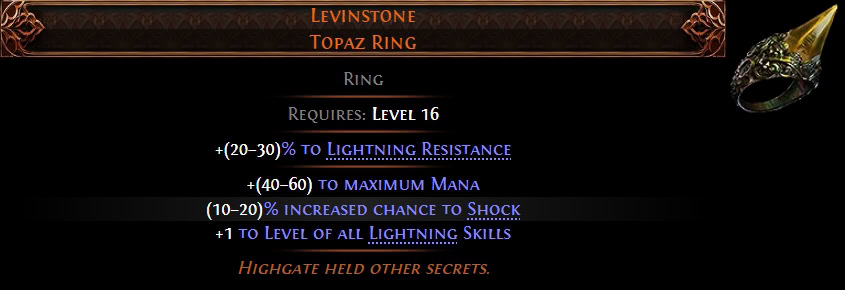
Outside of the +1 to Level of Lightning Skills effect, there’s not much to this ring. At the very least, it’s a Topaz Ring, so it’s not keeping our resistances too low.
Goregirdle
Goregirdle is a belt that has a fair bit of interesting things going for it, more notably making Armour more effective with the Defend with 200% Armour line. While this has a small downside of capping Physical Resistance to 50%, we’re unlikely to hit that break point early on anyway.
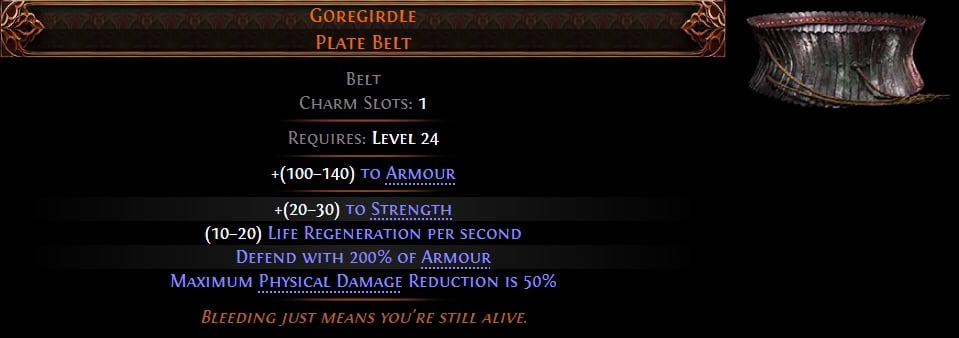
Much like Meginord’s Girdle, this also comes with a sizable amount of Strength as well. This can help it to shore up any Strength Requirements as ell as provide some additional life.
The images used in this guide are sourced from PoE2DB, an excellent database for viewing Items and their details.