Path of Exile 2 offers multiple ways for your character to achieve Ascension and gain Ascendancy Points. This guide breaks down each method along with its advantages and disadvantages of the Trials of Ascendancy.
Unlike Path of Exile 1, Path of Exile 2 offers multiple paths to Ascension. These are entirely flexible and interchangeable. If we favor a particular trial, we can opt only to run that specific trial. This allows us to avoid a trial type if our build isn’t suited for it.
For more information regarding the available Ascendancy Classes, check out our Classes and Ascendancies Guide. This gives a quick overview of each Class and Ascendancy currently available in Path of Exile 2.
Table of contents
Trial of the Sekhemas
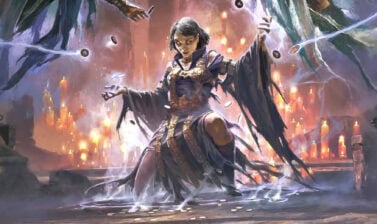
The Trial of the Sekhemas is mechanically similar to Sanctum from POE1, remaining almost unchanged. This means we’re in for a full Roguelite experience that can vary quite a bit from attempt to attempt. Each room we visit can provide us with various Boons and rewards as we progress toward the Boss on each floor.
Earning Ascendancy Points
Each attempt at the Trial of the Sekhemas requires a Djinn Barya, a special coin that will determine the enemy level and tier of the Trials.
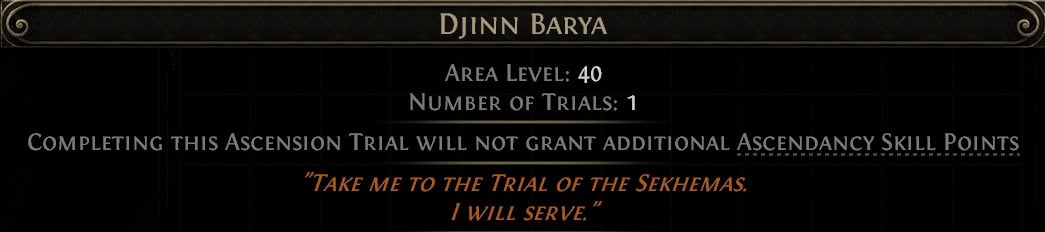
Enemy level is determined by the level of the zone where it drops, often being of equal level. Below is a table of the Tiers and their Minimum Levels and Drop Locations.
| Floors | Trial Level | Drop Location |
|---|---|---|
| 1 | 24+ | 100% Chance drop for Defeating Balabala in Act 2.* Random Drop any point after. |
| 2 | 45+ | Random Drop Starting in Act 2 Cruel ** |
| 3 | 60+ | Random Drop Starting near the end of Act 3 Cruel |
| 4 | 75+ | Random drop in Tier 11+ Waystones |
** This tier will only award Ascendancy Points when skipping the Quest Version of the Trial of Chaos.
Completing each Floor of the Trial of the Sekhemas will award two Ascendancy Points. Completing multiple trial floors in a single run will grant Ascendancy Points equal to the final reward of the Floor. If we manage to somehow go without an Ascendancy and then complete a four-floor Trial of the Sekhemas, it will award all 8 Ascendancy Points.
Mechanics
In addition to our standard Defenses, we get another resource called Honour. This serves as a separate Life bar we can influence. The base value for Honour is roughly equal to our Maximum Life, Energy Shield, and Mana (when using Mind over Matter).
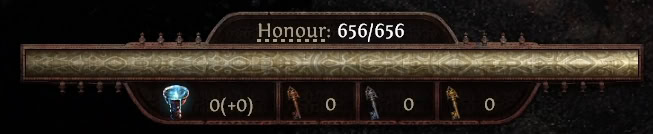
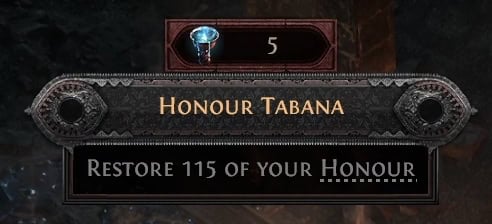
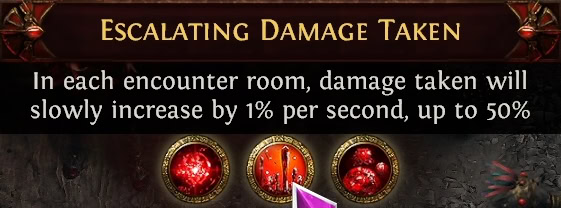
Any damage we take is dealt to Honour as well as our normal Life Pool. Unlike our standard Life, however, Honour can only be restored through rooms that provide a Healing Shrine.
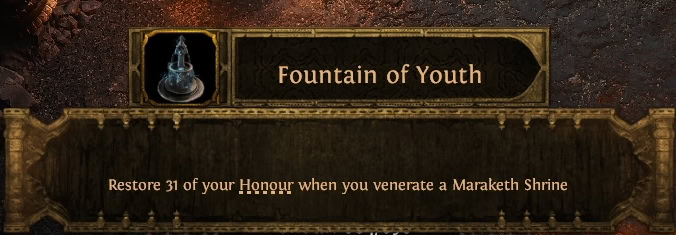
We can use Relics, which drop during attempts of the Trial of the Sekhemas to improve our Maximum Honour and Honour Resistance to increase our Honour and reduce how much is lost from hits. Increasing our Maximum Life, or Defences for Energy Shield builds, with Relics will also contribute to our Maximum Honour.
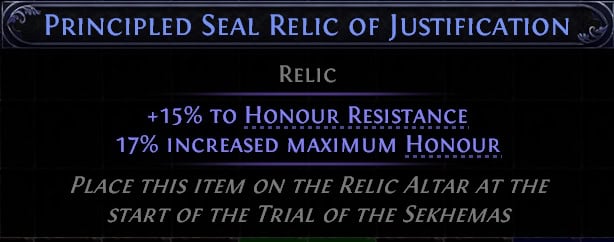
Honour Resistance stacks on top of our normal defenses, if Honour Resistance and the relevant defense hit are both at 75% we take an effective 6.25% of the base damage to our Honour! This damage reduction will also apply to the various Damage Dealing Afflictions.
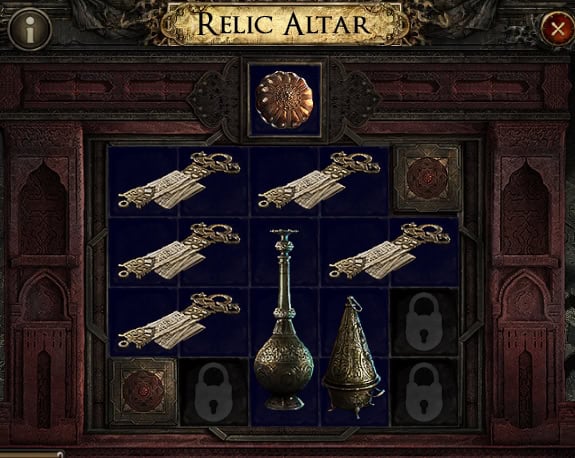
These Relics can also provide a wide range of other benefits, but these tend to be the most useful. These will need to be carefully arranged into the Relic Altar at the start of a Trial of the Sekhemas.
Each Floor of a Trial consists of multiple Trial Rooms and a Boss Room. As each Room is cleared, we’re able to choose our next room from the map. Not all of these rooms are linked though, so pay attention to the arrows to make sure you’re not locking yourself out of a later room.
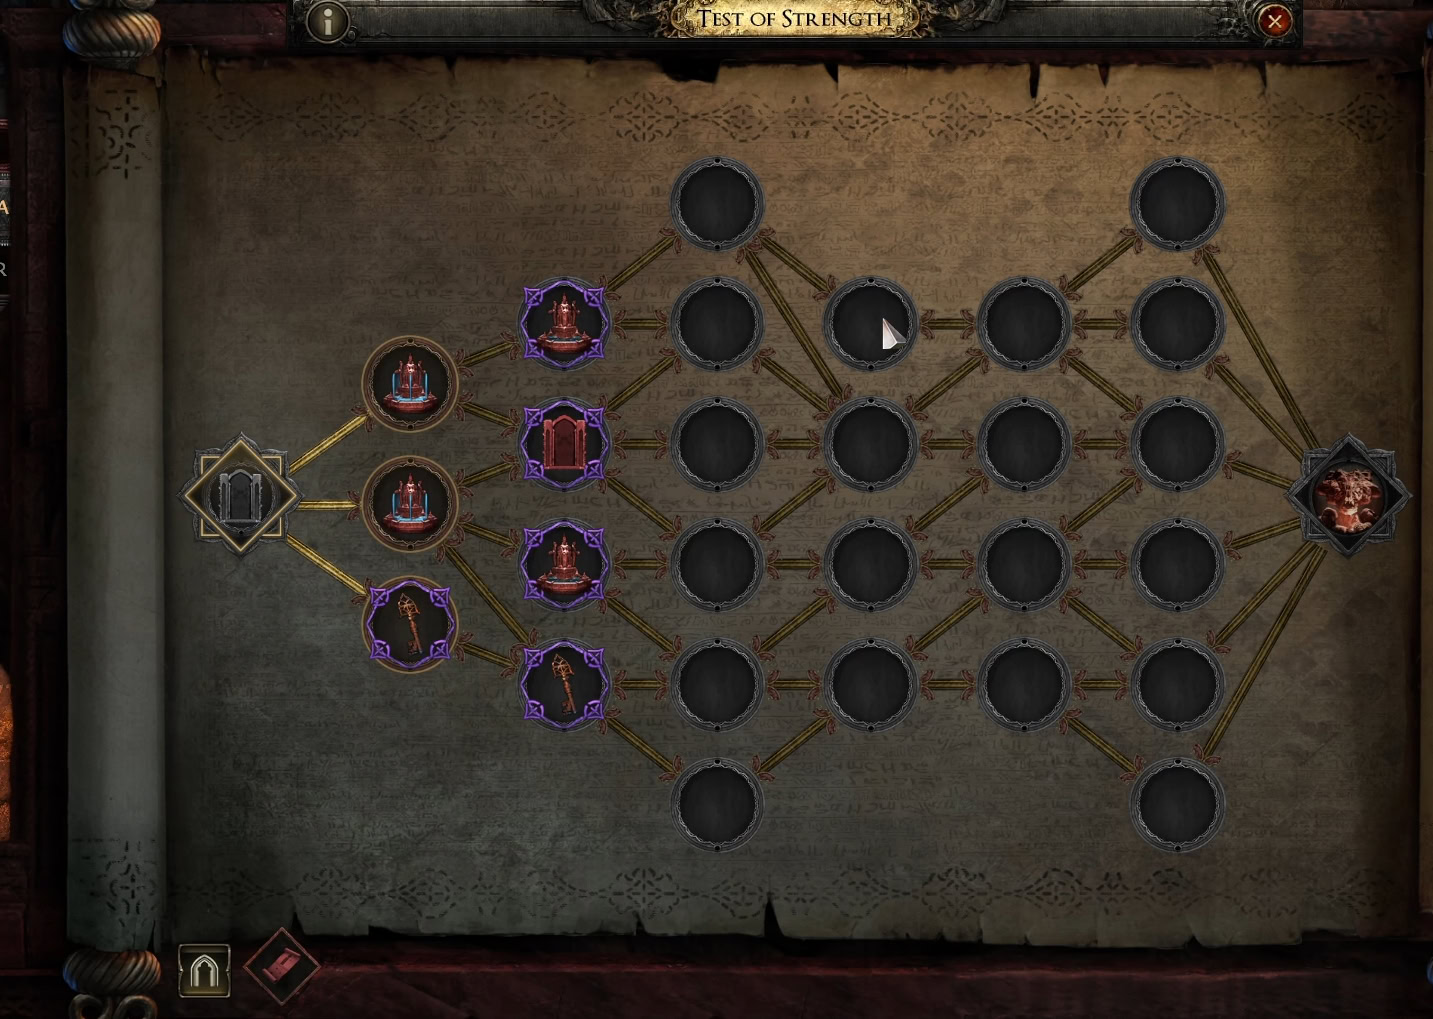
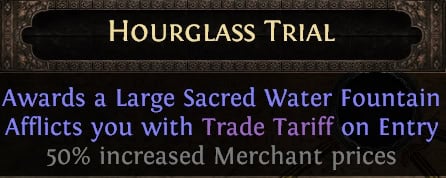
Each Room can be one of five types: Chalice, Escape, Gauntlet, Hourglass, or Ritual.
- Chalice Trials require us to defeat several Rare Monsters to proceed.
- Escape Trials require us to disable Death Crystals
- Gauntlet Trials are essentially Escape Trials but with far more traps.
- Hourglass Trials are timed survival trials against monsters.
- Ritual Trials require us to defeat Liches that are sustaining portals that will continue to spawn enemies until the Liches are defeated.
Each of these trials favors different build archetypes to some degree, but all are possible regardless of class and build. Escape, Gauntlet, and Ritual Trials favor higher Movement Speed; while Chalice and Hourglass favor higher damage.
These trials aren’t the only thing to worry about, as each room may also come with an Affliction that is applied upon entering the room. These are downsides, that while often minor, can make it harder to complete the Trial of the Sekhemas.
On the other side of things, some rooms can grant Boons, or positive bonuses on completion. These often make it easier by providing buffs to us, or debuffs on enemies.
Six Reward Room Types are also shown alongside selecting the Room Trial to undertake: Cache, Key, Merchant, Pledge, Scared Water Fountain, and Shrine
- Cache Rooms will have a single Cache that requires a Key to open.
- Key Rooms offer a Bronze, Silver, or Gold Key; used to open Caches in Cache Rooms or at the end of a floor.
- Merchant Rooms contain Balbala, who will sell Honour and Boons for Sacred Water
- Pledge Rooms offer a Pledge, which alters our current Afflictions and Boons.
- Sacred Water Fountain Rooms grant a small or large amount of Sacred Water used to purchase Boons at the merchant or turn into Keys at the end of a floor.
- Shrine Rooms Restore Honour. Depending on the Shrine this recovery may come with a Boon or Affliction as well.
Advantages and Disadvantages
Trial of the Sekhemas is very approachable, as we’re not punished for careful play. It’s entirely possible to go the whole trial without taking damage with excellent play.
Despite some of the traps in the Trials being intimidating, it is entirely possible to dodge roll through most traps safely. This can make it quicker and easier to get through most rooms with little risk so long as the roll is used properly.
Many of the Trial of Sekhema Bosses deal Area Damage around them. This can make this trial less accessible to Melee builds without higher Honour Resistance.
The Trial of the Sekhemas is a great place to get Jewels. These gems can be socketed into our Passive Tree to provide a huge amount of power or defenses if we’re lucky. There are also Time-Lost Jewels which can only be obtained from the Trial of the Sekhemas.
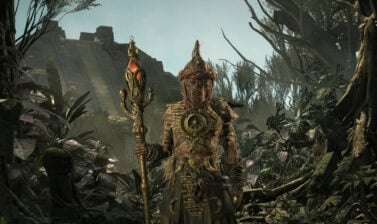
Trial of Chaos
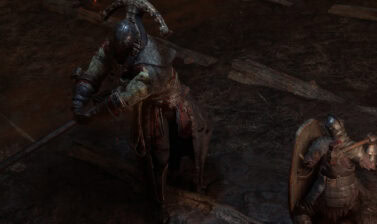
The Trial of Chaos is mechanically Similar to Ultimatum from POE1, outside of a larger space and objectives. Each Room of the Trial of Chaos will stack various effects that we need to adapt to. Similar to the Trial of the Sekhemas, each stage of the trials will require us to defeat a boss.
Gaining Ascendancy Points
Each attempt at the Trial of the Chaos requires an Inscribed Ultimatum, a special token that will determine the enemy level and tier of the Trials.
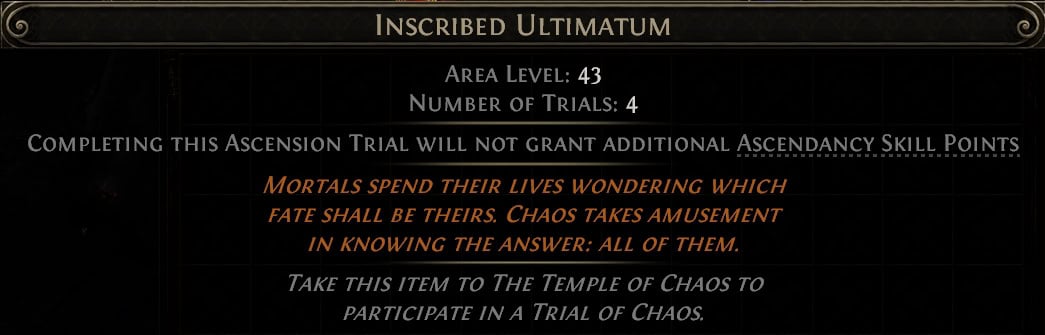
Enemy level is determined by the level of the zone where it drops, often being of equal level. Below is a table of the Tiers and their Minimum Levels and Drop Locations.
| Trials | Trial Level | Drop Location |
|---|---|---|
| 4 | 35 | 100% Chance drop for Defeating Xyclucian in Act 3.* Random Drop any point after. |
| 7 | 45+ | Random Drop Starting in Act 2 Cruel** |
| 10 | 75+ | Random Drop Starting near the end of Act 3 Cruel |
| 10 | 75+ | Requires the Cowardly Fate, Deadly Fate, and Victorious Fate items which drop from Trial of Chaos in addition to a 10-Room Trial of Chaos. |
** This tier will only award Ascendancy Points when skipping the Quest Version of the Trial of the Skehemas.
Defeating each Trial Boss in the Trial of the Chaos will award two Ascendancy Points. Defeating multiple Trial Bosses in a single run will grant Ascendancy Points equal to the final reward of the highest Boss. If we manage to somehow go without an Ascendancy and then complete a 10-Room Trial of the Chaos with the Fates, it will award all 8 Ascendancy Points.
Mechanics
The primary mechanic of the Trial of Chaos is that its rewards are all-or-nothing. Anything earned is risked with each successive room. The rewards of each room are shown before we select a hazard. Except for currency items, all rewards are also Corrupted which can have a wide variety of effects on the item.
Additionally, some Trials of Chaos will allow us to wager various currencies. These wagers are always double-or-nothing, meaning they’ll double the currency we wager if we’re successful. These however tend to be fairly uncommon to find.
Each new Trial Room will add a new hazard. These hazards are chosen randomly but are selected by us from a choice of three options. These will continue to stack and increase with each room, so we need to be careful of what hazards we choose.
Trial Rooms come in Five varieties: Boss, Exterminate, Escort, Soul Core, and Survival.
- Boss Rooms as the name suggests pit us against one of three Bosses, chosen at random.
- Exterminate Rooms requires us to defeat all enemies in the Trial Room.
- Escort Rooms require us to escort a totem as it crosses the Trial Room.
- Soul Core Rooms require us to collect 3 Soul Cores in the Trial Room and place them in sockets to activate the exit lift.
- Survival Rooms require us to survive waves of enemies and our hazards until the timer expires.
Unlike the Trial of the Sekhemas, all of these trials involve the need to defeat enemies. This heavily favors builds that can quickly dispatch enemies, minimizing the risk from both the enemies as well as the chosen hazards.
Advantages and Disadvantages
Since the Trial of Chaos heavily relies on defeating enemies quickly to be safe, some builds and archetypes may not find success with this trial until well past the level of the trial itself. Typically slower-paced builds will struggle here, as Survival Rooms can quickly overwhelm them.
With the Hazards being offered at random, this often means the choices offered can all be awful to deal with. This can make an otherwise easy trial immediately become far more difficult. On top of this, Hazards having levels also make them more dangerous the more times they are chosen, it can be tough to have a truly safe run.
The Trial of Chaos is the only source to obtain Soul Cores, a powerful alternative to Runes. These offer a wide variety of options, often being stronger options compared to some Runes. Some notable bonuses from these Soul Cores include All Elemental Resistances, Chaos Resistance, and Item Rarity.