Wreckage on Dantooine serves as an your introduction to the new area. During it, you will explore all three biomes of the Dantooine Crash Site and complete several other missions and dynamic encounters.
How to start the mission
The Wreckage on Dantooine mission is available to all players and was released with Update 7.8. A Subscription to SWTOR is not required.
The Dantooine Crash Site map is for players of level 80. There is no level sync and if you bring a low level character, even if they are able to pick up the quest and participate, they will struggle seriously.
This is a challenging map with difficult encounters. You can make your time at the Crash Site easier by unlocking and obtaining powerful buffs.
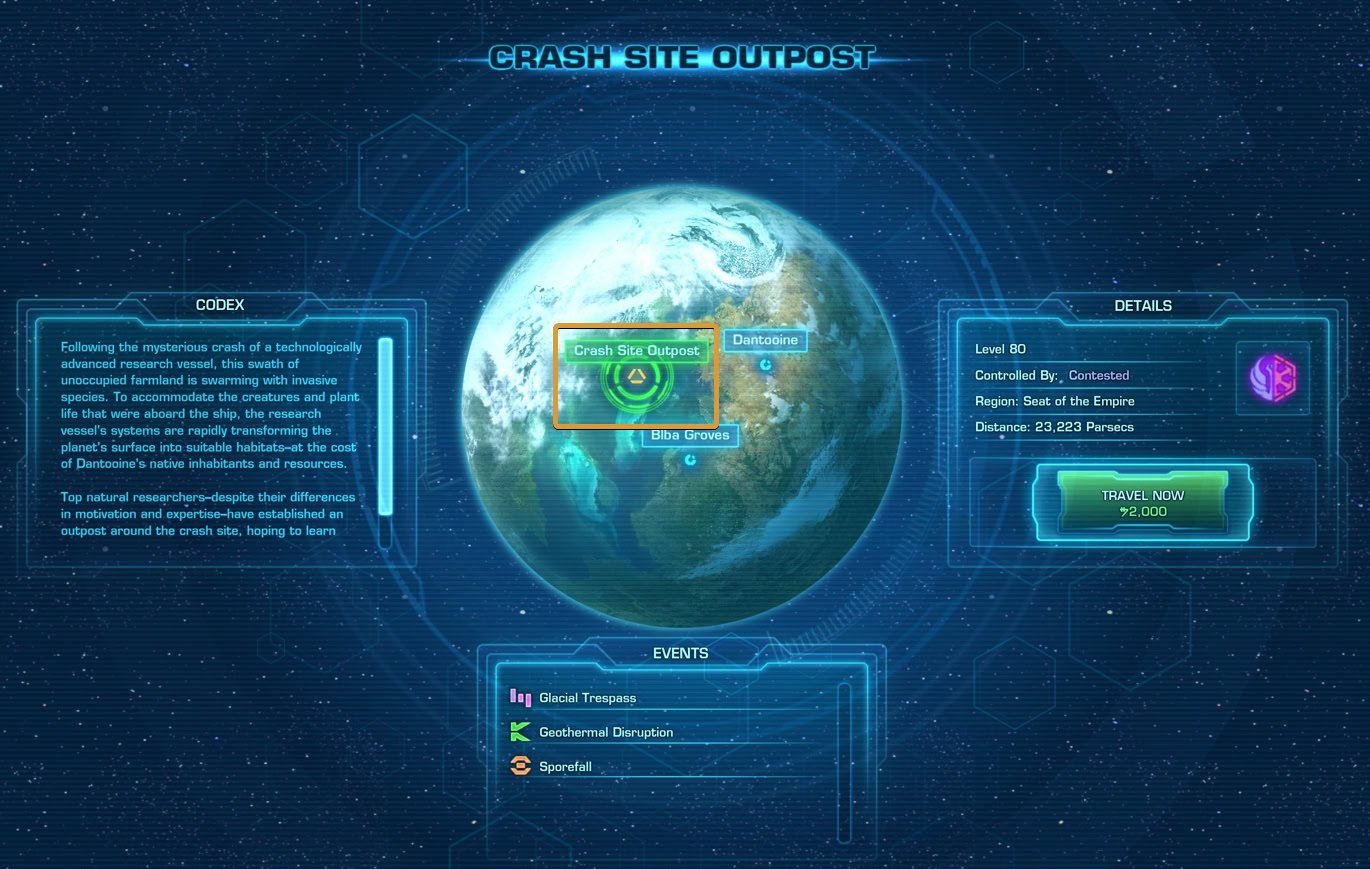
To start the mission, open the Galaxy Map and select Dantooine, located on the edge of Imperial Space. Choose “Crash Site Outpost” as a landing zone.
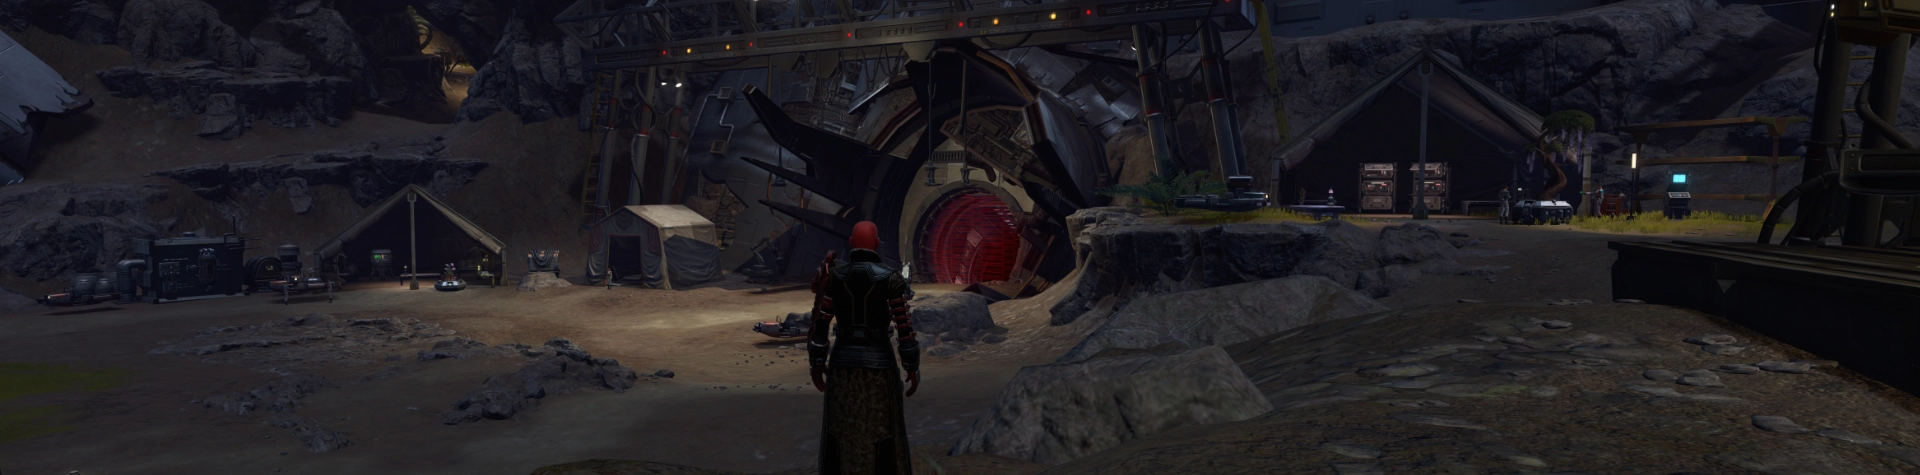
After a short intro cinematic, you will find yourself at the Research Camp, which is the starting area for this new map. You can find the Reputation Vendor in the middle of the camp.
Your Personal Comlink will pop up. Answer it. Doctor Pordav, the head researcher, is actually not far from you, in the Research Camp. Talk to him on the Comlink and then go to talk to him directly at the tents. This is the actual start of the mission Wreckage on Dantooine. You can now track it from your Mission Log as well.

Doctor Pordav will give you a briefing of the situation and introduce you to the three sections of the map, the three unique biomes where weird things are happening.
If you reach Doctor Pordav before you answer your comlink, his dialogue lines may go off automatically. This will not progress the mission, though. After you answer the comlink, move away from the tent with the Doctor and approach him again.
Mission Stages Explained
Each of the three biomes, Glacial, Geothermal, and Sporefall, will give you three identical short missions that have an exploratory character and will just take you throughout the Dantooine Crash Site map while asking you to inspect objects and complete Dynamic Encounters on Dantooine. Then complete a Level Transition Encounter.
- Start the Story Mission
Arrive to the Dantooine Crash Site, use your comline, talk to Doctor Pordav.
- Glacial Biome Missions
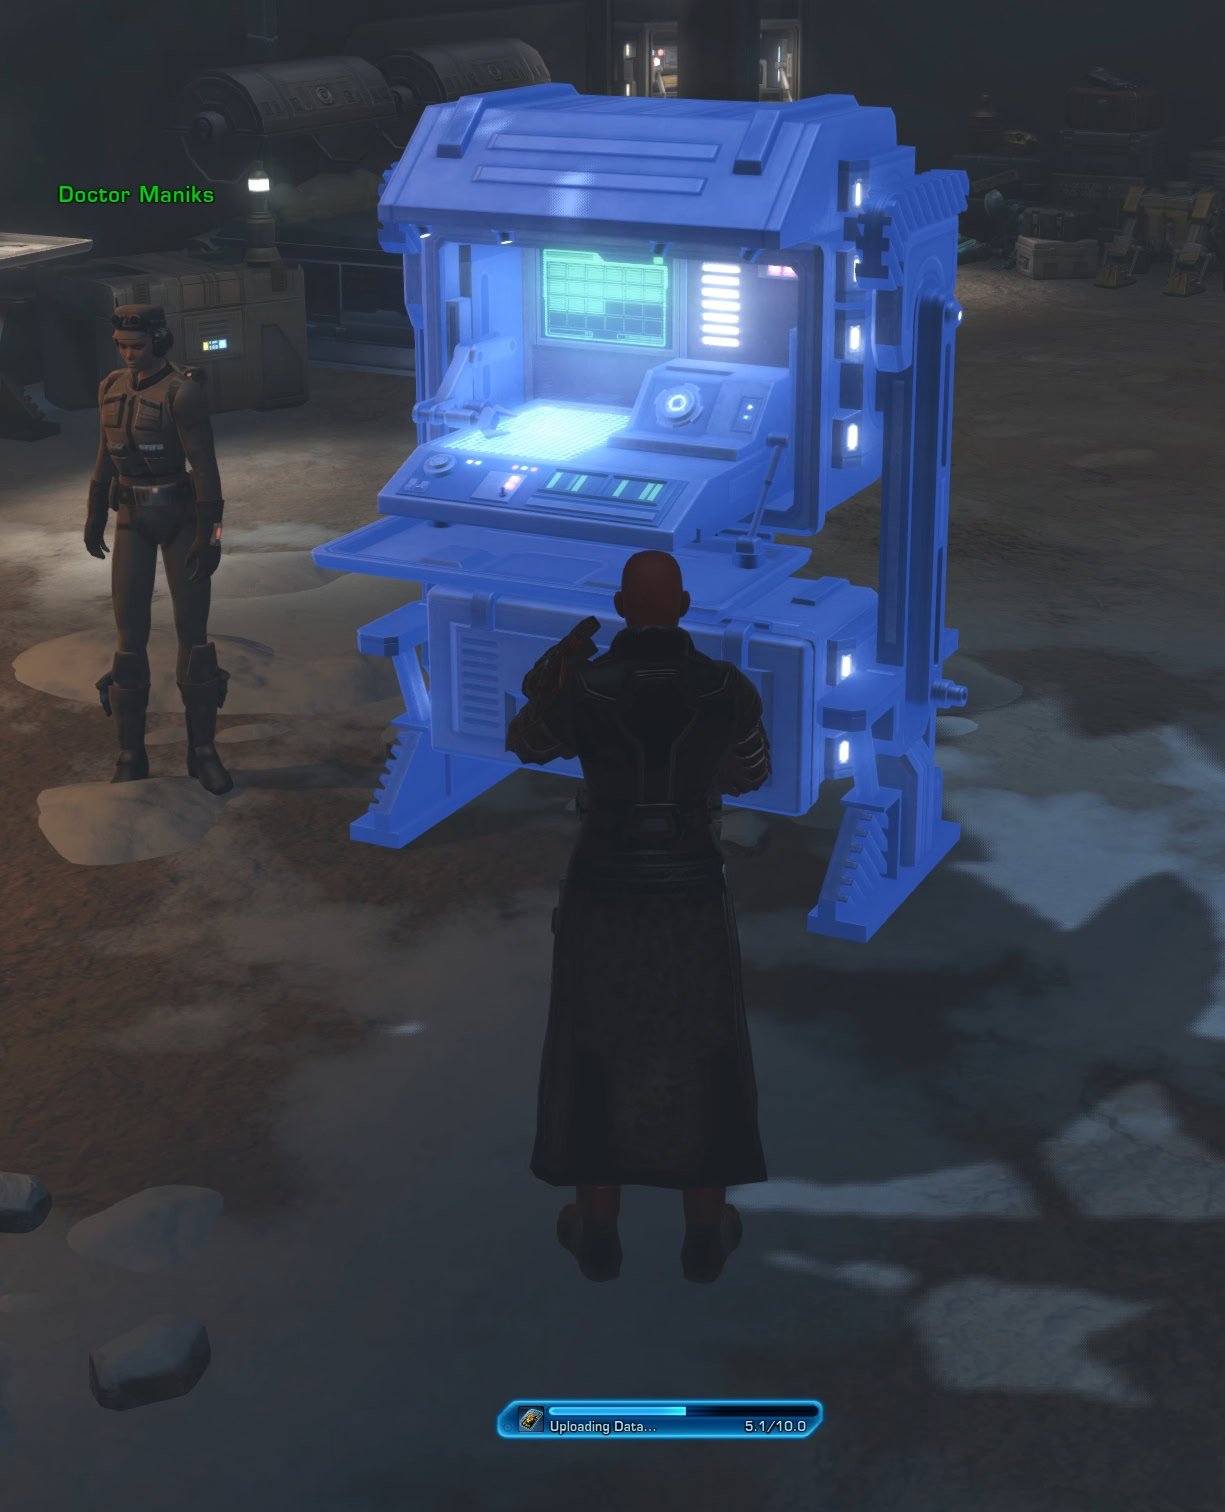
Talk to the scientists at the Glacial Trespass Camp, pick up and complete the three missions they will give you. Go back to the camp to upload the data you have gathered.
- Geothermal Biome Missions
Visit the Geothermal Disruption Camp, talk to the NPCs there, pick up the three missions and complete them. Return to the camp to deliver your data.
- Sporefall Biome Missions
Visit the Sporefall forward camp and pick up all three missions there. Complete them and upload the data to the terminal.
- Complete a Level Transmission Encounter
The Level Transmission Encounters become available when a biome (section) is ready to get to level 2 or 3. There is only one active Encounter of this type when a Transition occurs.
- Orbital Core Challenge
The final step is to defeat the Orbital Core. You will need a proper well-geared and prepared group for this difficult challenge.
To upload the collected data after you complete a biome, find this terminal in the center of the local camp and interact with it.
When you do this mission on other toons, particularly after you reach Friend reputation rank, it’s important to note that the Hazard Mitigation Module terminal is only disabled when you’re about to go to a new biome (Uploading Data step) until you complete the mission where you identify/examine the next region’s hazard.
Always do the hazard identification mission first, then go get hazard mitigation for the next region before completing your 3 regional encounters and .
The Glacial Biome Missions
The first camp Doctor Pordav will send you to, is the Glacial Trespass Camp, located in the Glacial Trespass biome. When you reach the camp, a short conversation will introduce you to this biome’s situation and prompt you to pick up the three available missions required to progress the main mission.

Biome Debuff:
While in the Glacial Biome, you will receive stacks of a freezing debuff while out in the open. Keep moving to lower the stacks or go to a warm place to remove them.

Cryo Hazard
This mission is given to you by Doctor Kontor. Stand on the marked spot on the map, use your Microbinoculars, and observe the blizzard.

Once you complete this mission, you can use the Hazard Mitigation Module at Research Camps (Friend rep required for Forward Camps) to protect yourself from the Cryogenic Saturation debuff throughout the zone.
Cold, Hard Data
This mission is given to you by Doctor Maniks. You need to scan three locations in the Glacial biome to complete it. The locations are all well marked on your map and you will not have any trouble finding them.
You do not need to engage in combat for these missions. Just stand on the marked spot on your map, and use the temporary ability that will appear on your screen to take a reading. The temp ability bar will only appear when you are at the correct spot.

 Glacial Encounters
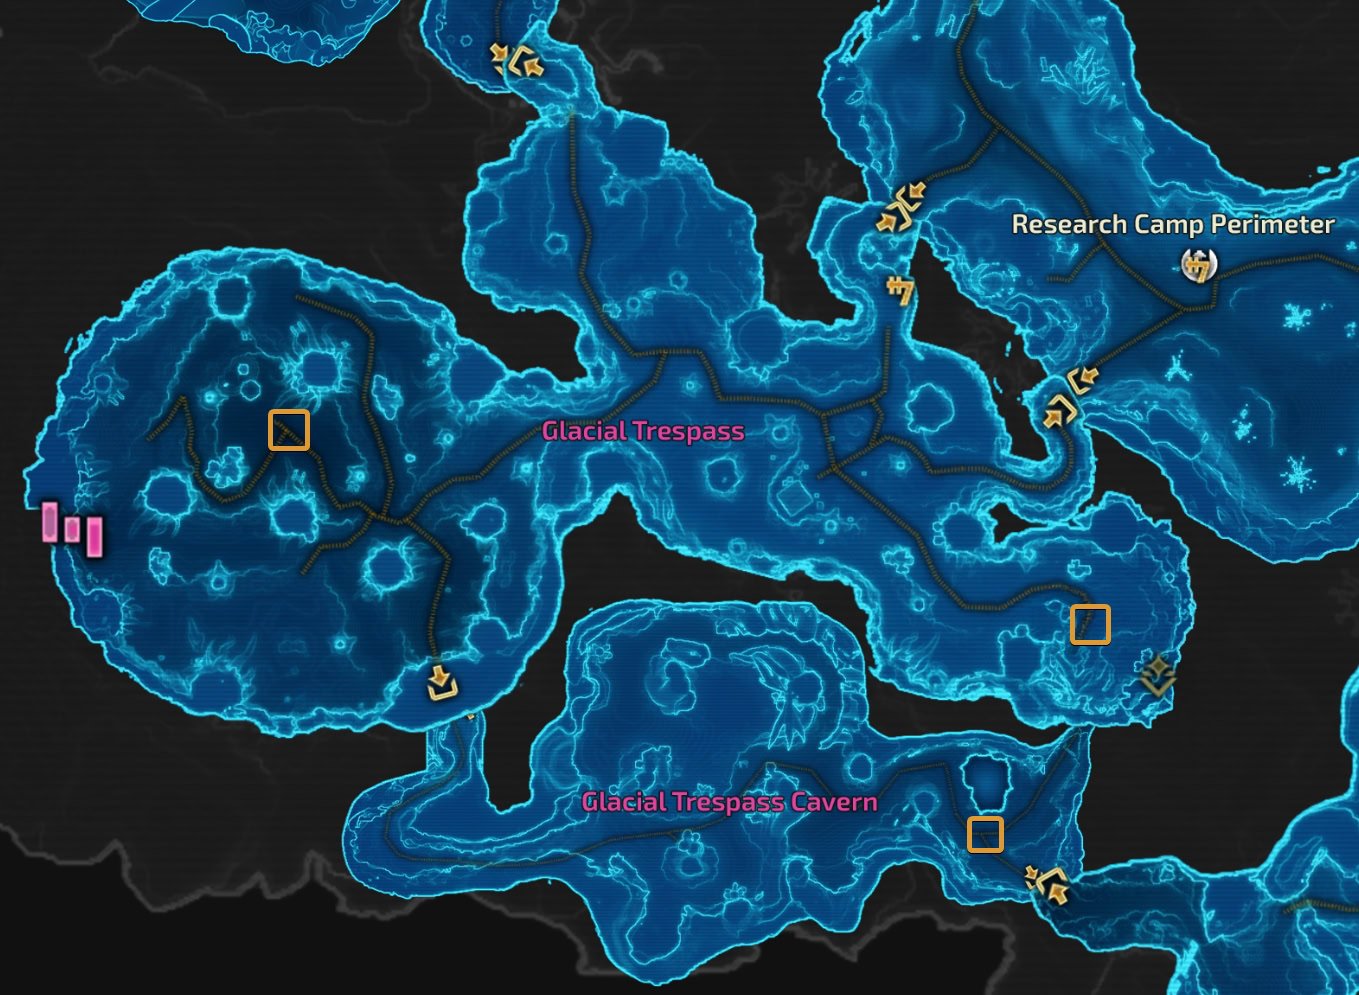
To complete this mission, look for the Dynamic Encounters in the Glacial biome. They are marked with the standard icon for Shared Dynamic Encounters, but with a pink-colored symbol at the top. The biome includes the following maps:
- Glacial Trespass
- Glacial Trespass Caverns
- A portion of the Research Camp Perimeter
- Ship Interior, Glacial Wing
| Event Name | Biome | Map Area | Type | Type | Objectives | Level | Achievements | Difficulty | Description: | Tasks: |
|---|---|---|---|---|---|---|---|---|---|---|
| Frigid Swarm | Glacial | Glacial Trespass | Normal | Hybrid | 1 | These creatures have been bio-engineered to aerate frozen soil and spread frost flora spores. Stop their seeding of invasive plant life across the snow shelf! | – Clear Out Cryo-Nesters – Destroy Cryo-Nest Eggs |
|||
| Frostbloom Sweep | Glacial | Glacial Trespass | Normal | Hybrid | 1,2 | The Vault Ship’s cryo-flora is plummeting local temperature. Cull the frostblooms before they spread even more! | – Cull the Frostblooms – Clear Out Iceclaws |
|||
| Frostcaller | Glacial | Glacial Trespass | Normal | Hybrid | 2,3 | Reactivate the Interference Spikes to shut down this Cryogenic Seeder Node before it repopulates the frost flora across the shelf! | 1. Activate the Interference Spikes 2. Protect the Interference Spikes from Frostkeepers 3. Upload the Interference Spike Data 4. Defeat the Cryosentinel |
|||
| Gelid Tendrils | Glacial | Glacial Trespass | Normal | Combat | 1,2,3 | Strange tendrils creep from the icy caves below. Stomp them out! | 1. Squish Fragile Tendrils 2. Defeat Massive Tendrils |
|||
| Glacial Reclamation | Glacial | Glacial Trespass | Normal | Combat | 2,3 | The ship’s tertiary protocols have activated and a final recovery effort has been launched. | 1. Deactivate the Reboot Sequence 2. Clear Out the Cryo-Nesters 3. Clear Out the Cryo-Sterilizer Droids 4. Clear Out the Cryo-Nester Broodguards 5. Clear Out the Cryo-Reclaimation Droids 6. Clear Out the Cryosentinels 7. Clear Out the Cryo-Dominator Droid |
|||
| Hollow Frost | Glacial | Glacial Trespass | Normal | Hybrid | 2 | These Resonating Frostbulbs are plummeting the local temperatures and preventing exploration further into the shelf. | – Defeat Gladiopods – Cull the Frostbulbs |
|||
| Iceweeds | Glacial | Glacial Trespass | Normal | Hybrid | 1 | Our forward base has been overrun. Get it back online if you can. | 1. Reactivate Heat Lamps 2. Defeat Cryo Droids 3. Defeat the Cryo-Dominator |
|||
| Outpost Defense | Glacial | Glacial Trespass | Normal | Hybrid | 2 | The forward outpost is now online but it’s under attack. Stablize the area before we lose it completely! | 1. Repair Turrets 2. Fend Off Hostile Creatures 3. Defeat the Cryosentinel |
|||
| Probe-lems | Glacial | Ship Interior | Normal | Clicking | 1,2,3 | Czerka is illicitly attempting to gather data inside the wreckage. Foil their plans. | – Slice Probe Droids – Scramble Czerka Datasctreams |
|||
| Root Cause | Glacial | Glacial Trespass Cavern | Normal | Hybrid | 3 | We’ve traced the source of the freezing to a massive Rootmass deep In this cavern, Thermal charges were staged near key subroot structures but the vault’s predators forced our retreat. Recover the charges, destroy the supports, and put an end ta the Rootmass before the entire zone locks in ice | 1. Find the Thermal Charges 2. Activate Heat Lamps 3. Destroy the Frostveins 4. Defeat the Frosthide Bolraida and Rootbound Bolraida 5. Destroy the Rootmass |
|||
| Unruly Nesters | Glacial | Research Camp Perimeter | Normal | Hybrid | 1,2,3 | The Cryo-Nesters being studied by the GSI have destroyed their cages! Repair the enclosures and grab an electro-net to help round them up. | – Wrangle Cryo-Nesters – Repair Containment Fence |
|||
| The Cryonest Matron | Glacial | Ship Interior | Transition | Hybrid | 1 | The cryo-fauna outbreak leads back to this sealed incubation chamber. It appears to have been reawakened by the recent rise in temperature. Destroy the nest and stop the swarm at its source! | 1. Clear Out the Swarm 2. Defeat Broodguards 3. Destroy Eggs 4. Defeat the Cryonest Matron |
|||
| Cryocore Override | Glacial | Ship Interior | Transition | Hybrid | 2 | The snow shell control core has finally opened. Shut the ship’s climate controls before it’s too late. | 1. Deactivate Cryo-Containment Consoles 2. Defeat Cryo-Sterilizer Droids 3. Defeat the Cyro-Core Guardian 4. Deactivate the Emergency Containment Response Consoles 5. Defeat Cryo-Reclaimation Droids |
The Geothermal Biome Missions
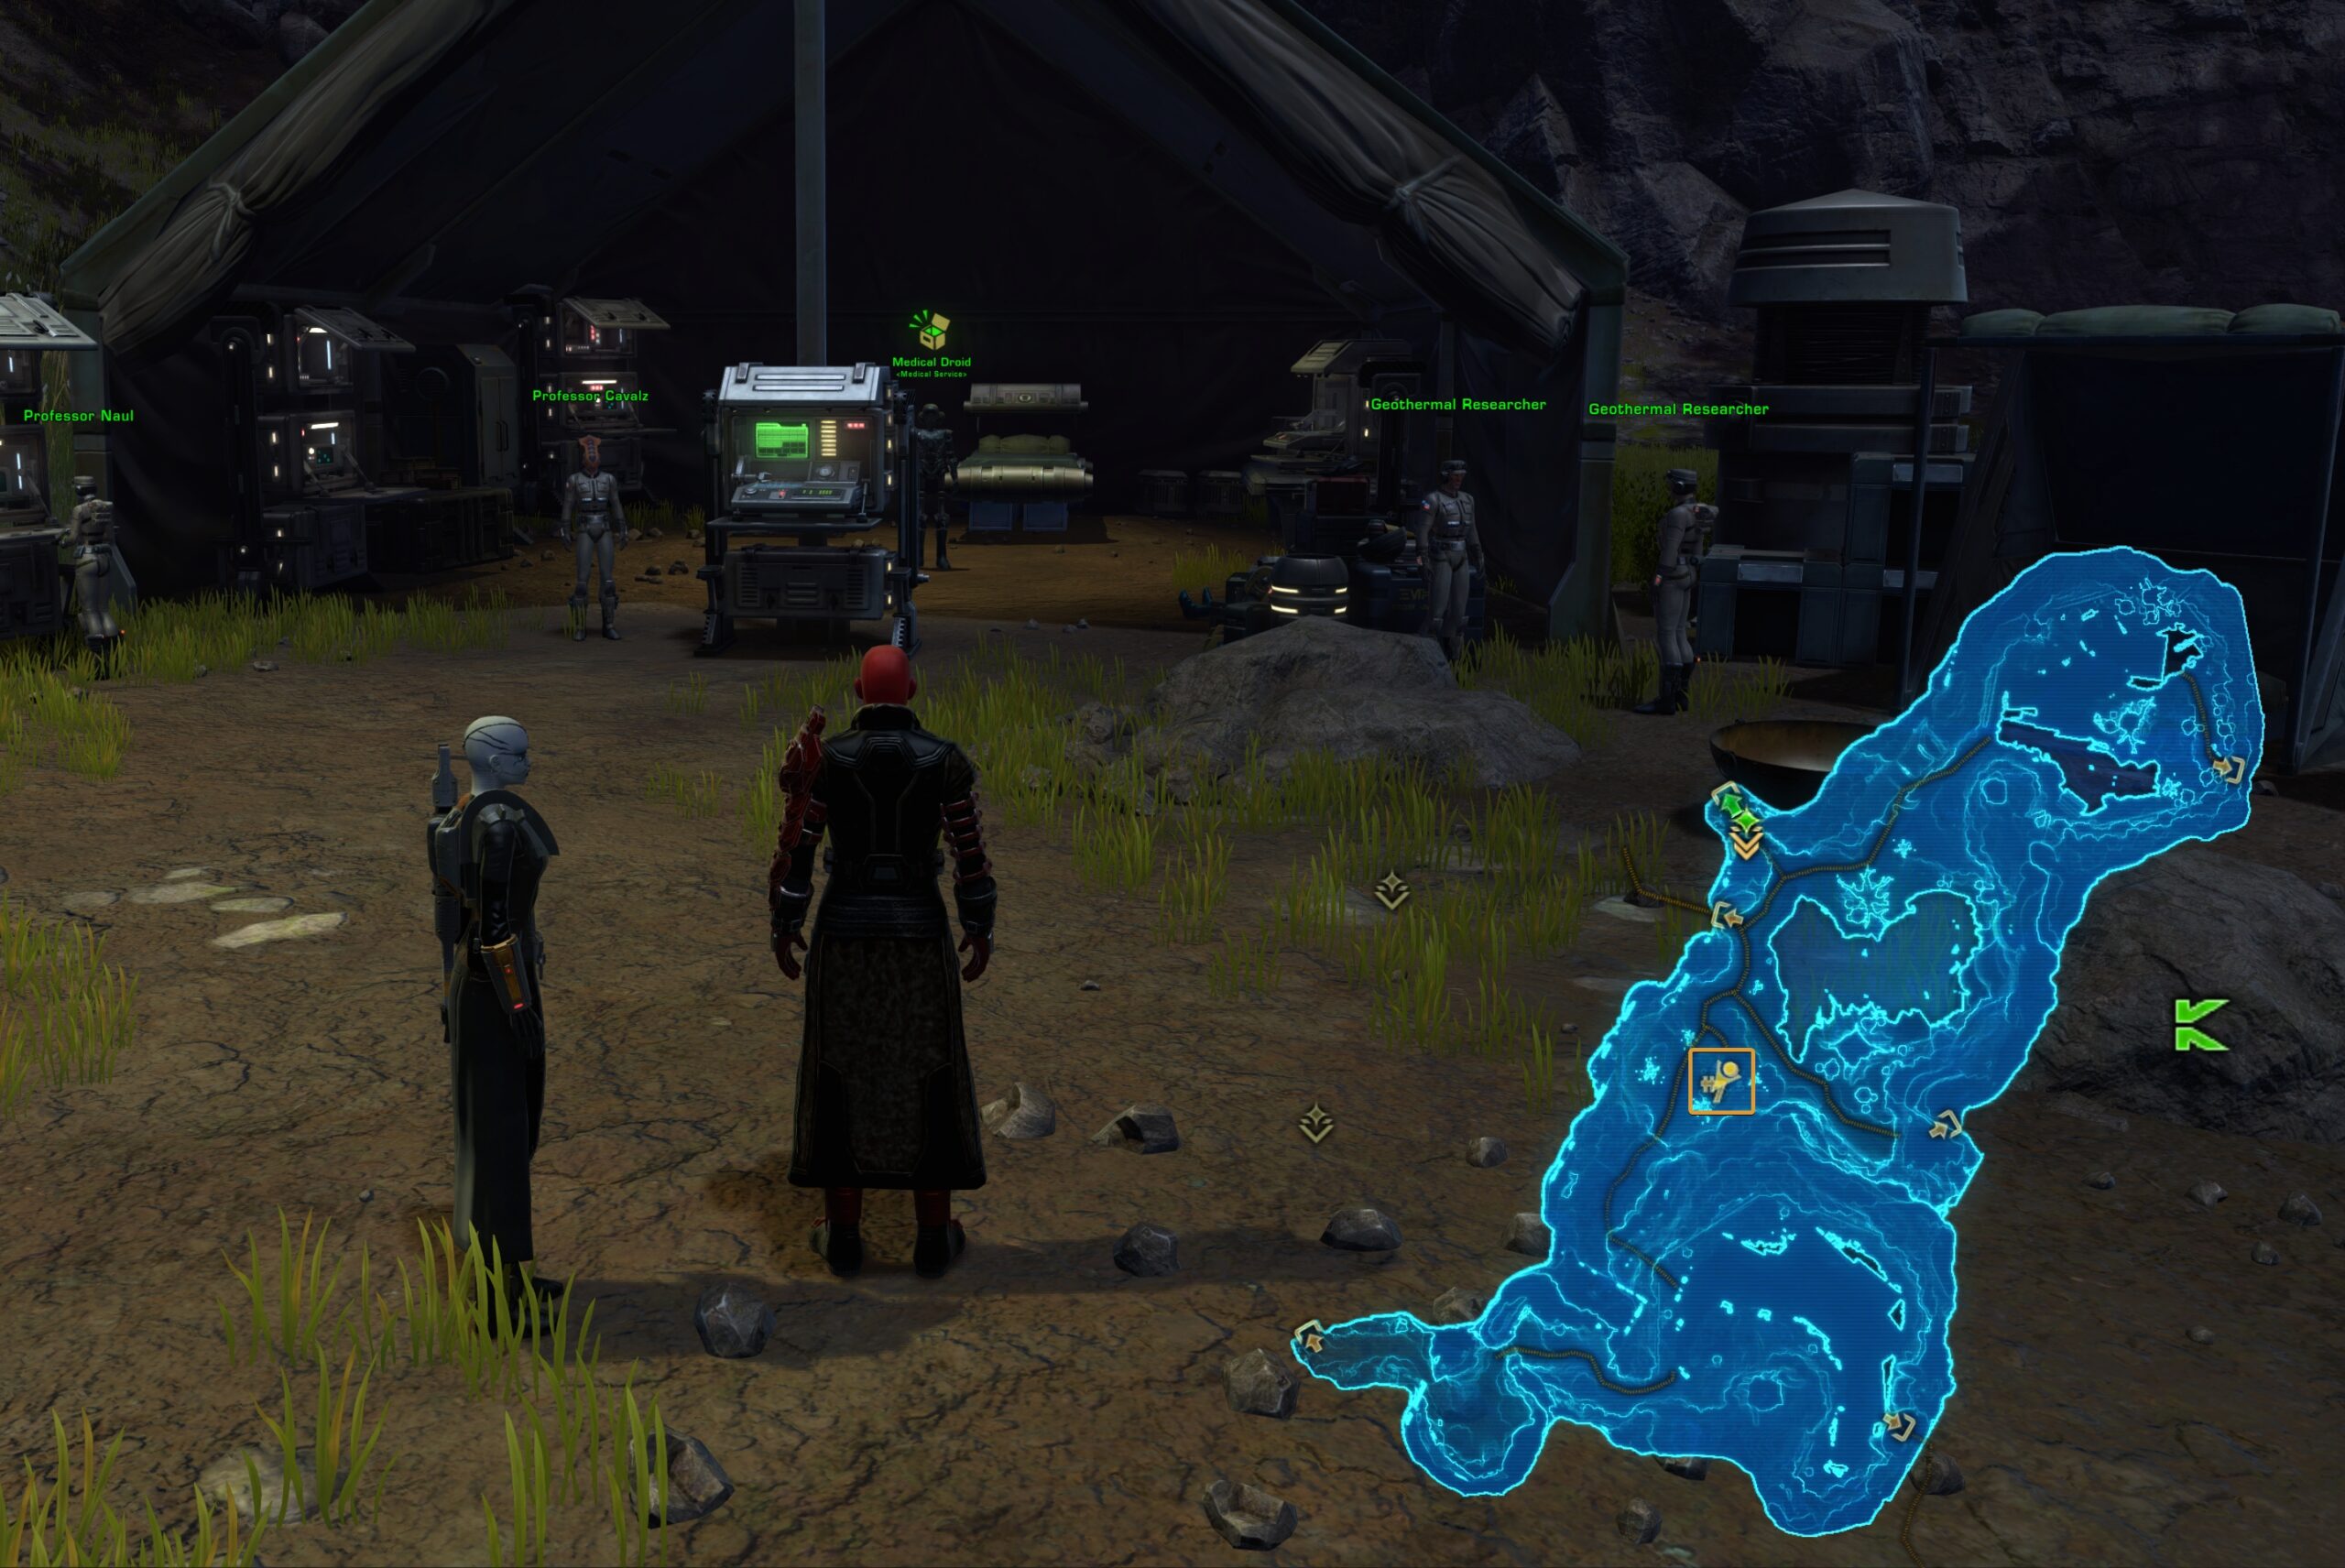
When you arrive at the Geothermal Disruption Camp, talk to Professor Cavalz. Now, it’s time to complete the three local missions to progress.
Biome Debuffs:
The area features two types of debuffs. While you are in a pool of water, you will get Contamination Stacks (the green icon). If you are near or in a lava pool, you will get Burned. The Burned debuff hurts a lot more. Both debuffs disappear if you step out of the hazardous area.
Toxic Runoff
The Geothermal Researcher at the camp, will ask you to help them by observing the Toxic Runoff in the area.
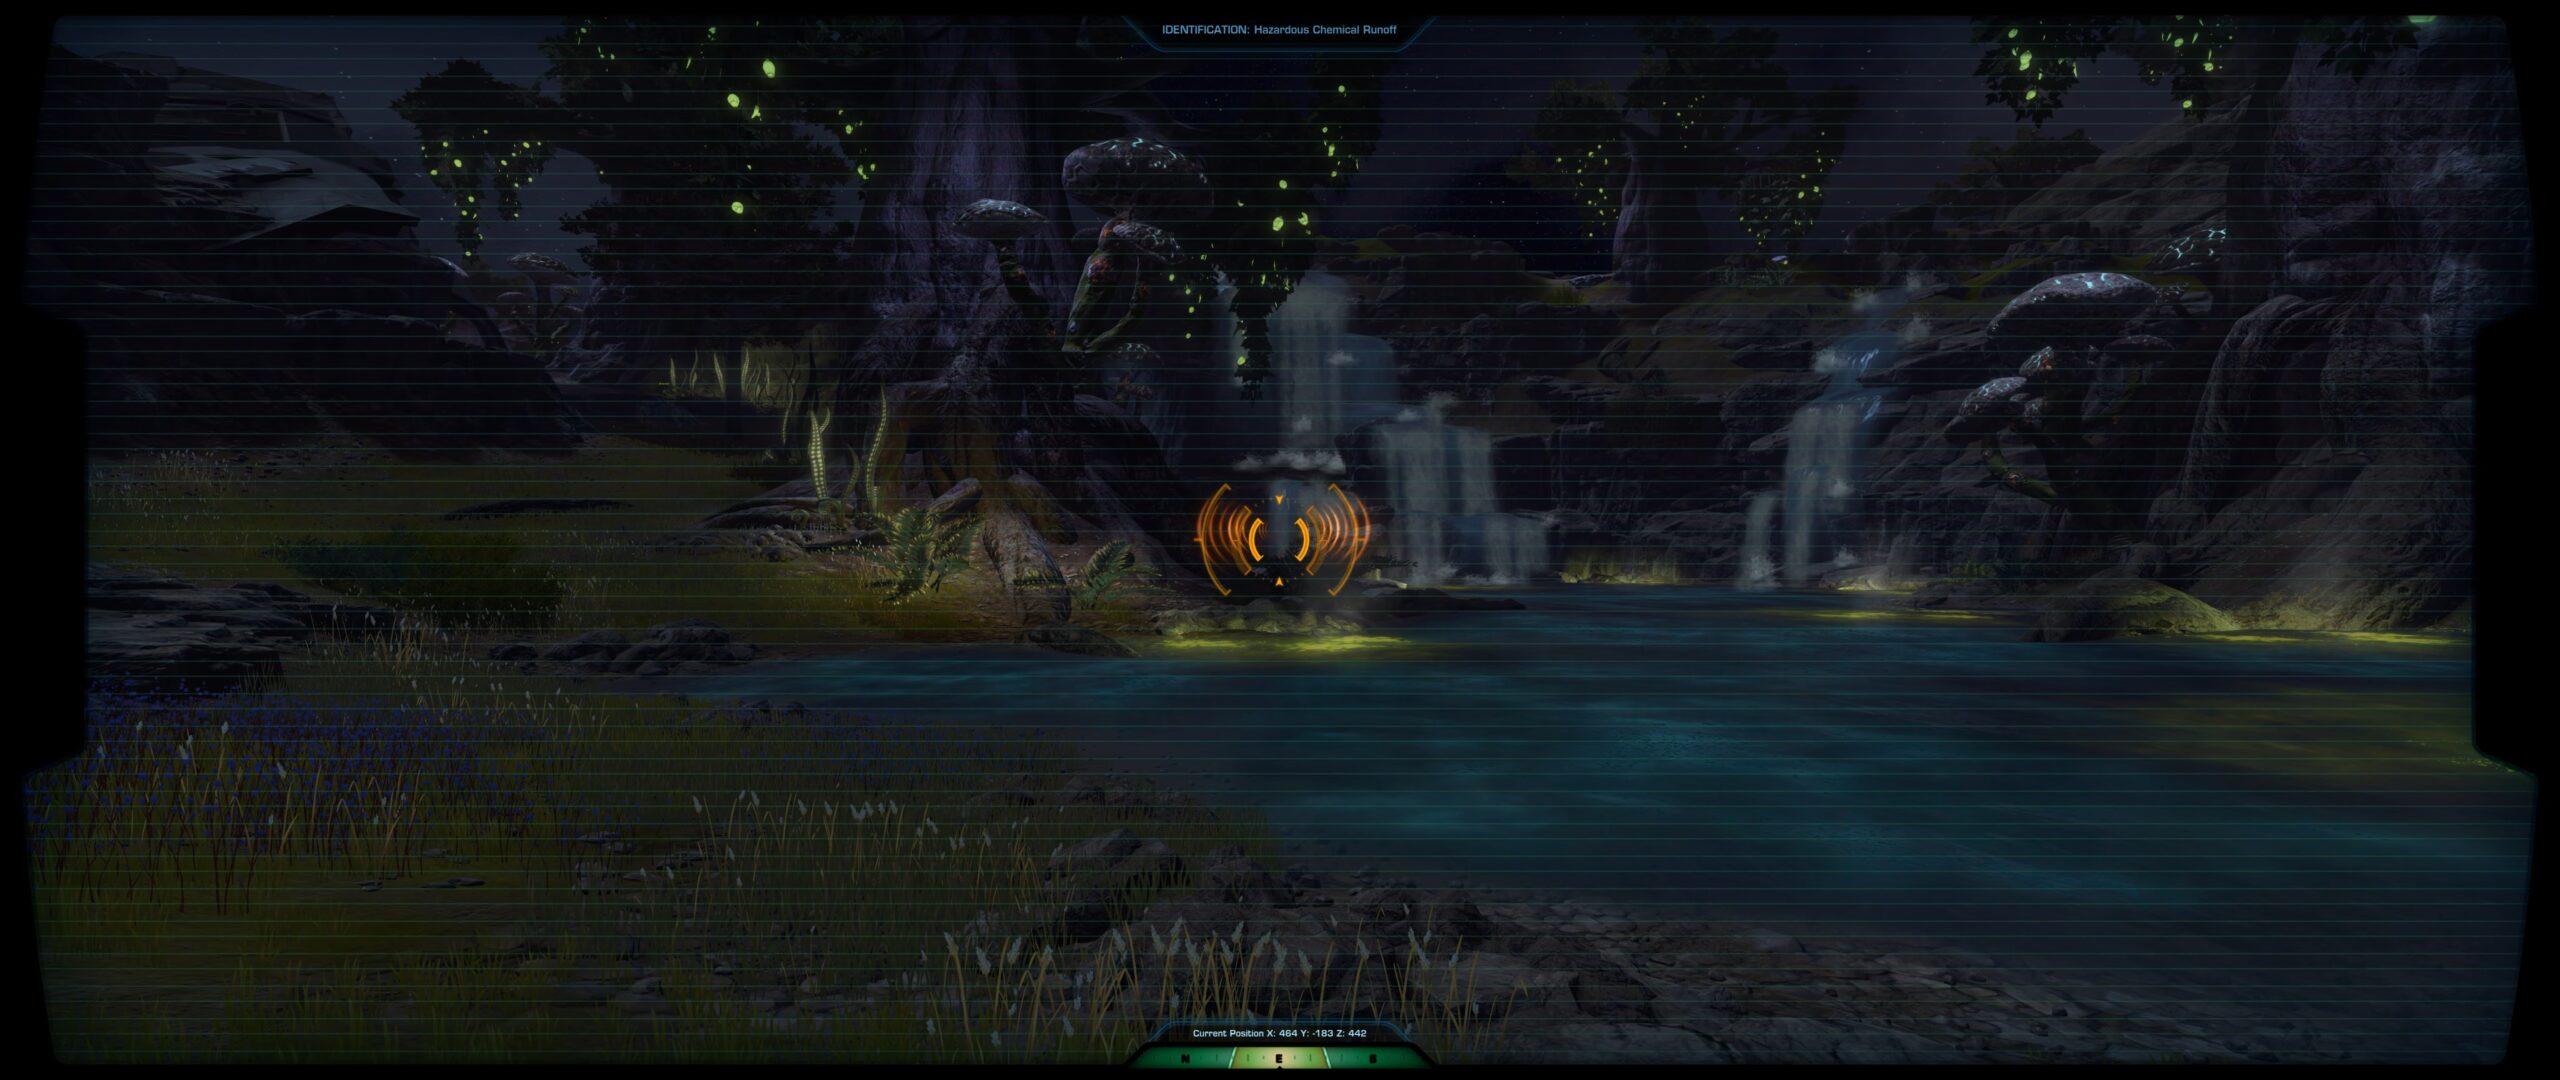
Once you complete this mission, you can use the Hazard Mitigation Module at Research Camps (Friend rep required for Forward Camps) to protect yourself from the Toxic Runoff debuff throughout the zone.
Stability Monitoring
Professor Naul will ask you to scan three locations in the Geothermal biome for the Stability Monitor mission.

Geothermal Encounters
Professor Cavalz will ask you to complete three Geothermal Encounters. They are marked on your map with the Shared Encounter icon with a green symbol at the top. The Geothermal biome includes the following maps:
- Geothermal Disription
- Crystal Cave
- Lava Cave
- A portion of the Research Camp Perimeter
- Ship Interior, Geothermal Wing
| Event Name | Biome | Map Area | Type | Type | Objectives | Level | Achievements | Difficulty | Description: | Tasks: |
|---|---|---|---|---|---|---|---|---|---|---|
| Acid Trip | Geothermal | Geothermal Disruption | Normal | Hybrid | 2 | The ship has sent recon droids to monitor the toxic pools in the area. Slice into those droids, and use them to safely collect samples for our research! | – Take Control of Reconnaissance Droids – Collect Acid Samples – Send Acid Samples to Camp – Defeat Frenzied Skar’kla |
|||
| Brood Basin | Geothermal | Geothermal Disruption | Normal | Combat | 1 | The ship’s habitat regulators are sustaining non-native bioengineered insects that rely on geothermal runoff to incubate. Clear out the invasive swarms before they overrun any more of the native wildlife! | 1. Clear out Embercrawleds 2. Clear out Emberstriders 3. Defeat the Emberqueen |
|||
| Caustic Cascade | Geothermal | Geothermal Disription | Normal | Hybrid | 1,2,3 | Toxic runoff from broken habitat tanks is seeping into the area and drawing skar’kla from deeper in the ship to the mineral-rich waste and spreading corrosive damage. Shut down those tanks before they poison the reservoir! | 1. Clear out Skar-kla 2. Repair Processing Tanks 3. Defeat Skar-kla Pack Leader |
|||
| Come Up, Fish | Geothermal | Lava Cave | Normal | Champion | 3 | The ship has been re-routing magma to care for Hothian Geo Beasts! Normally this would be a fascinating thing to study, but it presents a clear danger to our team. | Defeat the Gargantuan Geo Beast |
|||
| Data Appropriation | Geothermal | Ship Interior | Normal | Hybrid | 1,2,3 | Heavily-shielded Czerka personnel infiltrated the ship. Find a way to defeat them and steal their data. | – Defeat Shielded Czerka Enemies – Appropriate Data |
|||
| Fungal Protection | Geothermal | Crystal Cave | Normal | Hybrid | 1,2,3 | An endangered fungus is flourishing in the area. Help protect it from new predators and spread its spores. | 1. Defeat Hungry Geo Beast Larvae 2. Harvest Delicate Spore Sacs 3. Sow Spores Near Vents 4. Defend Nascent Fungai from the Geo Beast |
|||
| Graul Graveyard | Geothermal | Geothermal Disruption | Normal | Combat | 1 | A territorial Graul has wandered too close to the ship’s infrastructure and tts instincts have led it to disrupt the area. Now the ship’s subroutines have flagged the Graul as a hostile threat. Don’t let them kill it! | 1. Destroy Ship Droids 2. Destroy Ship Droid Enforcers 3. Destroy Ship Droid Battlemaster |
|||
| Hot Spots | Geothermal | Crystal Cave | Normal | Hybrid | 2 | We’ve been seeing some unusual geologic activity in the area. Could you take some readings? We have concerns about this development, Danyoine is not normally geologiqally, unstable! | – Take Magma Readings – Defeat Geo Beast Larvae |
|||
| Thermal Investigation | Geothermal | Crystal Cave | Normal | Hybrid | 1,2,3 | The sudden geothermal shifts are causing strange reactions in crystal formations. Collect data and be wary of dangerous creatures in the area. | 1. Scan Superheated Cystals 2. Defeat Thermoliphic Scurriers 3. Defeat the Thermophilic Lurker |
|||
| Under Pressure | Geothermal | Lava Cave | Normal | Hybrid | 3 | The ship has been re-routing magma for some unknown purpose. It doesn’t seem related to geothermal harvesting. Whatever the reason, there is a new geyser threatening the stability of the area. | 1. Take Control of a Mouse Droid 2. Scavenge Materials for a Geyser Cap 3. Scavenge Materials for a Geyser Cap 4. Take Control of a Construction Droid 5. Construct the Geyser Caps 6. Defeat Agitated Geo Beast Spawns |
|||
| Vent Sync Failure | Geothermal | Crystal Cave | Normal | Hybrid | 1 | Easy | The ship’s atmospheric regulators are causing these thermal vents to cycle the cavern with bursts of noxious gas. Shut them down before the native Kath Hounds succumb. | 1. Destroy Ship Droids 2. Deactivate Toxic Vents 3. Defeat the Ship Droid Overseer |
||
| Caretaker Unit K-6 | Geothermal | Ship Interior | Transition | Champion | 2 | The control chamber has activated some kind of Caretaker Unit. If we’re going to make any more progress here, it will need to be dealt with. | – Defeat Caretaker Unit K-6 |
|||
| Core Overload | Geothermal | Ship Interior | Transition | Hybrid | 1 | The ship has misinterpreted recent stabilization efforts as sabotage and it preparing to redirect a superheated purge through the areas above. Shut down the Biothermal Regulator before Dantooine suffers catastrophic overheating! | 1. Use Coolant to Access and Activate Thermal Regulators 2. Defeat Reinforcing Purge Protocol Droids 3. Defeat Warden Unit K-8 4. Shut Down the Biothermal Regulator |
The Sporefall Biome Missions
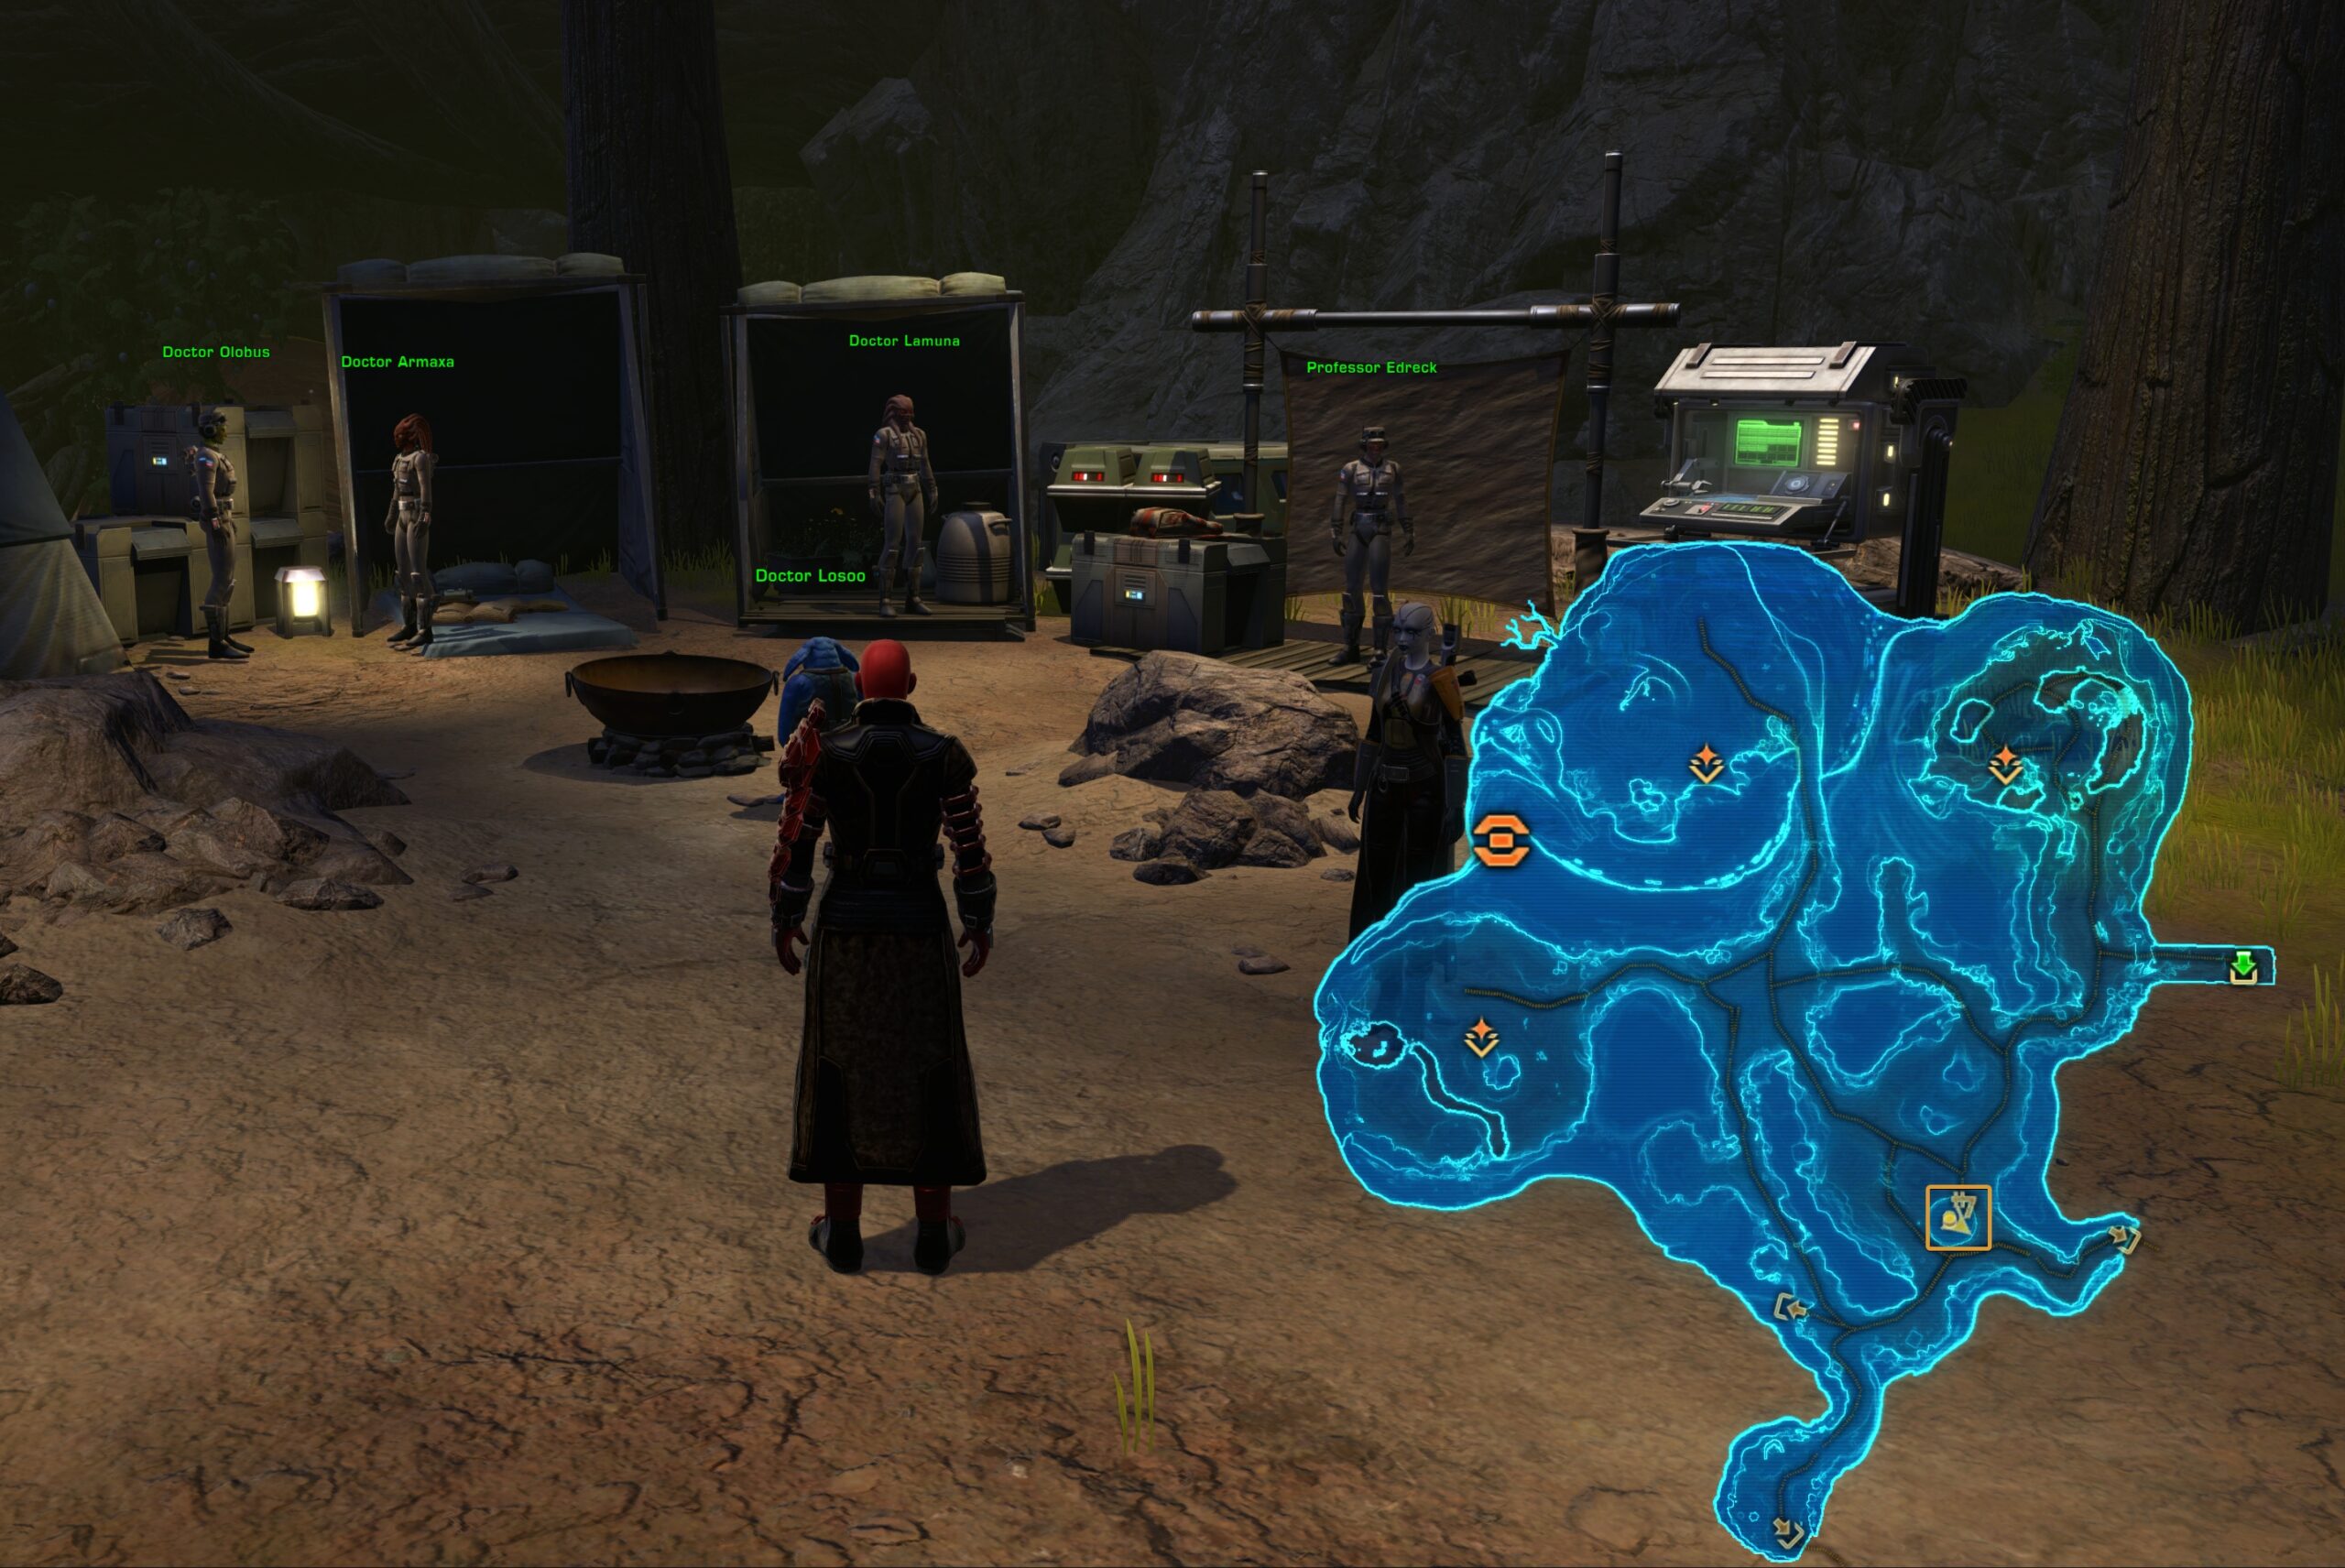
At the Sporefall forward camp, Professor Edreck will greet and introduce you to the current issues in this biome. Pick up the three available missions from the NPCs at this camp to progress.
Biome Debuff:
While in this area, you will get a Light Sporefall. It slows down your movement considerably as it stacks.
Spore Exposure
Doctor Lamuna will ask you to observe the Sporefall Hazard using your Macrobinoculars. Taking damage from the spores will interrupt you, so stand inside the log to shelter yourself from the spores. Also, be quick about taking the reading after, those stacks from the droid hurt!
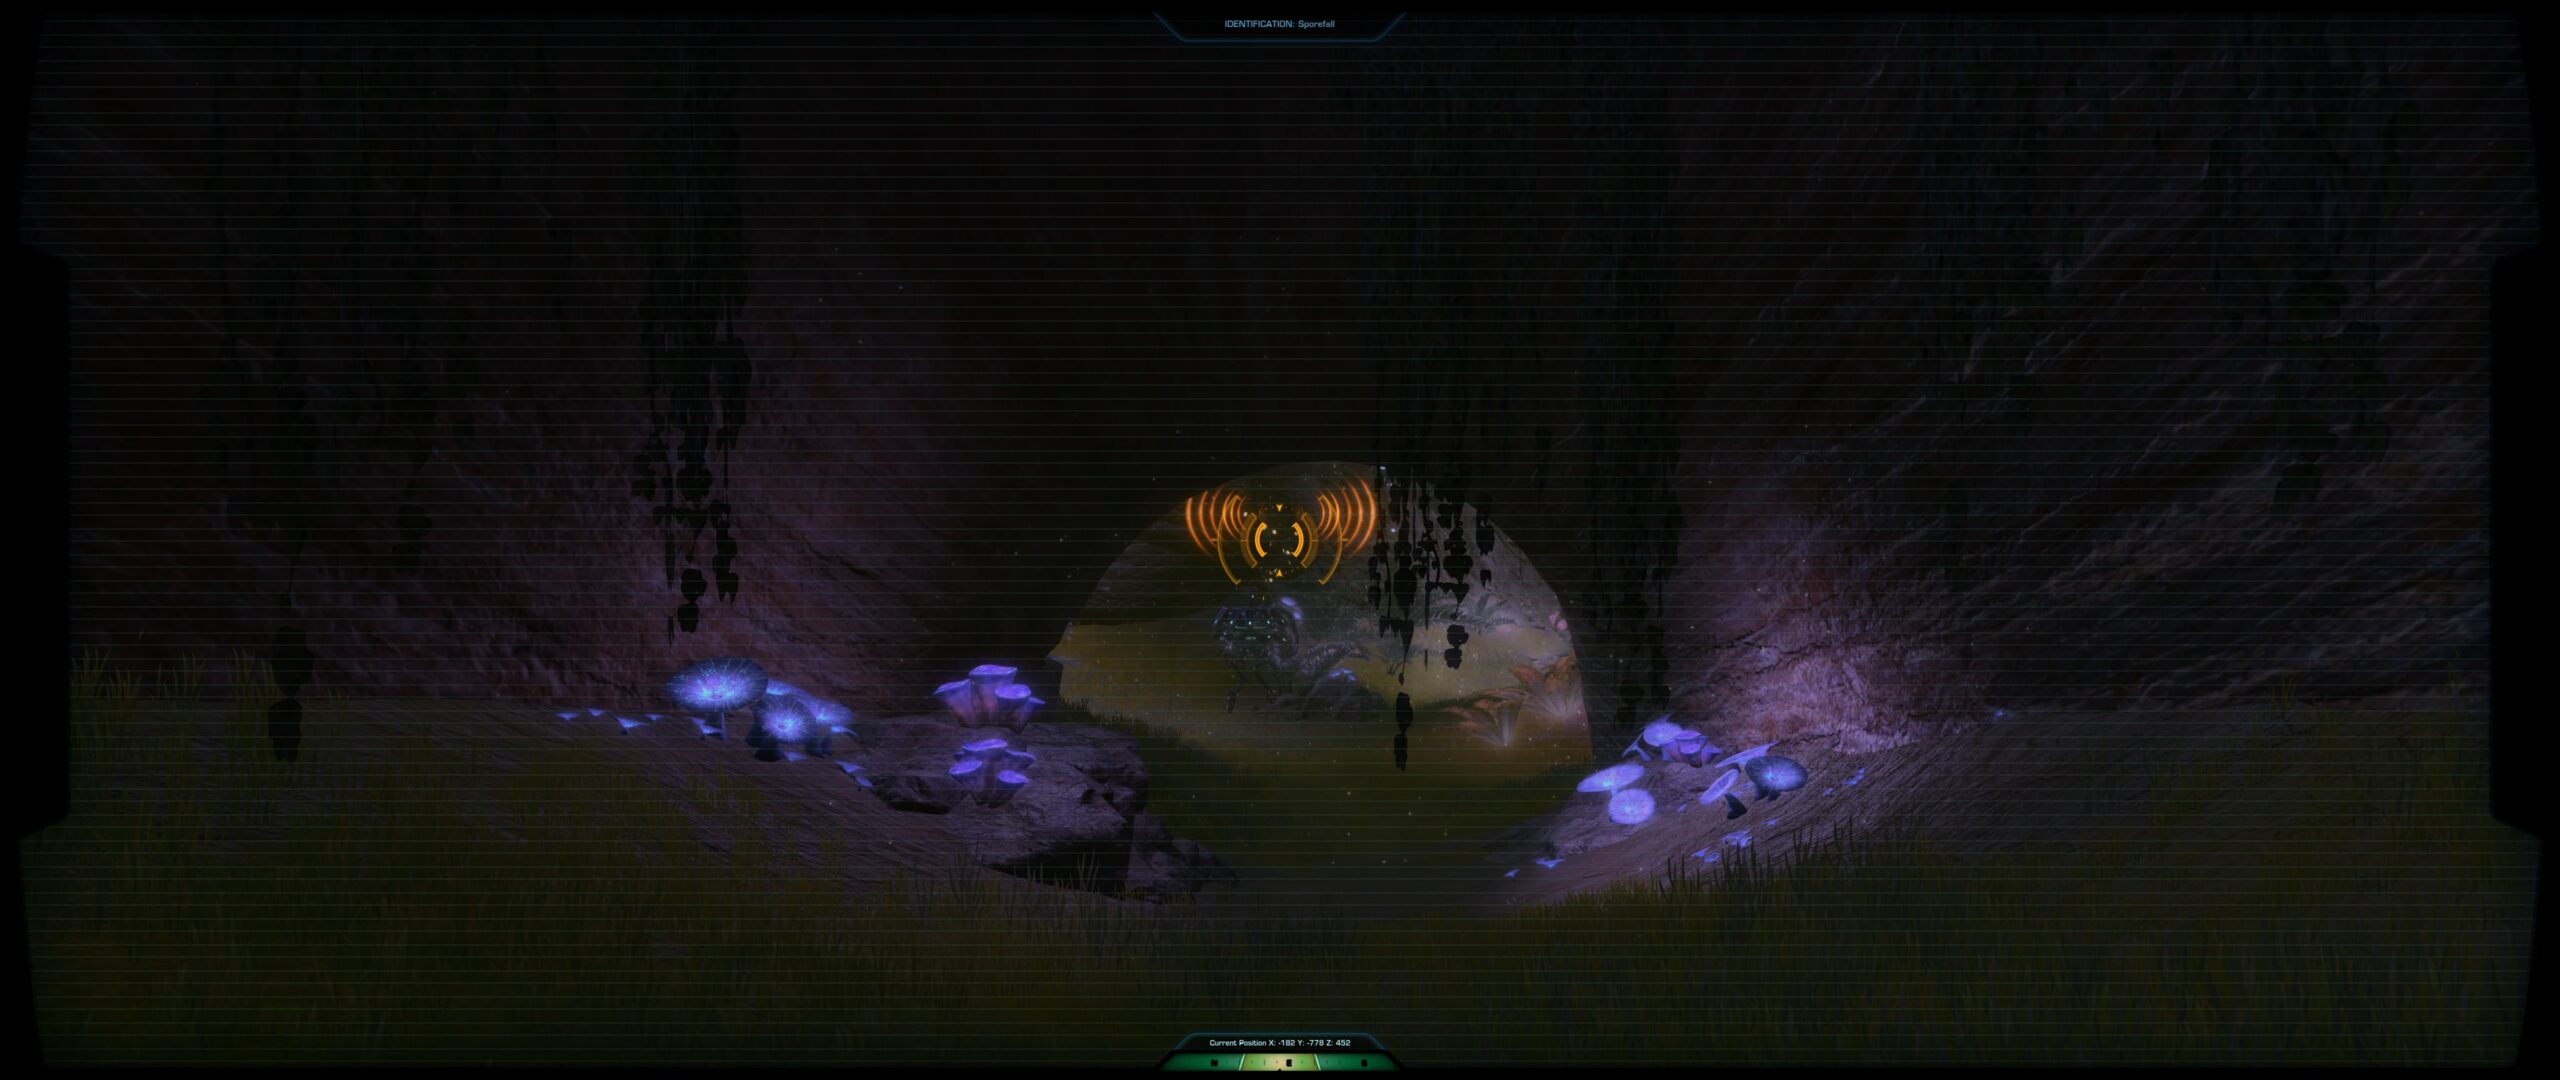
Once you complete this mission, you can use the Hazard Mitigation Module at Research Camps (Friend rep required for Forward Camps) to protect yourself from the Sporefall debuffs throughout the zone.
A Few Observations
Doctor Lasoo will require you to find and scan the final three locations to help them study the spores in this biome.
Sporefall Dynamic Encounters
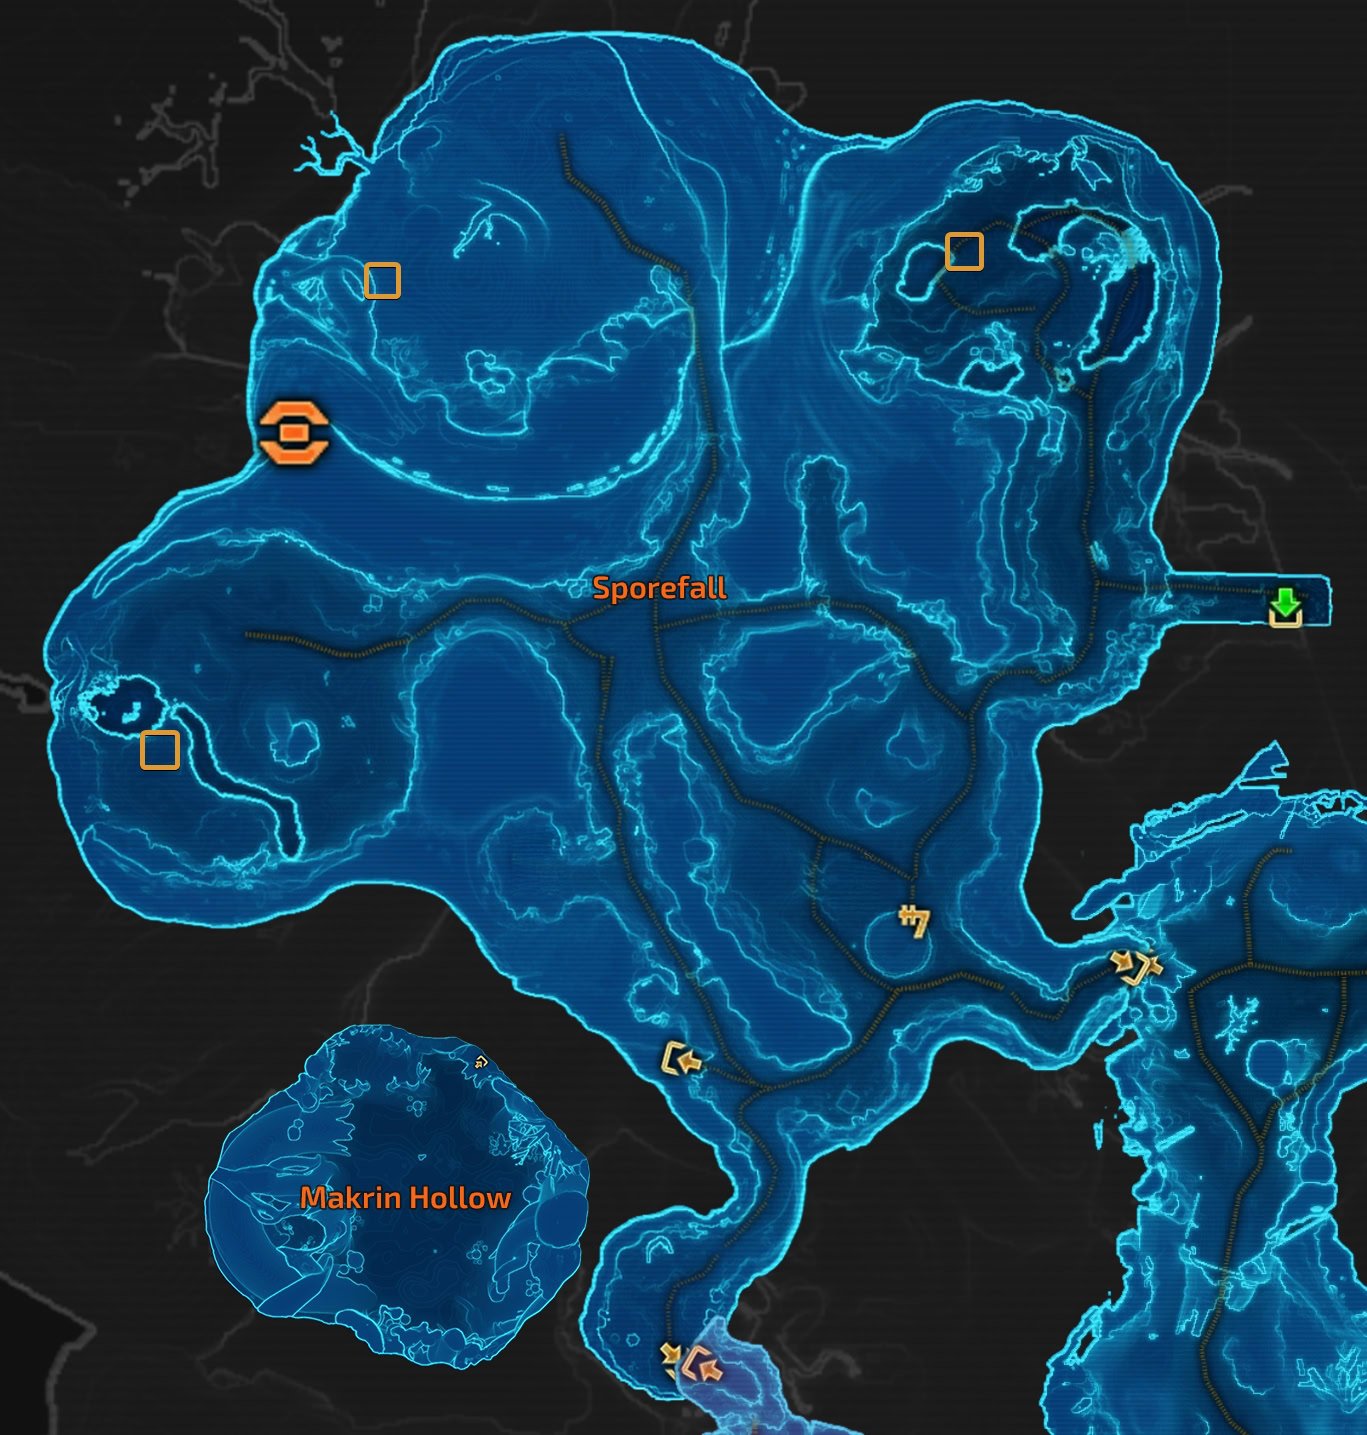
Doctor Edreck will task you with completing 3 Sporefall Dynamic Encounters. They are marked with a Shared Encounter icon with an orange symbol. The Sporefall biome includes the following maps:
- Sporefall
- Makrin Hollow
- Research Camp Perimeter
- Ship Interior, Sporefall Wing
| Event Name | Biome | Map Area | Type | Type | Objectives | Level | Achievements | Difficulty | Description: | Tasks: |
|---|---|---|---|---|---|---|---|---|---|---|
| Bigger Trouble | Sporefall | Makrin Hollow | Normal | Champion | 3 | Well. Now we know what the Caretaker Droids were taking care of. It’s not great. We could really use some help dealing with this mess. | – Defeat the Alien Megafauna – Defeat the Caretaker Droid |
|||
| Dr. Spears, I Presume? | Sporefall | Sporefall | Normal | Hybrid | 1,2,3 | Doctor Spears has disappeared from camp, and was behaving strangely. Somebody should check on him to make sure he’s okay! | 1. Examine Doctor Spears 2. Defeat Doctor SPORES! 3. Cure Doctor Spores |
|||
| Fascinating! | Sporefall | Research Camp Perimeter | Normal | Hybrid | 1,2,3 | Help the researchers get set up to observe a unique biological interaction before the opportunity passes. | 1. Defeat opportunistic Yaracats 2. Deploy Ginx Pheromones 3. Collect Data on Symbiotic Relationship |
|||
| Ginx Of Unusual Size | Sporefall | Sporefall | Normal | Champion | 1 | An unusually large Ginx has taken up residence in the area, threatening our research. The larger the Ginx, the more hostile. Be careful! | – Defeat the Unusually Large Ginx |
|||
| Lost Bormu | Sporefall | Sporefall | Normal | Combat | 1,2,3 | Defeat the Shyrack Screecher | 1. Defeat the Shyrack Swarm 2. Defeat the Shyrack Screecher |
|||
| No Spies Allowed! | Sporefall | Ship Interior | Normal | Hybrid | 1,2,3 | Czerka frequencies have been detected in the ship’s interior. Stop their spies! | 1. Destroy Surveillance Devices 2. Aid or defeat Czerka Spies 3. Defeat Czerka Droids |
|||
| Sample Collection: Ginx | Sporefall | Sporefall | Normal | Clicking | 1 | Our researcher could use assistance collecting samples from the local Ginx population. Studying the effects of the Sporefall on these creatures could lead to incredible insights! | – Collect Spore samples from Ginx – Pick Up Spore Collection Kits |
|||
| Sample Collection: Makrin | Sporefall | Makrin Hollow | Normal | Clicking | 1 | Our researcher could use assistance collecting samples from the local Makrin population. Studying the effects of the Sporefall on these creatures could lead to incredible insights! | – Pick Up Spore Collection Kits – Collect Verdant Spores from Makrin – Collect Luminous Spores from Makrin – Collect Vibrant Spores from Makrin |
|||
| Sample Collection: Pterathki | Sporefall | Sporefall | Normal | Clicking | 1 | Our researcher could use assistance collecting samples from the local Pterathki population. Studying the effects of the Sporefall on these creatures could lead to incredible insights! | 1. Pick Up Spore Collection Kits 2. Collect samples from Pterathki 3. Scan Spore-Generating Fungus |
|||
| Sample Collection: Yaracats | Sporefall | Sporefall | Normal | Clicking | 1 | Our researcher could use assistance collecting samples from the local Yaracat Studying the effects of the Sporefall on these creatures could lead to incredible insights! | 1. Pick Up Spore Collection Kits 2. Feed Hungry Yaracats 3. Collect Spore Samples from Yaracats |
|||
| Spore Subject: Ginx | Sporefall | Makrin Hollow | Normal | Clicking | 2 | Our researcher could use assistance collecting samples from the local Ginxpopulation. Studying the effects of the Sporefall on these creatures could lead to incredible insights! | – Pick up Spore Collection Kits – Collect Spore Samples from Ginx |
|||
| Spore Subject: Makrin | Sporefall | Makrin Hollow | Normal | Clicking | 2 | Our researcher could use assistance collecting samples from the local Makrin population. Studying the effects of the Sporefall on these creatures could lead to incredible insights! | – Pick up Spore Collection Kits – Collect Spore Samples from Makrin |
|||
| Spore Subject: Pterathki | Sporefall | Sporefall | Normal | Clicking | 2 | Our researcher could use assistance collecting samples from the local Pterathki population. Studying the effects of the Sporefall on these creatures could lead to incredible insights! | – Pick up Spore Collection Kits – Collect Spore Samples from Pterathki |
|||
| Spore Subject: Yaracats | Sporefall | Sporefall | Normal | Clicking | 2 | Our researcher could use assistance collecting samples from the local Yaracat Studying the effects of the Sporefall on these creatures could lead to incredible insights! | – Pick up Spore Collection Kits – Collect Spore Samples from Yaracats |
|||
| Taking Care of Caretakers | Sporefall | Sporefall | Normal | Champion | 3 | The Ship has activated one of its Caretaker Droids To what purpose, we don’t know. But iut’s incredibly hostile and beyond our researches to deal with. | – Defeat the Caretaker Droid |
|||
| The Watchers | Sporefall | Sporefall | Normal | Combat | 2,3 | It appears the ship is pushing back against our research efforts. We could use some help dealing with these droids! | – Defeat Eco-Defense Droids |
|||
| They Call me Doctor Spores | Sporefall | Ship Interior | Transition | Combat | 1 | Doctor Spears has been behaving strangely, and we can’t find him in his usual spots. We’re afraid he’s made his way into the crashed ship, who knows what kind of trouble he’s in? | 1. Confront Doctor Spears 2. Defeat Doctor SPORES 3. Subdue Doctor Hoppington 4: Subdue Professor Whiskers 5. Defeat Makrin Assistants 6. Tend to Doctor Spores |
|||
| Return of Doctor Spores | Sporefall | Ship Interior | Transition | Combat | 2 | Doctor Spears is missing again. He kept muttering about the ship, could you retrieve him? Again? We’re so sorry. | 1. Confront Doctor SPORES! 2. Defeat Doctor Spores! 3. Subdue Doctor Hoppington 4. Subdue Professor Whiskers 5. Defeat Makrin Assistants 6. Defeat Caretaker Droids 7. Tend to Doctor Spears |
Complete a Level Transition Encounter
After one of the biomes reaches 100%, it is ready to level up. Between Levels 2 and 3, there are Level Transition Encounters. They take place inside the ship in the biome-related wing.
Here is the list of Level Transition Encounter Missions that can spawn:
| Event Name | Biome | Map Area | Type | Type | Objectives | Level | Achievements | Difficulty | Description: | Tasks: |
|---|---|---|---|---|---|---|---|---|---|---|
| The Cryonest Matron | Glacial | Ship Interior | Transition | Hybrid | 1 | The cryo-fauna outbreak leads back to this sealed incubation chamber. It appears to have been reawakened by the recent rise in temperature. Destroy the nest and stop the swarm at its source! | 1. Clear Out the Swarm 2. Defeat Broodguards 3. Destroy Eggs 4. Defeat the Cryonest Matron |
|||
| Cryocore Override | Glacial | Ship Interior | Transition | Hybrid | 2 | The snow shell control core has finally opened. Shut the ship’s climate controls before it’s too late. | 1. Deactivate Cryo-Containment Consoles 2. Defeat Cryo-Sterilizer Droids 3. Defeat the Cyro-Core Guardian 4. Deactivate the Emergency Containment Response Consoles 5. Defeat Cryo-Reclaimation Droids |
|||
| Caretaker Unit K-6 | Geothermal | Ship Interior | Transition | Champion | 2 | The control chamber has activated some kind of Caretaker Unit. If we’re going to make any more progress here, it will need to be dealt with. | – Defeat Caretaker Unit K-6 |
|||
| Core Overload | Geothermal | Ship Interior | Transition | Hybrid | 1 | The ship has misinterpreted recent stabilization efforts as sabotage and it preparing to redirect a superheated purge through the areas above. Shut down the Biothermal Regulator before Dantooine suffers catastrophic overheating! | 1. Use Coolant to Access and Activate Thermal Regulators 2. Defeat Reinforcing Purge Protocol Droids 3. Defeat Warden Unit K-8 4. Shut Down the Biothermal Regulator |
|||
| They Call me Doctor Spores | Sporefall | Ship Interior | Transition | Combat | 1 | Doctor Spears has been behaving strangely, and we can’t find him in his usual spots. We’re afraid he’s made his way into the crashed ship, who knows what kind of trouble he’s in? | 1. Confront Doctor Spears 2. Defeat Doctor SPORES 3. Subdue Doctor Hoppington 4: Subdue Professor Whiskers 5. Defeat Makrin Assistants 6. Tend to Doctor Spores |
|||
| Return of Doctor Spores | Sporefall | Ship Interior | Transition | Combat | 2 | Doctor Spears is missing again. He kept muttering about the ship, could you retrieve him? Again? We’re so sorry. | 1. Confront Doctor SPORES! 2. Defeat Doctor Spores! 3. Subdue Doctor Hoppington 4. Subdue Professor Whiskers 5. Defeat Makrin Assistants 6. Defeat Caretaker Droids 7. Tend to Doctor Spears |
You don’t need to be grouped up specifically, but they are easier and faster to complete with multiple people. These Transition Encounters are just a boss fight with some environmental effects and adds spawning, speaking generally.
There really isn’t anything too special to them, except that the more people you have, the quicker the boss will fall.
Defeat the Orbital Core
The final stage of the main mission chain tasks you to defeat the final challenge. This is the challenge that is unlocked after each of the three biomes reaches 100% level 3. The core gets aligned and unlocked for a limited time.

To do this encounter, group up with friends, then head to the ship’s interior, to the large central area. In the round room on the east side of the map, you will find two terminals.
You need a standard 4-person group composition with a capable 1 tank, 2 DPS, and 1 healer. We strongly recommend having at least 340 gear, proper tactical item, and legendary implants, along with a full set of 296 augments.
You can purchase Buffs from the terminal in the back to boost your performance while you are tackling the Orbital Core. There are other buffs you can obtain from the biomes.

Use the terminal in the orange circle to teleport to the final encounter area, the Orbital Core. Orbital Core is a phased Master Mode boss fight.
How to defeat the Orbital Core: A complete guideRewards
Wreckage on Dantooine, the main mission, rewards you with the following items:
 | Experience Points (below lvl cap) | Varies |
| Environmental Conversion Codex | x1 | |
| Conquest Commendations (at level cap) | x3 | |
 | Tech Fragments (at level cap) | x50 |
The sub-missions you pick up at each of the biomes only provide Credits as a reward, but the Dynamic Encounters reward you with the following:
| Credits | Varies | |
| Experience Points (below lvl cap) | Varies |
| Environmental Conversion Codex | x1 | |
| Conquest Commendations (at level cap) | x3 | |
| Tech Fragments (at level cap) | x50 |
The Orbital Core features exclusive rewards, such as:
| Fitted Rugged Researcher’s Armor Set | Boss Loot | |
| Snowdrift Yaracat (Minipet) | Boss Loot | |
| Terra Shaclaw (Minipet) | Boss Loot | |
| Marsh Nerf Calf (Minipet) | Boss Loot | |
| Ancient Sample: 3M1-L3 (Deco) | Boss Loot | |
| Legacy Title: Locked In | Achievement | |
| Dantooine Expedition Carrier Mount | Achievement |
Achievements
You can unlock many achievements while completing the Wreckage on Dantooine story missions. We have listed them all in the full table in the Achievements section of our Dantooine Dynamic Encounters Guide.
Completing the mission itself, will unlock for you the “Wreckage Tour” achievement. There is no reward for it, though.
While completing the various stages of the mission, you can earn achievements for the first completion and possibly for completing dynamic encounters multiple times in each of the biomes.
There are a couple of achievements that give a reward (listed in the rewards segment above) that require you to defeat the Orbital Core. There are also achievements for defeating the Orbital Core up to 25 times, but these do not have any sort of reward attached to them.