A complete end-to-end guide to the Dantooine Crash Site in SWTOR, including all Biomes, every Dynamic Encounter, rewards, and achievements! Everything you should know.
Use the Table of Contents to easily navigate through this giant guide. On mobile devices, the left panel is accessible by tapping on the arrow in the top left corner.
How to access the Dynamic Encounters area
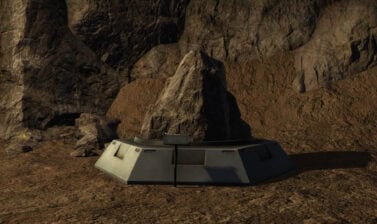
The Crash Site is a new area available for landing when you select Dantooine on the Galaxy Map. It is a location specifically designed for this new Dynamic Encounters System.
This content is free to all players. A subscription to SWTOR is not required, though you do need to be at level 80, and you might be locked to level 75 if you haven’t subscribed since 7.0 launched.
Level Requirements
The Dantooine Crash Site map is for players of level 80. There is no level sync and if you bring a low level character, even if they are able to pick up the quest and participate, they will struggle seriously.
Open your Galaxy Map and choose Dantooine, which is located on the edge of the Seat of the Empire region.
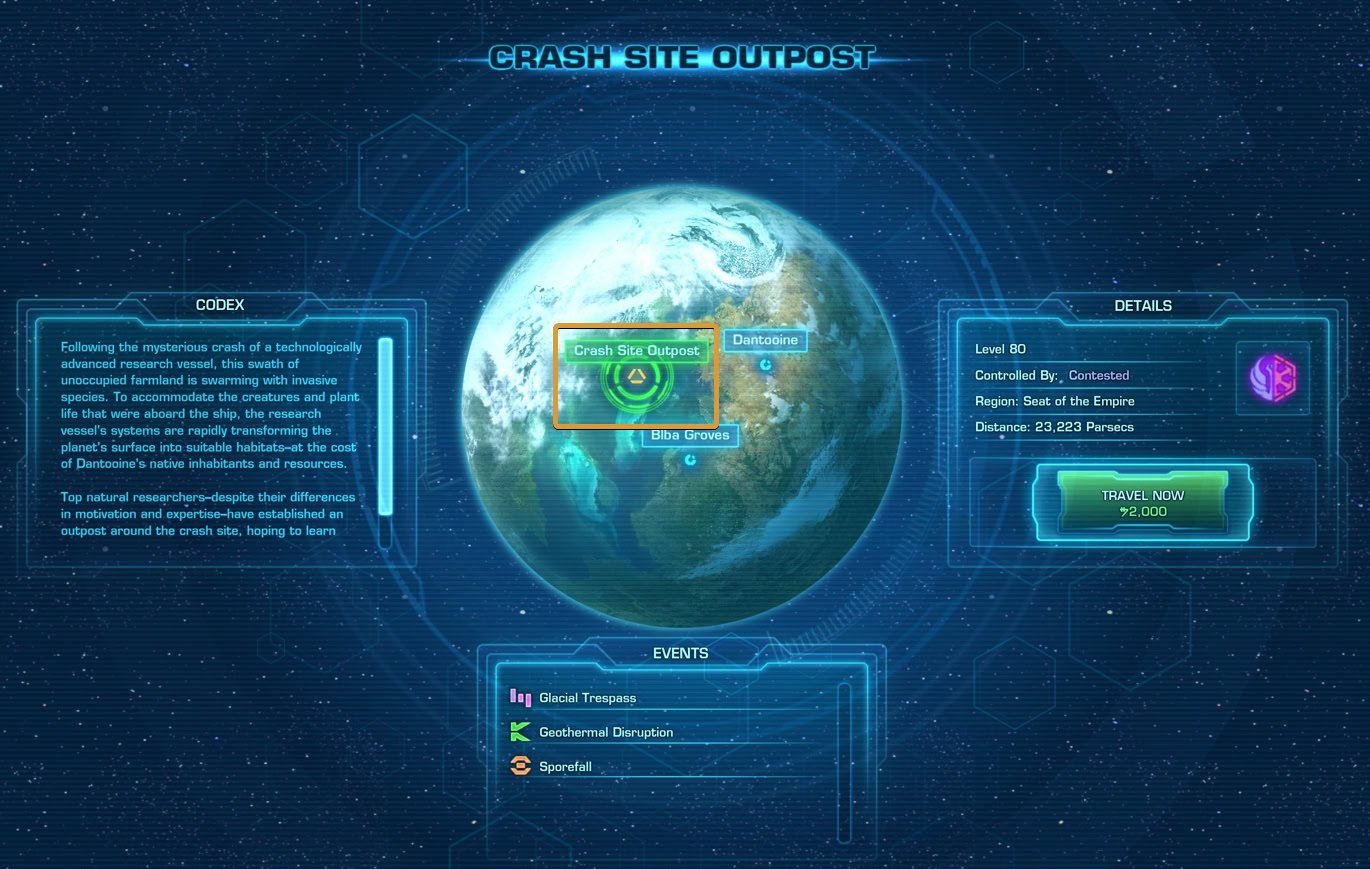
The story on this piece of land on Dantooine is separate and unique. At the time of this publication, it has no direct connections to any of the current or past SWTOR Storylines.
Main Mission Chain
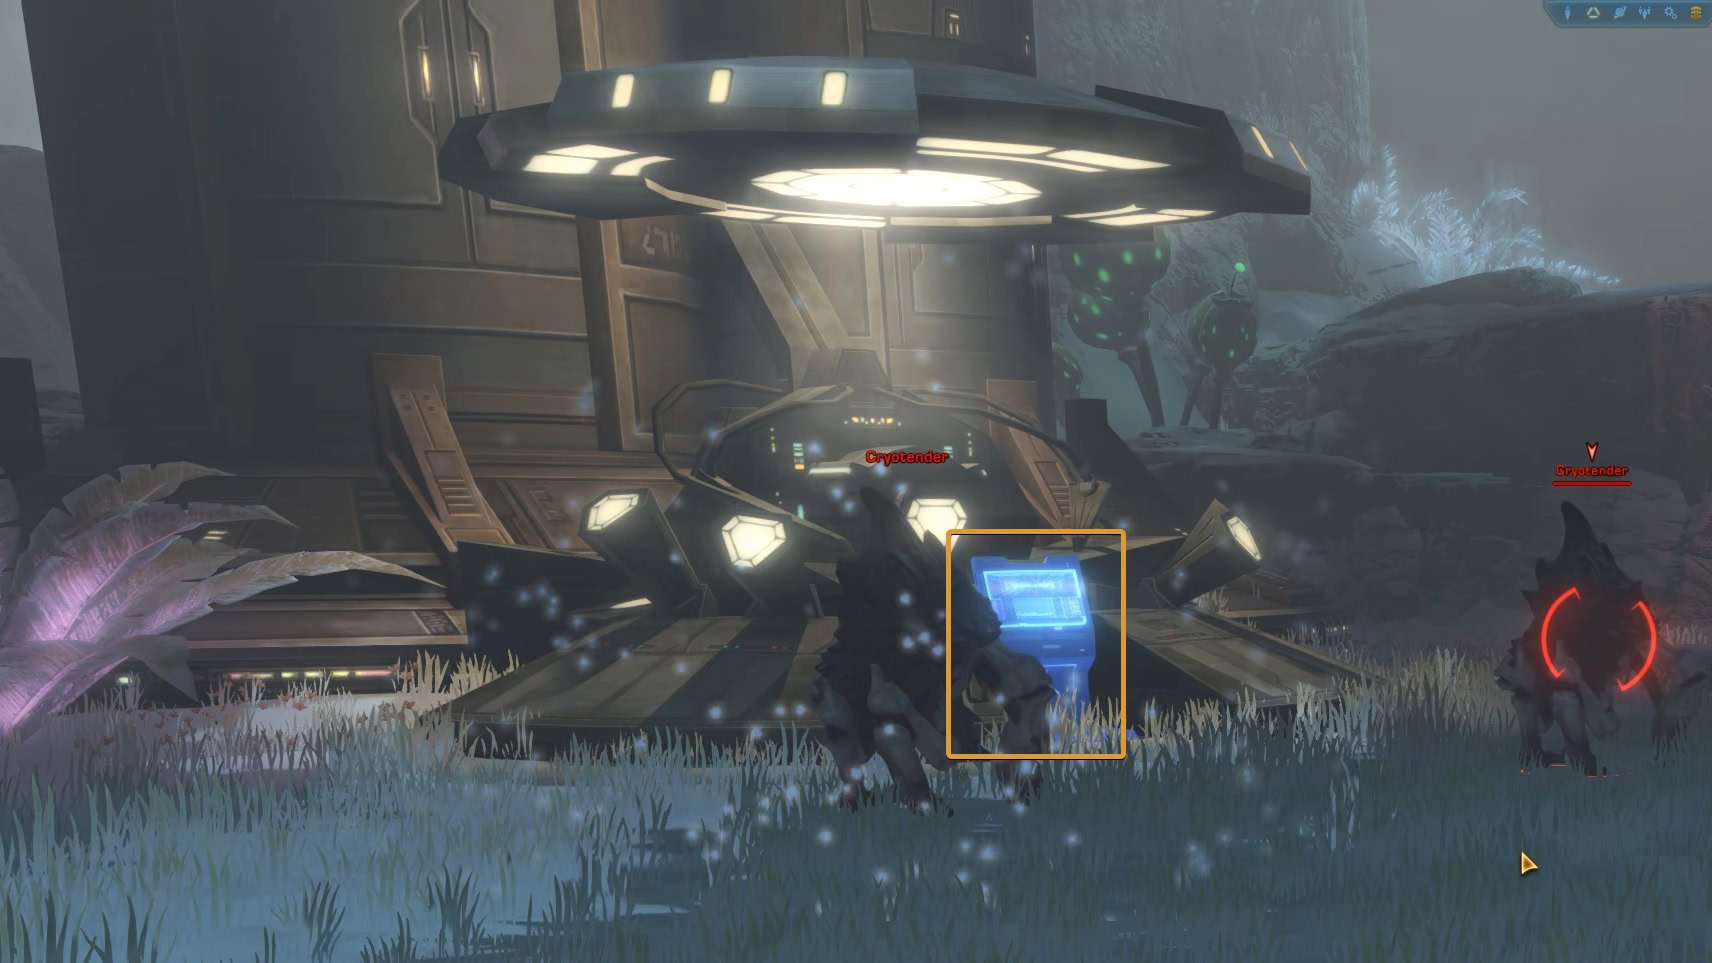
When you land, you will find yourself in the Research Camp. This is the starter area. This is where you will find the Reputation Vendor.
Your Personal Comlink will pop up. Answer it. Doctor Pordav, the head researcher, is actually not far from you, in the Research Camp. Talk to him on the Comlink and then go to talk to him directly at the tents. This is the actual start of the main mission chain, Wreckage on Dantooine. You can now track it from your Mission Log as well.
Wreckage on Dantooine Mission WalkthroughHow the system works
There are several stages of progress you can contribute to. You may arrive to the Crash Site in the middle of a progress cycle. When a cycle is complete, everything resets and starts from the beginning.
- Start the Wreckage on Dantooine Mission
This mission will start automatically when you first arrive to the Crash Site Outpost from the Galaxy Map. The mission is your introduction to the biomes and all other features available on this map.
- Progress the Core Levels
Complete Dynamic Encounters in each of the biomes to progress the level of the Core, which you can follow from the dedicated UI in your Mission Tracker.
- Complete a Transition Encounter
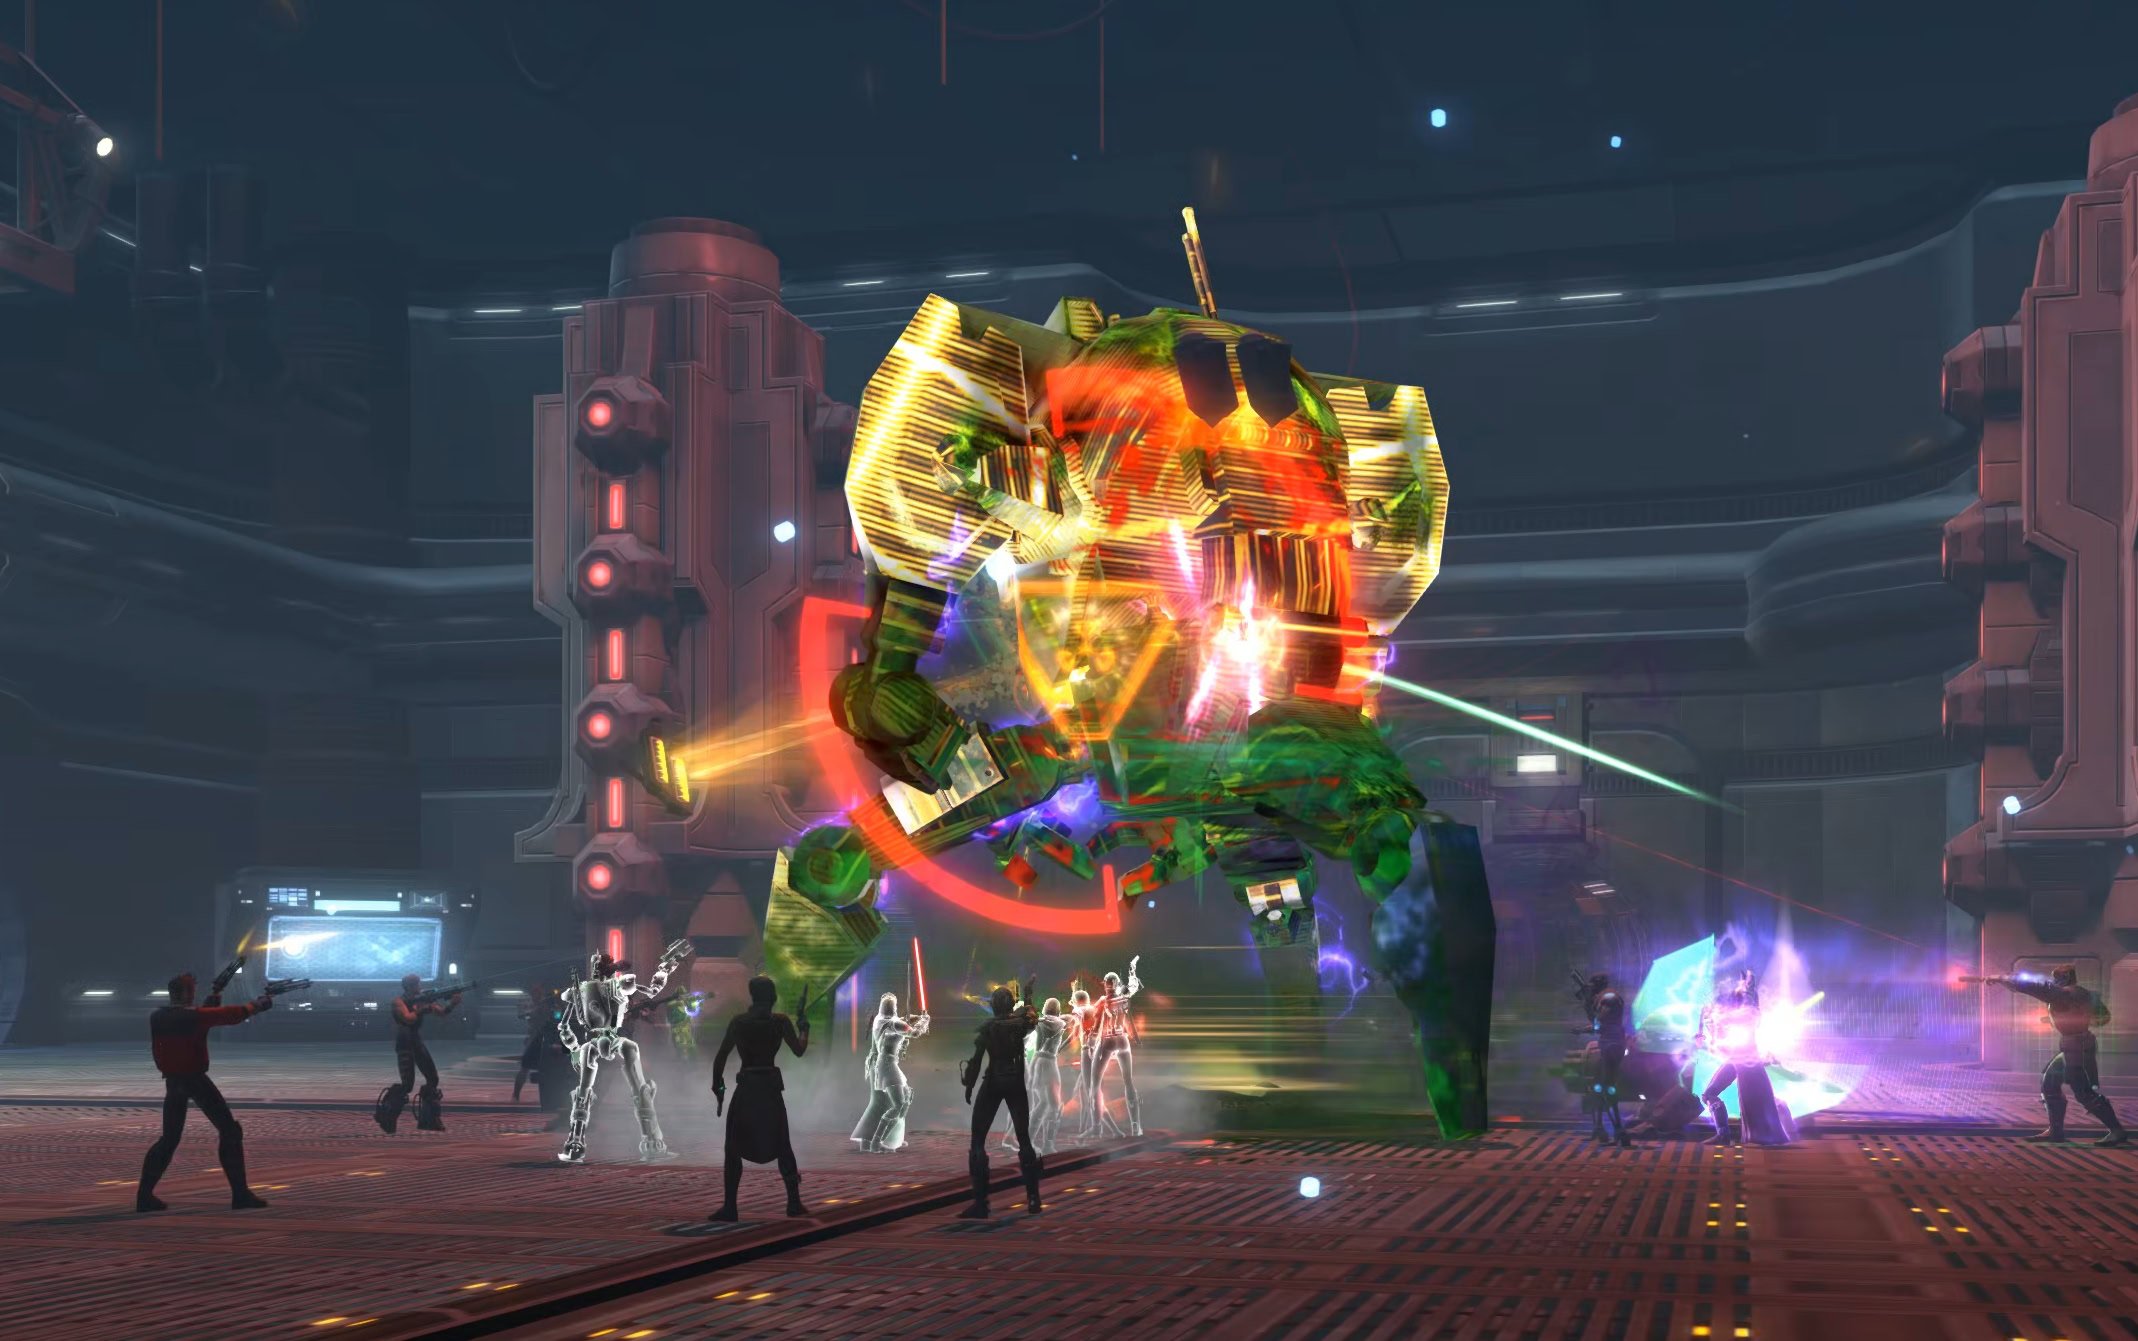
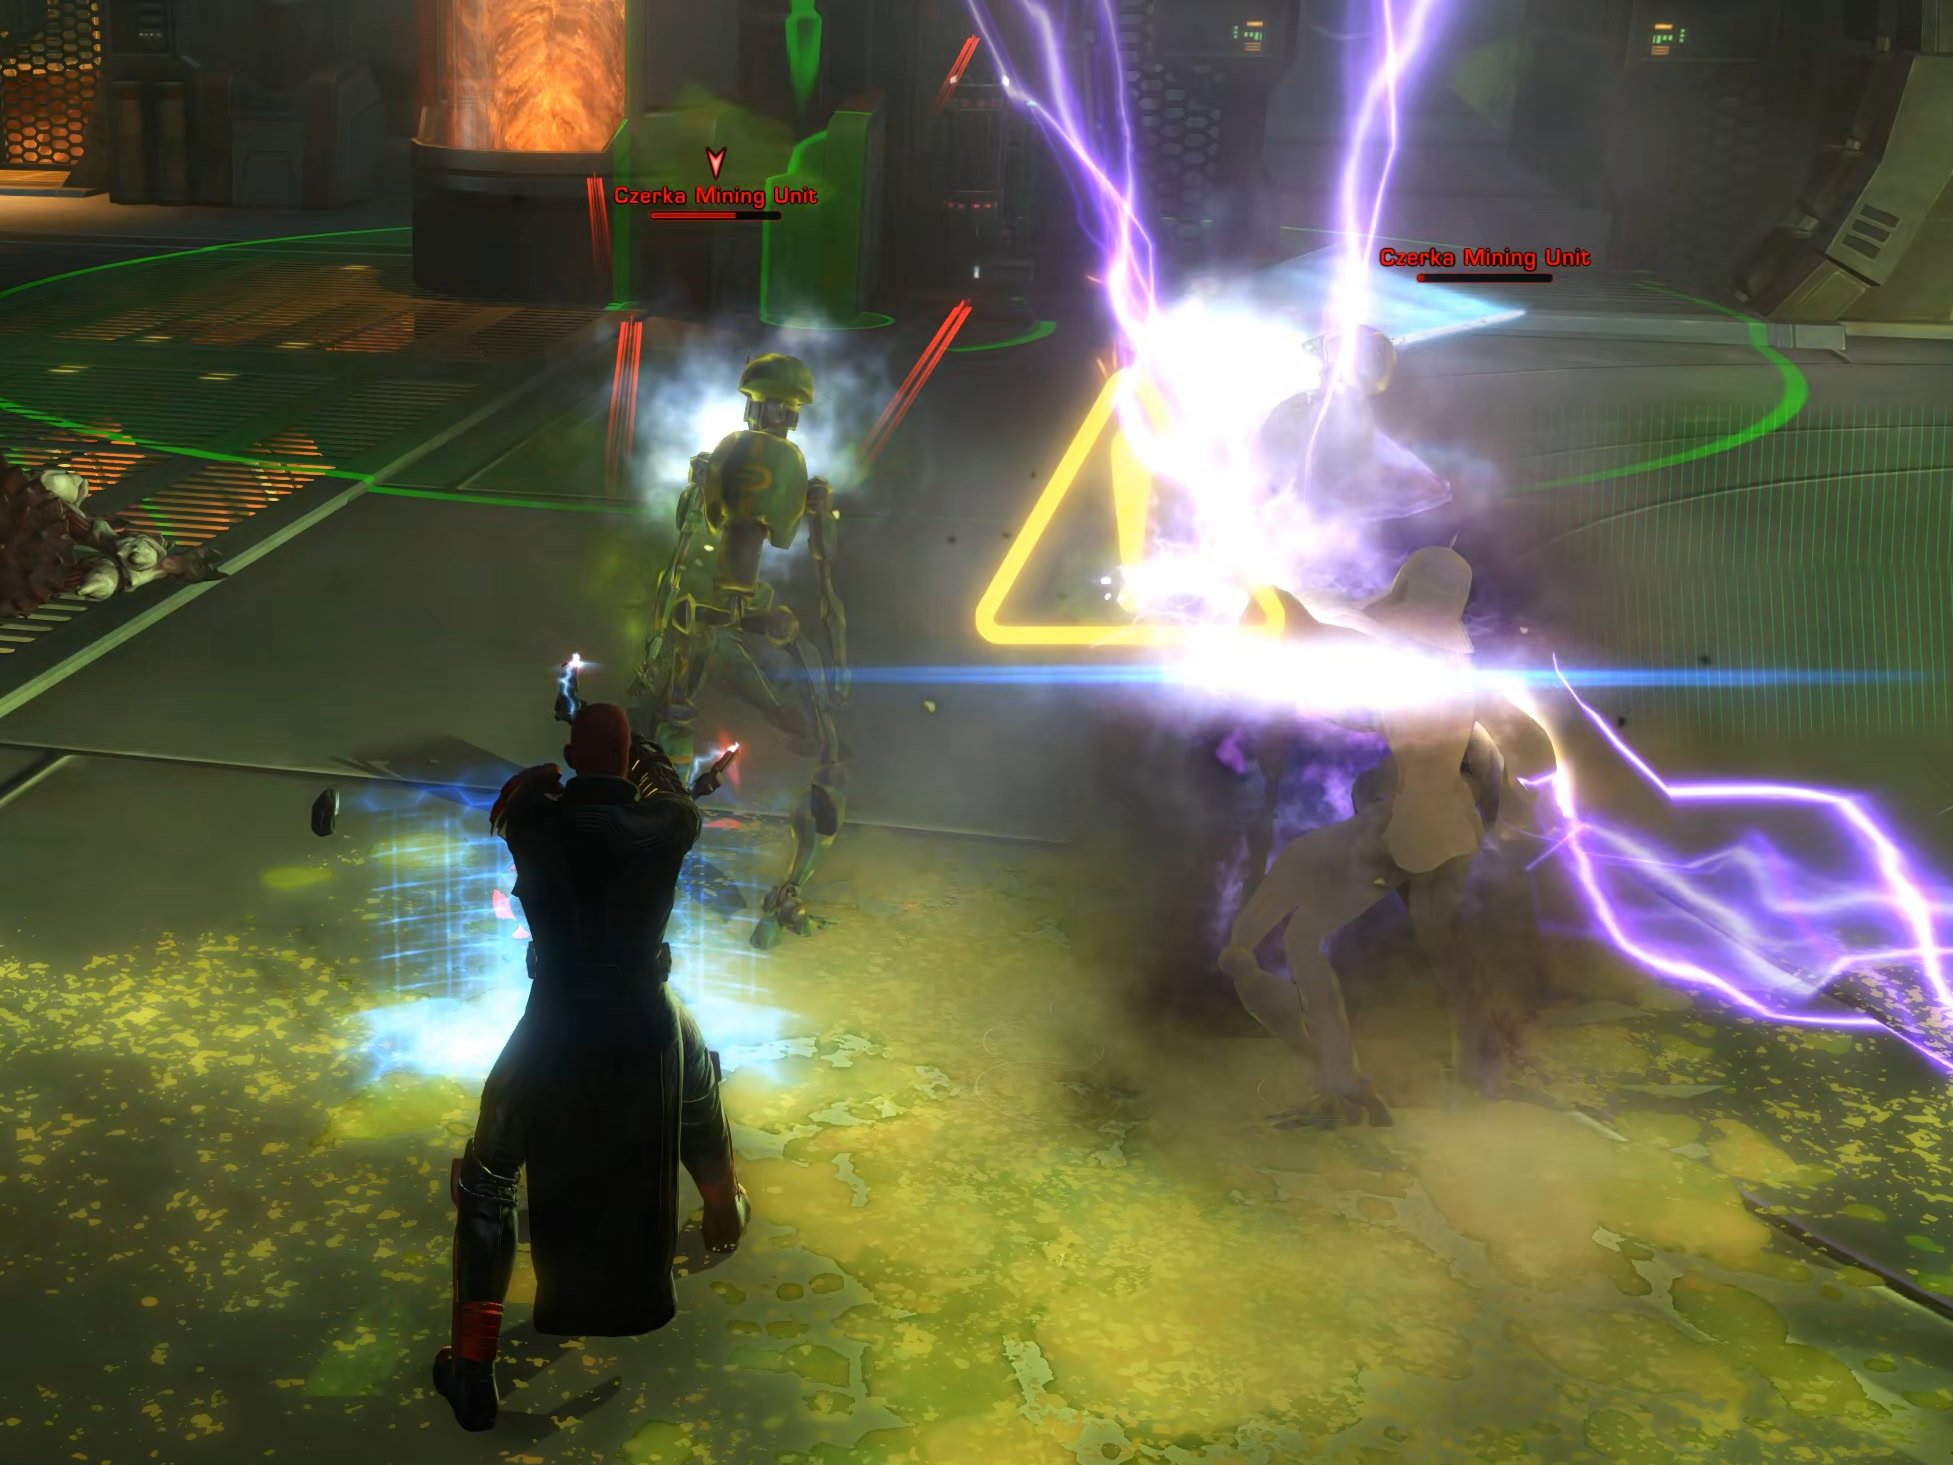
When the Core reaches 100%, it is ready to level up. There are a total of three levels. When the core enters a transition stage, a Transition Encounter will spawn in the Ship’s Interior. These are more challenging Dynamic Encounters, designed for group effort.
- Complete the final Boss Challenge
When you have progressed the Core through all 3 levels, the core will become aligned, which will unlock the final challenge – an encounter designed for four players in a group. The core stays accessible for limited time after which it resets and you have to start the entire process from all three biomes back at level 1.
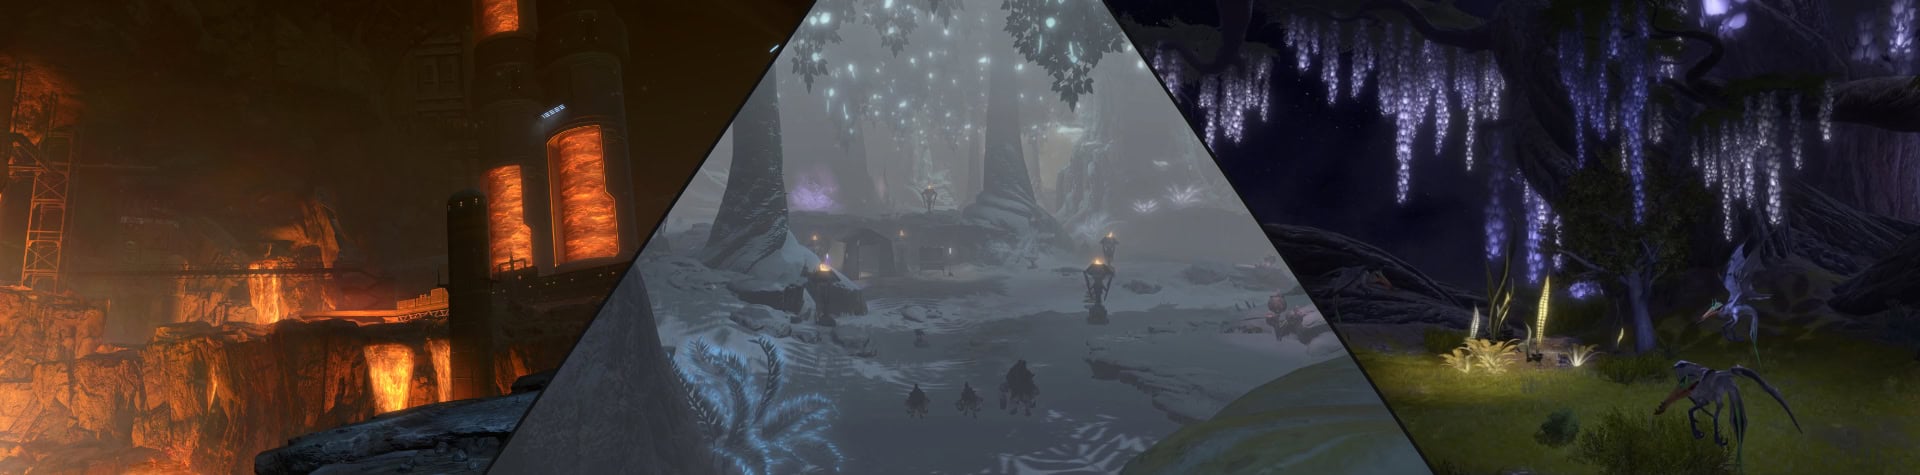
Dantooine Biomes Explained
The Crash Site is one large map with several mini maps (areas). There are three very distinctly different visually and gameplay-wise biomes that have been formed as a result of the ship’s crash onto the surface.
From the Research Camp, you will travel west and enter the Research Camp Perimeter. This is the area that connects all three biomes. Here is the only initially accessible Fast Travel Point as well. Later, you can unlock speeder taxi and quick travel points via the Reputation Vendor.
Each of the biomes offers a unique set of encounters and gameplay experiences. There are various hazards that will place a stacking debuff on you, so always be mindful and don’t stay in poison, fire or out in the freezing cold.
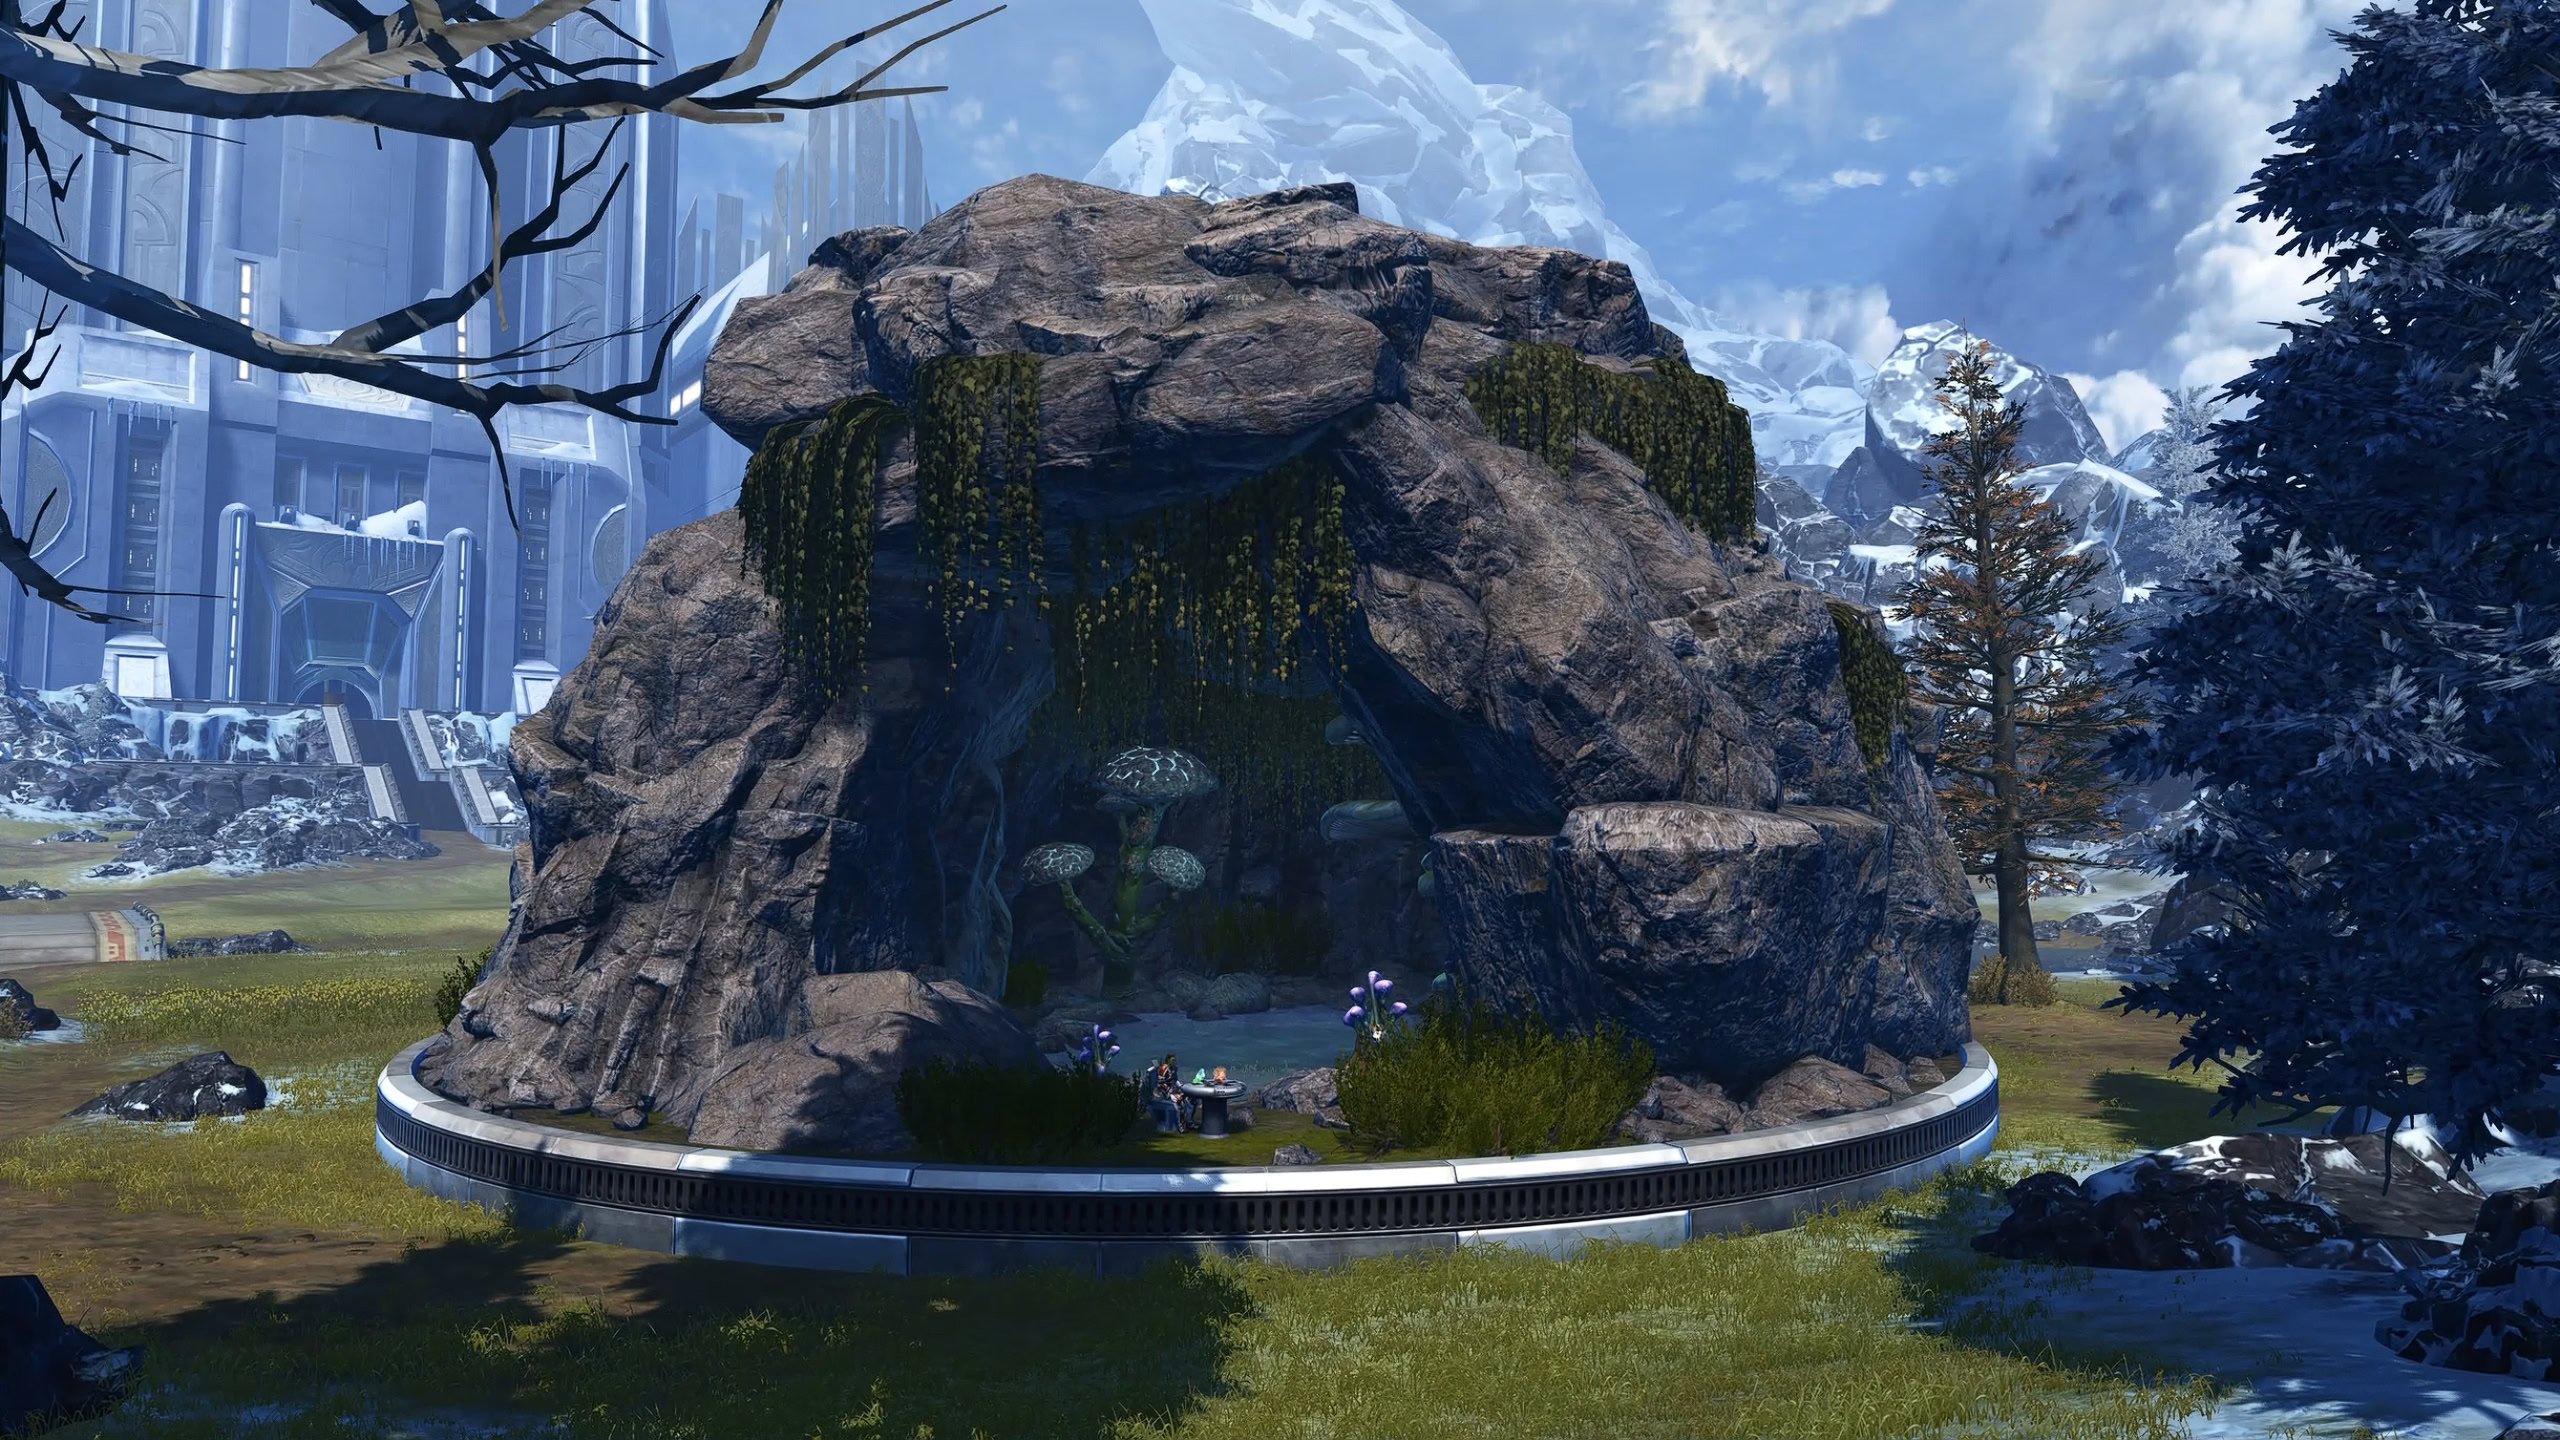
 Glacial Biome
The Glacial Biome is to the southwest from the Research Camp Perimeter. It spans across three area maps:
- Glacial Trespass
- Glacial Trespass Caverns

Unique Debuff: (Extreme) Cryogenic Saturation
The Glacial Trespass biome has blizzards, particularly around active encounters. Some are minor, some are intense. During a blizzard, you will receive stacks of a freezing Cryogenic Saturation debuff. Both slow you as you get more stacks and you can reduce your stacks by moving. The normal one makes you take more damage when you reach 10 stacks, while the extreme version just downright ends your life with hypothermia.
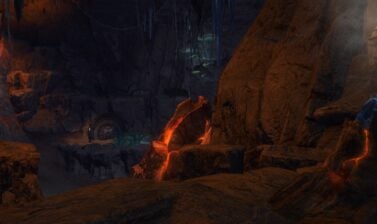
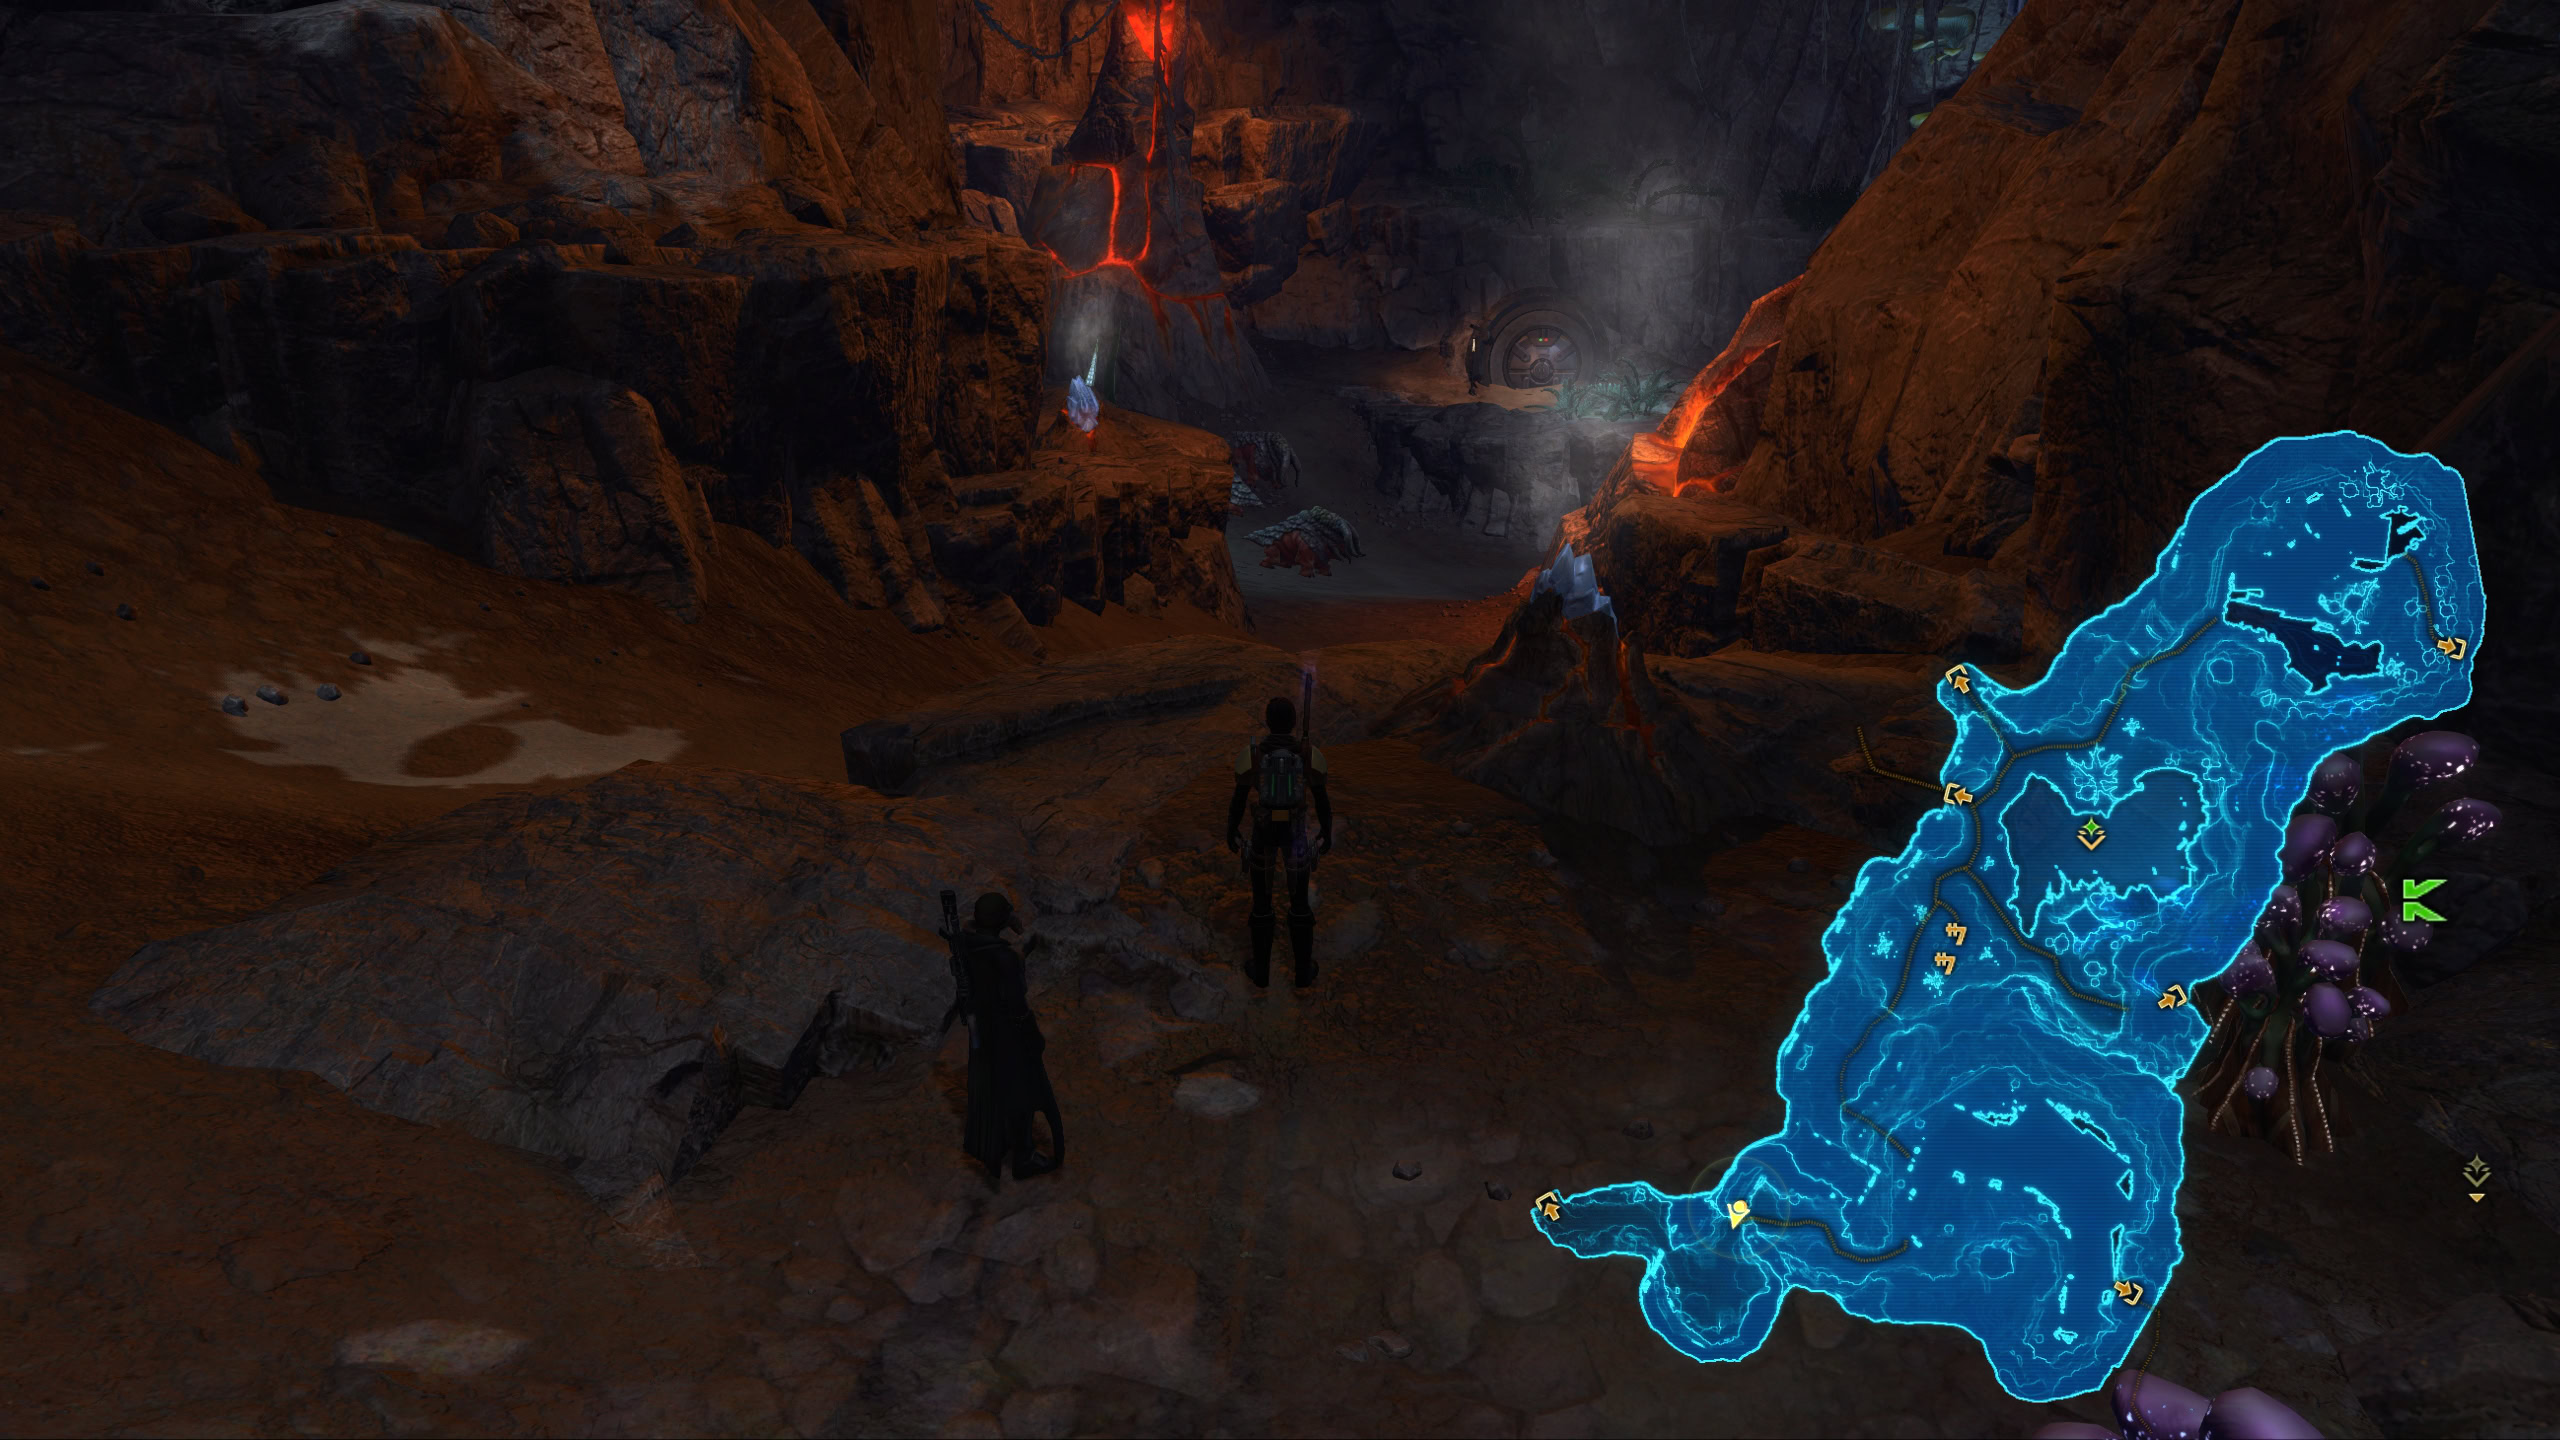
Geothermal Disruption Biome
The Geothermal Disruption biome is located southeast of the Research Camp Perimeter. It spans across four areas:
- Geothermal Disruption
- Crystal Cave
- Lava Cave
Unique Debuff: Contamination
All of the spring water is contaminated with pollution. While you are in a pool of water, you will build Contamination stacks, which is a stacking DoT. You can’t mount while in water without the Toxic Runoff Hazard Mitigation.
Unique Debuff: Burned
I know for a fact this is news to some of you, but believe it or not, if you are standing in lava, you will get Burned. The Burned debuff hurts a lot more than Contamination and you won’t survive more than a few stacks.
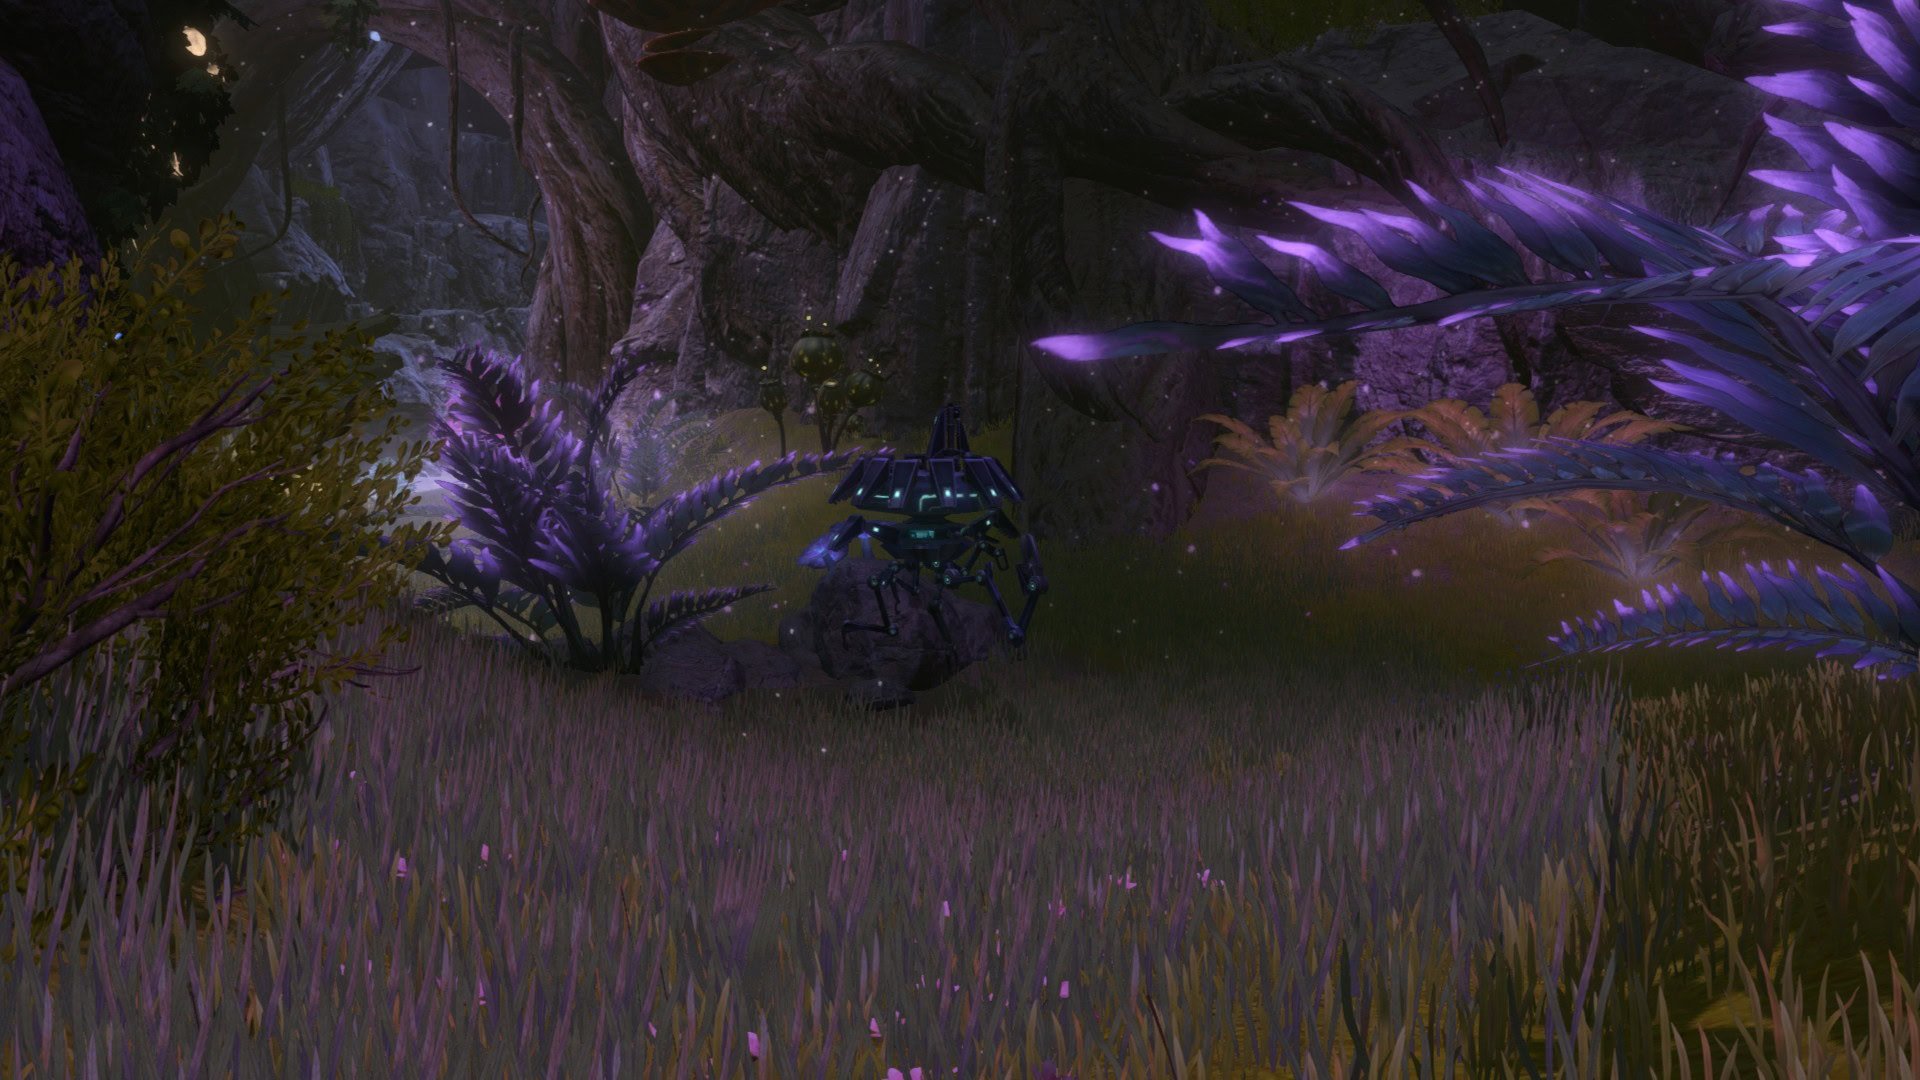
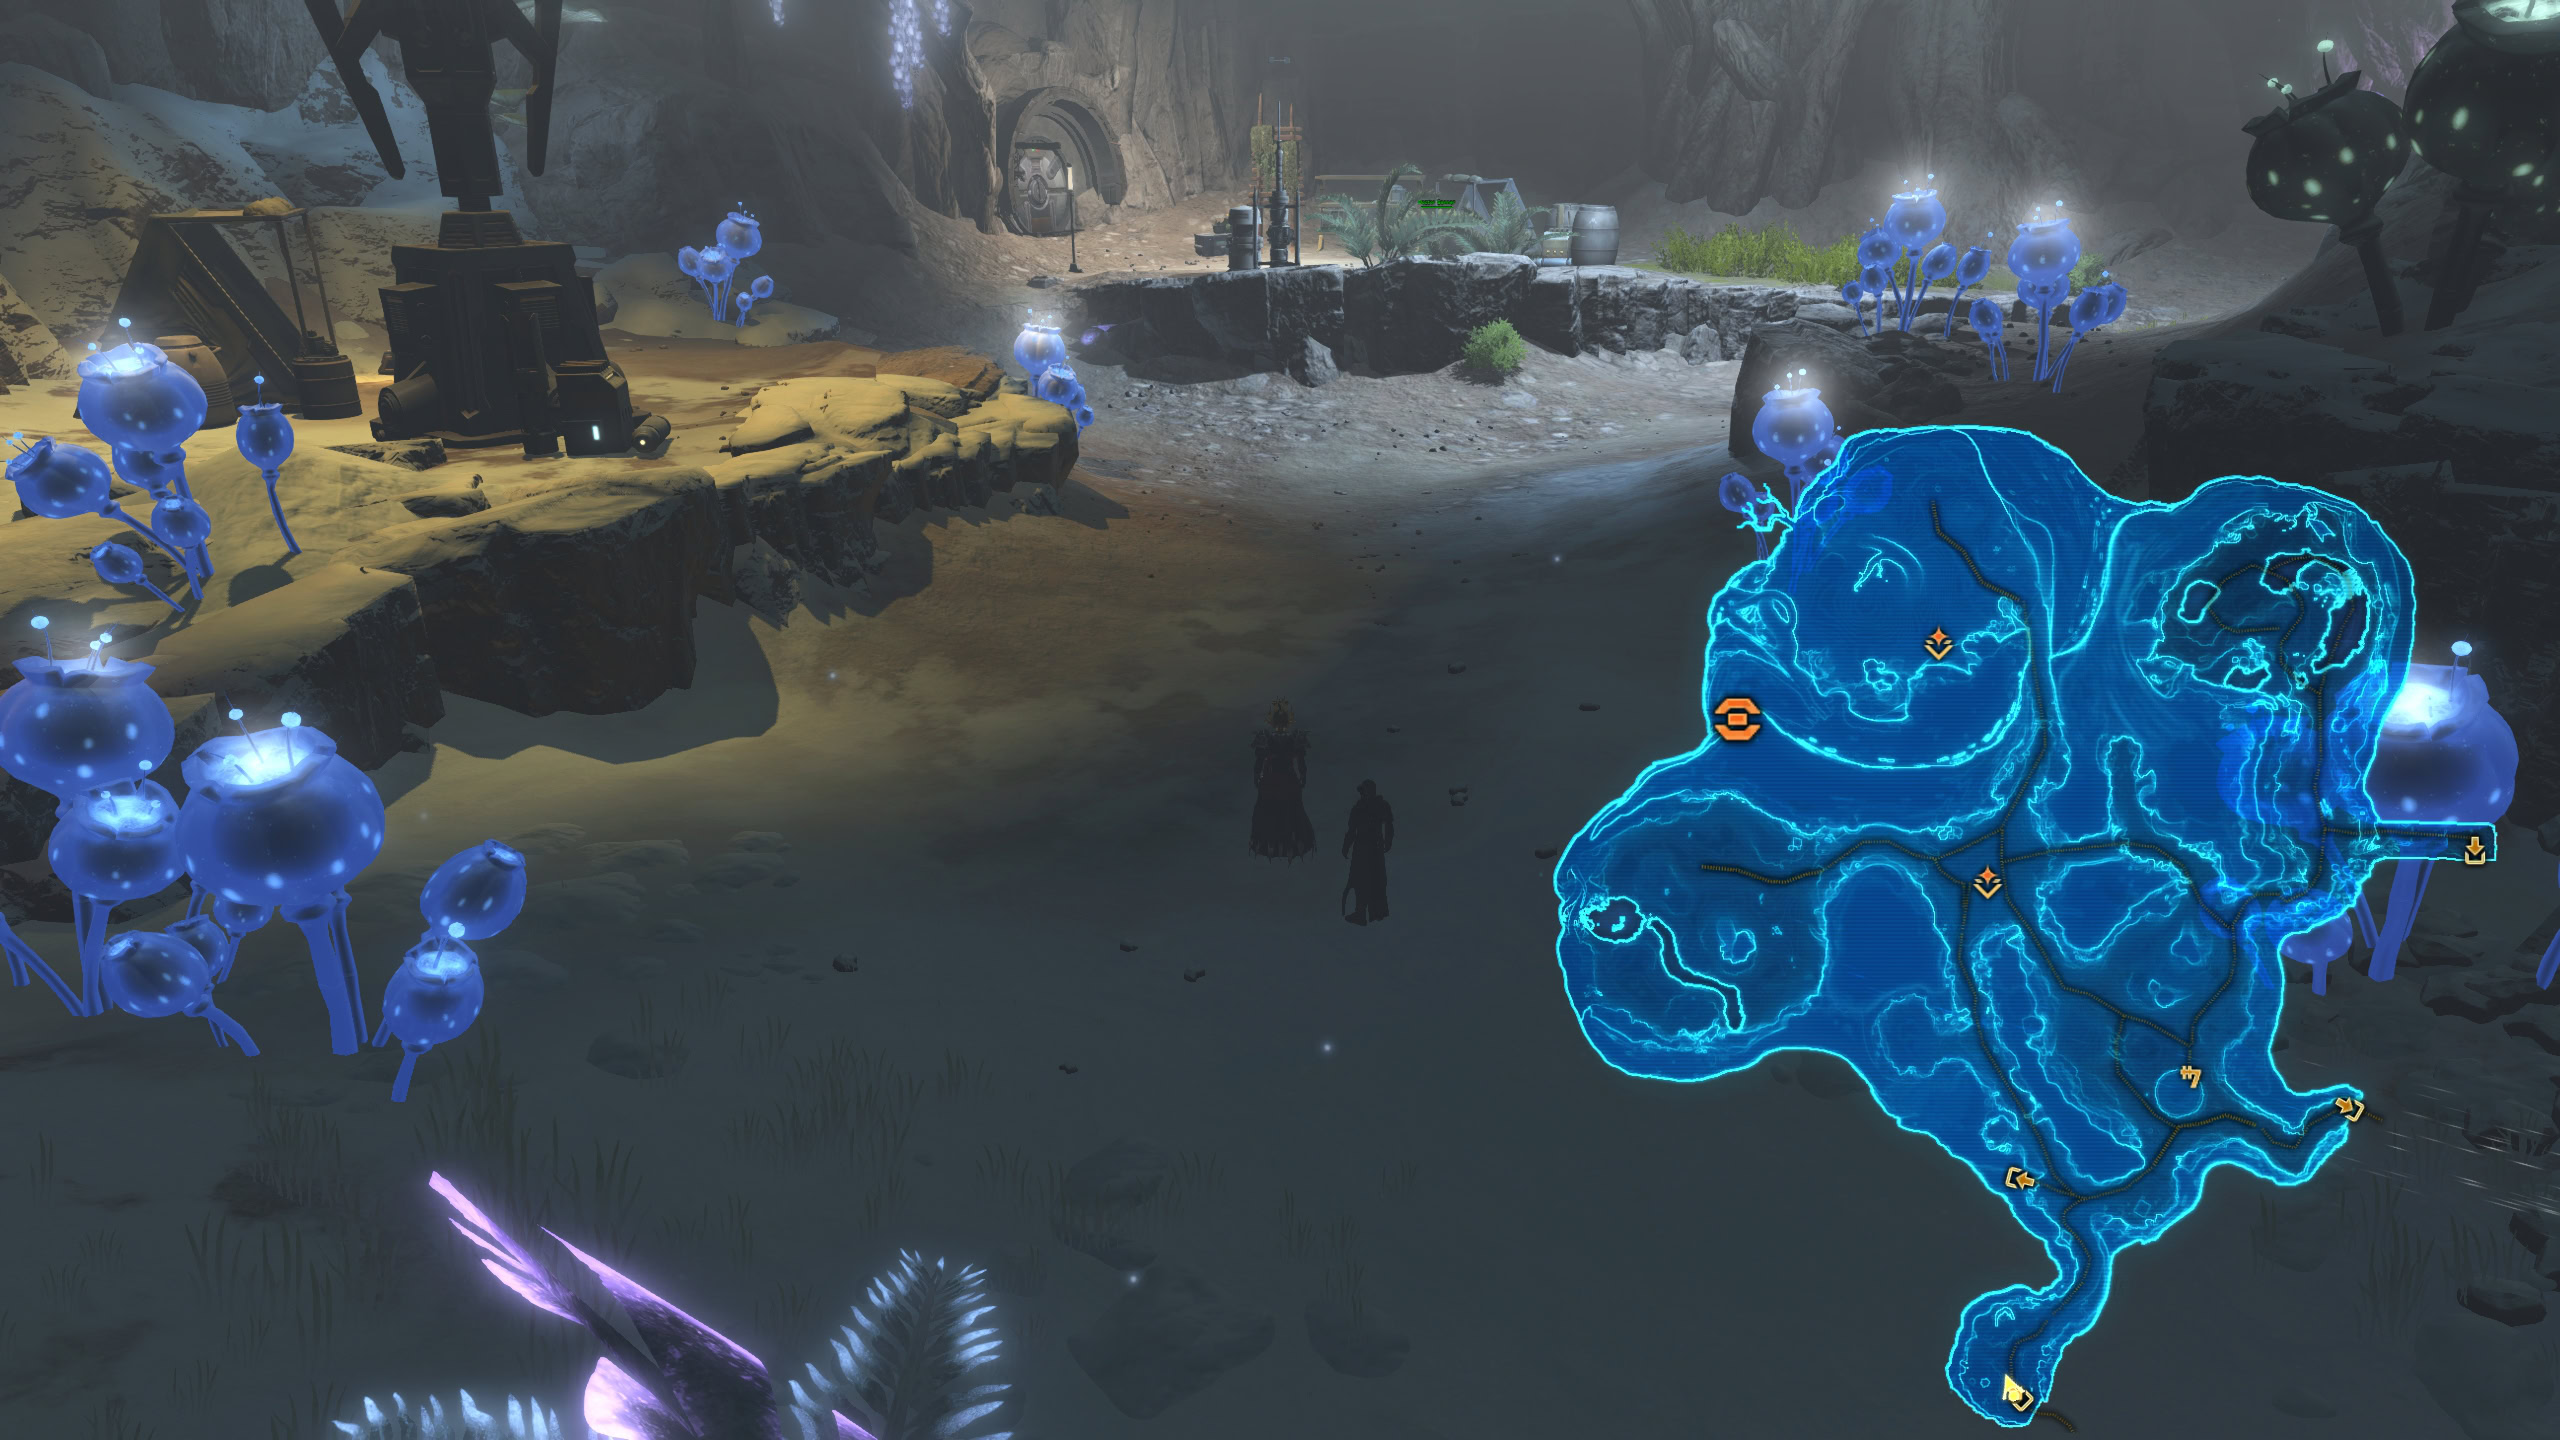
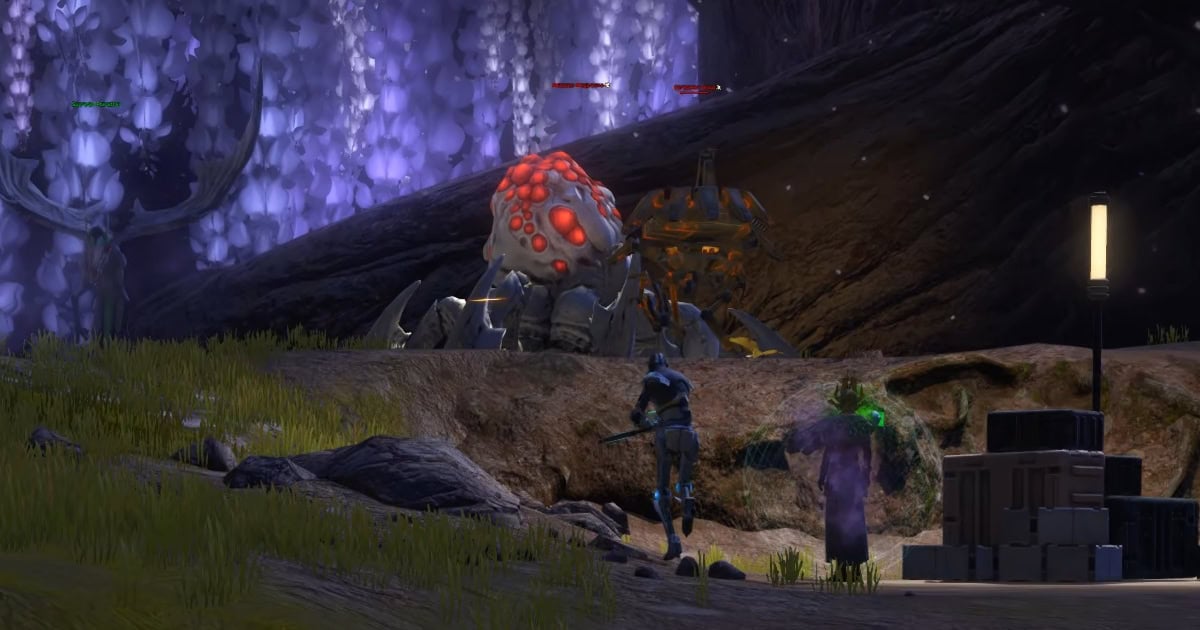
Sporefall Biome
The Sporefall Biome is located northwest of the Research Camp Perimeter. It includes the following areas:
- Sporefall
- Makrin Hollow
While in Sporefall, you are vulnerable to Light Sporefall which is a chance to build stacks of various types of Spores. Each type of Spore is rolled in sequence until they land on you. All Spore types prevent you from using your mount and you’ll usually have a combination of 2-3 debuffs with multiple stacks.
Unique Debuff: Numbing Spores
Light Sporefall can make you build stacks of Numbing Spores, which reduce your movement speed to 90%. Additional stacks do nothing because that’s not how movement speed works. Numbing Spores are most likely to be applied as you traverse the biome.
Unique Debuff: Poisonous Spores
Light Sporefall can make you build stacks of Poisonous Spores, which deal a small amount of damage over time. Poisonous Spores are moderately likely to be applied as you traverse the biome.
Unique Debuff: Debilitating Spores
Light Sporefall can make you build stacks of Debilitating Spores. Each stack reduces your Endurance (max HP) by 5%. Debilitating Spores are least likely to be applied passively.
Unique Debuff: Heavy Sporefall
While a Spore-Tending Unit is nearby, you build stacks of Heavy Sporefall, which deal a ton of damage, and, assuming you survive that long, are lethal at 8 stacks. Only the Hero tier hazard mitigation can protect you from Heavy Sporefall.
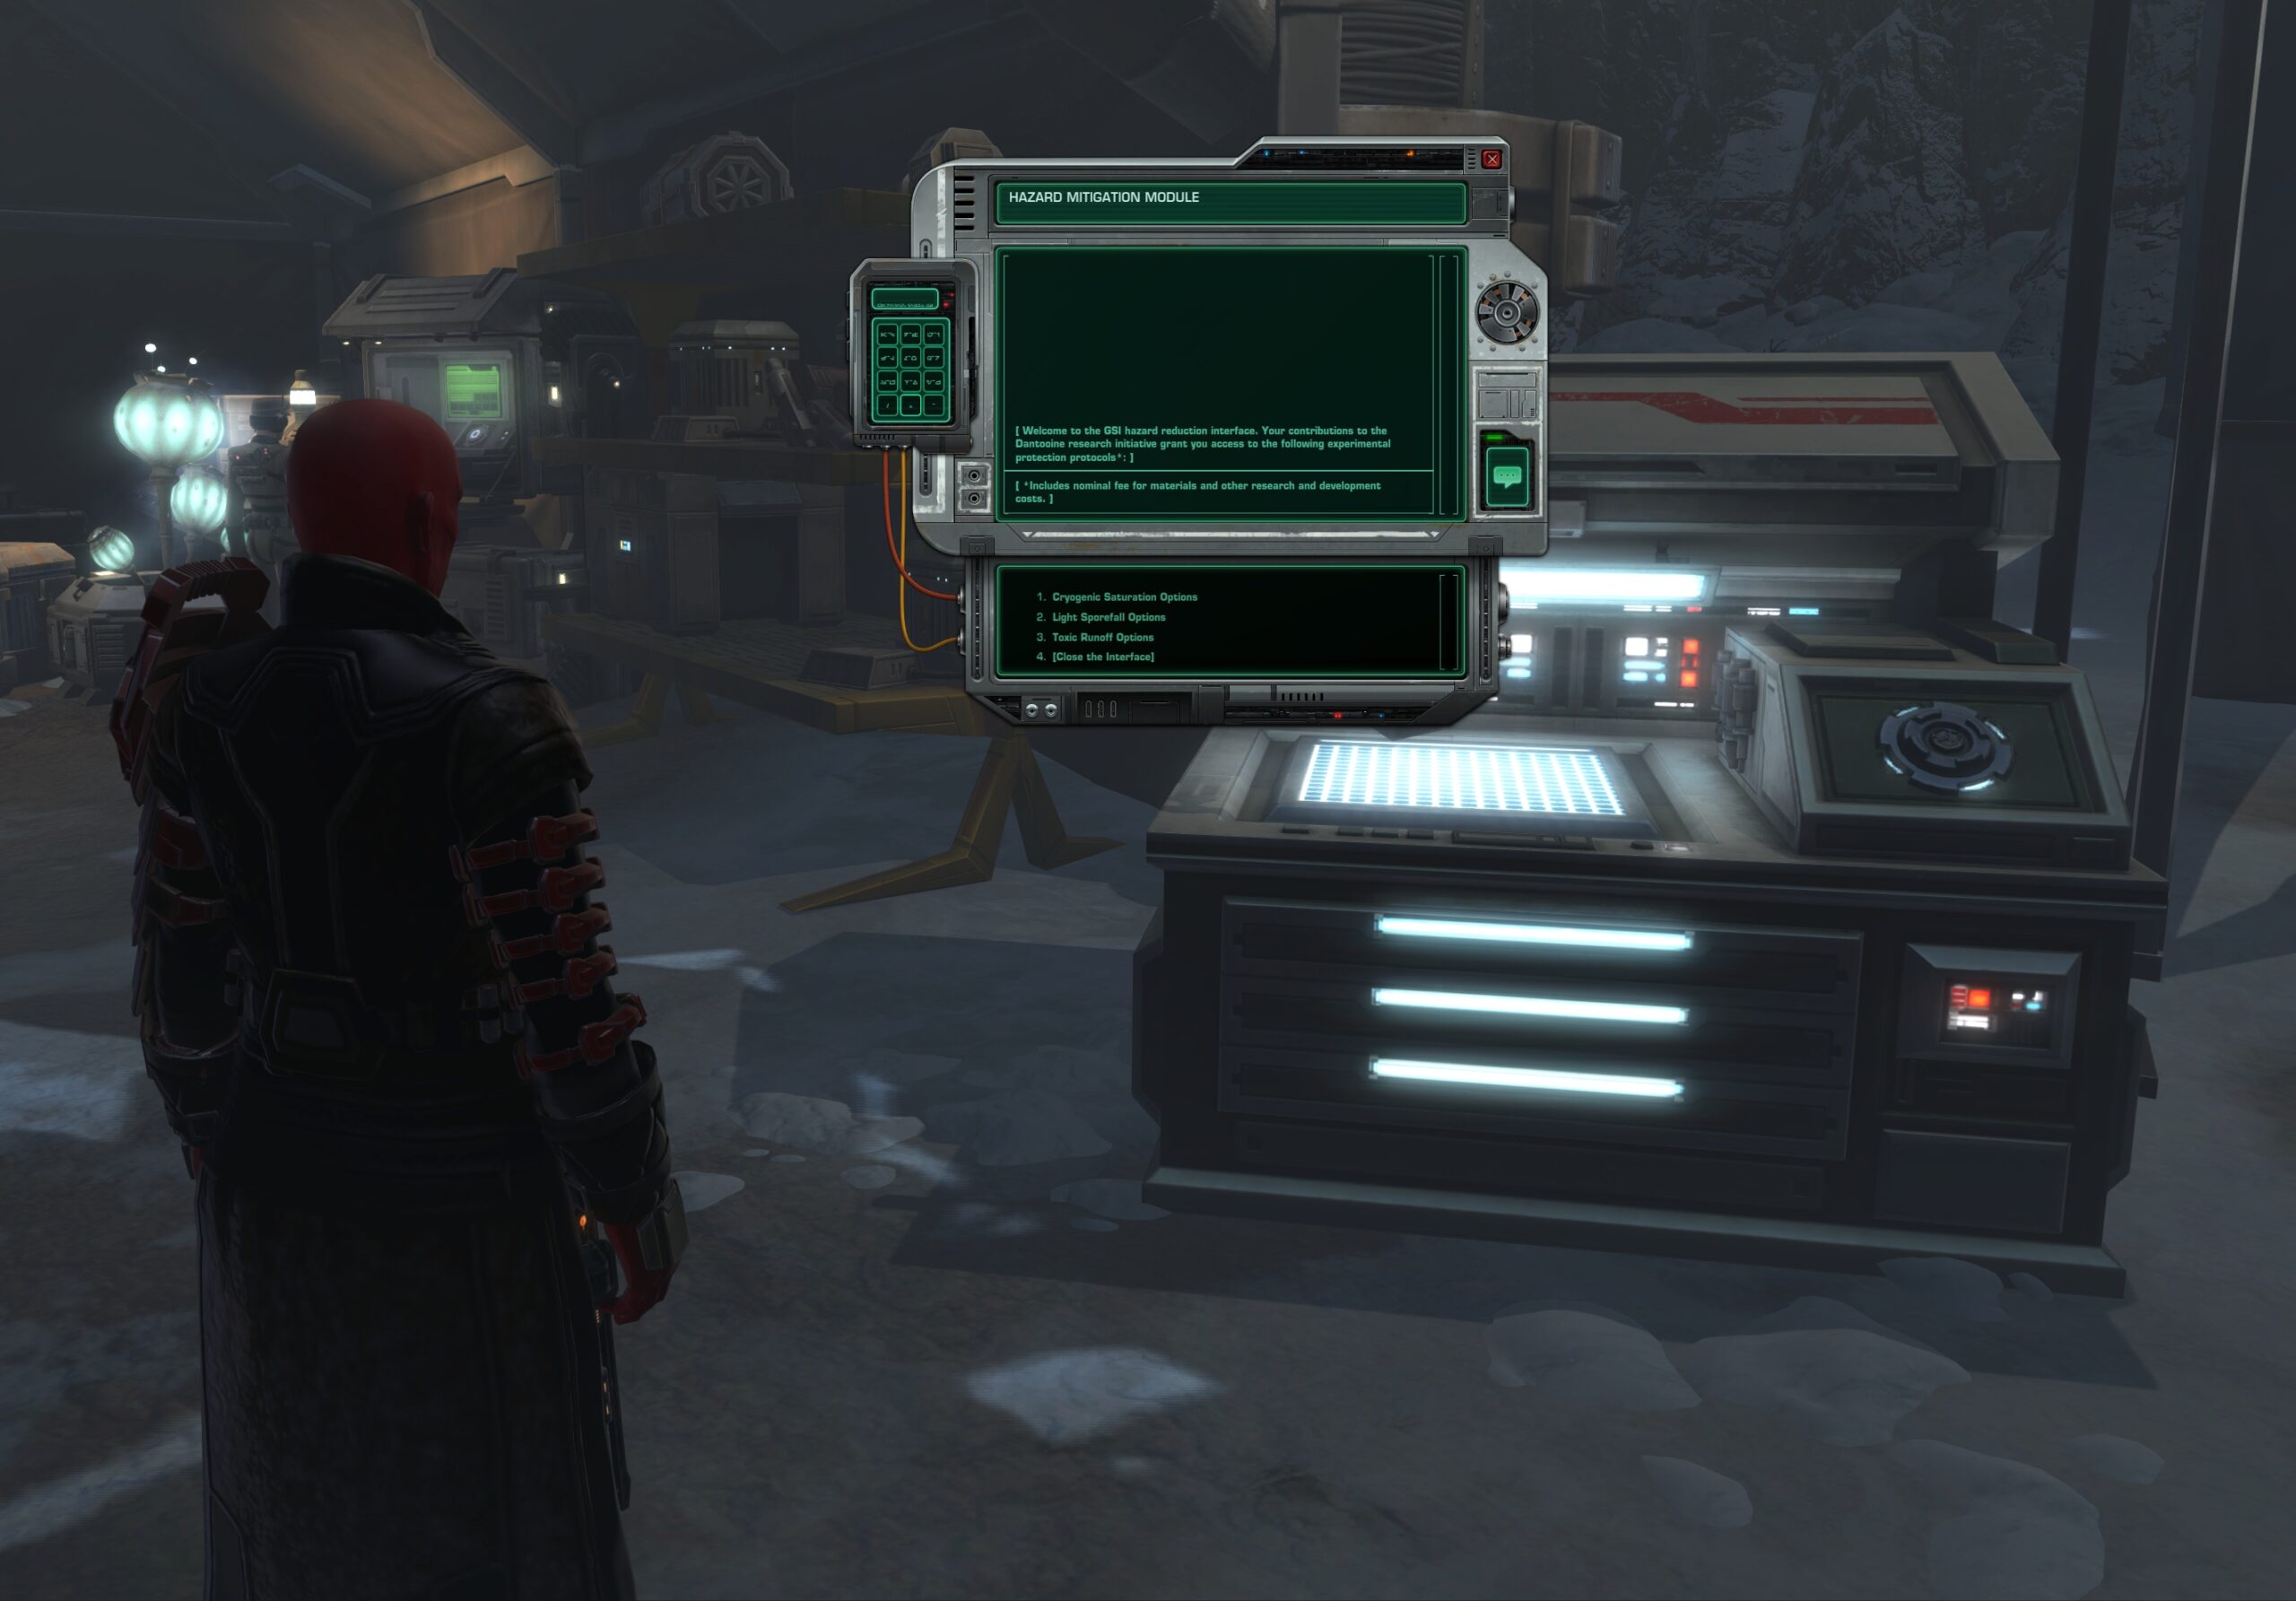
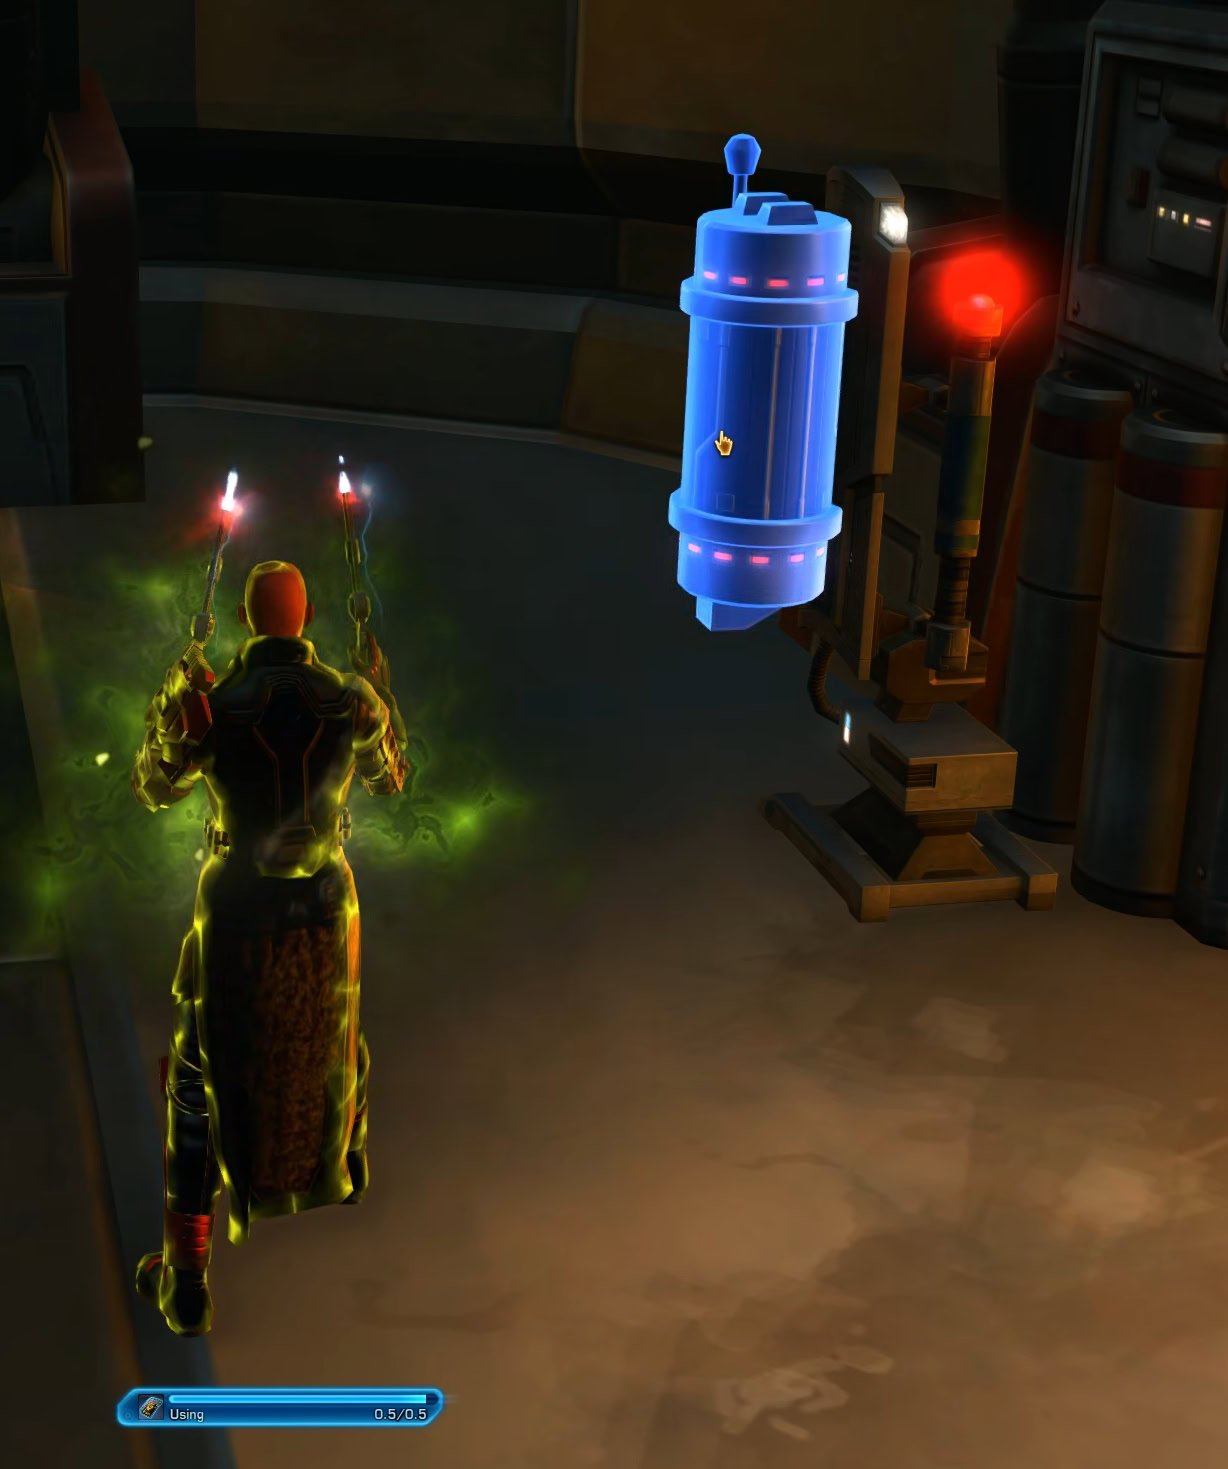
Hazard Mitigation Module
At the main Research Camp and each of the Forward Camps in each biome, you will find a terminal offering various stims that will protect you from the hazardous environments for a limited time.

Cryogenic Mitigation
Protects from Cryogenic Saturation in Glacial Trespass. Offers full immunity from Extreme Cryogenic Saturation at Friend rank.
Toxic Runoff Protection
Protects from Toxic Runoff in the Geothermal Disruption. Offers protection against Extreme Toxic Contamination at Friend rank and full lava immunity at Hero rank.
Mycelial Inoculation
Protects from Light Sporefall in Sporefall. Does not affect Heavy Sporefall until you reach Friend rank.
Each of these stims has 4 variants, depending on your reputation level with the Galactic Sustainability Institute. You cannot protect yourself from more than one type of hazard at a time.
| Reputation Rank | Duration | Bonus Effect | |
|---|---|---|---|
| Outsider | 30 mins | – | |
| Newcomer | 60 mins | – | |
| Friend | 60-120 mins | Unlocks Forward Camp Modules Additional Hazard Protection | |
| Hero | 120 mins | Full Hazard Immunity |
Their effect will be automatically applied as soon as you make the purchase (credits only) and you will see it as an icon on your buffs bar.
These stims do not protect you from all hazards in the biomes until you reach Friend or Hero rank and get the enhanced protection, but they will protect you from enough that you can remain mounted throughout the region.
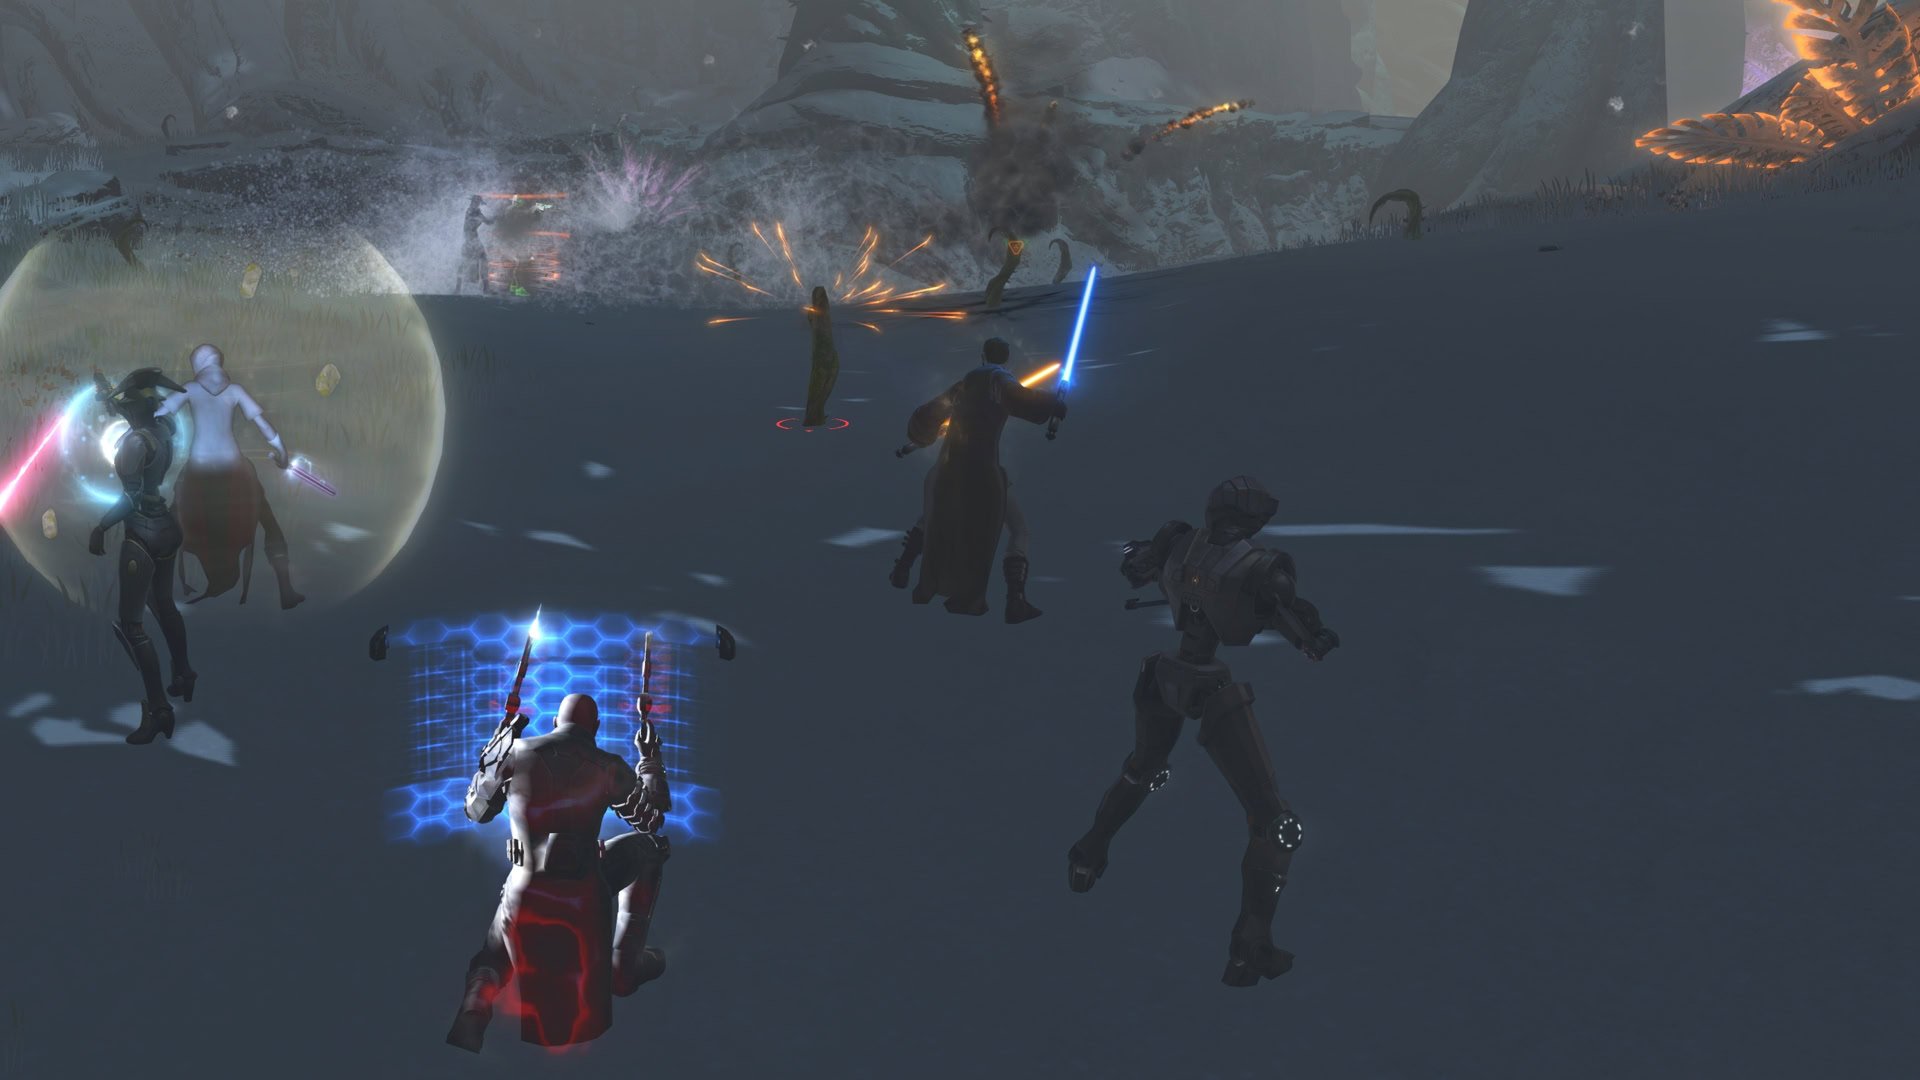
Grouping vs Solo
Most encounters are soloable, but they’re designed for a larger number of players so they take a long time to complete if people aren’t working together. The level 2 Transition encounters are more challenging to complete on your own without buffs from special objects.

Thanks to shared tagging added with Update 7.0, you only need to physically group up for the [Master] Orbital Core boss fight, and that requires a standard 1T, 2D, 1H group composition.
Navigation and Quick Travel Options
As you progress through the Reputation Ranks, at the Reputation Vendor in the Research Camp, you will be able to purchase items that unlock some fast travel points and other perks that speed up your navigation and exploration of the Dantooine Crash Site.
The two items that you would want to purchase for improve your pace of navigating the map, are the Maintenance Tunnel Pass and Forward Camp Speeder Access.
The Forward Camp Speeder token will unlock the four taxi speeders for 30 mins. They are located at each of the three forward camps in each of the biomes. The fourth one is in the Research Camp.
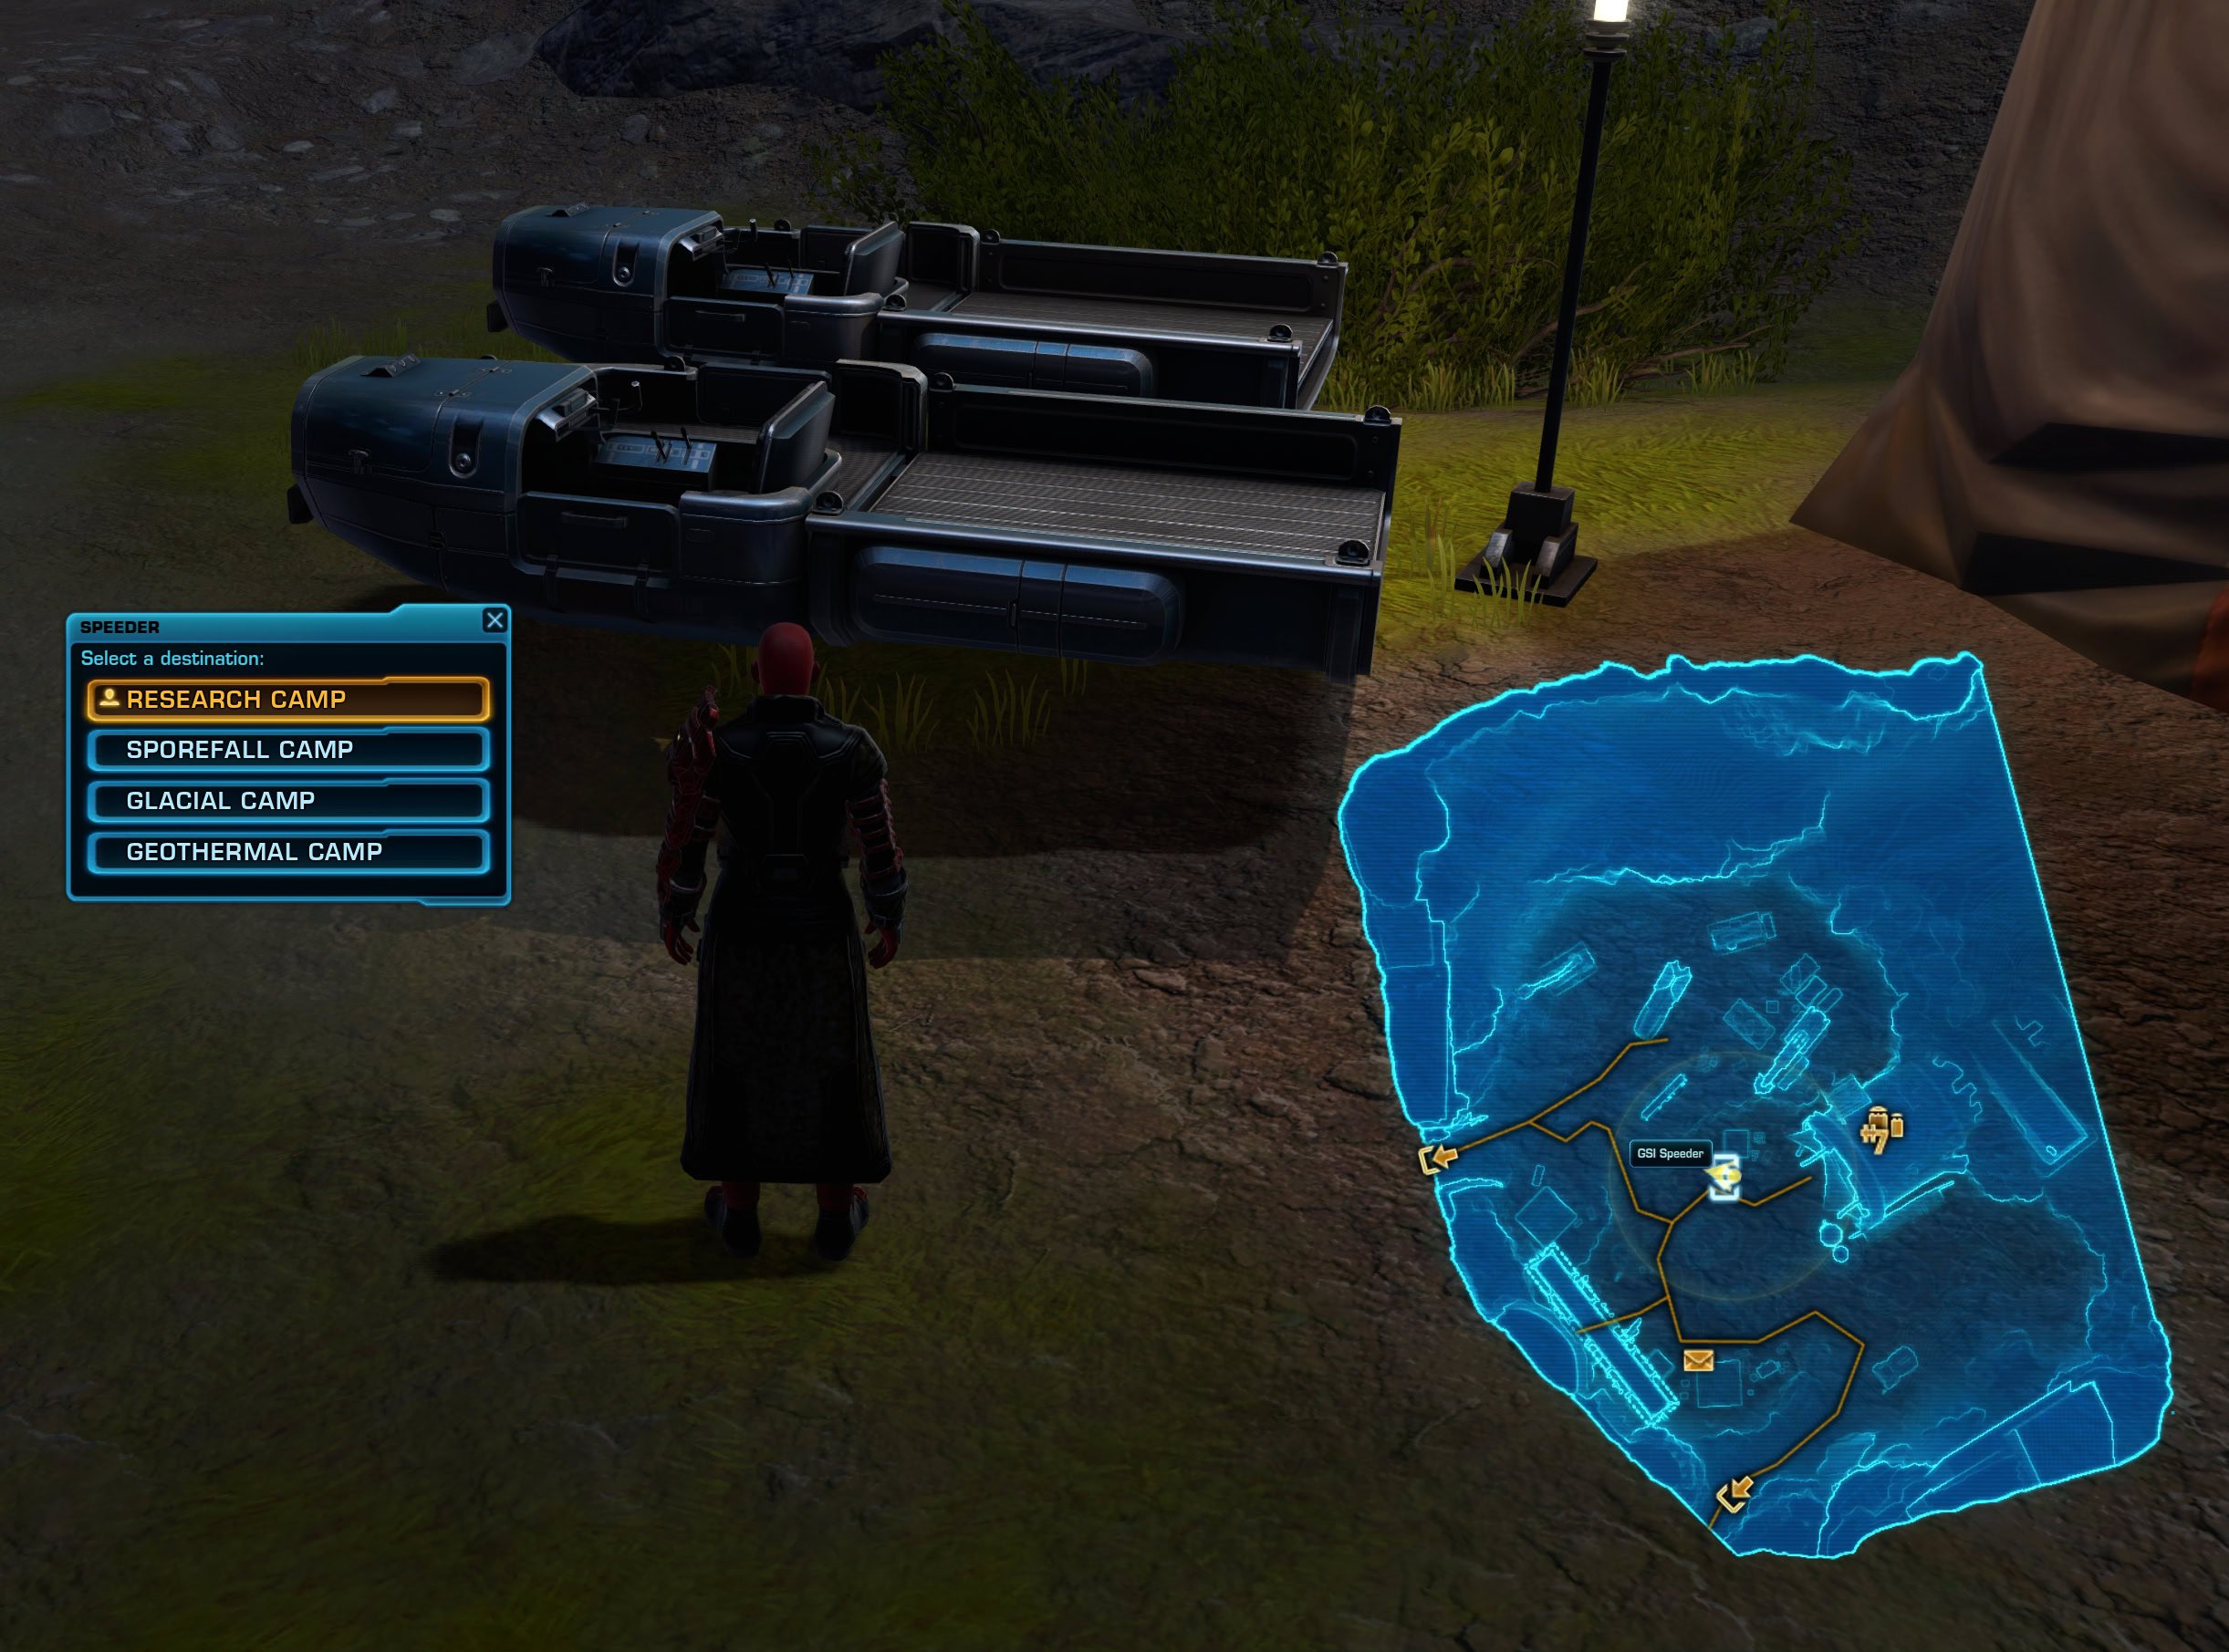
The Maintenance Tunnel Pass token grants you a single use of the Maintenance Tunnels below the Crash Site. You don’t get access to actual tunnels. The nodes on the map actually serve as quick travel points. There are several in each biome.
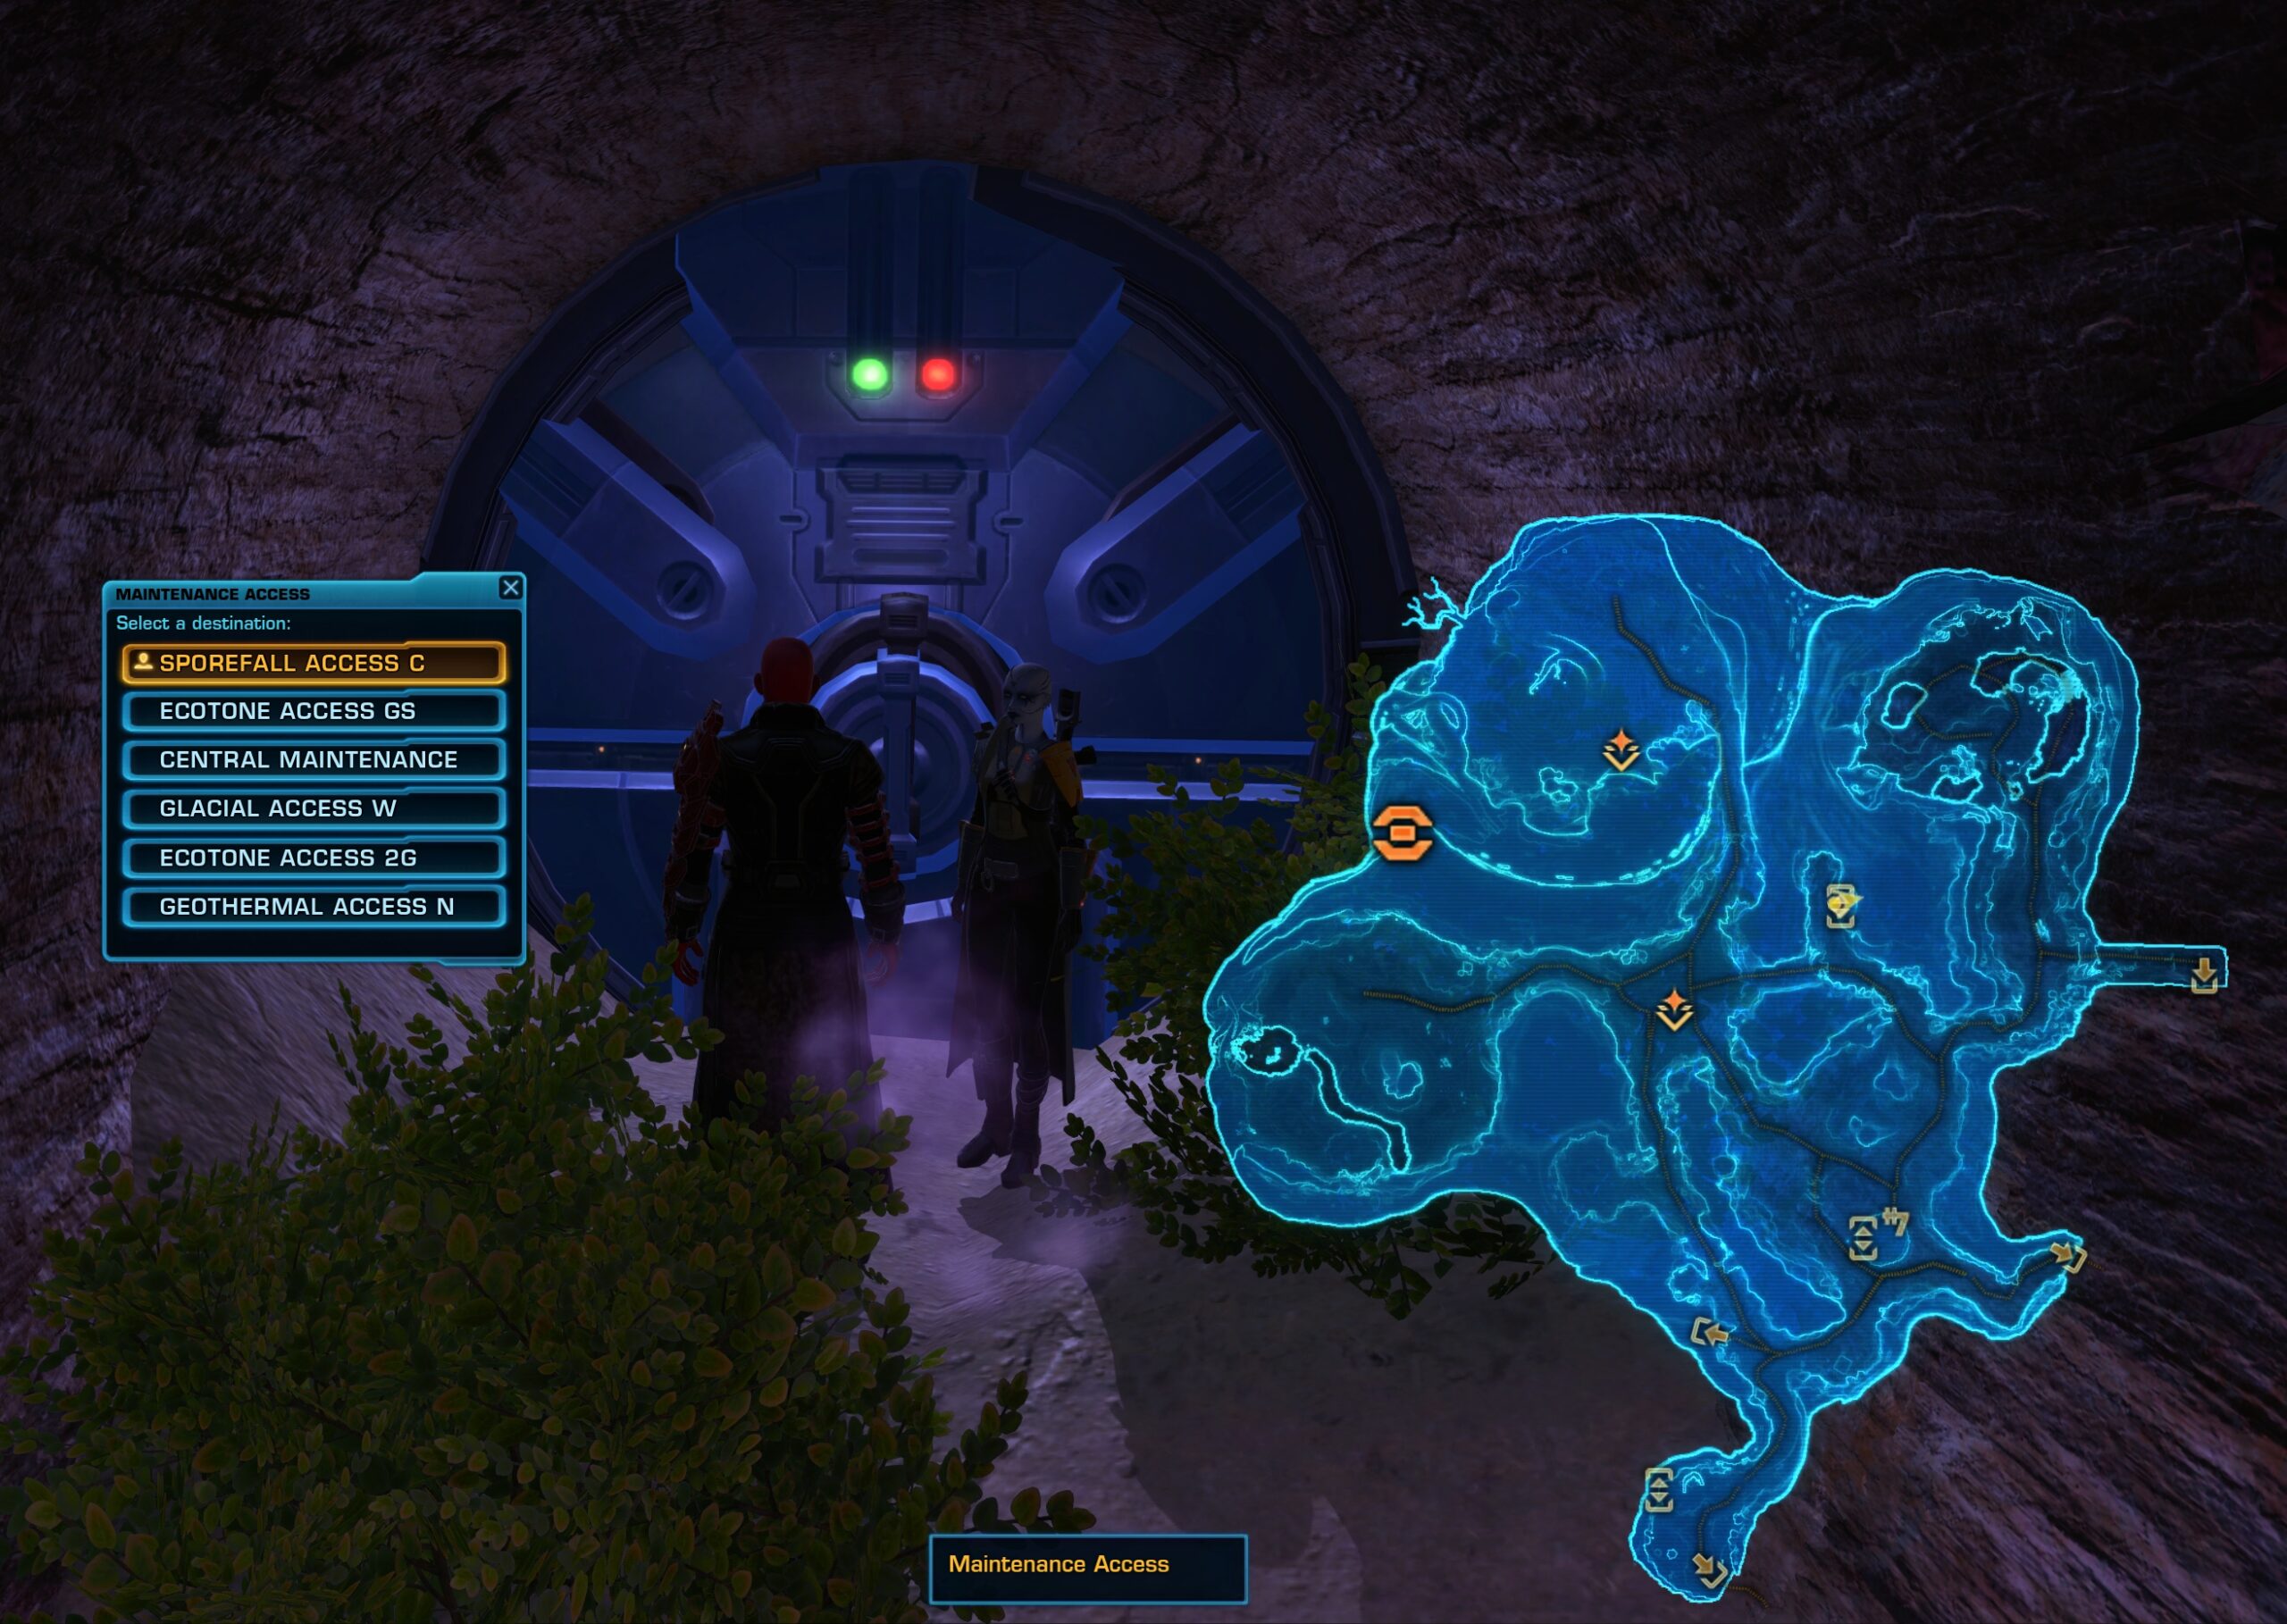
On the Interactive map of Dantooine Crash Site, you will find all locations of the Maintenance Tunnel Access Points, but basically each biome has 1 Maintenance Tunnel point. There’s also one next to each of the Ecotones where you can find powerful temporary buffs as well as one that’s right next to the entrance to Orbital Core.
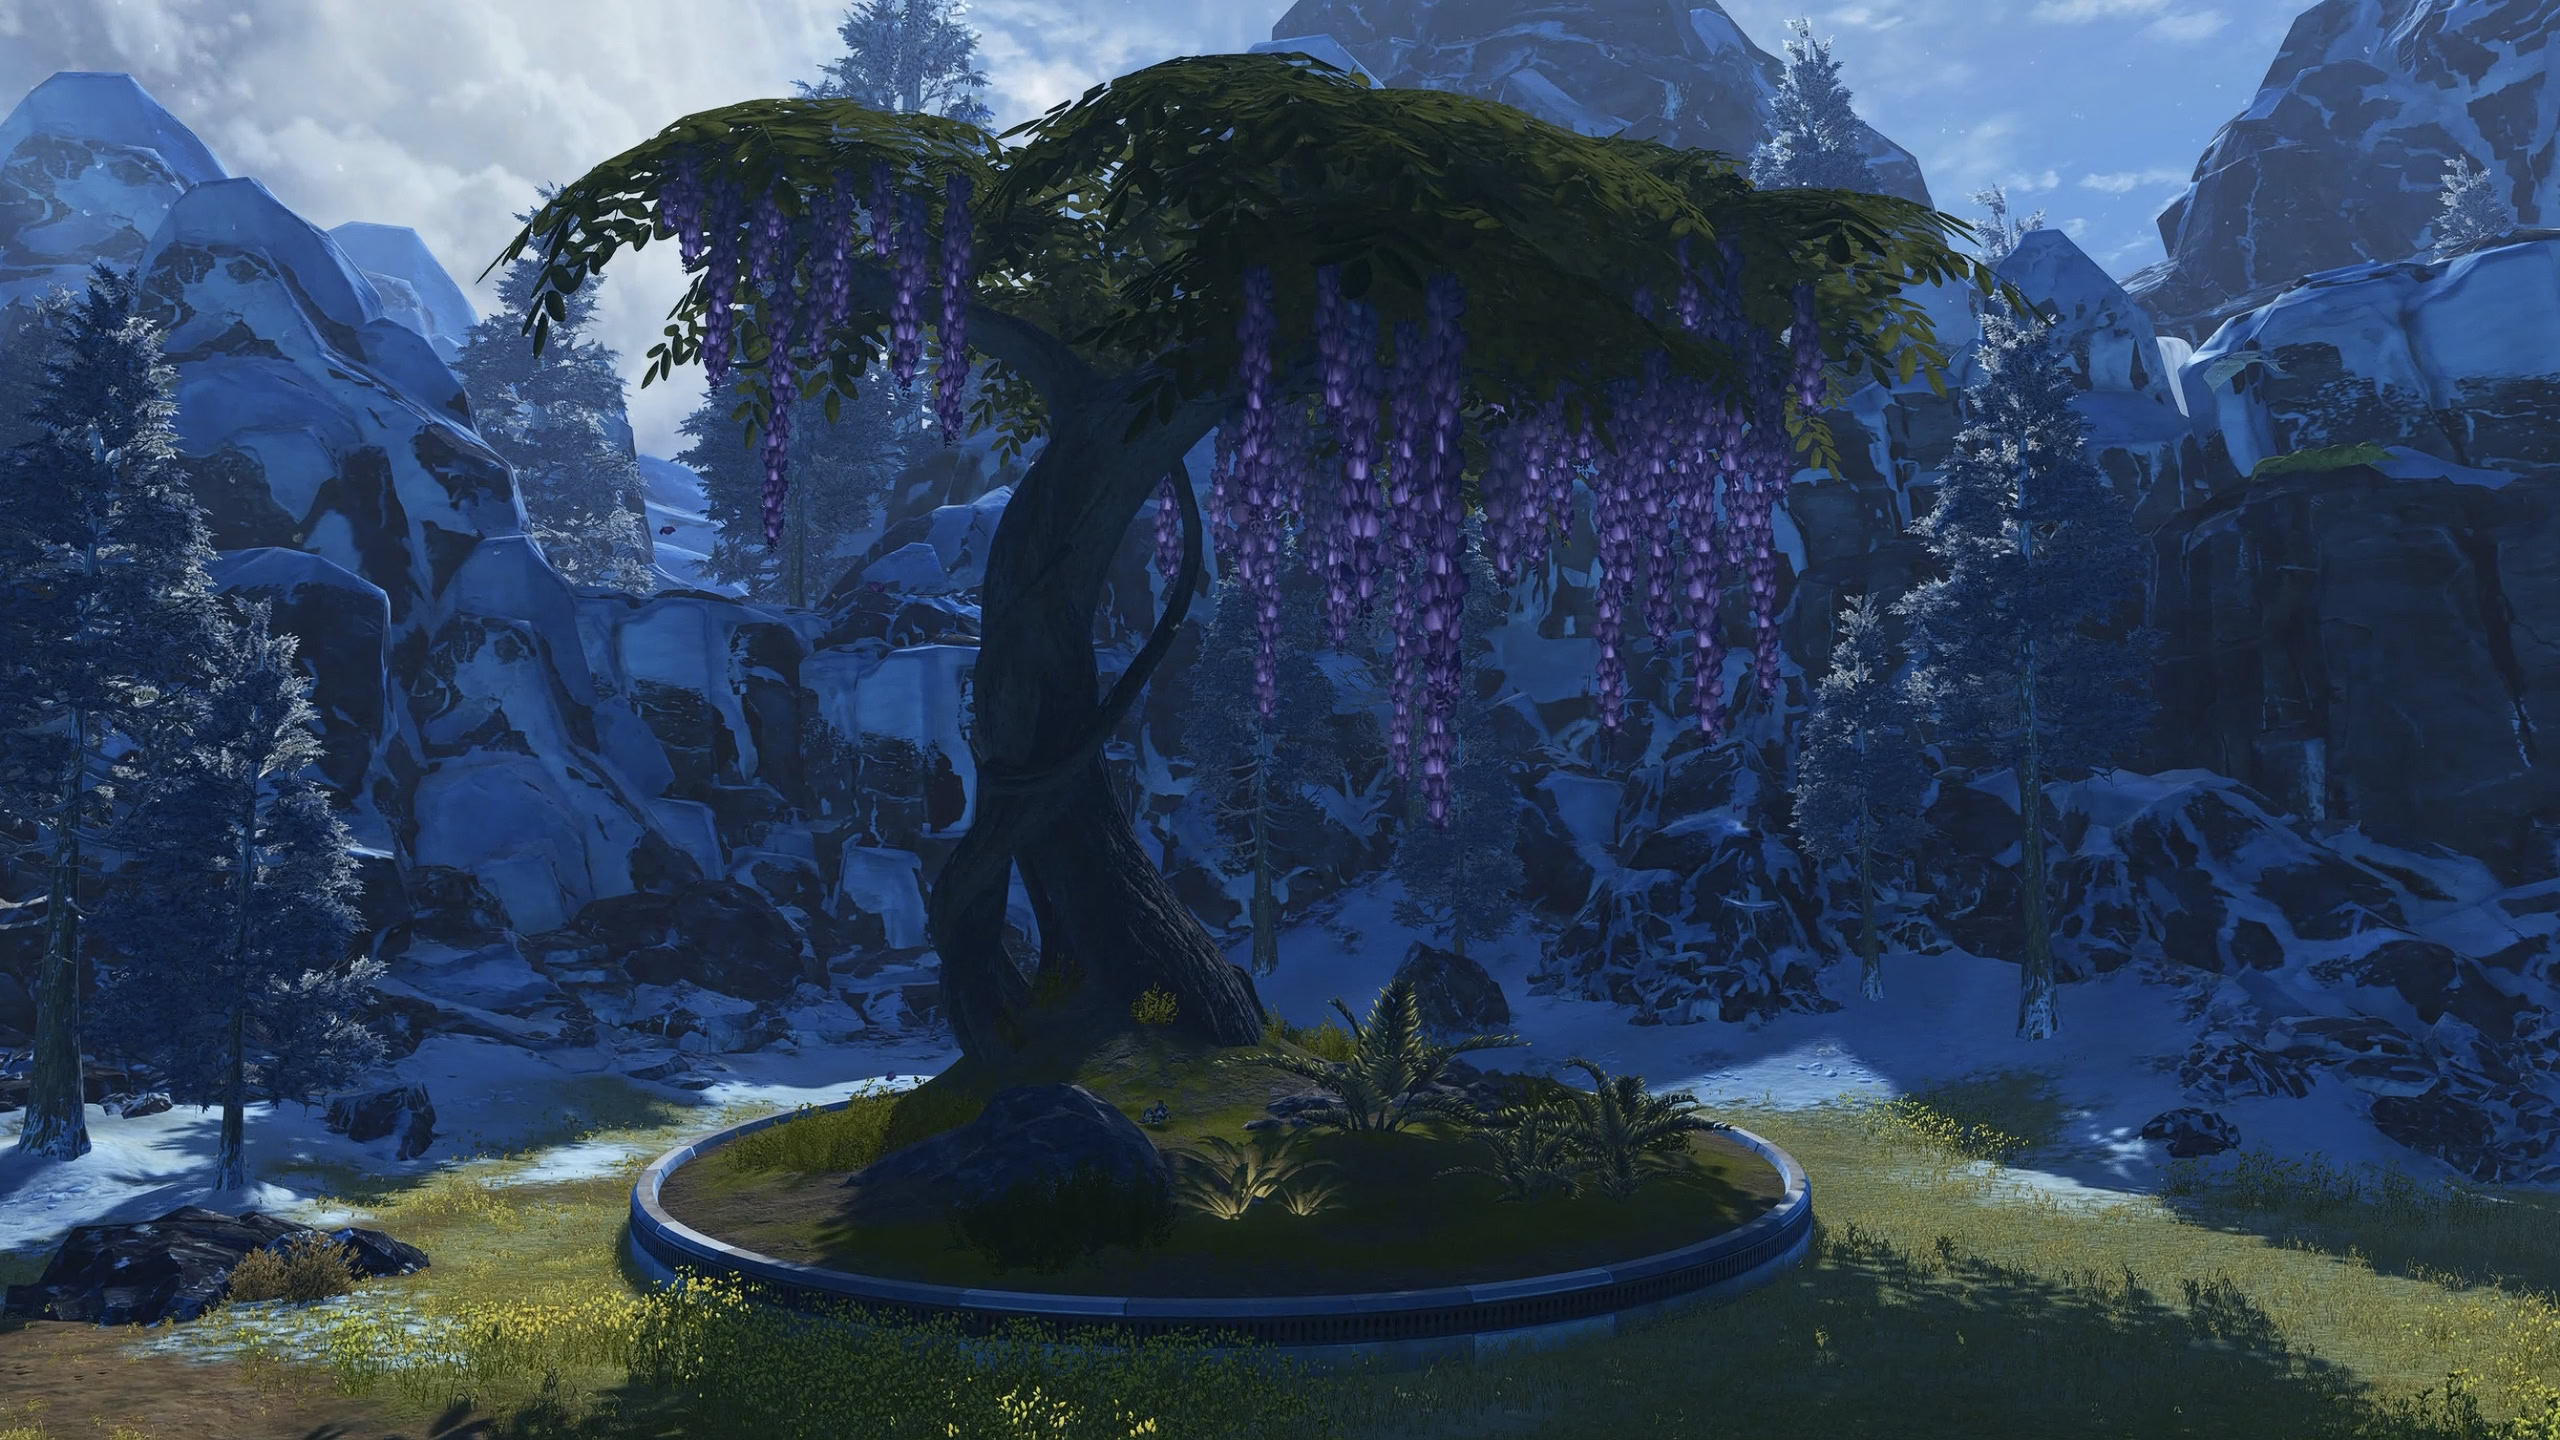
Ecotone Access GS takes you to the Glacial-Sporefall transition area where you can grab the flowers.
Ecotone Access 2G takes you to the Glacial-Geothermal transition area where you can find the frozen volcano for +30% defense/resist chance.
These buffs initially show up as temporary Dynamic Encounters during a Transition Encounter when a biome is leveling up.
While it gets expensive (180k per cycle), these Ecotone Access tunnels connect to Central Maintenance, allowing you to re-grab both buffs quickly after wiping against the Orbital Core.
Jannimak Security Terminals
Scattered around the biomes, you will find Jannimak terminals that you can interact with. To unlock their menu, you need a Sliced Security Card, which you can purchase from the Reputation Vendor for 250k credits once you have reached Champion rank.
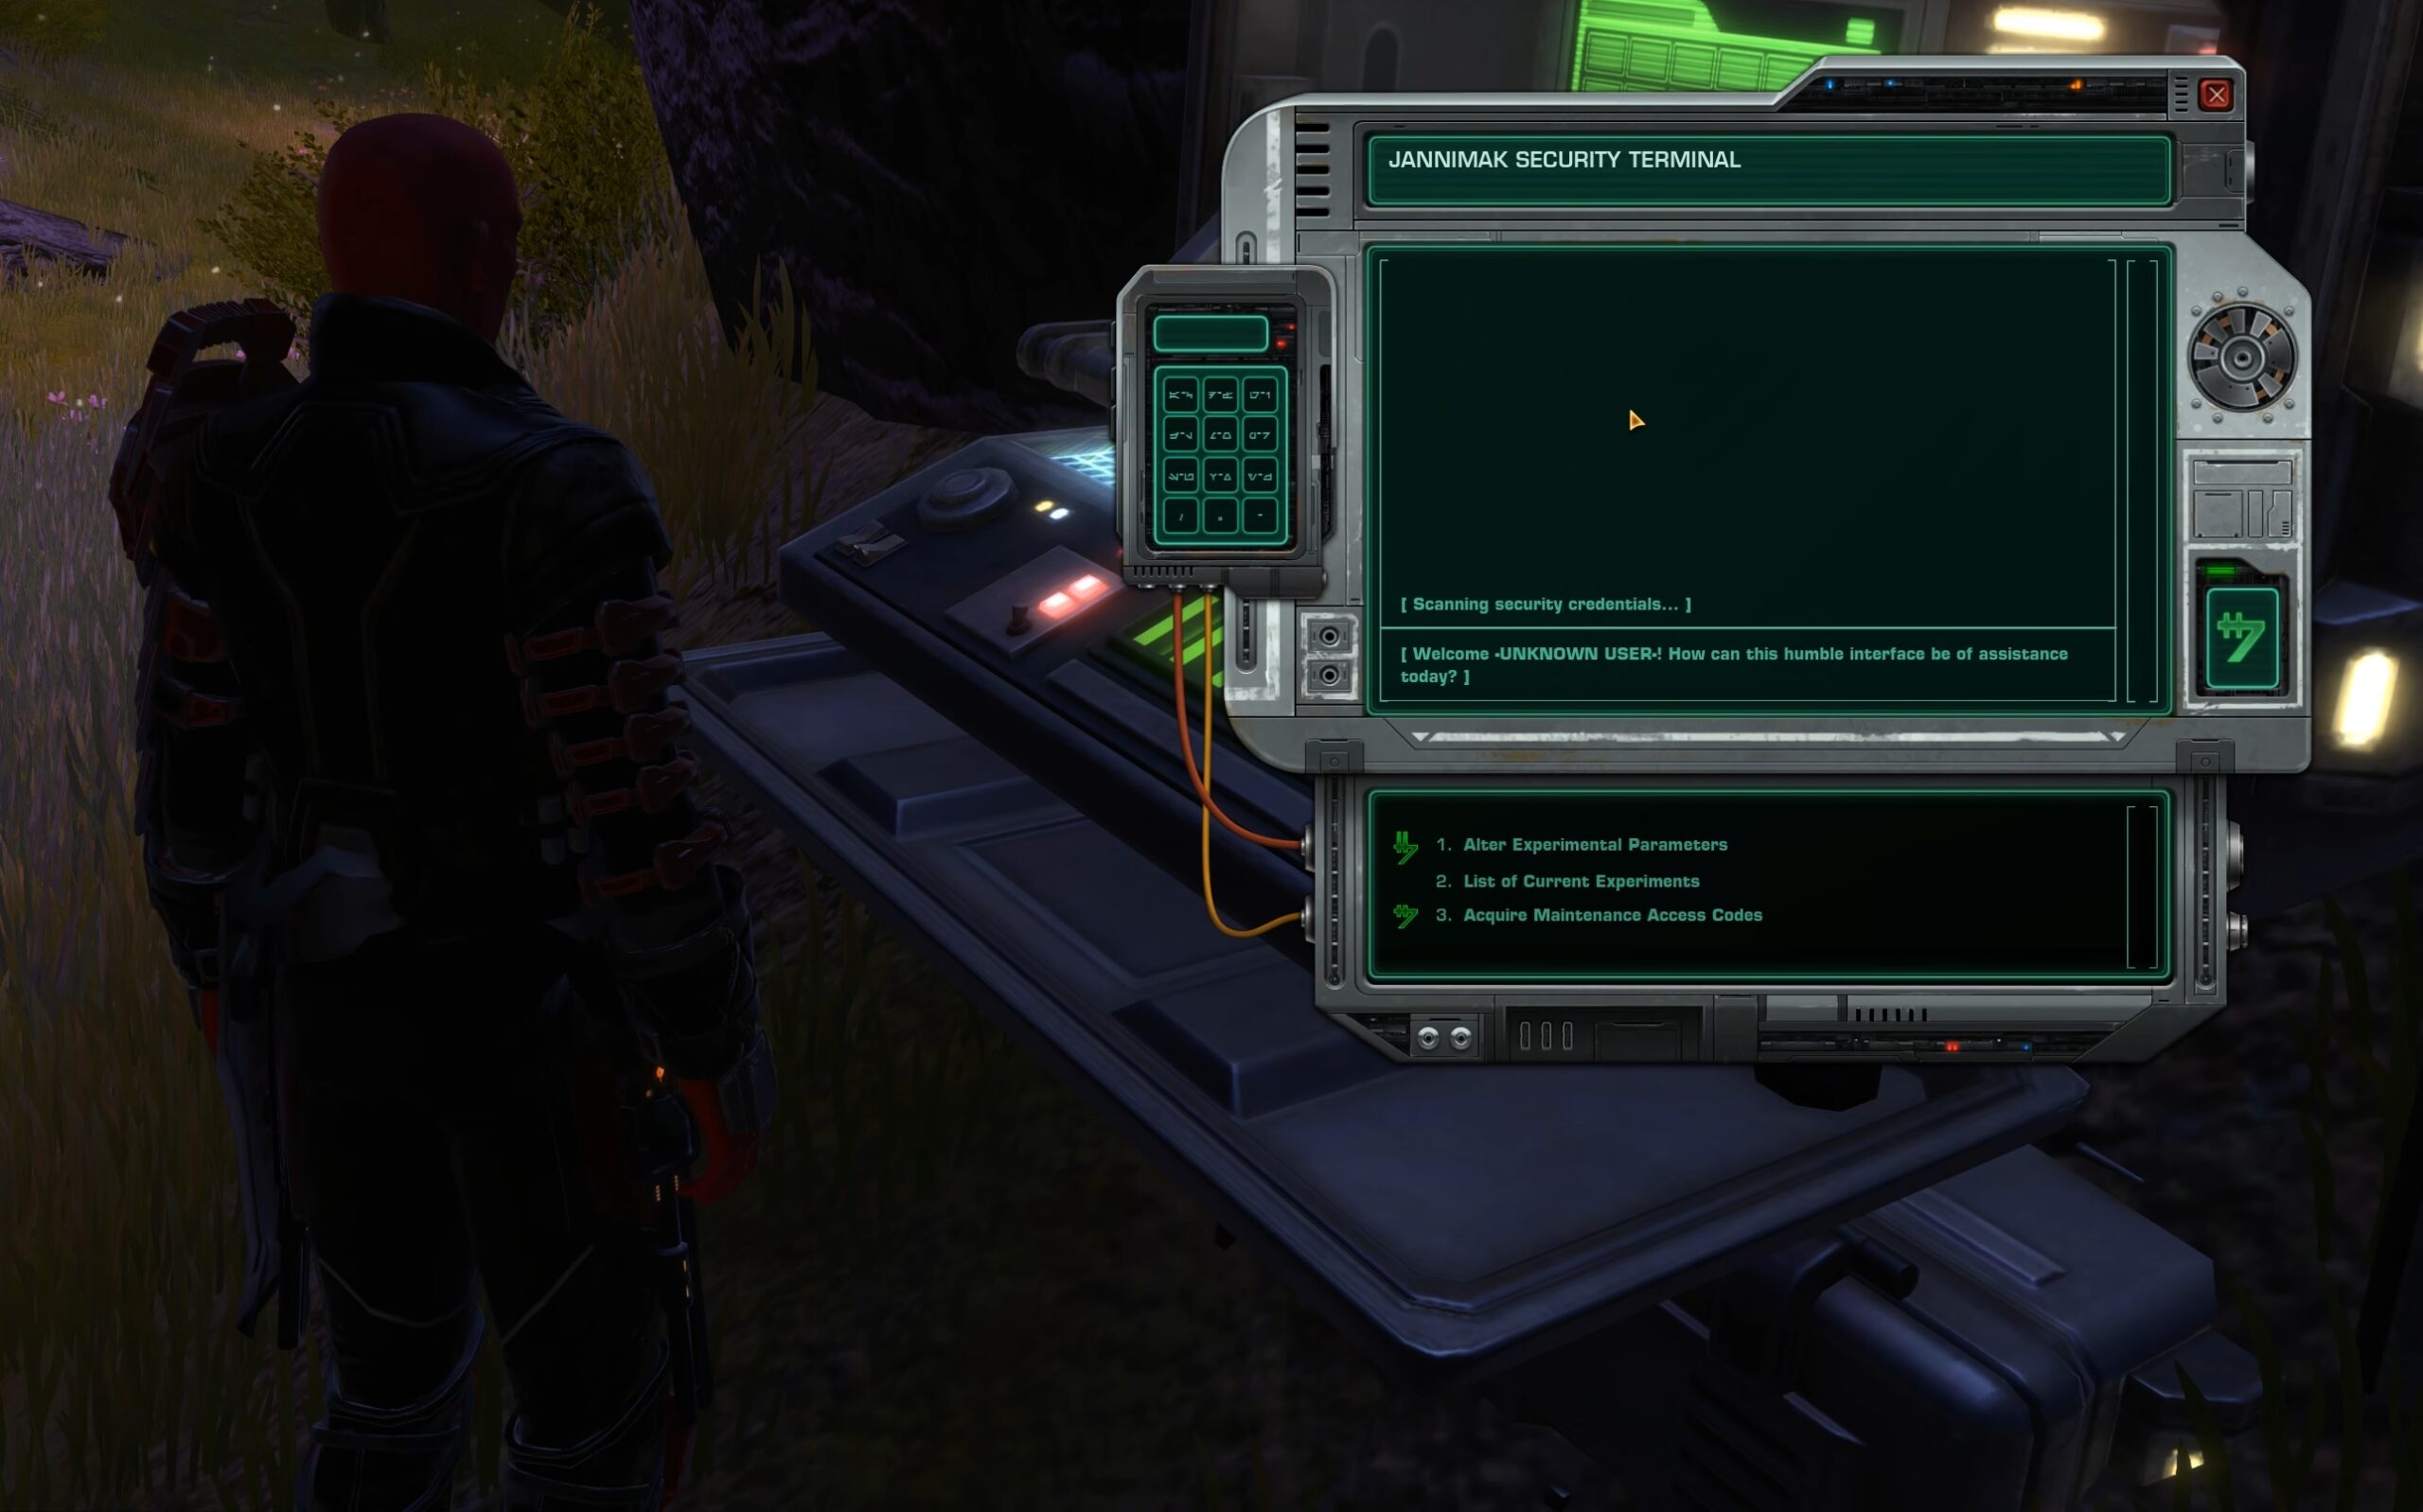
If you choose to Alter the Experimental Parameters, you will progress the core for the local biome as if you just completed a Dynamic Encounter, which corresponds to ~7% progress at Level 1 and ~3% progress at Level 2.
Altering Experimental Parameters does not change or complete any active encounters. This can only be done up to 3 times per level per biome and the option disappears if the biome is at level 3.
Altering Parameters does not count towards “Expedition” achievement progress or Wreckage on Dantooine mission progress. It’s only for progressing through the biome.
List of Current Experiments does nothing, at least for now, but it may just be flavor.
If you choose Acquire Maintenance Access Codes, you can exchange 1 Sliced Security Card for 3 Maintenance Access Codes. This is a terrible deal as Sliced Security Cards cost 250k a pop while Maintenance Access Codes cost 60k, so you could buy 3 from the vendor for only 180k.
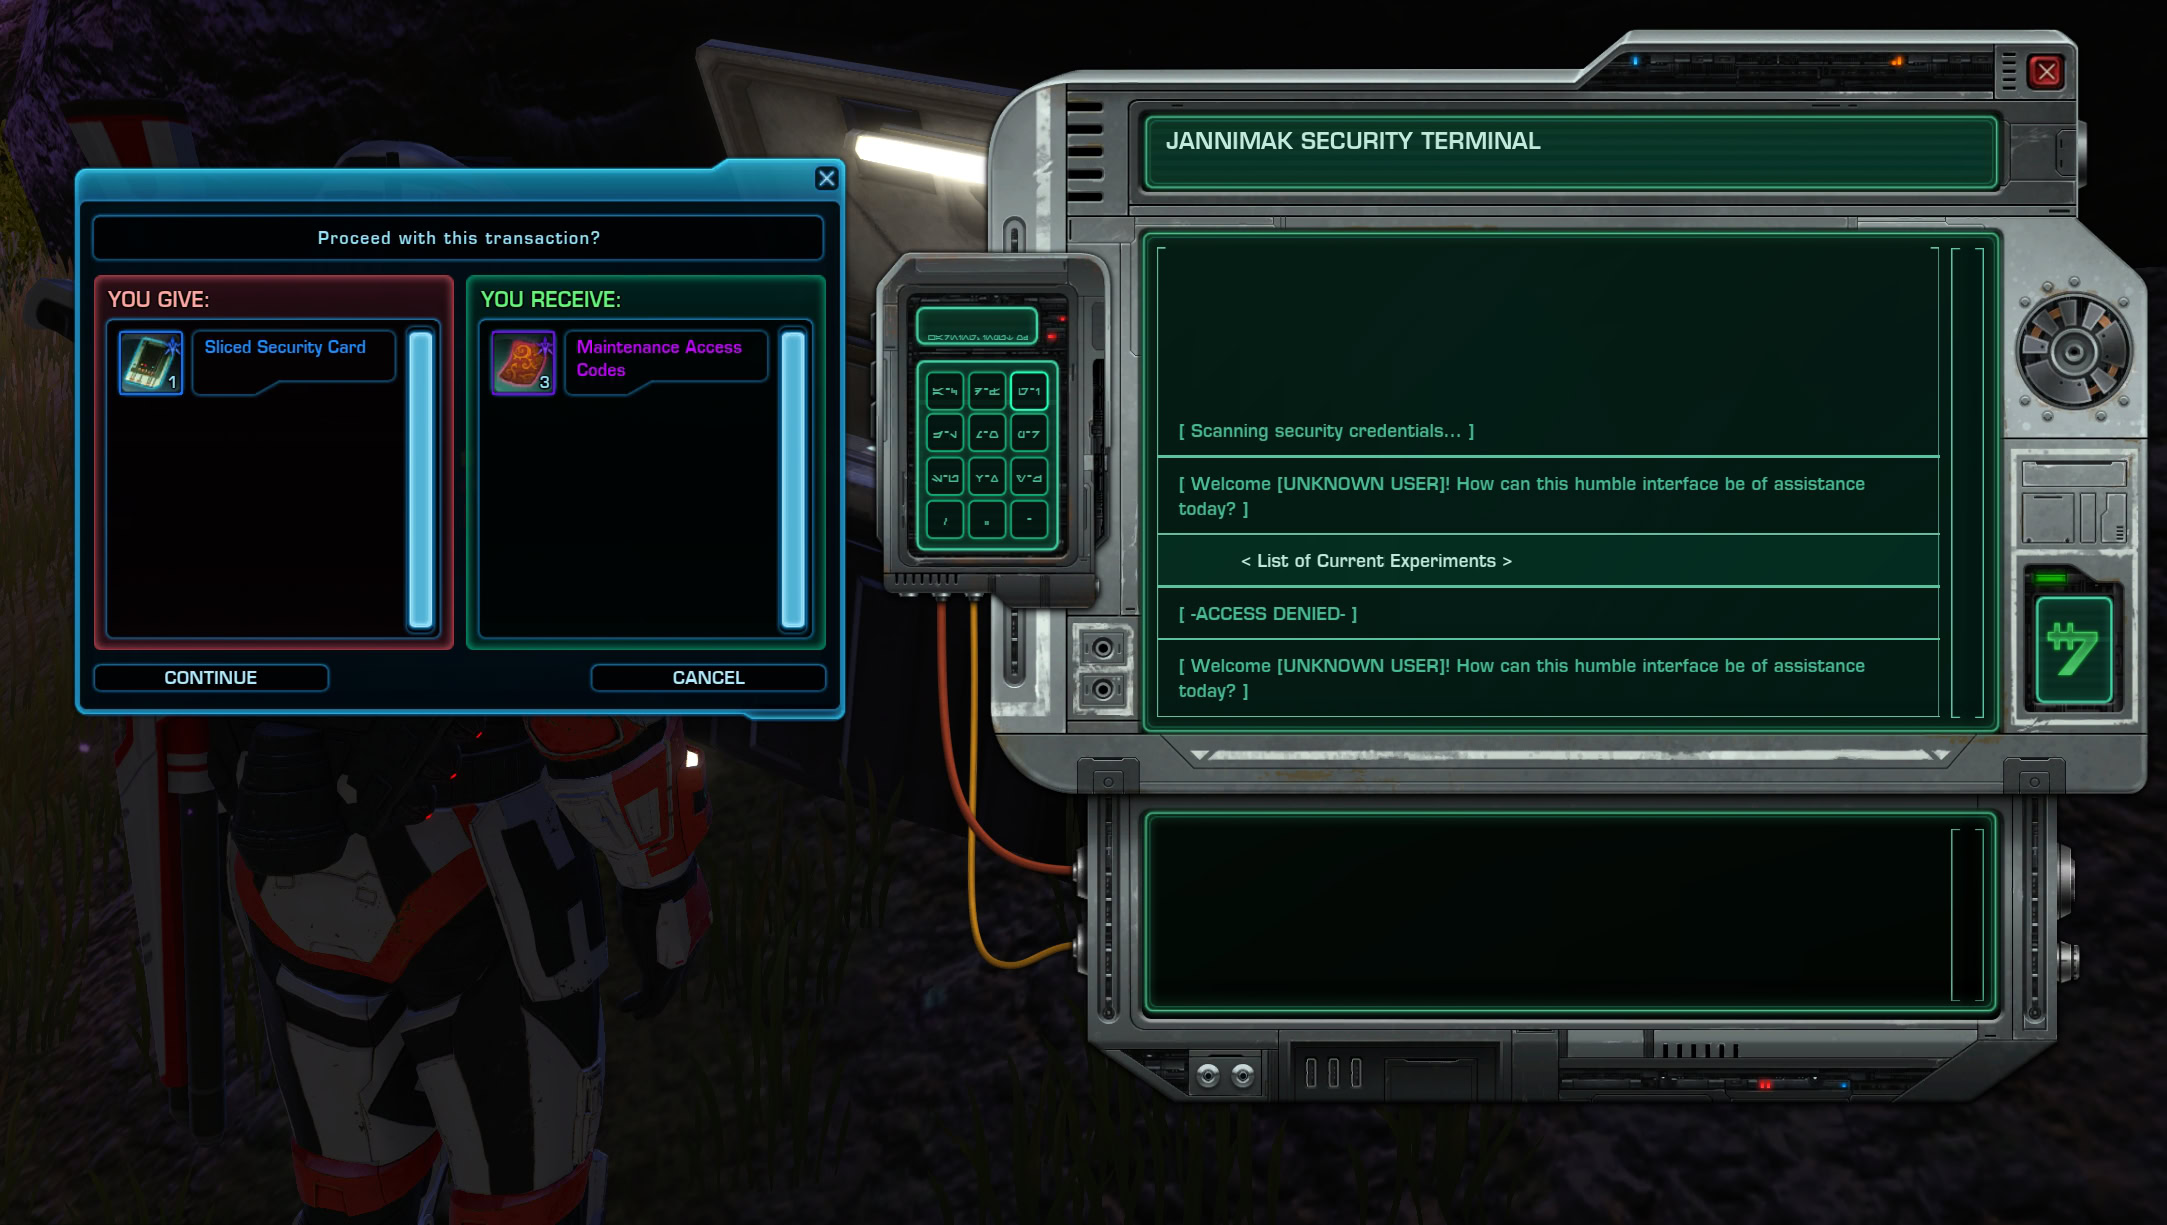
In general, unless you’re trying to put a group together for the Orbital Core and have a hard end time cutoff, using a Jannimak Security Terminal is not worth the credits.
All Dantooine Encounters
Below is a list of all Dynamic Encounters exclusive to Dantooine, including the name, region, progress type, faction and achievements availability, and objectives type. I personally recommend checking out the Dynamic Encounters listed in bold.
The Map and Table below are interactive. You can click or tap on the markers on the map to see more details about each encounter. You can sort, filter and search the table to find exactly what you need.
Interactive Map
You can open the Interactive Map in a separate tab so you could have it always handy and available for reference or to find an encounter or object quickly.
List of All Encounters
| Event Name | Biome | Map Area | Type | Type | Objectives | Level | Achievements | Difficulty | Description: | Tasks: |
|---|---|---|---|---|---|---|---|---|---|---|
| Frigid Swarm | Glacial | Glacial Trespass | Normal | Hybrid | 1 | These creatures have been bio-engineered to aerate frozen soil and spread frost flora spores. Stop their seeding of invasive plant life across the snow shelf! | – Clear Out Cryo-Nesters – Destroy Cryo-Nest Eggs |
|||
| Frostbloom Sweep | Glacial | Glacial Trespass | Normal | Hybrid | 1,2 | The Vault Ship’s cryo-flora is plummeting local temperature. Cull the frostblooms before they spread even more! | – Cull the Frostblooms – Clear Out Iceclaws |
|||
| Frostcaller | Glacial | Glacial Trespass | Normal | Hybrid | 2,3 | Reactivate the Interference Spikes to shut down this Cryogenic Seeder Node before it repopulates the frost flora across the shelf! | 1. Activate the Interference Spikes 2. Protect the Interference Spikes from Frostkeepers 3. Upload the Interference Spike Data 4. Defeat the Cryosentinel |
|||
| Gelid Tendrils | Glacial | Glacial Trespass | Normal | Combat | 1,2,3 | Strange tendrils creep from the icy caves below. Stomp them out! | 1. Squish Fragile Tendrils 2. Defeat Massive Tendrils |
|||
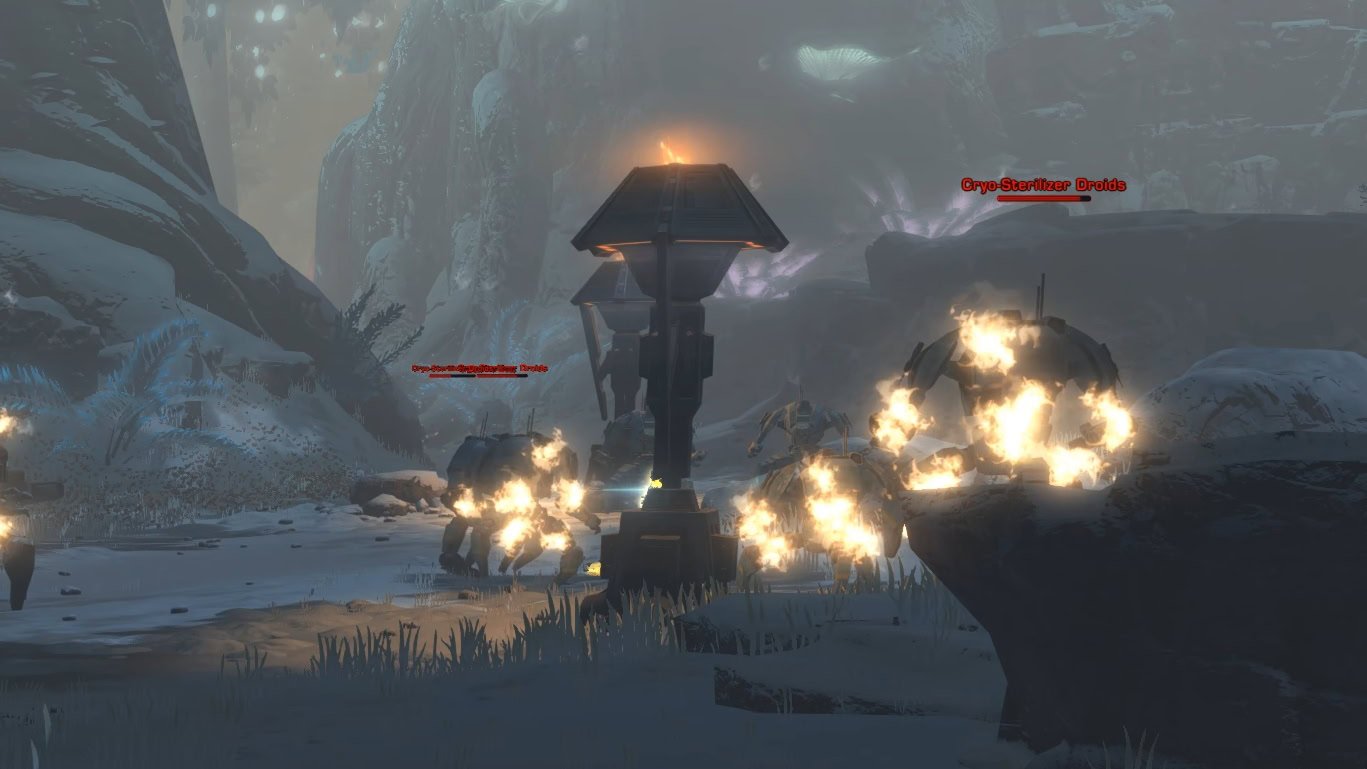
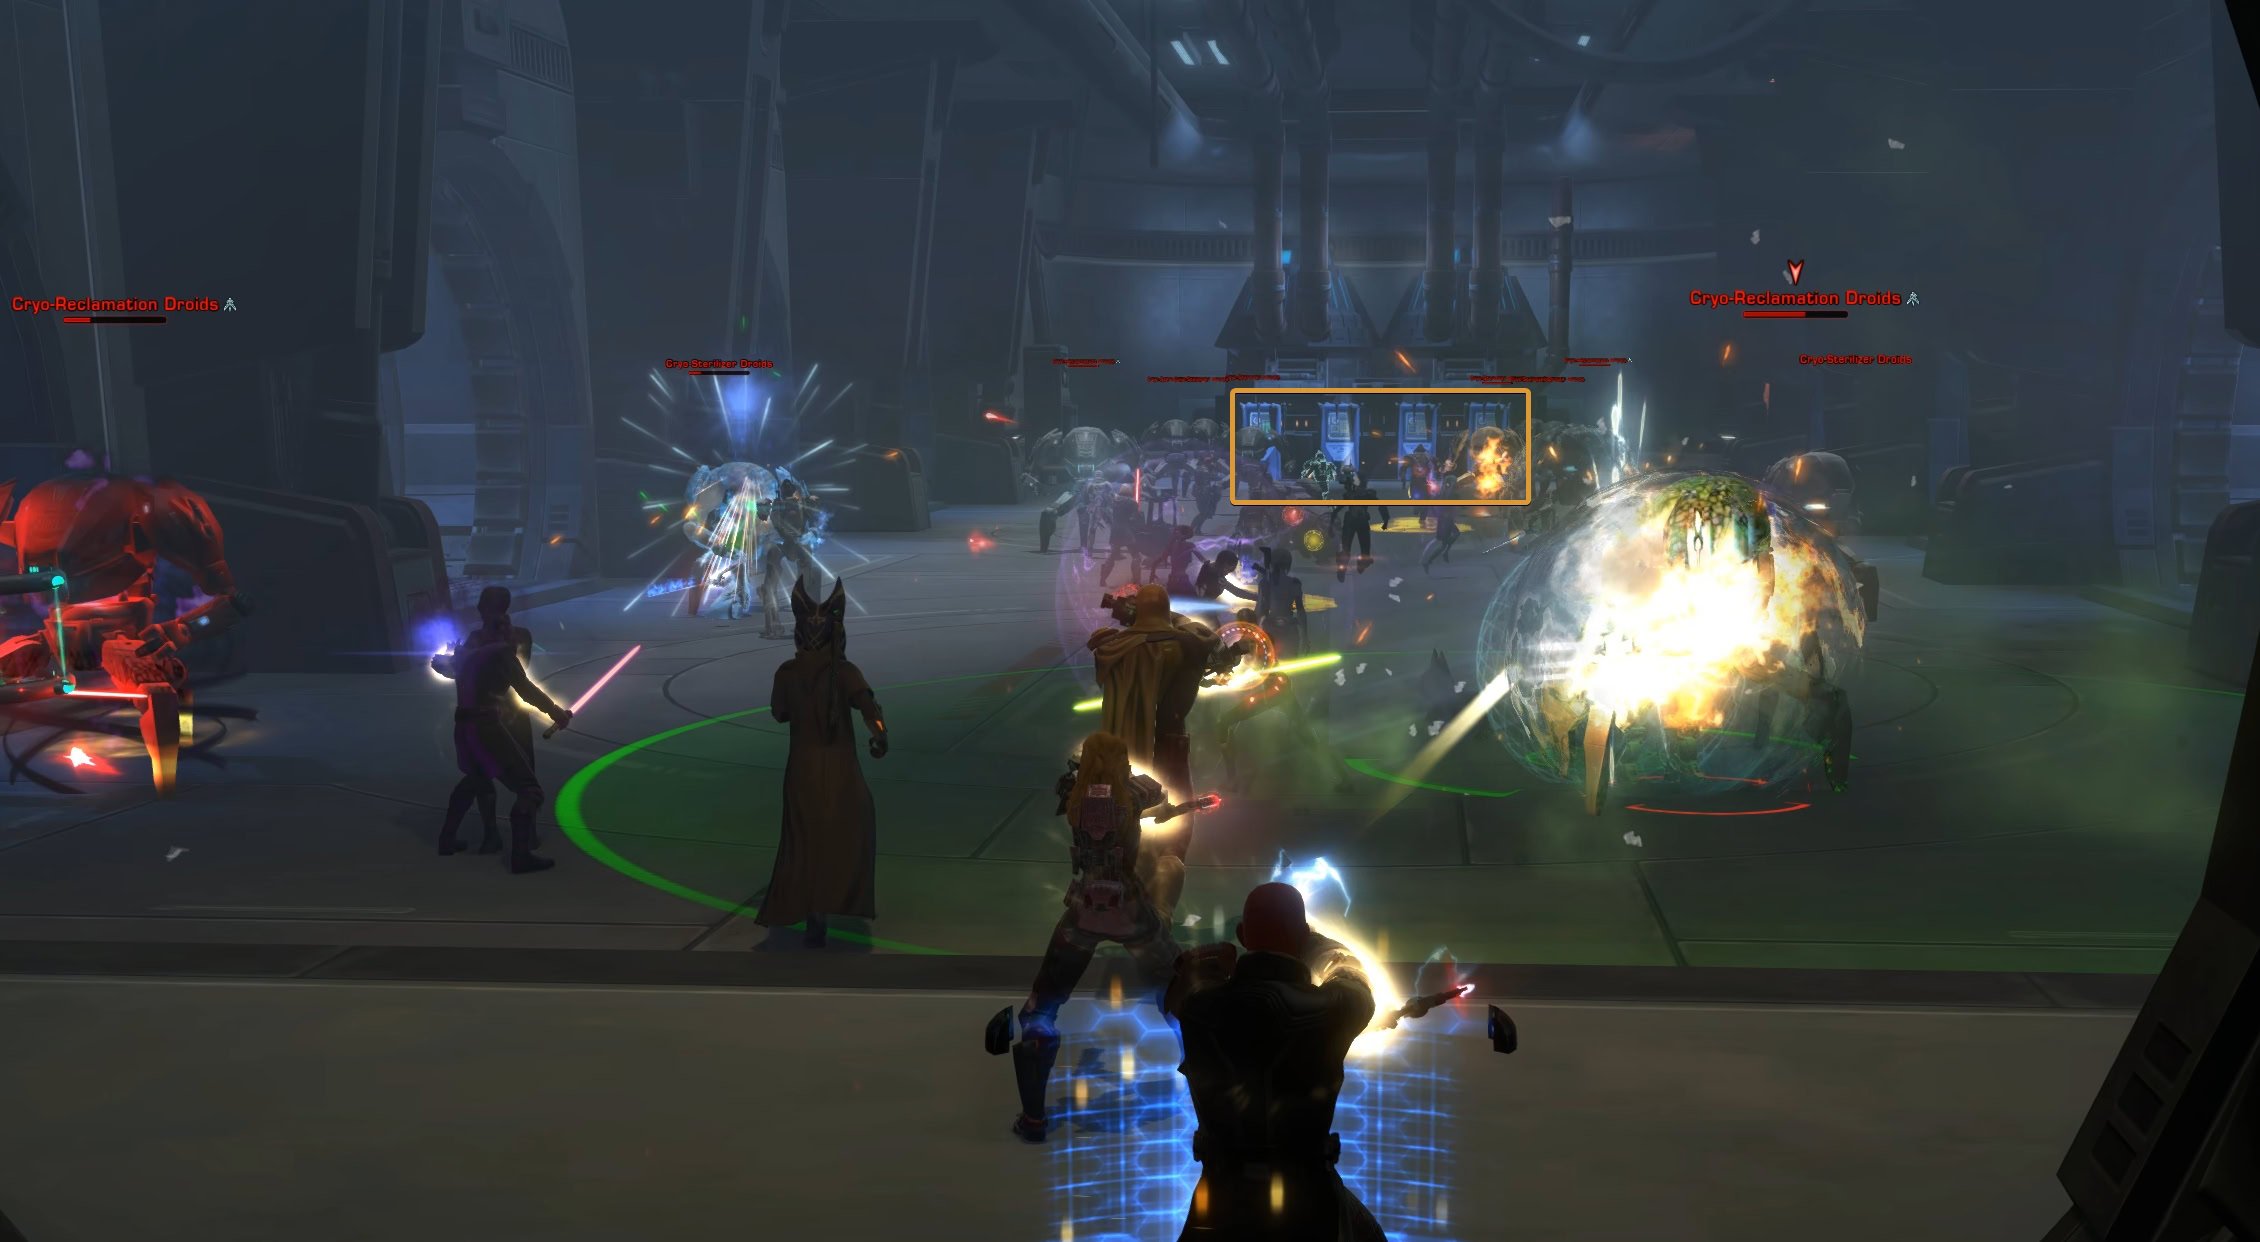
| Glacial Reclamation | Glacial | Glacial Trespass | Normal | Combat | 2,3 | The ship’s tertiary protocols have activated and a final recovery effort has been launched. | 1. Deactivate the Reboot Sequence 2. Clear Out the Cryo-Nesters 3. Clear Out the Cryo-Sterilizer Droids 4. Clear Out the Cryo-Nester Broodguards 5. Clear Out the Cryo-Reclaimation Droids 6. Clear Out the Cryosentinels 7. Clear Out the Cryo-Dominator Droid |
|||
| Hollow Frost | Glacial | Glacial Trespass | Normal | Hybrid | 2 | These Resonating Frostbulbs are plummeting the local temperatures and preventing exploration further into the shelf. | – Defeat Gladiopods – Cull the Frostbulbs |
|||
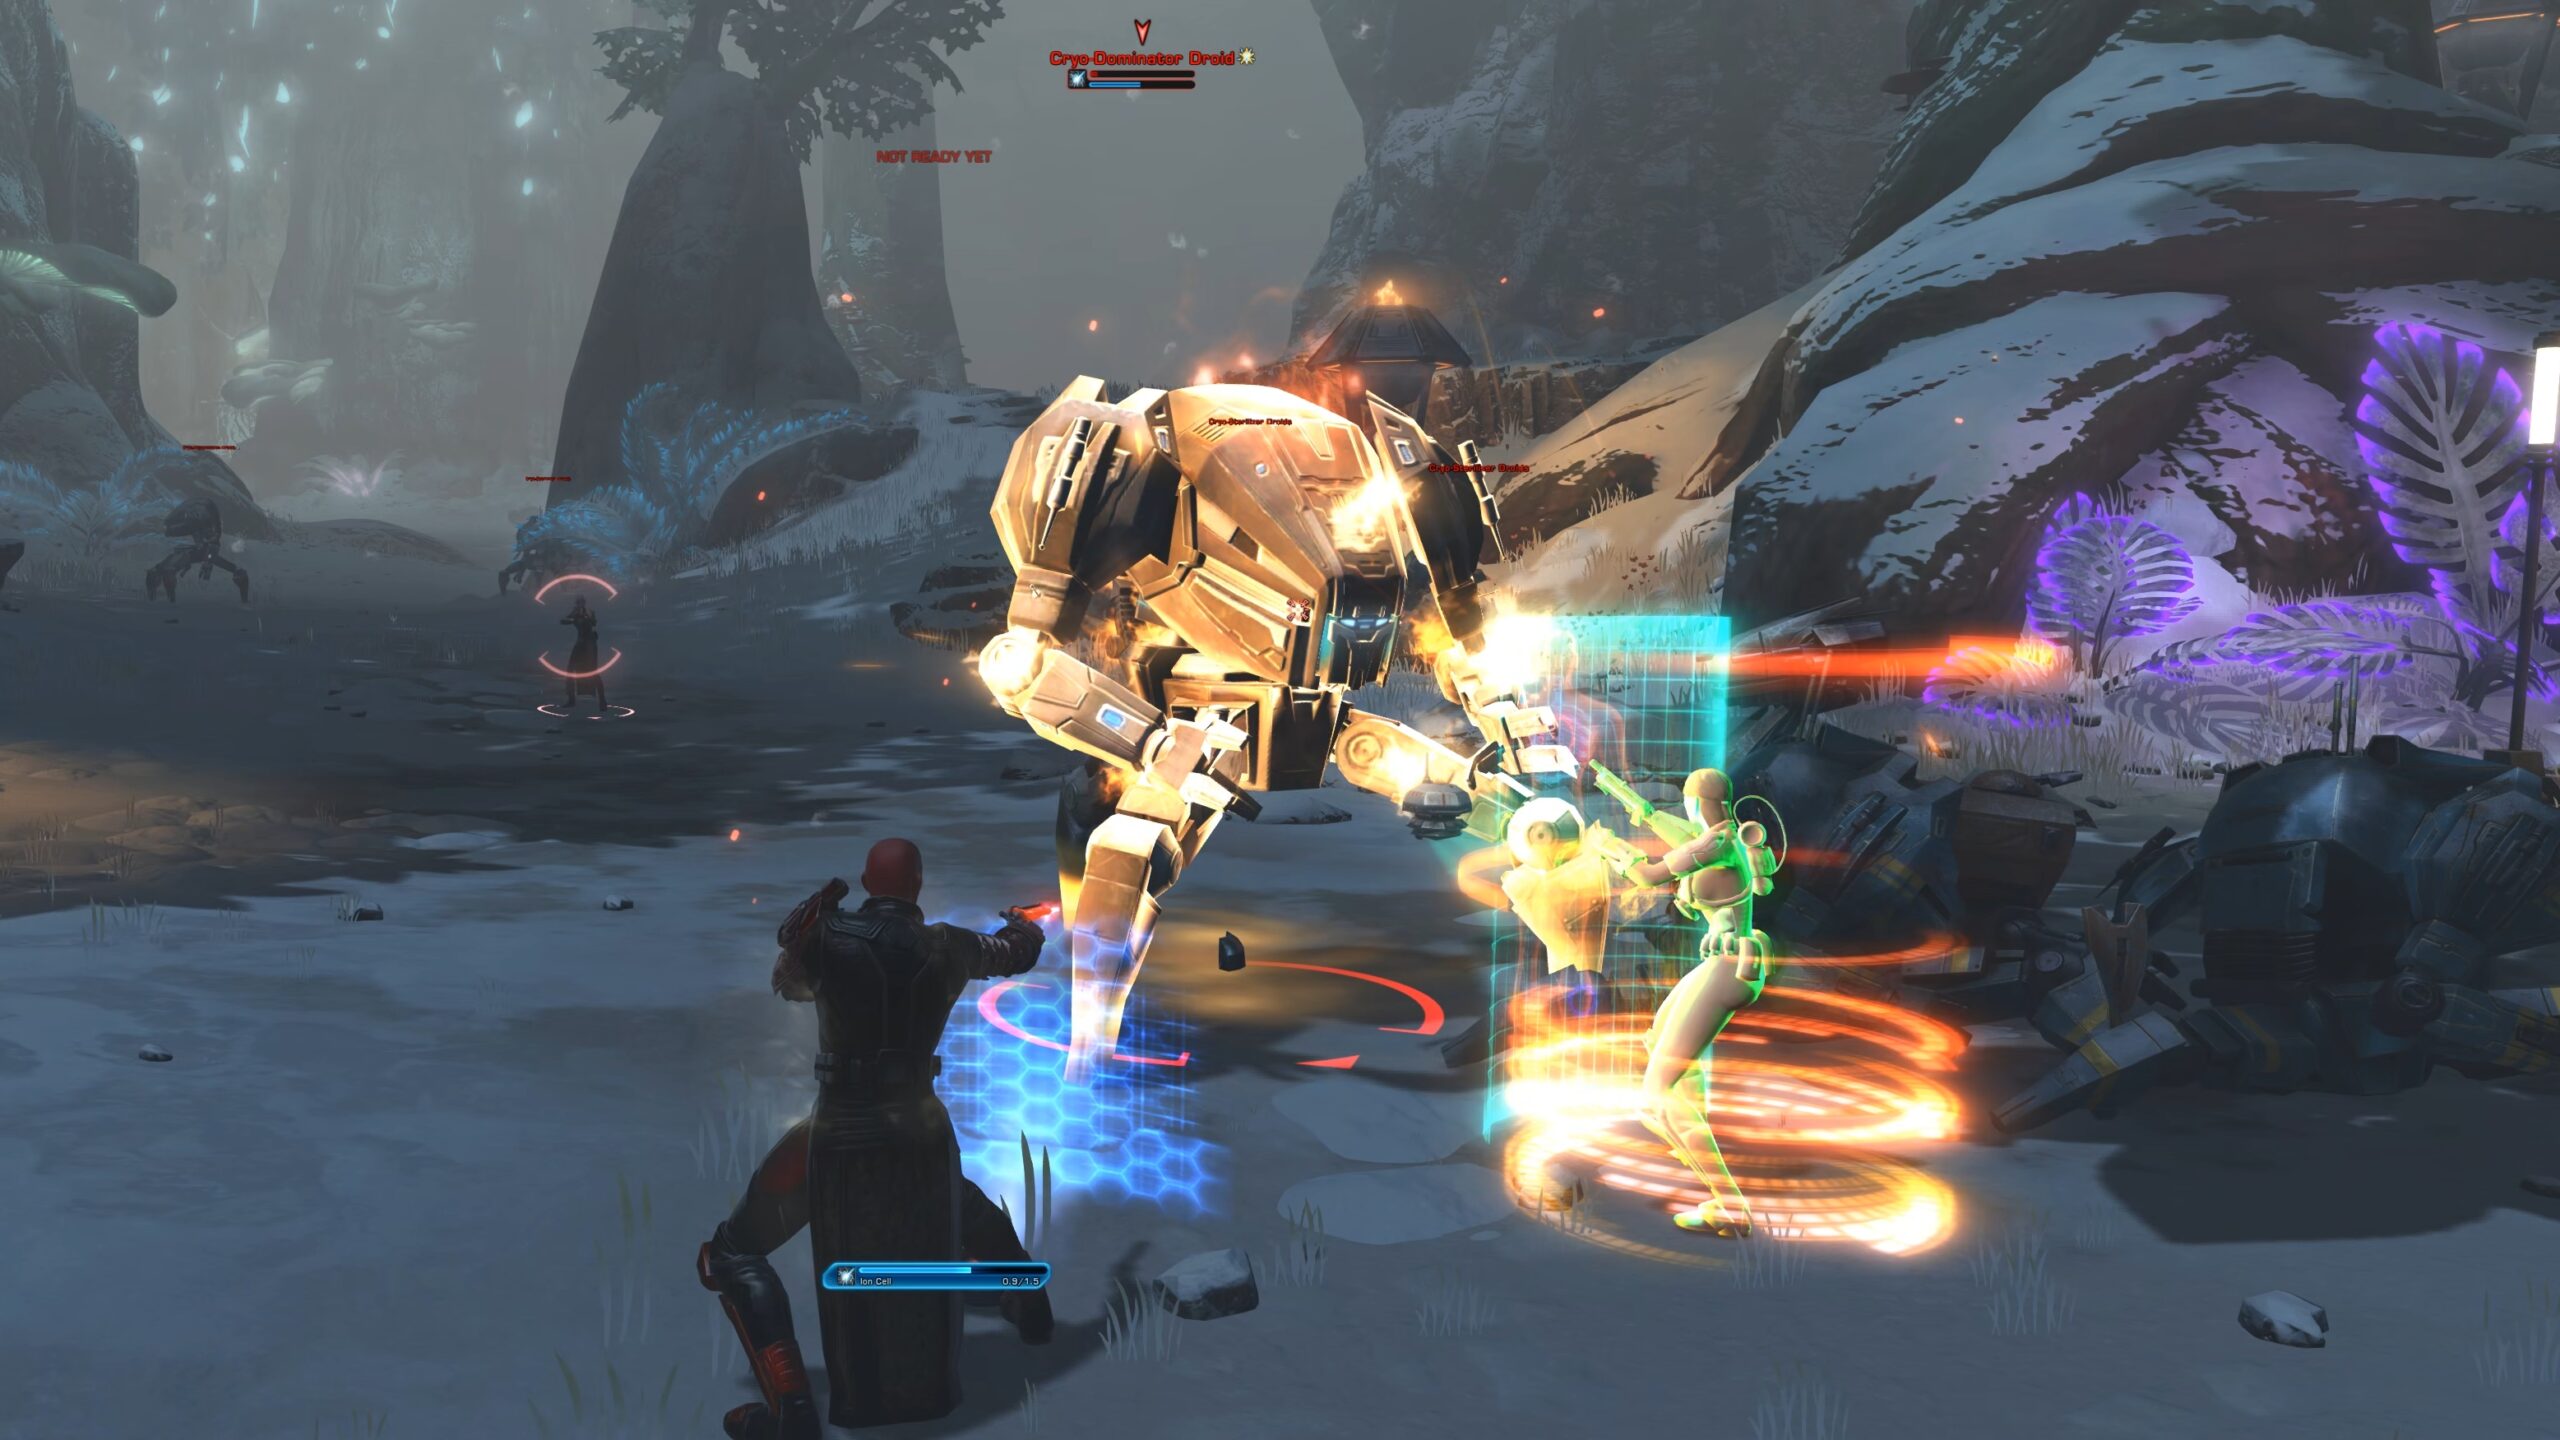
| Iceweeds | Glacial | Glacial Trespass | Normal | Hybrid | 1 | Our forward base has been overrun. Get it back online if you can. | 1. Reactivate Heat Lamps 2. Defeat Cryo Droids 3. Defeat the Cryo-Dominator |
|||
| Outpost Defense | Glacial | Glacial Trespass | Normal | Hybrid | 2 | The forward outpost is now online but it’s under attack. Stablize the area before we lose it completely! | 1. Repair Turrets 2. Fend Off Hostile Creatures 3. Defeat the Cryosentinel |
|||
| Probe-lems | Glacial | Ship Interior | Normal | Clicking | 1,2,3 | Czerka is illicitly attempting to gather data inside the wreckage. Foil their plans. | – Slice Probe Droids – Scramble Czerka Datasctreams |
|||
| Root Cause | Glacial | Glacial Trespass Cavern | Normal | Hybrid | 3 | We’ve traced the source of the freezing to a massive Rootmass deep In this cavern, Thermal charges were staged near key subroot structures but the vault’s predators forced our retreat. Recover the charges, destroy the supports, and put an end ta the Rootmass before the entire zone locks in ice | 1. Find the Thermal Charges 2. Activate Heat Lamps 3. Destroy the Frostveins 4. Defeat the Frosthide Bolraida and Rootbound Bolraida 5. Destroy the Rootmass |
|||
| Unruly Nesters | Glacial | Research Camp Perimeter | Normal | Hybrid | 1,2,3 | The Cryo-Nesters being studied by the GSI have destroyed their cages! Repair the enclosures and grab an electro-net to help round them up. | – Wrangle Cryo-Nesters – Repair Containment Fence |
|||
| The Cryonest Matron | Glacial | Ship Interior | Transition | Hybrid | 1 | The cryo-fauna outbreak leads back to this sealed incubation chamber. It appears to have been reawakened by the recent rise in temperature. Destroy the nest and stop the swarm at its source! | 1. Clear Out the Swarm 2. Defeat Broodguards 3. Destroy Eggs 4. Defeat the Cryonest Matron |
|||
| Cryocore Override | Glacial | Ship Interior | Transition | Hybrid | 2 | The snow shell control core has finally opened. Shut the ship’s climate controls before it’s too late. | 1. Deactivate Cryo-Containment Consoles 2. Defeat Cryo-Sterilizer Droids 3. Defeat the Cyro-Core Guardian 4. Deactivate the Emergency Containment Response Consoles 5. Defeat Cryo-Reclaimation Droids |
|||
| Acid Trip | Geothermal | Geothermal Disruption | Normal | Hybrid | 2 | The ship has sent recon droids to monitor the toxic pools in the area. Slice into those droids, and use them to safely collect samples for our research! | – Take Control of Reconnaissance Droids – Collect Acid Samples – Send Acid Samples to Camp – Defeat Frenzied Skar’kla |
|||
| Brood Basin | Geothermal | Geothermal Disruption | Normal | Combat | 1 | The ship’s habitat regulators are sustaining non-native bioengineered insects that rely on geothermal runoff to incubate. Clear out the invasive swarms before they overrun any more of the native wildlife! | 1. Clear out Embercrawleds 2. Clear out Emberstriders 3. Defeat the Emberqueen |
|||
| Caustic Cascade | Geothermal | Geothermal Disription | Normal | Hybrid | 1,2,3 | Toxic runoff from broken habitat tanks is seeping into the area and drawing skar’kla from deeper in the ship to the mineral-rich waste and spreading corrosive damage. Shut down those tanks before they poison the reservoir! | 1. Clear out Skar-kla 2. Repair Processing Tanks 3. Defeat Skar-kla Pack Leader |
|||
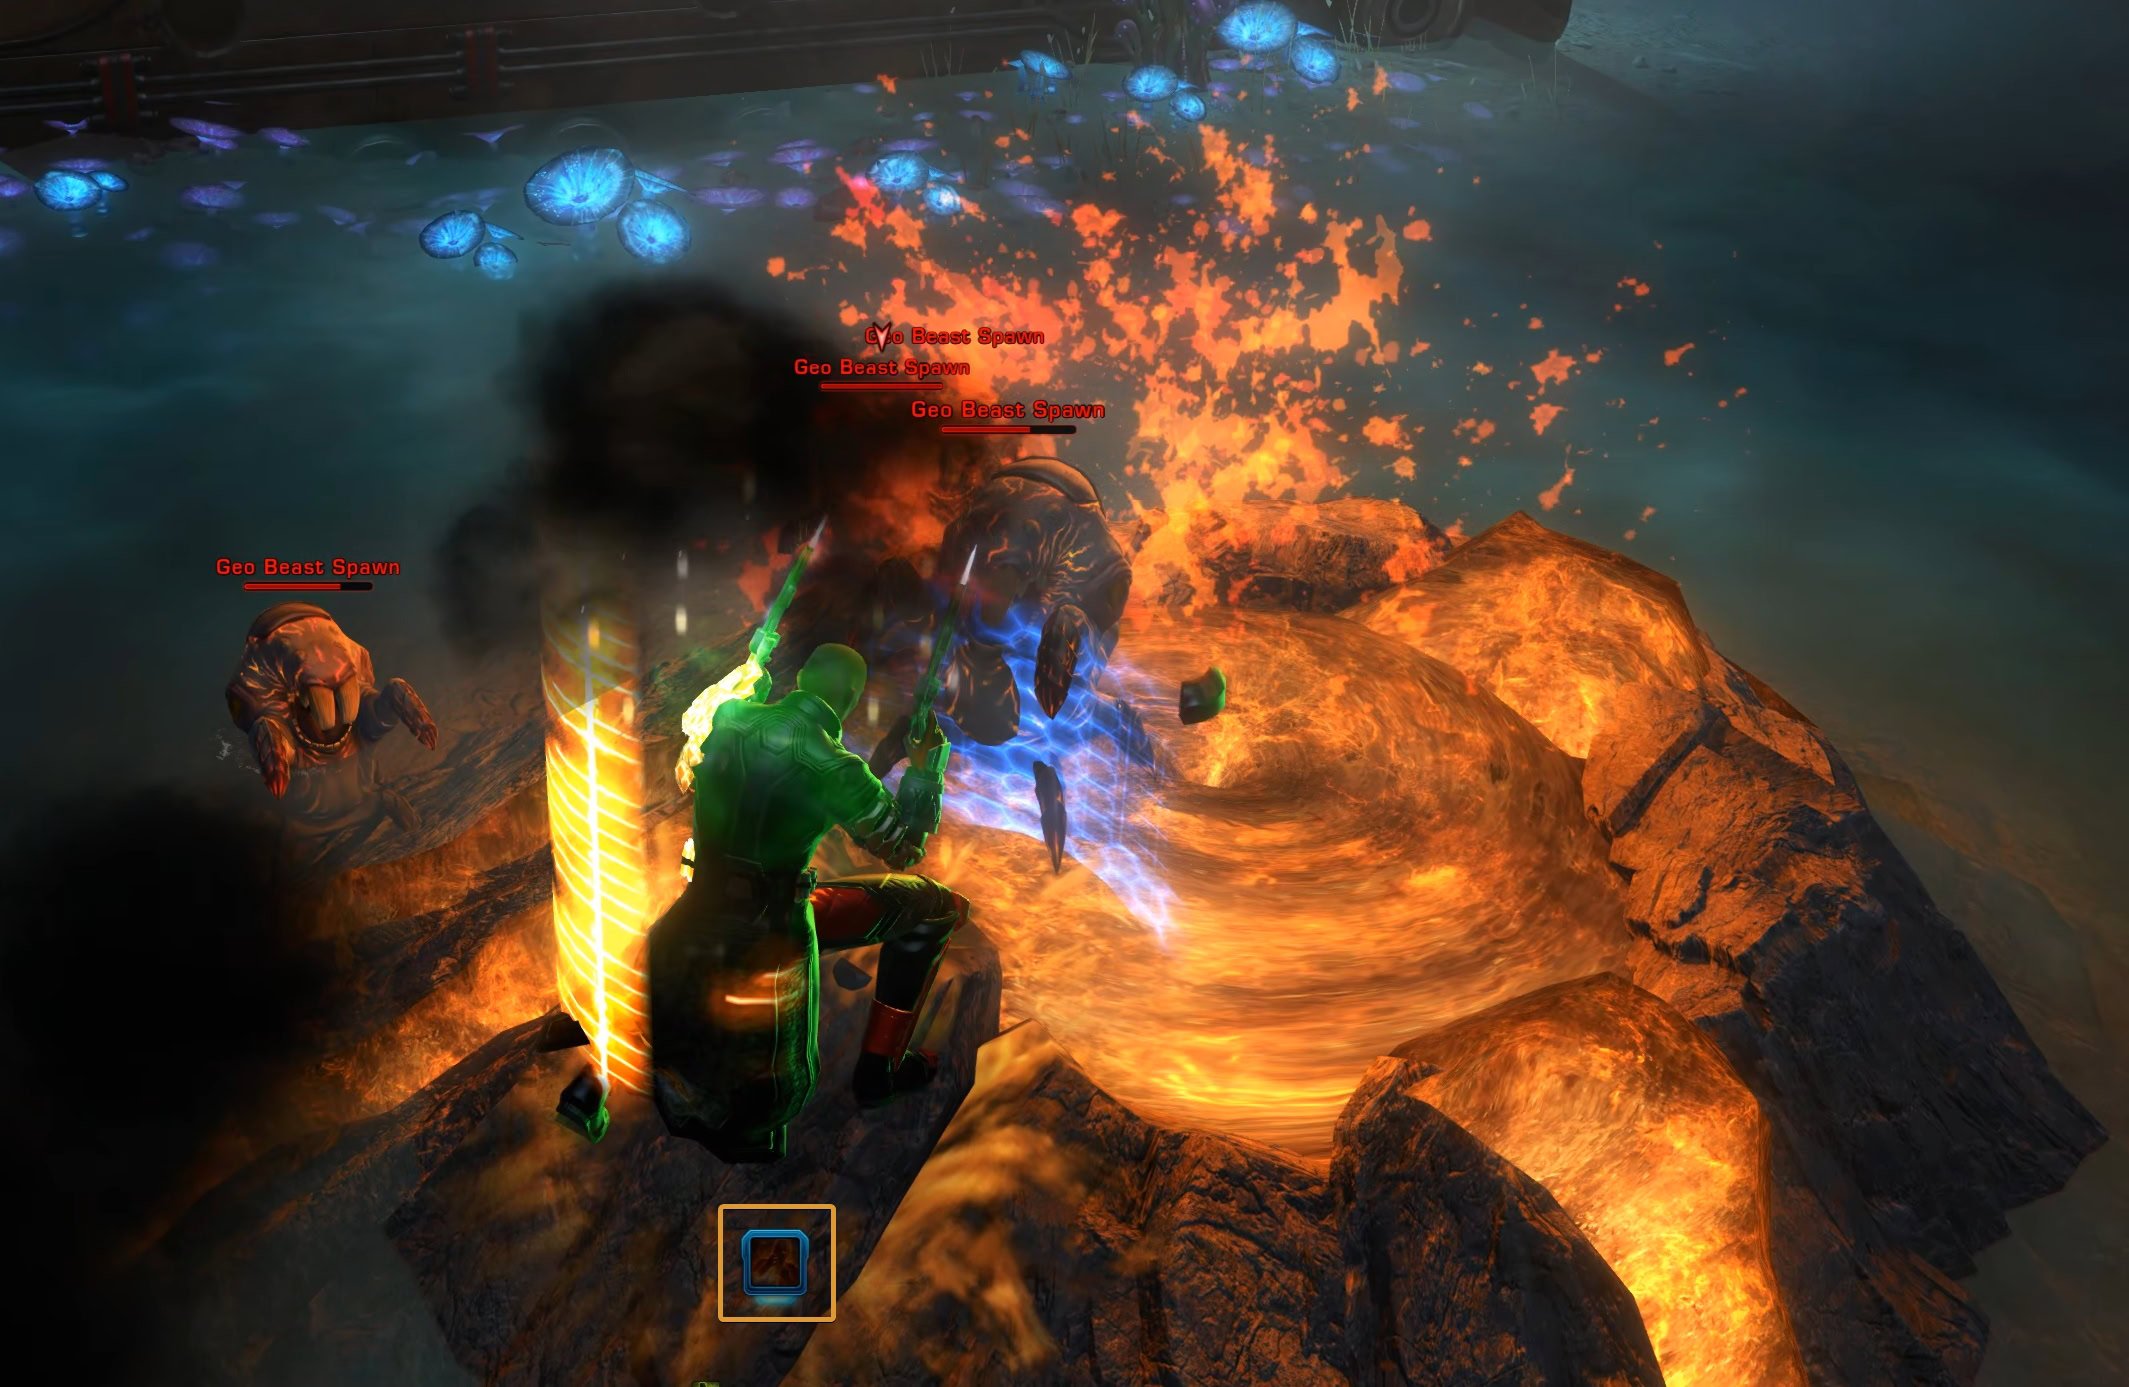
| Come Up, Fish | Geothermal | Lava Cave | Normal | Champion | 3 | The ship has been re-routing magma to care for Hothian Geo Beasts! Normally this would be a fascinating thing to study, but it presents a clear danger to our team. | Defeat the Gargantuan Geo Beast |
|||
| Data Appropriation | Geothermal | Ship Interior | Normal | Hybrid | 1,2,3 | Heavily-shielded Czerka personnel infiltrated the ship. Find a way to defeat them and steal their data. | – Defeat Shielded Czerka Enemies – Appropriate Data |
|||
| Fungal Protection | Geothermal | Crystal Cave | Normal | Hybrid | 1,2,3 | An endangered fungus is flourishing in the area. Help protect it from new predators and spread its spores. | 1. Defeat Hungry Geo Beast Larvae 2. Harvest Delicate Spore Sacs 3. Sow Spores Near Vents 4. Defend Nascent Fungai from the Geo Beast |
|||
| Graul Graveyard | Geothermal | Geothermal Disruption | Normal | Combat | 1 | A territorial Graul has wandered too close to the ship’s infrastructure and tts instincts have led it to disrupt the area. Now the ship’s subroutines have flagged the Graul as a hostile threat. Don’t let them kill it! | 1. Destroy Ship Droids 2. Destroy Ship Droid Enforcers 3. Destroy Ship Droid Battlemaster |
|||
| Hot Spots | Geothermal | Crystal Cave | Normal | Hybrid | 2 | We’ve been seeing some unusual geologic activity in the area. Could you take some readings? We have concerns about this development, Danyoine is not normally geologiqally, unstable! | – Take Magma Readings – Defeat Geo Beast Larvae |
|||
| Thermal Investigation | Geothermal | Crystal Cave | Normal | Hybrid | 1,2,3 | The sudden geothermal shifts are causing strange reactions in crystal formations. Collect data and be wary of dangerous creatures in the area. | 1. Scan Superheated Cystals 2. Defeat Thermoliphic Scurriers 3. Defeat the Thermophilic Lurker |
|||
| Under Pressure | Geothermal | Lava Cave | Normal | Hybrid | 3 | The ship has been re-routing magma for some unknown purpose. It doesn’t seem related to geothermal harvesting. Whatever the reason, there is a new geyser threatening the stability of the area. | 1. Take Control of a Mouse Droid 2. Scavenge Materials for a Geyser Cap 3. Scavenge Materials for a Geyser Cap 4. Take Control of a Construction Droid 5. Construct the Geyser Caps 6. Defeat Agitated Geo Beast Spawns |
|||
| Vent Sync Failure | Geothermal | Crystal Cave | Normal | Hybrid | 1 | Easy | The ship’s atmospheric regulators are causing these thermal vents to cycle the cavern with bursts of noxious gas. Shut them down before the native Kath Hounds succumb. | 1. Destroy Ship Droids 2. Deactivate Toxic Vents 3. Defeat the Ship Droid Overseer |
||
| Caretaker Unit K-6 | Geothermal | Ship Interior | Transition | Champion | 2 | The control chamber has activated some kind of Caretaker Unit. If we’re going to make any more progress here, it will need to be dealt with. | – Defeat Caretaker Unit K-6 |
|||
| Core Overload | Geothermal | Ship Interior | Transition | Hybrid | 1 | The ship has misinterpreted recent stabilization efforts as sabotage and it preparing to redirect a superheated purge through the areas above. Shut down the Biothermal Regulator before Dantooine suffers catastrophic overheating! | 1. Use Coolant to Access and Activate Thermal Regulators 2. Defeat Reinforcing Purge Protocol Droids 3. Defeat Warden Unit K-8 4. Shut Down the Biothermal Regulator |
|||
| Bigger Trouble | Sporefall | Makrin Hollow | Normal | Champion | 3 | Well. Now we know what the Caretaker Droids were taking care of. It’s not great. We could really use some help dealing with this mess. | – Defeat the Alien Megafauna – Defeat the Caretaker Droid |
|||
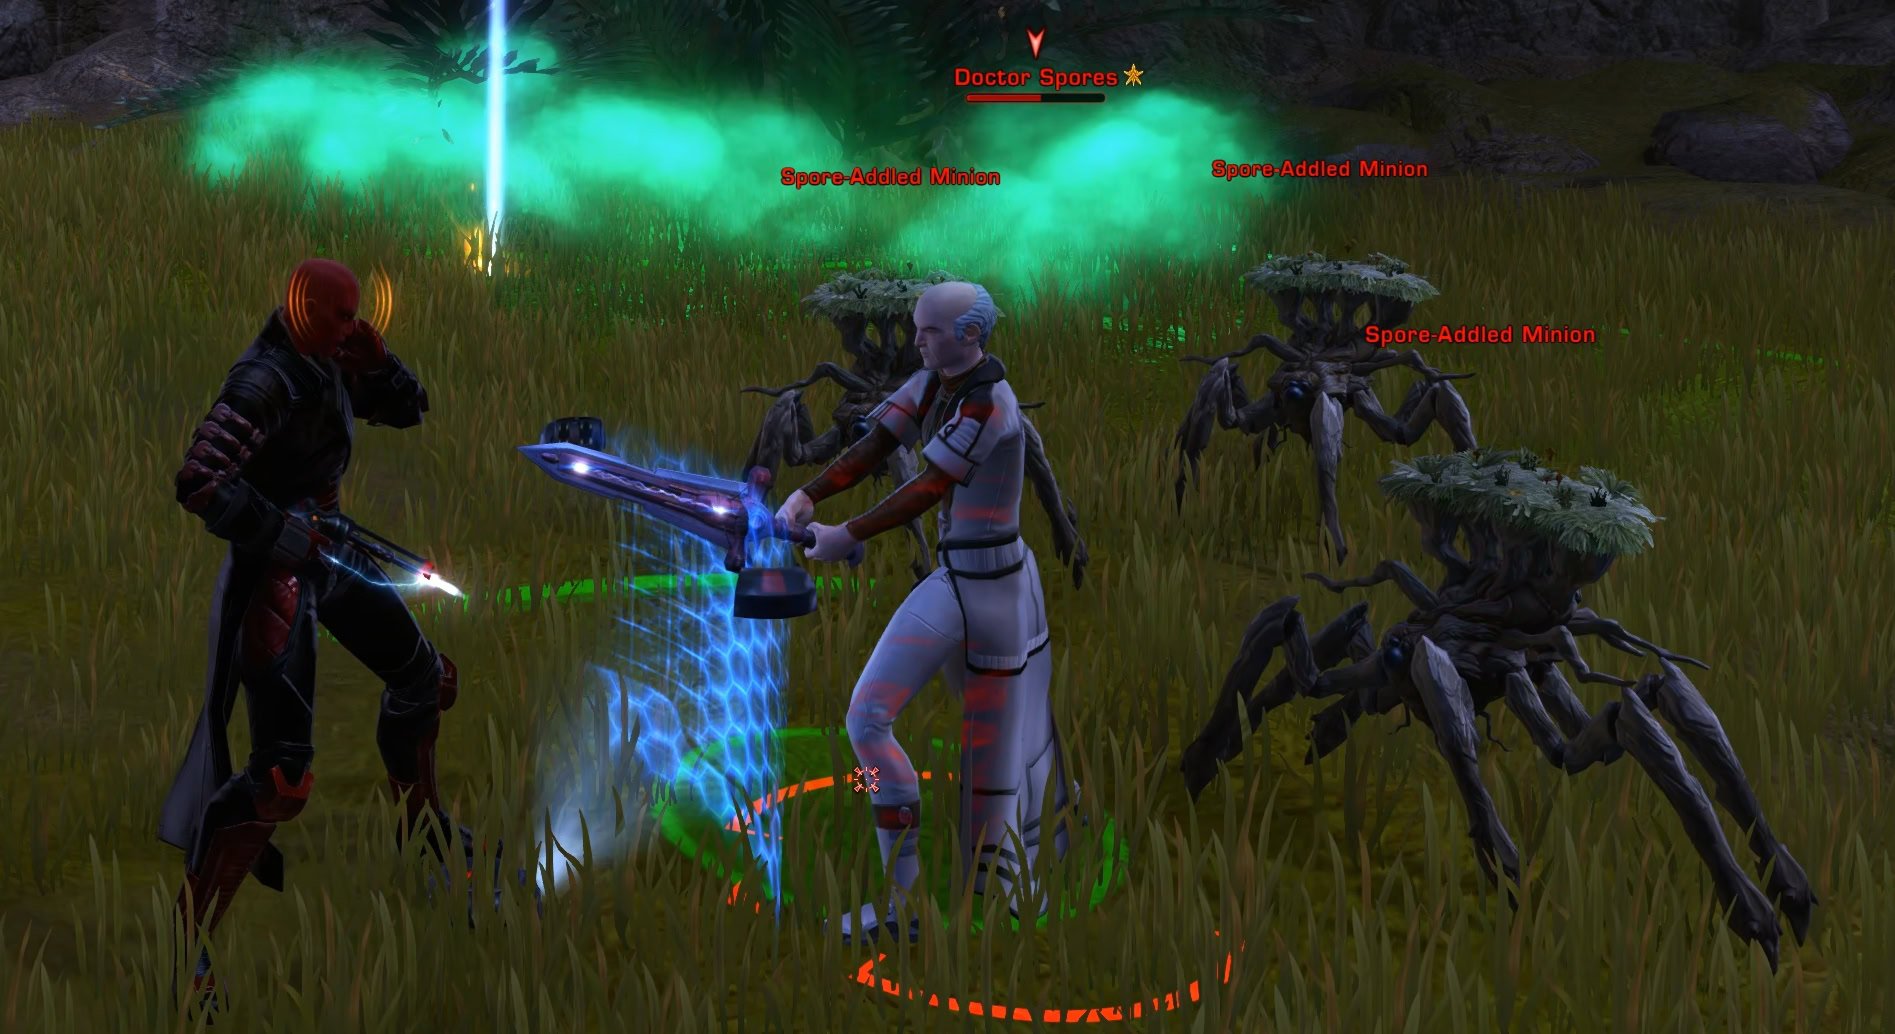
| Dr. Spears, I Presume? | Sporefall | Sporefall | Normal | Hybrid | 1,2,3 | Doctor Spears has disappeared from camp, and was behaving strangely. Somebody should check on him to make sure he’s okay! | 1. Examine Doctor Spears 2. Defeat Doctor SPORES! 3. Cure Doctor Spores |
|||
| Fascinating! | Sporefall | Research Camp Perimeter | Normal | Hybrid | 1,2,3 | Help the researchers get set up to observe a unique biological interaction before the opportunity passes. | 1. Defeat opportunistic Yaracats 2. Deploy Ginx Pheromones 3. Collect Data on Symbiotic Relationship |
|||
| Ginx Of Unusual Size | Sporefall | Sporefall | Normal | Champion | 1 | An unusually large Ginx has taken up residence in the area, threatening our research. The larger the Ginx, the more hostile. Be careful! | – Defeat the Unusually Large Ginx |
|||
| Lost Bormu | Sporefall | Sporefall | Normal | Combat | 1,2,3 | Defeat the Shyrack Screecher | 1. Defeat the Shyrack Swarm 2. Defeat the Shyrack Screecher |
|||
| No Spies Allowed! | Sporefall | Ship Interior | Normal | Hybrid | 1,2,3 | Czerka frequencies have been detected in the ship’s interior. Stop their spies! | 1. Destroy Surveillance Devices 2. Aid or defeat Czerka Spies 3. Defeat Czerka Droids |
|||
| Sample Collection: Ginx | Sporefall | Sporefall | Normal | Clicking | 1 | Our researcher could use assistance collecting samples from the local Ginx population. Studying the effects of the Sporefall on these creatures could lead to incredible insights! | – Collect Spore samples from Ginx – Pick Up Spore Collection Kits |
|||
| Sample Collection: Makrin | Sporefall | Makrin Hollow | Normal | Clicking | 1 | Our researcher could use assistance collecting samples from the local Makrin population. Studying the effects of the Sporefall on these creatures could lead to incredible insights! | – Pick Up Spore Collection Kits – Collect Verdant Spores from Makrin – Collect Luminous Spores from Makrin – Collect Vibrant Spores from Makrin |
|||
| Sample Collection: Pterathki | Sporefall | Sporefall | Normal | Clicking | 1 | Our researcher could use assistance collecting samples from the local Pterathki population. Studying the effects of the Sporefall on these creatures could lead to incredible insights! | 1. Pick Up Spore Collection Kits 2. Collect samples from Pterathki 3. Scan Spore-Generating Fungus |
|||
| Sample Collection: Yaracats | Sporefall | Sporefall | Normal | Clicking | 1 | Our researcher could use assistance collecting samples from the local Yaracat Studying the effects of the Sporefall on these creatures could lead to incredible insights! | 1. Pick Up Spore Collection Kits 2. Feed Hungry Yaracats 3. Collect Spore Samples from Yaracats |
|||
| Spore Subject: Ginx | Sporefall | Makrin Hollow | Normal | Clicking | 2 | Our researcher could use assistance collecting samples from the local Ginxpopulation. Studying the effects of the Sporefall on these creatures could lead to incredible insights! | – Pick up Spore Collection Kits – Collect Spore Samples from Ginx |
|||
| Spore Subject: Makrin | Sporefall | Makrin Hollow | Normal | Clicking | 2 | Our researcher could use assistance collecting samples from the local Makrin population. Studying the effects of the Sporefall on these creatures could lead to incredible insights! | – Pick up Spore Collection Kits – Collect Spore Samples from Makrin |
|||
| Spore Subject: Pterathki | Sporefall | Sporefall | Normal | Clicking | 2 | Our researcher could use assistance collecting samples from the local Pterathki population. Studying the effects of the Sporefall on these creatures could lead to incredible insights! | – Pick up Spore Collection Kits – Collect Spore Samples from Pterathki |
|||
| Spore Subject: Yaracats | Sporefall | Sporefall | Normal | Clicking | 2 | Our researcher could use assistance collecting samples from the local Yaracat Studying the effects of the Sporefall on these creatures could lead to incredible insights! | – Pick up Spore Collection Kits – Collect Spore Samples from Yaracats |
|||
| Taking Care of Caretakers | Sporefall | Sporefall | Normal | Champion | 3 | The Ship has activated one of its Caretaker Droids To what purpose, we don’t know. But iut’s incredibly hostile and beyond our researches to deal with. | – Defeat the Caretaker Droid |
|||
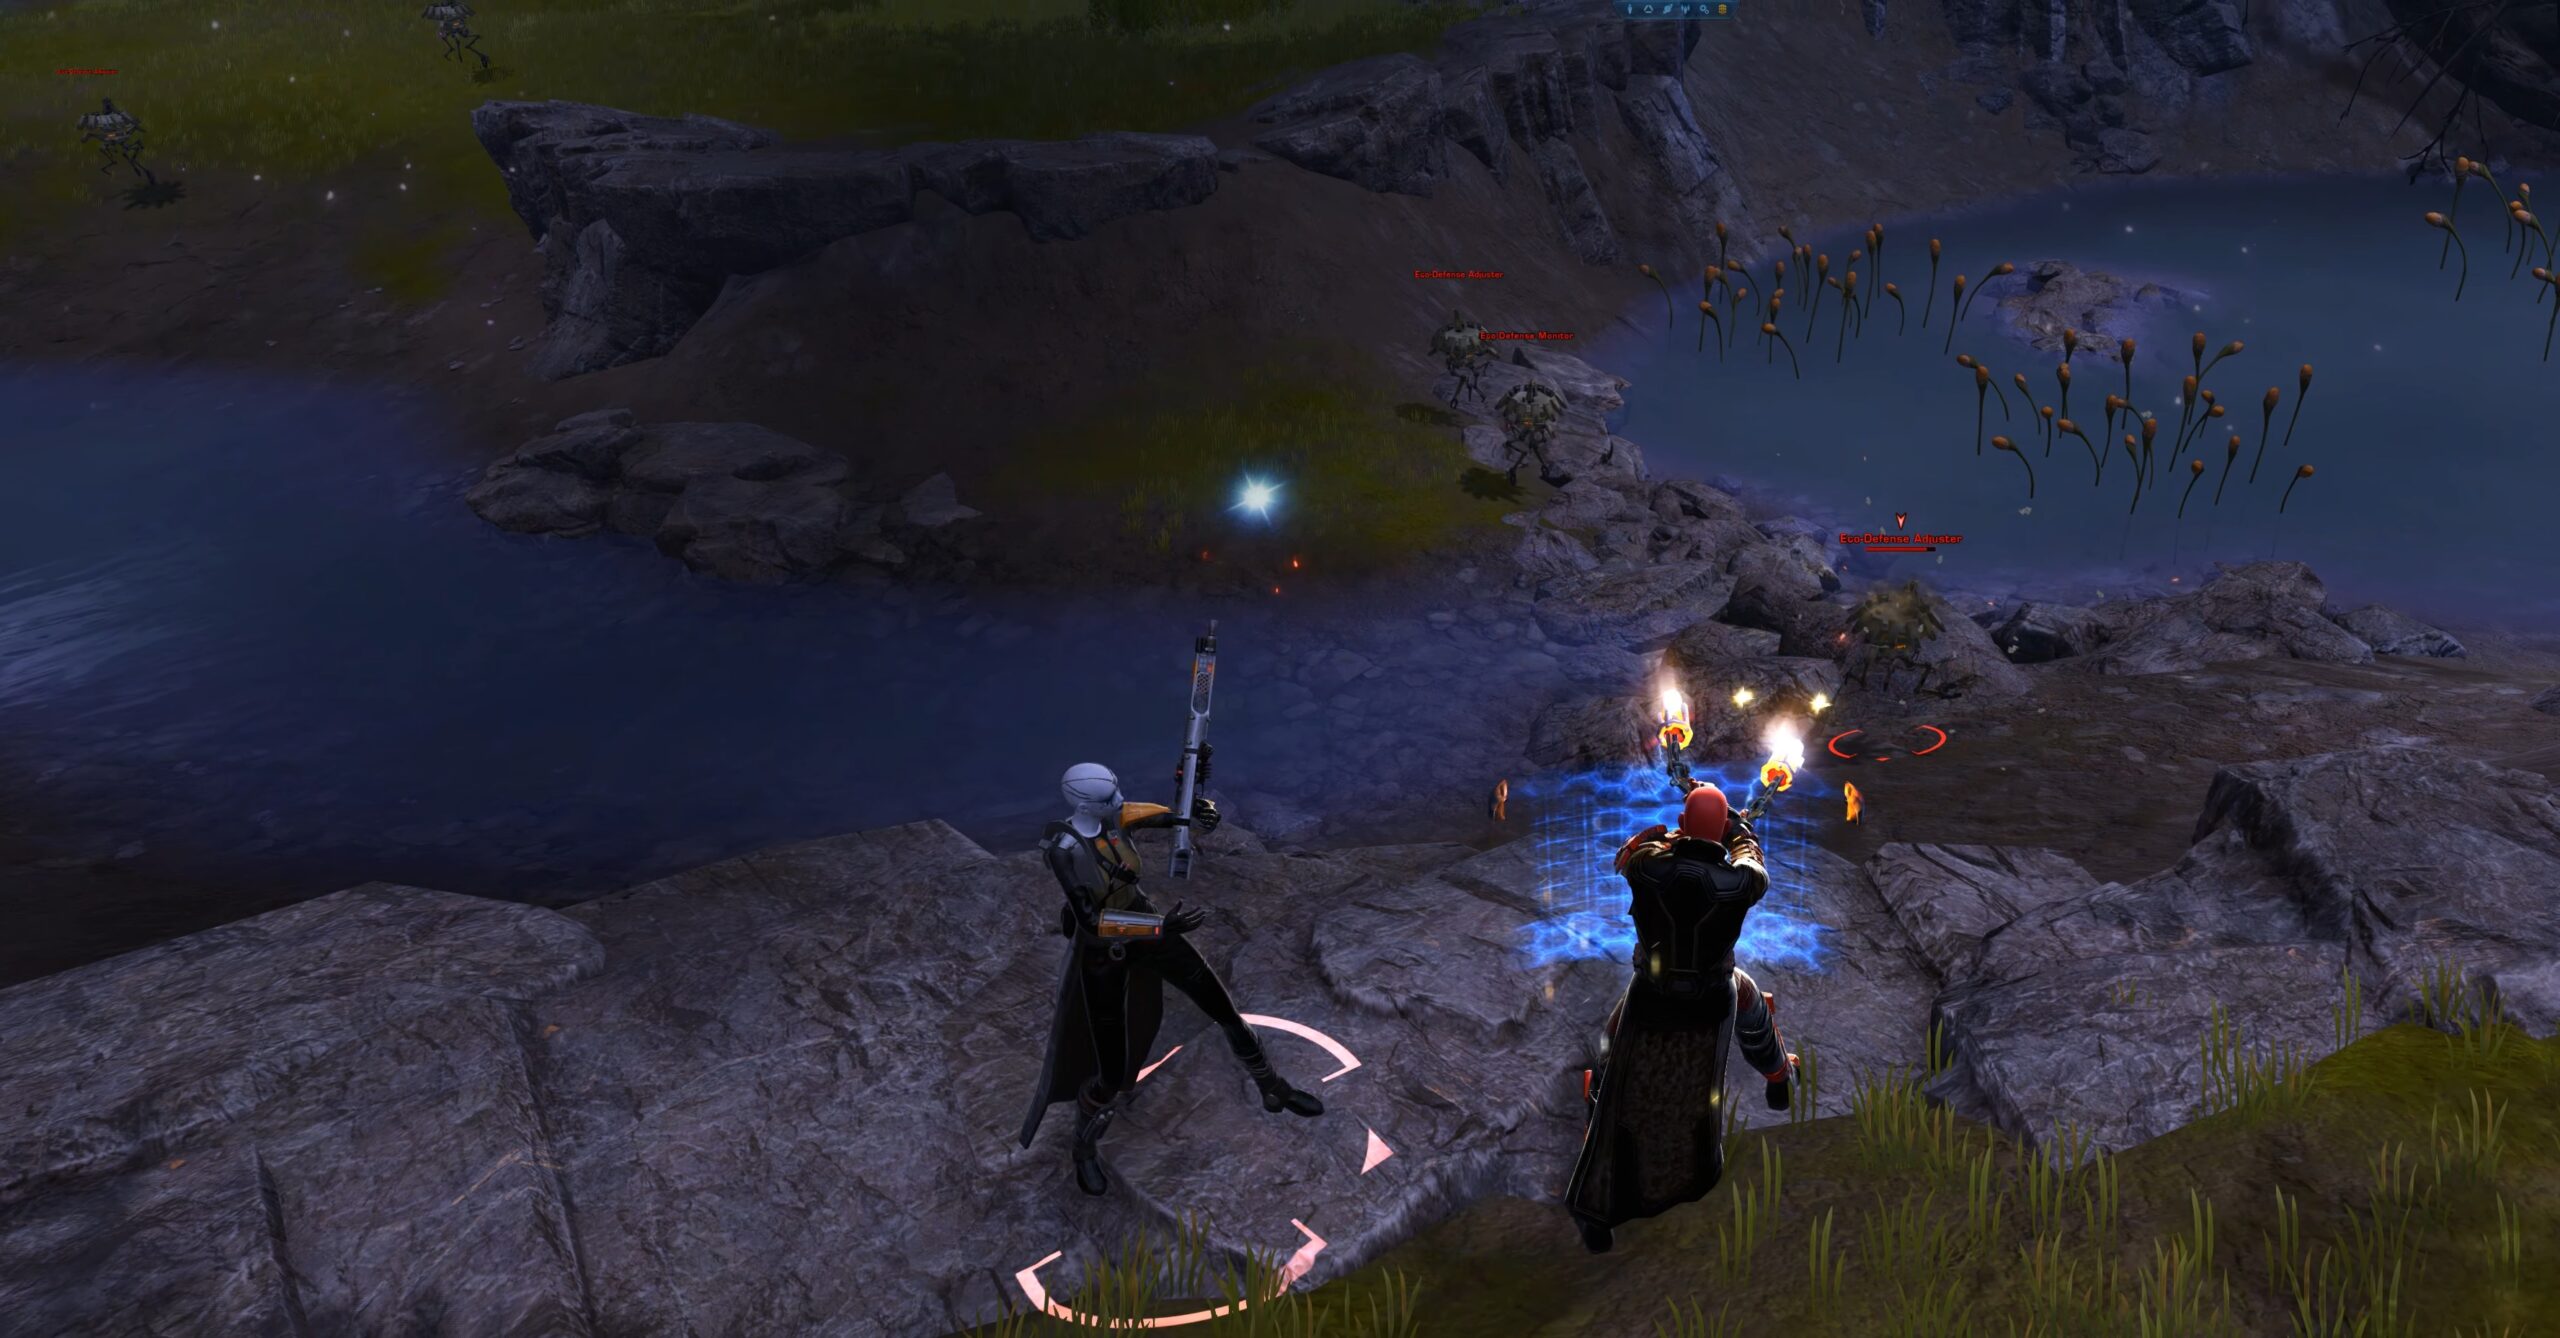
| The Watchers | Sporefall | Sporefall | Normal | Combat | 2,3 | It appears the ship is pushing back against our research efforts. We could use some help dealing with these droids! | – Defeat Eco-Defense Droids |
|||
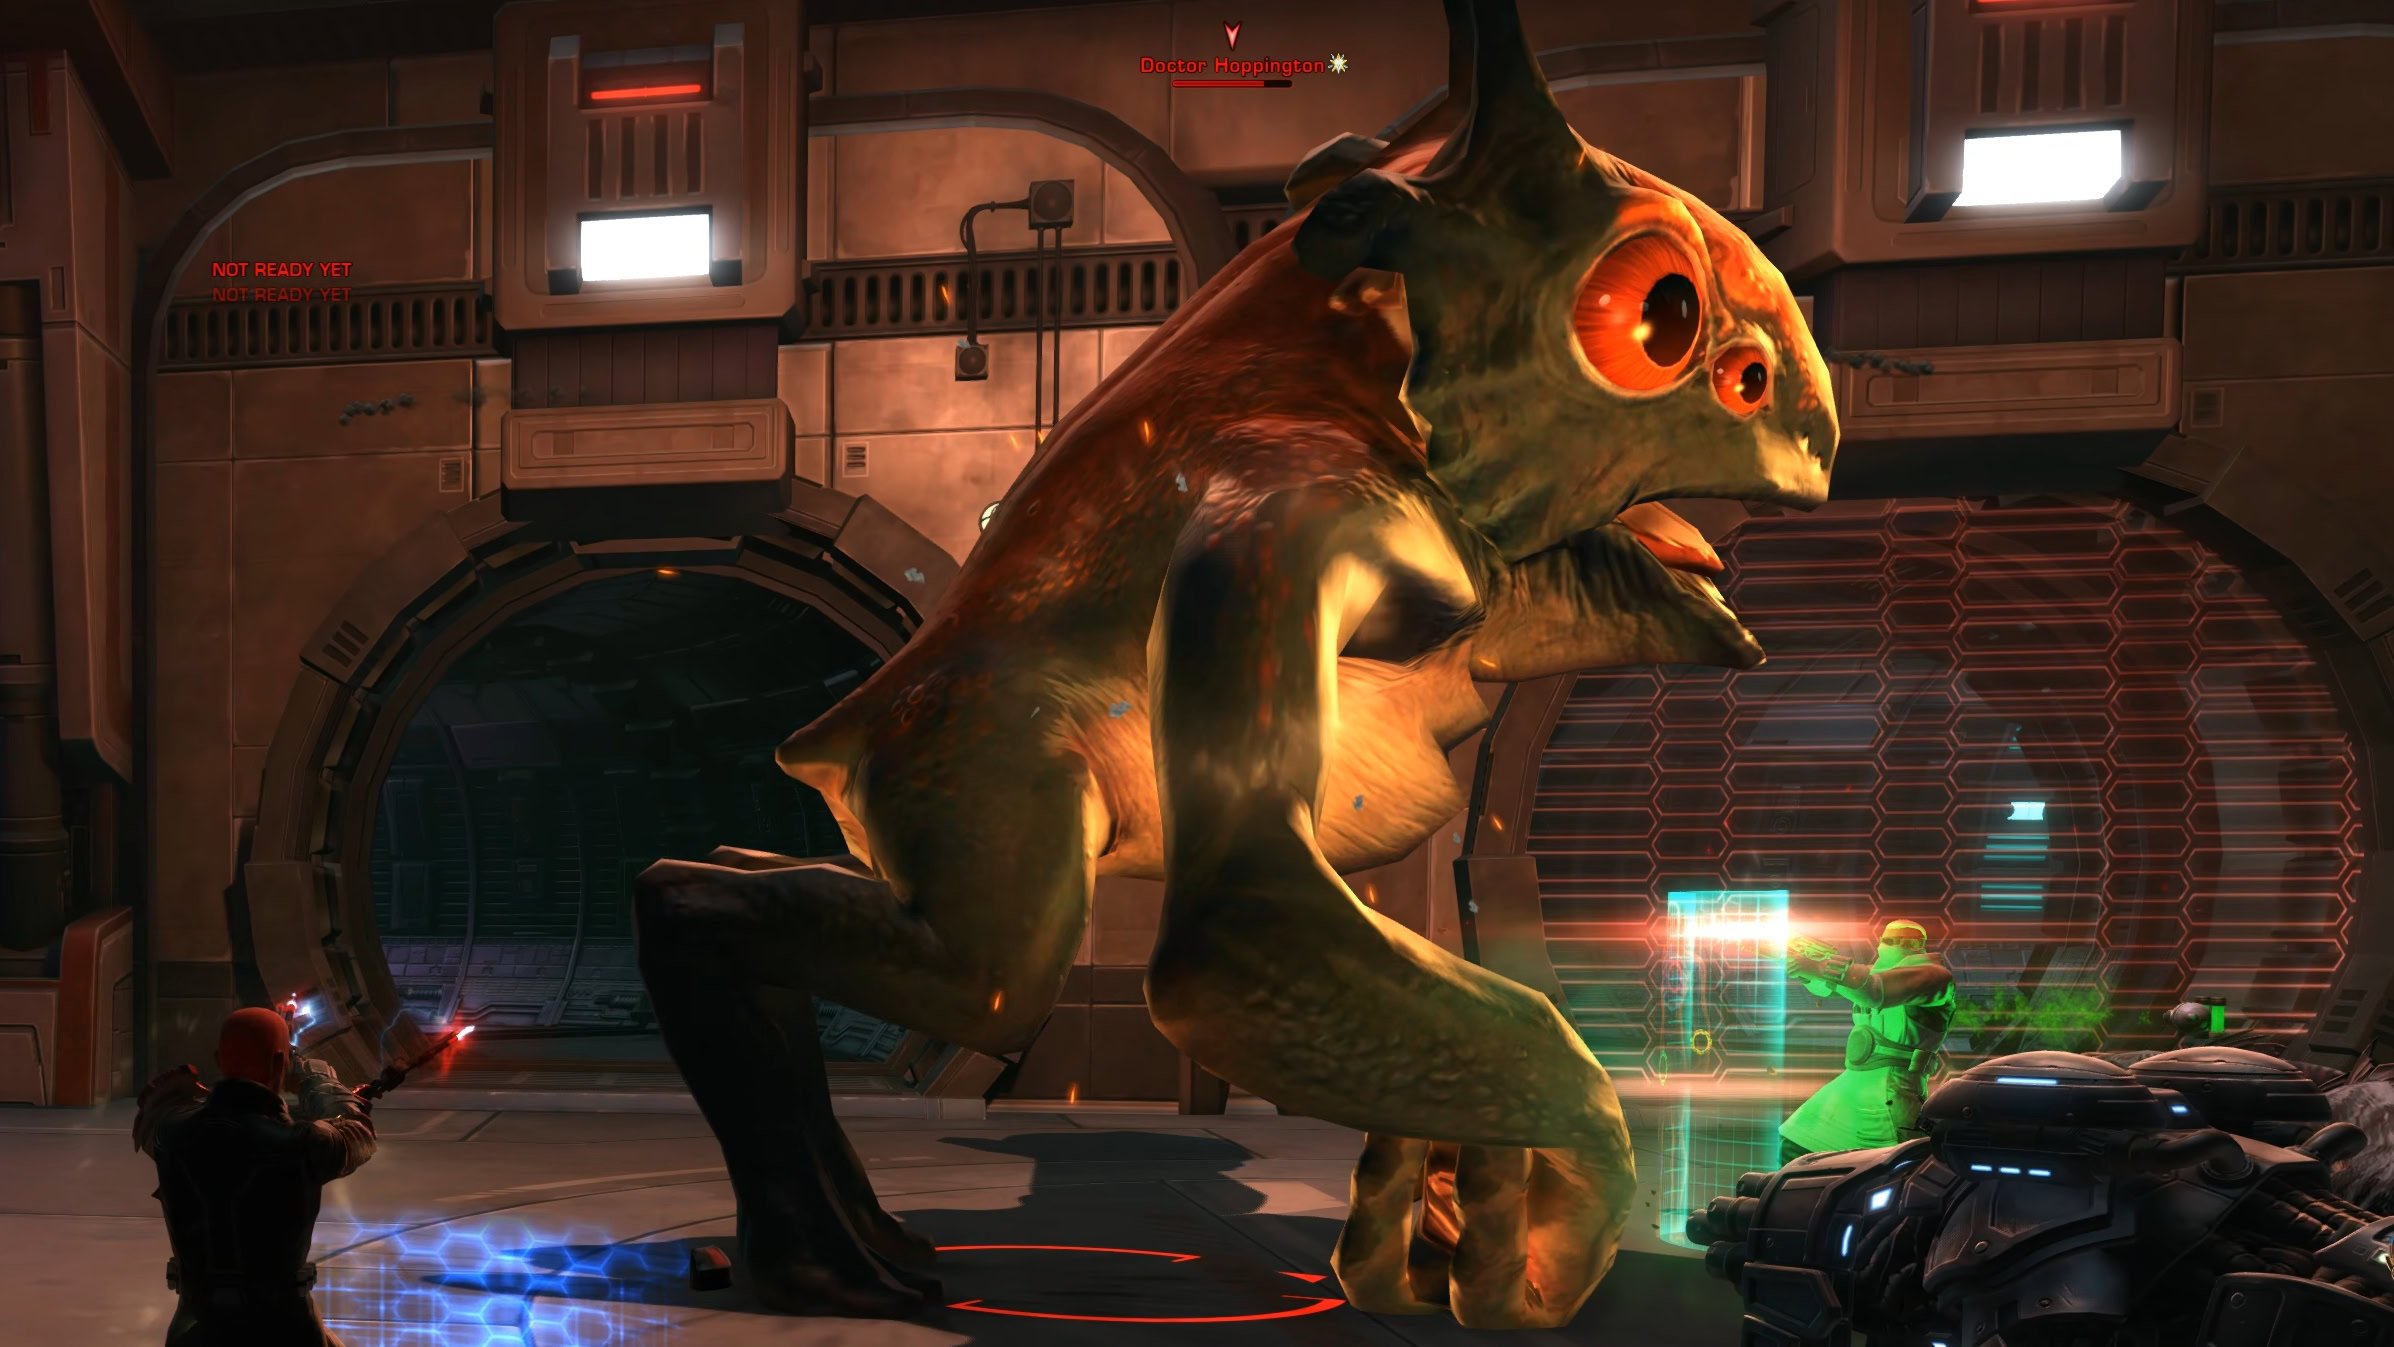
| They Call me Doctor Spores | Sporefall | Ship Interior | Transition | Combat | 1 | Doctor Spears has been behaving strangely, and we can’t find him in his usual spots. We’re afraid he’s made his way into the crashed ship, who knows what kind of trouble he’s in? | 1. Confront Doctor Spears 2. Defeat Doctor SPORES 3. Subdue Doctor Hoppington 4: Subdue Professor Whiskers 5. Defeat Makrin Assistants 6. Tend to Doctor Spores |
|||
| Return of Doctor Spores | Sporefall | Ship Interior | Transition | Combat | 2 | Doctor Spears is missing again. He kept muttering about the ship, could you retrieve him? Again? We’re so sorry. | 1. Confront Doctor SPORES! 2. Defeat Doctor Spores! 3. Subdue Doctor Hoppington 4. Subdue Professor Whiskers 5. Defeat Makrin Assistants 6. Defeat Caretaker Droids 7. Tend to Doctor Spears |
 Glacial Trespass Encounter Walkthroughs
This segment contains the walkthroughs and tips for the Dynamic Encounters in the Glacial biome of the Dantooine Crash Site.
 Frigid Swarm
Frigid Swarm spawns in the central part of the Glacial Trespass. It requires you to clear the Cryo-Nesters and destroy their eggs. Both respawn fairly quickly. You can get several of strong Cryo-Nester Broodguards to spawn after you destroy an egg.
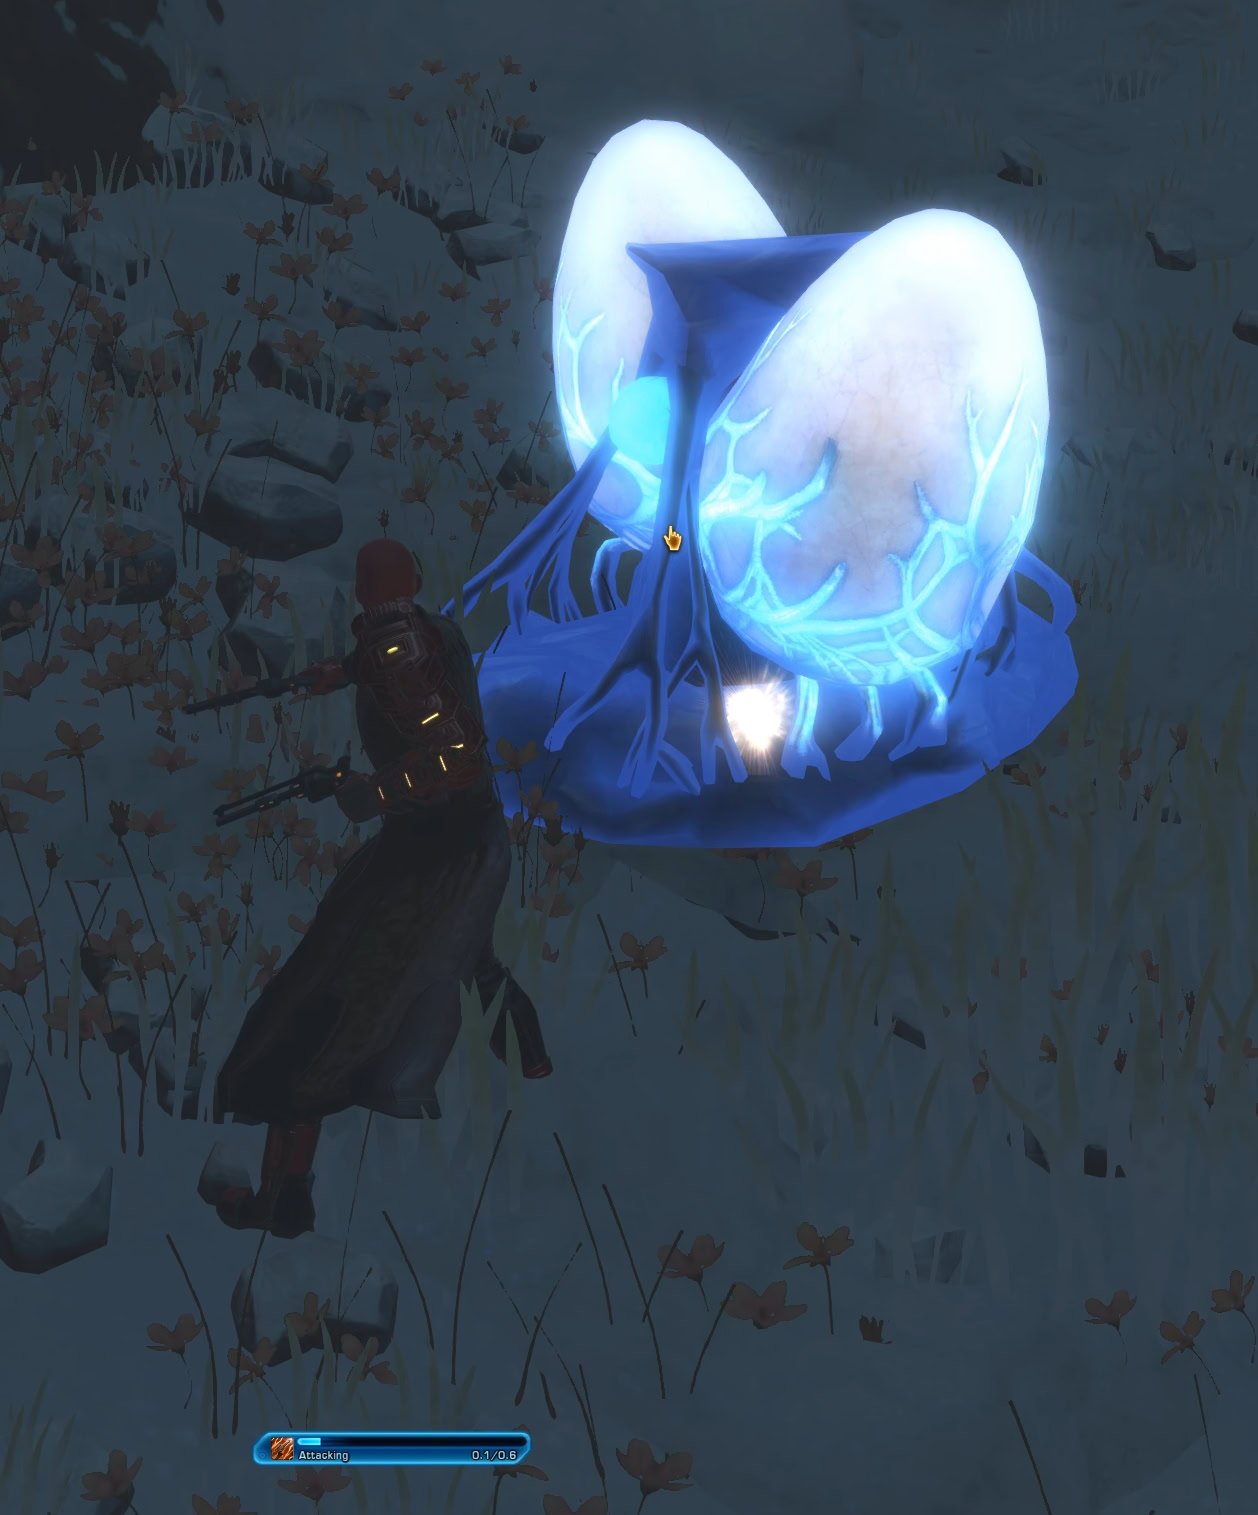
The Cryo-Nesters are swarmers. Although they are weak and can be taken out quickly with AoE, be mindful of taking on multiple groups.
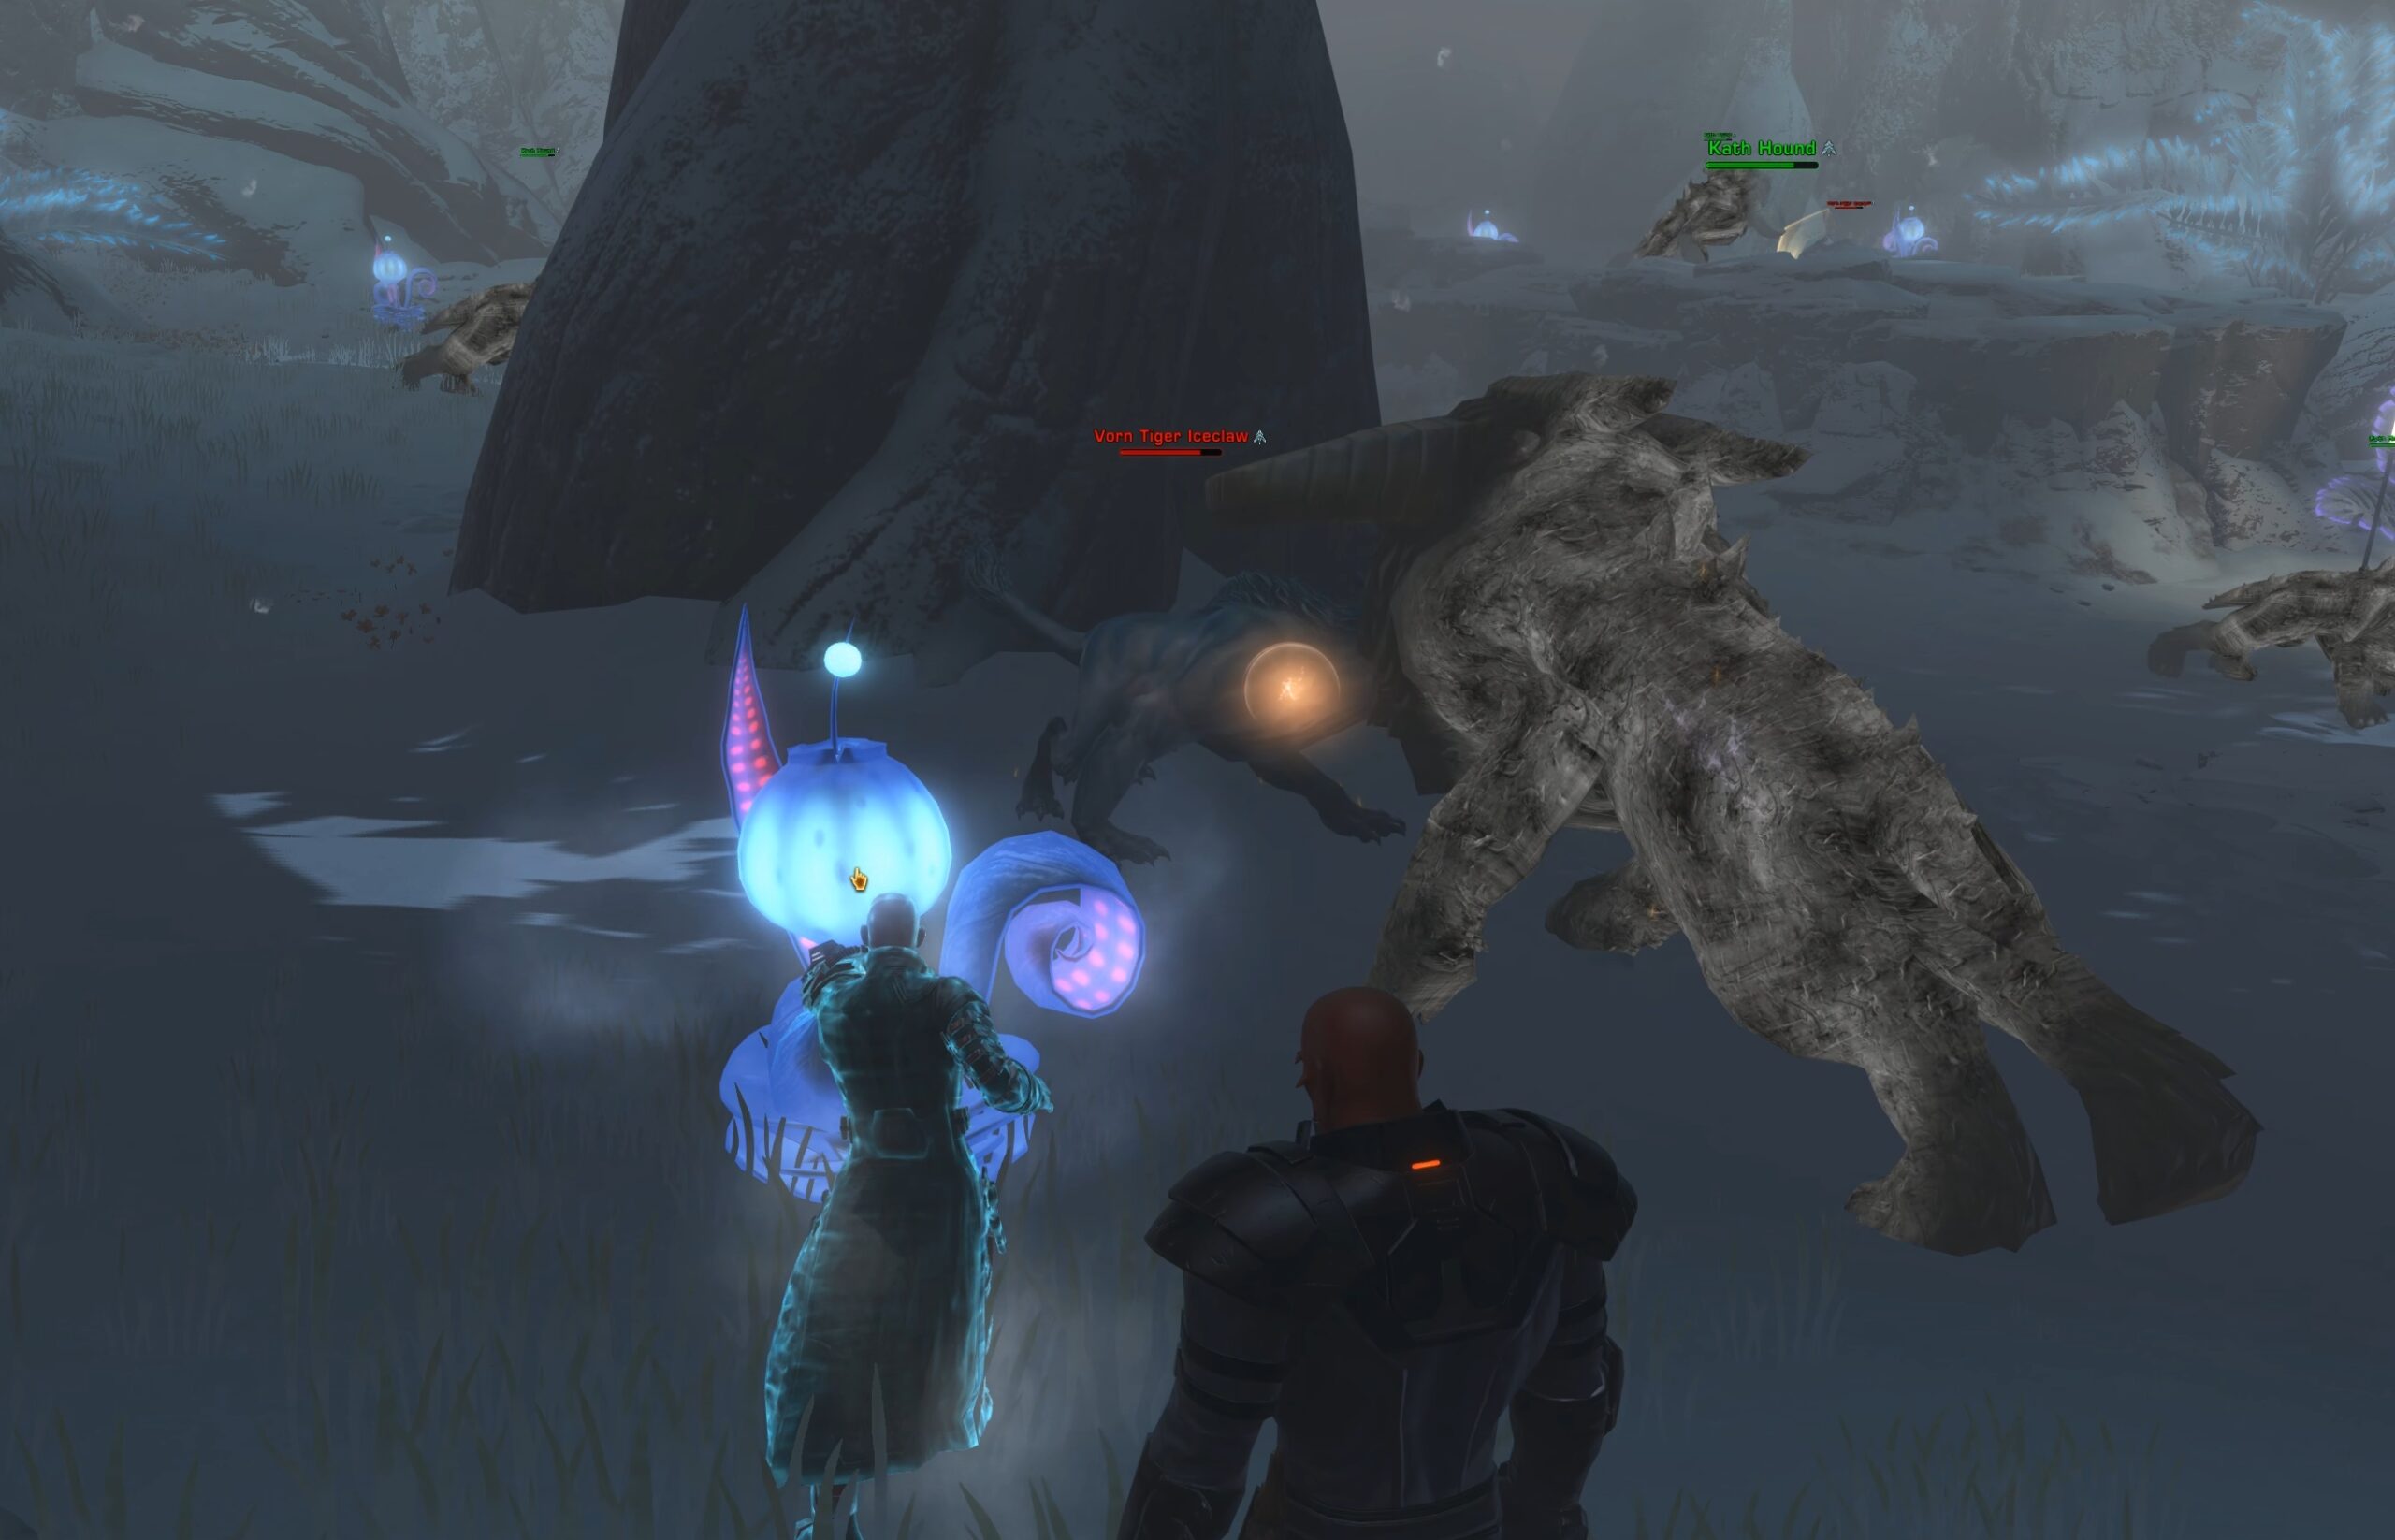
Frostbloom Sweep
Frostbloom Sweep spawns in the southeastern corner of Glacial Trespass. Be mindful of the stacking Freezing debuff while out in the open.
Look for the glowing blue plants. You need to burn them. The Kath Hounds provide great distraction as they are usually engaged with the Iceclaws, who you need to take out as well.
Torching a Frostbloom will sometimes reward you with a Frostbloom deco. This does not apply to any of the other encounters that involve plant immolation.
Frostcaller
Frostcaller spawns in the northwestern end of Glacial Trespass. After you activate the Interference Spikes, you need to clear out the Frostkeepers.
Go to the console and interact with it. Be mindful of the freezing cold out here. It would be helpful if you have someone else or a companion keep the spawning Frostkeepers busy while you work the console. Uploading takes 10 seconds.
The final step is to defeat the Cryosentinel. The Iceclaw passive on the boss gives it an extra chance to deal more damage and immobilize you.
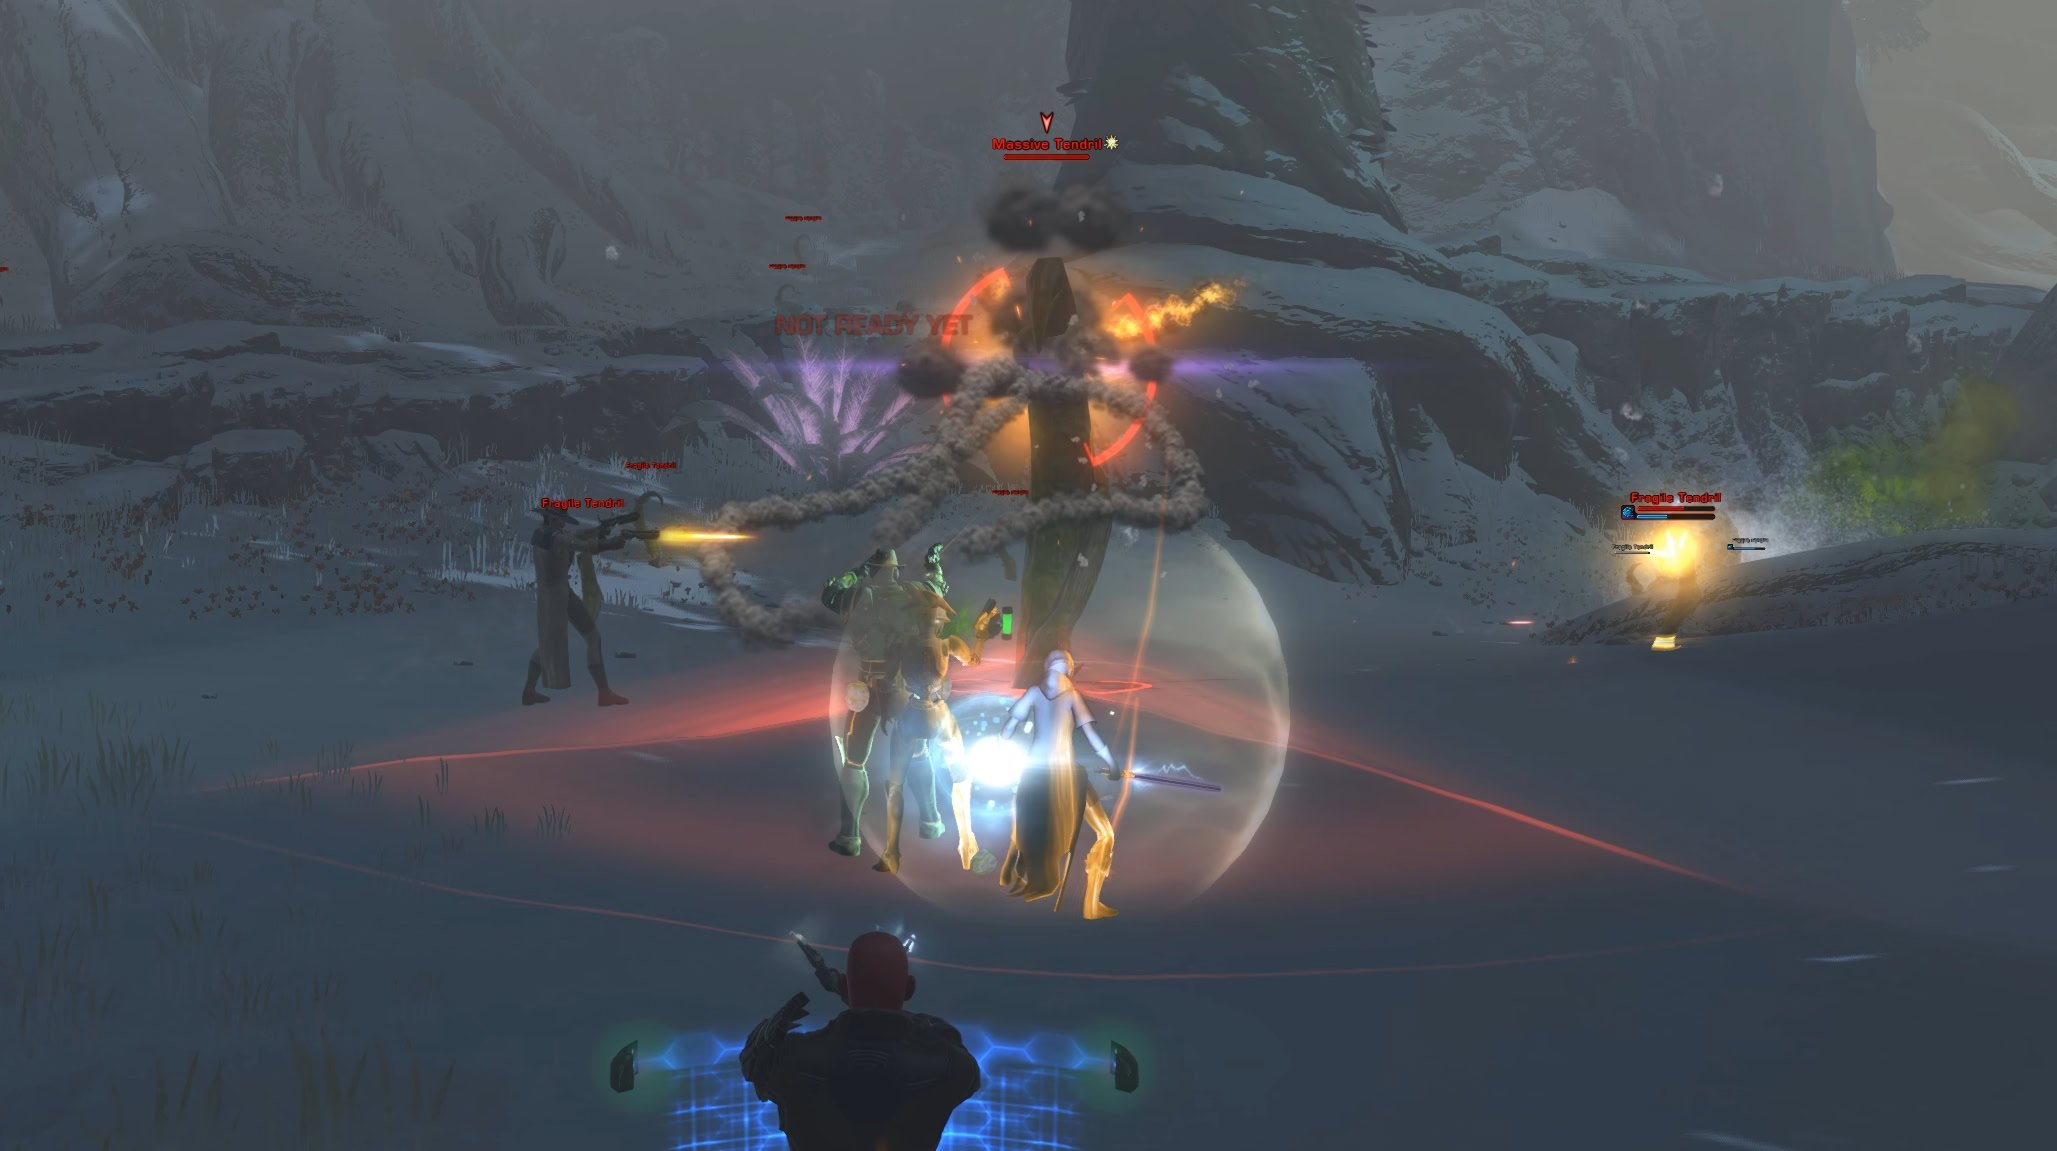
Gelid Tendrils
Gelid Tendrils spawns in the southeast end of Glacial Trespass. It has two stages.
Phase 1: In the first stage you have to stomp out small tentacles. Each tentacle has a buff that allows it to resist a huge portion of incoming damage, but they are very squishy to being crushed.
Phase 2: The second stage tasks you to kill three large tentacles with a much larger health pool. They have a frontal cone attack that knocks you out if you stand in the marked area. When you see the red marker on the floor, move out. The large tentacles are often surrounded by the small one
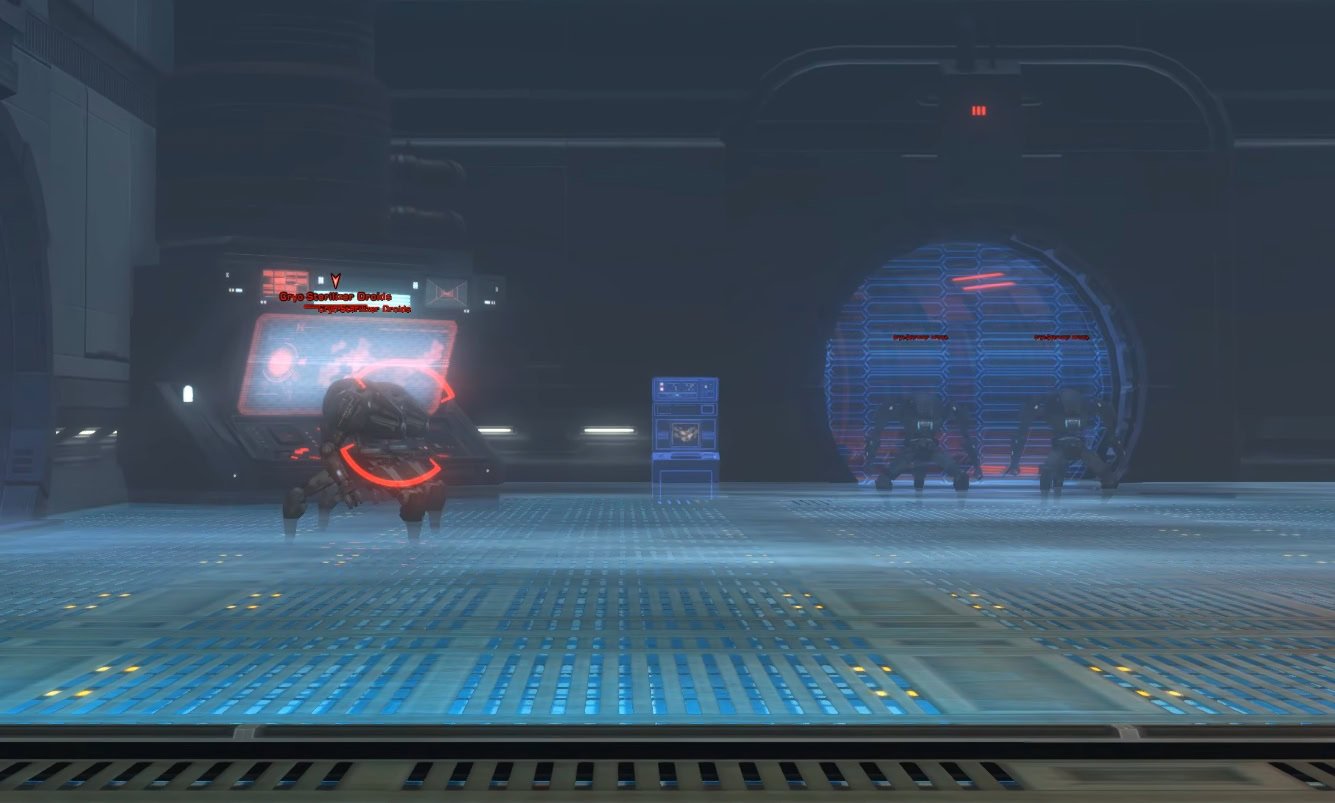
Glacial Reclamation
Glacial Reclamation spawns in the western clearing of Glacial Trespass. You have to interact with the console, then defeat waaaaaay too many champions. There are 3 Cryosentinels and Cryo Dominator Droids you need to defeat, and they respawn! Make sure you aren’t wasting time defeating something you’ve already done.

Cryosentinels have a passive ability that has a chance to deal additional elemental damage and immobilize you. They will also occasionally freeze you for far too long and switch targets until you have thawed.
Maddeningly, Glacial Reclamation is the only encounter that can drop the sick Glacial Trespass Diorama. No, it’s not Root Cause like you would expect.

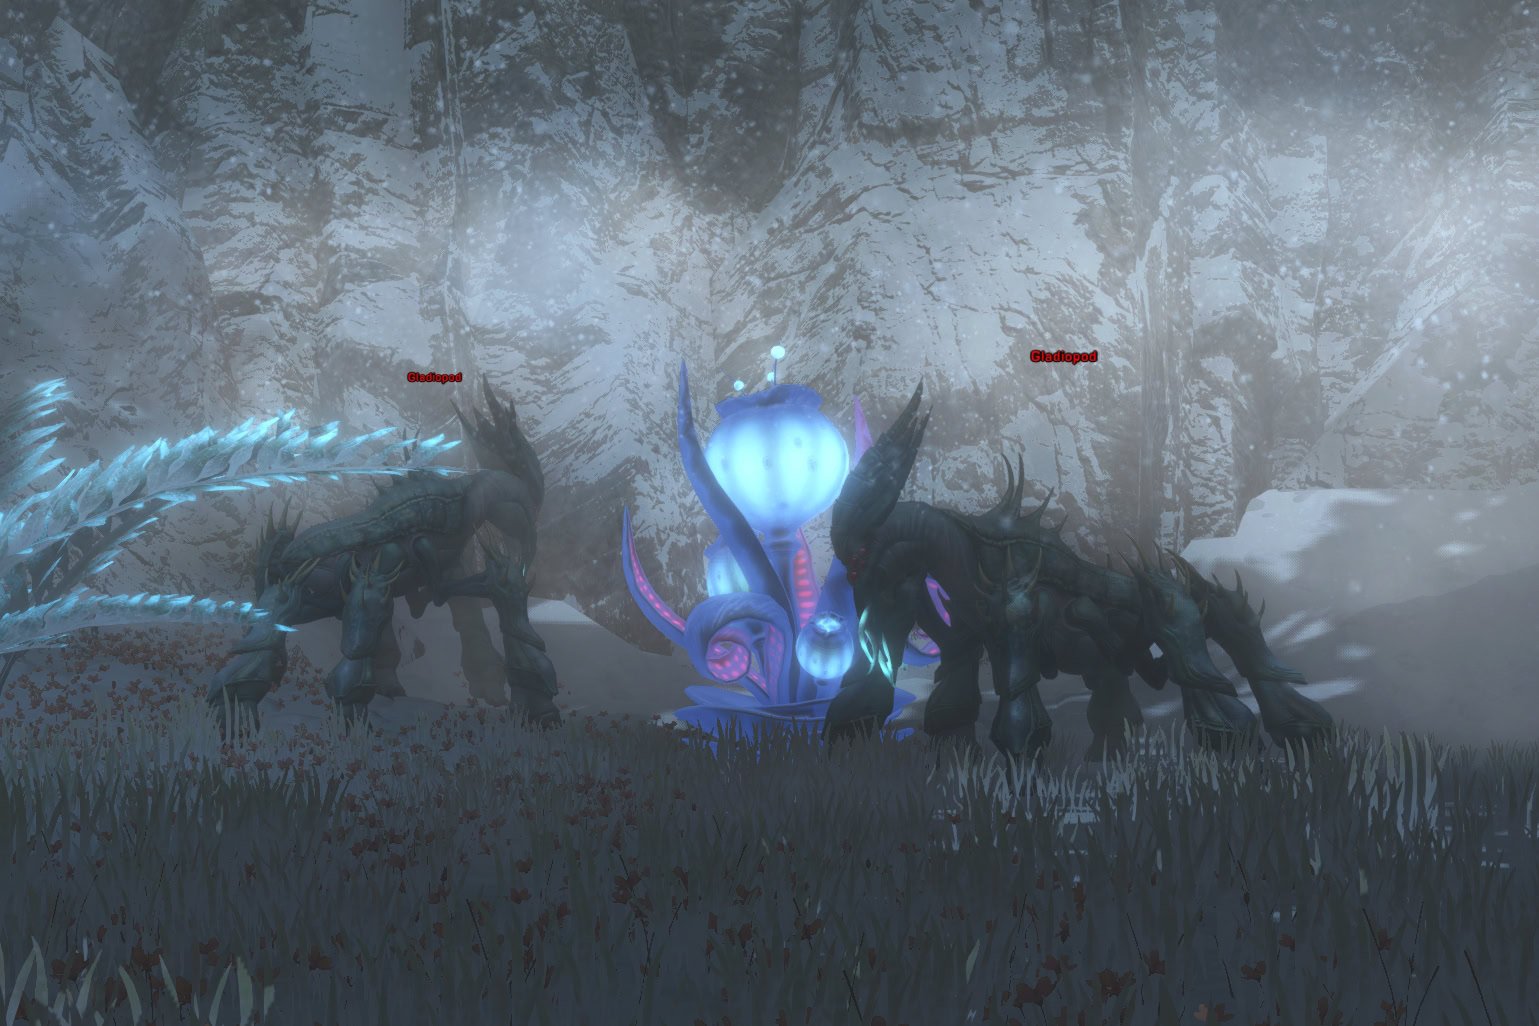
Hollow Frost
Hollow Frost’s objectives are similar to Frostbloom Sweep’s. You have to defeat Gladiopods and burn plants. The creatures are usually in pairs and hang around the plants.
The Frostbulbs are all around the edge of the area, so you will be taking damage from the stacking Frost debuff during a blizzard. The culling of each Frostbulb takes a long time. Head back towards the warm spots behind you or keep moving to avoid getting too many stacks.
Iceweeds
Iceweeds takes place at the forward camp in Glacial Trespass. It consists of two stages.
Phase 1: Defeat the droids around and reactivate the Heat Lamps they were attacking.
Phase 2: Defeat the Cryo-Dominator. This is a champion droid that will spawn among the rest of the droids.
Outpost Defense
Outpost Defense takes place at the forward camp in the Glacial Trespass. This is one of the more challenging encounters thanks to the Cryosentinel (ice creature) you are tasked to defeat in Phase 2.
Phase 1: Repair the turrets and clear out enough of the creatures that are attacking them. You can repair turrets without getting aggroed by the creatures.
Phase 2: Defeat the Cryosentinel. This beast hits hard and is usually surrounded by Strong and Weak creatures. Its Ice Fang attack is the most annoying one as it freezes you in place.
The Dantooine Heat Lamp (Small), Sporefall Tree (Potted), and Dantooine Fern (Wall) decos can all drop from enemies in the Outpost Defense encounter.


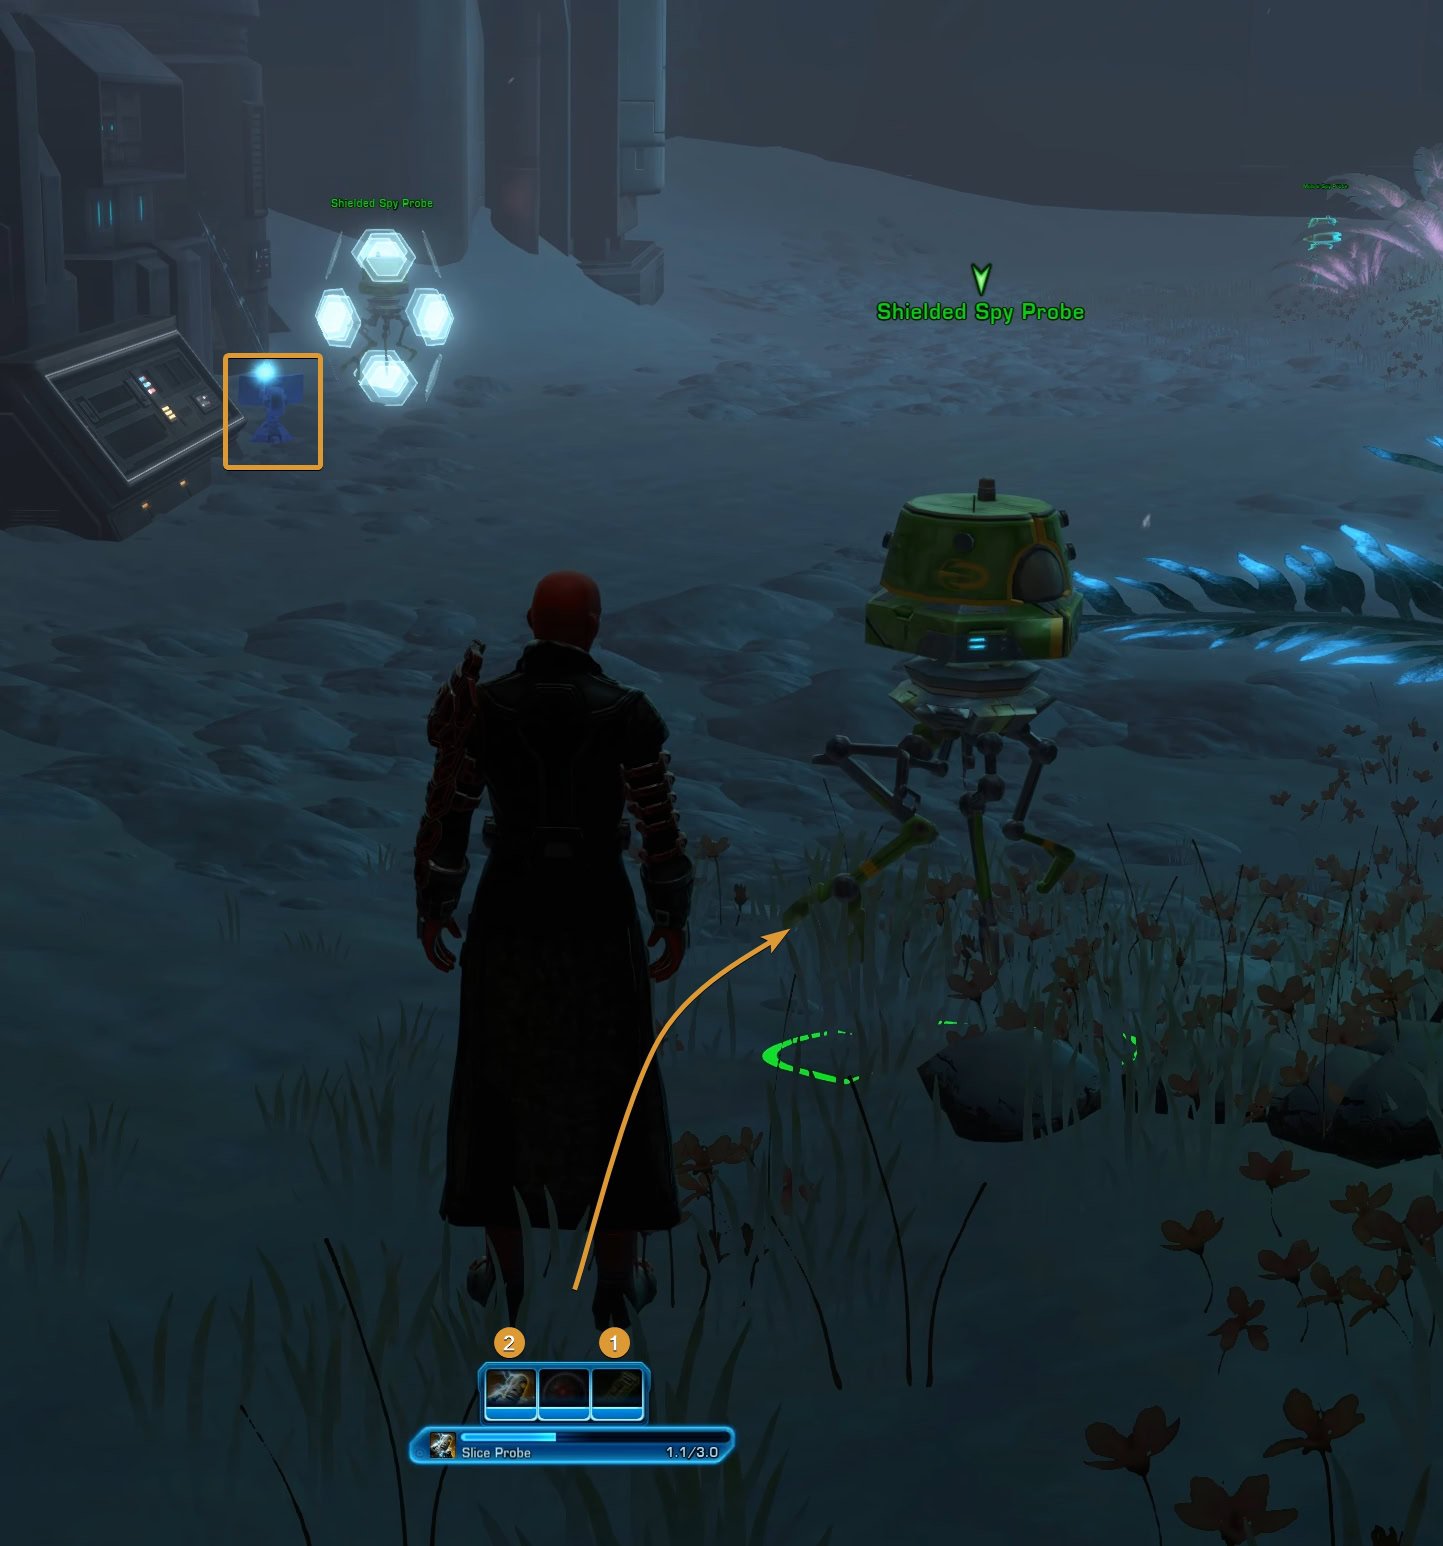
Probe-lems
Probe-lems takes place inside the Ship, in the Glacial wing. It’s a simple clicky encounter where you have to click on droids and datastreams.
There are two types of droids: shielded and roaming. In several places in this wing, you will see Slicing Tools. Pick one up. This will give you the temporary ability required to slice the droids.
| Ability | Effect | |
|---|---|---|
| Slice Probe | Slices the Probe Droid. Use after Immobilizer or Destabilizer. | |
| Immobilizer | Stops the mobile droid from moving. Use if the droid has no shield. | |
| Destabilizer | Removes the droid’s shield. Use if the droid is shielded. |
There are two types of Czerka Droids. The Shielded ones are stationary. The mobile ones move slowly from time to time.
You will have to use a different ability to open up a droid for slicing. If it’s a shielded one, use the Destabilizer. If it’s mobile, use the Immobilizer it first. Then Slice the probe droid.
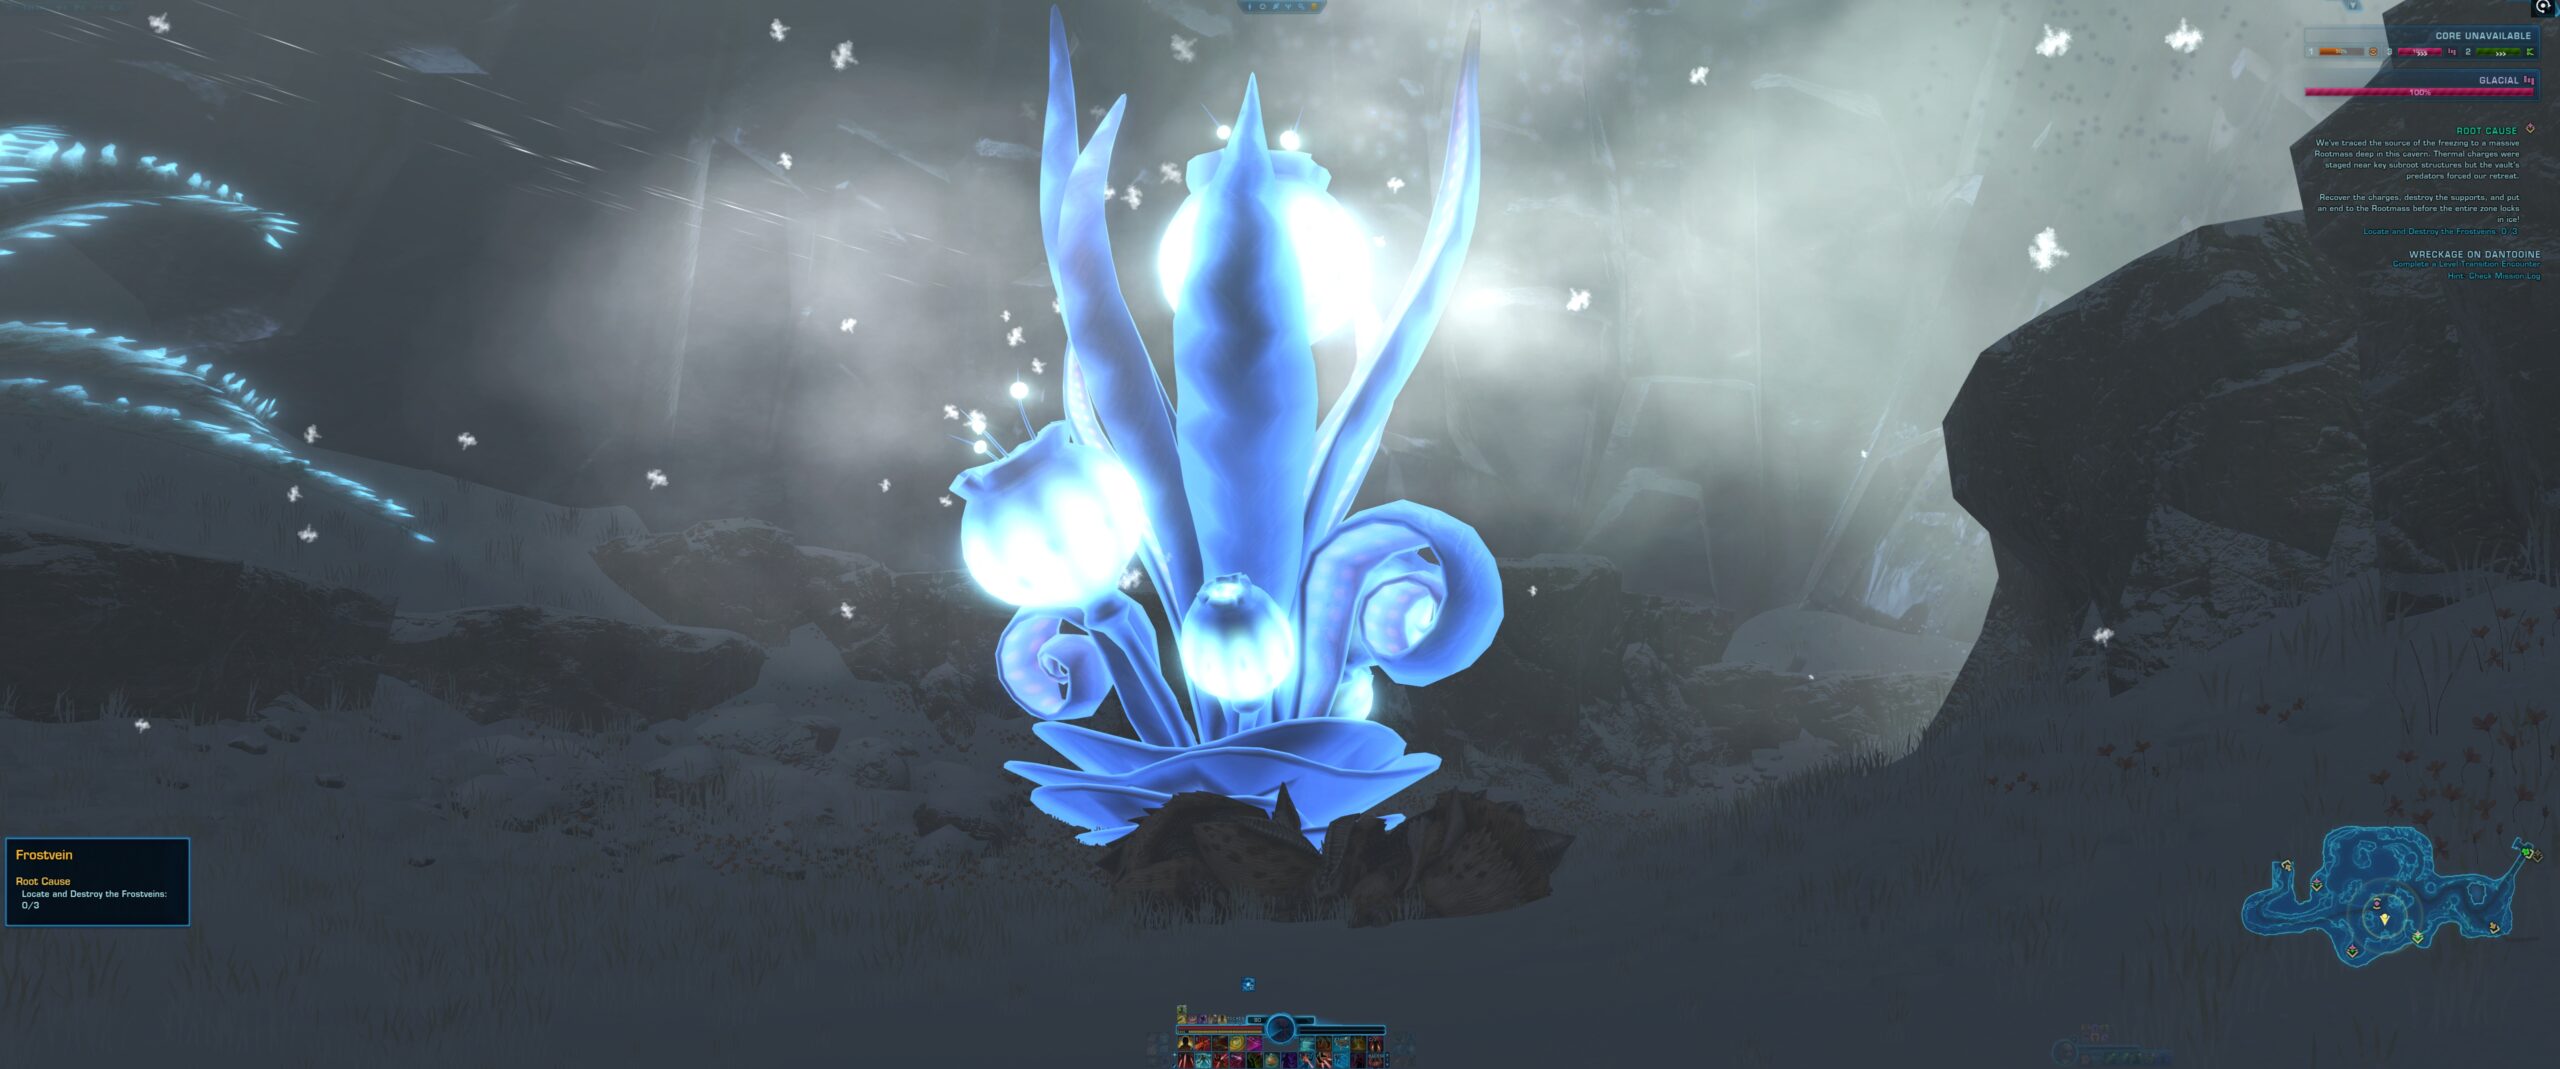
Root Cause
Root Cause is a Glacial encounter, taking place in Glacial Trespass Cavern.
Phase 1: The first objectives are to find Thermal Charges and Activate Heat Lamps. It’s cold in the cavern, so you should activate the heat lamps as soon as possible to help you keep the freezing debuff from stacking high.
The Thermal Charges are inside the cube containers that you see often located on the edge of a cliff. You can’t reach them from the lower ground. Walk around the plateau and climb on top of it to get to the box.
The lamps are located in the corners of the cave and are pretty huge. Hard to miss. You need to channel temp ability to free them from the vines that have overtaken them.
Phase 2: Now you need to destroy Frostveins. There are only three of them, but they are very large and not hard to spot. There are hostile creatures near them usually that you will need to clear first. Channel the temp ability that will appear once you are close.
Phase 3: This phase requires you to defeat a couple of the strong Frosthide Bolraida and the mini boss Rootbund Bolraida.
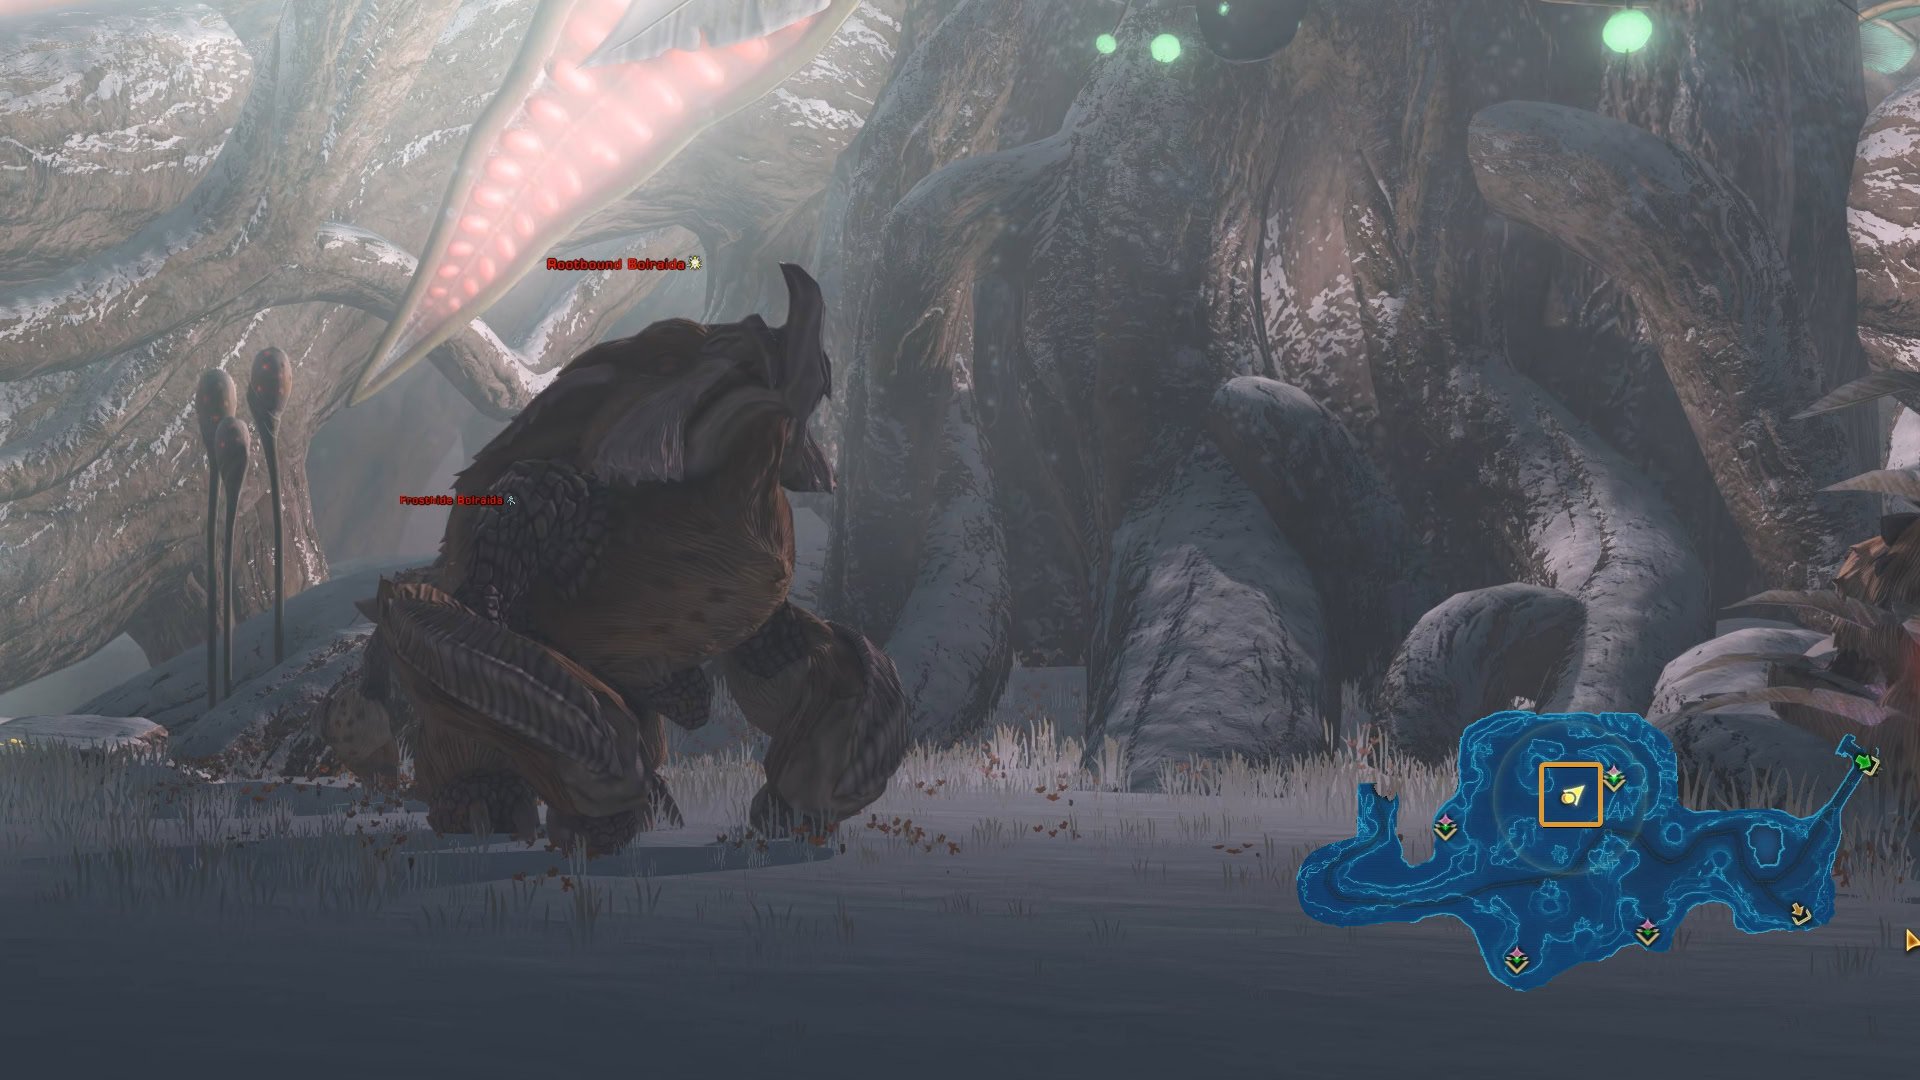
Phase 4: The final phase is to destroy the Rootmass. Glacial Prowlers will spawn and swarm you. The best approach is to have one player start the long channel on the Rootmass in the back, while the rest take care of the creatures.
You can do it alone by setting your companion to tank role while you click. I recommend using a rank 50 and popping Unity to make sure they survive for 20s. Have them aggro one as soon as they spawn so they don’t touch you.
Root Cause does not drop the Glacial Trespass Diorama deco despite being the only encounter to feature the landmark depicted in the diorama. Instead, you can get Dantooine Heat Lamp (Large) to drop from enemies.
Unruly Nesters
Unruly Nesters spawns on the Research Camp Perimeter map, near the south connection to Glacial Trespass. Up on the hill, you will find the fence that needs repairing. Click on the glowing fence elements, including the pylons.
The other objective, is to catch Cryo-Nesters. For this, you will need a net. Near the fence you just repaired, you will find a container with electro nets and to the left of it, an empty cage.
On the open field, you will see the Cryo-Nesters. Damage them to about ~25% and then you can capture them. You can capture and lead up to three at a time. When you deliver them to the cage up on the hill, pick up another Electro Net from the container. Repeat until done.
 The Cryonest Matron (Transition)
The Cryonest Matron is a Transition Encounter that spawns when the Glacial biome reaches 100% at Level 1 and is ready to go to Level 2. Like all Transitions, this encounter takes place inside the ship, in the Glacial wing.
This is a boss encounter with one large creature and little minions that will continue to spawn as you take them out and swarm you.
You do not need to target the adds specifically, passive AoE will take care of them in most cases. Don’t let them swarm your healer. The boss as a frontal cone AoE attack that knocks you back. If you are not tanking it, make sure you are behind it.
Cryocore Override (Transition)
Cryocore Override is a Transition Encounter that spawns when the Glacial biome reaches 100% at Level 2 and is ready to reach Level 3. The encounter takes place inside the ship, in the Glacial wing.
Phase 1: The task for this one is to deactivate the Cryo-Containment Consoles. To reach them, you have to complete the other objective, defeat Cryo-Sterilizer Droids. While you stand on the blue floor, you get Freezing debuff stacks if you don’t have hazard protection. The consoles deactivate the floor.
Phase 2: Upon completing Phase 1, the red shield will come down, and the Cryo-Core Guardian droid boss will become vulnerable.
Phase 3: After you are done with the boss droid, head to the four Emergency Containment Response Consoles in the end of the hallway to interact with them. You also need to clear the Cryo-Reclaimation Droids that spawn near them.
These droid adds respawn very quickly. The channel time is extremely long, so keep moving forward as far as you can, but try to pull multiple groups since they hit pretty hard.
If you don’t have the Mysterious Stimpack and the Volcanic Residue buffs, you will need the help of multiple other players.
Geothermal Disruption Encounter Walkthroughs
This segment contains the walkthroughs and tips for all Dynamic Encounters in the Geothermal Disruption biome at the Dantooine Crash Site.
Acid Trip
Acid Trip takes place in the water body in the center of Geothermal Disruption. Your task is to clear the pool from the Skar’kla creatures while taking samples from the contaminated water using the Droids nearby.
Stand close to one of the Reconnaissance Droids at the shore. A temp ability (Slice) will pop up. Use it to make the droid follow you.
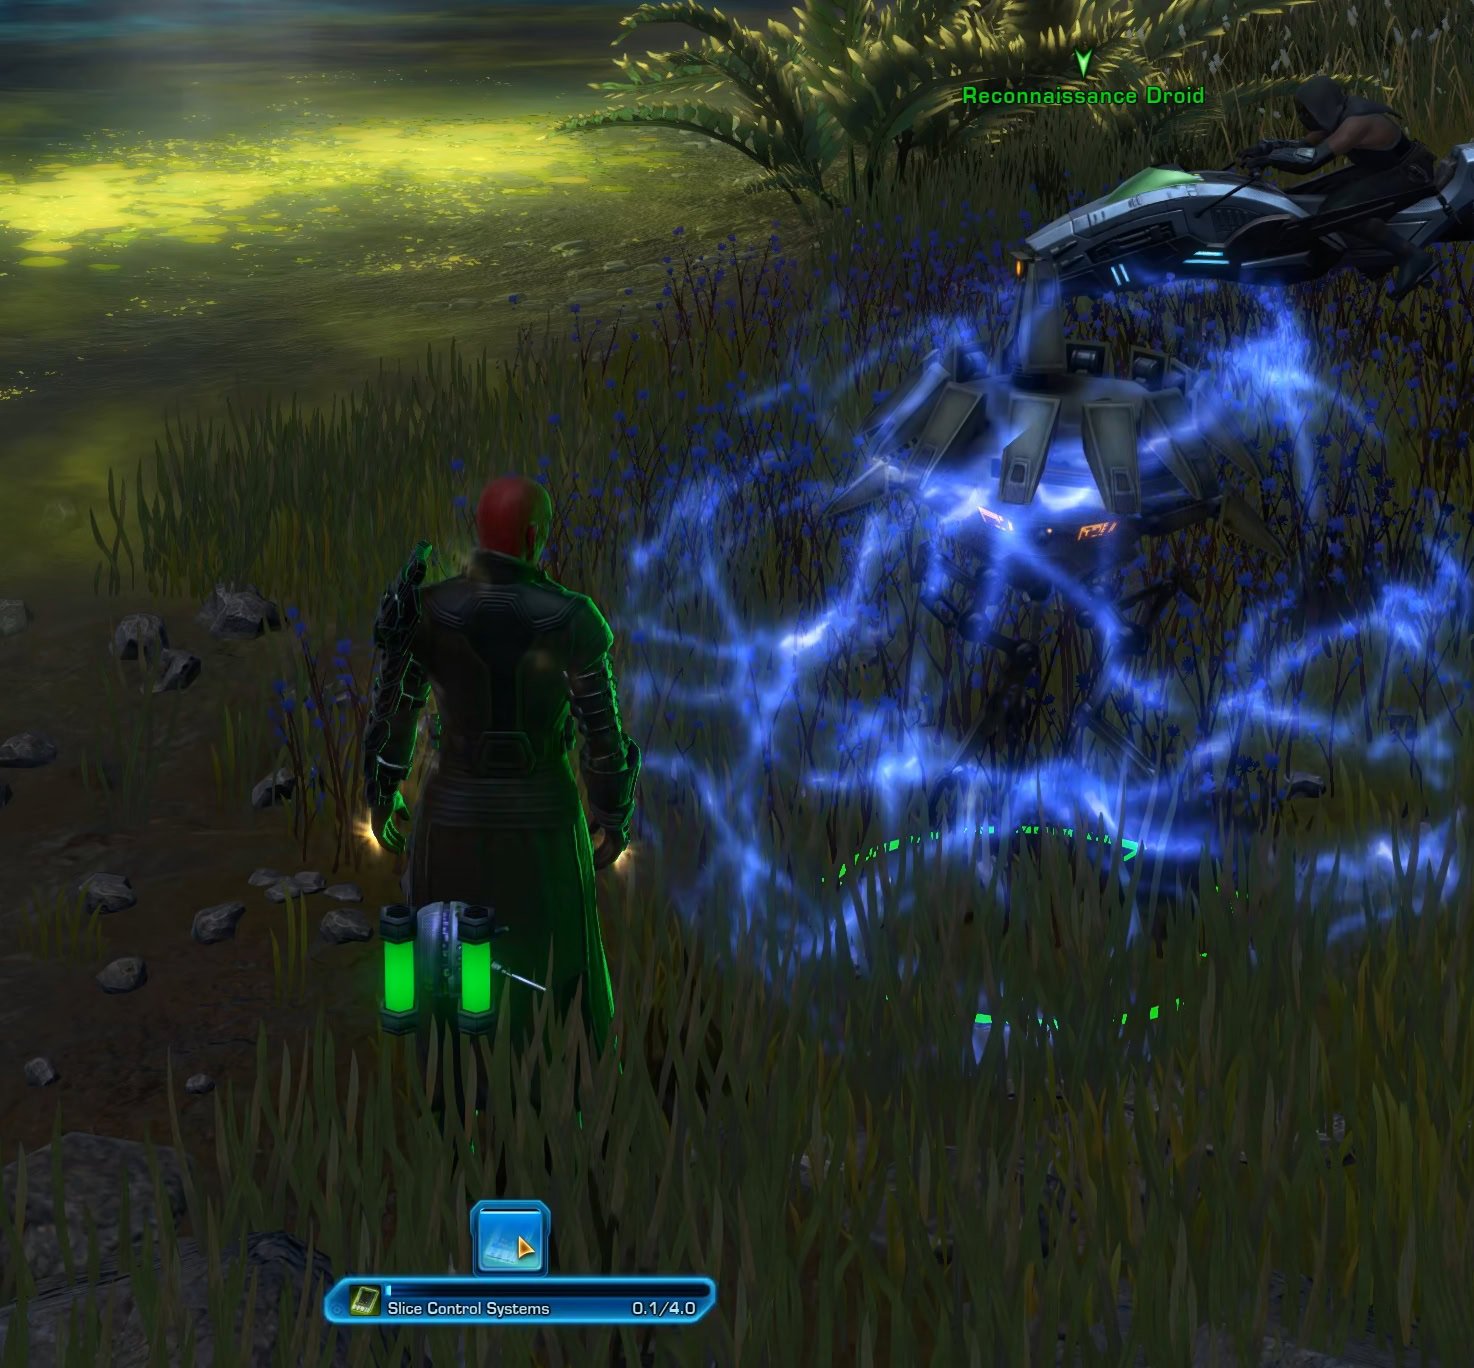
Head into one of the green puddles near the edges of the water body and when another temp ability pops up, click on it to send the droid to collect samples.
When the droid has collected the max number of samples it can hold, it will change shape and become clickable. Click on it and head back to the large tree and click on one of the containers near Professor Naul. Repeat enough times to complete the encounter.

Brood Basin
The event spawns in the southern part of the Geothermal Disruption map. Your task is to defeat 15 Embercrawlers. They are all over the contaminated water and lava pools in the area.
After you take out the required number, the Emberqueen will spawn as a final objective. Defeat her to complete the encounter. She is just a bigger and meaner version of her fervent subjects.

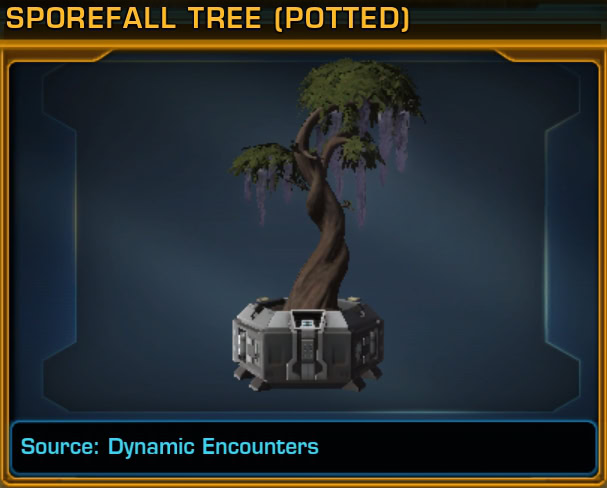
Enemies from this encounter can drop both the Sporefall Tree (Potted) and Sporefall Stalk decos.
Caustic Cascade
Caustic Cascade spawns in the north part of the Geothermal Disruption map. You have to take out the groups of Skar’kla creatures while also repairing the Processing Tanks spewing poison into the water.
While you are next to the tanks, in the green puddle, you will get a second, quickly stacking debuff that requires Hero tier hazard mitigation to avoid. Click the interactable object after defeating the pack of Skar’klas and healing up, and get ready move away.
When you are done, a Champion Skar’kla Pack Leader will spawn.
Data Appropriation
Data Appropriation takes place in the Geothermal Disruption’s wing of the Ship Interior. The two tasks for this encounter are to defeat Shielded Czerka Enemies and appropriate data.
The shields have a vulnerability that you can see on their debuff bar that makes them vulnerable to acid, so you just have to get them to step into the acid for a second to get rid of the shield. Most of them leap at you as soon as you attack them, so pull from acid. It doesn’t hurt that much, don’t worry.
For the second objective, click one of the large glowing Data Recorders (they respawn). Then click the temporary ability that will appear after a set time. You can only use the ability once per Data Recorder.
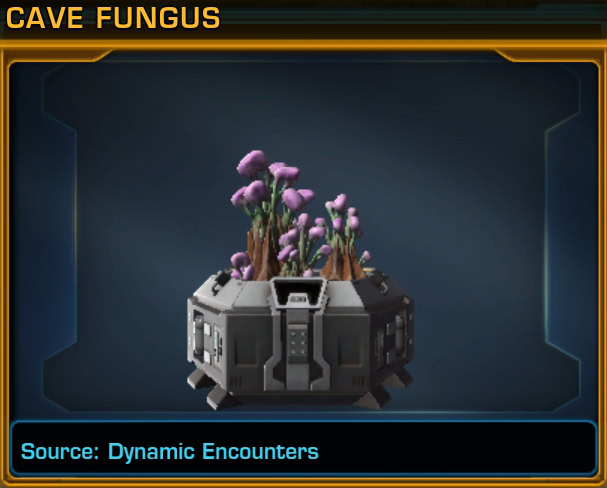
Enemies from this encounter can drop both the Sporefall Tree (Potted) and Cave Fungus decos.
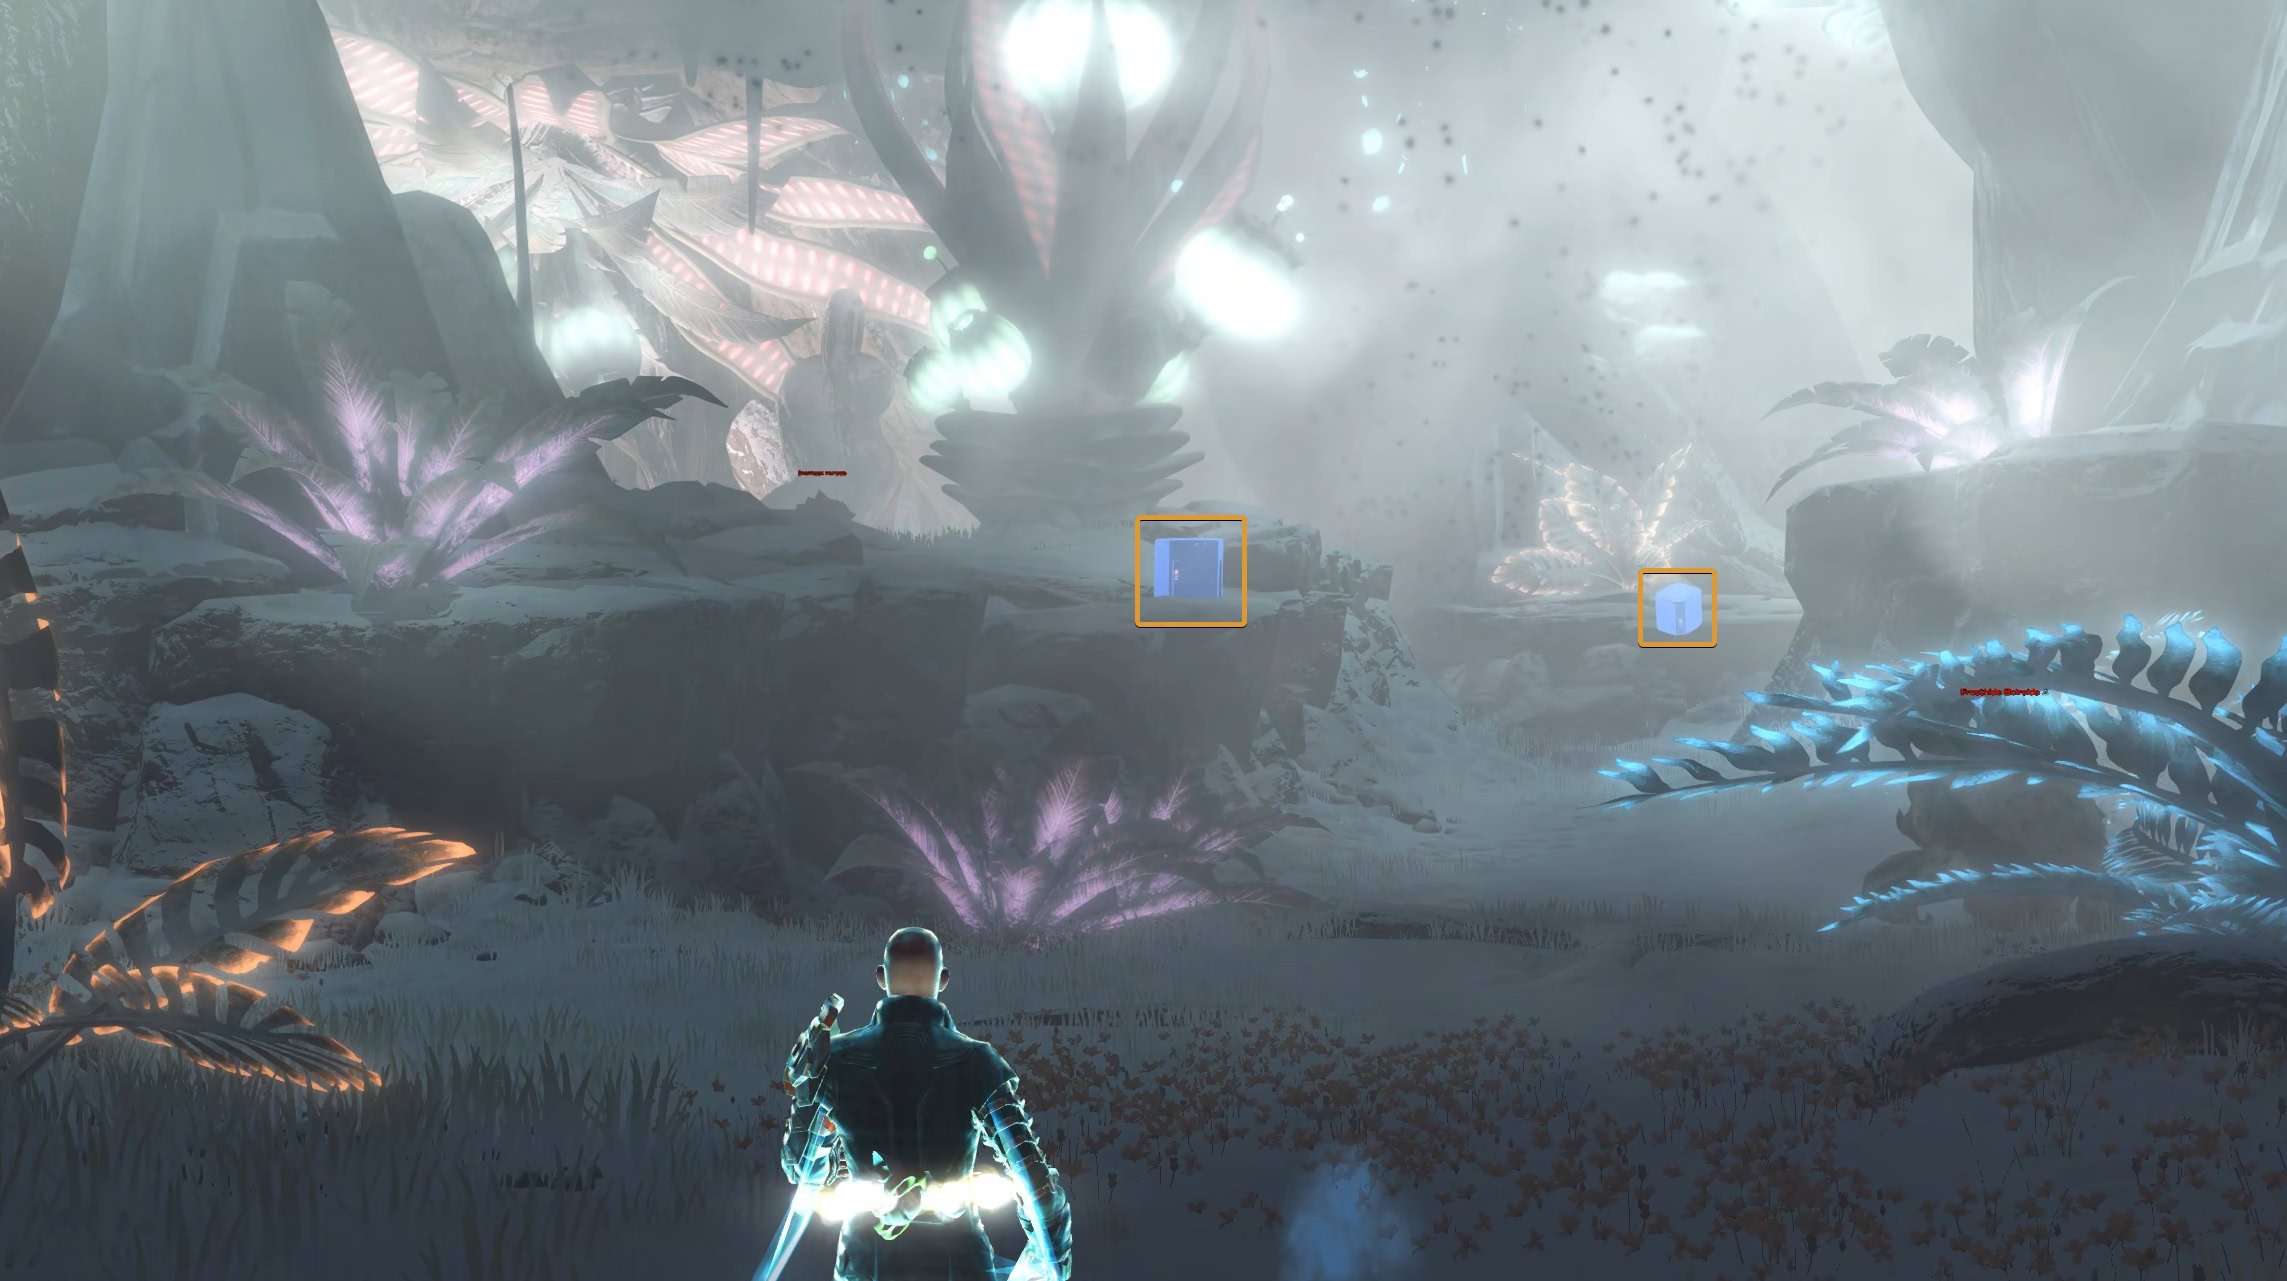
Fungal Protection
Fungal Protection takes place in the south end of the Crystal Cave, in the Geothermal biome. This is one of the longer dynamic encounters on Dantooine, including four phases with different objectives.
Phase 1: Defeat a bunch of Geo Beast Larvae. They may be little babies, but they’re packed densely, respawn too quickly for their own good, and spam a ranged lava spit attack that make the encounter a fair bit more challenging than you might expect.
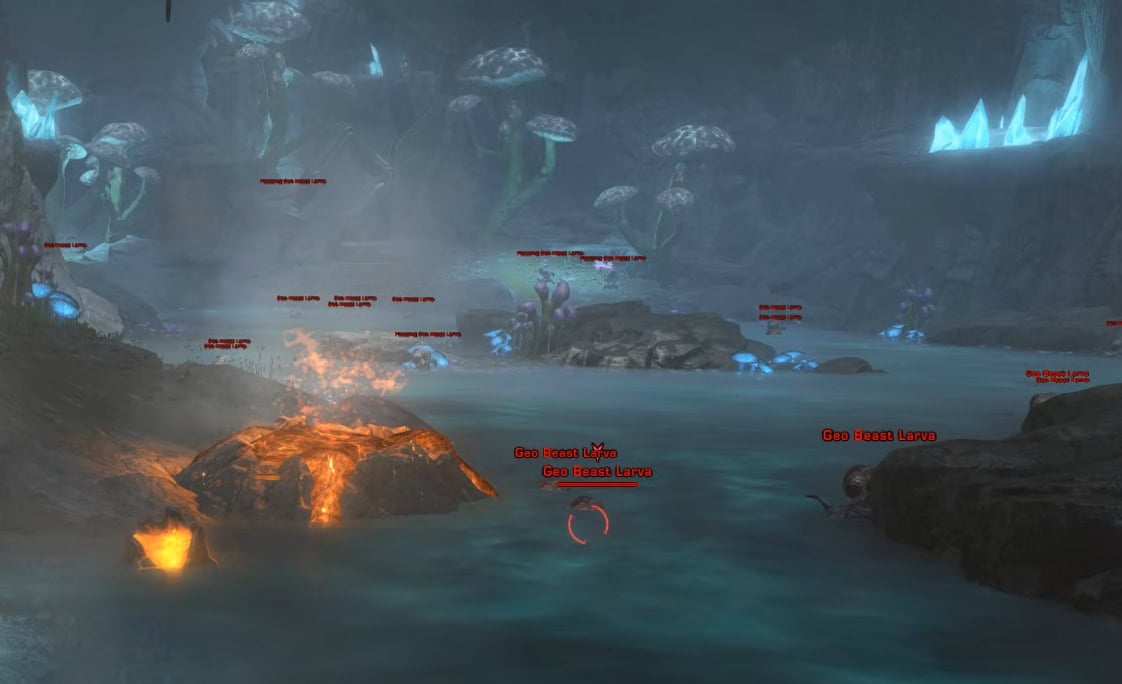
Phase 2: Click on the Mushrooms to harvest the delicate spore sacs. Some of them will poison and slow you, while others will just explode and knock you back. Also, you’ll have to contend with more larvae.
Phase 3: The next phase is to sow spores near volcanic vents. You will find them near the larger volcanoes in the water, along with, you guessed it, more Geo Beast Larvae.
Phase 4: The final phase is to defend Nascent Fungi from the Geo Beast. This is a beefy champion creature that applies a debuff that reduces your healing received. Oh, also, there are still Geo Beast Larvae around.
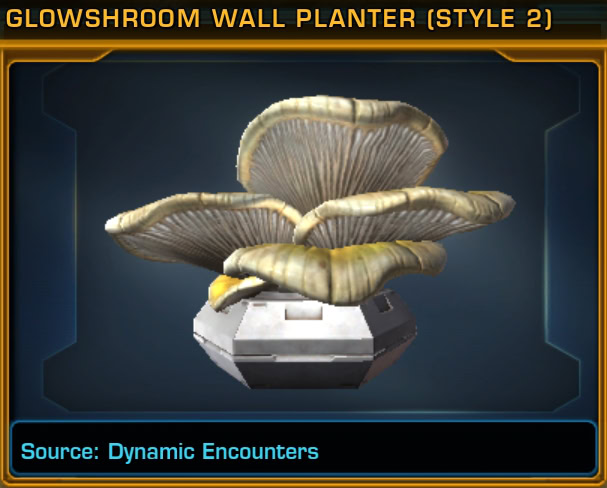
Geo Beast Larvae enemies from this encounter can drop both Glowshroom Wall Planter (Styles 1 and 2) decos.
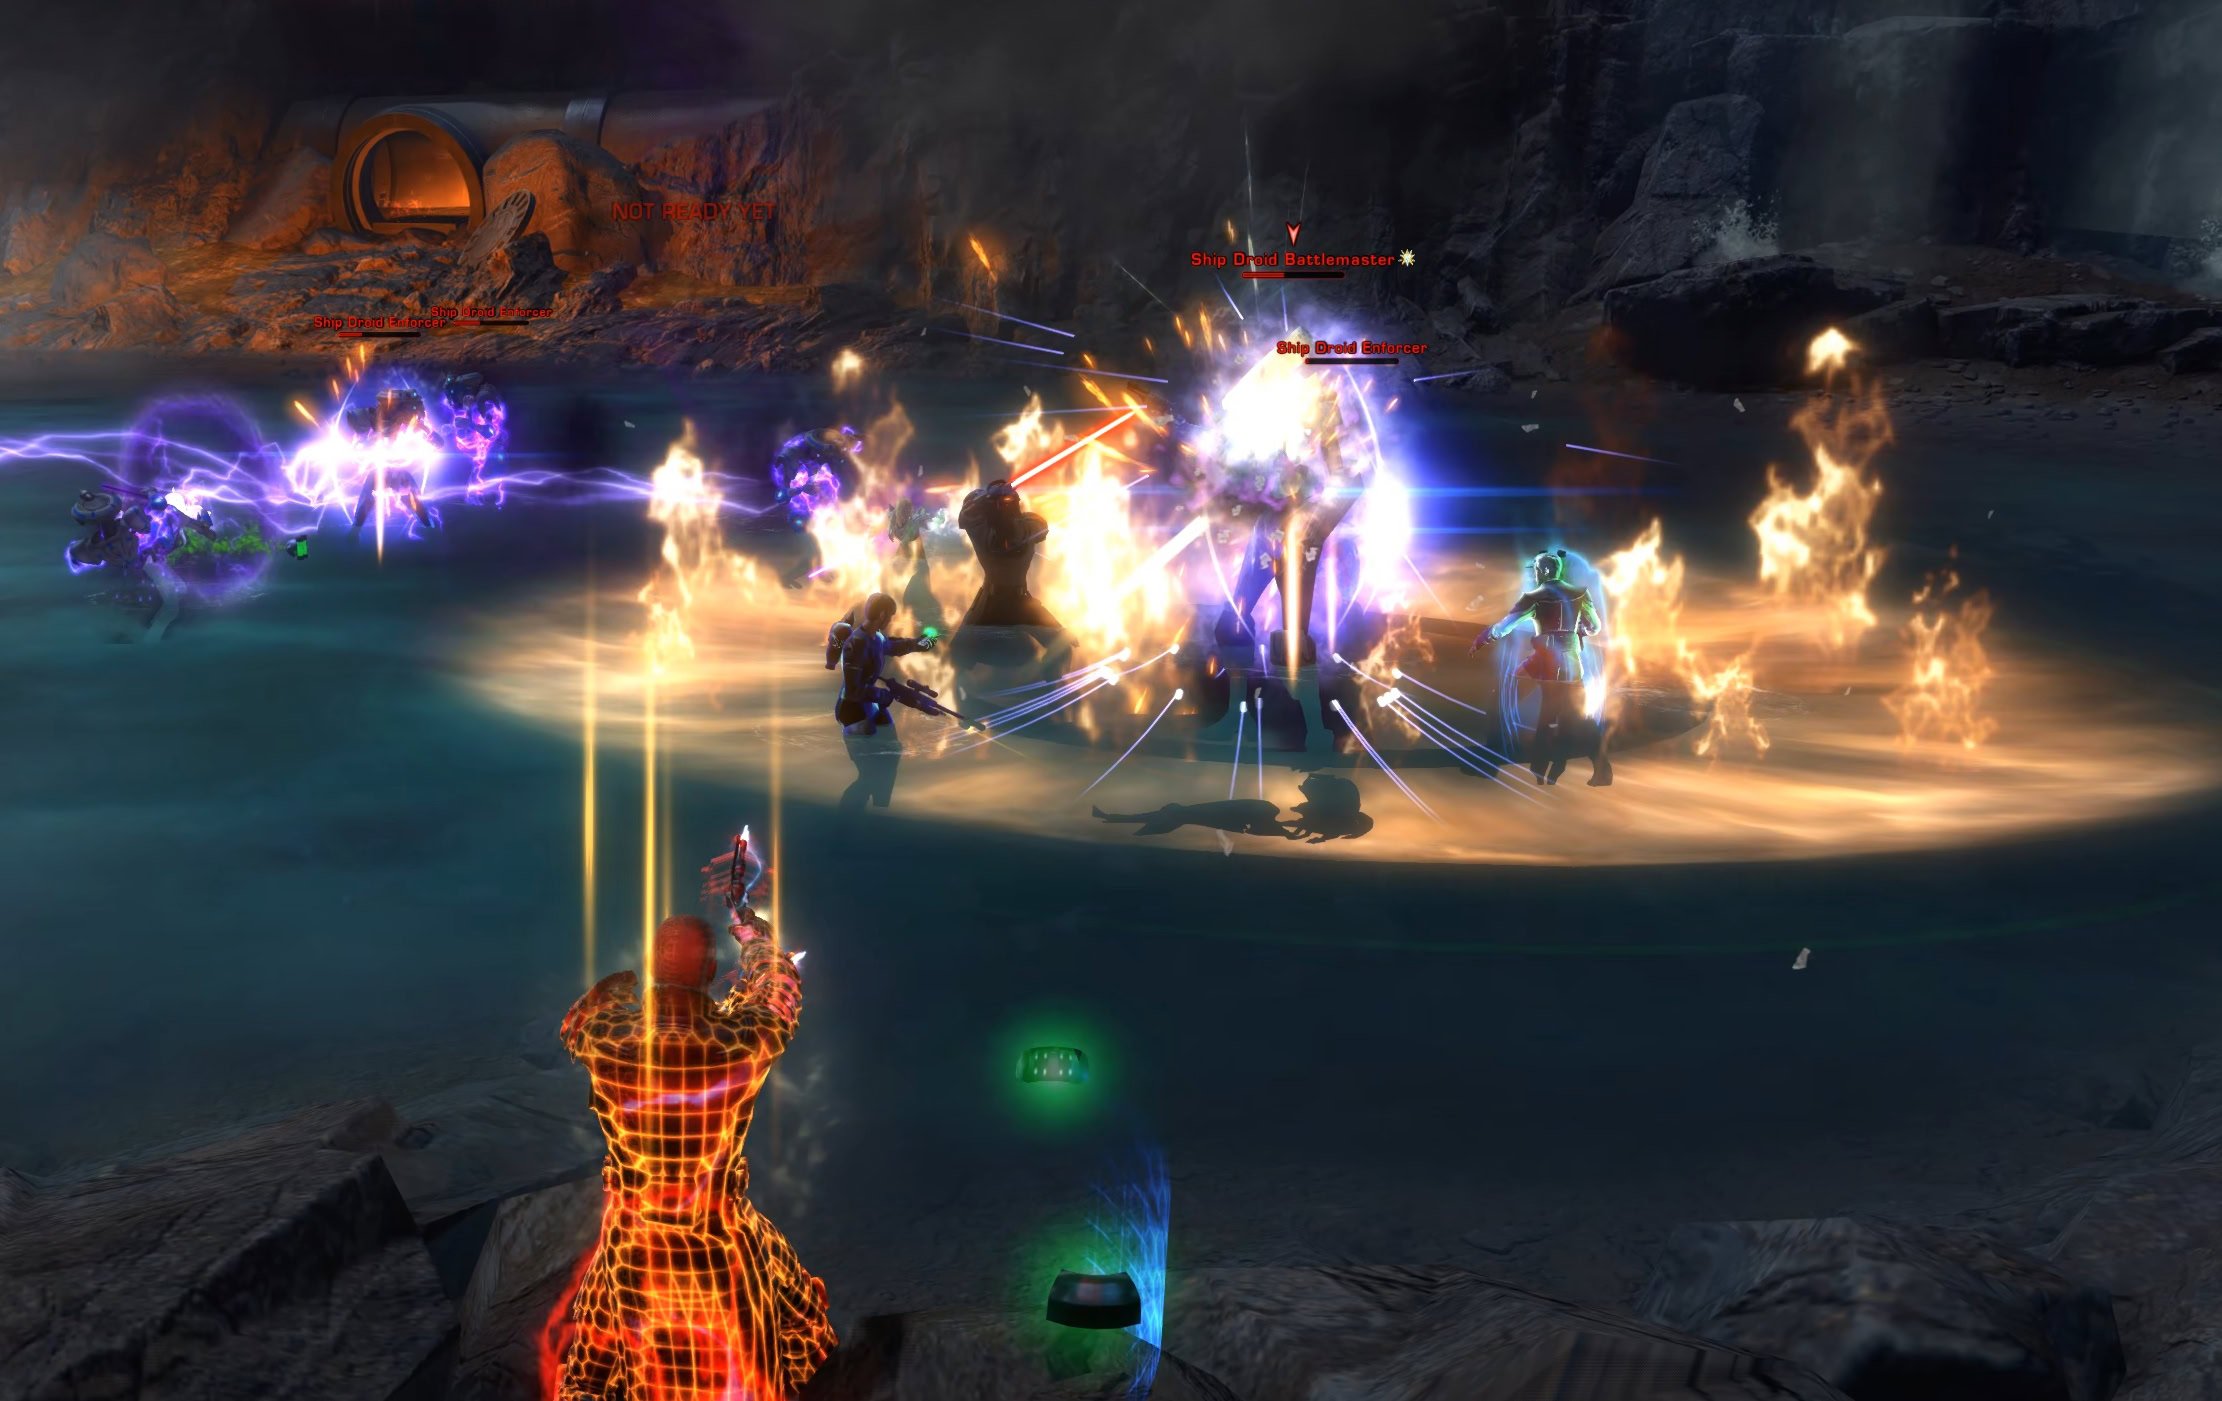
Graul Graveyard
Graul Graveyard spawns in the middle of the polluted waters near the entrance to the Lava Cave in Geothermal Disruption.
Phase 1: Destroy Ship Droids and Ship Droid Enforcers. They spawn from all sides of the giant Graul standing in the middle of the pool.
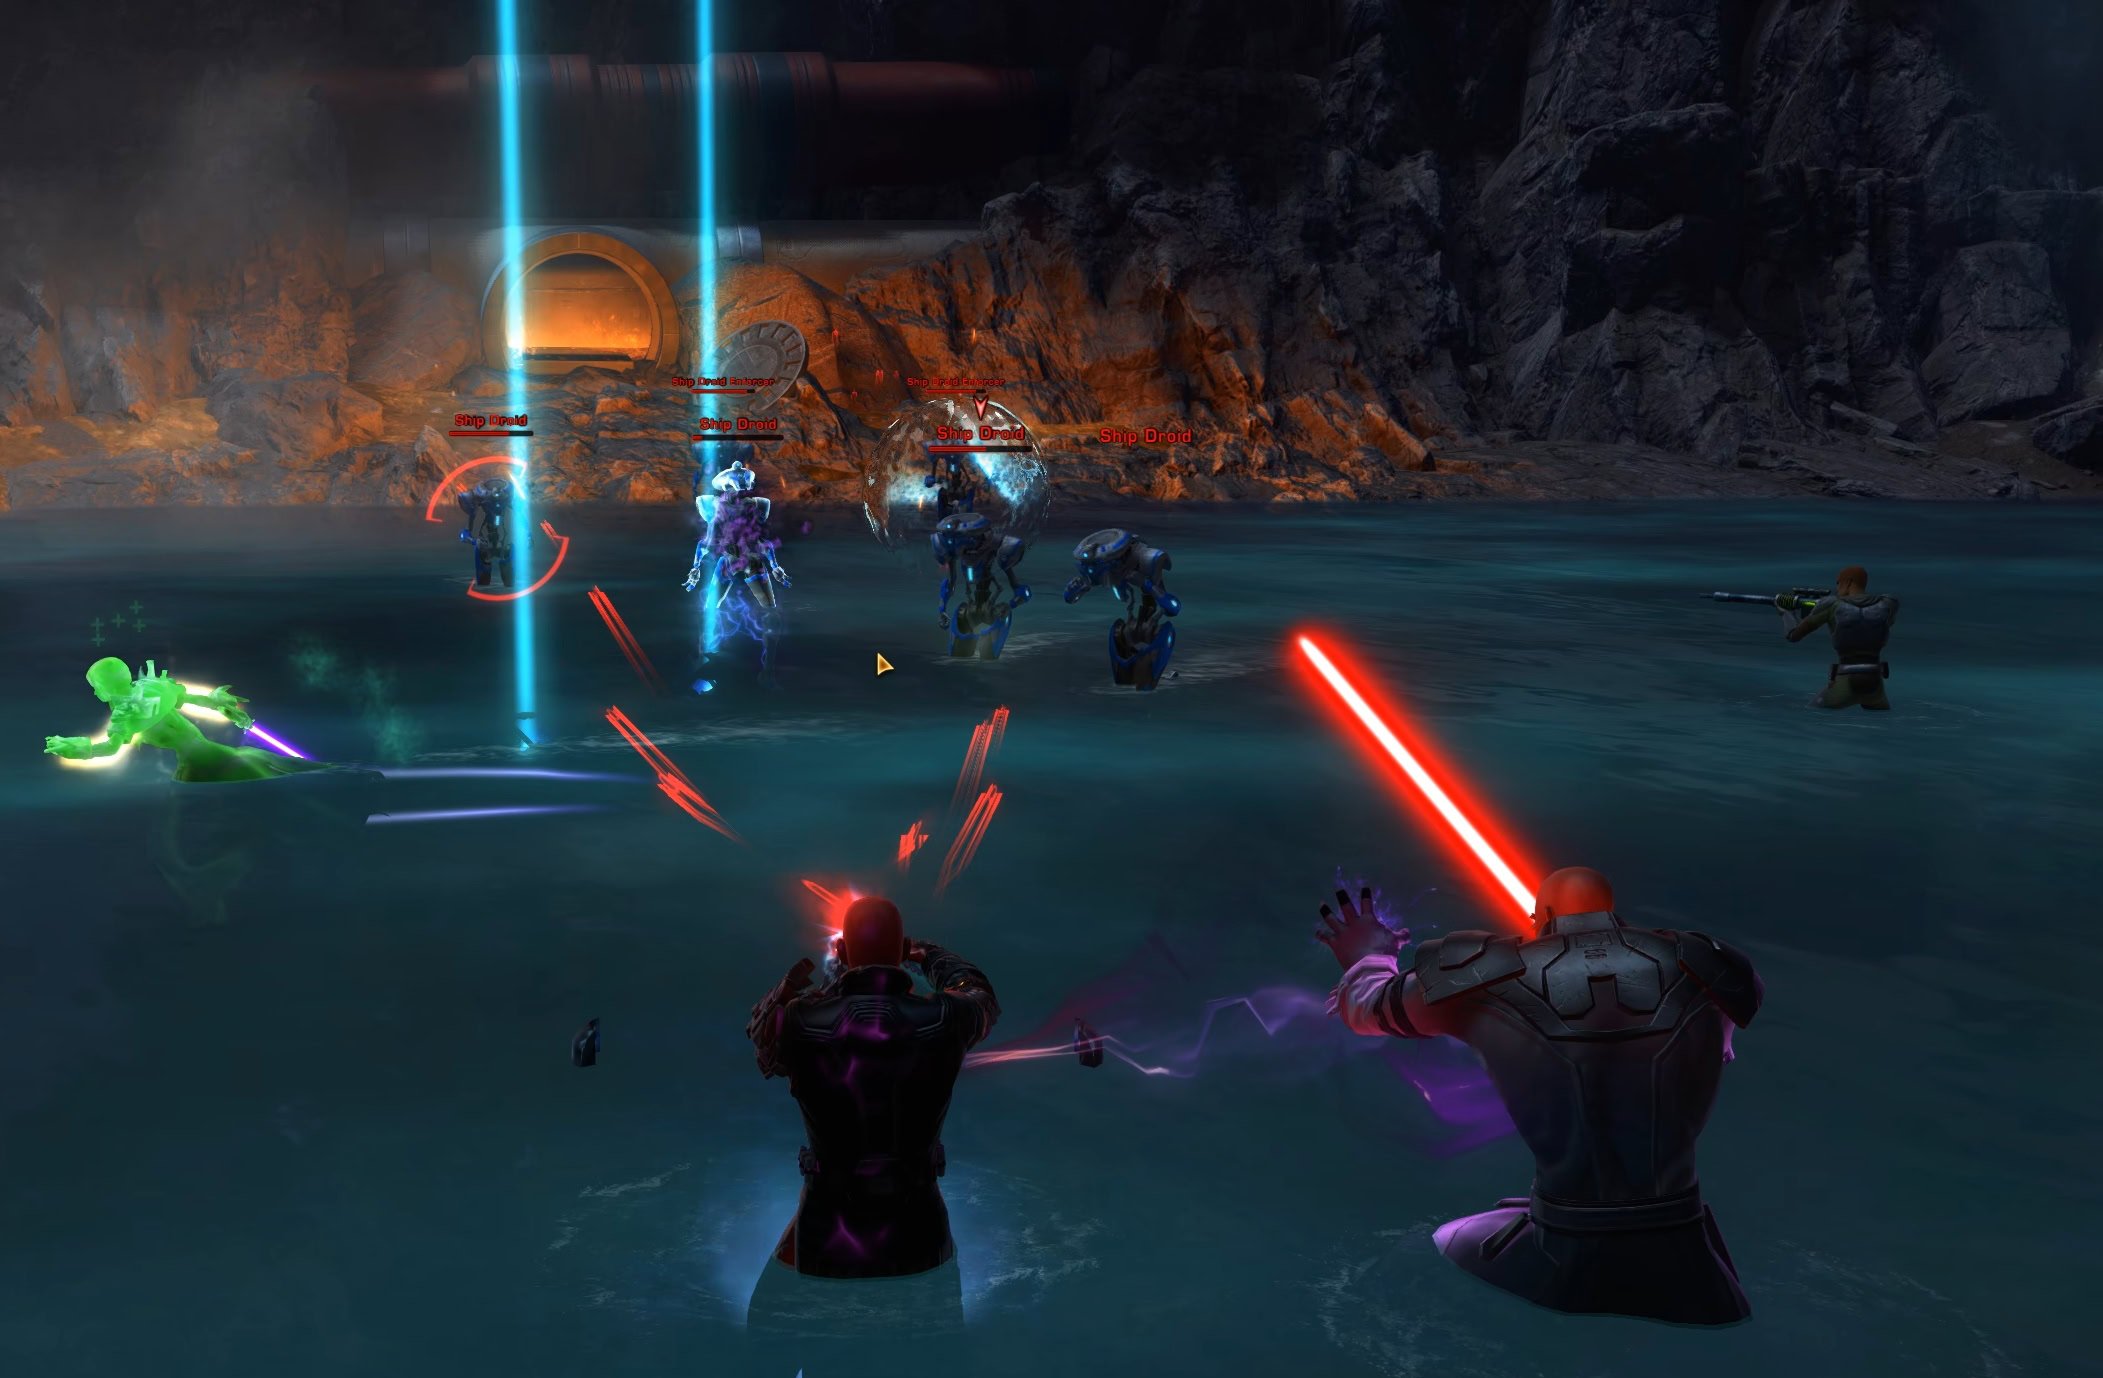
Phase 2: The Ship Droid Battlemaster will spawn, surrounded by a squadron of the same type of droid you just fought. Take the big one out to complete the encounter. The Graul will help you if you drag the droids over.
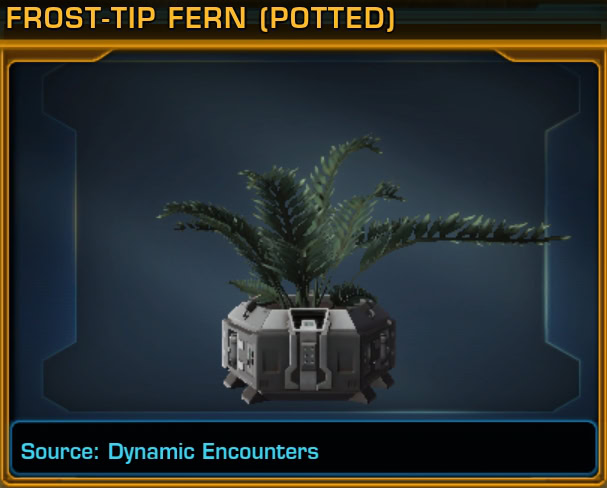
Frost-Tip Fern (Potted) and Snow Pod (Potted) decos can both drop from enemies in the Graul Graveyard encounter.

Hot Spots
Hot Spots takes place in the Crystal Cave. Watch the little volcano islands in the water pool. When Geo Beast Larvae spawn around one, go clear them out and use the ability that pops up in your temp bar to take a reading from the volcano.
You need to stand on the edge of the volcano after defeating the Geo Beast Spawn before you can take a reading. Unfortunately, the number of enemies you’ll need to defeat does not match the number of volcanoes you need to investigate.
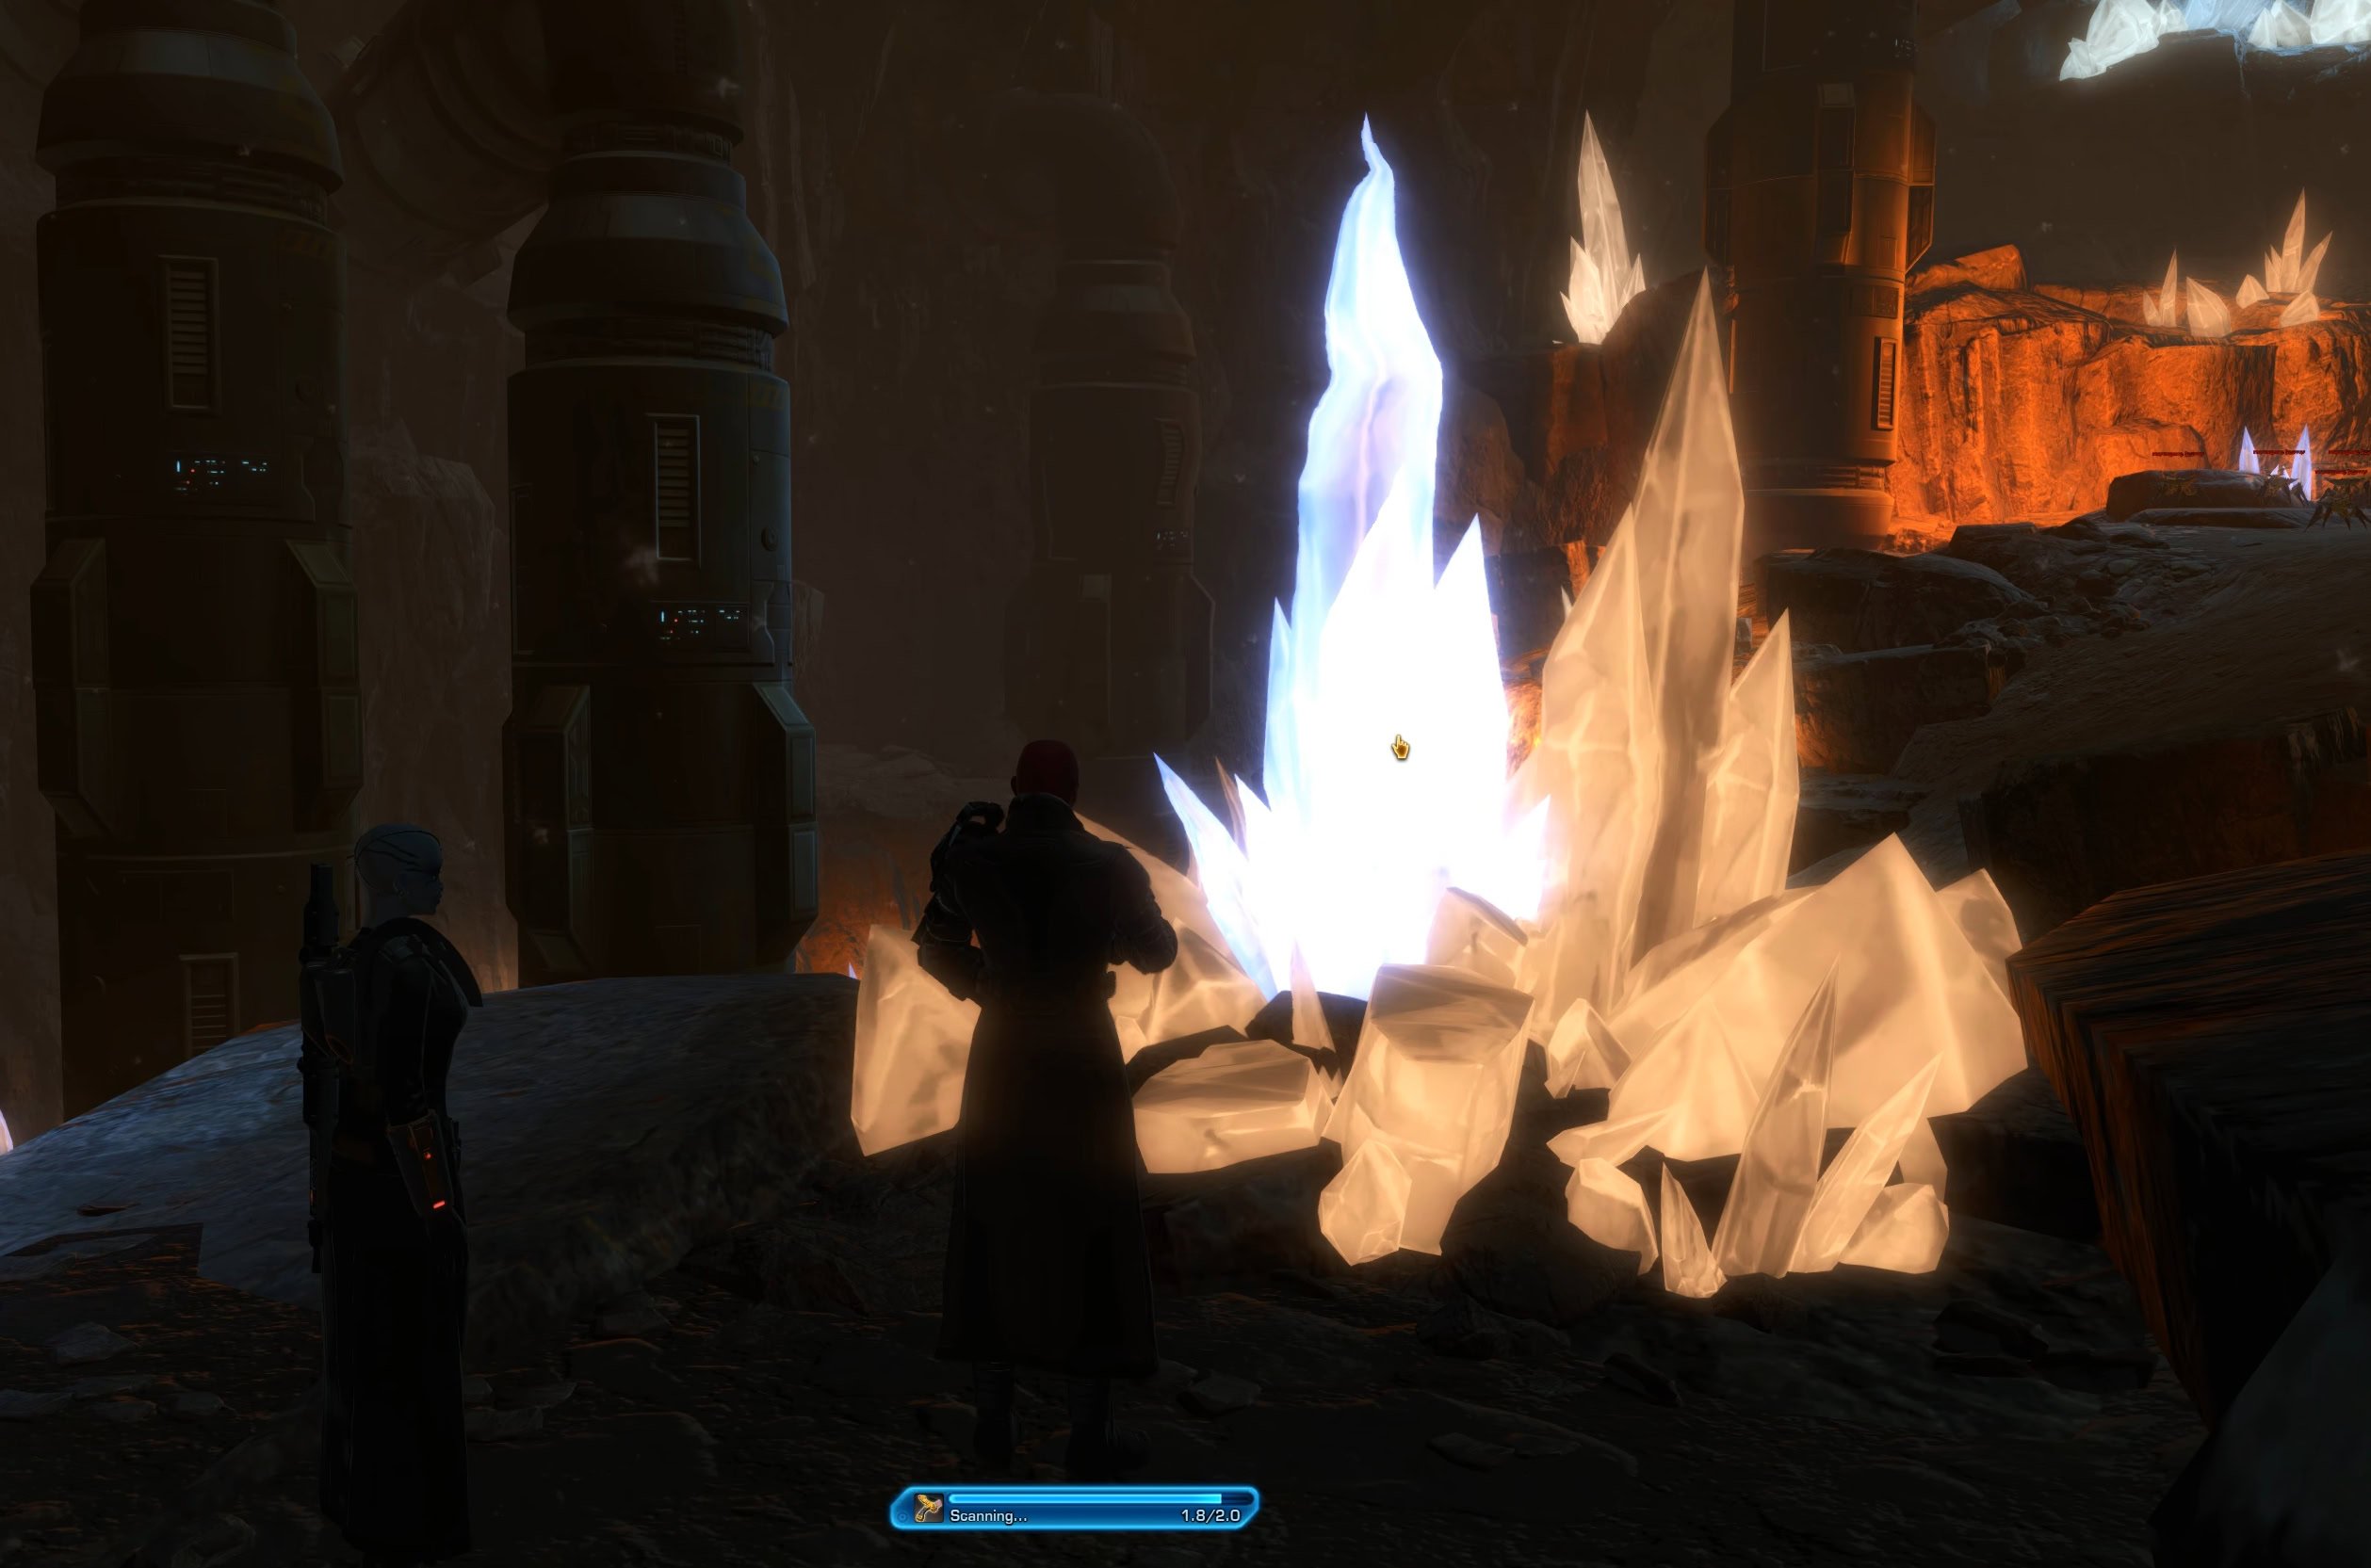
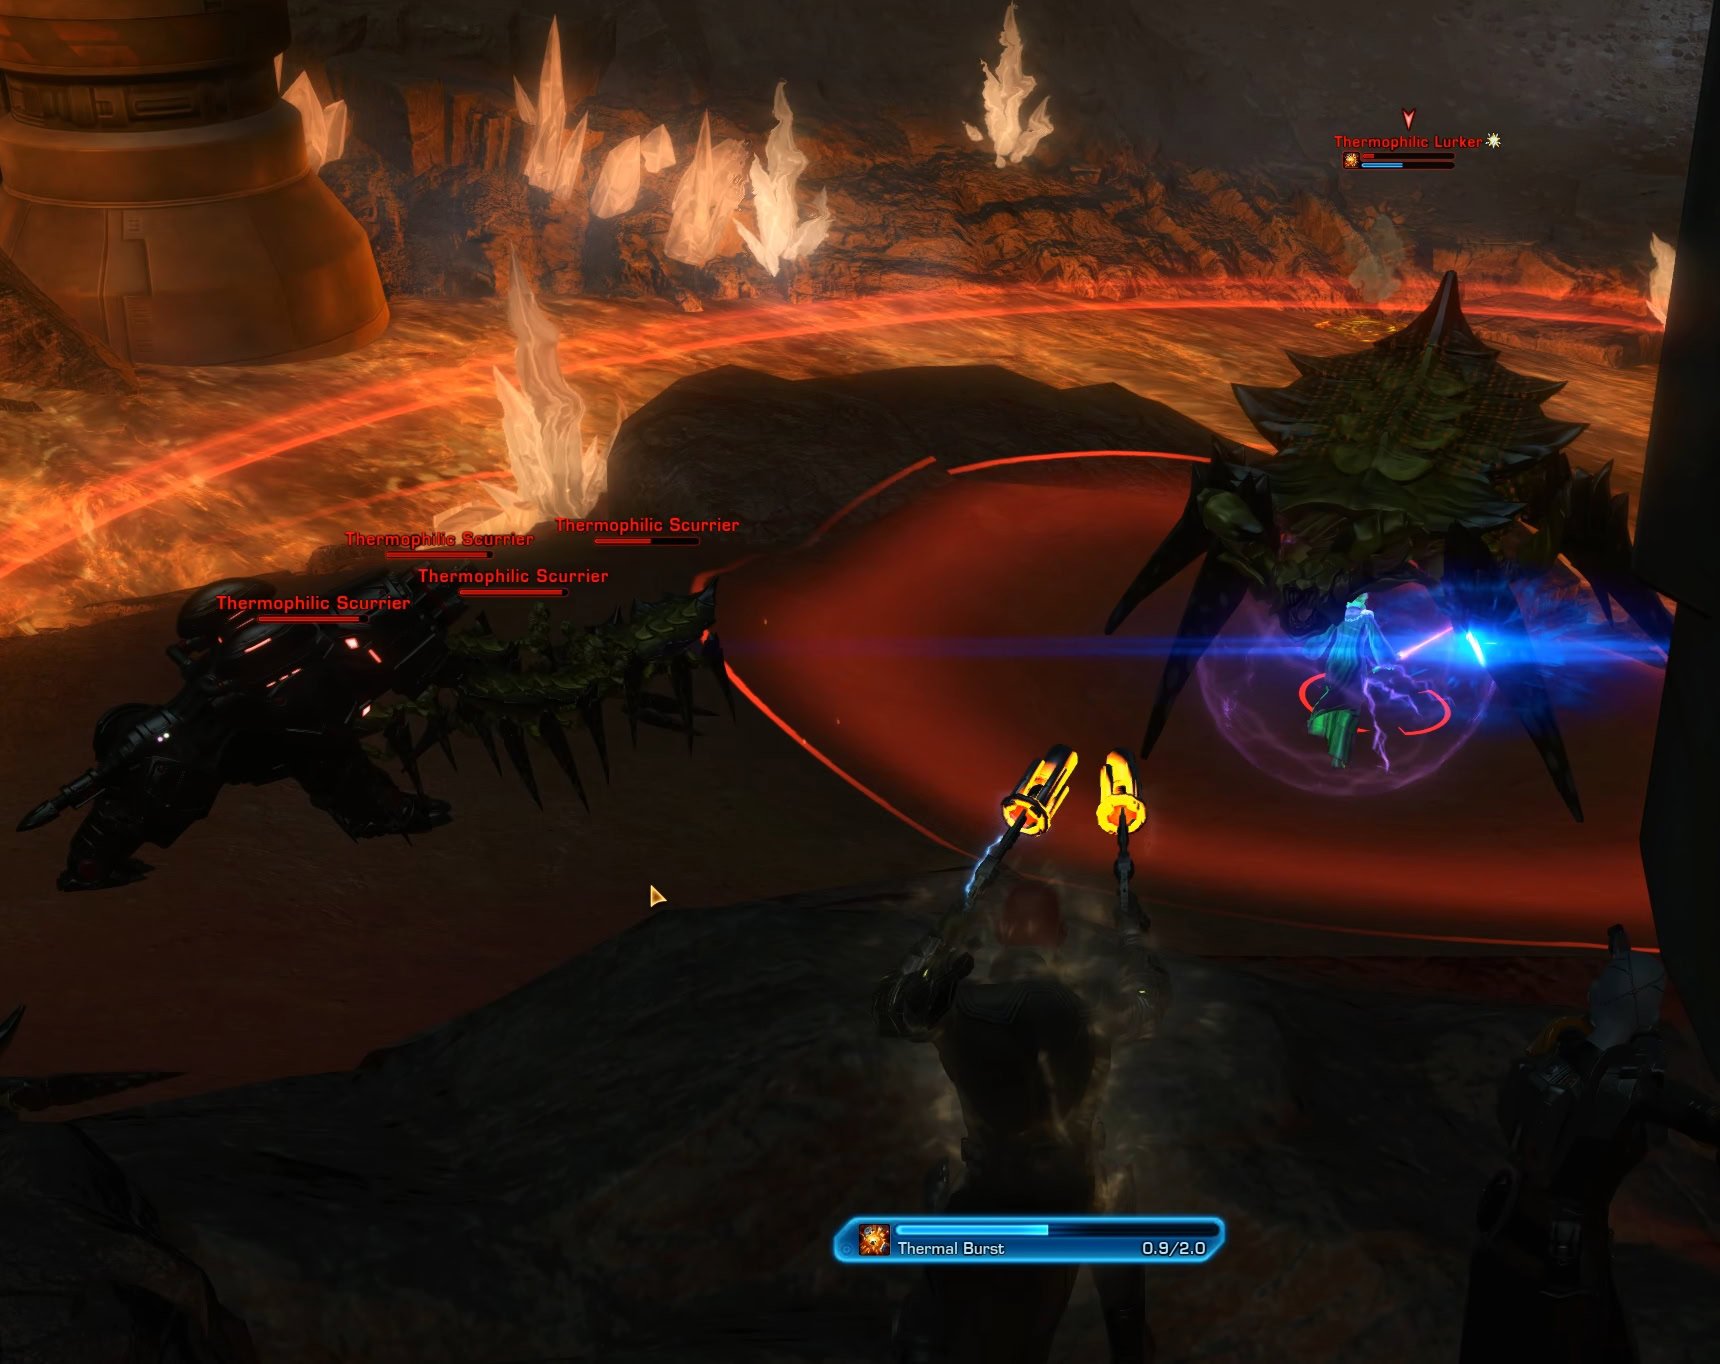
Thermal Investigation
Thermal Investigation spawns in the middle of the lava area of the northern half of the Crystal Cave in Geothermal Disruption. It has two phases.
Phase 1: Scan the Superheated Crystals and take out the little Thermophilic Scurriers.
Phase 2: A large Thermoliphic Lurker will spawn in the middle island. It has two abilities worth noting. Both of them place a large red circle on the ground around the mini boss.
- Heat Implosion pulls you toward the Lurker if you stand in the circle.
- Thermal Burst pushes you out if you stand in the circle.
Heat Implosion is unavoidable and ignores CC immunities, but if you’re quick, some movement speed abilities can get you out of Thermal Brust before the cast finishes, though the attack barely tickles.
Vent Sync Failure
Vent Sync Failure is located near the north entrance to the Crystal Cave, at the northeastern edge of Geothermal Disruption.
At each of the vents, take out the Ship Droids and interact with the glowing blue terminal on the side to deactivate it.
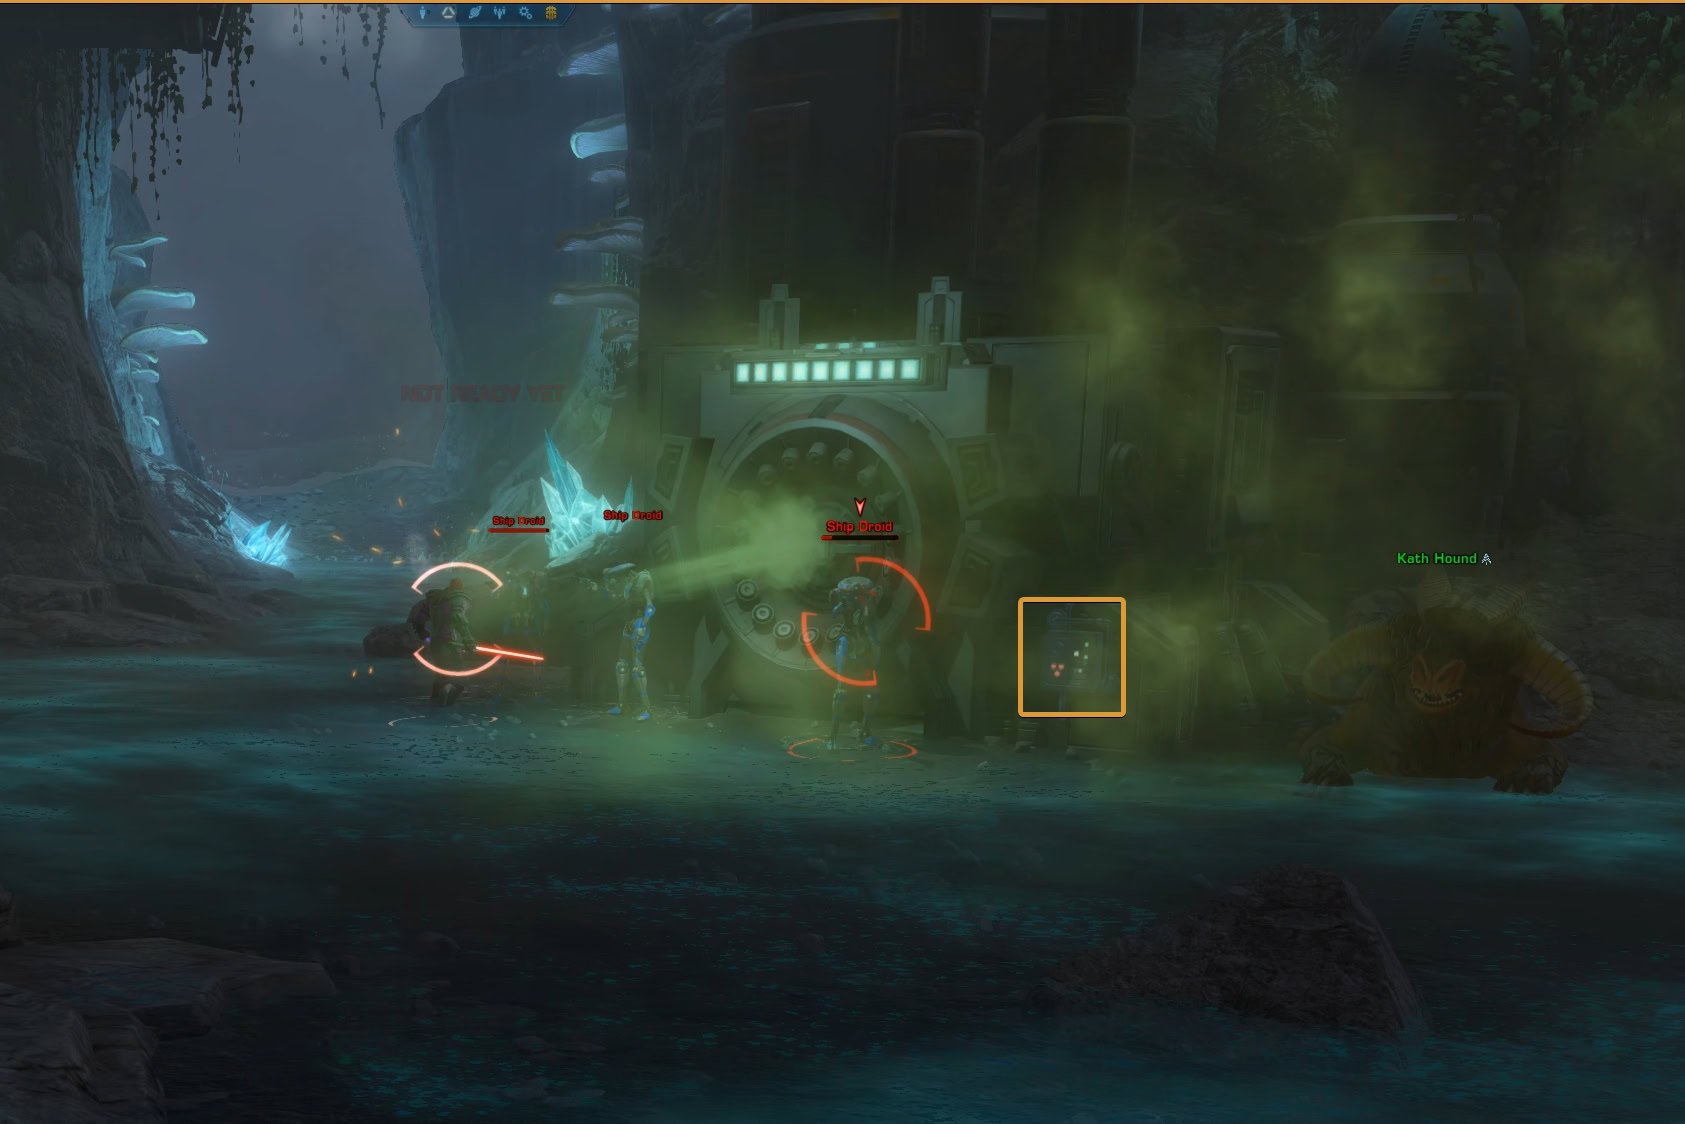
After the first set of objectives, the Ship Droid Overseer will spawn. It’s just a champion NPC.
Dantooine Fern (Wall) decos can drop from enemies in the Vent Sync Failure encounter.
Under Pressure
Under Pressure is a fabulous, rare encounter in the Lava Cave in Geothermal Disruption. It can only appear at Level 3. You’ll need to pilot a Construction Droid and Mouse Droid to construct a Geyser Cap and defend it against Agitated Geo Beasts.
The Mouse Droid will spawn you up on some scaffolding around the pipes on the wall. You’ll need to knock down a few pieces for the Construction Droid to assemble into a Geyser Cap. One of the clickables is a wall panel down near the lava.
After each assembly step, some Agitated Geo Beasts will spawn that you’ll need to defeat as either as a Construction Droid or as a regular player. At the end, you’ll need to defeat a fully-grown Agitated Geo Beast.
Come Up, Fish
Come Up, Fish is just a rare encounter that appears only at Level 3 in the Lava Cave in Geothermal Disruption. To everyone’s dismay, you do not get to fight a lava fish, though Star Wars in general does not seem to do that.
Instead, you just fight another Gargantuan Geo Beast. It has no special mechanics, but it’s the only place you can get the Geothermal Disruption Diorama deco.
Core Overload (Transition)
Core Overload is the Transition Encounter that spawns when the Core has maxed out Level 1 and is ready to go into Level 2. The encounter takes part inside the ship, in the Geothermal wing.
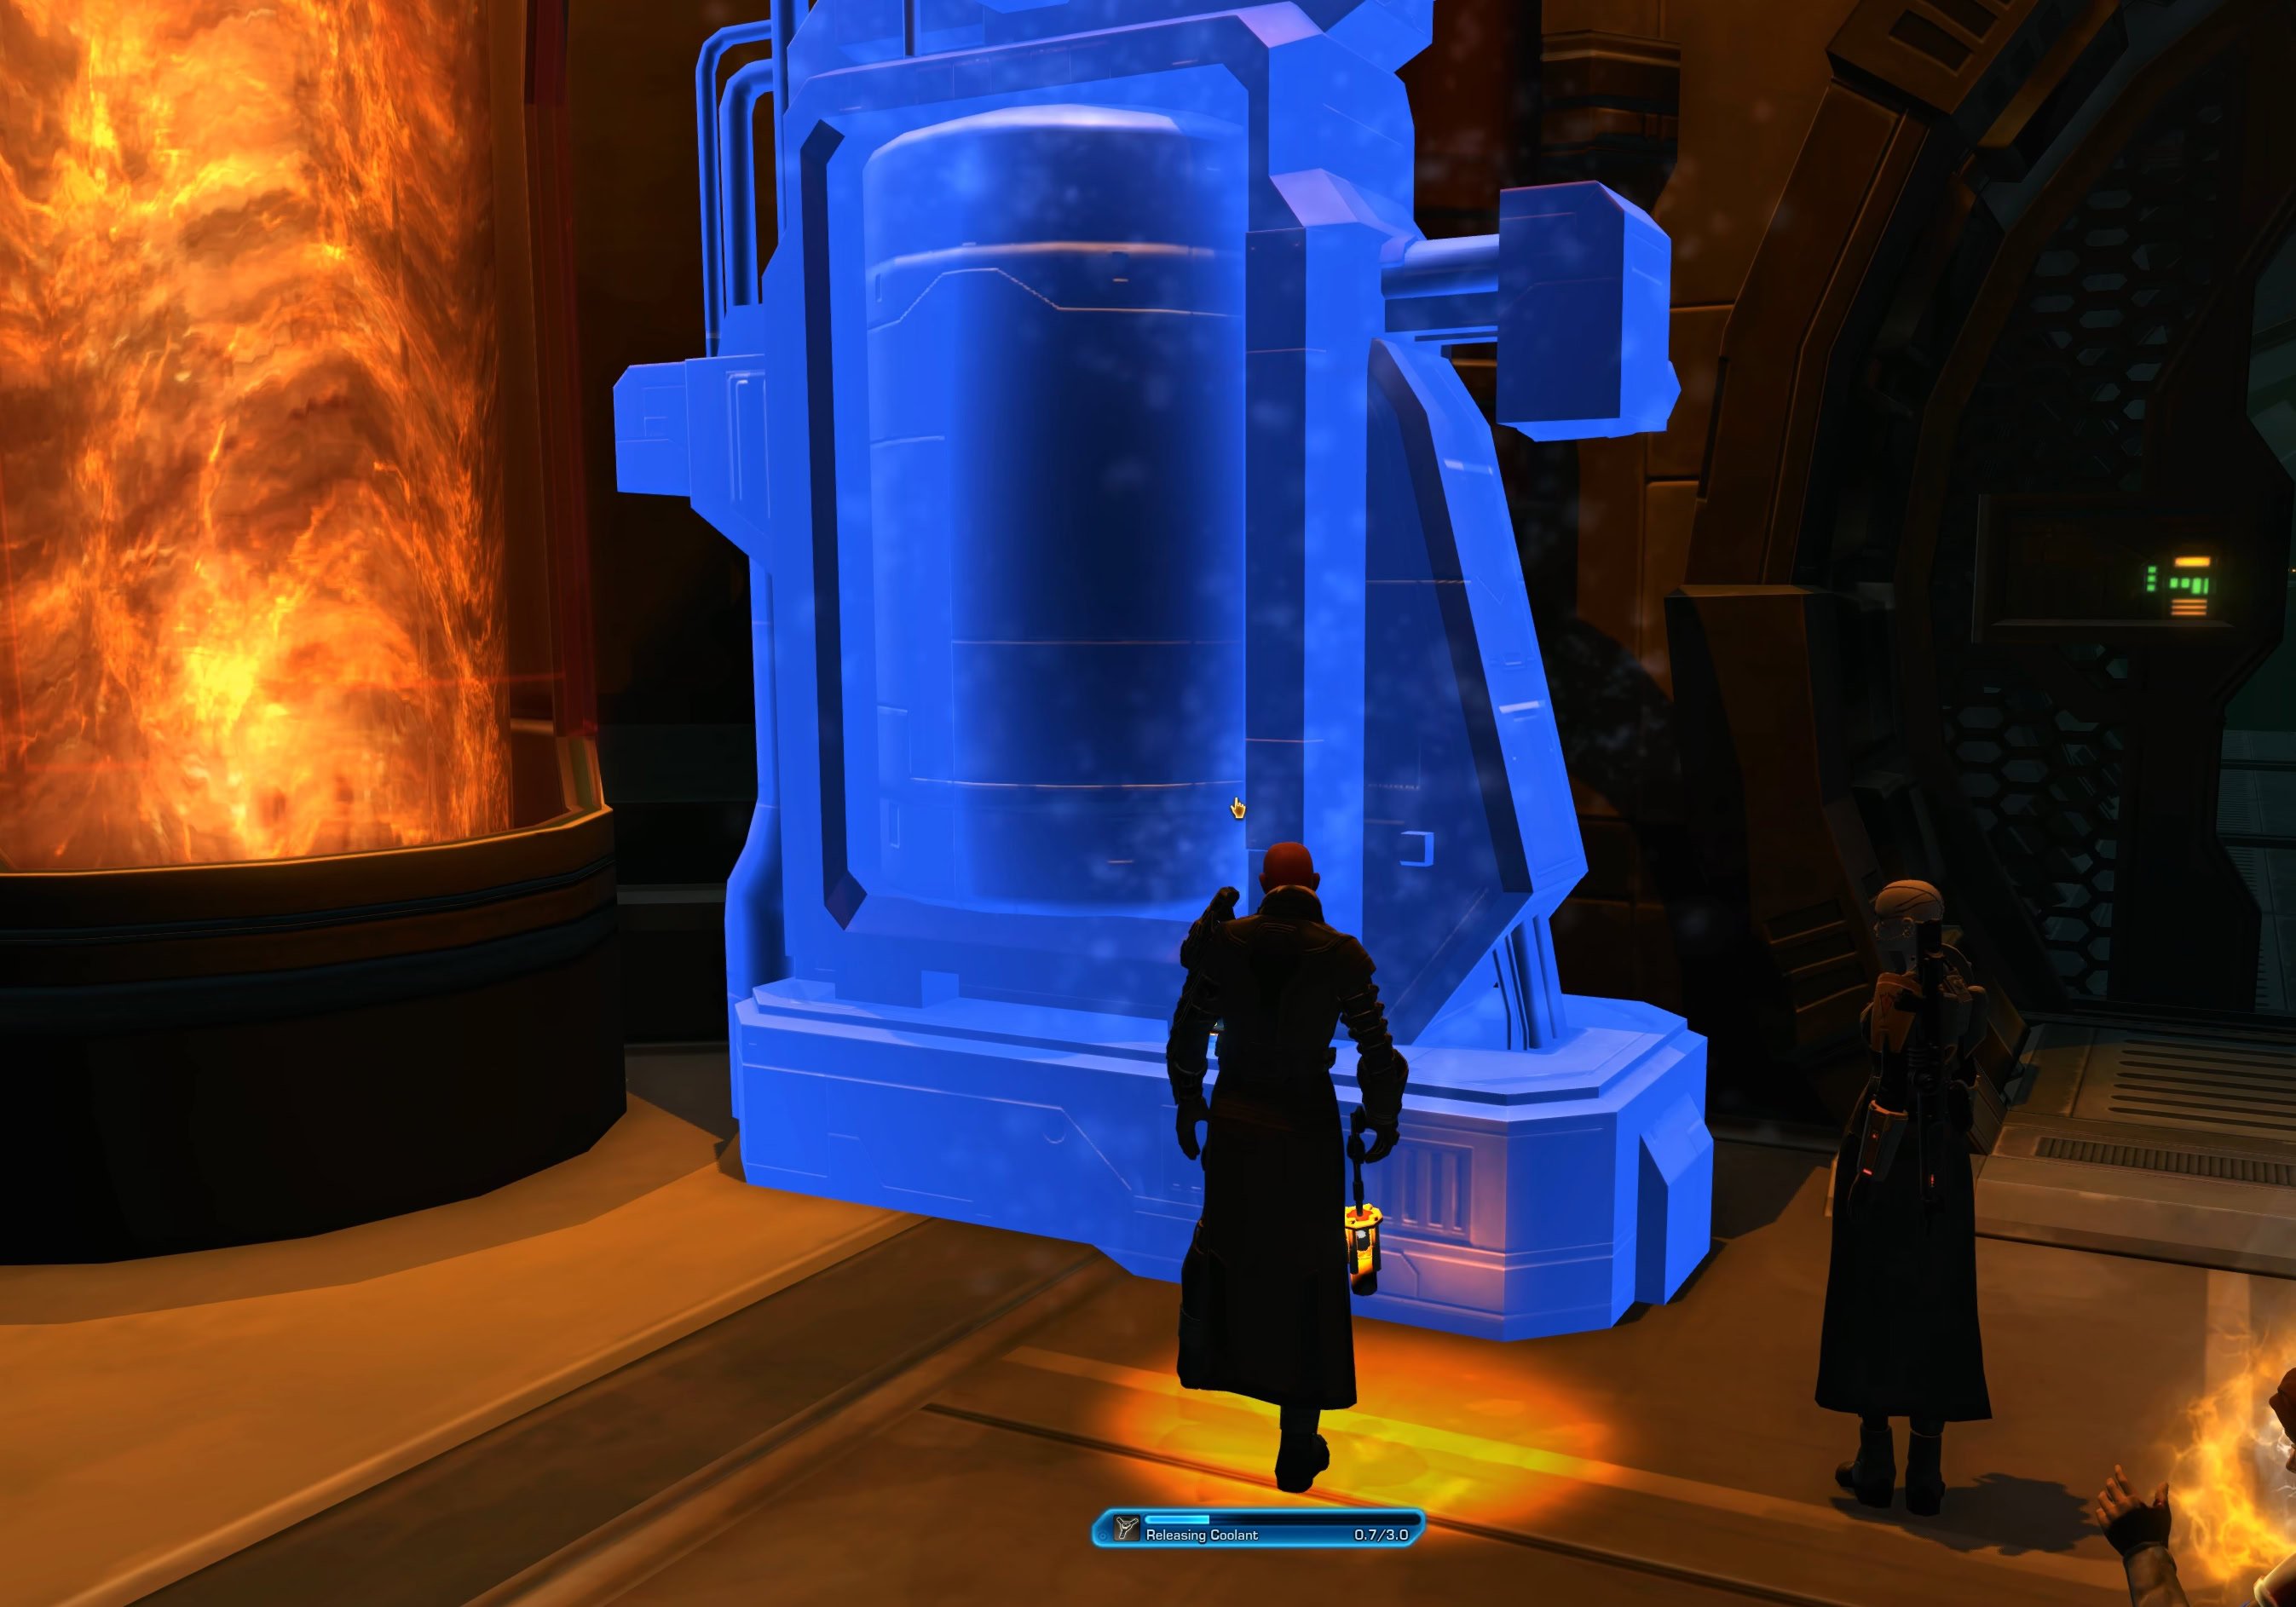
Phase 1: In the first phase, you have to access and activate the Thermal Regulators. These consoles are in the back of the area and the only way to get there alive, is to apply the coolant on yourself.
Click on the terminal near the entrance to get the temp ability. When you enter the steam on the other end, apply the coolant on yourself and go through to the consoles.
During this phase, Purge Protocol Droids will spawn and someone will have to keep them busy or take them out so others can deal with the consoles.
Phase 2: This stage requires you to clear the Purge Protocol Droids that have spawned and prepare to face the boss.
Phase 3: The boss, Warden Unit K-8, will spawn in the middle of the circular platform. Be mindful of the pylons surrounding the platform as they block your eye of sight.

Phase 4: Click on the console in the middle to shut down the Biothermal Regulator and complete the encounter.
Caretaker Unit K-6 (Transition)
The Caretaker Unit K-6 is a transition encounter that takes place in the Geothermal wing of the crashed ship. It’s a champion mini-boss with some adds.
Sporefall Encounter Walkthroughs
This segment contains the walkthroughs and tips for the Dynamic Encounters in the Sporefall biome of the Dantooine Crash Site.
Bigger Trouble
Bigger Trouble spawns in the northern alcove of Sporefall during level 3. Its objective is simple, defeat the iknayid creature and the droid, a pair of champion NPCs. There is nothing special about them.
This is the only encounter that drops the Sporefall Diorama.
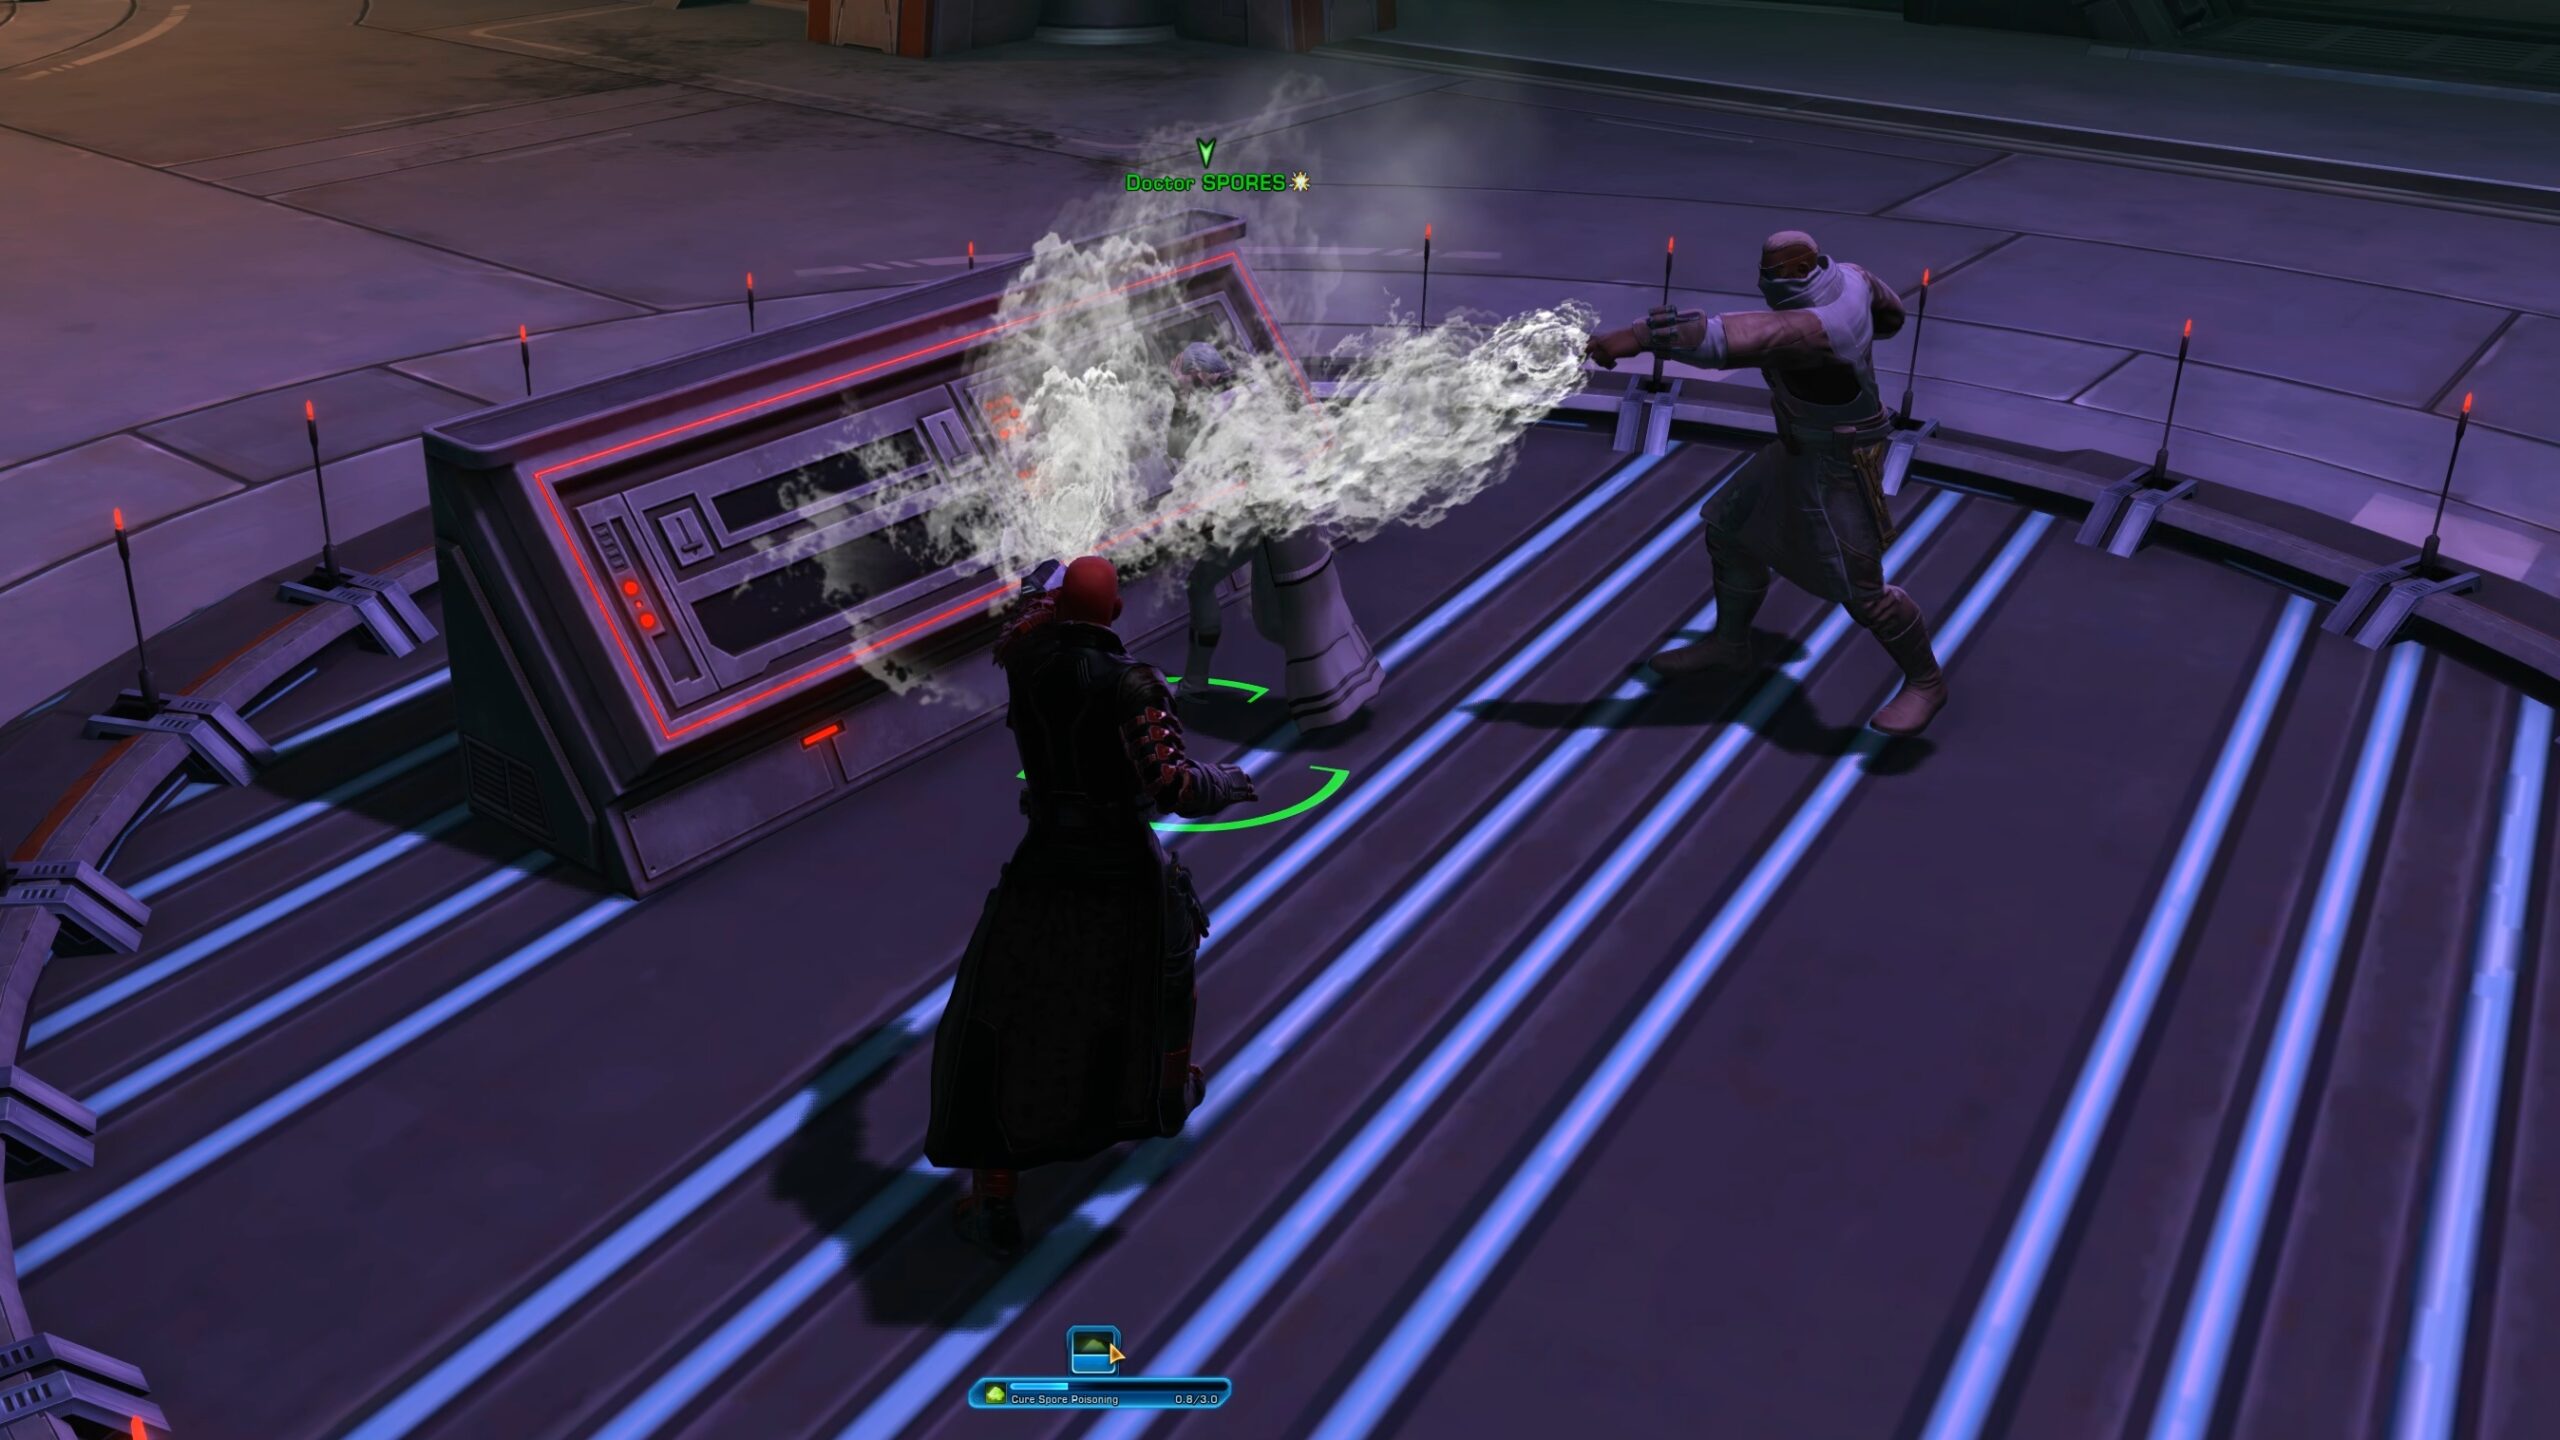
Dr. Spears, I presume?
The encounter takes place in a nice little alcove in the southern part of Sporefall. It can be easily completed solo.
When you arrive, you have to examine Dr. Spears. His mind is going off from the Spores. When he “turns” into Dr. Spores, defeat him. The fight is nothing exceptional. When he spawns adds, AoE or focus them quick (he heals significantly while they are around). Once he is defeated, click on him and use the temp ability to cure him.
You may not get credit unless you are the one to cure him.
Fascinating!
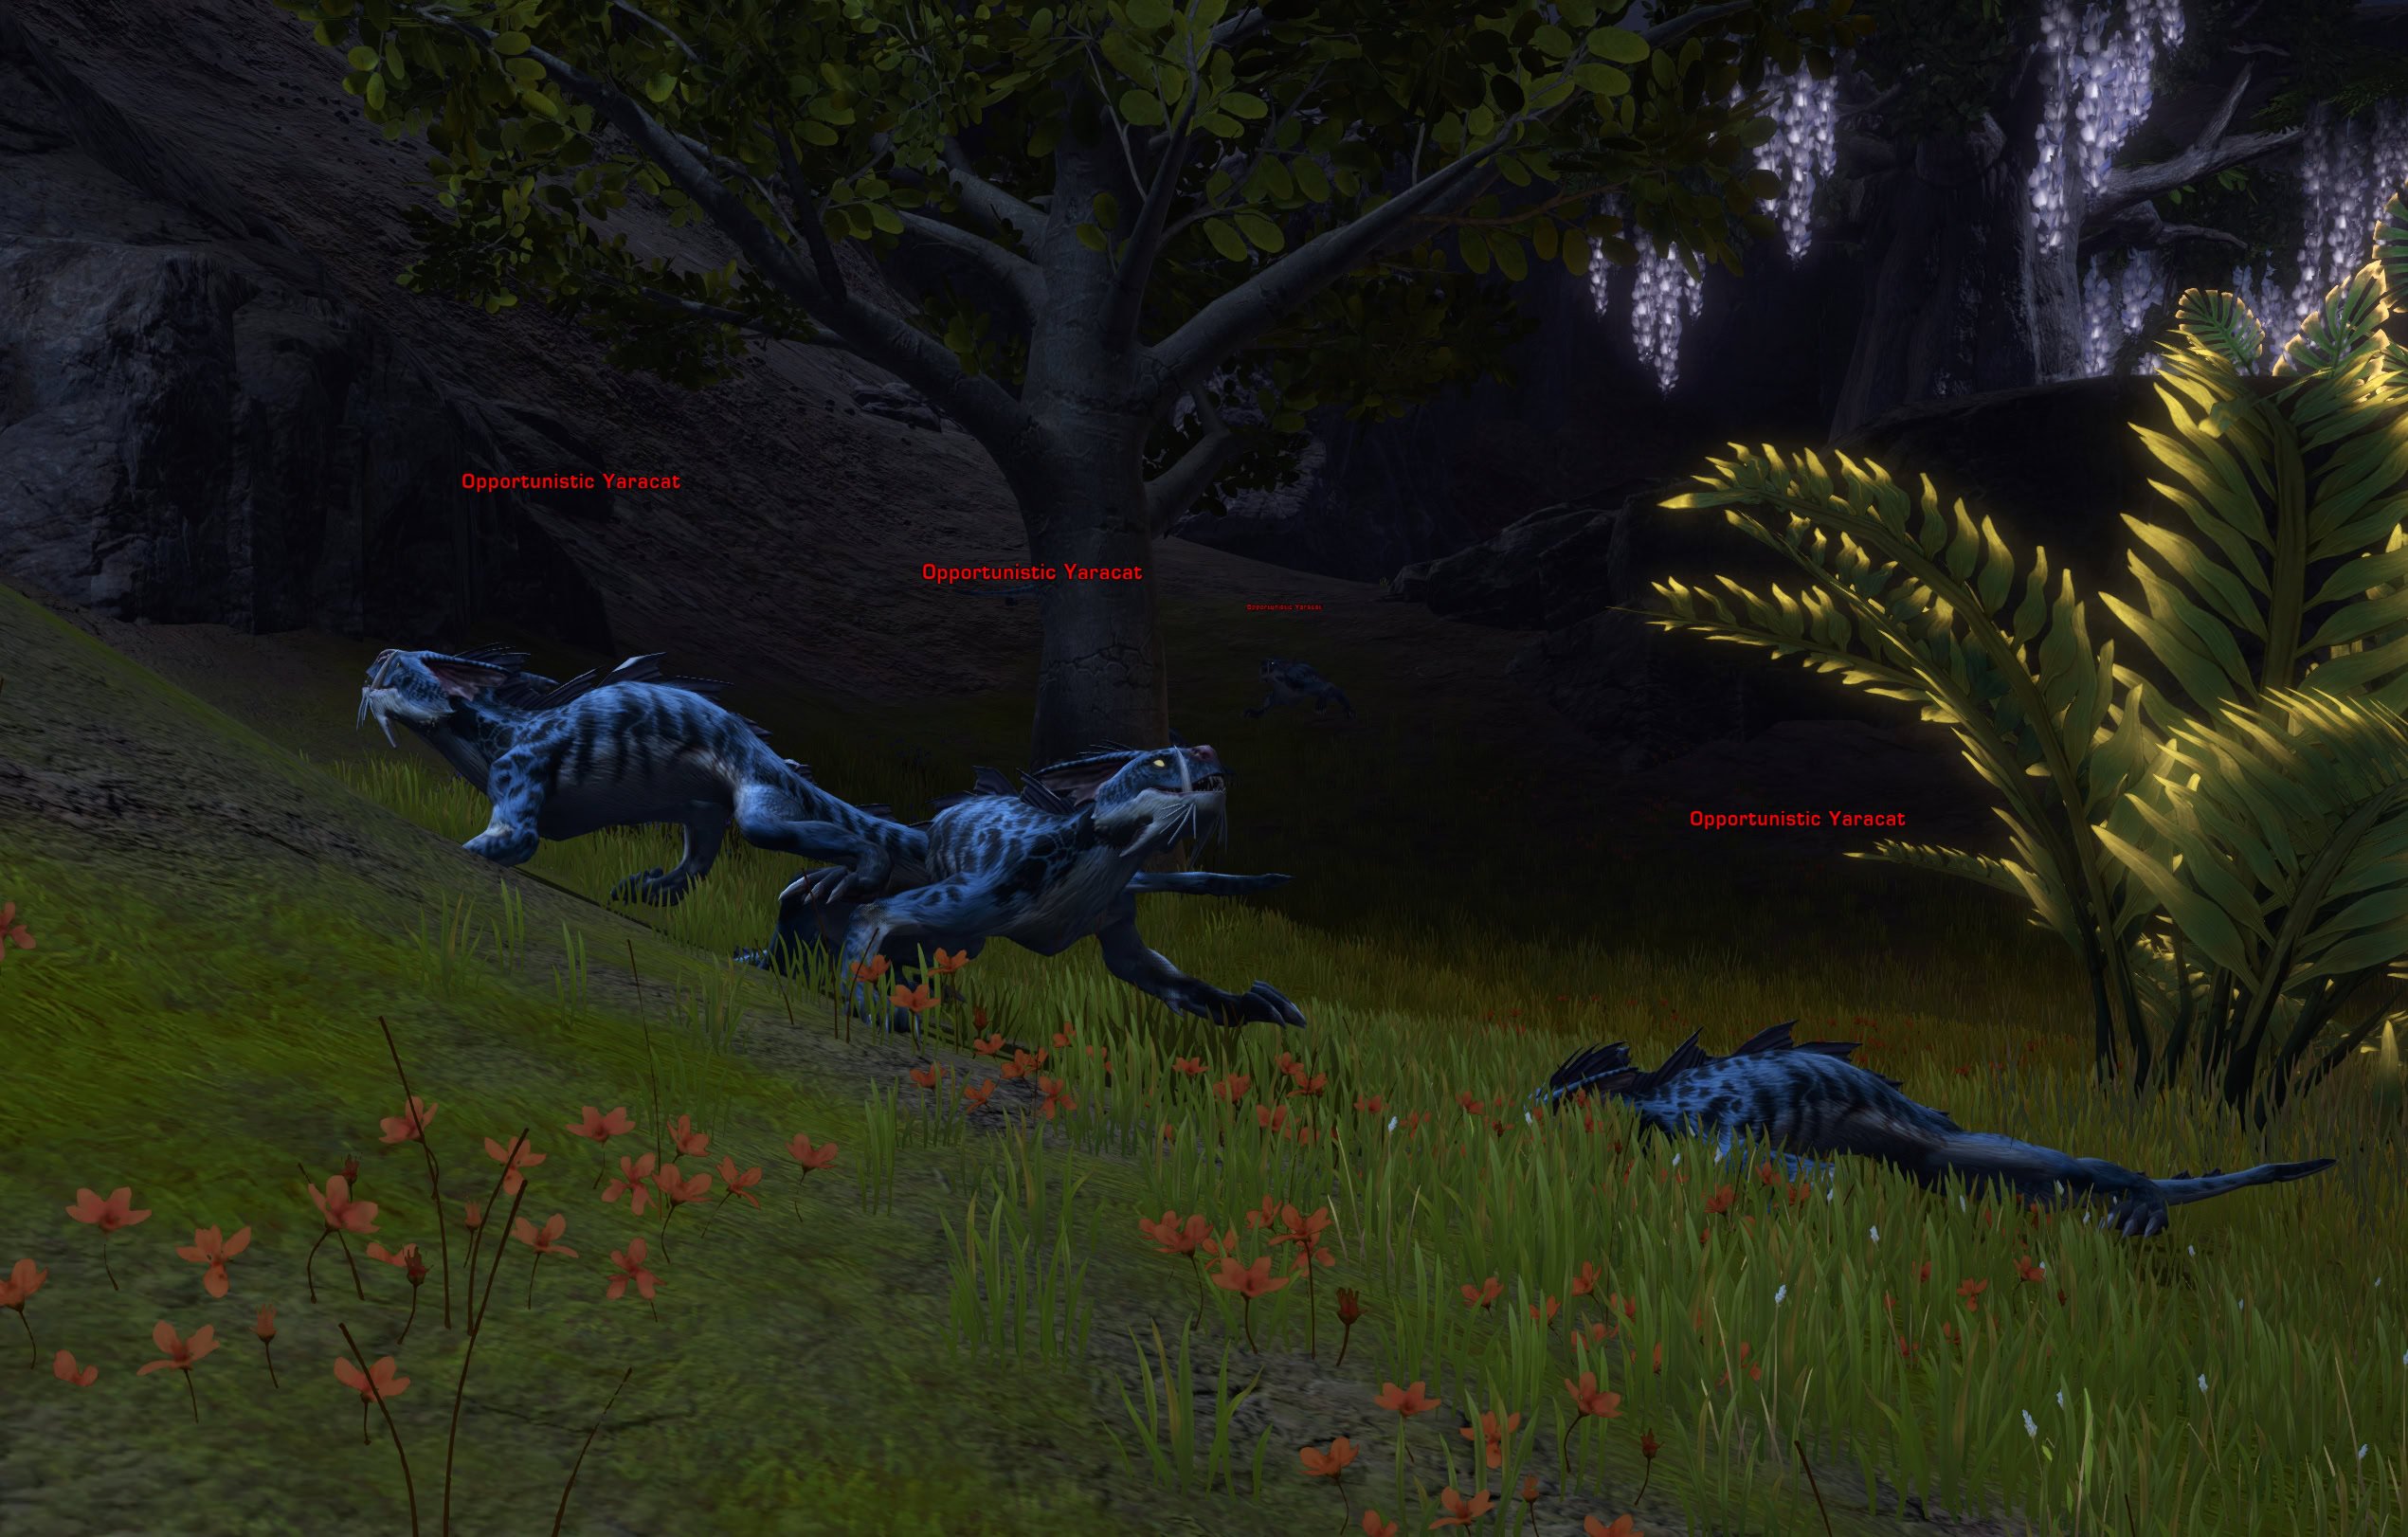
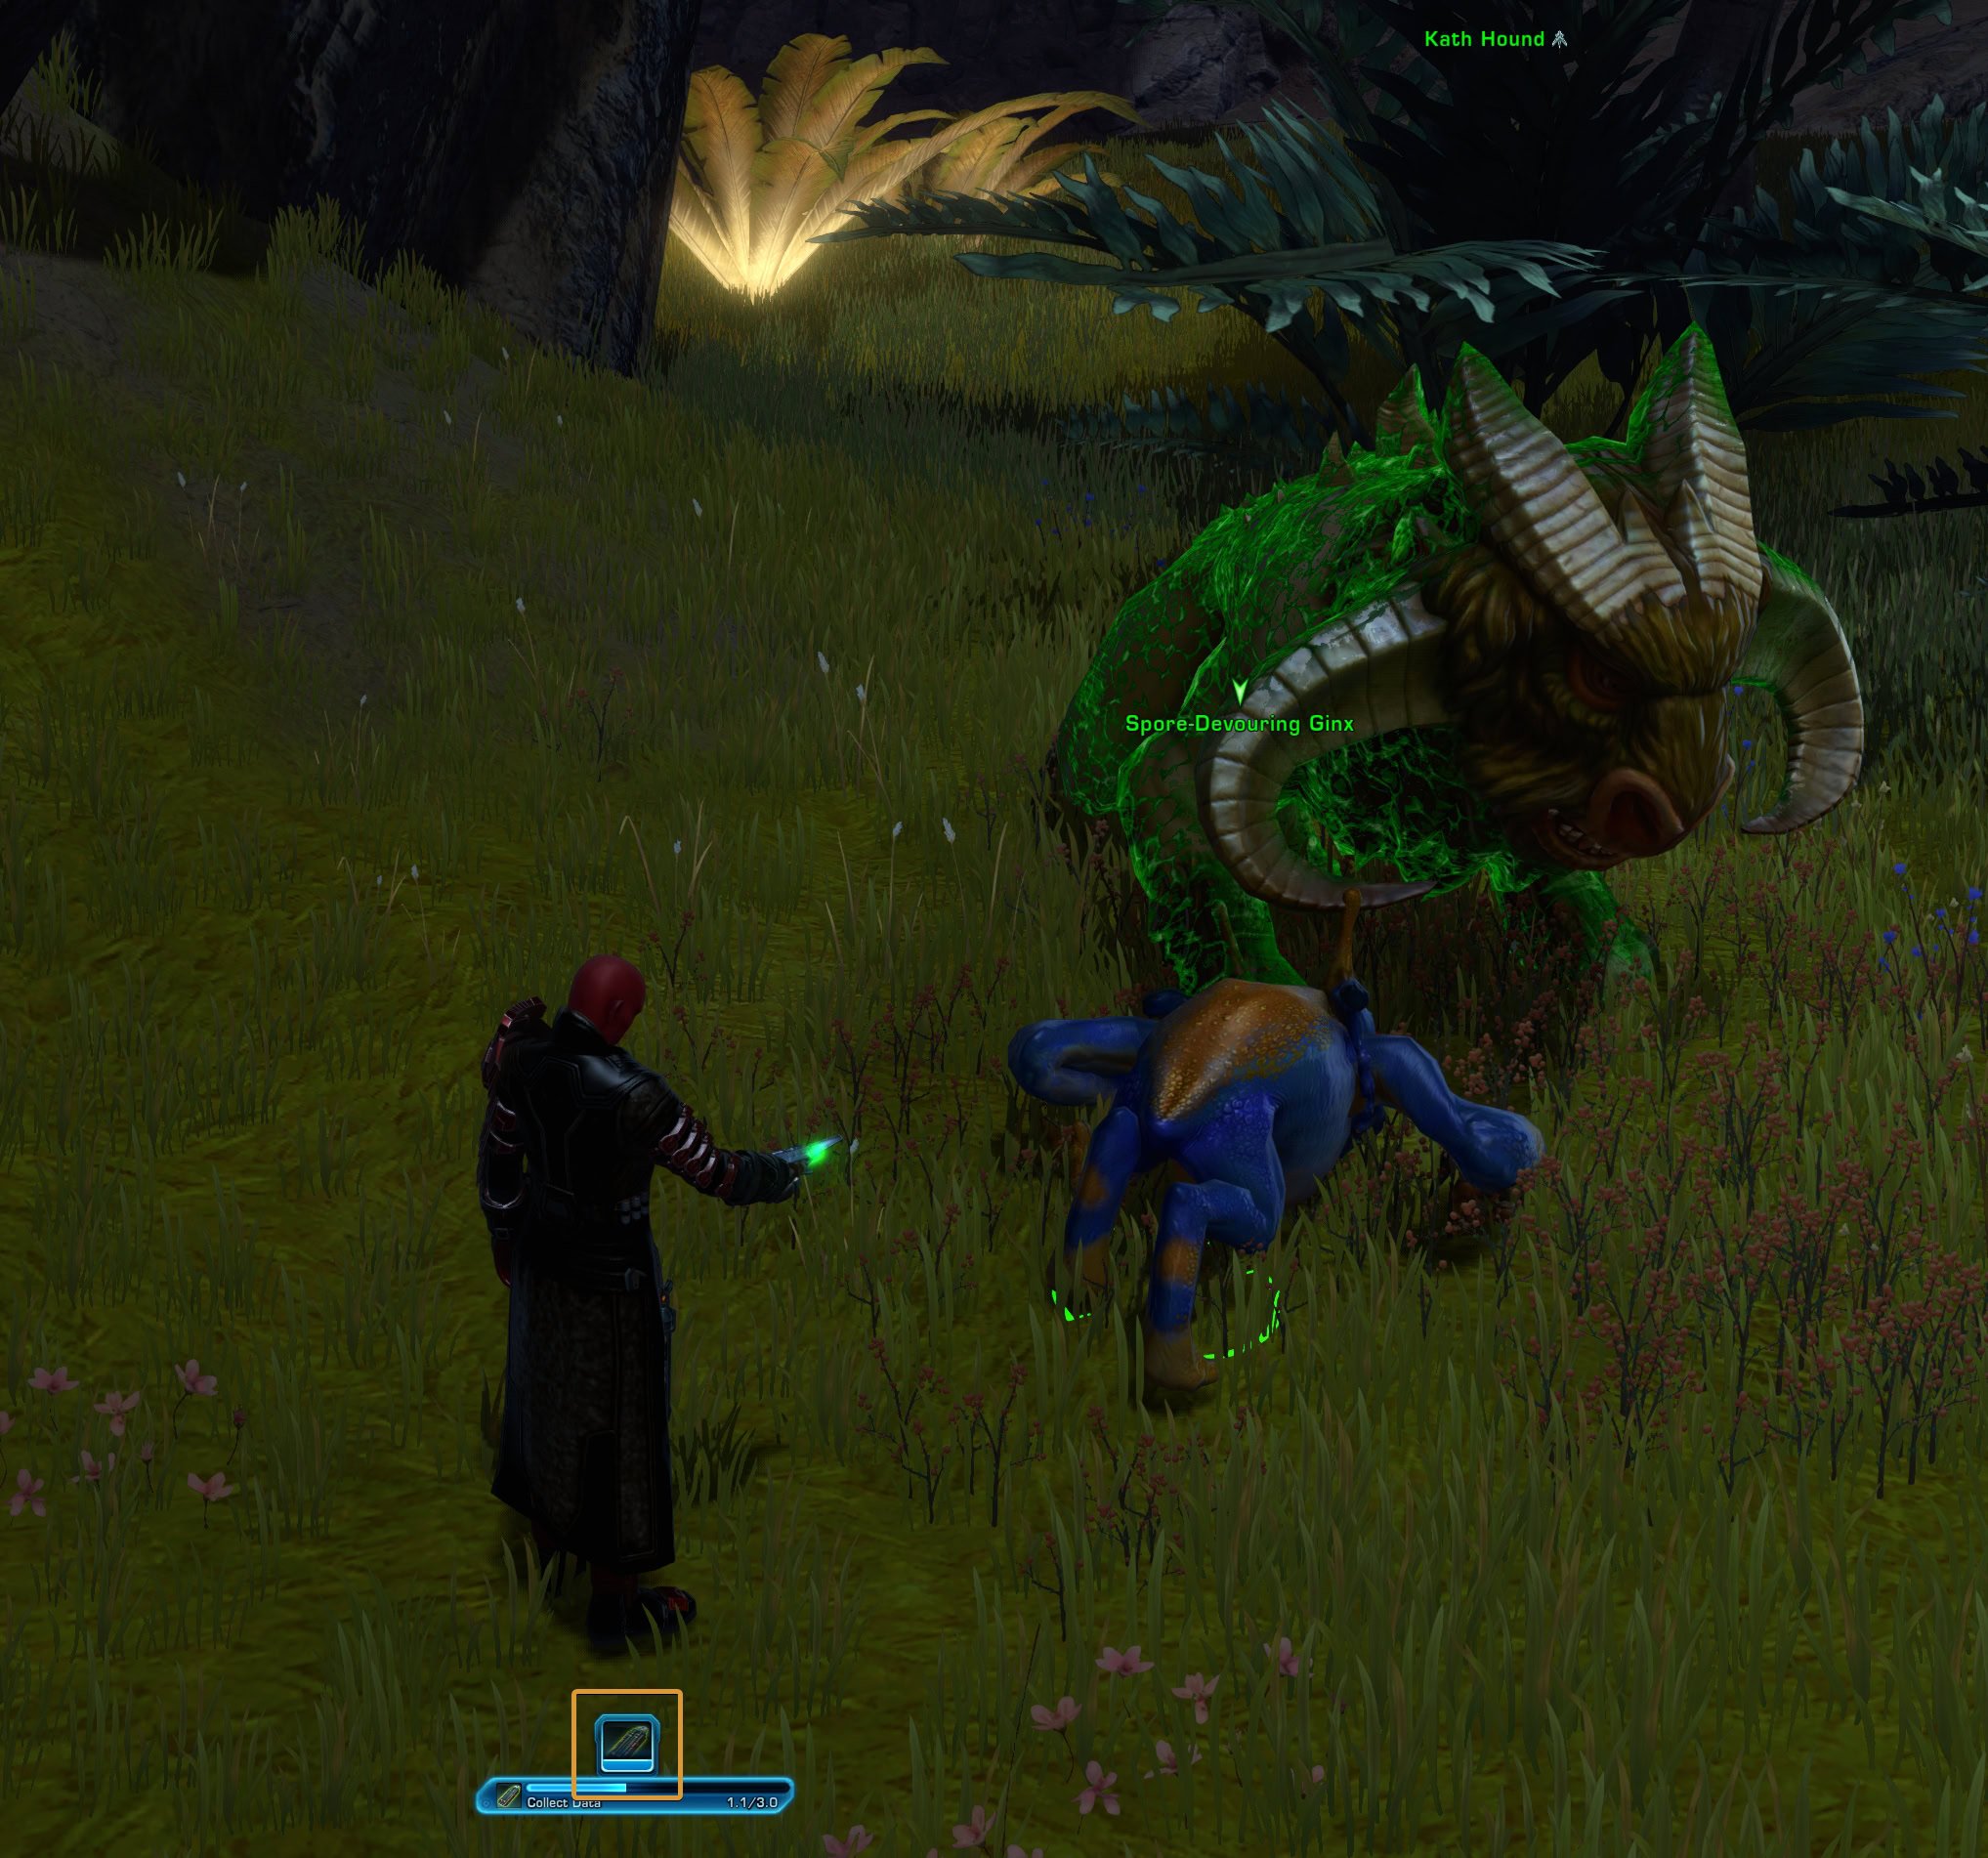
Fascinating spawns at the top of the Research Camp Perimeter, near the entrance to Sporefall proper. The scientists want to observe a fascinating relationship developing between the Ginx and Kath Hounds, but some nasty Yaracats are preventing them.
Phase 1: Clear out the Opportunistic Yaracats.
Phase 2: To deploy the Ginx Pheromones, look for the spots marked with the large green arrow. When you are close enough, your cursor will turn into a hand, indicating your ability to throw a grenade and spread some pheromones. Even though the action is “throwing”, you still need to be very close to the spots.
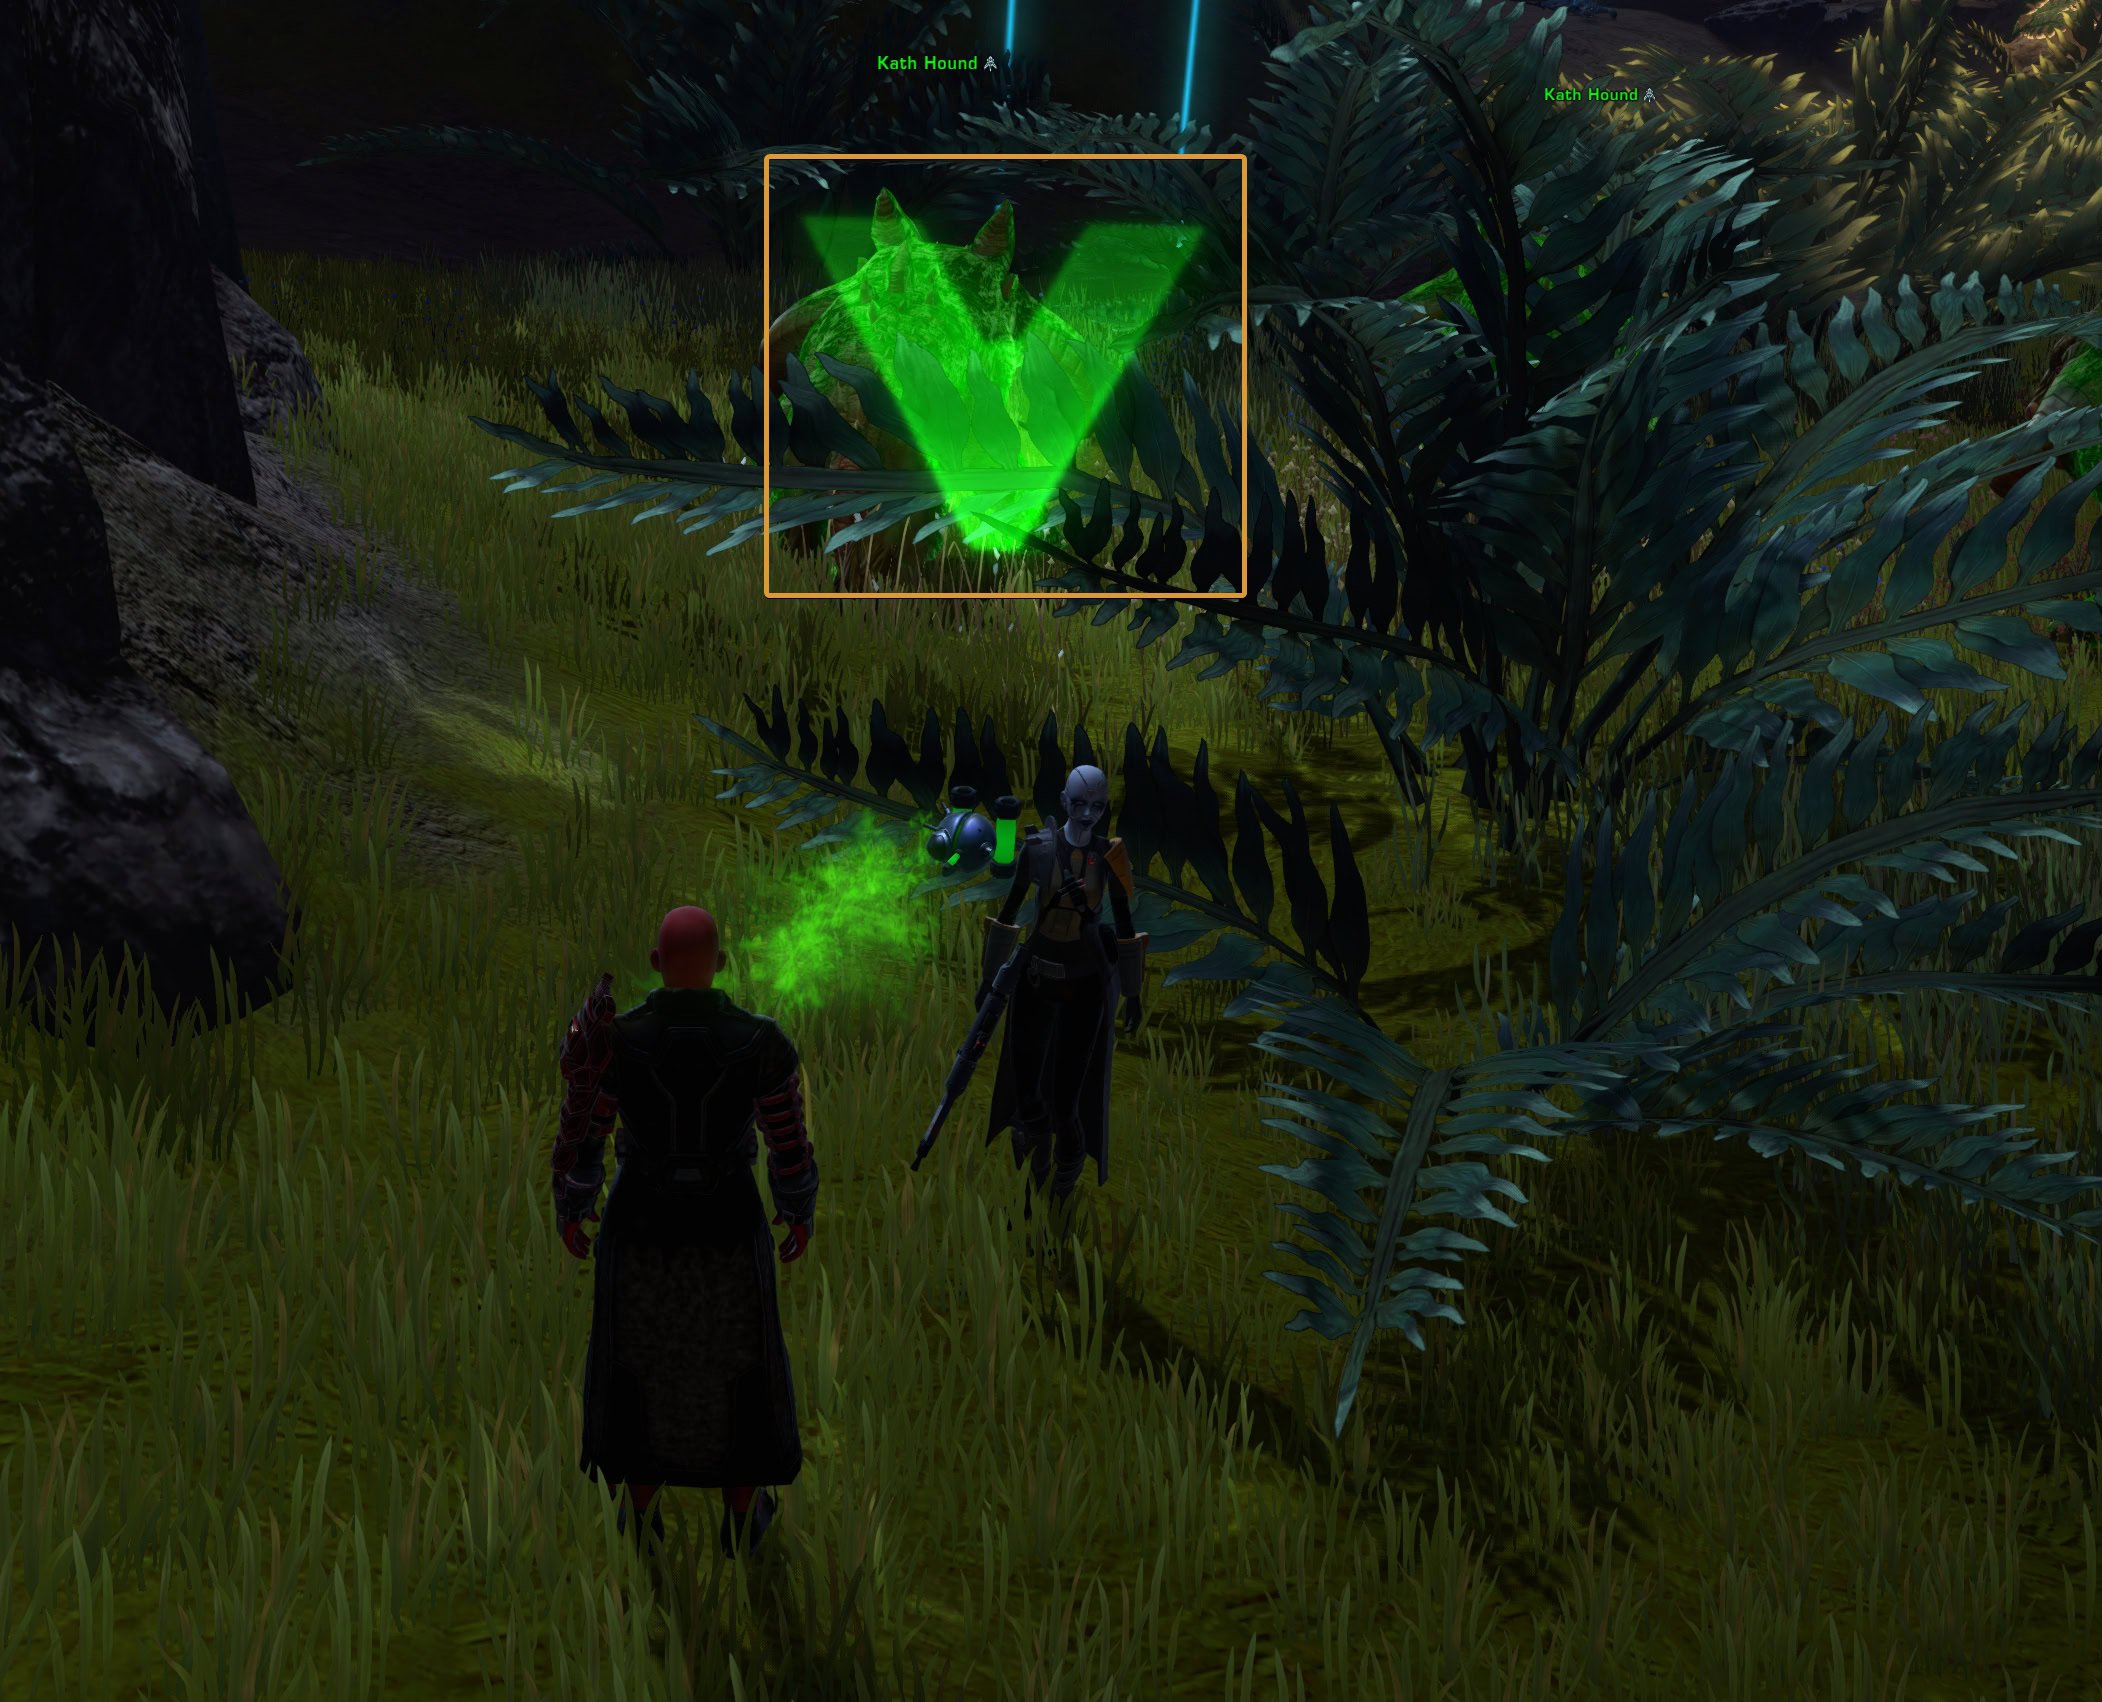
Phase 3: To collect data from the creatures, stand next to either a Spore-Devouring Ginx or a Kath Hound. A temp bar will appear with the ability allowing you to scan them. They reset fairly quickly, so find yourself a large group and just switch targets and click.
Ginx of an Unusual Size
The encounter spawns in the northeast corner of Sporefall. You will find a single large Ginx enemy in a little alcove at the end of the large root leading up to the higher ground.
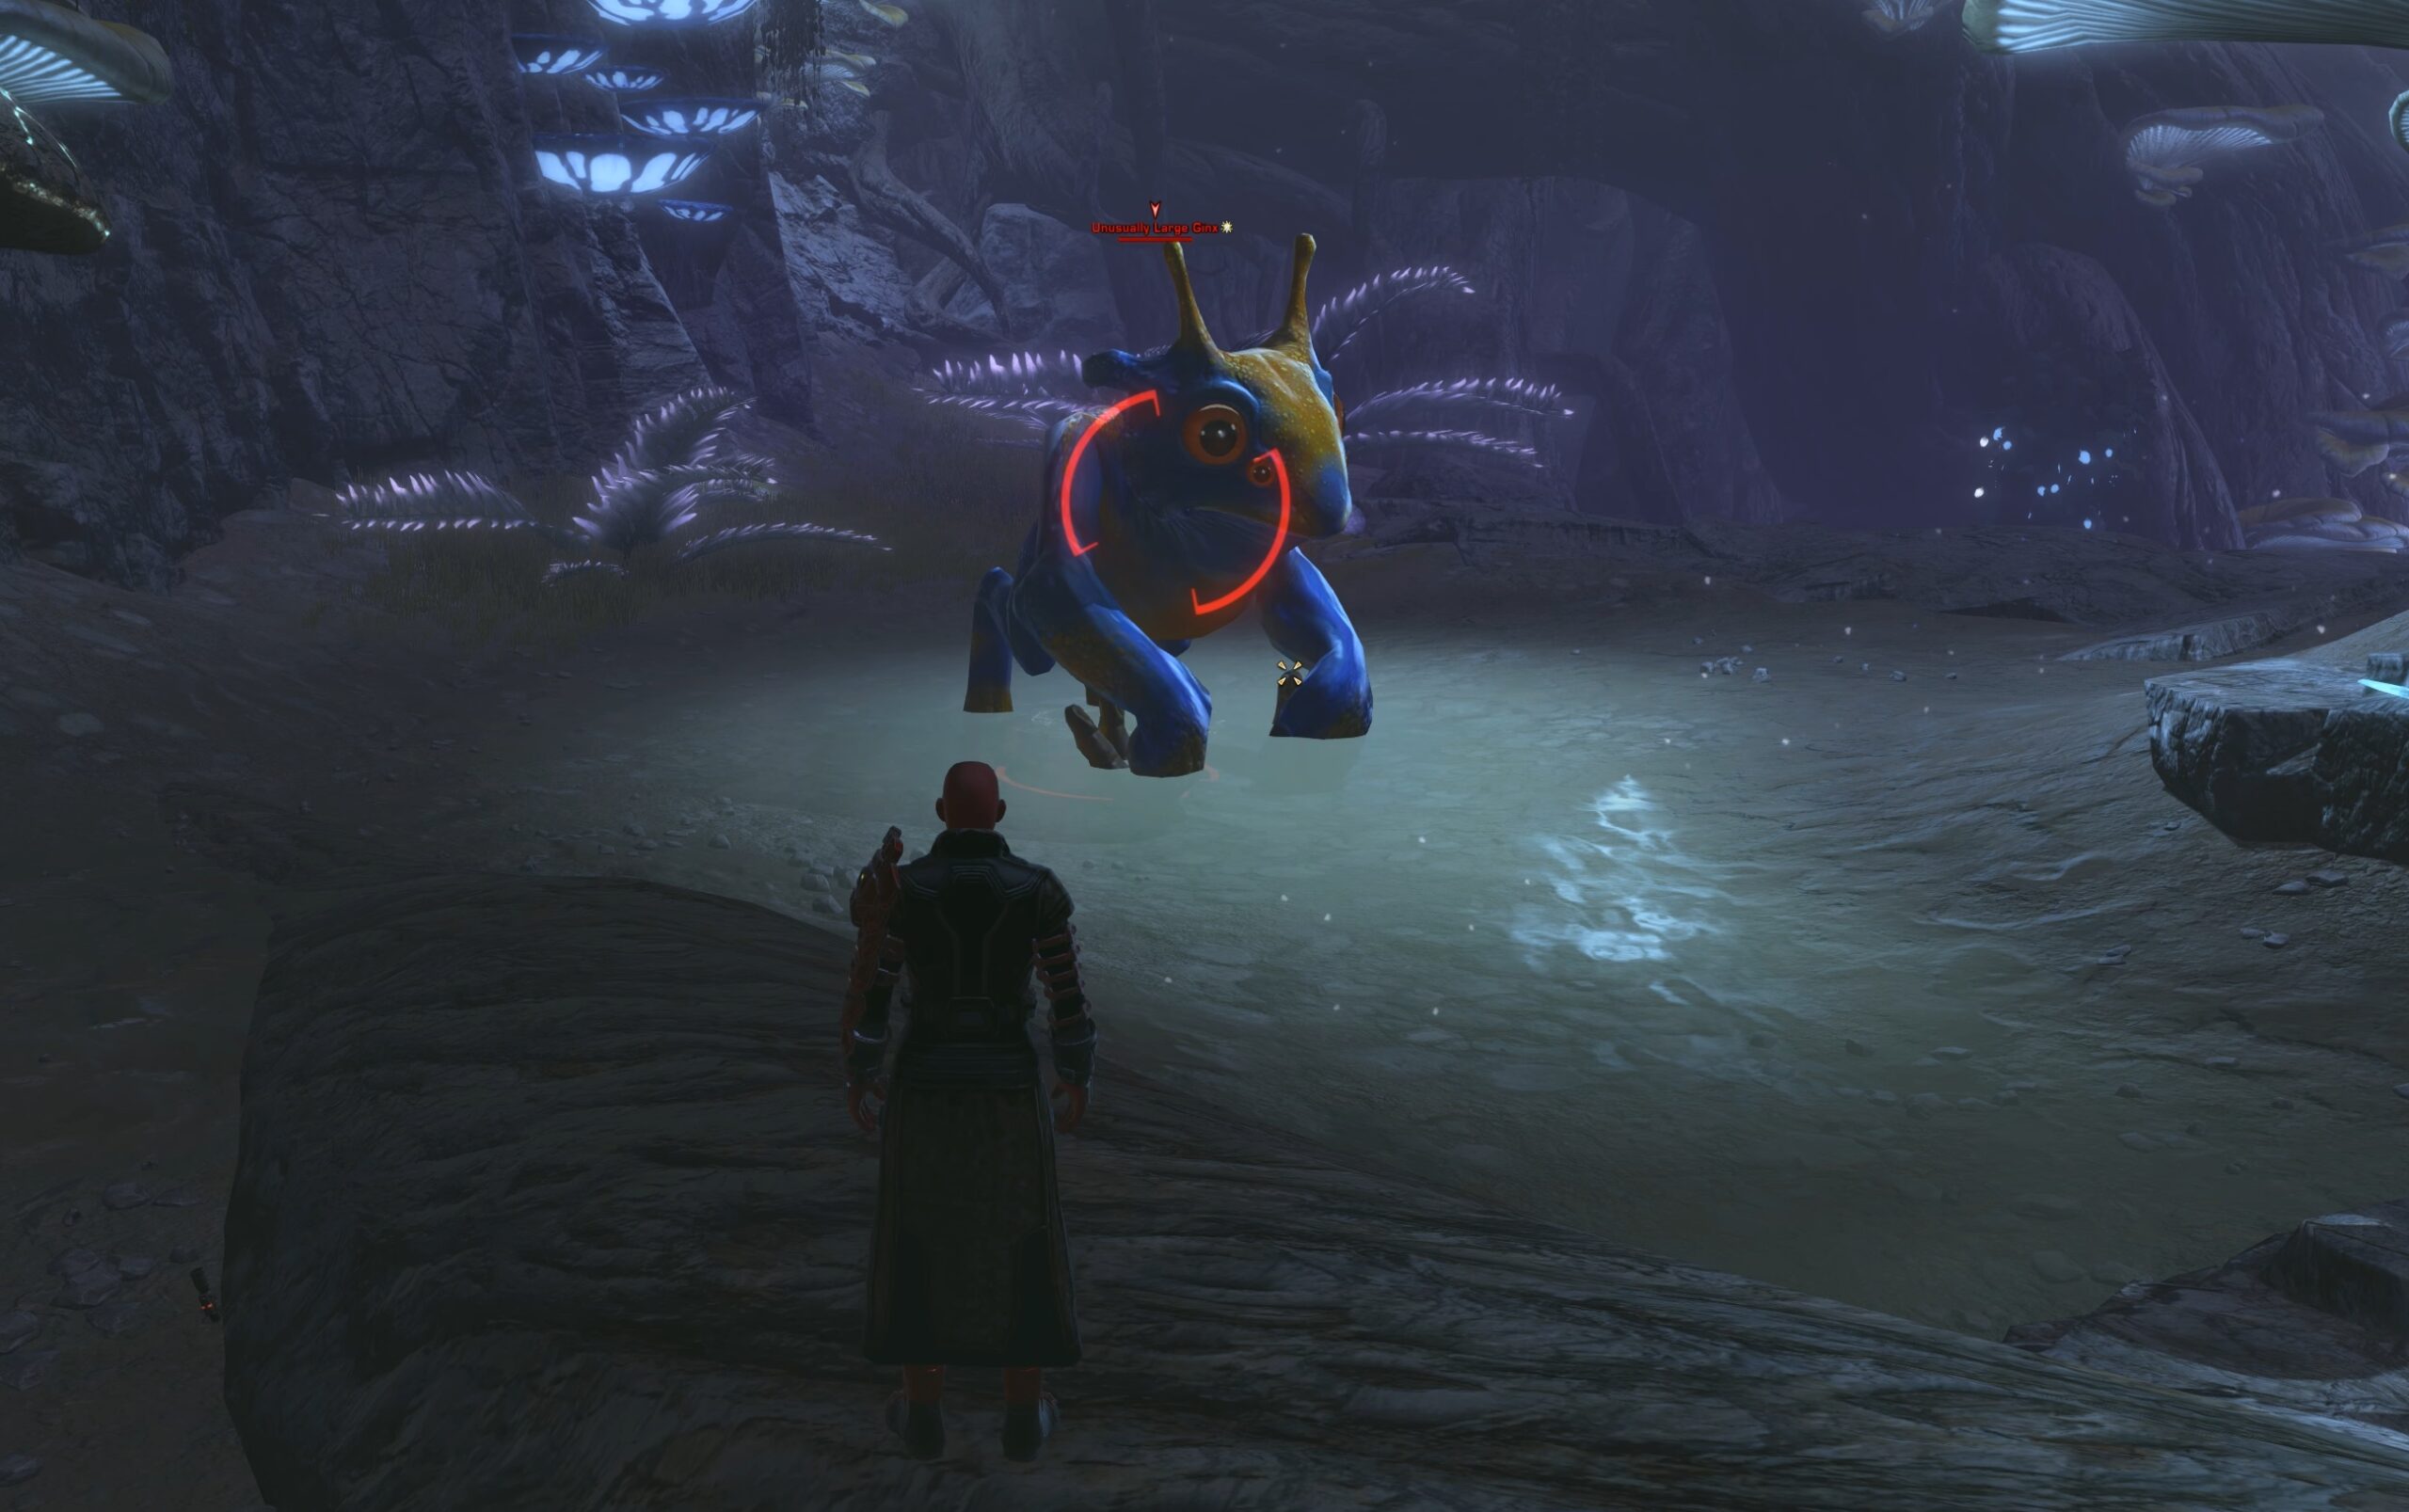
The creature has nothing to show off for, except its size and health pool. It has a chance to apply an armor debuff to you that stacks.
The beefy Ginx can drop the Dantooine Fern (Potted) deco.
Lost Bormu
Lost Bormu is an encounter that spawns in the western clearing of Sporefall. Its champion Screecher creature you have to defeat has one single notable ability: Mind Shatter.

This ability stuns you for a brief moment. The Screecher spams it very frequently and it has a huge 25m radius, marked with a red circle on the ground, but you can interrupt it or stand in the Bormu’s blue aura to protect yourself. There’s also a Spore-Tending Unit patrolling the area that you need to avoid.
Dantooine Hanging Roots can drop from enemies in the Lost Bormu encounter.

No Spies Allowed!
The encounter is relatively short and easy to solo, though its second phase may take a bit longer as the droids you have to defeat have a lot of HP. The encounter takes place inside the ship, in the Sporefall wing.
Phase 1: Pick up Anti-Microbial Injections if you plan to cure the Czerka Spies. You can opt to take them out, but this takes longer. Use the first ability in your temp ability bar to cure them when you are in melee range.
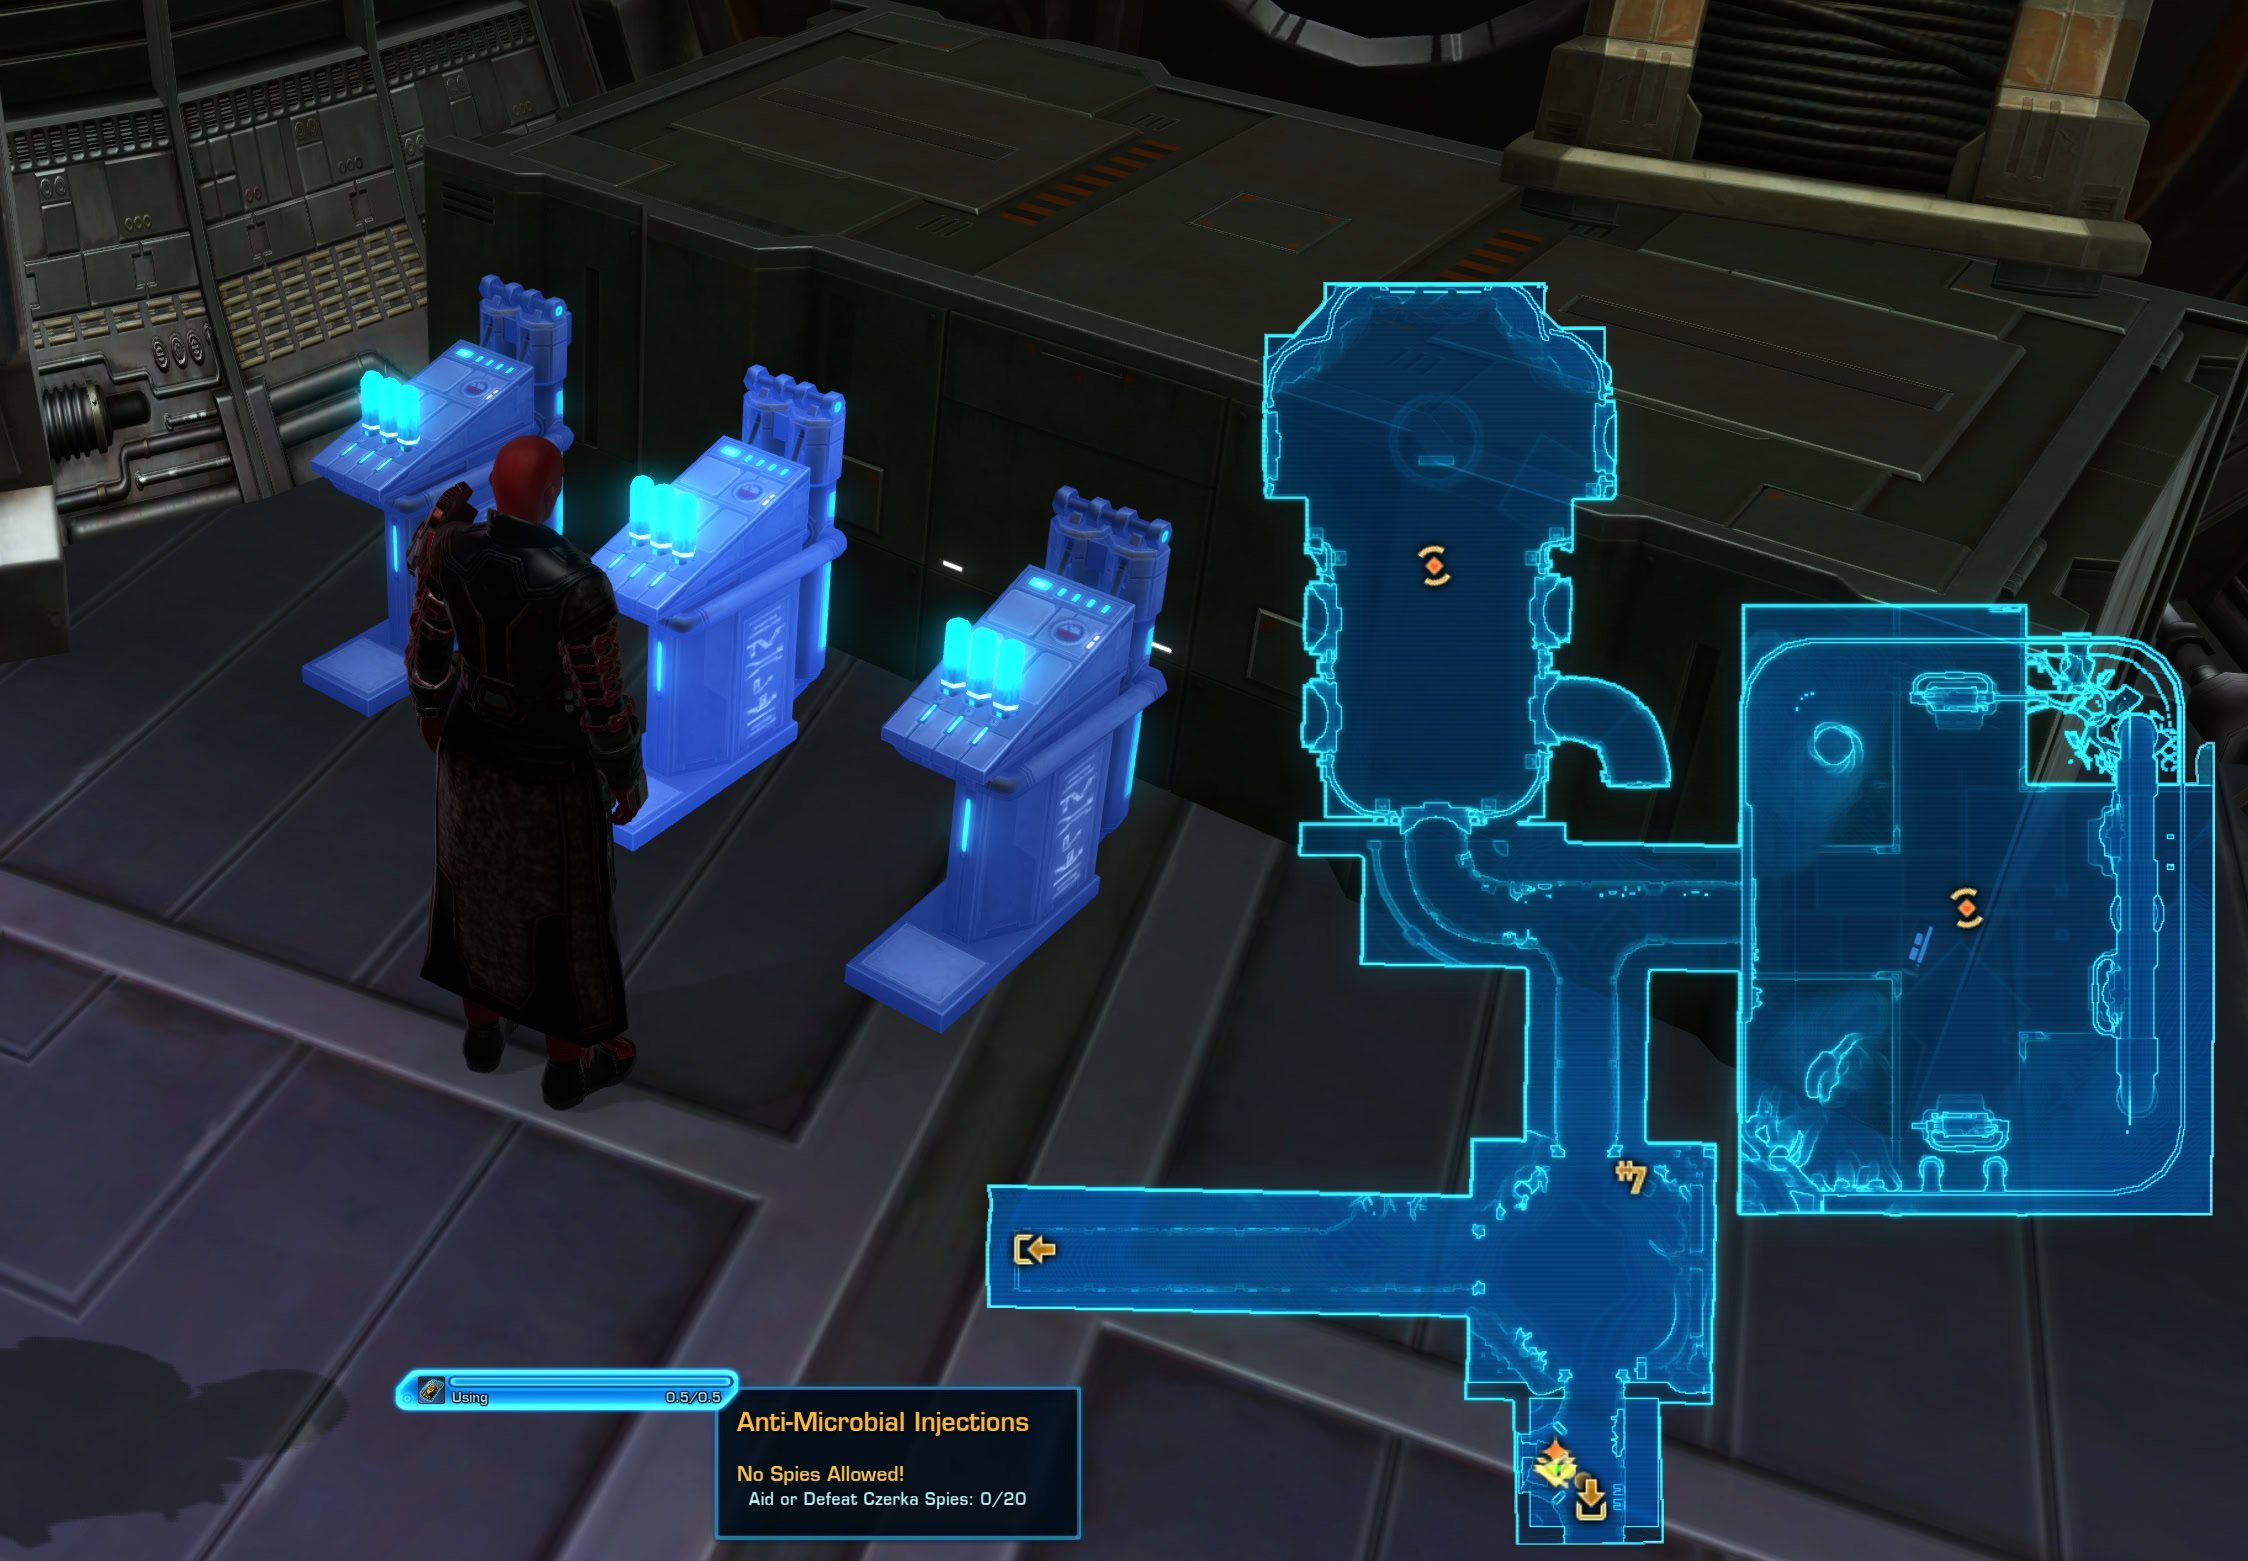
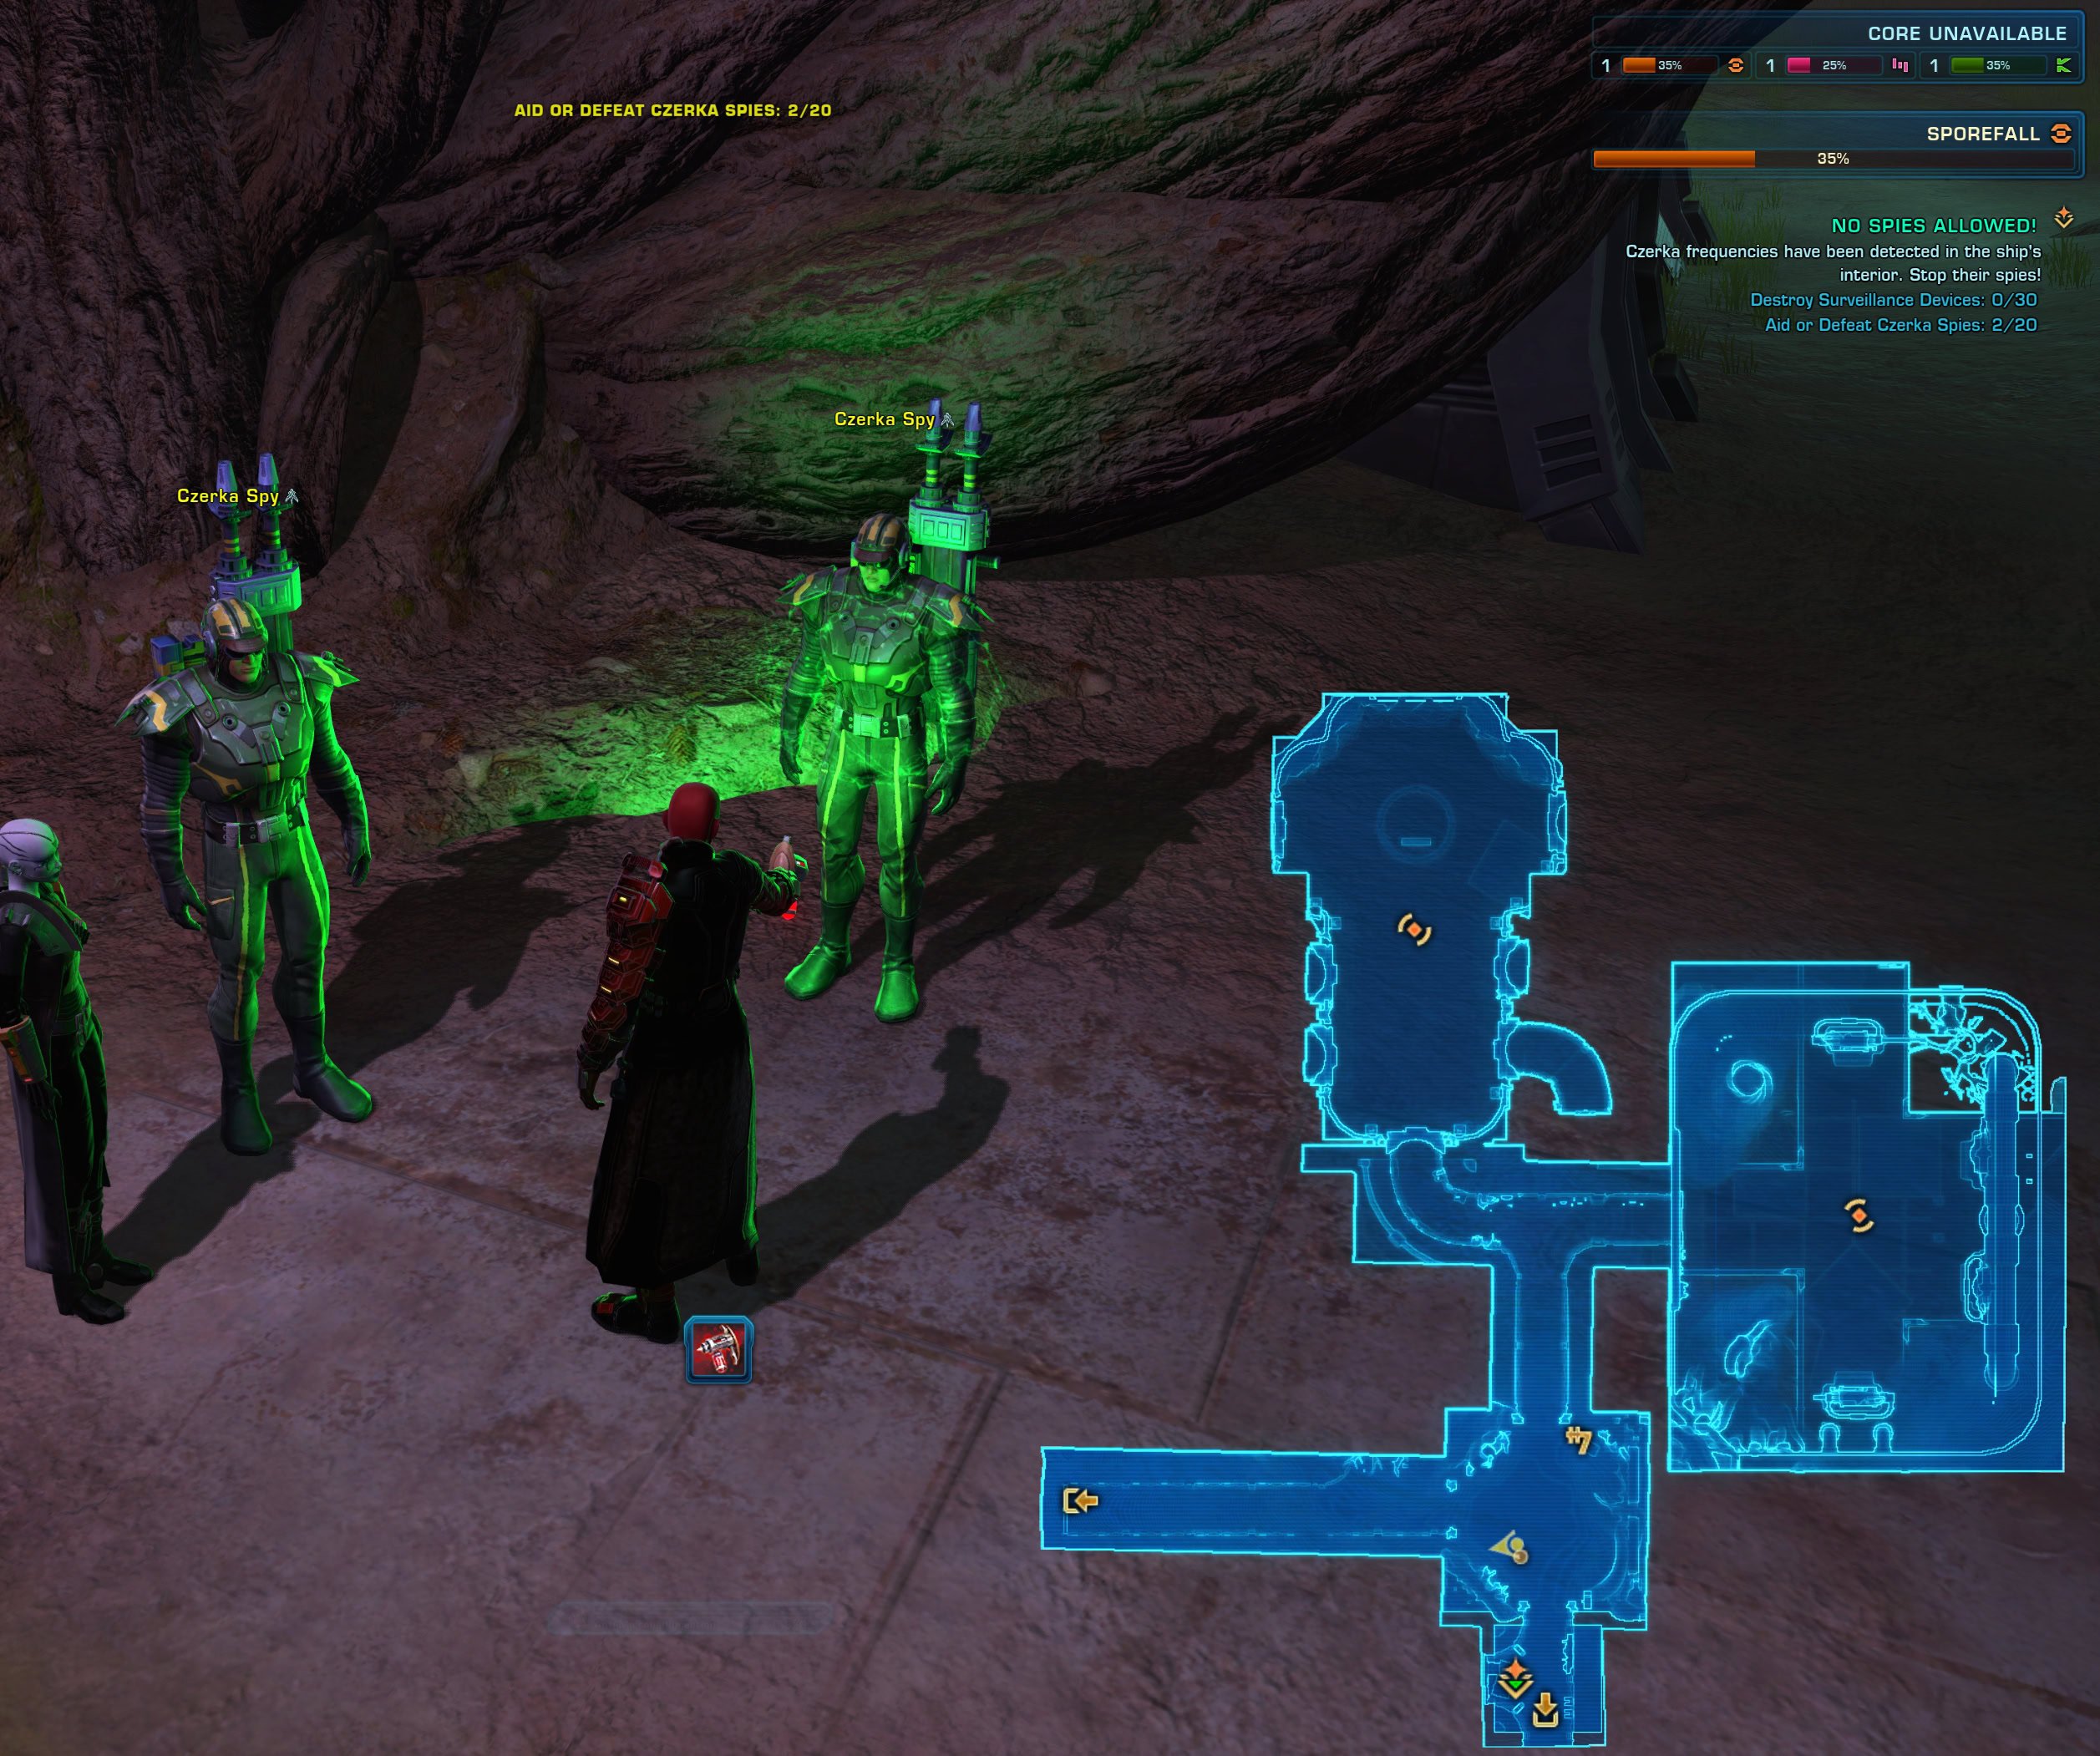
To reveal the Surveillance Devices so you can destroy them, watch for when the second temp ability shows up on your bar. Use it to reveal the devices and click on each one to destroy them.
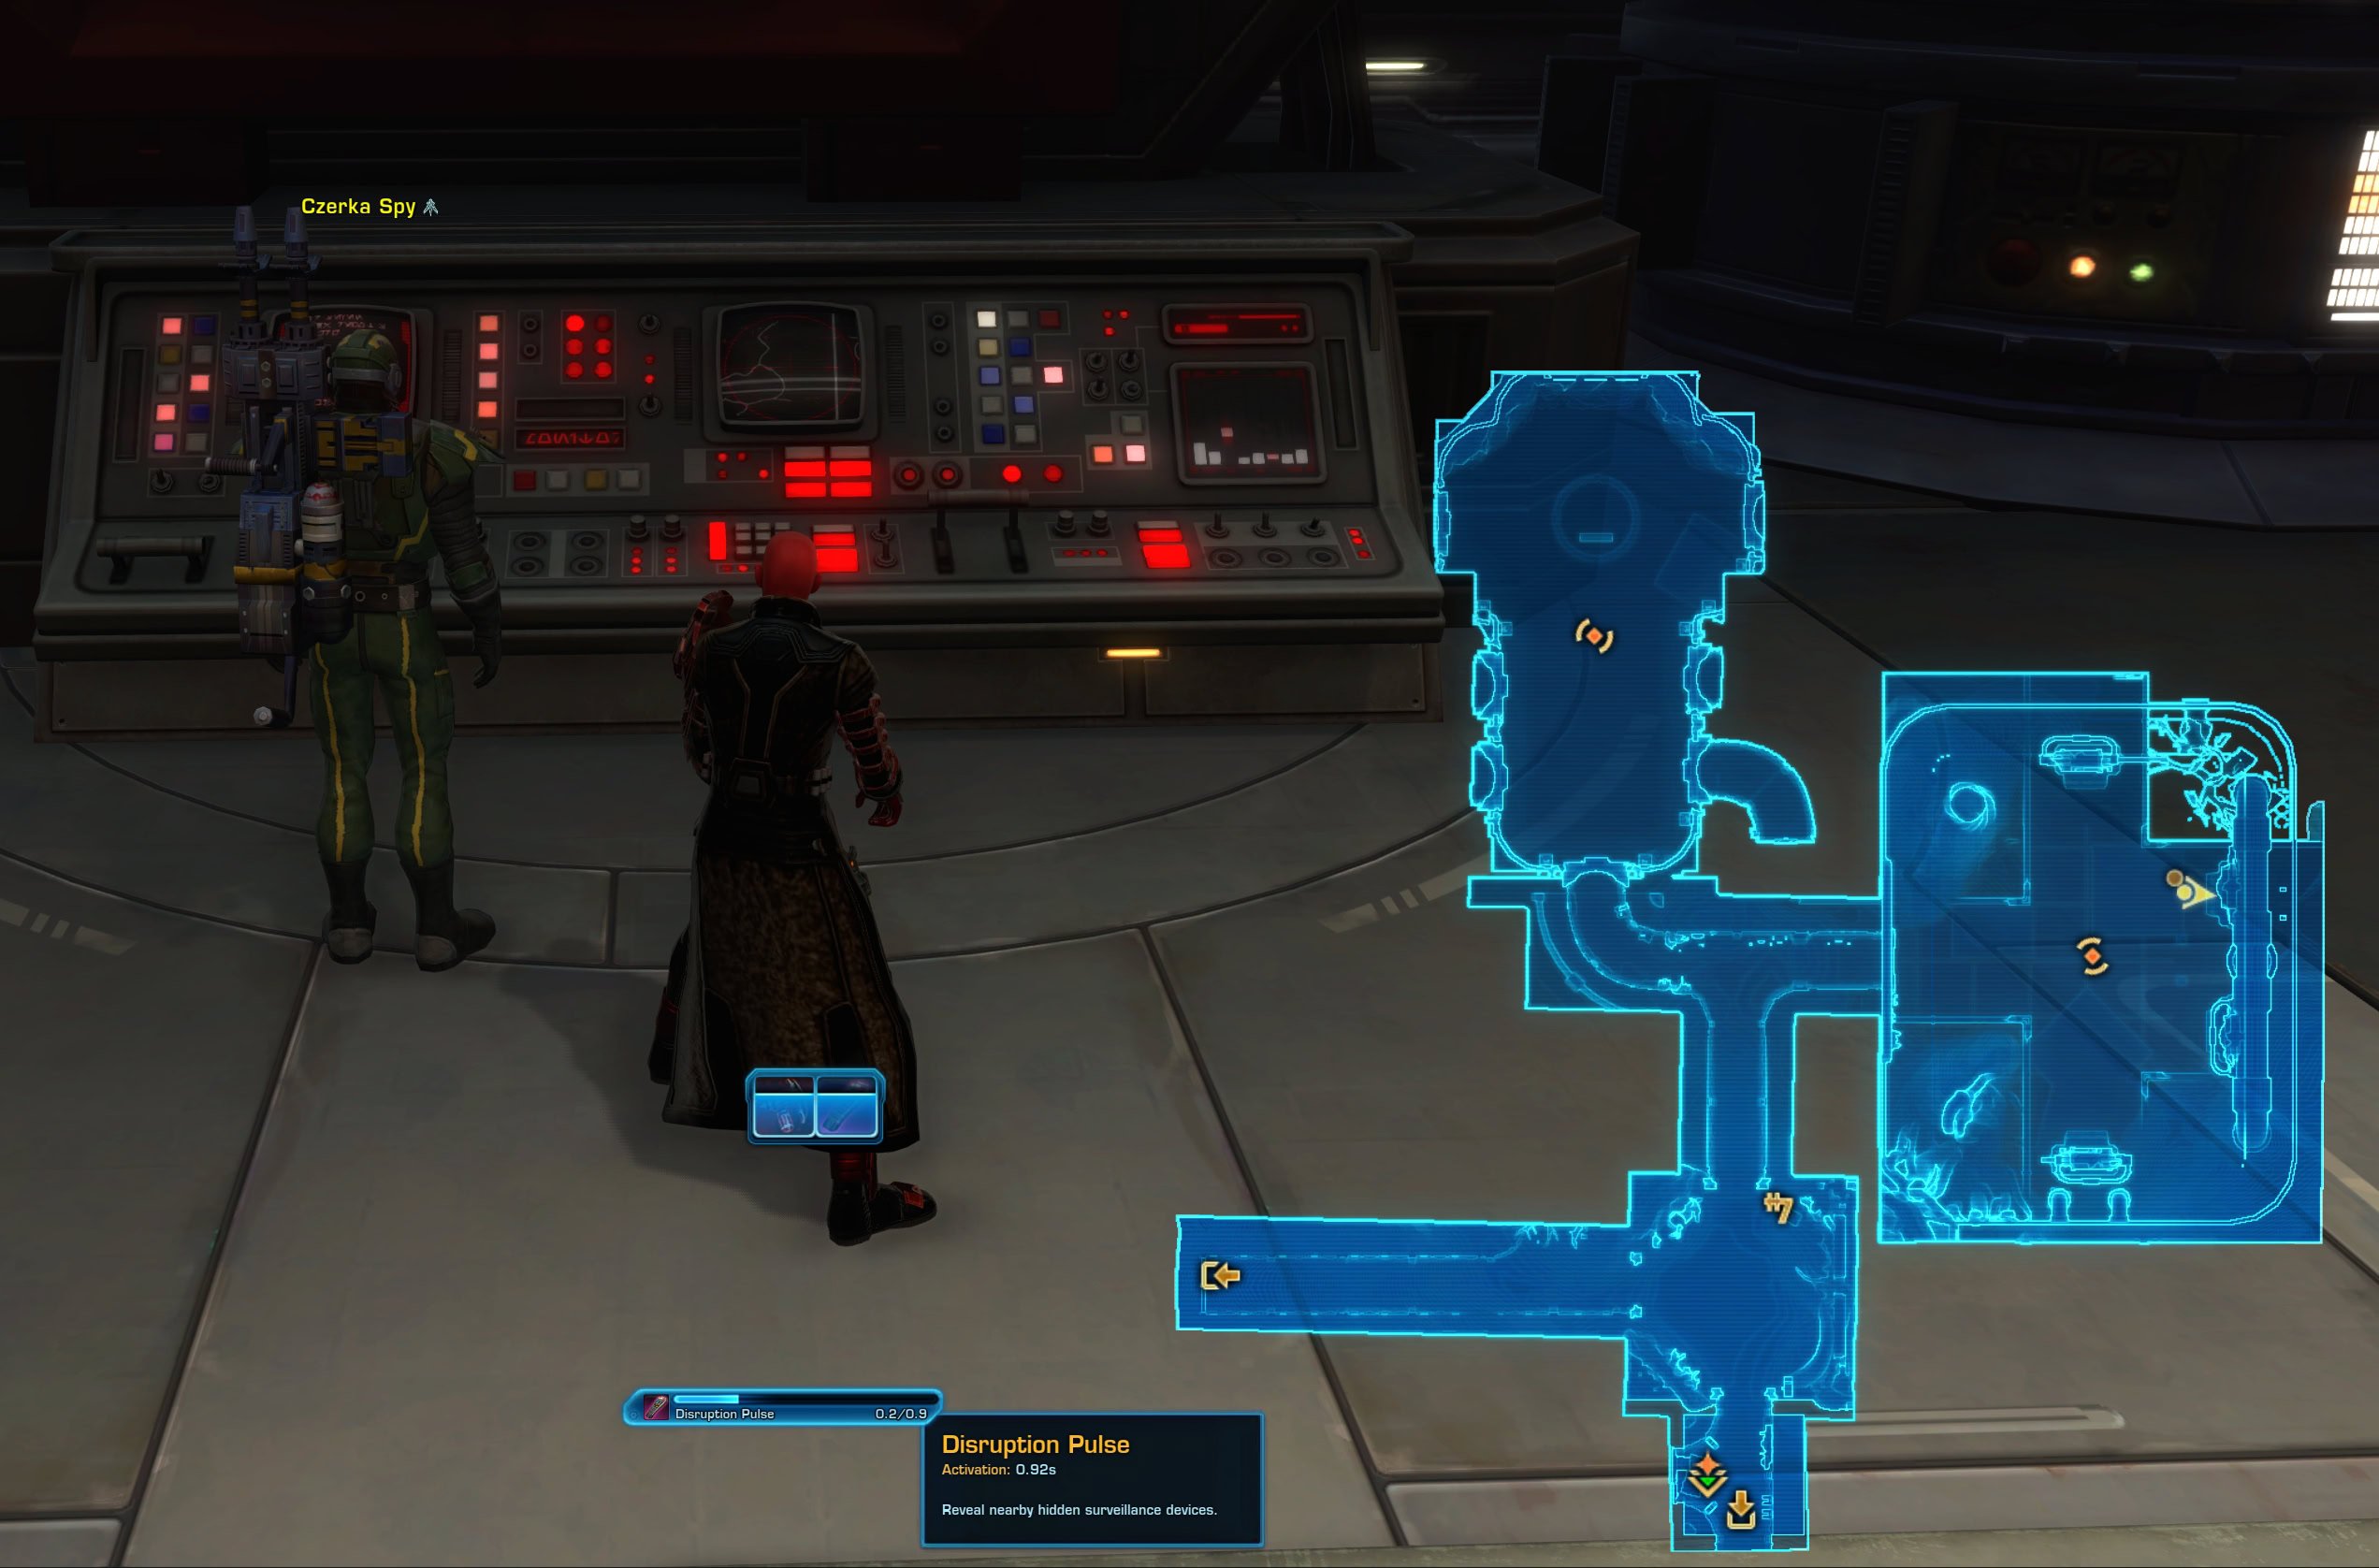
Phase 2: Take out the two mini boss droids that spawn in the middle of the two main rooms of this wing. The droids respawn after a short period of time.

Sample Collection: Ginx
Sample Collection: Ginx spawns in the northeast corner of Sporefall.
This encounter requires you to pick up Testing Kits and click on Sporefall Ginx creatures to collect samples.
Each Kit can only hold up to three samples, this is why you have two objectives for the encounter. You can take the Spore Testing Kits from a container to the right from the entrance as you come in.
Sample Collection: Makrin
Sample Collection: Makrin spawns inside the Makrin Hollow cave. Its entrance is in the south end of Sporefall. This is a simple clicking encounter where you have to pick up sample kits and collect samples from the Sporefall Makrin wooden spiders.
There are two temp abilities you need to aquire for the encounter. They are both located to the right from the entrance as you enter the hollow.
Watch for the color of the buff on the Makrin creatures. If you need to collect a different sample, “Apply Mutagenic Spores” (temp ability you pick up from the metal barel) on the creature and it will mutate in a few seconds. When the creature has the type of spores you need to collect, use the sample collection kit:
- RED: Vibrant Spores
- GREEN: Verdant Spores
- BLUE: Luminous Spores
Sample Collection: Pterathki
Sample Collection: Pterathki spawns in the far northern end of Sporefall. It is a clicky event where you have to pick up Spore Collection Kits and fill them with Samples from the nearby Prerathki flying creatures. The Kits are behind Doctor Losoo in his little camp.
Similar to the other encounters of this type, you can only collect up to 3 spores with every kit, so you will have to return to pick up more kits, which is also part of your objective.
If you see a green aura around a creature, go closer and click the temp ability that will spawn when you are close enough. If the ability doesn’t spawn, you either need to collect a new equipment kit, or this creature has been sampled too recently. This is indicated by the lack of green aura.
You also need to scan Spore-Generating Fungus as an additional objective. You get a new temp ability, Macrobinoculars. Use them and scan the blue-purple plants that are all over the trees around.
Sample Collection: Yaracats
In the middle of Sporefall, you will find a bunch of blue feline lizards, Yaracats, with a green “spaura” around them. When the encounter is active, you have to go up the small hill on the west side, pick up a Spore Collection Equipment, and collect samples from the creatures.
Similar to the other encounters of this type, you can only collect up to three spores in every kit, so you will have to return to pick up more kits, which is also part of your objective.
If you see a green aura around a Yaracat creature, go closer and click the temp ability that will spawn when you are close enough. If the ability doesn’t spawn, you either need to collect a new equipment kit, or this creature has been sampled too recently. This is indicated by the lack of green aura.
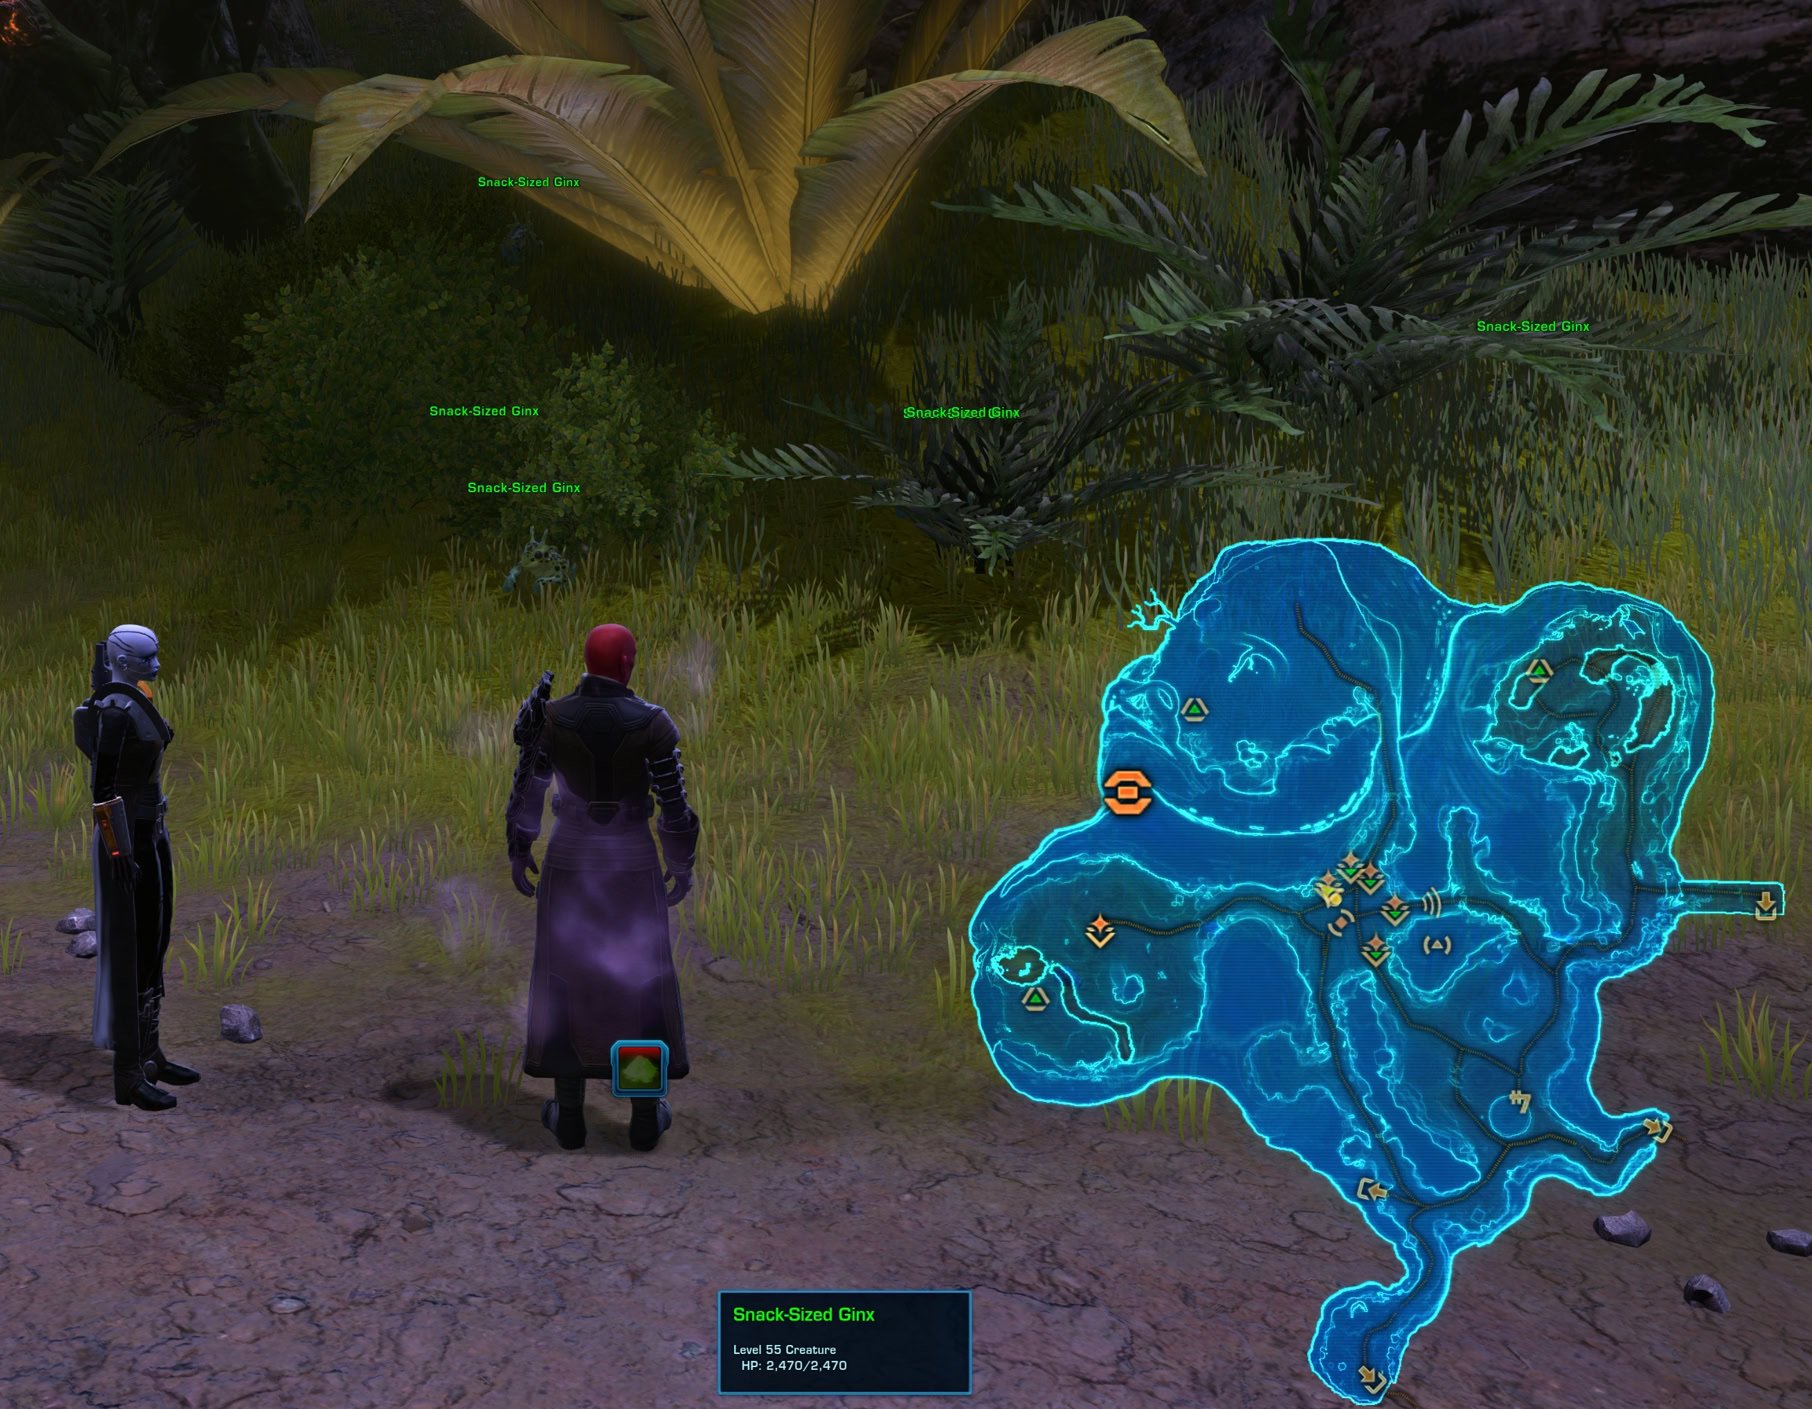
To be able to collect a sample, you have to first feed the animal if it’s hungry. You can tell if it is by checking for a “red” debuff on it. You can pick up Snack-Sized Ginx around the edges of the area, near the yellow-green plants. You can only pick up one of them at a time, though. You have to bring it to a hungry Yaracat, then go pick up another.
Taking Care of Caretakers
Taking Care of Caretakers spawns in several locations in Sporefall Only at Level 3. This is a single Champion Droid encounter. The droid has the ability to self-heal slowly. It is not enough to stop you from being able to solo it, but it may take a bit longer as the healing cannot be interrupted.
The floating egg sack that accompanies this encounter is just a visual bug.
The Watchers
The Watches has a chance to spawn in a few different places on the Sporefall map. It’s a simple and straightforward encounter, requiring you to take out 25 Eco-Defense Droids loitering in the marked area.
They Call me Doctore Spores (Transition)
The Transition encounter happens in the Sporefall wing of the Ship Interior. It spawns when the Sporefall biome reaches 100% at Level 2 and is ready to reach Level 3.
The encounter is separated into several stages. In each one you are fighting a monstrous edition of a creature from the Sporefall biome.
The first opponent is Doctor Hoppington, a giant Ginx with a snazzy, high-tech monocle. Apart from having a large health pool, there’s nothing extra special about this guy.
The next opponent you face is Professor Whiskers, a giant Yaracat. This mini boss has a passive called Putrefaction that sickens everyone near the creature. Cats don’t like baths, after all.
After Doctor Hoppington is down, four “Research Assistants” will spawn. These are just mini versions of the Sporefall Makrin spiders.
The final step is to cure Doctor SPORES and bring him back to his old normal self, Dr. Spears. Again. At this point the shield around him will be down. Go close and click the temporary ability that will show up to spray him.
You may not get the achievement unless you are the one to spray Doctor SPORES.
Return of Doctor SPORES! (Transition)
Return of Doctor SPORES! spawns in the Sporefall wing of the Ship’s interior when the core is in transition between Levels 1 and 2. The event has the same steps and enemies as the other transition encounter, They Call me Doctore Spores, but there are also a couple of Elite (gold) Caretaker Droids that spawn.
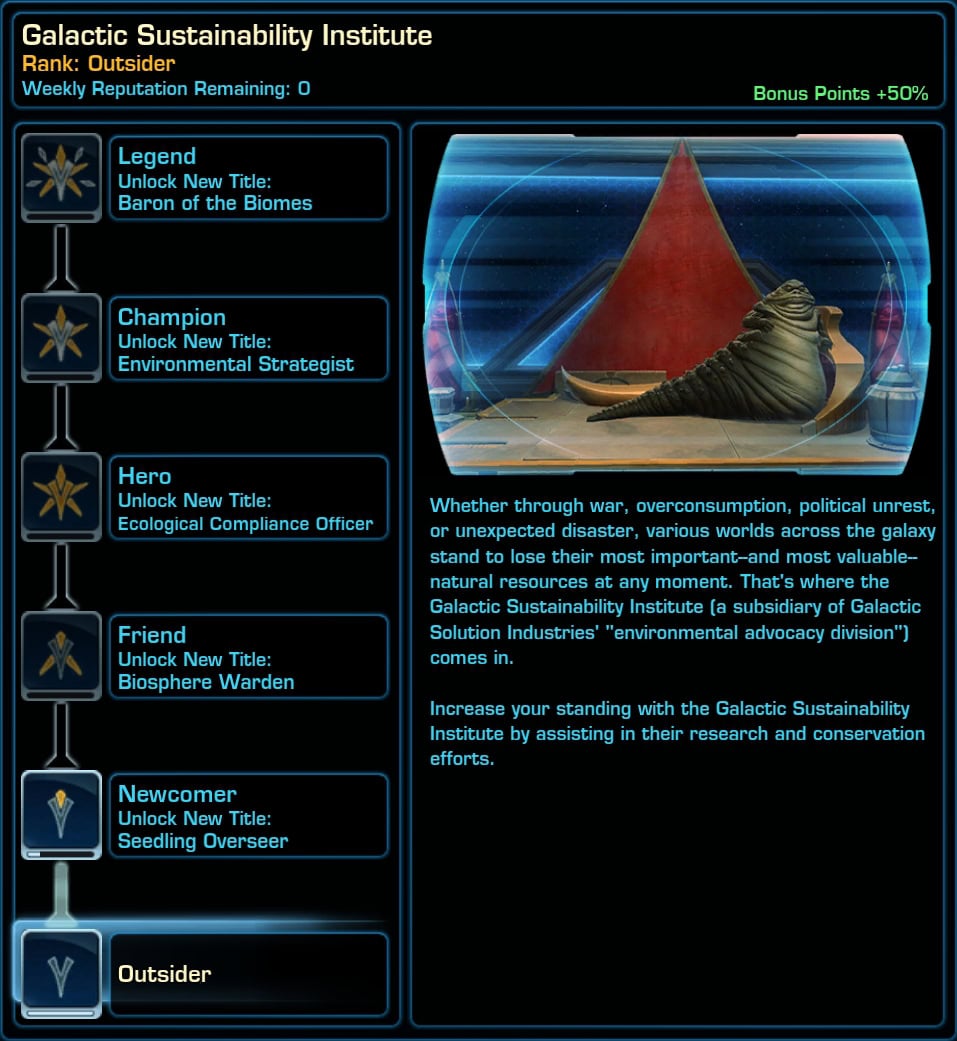
Reputation Track
The Dantooine Crash Site, released with SWTOR Update 7.8, added a new Reputation Track you can scale. The Galactic Sustainability Institute (a subsidiary of Galactic Solutions Industries) is shared between both factions and across your entire legacy.
You can find it in your Legacy window, under the Reputation tab in the top left:
You can only earn 3500 Reputation per week, and it will take ~20 weeks to finish the whole thing.
Unlike any other Reputation, you get a new title for almost every rank you gain, and the titles are pretty solid:
| Rank | Title | |
|---|---|---|
| Outsider | – | |
| Newcomer | Seedling Overseer | |
| Friend | Biosphere Warden | |
| Hero | Ecological Compliance Officer | |
| Champion | Environmental Strategist | |
| Legend | Baron of the Biomes |
Reputation Vendors
There is one main Reputation vendor, who sells the majority of items, including all keys to the Dantoone Stronghold. There are also several additional vendors spawning in the biome camps.
GSI Material Support Vendor
The Reputation Vendor, GSI Material Support, is located at the Research Camp, the starting map of the Dantooine Crash Site.
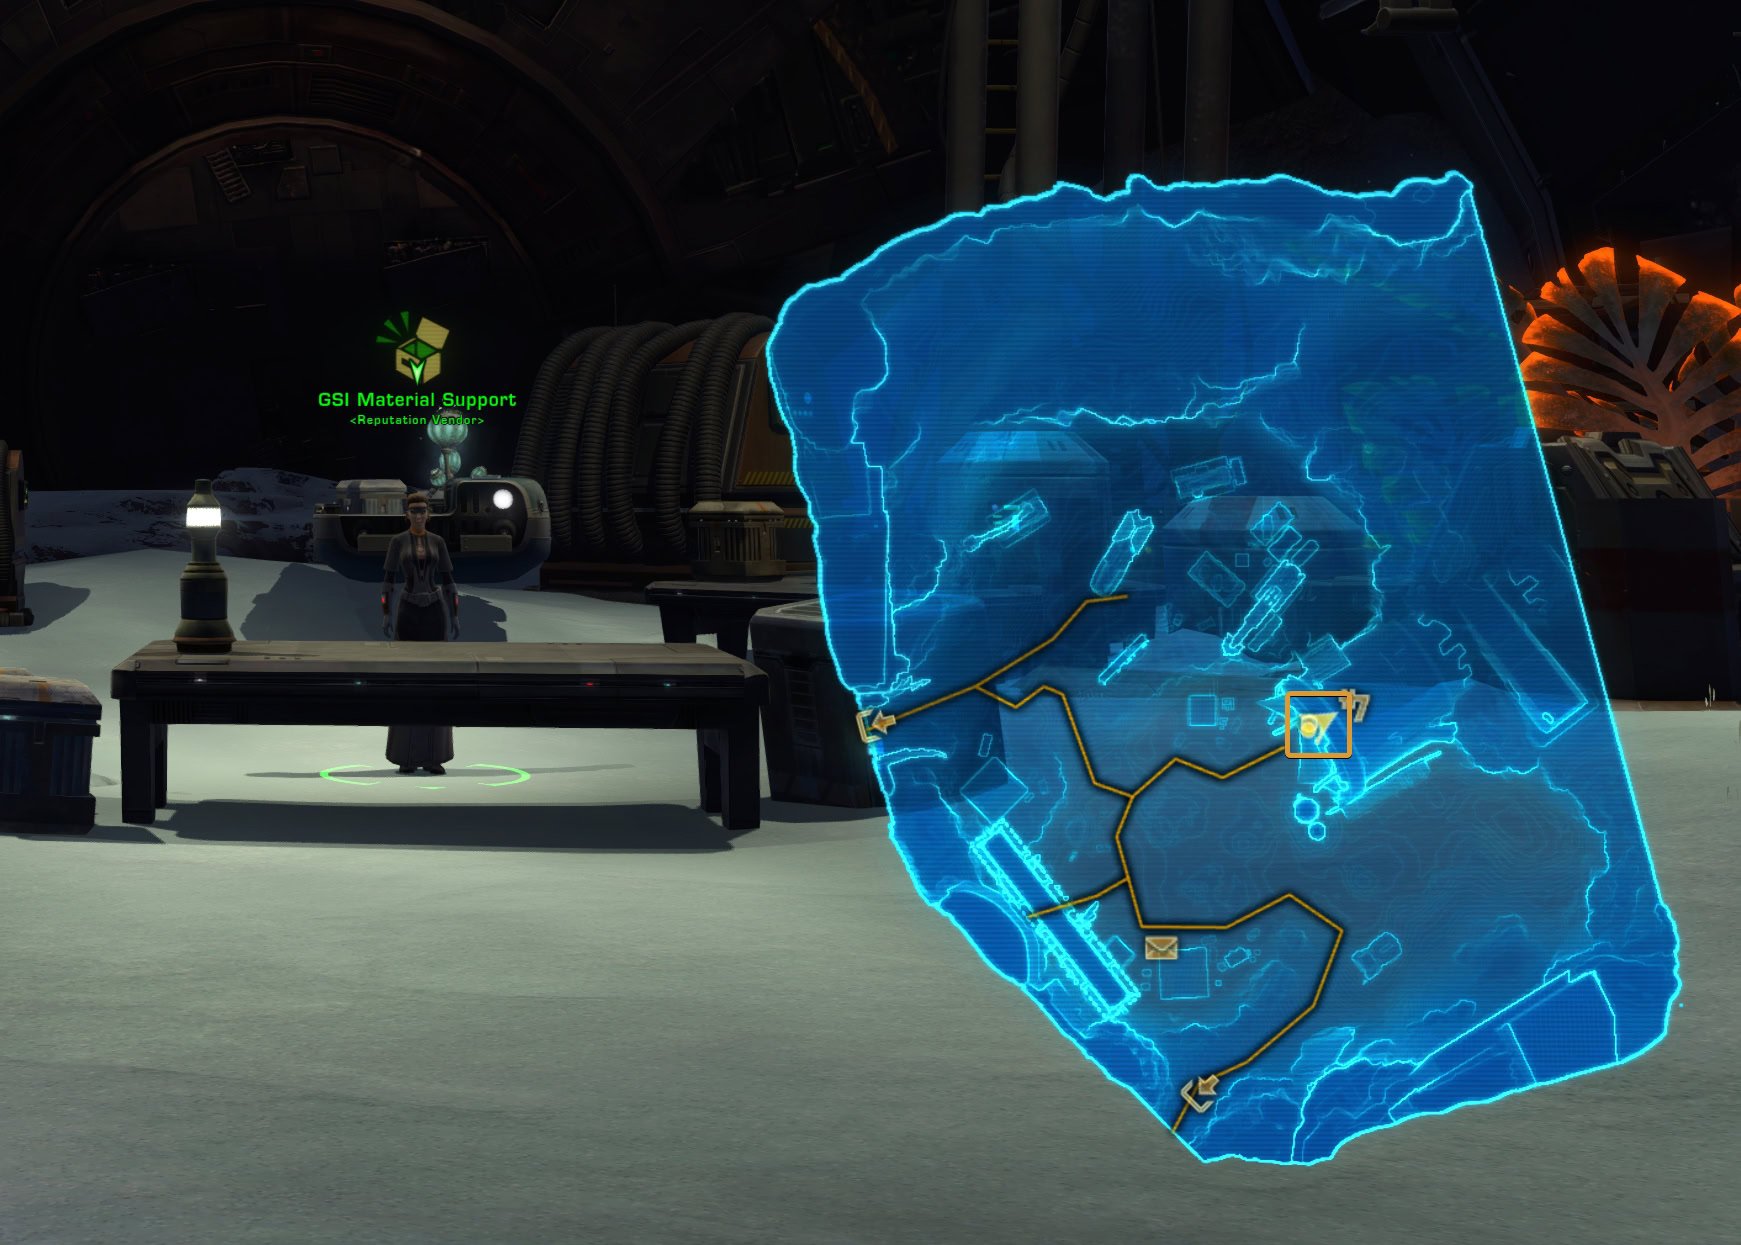
The vendor sells generally two types of items: a type that unlocks parts of your Dantooine Farmstead Stronghold, and parts that give you various boosts and unlock new features in the three biomes of the Dantooine Crash Site.
While standard cosmetic items (armor, weapons, mounts, decos, etc.) are typically sold by the reputation vendor, this time, those rewards are dropped by enemies in the field and given as rewards for completing secret achievements.
The unique nature of this reputation results from the unique nature of the content. It’s kind of like a daily area, which use a Reputation system, but Dynamic Encounters are the core gameplay, and those don’t have Reputation tracks.
The table below is interactive. You can search, filter and sort it to find the item you need. Below the table, you will find previews of the items.
| Icon | Item Name | Type | Reputation | Price | Effect: | Region | Source | Filtering |
|---|---|---|---|---|---|---|---|---|
| Advanced Research: Geothermal Disruption | Permanent Unlock | Legend | Use: Permanently allows you to interact with Ejected Sludge Containers found in the Geothermal Disruption biome. | Research Camp | GSI Material Support | Other | ||
| Advanced Research: Glacial Trespass | Permanent Unlock | Legend | Use: Permanently allows you to interact with Supercooled Crystaline Shards found in the Glacial Trespass biome. | Research Camp | GSI Material Support | Other | ||
| Advanced Research: Sporefall | Permanent Unlock | Legend | Use: Permanently allows you to interact with Spore-coated Masses found in the Sporefall biome. | Research Camp | GSI Material Support | Other | ||
| Barn Key | Permanent Unlock | Newcomer | Unlocks the Barn area of your Dantooine Farmstead Stronghold. | Research Camp | GSI Material Support | Stronghold | ||
| Cave Key | Permanent Unlock | Friend | Unlocks the Cave area of your Dantooine Farmstead Stronghold. | Research Camp | GSI Material Support | Stronghold | ||
| Contained Spore Bomb | Consumable | Hero | Use: Releases weaponized spores to apply Spore-Infected to up to 12 enemies within a 6m radius. Spore-Infected targets take 50% more damage from all sources for 60s. | Research Camp | GSI Material Support | Other | ||
| East Farmhouse Key | Permanent Unlock | Hero | Unlocks the East Farmhouse area of your Dantooine Farmstead Stronghold. | Research Camp | GSI Material Support | Stronghold | ||
| Forward Camp Speeder Access | Temporary Unlock | Friend | Use: Enables access to the Forward Camp speeder service for 30 minutes. | Research Camp | GSI Material Support | Other | ||
| Greenhouse Key | Permanent Unlock | Legend | Unlocks the Greenhouse area of your Dantooine Farmstead Stronghold. | Research Camp | GSI Material Support | Stronghold | ||
| Landing Area Key | Permanent Unlock | Friend | Unlocks the Landing area of your Dantooine Farmstead Stronghold. | Research Camp | GSI Material Support | Stronghold | ||
| Maintenance Tunnel Pass | Consumable | Champion | Grants access to maintenance tunnels connecting the wreckage of the Jannimak to the surrounding biomes. | Research Camp | GSI Material Support | Other | ||
| Research Notes: Geothermal Disruption | Temporary Unlock | Friend | Use: Allows you to Ejected Sludge Containers found in the Geothermal Disruption biome for 60 mins. Only one Research Notes can be active at a time. Does not persist through defeat. | Research Camp | GSI Material Support | Other | ||
| Research Notes: Glacial Trespass | Temporary Unlock | Friend | Use: Allows you to interact with Supercooled Crystaline Shards found in the Glacial Trespass biome for 60 mins. Only one Research Notes can be active at a time. Does not persist through defeat. | Research Camp | GSI Material Support | Other | ||
| Research Notes: Sporefall | Temporary Unlock | Friend | Use: Allows you to interact with Spore-coated Masses found in the Sporefall biome for 60 mins. Only one Research Notes can be active at a time. Does not persist through defeat. | Research Camp | GSI Material Support | Other | ||
| Sliced Security Card | Consumable | Champion | Allows access to remote terminals installed by the Jannimak’s automated systems in each biomes. It is consumed on use at the terminal. | Research Camp | GSI Material Support | Other | ||
| West Farmhouse Key | Permanent Unlock | Champion | Unlocks the West Farmhouse area of your Dantooine Farmstead Stronghold. | Research Camp | GSI Material Support | Stronghold |
Secret Vendors
Some of the scientists at the biome camps can spawn as active vendors, offering unique items, locked behind reputation ranks. Below you can see their locations and list of items they offer.
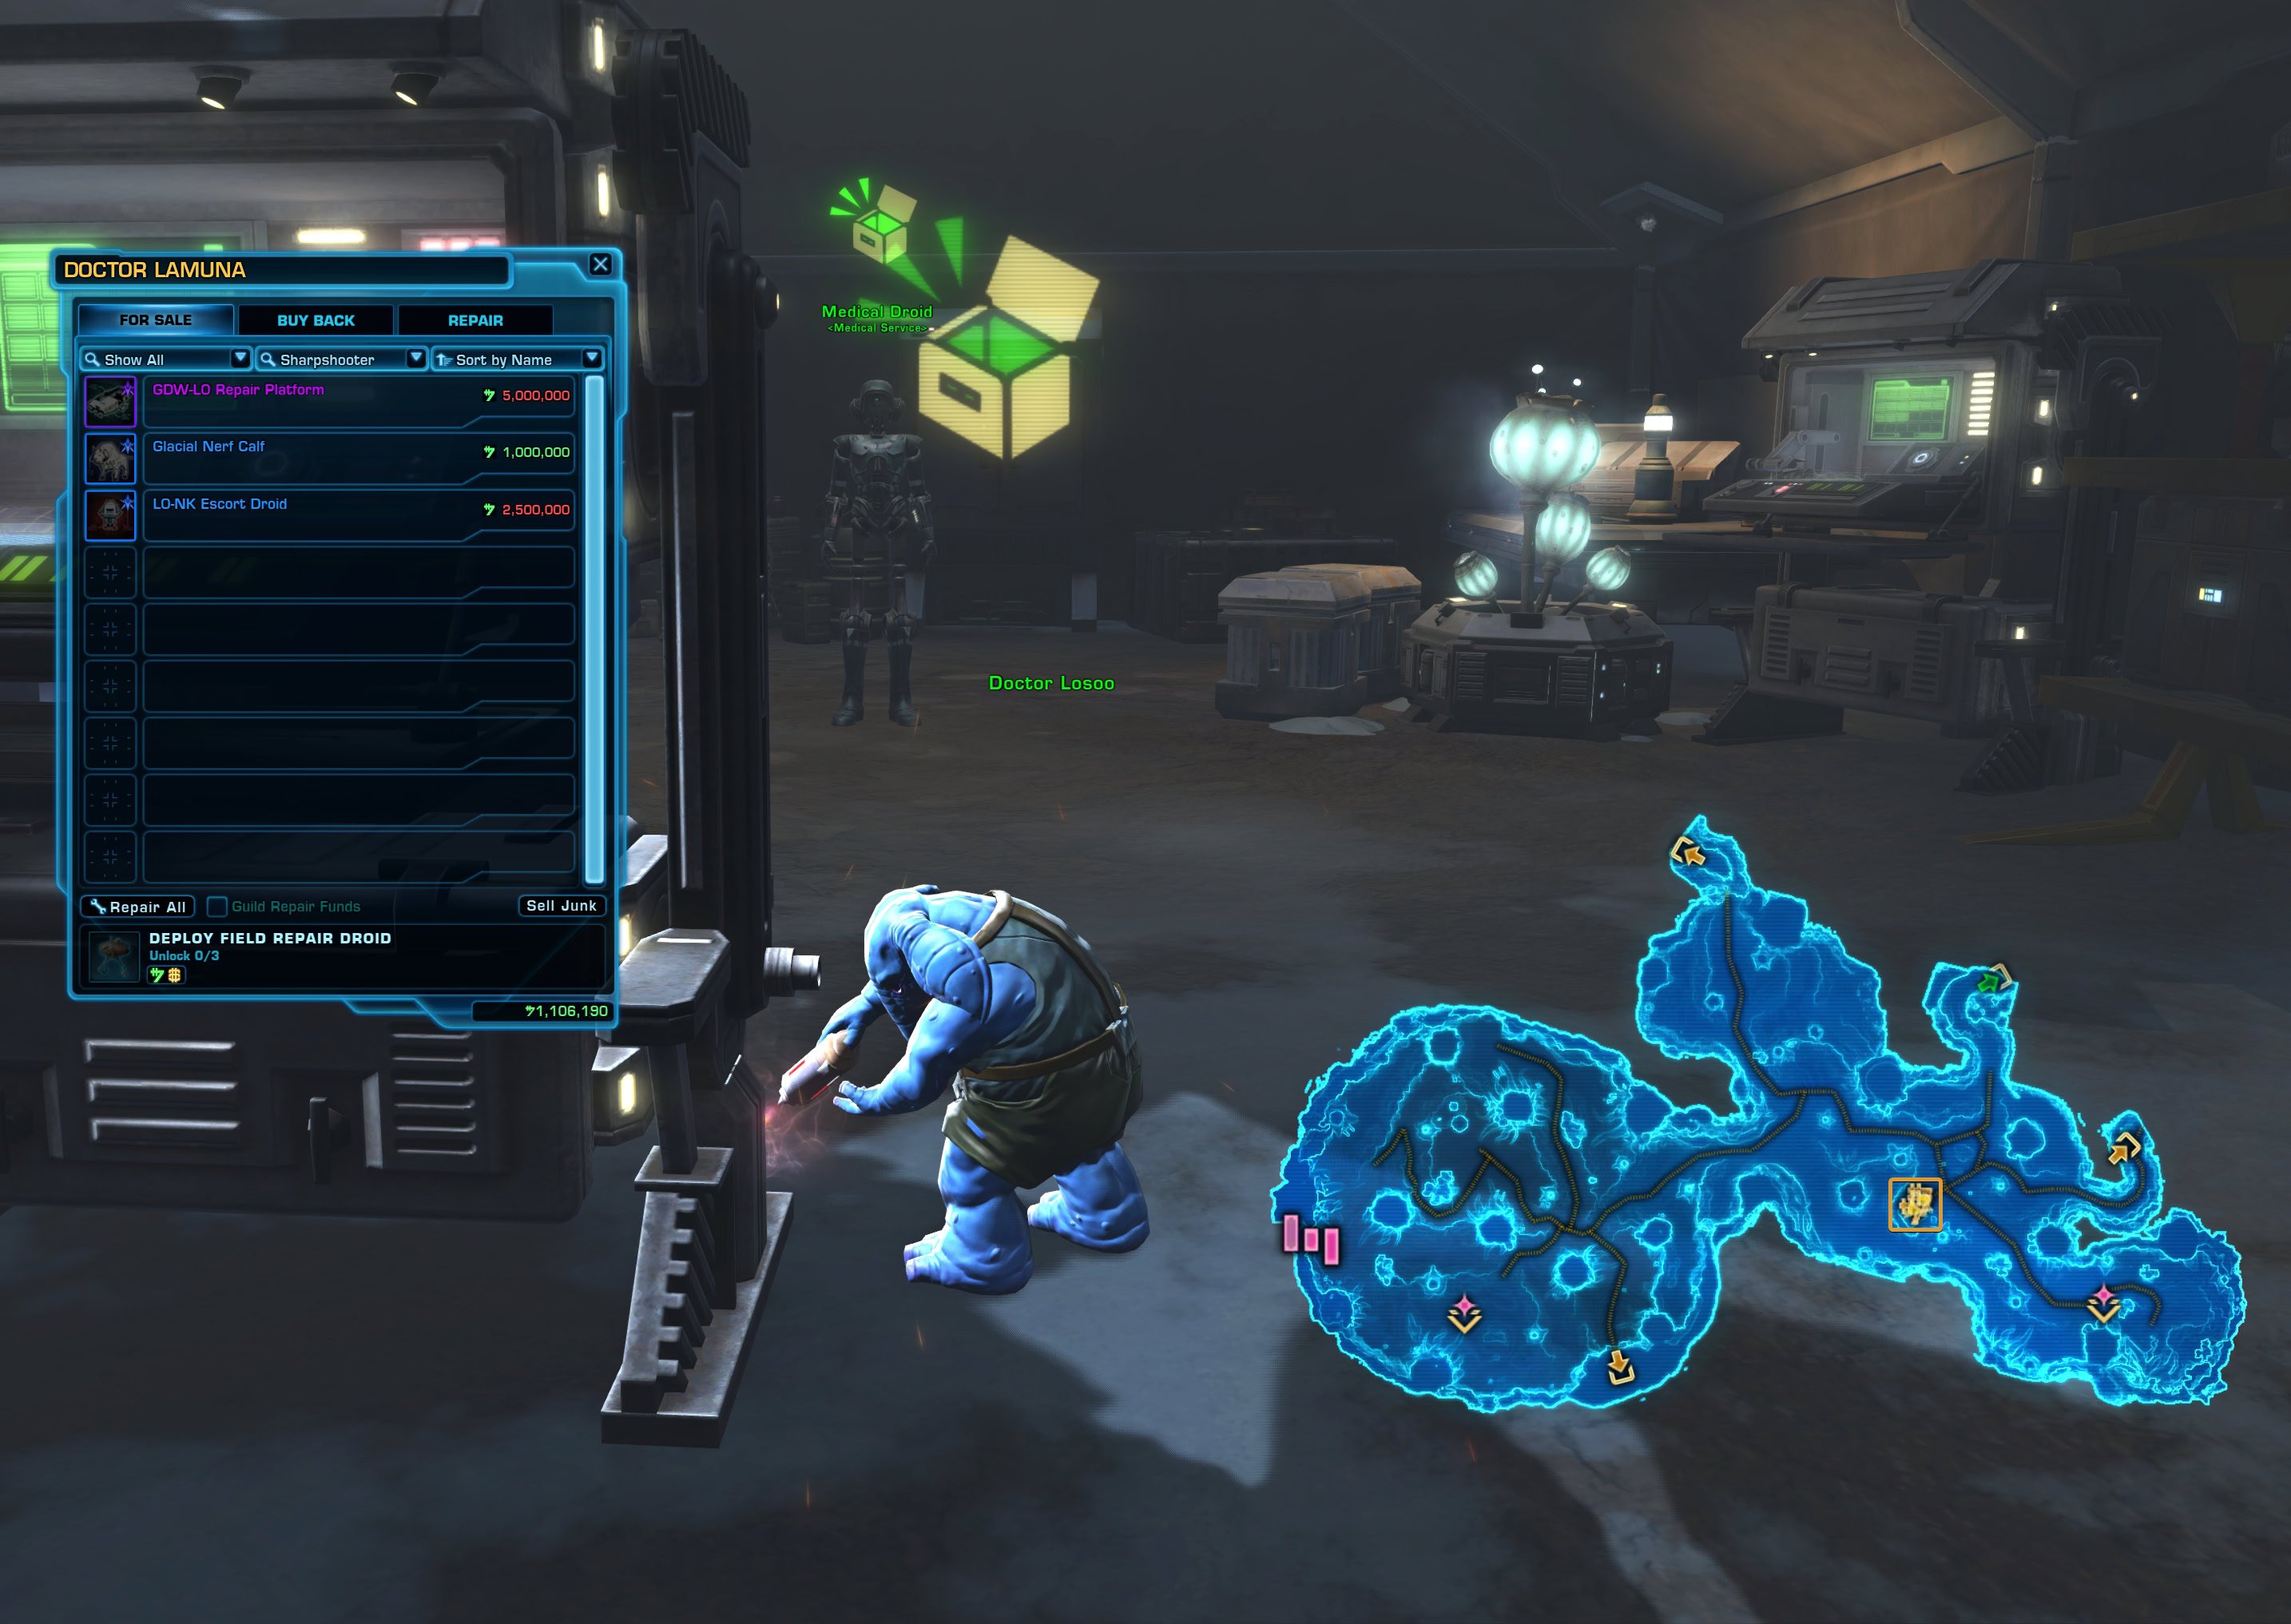
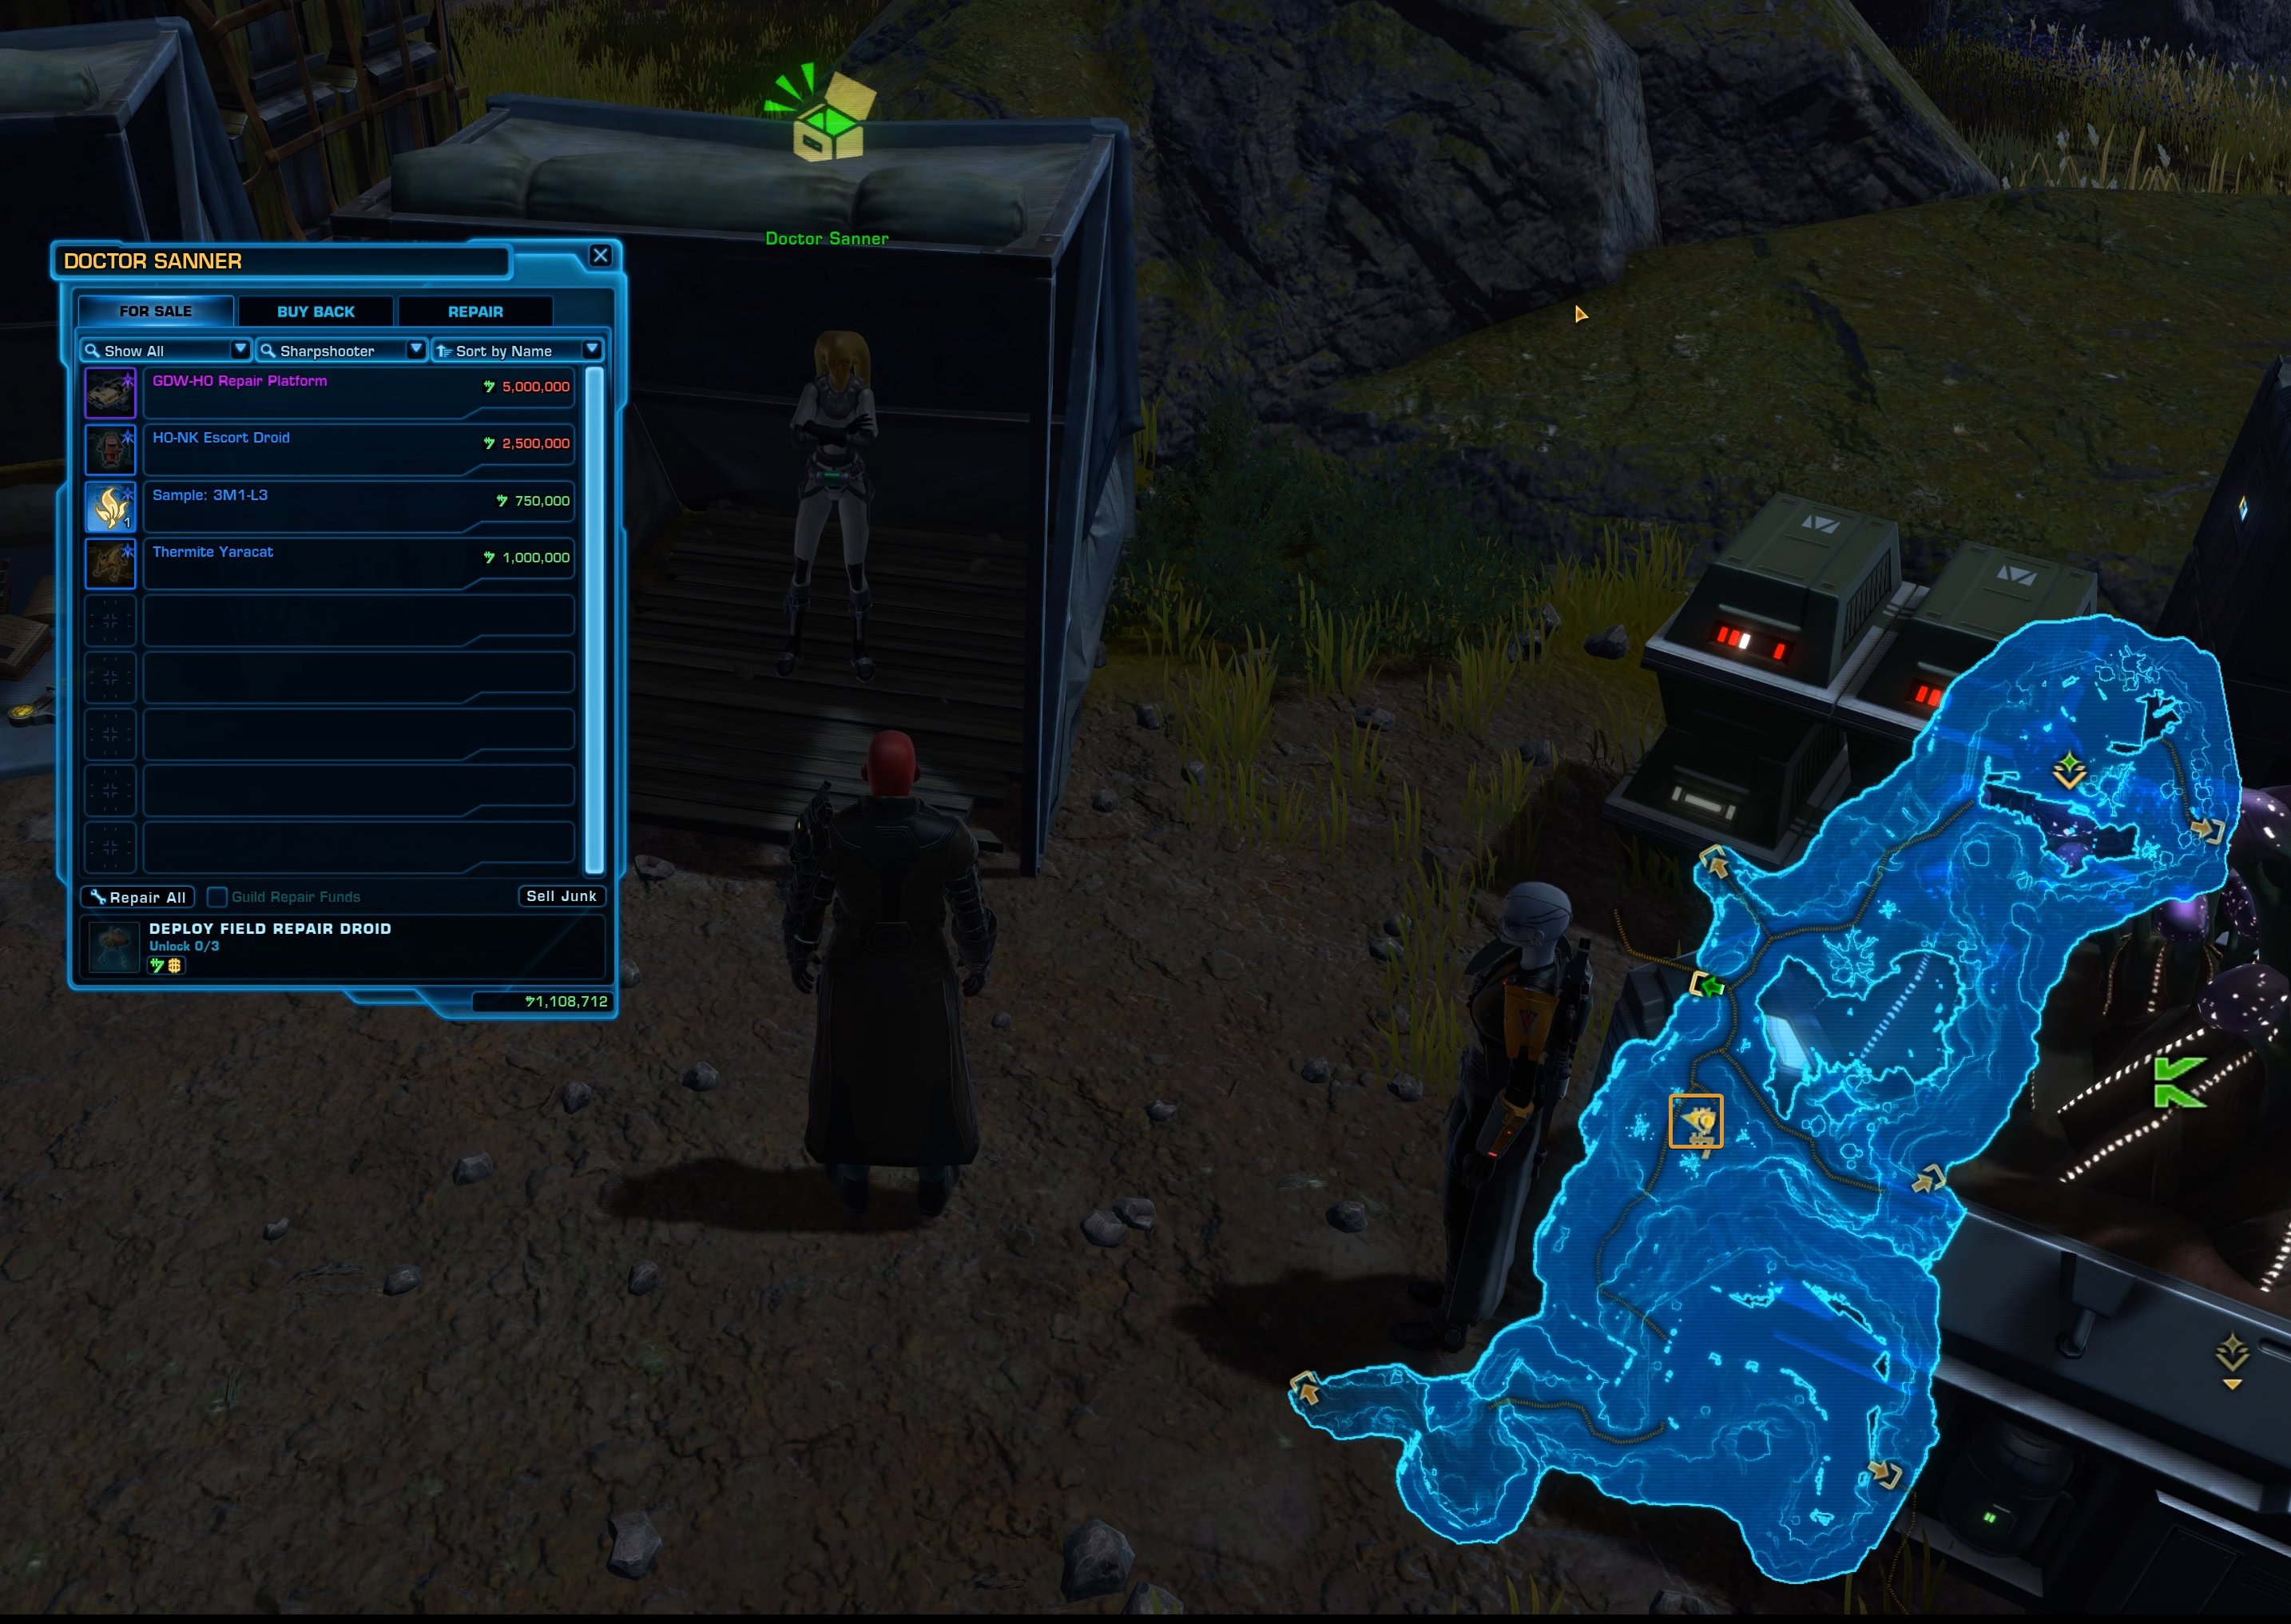
| Icon | Item Name | Type | Reputation | Price | Effect: | Region | Source | Filtering |
|---|---|---|---|---|---|---|---|---|
| GDW-H0 Repair Platform | Mount | Hero | – | Geothermal Disruption | Secret Vendor | Mount | ||
 | H0-NK Escort Droid | Minipet | Champion | – | Geothermal Disruption | Secret Vendor | Minipet | |
| Sample: 3M1-L3 | Decoration | Outsider | – | Geothermal Disruption | Secret Vendor | Decoration | ||
| Thermite Yaracat | Minipet | Newcomer | – | Geothermal Disruption | Secret Vendor | Minipet | ||
 | GDW-L0 Repair Platform | Mount | Hero | – | Glacial Trespass | Secret Vendor | Mount | |
 | Glacial Nerf Calf | Minipet | Newcomer | – | Glacial Trespass | Secret Vendor | Minipet | |
| L0-NK Escort Droid | Minipet | Champion | – | Glacial Trespass | Secret Vendor | Minipet | ||
| D0-NK Escort Droid | Minipet | Champion | – | Sporefall | Secret Vendor | Minipet | ||
| GDW-D0 Repair Platform | Mount | Hero | – | Sporefall | Secret Vendor | Mount | ||
| Purifying Station | Decoration | Outsider | – | Sporefall | Secret Vendor | Decoration | ||
| Sporefall Shaclaw | Minipet | Newcomer | – | Sporefall | Secret Vendor | Minipet |
It seems that these secret vendors appear at the Forward Research Camp if they get lost in the field and you rescue them, until the Core resets. Below, you can see that Doctor Maniks was hiding behind a tree at the northern edge of Geothermal Disruption zone.
If you approach one of these scientists, you’ll get a temporary ability bar pop-up to given them directions on how to get back to camp. They’ll listen to you and become a vendor at camp until the Core resets.
It seems quite rare that they appear and as soon as one person finds and helps them, it’s done. I’ve been spending quite a lot of time at the Crash Site since 7.8 launched and I’ve only seen one in the field once.
Achievements
This is an interactive table showing all achievements with the requirements to unlock them, and what rewards they offer.
| Icon | Name | Category | Points | Requirements: | Reward: | Rewards |
|---|---|---|---|---|---|---|
 | Wreckage Tour | General | 5 | Complete the mission “Wreckage on Dantooine“. | No | No |
| Sporefall Expedition I | General | 5 | Complete 5 Dynamic Encounters in the Sporefall area on Dantooine. | No | No |
| Sporefall Expedition II | General | 5 | Complete 25 Dynamic Encounters in the Sporefall area on Dantooine. | No | No |
| Sporefall Expedition III | General | 10 | Complete 125 Dynamic Encounters in the Sporefall area on Dantooine. | No | No |
| Sporefall Expedition IV | General | 20 | Complete 200 Dynamic Encounters in the Sporefall area on Dantooine. | Dantooine Research Vessel Twilight | Mount |
| Geothermal Expedition I | General | 5 | Complete 5 Dynamic Encounters in the Geothermal area on Dantooine. | No | No |
| Geothermal Expedition II | General | 5 | Complete 25 Dynamic Encounters in the Geothermal area on Dantooine. | No | No |
| Geothermal Expedition III | General | 10 | Complete 125 Dynamic Encounters in the Geothermal area on Dantooine. | No | No |
| Geothermal Expedition IV | General | 20 | Complete 200 Dynamic Encounters in the Geothermal area on Dantooine. | Dantooine Research Vessel Inferno | Mount |
| Glacial Expedition I | General | 5 | Complete 5 Dynamic Encounters in the Glacial area on Dantooine. | No | No |
| Glacial Expedition II | General | 5 | Complete 25 Dynamic Encounters in the Glacial area on Dantooine. | No | No |
| Glacial Expedition III | General | 10 | Complete 125 Dynamic Encounters in the Glacial area on Dantooine. | No | No |
| Glacial Expedition IV | General | 20 | Complete 200 Dynamic Encounters in the Glacial area on Dantooine. | Dantooine Research Vessel Zephyr | Mount |
| Brood Basin | Geothermal Disruption | 5 | Complete the Dantooine Dynamic Encounter “Brood Basin“. | No | No |
| Caretaker Unit K-6 | Geothermal Disruption | 5 | Complete the Dantooine Dynamic Encounter “Caretaker Unit K-6“. | No | No |
| Caustic Cascade | Geothermal Disruption | 5 | Complete the Dantooine Dynamic Encounter “Caustic Cascade“. | No | No |
| Come Up, Fish | Geothermal Disruption | 5 | Complete the Dantooine Dynamic Encounter “Come Up, Fish”. | No | No |
| Fungal Protection | Geothermal Disruption | 5 | Complete the Dantooine Dynamic Encounter “Fungal Protection“. | No | No |
| Data Appropriation | Geothermal Disruption | 5 | Complete the Dantooine Dynamic Encounter “Data Appropriation“. | No | No |
| Core Overload | Geothermal Disruption | 5 | Complete the Dantooine Dynamic Encounter “Core Overload”. | No | No |
| Graul Graveyard | Geothermal Disruption | 5 | Complete the Dantooine Dynamic Encounter “Graul Graveyard“. | No | No |
| Vent Sync Failure | Geothermal Disruption | 5 | Complete the Dantooine Dynamic Encounter “Vent Sync Failure“. | No | No |
| Under Pressure | Geothermal Disruption | 5 | Complete the Dantooine Dynamic Encounter “Under Pressure”. | No | No |
| Hot Spots | Geothermal Disruption | 5 | Complete the Dantooine Dynamic Encounter “Hot Spots“. | No | No |
| Acid Trip | Geothermal Disruption | 5 | Complete the Dantooine Dynamic Encounter “Acid Trip“. | No | No |
| Thermal Investigation | Geothermal Disruption | 5 | Complete the Dantooine Dynamic Encounter “Thermal Investigation“. | No | No |
| Frigid Swarm | Glacial Trespass | 5 | Complete the Dantooine Dynamic Encounter “Frigid Swarm“. | No | No |
| Frostbloom Sweep | Glacial Trespass | 5 | Complete the Dantooine Dynamic Encounter “Frostbloom Sweep“. | No | No |
| Iceweeds | Glacial Trespass | 5 | Complete the Dantooine Dynamic Encounter “Iceweeds“. | No | No |
| Unruly Nesters | Glacial Trespass | 5 | Complete the Dantooine Dynamic Encounter “Unruly Nesters“. | No | No |
| Hollow Frost | Glacial Trespass | 5 | Complete the Dantooine Dynamic Encounter “Hollow Frost“. | No | No |
| Outpost Defense | Glacial Trespass | 5 | Complete the Dantooine Dynamic Encounter “Outpost Defense“. | No | No |
| Probe-lems | Glacial Trespass | 5 | Complete the Dantooine Dynamic Encounter “Probe-lems“. | No | No |
| Frostcaller | Glacial Trespass | 5 | Complete the Dantooine Dynamic Encounter “Frostcaller“. | No | No |
| The Cryonest Matron | Glacial Trespass | 5 | Complete the Dantooine Dynamic Encounter “The Cryonest Matron“. | No | No |
| Root Cause | Glacial Trespass | 5 | Complete the Dantooine Dynamic Encounter “Root Cause“. | No | No |
| Glacial Reclamation | Glacial Trespass | 5 | Complete the Dantooine Dynamic Encounter “Glacial Reclamation“. | No | No |
| Cryocore Override | Glacial Trespass | 5 | Complete the Dantooine Dynamic Encounter “Cryocore Override“. | No | No |
| Gelid Tendrils | Glacial Trespass | 5 | Complete the Dantooine Dynamic Encounter “Gelid Tendrils“. | No | No |
| Sample Collection: Makrin | Sporefall | 5 | Complete the Dantooine Dynamic Encounter “Sample Collection: Makrin“. | No | No |
| Sample Collection: Pterathki | Sporefall | 5 | Complete the Dantooine Dynamic Encounter “Sample Collection: Pterathki“. | No | No |
| Sample Collection: Yaracats | Sporefall | 5 | Complete the Dantooine Dynamic Encounter “Sample Collection: Yaracats“. | No | No |
| Sample Collection: Ginx | Sporefall | 5 | Complete the Dantooine Dynamic Encounter “Sample Collection: Ginx“. | No | No |
| Dr. Spears, I Presume? | Sporefall | 5 | Complete the Dantooine Dynamic Encounter “Dr. Spears, I Presume?“. | No | No |
| Fascinating! | Sporefall | 5 | Complete the Dantooine Dynamic Encounter “Fascinating!“. | No | No |
| Ginx Of Unusual Size | Sporefall | 5 | Complete the Dantooine Dynamic Encounter “Ginx Of Unusual Size“. | No | No |
| The Watchers | Sporefall | 5 | Complete the Dantooine Dynamic Encounter “The Watchers“. | No | No |
| They Call Me Doctor Spores | Sporefall | 5 | Complete the Dantooine Dynamic Encounter “They Call Me Doctor Spores“. | No | No |
| Bigger Trouble | Sporefall | 5 | Complete the Dantooine Dynamic Encounter “Bigger Trouble“. | No | No |
| Lost Bormu | Sporefall | 5 | Complete the Dantooine Dynamic Encounter “Lost Bormu“. | No | No |
| Return of Doctor Spores! | Sporefall | 5 | Complete the Dantooine Dynamic Encounter “Return of Doctor Spores!“. | No | No |
| Taking Care of Caretakers | Sporefall | 5 | Complete the Dantooine Dynamic Encounter “Taking Care of Caretakers“. | No | No |
| No Spies Allowed! | Sporefall | 5 | Complete the Dantooine Dynamic Encounter “No Spies Allowed!“. | No | No |
| Orbital Core I | Orbital Core | 5 | Complete the Orbital Core on Dantooine 1 time. | No | No |
| Orbital Core II | Orbital Core | 5 | Complete the Orbital Core on Dantooine 5 times. | No | No |
| Orbital Core III | Orbital Core | 5 | Complete the Orbital Core on Dantooine 15 times. | No | No |
| Orbital Core IV | Orbital Core | 5 | Complete the Orbital Core on Dantooine 25 times. | No | No |
| A Core to Settle | Orbital Core | 25 | Defeat the Orbital Core boss without aid from the Hazard Mitigation Module or other Crash Site buffs. Disqualifying effects are: Regulated Preservation and Aggression Adrenals, LJnknown Adrenal, Mysterious Stimpack, Icy Infusion, Weaponized Runoff, and Spore-Spangled. | Legacy Title: Locked In | Legacy Title |
| Sporefall Encounters | Mastery | 10 | Complete every unique Dynamic Encounter in Sporefall on Dantooine. | No | No |
| Glacial Trespass Encounters | Mastery | 10 | Complete every unique Dynamic Encounter in Glacial Trespass on Dantooine. | No | No |
| Geothermal Disruption Encounters | Mastery | 10 | Complete every unique Dynamic Encounter in Geothermal Disruption on Dantooine. | No | No |
| Transition Events I | Mastery | 10 | Complete 5 Transition Events on Dantooine. | No | No |
| Transition Events II | Mastery | 10 | Complete 15 Transition Events on Dantooine. | No | No |
| Transition Events III | Mastery | 10 | Complete 30 Transition Events on Dantooine. | No | No |
| Encounter Mastery: Dantooine | Mastery | 50 | Complete the “Encounter Completionist: Dantooine” and “Expedition Leader” achievements and defeat the Orbital Core boss. | Dantooine Expedition Carrier | Mount |
| Expedition Leader | Mastery | 10 | Complete 200 Dynamic Encounters in each area of the Dantooine Crash Site. | No | No |
| Encounter Completionist: Dantooine | Mastery | 25 | Complete every unique Dynamic Encounter in the Dantooine Crash Site. | Legacy Title: I’m Doing My Part | Legacy Title |
Based on our discoveries on PTS, our experience on LIVE, and how things are structured, we believe there will be additional achievements added at a later point.
There are missing points in the “General” category. We think they are for hidden achievements requiring higher reputation (not accessible at this time due to weekly limits) to be able to interact with the Anti Hazard Terminals and Special Objects.
If you unlock an achievement we have not covered, please, let us know!
Rewards
Dantooine Crash Site blurs the line between Daily Area and Dynamic Encounter. There are both unique and standard rewards available as loot drops, from achievements and completing encounters.
The complete and fully interactive table lists all known rewards from all sources, including vendors, random drops, and achievements.
| Icon | Item Name | Type | Reputation | Price | Effect: | Region | Source | Filtering |
|---|---|---|---|---|---|---|---|---|
| Advanced Research: Geothermal Disruption | Permanent Unlock | Legend | Use: Permanently allows you to interact with Ejected Sludge Containers found in the Geothermal Disruption biome. | Research Camp | GSI Material Support | Other | ||
| Advanced Research: Glacial Trespass | Permanent Unlock | Legend | Use: Permanently allows you to interact with Supercooled Crystaline Shards found in the Glacial Trespass biome. | Research Camp | GSI Material Support | Other | ||
| Advanced Research: Sporefall | Permanent Unlock | Legend | Use: Permanently allows you to interact with Spore-coated Masses found in the Sporefall biome. | Research Camp | GSI Material Support | Other | ||
| Barn Key | Permanent Unlock | Newcomer | Unlocks the Barn area of your Dantooine Farmstead Stronghold. | Research Camp | GSI Material Support | Stronghold | ||
| Cave Key | Permanent Unlock | Friend | Unlocks the Cave area of your Dantooine Farmstead Stronghold. | Research Camp | GSI Material Support | Stronghold | ||
| Contained Spore Bomb | Consumable | Hero | Use: Releases weaponized spores to apply Spore-Infected to up to 12 enemies within a 6m radius. Spore-Infected targets take 50% more damage from all sources for 60s. | Research Camp | GSI Material Support | Other | ||
| East Farmhouse Key | Permanent Unlock | Hero | Unlocks the East Farmhouse area of your Dantooine Farmstead Stronghold. | Research Camp | GSI Material Support | Stronghold | ||
| Forward Camp Speeder Access | Temporary Unlock | Friend | Use: Enables access to the Forward Camp speeder service for 30 minutes. | Research Camp | GSI Material Support | Other | ||
| Greenhouse Key | Permanent Unlock | Legend | Unlocks the Greenhouse area of your Dantooine Farmstead Stronghold. | Research Camp | GSI Material Support | Stronghold | ||
| Landing Area Key | Permanent Unlock | Friend | Unlocks the Landing area of your Dantooine Farmstead Stronghold. | Research Camp | GSI Material Support | Stronghold | ||
| Maintenance Tunnel Pass | Consumable | Champion | Grants access to maintenance tunnels connecting the wreckage of the Jannimak to the surrounding biomes. | Research Camp | GSI Material Support | Other | ||
| Research Notes: Geothermal Disruption | Temporary Unlock | Friend | Use: Allows you to Ejected Sludge Containers found in the Geothermal Disruption biome for 60 mins. Only one Research Notes can be active at a time. Does not persist through defeat. | Research Camp | GSI Material Support | Other | ||
| Research Notes: Glacial Trespass | Temporary Unlock | Friend | Use: Allows you to interact with Supercooled Crystaline Shards found in the Glacial Trespass biome for 60 mins. Only one Research Notes can be active at a time. Does not persist through defeat. | Research Camp | GSI Material Support | Other | ||
| Research Notes: Sporefall | Temporary Unlock | Friend | Use: Allows you to interact with Spore-coated Masses found in the Sporefall biome for 60 mins. Only one Research Notes can be active at a time. Does not persist through defeat. | Research Camp | GSI Material Support | Other | ||
| Sliced Security Card | Consumable | Champion | Allows access to remote terminals installed by the Jannimak’s automated systems in each biomes. It is consumed on use at the terminal. | Research Camp | GSI Material Support | Other | ||
| West Farmhouse Key | Permanent Unlock | Champion | Unlocks the West Farmhouse area of your Dantooine Farmstead Stronghold. | Research Camp | GSI Material Support | Stronghold | ||
| Dantooine Heat Lamp (Large) | Decoration | Friend | Drop | – | Glacial Trespass | Drop | Decoration | |
| Dantooine Heat Lamp (Small) | Decoration | Friend | Drop | – | Glacial Trespass | Drop | Decoration | |
| Glowshroom Wall Planter (Style 1) | Decoration | Newcomer | Drop | – | ??? | Drop | Decoration | |
| Glowshroom Wall Planter (Style 2) | Decoration | Newcomer | Drop | – | ??? | Drop | Decoration | |
| Geothermal Disruption Diorama | Decoration | Legend | Drop | – | Geothermal Disruption | Drop | Decoration | |
| Glacial Trespass Diorama | Decoration | Legend | Drop | – | Glacial Trespass | Drop | Decoration | |
| Sporefall Diorama | Decoration | Legend | Drop | – | Sporefall | Drop | Decoration | |
| Sporefall Stalk | Decoration | Newcomer | Drop | – | Sporefall | Drop | Decoration | |
| Sporefall Tree (Potted) | Decoration | Newcomer | Drop | – | Sporefall | Drop | Decoration | |
| Ancient Sample: 3M1-L3 | Decoration | ??? | Drop | – | Orbital Core | ??? | Decoration | |
| Dantooine Fern (Wall) | Decoration | Outsider | Drop | – | ??? | Drop | Decoration | |
| Dantooine Fern (Potted) | Decoration | Outsider | Drop | – | ??? | Drop | Decoration | |
| Dantooine Hanging Roots | Decoration | Outsider | Drop | – | Glacial Trespass | Drop | Decoration | |
| Cave Fungus | Decoration | Newcomer | Drop | – | ??? | Drop | Decoration | |
| Frostbloom | Decoration | Newcomer | Drop | – | Glacial Trespass | Drop | Decoration | |
| Frost-Tip Fern | Decoration | Newcomer | Drop | – | Glacial Trespass | Drop | Decoration | |
| Snow Pod (Potted) | Decoration | ??? | – | – | Glacial Trespass | ??? | Decoration | |
| Obsidian Shaclaw | Minipet | Friend | Drop | – | Glacial Trespass | Drop | Minipet | |
| Cavernous Nerf Calf | Minipet | Friend | Drop | – | Geothermal Disruption | Drop | Minipet | |
| Marsh Nerf Calf | Minipet | Friend | Drop | – | Orbital Core | Drop | Minipet | |
| Terra Shaclaw | Minipet | Friend | Drop | – | Orbital Core | Drop | Minipet | |
| Snowdrift Yaracat | Minipet | Friend | Drop | – | Orbital Core | Drop | Minipet | |
| Sporefall Yaracat | Minipet | Friend | Drop | – | Sporefall | Drop | Minipet | |
| Fitted Armor Set of the Skirmishing Surveyor | Armor | Newcomer | Drop | – | All | Drop | Armor | |
| Fitted Rugged Researcher’s Armor Set | Armor | Friend | Drop | – | Orbital Core | Drop | Armor | |
| Dantooine Research Vessel Twilight | Mount | – | Achievement | – | Sporefall | Achievement | Mount | |
| Dantooine Research Vessel Zephyr | Mount | – | Achievement | – | Glacial Trespass | Achievement | Mount | |
| Dantooine Research Vessel Inferno | Mount | – | Achievement | – | Geothermal Disruption | Achievement | Mount | |
| Dantooine Expedition Carrier | Mount | – | Achievement | – | All | Achievement | Mount | |
| I’m Doing My Part | Legacy Title | – | Achievement | – | All | Achievement | Title | |
| Work In Progress | Legacy Title | Newcomer | Drop | – | ??? | Drop | Title | |
| Crashout | Legacy Title | Friend | Drop | – | ??? | Drop | Title | |
| Not My Final Form | Legacy Title | Hero | Drop | – | ??? | Drop | Title | |
| Whisker Skritcher | Legacy Title | ??? | – | – | ??? | ??? | Title | |
| Locked In | Legacy Title | – | Achievement | – | Orbital Core | Achievement | Title | |
| Coming in Hot | Legacy Title | Friend | Drop | – | ??? | Drop | Title | |
| All or Nothing | Legacy Title | Friend | Drop | – | ??? | Drop | Title | |
| A Complete Wreck | Character Title | Newcomer | Drop | – | Glacial Trespass | Drop | Title | |
| Spore King | Character Title | Hero | Drop | – | ??? | Drop | Title | |
| Spore Queen | Character Title | Hero | Drop | – | ??? | Drop | Title | |
| Sky Appreciator | Character Title | Newcomer | Drop | – | ??? | Drop | Title | |
| The Known | Character Title | Friend | Drop | – | Geothermal Disruption | Drop | Title | |
| The Unknown | Character Title | Friend | Drop | – | ??? | Drop | Title | |
| GDW-H0 Repair Platform | Mount | Hero | – | Geothermal Disruption | Secret Vendor | Mount | ||
| H0-NK Escort Droid | Minipet | Champion | – | Geothermal Disruption | Secret Vendor | Minipet | |
| Sample: 3M1-L3 | Decoration | Outsider | – | Geothermal Disruption | Secret Vendor | Decoration | ||
| Thermite Yaracat | Minipet | Newcomer | – | Geothermal Disruption | Secret Vendor | Minipet | ||
| GDW-L0 Repair Platform | Mount | Hero | – | Glacial Trespass | Secret Vendor | Mount | |
| Glacial Nerf Calf | Minipet | Newcomer | – | Glacial Trespass | Secret Vendor | Minipet | |
| L0-NK Escort Droid | Minipet | Champion | – | Glacial Trespass | Secret Vendor | Minipet | ||
| D0-NK Escort Droid | Minipet | Champion | – | Sporefall | Secret Vendor | Minipet | ||
| GDW-D0 Repair Platform | Mount | Hero | – | Sporefall | Secret Vendor | Mount | ||
| Purifying Station | Decoration | Outsider | – | Sporefall | Secret Vendor | Decoration | ||
| Sporefall Shaclaw | Minipet | Newcomer | – | Sporefall | Secret Vendor | Minipet |
Rewards for completing Encounters
Each Dynamic Encounter on Dantooine provides the same rewards upon completion. It doesn’t matter if you complete it solo or in a group:
| Credits | Varies | |
 | Experience Points (below lvl cap) | Varies |
| Environmental Conversion Codex | x1 | |
| Conquest Commendations (at level cap) | x3 | |
 | Tech Fragments (at level cap) | x50 |
Fitted Armor Set of the Skirmishing Surveyor
Individual pieces from the Fitted Armor Set of the Skirmishing Surveyor have a random chance to drop from enemies throughout the Crash Site. They are not bound and can be sold on the GTN, but they require Newcomer reputation to wear.

Fitted Armor Set of the Rugged Researcher
It is currently not known how this set is obtained. I have yet to see any pieces drop and have multiple of the Skirmishing Surveyor. It may be related to the Orbital Core or inside the Jannimak behind the red shield.

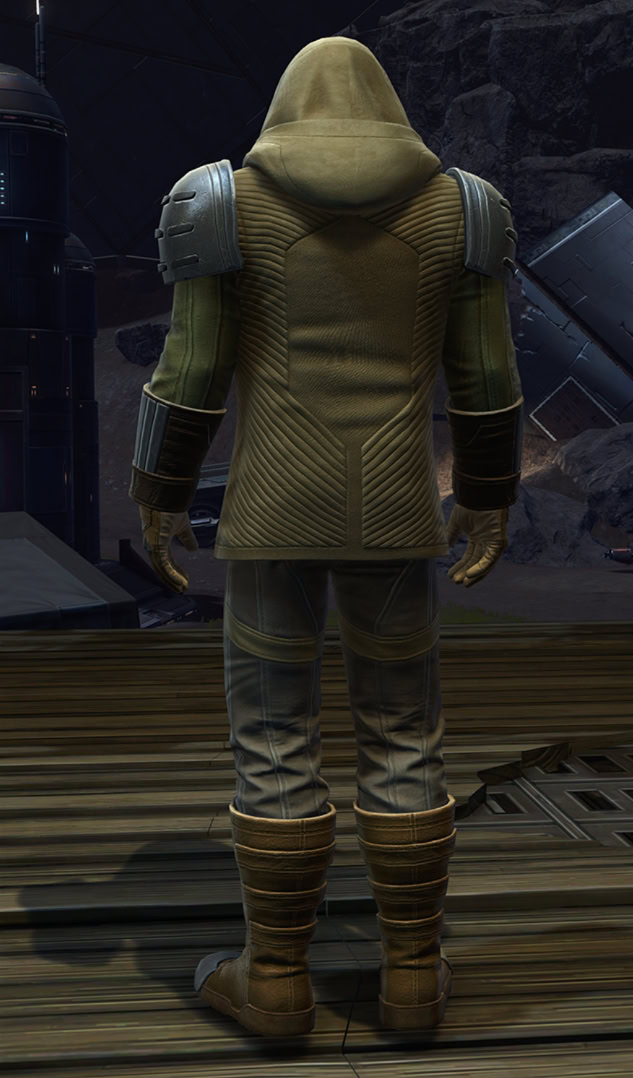
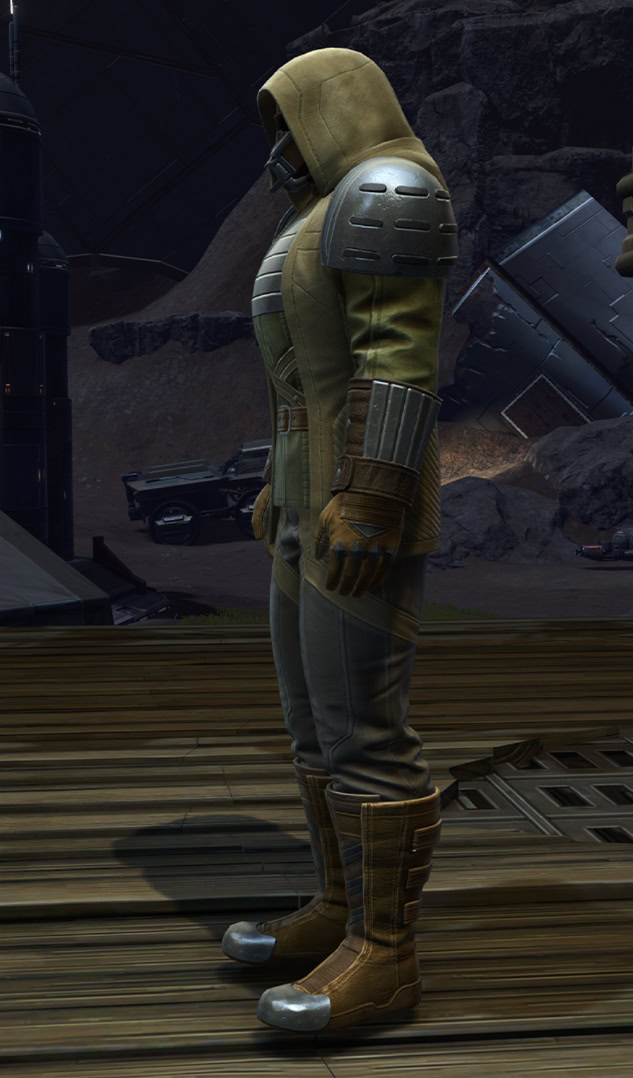
Decorations
Below, you’ll see all decos available from Wreckage on Dantooine as they appear when placed in a stronghold.

GDW Repair Platforms
Each GDW Repair Platform mount is available for purchase from the scientist vendor at the Forward Camp in the associated biome. Each requires Hero reputation and costs a whopping 5 million credits.
They also have space for a ground-based minipet, with the intent being to use the associated G0-NK droid available from the same vendor since both the paint job and naming scheme match.
For example, you pair the GDW-L0 Repair Platform with the L0-NK Escort Droid, both of which are sold by the same vendor, in this case, at Glacial Trespass.
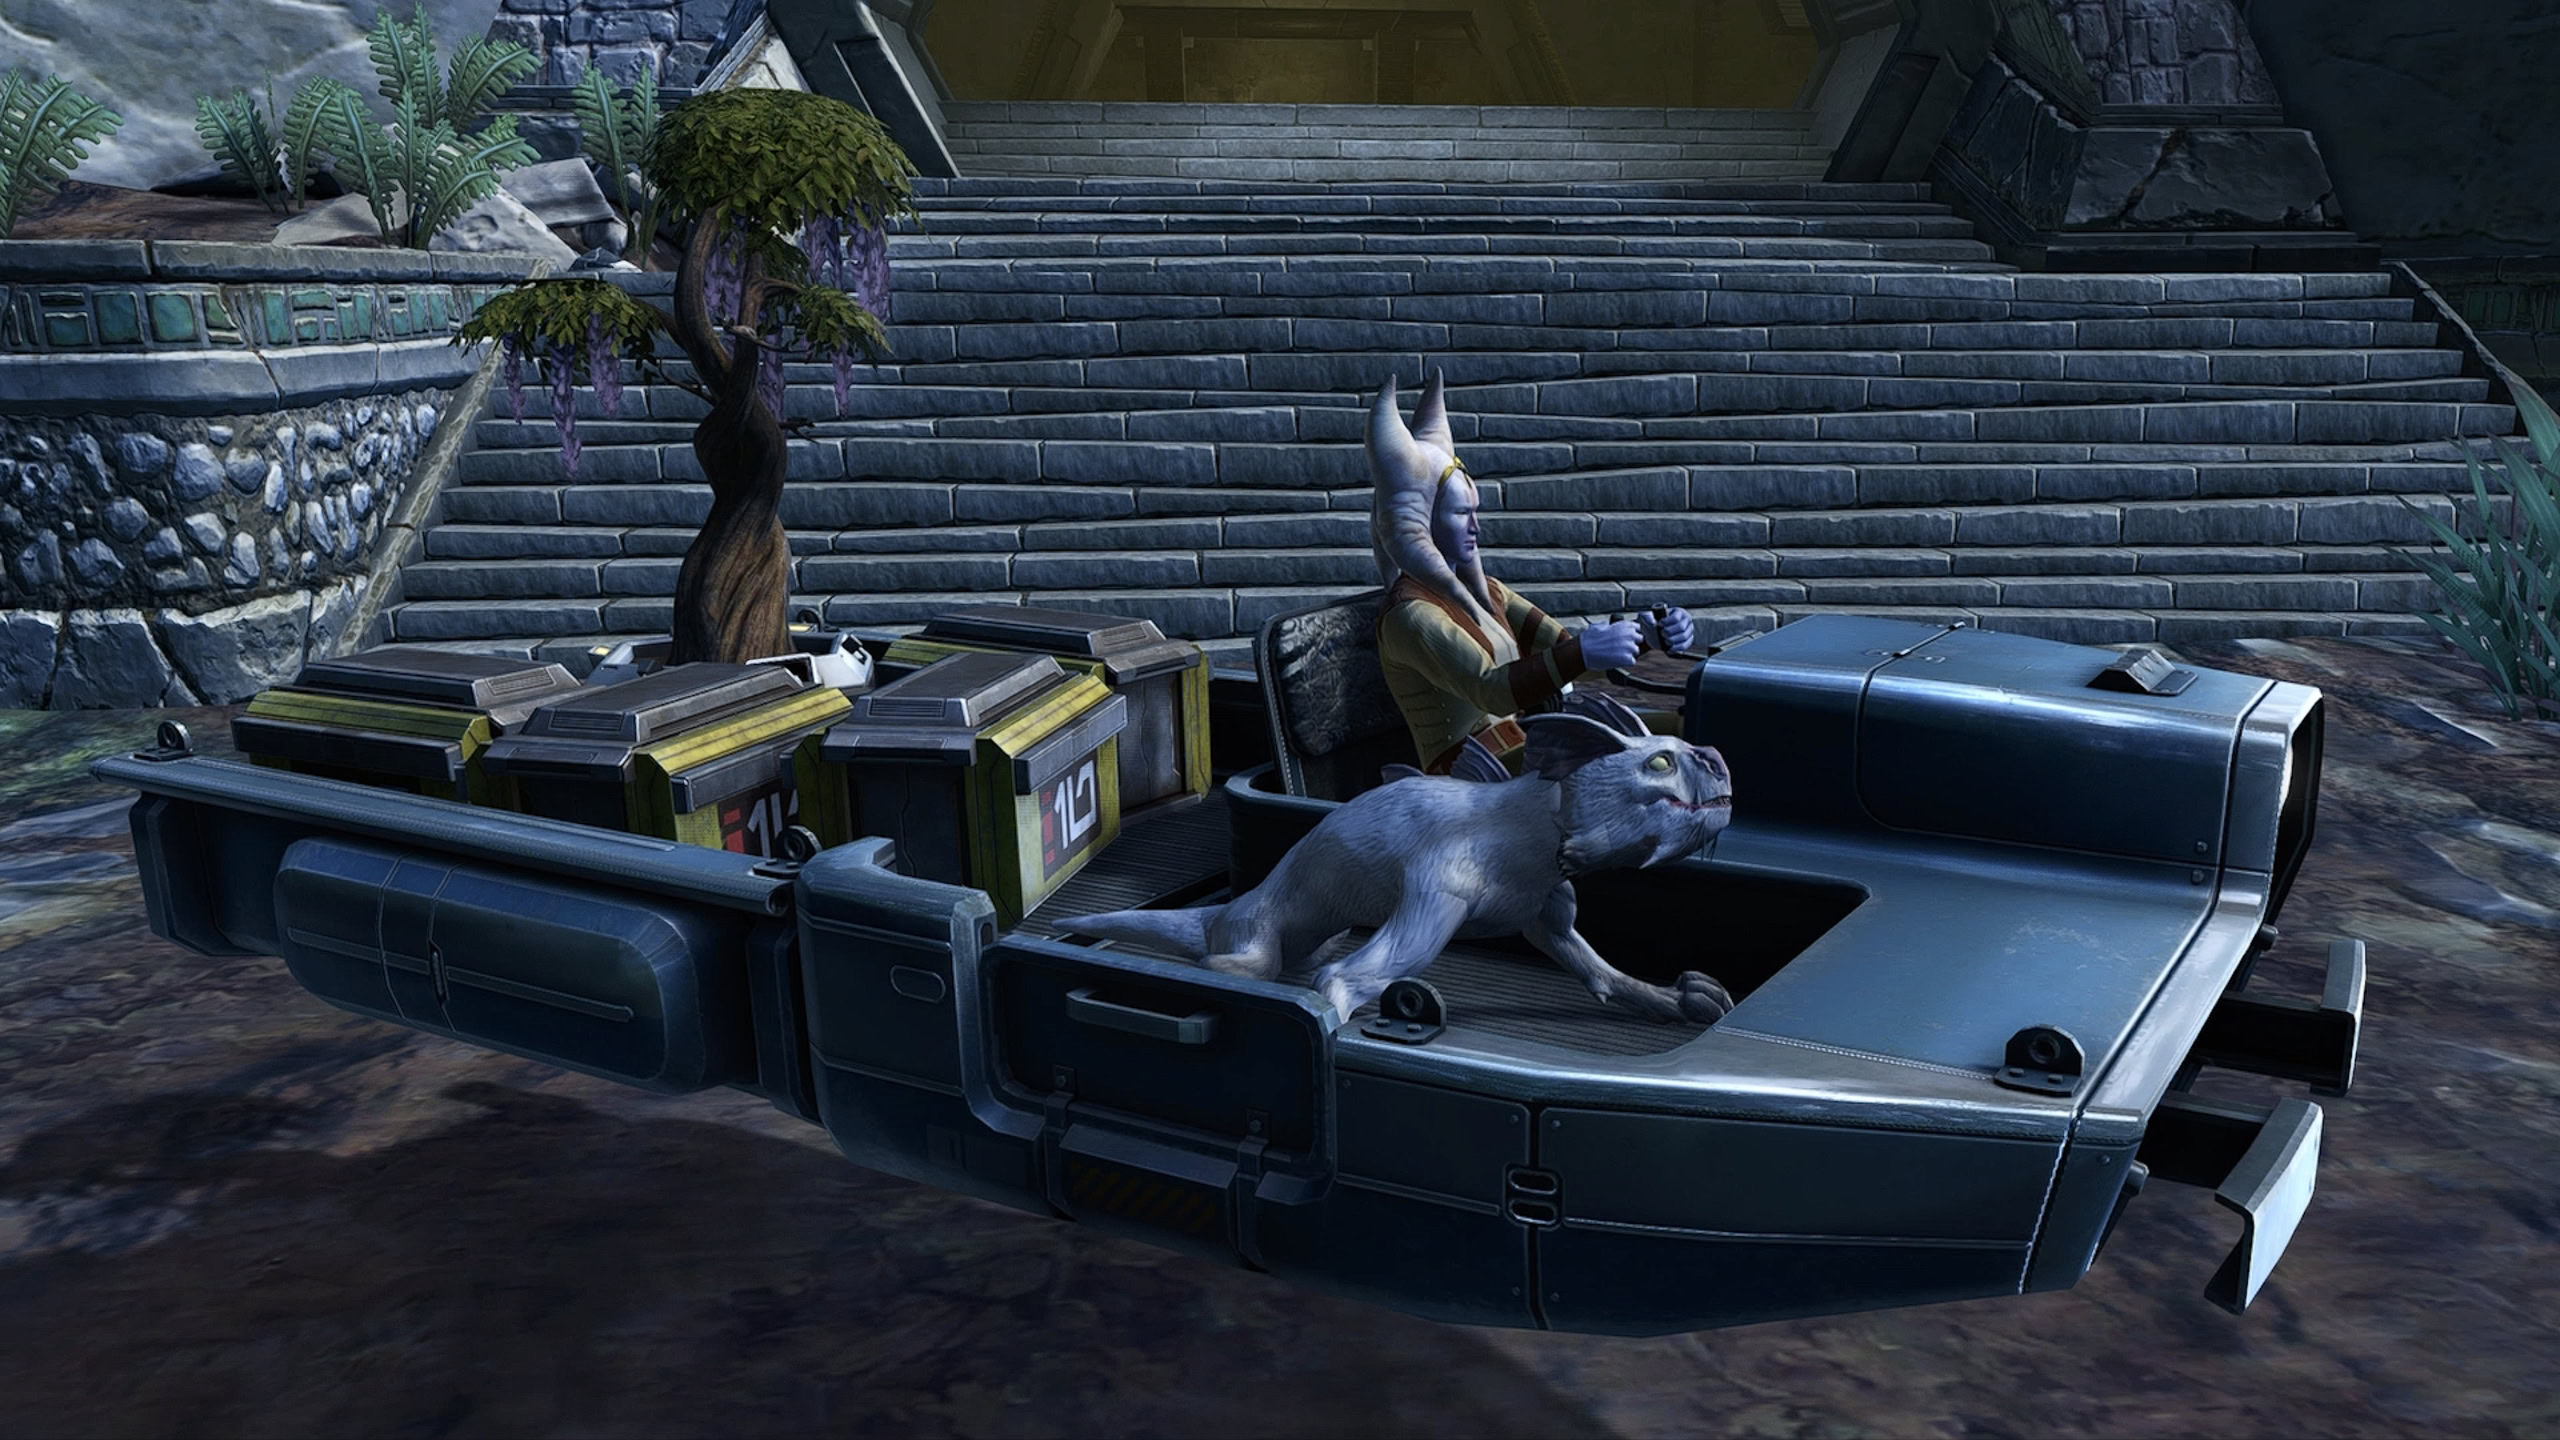
(Sporefall)

(Geothermal Disruption)
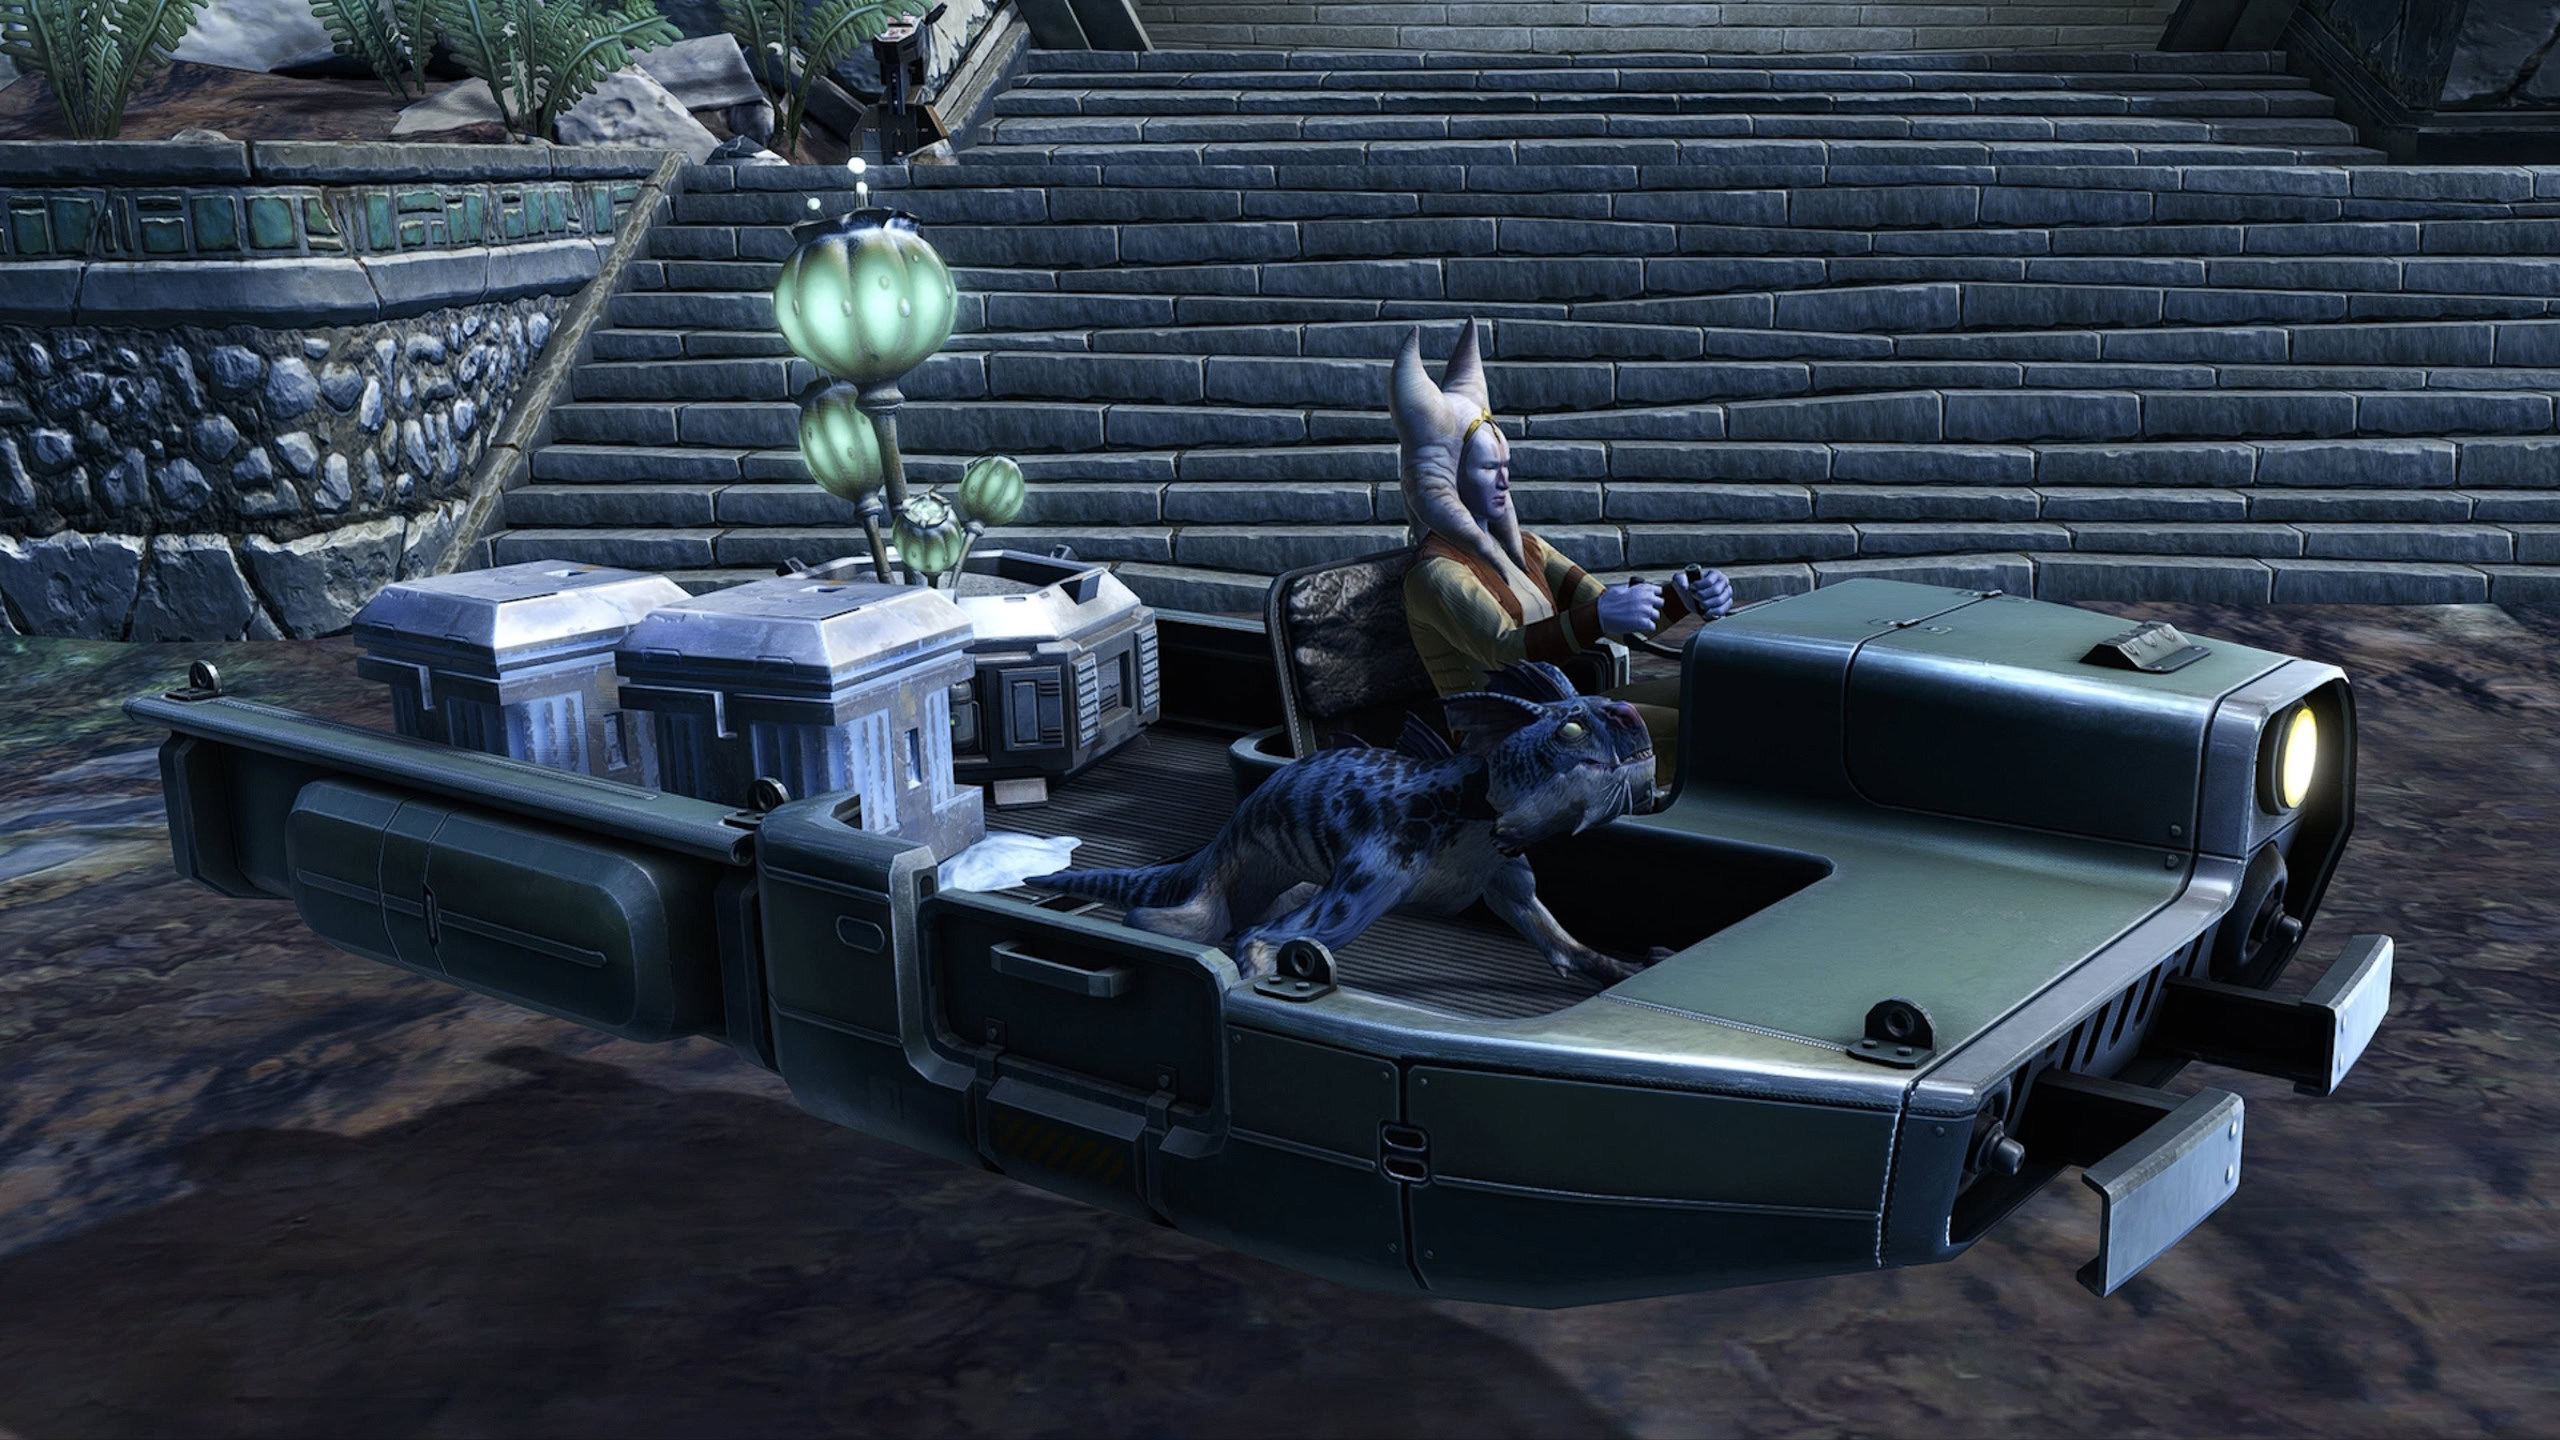
(Glacial Trespass)
Dantooine Research Vessels
Dantooine Research Vessels are a new type of mount presumably manufactured by GSI, though no make is listed. You receive each for completing 200 Dynamic Encounters in a given biome.
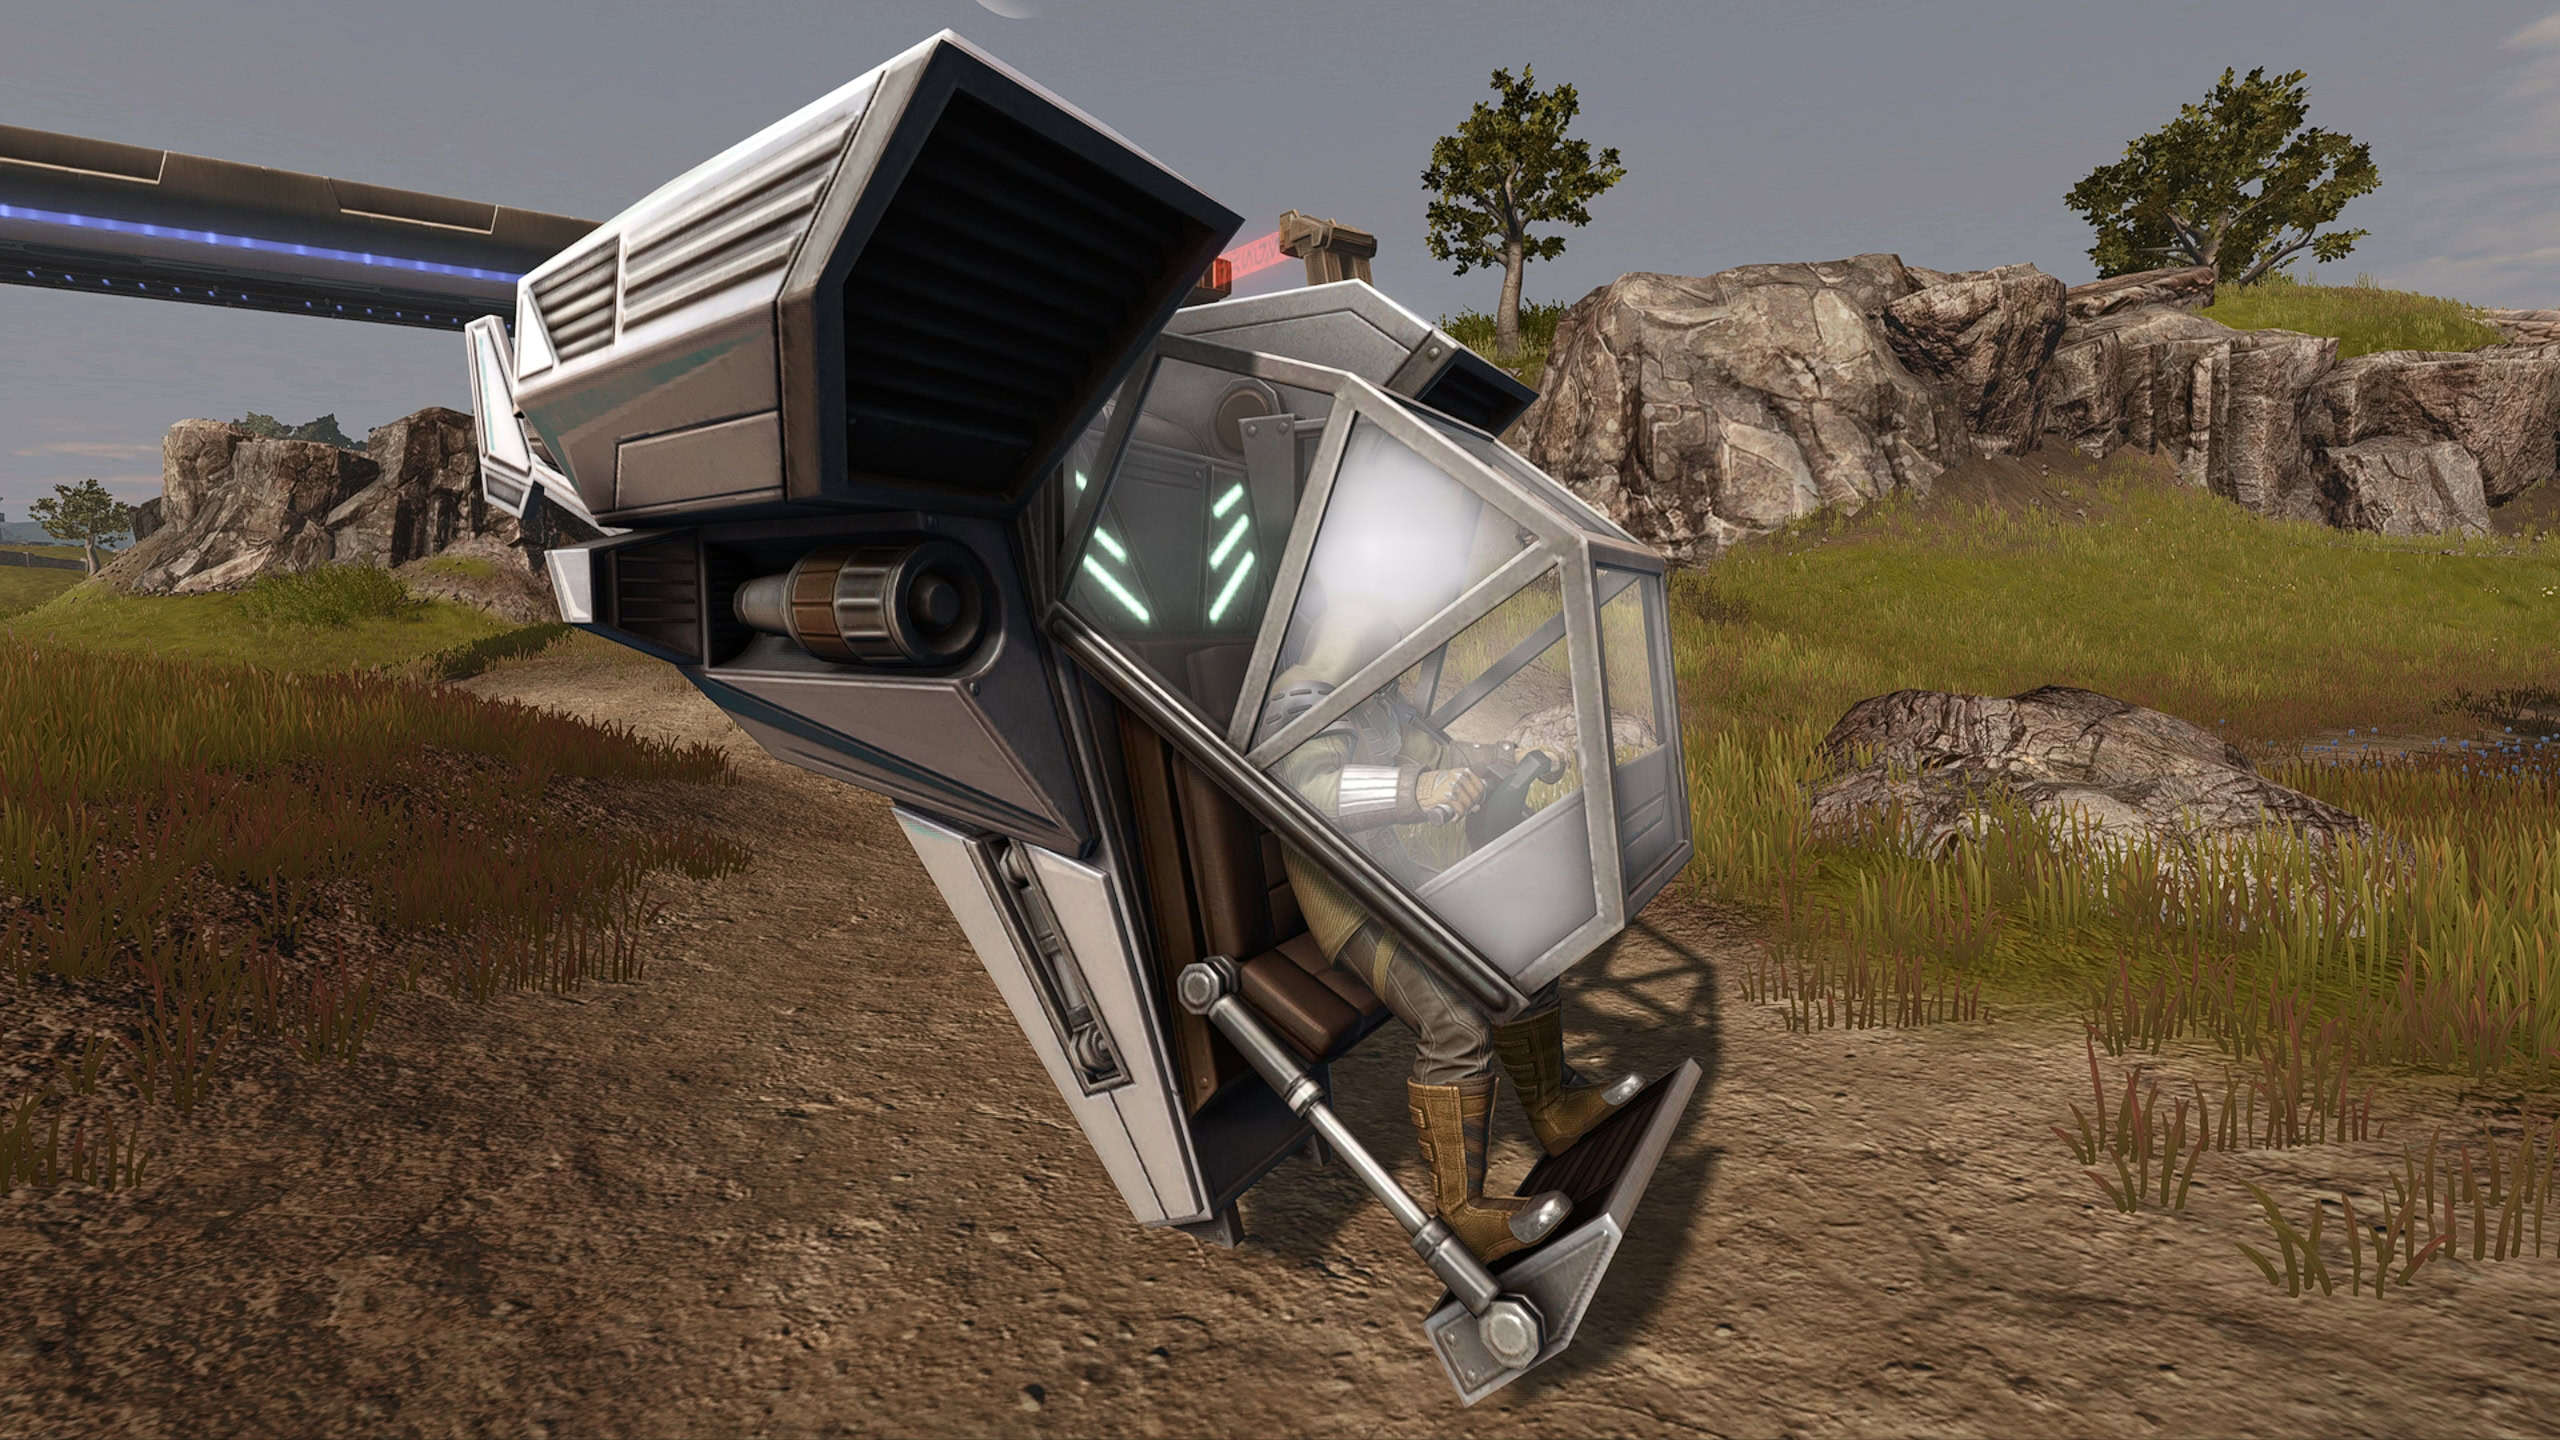
(Glacial Trespass)
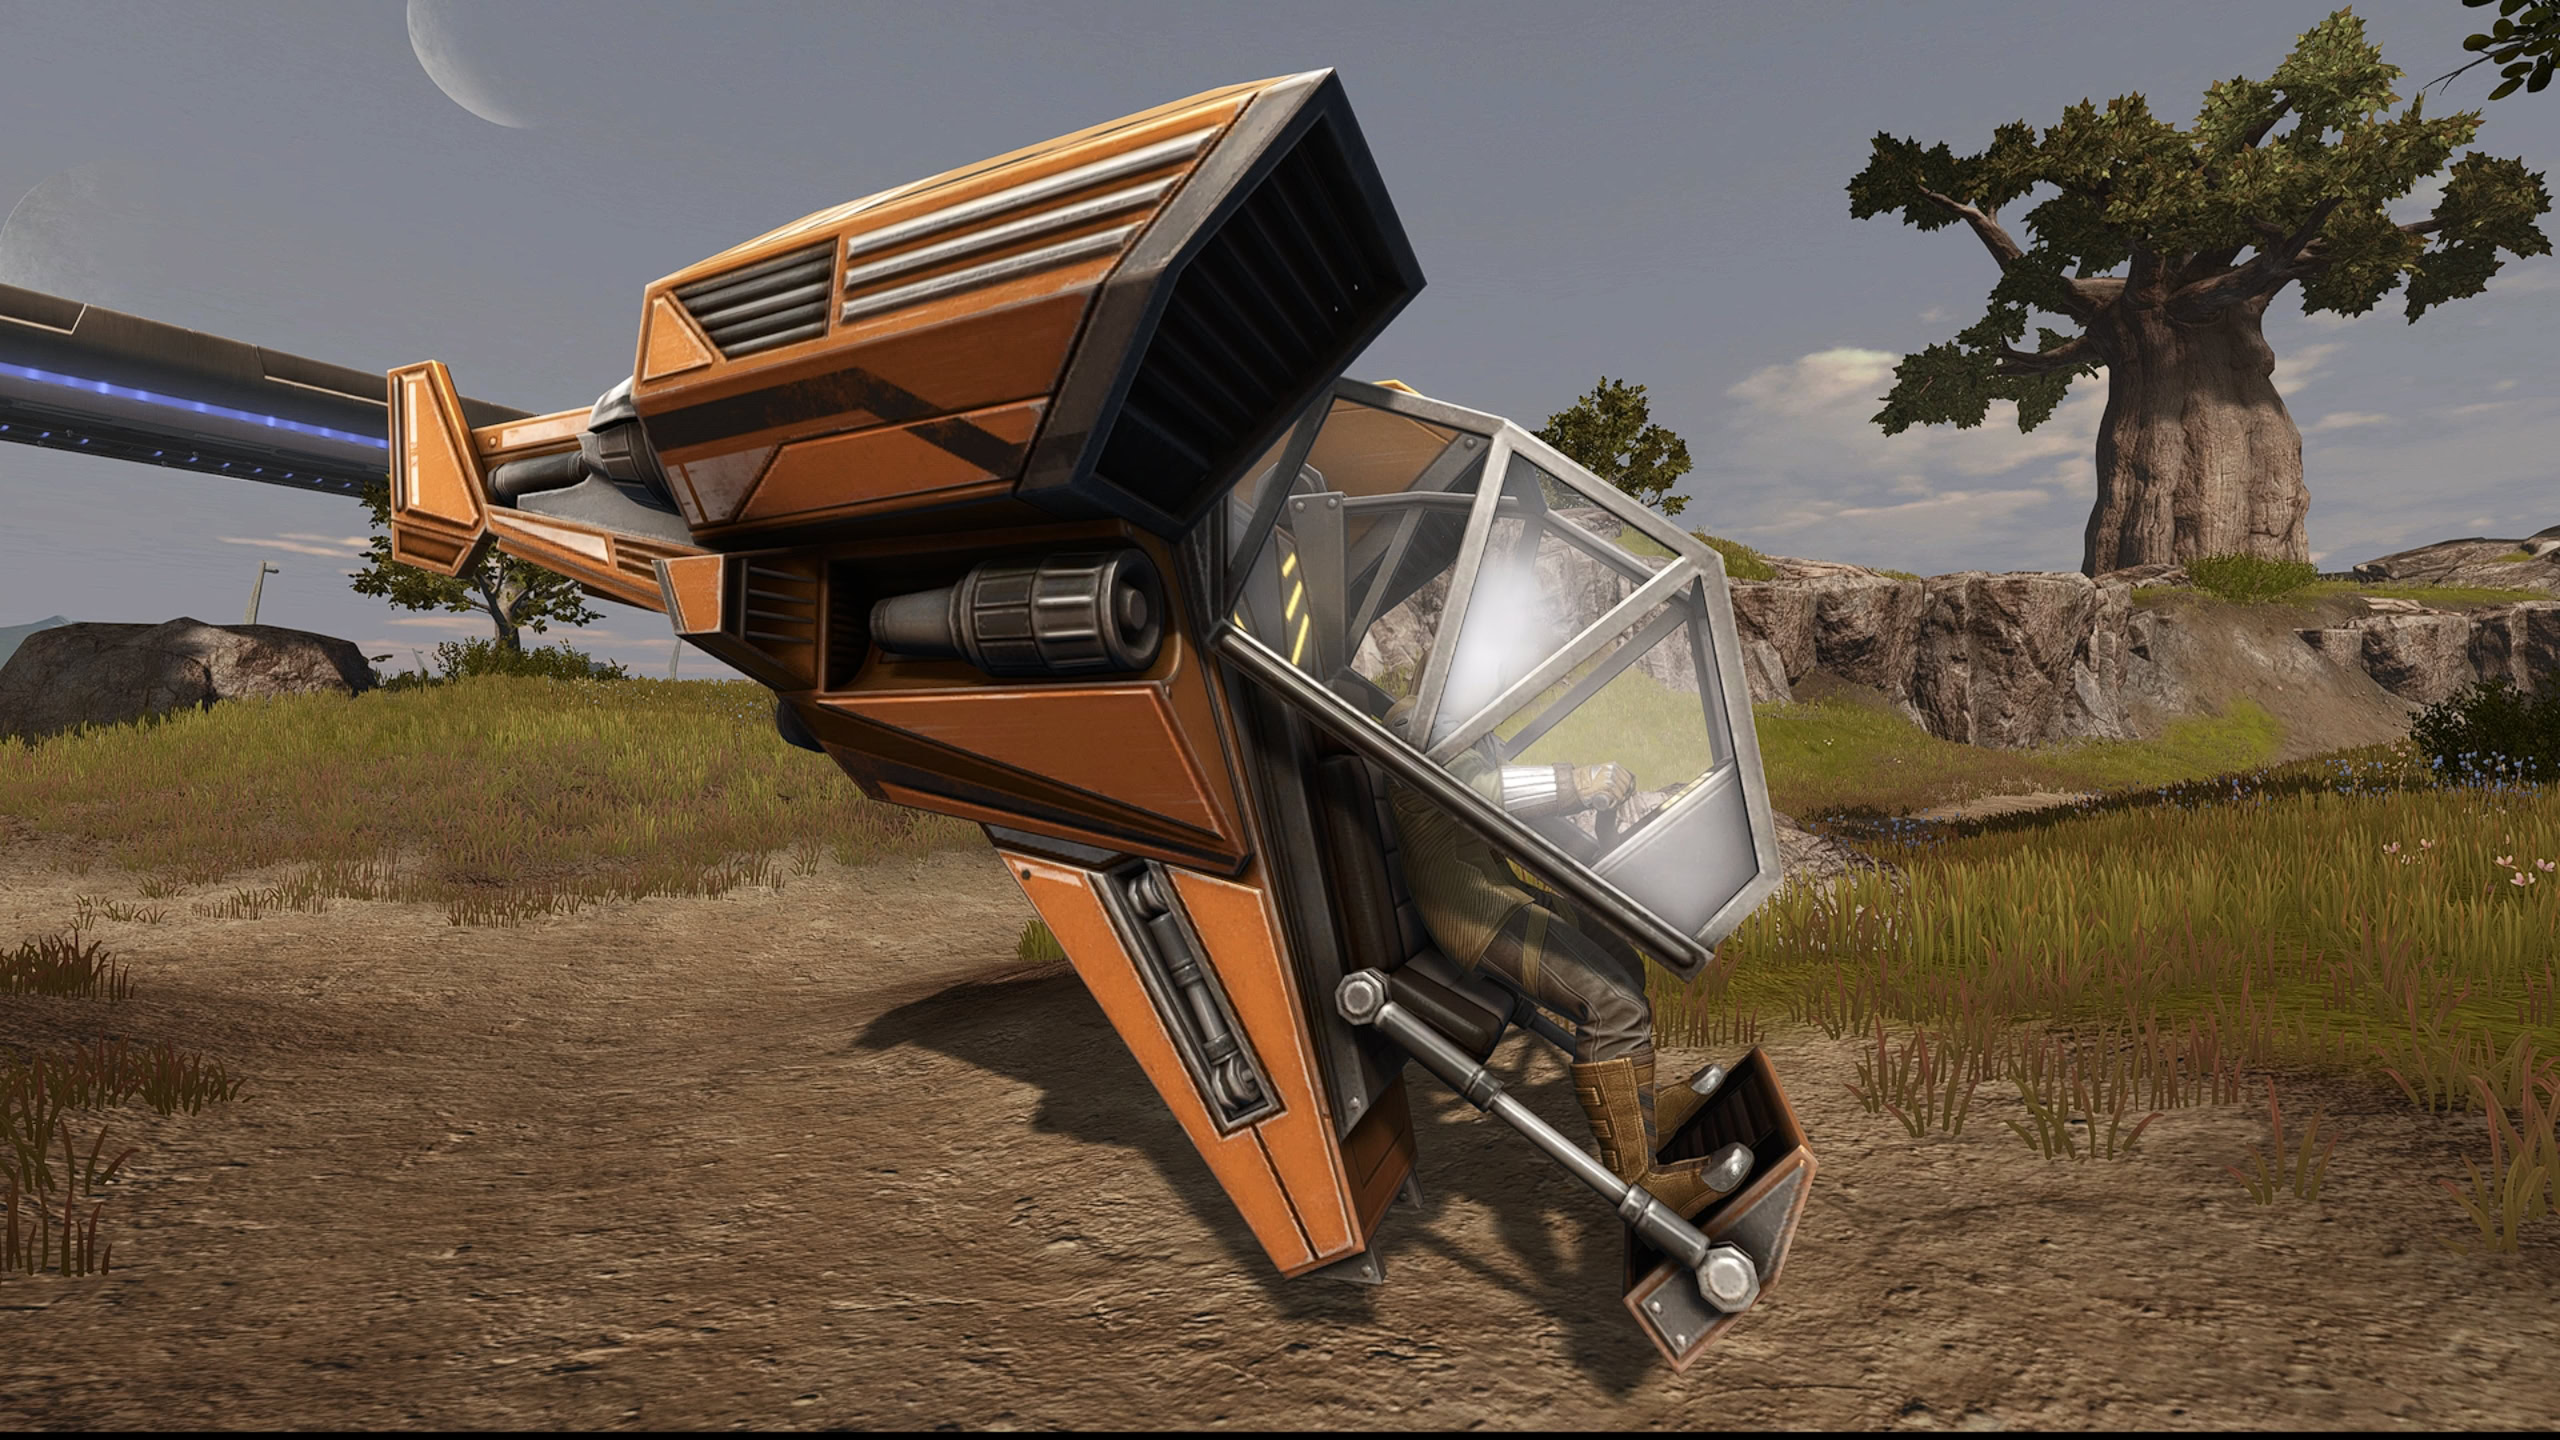
(Geothermal Disruption)
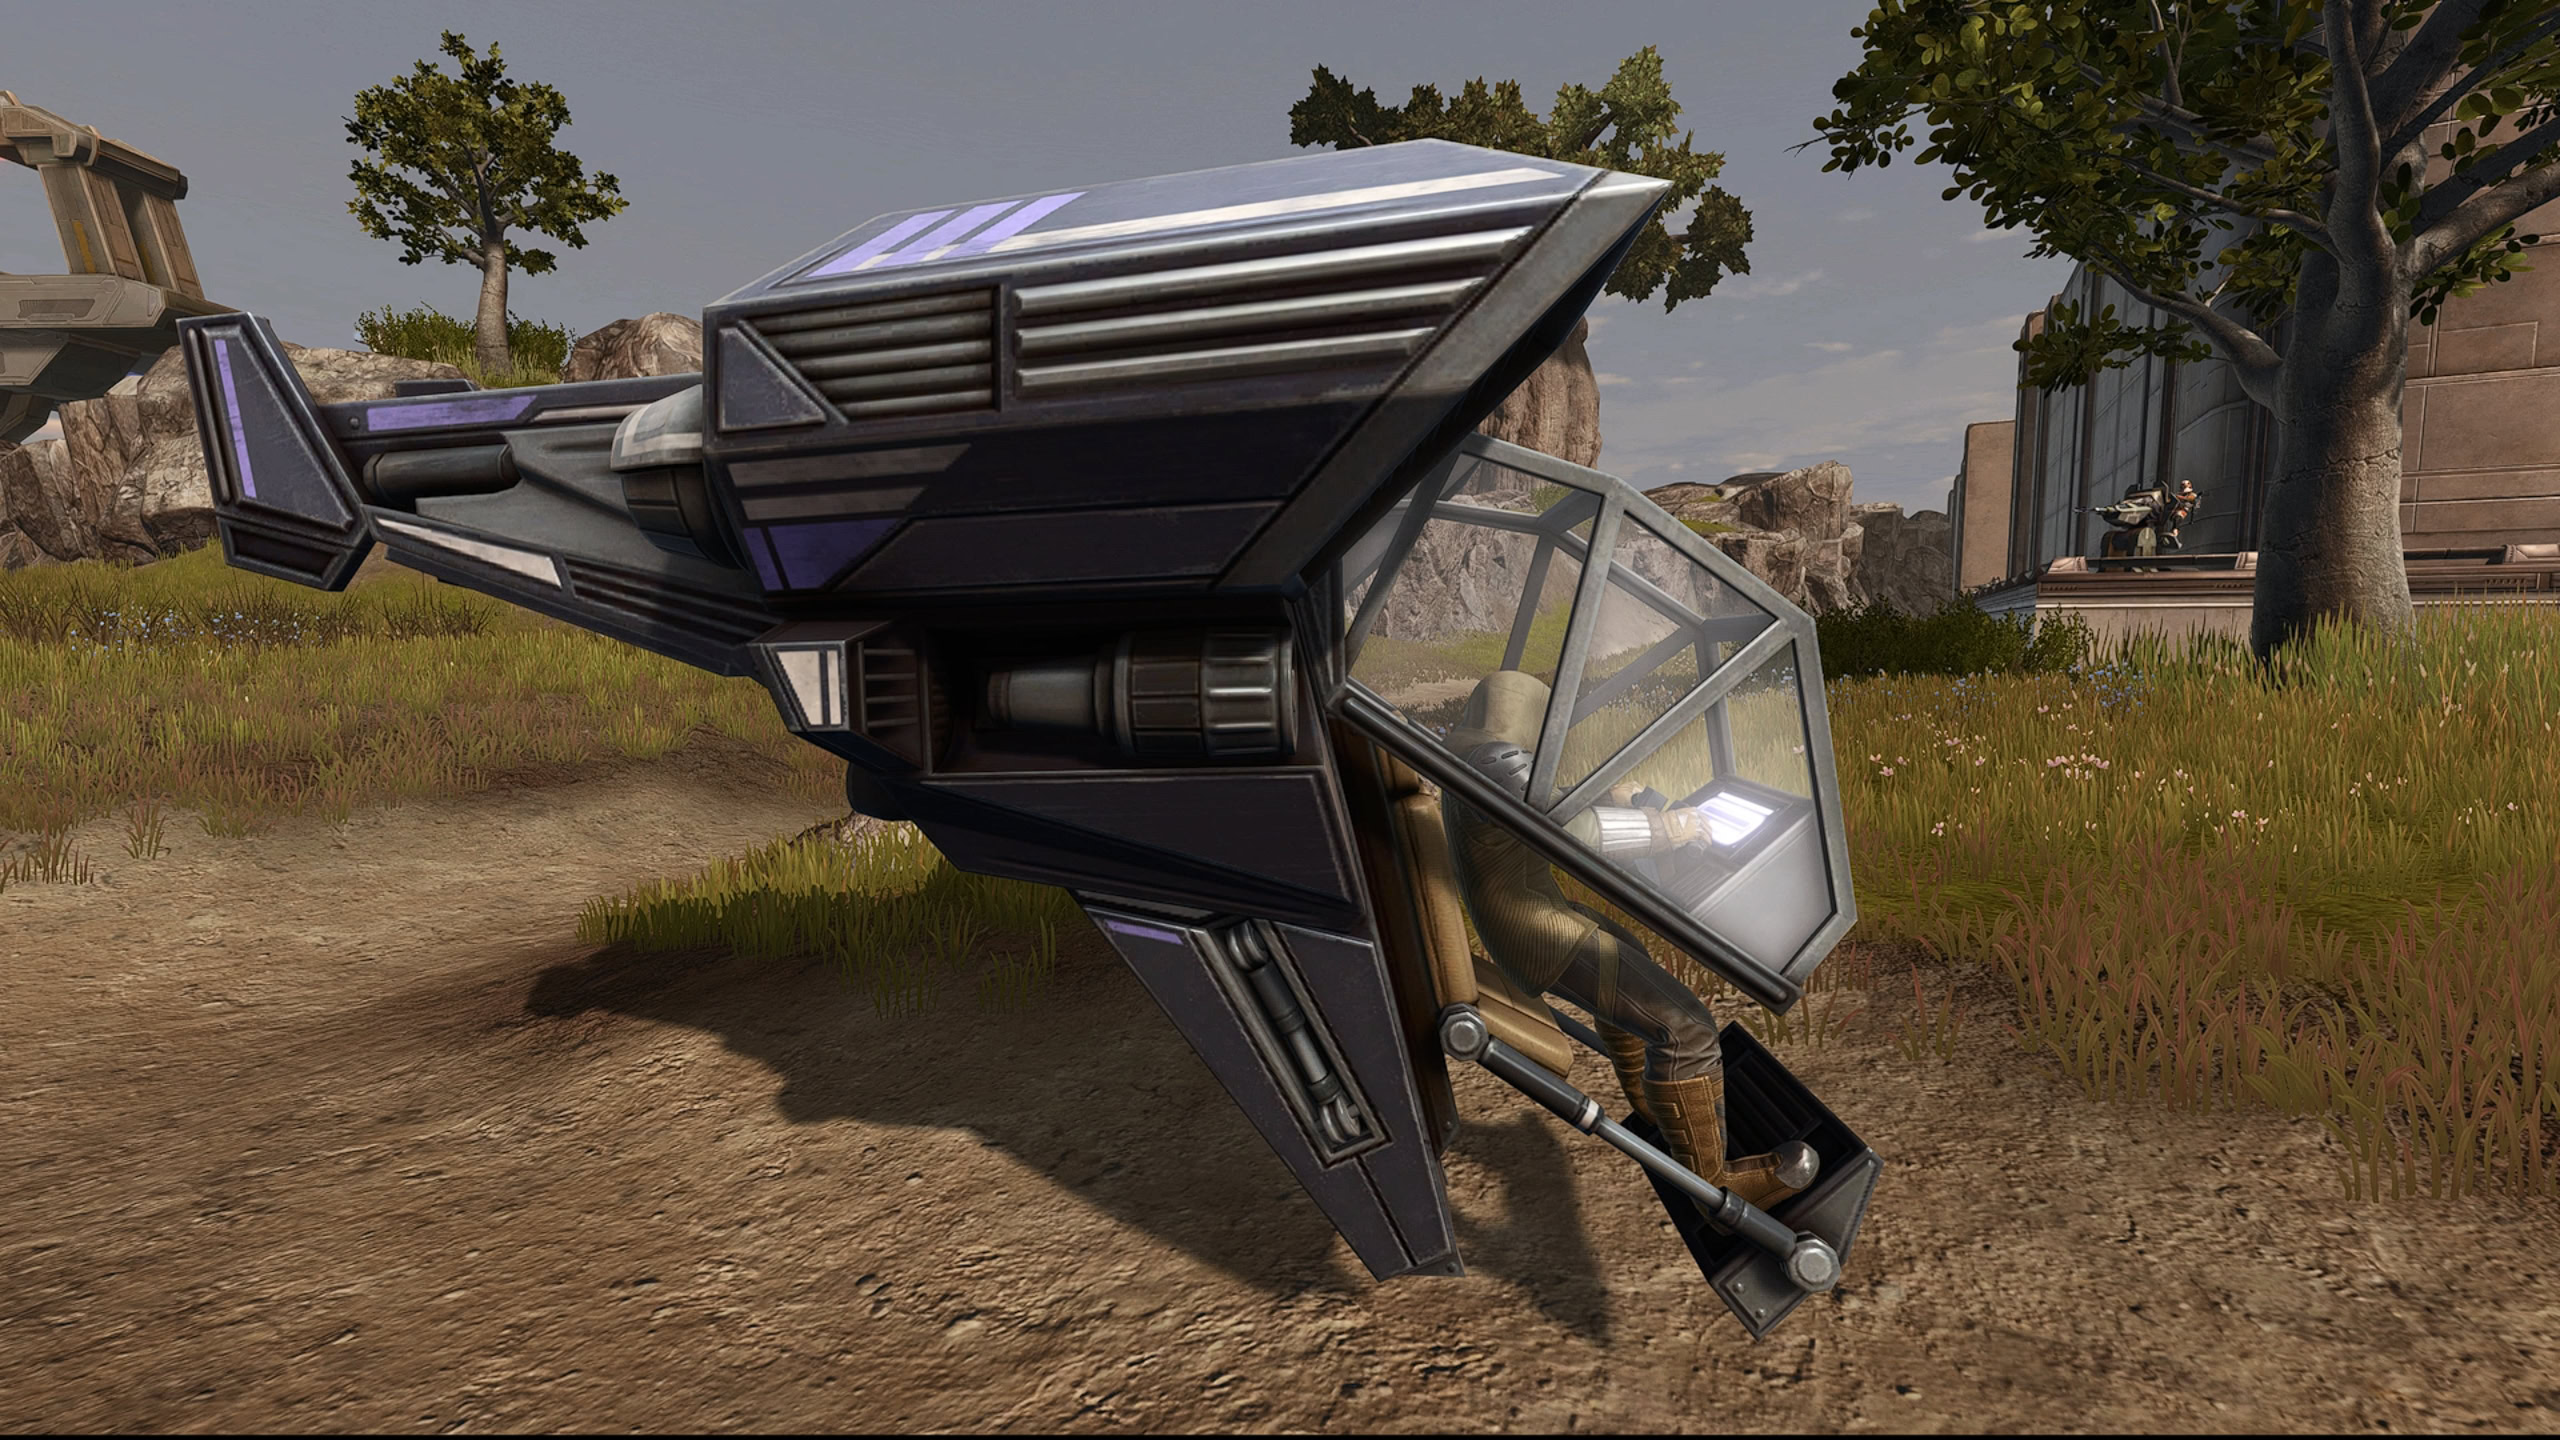
(Sporefall)
Dantooine Expedition Carrier
The Dantooine Expedition Carrier is an expanded version of the Dantooine Research Vessels that can transport a ground-based minipet. You receive it after completing 200 Dynamic Encounters in each biome, defeating the Orbital Core, and completing every single unique Dynamic Encounter at the Crash Site.
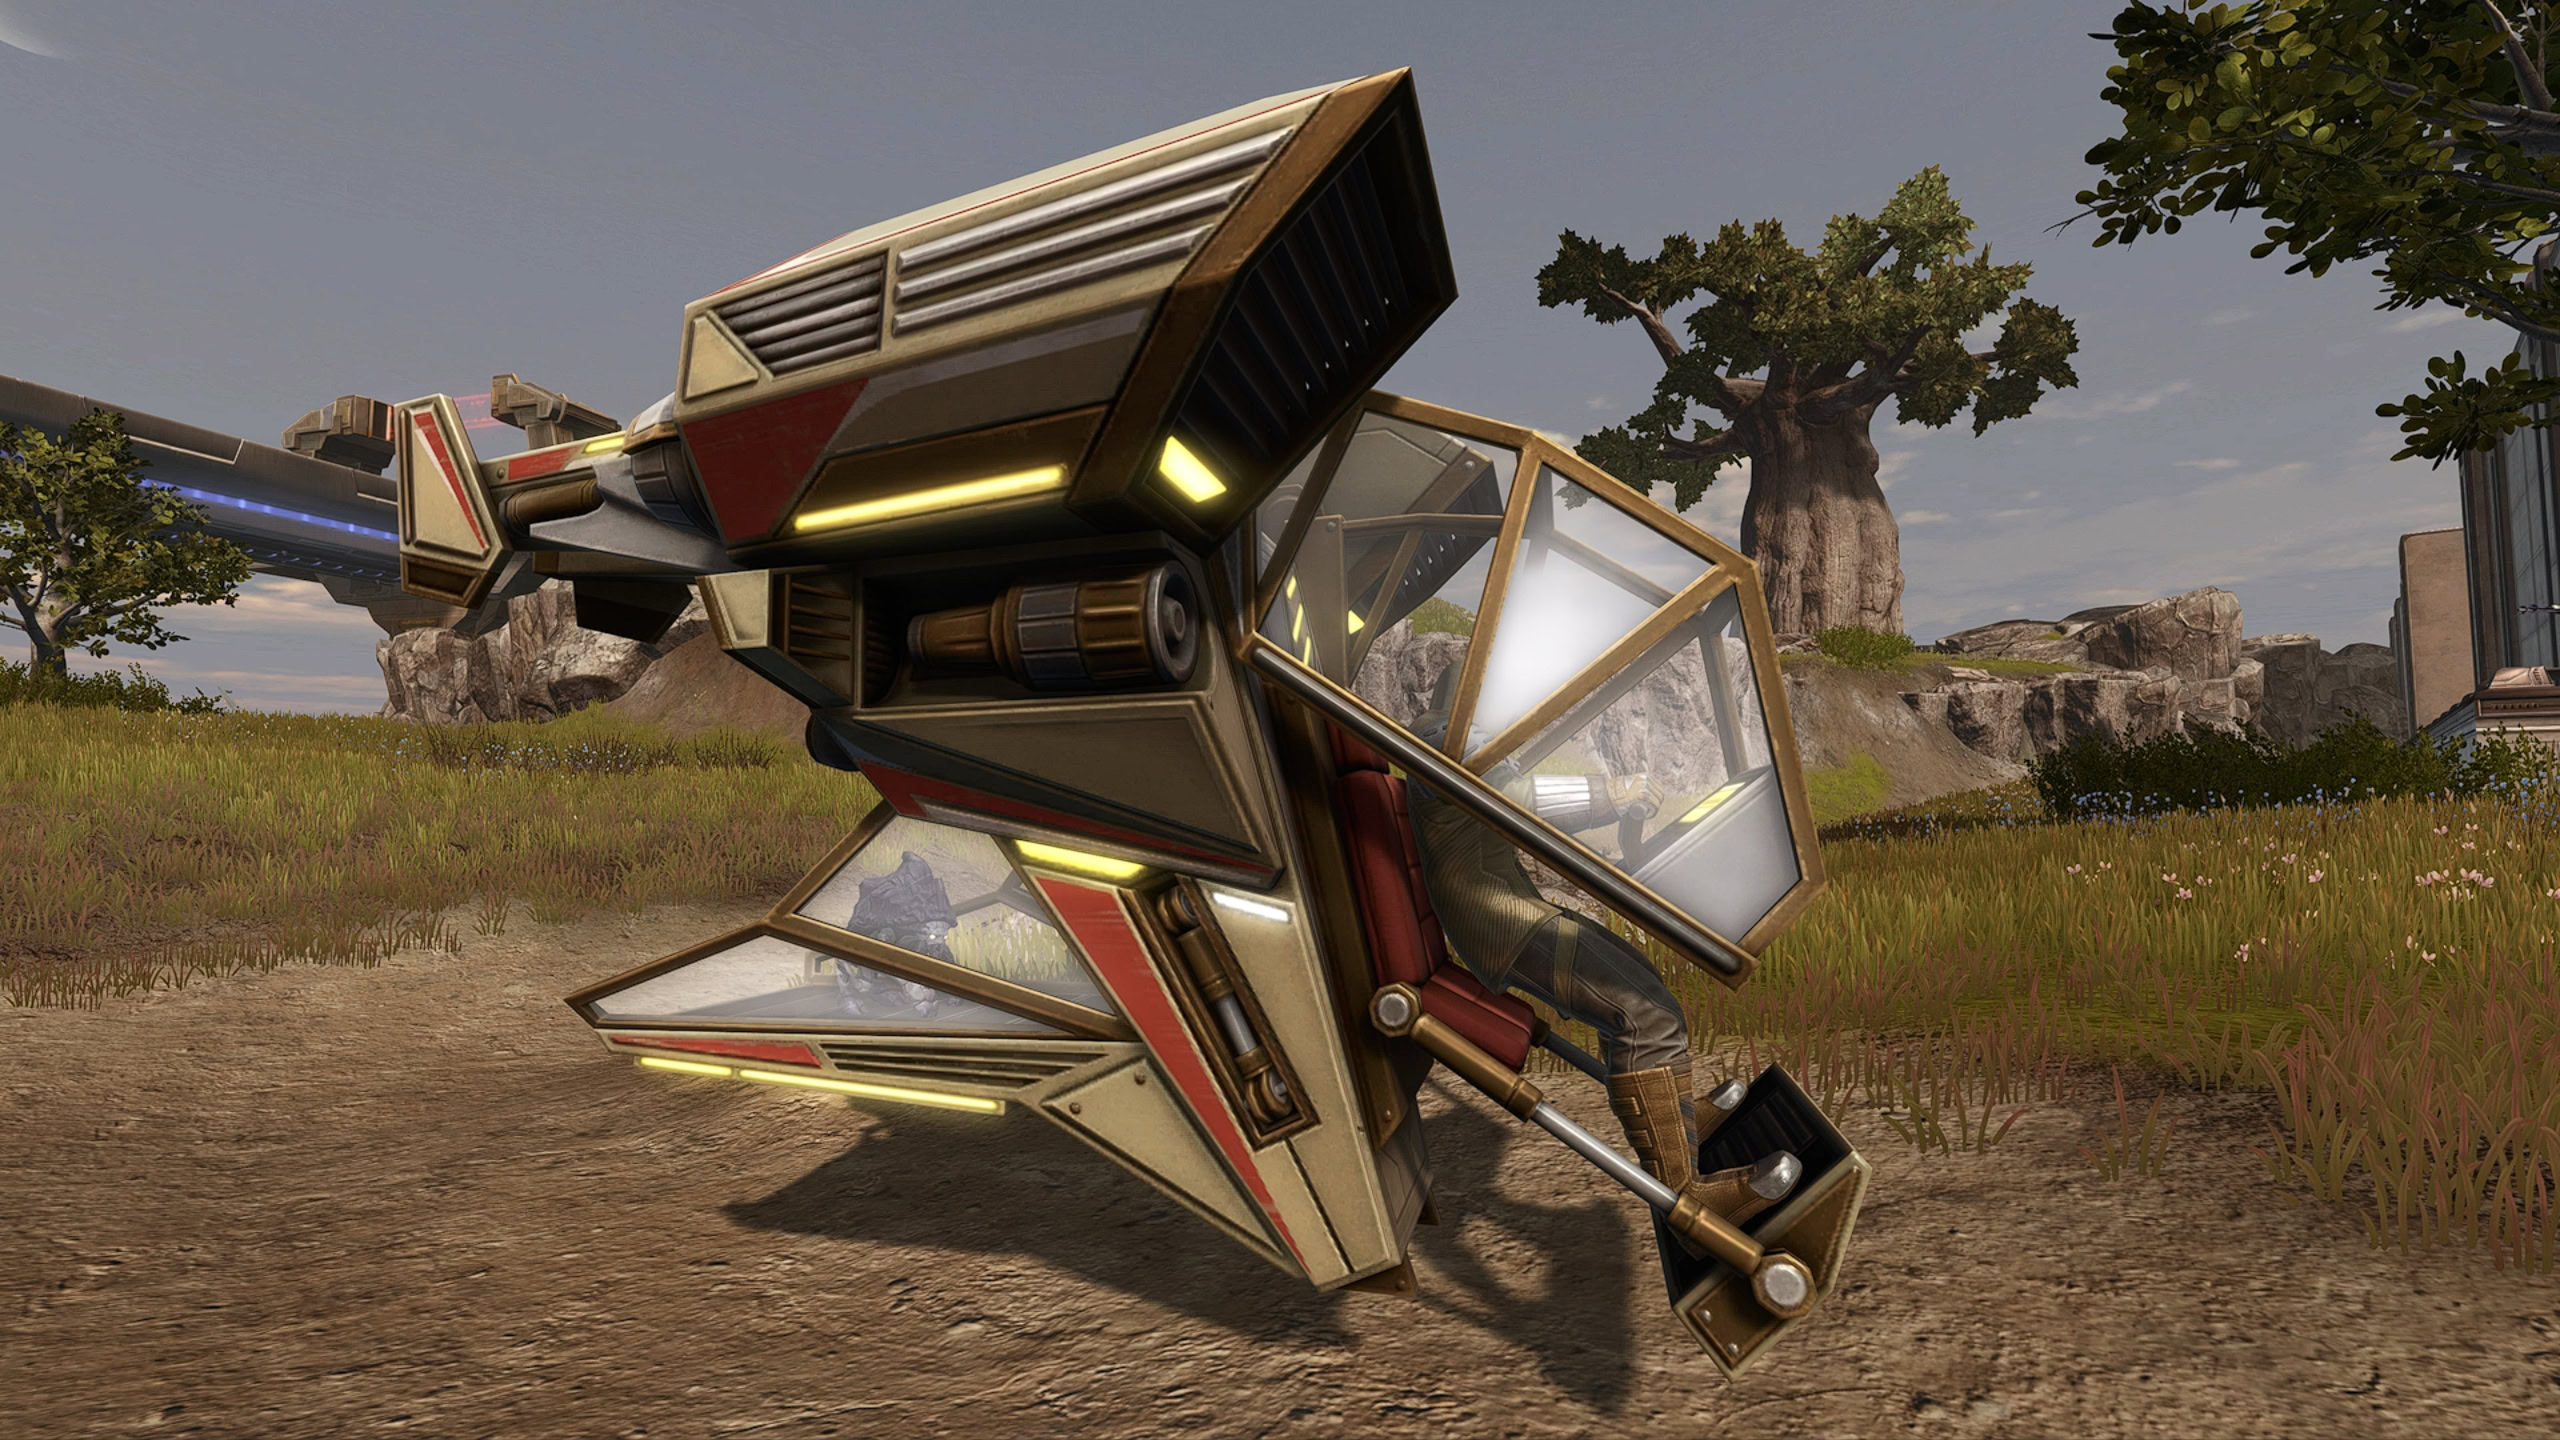
GDW Repair Platforms
Each GDW Repair Platform mount is available for purchase from the scientist vendor at the Forward Camp in the associated biome. Each requires Hero reputation and costs a whopping 5 million credits.
They also have space for a ground-based minipet, with the intent being to use the associated G0-NK droid available from the same vendor since both the paint job and naming scheme match.
For example, you pair the GDW-L0 Repair Platform with the L0-NK Escort Droid, both of which are sold by the same vendor, in this case, at Glacial Trespass.
(Sporefall)
(Geothermal Disruption)
(Glacial Trespass)
Yaracats
You can purchase the Thermite Yaracat from the scientists at the Geothermal Disruption Forward Camp and get the other two as drops in their respective biomes or purchase them from other players on the GTN.
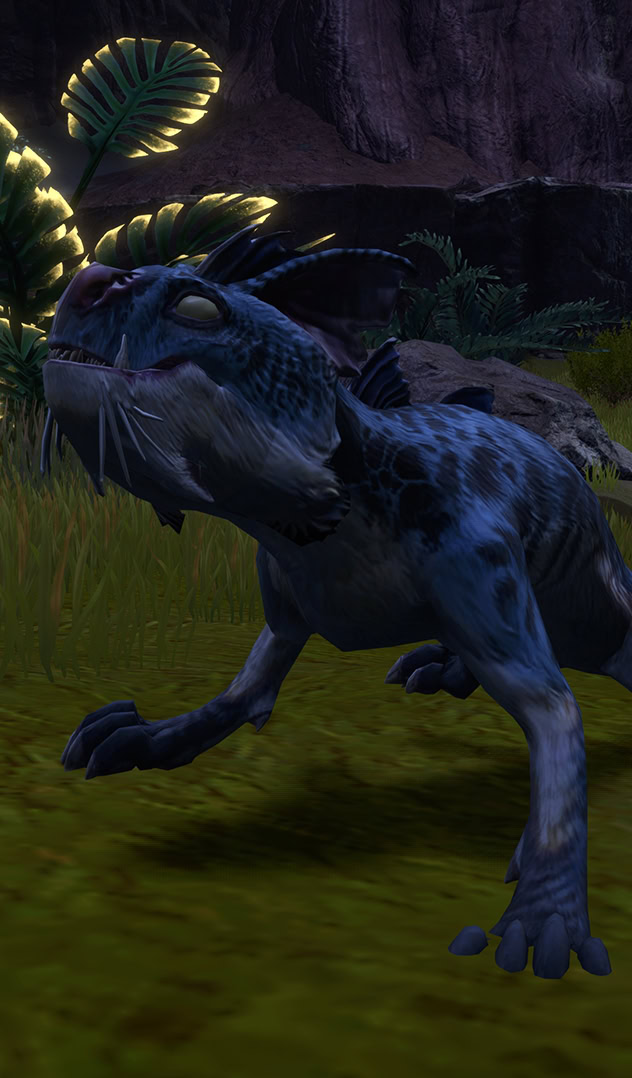
(Sporefall)

(Geothermal Disruption)
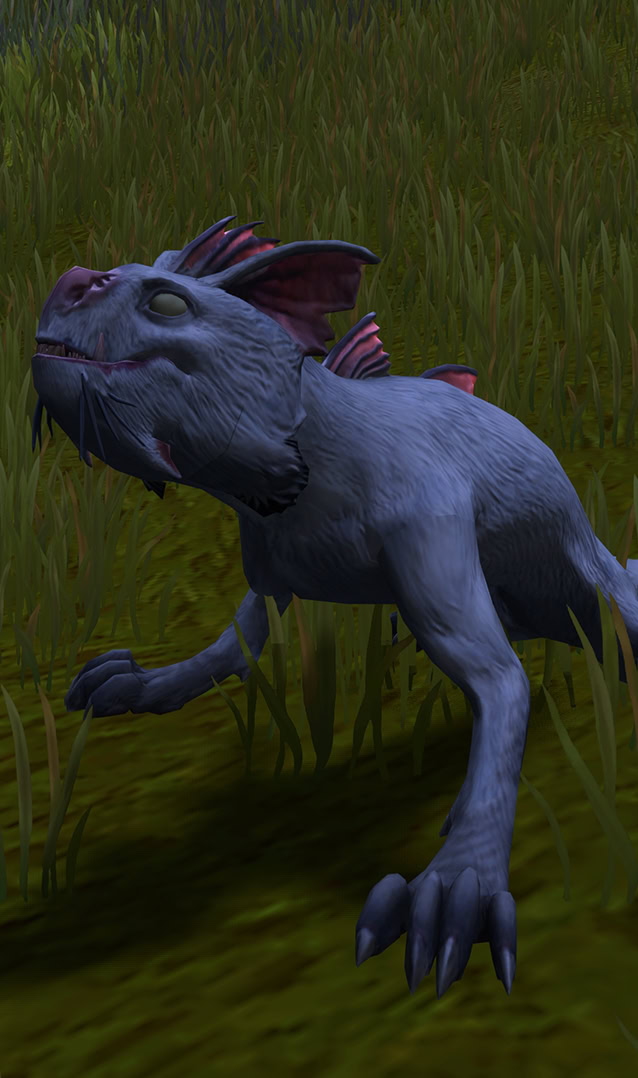
(Glacial Trespass)
Nerf Calves
You can purchase the Glacial Nerf Calf from the scientists at the Glacial Trespass Forward Camp and get the other two as drops in their respective biomes or purchase them from other players on the GTN.

(Sporefall)
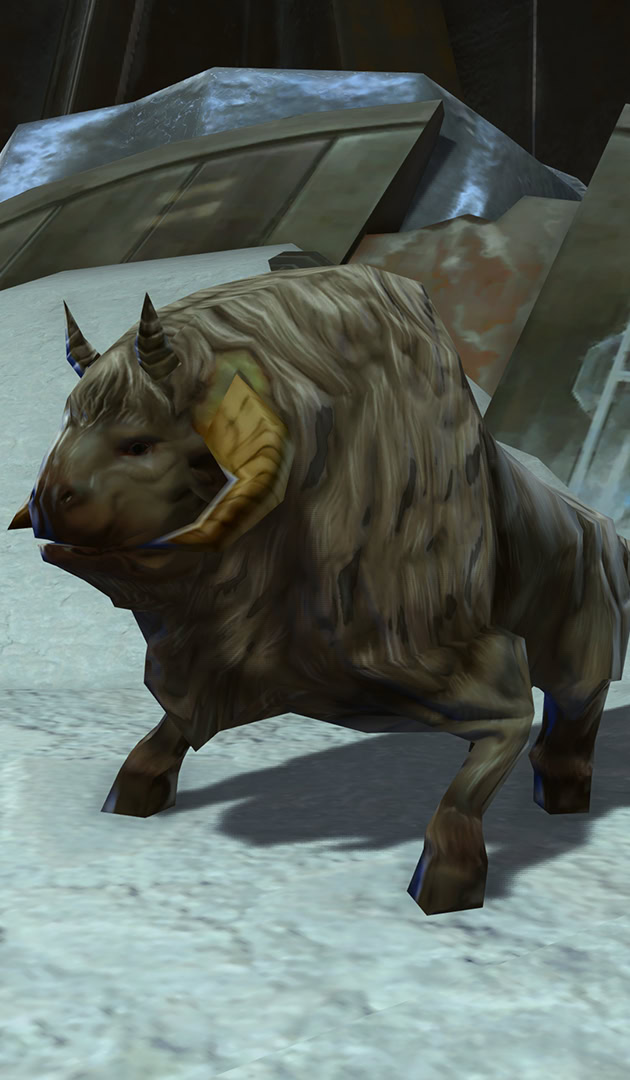
(Geothermal Disruption)
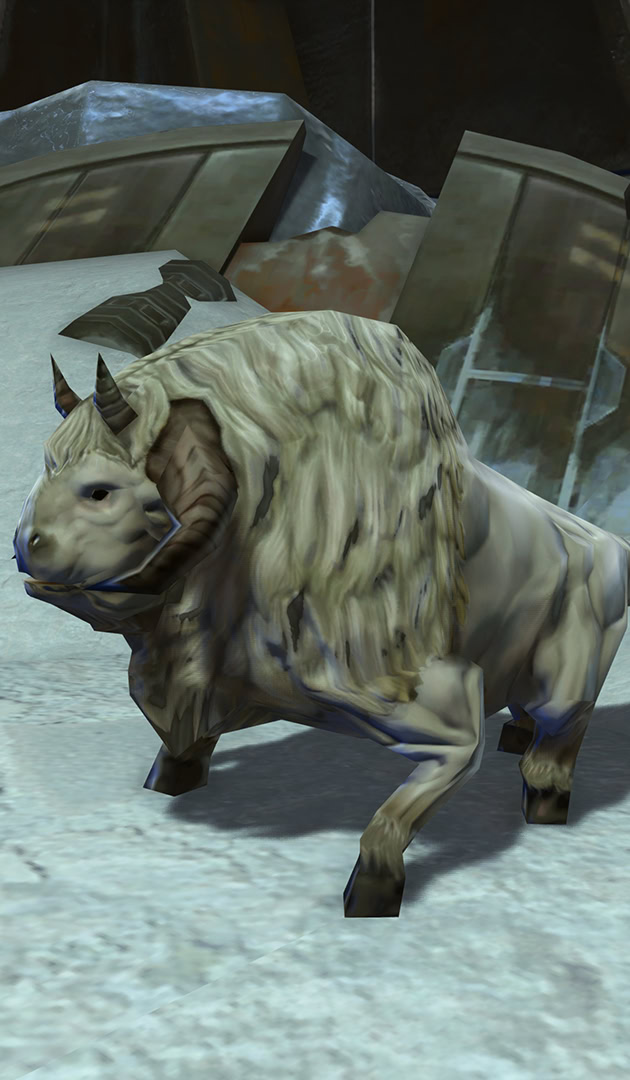
(Glacial Trespass)
Shaclaws
You can purchase the Sporefall Shaclaw from scientists at the Sporefall Forward Camp and get the other two as drops from their respective biomes or purchase them from other players on the GTN.

(Sporefall)
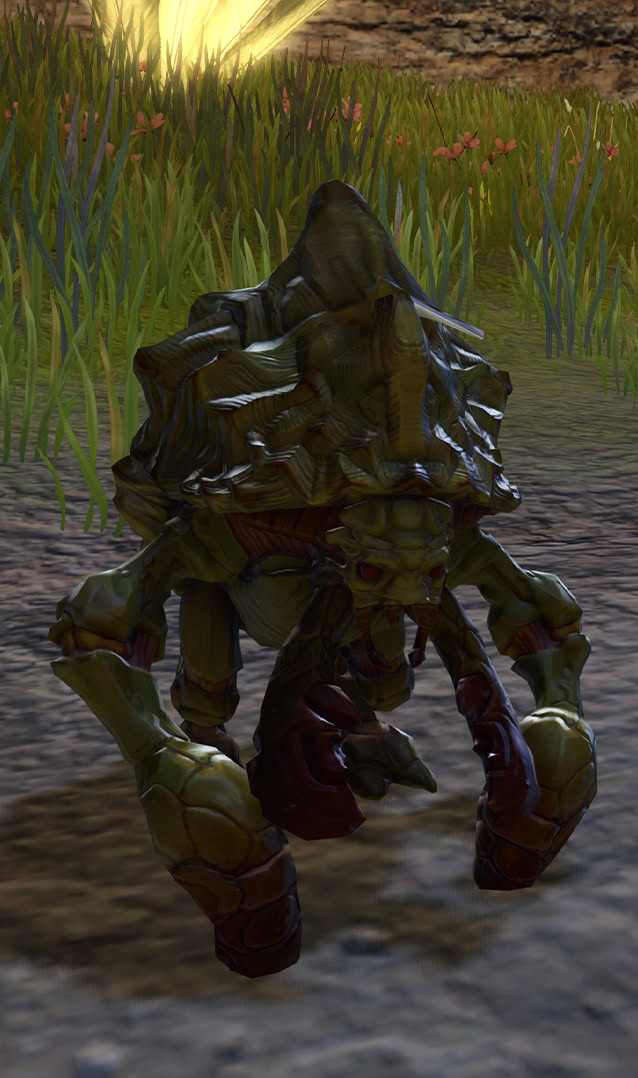
(Geothermal Disruption)
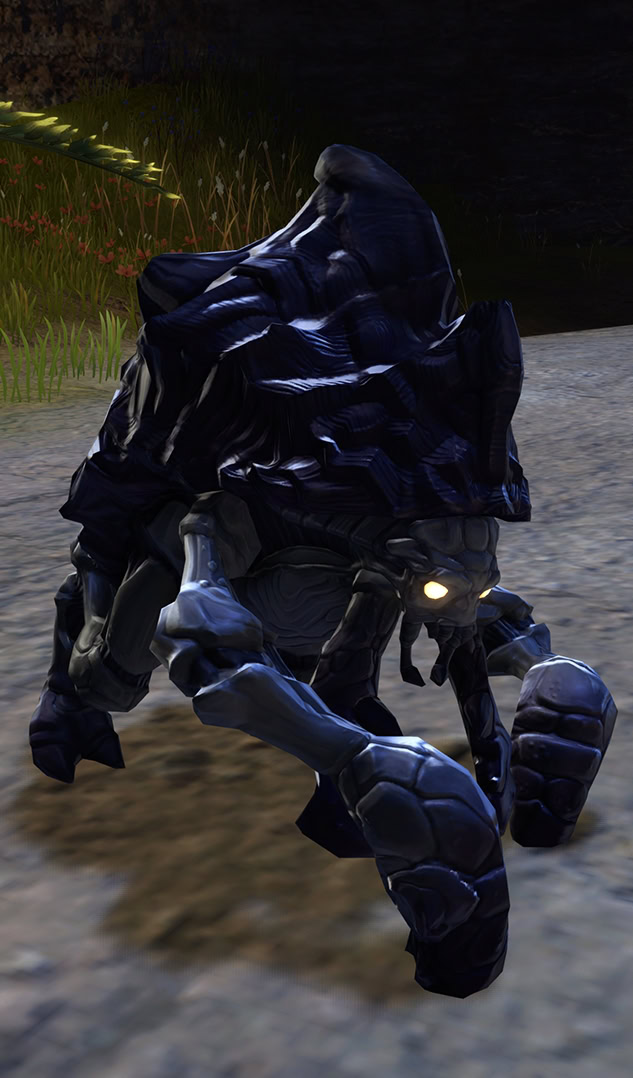
(Glacial Trespass)
G0-NK Droids
These droids cost 2.5 mil credits and require Champion reputation. All 3 are sold by the scientist vendors in their associated biome.

(Sporefall)

(Geothermal Disruption)
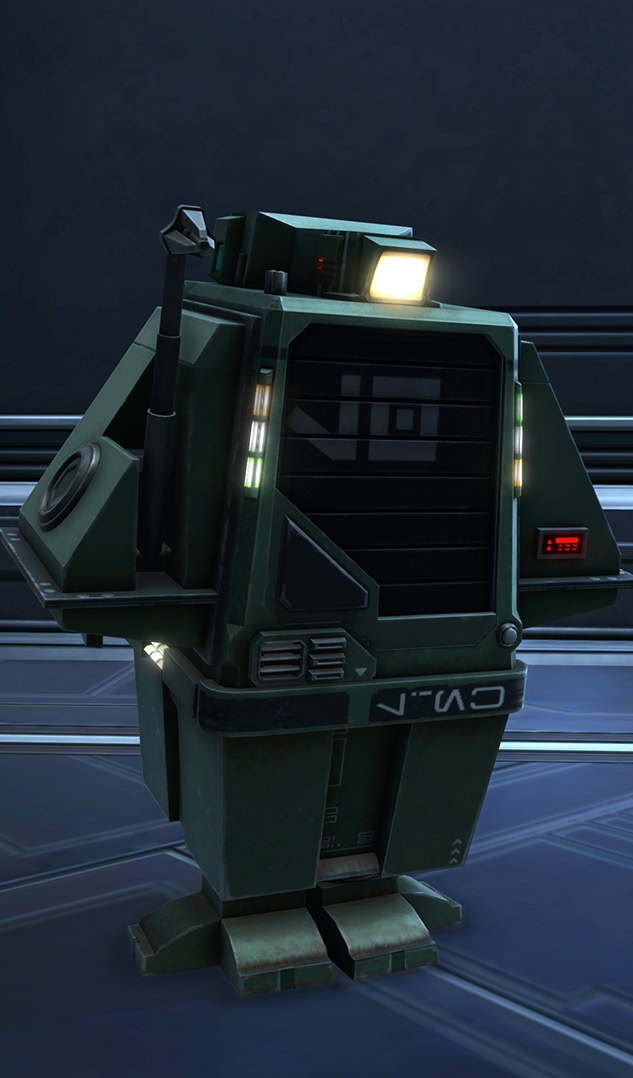
(Glacial Trespass)
Secrets and Special Objects
The Crash Site around the Jannimak ship has a ton of secrets and mysteries. Some of the objects you discover will give you powerful buffs that will make the Crash Site encounters easier. Others will provide additional lore and story bits.
Datapads
In each of the forward camps, including the research camp, you can find datapads to click on and get some extra background information of events and activities involving the scientists that run those camps. You can click the datapads at any point, you don’t need the Research Notes token.
There are 18 datapads in total and each tells a unique piece of backstory of the scientist that wrote it and includes details about their work at the biome and/or discusses their colleagues.
All Datapad Locations at the Dantooine Crash SiteMytserious Stimpacks
The Mysterious require you to have an active Research Notes for the biome they are located in. Once you pick up the stimpack, you get a 90-min buff that boosts your performances in combat. The items do not persist through defeat.
Mysterious Stimpacks Guide and LocationsUnknown Adrenals
The Unknown Adrenals provide a massive offensive boost for 90 minutes. They behave similarly to the Mysterious Stimpacks. When you pick up one, it disappears for a while.
Unknown Adrenals Guide and LocationsEcotone Buffs
At the direct connections where Glacial Trespass transitions to both Sporefall and Geothermal Disruption (the ecotones), you can sometimes find little frozen flora and volcanoes. These appear during transition encounters and clicking on them can give you a powerful buff.
Ecotone BuffsResearch Notes and Regional Special Objects
Each section of the map has a special object you can only click on if you have the appropriate Research Notes purchasable from the reputation vendor once you have Friend rank. Clicking on one gives you a chance-based buff in combat that basically allows you to inflict the biome’s debuff back on the enemies you encounter there.
Regional Special ObjectsProfessor Cavalz’s Unique Primal Rock
Outside the normal player area, at the Research Camp, you can climb up and explore the far northeastern parts of the map out-of-bounds. You will find some more wreckage scattered around, but at the far end, there is a datapad and a strange labeled rock. The Aurebesh reads “SAMPLE EAMI-LEA”.
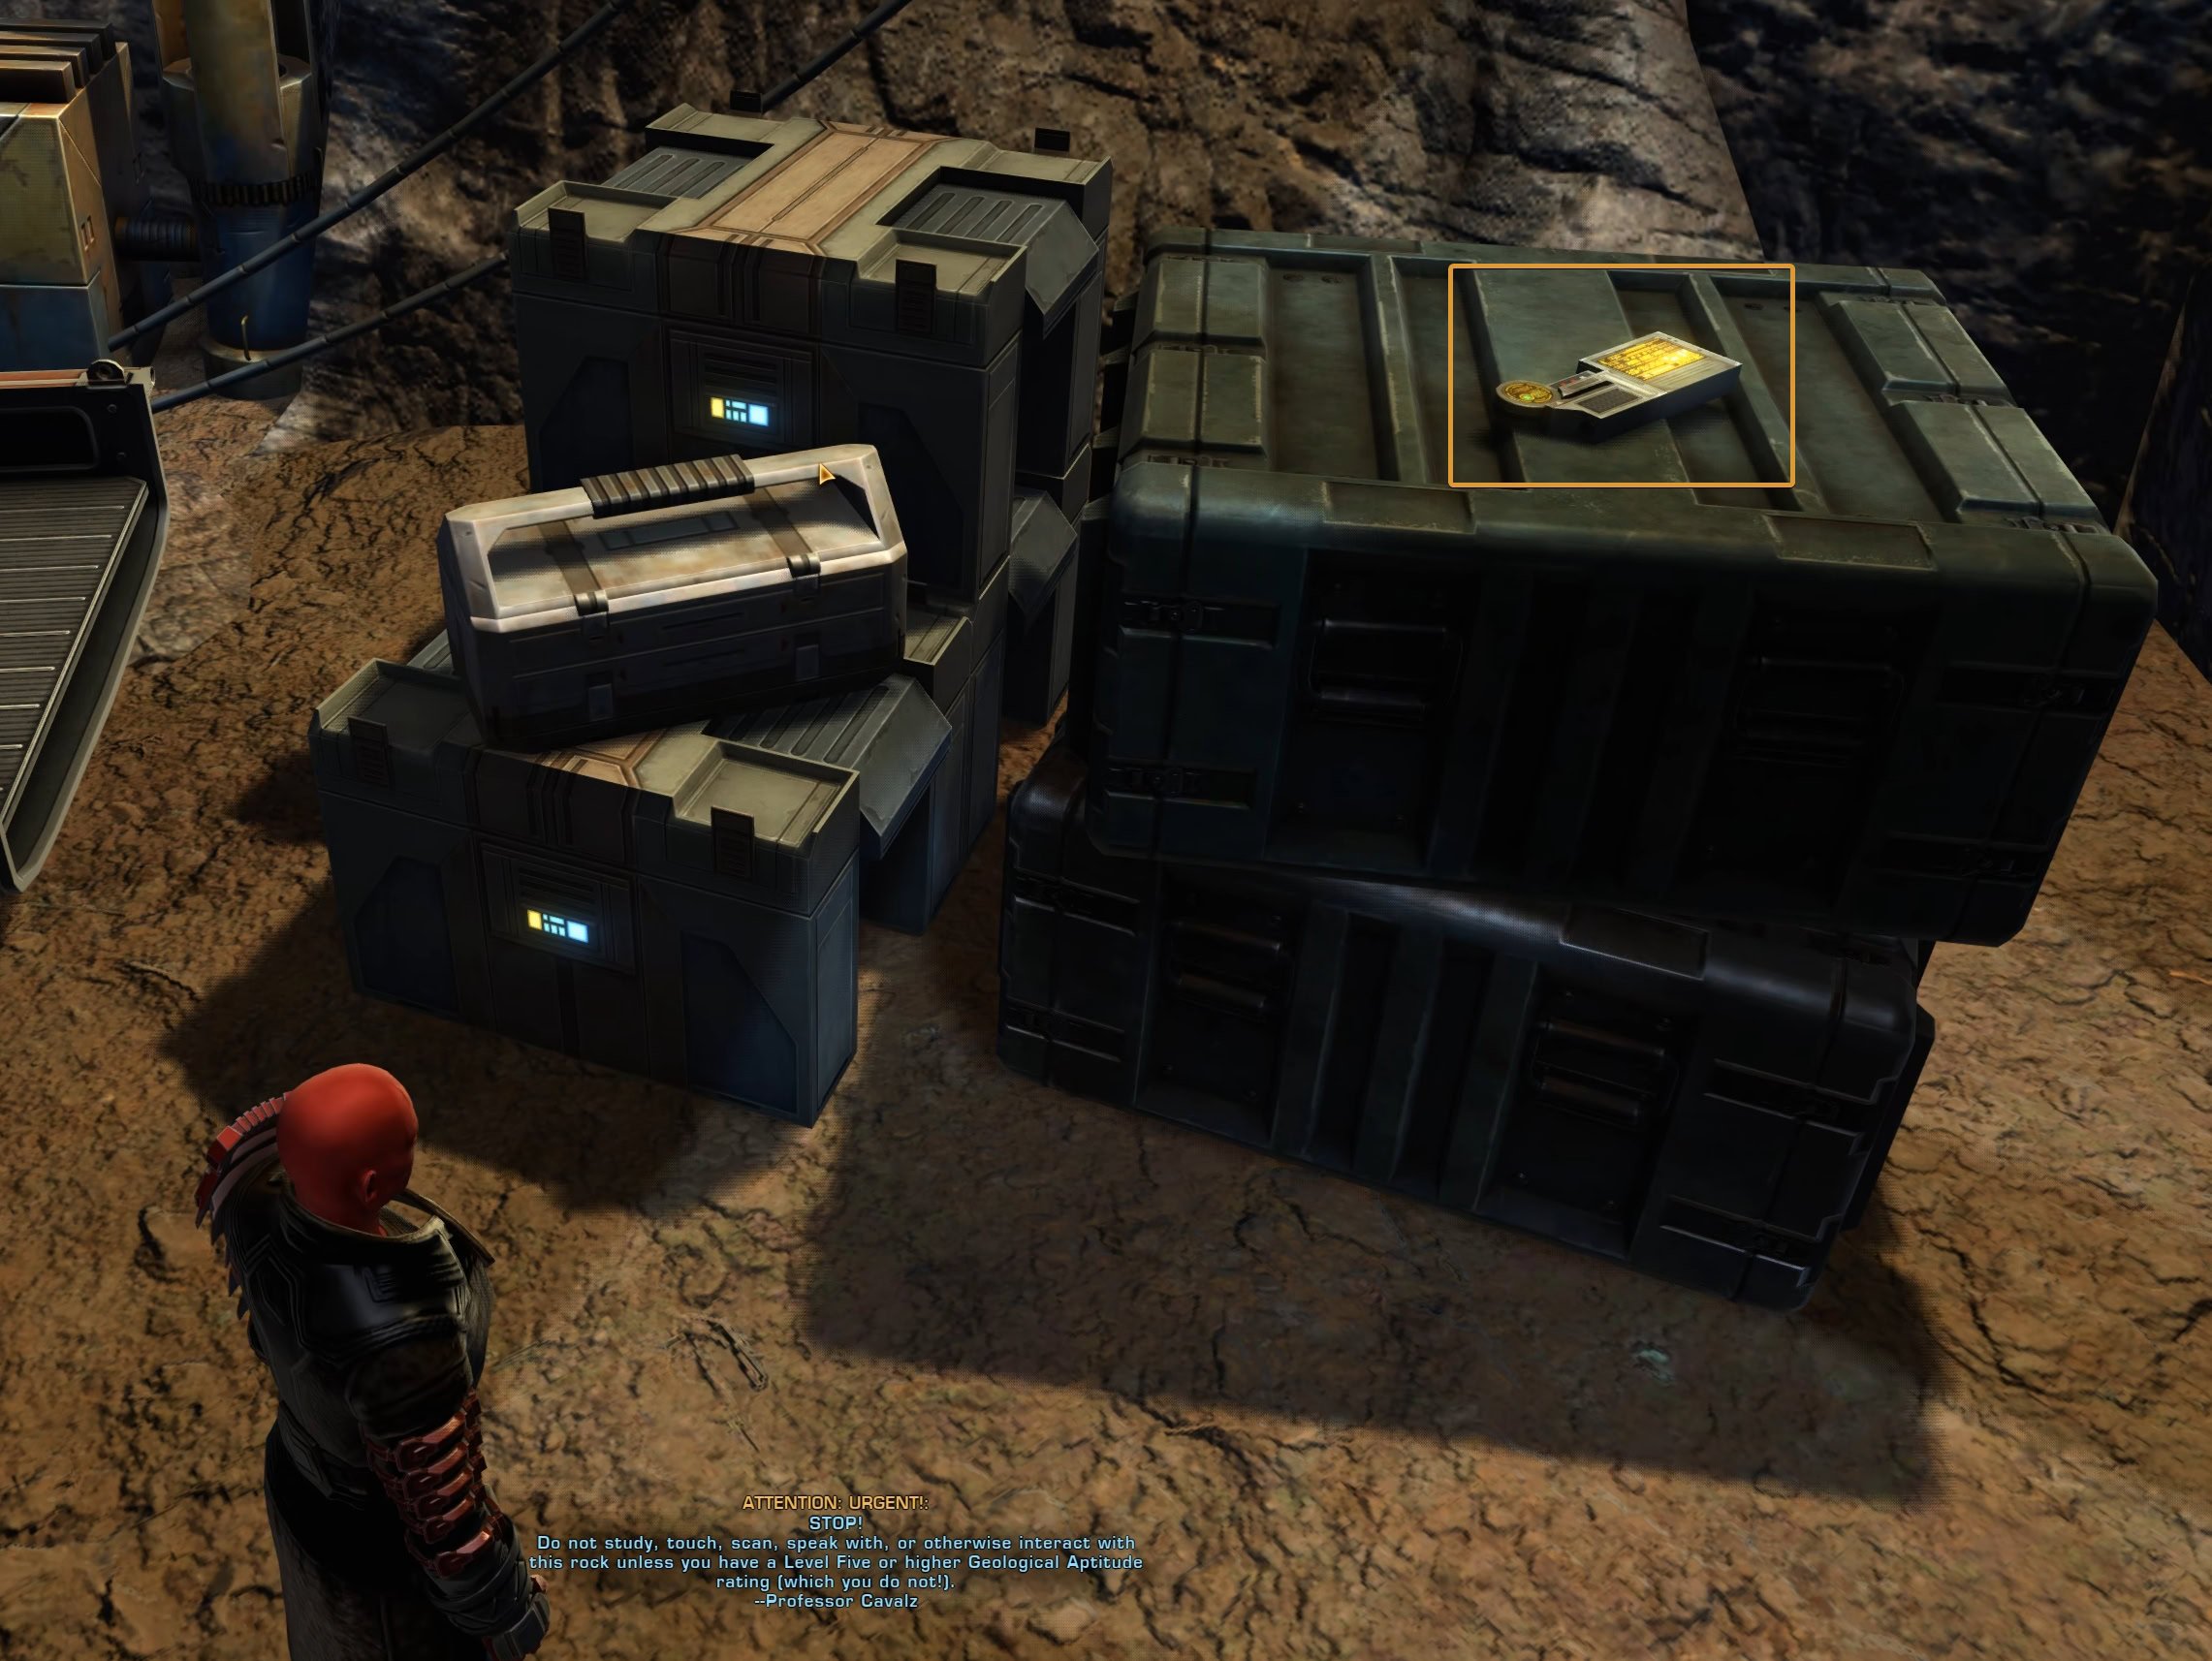
You can climb from this slope:
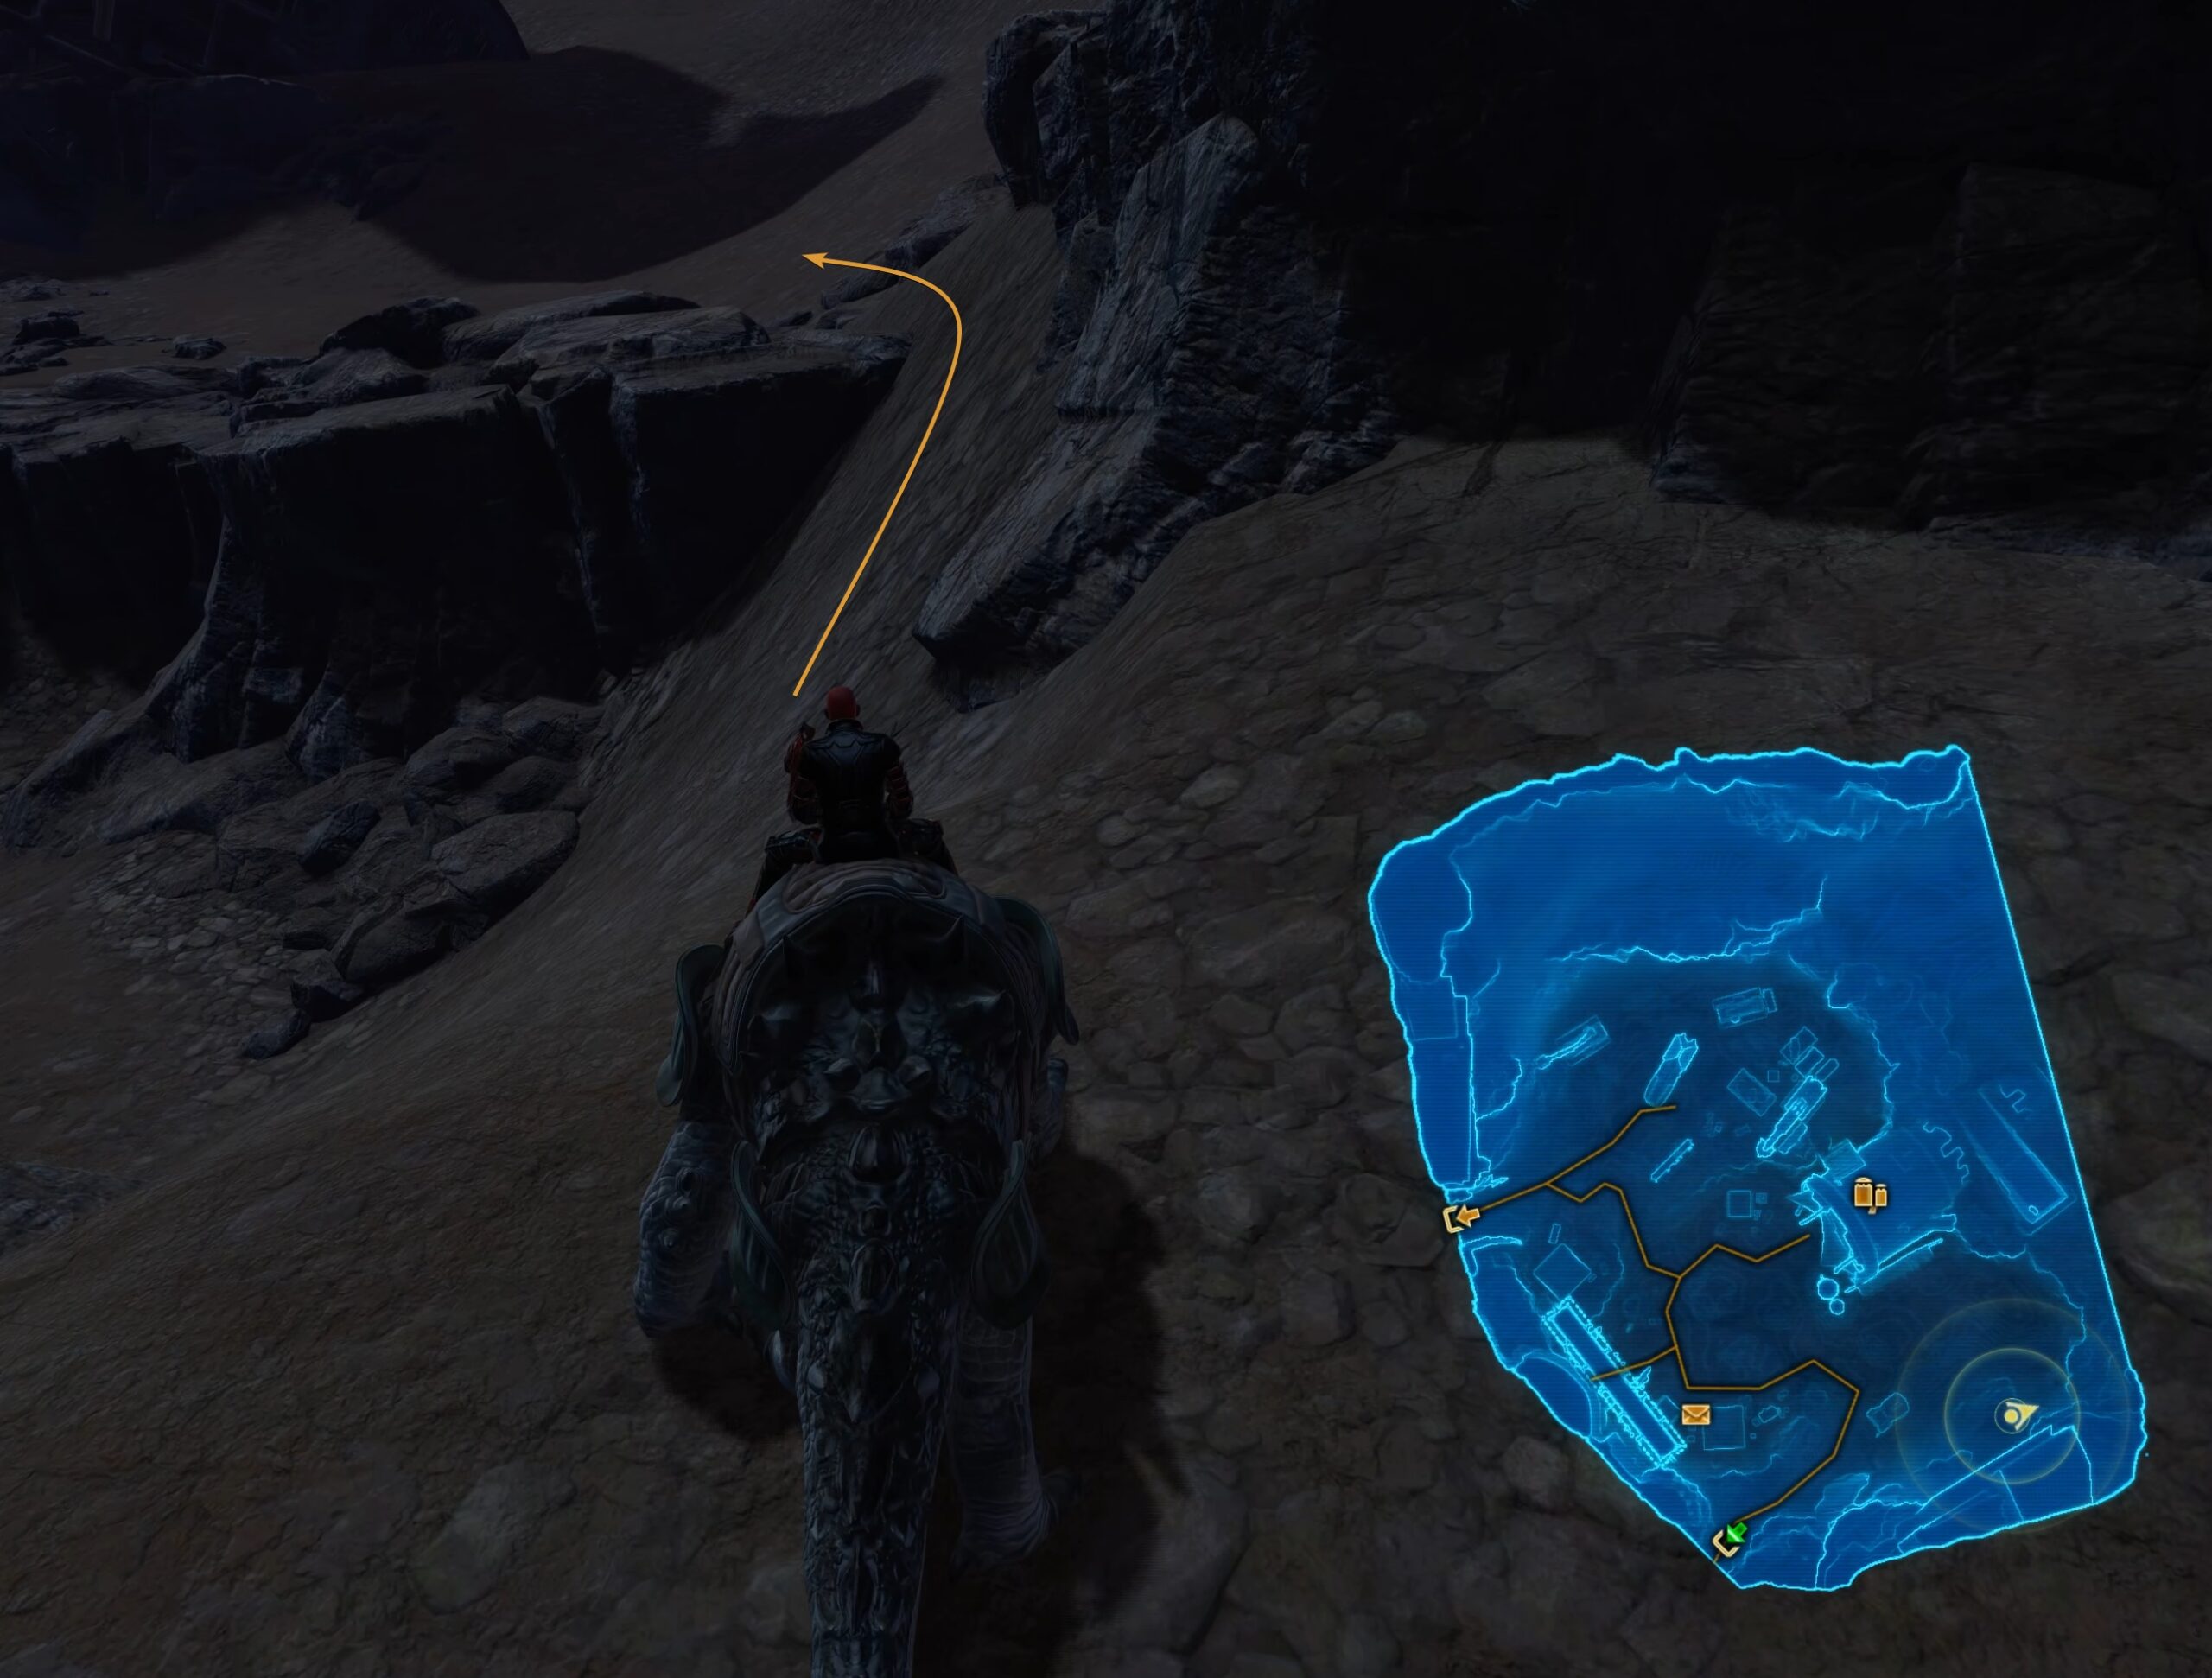
The datapads you can find and read at the Geothermal forward camp, all talk about this rock.
The scientists working with Professor Cavalz are worried he might be losing his mind. Maybe something similar to what happened to Doctor Spears is happening to Cavalz?
I made a dedicated guide for this story. It’s either a part of a bigger secret or a funny dev joke. Perhaps an easter egg for Dead Space?
The secret behind Professor Cavalz’s Primal RockSporefall Purifying Stations
Spore-Tending Units are the non-hostile roaming probe droids that apply Heavy Sporefall if you get too close. They are extremely dangerous unless you have immunity from the Friend+ Sporefall Hazard Mitigation.
If you defeat a Spore-Tending Unit, they drop Spore Specifications for everyone who participated, a piece of purple loot that gets automatically consumed and transformed into a buff on your bar.
You can use these Spore Specifications to construct part of a Purifying Unit in specific locations in each major sub-area in Sporefall, and there appear to be 7 total locations where they can be placed. You cannot place one inside the Orbital Core.
When you have the Spore Specifications, you’ll see little holographic outlines showing placeable locations and a temporary ability bar will pop up when you get close.
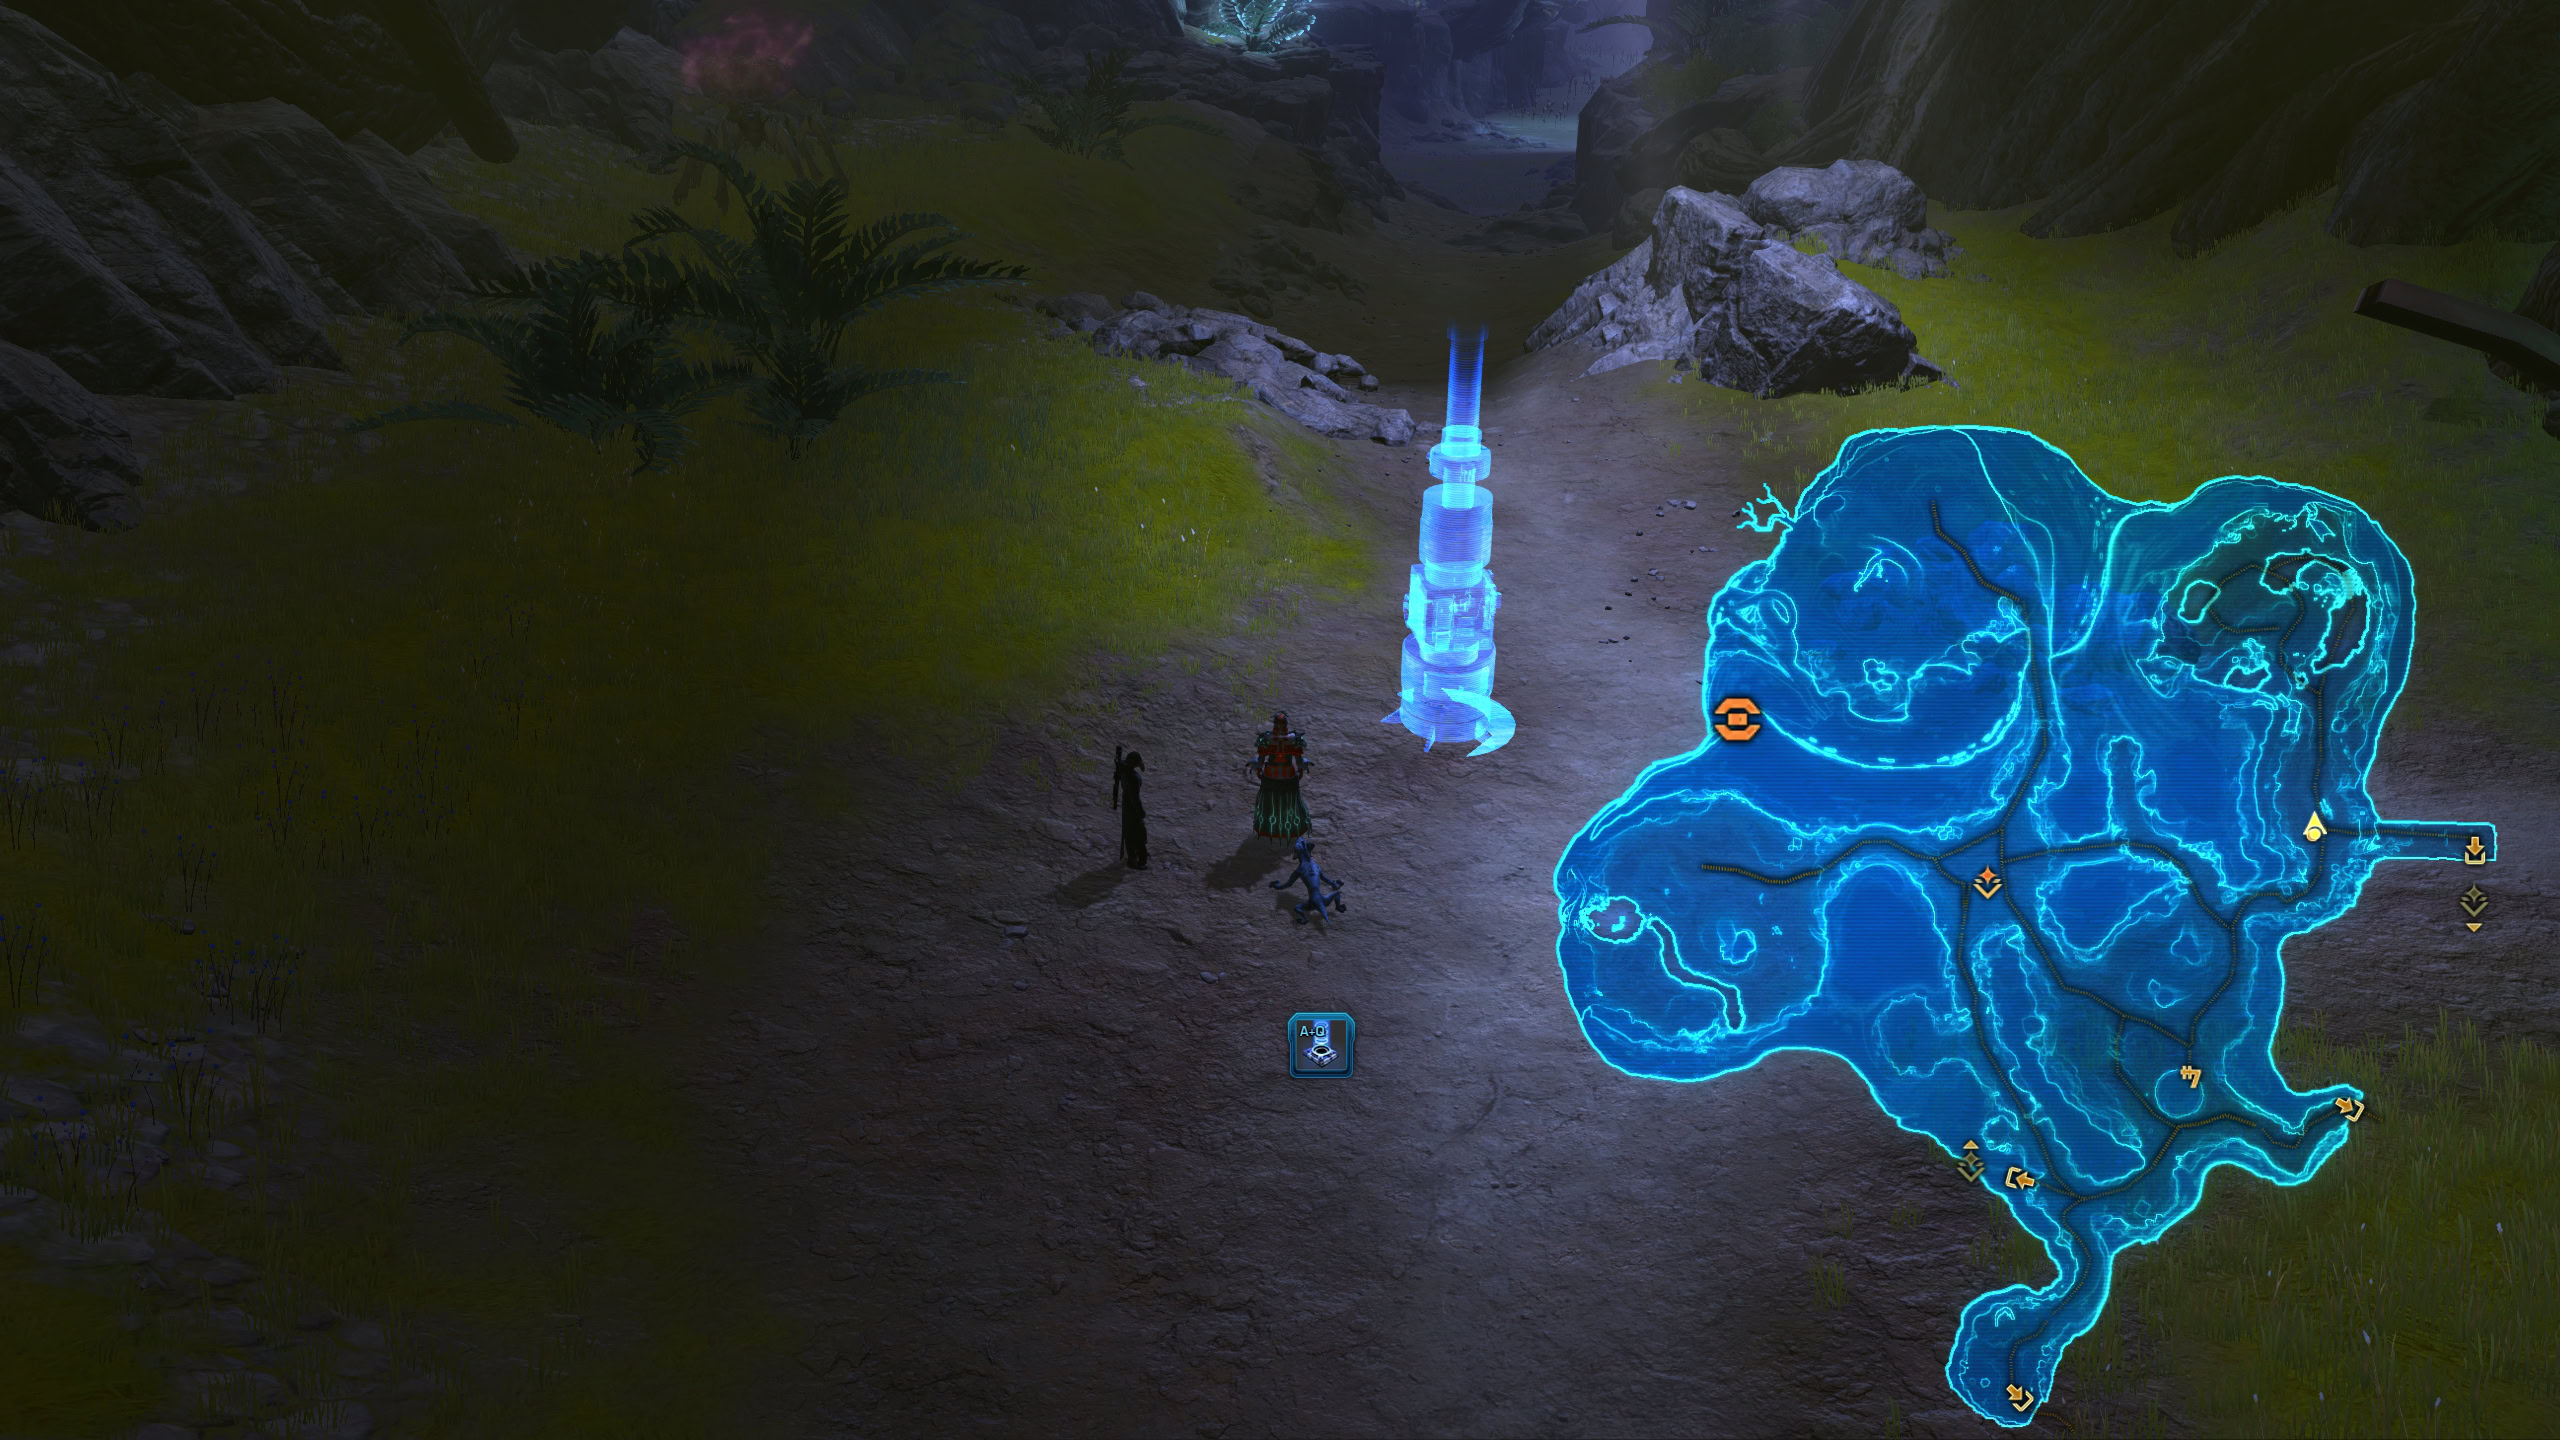
It takes 4 Spore Specifications to fully construct a Purifying Station, which gives immunity to Light and Heavy Sporefall if you remain within 5m of the machine and nullifies the effect of nearby Spore-Tending Droids. They last until the Orbital Core resets.
Only 1-2 Spore-Tending Units are out at a time, and they take a while to respawn, so it’s extremely inefficient to hunt them on your own. They spawn more frequently once Sporefall reaches level 3.
I suspect there’s more to the story since the radius is of the effect is so tiny. I’ve tried putting it in a couple spots that might be more noteworthy, but I’ve never had more than one up at a time.
It’s possible Broadsword may have planned to make this a secret achievement at one point or another, given that there is a deco version of the Purifying Station, but you get it from the scientist reputation vendor in the region, not for doing this.
We will update this guide if we learn more. Thanks to Kal (TodayinTOR) for telling us about this.
Datacrons?
There are hints and expectations that we will have new Datacron(s) at the Crash Site, though none are available and accessible at the moment .
If you find any more secrets, please let us know!