Galactic Threads is a main mission in SWTOR, part of the Legacy of the Sith storyline. It takes you to Elom, Tatooine, Hoth and Ilum in pursuit of information about Darth Malgus and Shae Vizla.
How to start the mission
To start Galactic Threads, you need a level 80 character, who has completed all previous main story missions from the two most recent expansions, Onslaught and Legacy of the Sith.
This is a solo story experience and you do not need any special gear or preparation. The mission has the same name for both factions, Republic and Empire with small variations in cinematic scenes with unique dialogue lines and characters.
Ultimately, the plot moves forward in the same direction for both Republic and Empire players, but you will meet and be accompanied by different NPCs during the missions that are part of this storyline.
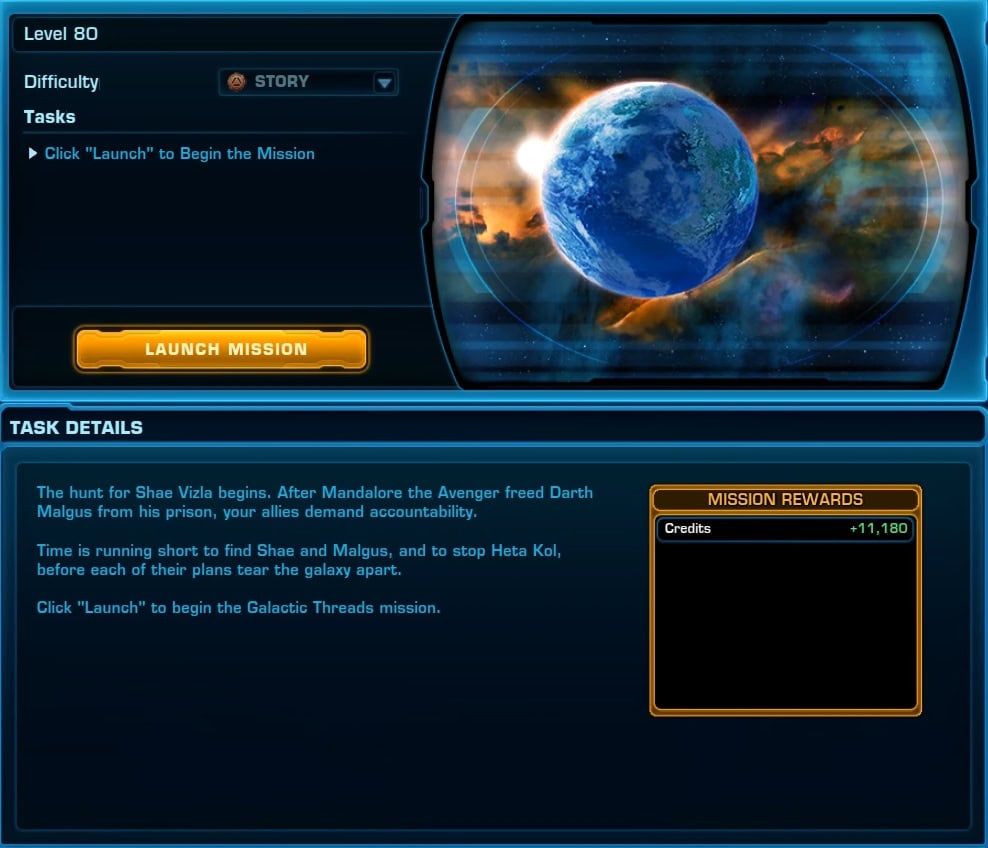
When you are ready, open your mission log, select “Galactic Threads” from the list on the left and click on the bright orange button “Launch Mission”.
This will launch a cinematic in which you will witness Darth Malgus and Shae Vizla fighting the Hidden Chain on what appears to be Tatooine.
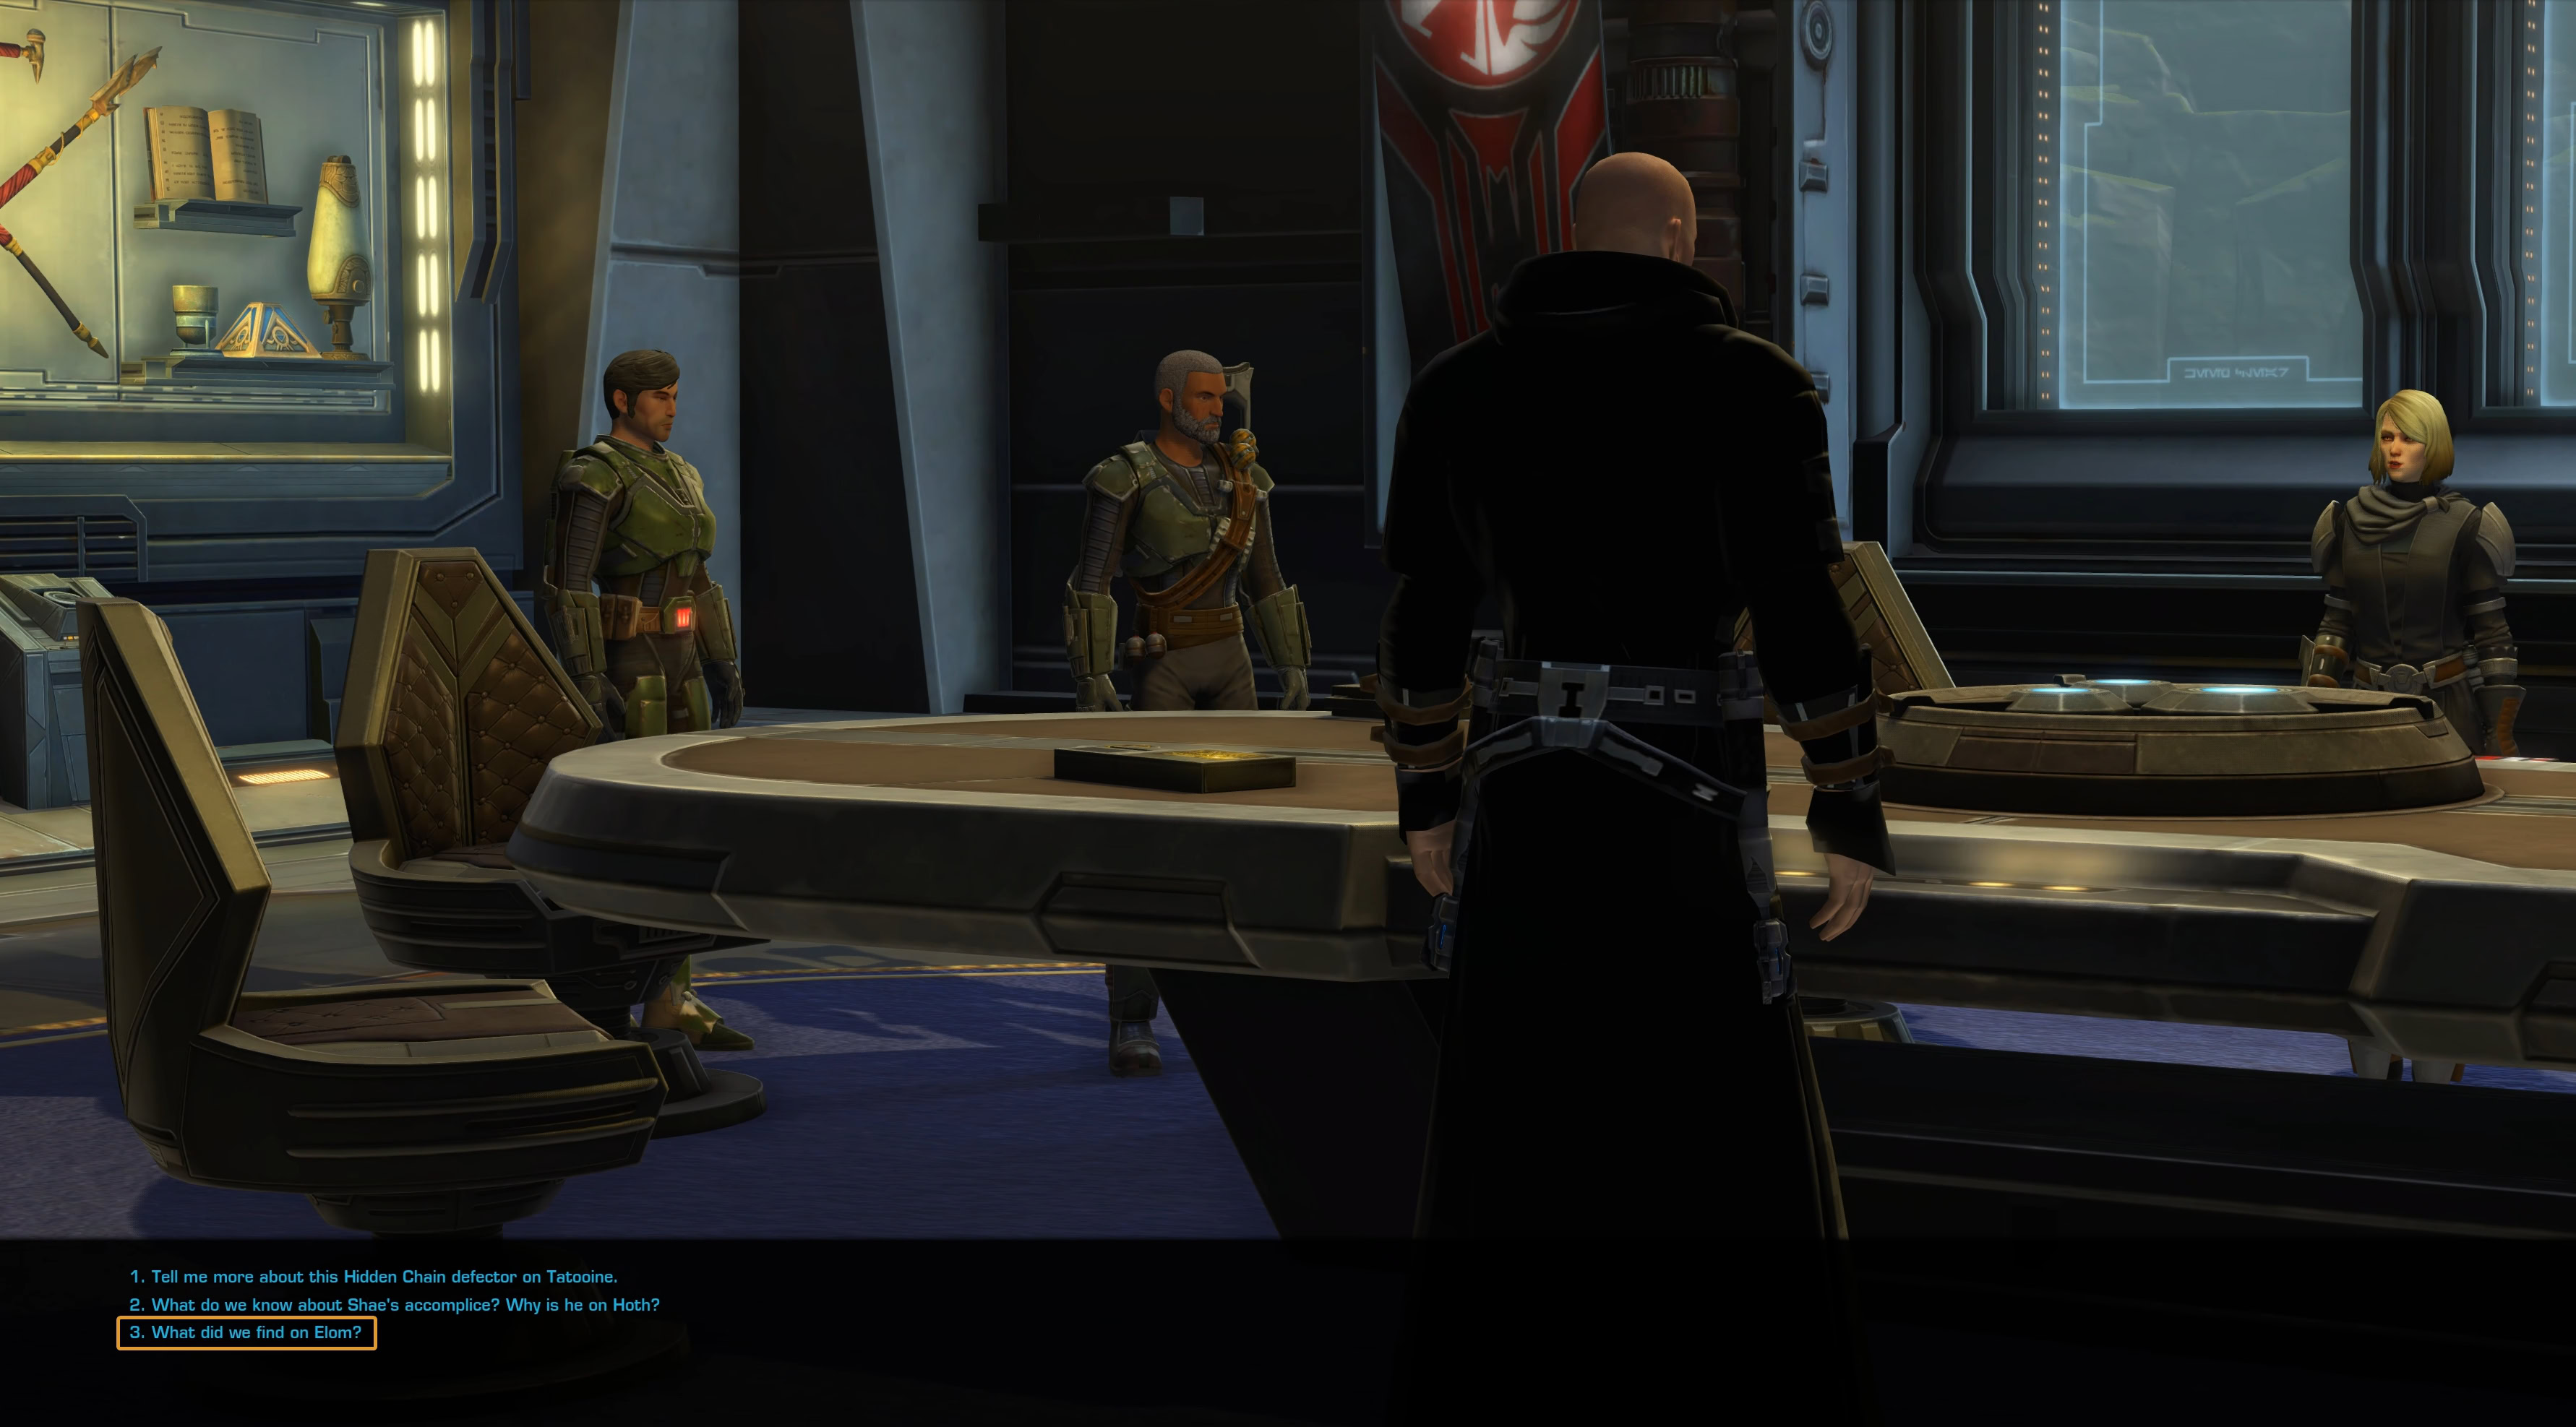
In the meantime, Jekiah Ordo and Rass Ordo land on Odessen and meet with the Alliance Commander. Before you head to the Alliance Operations room.
Before you head there, you can stop for a second and ask Rass what’s troubling you. The conversation has no big role in the mission, but you have a flirt option with Rass, if this is something you are after with your character.
During the conversation at Alliance Operations, your allies will lay out three options for you to choose from. There are three leads you have to pursue.
You can choose the order in which you do these three missions. You do that by selecting the appropriate prompts in the KOTOR-Style dialogue and then pressing the first option that will start the mission for you.
Reminder: You can use the Alliance Specialists in the Companions and Contacts window to travel back to Odessen for free after each mission.
The Library of Nul
The Library on Elom is a lore-rich mission with a few easy to solve puzzles and very cool exploration vibes. You will visit Darth Nul’s Temple on Elom that has finally been excavated. You, with the help of the Holocron your possess, will help unlock the entrance to the temple and explore the interior.
If you support the Republic, you will be accompanied by Arn Peralun during this mission. If you are allied with the Empire, you will meet Major Anri there. In both cases it will be Talos Drellik who will lead the expedition.
Meet the Droid Parts Dealer on Nar Shaddaa
The first task is to help Talos obtain a repair part from a shady dealer on Nar Shaddaa. The location of the store and vendor will be different for Republic and Empire, but the steps are the same.
Empire players will take the Duros Seector Taxi, while Republic supporters will go to the Red Light Sector Taxi. Both are in the upper right corner of the Nar Shaddaa global map. The destination will be clearly marked on your map.
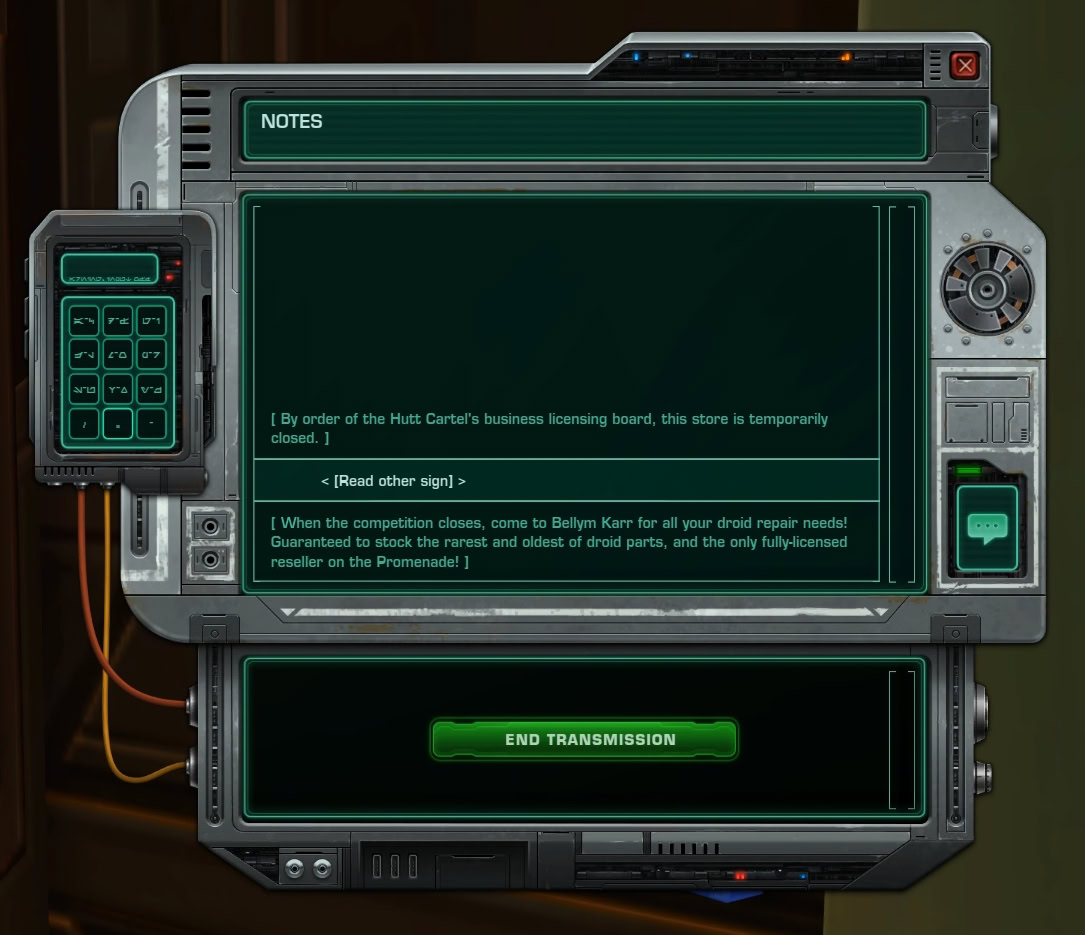
When you arrive at the store, you will see it closed with a couple of notes on the door. Click on either of them to read the messages:
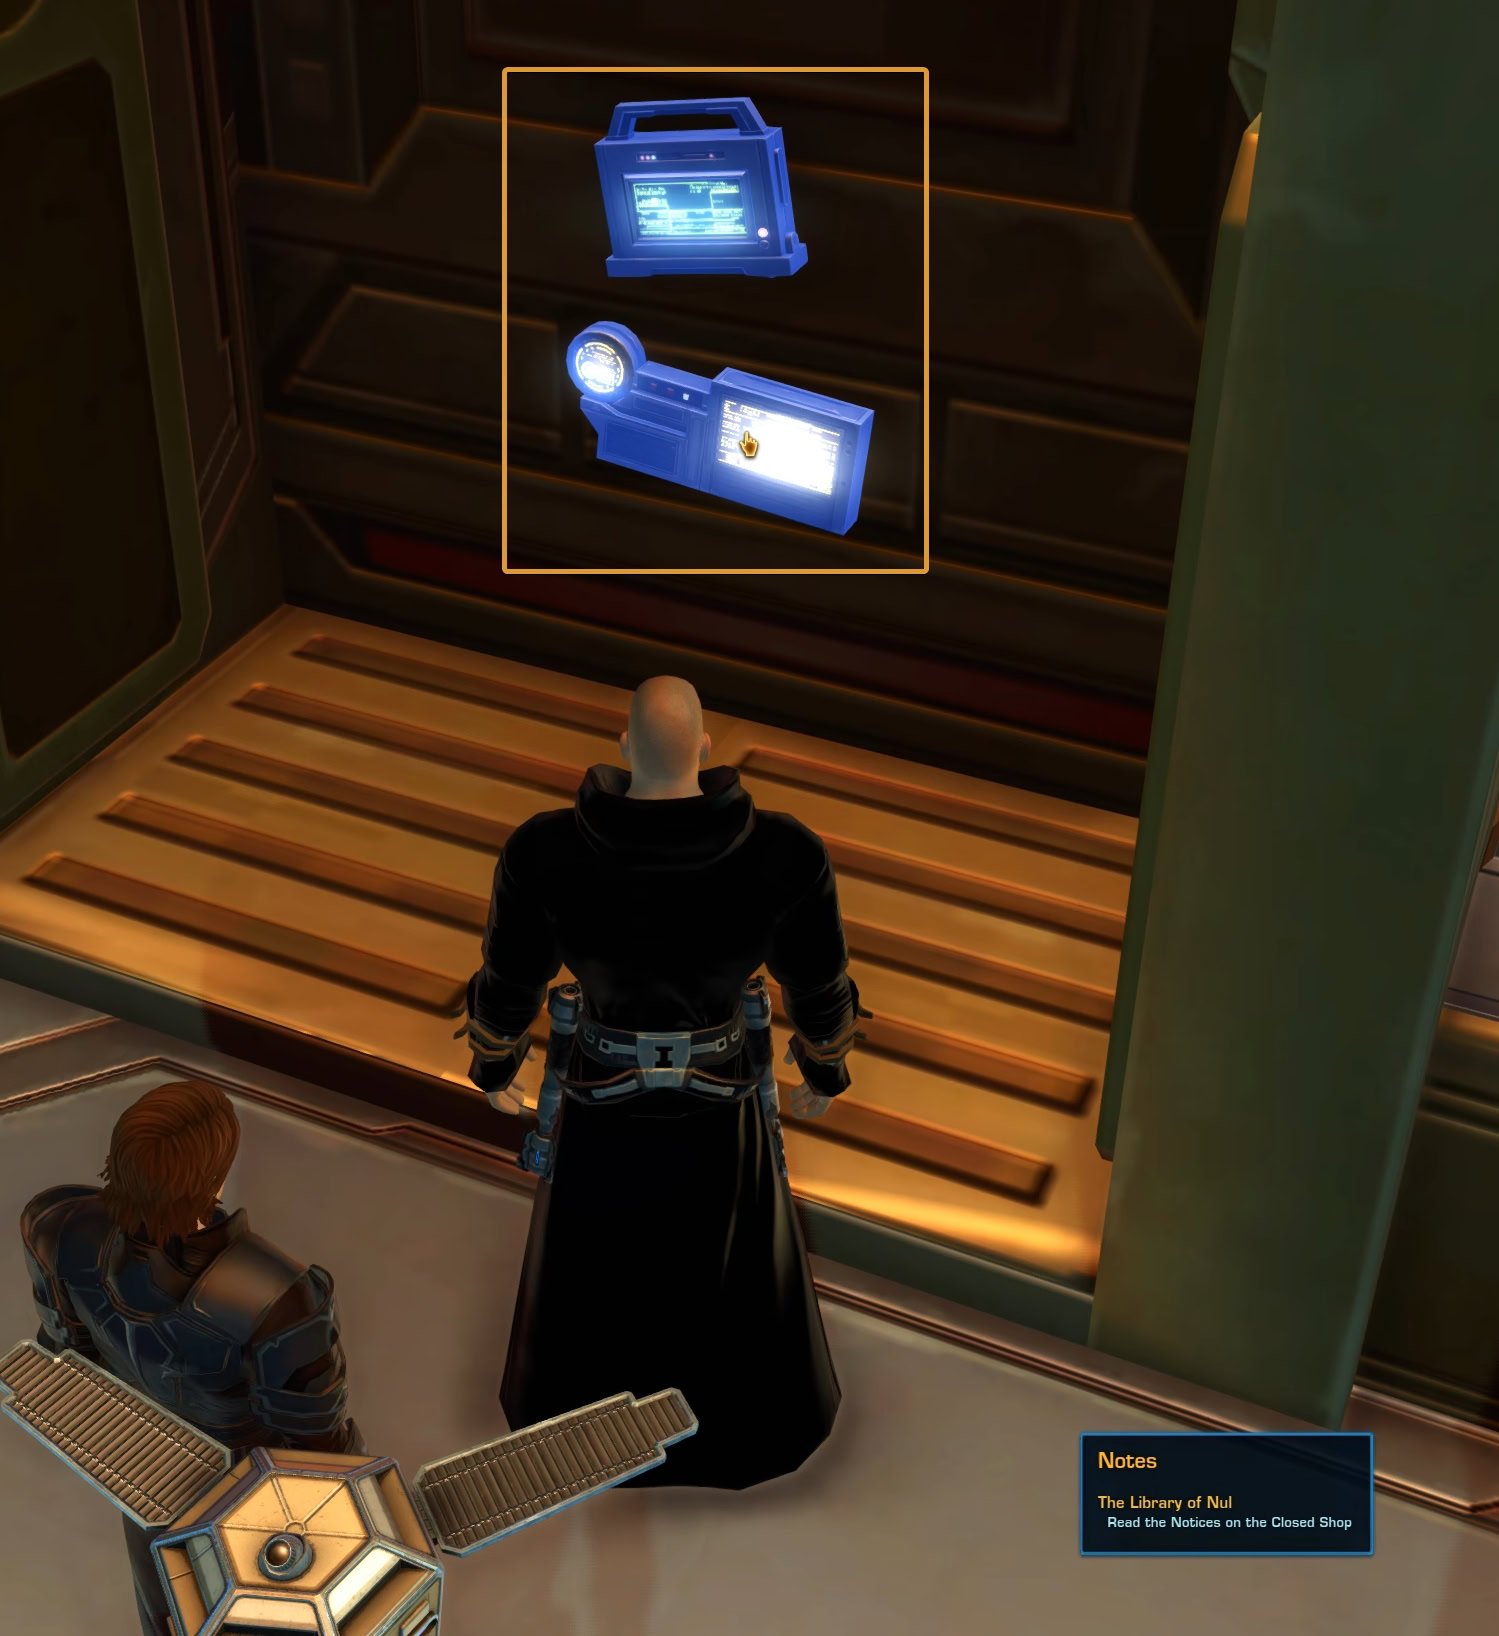
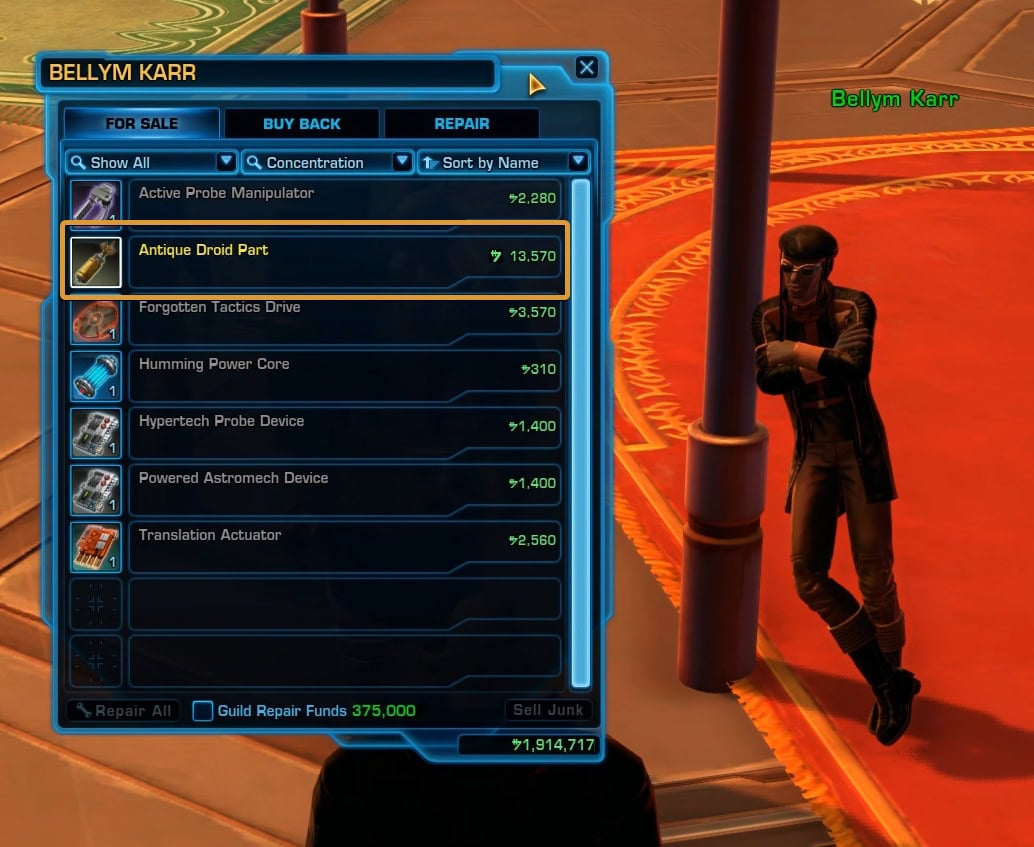
Follow the next marker on your map to the location of Bellym Karr and purchase the Droid Part from him. After that, you can teleport to Elom. Use the button next to the mission in your Mission Tracker to do that.
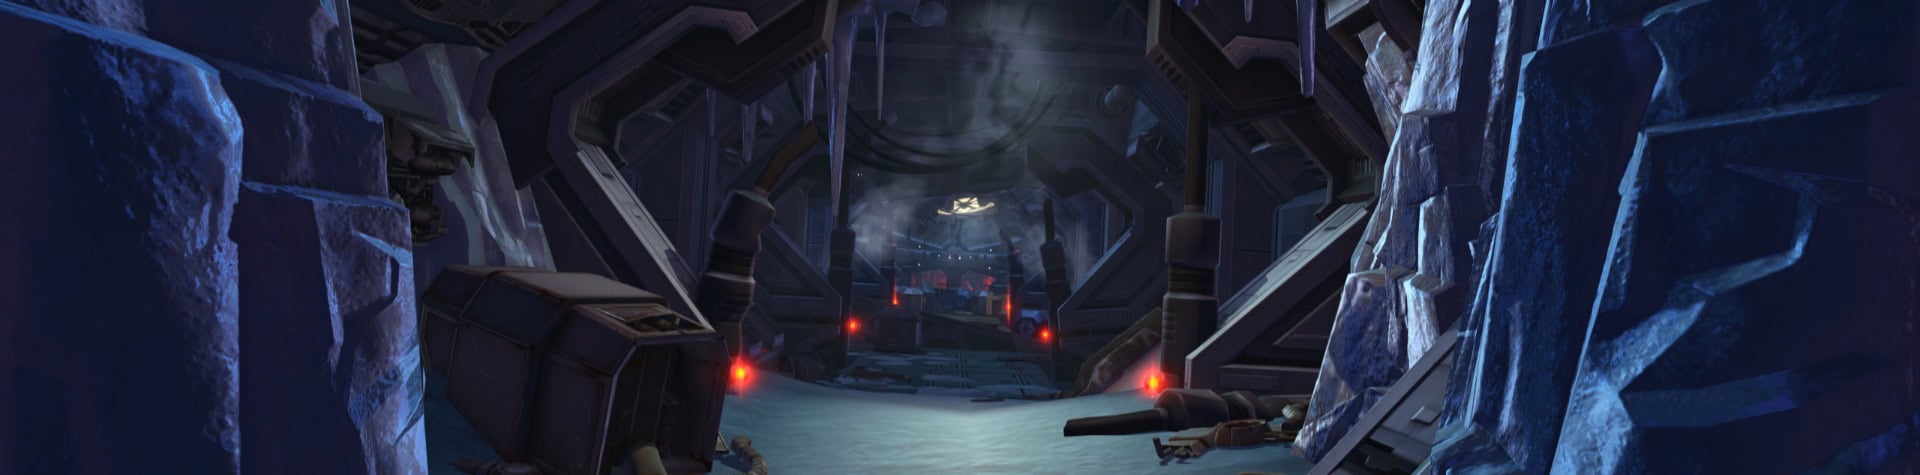
Enter Darth Nul’s Temple on Elom
When you arrive on Elom, a cinematic will play where you will meet your accompanying NPC (Arn for Republic, Anri for Empire) and Talos Drellik).
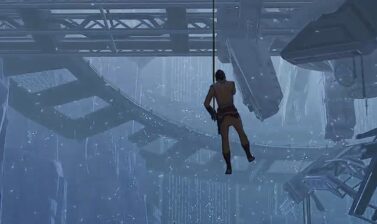
Use the rope to go down. A rare and very cool animation will play showing your character sliding down the rope.
You will use the Holocron to open the gate. This is where the fun begins. There are three mini puzzles, with the third one being a bit more interesting. As you explore the Temple, you will listen to narrations from Darth Nul and discover more of her secrets.
The temple’s layout is simple with one large chamber in the center and three additional ones on left, top and right sides. Each of the side rooms contains a mini puzzle.
Solve the “Illusion of Serenity” Puzle
To solve this puzzle, all you have to do is interact with the valves in front of you. There are three. Two in front and one on the left side. According to my tests, it doesn’t matter in which order you interact with them.
Interacting with the right valve, will stop the water stream from the middle pipe. The middle valve will cut off the water from right pipe. And the left valve will close the right pipe.
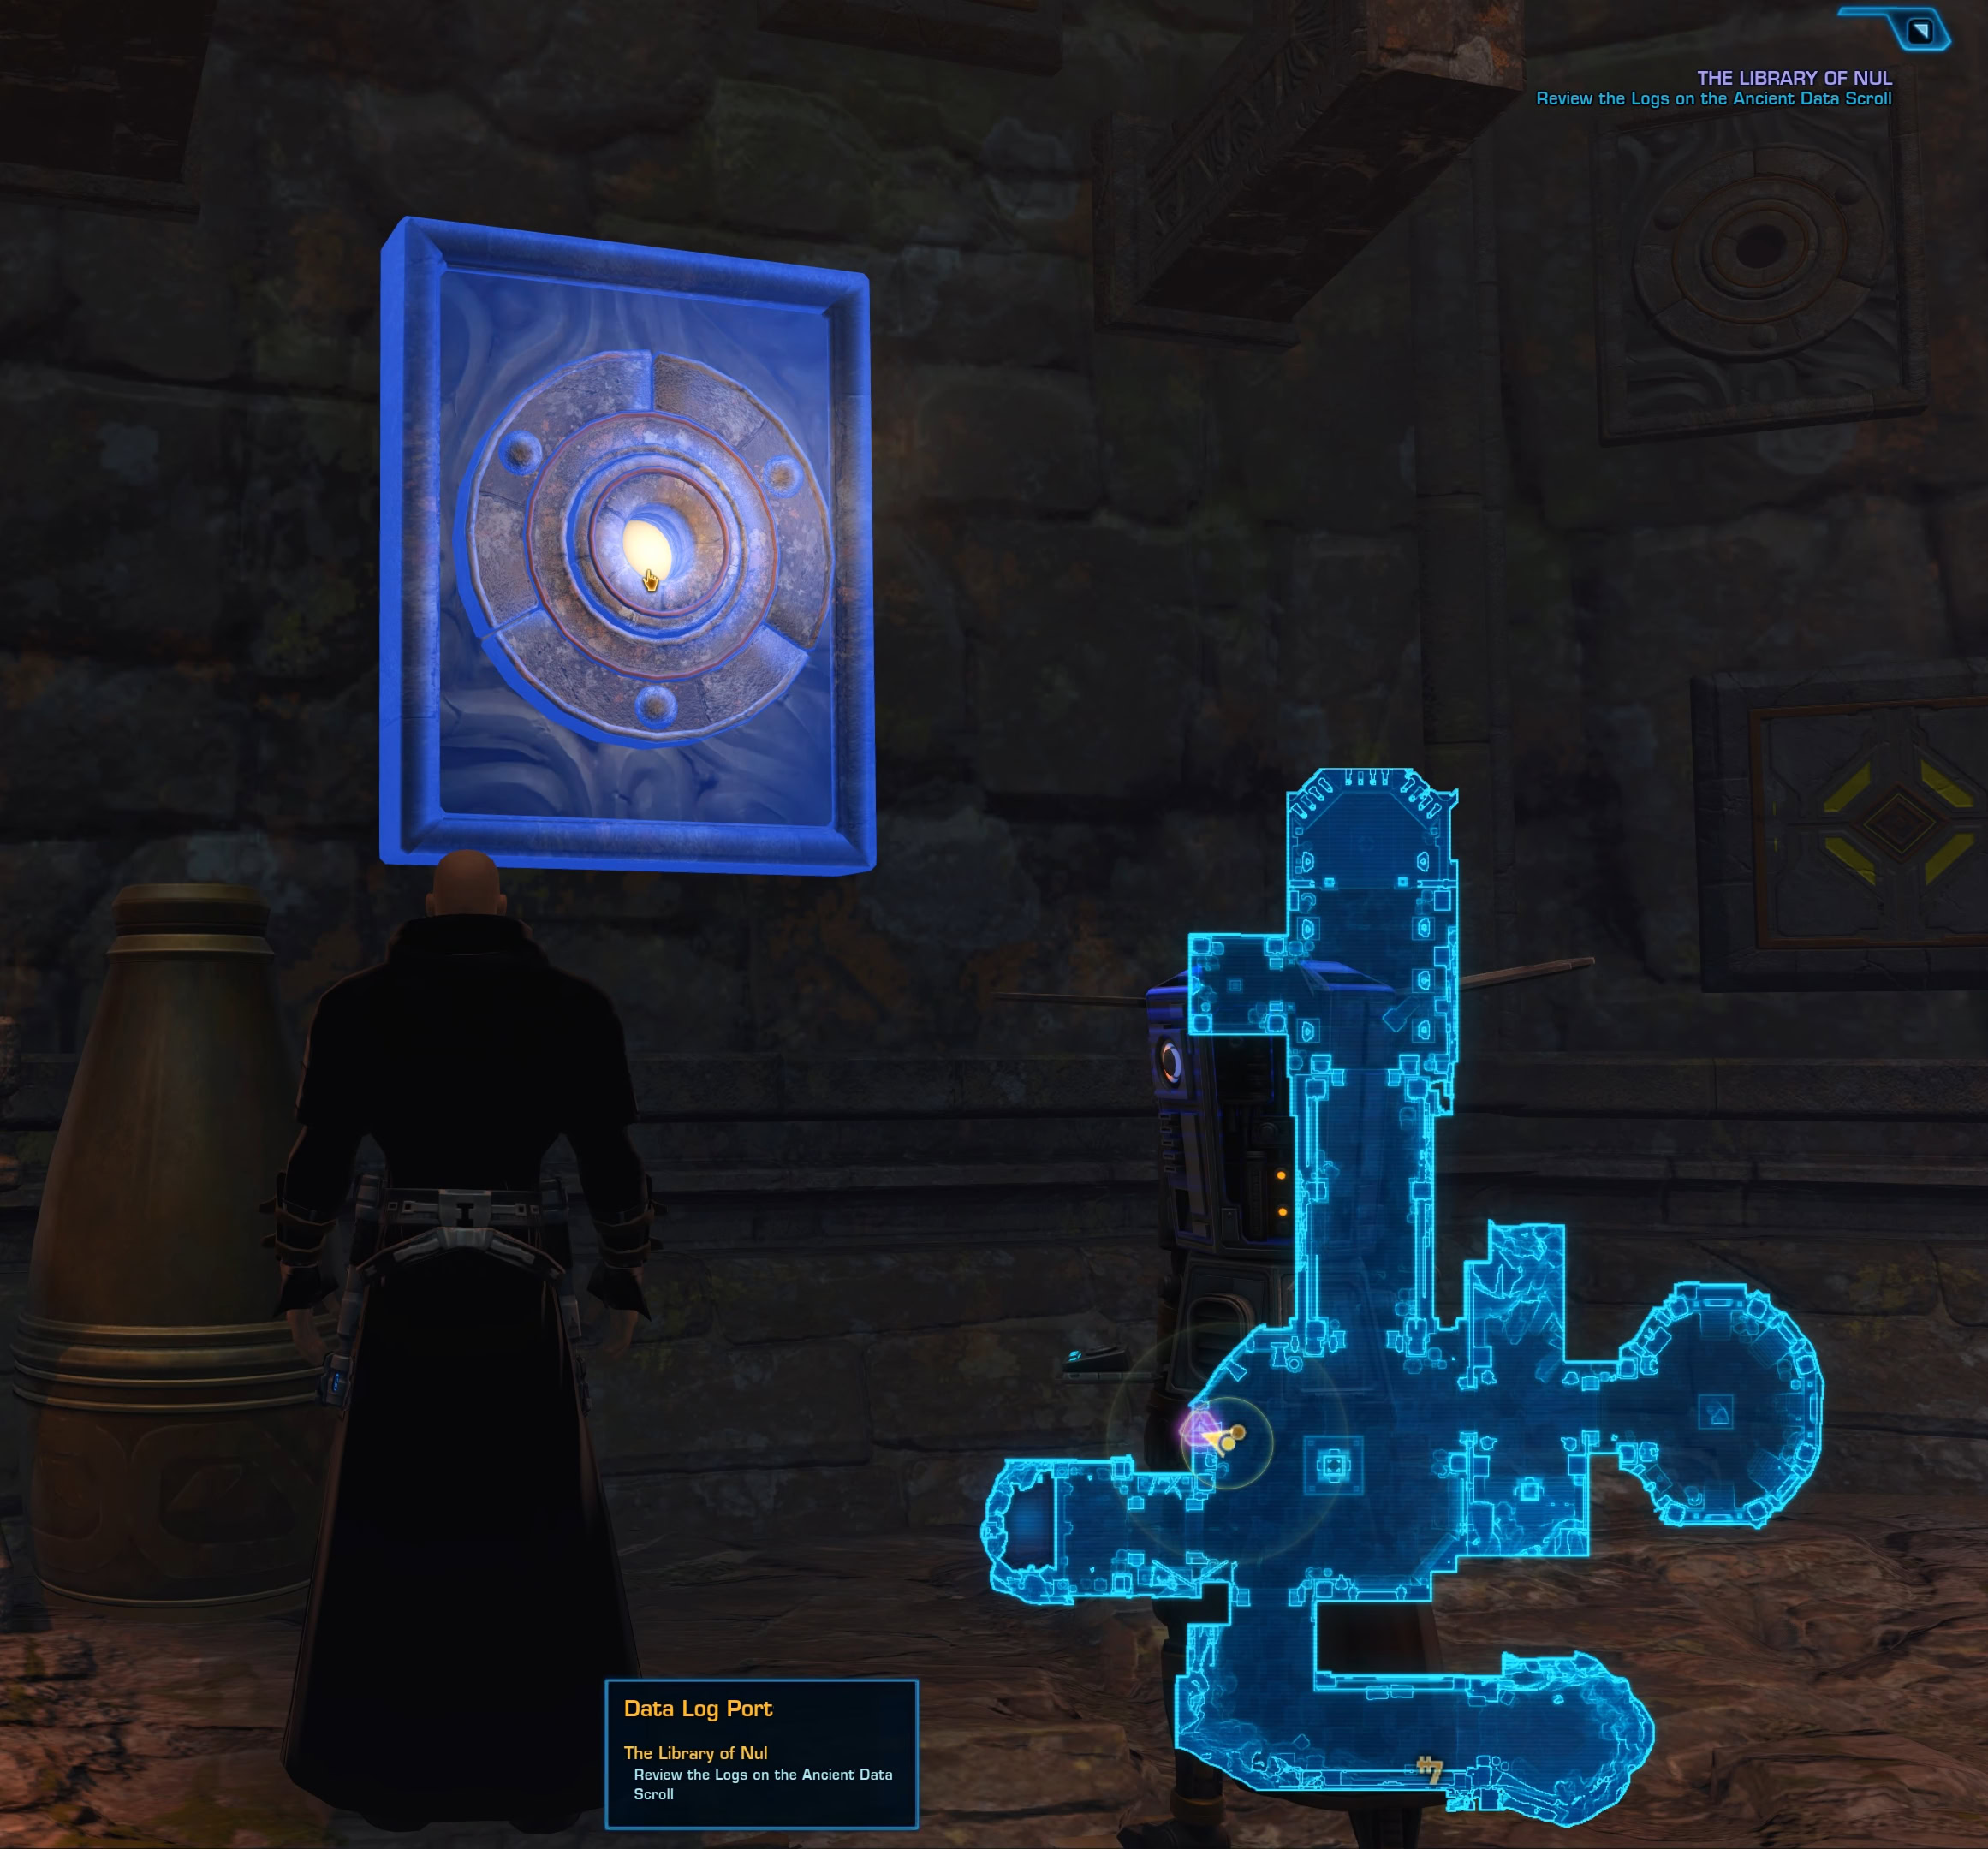
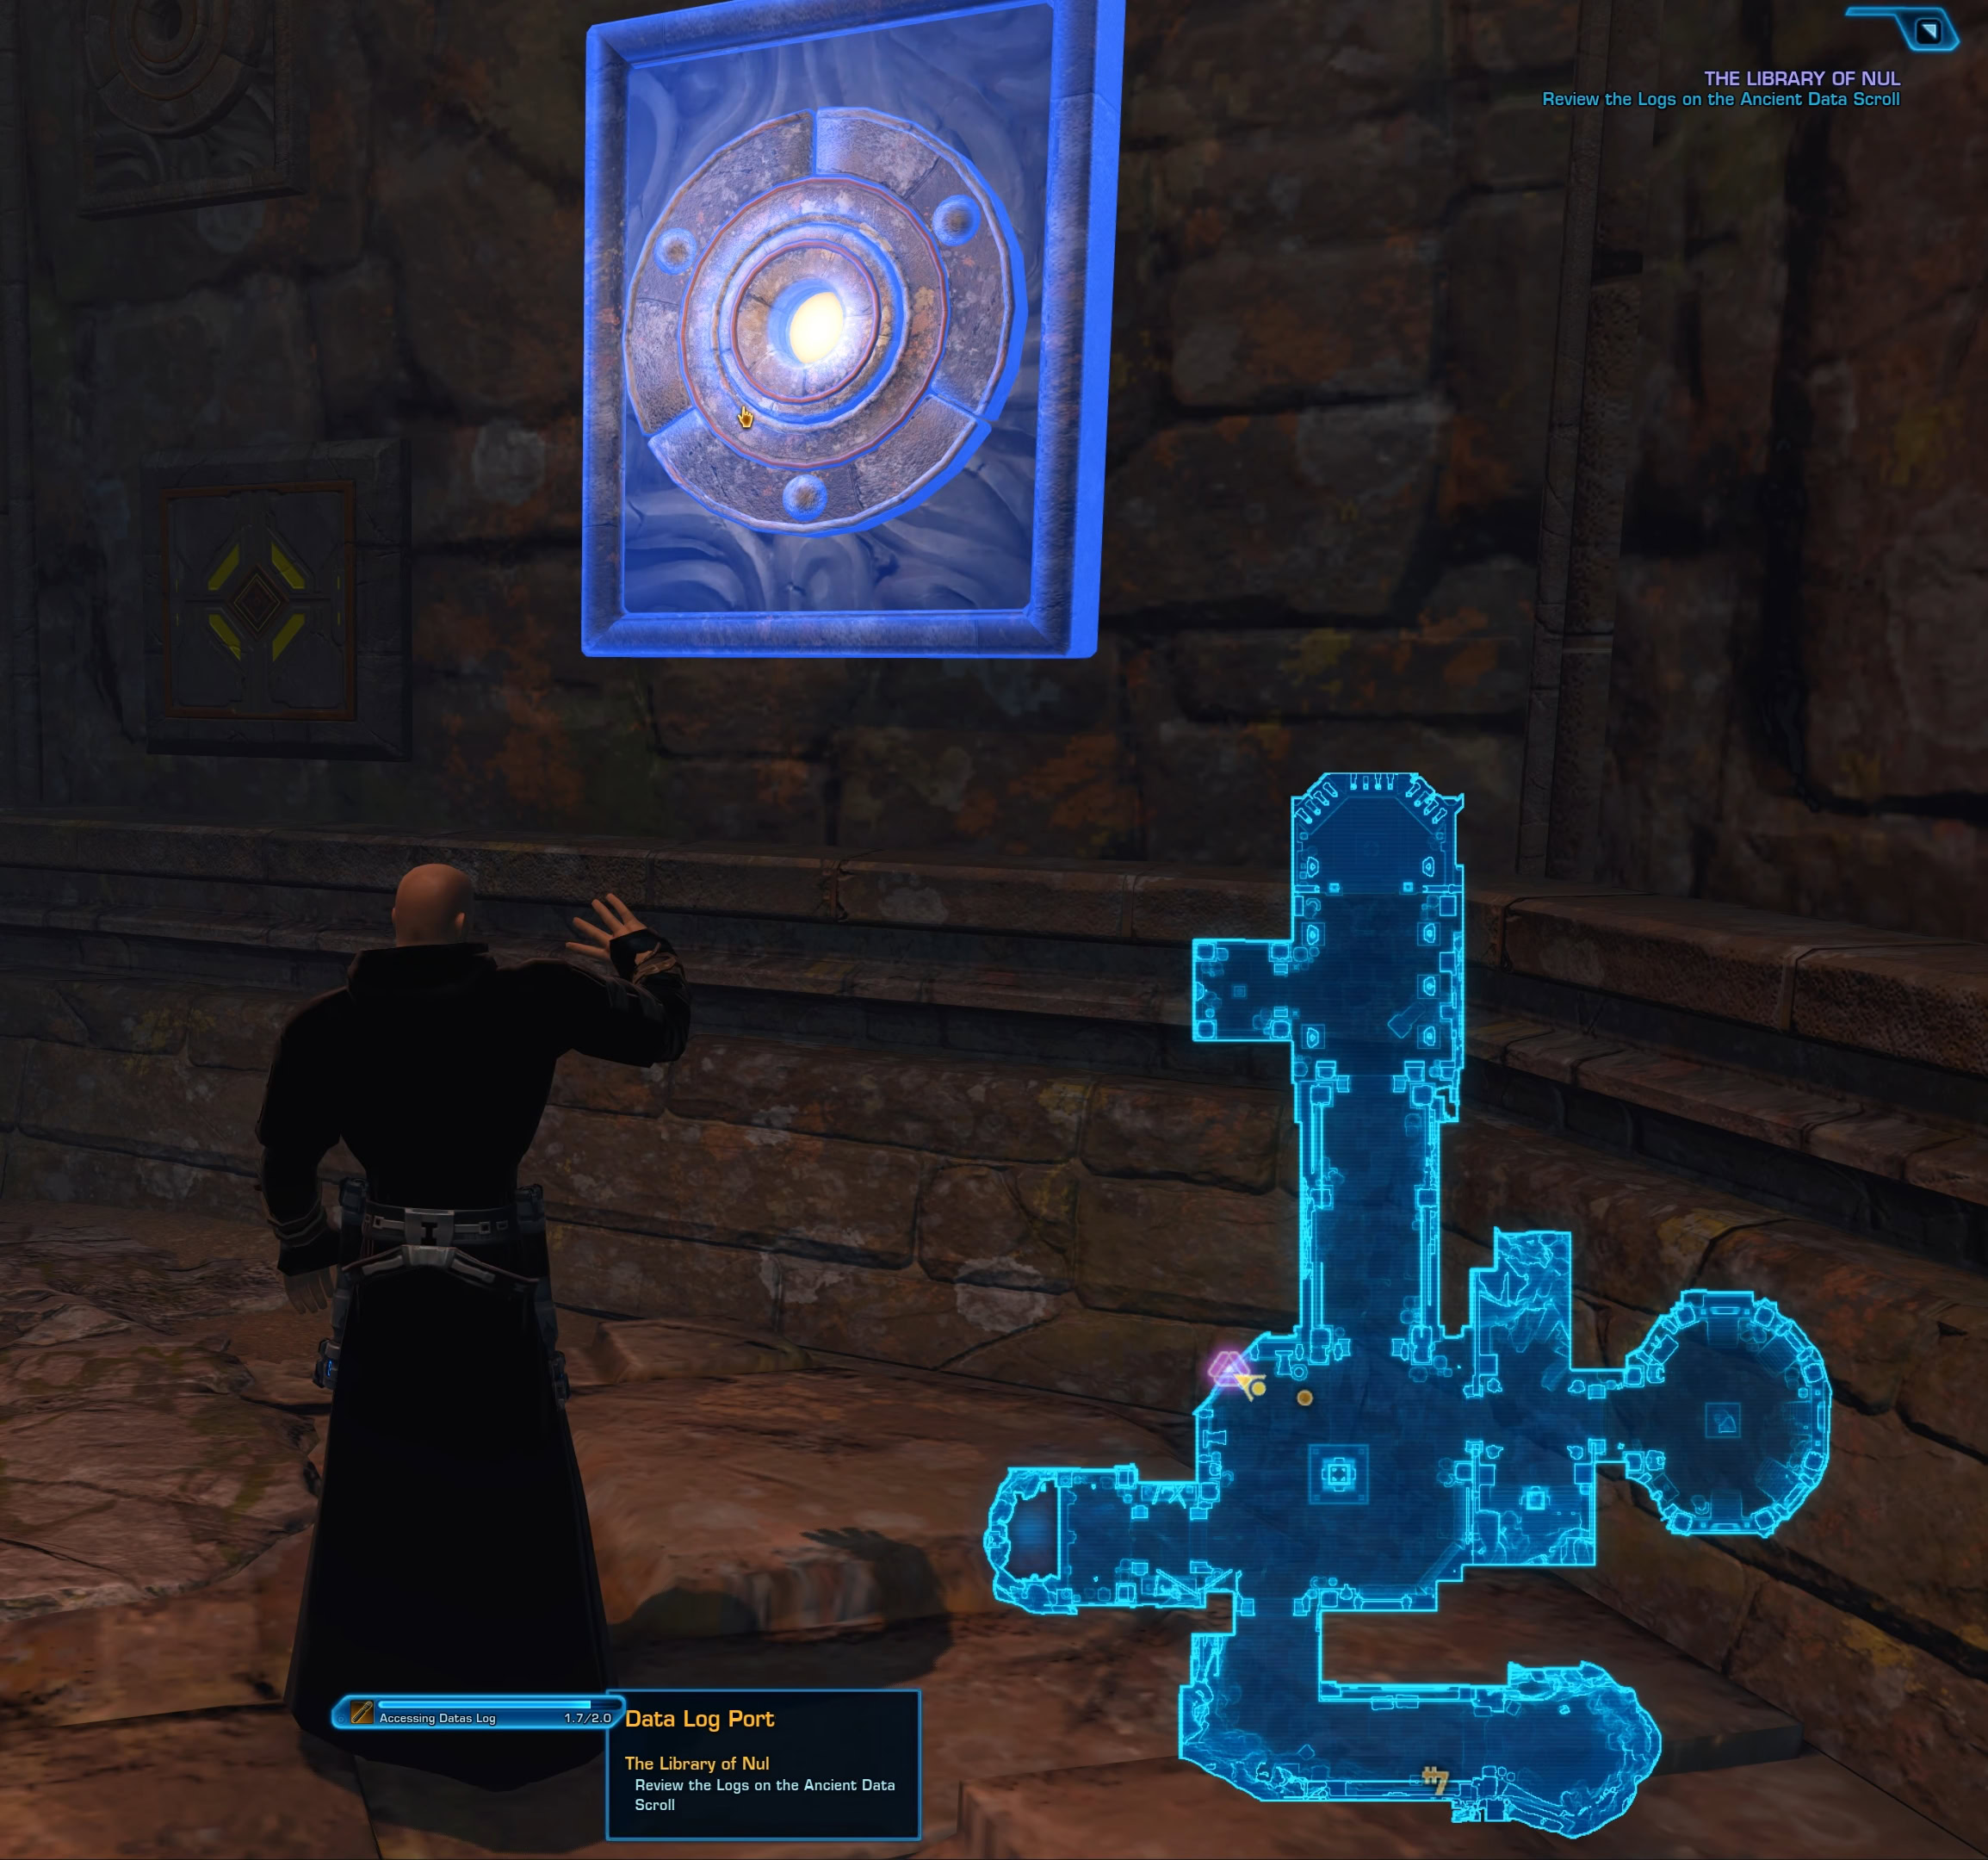
Pick up the Ancient Data Scroll and go back to the middle chamber. Interact with the tablet on the wall and turn towards the middle to see Darth Nul’s hologram.
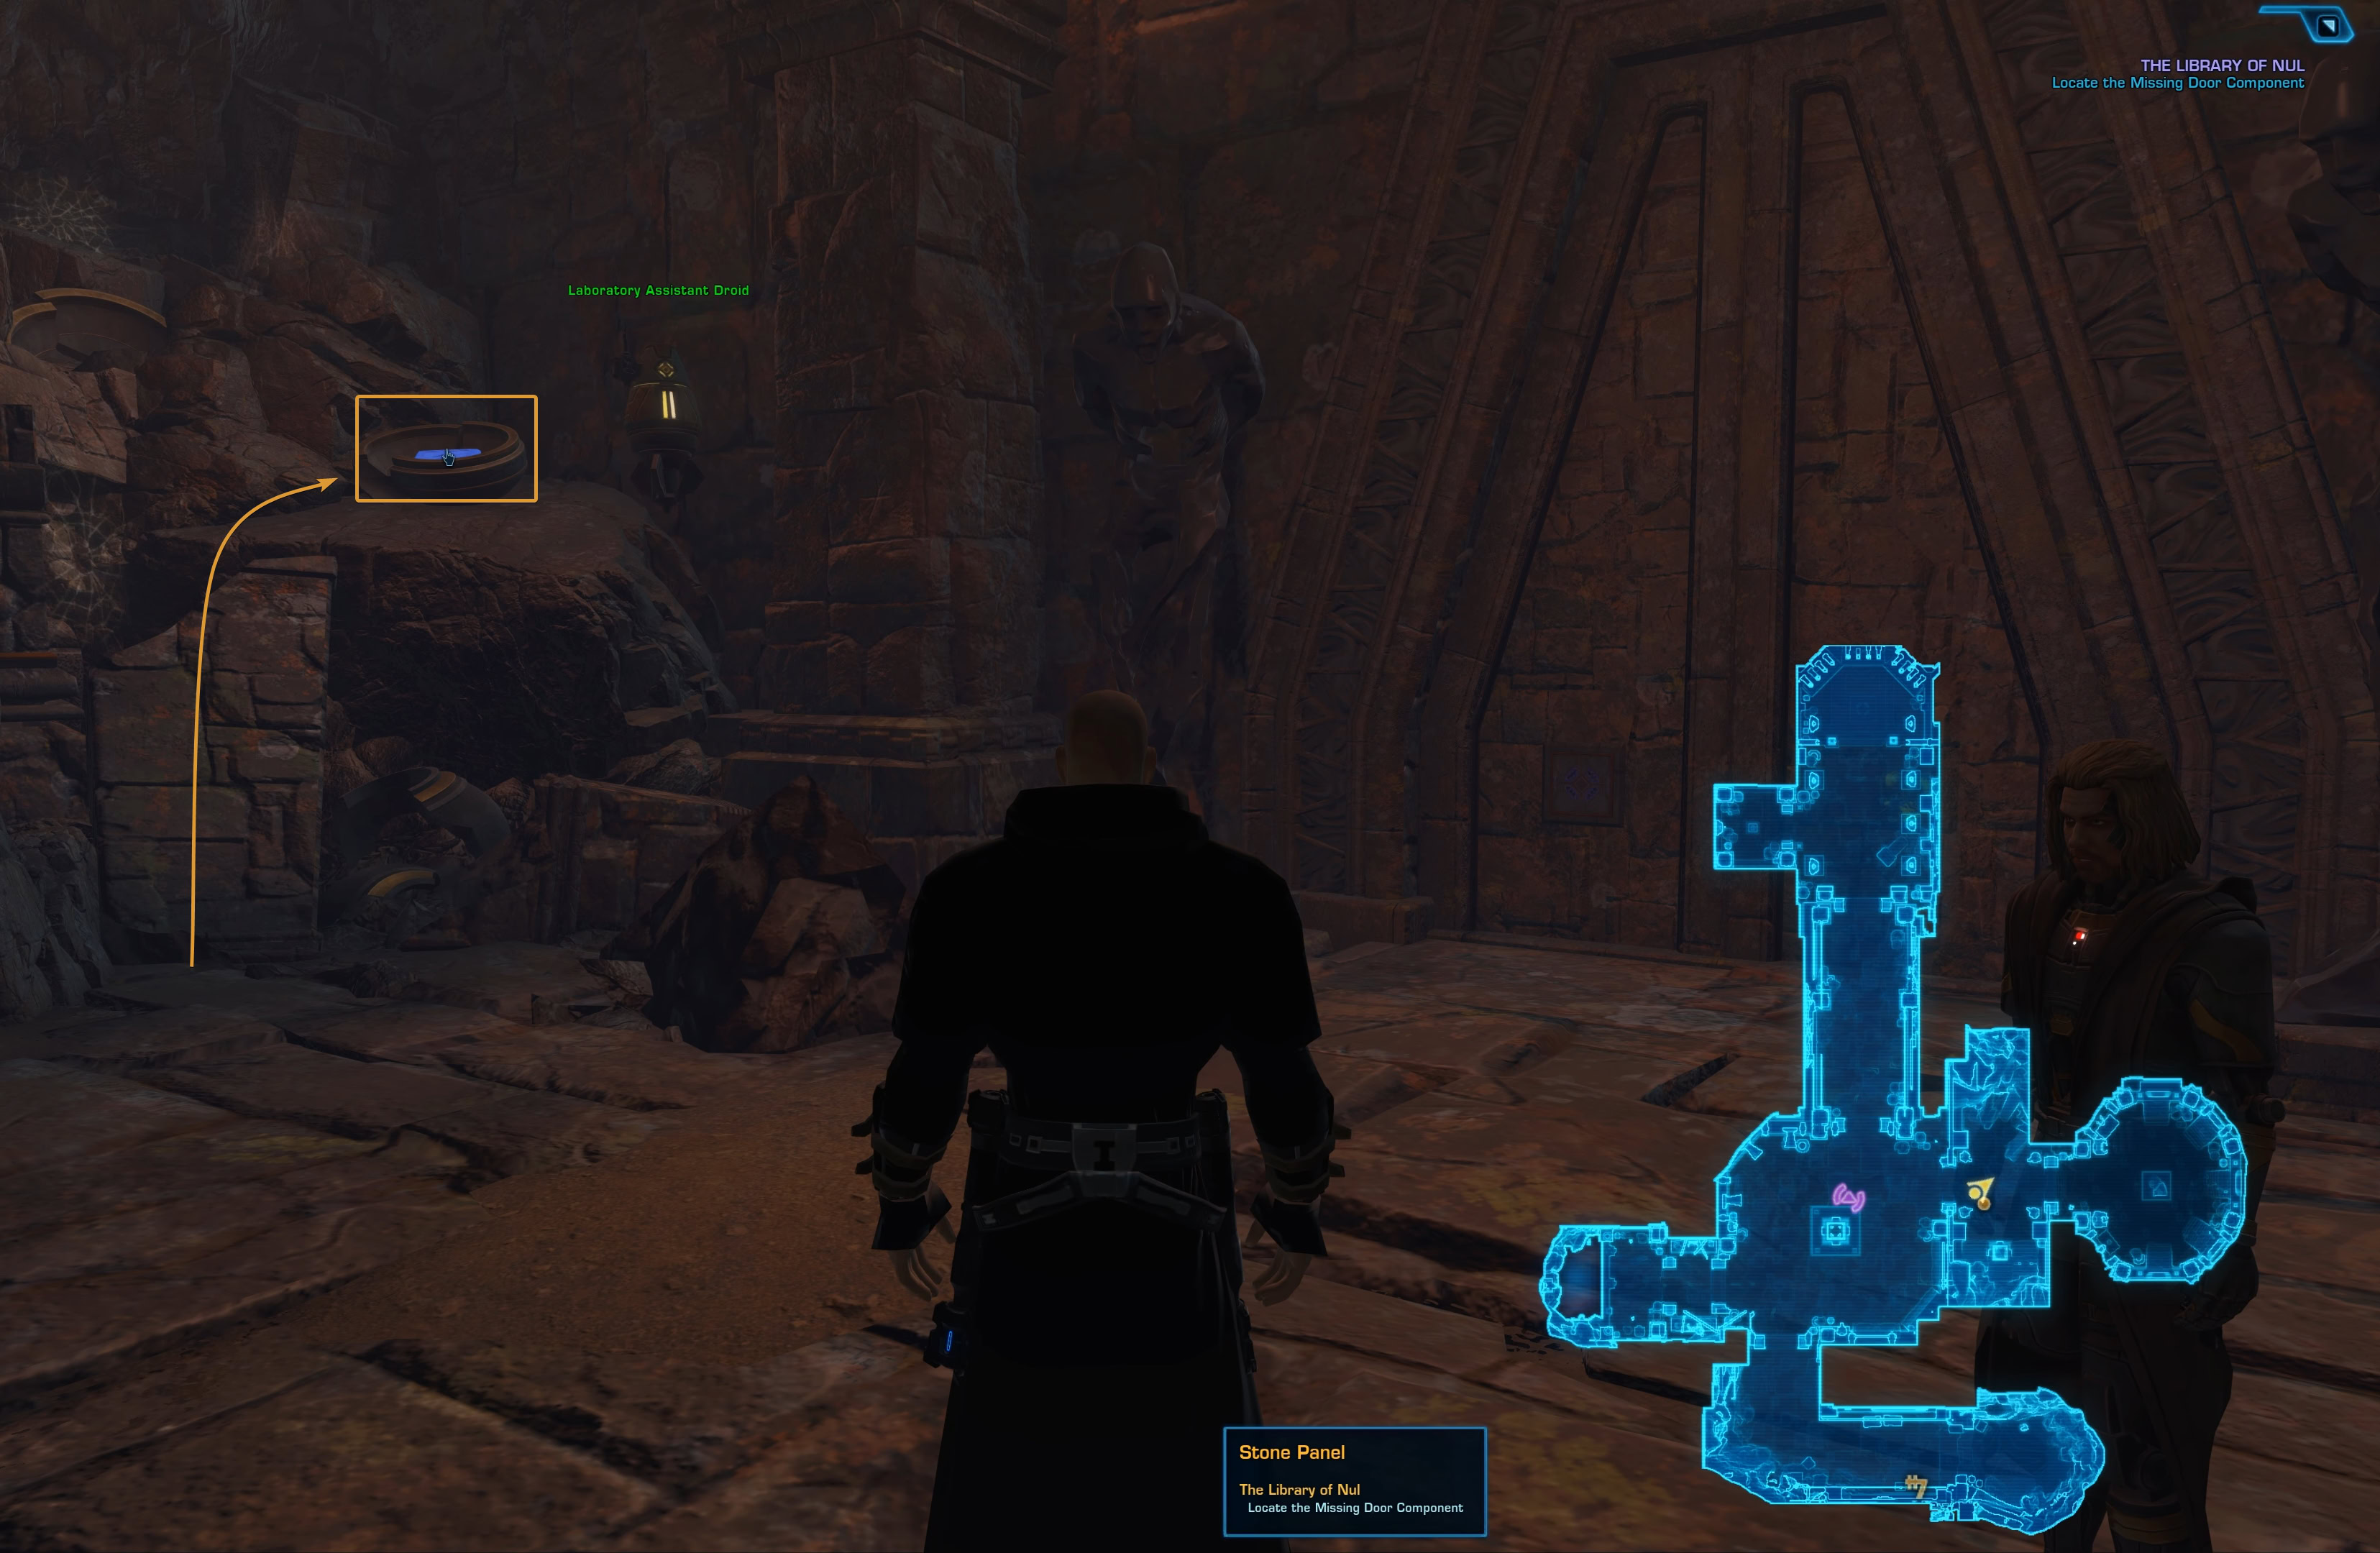
Locate the Missing Door Component
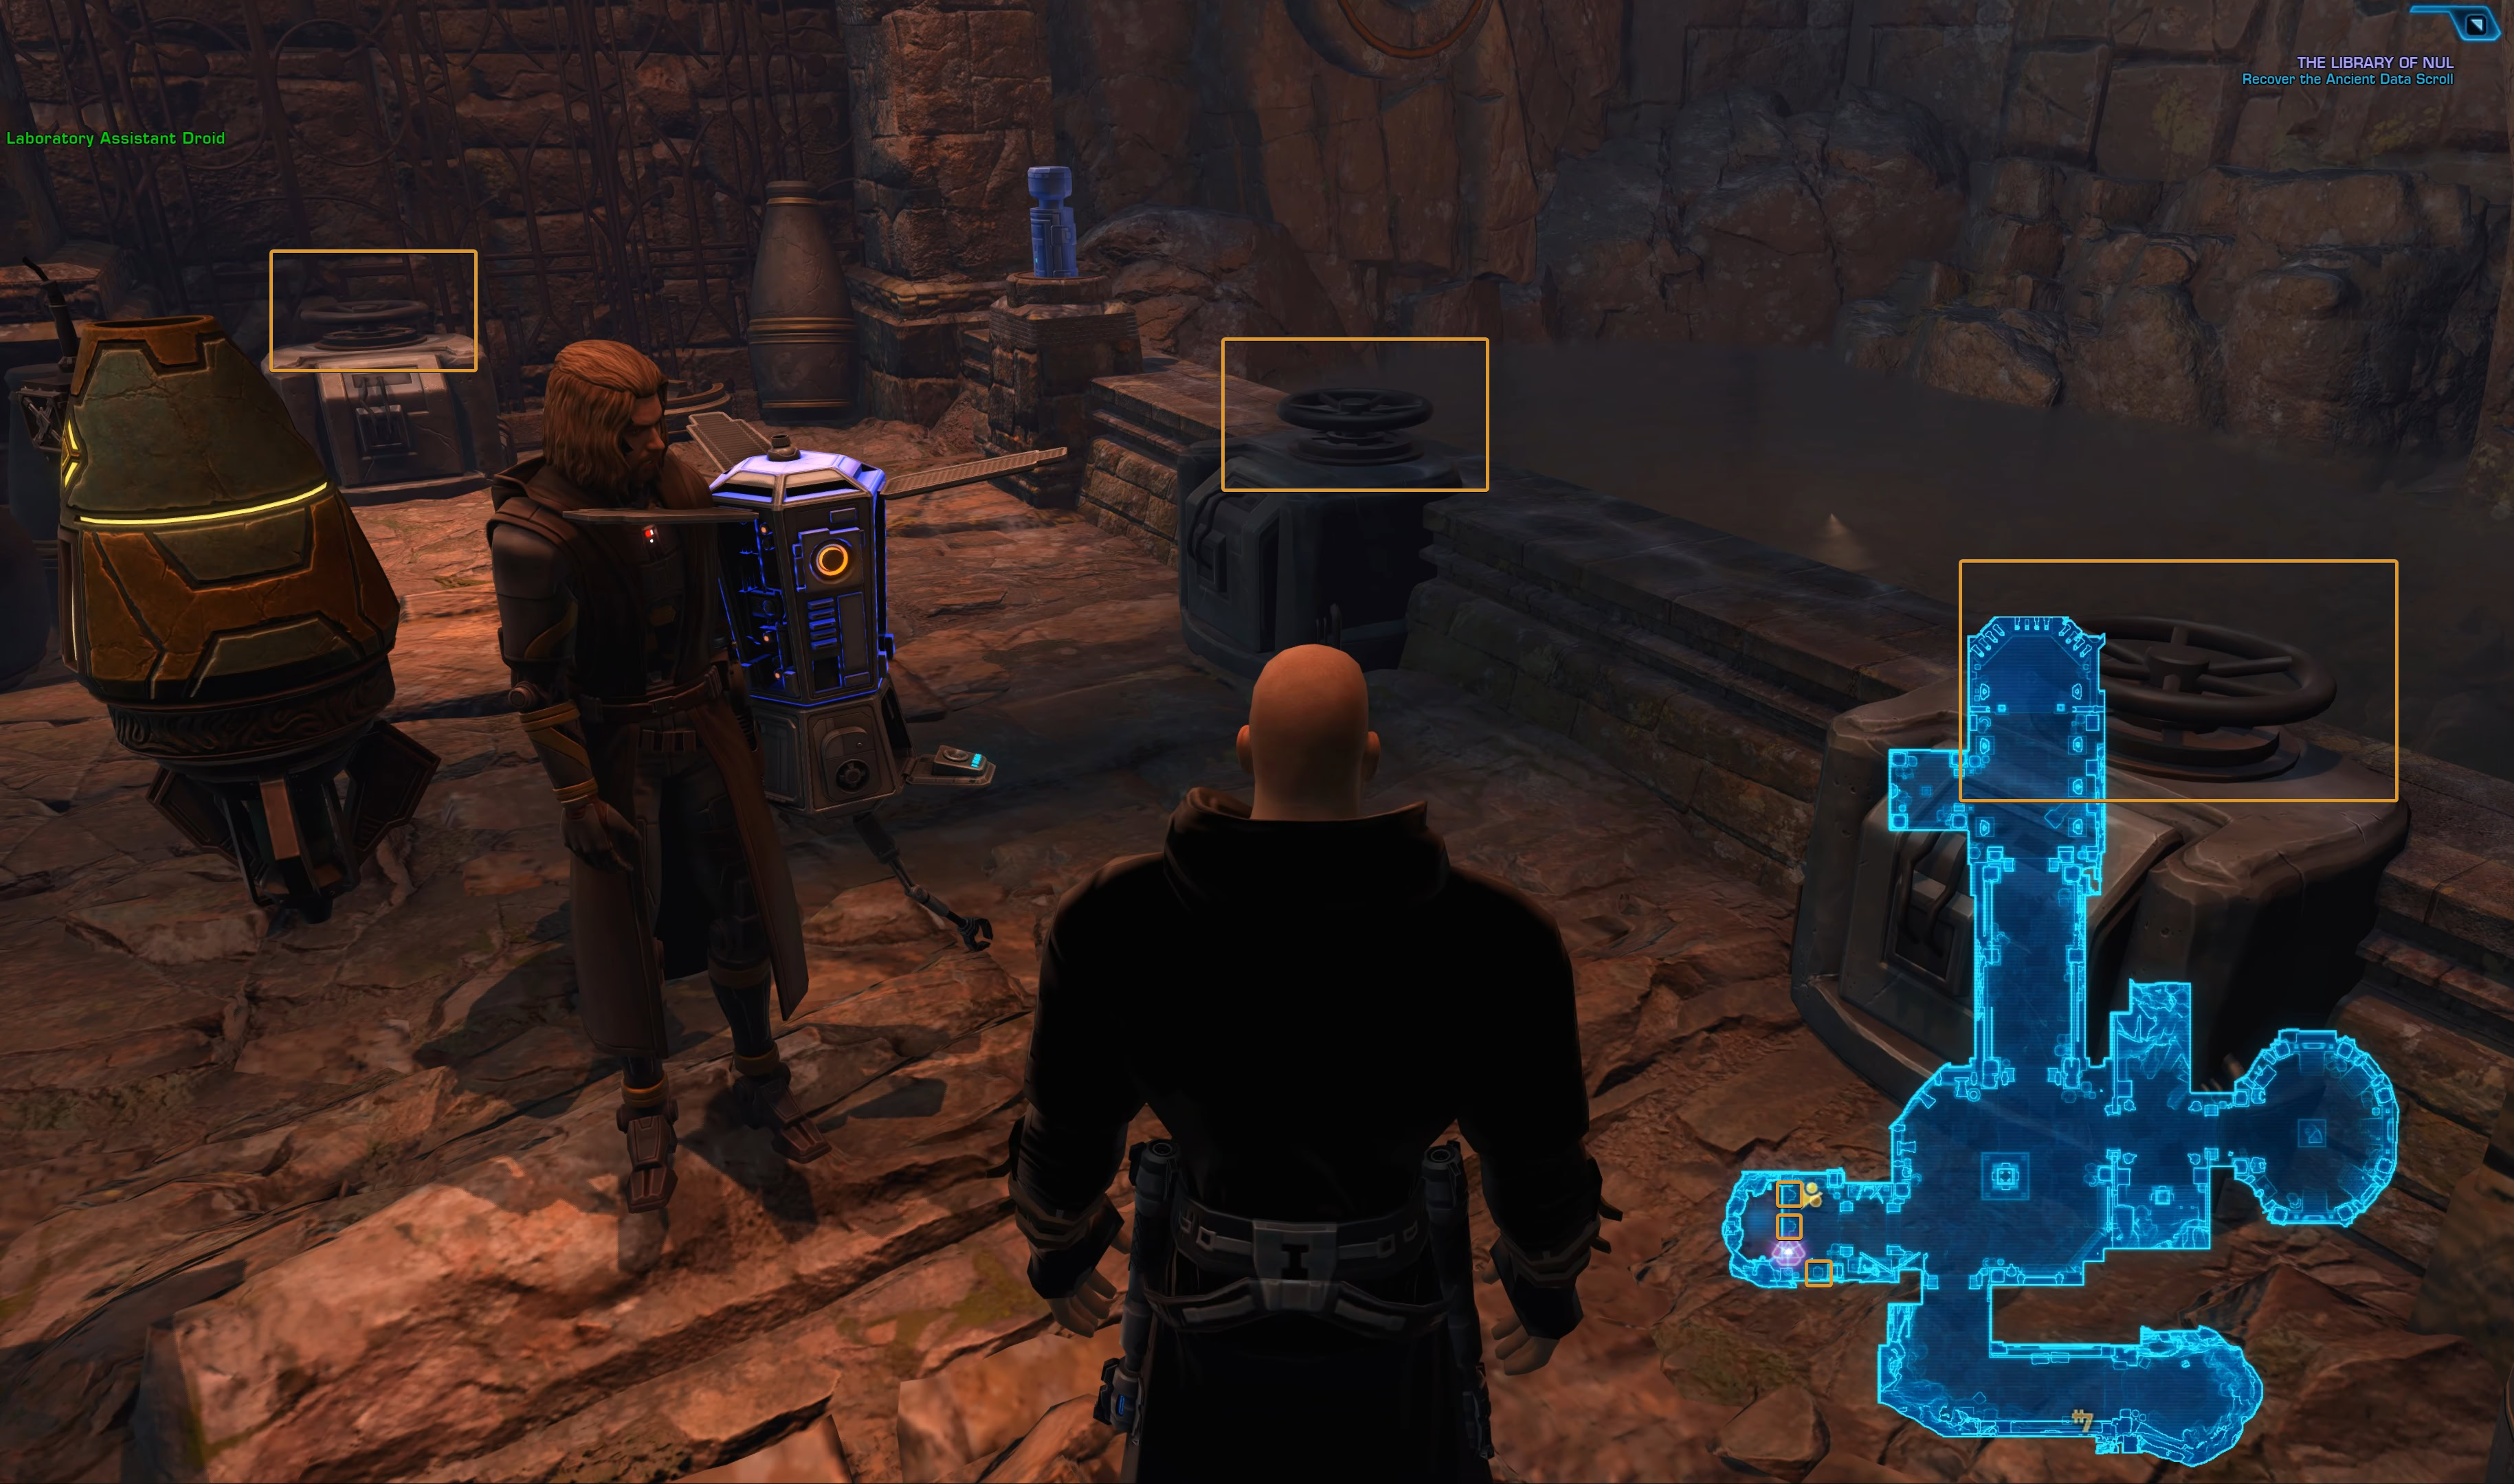
The next mini puzzle takes place in the east chamber. The droid will lead you there. When you reach the door, you will see that there is a missing pierce on it. The droid will then circle around to the top left and point out the location of the piece. Go pick it up.
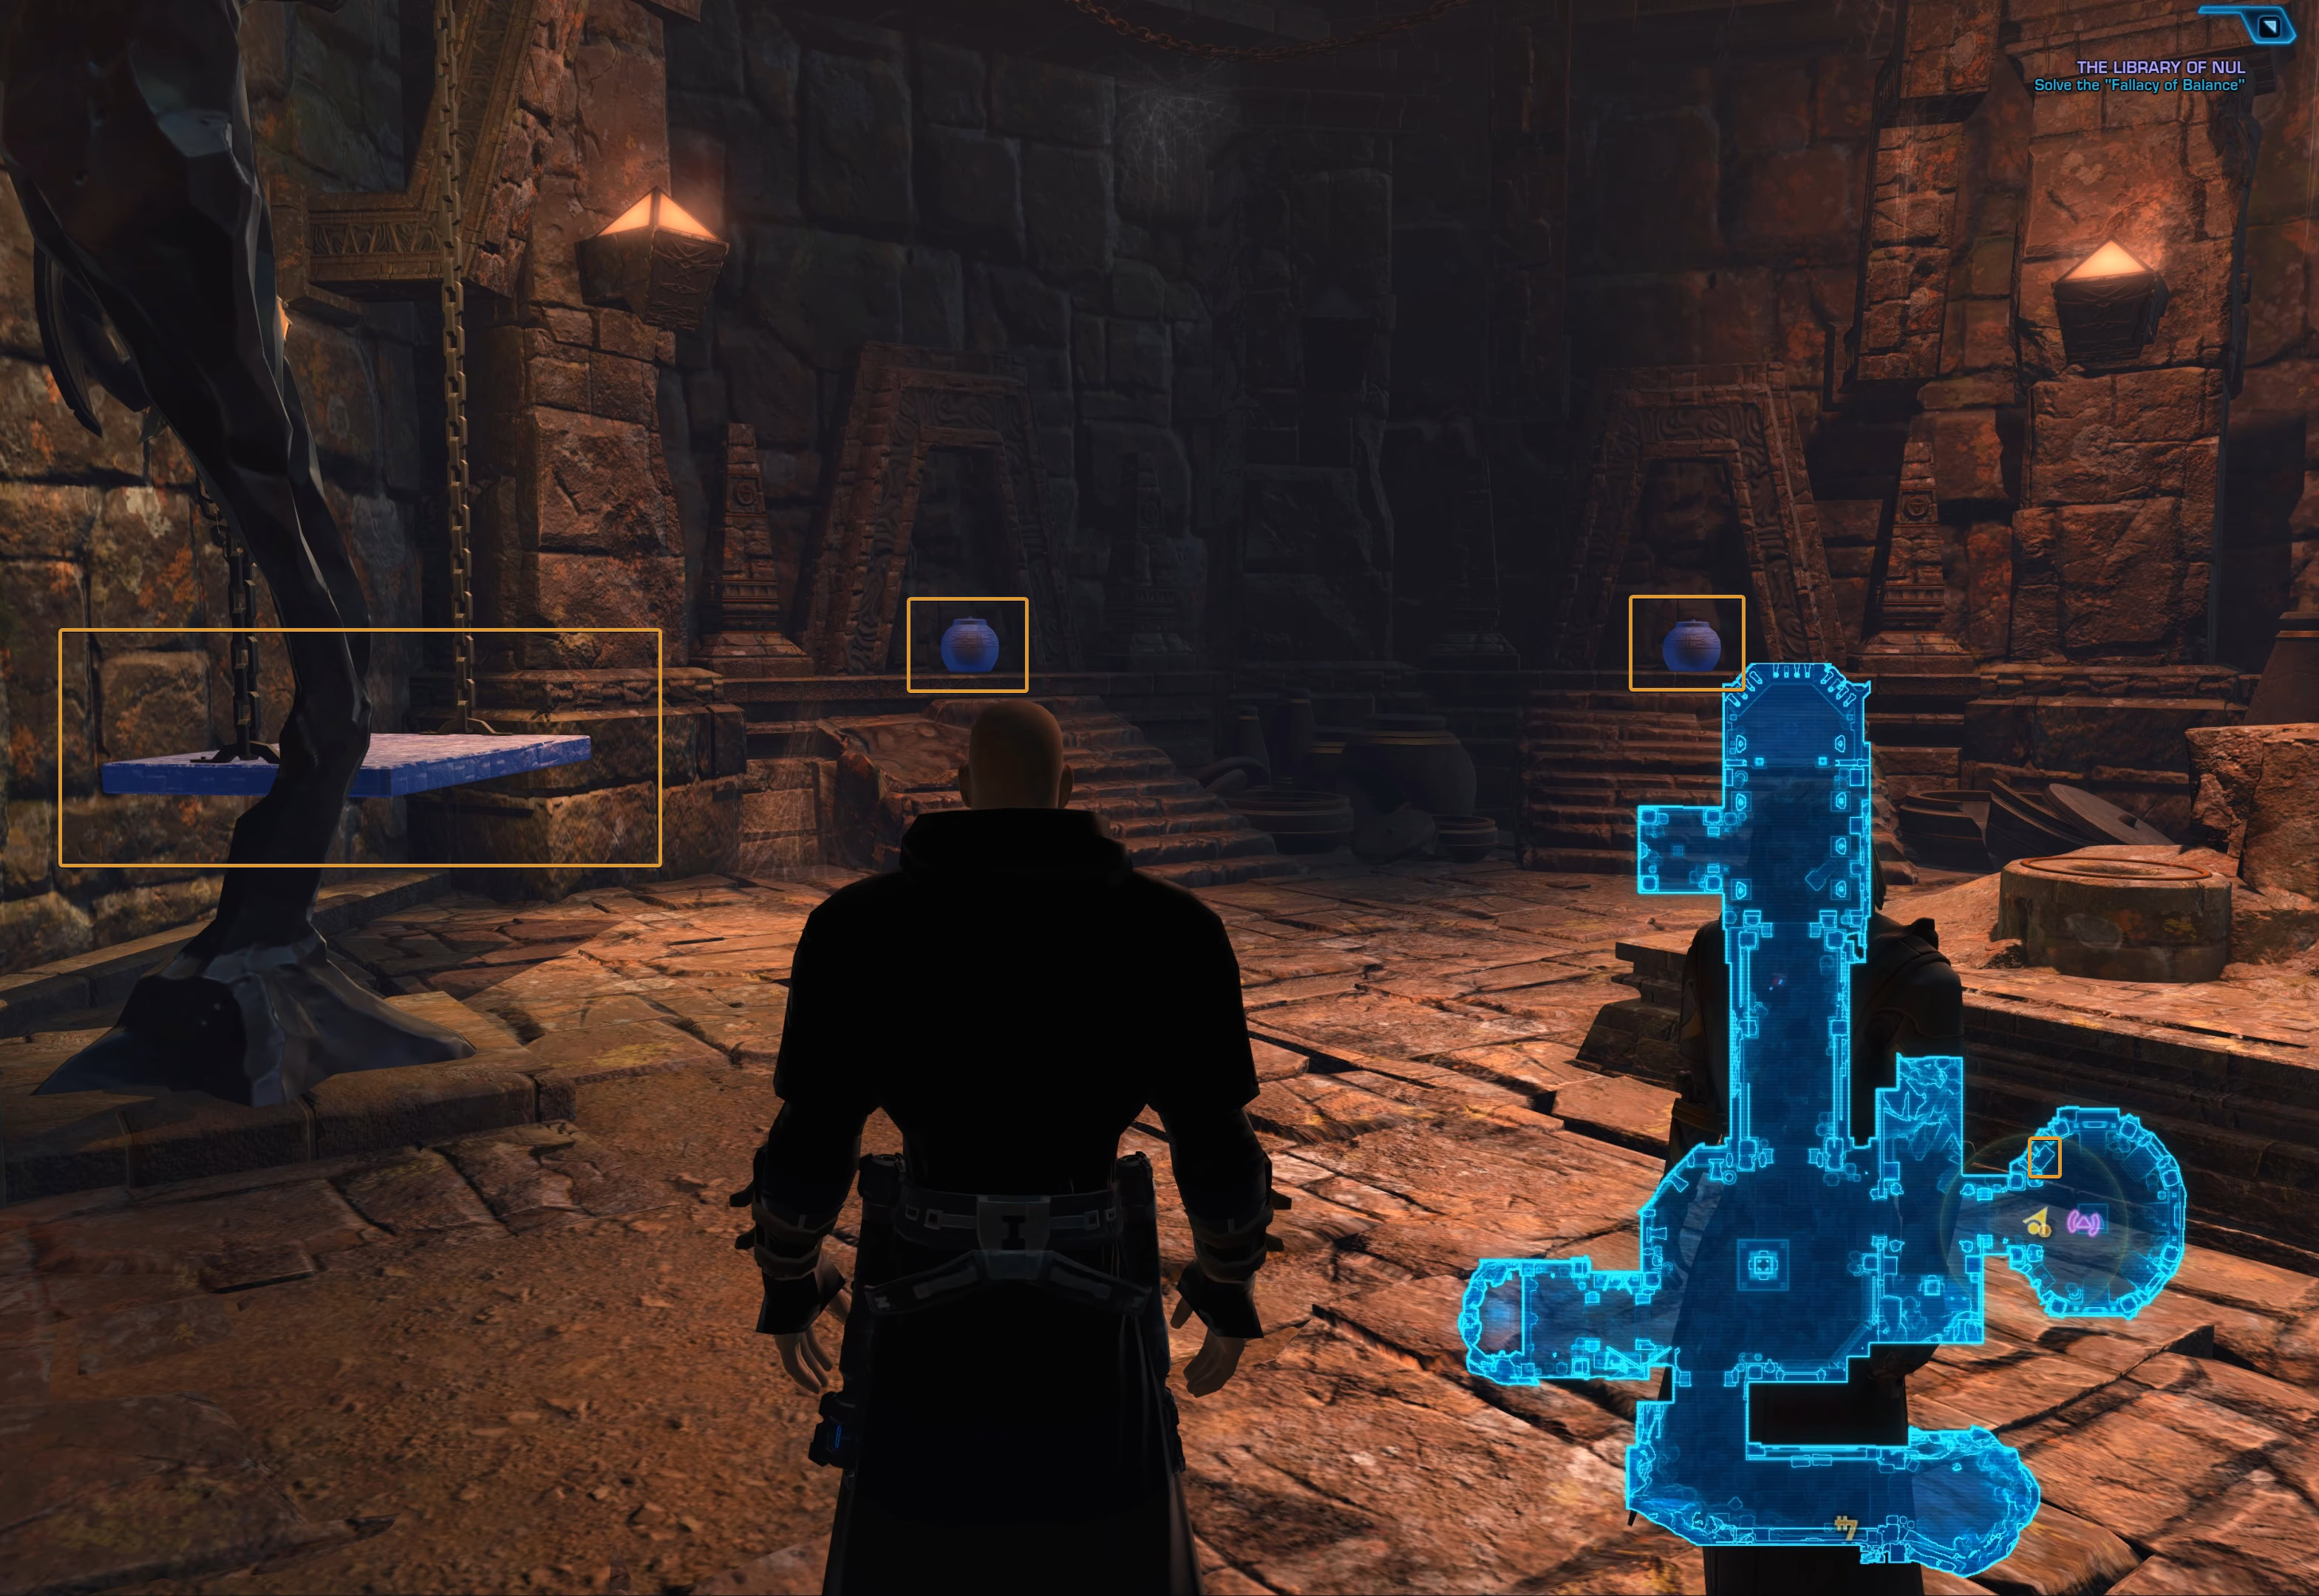
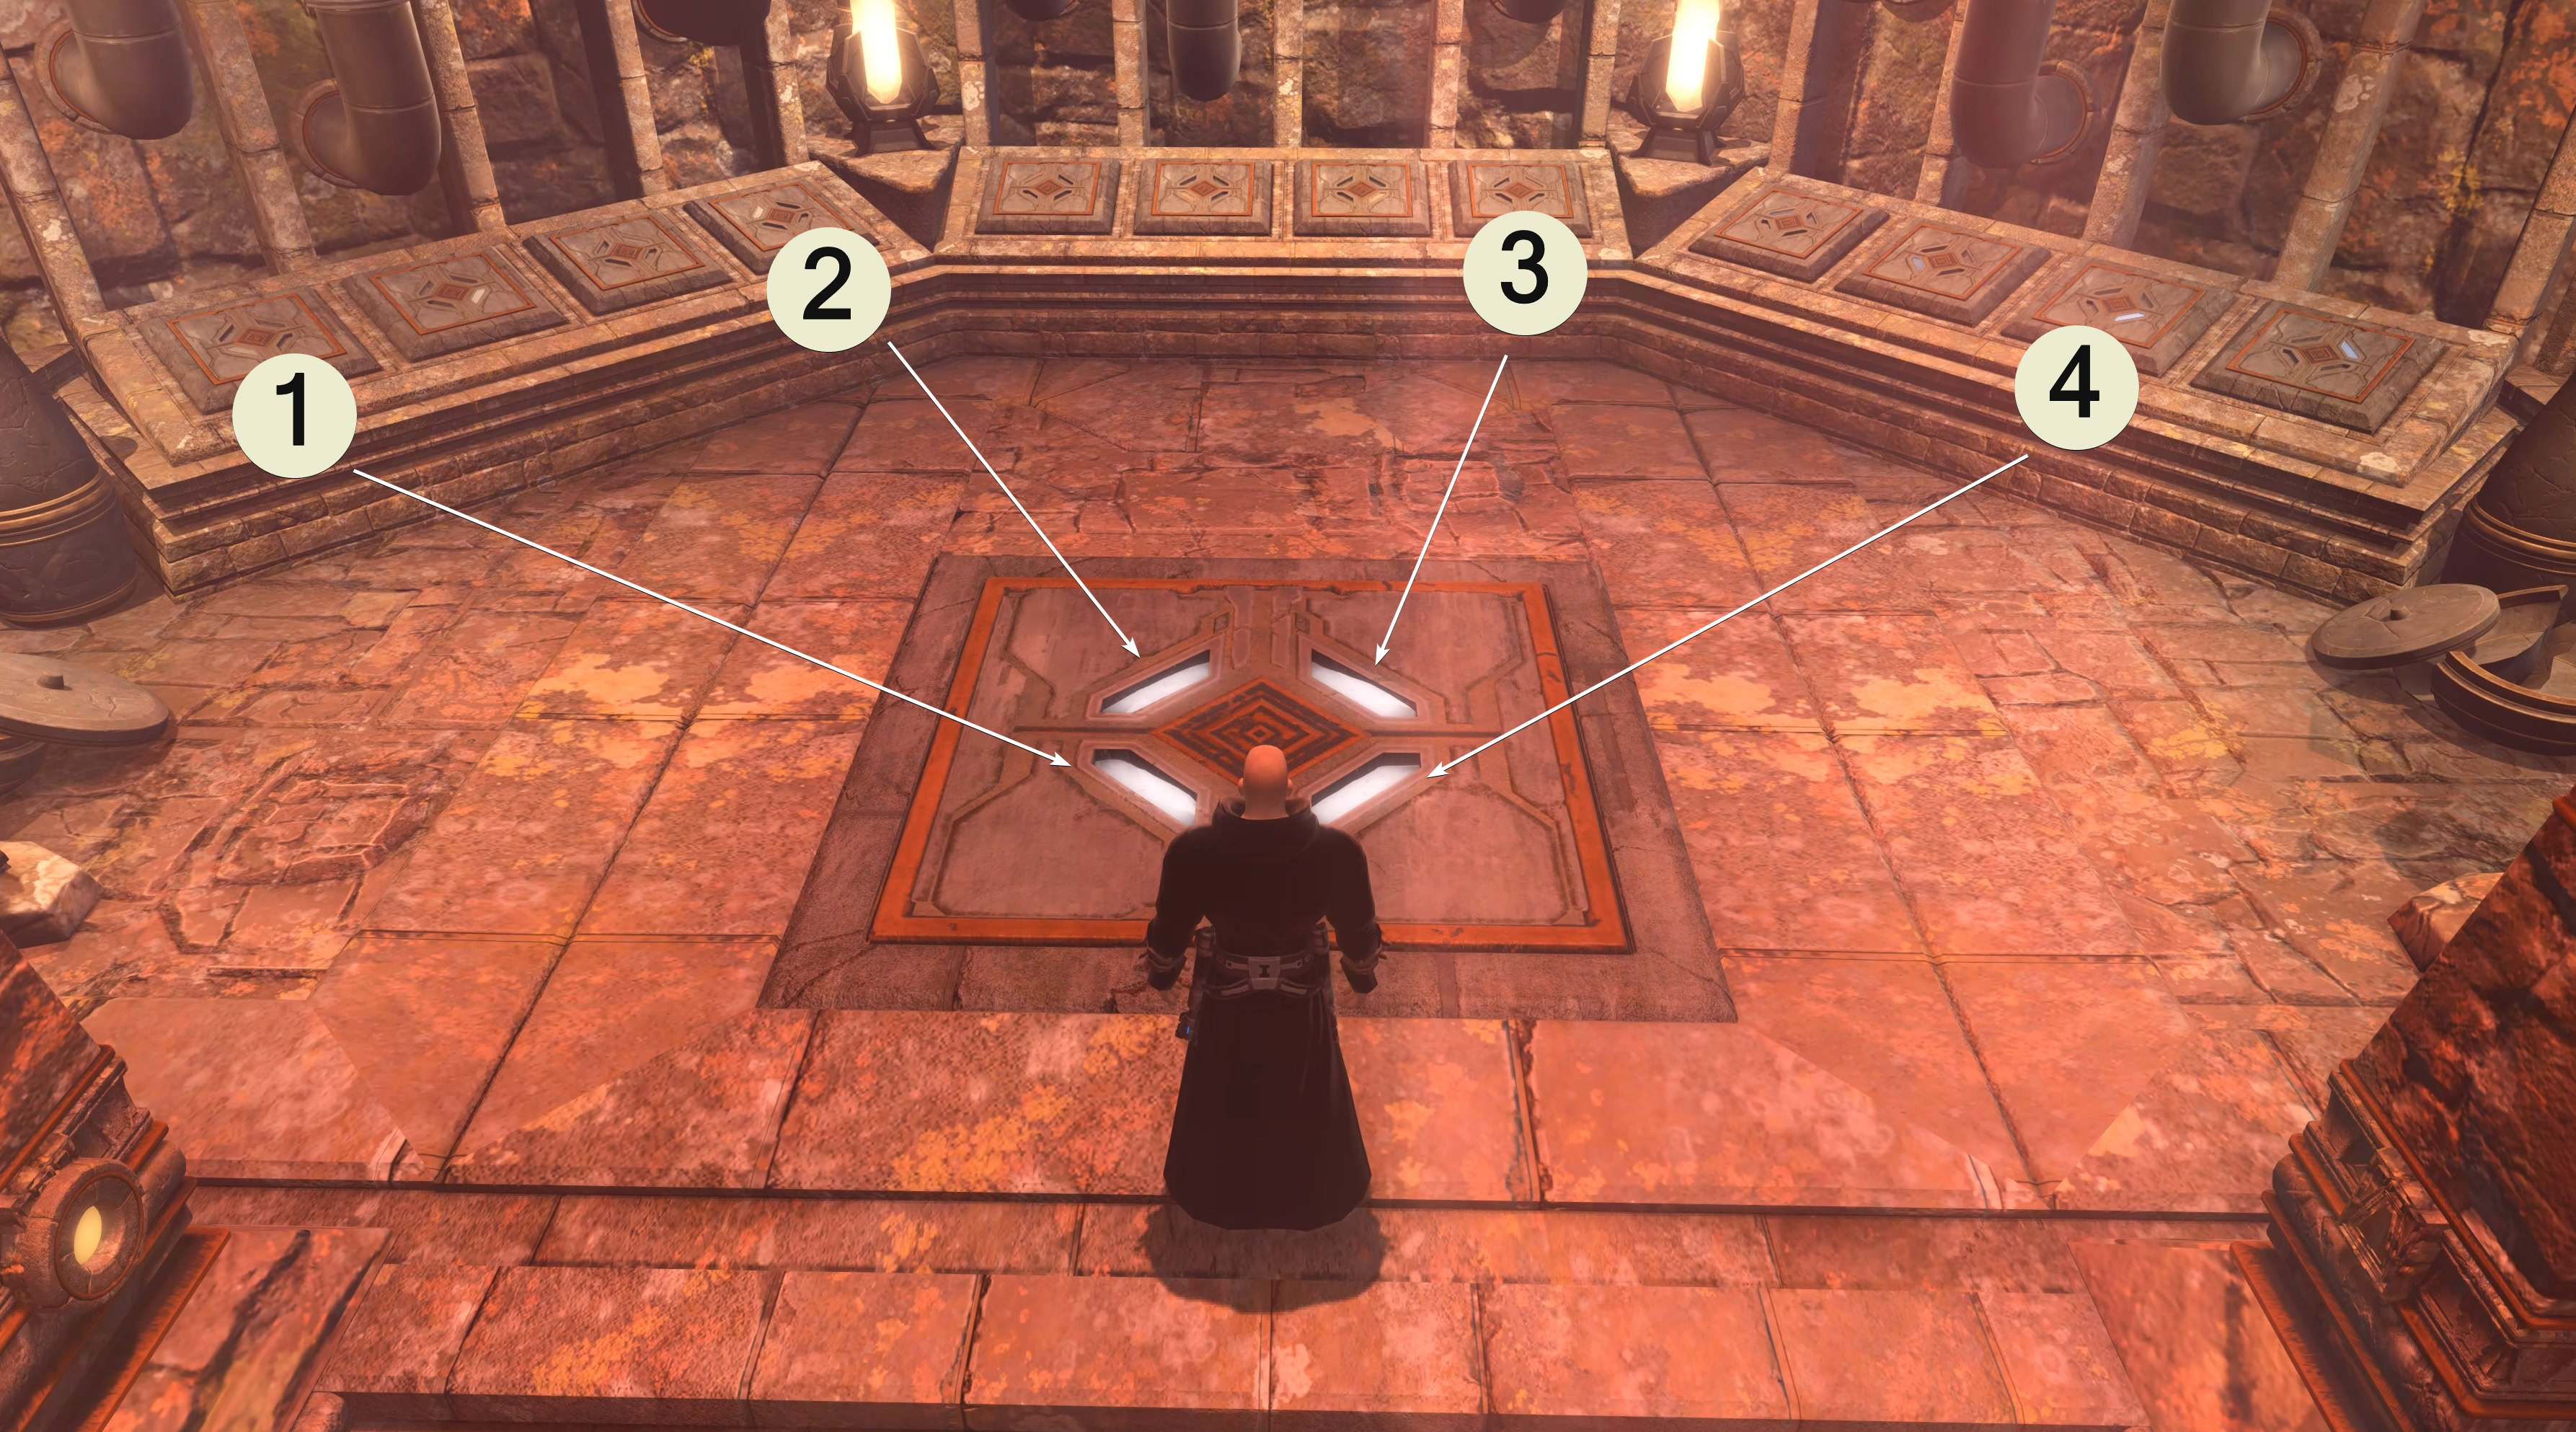
Solve the “Fallacy of Balance” Puzzle
Behind the door, to your left, you will see a glowing blue platform and four urns. Pick up the urns one by one and bring them to the scale. The order in which you pick up the urns doesn’t matter. When you click on the scale, the urns will be automatically placed.
Darth Nul’s hologram will appear in the middle of the room. Listen to her “teachings” and pick up the Ancient Data Scroll. Bring it back to the middle chamber and place it on the glowing Data Log Port on the wall.
Enter the North Chamber
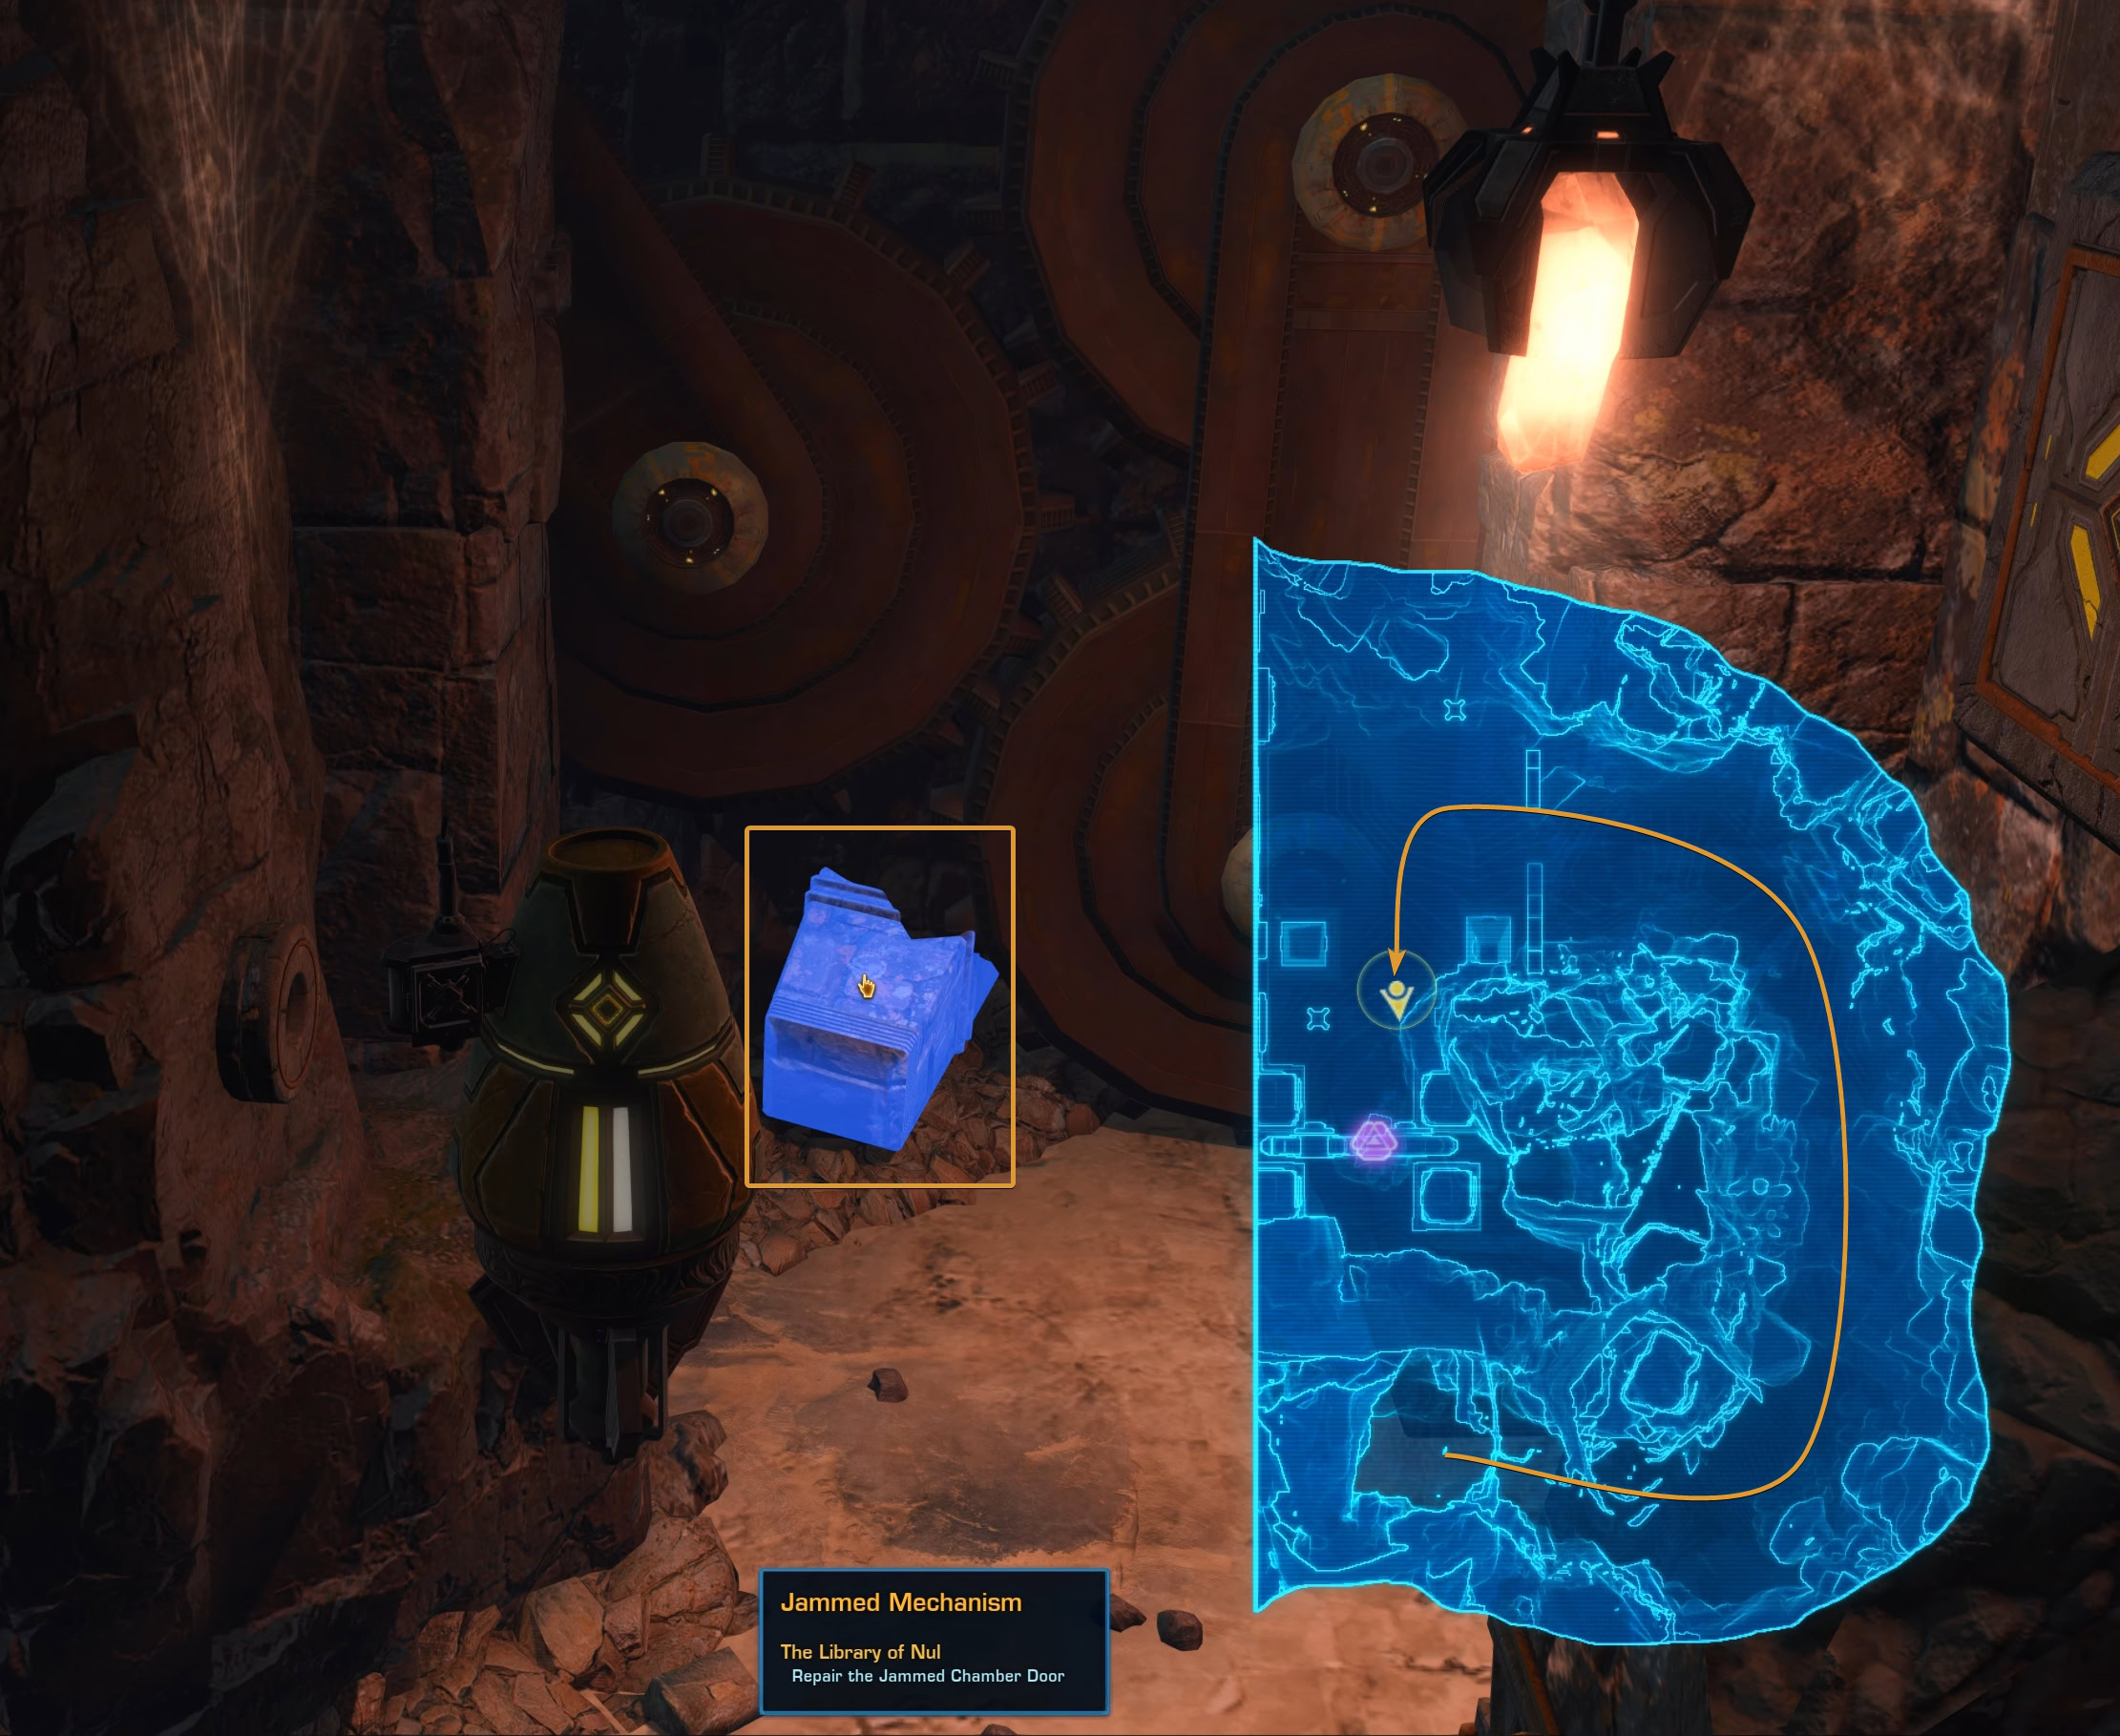
The final puzzle is behind the door at the end of the north corridor. To open it, you will need to operate the Laboratory Assistant Droid. Click on the door to try and open it. Then click on the droid to pick it up. Bring it to the opening in the wall to the right from the door.
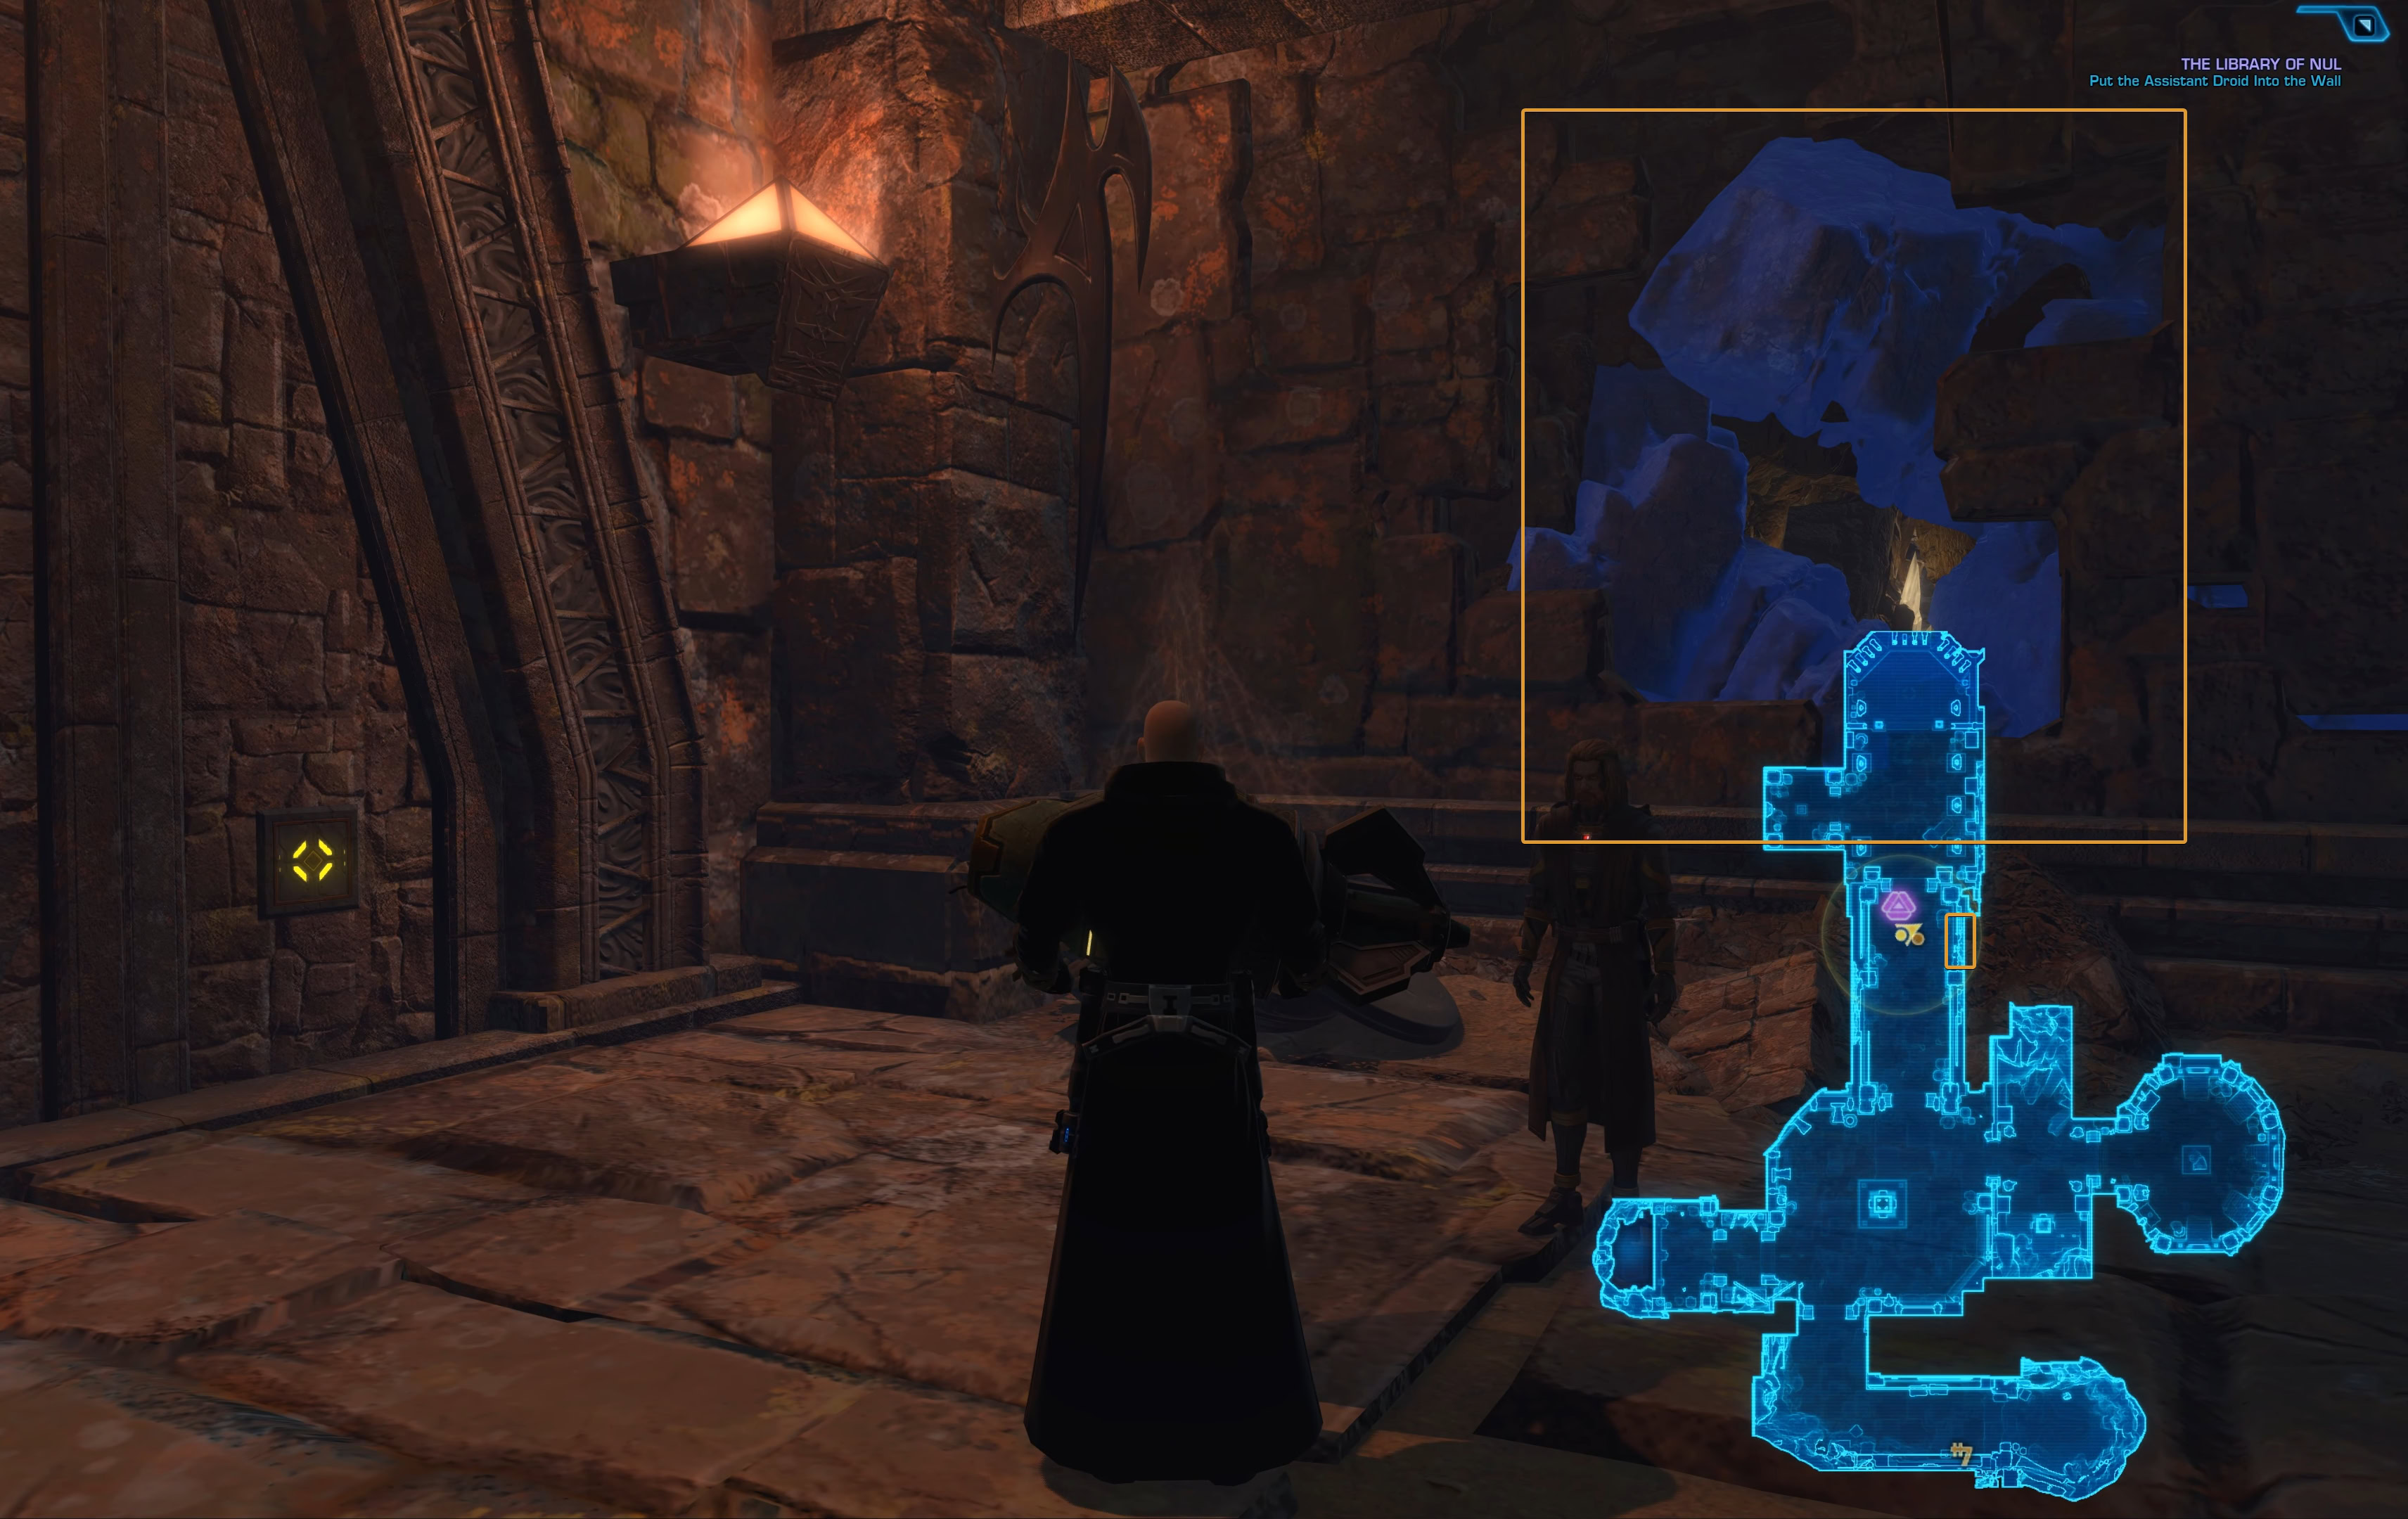
This will switch your perspective to controlling the dorid. Move around to the other end of the tunnel. Interact with the object that is blocking the door’s mechanism and you will spawn back as your character.
Solve the “Conceit of Harmony” Puzzle
In this chamber, you will see three groups of buttons you can press with and a large square tile on the floor in front of the panels displaying colors that change depending on your interactions with the buttons.
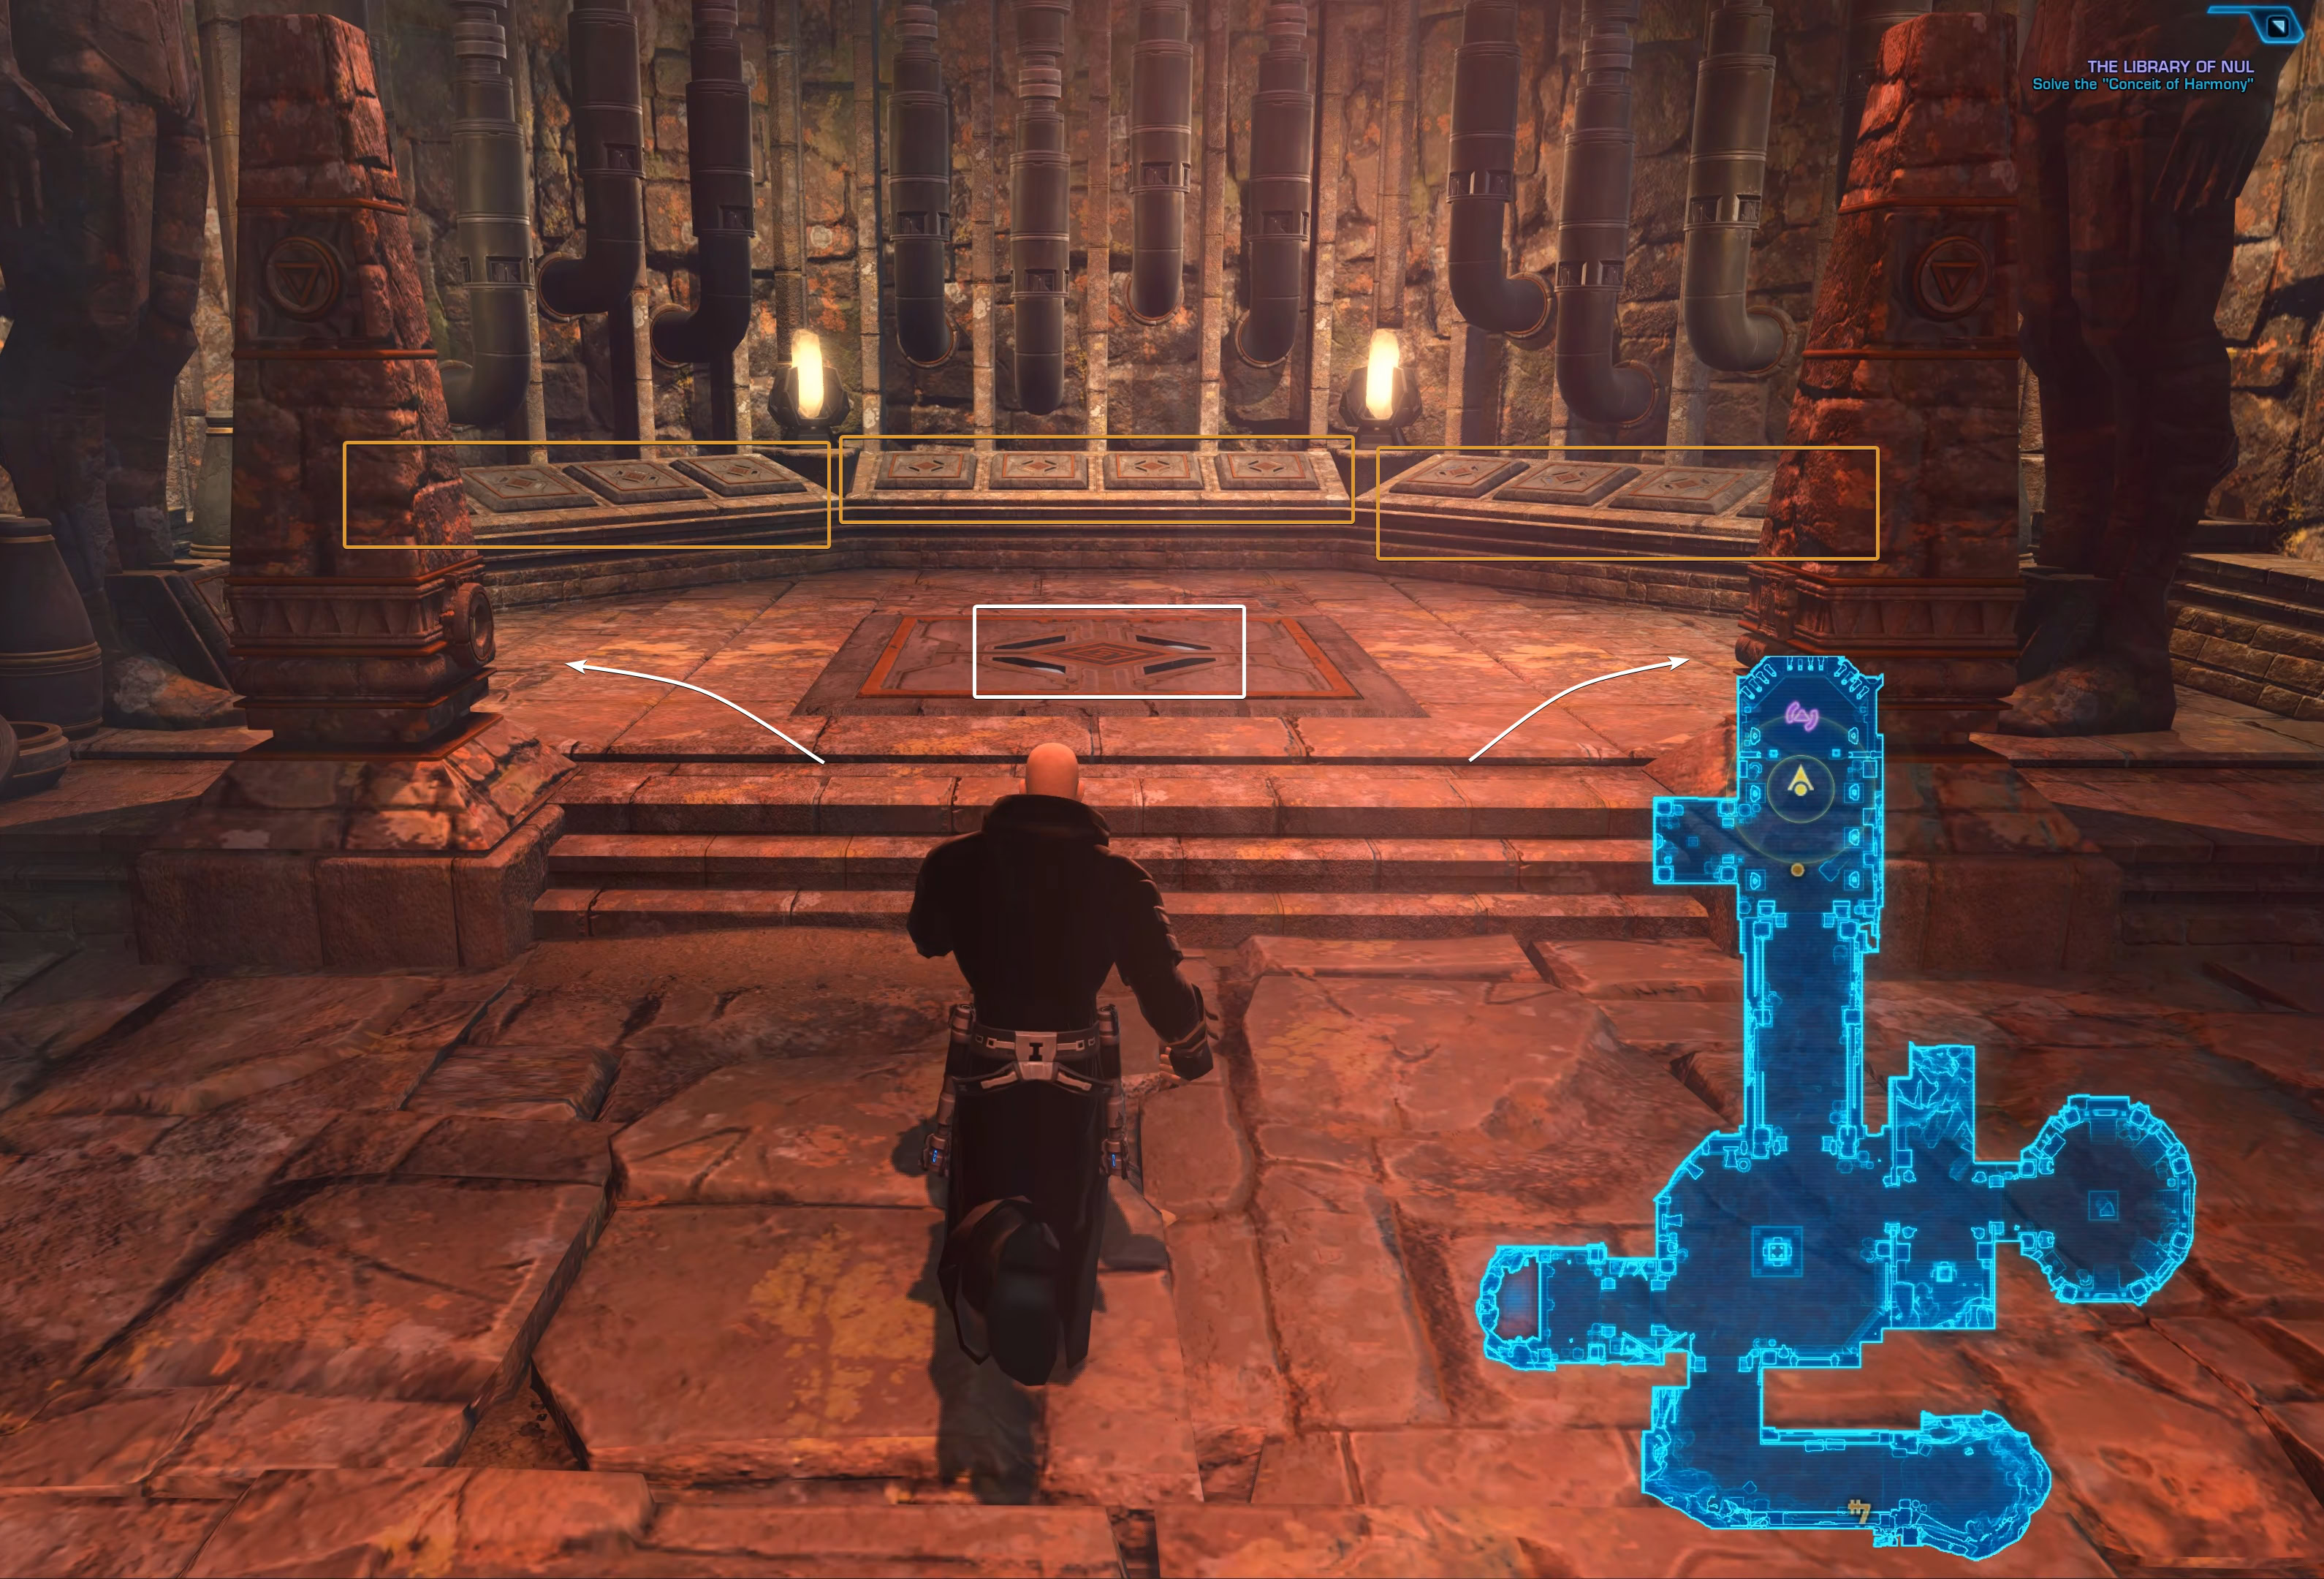
To solve the “Conceit of Harmony” puzzle, you must match the colors on the floor with the colors shown on the small tablets on both sides of the room.
The three groups of buttons. The left group lights up in Yellow. The middle group lights up in Orange. The right group lights up in Blue. The order in which you press the buttons does not matter. Your goal is to match the colors on the ground with the colors on the tablet at the feet of the statues on either side (they show the same combination).
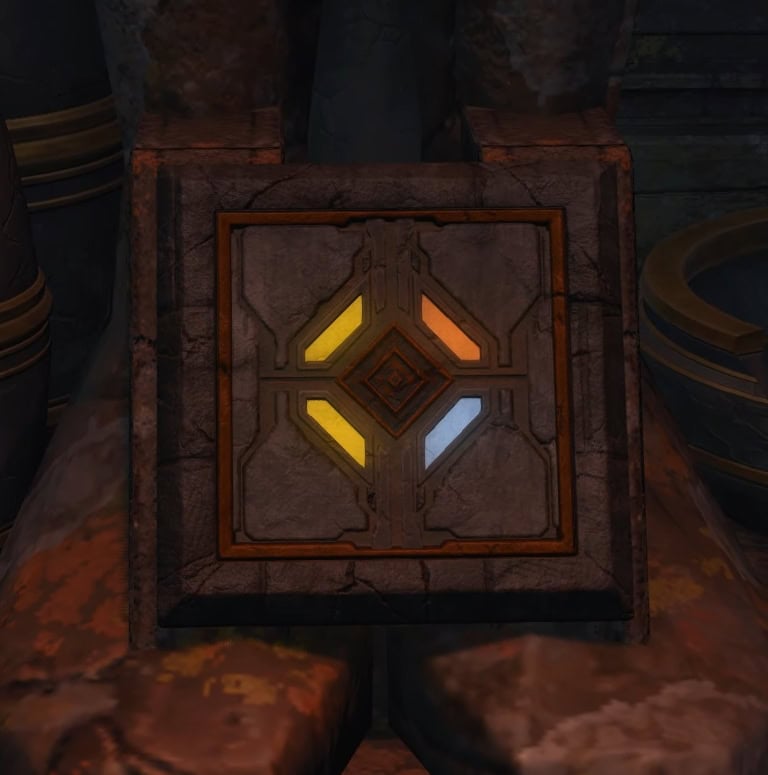
From left to right, you will have to press on the first and fourth buttons from the Yellow group, on the fourth button from the Orange group and on the third button from the Blue group.
Completing the puzzle, will unlock the door behind you, on your left side. Go there and pick up the third Ancient Data Scroll and bring it to the middle chamber.
Return to the middle chamber and place the device into the data log on the wall. This will activate a cinematic cutscene where you will have a choice.
Should you let the recording play or destroy the droid
You will place Darth Nul’s Holocron into the socket on the droid’s body. This will trigger another holo of Darth Nul. Suddenly, the droid will start sending data to somewhere. The group is uncertain who activated this uplink and it is up to you to decide: let the recording play or destroy the droid.

In either case, the outcome is the same. You will be attacked by droids. If you decide to let the recording play, your active companion will take the initiative and destroy the droid anyway.
I have played through it several times and so far, I have not witnessed an outcome where the droid is not destroyed. If you encounter this scenario, please describe it in the comments or send an email to info@vulkk.com.
The fight that will take place is nothing special. Several security droids from the temple will be activated and send your way. The last one will be a Nul Battle Droid (strong, silver). You should be able to beat those with whatever gear you have, so nothing to worry about.
The holocron will be in tact and you will have a short conversation with your two companions before you head back to Odessen to complete this mission.
Mission Rewards
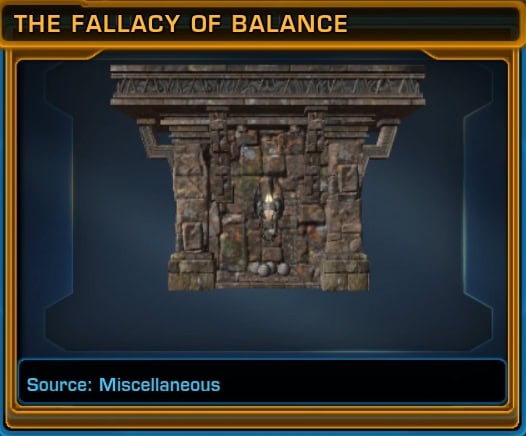
The rewards from this mission are the usual ones accompanied by a unique new decoration: The Fallacy of Balance.
| Credits | |
| 5x Conquest Commendations | |
 | 50x Tech Fragments |
| The Fallacy of Balance Decoration |
On the Run
On the Run is a simple straight-forward mission where you follow the markers on your map for most of the time. Your task here is to locate a Hidden Chain defector, who sent a distress signal, or so you think. You will be accompanied by Akaavi.
Find the Defector’s Safehouse
The first step is to locate the Defector’s Safehouse. Asking around at the spaceport, will reveal a location in the northern part of Judnladn, near Camp Karnori, which is Repuclic territory.
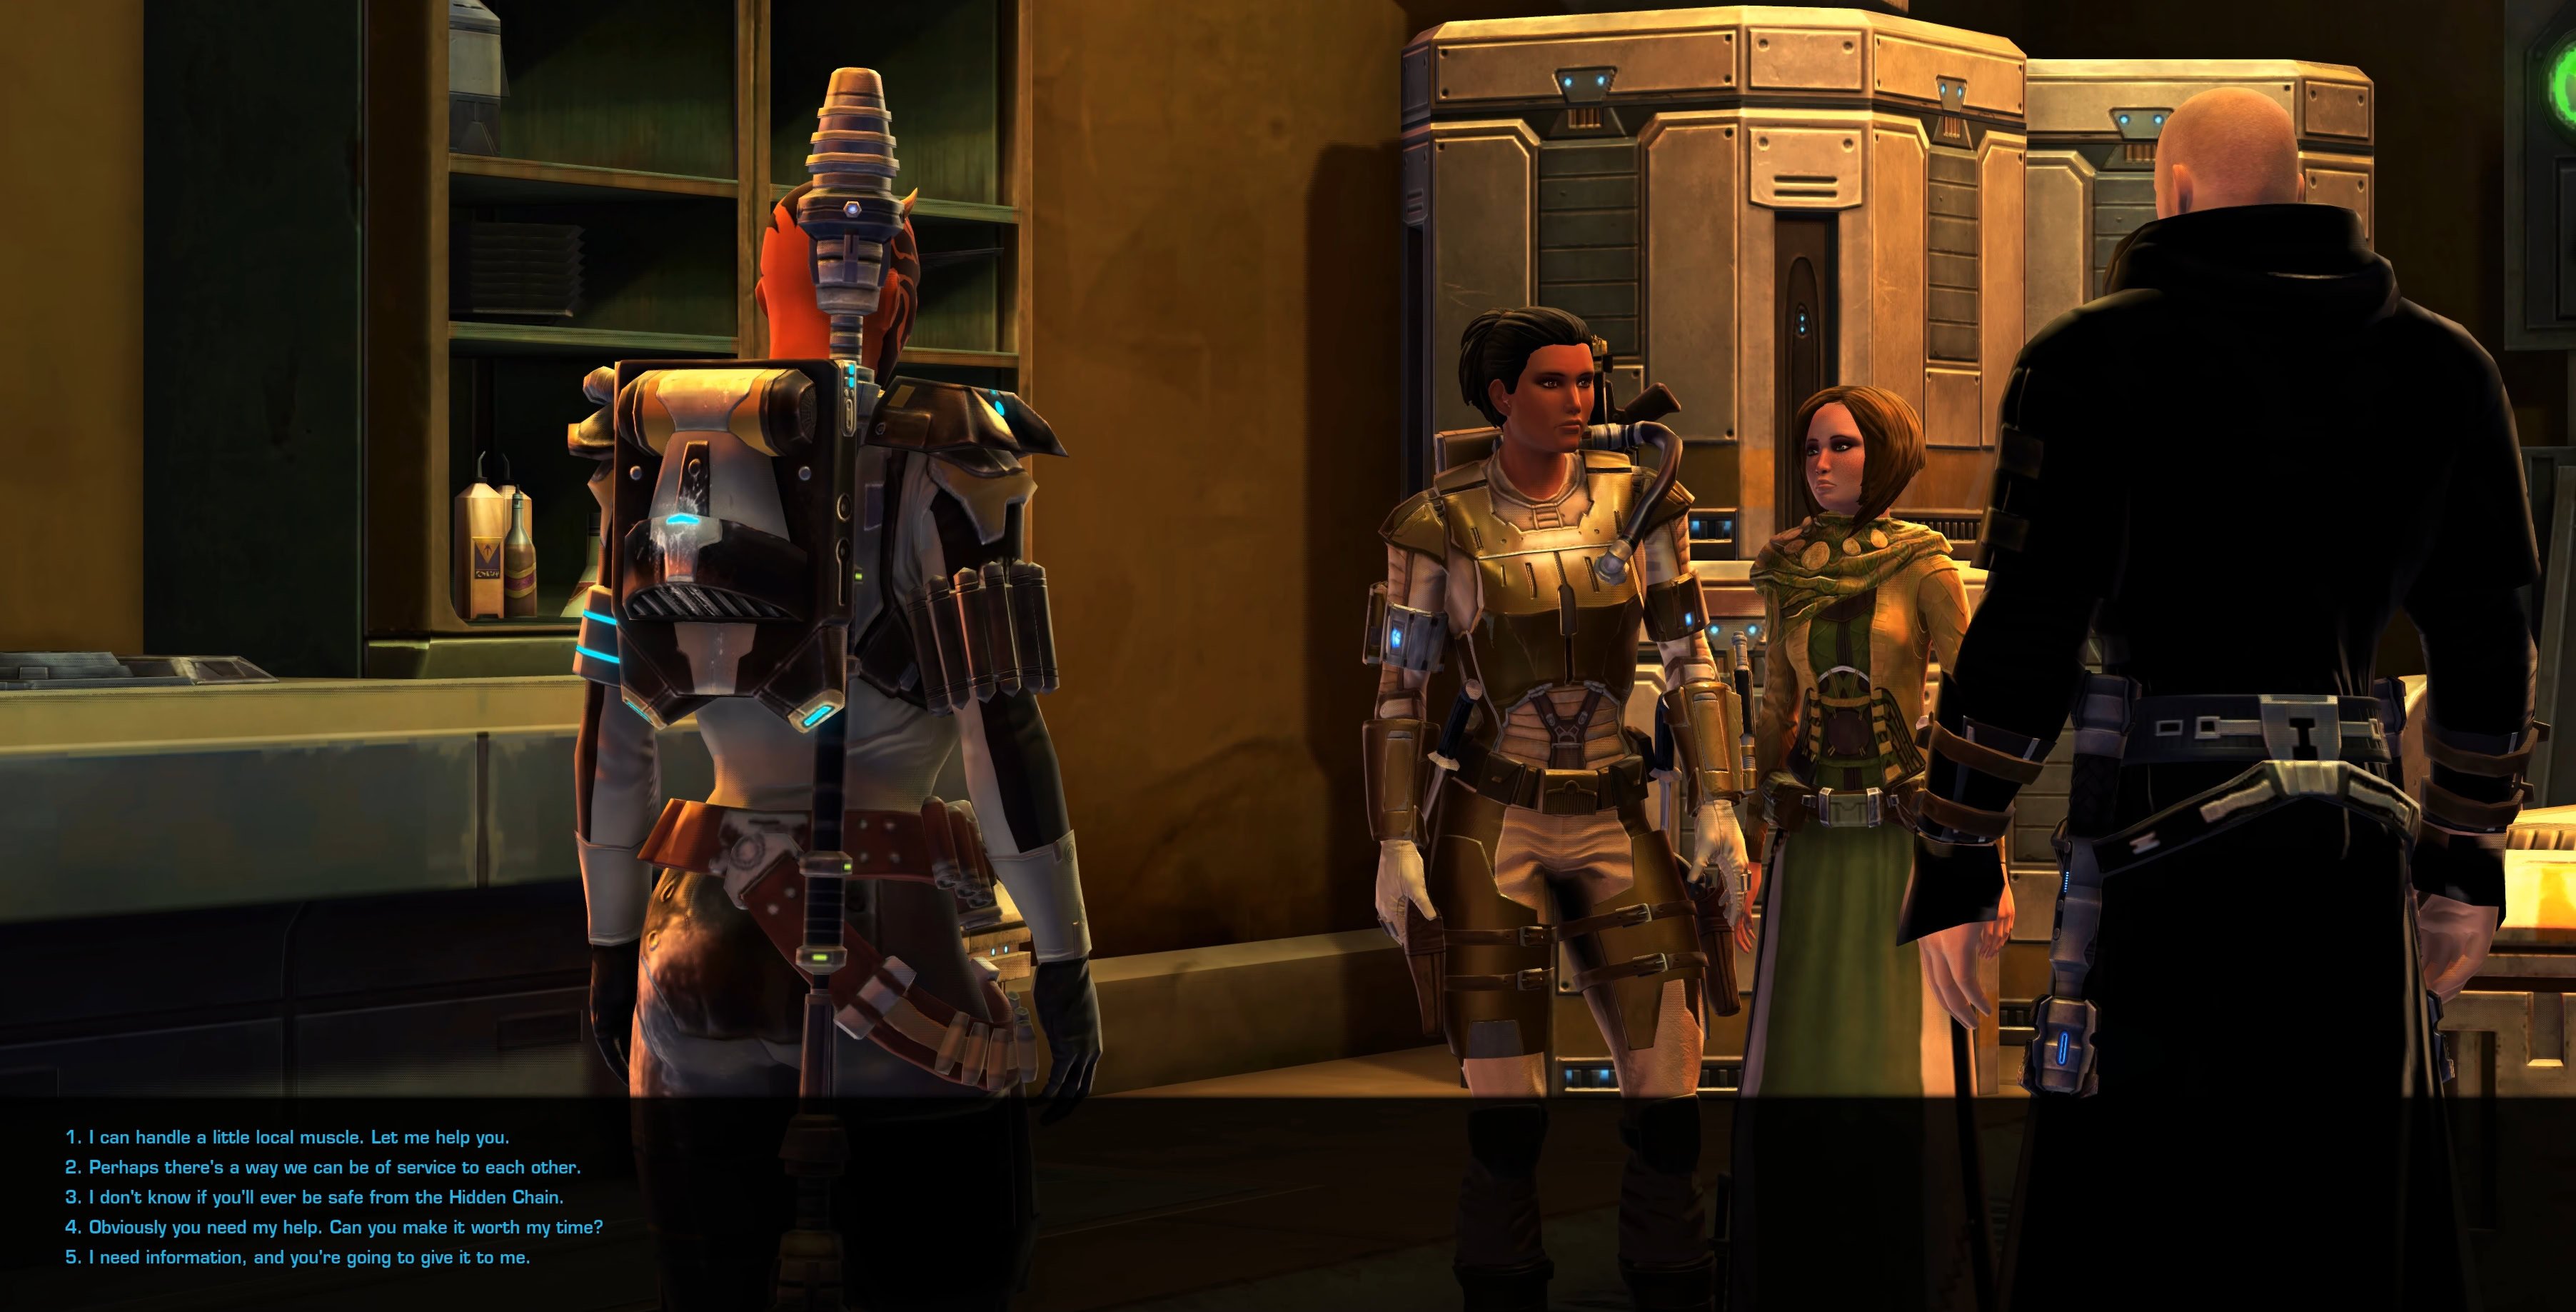
As soon as you enter the instance, you will be attacked by Jemala Ha’rangir. This duel is quickly interrupted by a girl called Ora, Jemala’s love interest
During the conversation you will learn that Jemala didn’t send any signals and that Ora is force-sensitive. They both ran away from the Hidden Chain and are being chased by them now.
Whatever you choose during the conversation, you will end up helping the two by tracking the mercenaries that are looking for them and making sure they don’t find them.
Take out the Mercenaries
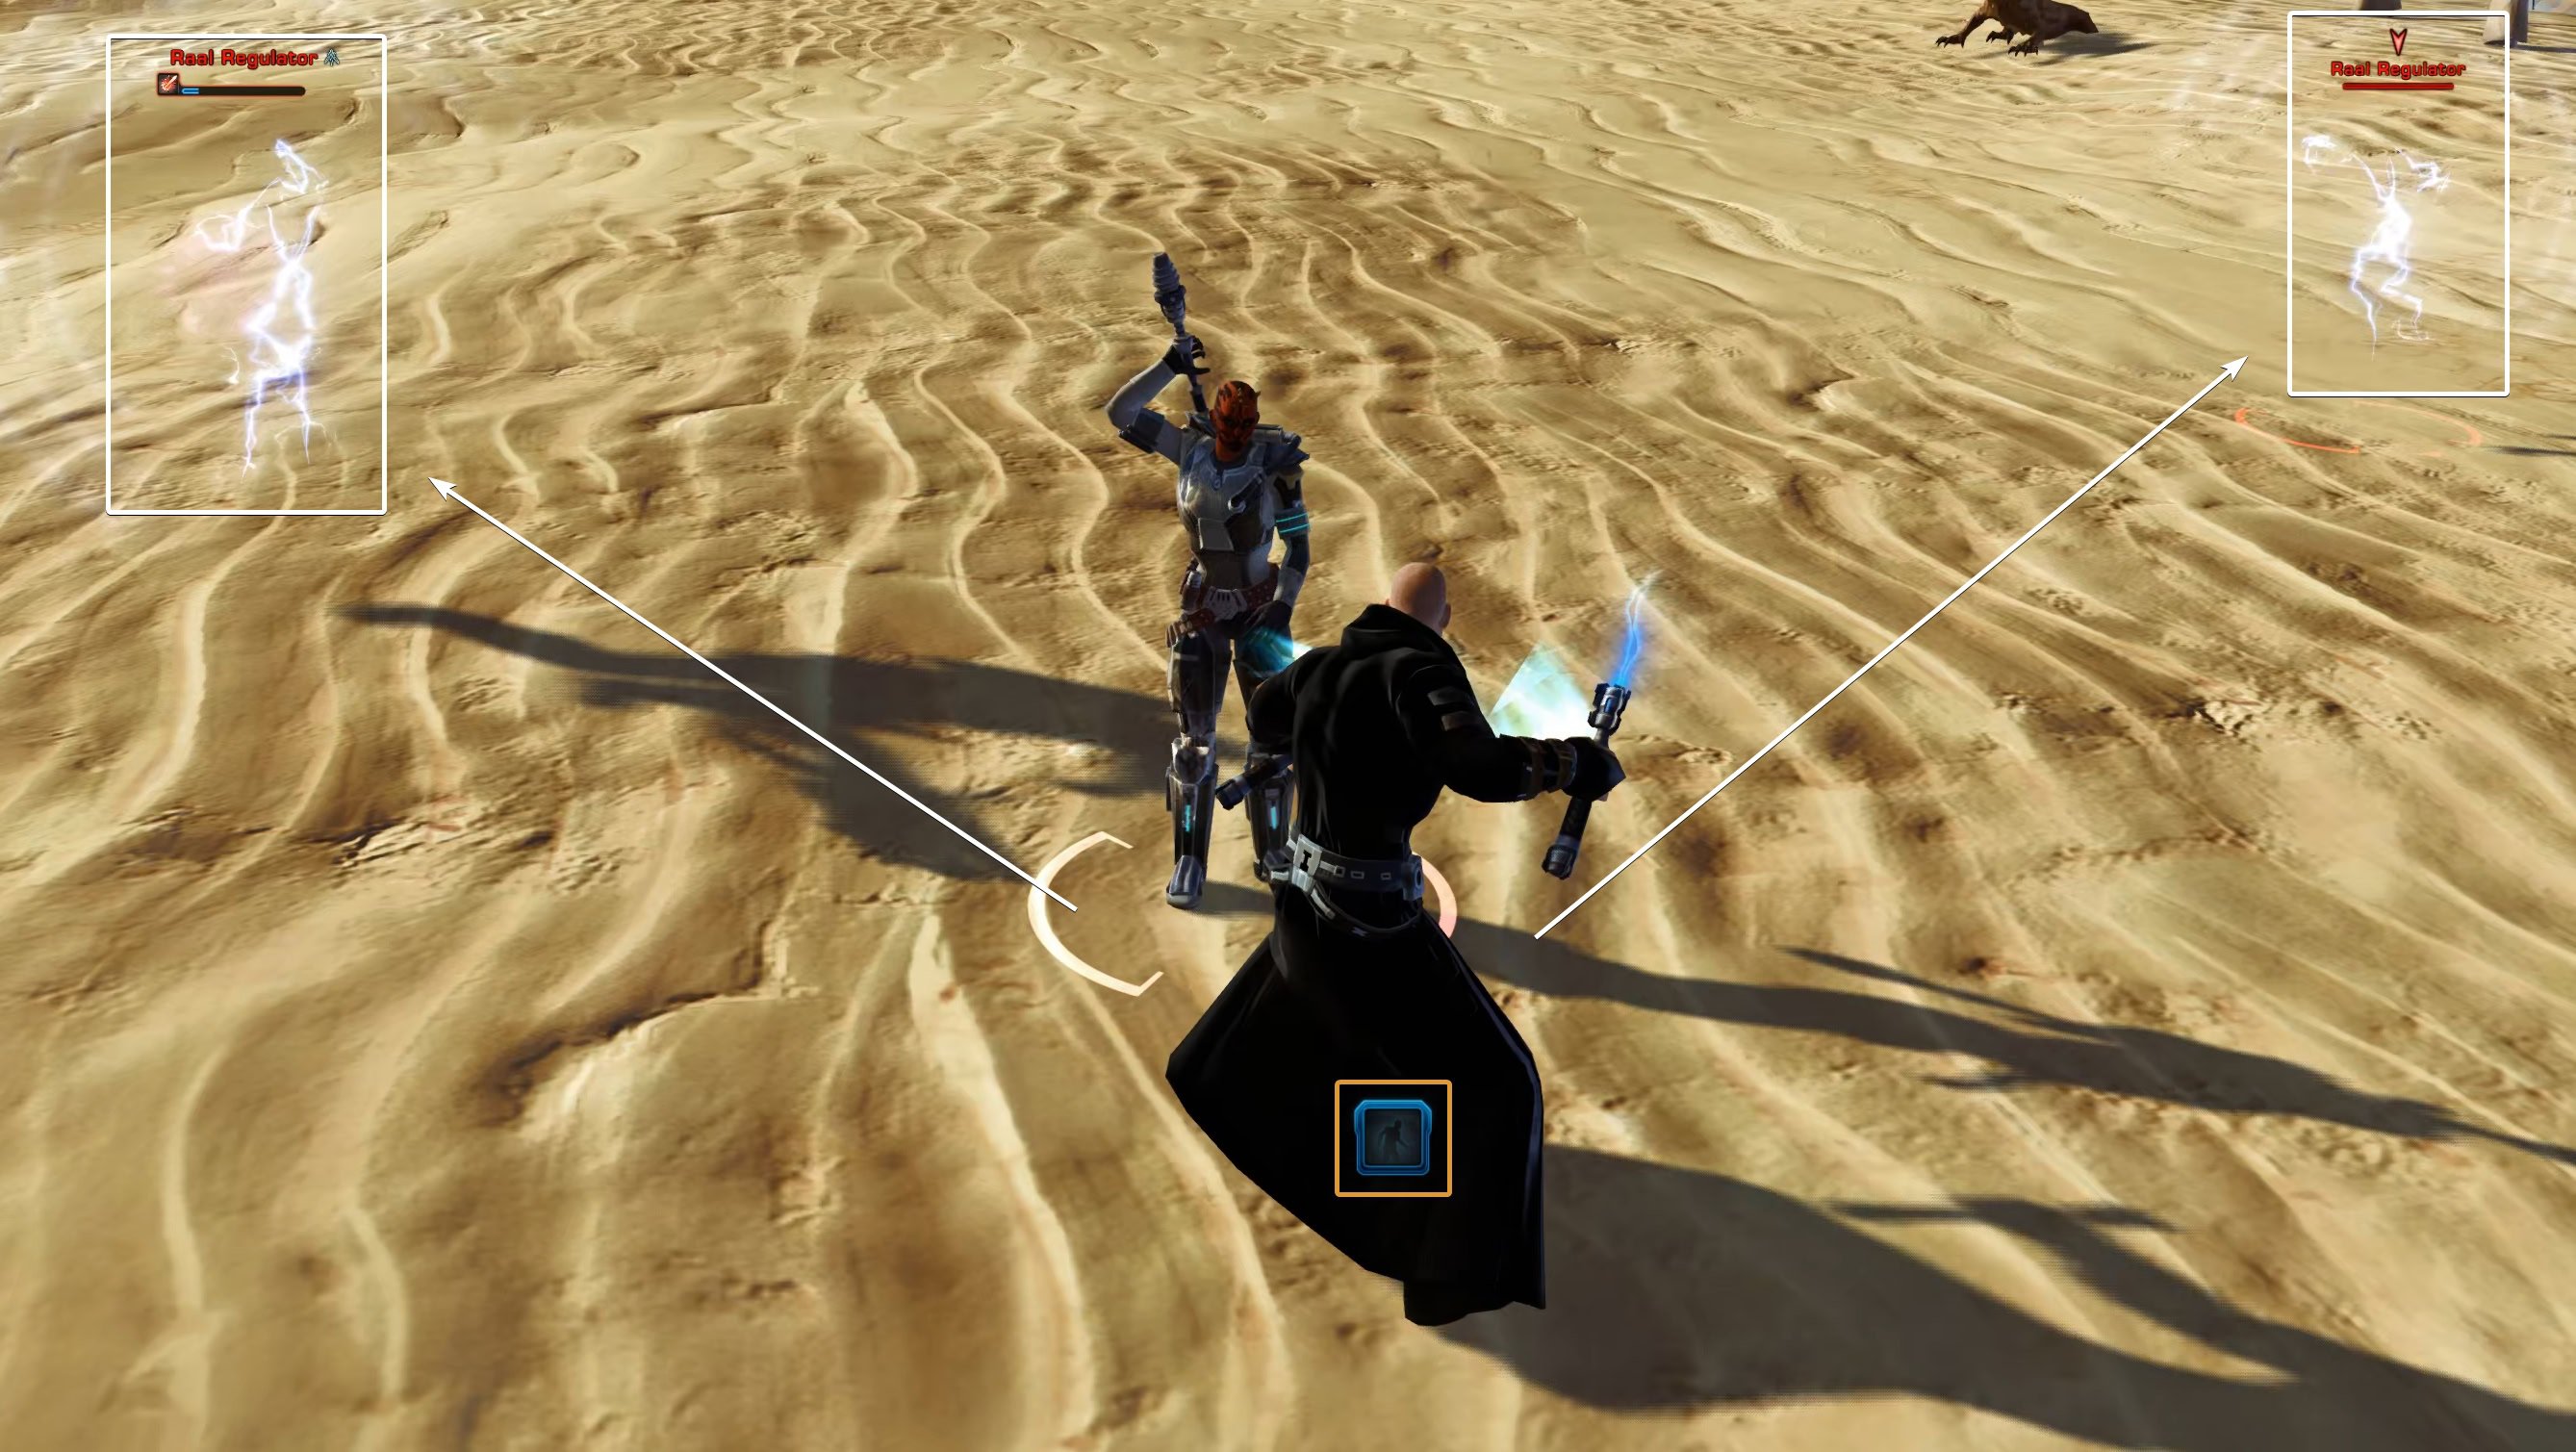
You will have four locations on Tatooine where you have to go and scan for Raal’s Regulators – two in Jundland and two in the Dune Sea. They are the same for both factions. When you are near the marked location, your character will make a “huh” sound and your temp ability bar will light up.
Use the scanner to reveal the two nearby mercenaries, they are usually one weak and one strong (silver).
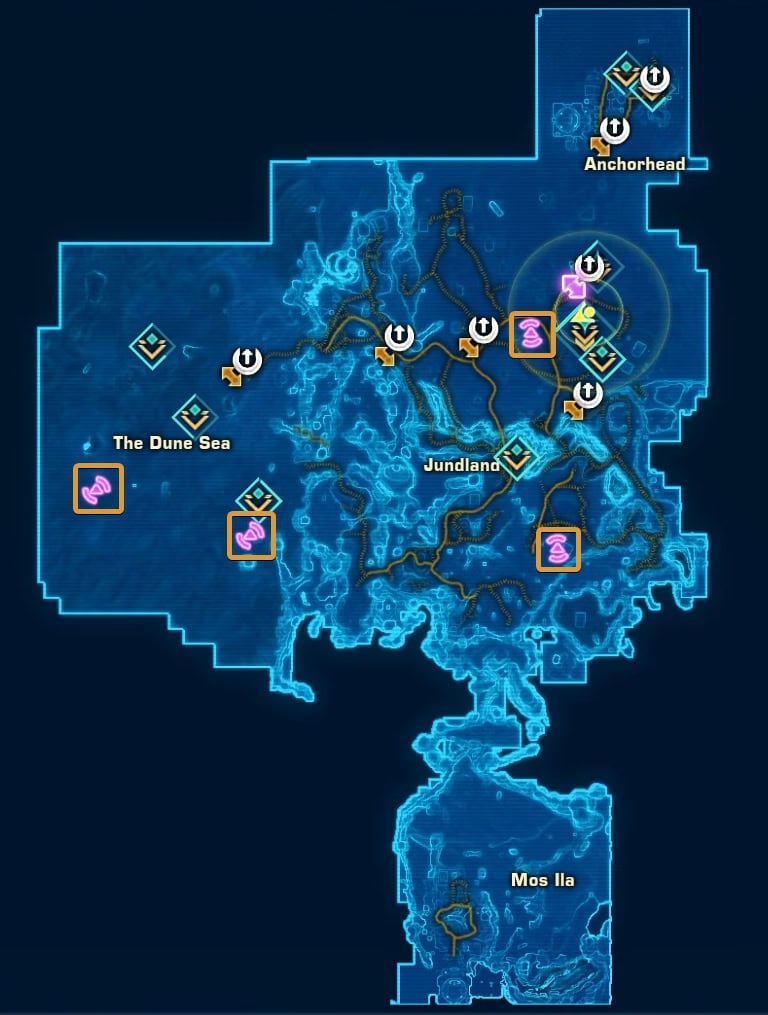
It doesn’t matter in what order you visit the locations. At the last one, you will pick up a datapad containing instructions for the mercenaries how to organize the hunt for the two women.
Defeat Sanlo Raal
It’s time to find the leader, Sanlo Raal. She will . Raal has a couple of special abilities, but she is just a regular Champion NPC.
Florid Shot is a straight line telegraphed cast that you can easily avoid as it takes 2.5 seconds until she activates it. If you stand on the marked line, you will get pushed far back. Step to the side.

Grenade Toss is another ability telegraphed on the ground. It forms a circle around the target.
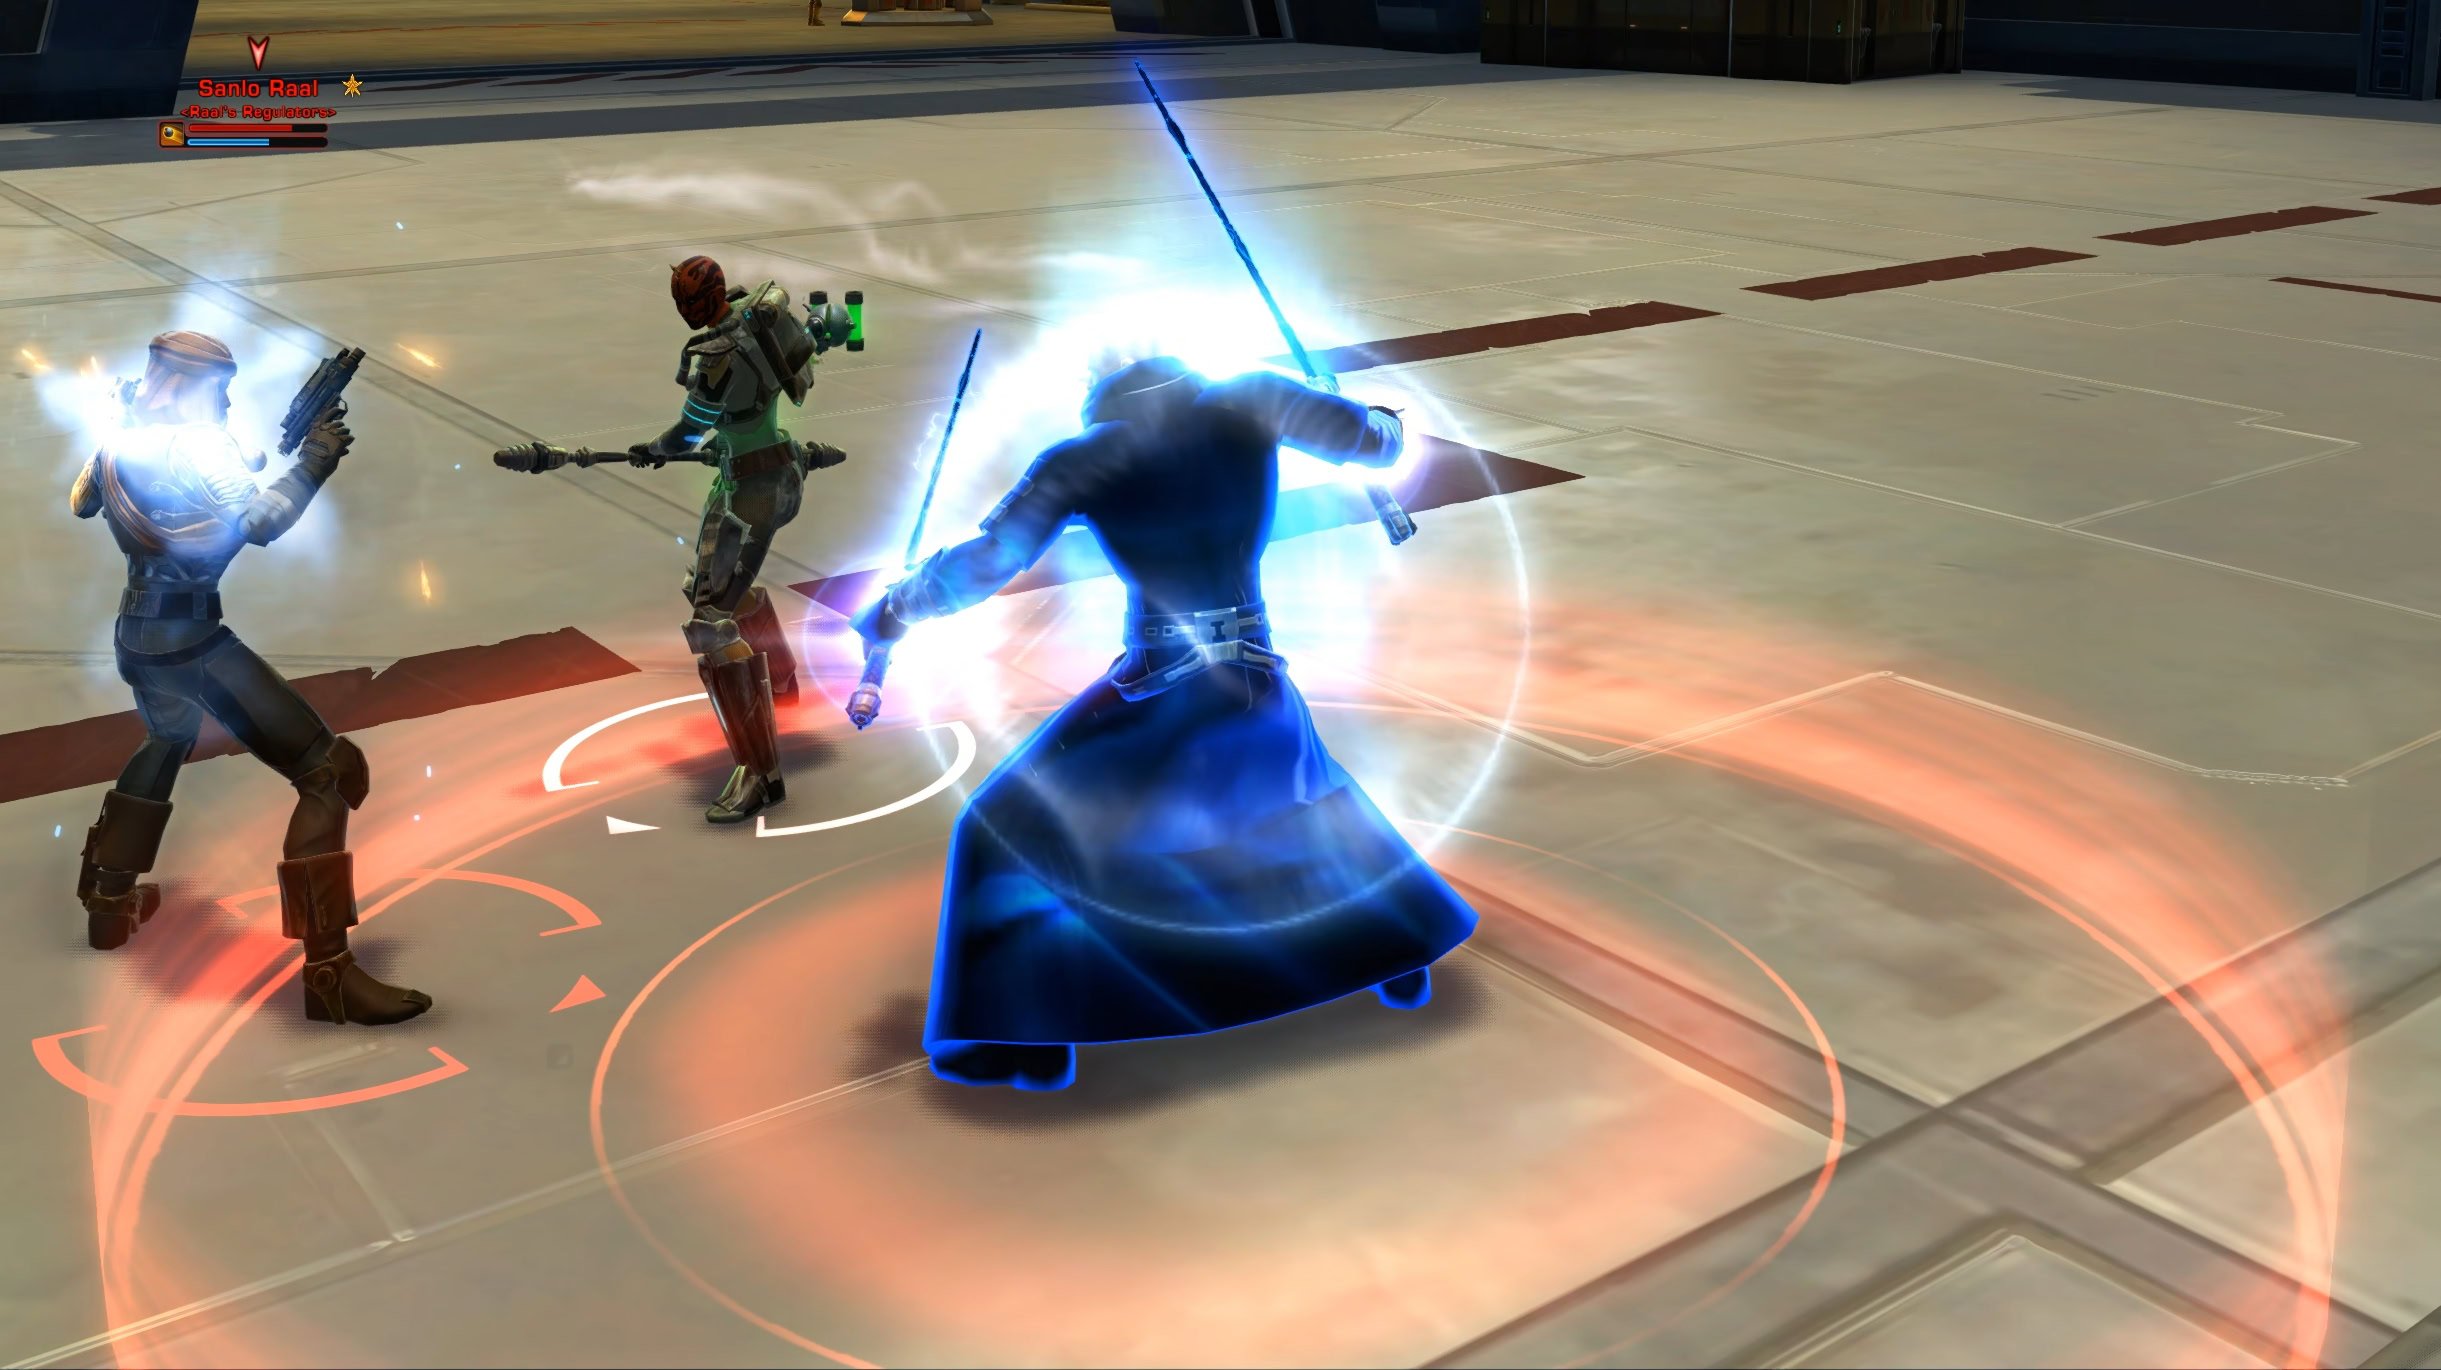
When Raal activates High Ground, she will hang from the air on a rope for 9 seconds. Keep moving around or you will be knocked down by the explosions.

Return to Jemala
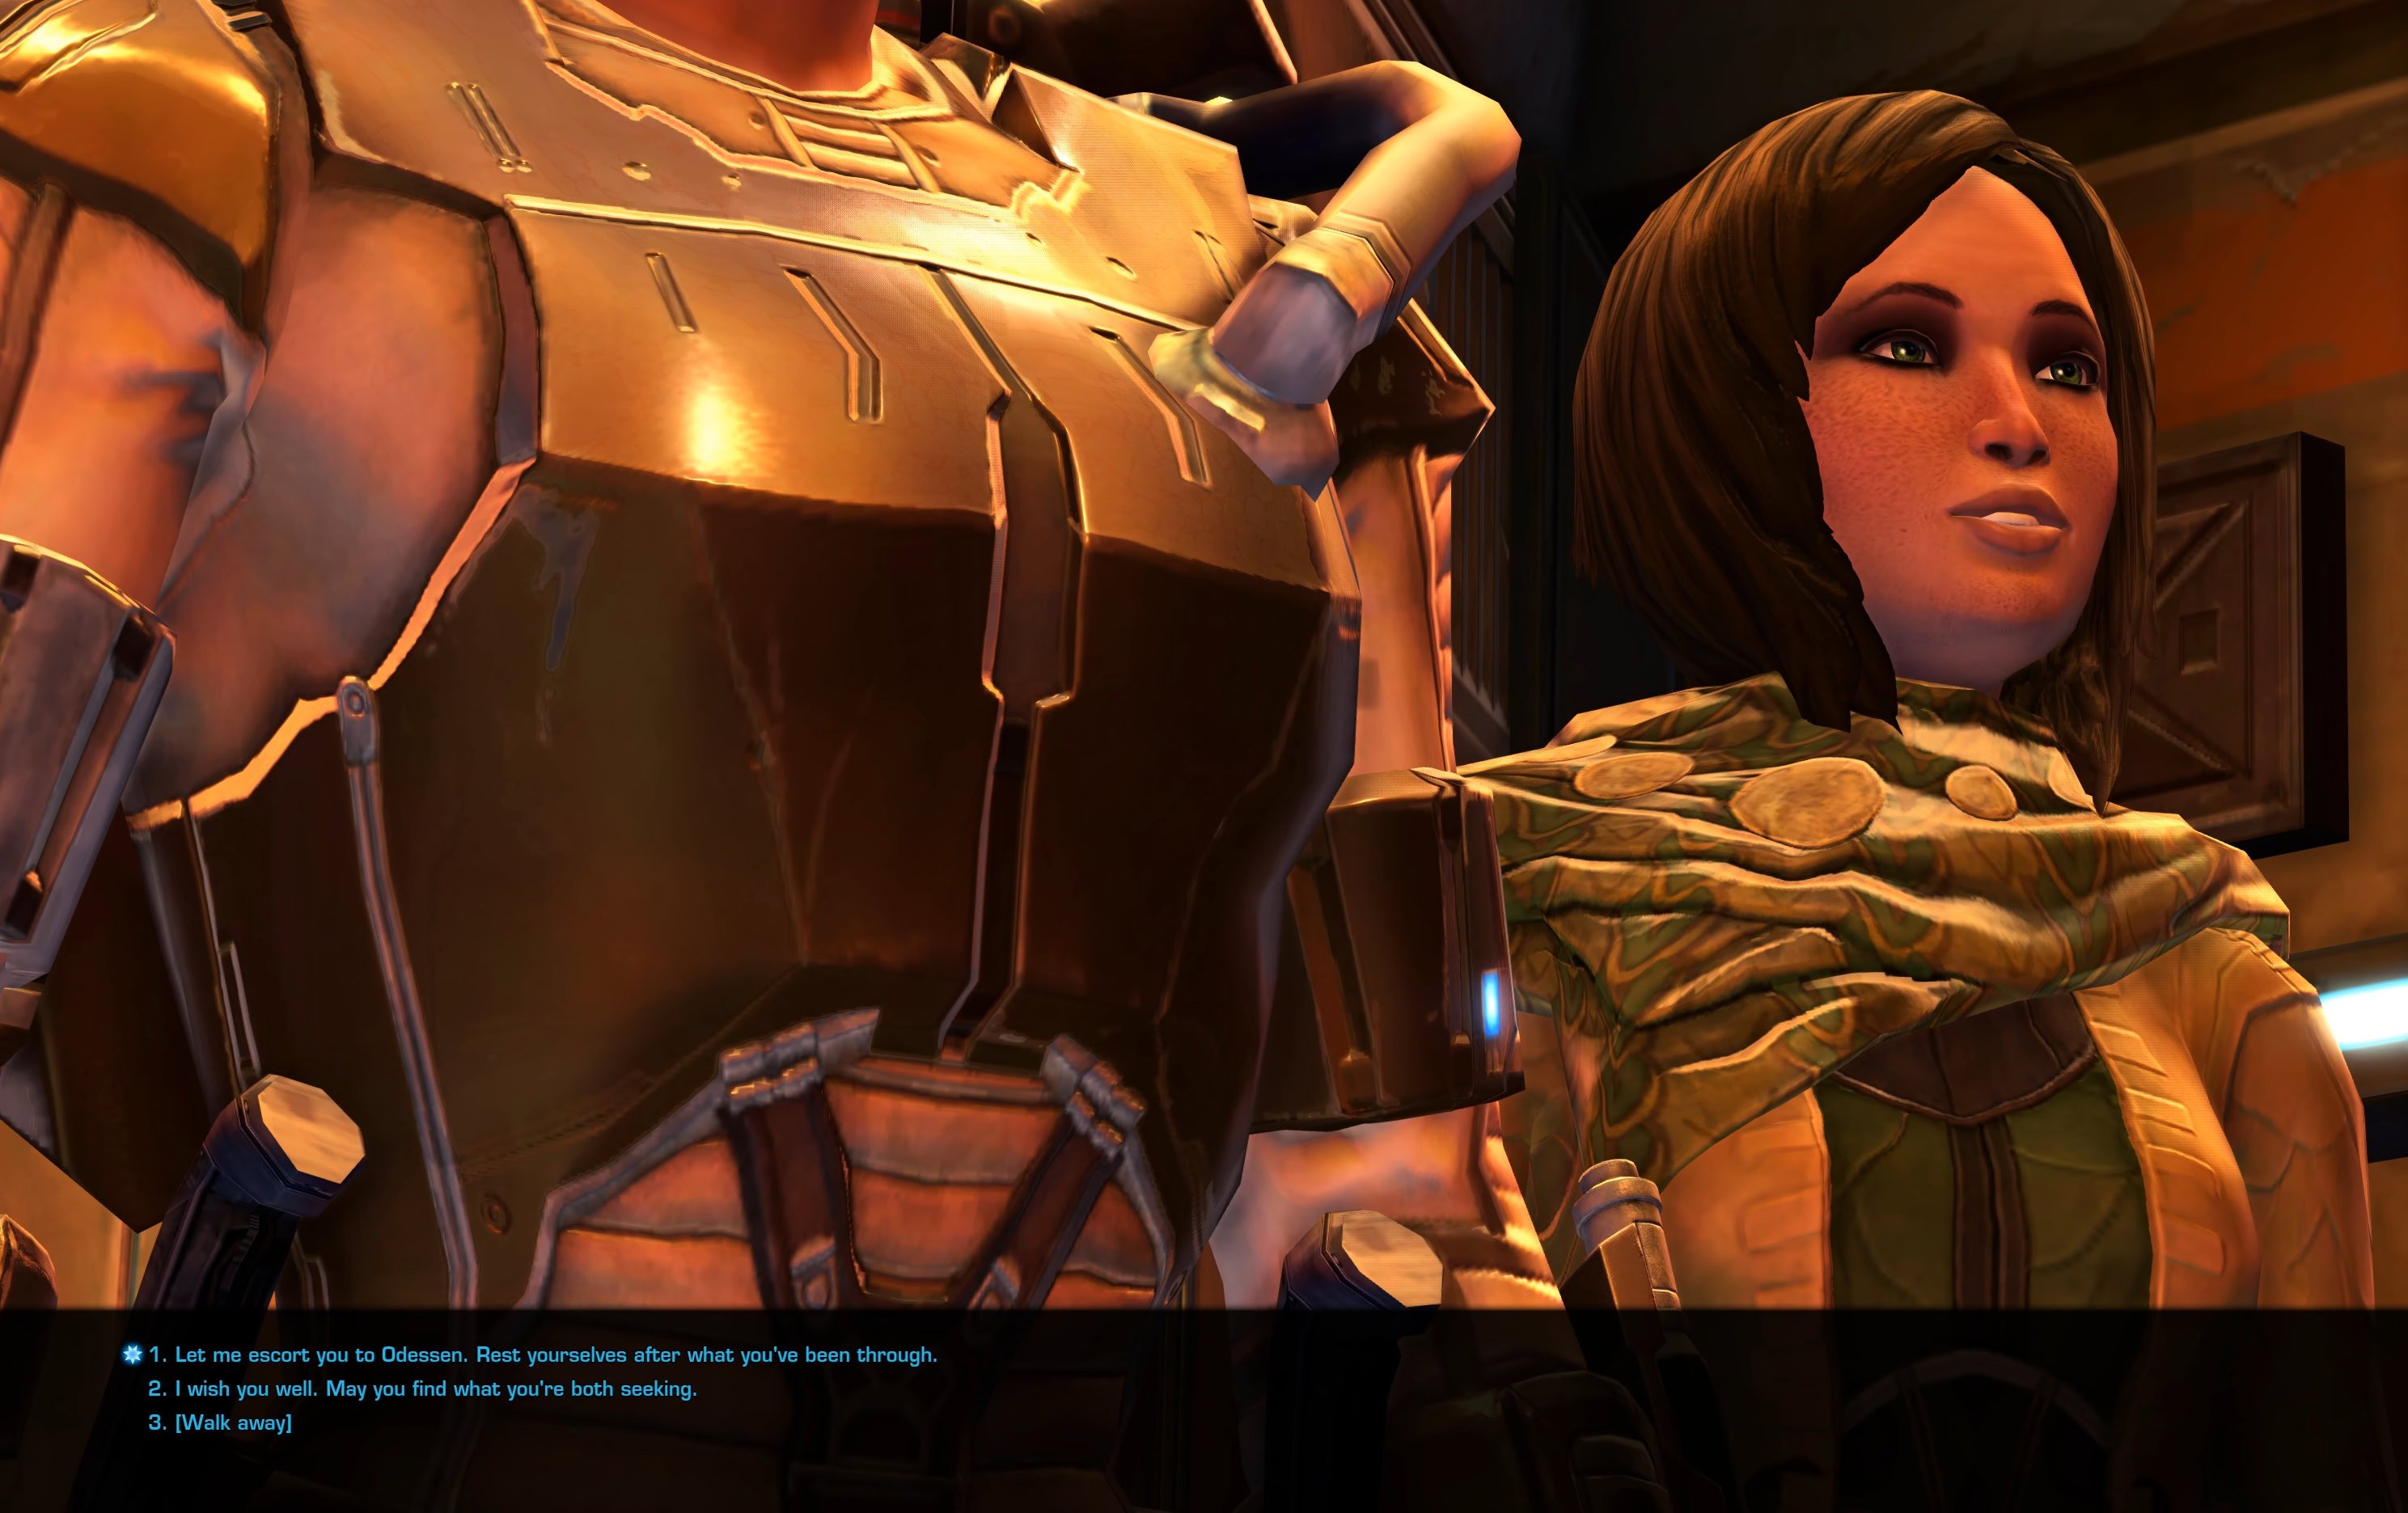
After you take care of the mercenaries and their leader, Sanla Raal, head back to Jemala in the safehouse. She will provide you with the promised information about Heta Kol.
There are a couple of choices you can make during the conversation, but they aren’t important for the plot. At the very end you can choose to say your farewell or earn light side points by offering the escort Jemal and Ora to Odessen.
Mission Rewards
To complete the mission, head back to Odessen and talk to Lana and Jekiah. During the conversation, Lana will bring up the situation on Ilum.
If this is the first of the three missions you do, this will be the first time Land mentions the situation on Ilum.
The reward for the mission “On the Run” is standard:
| Credits | |
| 15x Conquest Commendations | |
| 50x Tech Fragments |
| Sanlo Raal Holo Decoration |
Hoth Pursuit
Hoth Pursuit is the third mandatory mission you pick up from the Alliance Operations. It will take you to Hoth and although it’s fairly linear, you do have a coulpe of interesting choices and moments, including a fun mini boss fight at the end.
With the help from Rass Ordo, you will track an eccentric slicer named Greb Besrik who is buying specialty stims and is known to have been one of the accomplices of Shae Vizla’s breakout of Malgus.
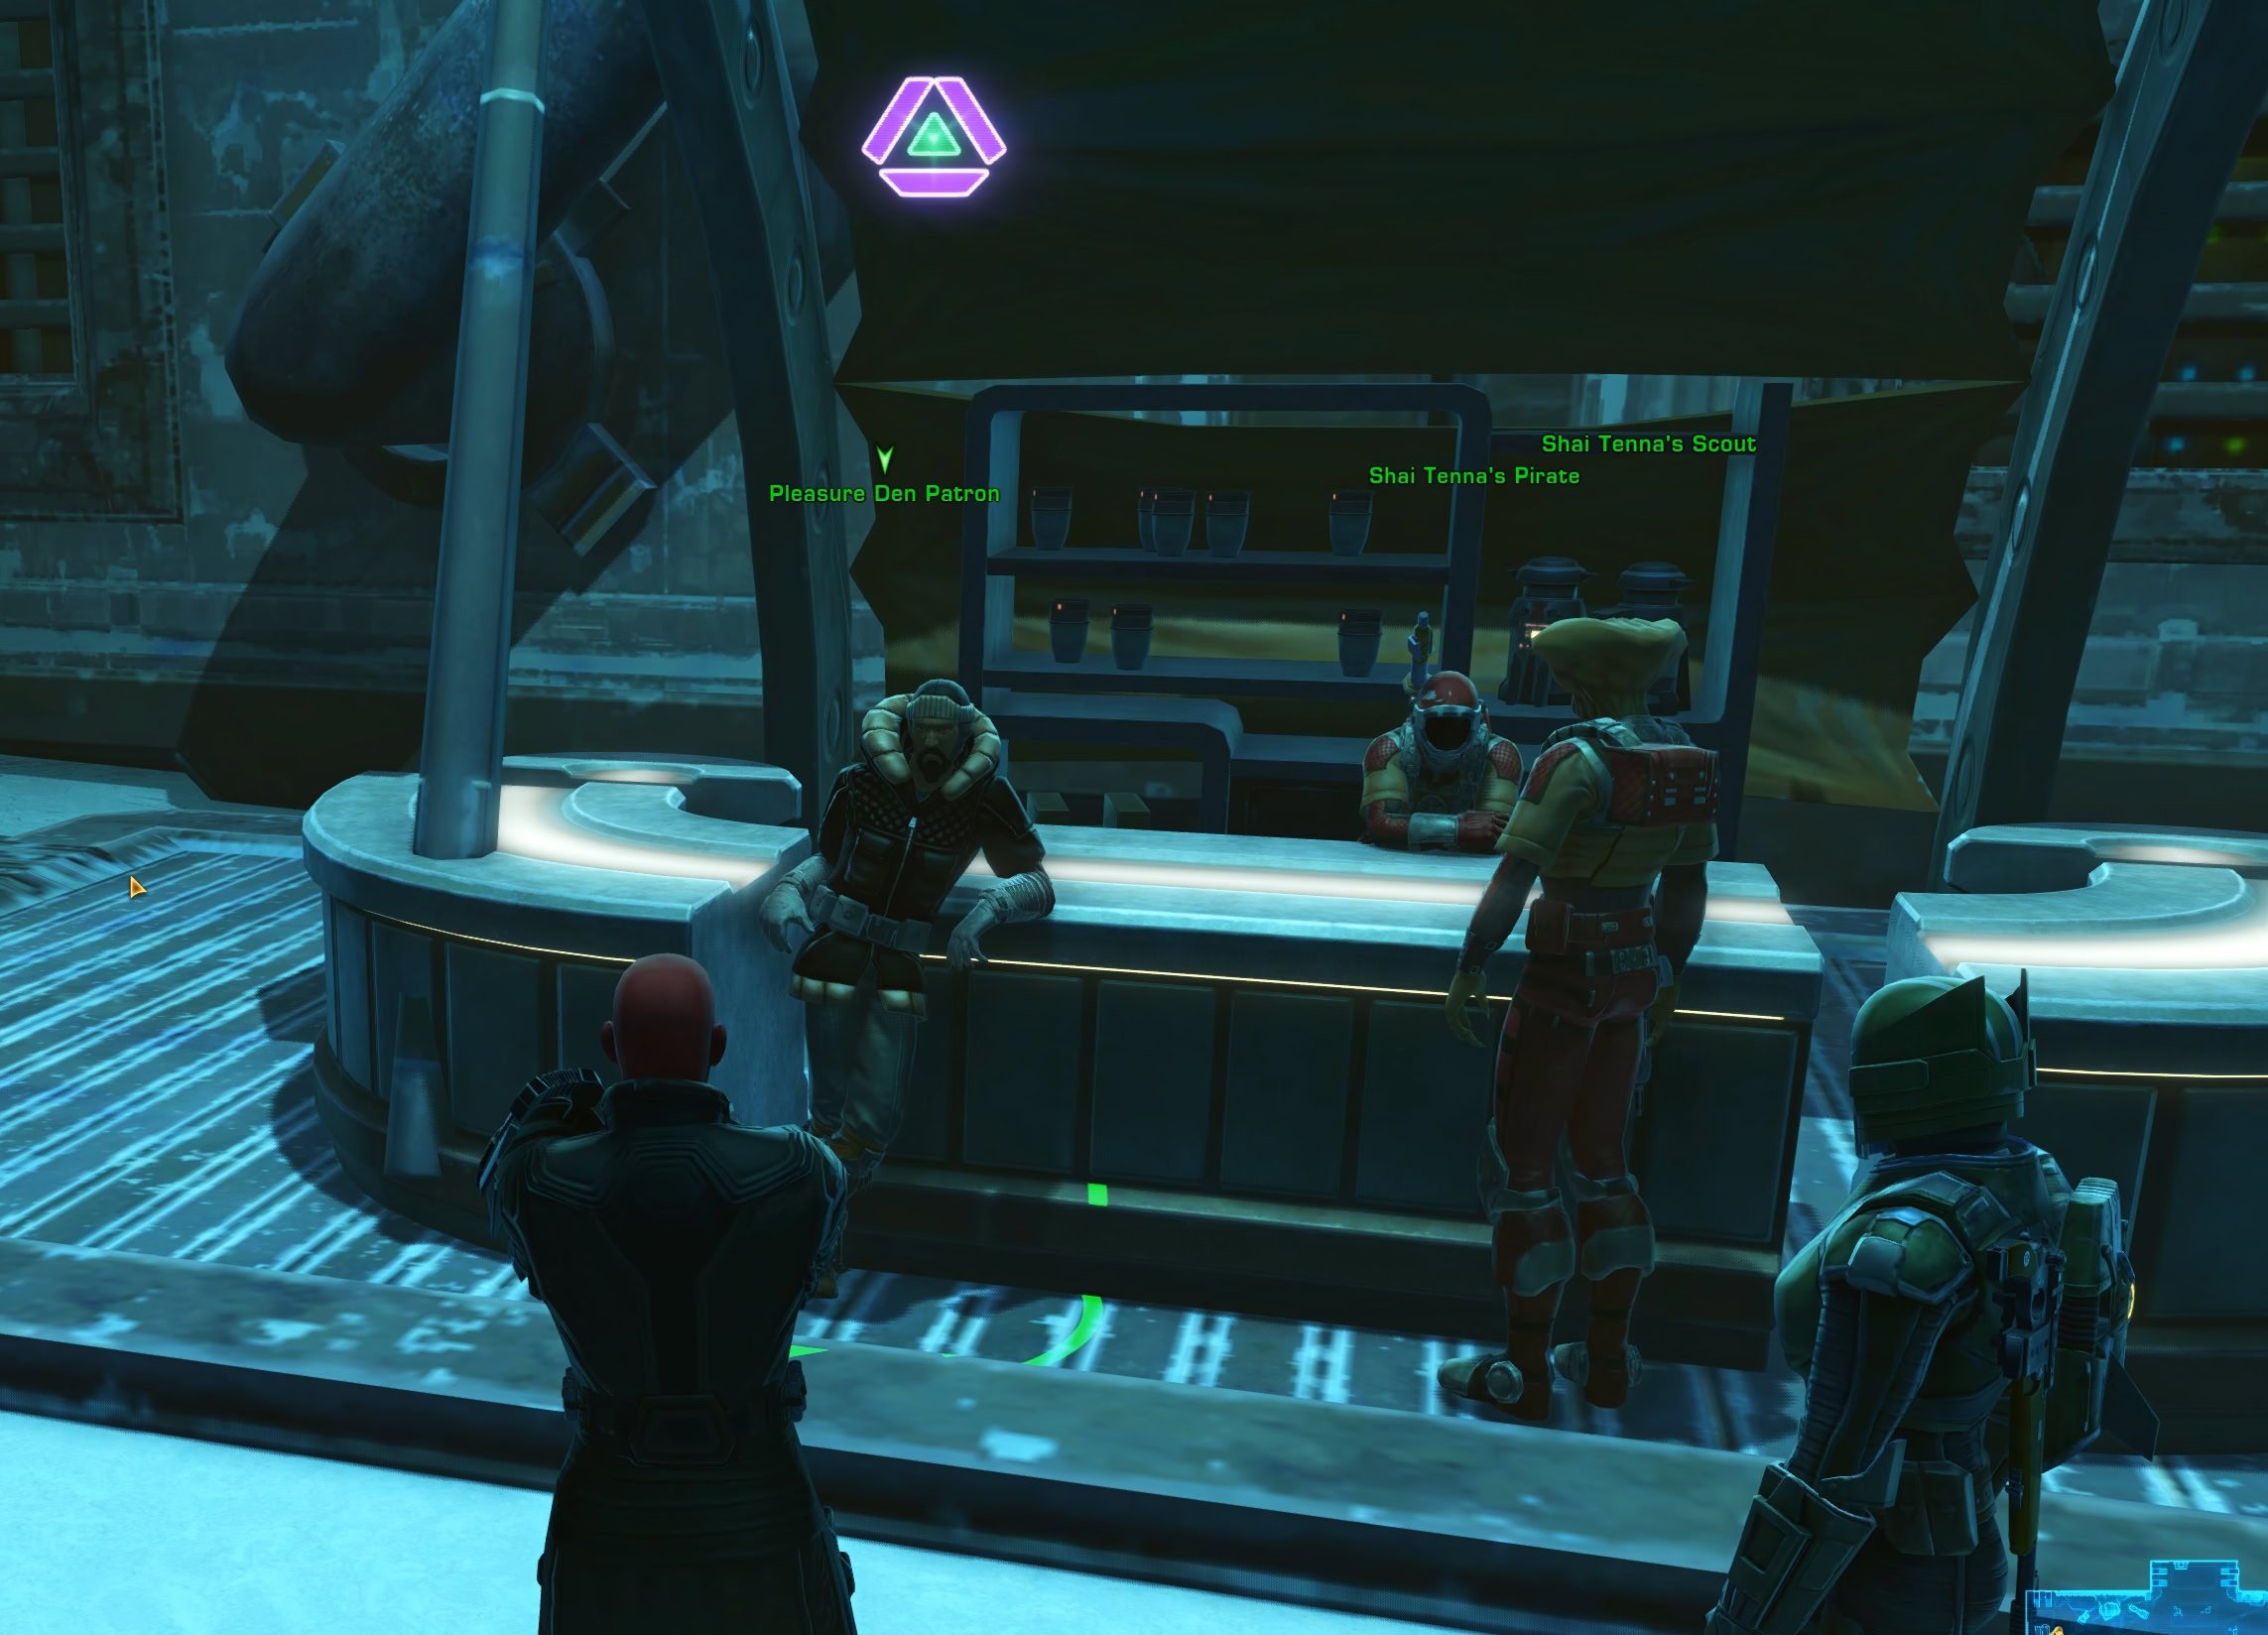
Search Shai Tenna on Hoth
Shai Tenna’s Pleasure Denn is located in the middle of Highmount Ridge on Hoth. You will have to ask around a few NPCs for information on Besrik. Talk to everyone that has a purple icon above their head until you get to the one in the far back, leaning against a stall.
Investigate White Maw Dead Drops
Go outside and visit the marked locations on your map. You are looking for small containers, usually half-buried under the snow. Interact with them. The last one will spawn White Maw Couriers. Defeat them and loot the Illicit Combat Stims mission item from them.

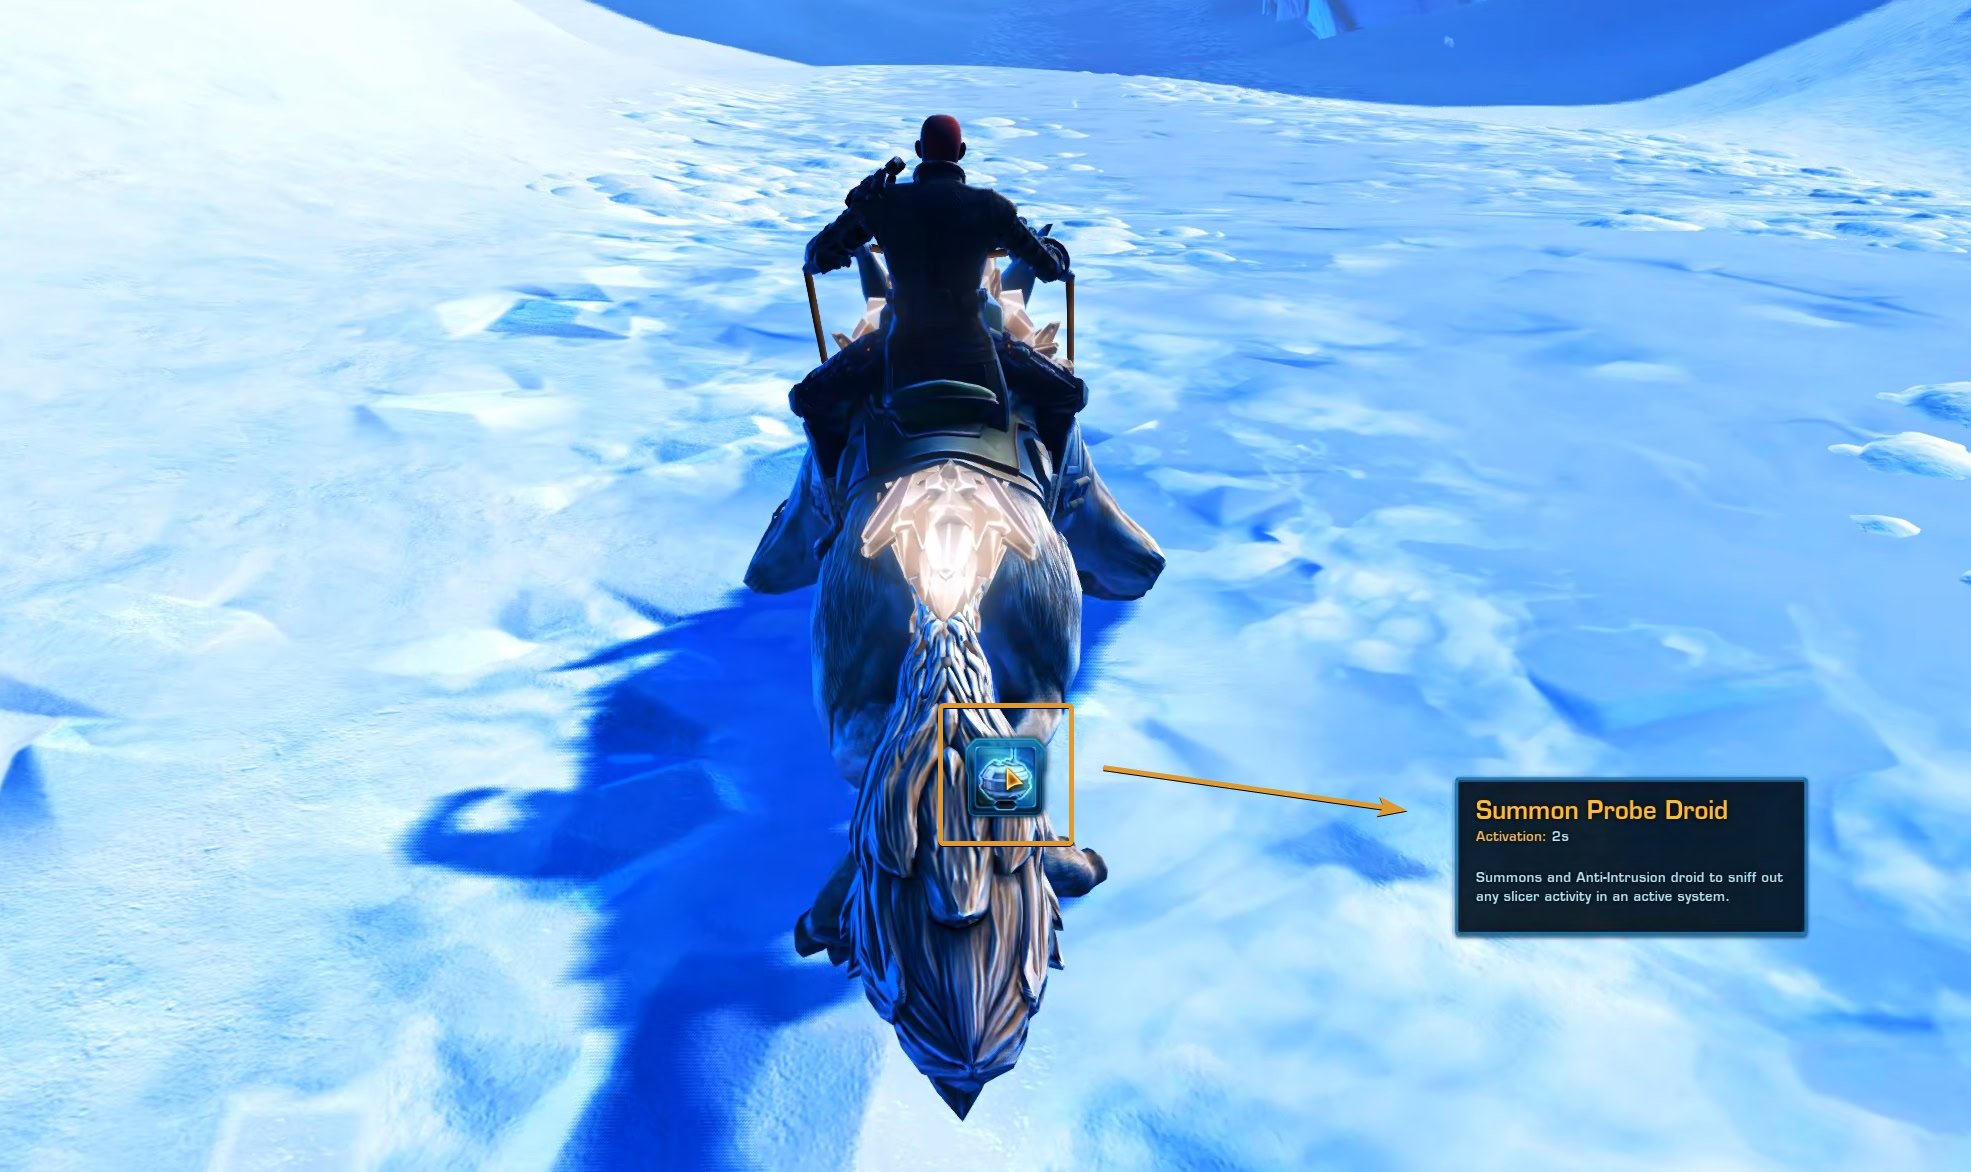
Go to the Star of Coruscant
When you approach the giant relic ship, Rass will give you a new temp ability. Use it to Summon Probe Droid. This droid will assist you in tracking the slicer.
Inside the ship, there will be a few White Maws you will have to take care of. Look for the large glowing panels on the walls. There are three you need to interact with to let the Droid do its job and track the slicer.
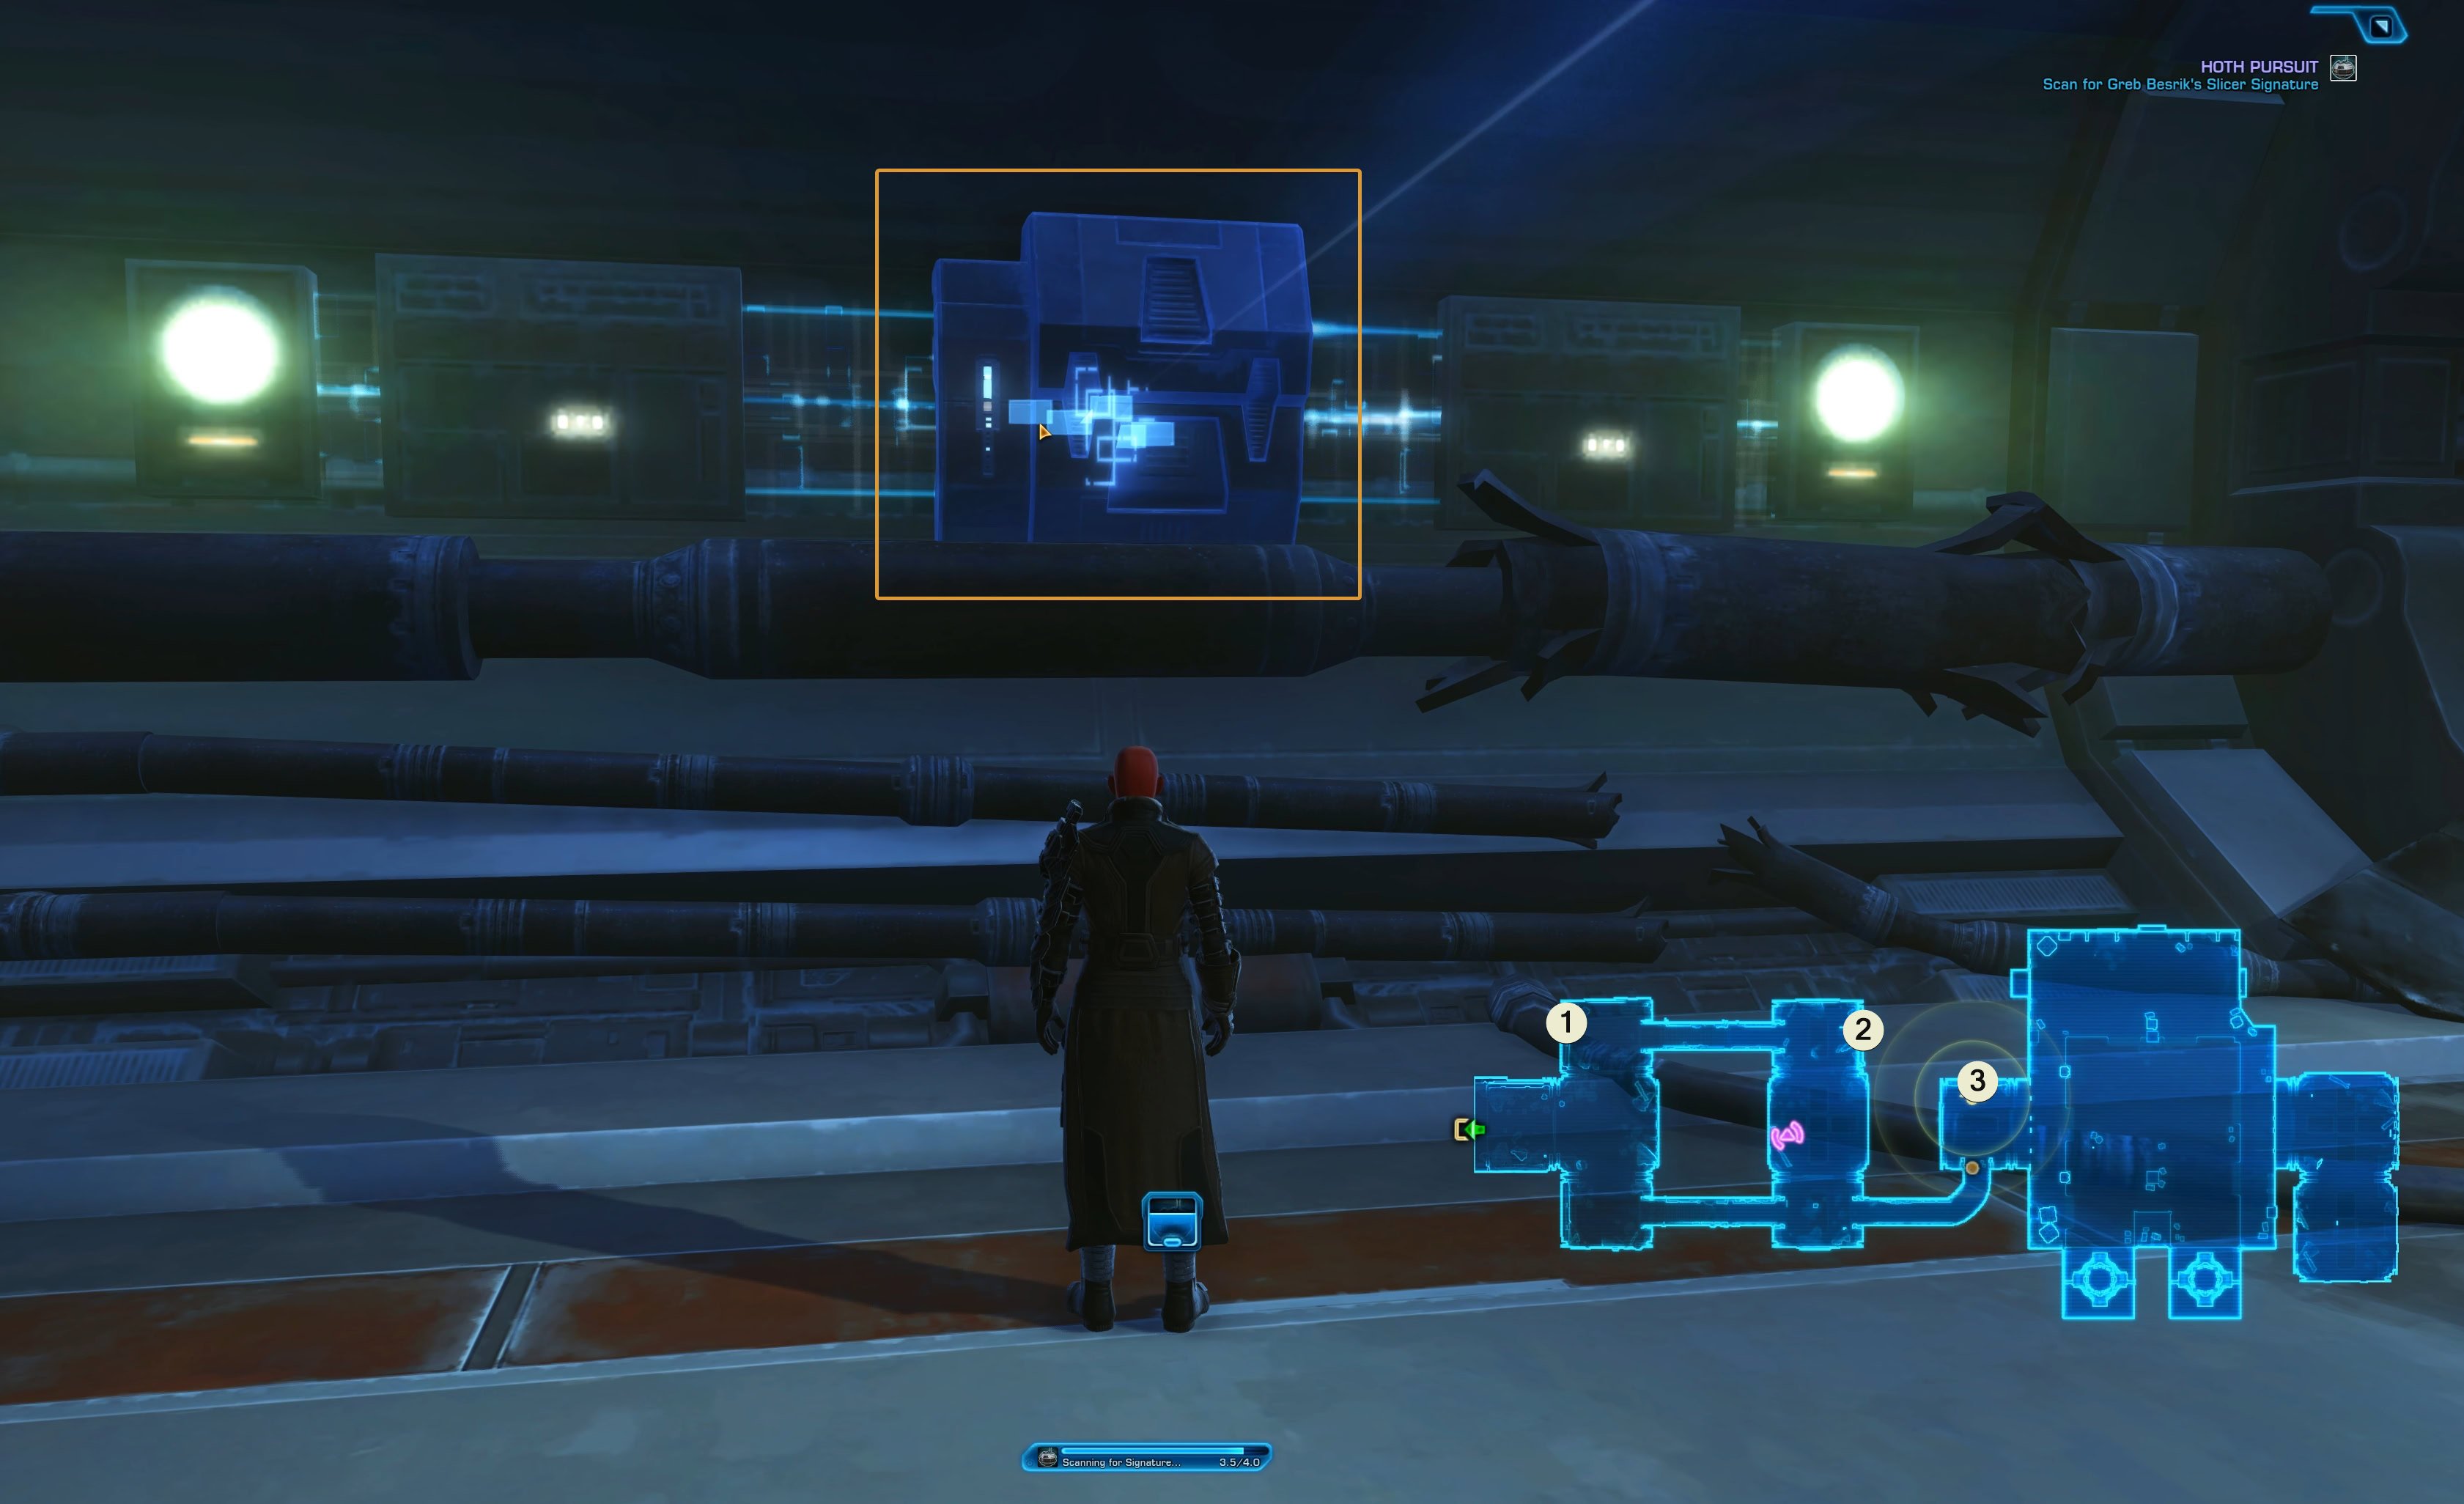
After this, go through the door marked on your map. The location is in the same room, but different for Republic and Empire. A cinematic will play where you will see Besrik talking to White Maw pirates.
You will then be transported into a new area for the continuation of the mission. Take out the NPCs and chase after the slicer.
Chase Besrik
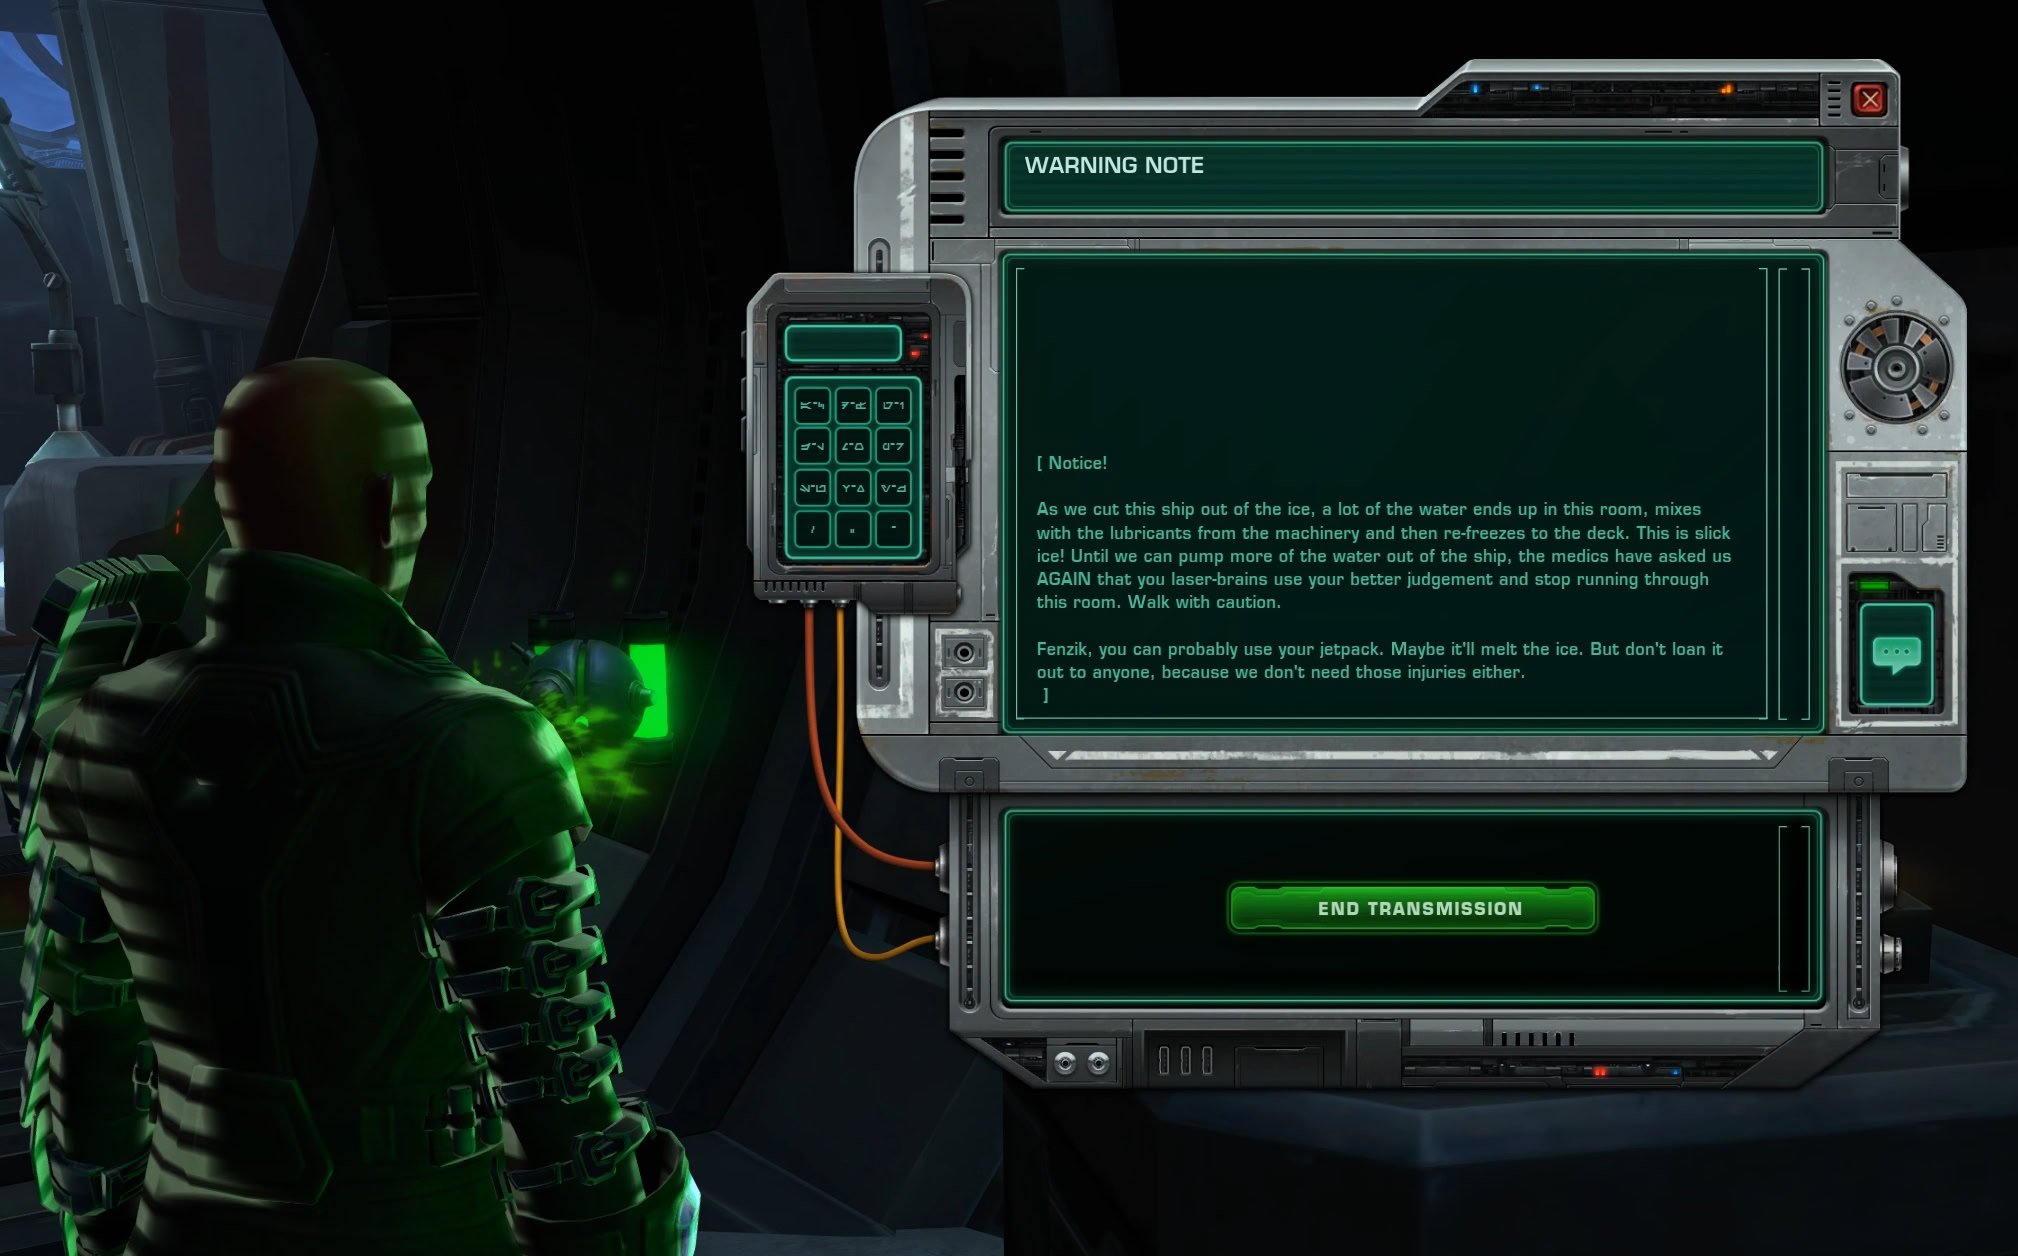
While trying to find another path to Besrik after he ran off, you will fight a couple more White Maw pirates and reach a tunnel with a datapad and a yellow exclamation mark icon over it. It’s a warning for the slick icy surfaces ahead:
To avoid slipping on the ice, walk on the clear path or you can use your Jetpack to cut across. Climb the stairs, fight a few more White Maw pirates until you reach the mini boss encounter area at the end.
Defeat Greb Besrik and the Droid Battle Platform
This mini boss fight is simple as long as you pay attention to the buffs and debuffs of the two targets.
When the droid casts Protective Shield, it will create a visible energy barrier around itself, which will also shield Besrik while he is inside. If Besrik has the buff Protected Occupant, he will take no damage. When this happens, focus the Droid.
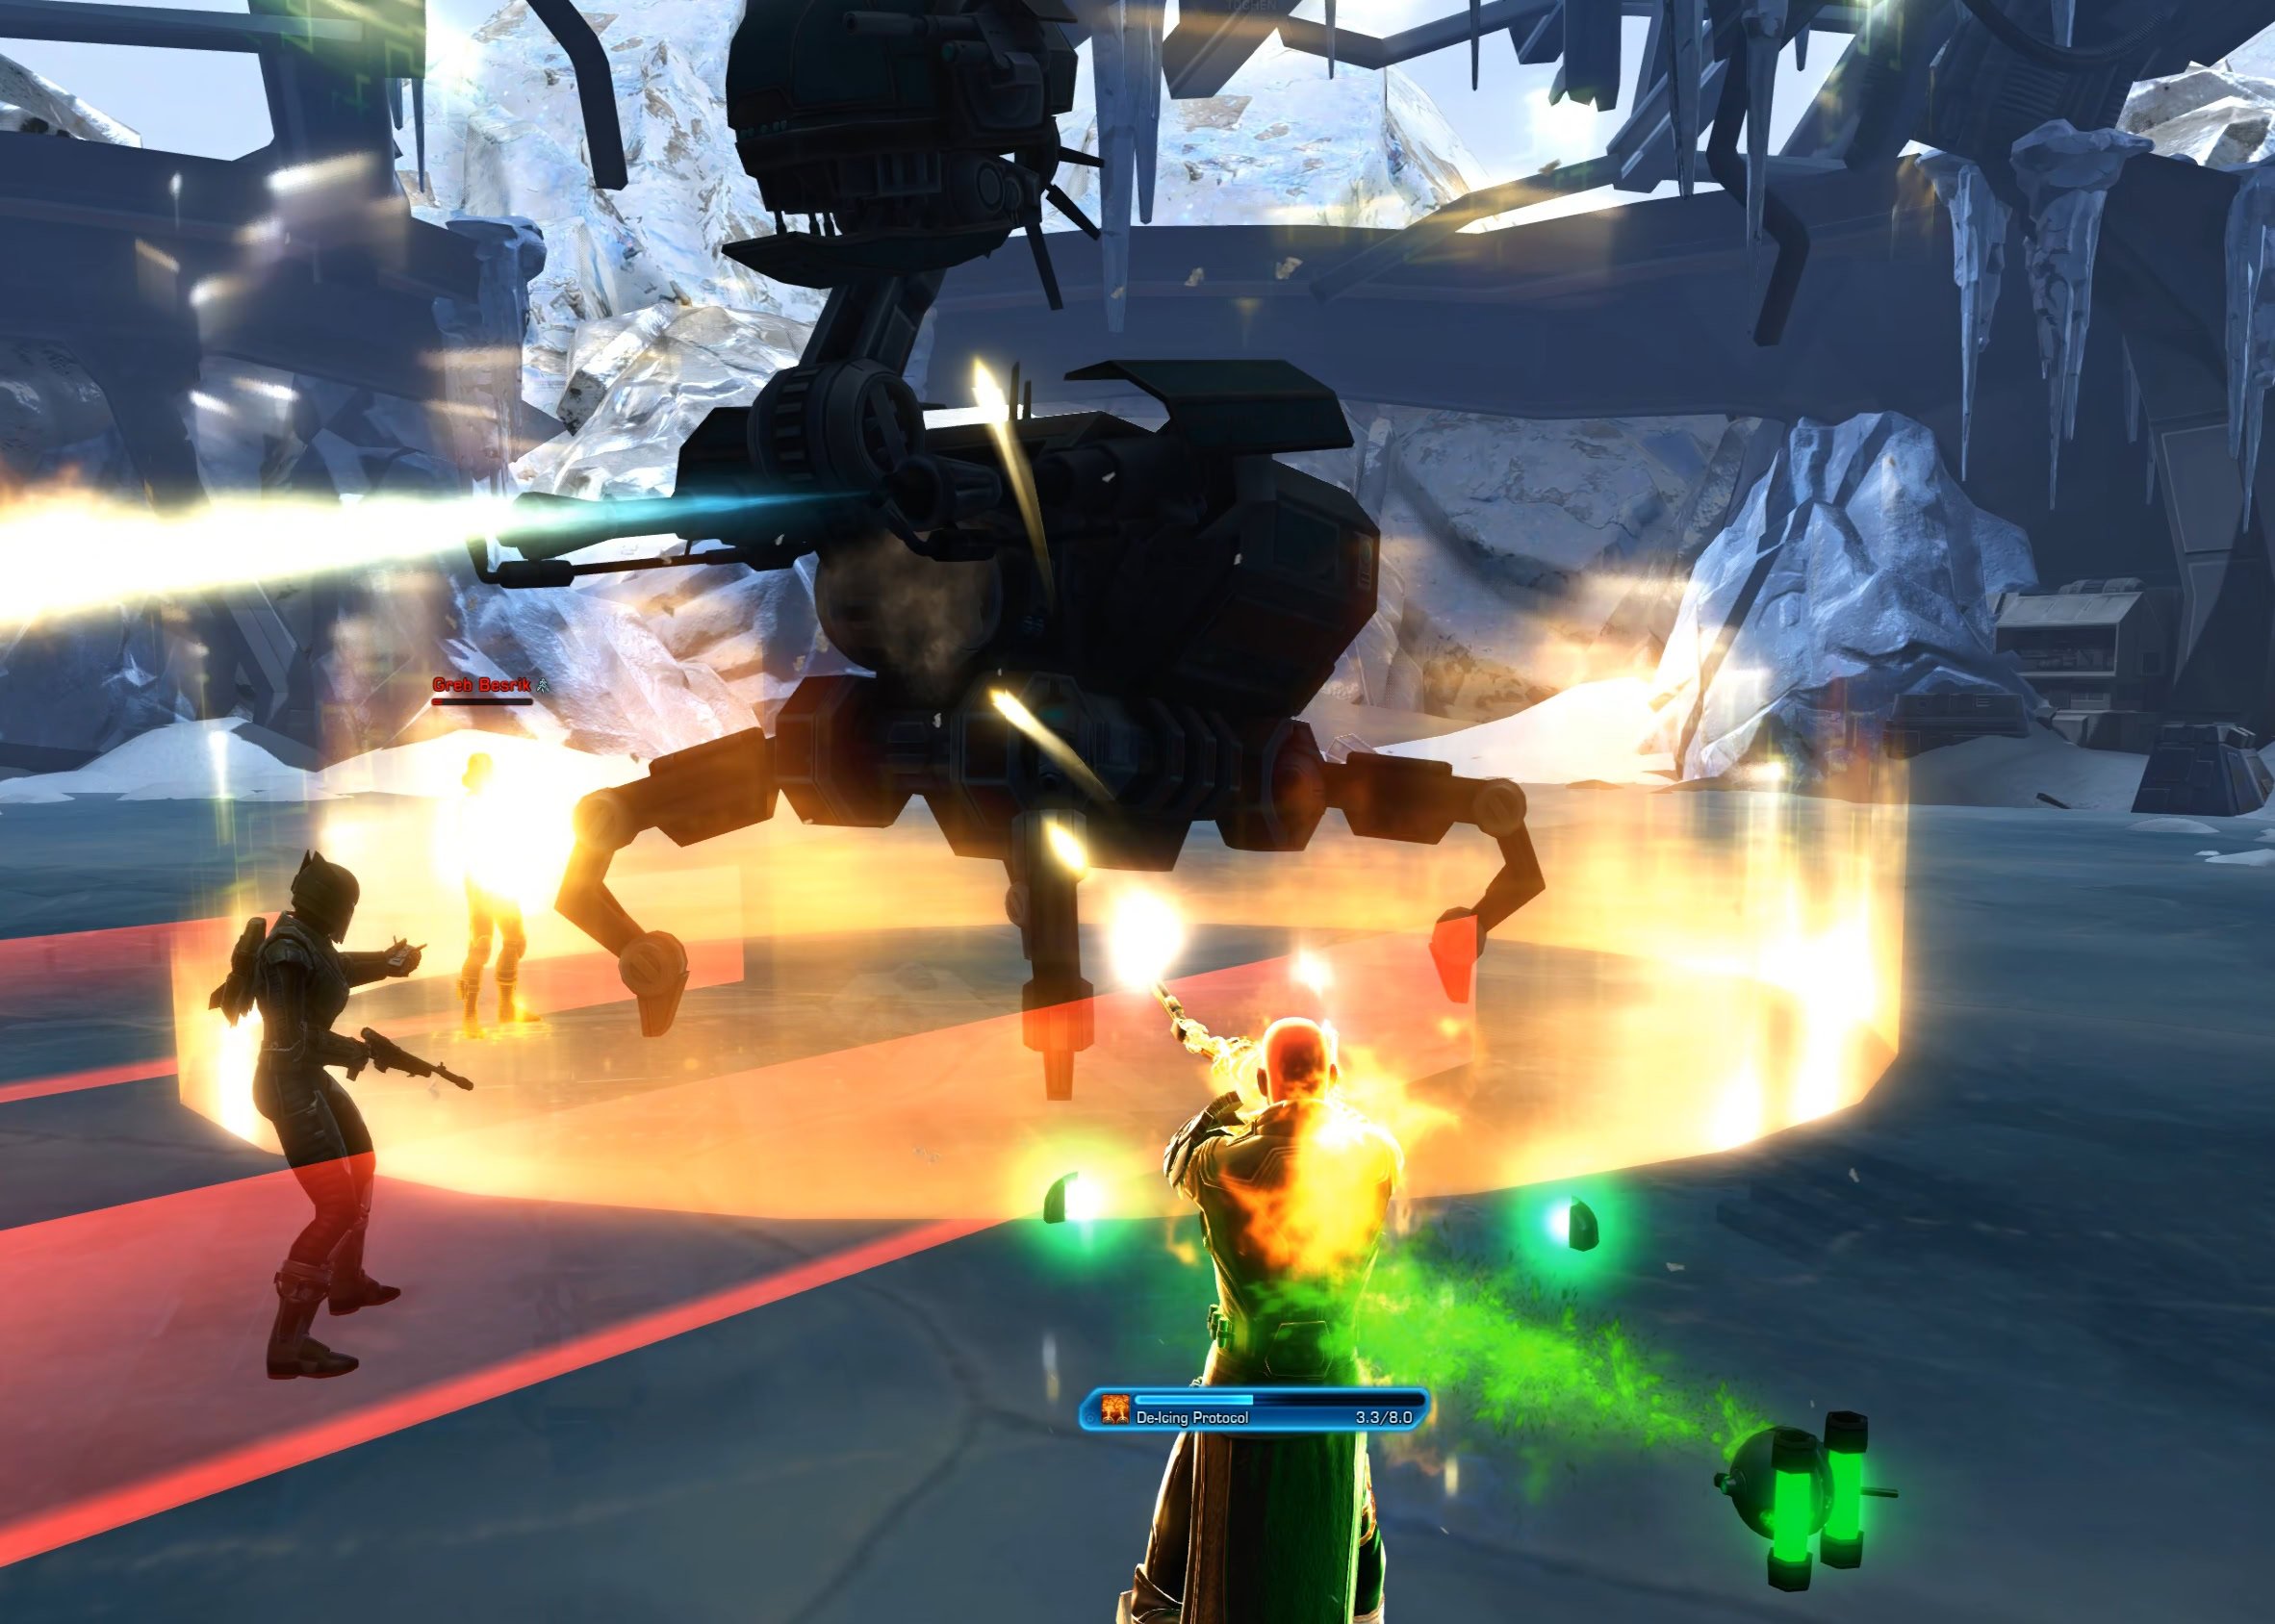
The droid can go into a Protective Shutdown, which will create a blue shield around its body and protect it from taking damage for 25 seconds. When you see this happen, focus on Besrik.
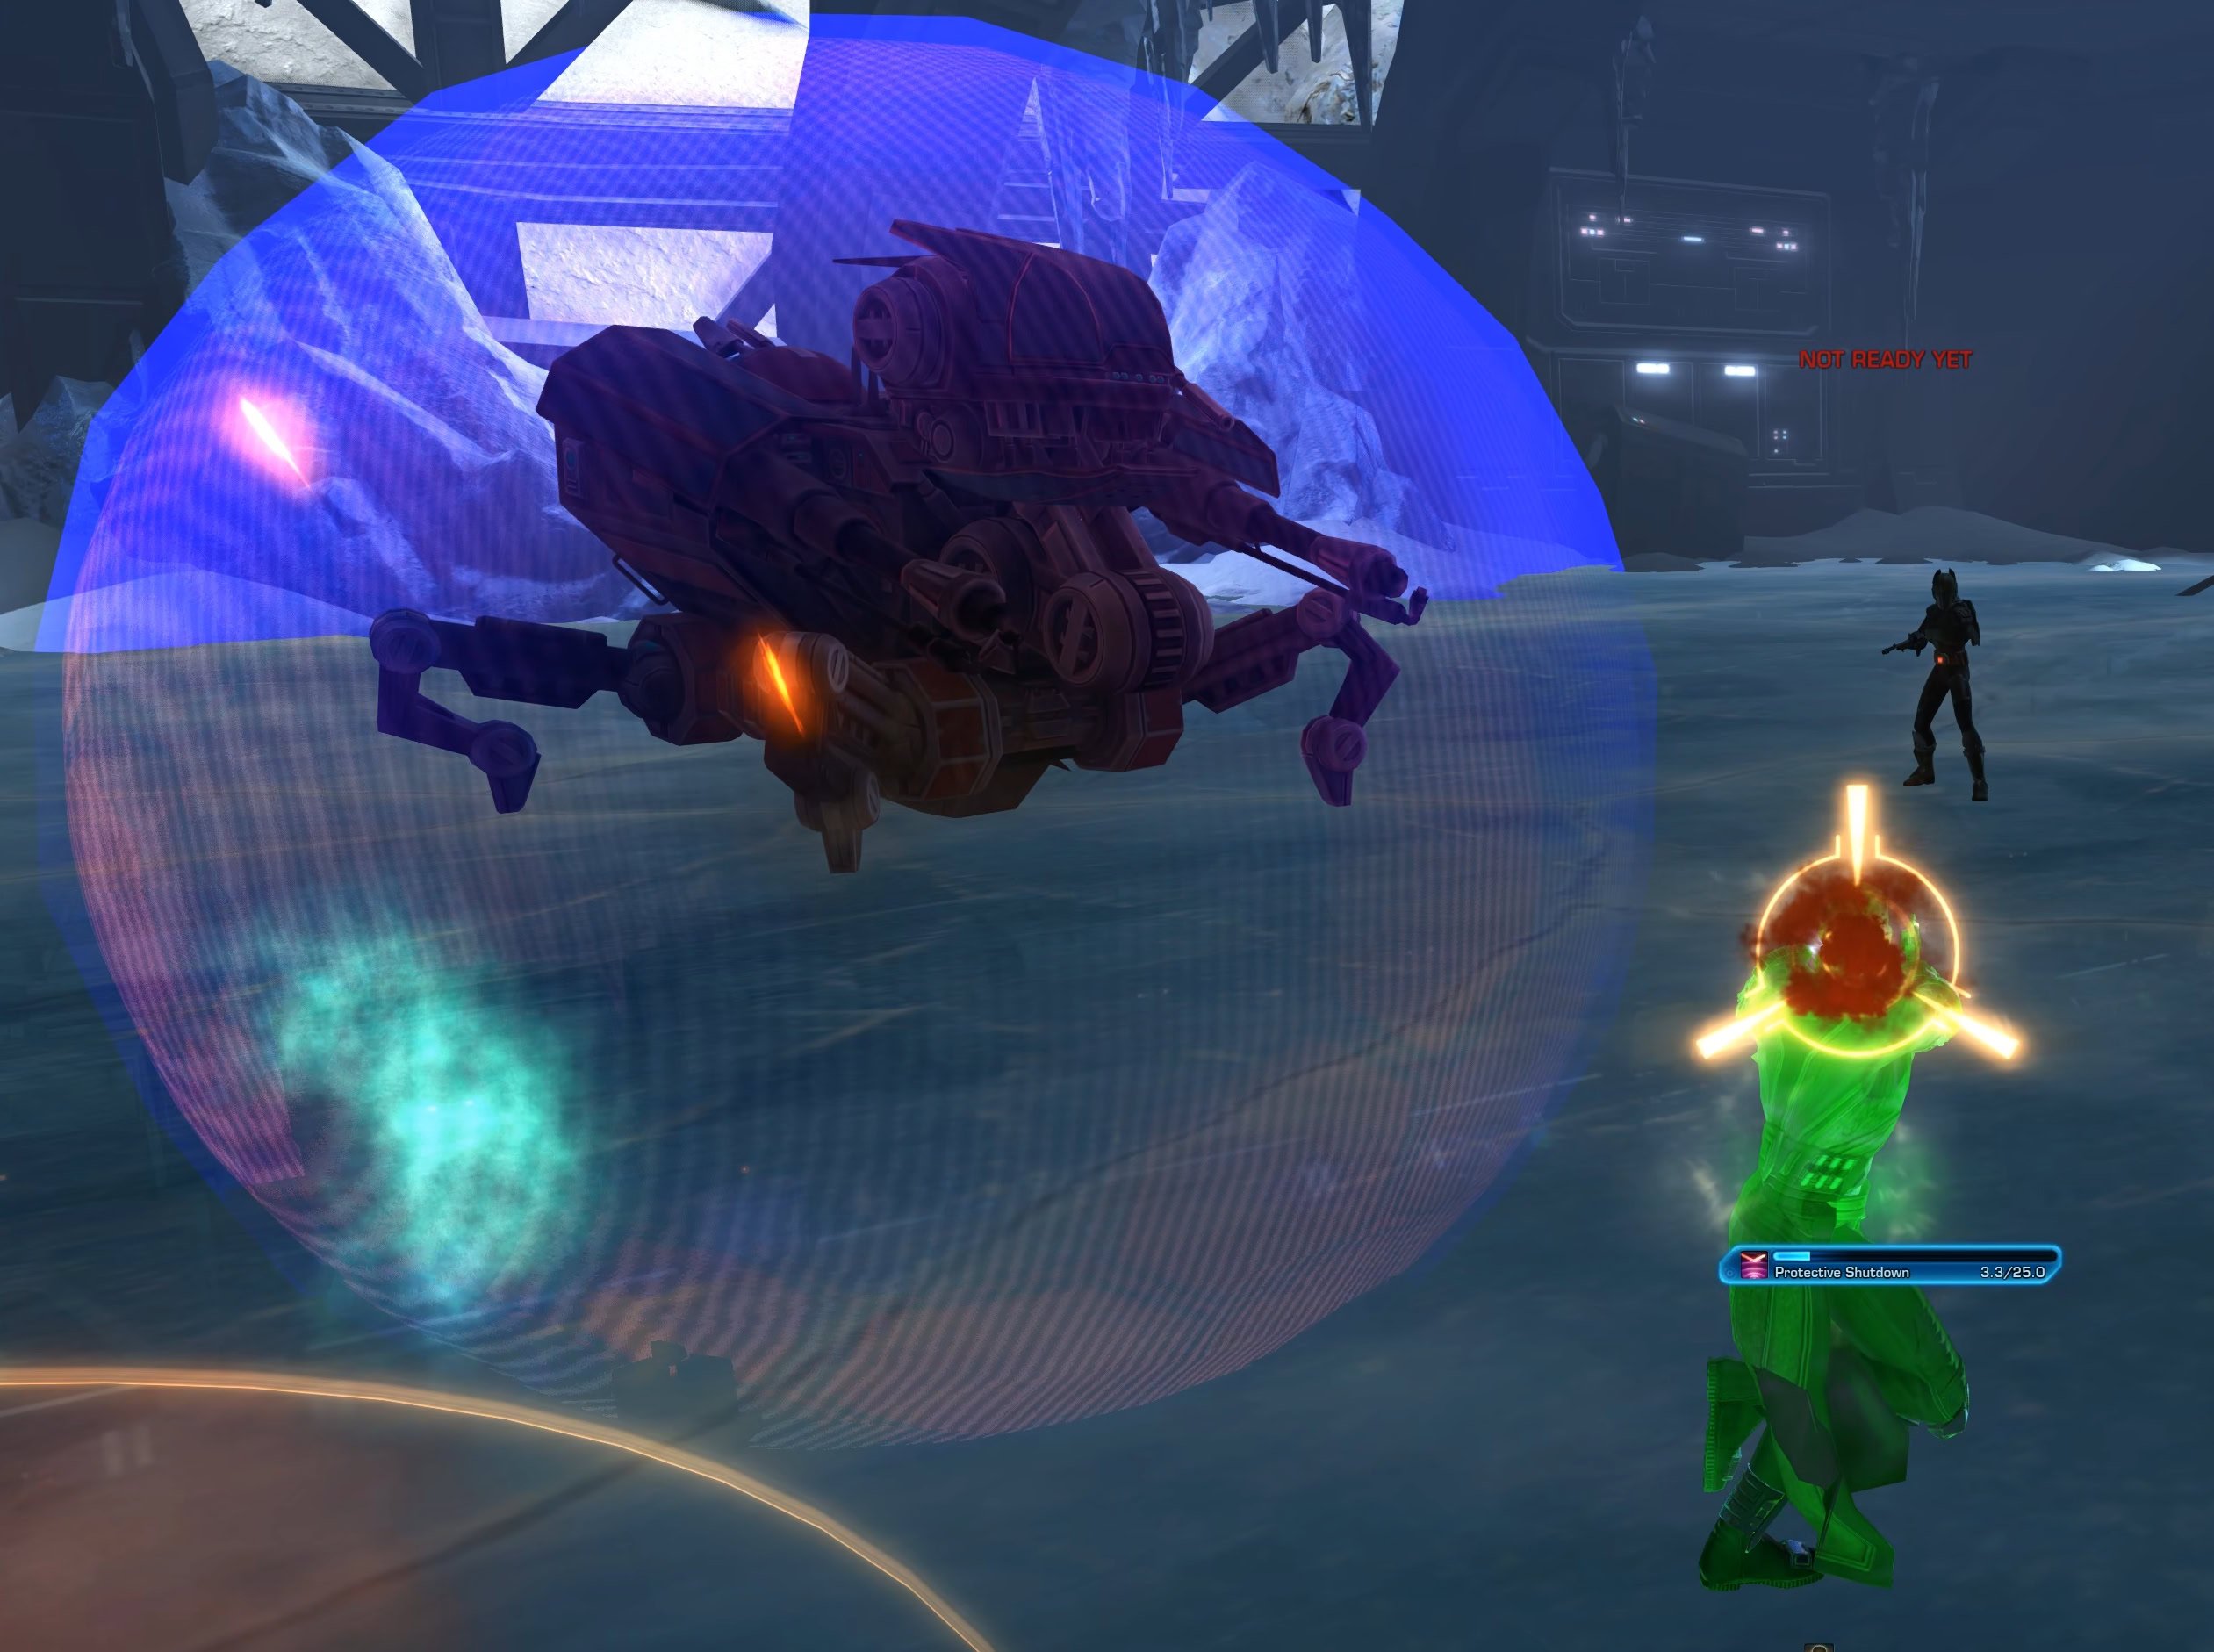
The other notable special abilities the Droid has are very well telegraphed and you can easily avoid them by moving out of the marked spots.
From time to time Besrik will throw a smoke bomb on you and darken your vision for a moment.
Light vs Dark Side Choices
We don’t know at this time if Besrik may play a role later down the line, but it is doubtful. There are a couple of choices at the end of the fight where you can pick a light or dark side. At the very end of the conversation after you defeat him, you have an option to shoot him.
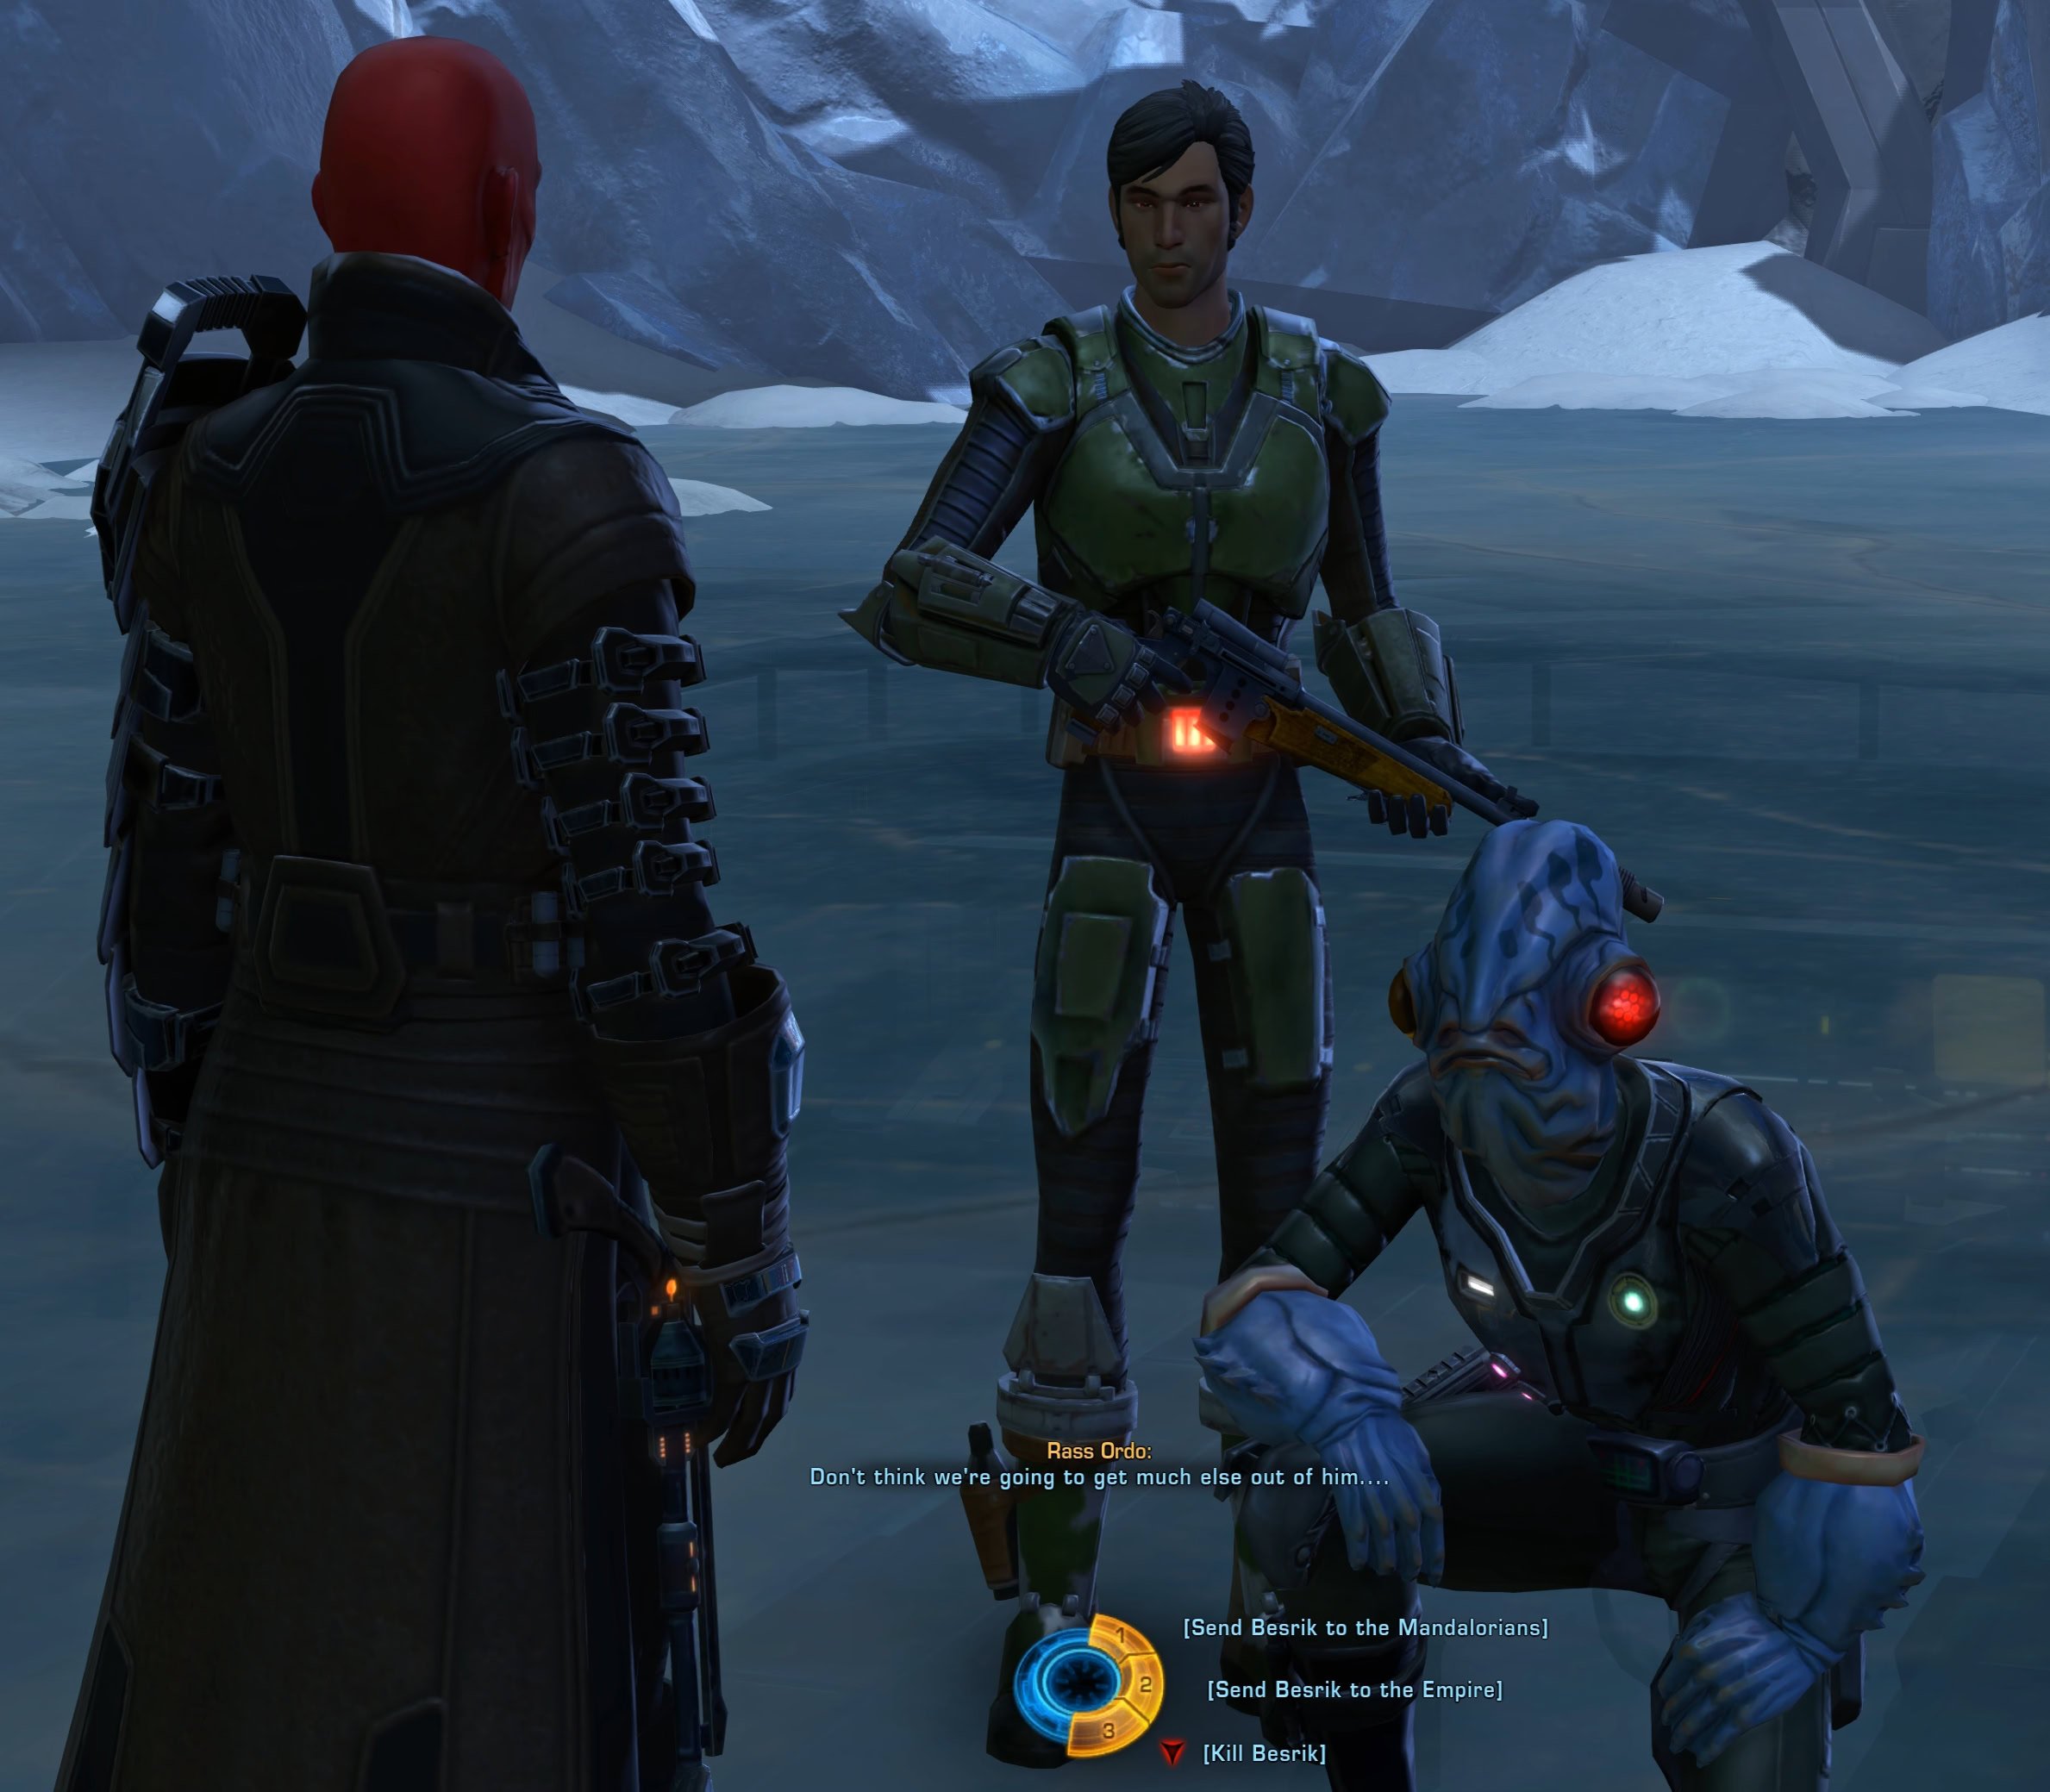
At this point in the story’s development, we don’t know if there will be any consequences to your decisions regarding Besrik. For this storyline, it doesn’t appear to matter at all if you send him to Mandalorians, Republic/Empire, or Kill him.
Mission Rewards
To complete the mission, head back to Odessen and talk to Lana and Jekiah. During the conversation, Lana will bring up the situation on Ilum. If this is the first of the three missions you do, this will be the first time Land mentions the situation on Ilum.
You will receive the following rewards for completing “Hot Pursuit”. Note that at the time of this publication, the Greb Besrik Holo decoration was bugged (or at least it was for me).
| Credits | |
| 10x Conquest Commendations | |
| 50x Tech Fragments |
| Greb Besrik Holo Decoration |
Dark Heart of the Fortress
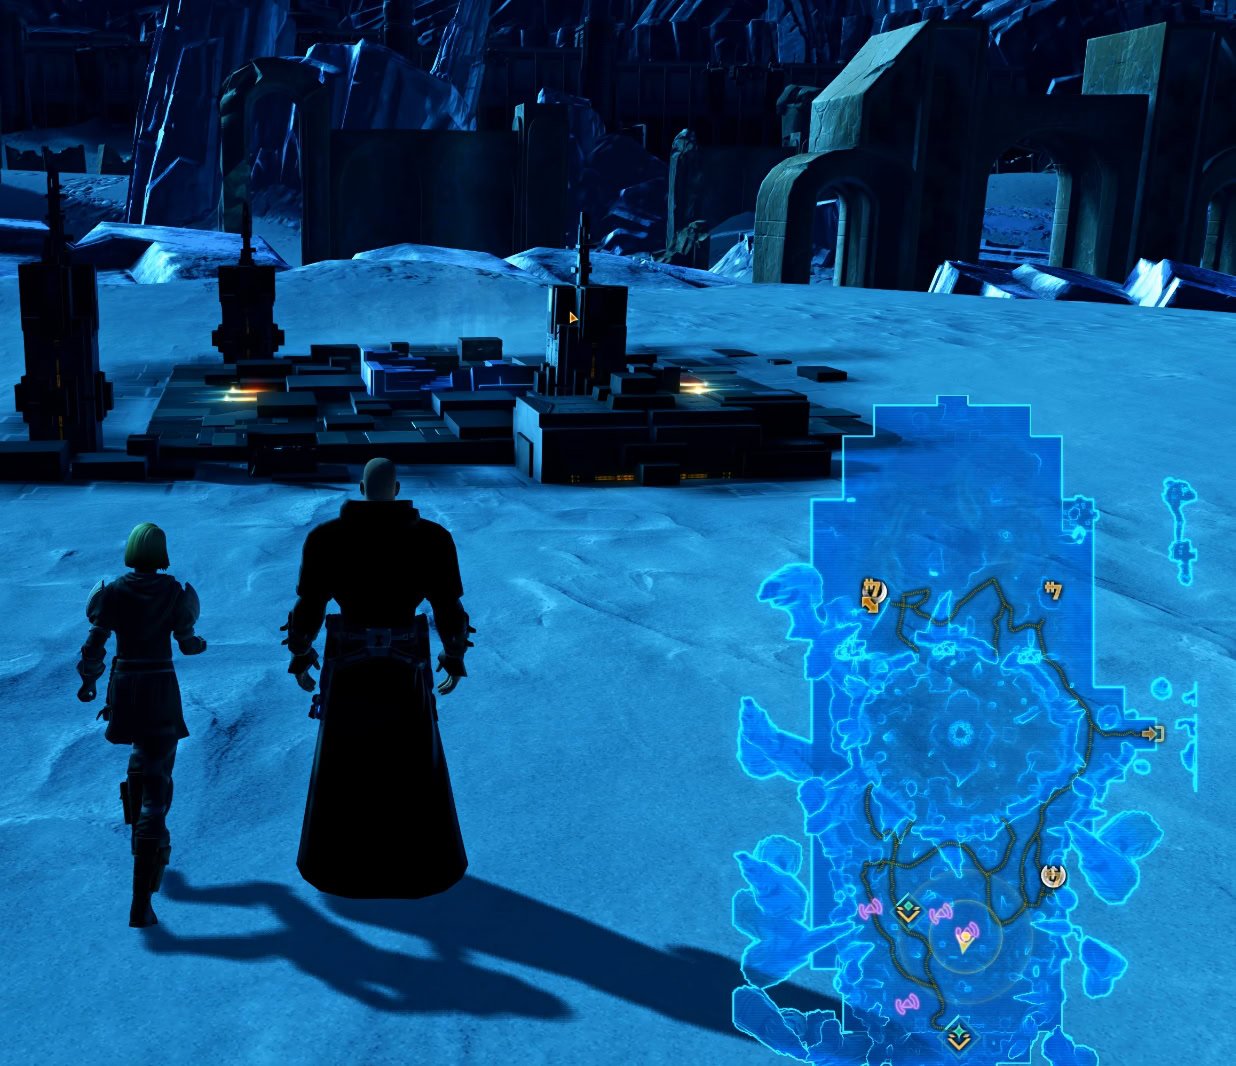
After you complete the missions on Elom, Tatooine and Hoth, Lana will bring your attention to Ilum. It’s time to visit the old Fortress where you defeated Malgus for the first time as part of the False Emperor Flashpoint. Buckle up, this will be a huge nostalgia trip!
A survey team has gone missing on Ilum while excavating things from the old Fortress that once belonged to the Emperor and briefly to Malgus. It’s up to you to go find out what happened.
Locate the missing Survey Team’s Base Camp
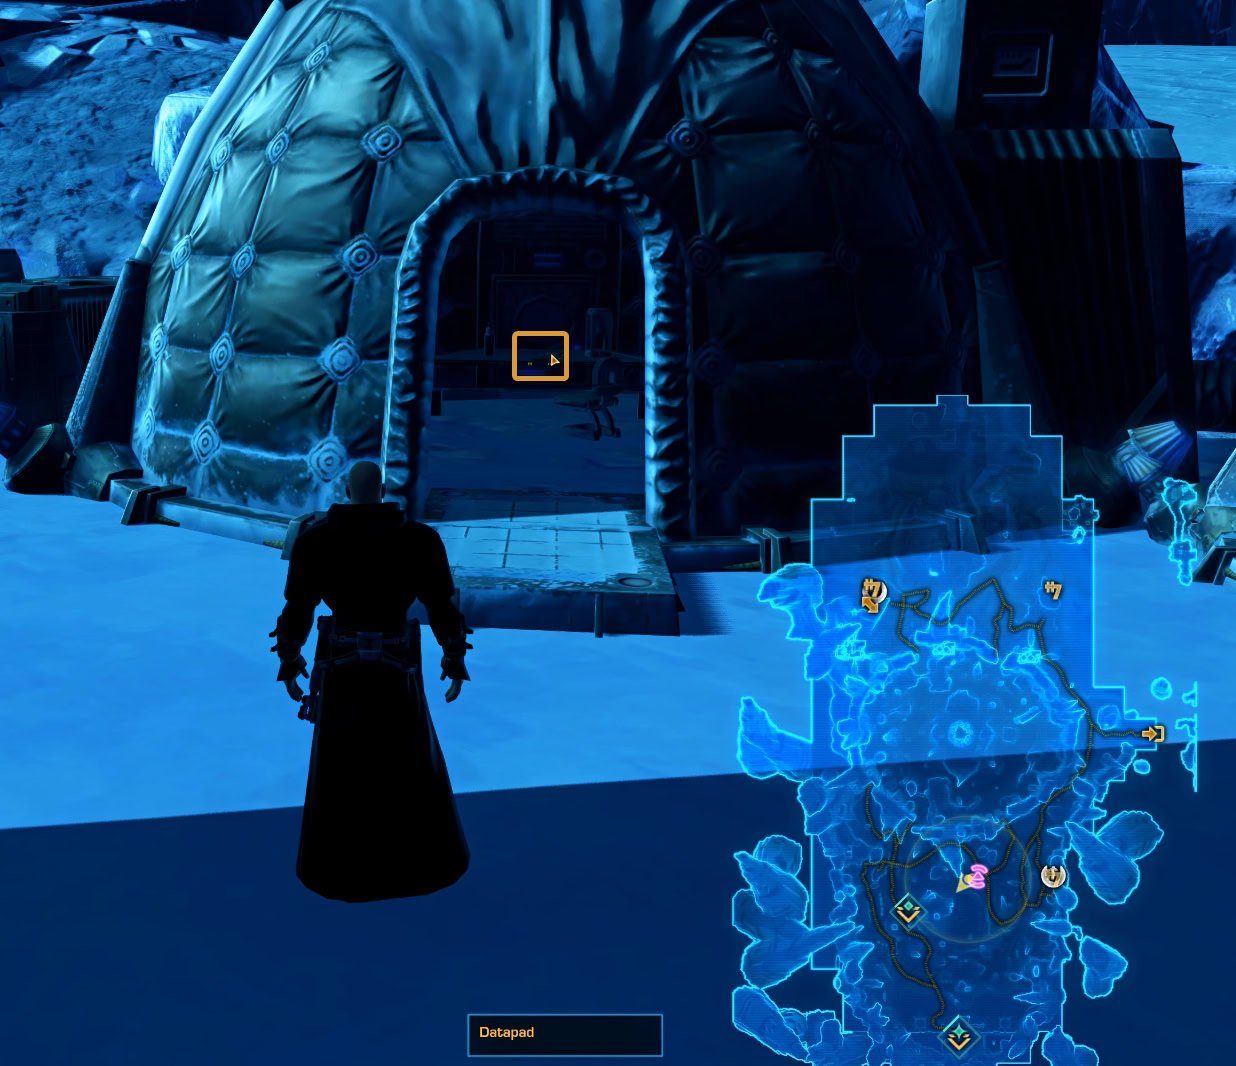
The camp is at the Western Ice Shelf, the place where Gree usually invade once every other month.
When you arrive at the marked location, enter the large tent and look for a clickable object (a datapad) on the table on the opposite side of the door.
Scan Green Technology Signatures
Your next objective is to bring Lana to four locations where there are active signals from Gree tech. Scan the objects on the ground. All four them them are in the southern part of the Western Ice Shelf and have light beams. Land needs to add those signals to the exclusion protocols to track the Fortress’ location (it uses Gree tech to hide its location).
Once done, Land will be able to locate the entrance to the Fortress. Open your mission log and click on the “Launch Mission” button.
This will transport you into a frozen destroyed partial version of the False Emperor Flashpoint instance. You will be going backwards, starting from the throne room where you once fought Malgus.
Search for the missing team
This segment is very linear and there is no way you will miss the markers to progress the story.
- The first clue you will find, is an old droid, which used to be with the survey team.
- The second object is a datapad on a corpse on the floor in the newly unlocked corridor.
- After you slide down to the lower level, you will find a datapad sitting on top of a terminal.
- Take out the Lisks and check the datapad sitting on the edge of the ice.
- Interact with the terminal that has a data spike stuck in it to trigger a cinematic scene where the corpses are being reanimated. Star Wars Zombies!
- Continue down the path through a few waves of reanimated Survey Team Members and after you slide down, there will be a Champion Security Droid to take out (he’s nothing out of the ordinary).
At the long of this long, but very nostalgic trip through the frozen version of the False Emperor Flashpoint, you will finally reach and open one of Vitiate’s many vaults. Inside, during a cinematic, you will discover a Rakatan Mind Trap device.
Tips for winning the boss fight
I will not spoil what happens when you enter the Mind Trap. There is a boss fight inside, but it’s nothing you haven’t seen before and you will have no trouble winning this fight.
- When a Mind Prison Pylon spawns, take it down. You can AoE it.
- Animate Saber is a 30s channel. Dealing damage to the boss while it’s active, shortens its duration
- When Ghastly Hawl or Haunted Wail is cast, move outside of the cone.
- If you are not a melee character, you can avoid standing in the circles spawned by several abilities such as Force Storm, Meteor Storm, Tear Down.
Mission Rewards
After you are done with the boss fight, one final surprise awaits you when you return to Odessen to discuss the events with your allies. A holo recording from an important character.
The mission ends on a cliffhanger, as tradition dictates with pretty much all of the Legacy of the Sith stories so far. The rewards you get are:
| Credits | |
| 25x Conquest Commendations | |
| 100x Tech Fragments |
| Darth Nul Holo Decoration |

After you are done with Galactic Threads, you can start the Master’s Enigma storyline. We have a full walkthrough for it as well, with detailed instructions for every objective, information about your choices and consequences, and an FAQ section where you can learn what is different for the other faction and classes.
SWTPR Master’s Enigma Mission Walkthrough