Welcome to my guide for the new SWTOR Secrets of the Enclave Flashpoint! Everything in this guide is written in the order that you encounter it in the actual FP, so all you have to do is follow along. Read carefully, so you don’t mess up or skip on any of the achievements available!
Table of contents
- Admiring the View Achievement
- Little Buddies’ Buddy Achievement
- Clearing Out the Vermin
- Kath Hound Compassion Achievement
- Secrets of the Past Achievement
- First Boss – Graul
- Thought I Could Make It Achievement
- Bonus Mission – Containment Protocol
- Second Boss – Republic/Imperial Troopers
- Bonus Boss – Monstrous Terentatek
- Final Boss – Leeha Narezz / Colonel Barden Golah
As is the case with any piece of content in this game, if you are struggling with beating this flashpoint, I would highly recommend that you take a look at the guide for your spec.
Knowing your spec well can make everything feel a lot easier. If your DPS is higher than required, you can just skip some mechanics outright and you will be less likely to be overwhelmed by multiple mechanics happening at the same time.
Proper cooldown use from everyone and high healing numbers can also significantly mitigate the punishment by not correctly following some mechanics.
A lot of the mechanics in this FP are centered around doing sufficient DPS. Fights quickly become very challenging if you aren’t able to meet the DPS checks.
In MM, Secrets of the Enclave seems to require that each DPS player contributes about 10k single target DPS, which is only about 40-50% of what an individual DPS spec is capable of doing in full 306 gear with blue augs, where a single DPS player can do about 22k single target DPS.
These numbers are derived from the fact that my group (all NiM raiders) was able to comfortably 3-man the FP in MM with a single DPS. You may see Shae Vizla in a couple of these images, she was mostly on passive for the bosses, just used to speed up clearing trash.
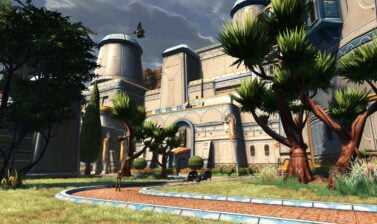
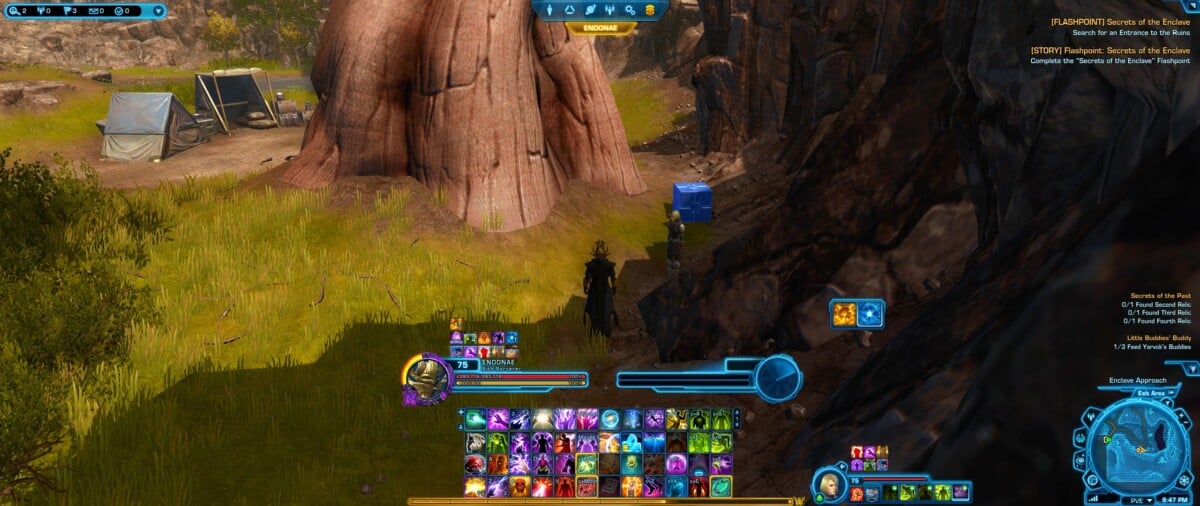
Admiring the View Achievement
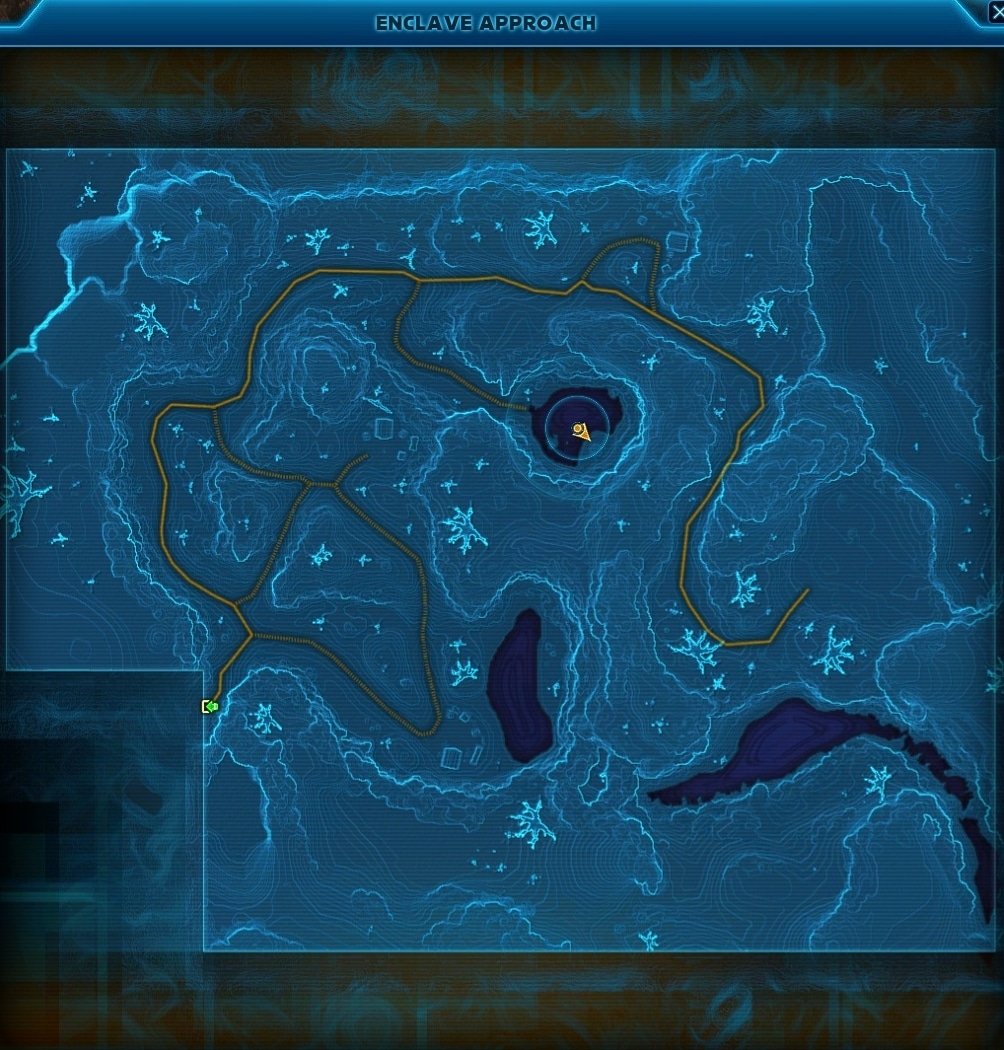
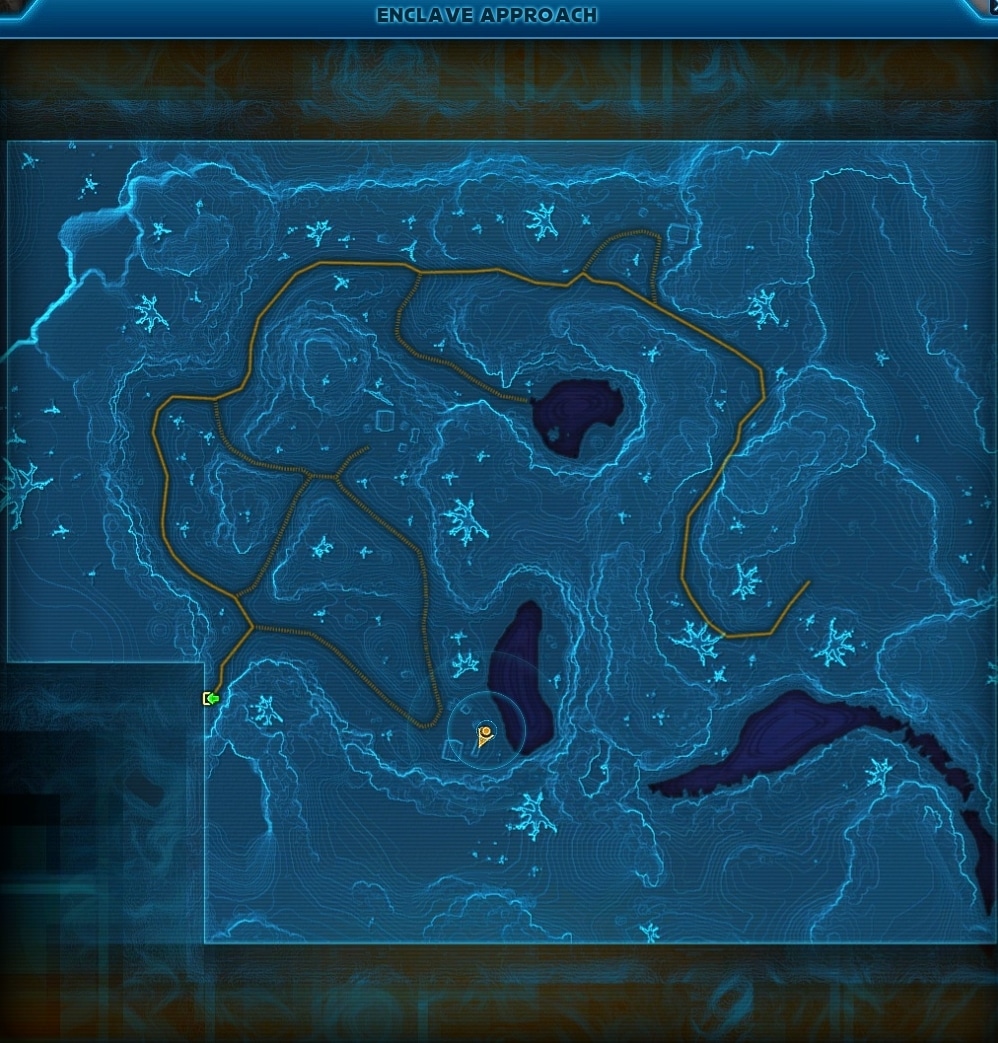
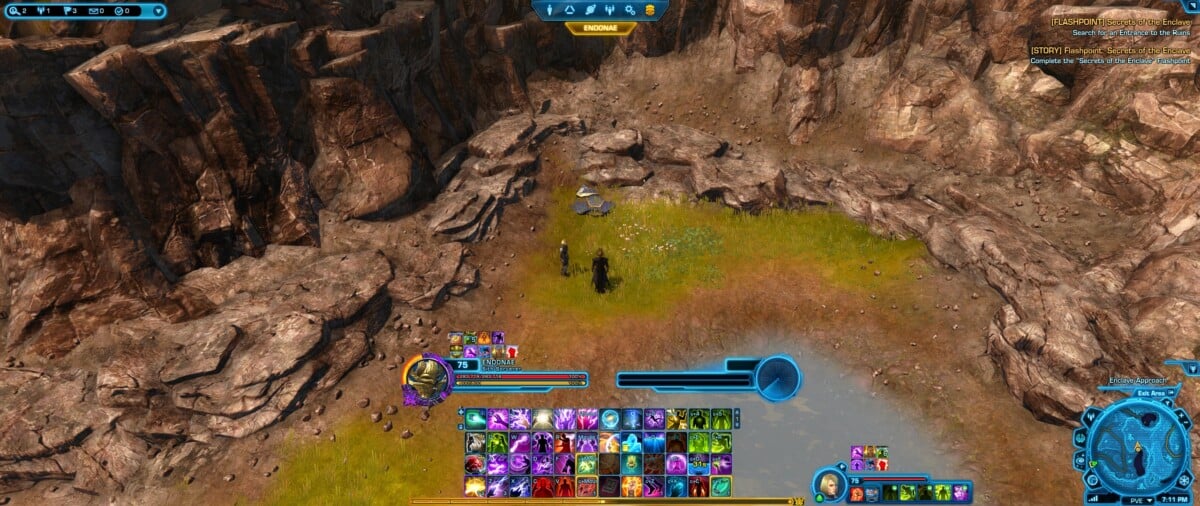
The very first achievement is right at the start of the FP, it’s called Admiring the View. All you have to do is stand still for a moment and look at that gorgeous vista depicted in the title image for this guide.
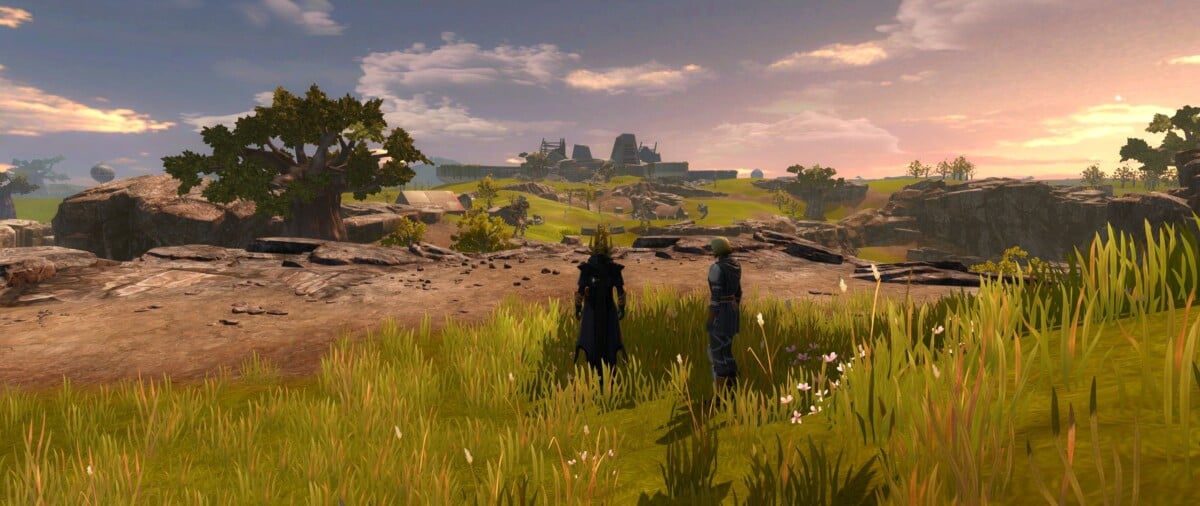
You only have to stand still there for a few seconds. From what I was seeing when helping others get the achievement, it seems that you need to stand on the grass, quite near where the crate can spawn. Don’t stand near the edge of the cliff. Here is the exact location I was standing when I got the achievement:
Little Buddies’ Buddy Achievement
You may have seen some glowing blue crates as you go through the first area, don’t click them yet! Clear out all the enemies in the Enclave Approach area first. There are some crates called Weapons Caches that give you weapons for your temporary ability bar and some that give you a specific kind of food that rots very quickly. I guess you can pick up the ones that give you weapons, but just make sure you know that the crate will give you a weapon before you will click it. When you pick up the Weapons Caches, I highly recommend holding onto them to use against the adds that spawn during the first boss fight. There are 3 Weapons Caches and 3 food crates.
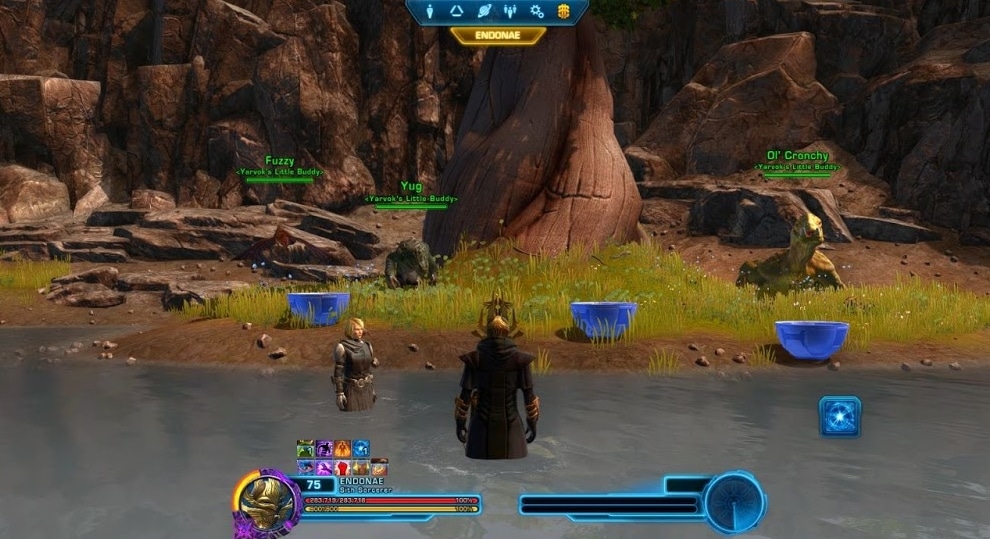
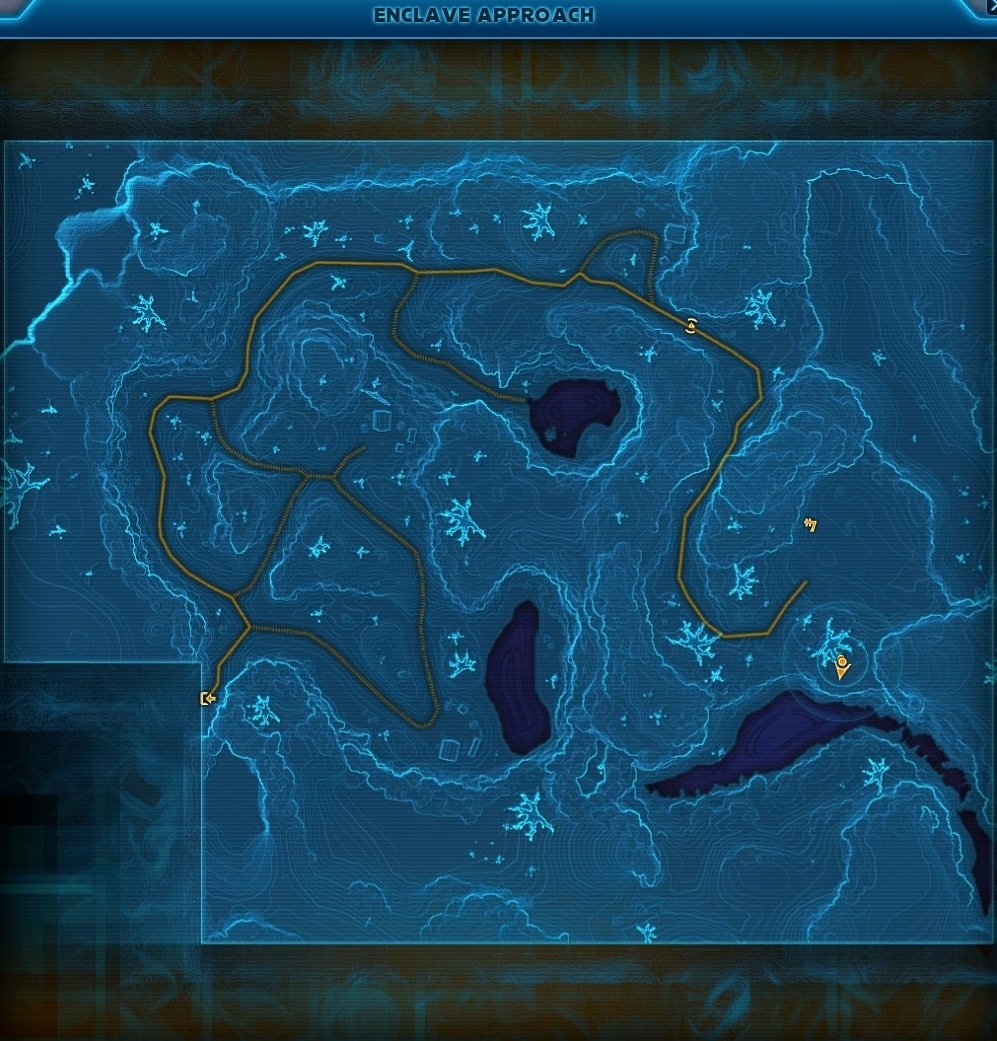
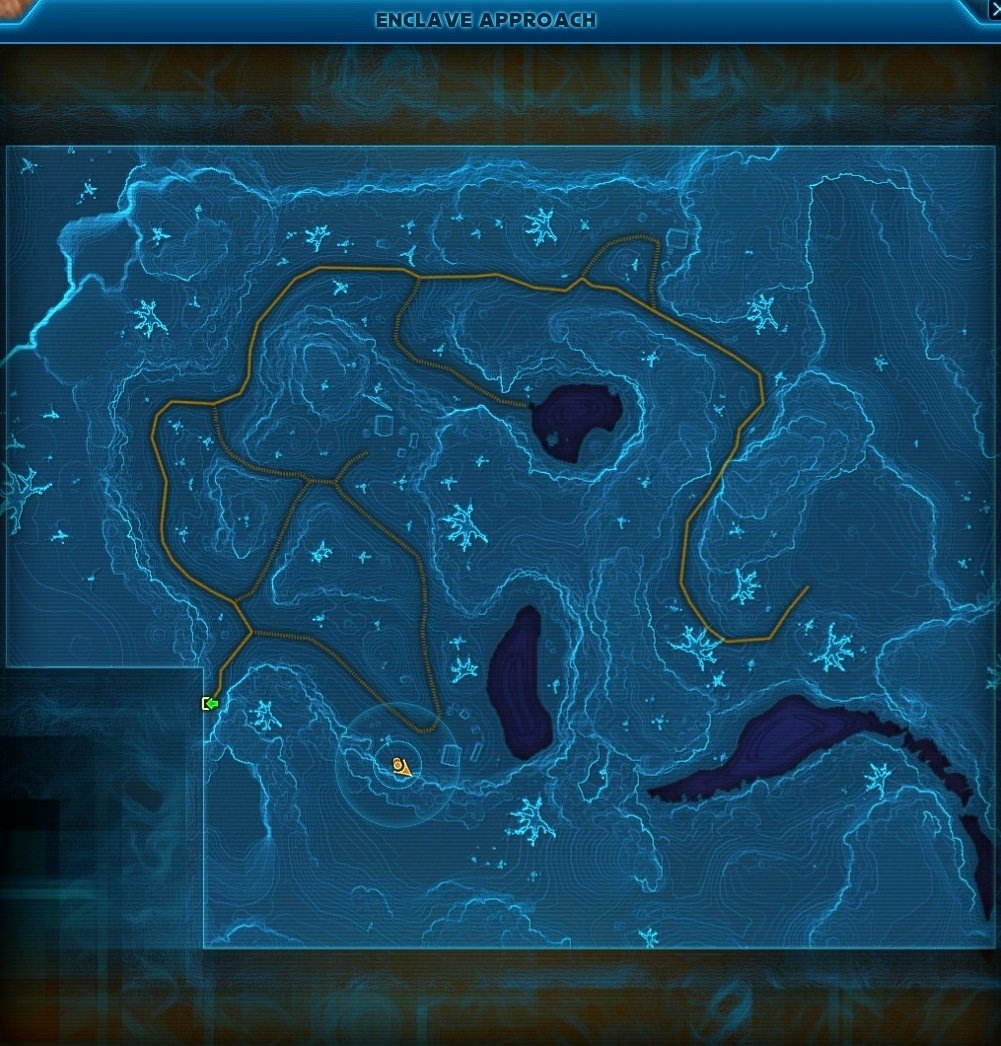
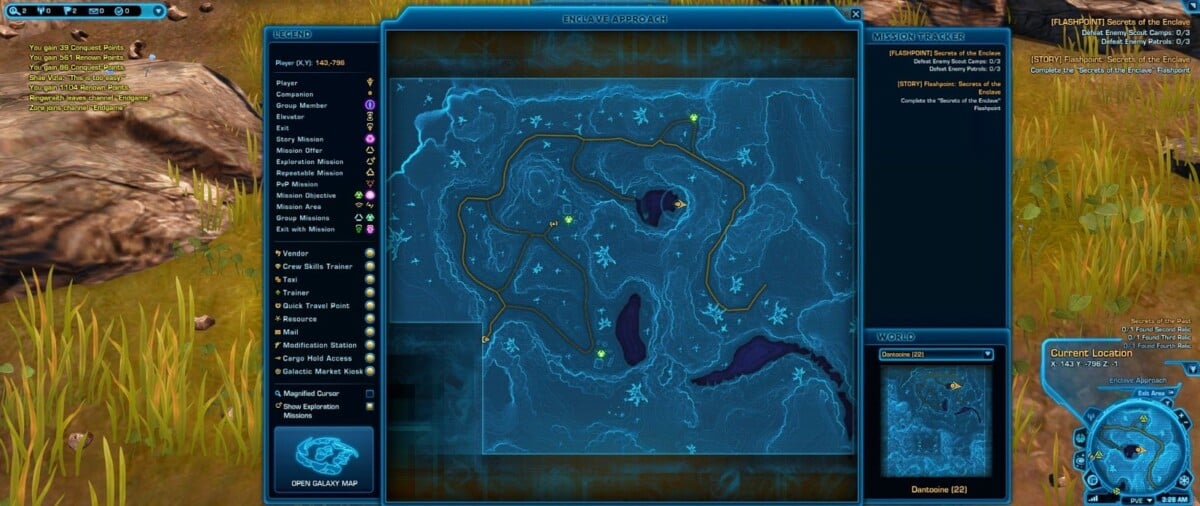
Eventually, you will come across 3 of Yarvok’s little buddies and in front of each of them is a dish, I have included the location below:
Each of the little buddies has a preference for a specific food found in a specific crate in the Enclave Approach area. The exact locations vary from run to run, so you may have to do a bit of searching to find each crate. There is a general location for each of the crates and the same food crate will always be in the same general location. I have included the locations where I found crates, and I recommend you check out the comments on this guide in case others have posted their own locations. Don’t click the crates until you read this entire section!!!!
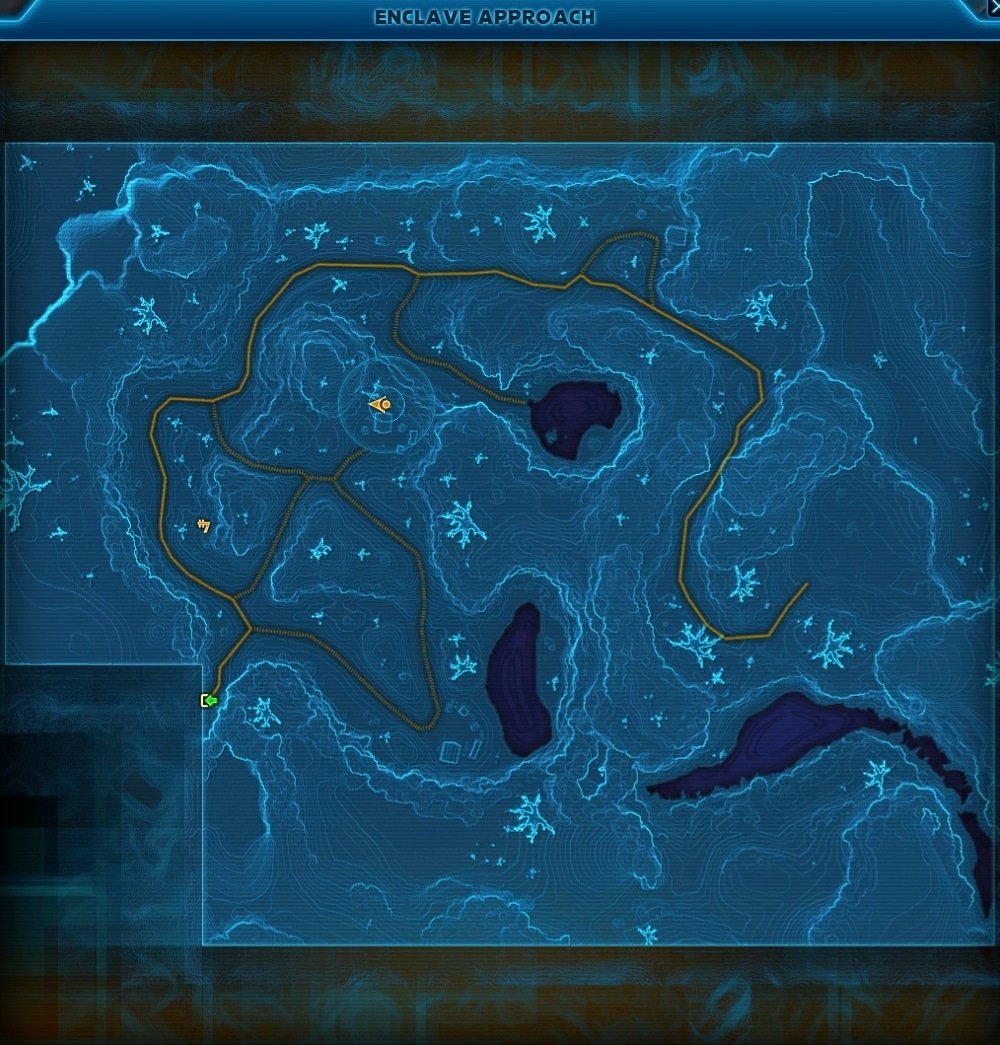
Fuzzy (leftmost creature, Xuvva) likes Crash-Landed Fruit Shipment, found by the very beginning of the flashpoint, near the shuttle


Yug (center creature, Skar’kla) likes Crash-Landed Cryo Crate, found by the damaged satellite dish towards the center of the map.
Ol’ Cronchy (rightmost creature, Zeldrate) likes Crash-Landed Frozen Meats, found towards the south of the map by one of the camps with the imprisoned Kath Hound.
Now, as I mentioned earlier, you have a very short time to deliver the food to the bowl after removing it from the crate, only 30 seconds! If you don’t deliver the food within 30 seconds, you fail the achievement and in order to try again, you have to start the entire flashpoint over. You only get a single try for each food item.This means you need to have a pretty optimal path in order to deliver them on time. There are a few ways that can make this a bit easier, and for some of the crate spawn locations, I don’t think it is possible to clear them in time without utilizing at least some of these tips:
- Plan out the route you are going to take beforehand, you almost certainly won’t make it in time if you are figuring out where to go while holding the food.
- I highly recommend doing this on a Sorcerer/Sage or Sniper/Gunslinger, since this will give you access to Phase Walk which should be placed near the food bowl.
- Extrication/Rescue and Translocate/Transpose can also be helpful in completing this achievement.
- Use the mount speed boost tacticals from doing the Swoop Rally event if you have them.
- Buy the Speeder Piloting 4 and 5 from your Legacy Character Perks to ensure maximum mount speed (you have to use your mount for this)
- Clear out all the enemies in the first area so you don’t accidentally enter combat (which will turn off Sprint and possibly dismount you) while attempting to deliver food.
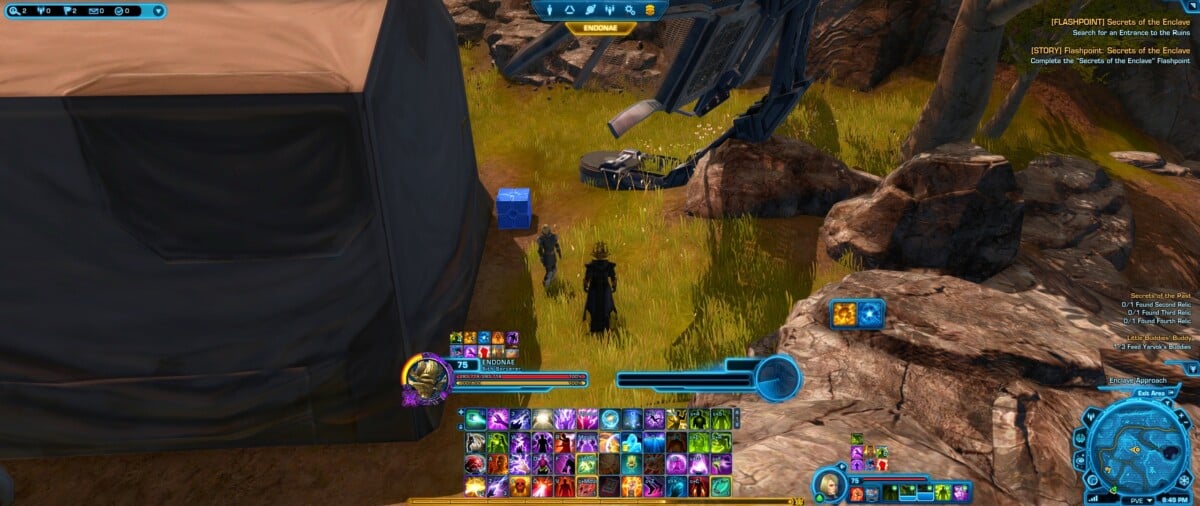
- Feeding Fuzzy, the bat creature can be made super easy with Phase Walk. You can place it behind the tree where the buddies are and Phase Walk through the rock wall, saving you a ton of time:
Unfortunately, in order to get this achievement, you have to feed all 3 of them 3 times. Also, now you can go click the crates.
Clearing Out the Vermin
All you have to do is defeat 50 creatures inside the FP, so this includes things like the Xuvvas and Zeldrates that are mostly found in the Enclave Approach area.
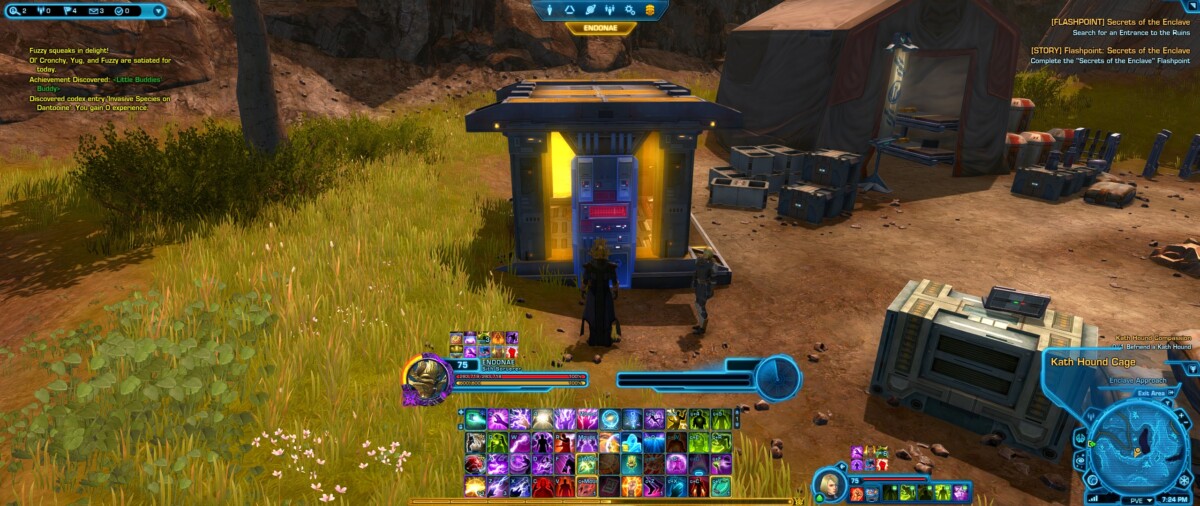
Kath Hound Compassion Achievement
This achievement can be completed by freeing the imprisoned Kath Hound near the southernmost camp. All you have to do is click on the side panel, which will glow blue when you mouse over it.
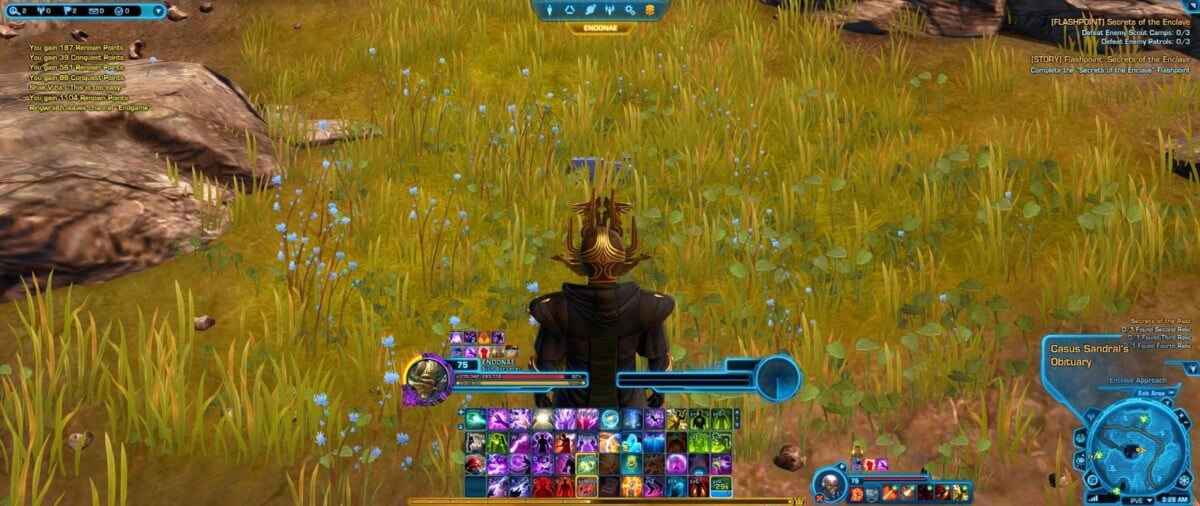
Secrets of the Past Achievement
There are 4 relics hidden throughout the FP. The first two are located before the first boss, the third one is located before the second boss, and the final one is before the final boss. Thanks to Marty Bolluyt for providing the locations to the final 3 relics. I definitely would have never found them without his help.

First Boss – Graul

Graul has 3 mechanics in story mode:
Quaking Blows – Graul does a 5 second channel that causes a ton of red circles to spawn everywhere and expand. This deals damage to anyone caught inside one, so just get out of them when they spawn.

Conal attack – Graul does a conal attack that will knock you back, there is no castbar for this ability. This attack does seem to have significantly longer range than the telegraph would suggest, so be sure you move to the sides, not backwards. Otherwise you will get knocked back and take damage.
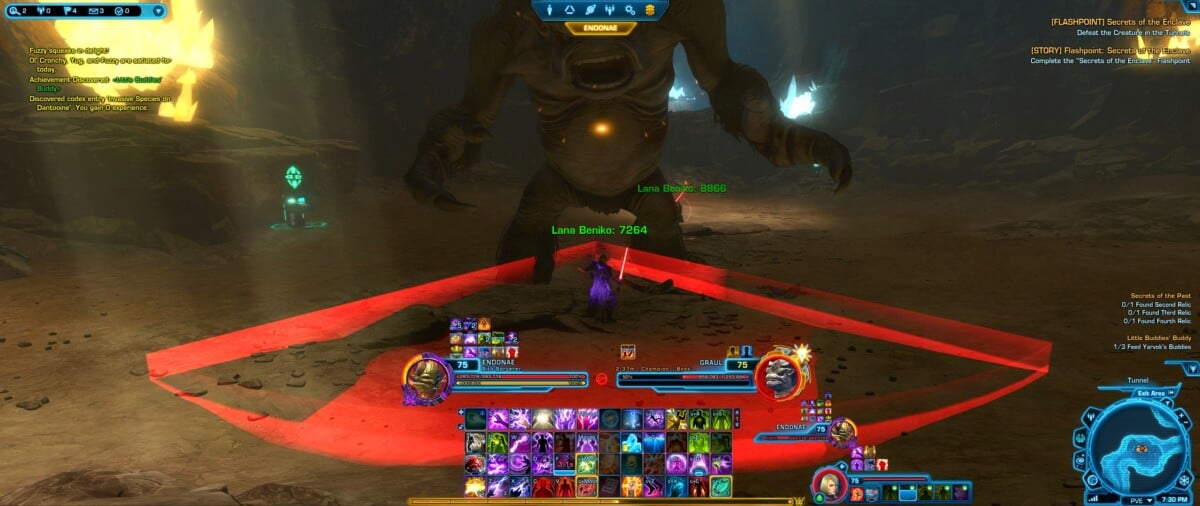
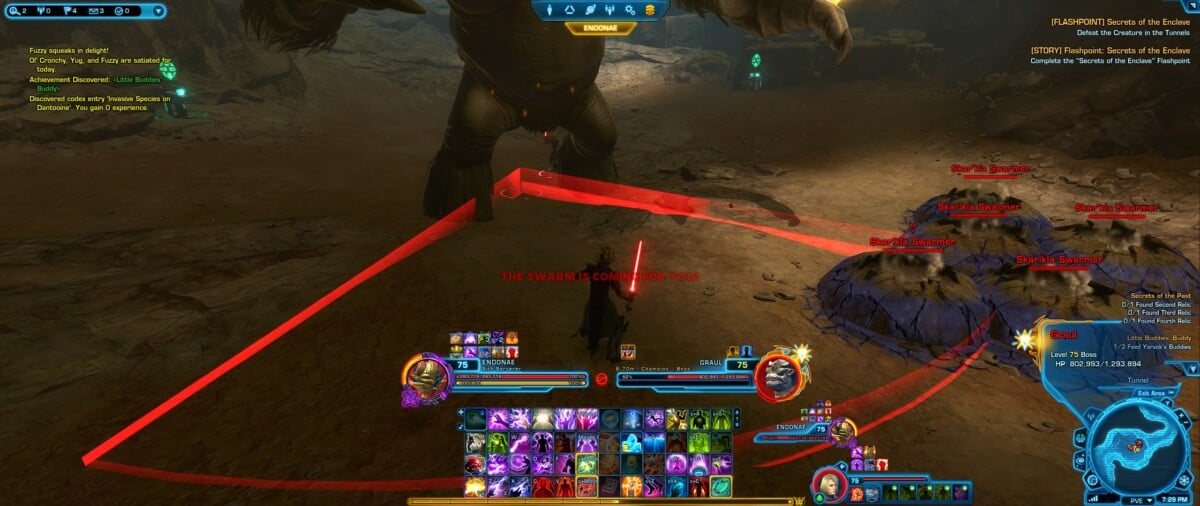
Adds Spawn – Red text will appear on the screen to indicate that Skar’kla Swarmer adds are spawning. When these adds hit you, they will apply a debuff that makes you run randomly in terror until all the adds are killed. You should kill these adds immediately with AoE. If they spawn at the same time as the Quaking Blows, consider popping a DCD since you may accidentally run into one of the circles.
Master Mode Differences and Strategy
- The conal attack stuns you rather than knocks you back.
- The circles from Quaking Blows hit you for about 30% of your health, so pop a DCD if you find it difficult to stay out of them, especially if the adds spawn while the channel is going out.
- The adds apply a stacking debuff that makes you take more damage from them.
- The adds gain a buff called “Inexorable Advance” that makes it so they don’t change targets. I think this only gets applied after you taunt them, so basically you only get 1 AoE Taunt per set of adds. I could be wrong about this though.
Strategy:
Whenever adds spawn, be sure to kill them ASAP. I would recommend holding onto the weapons that drop from the crates to use on the adds in this fight, only activate a single use of a single weapon per add spawn or you definitely won’t have enough for all spawns. They won’t kill them outright, but they will do quite a lot of damage to them. You may consider equipping AoE tacticals as well if you’re struggling with the adds, though they’re really just a DPS check, so if you can’t kill them fast enough, you really just need to brush up on your rotation. Check out a guide for your class if you haven’t already. You might also want to take AoE root/slow/stun utilities like Electric Bindings/Force Wake to stop the adds from reaching you. Remember the debuff is applied as soon as they hit you and won’t be removed until all the adds die, so be sure to apply any CC before any manage to touch you or else it’s pointless. Try to use your offensive cooldowns against the adds since they are what needs to die the fastest and you don’t want to have multiple groups up at the same time or you won’t have any time to DPS the boss.
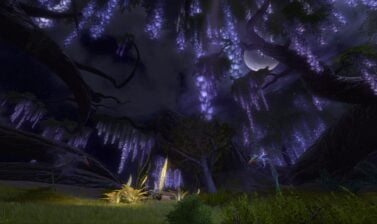
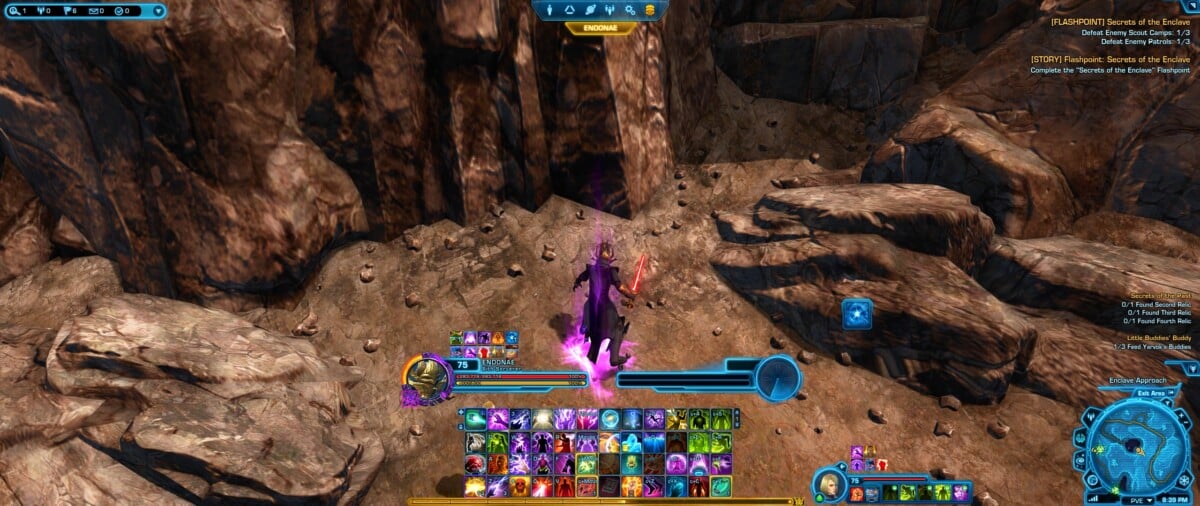
Thought I Could Make It Achievement
There is an achievement for jumping into this chasm. There isn’t an achievement for jumping into all of the chasms in this FP, not sure if this achievement is also granted if you jump into another chasm.
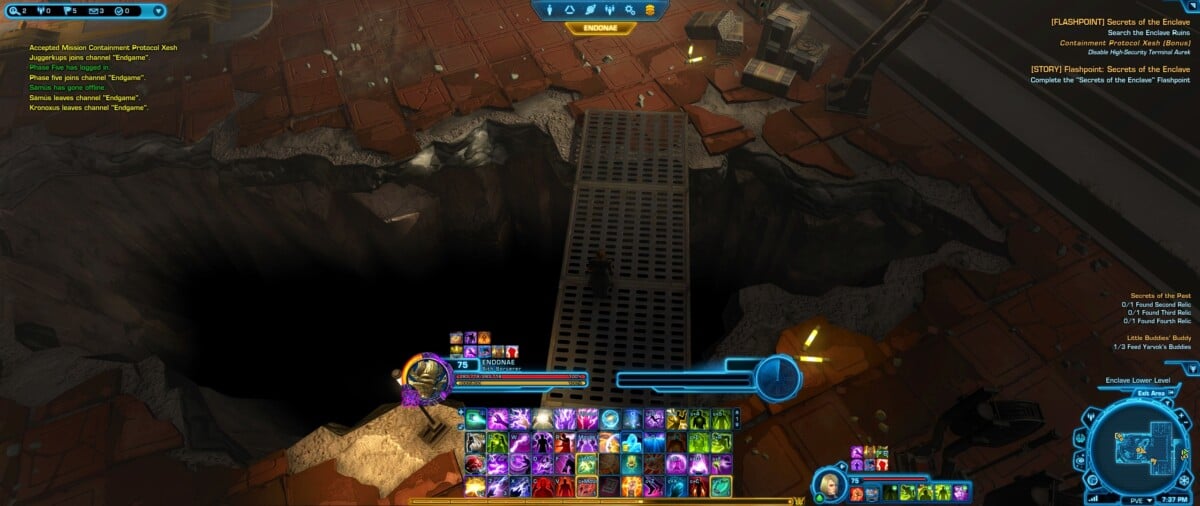
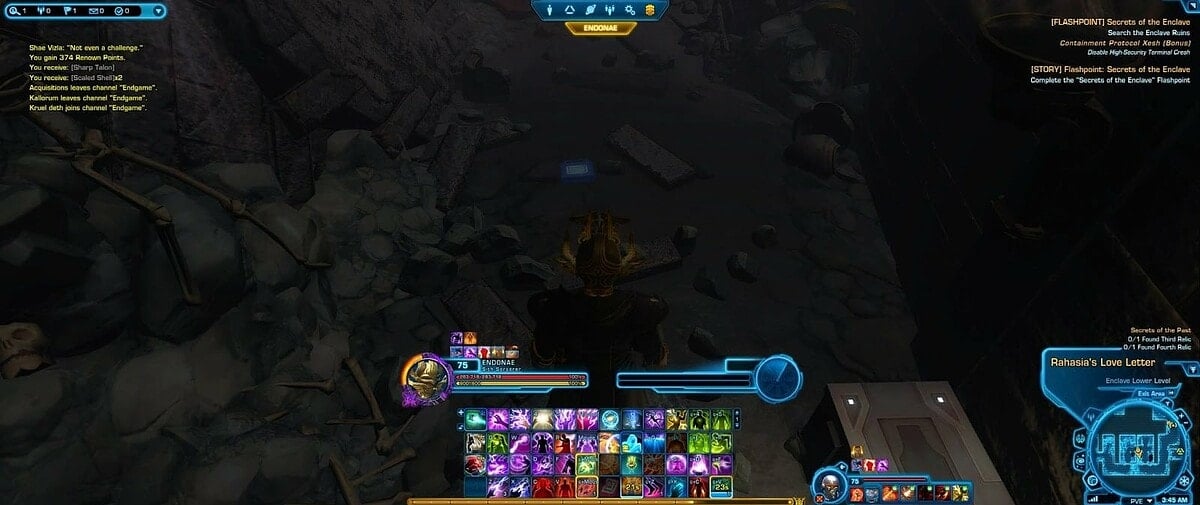
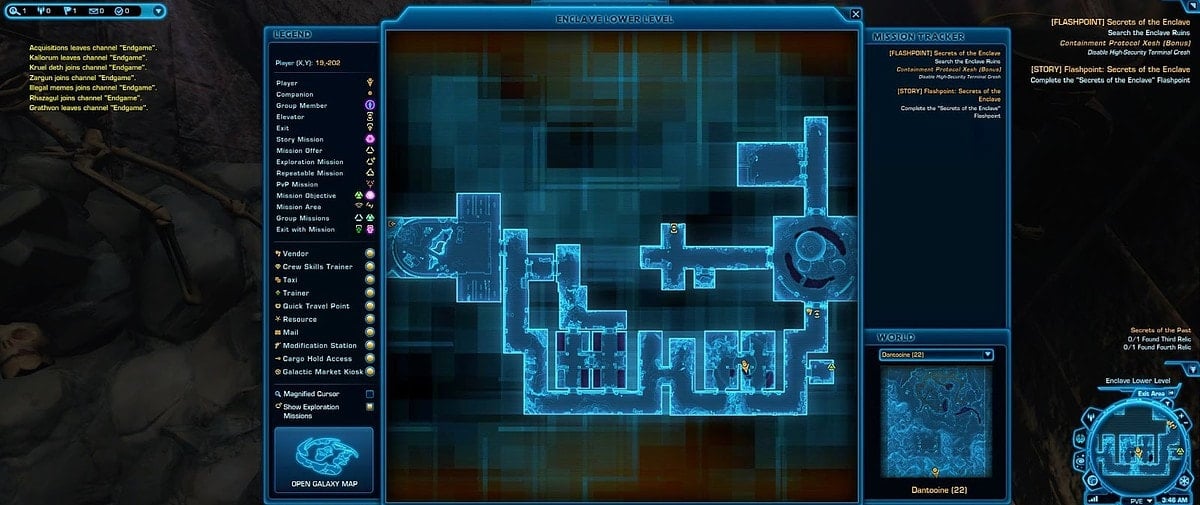
Bonus Mission – Containment Protocol
There are several panels to click, the first of which is in the Enclave Lower Level. When you click it, an Elite droid spawns. The droid explodes electronically when it dies and that will damage the console used to spawn the droid and allow you to click on the next console. The explosion is somewhat small, so make sure the droid is close to the console when you kill it.
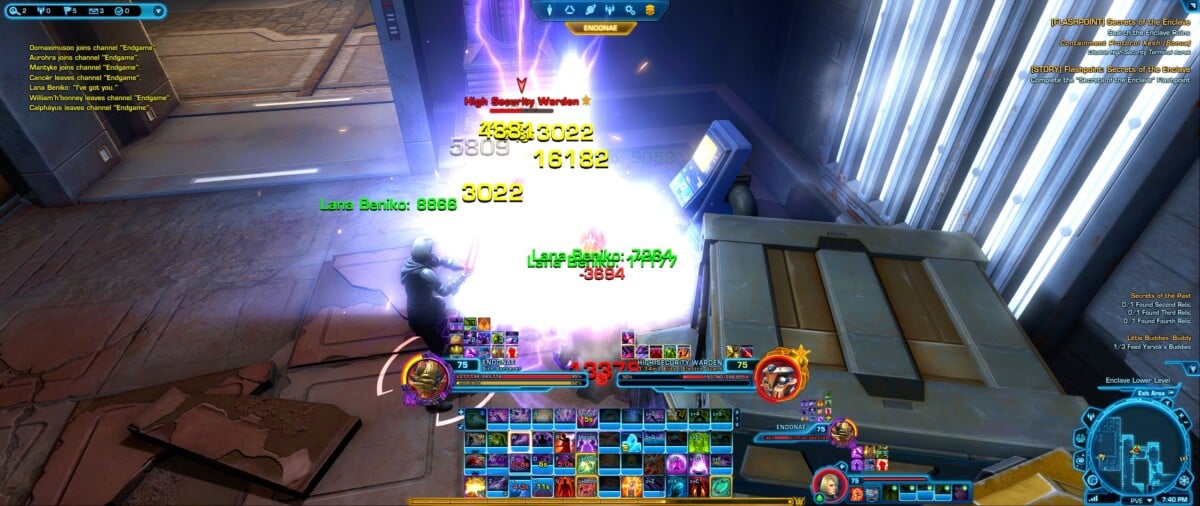
If you mess it up, it’s fine, just click the console again and another droid will spawn. You do not need to take this droid to the next console.
Second Boss – Republic/Imperial Troopers
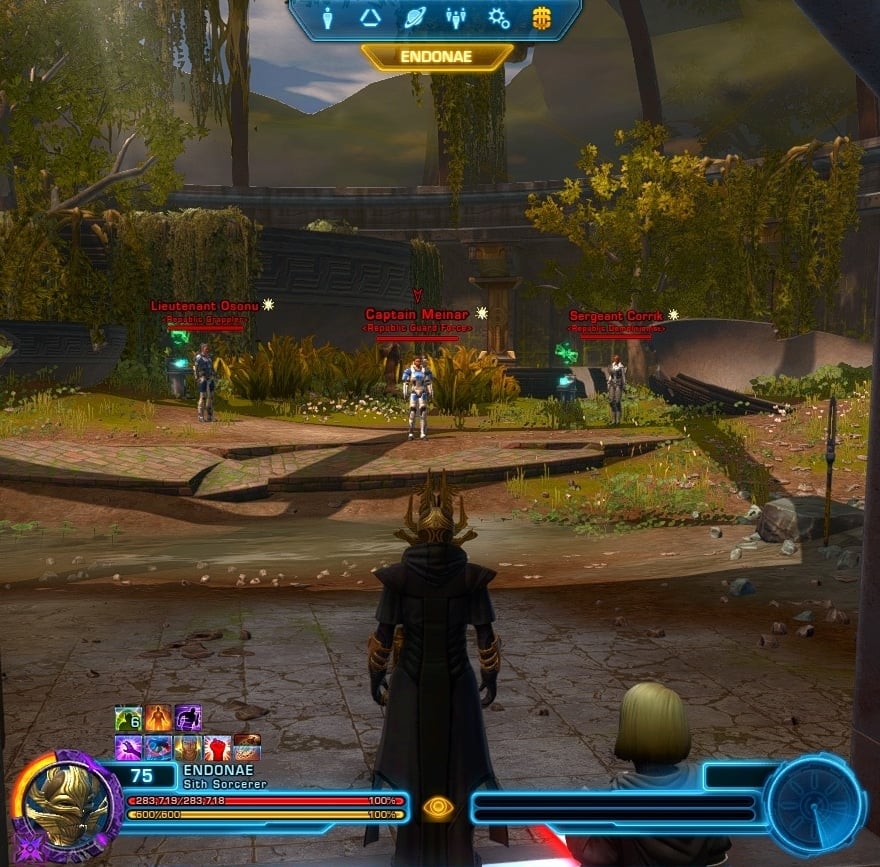
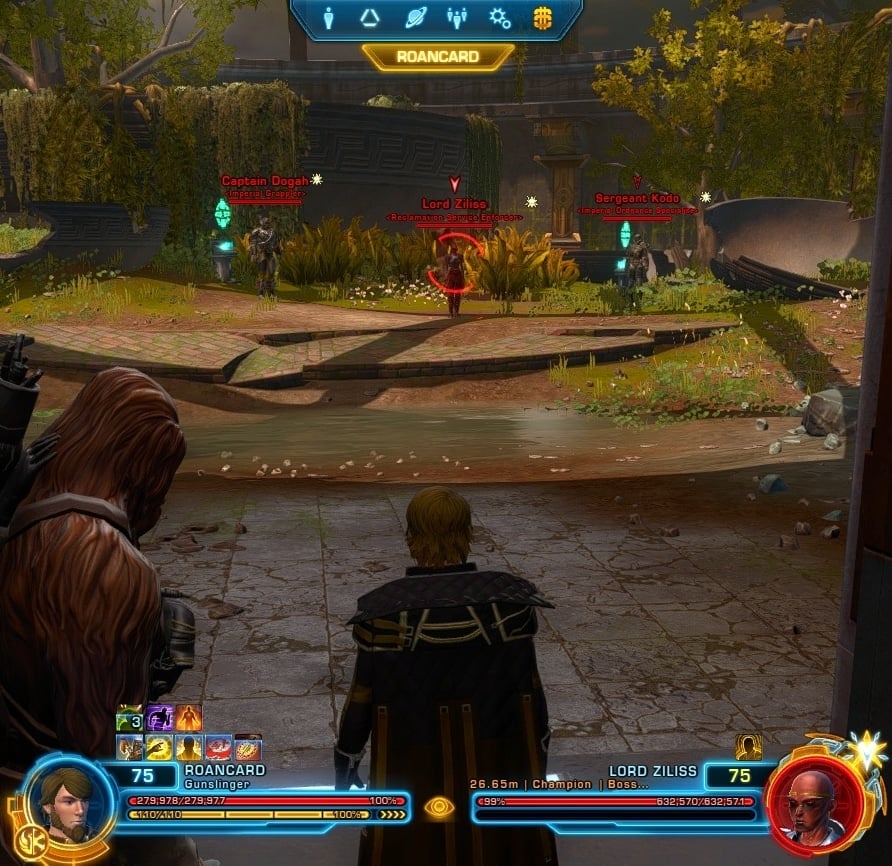
There are 3 bosses, with 1 attack each, the mechanics are the same for both Imperial and Republic versions. I will be using pictures when fighting the Republic Troopers. When each one drops below 50% HP, their attack becomes stronger in some way. In order to mitigate their boosted attacks, it is best to focus them down one at a time. If there’s a mechanic that’s hard for your class to deal with, focus that one down first.
Captain Meinar / Lord Ziliss – Throws a grenade/force bomb. It is denoted by a debuff that is cleansable. For Imp players, the debuff is green and is the same icon as Corrosive Grenade. For Pub players, it is white and looks like Force Cloak, the stealth out ability for Assassins/Shadows. When Meinar/Siliss has less than 50% HP, the bomb stuns you if you don’t deal with it. Focus down this one first if you don’t have a cleanse
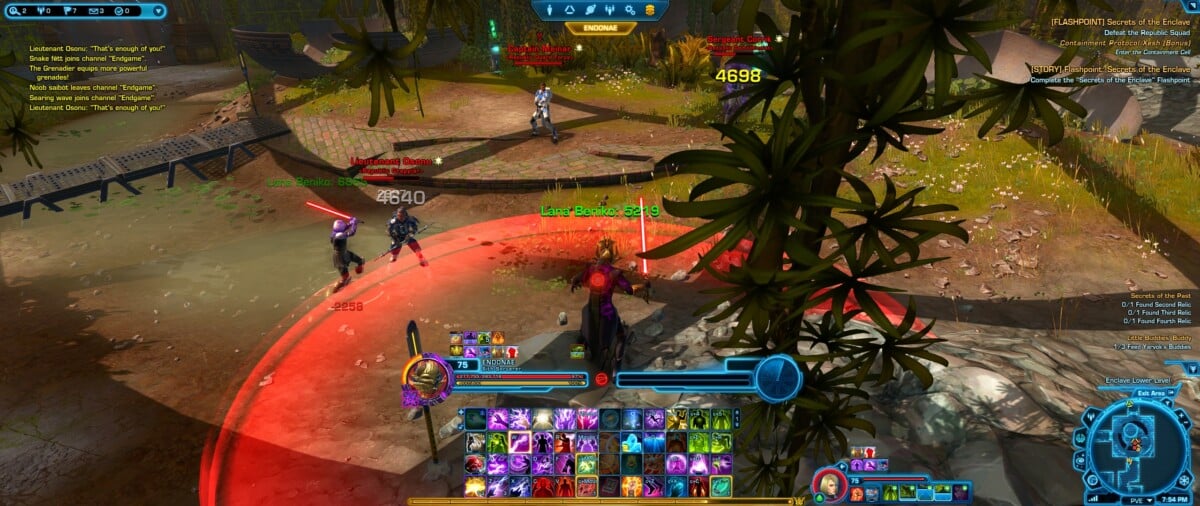
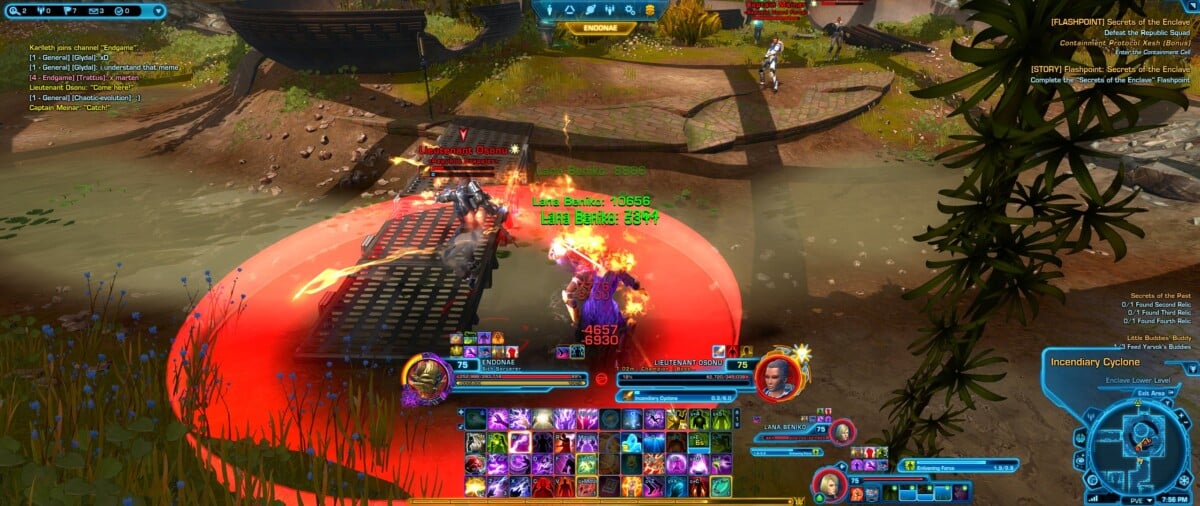
Lieutenant Osonu / Captain Dogah – Grapples people towards him and then does a 6 second channel called Incendiary Cyclone that deals damage. Sub-50% he slows you while you’re in his fire. All you have to do is get out of it or interrupt it. Focus this one down first if you are melee DPS.
Sergeant Corrick / Sergeant Kodo – Throws a grenade that goes on the ground, denoted by a static red circle. Sub 50%, the circle leaves behind napalm that deals additional damage. The cast is interruptible. It’s a bit hard to see her circle with all the other red circles that are happening. In general, if you see a red circle on this fight, get out of it.The napalm is currently invisible, but you will get an orange debuff that indicates when you are in it.
Master Mode Differences and Strategy
- It isn’t possible for a single healer to get all of the grenade cleanses, so other players should try to help out if they can. Communicate with your healers and try to coordinate when you will cleanse. If your healer isn’t doing a good job with cleansing, pop a DCD when you see the debuff and always try to cleanse yourself if you can in this fight.
- The napalm hits really hard, so make sure to get out of it ASAP or you will die.
- There is a new shield mechanic that seems to be somewhat bugged. I think what is supposed to happen is that each boss will have a shield come up that makes them immune. It activates as soon as they drop below 50% and get their upgraded ability and falls off when all of the bosses drop below 50 and get their shield, but sometimes it immediately falls off rather than staying until all of the bosses drop below 50%. We tried attacking them in different orders and that didn’t seem to have an effect on the shield not applying, which leads me to think it is a bug. Basically the mechanic just forces you to have to endure all of the bosses with their enhanced abilities at the same time.
- When 1 boss dies, the remaining ones that are still alive gain a soft enrage stack that increases their damage output. This doesn’t really make the fight more difficult in my opinion, it just means the fight doesn’t get easier as you kill them.
Strategy:
Rather than just focusing them down one at a time, you have to bring them all down to 50 first. I would still recommend focusing them one at a time since that minimizes the amount of time that you’ll be dealing with their enhanced abilities. If there’s a specific mechanic for one of them that causes you problems, you should focus that one down last for the pre-50% phase and then focus that same one down first for the post 50% phase. This fight also greatly benefits from AoE tacticals since you can often hit at least two of the bosses at the same time, sometimes 3, though the AoE tacticals certainly aren’t necessary by any means. Also remember to try and interrupt the casts whenever you see them. Save your offensive cooldowns and raid buffs for when all bosses are below 50%. This is when the bosses will be at their strongest.
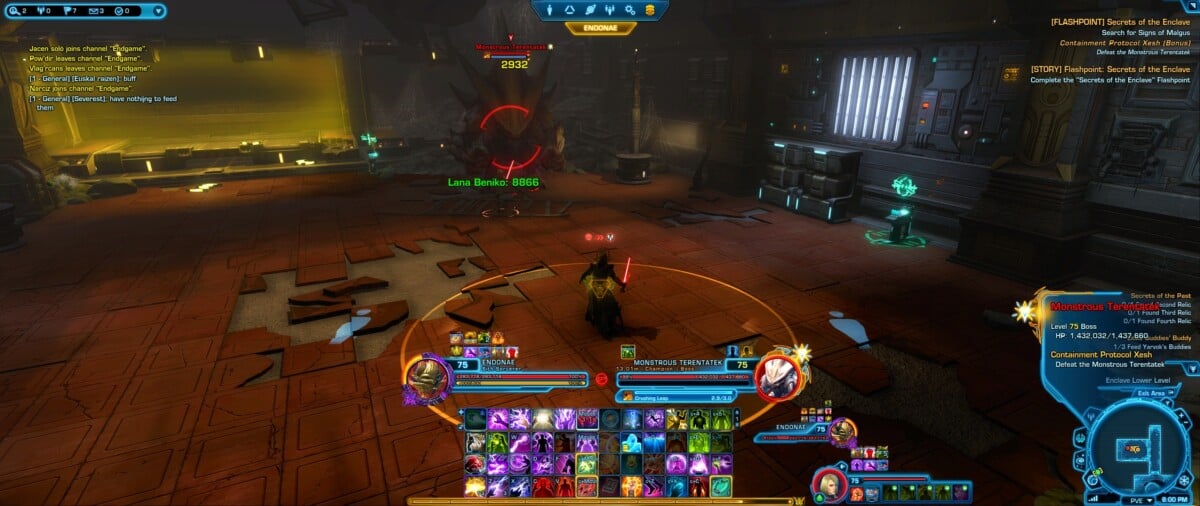
Bonus Boss – Monstrous Terentatek
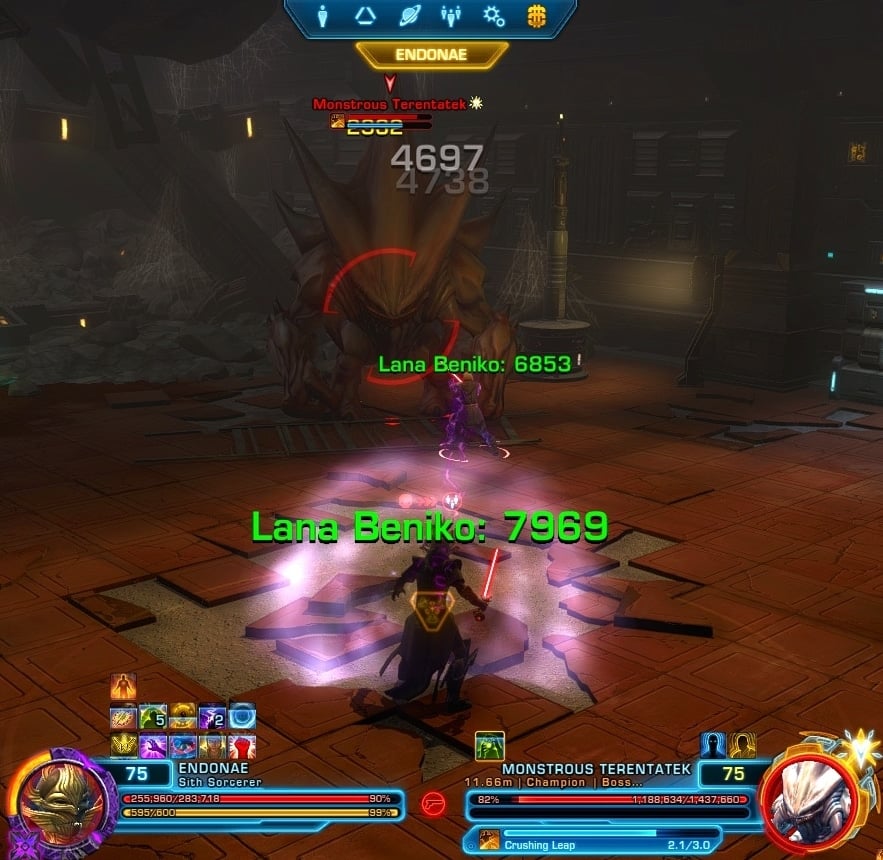
This boss is in a room directly after you fight the second boss so make sure you don’t take the elevator before fighting it or you’ll have to come back. The boss has 3 attacks.
Crushing Leap – He leaps to you at the end of the cast, so just move while the cast is happening and don’t stop moving until it ends.
Random knock up – I think this only happens to the person with aggro, but he just likes to knock you around and throw you behind him. There is no castbar and this is pretty much unavoidable.
Unnatural Energies – He charges up for 10 seconds and little pillars like those found on the first boss in Nathema light up, all you have to do is click on one before the cast ends to interrupt it. Otherwise you’ll take a bunch of damage.
Master Mode Mechanics and Strategy
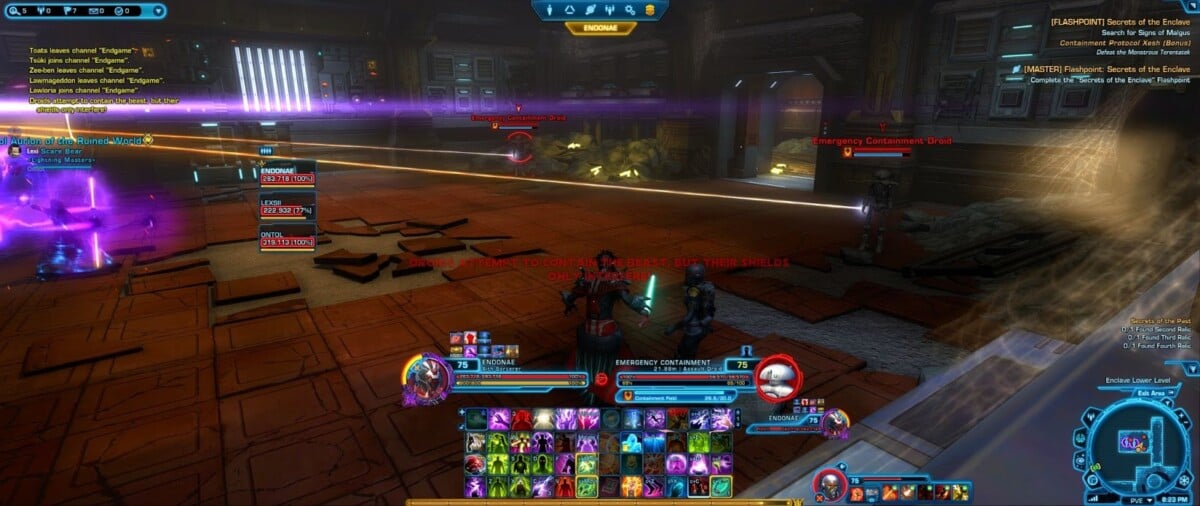
The only difference in this fight is that the Unnatural Energies channel mechanic is completely different in MM, though the difference is significant and requires coordination. Rather than the pillars you click to interrupt the boss, 2 Droids spawn, 1 in each corner of the room against the same wall where you enter the room. During the Unnatural Energies channel, the Terentatek becomes vulnerable to interrupts, though each of the droids channels a beam that restores the Terentatek’s immunity to being interrupted, though the immunity only exists while at least 1 of channels is active. The droids themselves are immune to being interrupted, but they are not immune to other types of CC like stuns, knockbacks, and mezzes. Unnatural Energies also does a ridiculous amount of damage that scales with how long the Terentatek was able to channel for before being interrupted, so the faster you interrupt, the less damage you take. If the channel is able to complete, everyone will get hit for about 80% of their health.
Strategy:
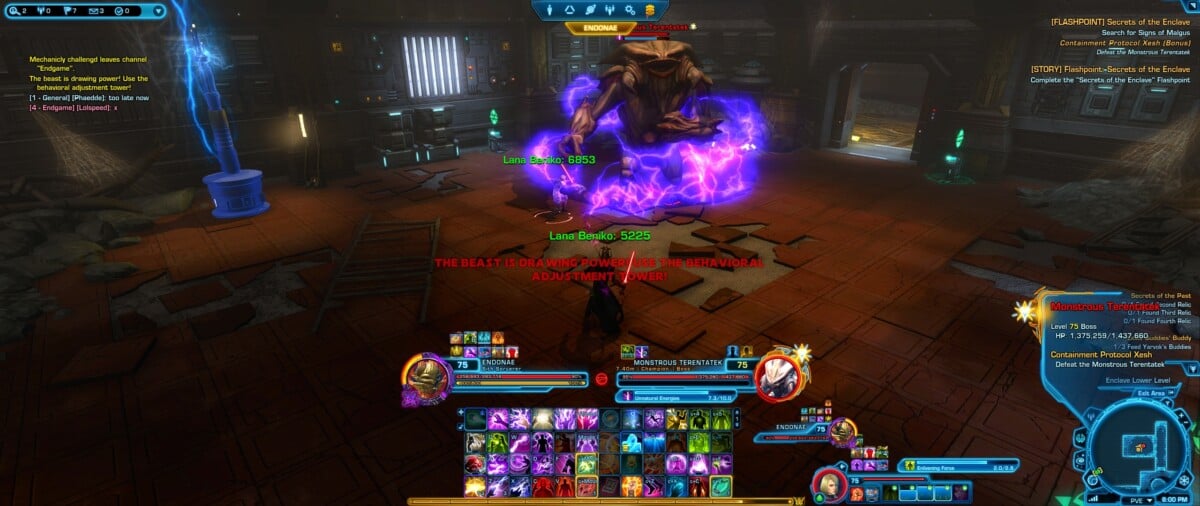
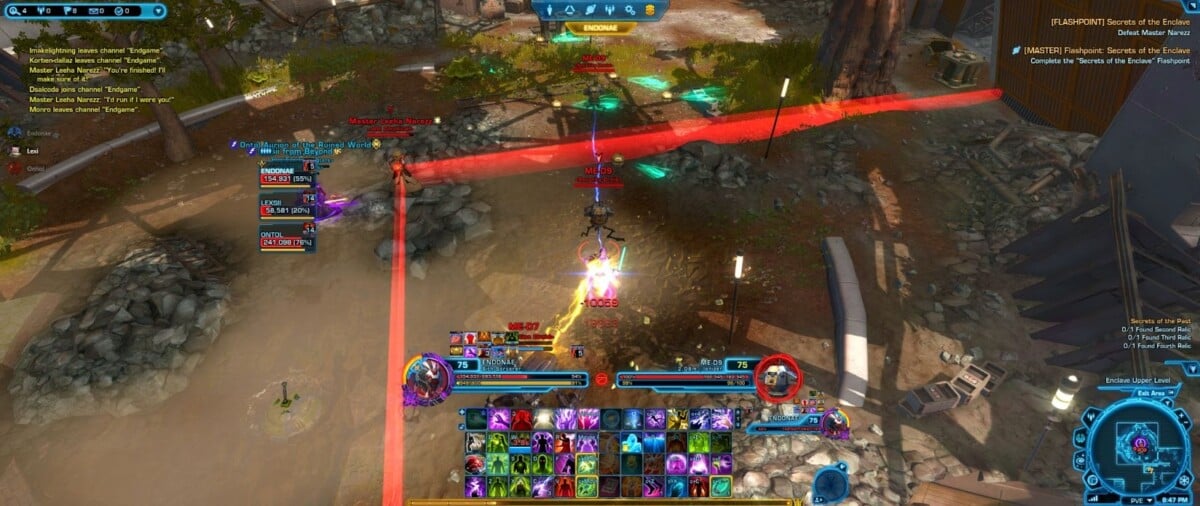
The droids have too much health to be killed before the Unnatural Energies channel completes.The key to this fight is to interrupt the droids that spawn in ways that are not your interrupt ability by using hard stuns, mezzes, and knockbacks. It channels Unnatural Energies once every 40-45 seconds. Every advanced class has a utility that reduces the cooldown on your hard stun ability, definitely take it for this fight, most of the time it’s in the first or second tier. It will enable you to use your hard stun for every single droid spawn. We have found it works best to assign 1 DPS to stun each of the droids and then have the tank interrupt the Terentatek when both adds are stunned. This allows the healer to focus on making sure everybody is topped off for the inevitable damage and also allows them to cover for someone if a mistake is made. Make sure the adds are killed after they are stunned, you will most likely wipe if you have multiple pairs of droids up at the same time. Also everyone should pop a DCD during this channel since some amount of damage is guaranteed and it can be quite a lot if the interrupt doesn’t happen fast. Here are some images that showcase new mechanic. The first image shows 1 stack of the interrupt immunity buff and the Concentrated Energies stacks that indicate how much damage the boss will deal with the attack. More stacks mean more damage.

The second image showcases the two droids channeling their beams.
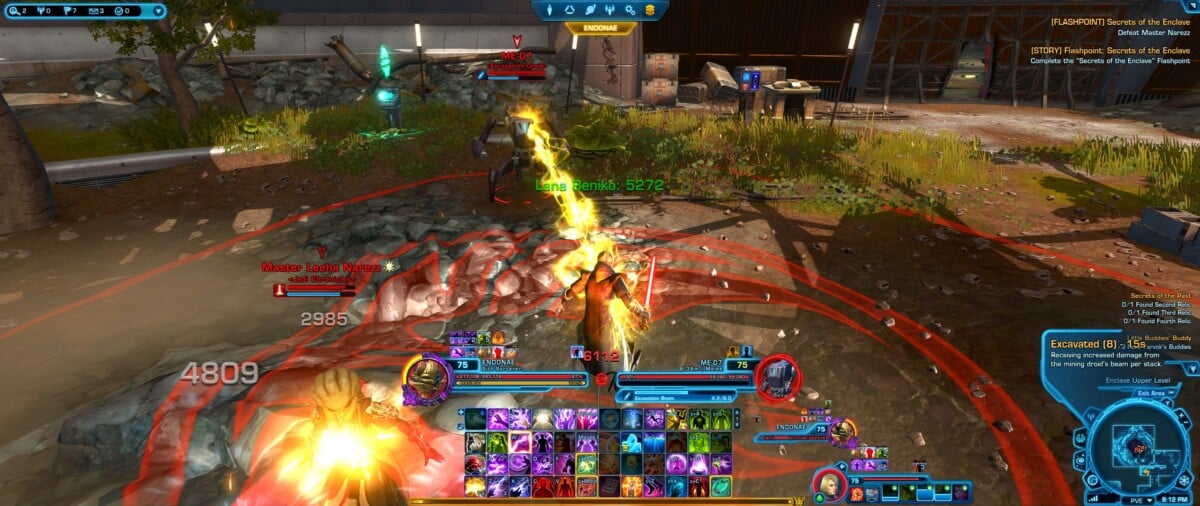
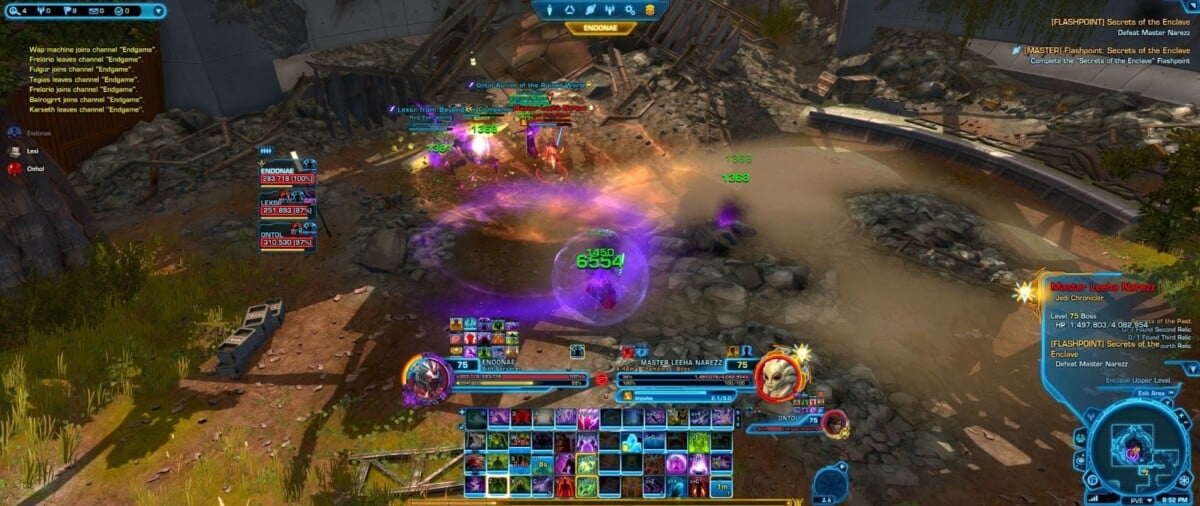
Final Boss – Leeha Narezz / Colonel Barden Golah
The mechanics are the same, though the bosses look different, just like for the second boss. I will be using Imp pictures. The boss has 2 different droids that spawn and 3 other mechanics. The order that the adds spawn in is random.
Excavating Droids – These will target you or someone in the group and build stacks that make them take increased damage from their Excavation Beam channel ability. This attack is not interruptible, so burn down this droid ASAP. The following picture depicts both the Excavation Droid and Leeha’s Forcequake ability
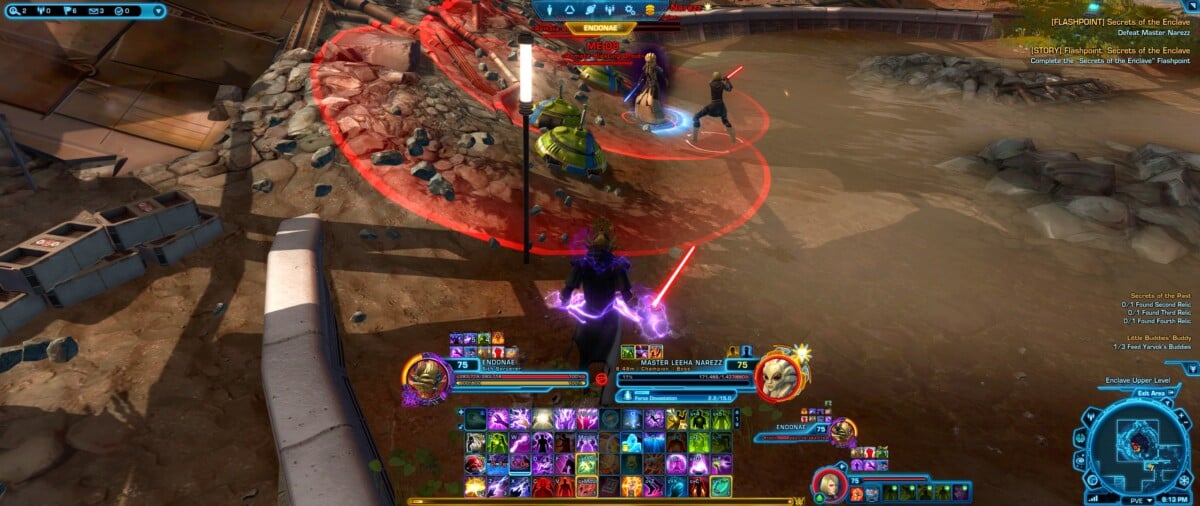
Remote Blasting Droids – These droids spawn and chase you and stop once they reach you and detonate shortly thereafter. You can’t actually deal damage to them, so just let them reach you and then run out of their circles once they stop moving before they detonate. The following image contains both the Remote Blasting Droids and the Force Devastation channel.
Conal attack – Leeha jumps to the center of the room and does a massive conal attack that covers a quarter of the room. It deals a fair amount of damage so be sure to get out of it. There is no castbar, so make sure you’re watching the floor.
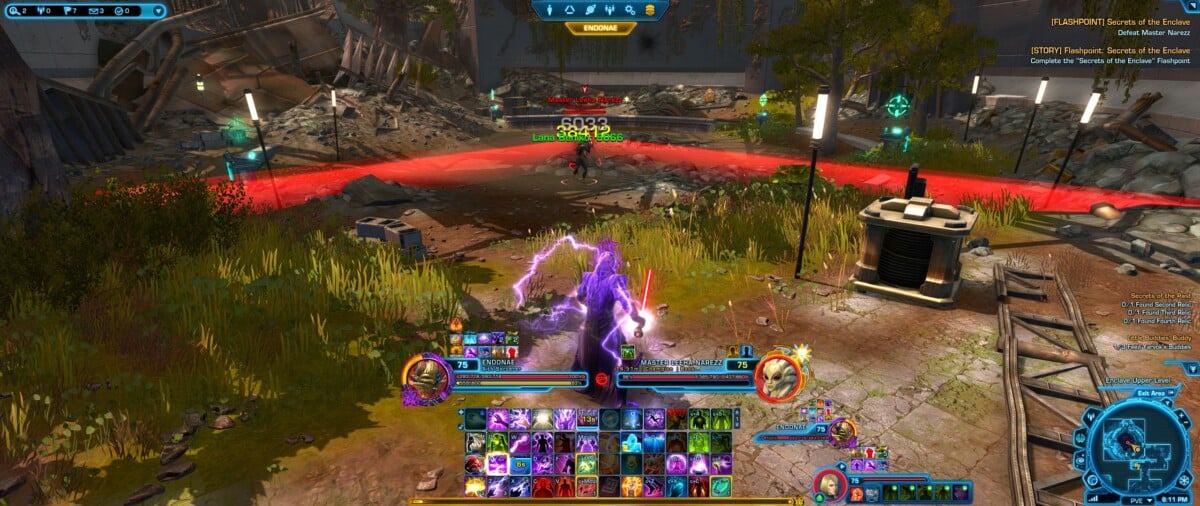
Forcequake / Quake Detonator – The boss channels Forcequake / Quake Detonator, which does damage while you’re standing in it. Make sure you leave the circle.
Force Devastation / Inevitable End – Sub-15% The boss does a 15 second channel burn phase ability. I expect in MM this wipes the group and you are expected to kill her before she finishes the channel, but in Story Mode letting the cast off does not appear to do anything.
Master Mode Differences and Strategy
The excavation droid debuff is more significant. It lasts for up to 15 seconds if it is not being refreshed by an excavation droid. If you aren’t careful, this droid can start killing people if you let it apply a bunch of stacks to everyone.
There is a new add that spawns. It basically just deals damage in melee range. It has a cast as well, but I can’t tell what the cast does. It doesn’t have any CC immunities like the other adds, so it can be CC’d if needed.
Sub-50%, the boss gains a new ability called Impulse (not sure if it’s called something different on the pub side). You can LOS it and outrange it, though it isn’t super worth it to even bother since it just knocks everyone back and then applies a short debuff that slows you. I guess it can be a little problematic if the explosive adds are out.
Force Devastation / Inevitable End hits really hard but isn’t a raid wipe and can be cheesed. It is still fully possible to kill her before she gets the channel off once.
Strategy:
The Excavation droid continues to be the highest priority enemy to kill, followed by the new probe droids. In general, this fight hinges on how good your DPS are. If your DPS is too low, too many adds will spawn and overwhelm you, but if you have enough DPS, the adds really aren’t that problematic because you’ll only deal with a small number at a time. Just kill the droids as soon as they spawn. Make sure you have offensive cooldowns and raid buffs available for the Force Devastation / Inevitable End cast.