
In SWTOR 7.0, legendary implants carry set bonus effects. We’ll show you how to unlock them, list out their effects more accurately than the devs do, and note which are BiS implants.
Table of contents
What are Legendary Implants
With the release of SWTOR Update 7.0 and the Legacy of the Sith expansion in February 2022, the devs changed the way set bonuses are earned and used by all classes.
Instead of having to collect up to six pieces of armor parts to get the set bonus you desire, these are now attached to legendary implants.
The devs often refer to them as legendary items, but this term is imprecise, and most players call them legendary implants.
Putting set bonus effects on singular pieces of gear provides the following advantages to your Endgame Gearing Process at level 80 compared to what it was at level 75 in 6.0:
- Faster Gearing – You’ll only need 2 pieces of gear to get the full effect of a full set bonus as opposed to 6.
- Greater Customization – Since the 4 and 6-piece bonuses are essentially decoupled, you will be able to mix and match them.
- More Inventory Space – Some disciplines even in the same role require completely different set bonuses. This took up a lot of space in inventory. With implants, you’ll only need to keep ~2 pieces of additional gear for each discipline as opposed to 6.
- Slightly Simpler Gearing – By making it so you get a full benefit from a single piece of gear, it’s a bit easier for new players to understand.
How to get Legendary Implants
Legendary implants have an initial Item Rating (iRating) of 326. There is a new vendor on the Fleet. After you complete his mission, he will be willing to sell these expensive endgame gear items to you.
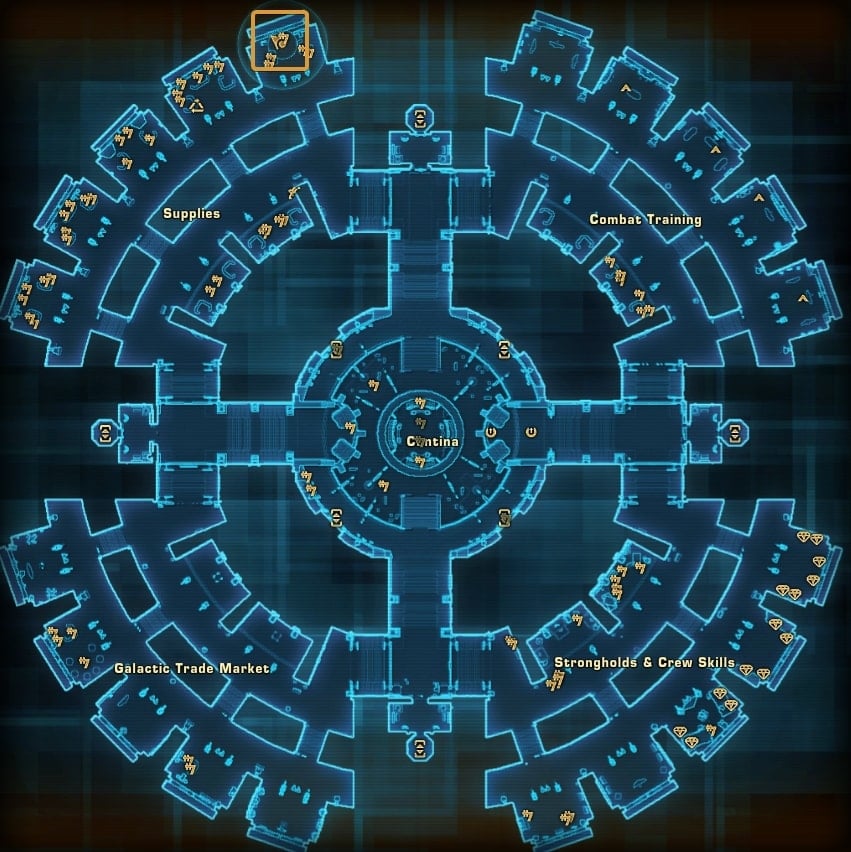
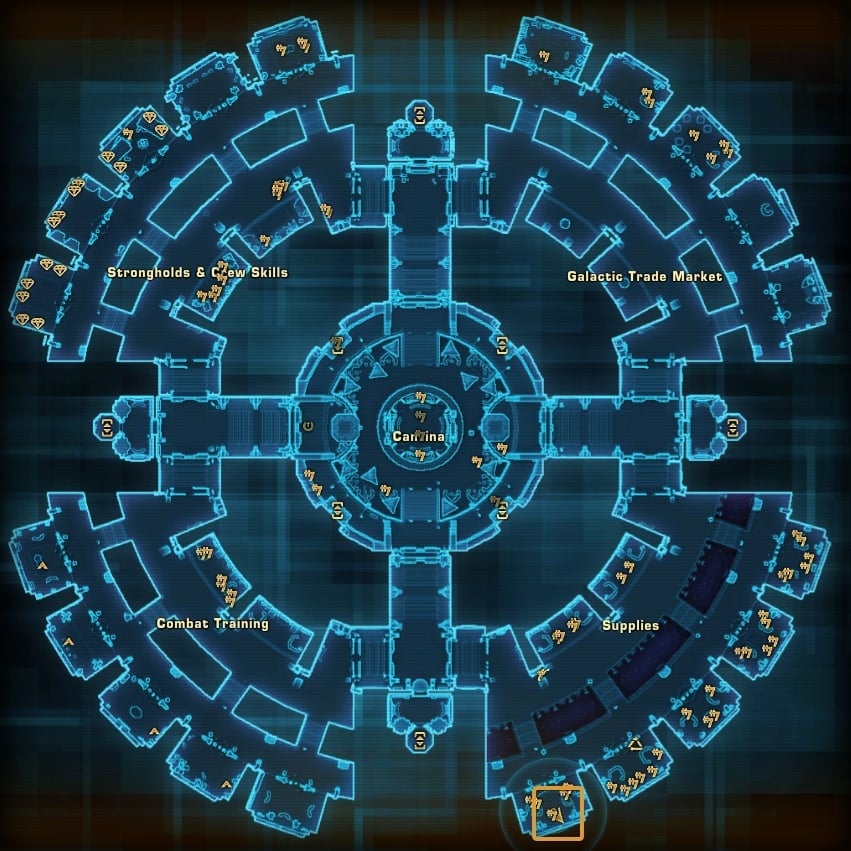
You can find this Implant Researcher twi’lek NPC named Lonndar Eadwinn in the Supplies Section, in the outer ring of the Fleet.
To unlock this new vendor, you will need to complete a mission for him. Of course, you need to be level 80 for him to even give it to you.
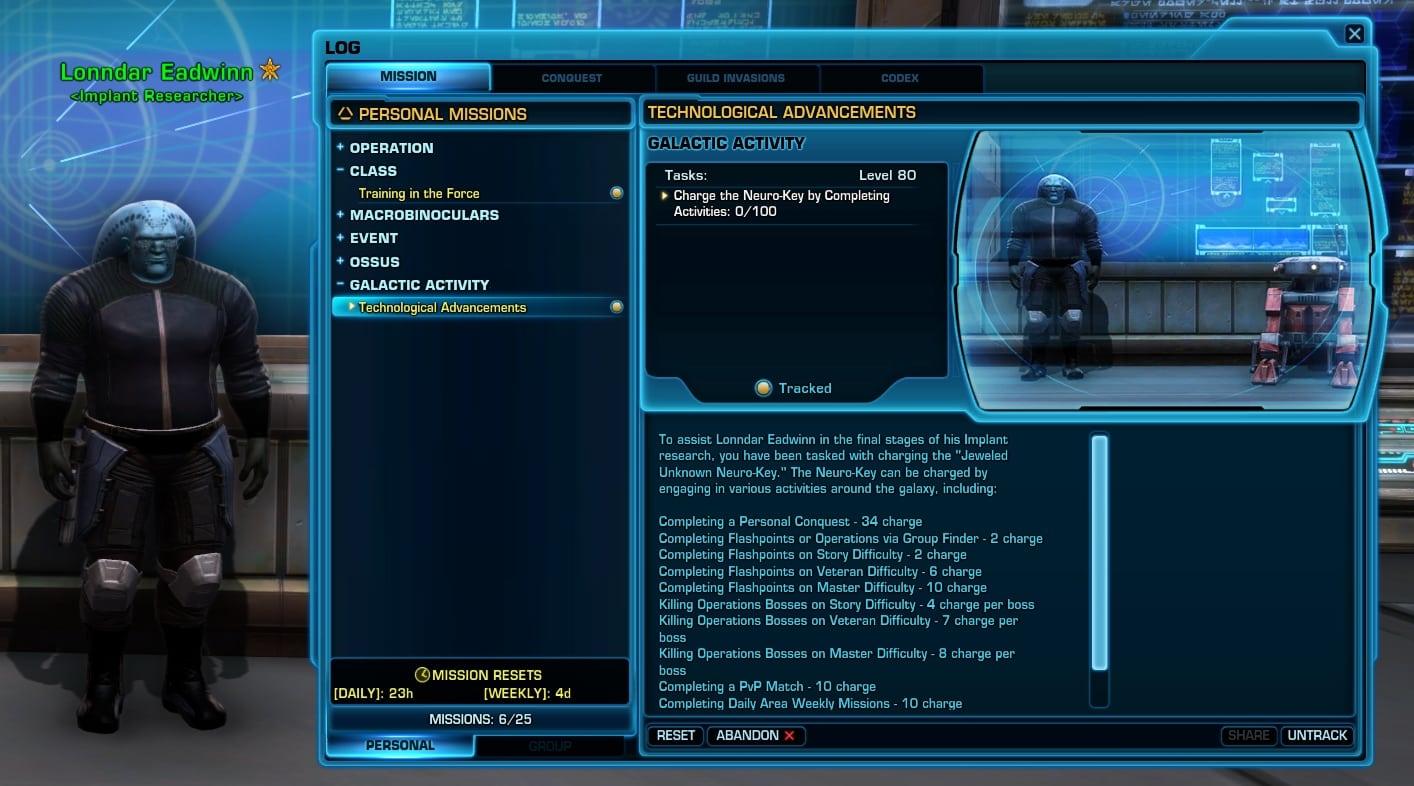
Talk to him. He will introduce himself and explain to you what he is able to offer. In exchange for you helping him out first with his research. The mission he will give you is called Technological Advancements.
“To assist Lonndar Eadwinn in the final stages of his Implant research, you have been tasked with charging the “Jeweled Unknown Neuro-Key.” The Neuro-Key can be charged by engaging in various activities around the galaxy.”
Below is the full list of activities and how many charges each one grants you:
| Activity | Charges |
|---|---|
| Completing a Personal Conquest | 34 |
| Completing Flashpoints or Operations via Group Finder | 2 |
| Completing Flashpoints on Story Difficulty | 2 |
| Completing Flashpoints on Veteran Difficulty | 6 |
| Completing Flashpoints on Master Difficulty | 10 |
| Killing Operations Bosses on Story Difficulty | 4 per Boss |
| Killing Operations Bosses on Veteran Difficulty | 7 per Boss |
| Killing Operations Bosses on Master Difficulty | 8 per Boss |
| Completing a PvP Match | 10 |
| Completing Daily Area Weekly Missions | 10 |
| Completing Heroic Weekly Missions | 10 |
At a first glance, this looks like a lot of work. But it’s not really that bad. The most rewarding activity, and one that you will likely complete in your first week anyway, is to complete your personal Conquest goal.
Upgrading Implants
Legendary implants can be upgraded to iRating 340. In addition, the SN-4RK droid vendor that sells you these implants will charge fewer Tech Fragments and Conquest Commendations once you’ve upgraded and equipped a pair of 330, 334, or 340 implants.
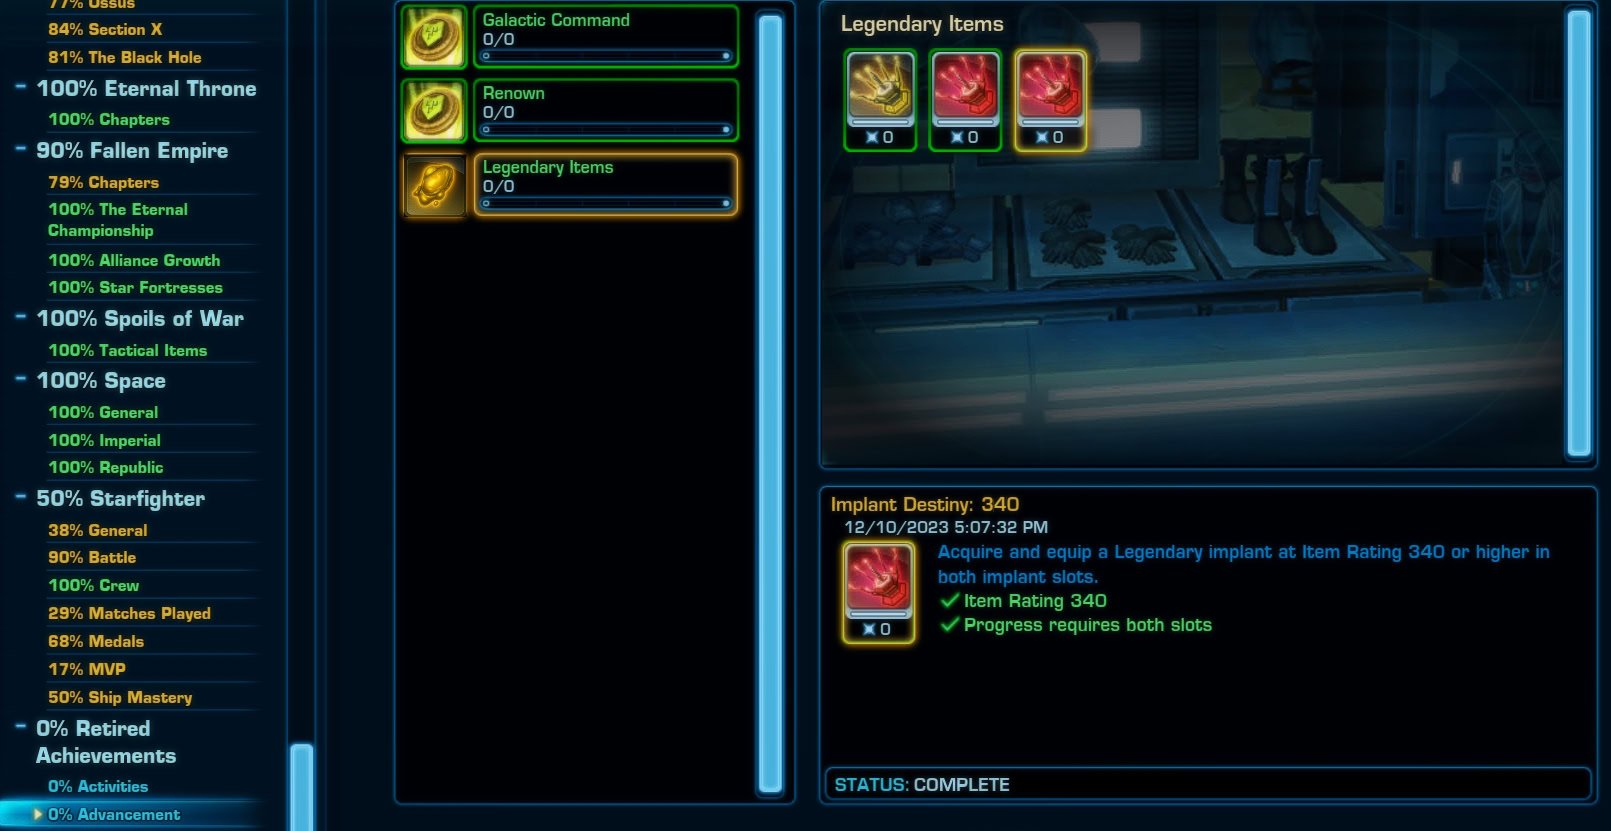
The game tracks this through 3 achievements, for iRating 330, 334, and 340. Once you have each achievement, legendary implant upgrade and purchase costs will be reduced accordingly:
| Before | After | ||
|---|---|---|---|
| Tech Fragments | 6,500 | 2,500 | |
| Conquest Commendations | 100 | 60 |
The purpose of reducing the costs of upgrades is primarily to make it cheaper to procure implants for your alts.
To be most efficient with Tech Fragments and Conquest Commendations while getting access to implants on all of the toons you care about, you should purchase and upgrade implants in the following order:
- Purchase a single pair of 326 implants and upgrade them to 330
- Purchase all the 326 implants for alts, but don’t upgrade them to 330
- Upgrade the initial pair of 330 implants to 340
- Upgrade the rest of your implants and prioritize upgrading the implants you use the most
The special effect provided by legendary implants is far more valuable than the additional stats gained from upgrading them, so once you have the cheaper price unlocked, it’s better to buy the implants for all of your alts and then upgrade them on the toons you play most.
Legendary Implant Quirks
Before I go through the list, there are a few things you should know about legendary implants. Most legendary implants are restricted to original Class – Advanced Class pairs. Here is a translation table for Class – Advanced Class Pairs:
| Requires This Base Class | Usable By These Combat Styles |
|---|---|
| Sith Warrior | Jedi Knight | Juggernaut, Marauder | Guardian, Sentinel |
| Sith Inquisitor | Jedi Consular | Sorcerer, Assassin | Sage, Shadow |
| Imperial Agent | Smuggler | Sniper, Operative | Gunslinger, Scoundrel |
| Bounty Hunter | Trooper | Mercenary, Powertech | Commando, Vanguard |
Some legendary implants with fairly generic effects like increasing damage dealt by certain damage types have separate legendary implants corresponding to each base Class.
For example, there is a Force Resistance Package for Sith Inquisitors | Jedi Consulars and a Force Resistance Package for Sith Warriors | Jedi Knights. Even if the effect is the same, you cannot benefit from or even equip the legendary implants that does not correspond to your Combat Style
In addition to semi-generic effects, there are some legendary implants are some implants that are usable by any combat style, though most of them have pretty weak effects.
To be clear, not every legendary implants is available to every Combat Style that could conceivably utilize it, some are only partially generic. If you don’t see the legendary implants on the list for your Combat Style, you cannot use it.
Even implants with the same name don’t always offer identical stats. Unless your discipline literally cannot make use of one or more stats on the legendary implants (e.g. tank stats for a DPS spec), tertiary stats should not be a factor in deciding which legendary implants you buy and use.
The effects are far more powerful than the stats and are often designed to synergize with specific builds. It’s your job to compensate for differences in stats by obtaining and equipping different augments and earpieces. For your convenience, I have still included the tertiary stat provided by each legendary implants.
All Legendary Implants
You’ll find a list of all legendary implants sorted by combat style with best in slot options (BiS) noted. Some implant effects have been reworded for clarity and transparency.
Icon Color Code
The icons are color-coded to match the tertiary stat provided by the implant. For example, all implants that provide Critical Rating are red.
 Critical
  Alacrity
 Shield
 Absorb
Please note that no legendary implants provide Accuracy, but under no circumstances should you ever use a regular implant just so you can have accuracy on your implant. Retool your gear instead.
In addition, since implants max out at 340 while the rest of your gear can go up to 344, you can’t treat an implant as an enhancement if you’re trying to hit a threshold.
Typically, BiS implants for a given discipline use 1 of each damage type, so you’ll need to tweak your gear if both implants offer the same stat.
Sorcerer | Sage
Dynamic Force
The cooldown of Recklessness | Force Potency is reduced by 15 seconds.
Empowered Restorer
Activating Force Barrier puts a barrier on nearby allies, absorbing some damage and granting them an additional 25% Elemental damage reduction while active. Lasts up to 8 seconds. Absorb shield HP is equivalent to twice as much as Static Barrier | Force Armor (~56k).
Situationally BiS for Corruption | Seer
Force Training
Increases your Force and Melee Bonus Damage by 3%.
Force Resistance (Inquisitor | Consular)
Increases your Damage Reduction by 3%.
Gathering Storm
Activating Force Speed grants Galvanized, which increases the damage dealt by your next tick of direct Force damage by 20%. In addition, you deal 20% more damage while Polarity Shift | Mental Alacrity is active.
BiS for Lightning and Madness | Telekinetics and Balance
Revitalize
Your other healing abilities have a 15% chance to tick Resurgence | Reguvenate whenever they heal a target affected by it.
BiS for Corruption | Seer
Unmatched Haste
The duration of Polarity Shift | Mental Alacrity is increased by 5 seconds and activating Force Speed reduces the active cooldown of Polarity Shift | Mental Alacrity by 5 seconds.
BiS for all Sorcerer | Sage disciplines
Assassin | Shadow
Ballast Point
Deflection grants Ballistic Immunity for 6 seconds, giving you immunity to movement-impairing effects, knockdowns, and physics.
Situationally BiS for Darkness | Kinetic Combat
Dynamic Force
The cooldown of Recklessness | Force Potency is reduced by 15 seconds.
Situationally BiS for Deception and Hatred | Infiltration and Serenity
Force Resistance (Inquisitor | Consular)
Increases your Damage Reduction by 3%.
BiS for Darkness | Kinetic Combat
Force Training
Increases your Force and Melee Bonus Damage by 3%.
Situationally BiS for Deception and Hatred | Infiltration and Serenity
Shadowcraft
Activating Phantom Stride | Shadow Stride from stealth while out of combat grants Shadowcraft, increasing your critical chance by 100% for 6 seconds. Activating Force Cloak resets the cooldown of Phantom Stride | Shadow Stride.
BiS for Deception and Hatred | Infiltration and Serenity
Powertech | Vanguard
Mandalorian Armaments
When Shoulder Cannon is put on cooldown, it applies Autocannon to you for 60 seconds, firing a rocket at your current target whenever you deal direct damage. This additional rocket can fire once every 10 seconds.
Situationally BiS for Pyrotech and Advanced Prototype | Plasmatech and Tactics
Shock Trooper
The Heat | Energy Cell cost of Flaming Fist and Rocket Punch | Shockstrike | Stockstrike is reduced by 4. In addition, dealing damage with Flaming Fist, Magnetic Blast, or Heat Blast | Shockstrike, Magnetic Blast, or Energy Blast increases all damage dealt by 10% for 15s. Cannot occur more than once every 30s.
BiS for Pyrotech and Advanced Prototype | Plasmatech and Tactics
Specialist
This implant has a different effect depending on the active discipline:
Tank: Explosive Fuel | Battle Focus also increases all damage dealt by 20%
DPS: Explosive Fuel | Battle Focus also increases your damage reduction by 10%
Yes, it does feel backwards. It has value for tanks in fights with burst DPS checks and technically for DPS in PvP.
Squad Leader
Whenever you take damage with Energy Shield | Reactive Shield, you apply a weaker shield that grants 10% DR to all allies within 5m for 3 seconds.
Situationally BiS for Shield Tech | Shield Specialist
Supercommando
Activating Power Yield, Thermal Yield, or Energy Yield | Balmorran Advanced Weaponry, Durasteel Armor, or Infused Kolto Packs grants a shield that absorbs 1.62 million damage. Lasts up to 3 seconds.
BiS for Shield Tech | Shield Specialist
Situationally BiS for DPS specs
Veteran Ranger
Each Shoulder Cannon rocket has a 50% chance to trigger an additional rocket.
| Configuration | Added Missiles |
|---|---|
| Advanced Prototype | Tactics | +3.5 missiles |
| Pyrotech | Plasmatech Shield Tech | Shield Specialist | +2 missiles |
| w/ Mandalorian Armaments | +3 missiles |
| w/ Shield Cannon | Guard Cannon | +3% HP per missile |
Veteran Ranger and Mandalorian Armaments synergize to contribute an additional 5-6.5 missiles per activation on average. Shield Cannon | Guard Cannon heals for 3% per missile, so these implants can offer up to 15-19.5% additional healing every 2 mins.
Mercenary | Commando
Advanced Scanning
Reduces the cooldown of Healing Scan | Advanced Medical Probe by 1.5 seconds and the cooldown of Emergency Scan | Bacta Infusion by 3 seconds.
Situationally BiS for Bodyguard | Combat Medic
Concentrated Fire
Activating Supercharged Gas | Supercharged Cell increases the critical chance of your next Rail Shot, Mag Shot, or Emergency Scan | High Impact Bolt, Mag Bolt, or Bacta Infusion by 100% for 20 seconds.
BiS for all Mercenary | Commando disciplines
Overcharged Cells
Dealing damage with Priming Shot or Thermal Detonator | Vortex Bolt or Assault Plastique or healing an ally with Healing Scan | Advanced Medical Probe builds 3 stacks of Supercharge. Cannot occur more than once every 15 seconds.
BiS for all Mercenary | Commando disciplines
Squad Leader
Whenever you take damage with Energy Shield | Reactive Shield, you apply a weaker shield that grants 10% DR to all allies within 5m for 3 seconds.
Target Eliminator
Dealing damage with Heatseeker Missiles or Serrated Shot | Demolition Round or Serrated Bolt increases all damage dealt by 2% for 15 seconds. Cannot occur more than once every 30 seconds.
Sniper | Gunslinger
Active Reload
Defeating an enemy within 3 seconds of damaging them with Takedown | Quickdraw resets the cooldown of Takedown | Quickdraw and increases your damage dealt by 5%. Stacks up to 3 times and lasts 10 seconds.
Energy Regulators
You regenerate 1 Energy per second while in cover.
BiS for Engineering | Saboteur
Improved Targeting
Reduces the cooldown of Laze Target, Viral Targeting, and Targeting Systems | Smuggler’s Luck, Blood Sights, and Target Hack by 15 seconds.
BiS for Marksmanship and Virulence | Sharpshooter and Dirty Fighting
Locked and Loaded
Increases your Tech and Ranged Bonus Damage by 5%.
BiS for all Sniper | Gunslinger disciplines
Mini Shield
Activating Shield Probe | Defense Screen grants a Mini Shield to up to 8 allies within 5m that absorbs ~7.3k damage and lasts up to 10s.
If used on cooldown, this is equivalent to ~250 HPS per player, so ~750 HPS if you apply it to the rest of the group and ~1750 HPS if you apply it to the entire raid group.
Operative | Scoundrel
Aggressive Treatment
Toxic Haze | Bushwhack now also heals up to 8 allies for ~6k per tick (non-crit), ticks 3 times.
BiS for Medicine | Sawbones
Field Medic
Activating a healing ability has a 15% chance to grant Field Medic’s Critical Bonus, which causes your next Kolto Injection | Underworld Medicine to automatically critically hit. Cannot occur more than once every 30 seconds.
Locked and Loaded
Increases your Tech and Ranged Bonus Damage by 5%.
Situationally BiS for all Operative | Scoundrel DPS disciplines
Mini Shield
Activating Shield Probe | Defense Screen grants a Mini Shield to up to 8 allies within 5m that absorbs ~7.3k damage and lasts up to 10s.
If used on cooldown, this is equivalent to ~250 HPS per player, so ~750 HPS if you apply it to the rest of the group and ~1750 HPS if you apply it to the entire raid group.
Tactician
Gaining Tactical Advantage | Upper Hand grants Critical Tactics, which increases your Critical Chance by 10% for 10 seconds.
BiS for all Operative | Scoundrel disciplines
Tactician’s Focus
Dealing critical damage with Veiled Strike or Lethal Strike | Bludgeon or Point Blank Shot grants Tactician’s Focus, which increases the critical chance of your next Laceration or Corrosive Assault | Sucker Punch or Brutal Shots by 100%. Cannot occur more than once every 30 seconds.
Situationally BiS for Concealment | Scrapper
Trapper
Toxic Haze | Bushwhack now refunds a Tactical Advantage | an Upper Hand and no longer costs Energy.
Juggernaut | Guardian
Champion’s Precision
Enrage, Bloodrage, and Threatening Rage | Combat Focus, Burning Focus, Threatening Focus grants Champion’s Precision, increasing your Critical Chance by 20% for 8 seconds.
BiS for Vengeance and Rage | Vigilance and Focus
Fearless Victor
Whenever you use an attack that spends Rage | Focus, your Melee Bonus Damage is increased by 10%.
Situationally BiS for Vengeance and Rage | Vigilance and Focus
Force Resistance (Warrior | Knight)
Increases your Damage Reduction by 3%.
BiS for Immortal | Defense
Nimble Master
Saber Ward now also increases your movement speed to 200%.
Situationally BiS for Juggernaut | Guardian DPS specs in Arenas
Retaliator
Retaliation | Riposte no longer has a cooldown.
BiS for Immortal | Defense
Vicious Thirst
Vicious Slash, Massacre, and Sweeping Slash | Slash, Blade Rush, and Cyclone Slash apply stacks of Vicious Thirst to targets they damage. Defeating an enemy affected by your Vicious Thirst icreases your damage dealt by 3% per stack for 10 seconds. Stacks up to 5 times.
Marauder | Sentinel
Berserker’s Call
Activating Berserk | Zen increases all damage dealt by 5% for 10s. In addition, the cooldown of Frenzy | Valorous Call is reduced by 15 seconds.
BiS for Annihilation and Fury | Watchman and Concentration
Dispatcher
Activating Dual Saber Throw | Twin Saber Throw grants Dispatcher’s Challenge, increasing the Critical Chance of your next Vicious Throw or Vicious Slash | Dispatch or Slash by 100%. In addition, critically hitting with a weapon attack generates 1 Rage | Focus. Cannot occur more than once every 3 seconds.
BiS for Annihilation and Carnage | Watchman and Combat
Fearless Victor
Whenever you use an attack that spends Rage | Focus, your Melee Bonus Damage is increased by 10%.
BiS for Fury and Carnage | Concentration and Combat
Nimble Master
Saber Ward now also increases your movement speed to 200%.
Situationally BiS for Juggernaut | Guardian DPS specs in Arenas
Force Resistance (Warrior | Knight)
Increases your Damage Reduction by 3%.
Vicious Thirst
Vicious Slash, Massacre, and Sweeping Slash | Slash, Blade Rush, and Cyclone Slash apply stacks of Vicious Thirst to targets they damage. Defeating an enemy affected by your Vicious Thirst icreases your damage dealt by 3% per stack for 10 seconds. Stacks up to 5 times.
Fully Generic
These implants do not have any sort of combat style restrictions like the others. They were added in 7.2, but almost all of them are pretty weak. I only recommend using a couple of them in specific situations.
If you play the game casually but have a lot of alts with different combat styles, these implants might be more worthwhile to obtain in lieu of combat style-specific ones so that you can get some benefit on all your toons instead of only having implants on individual toons.
Aside from the Second Wind Package, these implants are weaker than even the weakest of the combat style-dependent ones.
Berserker’s
Increases all damage dealt by 3% and all damage taken by 6%.
Dying Precision
Increases your Critical Chance by 5% while your HP is below 50%.
Entertainer
Increases your group members’ Mastery and Endurance by 2% and rate of XP gain by 10% while in combat.
The player in the group with the implant does not benefit from these effects and it only applies to your group frame, not the entire ops group.
Final Breath
Increases your Defense Rating by 10% and reduces your damage taken by 5% while your HP is below 50%.
Preserver’s
You passively regenerate 1% of your maximum health every 10s.
Second Wind
Defeating an enemy heals you for 20% of your max health and sets your movement speed to 175% for 8s. Cannot occur more than once every 8s.
BiS for:
Tanks in boss fights with adds
Most specs in Warzones
Most specs in solo content
Any spec with a garbage implant
Stationary Grit
Increases your damage dealt by 3% while not moving and increases your Armor Rating by 10% while moving.
Stimulated
Increases your Mastery by 5% while affected by a stim.
Trishin’s Retort
Shielding an attack causes your shield to overload, dealing ~1.9k weapon damage (non-crit) to up to 8 enemies within 5m. Cannot occur more than once every 3s.
Situationally BiS for Darkness Assassin | Kinetic Combat Shadow