SWTOR Kinetic Combat Shadow PvP Guide (Tank) for beginners and more experienced veterans: Skills, Choices, Rotations, Gearing, Builds, and helpful PvP tips!
The guide is up-to-date for Patch 7.6
Table of contents
- Introduction to Kinetic Combat Shadow
- Kinetic Combat Abilities Explained
- Kinetic Combat Ability Tree Choices
- Gearing and Stat Priorities
- Best Builds for Kinetic Combat Shadow in PvP
- Rotations and Ability Priorities
- Basic Tanking Tips for Kinetic Combat Shadow in PvP
- Tips on how to fight other classes
- Warzone Maps Tips
- Arenas Maps Tips
- Conclusion
Introduction to Kinetic Combat Shadow
Hello there! I am Jedi Master Siow and I will be going over the Kinetic Combat Shadow in Star Wars: The Old Republic. This is the class I have played the most in The Old Republic and I would like to teach others on how to excel at it as well! This has always been my favorite class to play in SWTOR because I love the versatility this class offers. You’re a stealthy tank that can adjust their damage output to either weapon damage or Force damage, and your kit allows you to handle anything that comes your way with confidence!
I will be going over the basics of the Kinetic Combat Shadow, how gearing works for us in 7.0, and much more. When it comes to explaining stats, I prefer to use percentages over flat numbers unlike most guides.
So you might be wondering, why would I use a Kinetic Combat Shadow over a Defense Guardian or Shield Specialist Vanguard? The Defense Guardian can be seen as one of the best defenders in PvP as they can jump to an ally to reduce their incoming damage. The Shield Specialist Vanguard got some fun new toys such as using their Grapple Hook on allies. Here’s why you would want to play as a Kinetic Combat Shadow in PvP…
- The best Area of Effect abilities of the 3 Tanks in terms of Offensive and Utility abilities.
- High Mobility with the Force Speed and Shadow Stride abilities.
- You have Defensive Abilities that can prepare you for any situation you’re thrown in..
- You have the most Control Abilities of the 3 Tanks.
- And most importantly of all, you can exit combat while in PvP zones at your leisure with the Force Cloak ability allowing you to reassess your situation.
With that said, let’s get started with the Kinetic Combat Shadow!
Kinetic Combat Abilities Explained
This section will feature your abilities sorted out by Weapon Attacks, Force Attacks, Offensive Cooldowns (OCDs), Defensive Cooldowns (DCDs), and Control & Utility Abilities. I won’t be discussing passive abilities by themselves, instead I’ll bring them up in abilities where they become relevant.
Weapon Attacks
 Saber Strike
 Saber Strike
“Deals X-X weapon damage spread across a flurry of 3 melee attacks.”
This is a single target melee attack that you generally use if you run out of Force and need to do something. It’s mostly useless but has the flashiest killing blow animations.
Double Strike
 Double Strike
“Strikes the target twice, dealing X-X weapon damage with each hit and inflicting Trauma, which reduces all the healing received from all sources by 20% for 6 seconds.”
This is your primary Melee attack against a single target. You use this to against a single target to increase your chances of proccing the Combat Technique bonus damage and empower Shadow Strike. Use this against a single target to apply the Trauma debuff to reduce their incoming healing by 20%.
Whirling Blow
 Whirling Blow
“Deals X-X weapon damage to up to 8 targets within 5 meters inflicting them with Trauma, which reduces the healing received from all sources by 20% for 6 seconds. Requires a double-bladed lightsaber or electrostaff.”
This is your primary Area of Effect (AoE) Weapon Attack. A slight edge we have above other tanks is our ability to spam an AoE weapon attack far more often than they could ever dream to. Don’t use this against a single target as you’ll be losing potential damage output. Using this against a group of enemies can be a great way to proc your passive effects or relic effects. Use this against groups of targets to apply the Trauma debuff to reduce their incoming healing by 20%.
Spinning Strike
 Spinning Strike
“Issues a subduing strike, dealing X-X weapon damage. Only usable on targets at or below 30% max health.”
This is your hardest hitting melee weapon attack, you want to use it against a target whenever you can. While it’s often limited to low HP targets, there is an Ability Tree choice, Stalker’s Swiftness, that allows you to use it against a target regardless of their HP after using Shadow Stride. We’ll go more in-depth about that in the Utility portion of the guide. As of 7.2, using Spinning Strike will have a 100% chance to energize your next Project through the Particle Acceleration passive. This is great for on-demand critical hits and helps you stack your Harnessed Shadows stacks sooner so you can exchange those for damage reduction.
Shadow Strike
 Shadow Strike
“Deals X-X weapon damage to a single target if used from behind the target or Y-Y weapon damage otherwise. Requires a double-bladed lightsaber or electrostaff.”
This is a strong melee attack that DPS Shadows would need to get behind a target to use it to its full damage potential. Kinetic Combat Shadows have the Passive Ability, Shadow Wrap, that lets us use Shadow Strike at 50% it’s Force Cost and deal its full damage regardless of the target’s position in relation to you. This is activated by using Double Strike, Whirling Blow, Spinning Strike, and Shadow Stride, and will cause the Shadow Strike icon to glow on the quickbar. Only use this ability if the icon is glowing otherwise you’re wasting Force.
Cleaving Cut
“Strikes targets in a 5 meter cone, dealing X-X weapon damage, immobilizing targets for 2 seconds, then slowing them for an additional 6 seconds once the immobilize wears off Requires a double-bladed lightsaber or electrostaff.”
7.2 reworked this ability by exchanging the damage reduction version Kinetic Combat used to have in exchange for a Root/Slow combo. This is an ability you can choose between 2 others at level 68 but it falls flat compared to Force Wave and Force Lift. It’s now only good for CC’ing someone without filling their resolve bar.
Force Attacks
Force Breach
 Force Breach
“Strikes up to 8 nearby enemies with shattering force, dealing X-X internal damage and generating a high amount of threat.”
You’ll be using this ability on your target(s) as an Area of Effect ability. The area is centered around your target. This means that using Force Breach on a group of targets grouped together that are 10 meters away will damage all of them.
Applying Force Breach to a target as a Kinetic Combat Shadow makes your targets Unsteady for 45 seconds which reduces their melee and ranged accuracy by 5%, as well as taking 15% more damage from your Whirling Blow ability. This is due to your Psychokinesis passive.
Slow Time
 Slow Time
“Slows the passage of time for up to 8 targets, dealing X-X kinetic damage, slowing the movement of all affected targets by 30% for 10 seconds, and weakening all targets for 45 seconds. Weakened targets deal 5% less melee and ranged damage. Does not damage sleeping, lifted, or incapacitated enemies. This ability generates a high amount of threat.”
This is one of your Bread and Butter abilities. This can be used against a single target or multiple targets to deal Force damage, slow them, and reduce their weapon damage.
 Project
 Project
“Throws debris at the target, dealing X-X kinetic damage. Standard and weak targets are additionally stunned for 0.5 seconds.”
You chuck a rock at a person, good stuff. You have a passive ability that increases its damage by 30% which is nice, but more importantly your passive ability, Particle Acceleration, gives you a 30% chance to have Project finish its cooldown early and make your next Project a critical hit. You can tell when this is the case when Project has a glowing border around it.
Additionally, if you use a glowing Project with a stack of Force Potency, its critical damage is increased by 50%. This ability REALLY hurts if you’re using a Skank Tank build (high endurance and crit).
A common mistake I see is that people new to Kinetic Combat will use Whirling Blow against a single target to proc the Particle Acceleration passive. Against a Single Target, you’ll want to use Double Strike to have a higher chance to proc Particle Acceleration. For groups of 3 or more, you’ll want to use Whirling Blow. If you would like to see the odds of proccing Particle Acceleration, please see Section 2 of the Math Chapter at the end of this guide.
Cascading Debris
 Cascading Debris
“Deals X kinetic damage to a target and consumes 40 Force over the duration of the channel. Slows the movement speed of the target by 50% and stuns weak or standard enemies while channeled. This ability can be channeled while moving.”
You chuck multiple rocks at a person, good stuff. Now this ability acts as both an offensive and defensive ability. Whenever you use Project or Slow Time, you gain a stack of Harnessed Shadows. At 3 stacks, your Cascading Debris begins to glow. This is the only time you want to use Cascading Debris. When empowered like this it deals 45% additional damage, it cannot be interrupted while being channeled, you don’t experience Pushback (meaning the duration of the channel isn’t slowed by getting attacked), and each successful landing of a rock increases your damage reduction by 1%, up to a maximum of 4% for 12 seconds.
With 7.0, Cascading Debris was made into one of your augmentable abilities and this will be covered in the Ability Tree Choices portion of this guide.
Offensive Cooldowns
I’d like to point out that while the following abilities are commonly referred to as Offensive Cooldowns, the Kinetic Combat discipline also transforms them into Defensive Cooldowns as well as they have added defensive effects. Both Force Potency and Battle Readiness do not break stealth.
Force Potency
 Force Potency
“Grants 2 charges of Force Potency, which increases the Force critical chance of your direct attacks and heals by 60%. Each time a direct Force ability or each time a channeled Force ability is activated, 1 charge is consumed. Lasts 20 seconds. Activating Force Potency grants 30% Shield Absorption for 20 seconds”
This ability is shared among Sages and Shadows which is why it lists direct attacks and heals as gaining extra critical hit chance. As a Shadow, you use this for the increased Force attack damage. This additional critical chance is additive and not multiplicative, meaning if you have a 40% critical hit chance, you gain 100% critical hit chance with your direct Force attacks while you have stacks of Force Potency.
However, Force Potency gains an additional effect as a Kinetic Combat Shadow. Activating Force Potency will grant you an additional 30% Shield Absorption for 20 seconds, this is a good way to mitigate damage further. Whether you use this Offensively or Defensively is entirely dependent on your playstyle and I will be offering builds that work with either scenario.
Battle Readiness
“Ready yourself with the Force, immediately restoring 15% of your max health and increasing damage reduction by 25%. While active, Battle Readiness increases the damage of Combat Technique by 50%, the chance to trigger Combat Technique by 25%, and heals you for X whenever it is triggered. The triggered healing cannot occur more than once per second.”
While this does have good offensive potential, I generally use it for its defensive properties rather than its offensive properties. As a Kinetic Combat Shadow, you’ll be using the Combat Technique which grants a 50% chance to deal around 507 internal damage with your melee strikes. While Battle Readiness is active, you have a 75% chance to deal an extra 760 internal damage with your melee strikes.
Battle Readiness also provides an extra 25% Damage Reduction for the duration. This makes this a great Defensive Cooldown ability to deal with large amounts of incoming burst damage. If you’re against a single target, use Double Strike to attempt to proc the additional healing effect, or use Cleaving Cut or Whirling Blow against multiple targets to proc the heal tick. It’s not that great of a heal but it’s better than nothing.
Defensive Cooldowns
Defensive Cooldown abilities (commonly referred to as DCDs) are abilities used for defensive purposes. DCDs for the Kinetic Combat Shadow come in many forms, each of which has a specific purpose to counteract certain types of damage. As you’ve read above, your Offensive Cooldown Abilities are transformed into DCDs as well.
Deflection
 Deflection
“Increases your ranged and melee defenses by 50% for 12 seconds. Requires a melee weapon.”
This one is fairly straight-forward. This increases your defense chance by 50% allowing you to potentially ignore Weapon Damage (also known as White Damage). This is great against Gunslingers/Snipers, Guardians/Juggernauts, and Sentinels/Marauders as these units are heavily reliant on weapon damage.
Though it gains a secondary effect when you are a Kinetic Combat Shadow, this is through the Pulsating Force passive. Deflection also creates an aura with an 8 meter radius that causes enemies found within it to deal 15% less Force/Tech damage (also known as Yellow Damage). This effect is particularly useful for lowering the threat of Shadows/Assassins, Sages/Sorcerers, Scoundrels/Operatives, Commandos/Mercenaries, and Vanguards/Powertechs who use a lot of Force/Tech abilities. If you use it for the secondary effect, do so when you’re surrounded by these threats or if you want to aid a group fight by applying this debuff to enemies.
Kinetic Ward
 Kinetic Ward
“Erects a kinetic ward with 15 charges that increases your shield chance by 18% for 20 seconds. Each time you successfully shield, Kinetic Ward loses 1 charge. Does not break stealth.”
How you use this ability defines if you are good at Kinetic Combat or bad at it. It’s often said that the Shadow Tank is the hardest of the three tanks to learn as you have numerous buffs and debuffs to manage. This right here is your primary buff you need to manage.
Some may pop Kinetic Ward the moment it’s off cooldown, but you really only want to refresh it if it’s down entirely or if it’s about to go down. You gain a passive called Kinetic Bulwark which increases your Shield Absorption for every stack of Kinetic Ward consumed, so the more Kinetic Ward Stacks are consumed, the stronger your shields will be. This is why you want to hang onto Kinetic Ward for as long as possible before refreshing it as when you do, you lose the extra Shield Absorption.
As of 7.0, Kinetic Ward can be augmented in one of three ways and will be discussed in the Ability Tree Choices portion of this guide.
Resilience
 Resilience
“Purges all hostile removable effects and increases your chance to resist Force and Tech attacks by 200% for 3 seconds. Does not break stealth.”
This is a great ability for purging hostile effects such as slows, debuffs, and Damage Over Time (DoTs) abilities. You could also use this when you expect to receive large amounts of Force/Tech damage as you become immune to them for the duration of this ability. You can extend the duration of Resilience with the Shroud of a Shadow tactical, gaining up to an extra 3.75 seconds of Force/Tech immunity. You used to be able to extend the base duration by 2 seconds with a utility, but since utilities are gone this is no longer the case.
Force Cloak
 Force Cloak
“Uses the Force to make you vanish from sight, immediately exiting combat and entering stealth mode. For 10 seconds, you become virtually undetectable.”
This is your “Nope” button, in that you use this to exit a fight and go into stealth. You have a utility that applies Resilience for 2 seconds when Force Cloak is activated so this can be used as a cleansing ability. This ability has only risen in popularity with the Tactical that grants 2 stacks of Force Cloak, allowing you to use it again without waiting for the cooldown to finish.
A good combo to use with this is to use Force Cloak, use Mind Maze on your target, exit stealth and use Meditation to restore your health. Though this is generally done if you have the luxury of doing so if you’re in a 1v1 and your opponent already used their Crowd Control breaker ability.
Force of Will
 Force of Will
“Demonstrates your force of will, purging all incapacitating and movement-impairing effects.”
This is your Crowd Control breaker, meaning it removes stuns and slows. When you use this defines your overall skill as a PvPer. It can be tempting to use this the moment you get stunned but you must learn to recognize the various stuns and incapacitates there are.
Is the stun you’re under broken by damage? It might be better to wait it out. Will getting hit by a hard stun determine your failure in a battle? If not, better to save it. Will using this prevent an enemy from obtaining an objective? If not, it’s better to save it. It all comes down to your personal judgment, and this judgment can only be refined with experience, insight, and retrospect.
Control and Utility Abilities
 Force Stun
“Deals X-X kinetic damage and stuns the target for 4 seconds’
It stuns a single target, it’s very useful but be wise when using it as it has a lengthy cooldown. The cooldown of Force Stun can be reduced by 15 seconds with a Ability Tree choice You generally want to use it to hold down an enemy player posing a huge threat to you or an ally, to hold a target in place so you and your allies can gang up on them, or as a last ditch effort to end a channel of an enemy if there are no other means available.
Spinning Kick
“Performs a spin kick that deals X-X kinetic damage and stuns the target for 3 seconds. Standard and weak enemies are additionally knocked down. Requires a double-bladed lightsaber or electrostaff. Dealing Damage with Spinning Kick applies Steely Kick to you, increasing your damage reduction by 10% for 6 seconds.”
This ability counts as a Force ability, so it can be reflected by certain defensive abilities such as Saber Reflect and negated by Resilience and Force Shroud. On-demand damage reduction is always an excellent choice especially when you expect to be hit hard. This is also great for killing someone’s momentum, stopping a channel if your interrupt is on cooldown, and it doesn’t fill the enemy’s white bar too much making them open to longer stuns.
 Force Slow
 Force Slow
“Deals X-X kinetic damage and slows the target’s movement speed by 50% for 6 seconds.”
This is a great ability to use against a single target to keep them slowed down. Use this when you’re still building stacks of Harnessed Shadows for Cascading Debris to have a 50% slow on a target.
Force Pull
 Force Pull
“Uses the Force to draw the target in, instantly pulling it to your location and generating a high amount of threat. Does not work against targets in cover.”
You want to use this ability to pull a target that’s running away from you, or to pull them out of an area to follow up with a Force Lift to keep that enemy out of the way for a bit. It’s also another way to interrupt a channel if other means are not available. A fun trick is to pull an enemy towards a cliff and use Force Wave to push them off, efficiently dealing with them.
Force Wave
“Deals X-X kinetic damage and knocks back up to 8 enemies within a 15-meter cone in front of you, unbalancing them and immobilizing them for 5 seconds. Standard and weak enemies are additionally knocked down for 3 seconds. Direct damage dealt after 2 seconds ends the immobilize effect prematurely.
This is a great group control ability as it’s quite powerful under the right circumstances. While non-direct damage abilities such as Damage Over Time abilities will not break the root at all, you have 2 seconds to hit your target(s) with direct damage abilities such as Project, Spinning Strike, or anything else without breaking the root.
Force Lift
“Lifts the target helplessly into the air, preventing all action for up to 8 seconds. Non-player, non-standard and non-weak enemies heal rapidly while lifted out of harm’s way. Damage will break the effect prematurely and stun the target for 2 seconds.”
This ability also got a buff with the loss of Utilities. This used to have a 2 second channel to cast but now it’s instant! Along with that, breaking the damage now applies a 2 second stun. Sounds great, right? With this you’ll be able to keep a target still for 10 seconds.
Using this ability this way with the lift and the 2 second stun is a waste in my opinion. Doing so will completely fill a target’s Resolve Bar and make them immune to Control abilities for a bit. Instead, use Force Stun to keep them pinned down for 12 seconds instead of 10 seconds if you’re going to end up filling their resolve bar in the event you need to. Better yet, have an ally that can use something like Awe or Flash Grenade to incapacitate them for 16 seconds total.
Mind Snap
 Mind Snap
“Interrupts the target’s current action and prevents that ability from being used for 4 seconds.”
This is an excellent ability and you have no excuse not to use it under the proper circumstances. Many powerful abilities are channeled, these can be hard hitting offensive abilities or Healing Abilities. You can use this interrupt to break the flow of an opponent’s offense or to negate the healing of a healer performing a channeled heal. Just to make it clear, if you can, use this ability to stop channeled healing abilities!
Mind Control
 Mind Control
“Controls the mind of the target, forcing it to attack you for 6 seconds. Player targets deal 30% less damage for 6 seconds when attacking anyone other than you”
This is your Taunt ability. Prioritize enemies that can deal large amounts of damage such as Shadows/Assassins, DPS Vanguards/Powertechs, Sentinels/Marauders, or Gunslingers/Snipers.
Mass Mind Control
 Mass Mind Control
“Forces all enemies within 15 meters to attack you for 6 seconds if Combat Technique is active. If Combat Technique is not active, threat towards all current enemies is immediately reduced. Player targets deal 30% less damage for 6 seconds when attacking anyone other than you.”
It’s your AoE Taunt, use this against multiple targets or if you REALLY need to protect an ally under fire and Mind Control is on cooldown, though do try to save it for groups of enemies.
Force Speed
 Force Speed
“Increases your movement speed by 150% for 2 seconds. Does not break Stealth.”
This ability right here makes both of the other tanks green with envy. This is a great movement speed buff with a rather short cooldown and is great for reaching objectives, chasing enemies, and looking good overall.
Shadow Stride
 Shadow Stride
“Use the Force to weave through the shadows, appearing at your enemy target and increasing your movement speed by 75% for 3 seconds. Does not break stealth. Cannot be used against targets in cover. Requires a double-bladed lightsaber or electrostaff.”
There are many opponents you will face that will attempt to run away from you to the best of their ability. Shadow Stride makes that difficult for them as using this with Force Speed helps you catch up to and stay on top of a target.
Stealth
 Stealth
“Enters stealth mode, increasing your stealth level by 15 and making you difficult to detect. While in stealth, movement speed is slowed by 15%. Your companion will not react to enemy attacks while in stealth. Most hostile actions prematurely end the effect. Cannot be used in combat.”
This ability makes you invisible to other players, though this comes at the cost of reducing your movement speed by 15%. It is possible for other players to see you if you get too close or if they have Passive or Active abilities that allow them to detect stealthed units. Using offensive abilities while stealth is active will break stealth but you have numerous abilities you can use that won’t break stealth. Such abilities will be stated of this capability in bold lettering.
Mind Maze
 Mind Maze
“Confuses the target, leaving it bewildered and unable to act for 60 seconds (8 seconds for Player targets). Damage will break the effect prematurely. This ability is only usable in stealth mode and cannot be used against a target in combat. Only one target can be incapacitated at any given time. Cannot be used on droids.”
In PvP Warzones, you generally use this ability to stun a target while you capture an objective. This will often force enemy players to waste their Stun Breaker making them more susceptible to uninterrupted Crowd Control abilities. You can Mind Maze a target twice though I would only recommend doing so to keep a DPS from joining their allies in a group battle or to allow an ally to capture an objective unhindered.
Guard
 Guard
Guard“While active, the guarded player takes 5% less damage and generates 25% less threat. In addition, so long as you remain within 15 meters of the guarded player, 50% of all incoming damage from enemy players is transferred back to you.”
This is your primary ability to reduce incoming damage for your ally in need. Be sure to stay within 15 meters of them so you can absorb their incoming damage in a warzone. Redirected damage can be shielded AND dodged as well! If you enter stealth mode and take damage from Guard’s damage transfer, it will break stealth.
Consumables
The following consumables can be used within PvP Warzones. Each has their strengths and weaknesses and it will be described in their notes. The great thing about Warzone Medpacs and Adrenals is that they’re both very cheap to purchase at 1,000 credits a piece, but you also get them from completing Daily and Weekly missions! You’ll never be short on these.
The grenades listed here are crafted by using Cybertech. While they only scaled up to level 65 since they were introduced a couple expansions ago, they’re still quite useful. You’re not using them for their damage but rather their utility. Targets recently hit by one of these grenades will become immune to them for 3 minutes, so you can’t have your team chuck these one after another to chain their effects. Use them wisely.
 Warzone Medpac
- Effect: Immediately restores 35% of maximum health. Only usable in Player versus Player environments. Only usable once per fight.
- Notes: This is your best healing option if you are alone such as when you’re sneaking to an objective or guarding an objective.
 Warzone Adrenal
- Effect: Increases damage reduction by 15% for 15 seconds while fighting other players. Only usable in PvP environments.
- Notes: This is your go-to Adrenal for reducing damage in PvP. It’s really good for when you’re getting ganged up on or for reducing incoming damage from a Burst Spec Enemy such as a Vanguard or Powertech.
Advanced Kyrprax Fortitude Stim
- Effect: Increases Endurance by 264 and Defense by 109 for 480 minutes.
- Notes: It’s always important to keep a Stim active at all times if possible. This is better for Full Tanks though at level 80, the Defense bonus is negligible but you get around 4,000 extra HP for the duration. Every bit of health helps!
Advanced Kyrprax Versatile Stim
- Effect: Increases Mastery by 264 and Power by 109 for 480 minutes.
- Notes: Keep this active when you’re playing as a Skank Tank as every bit of damage helps!
Advanced V-9 Seismic Grenade
- Effect: Disrupts the earth beneath all targets within 6 meters of the selected area, dealing 2,112 – 2,403 kinetic damage and knocking them unconscious for 5 seconds. Damage causes this effect to end prematurely.
- Notes: This grenade is used to incapacitate enemies that are grouped up. You’ll find this often in Ranked PvP as it allows a team to focus a target while forcing the odds that their opponents will use their Crowd Control breaker to protect their ally. This in turn can open them for more powerful stuns. It’s also good if you need to stun your enemies for a bit to give time to an ally that needs to heal. Use these if you’re alone and need to hold off opponents or if you’re with a PvP group you trust and can communicate with via voice chat to keep others updated when to not attack certain targets.
Advanced V-9 Cartel Waste Grenade
- Effect: Deals 4,865 – 5,447 kinetic damage to up to 5 targets within 6 meters of the selected area, and reduces movement speed by 70% for 9 seconds.
- Notes: This is particularly useful in Huttball when you need to keep a group of enemies from ganging up on a friendly ball carrier. It is also useful in the Odessen Training Grounds to stop a group of enemies from running to the next control point. This grenade can slow a group of opponents more than Slow Time ability can, so that 70% is very nice to have around when you need it.
Advanced V-9 Electro-Stun Grenade
- Effect: Shocks up to 3 targets in the area for 1,624 – 1,837 energy damage, and stuns them briefly. Tougher enemies are stunned for a shorter duration.
- Notes: This grande will stun up to 3 players for 2 seconds, it’s similar to the AoE Stun Vanguards and Powertechs use. If you can’t trust your allies to not hit incapatitated targets hit by a Seismic Grenade and need to CC people, use this one. Otherwise Seismic is far superior for controlling groups. This will also not fill an opponent’s Resolve Bar as much as the Seismic Grenade, leaving them open to more powerful stuns so long as you wait for it to go down a bit allowing you to hit them with 2 full stuns such as Force Stun and Force Stasis before filling their Resolve Bar.
Advanced V-9 Pyro Grenade
- Effect: Sets up to 5 enemy targets in a 6 meter area ablaze, dealing 8,397 elemental damage over 12 seconds.
- Notes: This grenade is only really useful for adding a smidge of DPS in a mosh pit or for keeping someone running away in combat for a longer time if they are unable to cleanse the effect, preventing them from using their self heal ability. This can be cleansed as it is a Tech effect so Shadows/Assassins with Resilience/Force Shroud become immune to it.
Advanced V-9 Rakata Freeze Bomb
- Effect: Freezes up to 4 targets within 6 meters of the selected area, dealing 3,422 – 3,557 energy damage and preventing movement for 6 seconds. Damage dealt after 2 seconds ends the effect prematurely.
- Notes: Like Force Wave’s root effect, any damage done within the first 2 seconds does not break the root. You can use this grenade to root a group of targets if you chose Force Lift, OR you can use this after using Force Wave to keep targets rooted for a total of 11 seconds! Since this is a root, this will not fill an opponent’s Resolve Bar but will have no effect if their Resolve Bar is full and have immunity to CC, instead applying a 50% slow.
As a bonus, targets affected by the freeze bomb have their legs caught in a block of ice which is really funny.
Kinetic Combat Ability Tree Choices
You’ll notice that there have been significant changes to how we optimize our builds. Instead of Utilities, you instead have Ability Tree choices at levels 23, 27, 39, 43, 51, 64, 68, and 73. Some of these choices used to be Utilities in 6.0, while we have some entirely new abilities as well. Though the most fun portion are the choices at levels 23 and 39 that directly affect how your Cascading Debris and Kinetic Ward functions.
Do note that you will be unable to change your chosen abilities while in Queue for PvP or if you’re already in a PvP match. Choose wisely.
Level 23
 Chained Cascade
- Effect: Cascading Debris pummels nearby targets each time it deals damage.
- Recommendation: You chuck multiple rocks at multiple people, good stuff. I would pick this if you love to fight in the mosh pits though I feel that the other two choices are better overall in most scenarios.
![]() Antagonizing Debris
Antagonizing Debris
- Effect: Increases the damage, critical hit chance, and threat generated by Cascading Debris by 10%.
- Recommendation: This is a solid pick for any scenario. By default, you have around 21% Critical Hit chance even with a full tank gear setup, so your Cascading Debris will have a 31% Critical Hit chance, 91% when using Force Potency. This is even better for Skank Tanks who add critical hit chance to their build. If they add at least an extra 10% for a base 30% critical hit chance, you are guaranteed to critically hit with each rock when using Cascading Debris with Force Potency.
 Kinetic Cascade
- Effect: Cascading Debris deals 20% more damage to targets you have mind controlled and restores 5 Force whenever it deals damage to them.
- Recommendation: This is my personal choice as I like to run full tank gear and I prefer to not leave things up to chance. While it’s not as potent as Antagonizing Debris, its damage output is far more consistent and controllable. This makes using your taunts in a 1v1 more valuable as it gives you a flat damage boost on your strongest damaging ability.
Level 27
 Energized Project
- Effect: Project’s critical hit damage is increased by 50% and dealing damage with Project extends the duration of mind control by 3 seconds to targets already affected by your mind control.
- Recommendation: So you know your Particle Acceleration passive which makes your Project deal 50% additional critical hit damage when using Force Potency? This basically keeps this on at all times. To make things better, this also stacks with the extra 50% critical hit damage from Particle Acceleration.
At the time of writing this, I have 327 Full Tank gear so these numbers might not reflect what you experience but will give you an idea how well this damage scales. The following assumes you’re using an empowered Project you get from hitting a target with a melee attack via Particle Acceleration.
A critical hit that is neither empowered by this ability or Particle Acceleration will deal around 15,000 Kinetic Damage. Having it empowered by Force Potency has it hit for around 25,000 Kinetic Damage. Having Project empowered by Force Potency and this ability has it hit for around 35,000 Kinetic Damage.
The damage this ability offers is nothing to scoff at and would make an excellent choice for someone using a Skank Tank build. This would be your go-to ability if you’re in a 4v4 Arena PvP scenario where you need to single down targets.
 Spinning Kick
- Effect: Grants the ability Spinning Kick
- Recommendation: This is my preferred ability as having an extra stun and on-demand damage reduction is always great to have. It’s useful for stopping a channel that can’t be pushed back or if you have already used your Mind Snap. This is a great choice to assert control over your opponents and a situation.
 Force Magnetism
- Effect: Force Cloak increases movement speed by 50%. Force Speed lasts 1 second longer and slows all enemies within 5 meters by 75% for 2.5 seconds when activated.
- Recommendation: This is the weakest of these choices in my opinion. It says it grants Force Cloak 50% extra movement speed but when testing this I haven’t noticed any significant difference. Either it’s bugged right now or it’s not noticeable. Though the extra second of Force Speed is nice, this will allow you to cover 45 meters in 3 seconds assuming you’re going in a straight line. This can be useful for catching up to opponents or objectives, but I’d recommend one of the other choices at this level.
Level 39
 Gloom Ward
- Effect: Each time you consume a charge of Kinetic Ward the cooldown of Mass Mind Control is reduced by 2 seconds. If Kinetic Ward is broken by damage, it deals X damage to nearby targets, generates a high amount of threat and finishes the cooldown of Force Breach and Slow Time.
- Recommendation: Don’t take this for PvP. While you could use this in a mosh pit, you’d be putting yourself at constant risk to deal the AoE damage you’d get when Kinetic Ward gets consumed. For my 327 Full Tank set, this damage is around 7,300 damage. It’s not much and putting yourself in the middle of a mosh pit just to proc this damage will mean one of two things, you either have an amazing healer focusing solely on you or you’re dead in a matter of moments.
 Dusk Ward
- Effect: Each time you consume a charge of Kinetic Ward the cooldown of Force Cloak is reduced by 2 seconds. If Kinetic Ward is broken by damage it reduces the accuracy of all nearby enemies by 20% for 6 seconds.
- Recommendation: This is the best pick for PvP. Having a reduced cooldown on your Force Cloak is great to get out of situations and can allow for an extra use of Resilience much faster assuming you took the Cloak of Resilience ability. In the event you manage to lose all stacks, nearby enemies will take a good hit to their accuracy, further increasing the survivability of yourself and your allies by reducing the DPS of all nearby enemies.
Twilight Ward
- Effect: Each time you consume a charge of Kinetic Ward the cooldown of Force Potency is decreased by 2 seconds. If Kinetic Ward is broken by damage it grants 1 charge of Force Potency.
- Recommendation: This is a good choice if you value offense over defense, making it a solid choice for Skank Tanks that prefer dueling. The sooner you can proc those auto crits, the sooner your target falls.
Level 43
 Potent Defense
- Effect: Consuming a charge of Force Potency grants you and nearby allies Potent Defense, increasing damage reduction by 5% per stack. Potent Defense stacks up to 3 times and lasts 10 seconds.
- Recommendation: Now you might be wondering, “If this stacks up to 3 times but I only get 2 charges of Force Potency, how do I get 3 stacks of Potent Defense?”. As of 7.2, you can no longer gain 3 stacks from using Cascading Debris once. Instead the only way to get all 3 stacks is to have the Twilight Ward passive so you get a stack of Force Potency, then use the Force Potency ability, then consume your Force Potency stacks in exchange for Potent Defense stacks.
I used to recommend this for Skank Tanks as they scale well with Critical Chance and Force Potency, but due to the requirement of shielding attacks this now works better on Full Tanks who are more likely to shield attacks and get the free Force Potency Stack sooner and with less chance of death when compared to the skank tank. If you have some teamwork strategies that utilize Potent Defense, go for it. Otherwise Battle Readiness is better for on-demand damage reduction.
 Battle Readiness
- Effect: Grants the ability Battle Readiness.
- Recommendation: While it doesn’t state it in the ability description, Battle Readiness grants +25% Damage Reduction for 15 seconds, this is due to the passive ability Shadowsight. This is a great choice if you need to absorb incoming burst damage at a moment’s notice while healing for a chunk of your maximum health.
 Light Forces
- Effect: Each time you deal damage to a target you have mind controlled you restore 2 Force and heal for 2% of your maximum health.
- Recommendation: Choose one of the other abilities for PvP. Due to the unpredictable nature of PvP and that PvPers move a lot, you can’t reliably proc the heals from this passive. If you would like to know the potential healing numbers of this passive, refer to Section 1 of the Math Chapter at the end of this guide.
Level 51
 Intangible Spirit
- Effect: Reduces all damage taken while stunned by 30%..
- Recommendation: I highly recommend taking this ability at this level for PvP. You’re going to get stunned a lot. This damage reduction will save your life repeatedly.
 Sturdiness
- Effect: Activating Deflection grants 6 seconds of immunity to stun, sleep, lift, and incapacitating effects.
- Recommendation: This is a close second as when you pair this with a Ballast Point implant, no amount of Crowd Control abilities can touch you for 6 seconds. Though I would still argue that Intangible Spirit is better for PvP given the amount of stuns you’ll be taking and Deflection as a 2 minute cooldown.
 Fade
Fade
- Effect: Reduces the cooldown of Force Cloak by 30 seconds and extends its duration by 5 seconds.
- Recommendation: A solid pick but the other 2 abilities at this level are more useful.
Level 64
 Kinetic Surge
- Effect: Increases your movement speed by 15% and increases your stealth level by 10. Activating Project, Psychokinetic Blast, or Squelch increases your movement speed by 50% for 9 seconds. This effect cannot occur more than once every 18 seconds.
- Recommendation: I wouldn’t bother with this ability as you can’t get the increased movement speed from Project that often.
 Force Phase
- Effect: Force Speed and Shadow Stride grants Force Phase, removing all movement-impairing effects and granting immunity to them for 2 seconds.
- Recommendation: This is mandatory, always take this for PvP. Everyone hates Shadows in PvP due to our mobility. They will stun and slow us to Tatooine and back. This gives you control over the situation by purging any slows or roots applied on you.
 Lambaste
- Effect: Increases the damage done by Whirling Blow by 25%.
- Recommendation: Don’t take this for PvP.
Level 68
 Cleaving Cut
- Effect: Grants the ability Cleaving Cut
- Recommendation: Your other two options are far more valuable in PvP. The cone of this ability is small and enemies are not going to huddle up for you. It’s also far much easier to hit opponents with Force Wave or capture objectives with Force Lift. Get something else.
 Force Wave
- Effect: Grants the ability Force Wave.
- Recommendation: This is a great ability to default to for PvP. Since it now roots your targets of Force Wave instead of just pushing them, it’s even more valuable than it was in 6.0. Holding off enemies from your allies can be the difference between victory and defeat. Also it’s just really fun to push enemies off a ledge in Voidstar or into fire pits and acid vats in Huttball.
 Force Lift
- Effect: Grants the ability Force Lift.
- Recommendation: I would only grab this if you have confidence in your ability to sneakily take an objective. Mind Maze a target and capture your target which will take 8 seconds. They will reactively use their CC breaker to stop you, then use Force Lift and immediately right click the objective. By the time they’re down, you would have captured the objective and from there you defend it.
Level 73
 Stalker’s Swiftness
- Effect: Shadow Stride grants Stalker’s Swiftness, allowing your next Spinning Strike to be used on any target, regardless of remaining health. Stalker’s Swiftness lasts for 10 seconds. Additionally, if the target of your Shadow Stride is killed within 10 seconds of using Shadow Stride, Shadow Stride’s cooldown is reset.
- Recommendation: The Infiltration Shadow is better off having this than a Kinetic Combat. Sure this is nice for on-demand critical hits and stacks of Harnessed Shadows, but Celerity and Cloak of Resilience are far better for your survivability. Your job is to stay alive so you can keep others alive.
 Celerity
- Effect: Reduces the cooldown of Mind Snap by 2 seconds, Force of Will by 30 seconds, and Force Speed by 5 seconds.
- Recommendation: This ability is an excellent choice as it does so much for you. You can use your Interrupt, CC Breaker, and Force Speed much sooner. This is probably the most popular choice to use in PvP as a Kinetic Combat Shadow.
 Cloak of Resilience
- Effect: Activating Force Cloak grants 2 seconds of Resilience.
- Recommendation: This is a great ability that’s ever so slightly outshone by Celerity. If you pair this with your Resilience, you can gain up to 5 seconds of Force/Tech immunity. It’s also good if you need to get out of a situation while clearing any DoTs you have that can take you back into combat, while avoiding any Force/Tech AoEs on you until you can run out.
Though the best part about this ability is how great it is in PvP for dealing with burst damage from Force/Tech powers. Force/Tech Powers are often more favored in PvP as they aren’t reliant on the Accuracy stat in order to hit like Weapon attacks are. With Resilience, you can negate incredible amounts of damage when you’re being ganged up on by a group of enemies all while being immune to any crowd control abilities for the duration.
Gearing and Stat Priorities
The highest gear that benefits PvP is 336 rated gear, anything higher will be scaled back. So there’s no real point in upgrading your gear beyond 336 unless you’re looking to do PvE as well. With that said, any gear or stats relating to the gear will be made with 336 stats so your results may vary if you’re not using all 336 gear.
Stat Priority
- Shield Chance to 42%
- Shield Absorption to 40%+
By getting 42% shield chance, your shield chance becomes 60% when Kinetic Ward is active. Everything else should go into Shield Absorption to help increase your survivability. If you wish to learn more about the Net Damage Reduction gained from your Shield Chance and Shield Absorption, refer to Section 3 of the Math Chapter found at the end of this guide.
Gearing up priority
Gearing up is a bit odd right now as our choices are very limited when relying on drops specific for our discipline. Once you gain access to mods this will no longer be an issue. But for now, let’s refer to the following infographic made by Alortania.
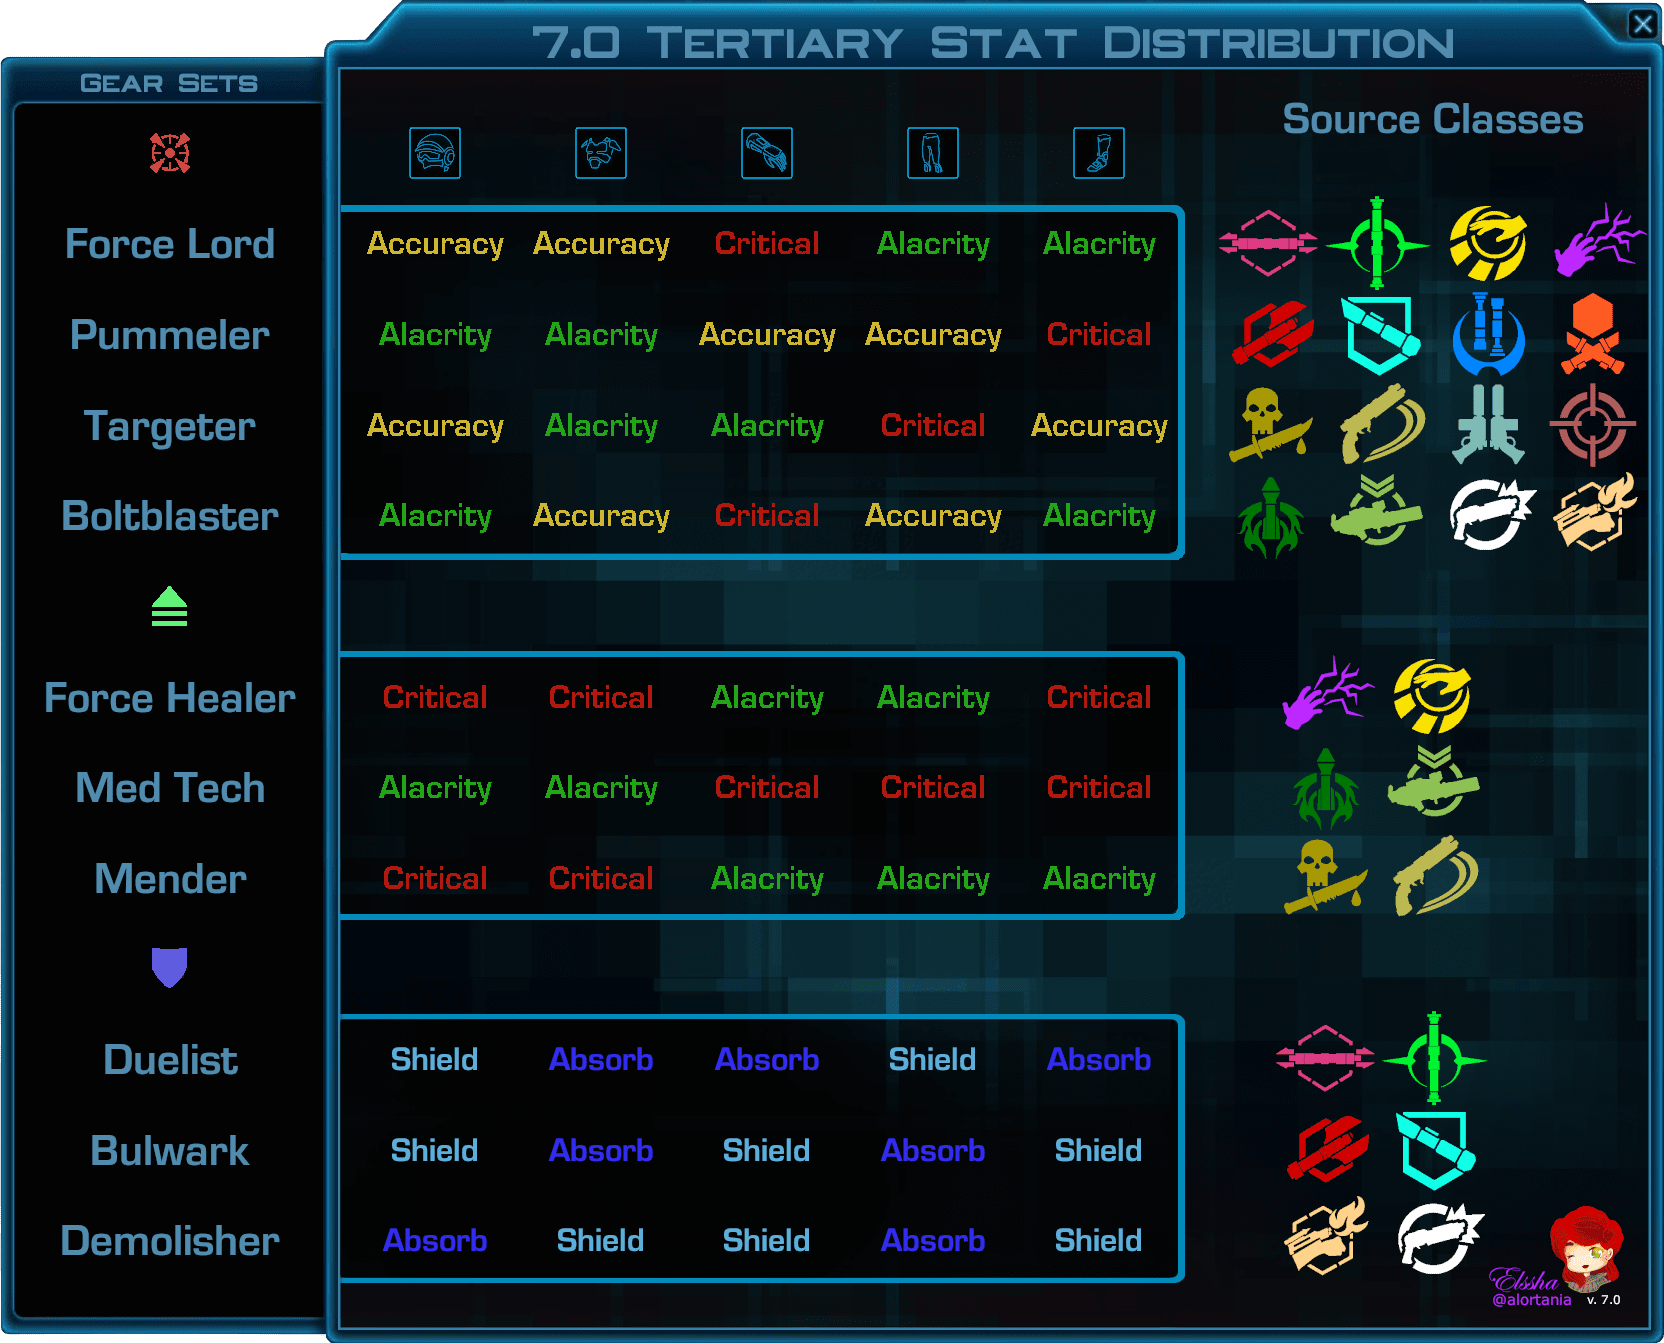
Gear Mods
With the release of 7.1, we now gain the ability to purchase gear mods at the fleet. You can find the Rodian vendors, Hyde and Zeek, in the middle room at the outer ring of the Supplies area of the fleet.
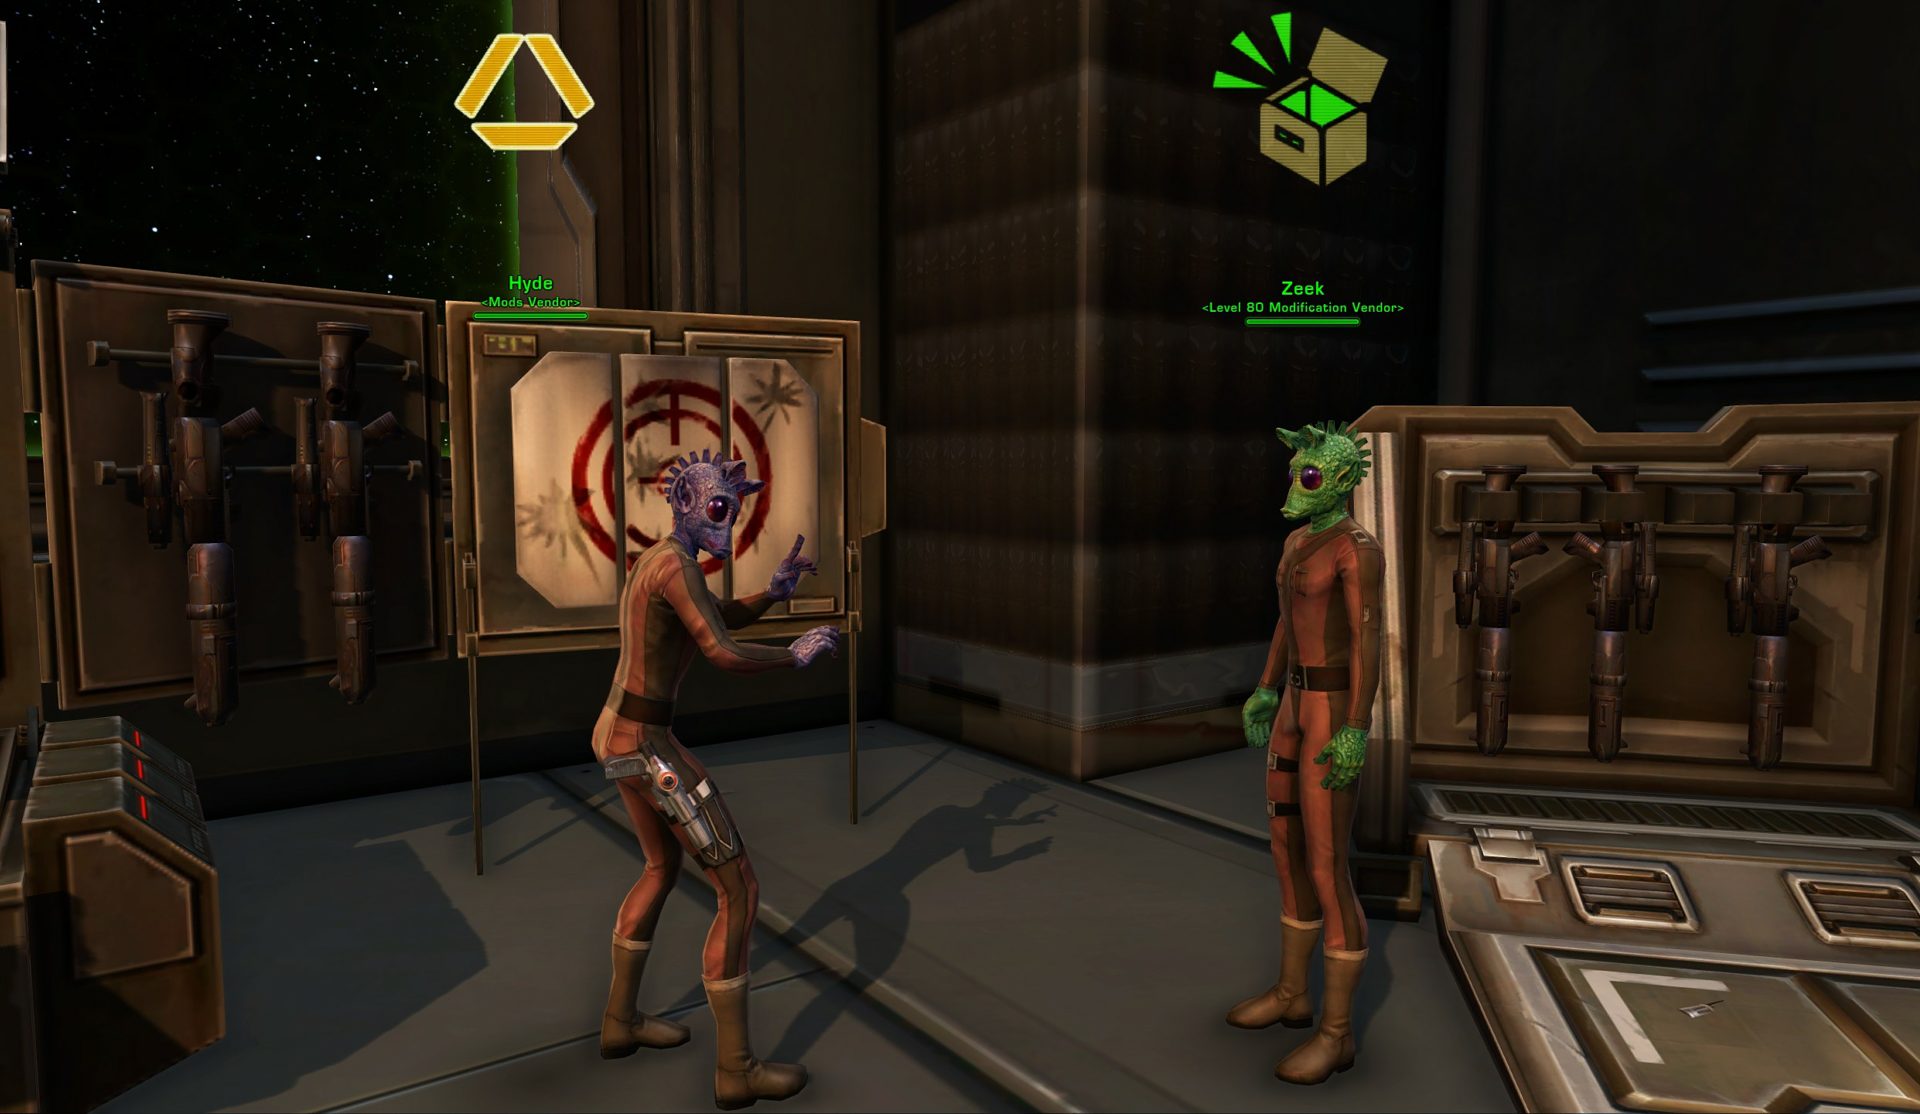
In order to gain access to the mods, you’ll first need a minimum overall Item Rating level of 324. You can then accept a quest from Hyde after some dialogue where you’ll need to deconstruct either 328+ gear of Prototype or Artifact quality. For PvP, you’ll want the 336 pieces, so it comes down to a matter of getting those pieces to deconstruct. For the prototype gear, run a flashpoint and gain a piece of gear you can upgrade to 336 to deconstruct. For artifact, deconstruct 336 PvP gear you have or an Ops gear piece you’re willing to sacrifice.
Unlocking Prototype gear will give you access to armorings, mods, enhancements, barrels, and hilts. Meanwhile, unlocking Artifact gear will give you access to enhancements only. The reason being is that it would make no difference using Artifact or Prototype armorings and mods, either that or it’s another classic Bioware bug.
With the mods unlocked, you’ll now be able to easily upgrade your item rating by slapping in these mods into empty gear pieces. Now you can also more easily get desirable stats like Shield Rating, Absorption Rating, and Critical Rating while trimming off excess stats you don’t need. Though let’s talk about the way Prototype and Artifact enhancements scale.
The important thing you’ll want to know is that Tertiary Stats, such as Shield Rating, Absorption Rating, Critical Rating, Alacrity Rating, and Accuracy Rating will remain the same on Prototype and Artifact Enhancements. This changes with stats on the enhancements such as Endurance and Defense Rating for tank mods. For DPS mods, the stat differences will lie in Endurance and Power. Let’s first look at the difference between using tank enhancements.
A 336 Prototype Enhancement will have +501 Endurance and +356 Defense Rating while a 336 Artifact Enhancement will have +589 Endurance and +202 Defense Rating. Endurance is a far more valuable stat as when combined with all of your defensive stats, it provides more effective. That said, go for Artifact quality enhancements over Prototypes.
As for DPS enhancements for Skank Tanks, you’ll actually want to favor Prototype enhancements over Artifact enhancements since they have more endurance. Even if you’re playing a critical heavy skank tank build, you’ll want more HP as when you’re guarding someone, you’ll have to rely more on your overall HP to keep yourself and your ally alive.
Crystals
Use 136 Indestructible Crystals (Endurance) for Full Tank builds and 136 Eviscerating Crystals (Critical Rating) for Skank Tank builds.
Earpiece
I recommend a 336 Bastion Device for the added Shield Chance as that’s the primary stat you want to upgrade.
Legendary Implants
here are 4 Legendary Implants that offer anything beneficial to a Kinetic Combat Shadow. These would be the:
- Force Resistance Package – Elemental, Internal, Kinetic, and Energy damage reduction is increased by 3%.
- Ballast Point Package – Deflection grants Ballistic Immunity for 6 seconds, giving you immunity to movement impairing effects, knockdowns, and physics.
- Stationary Grit Package – Increases damage dealt by 3% while not moving or increases armor rating by 10% while moving.
- Dynamic Force Package – The cooldown of Force Potency is reduced by 15 seconds.
The Force Resistance Package is a must as out of the 3 tanks, we have the lowest base damage reduction stat. With the extra 3% damage reduction, your overall Damage Reduction sits at around 41.78% with 336 armorings. This is a mandatory implant for either a full tank or skank tank build.
The Ballast Point Package is useful in PvP as there are a lot of slows and physics going around. By physics, I mean pushes and pulls while knockdowns may stem from grenades that knock down targets in an area. A solid choice but it only lasts 6 seconds with a 2 minute cooldown on Deflection.
The Stationary Grit Package was introduced in patch 7.2 as part of turning the 4 piece gear sets from 6.0 into packages. This offers Damage Reduction and while moving, you’ll have 42.64% damage reduction assuming you have 336 gear and the Force Resistance Package. Keep in mind, the bonus armor is based off your base armor before armor modifiers from Combat Technique.
This is a surprisingly good alternative to the Ballast Point package as it can be active at all times vs the 2 minute cooldown on Ballast Point. An extra .86% damage reduction doesn’t seem like much but every bit of damage reduction does help. Kinetic Combat Shadows always want to maintain movement so you should always have that extra damage reduction unless you’re CC’d.
The Dynamic Force Package is good for a skank tank build as you have a reduced cooldown on Force Potency allowing you to use your burst damage combo more often. Great for players that want a more offensive playstyle.
As of 7.2, there are now a lot more implants to choose from as previous 4-piece gear set passives were turned into packages. Some of these might seem useful for Kinetic Combat Shadows but I’ll list why you should stick with the previous 4 packages mentioned over these ones.
- Final Breath Package – Increases defense rating by 10% and reduce damage taken by 5% while health is below 50%.
- Preserver’s Package – Passively regenerate 1% of your maximum health every 10 seconds.
- Trishin’s Retort Package – Shielding an attack causes your shield to overload, dealing 1438-2158 weapon damage to up to 8 enemies within 5 meters. Your shield can only overload in this manner once every 3 seconds.
- Second Wind Package – Defeating an enemy heals you for 20% of your health and increases your movement speed by 75% for 8 seconds. This effect cannot occur more than once every 8 seconds.
The Final Breath Package sounds nice in theory as it lets us have a taste of that 40% base defense chance we used to have by default in expansion 5.0 and previous expansions. But don’t let that fool you as it being reliant on you being at half health is not a great thing. Defense Chance is the least useful stat in PvP as most of the damage you’ll encounter is Force/Tech damage. At best, it’ll be useful in 1v1 duels you do for tournaments or for fun when paired with the Ward of the Continuum tactical versus opponents that rely on white damage. In warzones, it’s not worth it at all.
The Preserver’s Package sounds like it would be nice as everyone loves self heals, I know I do. But healing 6% of your maximum health per minute is pathetic. It also offers little to you stat-wise as it uses alacrity as its tertiary stat. It’s outclassed by the Second Wind Package as that can heal someone up to 140% of their maximum health per minute.
The Trishin’s Retort Package offers less damage than a basic attack once every 3 seconds. This is not suitable for PvP and I don’t recommend it as you can get more damage reduction from the Stationary Grit Package or ignore all forms of CC with the Ballast Point Package.
The Second Wind Package restoring your HP and increasing your movement speed after defeating an enemy is nice. These are things we want and this could potentially grant you 140% of your health restored per minute assuming you’re working actively in combat. The heal can activate off assists, so it’s good to use for group fights or fighting solo while defending points. A great choice for a secondary implant!
Relics
For relics, I recommend the following for a Full Tank setup…
- Relic of Avoidance 336
- Relic of the Shield Matrix 332
I like these relics as these provide the most raw stats and given that we currently don’t scale like we used to, we need more raw stats to make up for it. Alternatively, if you wish to go for a Skank Tank build, I’d recommend the…
- Relic of Focused Retribution 336
- Relic of Serendipitous Assault 336
- Relic of Boundless Ages 336
Having an increase to your Mastery and Power is useful as you should be obtaining enough critical hit chance from other sources with a Skank Tank build. If you want to choose when you get your Power buff, go with Boundless Ages. Though this has a 2 minute cooldown versus the 40 second cooldown of Serendipitous Assault as that one is activated by chance.
Tactical Items
 Two Cloaks Two Cloaks |
|---|
| Effect: Force Cloak has 2 charges. |
| Recommendation: This is often the go-to pick for just about all Shadows due to how useful it is. Being able to get out of a situation multiple times can help you subvert an enemy’s plan and buy you time. This also means you get more usage out of the Cloak of Resilience ability should you choose it. |
 Friend of the Force Friend of the Force |
|---|
| Effect: Resilience also applies to any ally you are guarding. |
| Recommendation: This one is best used in a 4v4 scenario. You’ll want to use this when you have an ally that lacks a cleanse such as a Vanguard Burst DPS. This helps keep them alive and allows them to chuck all the grenades they can at the enemy as an ally like this will be the one getting focused down. |
 Ancient Tome of Exar Kun Ancient Tome of Exar Kun |
|---|
| Effect: Slow Time generates Redirected Retribution stacks for every enemy it hits, increasing your shield absorption by 2% and damage reduction per stack for 5 seconds. In addition, Shadow Strike deals 10% more damage to targets affected by Slow Time’s slow effect. |
| Recommendation: This Tactical relies on enemies being clumped together to make effective use of. This works better with Full Tanks fighting in the group fights where they can maybe get 4+ stacks of the passive effects for +8% Shield Absorption and Damage Reduction. Given how enemies are more often than not spread out in warzones, this isn’t quite worth taking in PvP. |
 Shroud of a Shadow Shroud of a Shadow |
|---|
| Effect: Using Resilience while Kinetic Ward is active consumes it, but extends the duration of Resilience by a quarter of a second for each Kinetic Ward stack consumed. |
| Recommendation: This one is a double-edged sword in PvP. This is great for dealing with multiple sources of Force/Tech damage, but using it will make you much more vulnerable to weapon damage. I would only recommend this for more skilled players. |
 Ward of the Continuum Ward of the Continuum |
|---|
| Effect: Kinetic Ward now has 10 charges and Kinetic Bulwark cannot restore charges. Consuming a charge of Kinetic Ward increases defense chance by 1%. This effect stacks up to 10 times and lasts for 20 seconds or until Kinetic Ward is reactivated. |
| Recommendation: No. Unfortunately Defense Chance is the least useful defensive stat for PvP as the majority of damage is Force/Tech damage (aka Yellow Damage). Sure this could pair well with the Final Breath Package so you could potentially get 50% Defense Chance, but you’d be crippling yourself by having 18% less Shield Chance and remain at 50% HP in order to maintain that 50% Defense Chance. If Broadsword ever makes Defense Chance useful against Force/Tech, then this would be an excellent choice but as it is, but it’s not worth crippling yourself for this tactical’s effects. |
 The Life Warden The Life Warden |
|---|
| Effect: Taking damage below 20% health will rapidly heal you for a large amount. 10 minute cooldown. |
| Recommendation: The long cooldown makes this an unpopular choice for PvP for prolonged use but it has its uses in Arena warzones. Oftentimes, Vanguard/Powertech Tanks and Shadow/Assassin tanks are what’s called, “Tank Tunneled”. This is when the entire enemy group focuses on killing the tank to take away their team’s defense. This is done against these two tanks because they lack the powerful self heals that Guardians/Juggernauts get through Focused/Enraged Defense. This tactical is good for dealing with being “Tank Tunneled” as it will give you a massive self heal when you are low on Hit Points. Your own self heals are rather poor or can cost too much time, so having this in the right situation can decide the outcome of the battle in your favor. I would save this for Arenas and not use it in Warzones. |
 Durasteel Wall Durasteel Wall |
|---|
| Effect: Successfully parrying, deflecting, or dodging an attack while under 80% health increases your damage reduction by 1% for 5 seconds. Stacks up to 3 times. |
| Recommendation: Don’t bother, the damage reduction gained from this is negligible and you can get better mitigation from other tacticals. |
Augments
If you’re going as a Full Tank, you’ll be looking at Advanced Shield Augment 74’s and Advanced Absorb Augment 74’s. The number may change depending on which gear pieces you’re using but if you follow the gearing suggestions from earlier you will need:
- Advanced Shield 74 Augments
- Advanced Absorb 74 Augments
If you’re going as a Skank Tank, you’ll want the following…
- Advanced Critical 74 Augments
Best Builds for Kinetic Combat Shadow in PvP
I will be offering two build variants, a Full Tank build and a Skank Tank build. The full tank is your traditional tank that uses tank stats. The Skank Tank sacrifices some defenses in favor of damage through a higher critical hit chance. Both builds are valid in PvP despite what some people may say.
Most are in favor of Skank Tank builds since the mitigation stats of tanks are often unreliable or ineffective against the most powerful attacks like the Vanguard’s/Powertech’s Cell Burst/Energy Burst. I however prefer control and defense through a Full Tank build as better tank stats mean I can lower the cooldown of certain abilities such as Force Cloak, Resilience, and make better use of Kinetic Ward’s augmented effects.
Keep in mind that these are guidelines, you may change an option here or there to suit your needs.
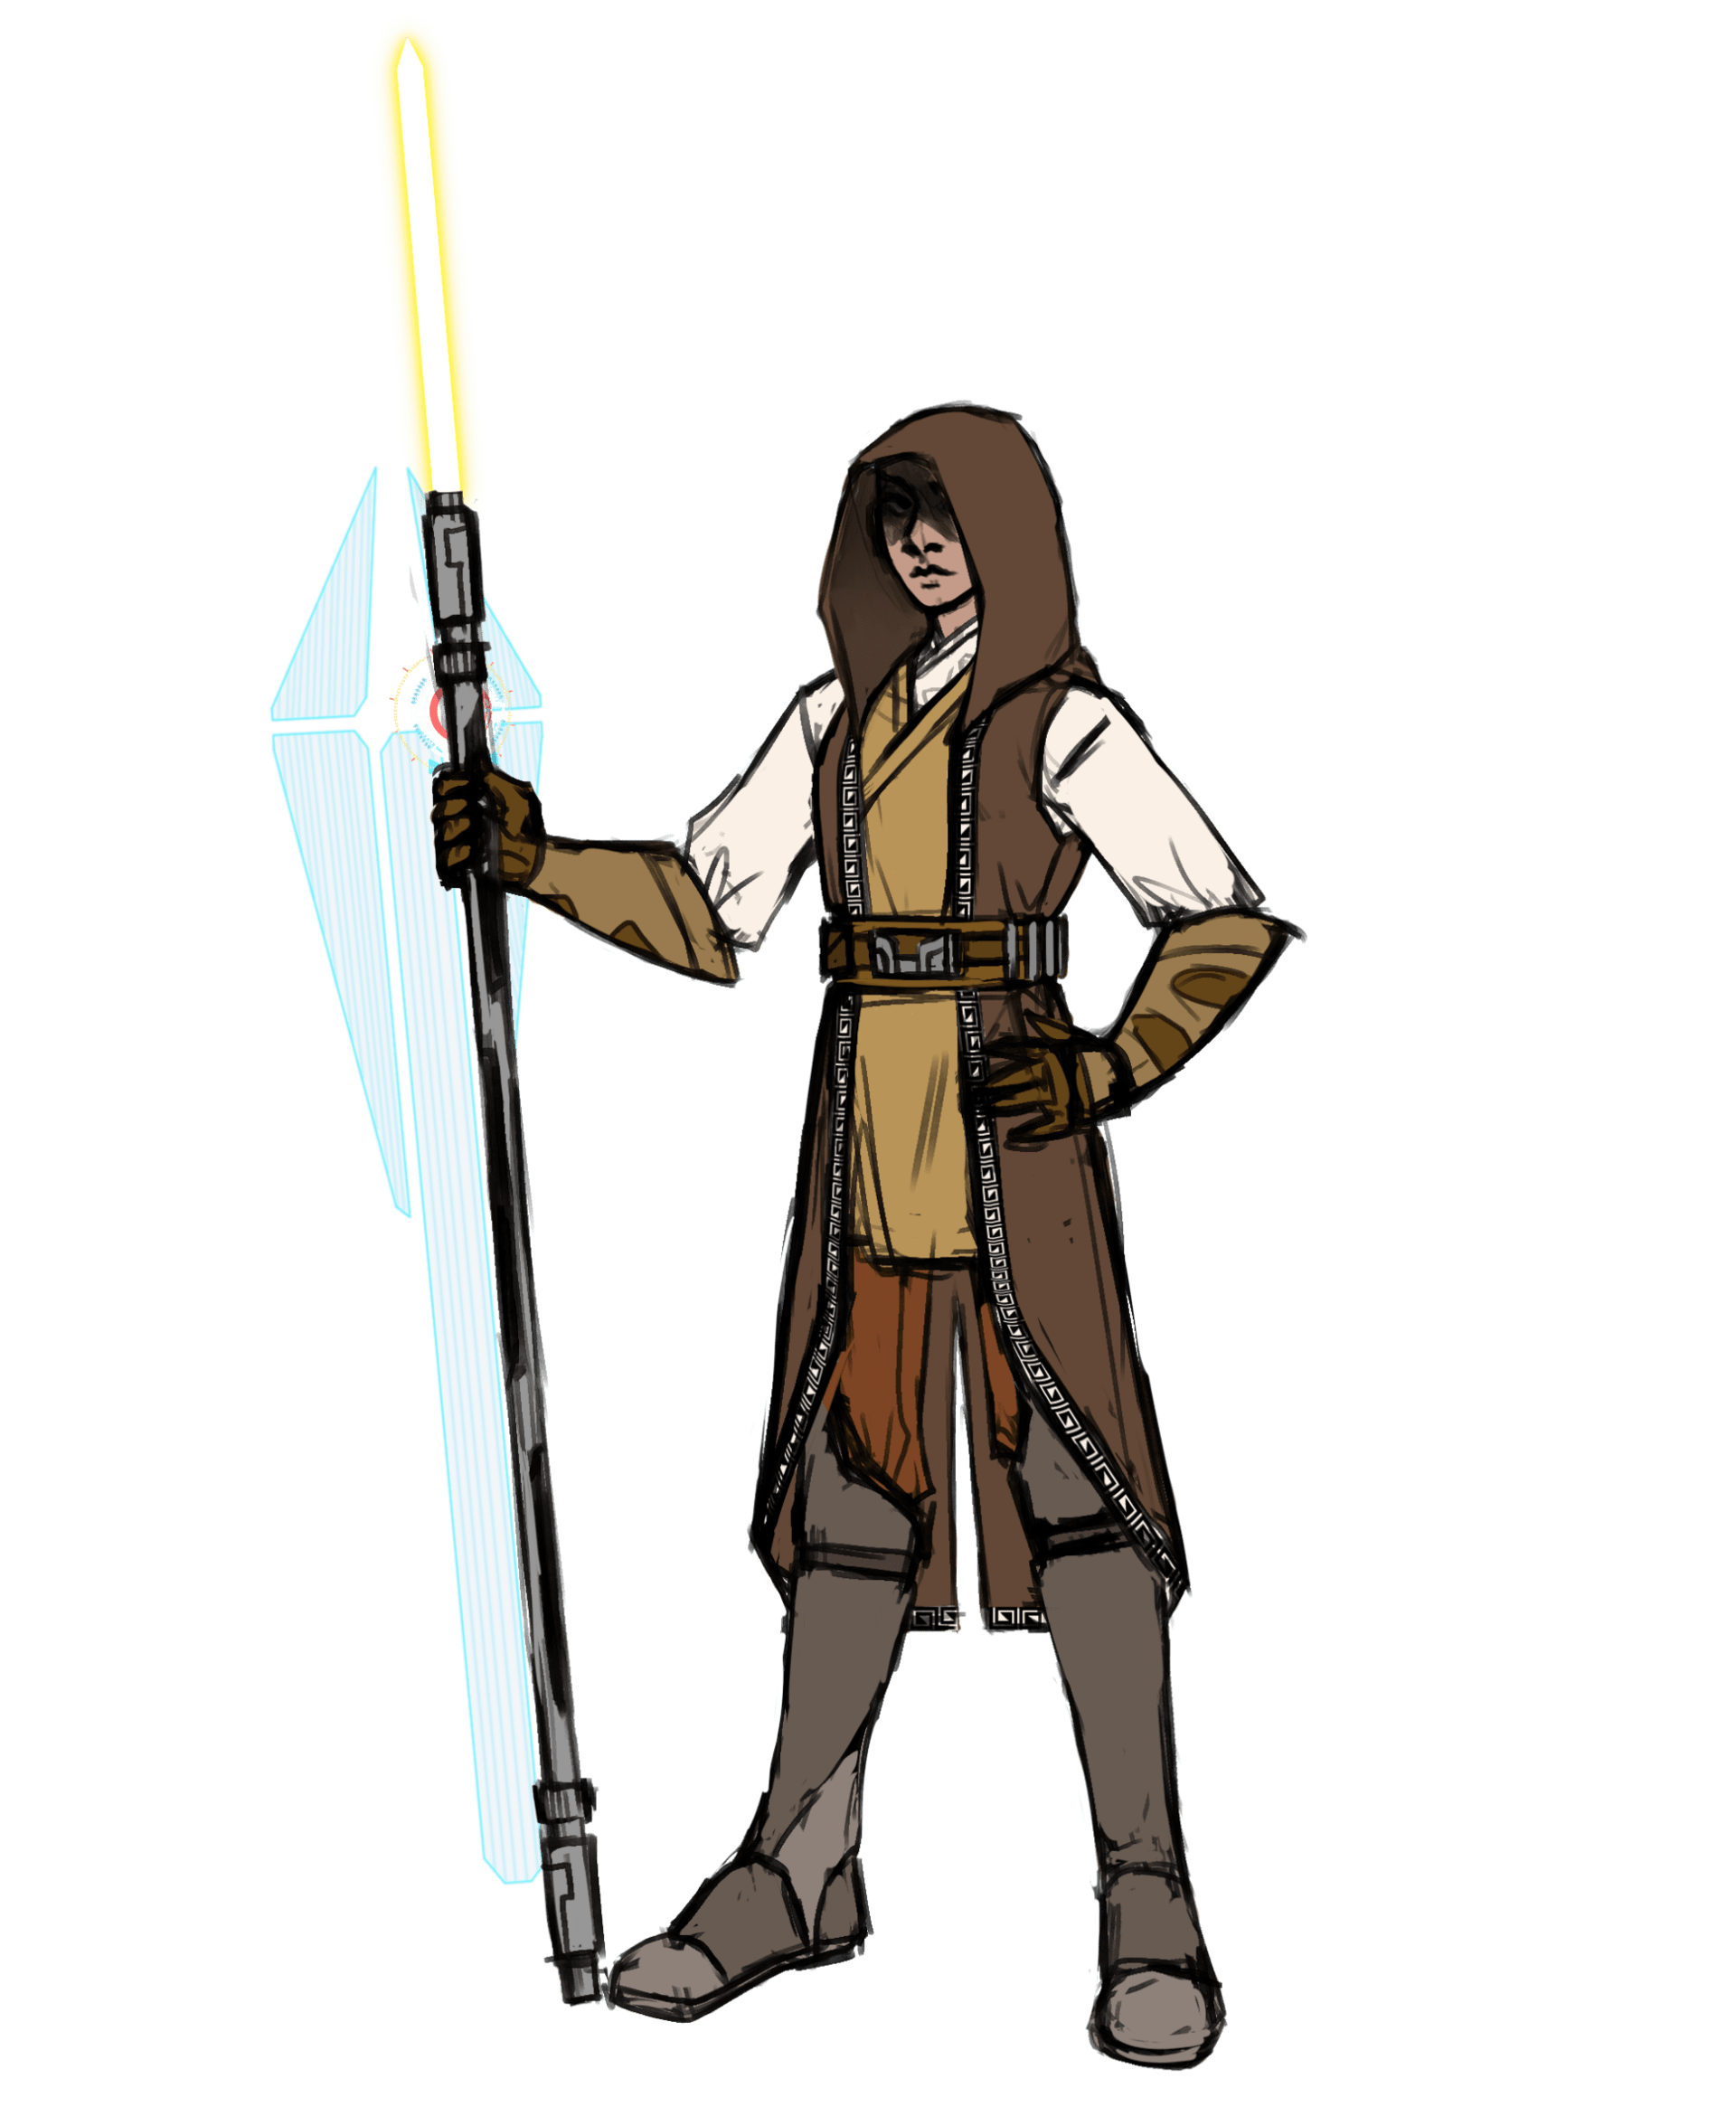
The Jedi Temple Guard Build (Full Tank)
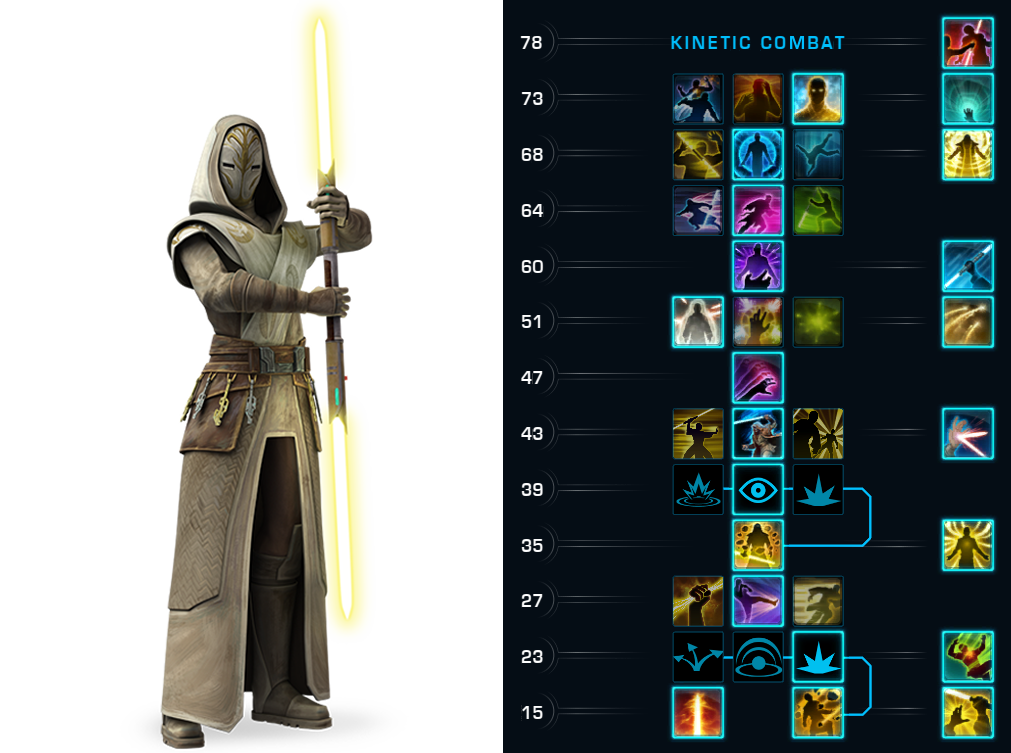
Build Essentials:
- Spinning Kick
 Dusk Ward
- Battle Readiness
- Intangible Spirit / Sturdiness
- Force Phase
- Force Wave
- Celerity / Cloak of Resilience
- Two Cloaks Tactical
This is your traditional Full Tank build. Some might tell you that you should never use a Full Tank build in PvP but I’ve always ran this and excelled at it. You’re just sacrificing damage output in favor of defense (isn’t that the point of being a tank?). By using Full Tank stats, you’re able to shield and dodge more often, meaning you increase your survivability by reducing the cooldown of Resilience. Though this build is best suited for Warzones or World PvP, I would use the skank tank build for Arena PvP.
While you can fight in a mosh pit, I feel the Kinetic Combat Shadow’s best strength is being able to defend themselves for extended periods of time. This is why I primarily play as an Objective Guardian when I’m a Full Tank. With Force Wave and Spinning Kick, you have more control over any opponents trying to steal or capture an objective from you. When you are familiar with your class and other classes, you’ll be able to win any 1v1 when defending a point. If you experience more than one opponent, your duty is to survive and hold the point for as long as possible until reinforcements arrive.
For gear you’ll want:
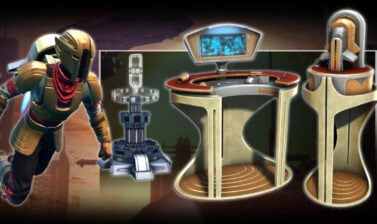
- Duelist’s Armor Set 336 (Helmet, Gloves, Pants, Boots, etc)
- Duelist’s Saberstaff 336
- Duelist’s Shield 336
- Bastion Device 336
- Force Resistance Package 336
- Ballast Point Package 336
- Relic of the Shield Matrix 336
- Relic of Avoidance 336
- Two Cloaks Tactical
- 2 Indestructible Crystals
For stats you’ll want:
- 42% Shield Chance
- 40%+ Absorption
As a Shadow, you’ll be able to get these gear from various endgame sources like your PvP Weekly Crates. Those PvP Weekly crates will drop a guaranteed upgrade for you, replacing the lowest ranked item you’re currently wearing.
For modded gear, you’ll want:
- x1 Resistive Hilt 103
- x8 Resistive Armoring 103
- x9 Warding Mod 103B
- x5 Bastion Enhancement 103
- x2 Bulwark Enhancement 103
- Bastion Device 336
- Force Resistance Package 336
- Ballast Point Package/Stationary Grit Package/Second Wind Package 336
- Relic of the Shield Matrix 336
- Relic of Avoidance 336
- Two Cloaks Tactical
- x2 136 Indestructible Crystals
Once you have the gear above, you’ll want to use Augmentation Kits MK-11’s to add an augment slot to each piece of gear. From there, you’ll want to add an Advanced Shield Augment 74 (Item Rating 286) Into your gear until you hit 42% Shield Chance. This way, when you activate your Kinetic Ward you’ll have 60% Shield Chance with around 40%+ Shield Absorption. Any remaining Augment slots you’ll want to fill with Advanced Absorb Augment 74s to give a boost to your base Absorption rating.
Remember to not augment your gear pieces until they reach Item Rating 336 as when you upgrade a piece, they lose their augmentation slot.
Now let’s discuss ability tree options.
For the level 23 Option, you’ll want either Antagonizing Debris or Kinetic Cascade depending on your preferred playstyle. If you want to fight in the mosh pits or you run with a coordinated PvP group, I’d recommend Antagonizing Debris so you can get a consistent damage buff while saving your taunts for enemies targeting your allies. If you like to run solo and prefer Objective Guarding, I would recommend the Kinetic Cascade option so you have increased damage in a 1v1 scenario. If you want the math on this, please refer to Section 4 of the Math Chapter found at the end of this guide.
At level 73, you’ll want either Celerity or Cloak of Resilience. Both are incredibly useful so it comes down to personal preference. The safest option would be Celerity as having a reduced cooldown on your CC Breaker and Interrupt is always useful. I myself prefer Cloak of Resilience to ensure no Force/Tech AoEs knock me out of stealth if I need to cloak out. Along with that, this allows me to avoid burst damage from Force/Tech sources even more as I can use this two times with the Two Cloaks tactical.
With this build, you’ll be able to defend points and hold off multiple opponents for a great deal of time. Gearing and abilities are only half the key to victory, knowing your rotations and timing your DCDs is far more important. You aren’t trying to outburst or out-damage them, you’re surviving and wearing them down until they are defeated. Like I’ve said, you’re pretty much able to win any 1v1 with enough skill when using this build. Why do you think the armor set for Kinetic Combat Shadows is called the Duelist set?
The Jedi Brute Build (Skank Tank)
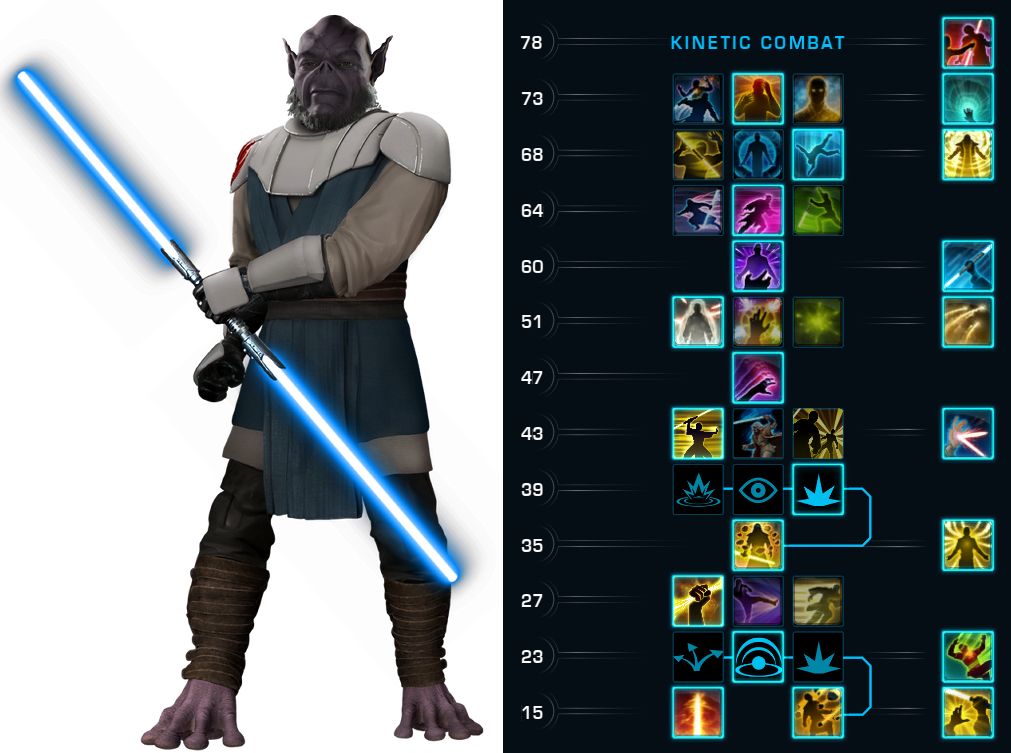
Build Essentials:
 Antagonizing Debris
- Energized Project
- Dusk Ward /
 Twilight Ward
 - Intangible Spirit / Sturdiness
- Force Phase
This is the kind of setup you’ll often find used by PvP Kinetic Combat Shadows. The most common mentality is “the sooner I can kill my opponent, the sooner I can win”. In some scenarios, this is definitely the case such as 4v4 Arenas. Because of this, I highly recommend using this build over the Jedi Temple Guard Build when in Arena PvP. Since you play as a tank, you have 111% Accuracy so you’re going to be hitting all of your Force attacks such as Project and Cascading Debris.
In both variants of the Skank Tank, choose Antagonizing Debris over Kinetic Cascade as it’ll always increase your Cascading Debris’ damage more due to your higher Critical Multiplier, that and the additional 10% Critical Chance on Cascading Debris.
Whether you go Potent Defense or Battle Readiness is up to you, though Battle Readiness is better overall since it’s on-demand damage reduction. As a skank tank, you may be sacrificing your chance to shield, and thus greatly reducing your ability to actually get the Force Potency stack from Twilight Ward.
When it comes down to the choice of Dusk Ward or Twilight Ward, that’s going to depend on the situation you want to put yourself in. If you’re in an Arena PvP battle or like fighting in the mosh pits, Dusk Ward wins hands down. The 20% Accuracy debuff is a massive drop in DPS for the enemy and it helps keep yourself and your allies alive that much longer. If you prefer Warzones and like to go alone to capture or defend objectives, Twilight Ward will be a good option for you as it boosts your dueling power.
I’ll be going over two gearing options, an Off-Tank Build and a proper Skank Tank build
Option 1 – Off Tank
You can use Full Tank armor with Critical Rating Earpiece, Double-bladed Lightsaber, and DPS relics to get your Critical Hit Chance to 30% then put everything else into Shield Chance.
I recommend the following setup:
- Duelist’s Saberstaff 336
- Duelist’s Shield 336
- Duelist’s Armor Set 336 (Helmet, Gloves, Pants, Boots, etc)
- Adept Device 336
- Force Resistance Package 336
- Dynamic Force Package 336
- Relic of the Shield Matrix 336
- Relic of Avoidance 336/Relic of the Shield Matrix 336
- Two Cloaks/Friend of the Force Tactical
- 2 Indestructible Crystals
- Critical Rating and Shield Rating 286 Augments
For the gear mod version, you’ll need…
- x1 Resistive Hilt 103
- x8 Resistive Armoring 103
- x9 Warding Mod 103B
- x7 Bastion Enhancement 103
- Bastion Device 336
- Force Resistance Package 336
- Dynamic Force Package 336
- x2 Relic of the Shield Matrix 336
- Two Cloaks/Friend of the Force Tactical
- x2 Indestructible Crystals
- x13 Advanced Shield Augment 74
- x1 Advanced Critical Augment 74
For stats you’ll want…
- 30% Critical Chance
- Everything else in Shield Chance
This option is somewhere between Full Tank and Full Crit Tank, think of it as an Off-Tank build if you wish. With this setup, you’ll have a 100% Critical Hit Chance when using Cascading Debris with Force Potency so long as you have the Antagonizing Debris ability. Your tanking stats will be weaker compared to the Full Tank but your primary source of survival here will be through your DCDs and defeating your opponent before they defeat you.
You’ll want to increase your Shield Chance as high as you can to more easily proc the effects of Dusk Ward, Twilight Ward, or Potent Defense. Remember that using Force Potency will grant you +30% Absorption Rating for 20 seconds, which makes up for your weak base Absorption rating with this setup.
I would highly recommend choosing the gear mod variant of this build as you’ll have more finely tuned stats with 30% critical chance and 66-69% shield chance with Kinetic Ward up. The more you can proc your Dusk Ward/Twilight Ward, the better for you and your team. The added shield chance also helps you use Resilience more often which is good for the “Friend of the Force” tactical.
Option 2 – Full Critical
You could go with a Full Critical set using tank armorings and mods for more overall HP.
- x1 Resistive Hilt 103
- x8 Resistive Armoring 103
- x9 Warding Mod 103B or x9 Lethal Mod 103
- x7 Powerful Enhancement 103
- Savant Device 336
- Force Resistance Package 336
- Dynamic Force Package 336
- Relic of Serendipitous Assault 336
- Relic of the Focused Retribution 336/Relic of Boundless Ages 336
- Two Cloaks/Friend of the Force Tactical
- x13 Advanced Critical Augment 74
- x1 Advanced Alacrity Augment 74
For stats you’ll want
- 40% Critical Chance
- 70% Critical Multiplier
- 7.5%+ Alacrity
This is more in line as to how Skank Tanks are traditionally played. Using mods, we ignore all tank stats (except from the Force Resistance Package, we need that for the extra Damage Reduction) in favor of having more critical rating while having as much endurance as possible. You’ll have around 40% Critical Chance with a 70% critical multiplier. You’ll have a guaranteed 100% critical hit chance with Force attacks while Force Potency is active.
Additionally, Cascading Debris will have a base 50% critical hit chance when you have Antagonizing Debris. Instead of using a Critical Device for this setup, we’ll be using an Alacrity one as you’ll have all the critical rating you’ll need from the other gear. You’ll want to get 7.5% alacrity to get your Global Cooldown reduced to 1.4 seconds from 1.5 seconds. Having more uptime will be useful to output damage sooner.
I would recommend using Prototype critical enhancements over Artifact enhancements as you’ll gain more overall HP. Having HP is very important when you spend your time guarding an allied player as it’ll keep you both alive longer. It’s also valid to replace your Warding Mod 99B’s with Lethal Mod 99’s to swap out your Defense Rating for more Power. This will let your rocks from Cascading Debris and Project hit harder and scale better with your critical damage multiplier. Though use tank armorings and hilts regardless as those only provide mastery and endurance, and you’ll want endurance wherever you can get it.
Rotations and Ability Priorities
So there are two crucial rotations you really need to know, which I will dub the Defensive Rotation and the Offensive Rotation. The thing about the Kinetic Combat Shadow is that they’re very versatile in how they can fight their opponents. Need to fight a melee enemy? Kite them between 5-9 meters to prevent them charging or pulling you while preventing melee strikes. Dealing with a kiter? Force Pull them or chase them with Force Speed and Shadow Stride. Enemy immune to Force and Tech for a bit? You have plenty of melee weapon options. Commando/Mercenary using their Single Target Reflect Shield? You have AoEs that can bypass the shield. You get the idea.
What’s more important is how you use Force Potency and your other DCDs. It’s a common newbie mistake to pop all of your DCDs at once, but then you’re weak afterwards as you have no way to defend yourself outside of shielding attacks. If you’re dealing with Force/Tech attacks, pop Resilience. Getting hit by weapon attacks? Use Deflection or Force Potency if Deflection is Down. Expecting large bursts of damage? Use Battle Readiness and Spinning Kick. A lot of it is improvisation and adaptation to the current situation you are in.
Defensive Rotation
- Stealth
- Kinetic Ward (while Stealthed, keep it up in case an enemy shows up)
- Project
- Slow Time
- Force Breach
- Double Strike
- Project
- Cascading Debris
 Stealth
 Project
This is your core basic rotation for maintaining slows, debuffs, dealing damage, and maintaining Shadow Protection. With each Project and Slow Time, you’ll be building a stack of Harnessed Shadows. At 3 stacks, you’ll have an empowered Cascading Debris meaning it’ll deal +45% increased damage, increase your Damage Reduction by 1% for every rock hit, it can’t be interrupted, and it experiences no ability pushback if you take damage.
Now ideally, you want to work in an empowered Project procced by a melee strike so you can use the empowered Project followed by the empowered Cascading Debris to deal more damage to your opponent. If you were unable to proc an empowered Project at step 7, you can use your empowered Shadow Strike in an attempt to proc Project again. Once your target reaches 30% HP or lower, use Spinning Strike whenever you can as this is your hardest hitting melee ability and will often end up being the finishing blow against a target.
Offensive Rotation
- Project
- Slow Time
- Double Strike / Whirling Blow (use either to proc an empowered Project)
- Force Potency
- Empowered Project
- Empowered Cascading Debris
This rotation is primarily used when Force Potency is available and is the Skank Tank’s favorite combo. It’s pretty much the same as the Defensive Rotation though once you proc the empowered Project, you want to use Force Potency, Empowered Project, then Empowered Cascading Debris. All of these rocks will critically hit with the Skank Tank build, from there I suggest Double Strike or Whirling Blow depending on the amount of enemies in an attempt to proc Project again.
If you’re a Skank Tank, your Empowered Project with Force Potency will deal an average of 37,000 damage against a training dummy. Each tick of Cascading Debris when fully empowered and critically hitting with Force Potency will deal about 15,000 damage per tick. Against a training dummy, you’ll deal between 97,000 kinetic damage. Keep in mind this number will vary on actual targets with varying amounts of armor. Now you can increase this even further through relics.
When you gain Power from your relics from either the Relic of Serendipitous Assault or the Relic of Boundless Ages, your empowered Project with Force Potency will hit for around 40,000 kinetic damage. Each critical tick of empowered Cascading Debris will deal around 16,000 kinetic damage for a total of around 64,000 damage. This will make your damage from these two abilities around 104,000 kinetic damage against the training dummy.
Gaining 3 Stacks of Potent Defense
- Consume all of your Kinetic Ward stacks while using the Twilight Ward passive to gain a charge of Force Potency.
- Use the Force Potency ability.
- Use empowered Force abilities (3 abilities vs 1 target, 1 AoE ability vs 3+ targets_.
- Gain 3 stacks of Potent Defense after consuming Force Potency charges.
With the release of 7.2, the “Potent Defense Rotation” was made useless and it will then be replaced by explaining the mechanics of getting 3 stacks of Potent Defense despite only being able to get two charges of Force Potency with the Force Potency ability. It all comes down to your shield chance and the Twilight Ward passive ability. In the past, we would use a Force Potency empowered Cascading Debris to get all 3 stacks of Potent Defense while consuming 1 charge of Force Potency. Apparently this was an unintended effect and was removed in 7.2 leaving us to figure out new ways to do this. As it turns out there is only one way to do this.
If you select the Twilight Ward passive ability at level 39, you’ll gain the ability to be granted 1 charge of Force Potency when all of your Kinetic Ward stacks are consumed. You’ll be unable to use this charge of Force Potency until you use the Force Potency ability. This allows you to use all 3 charges of Force Potency thus gaining all 3 stacks of Potent Defense granting you and your allies 15% damage reduction for 10 seconds.
In the previous version of this guide, I typically recommended Potent Defense for Skank Tanks as it was a good way to work in defensive options into their offensive rotations that utilized Force Potency. Now it seems to favor the high shield chance that the Full Tank and Off-Tank have while making Potent Defense for the Full Critical Skank Tank. As always, things change with time and we must adapt.
Basic Tanking Tips for Kinetic Combat Shadow in PvP
Guard Swapping
It is imperative to know how to swap Guard when fighting alongside two or more allies. To do this, you’ll need the Guard Ability set to something quick to access (I use the F key). Next you’ll need to open your Interface Editor to make sure the “Target of Target” window is enabled. This should allow you to see something like this…

Nadia is looking at me and her target (me) is on the far right. This is what the “Target of Target” window enables. So if you’re in a battlefield, you can press Tab to swap enemy targets in front of you to see who they’re targeting. If the enemy is someone like a Sentinel/Marauder, Shadow/Assassin, or other enemies that can deal high damage to your ally, you need to guard the ally they are targeting.
The fastest way to do this is to set a hotkey to acquire the target of your target. To set this hotkey, go to Preferences > Key Bindings > Targeting and scroll down until you find “Acquire Target’s Target”. Set the key to something you can quickly and easily access (I use the `~ key, the one right next to the 1 key). Now you have no excuse to NOT protect your allies in an efficient manner!
Stay within 15 meters of your guarded ally so their damage is reduced by 50%. The other 50% of that damage will be transferred to you. This damage can be reduced through your tank stats such as Damage Reduction, Defense Chance, and Shield Chance! Guard Damage will break Stealth.
In an Arena battle, the enemy group will likely begin to focus on another target that you aren’t guarding. It is then your responsibility to find out who they’re focusing next, target their target, and guard that ally and repeat this process as necessary. The ability to Guard Swap is one of the core skills that separates the bad tanks from the good tanks in PvP alongside DCD timing and Resolve Bar management.
Resolve Bar
What is the Resolve Bar? The Resolve Bar is a PvP specific bar used for measuring how many more hard Crowd Control effects a unit can take. Hard Crowd Control includes Stuns, Incapacitates, Sleeps, and Physics such as Pushes and Pulls. If the white bar becomes full, the unit will gain several seconds of Crowd Control Immunity after they have recovered from their previous effect.
Resolve is measured in units of 0-1,000. When the Resolve Bar hits 1,000, the unit gains Crowd Control Immunity after the latest effect ends. The amount of Resolve you fill depends on the duration of the stun you use. Generally, 1 second of Stun = 200 Resolve filled.
- Spinning Kick (3 seconds) = Fills 600 Resolve
- Force Stun (4 Second Stun) = Fills 800 Resolve
- Mind Maze/Force Lift (8 Second Incapacitate) = Fills 800 Resolve
- Force Pull = Fills 200 Resolve
- Force Wave = Fills 200 Resolve per target hit
Your own personal Resolve Bar will appear as follows…
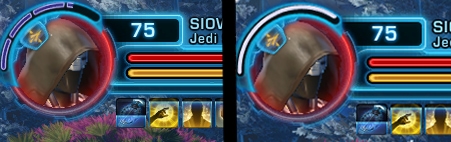
When it’s gray, you’re still vulnerable to Crowd Control effects. When the bar is white, you’ll be free from Stuns and Physics for the time being until it drains. It’s always good to keep your eye on this bar as if you’re hit by a particularly long stun such as a Flash Bomb, Force Lift, or a Fear and your bar is full, it might be a good time to use your Force of Will to break the effects early and gain some time free from Crowd Control. But that all depends on how much you’re needed at the moment. If you get Mezzed and white barred while guarding an objective, but allies are holding off the enemy from the objective, then you can more likely get away with saving your Force of Will.
The best time to use your CC Breaker, Force of Will, is when the White Bar is full and you have no time to spare to capture/defend an objective or when you need to protect an ally with taunt and/or a guard swap.
On your opponent it will appear as follows…
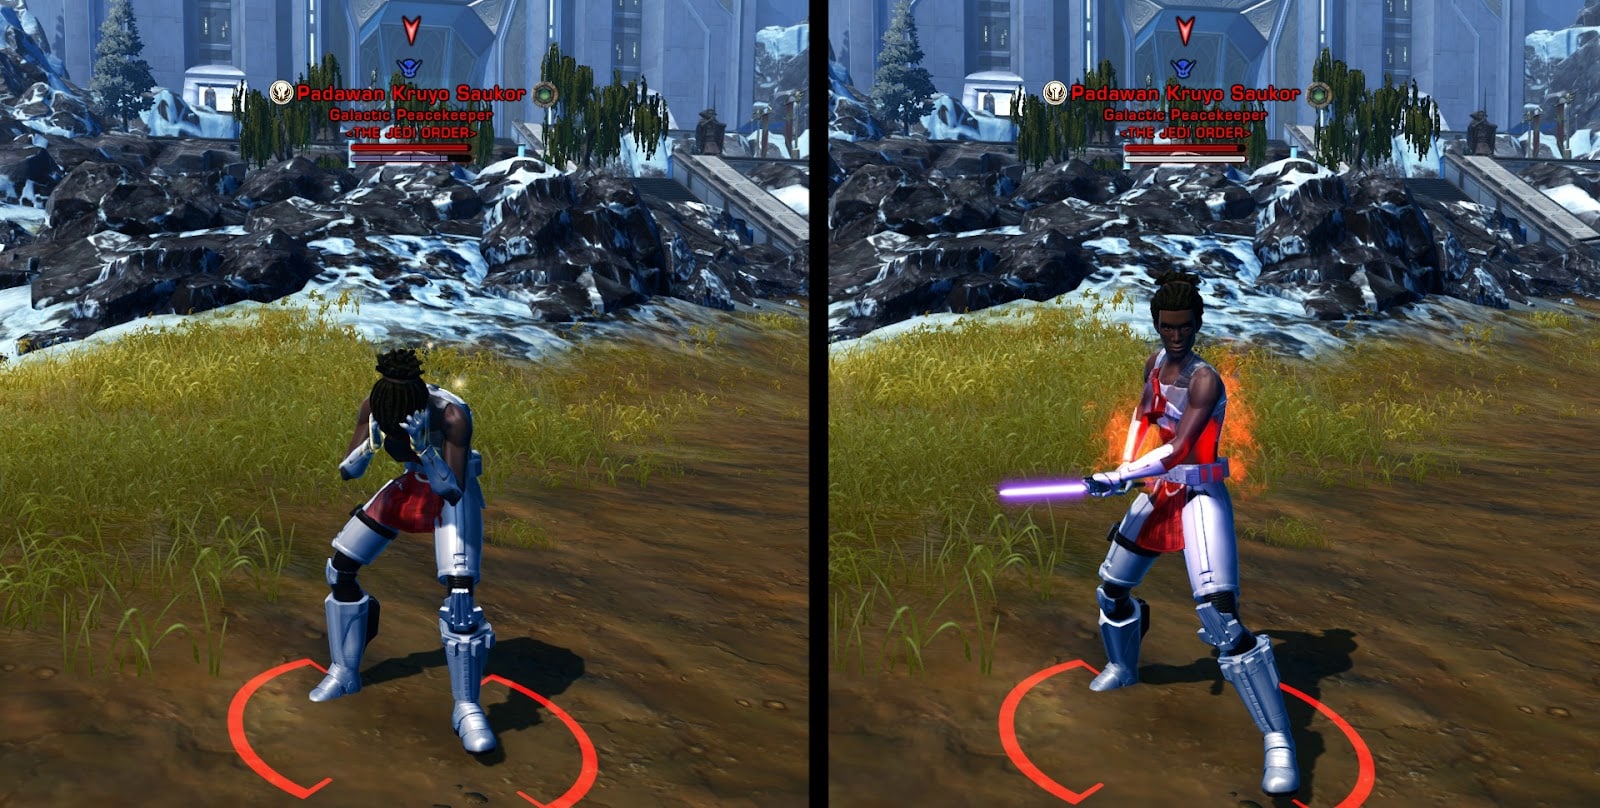
It is also very important to keep an eye on your opponent’s Resolve Bar as well as this can mean the difference between Victory and Defeat. Your task is to not fill the bar on an opponent for as long as possible so they can be susceptible to more powerful Stuns or Stun Chain targets. It only takes about 2 good stuns to fully fill the Resolve Bar of a target, as a Kinetic Combat Shadow this means using Spinning Kick and Force Stun its succession will fill your target’s Resolve Bar.
Now there are some times where you’ll have to fill an opponent’s Resolve Bar. Say you’re on Voidstar trying to lay a bomb on a door, you find one opponent guarding it. You use Mind Maze on them filling 800 Resolve. You decloak to then plant the bomb, this forces them to pop their CC Break where you then Force Lift them, filling their white bar, leaving them to float for 8 seconds as you plant the bomb.
Now if you were to be working with a Guardian Tank, you can apply two small stuns and not fill their Resolve Bar. Your Spinning Kick and their Hilt Bash will fill a total of 800 Resolve, leaving them open to another 4-8 seconds of being stunned by a Force Stun, Force Stasis, or incapacitating effect. You’ve then negated 8+ seconds of their ability to act. Keep in mind of timing your Stuns and Incapacitates so you don’t give your opponent an opportunity to retaliate.
It’s because of the Resolve Bar I’ve come to favor the use of various Slows in my personal utility setup (The Jedi Temple Guard Build). Slows are what’s considered Soft Crowd Control, this only hinders their movements and doesn’t outright prevent them from acting. They may not be stunned but being slowed to a crawl is by far the next best thing.
Roots applied by either offensive abilities (like the Consular’s Sever Force Ability) or those applied by other Crowd Control (Force Wave) will not fill the opponent’s Resolve Bar additionally, so roots are a great way to circumvent the Resolve Bar. Just note that roots won’t apply if the target’s Resolve Bar is full, instead they will apply a 50% slow. This is still really good to have on an opponent.
Tips on how to fight other classes
And now here is where we learn the various buffs and animations you should look out for to ensure you don’t end up assisting your enemy instead of harming them. It is important to spend time to understand the abilities of your opponents because there’s one key difference with Shadow Tanks when compared to Guardian or Vanguard Tanks, we are Proactive Tanks and not Reactive Tanks.
What is the difference between a Proactive Tank and a Reactive Tank? Simply put, a Reactive Tank will likely pop their DCDs as a response to receiving incoming damage. These DCDs are rather simple like a flat Damage Reduction buff or a Self Heal. Meanwhile, Shadow Tanks have different DCDs that affect specific Defensive Stats. Kinetic Ward increases Shield Chance, Force Potency increases Shield Absorption, Battle Readiness increases Damage Reduction, Deflection increases Defense Chance, Resilience grants Force/Tech immunity for a short time, you should know all of this by now.
Because we have very specific DCDs, we must know the best time to use them. In order to do this, we must understand our opponents. The sooner we find clues to their specific discipline, the sooner we can adapt our fighting style to deal with them specifically. Kinetic Combat Shadows make excellent duelists that can 1v1 almost any class in the game due to our adaptable DCDs and mix of AoEs, Single Target Force and Weapon attacks, and our ability to subvert combat flow entirely with our Stealth.
Guardians and Juggernauts
These opponents fight you by flinging you around like a ragdoll to have you fight on their terms. You on the other hand can kite them rather easily by applying Force Slow, Slow Time, and Cascading Debris. While tricky, it’s worth practicing kiting melee opponents by staying between 5-9 meters away from them. Their melee attacks only extend to 4 meters so you’re out of range for them to hit. Meanwhile, their charge has a minimum length of 10 meters which means you’ll have to not go beyond that range so they can’t catch up to you.

There’s one key buff you REALLY want to look out for, and that’s the Focused/Enraged Defense Buff like the ones seen above. There’s no obvious animation for it so you need to keep an eye on their buff bar. They’ll gain 12 stacks of Focused/Enraged Defense which will heal them every time they receive damage. When fully consumed, this can easily bring them back to full health. When you see these buffs, do not attack them, wait it out until it’s gone!
Guardians and Juggernauts have a chosen passive ability that decreases the Cooldown of these abilities by 30 seconds bringing its cooldown down from 2 minutes to 1 minute 30 seconds. You want to avoid prolonged battles with Guardians and Juggernauts as their self healing capabilities are MUCH better than yours. You must learn to be patient and wait it out so you don’t heal them.

Another buff to keep an eye out for is Saber Reflect. When this effect is active, all single target ranged, Force, and Tech attacks back to the attacker. The damage returned is capped so you wouldn’t be receiving the full damage but it still adds up. Guardians/Juggernauts will often use this when you are using your Cascading Debris. Should that happen, stop your channel by casting another ability so long as it’s a melee attack or an AoE. Spinning Kick counts as a single target Force attack so it will get reflected.
Defense Guardians and Immortal Juggernauts (Tank)

The primary thing you should look out for when fighting a Tank Guardian/Juggernaut is the Warding Call/Invincible buff. This reduces all incoming damage by 40% for 10 seconds. This ability alone makes Tank Guardians/Juggernauts a very popular pick in PvP. Avoid using your Offensive Rotation while this is active so you don’t waste your damage potential. Aside from this, it’s a matter of kiting while whittling them down and not healing them with their Focused/Enraged Defense.
Vigilance Guardians and Vengeance Juggernauts (DoT DPS)

If you’re against a Guardian/Juggernaut using the DoT Spec, look for the buffs seen above. These are the Robust and Brawn buffs. After using Force Leap, they gain immunity to CC and their damage reduction is increased by 20% for 4 seconds. While this buff is active, do not use any CC abilities or they will be wasted.
Focus Guardians and Rage Juggernauts (Burst DPS)
Burst DPS Guardians and Juggernauts will be much harder to effectively kite as they gain a short-range leap attack to deal with kiters like you. Burst DPS is also your greatest weakness so these foes are not to be taken lightly. After they use a leap at you, look for these buffs. This will make their next Focused Burst/Raging Burst critically hit against you. These are Force-based attacks so you can negate it with Resilience. If Resilience is on cooldown, I suggest Battle Readiness to increase your Damage Reduction since these attacks deal Kinetic Damage.
Sentinels and Marauders

Above are the Guarded by the Force (Sentinel) and Undying Rage (Marauder) buffs. This reduces all incoming damage on the Sentinel/Marauder by 99% for 6 seconds.. Don’t waste your Force Potency, Project, and Cascading Debris combo while this buff is active.

Above are the Rebuke (Sentinel) and Cloak of Pain (Marauder) buffs. These act as a personal shield to the Sentinel/Marauder that reduces all damage taken by 20% for 6 seconds. Every time they are attacked, the duration refreshes and they reflect energy damage back to the attacker. If you see them use this buff, stop attacking for 6 seconds so it wears off. This ability can be refreshed to last a total of 30 seconds and you don’t want to give them 20% damage reduction for 30 seconds.
Watchman Sentinels and Annihilation Marauders (DoT DPS)
A key thing to look out for is the amount of stacks they have in Merciless Slash (Sentinel)/Annihilate (Marauder). This buff can stack up to 4 times and at max stats, they can more often use the Merciless Slash/Annihilate ability which is the strongest burst melee attack available for the class. These are weapon attacks so you can dodge or shield them but do be careful that the longer you are in a battle with a DoT Sentinel/Marauder, the more damage they’ll do thanks to their Juyo Form buff which increases damage the longer they are in combat.
Combat Sentinels and Carnage Marauders (Sustained DPS)
These Sentinels/Marauders don’t quite focus on Burst or DoTs, rather, they focus on maintaining a high rate of attacks to keep up a sustained damage output. These units favor weapon attacks and will occasionally unleash a burst of Force energy damage to up to 10 meters. Deflection is especially useful against these units though there are some things you need to be aware of…

Above are the Precision (Sentinel) and Ferocity (Marauder) buffs that are one of two giveaways that you’re fighting a Combat Sentinel/Carnage Marauder. This buff grants 2 stacks of Precision/Ferocity, allowing their next melee attack of Clashing/Devastating Blast to ignore 100% of the target’s armor. They will hurt when this is active, but these attacks can be ignored entirely by having a good Defense Chance or using Resilience to negate their blast ability.

Above are the Lance (Sentinel) and Gore (Marauder) icons, you’ll find these against yourself as a debuff so remember these icons. You’ll know when they perform this attack when the Sentinel/Marauder stabs you with both lightsabers. For the next 1.5 seconds, you’ll be unable to use Force Speed, Shadow Stride, or Force Cloak while under the effects of Lance/Gore. This ability has a 15 second cooldown (likely even more since these units love to build Alacrity which lowers cooldowns ever so slightly) so they’ll use this to kill your flow.
This is a good example on why you should kite your melee opponents. This ability is melee and has a 4 meter range, so staying between 5-9 meters while kiting will prevent them from using Lance/Gore on you. As of 7.0, Sentinels/Marauders can augment this ability by making it into a 10 meter dash known as Driving Lance/Driving Gore. If they have this variant, you’ll have a harder time getting them off you. Like any weapon attack, it can be dodged so as a Full Tank you have a 30% chance of ignoring this ability entirely. At the time of writing this in patch 7.0.1, this Driving variant of Lance/Gore is bugged as it can be cast without having the user dash to their target so long as the user is moving.
Concentration Sentinels and Fury Marauders (Burst DPS)

Burst Sentinels/Marauders receive the same buff, Gravity Vortex, after using their Force Exhaustion/Force Crush ability. Force Exhaustion/Force Crush is noticeable when you progressively get slower and receive a burst of damage when the slow expires. Once they use them, they receive the Gravity Vortex Buff which makes them immune to CC and Interrupts for 6 seconds. Fortunately this effect can only occur once every 30 seconds but it’s important to keep an eye out for this buff so you don’t waste any stuns.
Shadows and Assassins
As a Shadow yourself, you should be well aware of your own strengths and weaknesses. This applies to the same as Assassins as they are your mirror class. In PvP you’ll mainly see Burst Shadows and Assassins with tanks often guarding objectives. DoT Shadows/Assassins are more common in Arenas due to their good mixture of DoTs, Burst, and being able to stay on top of a target.

Above are the Resilience (Shadow) and Force Shroud (Assassin) buffs. As you should already know, this makes them immune to Force and Tech abilities for 3 seconds. Don’t waste CC while these are active nor waste your powerful combos. Instead use your lightsaber melee attacks to continue doing damage to them.

Above are the Deflection buffs for the Shadow and Assassin respectively. When this is activated, you’ll want to use more Force based attacks as melee attacks will miss more often during the 12 second duration. Do note that if they’re a tank, they’ll create an aura around them that will lower the power of your Force attacks so stay between 9-10 meters so you can apply Force Attacks at full power.
Kinetic Combat Shadows and Darkness Assassins (Tank)
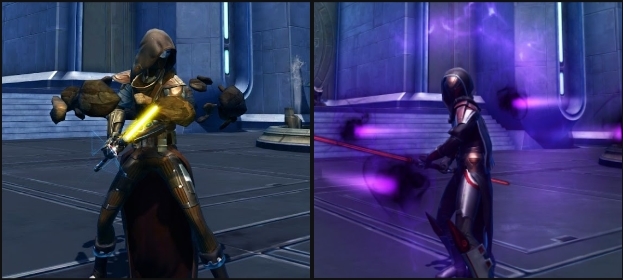
This is your own spec and the mirrored version of your spec. If you don’t know what they can do then scroll back up and reread everything since you weren’t paying attention the first time.
Infiltration Shadows and Deception Assassins (Burst DPS)
Burst Shadows and Assassins are a great class for quickly killing a single target, allowing them to dispatch a guard with ease and capture an objective. You’re one of the best tanks suited for combatting burst Shadows/Assassins due to your use of Resilience. You can easily discern a burst Shadow/Assassin if they use the floating, spinning saber attack against you.

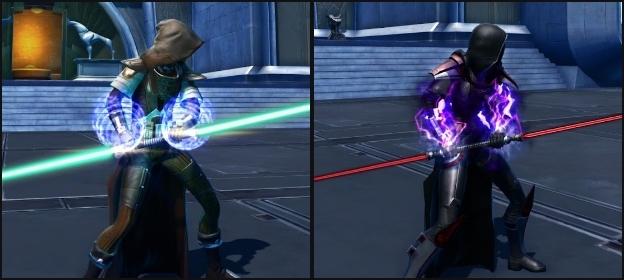
The key thing here is to recognize the Force Potency (Shadow) and Recklessness (Assassin) buffs. This is made obvious when a Shadow’s hands glow with blue orb energy while the Assassin’s hands begin to spark with electricity. This means that their Force breach is fully empowered and their next Force Breach will deal MASSIVE internal damage which can’t be mitigated. UNLESS!!! You pop Resilience the moment you see their hands glow with energy then they’ll waste their empowered Force Breach/Discharge. If they use Shadow Stride/Phantom Stride on you, they’ll have a fully empowered Force Breach/Discharge ready.
If they use Force Cloak, their cooldown on Force Potency/Recklessness is reduced by 1 minute, so be prepared to deal with another set of critically hitting empowered Force Breaches/Discharges the moment they exit stealth. This is one reason why the Two Cloaks Tactical is so popular among Shadows and Assassins, this helps them gain more offensive potential by actively lowering the cooldown of Force Potency/Recklessness.
Here’s a tip for dealing with any stealthers in general. If they cloak out and exit combat while in a 1v1 scenario, immediately use your Meditation ability to restore HP. This will give them one of two choices depending on how much they were hurt in the previous battle. If they were low on HP, they either have to retreat to heal up themselves or they’ll be forced to attack you instead of taking the time to run away and heal. This allows you to finish them off since you can out-tank them easily. This trick will not work outside of a 1v1 scenario.
Serenity Shadows and Hatred Assassins (DoT DPS)
These are technically the squishiest of the three Shadow/Assassin disciplines, but do not be fooled by this as they too are likely aware of this. These units can deal a solid mixture between Damage Over Time abilities with hard hitting melee weapon attacks that can quickly dispatch a target.
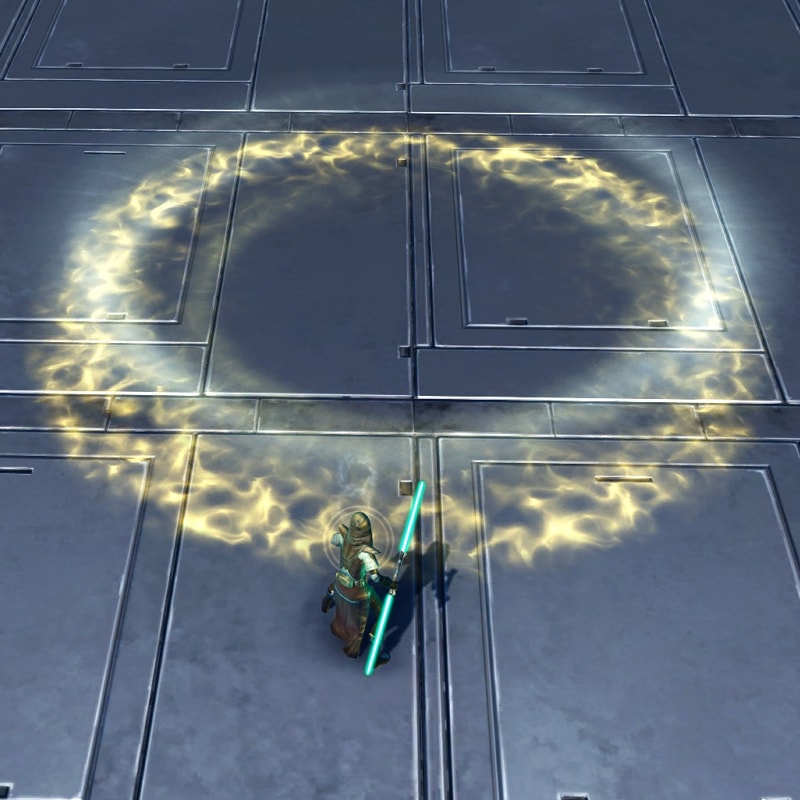
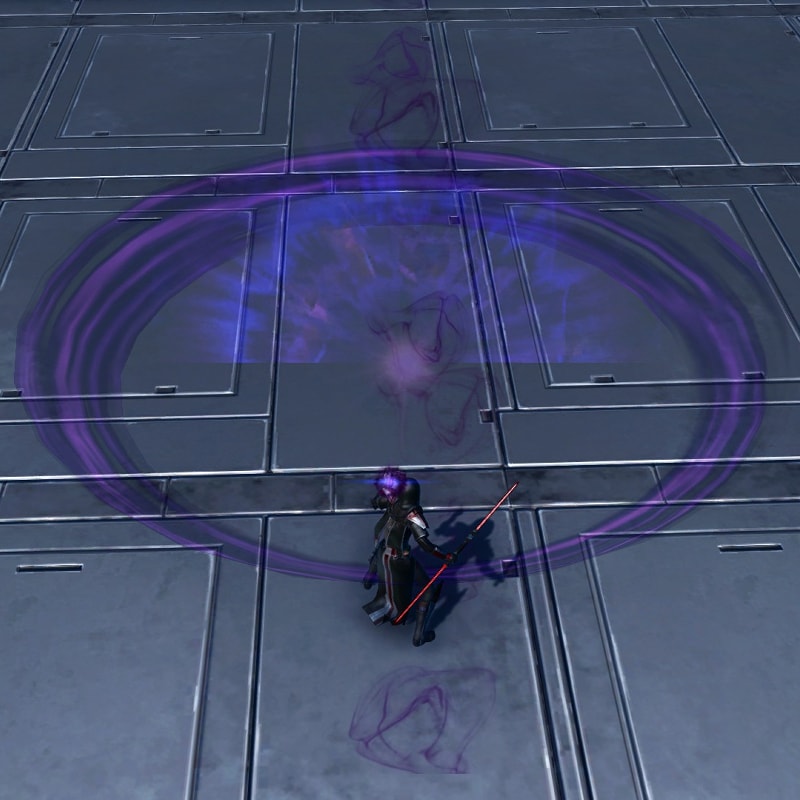
Above is the Force in Balance/Death Field AoE used by DoT Shadows/Assassins. While the animation for this ability only lasts for a second, it’s hard to miss due to the large AoE seen. If you get hit by this, you’ll gain 15 stacks of Force Suppression/Dearthmark which increases the damage from DoTs by 15%. You can cleanse this effect with Resilience to lower the overall damage done to you though it may be better to save your Resilience to cleanse the DoTs placed onto you by these units.

Above are the Mind and Body (Shadow) and Nefarious Methods (Assassin) buffs unique to their DoT disciplines. If you see this, they have their Mass Mind Control (AoE Taunt) to increase their Damage Reduction by 30% for 6 seconds. They’ll often use this buff when they are going in for melee strikes or expect large bursts of damage in return. Their base damage reduction is 15% but becomes 45% when this buff is active. Between this buff, Resilience/Force Shroud, and Cloaking for another Resilience/Force Shroud, these units can be deceptively tanky at the right moments.

Another thing to watch out for is this stacking buff. If you see the Shadow/Assassin gain this buff with a number between 1-4, you’ll know they’re using the Quick Escalation Tactical. This makes them extremely dangerous as this allows their Serenity Strike/Leeching Strike to chain Critical Hits up to 4 times in a row.
Serenity/Leeching Strike is a melee weapon attack that deals a lot of damage while also healing the user for 100% of the damage dealt.
If they critically hit with their Serenity Strike/Leeching Strike, they can instantly use Serenity/Leeching Strike up to 4 times in succession, each strike gaining another 25% critical hit chance. Their second strike will have a 60%+ Critical chance, their next has a 85%+, and their last will be a guaranteed critical hit. After this 4th hit, their ability will finally go on cooldown. But even then, it’s a 10 second cooldown so they can potentially crit chain again shortly and restore lots of HP for themselves. If they’re using the Shadowcraft Package, they can have their critical hit chance increased by 100% for 6 seconds so they can jump start this critical chain if they so choose.
Some key things to defend against this is to know that the more of their 3 DoTs are on a target, the more damage they’ll do with Serenity/Leeching Strike on targets below 30% health, thus this means they heal even more. If you’re their focus, cleanse the DoTs and apply Trauma with Double Strike or Whirling Blow to reduce their healing.
Sages and Sorcerers
In order to deal with Sages and Sorcerers, you must be able to discern what their discipline is purely based on their animations. I will be providing images to help you identify which Sages/Sorcerers are which. Regardless of their discipline, you’ll want to use Mind Snap against their many channeled abilities. Using Mind Snap is even more important to use if the Sage/Sorcerer is a healer.

If you see the following buff on a Sage/Sorcerer, you’ll know that they used their Mental Alacrity/Polarity Shift ability. When activated, they gain 20% Alacrity and become immune to Ability Pushback and Interrupts for 10 seconds. If you try hitting them while they channel an ability when this is active, the casting bar won’t be pushed back. You also can’t interrupt them during this time, so what do you do? Use your Crowd Control! Spinning Kick, Force Wave, Force Stun, Mind Maze, Force Lift, you name it. This will cancel their ability and waste their limited time they have for Mental Alacrity/Polarity Shift.

The most powerful DCD for the Sage/Sorcerer is the ability known as Force Barrier. They will channel a bubble around them that makes them immune to all damage and hostile effects for up to 8 seconds. If they are attacked while bubbled, they’ll gain stacks of Enduring Bastion which will act as a damage absorbing shield that lasts for several seconds after Force Barrier is channeled. The more you attack them while Force Barrier is up, the more stacks of Enduring Bastion they’ll have. Having Enduring Bastion will make them immune to interrupts so long as this buff is up. Don’t attack them when their super bubble is up, they can’t do anything anyways while channeling it and you’ll only make them more vulnerable when they inevitably come out.

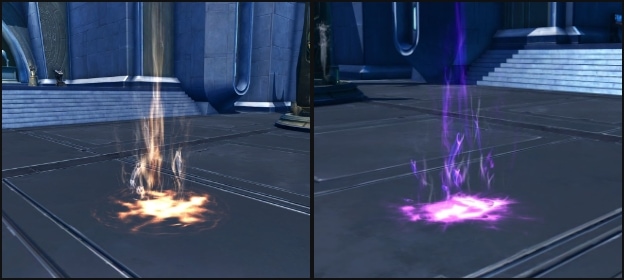
Phasewalk was an ability stolen from Shadows/Assassins only to be given to Sages/Sorcs then later removed from Shadows/Assassins entirely because it “made us too mobile”. I’m still salty about that. What this does is that it allows the Sage/Sorcerer to mark a spot with what appears like some ghostly flame. If they are within 60 meters of this spot, they can reactivate Phasewalk to immediately teleport to that spot. This can be done even while under the effects of stuns. If you see one of these marked locations, make a mental note of it in case a Sage/Sorcerer teleports away.
Seer Sages and Madness Sorcerers (Healer)


Above are the animations used by Healer Sages and Sorcerers. Each of these abilities are channeled and can be stopped by your Mind Snap or hard CC such as your Force Wave or Force Stun. You must always disrupt the enemy healer from channeling their abilities whenever possible. Since you’re a tank, you’ll lack the damage to actually kill a healer so the best thing to do is be very annoying to them and stop them from healing their group.
Telekinetics Sages and Lightning Sorcerers (Burst DPS)
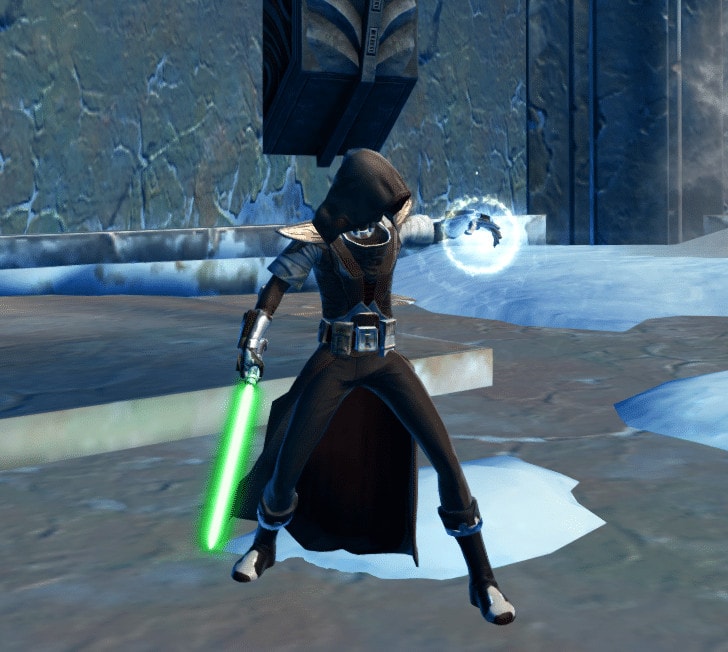
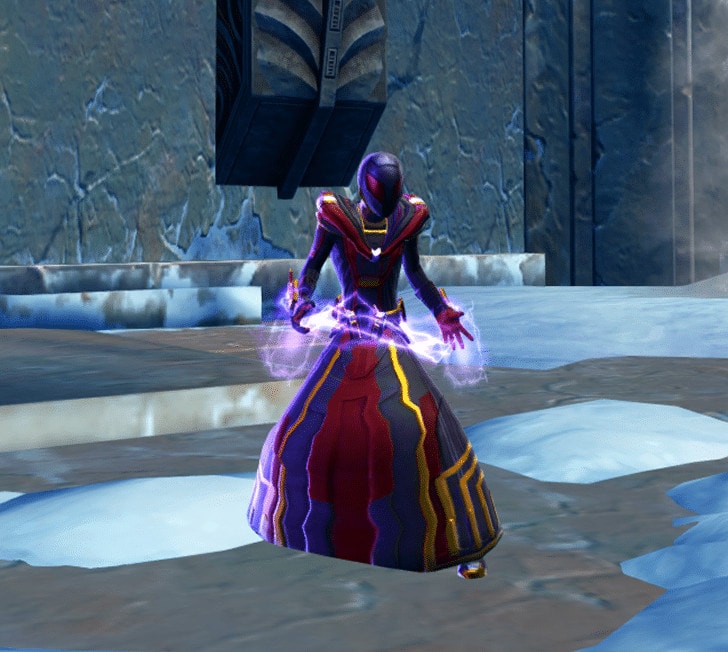
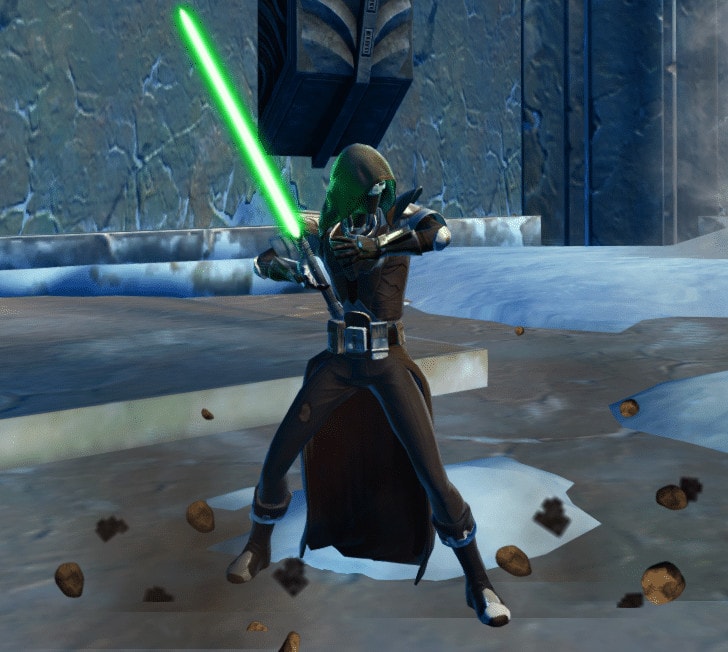


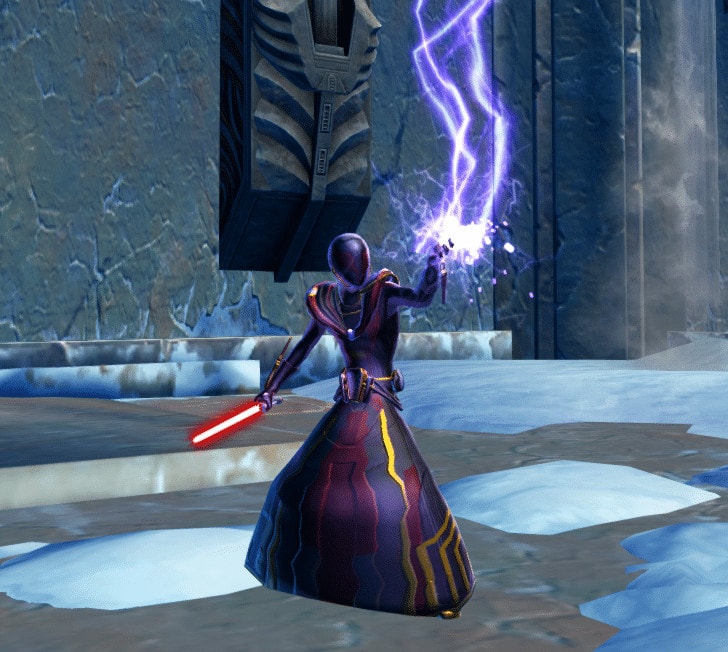
Above are the animations used by Burst Sages and Sorcerers. Their damage isn’t too bad, it’s just that they’re able to chain multiple telekinetics/lightning in succession and can be hard to catch up to as they’ll kite you. Oftentimes they’ll take a Utility that’ll make their bubble erupt in light blinding those nearby temporarily so you won’t be able to move if you’re caught up in that. This effect ends upon taking damage so it’s better to save your Force of WIll for something less easily broken.
Prioritize Telekinetic Burst/Lightning Bolt and Turbulence/Thundering Blast for abilities you want to interrupt as this deprives them of DPS and the ability to perform chain combos.
Balance Sages and Sorcerers (DoT DPS)
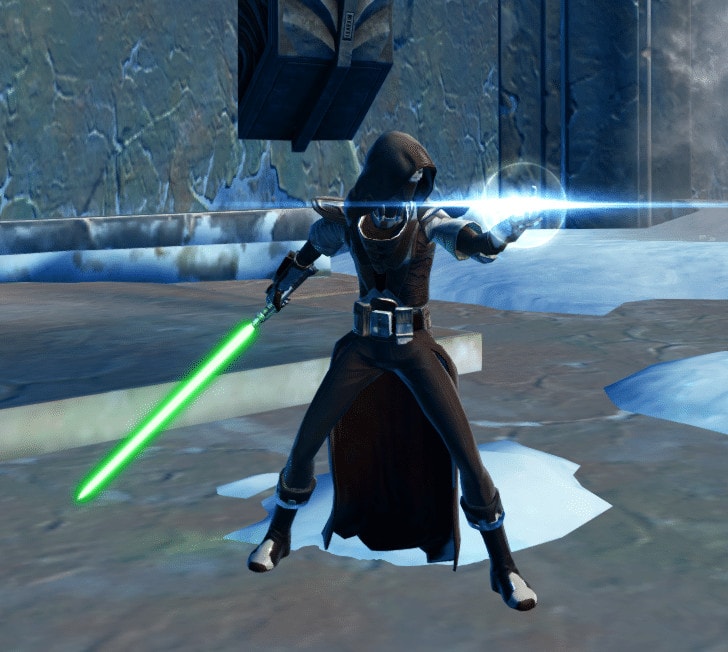

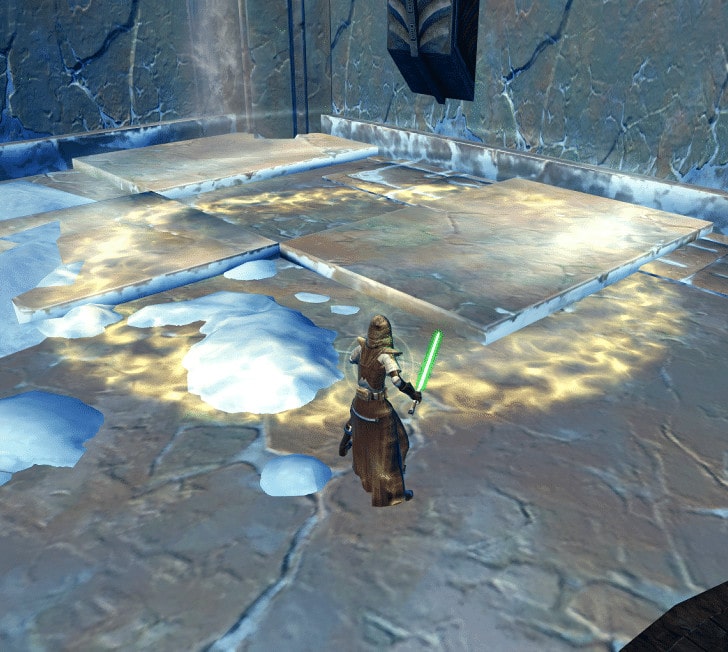

Then we have the Damage Over Time Sages and Sorcerers. Their animations are more subtle than the others but you can identify them with these two animations. The AoE fields will spread their DoTs to multiple targets hit in the field assuming one of those targets already has the DoTs applied to them. This in turn allows them to heal from the DoTs in the form of HoTs on themselves. The second ability is a Force-based Leech ability that allows them to transfer life from their target to themselves, this effect grows more powerful the more DoTs they have on their target.
These Sages/Sorcerers can be especially annoying as they’ll often work in Telekinetic Throw/Force Lightning which is a channeled ability that will slow your movement speed. Force Phase is great here as you can ignore the slows with Force Speed. You should have 2-3 cleanses assuming you have Resilience with Force Cloak, so you can always rid yourself of the DoTs. This shouldn’t be anything you can’t handle.
Vanguards and Powertechs
Vanguards and Powertechs are able to stun up to 8 enemies within a 5 meter radius for 2.5 seconds, can reveal all stealthed units in a designated area for 10 seconds and can increase their movement speed while making themselves immune to slows and controlling effects.
Where the Vanguard/Powertech shines best is their powerful durability. They can deploy a personal shield that reduces all damage by 25% for 15 seconds. They also have the ability to quickly regenerate health when below 35% HP at the cost that they can only heal themselves up to 35% hp while using this ability.
Vanguards and Powertechs can make use of a shoulder cannon which launches a small missile at a single target. It can have up to 4 charges (7 for the burst specs) and it can be used while they are stunned. This ability can be augmented with a chosen ability that makes each use of the shoulder cannon restore 3% of the user’s max hp.
An important thing to note is that a lot of damage used by Vanguards/Powertechs is considered Elemental damage, meaning you won’t be able to shield it.
Below are the various buffs they can apply and what you should look out for.

The above buffs are known as Hold the Line (Troopers) and Hydraulic Overrides (Bounty Hunters). Both Vanguard/Powertechs and Commandos/Mercenaries have access to this DCD. While active, the unit becomes immune to movement impairing effects, knockdowns, physics, and gains 30% increased movement speed for 6 seconds. Your slows, Force Lift, Force Wave, and Force Pull will have no effect on the unit while these buffs are active. For Troopers, this appears as an orange circle on the floor right beneath them. For Bounty Hunters, this is a circle shaped yellow gear on the floor right beneath them.


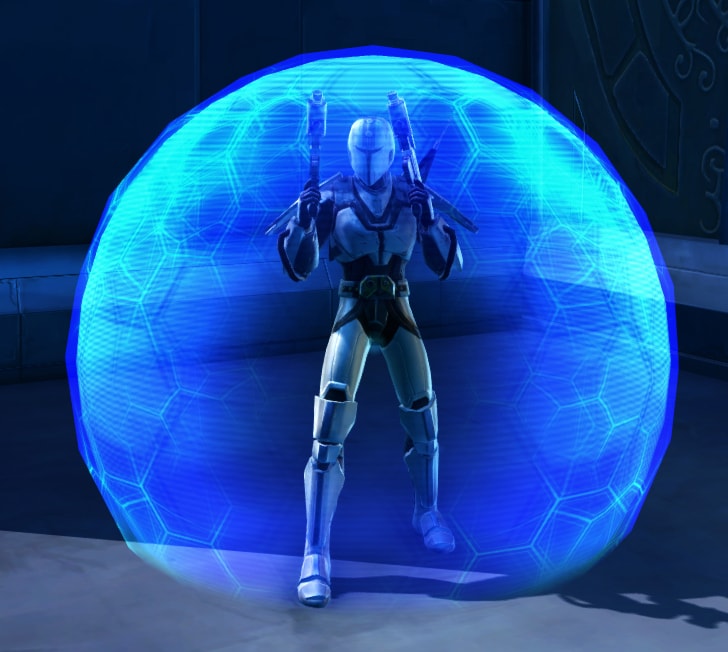
The Reactive Shield (Trooper) / Energy Shield (Bounty Hunter) raises the unit’s Damage Reduction by 25% for 15 seconds. DPS Vanguards/Powertechs have chosen abilities that can pop up when activating Reactive Shield/Energy Shield. These will be covered in their respective portions of the guide.
 Adrenaline Rush (Trooper) and Kolto Overload (Bounty Hunter) share the same buff icon. This buff can prepare up to 1 minute in advance of getting below 35% HP. It can also be activated when getting below 35% HP. When activated, this restores 35% of the unit’s health over 8 seconds but cannot exceed 35% total HP. Once this is over they’ll end up with 35% HP or less but it’ll be very difficult to kill them during this time. Remember to use Double Strike or Whirling Blow to apply Trauma which will reduce their healing by 20%. This will reduce their overall healing from 35% HP recovered to 28% HP recovered.
 Stealth Scan is a Utility AoE ability that reveals stealthed units within a 12 meter diameter circle. This circle can be cast up to a 30 meter range and will root any stealthed units it catches for 3 seconds. On top of this, any of their allies in the Stealth Scan’s area have +50% increased movement speed so long as they are within the area which lingers 6 seconds after they leave the area.
It’s an annoying tool to be sure as this will remove you from stealth if you’re caught in it. It’s often used on bridges or tight spaces with high traffic to expose stealthers and it is also used near turrets, pylons, control points, etc when one team is trying to capture it and keeping an eye out for stealthers. It makes a bright green circle with Probe Droids spinning around in it so it’s hard to miss. Don’t step into it, though sometimes they’ll use it the moment you cloak out with Force Cloak. Just run out of there with Force Speed or jump to a nearby target with Shadow Stride to reduce your chances of getting caught.
 The Shoulder Cannon ability is an ability available to both Vanguards and Powertechs. This can be activated and store up to 4 charges, when fired these home in on their target to deal a small amount of Kinetic Damage. What makes this annoying is that the Shoulder Cannon can be fired even when the Vanguard/Powertech is stunned. Many will choose a passive ability that allows them to restore 3% of their HP with each rocket fired, for a total of 12% HP restored. Burst Vanguards and Powertechs gain 7 charges which means they can restore 21% of their HP if they have the appropriate passive ability.

In 7.0, the Power Yield Ability used by Vanguards and Powertechs got an update. Depending on their selected discipline, Power Yield will have a new title and new effects specific to their selected discipline. The one thing they have in common is that this acts as a stacking armor buff that can stack up to 5 times. Each stack will grant the Vanguard/Powertech +40% armor rating. This effect is multiplicative and not additive, so they won’t become immune to all damage. We’ll go over specific effects they provide for their respective disciplines in their discipline sections.

If you see this buff when a Vanguard/Powertech uses their Power Yield variant, this means they’re using a tank implant. Regardless of their discipline, the Supercommando Buff and Implant can absorb 1.6 million damage for 3 seconds after they use their Power Yield. If you see this buff, avoid using any of your empowered damaging abilities as they’ll just get absorbed.
Shield Specialist Vanguards/Shield Tech Powertechs (Tank)
You’ll not often find Tank Vanguards/Powertechs in PvP that often as many people opt out to be a Burst Vanguard/Powertech. If you do find one, you’ll often find that they’re fighting in the mosh pits as they lack the damage to effectively 1v1 someone in a timely manner like how a Guardian/Juggernaut or Shadow/Assassin can. Instead they focus primarily on debuffing groups of opponents to reduce their damage, accuracy, speed, etc. all while whittling away at their health with elemental attacks to avoid shields.
An ability Tank Vanguards/Powertechs will use is Riot Gas/Oil Slick. Riot Gas will appear as a red cloud of gas that’s low to the ground while Oil Slick will appear as a black puddle on the ground. These effects slow your movement speed by 70% and reduce your melee and ranged accuracy by 15%. Just get out of the area and you’ll be fine or if for some reason you can’t leave, use Force attacks until it goes away.

The Tank Vanguard/Powertech get Infused Kolto Packs/Energy Yield as their variant of Power Yield. This grants a stack of Tactical Armor/Energy Yield and adds another stack (up to 5 stacks) with each stack granting 40% additional armor. Since this is multiplicative, they’ll have around 60%+ damage reduction at full stacks. Pairing this with Reactive Shield/Energy Shield can grant around 91%+ damage reduction for 15 seconds.
This ability will also heal them as every time they gain a stack of Tactical Armor/Energy Yield, they gain a stack of Infused Kolto Pack/Energy Heal which after 15 seconds, restores 6% of their HP per stack. Now the most insidious part of this ability is that it has a 1 minute cooldown, lasts 15 seconds meaning it has a 25% uptime. You can avoid attacking them to prevent stacks but then they’re getting no damage for 15 seconds. There’s no real easy way around this outside of using Force Lift, Mind Maze, or other control abilities. Fortunately their damage is low as they’re built around debuffing groups of enemies so they’re more annoying than a threat if you find yourself in a 1v1 against them. Just chuck them off some terrain and you’re good.
Tactics Vanguards/Advanced Prototype Powertechs (Burst DPS)
These particular units will be a pain as they are a counter to Kinetic Combat Shadows. They’re able to deal large bursts of elemental damage with Cell Burst/Energy Burst which cannot be shielded along with their Assault Plastique/Thermal Detonator which can be shielded. Basically the best way to defeat these units is to kill them before they can kill you. As a Full Tank build, you’re at a disadvantage as you’re weak against burst damage and these units do nothing but burst damage. If you’re a Skank Tank, you have better odds of defeating them due to your powerful use of chucking rocks at their face.

Above is what the Energy Lode buff looks like. When the Vanguard/Powertech gains one of these, they’re able to use Cell Burst/Energy Burst which will appear as a big red energy ball of death. Cell Burst/Energy Burst deal Elemental damage so you will be unable to shield this attack.
There are two ways you can get around this (sort of), you can pop Resilience however this only delays the Burst attack as targets that resist Cell Burst/Energy Burst end up giving the Vanguard/Powertech a refund on all Energy Lodes used meaning they get to use it again immediately after. They may end up wasting their combo of using 2 Cell Bursts/Energy Bursts in a row while Resilience is active, so they’ll be left with only one of the refunded bursts after Resilience ends. Alternatively, use Battle Readiness and a Shield or Warzone Adrenal to decrease the amount of burst damage taken from this ability.
Alongside Cell Burst/Energy Burst, Assault Plastique/Thermal Detonator will be one of their primary sources of damage. They’ll lob this explosive on you where it’ll stick and beep, once the beep gets high pitched it’ll blow. These deal kinetic damage so you can shield them using Force Potency to increase your Shield Absorption. It’s because of abilities like these that I suggest a 60% shield chance over a 50% shield chance so you can better deal with burst damage.
Above are the Balmorran Advanced Weaponry and Power Yield Buffs. This instantly grants 5 stacks of Power Yield, increasing their armor by 40% per stack or around 153% total for 10 seconds as well as granting 4 stacks of Energy Lodes. This means their damage reduction will be around 50% for 10 seconds but the buffs don’t end there. Their next Cell Burst/Energy Burst will have a 100% Critical Hit chance and any other critical hits they get from abilities will grant a stack of Energy Lode. This is when Burst Vanguards/Powertechs are at their most dangerous.
This ability also has a 1 minute cooldown so extended battles with them are not ideal. You may need help from a friend to deal with them efficiently. Burst Vanguards/Powertechs will typically pop this right after using their first Cell Burst/Energy Burst so they can instantly use another one as they get 4 stacks from this ability. When you see them at 4 stacks of Energy Lodes before they use this ability, pop Resilience to reduce the damage of refunded Cell Bursts/Energy Bursts.
Using your Battle Readiness when you see they build 4 stacks of Energy Lodes is also a good choice as they’re just going to follow up with another Cell Burst/Energy Burst in an attempt to burst you down. Since the duration of your +25% Damage Reduction lasts 15 seconds, you should be able to cover their first two Cell Bursts/Energy Bursts with it and outlast Balmorran Advanced Weaponry/Power Yield.

Above is the War Machine/Advanced Shielding passive sometimes used by Vanguards/Powertechs. Once they obtain this after using their Reactive Shield/Energy Shield, they can receive one of two effects…
- Adrenaline Rush/Kolto Overload can restore up to 45% HP
- Their next Balmorran Advanced Weaponry/Power Yield will last 15 seconds
How they use this passive will likely depend on their situation. If they are low on health and need to be defensive, they’ll likely use this for the heals from Adrenaline Rush/Kolto Overload. If they use their shield while high on health, they’re going to use this offensively. Keep in mind that if they use this for their Advanced Weaponry/Power Yield, they’ll have their increased armor rating for 15 seconds instead of 10 making them rather nasty.
Honestly the best way to deal with them is to chuck them off a cliff or have someone with DoTs deal with them as they have no way to cleanse themselves.
Plasmatech Vanguards/Pyrotech Powertechs (DoT DPS)
You never see them in PvP that often as people like the raw elemental burst damage that the Burst Vanguard/Powertech offers. It’s still good to know what you’re fighting and what to watch out for though. Truth be told, I never really learned tricks to fight DoT Vanguards/Powertechs since I so rarely run into them in PvP, they typically prefer PvE.

What makes DoT Vanguards/Powertechs unique compared to other DoT classes available is that they have access to the longest DoT available in the game, Plasmatize/Scorch. This annoying ability can be cast on a target within 10 meters dealing elemental damage over 30 seconds. Under most circumstances, you can deal with this via your cleanses from Resilience. Though if you don’t have an instance of Resilience available and you try to run away, you’ll be stuck in combat until it wears off, you cleanse it, or you die. This also keeps the Vanguard/Powertech in combat too, so this inability to heal out of combat goes both ways. This will also give you the debuff Susceptible, which increases damage from tech attacks by 5%.

The DoT Vanguard’s/Powertech’s Power Yield is transformed into the Durasteel Armor/Thermal Yield Ability. Its effects are simple yet powerful. They gain a stack of Durasteel Armor/Thermal Yield increasing armor rating by 40% per stack up to 5 stacks and increasing their damage by 20% per stack. The kicker here is that it lasts 30 seconds on a 1 minute cooldown, meaning it has a 50% uptime. There’s no getting around this in terms of not granting them stacks so you just have to whittle away at them with Internal damage such as that you gain from Force Breach or from Combat Technique’s internal damage bonus on melee attacks.
Commandos and Mercenaries
The above buffs are known as Hold the Line (Troopers) and Hydraulic Overrides (Bounty Hunters). Both Vanguard/Powertechs and Commandos/Mercenaries have access to this DCD. While active, the unit becomes immune to movement impairing effects, knockdowns, physics, and gains 30% increased movement speed for 6 seconds. Your slows, Force Lift, Force Wave, and Force Pull will have no effect on the unit while these buffs are active. For Troopers, this appears as an orange circle on the floor right beneath them. For Bounty Hunters, this is a circle shaped yellow gear on the floor right beneath them.
Adrenaline Rush (Trooper) and Kolto Overload (Bounty Hunter) share the same buff icon. This buff can prepare up to 1 minute in advance of getting below 35% HP. It can also be activated when getting below 35% HP. When activated, this restores 35% of the unit’s health over 6 seconds but cannot exceed 35% total HP. Once this is over they’ll end up with 35% HP or less but it’ll be very difficult to kill them during this time. Remember to use Double Strike or Whirling Blow to apply Trauma which will reduce their healing by 20%. This will reduce their overall healing from 35% HP recovered to 28% HP recovered.
Commandos/Mercenaries can increase the max HP threshold of Adrenaline Rush/Kolto Overload by choosing a passive. This will change the numbers listed above from 35% to 65%. Same rules apply, apply trauma to reduce their overall healing.

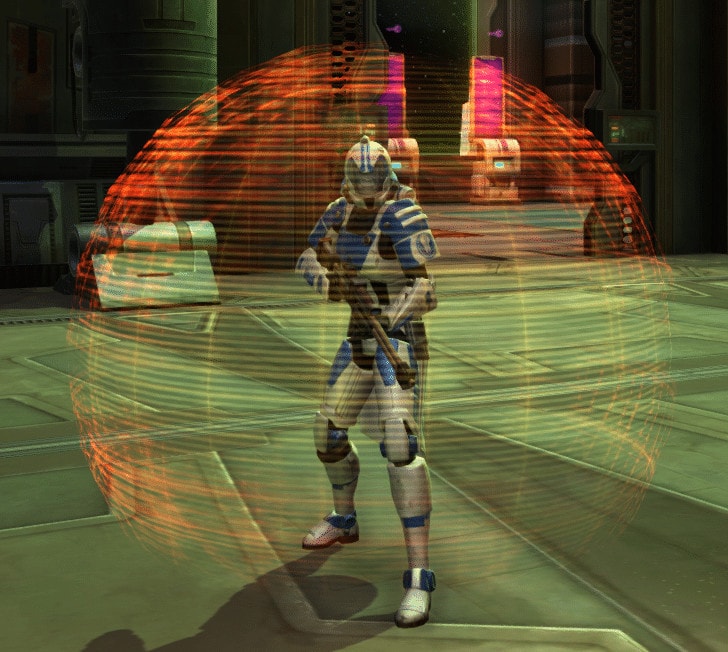

The Reactive Shield of the Commando/Mercenary only lasts 12 seconds instead of the 15 seconds that Vanguards/Powertechs get. They can choose a passive ability known as Trauma Stabilizers/Trauma Regulators. If they have this passive, they will gain a stack of Trauma Stabilizers/Trauma Regulators and can gain a maximum of 10 stacks. When their shield ends after 15 seconds, they’ll restore 4% of their HP for each stack of Trauma. This allows them to restore 40% of their HP at max stacks.
If you hit them with the shield up and you see them gain a stack of Trauma, stop attacking them. Use non-violent actions to disable them such as Force Lift or cloaking out and using Mind-Maze until their shield is gone. Your next best option is to use Force Stun to reduce their offensive potential while their shield is up. They want you to stop attacking so they can attack you freely in return, don’t give them the satisfaction.
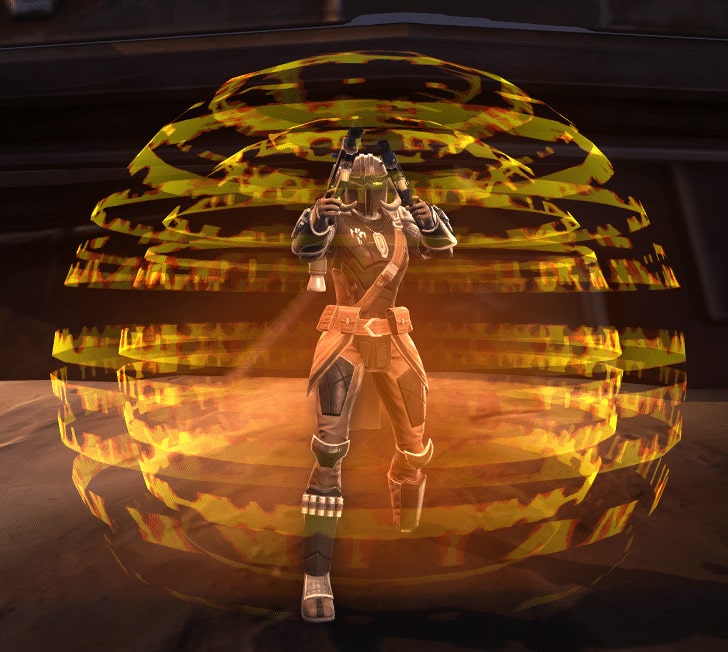
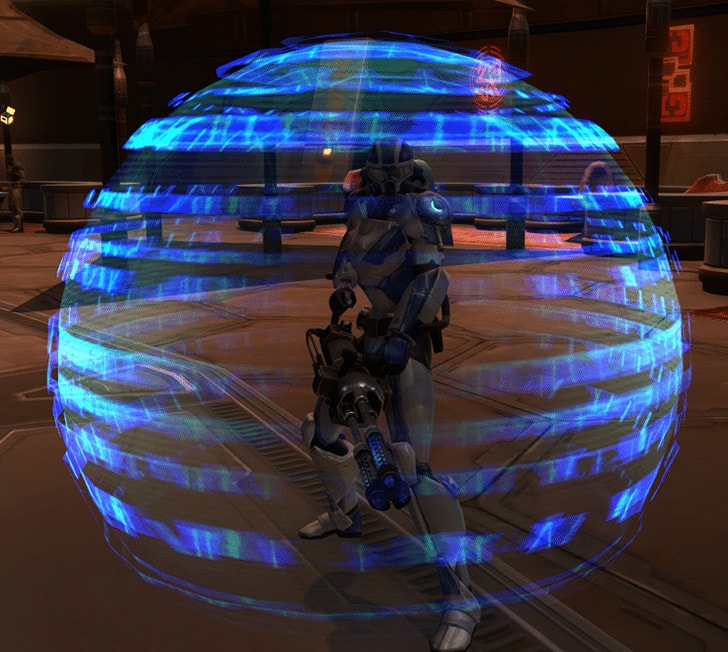
This ability is known as Echoing Deterrence/Responsive Safeguards. All single target direct attacks have 50% of their damage reflected back to the attacker, absorbs that damage so they don’t take the damage, and heals them for 5% of their HP for every single target attack that hits them. This ability’s effect lasts for 6 seconds. When you see these shields, only use Slow Time, Force Breach, Cleaving Cut, Whirling Blow, and Force Wave. These abilities will attack them at full power, not reflect the damage, and not heal them. Don’t confuse these with Reactive Shield/Energy Shield, you can tell them apart by their colors and the numerous lines on the bubble.

The ability Electro Net is a hard counter to you as a Shadow. While under the effects of electronet, your speed is reduced by 50%, you take energy damage for the duration of 9 seconds. The worst part is, whenever you move you take 20% more damage from Electro Net. This extra damage can stack up to 10 times for a bonus of +200% damage to you with electronet. If you’re hit by this ability, don’t move and wait it out. Just turn to face your opponent and use your ranged abilities to fight in the meantime or Force Pull them so they fight you face to face (they’ll probably just run away though but that’s more time running and less time shooting).
Identifying a Healer Commando/Mercenary

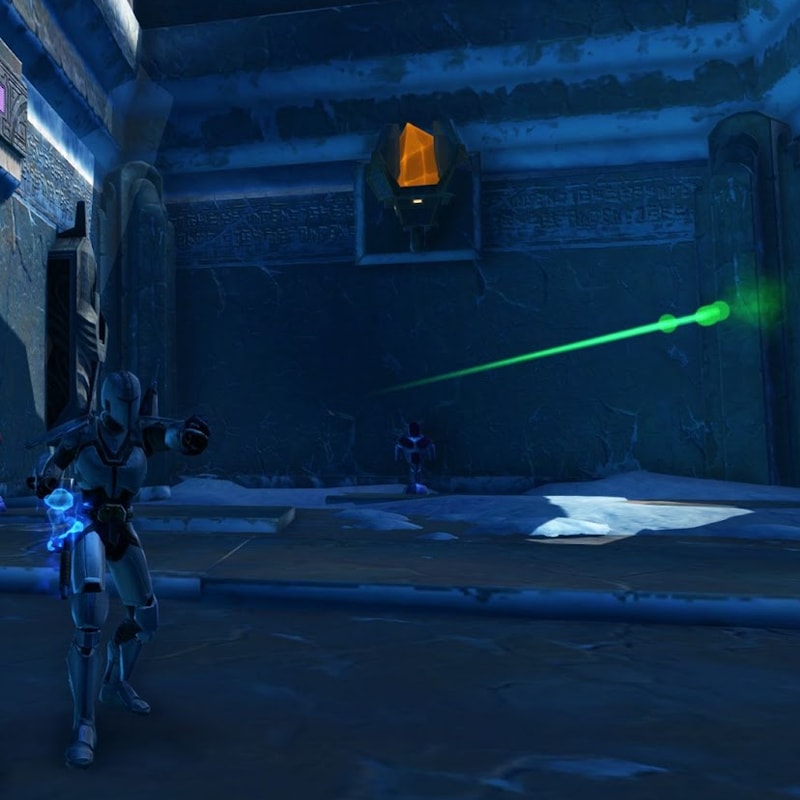
This is easily done for a Commando, if you see them firing a persistent, large, green laser at an ally repeatedly, you have yourself a Commando Healer. Healer Mercenaries are more subtle so you have to pay attention to the animations. They’ll be firing a small greet dart from their wrist launchers. While any discipline of Commando/Mercenary can use these healing abilities, they’re primarily used by healers to gain stacks of Supercharge which can be used later on to increase their healing output. The DPS Commandos/Mercenaries have other means of gaining stacks of Supercharge.
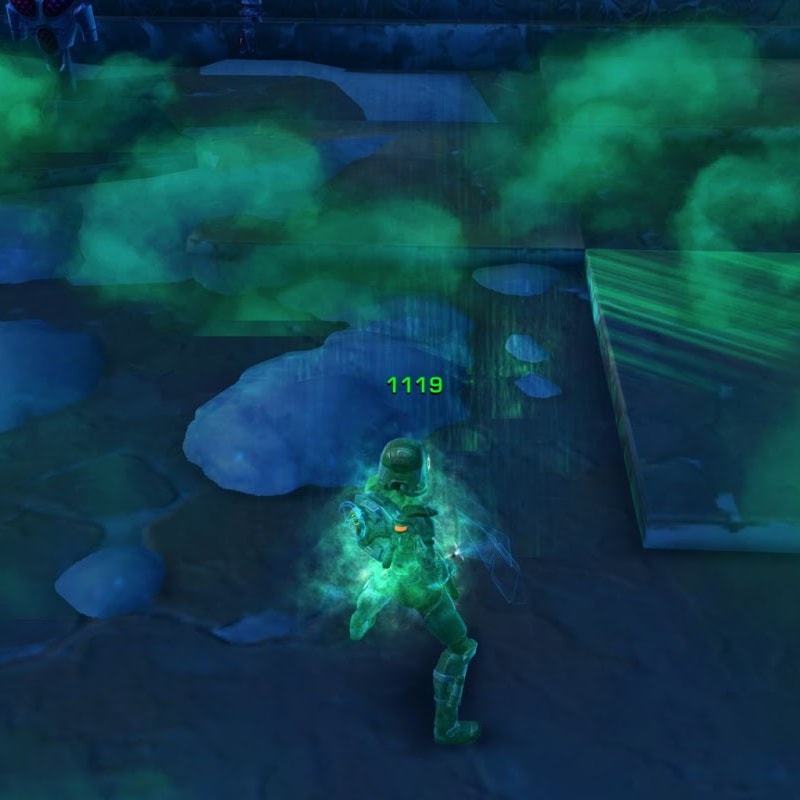
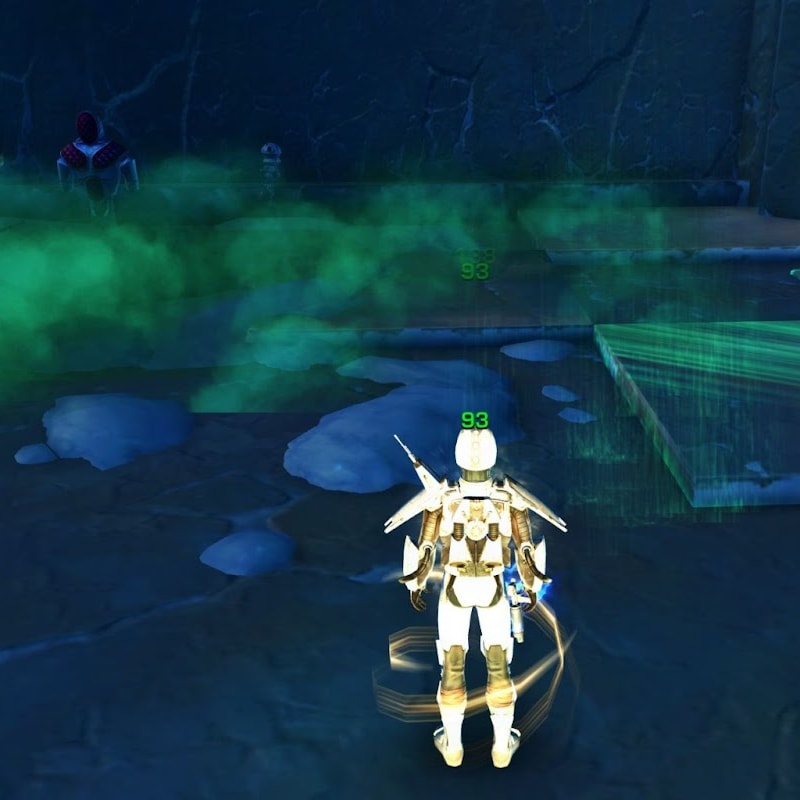
If you see a rocket fired on the ground that releases green healing goo followed by green clouds, that’s also a good indication that you got yourself a Healer Commando/Mercenary. Apply Trauma with Double Strike or Whirling Blow to their healing target(s) to reduce their healing received.
Scoundrels and Operatives
These classes are very similar to Shadow’s and Assassins. Both rely on stealth, have similar abilities, but where the Scoundrel/Operative lacks in Potency that we Shadows/Assassins have, they make up for in consistency. The most common type of Scoundrel/Operative you’ll find in PvP is the Burst DPS discipline. This is because they deal good damage, have great damage mitigation abilities, and I’ve seen operatives kite and tank 4 enemy players at the same time and live. Though that was back during 6.0 and prior.
Since 7.0 came out, they can’t quite get the mixture of passive abilities they choose like how they used to. They have to choose their single target hard stun, blink, AoE incapacitate, and AoE Stealth Generator. After seeing these units cause so much trouble for a DPS unit, I felt this was a long time coming. Personal biases aside, let’s identify Scoundrels/Operatives!
This green bubble indicates that they’ll dodge all melee attacks for 3 seconds, and with a selectable passive, will reflect all Single Target Force and Tech attacks back to the attacker at 150% of the damage.

The ability to reflect 150% of incoming Single Target Force and Tech attacks is actually an ability tree choice they take at level 73, they can opt out for another passive ability. But this is PvP, mixing a reflect with a dodge ability is too good to pass up especially with the abundance of Force and Tech attacks everywhere. Keep an eye out for these buffs on them when they’re dodging, if they don’t have these you can damage them with Force and Tech attacks.
If you do see this buff, DO NOT USE EMPOWERED PROJECT OR CASCADING DEBRIS WHEN YOU SEE THIS. Sometimes you may not have a choice since they will use it as a reaction to you using Cascading Debris. Use Force Wave to cancel your channel and prevent yourself from getting the reflected damage. Slow Time, Force Breach, and Force Wave should be able to hurt them while this buff is active
Scraper Scoundrels and Concealment Operatives (Burst DPS)
These are the most common Scoundrels/Operatives in PvP Warzones. They are easily identified because they’ll run circles around you while stabbing you with a knife or shooting a shotgun at your back. If you find yourself rooted and unable to turn while getting stabbed/punched a lot, you’re fighting a Burst Scoundrel/Operative. Do note that like Burst Vanguards/Powertechs, these units are a hard counter to Kinetic Combat Shadows due to their ability to mitigate incoming damage consistently and that they deal bursts of Internal damage which cannot be shielded.

A passive unique to the Burst Scoundrel/Operative is the Slippery Devil/Shadow Operative Elite passive. This is gained when they use their Scamper/Exfiltrate ability (this is when they roll forward). When they use Scamper/Exfiltrate, Slippery Devil/Shadow Operative Elite makes them dodge and resist all incoming attacks for 1.5 seconds. It’s an Invincibility Frame (iFrames) passive that’s rather annoying. They’ll use this to reduce damage from your Cascading Debris.

Blood Boiler/Volatile Substance is what’s going to kill you if you stay in a battle with a burst operative too long. They will apply this debuff to you which initially does nothing, but the moment a DoT ability from them will cause a large burst of elemental damage. This will also make you Assailable, meaning you take 7% increased damage from elemental and tech sources. You can’t shield this ability so you can either cleanse it off you with Resilience or brace yourself with Battle Readiness.
Ruffian Scoundrels and Lethality Operatives (DoT DPS)
While not often seen, these Scoundrels/Operatives can be a considerable threat especially if their opponents are grouping close together. They’re able to lob an AoE Grenade at a spot with a 5 meter radius that causes enemies affected by it to take Internal Damage over 24 seconds. They will continue to unload more DoTs on their opponents which further increase the power of some of their blaster attacks. To know how to defend yourself against a DoT Scoundrel/Operative, you must keep an eye out for 3 Damage Over Time abilities that they will stack on you. Rare but dangerous, don’t group up close if you spot a DoT Scoundrel/Operative. Keep an eye out for the following DoTs…
Vital Shot (Scoundrel) / Corrosive Dart (Operative) is a base class single DoT that, while weak alone, will add up with their numerous DoTs and abilities. This itself is not an indicator that you’re fighting a DoT Scoundrel/Operative as any of their disciplines can use it. Only when it’s paired with the following effects should you be careful.
Shrap Grenade (Scoundrel) / Corrosive Grenade (Operative) is a discipline-specific AoE attack that will cause all affected targets within its 5 meter AoE to take Internal Damage Over Time. Targets hit by this will also be slowed by 30% so long as they have this DoT on them.

Sanguinary Shot (Scoundrel) / Toxic Blast (Operative) is their third DoT. It initially deals weapon damage and causes the target to take additional weapon damage whenever they take damage from the Scoundrel’s/Operative’s other DoTs. Since this is considered weapon damage, you’re able to dodge his damage with Deflection! Though since this is weapon damage, you will not be able to cleanse this with Resilience nor Force Cloak.
Once all 3 DoTs are applied, the Scoundrel/Operative is ready to use Brutal Shots/Corrosive Assault. This is a blaster attack that will deal weapon damage while proccing damage from all active DoTs that they applied. They’ll be able to fire this off 3 times with their combo as this consumes Upper Hand/Tactical Advantage stacks.
Since you’re dealing with weapon damage, you’re able to shield the damage or dodge this ability entirely. You could also ruin their day by cleansing 2 of the DoTs with Resilience. This can force them to use a weakened Brutal Shots/Corrosive Assault thus reducing their damage output. If Deflection or Resilience are not an option, Battle Readiness is a good way to reduce the incoming damage. You have a lot more tools to defend against DoT Scoundrels/Operatives than Burst Scoundrels/Operatives.
Sawbones Scoundrels and Medicine Operatives (Healer)
These units are nowhere near as common as Burst Scoundrels and Operatives, you must still be familiar with their heal animations to determine if they’re healer or DPS. Once you determine they’re a healer, they’re more of an annoyance than a threat unless they’re grouped up with their allies. Many of their healing abilities are Heal Over Time abilities (also known as HoTs) which are instantly activated, only three of their heals are channeled. Keep an eye out for these animations to identify a Scoundrel/Operative healer.
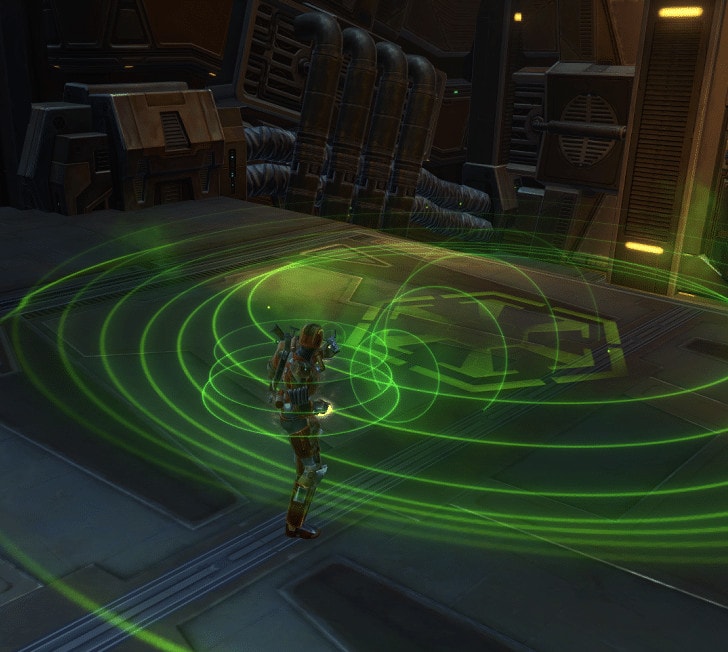
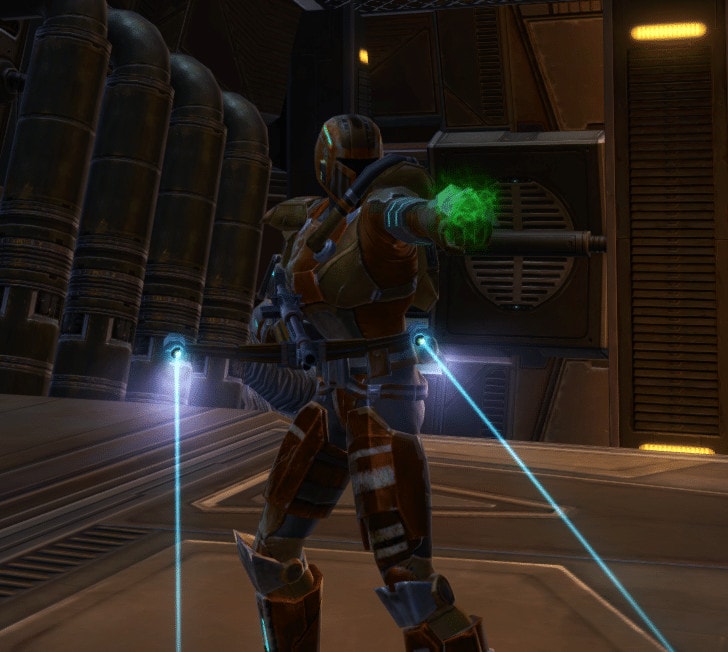
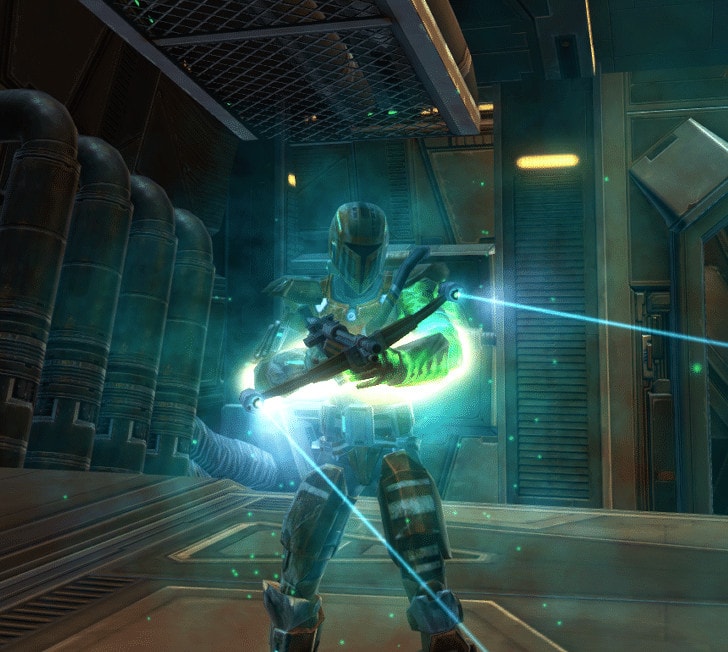
Out of all the healers, these ones have the best Area of Effect heals all found in the form of HoTs, using Whirling Blow against a group of enemies benefitting from these heals would be prudent so you can mitigate their heals received.
Gunslingers and Snipers
There isn’t too much to say about these guys, I’ve never considered them a threat and they’re annoying at best, though they’re much more of a threat to your squishier allies. They may be a bit more of a threat if you’re a Skank Tank as you’ll have less chance to dodge and shield their weapon attacks. If they are under cover, they cannot be dashed to with Shadow Stride so you’ll have to run to them.
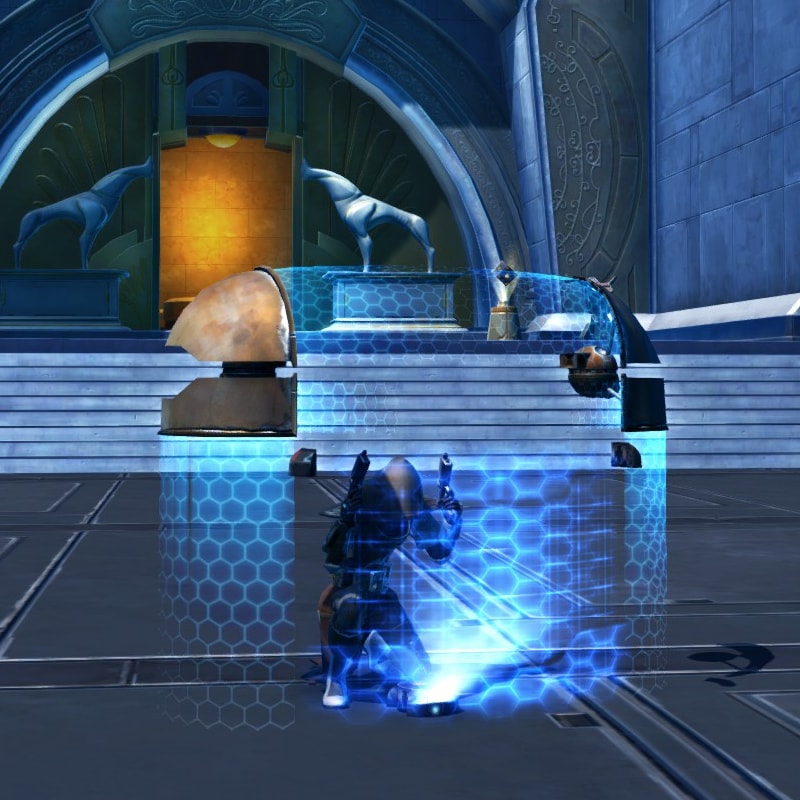
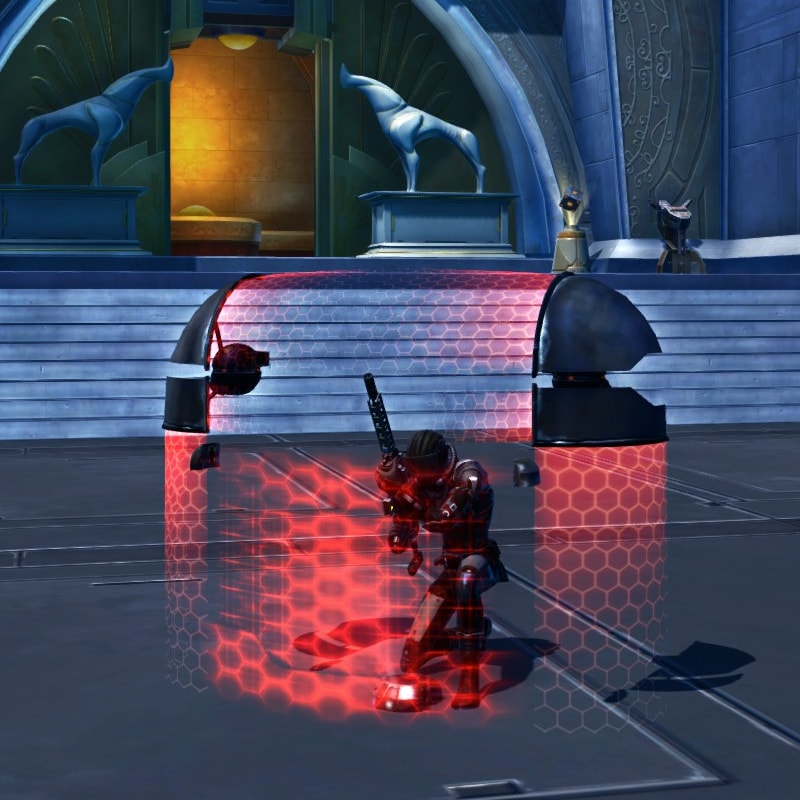
If you see that their portable cover gains floating borders, they are immune to Crowd Control abilities for 20 seconds so long as they are in that cover. You’ll want to pressure them with damage and make them feel helpless by negating all their damage. Deflection is especially good against them. Force them to roll away and lose their CC Immunity.

If you see that their portable cover gains floating borders, they are immune to Crowd Control abilities for 20 seconds so long as they are in that cover.
You’ll want to pressure them with damage and make them feel helpless by negating all their damage. Deflection is especially good against them. Force them to roll away and lose their CC Immunity. You’ll notice that like the Scoundrels/Operatives, Gunslingers/Snipers also have a dodge. But unlike the Scoundrels/Operatives, they can’t reflect Force/Tech Damage so use Force attacks when you see the green dodge bubble animation.


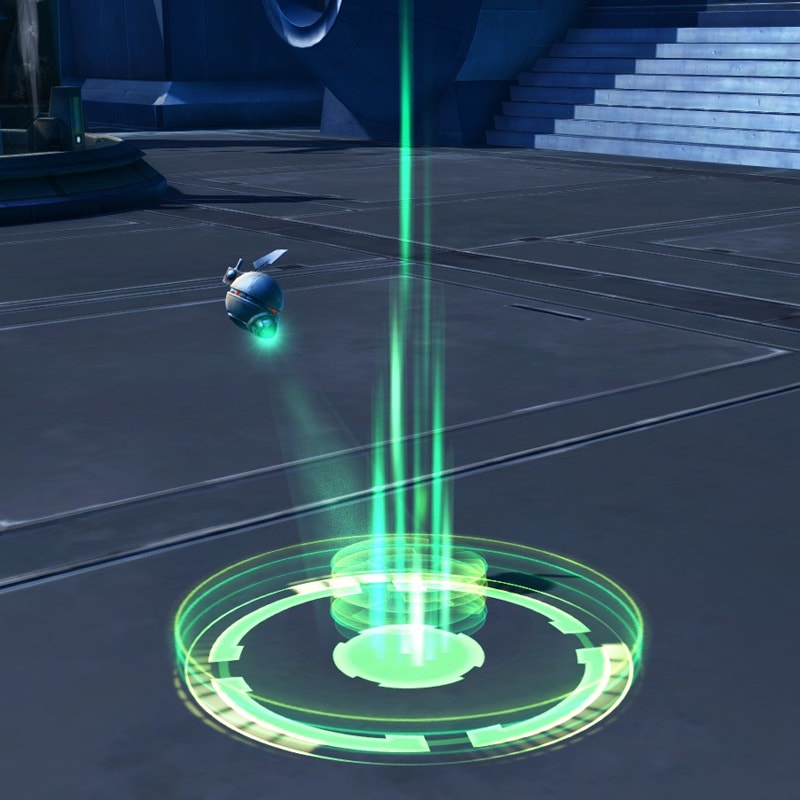
Hideout (Gunslinger) / Hololocate (Sniper) is an ability that is essentially a mirror of the Sage’s/Sorcerer’s Phasewalk. They set a point which looks like a small tech circle with pillars of light emanating from the center where they can teleport to at any time so long as they’re within 60 meters of the point. Keep an eye out for these spots as they’re more subtle than Phasewalk spots.

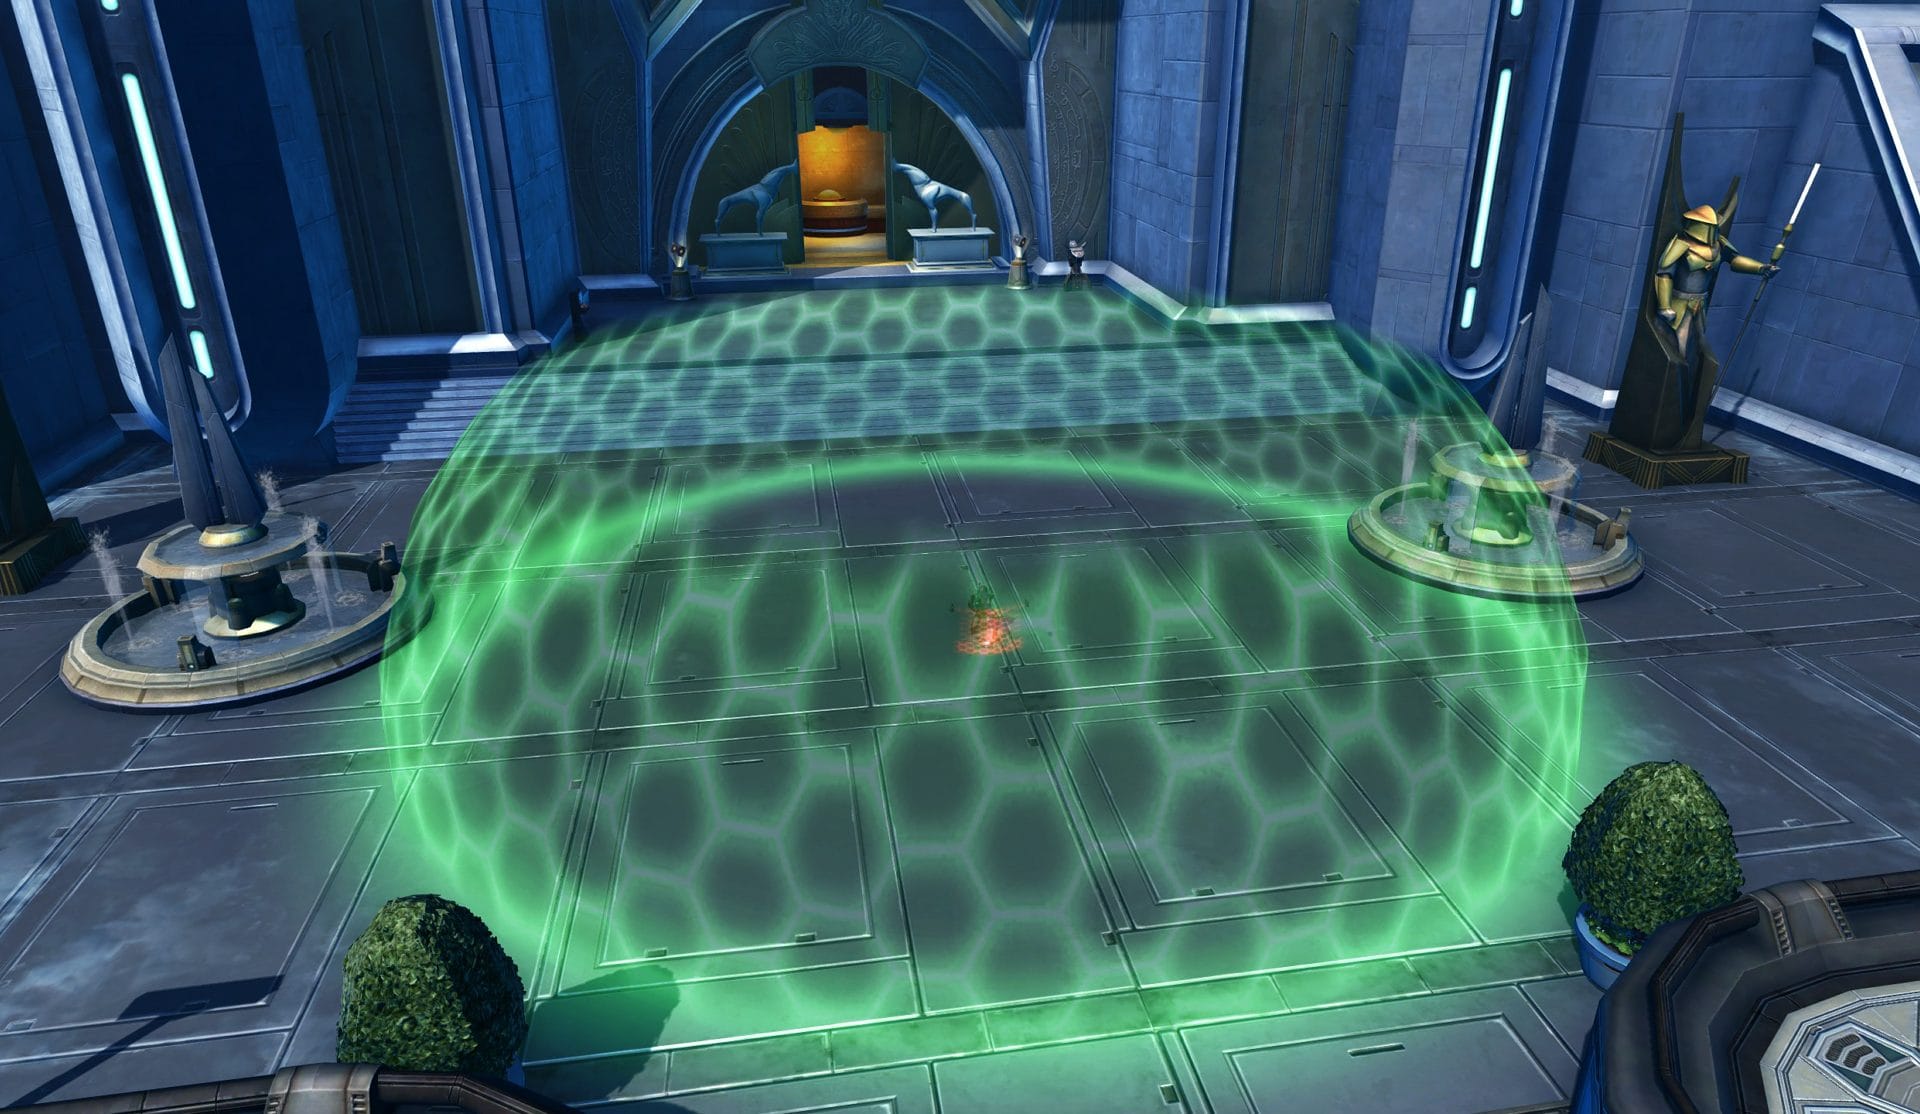
Scrambling Field (Gunslinger) / Ballistic Shield (Sniper) is a large AoE that projects from the point of casting for 25 seconds. This shield has a 10 meter radius and reduces damage of the Gunslinger/Sniper and their allies within it by 20% so long as they remain within the field. This is easily noticed by the giant green semi-sphere on the map.
Sharpshooter Gunslingers and Marksman Snipers (Burst DPS)
When you’re against these units, expect to get shot a LOT as after many of their damaging abilities, they can quickly follow up with Trickshot/Followthrough which only aim to pick off even more of your HP. Deflection as a Full Tank is great against these units but keep an eye out for this ability…
Penetrating Shots (Gunslinger) and Penetrating Blast (Sniper) is a channeled, single target attack that rapidly fires shots at the target. This reduces their armor by 20% and depending on their chosen abilities, Penetrating Shots/Penetrating Blast may root you for the duration of this ability. Force Speed empowered with Force Phase is a great way to counter this slow as your Force Speed lasts between 2-3 seconds.
Gunslingers/Snipers have an ability that instantly resets the cooldown of Penetrating Shots/Penetrating Blast so they may root an opponent for about 4 seconds while dealing heavy damage to them. Though knowing the PvP crowd, they’re going to favor the +20% Critical Chance and Critical Damage passive over the root for this ability. Deflection is good versus this ability as this is their hardest hitting ability that requires numerous ticks, so each of those ticks you have a chance at dodging.

Above is the icon for the ability Aimed Shot/Ambush. This is a hard hitting ability used by Sharpshooters and Marksman that will deal a large amount of weapon damage and ignore 20% of the target’s armor. With the tactical B-0 Differential Targeting System, they can instantly cast this ability after using their roll, Hightail It/Covered Escape, or after using their Hideout/Hololocate ability. This ability is easy to spot as they’ll stop firing as the animation for this ability will create a laser targeting you for 2 seconds before firing.

When the Gunslinger/Sniper gains the Smuggler’s Luck/Laze Target in the Burst discipline, their next Aimed Shot/Ambush will critically hit. Battle Readiness is good here to guarantee lowered damage or if you want to use your shields and chance it, use Force Potency to increase the damage absorbed if you shield it.
Saboteur Gunslingers and Engineering Snipers (Hybrid AoE DPS)
These disciplines aren’t often seen in PvP due to them requiring a good chunk of setup time but hoo-boy can they be annoying. These units will deal Weapon, Kinetic, Energy, Elemental, and Internal damage on their targets so it can be tricky to defend against them efficiently.

The primary damage ability of Hybrid Gunslingers/Snipers is Explosive Charge/Explosive Probe. This applies a debuff on you which by itself does nothing, but the moment you take damage from any source it’s going to explode and deal kinetic damage. It will also apply the Contingency Charge/Cluster Bomb debuff after the detonation.

Contingency Charge/Cluster Bomb will stack on you 3 times when you’re hit by the Explosive Charge/Explosive Probe detonation. The next 3 times you take damage from any source, one of the stacks will be consumed and create an explosion on you dealing Kinetic Damage. The damage from Explosive Charge/Explosive Probe and Contingency Charge/Cluster Bomb can be negated by Resilience.
The Shock Charge (Gunslinger)/Interrogation Probe (Sniper) is a DoT that also slows its target by 30% for 18 seconds. Be careful if you see this on yourself or your allies as those with this DoT are now able to be attacked by their Sabotage/EMP Discharge burst ability. Sabotage/EMP Discharge will damage the target with Shock Charge/Interrogation Probe to take a burst of energy damage and if they are also affected by Incendiary Grenade/Plasma Probe, they will also become stunned for 2 seconds.

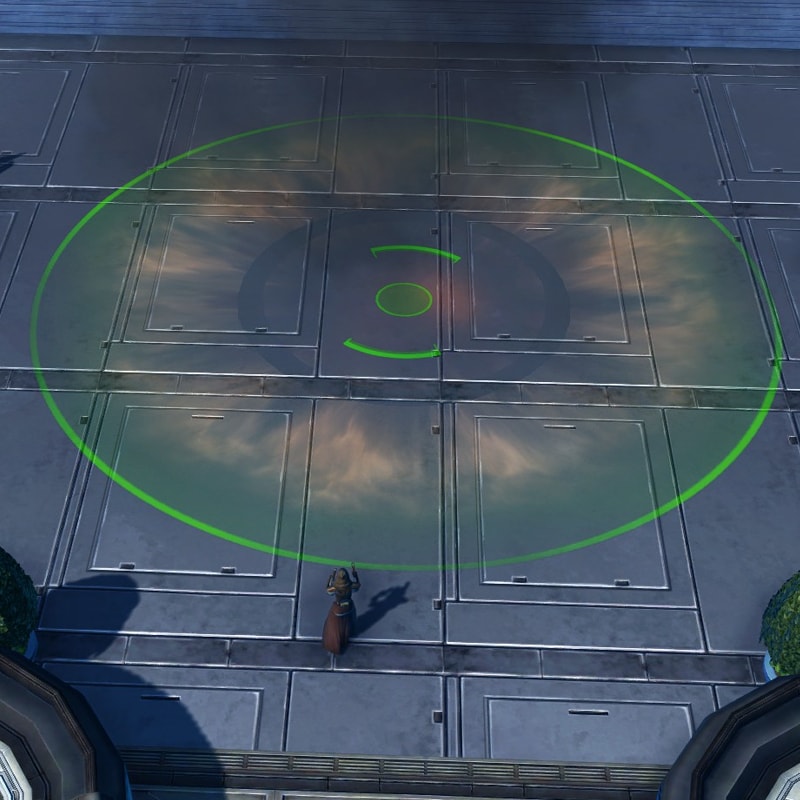
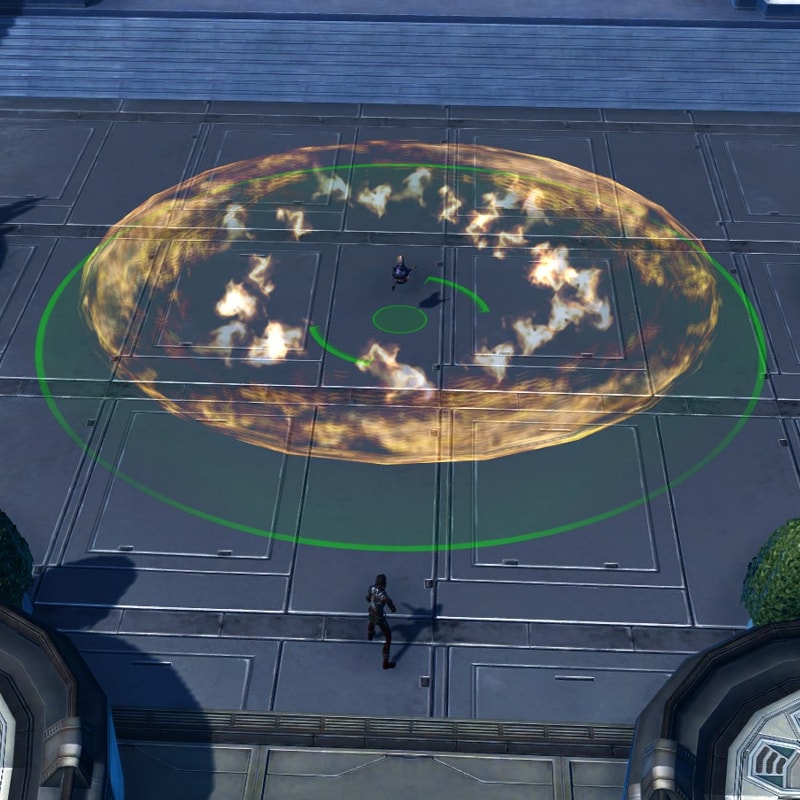
Incendiary Grenade/Plasma Probe will create a circular field of fire that deals elemental damage over 8 seconds. Targets also in this AoE will be slowed by 50% while they are in the affected area. Do your best to stay out of this field, especially if you have Shock Charge/Interrogation Probe on you as you can get stunned here. This ability can be recasted immediately as it has a negligible energy cost and has no cooldown, meaning it can have a 100% uptime. Resilience and/or Force Speed with Force Phase will get you out of this field.

The Hybrid Gunslinger/Sniper can use the Target Hack/Targeting Systems buff, making their next Explosive Charge/Explosive Probe critically hit. Along with that, any damage done by their Charges/Probes and Incendiary Grenade/Plasma Probe will deal an additional 10% damage for 20 seconds.
Dirty Fighting Sniper and Virulence Sniper (DoT DPS)
While rare as well, these units should not be left alone as when they are, they can deal devastating internal damage to a target of their choosing. They’ll stack numerous DoTs on their target and use their Wounding Shots/Cull Ability that causes each DoT effect they have on their target to tick as they are hit with Wounding Shots/Cull. Internal damage cannot be mitigated easily so don’t underestimate them simply because they appear to not be doing a lot of damage to you at first. You should either be using Resilience to cleanse, hope that your Defense Chance kicks in and you avoid the shot (and therefore the DoT), or use Battle Readiness to temporarily increase your Internal Damage Reduction.
Vital Shot (Scoundrel) / Corrosive Dart (Operative) is a base class single DoT that, while weak alone, will add up with their numerous DoTs and abilities. This itself is not an indicator that you’re fighting a DoT Scoundrel/Operative as any of their disciplines can use it. Only when it’s paired with the following effects should you be careful.
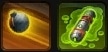
Shrap Grenade (Scoundrel) / Corrosive Grenade (Operative) is a discipline-specific AoE attack that will cause all affected targets within its 5 meter AoE to take Internal Damage Over Time. Targets hit by this will also be slowed by 30% so long as they have this DoT on them.

Above are the Wounding Shots/Cull abilities used by these disciplines. This ability is channeled over 3 seconds getting 4 weapon attacks on their target. Each time one of these hits land, each of their DoTs proc their damage. The more DoTs on their target, the more damage Wounding Shots/Cull will do. You cannot cleanse this with Resilience or Force Cloak as this is a weapon based debuff.
The DoT Gunslinger/Sniper gain the Blood Sights/Viral Targeting buff. This causes their next Wounding Shots/Cull to critically hit and have each of their DoTs critically hit automatically for the next 10 seconds. This buff is what will make DoT Gunslingers/Snipers very dangerous.
Warzone Maps Tips
And now we get down to the nitty-gritty. In this portion of the guide, we’ll be going over the most common scenarios you’ll encounter in these maps and what you can do for your team to help ensure victory.
From my experience when working with a random group, people (particularly those new to PvP) are more concerned with getting kills, high damage numbers and feeling like a bad*ss and not on objectives. DO NOT BE LIKE THESE PEOPLE!!! PvP is a group effort and in order to win, everyone has to work with each other.
Below are the various warzones you’ll encounter with maps. On these maps are various symbols and I will be explaining these now.
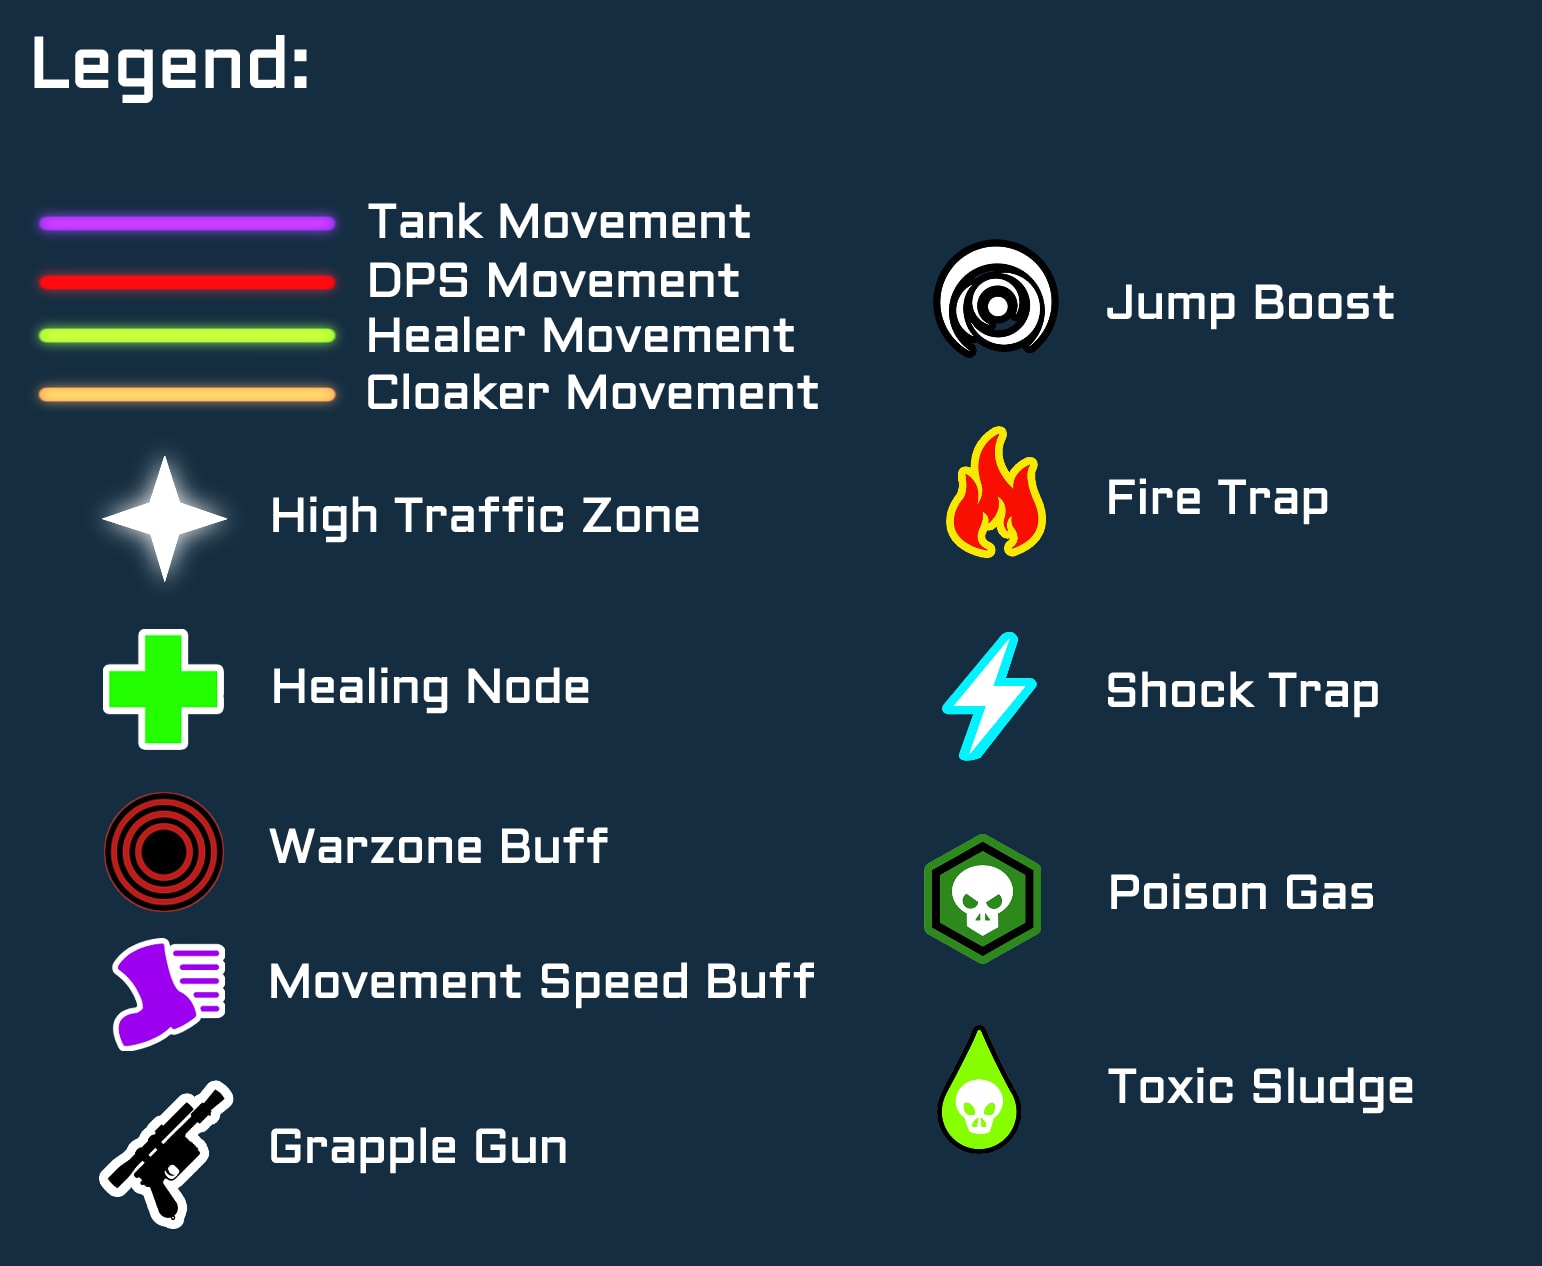
- Tank Movement: These lines indicate the typical paths tanks will take, usually one to guard an objective and another to fight on the front lines.
- DPS Movement: These lines indicate the typical paths DPS units will take, usually straight to the heat of the battle.
- Healer Movement: These lines indicate the typical paths healers will take.
- Cloaker Movement: This indicates where stealth units such as Shadows/Assassins and Scoundrels/Operatives move, typically at the start of the battle.
- Warzone Buff: This is a buff that increases damage done, healing done and reduces damage taken for a short time.
- Healing Node: Touching this restores an extremely large chunk of your health instantly.
- Movement Speed Buff: Self explanatory, “Gotta go fast!”
- High Traffic Zone: This is where you’ll often see a lot of movement, typically of incoming enemies or allies. If you’re guarding an objective, you’ll want your eyes on these areas as this is where enemies will be coming from (assuming they aren’t cloakers).
You might notice some new symbols on certain maps, those will be explained in those sections. And now, let us continue with the warzones.
Alderaan Civil War
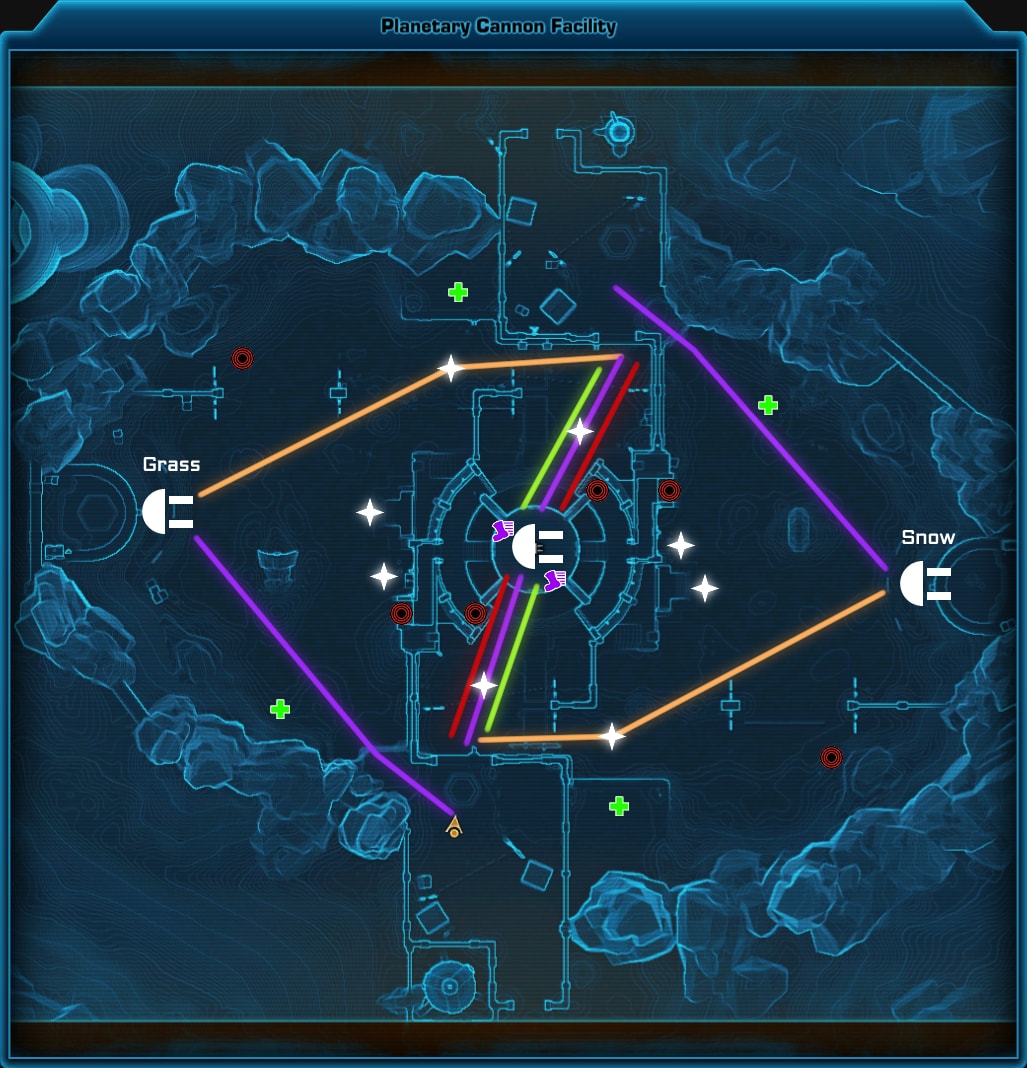
In the Alderaan Civil War map, the two teams will be fighting to control the turrets to deal damage to the opponent’s capital ship. Once the ship is out of health, that team loses. As both a Tank and a Stealth unit, you’ll have 3 options you can choose from.
- You can go to either Grass or Snow turret, capture it, and guard it. Remember to stay behind the capture pylon to prevent any meddlers from leaping to you.
- You can join the majority of your group at the Middle turret and apply your group debuffs, protect allies, and try to get the Accuracy debuff from Dusk Ward onto the most concentrated groups of enemies. Your Deflection with the Pulsating Force AoE is extremely valuable here as this space is rather cramped, forcing your enemies to fight in your AoE debuff.
- You can try to steal the opposing team’s side turret by disabling the turret guard with Mind Maze and Force Lift. When captured, it is now your job to capture it. This is good for pulling enemies away from the Middle turret and increasing your team’s odds of capturing it or defending it.
When guarding a turret, remember to communicate with your team. Say for example, you’re guarding grass and see 3 incoming enemies. Type in chat “3 inc grass” or “3 inc G”. I like to use full words for less chance of confusion but this alerts allies that you’re going to need backup. Try to include the number so they can send an equal amount of people otherwise they might send everyone leaving mid free for the taking.
Yavin Ruins
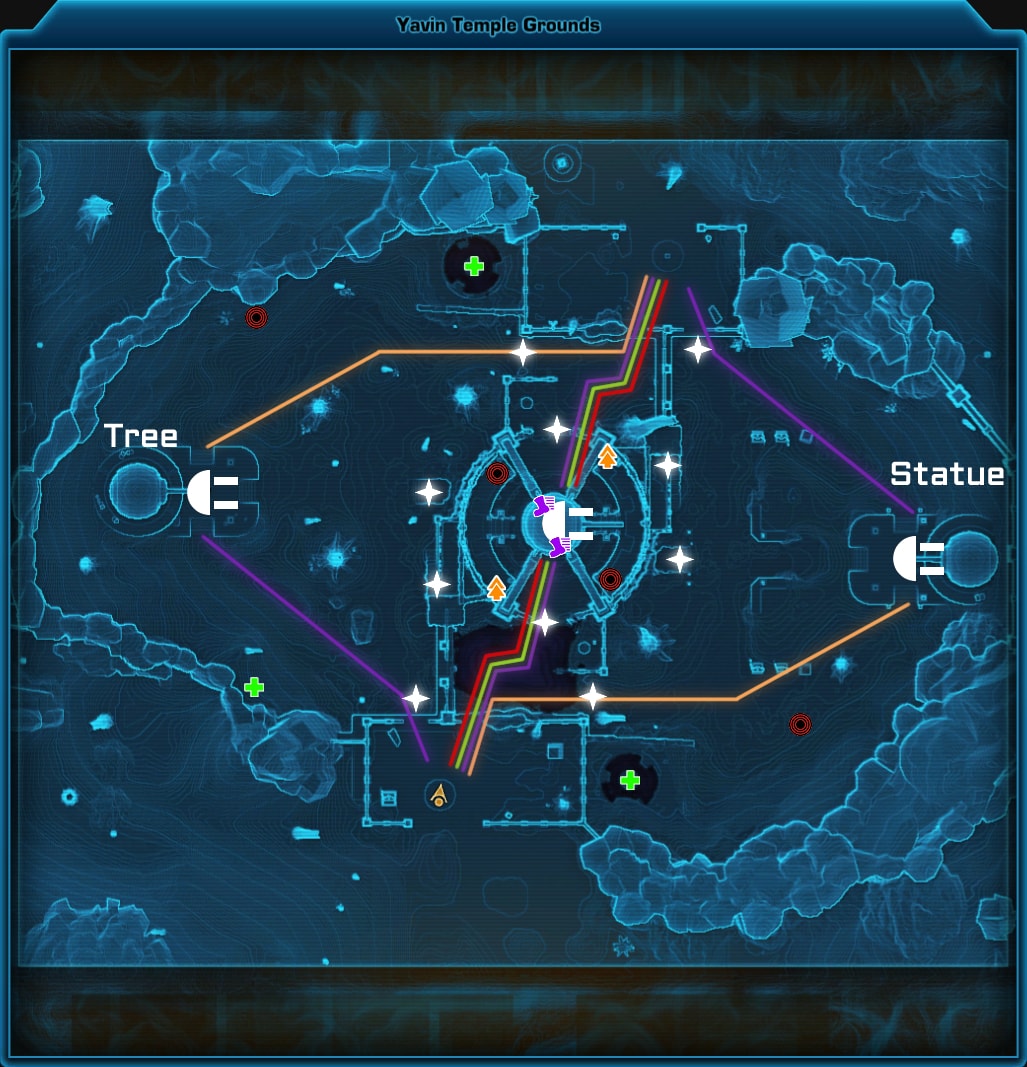
This is basically the same thing as Alderaan Civil War so the same rules apply here.
Novare Coast
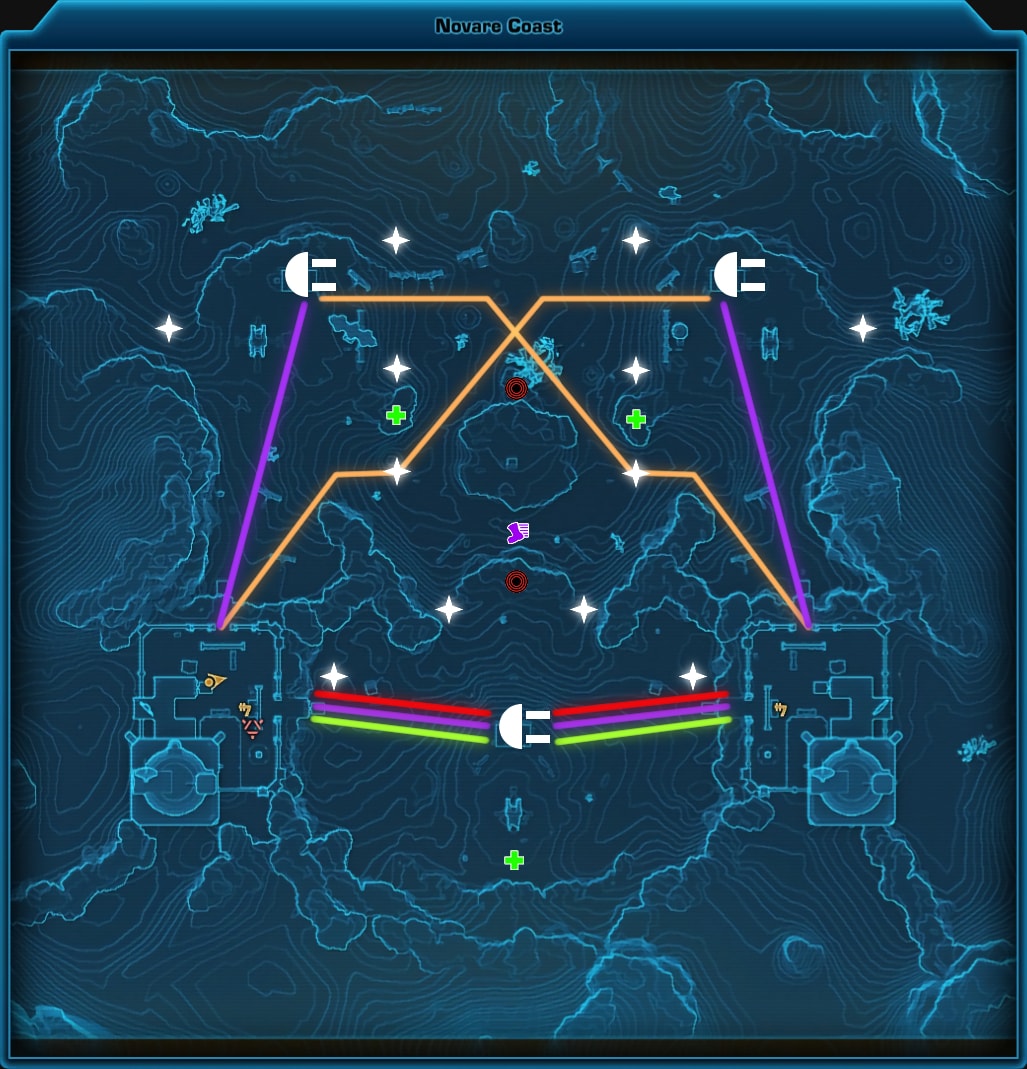
This map is similar to Alderaan Civil War in that there are three turrets that the teams try to capture. However, this one differs in that you NEED at least two turrets to reduce the enemy base’s HP. Most of the action will be at the south turret. If you’re attempting to capture an enemy controlled turret, you’ll need 8 seconds to do so, though you can decrease this time if multiple people capture it at the same time. You also don’t need to be right in front of the terminal to capture it as you’ll notice a semi circle border on the ground that indicates the maximum distance you can capture a turret from. Capture from this distance if you’re capturing a side turret at the start of a match.
Your 3 options for Novare Coast are the same as Alderaan Civil War.
- You can act as a turret guard, warning others of incoming groups of enemies or dealing with any 1v1s.
- You can join your group south to protect allies, apply Accuracy and Force/Tech debuffs, and crowd control with Force Wave. You have many AoEs to stop anyone from taking the objective so keep them up!
- You can try to sneak the enemy’s turret with Mind Maze and Force Lift.
Ancient Hypergate
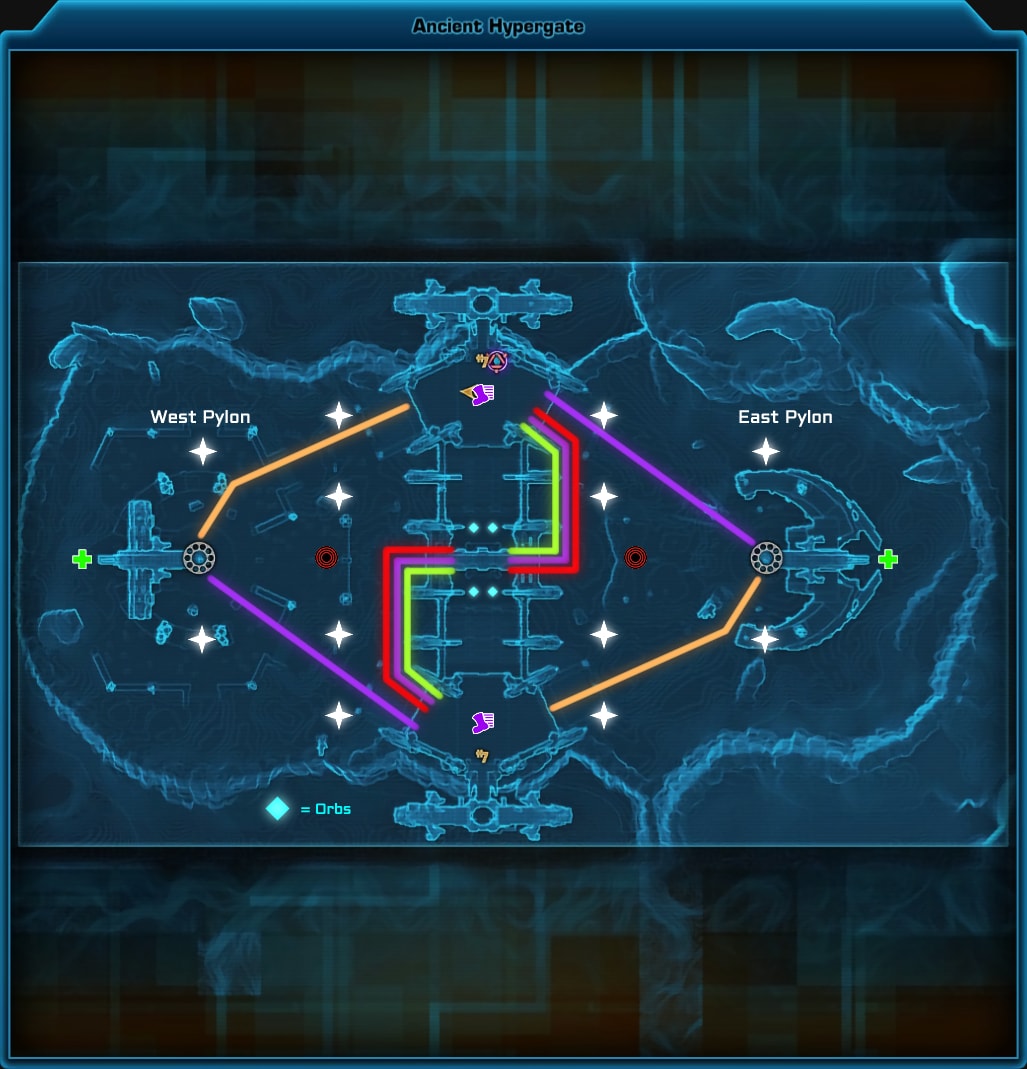
There are only two points to capture, the pylons to the west and east. Your goal is to capture at least one of the pylons and hold them while the rest of the team goes mid to either capture orbs or kill enemy players. By capturing orbs or by killing enemy players, you’ll give your team more points.
As a Kinetic Combat Shadow, I say your time is more valuable spent protecting your team’s pylon or trying to take the opponent’s. The less information you give the opponent the better, so remaining stealthed while guarding a pylon can have an opponent drop their guard.
When it comes to messing with the team’s pylon, you use your various CC abilities and tankiness to distract them. With Force Wave, you can push off groups of enemies from taking their pylon. This will in turn, aggro them and they’ll attack you as a group. Since you’re a tank, you can actively mitigate this damage through your DCDs and run to the back for a Healing Node if need be. By distracting them, you’ll draw their team to you, allowing your team to more securely grab orbs for your own team’s pylon.
Keep an eye on the timer as you’ll want to run away when it hits 7 seconds, this should give you ample time to reach the center or side rooms where you’ll be shielded from the AoE that kills anyone outside of the rooms. You can also cloak out and Mind Maze an opponent to ensure they get caught in the AoE.
Voidstar
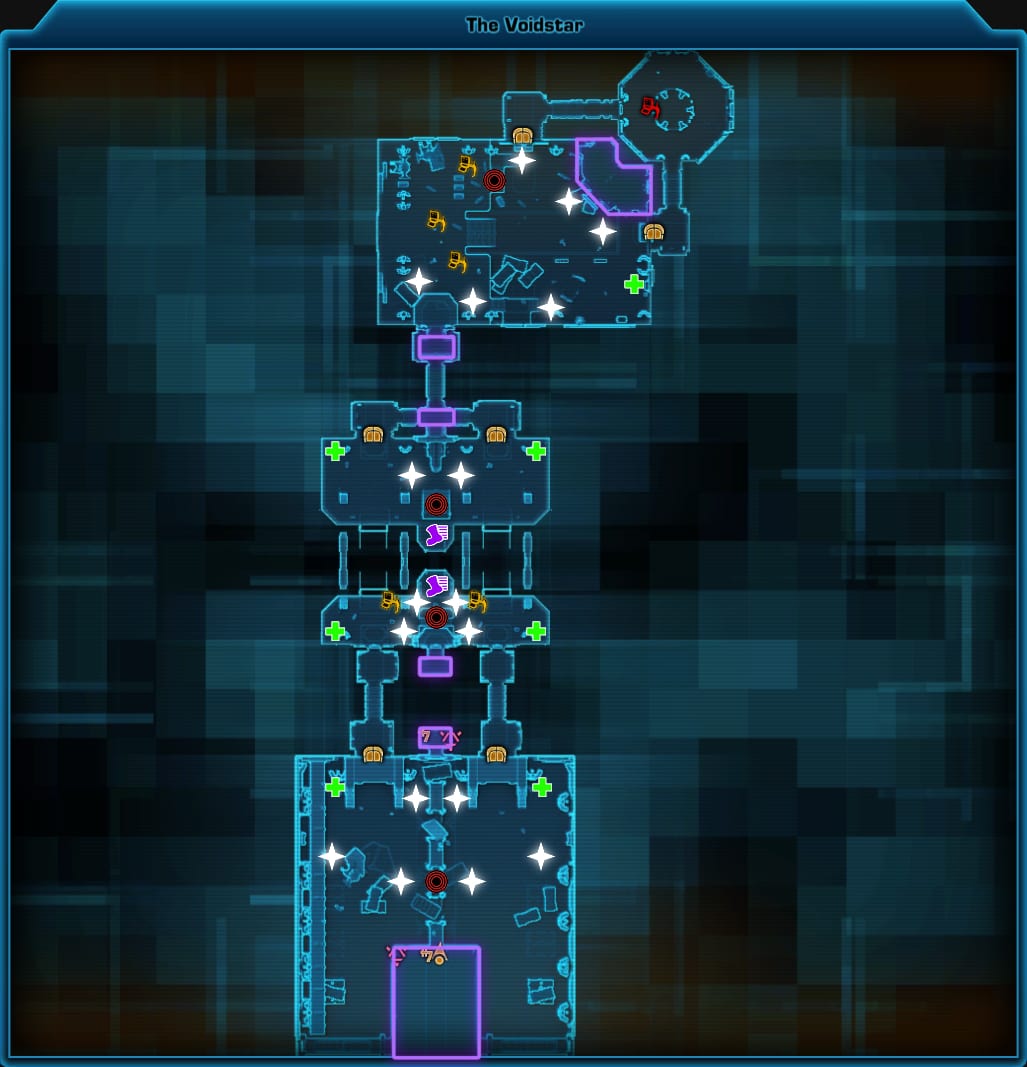
This is one of the more frustrating maps to deal with whether you’re defending or attacking. The goal for the attackers is to reach the doors or terminals and to either place explosives on the doors or slice the terminals. Eventually, they must reach the central computer and capture it, which requires a half second. The defending team must prevent the enemy team from progressing at all costs.
Each door or terminal requires 8 seconds to capture and the door bombs require 20 seconds to explode. The defending team can diffuse the bombs but require 2 seconds to do so.
If you’re defending the Voidstar, here’s the most important thing to keep in mind about defending the doors… DO NOT CHASE ENEMIES FAR OUT, DO NOT SEEK ONE ON ONE DUELS AND FIGHT AT THE DOOR, NOT NEAR IT, NOT AROUND IT, AT IT. I cannot stress this enough. Since many of your main abilities are AoE attacks, you can actively prevent someone from capping the door/terminal without trying. As a Kinetic Combat Shadow, your access to Whirling Blow also lets you spam AoEs at the door indefinitely.
Another thing to keep in mind if you’re defending is to keep an eye out on all the objectives and pay attention to the chat in case someone calls for help. At the start of the match, people will call the west door “right” and the east door “left”. This can be confusing at first and the doors are called “left” or “right” as that’s where they appear from the spawn door. If you’re defending the final zone, do not forget the door to the east. People always prefer to go to the north door where the action is but they will neglect the other door leaving it open to capture.
Odessen Proving Grounds
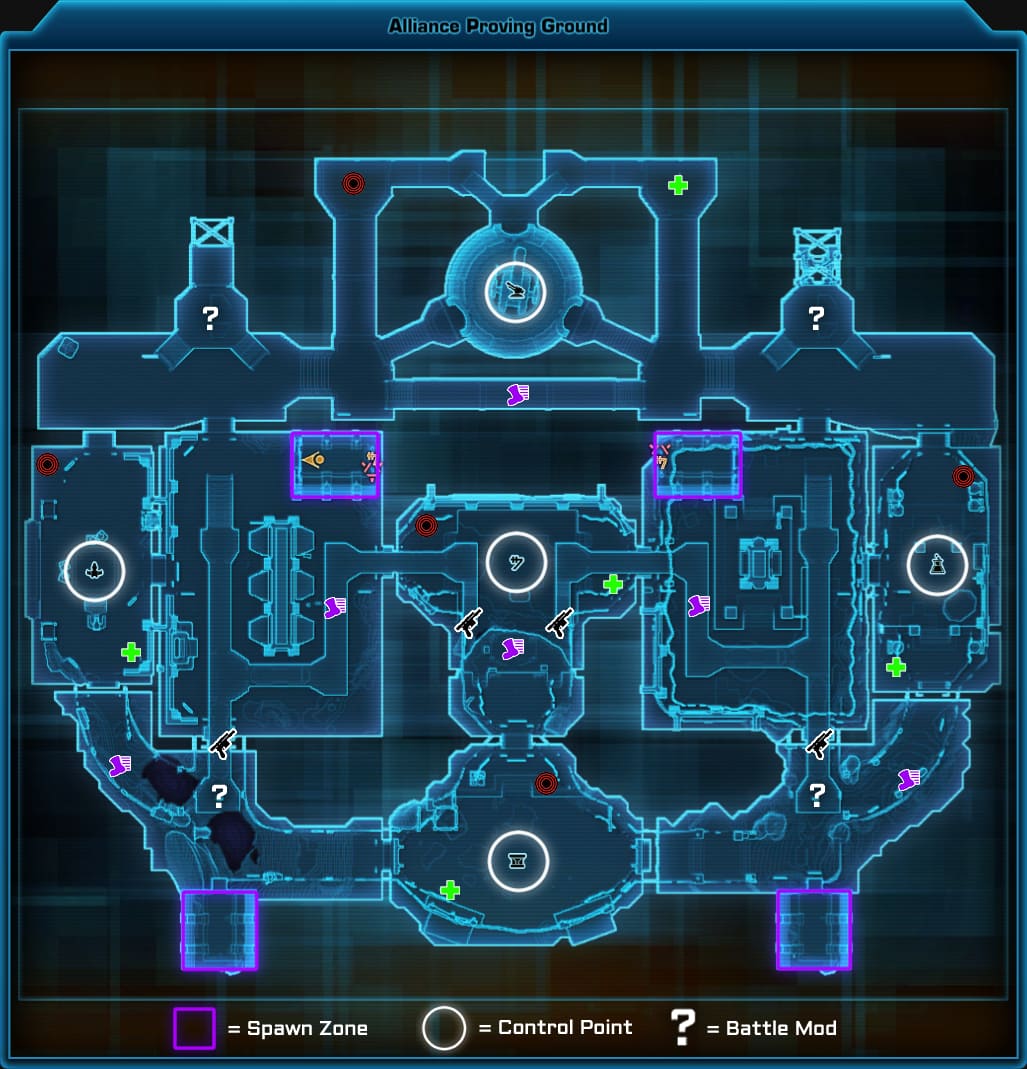
This map is my personal favorite. In Odessen Proving Grounds, you want to maintain control of capture points. In order to capture or defend said points, you have to remain in this cramped area. This forces opponents within this area to be affected by your Slow Time and Force Breach, Pulsating Force debuff, and easily hit by Force Wave and Cleaving Cut.
When the timer goes out and you’re preparing for the next control points to appear, cloak out if you’re in a battle and get out of the immediate area to avoid AoEs. You’re now a step ahead of the enemy team as you have a head start to capture any control points that are activating. Capture those points and defend them.
Up to the north you’ll be led outside, this is a great area to push a group of enemies off the ledge with Force Wave. Be careful as the same can be done to you as well.
Huttball
Whether you’re part of the Republic or the Empire, I’m sure that we can agree that the Hutts are jerks and shouldn’t be allowed to create sports. Regardless, we have to deal with Huttball. This game is akin to football only you can die and there are traps everywhere. Someone must capture the Huttball and carry it to the enemy’s goal line (it’s hard to miss, it’s a giant purple/yellow line on the ground and arrows will point the way for the Huttball carrier).
This one requires a great amount of teamwork to win. NEVER leave your team’s Huttball carrier to fend for themselves, you must protect them through your Guard, CC, and debuffs. It’s very important to use your taunts on this map as the entire enemy team’s focus will be on your Huttball carrier.
You might relate this game to football and want to assume the role of goalie, DO NOT DO THIS. DO NOT stand near your goal line as the enemy Huttball carrier can potentially jump to you, ignoring the traps and ledges to instantly score a point. Also, be mindful of your stuns to prevent the enemy Huttball carrier from White-Barring, making them immune to CC and free to reach the goal line without interference (though they are still susceptible to slows).
Teamwork is key here. Getting scores with the Huttball is a far more effective way to ensure victory for your team.
There are two Huttball maps at the moment, one on Quesh (the one with the sickly green hue) and one on Nar Shaddaa (the one with the sickly orange hue).
Nar Shaddaa Huttball Arena – The Pit
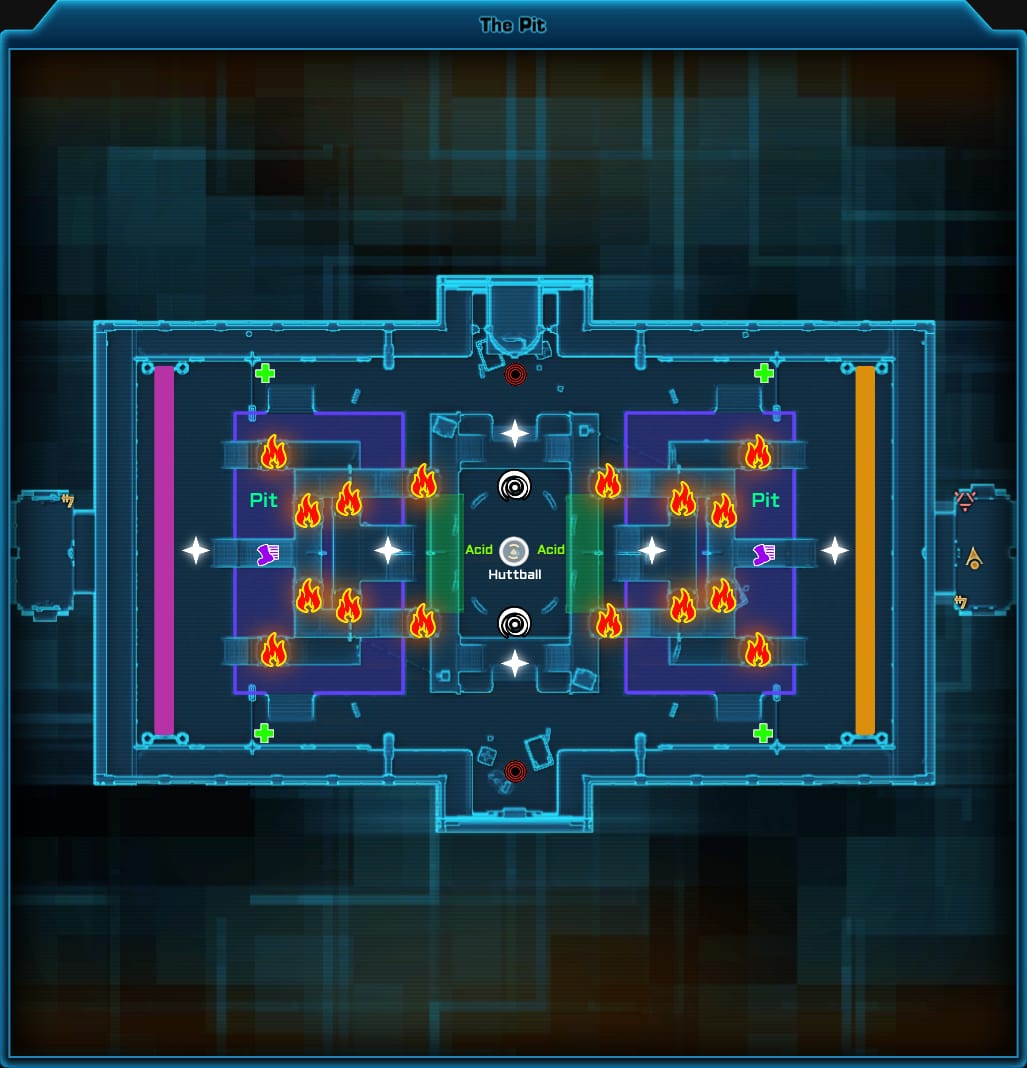
This is the more infuriating of the two Huttball maps. Traversing the ledges without getting pushed off and into the pit is a challenge to say the least. You’re also at the whim of the fire traps that activate every few seconds. Don’t stand in these for obvious reasons and be careful when you’re near them as the enemy will often attempt to push you into the fire or stun you as you attempt to walk across them.
Near the Huttball are acid pits. Should you get into these, they’ll slow you and you’ll take damage. The damage isn’t much but it adds up so it’s best to get out of there as soon as you can. To the north and south of the Huttball are these pads shooting out air. If you stand on these, you’ll be launched into the air and thrown into a random location. Sometimes it’ll take you to a nearby ledge and sometimes it’ll place you in the center of the map. Do not rely on this for transportation if you have the Huttball.
Quesh Huttball Arena
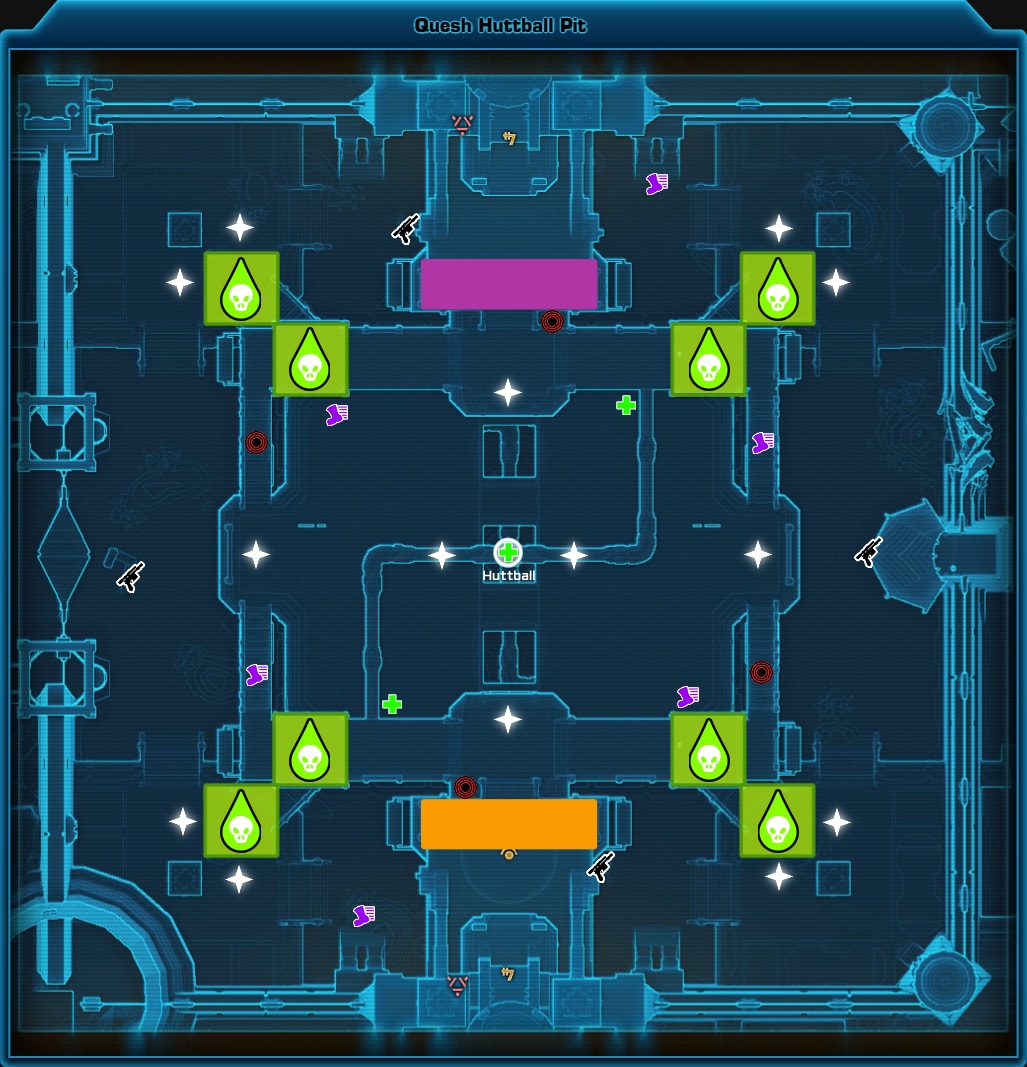
The layout of this map is a bit confusing as it’s built of three layers. The bottom layer has the Huttball and 4 speed boosts. The second or middle layer has two healing nodes and is the most stable zone. The top layer is built up of the goal lines and a thin pipe that connects the two goal lines. Beware the toxic sludge pipes as indicated by large green circles on the map. These will slow you and kill you in a second.
Arenas Maps Tips
Last but not least, we have the arena maps. These are 4 vs 4 Deathmatch arenas provided courtesy of the Hutt Cartel. This map is the true test of your skill and your team’s ability to cooperate. There are no warzone buffs, no healing nodes, no speed boost, just the terrain and the people inside it. It’s 2 out of 3, so win 2 times to ensure victory.
At the start of a match, you can tell who’s on the enemy team and if they’re a tank, dps or a healer. From there, you must check to see if anyone is being guarded. If their healer is being guarded, place your focus on the DPS that has the least HP or is the easiest to kill due to game mechanics. Once you select your target, everyone must work together to bring them down ASAP. If you each go off attacking your own targets, you’ll get nothing done and chances are you won’t kill anyone and end up getting your teammates killed.
As much as I would prefer it not be, this really comes down to a roll of the dice. Some classes are just simply better than others in terms of damage output and dueling ability. In order to do well in this warzone, you must work with your team and know your abilities as well as the abilities of your enemy.
There are currently five maps available for arenas, Makeb, Corellia, Tatooine, Rishi, and the Mandalorian Battle Ring.
The general rule of thumb is to avoid fighting on elevated areas such as bridges or ledges to avoid being pushed off, leaving your team to be outnumbered.
If your opponents have the higher ground, pull them back down with Force Pull. If your team has the high ground, use Force Wave to push 3 of the opposing team’s members off so your team can single out the one that remains. You can also use Force Lift to single out an opponent, leaving their team to fight a 3v4 for 8 seconds. Using this on an enemy healer is a good strategy but only do so if you know for sure they used their CC breakers.
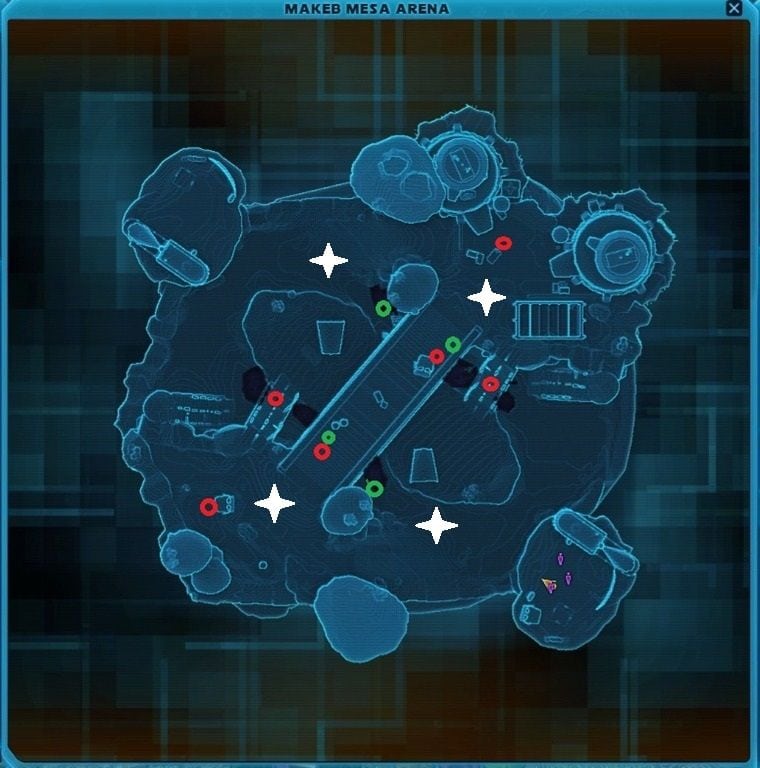
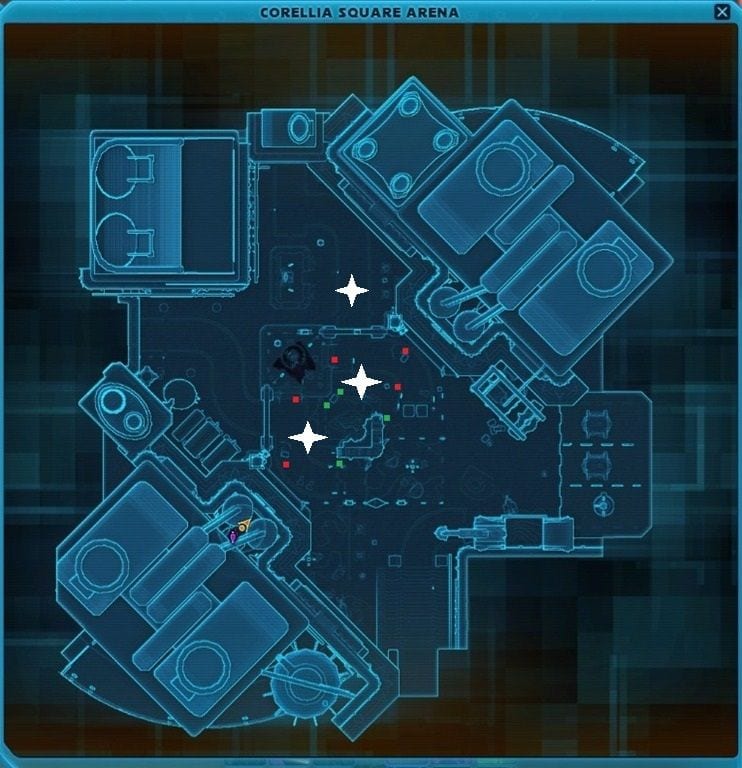
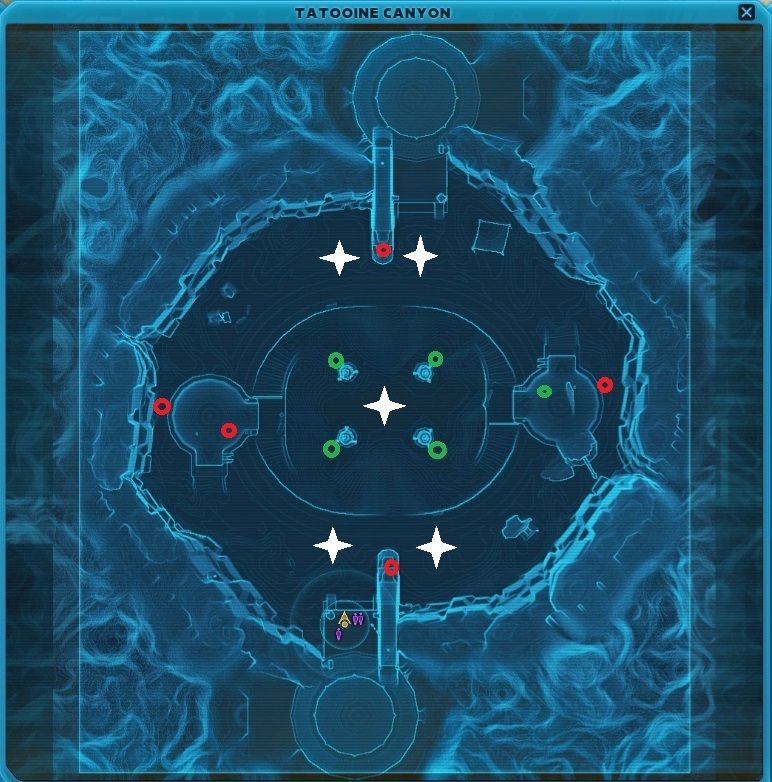
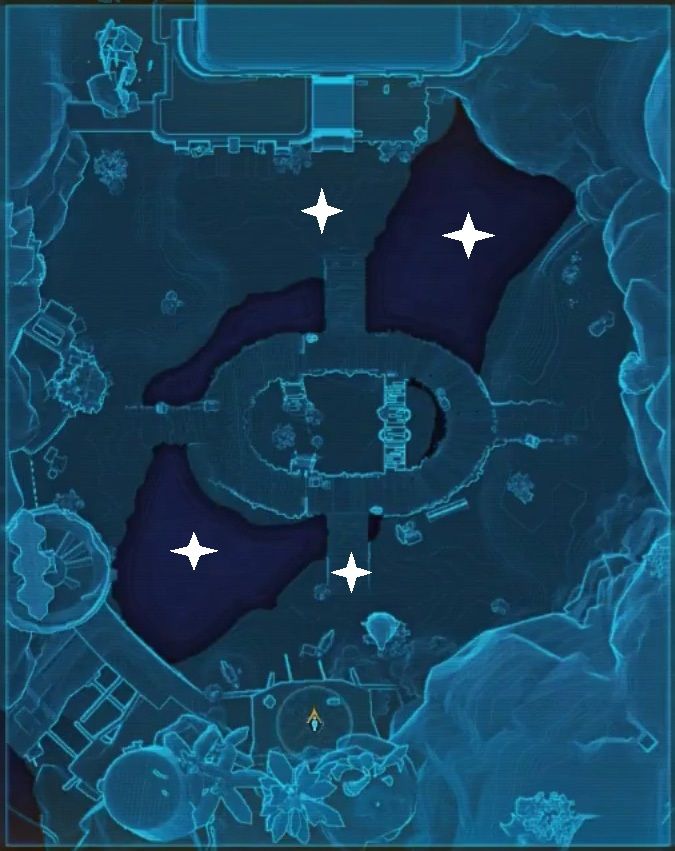
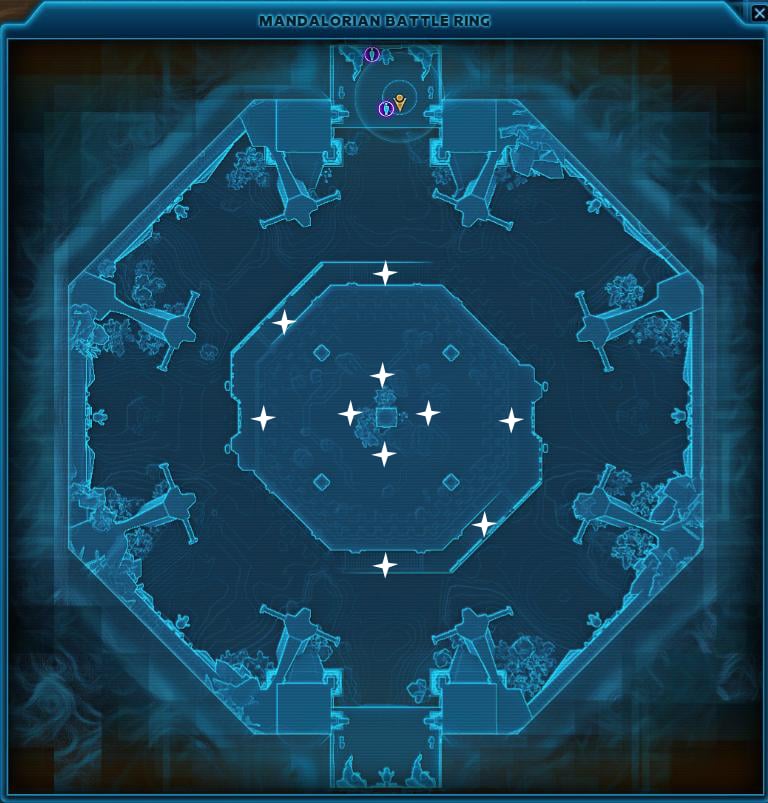
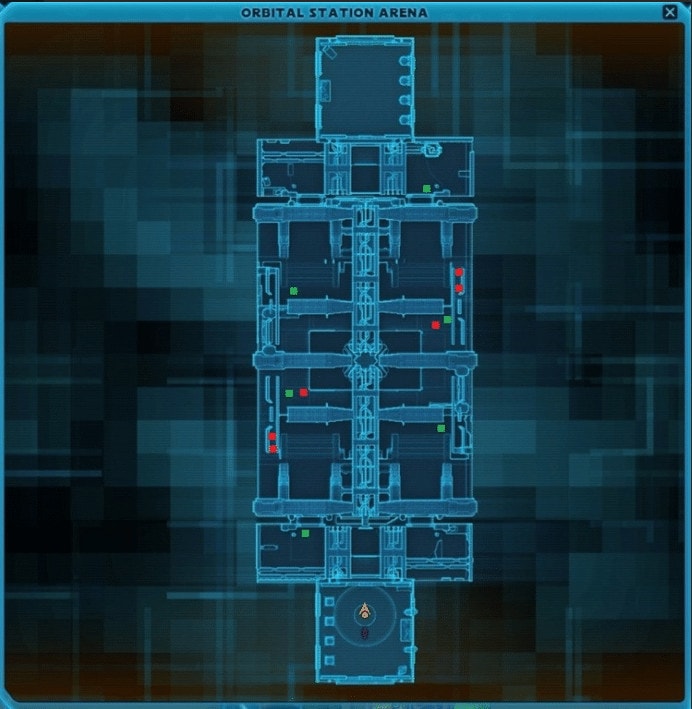
Conclusion
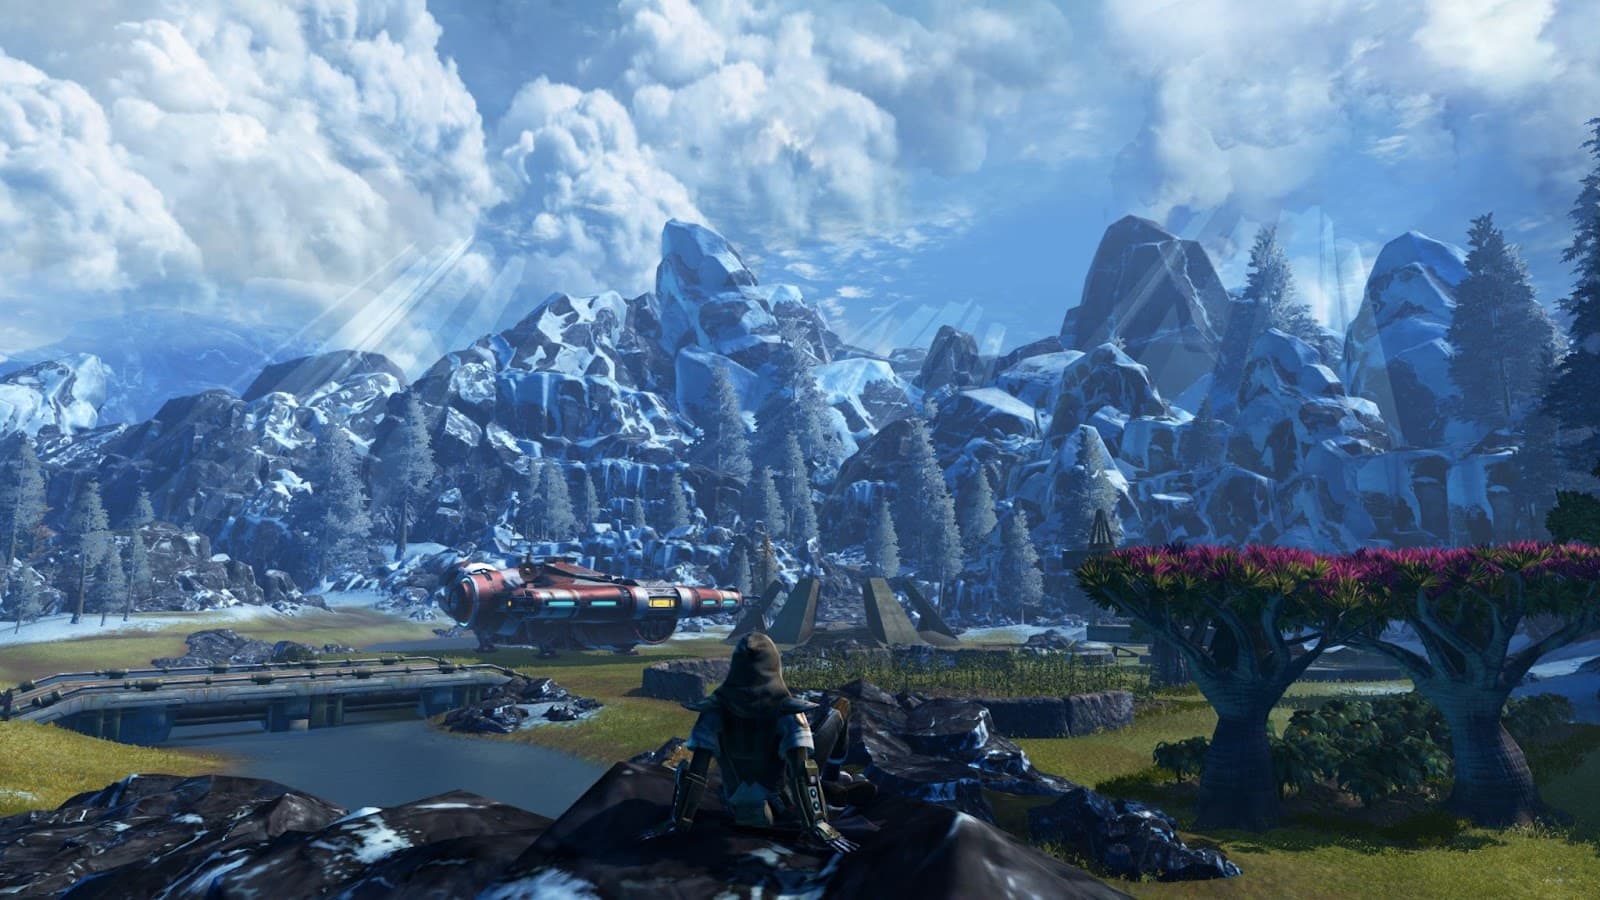
Well, you’ve reached the end of this guide. Thank you for taking the time to read up and I hope this serves useful to you in some manner! Before you go, I wish to teach you one more lesson, this one is about attitude.
In my experience, it does not occur to many that attitude is an important factor to winning a match. Some might think that “I’m so effing bad*ss that I can handle anything with little effort!” or perhaps they’re thinking “GRRR!!! I’LL MAKE THE SHADOW WHO KILLED ME PAY!!!” (Hoo-boy, I’ve been on the receiving end of that many times -Siow). PvP is a competitive scene and some people can take this way too seriously.
Sometimes, you’ll encounter people who whine, give up, troll or pm you after a match telling you how bad you are even though you scored higher than them. It’s best to either ignore, block or kick these people from the match. You must avoid doing this behavior yourself. Negative attitudes spread easily throughout your team, bumming them out and possibly affecting their performance.
From personal experience, the best way to keep your performance up is to remain calm and stay focused on your task. Don’t let other people distract you, and don’t take things too seriously, it’s a video game after all. Be sure you’re having fun with it! But if you’re not, don’t bring others down with you. At the end of a match, it’s always good sportsmanship to say “gg” or “good game” after a match and you can also say this in /say chat so your opponents can read what you said as well.
These attitudes are greatly exacerbated in Ranked PvP. The best you can do is remain nice and positive as it takes 1 positive attitude to make a world of difference. One time, I was doing Ranked PvP to obtain the Black-Silver Crystals and the atmosphere was getting to me. But there was one Powertech that was always supportive, nice, cooperative, and did a good job. That person kept me going because I ended up being queued on their team and we worked our way to victory.
Be the change you want to see and others will follow.
Good luck out there and may the Force be with you!
-Jedi Master Siow
About the Author
Christopher Siow (known as Siow in Star Wars: The Old Republic) describes himself as “some Native-American dude who loves Star Wars and other nerd stuff”. He currently operates a Star Wars YouTube channel known as “Siow’s Holocron”, where he touches upon various Lore subjects relating to Star Wars. Such videos include Lore videos about the Jedi Temple Guard, various Occupations that the Jedi would take on, and plans to include many more in-depth lore videos over time.
- YouTube Channel: Siow’s Holocron
- Facebook Page: https://www.facebook.com/siowsholocron
- Twitter: https://twitter.com/SiowsHolocron
Artist Credit
The art of Siow featured in the Guide’s Intro portion was given permission to be used in this guide by original artist, Joelle Blot, of Star Dragon Art.
https://star-dragon-art.tumblr.com/
Math Equations Credit
I did not form the equations for the math portion myself, I had help from a programmer friend of mine who also loves calculating MMORPG math. He’s the genius here, not me, he just gave me the equations I needed to figure out the numbers myself.
Addendum: The Math
[UPDATES TO THE MATH SECTION ARE INCOMING TO REFLECT 332 GEAR STAT NUMBERS]
So I had to use a lot of math to calculate whether this passive is better than that in X scenario, or things of that nature. Not everyone wants to read that, I get it. So any math will be placed here for us super nerds who like to crunch numbers for fun! I will be providing the equations I’ve used myself so you can have the ability to theorycraft and run numbers yourself! There’s also a tl;dr section at the end. With that said, let’s use some math!
Section 1 – Healing from the Light Forces Passive
Light Forces is a passive ability chosen at level 43 and in PvP, it is inferior to the +15% Damage Reduction for your team from Potent Defense and the +25% Damage Reduction with 15% Max HP Heal of Battle Readiness. But if you’re here, you want to know the potential healing numbers regardless.
Your Global Cooldown takes a large part in calculating how much health you can regain with this ability. The base GCD is 1.5 seconds, taunts last 6 seconds, this means you can get 4 swings in with your lightsaber to heal.
Versus a single target, using Double Strike can get you back 16% of your HP per taunt against a single target. You can gain even more health by using Whirling Blow on a large group of targets. Assuming you hit a group of 8 enemies, you can restore up to 64% of your HP if those 8 targets are affected by Mass Mind Control when using Whirling Blow.
If you use Force abilities on taunted targets, your healing can increase even moreso. Say you taunt 8 targets all huddled together in a compact formation, you could use Cascading Debris with the Chained Cascade passive to get 4 hits per target within 3 seconds. This alone will restore 64% HP, leaving you time to work in either a Slow Time with Force Breach combo or 2 Whirling Blows. This would increase your total healing to 96% maximum HP.
Sounds good right? Well not so much as it is extremely rare that the enemy will group tightly for you to hit like this. You can get CC’d ruining your chance to heal, targets will move out of the way, one will likely be guarding their objective while another is trying to sneak one of yours. PvP is unpredictable making it rather incompatible with PvP. This passive scales better with more predictable environments and unfortunately, it’s hard to take advantage of its full effects here. On demand Damage Reduction for either yourself or your team will always be better for PvP.
Section 2 – Particle Acceleration Odds of Activation
So, why should you use Double Strike against a single target and Whirling Blow/Cleaving Cut to proc your Particle Acceleration buff? To determine this, we must use the following equation to know the odds of activating Particle Acceleration:
1-(1-0.3)^x
In this equation, x is the number of attacks that land against your target(s). For Double Strike, x will be 2, and with Whirling Blow, x can be any number from 1 through 8 depending on how many targets you hit with it.
This gives Double Strike a 51% chance to activate the Particle Acceleration compared to the 30% of Spinning Strike, Shadow Strike, or using Whirling Blow against one target.
Here’s the chance that it would proc when using Whirling Blow…
- Target Hit = 30%
- Targets Hit = 51%
- Targets Hit = 65%
- Targets Hit = 76%
- Targets Hit = 83%
- Targets Hit = 88%
- Targets Hit = 91%
- Targets Hit = 94%
You have a much greater chance of gaining Particle Acceleration by using Whirling Blow if you’re in a battle against 3+ enemies, but you should rely on Double Strike against a single target to proc Particle Acceleration more reliably than Spinning Strike or Shadow Strike when fighting a single target.
Section 3 – Net Damage Reduction and You
Author’s Note: “Many of these equations were made before 7.1 and account for 326 gear except for the Prototype vs Artifact enhancements section. I am not recalculating them since the changes will be exceptionally minor so if you really need to know updated numbers with 328 PvP gear, I encourage you to math it out yourself using the DIY equations found at the end of this math portion.” – Siow
So this is where math becomes a tad more complicated as Net Damage Reduction has a lot of factors that go into it. What do I mean by Net Damage Reduction? How does this differ from my Damage Reduction stat? Simply put, your Net Damage Reduction is the amount of damage one of your defensive stats reduces. For your Damage Reduction stat, what you see is what you get. For your Defense Chance, your Net Damage Reduction is equal to your Defense Chance when being attacked by white damage sources such as weapon attacks.
Where it gets complicated is when you have to calculate the Net Damage Reduction offered by your Shield Chance. Since Shield Chance is bound to your Shield Absorption, these two will always be put together when accounting for Net Damage Reduction through your shield.
If you wish to theorycraft the amount of net damage you can reduce from Shields, you may use this following equation.
x*y = Net Damage Reduction
In this case, x is your Shield Chance and y is your Shield Absorption (50% for either value would be written as 0.5 for the equation as an example).
Consider an attack that deals 100 damage. You have a 50% chance to mitigate 25% of damage. Out of 10 attacks, it is reasonable to assume 5 will hit unhindered and 5 will be shielded. This means 5 hits at normal (500) and 5 hits at mitigated (375) for 875 total damage, or 12.5% total reduction (875 compared to 1000).
Coincidentally, 12.5% is 1/8, which means your 1/2 chance at 1/4 reduction = 1/8 mitigation
So now let’s look at examples of Shield Chance and Absorption Combinations
- 38% Shield Chance with 70% Absorption = 26% Net Reduction
- 50% Shield Chance with 60% Absorption = 30% Net Reduction
- 60% Shield Chance with 50% Absorption = 30% Net Reduction
- 70% Shield Chance with 46% Absorption = 32% Net Reduction
With the higher chance to shield, the more likely you are to consistently reduce incoming damage, regain Force Energy, and increase your chance to reduce the Cooldown on Resilience. Now let’s look at the stats I recommended…
60% Shield Chance with 41% Absorption = 24.6% Net Reduction
Now you might be thinking, “Couldn’t I go 50/50 Shield Chance and Absorption or go for 70% Shield Chance with 30% Absorption to proc passive effects more often?”. Let’s touch on that, let’s look at the following…
- 50% Shield Chance with 50% Absorption = 25% Net Reduction
70% Shield Chance with 30% Absorption = 21% Net Reduction
The 50/50 setup will grant you 0.4% more Net Reduction than the 60/40 setup I recommended, which means you have slightly more overall damage reduction while the latter provides less Net Reduction than the stats I recommended. You may go for a 50/50 approach if you like but I still firmly believe in going 60/40 is better at the moment as you have better odds at shielding Burst damage. Shadow Tanks have always struggled against Burst Damage from White Damage sources such as Weapon attacks. Being able to shield this more often will greatly increase our survivability.
Prototype Enhancements vs Artifact Enhancements
Here’s the long answer as to why Artifact enhancements are superior to Prototype enhancements. To determine this we’ll need to know how much damage we receive. Here are the stats with Prototype vs Artifact assuming we have Kinetic Ward active while using an Advanced Kyrprax Fortitude Stim…
Prototype Enhancements
- HP: 434,740
- Damage Reduction: 38.28%
- Defense Chance: 30.38%
- Shield Chance: 60.27%
- Shield Absorption: 41.18%
Artifact Enhancements Enhancements
- HP: 443,777
- Damage Reduction: 38.28%
- Defense Chance: 29%
- Shield Chance: 60.27%
- Shield Absorption: 41.18%
For this, we’ll use the following equation where X is the Percentage of Damage Received…
X = (1-Defense Chance %) * (1-(Shield Chance% * Shield Absorption%)) * (1 – Damage Reduction %)
Now let’s plug those numbers into our equation starting with the Prototype numbers…
X = (1-.3028)*(1-(.6027*.4118))*(1-.3828)
X will be equal to 0.3235119440503776, or when rounded down, X = 32% damage received.
Now let’s do the Artifact numbers…
X = (1-.29)*(1-(.6027*.4118))*(1-.3828)
X = 0.32945134864568 or 33% damage received.
Now we must figure out how this works with our HP and what our effective HP becomes. For that, we’ll be dividing our HP by our damage received values…
Prototype
434,740/0.3235119440503776 ≈ 1,343,814.37 Effective HP
Artifact
443,777/0.32945134864568 ≈ 1,347,018.31 Effective HP
As you can see, we have 4k more effective HP with the Artifact enhancements. It may not seem like much but every second you stay alive counts when you’re tanking in PvP.
Jedi Temple Guard Build (Full Tank) Damage Reduction
But now you’re probably wondering what your overall Net Damage Reduction is when you consider all of your Defensive Stats. I find it easier to think of it as the percentage of incoming damage received by you after going through your personal stat checks (assuming base stat percentages without buffs from Passives or DCDs). For this, we’ll use the following equation where X is the Percentage of Damage Received…
X = (1-Defense Chance %) * (1-(Shield Chance% * Shield Absorption%)) * (1 – Damage Reduction %)
For the equation examples, I will be using my own Defense Stats without any Passive or Active Buffs.
- Damage Reduction: 38.14%
- Defense Chance: 30.53%
- Shield Chance: 42.53%
- Shield Absorption: 41.23%
Now let’s plug those numbers into our equation…
X = (1-.3053)*(1-(.4253*.4123))*(1-.3814)
X will equal 0.35438575061, but to round it down we’ll say X = .35. This means we receive 35% of all incoming damage with these base stats. But now let’s add the +18% to Shield Chance from Kinetic Ward and the +4% to Damage Reduction from Shadow Protection…
- Damage Reduction: 42.14%
- Defense Chance: 30.53%
- Shield Chance: 60.53%
- Shield Absorption: 41.23%
X = (1-.3053)*(1-(.6053*.4123))*(1-.4214)
X will equal 0.30163983836 or about 30% of incoming damage was received. Maintaining your Kinetic Ward and Shadow Protection is crucial to take 5% less damage as it can add up quickly. But now let’s look at your stats when you account for your Kinetic Ward, Shadow Protection, AND your Kinetic Bulwark!
- Damage Reduction: 42.14%
- Defense Chance: 30.53%
- Shield Chance: 60.53%
- Shield Absorption: 51.23%
X = (1-.3053)*(1-(.6053*.5123))*(1-.4214)
X = 0.27730959785 or about .28% of incoming damage was received when you round it off. Squeezing Kinetic Ward with Kinetic Bulwark for every last drop of Net Damage Reduction is important as it helps you survive that much longer. So for shiggles, let’s say you’re using the Ward of the Continuum Tactical to gain additional stacks of Kinetic Ward to better take advantage of Kinetic Bulwark. Since that would add an additional 3% Defense Chance, X = 0.26533423016 or 26% of incoming damage was received.
So let’s go out and see what happens when we go all out and have ALL our buffs on! I’m talking Kinetic Ward, Kinetic Bastion, Deflection, Battle Readiness, and Force Potency! (Keep in mind, you should space out your DCDs so you’re not left defenseless by using them all at once. This is just for theory purposes and the only instance I can think of that you’d use this is if you’re getting 1v8’d in PvP).
- Damage Reduction: 67.14%
- Defense Chance: 80.53%
- Shield Chance: 60.53%
- Shield Absorption: 51.23%
X = (1-.8053)*(1-(.6053*.5123))*(1-.6714)
X = 0.04801163345 or about 5% of incoming damage is received. Though this number would only be good for about 12 seconds, then your other buffs will fall off in another 3 after that, then the last one in another 5 after that. Honestly, it’s much better to cloak out and mess with the enemies instead of tanking all their damage with all your DCDs if you end up in a 1v8. Use Force Wave, Force Pull, distract them and be slippery and tricky!
Though one thing I haven’t mentioned is that these previous equations accounted for Defense Chance which would only be useful when fighting against White Damage from Weapon Attacks. As a note, when you’re stunned weapon attacks ignore your Defense Chance which is why I like to take the Intangible Spirit passive as it reduces your incoming damage while stunned by 30%. This is the same as your Defense Chance so you’re reducing about the same amount of damage while stunned.
In PvP there are going to be a lot of Force/Tech attacks which flat out ignore your Defense Chance. This means our equation changes ever so slightly. To differentiate the two equations, I will be using Y for the Percentage of Incoming Damage Received when referring to damage from Force/Tech sources.
Y = (1-(Shield Chance% * Shield Absorption%)) * (1 – Damage Reduction %)
Let’s use our stats when properly maintaining Kinetic Ward without Kinetic Bulwark and Shadow Protection.
- Damage Reduction: 42.14%
- Shield Chance: 60.53%
- Shield Absorption: 41.23%
Y = (1-(.6053*.4123)) * (1-.4214)
Y = 0.43420158106 or 43% of incoming damage was received. This amount of damage reduction is quite drastic when compared to taking damage that can be mitigated by Defense Chance. Fortunately, us Shadows are excellent at negating damage from Force/Tech sources entirely thanks to our use of Resilience! We can also reduce Force/Tech damage by 15% when targets are affected by our Pulsating Force Aura that we get when we activate Deflection.
With Pulsating Force affecting our opponent, we’ll take about 36% of incoming Force/Tech Damage from them. Feel free to test these equations out yourself to learn the Percentage of Incoming Damage Taken when accounting for Force Potency and/or Battle Readiness buffs! I’d do it here but I feel this section is long enough and I’ve likely scared off some people with all this wonderful math. If you have read this far, congratulations on not fearing math! Knowledge is power, and knowing is half the battle!
Jedi Brute Build (Skank Tank) Damage Reduction
Let’s put Full Tank theory reduction aside and focus on the Off-Tank variant of the Skank Tank build. We’ll be comparing going as an Off-Tank with a full Duelist Set vs a Mixed Armor Set.
Full Duelist Skank Tank Set PIeces
- Force Lord’s Saberstaff 326
- Duelist’s Shield 326
- Duelist’s Armor Set 326 (Helmet, Gloves, Pants, Boots, etc)
- Adept Device 326
- Force Resistance Package 326
- Dynamic Force Package 326
- Relic of Boundless Ages 326
- Relic of the Focused Retribution 326
- Two Cloaks/Friend of the Force Tactical
- 2 Indestructible Crystals
Full Duelist Skank Tank Stats
- Damage Reduction: 38.14% (42.14% with Shadow Protection)
- Defense Chance: 27.38%
- Shield Chance: 33.38% (51.38% with Kinetic Ward)
- Shield Absorption: 32.88%
With this set, you’ll be receiving about 35% of all incoming damage when we maintain Kinetic Ward and Shadow Protection, so about the same as a Full Tank when they’re not maintaining their Shadow Protection buff and not using Kinetic Ward at all. You sacrifice some damage reduction in favor of hitting that 30% Critical Rating so you can have a 40% Critical Hit Chance with Cascading Debris with Antagonizing Debris, and a 100% Critical Hit Chance when using Force Potency. Now let’s see where we get when we replace pieces of our gear that have Absorption with Shield Rating.
Mixed Armor Skank Tank Set Pieces
- Force Lord’s Saberstaff 326
- Duelist’s Shield 326
- Duelist’s Armor Set 326 (Helmet, Gloves, Pants, Boots, etc)
- Adept Device 326
- Force Resistance Package 326
- Dynamic Force Package 326
- Relic of Boundless Ages 326
- Relic of the Shield Matrix 326
- Two Cloaks/Friend of the Force Tactical
- 2 Indestructible Crystals
Mixed Armor Skank Tank Stats
- Damage Reduction: 38.14% (42.14% with Shadow Protection)
- Defense Chance: 27.86%
- Shield Chance: 42.9% (60.9% with Kinetic Ward)
- Shield Absorption: 27.56%
With this set, you’ll be receiving about 35% of incoming damage when maintaining Kinetic Ward and Shadow Protection. I would say this is the preferable setup as you have an additional 9% more Shield Chance, granting you as much Shield Chance as a Full Tank, therefore allowing you to use your Dusk Ward or Twilight Ward more often. Though the Full Duelist Skank Tank set would be easier to get without the use of Alt Characters or using the Gear Vendors to fill in the gaps. If you get the chance, opt for the Mixed Set if you go as an Off-Tank Skank Tank.
Full Critical Skank Tank Set Pieces
- Force Lord’s Saberstaff 326
- Duelist’s Shields 326
- Force Healer’s/Mender’s Headgear 326
- Force Healer’s/Mender’s Chestpiece 326
- Force Lord’s Cuffs 326
- Force Lord’s Gauntlets 326
- Force Lord’s 326
- Targeter’s/Med Tech’s Pants 326
- Pummeler’s/Force Healer’s/Med Tech’s Boots 326
- Adept Device 326
- Force Resistance Package
- Dynamic Force Package
- Relic of Serendipitous Assault 326
- Relic of the Focused Retribution 326
- Two Cloaks/Friend of the Force Tactical
- 14 x Advanced Critical Augment
- 2 Eviscerating Crystals
Full Critical Skank Tank Stats
- Damage Reduction: 38.14% (42.14% with Shadow Protection)
- Defense Chance: 19.1%
- Shield Chance: 23.1% (41.1% with Kinetic Ward)
- Shield Absorption: 26.98%
With this set, you’ll be receiving about 41% of all incoming damage. Needless to say this is the squishiest of the tank builds and I’m beginning to wonder why you’re not just playing as a DPS. Though you’re using this setup for damage and being able to take out ⅓ of your opponent’s HP in one combo. What’s more important here is your damage output. Which leads us to the final section of the math portion…
Section 4 – Damage Calculation
Let’s first determine what our Total Damage Boost gained from our passive Critical stats. To know that, we’ll be using the following equation where X equals our Average Total Damage Boost…
X = Critical Chance*Critical Multiplier+(1-Critical Chance)
For a Full Tank, the Critical Stats will be around the following…
- 21.58% Critical Chance
- 51% Critical Multiplier
Then we plug this into our equation…
.2518*1.51+(1-.2518)=1.164418 or about a 16% damage boost on average.
For an Off-Tank Skank Tank, the Critical Stats will be around the following…
- 30.19% Critical Chance
- 60.03% Critical Multiplier
Then we plug this into our equation…
.3019*1.603+(1-.3019)=1.1820457 or about an 18% damage boost on average.
For a Full Critical Skank Tank, the Critical Stats will be around the following…
- 40.64% Critical Chance
- 70.28% Critical Multiplier
Then we plug this into our equation…
.4064*1.7028+(1-.4064)=1.28561792 or about a 28% damage boost on average.
Damage Boosts from Critical Stats
- Full Tank – 16% (1.164418)
- Off-Tank Skank Tank – 18% (1.1820457)
- Full Critical Skank Tank – 28% (1.28561792)
Keep in mind these numbers are averages, it could be less or more depending on how many abilities you critically hit.
All we have left to cover is which level 23 Passive choice is better? Antagonizing Debris or Kinetic Cascade? This question is only important for Full Tanks as Antagonizing Debris will always be better for a Skank Tank. Keep in mind that Antagonizing Debris only increases the Critical Hit chance for Cascading Debris and not the Critical Damage. Due to the increase, this can affect our Average Total Damage Boost numbers when looking at the damage output for Cascading Debris specifically.
We’ll be looking at the damage of Cascading Debris on a Full Tank when fully empowered by Harnessed Shadows for the 45% Damage Boost.
Base Damage with Harnessed Shadows: 44,140 damage
Damage with Harnessed Shadows and Antagonizing Debris: 47,409 damage
Before we plug in our Average Damage Boost from Critical Chance, let’s first determine the average damage boost of this Cascading Debris as the numbers change due to the increased critical chance.
.3518*1.51+(1-.3518) = 1.179418 or about an 18% damage boost on average. We’ll be using this with the Antagonizing Debris numbers.
44,140*1.164418 = 51397.41052 or about 51,397 damage.
47,409*1.179418 = 55915.027962 or about 55,915 damage
Though we’re not done yet as we have to account for the 20% damage boost of Cascading Debris when used on a target under the effect of your Mind Control…
51397.41052*1.2 = 61676.892624 or about 61,677 damage giving us the following damage results for a Full Tank
Full Tank Kinetic Cascade Debris Damage
- Antagonizing Debris – 55,915 damage
- Kinetic Cascade – 61,677 damage
So Kinetic Cascade is mathematically proven to be better for a Full Tank in terms of damage output. However it becomes a matter of when you should take Antagonizing Debris over Kinetic Cascade. Like I’ve said earlier, if you do coordinated group combat or like fighting in the mosh pits, use Antagonizing Debris for the consistent boost to your damage and save your taunts for damage reduction purposes to help your allies. If you want to go defend an Objective such as a Turret or a Pylon where you’ll be more prone to fight 1v1s, use Kinetic Cascade for the on-demand damage buff against a single target.
I’ll forgo writing the whole equations used when showing the damage numbers of Cascading Debris for the Off-Tank Skank Tank and the Full Critical Skank Tank…
Off-Tank Skank Tank
- Antagonizing Debris – 64,591 Damage
- Kinetic Cascade – 63,256 Damage
Full Critical Skank Tank
- Antagonizing Debris – 82,998 Damage
- Kinetic Cascade – 82,033 Damage
Due to your higher Critical Multiplier, Antagonizing Debris is objectively better than Kinetic Cascade when using either of the Skank Tank setups.
Fun Fact: If you use the Full Critical Skank Tank setup and pick the Chained Cascade passive, you can deal up to 723,656 damage assuming you hit 8 targets with all 4 rocks each while having a 100% Critical Hit Chance with Force Potency! I would say the Full Critical Skank Tank is where the Chained Cascade Passive really shines. But again, that’s a potential maximum, on average you’ll only be able to hit 4-6 depending on their team comp and how clumped up they are.
Section 5 – TL;DR
Did all that math give you a headache? Here’s a summary of what I proved with the math. Keep in mind that percentages are written as decimals when used in the equations, so something like 55.15% becomes .5512.
- Light Forces is objectively the worst Level 43 choice for the purposes of PvP due to it being unreliable in PvP.
- Use Double Strike against a Single Target to proc Particle Acceleration.
- Use Whirling Blow/Cleaving Cut against 3 or more Targets to proc Particle Acceleration.
- Go for 42% Shield Chance on the Full Tank Build and the Off-Tank Skank Tank Build so you can hit 60% Shield Chance with Kinetic Ward.
- Maintain your Kinetic Ward, Kinetic Bulwark, and Shadow Protection for better overall damage reduction.
- Kinetic Cascade offers better overall damage with Cascading Debris for a Full Tank but is beaten by Antagonizing Debris for a Skank Tank.
- Chained Cascade is pretty gnarly when used on a Full Critical Tank Setup.
- There was a G.I. Joe reference somewhere.
DIY Equations
Here’s a list of equations I used for various things throughout this portion of the guide. Some of these equations can be used to determine numbers for your class even if you’re not a Kinetic Combat Shadow!
- Odds of Proccing Particle Acceleration
1-(1-0.3)^x
x equals the amount of targets hit by a melee attack.
- Net Damage Reduction from Shield Chance with Shield Absorption
x*y = Net Damage Reduction
x equals your Shield Chance as a decimal and y equals your Shield Absorption as a decimal.
- Overall Incoming Damage Taken vs White Damage
X = (1-Defense Chance %) * (1-(Shield Chance% * Shield Absorption%)) * (1 – Damage Reduction %)
X equals the percentage of incoming Weapon damage taken
- Overall Incoming Damage Taken vs Yellow Damage
Y = (1-(Shield Chance% * Shield Absorption%)) * (1 – Damage Reduction %)
Y equals the percentage of incoming Force/Tech damage taken
- Effective Hit Points
Effective HP = Y/X
Y = your total HP, X = Damage Received value from Incoming Damage Taken equations.
Average Damage Boost from Passive Critical Stats
X = Critical Chance*Critical Multiplier+(1-Critical Chance)
X becomes the average damage boost when converted to a percentage. If it’s 1.163065 then it can be written as a 16% damage boost. A 60% Critical Multiplier is written as 1.6 when plugged into the Critical Multiplier slot in this equation.