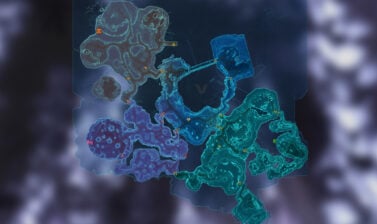
This guide will tell you everything you need to know about the Shrine of Silence Flashpoint in SWTOR, released with Game Update 7.3, including how to do the Shrine of Light Puzzle, cross the chasm to reach the bonus boss, complete achievements, and defeat all of the bosses!
The Shrine of Silence Flashpoint is available in Story Mode, Veteran Mode, and Master Mode. In Story Mode, you are accompanied by the Combat Support Droid as in any other Flashpoint. Veteran and Master are designed for groups of four players.
Table of contents
Story Mission
The Shrine of Silence Flashpoint is not part of the main storyline (AKA critical path) like all other Flashpoints from the past few years. This was a deliberate choice by BioWare because the objectives involved with creating a Flashpoint and piece of story content are often at odds with each other.
Most players just want you to spacebar through the cutscenes in a Flashpoint but cutscenes are the main course of a piece of story content. It’s also harder to tell a good story when you’re forced into using the rigid structure of a Flashpoint where you’re constantly alternating between trash and boss fights.
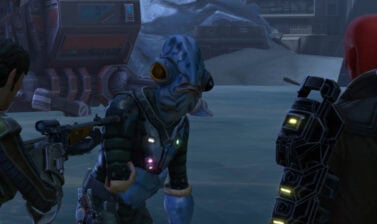
While Shrine of Silence isn’t part of the main story, there is still a small story mission with a partially voiced cutscene and a dedicated Story mode just like the rest of the modern FPs.
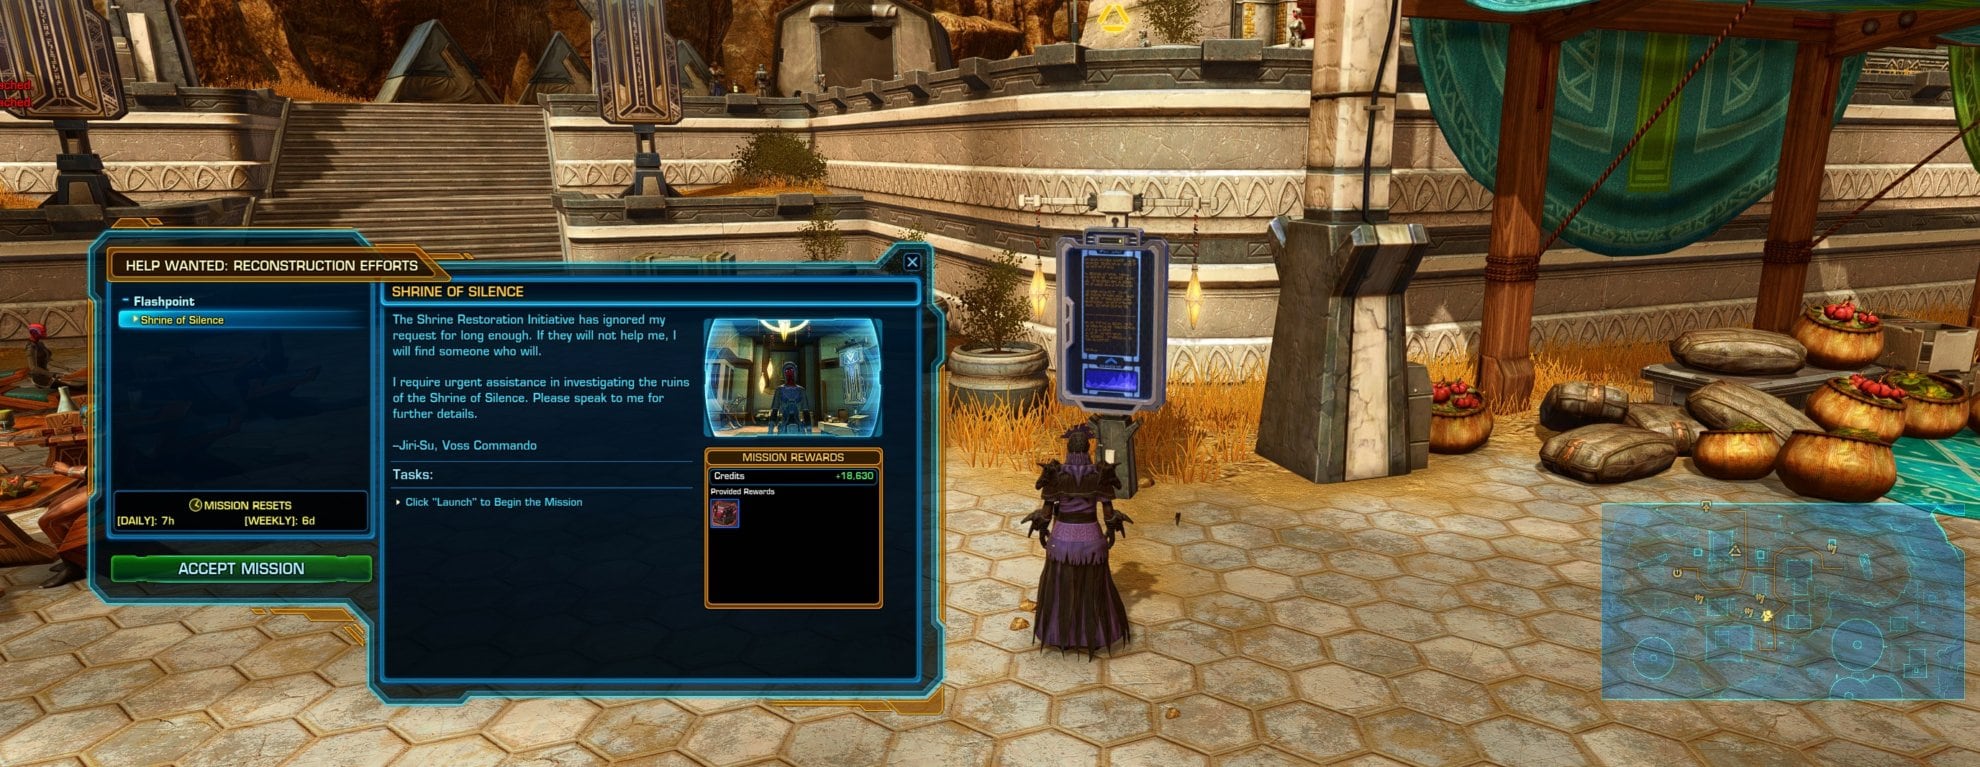
You can obtain that mission from the mission board at the Interpreter’s Retreat on Voss. We have a guide on how to access the Interpreter’s Retreat on Voss if you are not sure.
Read our SWTOR Story Progression Guide to learn where this story fits in. The guide will help you experience the game’s narrative in the proper intended order of events and aid and assist you if you are not sure what to do and where to go next.
Shrine of Light Puzzle and Bonus Mission
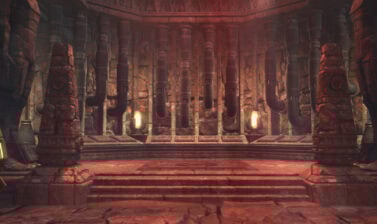
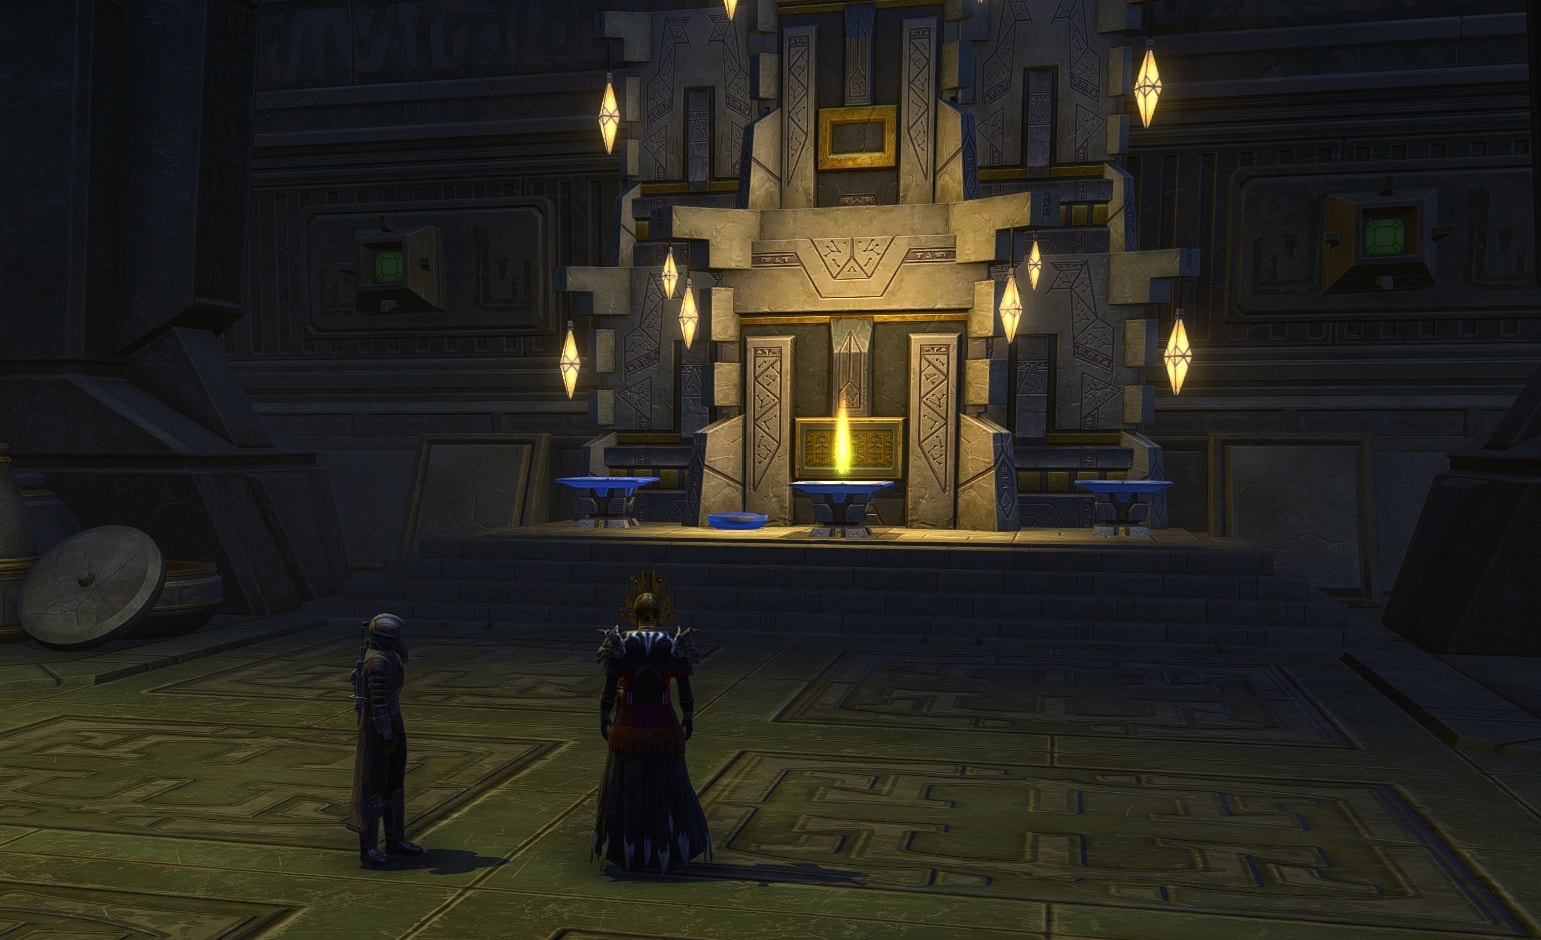
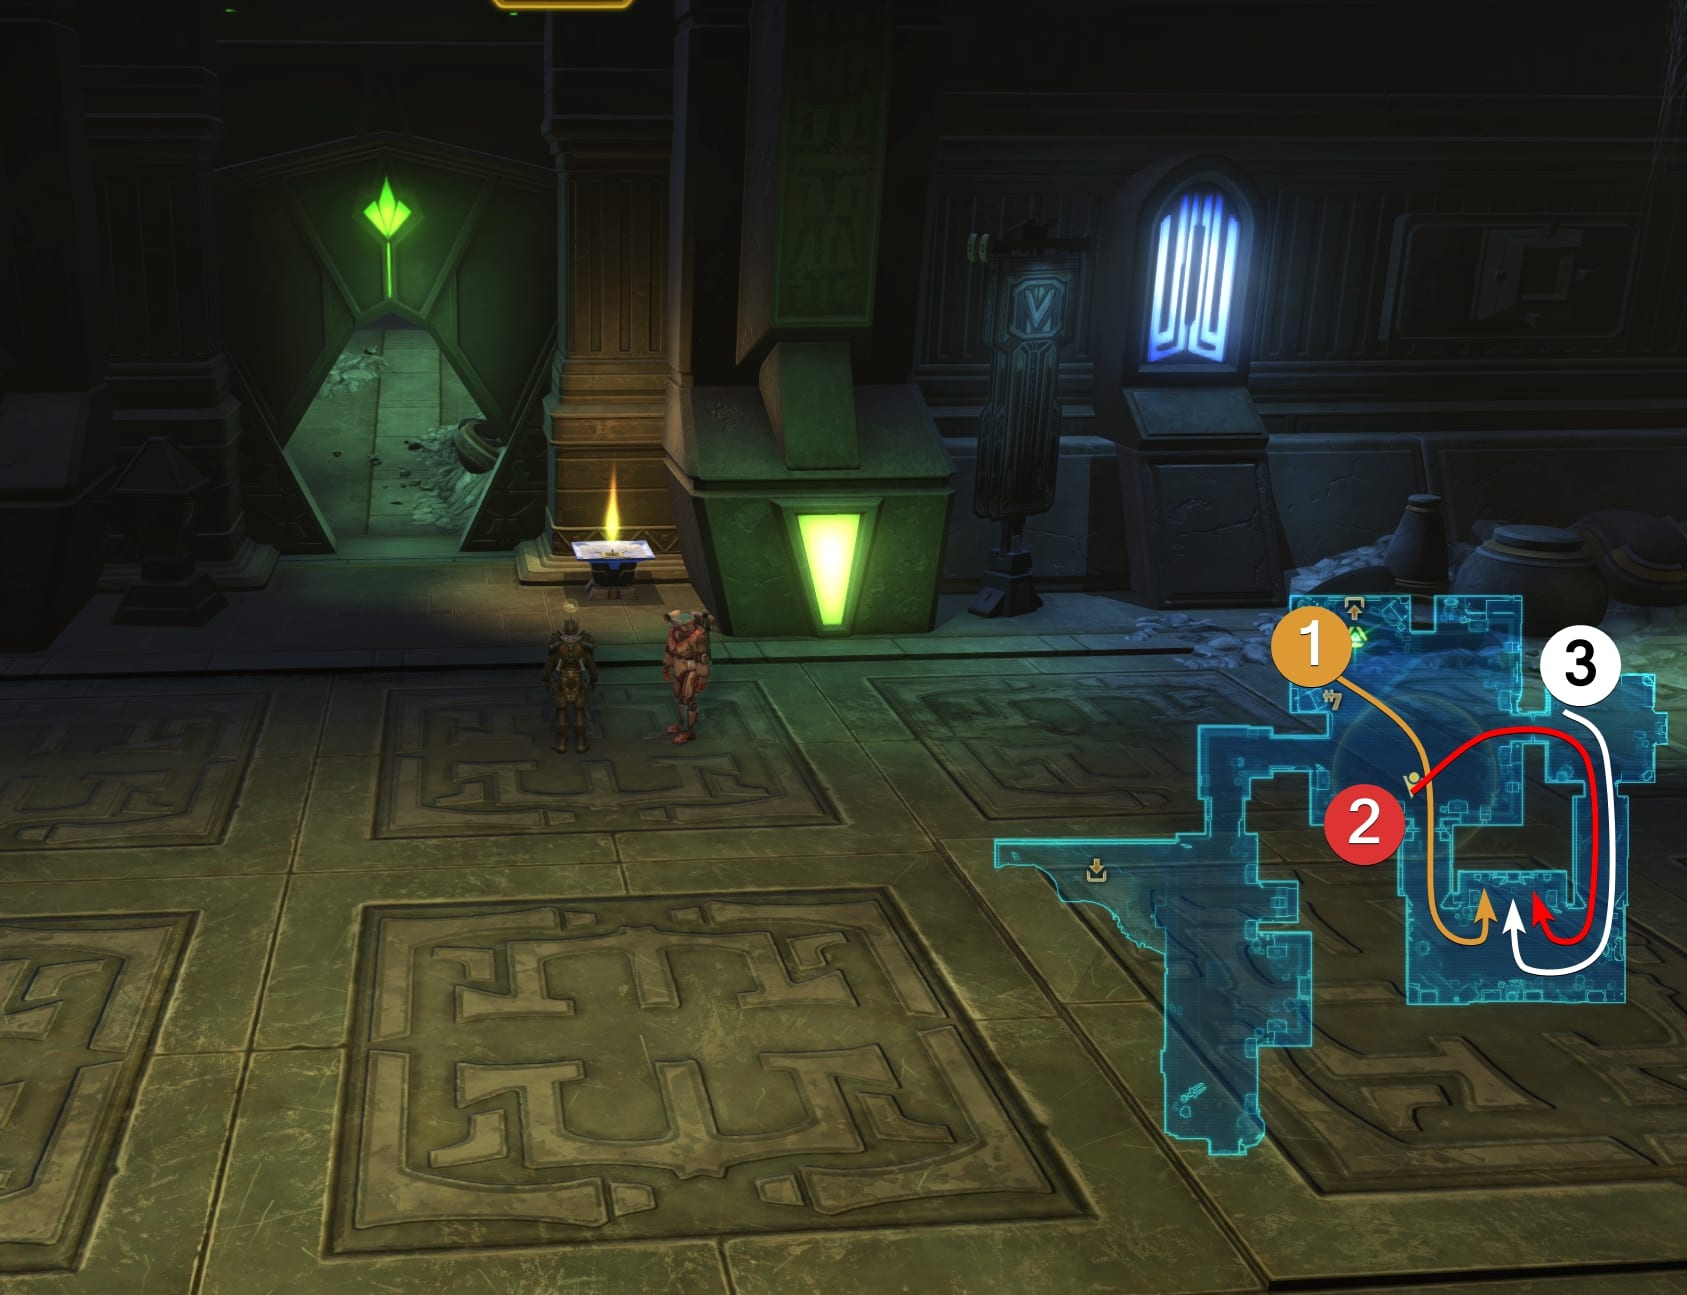
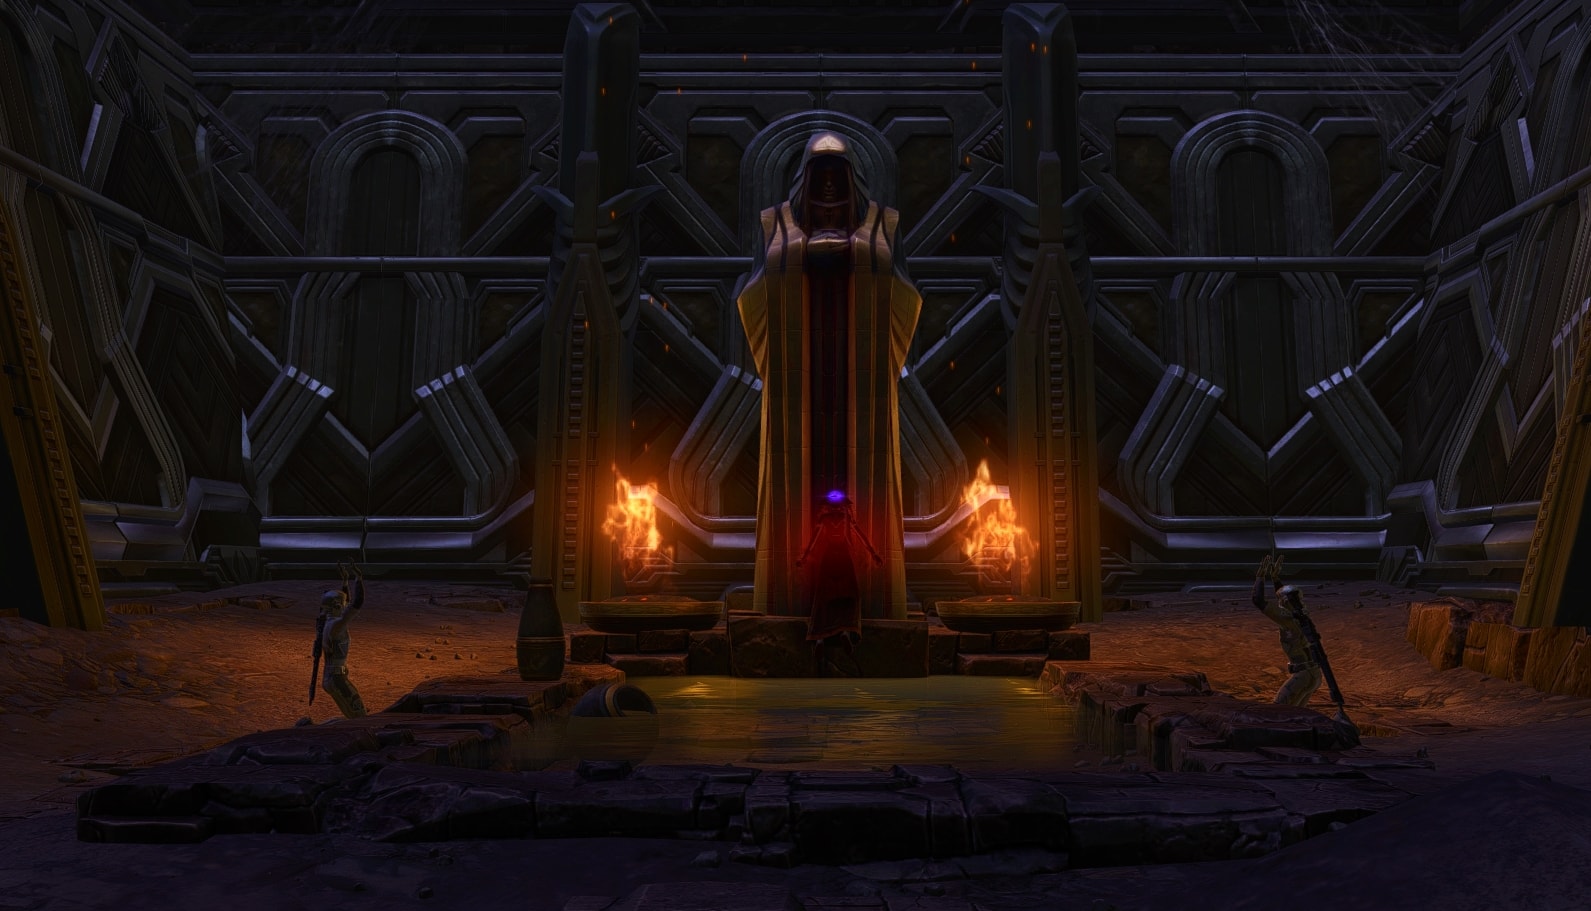
Early in the Flashpoint, you’ll come across a little puzzle called the Shrine of Light with 2 pyres that have a fire lit and a third that does not. This puzzle relates to the bonus boss, though you have to do a couple of extra steps to unlock access to the bonus boss, so read through the whole section before doing anything!

Your objective is to light all 3 pyres, but to do that, you need to locate a third flame.
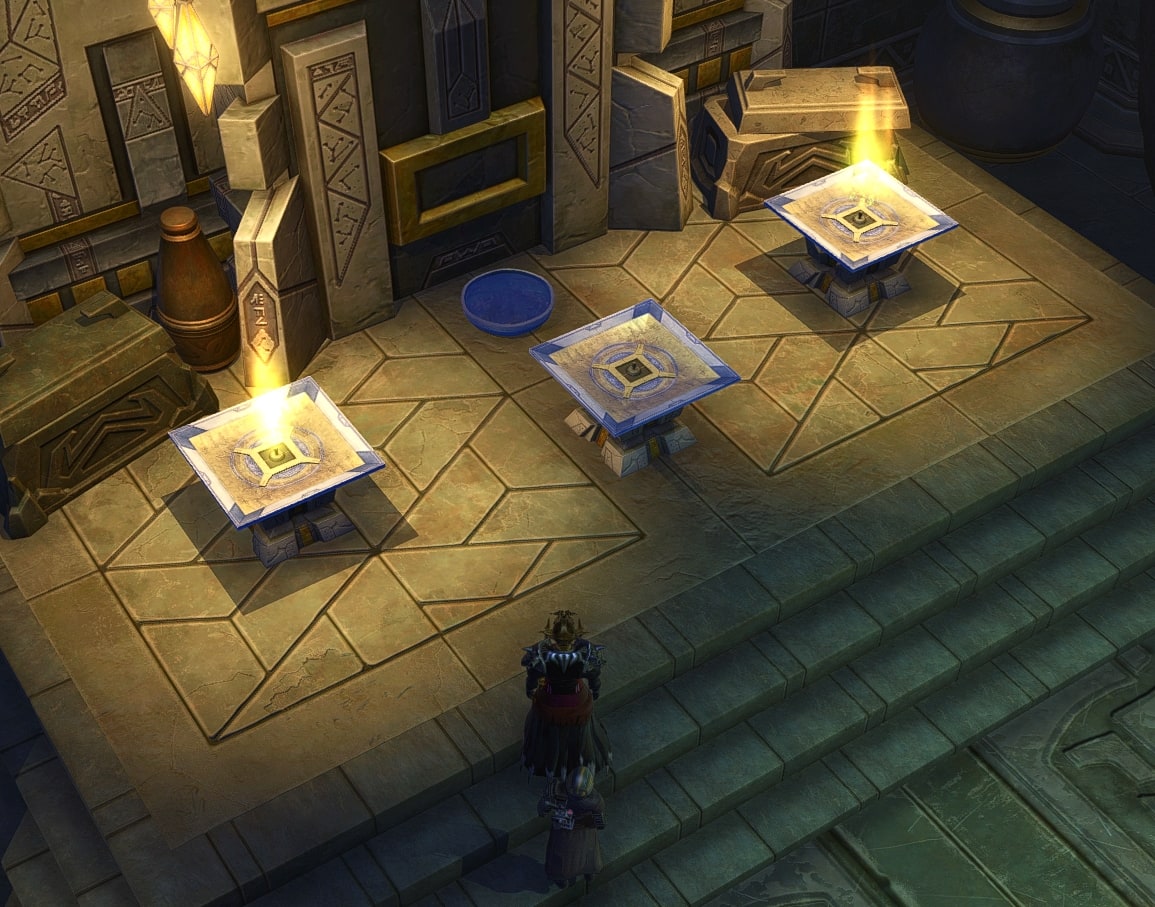
Clicking on one of the pyres will pick up the fire if it is there and you can move it to another pyre somewhere else. Clicking on the bowl on the ground will reset the pyres.
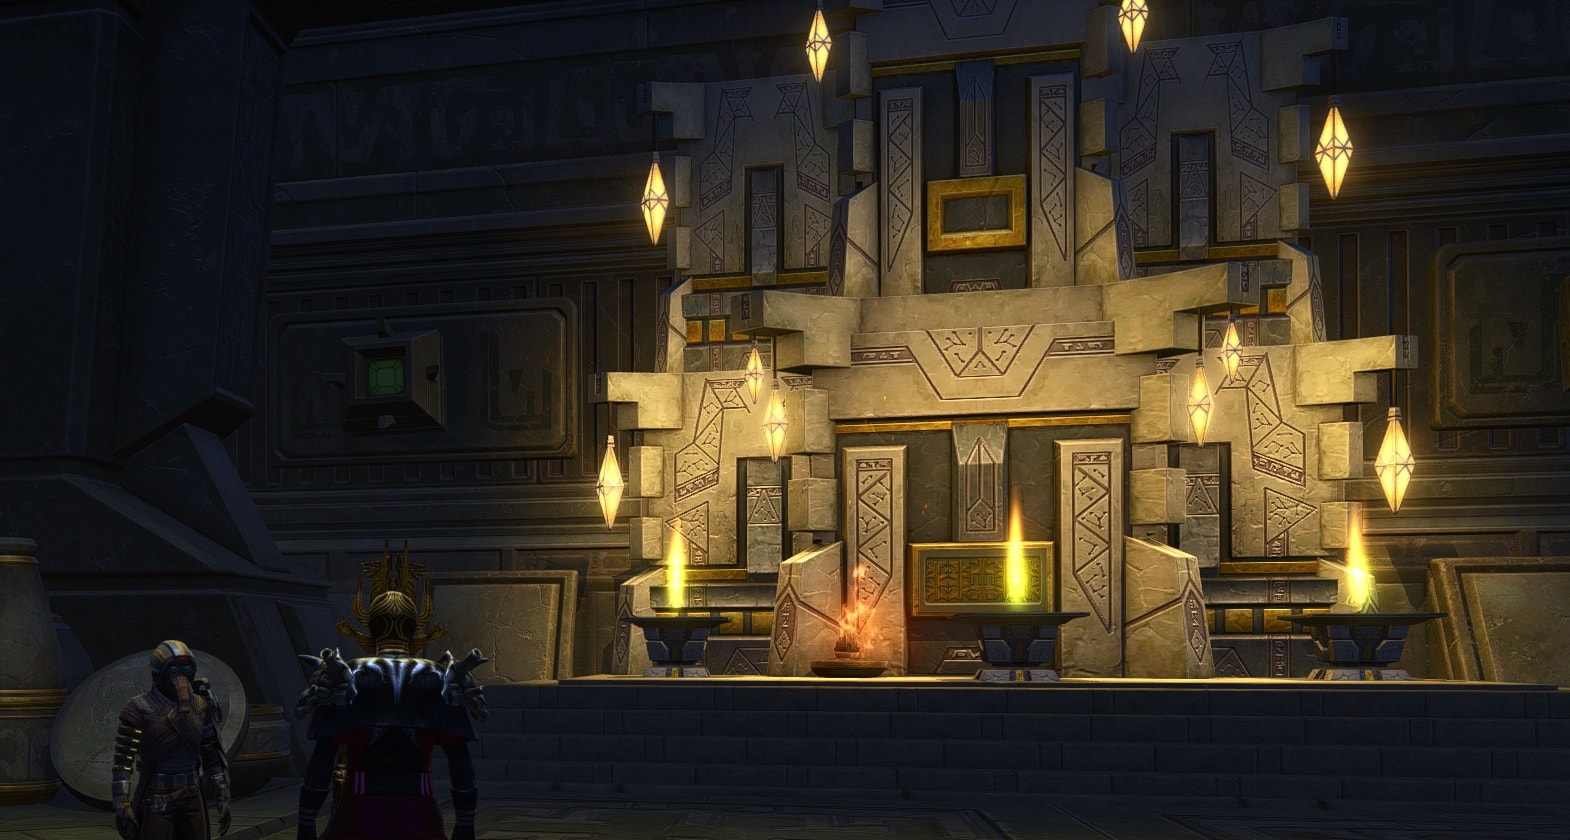
You want to take one of the flames and bring it over to the pyre by the door, which will open that door specifically.
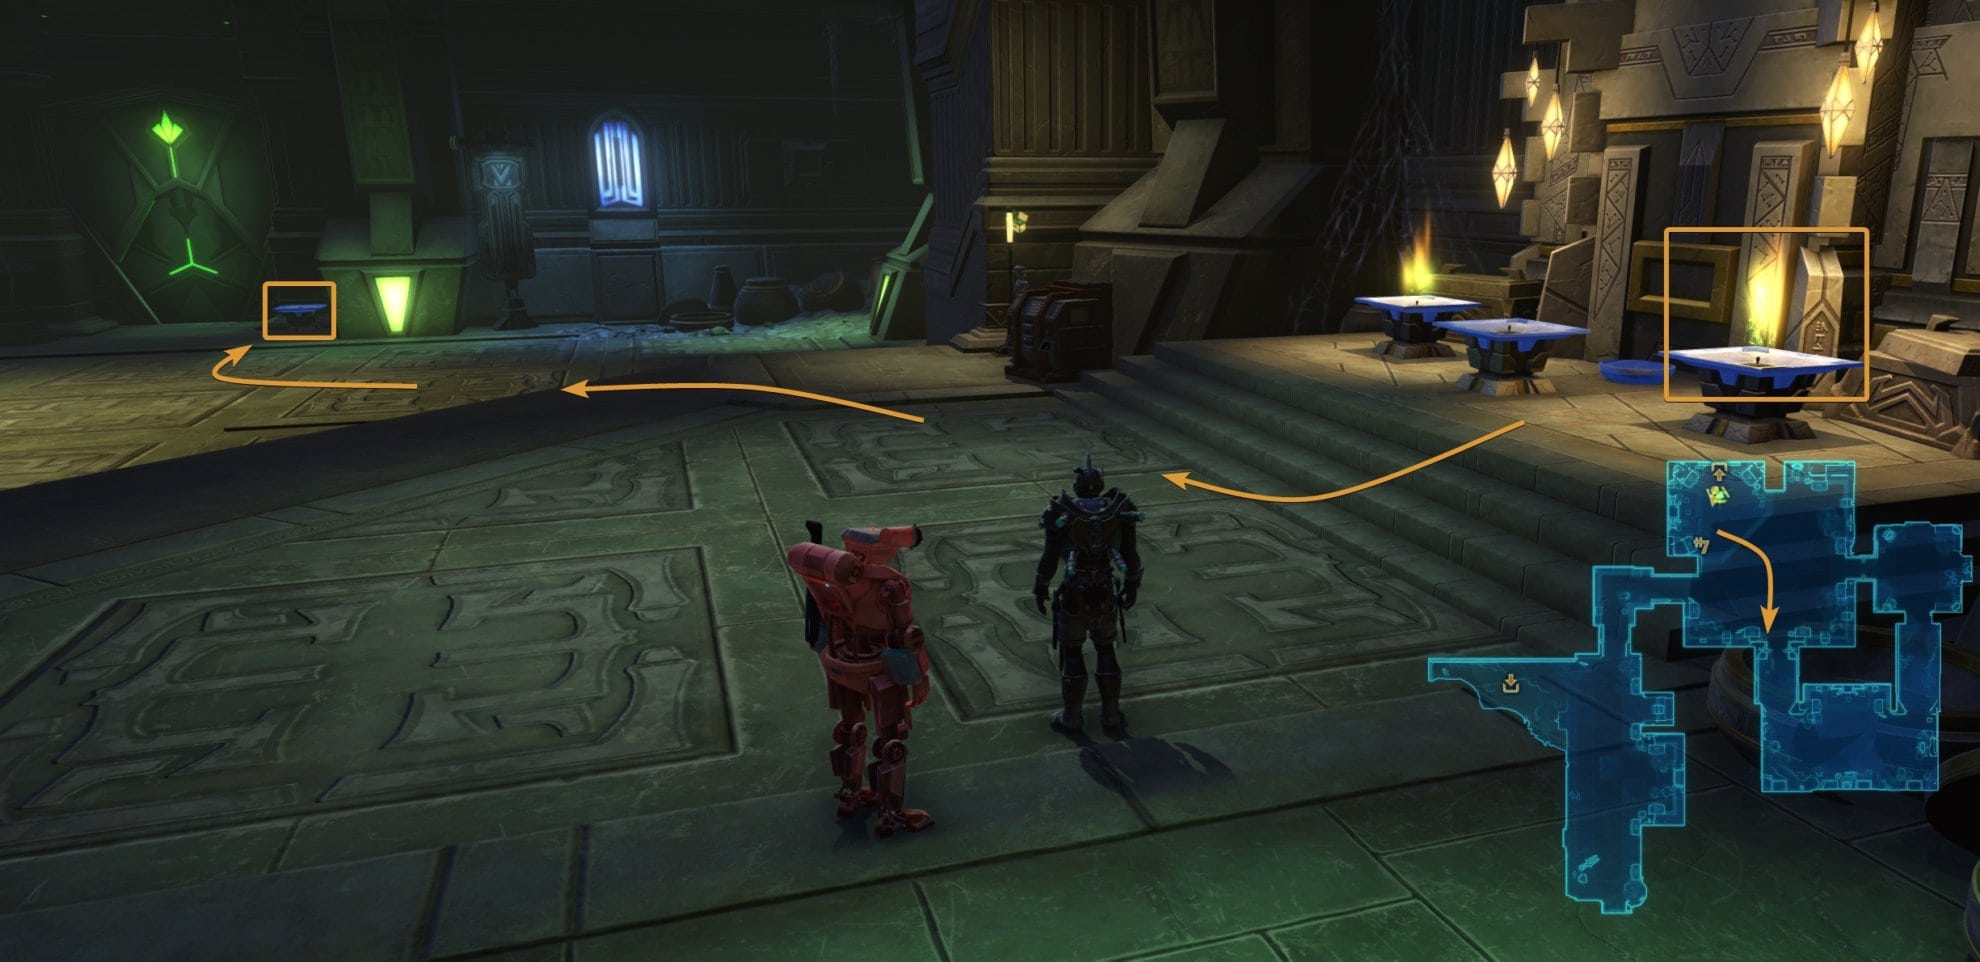
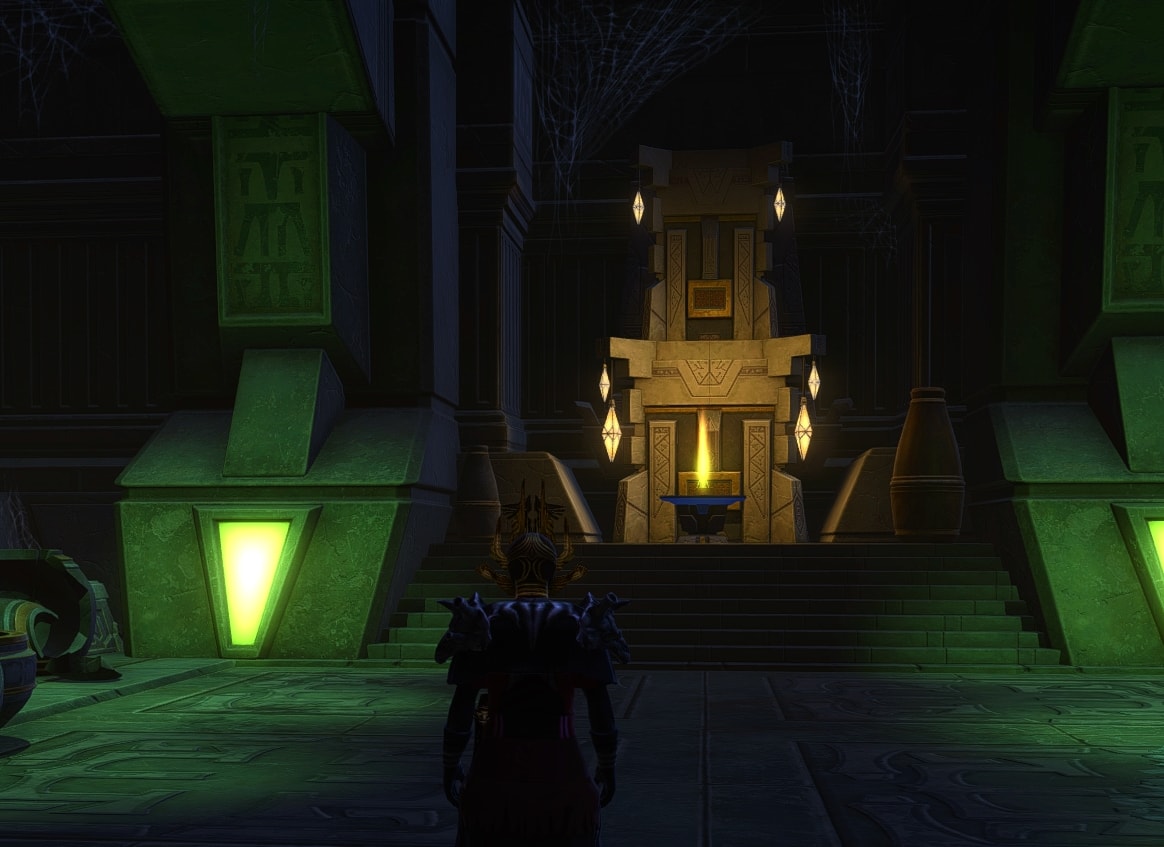
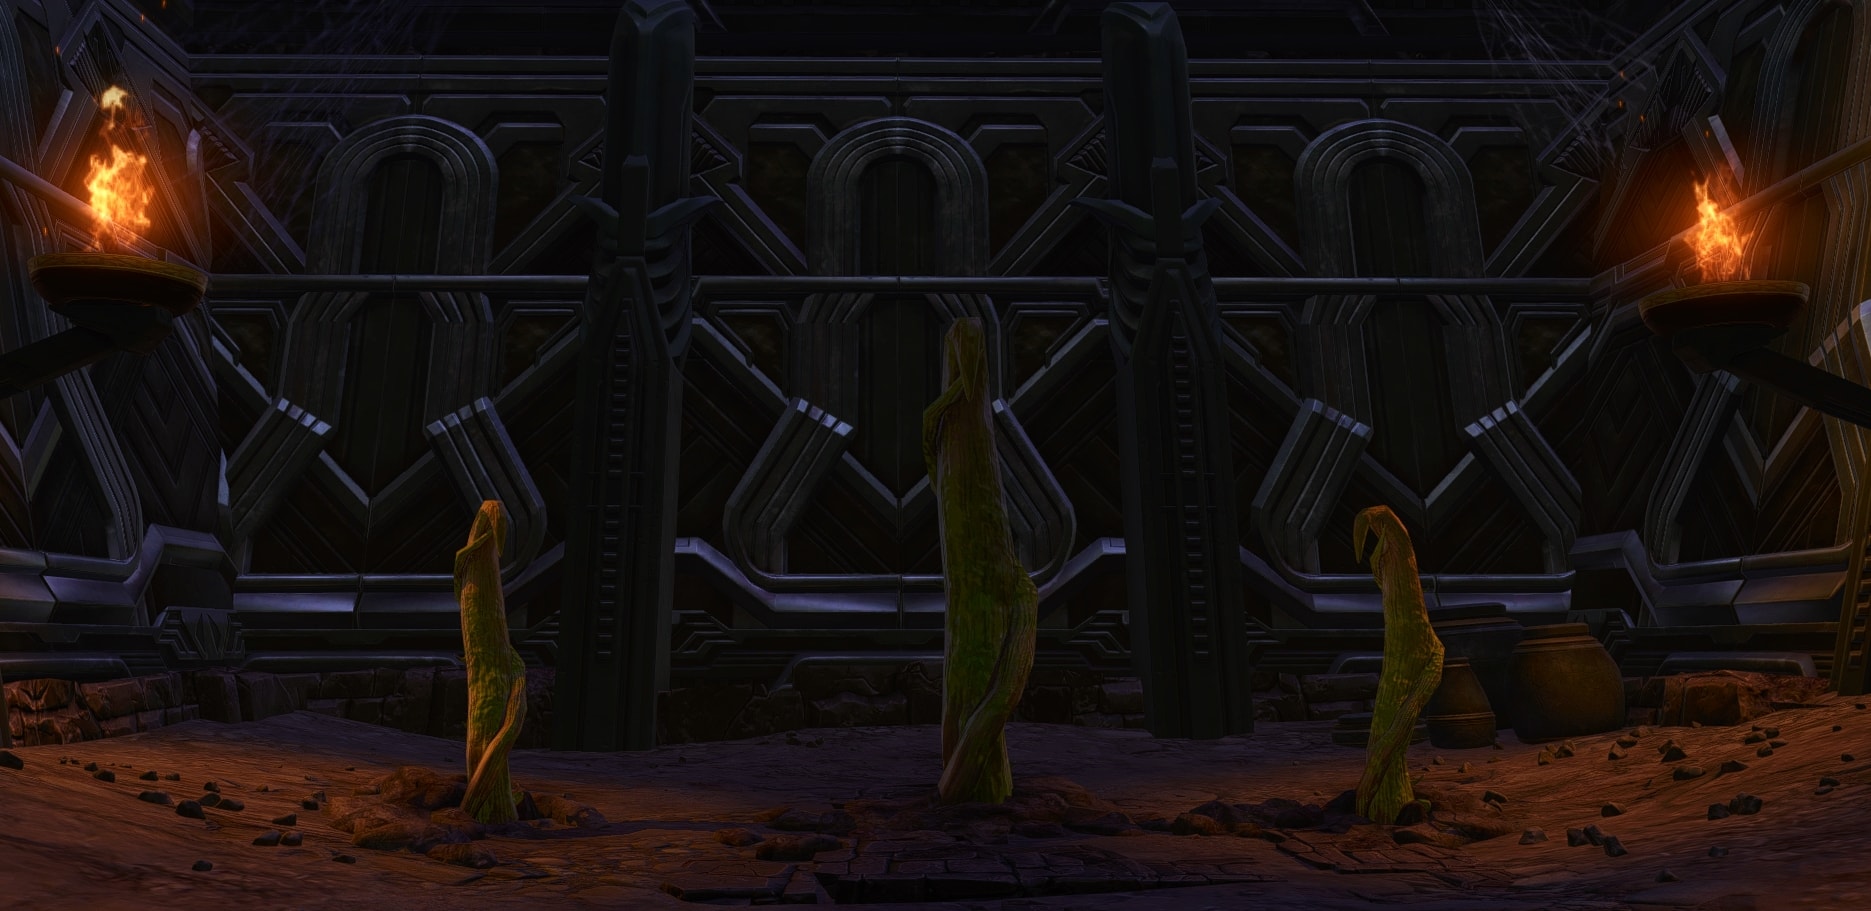
Once you go through that door, you’ll come across another shrine with a single pyre lit.
If you are okay with skipping the bonus boss, you can just bring that flame back to the other shrine and then bring back the one that is keeping the door open back after. It does not matter if the pyre is put back at its original pyre, you just need all 3 to be lit.
If you want to do the bonus boss, instead you’ll need to bring all 3 of the flames to the second shrine behind the locked door.
Bring the single flame from the second shrine around to the other door where there’s a pyre on the same side as the second shrine.
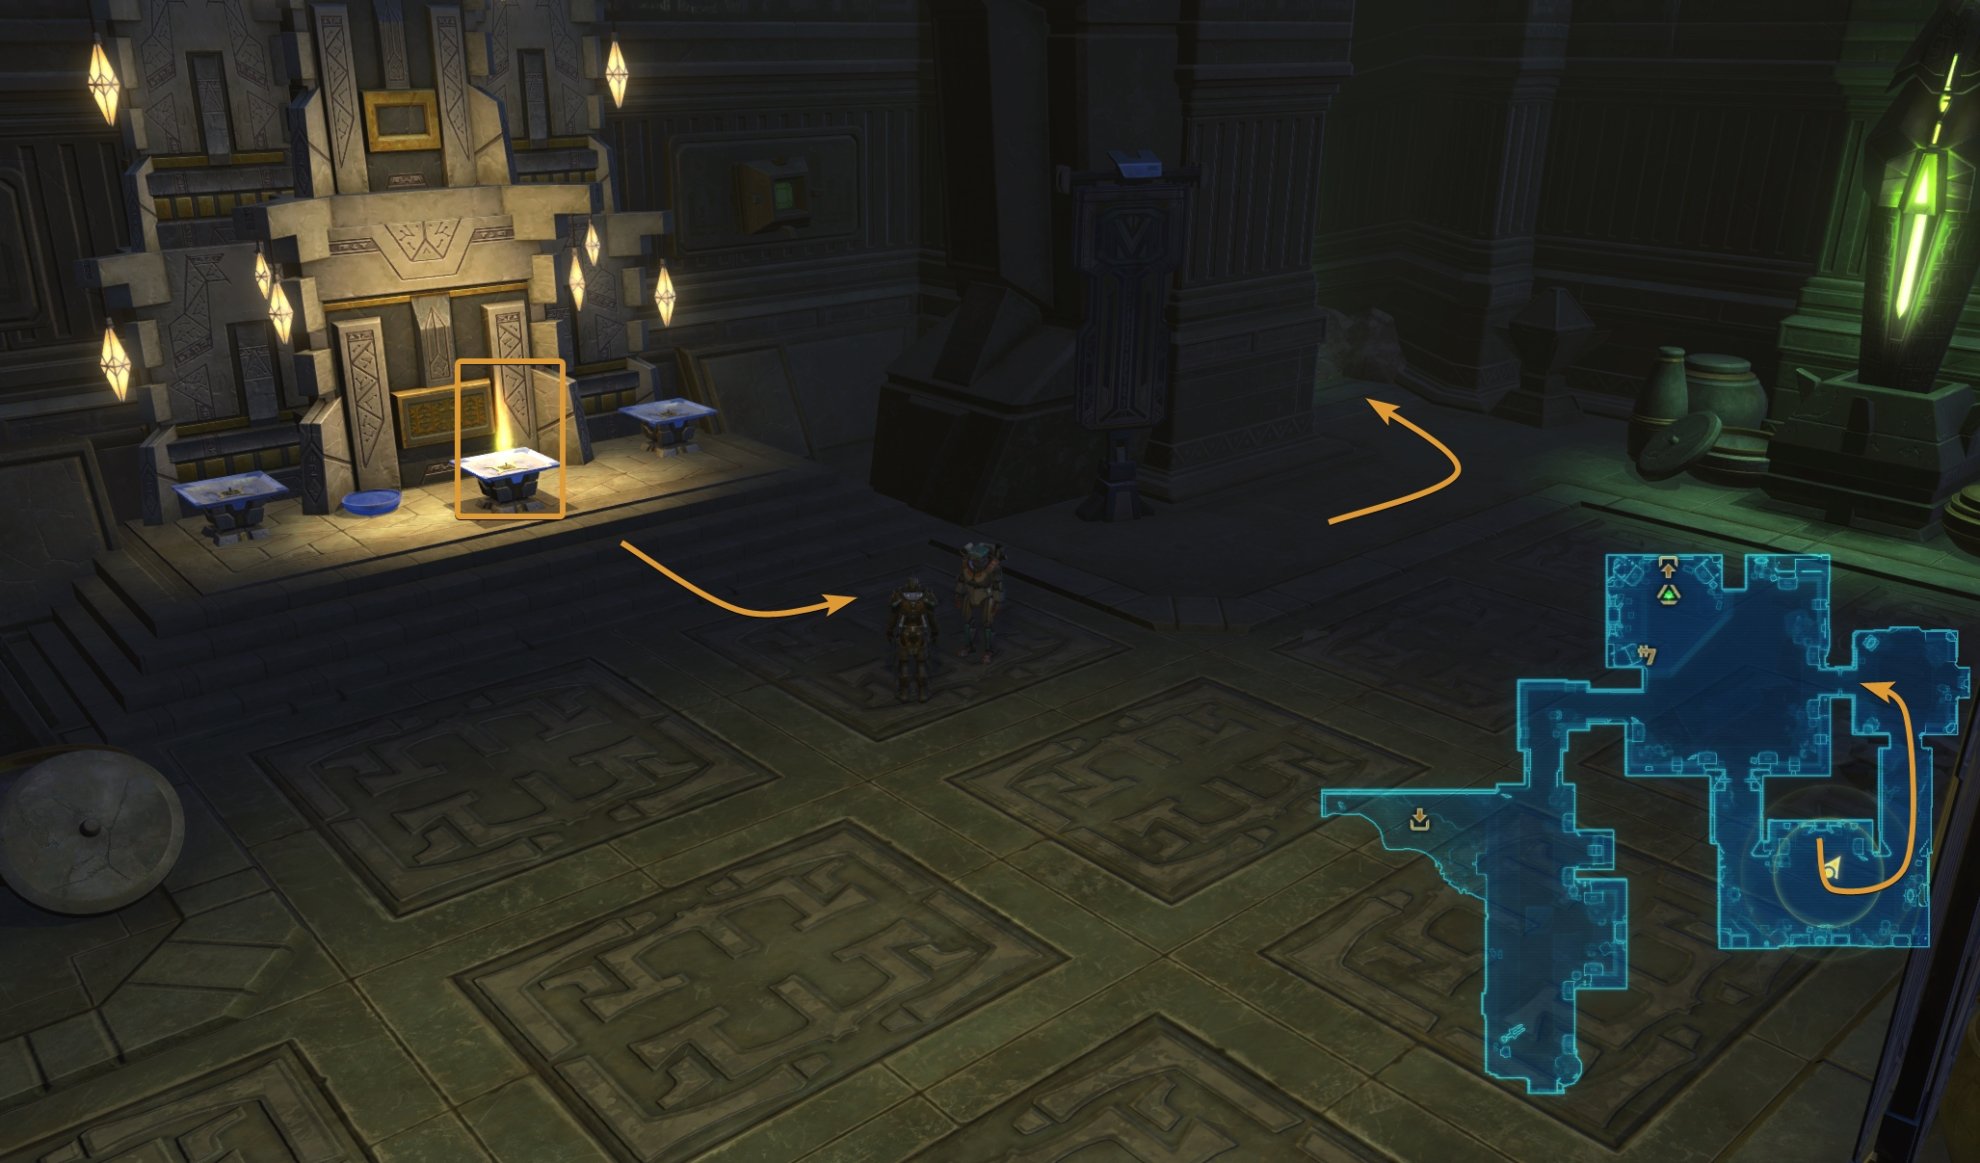
Then go grab the flames from the first shrine and from the first door. Bring them through the second door and put them on the second shrine along with the flame that kept the second door open.
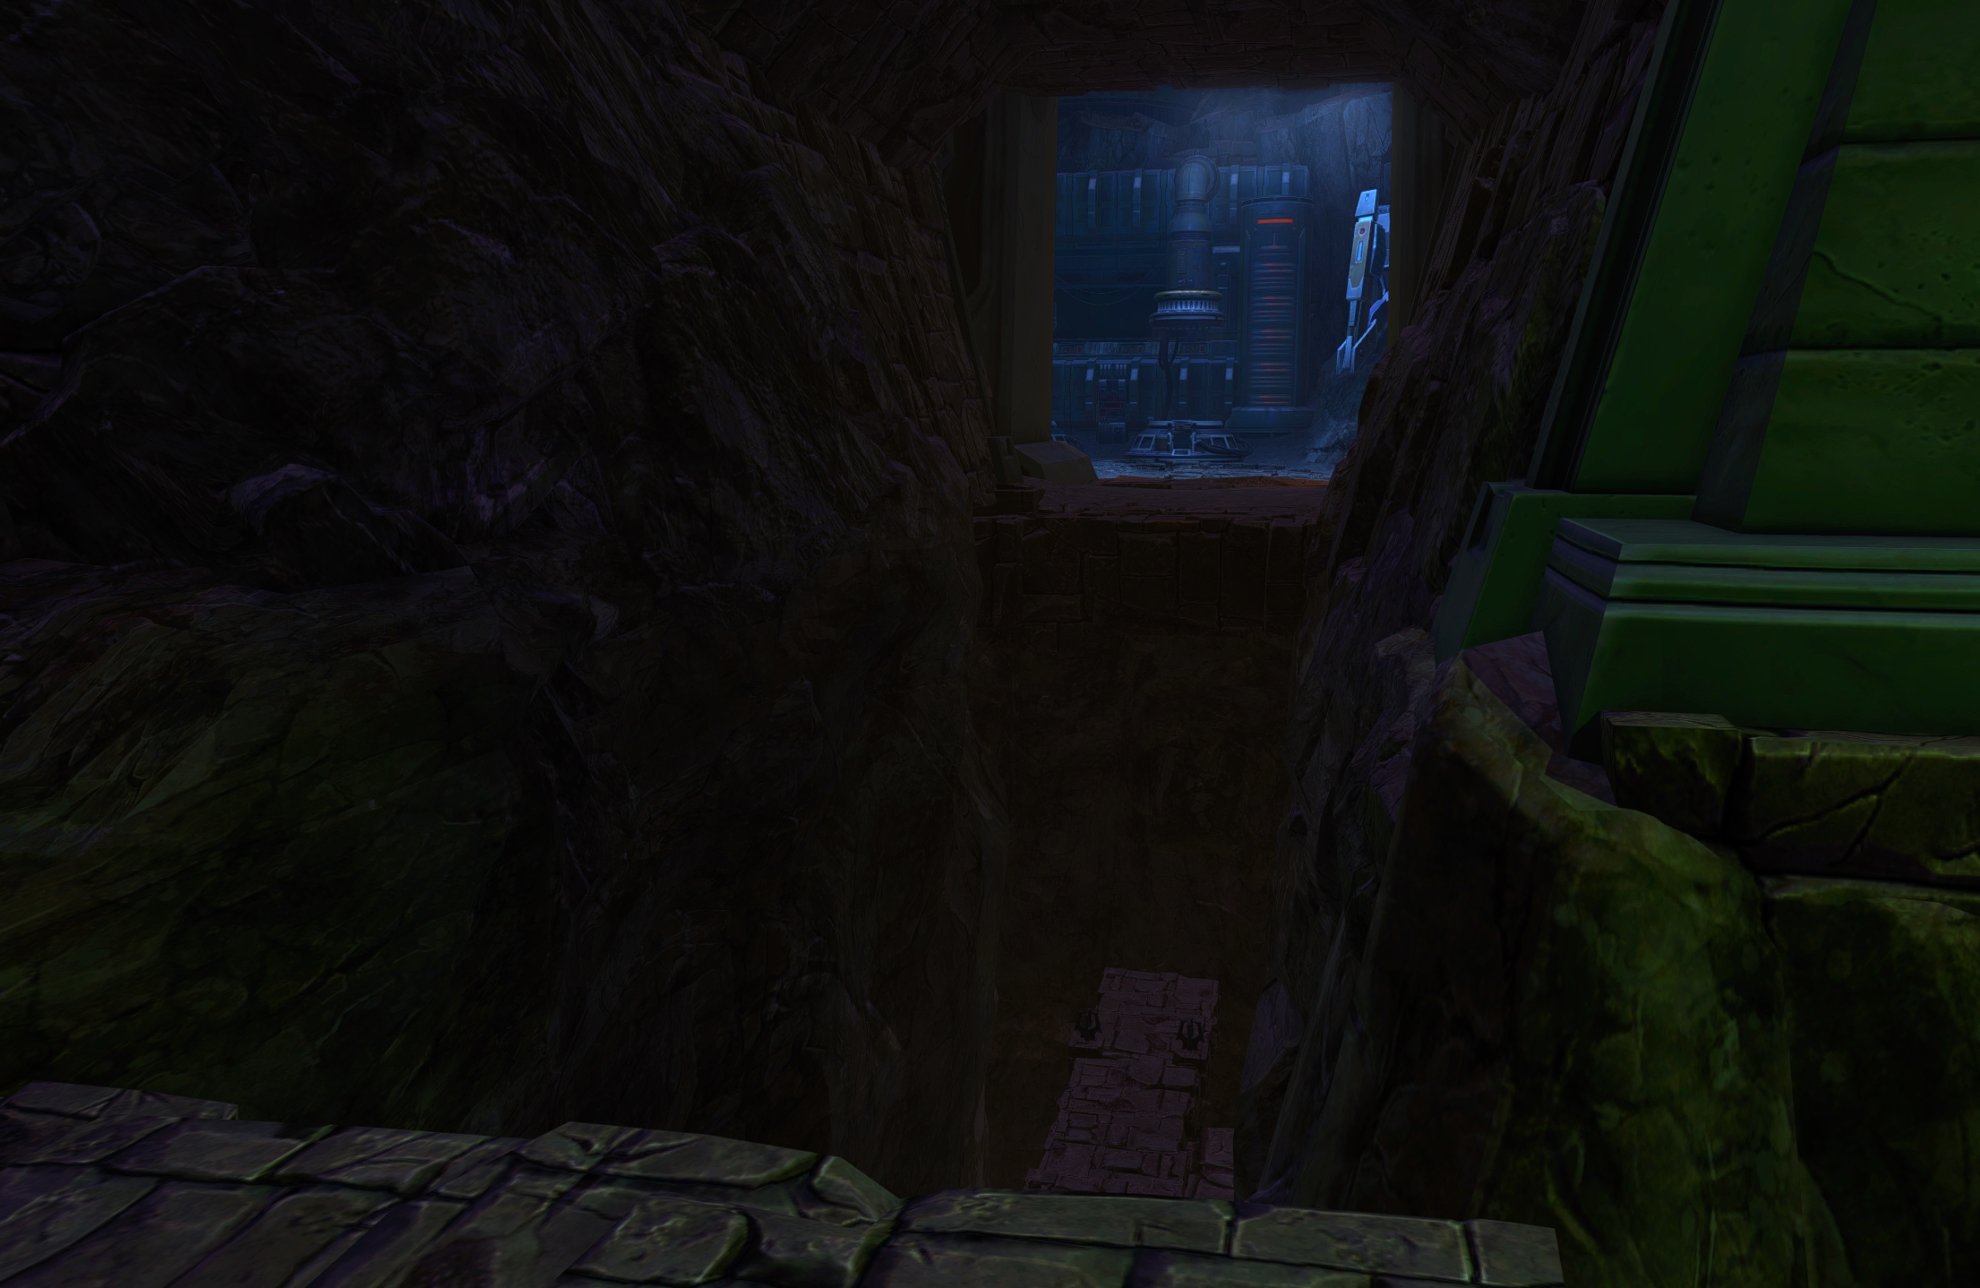
Doing so will open the way to the Alcove of Secret Light, which you have to carry with you to a point near the end of the FP past the second boss and place it on the pyre there.
The two previously closed doors (the ones you opened by bringing fire to their pyres), will remain open after you solve the puzzle.
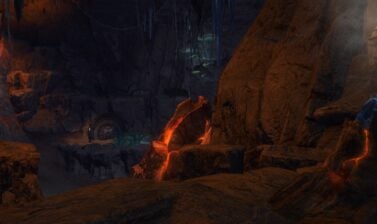
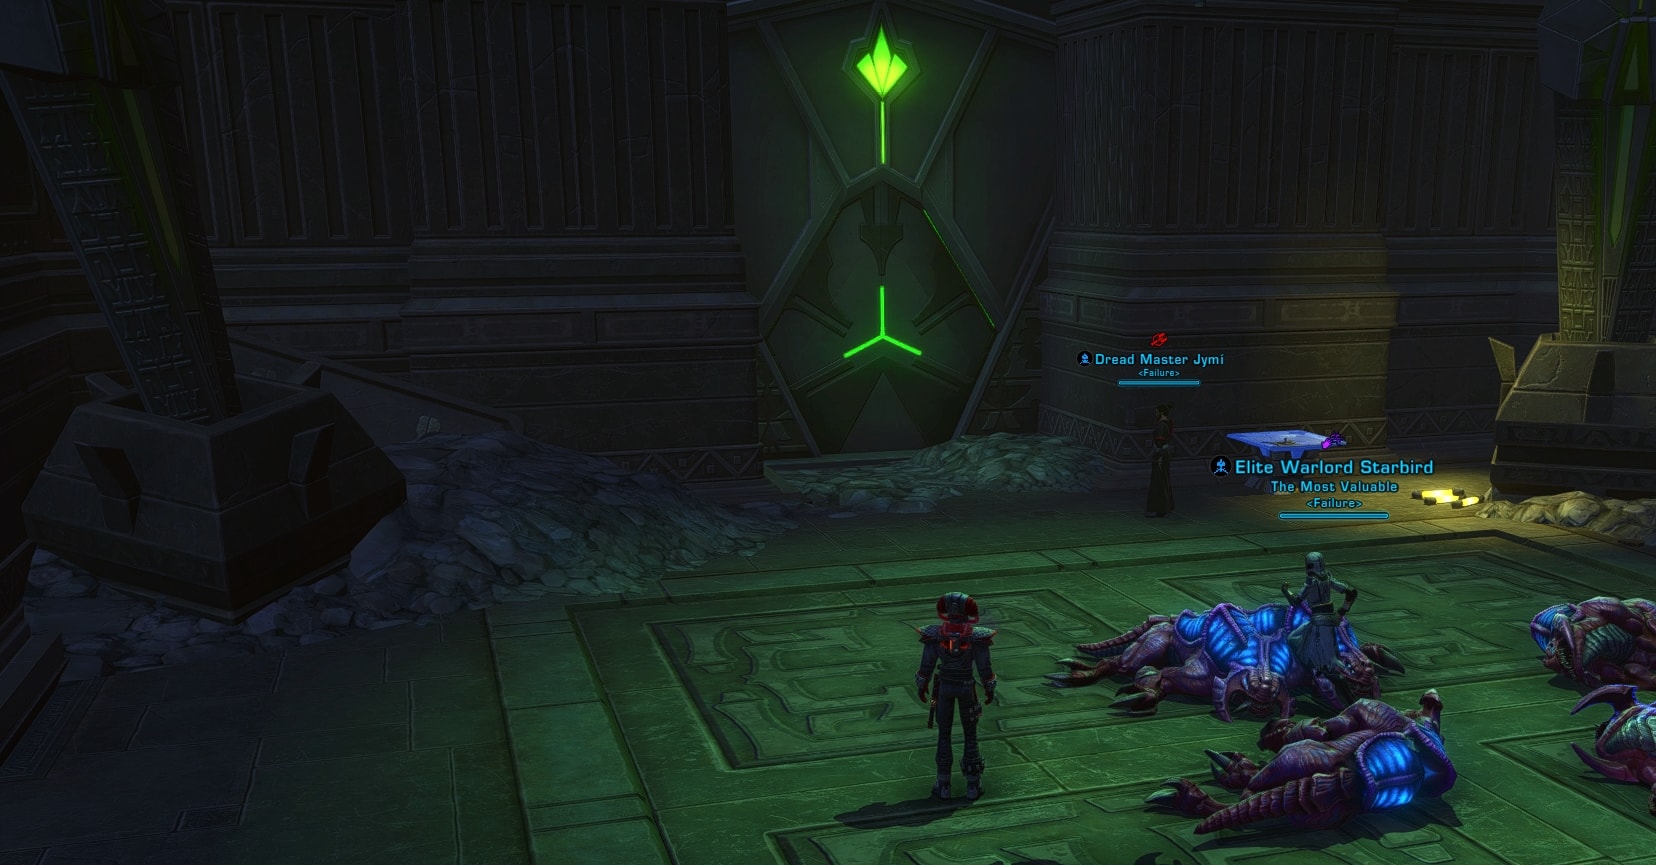
Placing the flame on that pyre will make a bridge to the bonus boss appear in a later part of the FP.


This whole bonus boss mission is a little different than the others because you have to complete the mission much sooner than when you actually fight the boss and it is entirely missable. Once you put all 3 flames in a pyre, you can’t undo it.
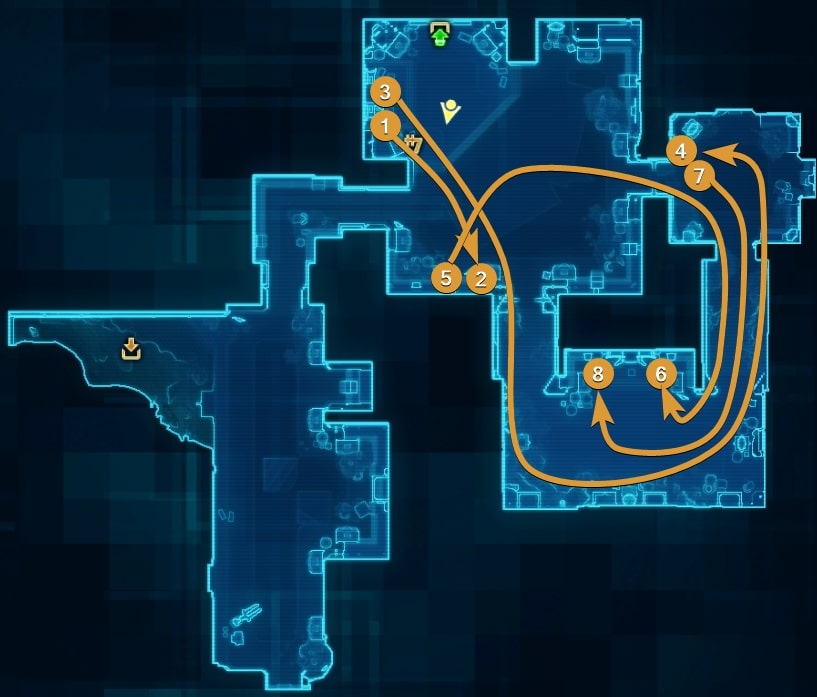
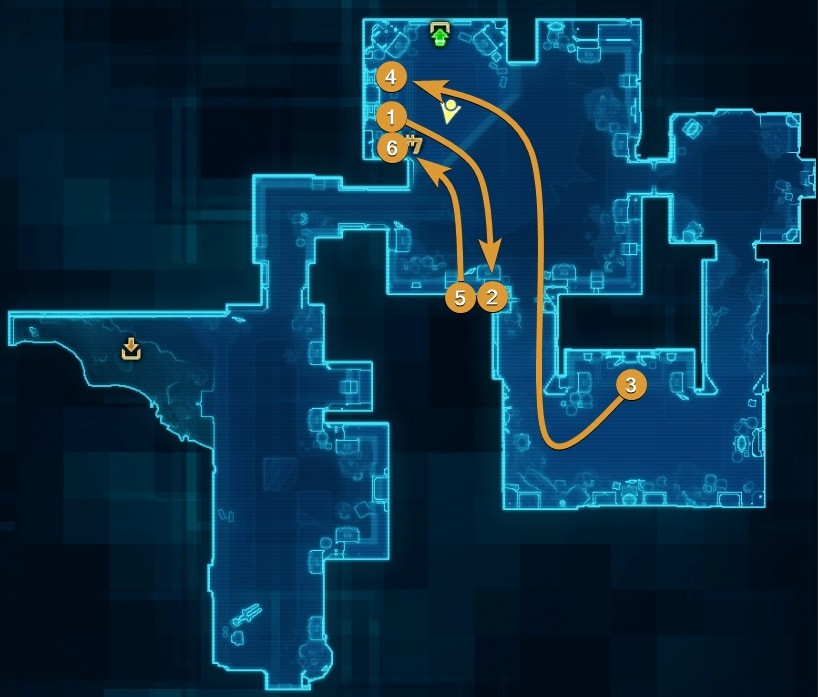
Flame Puzzle for Bonus Boss Path

This is a step-by-step summary of what and how you should do to solve the Shrine of Light Puzzle if you want to also unlock the Bonus Boss.
Instructions
- Pick up flame from the first shrine.
- Place flame in the pyre by the door.
- Take another flame from the first shrine.
- Take flame through the door, take it through the first door pass the second Shrine. Place it in the pyre by the second door.
- Take flame from the first door and bring it through the second door.
- Place the flame in the second shrine.
- Take flame from the second door pyre.
- Place the flame in the second shrine.
Flame Puzzle without Bonus Boss
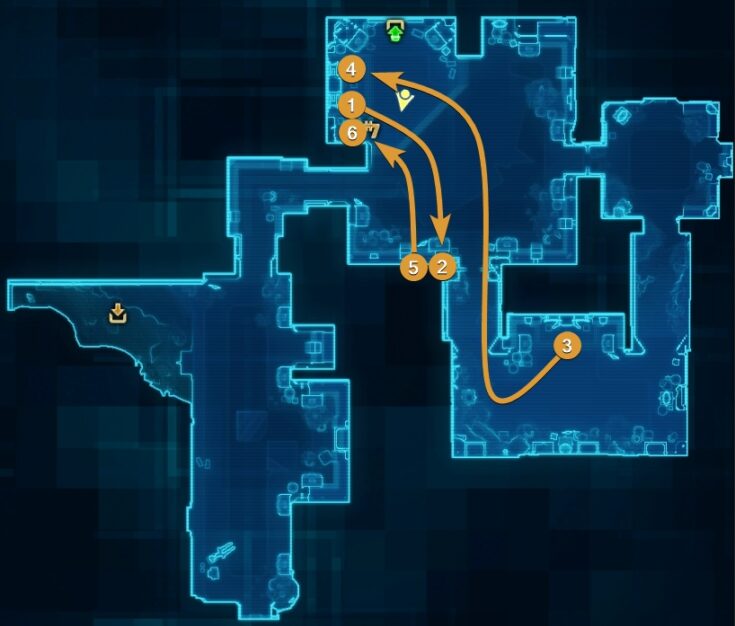
This is a step-by-step summary of what and how you should do to solve the Shrine of Light Puzzle if you want to progress through the Flashpoint without accessing and facing the Bonus Boss.
Instructions
- Pick up flame from the first shrine.
- Place flame in the pyre by the door.
- Grab flame from the second shrine.
- Place the flame from the second shrine in the first shrine.
- Grab flame from door pyre.
- Put the flame back in the first shrine.
Below you can watch a quick video walkthrough showing you how to solve the Flame Puzzle.
Boss Mechanics and Strategies
Note: Each boss has a dedicated achievement that is similar to the Marks of Mastery found in newer Operations. Each of these achievements is explained alongside each boss rather than at the end with the rest of the achievements.
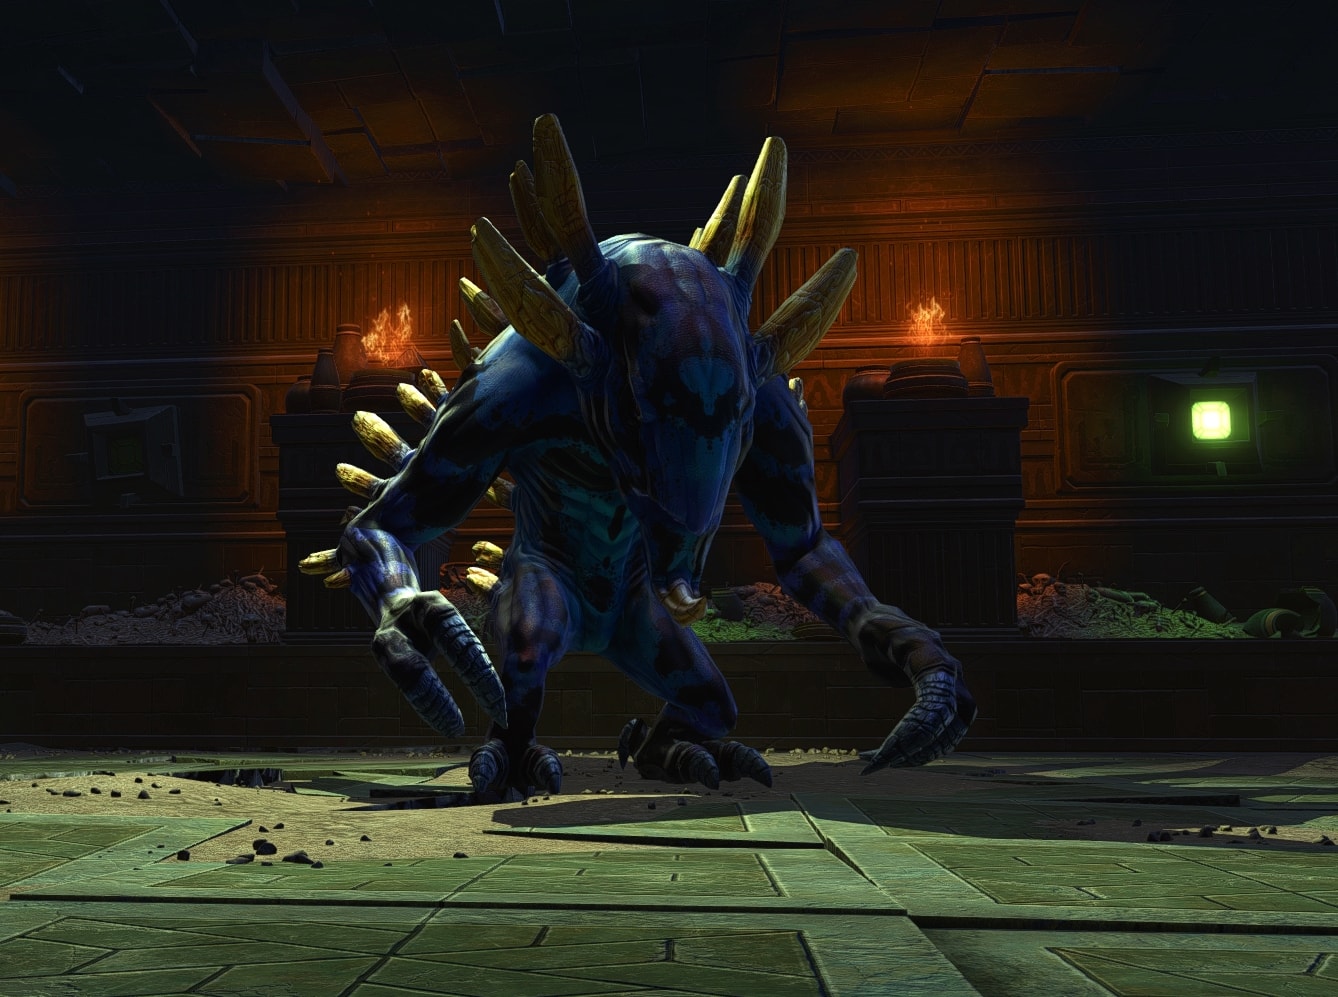
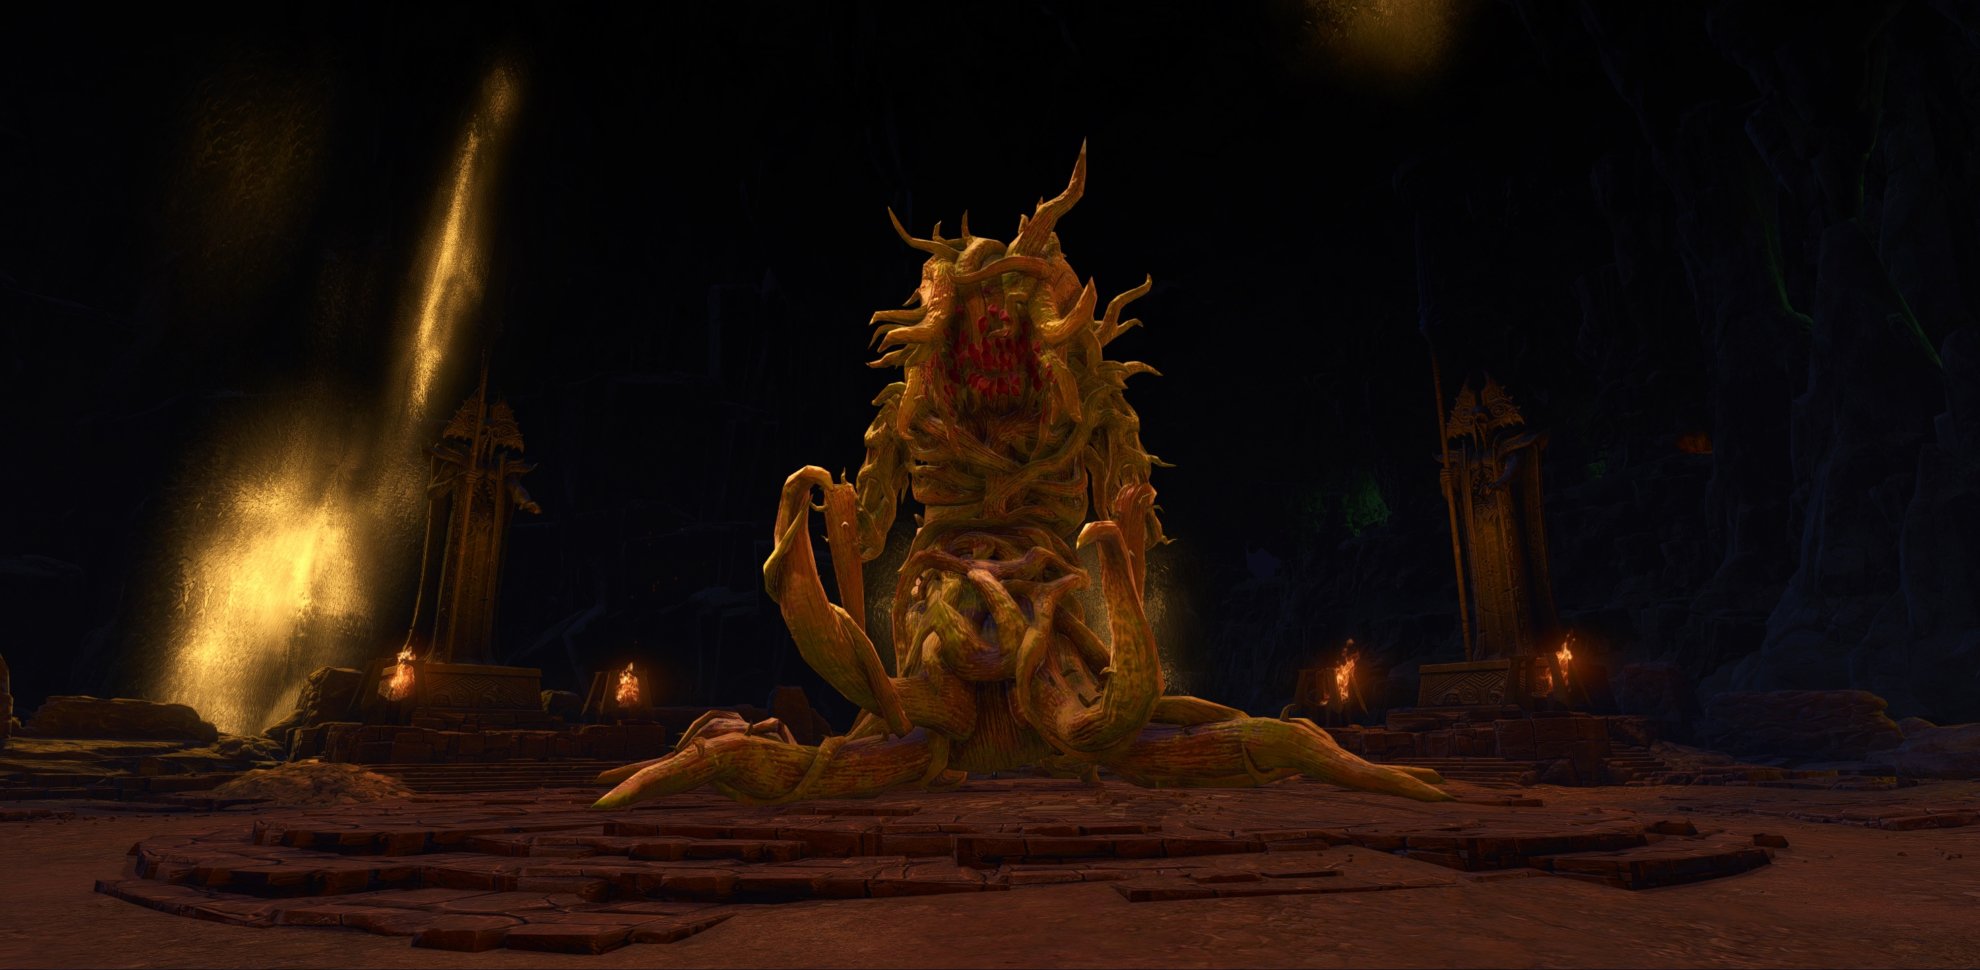
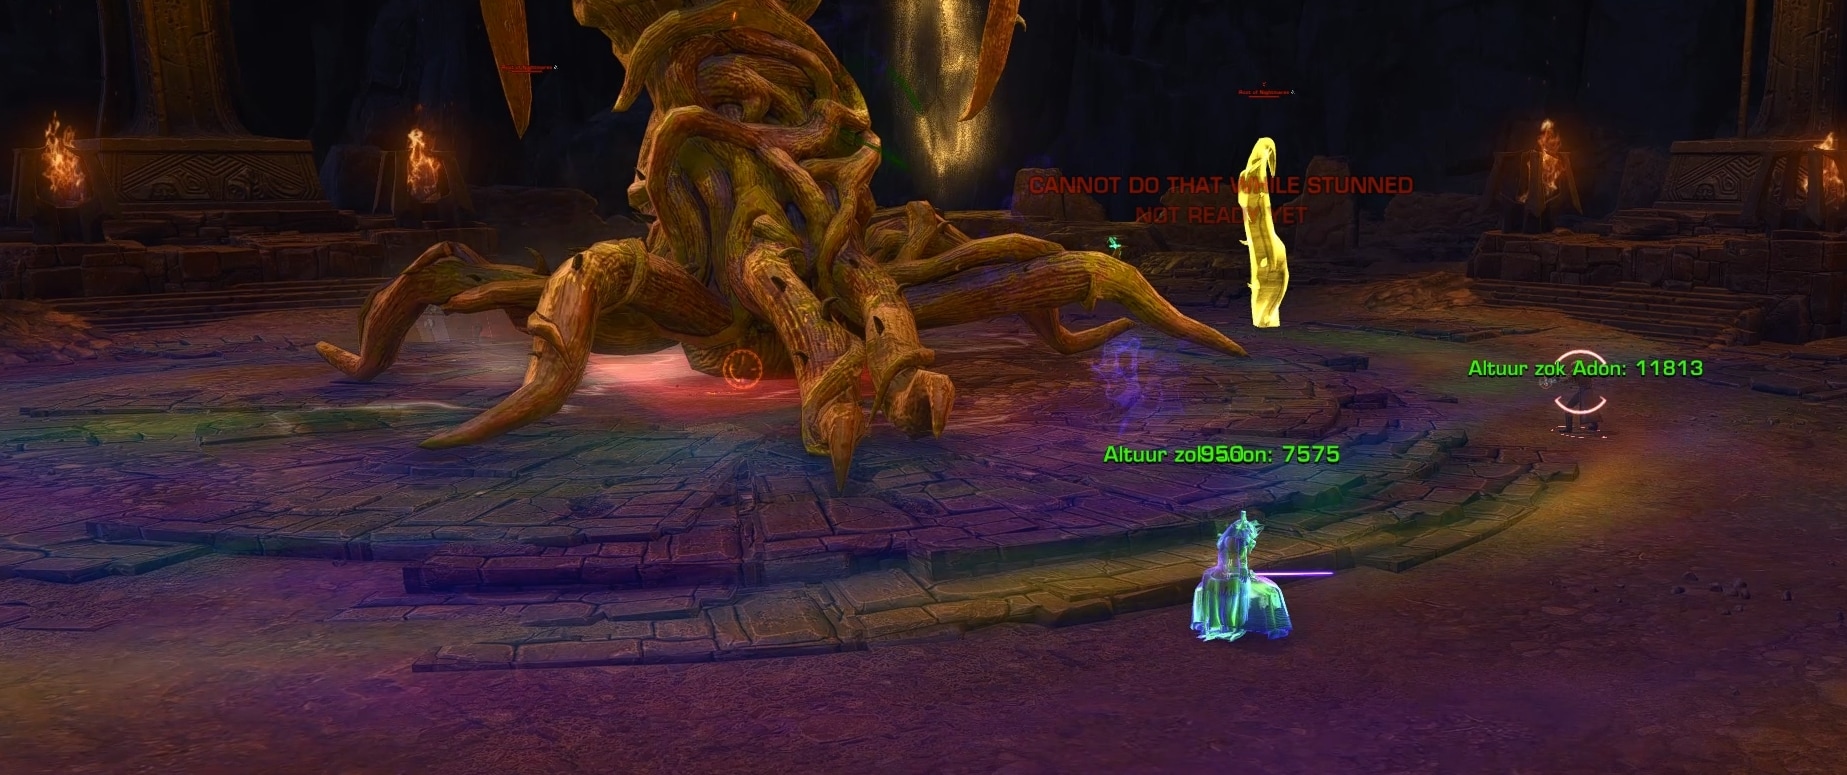
Corrupted Vorantikus
The Corrupted (not necessarily Savannah) Vorantikus is the gargantuan first boss in the Shrine of Silence.
Veteran Mode Mechanics
The Corrupted Vorantikus has 3 mechanics, a conal attack, a multi-step circle-dodging attack, and hibernation mode.
Conal
The Corrupted Vorantikus will periodically telegraph a big red conal at a player in the group. It does not follow the target’s movement. After a short period, the Vorantikus will do a scream-like attack that damages and knocks back anyone still standing in the cone.
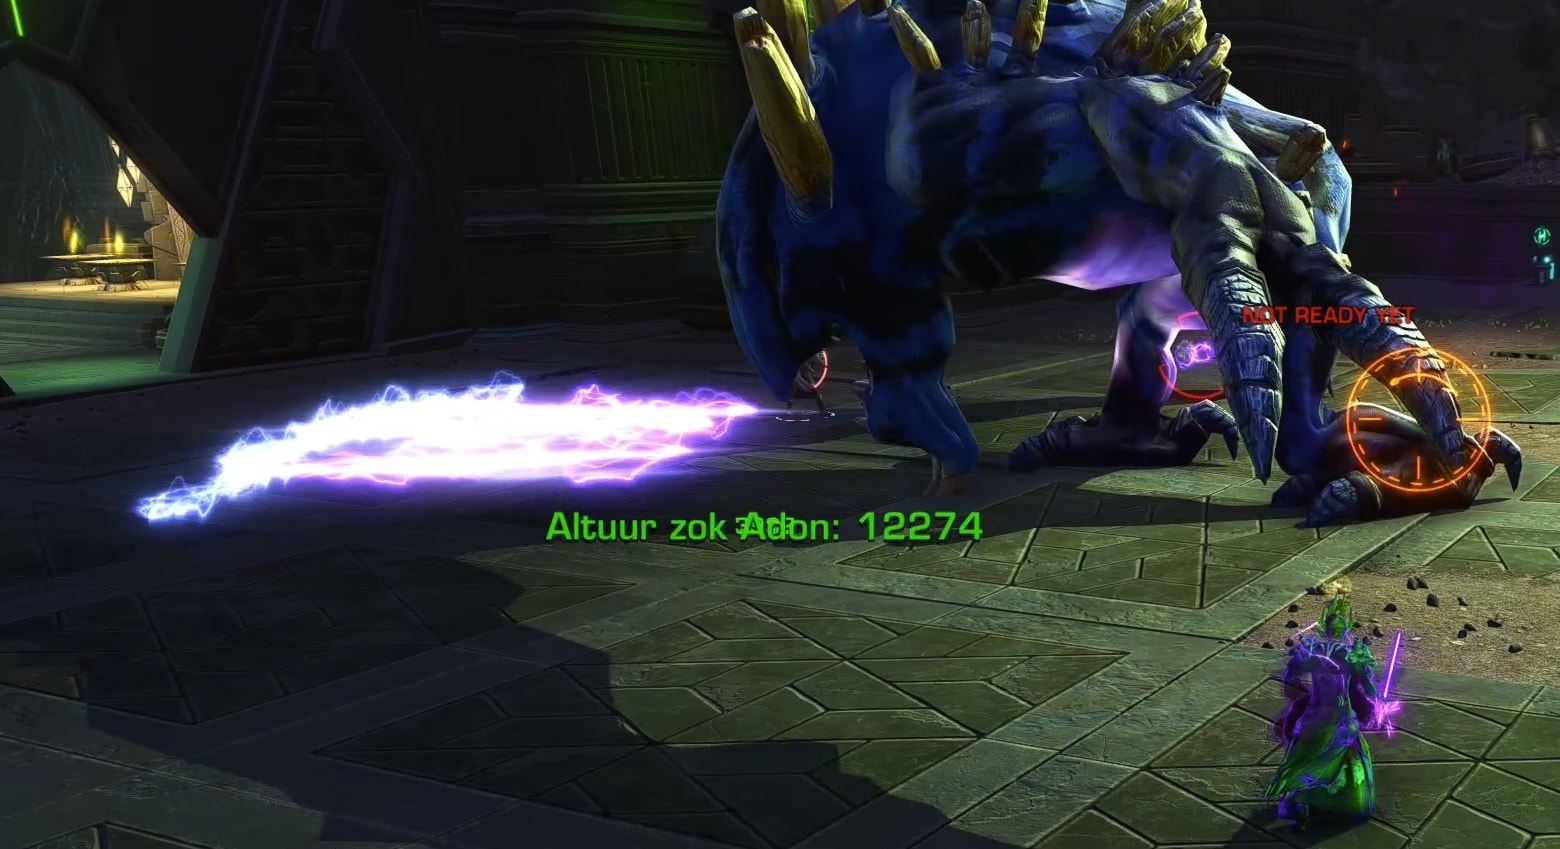
All you have to do is get out of the cone before the damage goes out. You can minimize the chance of having to move if you position yourself on a different side of the boss from everyone else.
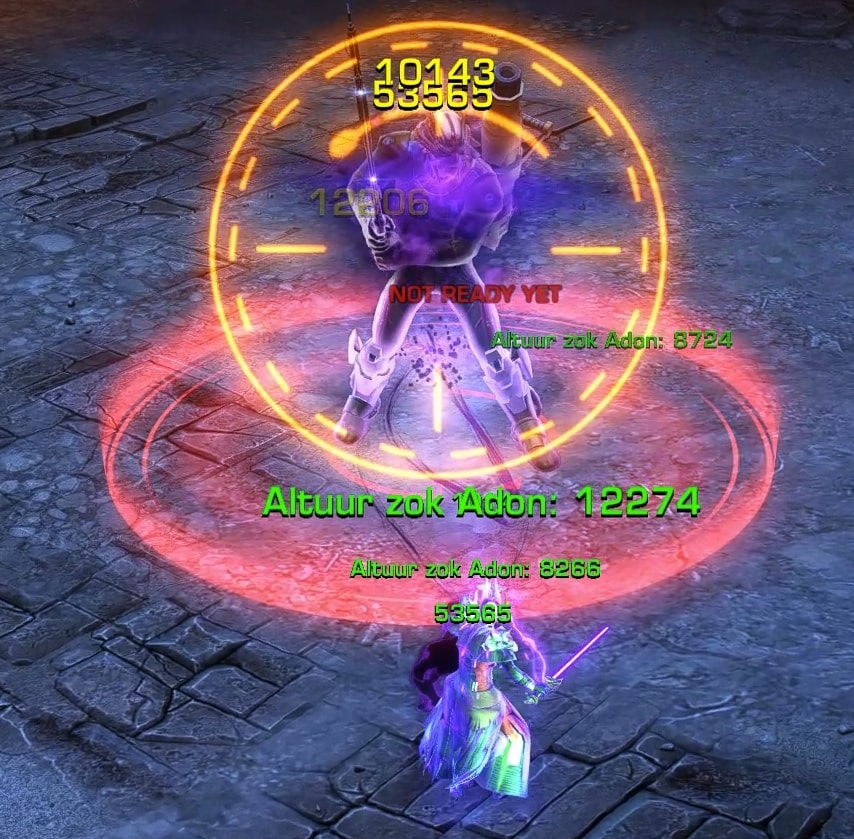
Trample
The Corrupted Vorantikus will periodically telegraph a series of 3 circles on the ground around itself before slamming the ground after each circle. If you’re within the red region, you’ll take damage. If you’re within the white region or outside of the circle you’re safe. Each circle is large than the last and has a different area that is safe.
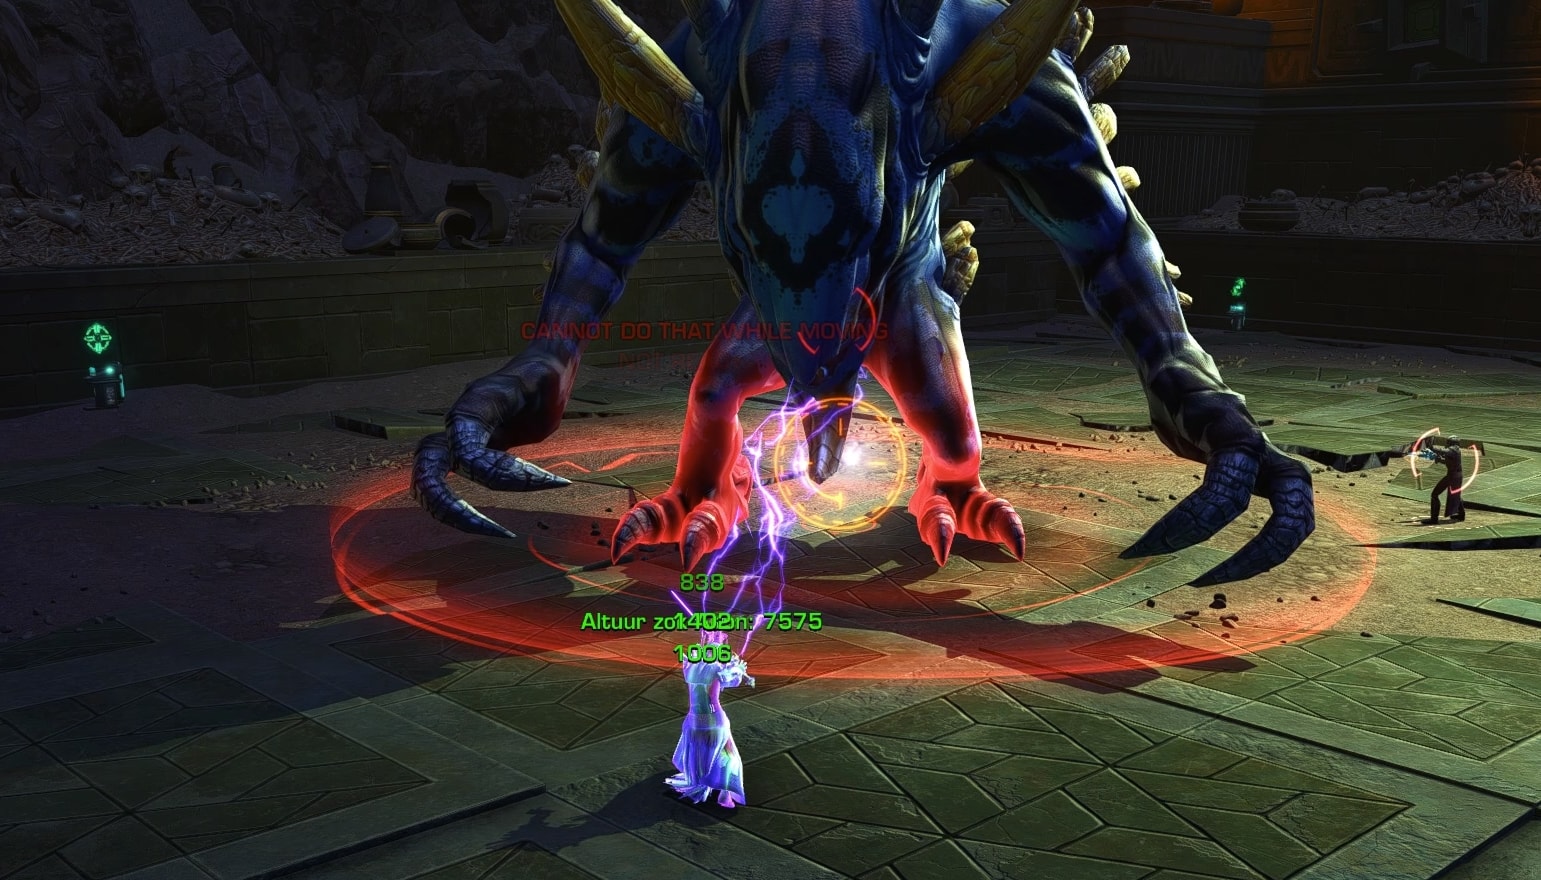
The first circle is the smallest, and the safe area is outside of it.
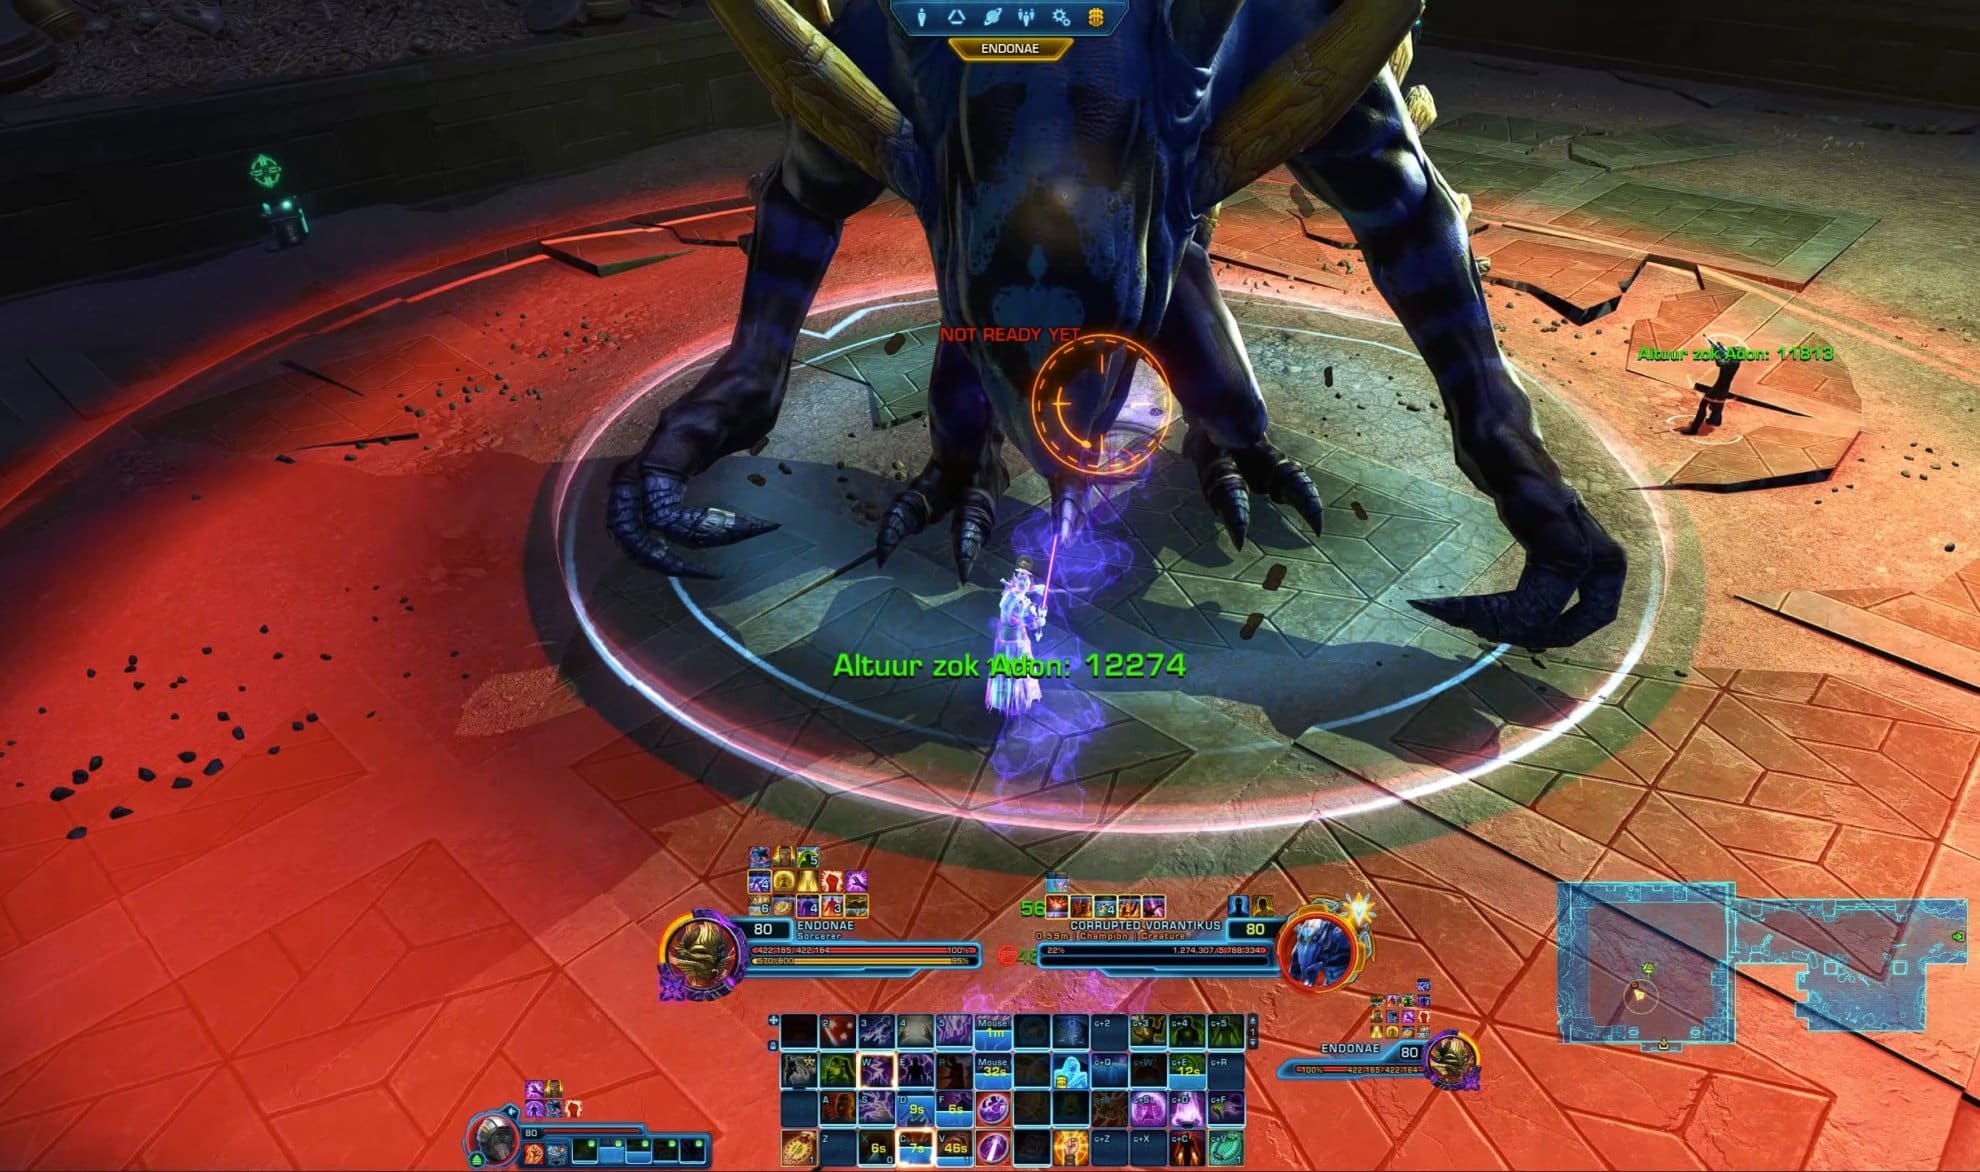
The second red circle is larger, and the safest place is in the white circle beneath the boss. You could run out of it, but you probably won’t be able to avoid the damage from the third circle.
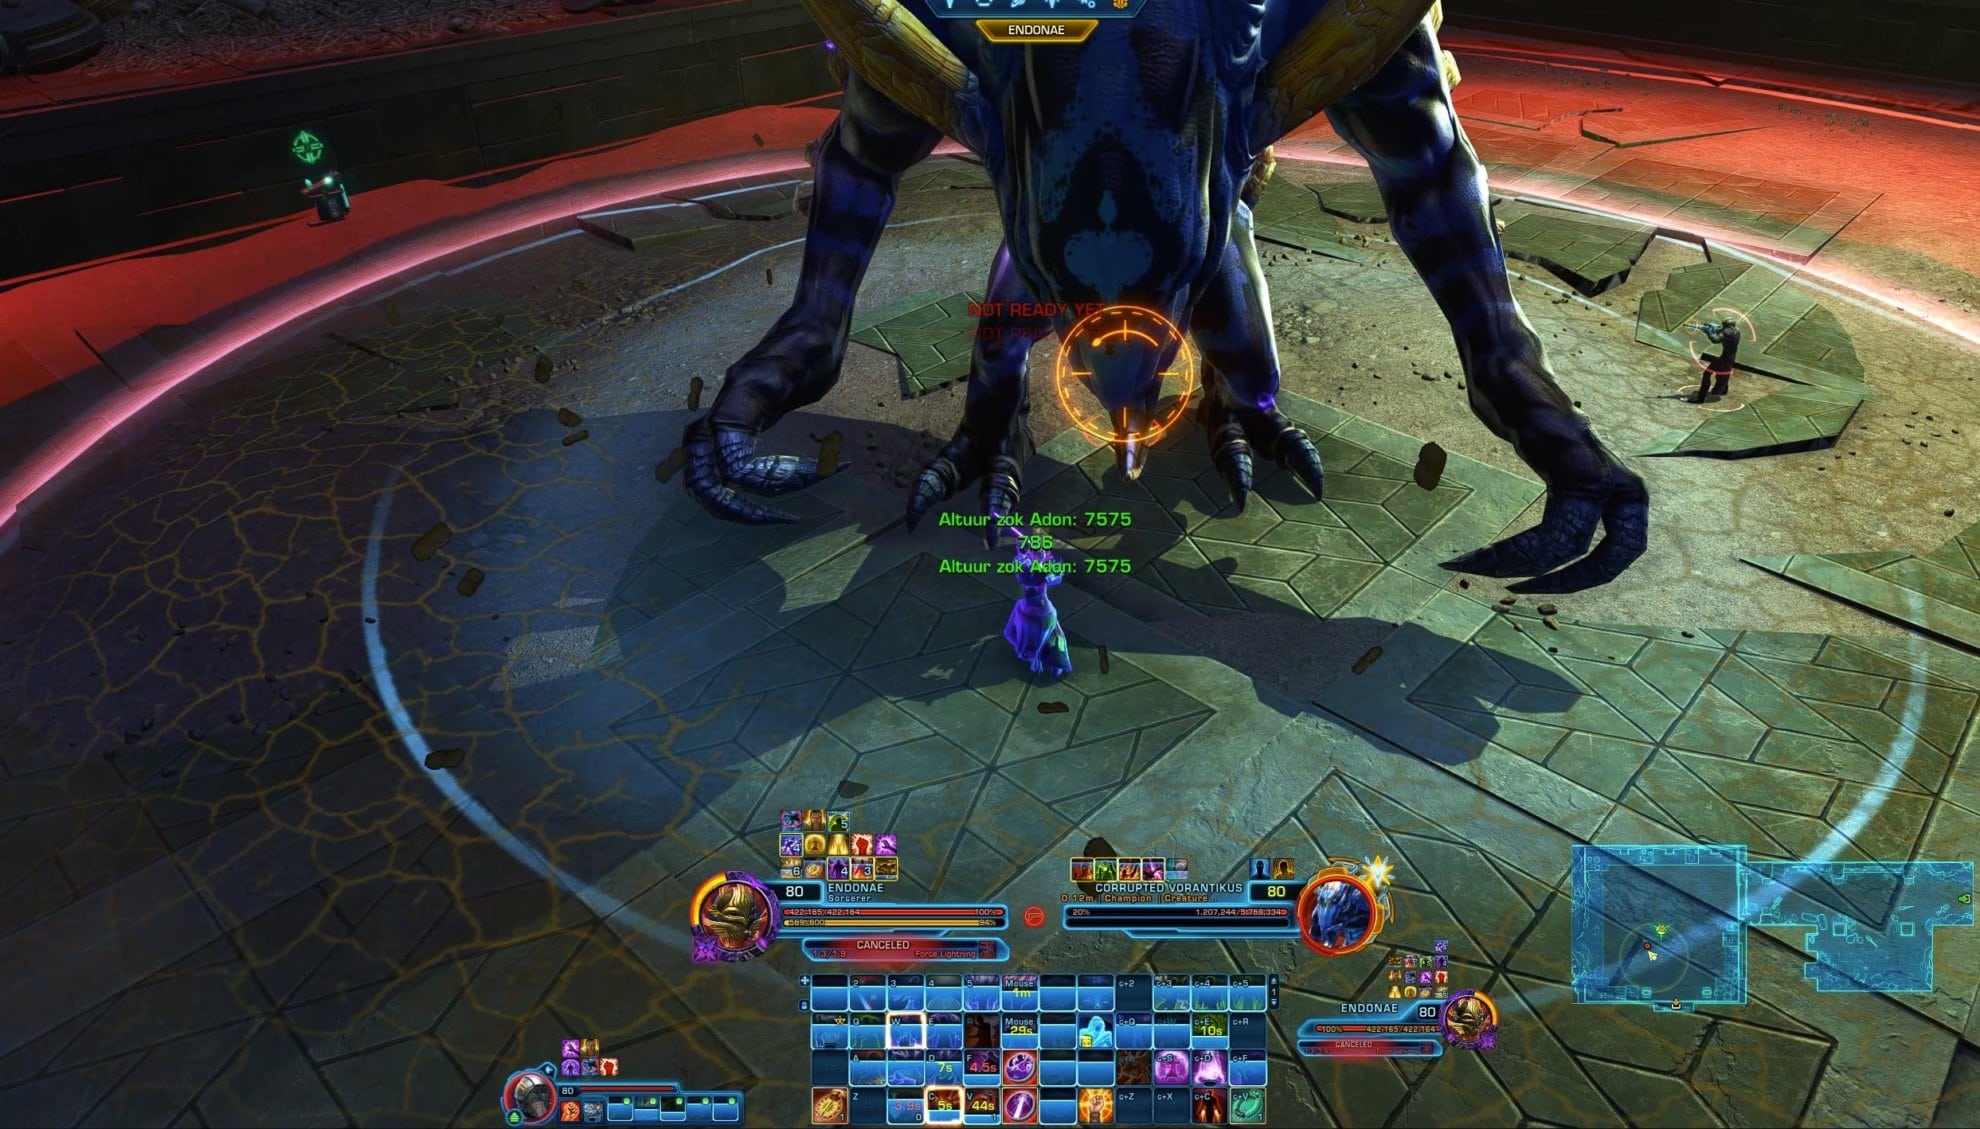
The third red circle is the largest, the safe place is in the larger white circle around the boss. Technically, you can also go outside of the red circle, but it’s nearly impossible to reach there before the damage goes out.
Hibernate
After the boss does the Expanding Red Circles attack, it’ll Hibernate for 10s. While Hibernating, someone will get a buff called Dreamer’s Blessing that boosts their damage and healing dealt by 25%. There’s also a blue circle that provides the Dreamer’s Blessing buff to anyone else standing in it.
Everyone should stack up inside the blue circle when it appears. This is a great time to use any offensive cooldowns if they’re available.
Additional Master Mode Mechanics
In MM, Tantrum has a much longer duration with a seemingly random circle pattern so you actually have to respond to them as they go out and do so for a more extended period of time.
After Tantrum, the Corrupted Vorantikus does Hibernate and in addition to the blue circle, someone will get a red circle. The mechanic doesn’t seem to be functioning correctly, but from reading the buffs and debuffs, the boss is supposed to heal during Hibernate and bringing the red circle to him breaks him out of Hibernation.
Achievement: Tantrum Two-Step
The Tantrum Two-Step just requires you to perfectly dodge the Tantrum attack for the entire fight. Remember, the correct positioning in VM is the following:
- Outside red
- Inside white
- Stay inside white
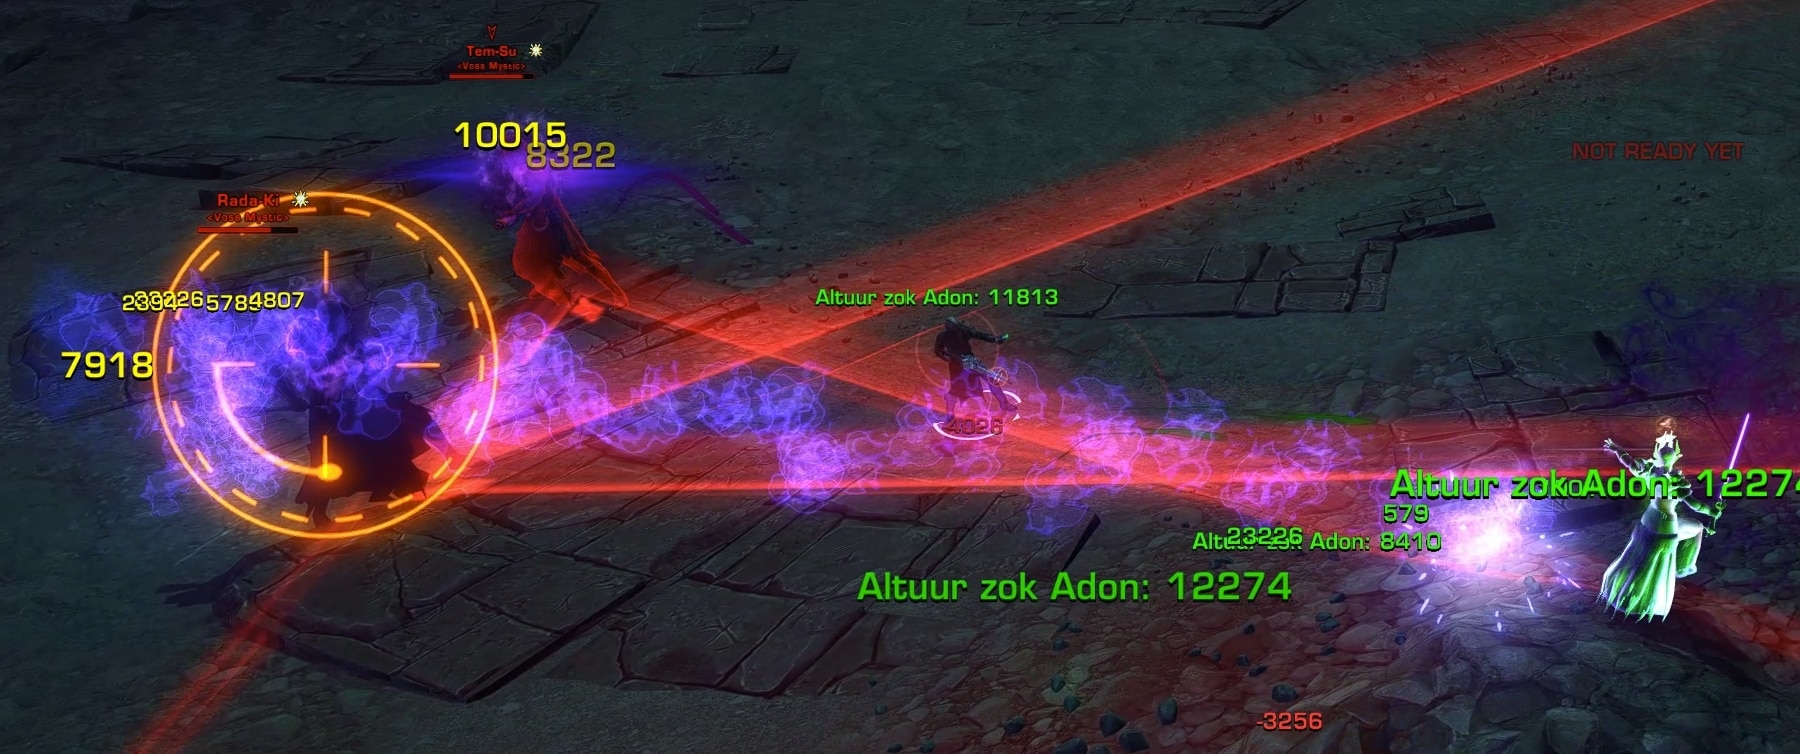
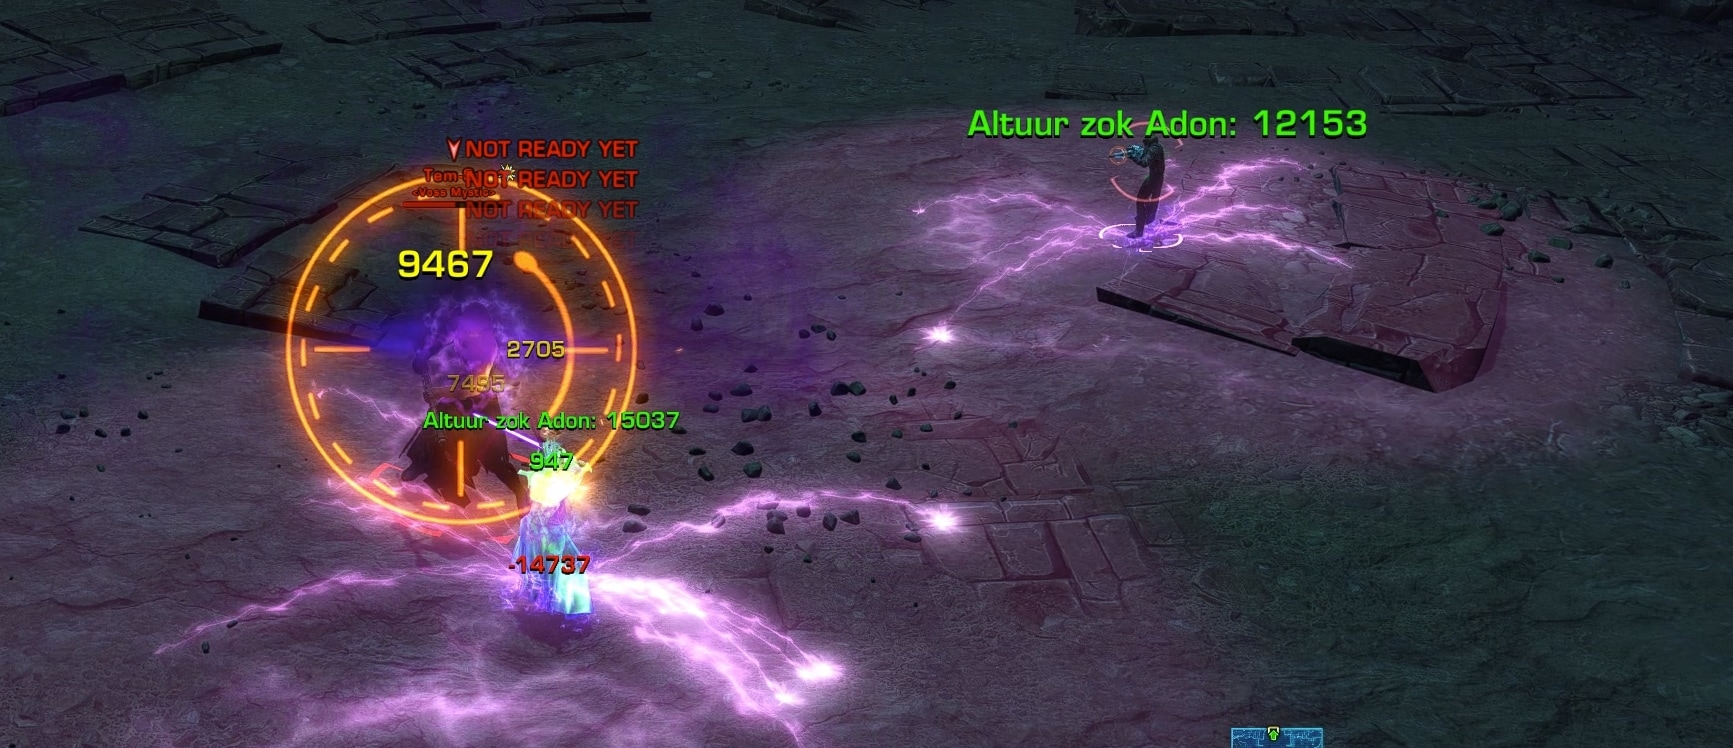
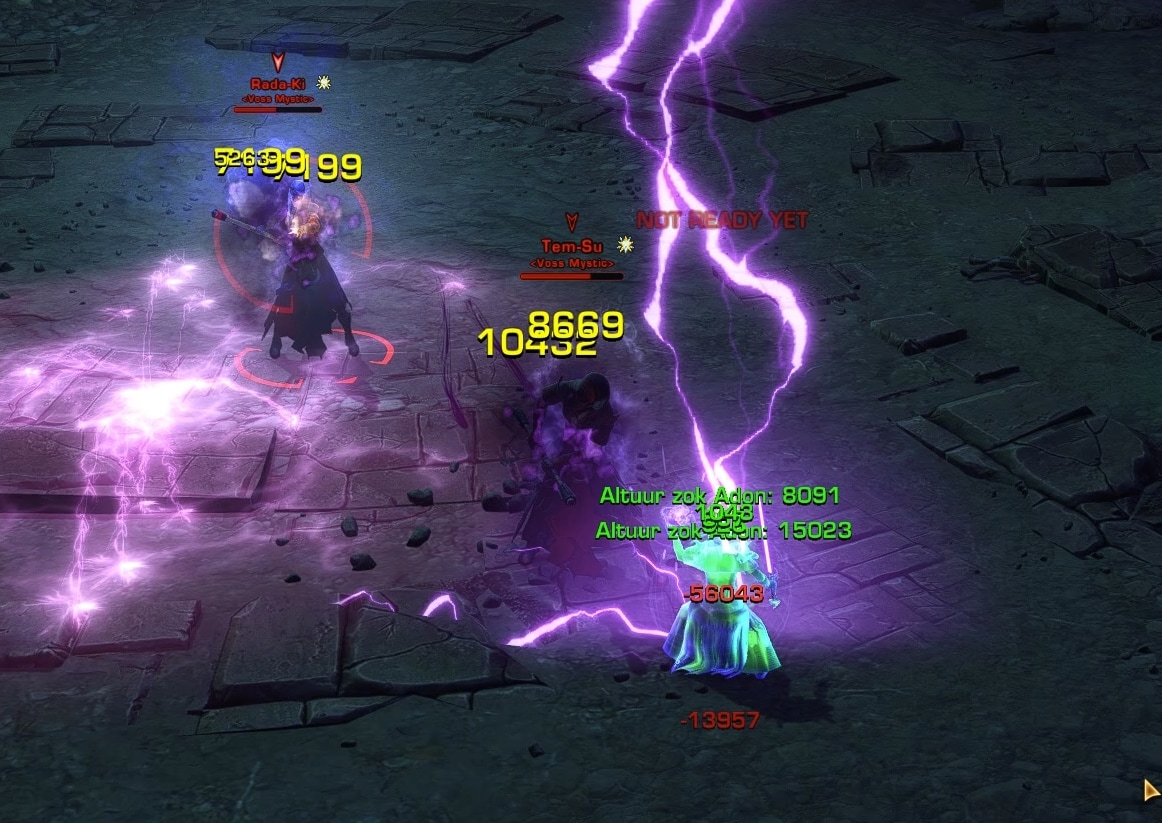
Corrupted Voss Mystics, Rada-Ki and Tem-Su
Rada-Ki and Tem-Su are the second boss fight, they are Voss Mystics that have been corrupted by The Curse of the Shrine of Silence.
Veteran Mode Mechanics
The Corrupted Mystics have several attacks including Light Beam, Lightning Storm, Lightning Blast, Force Push, and the ability to summon Corrupted Spirits.
Focus One Down
As soon as you defeat one of them, the other instantly gains a buff that makes them heal to full and they become able to use all of the attacks of both bosses. There is no penalty for hitting both bosses at the same time, but don’t go out of your way to hit both unless doing so results in a single-target DPS increase. Everybody should be focusing the same one down.
Technically, the buff each boss gains is slightly different. Both increase their damage dealt to compensate for the fact that there’s only 1 boss now. Rada-Ki’s buff, Undercurrent, also boosts the damage dealt by Lightning Blast whereas Tem-Su gains Scorching Aura, which buffs the damage dealt by Light Beam and Lightning Storm.
It really doesn’t matter that much, but if your group is bad at getting out of danger on the ground, defeat Tem-Su first. Otherwise, defeat Rada-Ki first.
Corrupted Spirit Add
The add pulses out damage to the entire group until it is defeated. The bosses will call them out periodically, so you can have multiple out at the same time if you don’t deal with them in a timely manner.
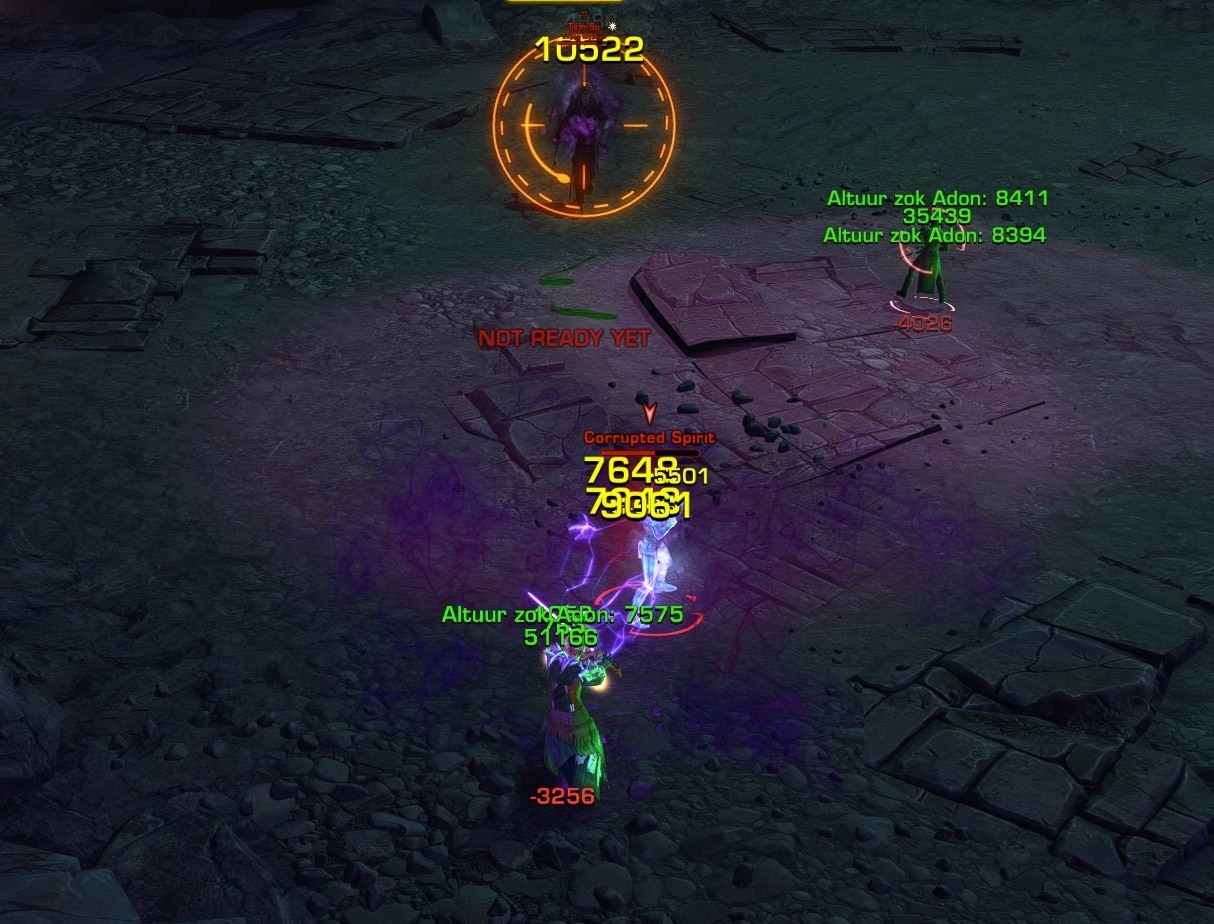
If your tank is fast, bring the bosses over to the corrupted spirit and defeat it with DoT spread and AoE. If your tank isn’t paying attention, hard swap to each add that spawns.
Light Beam
The Light Beam is a rectangular telegraph that gets aimed at a player and deals damage to anyone in the telegraph when the attack actually happens. The cast happens independently from the telegraph and damage going out. It only serves to show that the cast is happening shortly.
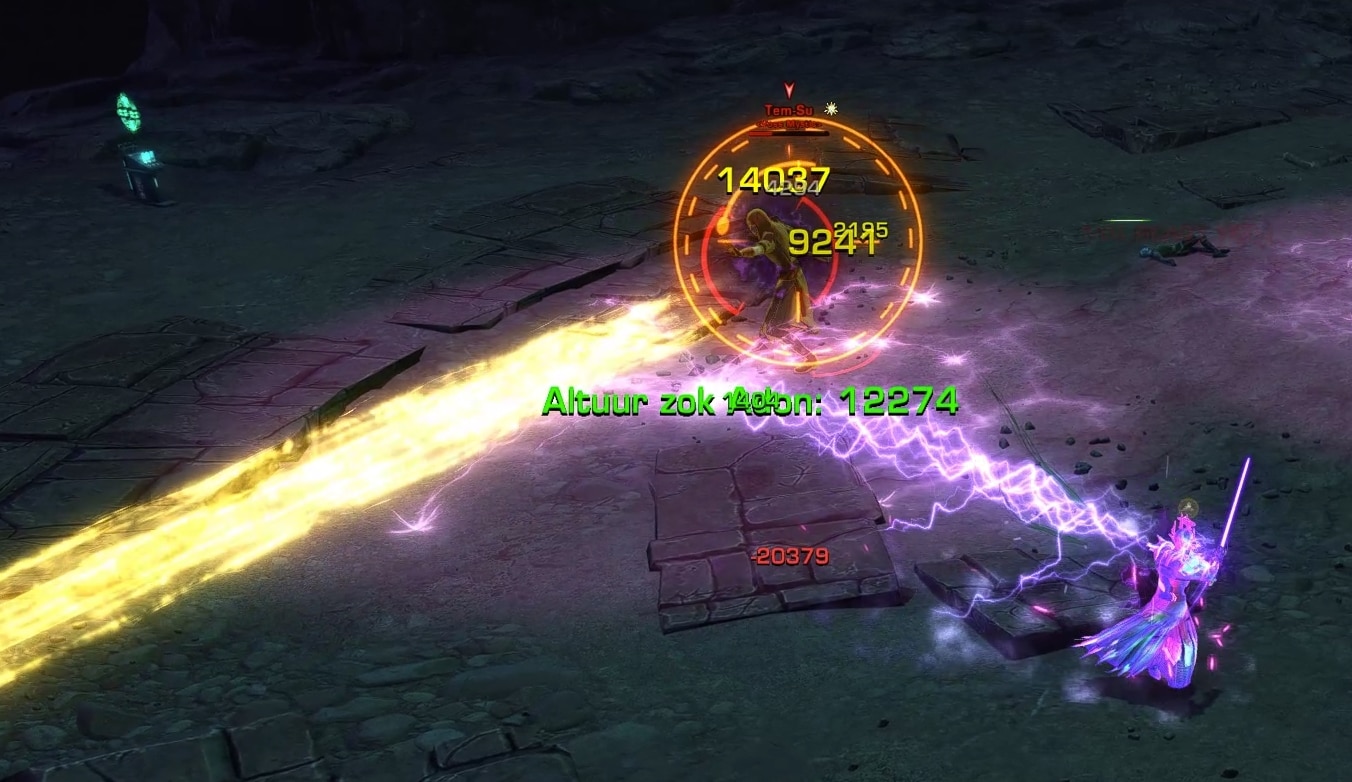
The telegraph does not track after being placed on the ground, so everyone just needs to get out of it.
Force Push
Force Push is a wider conal that works the same as the Corrupted Vorantikus’ conal scream attack, except both bosses can cast it at the same, so you have to get out of a wider area. The cast is not connected to the ability activation, but rather the cast happens to indicate that the attack has been queued up and will happen shortly.
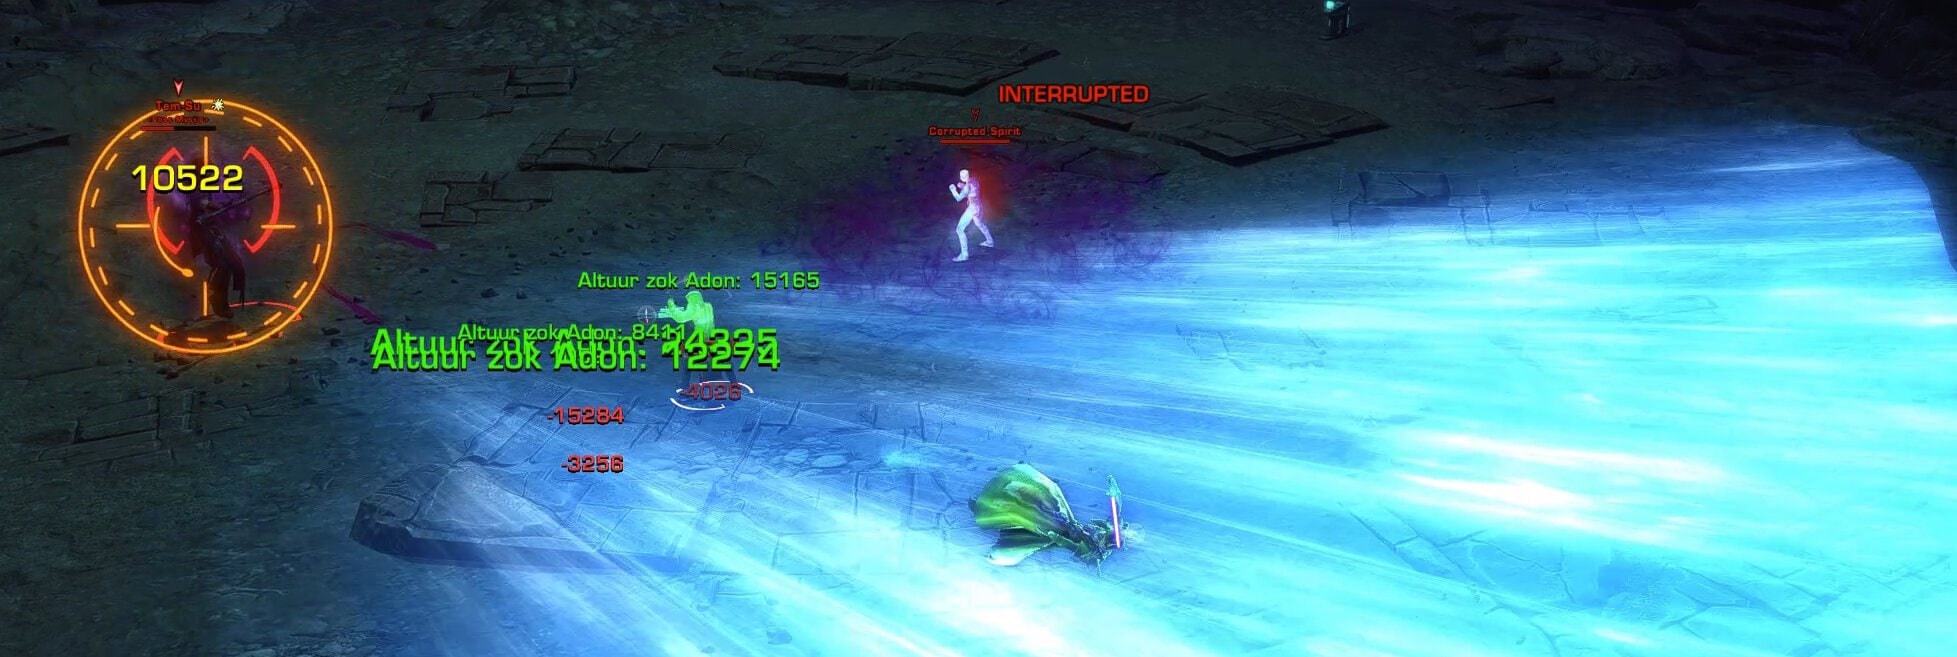
Get out of the telegraph(s) when you see them and try to stay toward the middle of the room so you don’t get knocked into the abyss.
Lightning Storm
Lightning Storm calls down lightning onto the ground beneath multiple players that deals damage in that area.
This is your standard danger circle, just don’t stand in it and make sure to move the bosses away from it so DPS have somewhere to stand so they can continue to deal damage without getting cleaved by other attacks.
Lightning Blast
This cast calls down a lightning strike on multiple enemies in the group that deals immediate direct damage.
Pop a DCD when you see the cast goes out if you want, but it doesn’t hit that hard or go out very often.
Additional Master Mode Mechanics
In MM, all of the attacks are just more dangerous and punishing. The Corrupted Spirits gain a stacking buff that makes them deal progressively more damage the longer they’re up. In addition, the Light Beam attack will knock you straight up if you get hit by it.
If you get hit by the Force Push conal, you will get yeeted out of the arena and plummet into the abyss. It’s unclear if it’s intentional, but you can’t be battle rezzed if you get thrown out of the arena as your body is too far away, so be extra careful about avoiding the conal.
Achievement: Good Exorcise
If you manage to defeat all Corrupted Spirits within 10s of them spawning you’ll get the achievement Good Exorcise. If you want to go for this achievement, swap to adds as soon as they spawn and call out to your group members when you see it if you’re in voice so they can swap too.
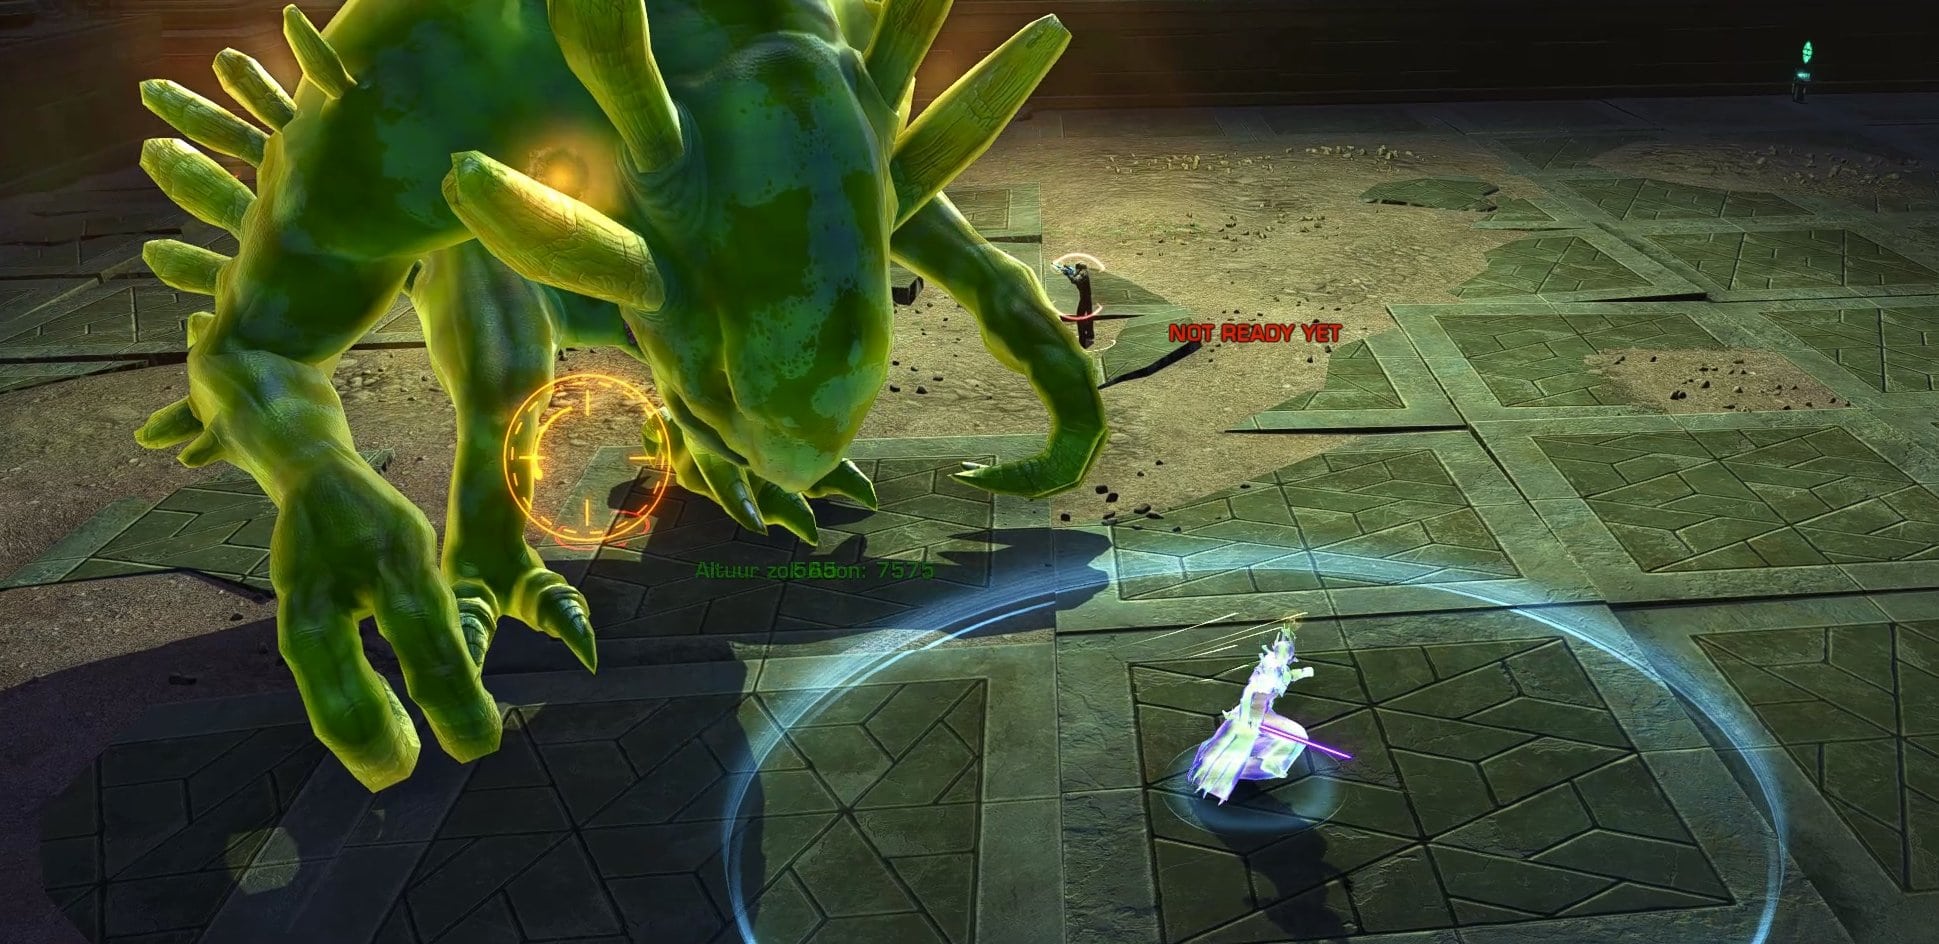
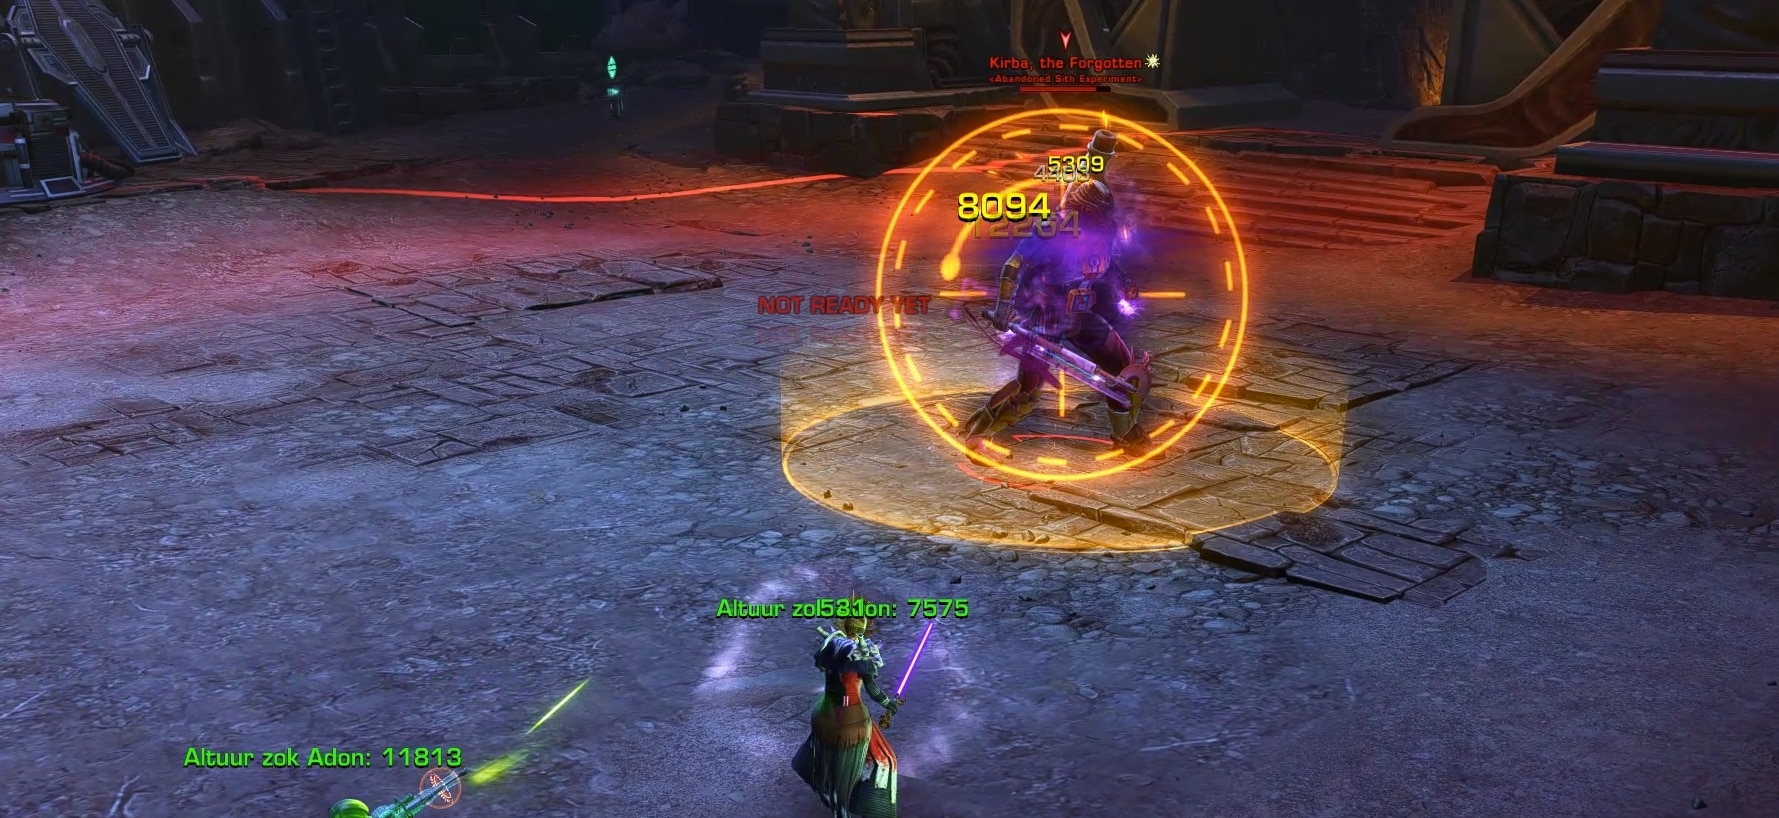
Kirba, the Forgotten (Bonus Boss)
Kirba, the Forgotten, is a Gormak that’s endured Sith experiments and is the bonus boss of the Flashpoint.
Veteran Mode Mechanics
Kirba, the Forgotten has a couple attacks that are reminiscent of the Trample attack from the Corrupted Vorantikus along with some memes for the group.
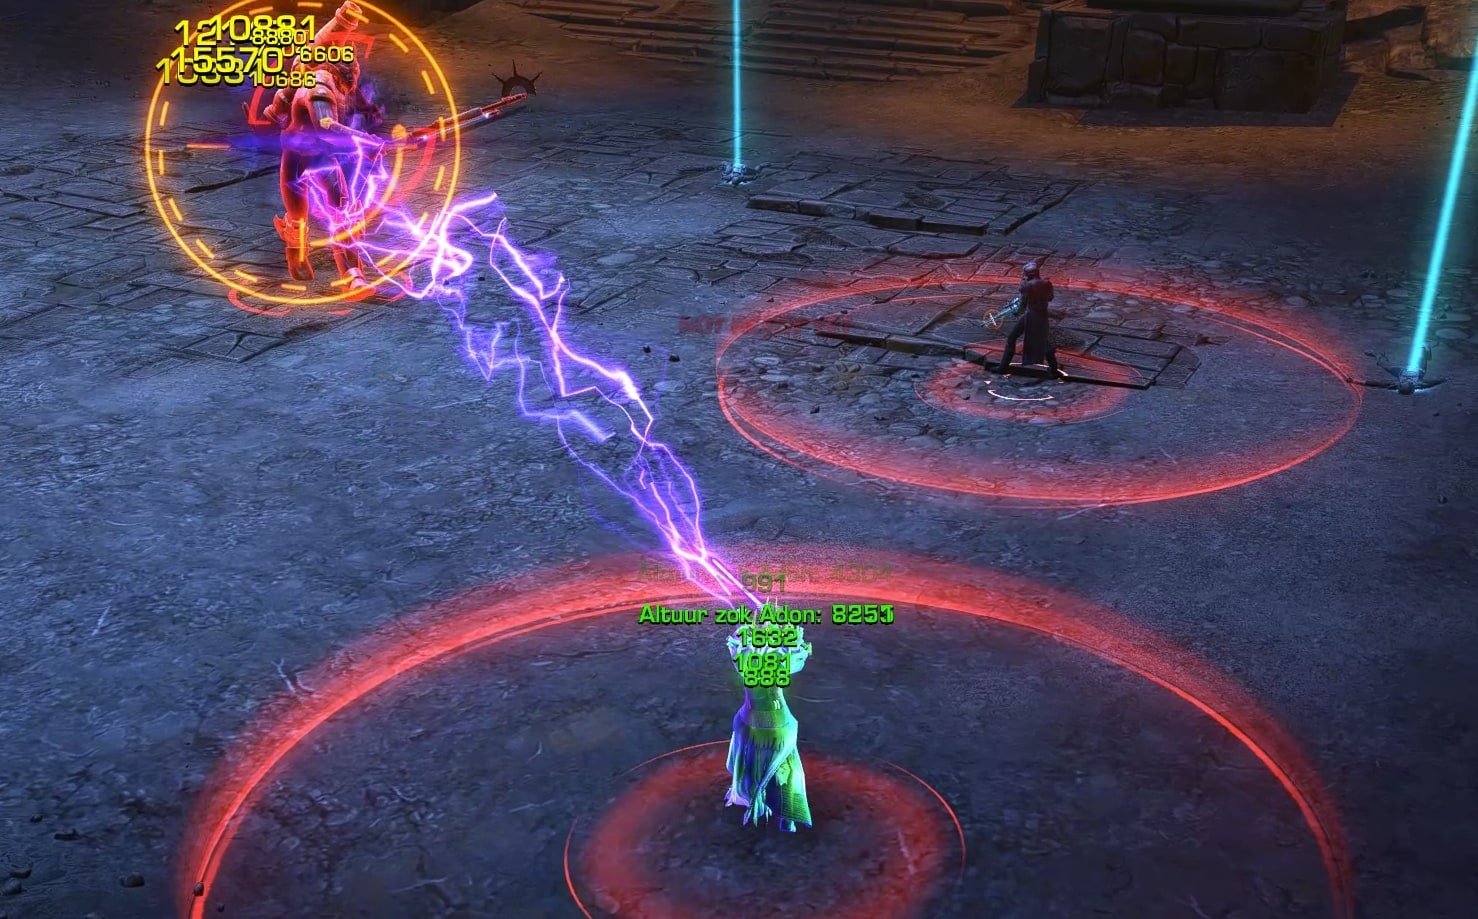
Blast of Hatred
When the boss does Blast of Hatred, you won’t see a cast, but you will see a giant red outer circle that covers the vast majority of the room and an orange circle that surrounds him. You will take damage if you are not standing in one of the circles.
I’ve done the fight several times and I’m still not sure of exactly how it works, but it seems that if you have 1 person stand in the orange circle, the others in the red circle, only the person in the orange circle will take damage (and also get stunned). If no one stands in the orange circle, everyone takes damage. You will also take damage if you are not standing in one of the circles.
The person (ideally tank) that stands in the middle should pop a DCD, though it’s better that anyone stands in the circle rather than no one.
Furious Bellow
The Furious Bellow is a small red circle that surrounds him. When it detonates, you take damage and get knocked back.
This mechanic just serves to keep tanks on their toes with the Blast of Hatred attack where they have to pay attention about whether they should be in the circle or not.
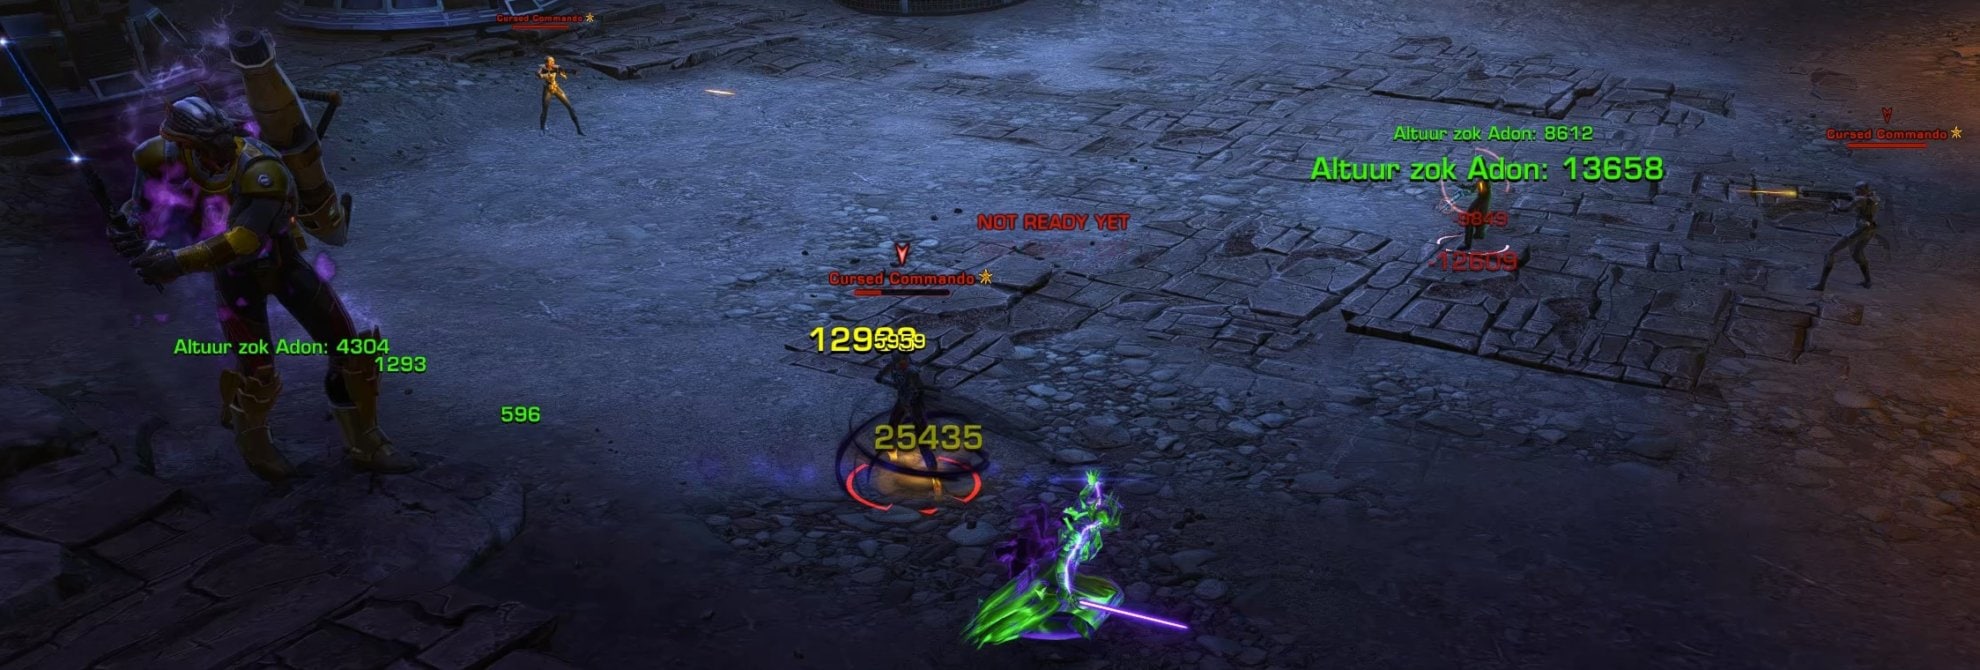
Clickable Panel and Cursed Commando Adds
Pressing the blue panel on the wall will cause 3 elite (gold) Cursed Commando adds to spawn. That’s all it does. The Cursed Commandos are blaster-wielding Voss that hit pretty hard and have an ability called Hindering Shot that hurts and slows you.
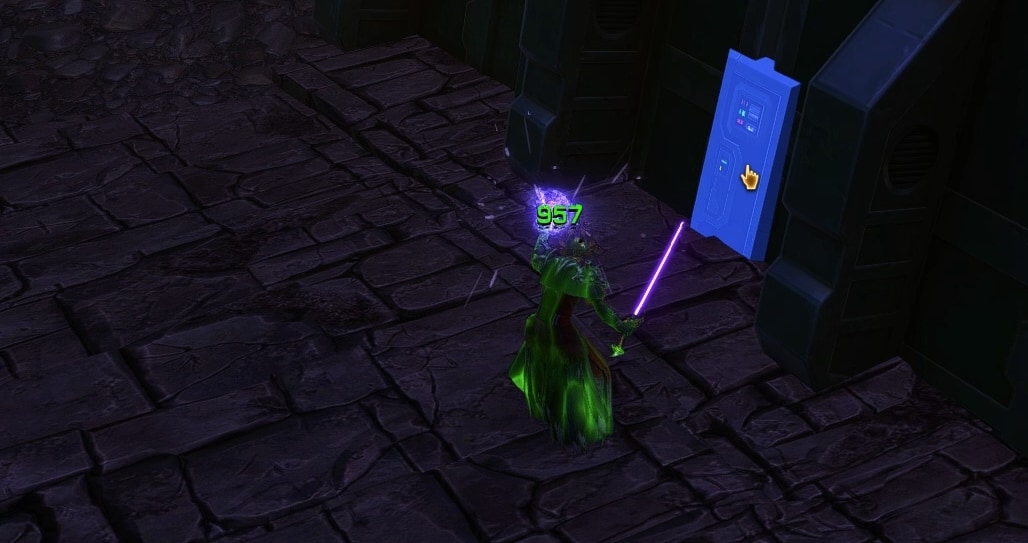
If you only care about beating the boss, just don’t press the panel. If you wanna troll your friends, I highly recommend telling them to press the panel, though be prepared to wipe.
Thirst for Massacre Buff
When the boss drops below 30%, he gains a buff called Thirst for Massacre, which does the following to him:
- Reduces ability cooldowns by 50%
- Increases casting and attack speed by 25%
- Increases damage taken by 50%
Again, these effects apply to him and serve as his burn phase. Basically, he does his attacks faster and takes more damage. Sub-30%, he’ll also begin casting Enraged Stomp.
Enraged Stomp
Once Kirba drops below 30%, he’ll add a new ability, Enraged Stomp, to his rotation. This ability causes rocks to fall from the ceiling onto each player if they don’t get out of the way.
Just get out of the red circles. You can stack if you want to reduce the overall danger zone, but you have to stack precisely or the guy in the middle might get screwed over and not make it out in time.
Additional Master Mode Mechanics
Like the Corrupted Mystics, Kirba mostly just hits harder in MM. You need to do the Blast of Hatred mechanic correctly or there’s a good chance that you’ll wipe. Make sure you have the tank (or at least a single person) stand in the orange circle with a DCD up to mitigate the damage. Tanks should also be sure to take their Stun DR ability tree buff.
Every minute, Kirba also grants himself a stack of a buff called Ancient’s Rage that makes him deal 10% more damage, meaning the fight gets harder the longer it goes on.
Achievement: Wonder What This Does…
In order to get this achievement, you have to defeat 6 of the Corrupted Commandos. Since you spawn 3 of them each time you press the panel, you have to click it twice over the course of the fight.
Since the fight has a healer check to it in MM, especially with the Corrupted Commandos, I highly recommend doing this one in VM, though it’s absolutely doable in MM if you want a bigger challenge.
Make sure you don’t summon the second set of adds until you’ve defeated the first set and the healer has had a bit of time to recover and you have some DCDs to spare. In addition, don’t push the boss below 30% until you’ve defeated the adds or you’ll have to contend with the burn phase.
It’s best to LoS the adds around one of the pillars so they stack up and you can AoE them, though still try to focus your heavy hits into a single enemy. Once you have them stacked sufficiently for AoE, you need to spread out a bit so you’re not all tucked in the corner for Blast of Hatred and Furious Bellow.
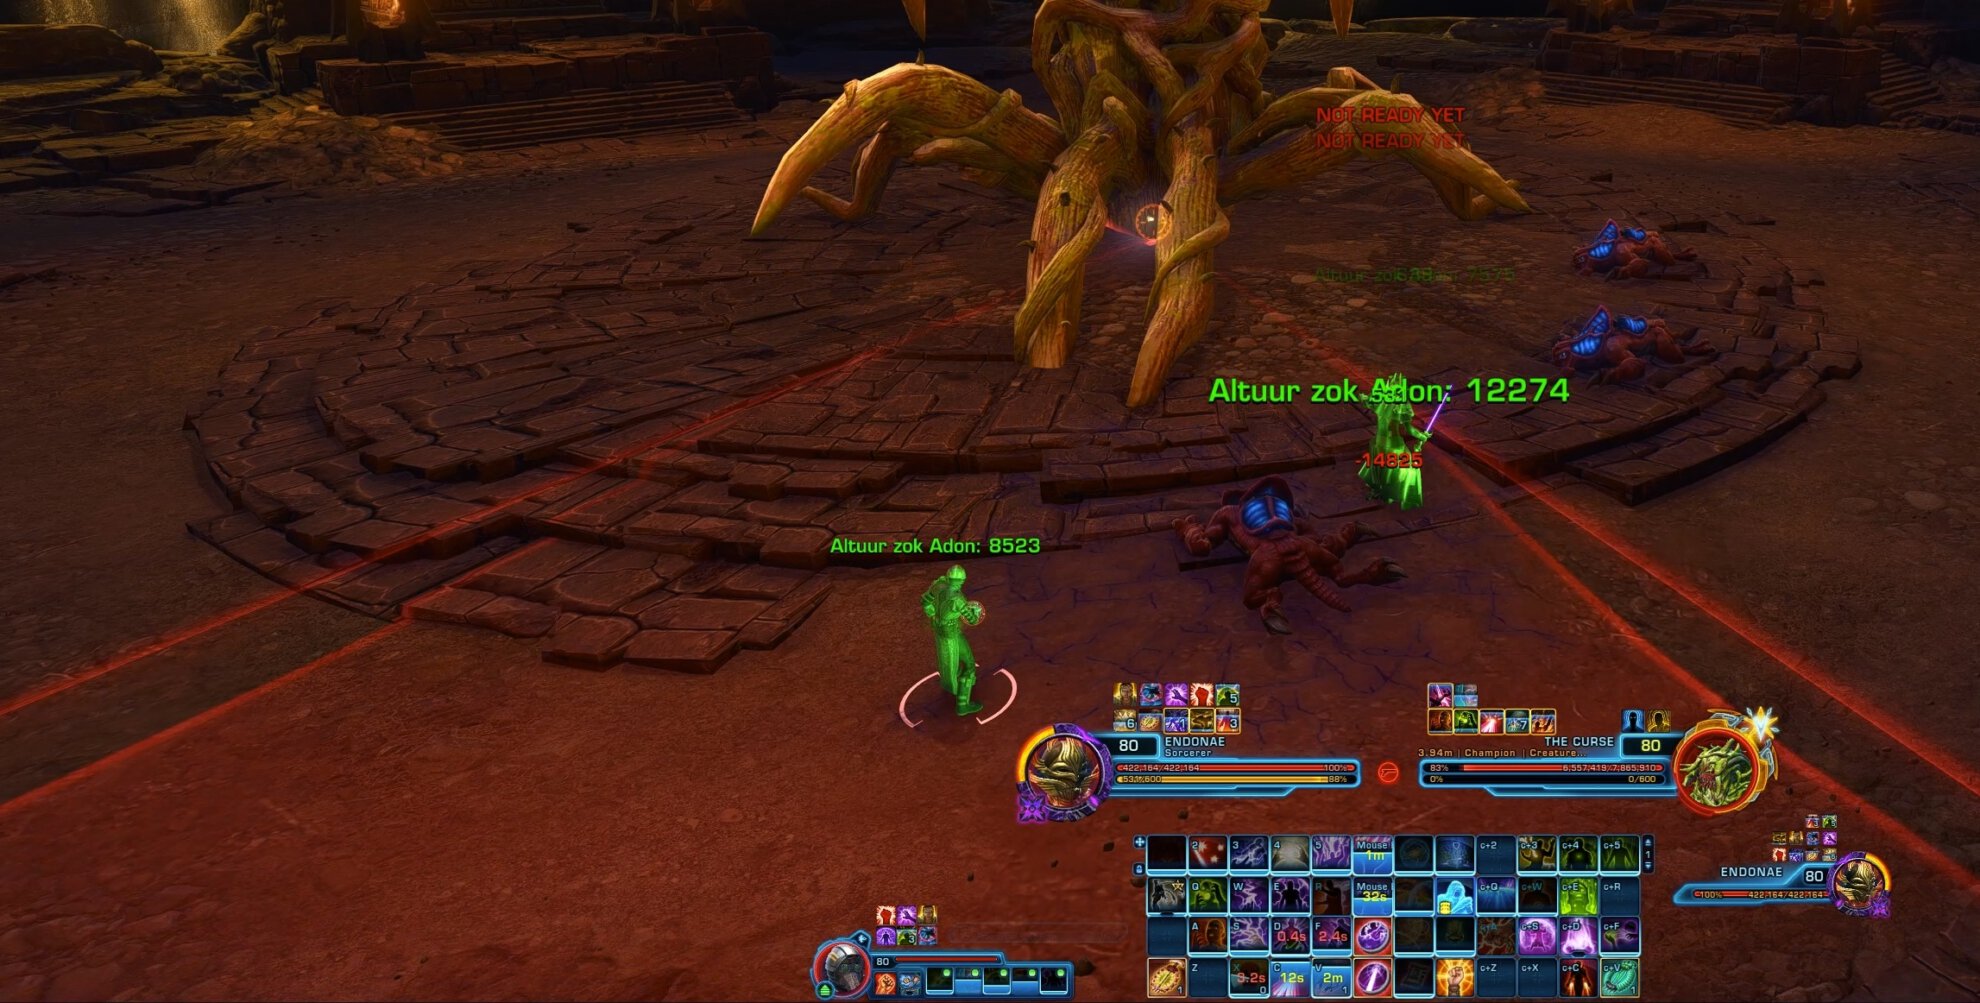
The Curse
The Curse is the botanical final boss in the Shrine of Silence Flashpoint. Its appearance is reminiscent of the Terror from Beyond.
Veteran Mode Mechanics
The Curse is a boss fight that starts out super basic but builds into utter chaos by the end of the fight. There are a bunch of AoEs, add spawns, and you’ll enter the Spirit World.
Forceful Slam
The Curse will frequently cast a wide conal slam at a random player that damages and stuns anyone inside it once the attack goes off. The telegraph does not track, but does target a player and takes up an entire slice of the arena.
Get out of the telegraph when you see it. Try not to stand near other players so you don’t have to move as much.
Spirit Strike
The Curse will frequently cast Spirit Strike, which fires a blast of Spirit energy at a random player. It’s just a flashy attack, there’s not much to it.
Technically, you can pop a DCD if you see it targeting you, but the attack doesn’t hit very hard. It’s really just there to make things more interesting for the healers and add a little pizazz to the fight.
Summon the Corrupted and Mawvorr Adds
The boss will occasionally summon a flock of Mawvorr adds to attack you. Like all add spawns, they typically go for the healer first.

The tank should get aggro on them ASAP and the DPS can AoE them down once they’re grouped up.
Creeping Roots and Root of Nightmares Adds
The Curse will infrequently cast Creeping Roots, which summons a Root of Nightmares vine enemy that is immune to damage for the entirety of the fight. The add just casts a vine slam ability if you get close that deals damage and knocks you back. The fight gets harder over time as you have less room to maneuver as more Roots of Nightmares spawn.
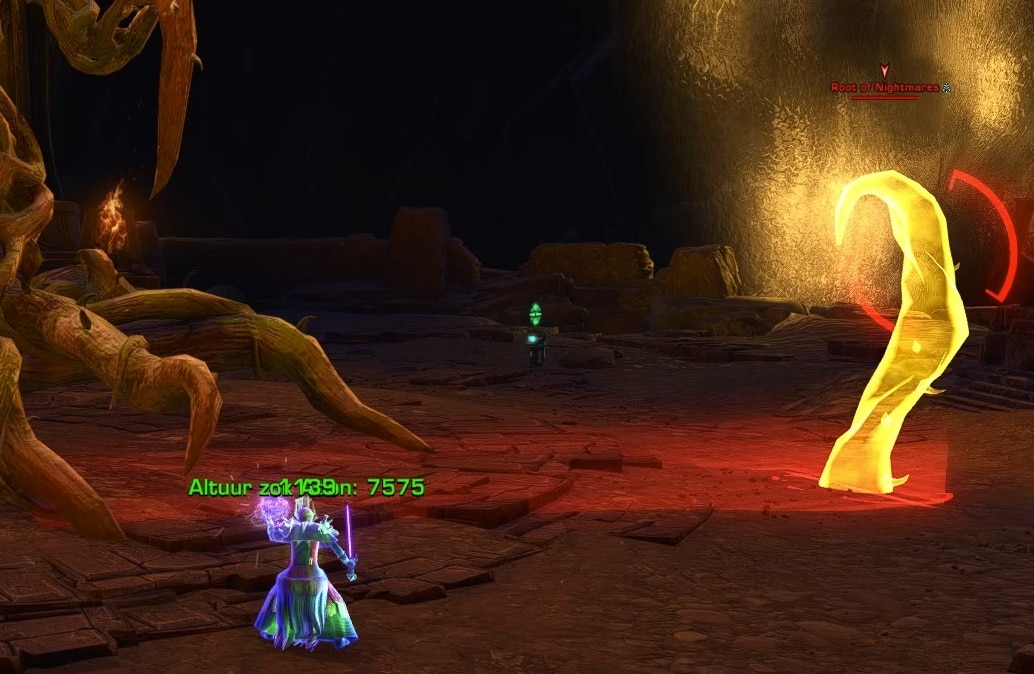
Stay away from them as best you can. Get out of their telegraphed slam when you have to be near one. They are pretty avoidable until the end of the fight when they surround the entire room, so there’s little space that’s safe to stand. Still, avoid them for as long as you can.
Portal to the Spirit World
When The Curse drops below 50%, it will stun and transport the group to the Spirit World, which turns everything yellow and dampens the sound. While in the Spirit World, you’ll gain stacks of a debuff called Mind Corruption. Each stack increases the damage you take from Mind Corruption.
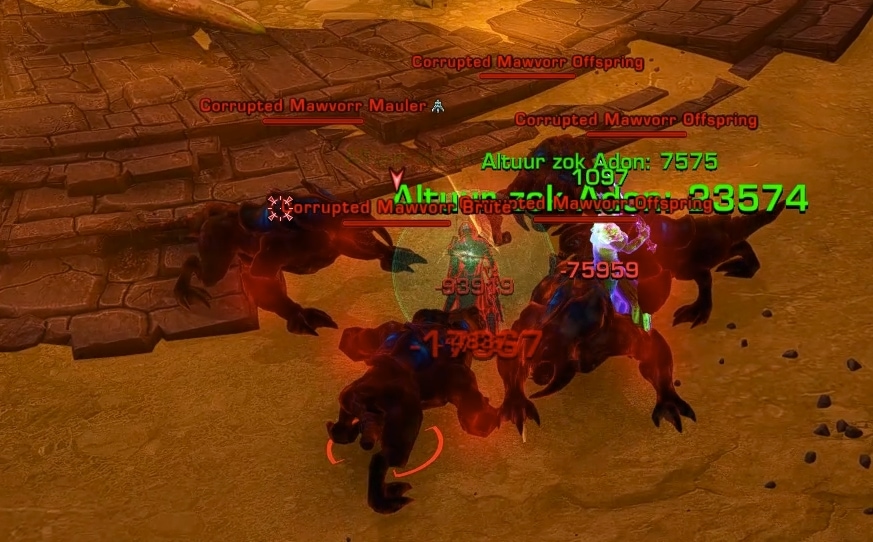
Since you’ll all be in the Spirit World for the remainder of the fight, this serves as a DPS check as you’ll have to defeat the boss before you get too many stacks. In addition, each group of Mawvorr that spawn now contain a Corrupted Mawvorr Mauler, which is a strong (silver) enemy instead of being weak or standard.
There will also just be more Roots of Nightmares up at that point, so the fight is just more overwhelming in general.
Additional Master Mode Mechanics
When you’re in the Spirit World, the ghosts of the Corrupted Mystics you defeated earlier will appear at the base of each statue. Like the Roots of Nightmares, these are immune to damage. They spam cast the Lightning Storm attack which may not seem like much, but it really hurts and adds to the chaos.
Melee should try to stack on top of the tank as much as possible and move as a unit so that all of the Lightning Storm puddles are stacked together and you have more room to maneuver. Coordinate with the melee to all move either clockwise or counterclockwise around the boss when you have to get out of danger.
Try to save as many DCDs as possible for the second phase as you’ll be taking a lot more damage. In addition, make sure all of your OCDs will be up for use in the second phase so that you minimize the amount of time you spend there.
Achievement: Hard to Handle
In order to obtain The Curse’s Mark of Mastery, Hard to Handle, you’ll need to keep alive the 3 Corrupted Mawvorr Maulers alive. These are the strong (silver) Mawvorr enemies that spawn with the weak Mawvorr when you’re in the Spirit Realm below 50%. A single Corrupted Mawvorr Maulter spawns with each wave of adds.
You’ll be taking a fair bit of damage by the end of the fight, so you still want to defeat the weak Mawvorr to minimize that damage. You can AoE them down even if the strong enemy is in the group, though don’t go overboard, like DoT spreading is excessive.
If you have aggro of a Corrupted Mawvorr, you should kite it around the room as much as possible to minimize the damage you take. You can also CC them; the 60s mezzes that Sorcerers / Sages and Mercenaries / Commandos have are particularly helpful because you can keep one of them CC’d for the entirety of the fight.
When you beat the boss, all enemies despawn immediately, so if the final set of adds spawn when the boss is low, just finish the boss off instead of trying to deal with the adds. Treat it like a burn phase.
Special Achievements
The Shrine of Silence has multiple achievements beyond the regular clear the FP 25 times in each difficulty.
Marks of Mastery
Each boss has a dedicated bonus achievement for completing an extra challenge, these are effectively the same as the Marks of Mastery that the newer operations offer.
Each Mark of Mastery in the Shrine of Silence can be completed in VM or MM, and it is considerably easier to do them all in VM. The explanation for each Mark of Mastery in this FP is located next to its associated boss:
- Corrupted Vorantikus: Tantrum Two-Step
- Corrupted Mystics: Good Exorcise
- Kirba, the Forgotten: Wonder What This Does…
- The Curse: Hard to Handle
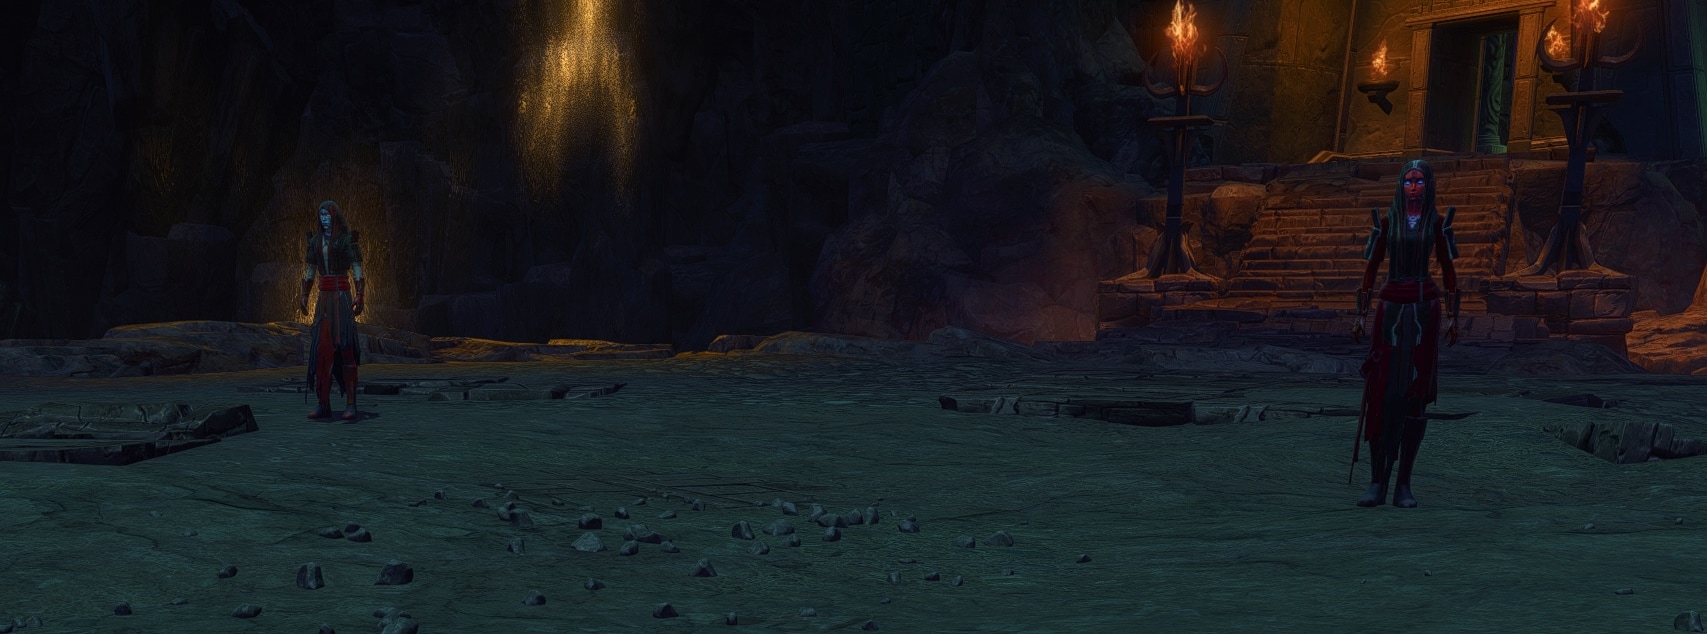
Nil-Uu, Soul Coil, and Related Achievements
This section of the guide concerns the 2 champion enemies Nil-Uu and the Soul Coil as well as their associated debuffs, Unstable Soul and Mangled Spirit, and the achievements Nightmare Stack, Share the Burden, and Intentional Complications.
Nil-Uu
Nil-Uu is a corrupted Voss. Her attacks include Force Pull, Dark Heal, and Electrocution, and Crushing Darkness which pull you, heal her, stun you, and apply a cleansable DoT respectively. It’s more valuable to interrupt Dark Heal and Electrocute because they’re just more impactful effects. She also has 2 Strong enemies that you can take out with DoT spreads.
When you defeat her, someone in the group will get a debuff called Mangled Spirit, which makes you take damage over time and move progressively slower the longer you have the debuff, denoted by the number of stacks. When you have 5 stacks, you can barely move.
Thankfully, if someone else gets close to you, they can take the debuff from you and start at 0 stacks. The only way to cleanse it is by defeating the Soul Coil enemy. Cleansing the Mangled Spirit debuff grants the Share the Burden achievement.
If you defeat Nil-Uu while under the effect of Unstable Soul in VM or MM (so defeat Soul Coil first), you’ll get the Nightmare Stack achievement and unlock a deco at the Speciality Nutrient Vendor.
Soul Coil
The Soul Coil is a stronger champion version of the vine enemies you’ve been fighting throughout the Flashpoint. It has 2 attacks, Tentacle Slam and Slime Throw. Tentacle Slam is a short-range slam like the other vines can do while Slime Throw is a ranged cast. Just like with Nil-Uu, there are 2 strong enemies that you can take out with DoT spreads.
The boss will also cast Transliminal Coating, which grants a buff to itself that temporarily reduces its damage taken. The Transliminal Coating cast is also interruptible, which I highly recommend doing.
If someone has the Mangled Spirit debuff, Transliminal Coating will instead be permanent and make it completely immune to damage. The only way to get rid of the buff is by passing the Mangled Spirit debuff to the Soul Coil. Since you’re slowed and Tentacle Slam knocks you back, you’ll need to pass the debuff around frequently until one of you can get close enough to turn it off.
When you defeat the Soul Coil while someone is affected by Mangled Spirit (so defeat Nil-Uu first), you get the Share the Burden achievement and unlock a deco at the Speciality Nutrient Vendor.
Once you complete both achievements, you get the Intentional Complications achievement, which unlocks a third deco at the Specialty Nutrient Vendor.
Secret Achievement
There are 20 points unaccounted for that indicate the presence of at least 1 secret achievement. I will update this guide when I learn how to obtain said achievement.