This guide will tell you how to start and complete the SWTOR Flashpoint The False Emperor, in any difficulty mode, what achievements you can unlock and the rewards you can earn.
Table of contents
- How to Start the Flashpoint and its Story
- Bonus Mission: The Architect’s Tour
- Bonus Mission: The Hidden Threat Phases 1 & 2
- Mini-Boss 1: Tregg the Destroyer
- First Boss: Jindo Krey
- Mini-Boss 2: Prototypes A-14 and B-16
- Second Boss: HK-47
- Mini-Boss 3: Condrus Berani
- Bonus Mission: The Hidden Threat Phase 3
- Bonus Mission: Hidden Threat Final Phase
- Optional Bonus Boss: Sith Entity
- Final Boss: Darth Malgus
- Achievements for The False Emperor
- Decoration Drop from The False Emperor
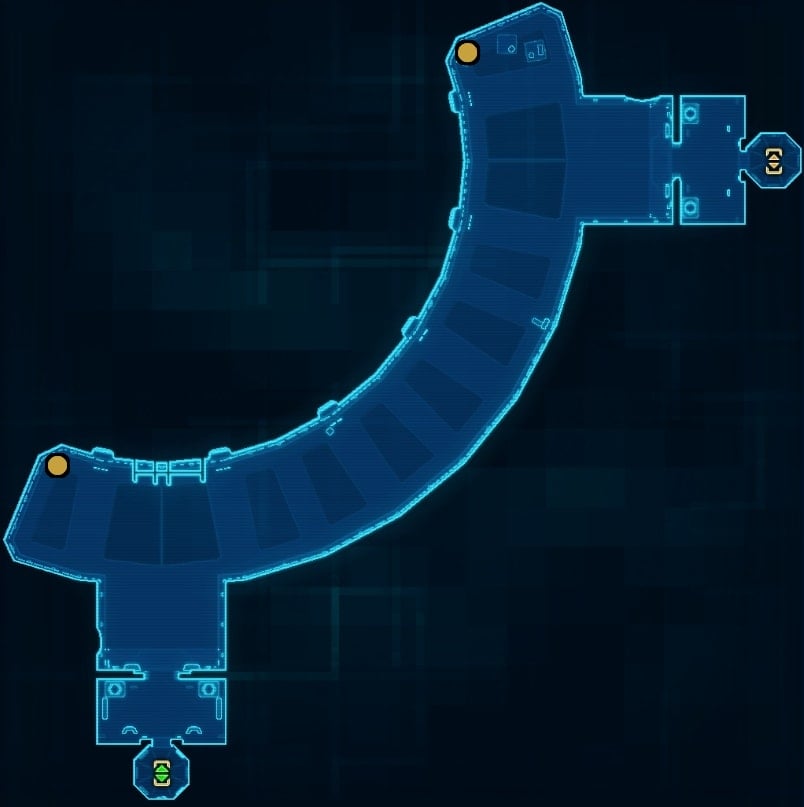
How to Start the Flashpoint and its Story
The False Emperor is the second flashpoint of two in the Ilum story arc. This takes place after the flashpoint The Battle of Ilum, so if you want the full story experience I recommend that you start out with this flashpoint.
After securing a stealth ship, a strike team manages to use it to climb aboard Malgus’s command ship. You’ll be going into the most secured vessel in his fleet, so prepare yourself for a tough fight ahead. If you fail, Malgus can use his stealth fleet to take over the galaxy while being untraceable to his opponents.
This guide covers Story Mode, Veteran Mode, and Mater Mode for The Battle of Ilum.
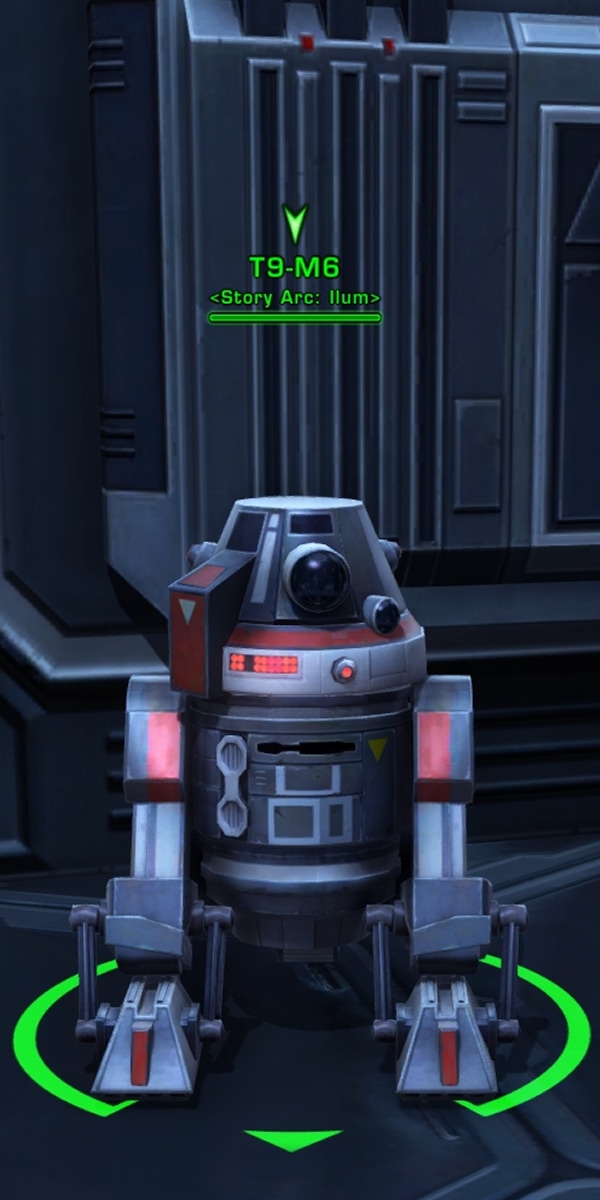
To start the Ilum story arc, you need to complete the three chapters of your class origin story. Once you do, you’ll be able to find an NPC in the promenade around the fleet cantina that will send you to Ilum. For the Republic, this NPC is Lieutenant Ha’laa. For the Empire, this NPC is T9-M6.

If you prefer to get The False Emperor flashpoint without going through the story arc, you’ll need to travel to Ilum. From there, head to your faction’s Ilum base and use the elevator to go to the lower level. For the Republic, the NPC that grants the flashpoint is Captain Farnis. For the Empire, this NPC is Commander Gerault.
The False Emperor flashpoint is available in the Activity Finder under the Group tab. You can also obtain it under the Solo tab of the Activities window if you wish to complete this flashpoint alone.
Read our SWTOR Story Progression Guide to learn where this story fits in. The guide will help you experience the game’s narrative in the proper intended order of events and aid and assist you if you are not sure what to do and where to go next.
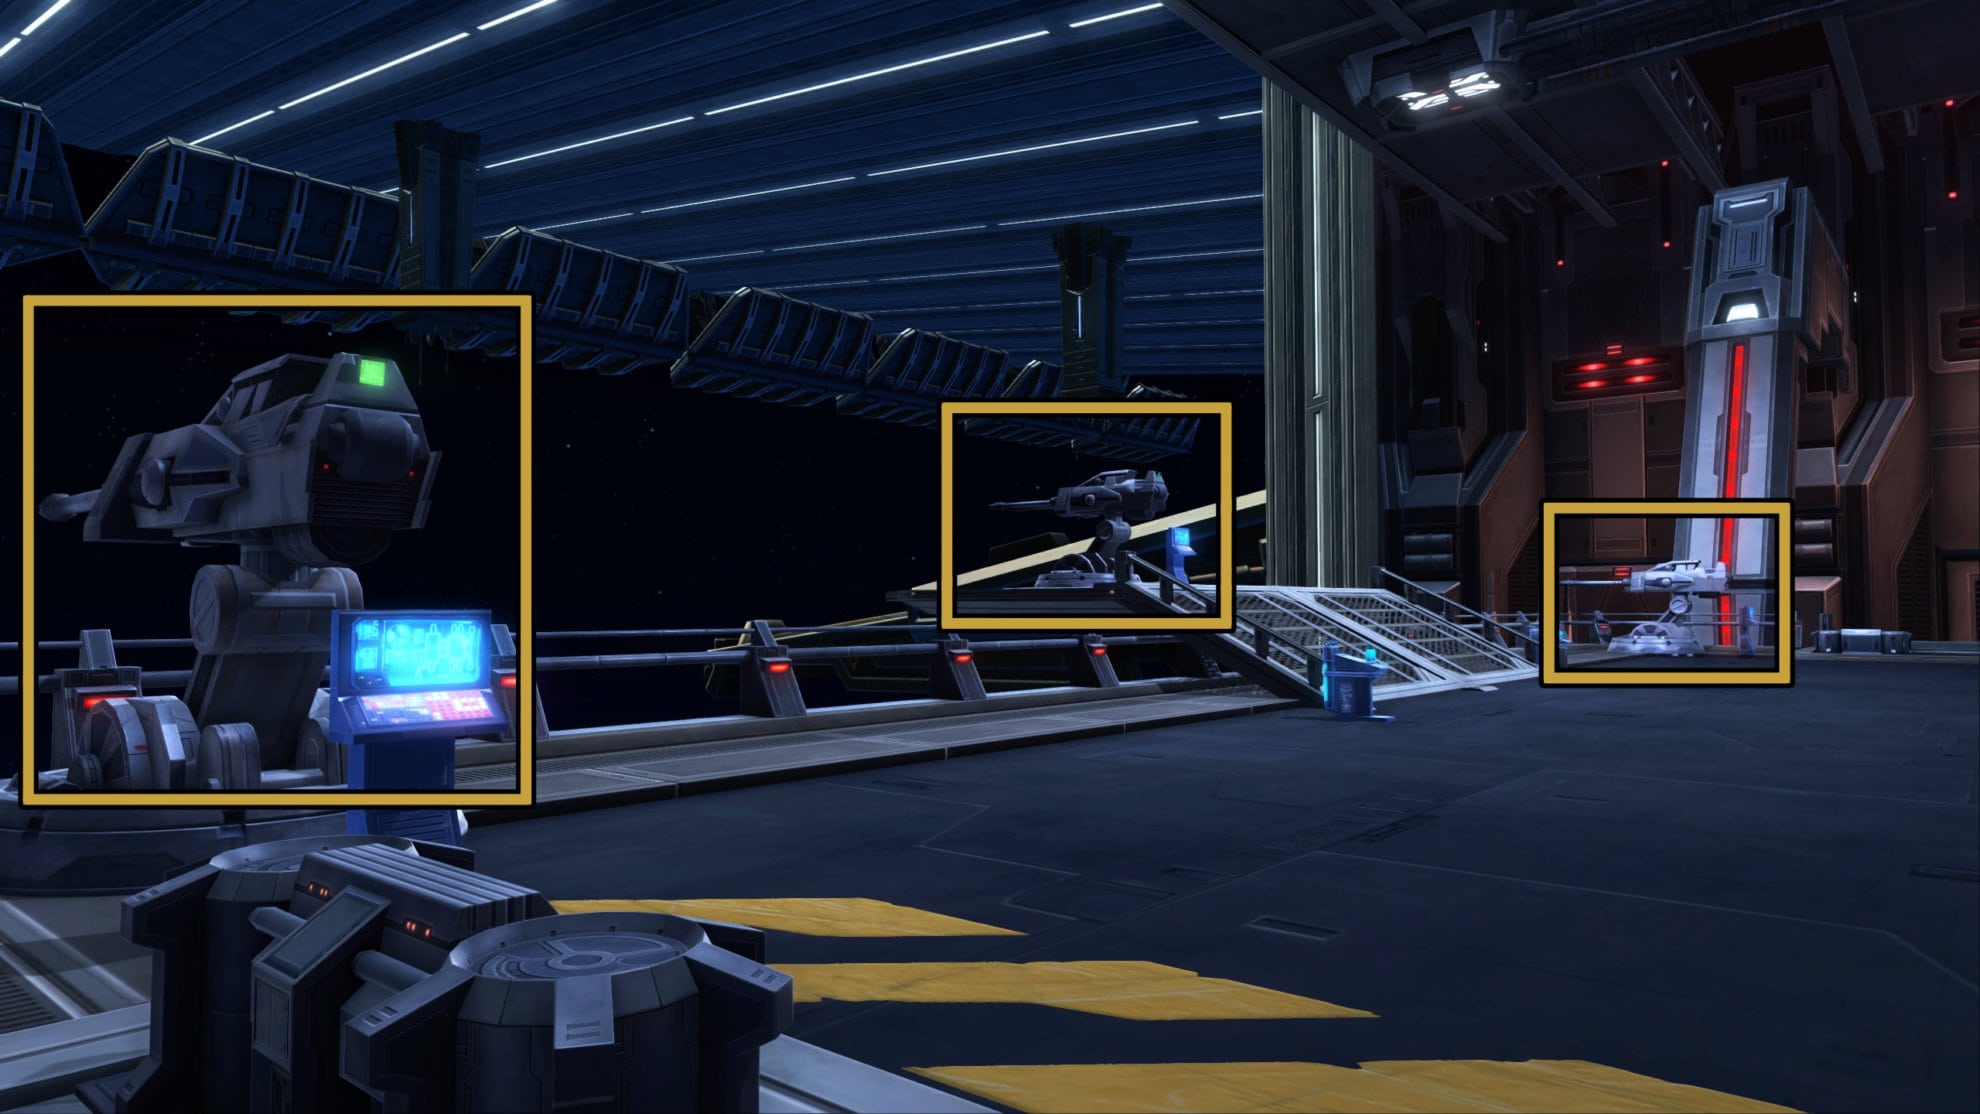
Bonus Mission: The Architect’s Tour
This Bonus Mission will only grant extra XP and not grant the bonus boss. For this bonus mission, you’ll need to disable four Assembly Monitors and six Weapons Consoles.
The Assembly Monitors can be found in the Hangar Deck of Darth Malgus’s Space Station.

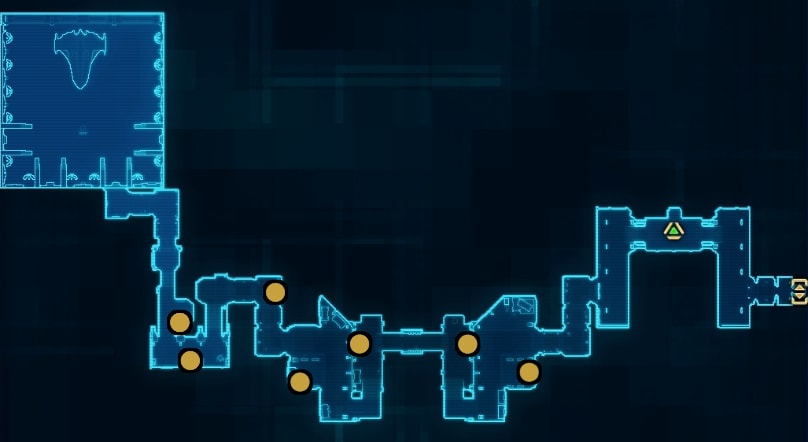
The Weapons Consoles are a bit more spread out and out of the way. Keep your eye out for these consoles.
The Weapons Consoles can be found in the Ion Cannon Chamber, Central Reactor Core, and Upper Reactor Core.
Bonus Mission: The Hidden Threat Phases 1 & 2
This bonus mission will eventually grant the bonus boss of The False Emperor flashpoint. To start this mission, defeat any enemy in the flashpoint. For the first phase, you’ll need to defeat 30 of Malgus’s Forces. For phase two, you’ll need to defeat 40 more of Malgus’s Forces. There are a lot of enemies in the hangar bay that you start out in. Defeat the enemies in the hangar bay to get a good head start for this.
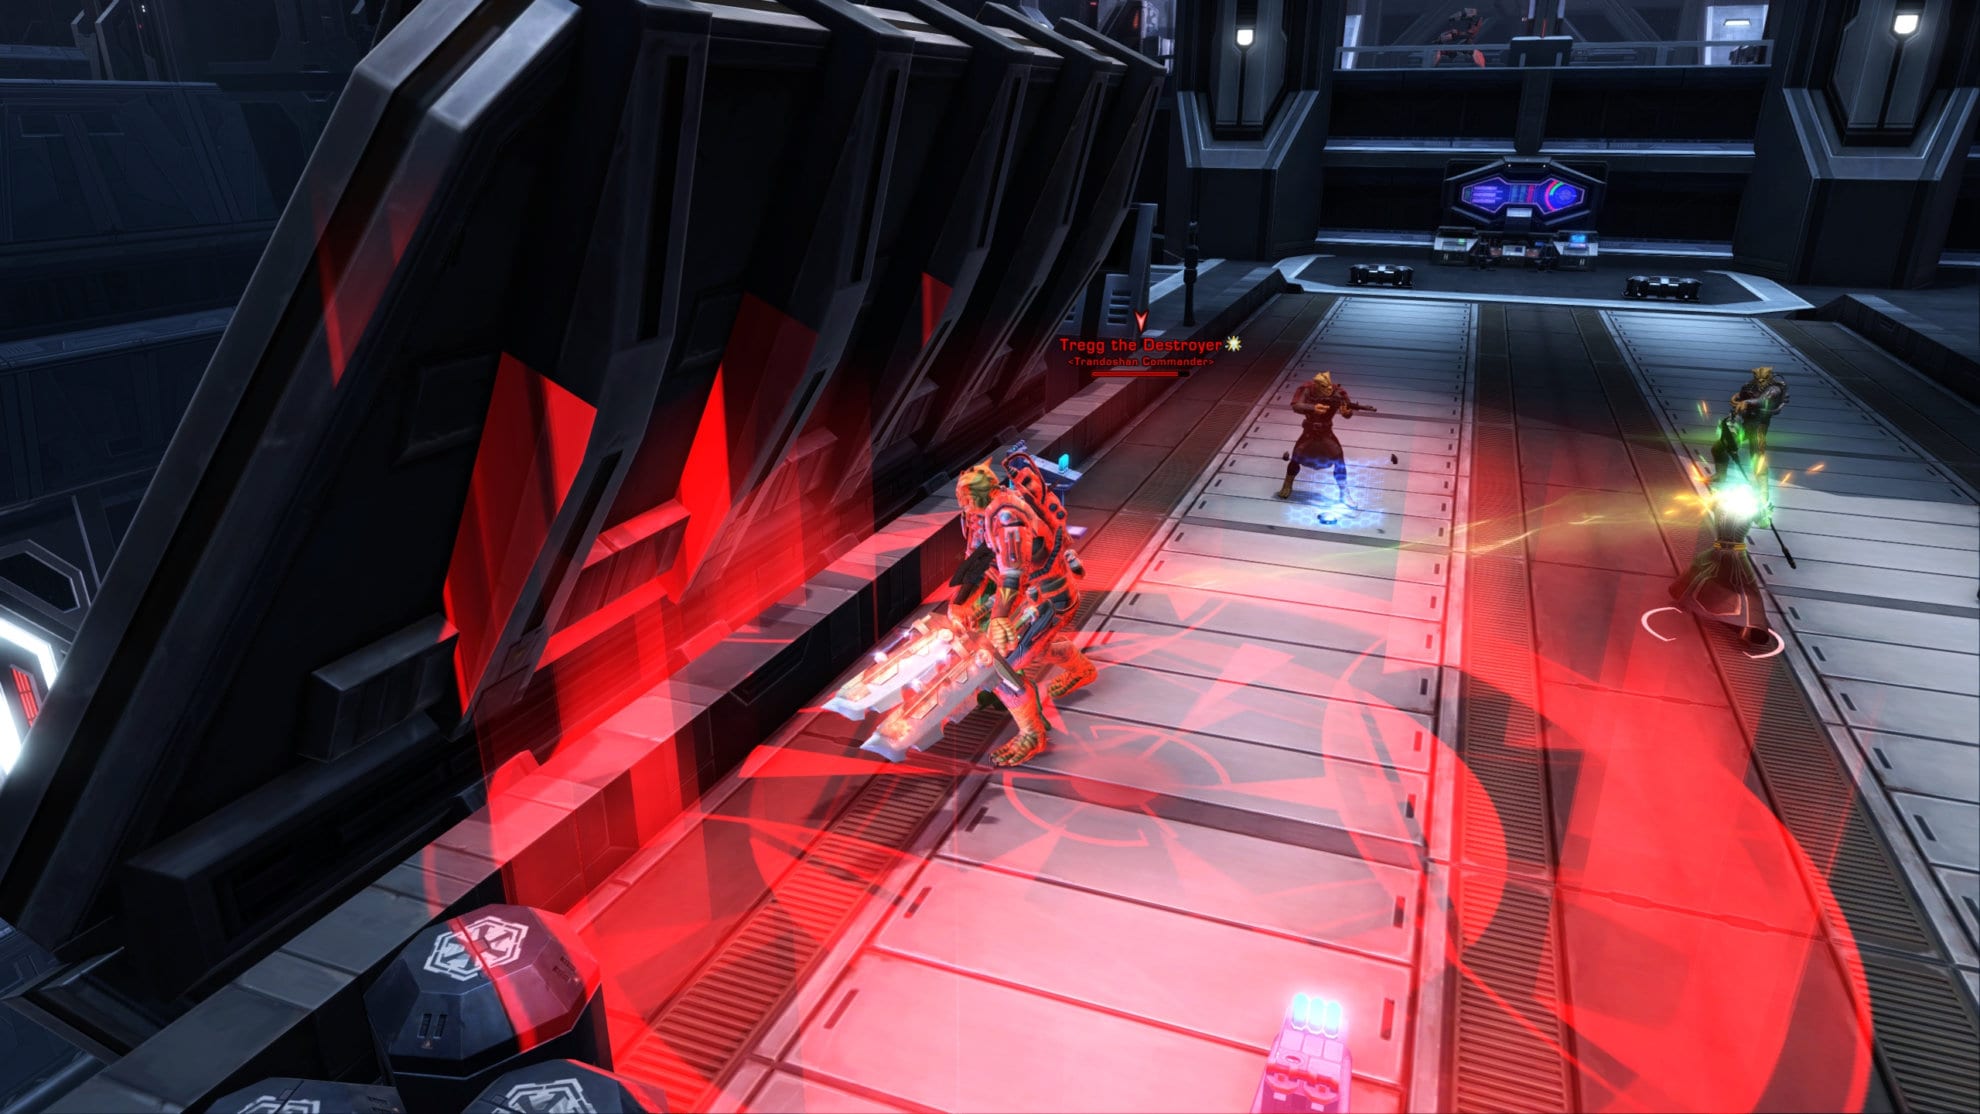
Mini-Boss 1: Tregg the Destroyer
Tregg the Destroyer is somewhat annoying but nothing you shouldn’t be able to handle. Defeat the adds surrounding him first then fight him under the canopies on the bridge. He’ll knock his target into the air, so if you’re near exposed parts of the bridge then you’ll very likely be knocked off. The canopies on the bridge will catch you and keep you in the fight.
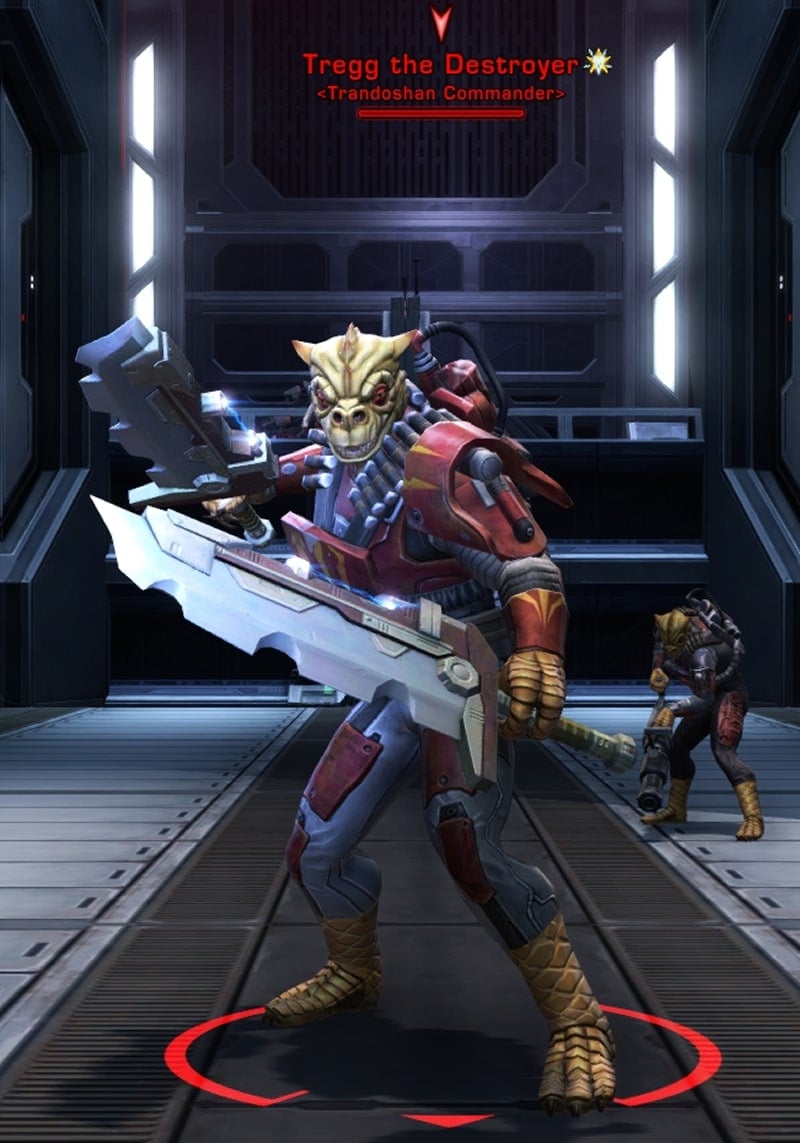
Tregg will sometimes use an AoE attack as seen by the red ring beneath him. Try to stay out of this if you can to avoid unnecessary damage, but stay under the canopied area. Do be aware that his attacks will shred your armor, this in turn increases your incoming damage from him.
Veteran and Master Mode Diffferences
There are no mechanical differences with Tregg on Veteran or Master Mode.
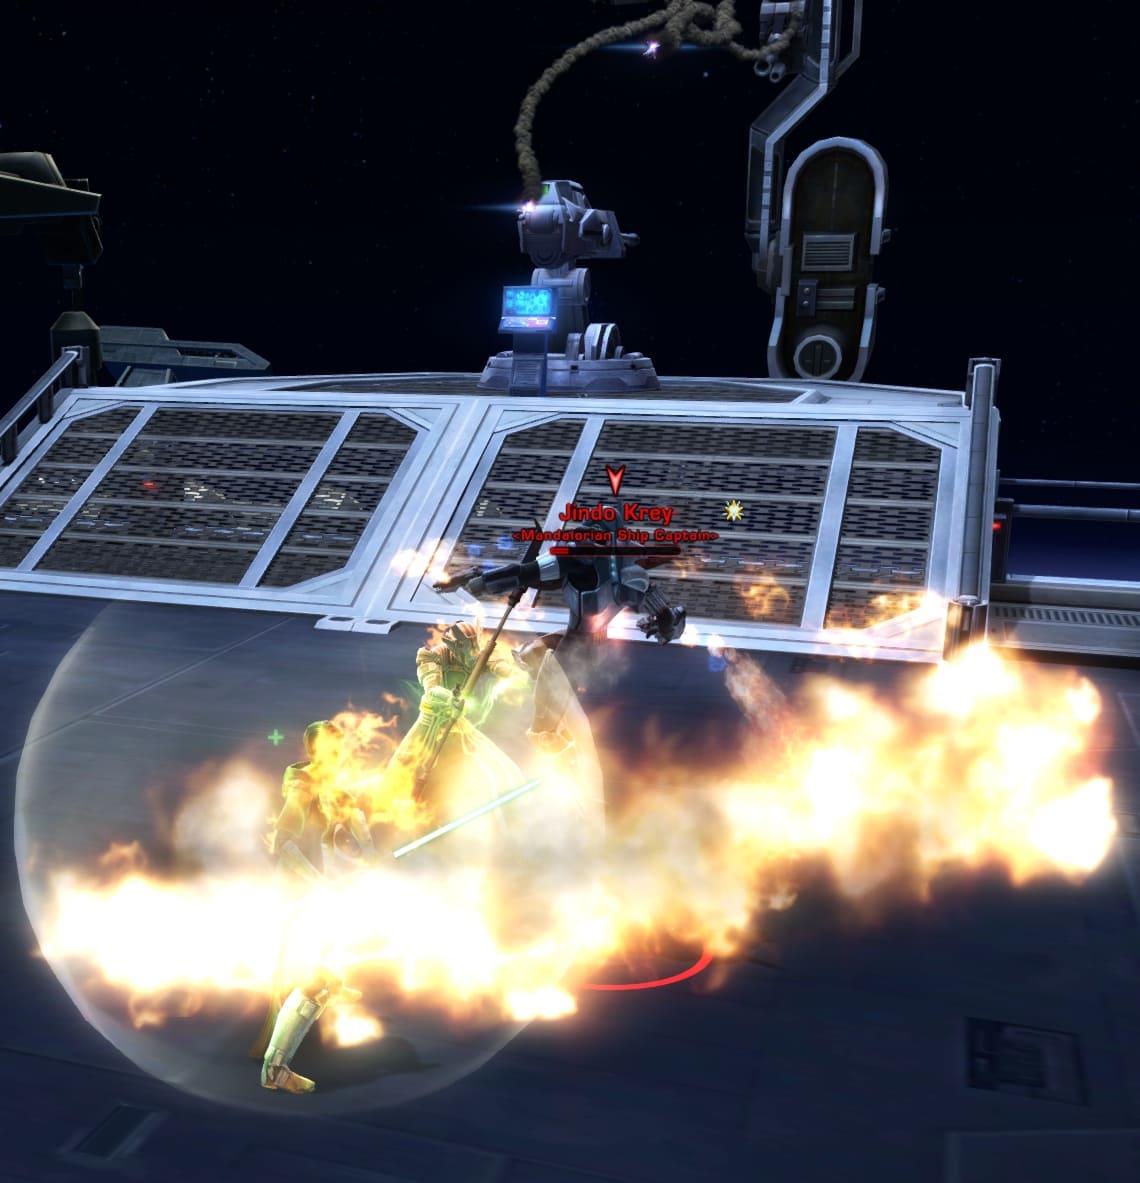
First Boss: Jindo Krey
Jindo Krey is a Mandalorian that will fight you with his ship assisting him. This ship will constantly fire missiles at the group so you need to keep it at bay when you need to heal up.
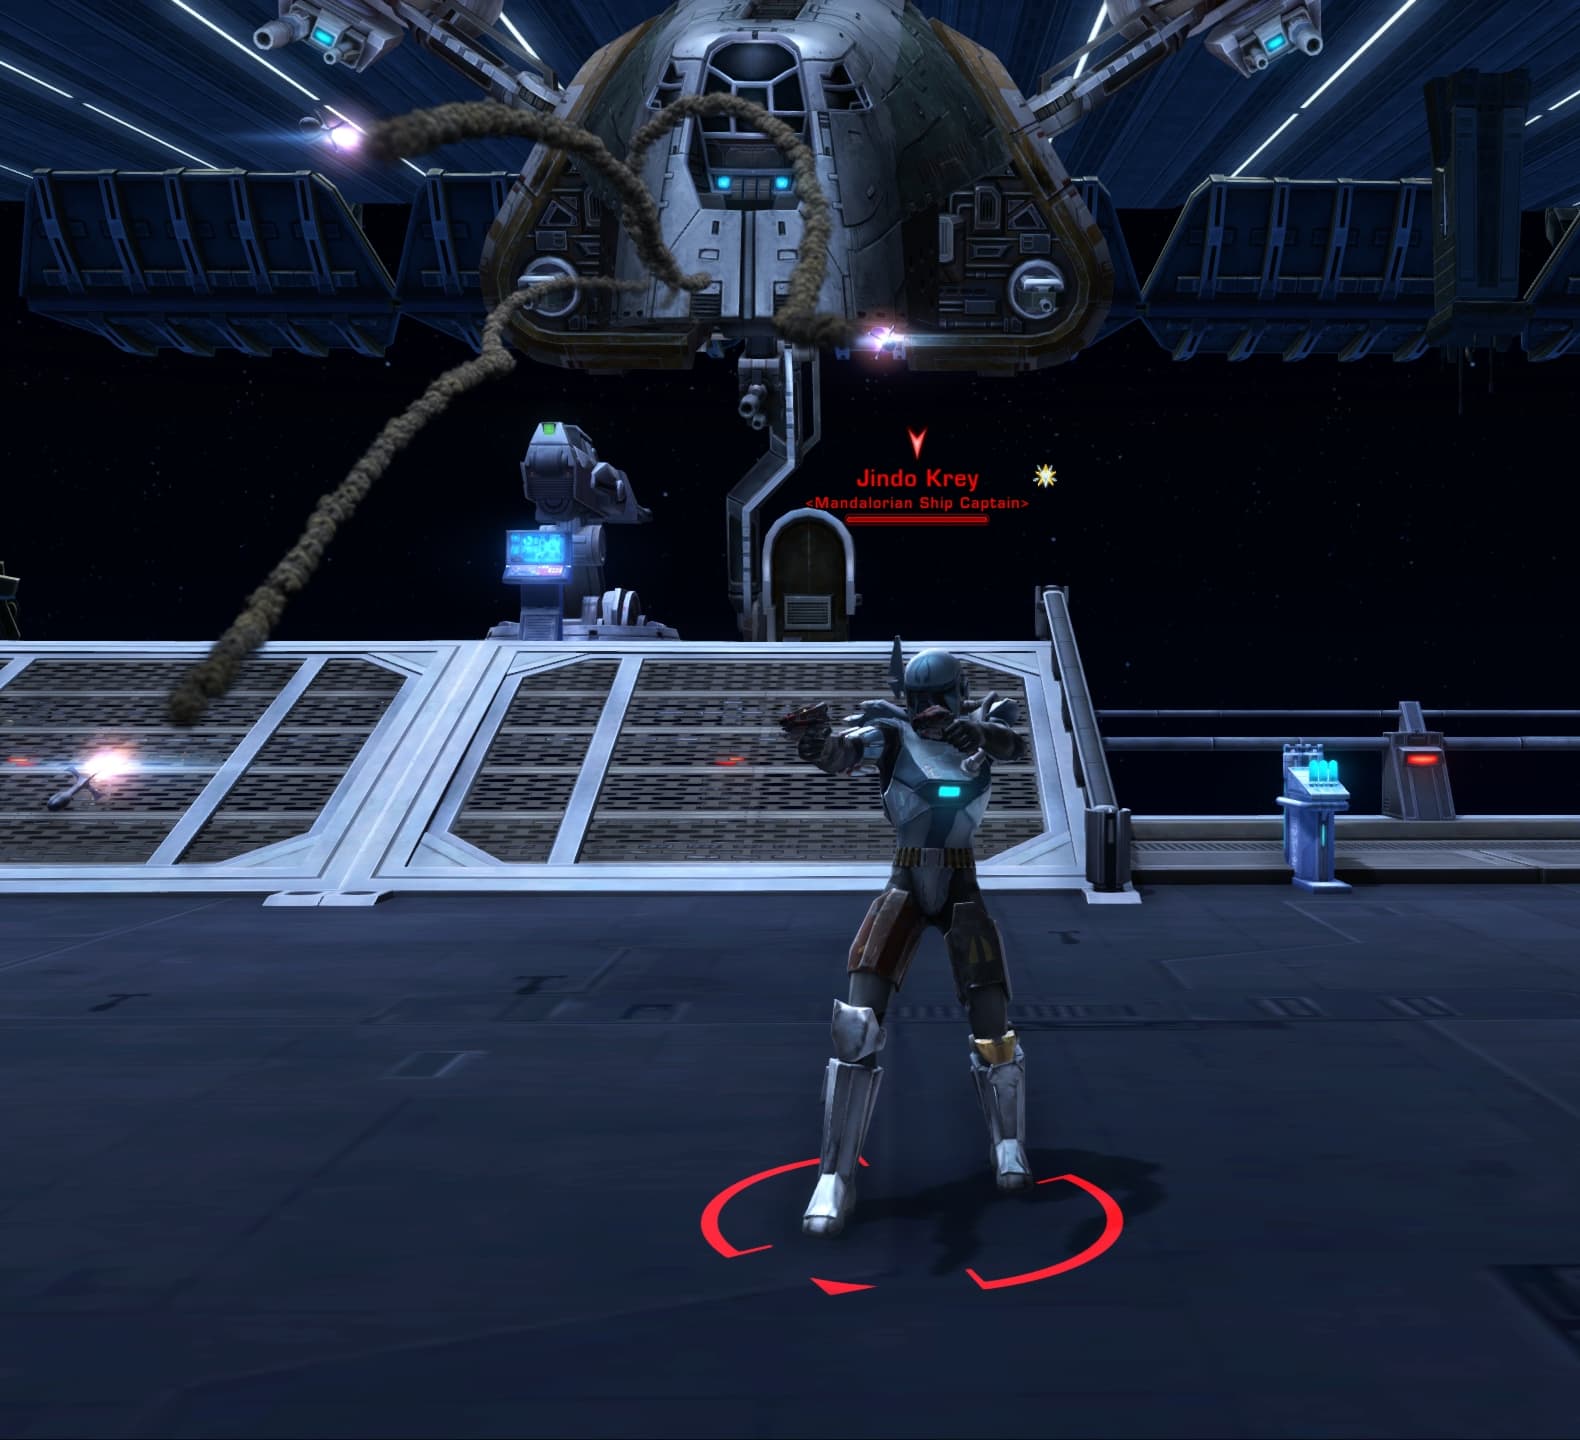
To disable the ship, you’ll need to use one of the three turrets facing outer space. Jindo Krey mwill grapple you if you do this at the middle turret. He’ll then proceed to punch you into the air. Someone needs to get to that middle turret to push his ship back for a bit.
Once you fire the ship with the turrets, the ship will retreat. The two turrets on the sides are unreliable, use the turret in the middle!
After you push back the ship with the turrets, it’ll fire larger missiles at you as seen by red AoE rings spawning on the floor. Step out of these red rings to avoid the damage from the rockets.
When the ship falls back, Jindo Krey will get an Absorption Shield as seen by the blue shield around him. This shield has a limited hit point pool, so you can destroy it by dealing enough damage. When the shield breaks, the ship will come back in close range to fire missile barrages again.
The purpose of pushing the ship back in this fight is to give your healer an easier time to do their job. Whenever party members are hit by the missile barrage, they may receive a stack of the Target Lock debuff. This stacks up to three times and each stack increases incoming missile damage by 100% per stack.
The AoE missiles are preferable since you can negate their damage entirely by moving out of the way. The AoE fields are easily avoidable whereas the rocket barrage attacks targets randomly. If you’re good on health, don’t send the ship back so you can damage Jindo Krey. If you get too many stacks of Target Lock, push the ship back.
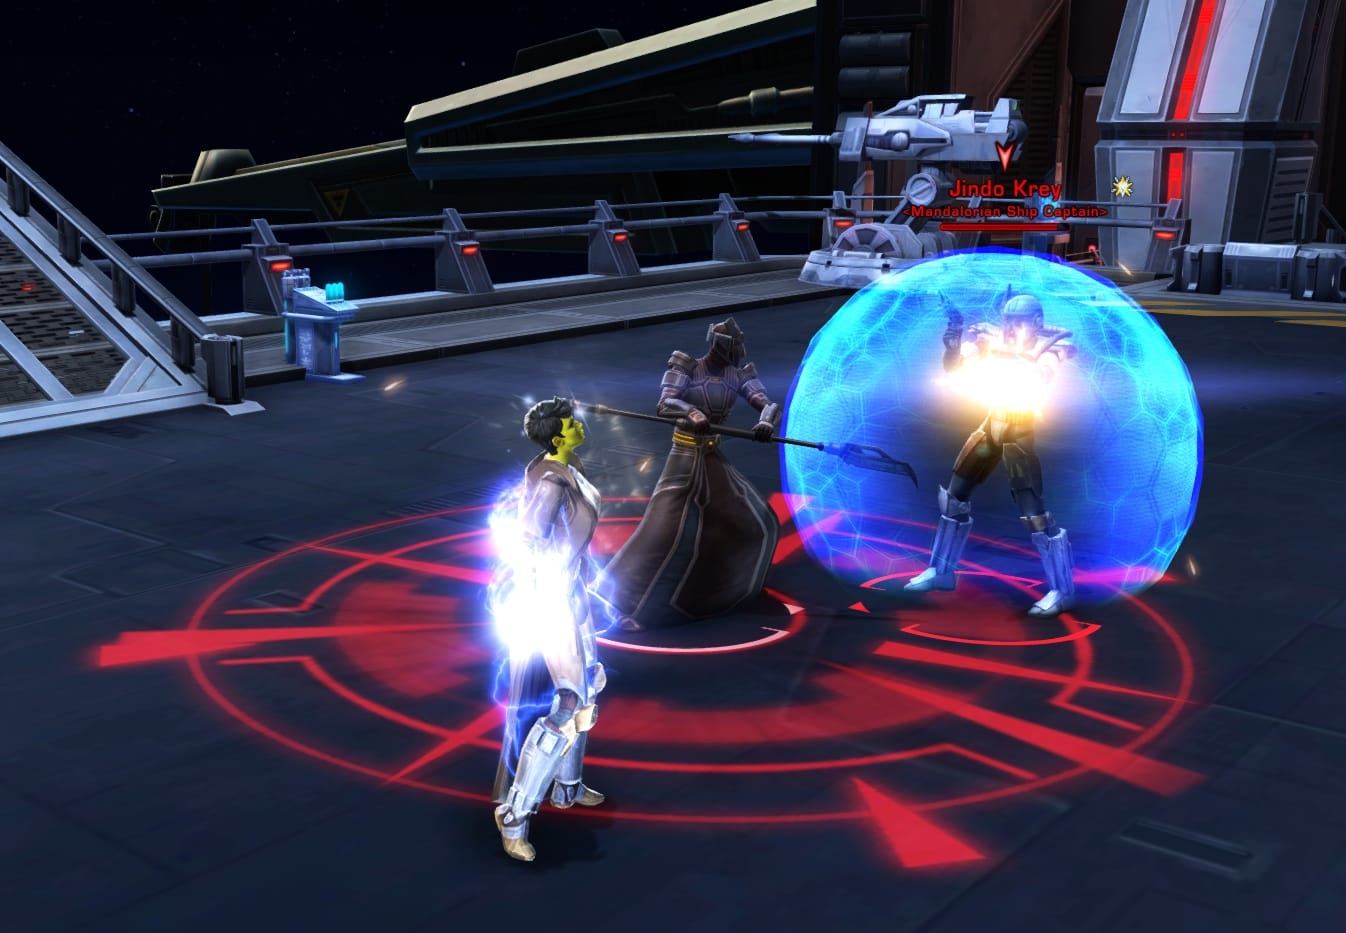
Jindo Krey will occassionally charge a Flame Sweep attack. Interrupt this or step back to avoid getting hit by flames.
Repeat the process of using the turrets on the ship to heal and squeezing damage on Jindo to defeat him.
Veteran Mode Differences
There are no mechanical differences on Veteran Mode. If you have good gear, the missile barrages won’t really be a threat.
Master Mode Differences
There are no mechanical differences on Master Mode. The missile barrages deal an insane amount of damage if you let yourself get two to three stacks of Target Lock. Get the ship off you to remove the debuff and heal. His Flame Sweep hurts much more so try to interrupt it whenever you can or get out of the area.
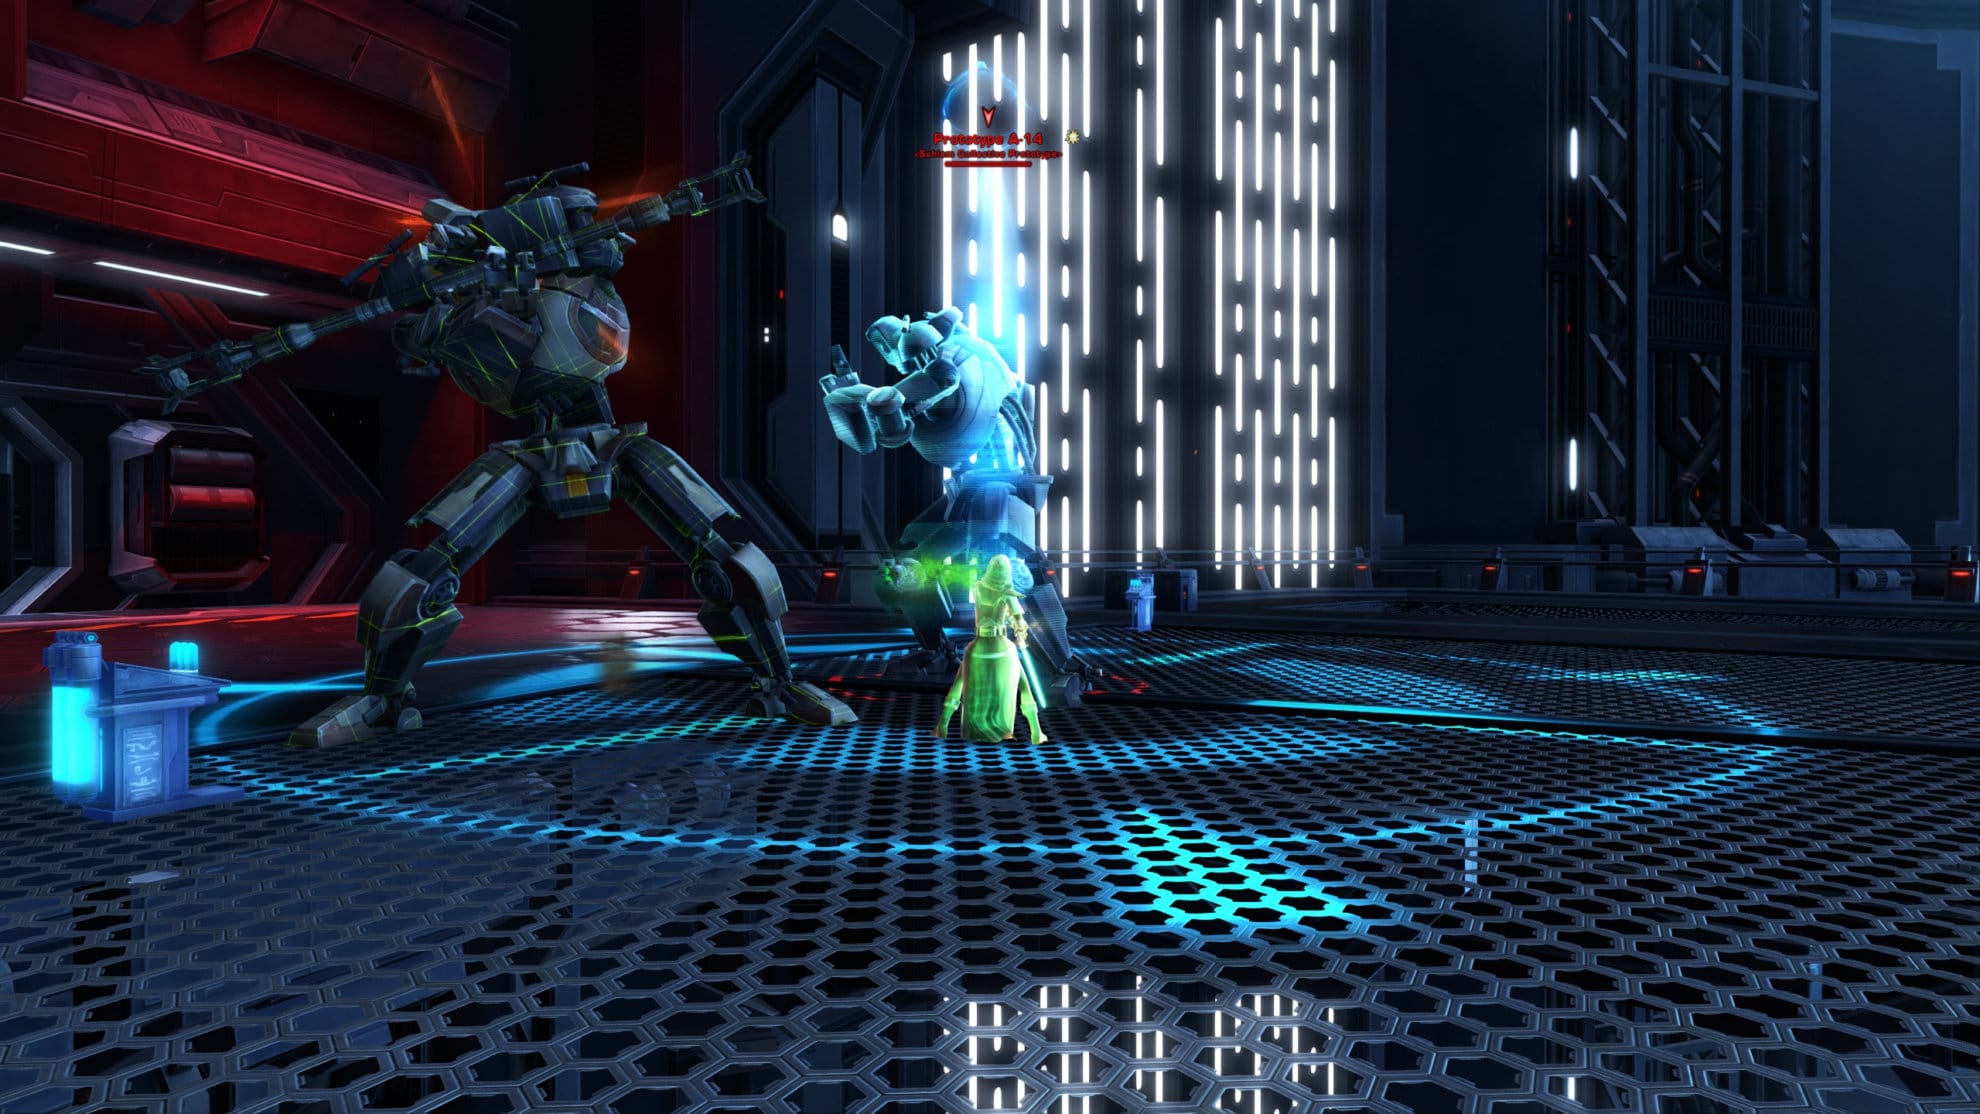
Mini-Boss 2: Prototypes A-14 and B-16
These two droids may seem intimidating due to their size, but they’re quite easy to fight.
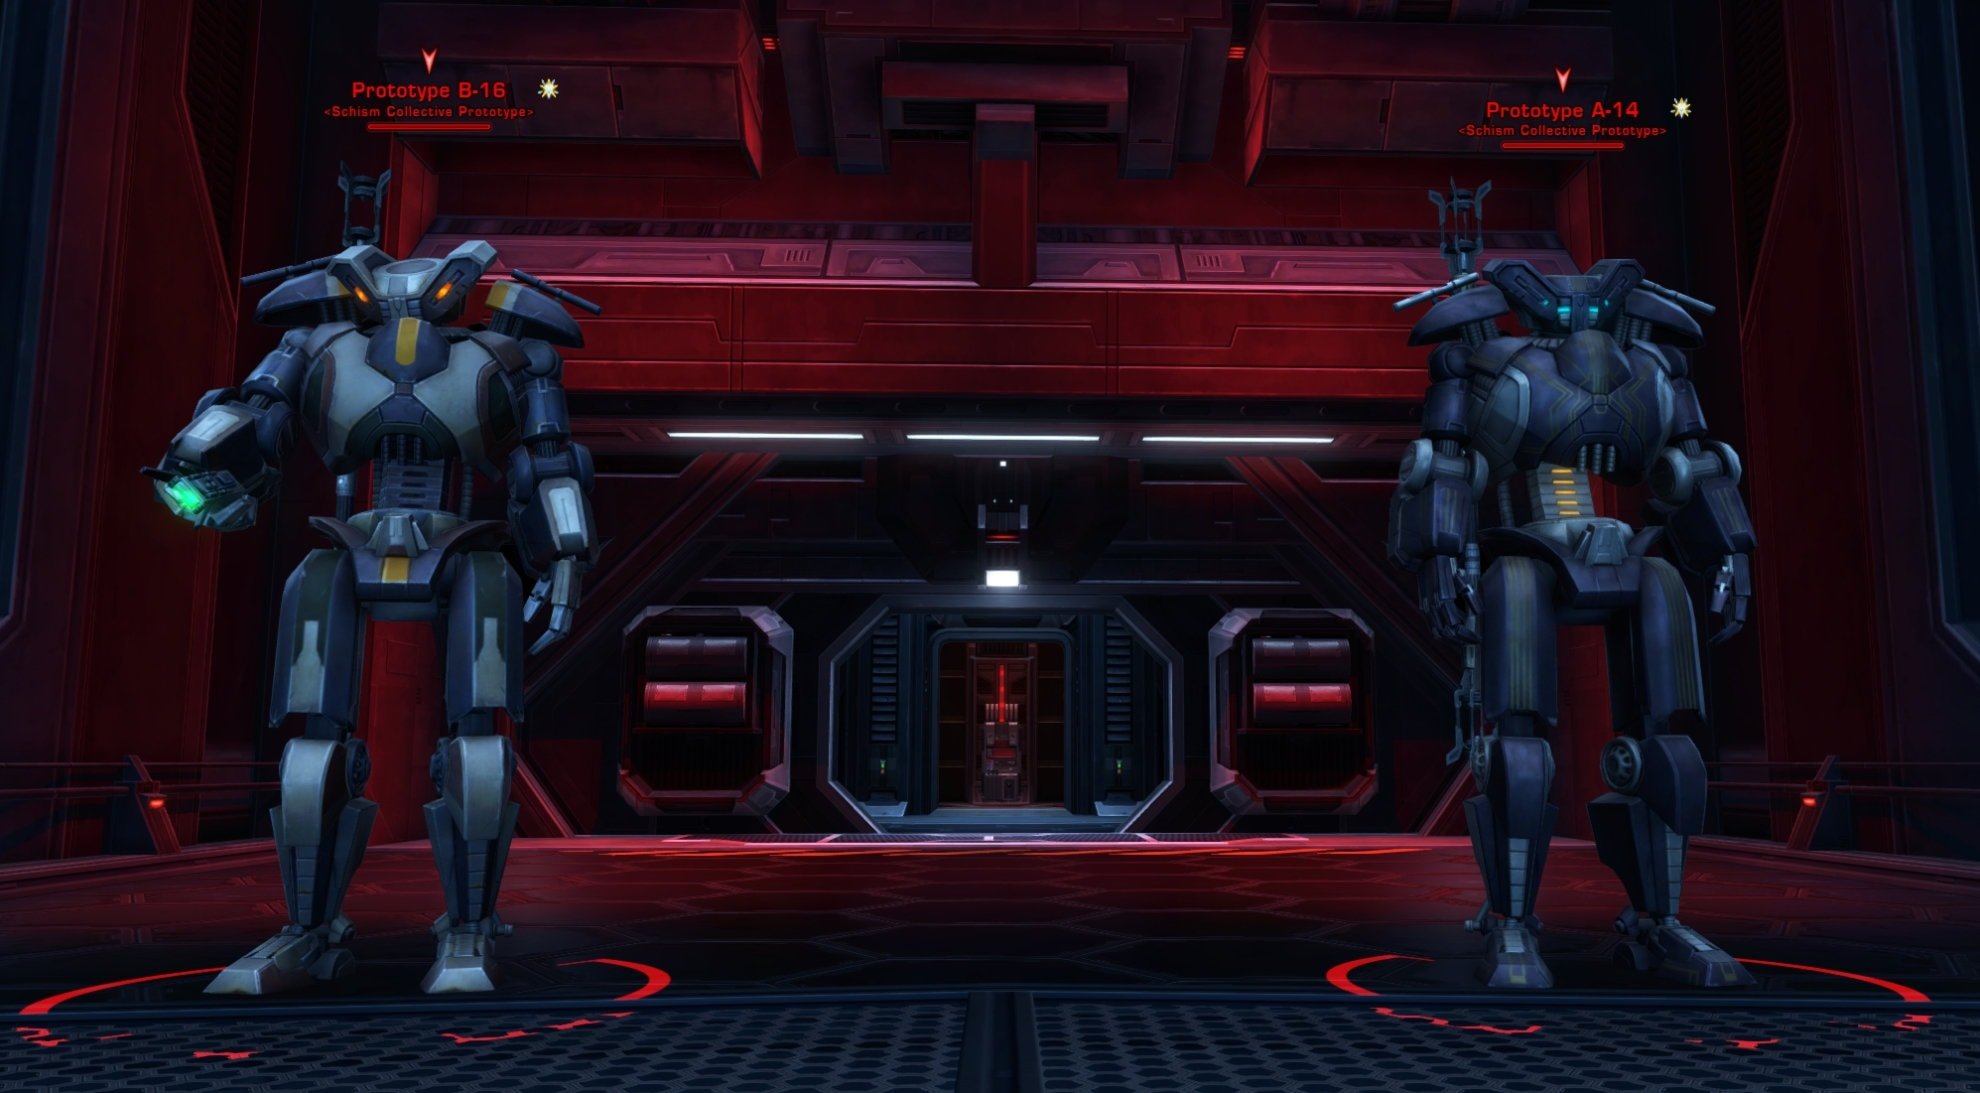
During the battle, one of the droids will activate a shield that will make them immune to damage. The other will attack the group and if they survive long enough, they’ll swap who has the shield and who attacks. Keep in mind that the one with the active shield can use ranged attacks at a target, so a tank should maintain aggro on both droids.
Veteran and Master Mode Differences
There are no mechanical differences on Veteran or Master Mode.
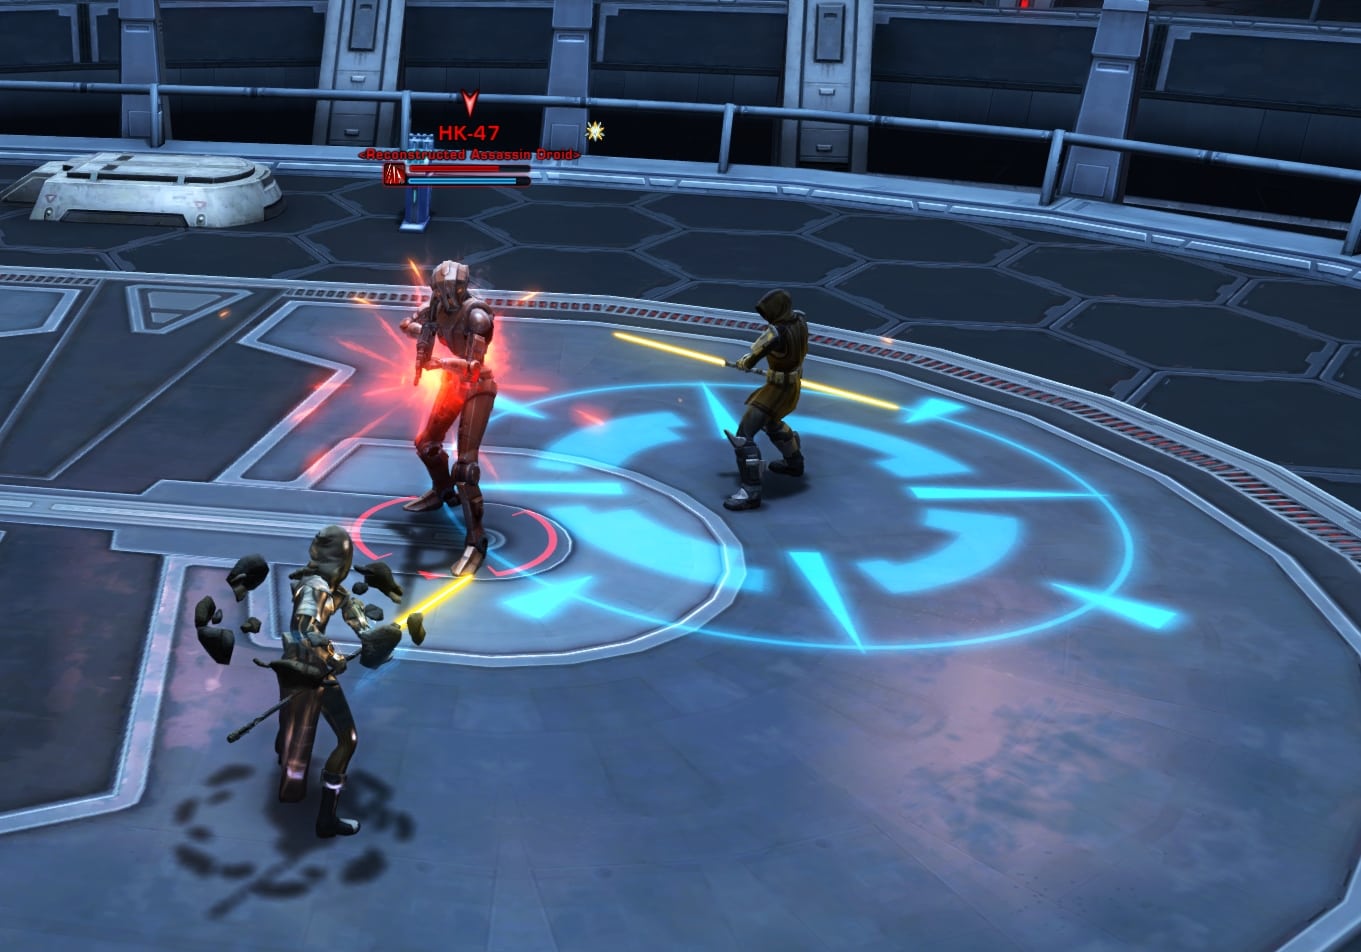
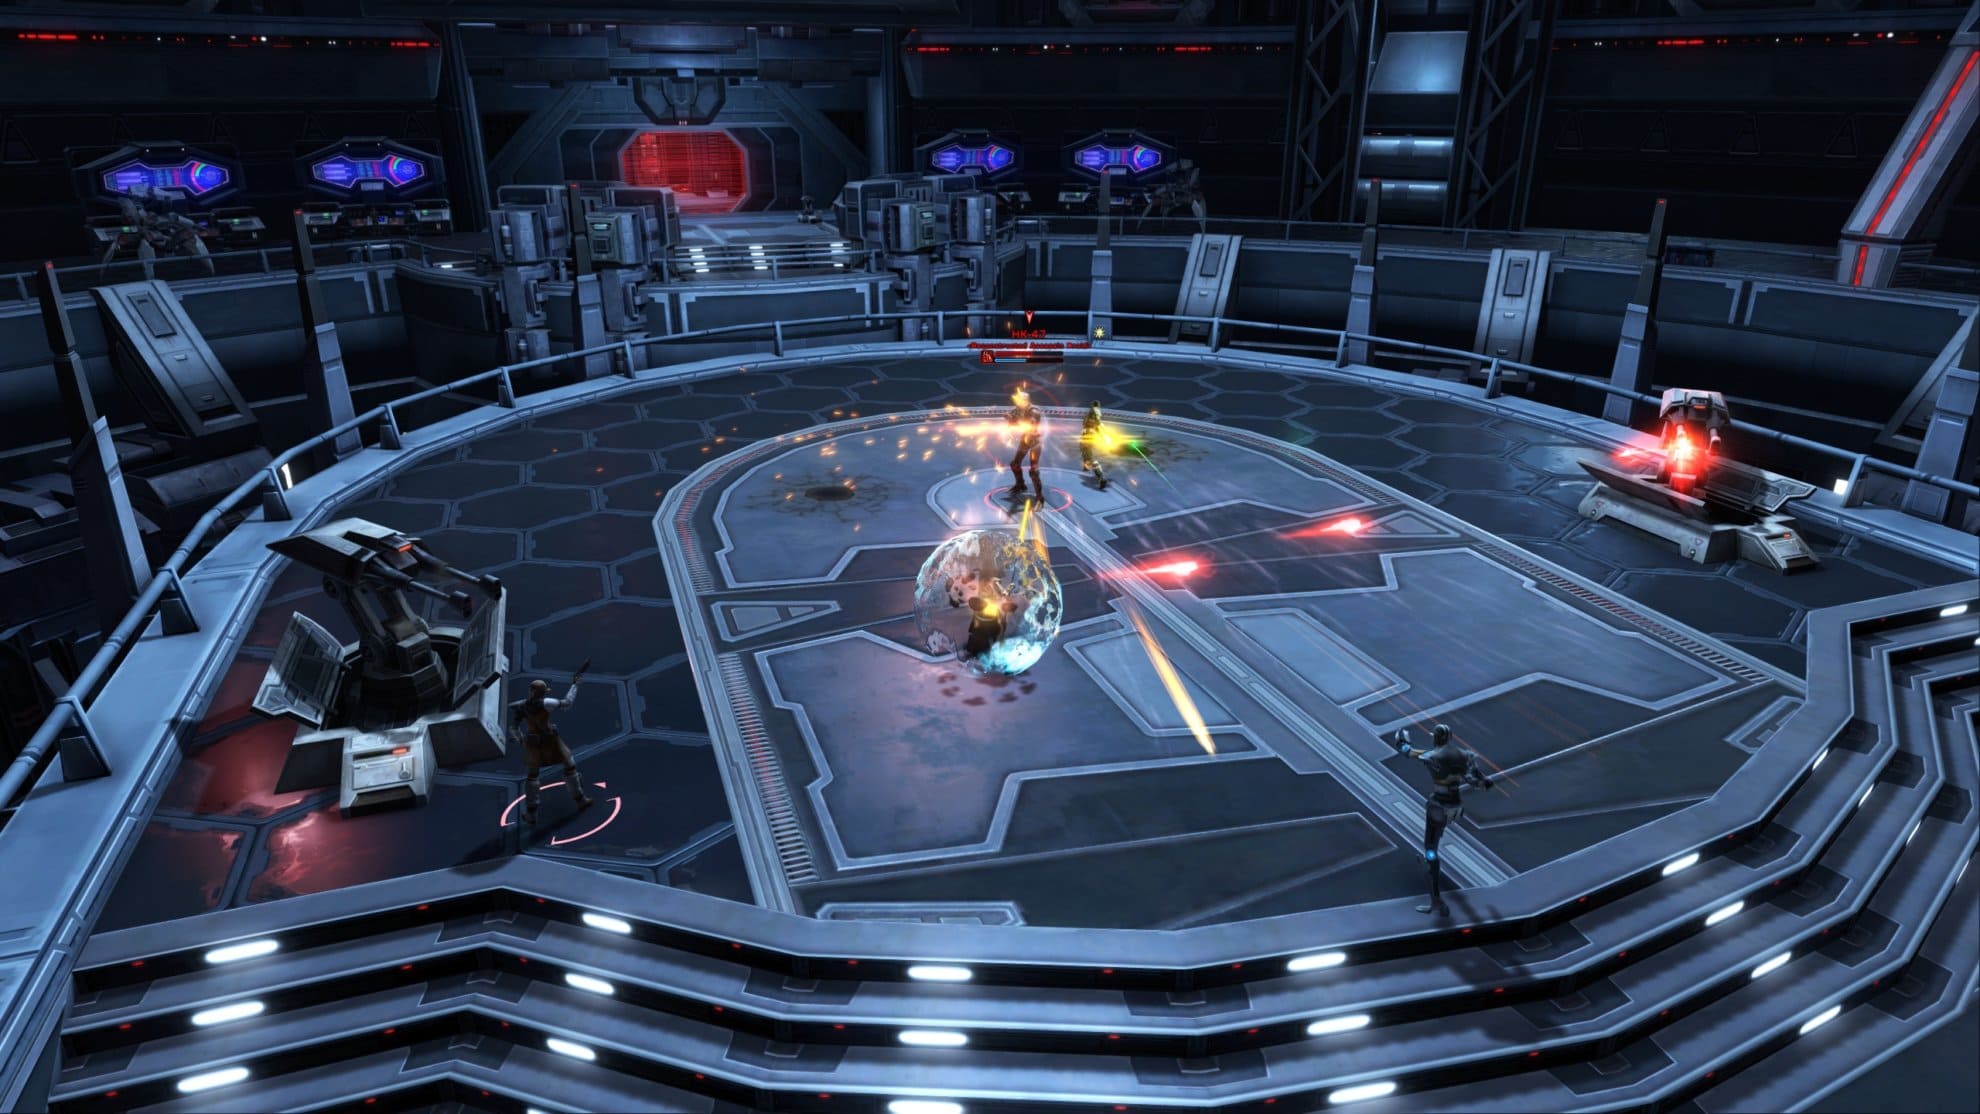
Second Boss: HK-47
This familiar face is loved by many KOTOR fans, unfortunately he’s here to assassinate you. Don’t let his stature fool you, he can be very durable and slippery.

The fight starts out simple enough as it’s a tank and spank. He’ll choose a random target to snipe so if you’re his target, prepare any defenses you feel you may need. When he reaches around 50% of his hit points, he’ll stun his primary target and turn invisible. He’ll emerge from stealth and stab a random target repeatedly.
This target will be unable to move or act for the duration of this ability. A healer should heal this ally during this time while a tank needs to guard them to reduce incoming damage.

If you have the mission to obtain HK-51 as a companion, this is the boss fight that will grant you the HK Weapons Protocol. Simply defeat HK-47 on any difficulty mode to pick up the Weapons Protocol to further increase your progress on getting HK-51!
Veteran Mode Differences
In Veteran Mode, rockets will be fired for the first phase of the fight. They’ll target random group members as seen by a blue ring beneath them. If you’re targeted by this, run away from the circle when it turns red. Avoid putting your allies into the rocket’s AoE.
Master Mode Differences
The rockets with the AoE will deal around 60,000 damage. Be sure to dodge the rockets as this is a significant chunk of damage. When HK-47 hits around half health, he’ll summon two turrets to assist him. Take out these turrets as soon as they pop up then focus on HK-47 again.
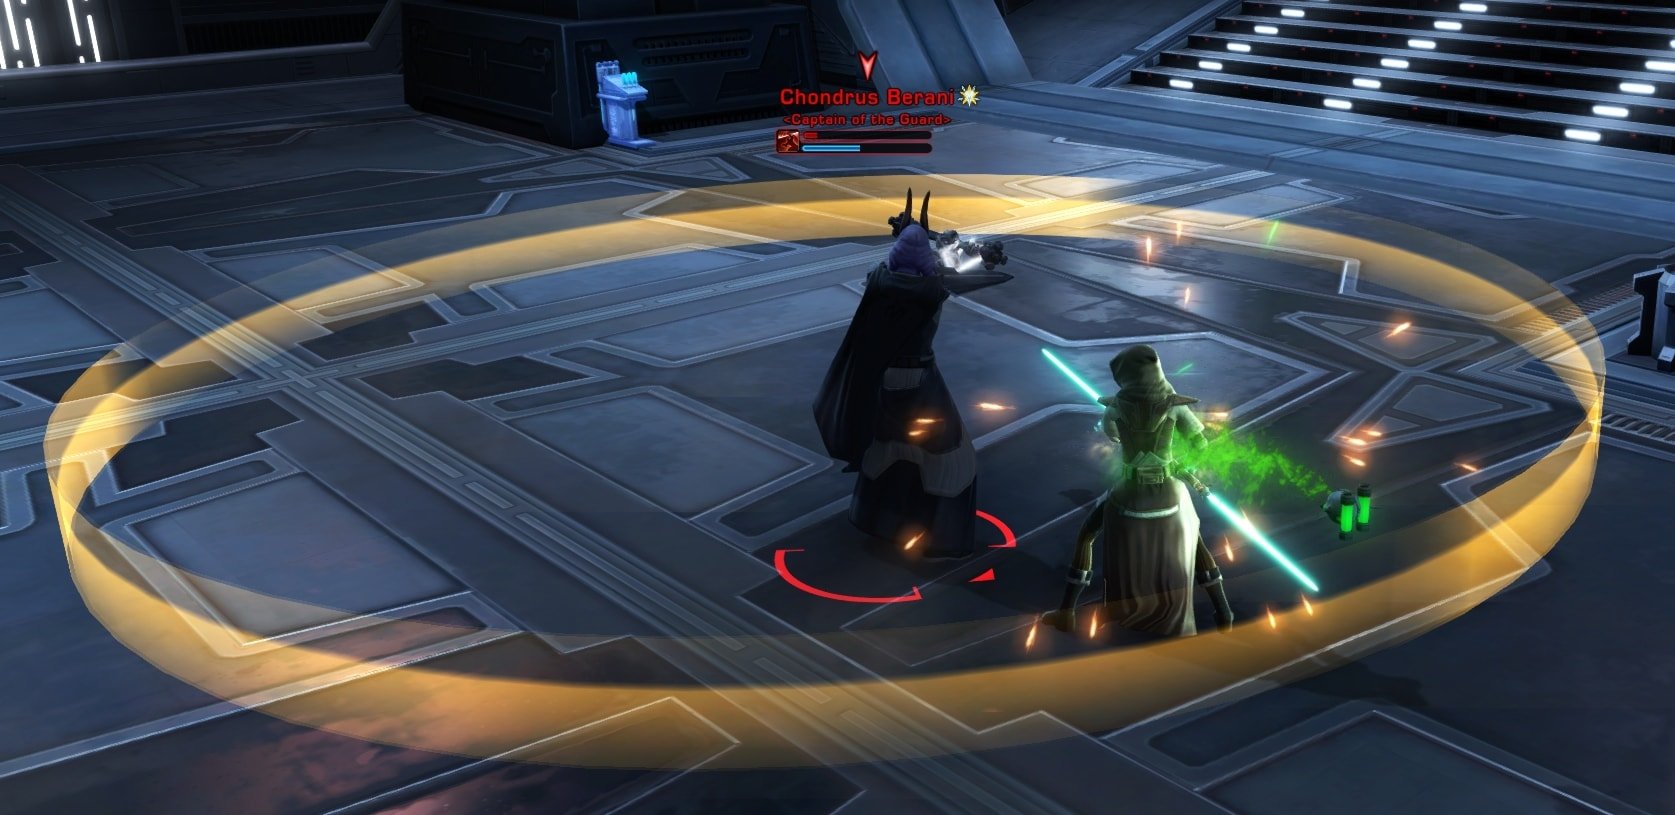
Mini-Boss 3: Condrus Berani
Defeat the Imperial Guards accompanying Condrus before you focus him. He’s a simple obstacle that uses two AoE pushes. One is a circular AoE push centered around himself that pushes away anyone within a few meters of him.
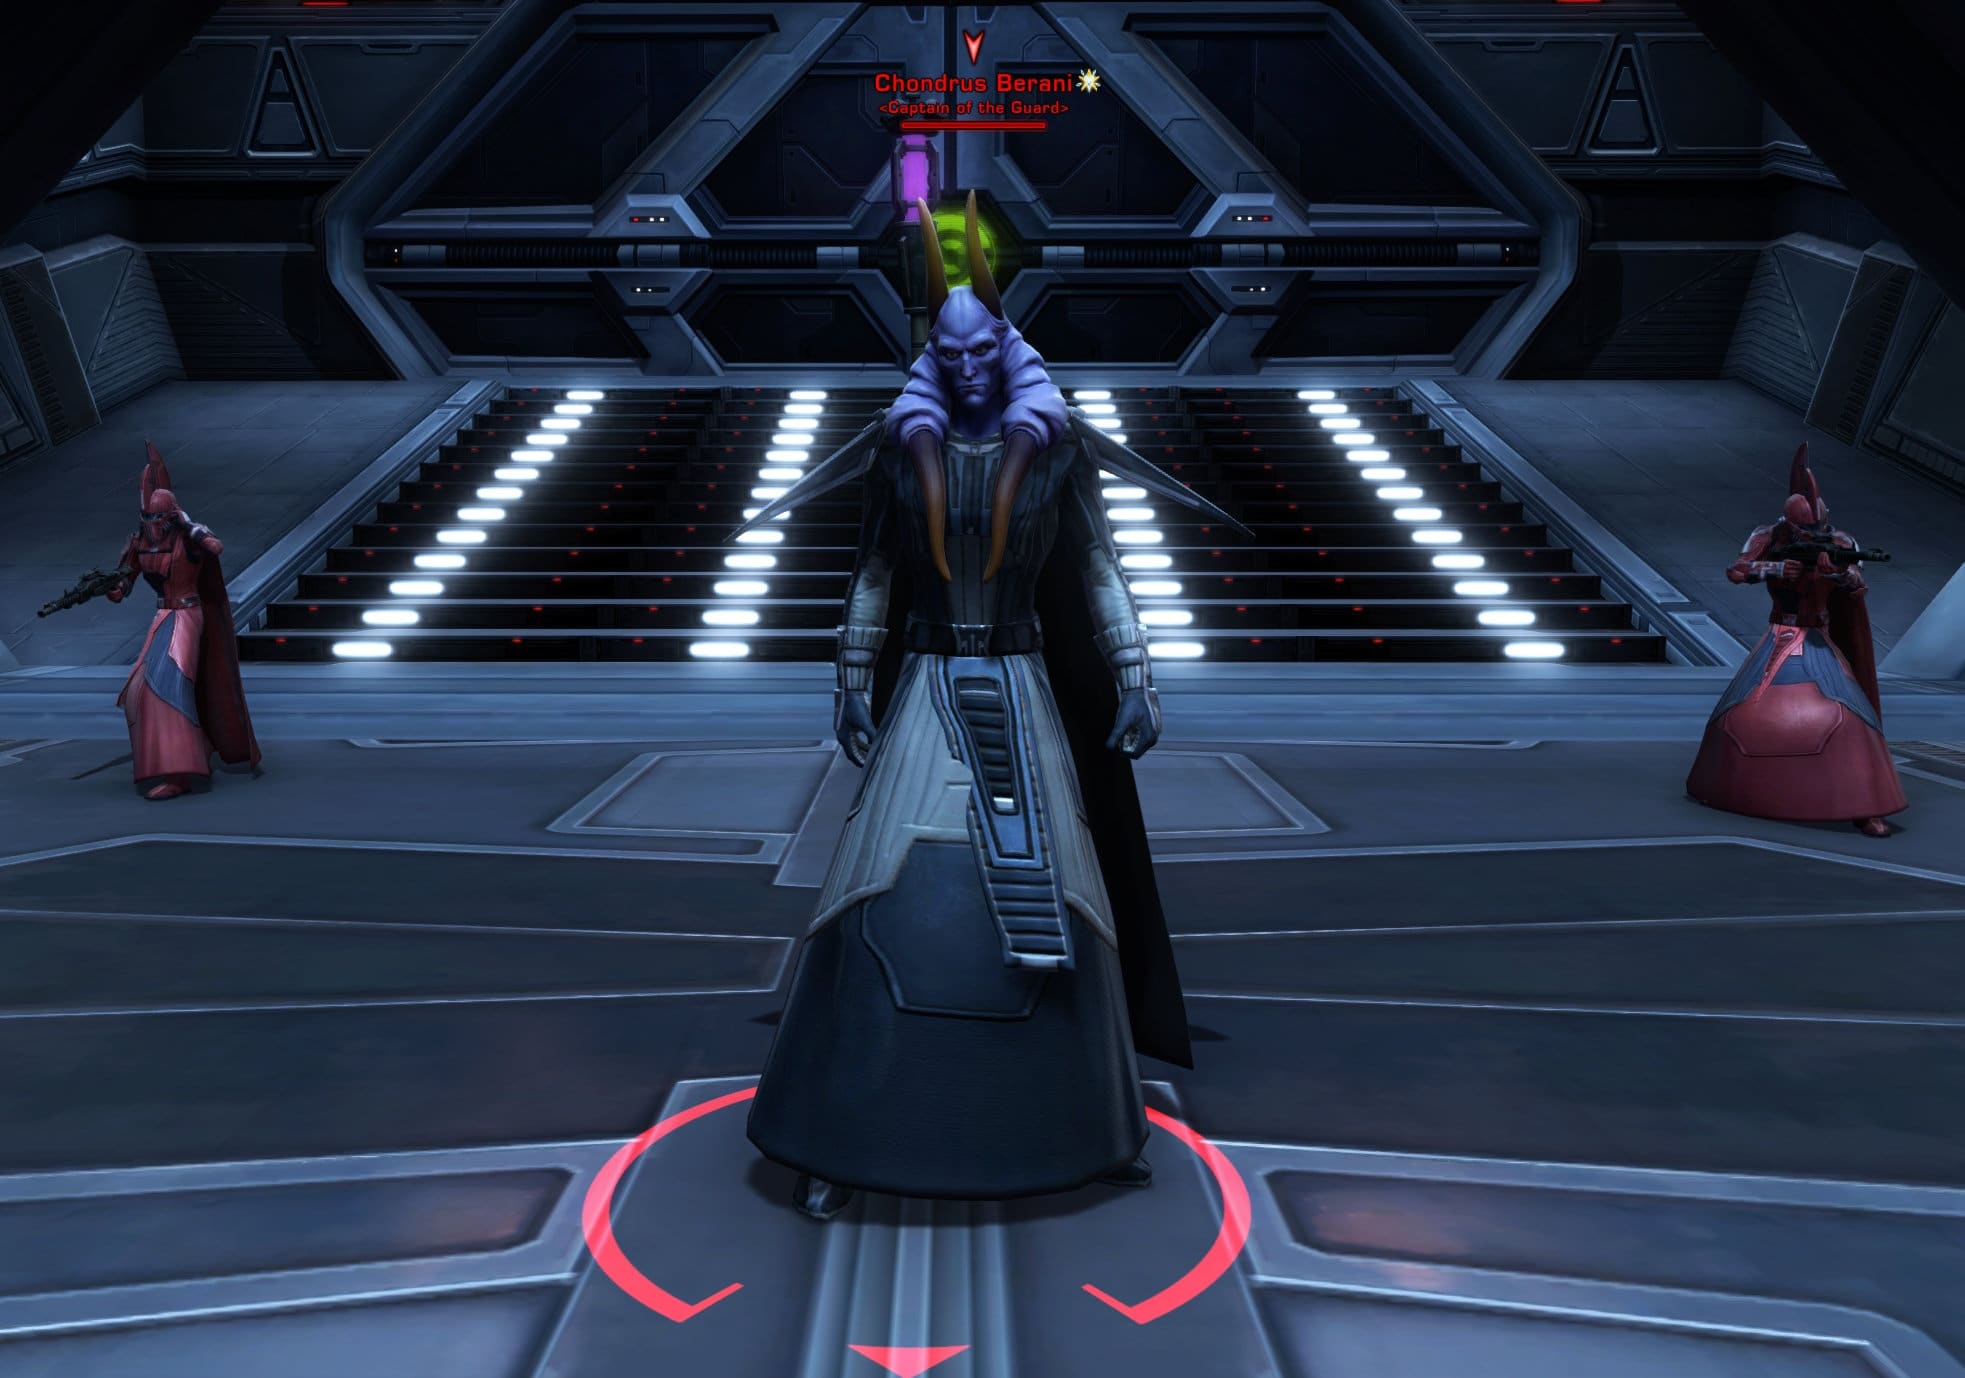
His second AoE push is far easier to avoid. It’ll appear as a channeled ability where a yellow rectangle appears in front of him. Stay out of this small rectangle to avoid being knocked up into the air.
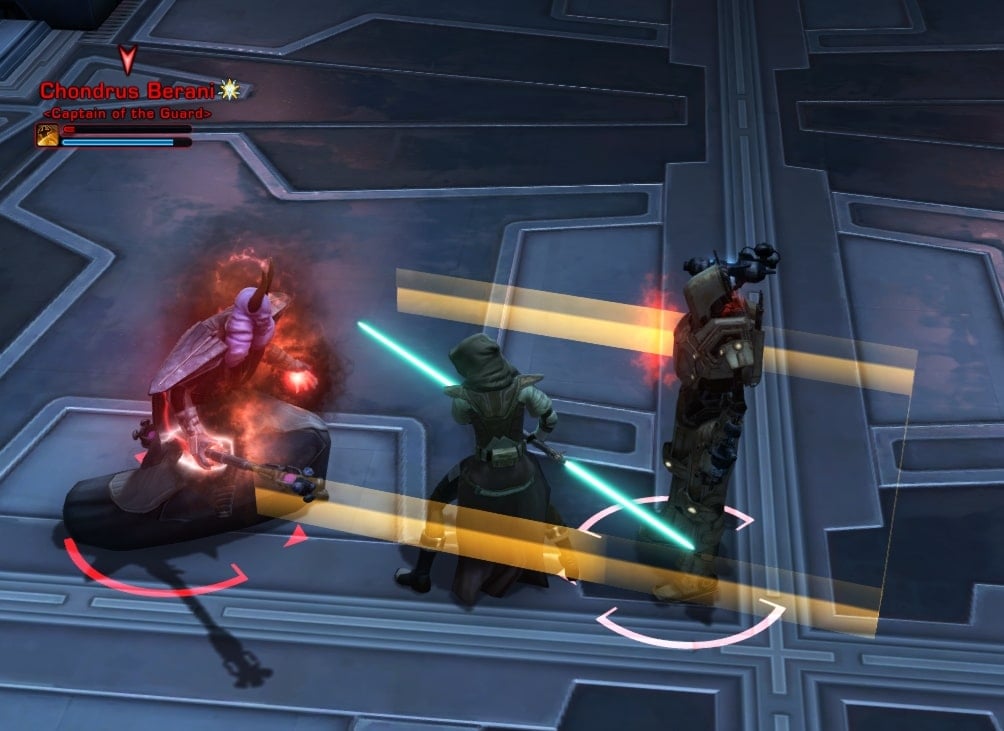
If you see a yellow circle around him, he’s using an AoE weapon attack. He’ll stand still for the duration so you can just walk out and use any ranged attacks if you want to avoid the damage.
Veteran Mode and Master Mode Differences
There are no mechanical differences on Veteran or Master Mode.
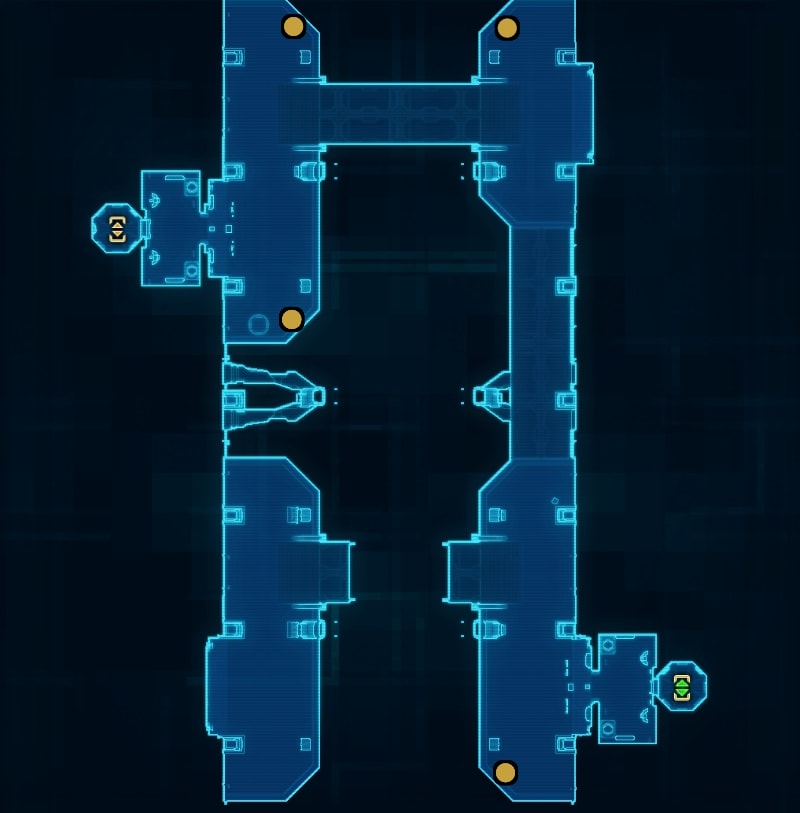
Bonus Mission: The Hidden Threat Phase 3
For the third phase of The Hidden Threat, you’ll need to override six Command Consoles. These can be found on the Command Deck, with the last one going south into the area that leads to the bonus boss.
Bonus Mission: Hidden Threat Final Phase
After overriding all of the command consoles, disable the Stasis Chamber located in the Emperor’s Vault. There are three consoles you’ll need to interact with around the room.
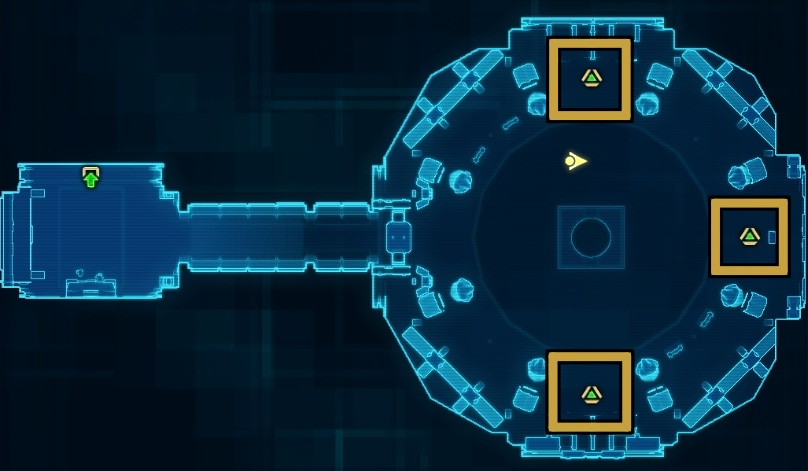
Optional Bonus Boss: Sith Entity
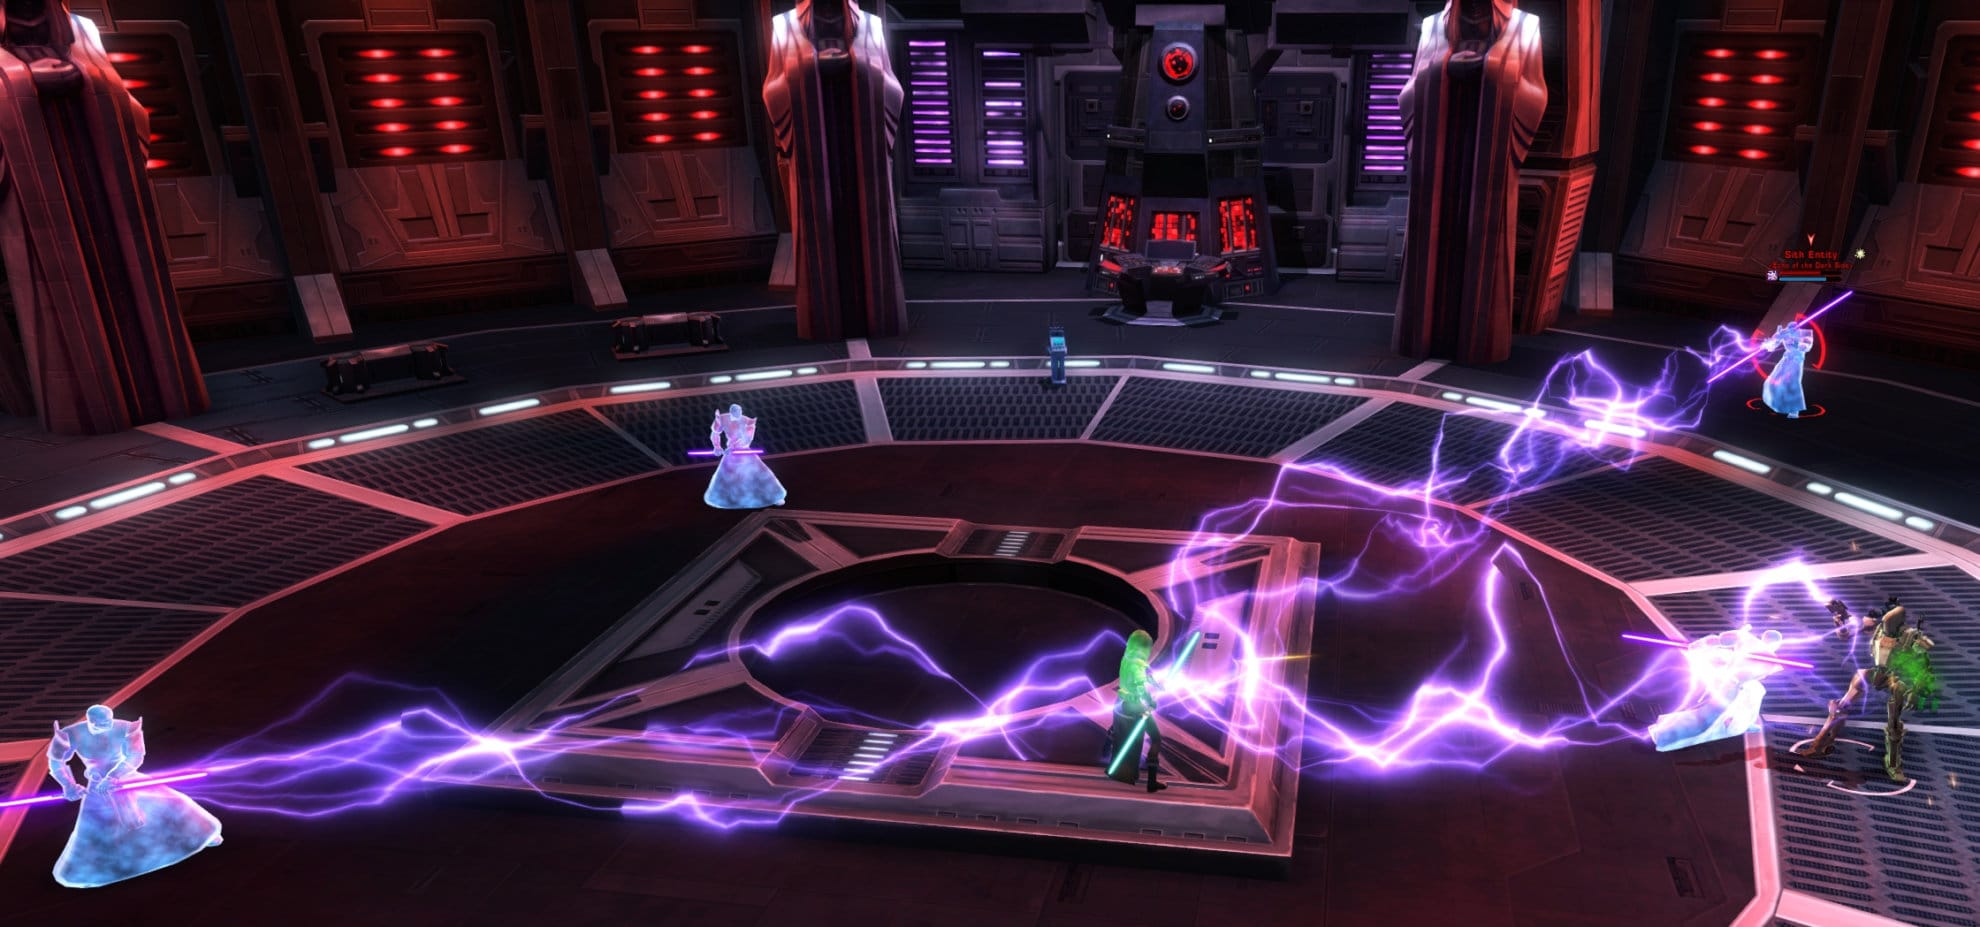
After disabling the Stasis Chamber, the Sith Entity will be released. This is a Sith Force ghost that was imprisoned by Malgus, likely to be used as a weapon to further his goals.
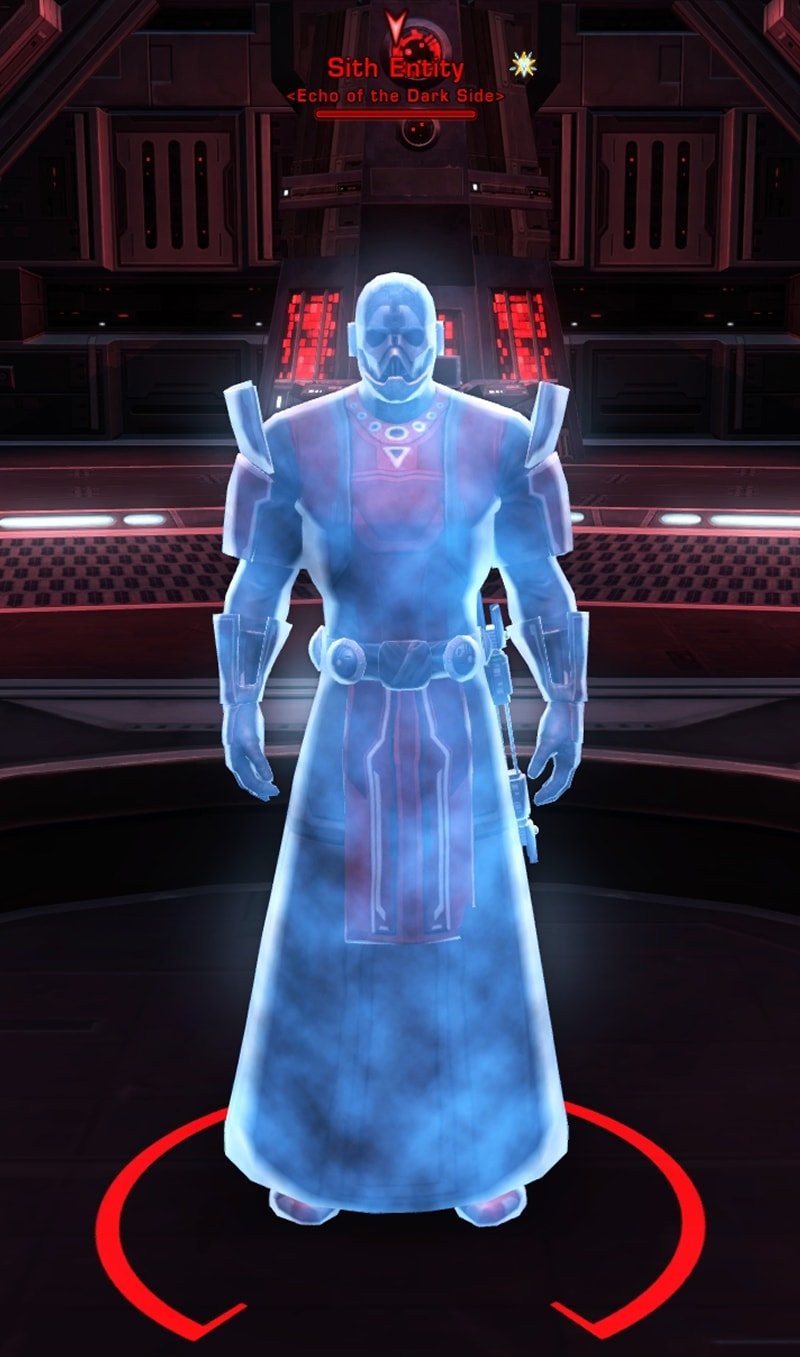
As you fight the Sith Entity, it will split into numerous copies when it takes a certain amount of damage. There will be one melee copy and two or more ranged copies. A tank will need to kite the melee copy while DPS take out the ranged copies. Some of these ranged copies can heal, so use your interrupts to stop the heals.
If you use a DoT spec and you need to spread the damage, place your spreadable DoTs on the melee copy and spread the DoTs when its close to a ranged copy.
Once you defeat the copies, you’ll fight the primary entity once more. It’ll split up again so repeat this process until the Sith Entity is defeated.
Veteran Mode Differences
There are no mechanical differences, though the ghosts hit harder.
Master Mode Differences
Everything hits a lot harder so you’ll need to focus on taking out the ghosts shooting Force Lightning at your group. Other than that, there are no mechanical differences.
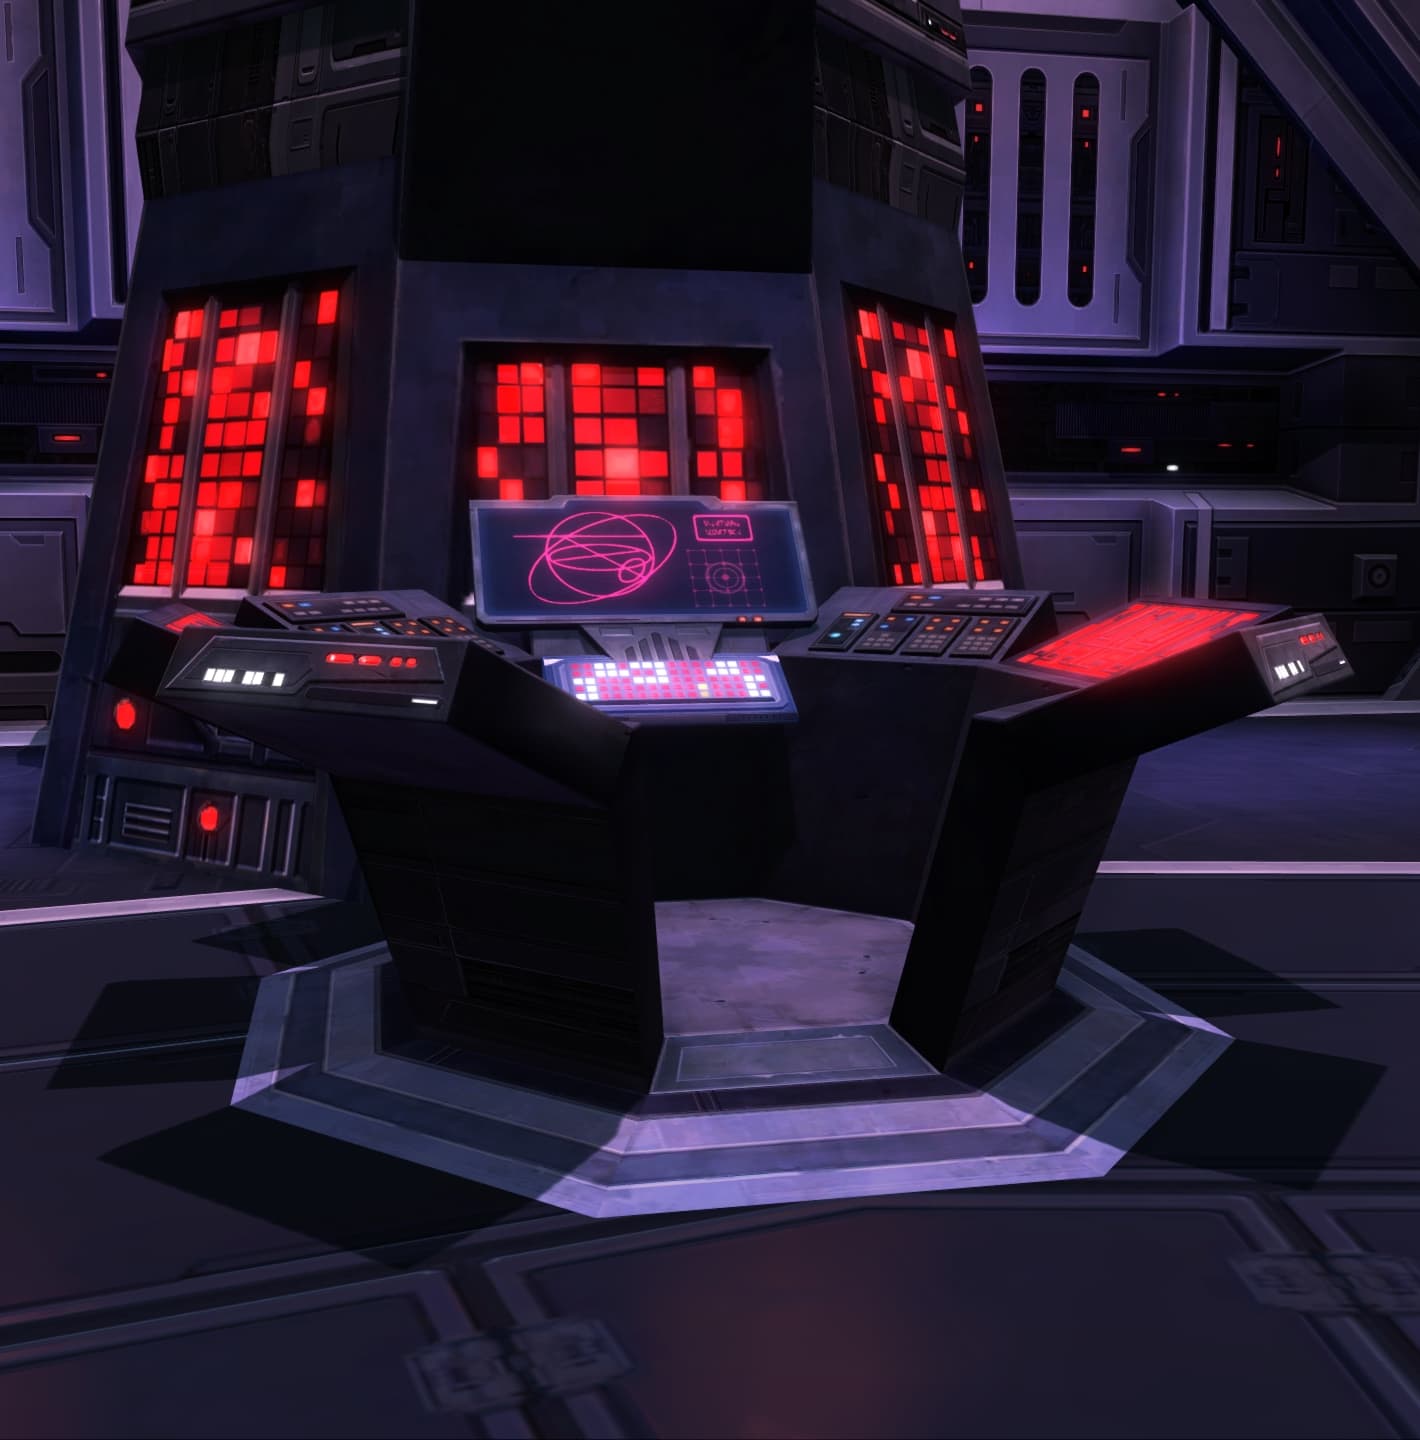
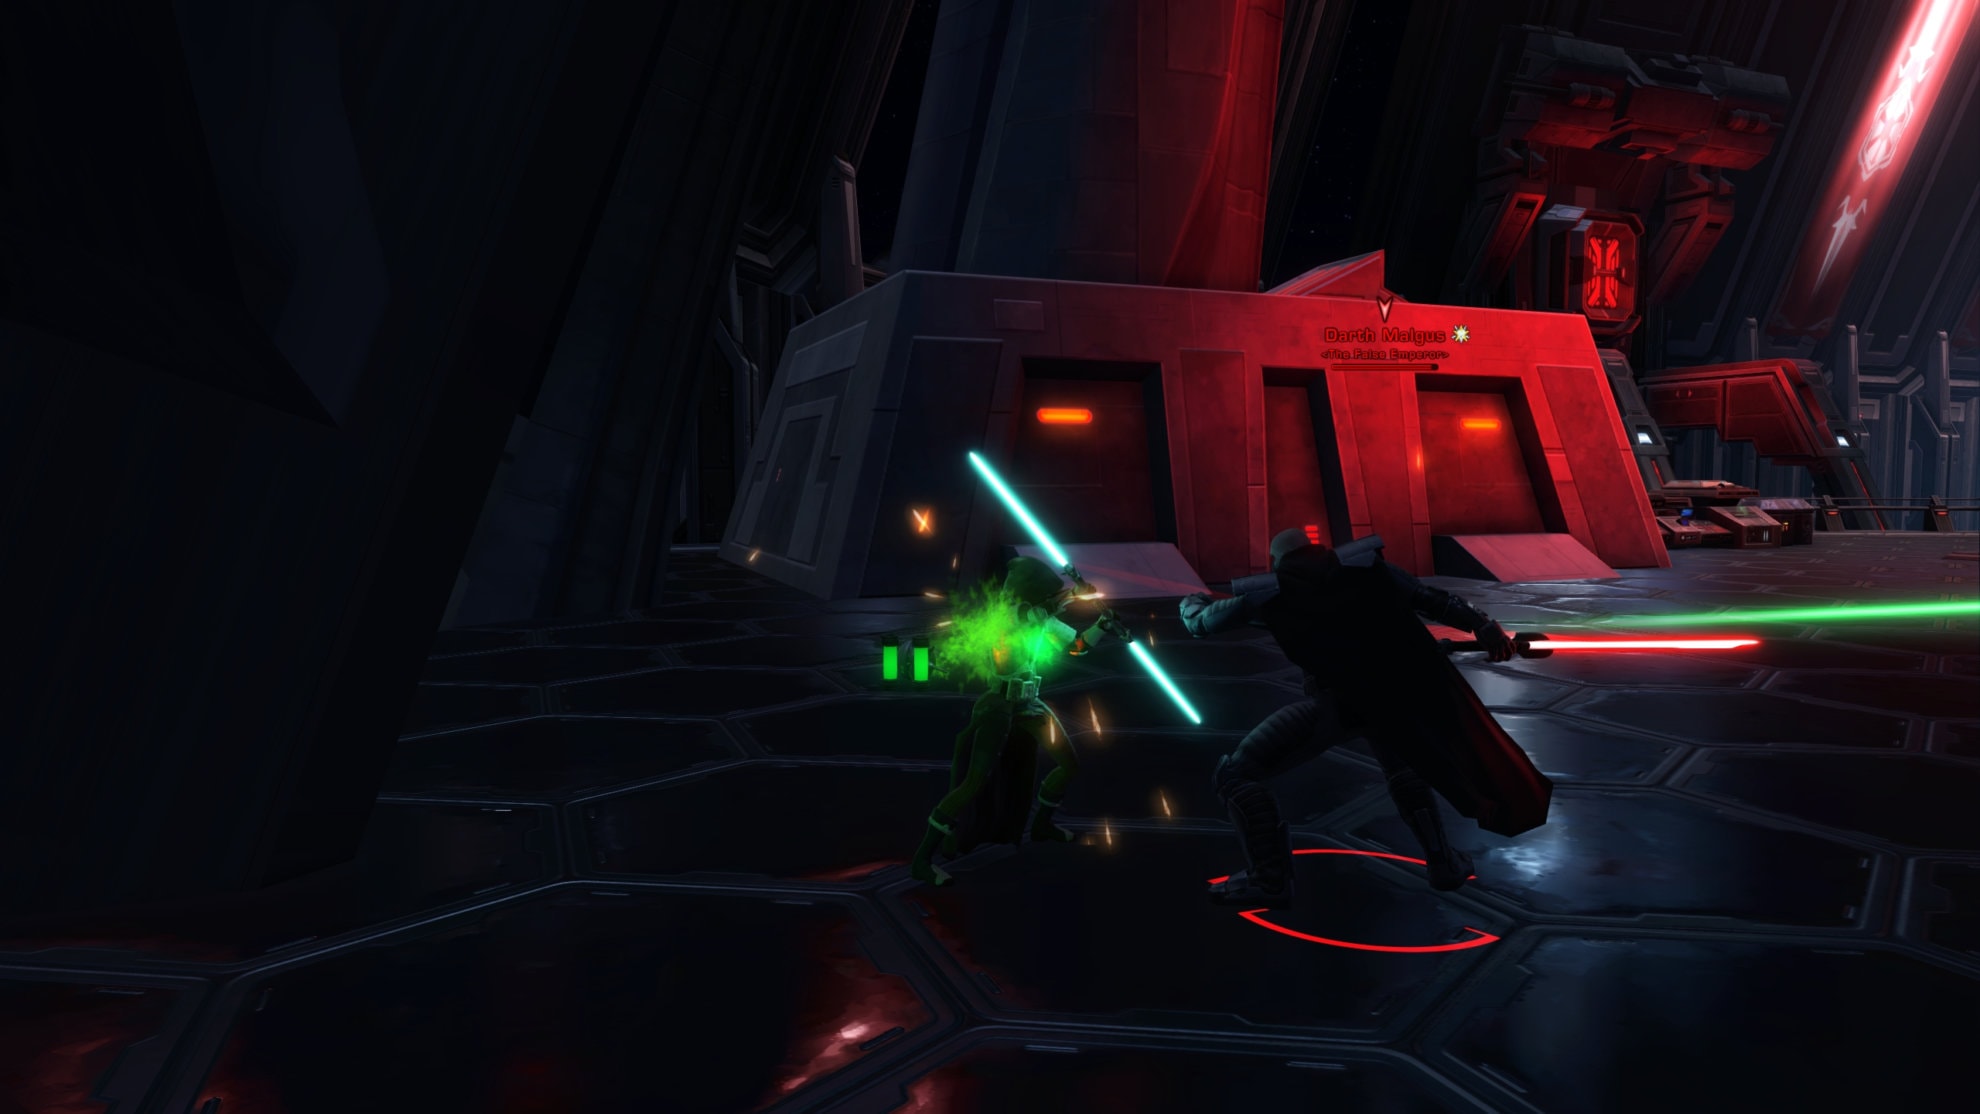
Final Boss: Darth Malgus
When you reach Malgus, you’ll find yourself surrounded by Imperial Guards in a cutscene. Unfortunately, Malgus dismisses them and talks to you for a bit instead before he fights you.

The tank needs to taunt Malgus and lure him to the area behind the throne. You do this because he knocks his target back regularly. If you fight him in the area you start in, he can knock you into the shafts. Behind the throne near the window, there’s nowhere to fall down into and it’s much safer to fight up here.
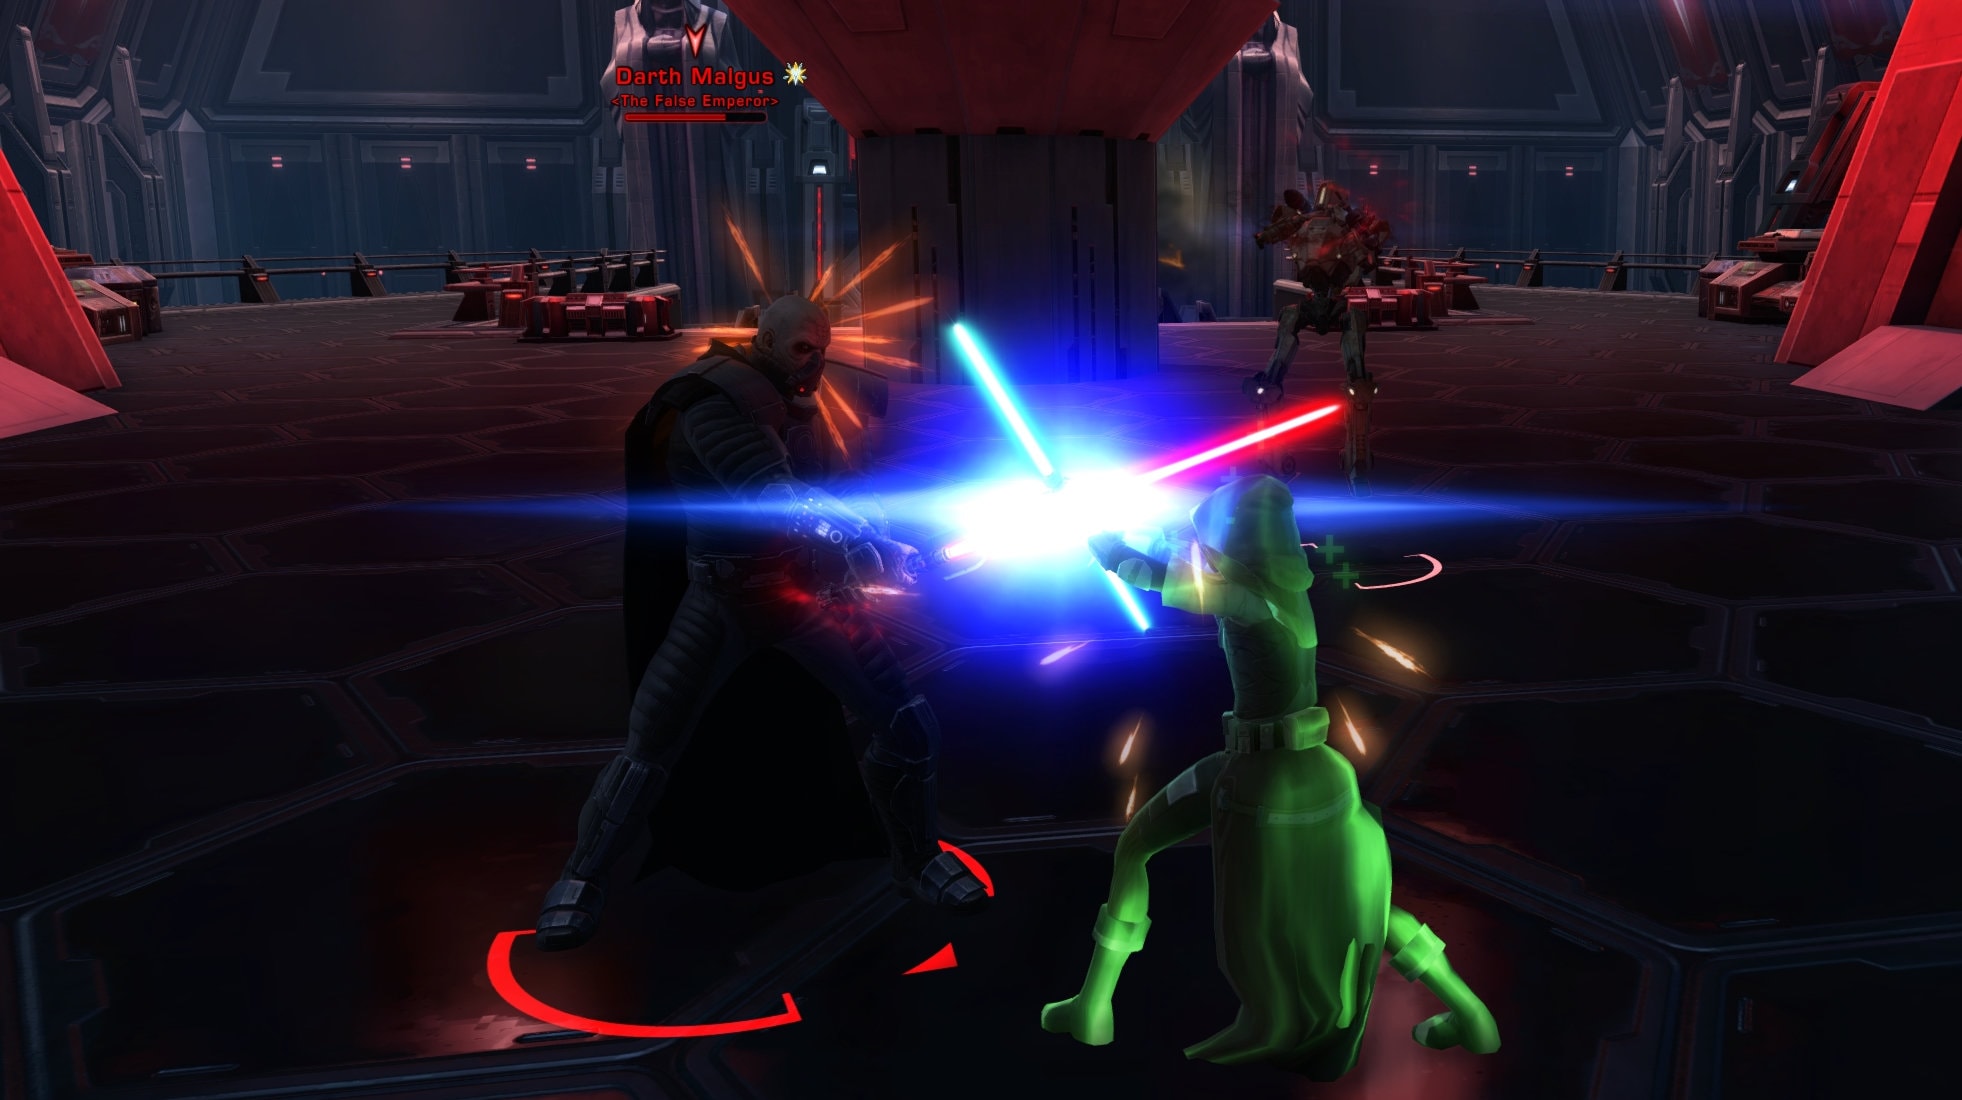
This fight has a unique mechanic where Malgus will challenge a random person in the party. You’ll know when you’re being challenged as you’ll receive the “Doubt” debuff.
The Doubt debuff makes you unable to act for ten seconds, giving Malgus the ability to damage you freely. Once Doubt is over, everyone but the challenged will be Force Choked and unable to act. Fortunately, they take no damage during this time so now the challenged needs to fight Malgus one on one.
If you’re challenged, you’ll need to fight Malgus one on one for a bit before your allies are freed and able to help.
When you see Malgus in this pose, he’s channeling his ability “Unlimited Power”. This is a burst of Force Lightning when activated that will take out a good chunk of your health. Use your interrupts to cancel the channel.
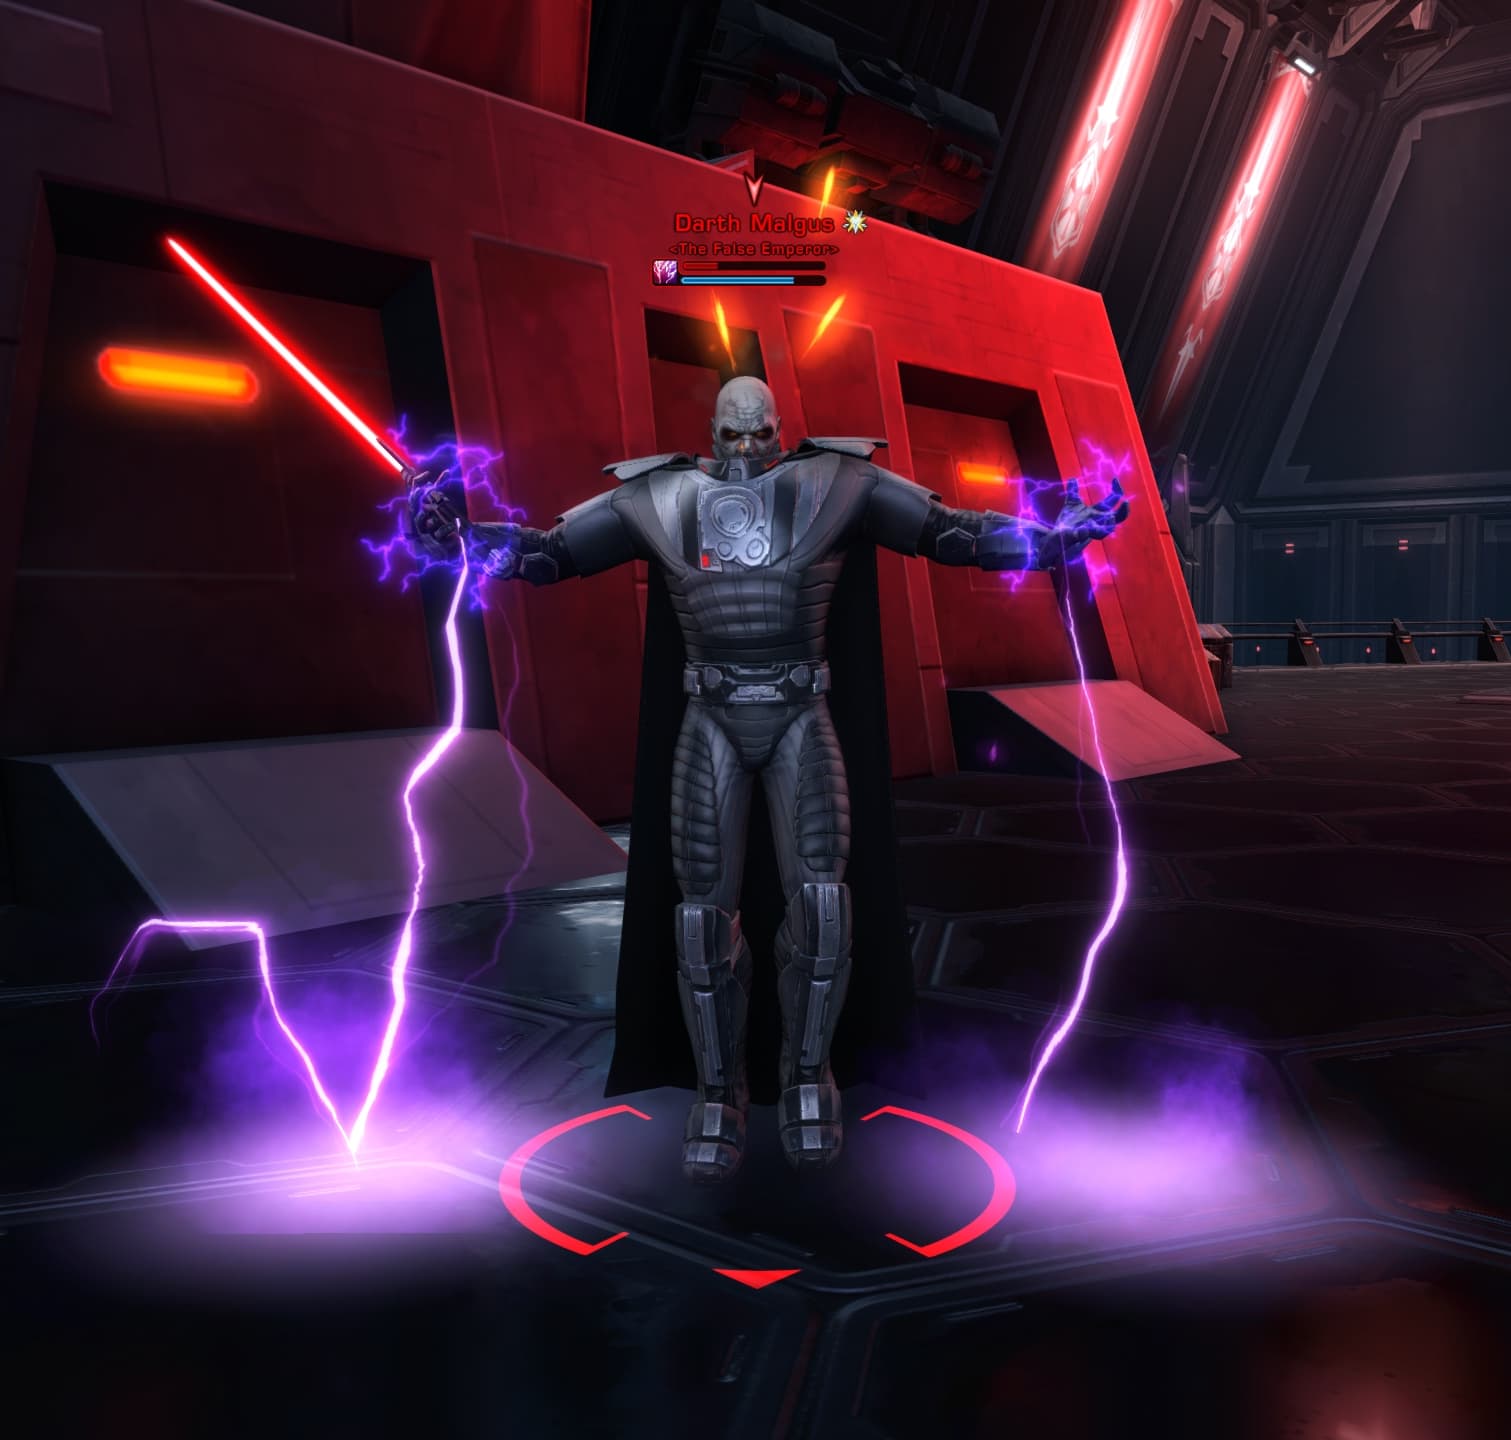
When Malgus has 10% hit points, he’ll start using Force lightning against one or more targets. This damage adds up quickly, finish him off and complete the flashpoint.
Veteran Mode Differences
There are no mechanical differences in Veteran Mode.
Master Mode Differences
Be sure to interrupt Malgus when he’s casting Unlimited Power. If it’s successfully cast, this can take out 40% HP on the tank. When he hits 10% hit points, he’ll become enraged and deal incredible amounts of damage with his Force Lightning against multiple targets. This end stage becomes a significant threat and a DPS race to defeat Malgus.
Achievements for The False Emperor
The majority of the achievements for this flashpoint are for defeating the bosses 1 time, 10 times, and 25 times. Though here are two that grant item rewards:
Defeat the Sith Usurper (Veteran Mode)

Defeated Darth Malgus in “The False Emperor” flashpoint.
You’ll gain the Darth Malgus (Story) Trophy Decoration.
Elite: Overthrown (Master Mode)
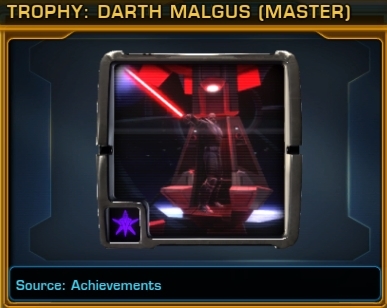
Defeated all bosses in “The False Emperor” flashpoint 25 times on master mode.
You’ll gain the Darth Malgus (Master) Trophy Decoration.
Decoration Drop from The False Emperor
The bosses in The False Emperor Flashpoint can drop the Statue of the Emperor decoration. If you complete The False Emperor on Story Mode, you’ll have a guaranteed chance to get this decoration once you finish the flashpoint. This decoration will fit in a Medium or Medium Narrow hook.
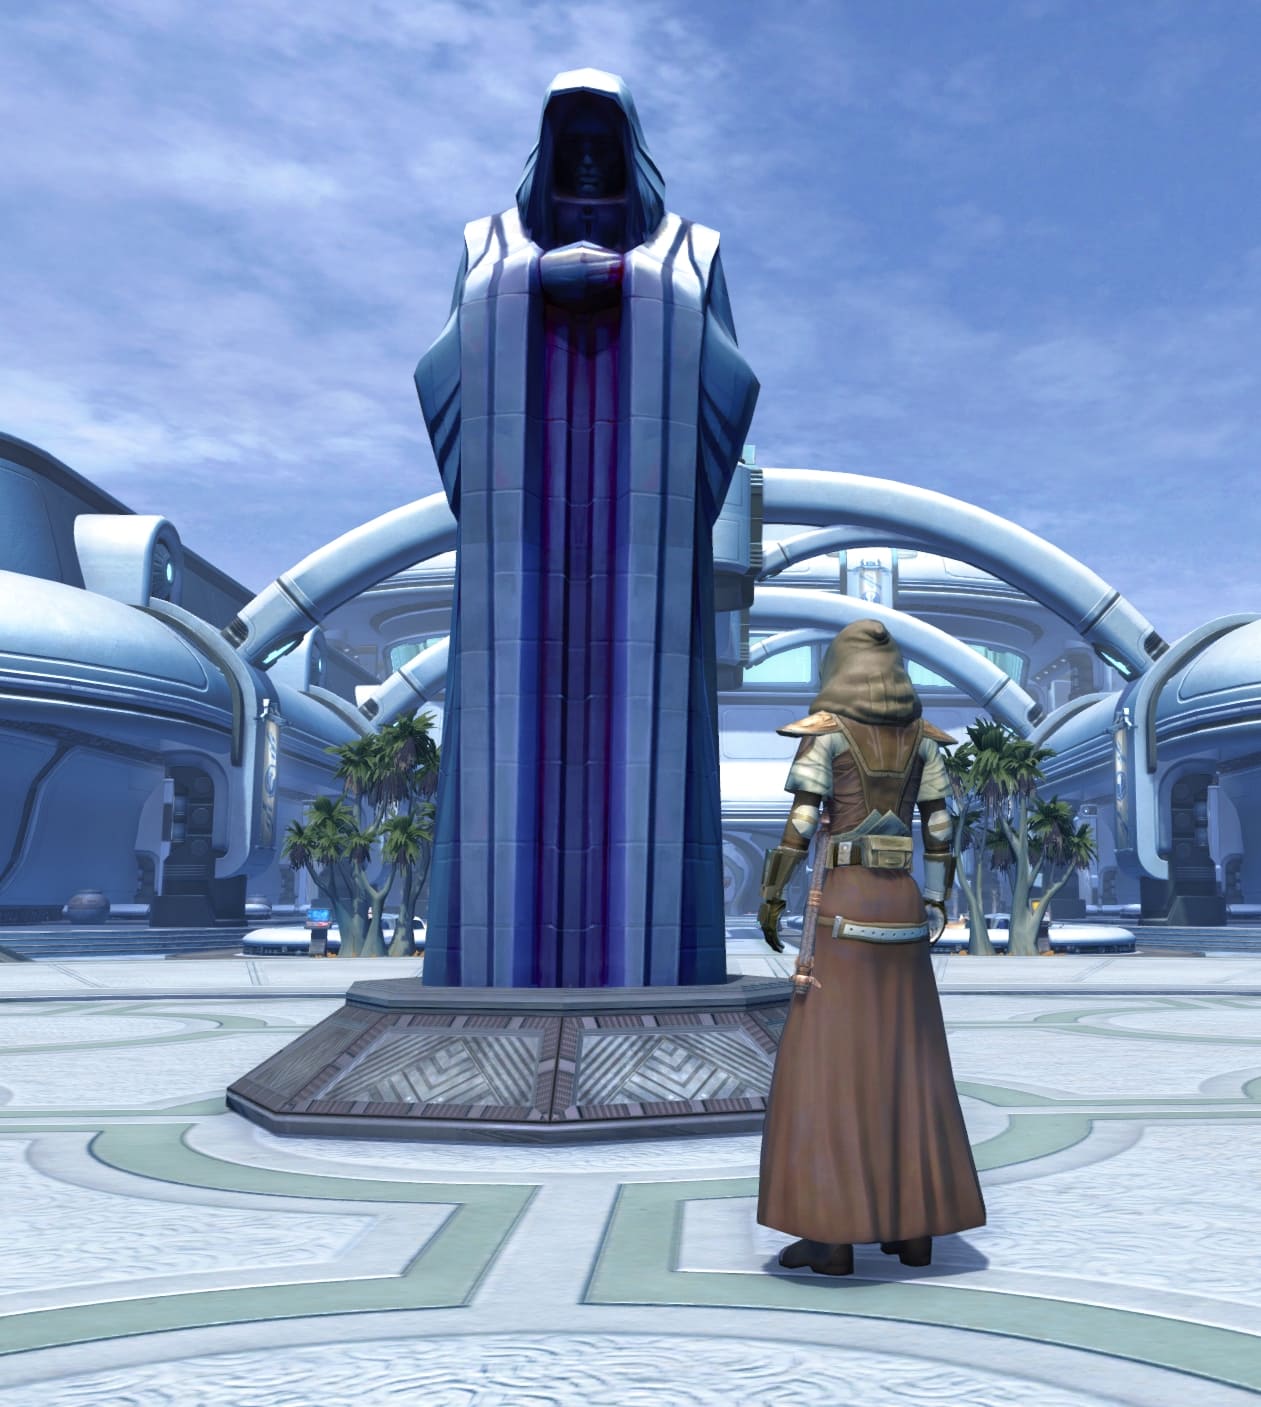
This is a good sized statue for something that can fit in a Medium Narrow Hook. This would look good in the Dromund Kass or Vaiken Spacedock Penthouse strongholds. If you get enough of them, you could have them line a hallway to look down upon those who walk through.