This guide will tell you everything you need to know about the Objective Meridian Flashpoint, introduced to SWTOR during the Onslaught expansion, including all boss encounters, bonus boss, achievements, decorations and other loot.
This guide covers Story Mode, Veteran Mode, and Master Mode.
Table of contents
- How to Start the Flashpoint and its Story
- Shortcut to the First Boss
- First Boss (Republic): Vulture Squad Armored Units 02 and 14
- First Boss (Imperial): R10-X6
- How to access the Bonus Boss
- Shortcut to the Bonus and Second Bosses (Empire)
- Bonus Boss (Republic): Darth Yun and Lord Feng
- Bonus Boss (Imperial): Commander Rasha
- Second Boss (Republic): Commander Aster
- Second Boss (Imperial): Master Jakir Halcyon and Seldin
- Stealth Shortcut to the Final Boss
- Final Boss (Republic): Darth Malgus
- Final Boss (Imperial): Tau Idair
- Achievements for Objective Meridian
- Decoration Drops
How to Start the Flashpoint and its Story
As part of the Onslaught expansion, you will need to make progress through the Onslaught storyline to get the Story Arc with this flashpoint. To do this, you would have needed to complete the previous story such as KOTET, KOTFE, Shadow of Revan, Rise of the Hutt Cartel, and Class Story Arcs.
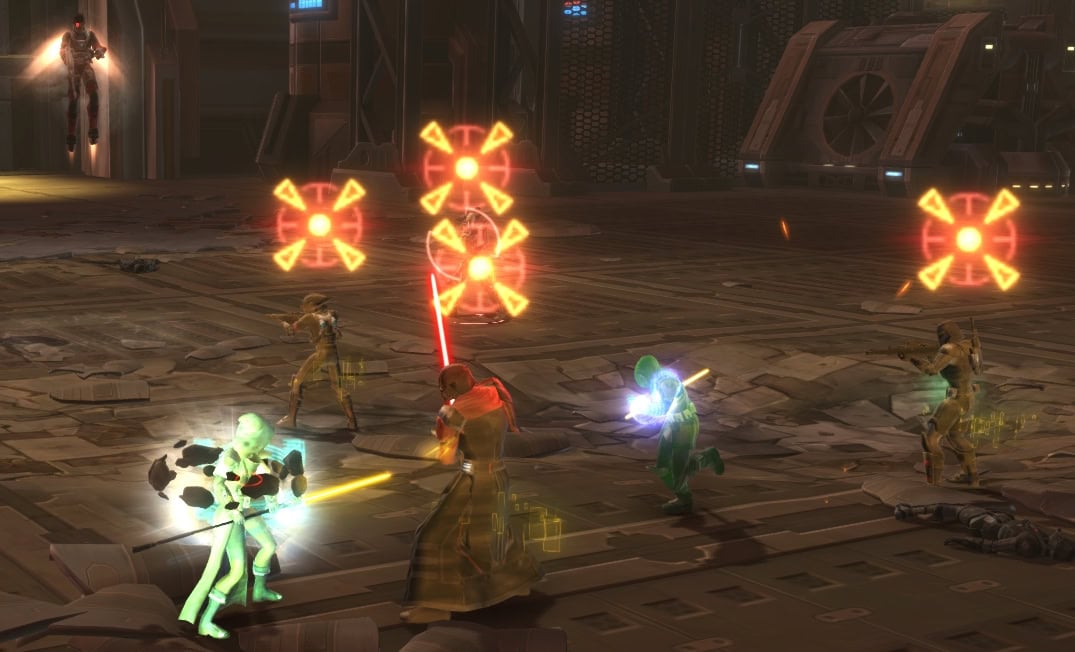
You’ll be fighting for your faction to gain control of a prototype shipyard that can easily mass produce battleships. I hope you like dodging AoEs as you’ll be doing a lot of that in Objective Meridian!
To start the mission without the story arc, you’ll need to go to your faction’s fleet and travel to one of the ships. For the Republic Fleet, you’ll want to go to The Telos. For the Imperial Fleet, go to The White Nova.
Use the elevator to go to the Meridian Complex Staging Deck and you’ll find a mission terminal granting Story, Veteran, and Master difficulties for Objective Meridian.
This flashpoint is also available in the Activity Finder under the Group tag. It’s available for Veteran and Master Mode, but you can find a Solo version in the Solo tab. The Solo version offers guaranteed decoration drops from defeated bosses (more about decorations at the end of this guide).
For this Flashpoint, there are two sets of bosses that change depending on whether you are playing a Republic or Imperial character. The bosses have a lot of similarities though they can have slightly differing mechanics and animations. Make sure you’re reading the proper boss for your faction.
Read our SWTOR Story Progression Guide to learn where this story fits in. The guide will help you experience the game’s narrative in the proper intended order of events and aid and assist you if you are not sure what to do and where to go next.
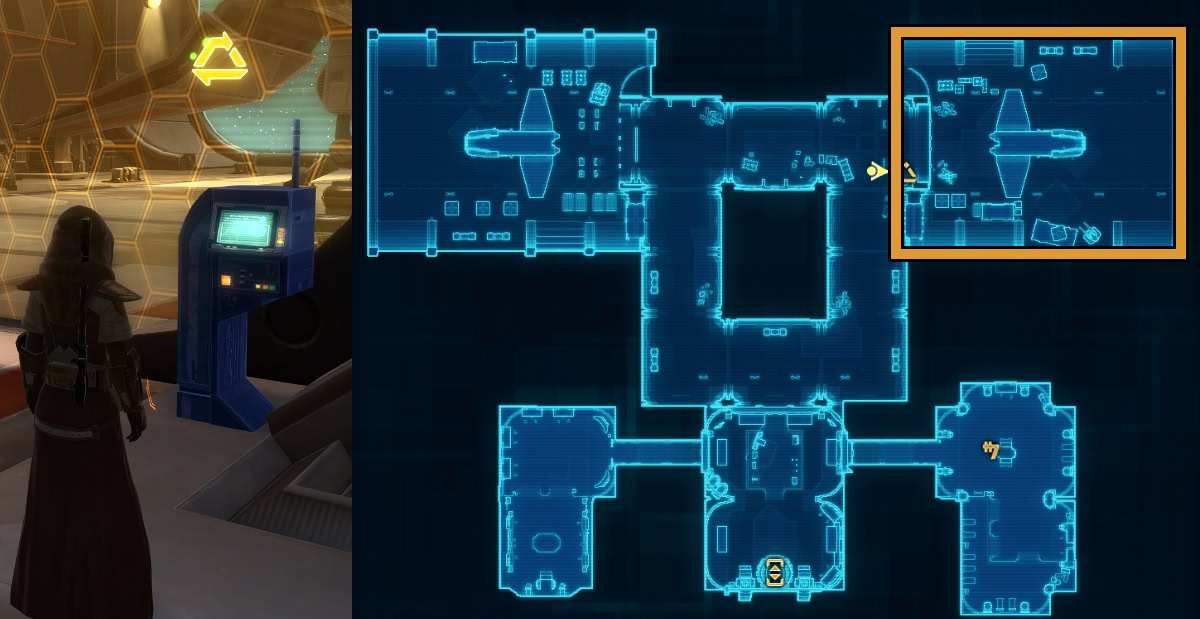
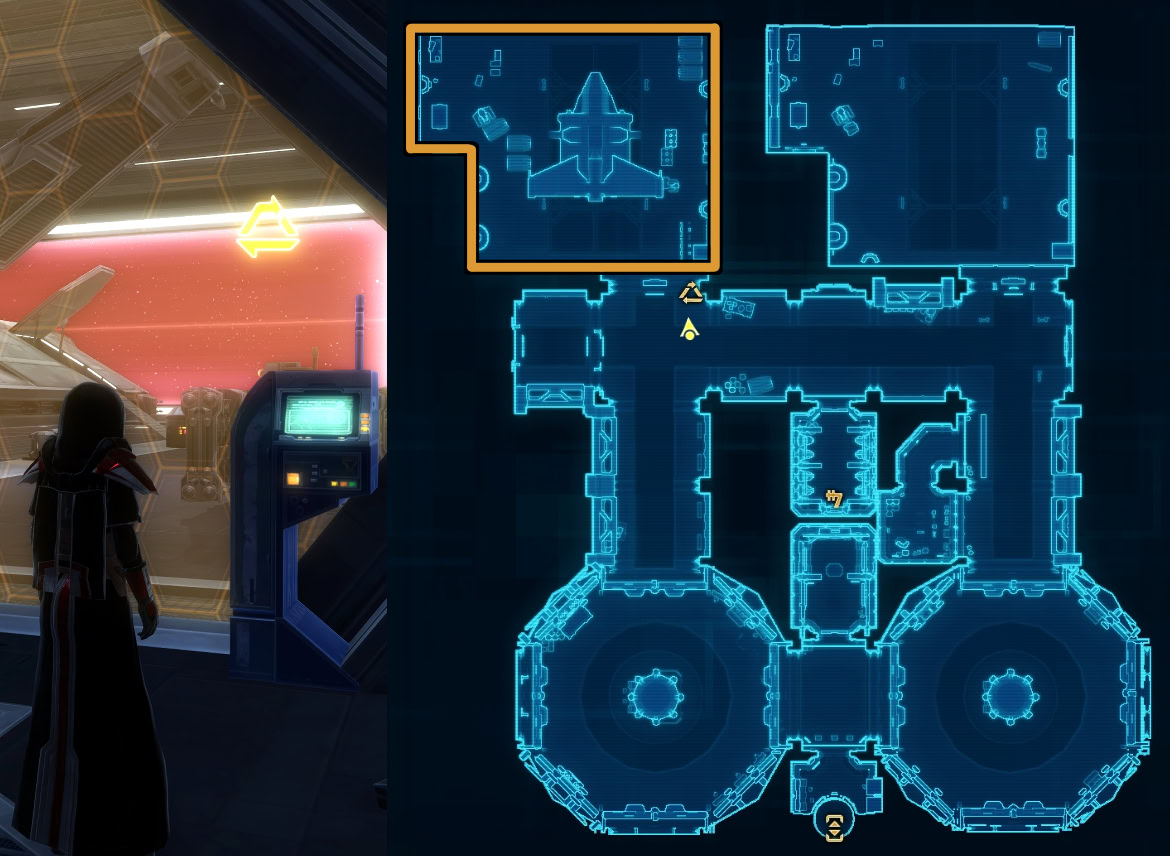
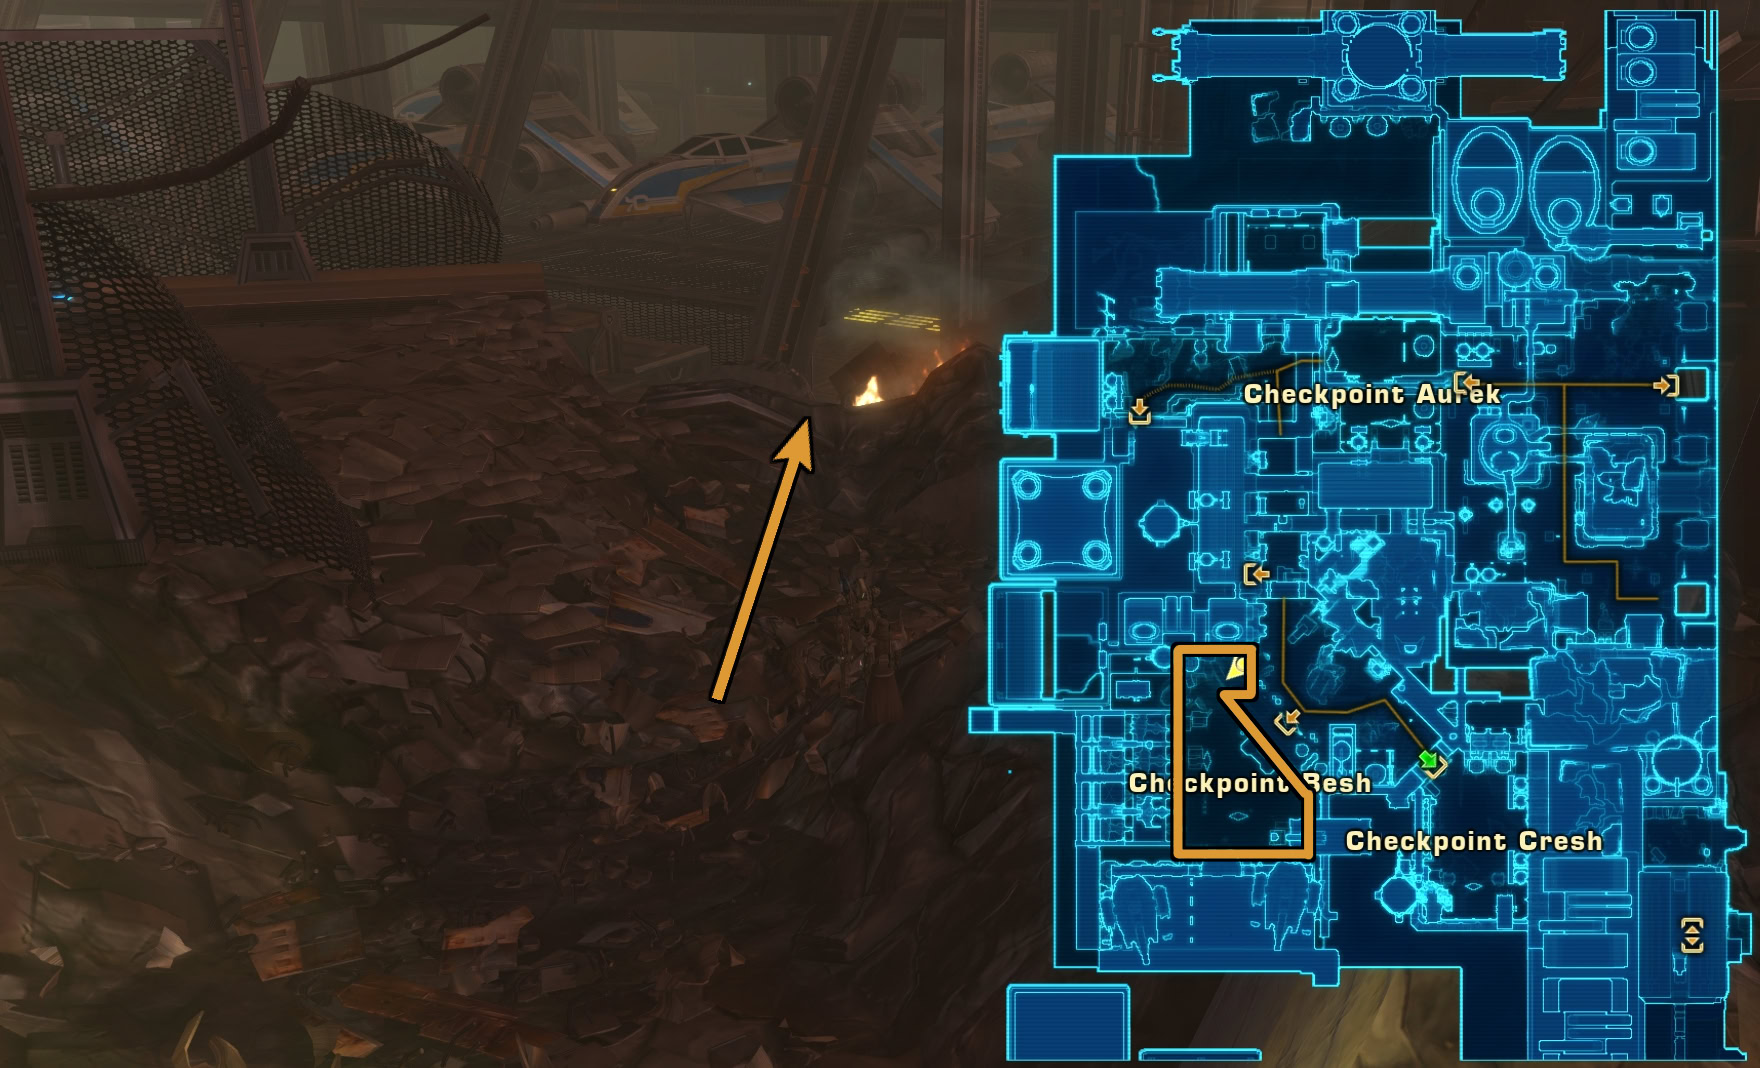
Shortcut to the First Boss
This shortcut is good for avoiding unnecessary fights after going up the large elevator at the start of the flashpoint. Be sure to really hug those walls while following this path! The shortcuts may vary or may not even be available depending if you’re on the Republic or Empire as some roads may be blocked off.
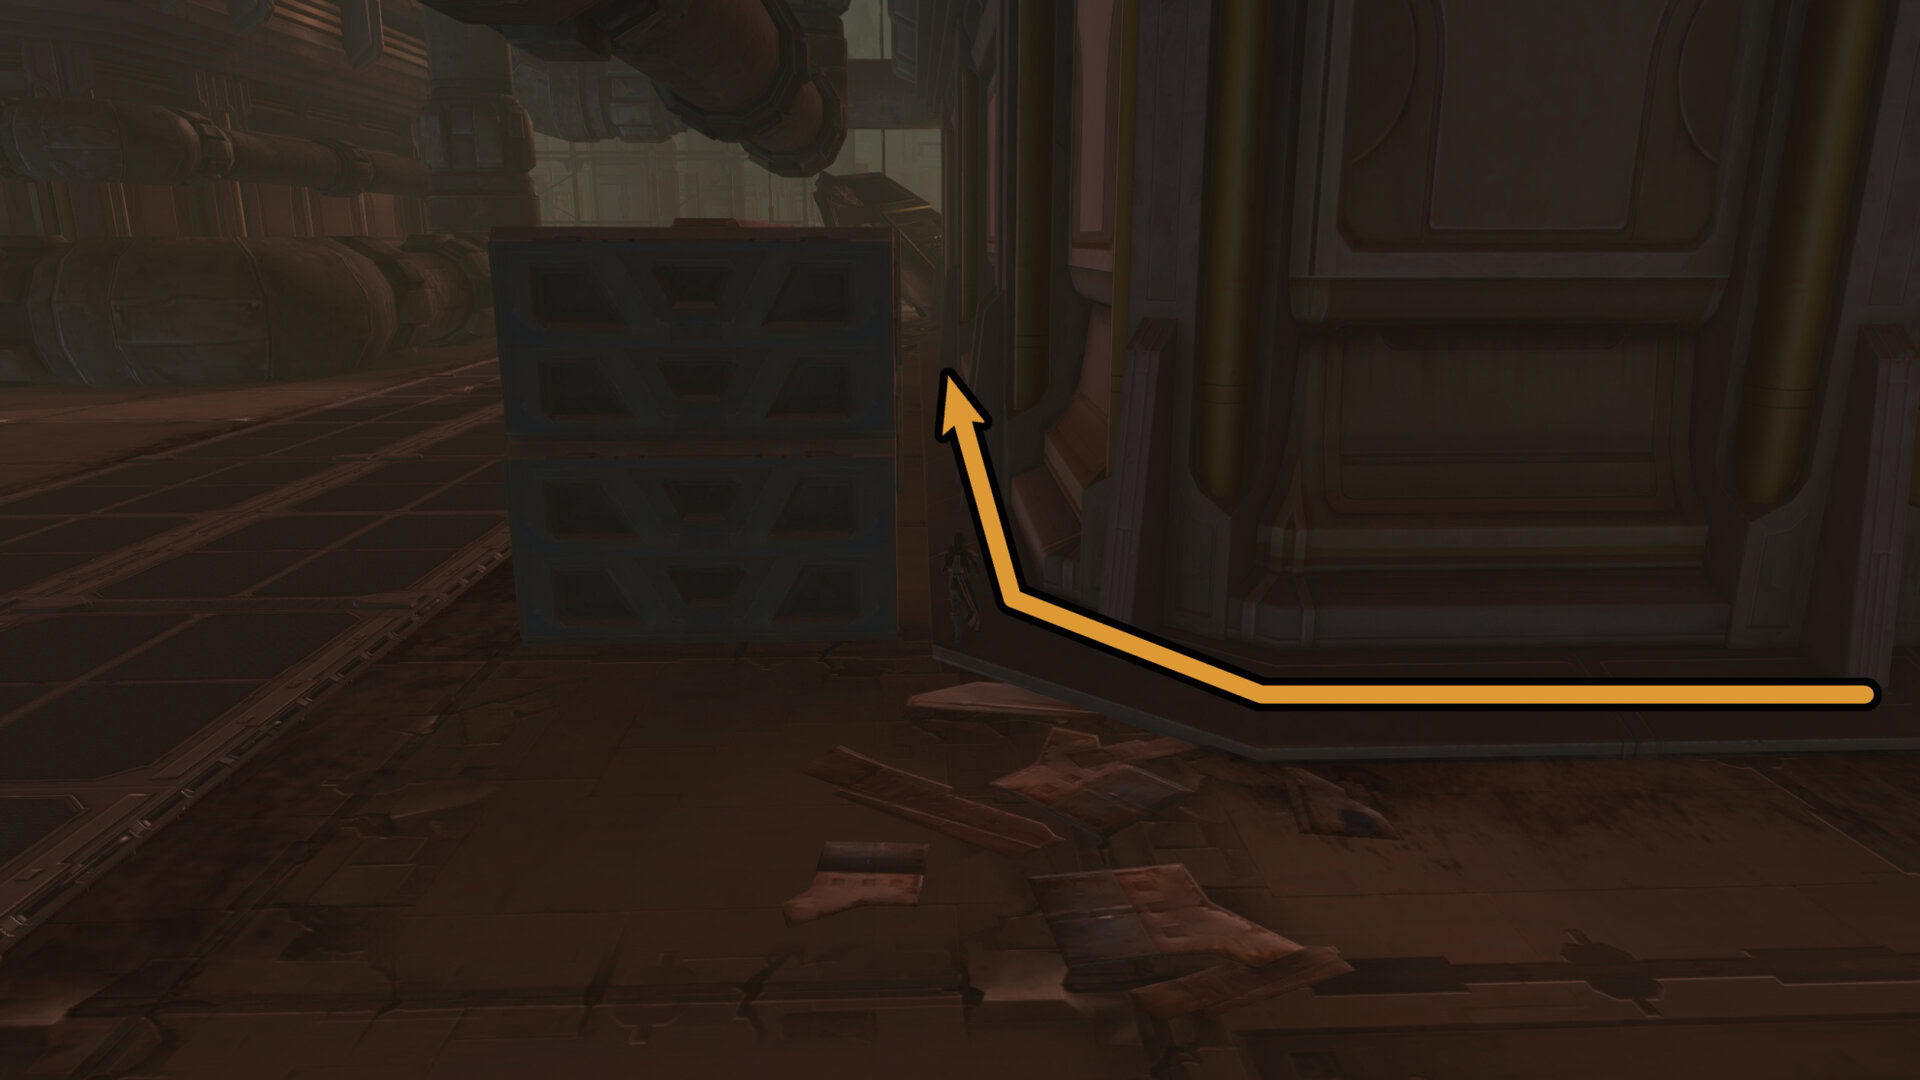
Republic First Boss Shortcut
Starting from the elevator ramp, make a right and avoid getting too close to any Imperials. Once you get past a large piece of broken sheet metal, shift to the right and hug the crate up ahead then hug the wall on the right. Once you’re close to the first boss, run past the Imperials, jump down into the arena where the boss is and head to the left to avoid aggroing the boss too soon.
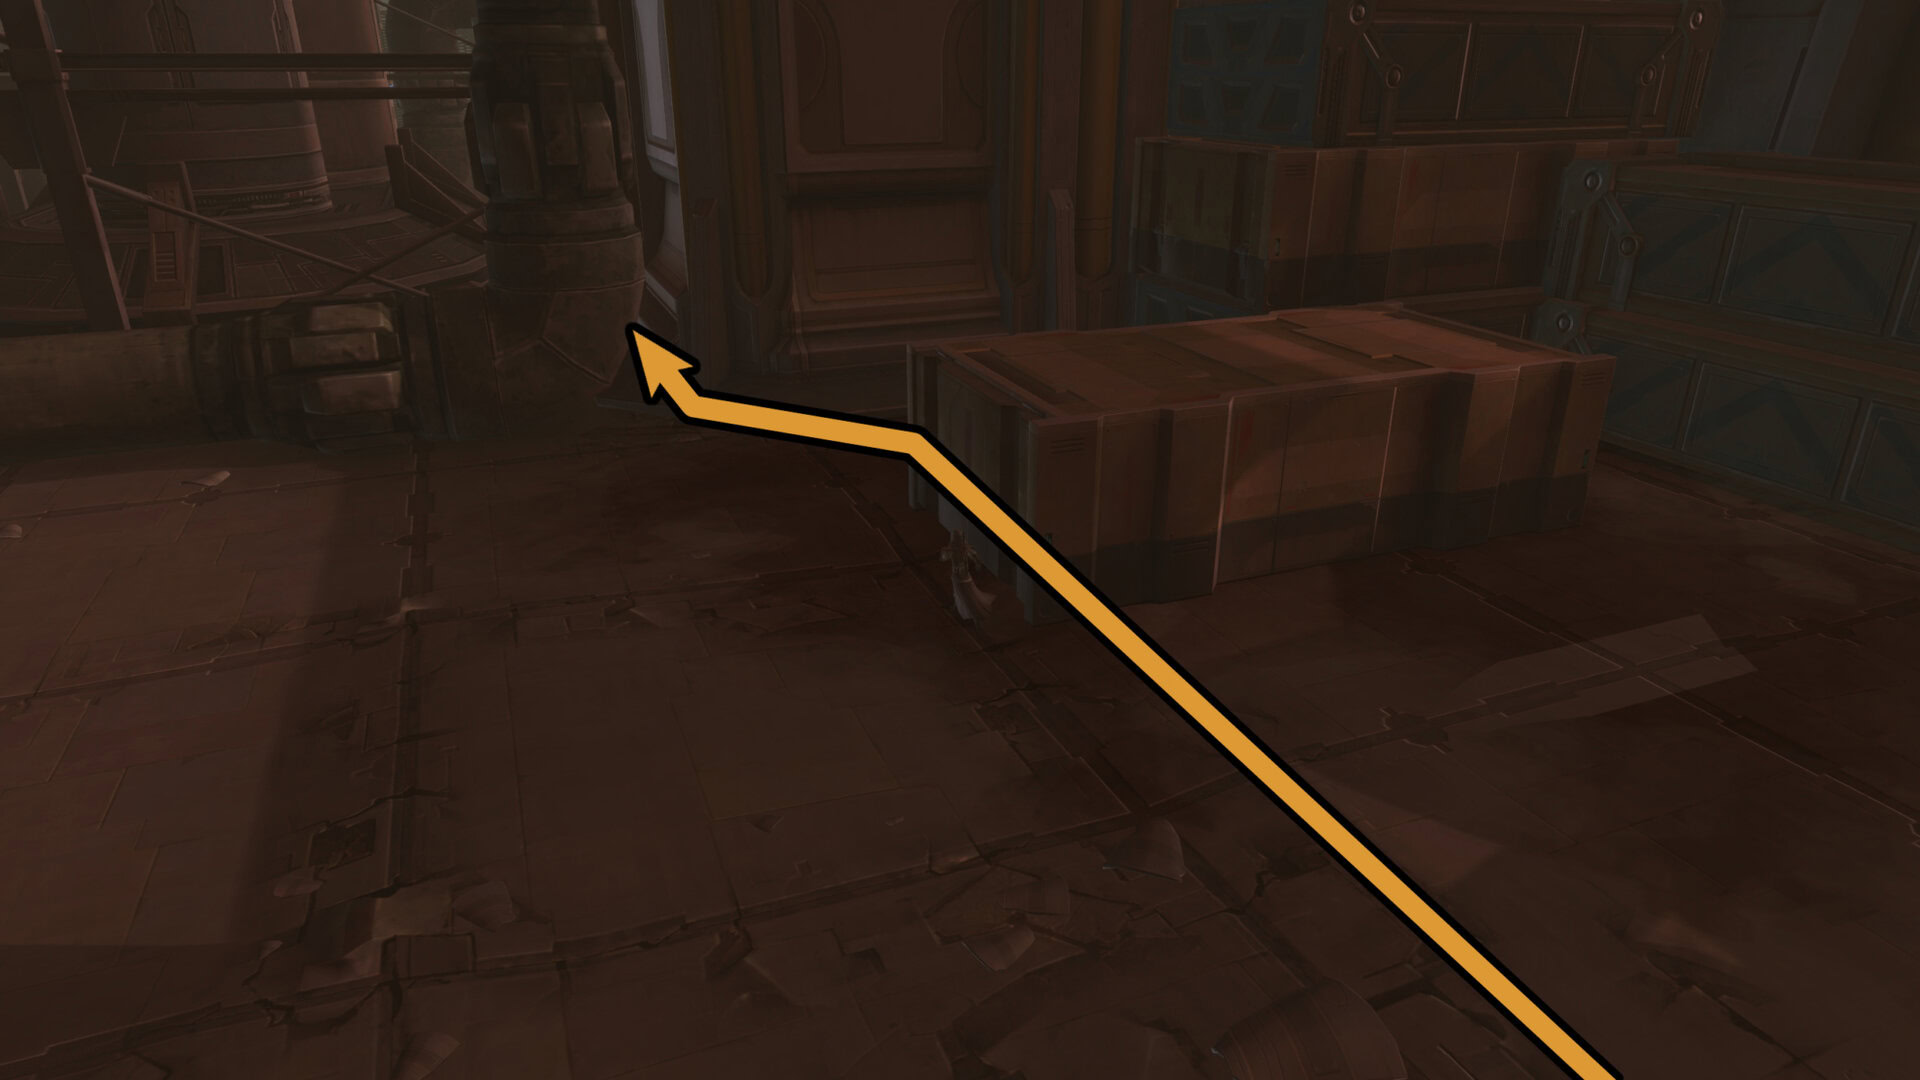
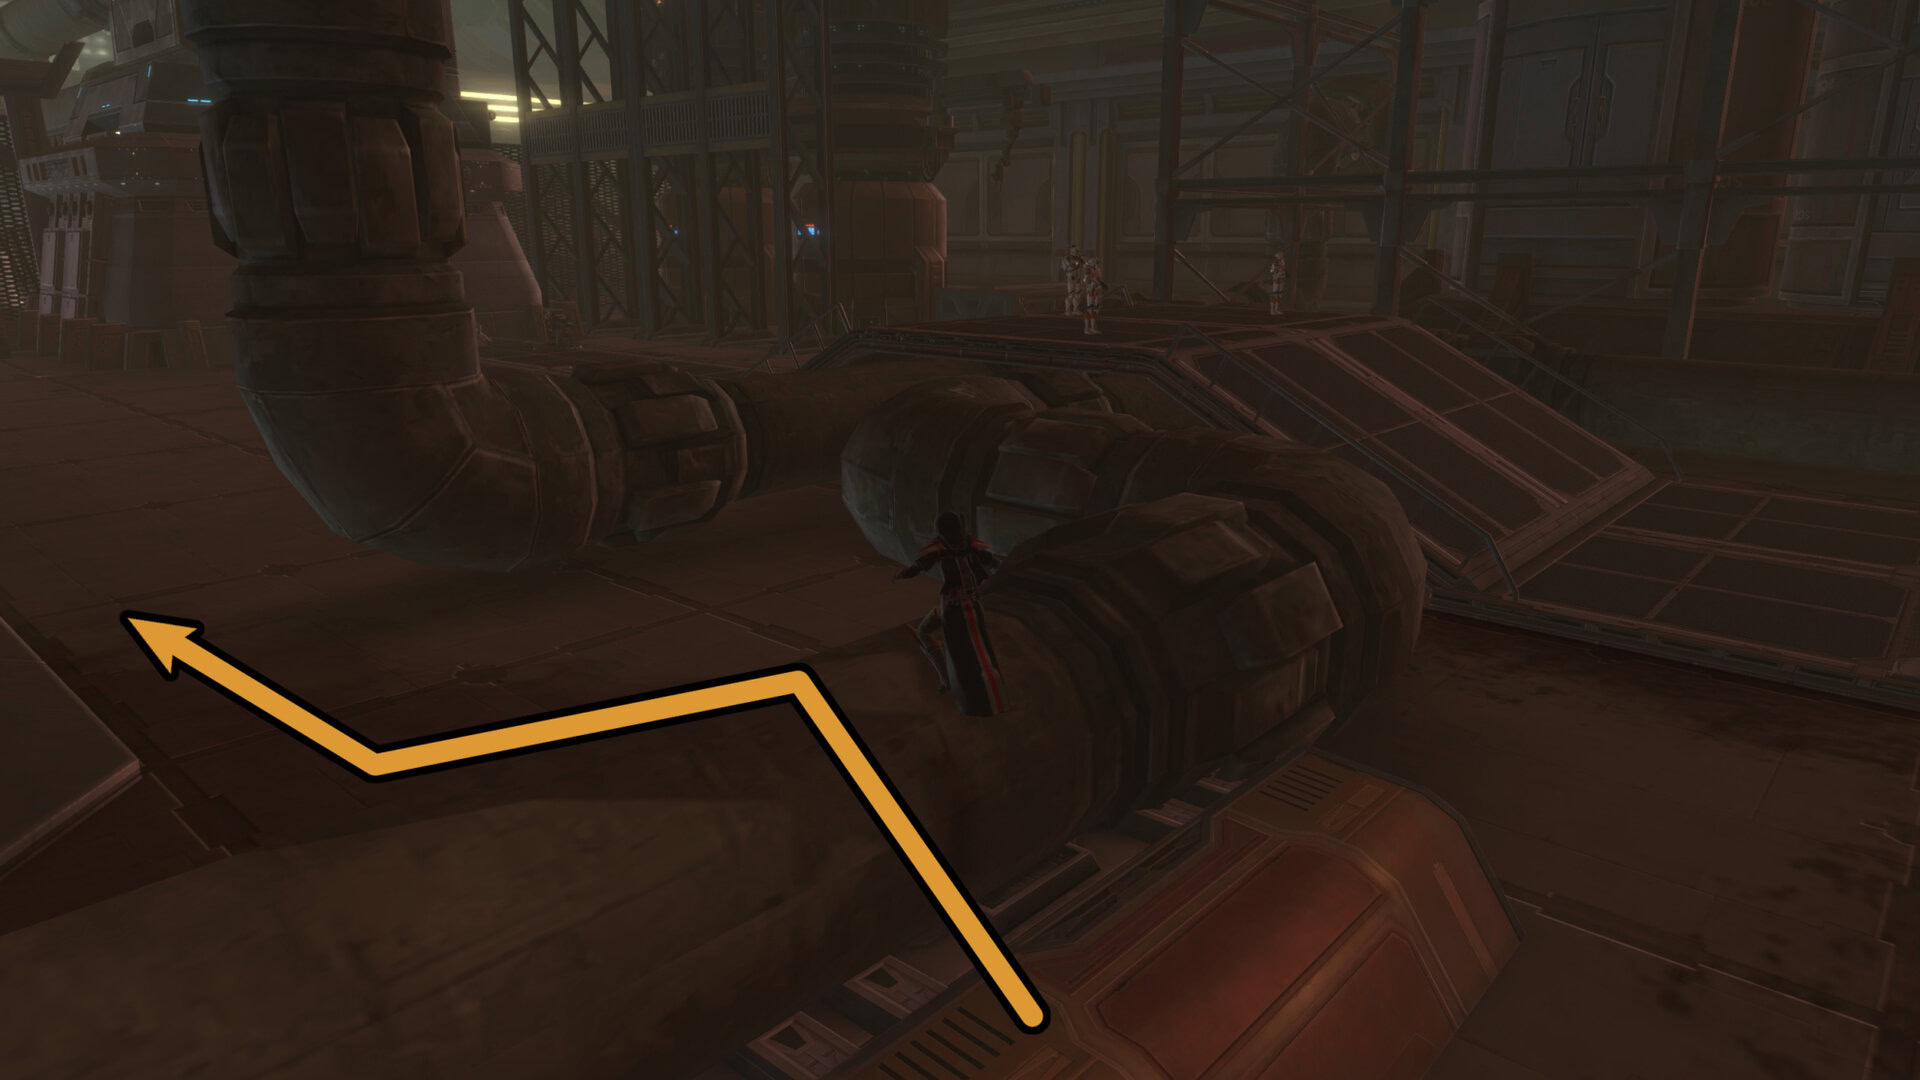
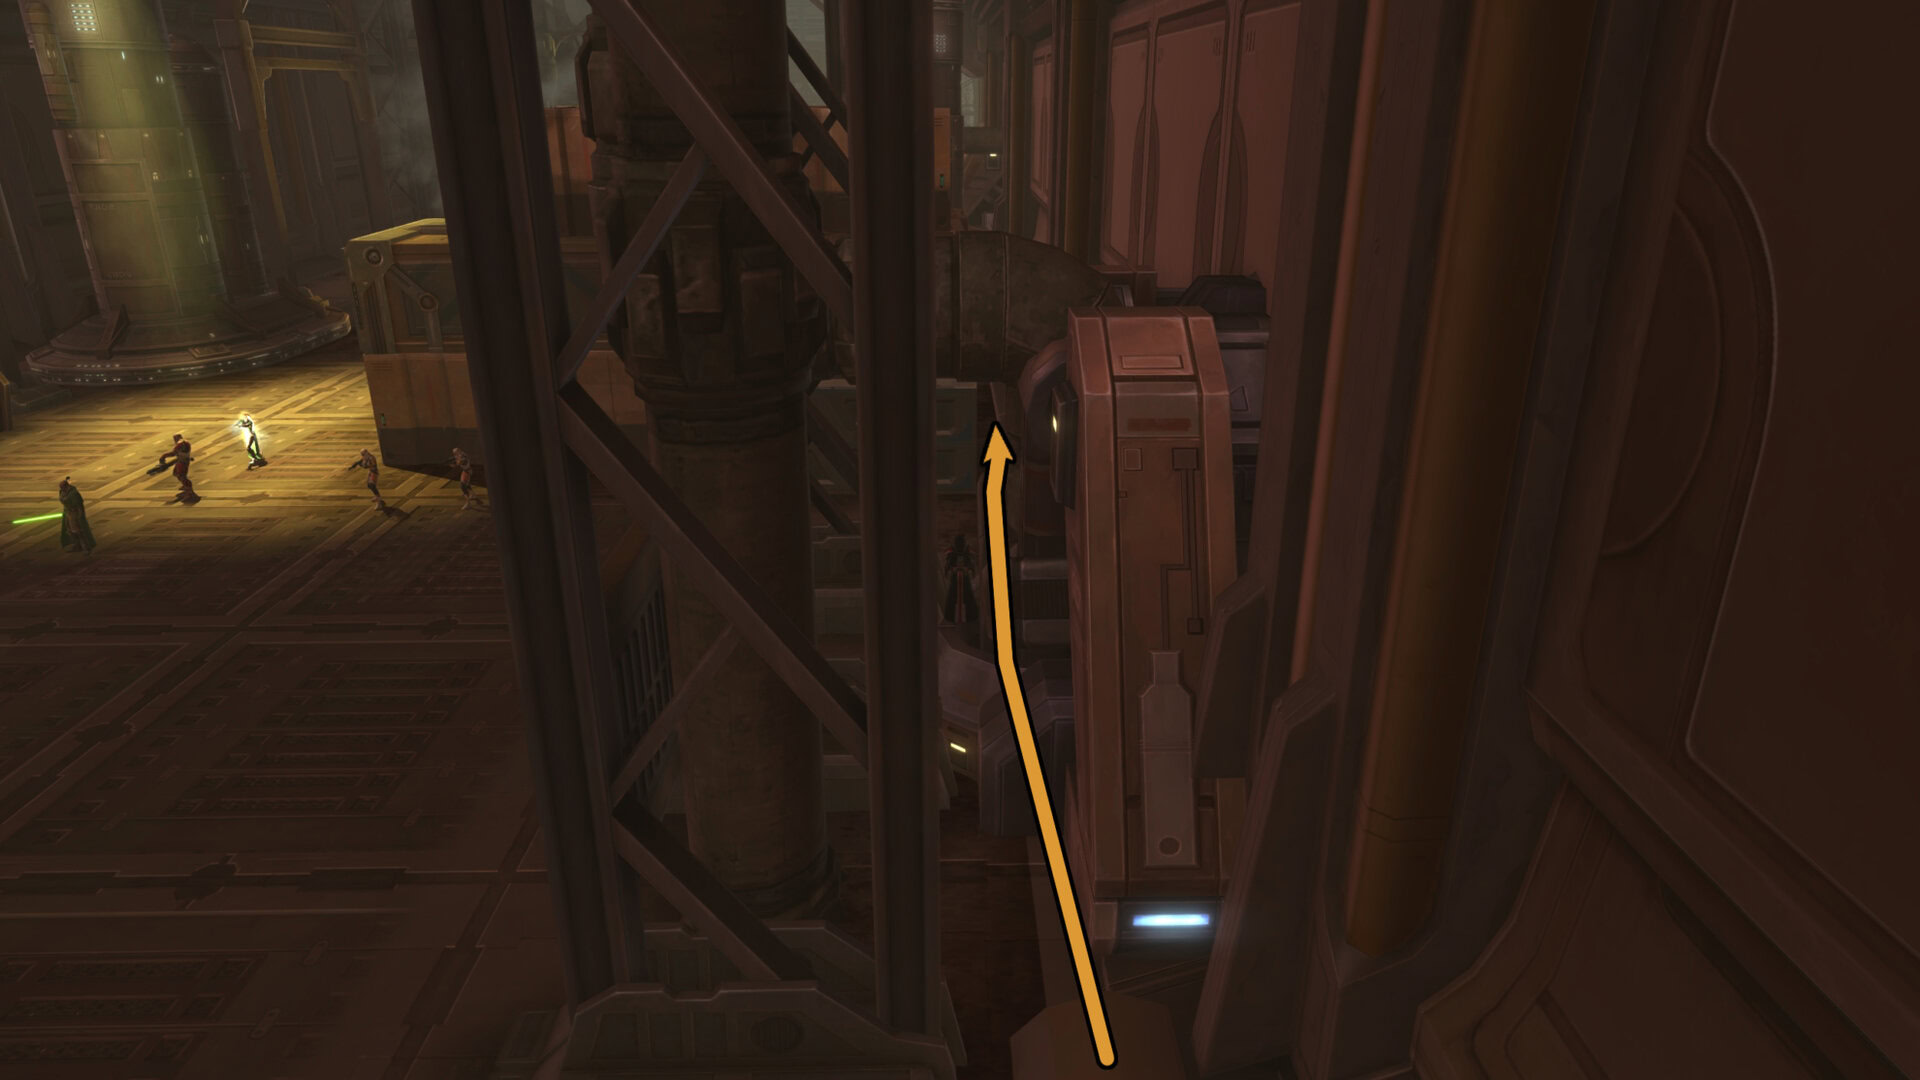
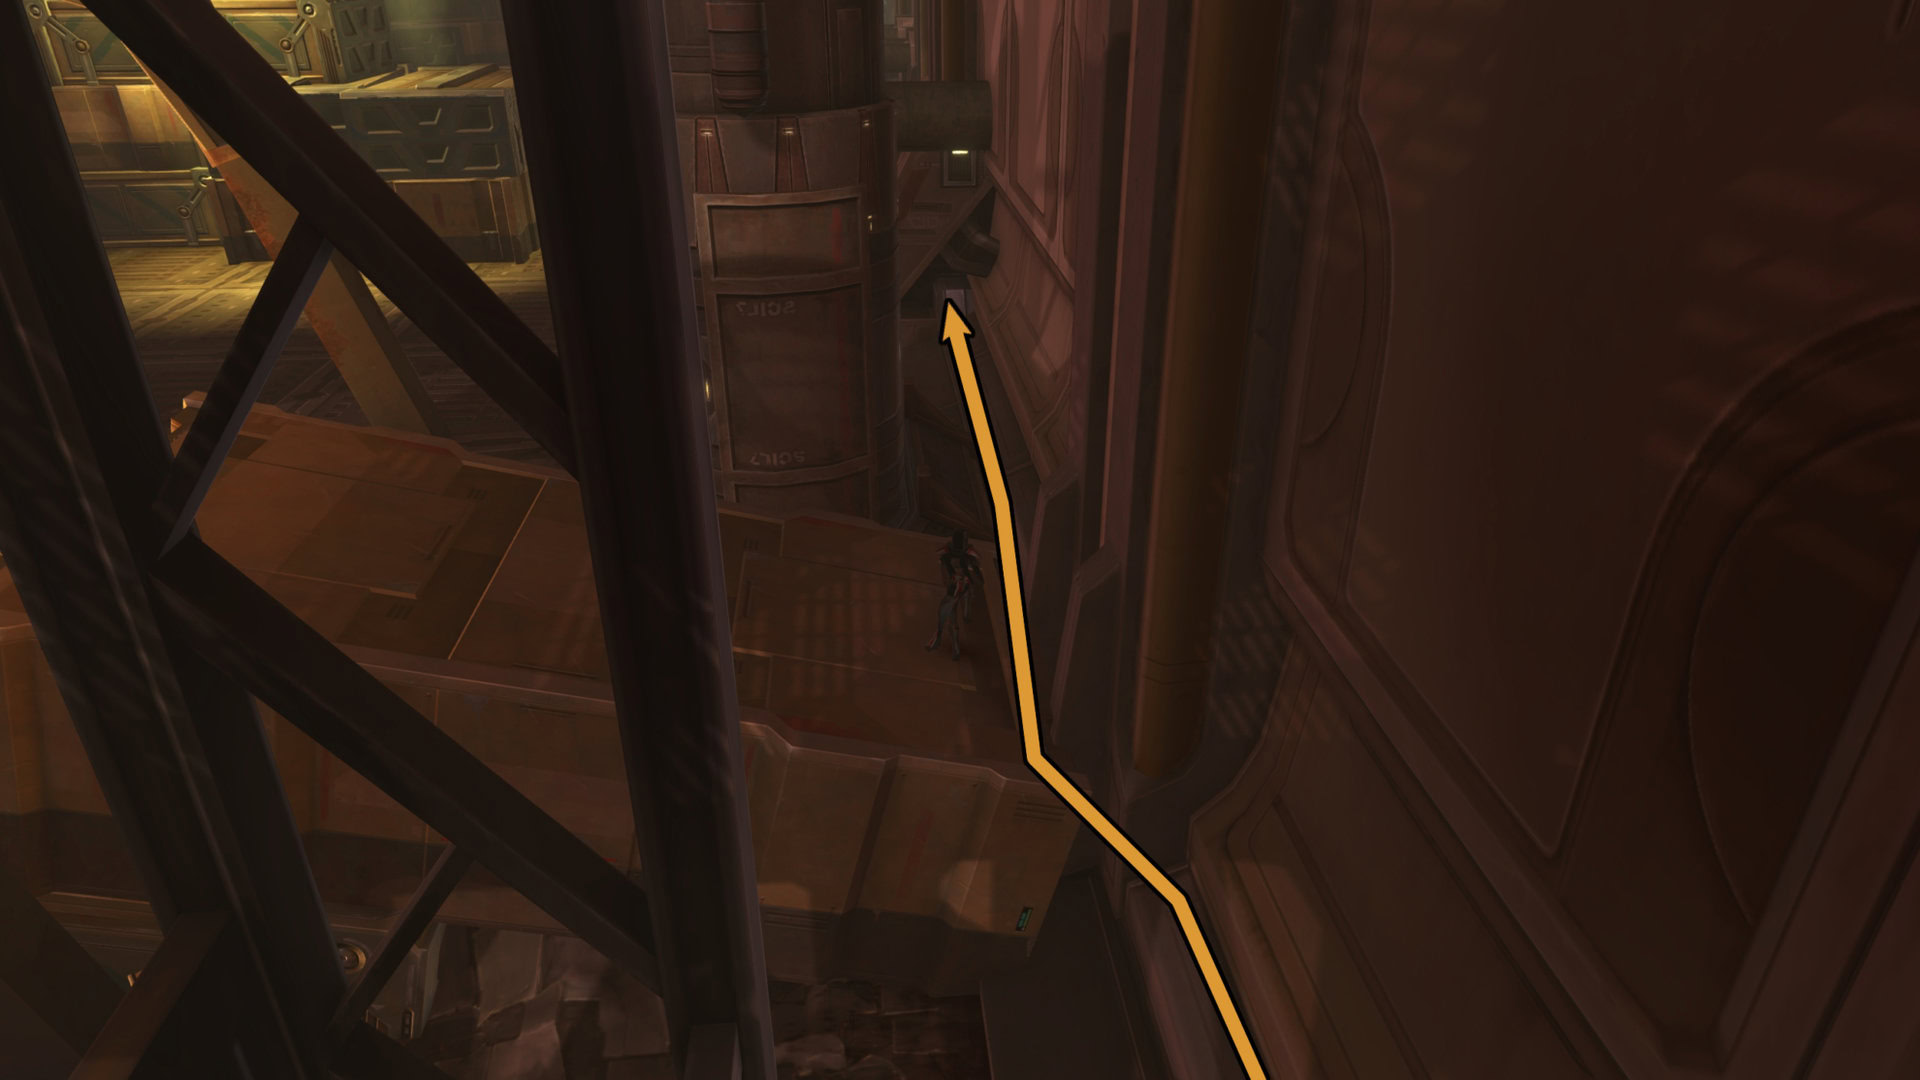
Imperial First Boss Shortcut
Starting from the elevator ramp, make a left and hug the wall and go across the street where the Republic troopers were bombed. Now hug the wall to your right across the building, jump across the pipe, hug the wall to the left and run past the Republic Turrets and into the first boss’s arena. Be sure to the left after jumping down into the arena so avoid aggroing the boss.
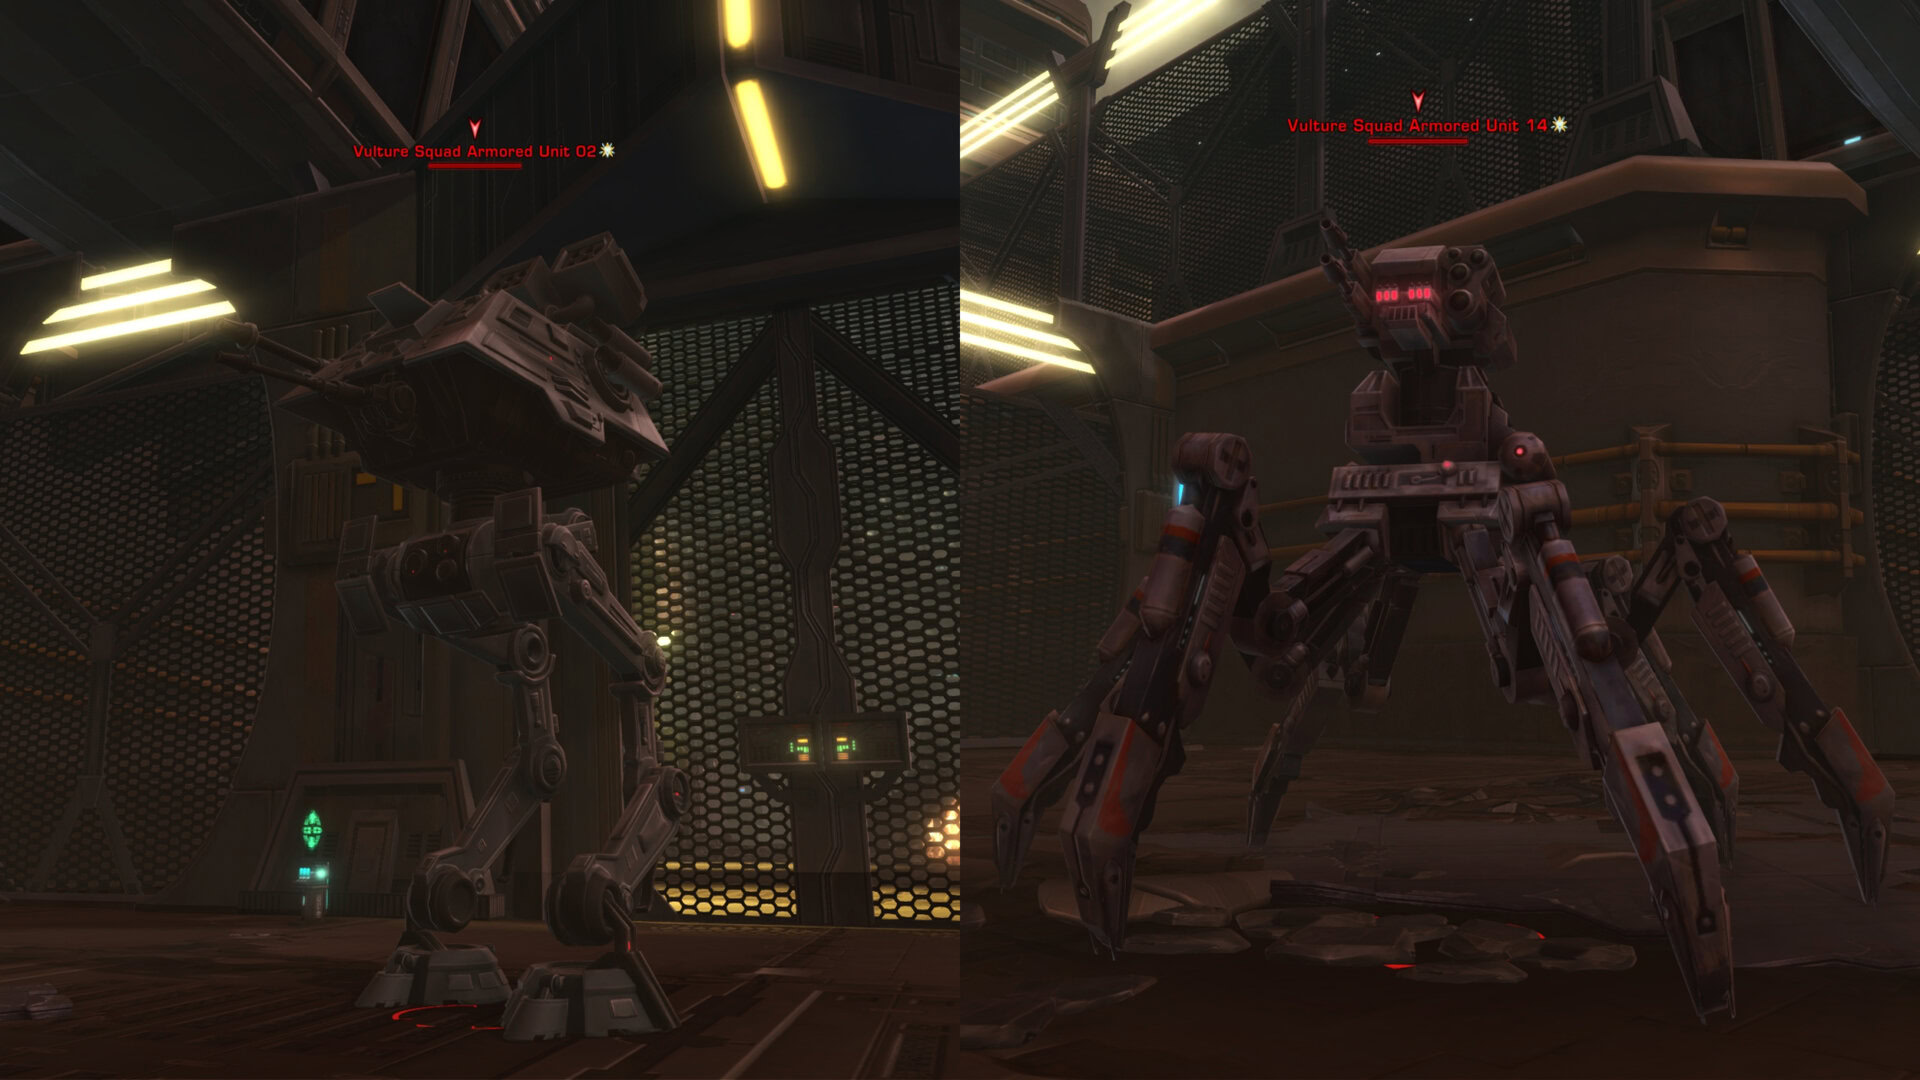
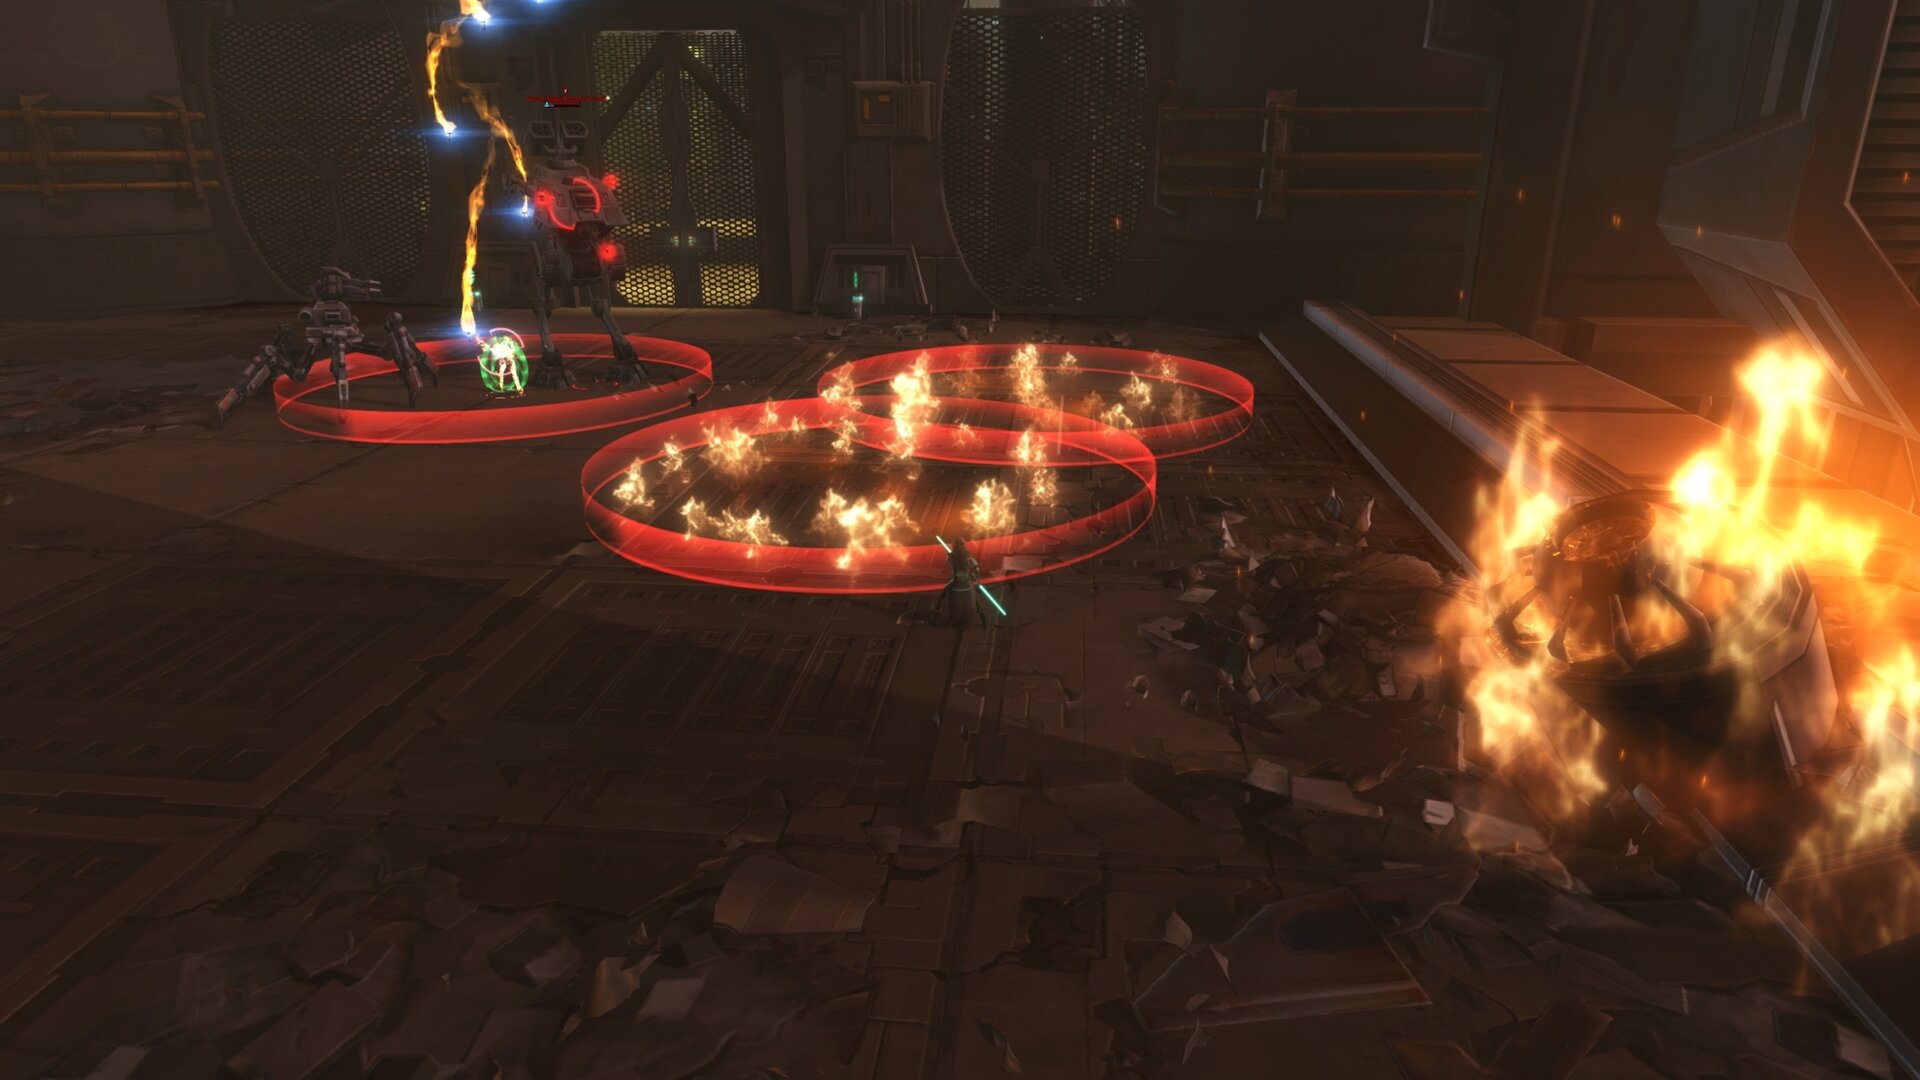
First Boss (Republic): Vulture Squad Armored Units 02 and 14
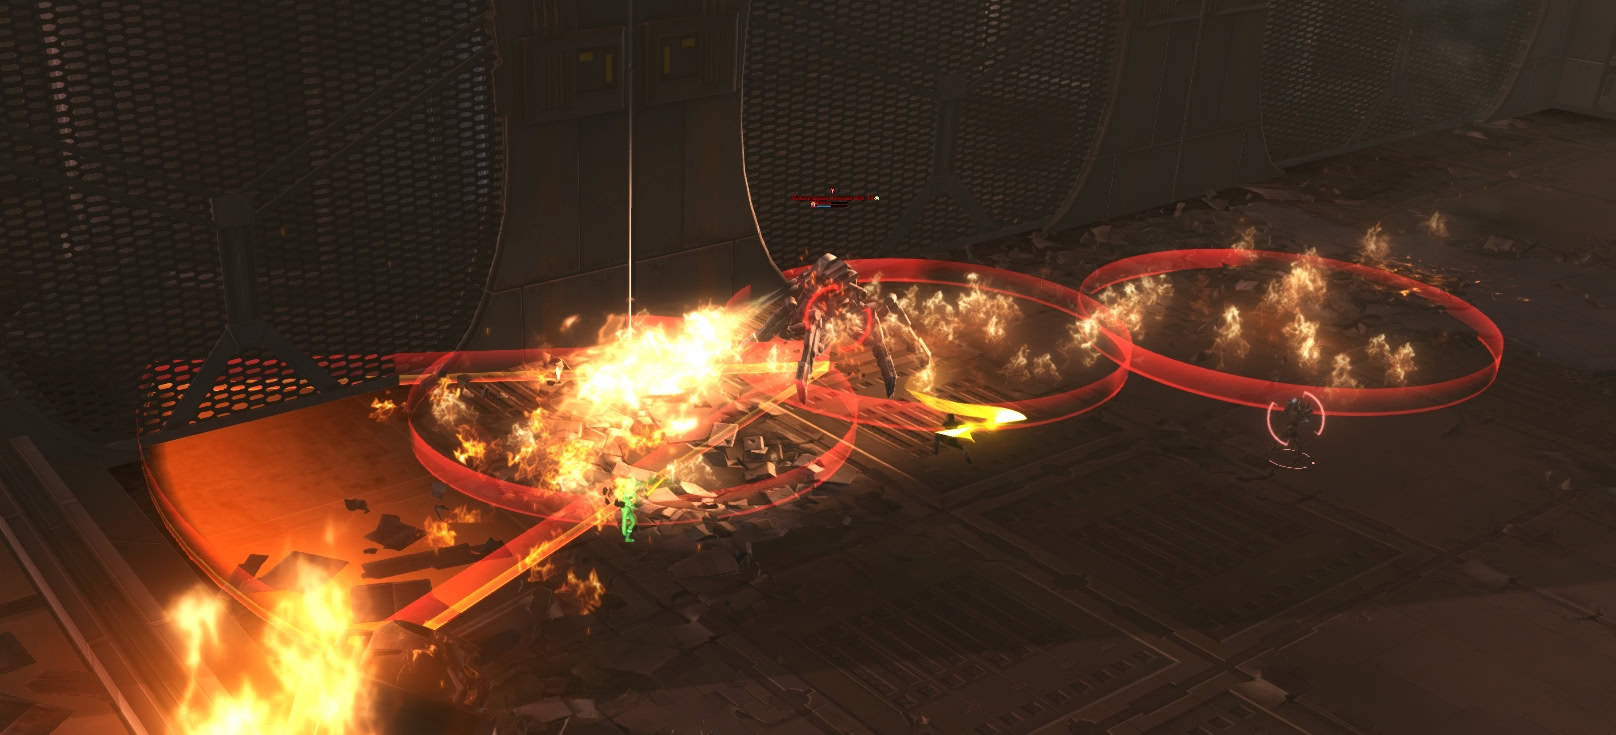
The first boss for Republic characters is a pair of a consisting of a Walker and a War Droid known as Vulture Squad Armored Unit 02 and 14. The flow of this battle can change depending on which boss you defeat first, keep reading and decide which outcome you’d prefer to deal with.
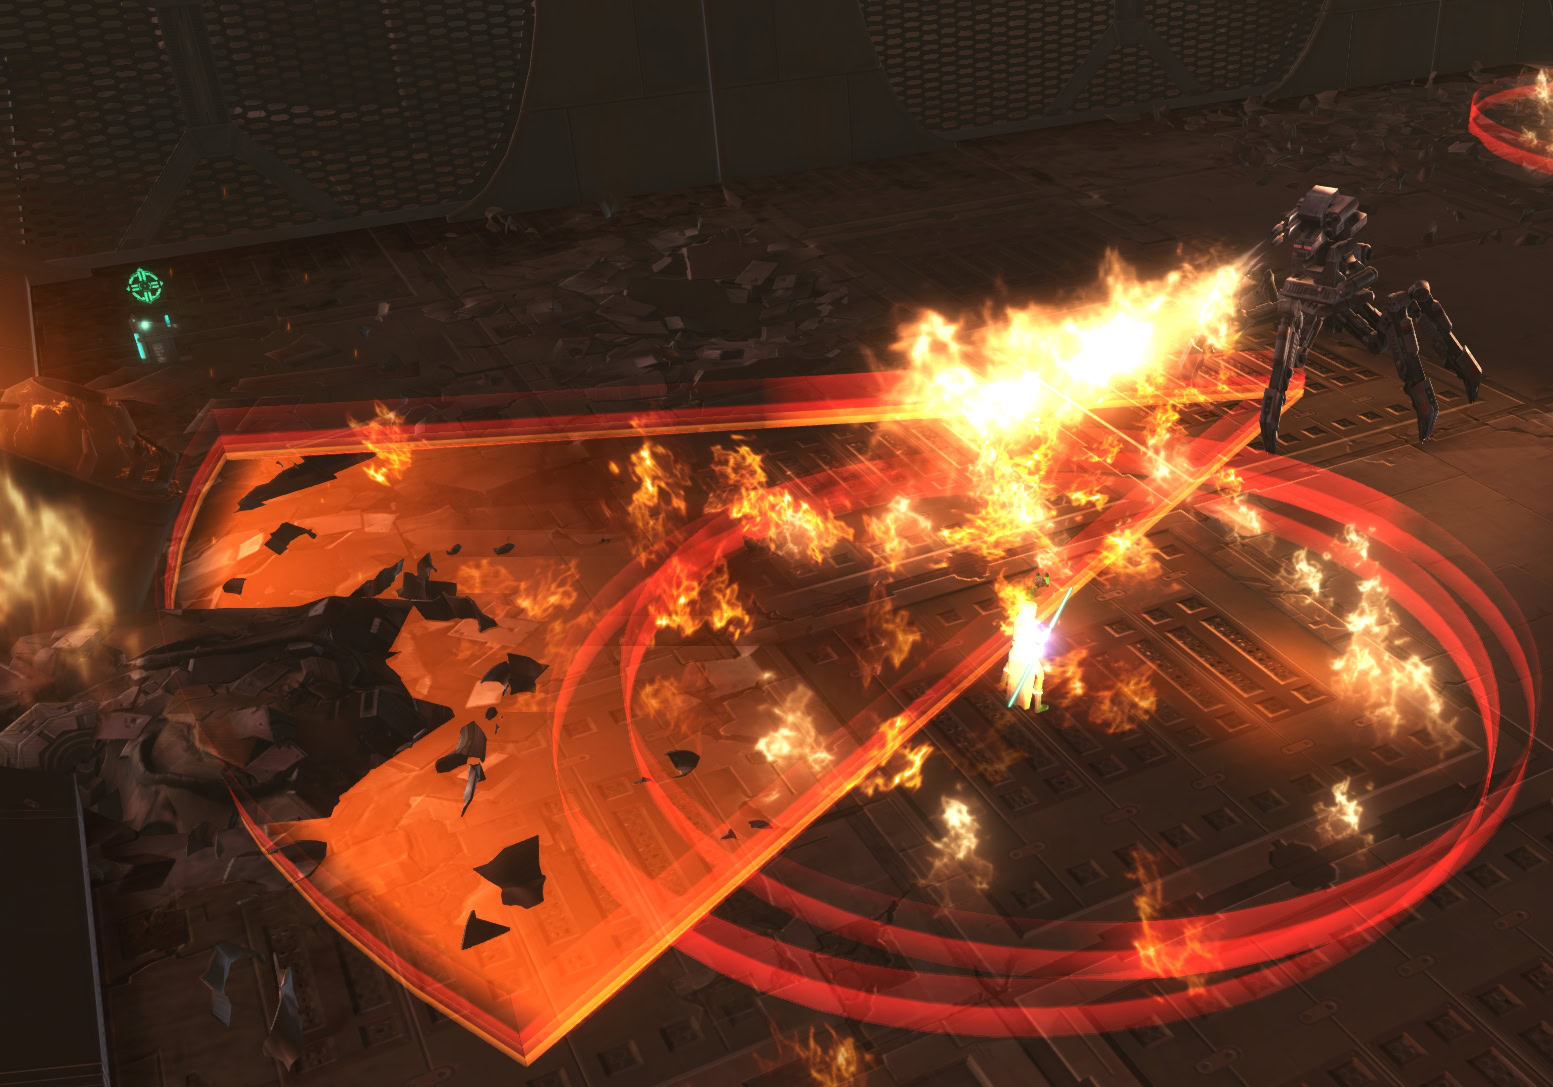
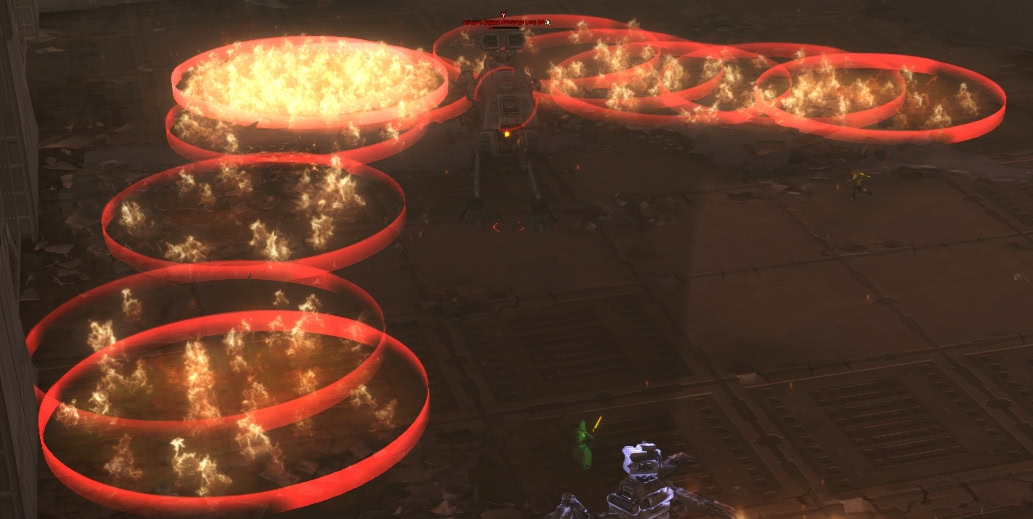
Unit 02 will fire rockets at their target as seen by a red circle following the target. Whoever is being targeted by this circle needs to move to the edge of the map as when fired upon, a fire in the area starts. It should go without saying that standing in fire hurts, stay out of it and don’t put it in the middle of the area so your allies don’t step in it.
The last ability that Unit 02 has that can be worked around is Charged Beam. Charged Beam takes a couple seconds to charge before firing, you can cancel the channel by walking 8 meters or closer to Unit 02. This can take out a noticeable chunk of your HP in story mode, get used to working around it should you take on higher difficulties.

Unit 14 will have a beam attack and a Flamethrower AoE. Whoever is being target by the flamethrower needs to face the red cone away from any allies. This cone will persist for a few seconds before the channel stops. All you have to do from here is dodge the AoEs and defeat one of the Armored Units, though which one you defeat first determines which enraged buff is obtained.
Defeating Armored Unit 02 first will cause Unit 14 to follow a target while firing its flamethrower at them non-stop. This doesn’t pose too much of a threat in story mode due to low damage, but keep this in mind for higher difficulties.
Defeating Armored Unit 14 first will cause Unit 02 to carpet the area with numerous Heat Seeking Infernal Missiles (the red circle AoEs). In Story Mode, Unit 02 just sort of stops doing anything and is just a glorified punching bag.
Veteran Mode Differences
There are no mechanical differences in Veteran Mode, the bosses are just tougher. So long as you work around the abilities mentioned above, you’ll be fine.
Master Mode Differences
This is easily one of, if not the hardest, fight in this flashpoint on Master Mode. The AoEs are very deadly and this fight requires good tanking and the ability for the DPS and Healer to fully cooperate.
You will need to focus Unit 14 first while kiting it around the arena. This is done so the middle of the arena is clear of fire for the DPS and Healer. The tank should single target taunt Unit 02 while kiting Unit 14 to maintain aggro while the DPS ignore Unit 02. Keep kiting Unit 14 around the arena, avoid the AoEs and then move onto Unit 02.
It only gets a little bit easier from there. Once Unit 14 is down, everyone needs to spread out and away from each other as Unit 02 will fire AoEs on EVERYONE. When it stops firing, attack Unit 02 and spread out again when it fires its AoEs. Repeat this process until it’s defeated.
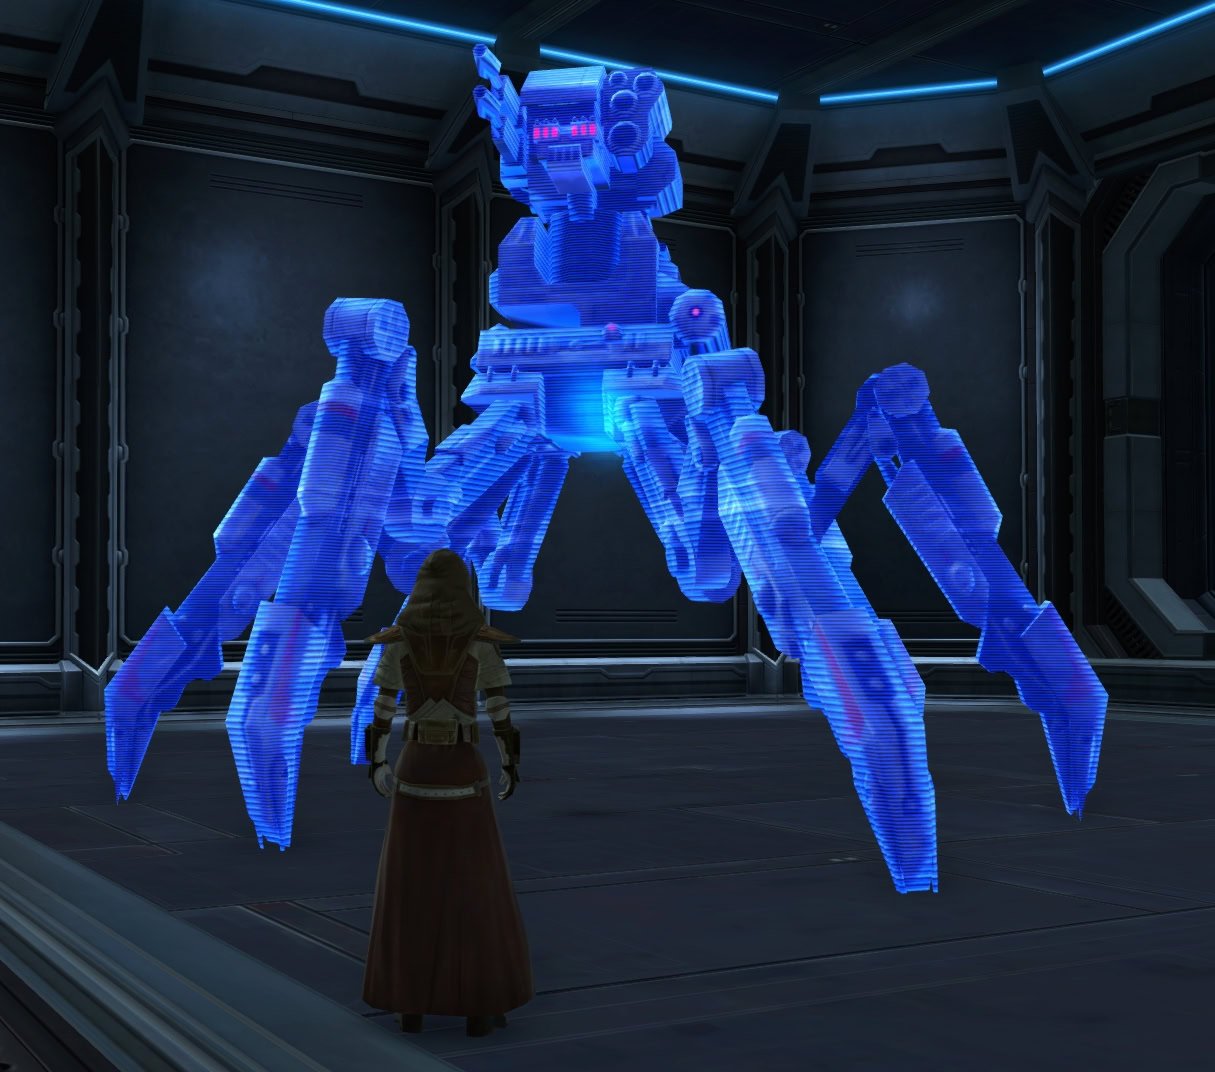
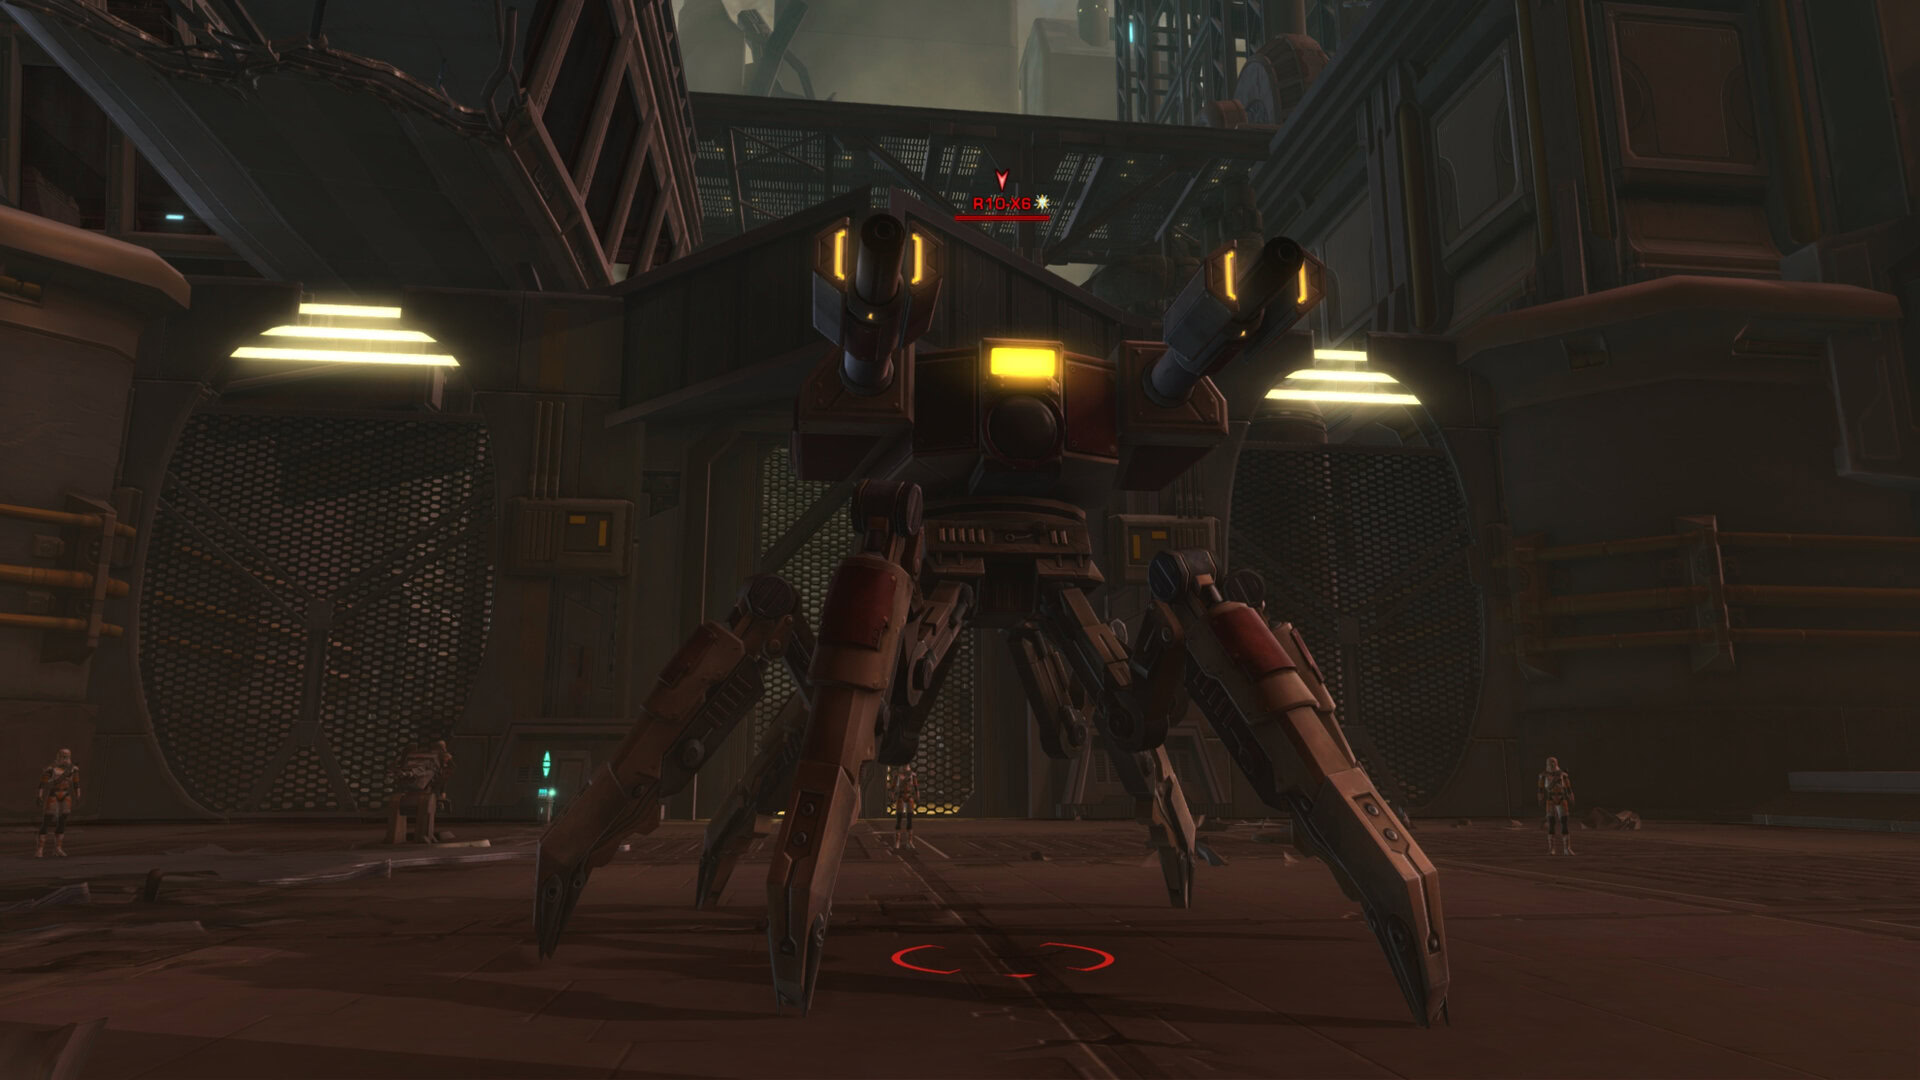
First Boss (Imperial): R10-X6
The boss will be accompanied by numerous Republic Trooper adds at the start of the battle. Your primary target is the large war droid, R10-X6.
Start by defeating the troopers then focusing on R10-X6. Every so often, R10-X6’s target will be surrounded by a blue AoE, get out of there as it’ll repeatedly fire on this area with Explosive Shot.
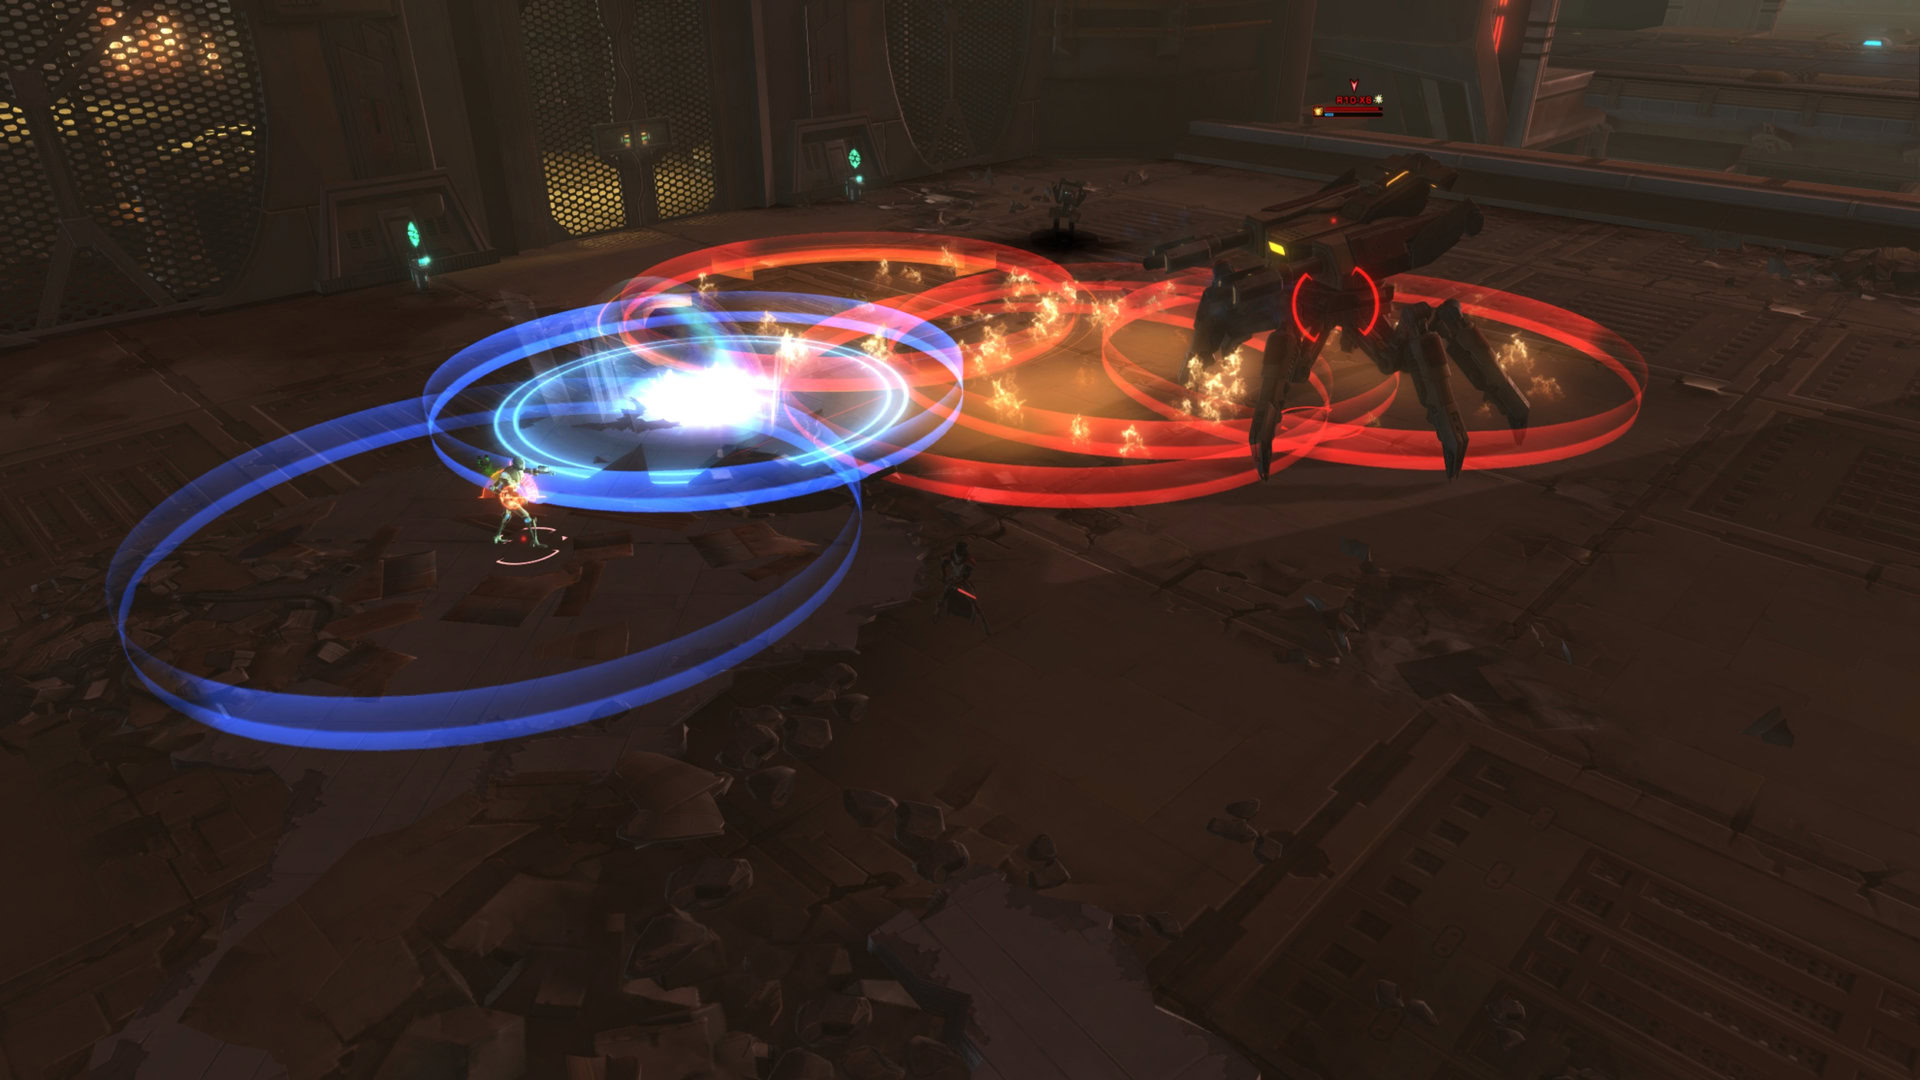
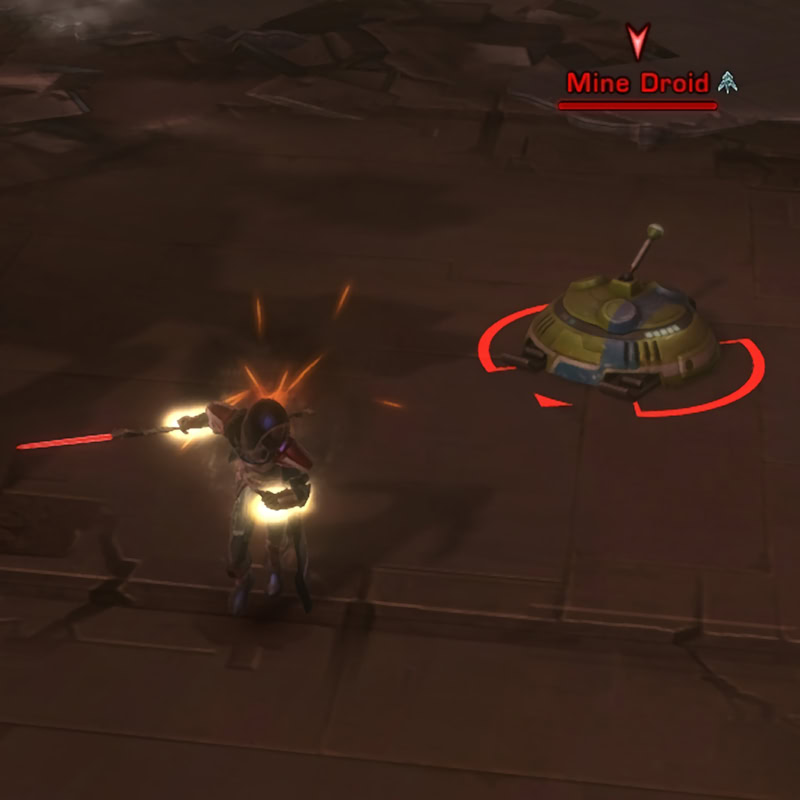
Mine Droids will spawn and follow someone. If they get too close, they’ll blow up creating a red circle AoE full of fire. The tank can AoE taunt the Mine Droids and lure them away from their allies. If you’re not the tank and being chased by a mouse droid, lure it away from your allies.
On the other hand, if you have any ranged DPS with spammable AoEs, they can fire their AoEs on the Mine Droids and lure them away from the team. This will make it a bit easier for melee DPS to continue attacking the boss without getting burned to a crisp.
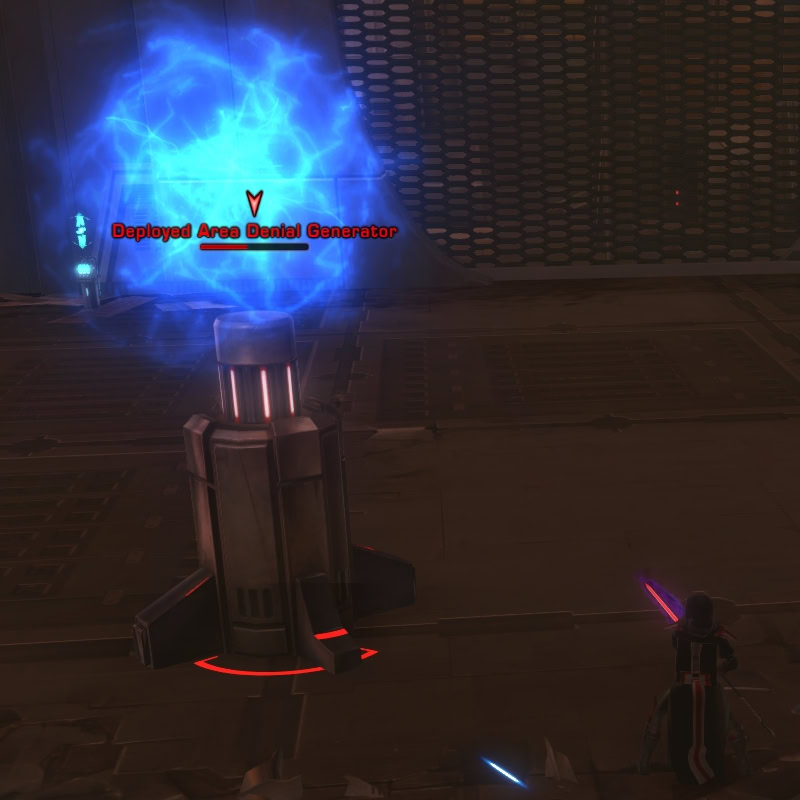
Once R10-X6 get’s low on health, two Area Denial Generators will appear in the arena. Together they’ll deal damage to a large portion of the area. Destroy these when they spawn and you can finish off the boss. The longer these are up, the more damage they’ll do so get rid of them.
Veteran Mode Differences
The blue AoE in this boss fight will now follow its target in Veteran Mode instead of remaining stationary. If you’re being targeted by the blue AoE, don’t bring the damage to your allies.
Master Mode Differences
There aren’t any mechanical differences but you will definitely feel the difference in terms of damage. This includes the Mine Droid AoEs and especially the blue AoE that should be focused on the tank. This deals tech damage so something like Resilience or Force Shroud can negate it. Otherwise pop DCDs that increase damage reduction or reduce incoming damage because it will HURT.
When the Deployed Area Denial Generators spawn, take them out as fast as you can before their power increases to absurd levels. Continue fighting the boss from there and move on with the flashpoint.
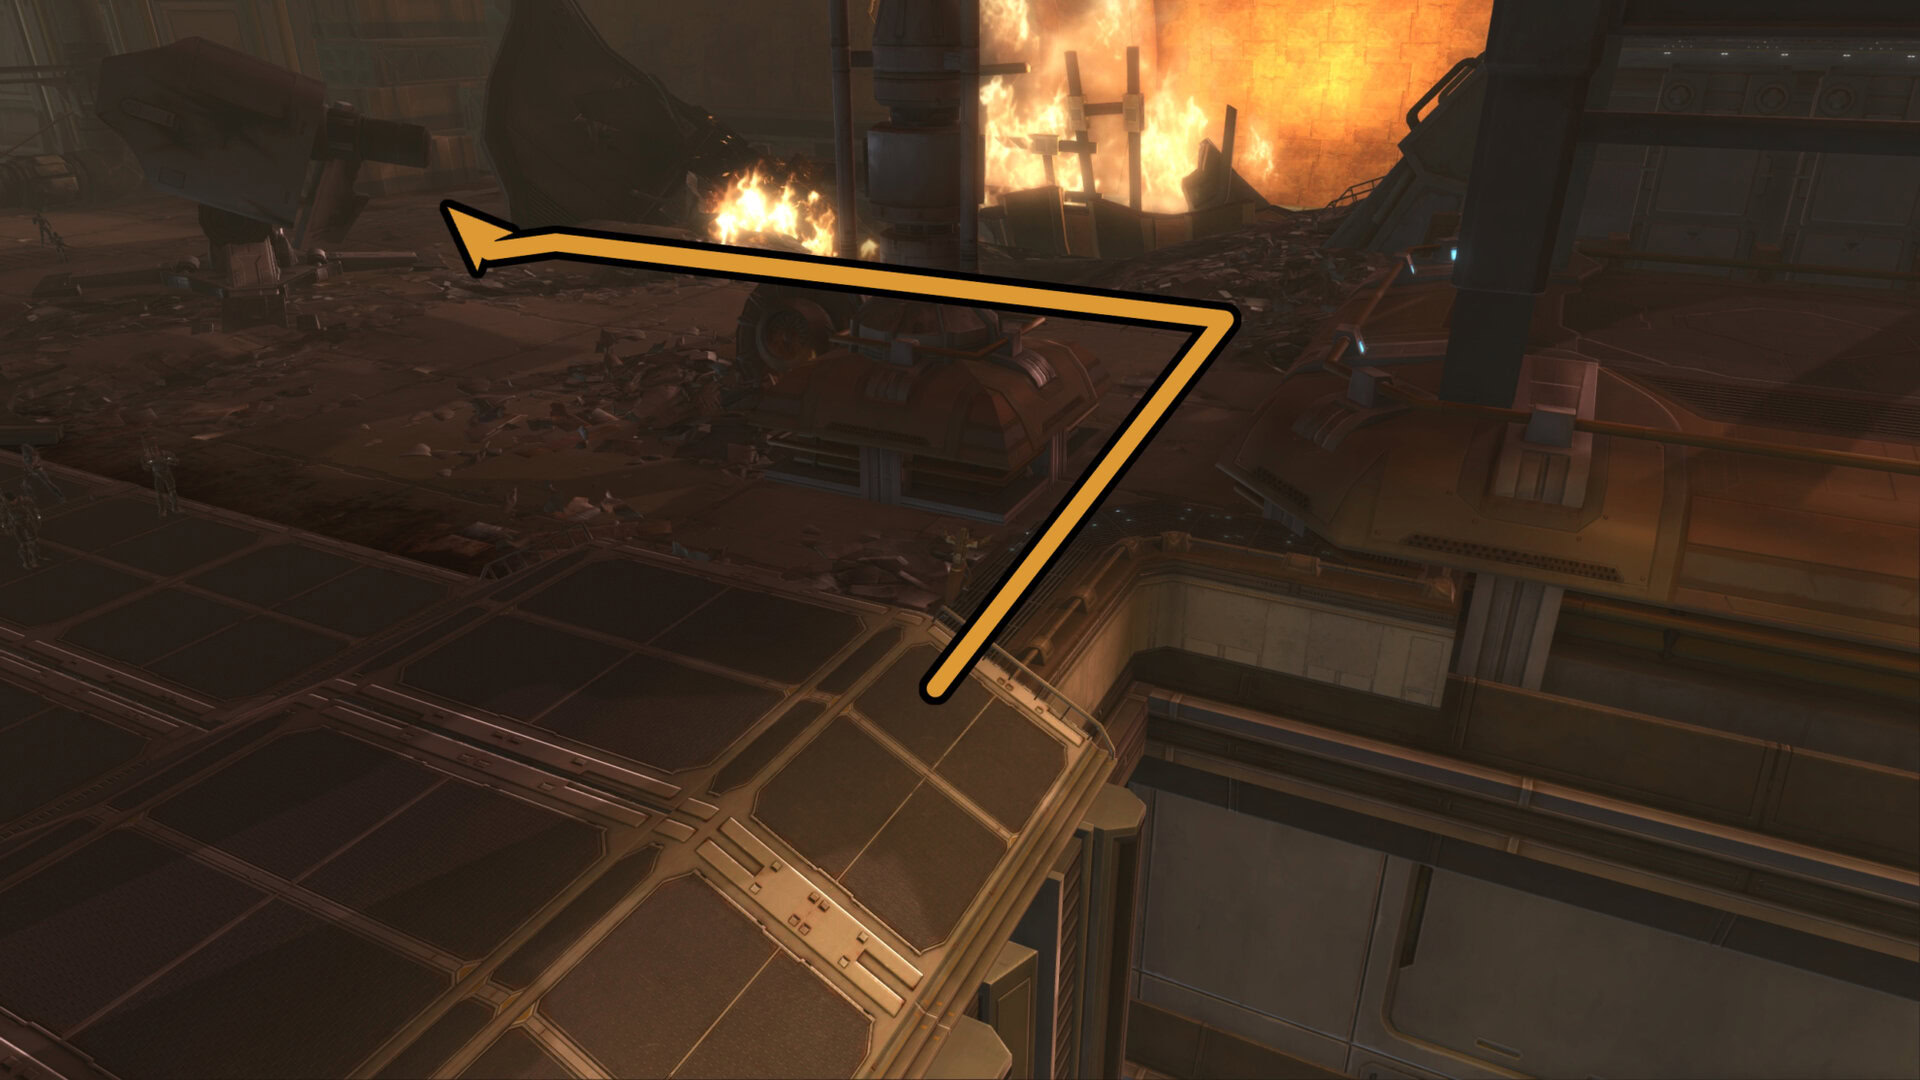
How to access the Bonus Boss
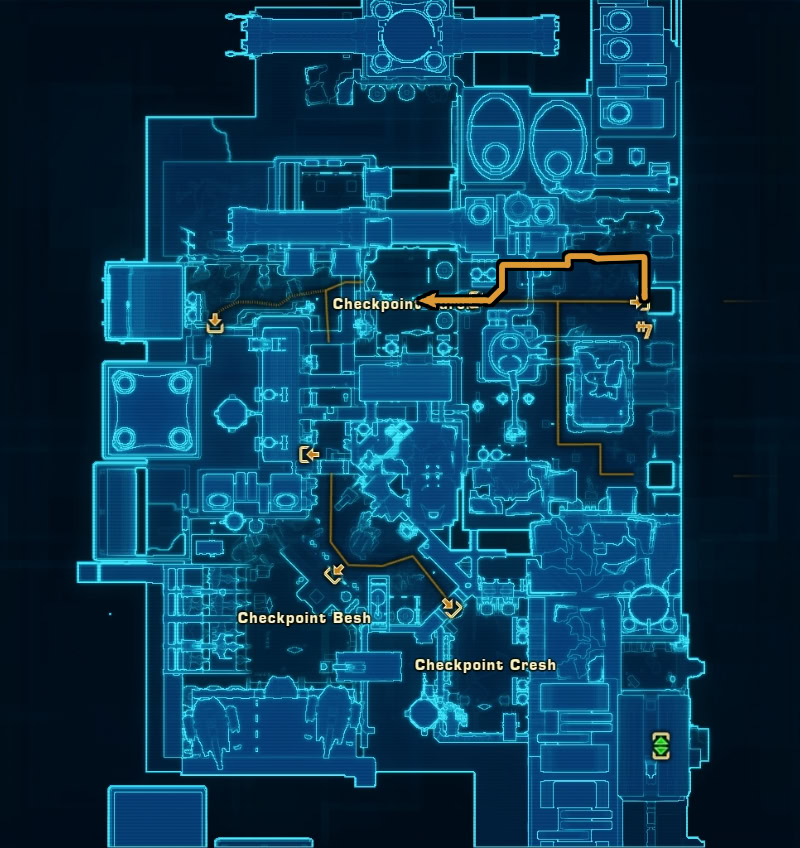
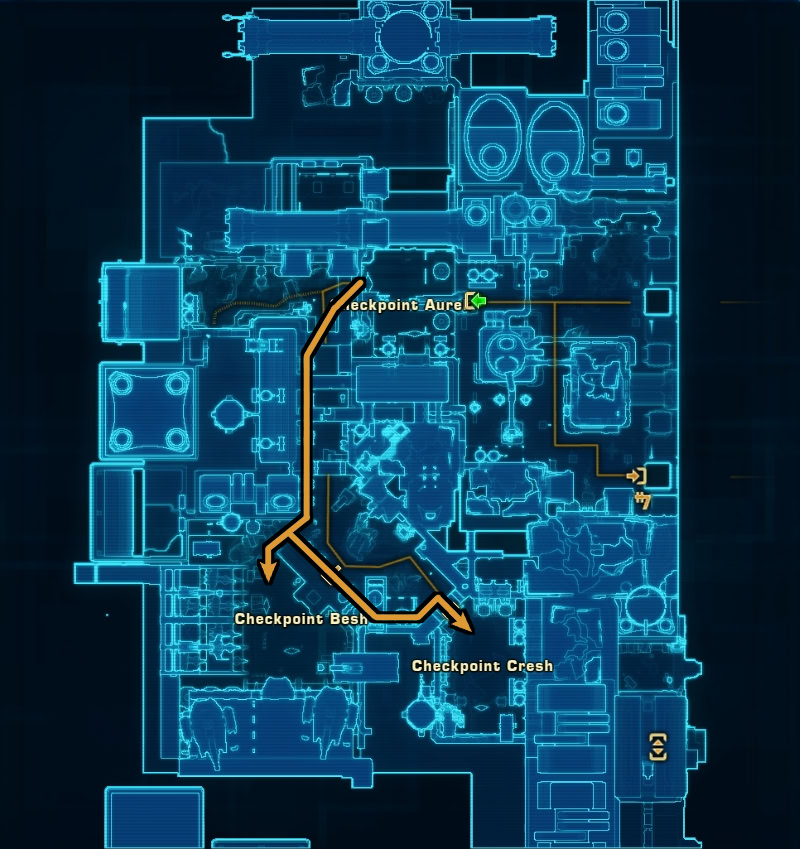
Objective Meridian lacks any bonus missions that would typically lead to a bonus boss. Instead, you can access the bonus boss on your way to Checkpoint Cresh after defeating the first boss. Instead of going to Checkpoint Cresh, go to Checkpoint Besh and look for a broken grated fence. Following this path will lead you to the bonus boss.
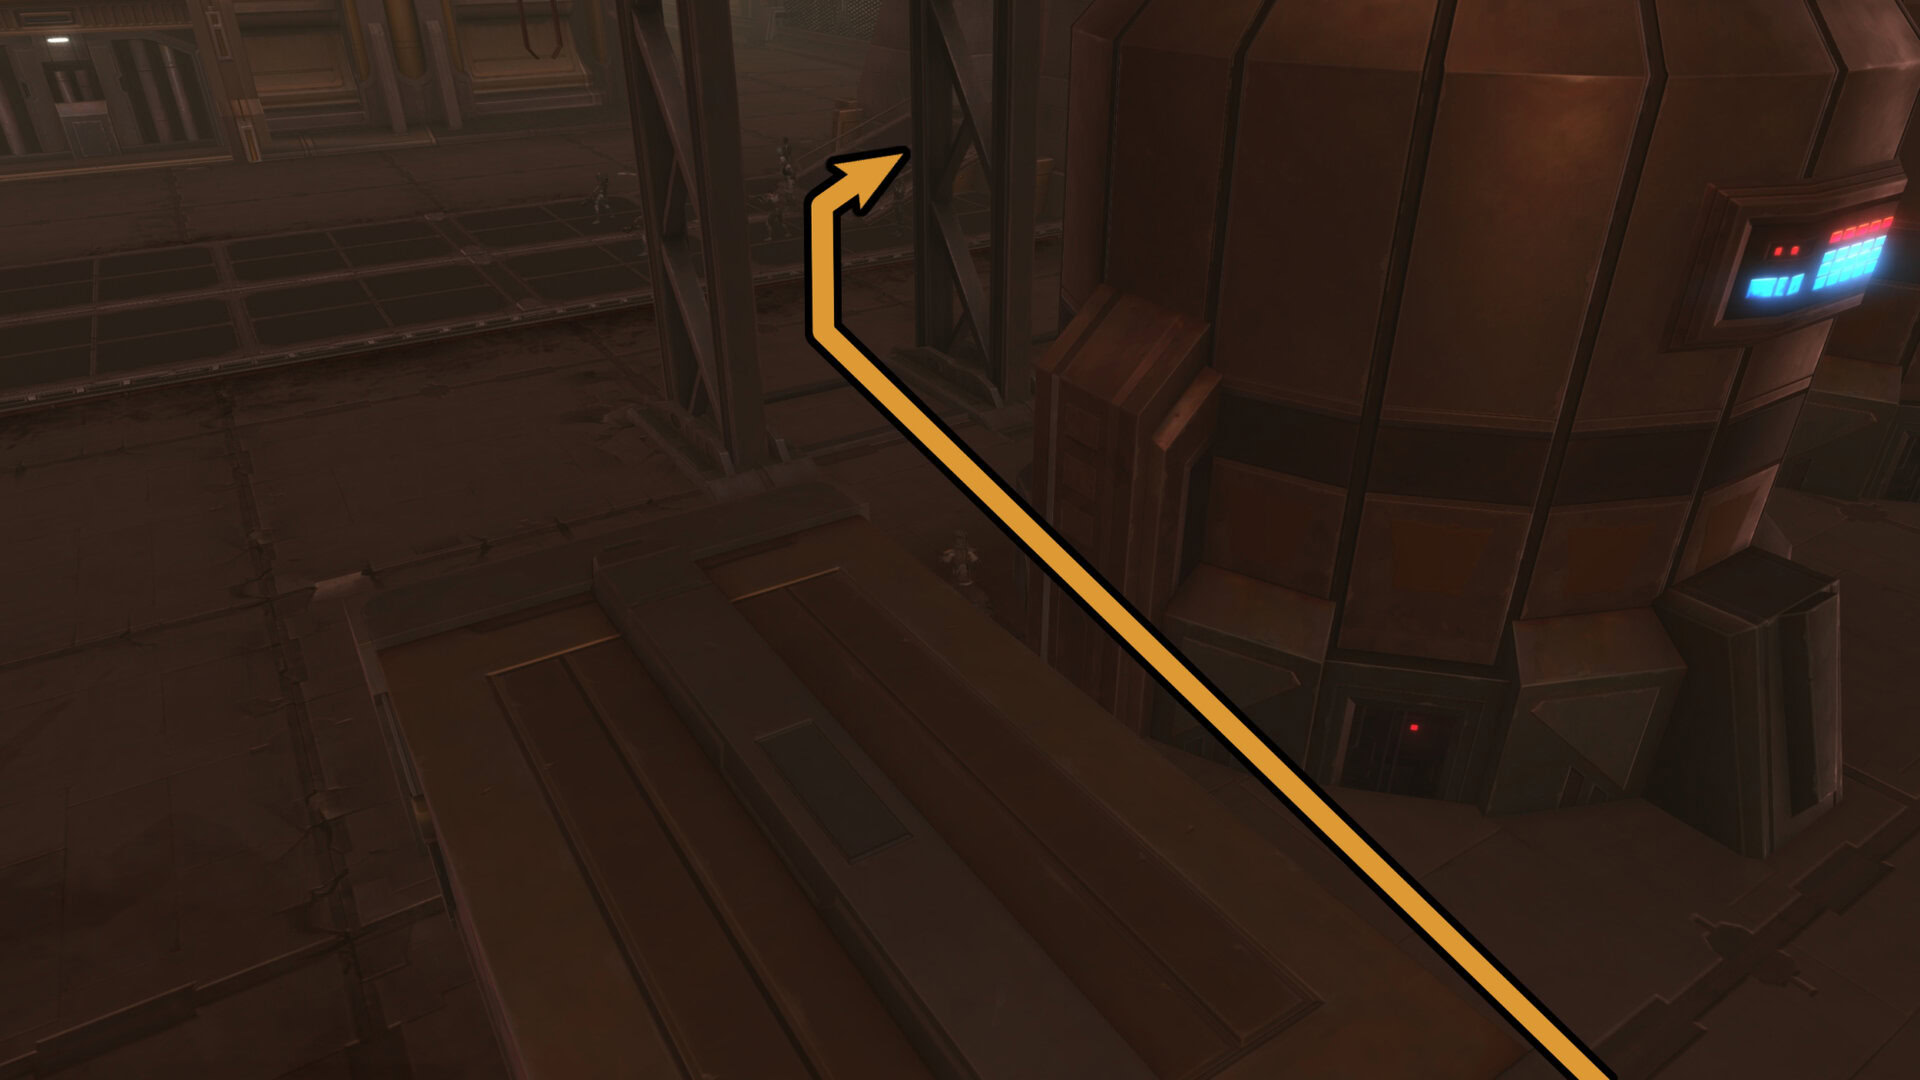
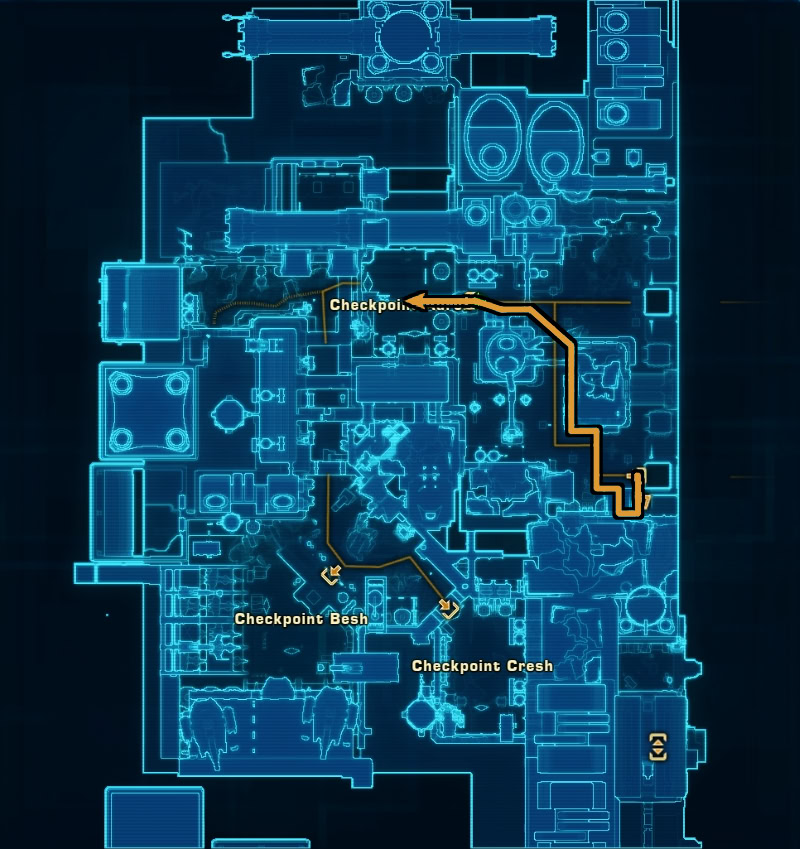
Shortcut to the Bonus and Second Bosses (Empire)
The Empire has a much easier time than the Republic avoiding enemies to the bonus and second boss. Due to the paths and enemy placement, Republic characters will be unable to avoid many fights along the way. Instead, only the Imperial shortcut will be featured here as they can avoid fights entirely.
After defeating the first boss, hug the wall to the right and follow the wall. You’re going to have to do some jumping over weird terrain. If you find yourself jumping over a crate, you’re on the right path. Eventually you’ll be led to the Bonus Boss pathway. You can exit here at Checkpoint Besh to fight the Bonus Boss, or continue moving while hugging the fence to reach Checkpoint Cresh to fight the Second Boss.
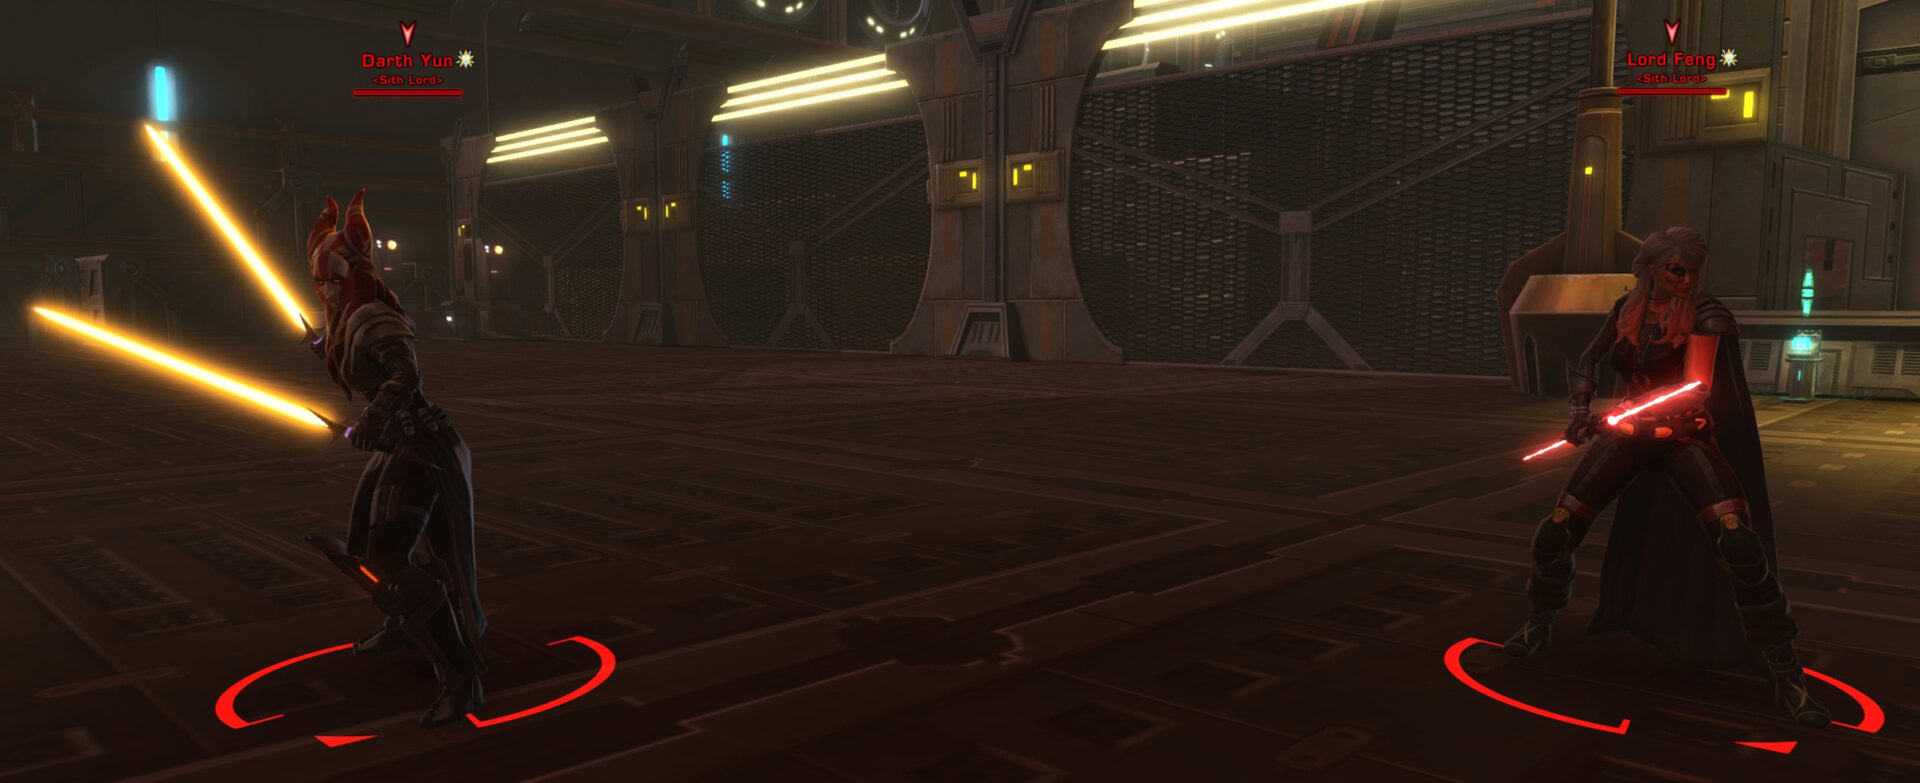
Bonus Boss (Republic): Darth Yun and Lord Feng
Darth Yun and Lord Feng are the bonus bosses for the Republic Instance of Objective Meridian. Darth Yun uses melee attacks while Lord Feng is the more dangerous one as she uses the Force to attack.
Lord Feng will choose a target for her Dark Ritual ability. This target will take constant damage while the ability is being channeled while having an AoE explode around them every so often. They should avoid being too close to allies to avoid damaging with the AoE explosions. Once finished, there will be one last explosion that is much larger.
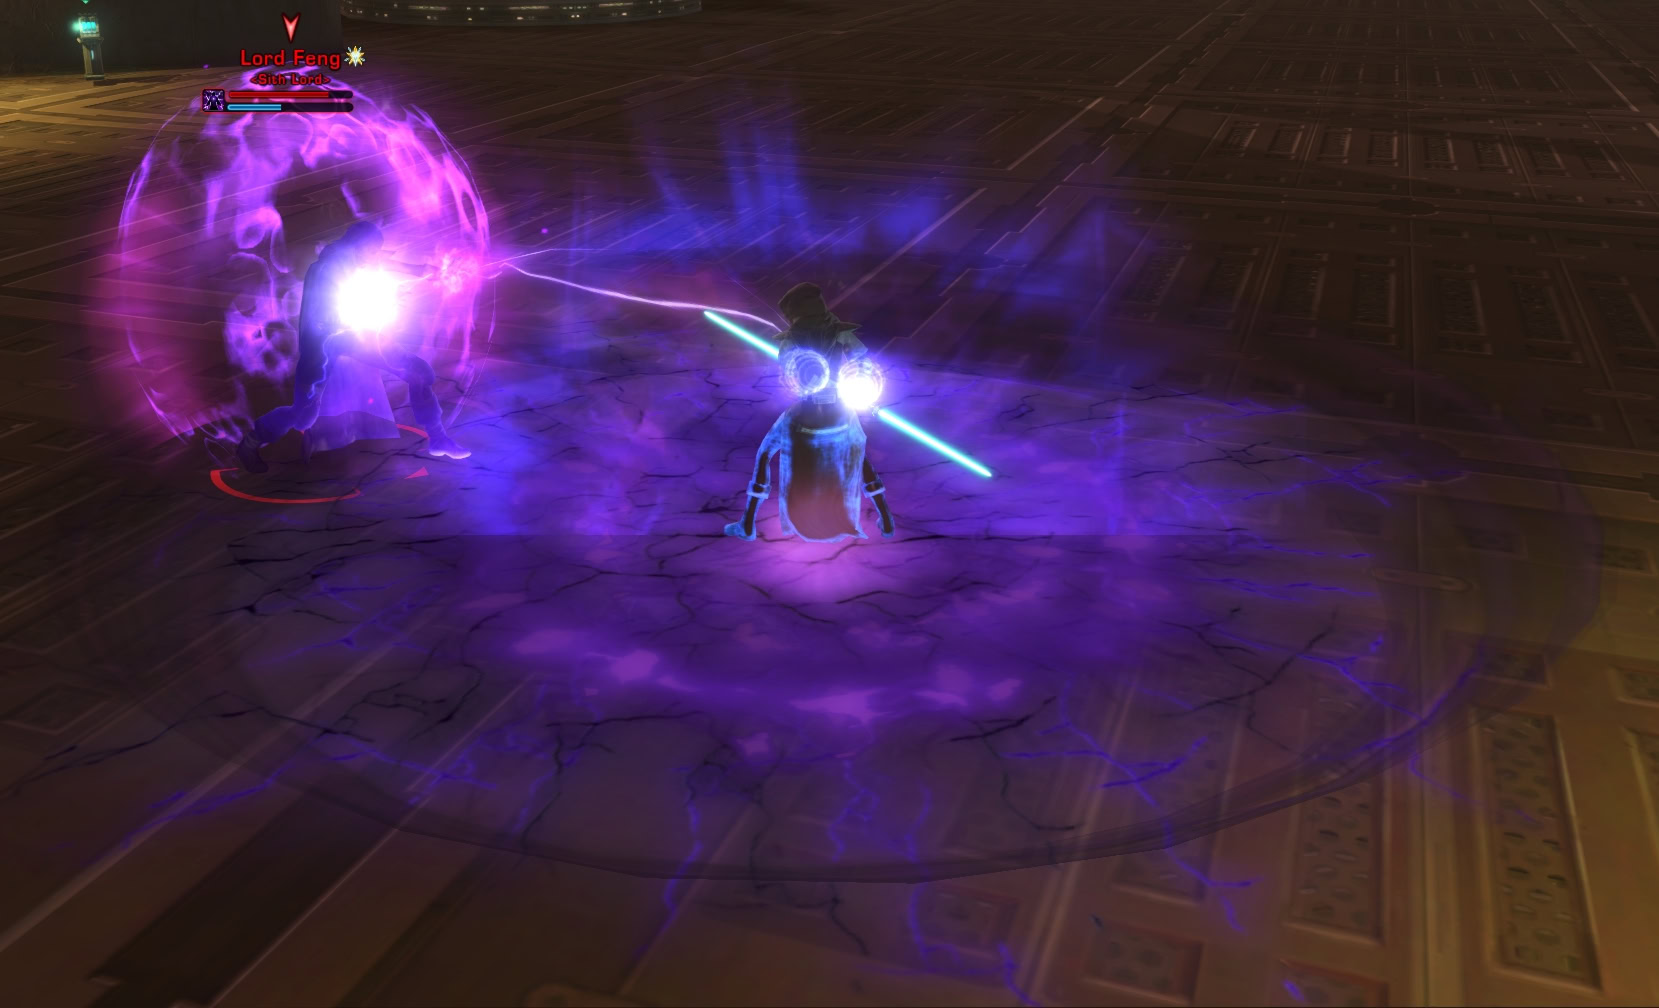
Once either boss reaches 50% health, Lord Feng will start using Death Field and Lightning Storm. Death Field will have a large, pale-blue AoE that you’ll need to get out of before the ability is fully casted.
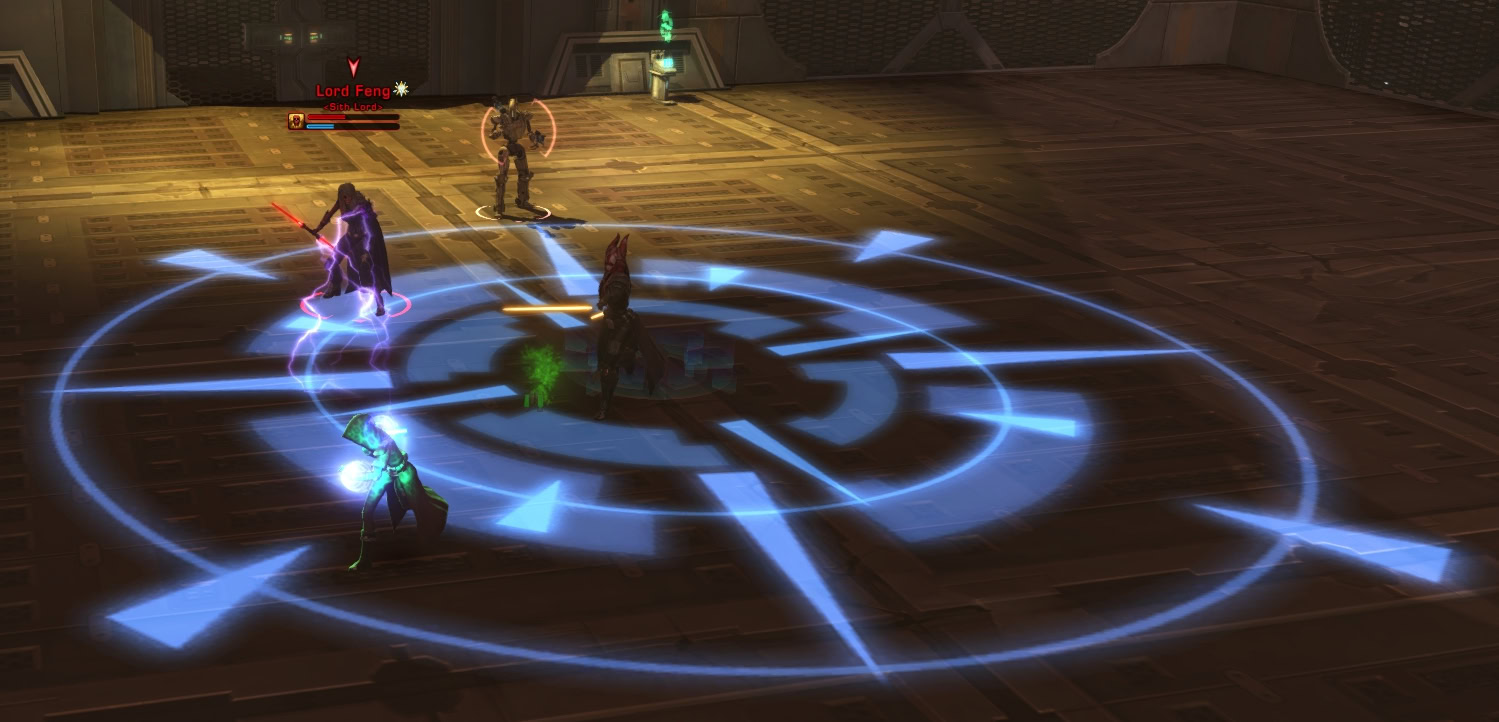
Lightning Storm will target someone as seen by the purple circles beneath them. The target will need to run and keep the multiple circles away from others as lightning will hit these areas.

Once either boss is defeated, the surviving one will become enraged and gain a bonus to alacrity, allowing them to attack faster or cast Force abilities faster.
Veteran Mode Differences
Aside from being tougher, Lord Feng now becomes immune to damage when she’s casting Dark Ritual. Try to get either boss down to 50% HP as soon as you can so Lord Feng stops getting damage immunity.
Master Mode Differences
This fight isn’t that much harder compared to Veteran Mode, though that’s assuming you know how to dodge the AoEs. If you don’t, you won’t be sticking around long as Lord Feng’s Lightning Storm and Death Field hits like a truck. Avoid the AoEs, focus Lord Feng first, then tank and spank Darth Yun.
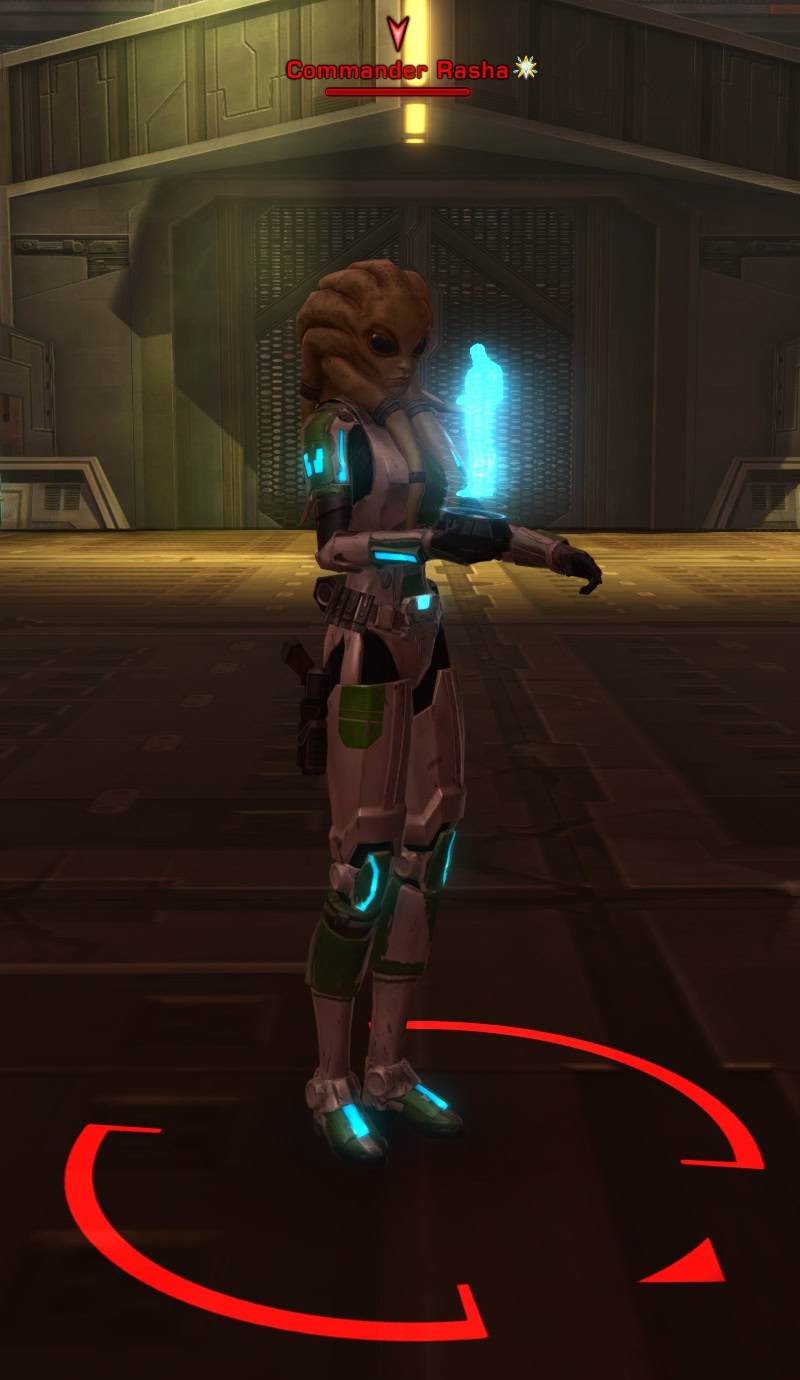
Bonus Boss (Imperial): Commander Rasha
The Bonus Boss for the Imperial Instance of Objective Meridian is Commander Rasha. There will be a lot of AoEs and adds in this boss fight, so long as you mind the mechanics you should be fine.
One of the first AoEs to watch out for is Sweeping Gunfire. Keep the green AoE cone facing away from your allies while she’s channeling this ability.
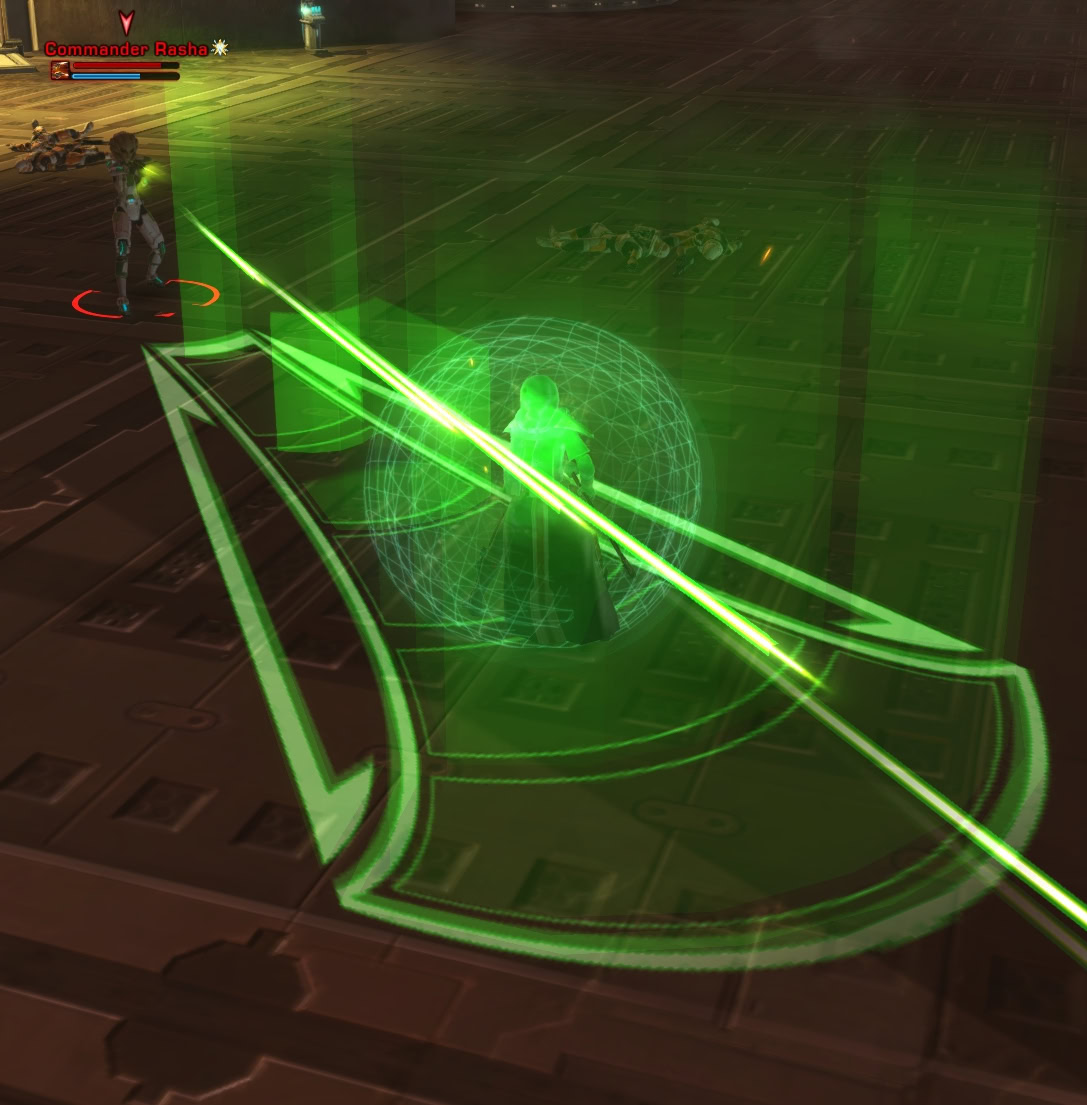
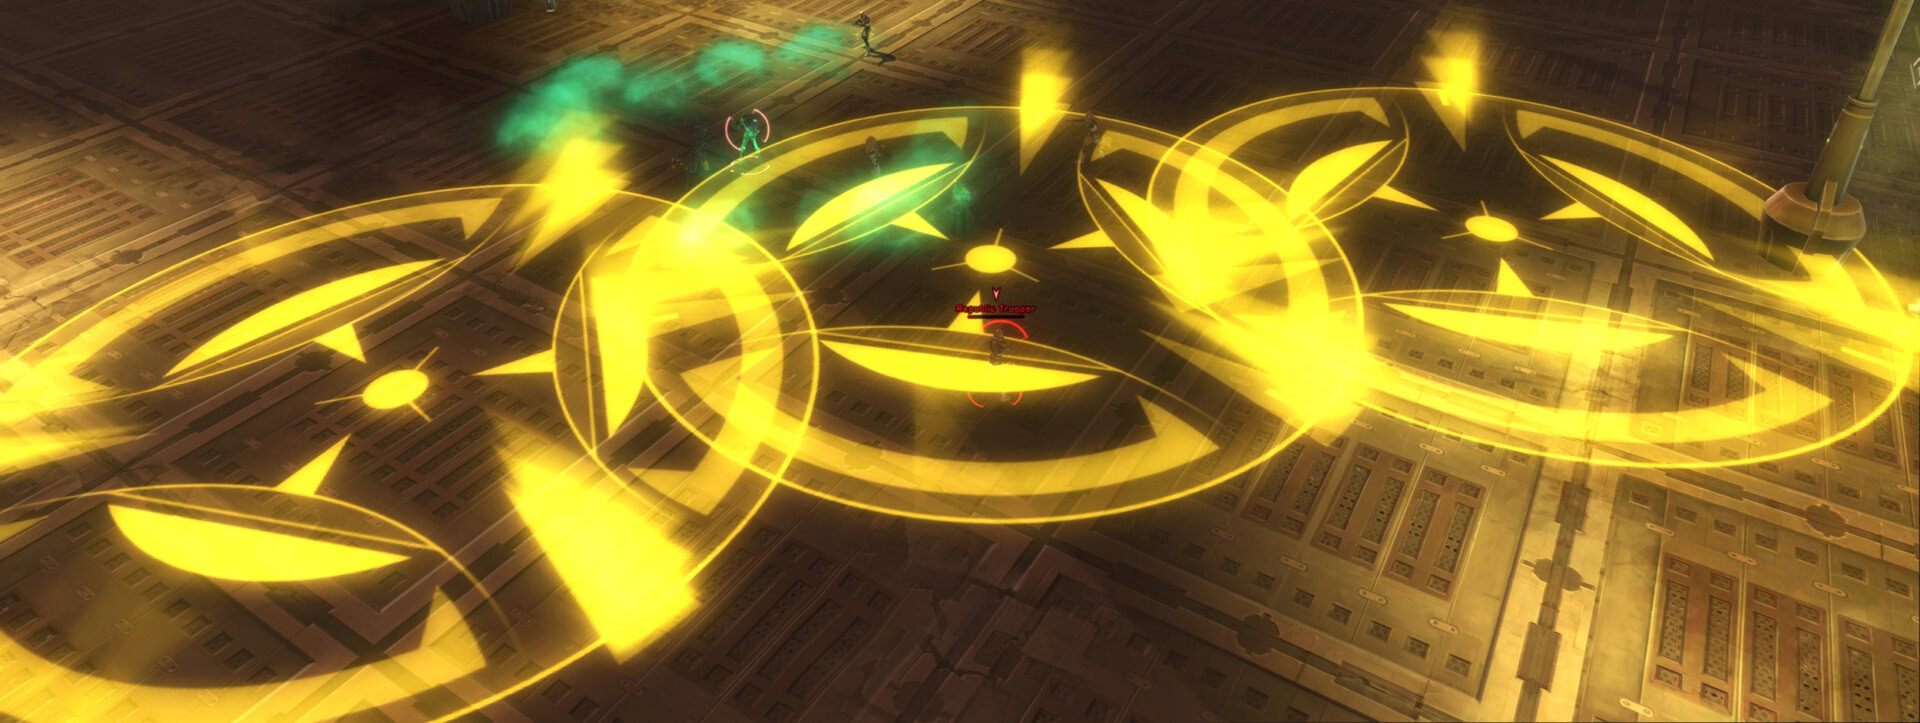
Commander Rasha can also call in for artillery barrages in the area. Three yellow circles will occassionally appear in the area and you’ll need to get out of them before the artillery shoots here. Get out through the sides and avoid running out of this area lengthwise.
The most dangerous facet of Commander Rasha is her ability to summon adds. Normally this would be a small issue but she can grant them all a buff called “Coordinated Firepower”.
When she uses this ability, every add gets DPS marker above them for a couple seconds and gain a stack of Coordinated Firepower which increases their damage done per stack. Whenever she uses this buff again, they’ll gain another stack of Coordinated Firepower. Defeat any adds as soon as possible before they become too numerous and too buffed.
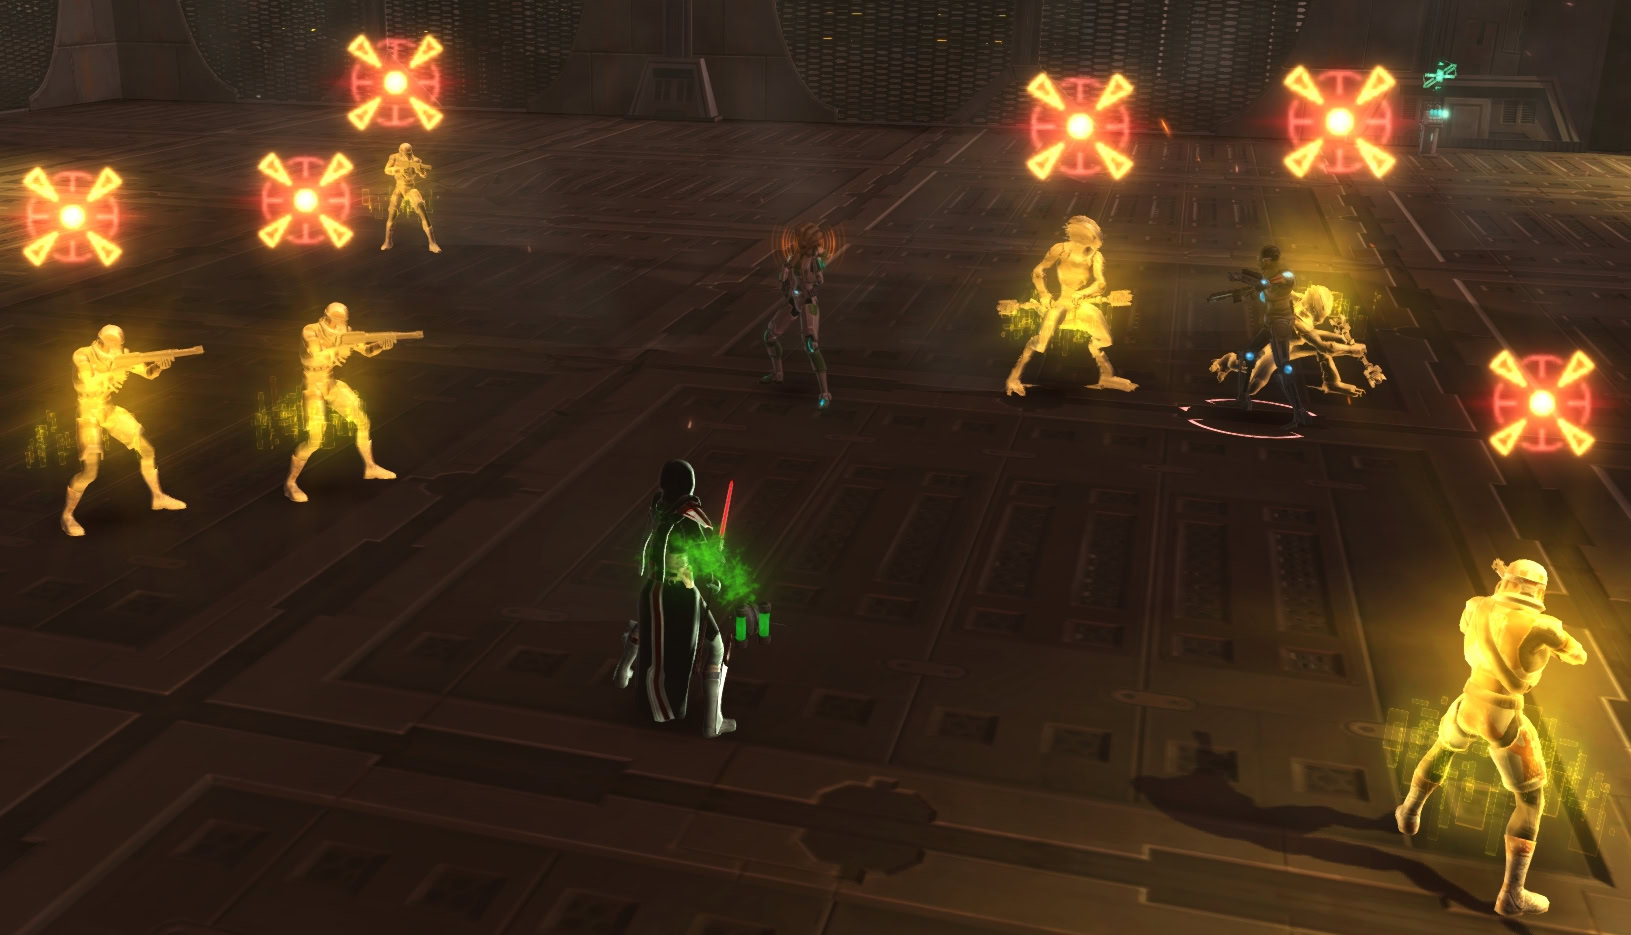
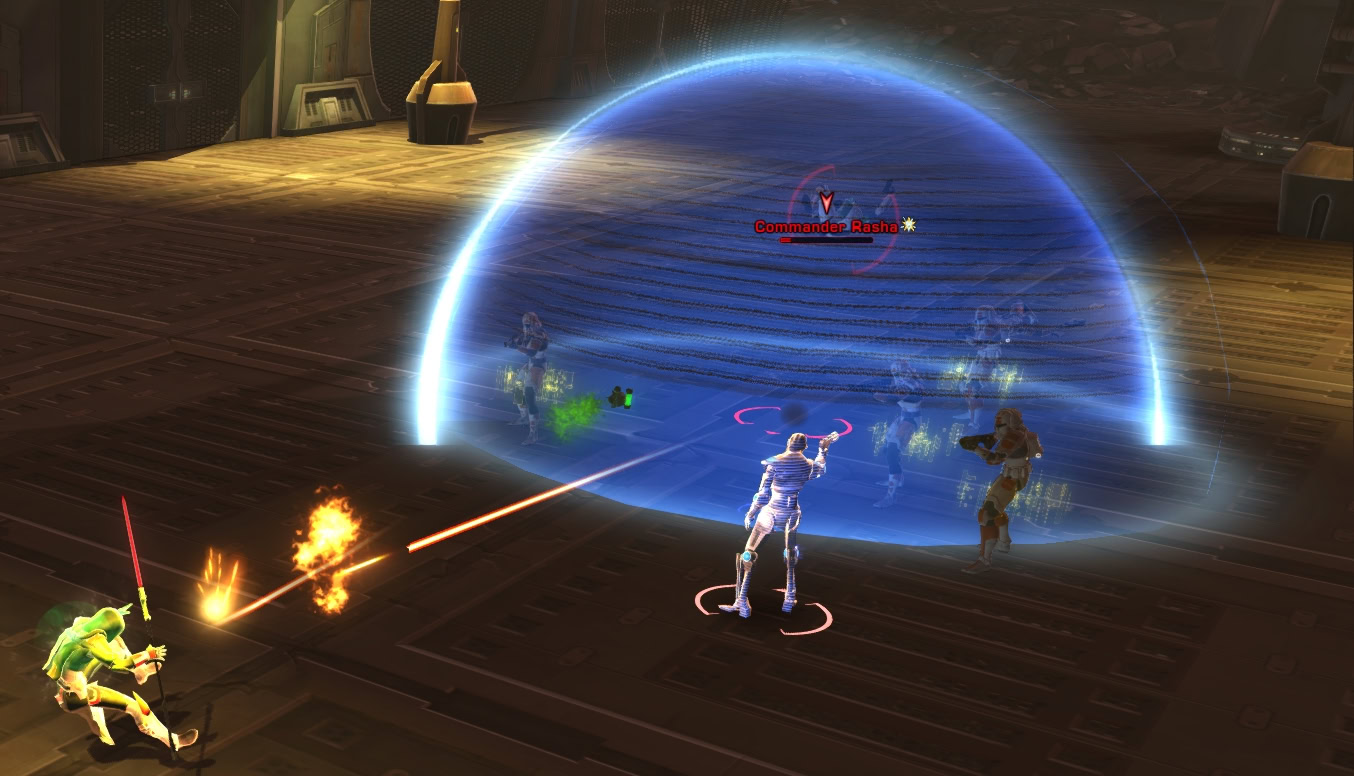
When she has low health, Commander Rasha will begin to use a Deployable Shield around her when summoning adds. This blocks damage from outside the bubble and pushes away any melee characters trying to get close. Defeat the adds to have the shield come down and defeat Commander Rasha.
Veteran Mode Differences
Commander Rasha now has the ability Armor Piercing Rounds. This is a long, thin, green AoE that will shred the armor of anyone hit by it. Both players and even her adds can get their armor shredded by this ability. Each stack reduces your armor by 1% and can stack up to 100 times. This debuff lasts for 20 seconds in Veteran Mode.
Affected targets of the debuff will have a yellow shield over their head. If you have a DPS with a taunt, have them taunt so the tank if they get too many stacks so they can wait out the debuff. The tank needs to be sure they maintain aggro on Rasha because if she starts firing on a DPS with Armor Piercing Rounds, she won’t stop until the ability is over.
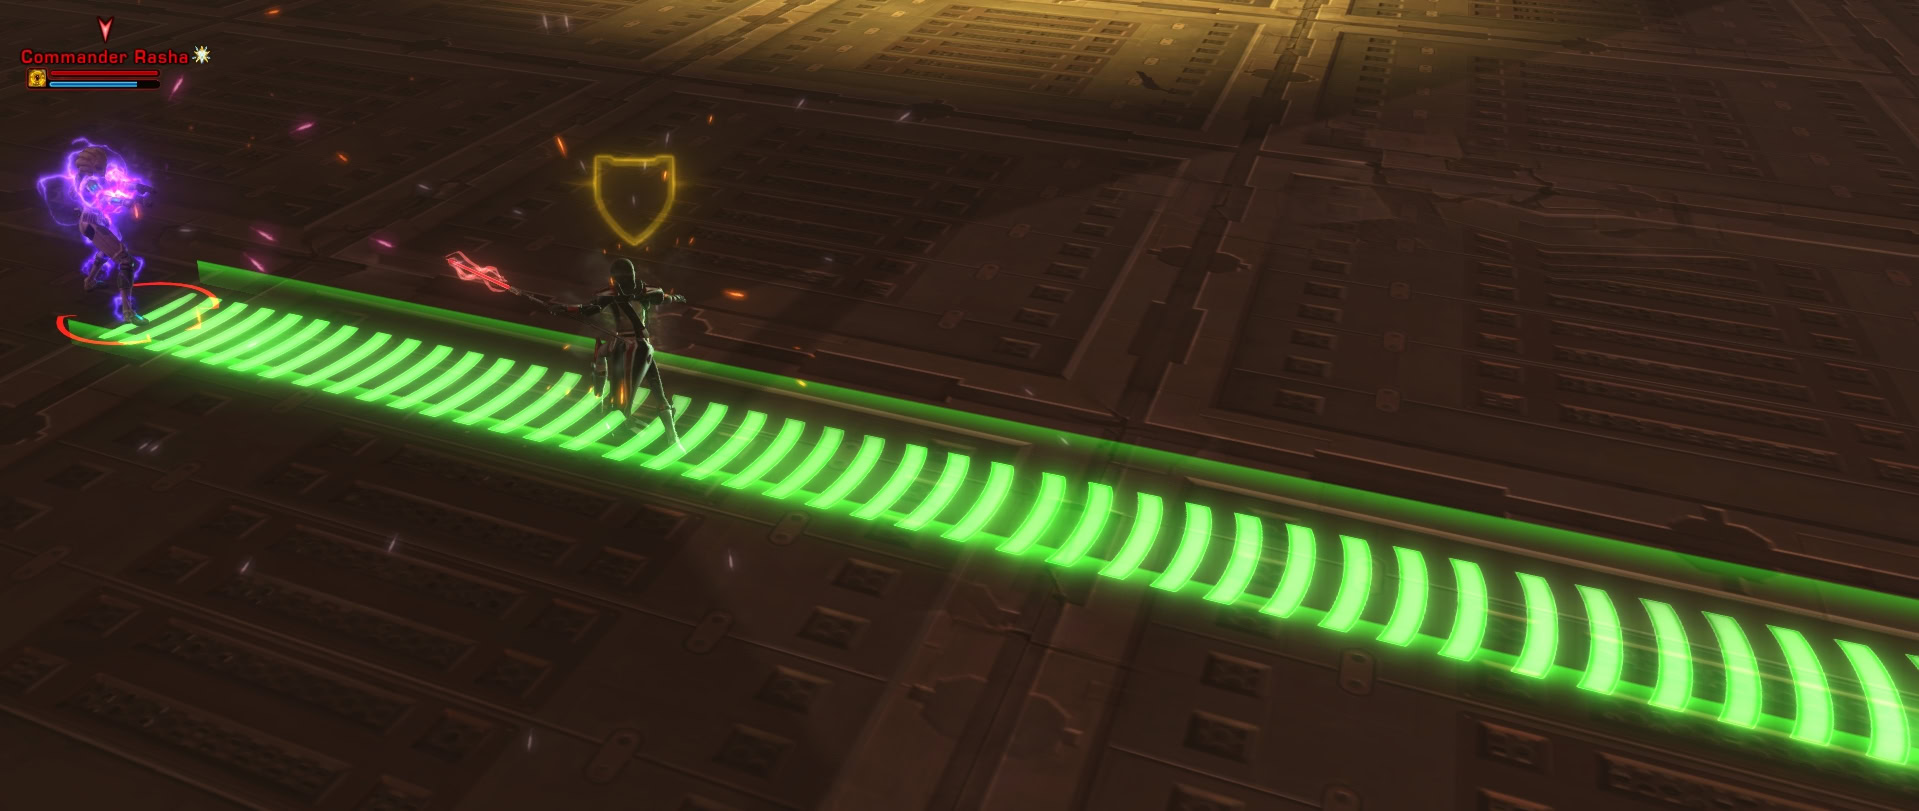
A good way to work around this is to put enemy adds between yourself and Rasha. Rasha’s Armor Piercing Rounds will hit the first thing it collides with. Use the Selonians as meat shields so your armor isn’t shredded. Use it on the troopers if you need to thin their numbers as they’ll die in a couple hits.
If you’re a Shadow or Assassin tank, you can use Force Cloak as Rasha is using Armor Piercing Rounds to end it. The Two Cloaks tactical will be useful in this fight if you need to avoid the AoE in case you’re out of meat shields.
Master Mode Differences
In Master Mode, avoid killing the adds and focus on the boss. The tank will need as many meat shields as they can get for negating damage from Armor Piercing Rounds. You can start to thin out the trooper adds once they hit 3 stacks of Coordinated Firepower, but leave the Selonian alive for the tank. The tank needs to AoE taunt the troopers so they don’t go after the healer or DPS.
Armored Piercing Rounds got a big buff in Master Mode. Instead of lasting 20 seconds like in Veteran Mode, it’ll now last 2 minutes. If you get more than 100 stacks of the Armor Shred debuffs, they’ll be converted to Blowthrough stacks, which increases damage taken per stack. Chances are you’re going to get downed at this point if you don’t find a meat shield as soon as possible. If someone’s shield icon turns orange, they’re under the effects of Blowthrough.
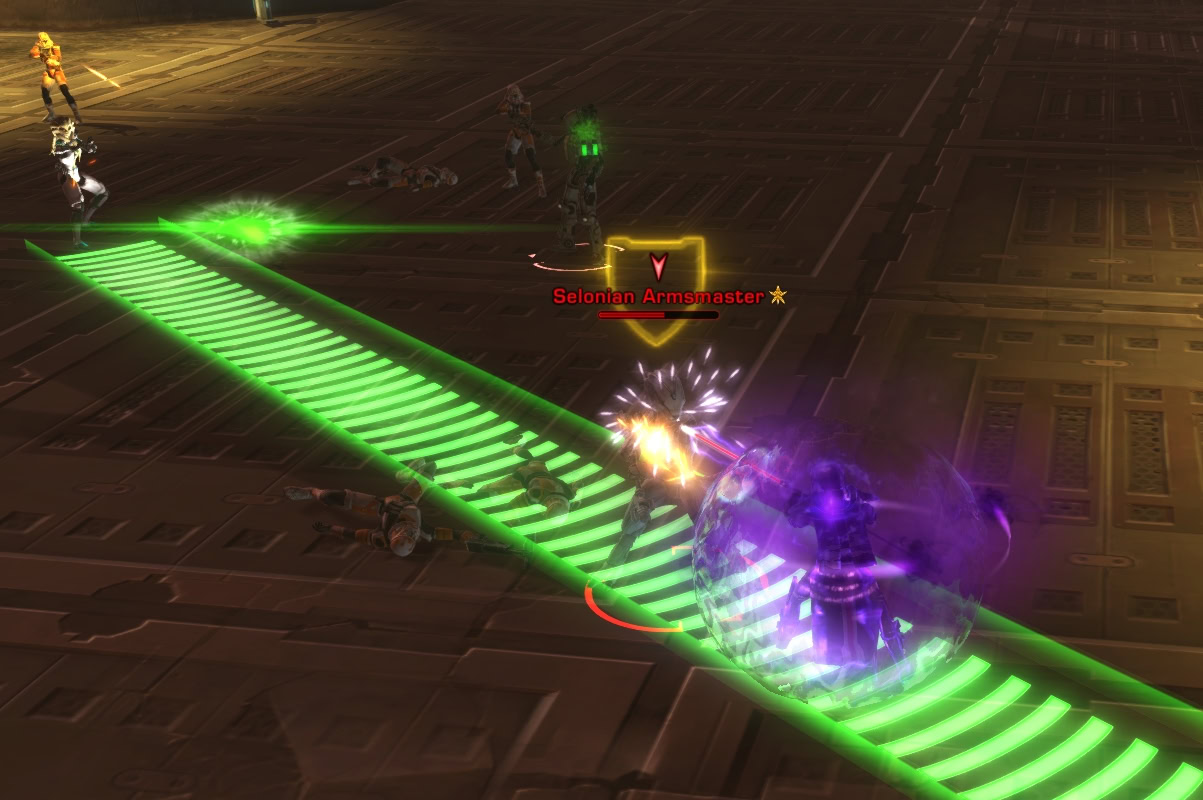
Start clearing adds from the area right before she hits 30% HP to prepare for the final phase of the fight.
Once Commander Rasha is at 30% health and pops her deployable shield, you’ll need to defeat the adds. Focus on the Republic Grenadiers above all else!!! The grenadiers will fire high damage AoEs on your group, defeat them then the troopers, and damage Rasha. Repeat this process when she brings her shield up again until she’s defeated.

BUG ALERT
In Veteran and Master Modes, Rasha’s Armor Piercing Rounds AoE may disappear. This does not mean she’s not firing her Armor Piercing Rounds, she very much still is. Continue to hide behind adds until the ability stops and you no longer see her shooting green shots. Just hope it doesn’t bug out again the next time she uses Armor Piercing Rounds.
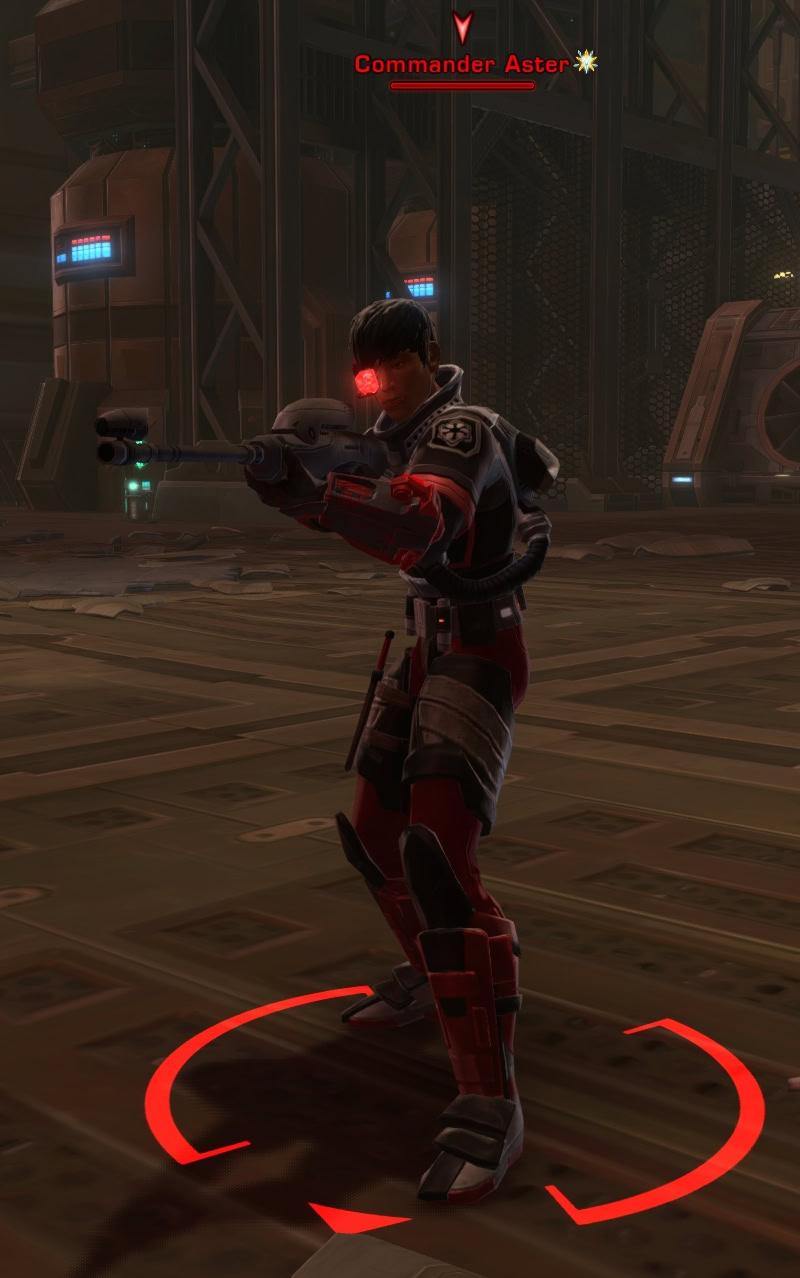
Second Boss (Republic): Commander Aster
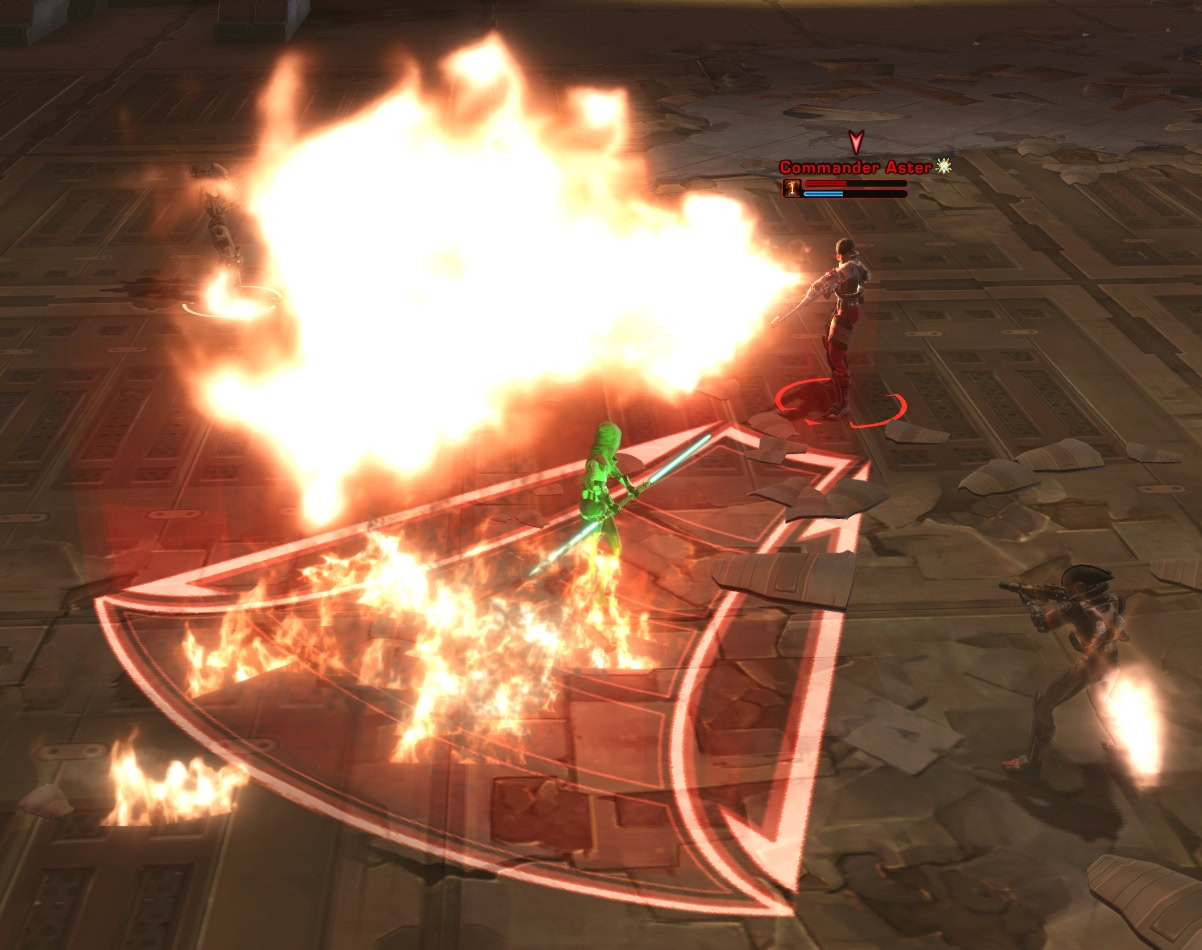
Commander Aster is the second boss for the Republic Instance of Objective Meridian. He’ll be summoning adds throughout the fight so you’ll need to defeat them as soon as they appear.
If you see him hovering with his jetpack early on in the fight, he’s using the Death from Above ability. His target will have red circle AoEs beneath them, they should avoid being too close to allies so they don’t get hit as well.
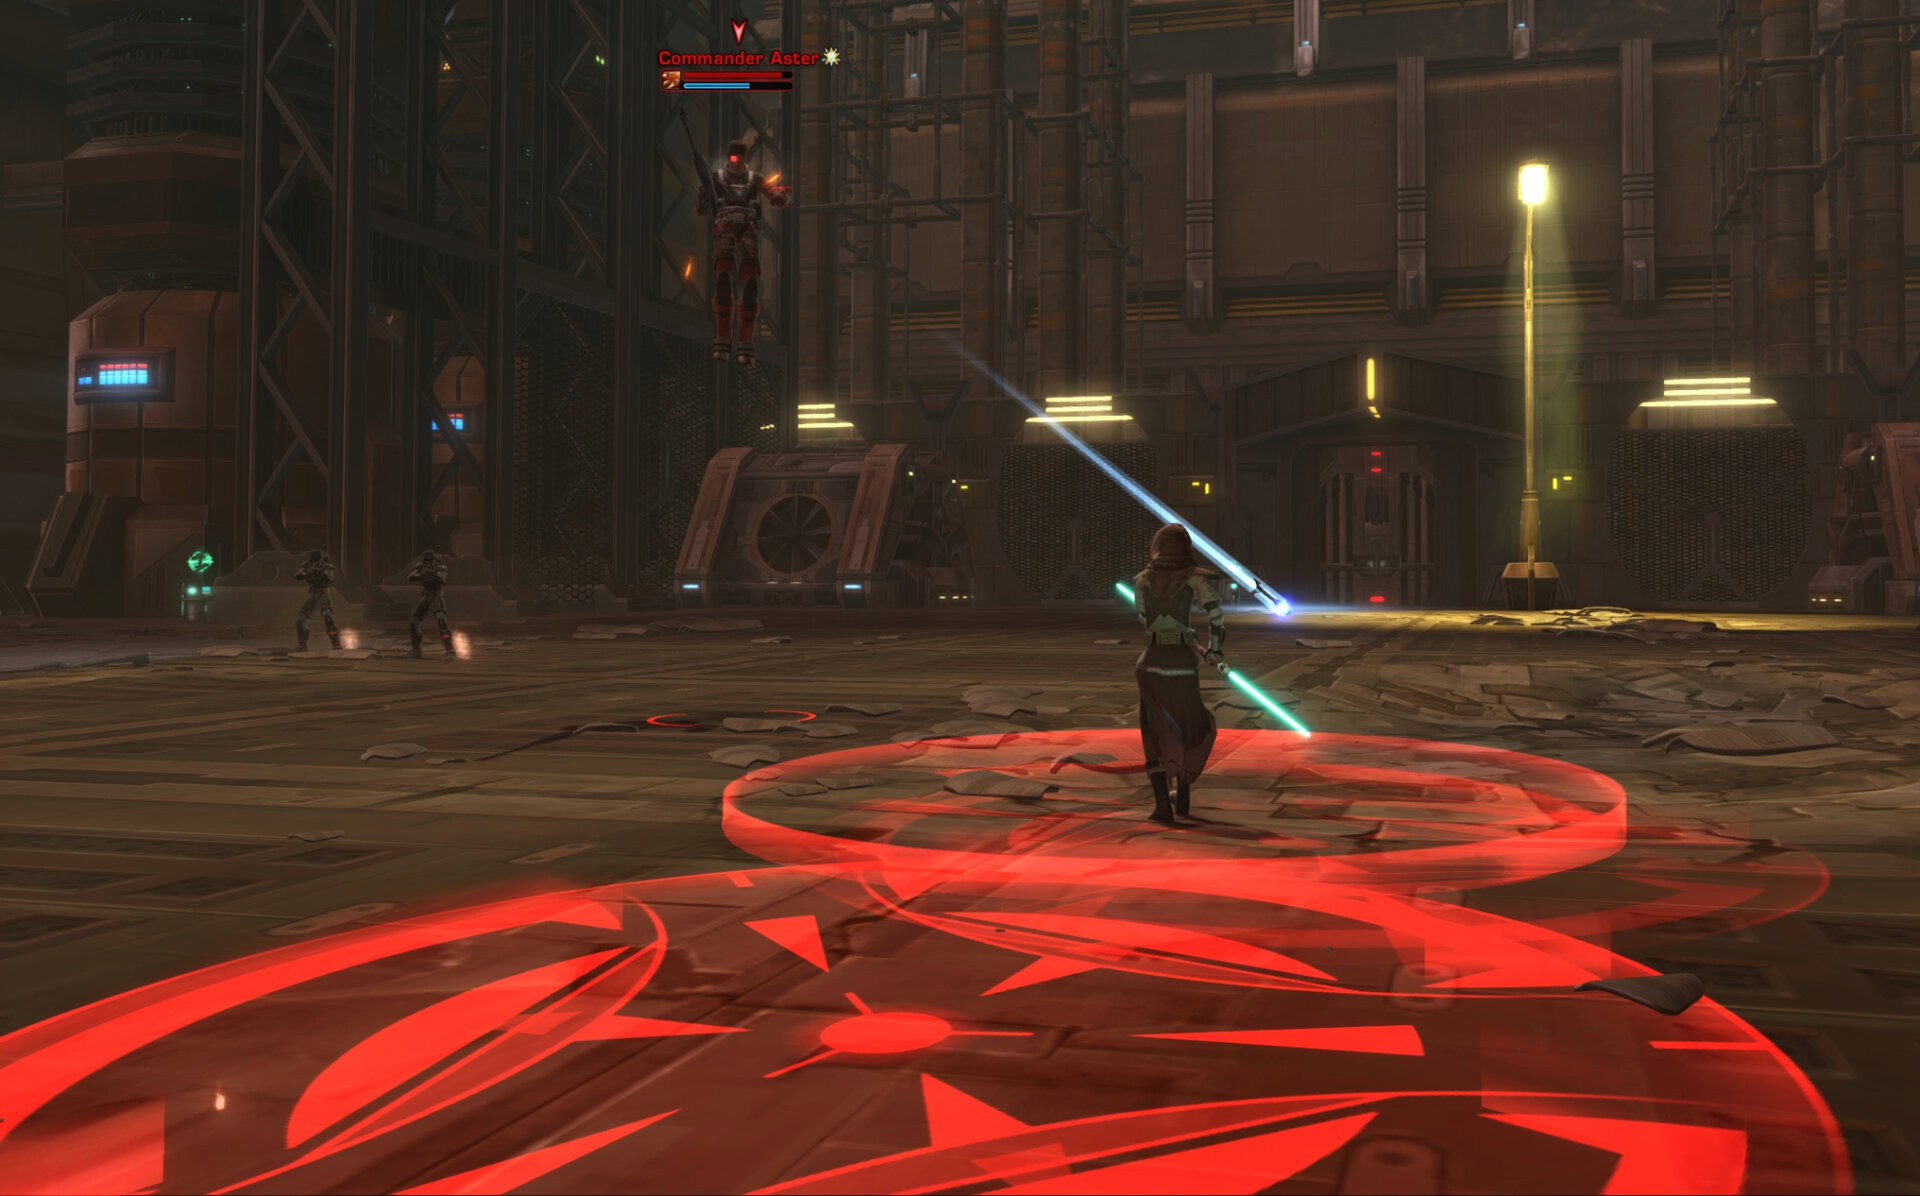
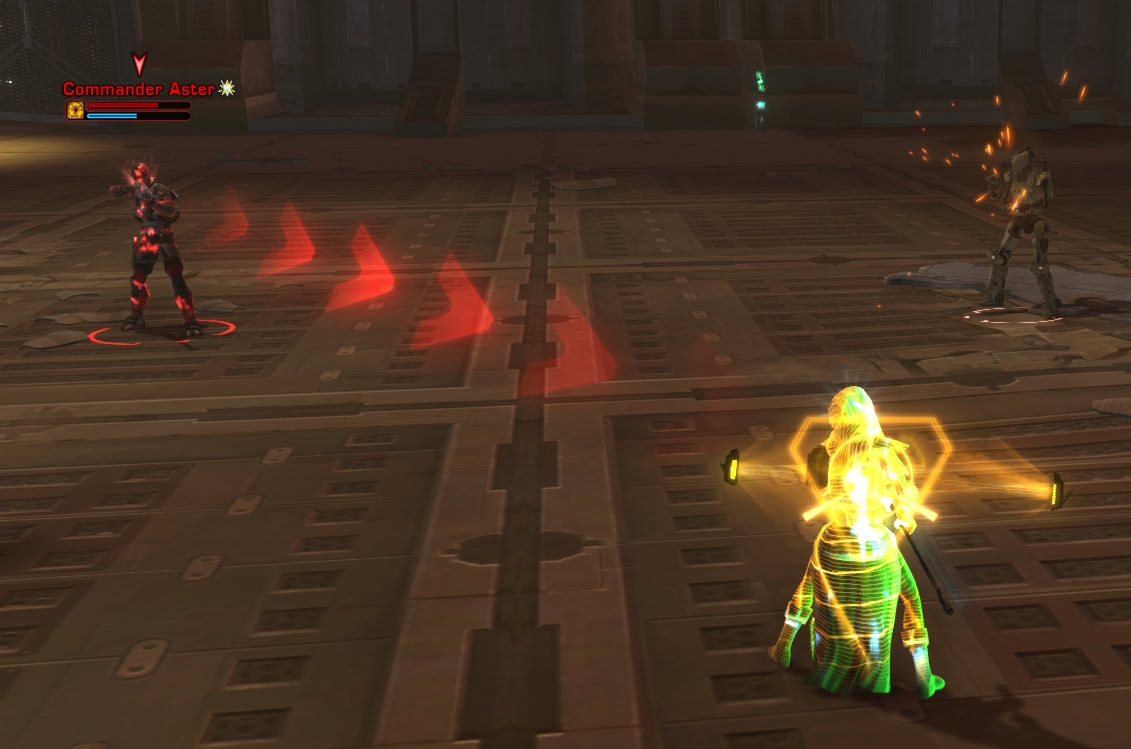
Any melee player trying to get close to Commander Aster will get pushed back by his Flame Sweep. Aster can only use this ability once every 12 seconds.
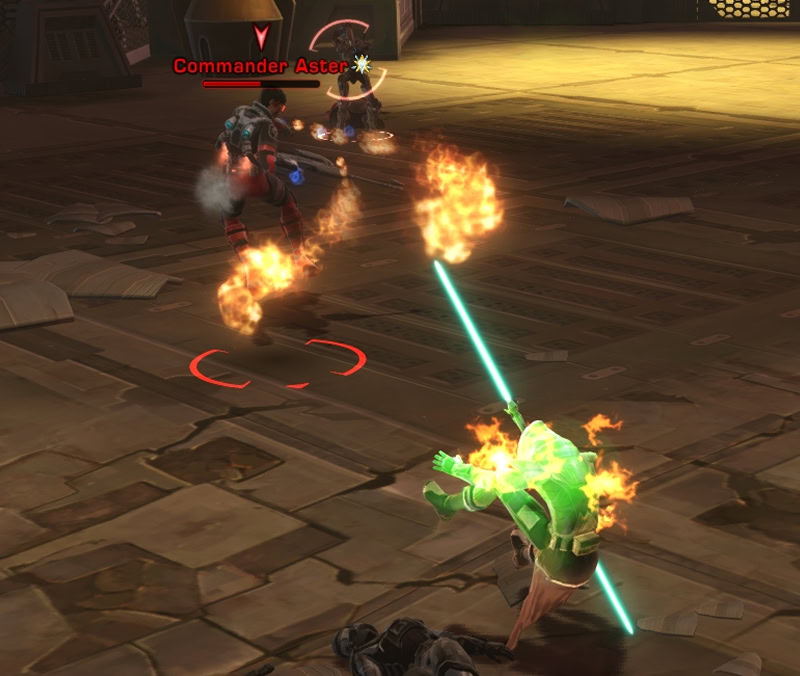
When Commander Aster uses his Flamethrower ability, the tank needs to face the red cone away from allies. This isn’t a threat in Story Mode but it’s good to practice good habits before you go on higher difficulties.
When Commander Aster is low on health, he’ll summon adds and hover. Hovering allows him to ignore ground based attacks but this doesn’t really do anything in Story Mode, it’ll have an actual defensive effect in Veteran and Master Modes. Defeat the adds to bring Commander Aster back down.
Veteran Mode Differences
Commander Aster gets two new abilities in Veteran Mode, these are Fusion Round and Hunter Probe. Fusion Round is noticeable by the line of red arrows on his target. This damage can be increased if the target is affected by Hunter Probe, which immobilizes them and applies a debuff that increases damage taken from Fusion Cell.
Master Mode Differences
The only difference compared to Veteran Mode is that Commander Aster can now use the Coordinate Firepower buff that increases the damage of all his allied adds. You can tell when an add gets this affect as a DPS marker will appear over their heads when they gains a stack of Coordinated Firepower.
Defeat the adds as soon as you can before they get too many stacks of the buff, starting with the troopers as they’re the squishiest. Take out the Sith Lord last as it’s far easier to deal with one buffed enemy over multiple buffed enemies. Defeat Commander Aster as you normally would from here, repeating this process when needed.
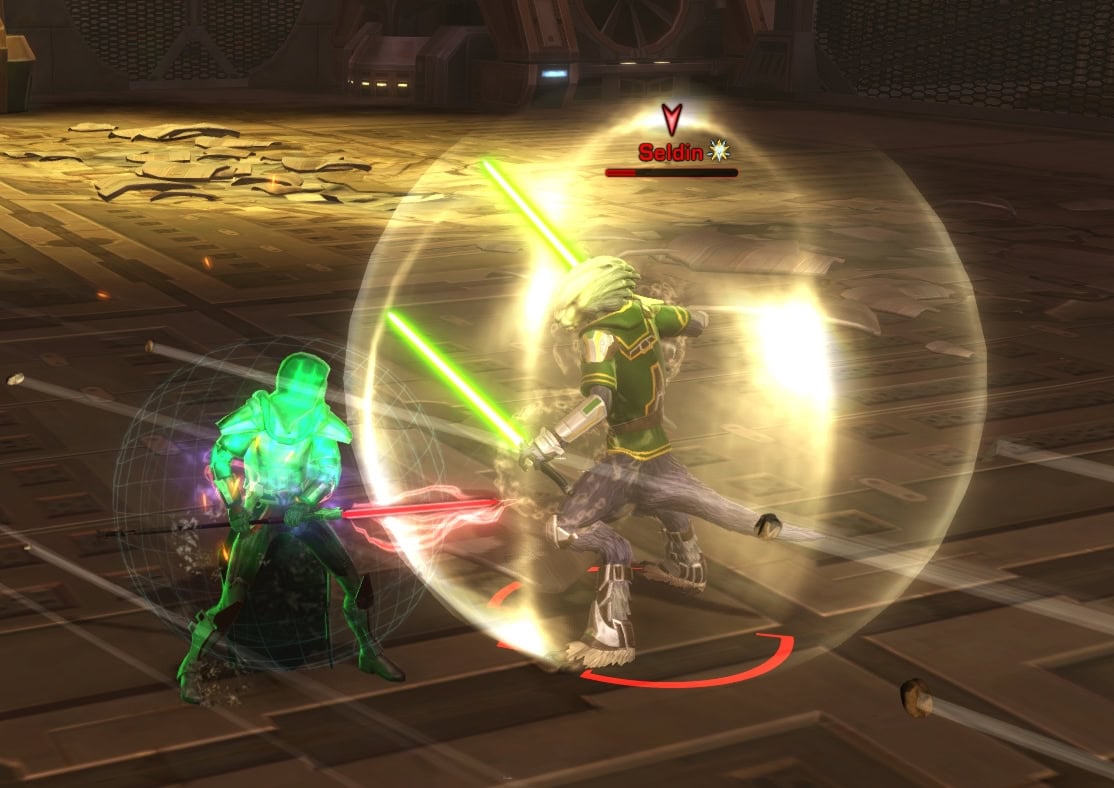
Second Boss (Imperial): Master Jakir Halcyon and Seldin
The second boss for the Imperial Instance of Objective Meridian will be two bosses, Master Jakir Halcyon and Seldin. Seldin uses melee attacks while Master Halcyon uses Force abilities to attack you and support Seldin. Master Halcyon should be your primary target.
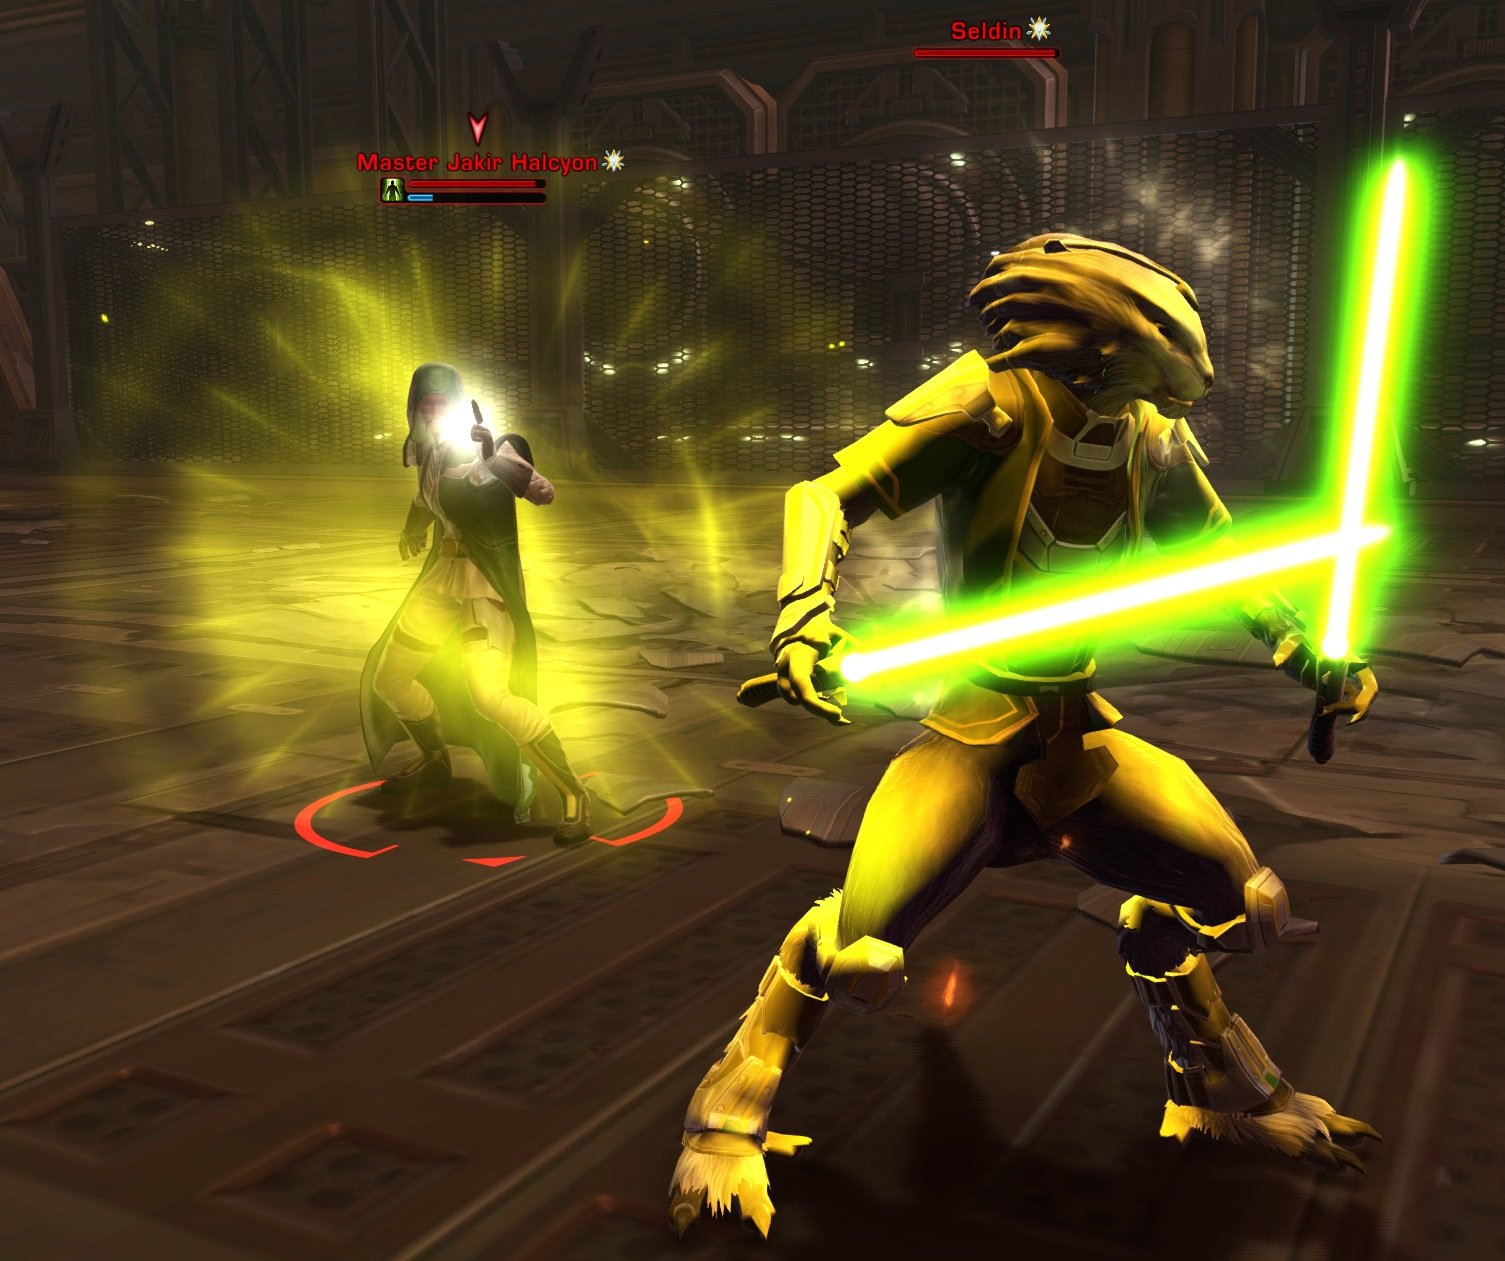
The primary ability you should be mindful of is Master Halcyon’s Healing Trance ability. This is super easy to spot as Master Halcyon will be surrounded by a yellow-green orb with a yellow-green beam connected to Seldin. When using this power, he’ll absorb incoming damage but you can still get some damage through.
This will also heal Seldin so the sooner you can defeat Master Halcyon, the more easily you can defeat Seldin.
Master Halcyon will also attack by throwing debris at his target, creating large red circles on the ground. Anyone caught in one should run out before the debris is thrown into the area.
Defeating either boss will cause the surviving boss to become enraged, gaining increased alacrity and damage. This is a bit easier to deal with when Seldin is enraged as it just becomes a tank and spank for the remainder of the fight.
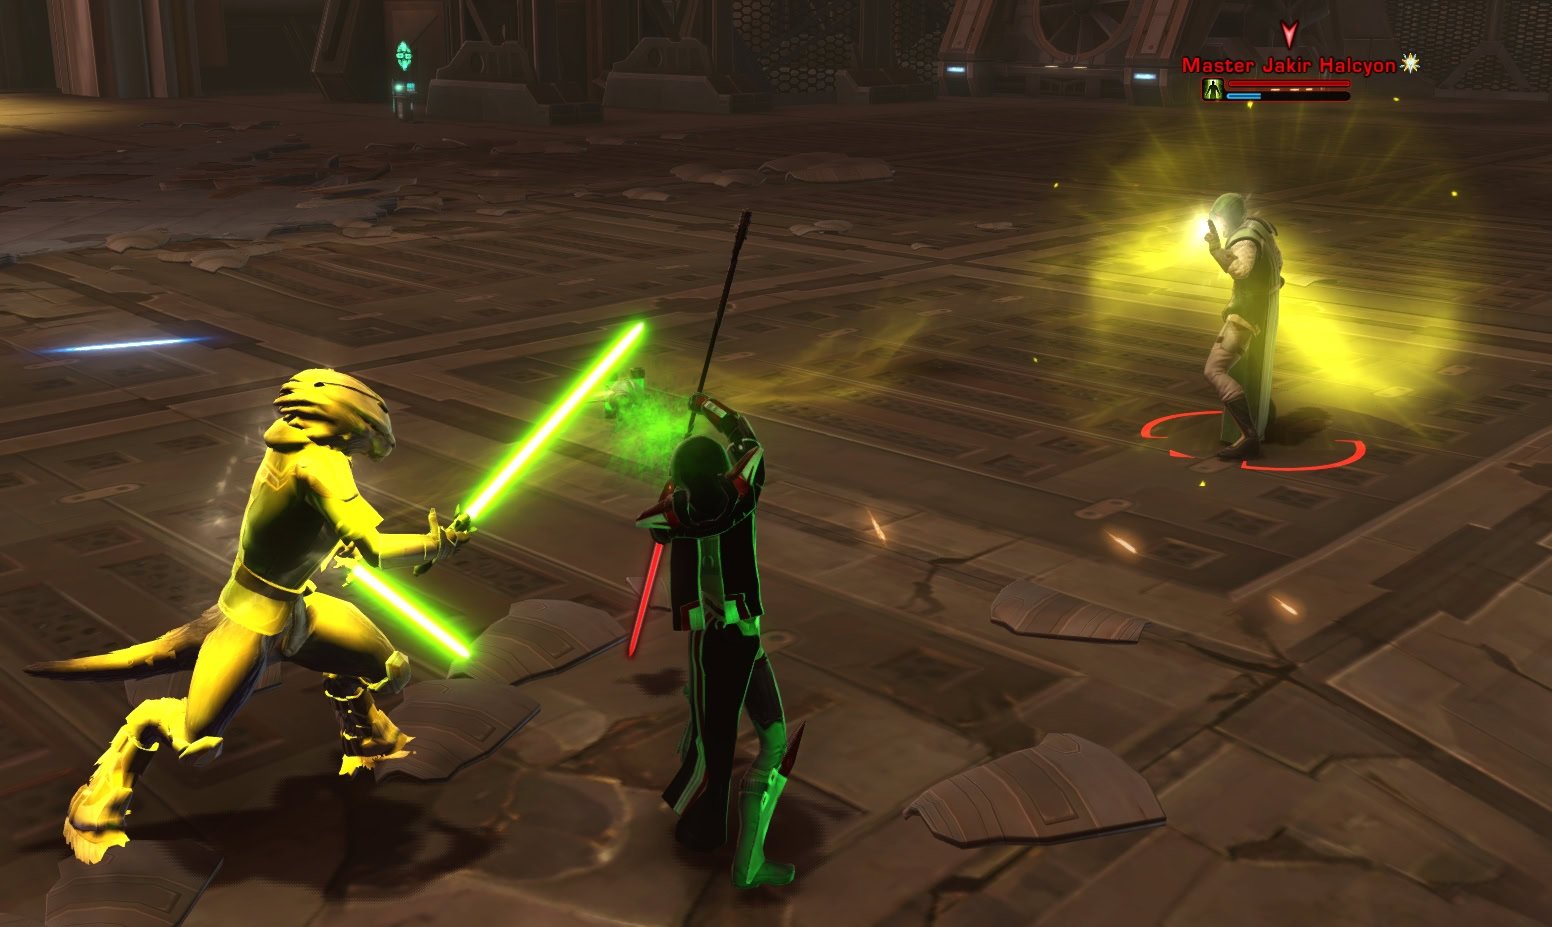
Veteran Mode Differences
In Veteran Mode, Master Halcyon’s Healing Trance makes him immune to damage when being channeled. Get to 50% HP as soon as you can to prevent the Halcyon from using Healing Trance again. From there, Master Halcyon becomes your primary target.
Once at 50% HP or lower, Master Halcyon uses Force Augment on Seldin. This is seen as a Force bubble around Seldin that absorbs incoming damage and grants Seldin increased alacrity so long as it’s up. Damage it to pop it and remove their alacrity buff. Defeat Halcyon first then Seldin, then move onto the next boss fight.
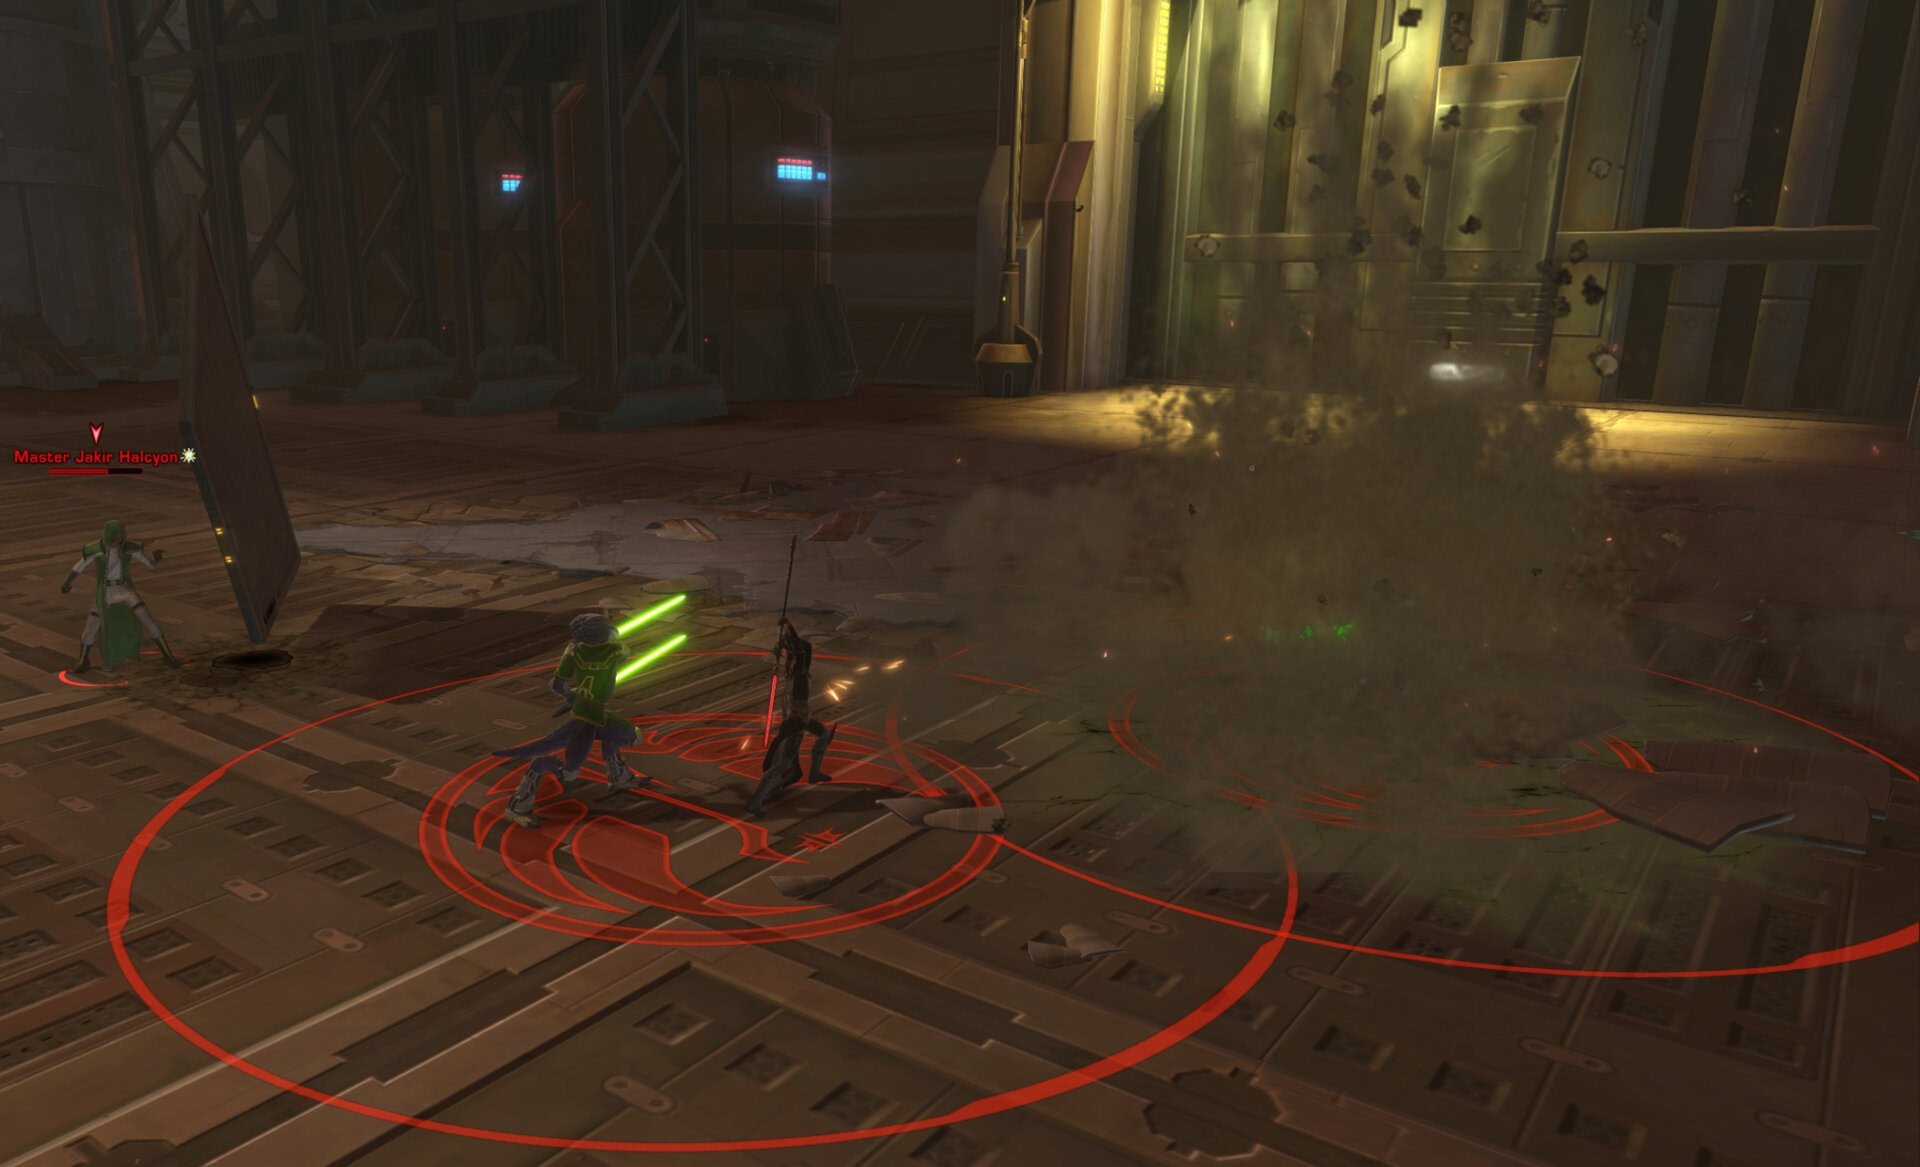
Master Mode Differences
Master Jakir Halcyon is much more of a higher priority to defeat due to his new ability, Weakness Exposed. You’ll get a system alert when someone gets the Weakness Exposed debuff. When someone gets this, they’ll take increased damage from Master Halcyon and Seldin.
Seldin also gets a couple new tricks as they can now immobilize their target when Master Halcyon is using Force Barrage, making them sitting ducks. On top of that, Seldin can now reduce the armor of their target. If you pair this with Weakness Exposed debuff, you’re going to be in for a rough time.
The only way to cleanse these debuffs is to look for and step into this glowing AoE on the floor. Once cleansed, you can start to fight with a lot less anxiety, at least until the second phase of the fight. Just keep focusing Master Halcyon over Seldin. Seldin will also drop aggro every so often, so the tank needs to keep an eye on them to taunt if needed.
Get Seldin to 50% HP and then focus on Master Halcyon. The healer should be prepared to perform some serious burst heals because if Master Halcyon uses Force Slam on a target, they are going lose a large chunk of health. Once Master Halcyon is down, it becomes a tank and spank fight versus Seldin.
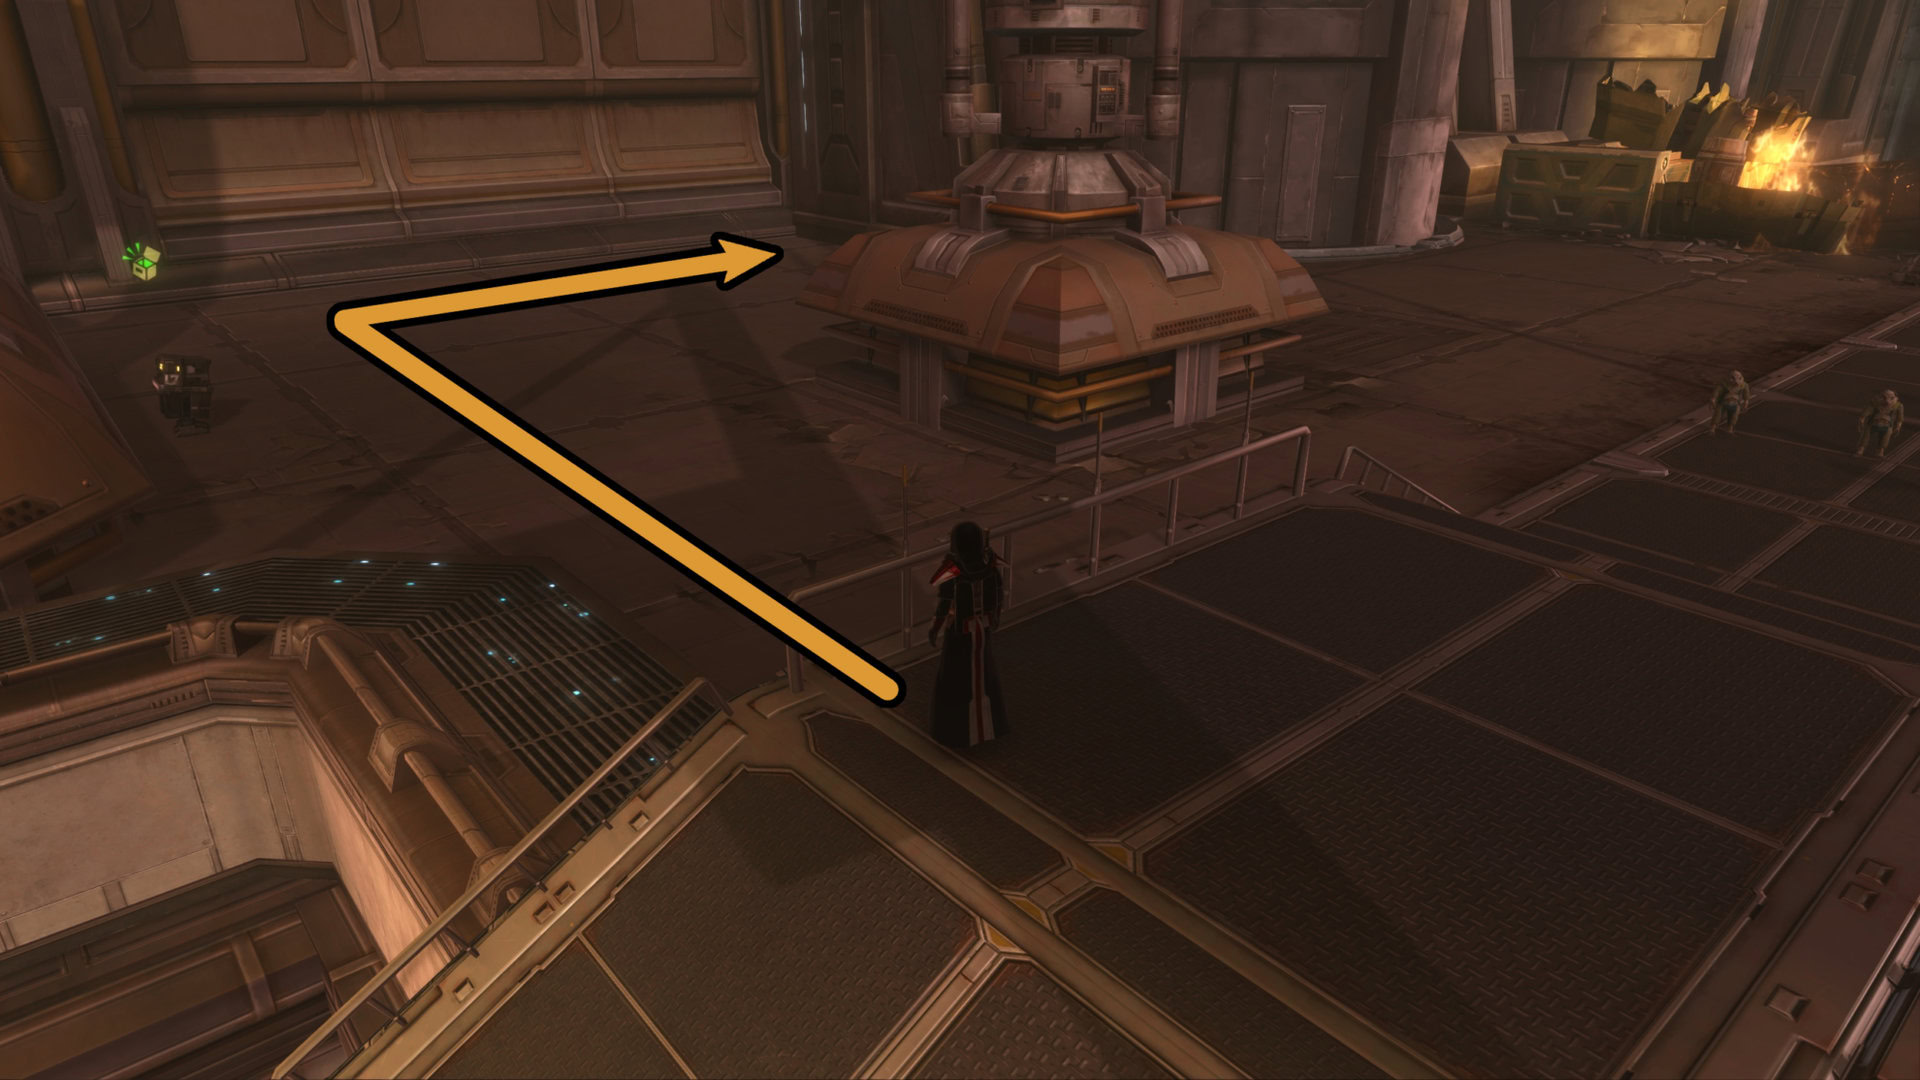
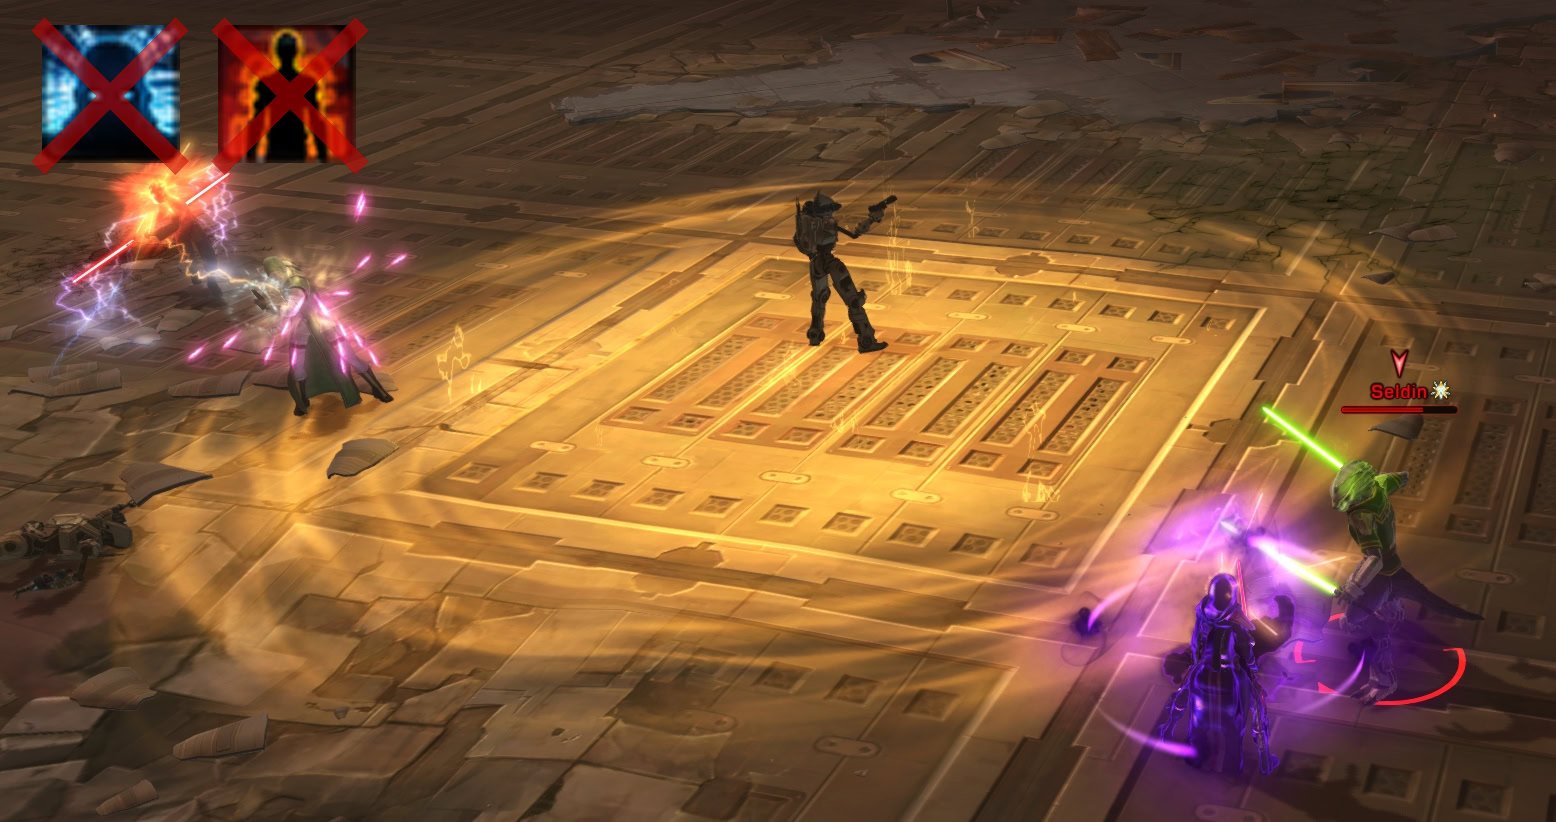
Stealth Shortcut to the Final Boss
The final boss can be skipped to assuming you have a stealth unit on your team such as a Shadow/Assassin or Scoundrel/Operative. This is simple enough for those on the Empire as there are no surprise attack enemies. Once they reach Tau, the rest of the team can respawn to appear at the final boss arena.
Unfortunately the Republic has it a bit harder. There are two instances of Sith Assassins on the path to the final boss. There are only 2-3 of them per group and are easy enough to deal with, you can just push them off the ledge. It’s still mildly frustrating that the Empire has an easier time with this, but it is what it is.
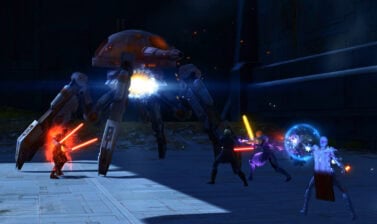
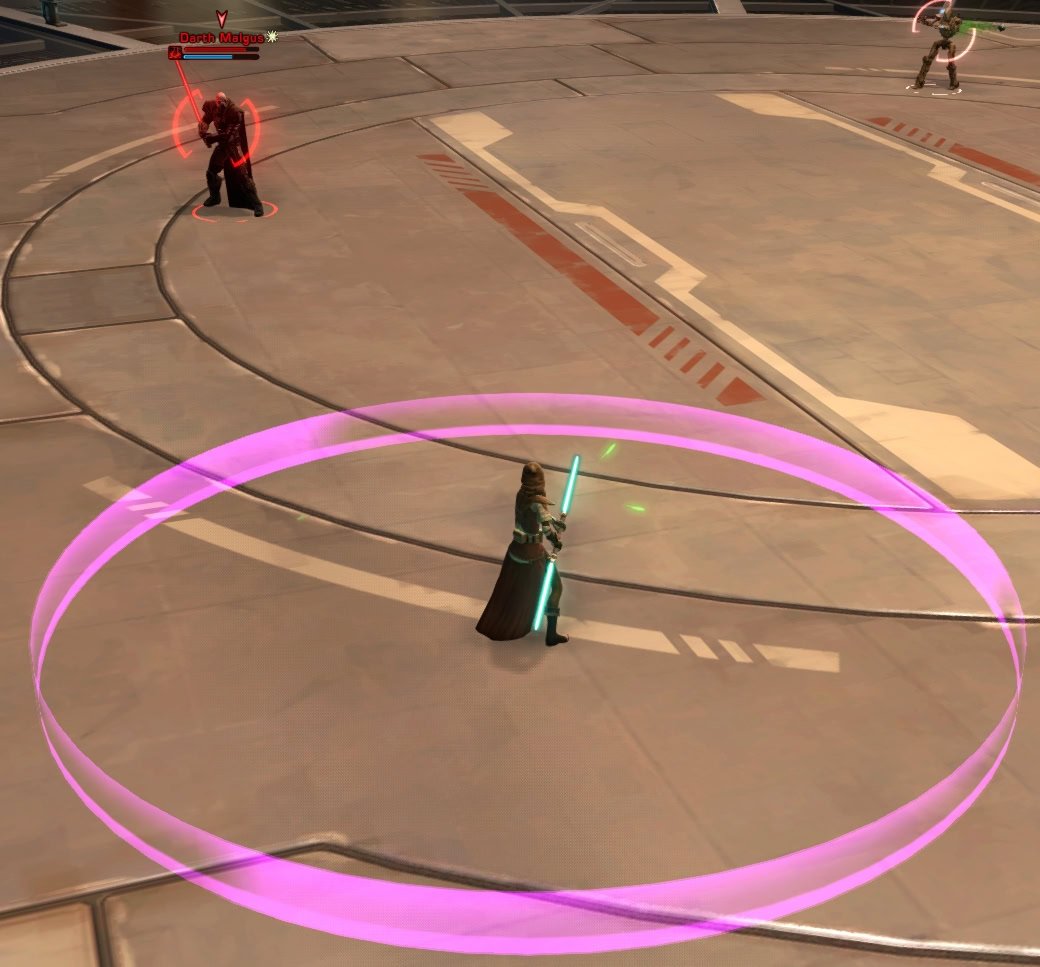
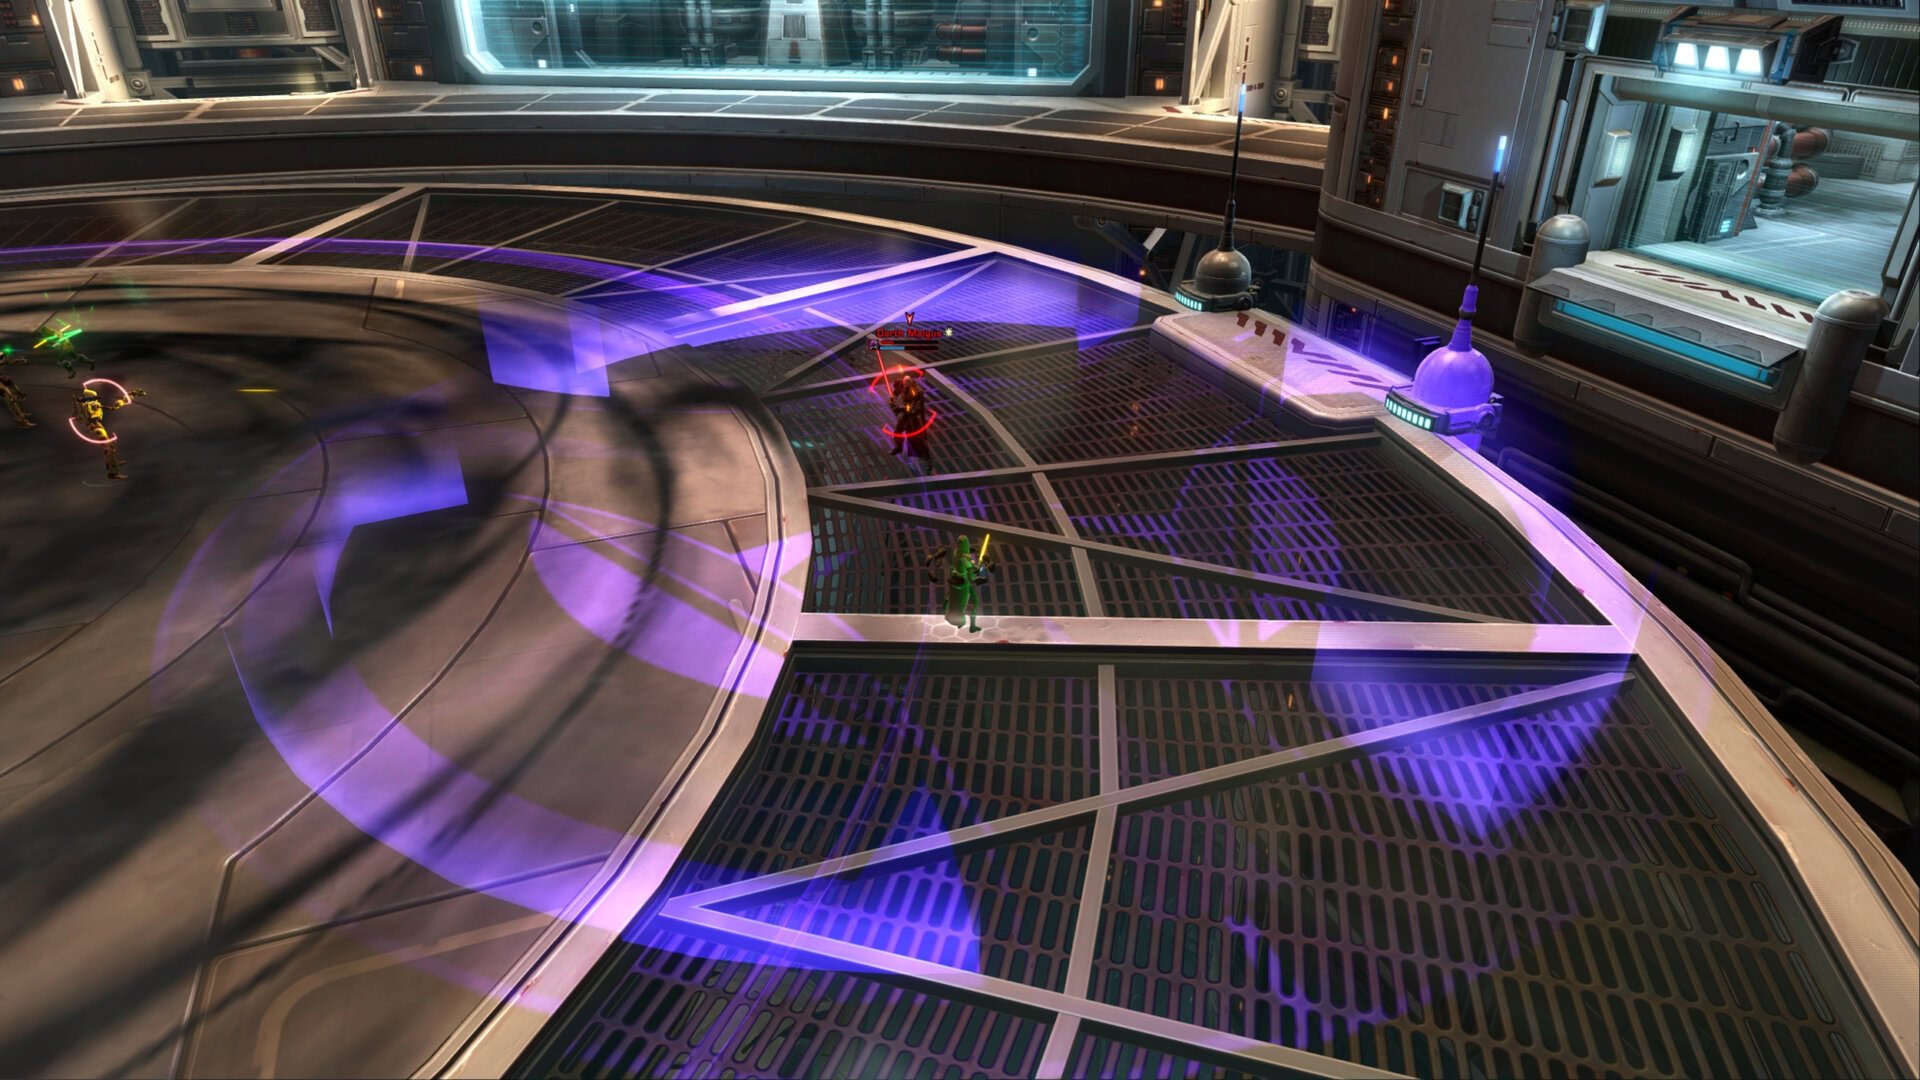
Final Boss (Republic): Darth Malgus
As always, Malgus is causing trouble for everyone. This time he’s trying to capture the Meridian Complex for himself so he can mass produce warships. Obviously this can’t be allowed and you’ll need to defeat him.
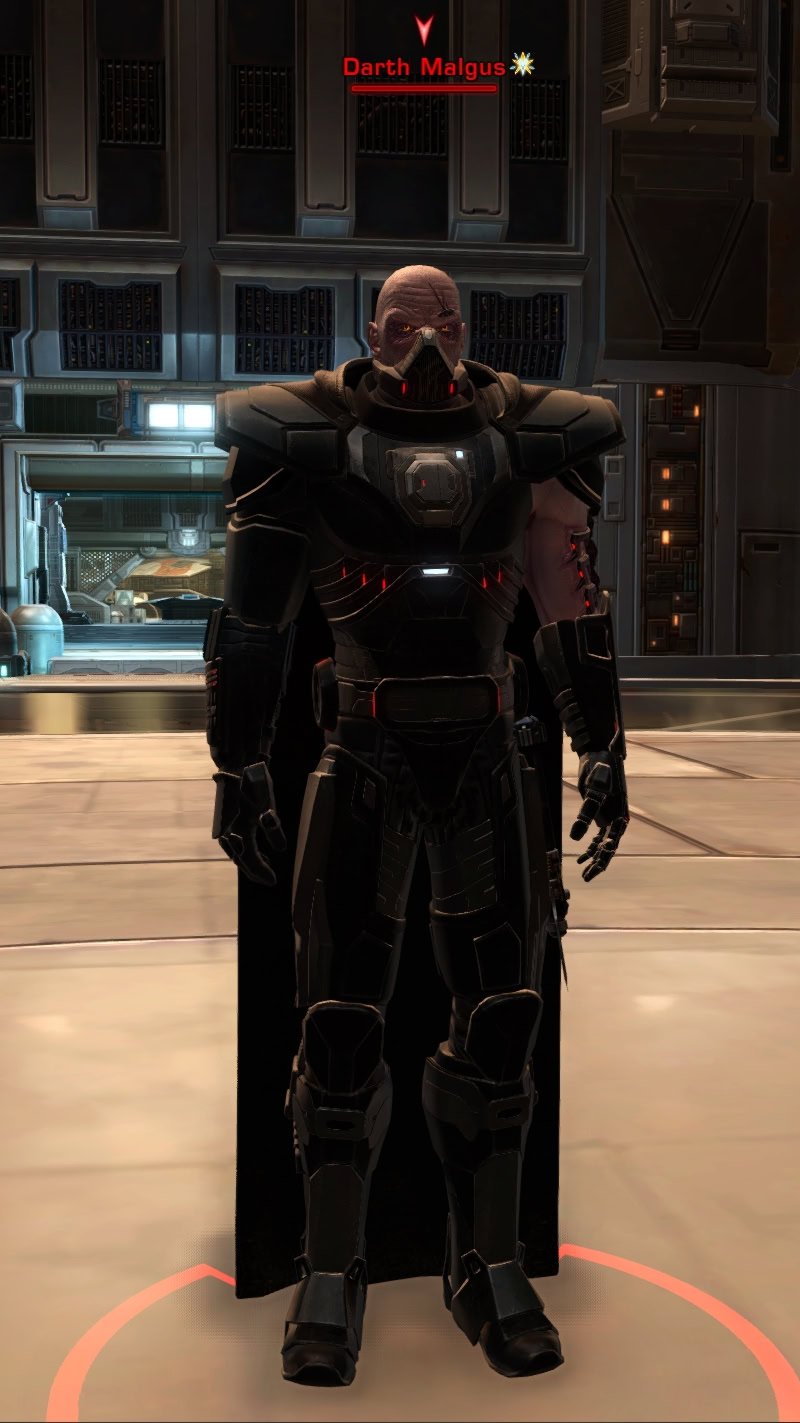
As part of this flashpoint’s apparent theme, Malgus will have a ton of AoEs that will need to be worked around. Fortunately he has some tricks up his sleeve that AREN’T AoEs which is a good touch. The most important thing here is to not fight close to the edge of the platform.
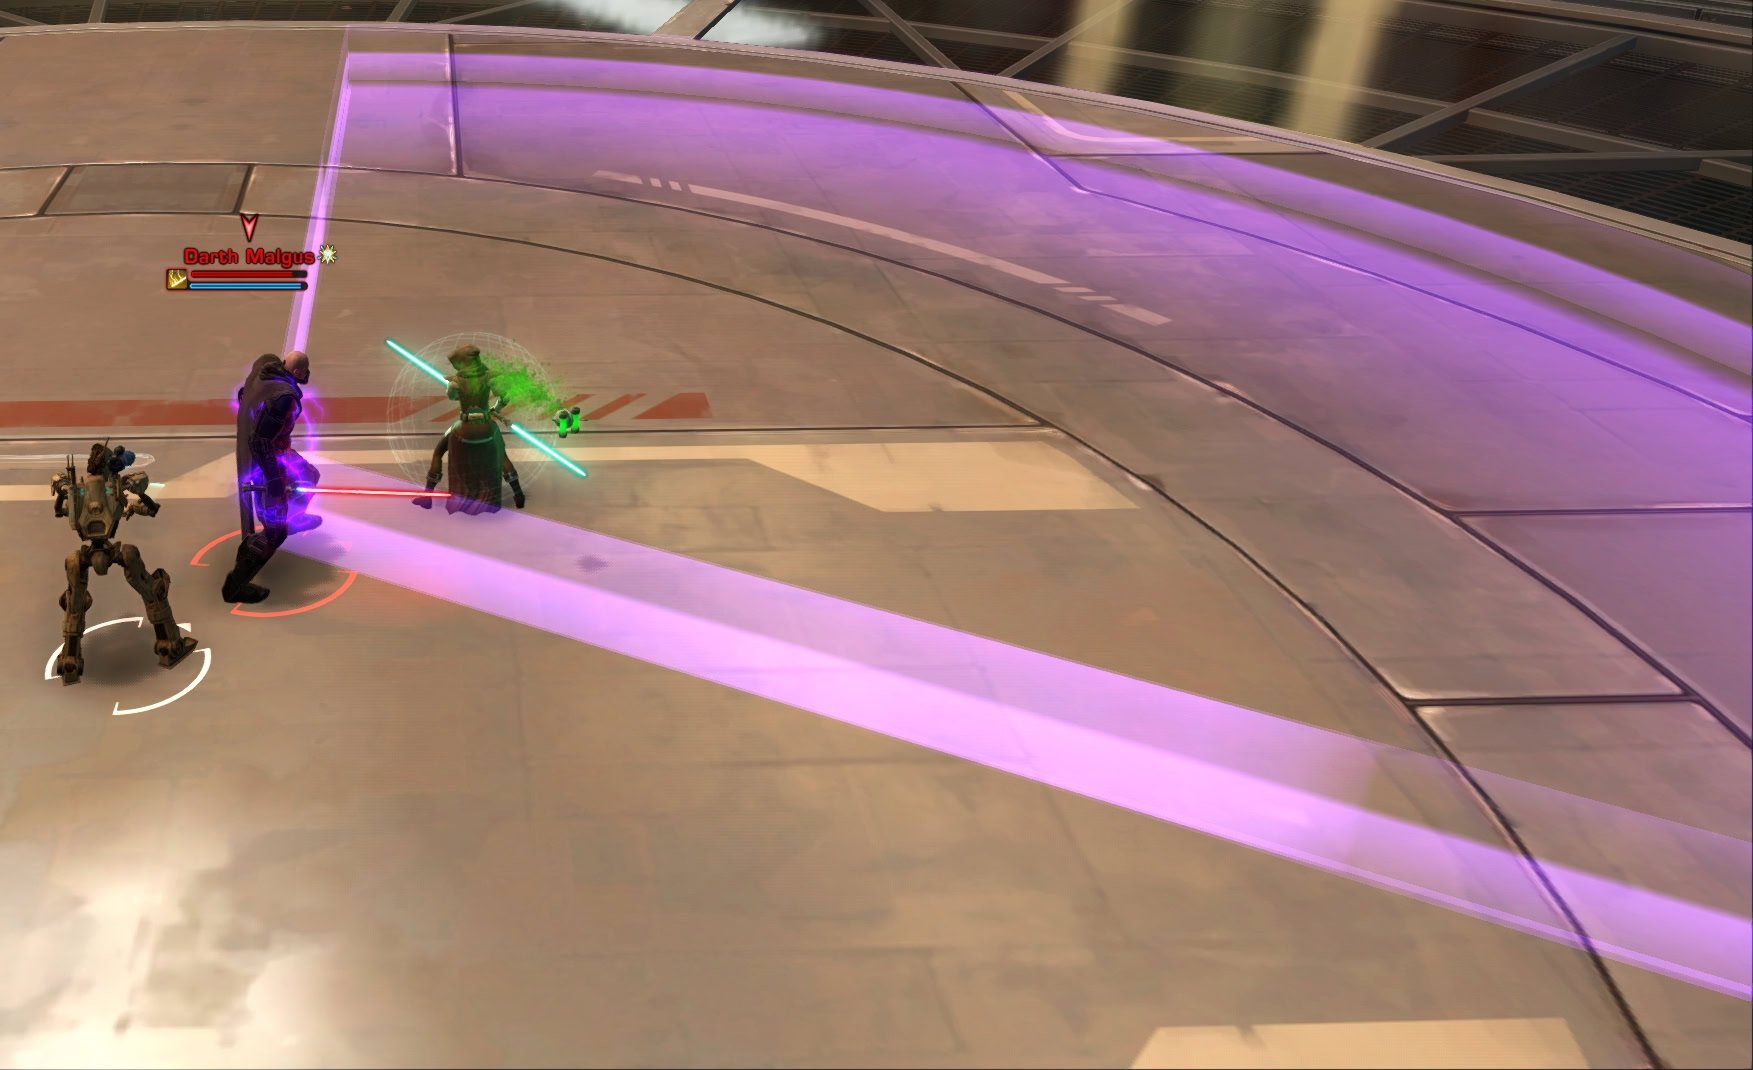
Malgus will summon debris and throw it into an area with Force Barrage. This is seen as purple AoE effect on the ground. As always, just stay out of this AoE and you’ll be fine.
If there’s just a purple ring around someone, Malgus is about to use Vicious Lunge on them. He’ll leap to them and anyone else within the ring aside from his target will be pushed back.
The Shockwave Strike ability will appear as a large purple cone. Anyone caught within it when he slams will be pushed back. Between this and Vicious Lunge, this is why you want to stay away from the edges of the platform throughout the fight.
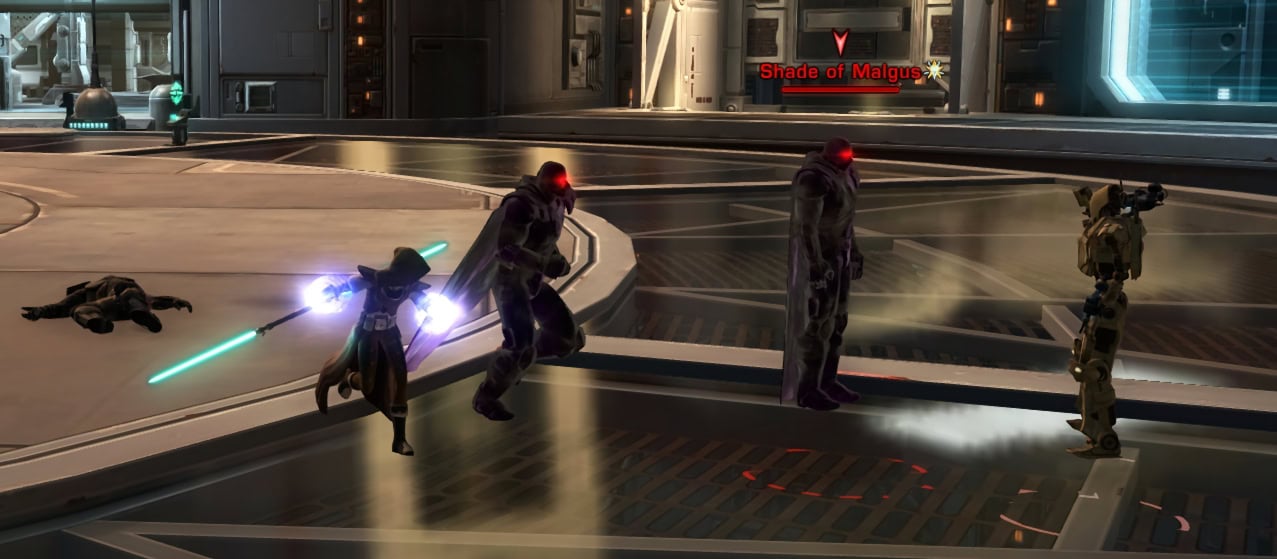
Once he hits half health, Malgus will cast Test of Resolve for 4 seconds before disappearing. The edges of your screen will get a black shadow overlay and Shades of Malgus will spawn. These won’t do anything in Story Mode so defeat them to bring back Malgus.
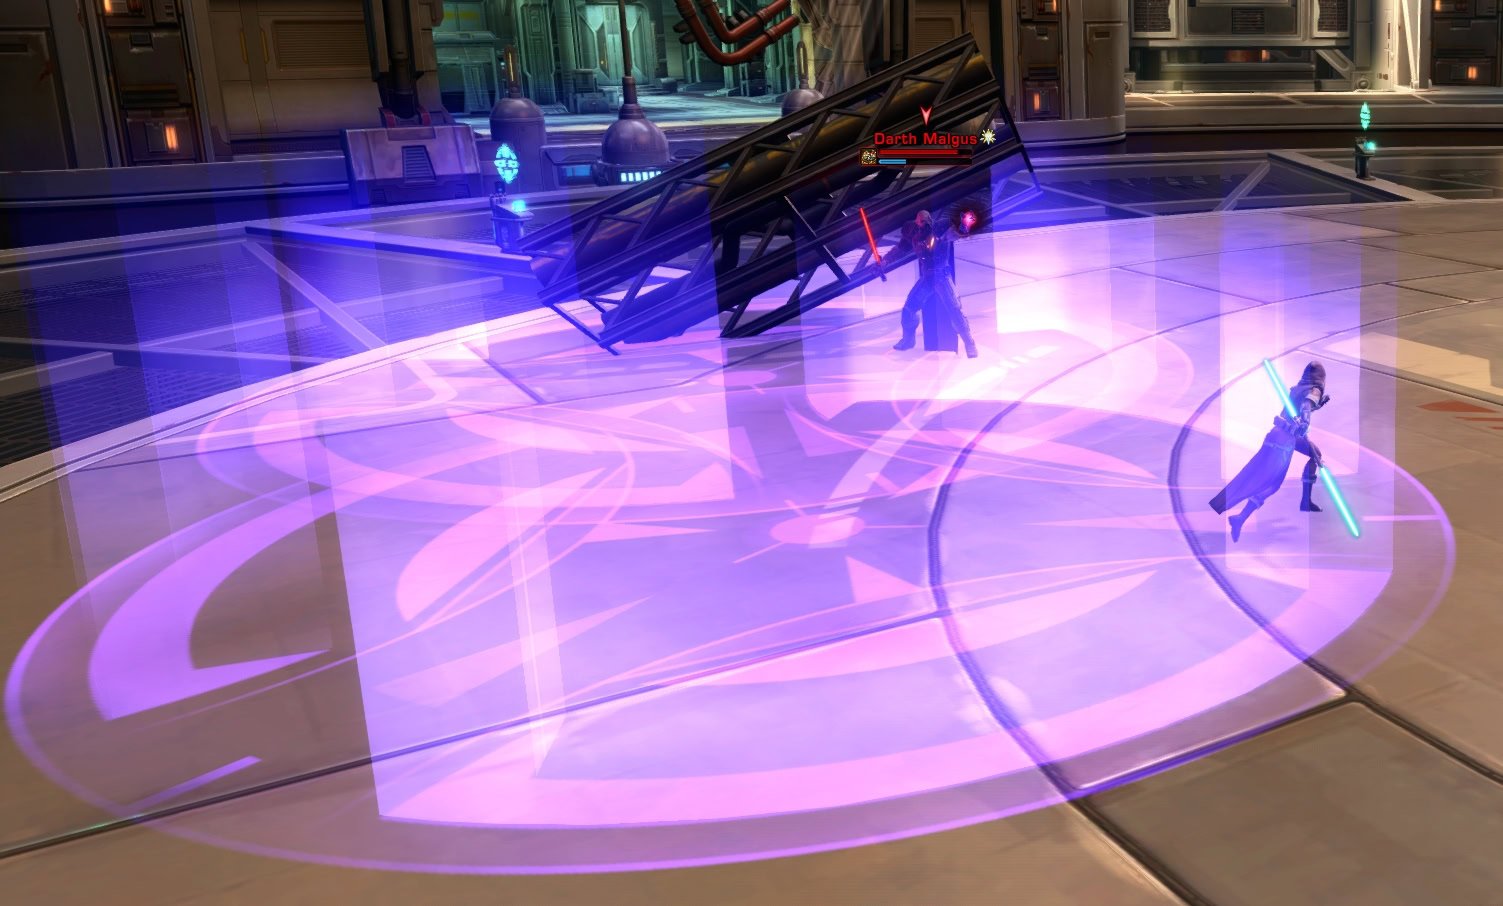
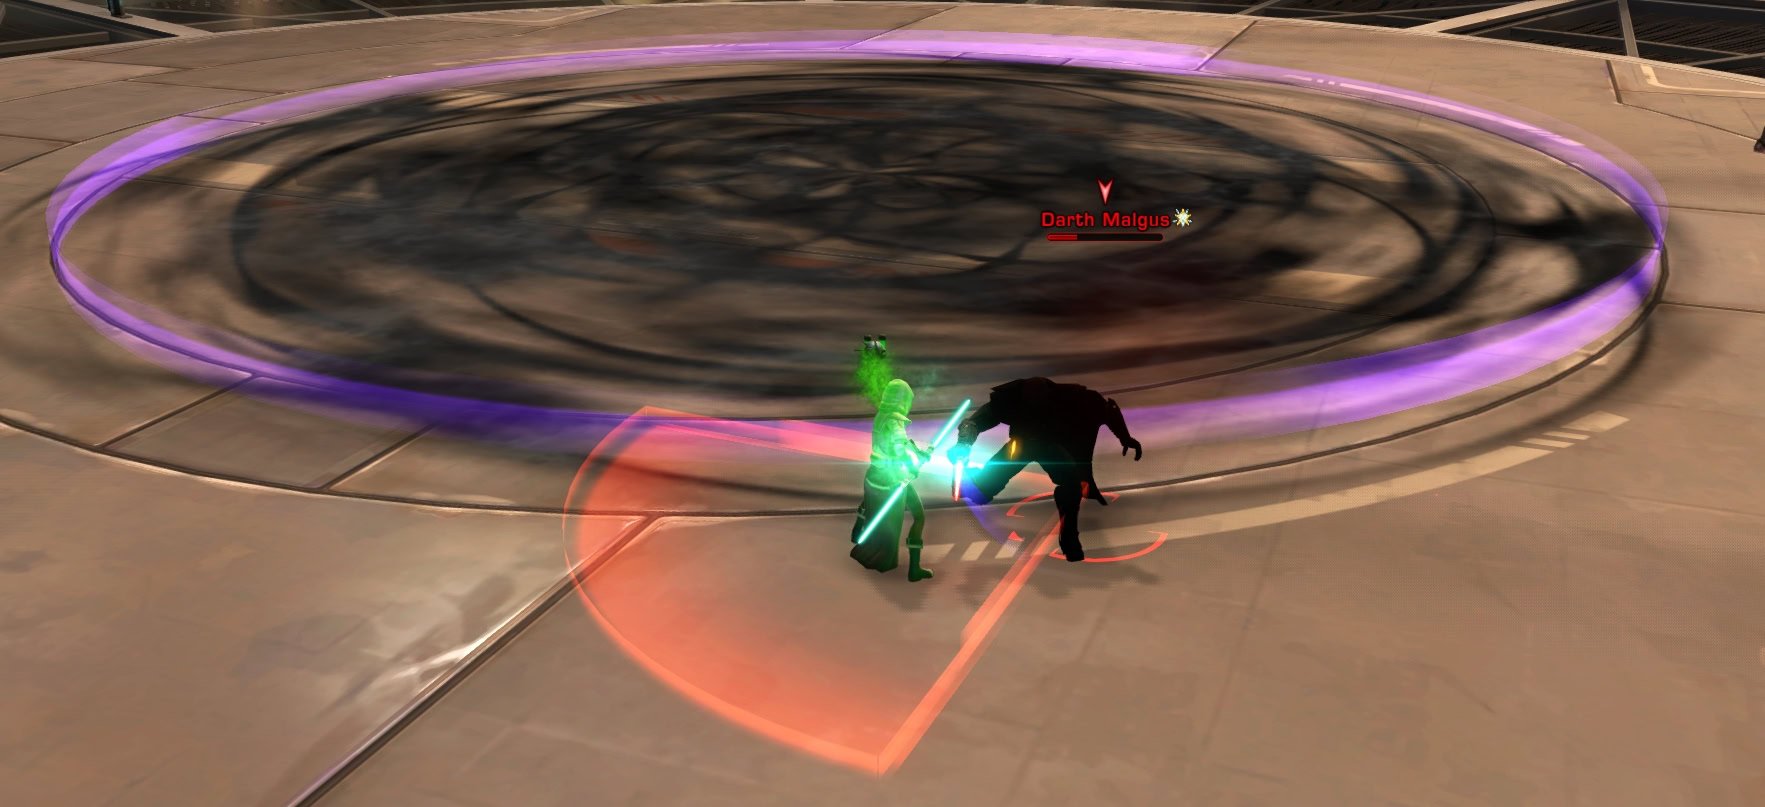
Once the real Malgus is back, he’ll use the Void of Despair ability in the center of the platform. This appears as a purple ring with inky shadows within it. It starts out small but it grows bigger as the fight goes on. This will grow so large that it’ll cover most of the platform except of the outer edges.
Standing in this area will summon Shades of Malgus adds into the right, so try to avoid standing in it while it’s small. Eventually it becomes too big to ignore so you have your choice of fighting adds or fighting at the edge. I recommend just dealing with the adds as getting pushed off the edge of the platform can result in a party wipe.
Avoid Malgus’s AoEs and you’ll do fine. Once defeated you’ll enter a cutscene and can end the mission with the Shield Controls terminal. Be sure to destroy the loot cache before activating the Shield Controls terminal.
BUG ALERT
It’s possible for the loot cache to disappear if you activate the Shield Controls terminal before attacking the loot cache. If this happens there will be no way for you to get loot from the final boss.
Veteran Mode Differences
When Malgus uses his Test of Resolve ability, you won’t be fighting his shades. Instead you’ll be fighting Malgus in a one on one where he has some black smoke and red visual effects. Aside from that, there aren’t many differences aside from being tougher.
Only one person will fight the real Darth Malgus, the others will be fighting shades of Malgus while this portion of the fight is going on. Anyone fighting Shades of Malgus will need to defeat them in order to see and attack the real Darth Malgus.

Master Mode Differences
The tank needs to keep a taunt handy for the duration of this fight. Darth Malgus will occassionally drop aggro and use Shockwave Strike on a random player. The tank needs to taunt them before they get hit and potentially pushed off the platform.
Malgus now has access to the ability Darkside which is telegraphed by a purple AoE. He gets this in the final phase of the fight where he used Void of Despair. Get out of this area otherwise he’ll deal damage to you while also healing himself so long as he hits someone.
With the Void of Despair AoE taking up most of the platform, you may want to consider fighting Malgus on the edge despite prior warnings. This is Master Mode, you should have the skill required to face his Shockwave Strike (purple cone AoE) away from the edge to instead be pushed on the platform. Ideally you should land on a clear area of the edge, or inside the Void of Despair if you’re not yet comfortable with that notion.
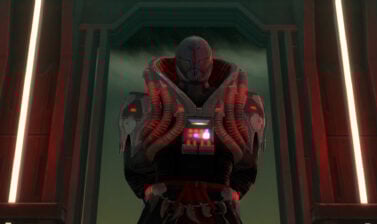
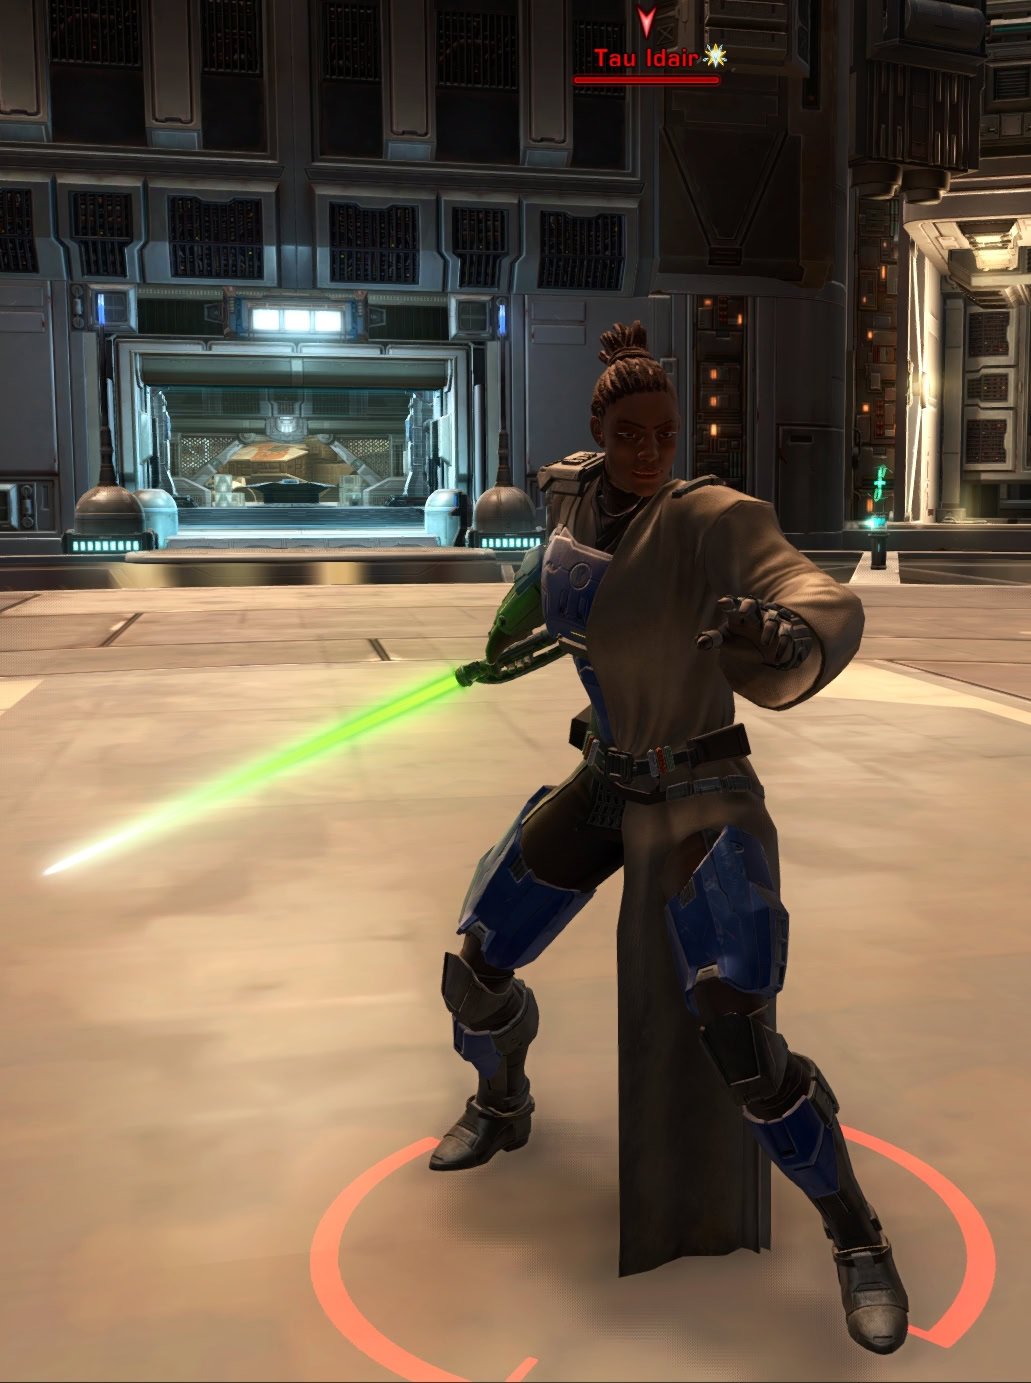
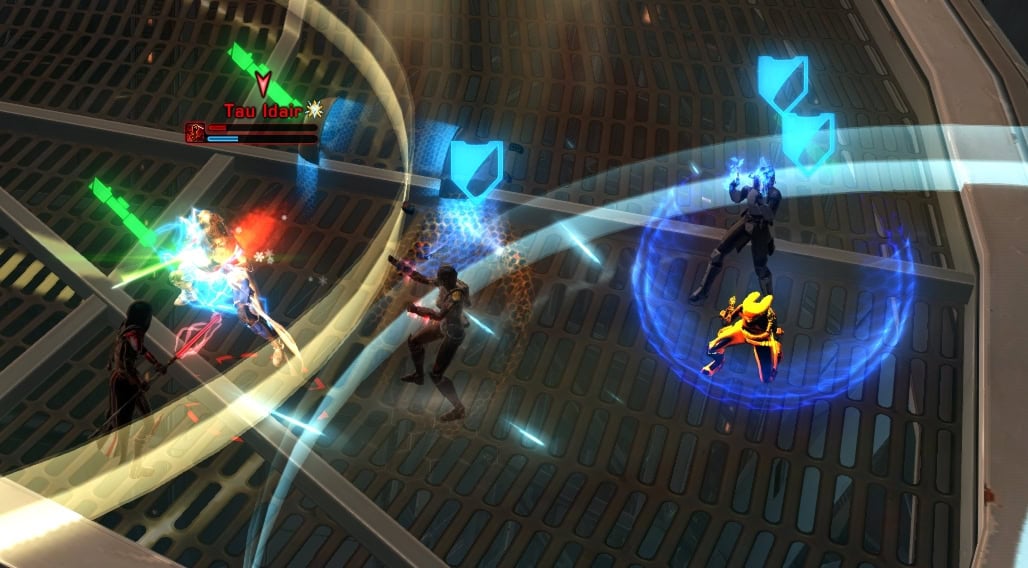
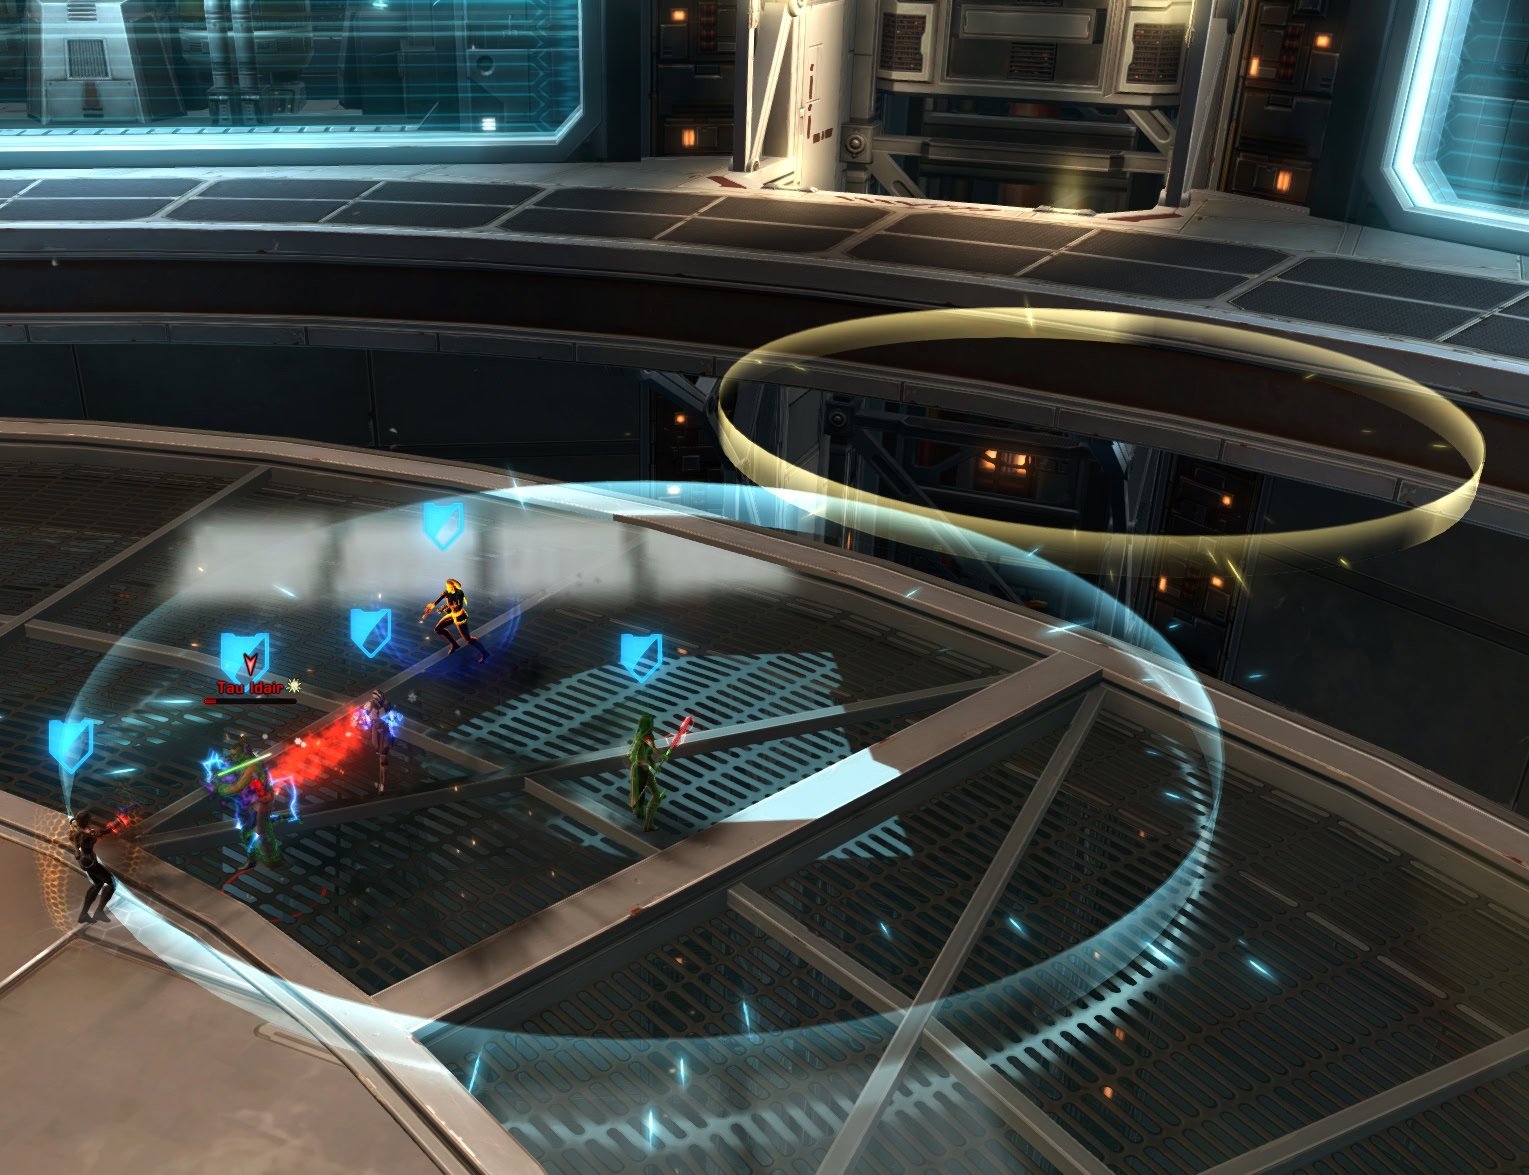
Final Boss (Imperial): Tau Idair
The final boss for the Imperial Instance of Objective Meridian is Jedi Knight Tau Idair. She wishes to gain control of the Meridian Complex for the Republic, it is your job to secure it for the glory of the Empire. Take out the adds with Tau first before fighting her.
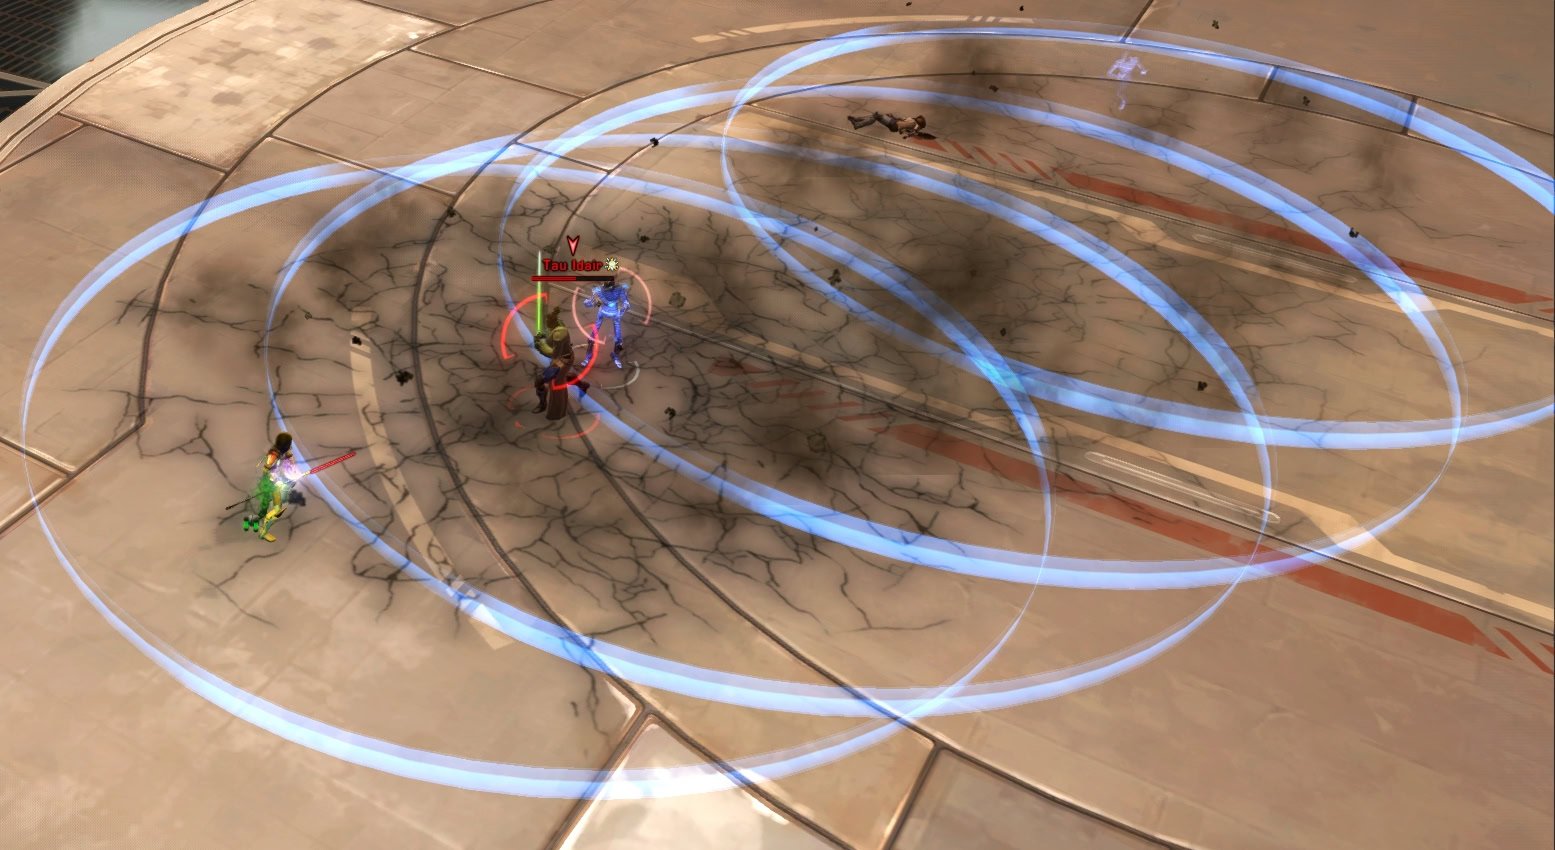
Players can find a blue ring around them, this means that Tau is about to use Force Quake in this area. This will be a persistent terrain hazard that’ll deal damage should any Force Quake AoE’s overlap one another. If you can, barely step outside the previous ring so the next one isn’t too far spread out. This allow allows melee players to stand in an area where they only take damage from one ring instead of multiple.
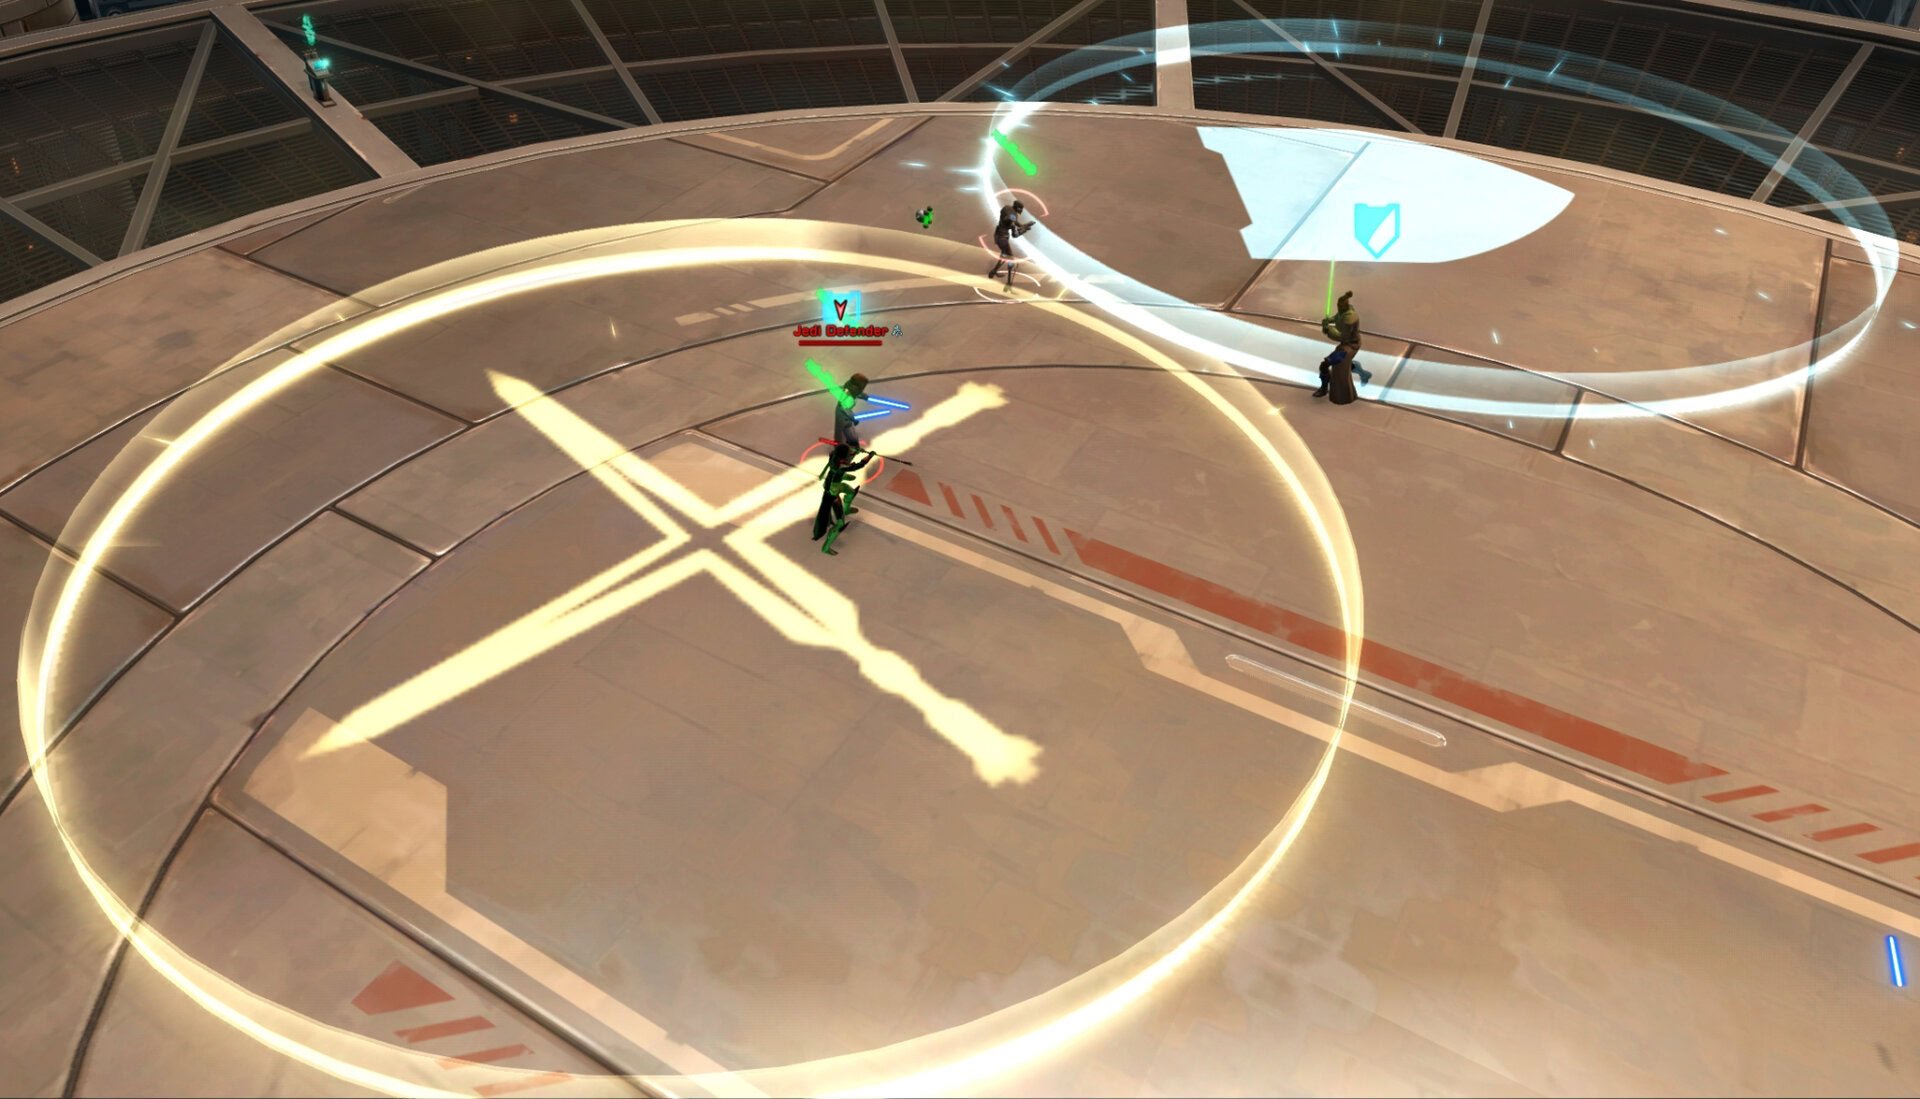
When Tau gets to half health, she can spawn two large AoE circles in the ground that will either have a shield or crossed lightsabers icon in the center. Adds tend to spawn during this phase of the fight. Standing in the shield AoE will grant anyone inside (friend or foe) increased damage reduction. Standing in the lightsaber AoE will grant anyone (friend or foe) increased damage.
This is a double edged sword as the DPS can get increased damage vs Tau, but Tau and her adds can also benefit from it. If the tank needs healing, they can stand in the shield AoE to be a bit more tanky and easier to heal. The tank should pull any enemies out of the AoEs as they’ll lose the buff over a few seconds.
If someone is benefitting from one of the AoE buffs, they’ll have a blue shield icon (damage reduction) or a green lightsaber icon (increased damage) above their head.
During this latter half of the fight, Tau will use an ability called Breath of Ossus. This appears as an extremely large blue ring that can easily cover the entire platform. Anyone caught in this ring when Breath of Ossus activates will take Force damage and heal Tau.
Continue working around the AoEs you can dodge, have the tank fight closer to the edge so any ranged players can hopefully leave the Breath of Ossus AoE, and have ranged DPS take advantage of the crossed lightsaber AoE for extra damage. Once you defeat Tau, you can attack a loot cache to get the boss’s drops and end the flashpoint by interacting with the Shield Controls terminal. Be sure to destroy the loot cache before activating the Shield Controls terminal.
BUG ALERT
It’s possible for the loot cache to disappear if you activate the Shield Controls terminal before attacking the loot cache. If this happens there will be no way for you to get loot from the final boss.
Veteran Mode Differences
The only prominent mechanical difference is with Tau’s Shield AoE buffs. Instead of reducing damage, they will now negate damage entirely. Pull her and any adds out of these areas to damage her. With abilities such as Breath of Ossus being a far more significant threat, we can look into more advanced strategies utilizing the Shield and Cross Lightsabers AoEs.
You’ll want to start practicing keeping Tau in the Lightsaber AoE and yourself in the Shield AoE, this fight gets harder in Master Mode so now is a good time to practice for that. Have the tank draw Tau to the edge of the Lightsaber AoE while the tank and everyone else can stay in the Shield AoE. This will prevent your party from taking any damage while Tau becomes a sitting duck.
This is also useful for dealing with Tau’s Breath of Ossus ability. It’ll deal a good chunk of your health in Veteran Mode. If you’re within the Shield AoE while Breath of Ossus is casted, you can ignore the damage entirely.
As you’re moving through the various Buff AoEs that spawn, they’ll start to inch away from the center. Should they ever go too far and spawn beyond the platform, everyone in the group needs to run to the center of the platform so they’ll respawn on the platform.
Master Mode Differences
Things are mostly the same as Veteran Mode. for this fight. You can expect things to hit harder now, so be sure to follow the Buff AoE strategies brought up in the Veteran Mode difficulty for this fight. Tau now has access to the Saber Reflect ability, so be careful when attacking her with direct damage ranged attacks while this is active.
Achievements for Objective Meridian
Most achievements gained through Objective Meridian are just basic achievements that don’t do much for you. Though by defeating the bosses multiple times, you’ll be able to earn 20 Cartel Coins per applicable achievement. If you haven’t done any of them and complete all the achievements listed here, you can get yourself 300 Cartel Coins.
Spire of Stars (Republic – Story and Veteran)
Complete the “Objective Meridian” flashpoint on Story or Veteran difficulty as the Republic 25 Times. Rewards 20 Cartel Coins.
Advanced: A Spire Too Far (Republic – Master)
Complete the “Objective Meridian” flashpoint on Master difficulty 10 times as the Republic. Rewards 20 Cartel Coins.
Elite: A Spire Too Far (Republic – Master)
Complete the “Objective Meridian” flashpoint on Master difficulty 25 times as the Republic. Rewards 20 Cartel Coins.
Elite: Armor Piercing (Republic – Master)
Defeat the Vulture Squad Armor Units 02 and 14 in the “Objective Meridian” flashpoint on Master difficulty 25 times. Rewards 20 Cartel Coins.
Elite: Special Air Service (Republic – Master)
Defeat Commander Aster in the “Objective Meridian” flashpoint on Master difficulty 25 times. Rewards 20 Cartel Coins.
Elite: Rematch (Republic – Master)
Defeat Darth Malgus in the “Objective Meridian” Flashpoint on Master difficulty 25 times. Rewards 20 Cartel Coins.
Elite: Storm Riders (Republic – Master)
Defeat Darth Yun and Lord Feng in the “Objective Meridian” Flashpoint on Master difficulty 25 times. Rewards 20 Cartel Coins.
Storm the Ramparts (Empire – Story and Veteran)
Complete the “Objective Meridian” flashpoint on Story or Veteran difficulty as the Empire 10 times. Rewards 20 Cartel Coins.
Overlord (Empire – Story and Veteran)
Complete the “Objective Meridian” flashpoint on Story or Veteran difficulty as the Empire 25 times. Rewards 20 Cartel Coins.
Advanced: The Longest Day (Empire – Master)
Complete the “Objective Meridian” flashpoint on Master Difficulty 10 times as the Empire. Rewards 20 Cartel Coins.
Elite: The Longest Day (Empire – Master)
Complete the “Objective Meridian” flashpoint on Master difficulty 25 times as the Empire. Rewards 20 Cartel Coins.
Elite: Spearhead (Empire – Master)
Defeat the R10-X6 Droid in the “Objective Meridian” flashpoint on Master difficulty 25 times. Rewards 20 Cartel Coins.
Elite: Thin Green Line (Empire – Master)
Defeat Jakir Halcyon and Seldin in the “Objective Meridian” flashpoint on Master difficulty 25 times. Rewards 20 Cartel Coins.
Elite: Confrontation (Empire – Master)
Defeat Tau Idair in the “Objective Meridian” flashpoint on Master difficulty 25 times. Rewards 20 Cartel Coins.
Elite: Who Dare Wins (Empire – Master)
Defeat Commander Rasha in the “Objective Meridian” flashpoint on Master difficulty 25 times. Rewards 20 Cartel Coins.
Decoration Drops
The bosses in Objective Meridian have a chance at dropping the following decorations:
Anti-Tank Trap
The Anti-Tank Trap decoration can fit into a Narrow, Medium, or Large decoration hook. This is a surprisingly large decoration that can fit into a narrow hook but something’s got to stop those pesky tanks.
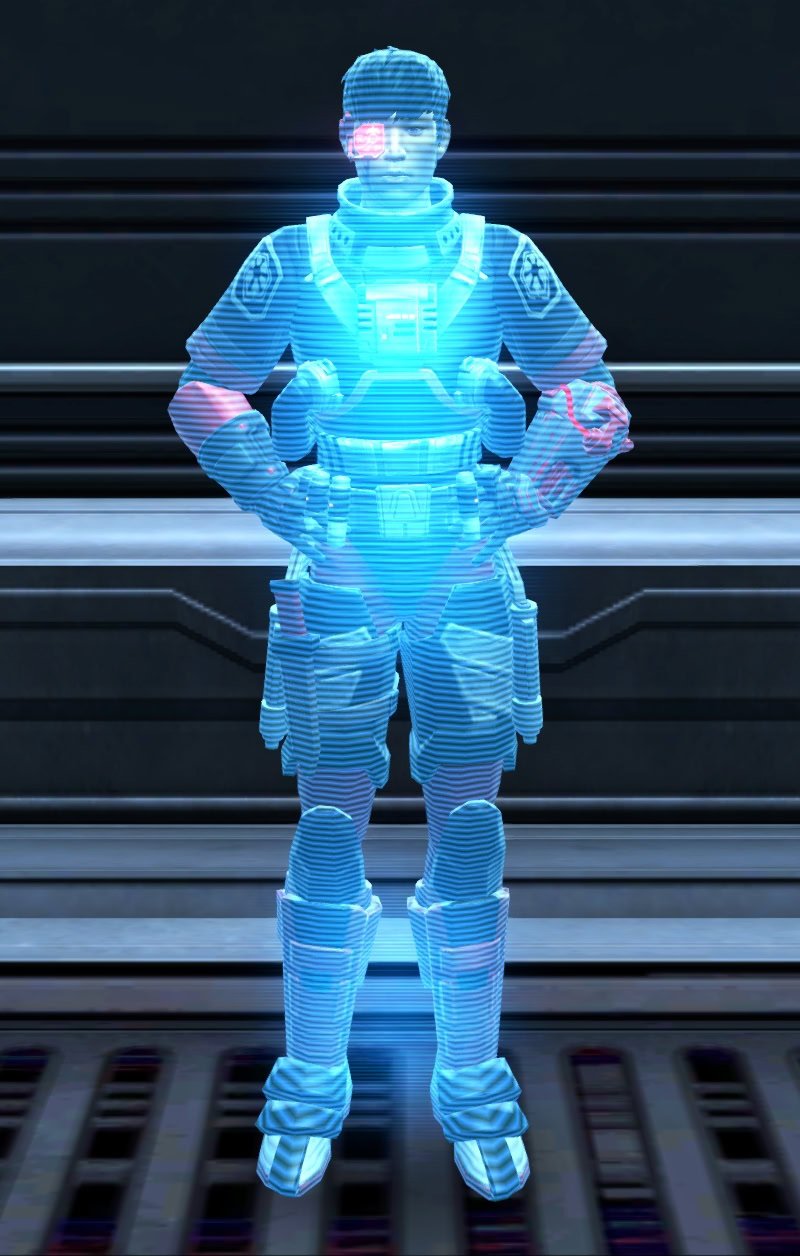
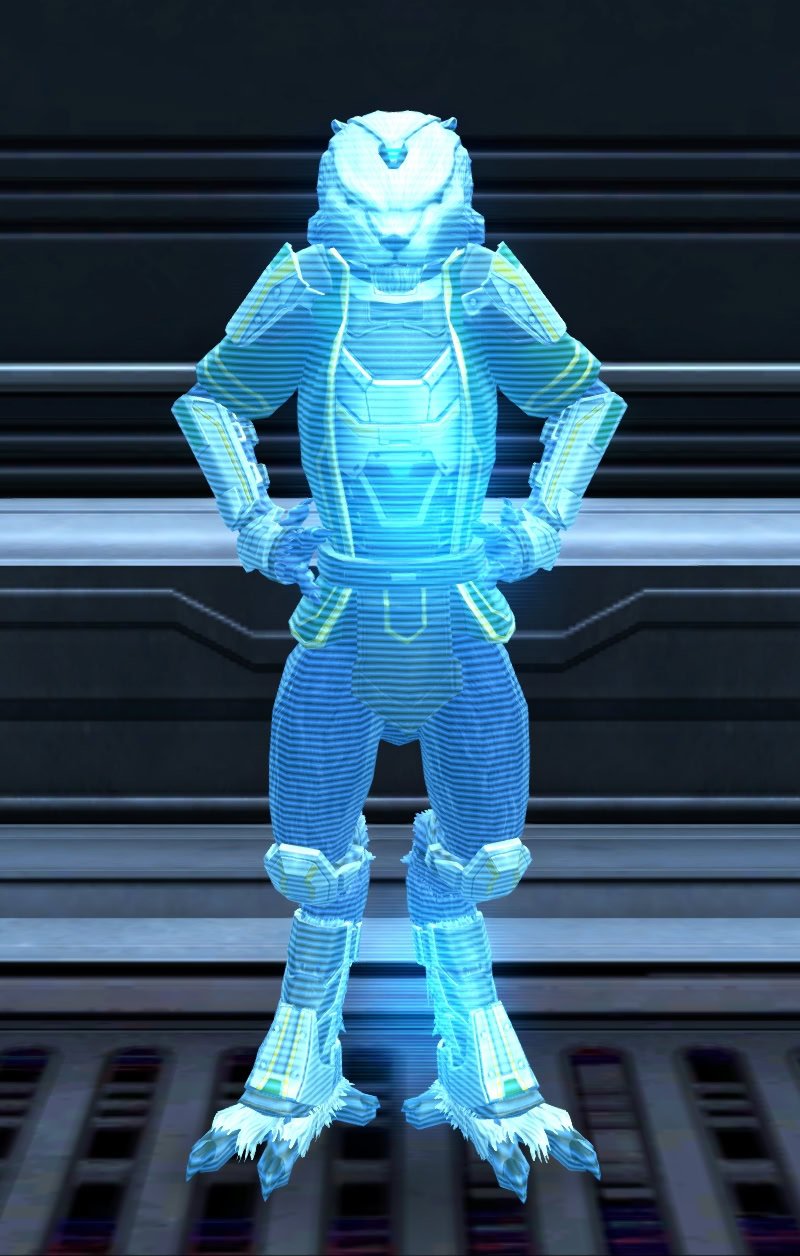
Commander Aster Holo
The Commander Aster Holo decoration can fit into a Small hook.
Commander Rasha Holo
The Commander Rasha Holo decoration can fit into a Small hook.
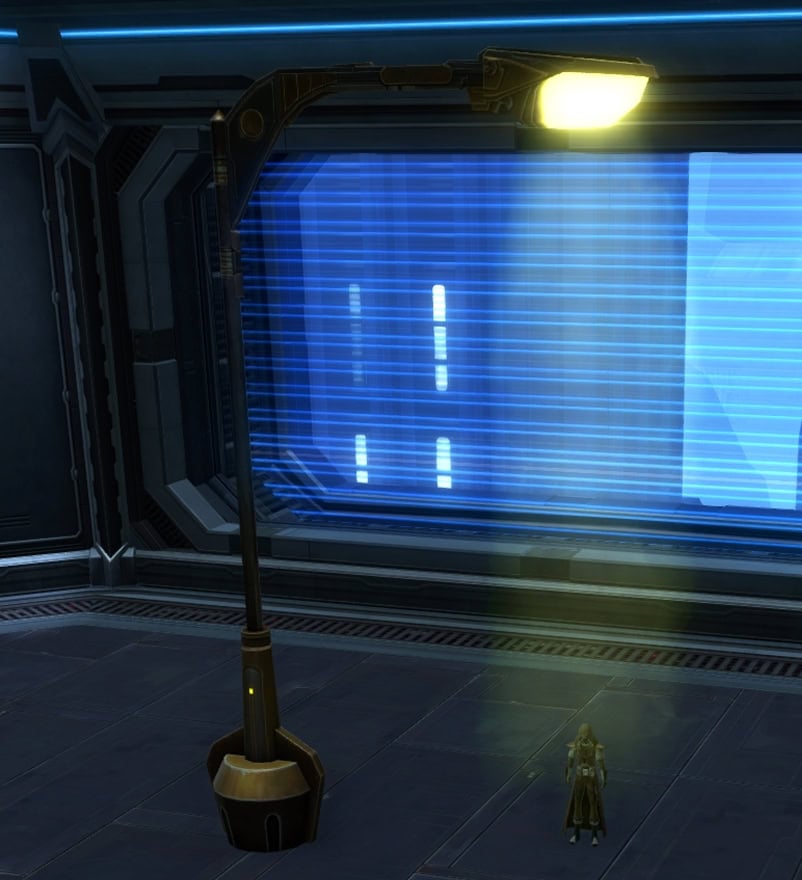
Corellian Street Light
The Corellian Street Light decoration can fit into a Small, Narrow, or Medium hook. It doesn’t offer any actual light to the area but it does have a neat halation effect beneath the lamp portion.
Darth Malgus Holo
The Darth Malgus Holo decoration can fit into a Small hook.
Darth Yun Holo
The Darth Yun Holo decoration can fit into a Small hook.
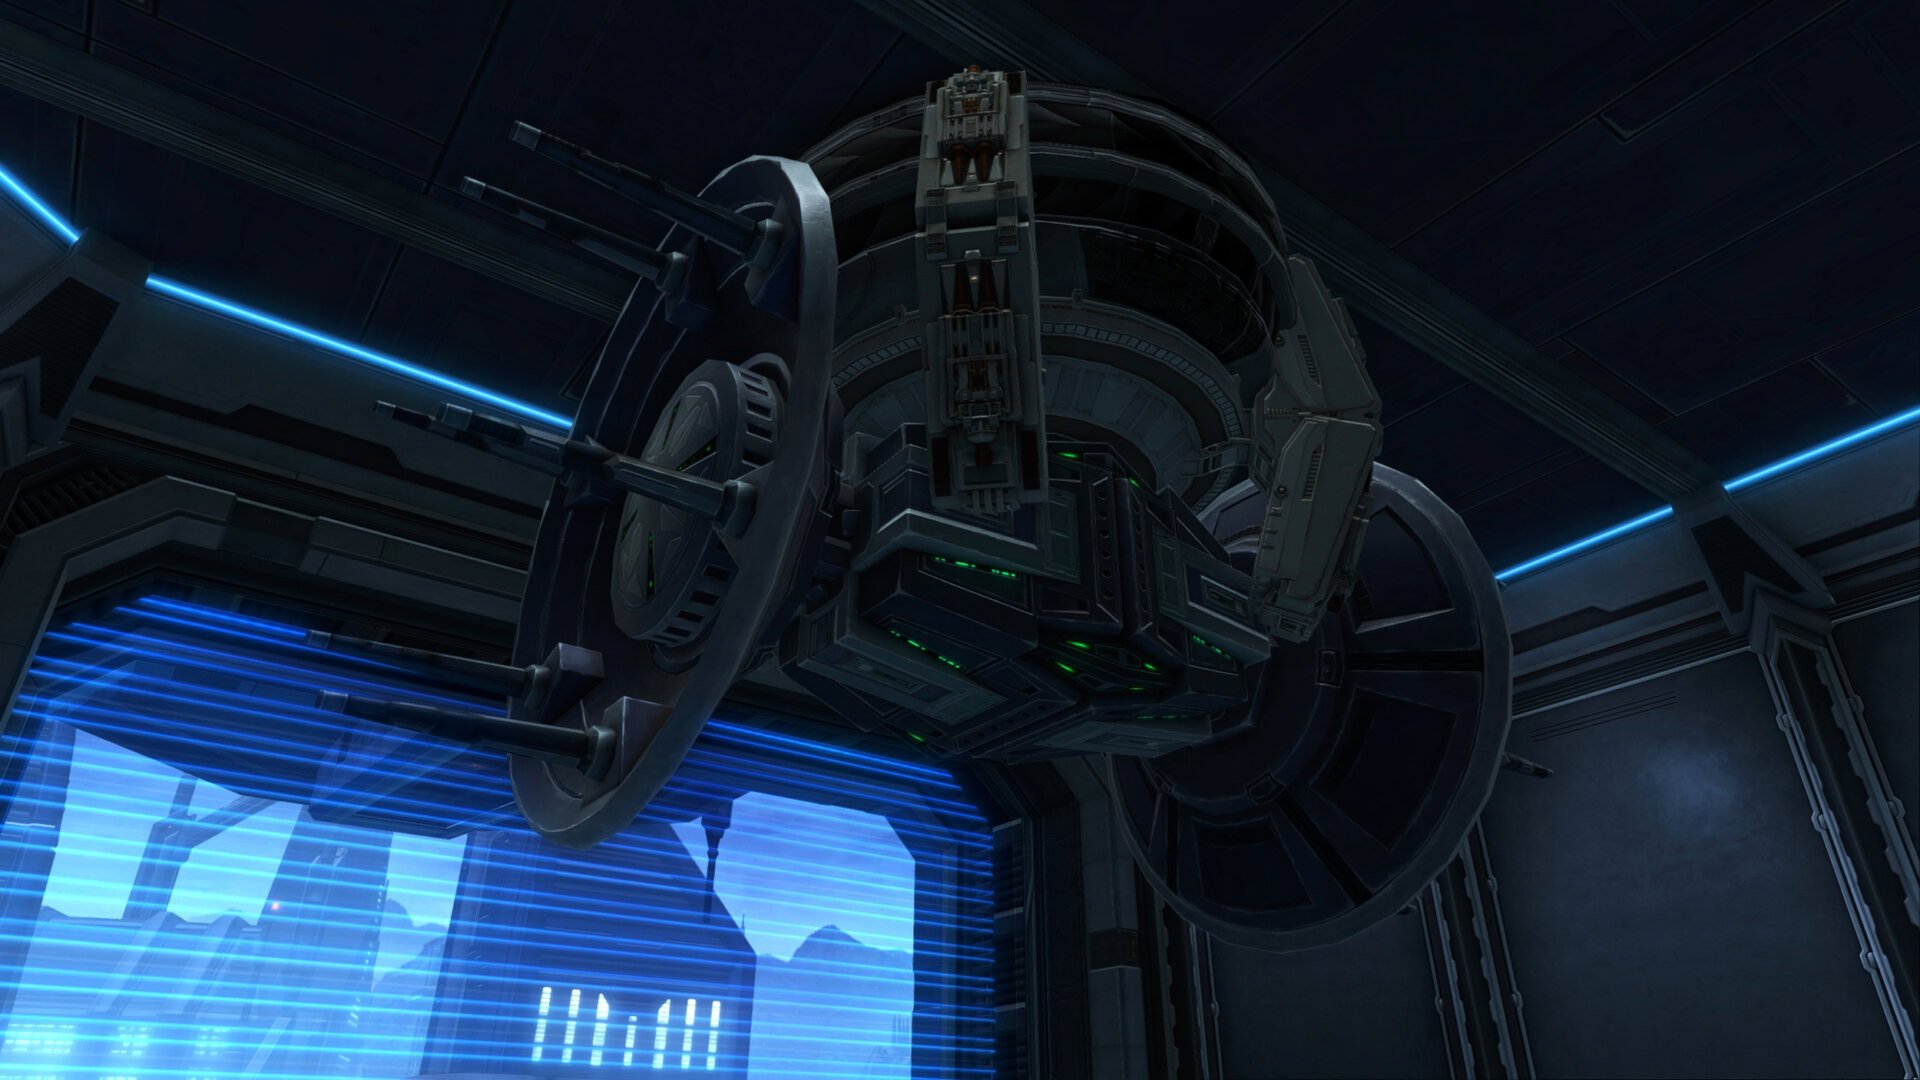
Factory Ceiling Crane
The Factory Ceiling Crane decoration can fit into a Ceiling hook. This large decoration requires a good chunk of space so it won’t overpower a room. It would look good on the Sky Deck of the Rishi Stronghold.
Gravity Well Generator
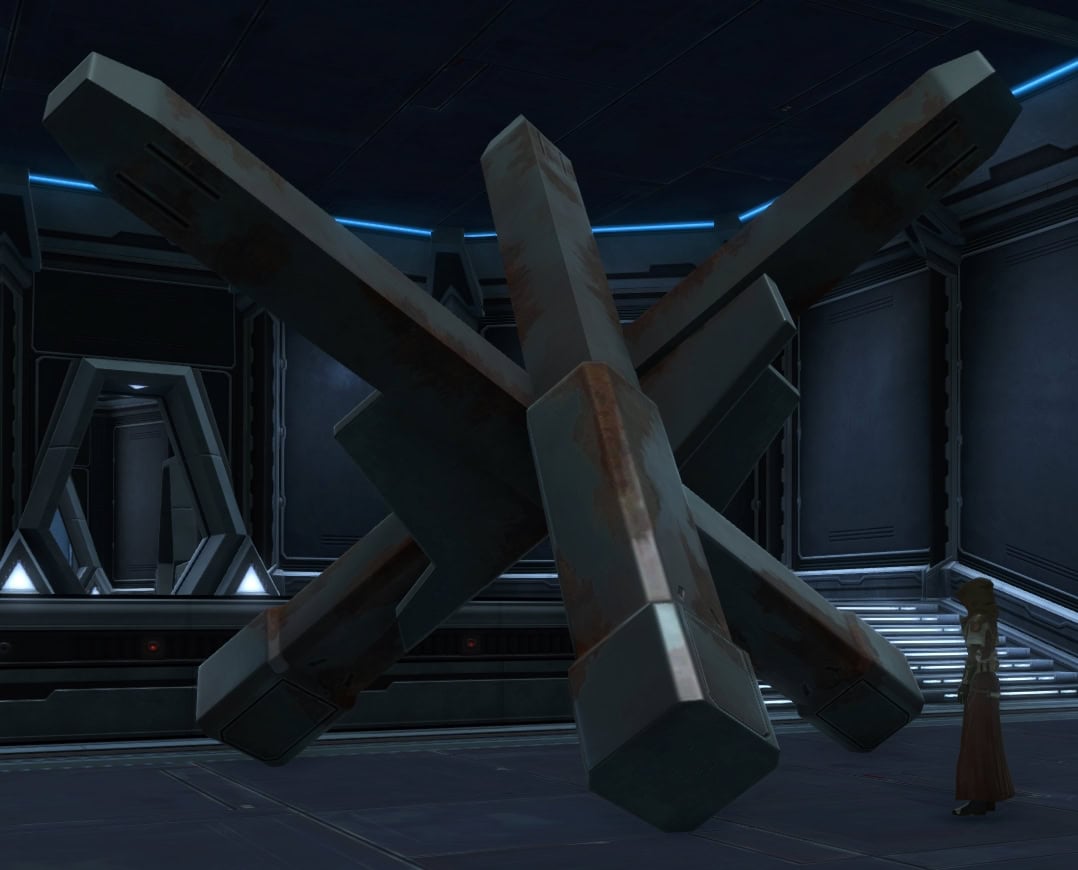
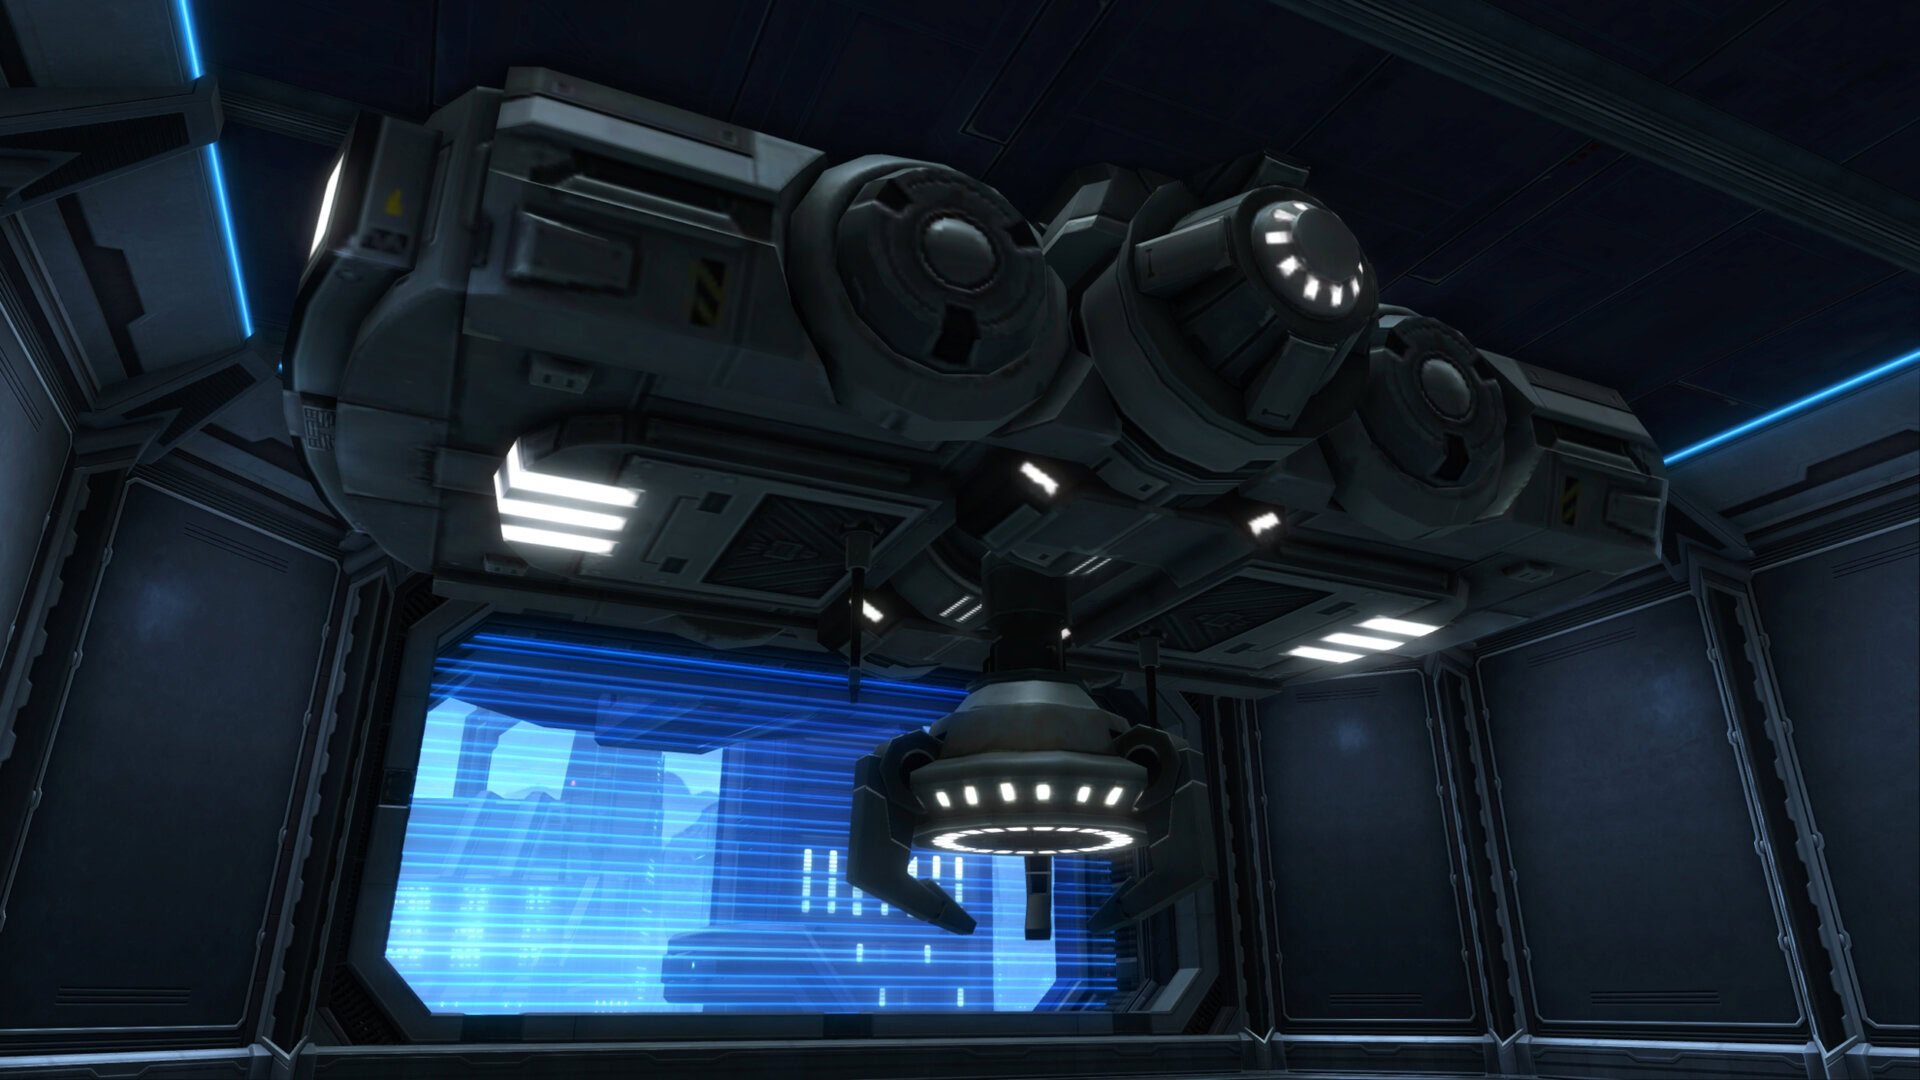
This Gravity Well Generator decoration can fit into a Ceiling hook. This extra thick decoration will need plenty of room.
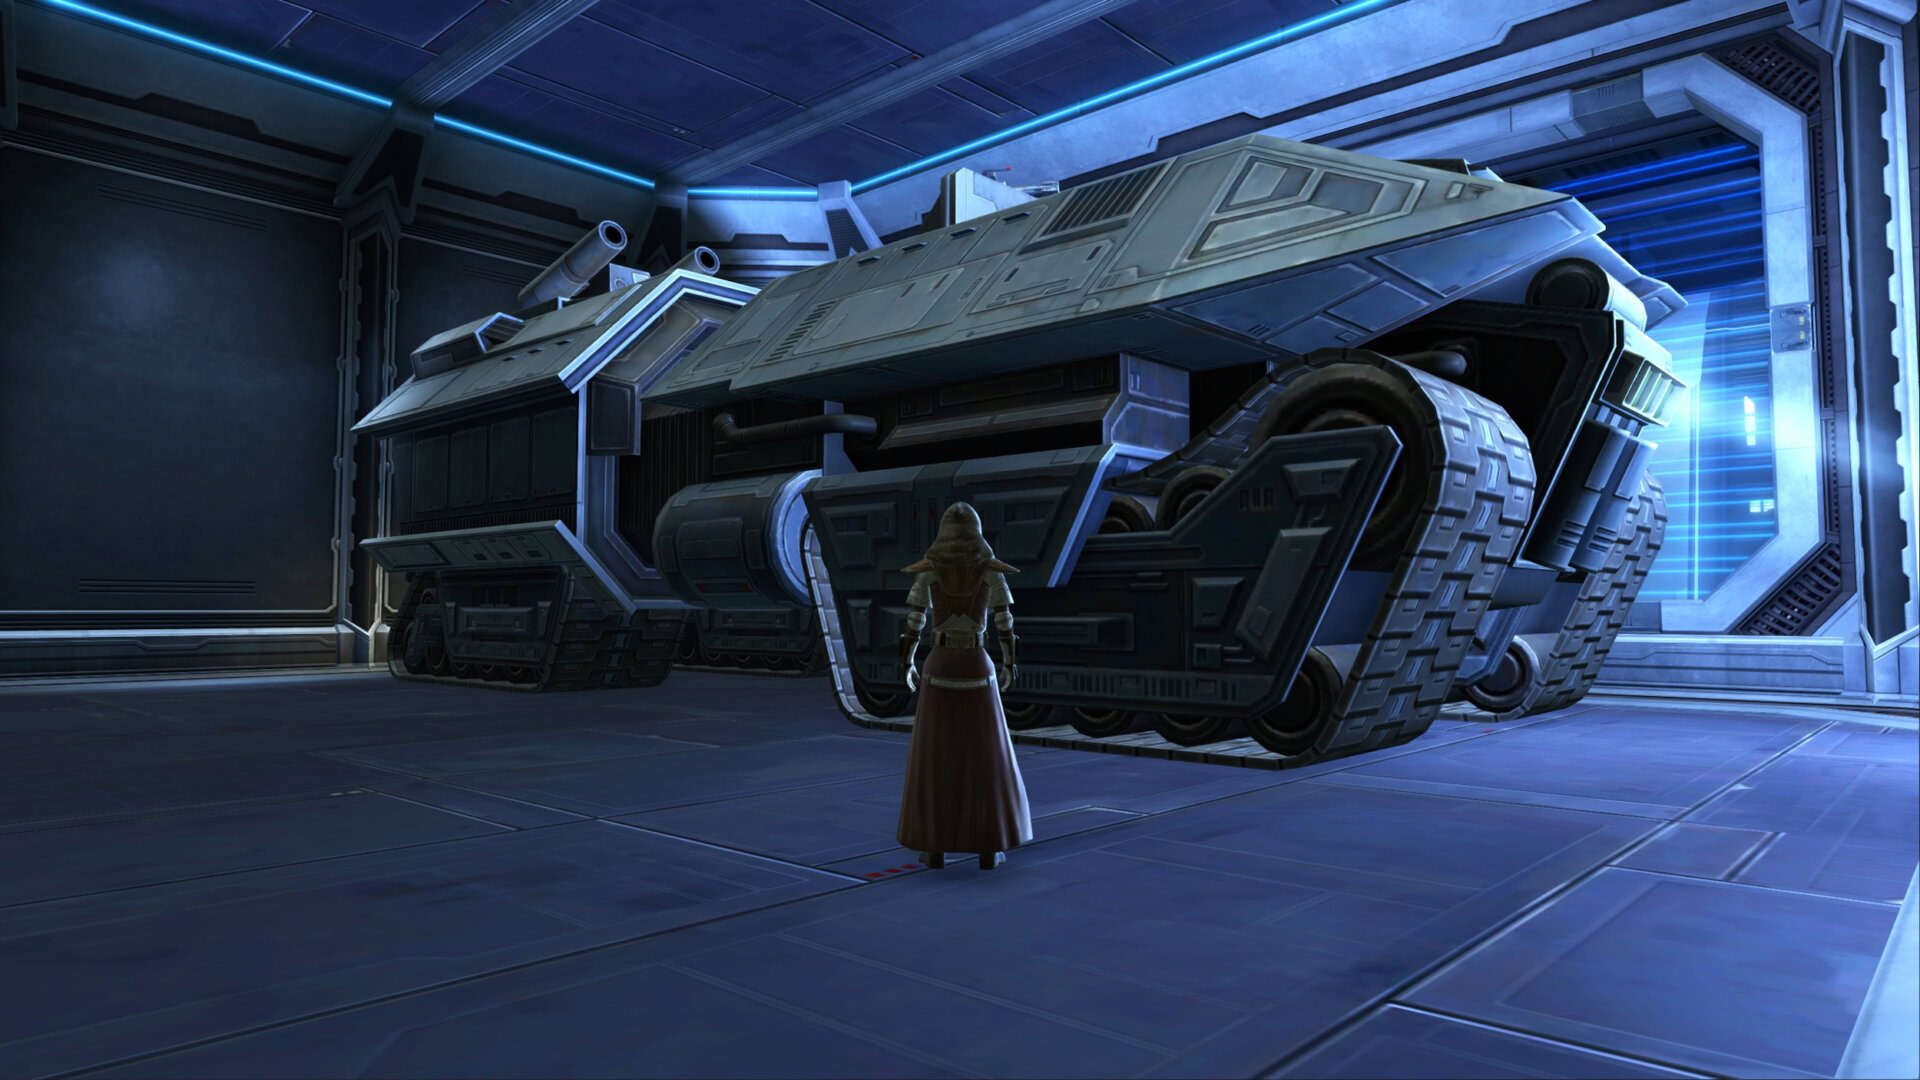
Imperial Battle Crawler
The Imperial Battle Crawler decoration can fit into a Large or Centerpiece hook. This is a nice looking vehicle that also generates light in front of it.
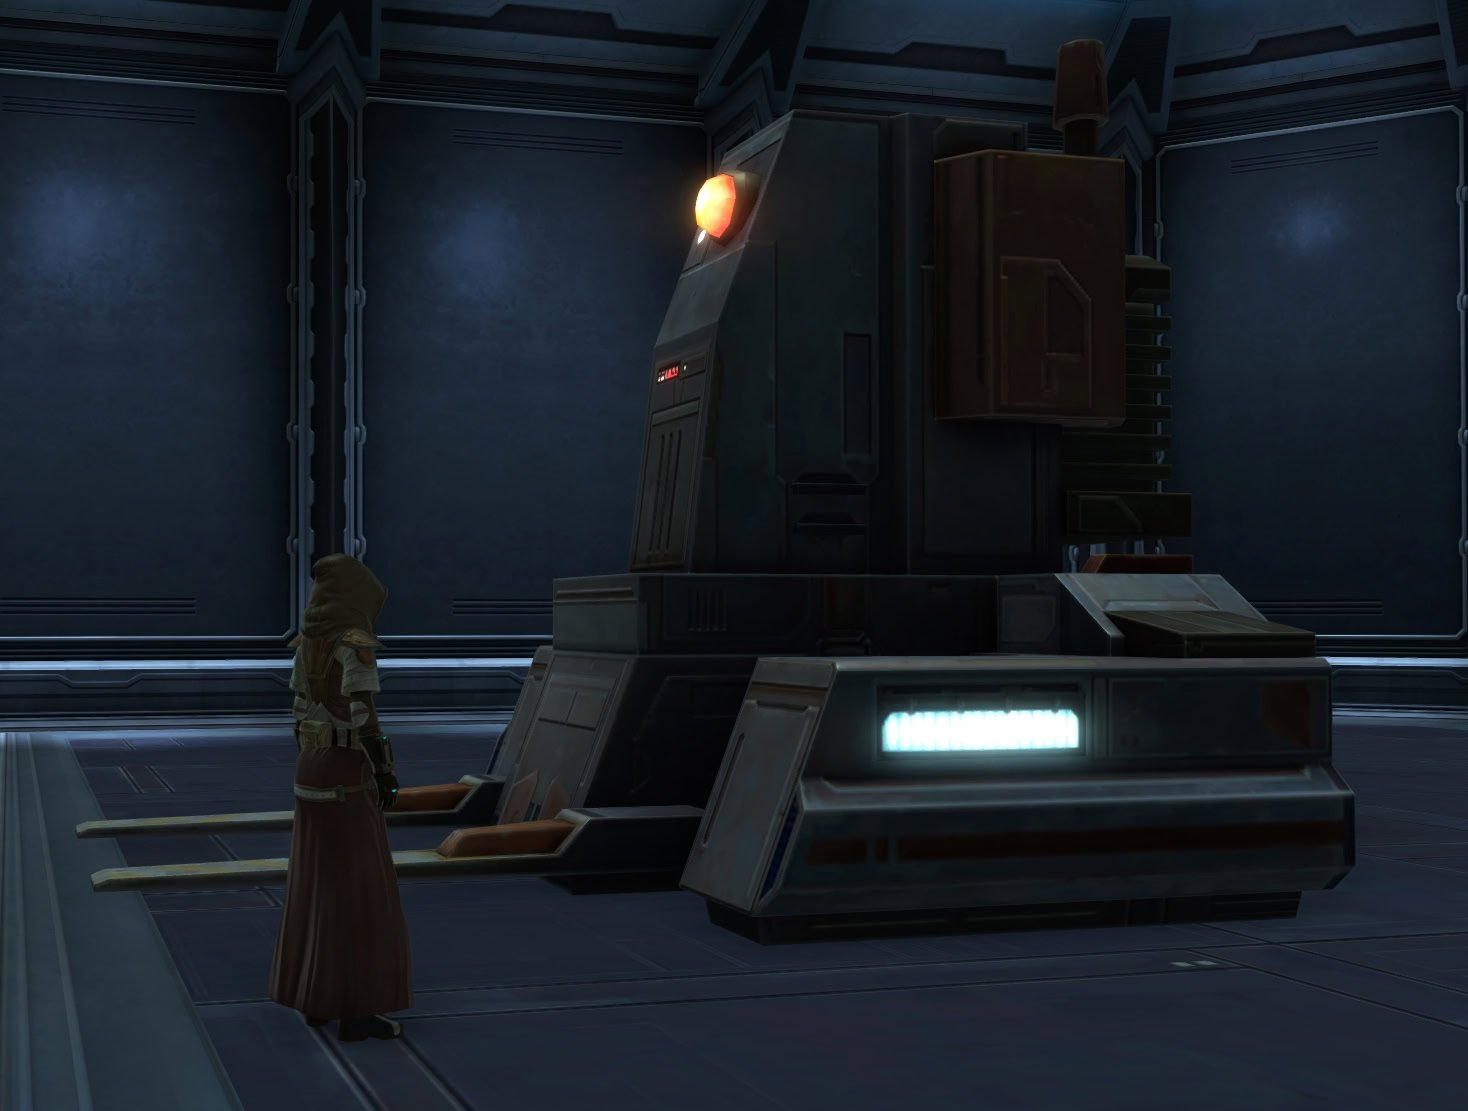
Industrial Forklift
The Industrial Forklift decoration can fit into a Large hook. Make sure you’re Forklift Certified before using this decoration!
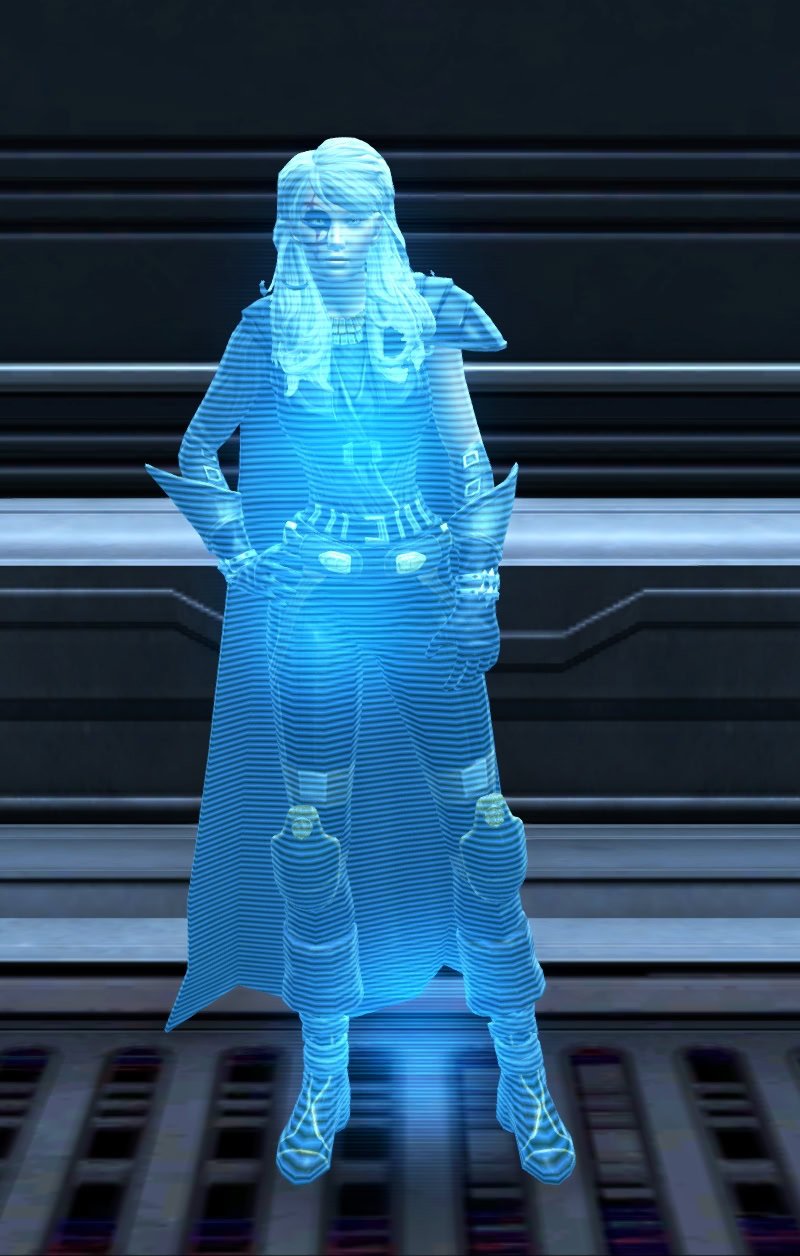
Lord Feng Holo
The Lord Feng Holo decoration can fit into a small hook.
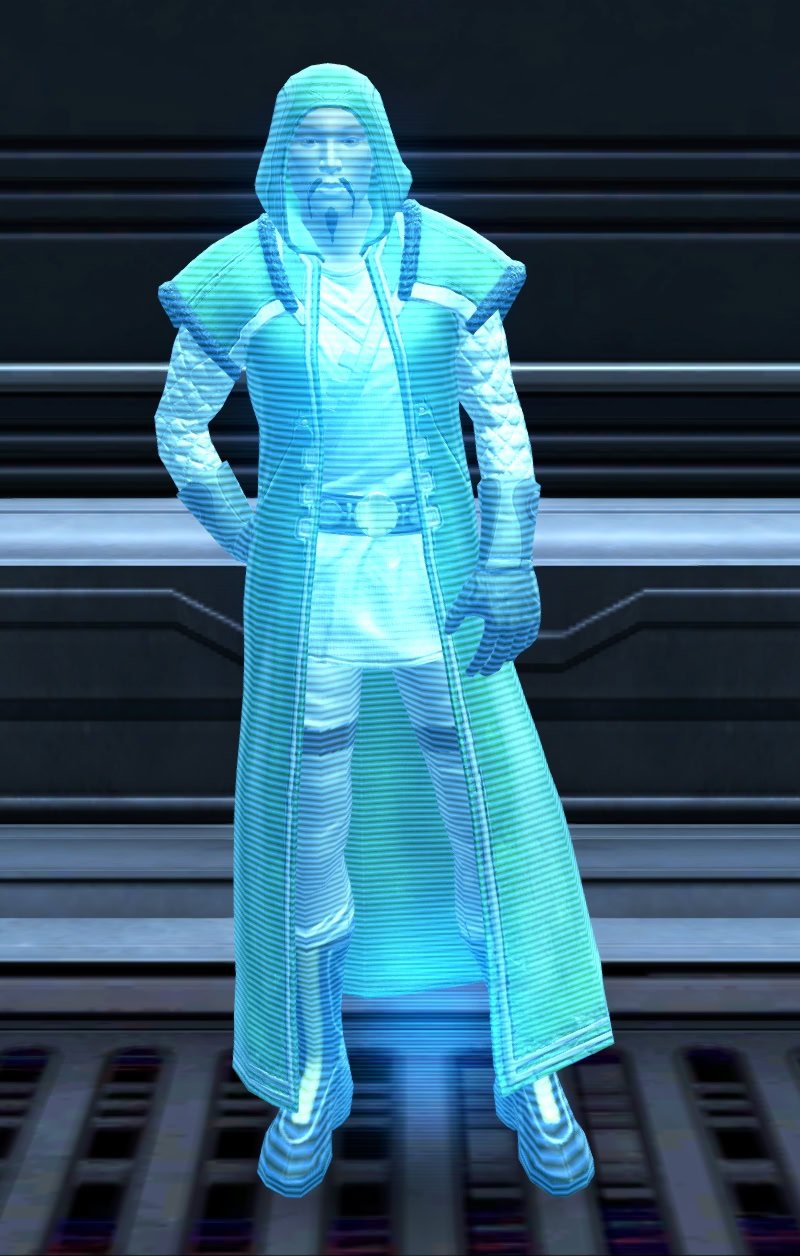
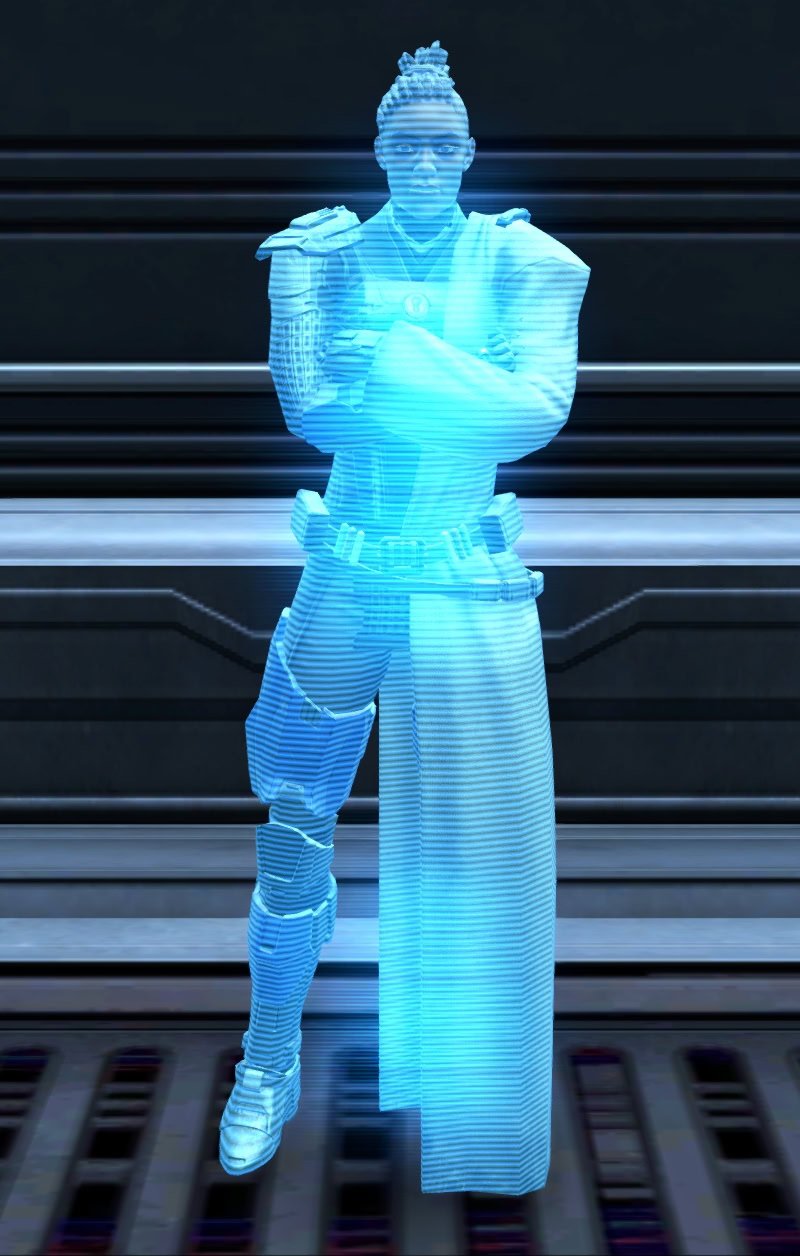
Master Jakir Halcyon Holo
The Master Jakir Halcyon Holo decoration can fit into a small hook.
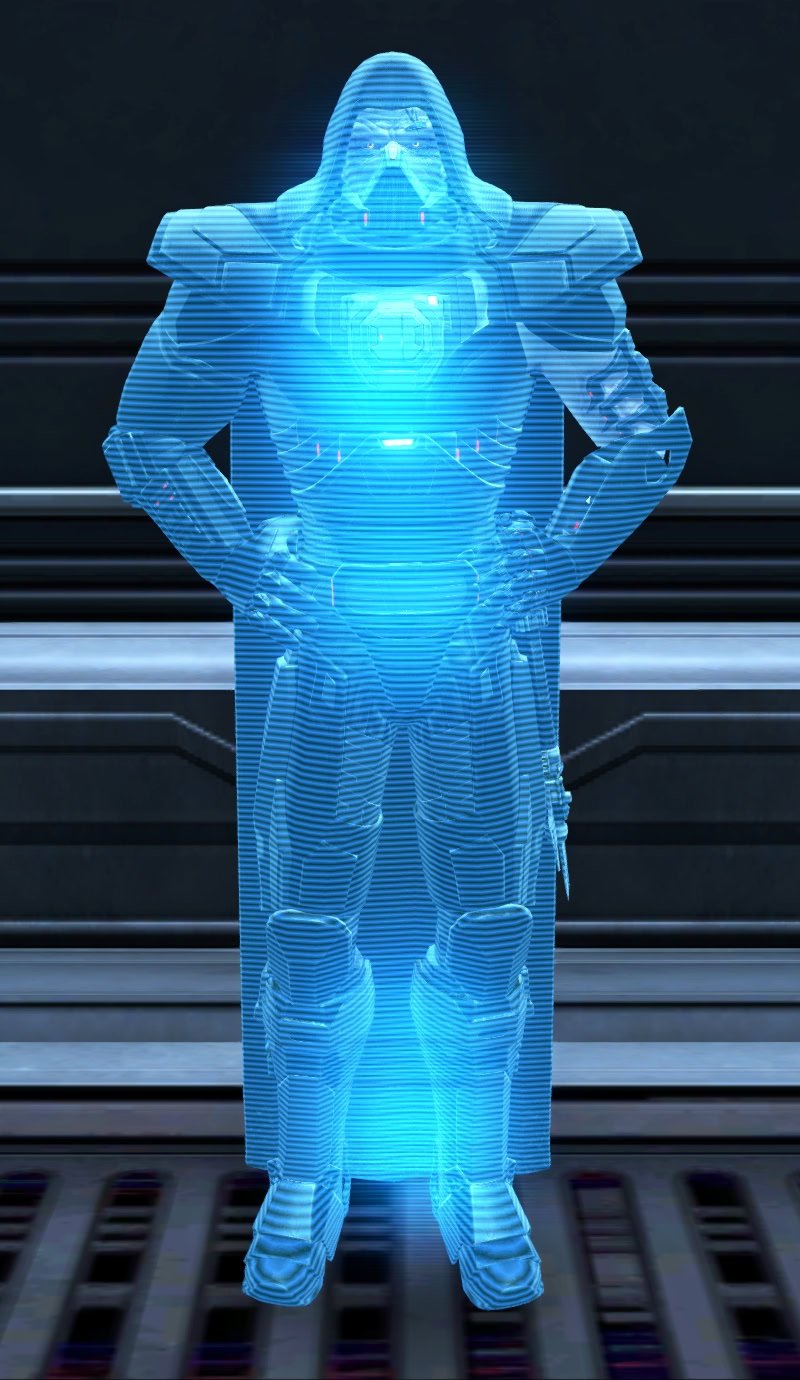
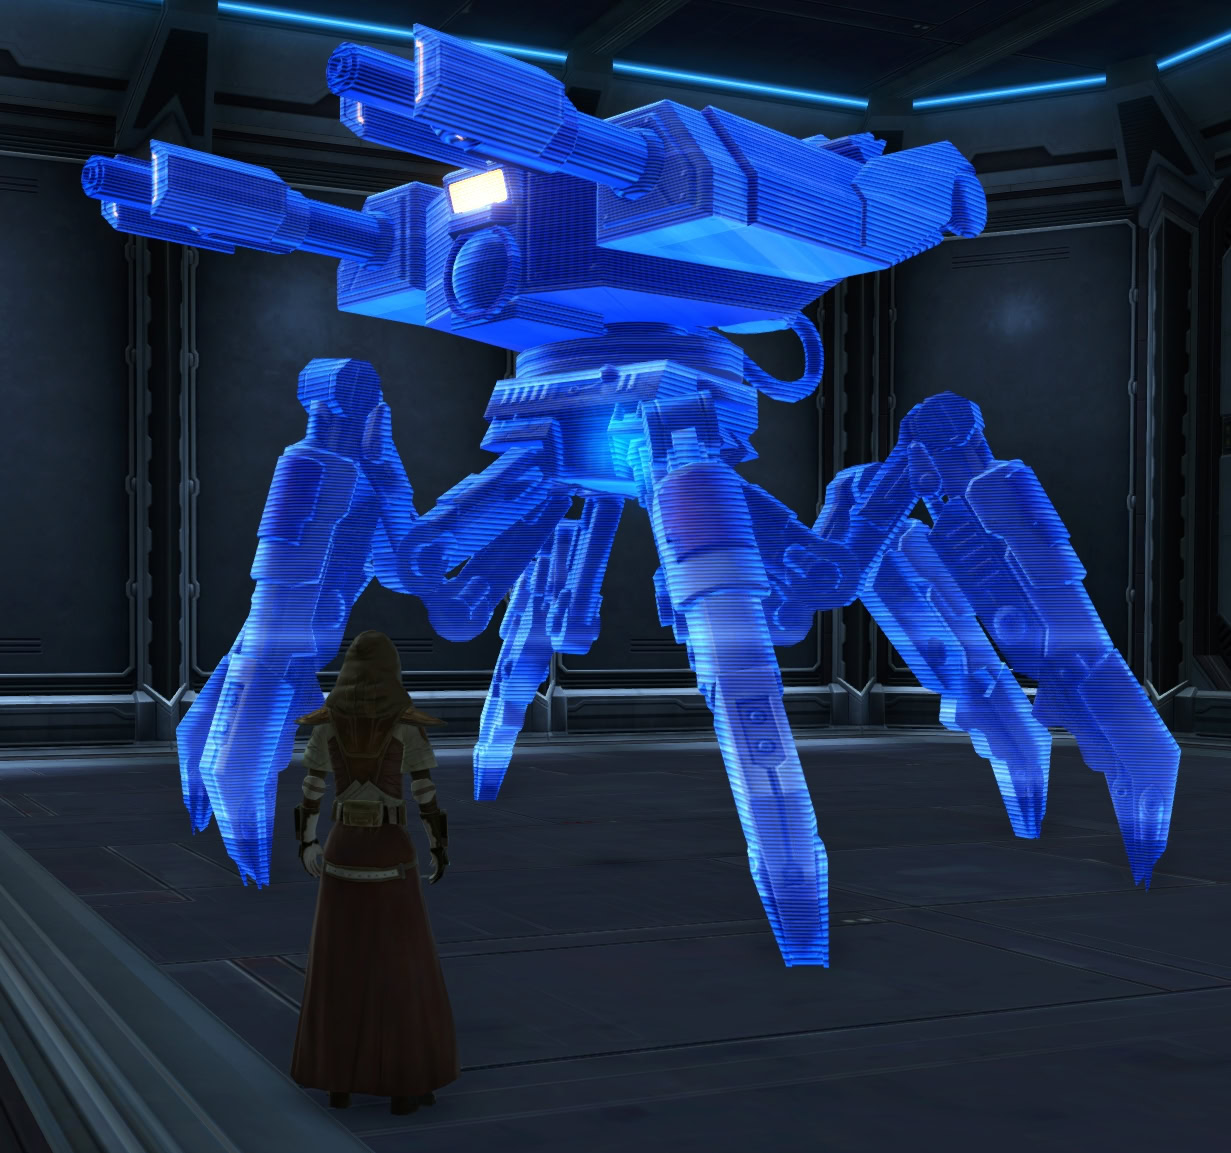
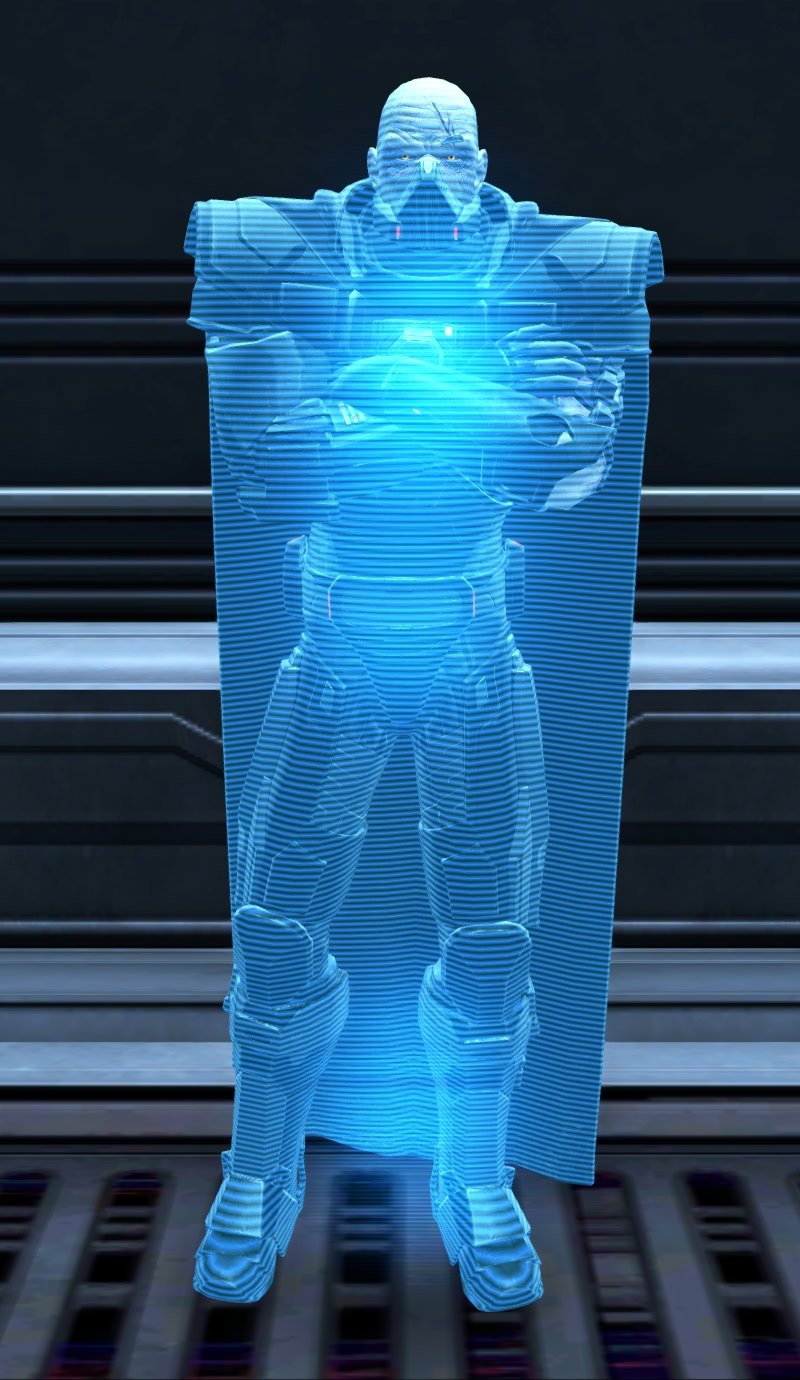
R10-X6 Holo
The R10-X6 Holo decoration can fit into a Large or Centerpiece hook.
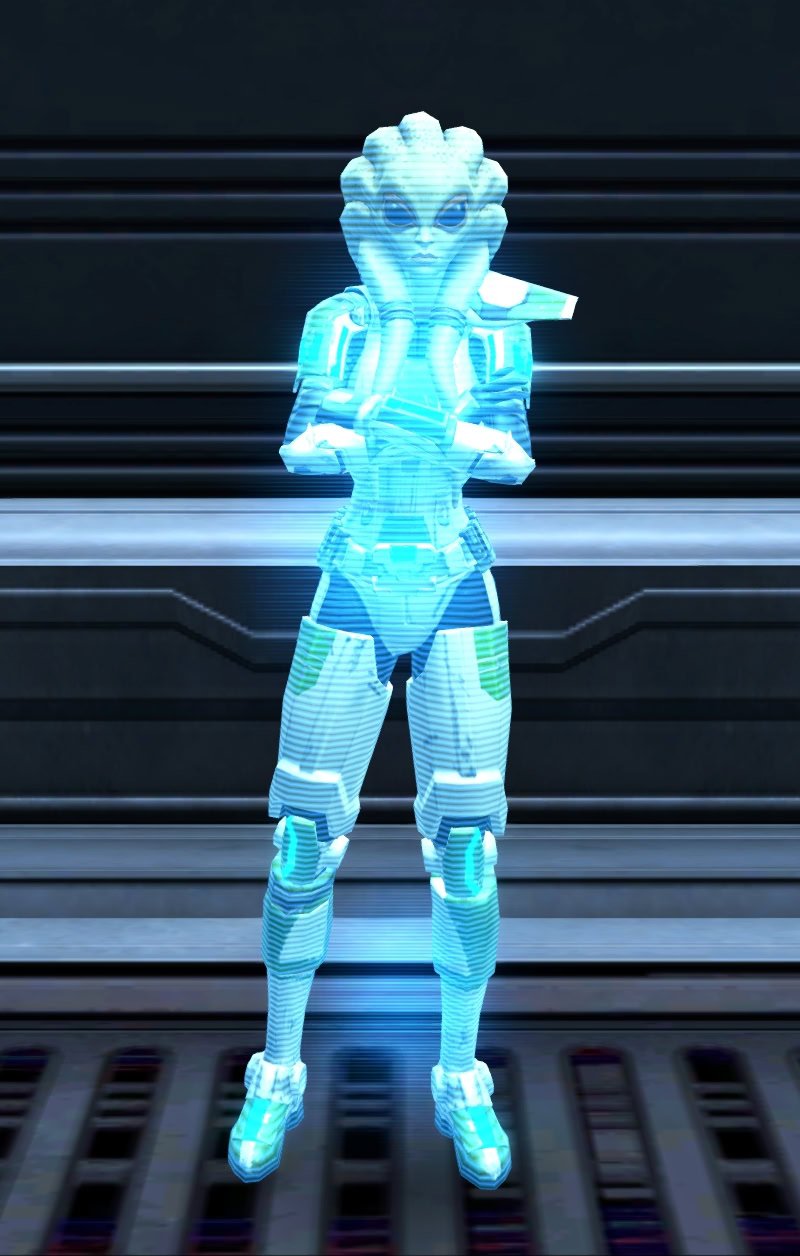
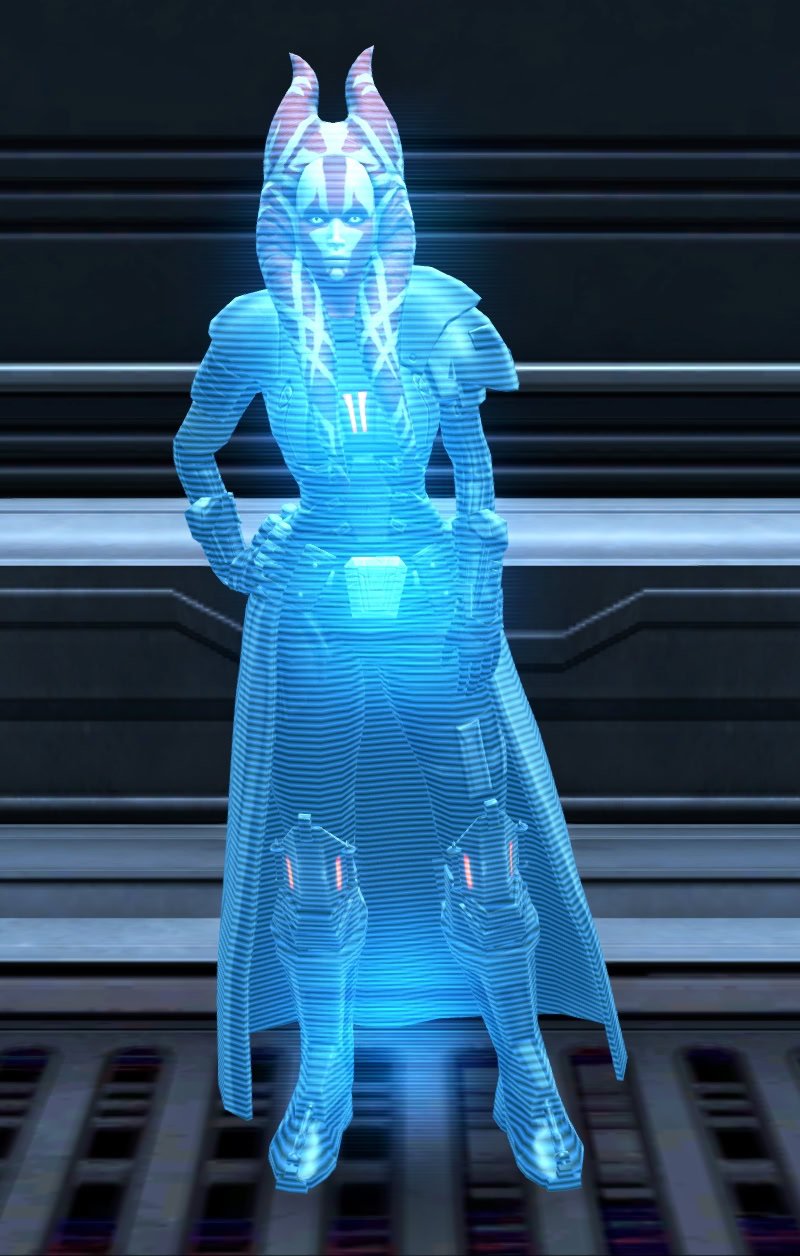
Seldin Holo
The Seldin Holo decoration can fit into a small hook.
Shade of Malgus Holo
The Shade of Malgus Holo decoration can fit into a small hook.
Tau Idair Holo
The Tau Idair Holo decoration can fit into a small hook.
Vulture Squad Armored Unit 14 Holo
The Vulture Squad Armored Unit 14 Holo decoration can fit into a Large or Centerpiece hook.