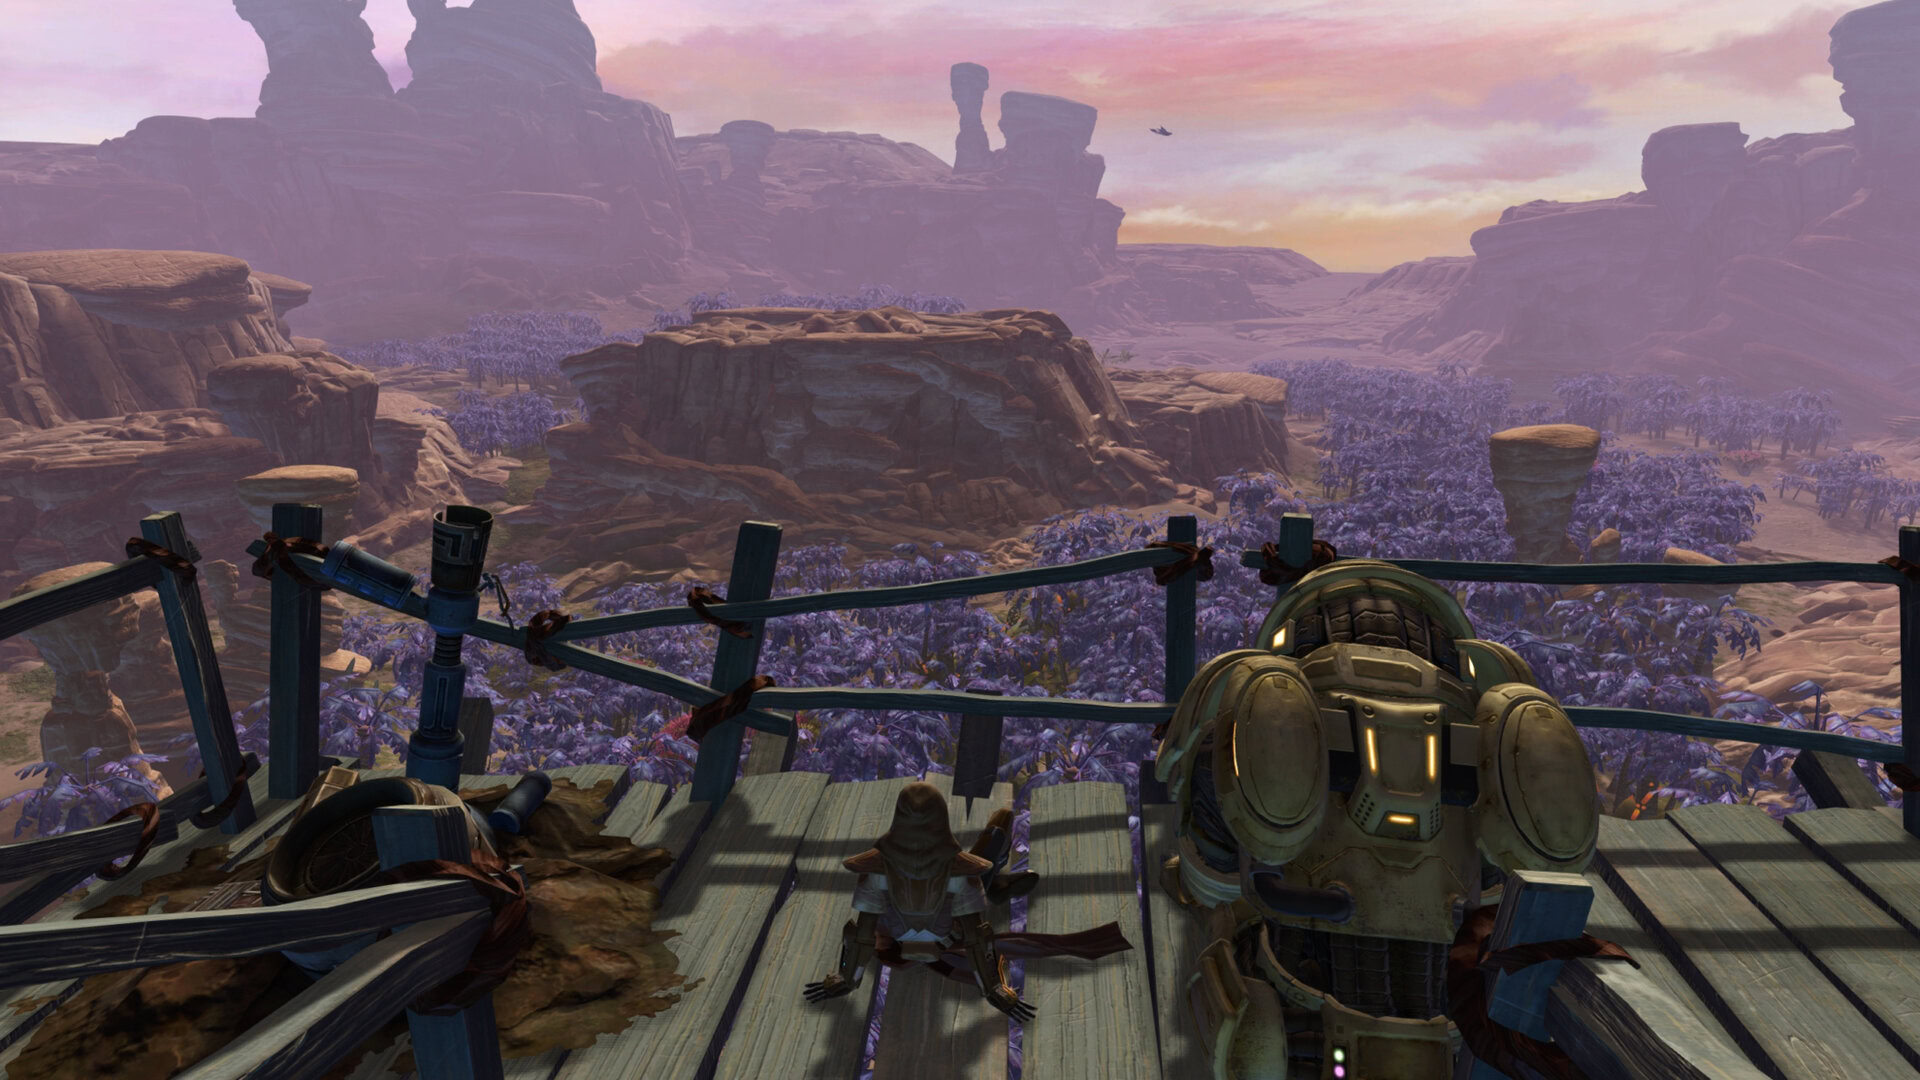
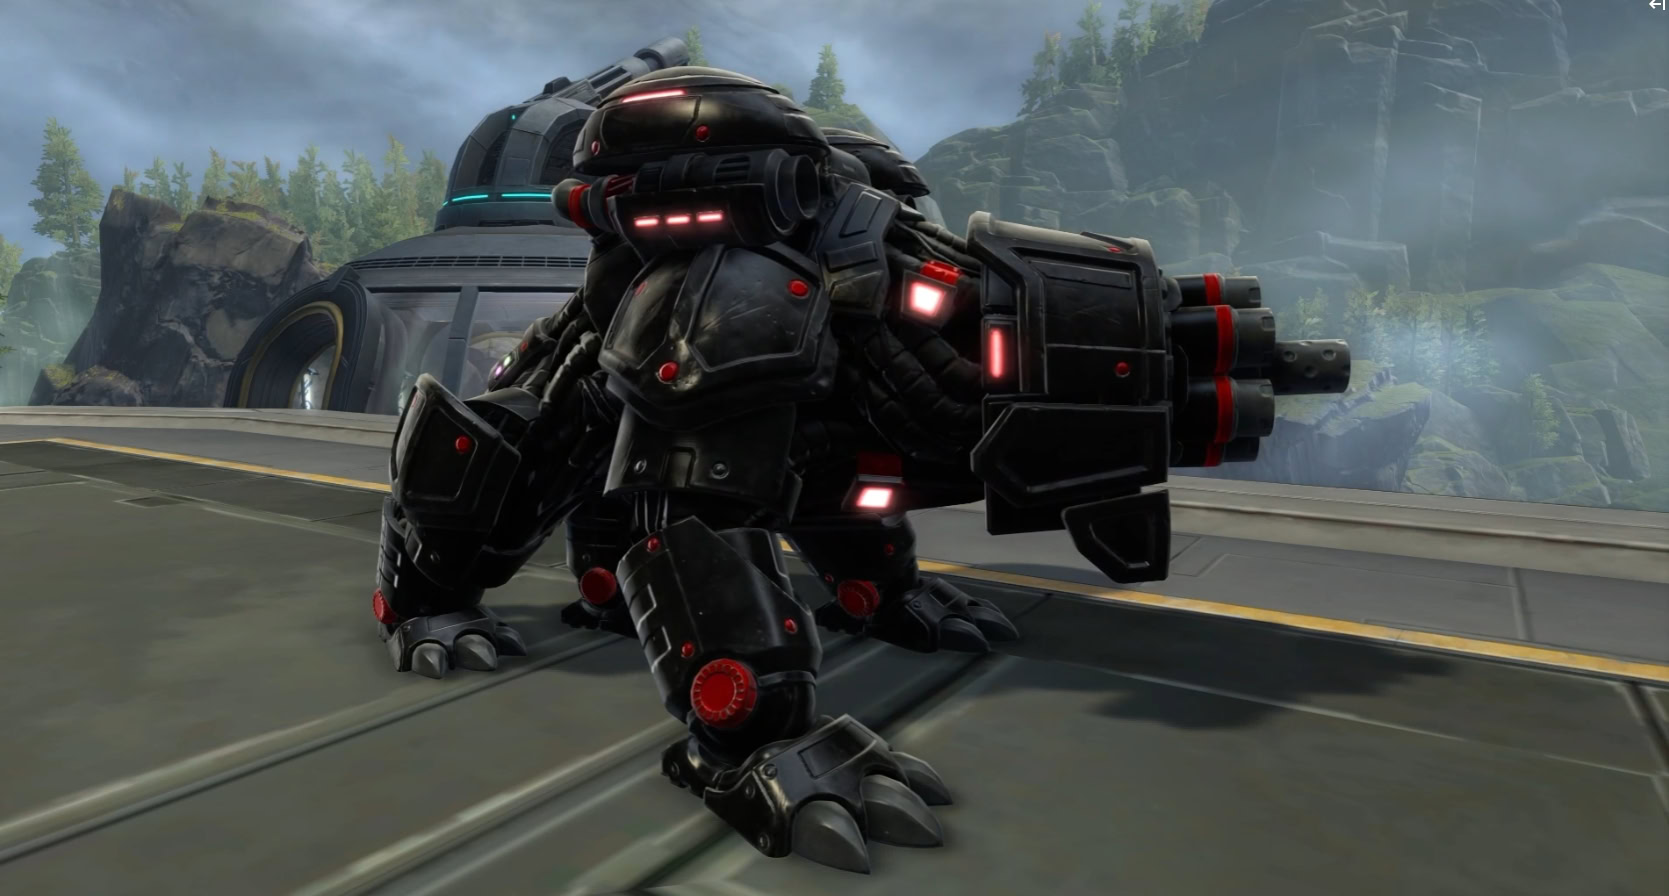
Learn how to unlock and use the new Ventures game system in SWTOR to train your own Basilisk Prototype companion B3-S1, Bessie!
Table of contents
What are Ventures in SWTOR
Ventures are a new type of solo mission experience available to SWTOR subscribers. Introduced in update 7.5, Ventures aim to have players work hard for premium rewards.
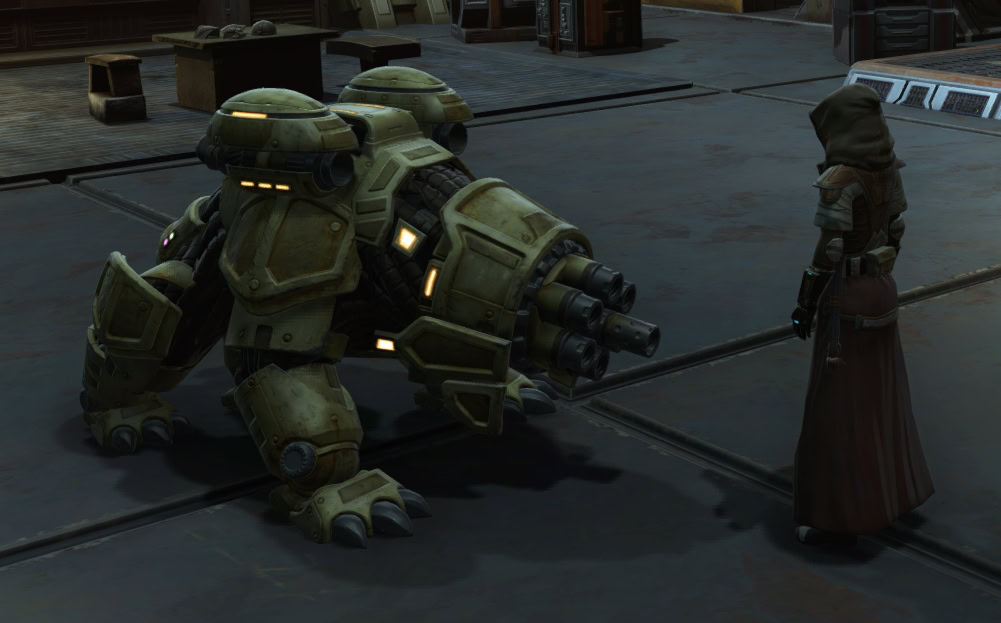
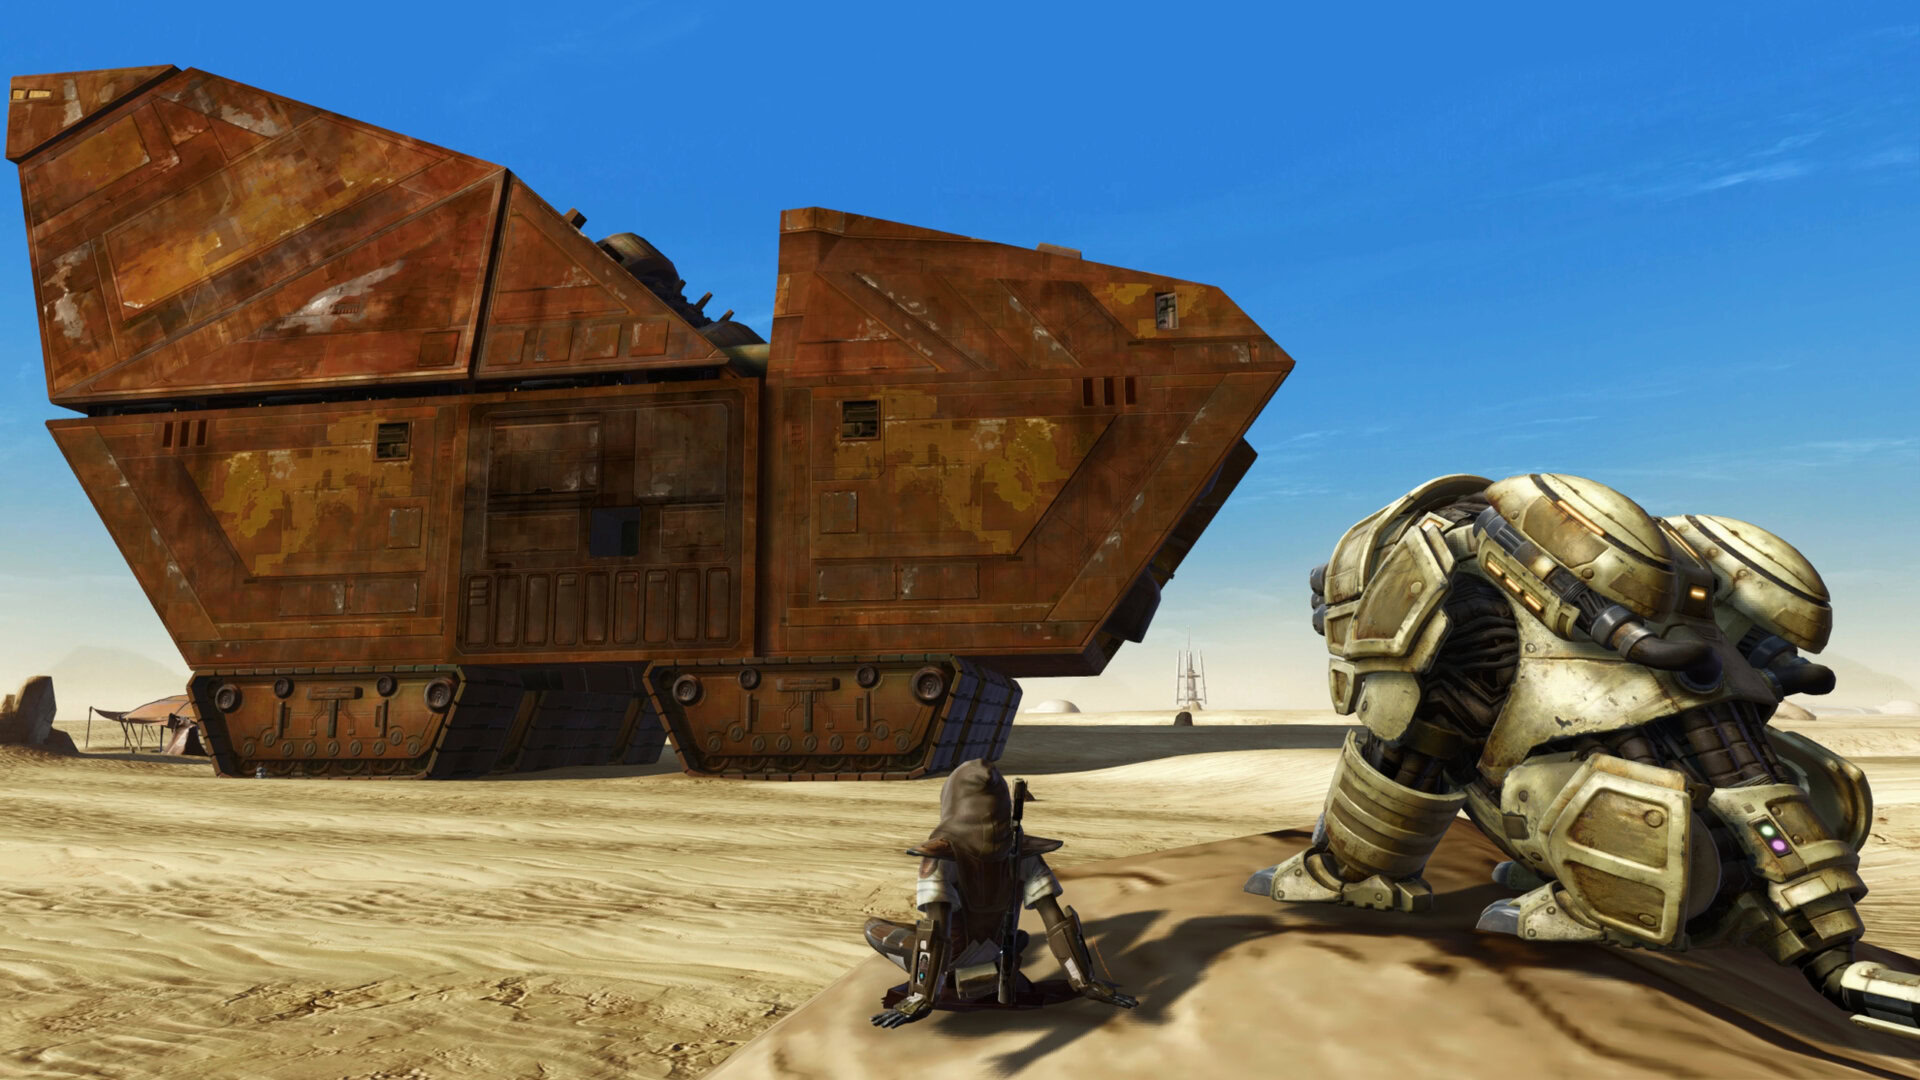
What types of rewards these will be can only be answered in time as we’ll see how the devs tackle them in the future. For our first Venture, we have to train a Basilisk War Droid named B3-S1 to become a full-fledged companion!

How to Start the Basilisk Prototype Venture
This segment of the guide will show you all of the steps you need to complete to unlock the Basilisk Protptype War Droid B3-S1 (or Bessie) in your Legacy.
Complete the Ruhnuk Storyline
To access the Basilisk Prototype Venture, you need to complete the Ruhnuk storyline. The story starts with the mission “A Rock and a Hard Place”. Upon completion of the chain arc, you’ll get a holocall from Lane Vizla, Shae Vizla’s cousin.
Ruhnuk’s story is a chain of missions that will also unlock the planet as a daily area after that. The chain is also a part of the main story of SWTOR.

Complete “Showdown’s Wake”
Accept the call from Rass Ordo to start the mission “Showdown’s Wake“. Visit Lane Vizla on Ruhnuk and agree to help her. The mission includes the following objectives:
- Speak to Lane Vizla
- Recover a Hidden Chain Access Card
- Decrypt Infrastructure Data
- Access the Primary Control Terminal
- Defeat Arla Ha’rangir
- Return to Lane Vizla
Complete “Iron Beast”
This mission involves a bit more busy work for Lane and doing errands for her on Ruhnuk. While assisting her, you will end up in a Hidden Warehouse where you will find Kur Ha’rangir and a bunch of old Basilisk War Droids in one of the rooms. The mission objectives are as follows:
- Collect Mining Data from Excavation Site
- Answer your Personal Holocom
- Check the last knogn coordinates of Lane’s forces
- Defeat the Ambush
- Search for Clues
- Search coordinates found on Clan Ha’rangir Datapad
- Recover Intel from Clan Ha’rangir Commander
- Transmit the recorded data to Lane Vizla
- Scan the Excavation site for clues
- Install three Data Spikes
- Investigate the Hidden Warehouse
- Defeat the Warehouse guards
- Free the Mandalorians
- Access the Primary control terminal
- Defeat the Ambush and get Basilisk War Droids online
- Open the Warehouse door
- Defeat Kur Ha’rangir’s War Droid
- Return to Lane Vizla
Complete “Taylir Gra’tua”
This is the mission where you will find a small Basilisk Prototype War Droid and Lane will tell you that she will try to fix it for you. The mission’s objectives are:
- Deploy the Sensor Beacons
- Answer your personal Holocom
- Track Kur Ha’rangir
- Investigate the Laboratory
- Defeat Kur and his Basilisk Droids
- Speak to Lane Vizla
During your mission, you’ll get the mission “Small Victories” where you’ll watch a cutscene with Lane explaining how she plans to repair the recovered Basilisk droid.
Complete the “Chains in the Dark” storyline
Next you’ll need to start the “Chains in the Dark” story. This mission chain is also part of the main story of the game and will take you to Kessan’s Landing on Ord Mantel. The starter mission is called “Road to Nowhere“.

Complete “Small Victories”
There may be some slight delays between missions here. Give it some time. Log out and log back into the game. Check your mailbox in-game too for updates from Lane Vizla.
Lane will contact you via your Holocom and will update you on her progress with the Basilisk Prototype. This is a small conversation-only mission. After that you can relog again to try and force an update to continue.
Complete “Eyes on the Prize”
Lane designs a plan to use the infamous Eye of G0-T0 to force a meeting with The Curator. This mission will send you on an adventure across the entire galaxy from Ruhnuk to Mek-Sha, to Dantooine, to Ord Mantell and back on Ruhnuk.
- Recover a Disruptor Array
- Attune the Disruptor to Probr Droids
- Retrieve a Probe Droid Optical Sensor
- Retrieve Certificate from Lane’s contact on Mek-Sha
- Retrieve Uniform from Lane’s contact on Dantooine
- Bring the collected materials to Lane on Ruhnuk
- Deliver the Forgery to The Curator on Kessan’s Landing
- Leave The Curator’s Bunker and Answer your Holocom
Complete “The Memory Heist”
Right after it, is a mission called “The Memory Heist“. You must recover a Memory Core from an HK-24 unit on Belsavis using a gonk droid.
This mission can be a bit tricky to complete. You will find yourself in a prizon on Belsavis (naturally…) where you have to use a mouse droid to reach the chasis of the old HK-24 droid unit.
Navigate with the mouse droid through the ventilation pipes. Zap the big droid and force it to blow up the crates blocking one of the vent entrances. When you reach the HK-24 unit, stand on the vents to build up the pressure.
After a few seconds, the pipes will explode, and you will be able to get the memory core from the chassis of the droid. Bring it back to Lane Vizla on Ruhnuk.
Complete “A Few Modifications”
This will start a new mission called “A Few Modifications”. Complete it to be able to unlock the Basilisk Protrotype window in your Legacy and start training the Basilisk droid companion B3-S1. Bessie is desperate for your attention!
In your Legacy panel, click “Ventures” on the left menu and you’ll find a red, blocked schematic of the Basilisk droid. It’ll tell you the requirements for starting the Venture.
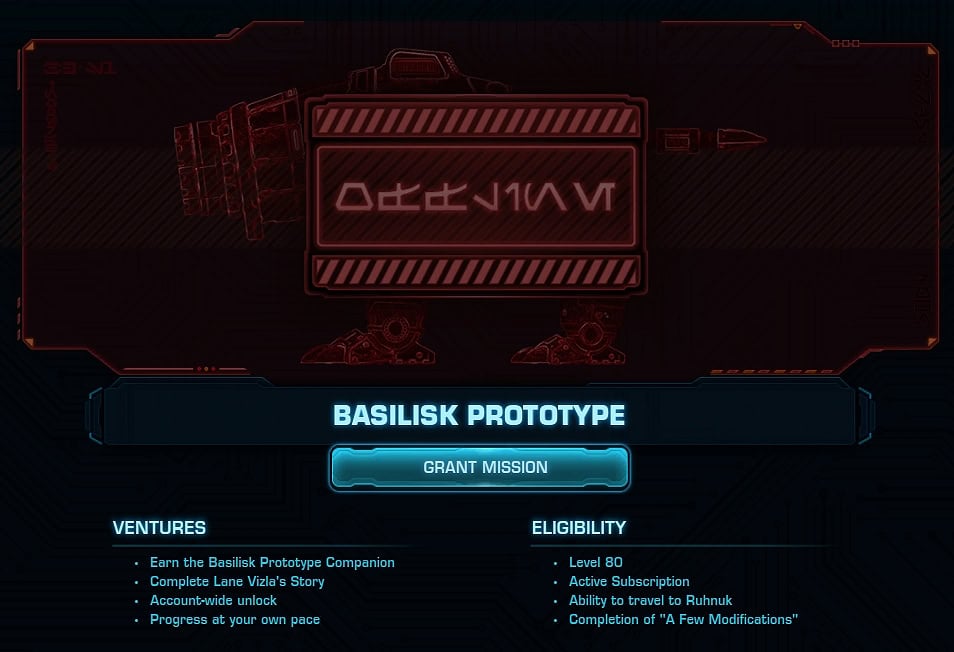
Once you’re ready and able, click Grant Mission to get a holocall from Lane. Now it’s time to start working on this droid!
How to Start the Basilisk Prototype Venture: Step-By-Step Summary

This is a quick step-by-step summary of every mission you have to complete on your way to unlocking B3-S1, the Basilisk Protptype War Droid companion, available through the SWTOR Ventures system.
Instructions
- Complete the Ruhnuk Story.
The Ruhnuk storylyne starts with the mission "A Rock and a Hard Place". Finishing this quest chain will also unlock the Daily Area on Ruhnuk. - Complete Showdown's Wake.
Shortly after you complete the Ruhnuk story, you will get a holocall from Rass Ordo asking you to assist Lane Vizla. Agree and help her with the missions she gives you. - Complete Iron Beast.
While assisting Lane with some errangs and generally doing busy work for her, you will end up in a Warehouse full of old Basilisk War Droids. - Complete Tylir Gra'tua.
Track Kur Ha'rangir for Lane. At the end of the mission you will discover a small version of a Basilisk Prototype War Droid. When this mission ends, you may have to wait a bit for Lane to contact you again. You can try relogging to force an update. - Complete Small Victories.
Lane Vizla will contact you via a Holocom to give you a progress update on how the work on the prototype is going, followed by another silence. Try relogging again to force an update. - Complete the "Chains in the Dark" story on Kessan's Landing.
Completing this mission chain will unlock Kessan's Landing daily area and all of its additional content for you. - Complete Eyes on the Prize.
Help Lane by using a forged version of the infamous Eye of G0-T0 as a bait to force a meeting with The Curator. You will have to literally travel the Galaxy during this mission obtaining items from various planets including Mek-Sha, Dantooine, Ord Mantel and Ruhnuk. - Complete The Memory Heist.
You have to find a way to take a Memory Core from an old HK-24 droid located on Belsavis. - Complete A Few Modifications.
This is the final mission before unlocking the Basilist Prototype companion. - Click "Grant Mission" in your Basilist Prototype window.
Open the Legacy Tab. On the right you will see the Ventures menu. Click to open the Basilisk Prototype window and click the button to get the mission started. Now the long process of training and upgrading your companion begins!
Notes
It doesn't matter when you start and complete the chain of missions to unlock the Basilist Prototype venture. This is not tied to an event or time-limited offer. The Ventures system is available all the time, whenever you are ready for it. The requirements for it are always the same:
- Be level 80
- Have an Active Subscription
- Be able to travel to Ruhnuk
- Have the mission "A Few Modifications" completed.
B3-S1 is a Legacy-shared companion, and her progress is also shared with your entire Legacy.
How to Repair and Train the B3-S1 Droid Companion
Despite being a droid, B3-S1 can’t be simply programmed to be proficient in various forms of combat. She has to learn more organically through first-hand experience.
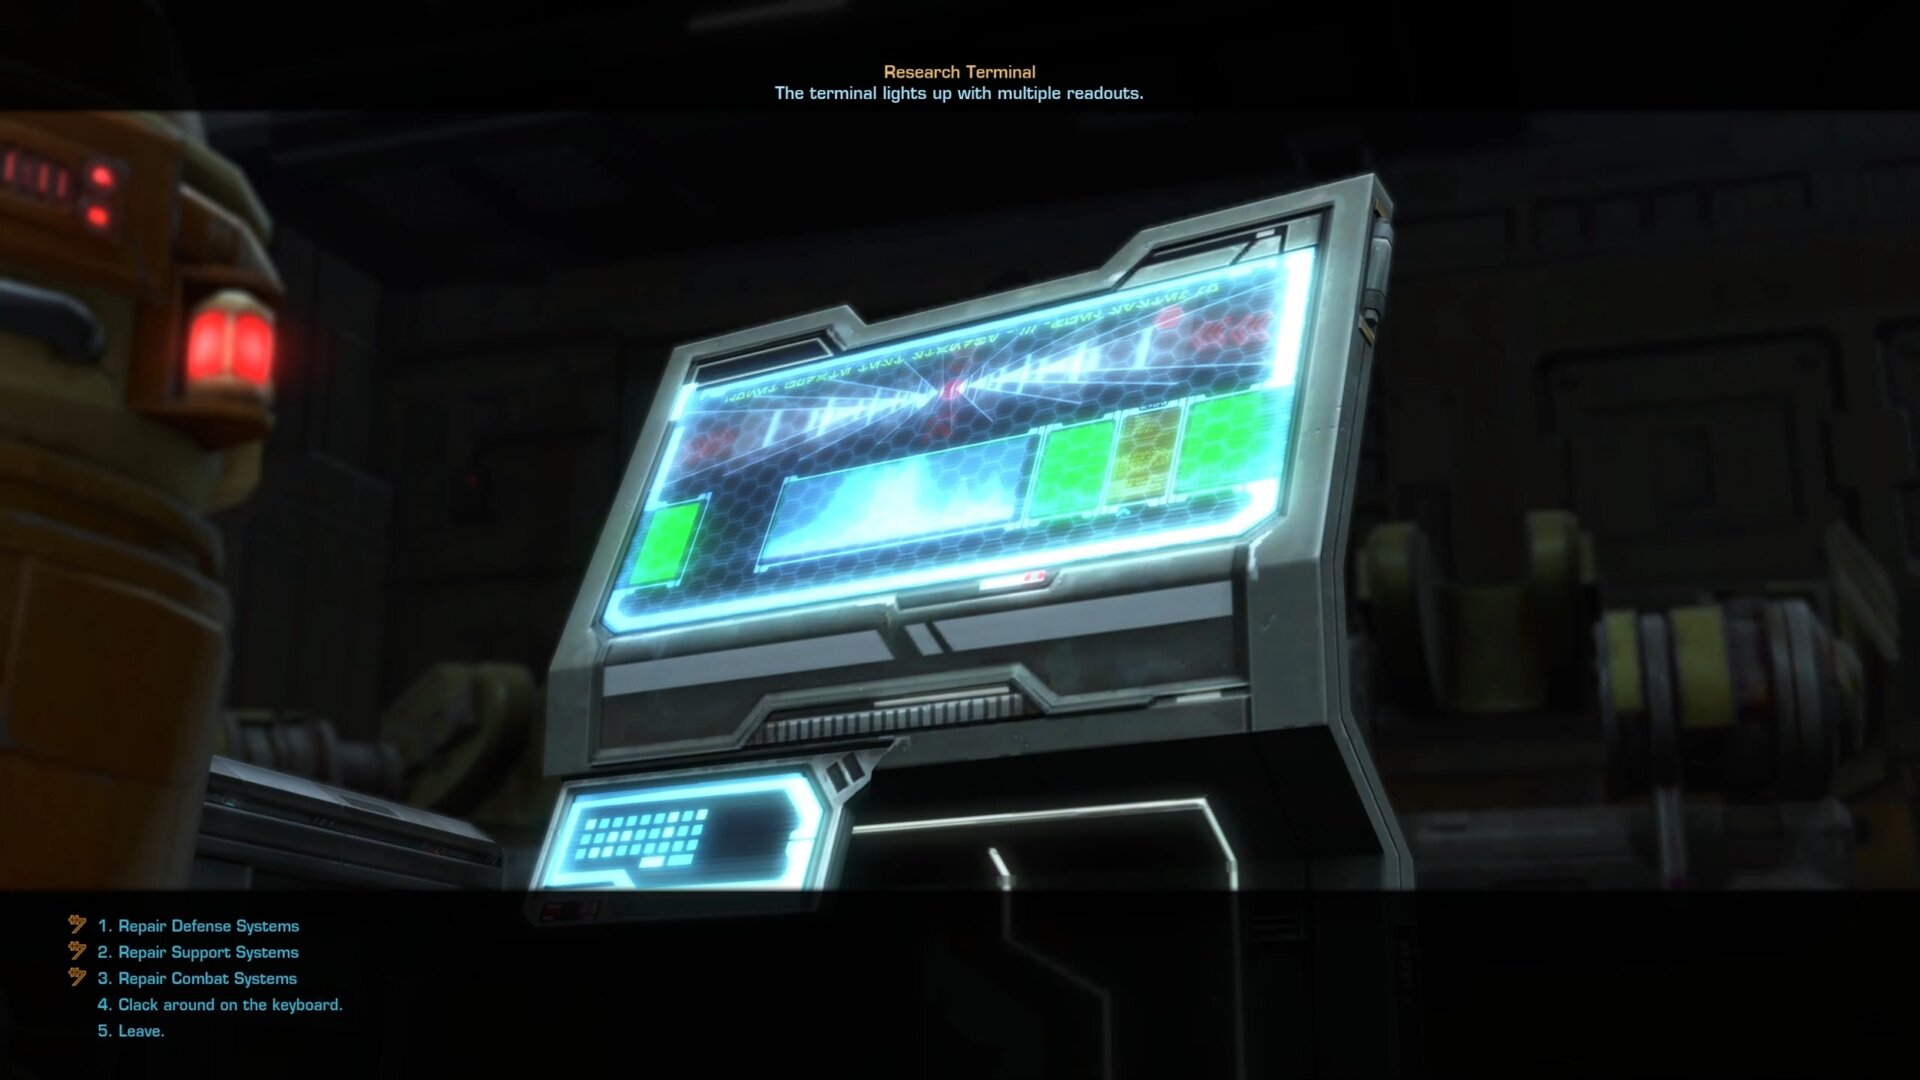
B3-S1 will only have one ability whether she’s set to Combate (DPS), Defense (Tank), or Support (Healing) modes when she’s first starting out. To grant her more abilities, you’ll need to level her up by increasing her repair levels. You can do this by using the terminal in Lane’s lab at the earlier levels of repair.
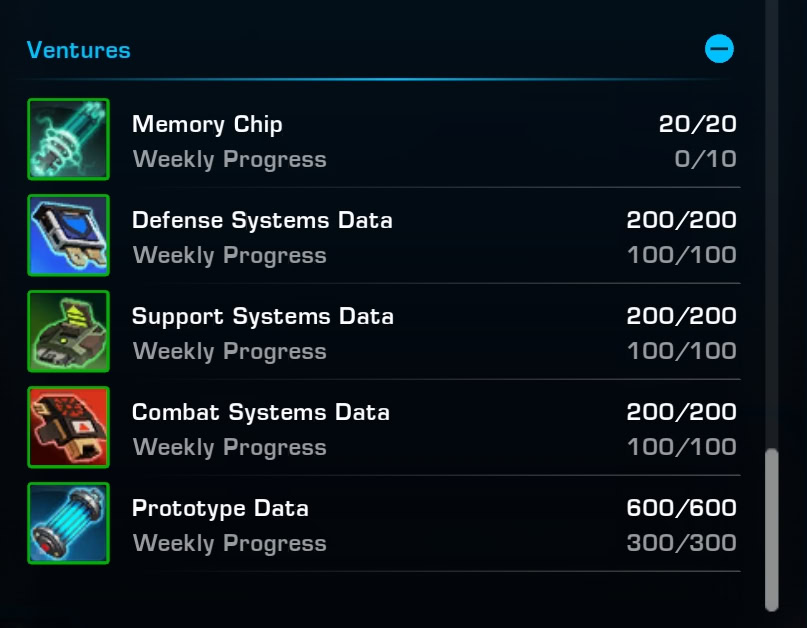
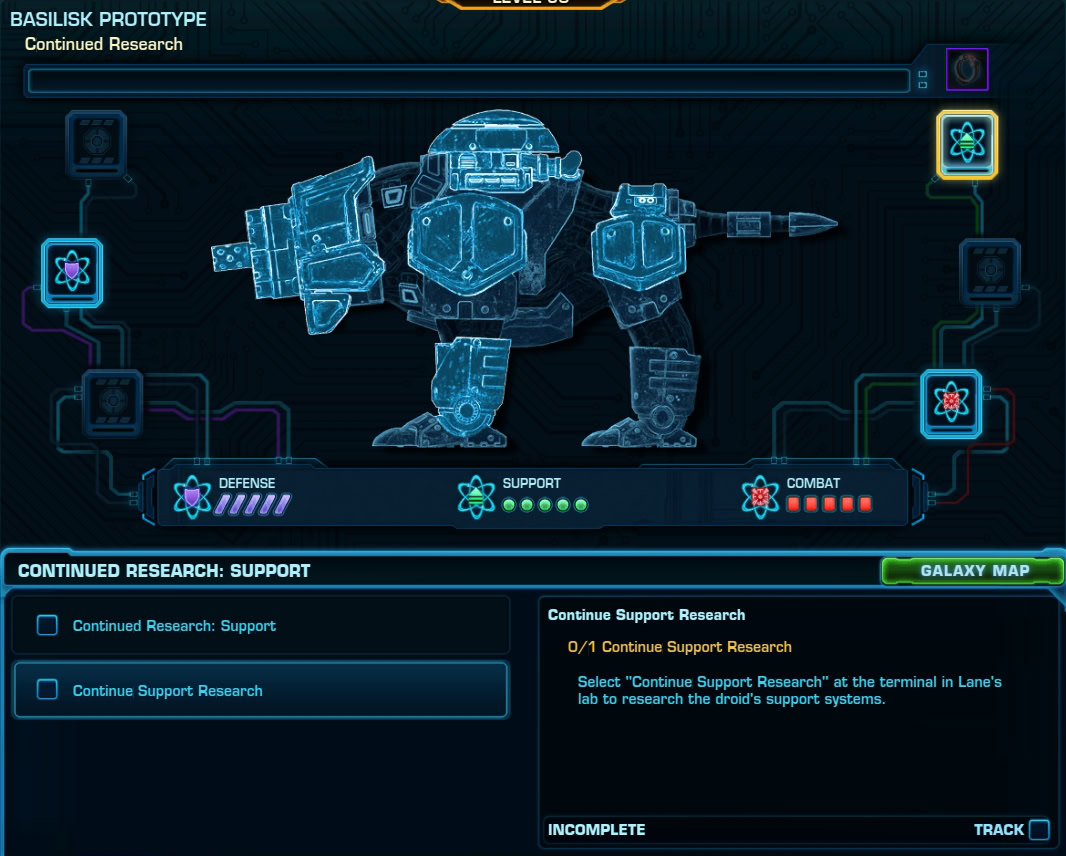
You can track your progress at any time through your Legacy Window. Go to Ventures and select Basilisk Prototype. You’ll find a page with your current levels in Combat, Defense, and support.
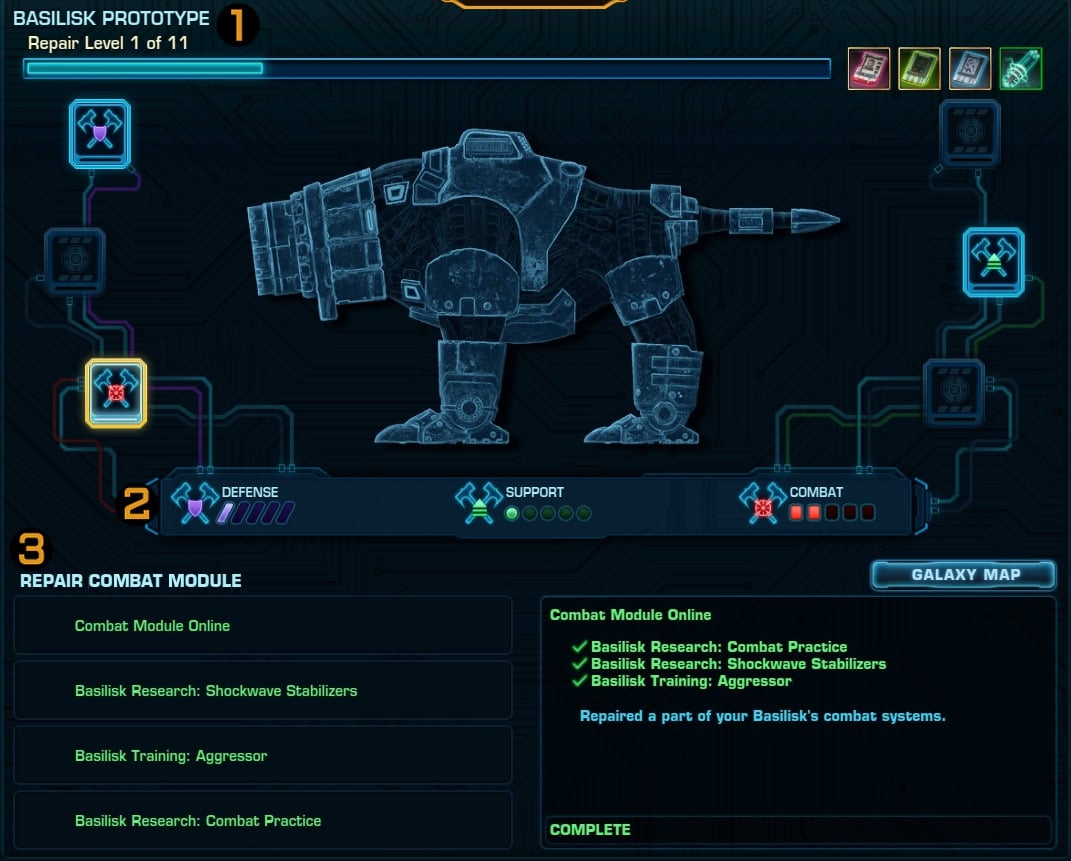
Here is an explanation for each segment of this window – what it shows and how to use the Basilisk Prototype’s UI:
- At the top you can track your Repair Level progress. To the right of the bar you’ll find icons of items related to the venture. In this case, the items Training Modules and Memory Chips.
- In the middle of the window, you’ll see your current progress with B3-S1’s training levels for Defense, Support, and Combat. For each pip that’s lit up, B3-S1 unlocked another ability for that mode. In the diagram, there are empty circuits, though what purpose these serve has yet to be seen. Stay tuned for updates.
- At the bottom of the window, you’ll find Venture objectives to aid B3-S1’s training. Click the Defense, Support, or Combat Modules at the diagram to find different objectives to complete. These include using abilities for each 25 times, completing a training module, researching new upgrades, and performing repairs.
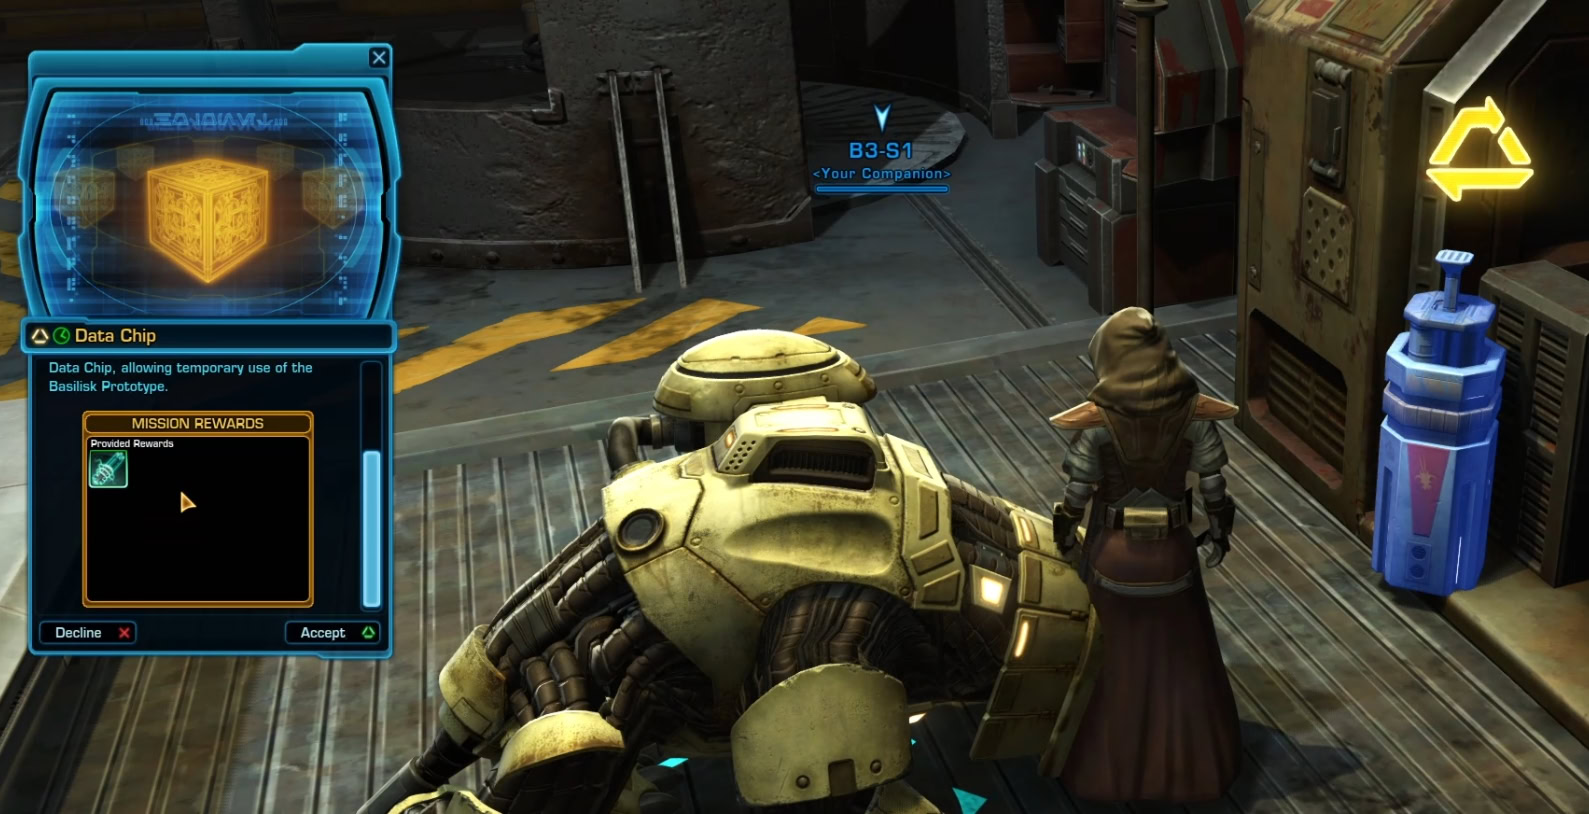
After talking to Lane Vizla, you’ll get some items in your inventory. These will be Training Modules for Combat, Defense, and Support, along with three Data Chips. These are necessary components to train and level up B3-S1.
Training Modules
You’ll gain 3 Training Modules when you start out training B3-S1 with the mission Burc’ya Vaal Burk’yc. Depending on which one you choose to activate will grant you a different mission along the lines of “Combat/Defense/Support Training: Ruhnuk”. You must complete 2 Daily Missions on Ruhnuk for this training mission.
This can be challenging if you’ve grown dependent on companions for combat, so I’d recommend the missions Ani Ara’novor and What’s in the Works.
You can start the first portion of Ani Ara’novor at the Machine Scrapyard then finish the two missions at the Dilapidated Waterworks.
A potentially shorter quest than What’s in the Works you can do in the same area is Ruhnuk Rarebit. This only applies if the creatures aren’t being farmed by others also trying to complete their two missions.
After you finish the tutorial portion of this venture, future Training Modules might not be on Ruhnuk but on other planets instead. There you’ll have to complete dailies on those other planets for B3-S1’s training. Make good use of your time as you only have 1 hour to train her for every use of a Data Chip.
Data Chips (Currency)
Data Chips will appear in your Currency Tab in your Inventory. These are required to take B3-S1 out for training as she’s unstable, these will stabilize her for an hour. You can gain 10 Data Chips per week and hold a maximum of 20.
If you run out of Data Chips, there’s a canister in Lane’s Lab that you can use to get a daily Data Chip. Interact with it to gain the Data Chip mission for 1 Data Chip. As this is a Legacy currency, you can repeat this on multiple characters to get up to 10 Data Chips per week.
Collected Research
Whenever you complete a venture for Combat, Defense, or Support, you’ll get the Collected Research: Combat/Defense/Support item. Using this item will award you with 30 Prototype Data, 30 Systems Data (the type depends on the Training Module used), and 1 Data Chip.
These items will go into your Currency Tab in your Inventory. Keep in mind that the Prototype Data and Systems Data are not Legacy-bound and will be limited to the character you earned them on.
You can use these currencies at the terminal near Lane to repair B3-S1. Repairing B3-S1 this way will grant her a new ability for the chosen mode when you complete the current Venture objectives for the selected upgrade.
You’ll need specific Systems Data to repair certain modes, though all repairs require the Prototype Data. Repairing B3-S1 at the terminal also counts towards one of your Venture Objectives seen in the Legacy Window.
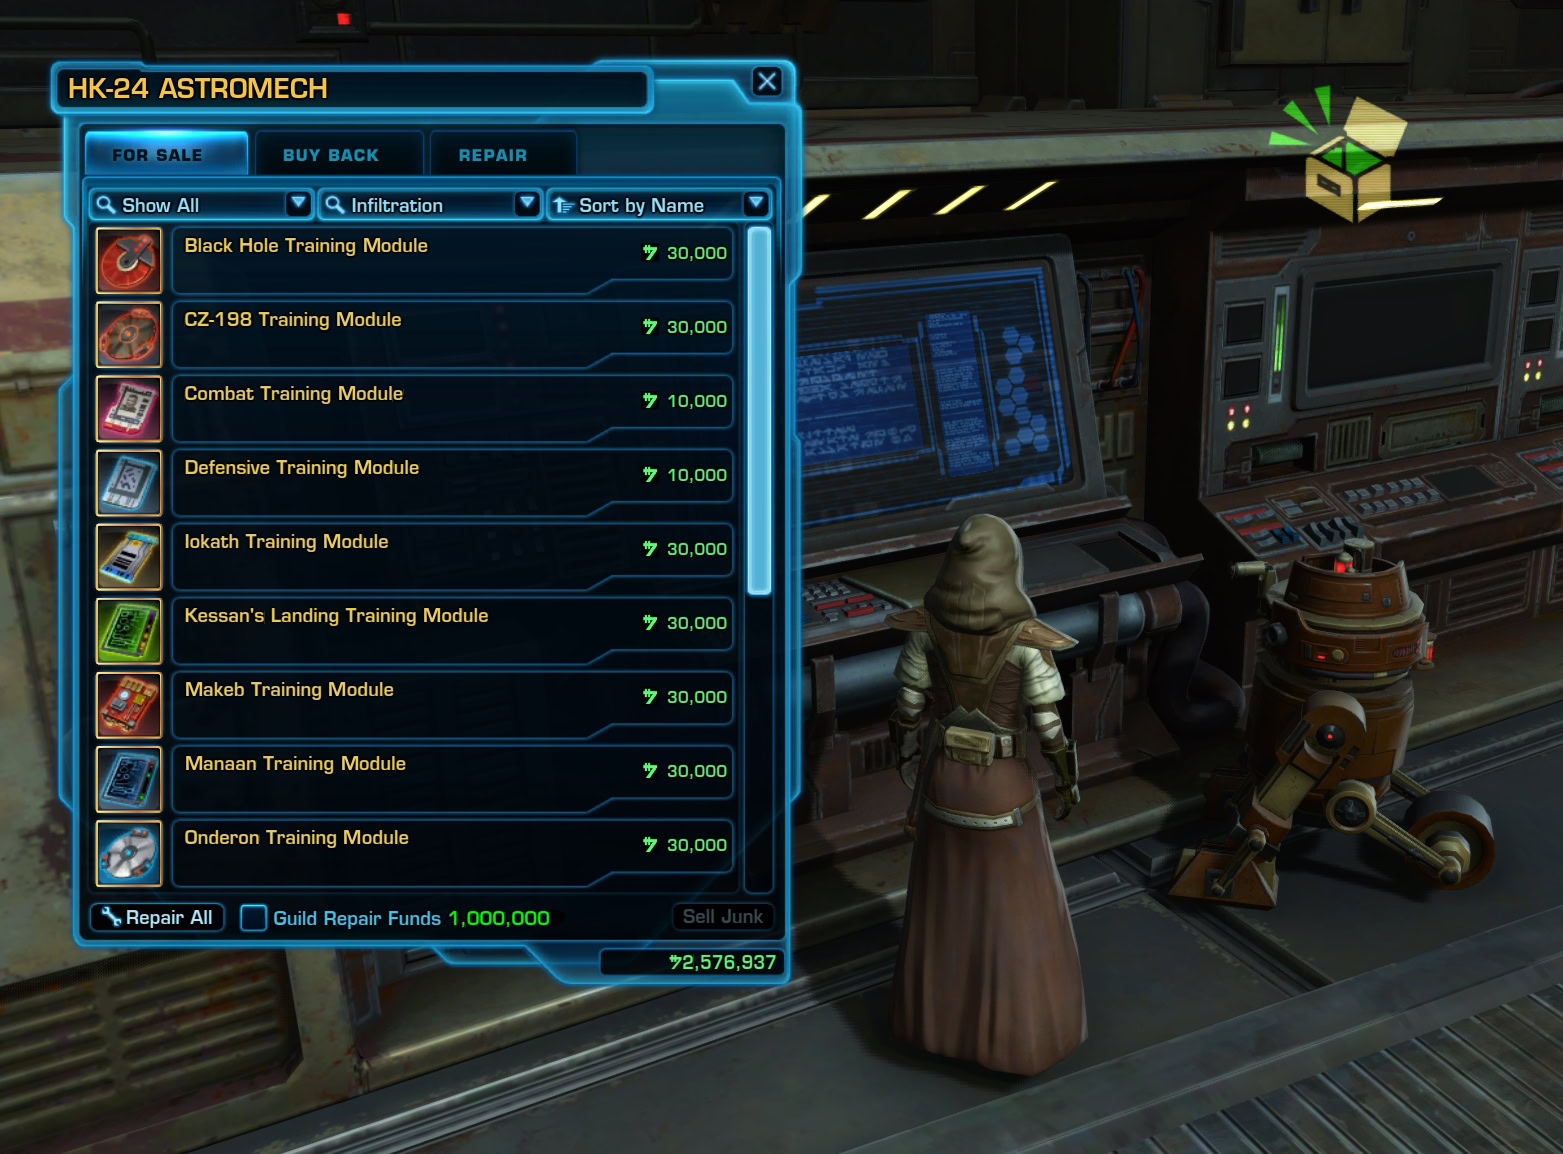
HK-24 Astromech
You can talk to the HK-24 Astromech to purchase Training Modules. You can get specific modules for Combat, Defensive, or Support Training for 12 Prototype Data. Alternatively, you can use 10 Combat/Defense/Support Systems Data to get a random Training Module.
As of patch 7.5b, you can purchase Area-Specific Training Modules for 30 Prototype Data. This is useful for Repair Levels 5 and above as you’ll need to train B3-S1 in specific areas for those levels. The HK-24 Astromech sells the following Area-Specific Training Modules:
- Black Hole Training Module
- CZ-198 Training Module
- Iokath Training Module
- Kessan’s Landing Training Module
- Makeb Training Module
- Manaan Training Module
- Onderon Training Module
- Oricon Training Module
- Ossus Training Module
- Ruhnuk Training Module
- Section X Training Module
- Yavin IV Training Module.
Before purchasing an Area-Specific Training Module you need, try your RNG luck with the random Training Modules you get for using Memory Chips. At Repair Level 5 and beyond, you’ll need a full week’s Prototype Data for upgrades and research. Purchasing even one Area-Specific Module can set you back a week and slow the upgrade process.
B3-S1 Repair Levels
A total of 11 levels of repairs can be done on B3-S1. Different levels of repair can offer more upgrades at the cost of most resources and completing level-specific objectives.
Repair Levels 1-4
At Repair Levels 1-4, B3-S1 will need to use her abilities (not auto-attacks) against opponents a set amount of times.
You’ll also need ![]() Prototype Data and
Prototype Data and ![]() Systems Data to repair her and use a certain amount of
Systems Data to repair her and use a certain amount of ![]()
![]()
![]() Training Modules to increase her repair level.
Training Modules to increase her repair level.
The ability usage requirements will scale but keep in mind, you’ll gain new abilities for B3-S1 as you repair her. It’ll be slow to start but it’ll only get faster and faster and that much easier to accomplish.
You can use training dummies on the fleet or at a stronghold to help B3-S1 use her abilities 25+ times for objectives! For healing ability usage requirements, remove your armor then put it back on so you have missing health, then let her heal you!
You will require the following objectives and resources per upgrade for levels 1-4:
| Repair Level | Ability Usage # | |||
|---|---|---|---|---|
| 1 | 25 | 30 | 30 | 1 |
| 2 | 50 | 50 | 50 | 2 |
| 3 | 100 | 70 | 70 | 3 |
| 4 | 100 | 90 | 90 | 4 |
Repair Levels 5-9
Starting from level 5, you’ll be working to increase the power of B3-S1’s abilities through upgrades.

These upgrades use Prototype Data ![]() and Systems Data
and Systems Data ![]() . When you upgrade B3-S1’s abilities, her progress pips in the Legacy Window will reset to reflect her current progress with upgrades.
. When you upgrade B3-S1’s abilities, her progress pips in the Legacy Window will reset to reflect her current progress with upgrades.
The icon of the two hammers behind the shield/target/green icons will be replaced by an up-arrow when you’re working on her ability upgrades.
The previously blank slots in the Legacy Venture window will now be filled with Area-Specific Objectives. Meanwhile, the Tank/DPS/Heal icons will display if you’ve researched and upgraded B3-S1’s abilities.
Instead of using her abilities a set amount of times, you’ll have three new objectives to further increase her repair level. These three new objectives will require the following to progress the level:
- Complete 5 Area-Specific
 Training Modules for each of the repair level’s areas.
 - Collect 10 Area-Specific Data Fragments for each of the repair level’s areas by defeating enemies in those areas with B3-S1 as your active companion.
- Upload Area-Specific Research at the terminal by submitting 50 Prototype Data and 50 Systems Data.
 Data Fragments for each of the repair level’s areas by defeating enemies in those areas with B3-S1 as your active companion.
Store any Training Modules you don’t need in your Cargo Hold, you will likely need them for future levels to upgrade B3-S1. You might have to use some of them if you’re trying to hit the weekly resource cap. Unfortunately, we are all at the mercy of RNG so the Training Modules we earn or buy may not grant us what we need for the specific areas required.
You will require the following objectives and resources for levels 5-9:
| Repair Level | Area Research Locations | Training Modules Completed Per Area | Data Fragments Per Area | ||
|---|---|---|---|---|---|
| 5 | CZ-198, Iokath, The Black Hole (Corellia) | 5 | 10 | 300 | 100 Defense, Combat, and Support Data. |
| 6 | Onderon, Oricon, Ruhnuk | 5 | 10 | 300 | 100 Defense, Combat, and Support Data. |
| 7* | – | – | – | – | – |
| 8 | Kessan’s Landing, Ossus, Yavin IV | 5 | 10 | 300 | 100 Defense, Combat, and Support Data. |
| 9 | Makeb, Manaan, Section X | 5 | 10 | 300 | 100 Defense, Combat, and Support Data. |
Repair Level 7 Mission: Missing Parts
When you reach Repair Level 7, you’ll be unable to continue progress with B3-S1’s repairs via training modules. You’ll need to talk to Lane Vizla to start a cutscene where you’ll learn that B3-S1 is in need of repairs to her memory circuits. The HK-24 Astromech will send you to Belsavis to track down a Droid Hunter.

Go to Belsavis and Quick Travel to “The Tomb”. There are two caves you’ll need to visit here, one at the very northern tip of The Tomb, and another on the east wall of the Signal Monitoring Center area. You’ll need to collect a Combat Droid Plasma Stabilizer from a Combat Droid, a Watcher Droid Sensor Core from a Watcher Droid, and 5 Primeval Droid Parts you can get from any defeated Primeval Droid in these caves.
Once you gather the droid parts, you’ll need to lure out the Droid Hunter by placing the droid parts on the rocky bridge in the lava cave. After defeating and looting the hunter, you’ll need to Decode the Navigation Module to learn 3 potential locations for the Droid Hunter’s Caches. I’m unsure if the exact cache is randomized, but I found the proper cache at the southern location.
After finding the cache, you can return to Lane Vizla on Ruhnuk to fix up B3-S1’s memory circuits. You can continue progressing with Repair Level 8 by using Training Modules for Kessan’s Landing, Ossus, and Yavin IV. That’s right, this mission counts as completing Repair Level 7!
Repair Levels 10
Once you start level 10, you’ll no longer be required to complete 5 Training Modules in pre-selected daily areas. At level 10, you’ll be going back to using B3-S1’s abilities multiple times. Don’t let the numbers scare you, this can easily be done during normal combat or against training dummies like before with levels 1-4.
You will require the following objectives and resources per upgrade for level 10:
| Repair Level | Ability Usage # | |||
|---|---|---|---|---|
| 10 | 500 | 150 | 150 | 5 |
Upon completing level 10, you will have unlocked B3-S1 at her full potential. You’ll need to speak with Lane in her lab for one final cutscene and B3-S1 will be all yours! She will receive a second bump on her back to indicate she’s complete.

After completing level 10, the HK-24 Astromech will now sell the Training Modules for credits instead of Systems Data. Random Training Modules cost 5,000 credits, Combat/Defense/Support Modules cost 10,000 credits, and area-specific training modules cost 30,000 credits.
Repair Level 11
When you start Repair Level 11, you’ll only need to complete “Continue Defense Research”, “Continue Combat Research”, and “Continue Support Research” to finish this level. You’ll need to turn in more Systems Data and Prototype Data at the terminal in Lane’s lab to earn the Basilisk Prototype Customization 1 for B3-S1.
Each research option will require 200 Systems Data and 300 Prototype Data. Keep in mind that this covers Combat, Defense, and Support, so you’ll need 200 of each and 900 Prototype Data total to complete this level. Take it one upgrade at a time and you’ll make it eventually. Chances are it’ll take another 3 weeks to complete level 11. At least this is just for a cosmetic option as a bonus instead of necessary upgrades.
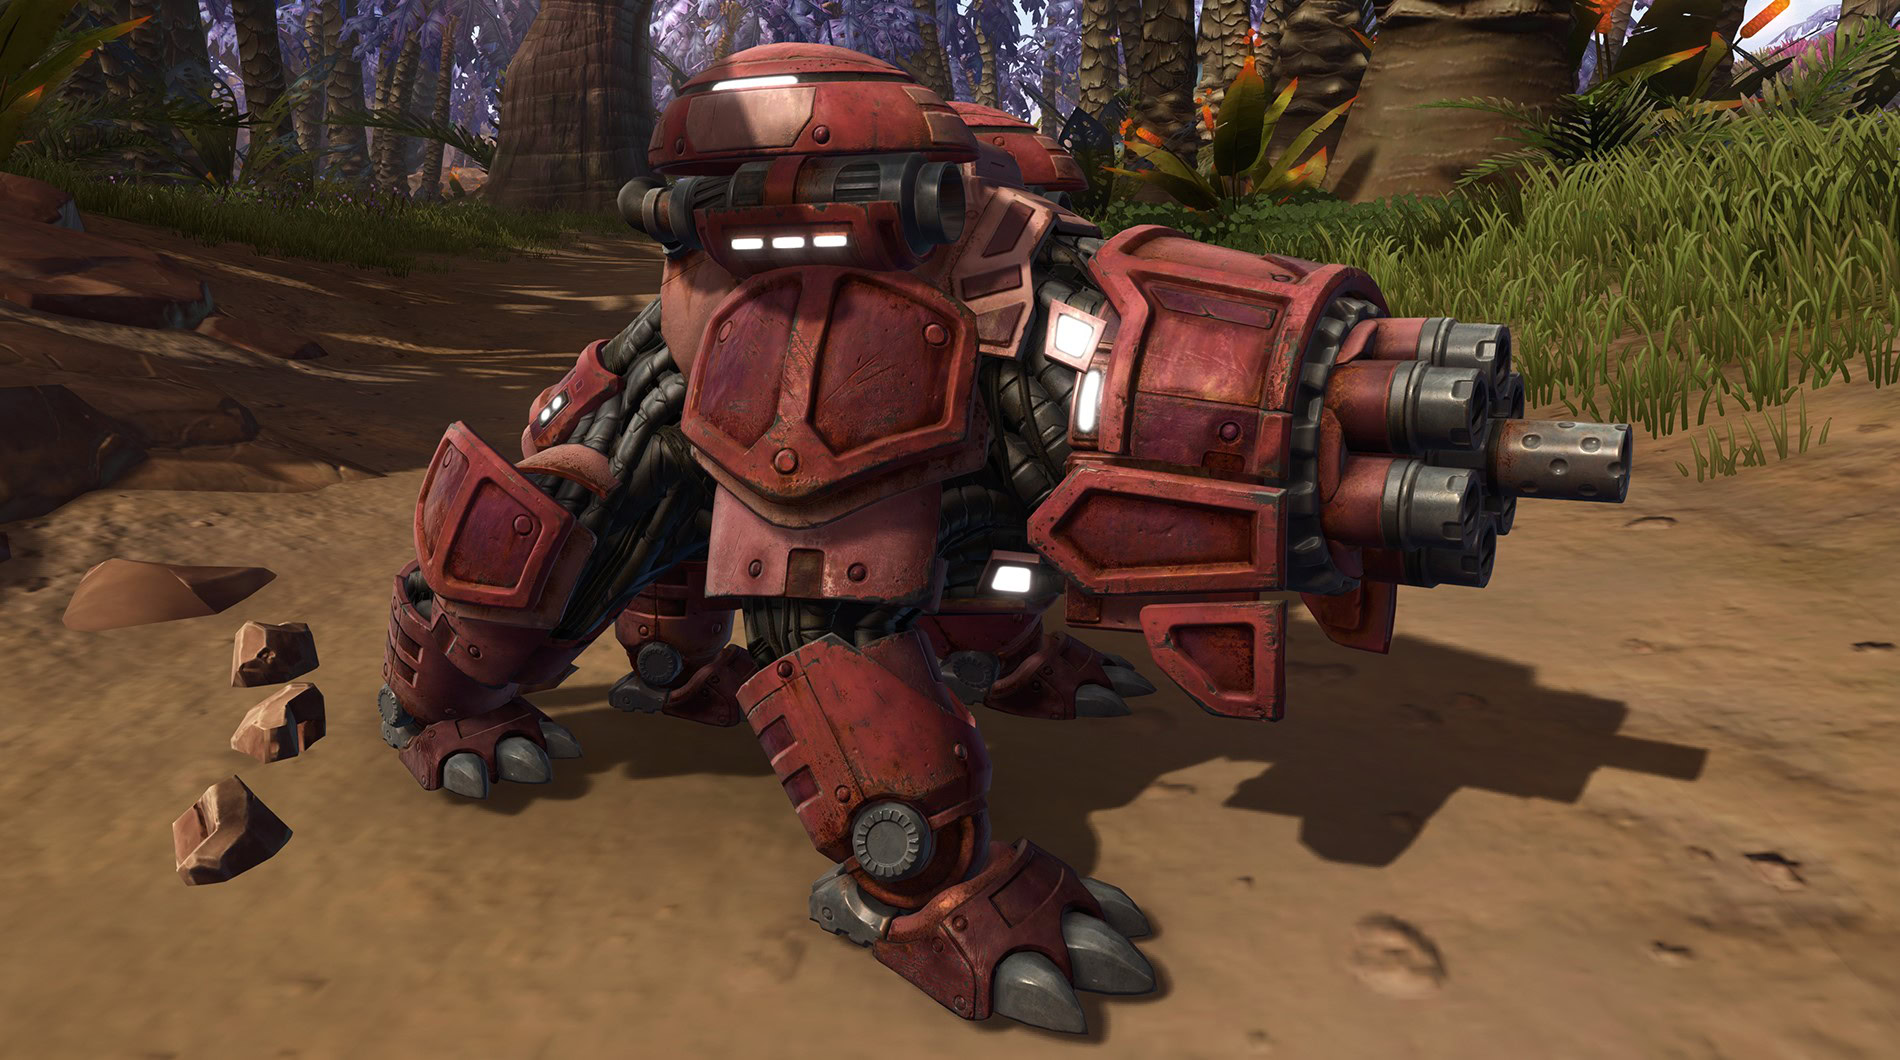
Once you complete level 11, you’ll complete the venture and gain the Basilisk Prototype Customization 1 for B3-S1! This will give her a more aged and battle-worn with gray and orange tones. Once unlocked, you can get copies of this from the Collections window and unlock it for your legacy for 10 Cartel Coins.

Fastest Dailies to Complete
The following missions were selected as they were the fastest to complete, if they were very close to one another on the map, or offered the path of least resistance (Makeb and Iokath).
Due to the nature of faction-specific missions, Republic or Imperial characters may be able to gain access to easier missions than their counterparts. Any pair of missions with (Stealth) are faster to complete for stealth characters such as Shadows | Assassins and Scoundrels | Operatives.
Fastest Dailies by Planet in Table Format
| Planet | Republic Missions | Empire Missions |
|---|---|---|
 Corellia The Black Hole | • Criminal Crackdown • Stolen Victory | • Asset Liquidation • No Trace Left |
 CZ-198 | • Manual Shutdown • Workforce Reduction • Anti-Toxin Recovery (Stealth) • Off Message (Stealth) | • Droid Demolition • Staff Cuts • Anti-Toxin Acquisition (Stealth) • Off Message (Stealth) |
 Iokath | • Clearing the Path • Disarm | • Disarm • Taking Care of the Caretakers |
 Ord Mantell Kessan’s Landing | • Grateful Grazers • Turn the Lights On | • Everything Must Go • Short Circuiting |
 Makeb | • Counterstrike • Too Close to Home | • Clean Bill of Health • Inciting Incident |
 Manaan Invasion Zone | • Kolto Enrichment Lab Process • Preserving History | • Amateur Archaeology • Kolto Enrichment Lab Process |
 Onderon | • Blinding the Enemy • Cleaning Up the Streets | • Rooftop Rumble • To Catch a Killer |
 Oricon | • Fallen Forces • Oricon Decimation | • Fallen Forces • Oricon Decimation |
 Ossus | • Firestorm • Perimeter Protection | • Blazing Fury • Silencing the Guns |
 Ruhnuk | • Ani Ara’novor • What’s in the Works? | • Ani Ara’novor • What’s in the Works? |
 Belsavis Section X | • Bio-Reform • Imminent Threat | • Hyperbiology • Targeted Misfire |
 Yavin IV | • Chopping Block • Confederacy | • Chopping Block • Confederacy |
As of 7.6.1, you can also get Training Modules for Hoth and Tatooine and earn progress with Dynamic Encounters.
B3-S1’s Abilities
As you conduct more repairs on B3-S1, you’ll unlock more of her abilities and slowly unleash her full potential.
Combat Mode (DPS) Abilities
| Ability # | Ability Name | Ability Description | Unlocked At | Upgraded At |
|---|---|---|---|---|
| 1 | Shockwave Generator | A powerful blast dealt to a single target, dealing weapon damage. | Default | Level 5 |
| 2 | Shatter Missile | Shatters on impact, dealing weapon damage over a 10 second duration and causing the target to become sundered. Sundered targets have their armor reduced by 20% for X seconds. | Level 1 | Level 6 |
| 3 |  Pulse-Wave Cannon | Fires a powerful blast at target with less than 30% health, dealing X weapon damage. | Level 2 | Level 8 |
| 4 |  Concussion Missile | Fires a concussion missile, stunning the target for 4 seconds. | Level 3 | Level 9 |
| 5 |  Sub-Orbital Strike | Rains death from above, firing a volley from the Basilisk Prototype’s weapon systems, hitting all hostiles within 4 meters around the enemy target dealing X weapon damage to up to 5 targets over 1.5 seconds. | Level 4 | Level 10 |
Defensive Mode (Tank) Abilities
| Ability # | Ability Name | Ability Description | Unlocked At | Upgraded At |
|---|---|---|---|---|
| 1 | High-Boost Charge | Charges or strikes the target, dealing weapon damage, heals for 50% of the damage dealt and generates a moderate amount of threat. | Default | Level 5 |
| 2 | Reactive Plating | Taunts the target, forcing it to attack the companion for X seconds. Also reinforces the companion, absorbing Y damage. | Level 1 | Level 6 |
| 3 |  Flare Mortar | Fires a barrage of flares, taunting attacking enemies and forcing them to attack your companion for 4 seconds. Generates a moderate amount of threat. | Level 2 | Level 8 |
| 4 |  Overcharge Boosters | B3-S1 removes the limiters on its high-boost engines and deals X kinetic damage to up to 5 enemies 5 meters around it. Generates a moderate amount of threat and reduces incoming damage by 40% for 8 seconds. Does not hit sleeping, lifted, or incapacitated targets. | Level 4 | Level 10 |
| 5 |  Grapple Cannon | Fires a dual-grapple line that fires in a wide cone in front of the companion and pulls the closest two targets and generates a high amount of threat. Only affects targets that are in combat and are not in cover or have Boss Immunity. | Level 3 | Level 9 |
Support Mode (Heal) Abilities
| Ability # | Ability Name | Ability Description | Unlocked At | Upgraded At |
|---|---|---|---|---|
| 1 | High-Boost Charge | Executes a quick Kolto scan on the target, healing for X. | Default | Level 5 |
| 2 | Kolto Probe | Slowly heals the target for X over Y seconds and cleanses physical and mental effects each time it heals the target. | Level 1 | Level 6 |
| 3 |  Prototype Probe | Deploys a Prototype Probe with 6 charges that lasts up to 3 minutes. When the target is damaged, Prototype Probe loses 1 charge and heals the target for X. This effect cannot occur more than once every 3 seconds. A target may not have more than one Prototype Probe active. | Level 2 | Level 8 |
| 4 |  Kolto Barrage | Heals a friendly target for x over the duration of the channel. | Level 3 | Level 9 |
| 5 |  Concussion Barrage | A barrage of concussion missiles disorients the target for up to 8 seconds. Damage to the target causes this effect to end prematurely. Targets may only be affected by Concussion Barrage once every 30 seconds. Target must not be suffering from periodic damage and have greater than 90% max health | Level 4 | Level 10 |
Achievements
You can find the Basilisk Prototype achievements in Legacy ▶ Ventures ▶ Basilisk Prototype.
| Achievement Name | Requirement | Reward |
|---|---|---|
| Initial Combat Assessment | Complete your first Combat Training Module with B3-S1. | – |
| Initial Support Assessment | Complete your first Support Training Module with B3-S1. | – |
| Initial Defensive Assesment | Complete your first Defense Training Module with B3-S1. | – |
| How to Train B3-S1 | Completed the Venture Mission “Burc’ya Vaal Burk’yc”. | – |
| Required Components | Completed the Venture Mission “Missing Parts”. | – |
| Legacy Preserved | Completed the Venture Mission “Burc’ya Veman”. | – |
| Fully Loaded | Completed All Research on B3-S1 | – |
| Iziz the Place? | Took B3-S1 to see the Jungles of Iziz on Onderon | – |
| The Farm is Real | Took B3-S1 to see the Dantooine countryside | – |
| Big Machine, Little Creatures | Took B3-S1 to see the Sandcrawler on Tatooine | – |
| It’s a Big Galaxy Out There | Took B3-S1 sightseeing across the galaxy | – |
| Speculative Ventures | Complete the mission “Curated Investments” | – |
| Going Dark | Fund the Curator’s Research on Non-Lethal Blaster Applications 4 times | B3-S1 MK II Combat Customization |
| High Polish | Fund the Curator’s Research on a HoloNet Virtual Item Exchange 4 times | B3-S1 MK II Defender Customization |
| If Looks Could Heal | Fund the Curator’s Research on Personality Chip Augmentation 4 times | B3-S1 MK II Support Customization |
| Solid Aurodium | Fund the Curator’s Research on Aurodium Ablation and Reapplication 4 times | B3-S1 MK II Aurodium Plating Customization |
| Wild Brunch | Defeat 1000 enemies with B3-S1 as your active companion while under the effects of Akaba Spice Fizz | – |
Secret Achievements
There are 5 Secret Achievements, 4 of which involve taking B3-S1 sightseeing to specific locations on Onderon, Dantooine, and Tatooine. The fifth achievement is new and associated with the Curator’s Research.
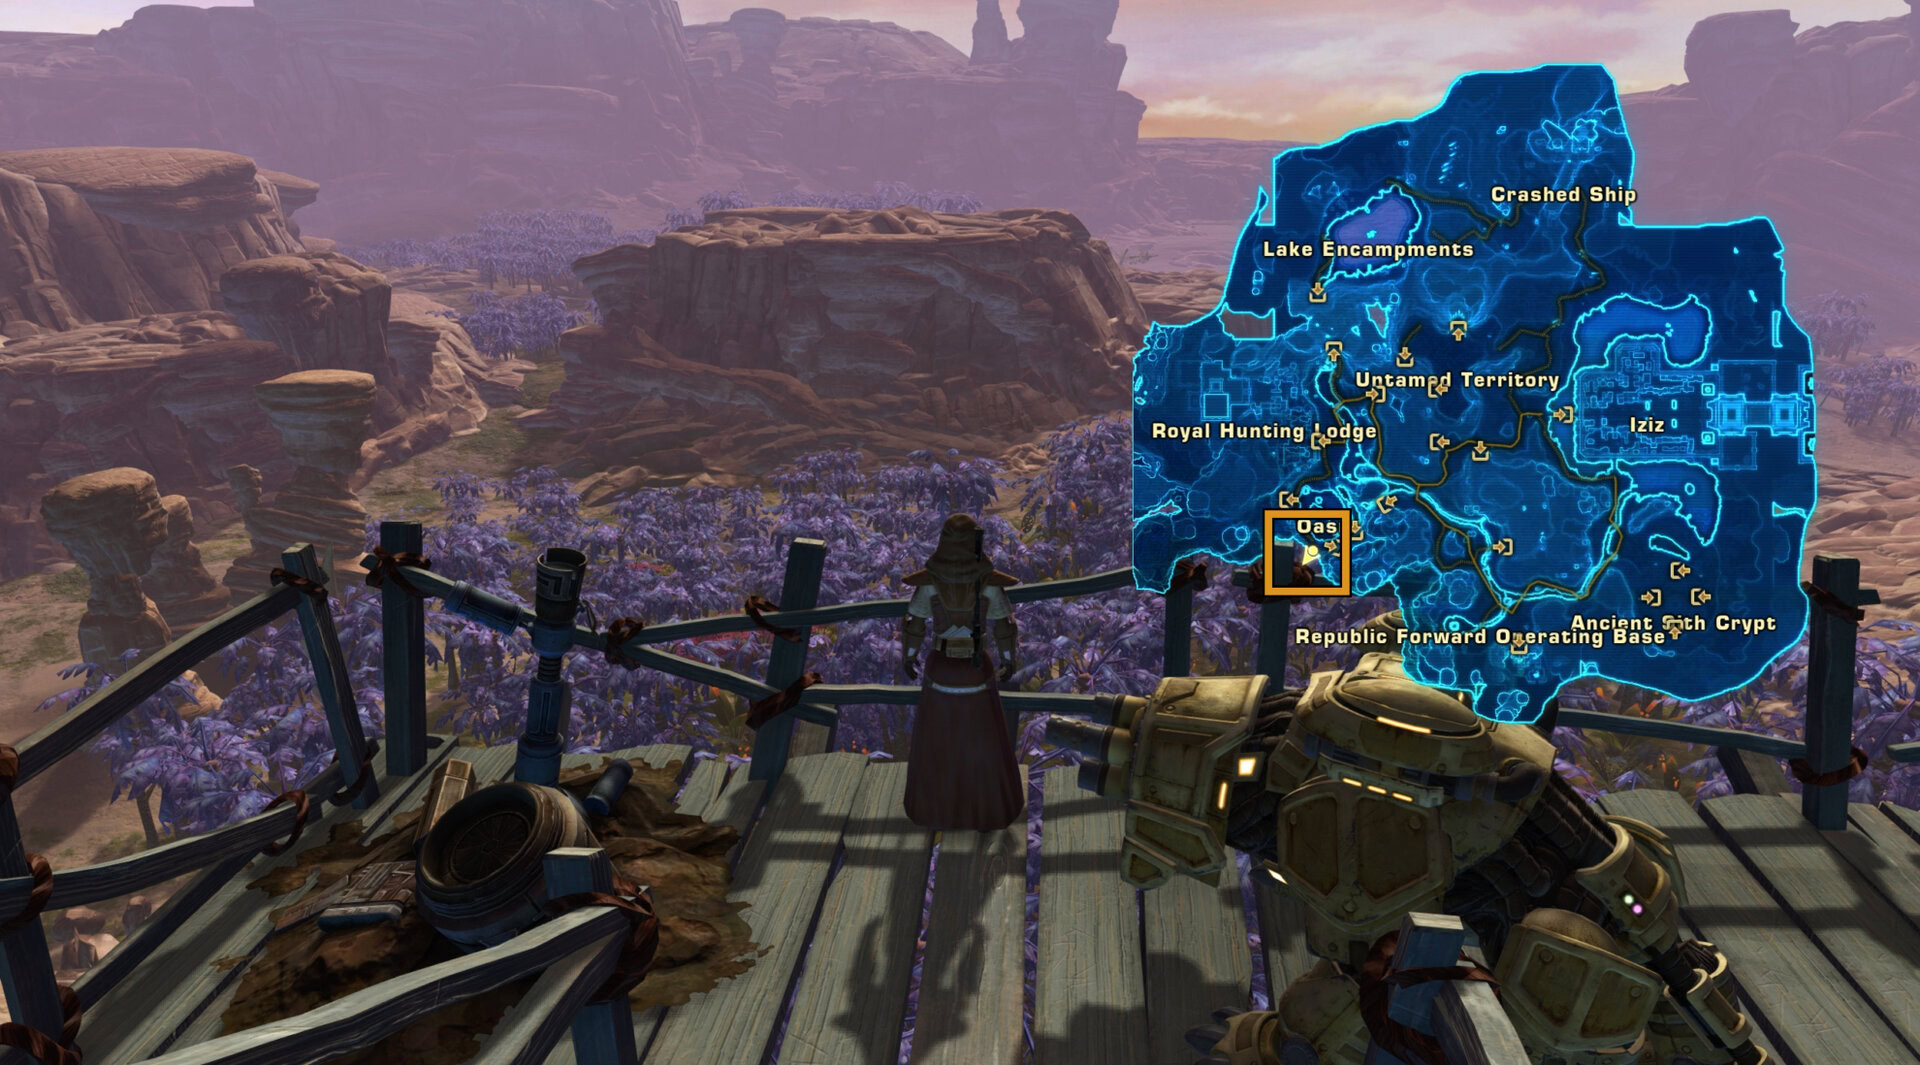
Iziz the Place?
Take B3-S1 to Onderon and head to the Oasis on the Southwest part of the map, south of the Royal Hunting Lodge. Take her onto the wooden platform at (X,Y) -580, 220 and you’ll have a scenic shot of the area and gain the achievement.
The Farm is Real
Go to Dantooine and head to the Southeast part of the map near one of the farms. Go to (X,Y) 330, 1126 and stick around until you get the scenic shot of you sitting down with B3-S1.
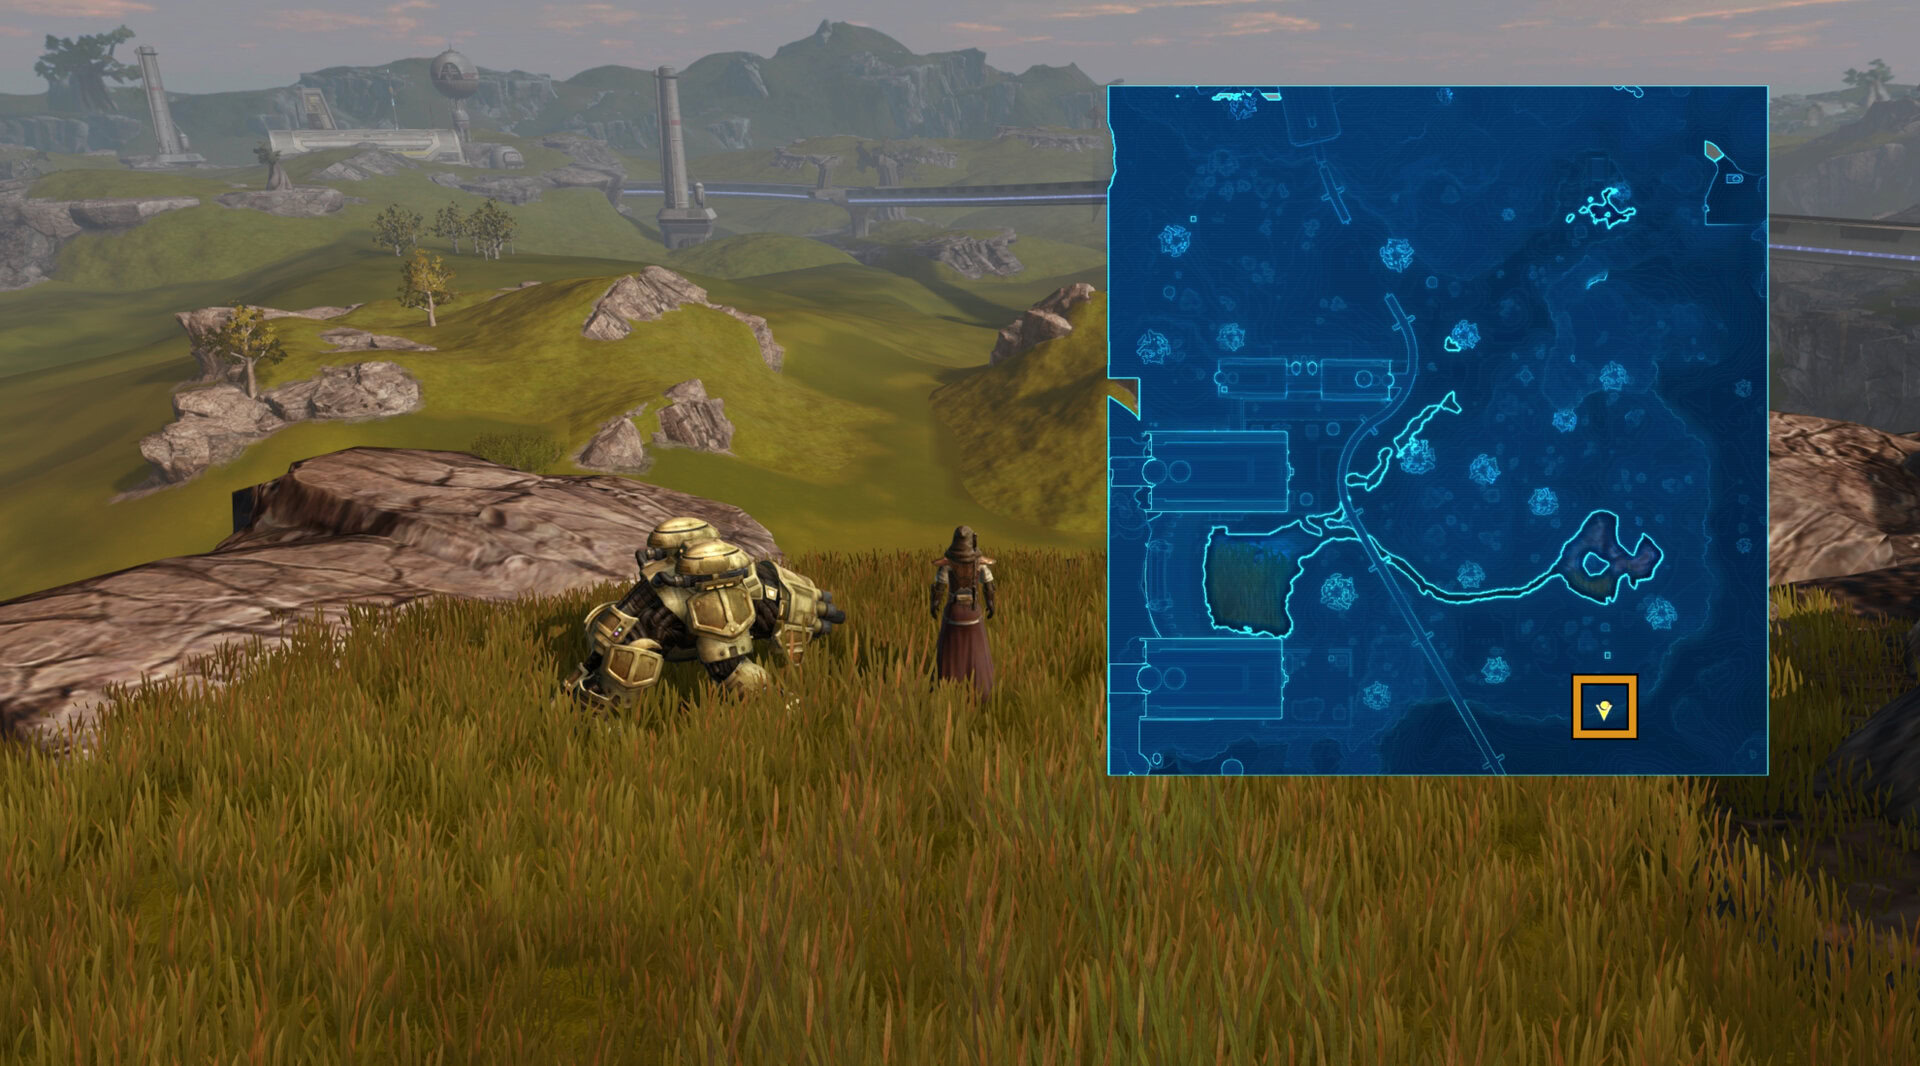
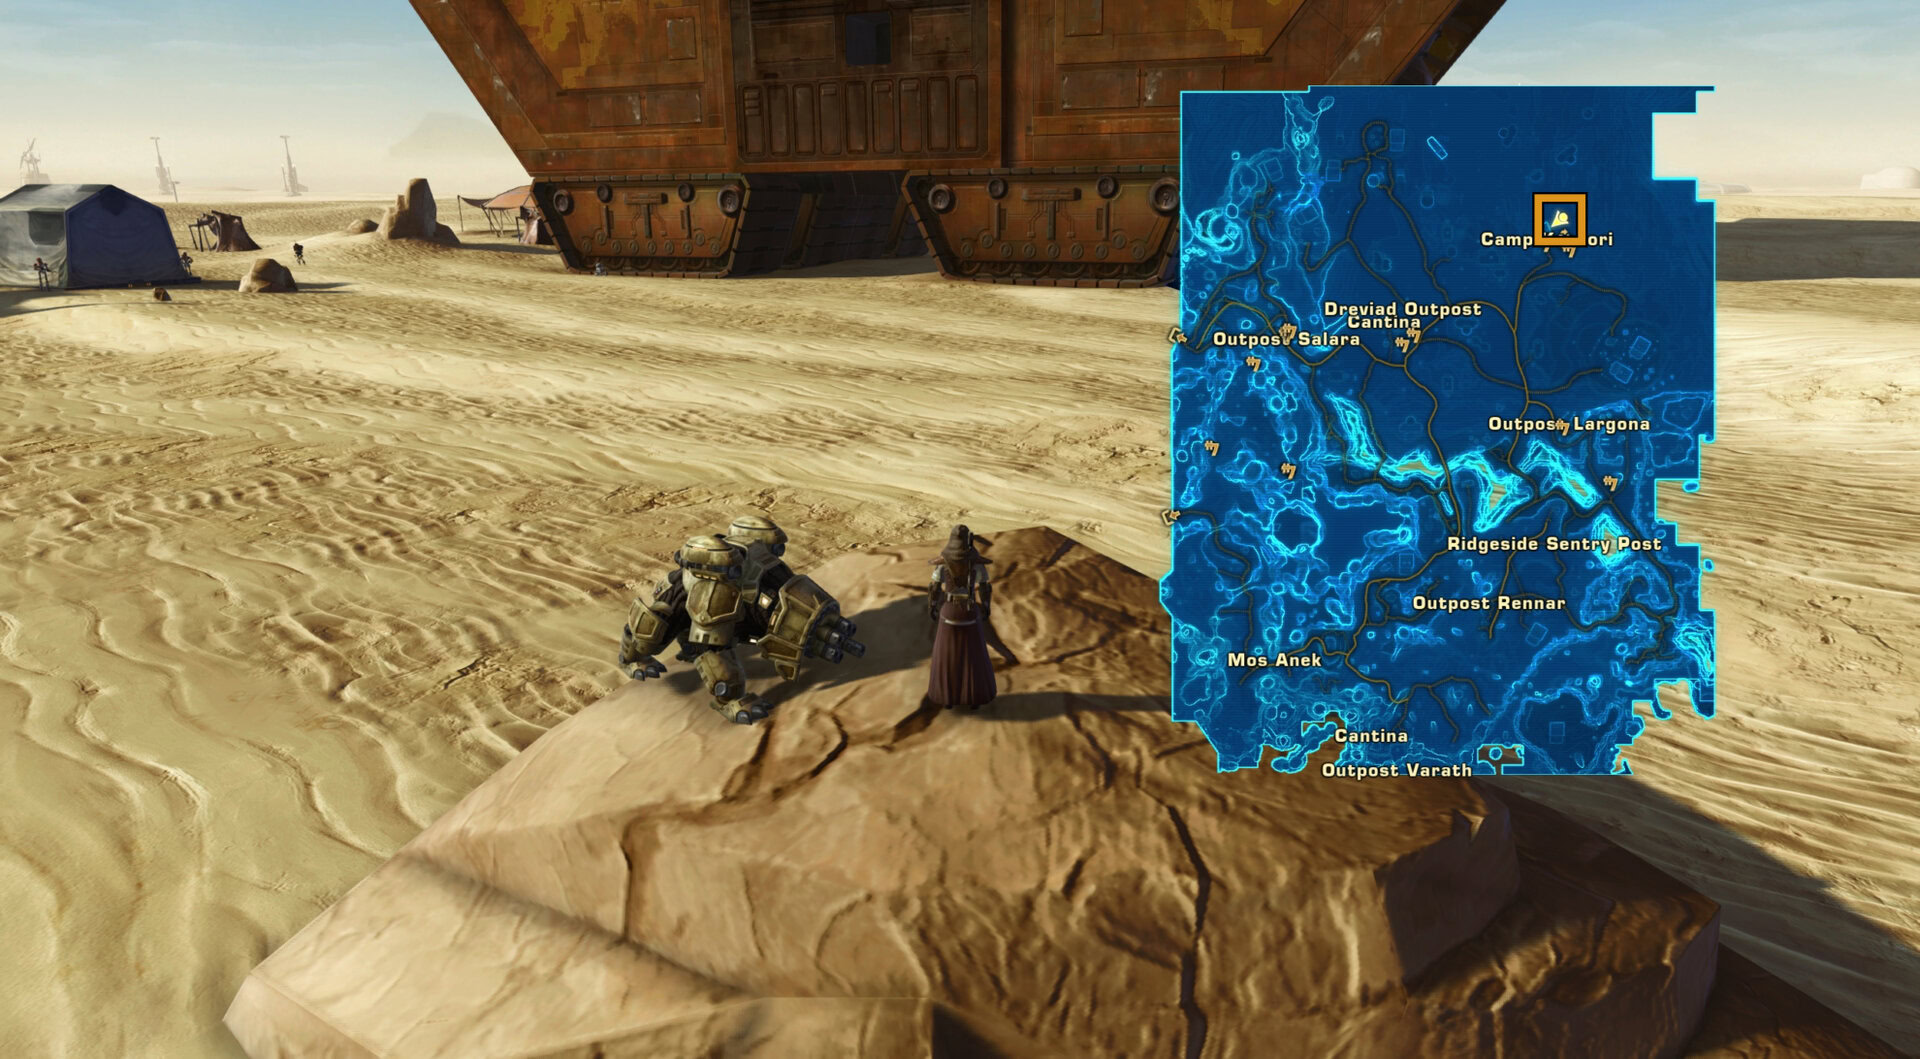
Big Machine, Little Creatures
Quick travel to Camp Kanori on Tatooine if you can, then look for the Sandcrawler in the area. Stand on the boulder located at (X,Y) 1685, -2290 and wait for the scenic shot to start.
It’s a Big Galaxy Out There
You get the achievement It’s Big Galaxy Out There for taking Bessie to visit the afforementioned spots on Onderon, Tatooine, and Dantooine.
Wild Brunch
You receive the Wild Brunch achievement for defeating 1000 enemies while you have Bessie out and are under the effects of the Akaba Spice Fizz, which is a beverage sold by the Curator’s Envoy droid and given to you each time you contribute funding to one of his projects.

The Fizz lasts 10 minutes, so you’ll be getting sloshed with Bessie. While you’re trying to fund the Curator’s Projects by taking Bessie out for training missions, just make sure to have Akaba Spice Fizz active as well.
If you’re like me and didn’t realize this until after you got all of the new Bessie skins, I recommend running around on one of the starter worlds with an rDPS and the Rampage Achievement Boost (from Login rewards) spamming your AoE until the achievement pops.
The achievement may not pop until the Akaba Spice Fizz wears off, but that might have just been a coincidence.
Additional B3-S1 Customizations
As of 7.6.1, there are some additional B3-S1 customizations available from 2 different sources.
Curator’s Customizations
The Curator sent a droid envoy to Ruhnuk to collaborate with you on his own research projects. The Curator’s Envoy only shows up after you’ve completed the Venture, and you’ll be notified via Comlink when it arrives.
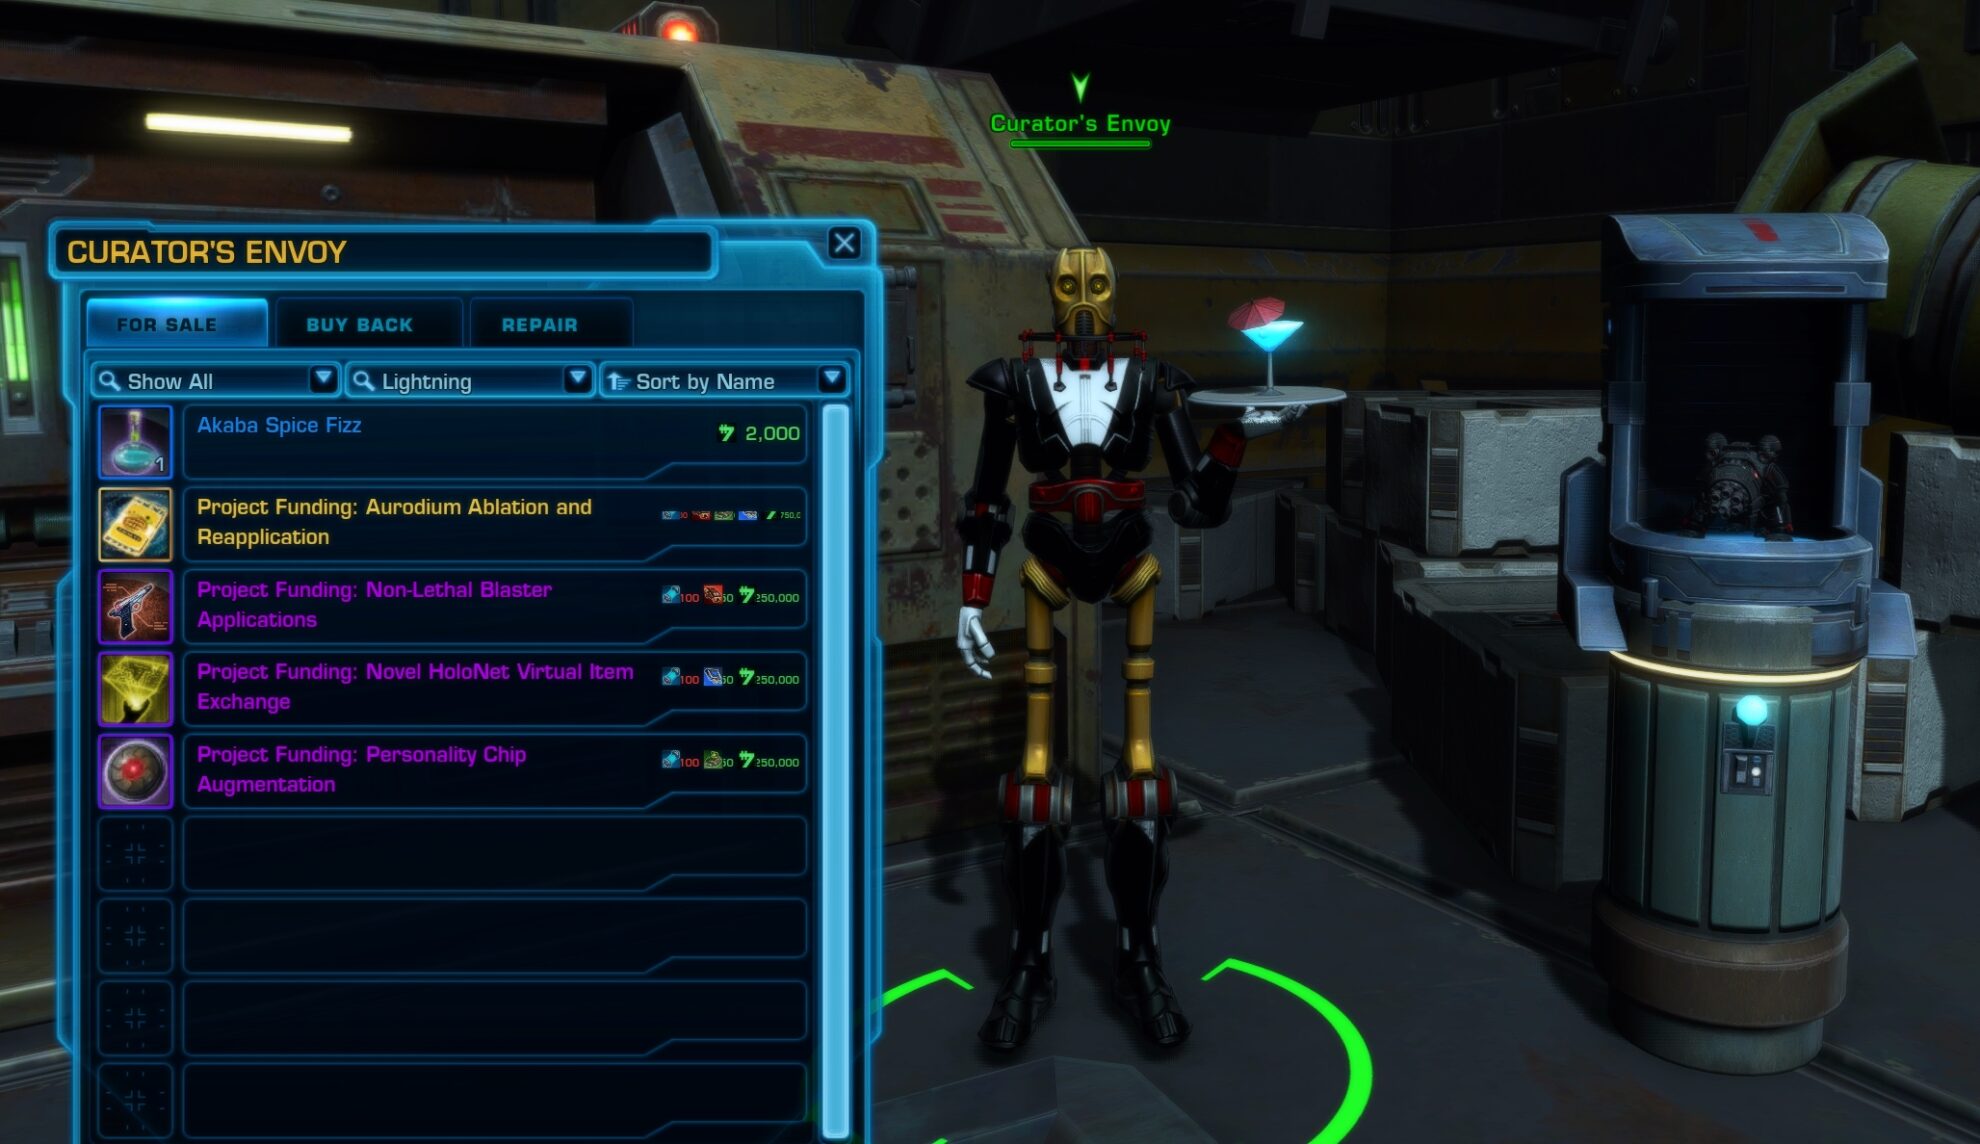
The Curator’s Envoy is a vendor who has 5 items for sale, a beverage that does nothing, and 4 projects to fund. Each Project corresponds to one of the 4 sleek new customizations available for B3-S1.


Aside from the Aurodium one, each Project Funding costs 50 Role-Specific Systems Data, 100 Prototype Data, and 250,000 Credits. The Aurodium Plating costs 50 of each type of Systems Data, 100 Prototype Data, and 3,750,000 Credits. You must fund a given project 4 times to unlock the associated customization.
In total, you must collect 1600 Prototype Data, 400 Combat Systems Data, 400 Defense Systems Data, and 400 Support Systems Data, and pay 19,000,000 credits if you want to collect all 4 skins.
Thanks to the weekly caps, it will take 4 weeks minimum to collect all of the Systems Data and 6 weeks minimum to collect all the necessary Prototype Data, though half of those costs are for the Aurodium Plating.
Keep in mind that Dynamic Encounters now have Training Modules available, so you can knock out those new Encounter-specific achievements at the same time.
Galactic Seasons Prototype Customization 2
One of the rewards from Galactic Season 7 was a rusty red customization. Now that GS7 has ended, Jaleit Nall now sells Basilisk Prototype Customization 2 as part of her non-rotating stock for 3 Galactic Seasons Tokens.
Basilisk Prototype Venture FAQ
Chances are you have questions about the Basilisk Prototype Venture. I’ll answer some of the more common questions that should pop up.
How long will it take to complete the Venture?
This venture came out with version 7.5.0 on May 29, 2024 and I’ve been doing as much as I could, completing it on August 13, 2024. I had fairly good RNG and managed to complete the venture in 11 weeks.
This will take longer if you have poor RNG luck and spend resources on getting random missions from the HK-24 Astromech. It’ll take 2.5 months if you’re lucky, maybe averaging 3 months, or longer than 3 months if you have poor luck.
Is B3-S1 worth the effort?
That honestly depends on the player. Do you already have Shae Vizla unlocked as a companion? If so, it’s probably not worth the effort. B3-S1 is essentially the same as Shae in terms of mechanics.
Do you not have Shae nor the resources or patience to purchase her from the Galactic Seasons Vendor? Then it’ll be more worth the effort if you need a good DPS companion.
If you want something to do to pass the time and get a unique companion out of it, this is a good way to occupy yourself. B3-S1 is as dangerous as she is adorable, and would make a great addition to your companion collection.
What is the best role for B3-S1?
B3-S1 is best suited for DPS, she really shines when set to the Combat role. She deals the most DPS out of every companion in the game, tied with Shae Vizla. She’s great for clearing out mobs or for filling a DPS role if your Flashpoint group lacks another DPS player.
After performing some tests, I’ve come to the conclusion that her tanking ability is a bit lower than average, but it’s nothing too detrimental. Her healing is on-par with most other companions, so you can’t go wrong with putting her in Support mode.
Can I still pet her after I finish repairing her?
Unfortunately, no you cannot. If you want to get your pets in, do so in Lane’s lab between training sessions before you finish repairing her.
This concludes my SWTOR Basilisk Prototype Venture Guide. For more SWTOR 7.5 content, check out our SWTOR 7.5 Archives to read our comprehensive coverage of the new update. For everything else SWTOR, see our SWTOR Guides Master List.