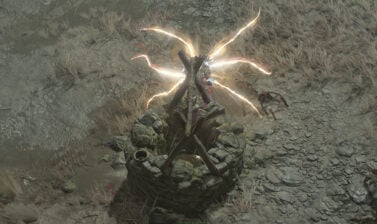
Diablo 4 loves its hidden bosses, and the Unlucky Council is one of them. This guide will tell you everything you need to know about finding this boss, as well as challenges and rewards awaiting you.
THIS GUIDE CONTAINS SPOILERS FOR THIS ENCOUNTER.
If you wish to avoid spoilers and complete the encounter blind, follow the hints left at the bottom of the Complete Guide to Diablo 4’s Lucky Coin Secrets, or simply stop at the final warning if you want preparation tips.
Reaching the Unlucky Council
If you’re at all familiar with Diablo 4’s Lucky Coin Secrets and their resulting Unlucky Jewelry Set, this hidden boss is an extension of that questline. Albeit, very optional and exceptionally difficult to boot. Let’s go over the requirements.
Yes, you will need to have completed the steps to obtain the Unlucky Jewelry Set, to access this boss. The guide linked in the spoiler at the top of the guide will help you obtain these items. So start there if you haven’t already got them.
The next requirement is fairly basic. This encounter is only accessible in Torment 12. No way around it, you’ll need to be able to comfortably handle Torment 12 Bosses to even remotely have a chance anyways.
The last requirement is where a lot of the difficulty of this encounter comes from. You must have all three pieces of the Unlucky Jewelry Set equipped. They’re on you permanently once you step into the portal that leads to the arena.
THIS LAST CONDITION MUST BE MET BY ALL PLAYERS IN THE ENCOUNTER TO RECIEVE THE REWARDS. So no bypassing the difficulty with a carry of any kind.
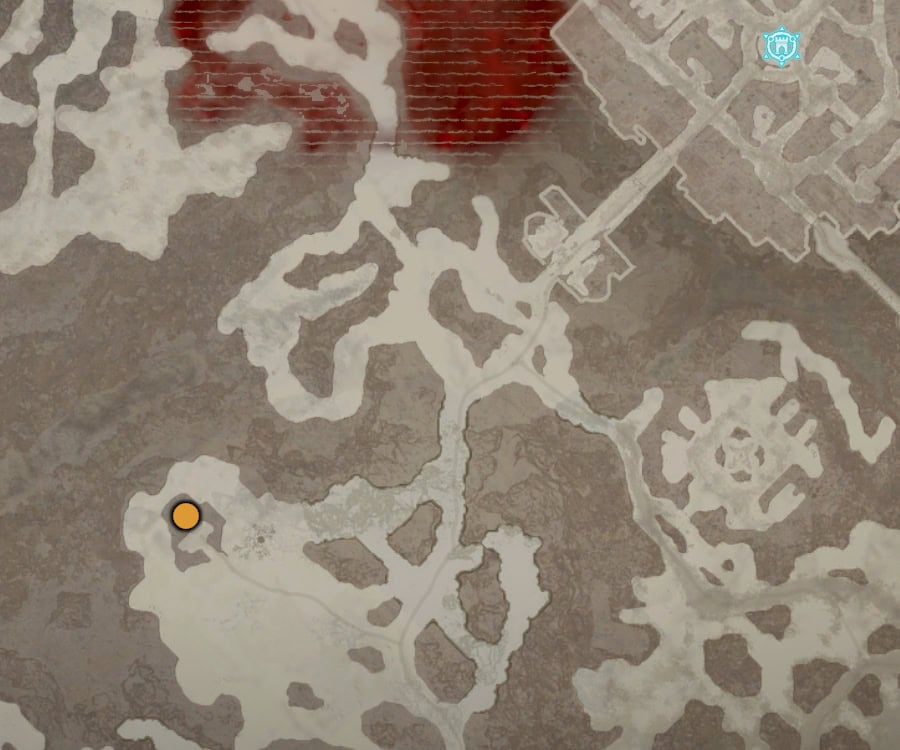
With these requirements met, you’ll simply need to head to Lorath’s Cabin, south of Kyovashad where the Echo of the Damned Portal awaits you.
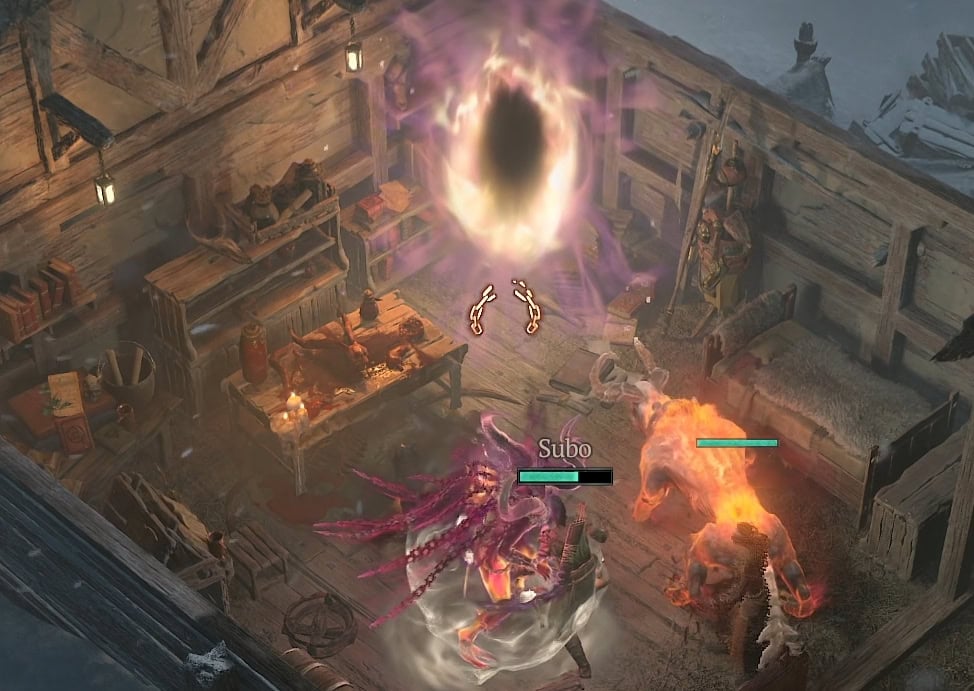
Once you head in, if you haven’t already, you’ll want to prepare for this encounter. Depending on your class and build, you may even need to entirely respec to handle everything that’s about to happen.
Preparing for the Unlucky Council
There are three main hurdles you need to plan for when you go to tackle this encounter: The Amulet of Dark Omens, The Ring of Misfortune, and of course the general lack of “good” jewelry slots.
As a reminder, you are forced to have the Unlucky Jewelry equipped, so you will need to solve the problems mentioned below without the use of these slots, though Charms of them are fair game if you can afford to fit them.
Countering the Downsides of the Amulet of Dark Omens
If you’re not already aware, the Amulet of Dark Omens will periodically spawn an NPC that will throw tomatoes at you. If they successfully hit you, you will take a force knockdown that lasts several seconds.
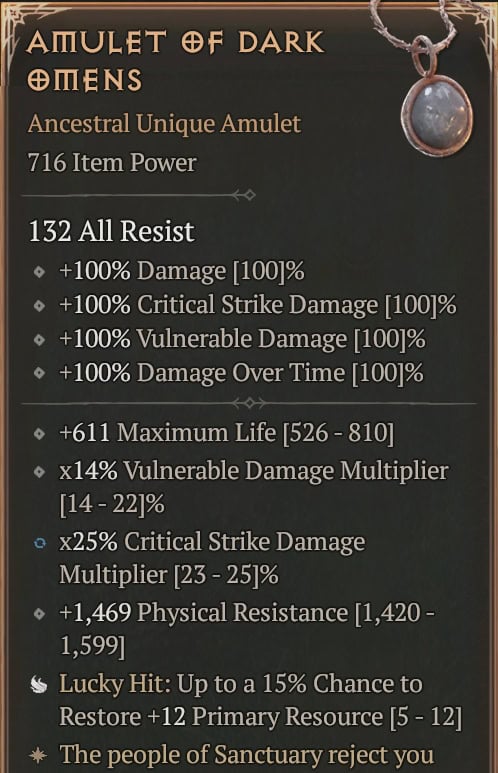
The easiest way to avoid this is to simply be Unstoppable. Not every class can do this, but Warlocks in particular can avoid this through the Metamorphosis upgrade that grants Unstoppable. Of course, if you preferred class has an option similar to this, it’s highly recommended.
The next easiest is Minion Blocking. If you have a stationary minion you can stand behind, or even a horde to hide in, they will happily eat the projectile and not suffer the knockdown. Definitely easier for a Necromancer to pull off this particular trick, though not consistently, but any class with damageable summons will work.
Finally, there’s always the option of simply moving out of the way. Though this is much easier said than done during the nearly room-wide attacks you’ll need to also dodge at the same time. Classes like Sorceress that can teleport or have access to other very quick Mobility skills will find it much easier to manage.
Countering the Ring of Misfortune
The Ring of Misfortune comes with a high chance of simply evaporating your Primary Resource, by way of it’s Lucky Hit Effect. This will instantly drain 100% of your Primary Resource. The Phrasing of “drains” in the effect is important, as this means it will not trigger effects, like Runes, that trigger with Primary Resource being used.
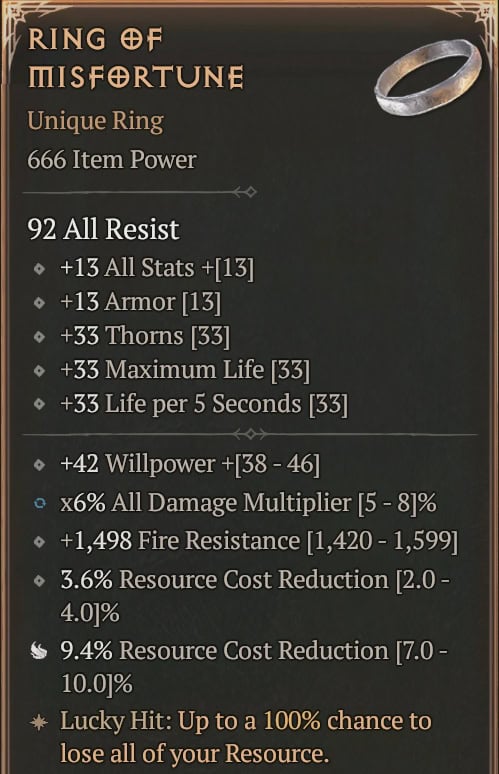
One of the simplest way of countering this is to use a build that doesn’t rely on Primary Resource at all, or at least very little. Using Basic Skills and Cooldown Skills as your main Damage sources is highly recommended. This makes it a lot more consistent, as most skills have enough inherent Lucky Hit Chance to make it less viable to to rely on them.
The only other option for solo play is massive amounts of Primary Resource Generation. For a class like Warlock, the popular Igni-Tir Rune Combination works incredibly well alongside Bombardment. Outside of that you’ll mainly be relying on a combination of Resource per Second Affixes, Resource Cost Reduction, as well as other generative effects, such as the Kel Rune, which triggers Paladin’s Rally. All of this is in addition to careful resource management, if you go too crazy with attacking, you’ll never have any resource.
If you attempt the fight in a group, it can be easier. Especially with a Paladin (particularly with Rally on Hotbar and as a rune combo) or other classes providing consistent buff to the party or debuffs on the Unlucky Council. Just be aware there is still some co-op Life scaling here, though it may be hard to notice at first.
Dealing with the Lack of Jewelry
The Lack of Jewelry can break a lot of builds, one particular stand out in this case is the Whirlwind + Hammer of the Ancient Barbarian, which heavily relies on the Melted Amulet of Selig, so sorry Barbs, you can’t cheese your way through this one.
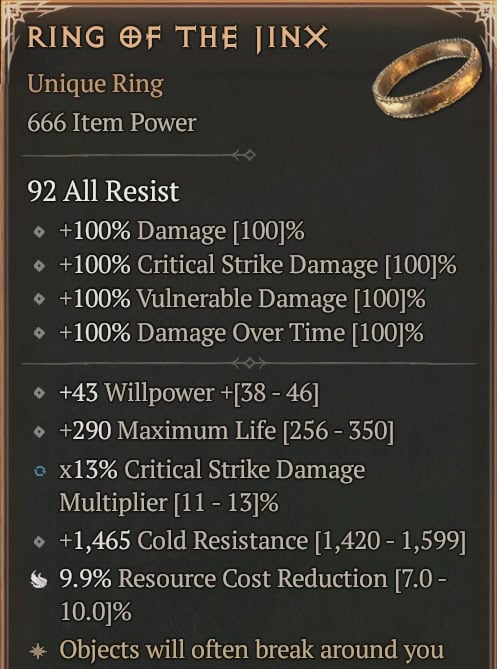
Thankfully, at least in terms of damage, the Amulet of Dark Omens and Ring of the Jinx both provide heaps of scalable damage bonuses. In case of what provided, Damage over Time Skills even get a slight edge, getting value from both the Damage and DoT Damage lines. So getting lucky on the random Affixes or even Enchanting them to better suit your build’s scaling needs is helpful.
In the cases where a Ring or Amulet is an absolutely core part of your Offensive or Defensive Setup, Consider making a Charm of mandatory Jewelry. This can be done by taking an Ancestral Unique Item, and cubing it with three random Unique Charms. In a lot of cases for Season 15, this might mean using Stone of Jordan as a charm to help both offensively and defensively.
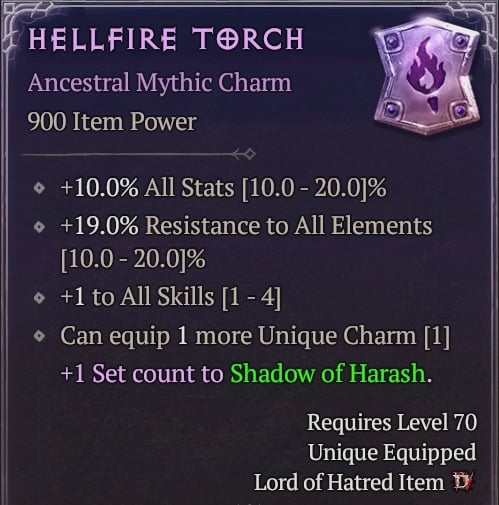
Seasonal player for Season 15 also have access to the powerful Hellfire Torch Mythic Charm from the Echo of Tristram Secret, which if you get a roll for either of your set bonuses can be a huge leap in offensive power. This can let you get the 5-set bonus with 3 Set Charms if it rolls your Primary set bonus, while still leaving two slots for other Charms, such as a necessary Jewelry piece (as it also grants +1 Unique Charm limit), or your 2-set bonus.
Make sure to claim the Unlucky Jewelry in Torment Difficulties where possible. Which is much easier to group consistently on Normal or Hard, to allow an second character to be made if needed, you’ll lose Access to the items being Ancestral if you don’t. This prevents them from rolling Greater Affixes on drop, as well as prevents them from being Masterworked, preventing a further boost to any stat on your choice.
Speaking of Masterworking, while you’re at the Blacksmith, always make sure you Temper a useful stat on to the Jewelry as well. Resource Cost Reduction is very important if you’re trying to overcome the draining effect, otherwise, defensive tempers are great here.
As a final tip for overcoming the jewelry, don’t forget to Transfigure a useful Legendary Power on to your Amulet with Kullean Tuning Prisms. While it’s not a deal breaker for many builds to not have it, you’ll want every bit of power you can get, so even a suboptimal Power is fine here.
Other Useful Preparation Tips
This encounter will deal very high damage, as well as take an exceptionally long time, with the low end of times being around 8-10 minutes for many builds. This leaves a lot of time to make silly mistakes and cause your death.
Prioritize survival over raw damage, you’ll likely be dropping to around 1% or less of your typical T12 Damage, so this becomes more a test of endurance rather than a DPS check. This means High Life, Consistent ways to heal that aren’t potions, as well as good Damage Reduction both as a general stat and from Resistances.
The small arena in combination with their heavy hitting damage makes Endurant Faith a strong recommendation, either equipped or as a Charm if you have space. Since many build are often one shot from a single mistake here, having any means to shrug off such a mistake is important.
Having Raheir as your Active Mercenary is also incredibly useful for his Valiance Skill, providing Unstoppable periodically. Other options for Damage Mitigation/Redirection are also highly recommended as they take a LOT of pressure off you to play perfectly. As the Unlucky Council.
Having instant Mobility, or skills that grant Immune, such as Sorceress’s Teleport and Flame Shield or Warlock’s Nether Step are crucial to this fight, as there are several attacks that will leave very little room to dodge or avoid damage, or require quick repositioning to avoid.
Fighting the Unlucky Council
IF YOU WISH TO EXPERIENCE THE FIGHT BLIND, STOP HERE AND COME BACK LATER IF YOU NEED TIPS TO DEAL WITH THE MECHANICS.
So you’ve done all the preparing you feel necessary for the fight and don’t want to go in blind, or simply looking for ways of dealing with the Council’s attacks after multiple attempts. Below are their general details, mechanics, rewards, and the best ways of dealing with them.
Unlucky Council’s Basic Skills
Each of the Unlucky Council has their preferred way of fighting you. Thankfully, there are ways of dealing with all of them fairly easily.
The Damage types listed below are based on the appearance of the skills and have not been fully confirmed as of yet. Try to keep your resistances all high and roughly equal to deal with the variety of damage types used.
Donan – The Support
Echo of Donan is a supportive caster, and will constantly buff the other two bosses while in range, granting them a rather large shield and a damage boost. This channeled buff also deals minor Shadow Damage over Time with the link between them. This skill is interrupted if Donan or his target are Staggered, but don’t rely on this as Stagger Resistance will make him more or less immune after just a couple staggers.
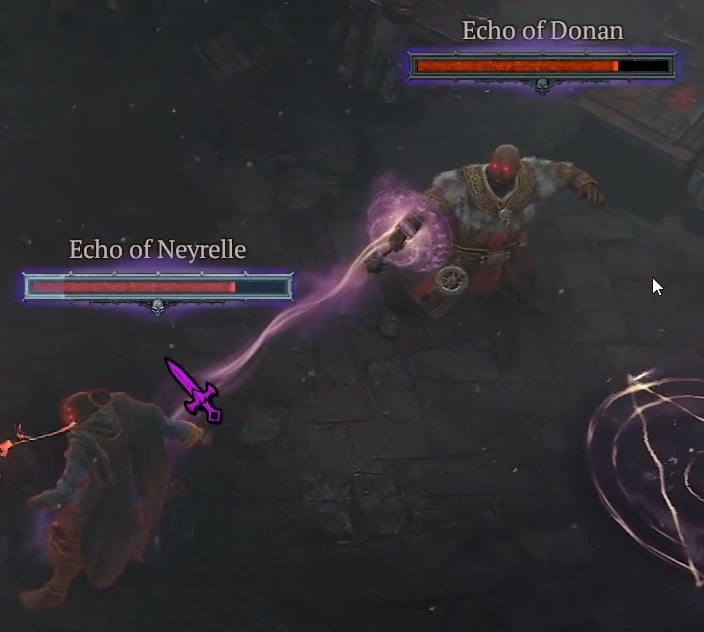
He’ll also cast a massive Shadow DoT area around him if you say too close for too long, forcing you away. If you’re not Unstoppable, he’ll tether you into the AoE if you’re close enough, but the tether will break if you remain at the outer edge for roughly a second.
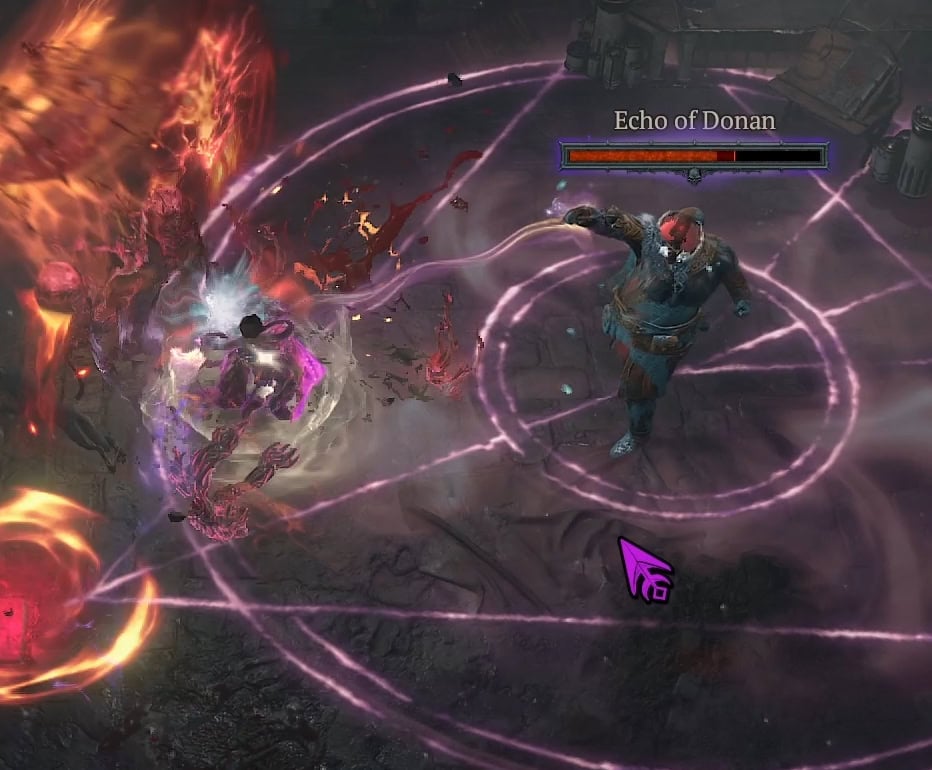
He will also periodically cast a hard Crowd Control Effect that can lock you down for a second or two. Usually not the worst thing to get caught by, depending on the actions of the other two.
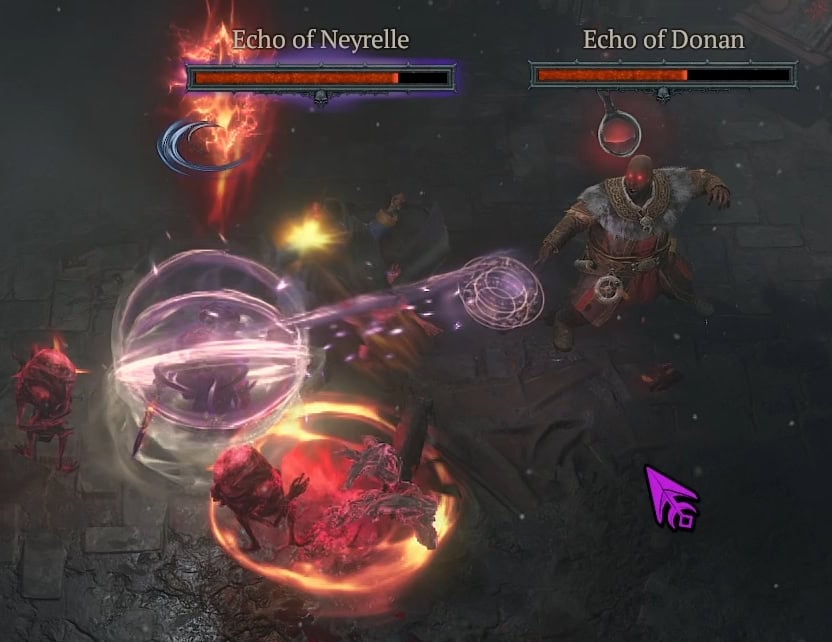
When not channeling any of these skills (which is quite rare), Donan will first large Shadow projectiles at you that travel slowly.
Neyrelle – The Melee DPS
Echo of Neyrelle is Melee DPS, with access to invisibility and high Physical Damage Output. She’s not as huge of a threat as the other two honestly as long as you have consistent healing, as she attacks fast, but doesn’t hit insanely hard on her own.
When she goes invisible near you, you will get Dazed, similar to Rogue’s Smoke Bomb skill. This will temporarily disable any skill that doesn’t grant even a brief Unstoppable like Teleport or Nether Step. When popping out of this stealth, she’ll reappear out small AoEs in a Y shape that will knock you back if hit by them, occasionally she will cover a larger area with more explosions as well, but this is the most common. These appear to deal Cold Damage.
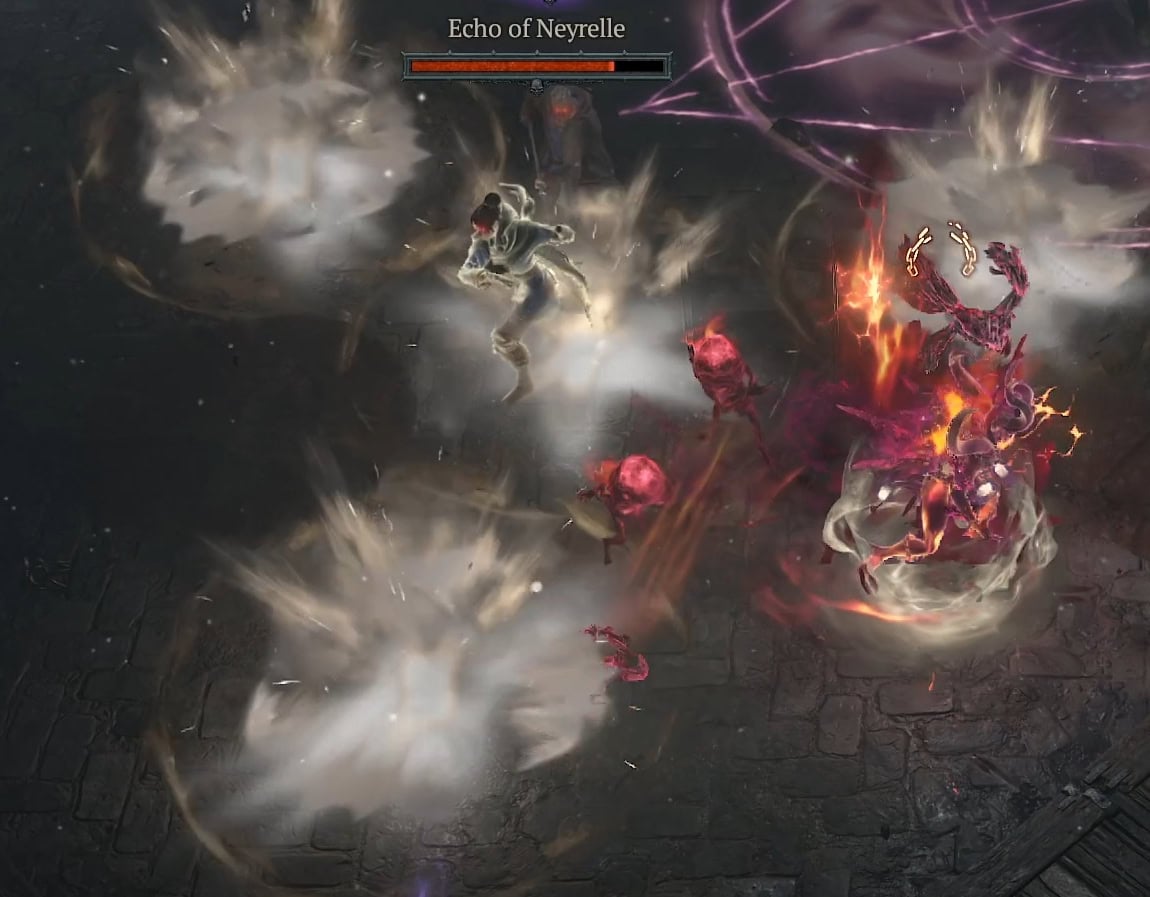
Other than this Invisibility into AoE combo, she doesn’t seem to have any other mechanics. Her consistent damage can be tough to deal with if she’s buffed by Donan, but otherwise is best saved for last if you have consistent recovery, if not, she can be a higher priority.
Lorath – The Caster DPS
Echo of Lorath is a Caster DPS, who while not dealing consistent damage due to his projectiles being slower, will hit like a truck, buffed or not. His main attack will have him channel up to 5 projectiles above him, which appear to be Shadow Damage. After the channel completes, the projectile will be fired at you in quick succession and will hit incredibly hard, so be prepared to dodge.
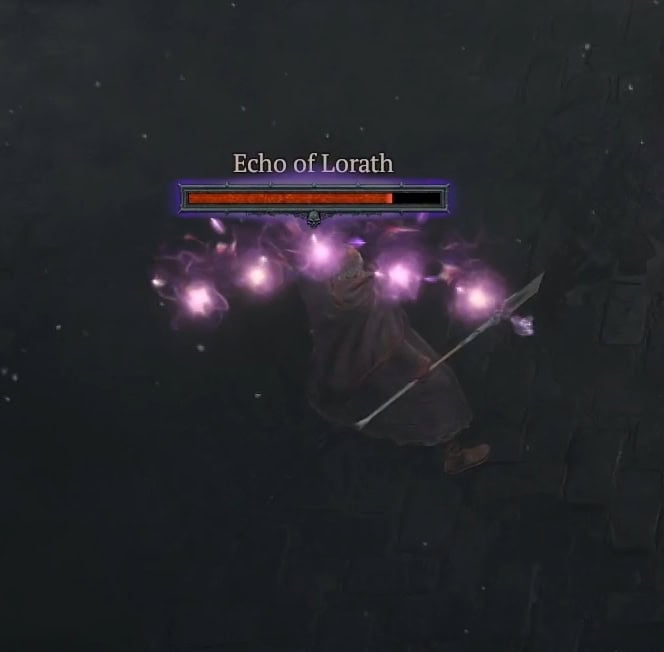
He’ll also occasionally spread a bunch of runes across the floor, which deal incredibly high damage when stepped on. If you have consistent means of quick healing and can tank them, it’s recommended to clear them. If not, the Joint Attacks will be harder to avoid.
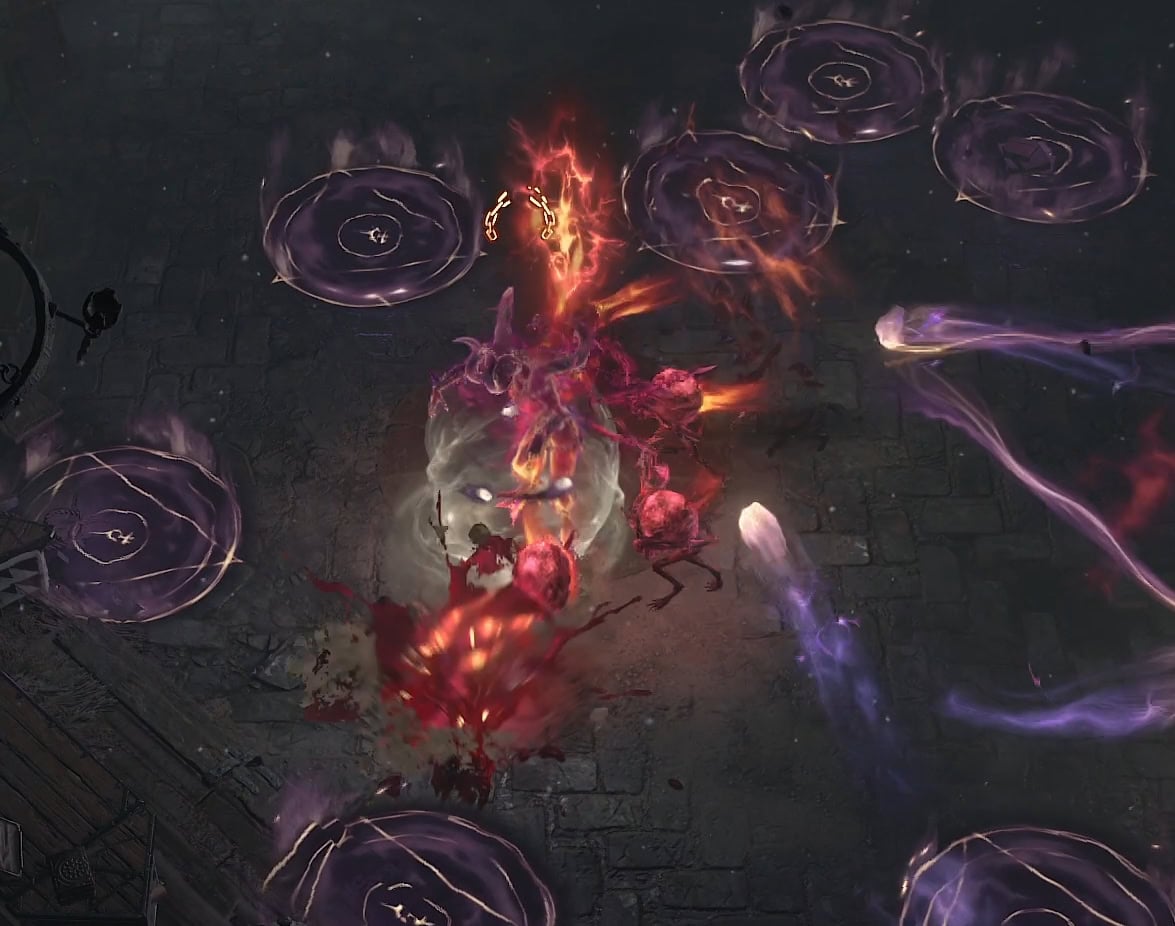
He can also fire off Shadow Projectiles with a link between them, dealing damage on hit, or when a link is broken. This will also apply Vulnerable to you, making it much harder to survive follow up attacks.
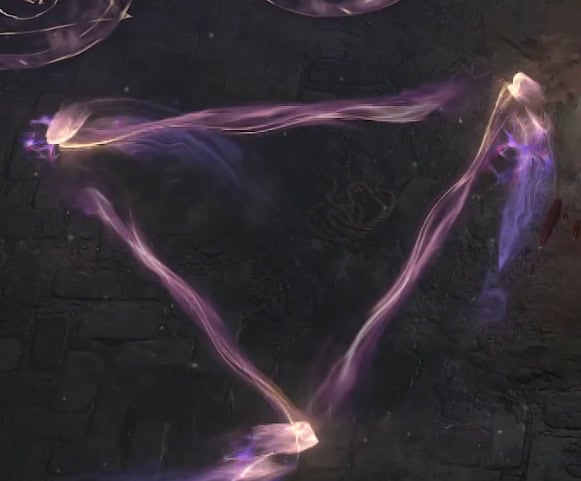
Just for fun, if you get close enough, he’ll also attack you with his staff, dealing Physical Damage and applying a small knockback. It doesn’t hurt much or keep him from doing more dangerous attacks for very long, but can interrupt channeled skills.
His insane damage output can make him a real threat you’ll want to take out second, unless you cannot deal with Neyrelle’s sustained damage very well, as his are avoidable. Donan still gets priority to prevent his buffing, shielding, and crowd control from being a larger problem.
Unlucky Council’s Joint Attacks
As if their individual individual strength wasn’t enough to make this a hard fight, they also have couple attacks that unleash room-wide chaos, and hit much harder, generally one shotting, or dealing high enough Damage over Time to also bypass effects like Endurant Faith.
These skill are not interruptible. They will continue even after one of the trio dies, and they are all Stagger Immune until the end of the channel, preventing Stagger buildup when nearing max Stagger.
Starting these phases near Lorath’s tip of the triangle seems to make dodging all of these attacks much more consistent, regardless of which one is thrown at you.
All of these attacks are accompanied by high damage Shadow Beams linking the trio and restricting movement with their high DoT damage evaporating your Life. In the case of the example image below, this simple touch instantly ate 100k worth of Life and Barrier combined.
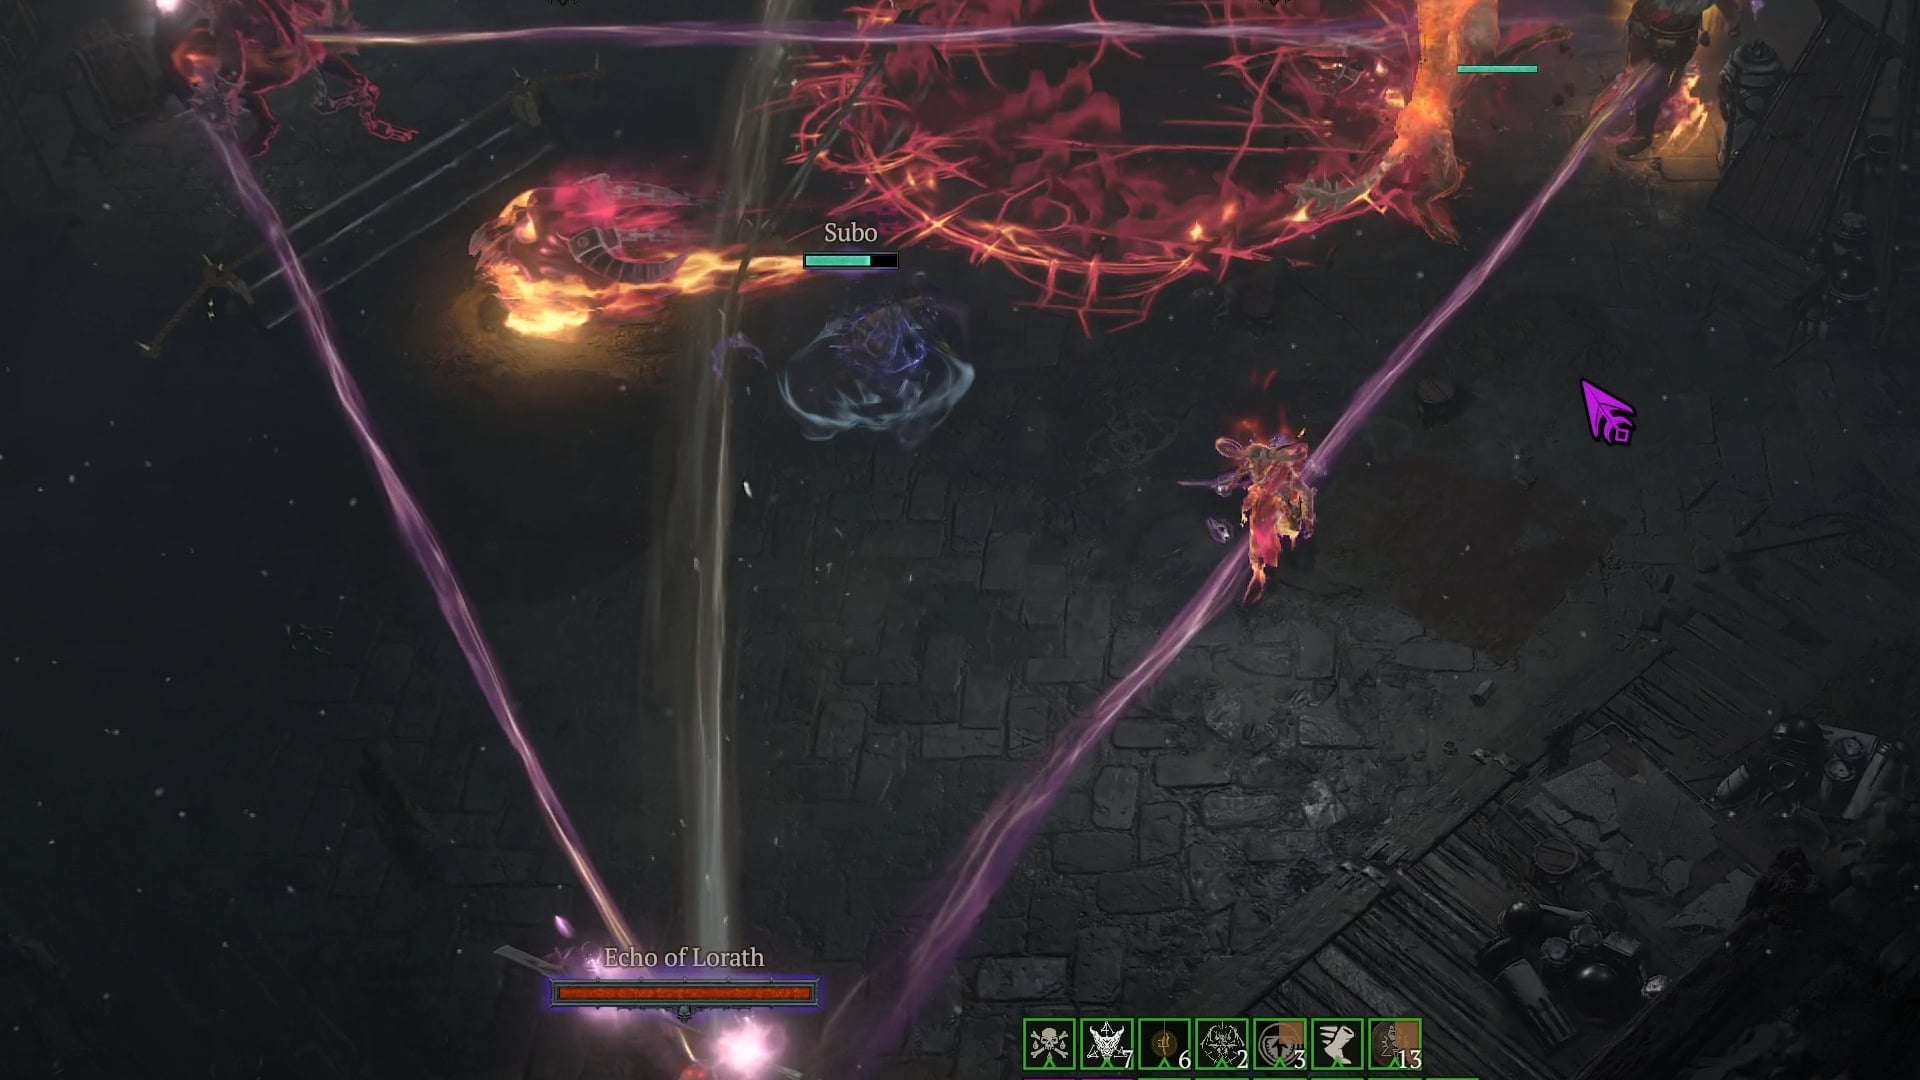
These linking beams are accompanied either by additional Cold Explosions, Shadow Beams, or Shadow projectiles. Each representative of one of the Unlucky Council: The Cold Explosions from Neyrelle, The Shadow Beams from Lorath, and the Shadow Projectiles from Donan.
Cold Explosions
The Cold Variant sees a ball of Cold energy form in the middle, that sends out projectiles towards all players in the room. If not constantly moving, the resulting ground AoEs will hit roughly once a second, dealing very high damage. Additionally, the middle of the triangle will have several larger damage zones place around every few seconds.
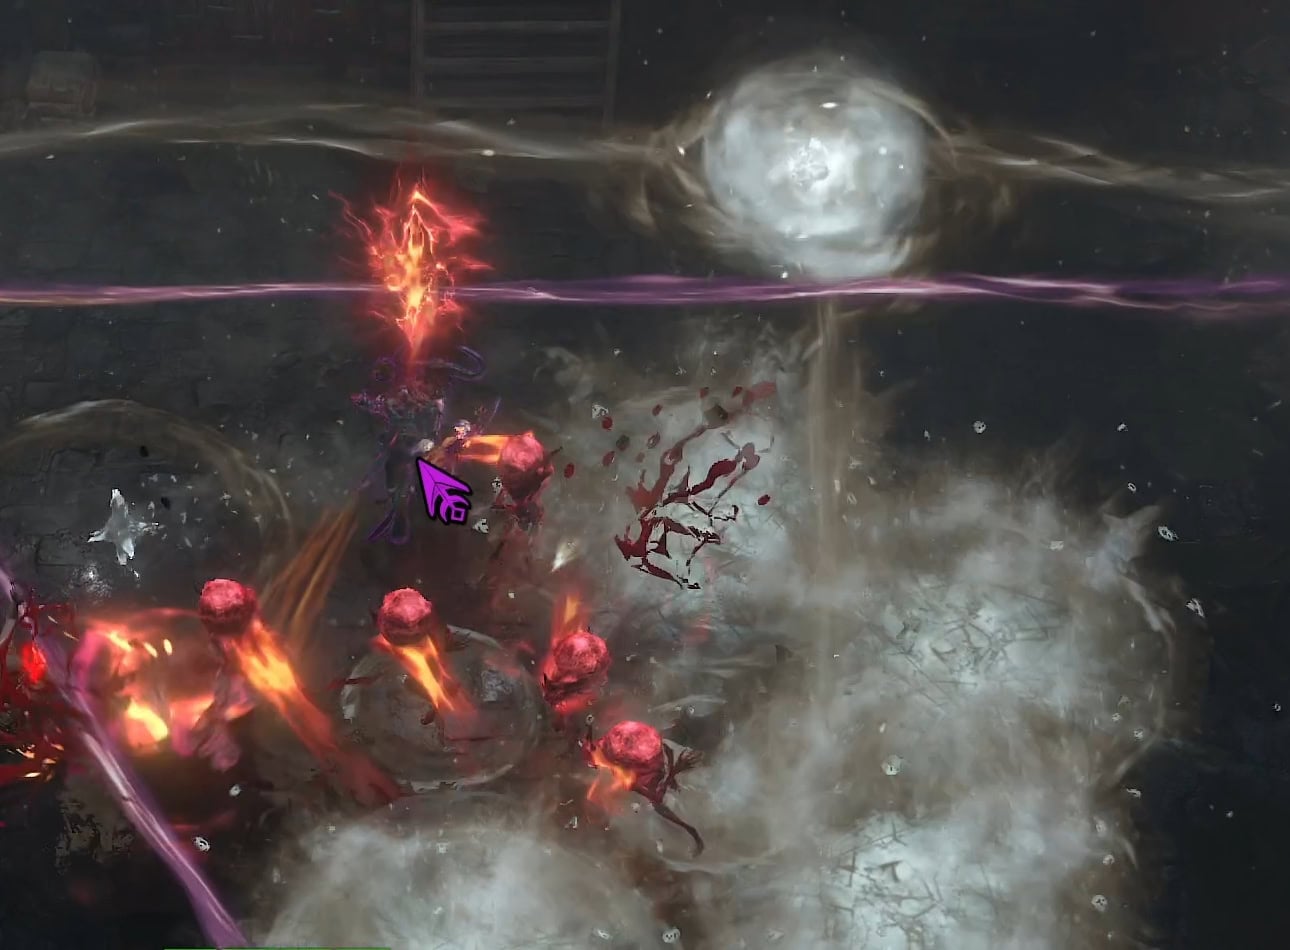
Careful movement is the key to avoiding this skill, regardless of which section of the arena you stick to. The projectiles always hit in a steady pattern, about once a second. Moving a small amount between each projectile firing is more than enough to keep you safe.
The outer edges of the arena can be safer, as you’ll only need to avoid the small projectiles, though you’ll need to be a lot more careful with your movements. If you’re sticking to the Middle, then pay more attention to the larger AoEs, while trying to keeping the short rhythmic movement pattern going to avoid the small projectiles
Shadow Beams
The Shadow Beams variant adds thinner shadow beams to the middle of the tringle that rotate clockwise. Additionally, a vertical beam will start in the center and seek you out.
Learn to identify this particular variant, as you’ll want to reposition to start near Lorath to have a safer, more consistent rotation for this mechanic in the intended way.
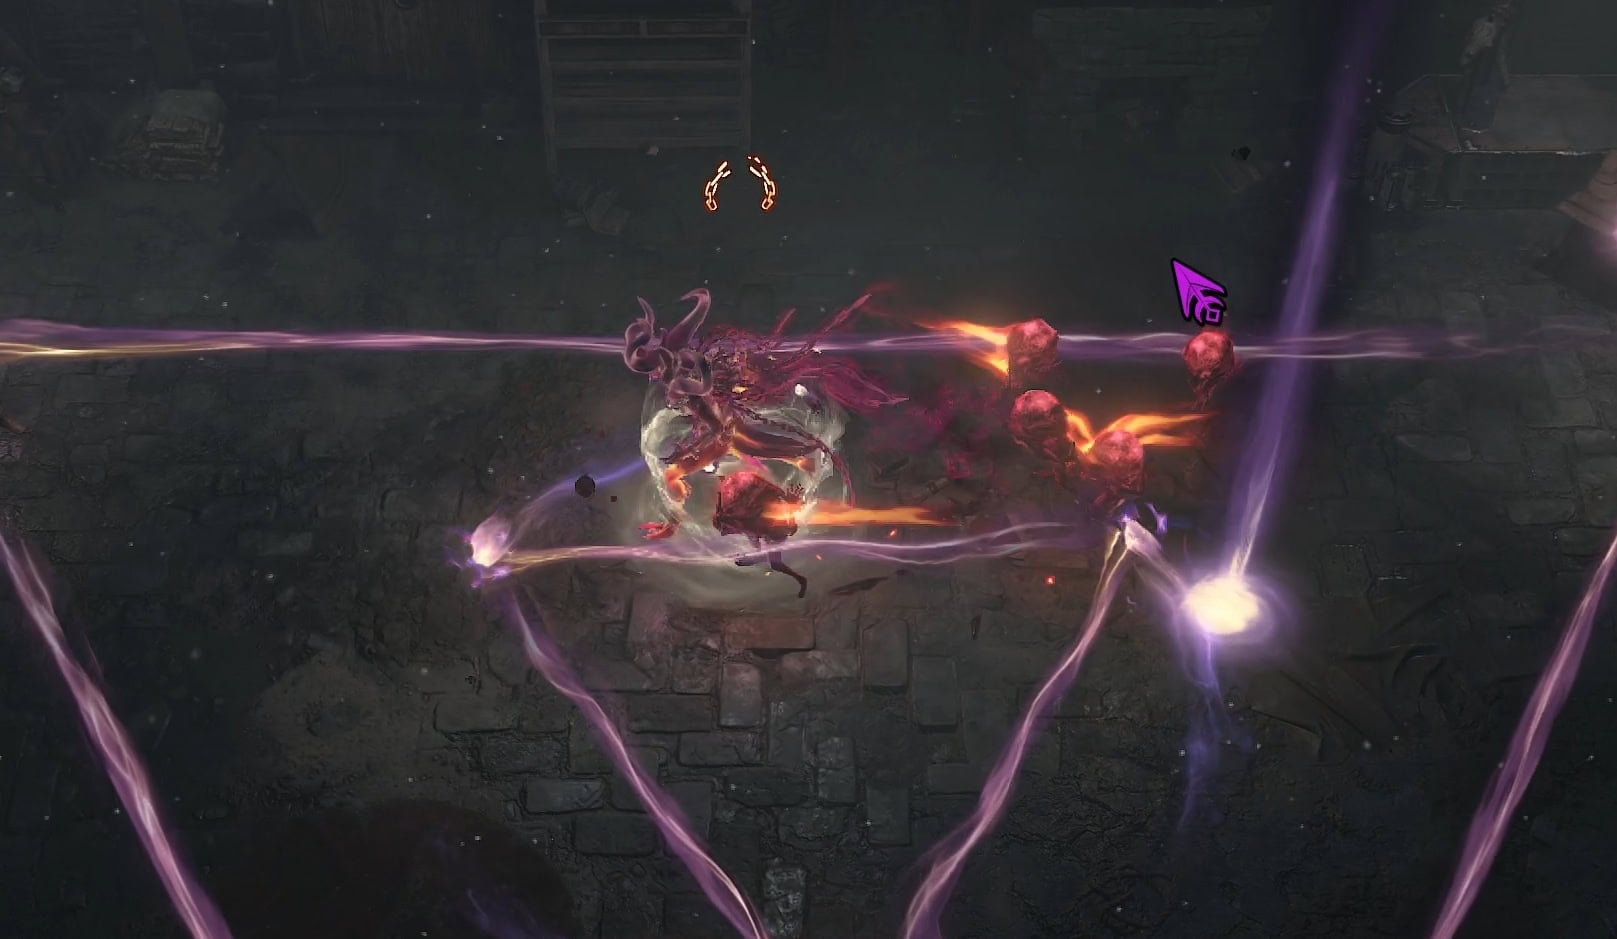
As the Triangle in the middle rotates, it also leaves an open trail that you can quickly run through with enough movement speed, as shown above. But having a quick movement skill of any kind, especially if it avoid the beam damage, can make this much safer ensuring you have a way to get away from the beam quickly if needed.
This pattern lasts for enough time to make a full rotation around the triangle this way. This also makes for an excellent visual indicator even if not staying in the middle.
The right and left sides on the outside of the triangle can be more manageable. It’s a tighter space, but there’s not extra beams to avoid.
Shadow Projectiles
The Shadow Projectiles Version will see a large Shadow Bolts fly out from each of the Unlucky Council, directed at your current position. They’ll always attack one at a time, so no need to worry about dodging three projectiles.
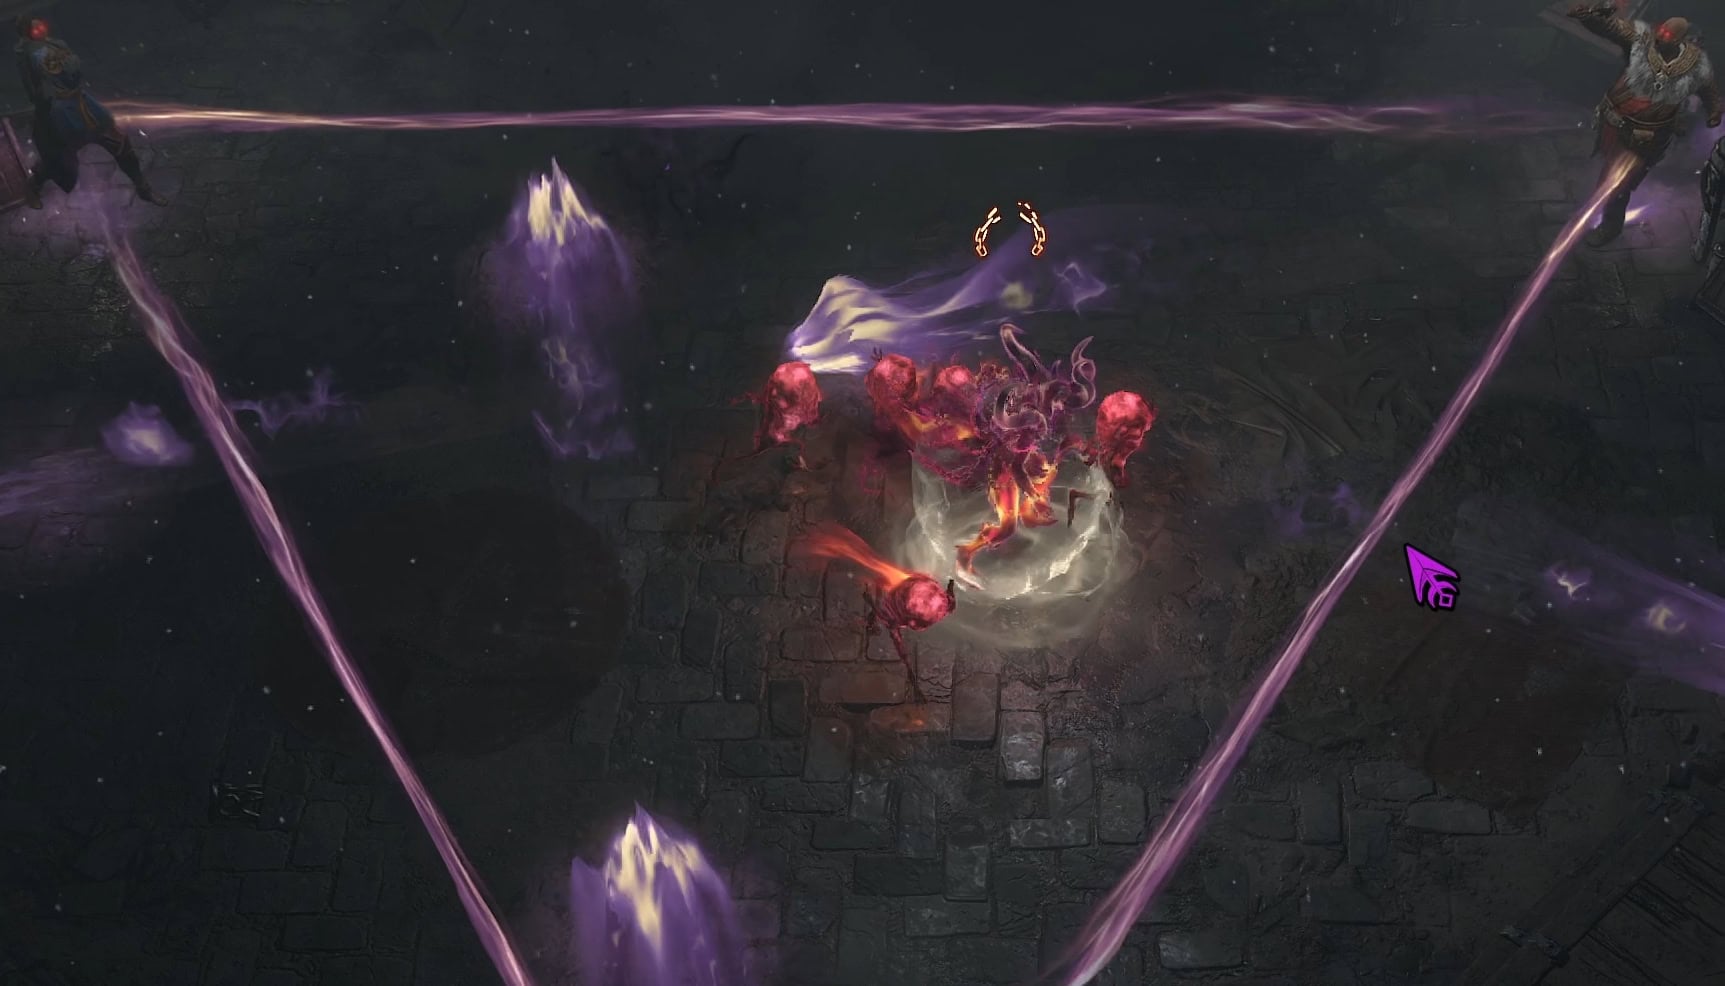
This attack is by far the easiest to deal with if you have minions, as there is a nice little safe spot that will end up blocking all the projectiles near the upper right, just on the other side of the shelving near Donan. If you have minions or any entity blocking line of sight from Lorath, you’ll never get hurt by this as they don’t appear to pierce, at least not consistently.
The proper way of dealing with this attack, in case the safe spot is removed, is to simply pay attention who is firing projectiles and move accordingly. Up or Down when anyone but Lorath is attacking, Left or right if he is. Just be mindful of the previous projectiles, as they move slow.
Unlucky Council Rewards
Should you manage to defeat the Unlucky Council, you’ll recieve two primary rewards: An Achievement, which comes with a Prefix Title and the Horadric Coin.
Achievements and Titles
For completing this Challenge on both Softcore, you’ll receive the “Unlucky” Player Title. This is a Prefix title, exclusive to the Softcore version of the encounter. It does not have an associated Achievement.
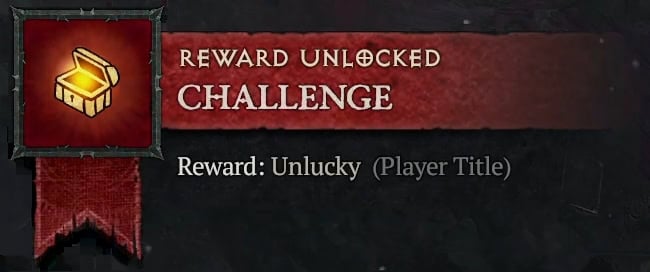
In Hardcore, You’ll receive the Unlucky Hardcore Achievement, as well as the “Hardcore” Player Title. This is also a prefix title.
Horadric Coin
The Horadric Coin is the other Primary reward for this, which seems to just be a fun toy that allows you to flip a coin in-game.
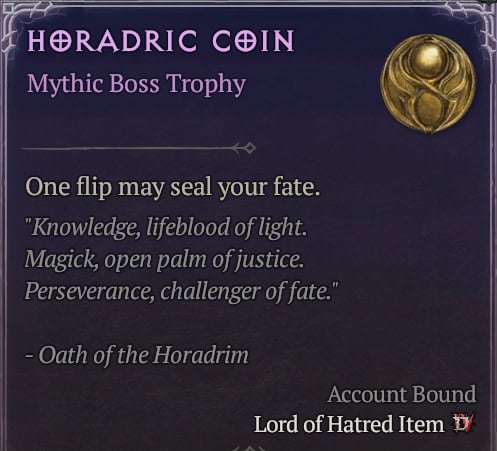
There could be more to this coin than it lets on, perhaps another part of this secret? Only time will tell.
Credits
As always when it comes to these guides for Diablo 4’s many secrets, they wouldn’t be quite as detailed without the assistance of the many dedicated secret hunters of the “D4 – Not Finding a Cow Level” Discord. They provided some of the tips and strategies in this guide, as well as helped uncover it’s location.