A complete guide to the User Interface in SWTOR, designed to teach new players and returning veterans how every piece of the UI works and how to use them.
The guide is up-to-date for Patch 7.8
The SWTOR User Interface (UI) is the combination of graphics, windows,panel and modules you see on your screen while you play. You interact with them constantly and understanding of the meaning and design of the UI is key to improving your gameplay experience.
Table of contents
- Introduction
- Elements of the SWTOR Interface
- The Abilities Bar and Character HP module
- Buffs and Debuffs Bars
- The Minimap
- Server Lag
- The World Map
- Galaxy Map
- Galactic Starfighter
- Activities Window
- The Chat Window
- The Menu Line
- Character Sheet and Inventory
- Inventory
- Deconstruction Tab
- Materials Inventory
- Cartel Market Window
- Collections tab
- Pack Viewer and Item Stash
- Abilities Window
- Combat Proficiencies Window
- Legacy Window
- Ventures
- Chapters Window
- Log (no longer displaying its name)
- Codex
- Eras Window
- Companions and Contracts
- Companion Portrait and HP Bar
- Strongholds Window
- Crew Skills Window
- Friends Window
- Guilds Window
- Galactic Window
- Rewards Window
- Location-based and Time-dependent UI Elements
- The Main Menu
- SWTOR UI Video Guides and Tutorials
- Conclusions
Introduction
The SWTOR Interface, aka SWTOR UI, aka SWTOR HUD is a collection of graphics, tools, windows and tabs that allow you to navigate through all available features and play the game.
The UI consists of several main and supplementary modules. Each one of them can be modified and moved to better fit your personal needs.
We’ll begin with an overview of the available pre-installed Interfaces, go over each individual module and menu to help you get to know your environment and show you how to modify the UI to your personal desires and needs.
Available pre-installed SWTOR Interfaces
The game arrives on your PC with a number of Interfaces preinstalled and automatically pre-configured already. I will show you the predefined Interfaces you can choose from and how to customize the UI to make your own unique version.
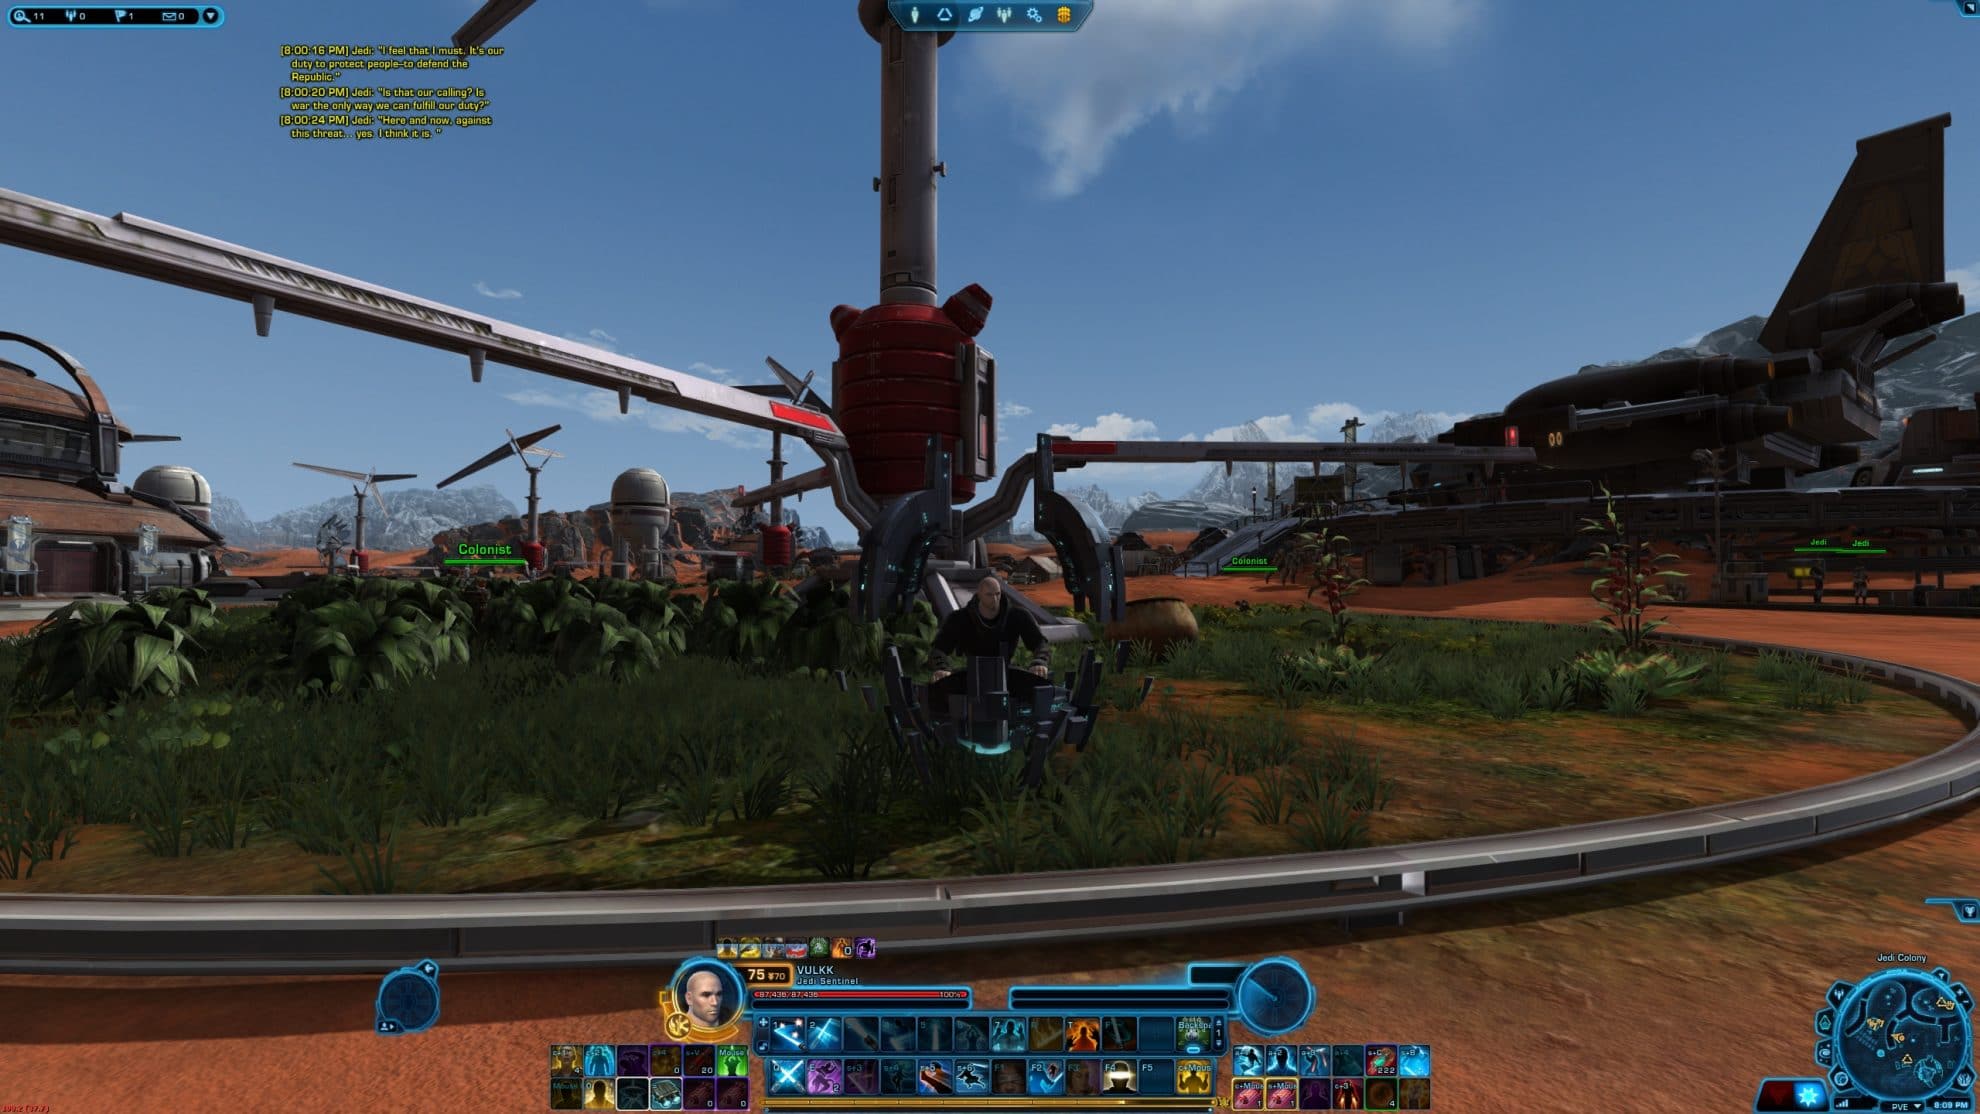
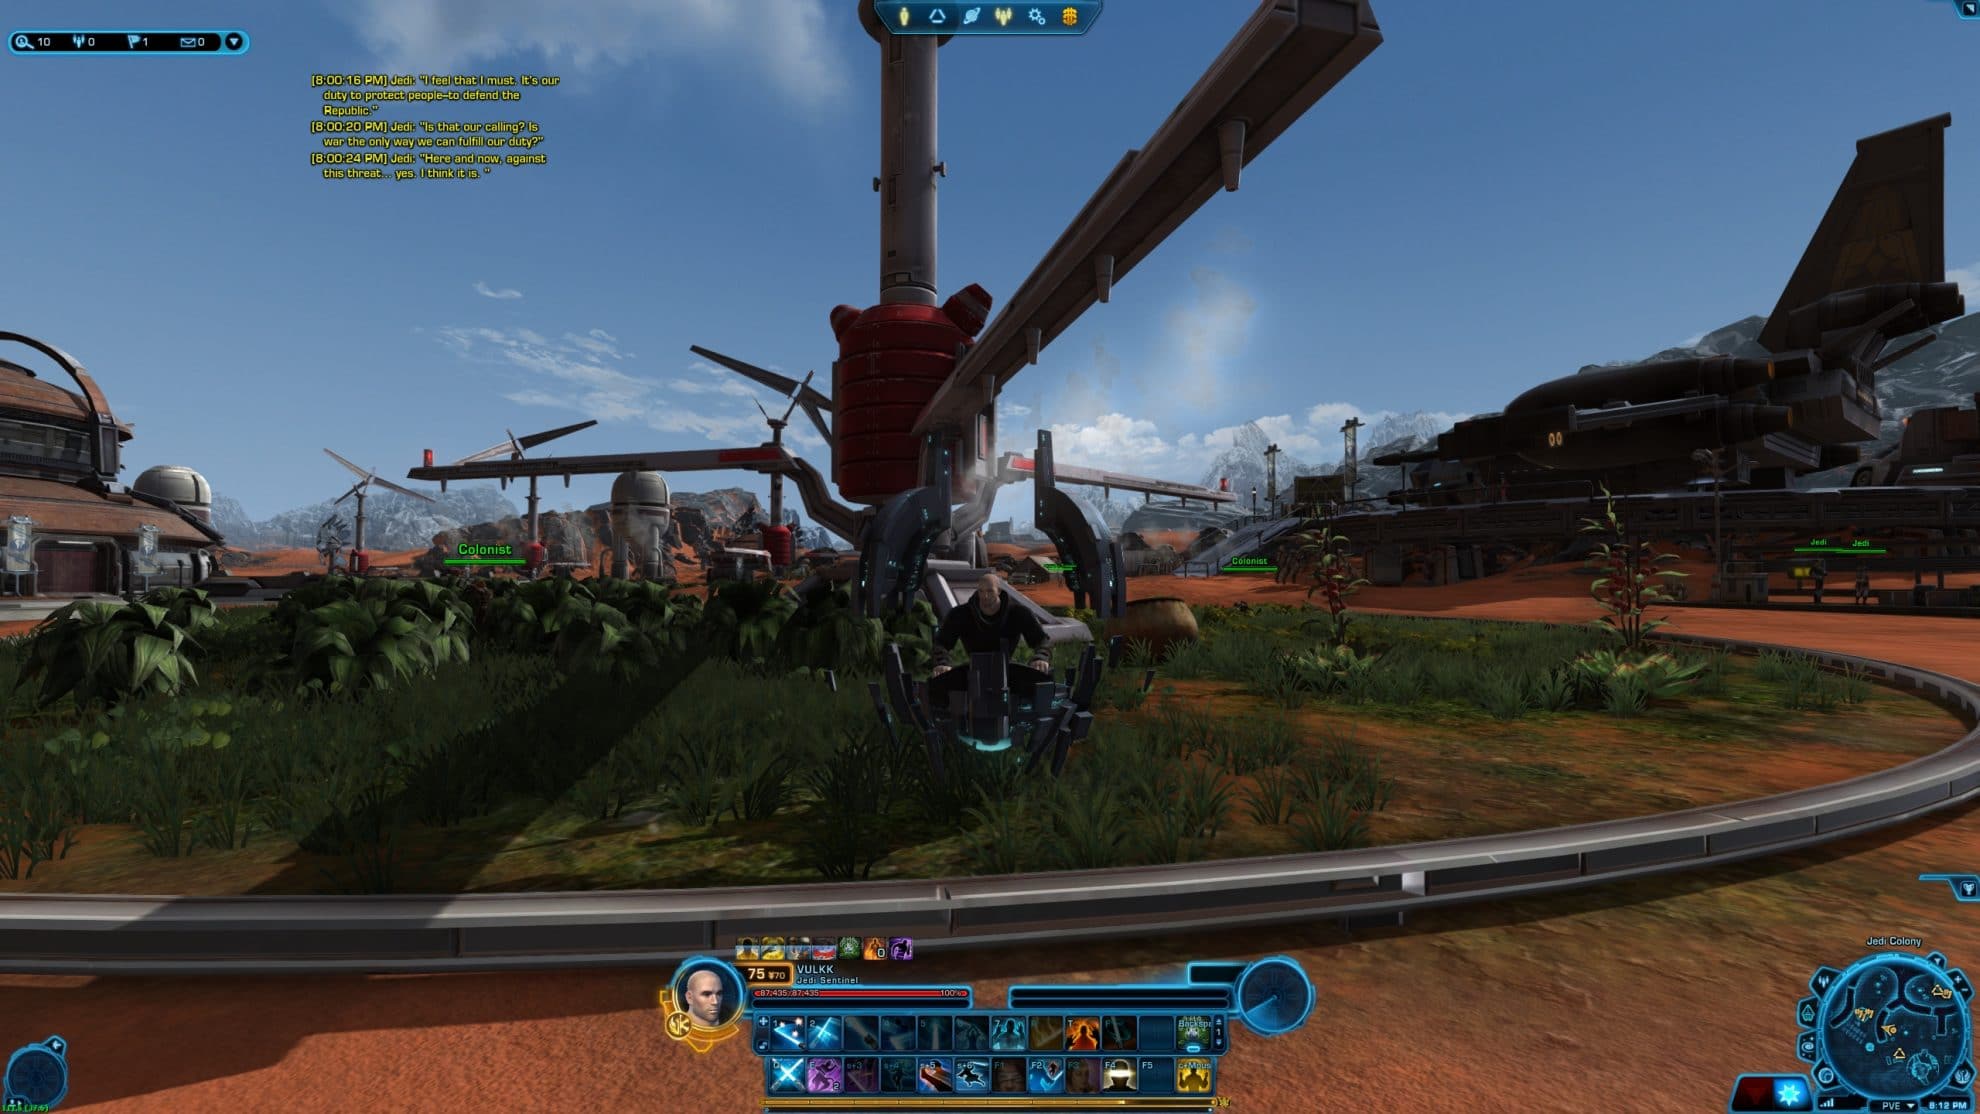
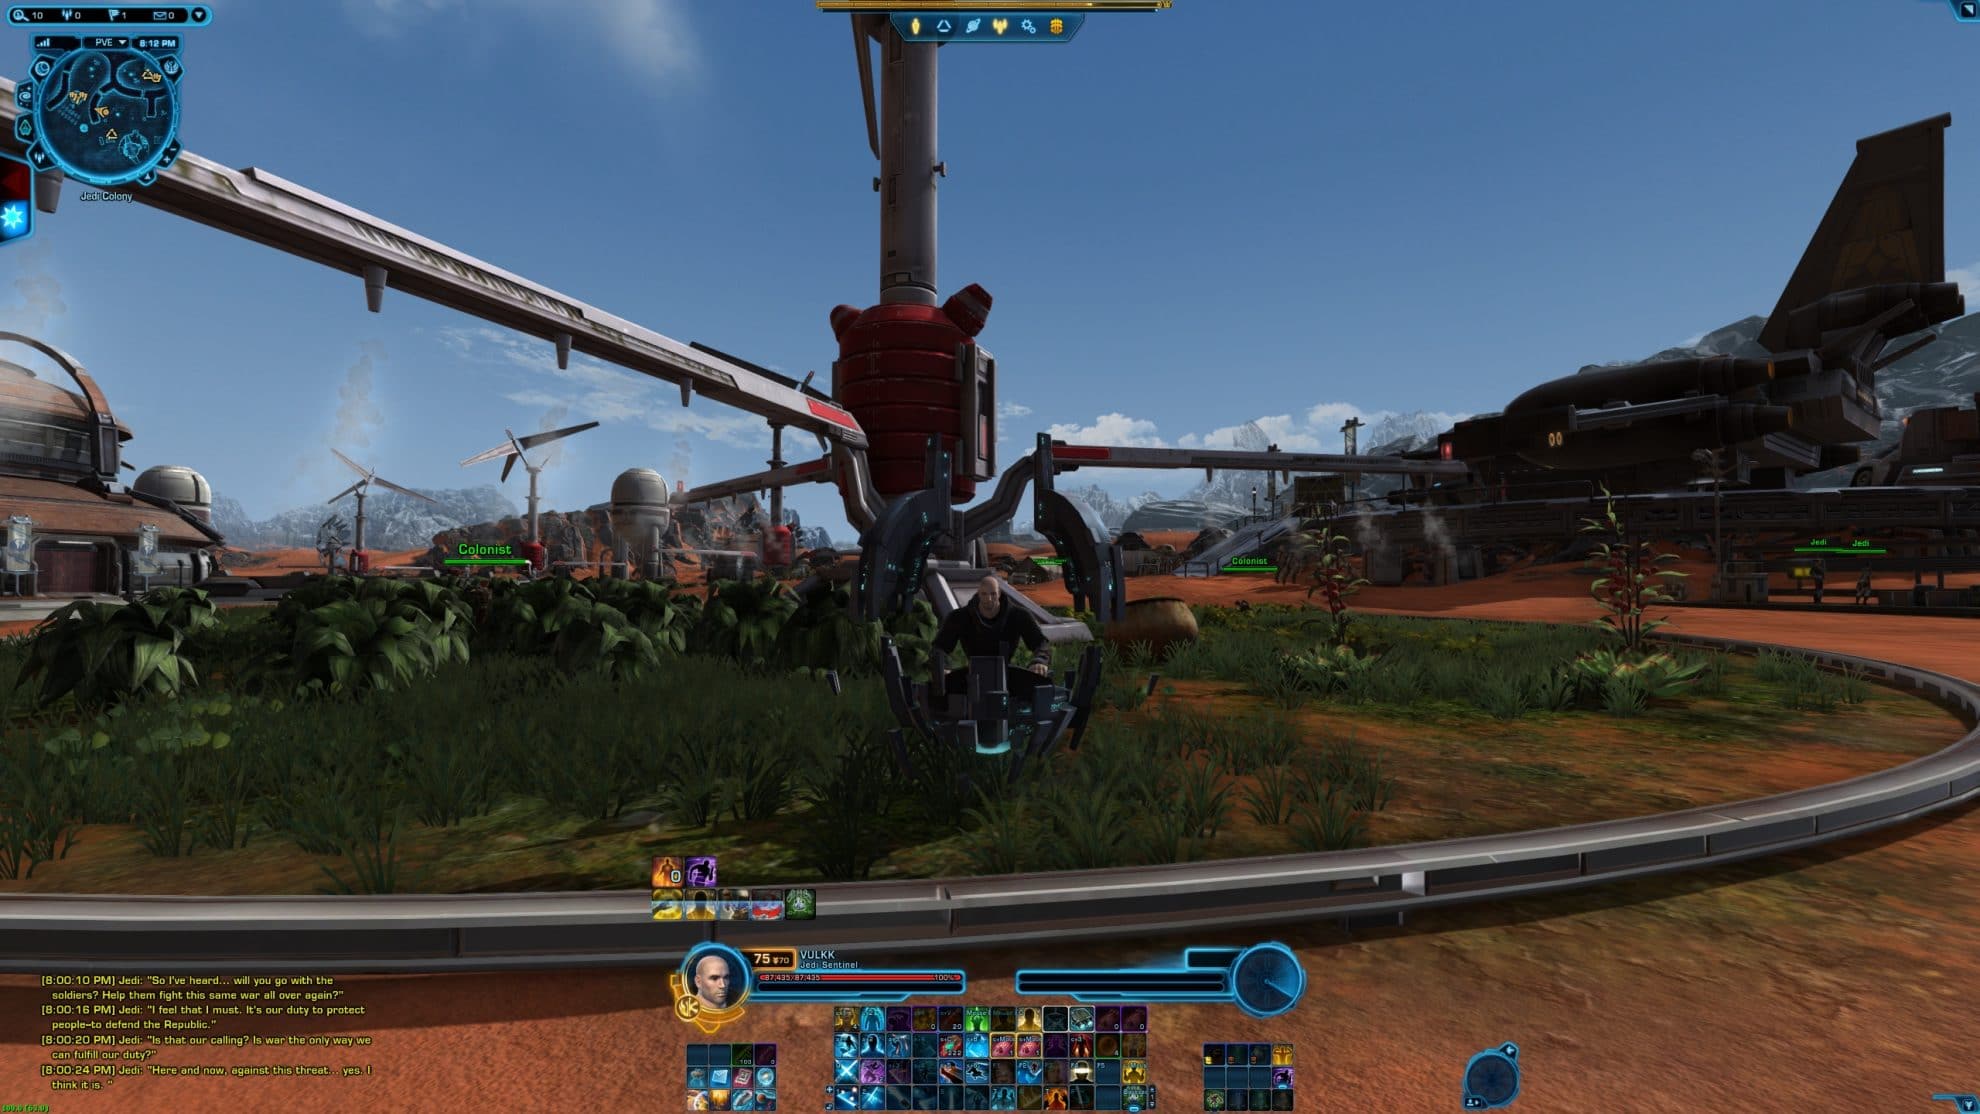
When you log in for the first time you will most likely see one of these pre-installed Interfaces. For now, let’s just take a look at the available variations.
Note that your toolbars will have far less abilities as the images I am using are from my level 75 Jedi Sentinel character.


To use the VULKK SWTOR UI, check out my guide. It includes instructions on how to install another player’s interface and as a bonus – a keybinding guide for beginner players.
How to choose or make the best UI for your needs
With the ability to customize nearly every element of the UI, you may be wondering how to choose and which is the best. I have a few simple, but very important tips to share.
First, if you are a clicker – you prefer to activate abilities using your Mouse), a large-scale UI may be more beneficial to you. The Standard pre-installed UI setups all feature rather large elements and are good for using your mouse.
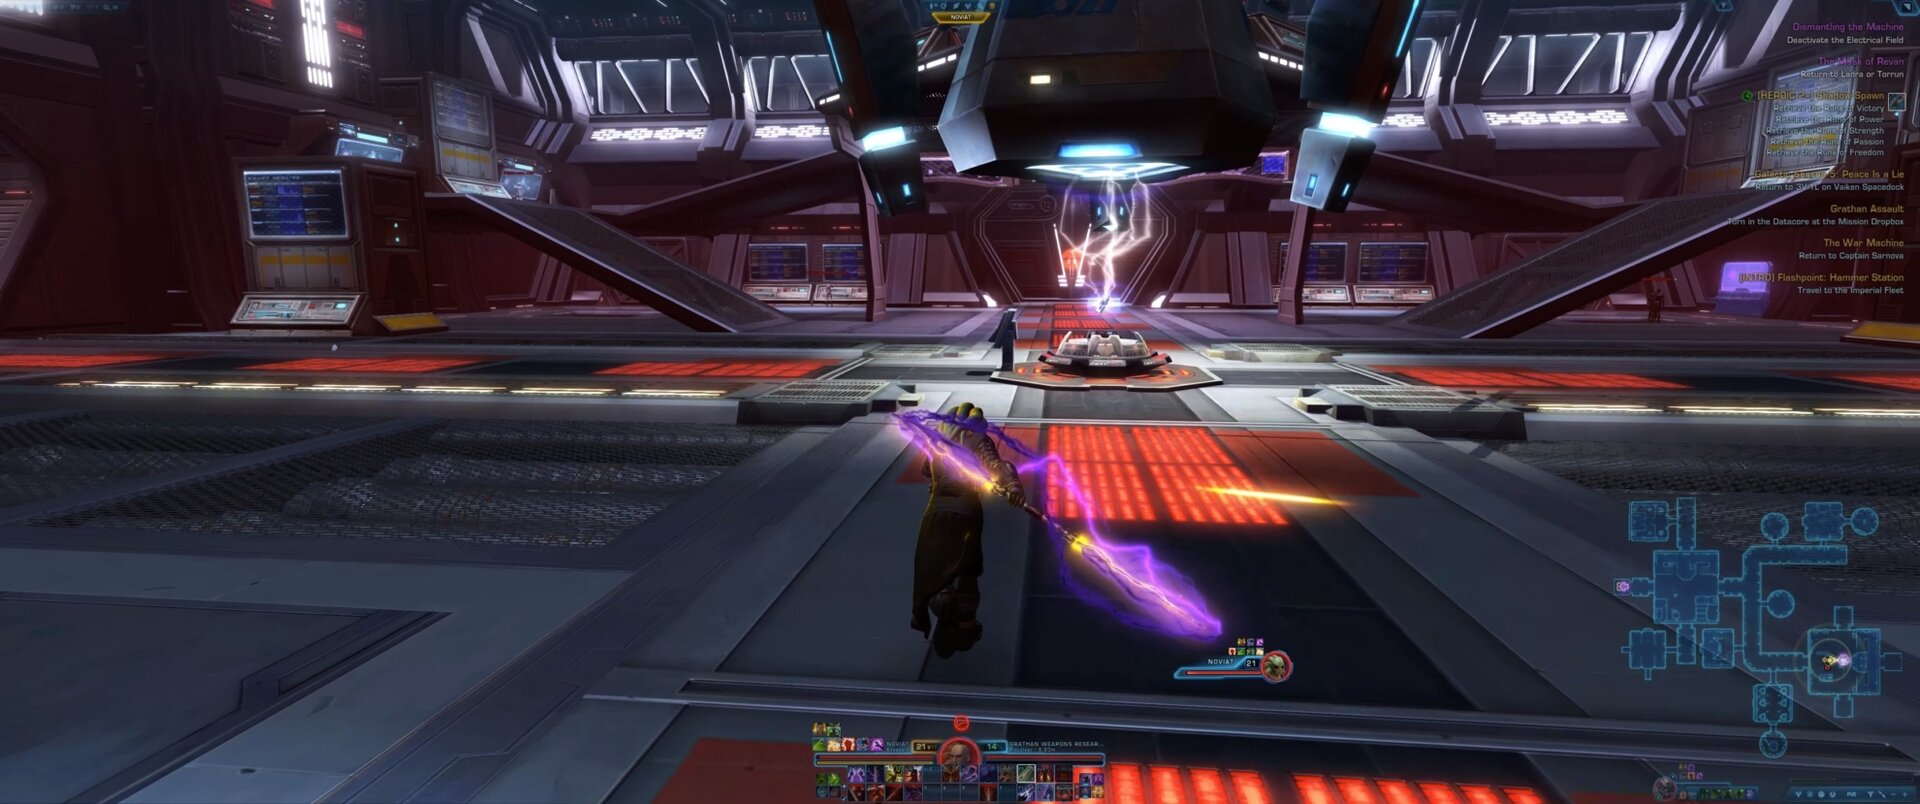
If you prefer to use keybinds (I strongly recommend learning to play this way!), a more minimalist UI will allow you to better immerse yourself in the story and environments.
If you are a new player, don’t make your UI too small. You would want to slowly learn what’s what and where each menu or window is located. Until then, don’t do this:
How to switch between the UIs
To switch between the available SWTOR Interfaces, click on the little plus icon on the left side of the main ability toolbar, as shown below:

Alternatively you can access the Interface Editor from the main in-game menu by pressing ESC and from the menu line on the top.
We will talk more about the things you see in the image below later.

Elements of the SWTOR Interface
Next we’ll take a closer look at each of the UI’s elements and explain what they do, how to use them and why. Some of these elements you may not be able to use right from the beginning of your journey. You will unlock them as you play.
The Abilities Bar and Character HP module

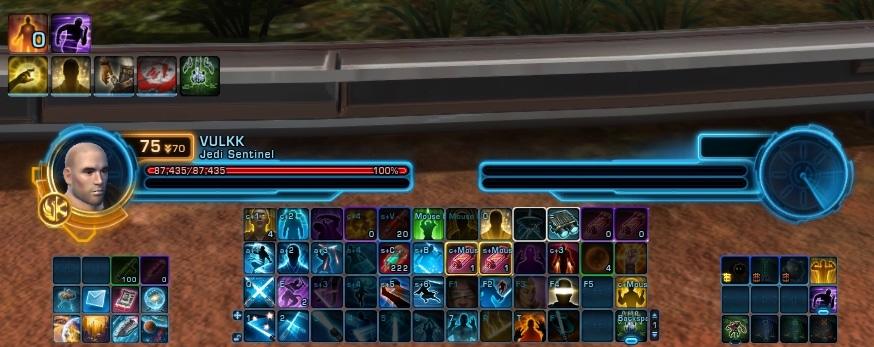
Regardless of how many toolbars you see or have available (based on your subscriber status), you will always see at least one toolbar.
Toolbars are where you will place your abilities as you learn them.
I suggest you place your most used abilities on keybinds. If you prefer to stick to “clicking”, make an order that will best fit your needs. Put abilities you use often and/or together with one another close, so you don’t have to move your mouse too much. This will help narrowing down your reaction delays.
Above the Toolbars are the Character Portraits and HP modules. On the left side is your own character’s HP bar and resources bar. The HP bar is always red, while the resource bar can be empty (like in the images above) or full.
If it’s empty, this means that your character will fill it up as you use special abilities. If it’s full, this means that it will start depleting when your character uses special abilities. You have to learn to manage your resources, but that’s a topic for another place and time. You can check out the SWTOR Class Guides for more info on that.
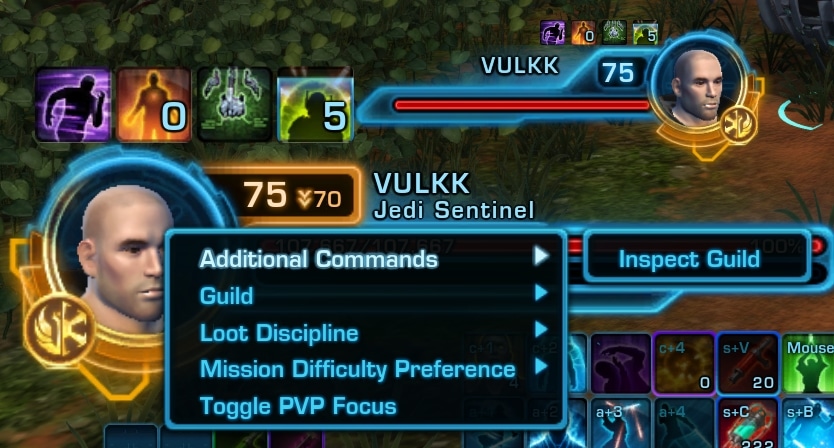
To the left from the HP and Resource Bars is the Character Portrait with the current name and level of your toon.
If you are on a planet or location that is designed for lower level than your current one, this will be indicated by the Level Sync system and displayed right next to your character’s name.
Right-clicking with your mouse on your character’s portrait, will pull up a pop-up menu with the following categories and options:
- Additional Commands:
- Inspect Guild – allows you to see a brief overview of your guild, that is if you a a part of a guild, of course.
- Guild – these are special commands available only to Guildmasters:
- Set Officer Note
- Set Member Note
- Set as Primary
- Loot Discipline – allows you to choose what kind of loot you prefer to drop from the enemies you defeat:
- Current Discipline
- Other available Disciplines for your character
- Mission Difficulty Preference – Allows you to switch between the difficulties for content where difficulties are available. These will come into play later in your adventure. They apply to Flashpoints, Uprisings, Operations and Story Chapters (not the original ones up to level 50ish, though).
- Story
- Veteran
- Master
- Toggle PvP Focus – allows you to switch your current focus between PvP and PvE environment. If you are in a PvP setting, other PvP-enabled players in the same instance will be able to attack you on sight.
Buffs and Debuffs Bars
Right on top of your character’s portrait you will see a group of icons. These are the positive effects currently active on your character. They are called commonly “buffs”.
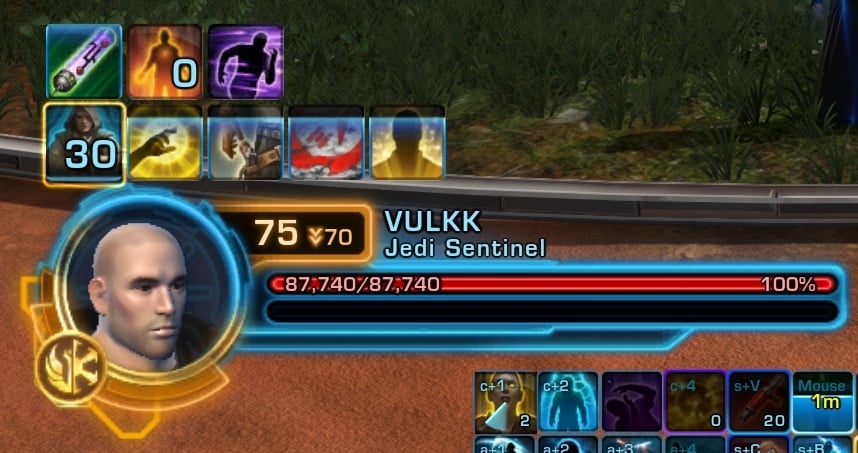
Mousing over each of the icons will display a brief description of what this effect does to you.
The ones that have an expiration timer, will show it on the icon as a horizontal light-blue bar that slowly depletes (moves towards the bottom).
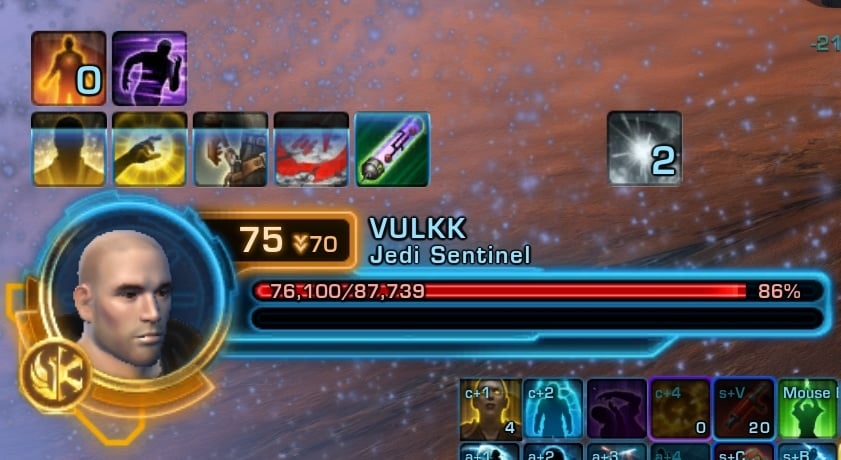
On the right side is your Debuffs bar. This is where the negative effects that currently affect your character are located. They have the same features like the buffs in regards to visual presentation.
These effects usually appear during combat. Some of them may remain on you out of combat as well.
In time you will learn how to recognize them by their icons and you wont have to mouse over each one of them to understand what their effect is.
You can change the appearance of the HP bars by disabling and enabling the texts on them. You can also edit the appearance of the buffs and debuffs, move their position. To do this, open the editor and click on that module. The video below explains how to do all this. Note that many UI modules display custom settings when you click on them while editing the UI.
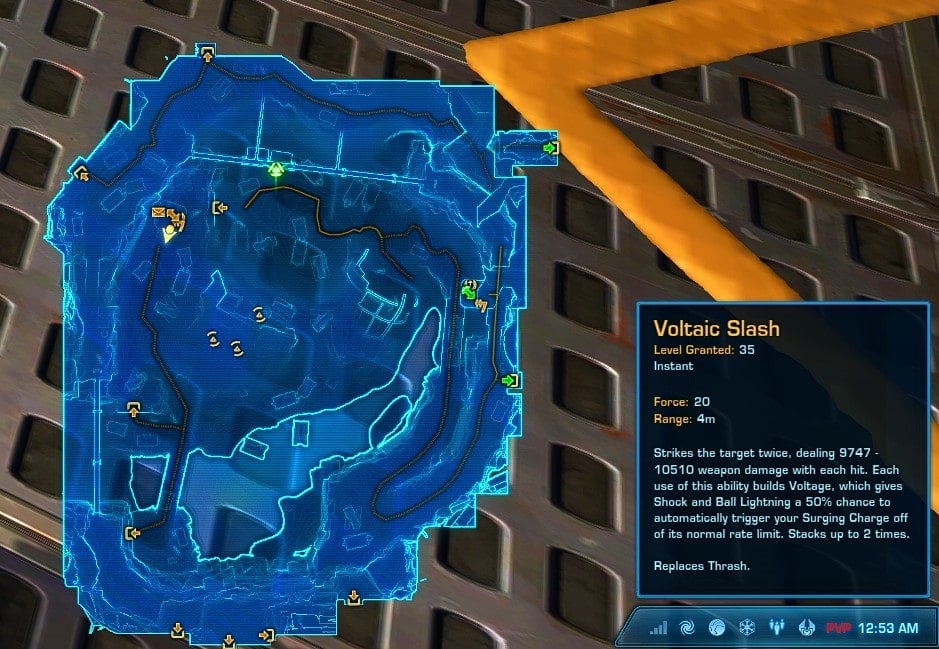
The Minimap
The Minimap is usually located in one of the corners of you UI. It displays the immediate area around your character.

It is surrounded by a number of buttons and features. Most of these modules and windows are also available from other places in the UI.
Display or Hide Icons on the Minimap
Clicking the little blue arrow on the bottom of the minimap will open a drop-down menu. Here you can choose which symbols to be displayed on the minimap. If you are not interested in all of them, you can opt to disable some to clear up the clutter. I usually like to leave them all on.
Zoom in and out the map
Clicking on the plus + and minus – icons on the bottom right of the minimap will zoom in and out the image. If you want to see a larger area surrounding your character, zoom out. Note that going too far out will make things hard to distinguish when in crowded places such as camps or cities.
Your current Location
Right below the minimap is where you can see the name of the area you are currently in. In the image above you can see that I am currently in the Jedi Colony area (on the planet of Ossus).
IMPORTANT: With Update 7.2 the developers added a new type of minimap and redesigned a lot of the features involved, including adding two new utility bars. Check out the dedicated guide to that to learn how to take full benefit of them and how to set your map properly for optimal performance and usability.
Server Lag
Server lag – these bars look a lot like the bars of your mobile phone. They show your current connection to the game server.
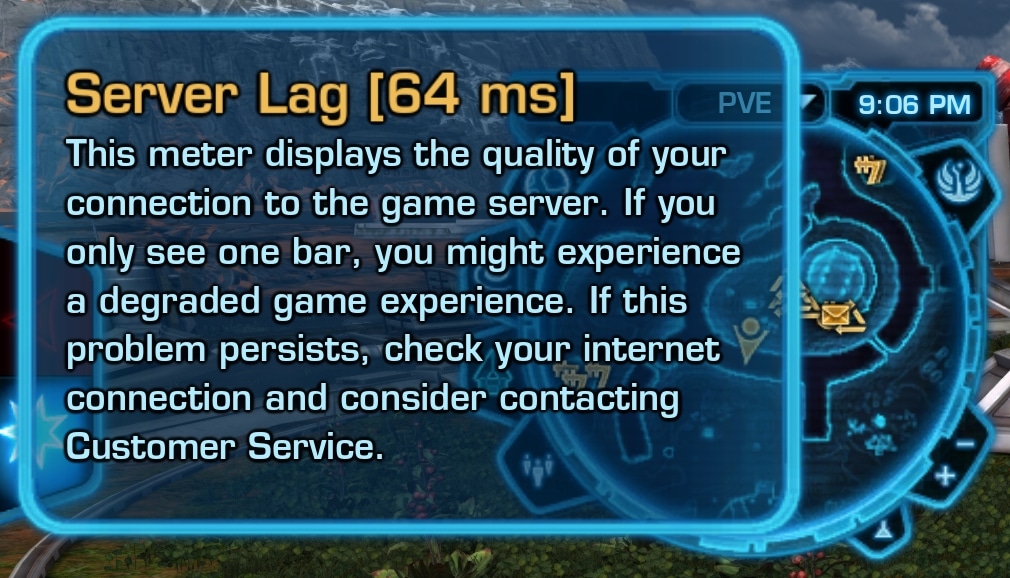
If you mouse over it you will see the exact server lag in ms. Just a note – lag above 100 is considered a bit too much. Usually it is between 15 and 80 for more players.
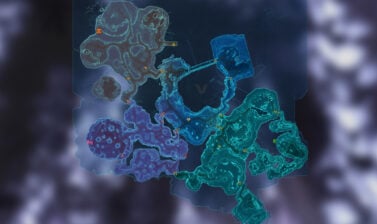
The World Map
The big map is available at your disposal and can be opened at any time by pressing the M key (by default). It is not comfortable having it open as you play, but it gives you a much more detailed overview of the area you are in.
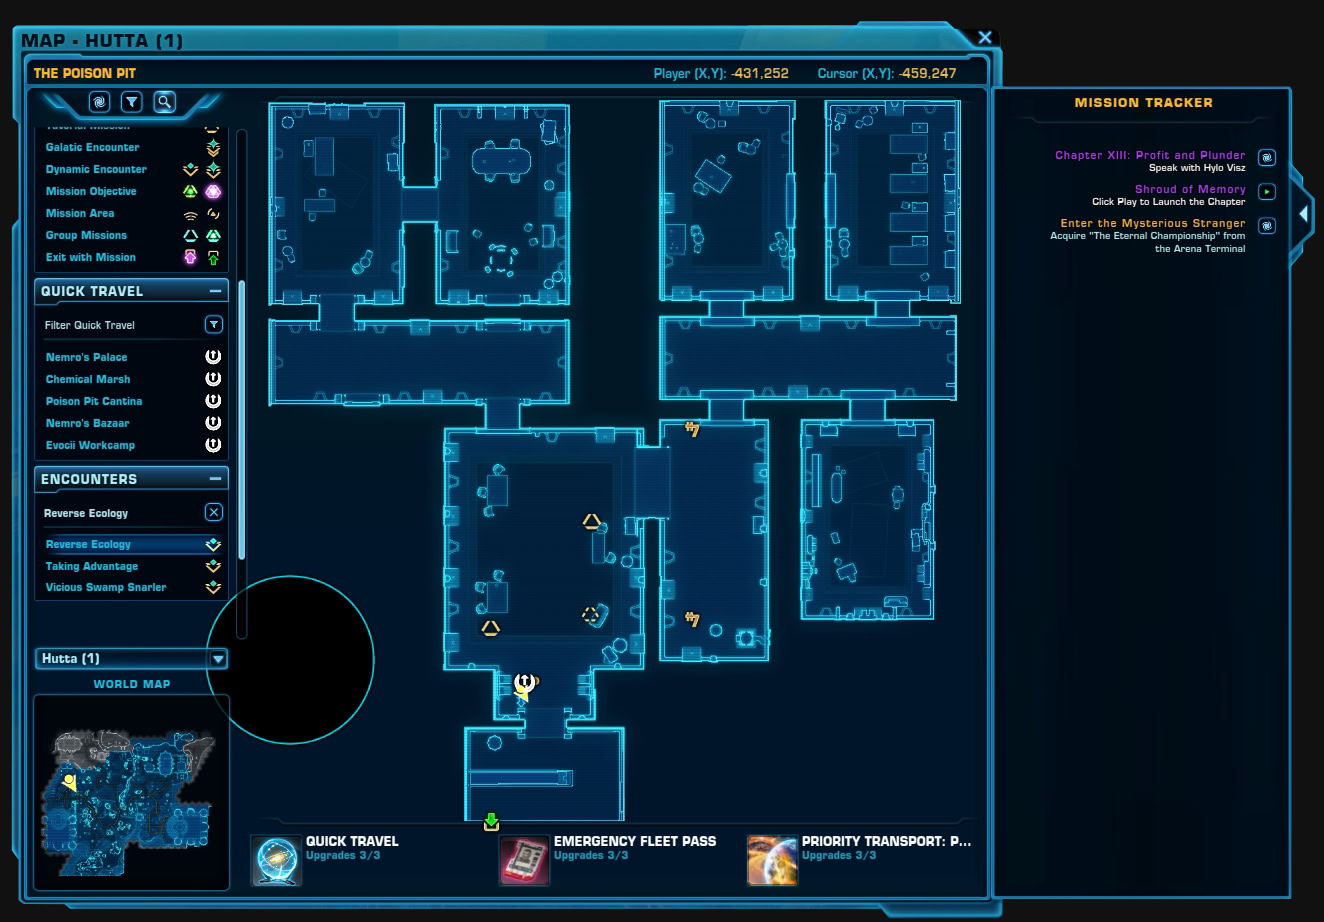
On the left side, at the very top, are your navigation shortcuts and options to display various icons and notifications on the map to the right, as well as the magnifying glass tool.
The small map at the bottom left, shows where you are on the world map and the large map displays the current area.
You can track Dynamic Encounters, which is helpful for planets with complex navigation, such as Coruscant. The panel in the right, will display any missions you are currently tracking. If you hover over a mission, you will see it highlighted on the map
Below the area map, you will find buttons to popular Legacy abilities that allow you to quickly travel to specific locations such as the Fleet or your personal starship.
Galaxy Map
The next button on the left of your minimap opens the Galaxy Map. For any Star Wars Lore junkie this will look familiar. This is the map of all known systems that are part of the game’s story and you will sooner or later visit each and every one of them.
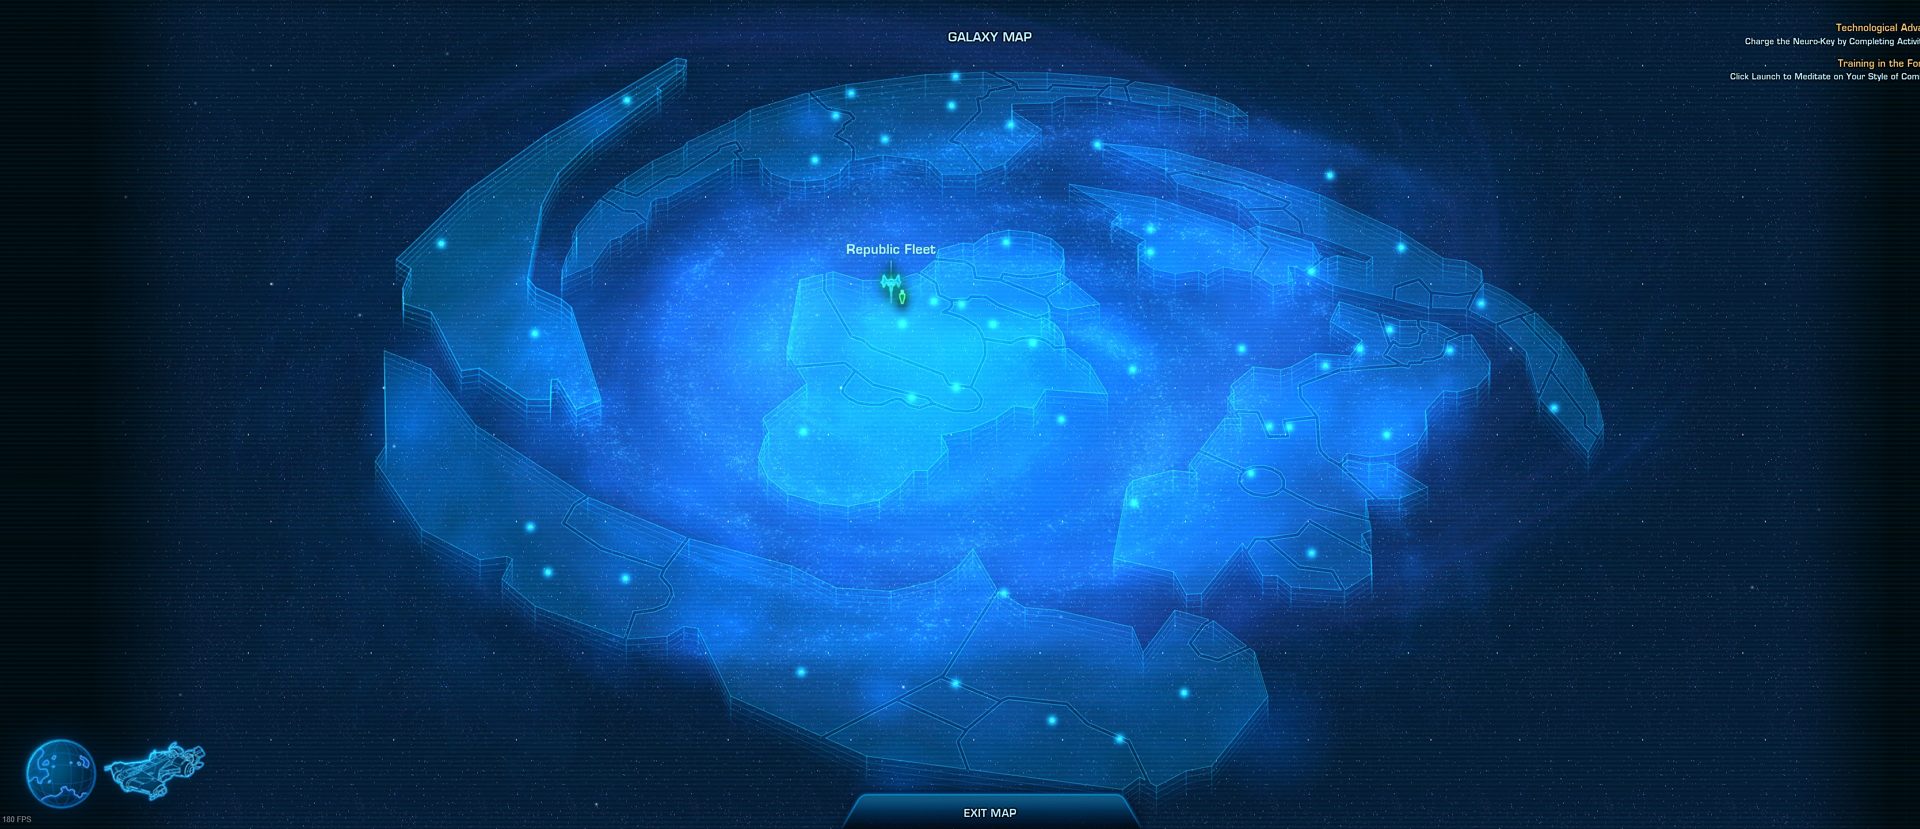
In the bottom left corner, you have two symbols. The planet one allows you to switch to the world map, that we discussed already in the previous segment.
The second icon that looks like your class’ starship allows you to travel quickly to your own ship. This icon is available if you own a ship and have unlocked the “Priority Transport: Personal Starship” perk. More on that later.
In the top right corner of the screen you can see the mission tracker.
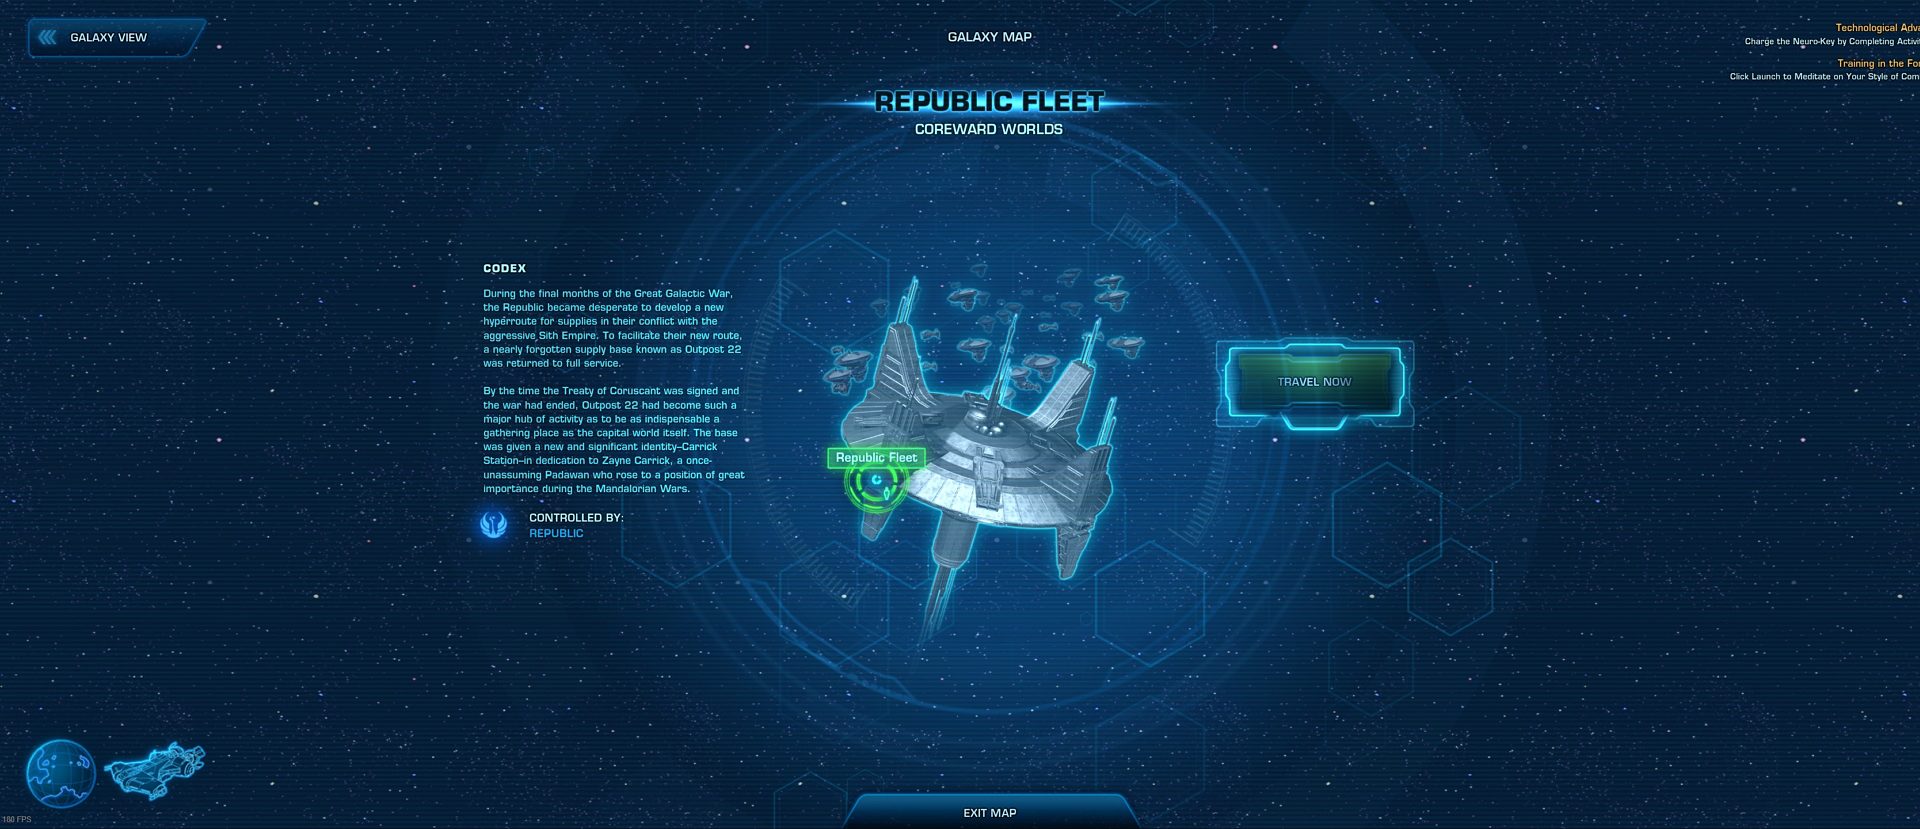
When you open the Galctic Map, clicking on an object will show you a brief description and allow you to travel to it.
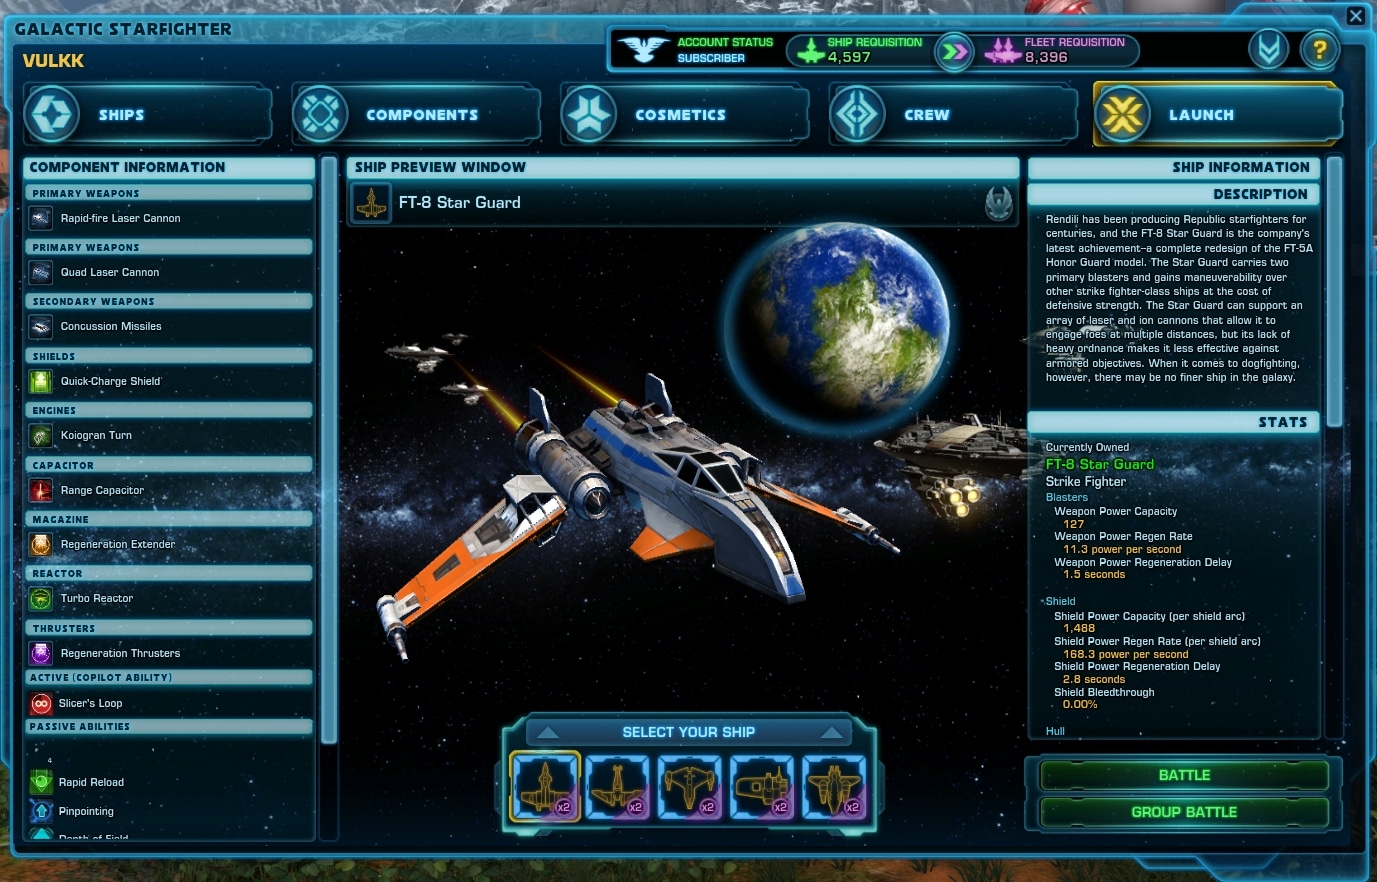
Galactic Starfighter
Galactic Starfighter (GSF) is a separate game within the main game. It is Space flight PvP mode. I have a very detailed and in-depth guide to the SWTOR GSF. Check it out if you want to participate in this activity.
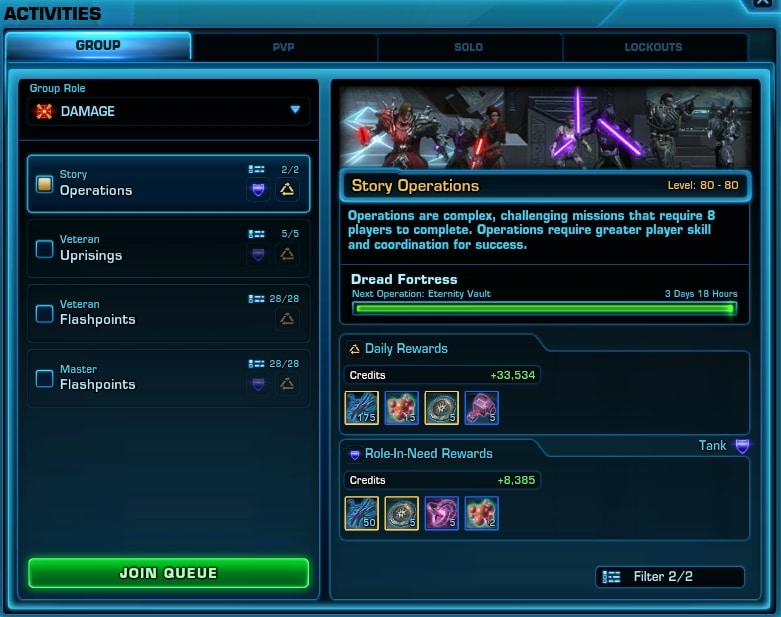
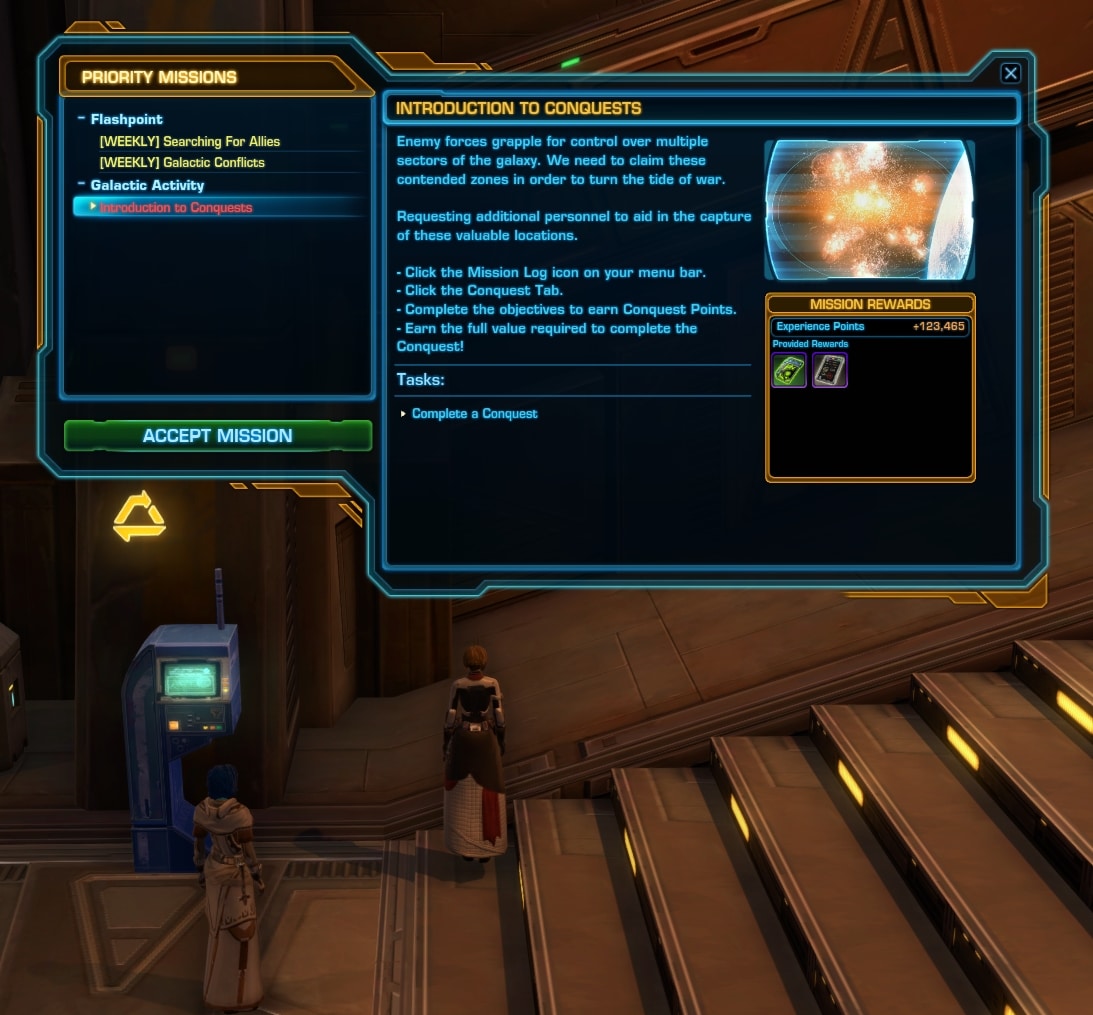
Activities Window
This is the place you will visit very often later on. Here you will find all kinds of solo and group activities and you can start or queue for them all right from this window.
I have a great turorial video explaining all of the Activities Window’s aspects. Check it out below:
Here is a brief list:
- Group tab – allows you to queue for a group activity. On the left is a list of all activities currently available to you, based on your character’s level. On the right are the rewards you are going to receive for completing the selected activity.
- PvP tab – allows you to queue for Unranked Warzones (8v8), Ranked Arenas (4v4), Galactic Starfighter or issue a Group PvP Challenge.
- Solo tab – a list of available destinations for your to complete Heroic Missions (group missions in the open world or in a separate instance or do Daily Missions. You can also opt to do a Flashpoint in Solo Mode from here.
- Lockouts tab – here you will find the locked content that you have already completed and need to wait for the cooldown to expire before you can participate again. On the left side is the list of all available Operations (8 or 16 players raids). On the right side is the current lockout for your current group, it you are grouped.
The Chat Window
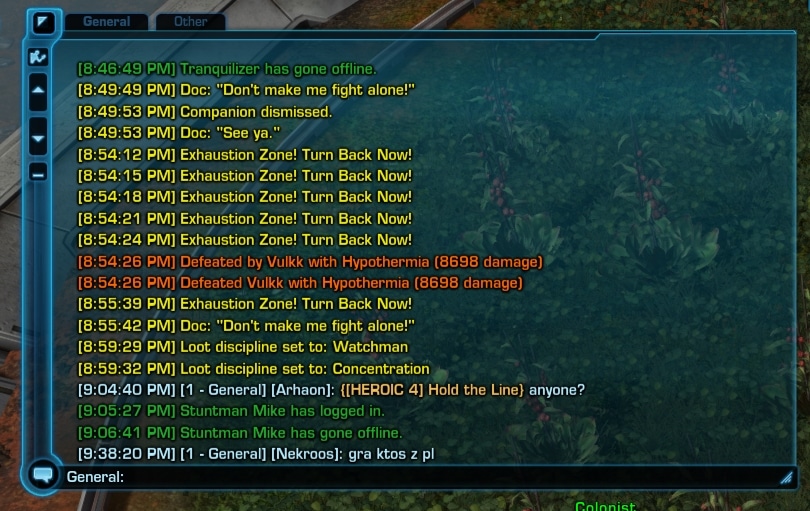
In the different UIs the Chat tab may be located in a different place. Its features are always the same, though.
To Toggle On or Off the chat, click the blue triangle icon on the top left corner.
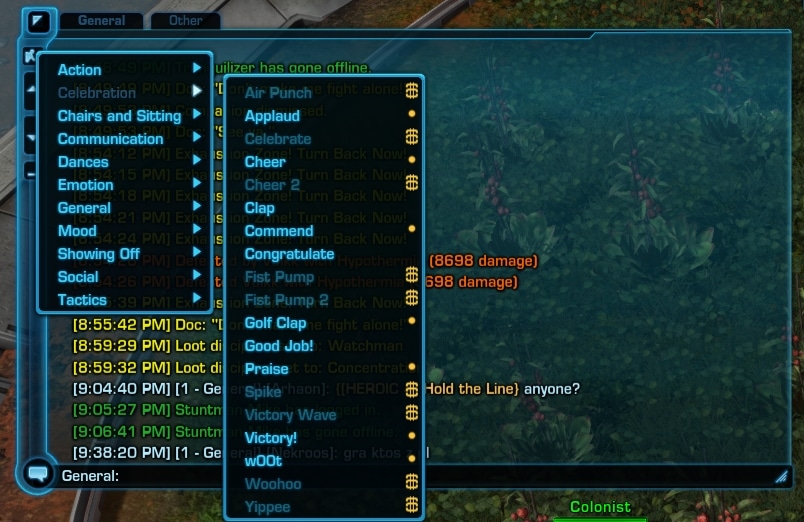
To see and use any of the available emotes, click on the person icon on the left side of the chat tab. This will open a drop-down menu with sub-menus for each category of an emotion available.
The down and up arrows allow you to move through the chat log.
Click on the bottom left corner to choose what kind of a chat line you want to type. Type in the dark-blue field at the bottom of the chat tab to write your message.
The available chat tabs are dispayed on the top above the chat log.
To change the size of the chat window, click and drag the little triangle in the bottom right edge of the chat tab.
The Menu Line
This is the blue horizontal (can be made to be vertical as well via the Interface Editor) is where the vast majority of the UI elements and additional windows are. This menu bar allows you to access pretty much everything.
I have already covered some of the UI elements available here. The rest will be explained in the next segment. For now, let’s just list the menus and sub-menus.
Note: the shortcuts you see may not the exactly the same as in the images below. Over the years I have made my own keybinds that best suit my style and needs. You should do the same.
Personal Character menu
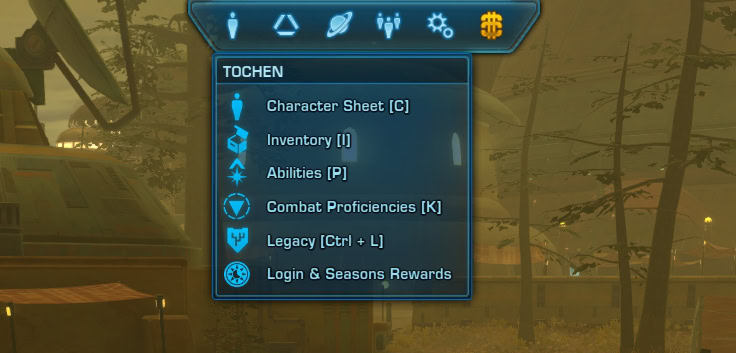
This is where you can access most of your personal character’s tools like inventory, legacy, abilities and utilities builds.
Content menu
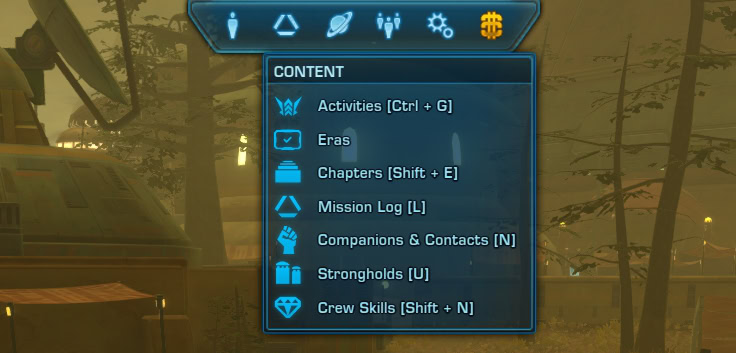
The Content menu allows you to explore a number of different gameplay elements of the game. Here is the Mission log, which gives you an overview of all of your currently active missions.
Explore menu
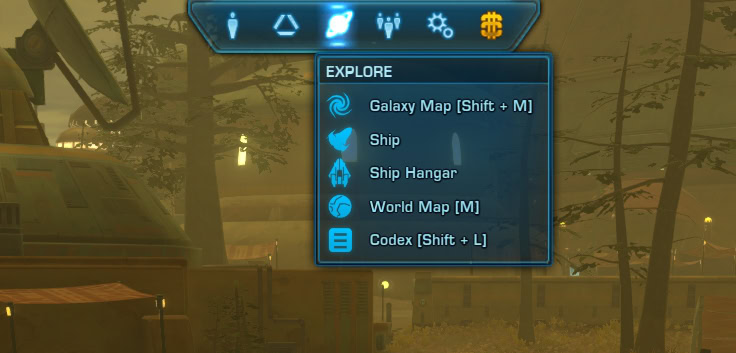
We already discussed the Galaxy map and the World map. They can be accessed from here as well.
Social menu
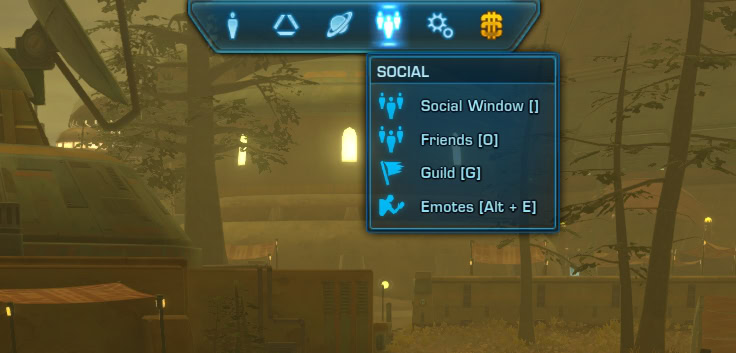
From the Social menu you can check your friends list to see who is online. Here is also the Guild tab access, iuf you are a member of a guild.
System menu
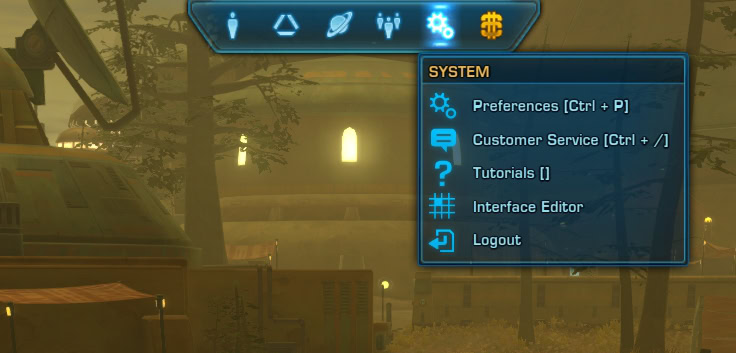
The System menu allows you to tweak the game’s performance, audio settings, check the tutorials again. Here is a link to the Interface editor, which you can use to customize the UI to make it your own.
Cartel Market menu
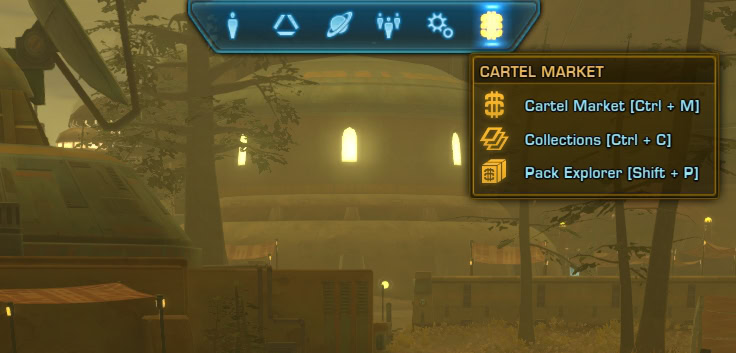
The Cartel Market menu allows you to easily access various elements of the real-money related features of SWTOR such as the in-game shop, your collections and the Pack Explorer tool.
Now, lets take a closer look at each one of the modules and windows from these menus.
Character Sheet and Inventory
The Character Window has been redesigned for Update 7.0. It is the home of all important stats to your character, gear overview, outfitter, abilities, loadouts and companion screen all in one place.
On the top you see five tabs. Here is a quick description of what information you wil find in each one of them:
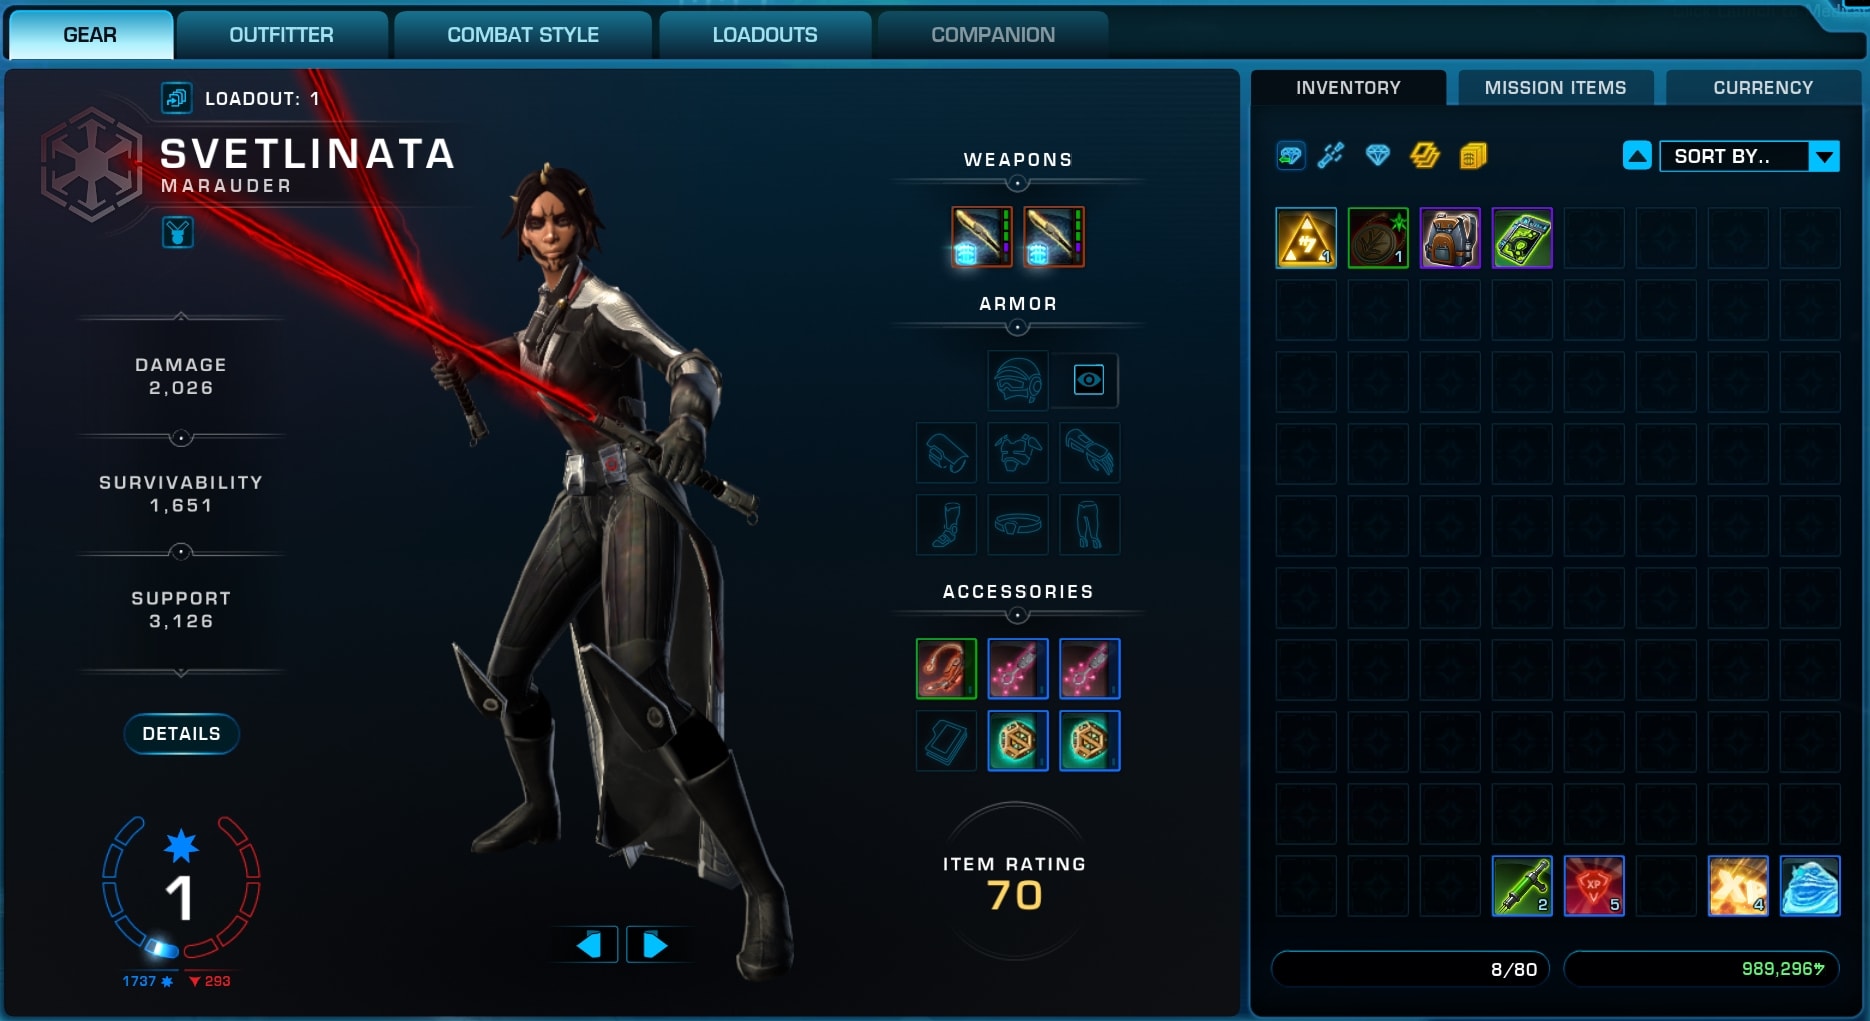
Gear Tab
On this tab you can see a visual preview of your character, their name and current level as well as the equipped gear items and light/dark side alignment.
The Item Rating stat just below your gear slots is an average cumulative summary of your currently equipped gear. It is used in some group content to indicate whether you are wearing good enough gear for the challenges ahead.
IR is used to determine the difficulty of the content you should be shooting for. For example, with the starter level 80 gear, you should not jump into Master Mode difficulty of any group content. To tackle the most challenging group content (Master Mode Operations) you would need well-balanced high tier gear with proper stats distribution according to your class.
The stats that you see on the left side are a result of the equipped gear and active buffs on your character.
Based on your class and discipline, you will see different information in the bottom two panels on the Character Tab. To get a better understanding of how your character stats and gear work together, check out the appropriate SWTOR Class Guides list.
Outfitter Tab
The Outfitter tab is the place where you change the appearance of your character without impacting your performance in combat. There was a subtle quality of life change introduced with Update 7.1, but otherwise, this tab has been majorly redesigned with the Legacy of the Sith expansion.
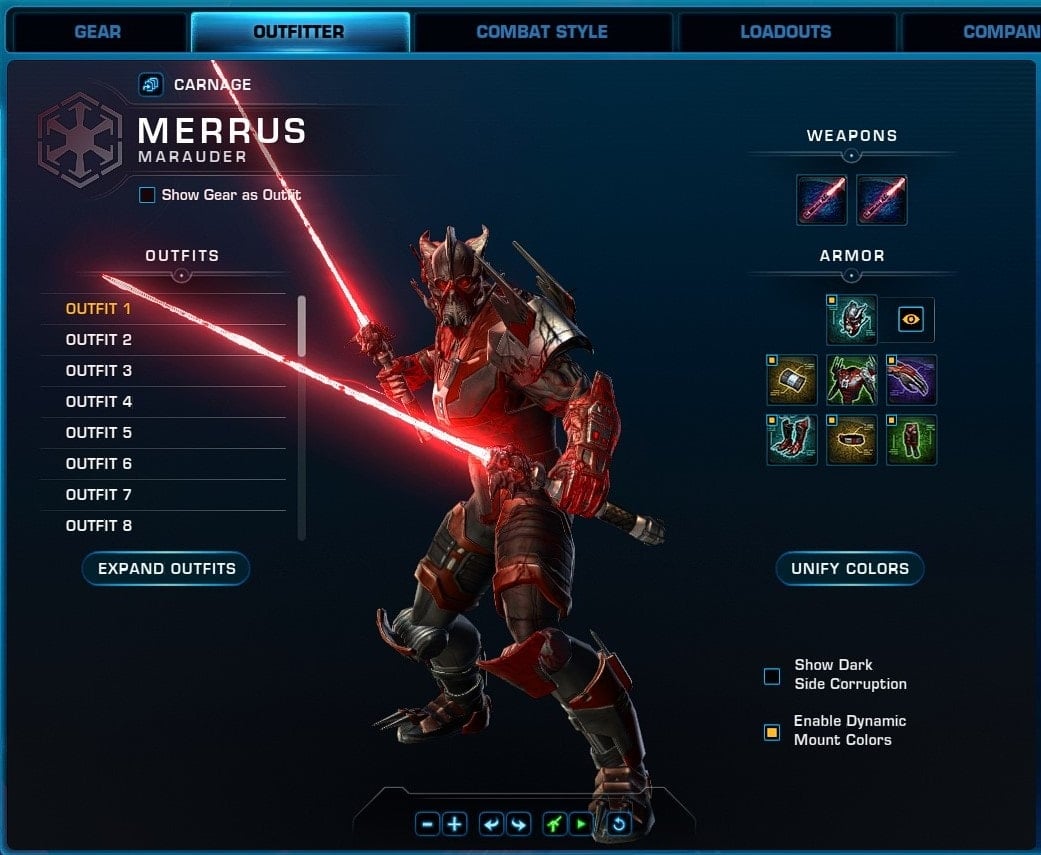
To learn more about Gear and Outfits, check out the SWTOR Gear vs Outfits: what is the difference guide.
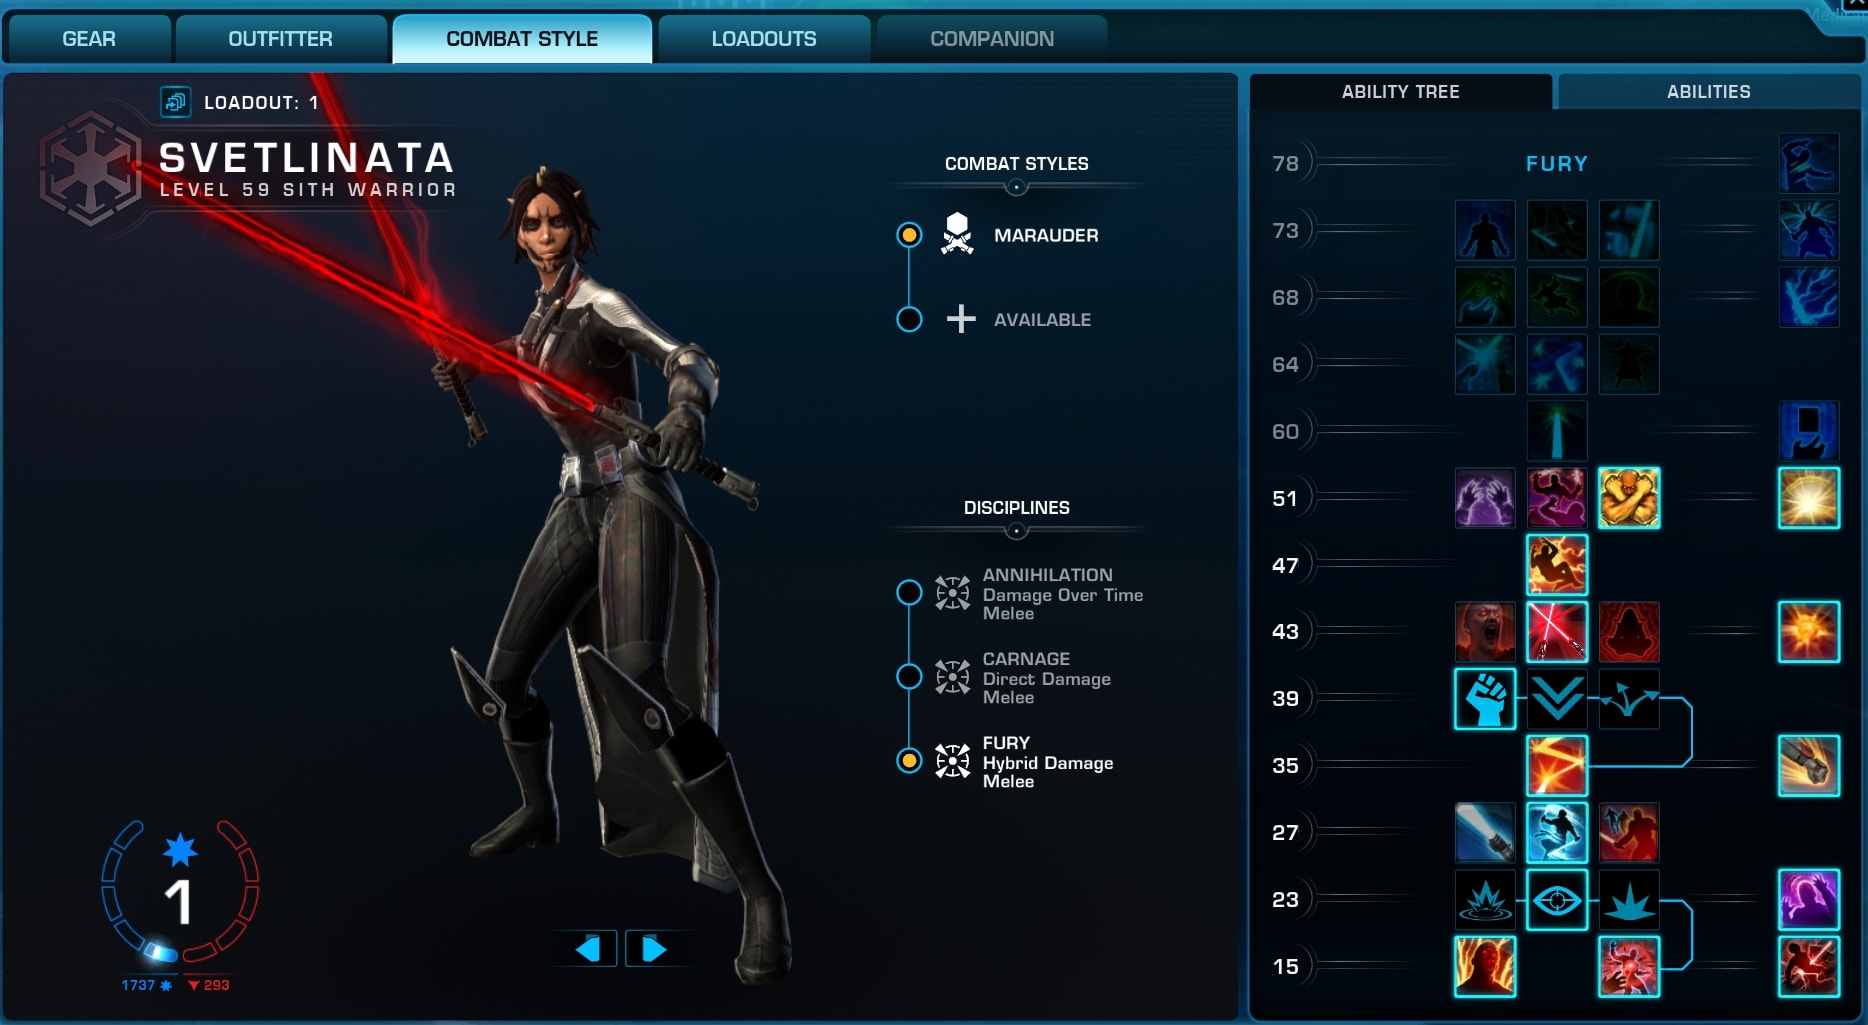
Combat Style Tab
The Combat Style tab is where you can see and set your active abilities and passive skills that make your character build work for you.
You can learn a lot about this tab by reading the dedicated Combat Styles Guide in SWTOR, where you will also learn how to choose a Combat Style and add a second one.
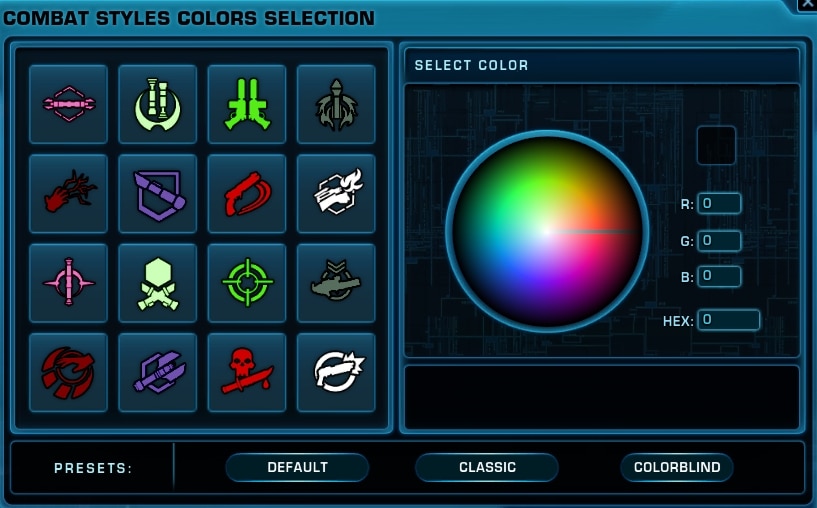
In Patch 7.1 BioWare introduced the option to change the Combat Styles Colors for yourself. This isn’t visible to other players, it’s a strictly personal preference.
Loadouts Tab
The Loadouts Tab is the place where you can define different builds for your character. You can save different loadouts ready to switch between them at (almost ) any time.
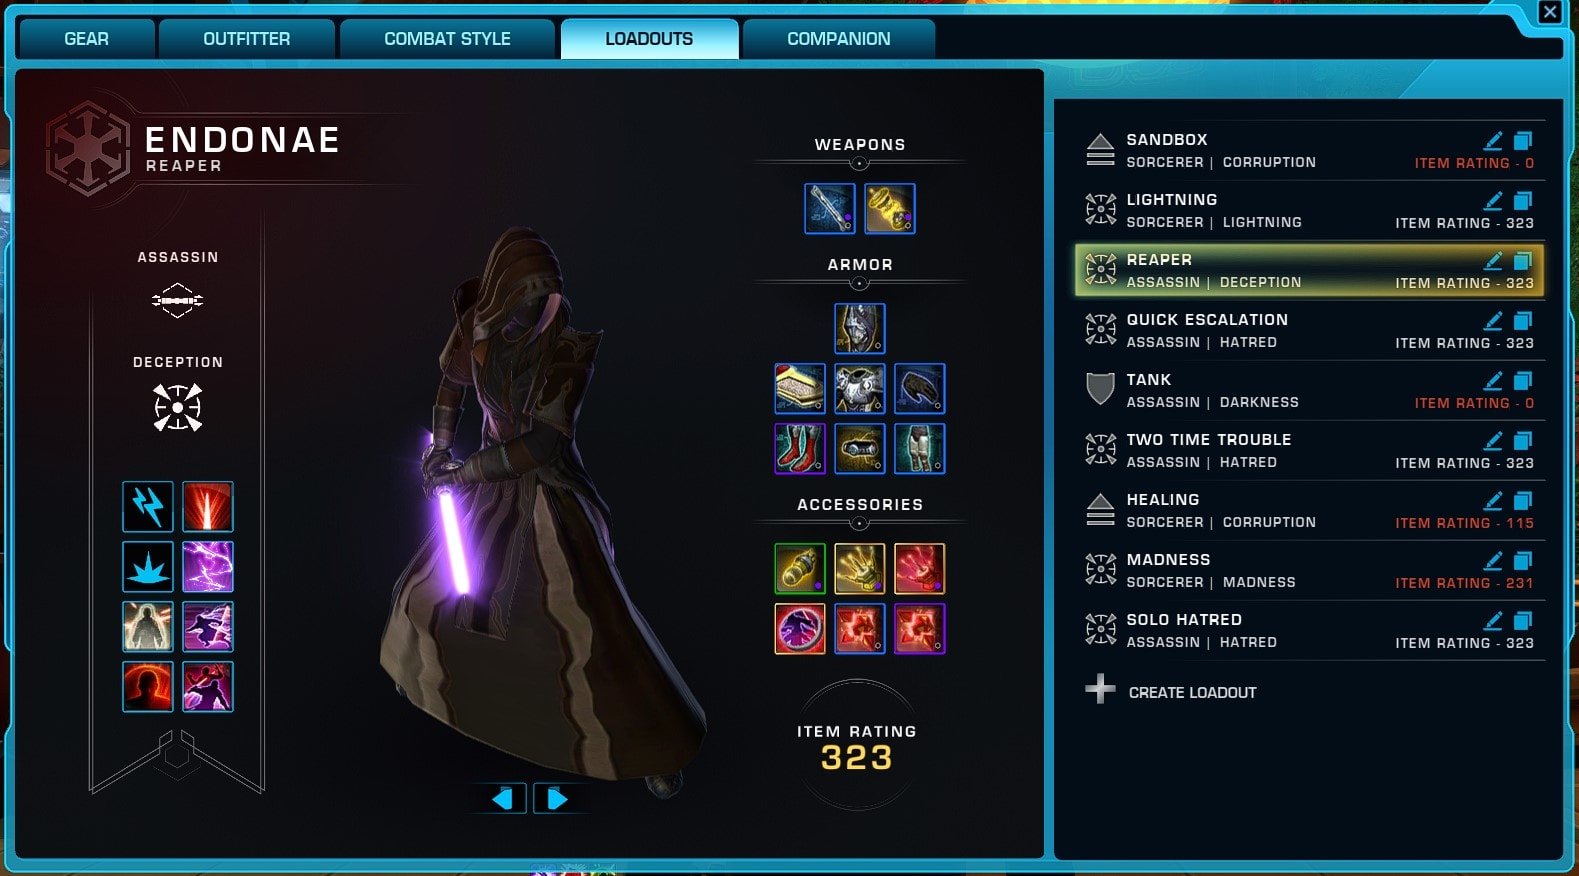
You can learn more about how Loadouts work in SWTOR by checking the dedicated guide on that topic.
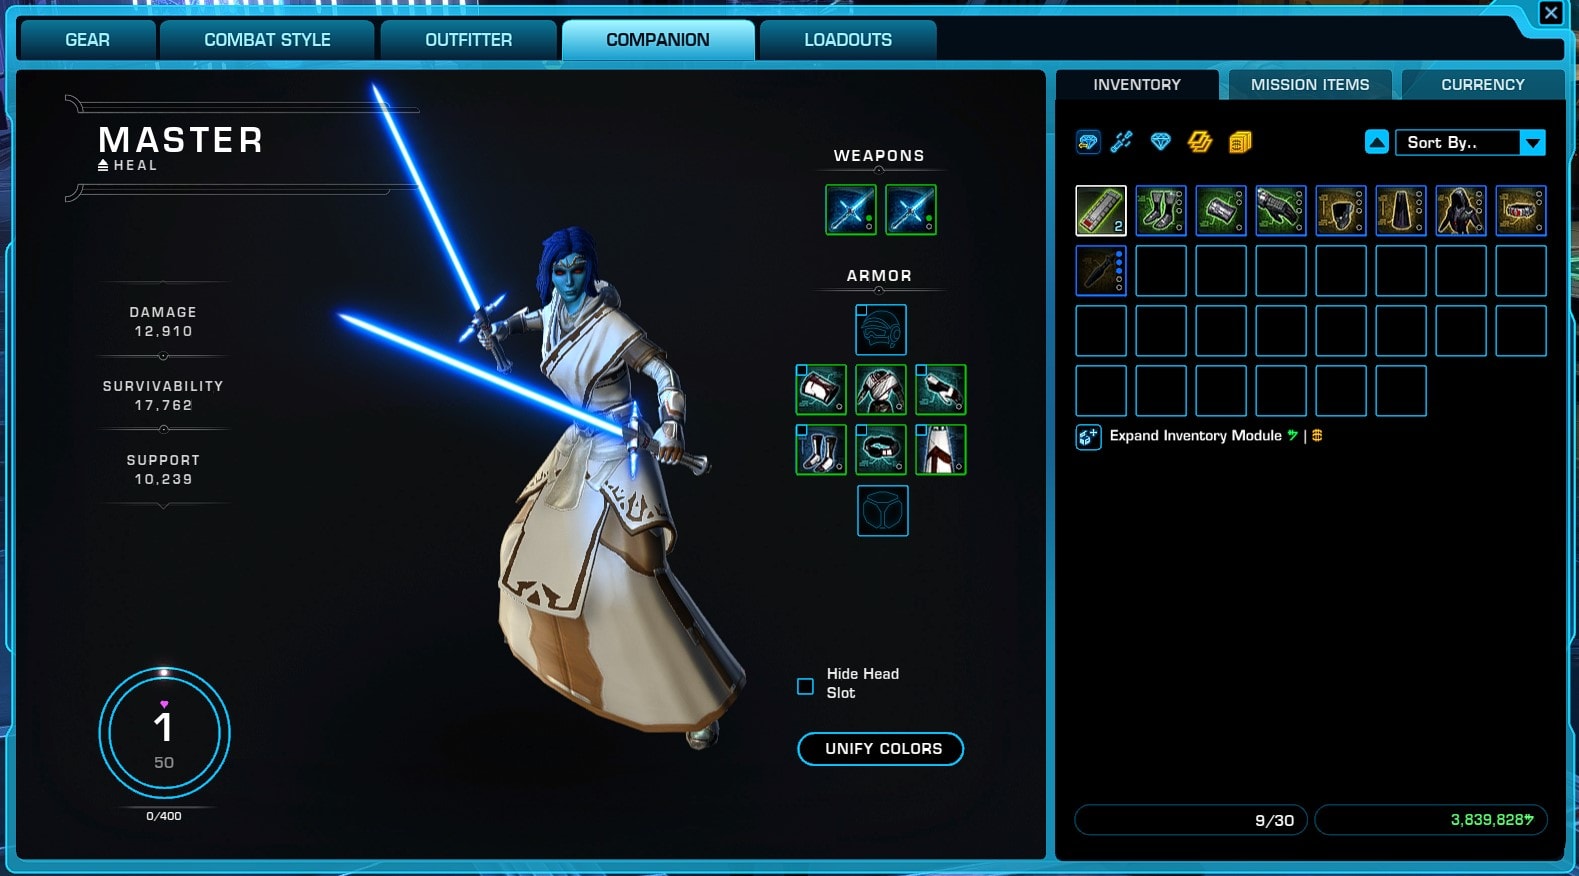
Companion Tab
In the Companions Tab you can see the equipment and stats of your currently active companion.
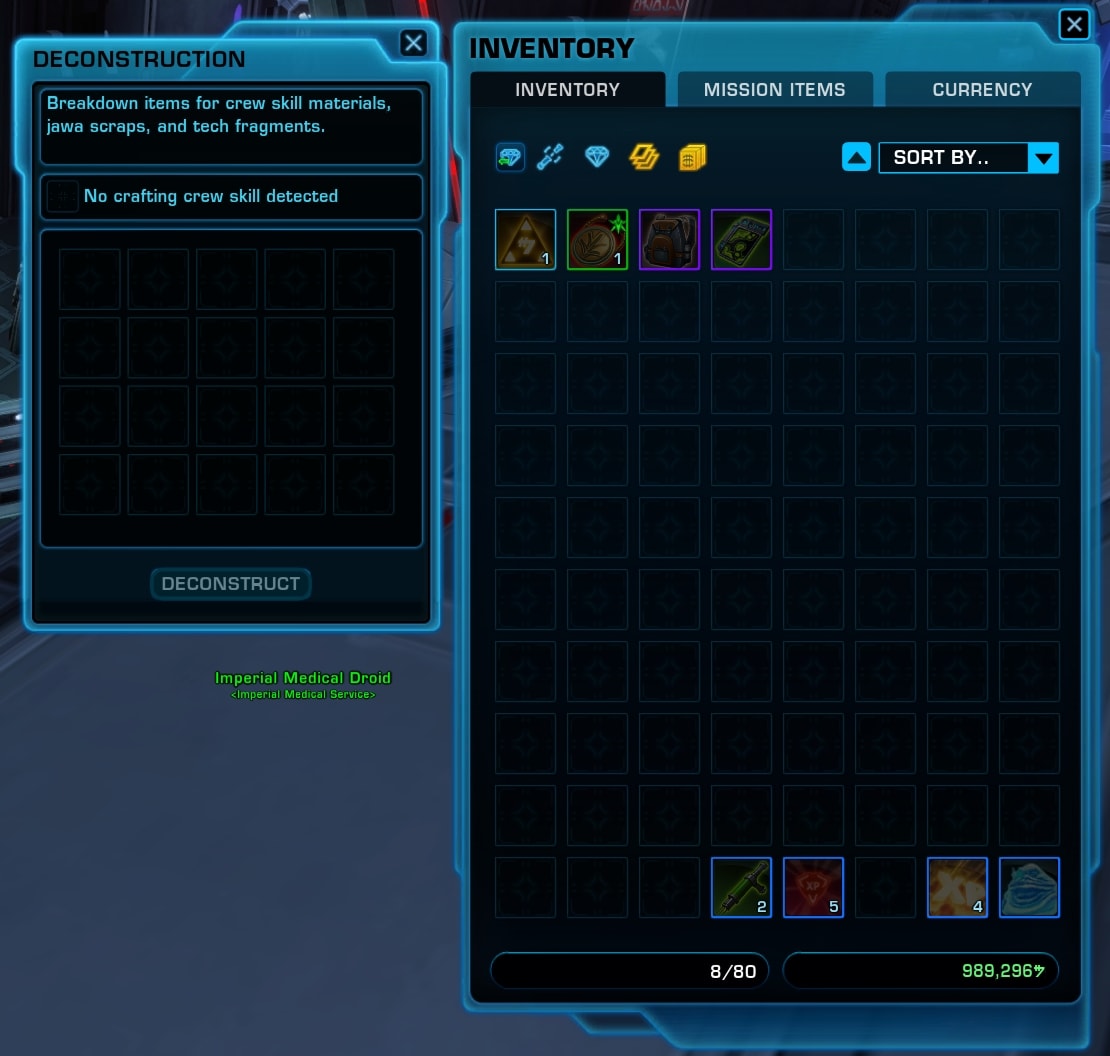
Inventory
The Inventory Tab is available in several of the Character Sheet window tabs as well as a stand-alone window. It received some cosmetic make-over in Patch 7.0, but the main functionality remains the same.
The Inventory is where you will find all of the items you have looted, earned or purchased.
On the top there is a shortcut button that will quickly transport all of the crafting materials to the Crafting tab. It only applies for Green items or lower.
On the right side is an order drop-down menu. It allows you to choose how to automatically order the items in your inventory. My advice is to never use it and remember what items you place where instead. You could thank me later.
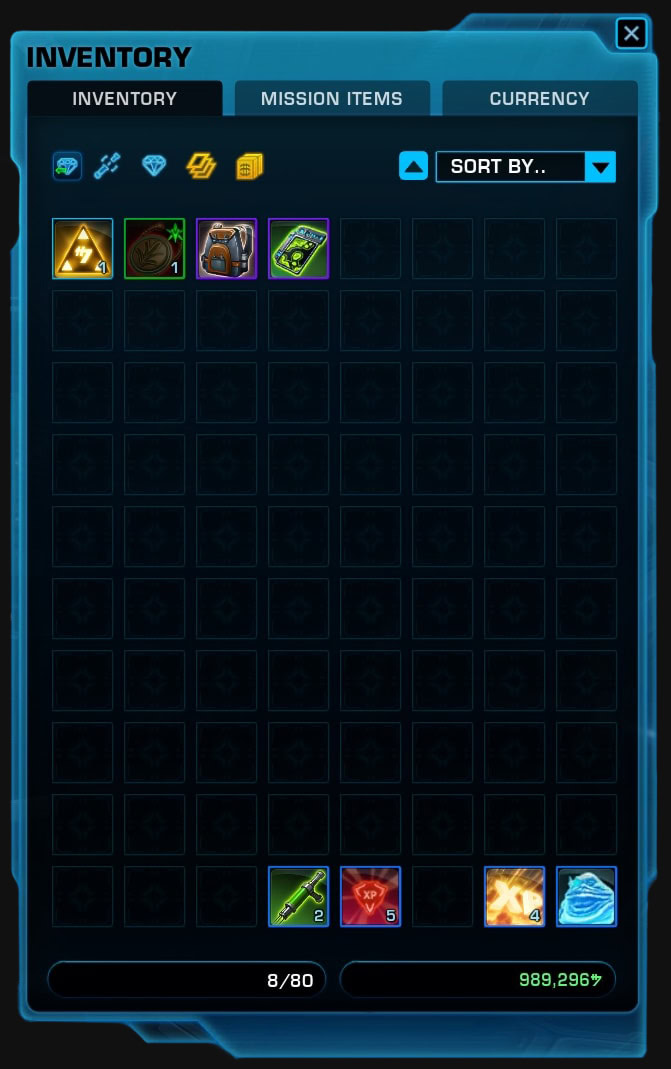
The main inventory consists of three tabs:
- Inventory – all items you purchase or loot appear here.
- Mission Items – all items related to currently active missions are located here. You don’t usually need to open this tab to use the items. They will appear as a small icon next to the quest objective in the tracker.
- Currency – here you can see a full list of currencies you have earned or collected. Mouse over each one to get more information on where and how you can spend the specific currency to trade it for a reward or something shiny. At the top of this tab with bright gold text is you Cartel Coins currency – used to purchase items from the in-game shop.
We have a full guide to all currencies in SWTOR. Check it out to find out how to earn them, what each one is good for and how to spend them wisely.
Your first character will start with very few available inventory slots. You can expand their number by purchasing unlock for additional rows. To do this, click on the plus sign on the bottom left of the inventory window.
At the bottom left edge is your inventory space stat. On the opposite side is the amount of credits (the in-game money currency) you currently have on this character.
The left vertical bar next to your inventory has the following buttons:
Deconstruction Tab
Opens a small window where you can place items you do not need or want. Deconstructing them can yield valuable crafting resources.
Materials Inventory
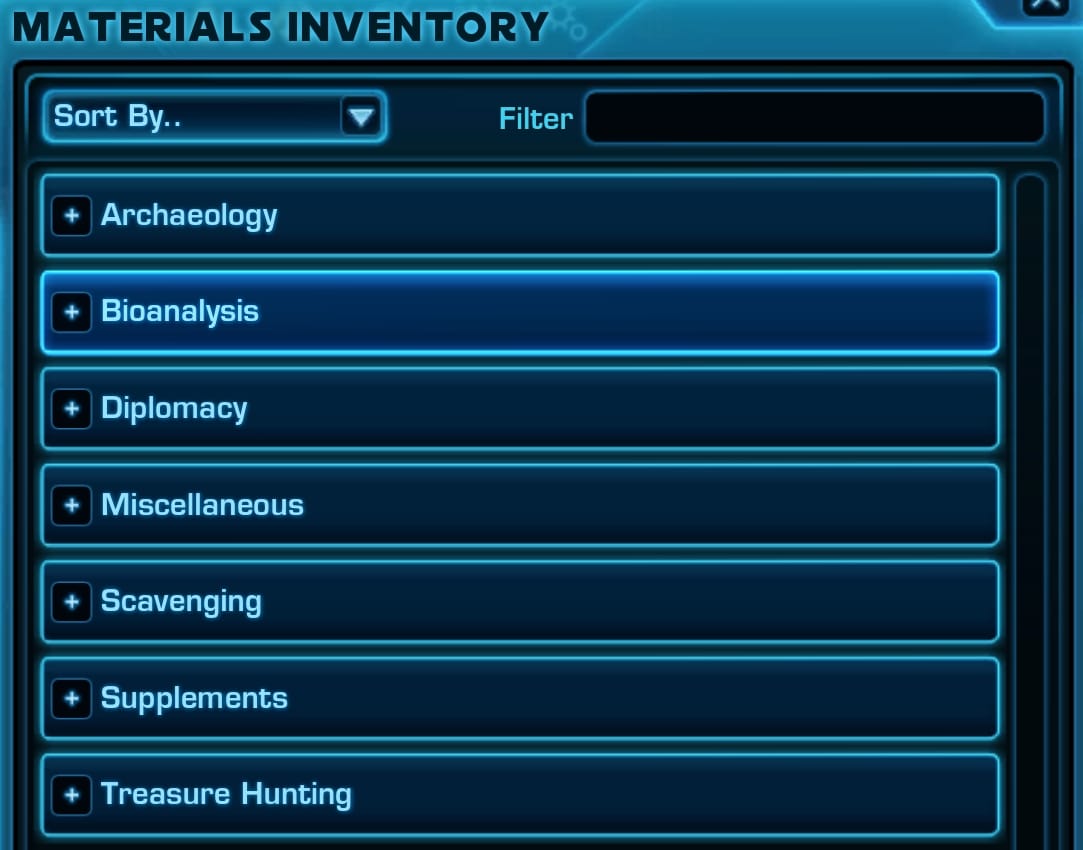
Shows a list of all the crafting materials you have collected so far. To learn more about Crafting in SWTOR, check out my guide!
Cartel Market Window
The Cartel Market window had a visual update in Patch 7.5, which saw its borders straightened and simplified. The developers also redesigned the structure and categories to include a new set of buttons “Inspired by”.
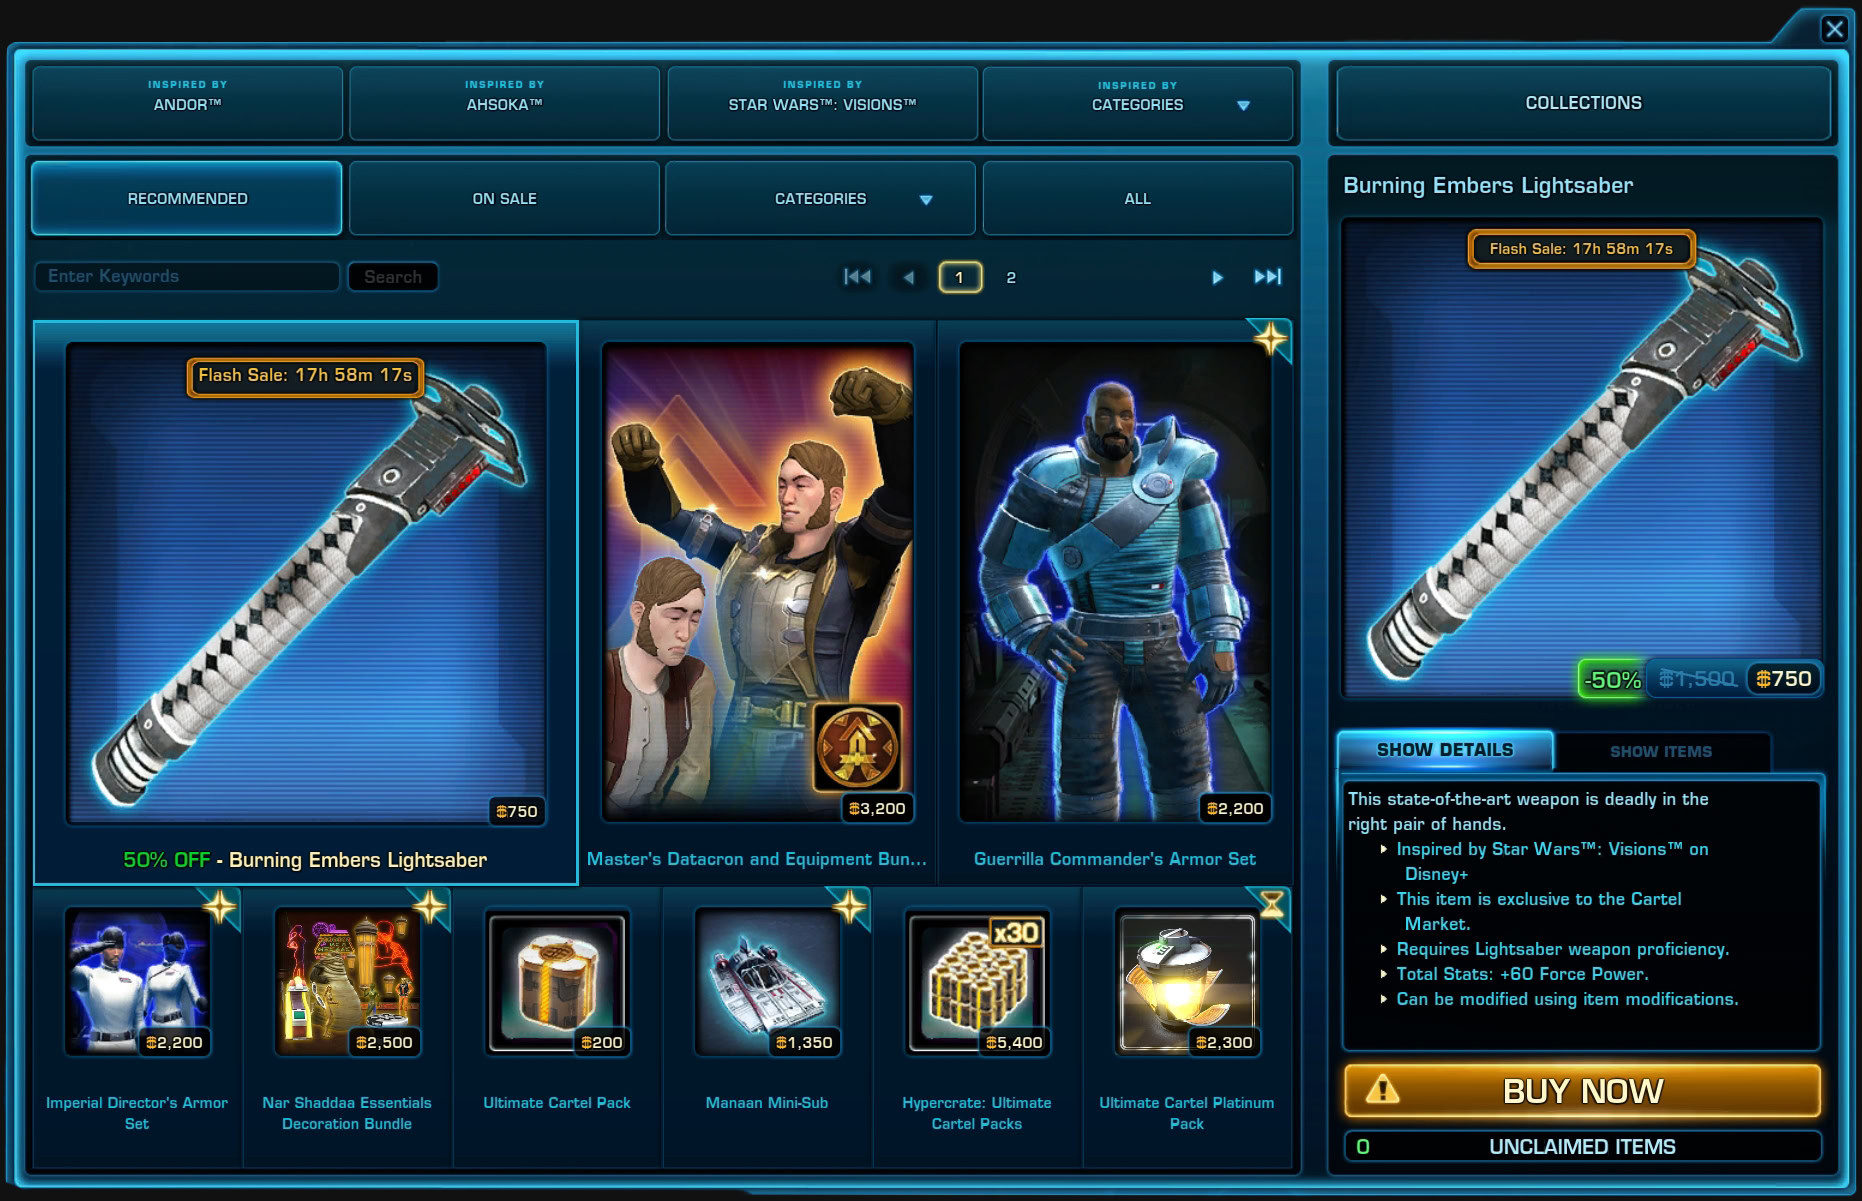
The Cartel Market is the in-game store, where you can purchase items for Cartel Coins, which in their own turn can be purchased with real-life money or earned in very tiny quantities by completing achievements as you play.
The Cartel Market gets updated with new cosmetics when a new Game Update is released. We often write reviews for some of the more valuable and interesting offerings.
Collections tab
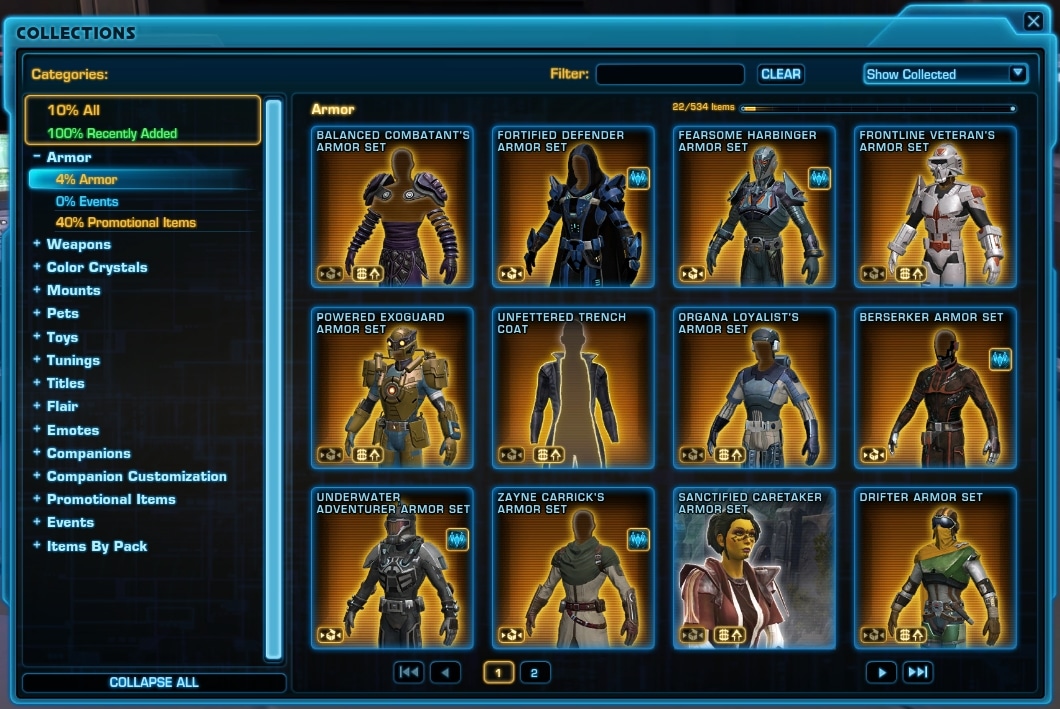
When you purchase something from the Cartel Market, it appears in your Collections. From here you can unlock it for the whole Legacy on your server.
In the left column you will find all categories of items. On the main window space you can see the contents of the selected category.
You can search for a specific item from the search bar at the top. Next to it you also have a drop-down menu allowing you to show certain items only.
Pack Viewer and Item Stash
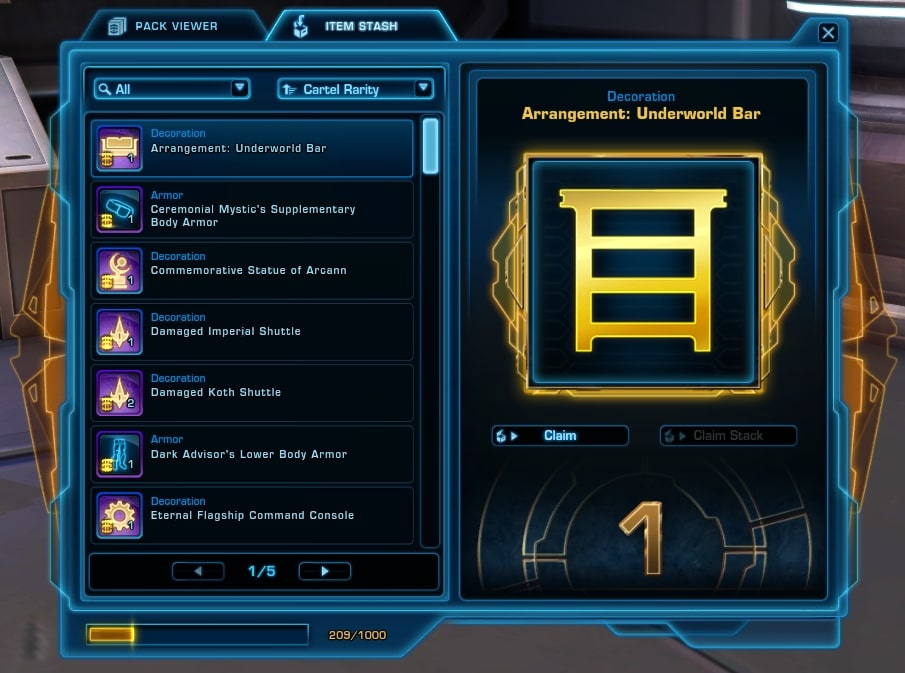
The Pack Viewer contains the Cartel Market Packs you have purchased with real-life money turned into Cartel Coins.
The Item stash is where you can see the items you have found in those Cartel Packs. The contents of the POacks are randomized.
Abilities Window
The Abilities Window is accessible both as part of the Combat Style Tab in the Character Sheet and as a stand-alone window. You can open it by pressing “P” shortcut (by default).

In the Abilities Window you can see what active and passive skills you have learned with your character so far. They are split into categories, shown on the right side in the form of a drop-down list. Click on each one to see its contents
- Advanced Class abilities – contains the active and passive abilities for your advanced class and discipline.
- Main Class abilities – these are abilities your advanced class shares with the other advanced class from the main class. In the image above I am on my marauder, which is an advanced class to the Sith Warrior main class on the Imperial side.
- Legacy – Legacy-bound abilities are available to all of your characters on the server.
- Pets – list of the pet companions you have available. Pets can be purchased, earned or found through gameplay.
- Vehicles – same as pets.
Combat Proficiencies Window
As soon as you start the game, you will pick a Discipline path. The specifics of your current Discipline and the available Utilities are all listed in the Combat Proficiencies window. You can access this window by pressing the default shortcut “K” or by opening the Combat Style Tab in the CHaracter Sheet.
The left tab shows your Ability Tree where at certain levels you can choose one out of three available active and/or passive abilities. The right tab is a full list of all of your Abilities – passive and active ones.
Legacy Window
Ok, are you ready for an overload of information?
Your Legacy allows you to unlock and share certain bonuses and perks across all characters you create on the same server.
This window is where it all starts and ends. From the left side you can open the various tabs that give you access to all of the features of your Legacy.
Legacy Name and Level

When you start your Legacy, you pick a name for it. As you playu the game, every activity rewards you with Legacy XP. The maximum level currently is 50. Some of the Legacy perks you can purchase and unlock require a certain Legacy level.
Character Perks
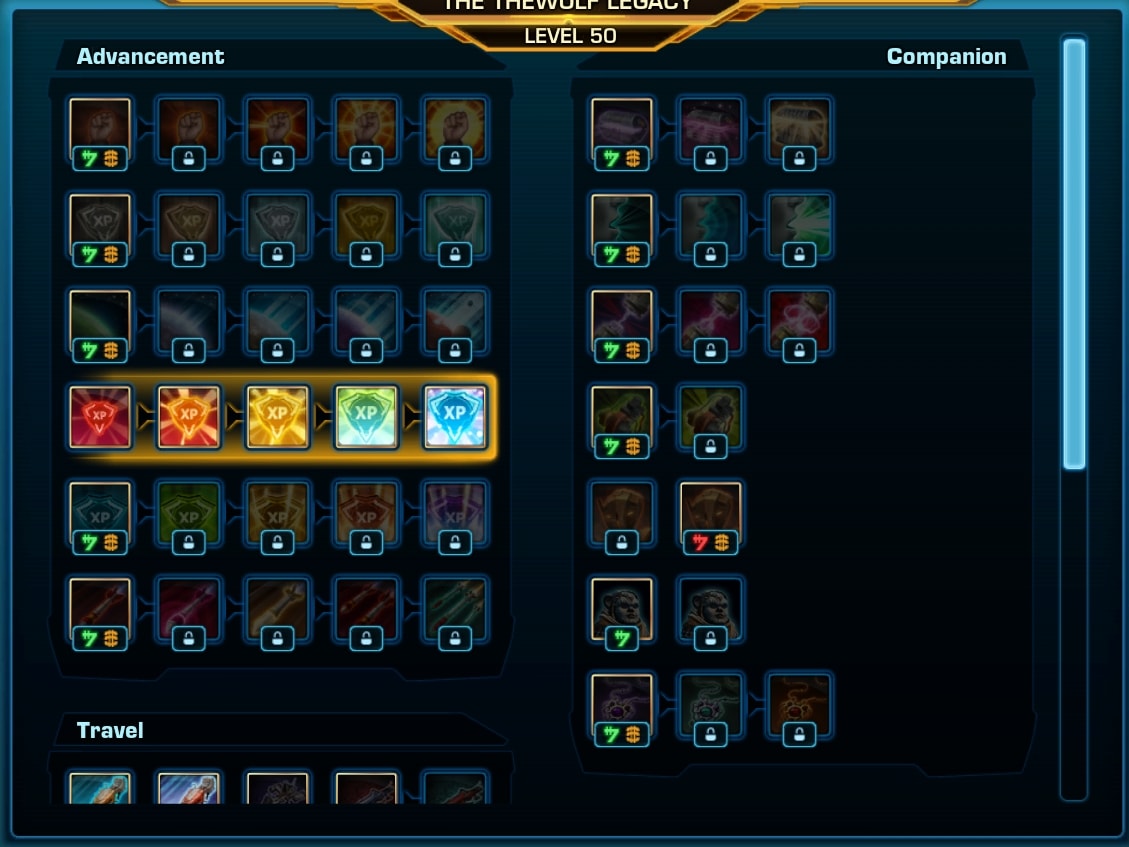
From this window you can spend Credits or Cartel Coins to unlock character specific boosts and perks.
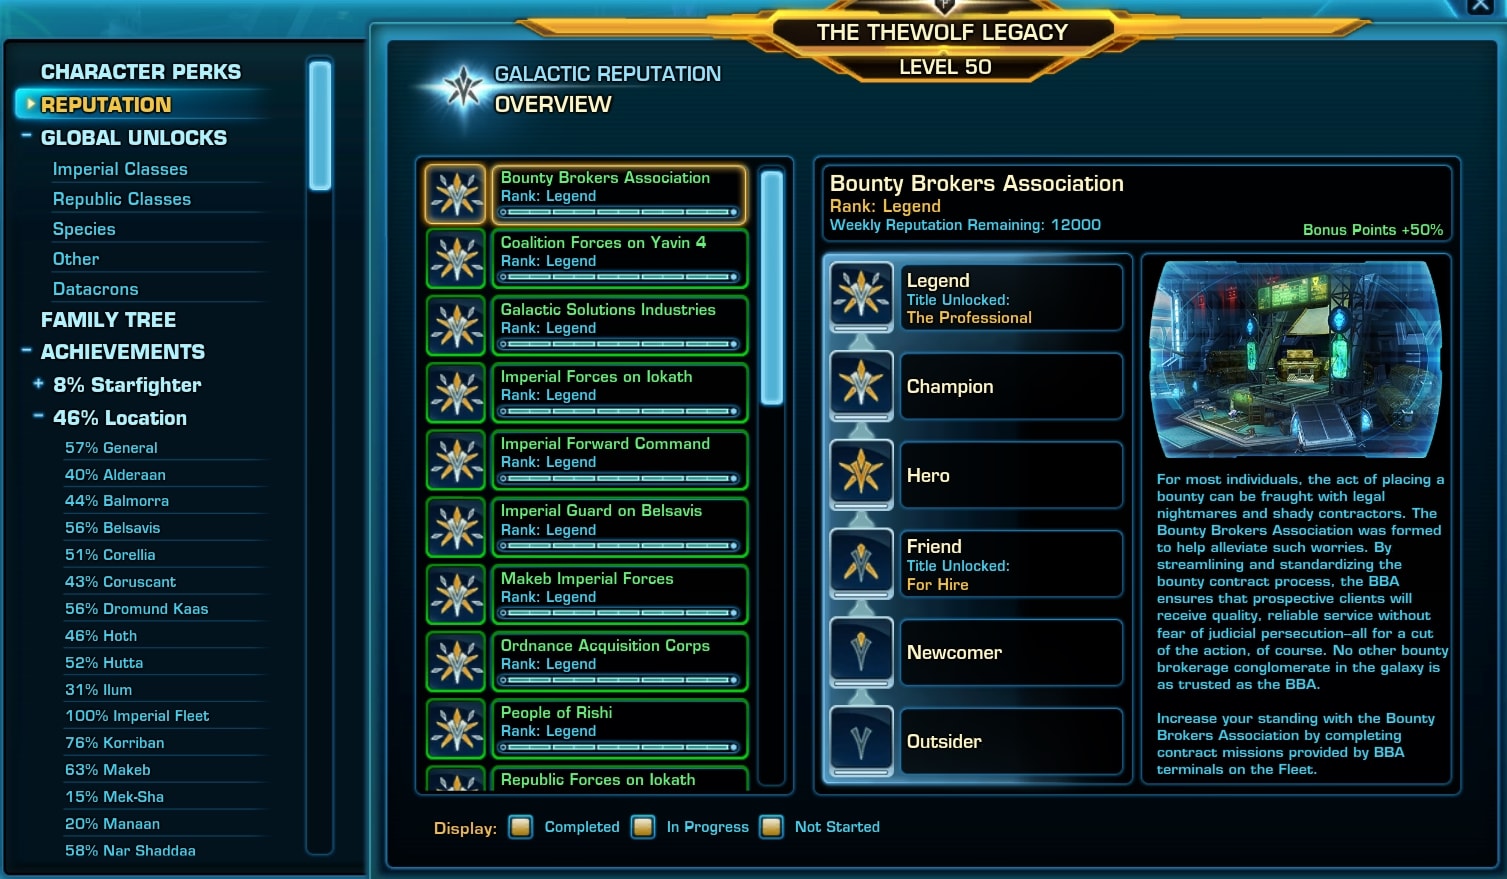
Reputation Tab
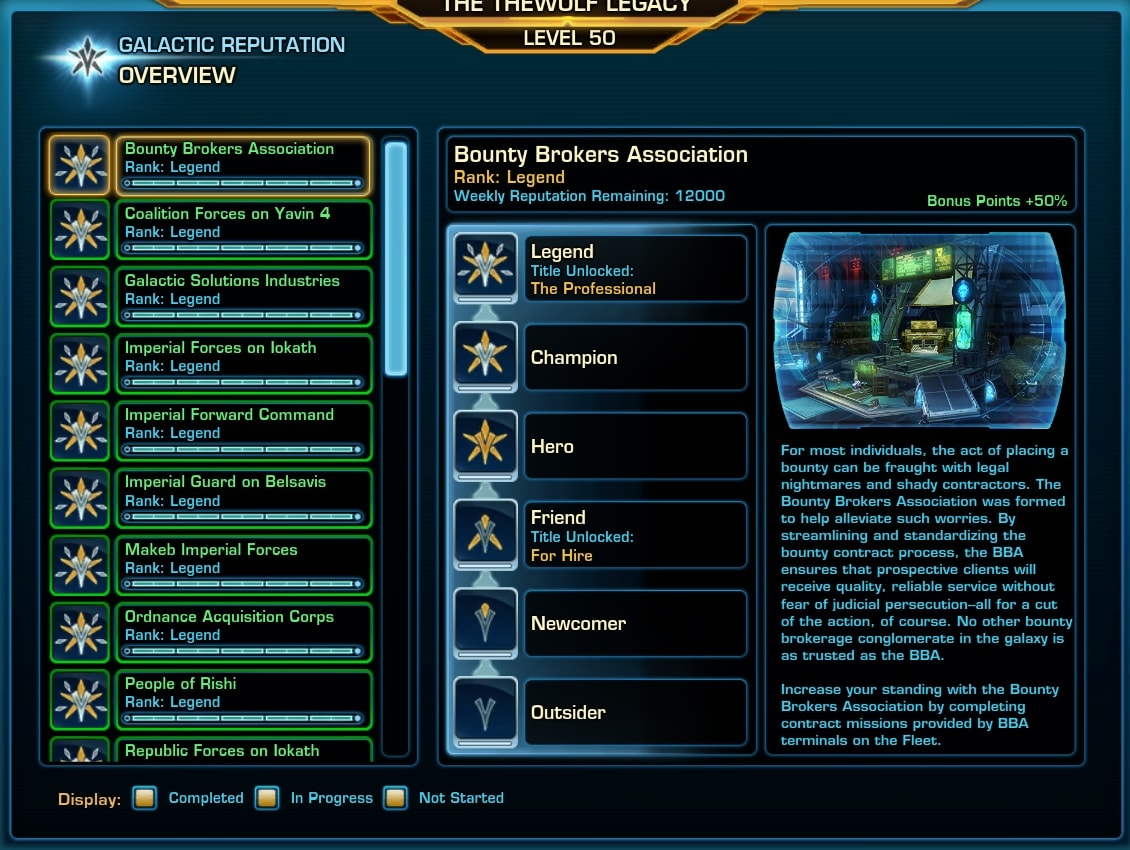
There are qute a lot of factions you can earn reputation with as you journey though the planets and the game’s content. In this tab you will see and track your progress with each one of them.
Gaining reputation with factions unlocks special perks like titles, story missions and allows you to purchase unique items from Reputation Vendors.
Global Unlocks Tab
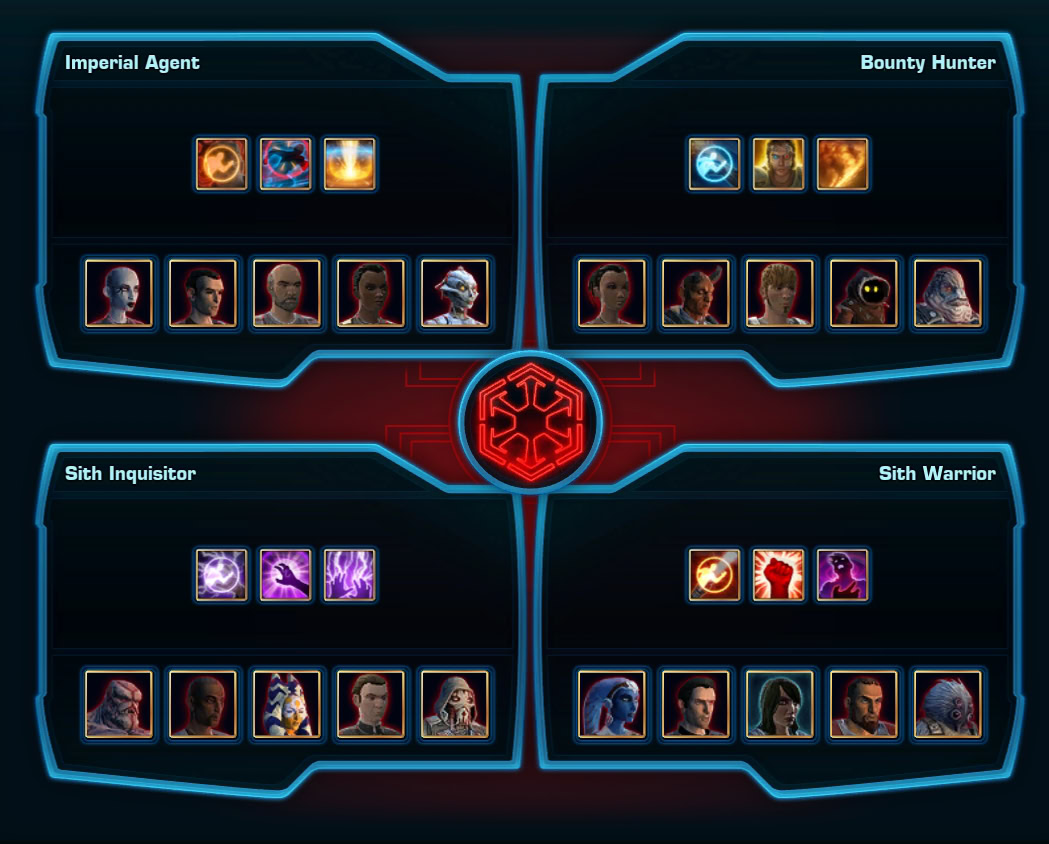


Here’s a brief description of each sub-tab here:
- Imperial and Republic Classes – shows the bonuses you have unlocked by leveling other classes and characters.
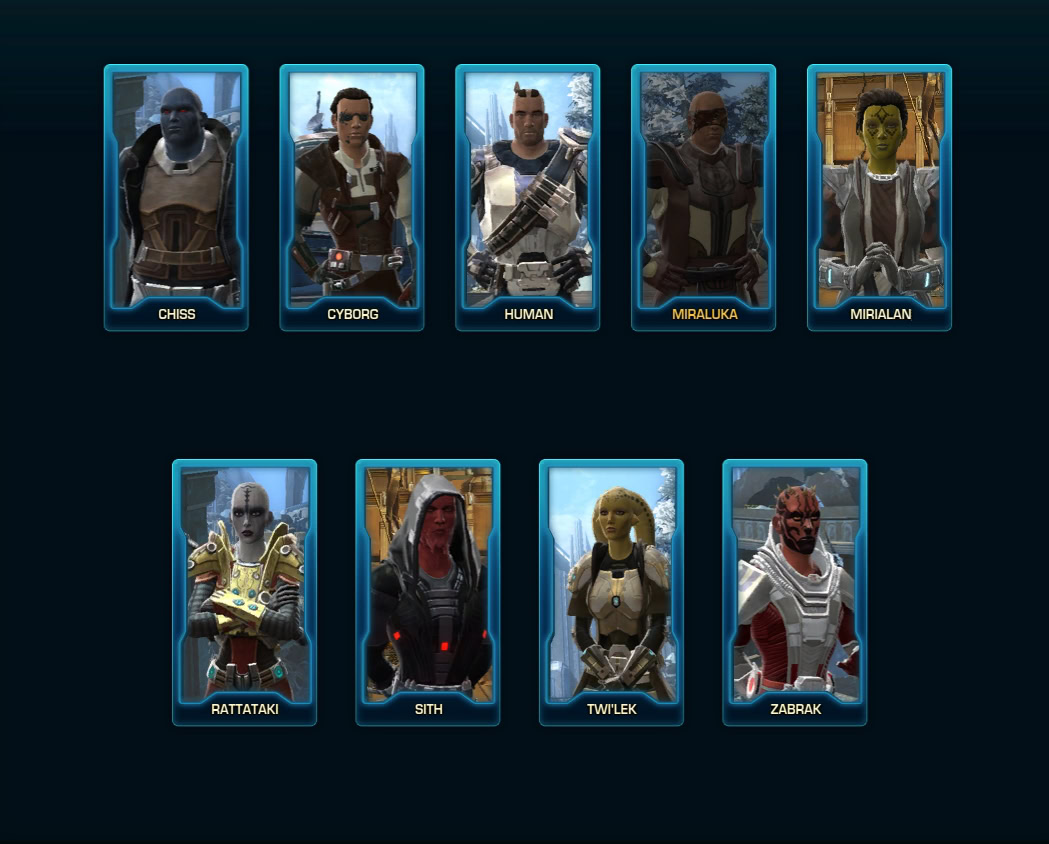
- Species – shows what species you have unlocked by playing them with the other faction.
- Other – a few categories of items you can globally unlock for your whole legacy.
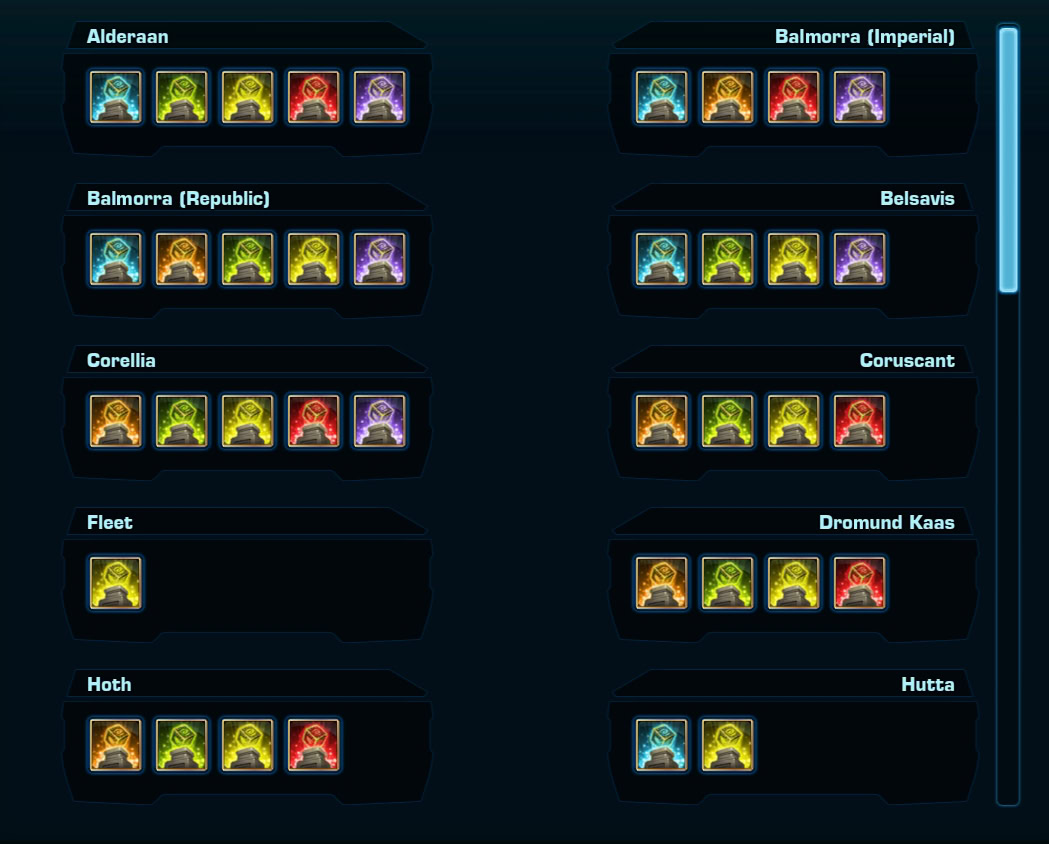
- Datacrons – SWTOR’s worlds are filled with Datacrons you can hunt and open to gain small amounts of permanent stats boostts.
Family Tree
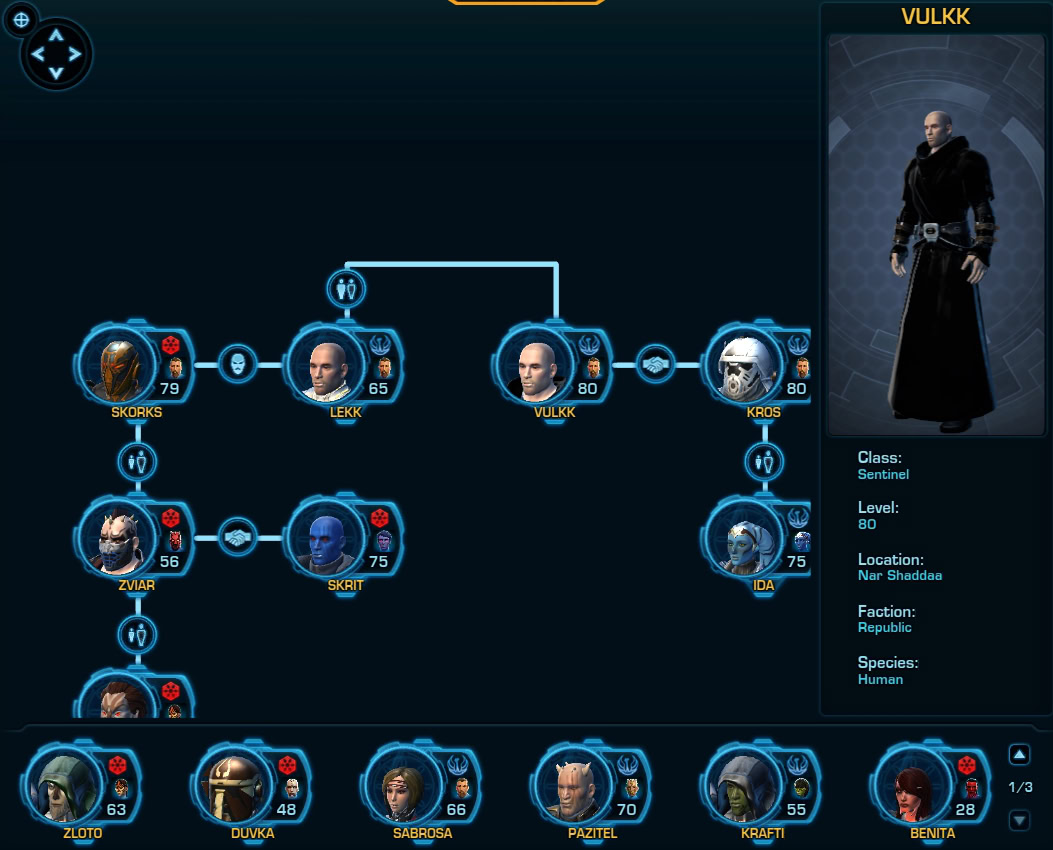
In the Family Tree tab your Role-Playing side can live its dream. Here you can draw connections between the characters in your Legacy. This is purely a cosmetic feature and it does not affect stories or the game’s general narrative.
Achievements
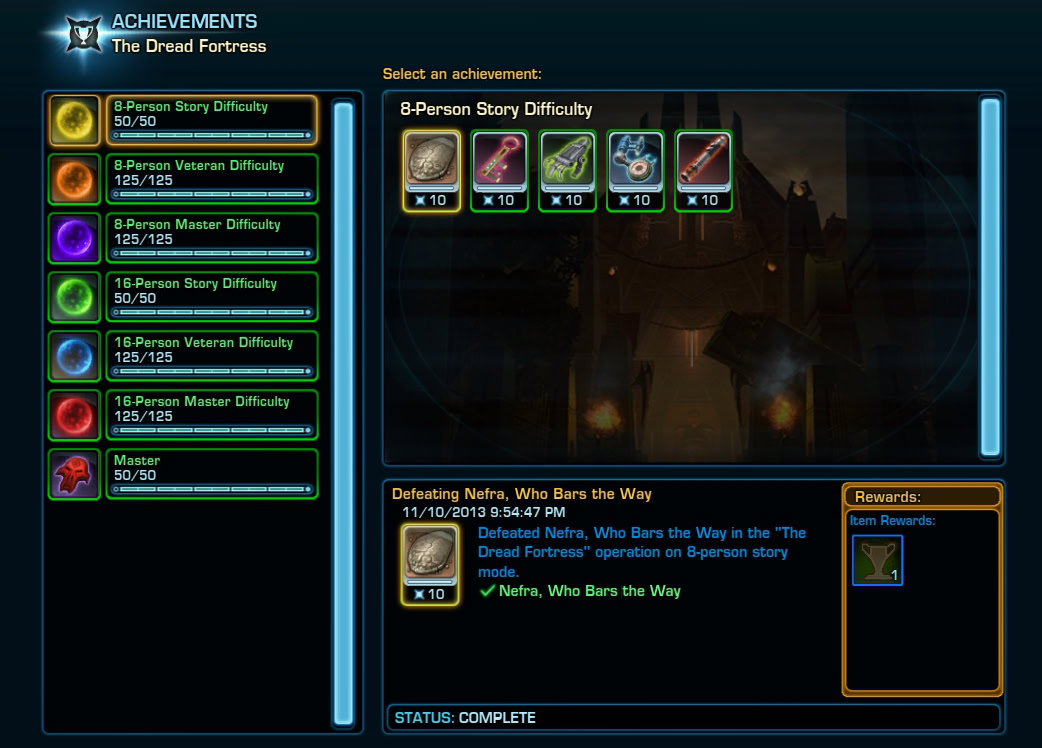
The achievements tab is where you can track your achievements as you play through the game. Some of the achievements reward you with Cartel Coins, although the amount is not large.
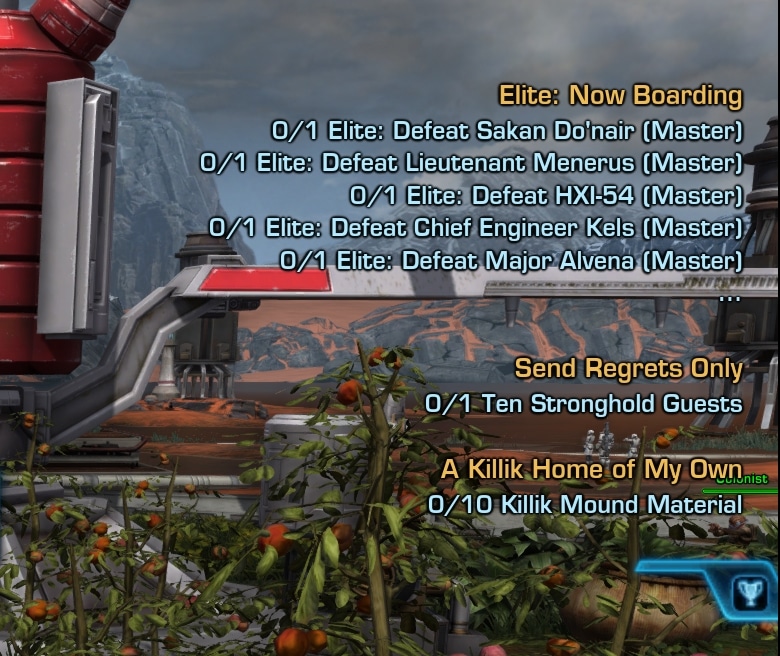
You can track an achievement by clicking on the empty square slot located in the bottom right corner of the window. This will add them to the Tracker UI tool. It is similar to the mission objectives tracker, but for Achievements only.
Ventures
Ventures are a type of solo mission experience available to SWTOR subscribers. Introduced in update 7.5, Ventures aim to have you work hard for premium rewards.

The system is unlocked at first. To unlock it, you have to complete the main story ark of the game up to a certain point at level 80 when you will get the prompt to unlock the first ventures companion B3-S1 (Bessie).
We have a very detailed guide to the new Ventures system with instructions how to unlock it and how to start training your new companion.
Chapters Window
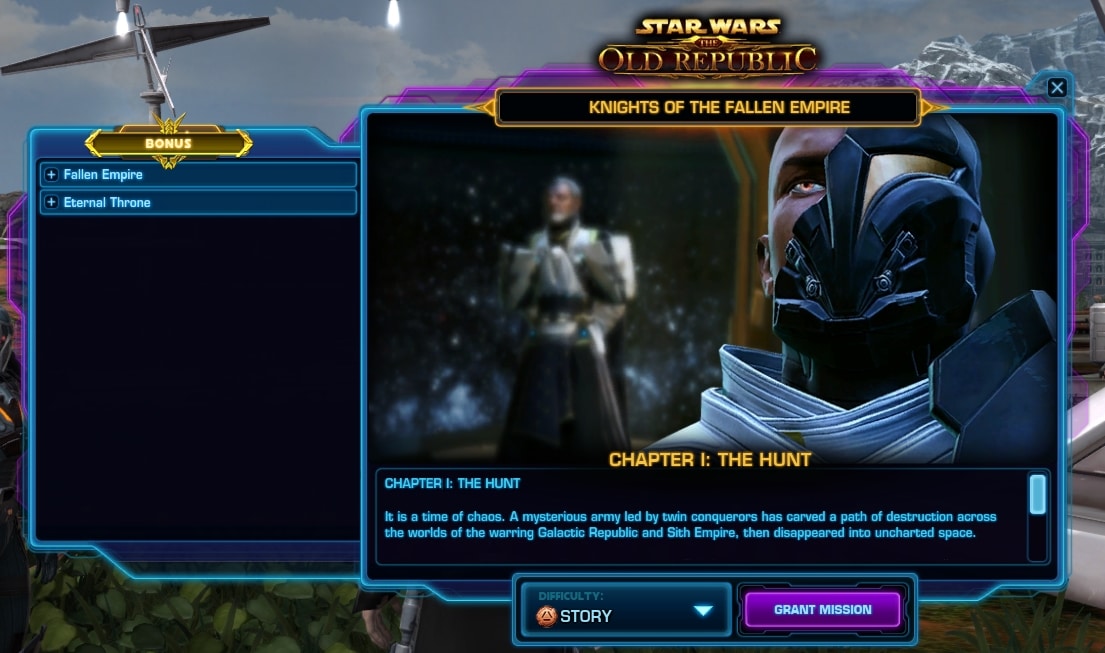
This window refers to the Chapters released with the 4.0 and 5.0 digital expansions to SWTOR. Here you can track your progress through all of the twenty0five chapters.
To do KOTFE and KOTET Chapters you need to be at least level 60-65 accordingly. You do not need to worry about these yet as a new player.
They are available in all three difficulties and offer an additional challenge for your to go through and test yourself.
On the left side you will see available chapters. You can reply them as many times as you wish in any difficulty. Only the first run will carry your story decisions forward, though.
In the bottom you can select the difficulty mode for the chapter you have selected.
Log (no longer displaying its name)
Note: As of Update 7.7, this window has been slightly reworked and no longer displays the “Log” title in the top left. Its contents are mostly the same, with a few changes and a new addition – the Eras tab.
You will be using this a lot. Here you will find pretty much all of the information for your current missions, activities and objectives.
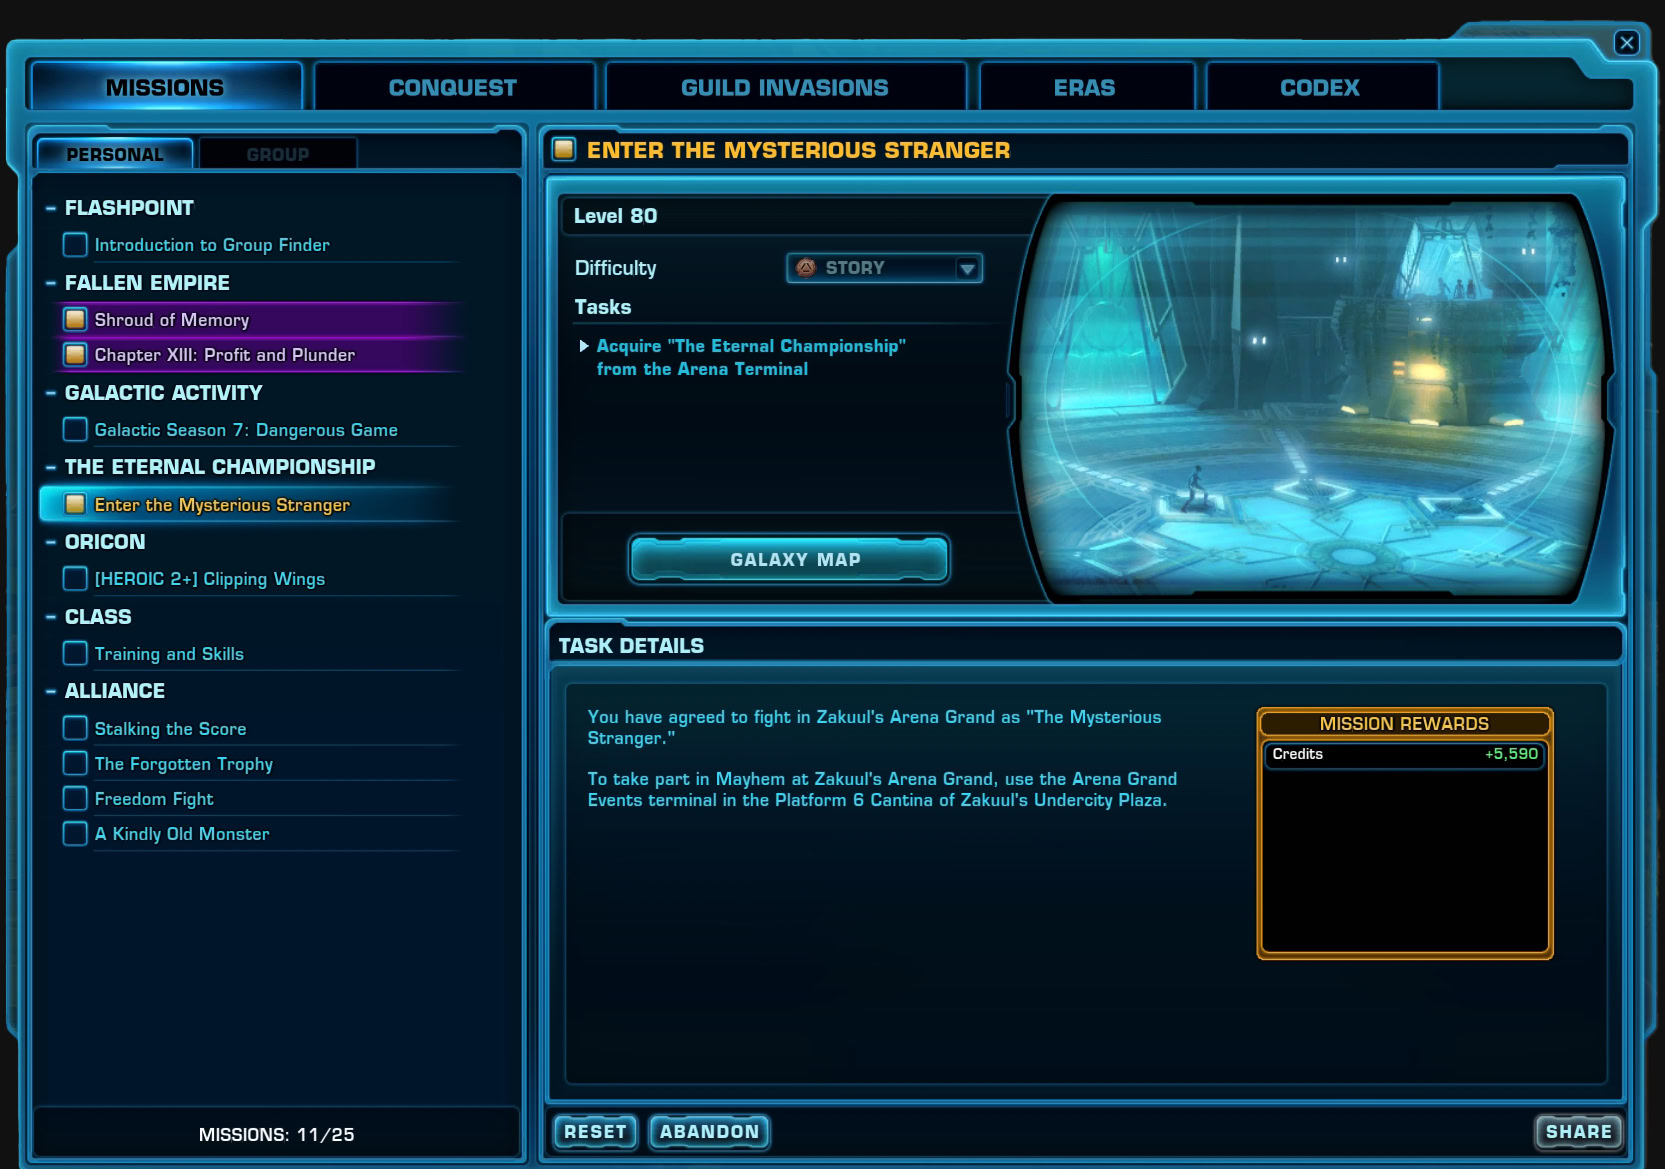
Here is a brief walkthrough of the available tabs in this window:
- Mission – here you will find all currently active missions you have picked up. Click on the circle icon to track the mission. On the right side you can opt to Reset, Abandon or Share the mission with others in your group. In the bottom left you can see a Personal nd Group tabs. The Group one is active when you are in a group.
- Conquest and Guild Invasions – I have explained these two tabs in great detail in my SWTOR Conquest Guide. Conquest is a supplementary gearing and resources earning system. The Personal tab shows your current weekly goal and objectives, while the Guild tab shows your guild’s progress (if you are a part of a guild).
Codex
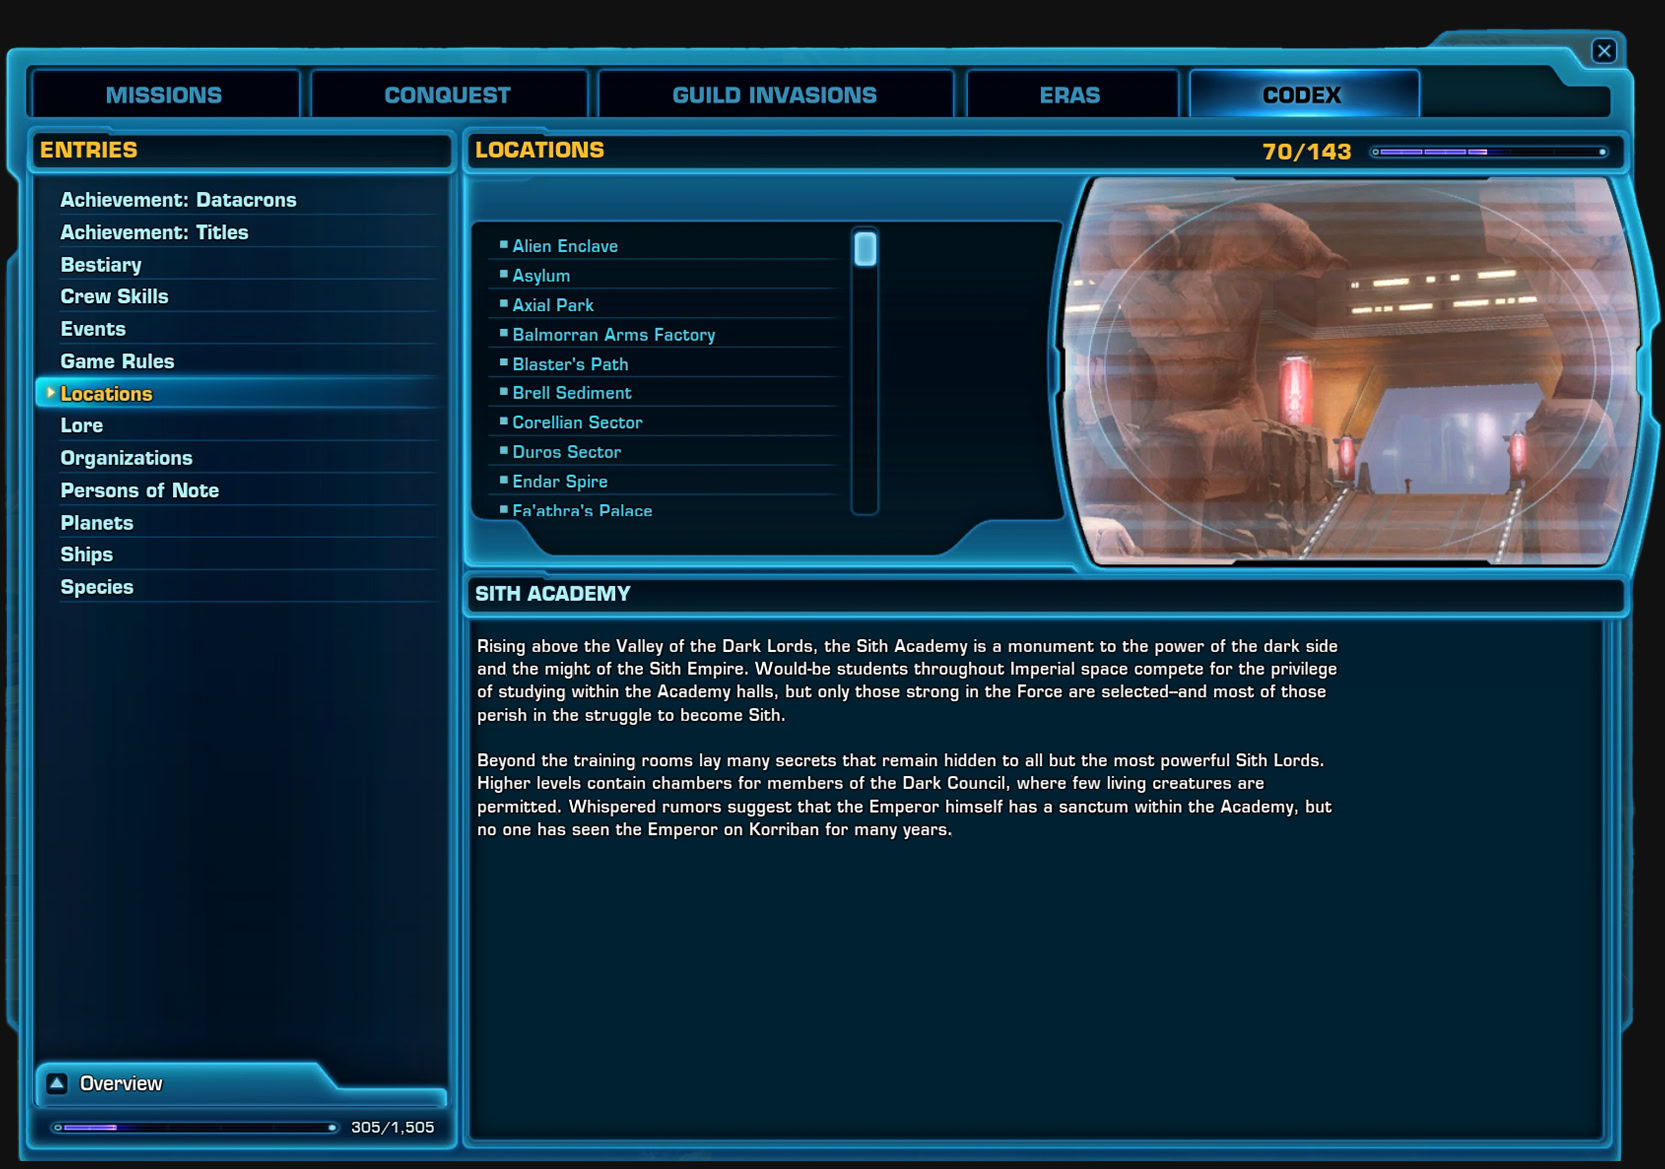
As you play through the game you can pick up lore objects, discover historical areas or in any other way obtain lore knowledge. In most cases a large pop-up window will display on your screen, letting you know you have a new Codex Entry added. This is where they are all stored.
Eras Window
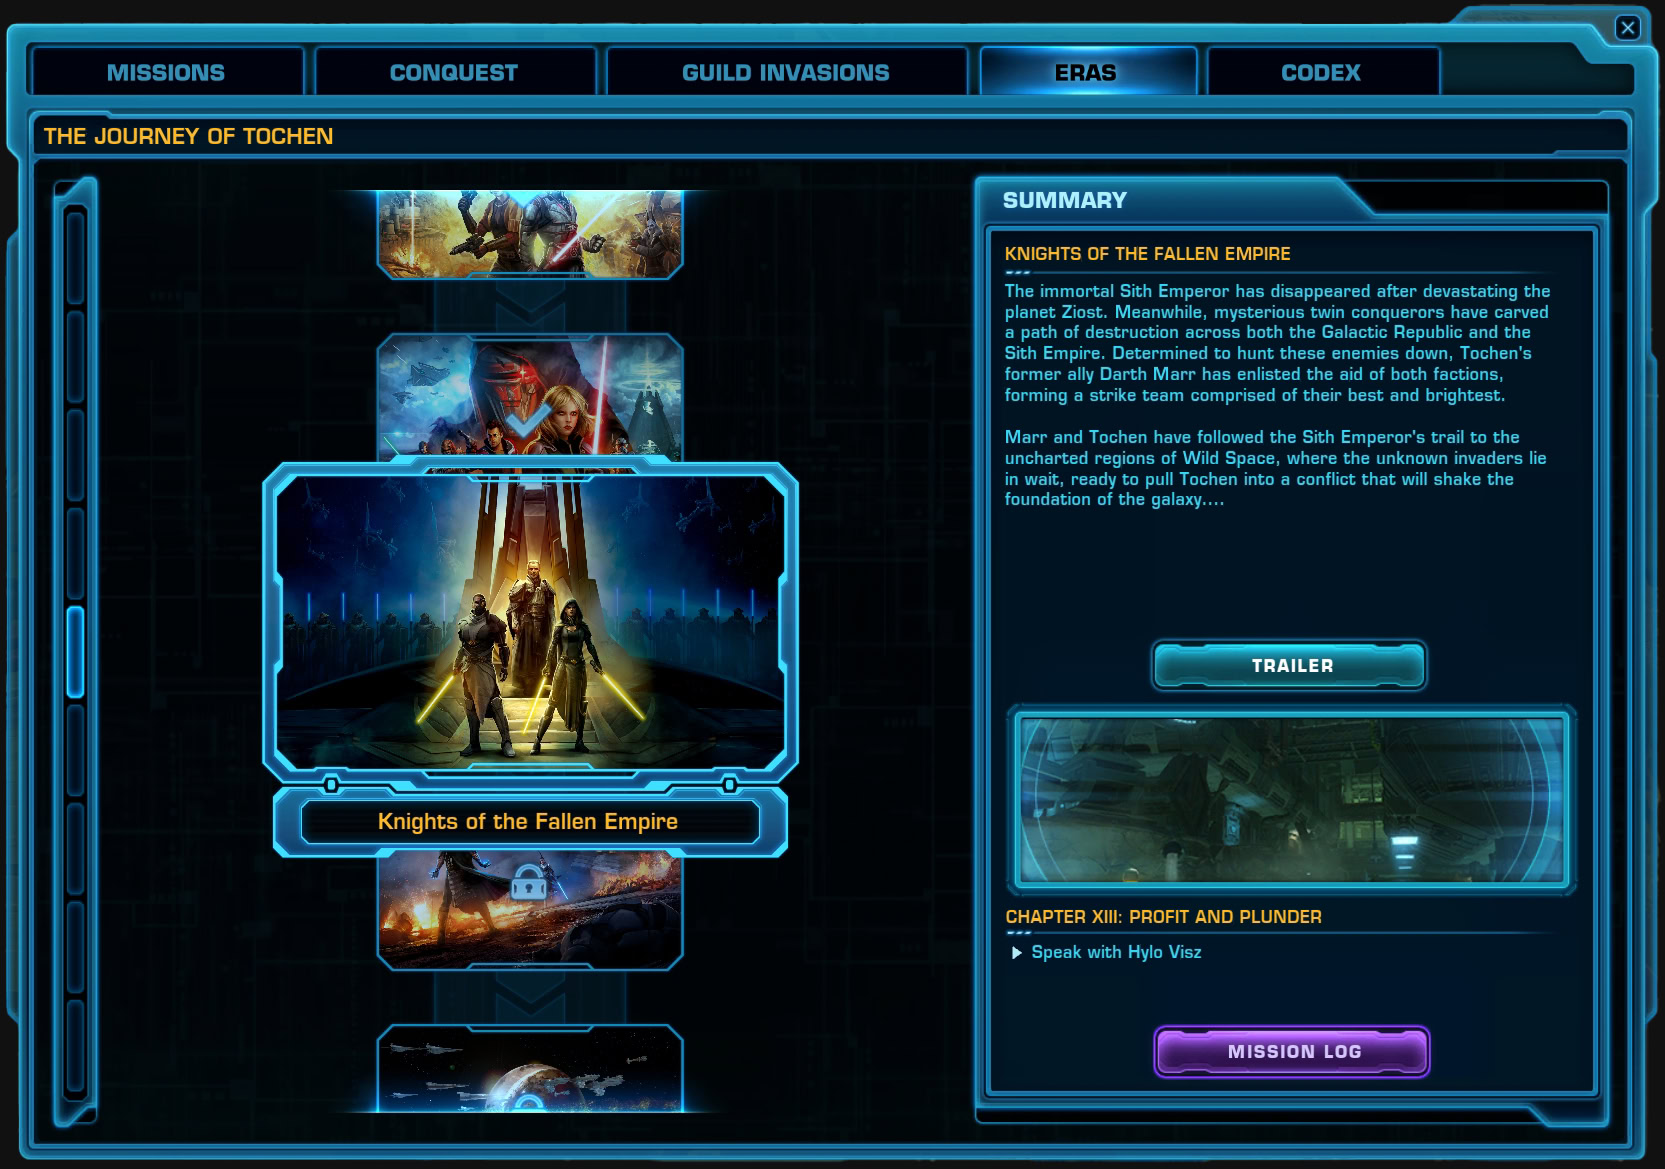
The Eras window gives you a high level information about your character’s progress through the game’s main storyline. If you want more details, you can use our guide to SWTOR’s story progression.
Companions and Contracts
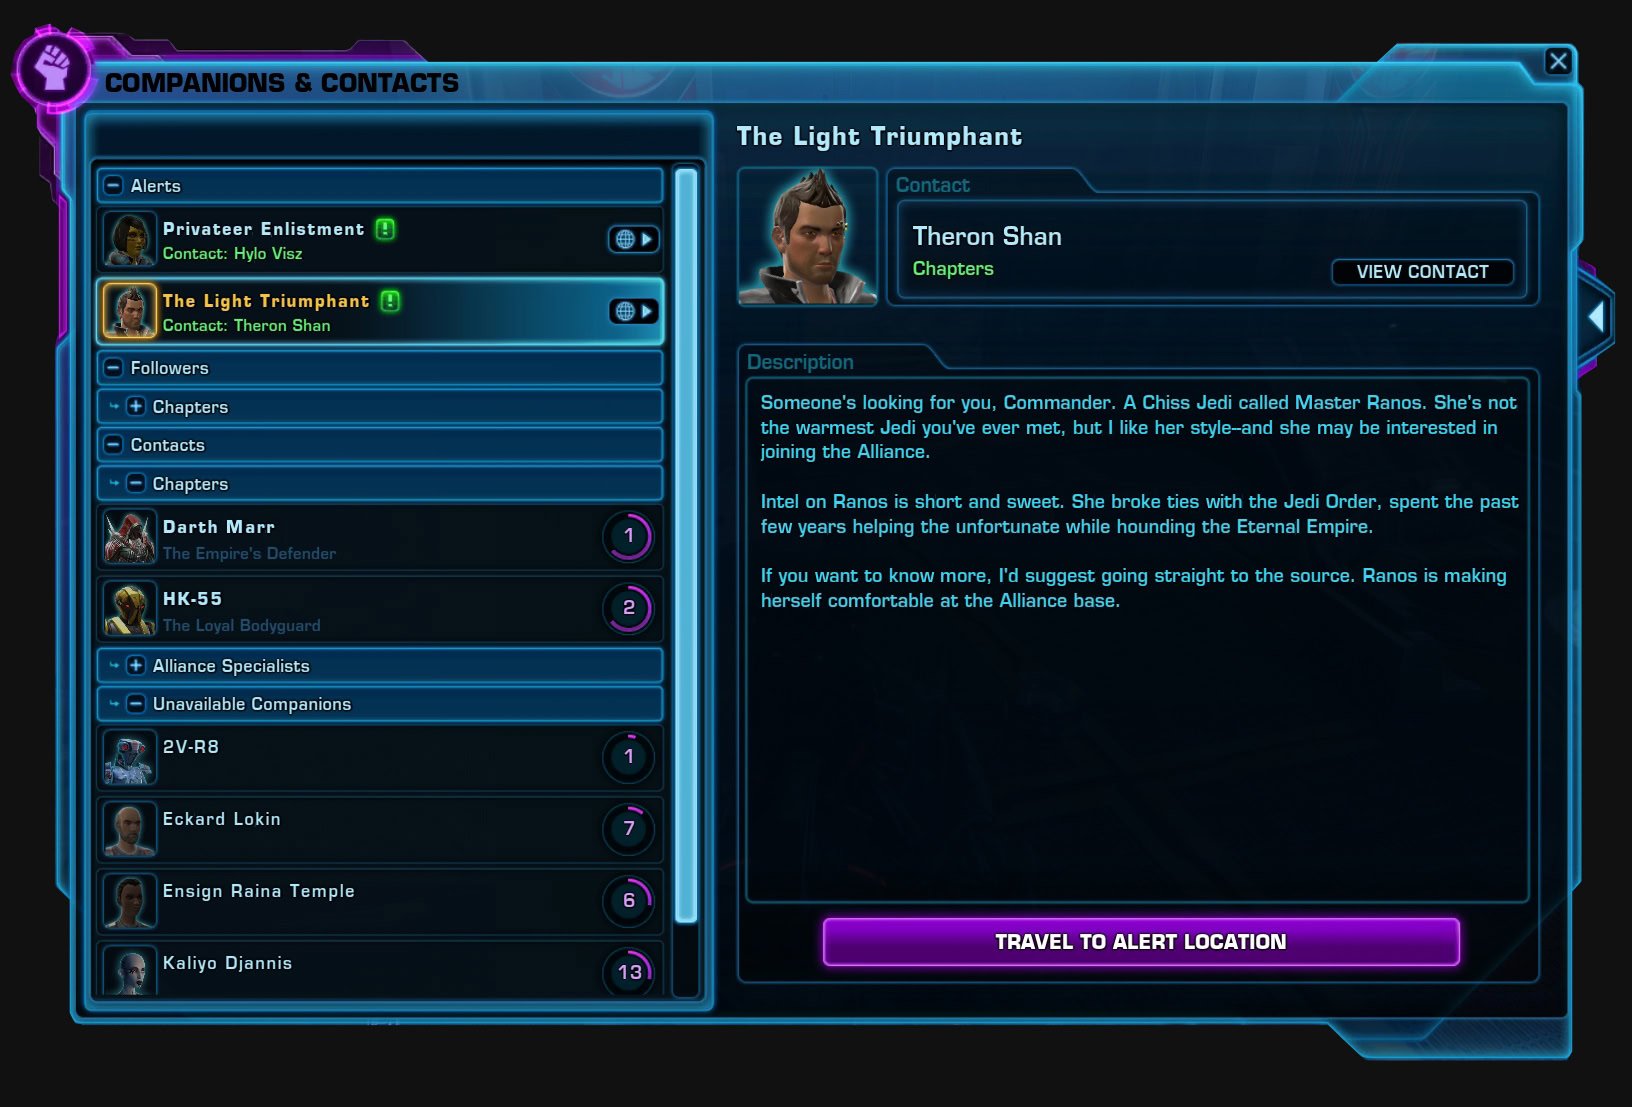
During your adventures you will meet and accept followers. In SWTOR thery are known as Companions. These NPCs will accompany you on your journey.
Unless locked for story purposes, you can always pick which companion you want to come with you. You can switch them at any given time, out of combat.
In the top left corner you will start seeing Alerts once you complete Chapter 9 of the Knights of the Fallen Empire expansion.
Until then this segment will be empty.
Below that on the left is a list of all of your active companions. Each one of them has its own Influence rank. The higher the rank ,the better this companion will perform for you in combat or when busy with Crafting duties on your ship. To gain influence with your companioins, give them Companion Gifts.
On the right side of the window you see a brief description of the companion along with a few key reactions and activities from the marked companion and their history with you.
To summon a companion, press on the button with a person and an arrow next to their head. It’s to the right from the companion’s name.
Companions can perform one of the three classical roles in combat for you – tank, DPS or heals. you can select their role from the menu or by right-clicking on their own portrait.
Companion Portrait and HP Bar

Similarly to your character’s portrait, the one for your companion also displays their name, HP (red bar) and resource bar.
On the bottom left of the portrait you can see an icon representing the current role this companion is pefrorming for you – tank, heal or DPS.
Right-clicking on the portrait will open the menu you see on the image above.
Above the HP bar on the left side are all positive effects active on the companion, whole on the right side would be all negative effects, when ones are present.
Strongholds Window
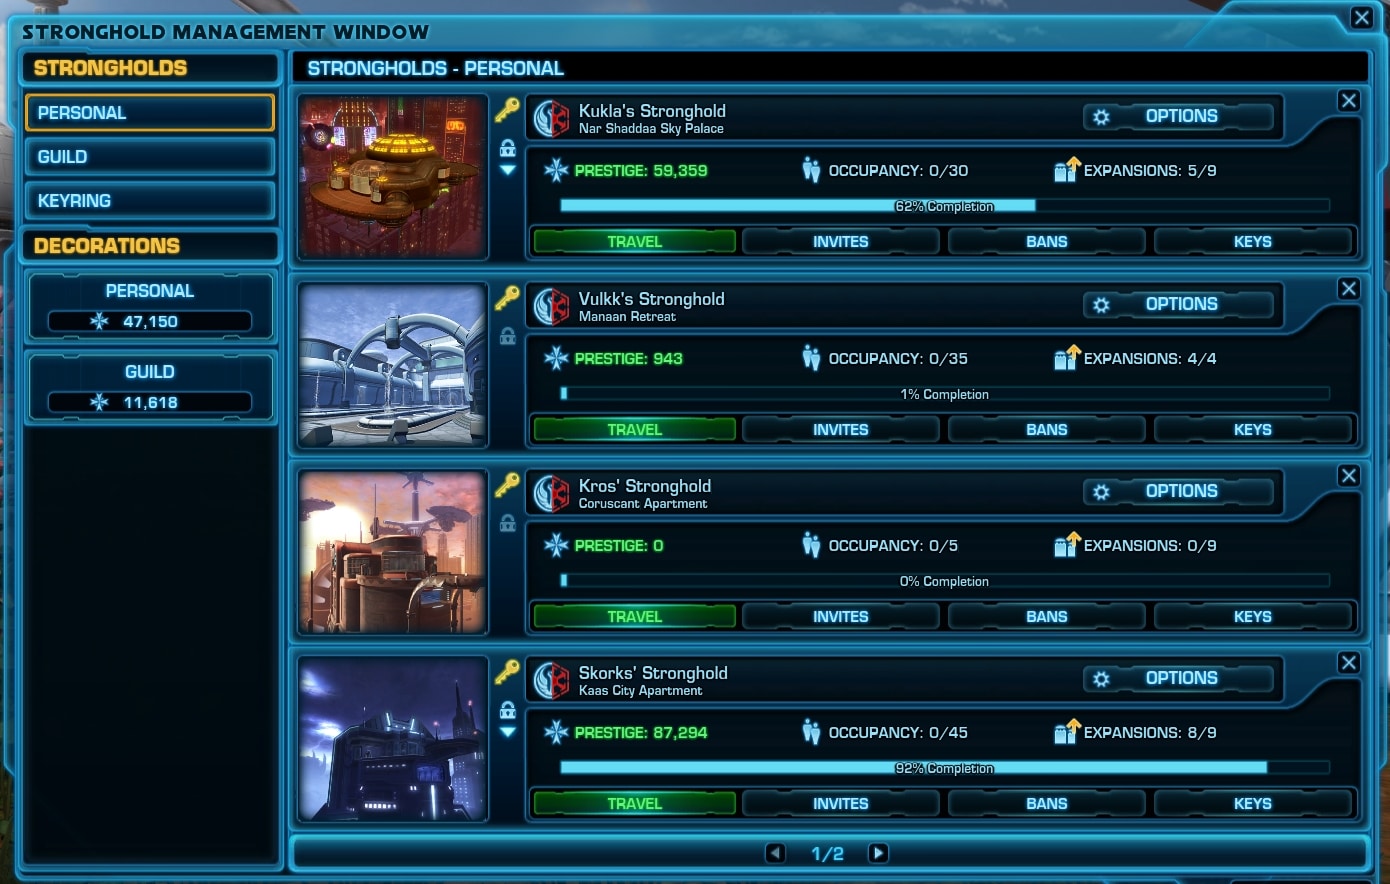
Strongholds in SWTOR serve as your personal digital home, which you can decorate as you wish. To access your Stronghold or see its key features, open the Strongholds menu. From here you can also quick-travel to one of your Strongholds.
If you are in a Guild, you can also see the Guild’s Starship and ground Stronghold in the second tab.
To access other players’ Strongholds, use the Keyring tab.
The topic of SWTOR Strongholds is quite extensive and I will not cover it here in details. Instead, check out the Introduction to Strongholds in SWTOR video guide I have recorded, explaining how to get your first Stronghold, what do with in them, how to navigate the Strongholds menus and so on.
Crew Skills Window
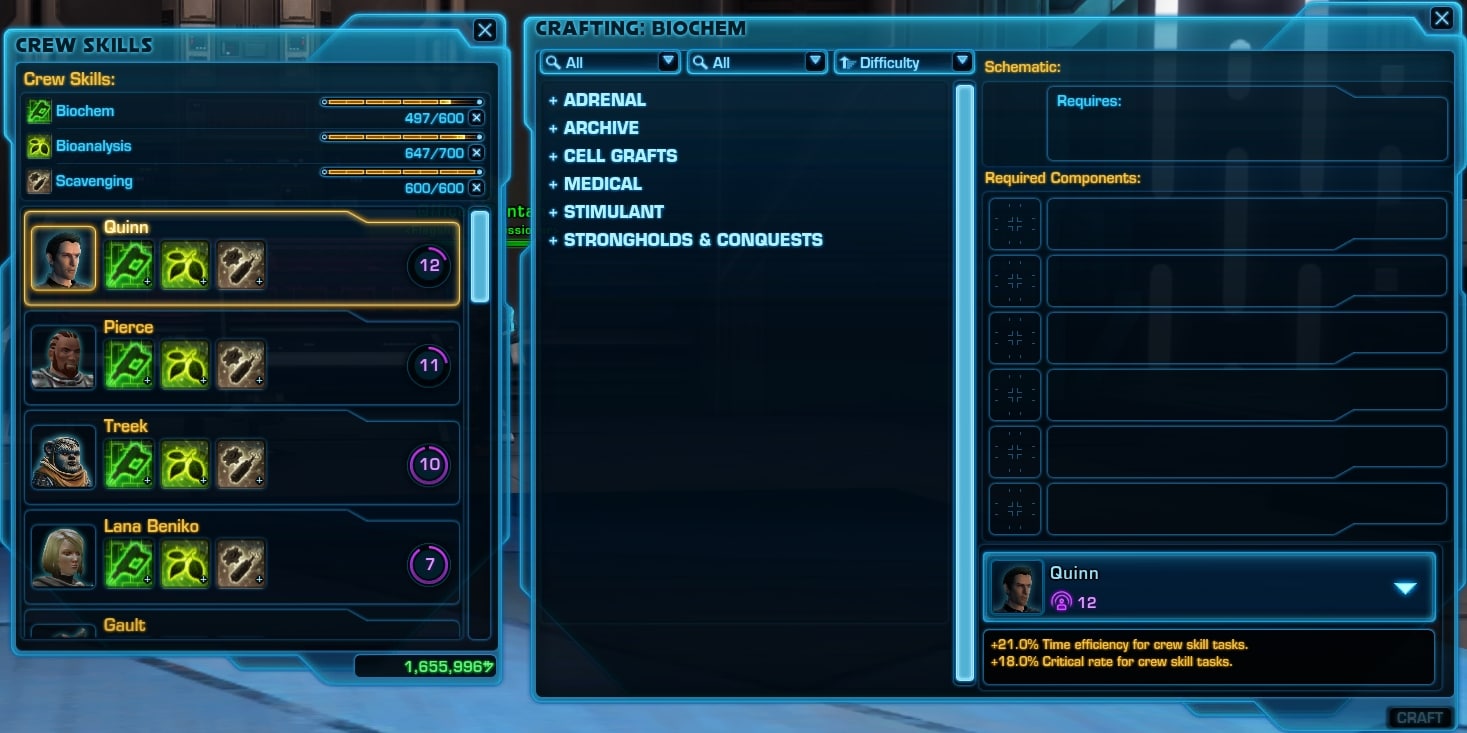
SWTOR’s Crafting and Crew Skills are an important part of the game’s economy.
Each character can learn up to three skills, one of which can be a Crafting Profession or you can opt to only learn Gathering Skills.
The left panel lists your current crew skills. On the right side is the panel where you can order your companons to remain on the ship and craft things for you. The higher the companion’s Influence, the better chance for a crit result they get during crafting.
I have explained everything you need to know about the Crafting in SWTOR in my beginner’s friendly guide. Take a look.
Friends Window

Here you can see all of your friends, who is online, what they do at the mooment and so on.
Right-clicking on their name opens a menu with a few shortcut commands such as ignore, remove from list or invite to group.
At the bottom of this window you can open one of the three tabs. By default the window opens on the Friends tab. The “Who” is for searching for someone using a specific search parameter. The “Ignore” tab is self-explanatory. No mater how much you ignore the cradit seller spammers, they will always return with new names. Sad, but true.
Guilds Window
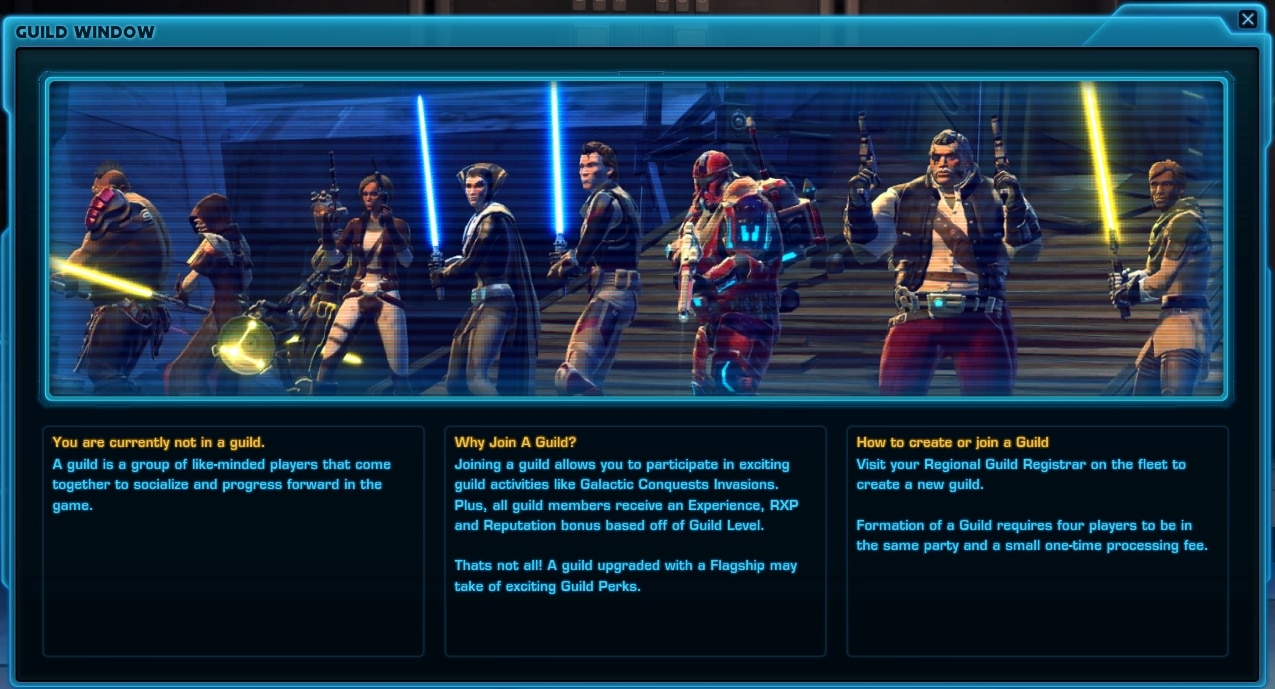
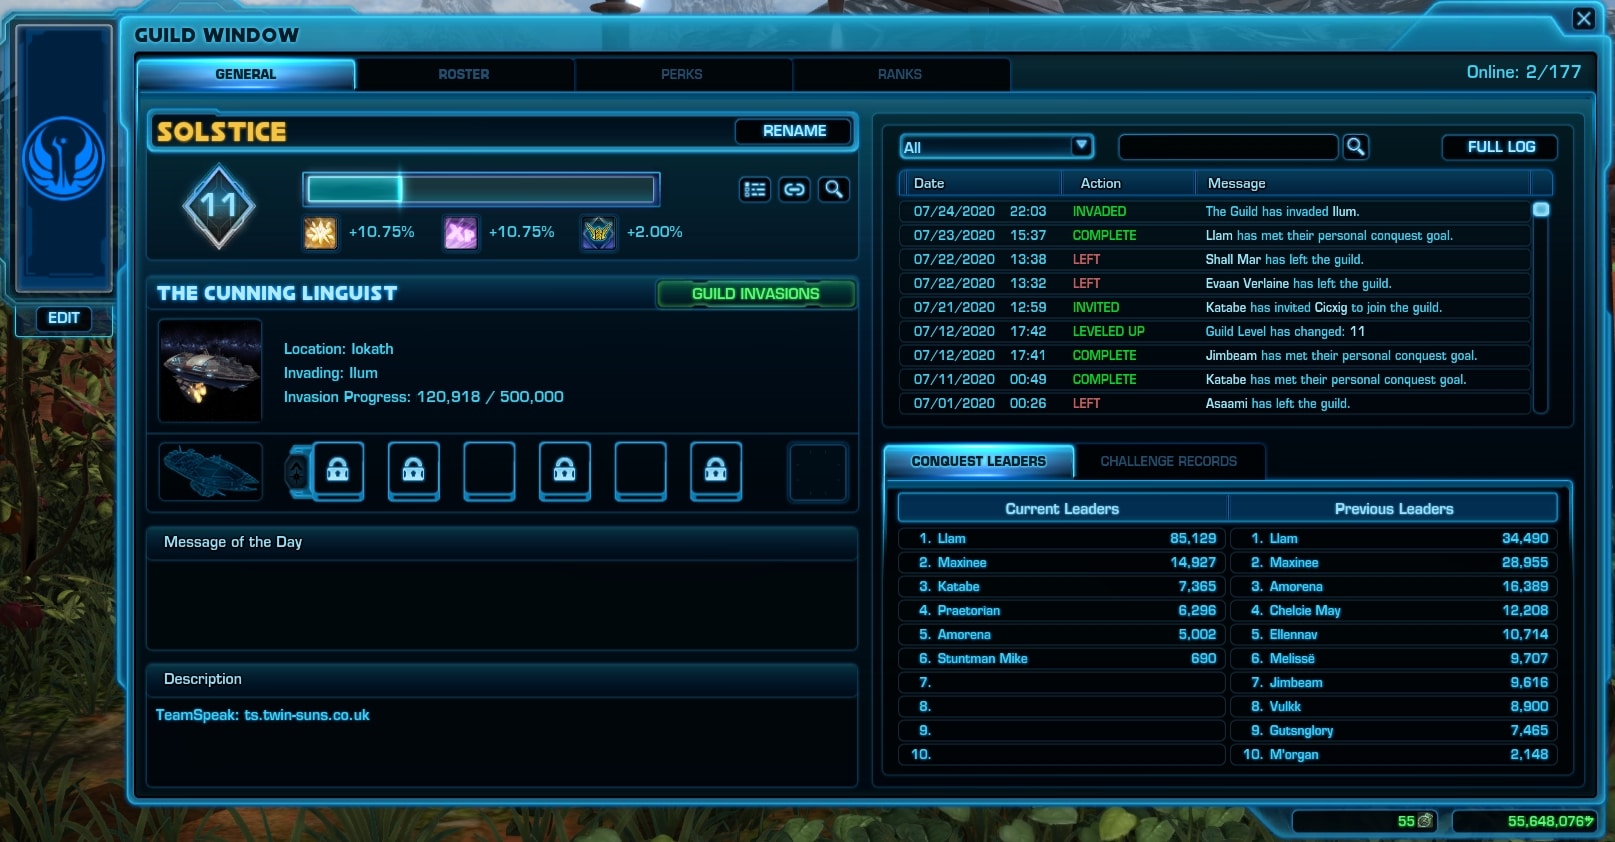
The Guild window is where you can see who from your guild is online, where they are and on which character are they currently online.
Guildmasters can edit roles, ranks and allow specific permissions to certain players like officers, members, alts, recruits etc.
The first tab provides a general overview of the guild. The Roster is the most often used tab as this is where the active online players are listed. The Perks tab is showing what Guild perks you have assigned and activated to which segments of your Guild Ship, provided your guild has one (they are quite expensive).
The Ranks tab is only available to Guildmasters. Here they can tweak players roles and access permissions.
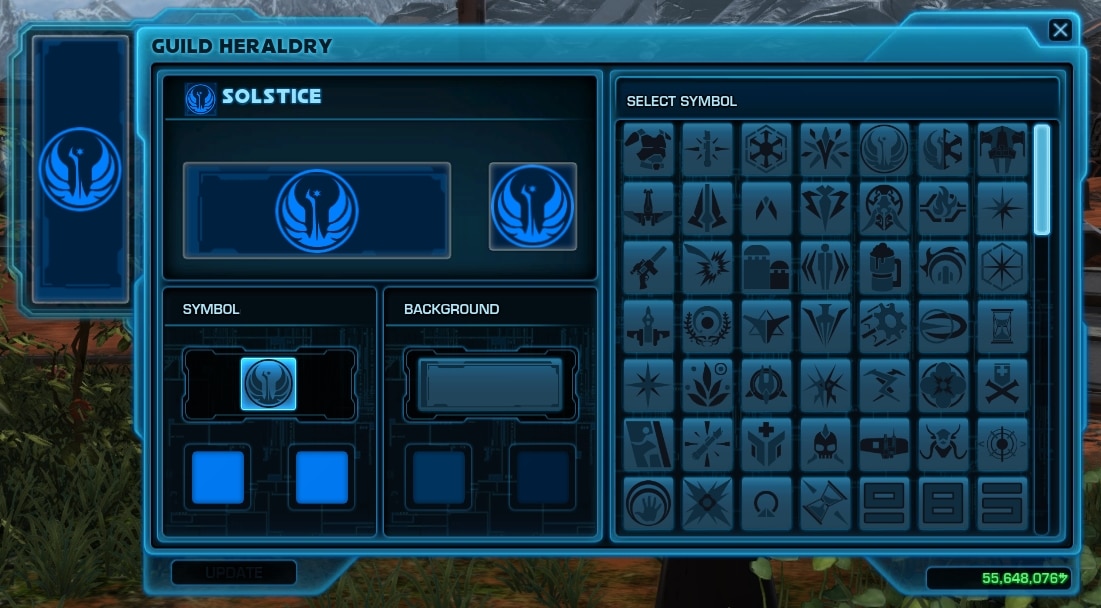
Each Guild can have a herald, or an emblem. It is displayed on the left side of the Guild window. Guildmasters can edit it if they wish to.
Galactic Window
Added with Game Update 6.1.2 this tool is supposed to help you track your character’s progress and help you remember where you last left off.
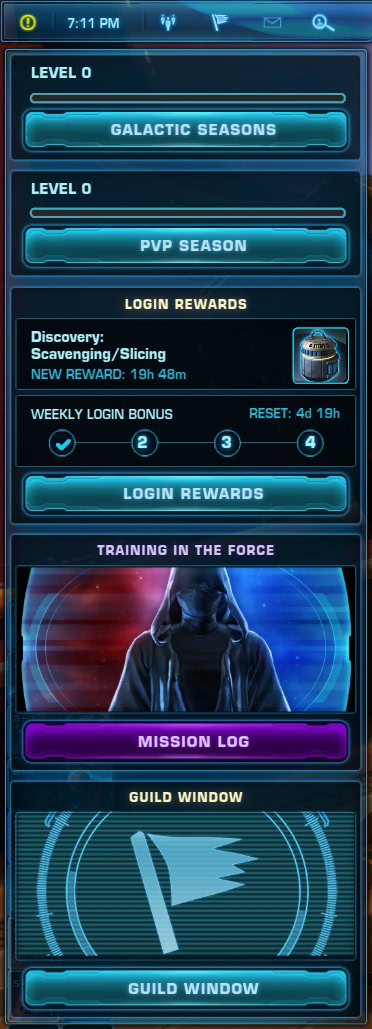
The Galactic Guide can be found near the chat panel when first logging in. This feature will showcase the current (or oldest) Story Mission, the active Conquest, and the current Featured Offer from the Cartel Market.
In reality, what this tool achieve is to promote the featured Cartel Market item. If you become an altoholic, this might be of use to you.
Even (ex) Creative Director Charles Boyd (before he left) admitted that this tool provokes more criticism than positive reactions during the SWTOR Dev Stream that detailed the 2020’s second half of the year Roadmap for the game. Charles said that this tool is intended for returning players. If you are one, share your thoughts below.
The tool received a revision as part of the SWTOR 7.2 Toolbars revamp. You can learn what has changed and how to use the new Toolbars in the dedicated guide.
Rewards Window
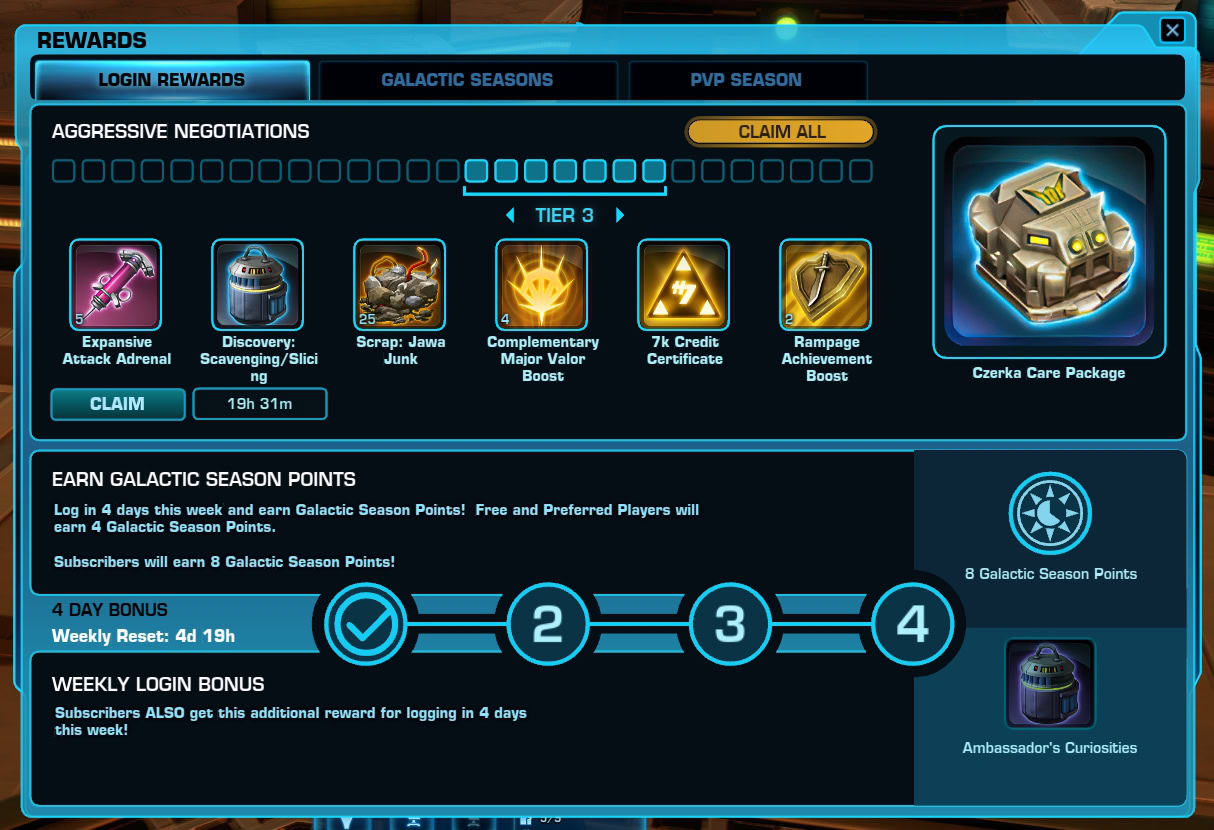
The Rewards Window contains two tabs – Login Rewards and Galactic Rewards. This is where you can track what you earn passively as you play the game regularly.
Login Rewards Tab
The Login Rewards System serves one simple purpose – to encourage you to log in to the game more frequently. Every day you log in, you earn something and the more frequently you play the game, the more rewards you earn, and the better they get.
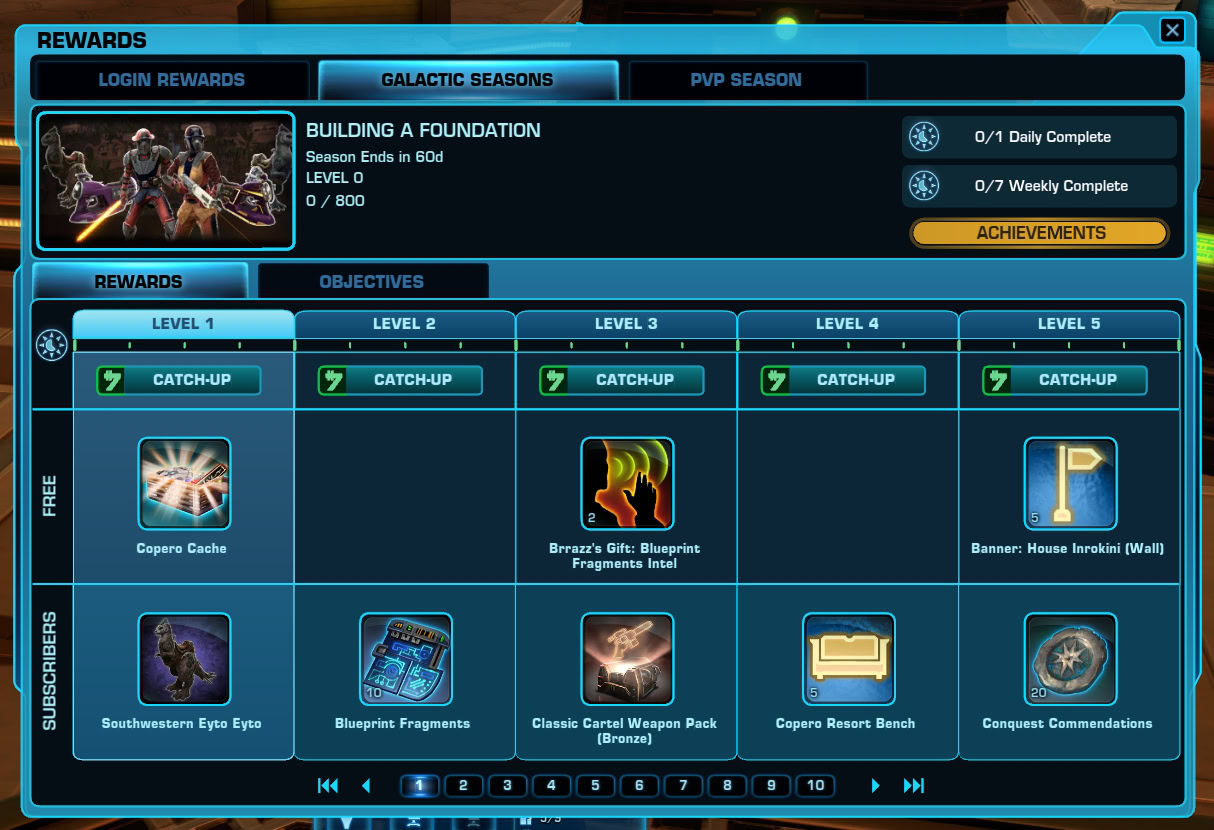
Galactic Seasons Tab
Galactic Seasons is a passive game system that rewards you for playing the game and participating in various activities. I have a very in-depth guide to the Galactic Seasons, which I encourage you to read through if you want to get familiar with how it works and what you can earn.
PvP Season Tab
The PvP Seasons system works in a similar way to the Galactic Seasons system. It rewards participation in PvP activities at any level and tier. The more wins you gain in Warzones (8v8) and Arenas (4v4), the more points you will earn and be able to climb through the PvP Season Levels faster.
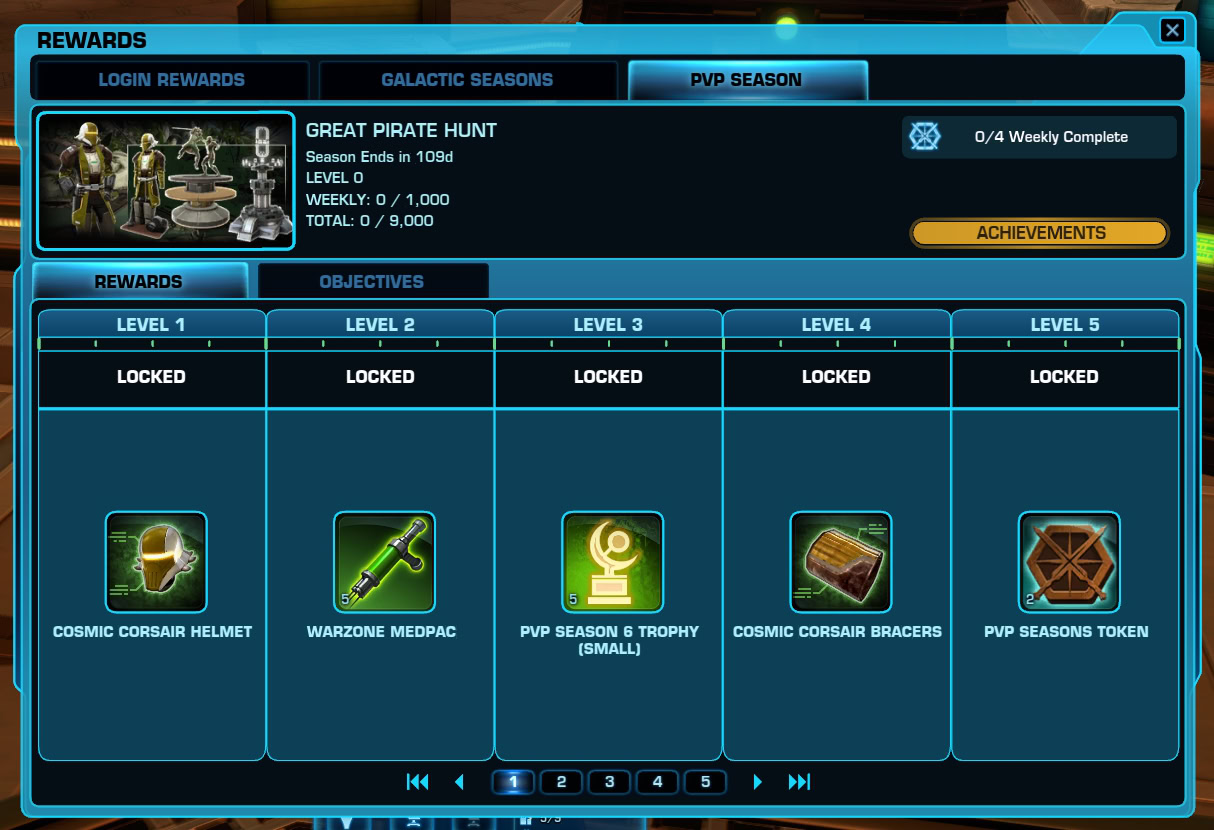
The dedicated guide to the PvP Seasons System in SWTOR will explain in great detail how this works, what you can do and how to earn rewards, as well as how to access the Seasonal and Non-Seasonal vendors.
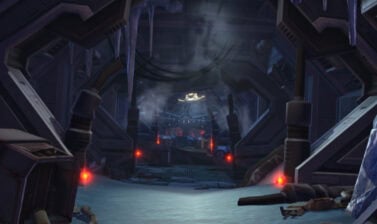
Location-based and Time-dependent UI Elements
The following windows and UI modules are available only at a specific location. You would need to travel to a place, click on something for these to appear. They cannot be called and interacted with from a distance (with a few notable exceptions).
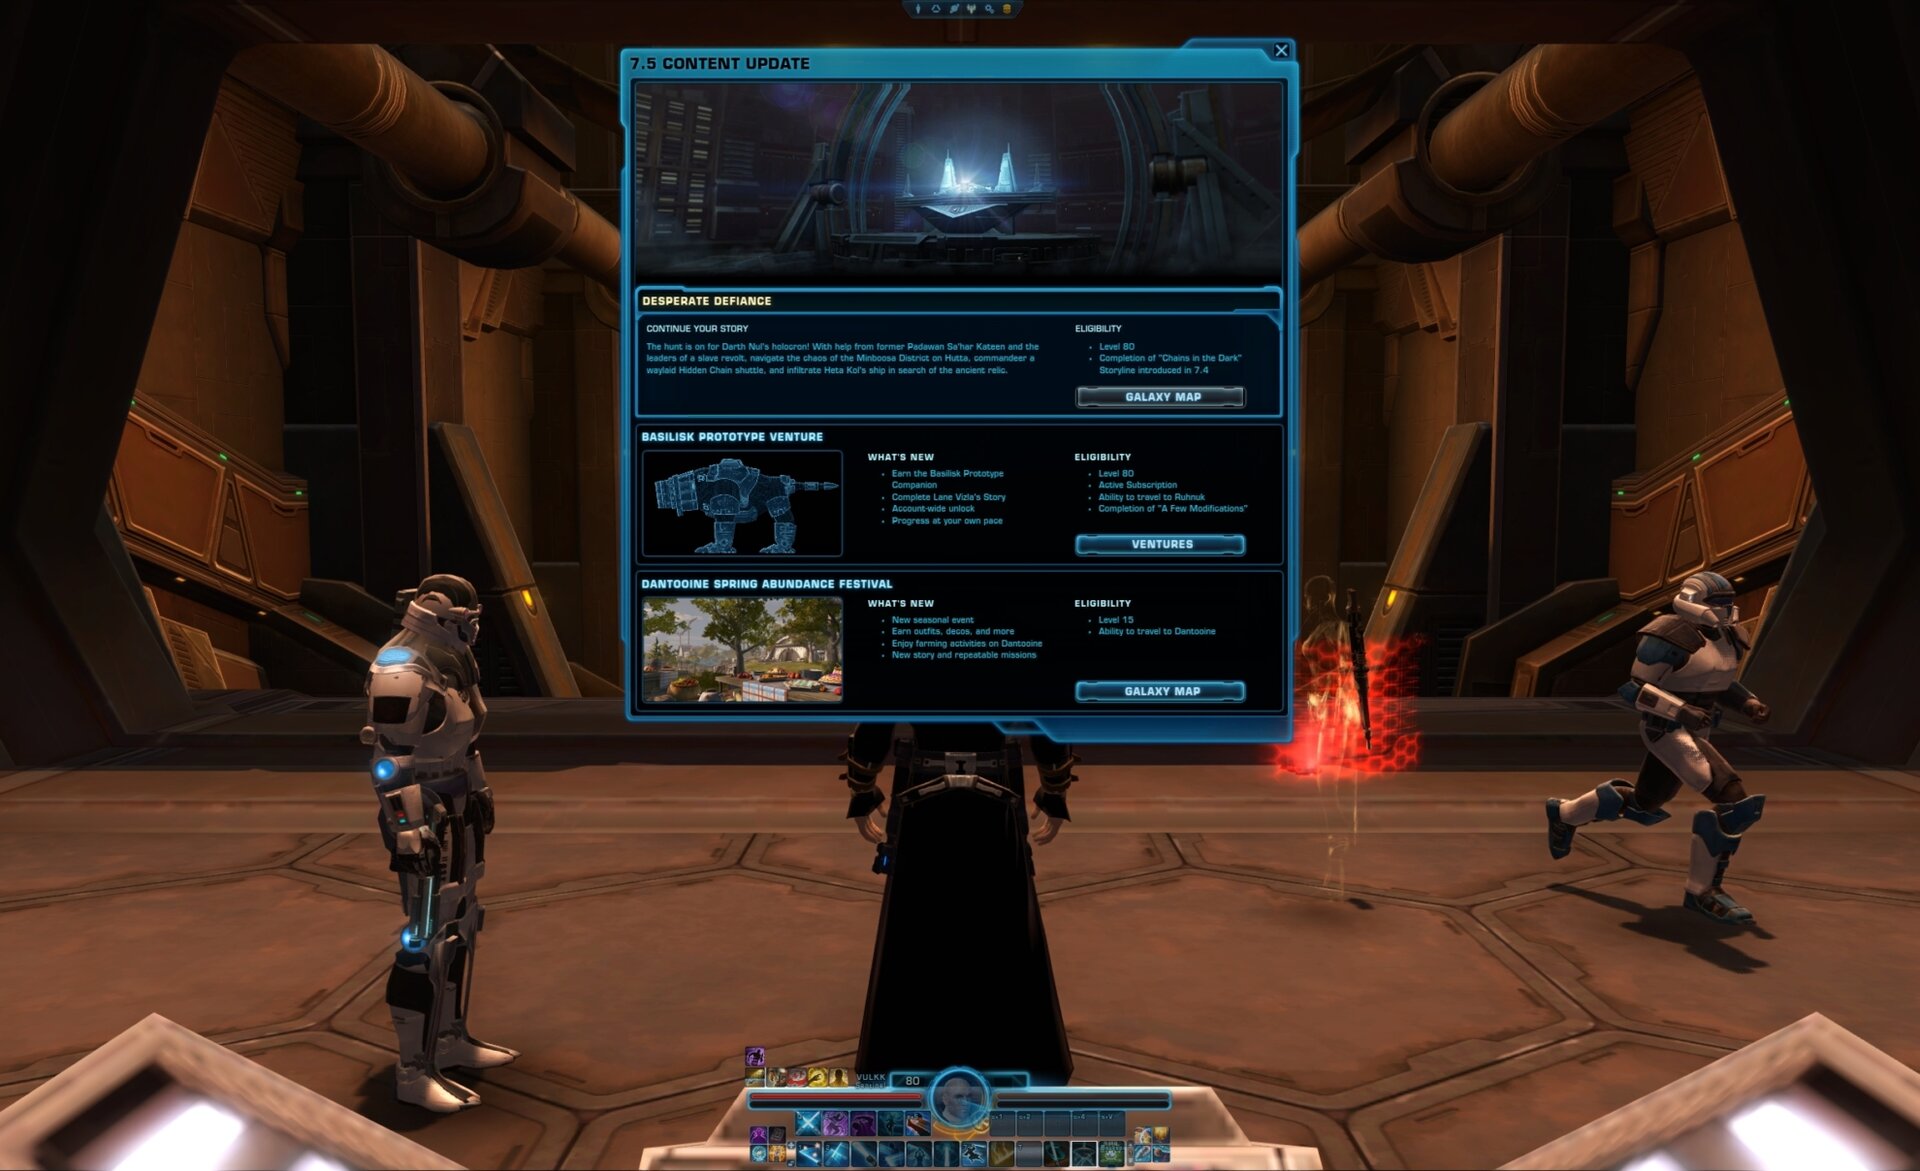
Game Update News Window Pop-up
Like many other modern MMOs, SWTOR also shows you a window with a brief information of what was introduced to the game with the most recent game update. You will see this once when you arrive on the Fleet.
Galactic Trade Network (GTN)
Available on the Republic and Empire Fleets, the GTN Kiosks are easy to spot as their large displays glow in green. Click on the terminal to interact with it and access the GTN.

GTN is the in-game economy trade network. Anything you craft, loot or purchase from the Cartel Store can be sold here. Some items may have an internal cooldown before you are allowed to offer them for selling.
GTN Kiosks can be placed in Strongholds and Guild Ships as decorations.
On the bottom you will see a Buy and a Sell tabs.
Buy Tab
On the left side of the panel are the filters that you use to buy or sell your items. The large portion of the screen is taken by an overview of the item(s) and their names, level requirements, prices and seller’s name.
To purchase an item, click on the little button of the far right column in the list. When you make a purchase, it arrives at your mailbox. More on mailboxes below.
Sell Tab
The Sell tab is where you place your own items for selling. You can choose their price and duration for them to remain on the GTN. If you succeed in selling an item, you will receive your credits via a mail.
Workbench and Gear Augmenting
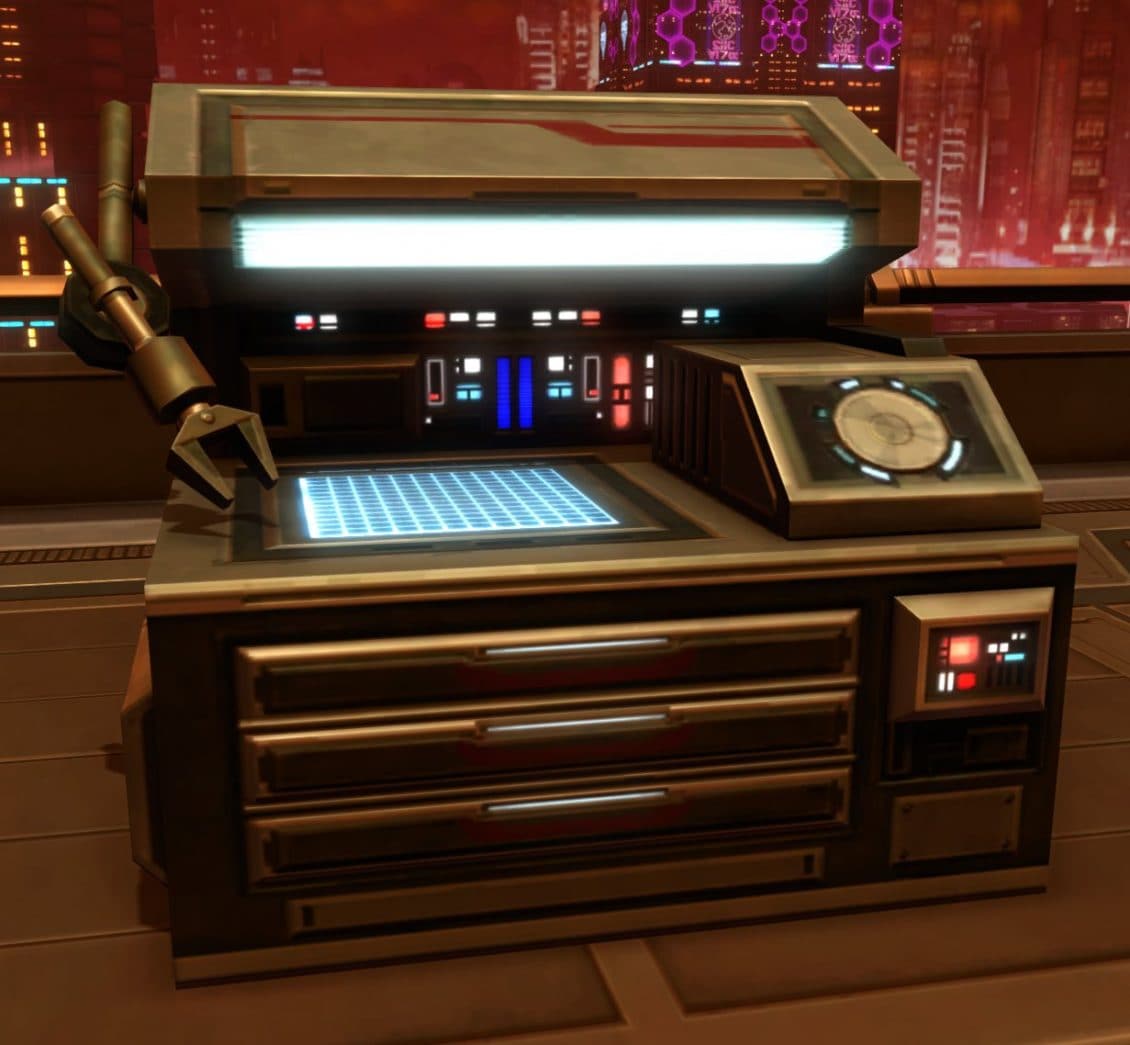
I have an extensive guide on How to Augment your Gear in SWTOR. I wont go into too much detail on that topic here.
Workbenches are tools that allow you to open up a mod-able gear piece and insert mods into it to add stats to it. They are available in a lot of places, including on the origin planet where you start your adventure, on the Fleet, can be placed in Strongholds and so on.
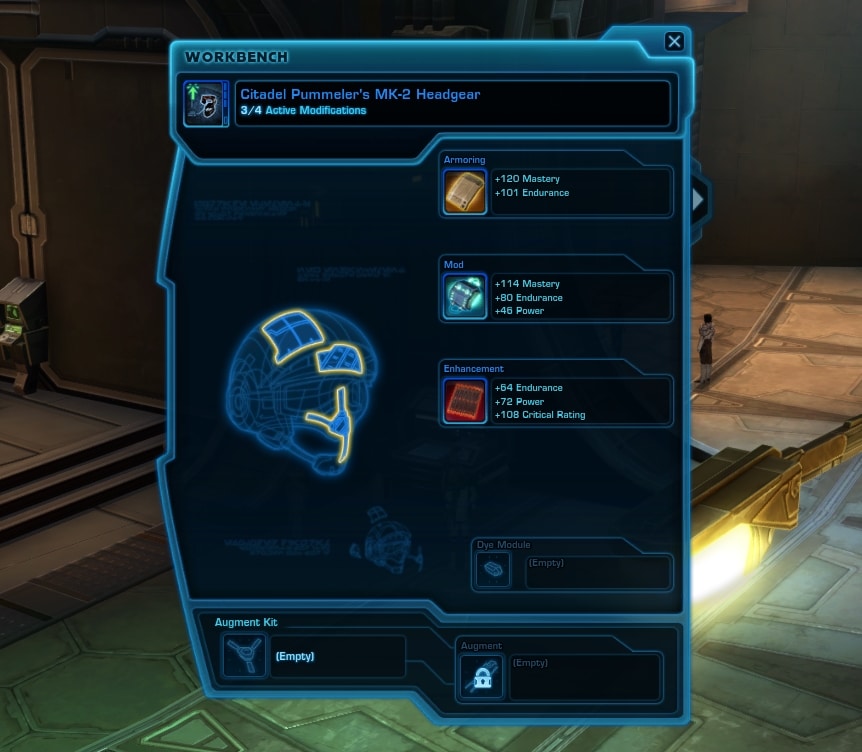
You do not need them to place Augments in your gear since you can CTRL+RightCLICK on a mod-able item to see its slots.
Mailbox
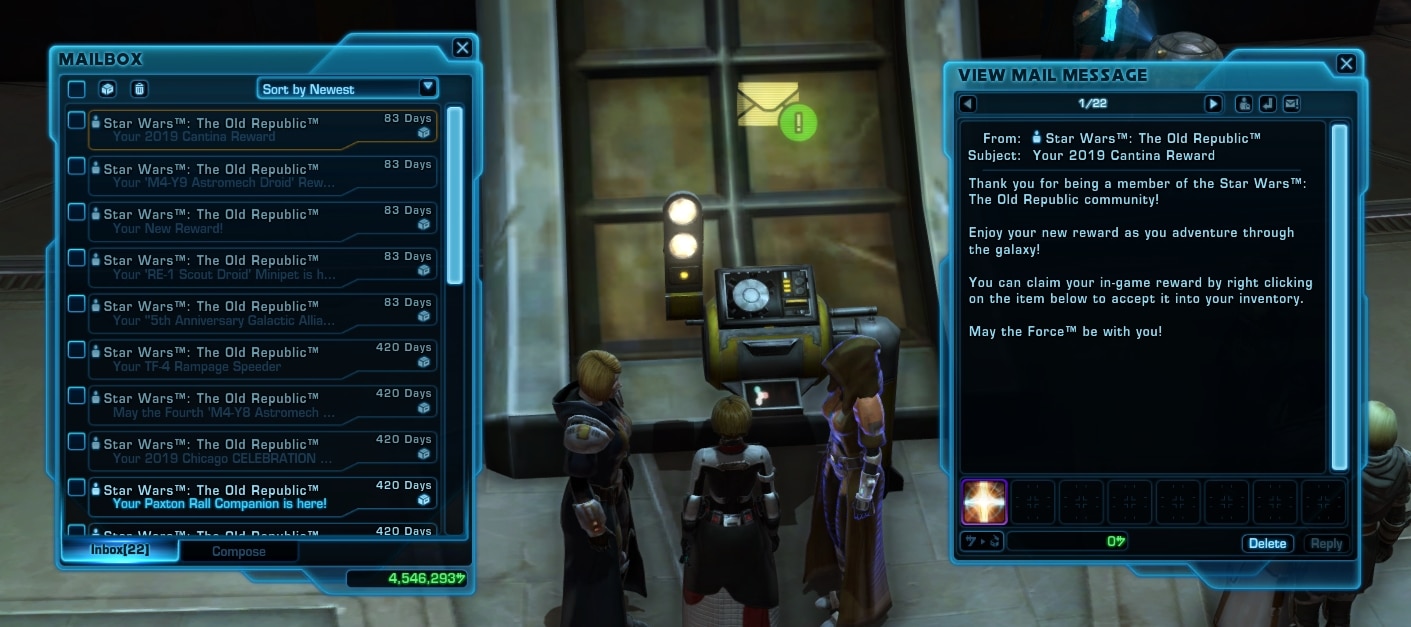
Mailbox in SWTOR serves the exact same purpose as it does in our real lives. It delivers items, credits and messages to your character.
Mailboxes are located on the Fleet, on your ship, on every city, town and camp on every planet. They are also available as a portable object unlocked through your Character Legacy perks panel.
Left-clicking on a message will open the window you see on the right side of the image above. If there are attached items or credits to the mail, they will appear in the bottom.
Cargo Holds
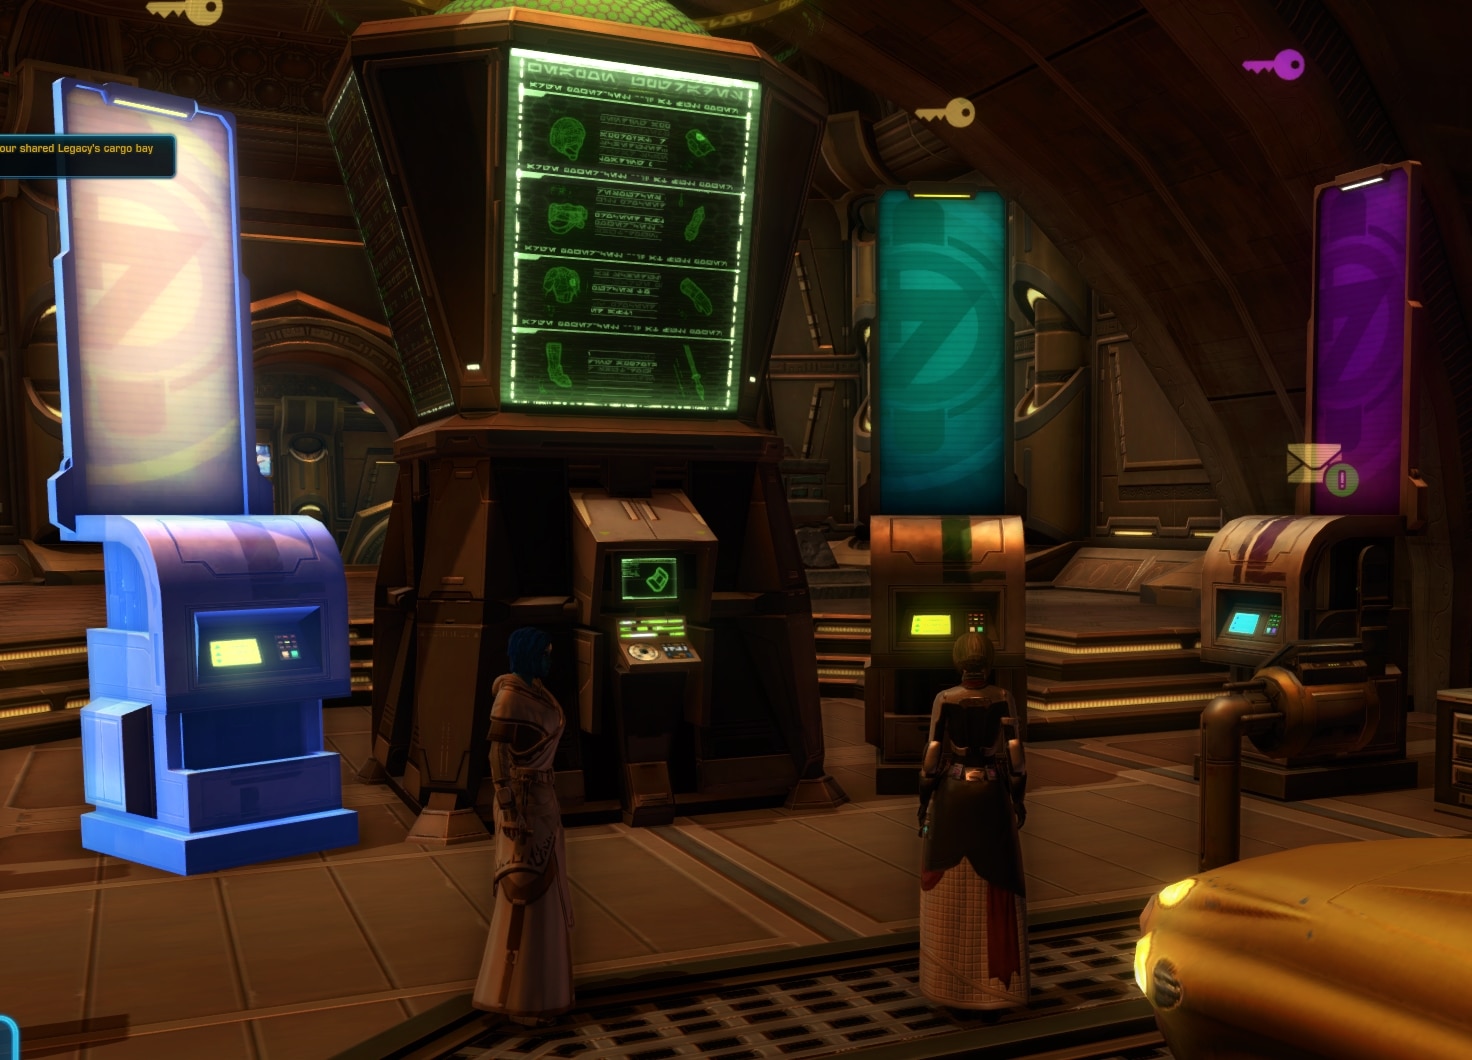
There are three types of Cargo Holds: Personal, Legacy and Guild. Each one of them allows you to store your items and credits.
The Personal Cargo Hold can be accessed only by your character. The Legacy Cargo Hold can be accessed by all characters in your Legacy. The Guild Cargo Bay can be accessed by guild members based on the specific permissions the Guildmaster has allowed for each member rank within the guild.
Each Cargo Hold can be further expanded with additional tabs, allowing you to store more items. Each new tab must be purchased with Credits or Cartel Coins.
Cargo Holds can be found on the Fleet, purchased and placed as decorations in Strongholds and Guild Ships or found in major social hubs on most planets.
Appearance Designer
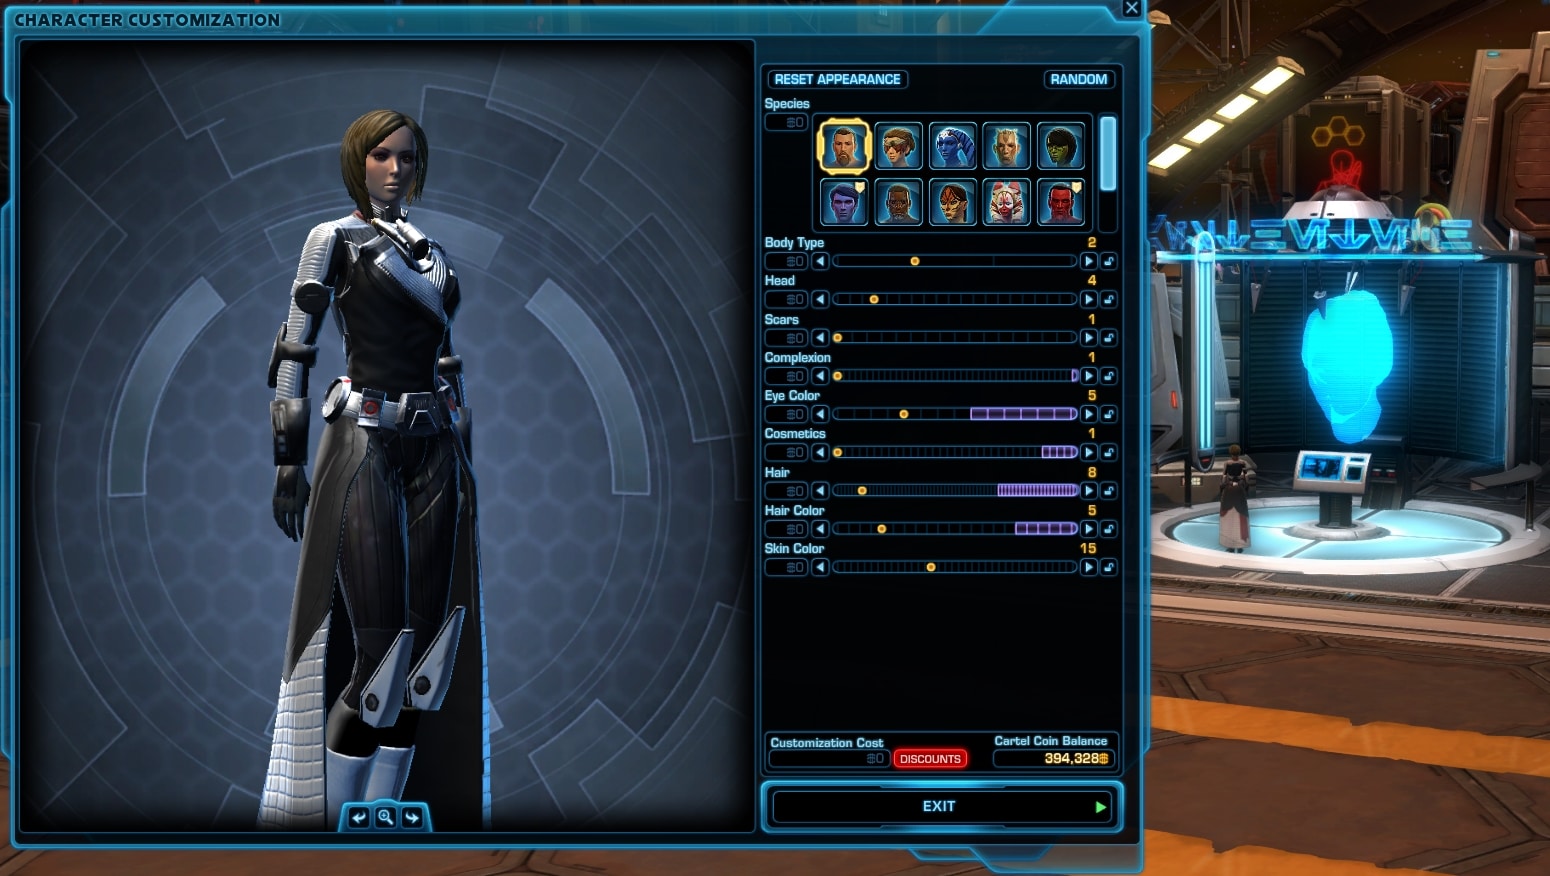
If it so happens that one day you decide the character you created when you started the game does not look as cool as it could or if you want to simply change their hairstyle and facial cosmetics, the Appearance Designer tool is for you.
Found originally in the Cartel Bazaar on the Fleet, but it can also be purchased and placed in Strongholds and Guild Ships for convenience.
On the left side of the panel is a preview of what your character would look like with the currently selected options, which can be chosen from the filters on the right side of the panel.
Using the Appearance Designer to alter you character’s appearance costs Credits or Cartel Coins. Subscriber players receive massive discount, as can be seen by placing your mouse over the red button “Discounts” near the bottom.
I have a dedicated guide on what SWTOR Appearance Designer is and how it works. There you can learn all the details you need and I have a few tips on how to get cheaper prices for the customizations you have not unlocked.
Vendors and their Contents
When you approach a vendor NPC and right-click on it, the contents window will appear. Different vendors offering all kinds of cool items are available literally everywhere in SWTOR.

At the bottom you see three tabs. The first one allows you to buy items from that vendor. The second one allows you to get back items you sold to that vendor (by mistake or because you changed your mind suddenly). The third tab allows you to repair your gear. Yes, Gear in SWTOR wears down, just like in most MMORPG out there.
To sell an item, simply move it from your Inventory over to the vendor’s tab or right-click on the item in your inventory to immediately sell it.
At the bottom there are two buttons. The Repair All conveniently repairs all of your gear and restores it back to its optimal status. The Sell Junk button allows you to quickly sell all of the junk items in your inventory. These items have no other value than to take up space and be sold at first chance.
Mission Terminals
Whenever you stumble upon one of these terminals with a quest icon above them, take a look, see what missions they will offer you. Your Mission log can store quite a few missions at the same time, so don’t be afraid to pick up more and have them.
Right-click to open the terminal and see what missions are available. Various Mission Terminals on the Fleet will offer you Weekly quests that you can complete while doing your favorite content, such as Flashpoints, Operations, Daily Areas Missions and more.
The Main Menu
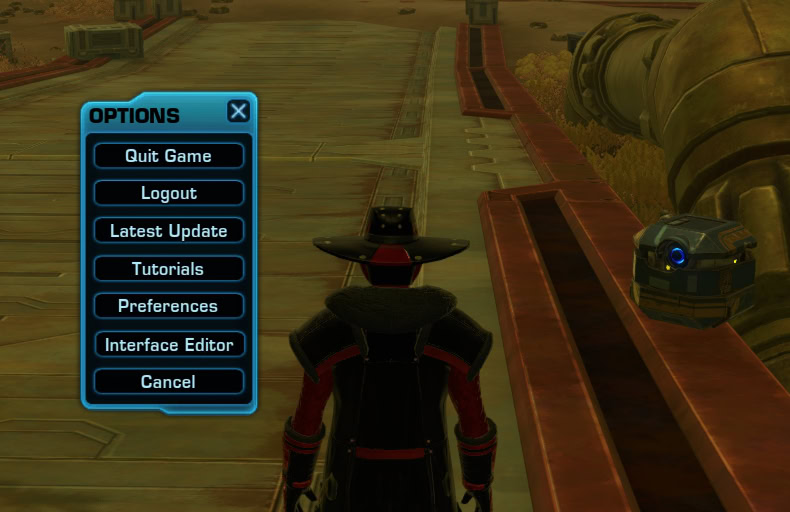
The main menu can be accessed by pressing ESC. Some of the sub-menus can be opened form elsewhere too.
The Main menu has the following windows and features:
- Quit Game
- Logout
- Latest Update
- Tutorials
- Preferences
- Interface Editor
- Cancel
Preferences Menu
The Preferences Menu is where you can tweak a lot of the game’s behavioral elements. The menu includes several sub-menus with additional tabs on the bottom.
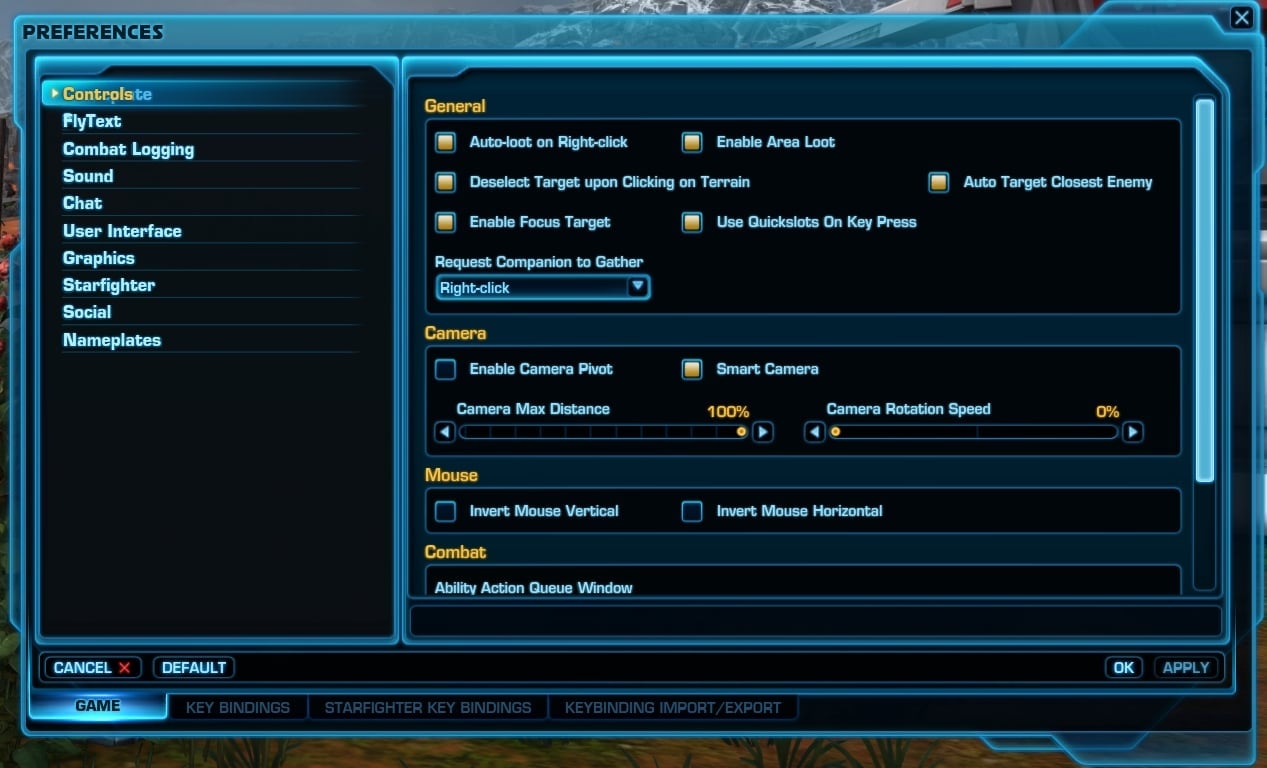
From the Preferences menu you can change the game’s graphics, sound, chat, UI and more.
From the tabs at the bottom you can import and export Key Bindings as well. I highly recommend you to learn how to play with keybinds and try to make them logical for each character you create. Similar abilities should be bound to similar keys. This way you will learn faster and remember better what ability is where on each alt you play.
Interface Editor Tool
If you want to customize your SWTOR User Interface, this can be done from the Interface Editor tool, which is accessible from a number of places, including the Main Menu, the left side of the main toolbar and the menu bar at the top of your screen.
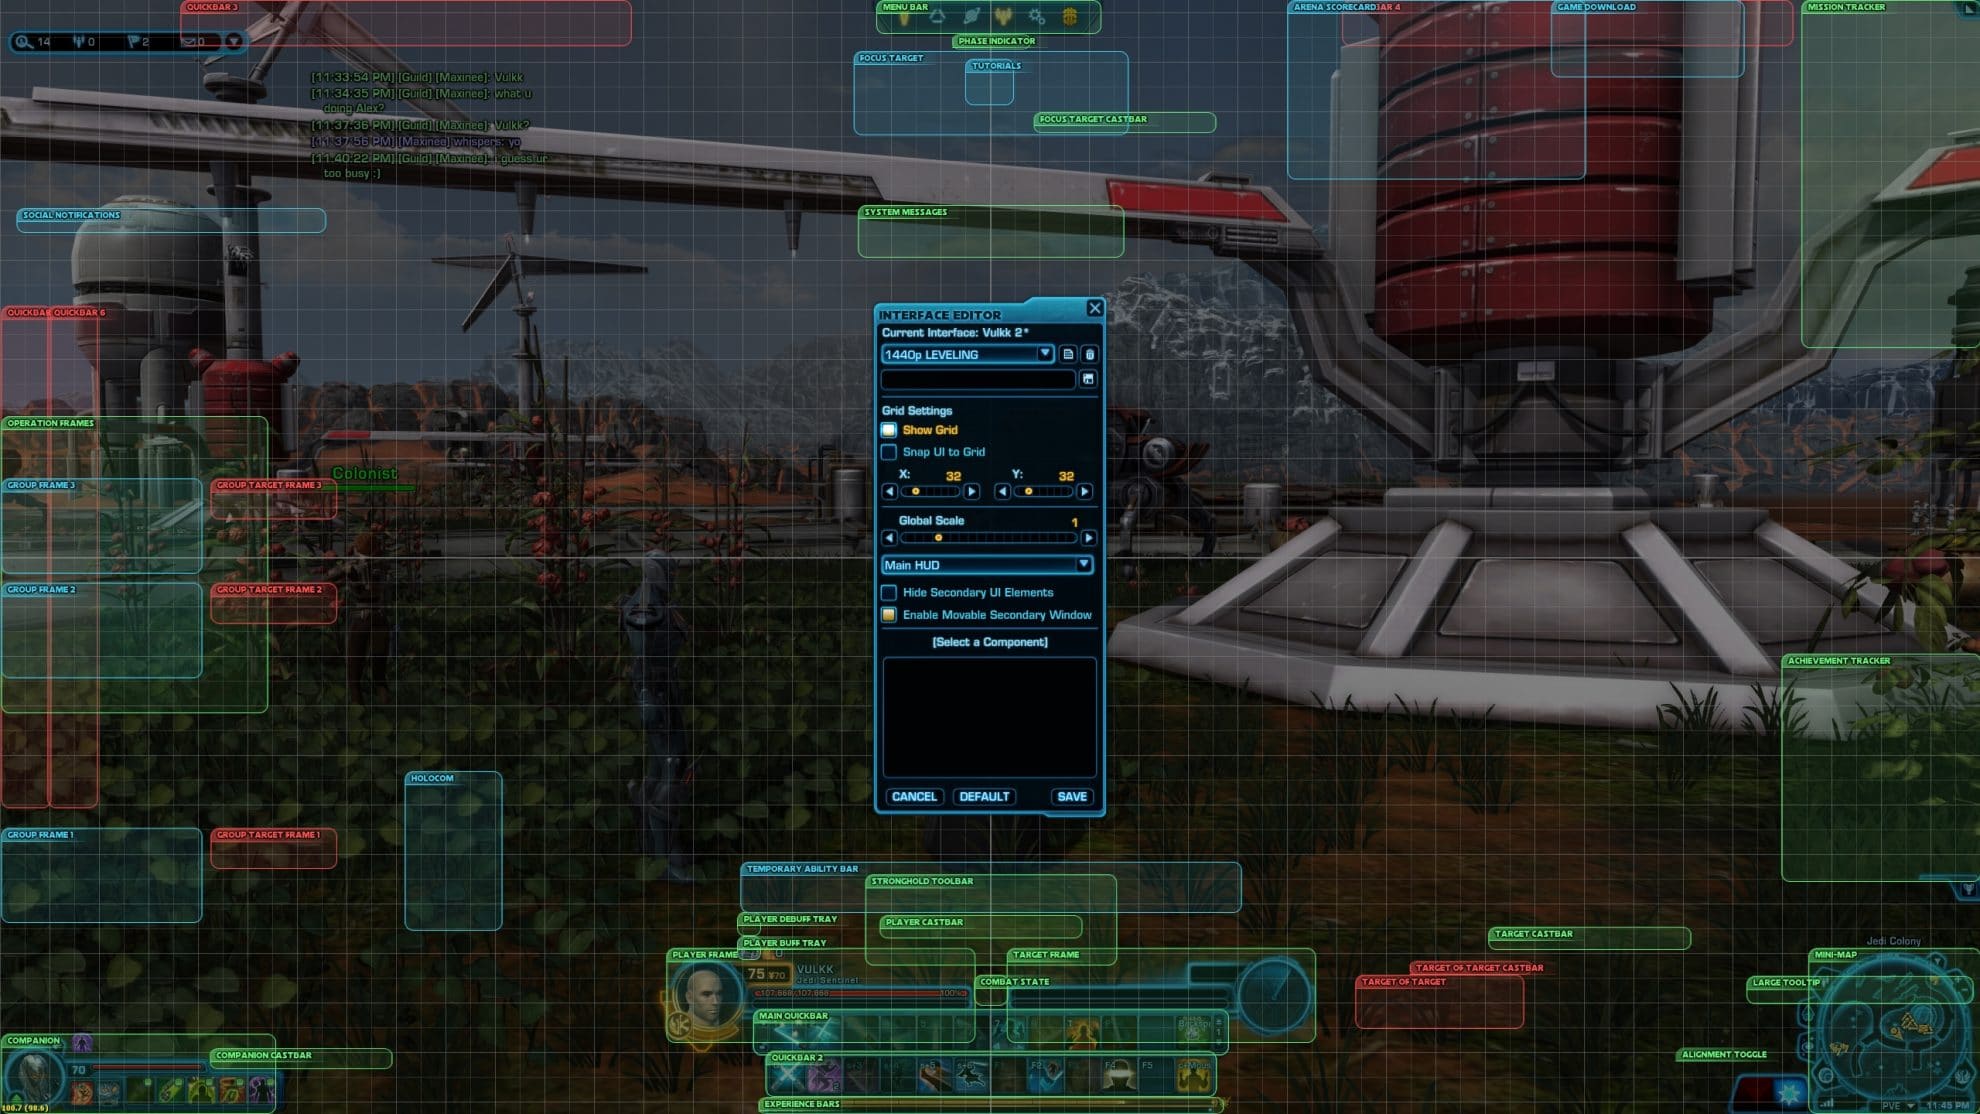
You can move, resize, tweak and customize a lot of aspects for a lot of the UI elements. By clicking on a module you will see the specific editable elements of that module in the Interface Editor tool.
Customizing your UI will take time and practice until you tweak and set up every single main or secondary element to fit with everything else.
I have two custom UIs available. You can download them for free, of course. The Vulkk SWTOR UI guide comes with instructions on how to install a SWTOR UI from another player. As a bonus I have an in-depth Keybinding Guide for SWTOR Beginner players over there. Check the link above.
SWTOR UI Video Guides and Tutorials
The videos below are a collection of recordings I have made over the years, demonstrating new elements as BioWare have added them to the game or simply a beginner’s friendly tutorial of the UI tools available and how they work.
A large portion of what you were reading in this guide is also covered in the videos below. It’s up to you in which form you prefer to consume the content, as long as it helps you.
Full Overview of the SWTOR UI
How to install another player’s SWTOR UI
To add a custom UI from another player into your game, you have to download a .XML file and place it in the “GUIProfiles” folder located here:
C:\Users\Your-PC-Account-Name\AppData\Local\SWTOR\swtor\settings
If the AppData folder is hidden, open “Folder Options” in Windows and navigate to the “View” tab. Choose “Show hidden files, folders, and drives”.
Full Keybinding Guide for Beginners
Please note that if you cannot see the videos or if they don’t play properly, your AdBlocker may be the cause for that. Consider white-listing VULKK.com and support the site. Thank you very much!
Conclusions
The SWTOR UI is a vast topic and it is likely that I will keep adding new and updating existing segments from this guide. If you have any questions or feedback, share it in the comments below the article, please.
I hope you find this SWTOR User Interface Guide useful. If you have any questions or feedback, don’t hesitateto share it in the comments section below the article. Don’t forget to sha re this with your friends and hep them too.
With the Steam Launch of SWTOR and the large influx of new players (both new to SWTOR and to the MMO genre), I thought it would be a good idea to expand the Interface section I had in my Ultimate SWTOR Guide.