Dynamic Encounters are a new style of short planetary mission in SWTOR that you can stumble upon while you’re out questing. We’ll tell you how they work, where to find them, and what you get for completing them!
Table of contents
What are Dynamic Encounters?
Dynamic Encounters are a new style of mission in SWTOR, though if you’ve played any modern open-world games, MMO or not, you’ll likely be familiar with the style.
They’re quite similar to [AREA] missions, if you remember those from back in the day, and many have compared them to the system that goes by the same name in Guild Wars 2.
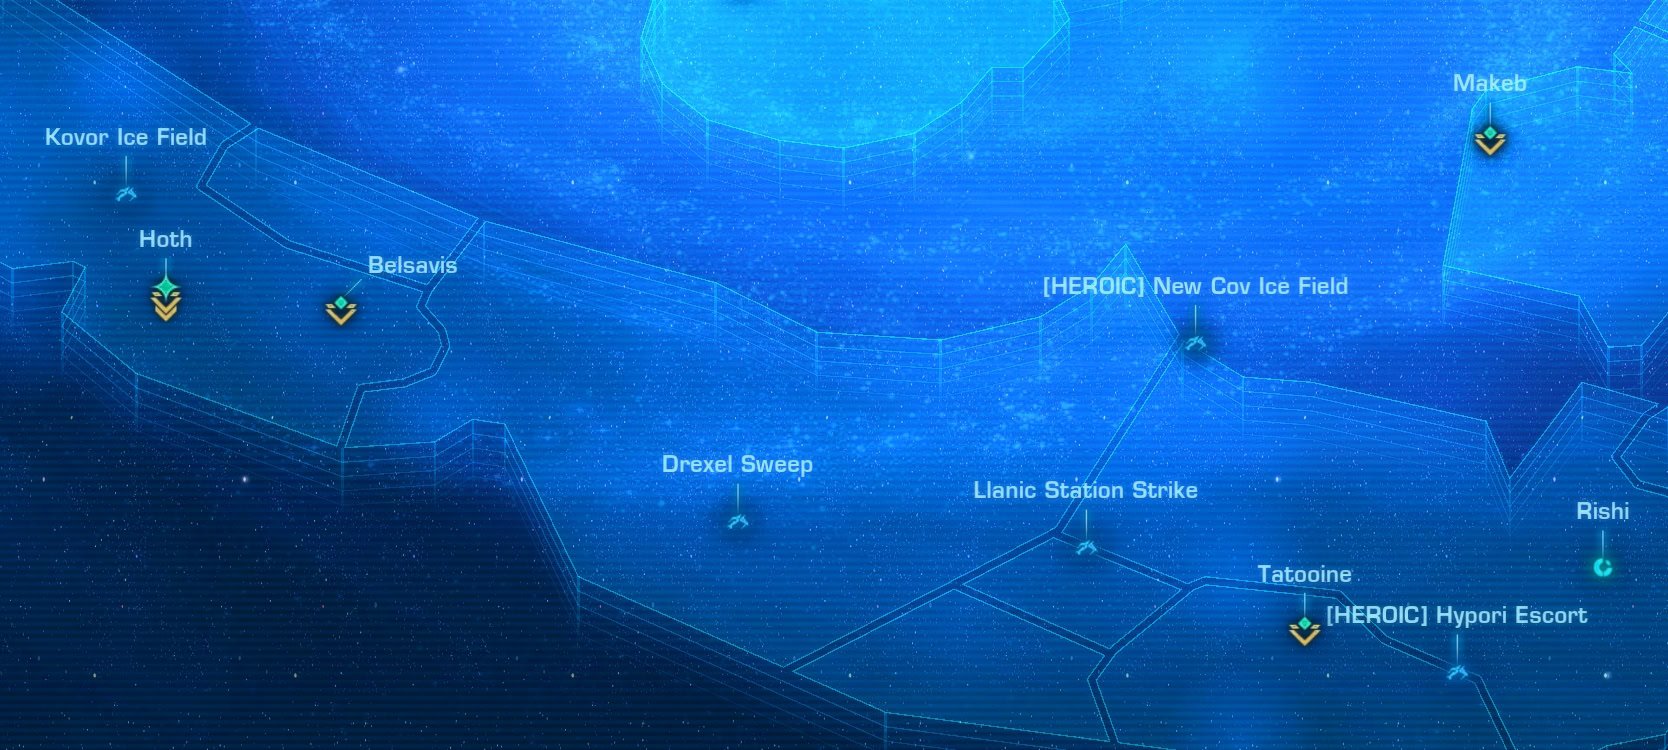
Rather than picking up these missions from an NPC or terminal, they exist out in the field on your map. All you have to do is reach the marked location and the objectives will pop up automatically.

Everyone can see all currently available Dynamic Encounters on all maps, and anyone can complete them, though they’re only available for a set time. As old events expire, new ones become available.
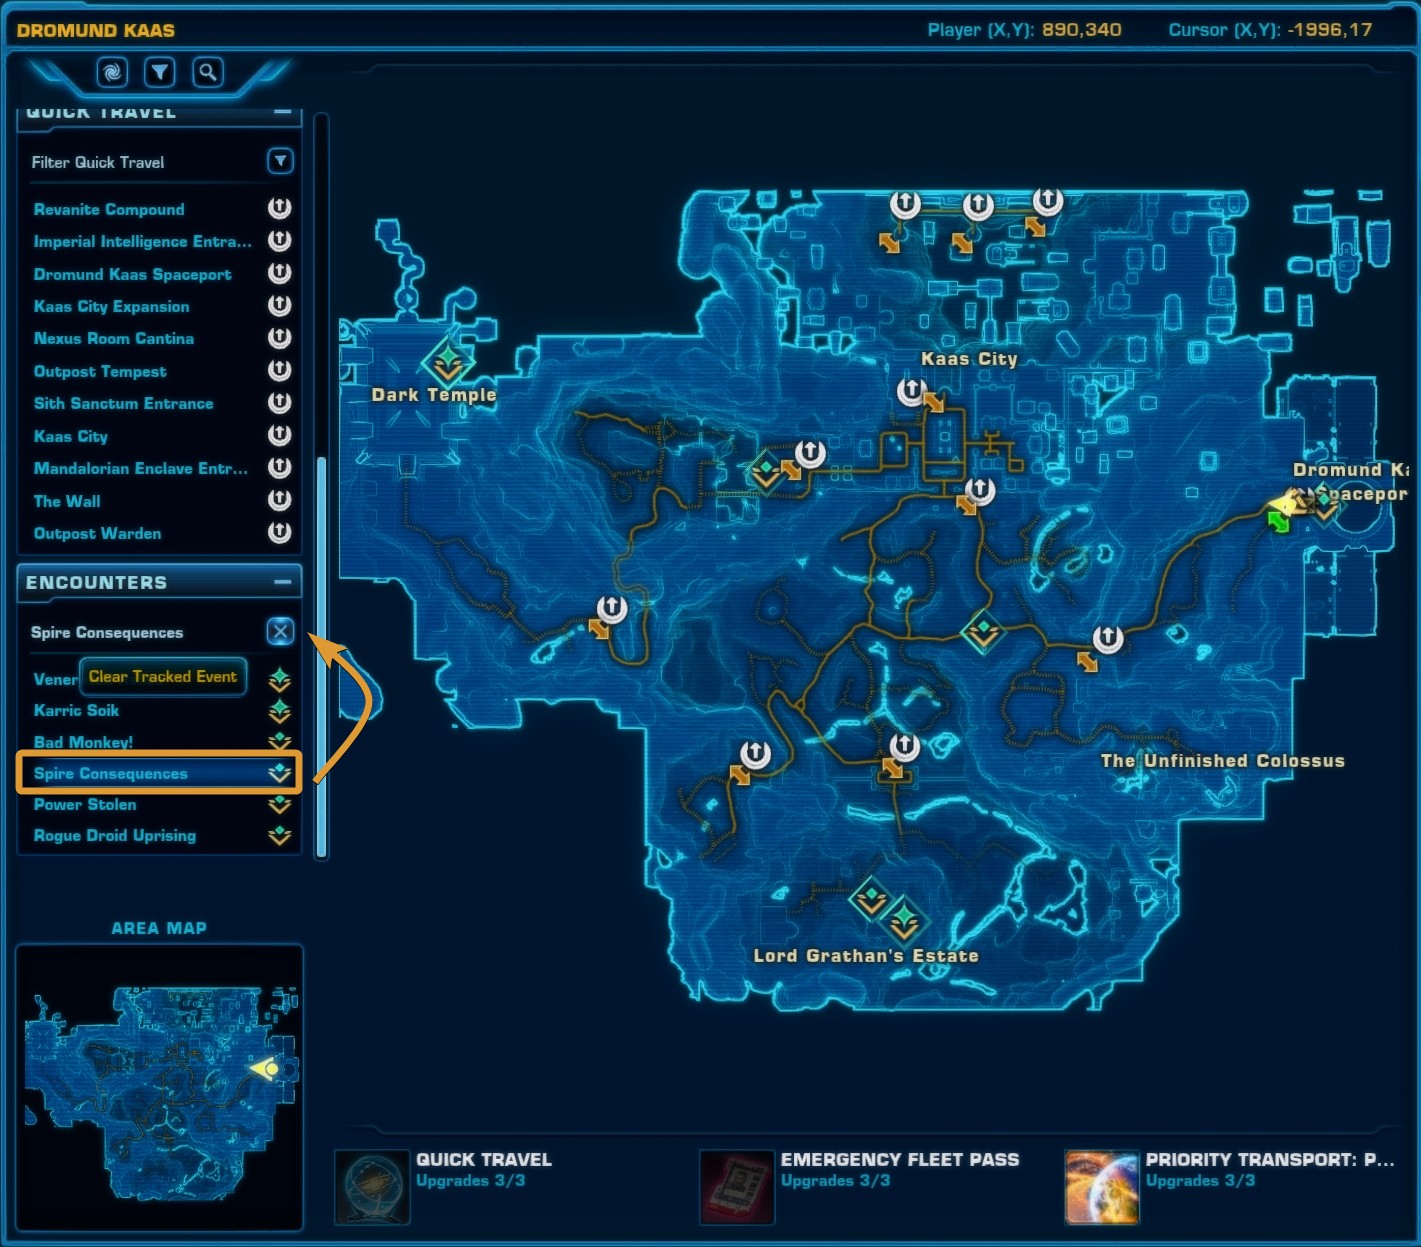
Dynamic Encounters don’t show up in your mission log, but you can track them using the expandable list on the left side of the World Map [M]. This is particularly valuable for city planets like Coruscant because the world map is useless.
Most Dynamic Encounters are doable by both factions, but some are faction-restricted. Typically, the ones in the region with each faction’s spaceport are exclusively available to that faction. That being said, some Dynamic Encounters are technically shared but exist far outside the range of one faction’s taxis, QT points, and med centers.
All Dynamic Encounters are easily soloable, at least at max level. However, some are more time-consuming to do alone, and just because an event is still active doesn’t mean you’ll be able to finish it before time runs out.
Types of Dynamic Encounters
Dynamic Encounters can differ in terms of how progress is shared between players and what sorts of objectives you’ll need to do to complete them.
Progress Sharing
There are 2 ways that Dynamic Encounter progression can be shared across multiple players, and they are visually distinguished on the map by their icon.
 Group Shared
The vast majority of Dynamic Encounters have Group Shared progression, meaning they function practically the same as regular missions. If you’re in a group doing that Encounter together, progress is shared within the group. Otherwise, it’s an individual mission.
Keep in mind that most Dynamic Encounters involve combat, and SWTOR has shared tagging, so you can still both get individual credit for the same enemy as ungrouped players.
Once you complete it, the Dynamic Encounter will remain available for others until the global timer expires. You will continue to see those world interactions, but you cannot repeat the encounter until it disappears and reappears.
 Encounter Shared
Encounter Shared means that progress is shared across everyone in the vicinity of the Dynamic Encounter. These are less common, have multiple stages culminating in a fight against a Champion, and generally take longer to complete alone.
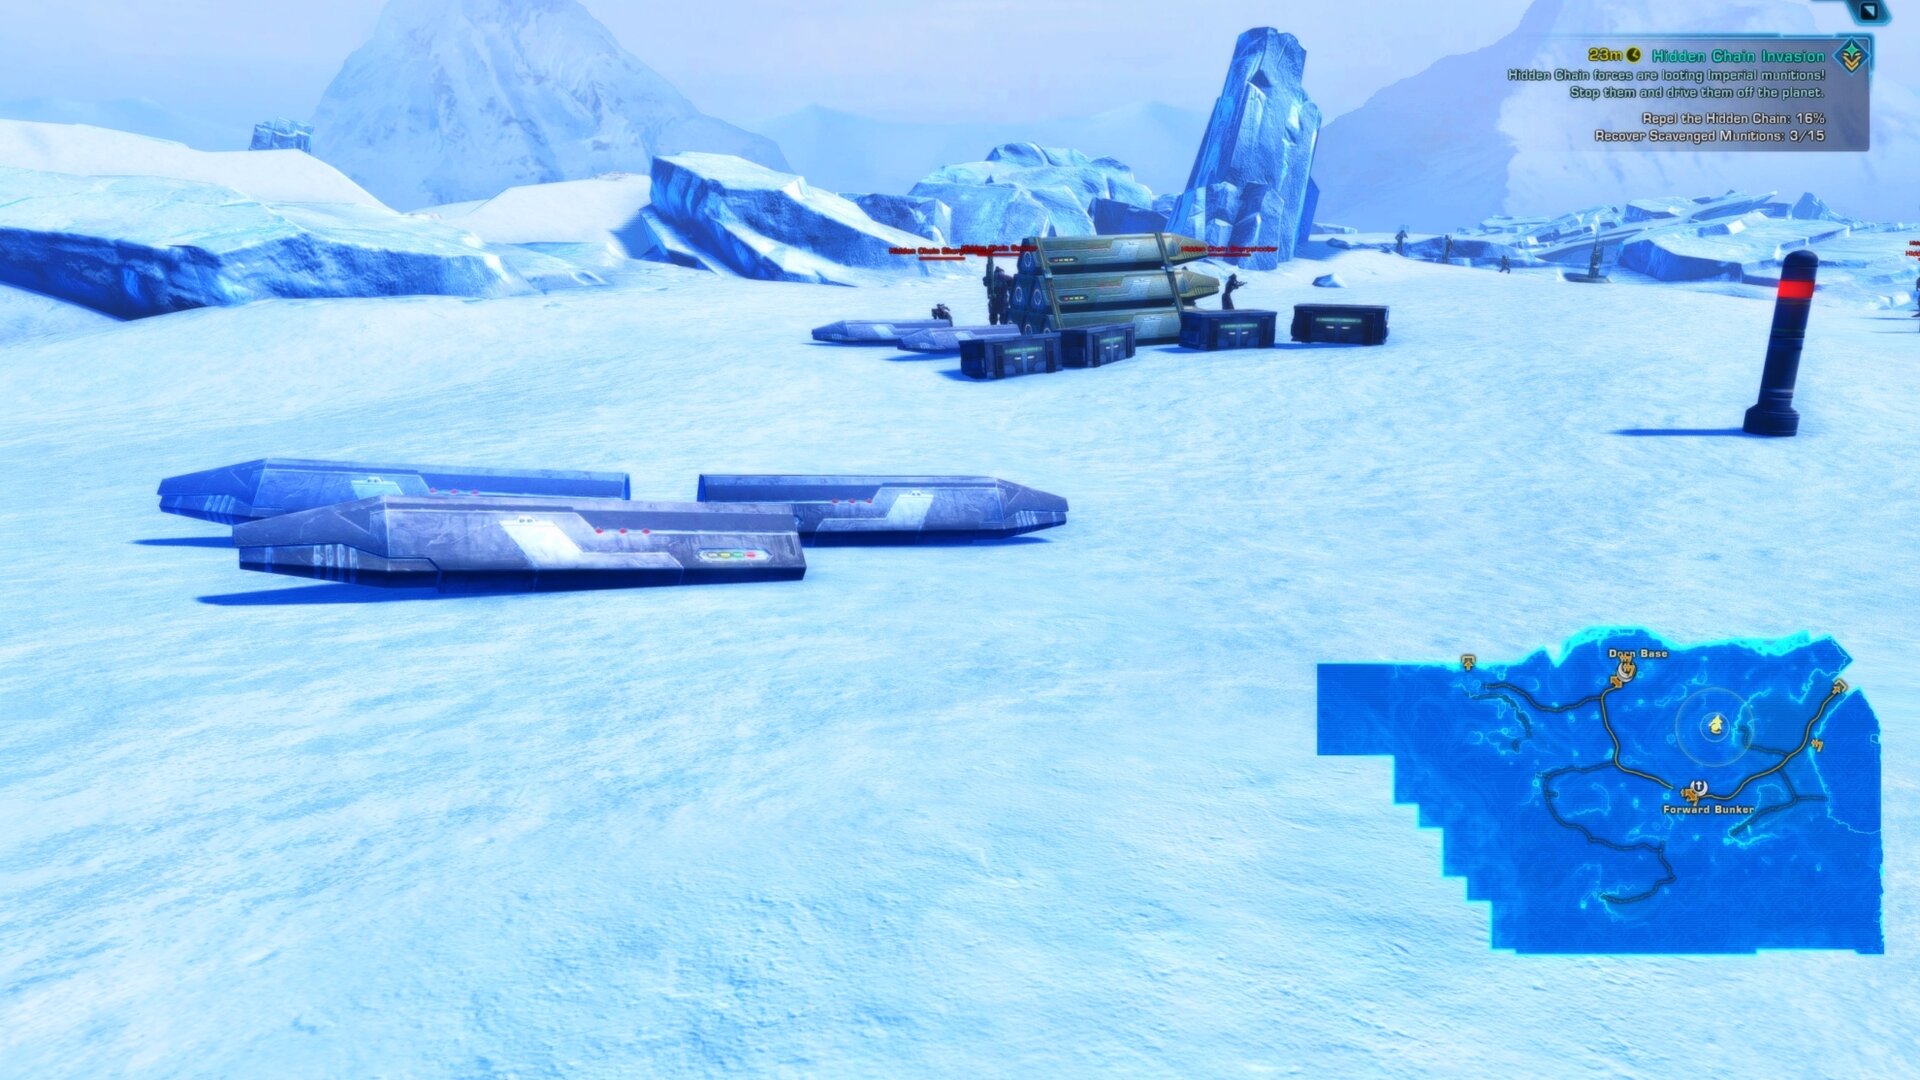
The most common types of Shared Encounters are Battles at faction bases and the Hidden Chain Invasions. Shared Encounters also tend to have percentage-based objectives rather than countable ones, though the devs are inconsistent on this.
To get credit for completing the mission or progress it, you need to participate in all phases. While the mission resets globally once it is finished, you can only get credit once.
Yes, the system is flawed. Encounter Shared missions need another round or two of innovation to make sense in an MMO.
Objectives
Each Dynamic Encounter falls into 1 of 5 categories in terms of what type of gameplay objectives you’ll need to satisfy to complete said encounter. The following are not official terms, but they are mostly recognized through dileniations in the achievements.
- Combat Encounters solely require you to defeat enemies or loot something from them.
- Clicking Encounters do not require you to engage in combat at all because their objectives only require you to click on things. Some have no enemies nearby, and those tend to be the more quirky ones.
- Hybrid Encounters combine both Combat and Clicking objectives.
- Champion encounters only require you to defeat a specific named Champion enemy.
- Battle – Battle encounters involve NPC soldiers fighting alongside you against a lot of enemies. These typically play out at faction bases or pit your faction against the Hidden Chain, and always have Encounter-Shared progression.
 Hidden Chain Invasions and Galactic Encounters
Hidden Chain Invasions are currently available on 4 planets with separate encounters for both Imperial and Republic factions. These appear to be a type of Galactic Encounter according to the world map legend.
They are not always active, but each lasts 60 minutes and have Encounter Shared progress. The mission structure is the same for all locations. The Hidden Chain Invasion is at the top of the Dynamic Encounters list.

Tatooine
Level 24+

Hoth
Level 37+

Ilum
Level 50+

Rishi
Level 55+
To complete the Dynamic Encounter, players must call in military support from their faction, contribute towards defeating enough members of the Hidden Chain, and reclaim a combined 25 planet-specific goods that the Hidden Chain is trying to steal.
Once you’ve collectively completed all 3 of those objectives, you can call down a Hidden Chain Lieutenant, which is a champion enemy that has a few generic attacks, but doesn’t hit very hard.
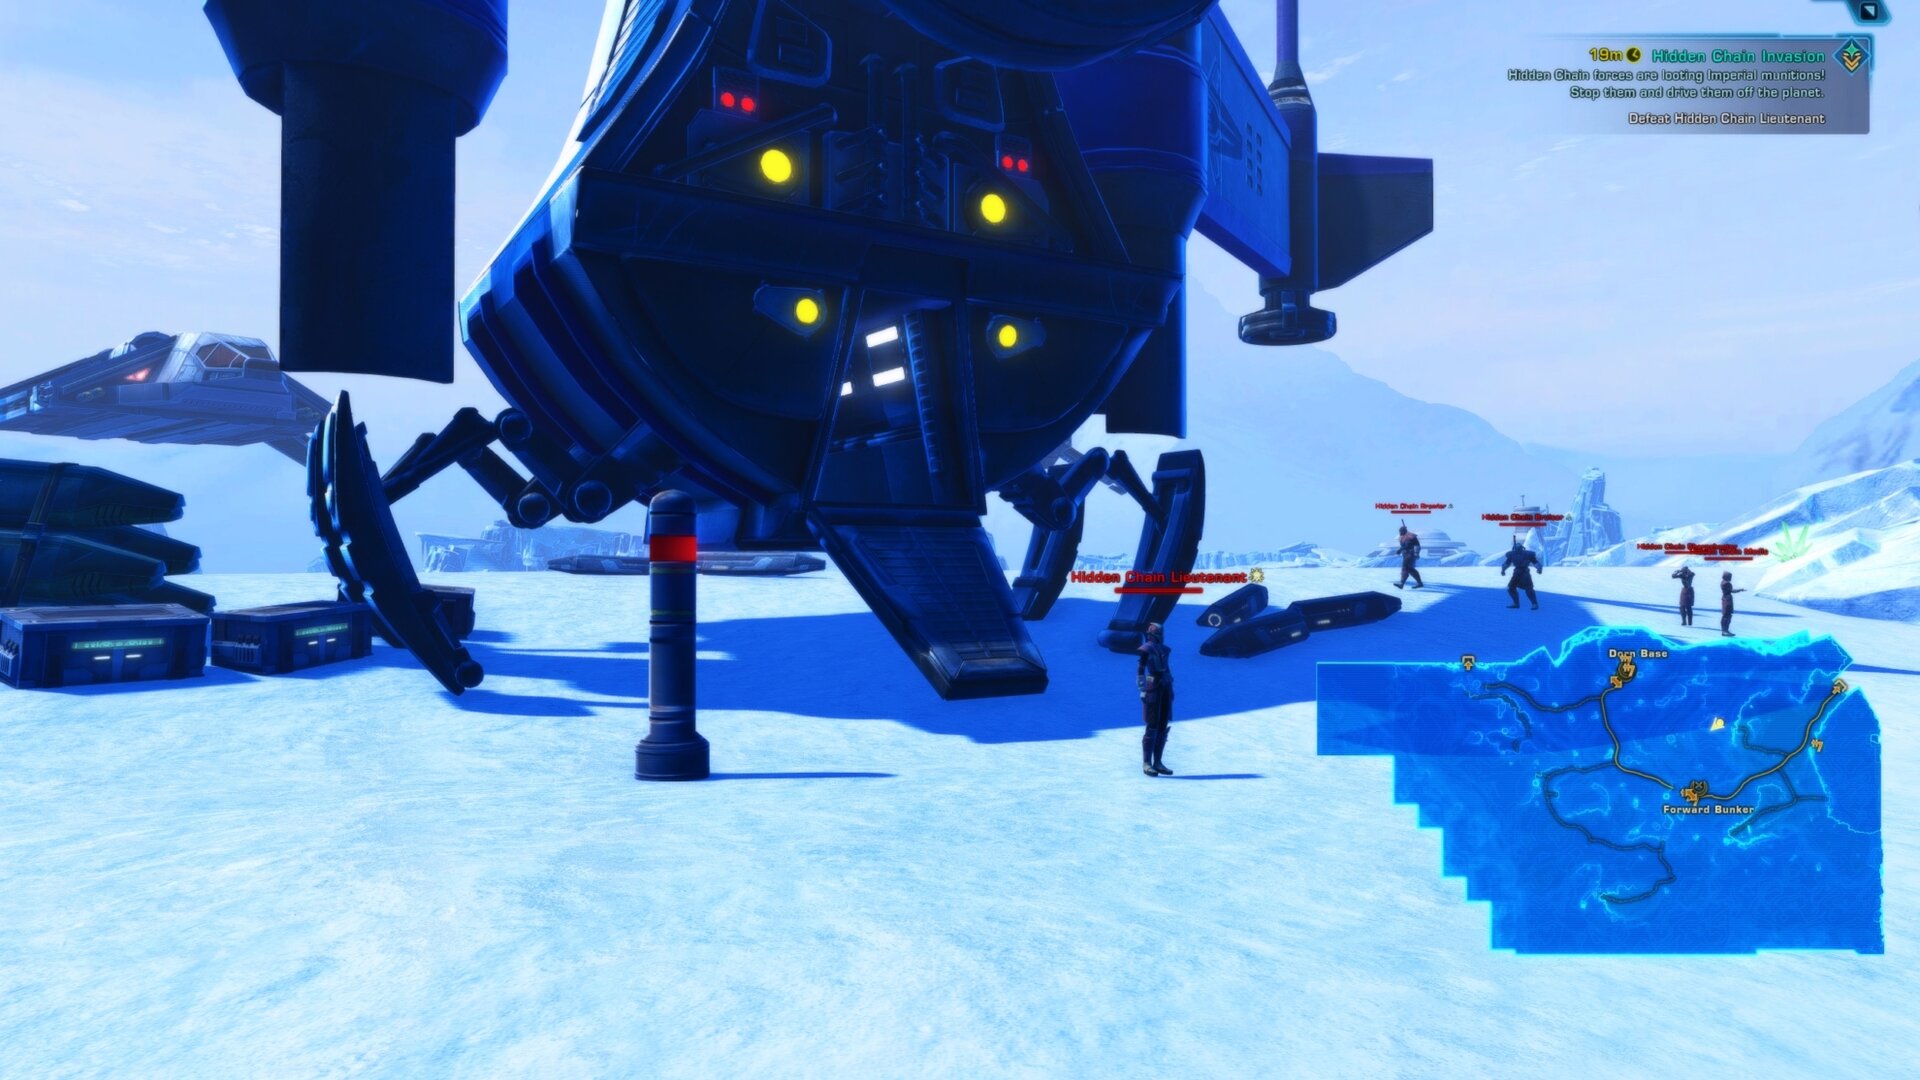
The Hidden Chain Lieutenant has a chance to drop a random piece of Hidden Chain armor as personal loot. I suspect that these encounters may end or become less available once the Hidden Chain storyline finishes.
All Planets with Unique Dynamic Encounters
Right now, the planets shown in the list below, are the ones offering Dynamic Encounters. The developers plan to add more in the future as the goal is to make SWTOR feel alive. We have dedicated guides for each of the planets, including all achievements (yes, secret ones too).

Tython
Level 1+

Korriban
Level 1+

Ord Mantell
Level 1+

Hutta
Level 1+

Coruscant
Level 10+

Dromund Kaas
Level 10+
Tatooine
Level 24+
Hoth
Level 37+
Ilum
Level 50+
Dantooine
Level 20+
Full List of all Dynamic Encounters on All Planets
The tables below contains all Dynamic Encounters currently available in the game. You can customize them by sorting, filtering, and searching them. Clicking on the + symbol for each encounter, will show its description and tasks you have to complete.
Standard Dynamic Encounters
The encounters listed in bold, are the ones we recommend you pay special attention to. For more details about them, please refer to the dedicated guides for each planet.
As this table is quite long, you may want to skip over it for the moment and continue reading the next section of this guide, explaining and previewing Dynamic Encounter Rewards available, click on the link to be taken there. We have this type of tables for each planet, available in our dedicated guides.
| Planet | Name | Region | Faction | Faction | Type | Objectives | Progress Type | Achievements | Recommended | Description: | Tasks: |
|---|---|---|---|---|---|---|---|---|---|---|---|
| Tython | Flesh Raider Deathcaller | Flesh Raider Territory | Republic | Champion | Group Shared | No | The Flesh Raider Deathcaller’s chants drive its allies into a frenzy, energizing their attacks. Defeat it to quell their violence. | Defeat the Flesh Raider Deathcaller |
|||
| Tython | Ill-Tempered Guid | The Gnarls | Republic | Champion | Group Shared | No | This guid has been driven mad by an unknown ailment. It must be destroyed for the safety of all, including its own good. | Defeat the Ill-Tempered Guid |
|||
| Tython | Ancient War Droid | The Ruins of Kaleth | Republic | Champion | Group Shared | No | Activated in war mode as a result of recent excavations, this ancient droid must be destroyed or it will harm Jedi archaeologists. | Defeat the Ancient War Droid |
|||
| Tython | Attack: Kalikori Village | Kalikori Village | Republic | Hybrid | Encounter Shared | Yes | Yes | Kalikori Village is under attack by exceptionally bloodthirsty Flesh Raiders. Help aid the wounded and fend off the assault. | 1. Defeat Empowered Flesh Raiders 3. Aid Injured Villagers |
||
| Tython | There Is Serenity (guide) | Jedi Temple | Republic | Clicking | Group Shared | Yes | Yes | Each day, the Jedi take time to quietly reflect as they tend the temple grounds. They welcome all to participate and be mindful. | 1. Recycle Defeated Combat Droid Parts 2. Shoo Curious Varmints Away 3. Tend to the Gardens 4. Meditate with the Jedi |
||
| Tython | Treat Them With Care | Tythos River Valley | Republic | Clicking | Group Shared | No | A kind-hearted Kalikori settler is concerned for Tythonian wildlife after Flesh Raiders defiled the area. Hell her set things right. | 1. Collect Supplies 2. Aid Creatures 3. Remove Pollutants 4. Clear Foul Detritus |
|||
| Tython | Flesh Raider Assault | The Gnarls | Republic | Hybrid | Encounter Shared | No | Yes | The Flesh Raiders are intensifying their assault! Help the Jedi protect the Gnarls from their raid. | 1. Defeat Flesh Raiders 2. Extinguish Fires 3. Repair Defense Fields 4. Defeat the Hulking Flesh Raider |
||
| Korriban | Battle-Scarred Tuk’ata | Lower Wilds | Empire | Champion | Group Shared | No | Tempered by age and battles for dominance, this Tuk’ata poses a threat to research efforts in the area. Destroy it! | Defeat the Battle-Scarred Tuk’ata |
|||
| Korriban | Agitated K’lor’slug | Valley of the Dark Lords | Empire | Champion | Group Shared | No | Seismic disturbances caused by excavation equipment have riled this horrible k’lor’slug into mindless aggression. | Defeat the Agitated K’lor’slug |
|||
| Korriban | Unhinged Commander | Lower Wilds | Empire | Champion | Group Shared | No | An Imperial soldier has been driven mad by dark side energy. Prove your strength by putting him down. | Defeat the Unhinged Commander |
|||
| Korriban | Slow, Insidious Killer | Sith Academy | Empire | Combat | Encounter Shared | No | Three presumptuous acolytes are challenging the authority of the Sith Academy. They must be put in their place. | 1. Defeat the Arrogant Acolyte 2. Defeat the Pompous Acolyte 3. Defeat the Overconfident Acolyte |
|||
| Korriban | Never a K’loring Day (guide) | Valley of the Dark Lords | Empire | Combat | Encounter Shared | No | Yes | Ongoing excavations have disturbed a cluster of k’lor’slugs. Drive the foul beasts away! | 1. Repel K’lor’slugs 2. Defeat Agitated Broodmothers |
||
| Korriban | The Perfect Opportunity | Lower Wilds | Empire | Hybrid | Group Shared | Yes | The possessed troopers present an exciting opportunity for an enterprising Sith researcher, if someone is willing to lend a hand. | 1. Gather Experiment Instruments 2. Scan Berserk Troopers 3. Test Proprioception Inhibitor 4. Test Neuropathic Amplifier 5. Test Compassion Dampener 6. Transmit Data |
|||
| Korriban | Incubation Miscalculation | Sith Academy | Empire | Clicking | Group Shared | Yes | An inattentive acolyte left a research incubator open, releasing the hatched k’lor’slugs! Contain the slugs before anyone notices! | 1. Collect a Slug Wrangler 2. Defeat or Wrangle K’lor’slug Neonates |
|||
| Ord Mantell | Savrip Skullcaver | Savrip Island | Republic | Champion | Group Shared | No | This Savrip Skullcaver has been identified as the leader in recent deadly attacks on Republic squads. Eliminate the threat. | Defeat the Savrip Skullcaver |
|||
| Ord Mantell | Separatist Field Commander | Volcanic Wilderness | Republic | Champion | Group Shared | No | A high-level Separatist tactician has taken up a position in this area. This is the Republic’s chance to strike! | Defeat the Separatist Field Commander |
|||
| Ord Mantell | Ethen Remak | Mannett Point | Republic | Champion | Group Shared | No | Legendary for his unusual height and strength, Remak is attempting to recover a lost datacron. Stop him and claim it for the Republic! | Defeat Ethen Remak |
|||
| Ord Mantell | Good Mantellian | Oradam Village | Republic | Hybrid | Encounter Shared | No | A group of Separatist defectors has surrendered. Ensure their safety-and the Republic’s. | 1. Scan Defectors for Weapons 2. Aid Injured Defectors 3. Grapple to the Ridge and Defeat Separatists 4. Destroy Mortar Emplacements |
|||
| Ord Mantell | Inside Job (guide) | Volcano | Republic | Clicking | Group Shared | Yes | Yes | A Separatist defector is trying to make a clean break. Help wipe the defector’s data and damage the Separatists’ databanks. | 1. Collect Stealth Field Generator 2. Sabotage Separatist Databanks 3. Delete Personnel Data |
||
| Ord Mantell | Power Walking | Fort Garnik | Republic | Combat | Group Shared | No | Republic Command has sent a walker to resource-starved Fort Garnik. Give it a test drive and fight back the Separatists. | 1. Pilot the Walker 2. Test Power Stomp 3. Test Heavy Cannon 4. Test Orbital Strike 5. Defeat Separatist Forces 6. Dismount Walker |
|||
| Ord Mantell | Driving the Point | Mannett Point | Republic | Hybrid | Group Shared | Yes | An eccentric droid engineer requests your help in assembling an “improved” battle droid to prove his worth to the Republic. | 1. Collect Ambulator 2. Collect Weaponry Unit 3. Collect Armored Plating 4. Assist with Assembly 5. Defeat Separatists |
|||
| Hutta | Escaped Rancor | Fa’athra’s Palace | Empire | Champion | Group Shared | Yes | Fa’athra, in his hubris, has acquired a massive rancor. Predictably, it has escaped its bonds and must be defeated. | Defeat the Escaped Rancor |
|||
| Hutta | Vicious Swamp Snarler | Evocii Work Camp | Empire | Champion | Group Shared | No | A formidable swamp snarler is attacking transports. Put it down to protect supply routes. | Defeat the Vicious Swamp Snarler |
|||
| Hutta | Brutal Foreman | The Rust Yards | Empire | Champion | Group Shared | No | Fa’athra’s foreman are widely known for their brutality. Defeat this one before he can press anyone else into service. | Defeat the Brutal Foreman |
|||
| Hutta | Jiguuna Cleanup (guide) | Jiguuna | Empire | Combat | Group Shared | No | Fa’athrra’s gangsters are assaulting Jiguuna! Fight them off and destroy their expensive battle droid. | 1. Control a Battle Droid 2. Defeat Fa’athra’s Gangsters 3. Destroy the Fa’athra Obliterator Droid 4. Disconnect from the Droid |
|||
| Hutta | Reverse Ecology | Evoccii Work Camp | Empire | Clicking | Group Shared | Yes | The Hutts are depleting toxic runoff that chemilizards need to live! Help restore the imbalance so the lizards can thrive. | 1. Retrieve Tox Blaster 2. Puncture Chem Harvesters 3. Rupture Pipes 4. Douse Chemilizards |
|||
| Hutta | Taking Advantage (guide) | Evoccii Work Camp | Empire | Hybrid | Group Shared | No | Yes | A shipment of exotic meats meant for Fa’athra has been waylaid by beasts, presenting an enticing opportunity… | 1. Defeat the Beasts 2. Collect Valuable Cargo 3. Regroup with the Bounty Hunter 4. Defeat the Bounty Hunter |
||
| Hutta | Freedom, for What It’s Worth | The Rust Yards | Empire | Hybrid | Encounter Shared | No | A group of enslaved Evocii have risen up against their captors. Aiding them would hurt Fa’athra’s operation. | 1. Free Restrained Evocii 2. Defeat Fa’athra’s Forces |
|||
| Coruscant | Black Sun Boss: Finis Pellian | Black Sun Territory | Republic | Champion | Group Shared | Yes | Three norotious Black Sun underbosses are smuggling something big through unusual channels, terrorizing beleaguered civilians in the process. Put an end to their crime spree. | Defeat Finis Pellian |
|||
| Coruscant | Black Sun Boss: Nej Shif | Black Sun Territory | Republic | Champion | Group Shared | Yes | Three norotious Black Sun underbosses are smuggling something big through unusual channels, terrorizing beleaguered civilians in the process. Put an end to their crime spree. | Defeat Nej Shif |
|||
| Coruscant | Black Sun Boss: Daro Desyk | Black Sun Territory | Republic | Champion | Group Shared | Yes | Three norotious Black Sun underbosses are smuggling something big through unusual channels, terrorizing beleaguered civilians in the process. Put an end to their crime spree. | Defeat Daro Desyk |
|||
| Coruscant | Sabotaging the Sun | Black Sun Territory | Republic | Hybrid | Group Shared | The Black Sun are stockpiling stolen technology. Use it against them to deal a major blow to the organization. | 1. Defeat Black Sun Forces 2. Destroy Black Sun Weapon Crates |
||||
| Coruscant | Black Sun Battle | Black Sun Territory | Republic | Combat | Encounter Shared | Members of the Coruscant Security Force are under siege! Stop the surprise assault just outside the Black Sun Territory landing zone. | 1. Defeat Black Sun Forces 2. Destroy Black Sun Supply Caches 3. Defeat the Black Sun Foreman |
||||
| Coruscant | Blot Out the Sun* | Black Sun Territory | Republic | Hybrid | Group Shared | Yes | The Black Sun’s increased recruitment is causing problems for the Coruscant Security. Clear out the Black Sun presence. | 1. Defeat Black Sun Forces 2. Remove Black Sun Graffiti 3. Defeat Black Sun Recruiters |
|||
| Coruscant | Holding the Line | Old Galactic Market | Republic | Battle | Encounter Shared | Assist the desperate group of refugees that are fleeing from the Migrant Merchants’ Guild before their fates are sealed. | 1. Defeat Guild Forces 2. Restock the Medical Supplies for the Refugees 3. Defeat the Guild War Droids |
||||
| Coruscant | Push Comes to Shove | Old Galactic Market | Republic | Combat | Group Shared | Yes | The Guild has regrouped and launched a second assault on the Security forces protecting the regugees. To protect these civilians, use of experimental technology has been authorized. | 1. Defeat Guild Forces 2. Push Guild Forces Off Catwalks with the Kinetic Displacer |
|||
| Coruscant | Crane and Punishment | Old Galactic Market | Republic | Hybrid | Group Shared | Yes | The Guild has retreated to this construction site to regroup. Disable the crances that transport their stolen goods to disrupt their operation and end their hold over the refuges. | 1. Defeat Guild Forces 2. Overload Cranes 3. Overload Super Cranes 4. Defeat the Guild Foreman |
|||
| Coruscant | Breaking the Chains | Old Galactic Market | Republic | Hybrid | Group Shared | The Guild is holding kidnapped refugees for ransom. Free the captives before they’re sold off, or worse. | 1. Free the Prisoners 2. Defeat the Guild Taskmaster |
||||
| Coruscant | Crippling the Guild | Old Galactic Market | Republic | Hybrid | Group Shared | Yes | Coruscant Security has identified a major Guild supply hub. Destroy weapons to weaken the Guild’s control over the district. | 1. Defeat Guild Forces 2. Detonate Guild Missiles From Afar 3. Detonate Guild Tech Weapons From Afar |
|||
| Coruscant | A Bazaar Request | Old Galactic Market | Republic | Clicking | Group Shared | These Gonk droids have corrupted programming, and instead of completing their tasks, they’re causing mayhem! | 1. Use a Terminal to Reprogram Gonk Droids 2. Repair Damage Caused by Gonk Droids |
||||
| Coruscant | Ugnaught Engineering (guide) | Jedi Temple Ruins | Republic | Combat | Group Shared | The Jedi Temple ruins are taking heavy losses for Imperials, but the ugnaughts have a secret weapon: the Uggernaught! | 1. Defend Ugnaught Engineers Repairing the Uggernaught 2. Accompany the Uggernaught |
||||
| Coruscant | Buried Secrets | Jedi Temple Ruins | Republic | Champion | Encounter Shared | A Jedi and a small group of Padawans are restoring order to the overrun Jedi Temple on Coruscant. | 1. Defeat the Imperial Commando 2. Defeat Imperial Shock Troopers 3. Guard the Jedi Master 4. Defeat the Corrupted Jedi Master 5. Defeat Corrupted Padawans |
||||
| Coruscant | Industrial Shutdown | The Works | Republic | Hybrid | Group Shared | A critical malfunction has caused construction droids to tear The Works apart. Contain the chaos before the damage is irreversible! | 1. Defeat Rogue Droids 2. Repair Infrastructure |
||||
| Coruscant | Press Gang | Justicar Territory | Republic | Combat | Encounter Shared | The Justicars are processing a new batch of conscripts in the Shady Glen Estates.: innocent citizens whose “crimes” against the gang will be forgiven in exchange for their services. | 1. Defeat the Justicar Captain 2. Defeat Justicar Enforcers 3. Destroy Sharpshooter Platforms |
||||
| Coruscant | Detention Is Over | Justicar Territory | Republic | Clicking | Group Shared | A recently-recruited Justicar is having second thoughts and needs help freeing innocent civilians from the Detention Center. | 1. Disguise Yourself as a Justicar Officer 2. Reprimand Prison Guards 3. Access Detention Center Records 4. Release Innocent Prisoners 5. Escort Prisoners to Safety |
||||
| Coruscant | Unlevel Loading | Justicar Territory | Republic | Clicking | Group Shared | Yes | Yes | Coruscant Security has accessed Justicar systems in the Shipping Docks. Time to “accidentally” damage their cargo! | 1. Take Control of a Loader Droid 2. Destroy Shipping Containers 3. Damage Justicar Property 4. Defeat Justicar Forces |
||
| Coruscant | Wiped Clean | Justicar Territory | Republic | Hybrid | Group Shared | The Justicars enforce their brutal rule over the local population by using personal information to target dissenters. Purge the gang’s databanks to help civilians escape their oppretion. | 1. Defeat Justicar Forces 2. rase Citizen Records from Justicar Databases |
||||
| Coruscant | Unleashed Justice | Justicar Territory | Republic | Hybrid | Group Shared | Yes | The Justicars are using trained attack hounds to patrol their checkpoint, intimidating and controlling the local population. | 1. Acquire a Control Collar Disruptor 2. Defeat Justicar Houndmasters 3. Destroy Control Collars 4. Free Justicar Hounds |
|||
| Coruscant | Senatorial Celebration | Senate Plaza | Republic | Clicking | Group Shared | Yes | The Republic is hosting a Senate Day celebration in the Senate Plaza. Complete with woriworks to honor democracy and unity! | Set Off Fireworks |
|||
| Coruscant | Lawn and Order | Senate Plaza | Republic | Clicking | Group Shared | The Senate Day celebration has taken a dangerous turn! Help extinguish fires across the Senate Tower plaza! | 1. Pick Up Firefighting Equipment 2. Put Out Fires 3. Repair Pruning Droids |
||||
| Coruscant | Vandals at the Gate (guide) | Senate Plaza | Republic | Clicking | Group Shared | Yes | Maintenance droids have been hijacked after the chaotic Senata Day celebrations! Stop them from vandalizing the Senate Tower! | 1. Use the Malfunctioning Terminal 2. Link With a Maintenance Droid 3. Find a Hiding Spot 4. Take Control of Your Linked Droid 5. Vandalize the Senate! 6. Clean the Senate |
|||
| Coruscant | Understaffed | Senate Plaza | Republic | Clicking | Group Shared | Yes | The lone bartender in the Drunkard’s Vote is begging for assistance. Help serve the busy cantina’s many patrons. | 1. Take Paxton’s Drink Order 2. Make Paxton’s Drink 3. Pick Up the Serving Tray 4. Serve Paxton’s Drink 5. Wait for Paxton to Finish 6. Clear Paxton’s Empty Drink 7. Serve Cantina Patrons |
|||
| Coruscant | They’re Listening! (guide) | Senate Plaza | Republic | Clicking | Group Shared | Yes | Yes | A security guard suspects Imperial spies have hidden listening devices in the area. She’s probably just being paranoid… right? | 1. Pick Up a Scanner 2. Search Plants for Listening Devices 3. Scan Gardeners and Senate Guards 4. Return to the Senate Tower Guard |
||
| Dromund Kaas | Dark Omens | Dark Temple | Empire | Combat | Group Shared | No | There are ominous signs of unrest around the Tempe Approach. A bit of violence might have a claming effect on these shades. | Confront Restless Sith Spirits |
|||
| Dromund Kaas | Ritual Killing (guide) | Dark Temple | Empire | Hybrid | Encounter Shared | Yes | Yes | Entranced by Nil Venerous’ whispers, a group of treaturous Sith apprentices are attempting to complete a forbidden ritual. | 1. Disrupt the Ritual 2. Defeat the Ritual Master |
||
| Dromund Kaas | Venerated Relics | Dark Temple | Empire | Combat | Encounter Shared | No | Yes | The whispers on Fil Venerous grow louder within the Dark Temple. Put an end to this shadowy threat. | 1. Defeat Enemies Empowered by Nil Venerous 2. Defeat Nil Venerous |
||
| Dromund Kaas | Purging the Cursed | Dark Temple | Empire | Hybrid | Group Shared | No | Yes | The possessed workers are attempting to excavate something. Don’t let them complete their operation! | 1. Clear Out the Possessed Workers 2. Retrieve Explosives 3. Destroy the Mining Drills |
||
| Dromund Kaas | Assault of the Possessed: Outpost Warden | Dark Temple | Empire | Battle | Encounter Shared | Yes | The possessed workers from the Dark Temple Approach are attempting to breach Outpost Warden. Don’t let them through. | 1. Defeat the Possessed Imperials 2. Defeat the Possessed Overseer |
|||
| Dromund Kaas | Power Stolen | Grathan Estate | Empire | Hybrid | Group Shared | No | A rogue scientist within Lord Grathan’s estate has poisoned his colleagues and stolen Sith research to sell to the Republic | 1. Recover Data Drives from Dead Scientists 2. Find and Administer Antidote to Poisoned Scientists 3. Defeat the Rogue Scientist |
|||
| Dromund Kaas | Power Reclaimed | Grathan Estate | Empire | Hybrid | Group Shared | No | The survivors revealed the stolen data was schematics for advanced war droid overrides. Use them against Grathan! | 1. Override War Droids 2. Destroy Lord Grathan’s Warehouse Munitions |
|||
| Dromund Kaas | Power Reforged | Grathan Estate | Empire | Hybrid | Group Shared | No | The chaos from the warehouse has weakened Grathan. Lay waste to the estate to cripple his operations! | 1. Defeat Lord Grathan’s Forces 2. Destroy Turrets 3. Destroy Fuel Tanks |
|||
| Dromund Kaas | Lord Grathan’s Assault: The Wall | Grathan Estate | Empire | Battle | Encounter Shared | No | Lord Grathan’s forces have launched a coordinated assault on The Wall. Drive the traitors back! | 1. Defeat Lord Grathan’s Forces 2. Defeat the Grathan Sith Commander |
|||
| Dromund Kaas | Karric Soik | Grathan Estate | Empire | Champion | Encounter Shared | No | A Jedi has infiltrated Lord Grathan’s Estate! Stop the Jedi before valuable Imperial property is lost. | Defeat Karric Soik |
|||
| Dromund Kaas | Hard Target | Kaas City | Empire | Clicking | Group Shared | Yes | Yes | A notorious Bounty Hunter has recently escaped Kaas City after injuring several Imperial troopers and must be tracked down before he can leave the planet. | 1. Request an Imperial Tracking Droid 2. Gather Data from Imperial Droids 3. Triangulate Unregistered Transponder Data 4. Scan for Unregistered Transponder 5. Defeat the Sketchy Stims Merchant 6. Scan for Unregistered Transponder 7. Defeat the “Innocent” Bounty Hunter 8. Scan for Unregistered Transponder 9. Defeat the Unremarkable Traveler 10. Scan for Unregistered Transponder 11. Defeat the Unregistered Merchant 12. Scan for Unregistered Transponder 13. Defeat the Fugitive Bounty Hunters |
||
| Dromund Kaas | Power To Truth | Kaas City | Empire | Hybrid | Group Shared | No | Rebellious Imperial citizens are spreading seditious propaganda within Kaas City. Shut down their illegal broadcasts! | 1. Disable Propaganda Terminals 2. Disperse Curious Citizens 3. Defeat the Dissident Leader |
|||
| Dromund Kaas | Droid Assault: Kaas City | Kaas City | Empire | Battle | Encounter Shared | Yes | Rogue construction droids are mounting an assault on Kaas City! | 1. Repel the Droid Assault 2. Defeat the Rampaging Construction Droid |
|||
| Dromund Kaas | Sith Affairs | Kaas City | Empire | Combat | Encounter Shared | No | Yes | The Sith Sanctum has errupted into a violent power struggle. | 1. Defeat Rix Kilis 2. Defeat Cadan Keeg 3. Defeat Tylo Orum 4. Defeat Arlen Drax 5. Defeat the Sith Sanctum Guard |
||
| Dromund Kaas | Rogue Droid Uprising | Kaas City | Empire | Combat | Group Shared | Yes | Malfunctioning droids near the Kaas City Expansion are defying their programming. Recover their data chips for further analysis. | 1. Defeat Rogue Droids 2. Collect Data Chips 3. Analyze the Data Chips 4. Defeat the Malfunctioning War Droid |
|||
| Dromund Kaas | Wildlife Assault: Dromund Kaas Spaceport | Dromund Kaas Spaceport | Empire | Battle | Encounter Shared | No | Local wildlife have been driven into a violent frenzy. Don’t let them breach the Spaceport! | 1. Defeat Attacking Creatures 2. Take Down a Vicious Sleen 3. Defeat the Stormbeast Abomination |
|||
| Dromund Kaas | Bad Monkey | Dromund Kaas Spaceport | Empire | Clicking | Group Shared | Yes | Yes | A shipment of monkey-lizards from Rishi have escaped. Capture them before they cause any more damage! | 1. Use Electronets to Capture Escaped Monkey-Lizards 2. Repair Damaged Equipment 3. Defeat the Escaped Krak’jya |
||
| Dromund Kaas | Powder Keg (guide) | Unfinished Colossus | Empire | Hybrid | Encounter Shared | No | Republic agents, aided by rebelling workers, are attempting to use the Empire’s munitions to destroy the Colossus! | 1. Destroy Air Support Beacons 2. Defeat Republic Forces 3. Disarm Imperial Ordnance |
|||
| Dromund Kaas | Monolithic Mistake | Unfinished Colossus | Empire | Champion | Encounter Shared | No | A malfunctioning construction droid at the Unfinished Colossus is rampaging through the worksite and attackign the workers. | Defeat the Malfunctioning Construction Droid |
|||
| Dromund Kaas | Spire Consequences | Dromund Kaas Wilderness | Empire | Combat | Group Shared | No | Wildlife around the Kaas City lightning spire are showing strange effects from long-term exposure to the device. Investigate the disturbance and collect samples for study. | 1. Acquire Lightning-Charged Samples – Lightning-Charged Gundark Samples – Lightning-Charged Vine Cat Samples – Lightning-Charged Sleen Samples – Lightning-Charged Yozusk Samples 2. Return Samples to the Imperial Researcher |
|||
| Dromund Kaas | Shocking Developments | Dromund Kaas Wilderness | Empire | Combat | Encounter Shared | No | Electrically-charged predators are attacking the Research Camp! Defend the site and repel the mutated creatures. | 1. Defend the Camp from Attacking Beasts 2. Defeat the Yozusk Packleader |
|||
| Dromund Kaas | Shock and Awe | Dromund Kaas Wilderness | Empire | Champion | Encounter Shared | No | Mutations from the lightning spire have created a massive Apex Predator that’s absorbing power from the device itself! | Defeat the Apex Predator |
|||
| Dromund Kaas | Kubaz Incursion | Dromund Kaas Wilderness | Empire | Hybrid | Group Shared | No | From an outpost in the wilderness, Kubaz infiltrators are scavenging Imperial technology and disrupting supply routes. | 1. Loot Kubaz Supply Caches 2. Defeat Kubaz Forces 3. Find and Defeat the Kubaz Leader |
|||
| Dromund Kaas | Spy Den Sweep (guide) | Dromund Kaas Wilderness | Empire | Hybrid | Group Shared | No | Yes | A band of SIS agents has set up a temporary encampment on Dromund Kaas to conduct espionage operations. Destroy them! | 1. Defeat SIS Forces 2. Destroy SIS Equipment 3. Destroy Listening Post Array |
||
| Tatooine | A Bad Exchange | Mos Ila | Empire | Clicking | Group Shared | No | Increased Exchange activity has Imperial Command on edge. Hunt down data on their operations for analysis. | 1. Obtain a Scanner Droid 2. Retrieve Data from Shady Individuals 3. Enter the Exchange Safehouse 4. Slice the Exchange Shipping Terminal |
|||
| Tatooine | A Worse Exchange | Mos Ila | Empire | Clicking | Group Shared | Yes | Imperial Command discovered the Exchange preparing to smuggle Imperial weaponry offworld. Identify these shipments immediately! | 1. Control a Mouse Droid 2. Tag Exchange Contraband 3. Disable Surveillance Devices 4. Disconnect from the Mouse Droid |
|||
| Tatooine | A Catastrophic Exchange | Mos Ila | Empire | Clicking | Group Shared | Yes | Give the Exchange a taste of their own medicine! Teach them a lesson with the experimental weapons they tried to smuggle offworld. | 1. Gear Up with Experimental Weapons 2. Defeat Exchange Personnel |
|||
| Tatooine | Desiccation Threat | Mos Ila | Empire | Hybrid | Group Shared | No | Critical moisture harvesting equipment is under attack! Help defend this precious resource. | 1. Repair Damaged Panels 2. Repel the Sand People Attack |
|||
| Tatooine | Hydration Hazard | Mos Ila | Empire | Hybrid | Group Shared | No | Drive away the Womp rats that attacked these moisture farmer transports and retrieve any remaining viable water canisters. | 1. Defeat Womp rats 2. Retrieve Water Canisters |
|||
| Tatooine | In Search of a Problem | Mos Ila | Empire | Clicking | Group Shared | Yes | Yes | Imperial Scientists are experimenting with eays to “imrrove” local livestock. Help them with their work. | 1. Obtain Growth Hormone 2. Obtain Vaccination 3. Obtain Temperament Regulator |
||
| Tatooine | Maintaining Order | Mos Ila | Empire | Hybrid | Group Shared | No | Outlaws are moving into Mos Ila and threatening to disrupt Imperial operations. “Encourage” these outlaws to leave the area. | Intimidate Outlaws in Mos Ila |
|||
| Tatooine | Republic Attack: Mos Ila | Mos Ila | Empire | Battle | Encounter Shared | Yes | Republic forces are attacking Mos Ila. Help the local defenses repel the attack. | 1. Repel the Republic Attack 2. Defeat the Republic Walker |
|||
| Tatooine | Breezepunks (guide) | Jundland | Both | Clicking | Group Shared | No | Gammorreans are stealing energy from local moisture farmers! Help the farmers steal it back before the situation worsens. | 1. Find the Technician 2. Pick Up Energy Diverters 3. Plant Energy Diverters 4. Signal the Technician to Slice Turbines |
|||
| Tatooine | Bug Buster | Jundland | Both | Hybrid | Encounter Shared | No | Disperse the swarm of Geonosians to end their raids in the area. | 1. Defeat Geonosian Drone Scouts 2. Defeat Geonosian Drone Warriors 3. Defeat Geonosian Drone Champions |
|||
| Tatooine | Gamorrean Taskmaster | Jundland | Both | Champion | Group Shared | No | This brutal warlord is known for delighting in senseless slaughter. | Defeat the Gamorrean Taskmaster |
|||
| Tatooine | Geonosian Warlord | Jundland | Both | Champion | Group Shared | No | This cunning warlord will stop at nothing to conquer territory. | Defeat the Geonosian Warlord |
|||
| Tatooine | Imperial Attack: Camp Karnori | Jundland | Republic | Battle | Encounter Shared | No | Imperial forces are attacking Camp Karnori. Help the local defenses repel the attack. | 1. Repel the Imperial Attack 2. Defeat the Imperial Walker |
|||
| Tatooine | Imperial Attack: Outpost Salara | Jundland | Republic | Battle | Encounter Shared | No | Imperial Forces are attacking Outpost Salara. Help the local defenses repel the attack. | 1. Repel the Imperial Attack 2. Defeat the Imperial Walker |
|||
| Tatooine | Mandalorian Battlemaster | Jundland | Both | Champion | Group Shared | No | The thrill of battle and thirst for a true challenge drive this battlemaster to attack any in her path. | Defeat the Mandalorian Battlemaster |
|||
| Tatooine | Mandalorian Menace | Jundland | Both | Hybrid | Group Shared | Yes | The Exchange are supplying a rogue Mandalorian faction with weapons. Disrupt the weapons sale and disarm both sides! | 1. Defeat Rogue Mandalorian Forces 2. Defeat Exchange Forces 3. Destroy Exchange Weapon Crates 4. Defeat the Exchange Boss 5. Defeat the Mandalorian Commander |
|||
| Tatooine | Raiders’ Reckoning | Jundland | Both | Hybrid | Group Shared | Yes | A group of Sand People are abducting civilians as slaves. Free the prisoners and route their captors. | 1. Defeat Sand People Forces 2. Free Prisoners |
|||
| Tatooine | Republic Attack: Outpost Rennar | Jundland | Empire | Battle | Encounter Shared | No | Republic Troops are attacking Outpost Rennar. Help the local defenses repel the attack. | 1. Repel the Republic Attack 2. Defeat the Republic Walker |
|||
| Tatooine | Suns-Crazed Wraid | Jundland | Both | Champion | Group Shared | No | The merciless desert suns have driven this creature to madness. | Defeat the Suns-Crazed Wraid |
|||
| Tatooine | The Renegade Dewback | Jundland | Both | Champion | Group Shared | No | Yes | This dewback has had enough of the domesticated life! Unfortunately, it now poses a threat to travelers. | Defeat Mister Grumbletail |
||
| Tatooine | Tread Lightly | Jundland | Both | Clicking | Group Shared | No | Yes | The canyon has been rigged with deadly traps! Disarm them before they cause any more harm. | Disarm Mines |
||
| Tatooine | Twin Suns Brutalizer | Jundland | Both | Champion | Group Shared | No | Twin Suns operations on Tatooine are expanding, disrupting Imperial and Republic interests alike. | Defeat the Twin Suns Brutalizer |
|||
| Tatooine | Wompfestation | Jundland | Both | Hybrid | Group Shared | No | Womp rats have mutated after feeding on toxic sludge0tainted refuse. | 1. Deplete the Womp rat Colony 2. Defeat Irradiated Womp Alpha |
|||
| Tatooine | Ancient Womp Rat | Dune Sea | Both | Champion | Group Shared | Yes | This womp rat has survived many years longer than the average specimen, growing to a dangerous size for its ferocity. | Defeat the Ancient Womp Rat |
|||
| Tatooine | Another Scavengers’ Tale | Dune Sea | Both | Hybrid | Encounter Shared | Yes | The droids that the Jawas repaired have returned on them! Help the Jawas fend off the droids and get back on their feet. | 1. Defend Against Haywire Droids 2. Aid Injured Jawas |
|||
| Tatooine | Archaeological Scramble | Dune Sea | Both | Hybrid | Group Shared | No | Sandquakes have exposed valuable buried artifacts. Help the Jawas recover them before the scavengers can! | 1. Recover Relics 2. Defeat Sand People Scavengers |
|||
| Tatooine | Brooding Season | Dune Sea | Both | Hybrid | Group Shared | Yes | Sand Worm breeding season is in full swing. Keep the population of these dangerous creatures under control. | 1. Defeat Sand Wormlets 2. Destroy Eggpods 3. Agitate and Defeat a Sandworm Broodmother |
|||
| Tatooine | Czerka Sabotage | Dune Sea | Both | Hybrid | Group Shared | Yes | Drive the unwelcome Czerka forces from the desert. Perhaps the Unstable Czerka Droids could be of assistance… | Defeat Czerka Forces |
|||
| Tatooine | Dust to Dust | Dune Sea | Both | Hybrid | Group Shared | No | The Exchange are secretly stocking illegal spice here. Destroy the stockpiles before they have a chance to move it. | 1. Defeat Exchange Forces 2. Eliminate the Exchange’s Spice Supply |
|||
| Tatooine | In the Wrong Hands | Dune Sea | Both | Hybrid | Group Shared | No | Sand People Raiders have attacked a weapons convoy! Stop their operation before they use their plunder in future raids. | 1. Battle the Sand People Raiders 2. Confiscate Stolen Weapons |
|||
| Tatooine | Malfunctioning Czerka Droid | Dune Sea | Both | Champion | Group Shared | No | Czerka’s prior activities on Tatooine still cause trouble for the planet’s inhabitants. Destroy this deadly haywire battledroid. | Defeat the Czerka Droid |
|||
| Tatooine | Militant Jawa (guide) | Dune Sea | Both | Champion | Group Shared | No | Yes | Some Jawas reject peaceful trading and embrace violence. Stop this one before he rallies more Jawas to his cause! | Defeat the Militant Jawa |
||
| Tatooine | Republic Attack: Outpost Zaroshe | Dune Sea | Empire | Battle | Encounter Shared | No | Republic troops are attacking Outpost Zaroshe. Help the local defenses repel the attacks. | 1. Repel the Republic Attack 2. Defeat the Republic Walker |
|||
| Tatooine | Sand People Warband | Dune Sea | Both | Hybrid | Group Shared | No | Though many Sand People are peaceful, rare warbands like this one seek to eradicate outsiders. | 1. Defeat the Sand People Marauder 2. Defeat the Sand People Aggressor 3. Defeat the Sand People Sniper |
|||
| Tatooine | Sand Strike | Dune Sea | Both | Hybrid | Group Shared | No | The Twin Suns have built the staging ground to launch assaults on nearby settlements. Dismantle this operation before they can deploy. | 1. Defeat Twin Suns Brutes 2. Defeat Twin Suns Bruisers 3. Defeat Twin Suns Commanders |
|||
| Tatooine | Sarlacc Snacktime (guide) | Dune Sea | Both | Hybrid | Group Shared | Yes | Yes | Gammorreans testing out repulsor guns threaten to rouse the Sarlacc! Sate the Sarlacc’s hunger and stop the Gammoreans. | 1. Defeat Gamorrean Forces 2. Sate the Sarlacc’s Hunger |
||
| Tatooine | Surly Dunerill | Dune Sea | Both | Champion | Group Shared | Yes | This aggressive beast threatens anything caught in its path. Defeat it. | Defeat the Surly Dunerill |
|||
| Tatooine | Territorial Bantha | Dune Sea | Both | Champion | Group Shared | No | Yes | This banthahas become a menace to trade caravans! | Defeat the Territorial Bantha |
||
| Tatooine | The Last Scavengers’ Tale (guide) | Dune Sea | Both | Hybrid | Group Shared | Yes | A massive battedroid has hunted down the scavengers! Help the Jawas fend it off to put an end to their troubles. | Defeat the Czerka Droid |
|||
| Tatooine | The Scavengers’ Tale | Dune Sea | Both | Clicking | Group Shared | Yes | A band of Jawas stumbled on valuable-looking droids that have seen better days. Help the Jawas find parts and repair the droids. | 1. Recover Droid Parts 2. Diagnose the Broken Droids 3. Collect a Toolkit 4. Repair Locomotors 5. Inject Hydraulic Fluids 6. Install Motivator 7. Return Unused Parts |
|||
| Tatooine | Hydro Hustle | Anchorhead | Republic | Hybrid | Group Shared | No | Drive away the Womp rats that attacked these moisture farmer transports and retrieve any remaining viable water canisters. | 1. Defeat Womp Rats 2. Retrieve Water Canisters |
|||
| Tatooine | Imperial Attack: Anchorhead | Anchorhead | Republic | Battle | Encounter Shared | Yes | Imperial forces are attacking Anchorhead. Drive them back! | 1. Repel the Imperial Attack 2. Defeat the Imperial Walker |
|||
| Tatooine | Radio Silencing | Anchorhead | Republic | Clicking | Group Shared | No | Yes | Strange Czerka-encrypted datastreams have activated in Anchorhead. Find the source of the signals and stop them. | 1. Scan for Frequency Aurek 2. Scan for Frequency Besh 3. Scan for Frequency Cresh 4. Scan for Frequency Cherek 5. Deactivate First Terminal 6. Deactivate Second Terminal 7. Deactivate Third Terminal |
||
| Tatooine | Road Gig: The Comeback | Anchorhead | Republic | Hybrid | Group Shared | Yes | Yes | The Double Sunburns finally made it to their gig. Celebrate with them and enjoy the snow! | 1. Show Off Your Dance Moves 2. Cheer for the Band 3. Intimidate Discourteous Patrons 4. Sample Beverages |
||
| Tatooine | Road Gig: The Debut | Anchorhead | Republic | Clicking | Group Shared | No | Yes | Womp rats are attacking the broken down band. The Double Sunbirns. Help them get back on the road before they miss their gig! | 1. Recover Nalargon Keys 2. Recover Kloo Horn Reeds 3. Recover Audio Cables 4. Help Repair Speeders |
||
| Tatooine | Road Gig: The Sophomore Album | Anchorhead | Republic | Clicking | Group Shared | Yes | Yes | Help the Doubler Sunburns drum up interest for their upcoming gig at the Anchorhead Cantina. | 1. Find the Double Sunburns’ Strummer 2. Use Power Sources to Charge the Battery 3. Power Up the Ad Gonk 4. Advertise the Gig to Anchorhead Residents |
||
| Tatooine | Spaceport Chaos | Anchorhead | Republic | Clicking | Group Shared | Yes | Yes | It’s chaos in here! Wrangle the tiny banthas that have broken out of their shipping containers. | 1. Grab a Bantha Lasso 2. Return Banthas to Shipping Containers |
||
| Tatooine | Weary Travelers | Anchorhead | Republic | Clicking | Group Shared | No | Travelers fleeing Sand People and the Empire have flooded Anchorhead. Assist the local militia with providing aid. | 1. Retrieve Hydration Supplies 2. Retrieve Medical Supplies 3. Retrieve Food Supplies 4. Go to the Weary Travelers 5. Take Care of Travelers’ Ailments |
|||
| Hoth | Blizzard Beacons | Clabburn Tundra | Both | Hybrid | Group Shared | No | Skels have damaged machinery used to track dangerous weather conditions. Drive the Skels away and repair the beacons. | 1. Defeat Skels 2. Repair Weather Beacons |
|||
| Hoth | Icetromper Incursion | Clabburn Tundra | Both | Hybrid | Group Shared | No | This frenzied pack of Icetrompers destroyed a ffood supply convoy! Retrieve the supplies before they’re lost to the snow. | 1. Defeat Frenzied Icetrompers 2. Retrieve Food Supplies |
|||
| Hoth | Icy Intervention | Clabburn Tundra | Both | Hybrid | Encounter Shared | No | White Maw pirates have stolen medical supplies. Mark the supplies for extraction and deal with the pirates. | 1. Defeat White Maw pirate Forces 2. Mark Stolen Medical Supplies for Extraction |
|||
| Hoth | Wamp Womp | Clabburn Tundra | Both | Combat | Encounter Shared | No | White Maw activities are enraging the wampas! Take this opportunity to strike at both foes. | 1. Defeat White Maw pirate Forces 2. Defeat Wampas 3. Defeat the Wampa Pack Leader |
|||
| Hoth | Whitefang Woes | Clabburn Tundra | Both | Combat | Group Shared | No | Pantran Whitefangs are attacking nearby settlements. Collect tissue samples and determine the cause of the predators’ aggression. | 1. Defeat Stalking Ice Cats 2. Collect Tissue Samples from Ice Cats |
|||
| Hoth | Brother Ghul | Glacial Fissure | Both | Champion | Group Shared | No | A champion of the Hailstorm Brotherhood is accepting all challengers in a test of might! | Defeat Brother Ghul |
|||
| Hoth | Brother Rok | Glacial Fissure | Both | Champion | Group Shared | No | A champion of the Hailstorm Brotherhood is accepting all challengers in a test of might! | Defeat Brother Rok |
|||
| Hoth | Brother Tuk | Glacial Fissure | Both | Champion | Group Shared | No | A champion of the Hailstorm Brotherhood is accepting all challengers in a test of might! | Defeat Brother Tuk |
|||
| Hoth | Fury Manifested | Glacial Fissure | Both | Hybrid | Group Shared | No | Valuable salvage surrounds the wreck of the Ambra’s Fury. Probably. | Recover Frozen Cargo |
|||
| Hoth | Lakeside Retreat | Glacial Fissure | Both | Combat | Group Shared | No | 1. Patch Up the Defector 2. Defeat White Maw pirates |
||||
| Hoth | Massive Geo Beast | Glacial Fissure | Both | Champion | Group Shared | No | A massive Geo Beast haunts the Glacial Fissure. | Defeat the Massive Geo Beast |
|||
| Hoth | Pirated Radio | Glacial Fissure | Both | Combat | Group Shared | Yes | The White Maw are wreaking havoc with a captured broadcast tower. Shut it down. | 1. Disrupt the White Maw Broadcast 2. Defeat White Maw pirates 3. Recover a White Maw Disruptor 4. Use the Disruptor on the Broadcasting Dish |
|||
| Hoth | Taun Fawn Fun | Glacial Fissure | Both | Clicking | Group Shared | No | Yes | Some nearby Taun Fawns are having trouble getting to the top of their favorite ice shelf! Assistance would be appreciated. | Carry Taun Fawns Up the Hill |
||
| Hoth | The Wolf | Glacial Fissure | Both | Champion | Group Shared | No | “The Wolf”, a pirate with mysterious origins, waits for his prey. | Defeat “The Wolf” |
|||
| Hoth | Trial by Fire (dedicated guide) | Glacial Fissure | Both | Clicking | Group Shared | Yes | Yes | A researcher studying the volcanic fissures on Hoth has requested help testing the features of an incredibly safe experimental suit. | 1. Activate the L.A.V.A. Suit Near a Fissure 2. Test the Features of the L.A.V.A. Suit |
||
| Hoth | Volcanic Rumblings | Glacial Fissure | Both | Clicking | Group Shared | No | The ice in this area can be unstable, so any help with monitoring the temperature readings at volcanic fissures is welcome. | Take Temperature Readings |
|||
| Hoth | Fur, Fur Away | Highmount Ridge | Both | Clicking | Group Shared | Yes | Yes | An itinerant researcher needs help collecting Icetromper fur sasmples. | Collect Different Kinds of Icetromper Fur – Icetromper Mammoth Fur – Icetromper Groundshaker Fur – Icetromper Yearling Fur |
||
| Hoth | Ice Fishing | Highmount Ridge | Both | Clicking | Group Shared | Yes | Yes | Occasionally, rare and valuable fish are driven to the surface of Icetromper Lake by volcanic activity. Look for the shadows! | Catch Rare Ice Fish |
||
| Hoth | Pirate Problem (guide) | Highmount Ridge | Both | Hybrid | Encounter Shared | No | Pirates are preparing to raid the Tromper Crags Geothermal Plant. | 1. Defeat White Maw pirates 2. Disable White Maw Transports 3. Defeat White Maw Lieutenants 4. Defeat Zakxon Gewchi 5. Defeat Tre’vor Kirieleison |
|||
| Hoth | Snow Capped Delicacies (guide) | Highmount Ridge | Both | Clicking | Group Shared | Yes | Yes | Help an Ortolan settler gather flowers from a nearby mountain. | 1. Find Snowcap Flowers 2. Deliver the Snowcaps to the Ortolan Wanderer |
||
| Hoth | Unnecessary Repairs | Highmount Ridge | Both | Clicking | Group Shared | Yes | A geothermal substation is on the verge of meltdown. Perform sorely needed emergency repairs! | Repair Damaged Pressure Regulators |
|||
| Hoth | Wampa Hunt | Highmount Ridge | Both | Combat | Group Shared | No | Aggressive wampas threaten the local wildlife, interfering with reputable collectors. Deal with the wampas and collect proof. | Collect Gargantuan Wampa Horns |
|||
| Hoth | Dud Droids | Icefall Plains | Empire | Hybrid | Encounter Shared | No | Activate the self-destruct sequence of these Imperial probe droids before the Republic Troopers acquire their intel. | 1. Defeat Republic Forces 2. Detonate Imperial Probe Droids |
|||
| Hoth | Relic Race | Icefall Plains | Empire | Hybrid | Group Shared | No | Lost Sith relics have appeared in the thawing ice. Retrieve the artifacts before Republic forces can extract them | 1. Defeat Republic Forces 2. Retrieve Sith Relics |
|||
| Hoth | Republic Attack: Dorn Base | Icefall Plains | Empire | Battle | Encounter Shared | No | Republic forces are assaulting Dorn Base. Rally Imperial defenders to your aid and defeat the enemy. | 1. Repel the Republic Attack 2. Defeat the Republic Walker |
|||
| Hoth | Republic Attack: Forward Bunker | Icefall Plains | Empire | Battle | Encounter Shared | No | Republic forces are assaulting the Forward Bunker. Drive them back with the settlement’s portable turret defenses. | 1. Repel the Republic Attack 2. Defeat the Republic Walker |
|||
| Hoth | Scouts Honor | Icefall Plains | Empire | Hybrid | Group Shared | No | A team of Imperial spies went missing during a blizzard while exploring this area. Commence a search and rescue operation for any survivors. | 1. Defeat Talz Forces 2. Free Imperial Spies |
|||
| Hoth | Shadows in the Snow | Icefall Plains | Empire | Hybrid | Group Shared | No | An Imperial mining transport was ambushed in this area. Mark the materials for transport and keep your guard up. | 1. Mark Mining Materials for Transport 2. Defeat Any Hostile Forces |
|||
| Hoth | Snipers! | Icefall Plains | Empire | Combat | Group Shared | Yes | The Talz ambushers are beaten back, but the Talz snipers remain. | 1. Pick Up a Stealth Disruptor 2. Pick Up an Instant Shield Generator 3. Recover Comms from Hidden Talz Snipers |
|||
| Hoth | Talz Order | Icefall Plains | Empire | Combat | Group Shared | No | Take out the Talz mastermind behind these attacks! | Defeat Dootu Mu Bacha |
|||
| Hoth | Under Fire! | Icefall Plains | Empire | Combat | Group Shared | No | Yes | Talz ambushers have pinned down an Imperial squad. Reinforce the squad before it’s too late! | Defeat the Talz Ambushers |
||
| Hoth | King of the Wampas | Starship Graveyard | Both | Champion | Group Shared | No | An enormous Wampa has been sighted nearby. Pirates whisper to beware the “King” of the Wampas. | Defeat the King of Wampas |
|||
| Hoth | Top Shelf Ice | Starship Graveyard | Both | Hybrid | Group Shared | No | Wampas are making ice collection next-to-impossible. Perhaps you would have more luck than the poor ice merchant? | Collect Pristine Ice |
|||
| Hoth | Lost Inventory | Starship Graveyard | Both | Hybrid | Group Shared | No | White Maw pirates have scavenged manifests from ships in the Starship Graveyard, pointing them to cargo locked away in the ice. | 1. Defeat White Maw Droids 2. Destroy Backup Database2 3. Defeat the Cold Assault Point Defense Droid 4. Defeat White Maw Forces 5. Loot Encrypted Datapads 6. Defeat the White Maw Keyholder |
|||
| Hoth | Malfunctioning Security Droid | Starship Graveyard | Both | Champion | Group Shared | No | A security droid from the wreckage of the Star of Coruscant has reactivated, attacking random targets. | Defeat Malfunctioning Security Droid |
|||
| Hoth | Mining Accident | Starship Graveyard | Republic | Hybrid | Group Shared | Yes | Yes | The White Maw have mined the road ahead! Watch where you step! | 1. Clear the Road 2. Disarm Proximity Mines 3. Defeat White Maw Sappers |
||
| Hoth | Old Droids, New Tricks | Starship Graveyard | Both | Combat | Group Shared | Yes | The wreck of The Broken Blade still contains many of its original defense droids., Reactivate them to ward off White Maw pirates. | 1. Activate a Defense Droid 2. Defeat Scavenging Pirates |
|||
| Hoth | White Maw Assault: Frostwake Outpost | Starship Graveyard | Empire | Battle | Encounter Shared | No | White Map pirates are attacking Frostwake Outpost! Make use of grenade reserves for extra firepower. | 1. Repel the White Maw Assault 2. Defeat the White Maw Executioner |
|||
| Hoth | White Maw Assault: Outpost Zerek | Starship Graveyard | Republic | Battle | Encounter Shared | No | White Map pirates are attacking Outpost Zerek! Make use of grenade serves for erxtra firepower. | 1. Defeat White Maw Pirates 2. Defeat White Maw Executioner |
|||
| Hoth | Rodent Problem (guide) | Starship Graveyard | Both | Clicking | Group Shared | Yes | Yes | An MSE-6 Series droid needs data from the Sendant Pride wreckage. Where did it get a crate of MSE-6 Series drones? | 1. Connect to a Mouse Droid 2. Recover Data From the Wreckage 3. Return to MSE-6-PR2 With the Data |
||
| Hoth | Spent Fuel | Starship Graveyard | Both | Clicking | Group Shared | No | An eclectic droid curator will pay for the recovery of rare fuel isotopes found in wreckage from the Starship Graveyard. | Recover Fuel Isotopes |
|||
| Hoth | Underworld Engineering | Starship Graveyard | Both | Hybrid | Group Shared | No | White Maw engineers are experimenting with combat enhancing stims in a northern encampment in the Starship Graveyard. | 1. Defeat the Enhanced Whitefangs 2. Destroy Laboratory Equipment 3. Shutdown the Lab’s Generator and Defeat Overseer Krash 4. Defeat White Maw Forces 5. Collect Whitefang Blood Samples 6. Defeat the Deranged Research Lead |
|||
| Hoth | Valuable Data | Starship Graveyard | Both | Combat | Group Shared | No | Honest merchants can’t scavenge much once the pirates move in. Unless… we can scavenge data from the scavengers! | Recover Scavenged Datapads from White Maw Pirates |
|||
| Hoth | Vit’ash Kolk | Starship Graveyard | Both | Champion | Group Shared | No | Put a stop to Vit’ash Kolk and her enforcers terrorizing the area. | 1. Defeat Vit’ash Kolk 2. Defeat Vit’ash’s Enforcers |
|||
| Hoth | A Bridge Too Close | Whiterock Wastes | Republic | Hybrid | Group Shared | No | Imperial sappers are setting up charges on a nearby bridge. Put an end to this before critical infrastructure is damaged! | 1. Remove Detonators 2. Defeat Imperial Saboteurs 3. Defeat the Sapper Commander |
|||
| Hoth | Imperial Attack: Aurek Base | Whiterock Wastes | Republic | Battle | Encounter Shared | No | Imperial forces are assaulting Aurek Base from South. Rally Republic defenders to your aid and defeat the enemy. | 1. Repel the Imperial Attack 2. Defeat the Imperial Walker |
|||
| Hoth | Imperial Attack: Outpost Cresh | Whiterock Wastes | Republic | Battle | Encounter Shared | No | Imperial forces are assaulting Outpost Cresh. Drive them back with the outpost’s portable turret defenses. | 1. Repel the Imperial Attack 2. Defeat the Imperial Walker |
|||
| Hoth | Over and Out | Whiterock Wastes | Republic | Combat | Group Shared | No | Imperials have captured a nearby transmission station. Recover troop movement and outpost locations from encrypted data. | 1. Collect Encrypted Transmissions 2. Transmit Acquired Encrypted Data |
|||
| Hoth | Sensing Trouble | Whiterock Wastes | Republic | Hybrid | Group Shared | No | Some of the remote sensors have been acting up. Check to make sure there’s nothing wrong with them. | 1. Scan for Malfunctioning Sensors 2. Repair Sensor Tower 3. Secure the Sensor Tower |
|||
| Hoth | Snow Grift | Whiterock Wastes | Republic | Clicking | Group Shared | Yes | A mysterious Ortolan vendor claims they’ve discovered fabulous treasure under the snow. Might be worth a look? | 1. Purchase a Treasure Finder 2. Find a Mysterious Treasure |
|||
| Hoth | Wire Consequences (guide) | Whiterock Wastes | Republic | Clicking | Group Shared | No | Yes | Some of the kittens around the generator need to recover. Soothe them and bring them somewhere cozy. | 1. Calm Confused Ice Kittens 2. Bring Ice Kittens to Warm Crates |
||
| Hoth | Wire You Doing That (guide) | Whiterock Wastes | Republic | Clicking | Group Shared | No | Yes | Local fauna are chewing on the generator wires! Scare them off and repair any damage. | 1. Repair Damaged Wires 2. Shoo Ice Cats Away |
||
| Hoth | Wire You So Cute (guide) | Whiterock Wastes | Republic | Clicking | Group Shared | No | Yes | The kittens are sleeping soundly, but they’ll need someone to help take care of them. | 1. Collect Supplies for Ice Cat Care Package 2. Collect Cat Toys 3. Collect Cat Food 4. Collect Medicine 5. Assemble a Care Package 6. Find Someone to Adopt the Ice Kitten |
||
| Ilum | Crushing Our Enemies | Eastern Ice Shelf | Empire | Battle | Encounter Shared | Yes | Republic forces are attacking the Imperial Base Camp! Defeat them to fend off their sudden strike. | 1. Defeat Republic Attackers 2. Defeat Jedi Reinforcements |
|||
| Ilum | Foiling Their Ambushes | Eastern Ice Shelf | Empire | Battle | Encounter Shared | Yes | An arms convoy has been ambushed by the Republic! Fend off the attack, disarm explosives, and aid injured guards. | 1. Disarm Traps 2. Destroy Roadblocks 3. Defeat Republic Ambushers 4. Defeat Republic Commander |
|||
| Ilum | Deflecting Their Blows | Eastern Ice Shelf | Empire | Battle | Encounter Shared | Yes | The arms convoy has suffered serious damage while passing Fort Salvo. Help restore the convoy so it can continue to the battlefront. | 1. Reinforce Shield Units 2. Defeat Republic Saboteurs 3. Defeat Republic Strike Team 4. Defeat the Strike Team Captain |
|||
| Ilum | Ensuring Our Victory (guide) | Eastern Ice Shelf | Empire | Battle | Group Shared | Yes | Yes | The arms convoy has finally reached the battlefront. Reinforce your allies and devastate the Republic! | 1. Distribute Ammunition 2. Deploy Turrets 3. Defeat Republic Forces 4. Activate Low-Orbit Blaster |
||
| Ilum | Surrounded | Eastern Ice Shelf | Empire | Hybrid | Group Shared | No | The Republic have brought supplies and combat instructors to the Talz, and are planning to launch an attack on Imperial territory. Destroy their operation. | 1. Defeat Republic Instructors 2. Defeat Talz Recruits 3. Destroy Munitions and Supplies 4. Defeat the Jedi Emissary |
|||
| Ilum | Lisk Frenzy | Eastern Ice Shelf | Empire | Hybrid | Group Shared | No | The Republic is expanding their nearby camp, displacing lisks and riling them up. Use the beasts’ fury against the Empire’s enemies! | 1. Retrieve Electro Net 2. Capture Lisks 3. Deploy Lisks 4. Defeat Republic Forces 5. Destroy Republic Tents |
|||
| Ilum | Tauntaun Alpha | Western Ice Shelf | Both | Champion | Group Shared | No | This particularly large tauntaun specimen defends its territory with overwhelming violence. | Defeat the Tauntaun Alpha |
|||
| Ilum | Enraged Wampa | Western Ice Shelf | Both | Champion | Group Shared | No | Tonvarr Pirate activity in the area has encroached on this wampa’s territory, making it a danger to all. | Defeat the Enraged Wampa |
|||
| Ilum | Rampaging Guid | Western Ice Shelf | Both | Champion | Group Shared | No | Frigid wind storms are preventing guids from finding food, driving them into a rage. Defeat this one before it hurts anyone else. | Defeat the Rampaging Guid |
|||
| Ilum | Road to Fort Tonvarr | Western Ice Shelf | Both | Hybrid | Encounter Shared | No | The Tonvarr pirates have sent out warbands to lay further claim to the Western Shelf. Drive them back to their base! | 1. Defeat Tonvarr Pirates 2. Defeat Tonvarr Raidleaders 3. Detonate Plundered Munitions |
|||
| Ilum | The Defense of Fort Tonvarr | Western Ice Shelf | Both | Hybrid | Encounter Shared | No | The Tonvarr Pirates have fallen back to the outer defenses of their base. Destroy their fortifications and recover stolen crystals. | 1. Defeat Tonvarr Pirates 2. Destroy Tonvarr Turrets 3. Reclaim Plundered Crystals |
|||
| Ilum | The Fall of Fort Tonvarr | Western Ice Shelf | Both | Champion | Encounter Shared | Yes | The Ronvarr Pirates have been driven into their newly-claimed base. Defeat their forces and leadership to hamstring their operations! | 1. Defeat Elu Neleh 2. Defeat Yosh Woon 3. Defeat Gredan Obsnog |
|||
| Ilum | Cold Called | Eastern Ice Shelf | Republic | Battle | Encounter Shared | Yes | Imperial forces are attacking the Republic Base Camp! Defeat them to fend off their sudden strike. | 1. Defeat Imperial Attackers 2. Defeat Sith Reinforcements |
|||
| Ilum | Blizzard Blitz | Eastern Ice Shelf | Republic | Battle | Encounter Shared | Yes | A Republic convoy has been waylaid and must defend itself. Thwart the Imperial attackers! | 1. Defeat Imperial Ambushers 2. Recover Medical Supplies 3. Destroy Roadblocks 4. Defeat the Imperial Commander |
|||
| Ilum | Shivering Stand | Eastern Ice Shelf | Republic | Battle | Encounter Shared | Yes | Imperial forces are shelling the Republic Waystation in an attempt to destroy a critical supply convoy. Stop their assault. | 1. Repair Assault Droids 2. Destroy Mortar Emplacements 3. Defeat Imperial Forces 4. Defeat the Imperial Ambush Squad 5. Defeat the Ambush Squad Captain |
|||
| Ilum | Frozen Front (guide) | Eastern Ice Shelf | Republic | Battle | Group Shared | Yes | Yes | The supply convoy has reached the battle front! Help your allies push back against the Imperial onslaught. | 1. Gather Stimpack Launcher 2. Retrieve Provisions 3. Collect Electro-Rocket 4. Aid Injured Troops and Distribute Provisions 5. Destroy Imperial Turrets 6. Destroy Munitions Stockpiles |
||
| Ilum | Clear the Crystals | Eastern Ice Shelf | Republic | Hybrid | Encounter Shared | No | The Empire is attempting to fly several transports full of crystals off-planet. Stop them from stealing this precious resource. | 1. Destroy Imperial Turrets 2. Defeat Imperial Forces 3. Plant Explosives 4. Call Bombardment on West Transport 5. Call Bombardment on East Transport 6. Recover Crystals |
|||
| Ilum | Troubled Tauns | Eastern Ice Shelf | Republic | Hybrid | Group Shared | No | Imperial mining operations are leaking runoff into the tauntauns’ habitat. Help the poor creatures recover. | 1. Defeat Imperial Dumpers 2. Remove Waste Canisters 3. Cure Afflicted Tauntauns |
Dantooine Dynamic Encounters
The Dynamic Encounters on Dantooine are similar to the standard ones, but they belong to a unique system. There are three biomes at the Dantooine Crash Site, each one offering unique environmental obstacles, hazards and challenges.
As you complete dynamic encounters, you progress each biome until their levels are maxed out and a special group challenge is unlocked.
| Event Name | Biome | Map Area | Type | Type | Objectives | Level | Achievements | Difficulty | Description: | Tasks: |
|---|---|---|---|---|---|---|---|---|---|---|
| Frigid Swarm | Glacial | Glacial Trespass | Normal | Hybrid | 1 | These creatures have been bio-engineered to aerate frozen soil and spread frost flora spores. Stop their seeding of invasive plant life across the snow shelf! | – Clear Out Cryo-Nesters – Destroy Cryo-Nest Eggs |
|||
| Frostbloom Sweep | Glacial | Glacial Trespass | Normal | Hybrid | 1,2 | The Vault Ship’s cryo-flora is plummeting local temperature. Cull the frostblooms before they spread even more! | – Cull the Frostblooms – Clear Out Iceclaws |
|||
| Frostcaller | Glacial | Glacial Trespass | Normal | Hybrid | 2,3 | Reactivate the Interference Spikes to shut down this Cryogenic Seeder Node before it repopulates the frost flora across the shelf! | 1. Activate the Interference Spikes 2. Protect the Interference Spikes from Frostkeepers 3. Upload the Interference Spike Data 4. Defeat the Cryosentinel |
|||
| Gelid Tendrils | Glacial | Glacial Trespass | Normal | Combat | 1,2,3 | Strange tendrils creep from the icy caves below. Stomp them out! | 1. Squish Fragile Tendrils 2. Defeat Massive Tendrils |
|||
| Glacial Reclamation | Glacial | Glacial Trespass | Normal | Combat | 2,3 | The ship’s tertiary protocols have activated and a final recovery effort has been launched. | 1. Deactivate the Reboot Sequence 2. Clear Out the Cryo-Nesters 3. Clear Out the Cryo-Sterilizer Droids 4. Clear Out the Cryo-Nester Broodguards 5. Clear Out the Cryo-Reclaimation Droids 6. Clear Out the Cryosentinels 7. Clear Out the Cryo-Dominator Droid |
|||
| Hollow Frost | Glacial | Glacial Trespass | Normal | Hybrid | 2 | These Resonating Frostbulbs are plummeting the local temperatures and preventing exploration further into the shelf. | – Defeat Gladiopods – Cull the Frostbulbs |
|||
| Iceweeds | Glacial | Glacial Trespass | Normal | Hybrid | 1 | Our forward base has been overrun. Get it back online if you can. | 1. Reactivate Heat Lamps 2. Defeat Cryo Droids 3. Defeat the Cryo-Dominator |
|||
| Outpost Defense | Glacial | Glacial Trespass | Normal | Hybrid | 2 | The forward outpost is now online but it’s under attack. Stablize the area before we lose it completely! | 1. Repair Turrets 2. Fend Off Hostile Creatures 3. Defeat the Cryosentinel |
|||
| Probe-lems | Glacial | Ship Interior | Normal | Clicking | 1,2,3 | Czerka is illicitly attempting to gather data inside the wreckage. Foil their plans. | – Slice Probe Droids – Scramble Czerka Datasctreams |
|||
| Root Cause | Glacial | Glacial Trespass Cavern | Normal | Hybrid | 3 | We’ve traced the source of the freezing to a massive Rootmass deep In this cavern, Thermal charges were staged near key subroot structures but the vault’s predators forced our retreat. Recover the charges, destroy the supports, and put an end ta the Rootmass before the entire zone locks in ice | 1. Find the Thermal Charges 2. Activate Heat Lamps 3. Destroy the Frostveins 4. Defeat the Frosthide Bolraida and Rootbound Bolraida 5. Destroy the Rootmass |
|||
| Unruly Nesters | Glacial | Research Camp Perimeter | Normal | Hybrid | 1,2,3 | The Cryo-Nesters being studied by the GSI have destroyed their cages! Repair the enclosures and grab an electro-net to help round them up. | – Wrangle Cryo-Nesters – Repair Containment Fence |
|||
| The Cryonest Matron | Glacial | Ship Interior | Transition | Hybrid | 1 | The cryo-fauna outbreak leads back to this sealed incubation chamber. It appears to have been reawakened by the recent rise in temperature. Destroy the nest and stop the swarm at its source! | 1. Clear Out the Swarm 2. Defeat Broodguards 3. Destroy Eggs 4. Defeat the Cryonest Matron |
|||
| Cryocore Override | Glacial | Ship Interior | Transition | Hybrid | 2 | The snow shell control core has finally opened. Shut the ship’s climate controls before it’s too late. | 1. Deactivate Cryo-Containment Consoles 2. Defeat Cryo-Sterilizer Droids 3. Defeat the Cyro-Core Guardian 4. Deactivate the Emergency Containment Response Consoles 5. Defeat Cryo-Reclaimation Droids |
|||
| Acid Trip | Geothermal | Geothermal Disruption | Normal | Hybrid | 2 | The ship has sent recon droids to monitor the toxic pools in the area. Slice into those droids, and use them to safely collect samples for our research! | – Take Control of Reconnaissance Droids – Collect Acid Samples – Send Acid Samples to Camp – Defeat Frenzied Skar’kla |
|||
| Brood Basin | Geothermal | Geothermal Disruption | Normal | Combat | 1 | The ship’s habitat regulators are sustaining non-native bioengineered insects that rely on geothermal runoff to incubate. Clear out the invasive swarms before they overrun any more of the native wildlife! | 1. Clear out Embercrawleds 2. Clear out Emberstriders 3. Defeat the Emberqueen |
|||
| Caustic Cascade | Geothermal | Geothermal Disription | Normal | Hybrid | 1,2,3 | Toxic runoff from broken habitat tanks is seeping into the area and drawing skar’kla from deeper in the ship to the mineral-rich waste and spreading corrosive damage. Shut down those tanks before they poison the reservoir! | 1. Clear out Skar-kla 2. Repair Processing Tanks 3. Defeat Skar-kla Pack Leader |
|||
| Come Up, Fish | Geothermal | Lava Cave | Normal | Champion | 3 | The ship has been re-routing magma to care for Hothian Geo Beasts! Normally this would be a fascinating thing to study, but it presents a clear danger to our team. | Defeat the Gargantuan Geo Beast |
|||
| Data Appropriation | Geothermal | Ship Interior | Normal | Hybrid | 1,2,3 | Heavily-shielded Czerka personnel infiltrated the ship. Find a way to defeat them and steal their data. | – Defeat Shielded Czerka Enemies – Appropriate Data |
|||
| Fungal Protection | Geothermal | Crystal Cave | Normal | Hybrid | 1,2,3 | An endangered fungus is flourishing in the area. Help protect it from new predators and spread its spores. | 1. Defeat Hungry Geo Beast Larvae 2. Harvest Delicate Spore Sacs 3. Sow Spores Near Vents 4. Defend Nascent Fungai from the Geo Beast |
|||
| Graul Graveyard | Geothermal | Geothermal Disruption | Normal | Combat | 1 | A territorial Graul has wandered too close to the ship’s infrastructure and tts instincts have led it to disrupt the area. Now the ship’s subroutines have flagged the Graul as a hostile threat. Don’t let them kill it! | 1. Destroy Ship Droids 2. Destroy Ship Droid Enforcers 3. Destroy Ship Droid Battlemaster |
|||
| Hot Spots | Geothermal | Crystal Cave | Normal | Hybrid | 2 | We’ve been seeing some unusual geologic activity in the area. Could you take some readings? We have concerns about this development, Danyoine is not normally geologiqally, unstable! | – Take Magma Readings – Defeat Geo Beast Larvae |
|||
| Thermal Investigation | Geothermal | Crystal Cave | Normal | Hybrid | 1,2,3 | The sudden geothermal shifts are causing strange reactions in crystal formations. Collect data and be wary of dangerous creatures in the area. | 1. Scan Superheated Cystals 2. Defeat Thermoliphic Scurriers 3. Defeat the Thermophilic Lurker |
|||
| Under Pressure | Geothermal | Lava Cave | Normal | Hybrid | 3 | The ship has been re-routing magma for some unknown purpose. It doesn’t seem related to geothermal harvesting. Whatever the reason, there is a new geyser threatening the stability of the area. | 1. Take Control of a Mouse Droid 2. Scavenge Materials for a Geyser Cap 3. Scavenge Materials for a Geyser Cap 4. Take Control of a Construction Droid 5. Construct the Geyser Caps 6. Defeat Agitated Geo Beast Spawns |
|||
| Vent Sync Failure | Geothermal | Crystal Cave | Normal | Hybrid | 1 | Easy | The ship’s atmospheric regulators are causing these thermal vents to cycle the cavern with bursts of noxious gas. Shut them down before the native Kath Hounds succumb. | 1. Destroy Ship Droids 2. Deactivate Toxic Vents 3. Defeat the Ship Droid Overseer |
||
| Caretaker Unit K-6 | Geothermal | Ship Interior | Transition | Champion | 2 | The control chamber has activated some kind of Caretaker Unit. If we’re going to make any more progress here, it will need to be dealt with. | – Defeat Caretaker Unit K-6 |
|||
| Core Overload | Geothermal | Ship Interior | Transition | Hybrid | 1 | The ship has misinterpreted recent stabilization efforts as sabotage and it preparing to redirect a superheated purge through the areas above. Shut down the Biothermal Regulator before Dantooine suffers catastrophic overheating! | 1. Use Coolant to Access and Activate Thermal Regulators 2. Defeat Reinforcing Purge Protocol Droids 3. Defeat Warden Unit K-8 4. Shut Down the Biothermal Regulator |
|||
| Bigger Trouble | Sporefall | Makrin Hollow | Normal | Champion | 3 | Well. Now we know what the Caretaker Droids were taking care of. It’s not great. We could really use some help dealing with this mess. | – Defeat the Alien Megafauna – Defeat the Caretaker Droid |
|||
| Dr. Spears, I Presume? | Sporefall | Sporefall | Normal | Hybrid | 1,2,3 | Doctor Spears has disappeared from camp, and was behaving strangely. Somebody should check on him to make sure he’s okay! | 1. Examine Doctor Spears 2. Defeat Doctor SPORES! 3. Cure Doctor Spores |
|||
| Fascinating! | Sporefall | Research Camp Perimeter | Normal | Hybrid | 1,2,3 | Help the researchers get set up to observe a unique biological interaction before the opportunity passes. | 1. Defeat opportunistic Yaracats 2. Deploy Ginx Pheromones 3. Collect Data on Symbiotic Relationship |
|||
| Ginx Of Unusual Size | Sporefall | Sporefall | Normal | Champion | 1 | An unusually large Ginx has taken up residence in the area, threatening our research. The larger the Ginx, the more hostile. Be careful! | – Defeat the Unusually Large Ginx |
|||
| Lost Bormu | Sporefall | Sporefall | Normal | Combat | 1,2,3 | Defeat the Shyrack Screecher | 1. Defeat the Shyrack Swarm 2. Defeat the Shyrack Screecher |
|||
| No Spies Allowed! | Sporefall | Ship Interior | Normal | Hybrid | 1,2,3 | Czerka frequencies have been detected in the ship’s interior. Stop their spies! | 1. Destroy Surveillance Devices 2. Aid or defeat Czerka Spies 3. Defeat Czerka Droids |
|||
| Sample Collection: Ginx | Sporefall | Sporefall | Normal | Clicking | 1 | Our researcher could use assistance collecting samples from the local Ginx population. Studying the effects of the Sporefall on these creatures could lead to incredible insights! | – Collect Spore samples from Ginx – Pick Up Spore Collection Kits |
|||
| Sample Collection: Makrin | Sporefall | Makrin Hollow | Normal | Clicking | 1 | Our researcher could use assistance collecting samples from the local Makrin population. Studying the effects of the Sporefall on these creatures could lead to incredible insights! | – Pick Up Spore Collection Kits – Collect Verdant Spores from Makrin – Collect Luminous Spores from Makrin – Collect Vibrant Spores from Makrin |
|||
| Sample Collection: Pterathki | Sporefall | Sporefall | Normal | Clicking | 1 | Our researcher could use assistance collecting samples from the local Pterathki population. Studying the effects of the Sporefall on these creatures could lead to incredible insights! | 1. Pick Up Spore Collection Kits 2. Collect samples from Pterathki 3. Scan Spore-Generating Fungus |
|||
| Sample Collection: Yaracats | Sporefall | Sporefall | Normal | Clicking | 1 | Our researcher could use assistance collecting samples from the local Yaracat Studying the effects of the Sporefall on these creatures could lead to incredible insights! | 1. Pick Up Spore Collection Kits 2. Feed Hungry Yaracats 3. Collect Spore Samples from Yaracats |
|||
| Spore Subject: Ginx | Sporefall | Makrin Hollow | Normal | Clicking | 2 | Our researcher could use assistance collecting samples from the local Ginxpopulation. Studying the effects of the Sporefall on these creatures could lead to incredible insights! | – Pick up Spore Collection Kits – Collect Spore Samples from Ginx |
|||
| Spore Subject: Makrin | Sporefall | Makrin Hollow | Normal | Clicking | 2 | Our researcher could use assistance collecting samples from the local Makrin population. Studying the effects of the Sporefall on these creatures could lead to incredible insights! | – Pick up Spore Collection Kits – Collect Spore Samples from Makrin |
|||
| Spore Subject: Pterathki | Sporefall | Sporefall | Normal | Clicking | 2 | Our researcher could use assistance collecting samples from the local Pterathki population. Studying the effects of the Sporefall on these creatures could lead to incredible insights! | – Pick up Spore Collection Kits – Collect Spore Samples from Pterathki |
|||
| Spore Subject: Yaracats | Sporefall | Sporefall | Normal | Clicking | 2 | Our researcher could use assistance collecting samples from the local Yaracat Studying the effects of the Sporefall on these creatures could lead to incredible insights! | – Pick up Spore Collection Kits – Collect Spore Samples from Yaracats |
|||
| Taking Care of Caretakers | Sporefall | Sporefall | Normal | Champion | 3 | The Ship has activated one of its Caretaker Droids To what purpose, we don’t know. But iut’s incredibly hostile and beyond our researches to deal with. | – Defeat the Caretaker Droid |
|||
| The Watchers | Sporefall | Sporefall | Normal | Combat | 2,3 | It appears the ship is pushing back against our research efforts. We could use some help dealing with these droids! | – Defeat Eco-Defense Droids |
|||
| They Call me Doctor Spores | Sporefall | Ship Interior | Transition | Combat | 1 | Doctor Spears has been behaving strangely, and we can’t find him in his usual spots. We’re afraid he’s made his way into the crashed ship, who knows what kind of trouble he’s in? | 1. Confront Doctor Spears 2. Defeat Doctor SPORES 3. Subdue Doctor Hoppington 4: Subdue Professor Whiskers 5. Defeat Makrin Assistants 6. Tend to Doctor Spores |
|||
| Return of Doctor Spores | Sporefall | Ship Interior | Transition | Combat | 2 | Doctor Spears is missing again. He kept muttering about the ship, could you retrieve him? Again? We’re so sorry. | 1. Confront Doctor SPORES! 2. Defeat Doctor Spores! 3. Subdue Doctor Hoppington 4. Subdue Professor Whiskers 5. Defeat Makrin Assistants 6. Defeat Caretaker Droids 7. Tend to Doctor Spears |
Dynamic Encounters Rewards
You receive a small amount of Tech Fragments, Conquest Commendations, Credits, XP, and Conquest Points for completing a Dynamic Encounter.
| Icon | Rewards | Amount |
|---|---|---|
| Tech Fragments | 50 | |
| Conquest Commendations | 3 | |
 | Credits | 5,590 |
| Conquest Points* | 4,125 |
There is also [Weekly] The Shifting Tides in the Supplies quadrant on the Fleet, which gives 50 Conquest Commendations, 33k Credits, and your choice of 25 FP-1 Stabilizers or a Noble Decurion Distribution Chest.
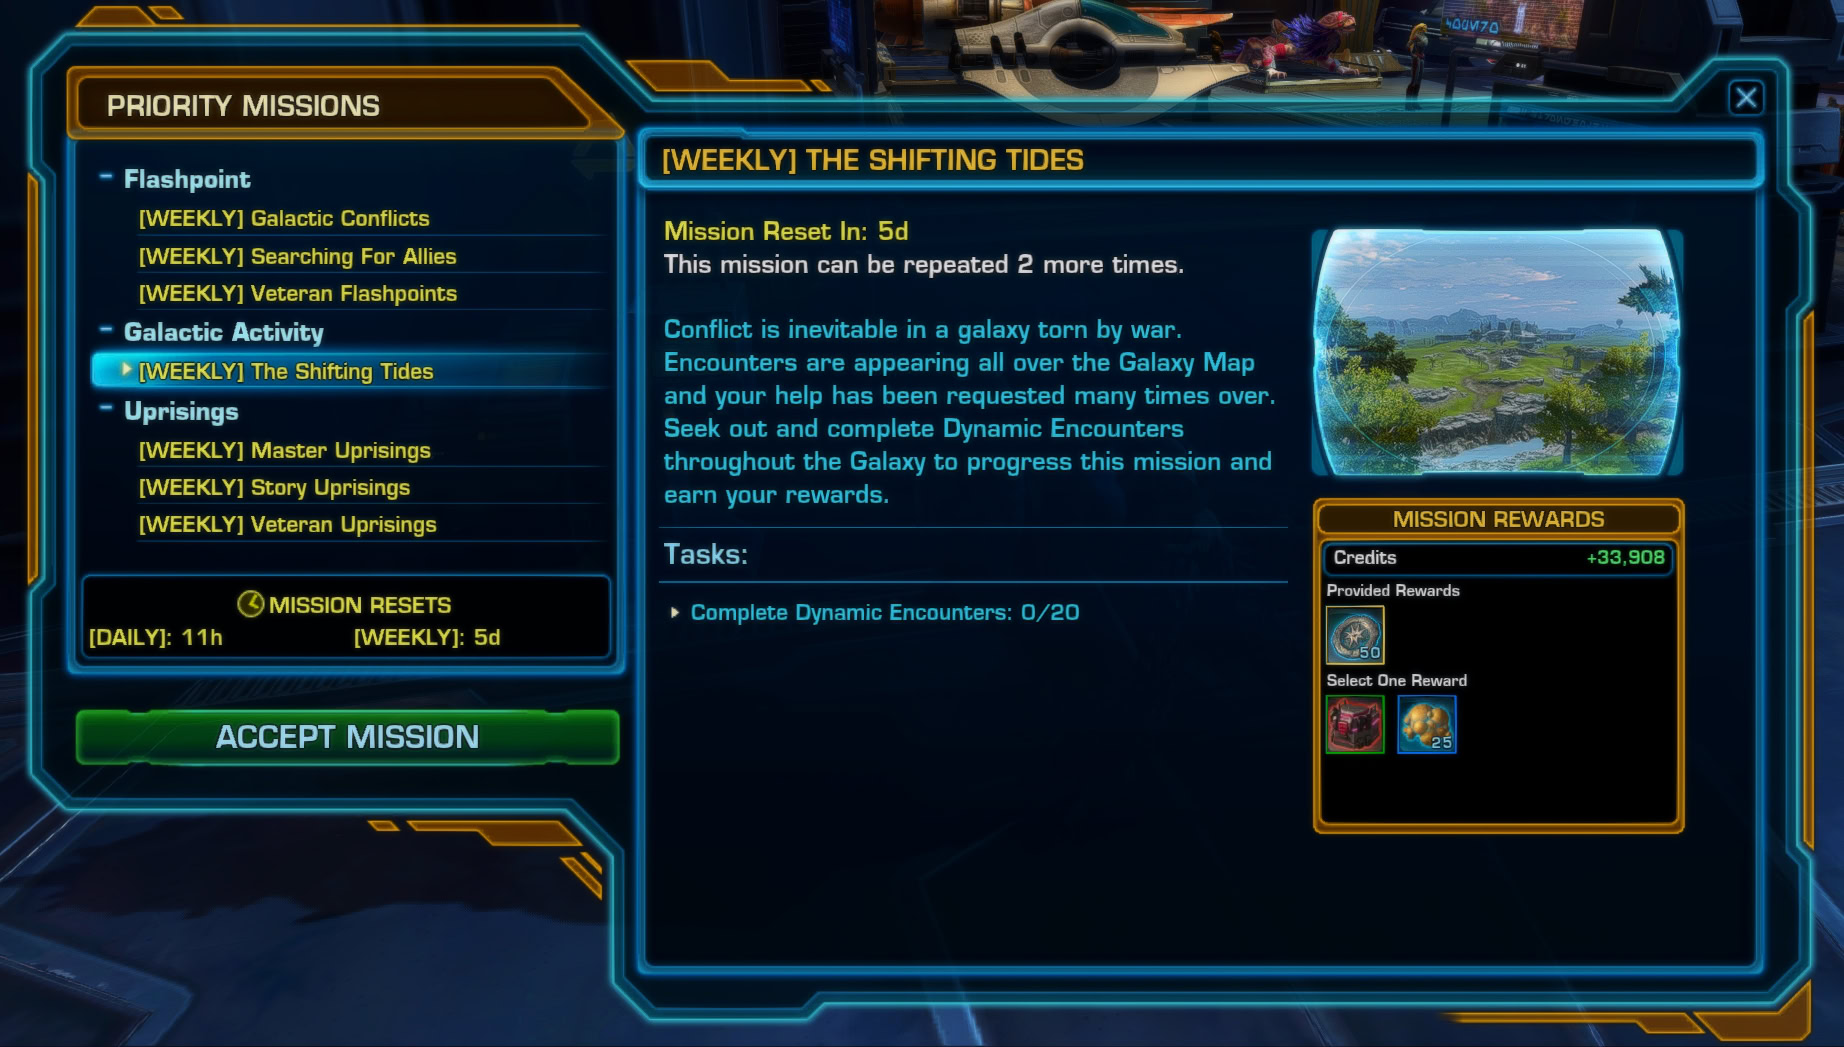
Some enemies and Dynamic Encounters have chances to drop pieces of specific Fitted Gear sets and other rewards as well.
Armor Sets
All Dynamic Event armor sets are Fitted and Bind to Legacy on Equip (BLE). Fitted gear provides no stats and is unmoddable, and BLE means you can sell the individual pieces on the GTN/trade/donate so long as you don’t equip them. Once they’re bound, you can still transfer them to your other toons.
Fitted Armor of the Electric Gaze
The Fitted Armor of the Electric Gaze is an entirely new armor set. It features one of the more eccentric helmets in the game and an overall style that’s quite reminiscent of Iokath, though it’s clearly inspired by Marchion Ro and his ship The Gaze Electric from Star Wars: The High Republic. Check out our Reading Order Guide and full Catalog for more details.

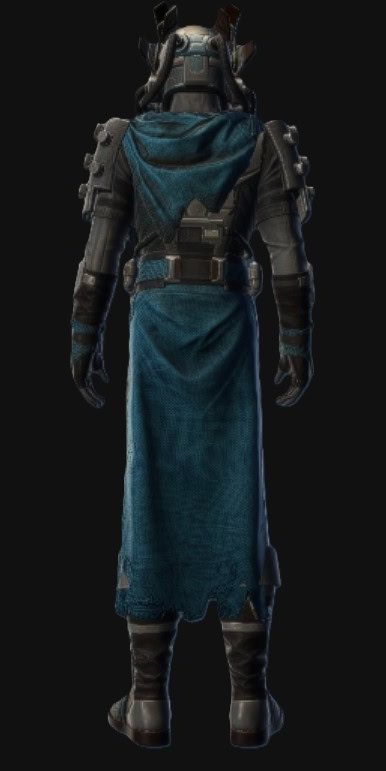

Shown below with the Light Yellow and Deep Pink Dye Module, you can see that practically all of the nonmetal elements of the outfit are dyeable.
The shoulder plates also get a tinge of the secondary color, which is kinda neat, though it’s frustrating that this effect does not apply to the other metal pieces.
The coattail does not dye the same color as the scarf because the dye regions are inverted. You can force it to match by getting an inverted dye for the pants and making them not unify with the rest of the outfit.


Enemies from specific Dynamic Encounters in designated regions across Hoth and Tatooine have a chance to drop a specific piece of this gear. More challenging enemies have a greater chance of dropping rarer items
| Icon | Item | Planet | Region(s) |
|---|---|---|---|
| Helmet of the Electric Gaze | Tatooine | Dune Sea | |
| Chest of the Electric Gaze | Hoth | Glacial Fissure | |
| Vambraces of the Electric Gaze | Tatooine | Mos Ila | |
| Gauntlets of the Electric Gaze | Hoth | Whiterock Wastes Icefall Plains | |
| Belt of the Electric Gaze | Tatooine | Anchorhead Jundland (Battles) | |
| Legplates of the Electric Gaze | Tatooine | Jundland (Champions) | |
| Boots of the Electric Gaze | Hoth | Starship Graveyard |
Hidden Chain’s Armor Set
The Hidden Chain’s Armor Set enables you to wear the exact same uniform as the rest of Heta Kol’s forces. The Hidden Chain Lieutenants you fight at the end of Hidden Chain Invasions have a chance to drop individual pieces of this armor set.


Shown below with the Deep Orange and Light Blue Dye, the Hidden Chain’s Armor Set is an excellent example of what it means to have primary and secondary colors on the set, though a few tertiary bits are undyeable.


L.A.V.A. Suit Fitted Armor Set
You presumably receive the L.A.V.A. Suit for completing all achievements related to Trial By Fire on Hoth.

Dark Initiate’s Fitted Robes
The Dark Initiate’s Fitted Robes is a full set to go with the purple chestpiece of the same name previously offered on the Cartel Market.
Individual pieces of the Fitted Dark Initiate Robes have a chance to drop from enemies at Dynamic Encounters in Mos Ila on Tatooine, but you can find similar versions of the set at the Specialty Goods Vendors on Korriban and Balmorra.


Unfortuntately, the helmet removes the hood, but at least you have the option to wear a hood with this chestpiece.


Below, you can see the Dark Initiate’s Fitted Robes with a Deep Orange and Light Blue Dye Module. The set dyes poorly, to the extent that I consider it bugged. The chest does not color fully, while the gloves and boots are tinted.


Mounts
There are currently 3 mounts obtainable through Dynamic Encounters.
Everglade Zakkeg
The Everglade Zakkeg is a blue and green reptillian creature mount recolored from the original Zakkeg mount on the Cartel Market. The mount seems to drop from defeating Talz enemies on Hoth, which you can find in abundance at the “Under Fire!”, “Snipers!”, and “Talz Order” in Icefall Plains.
The Talz are Republic-aligned, save for Broonmark, so the Everglade Zakkeg is effectively Imperial-exclusive. However, it is not bound, so you can buy | sell it on the GTN, though it’s pretty easy to get, so your credits are probably spent some other way.
Desert Sands Lifter (Hoth)
You receive the Desert Sands Lifter for completing Encounter Mastery: Tatooine, which requires that you must complete each unique Dynamic Encounter and 125 total Dynamic Encounters on Tatooine.
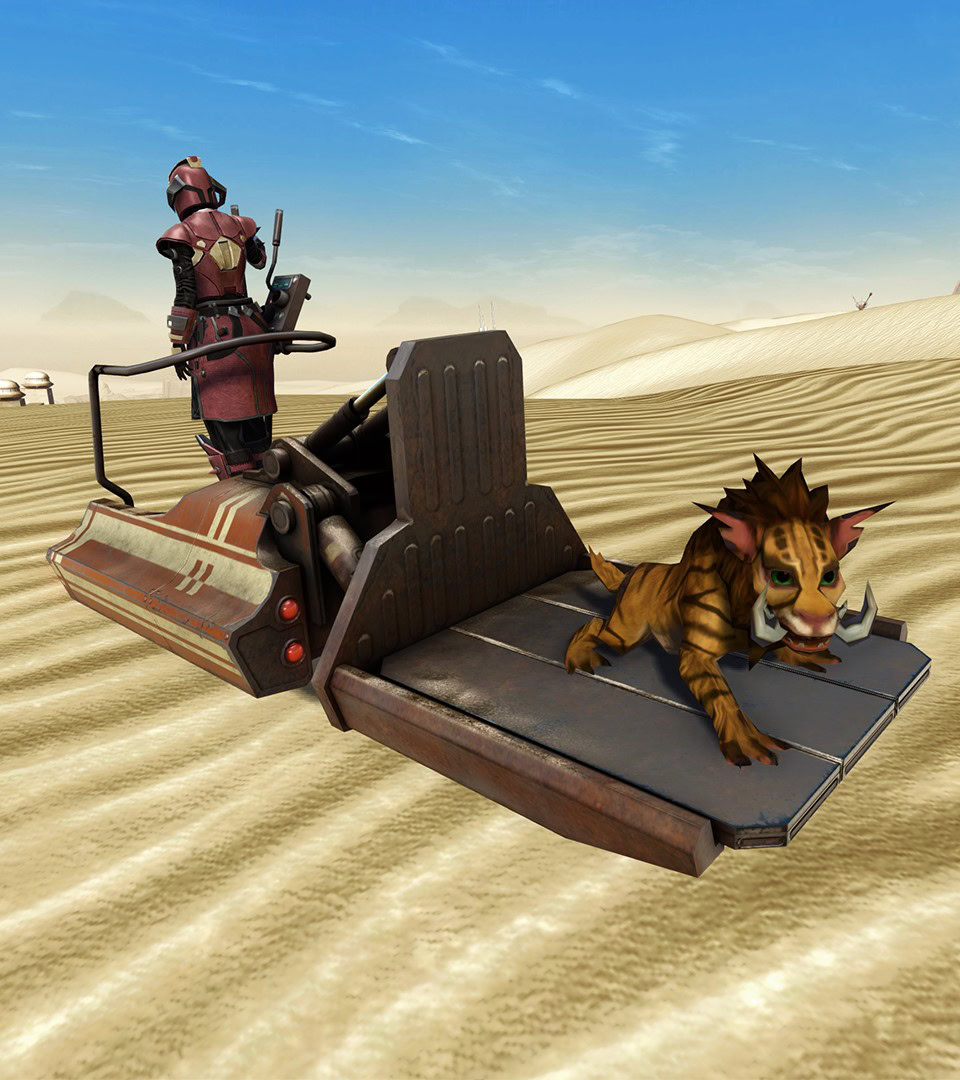
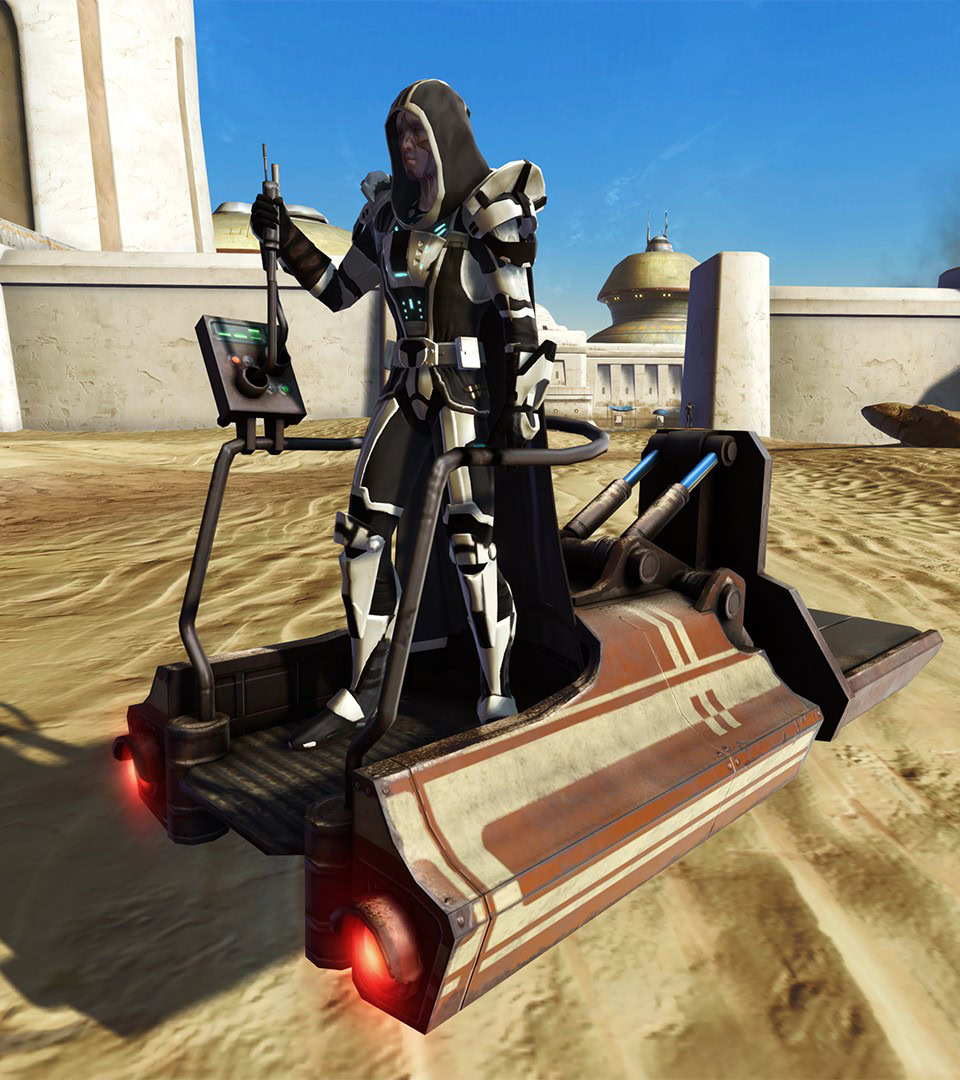
The Desert Sands Lifter is a variation of the Load Lifter vehicle mounts from the Cartel Market with a rusty orange and yellow striped paint job. The Lifter can carry a minipet of your choice.
Frozen Peaks Lifter (Hoth)
You receive the Frozen Peaks Lifter for completing Encounter Mastery: Hoth, which you receive after completing each unique Dynamic Encounter and 125 total Dynamic Encounters on Hoth.
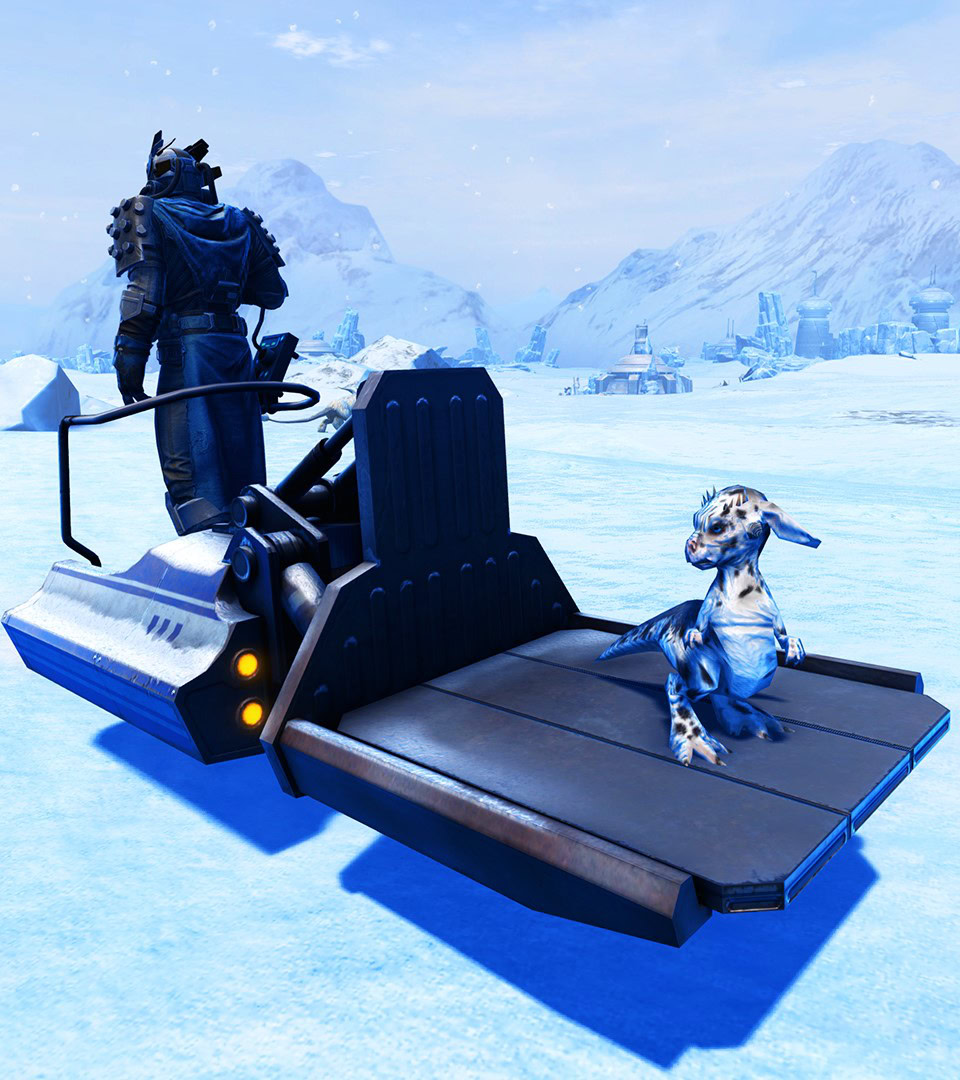
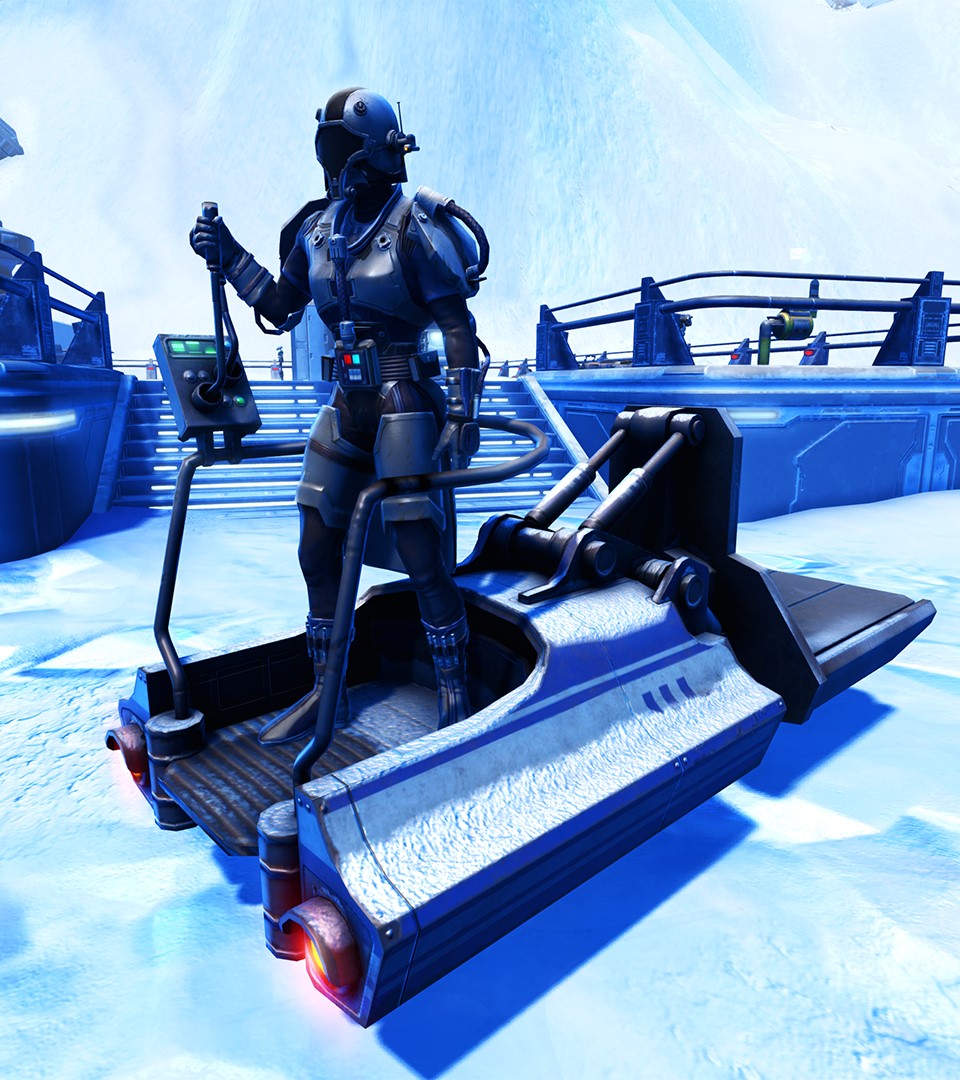
The Frozen Peaks Lifter is a variation of the Load Lifter vehicle mounts from the Cartel Market with a blue and white striped paint job and rusty undercarriage. The Lifter can carry a minipet of your choice.
Zelthian Highland Brig (Korriban)
You receive the Zelthian Highland Brig for completing Encounter Mastery: Korriban, which you receive after completing each unique Dynamic Encounter and 30 total Dynamic Encounters on Korriban.
Zelthian is a new speeder manufacturer introduced with the Dynamic Encounters on starter planets. The speeder features a carriage for your active ground-based pet.
Zelthian Forest Schooner (Tython)
You receive the Zelthian Forest Schooner for completing Encounter Mastery: Tython, which you receive after completing each unique Dynamic Encounter and 30 total Dynamic Encounters on Tython.
Zelthian is a new speeder manufacturer introduced with the Dynamic Encounters on starter planets. The speeder features a carriage for your active ground-based pet.
Zelthian Foothill Clipper (Ord Mantell)
You receive the Zelthian Foothill Clipper for completing Encounter Mastery: Ord mantell, which you receive after completing each unique Dynamic Encounter and 30 total Dynamic Encounters on Ord Mantell.
Zelthian is a new speeder manufacturer introduced with the Dynamic Encounters on starter planets. The speeder features a carriage for your active ground-based pet.
Zelthian Bog Cutter (Hutta)
You receive the Zelthian Bog Cutter for completing Encounter Mastery: Hutta, which you receive after completing each unique Dynamic Encounter and 30 total Dynamic Encounters on Hutta.
Zelthian is a new speeder manufacturer introduced with the Dynamic Encounters on starter planets. The speeder features a carriage for your active ground-based pet.
Coruscant Leisure Cruiser
You receive the Coruscant Leisure Cruiser for completing Encounter Mastery: Coruscant, which you receive after completing each unique Dynamic Encounter and 75 total Dynamic Encounters on Coruscant.
The speeder features a carriage for your active ground-based pet.
Kaas Leisure Cruiser
You receive the Kaas Leisure Cruiser for completing Encounter Mastery: Dromund Kaas, which you receive after completing each unique Dynamic Encounter and 75 total Dynamic Encounters on Dromund Kaas.
The speeder features a carriage for your active ground-based pet.
Ilum Leisure Cruiser
You receive the Ilum Leisure Cruiser for completing Encounter Mastery: Ilum, which you receive after completing each unique Dynamic Encounter and 45 total Dynamic Encounters on Ilum.
The speeder features a carriage for your active ground-based pet.
Minipets
There are currently 2 minipets obtainable through Dynamic Encounters. These minipets are not bound, so you can buy | sell it on them GTN.
Freckled Loth-cat Kitten
You have a chance to receive the Freckled Loth-cat for completing Wire Consequences, Wire You So Cute, or Wire You Doing That. All of these cat-themed Dynamic Encounters are Republic exclusive near Aurek Base in Whiterock Wastes.
Killik Stalker Larva Minipet
The Killik Stalker Larva minipet can drop from the K’lor’slug Swarmers and Broodmothers you fight during the encounter “Never a K’loring Day”. You can also buy | sell this minipet on the GTN.
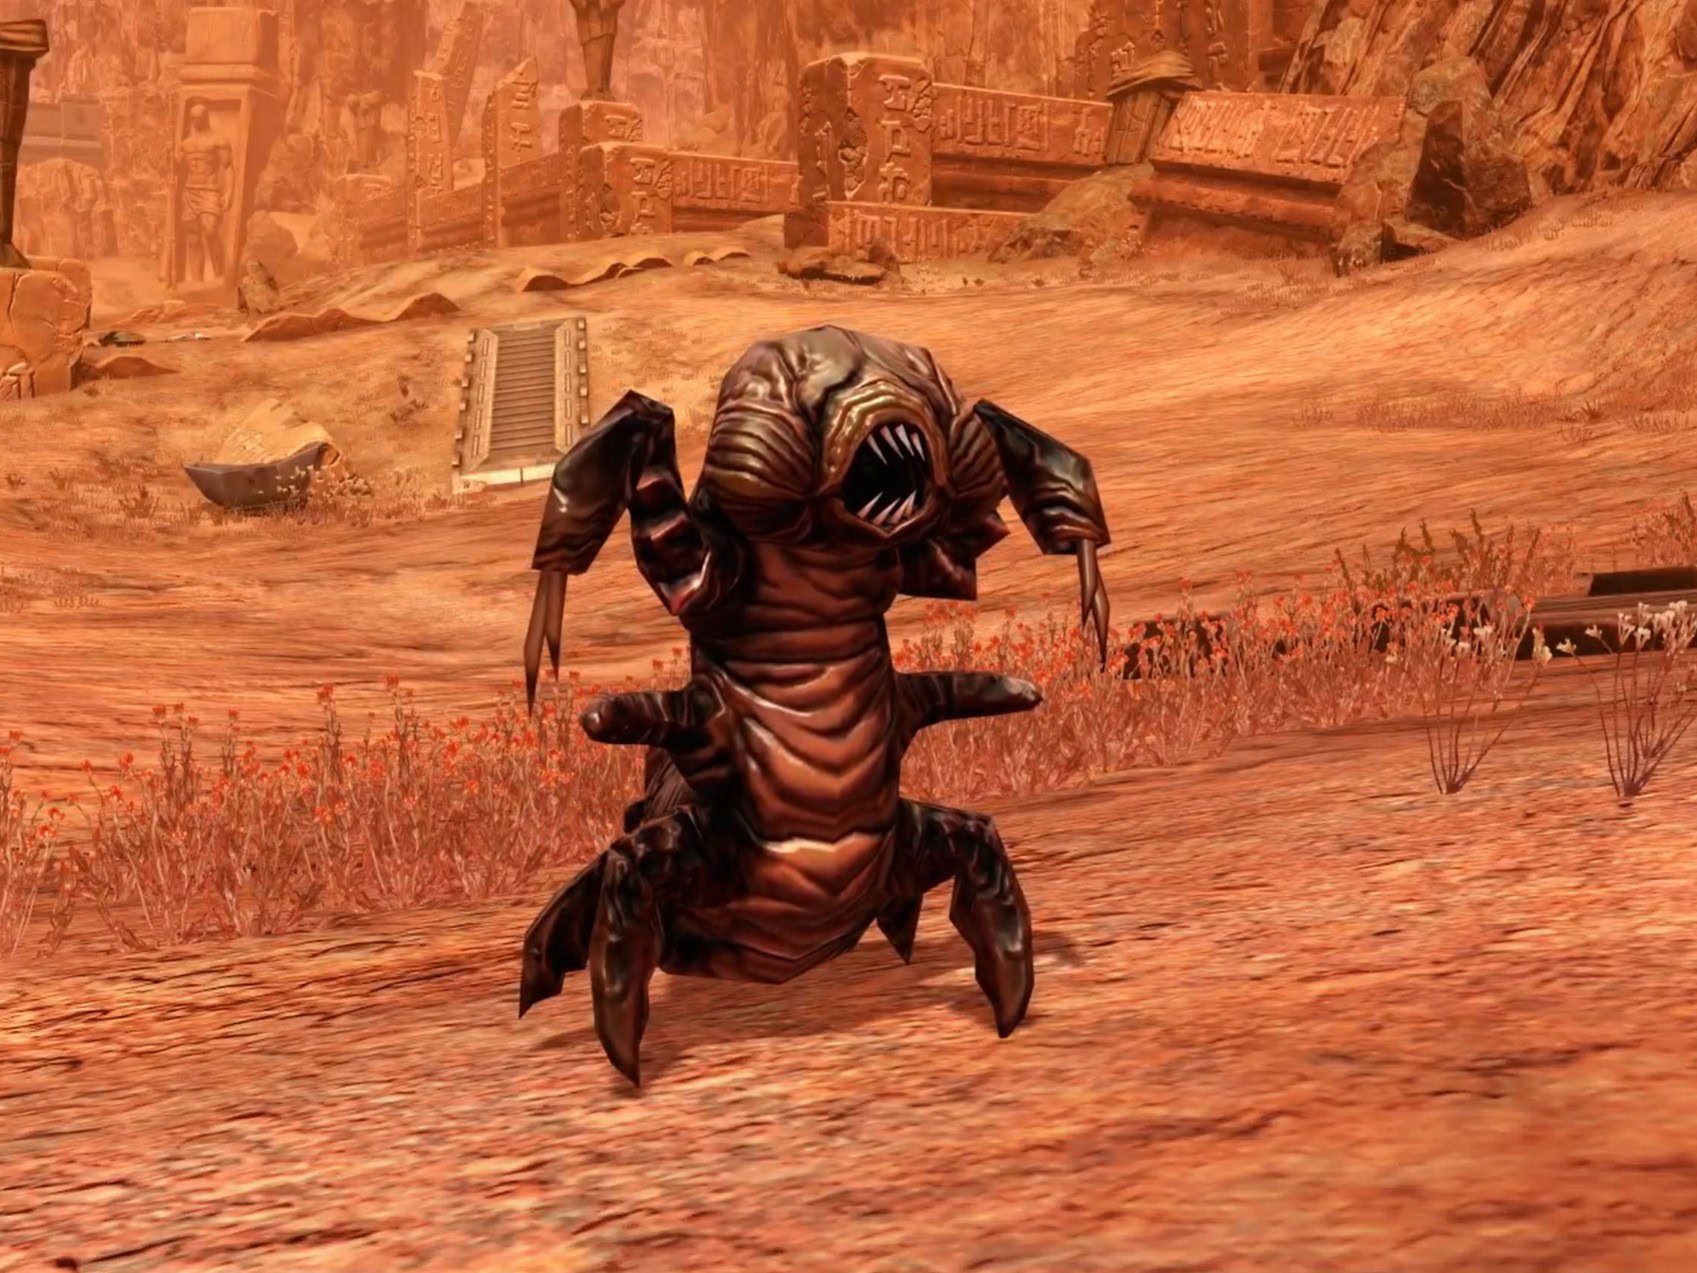
Decorations
There are currently 20 Stronghold Decorations obtainable through Dynamic Encounters. Some are associated with specific encounters, while others drop from enemies on specific planets. The decos are not bound, so you can buy | sell them on the GTN.


Potted Plant: Hoth Snowcap
The Potted Plant: Hoth Snowcap is an Environmental – Plants decoration that fits on Small, Narrow, and Medium Hooks. You have a chance to get a single copy after completing Snow Capped Delicacies at the northern edge of Highmount Ridge.

Dynamic Encounters Achievements
There are currently no secret achievements associated with Dynamic Encounters. You get an achievement for doing the following:
- Completing a Dynamic Encounter for the first time
- Completing all Dynamic Encounters in a given region
- Completing all Dynamic Encounters on a given planet
- Completing W ▶ X ▶ Y ▶ Z number of Dynamic Encounters on a given planet
Once you get all of these achievements on a given planet, you get the meta-achievement that comes with a mount.
These achievements exist in a dedicated section called Dynamic Encounters rather than as a new subcategory on each planet in the Location section. Hidden Chain Invasions are not considered part of the planetary encounters.