Everything you need to know about GTA VI’s controls for Xbox and Playstation Controllers: settings, keybinds, customizations.
How to Access and Customize Keybinds
To see and access your Keybindings, open the Pause Menu (Menu/Start) and select Settings. Then navigate the menu along the side down to Settings.
By default you should arrive to the Control Scheme menu, where you can view the controls. Unfortunately, the Console version doesn’t allow for Control rebinding at this time.
Controller Inputs
Controller Inputs cannot be rebound. However, there are three different Control Schemes available to use: Default, Classic, and Left-Handed. Below are the controls for the Default and Classic Control Schemes.
PS5 and Xbox Controls List
| Action | XBOX | XBOX Alt | PS5 | PS5 Alt | Input | Cateory |
|---|---|---|---|---|---|---|
| Map | View | View | Touchpad | Touchpad | Press | Menus |
| Pause | Menu | Menu | Menu | Menu | Press | Menus |
| Move | LS | LS | LS | LS | Tilt | On Foot |
| Run | LS | A | L3 | X | Press (Toggle) | On Foot |
| Crouch | B | LS | ⭘ | L3 | Press (Toggle) | On Foot |
| Rest | B | LS | ⭘ | L3 | Hold | On Foot |
| Jump / Climb | A | X | X | ☐ | Press | On Foot |
| Look | RS | RS | RS | RS | Tilt | On Foot |
| Look Behind | RS | RS | R3 | R3 | Press | On Foot |
| Loadout | LB | LB | L1 | L1 | Hold | On Foot |
| Holster | LB | LB | L1 | L1 | Press | On Foot |
| Cover | RB | RB | R1 | R1 | Press | On Foot |
| Shoot | RT | RT | R2 | R2 | Press | On Foot |
| Aim / Interact | LT | LT | L2 | L2 | Hold | On Foot |
| Melee | X | B | ☐ | ⭘ | Press | On Foot |
| Interact | Y | Y | △ | △ | Press | On Foot |
| Cellphone | D-Pad Up | D-Pad Up | D-Pad Up | D-Pad Up | Press | On Foot |
| Waink App | D-Pad Up | D-Pad Up | D-Pad Up | D-Pad Up | Hold | On Foot |
| Radio Controls | D-Pad Left | D-Pad Left | D-Pad Left | D-Pad Left | Press | On Foot |
| Radio Menu | D-Pad Left | D-Pad Left | D-Pad Left | D-Pad Left | Hold | On Foot |
| Objective / Minimap | D-Pad Down | D-Pad Down | D-Pad Down | D-Pad Down | Press | On Foot |
| Quick Navigation | D-Pad Down | D-Pad Down | D-Pad Down | D-Pad Down | Hold | On Foot |
| Detonate Explosives | D-Pad Right | D-Pad Right | D-Pad Right | D-Pad Right | Press | On Foot |
| Partner Menu | D-Pad Right | D-Pad Right | D-Pad Right | D-Pad Right | Hold | On Foot |
| Quick Throw | RB | RB | R1 | R1 | Hold | Aiming |
| Quick Swap Weapon | Y | Y | △ | △ | Press | Aiming |
| Zoom Scope In | D-Pad Up | D-Pad Up | D-Pad Up | D-Pad Up | Press | Aiming |
| Zoom Scope Out | D-Pad Down | D-Pad Down | D-Pad Down | D-Pad Down | Press | Aiming |
| Swap Shoulder | D-Pad Left | D-Pad Left | D-Pad Left | D-Pad Left | Press | Aiming |
| Zoom / Throw Path | RS | RS | R3 | R3 | Press (Toggle) | Aiming |
| Lock-On / Strafe | LT | LT | L2 | L2 | Hold | Melee |
| Grapple | RT | RT | R2 | R2 | Press | Melee |
| Punch / Kick | X | B | ☐ | ⭘ | Press | Melee |
| Block / Dodge | A | X | X | ☐ | Press | Melee |
| Accelerate | RT | RT | R2 | R2 | Hold | Land / Water Vehicles |
| Brake / Reverse | LT | LT | L2 | L2 | Hold | Land / Water Vehicles |
| Handbrake | A | A | X | X | Press | Land / Water Vehicles |
| Turn | LS | LS | LS | LS | Tilt | Land / Water Vehicles |
| Horn / Nitrous | LS | LS | L3 | L3 | Press | Land / Water Vehicles |
| Shoot | RB | RB | R1 | R1 | Press | Land / Water Vehicles |
| Headlights | B | X | ⭘ | ☐ | Press | Land / Water Vehicles |
| Duck | B | X | ⭘ | ☐ | Hold | Land / Water Vehicles |
| Melee | X | B | ☐ | ⭘ | Press | Land / Water Vehicles |
| Exit Vehicle | Y | Y | △ | △ | Press | Land / Water Vehicles |
| Cellphone | D-Pad Up | D-Pad Up | D-Pad Up | D-Pad Up | Press | Land / Water Vehicles |
| Interact | D-Pad Up | D-Pad Up | D-Pad Up | D-Pad Up | Hold | Land / Water Vehicles |
| Indicate Left | D-Pad Left | D-Pad Left | D-Pad Left | D-Pad Left | Press | Land / Water Vehicles |
| Vehicle Menu | D-Pad Left | D-Pad Left | D-Pad Left | D-Pad Left | Hold | Land / Water Vehicles |
| Objective / Minimap | D-Pad Down | D-Pad Down | D-Pad Down | D-Pad Down | Press | Land / Water Vehicles |
| Quick Navigation | D-Pad Down | D-Pad Down | D-Pad Down | D-Pad Down | Hold | Land / Water Vehicles |
| Indicate Right | D-Pad Right | D-Pad Right | D-Pad Right | D-Pad Right | Press | Land / Water Vehicles |
| Partner Menu | D-Pad Right | D-Pad Right | D-Pad Right | D-Pad Right | Hold | Land / Water Vehicles |
| Throttle Up | RT | RT | R2 | R2 | Hold | Aircraft |
| Throttle Down | LT | LT | L2 | L2 | Hold | Aircraft |
| Yaw Left | X | X | ☐ | ☐ | Hold | Aircraft |
| Yaw Right | B | B | ⭘ | ⭘ | Hold | Aircraft |
| Pitch / Roll | LS | LS | LS | LS | Tilt | Aircraft |
| Undercarriage | LS | LS | L3 | L3 | Press | Aircraft |
| Exit Vehicle | Y | Y | △ | △ | Press | Aircraft |
| Pedal / Move Forward | RT | RT | R2 | R2 | Hold | Bicycle |
| Brake / Reverse | LT | LT | L2 | L2 | Hold | Bicycle |
| Turn | LS | LS | LS | LS | Tilt | Bicycle |
| Bell | LS | LS | L3 | L3 | Press | Bicycle |
| Shoot | RB | RB | R1 | R1 | Press | Bicycle |
| Dismount | Y | Y | △ | △ | Press | Bicycle |
| Melee | X | B | ☐ | ⭘ | Press | Bicycle |
| Bunnyhop | B | X | ⭘ | ☐ | Press | Bicycle |
| Sprint | A | A | X | X | Press | Bicycle |
| Move | LS | LS | LS | LS | Tilt | Swimming |
| Swim Faster | LS | A | L3 | X | Press (Toggle) | Swimming |
| Dive | RB | RB | R1 | R1 | Press | Swimming |
| Shoot | RT | RT | R2 | R2 | Press | Swimming |
| Melee | X | B | ☐ | ⭘ | Press | Swimming |
| Surface | A | X | X | ☐ | Press | Swimming |
| Turn | LS | LS | LS | LS | Tilt | Parachute |
| Brake Left | LT | LT | L2 | L2 | Hold | Parachute |
| Brake Right | RT | RT | R2 | R2 | Hold | Parachute |
| Detach Parachute | B | Y | ⭘ | △ | Press | Parachute |
| Open Parachute | A | A | X | X | Press | Parachute |
Control Scheme Differences
We recommend using the Default Control Scheme if you’re a newer player. They’re more modern control scheme, making controls fairly straightforward, such as moving Sprint to a toggle on the control stick, rather than a face button.
The Left-Handed Control Scheme is very similar to the Default one, the only exception being that the function of the Bumpers, Triggers, and Control Sticks are swapped. Using Playstation controls as an example, controls normally on LS, L3, L2, or L1 are mirrored to RS, R3, R2, and R1 and vice versa.
I you’re a longtime fan or player of the GTA franchise, you may find the Classic Control Scheme preferable. It’s more or less the same layout that the franchise has used since the jump to 3D back in the PS2 / Xbox era including using a face button to Sprint.
Controller Settings
In addition to the multiple Control Scheme’s available, the Controller tab in the setting menu offers a handful of useful control changes, specifically for Aiming and movement.
Aim Sensitivity
You’re able to freely adjust the horizontal and vertical sensitivities for Looking and Aiming independently. This also include acceleration which speed up how quickly the camera reaches its max turn speed when adjusting.
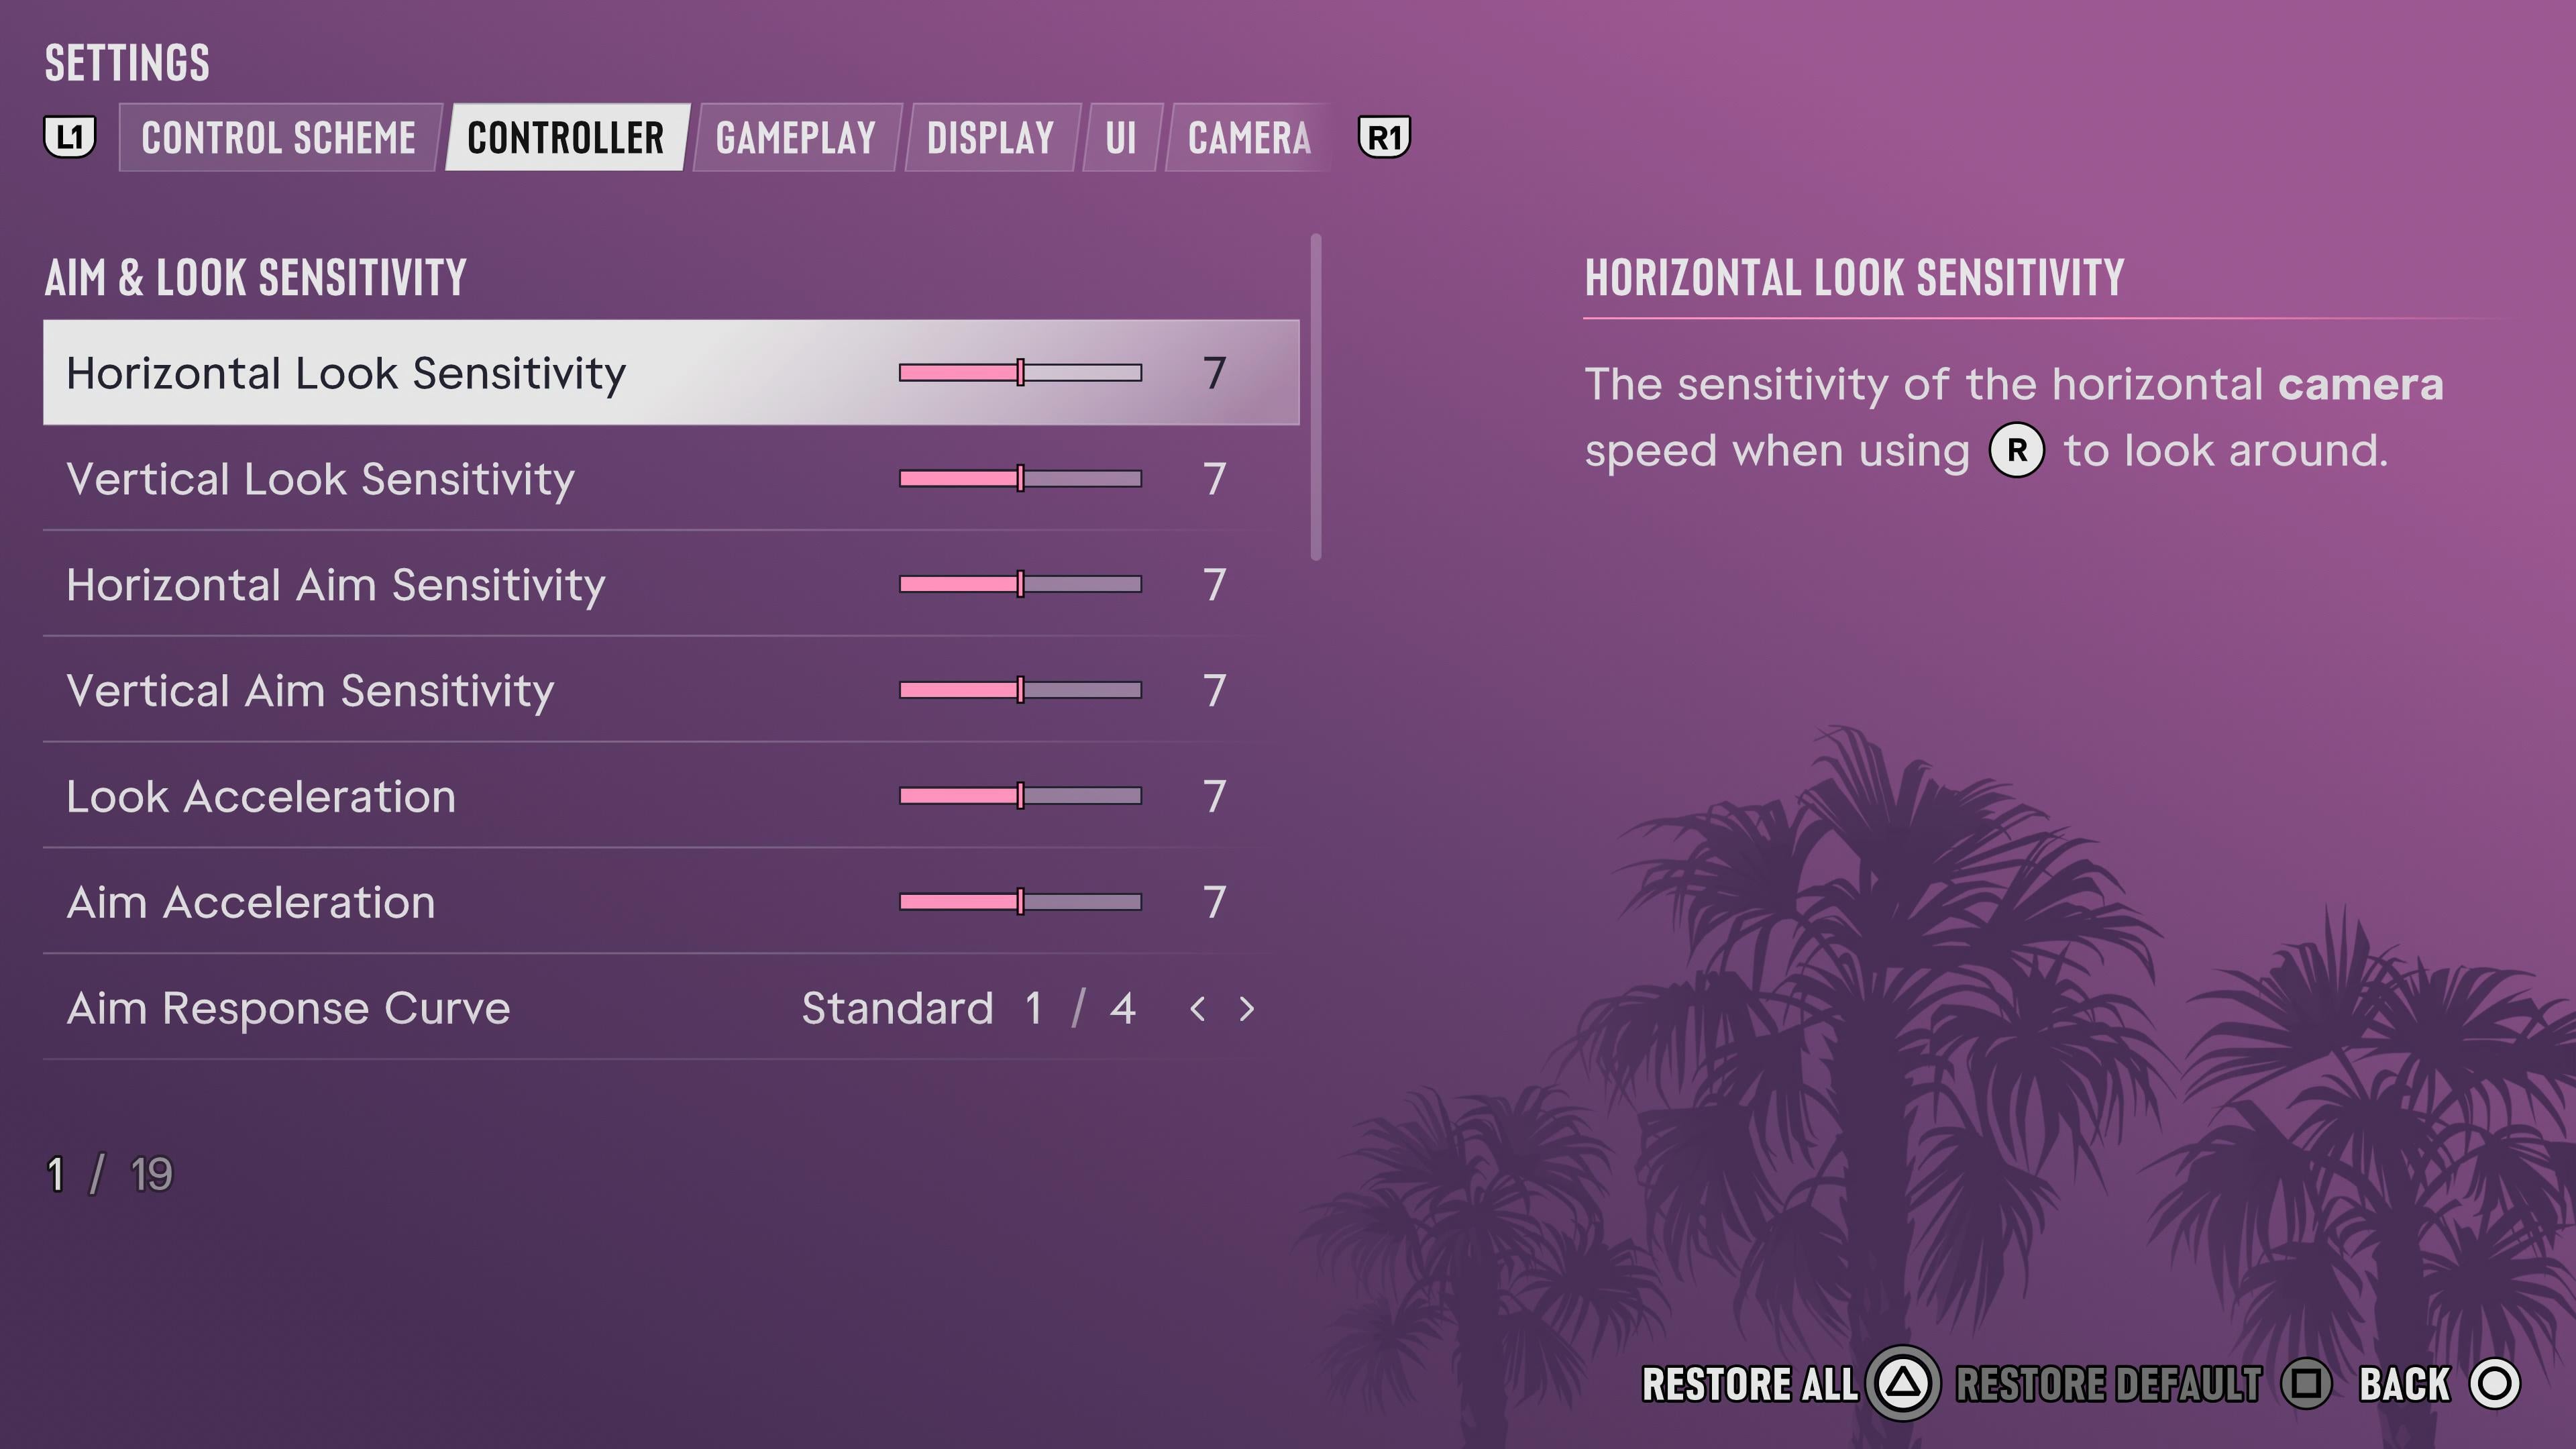
This also includes the option to reverse some aiming controls. Very useful in some cases, but generally depends on what you’re used to personally.
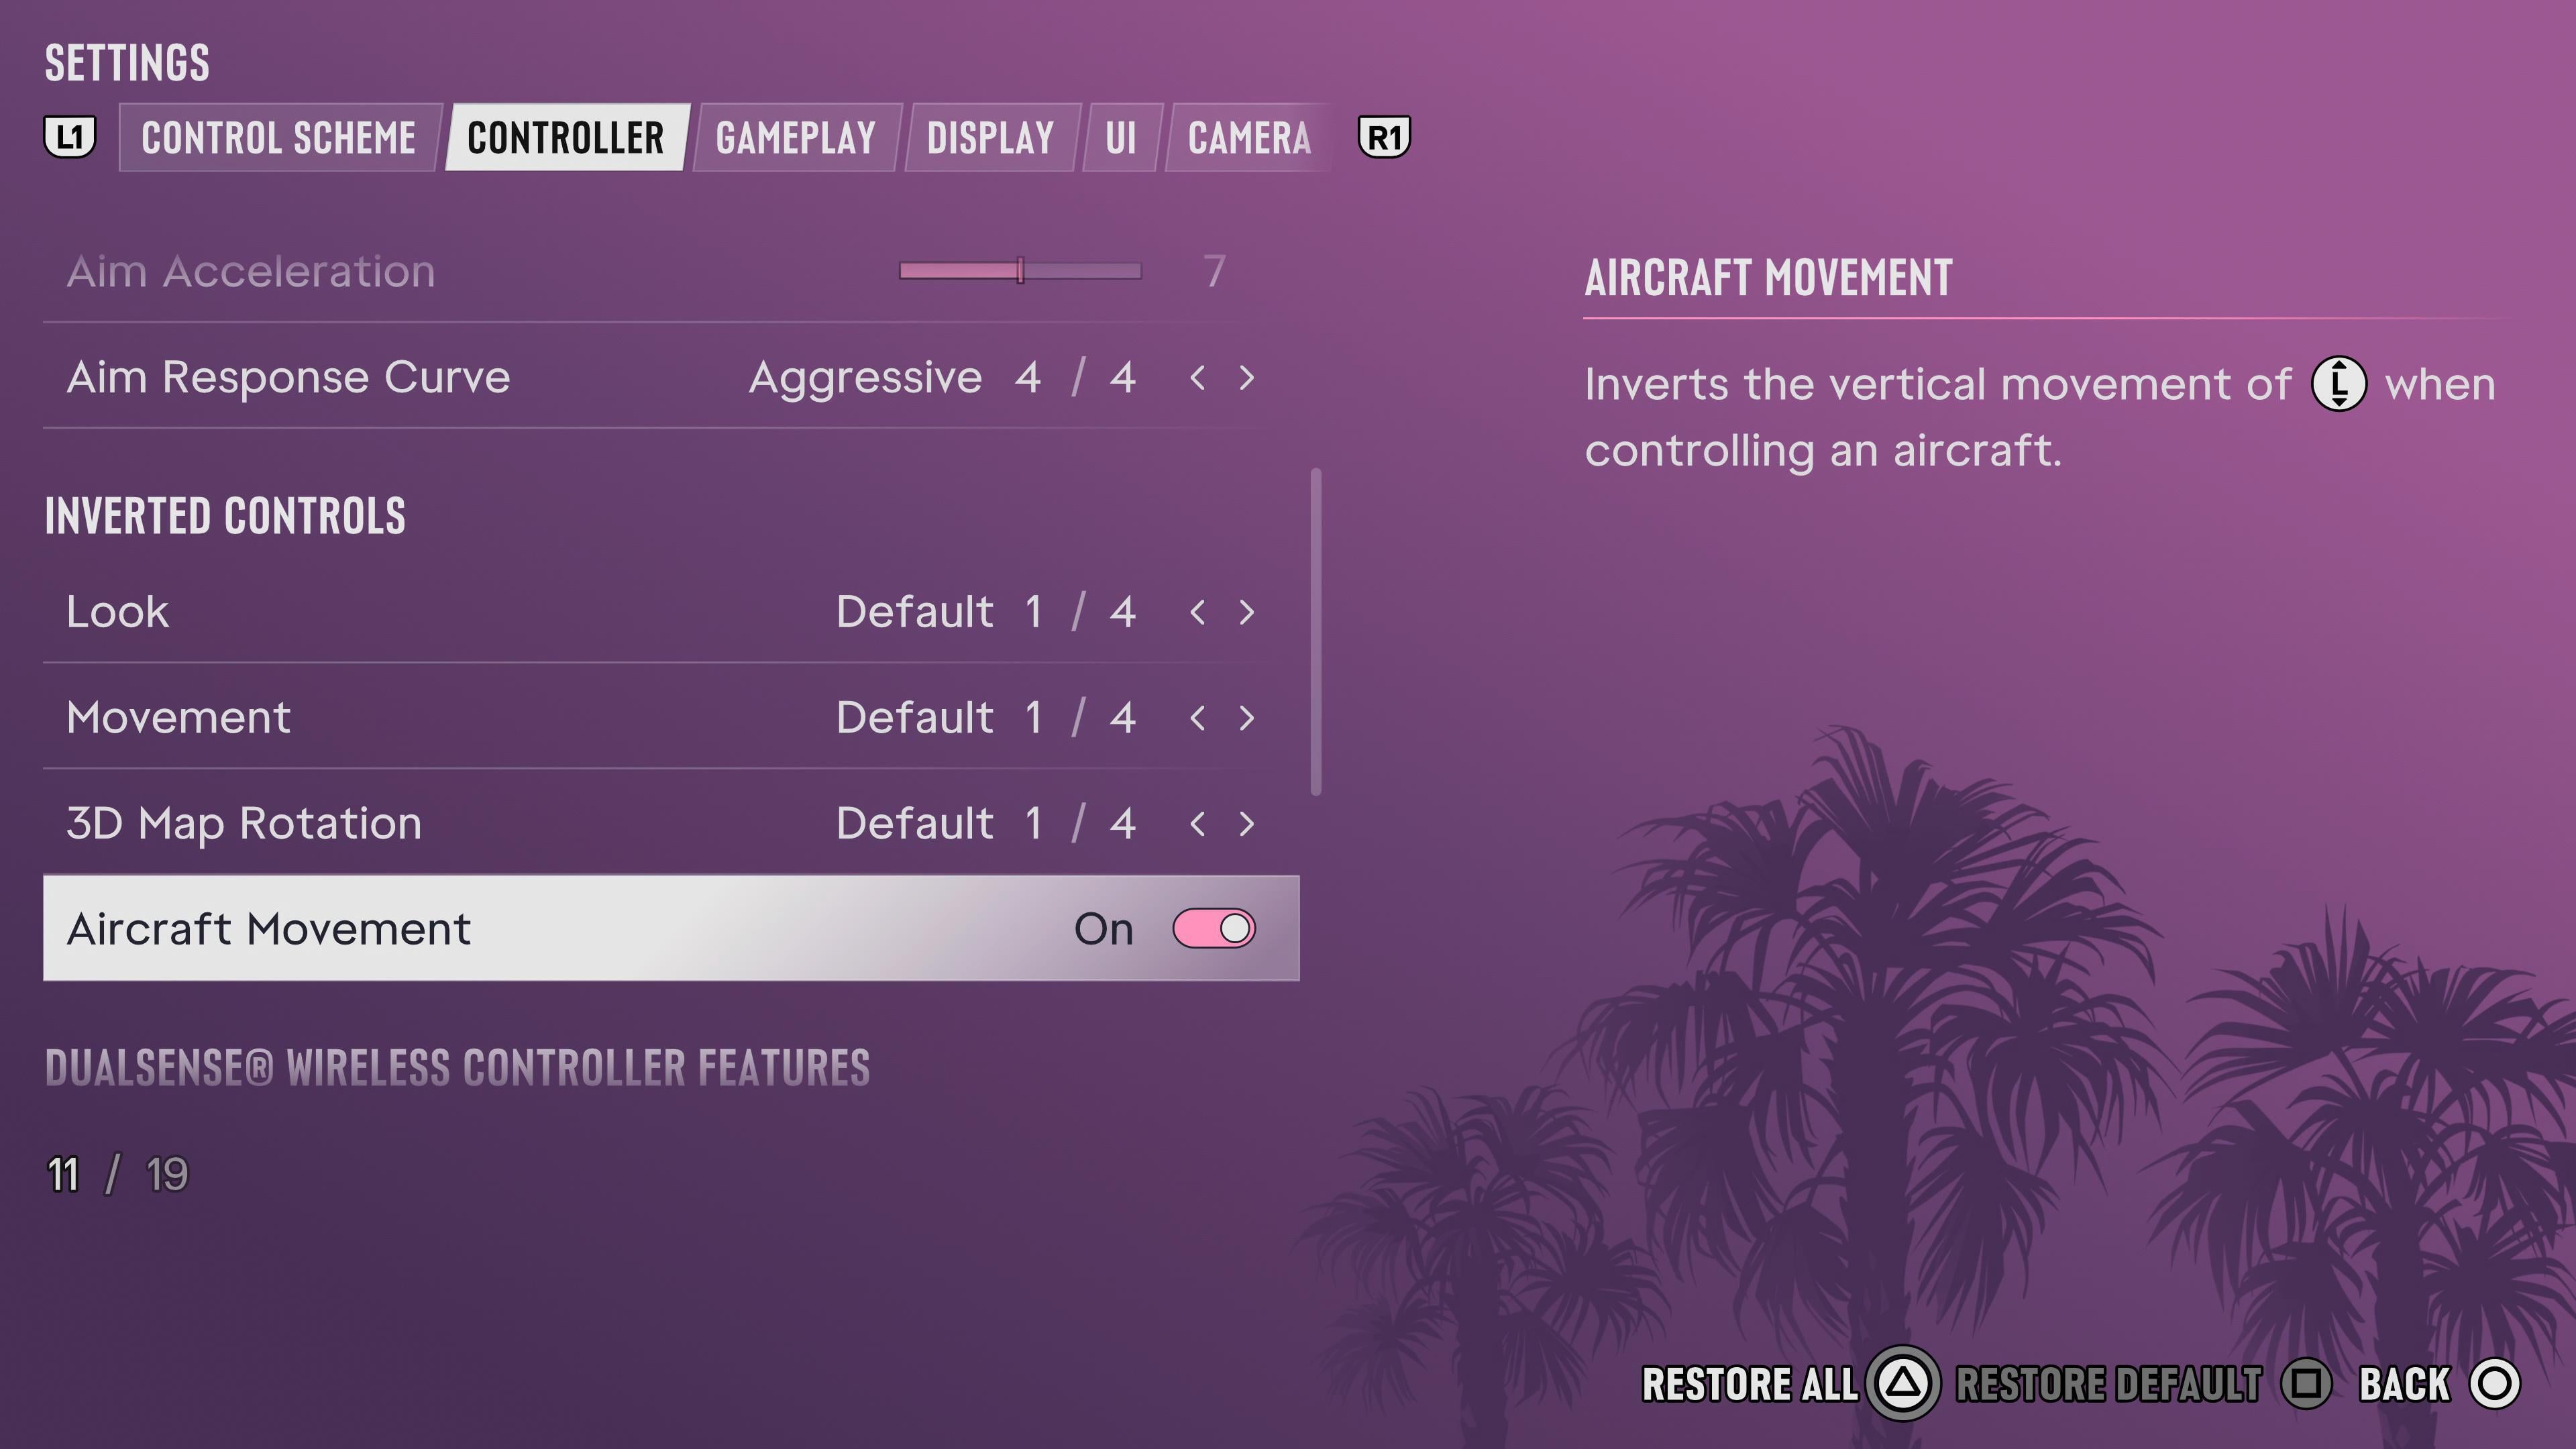
Aim Response Curves
Additionally, there are four different Aim Response Curves to adjust how aiming works and feels: Standard, Linear, Precision, and Aggressive.
The Standard curve is the default, providing a balance of speed and precision. This is the option I recommend, as it’s a very comfortable balanced option.
Linear matches your raw input, and s heavily dictated by how far you tilt the control stick. If you’re good at managing how far you tilt the control stick, this can be a very good option.
Precision responses slower to the control stick being tilted far in one direction, making precise aim easier at the cost of speed. It can be useful if you’re going for more of a passive playstyle, where the precision really matters.
Aggressive is the opposite of Precision, trading the precision for speed instead. Great for more aggressive approaches where that speed can be the difference between reacting in time or not.
Dualsense Features
The Dualsense controller for the PS5 has its own additional features that can impact gameplay as well. Most of these are pretty minor, such as adjusting the deadzones and what the Trackpad does when pressed.
There are some useful setting for the Adaptive Triggers, which can make cruising around and shooting feel much easier and more impactful.
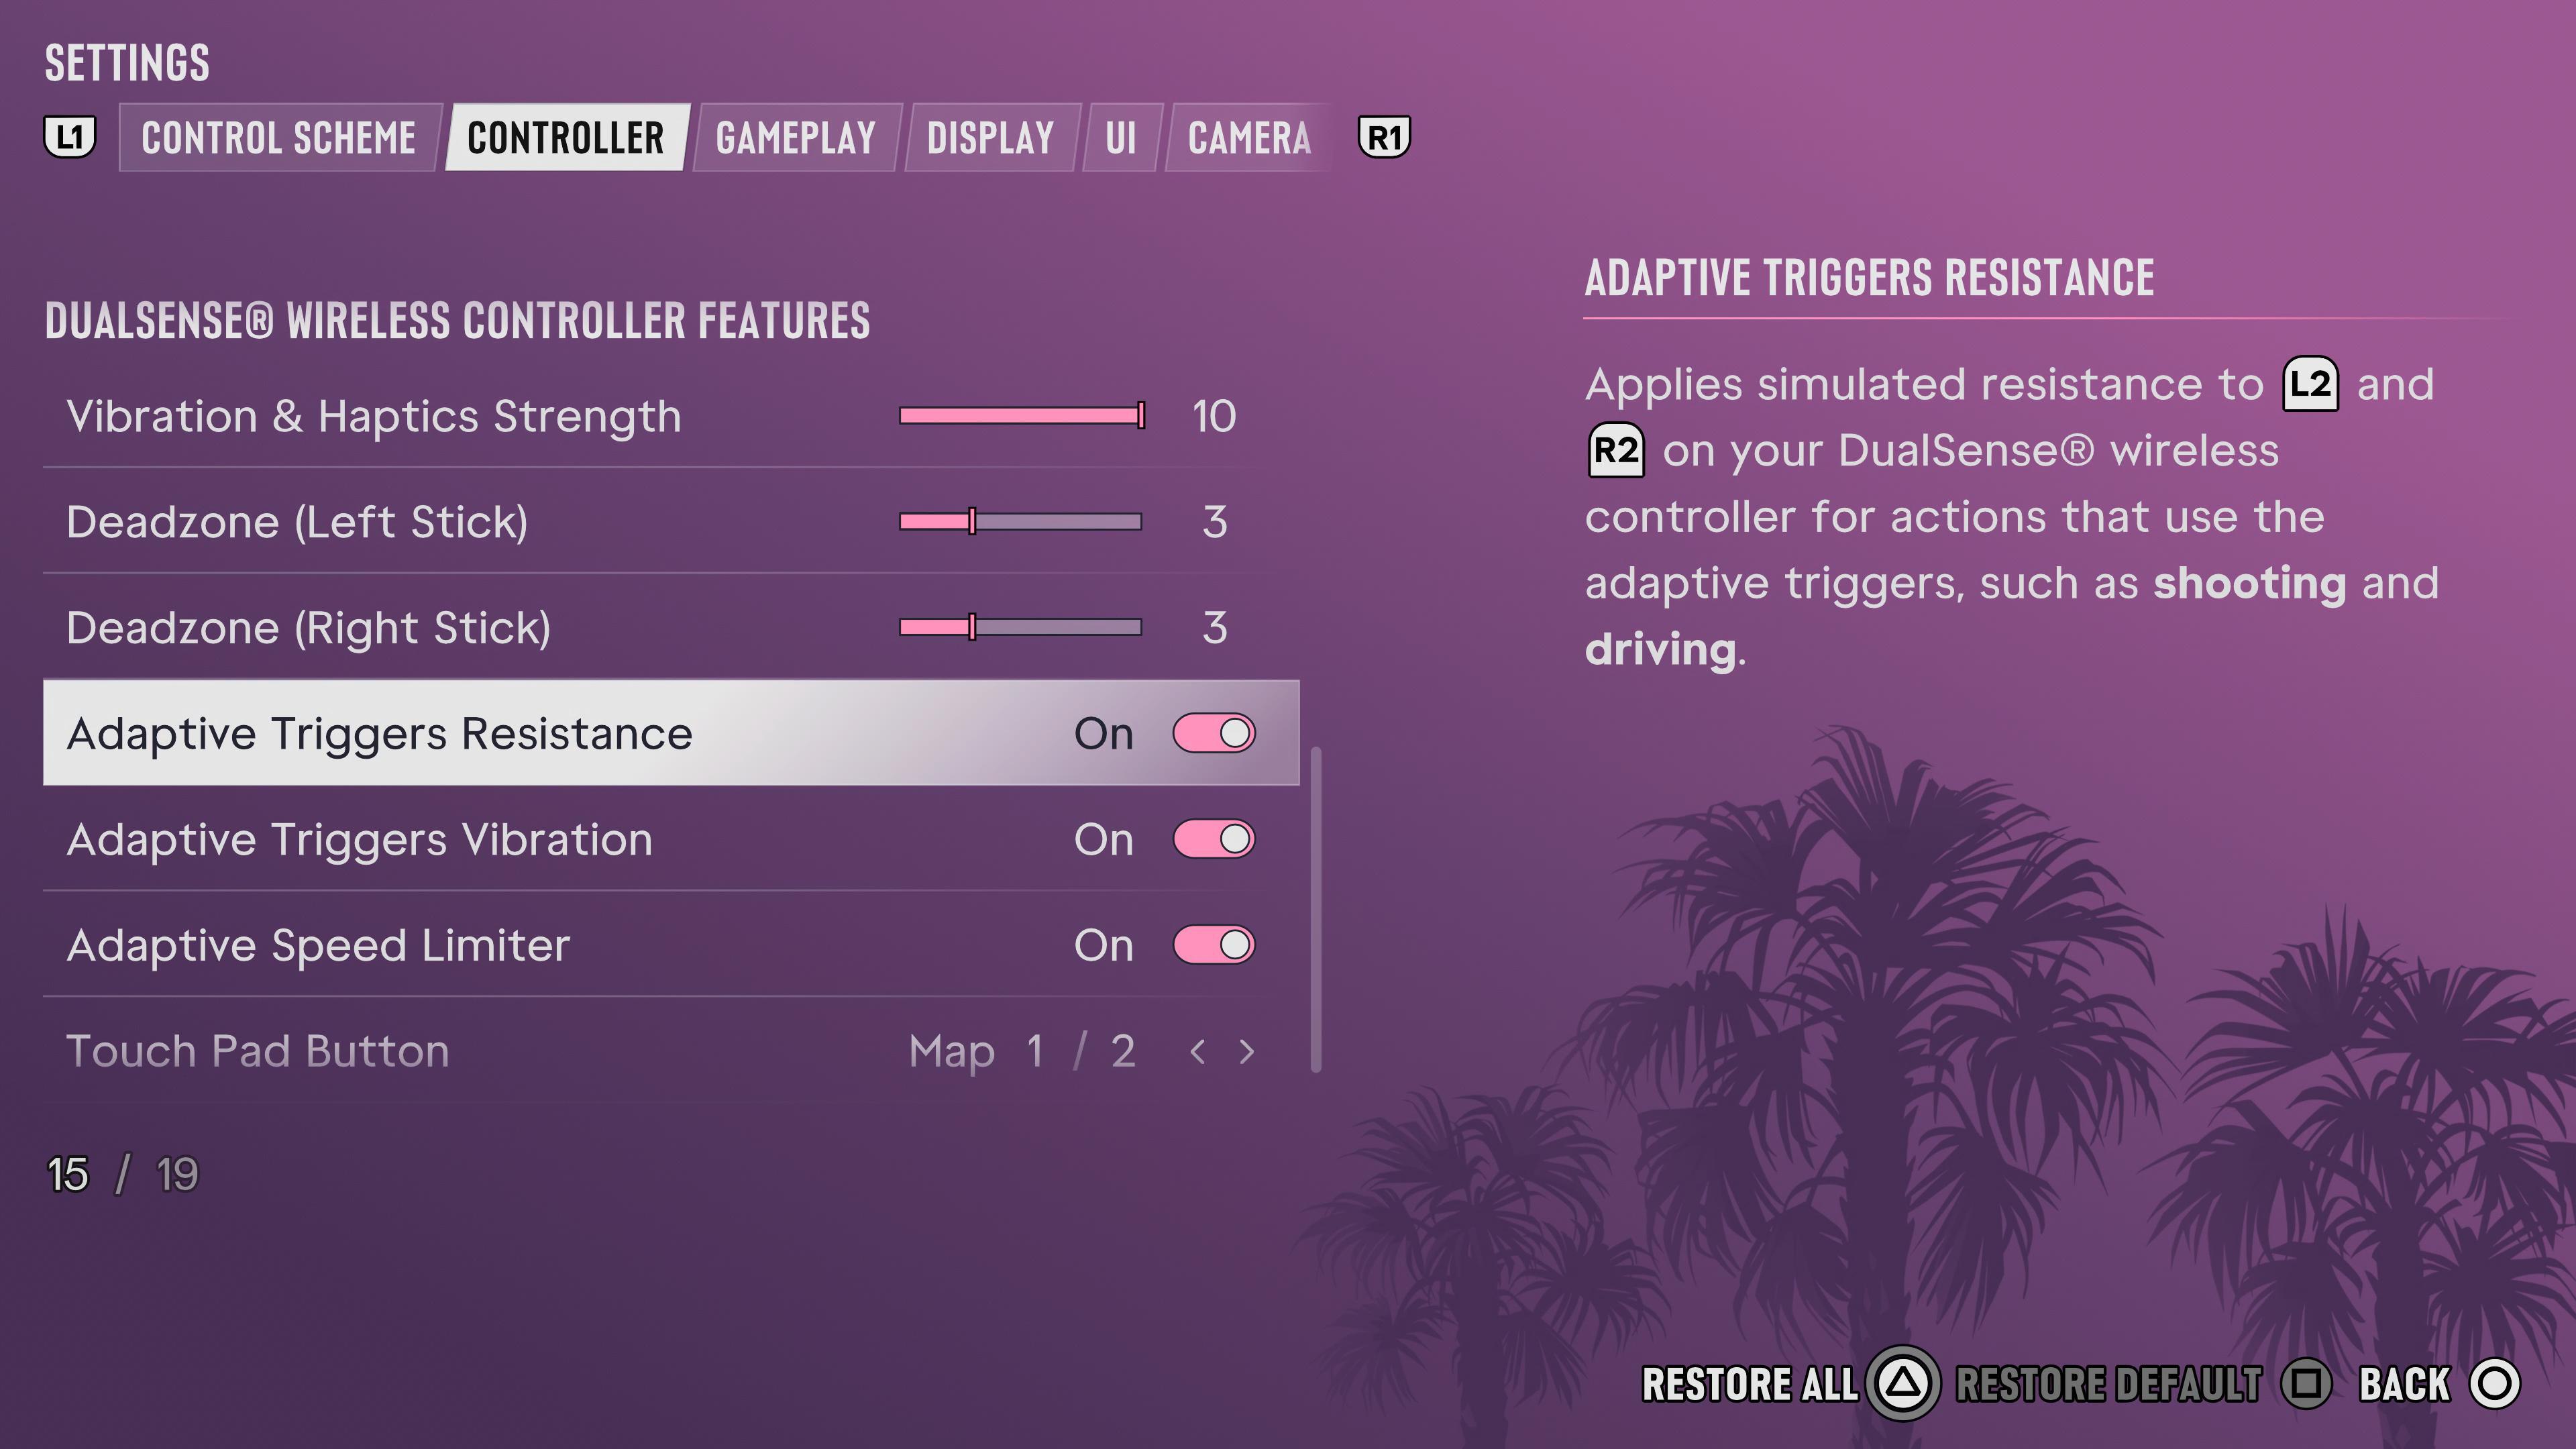
There is Adaptive Trigger Resistance and Vibration, which adds more feedback when pulling the trigger of a gun or simply how far you step down on the gas when driving. I recommend having these on, partially because the next setting requires them.
I’d say the most important one of these to have on at all times is the Adaptive Speed Limiter setting. If you’re not speeding around town, this can help immensely with just going with the typical flow of traffic.
Controls Tips and Tricks
To round off this guide, we’ll cover a handful of useful tips that let you get the most out of the options provided.
If you’re playing on a PS5 or otherwise using a Dualsense Controller, it cannot be stressed enough how good it feels to use the Adaptive Trigger features. They’re on by default, and you’ll definitely notice them missing if you turn them off.
Additionally, if you have a Dualsense Edge Controller it can be worth changing some of your buttons to your preference, or make certain controls, like Focus, a single button without the use of the accessibility setting that moves it to the Trackpad
In the Options for Inverted Controls, the toggle for Aircraft Movement can make flying a bit more intuitive if you’re not used to the typical control scheme for them, which has you tilt down to make an aircraft ascend. Inverting will making you ascend with you tilt the stick up, which can feel more natural for a less experienced player.
For many of GTA VI’s higher acceleration cars, which include Jason’s Ganado that you’ll drive for much of the early game, it’s a good idea to accelerate slowly, as you’ll have more control and spin out far less when starting to take off. It can make a difference between a clean escape from a situation and not.
Similarly, slowing down to take corners helps a lot when you’re trying to evade the police. There are a lot of times where the handbrake can make this quicker as well, but if you’re going too fast and trying to turn too quickly, you’ll spin out.
If you’re going a less lethal route, using the Precision Aim setting is very useful. Just keep in mind that you’re also aiming for the arms or legs to incapacitate, where in most situations, one or the other will be exposed. If you wan to go without it, you may find yourself leaning on your Focus ability more.
Gameplay Settings
The last tab of the setting menu that has a noticeable impact on gameplay. Here there are a handful of options to help with getting around faster and making combat more comfortable.
Targeting
In this menu are three targeting settings, that adjust how strongly you lock on to enemies: Lock-On, Partial, and Free Aim.
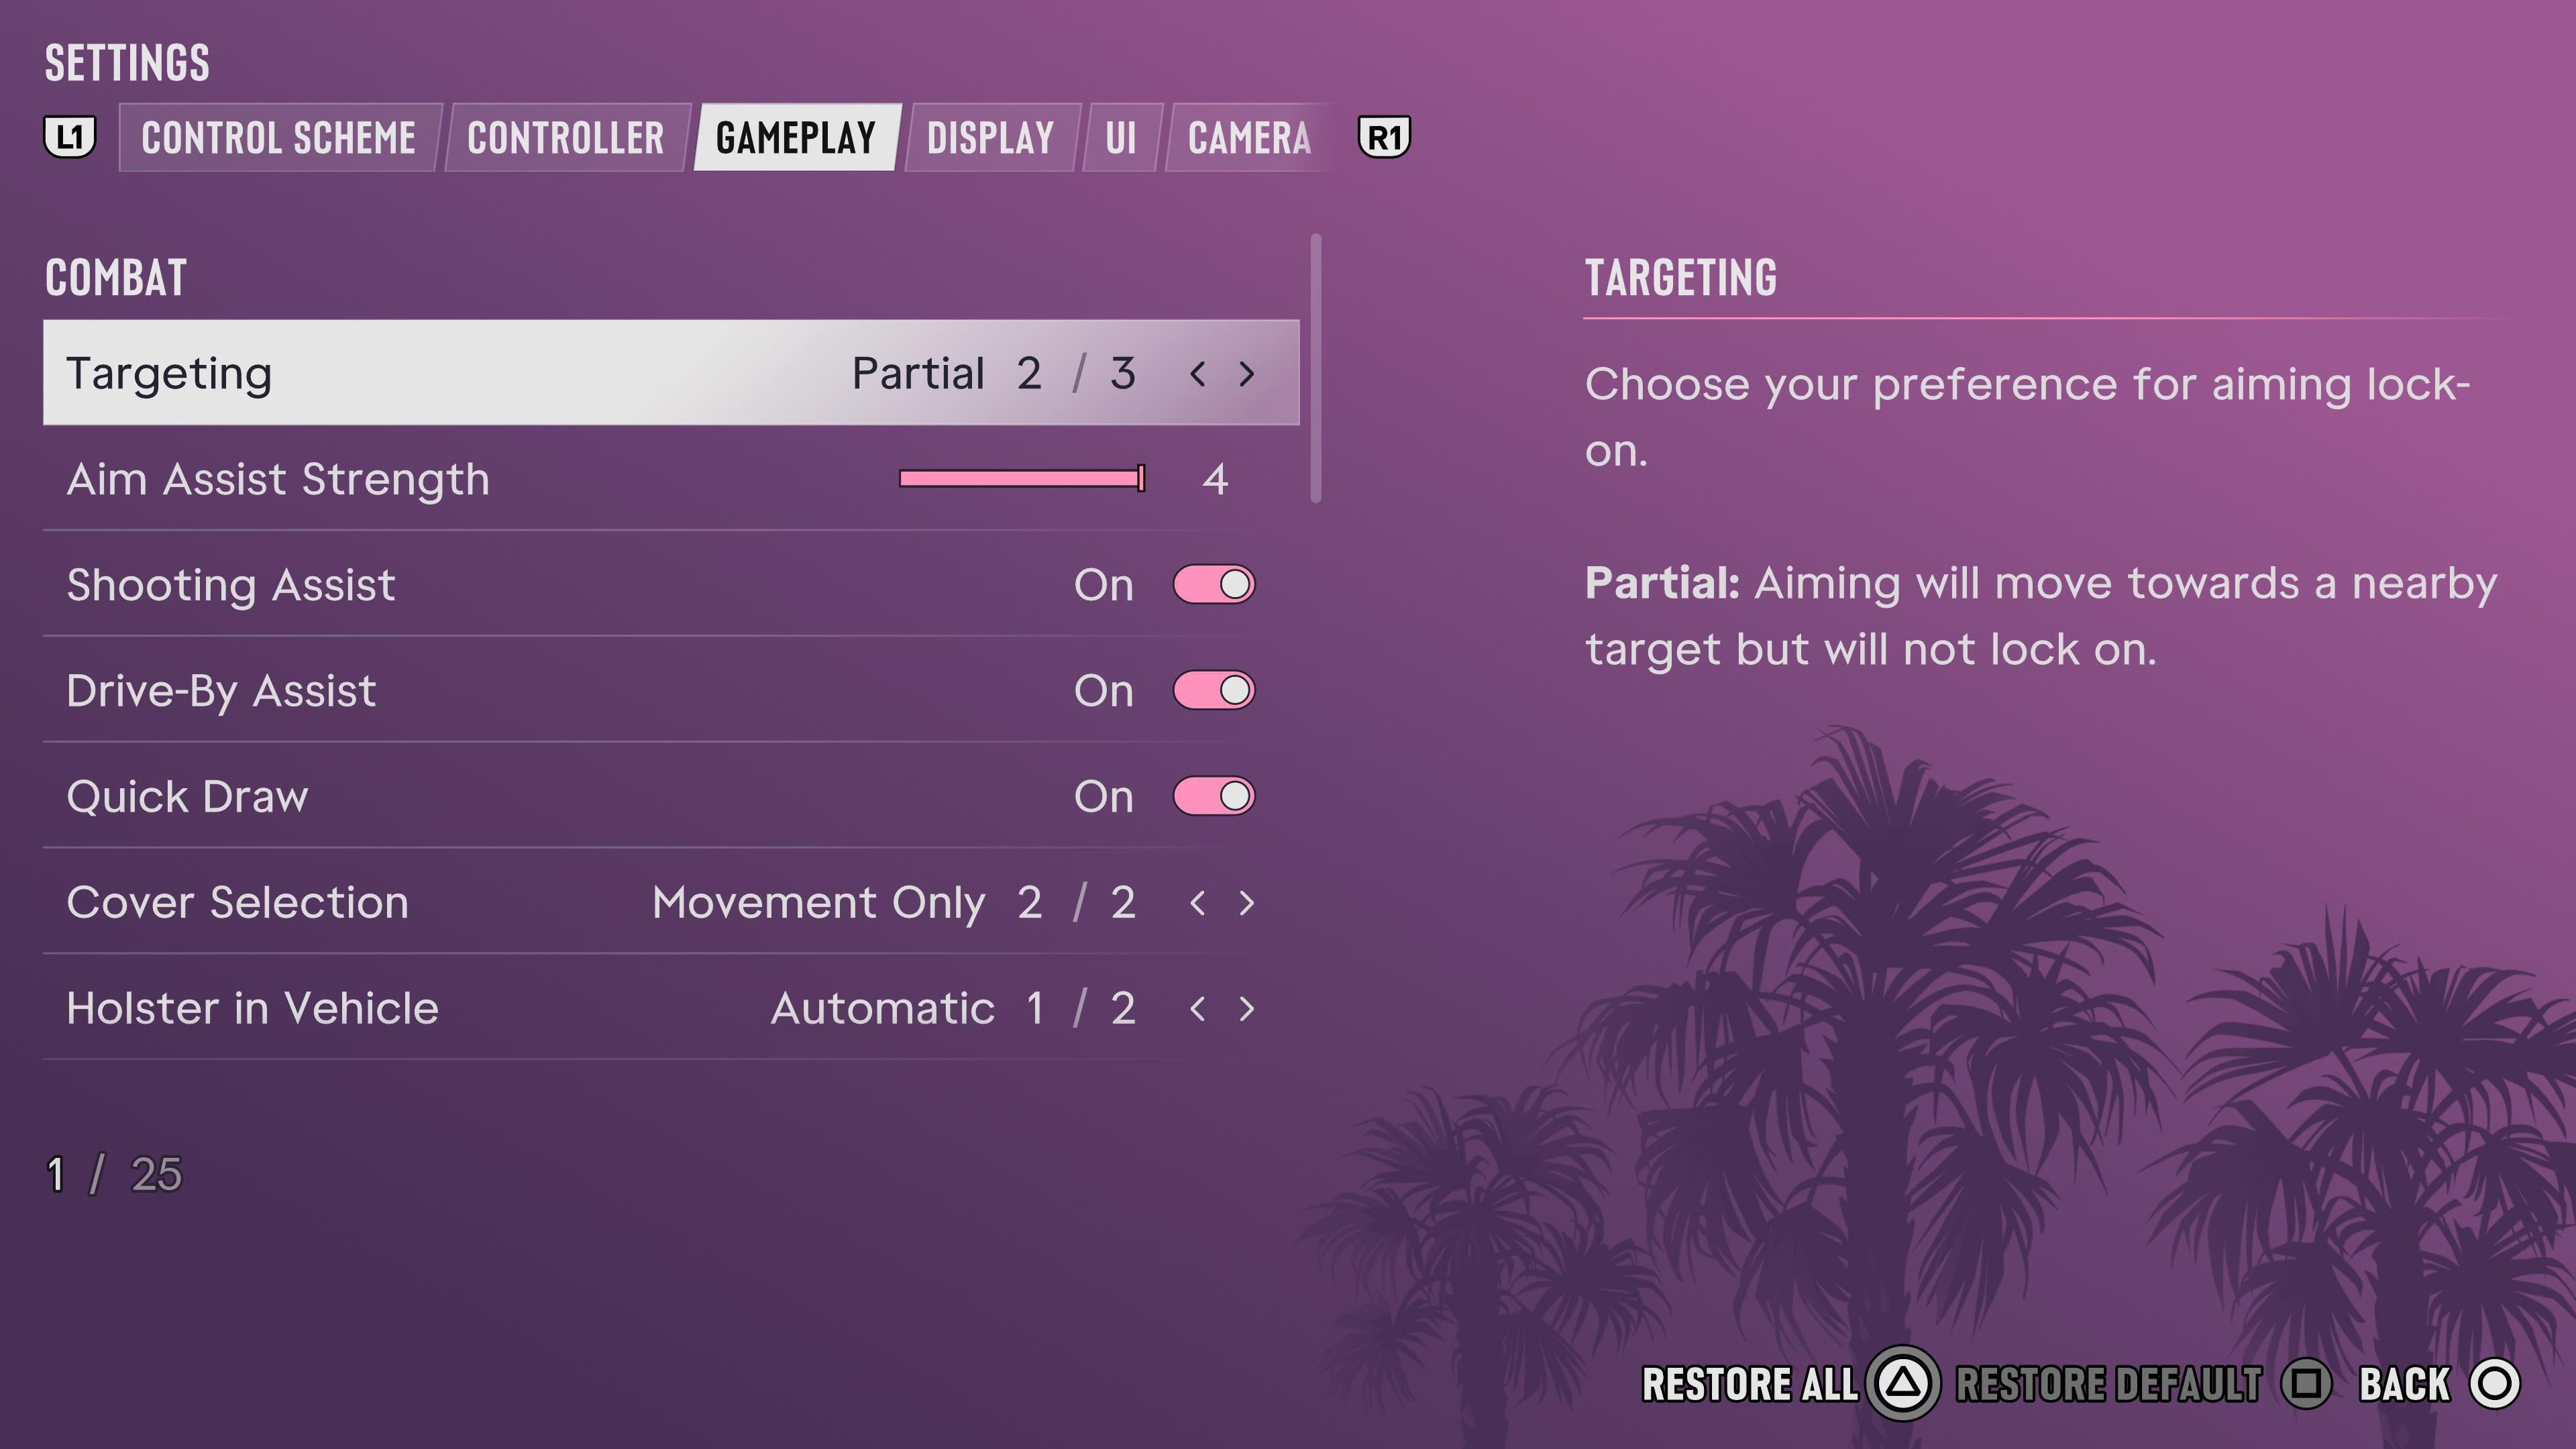
Lock-On will always try to correct your aim towards the nearest target. This may not always be to the specific place you’re trying to aim though. Really nice for players not fully used to aiming on console.
Partial is a softer lock-on, where it will help adjust your aim, but not forcibly lock on to a target. This is the default, as well as our recommendation and it provides help, but no so much so that it limits your control.
Free Aim will not lock on nor will it guide your aim at all. I’d only recommend this if confident in your aiming with a controller.
Additionally, you can adjust the strength of the Aim Assist to make it more tolerable as well.
Cover Selection
This is a mino setting all things considered, offering to forms of how different pieces of cover are prioritized in combat.
The default option here, Movement and Camera, is decent, but can lead to you jumping behind cover you didn’t intended to. Since the Camera also influences it, you can’t rotate the camera much in combat to try and readjust around cover as easily.
Movement Only is our recommendation, as it allows free use of the camera in combat without in influencing where you take cover.
Movement Speed
These options allow you to set a faster movement Speed when the control stick is fully tilted.
Your non-combat Movement Speed is set to Walk by default, meaning you always need to press Sprint button twice to actually go into a full sprint. We recommend setting this to Jog, so that way tilting your stick gives you all three speeds of movement, and you only have to press he control once to go into a sprint.
There’s a separate setting for Combat as well, which we recommend setting to Run, as it makes it much easier to move from cover to cover as needed when paired with turning on the Run & Sprint Toggle below it, which will make you stand when you Run.
Accessibility
Tap Assist is by far the most important option here, which allows you to replace a single tap with multiple to reduce mashing during certain events, or swapping it to a hold. We recommend swapping this to Hold, unless you’re comfortable with mashing.
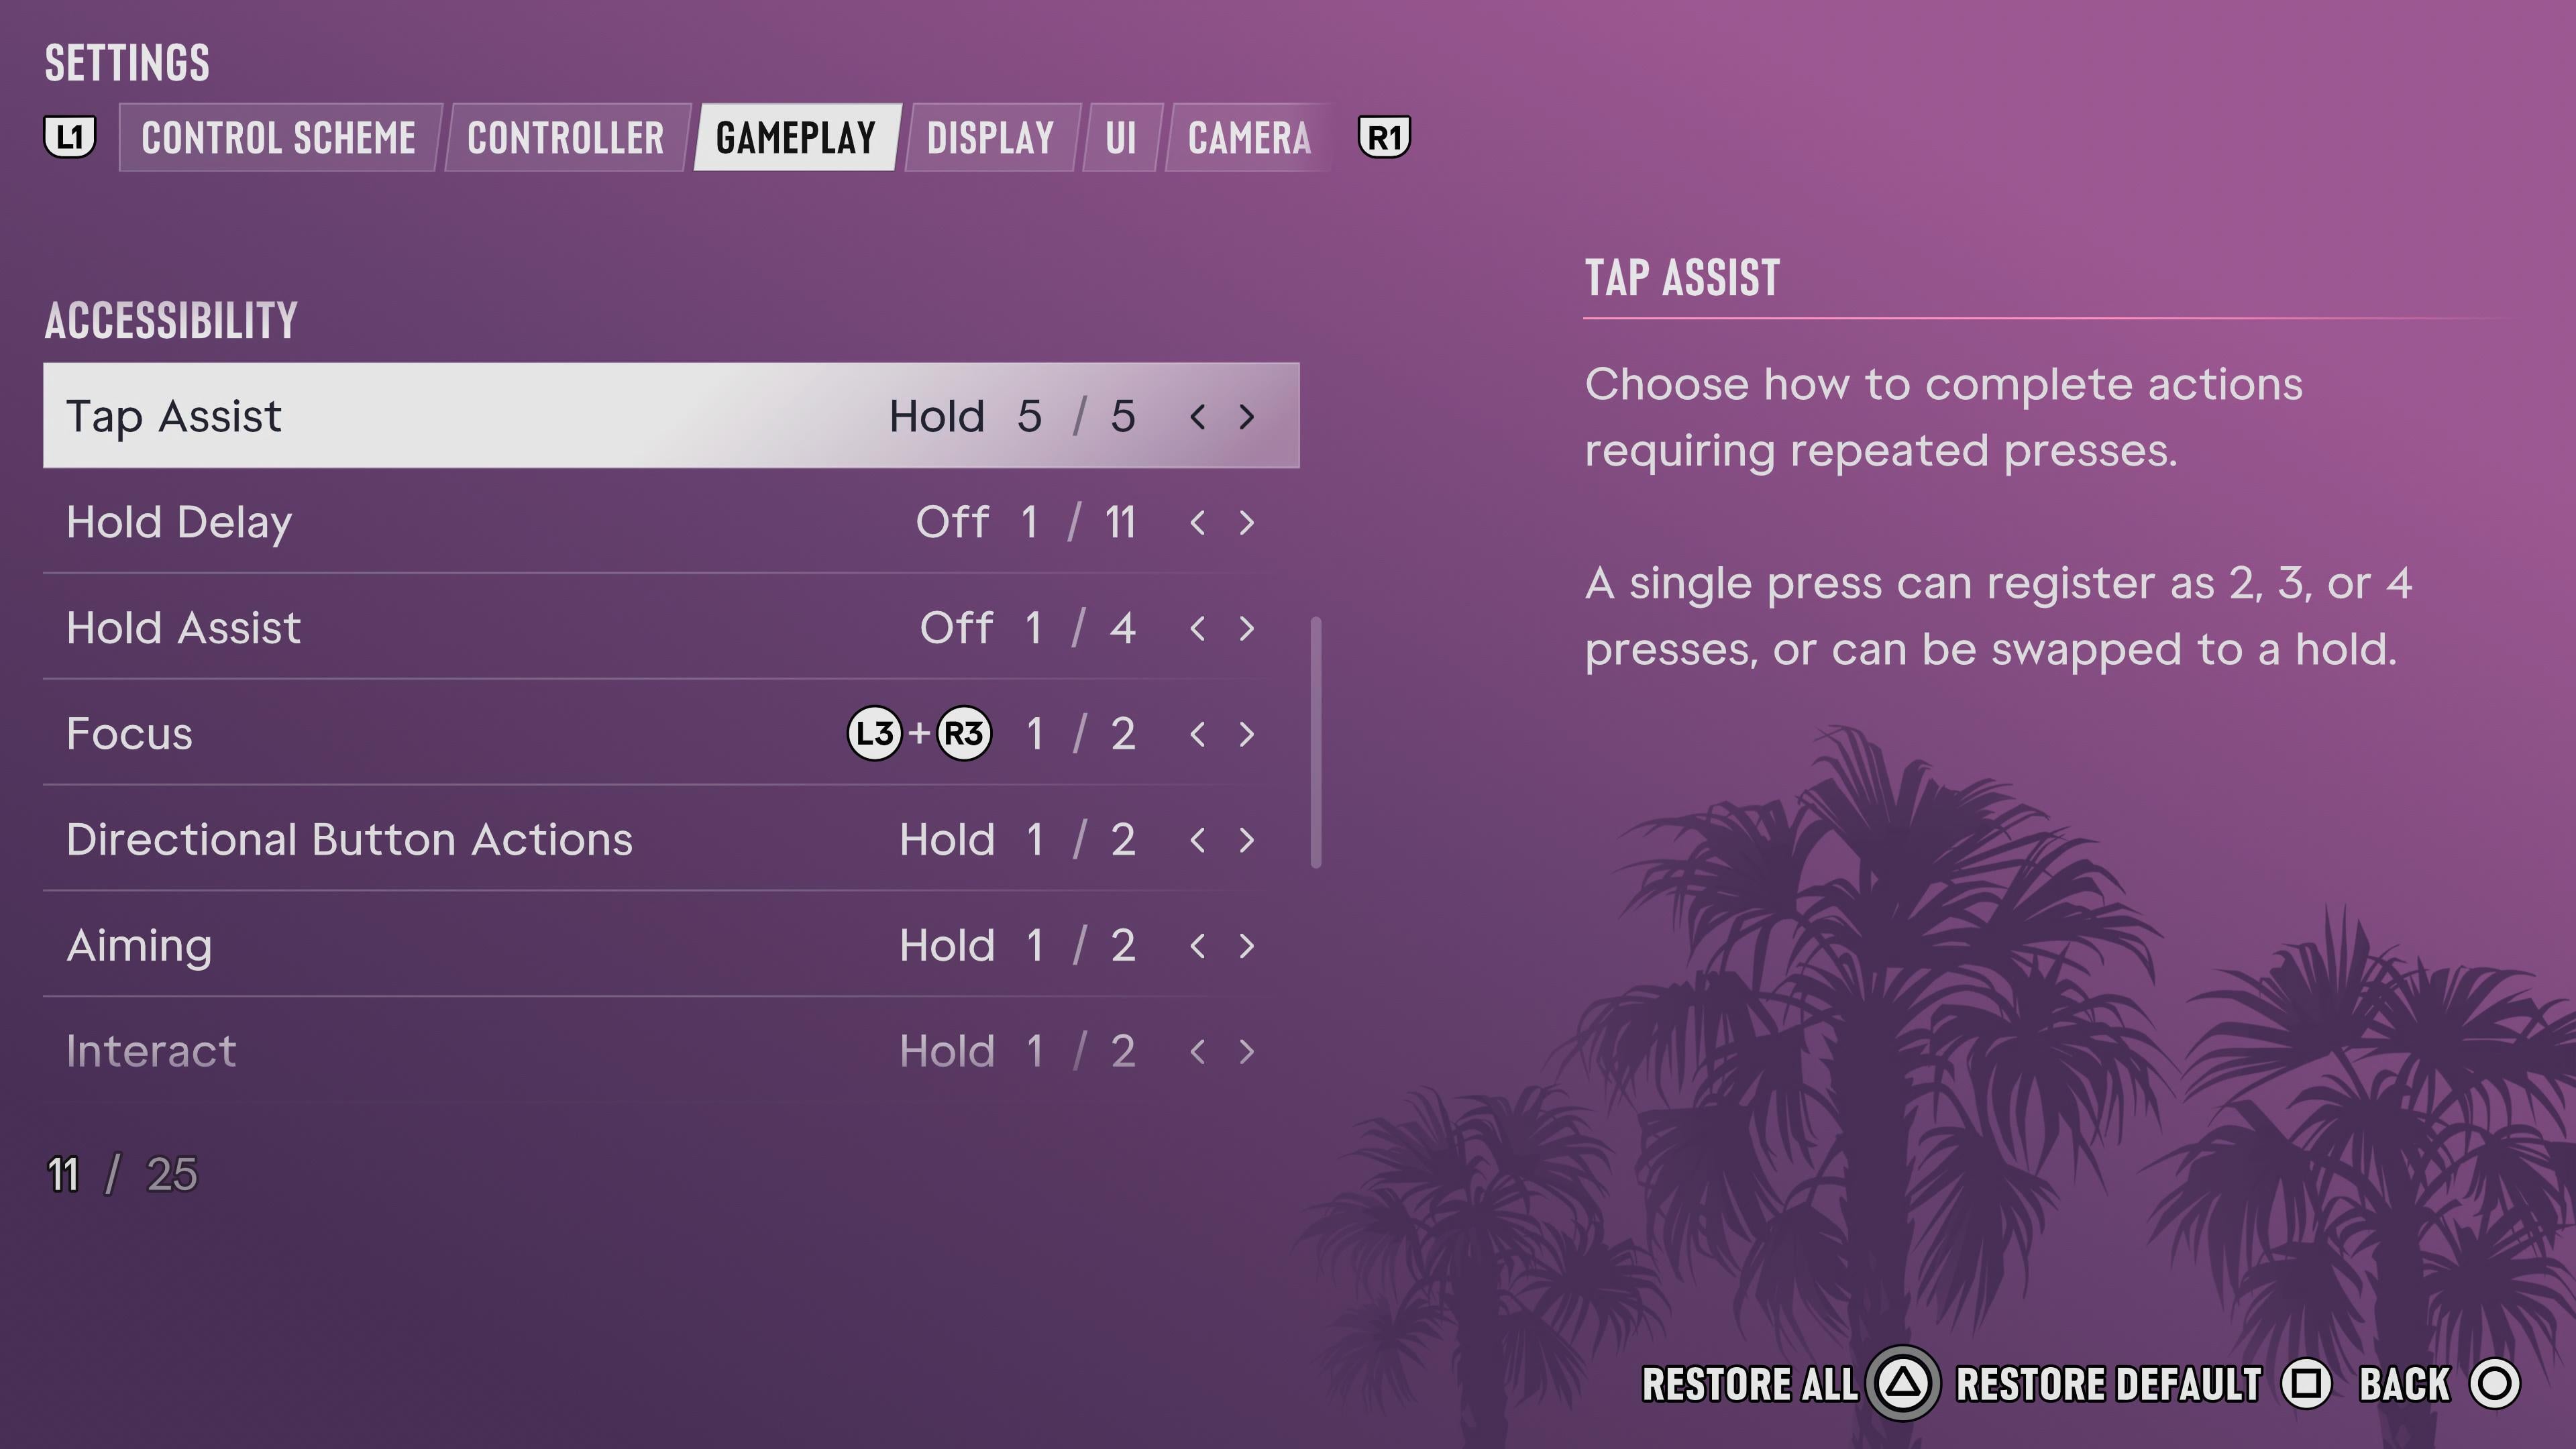
You’ll also find many of the option to toggle between Press and Hold for action such as Aiming or Interacting. Set these as you see fit, they can be helpful even if you don’t need them purely for accessibility reasons.
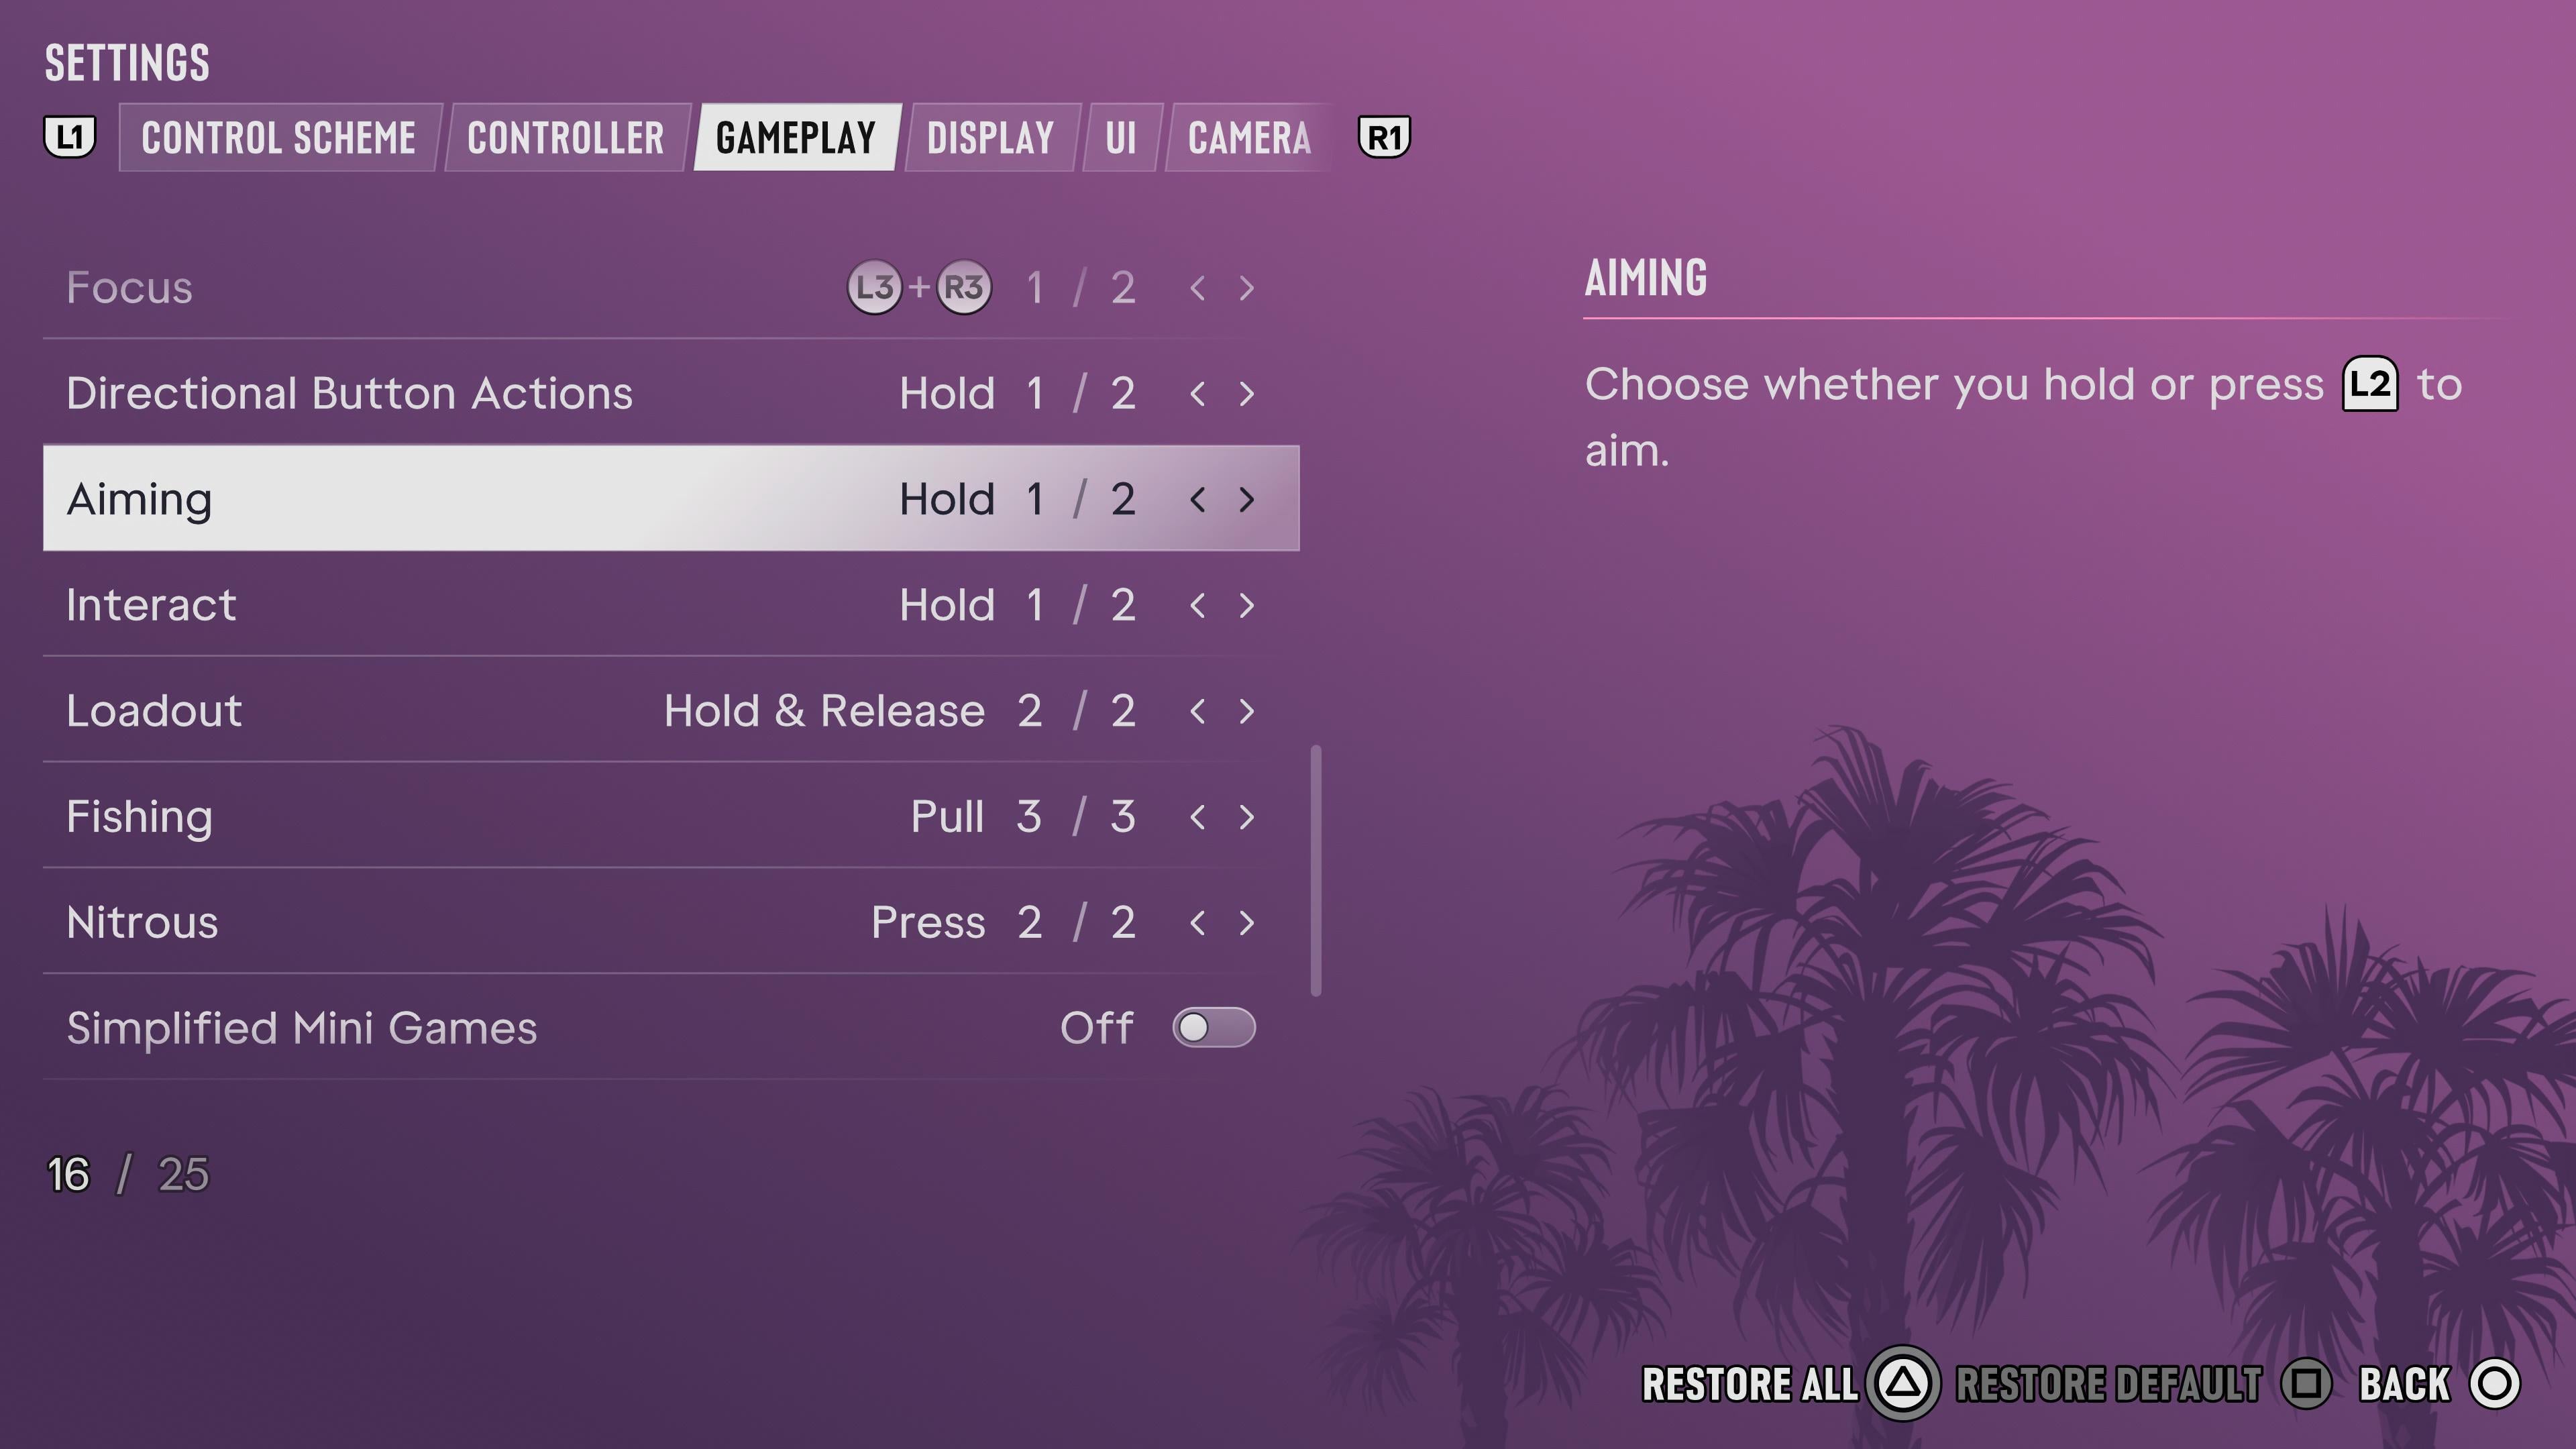
Simplified Minigames is also a useful setting as it reduces the inputs need for certain minigames which require multiple controls, fine motor control, or timed inputs, making them easier to complete. Similar to the other controls here, use it if you want, it makes things faster and easier even if not for an accessibility need.
Accessible Combat
These last two are included under Accessibility, but function more like difficulty Modifiers, as they adjust the health and damage of you, your car, and the enemies.
Accessible Combat will reduce the damage you take as well as reduce the health of enemies to make them weaker when toggled On. This gives you a lot more breathing room and time to think in combat without as much punishment if you need it.
Reduced Vehicle Damage simply makes your vehicle harder to destroy or disable. Similar to the Combat option, this is very good to use for sections that require driving and shooting to give you more time to think and engage the enemies better.