Everything you need to know about winning Crimson Desert’s Orb Roll minigame, including instructions on how to beat every level and what rewards you get for beating it.
Use the Table of Contents, located in the left panel (top left button on the mobile menu) to navigate through this long guide more easily and quickly.
What is Orb Roll?
Orb Roll is basically tabletop mini golf/putt-putt that was added with Update 1.10.00. You have to aim, charge, and fire a ball from a set position to get it into a hole. There are 50 different levels that get progressively harder.
You have to get a hole-in-one, but you have 10 lives to start and gain an additional life for every 5 Cubes you manage to hit. Cubes are random-ishly strewn about the board and do not respawn between attempts.
Where to find Orb Roll Minigame?
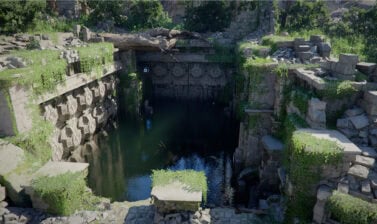
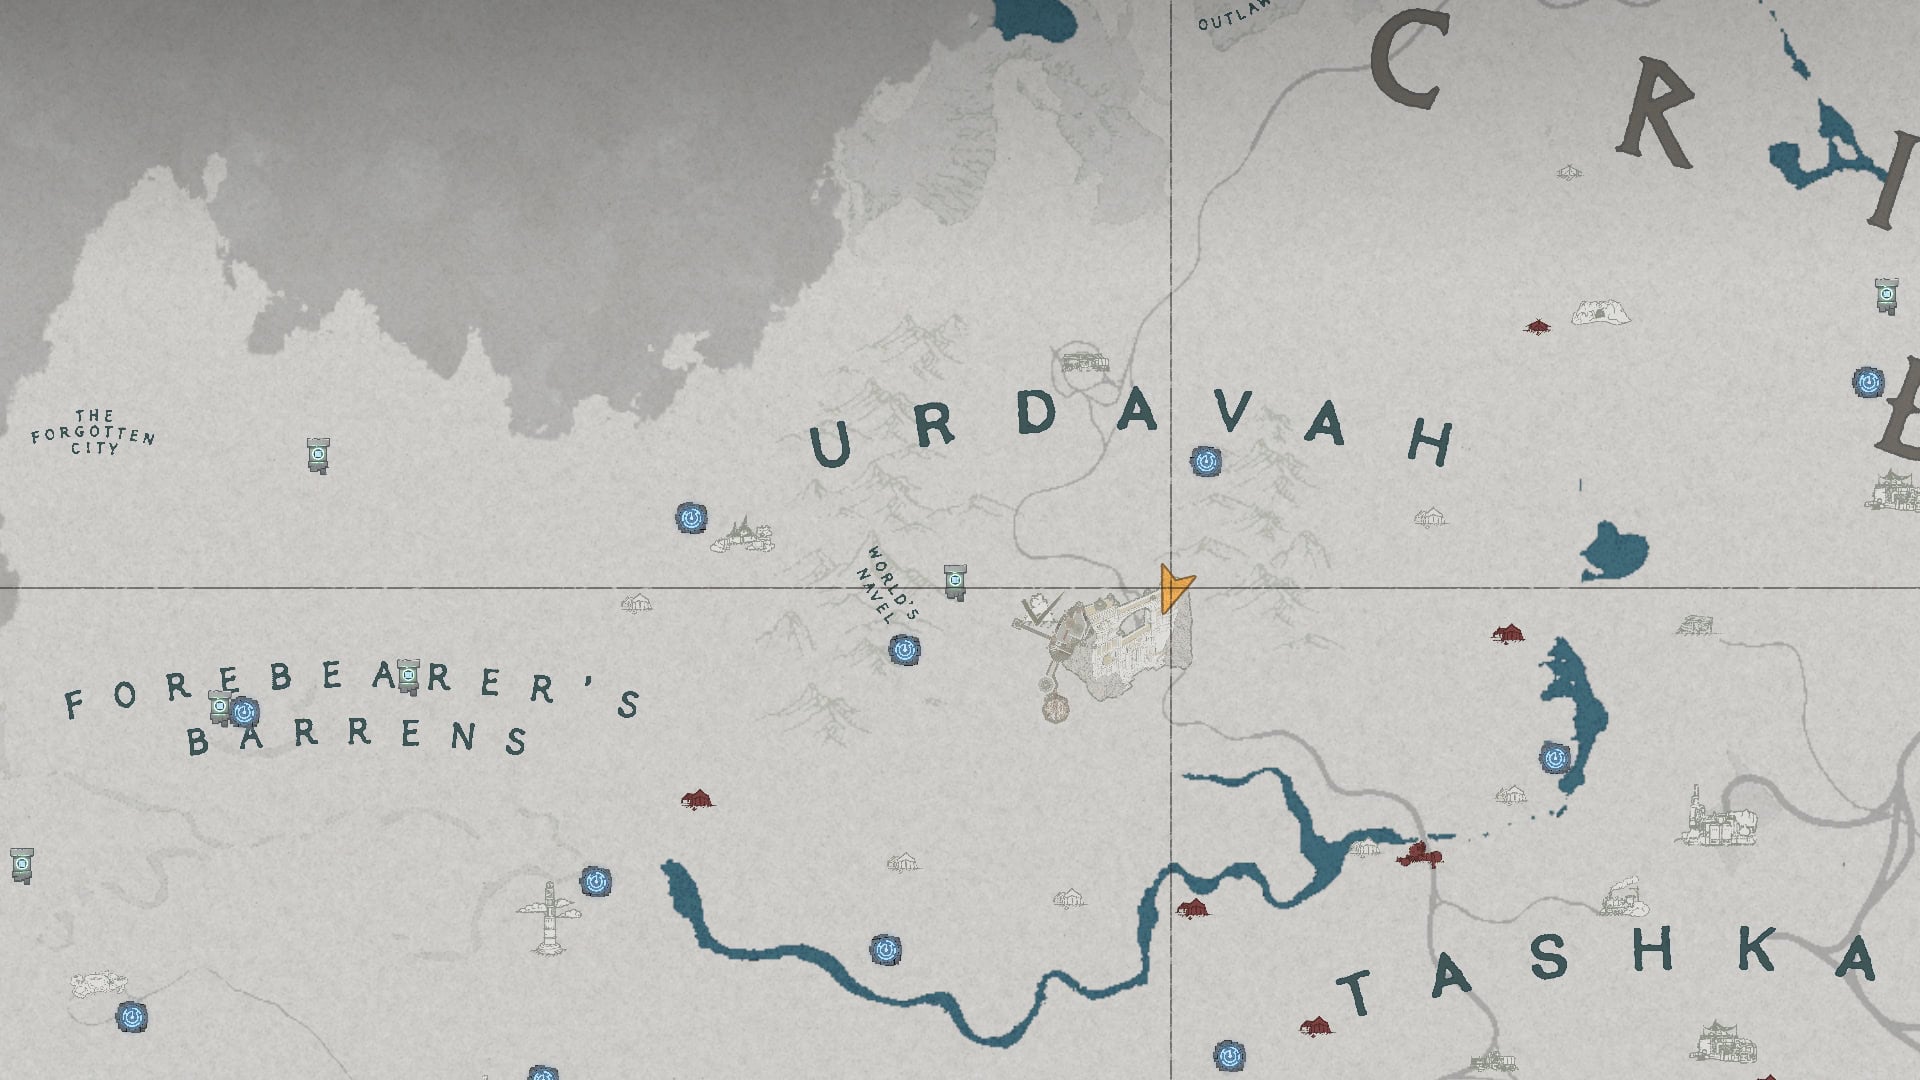
You can find the Orb Roll minigame atop the east side of the Great Gate of Urdavah in the western wastes of the Crimson Desert in the room where the roof opens up.
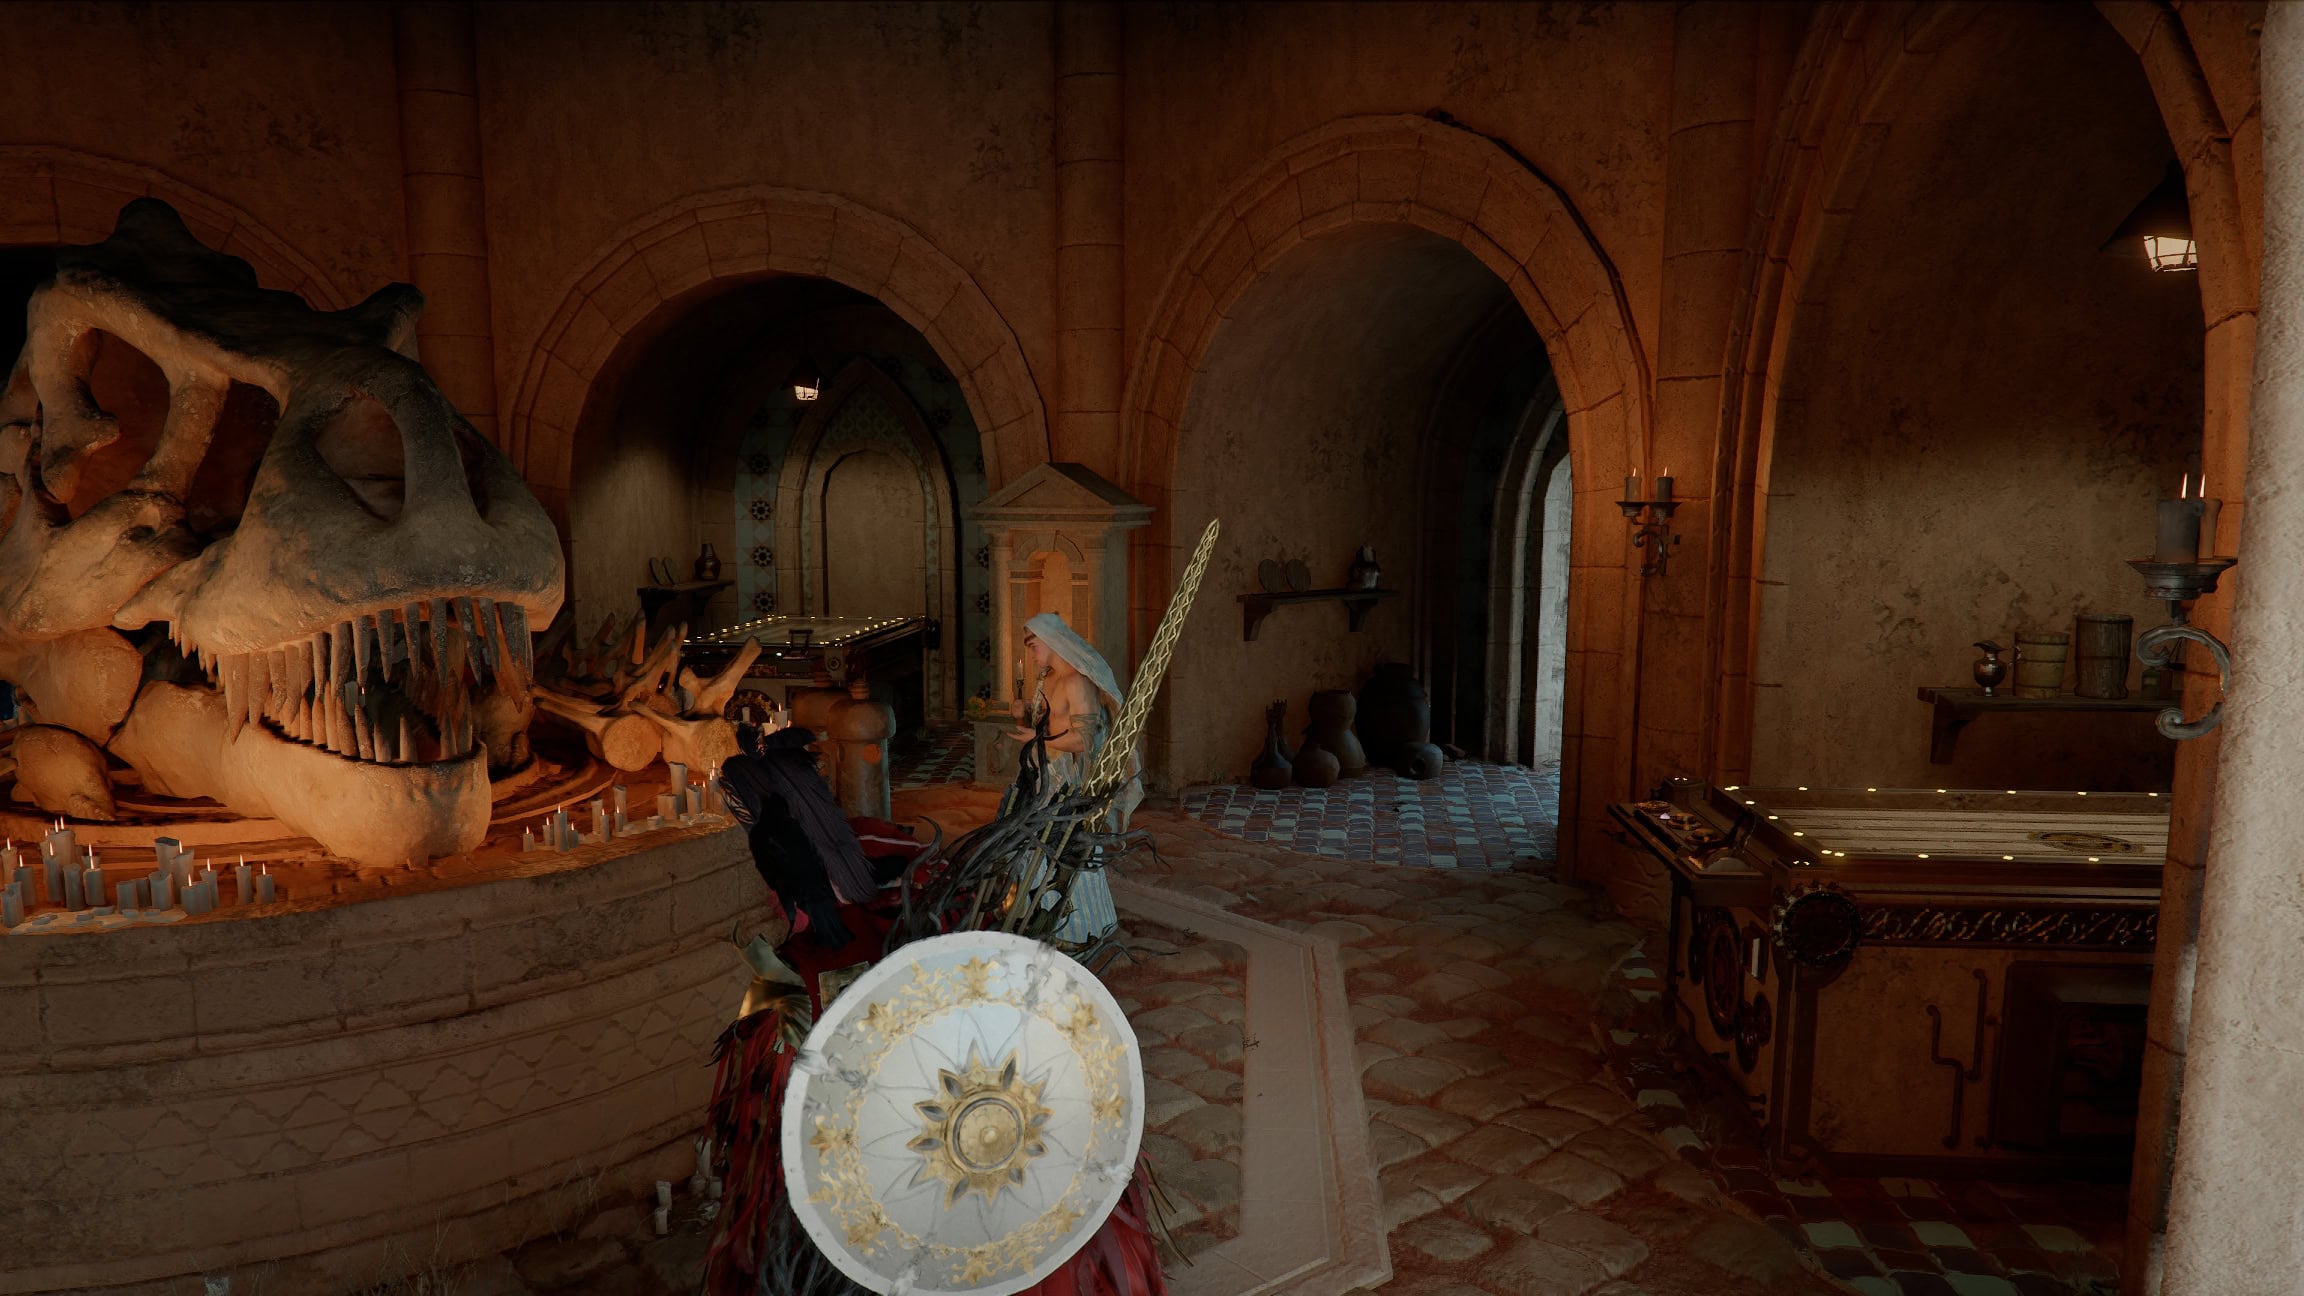
You can reset with a fresh attempt at the current level at any time or exit before you’ve run out of attempts, but this is an arcade game, so your progress does not get saved. If you want to beat level 50, you have to do it all in a single sitting.
Orb Roll Minigame Rewards
Every 10th level is associated with a Challenge in Continued Journey → A Fragment of Forgotten Childhood, Toy, so you get rewards for completing Levels 10, 20, 30, 40, and 50. Rewards include Abyss Artifacts, Furniture (carpets and ceiling lights), and boxes with random good materials inside.
| Icon | Reward | Requirement | Challenge |
|---|---|---|---|
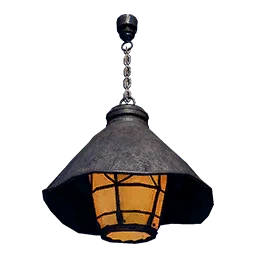 | Twilight Lampshade x1 | Level 10 | The Beauty of Angles |
 | Abyss Artifact x1 | Level 10 | The Beauty of Angles |
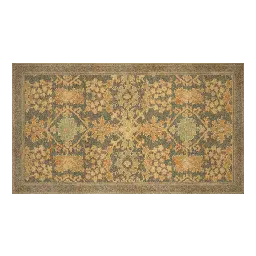 | Large Twilight Floral Carpet x1 | Level 20 | Lively Bounce |
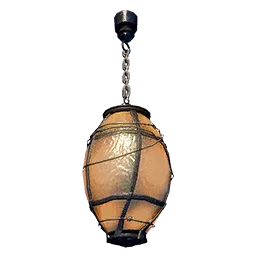 | Twilight Drop Light x1 | Level 30 | Perfect Design |
| Abyss Artifact x3 | Level 30 | Perfect Design |
 | Box of Fortune x1 | Level 30 | Perfect Design |
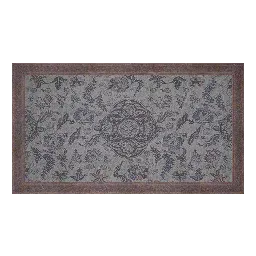 | Large Moonlit Garden Carpet x1 | Level 40 | Ethereal Orbit |
| Box of Fortune x3 | Level 40 | Ethereal Orbit |
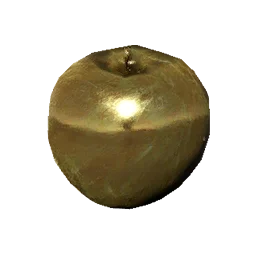 | Golden Apple x1 | Level 40 | Ethereal Orbit |
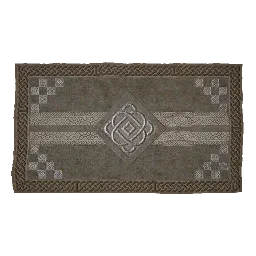 | Large Stone Knotted Carpet x1 | Level 50 | The World in an Orb |
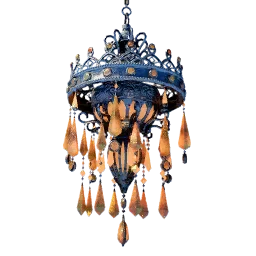 | Twilight Starcluster Light x1 | Level 50 | The World in an Orb |
| Abyss Artifact x5 | Level 50 | The World in an Orb |
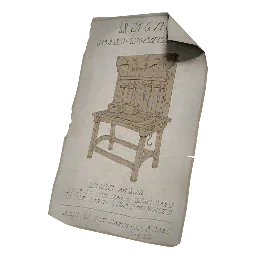 | Blueprint: Clanging King | Level 50 | The World in an Orb |
| Box of Fortune x5 | Level 50 | The World in an Orb |
| Golden Apple x3 | Level 50 | The World in an Orb |
General Tips for beating Roll Orb
If you prefer to figure out each level on your own, here are a few tips that you might find helpful:
- Don’t hit the edges of obstacles, especially triangles
- Curved surfaces slow down the ball considerably
- Cubes are bait. It takes 5 Cubes to equal 1 Attempt, so don’t go out of your way to aim for Cubes unless you know you can get at least 6 to turn a profit.
- Use the glowing marks on the edges of the room to line up your shots and change your view to first person for more precision
- Power thresholds are typically 15, 50, 75, and 100
- Use 50 by default
- Use 75 to jump a ramp or for a complicated path
- Use 100 if you will collide with a curve or precise timing is required
- Use 15 if you need to use a ramp to get around an obstacle
Levels 1-10 Walkthrough
Levels 1-10 introduce the basics of Orb Roll including aiming, ricochet, charged shots, and obstacles.
You receive a Twilight Lampshade and Abyss Artifact for completing level 10, “The Beauty of Angles” Challenge.
Level 1
There is no need to change the aim, just charge and release at 50 Power.
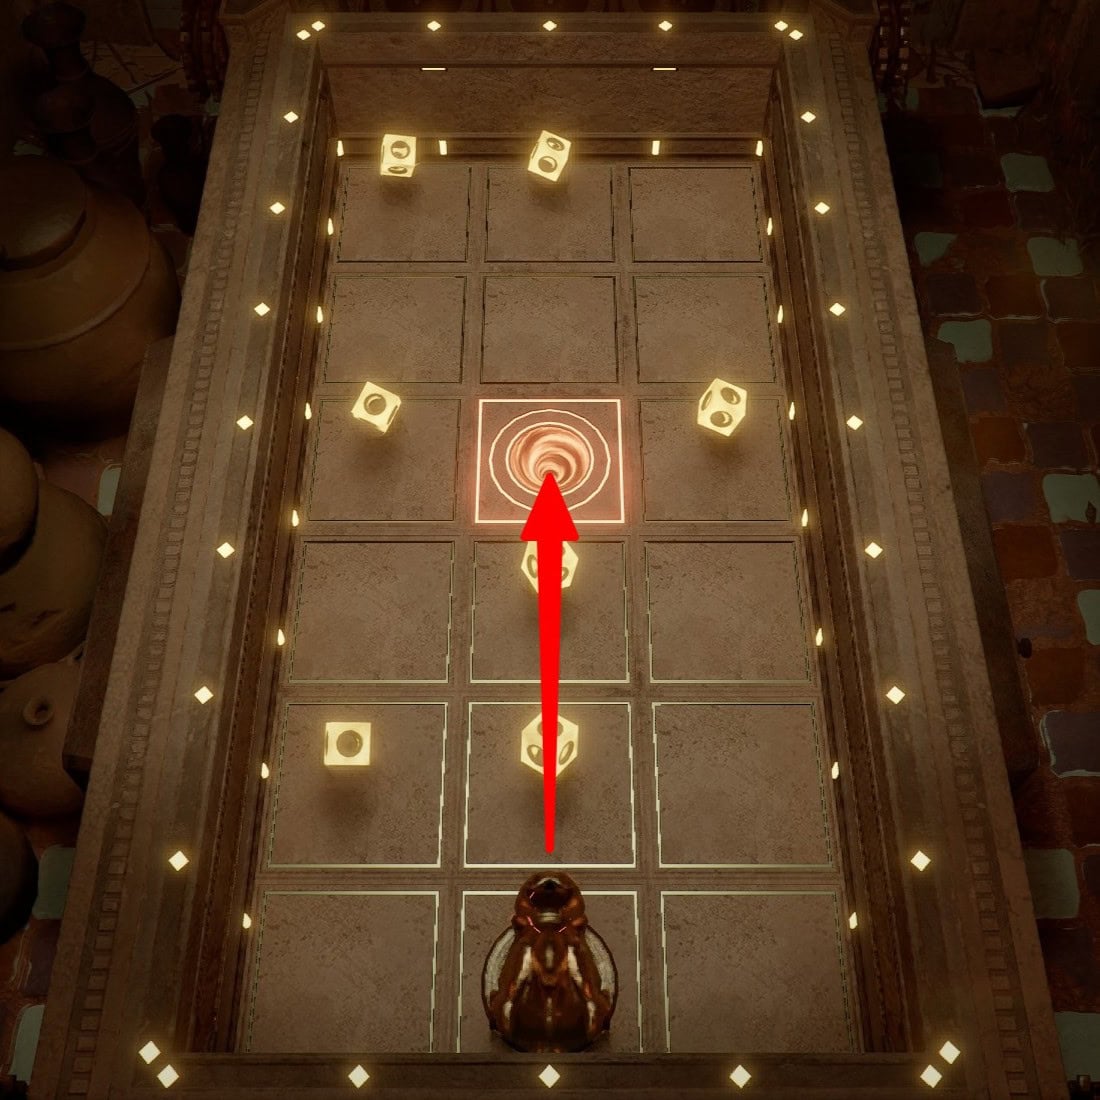
Level 2
Just aim directly at the hole and charge to 50.
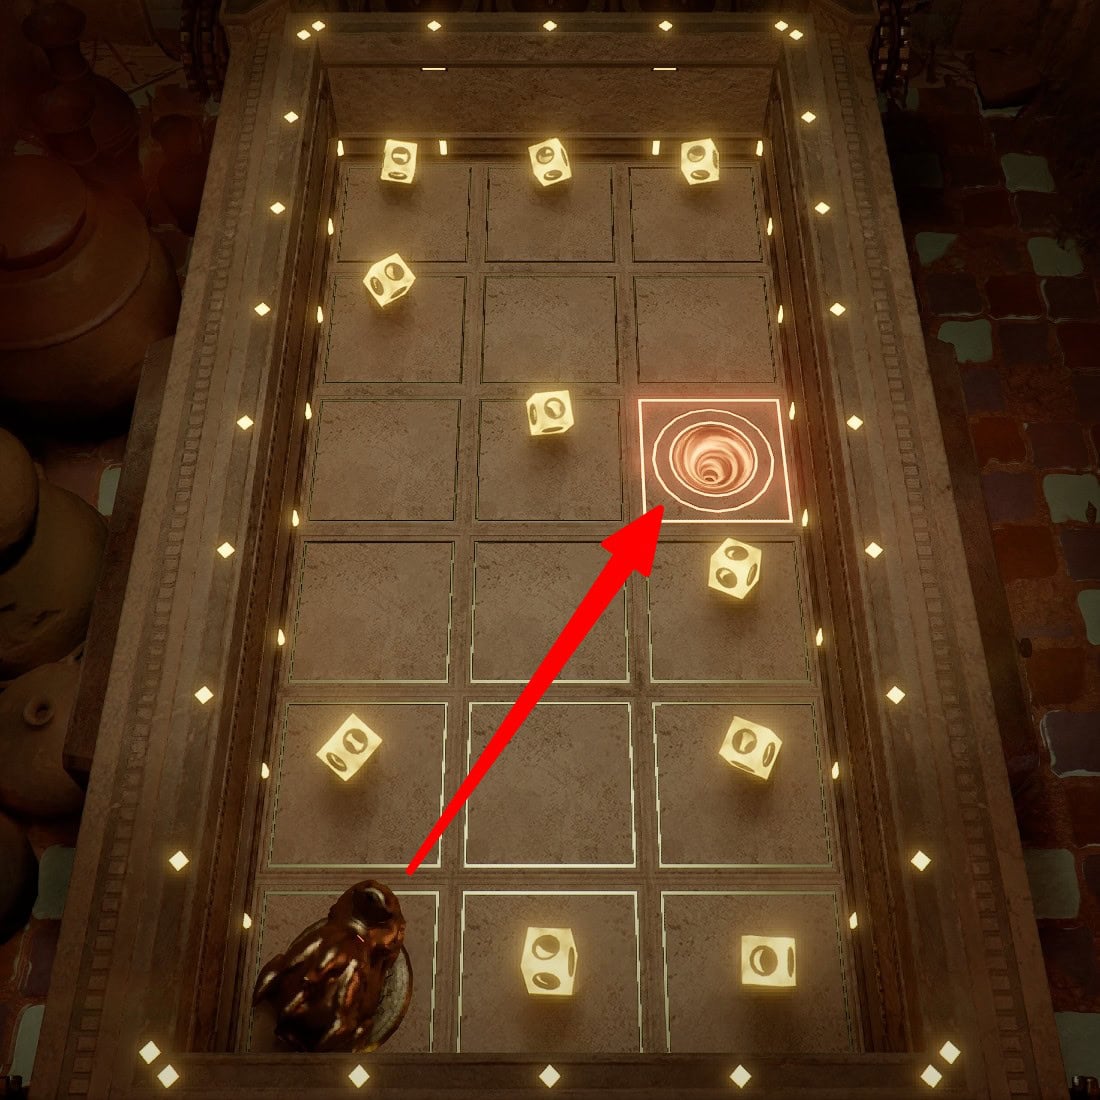
Level 3
Line up the ironsight with central dash and charge to 50.
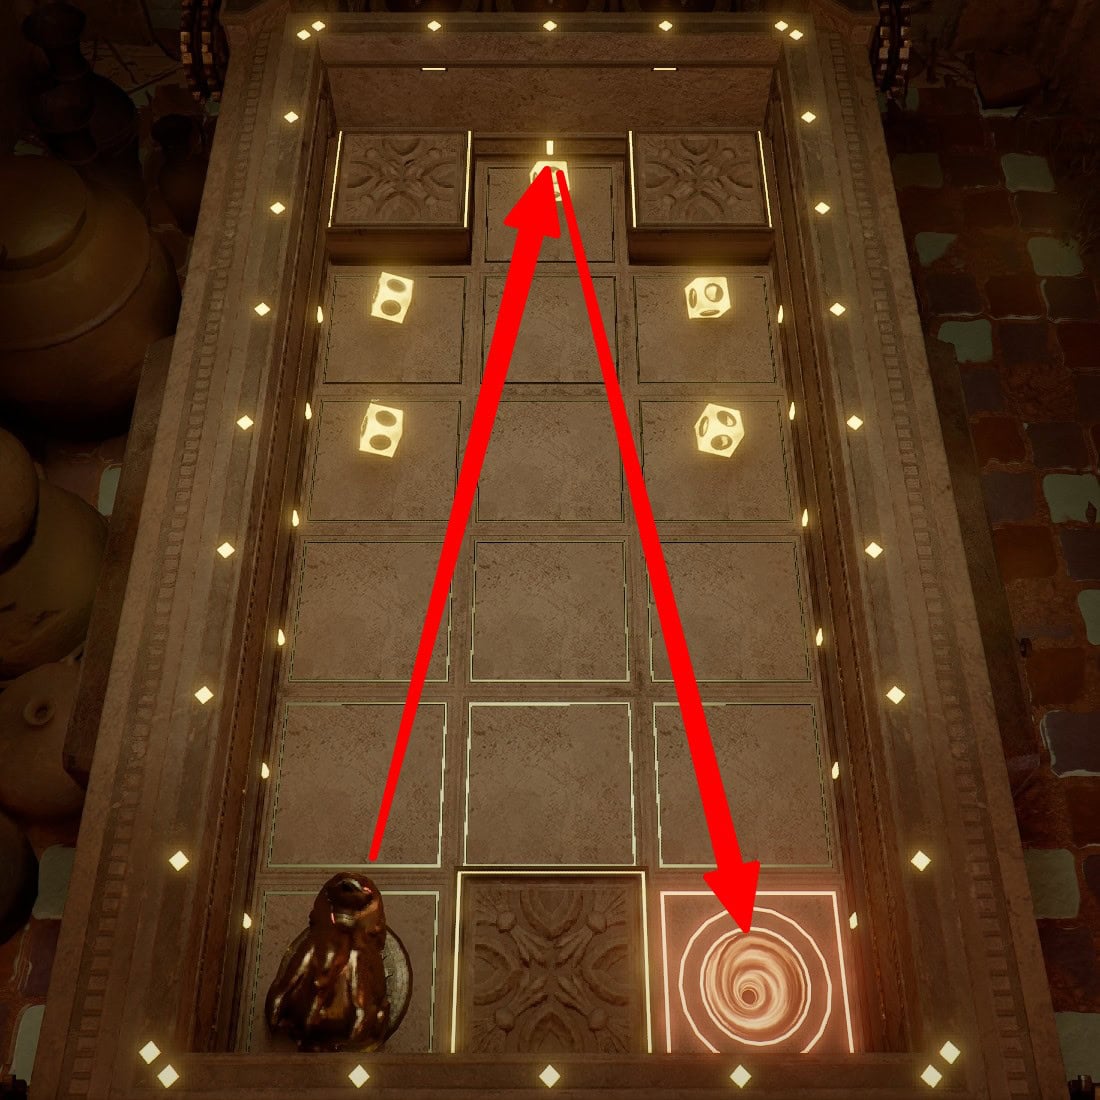
Level 4
Use first-person to line up the ironsight with the dash in the center on the right side of the board to get 2 Cubes and charge to 50.
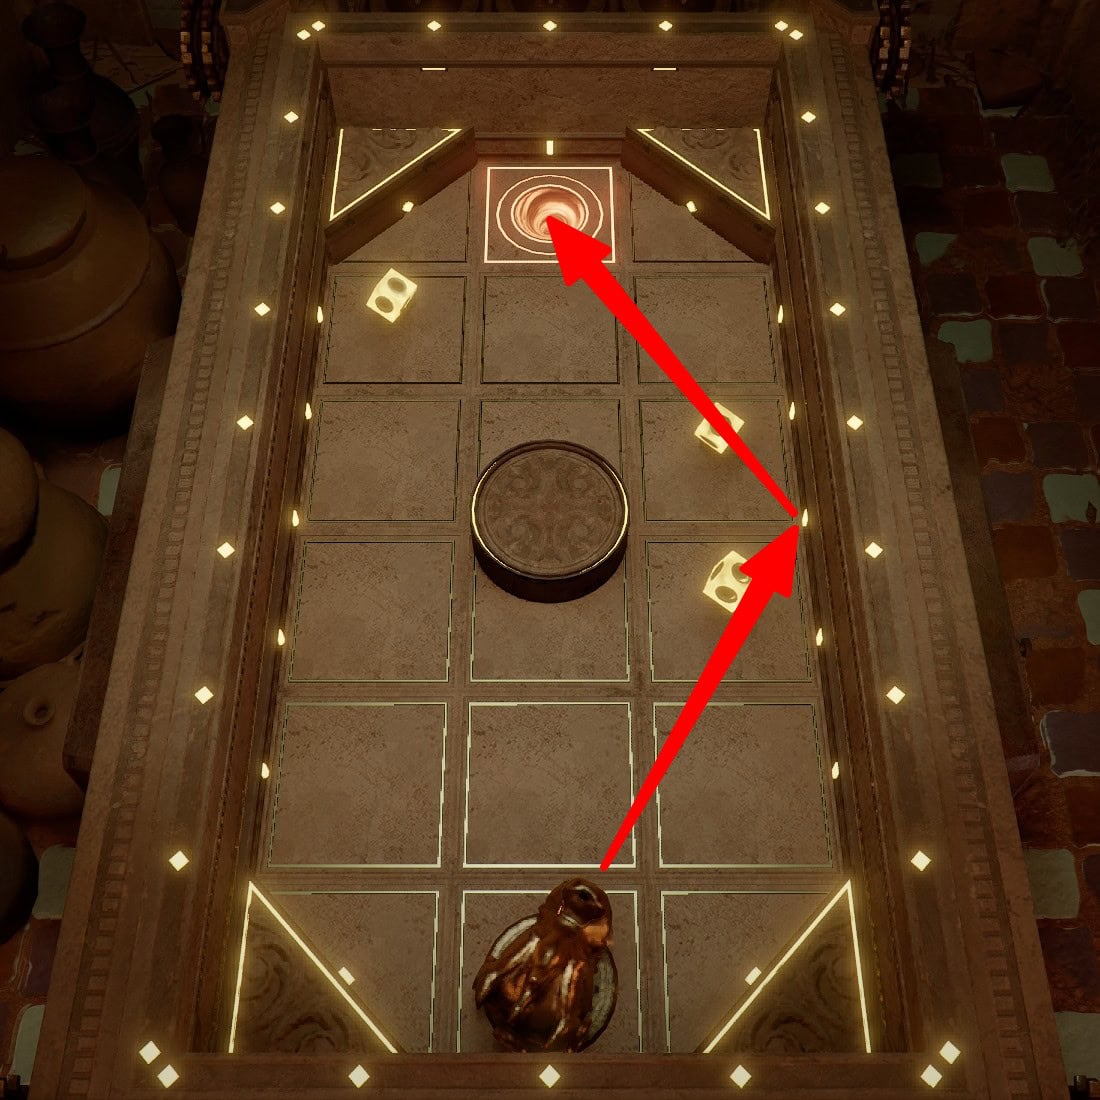
Level 5
Ignore the Cubes and aim for the center of the ramp and charge 35-50. This one can be a little finicky, but if you manage to get the ball up into the main basin, gravity will do the rest of the work for you.
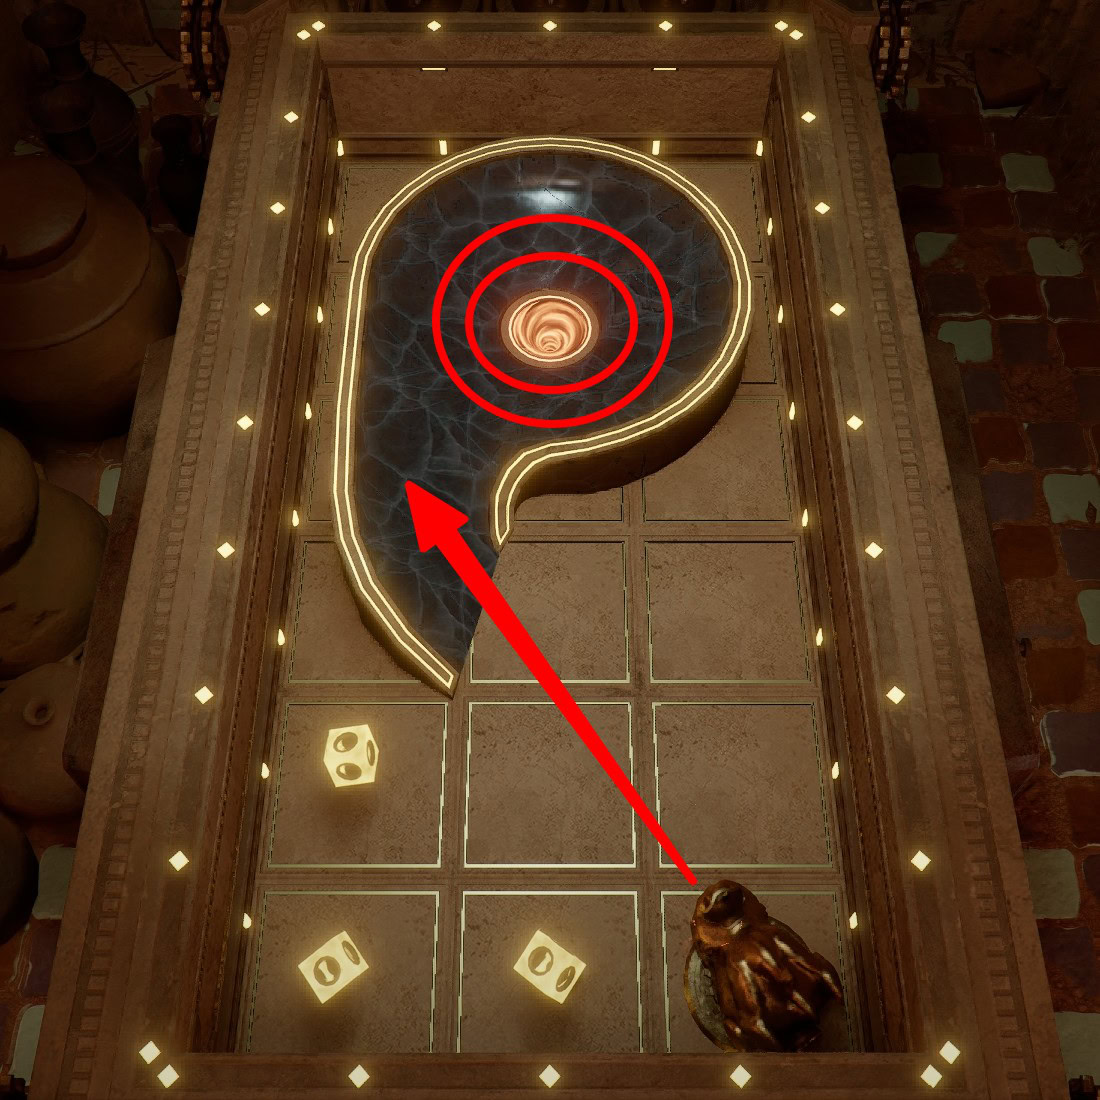
Level 6
Level 6 introduces the first ramp. Aim directly at the hole and charge to 50, not 75. If you charge too low, you won’t make it over the ramp. If you charge too high, it will ricochet like crazy.
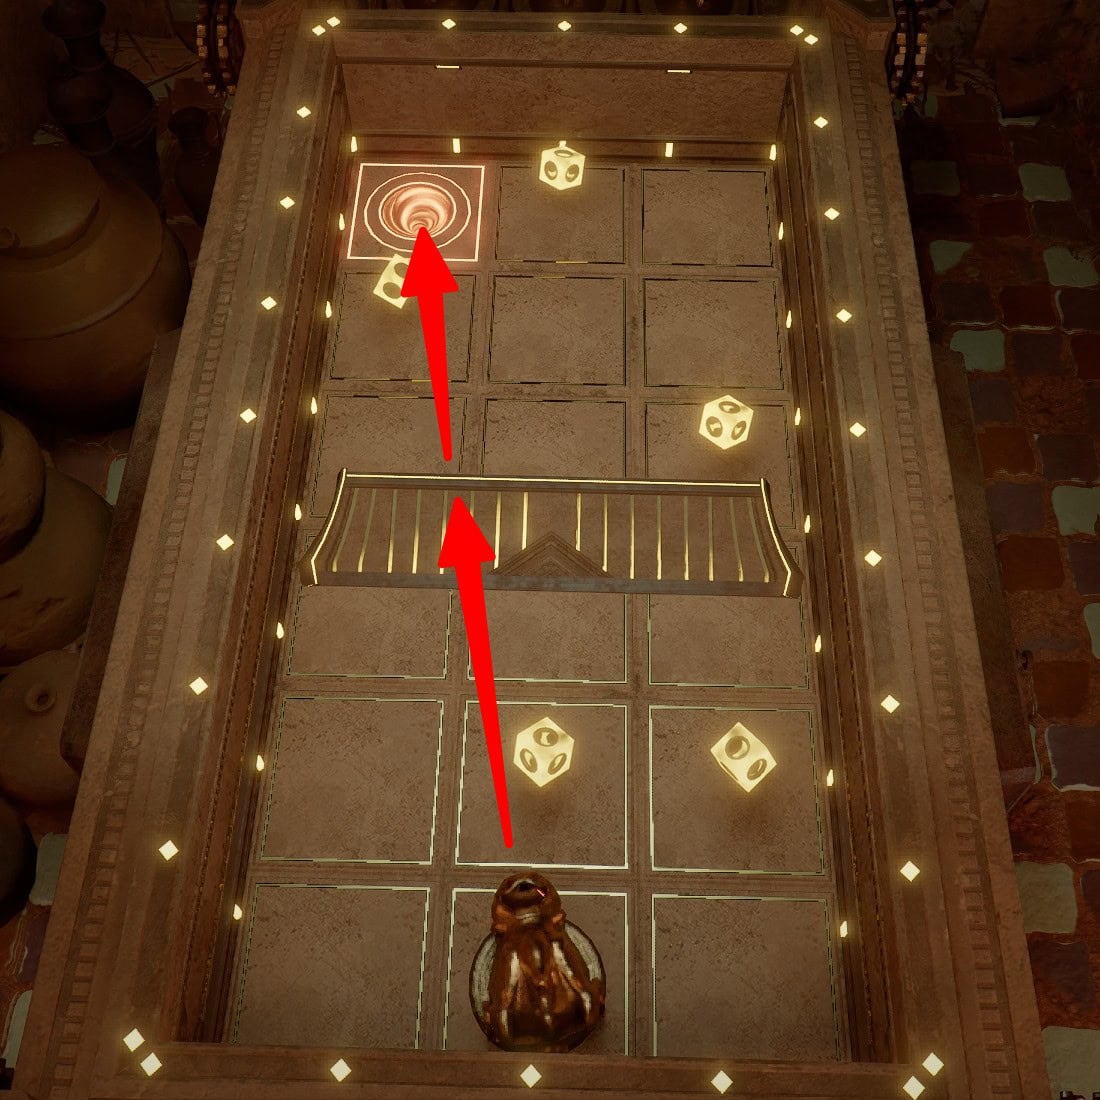
Level 7
Use the first-person ironsight to aim at the center dash on the right-side wall and charge to 50. Don’t worry, you have enough clearance to avoid the first triangle obstacle.
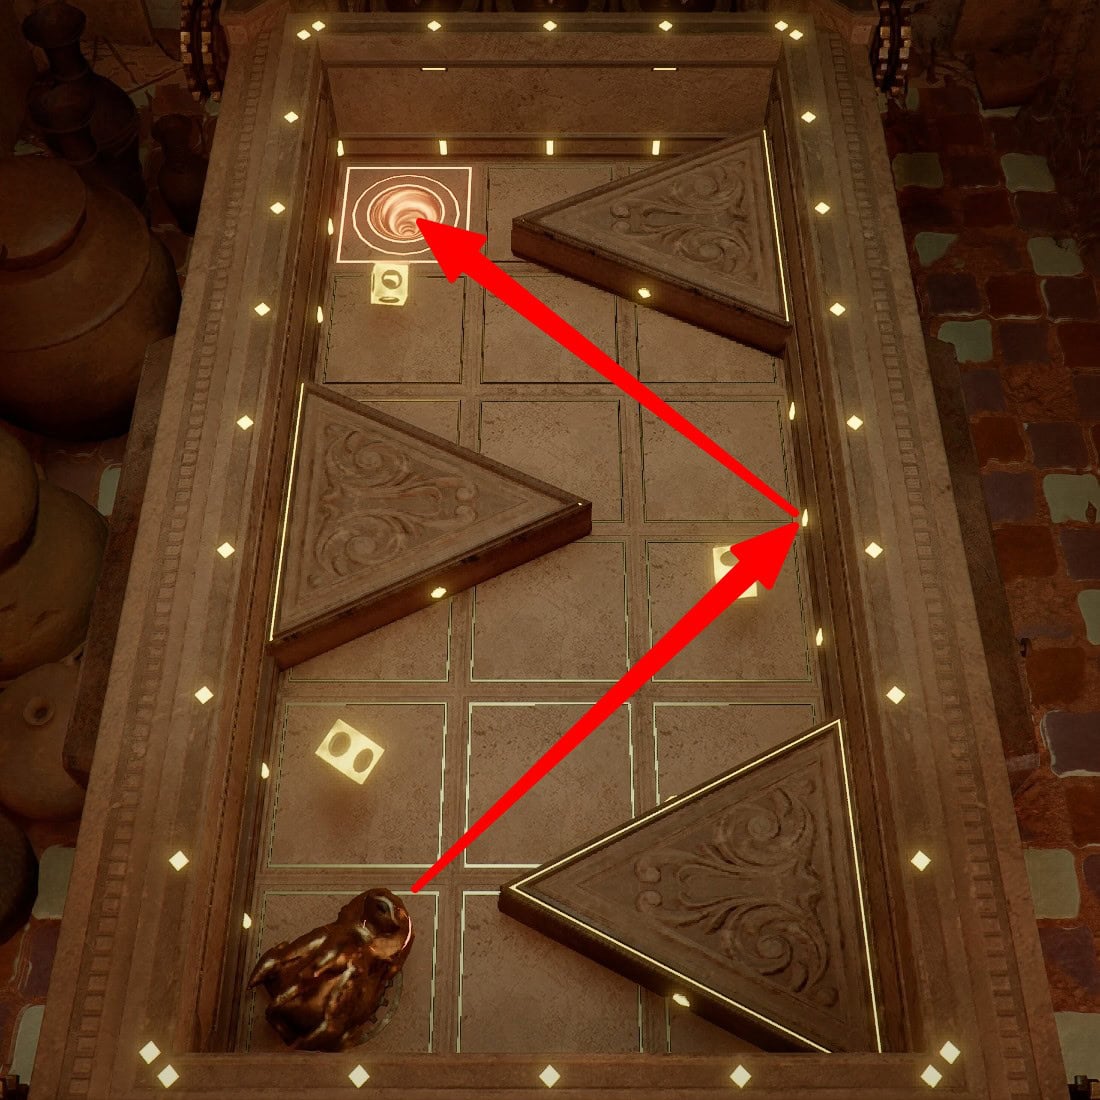
Level 8
Use first-person to line up the ironsight precisely with the small gap between the two triangle obstacles.
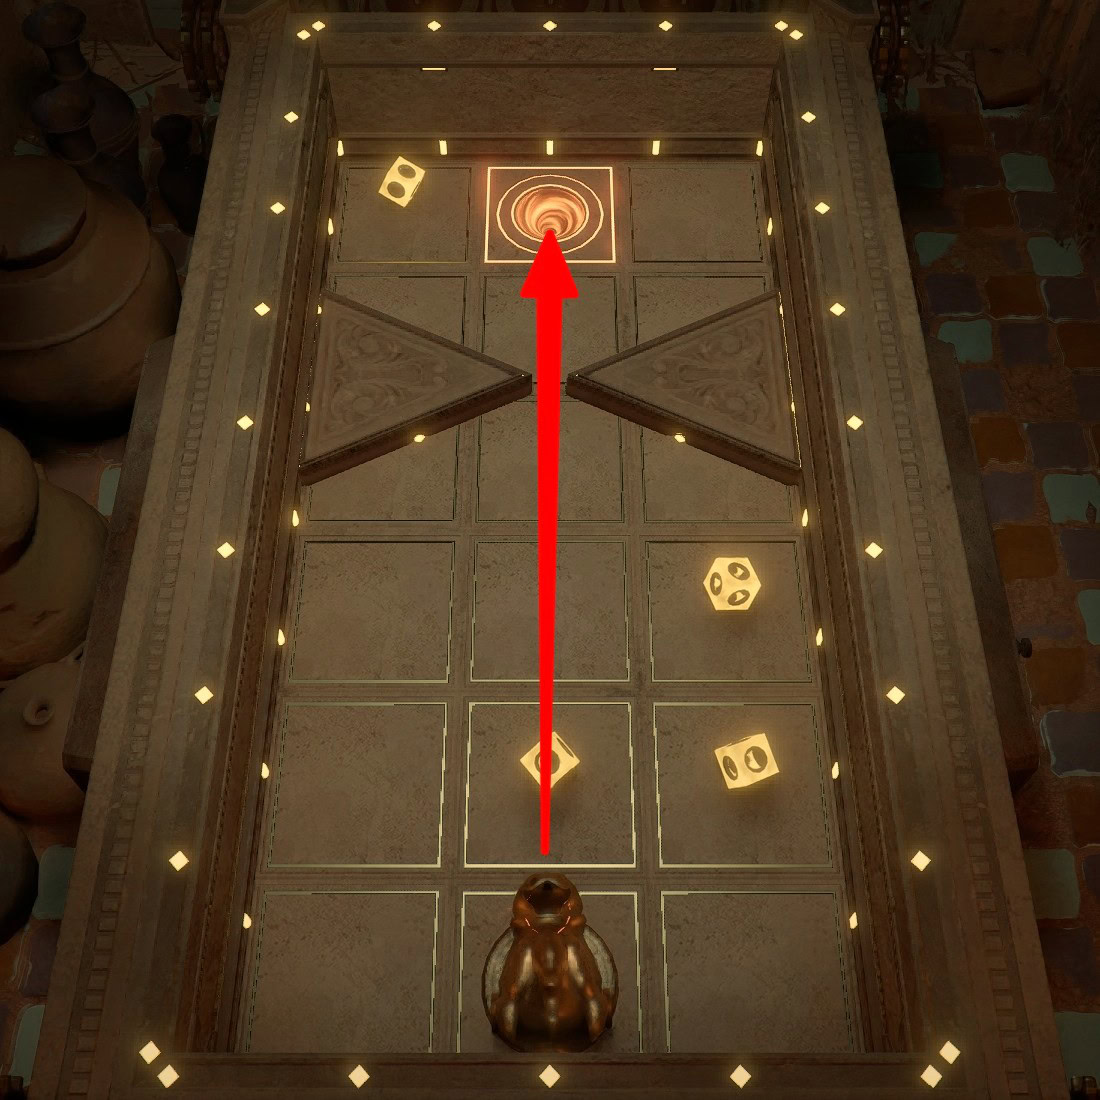
Level 9
There is no need to adjust the aim at all; just charge to 50 and win. Don’t be a hero and try to get the Cubes with the curve.
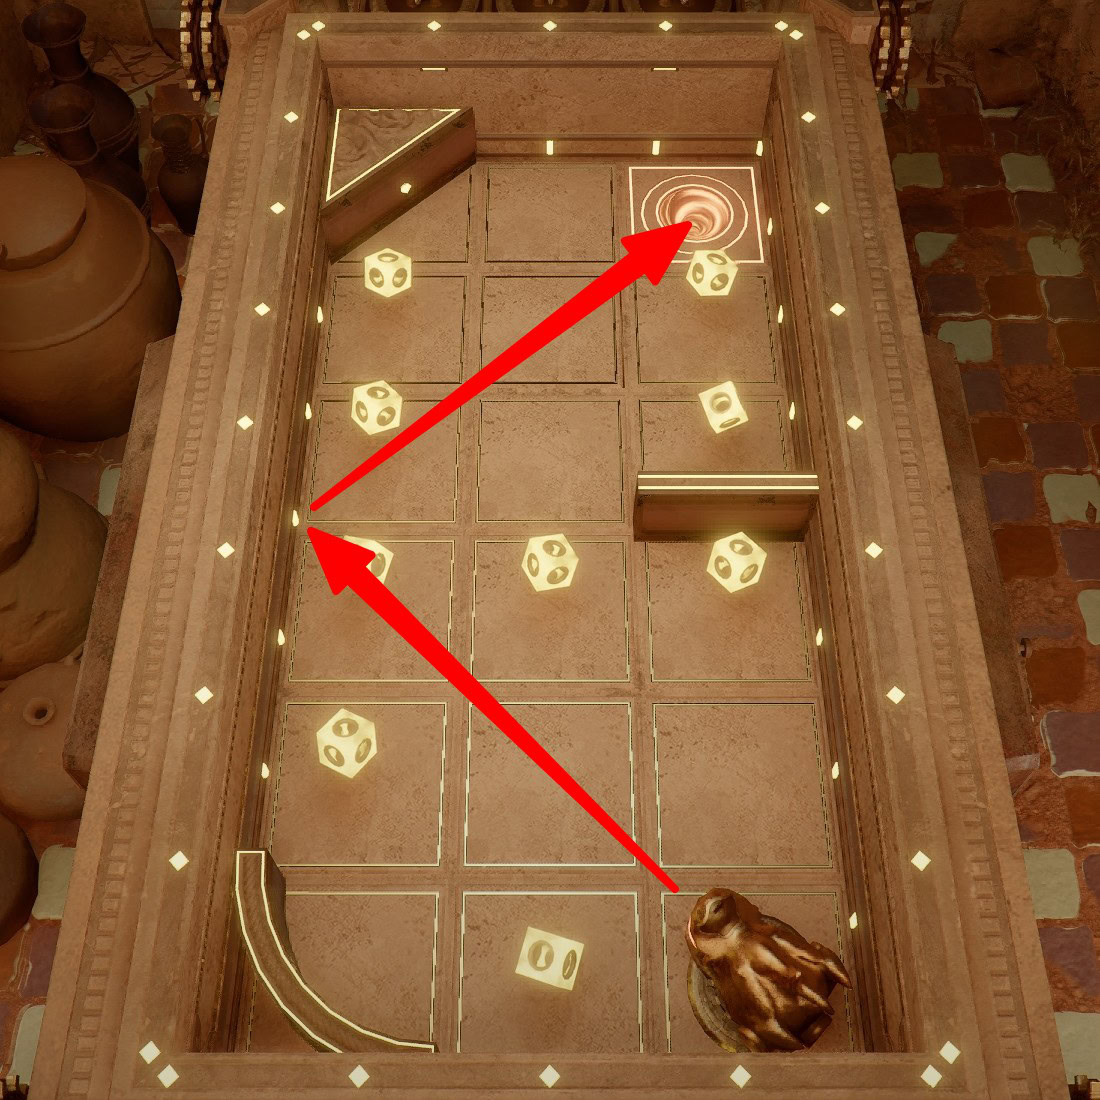
Level 10
There is no need to adjust the aim, but you need to be precise with your charge level to get over the ramp and not overshoot the elevated hole. Charge to 75.
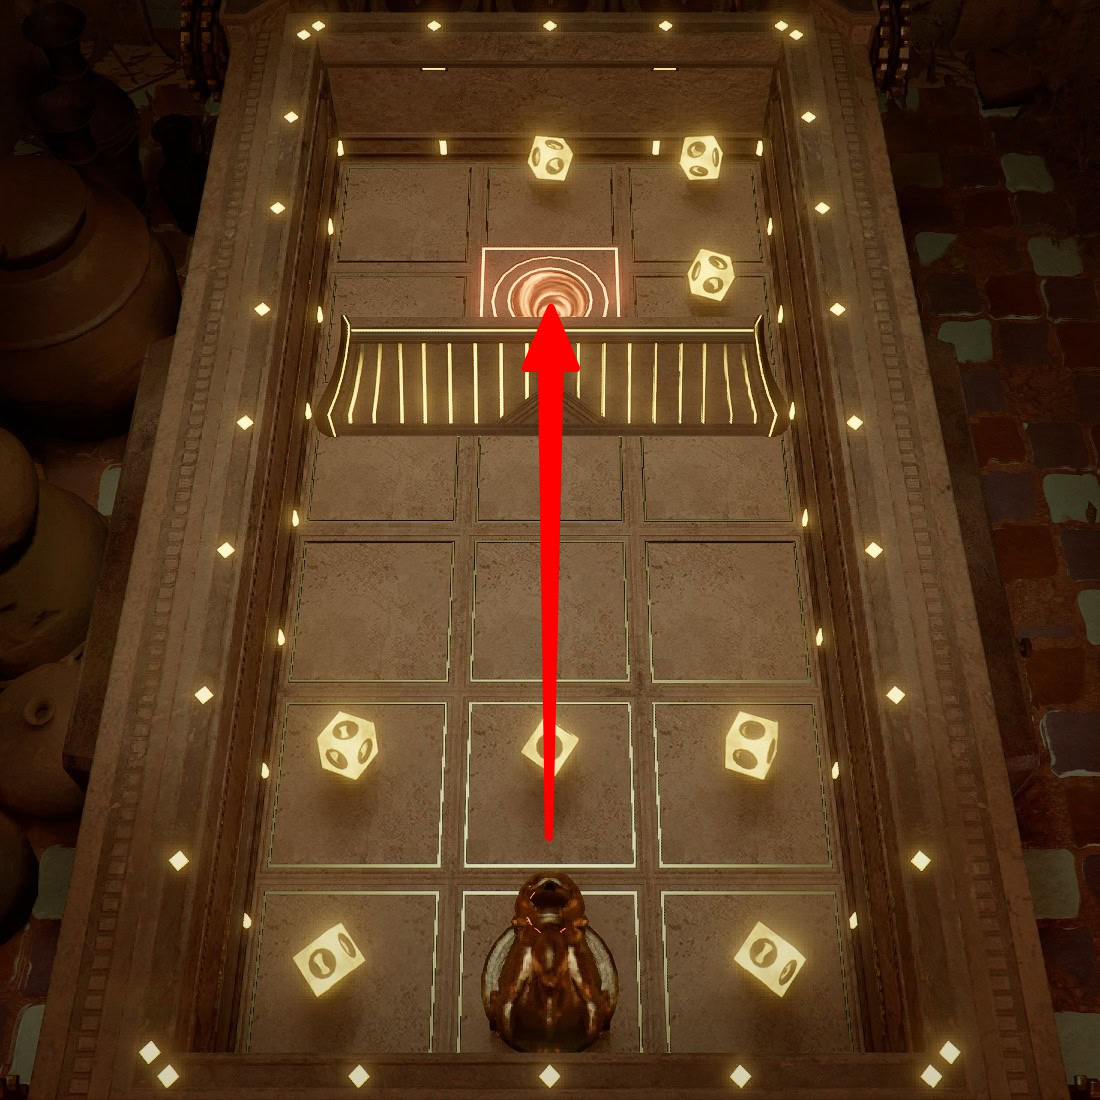
Levels 11-20 Walkthrough
Levels 11-20 introduce moving objects that require you to time your shots and contend with curved obstacles.
You receive a Large Twilight Floral Carpet for completing level 20, the “Lively Bounce” Challenge.
Level 11
This level is about timing. There is no need to adjust your aim, just hold charge at 100 and release when the semicircle isn’t blocking your path.
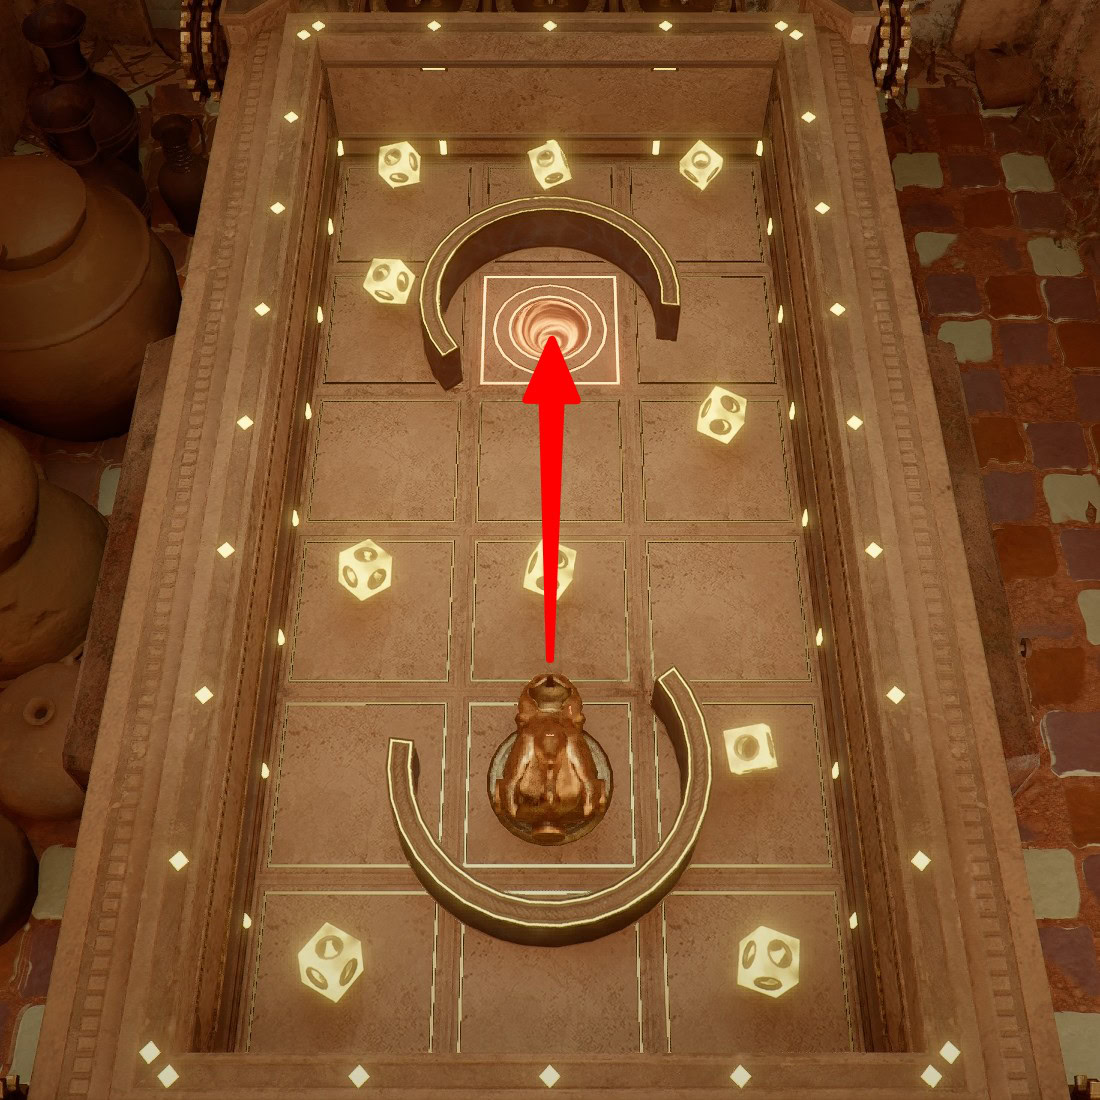
Level 12
This level is also about timing. There is no need to adjust your aim, just hold charge at 100 and release as soon as the obstacle has moved out of the way.
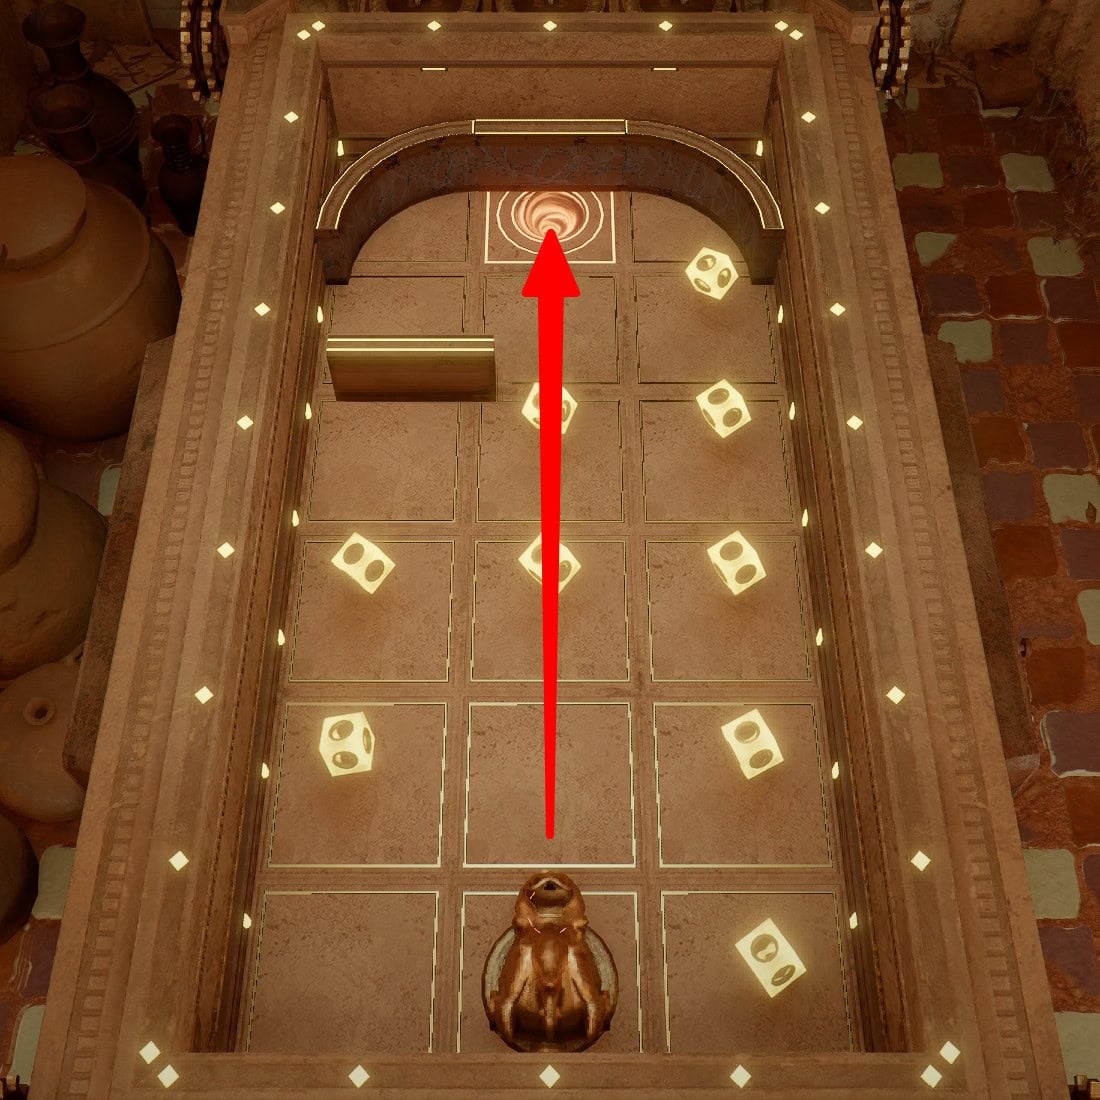
Level 13
Level 13 is a nice little freebie. There is no need to aim, just charge to 100 and release. You’ll get all the Cubes and have enough power to round the curve.
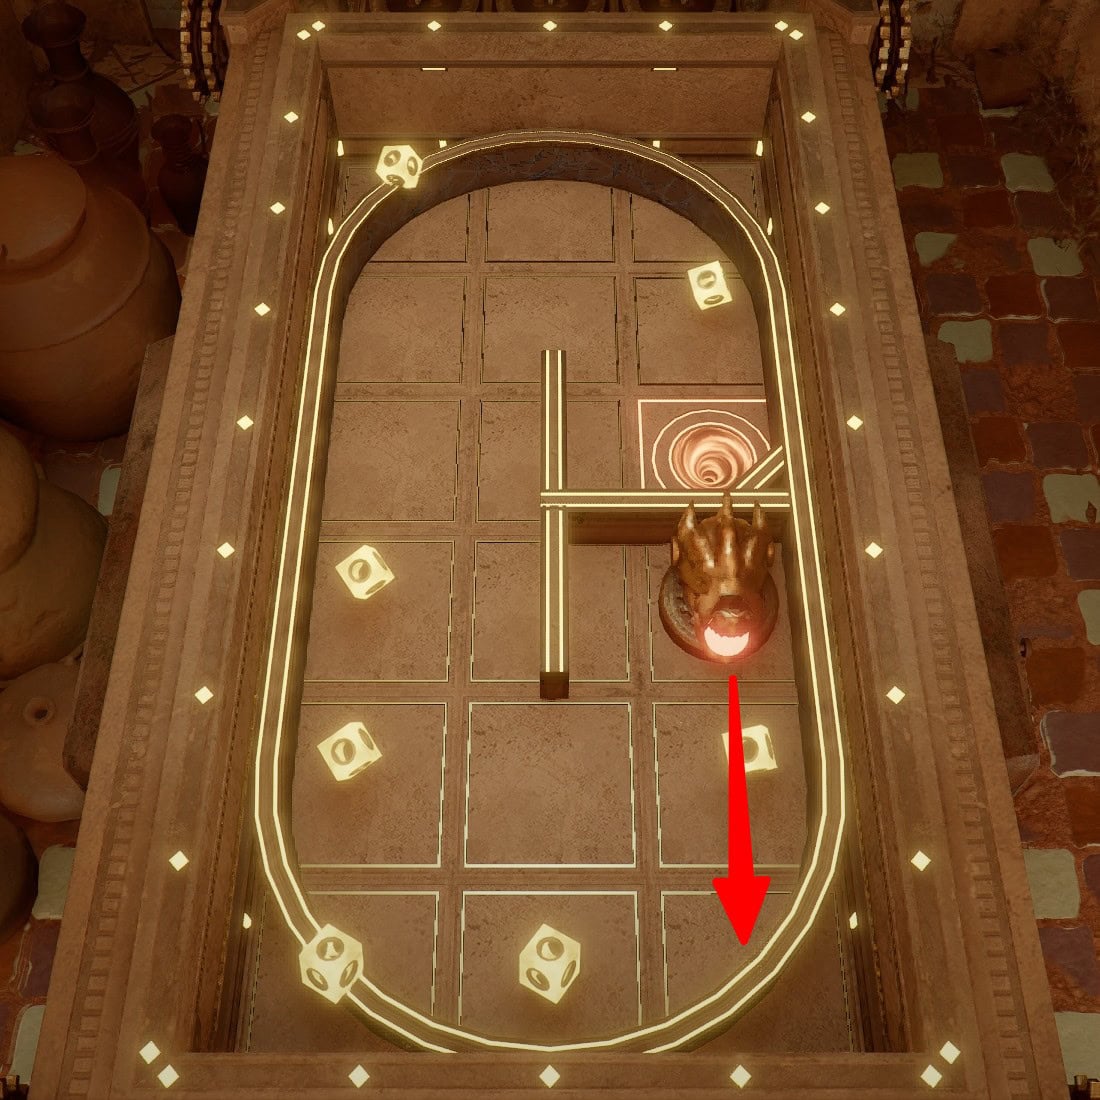
Level 14
Use first-person to line up the ironsight with the midpoint between the two dashes on each side of the square obstacle outer dashes (or the dash outside the tray). Hold charge at 100 and fire as soon as you see the wall beginning to retract. The timing is pretty tight.
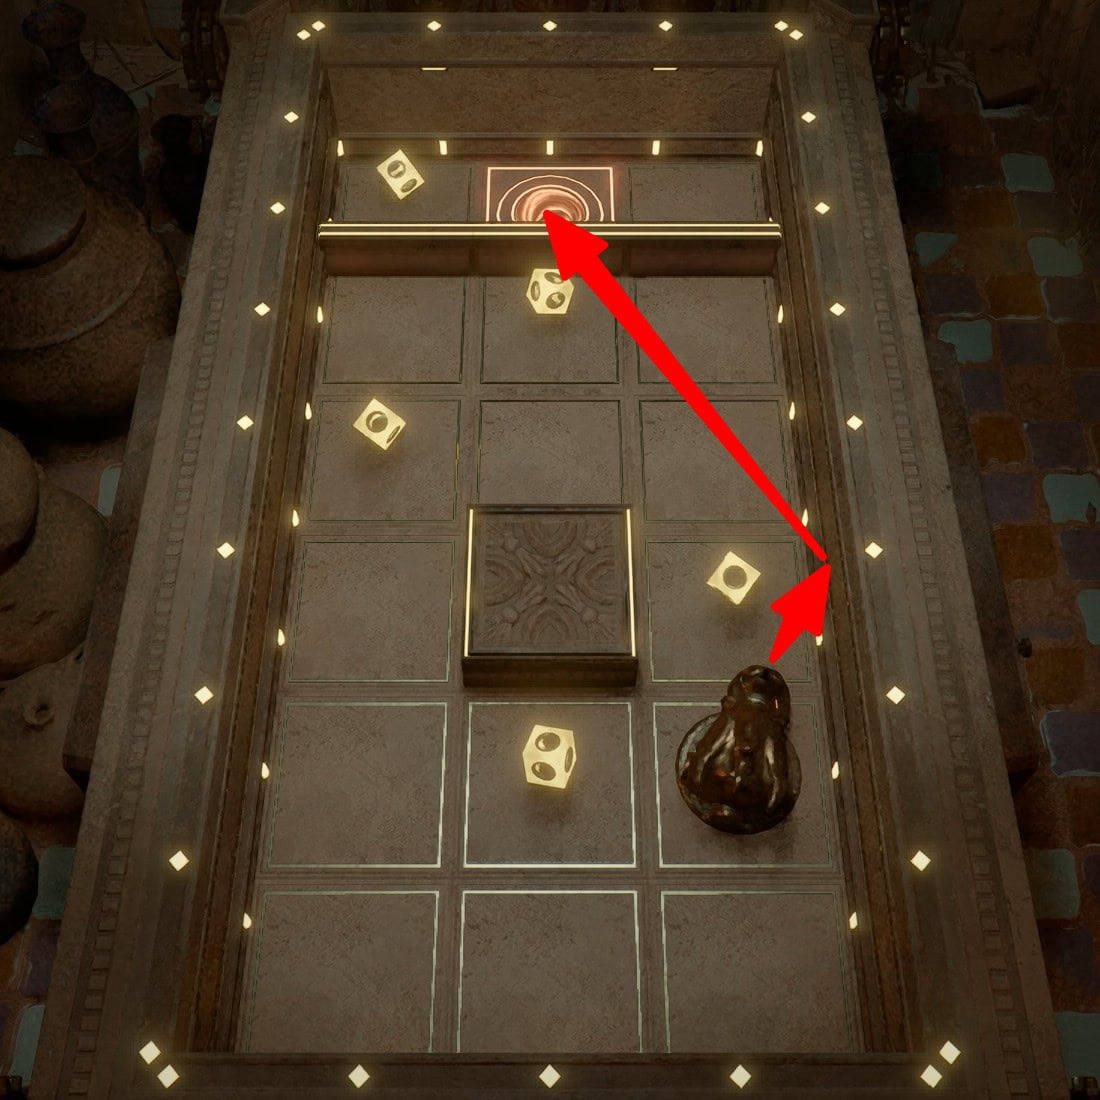
Level 15
Use first-person to aim the ironsight at the center dash on the right side of the wall. Hold the charge at 100 and wait until the spinning obstacle passes the hole. You can get a Cube if you aim at the left side wall instead, but the timing is tighter.
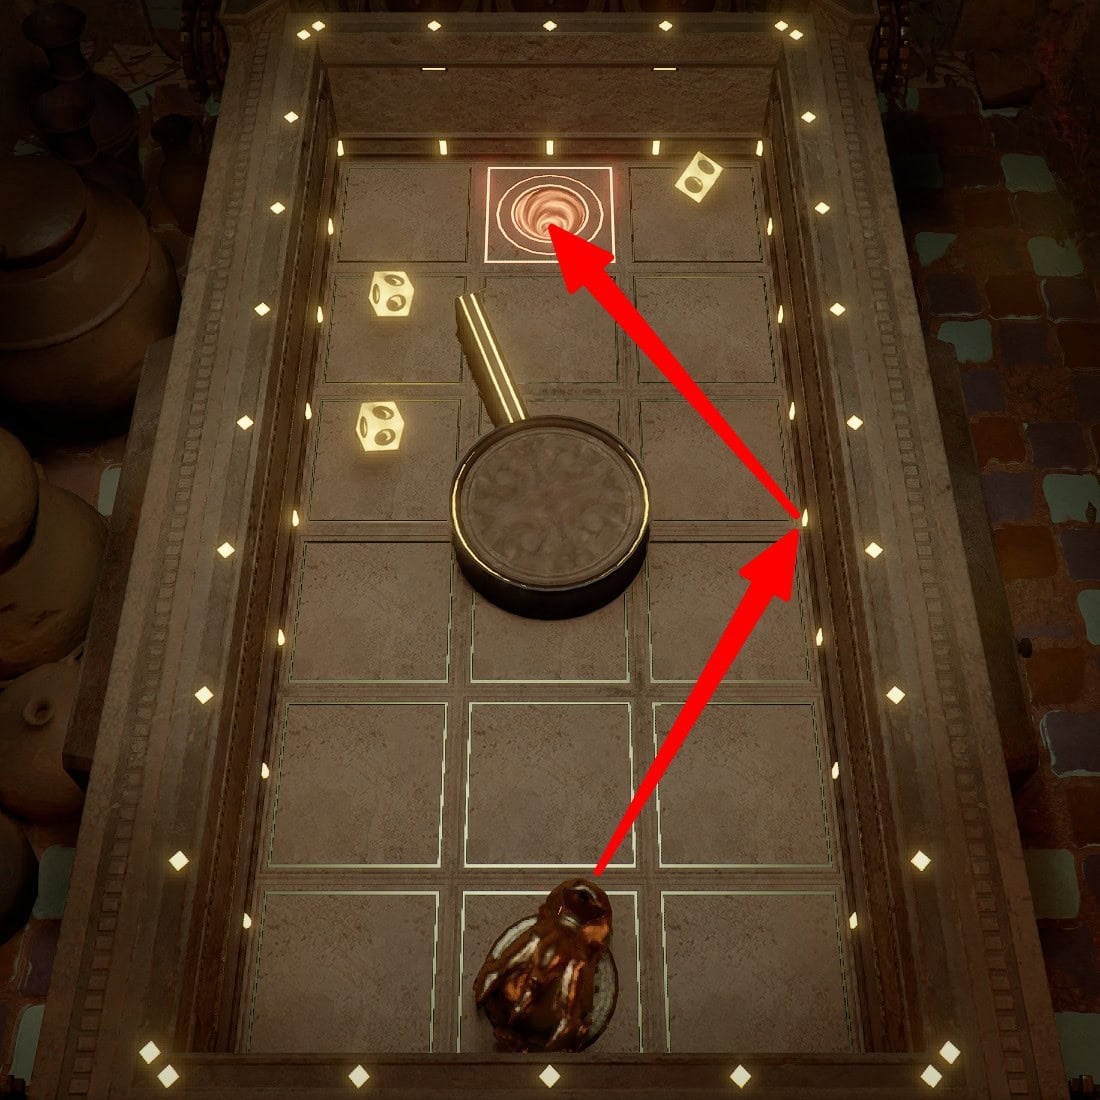
Level 16
Level 16 is finicky but forgiving. Aim at the center of the rear rotating wall, basically the diagonal dash on the triangle behind it. Charge to 75-100 and release when the rotating wall has roughly the same angle as the triangle behind it.
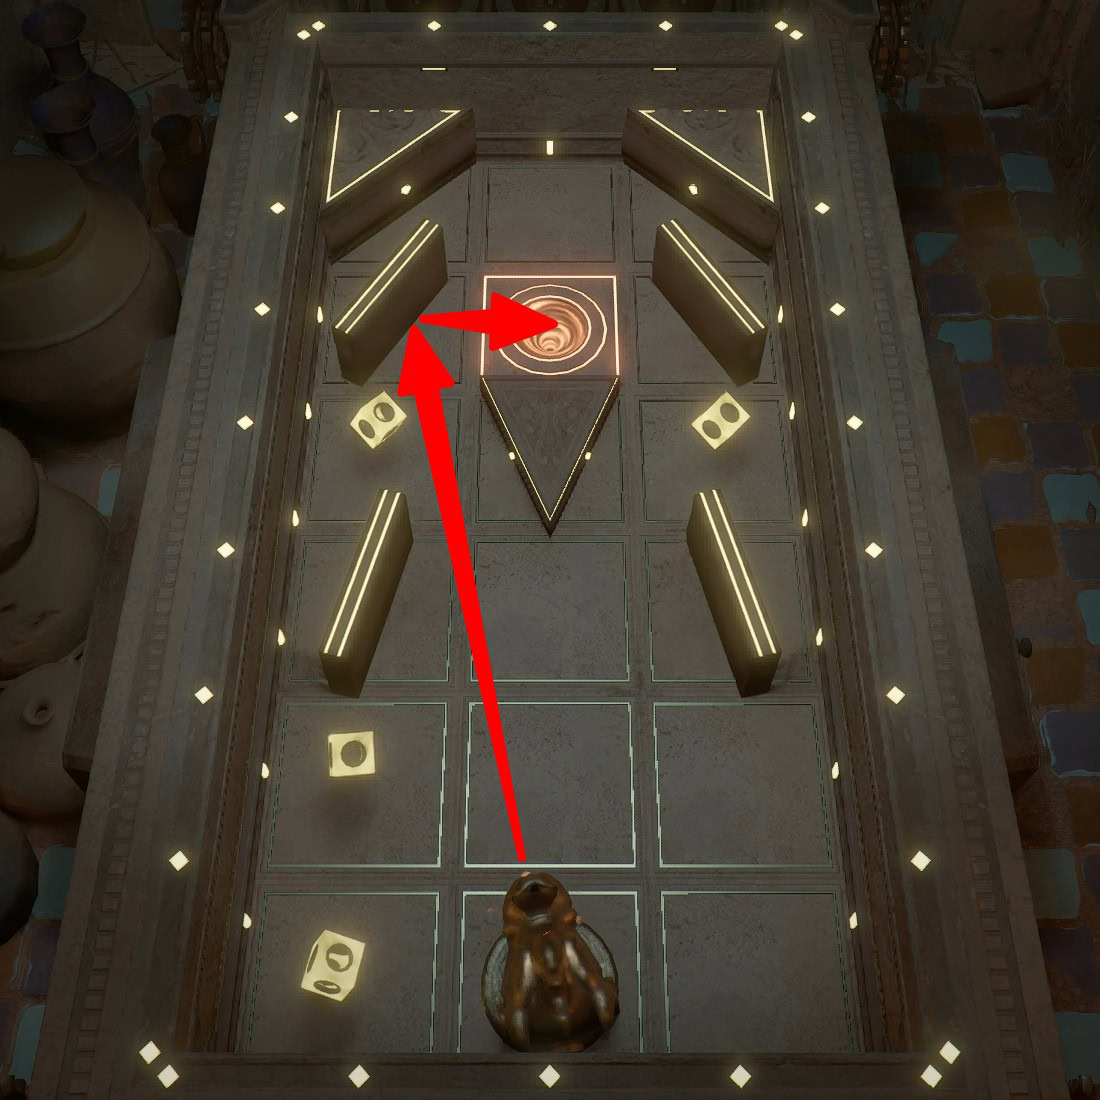
Level 17
Use the moving wall as the bridge. There is no need to aim. Hold charge at 100 and fire as soon as the moving wall stops briefly in the center.
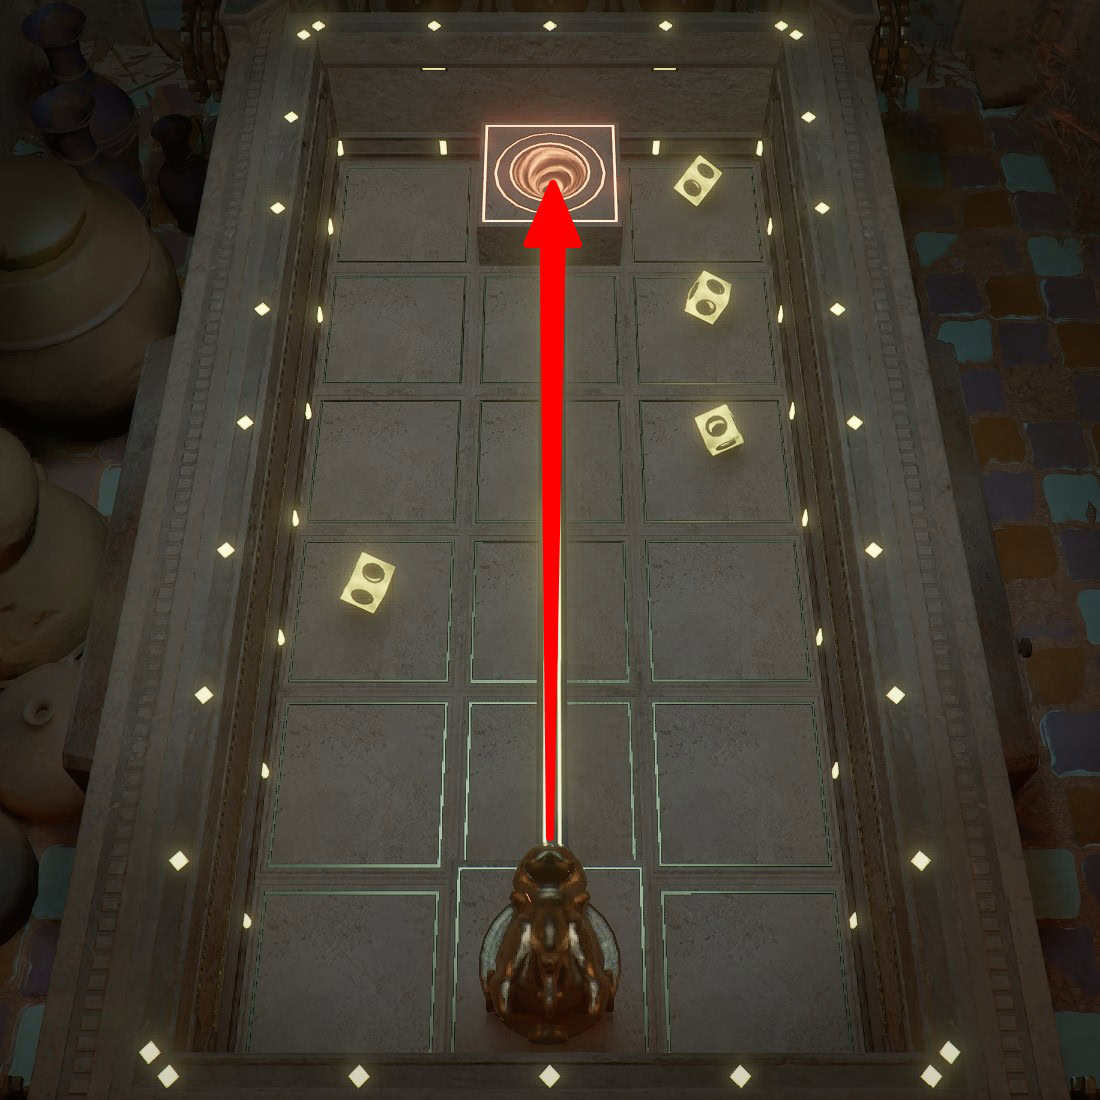
Level 18
Use first-person to aim at the dash just past the wall obstacle. Hold charge at 100 and fire as soon as the semicircle obstacles stop blocking your path.
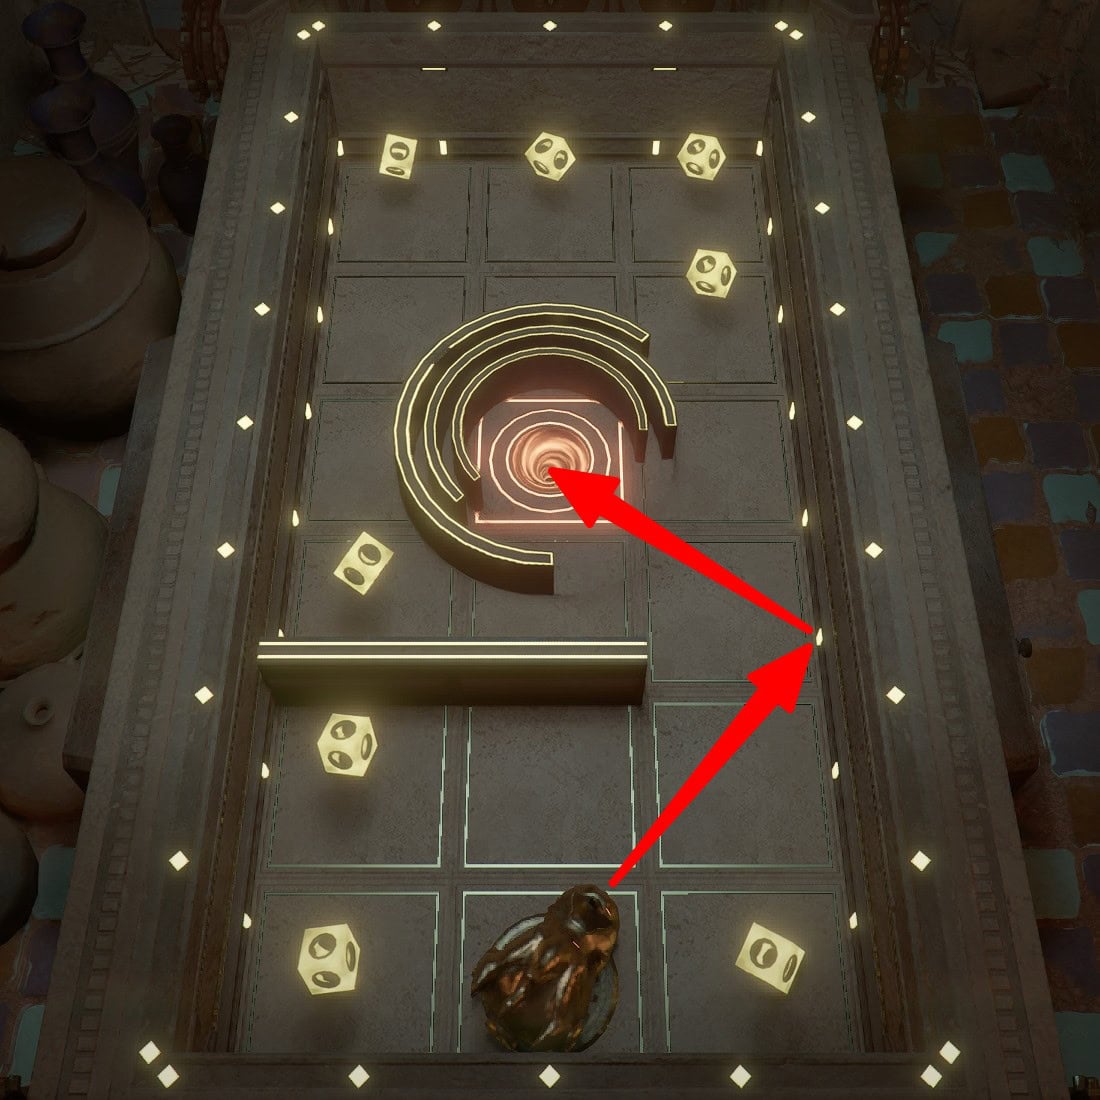
Level 19
The rotating spiral wall will carry the ball into the hole if you let it. There is no need to aim. Hold charge to ~20 and fire when the outer edge of the spiral is in the center of the row 3 tile on the right. You want the spiral to “catch” the ball and carry it inside. Too much power will prevent the ball from moving with the spiral and it will get stuck.
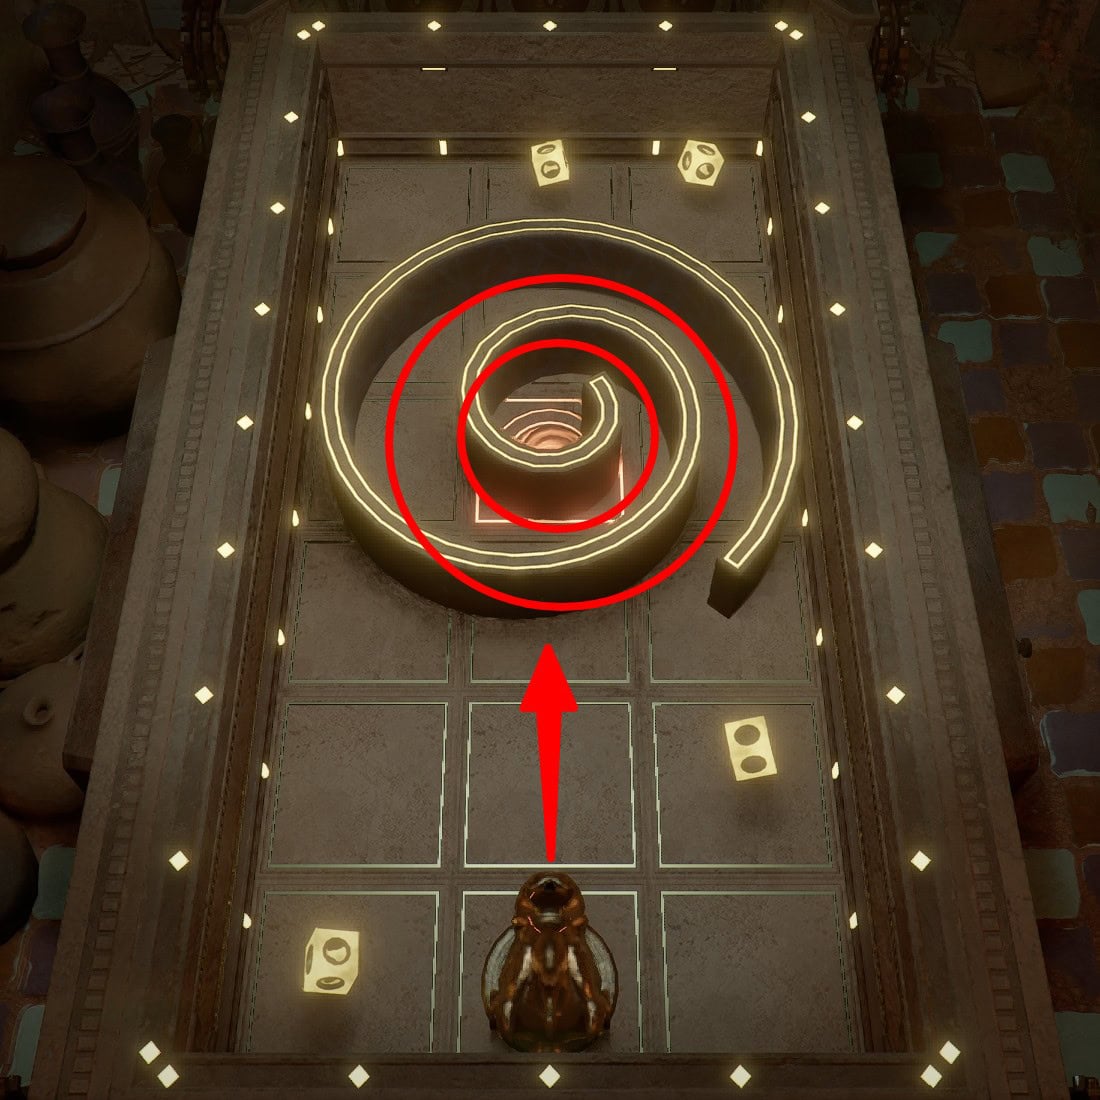
Level 20
Use first-person to aim at the dash across from the left side triangle and charge to 50.
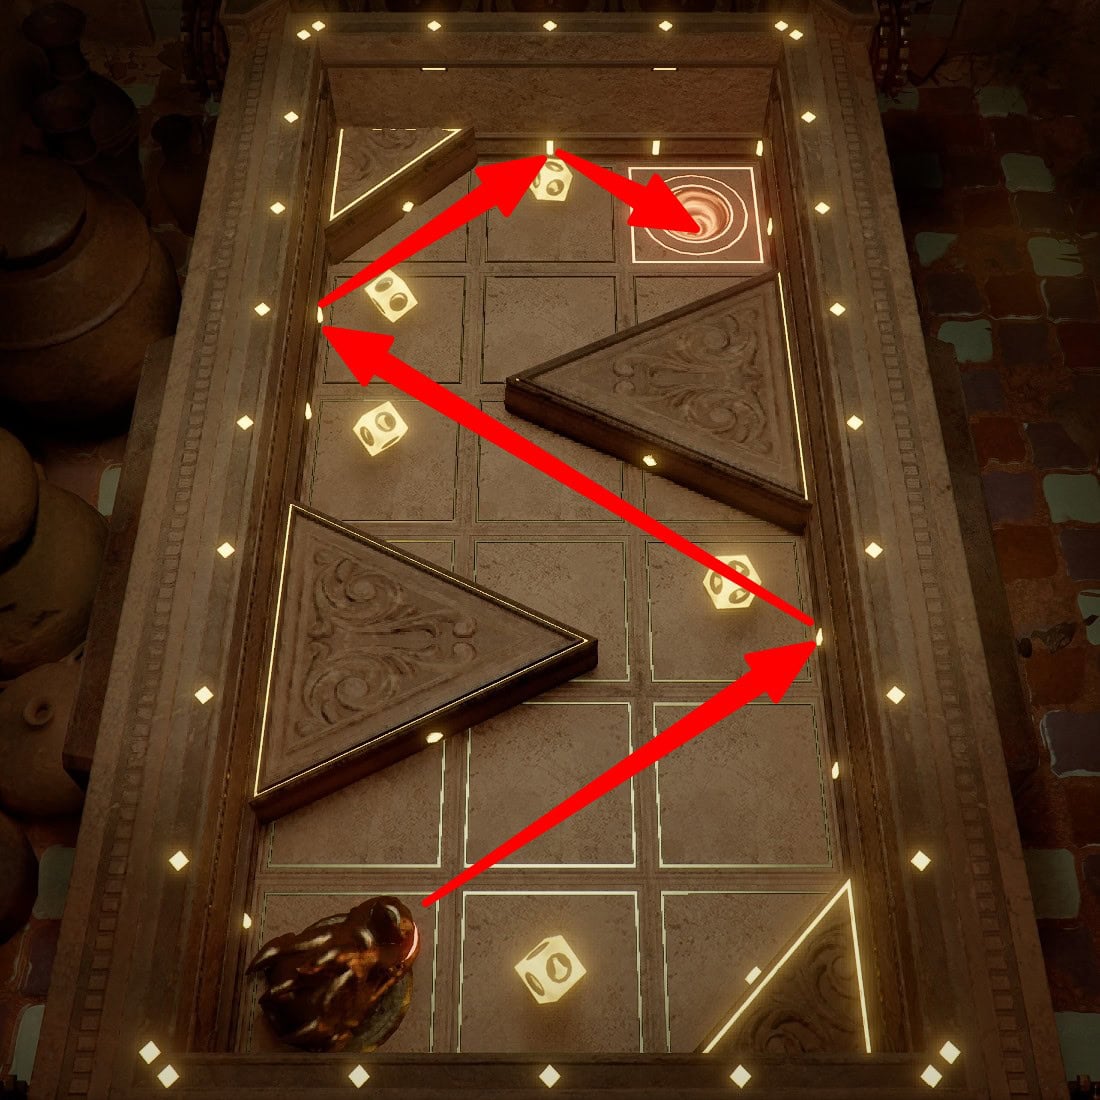
Levels 21-30 Walkthrough
Levels 21-30 require precise timing to get past moving obstacles with unusual angles.
You receive a Twilight Drop Light, a Small Artifact Chest (3 Abyss Artifacts), and a Material Box of Fortune for completing Level 30, the “Perfect Design” Challenge.
Level 21
Charge to ~75 and fire as the moving hole is about to reach the center. There is no need to aim. You want to fire just a little bit early to account for rolling and overshoot.
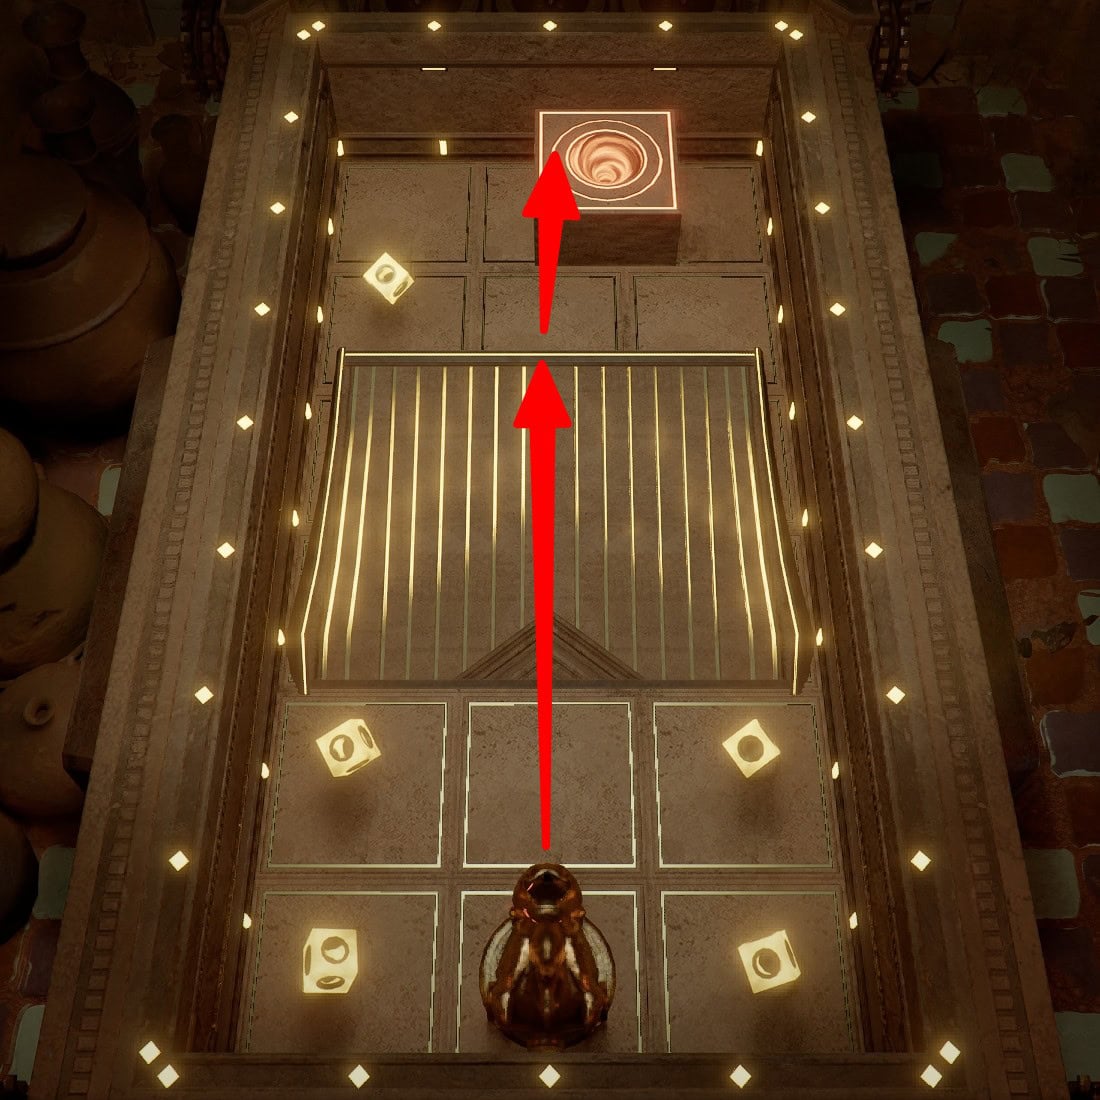
Level 22
The floor moves in a wave. Charge to 100 and fire when the final row before the hole is raised. It will have lowered back down by the time you get there. You want to avoid the ball getting blocked by the floor raising in front of it.
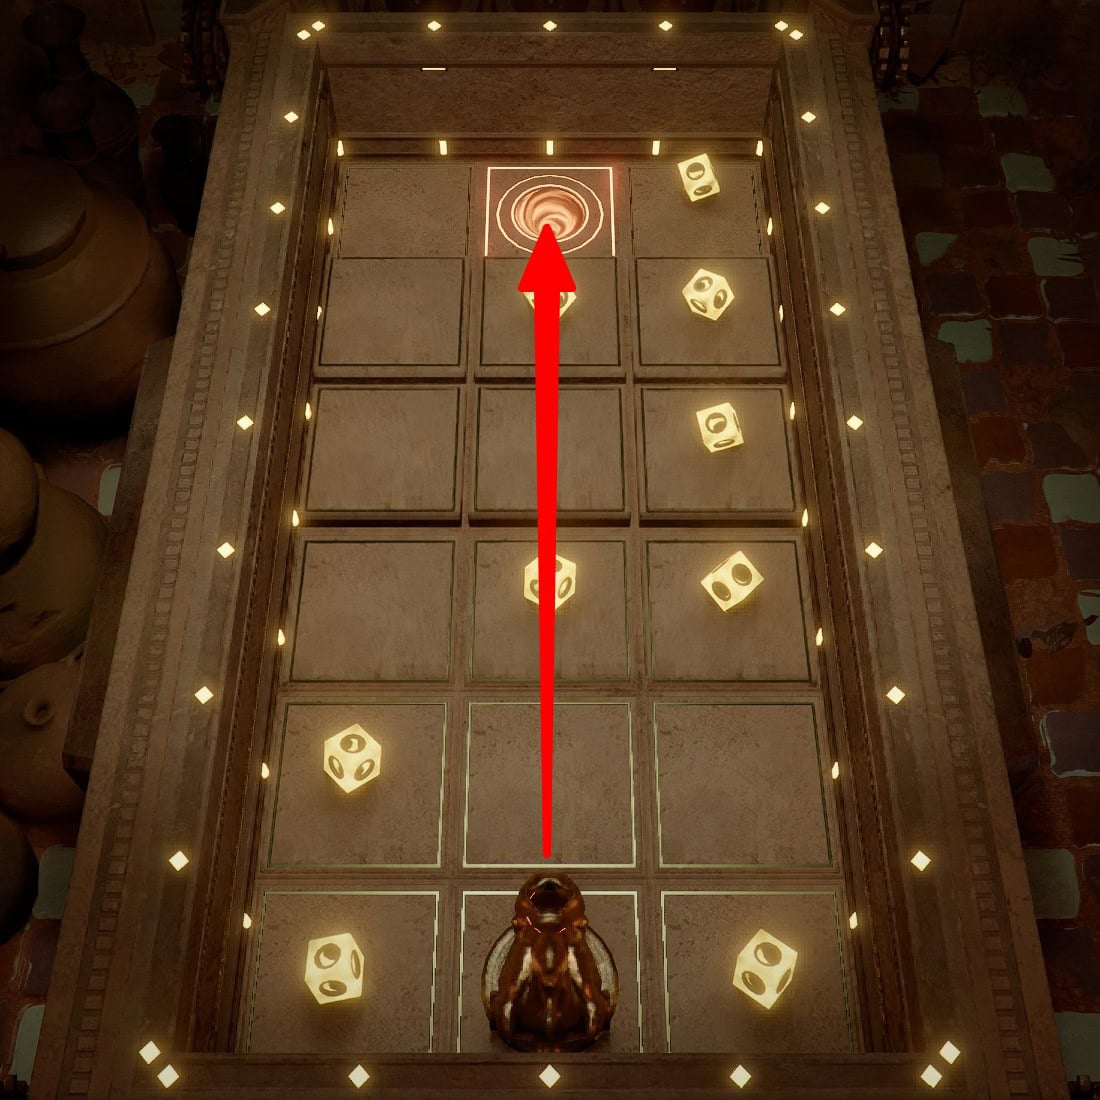
Level 23
Both the firing and hold title are moving. It’s the same challenge as Level 17 with the narrow bridge. Charge to 100 and fire when both are aligned in the middle. There is no need to aim.
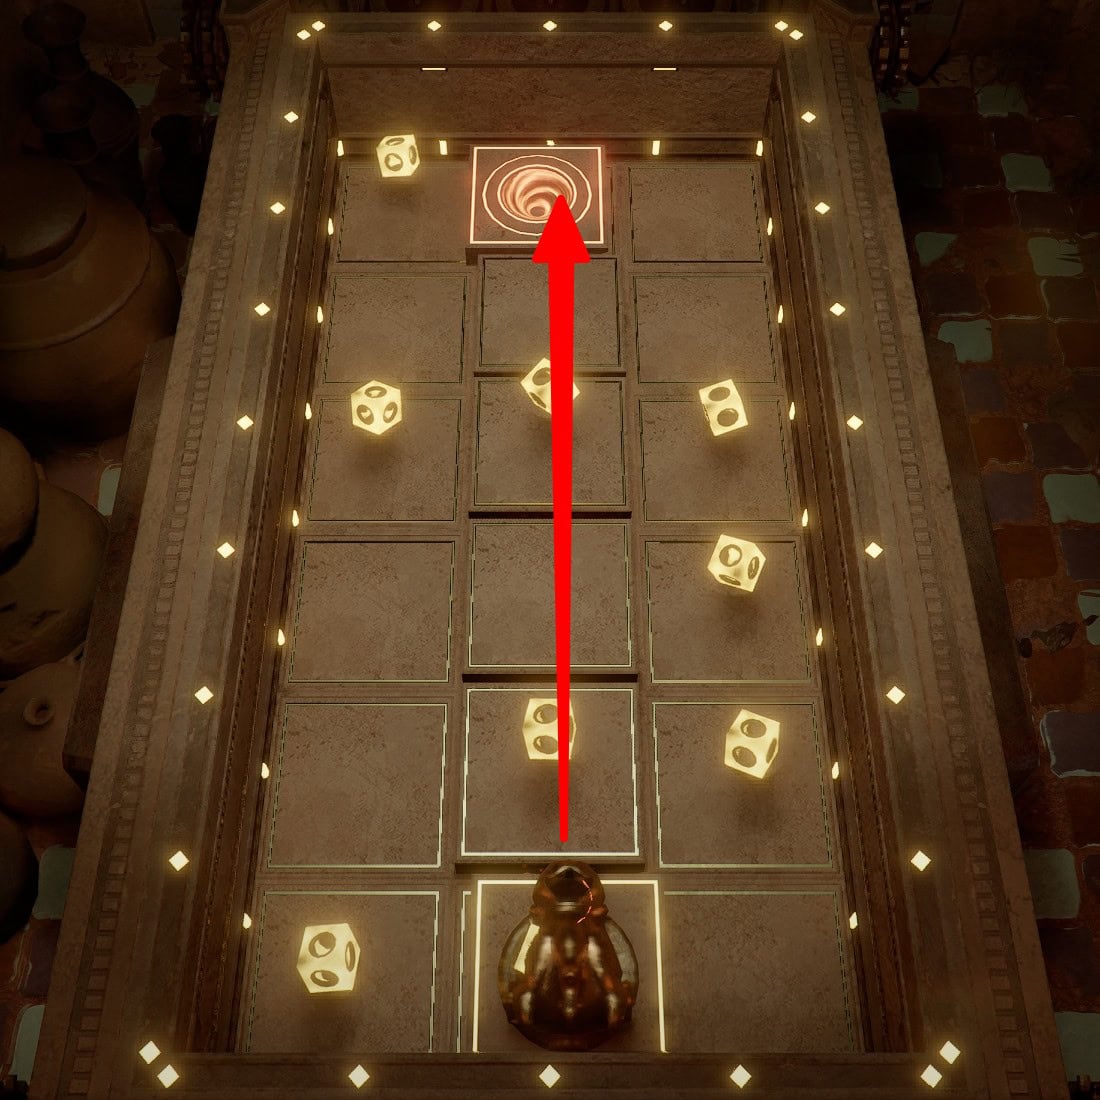
Level 24
The triangle obstacles rotate in unison, creating a periodic opening to a curved track at the end. Aim at the opening (don’t use first-person, just eyeball it), charge and hold at 100, then release as soon as the opening appears. It’s okay of the ball gets caught a little bit; it helps make sure it doesn’t get stuck on the track.
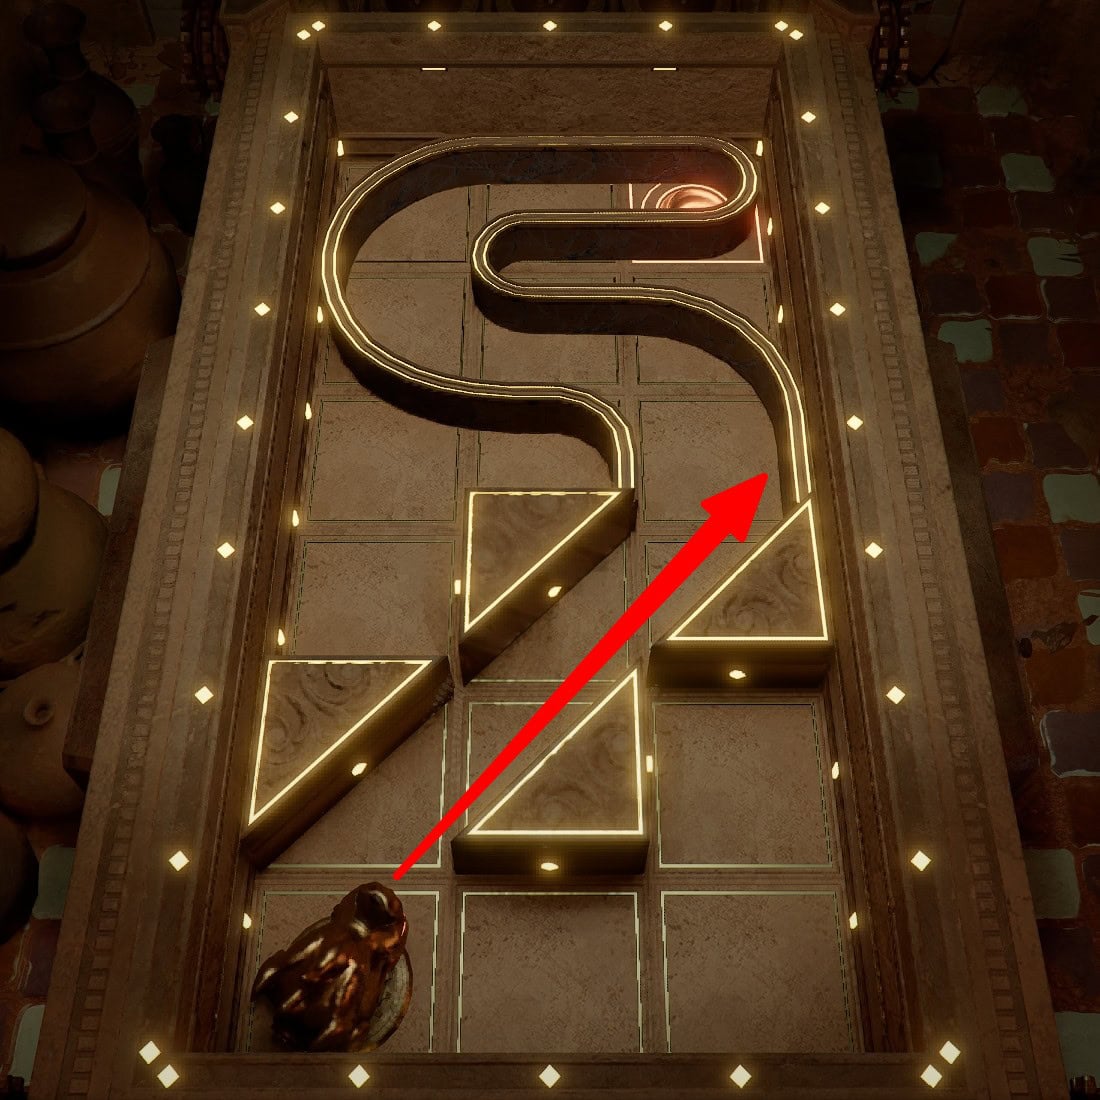
Level 25
Use first-person to aim at the left side center dash and charge to 50. If you overcharge, it may not go in.
Level 26
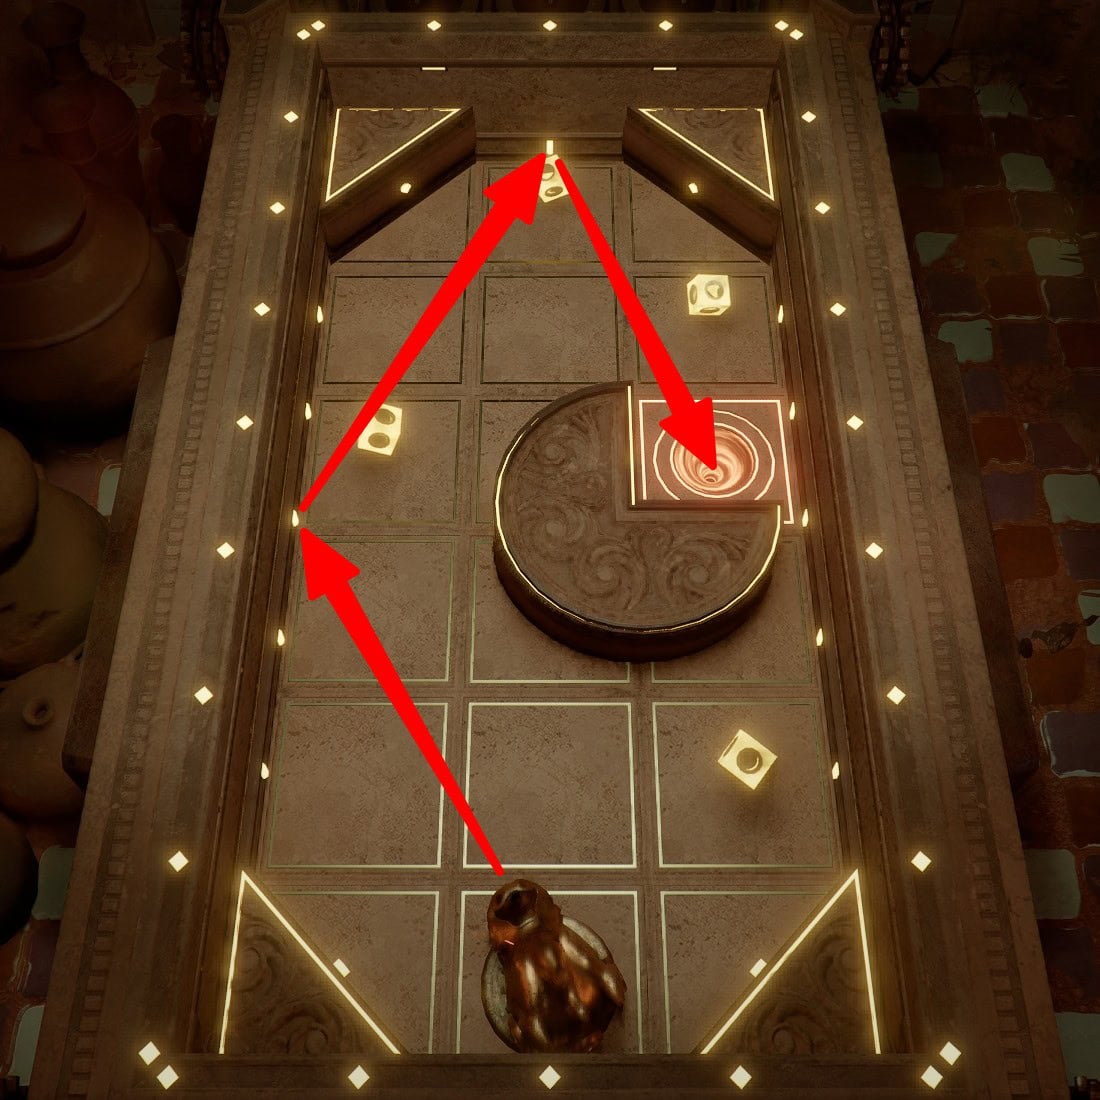
Aim so you’ll fire the ball straight down at the curved track. Charge to 100 and wait to fire until the triangle obstacle is coming back towards the track right as the lower corner passes over the final dash on the wall.
Level 27
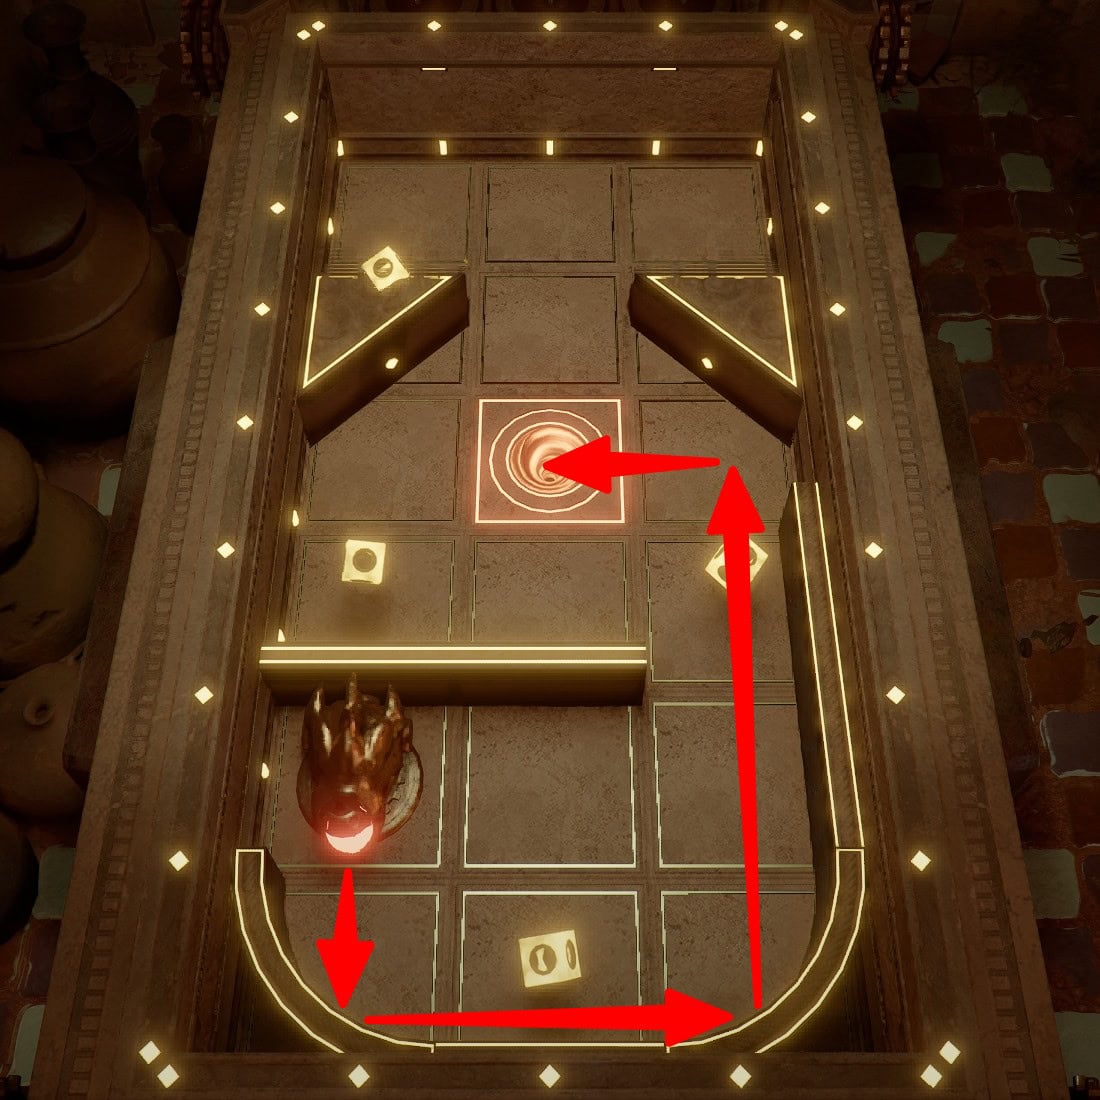
Aim directly at the hole but a little to the left. You want to avoid the ball colliding with the axis of rotation on the center wall. Charge to 100 and wait to fire until the wall obstacles are mostly not blocking your path. This level Levelis pretty forgiving with ricochets.
Level 28
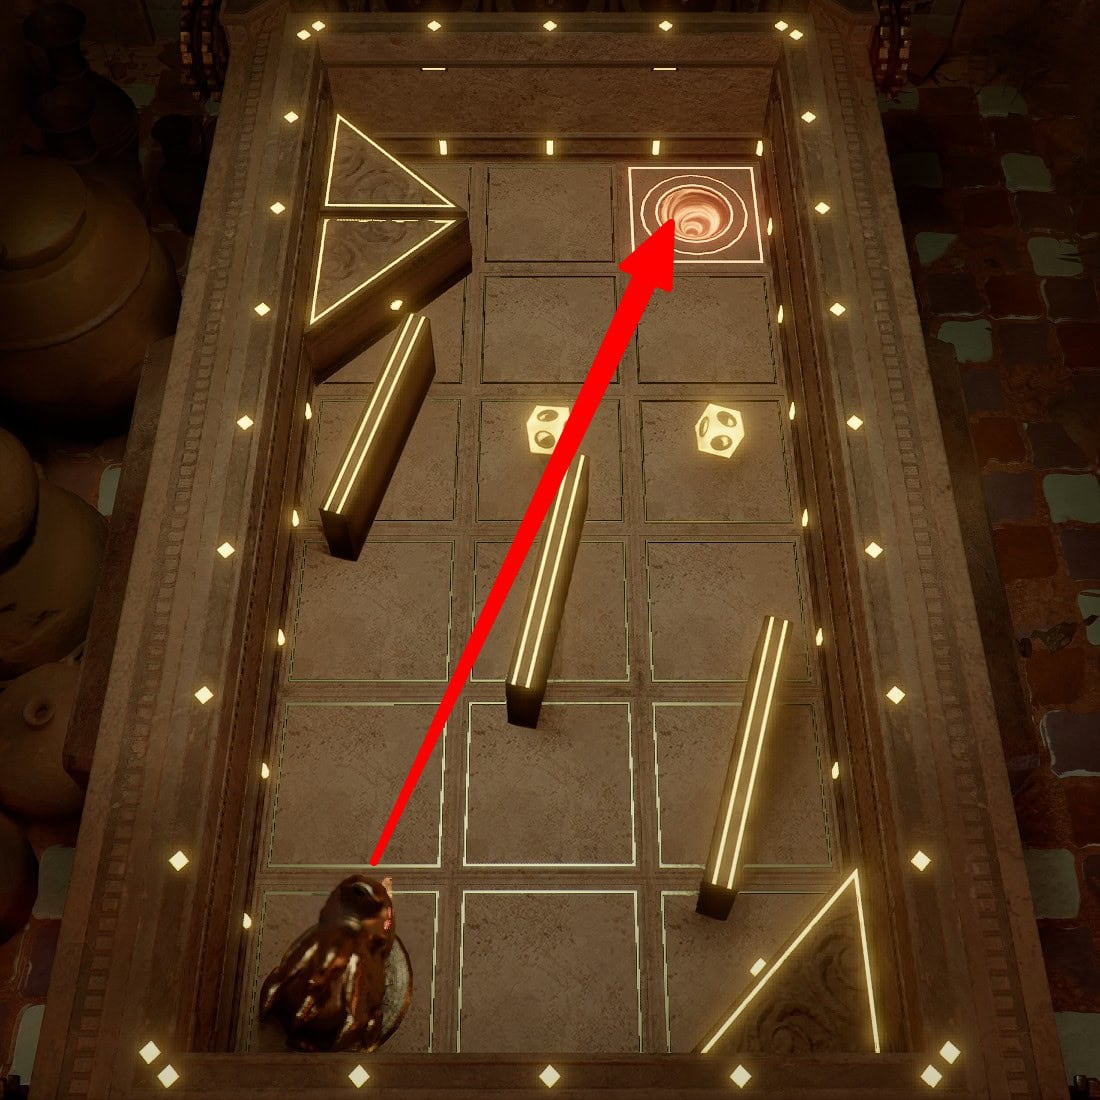
Use first-person to aim at the below-center dash on the right-side wall so the ball will ricochet off the rotating circle and make the ball spin weird. Avoid letting the ball hit the rotating wall, so fire after the wall passes through the ball’s trajectory. Charge to 40-50. You need speed to avoid the wall but not too much or the ball ends up bouncing everywhere.
Level 29
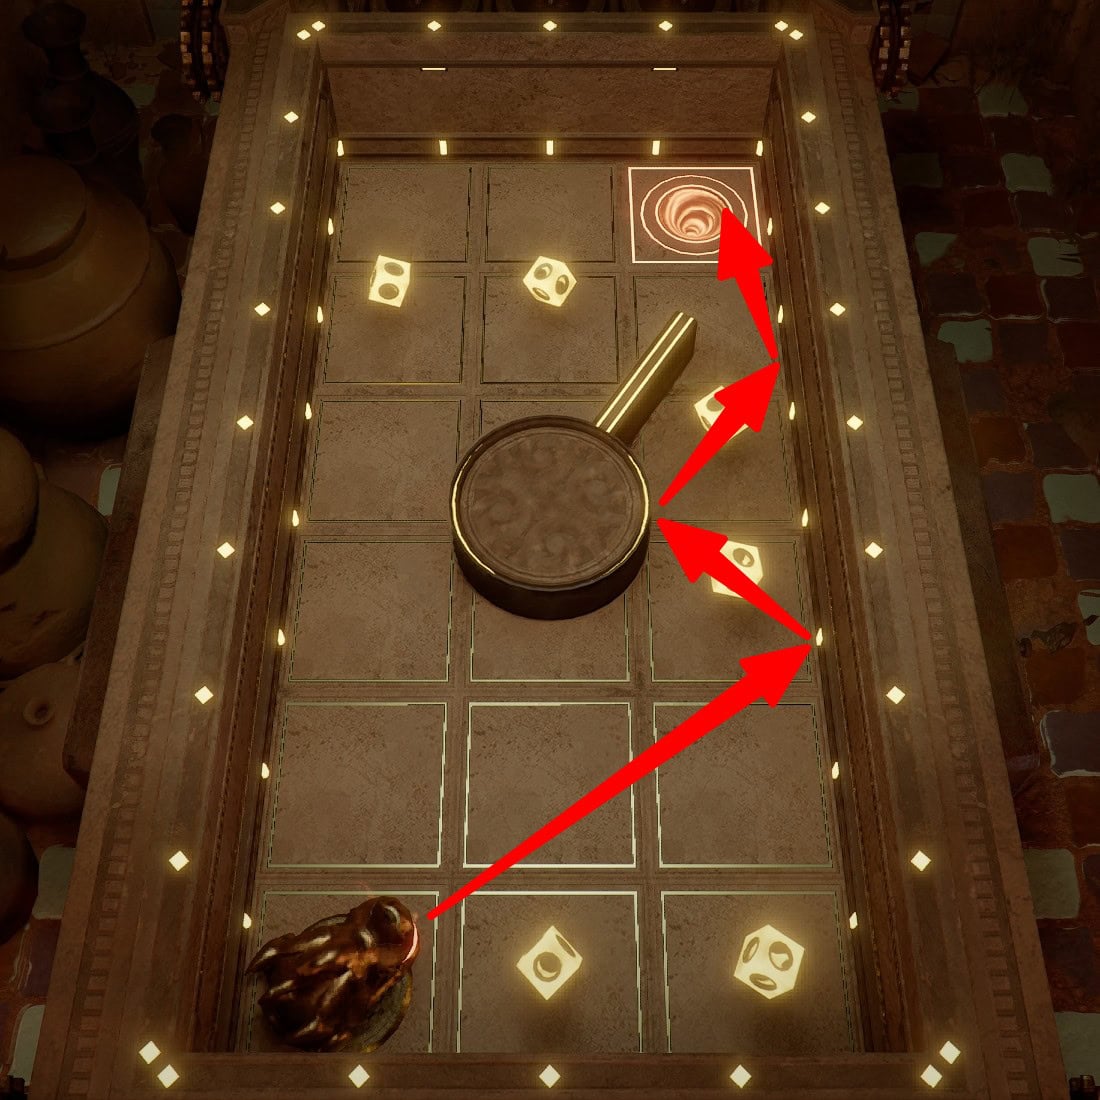
Without using first-person, aim the ball diagonally so it will first hit the left side of the inner S-shaped spinning wall. Charge to 100 and hold until the semicircles open up. The goal is for the ball to ricochet against the inner S wall, then the outer curve, followed by the back wall. The curves will dampen the spin a lot, so you need full power. Try aiming a little bit to the left if it’s sticking to the outer edge of the right wall at the end.
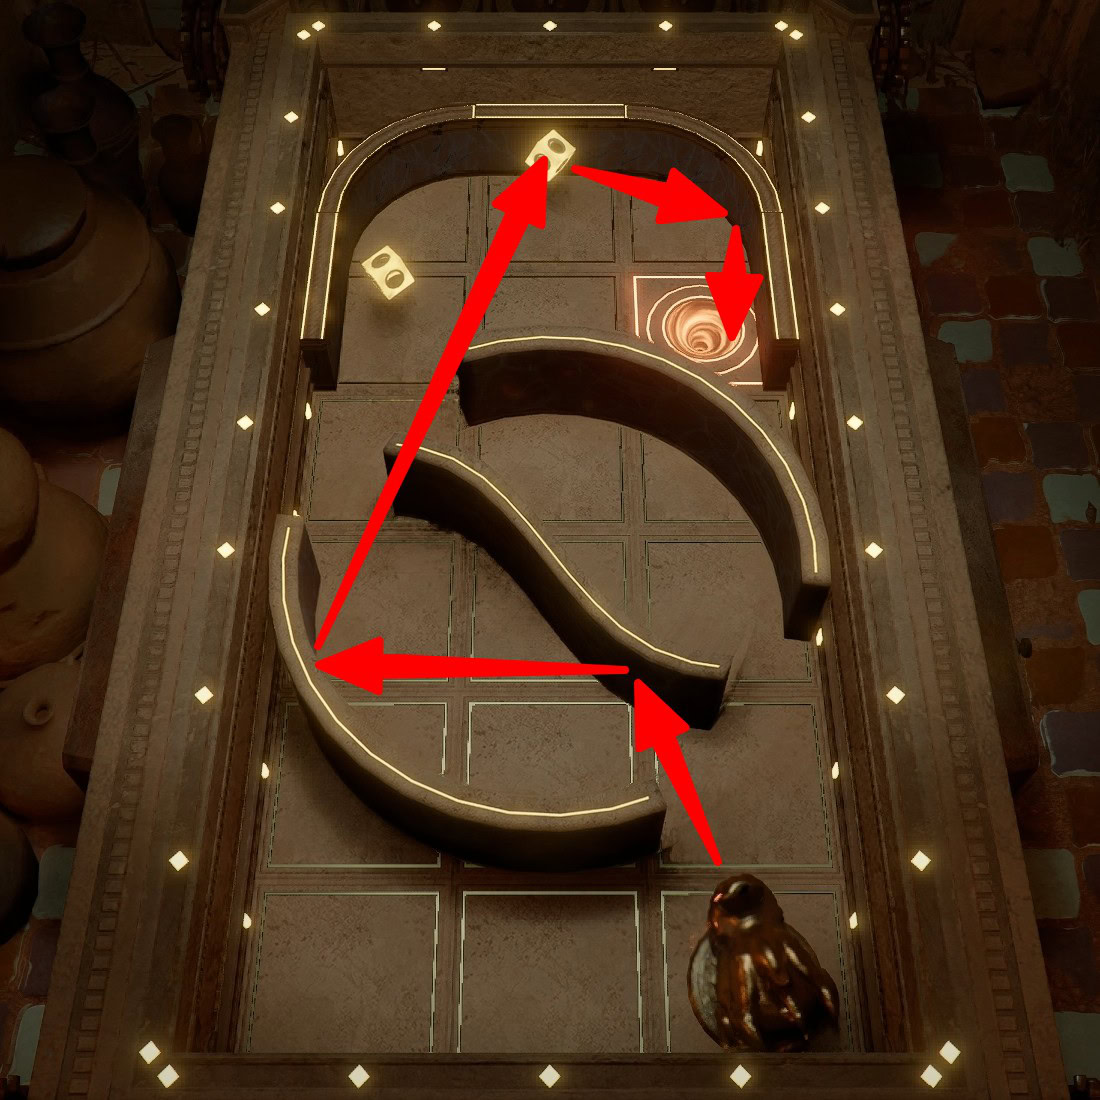
Level 30
Level 30 is maybe the most obnoxious level in the whole thing. The goal is to get the moving wall on the right to push it into the hole. Aim at the center of the moving wall, use the dash behind it if you like, then wait for the wall to be fully extended (like it just finished a push), charge to less than 10 and fire immediately.
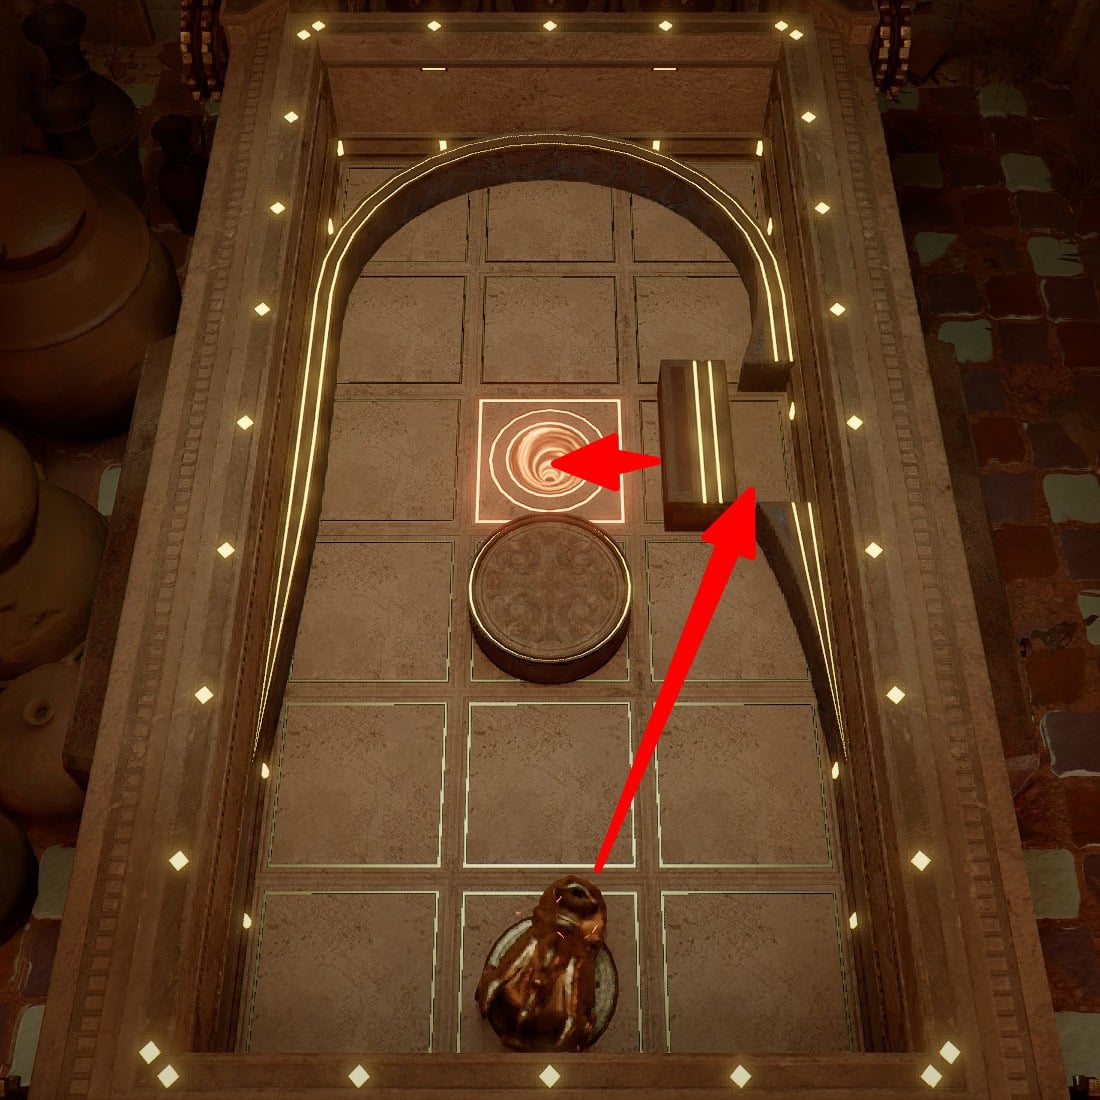
Levels 31-40 Walkthrough
Levels 31-40 require you to use ramps to get around obstacles and contend with tight tolerances.
You receive a Large Moonlit Garden Carpet, 3 Material Boxes of Fortune, and a Golden Apple for completing Level 40, the “Ethereal Orbit” Challenge.
Level 31
Aim for the midpoint between the center dash and the one below it on the right-side wall, roughly parallel with where the semicircle stops. Charge to ~75, but it doesn’t matter too much.
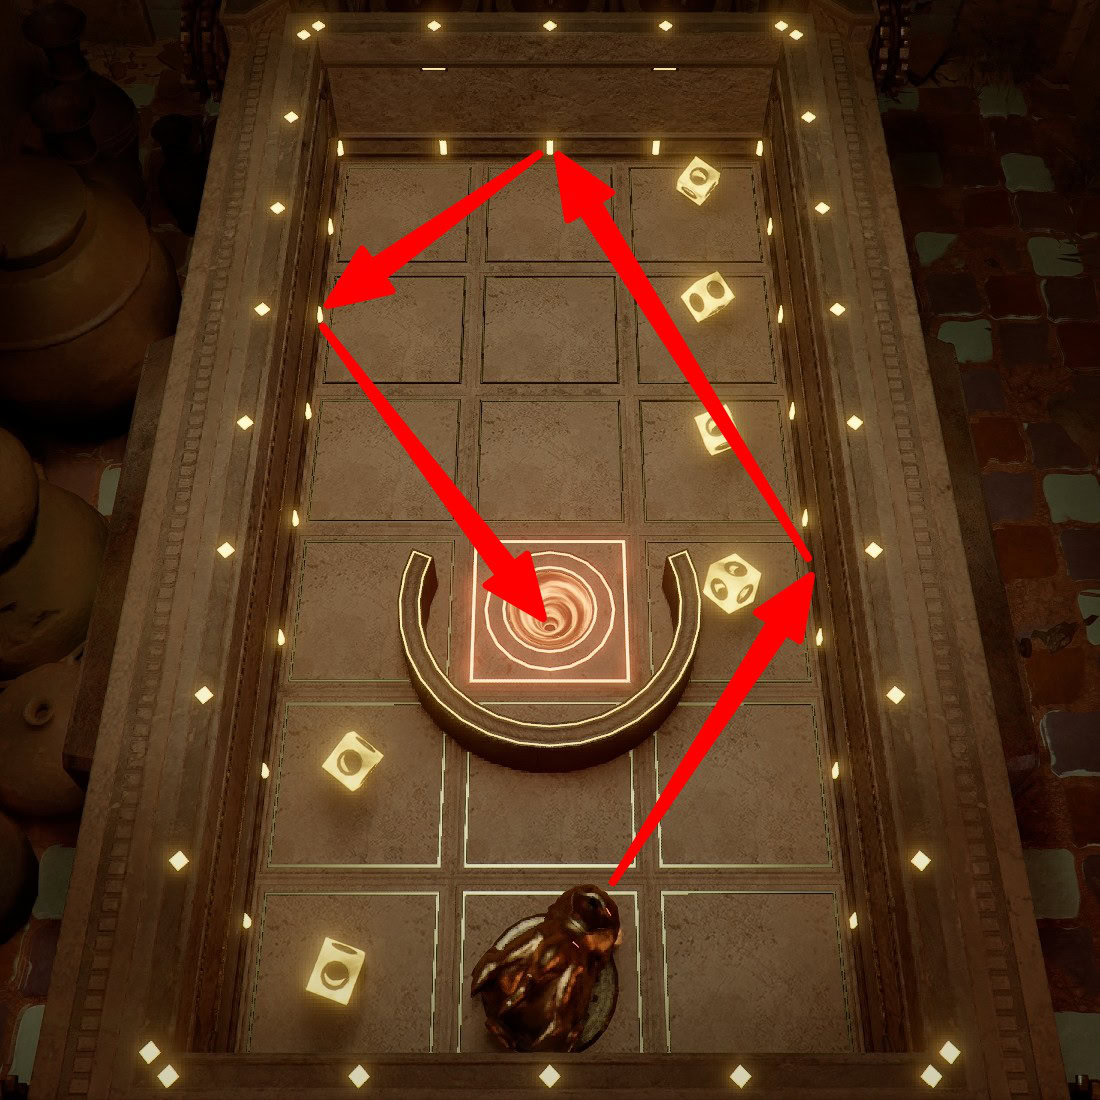
Level 32
Aim at the center dash on the right-side wall (parallel with the wall obstacle) and charge to 50.
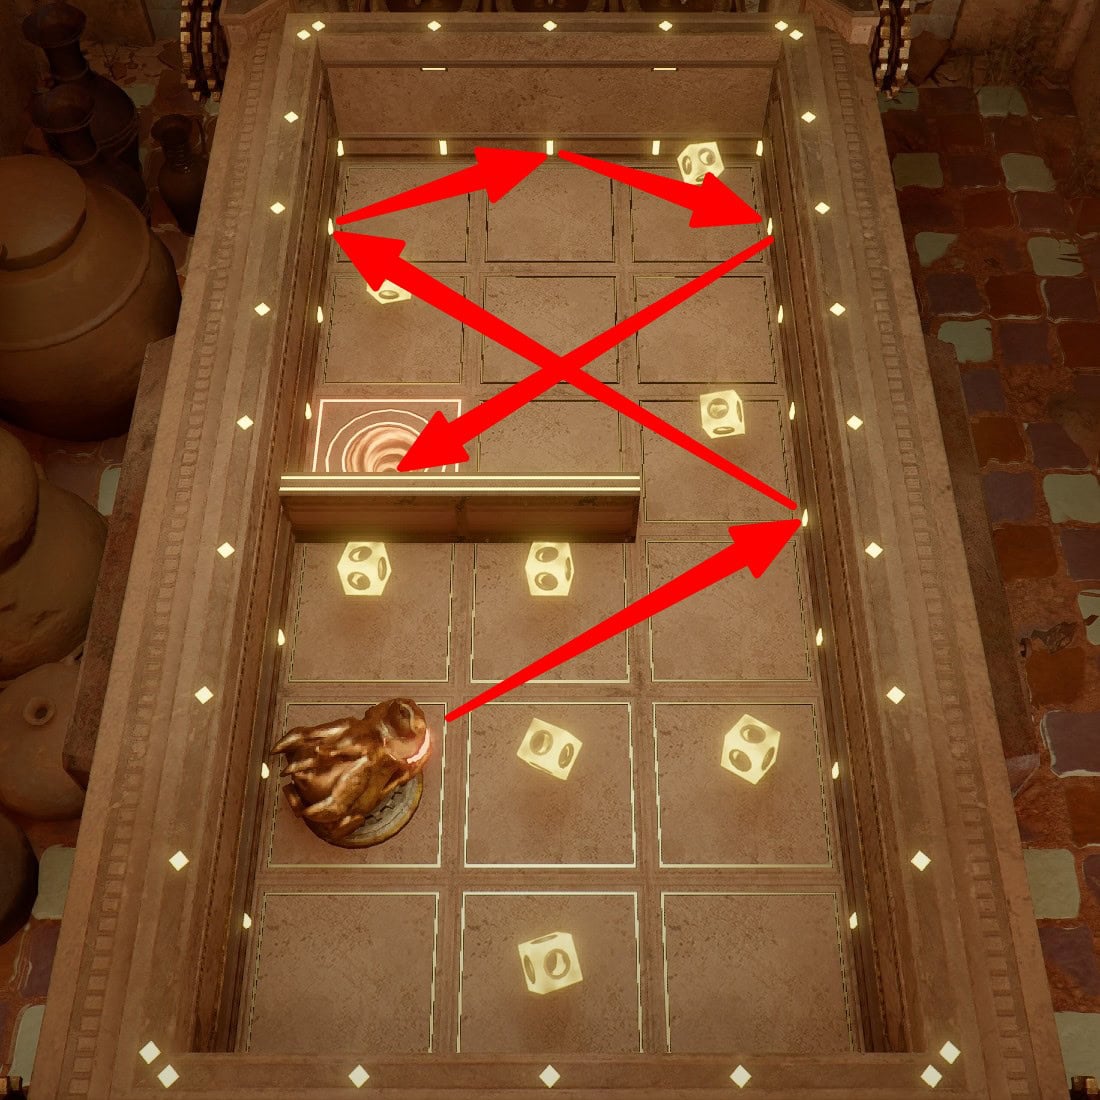
Level 33
Use first-person to aim at the center dash on the left-side wall. Precision is important to pass through the narrow gap. Charge to 50.
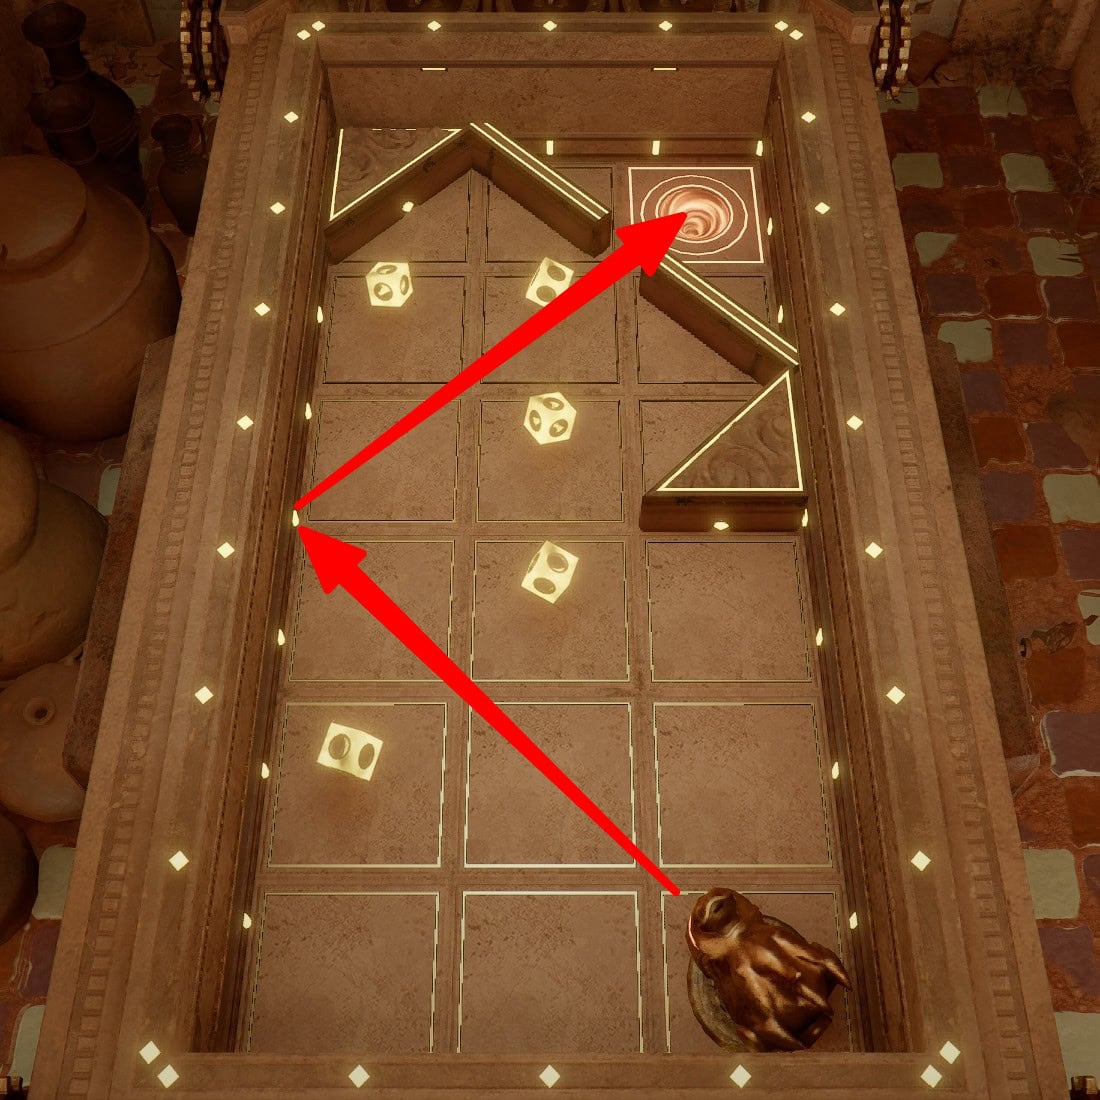
Level 34
Use first-person to aim at the center dash on the back wall. Charge to 50.
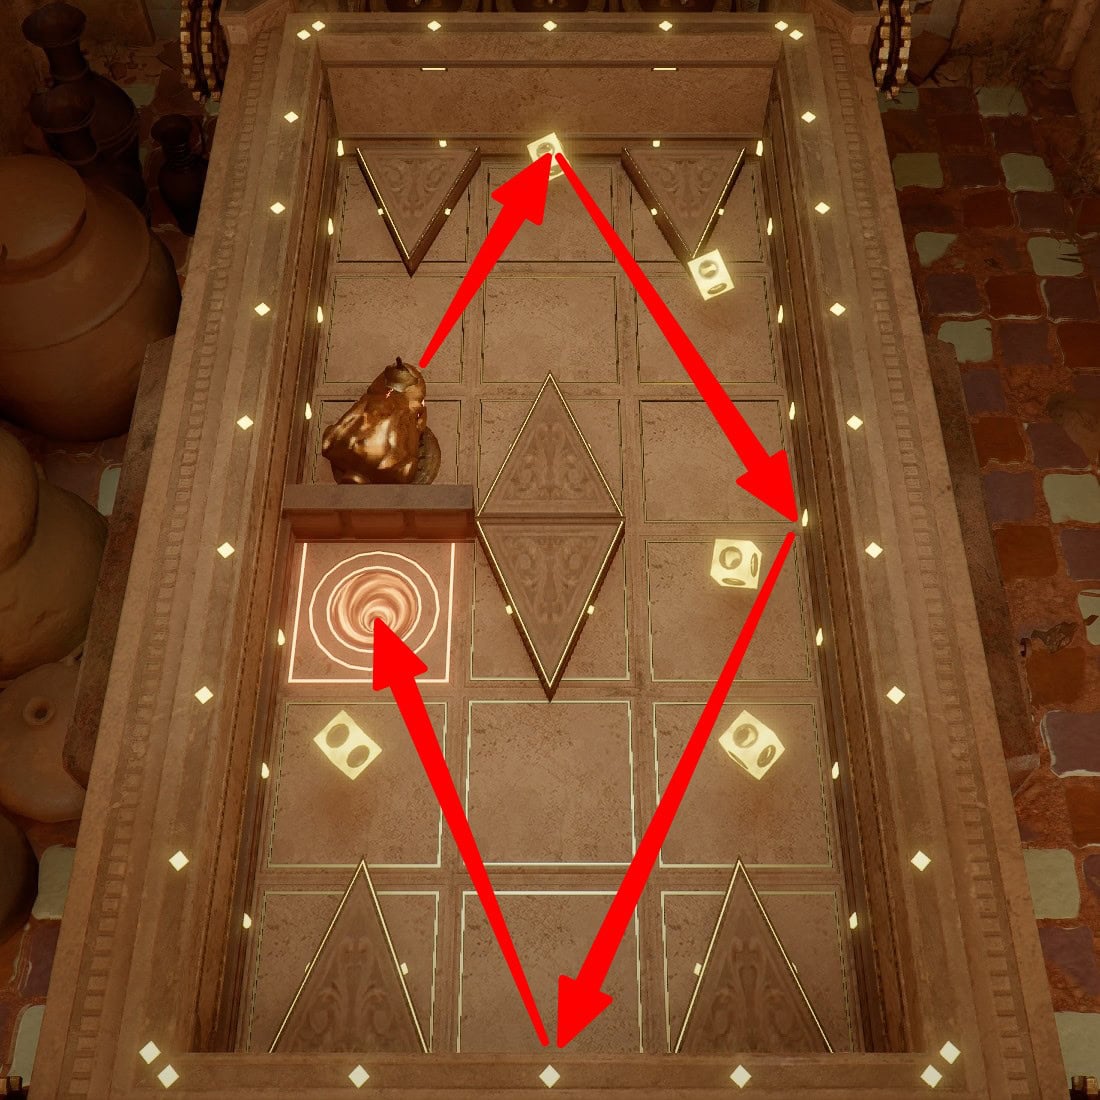
Level 35
Aim so that the ball will follow the curved wall all the way to the end. Charge to 100 and wait until after both walls on the right are up and fire the moment the first/lower wall finishes retracting into the table before the second/rear wall begins to retract.
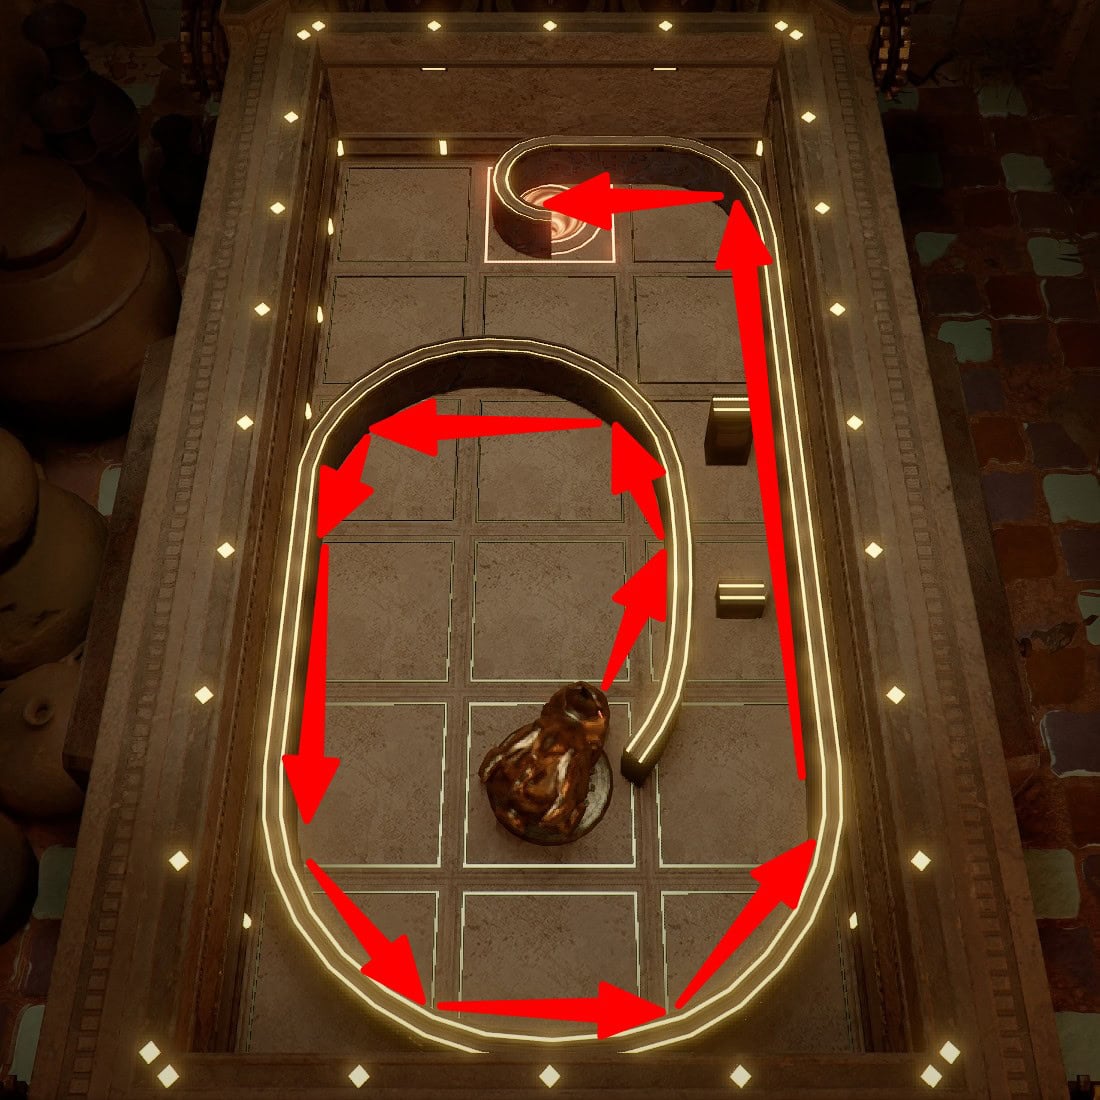
Level 36
Use first-person to aim the ironsight at the dash on the bottom left triangle corner. Charge to 75. Things get a weird at the top, but it works. You may need to tweak your aim very slightly.
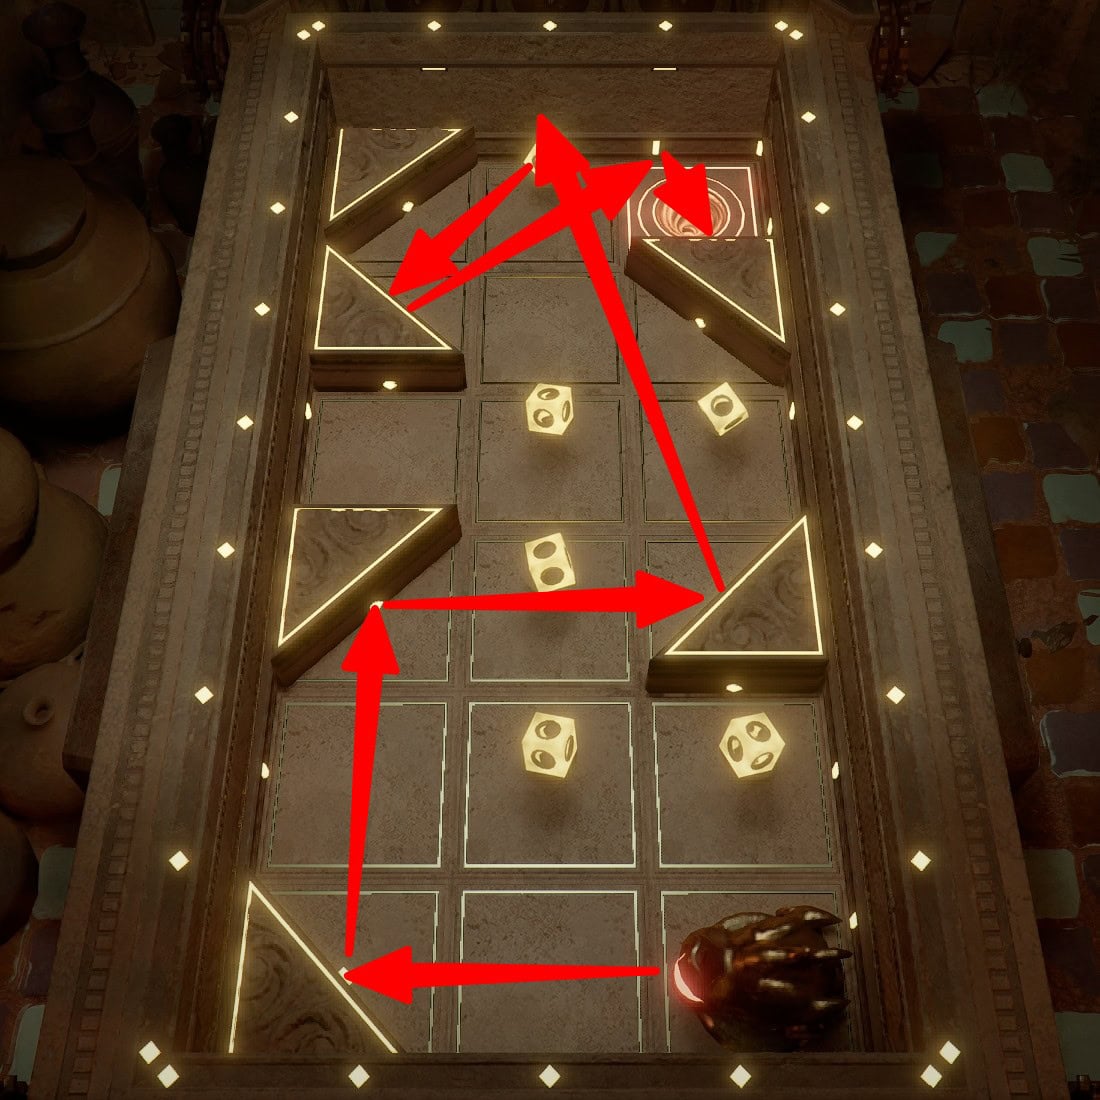
Level 37
Aim between the first and second dashes on the lower right-side wall and charge to 100. You may only need to charge to 50.
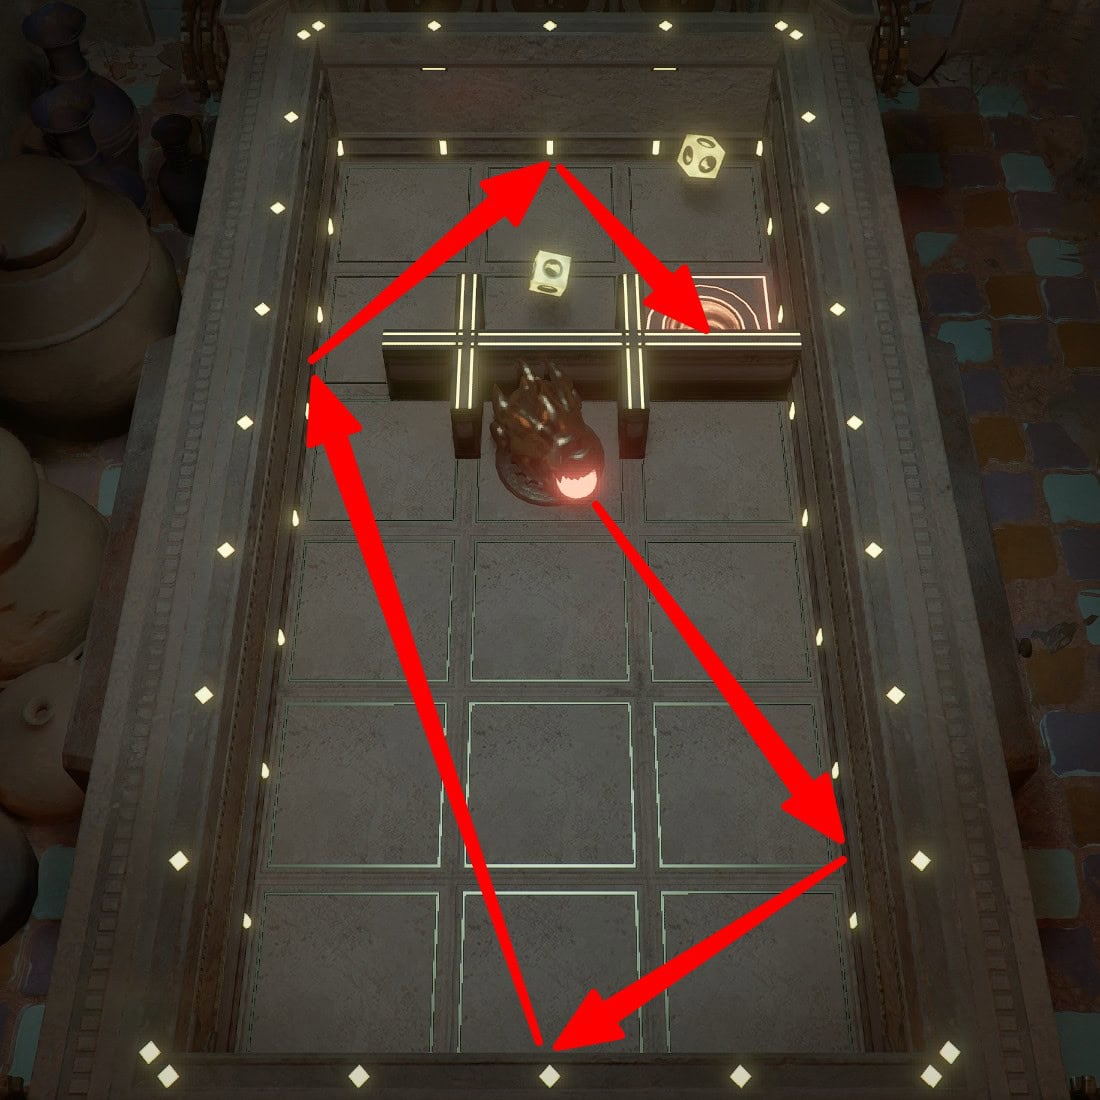
Level 38
Use the ramp to make a U-turn to get around the wall. Aim slightly diagonally and charge only to 15. Remember, you don’t need much juice if you don’t plan to go over the ramp.
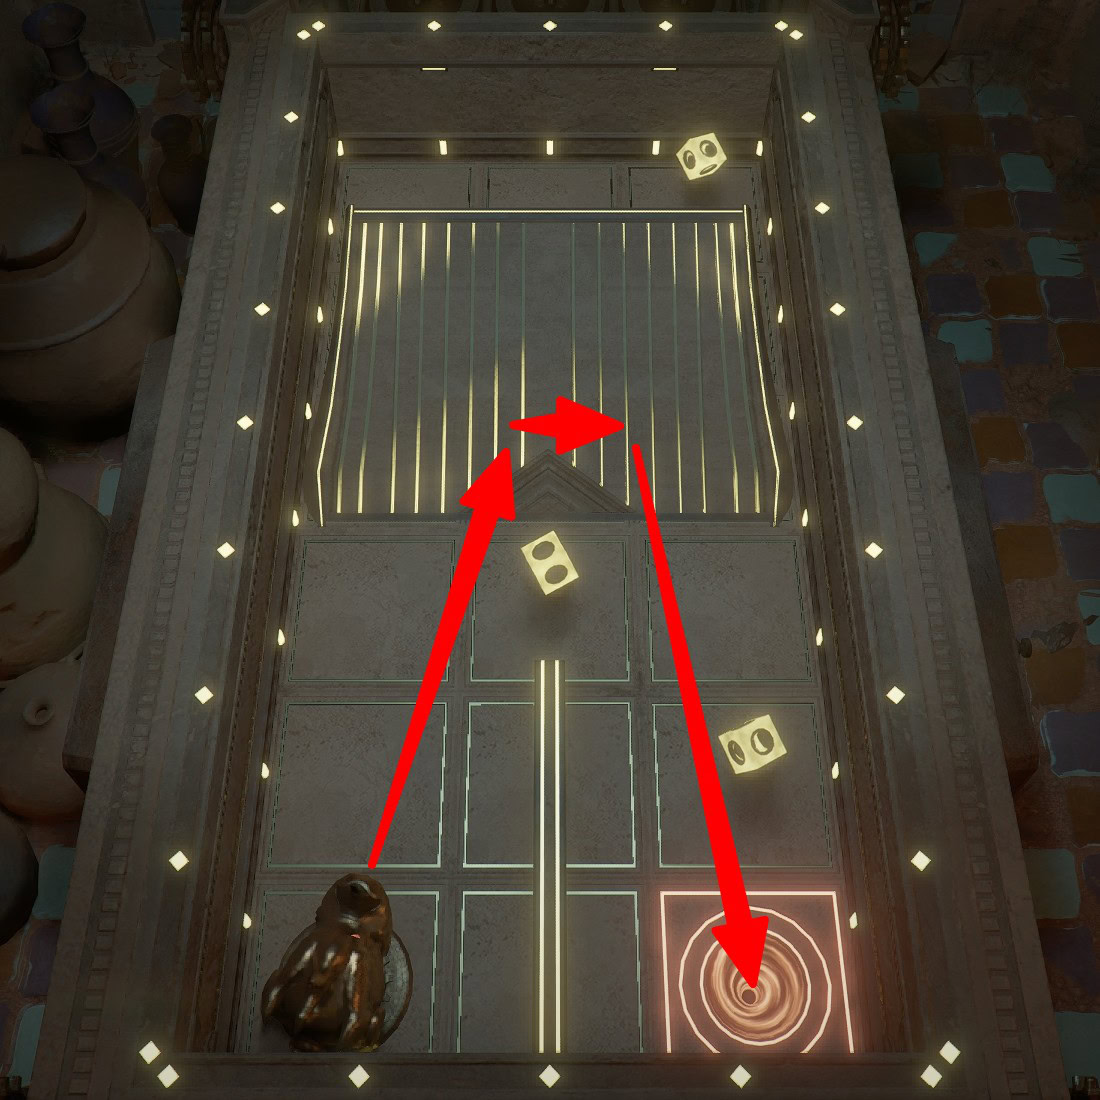
Level 39
Aim roughly at the center dash on the left-side wall. Charge to 15-20.
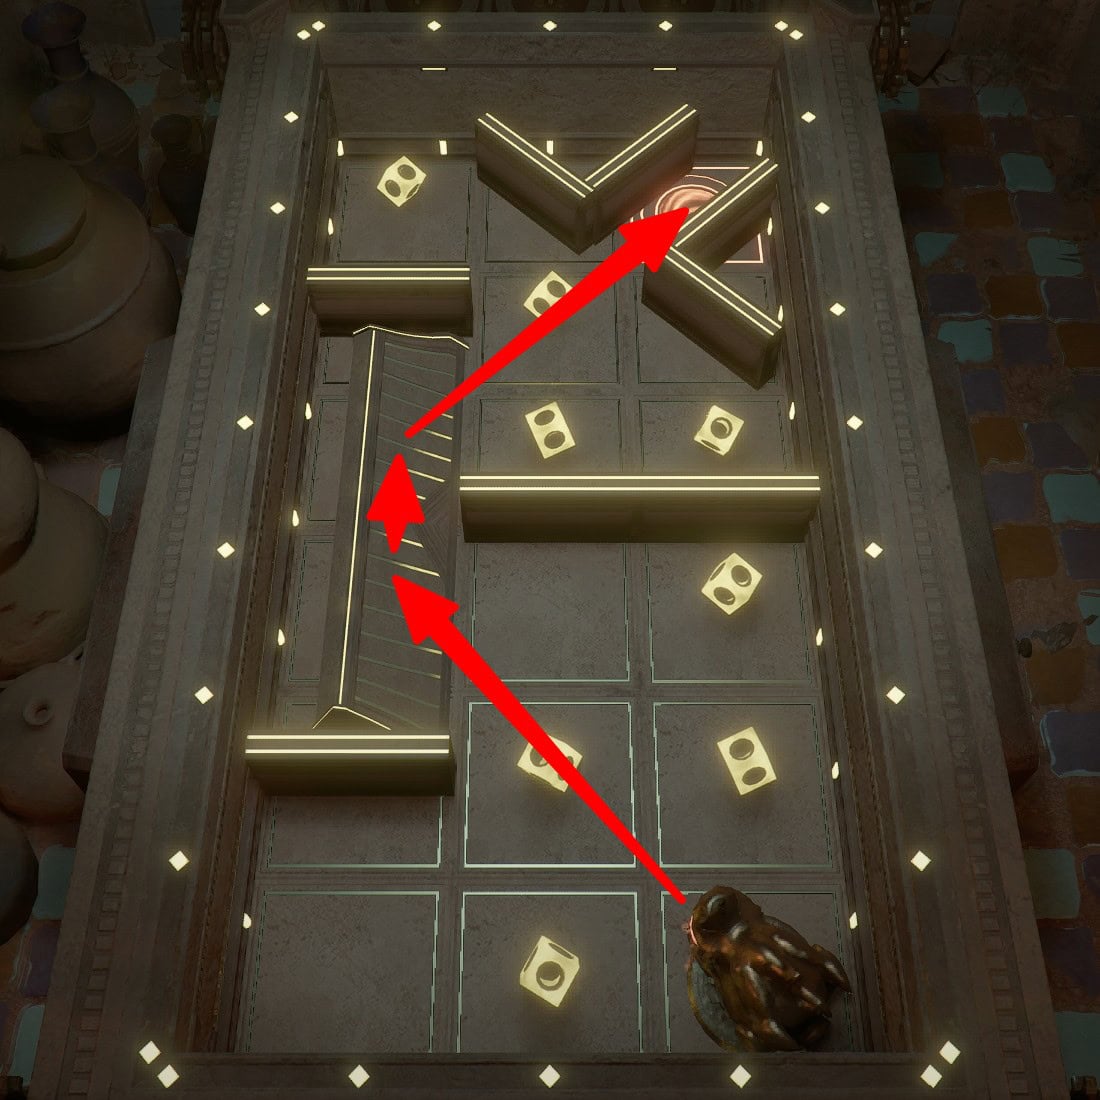
Level 40
Aim at the center of the bottom half of the ramp on the left and charge to 15.
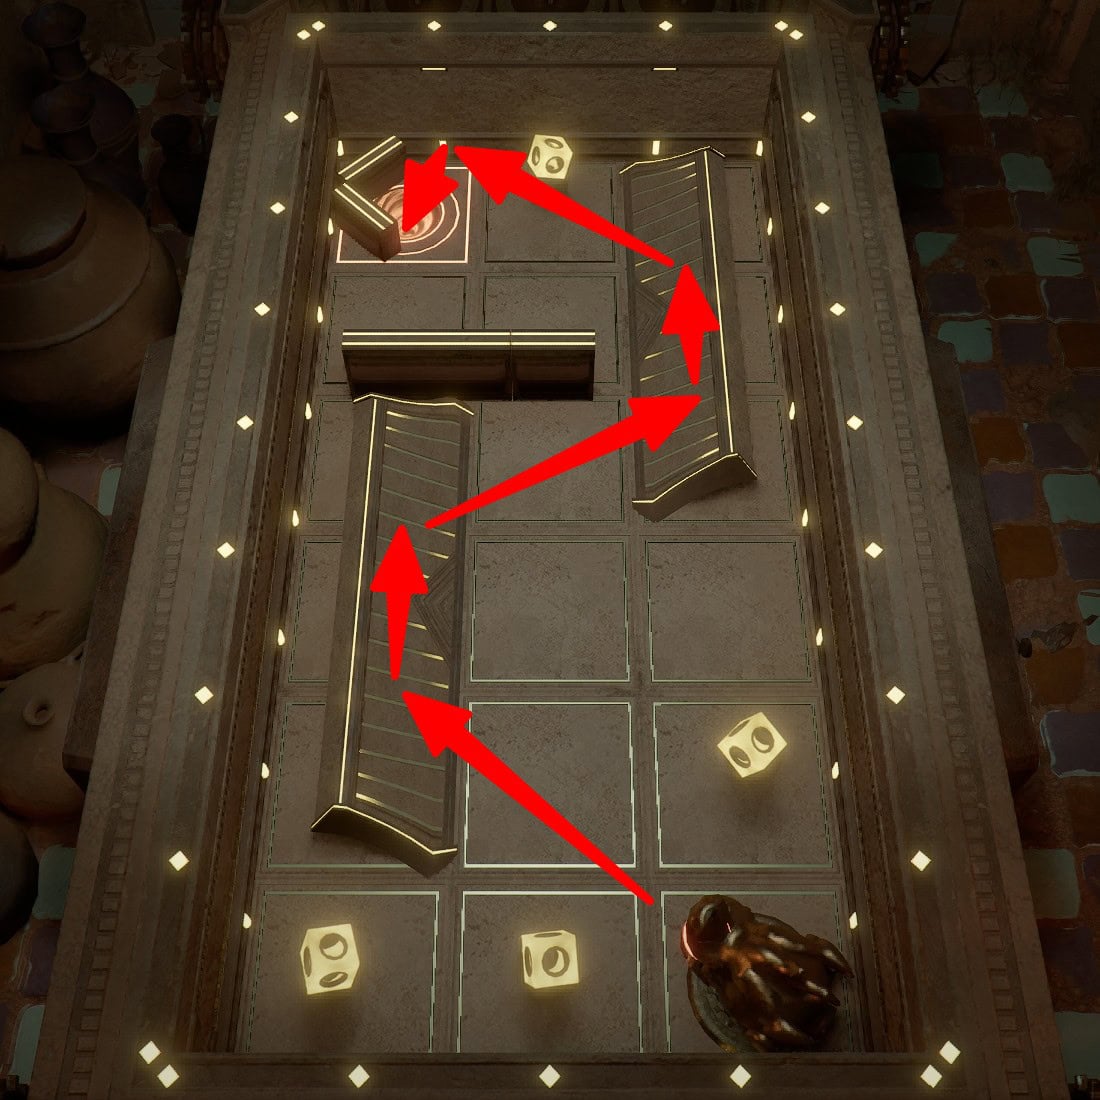
Levels 41-50 Walkthrough
The final 10 levels introduce a second ball you have to hit in a second hole with the same shot and/or require precise aim and charge control.
You receive a Large Stone Knotted Carpet, Twilight Starcluster Light chandelier, a Medium Artifact Chest (5 Abyss Artifacts), 3 Golden Apples, the Blueprint: Clanging King, and 5 Boxes of Fortune for completing level 50, the “The World in an Orb” Challenge.
Level 41
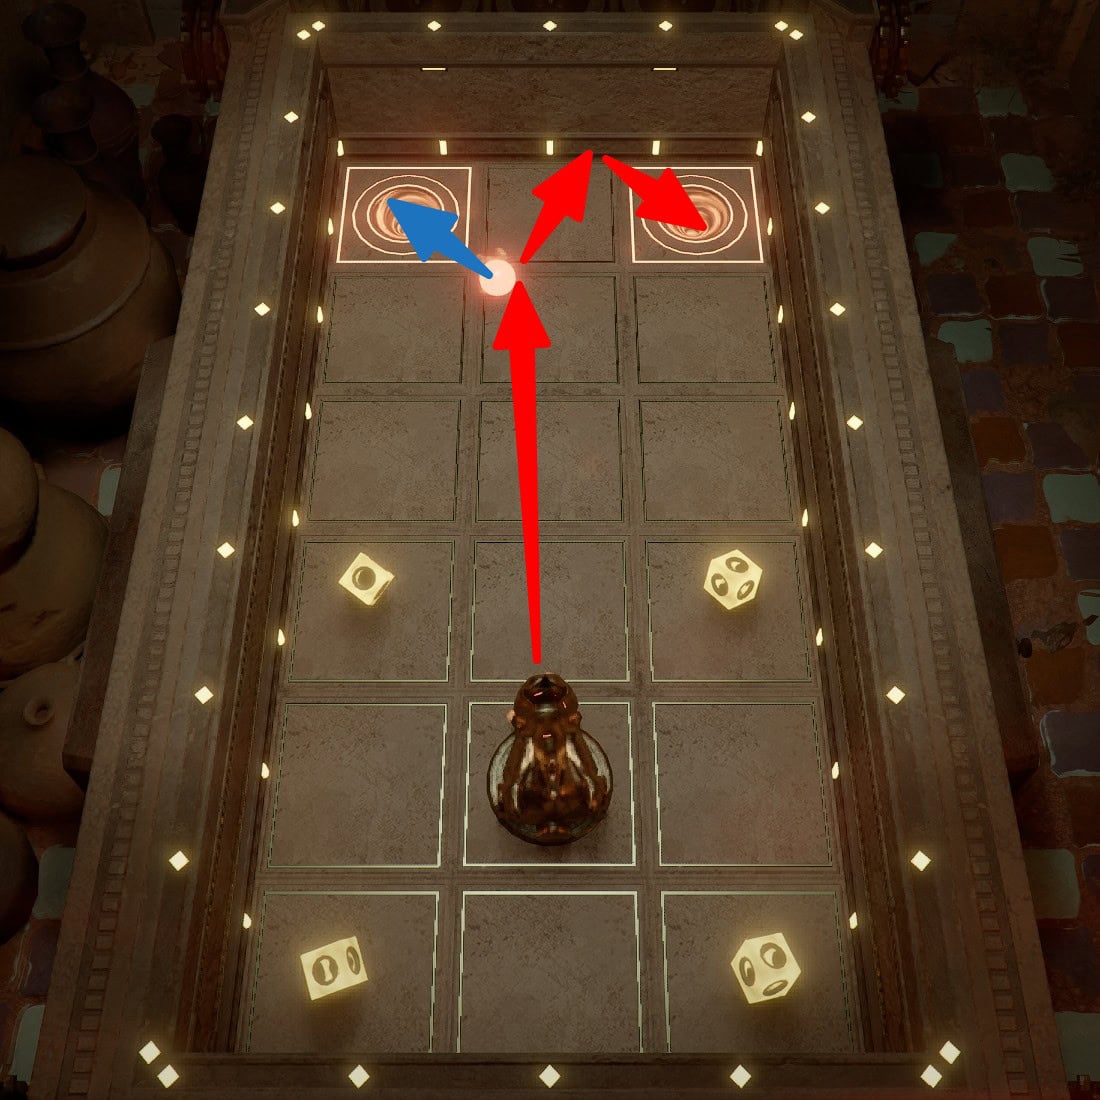
Now there’s a second ball that you have to hit with the first one and get both to go into their own holes. You can’t have both go into the same hole, either. Aim slightly to the right of the ball so it’s not quite a head-on collision and charge to 50. The ball you’re firing will go into the right hole and the one on the table will go into the left hole.
Level 42
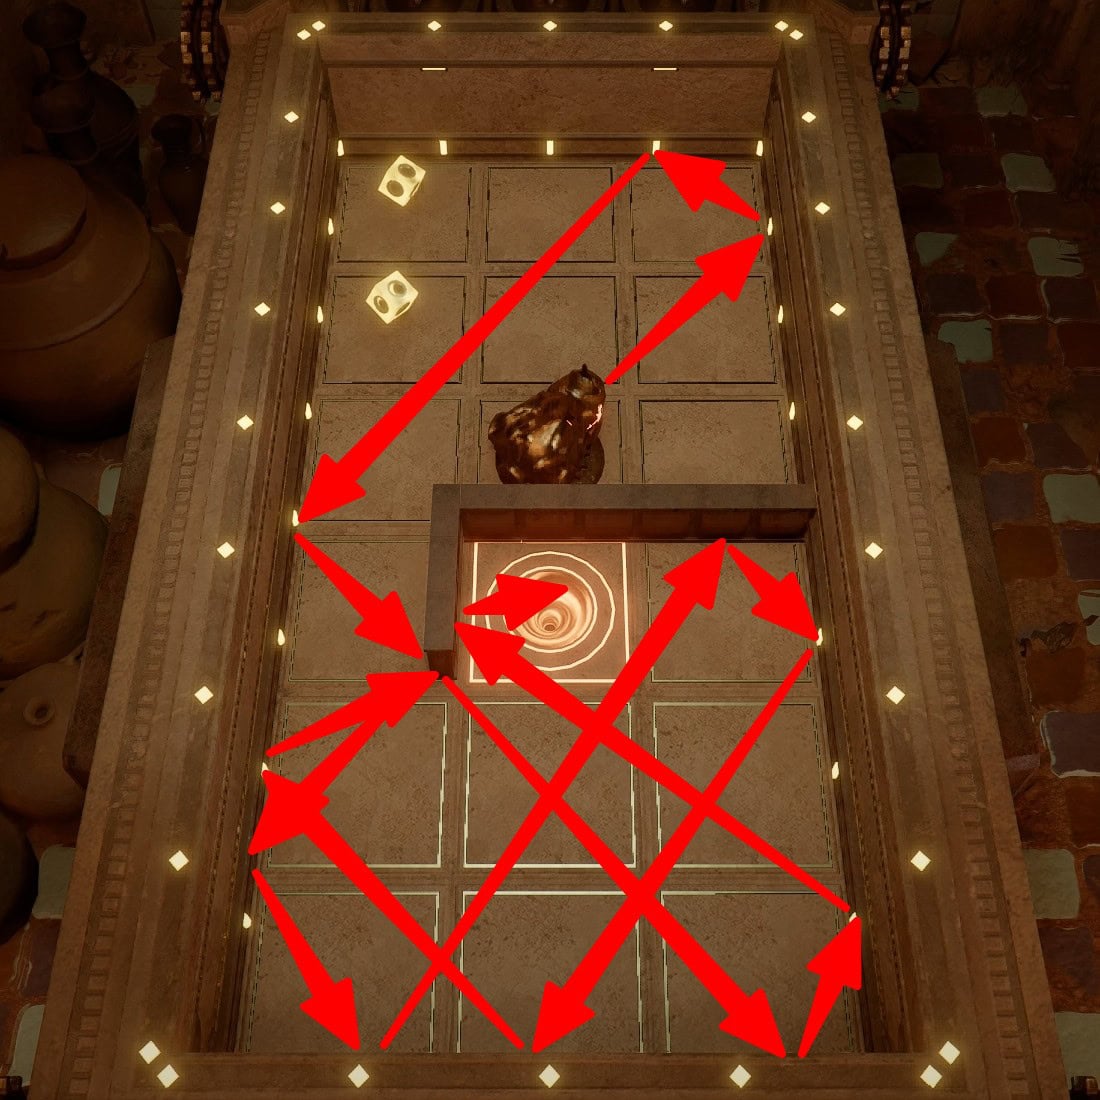
Use first-person to aim at the top right dash on the right-side wall and charge to 75. This one is a bit finicky and ricochets a whole lot in the bottom half. You might be able to get more reliable results if you aim a little lower on the wall.
Level 43
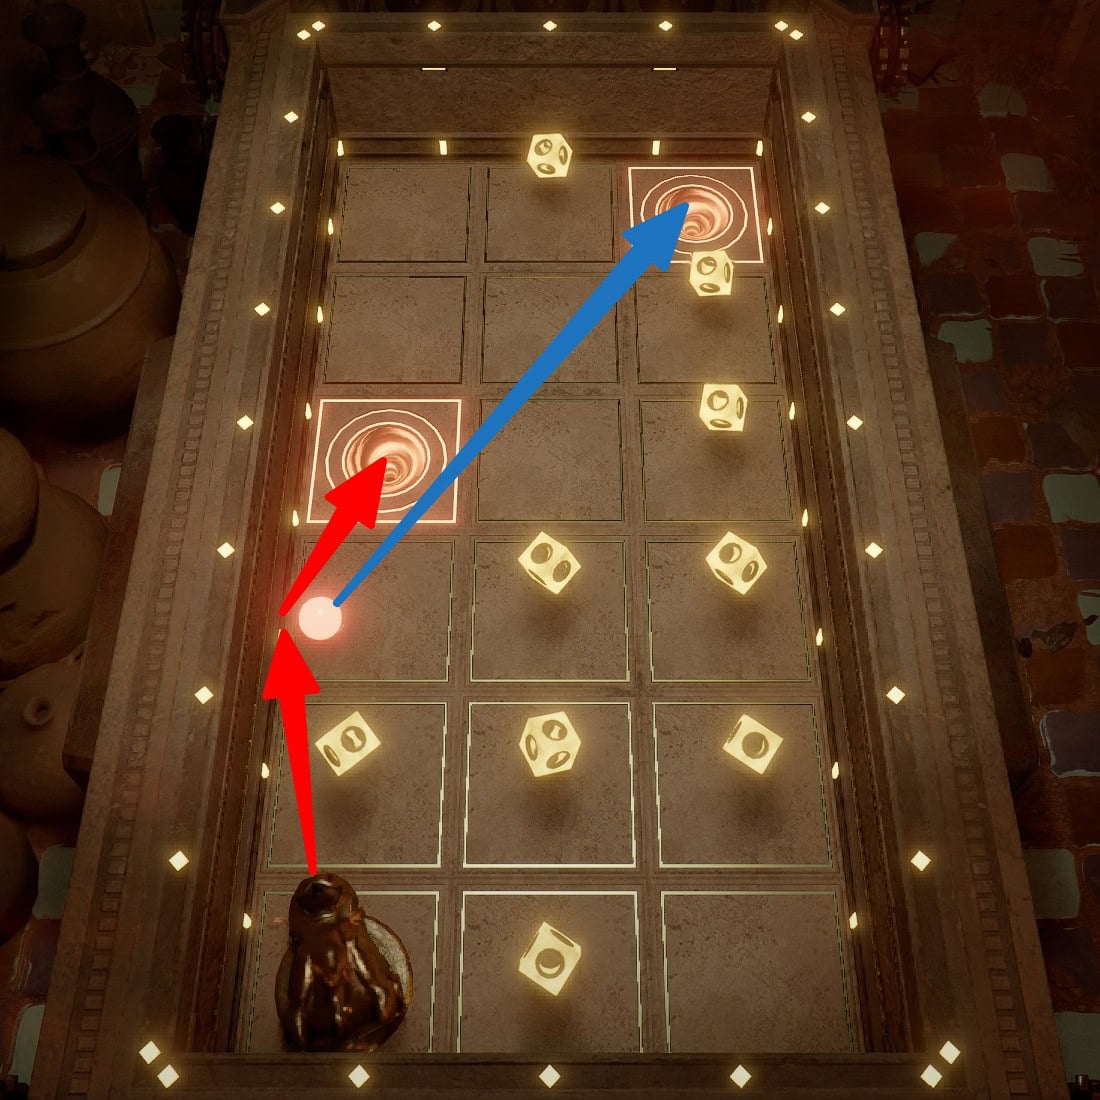
Use first-person to aim the ironsight at the dash next to the other ball. Charge to 50 and that ball should strike the other one, causing the one you fired to go into the hole on the left and the other ball to go into the hole on the right.
Level 44
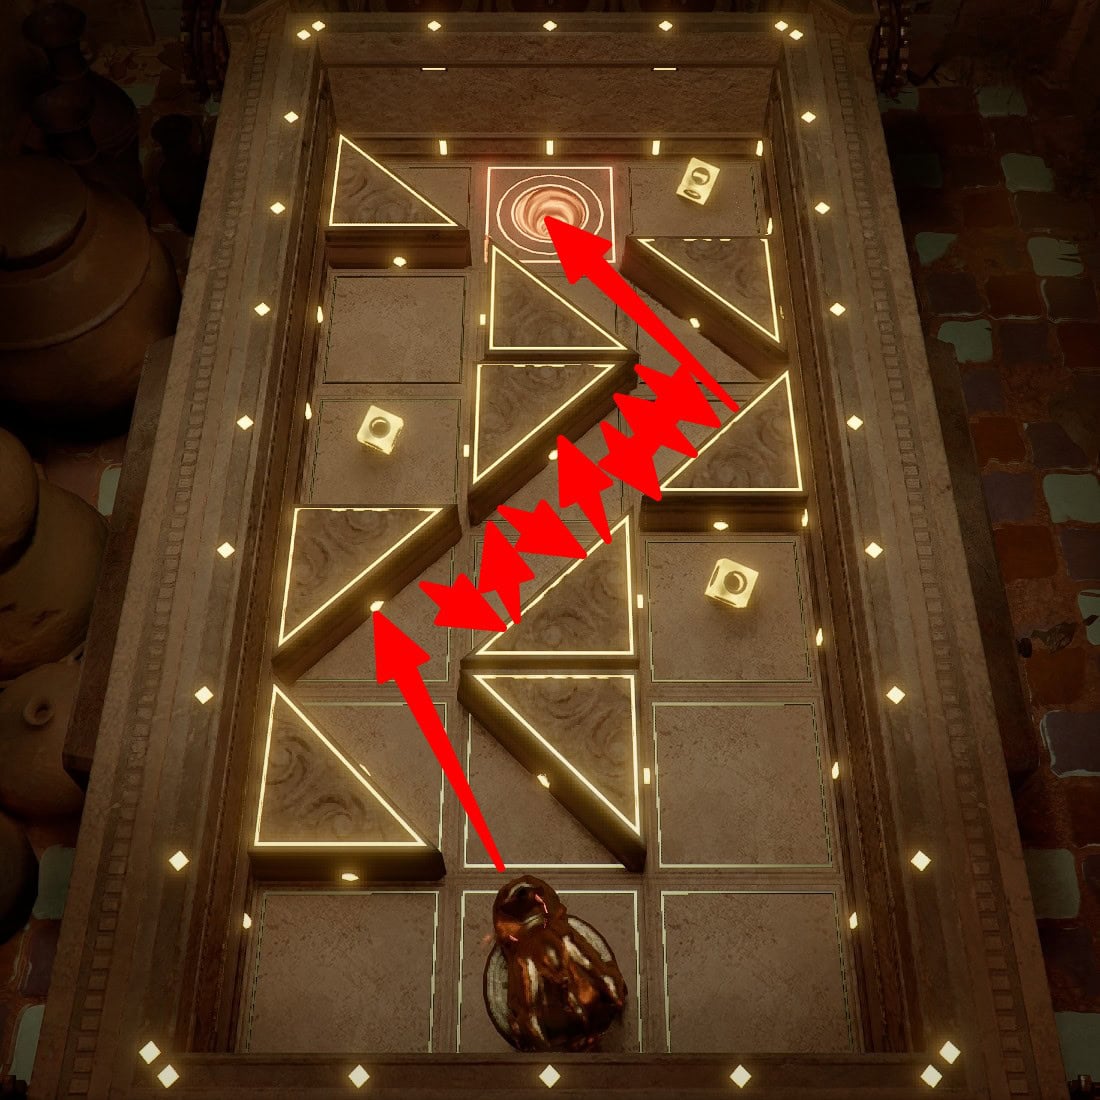
Triangular obstacles open and close in sequential unison that periodically create a path. Use first-person to aim at the center dash on the second triangle from the bottom when it’s momentarily stopped in the left column. Charge to 100 and wait to fire until it has reached that momentary stop as the later triangles are almost in position.
Level 45
This one has two balls you have to get in separate holes. Aim directly at the center of the ball and charge to at least 75. You might need to make minor corrections to aiming or charging.
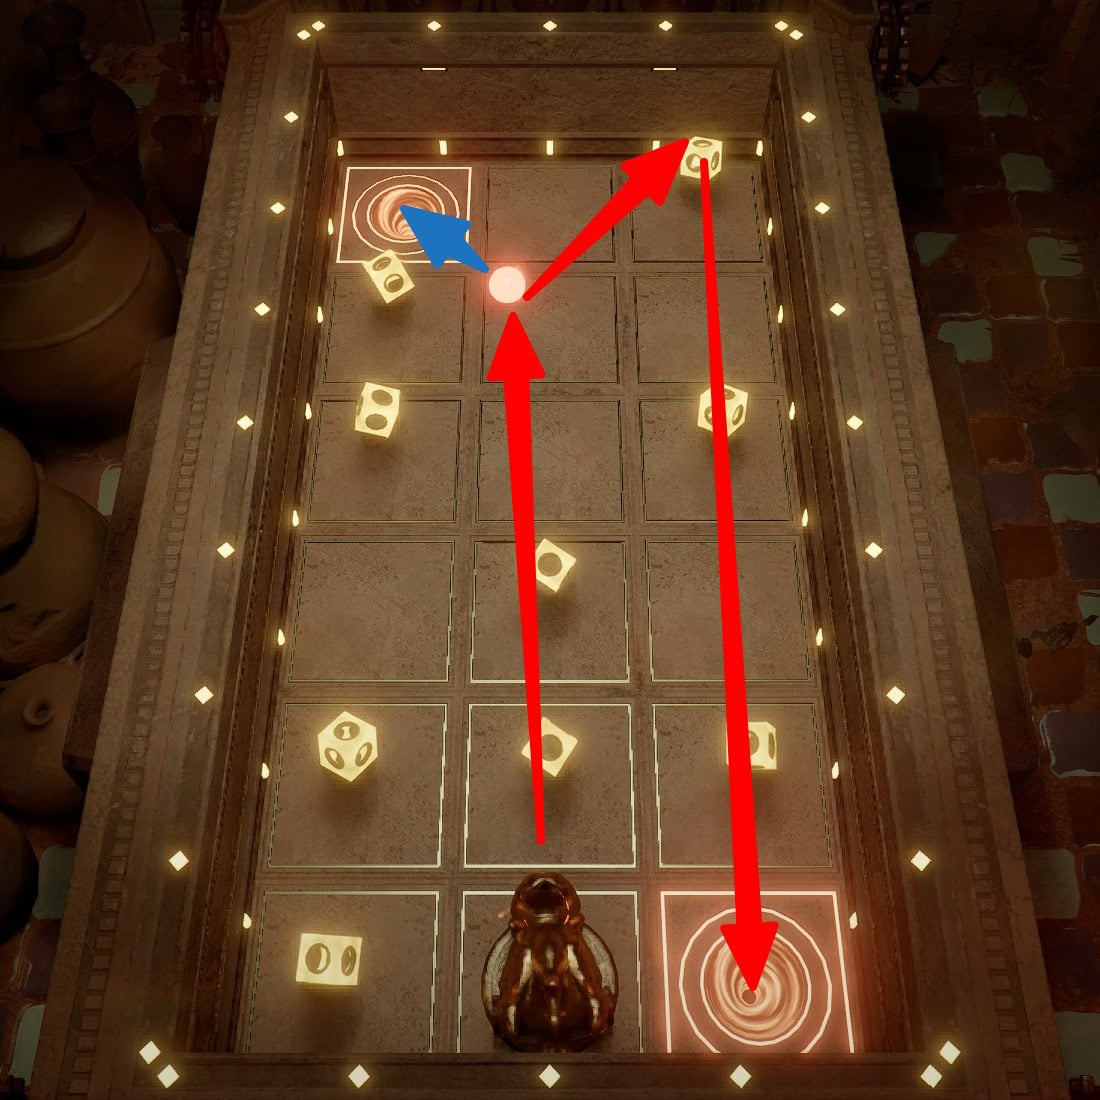
Level 46
There is no need to aim. Charge to 50 and wait to release until right when the first two rows have lowered. This one is pretty forgiving, but you do have to time the moving obstacles with a partial charge.
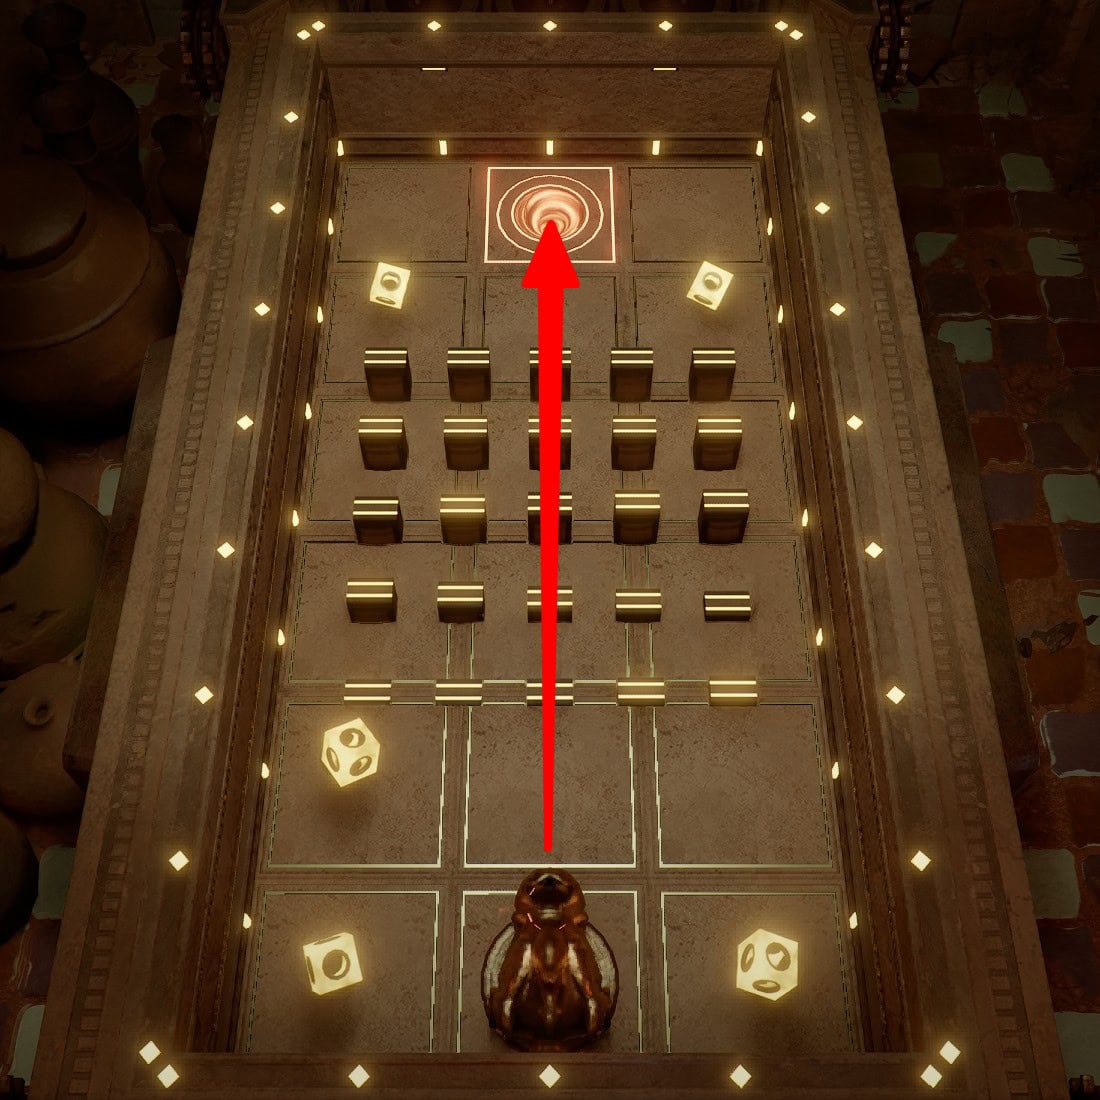
Level 47
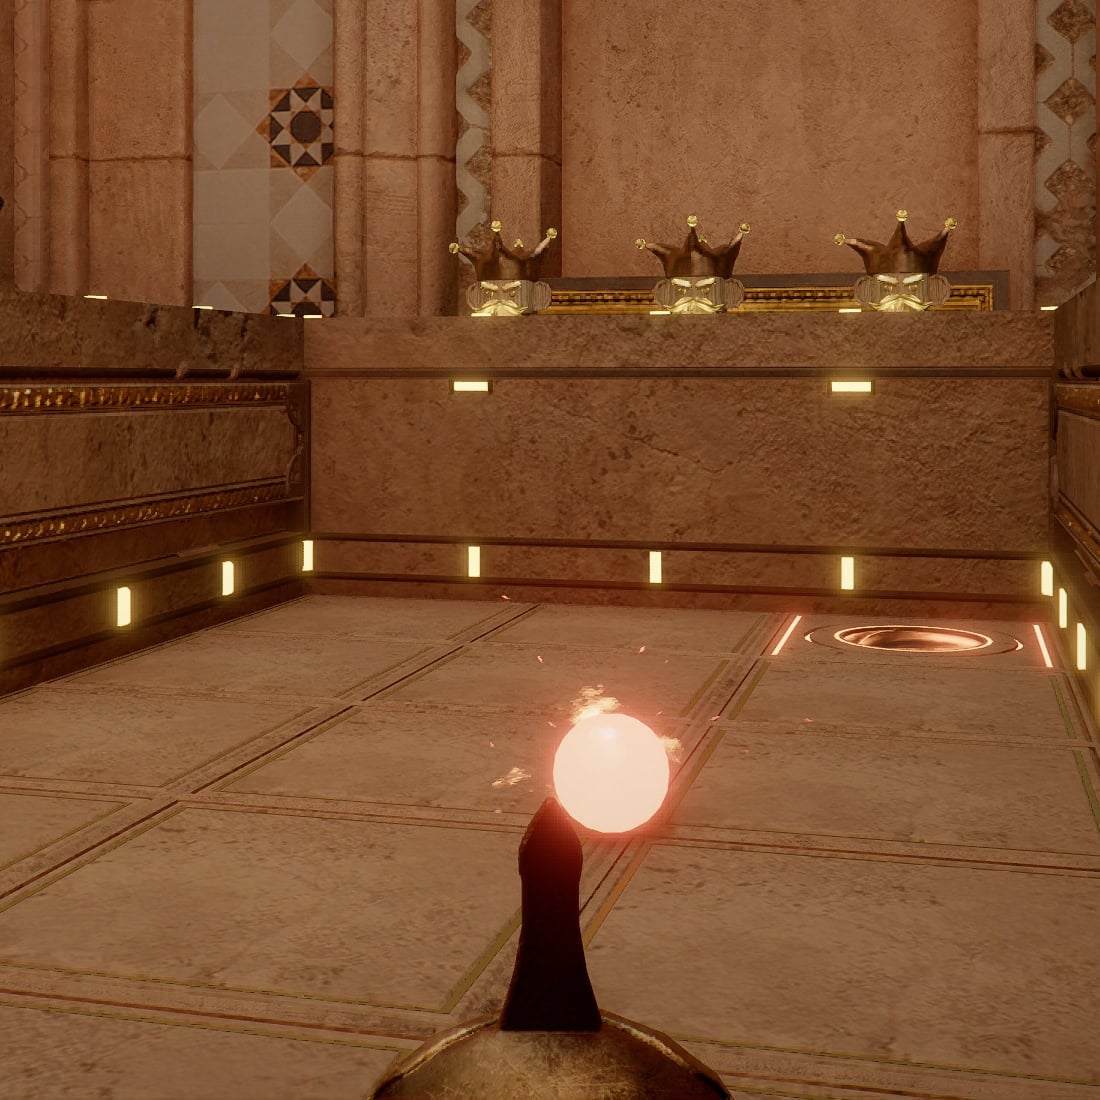
This is a super finicky one with a second ball and hole in play. Use first-person and aim the ironsight so it’s just barely touching the left side of the ball and charge to exactly 75.
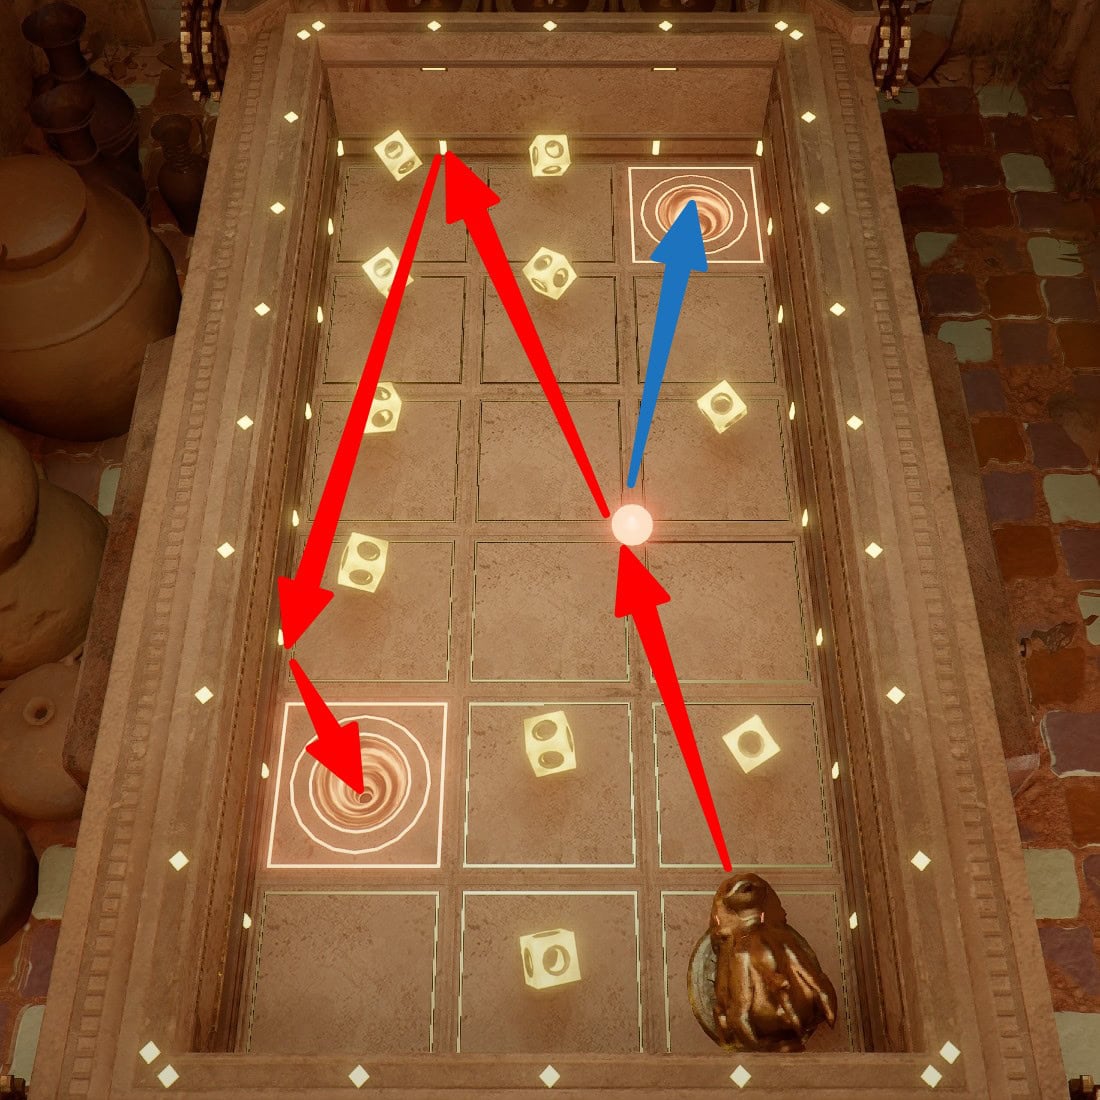
The first-person view should look very close to this. You may need to make minor adjustments to get it right.
Level 48
Use first-person to adjust the angle so you’re hitting close to the edge of the wall obstacle in the left column and charge to 50-60. You don’t want to hit the end of that wall or clip the one in the middle.
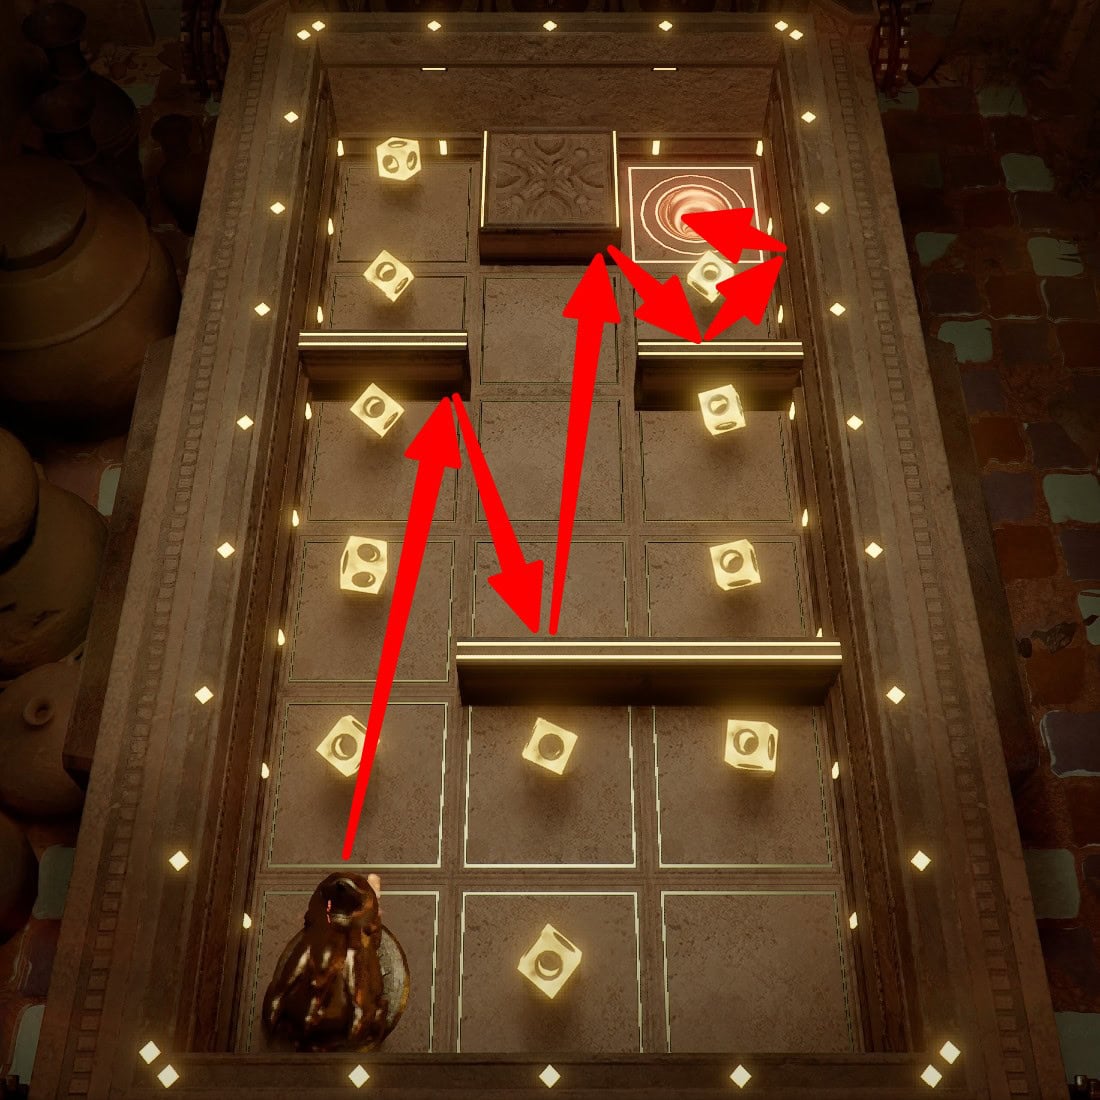
Level 49
Use first-person to aim the ironsight so that it’s between the center and center-left dash on the back wall. Charge to exactly 75. Minor variations in the angle and charge will cause you to miss.
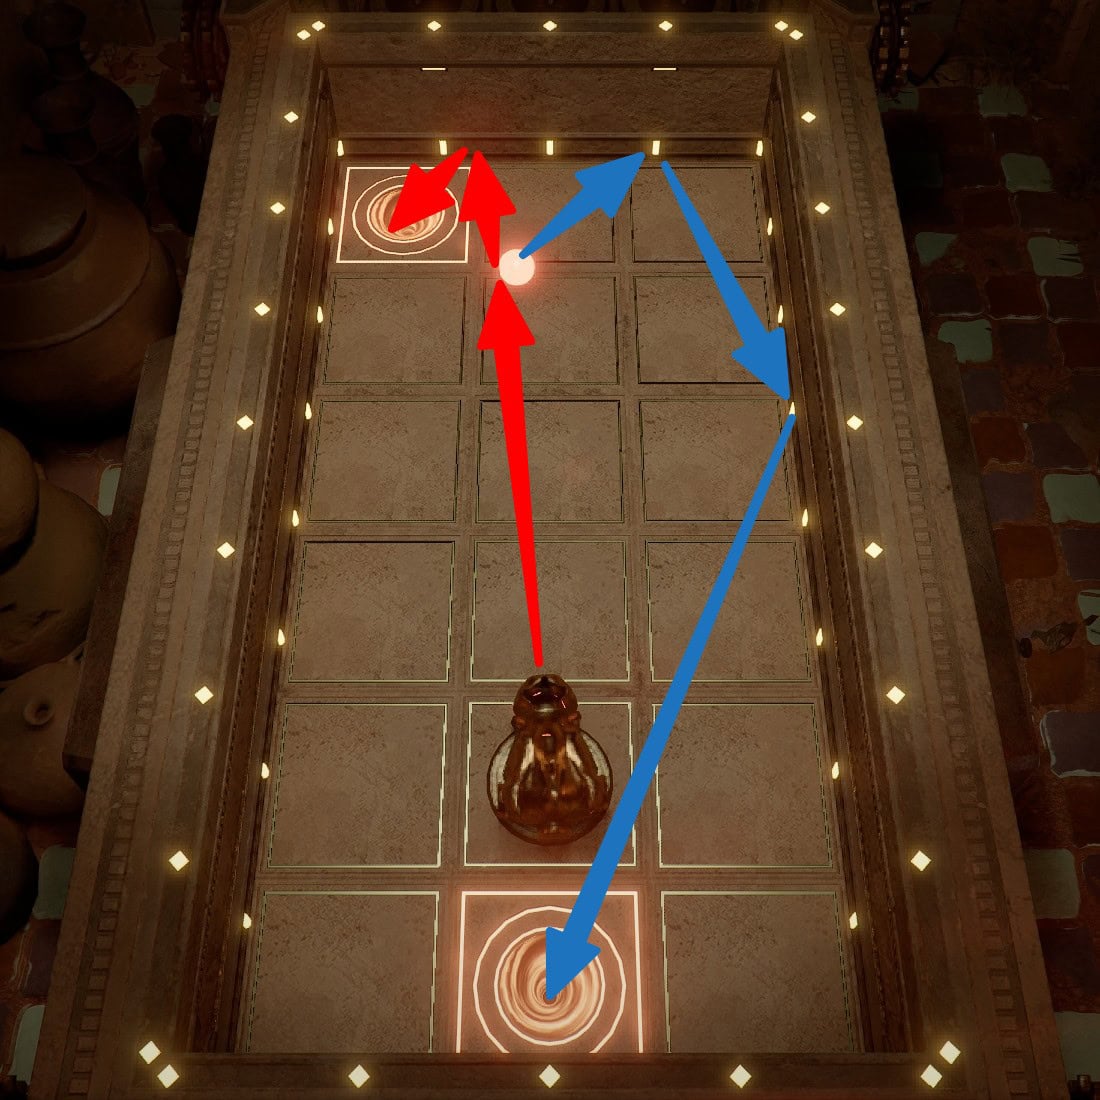
Level 50
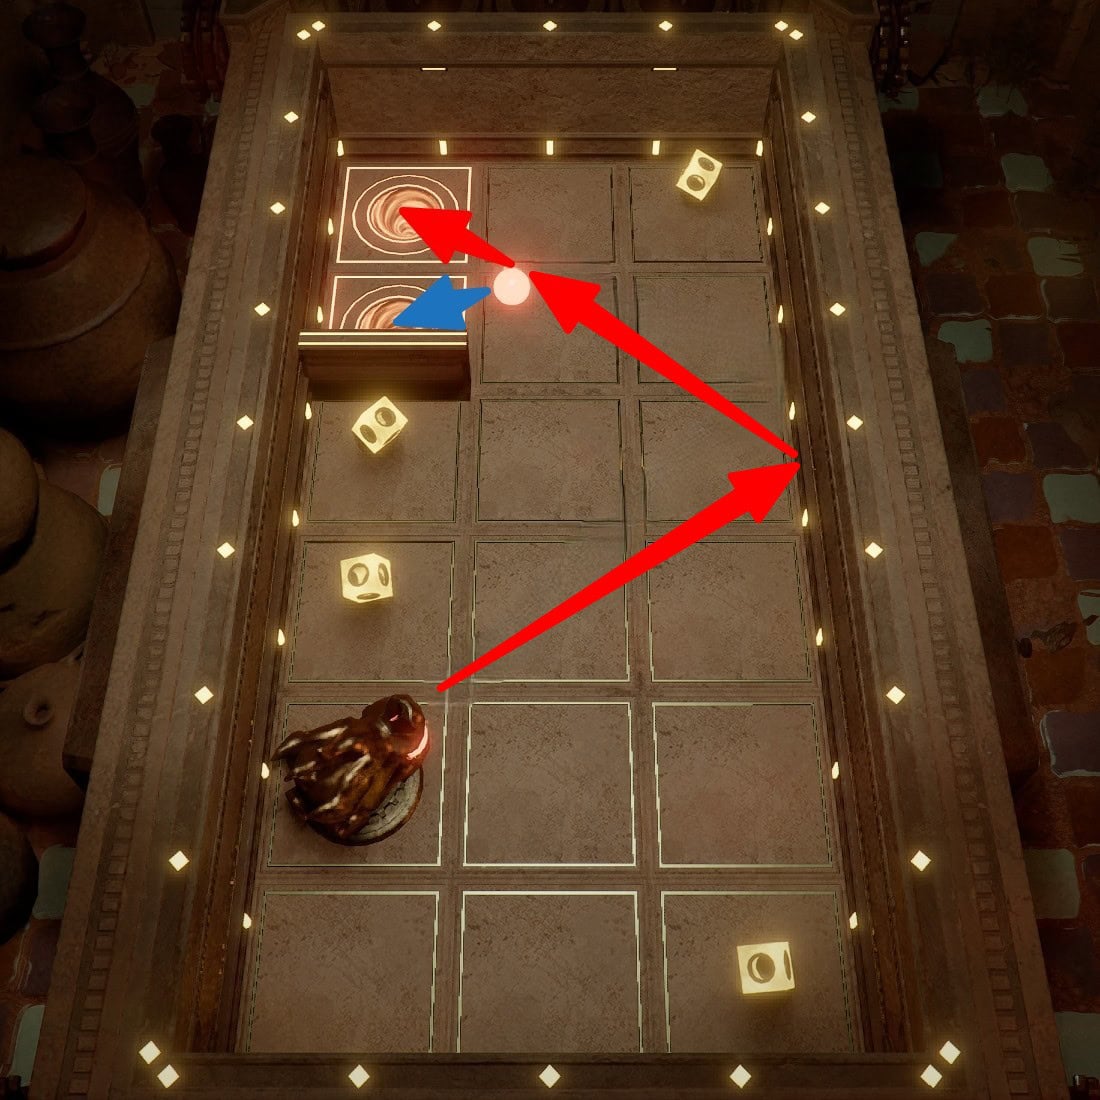
The final level requires you to hit a ball after ricocheting off a wall. Use first-person to aim at the exact center between the middle and upper middle dash on the right-side wall. Charge to exactly 75 and win the whole enchilada.