Everything you need to know about how armor and accessories work in Crimson Desert, including different types, upgrade costs, and use cases.
Crimson Desert doesn’t have statistically best armor or accessories because everything has the same stats (with a few balanced variations) and the parts that make them unique, Abyss Gears, can be switched into any other armor you’d prefer to use.
The fact that all armor and accessories are more or less the same means that you can wear whatever you think looks the best and not have to worry about looking ugly or the same as everyone else.
Armor Types and Upgrade Costs
There are 3 different types of upgradeable armor in Crimson Desert, including Cloth, Leather, and Plate. These types determine defensive stats and bonuses.
All armor pieces of each type have identical defensive stats and bonuses. All armor pieces for a given slot have the same number of Abyss Gear sockets.
Each piece of armor belonging to an upgradeable set contains one of those 3 terms. Sometimes, the same armor set will have pieces from multiple different weight classes. For example, the Bolton Plate set has Leather Footwear instead of Plate.
In general, full Plate has roughly 15% more Defense than full Leather, which has roughly 20% more Defense than full Cloth, but Plate doesn’t have as much of a lead in terms of unarmed Attack power and can fall behind in terms of mobility, so it isn’t objectively better.
Cloth Armor
Cloth armor offers the lowest Defense at a combined 69 (nice) when an entire 5-piece set is fully upgraded. In exchange for lower Defense, Cloth armor offers an additional 2 levels of Movement Speed.
Cloth Cloaks tend to provide Ice Resistance Lv 3-7, though you will need to add a Frostward II or III to reach the 5/10/15 thresholds to receive an extra degree of protection.
There are only a couple of Cloth Gloves and Footwear, but both trade a small amount of Attack power for additional levels of Attack Speed or Movement Speed.
Crafting and Refining Cloth equipment costs Cloth Pieces, Fleece, Feathers, and Long Hair Hides, in addition to the Abyss Artifact required for each tier past +4.
| Slot | Cloth Piece | Fleece | Feather | Spider Web | Long Hair Hide | Abyss Artifacts | Aeserion’s Scale |
|---|---|---|---|---|---|---|---|
| Head | 73 | 32 | 60 | 0 | 4 | 6 | 1 |
| Chest | 167 | 65 | 80 | 0 | 8 | 6 | 1 |
| Gloves | 73 | 32 | 0 | 240 | 4 | 6 | 1 |
| Boots | 73 | 32 | 0 | 240 | 4 | 6 | 1 |
| Total | 386 | 161 | 140 | 480 | 20 | 24 | 4 |
If you don’t want big, heavy armor weighing you down, and don’t have much trouble avoiding attacks, consider using Cloth Armor.
Leather Armor
Leather armor offers middling Defense at a combined 99 when an entire 5-piece set is fully upgraded. Each piece of leather gear also grants 1 level of Lightning Resistance, but Leather Cloaks give 3-7 levels instead.
Make sure you’re incorporating Shockward Abyss Gears to reach Lv 10 or 15 Lightning Resistance and meet the Tier I or II immunity threshold.
It’s worth noting that Leather sets almost never have a full 5 pieces, most often missing Headgear, so you may want to consider hiding your Headgear and equipping and upgrading a helmet with a unique effect instead.
Leather Gloves and Footwear sometimes trade 3-4 points in Attack power for 1-3 levels of Critical Rate, per piece, so if you want a higher Critical Rate, Leather is the way to go.
Crafting and Refining Leather equipment costs Thin Hides, Thick Hides, Small Bones, and Sturdy Hides, in addition to the Abyss Artifact required for each tier past +4.
| Leather | Thin Hide | Thick Hide | Short Hair Hide | Small Bone | Sturdy Hide | Abyss Artifacts | Aserion’s Scale |
|---|---|---|---|---|---|---|---|
| Head | 49 | 32 | 0 | 16 | 4 | 6 | 1 |
| Chest | 78 | 51 | 0 | 29 | 8 | 6 | 1 |
| Gloves | 49 | 0 | 96 | 16 | 4 | 6 | 1 |
| Boots | 49 | 0 | 96 | 16 | 4 | 6 | 1 |
If you want higher Critical Rate, are struggling against an enemy that deals Lightning damage, or want higher Defense without wearing Plate, consider equipping Leather armor.
Plate Armor
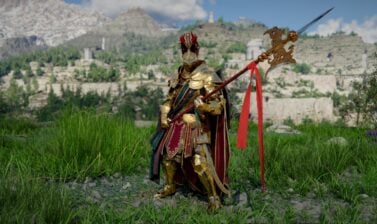
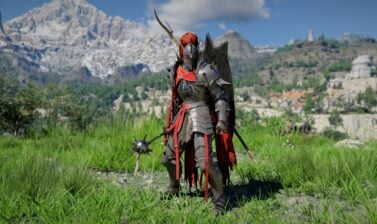
Plate armor offers the highest possible Defense. Plate Headgear also offers Daze Immunity and Plate Cloaks typically offer Fire Resistance Lv 3-7. Make sure you’re meeting the relevant immunity threshold by equipping Flameward II or III.
It’s worth noting that a few pieces of Plate Armor use the term Chain Mail instead Plate, but they work the same way.
Some Plate Gloves and Footwear will trade 2 points of Defense for 1 point of unarmed Attack. The difference in Attack between Cloth, Leather, and Plate is only 6 points between each if the set gives up that Defense. Otherwise, Attack stats on Plate Gloves and Footwear are only 2 points higher than that of Leather.
Crafting and Refining Plate equipment costs Iron Ore, Copper Ore, Large Bones, and Bismuth Ore, in addition to the Abyss Artifact required for each tier past +4.
| Plate Costs | Iron Ore | Copper Ore | Short Hair Hide | Large bone | Fang | Bismuth Ore | Abyss Artifacts | Aserion’s Scale |
|---|---|---|---|---|---|---|---|---|
| Head | 49 | 32 | 0 | 16 | 0 | 4 | 6 | 1 |
| Chest | 78 | 65 | 0 | 29 | 0 | 8 | 6 | 1 |
| Gloves | 49 | 0 | 64 | 0 | 16 | 4 | 6 | 1 |
| Boots | 49 | 0 | 64 | 0 | 16 | 4 | 6 | 1 |
Use Plate Armor if you don’t care about high mobility or fancy crits and want to be able to tank hits.
Since maximum Defense is the hallmark of Plate armor, you should consider equipping a Shield, which adds to your Defense while it’s equipped, especially if you primarily use your Two-Handed Weapon.
Disguises, Skills, and Special Effects
If a piece of armor counts as a Disguise, has a Skill (LT + RT | L2 + R2 | B), or bonus effect, it is always fully upgradeable but may have a reduced number of Abyss Gear sockets depending on the potential combat impact of the bonus.
Essentially, each unique bonus is balanced as a baked-in Abyss Gear if it has any effect in combat. It’s basically like soldered vs user-upgradeable slots for RAM and storage on laptops.
Disguises never influence the number of Abyss Gear sockets because they are solely useful outside of combat against a specific subset of enemies.
The changes made in update 1.06.00 solely added Abyss Gear sockets to equipment that previously lacked it, they didn’t remove anything, and there are a few situations where pieces offer combat bonuses and still have the standard amount of Abyss Gear sockets.
For example, the Combat God’s Plate Gloves have 2 sockets alongside its Lightning Unarmed Attack and the Plate Helm of the Shadows has its unique Glacial Domain skill, making these among the best pieces in the game.
The latter probably could be fixed by transforming it into an Abyss Gear, but the former has some buggy VFX on the gloves themselves and is more akin to a piece of Kuku equipment.
The devs gave more attention to Kuku equipment in general. Kuku [Element]-Resistant Armor has 1 slot, as do the various Kuku Footwear.
Given that one of the slots on each Kuku Armor is effectively taken up by Haste, Insight, or Swift II → III, it’s possible these could be replaced by a second empty slot, though you can’t normally embed Insight and Swift in chestpieces.
Of course, they also have the equivalent of 2 Greater [Element]ward Abyss Gears, so Kuku [Element]-Resistant Armor really has the equivalent of 5 sockets now.
Slot Differences
The Headgear, Gloves, and Footwear are all pretty much the same in terms of Defense stat contribution. Chest Armor contributes more to Defense than any other piece of individual equipment, but it also costs more resources to upgrade.
| Slot | Stat | Cloth | Leather | Plate I | Plate II | Plate III |
|---|---|---|---|---|---|---|
| Head | Defense | 0 → 12 | 1 → 18 | 2 → 21 | – | – |
| Head | Bonus Effect | Movement Speed Lv 1 | Lightning Resistance Lv 1 | Daze Immunity | – | – |
| Chest | Defense | 2 → 21 | 3 → 32 | 4 → 41 | – | – |
| Chest | Bonus | Movement Speed Lv 1 | Lightning Resistance Lv 1 | – | – | – |
| Gloves | Defense | 0 → 12 | 1 → 18 | 4 → 21 | 2 → 19 | 0 → 17 |
| Gloves | Attack | 10 → 30 | 11 → 33 | 10 → 34 | 11 → 35 | 12 → 36 |
| Gloves | Attack w/ Crit Lv 1 → 2 | – | 10 → 30 | – | – | – |
| Gloves | Attack w/ Crit Lv 2 → 3 | – | 9 → 29 | – | – | – |
| Gloves | Attack w/ Attack Speed Lv 1 | 10 → 30 | – | – | – | – |
| Gloves | Attack w/ Attack Speed Lv 2 → 3 | 9 → 27 | – | – | – | – |
| Boots | Defense | 0 → 12 | 1 → 18 | 4 → 21 | 2 → 19 | 0 → 17 |
| Boots | Attack | 9 → 27 | 11 → 33 | 10 → 34 | 11 → 35 | 12 → 36 |
| Boots | Attack w/ Crit Lv 1 → 2 | – | 10 → 30 | – | – | – |
| Boots | Attack w/ Crit Lv 2 → 3 | – | 9 → 29 | – | – | – |
| Boots | Attack w/ Movement Speed Lv 1 | 9 → 27 | – | – | – | – |
| Boots | Attack w/ Movement Speed Lv 3 → 4 | 8 → 26 | – | – | – | – |
| Sums | Defense | 57 | 86 | 104 | 100 | 96 |
| Sums | Attack | 60 | 66 | 68 | 70 | 72 |
| Sums | Attack w/ Crit Lv 1 → 2 | – | 60 | – | – | – |
| Sums | Attack w/ Crit Lv 2 → 3 | – | 58 | – | – | – |
| Sums | Attack w/ Speed (small) | 57 | – | – | – | – |
| Sums | Attack w/ Speed (large) | 53 | – | – | – | – |
Headgear
Headgear offers about the same Defense as Gloves and Footwear. There are a bunch of Helms that comes with a special effect, like the Visione.
Since armor sets often lack unique Headgear, it’s best to pair such sets with a Helm that offers a special effect or Skill. They often have rather eccentric appearances, but you can hide your helmet in the settings.
Headgear always has 1 socket for Abyss Gear and offers 1 level of Movement Speed for Cloth armor, 1 level of Lightning Resistance for Leather armor, and Daze Immunity for Plate armor.
Chest Armor
Chest Armor contributes the most to set’s total Defense pool by far and has the most Abyss Sockets (3). To help offset their lower Defense values, Cloth Armor comes with Movement Speed Lv 1 and Leather Armor comes with Lightning Resistance Lv 1. Plate armor has no special bonus because it offers higher Defense.
Despite costing more total resources, you do get more bang for your upgrade buck when prioritizing chest Armor if your limiting reagent is Abyss Artifacts because you’re getting more Defense per Abyss Artifact by upgrading Armor.
Gloves and Footwear
Gloves and Footwear have identical stats and upgrade costs to each other. Both have 2 Abyss Gear sockets each and offer as much Defense as Headgear. They can also deal damage with unarmed attacks, and each has an Attack power range of ~28-36.
The Attack value only applies when you deal damage with an unarmed attack using the associated appendage, so kicks use the Attack listed on your Footwear and punches use the Attack listed on your Gloves.
Just like with Defense, Plate Gloves and Footwear have the highest possible raw Attack stats but have to trade some of that Defense to fully maximize it. Cloth Gloves can trade some Attack power for Attack Speed and Movement Speed, respectively, and Leather Gloves can trade Attack for Critical Rate boosts.
Upgrade costs for Gloves and Footwear are identical to each other and have the same or similar to the cost of upgrading Headgear, though they require 1-2 different materials starting at upgrade tiers +3 and +5 compared to the Headgear and chest Armor.
Cloaks
Cloaks were reworked as part of Update 1.06. They don’t have any Abyss Gear sockets but are fully upgradeable.
They offer the bulk of an armor set’s elemental Resistance, ranging from 3 to 7; Defense that can be upgraded to 12 or 18; and either a Stamina Cost reduction that can be upgraded to -6% or -8%, or Movement Speed Lv 1.
They do not follow the Cloth/Leather/Heavy paradigm when it comes to Defense, and instead fall into one of 4 types, similar to how accessories are balanced.
Each type features a focus or emphasis on a specific attribute, whether it be Elemental Resistance, Defense, or Stamina Cost Reduction. The fourth type trades the Stamina Cost reduction for Movement Speed Lv 1.
| Type | Elemental Resistance Lv | Defense | Stamina Cost Reduction |
|---|---|---|---|
| A | 7 | 0 → 12 | 0% |
| B | 3 | 0 → 12 | -4% → –8% |
| C | 3 | 6 → 18 | -2% → –6% |
| D | 5 | 6 → 18 | Movement Speed Lv 1 |
Since Cloaks are always mostly fabric or leather, their Defensive stat is more consistent and less influential in differentiating them. A Cloak’s Defense value (and upgrade materials) reflect their physical components, which put them on par with other pieces of Cloth armor.
Elemental Resistance is the most significant unique benefit offered by Cloaks, so it is the more reliable connection to armor class, rather than Defense, but this is not 100% consistent.
In other words, the elemental Resistance offered by a given Cloak matches the type associated with its armor class, so Cloth tends to offer Ice Resistance, Leather tends to offer Lightning Resistance, and Plate tends to offer Fire Resistance.
Some Cloaks also come with Disguises, but these are balanced as lore-appropriate freebies, so due to their limited utility, there is no downside associated with Disguise Cloaks.
Fully upgrading any Cloak requires the follwing resources:
| Type | Cloth Piece | Fleece | Ivory | Long Hair Hide | Abyss Artifact | Aserion’s Scale |
|---|---|---|---|---|---|---|
| Cloth | 167 | 65 | 29 | 8 | 6 | 1 |
| Leather | 167 | 65 | 29 | 8 | 6 | 1 |
| Plate | 167 | 65 | 29 | 8 | 6 | 1 |
Fleece is hard to find in the early game without resorting to hunting livestock. It’s best to steal or purchase a couple of Sheep as soon as you unlock the Ranch at Howling Hills.
Ivory is only readily available from poaching Rhinos and Elephants, which exclusively live in the Crimson Desert. You can create (more) havoc at the Demeniss Zoo if you want to procure some Ivory sooner than that.
Accessories
Accessories offer small stat boosts and passive regenerative effects. You can hide Earrings and Glasses in the Language and Input Settings but not Necklaces or Rings.
Necklaces
Necklaces typically grant passive Spirit recovery at up to +0.4 Spirit/sec and offer increases to your Attack power. They come in 3 flavors:
| Type | Attack | Spirit Regeneration | Critical Rate Lv |
|---|---|---|---|
| A | 0 → 11 | +0 → 0.4 Spirit/sec | 0 |
| B | 0 → 5 | +0 → 0.3 Spirit/sec | 0 → 4 |
| C | 0 → 5 | +0 → 0.4 Spirit/sec | 0 → 3 |
There are also Necklaces that have Skills in place of lower Attack, no Spirit regen, nor any Critical Rate Boost. The Skills usually have long cooldowns and continue to count down even if the item isn’t equipped, so there’s little reason to use those in combat. Just equip them, use their effects, and swap them out.
In essence, you get to pick whether you want pure damage or prefer to divert some of that to Critical Rate. Some Necklaces on the Critical Rate side only go up to Lv 3, not Lv 4, so check the Item Details → Refinement Information to see its potential.
Critical Rate does have a maximum level, so it depends on the rest of your build whether or not it’s worthwhile to use a pure Attack Necklace.
There’s no point in adding Critical Rating you can’t benefit from, Spirit Recovery is a bit harder to come by, so I would recommend staying away from the Lv 4 Critical Rate Necklaces unless you really know what you’re doing.
Earrings
Earrings grant passive Health recovery at up to +0.8 HP/sec and offer increases to your Defense and, optionally, Movement Speed. They come in 3 different types. Every Earring is identical within their associated type, so you can try to get two that match, or don’t.
| Type | Defense | Health Regen | Movement Speed Lv |
|---|---|---|---|
| A | 0 → 10 | +0 → 0.8 HP/sec | 0 |
| B | 0 → 6 | +0 → 0.6 HP/sec | 0 → 4 |
| C | 0 → 4 | +0 → 0.8 HP/sec | 0 → 3 |
In essence, you get to pick whether you emphasize Defense, Movement Speed, or Health Regen.
I don’t recommend picking a Type A Earring that just offers slightly more Defense at the cost of no improvement to Movement Speed. As a percentage, sure, 40-60% more Defense sounds really good, but in absolute terms, it’s only a few points.
Movement Speed has a cap at Lv 15, so it’s easier to waste the benefit, but there aren’t too many sources of Movement Speed boost, so that’s unlikely, and the health regen becomes less valuable as you progress through the game.
In general, health regen from these Earrings is only going to offer a noticeable effect outside of combat because it’ll take like 10 mins to recover your full health bar, depending on your max health. My measurement was with 7/18 Abyss Artifacts invested in Health.
In combat, you need to eat food. The healing is genuinely worthless against the likes of Antumbra’s Sword and other such bosses. Movement Speed won’t do that much either, but the effect is far more noticeable when you’re just wandering around.
Rings
Finger Rings increase your Stamina regen rate by up to 8% and boost your Attack and, optionally, Attack Speed. They’re the offensive version of Earrings.
| Type | Attack | Stamina Regen Boost | Attack Speed Lv |
|---|---|---|---|
| A | 0 → 7 | +0 → 8% | 0 |
| B | 0 → 3 | +0 → 6% | 0 → 4 |
| C | 0 → 3 | +0 → 8% | 0 → 3 |
Essentially, you get to pick whether you want higher raw Attack or a boosted attack speed with potentially reduced stamina consumption.
The absolute amounts of Attack are more noteworthy here. Weapons deal 30-40 damage at tier 9, so we’re talking about a 10% boost to damage output across the board in exchange for lower Attack Speed.
I don’t think the lower Stamina Regen really matters. It’s 2% faster on something that already recovers pretty quickly, so I recommend picking either the raw Attack on Type A or a maximum Attack Speed offered by Type B.
Attack Speed has a cap, so the only reason you’d want to consider Type C is if you’d be wasting the stat otherwise.
Signet Rings
Signet Rings, sold by each region’s Contribution Shop for 65 Points, are upgradeable and offer Necklace-tier Attack in exchange for lower Stamina Regen. They can always be upgraded to 11 Attack and either +2% or +4% depending on whether or not they offer a Lv 1 boost to Critical Rate or Attack Speed.
| Signet Ring | Attack | Stamina Regen | Additional Effect | |
|---|---|---|---|---|
 | Hernandian | 3 → 11 | 0 → 4% | None |
 | Greymane | 2 → 11 | 0 → 2% | Critical Rate Lv 1 |
 | Demenissian | 2 → 11 | 0 → 2% | Attack Speed Lv 1 |
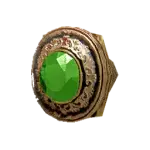 | Delesyian | 3 → 11 | 0 → 4% | None |
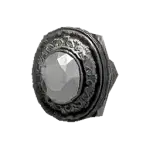 | Pailunese | 2 → 11 | 0 → 2% | Critical Rate Lv 1 |
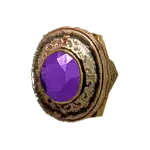 | Tashkalp | 2 → 11 | 0 → 2% | Critical Rate Lv 1 |
If you’re ignoring the unique effects and are trying to max out Attack Speed and Critical Rate with a bunch of Swift III and Insight III Abyss Gears, the Signet Rings are your best bet.
Unfortunately, they will prevent you from being able to afford much of anything else from the Contribution Shop, so make sure you buy all the Prestige gear first.
The Crimson Desert Tashkalp Signet and Varnian Crown are particularly annoying. You need the Varnian Crown to buy the best horse armor in the game, which takes 3 in-game weeks to get full sets for each Legendary Horse.
You can only resell the Varnian Crown to the Varnian Contribution Shop, not the one in Tomasso that sells the Tashkalp Signet, despite the fact that both use the same Contribution Points.
Glasses
Each region’s Contribution Shop sells a little circlet crown for a whopping 70 Contribution Points. Aside from Master Du’s Circlet that you get in Chapter IX: Sage of the Desert, these Crowns are the only thing that can goes into the Glasses slot, and only Kliff can equip them.
The Contribution Crowns unlock the ability to purchase Prestige items from certain vendors in their associated region. There are a couple of exceptions, but the main thing you are allowed to buy is superior Horse Tack from Saddleries.
You don’t actually need to equip the Crown to unlock the Prestige items; you just need to have them in your inventory.
Crowns are also the most expensive item offered at each Contribution Shop, and since you can sell them back when you don’t need them, they effectively allow you to bank 70 Contribution Points.
Packs
Packs are specialized tools that enable you to use a Skill with (LT + RT | L2 + R2 | B) and can be upgraded with the Kuku Pack at Kilnden Workshop in Hernand. You’ll either equip one for a specific purpose or the slot will be empty.
The packs you can steal from Peddlers and Porters are required to craft Kuku Packs. Even though the Kuku Pack recipe specifies that you need a Peddler’s Pack, any type will work so long as you have the Pack in your Inventory.
Non-Kuku Packs cannot be equipped, though it’s possible this functionality could change in the future.
Now that you know how Armor and Accessories work, it’s time to learn how Abyss Gears work so you know how to best utilize them by slotting the most appropriate ones into your gear’s sockets.