Learn how to access the Daily area on Ziost in SWTOR, how to complete all daily and weekly missions, find out what rewards await you, and see how to unlock all achievements.
Table of contents
How to access the Daily Area
Ziost is located in the Seat of the Empire region. To access its Daily Area, you must complete the Main Story Ark on Ziost, which takes place after the events on Rishi and Yavin 4 from the Shadow of Revan expansion.
The mission should be available once you reach level 60 at the terminal in your personal ship.
Once you complete the story – it should take you no more than 45-60 minutes or even less if you rush it (don’t, it’s good!) – you will be able to travel down to the now-dead planet and complete all the daily missions as well as pick up all the achievements.
Daily Mission Walkthroughs
There are five daily missions and one weekly. There is also one Operation (group) weekly mission, Heart of Ruin, which requires you to defeat the Colossal Monolith and Worldbreaker Monolith on Ziost.
Three of the dailies are available at the camp, next to the landing pad, another two are given via datapads you will pick up while exploring the planet.
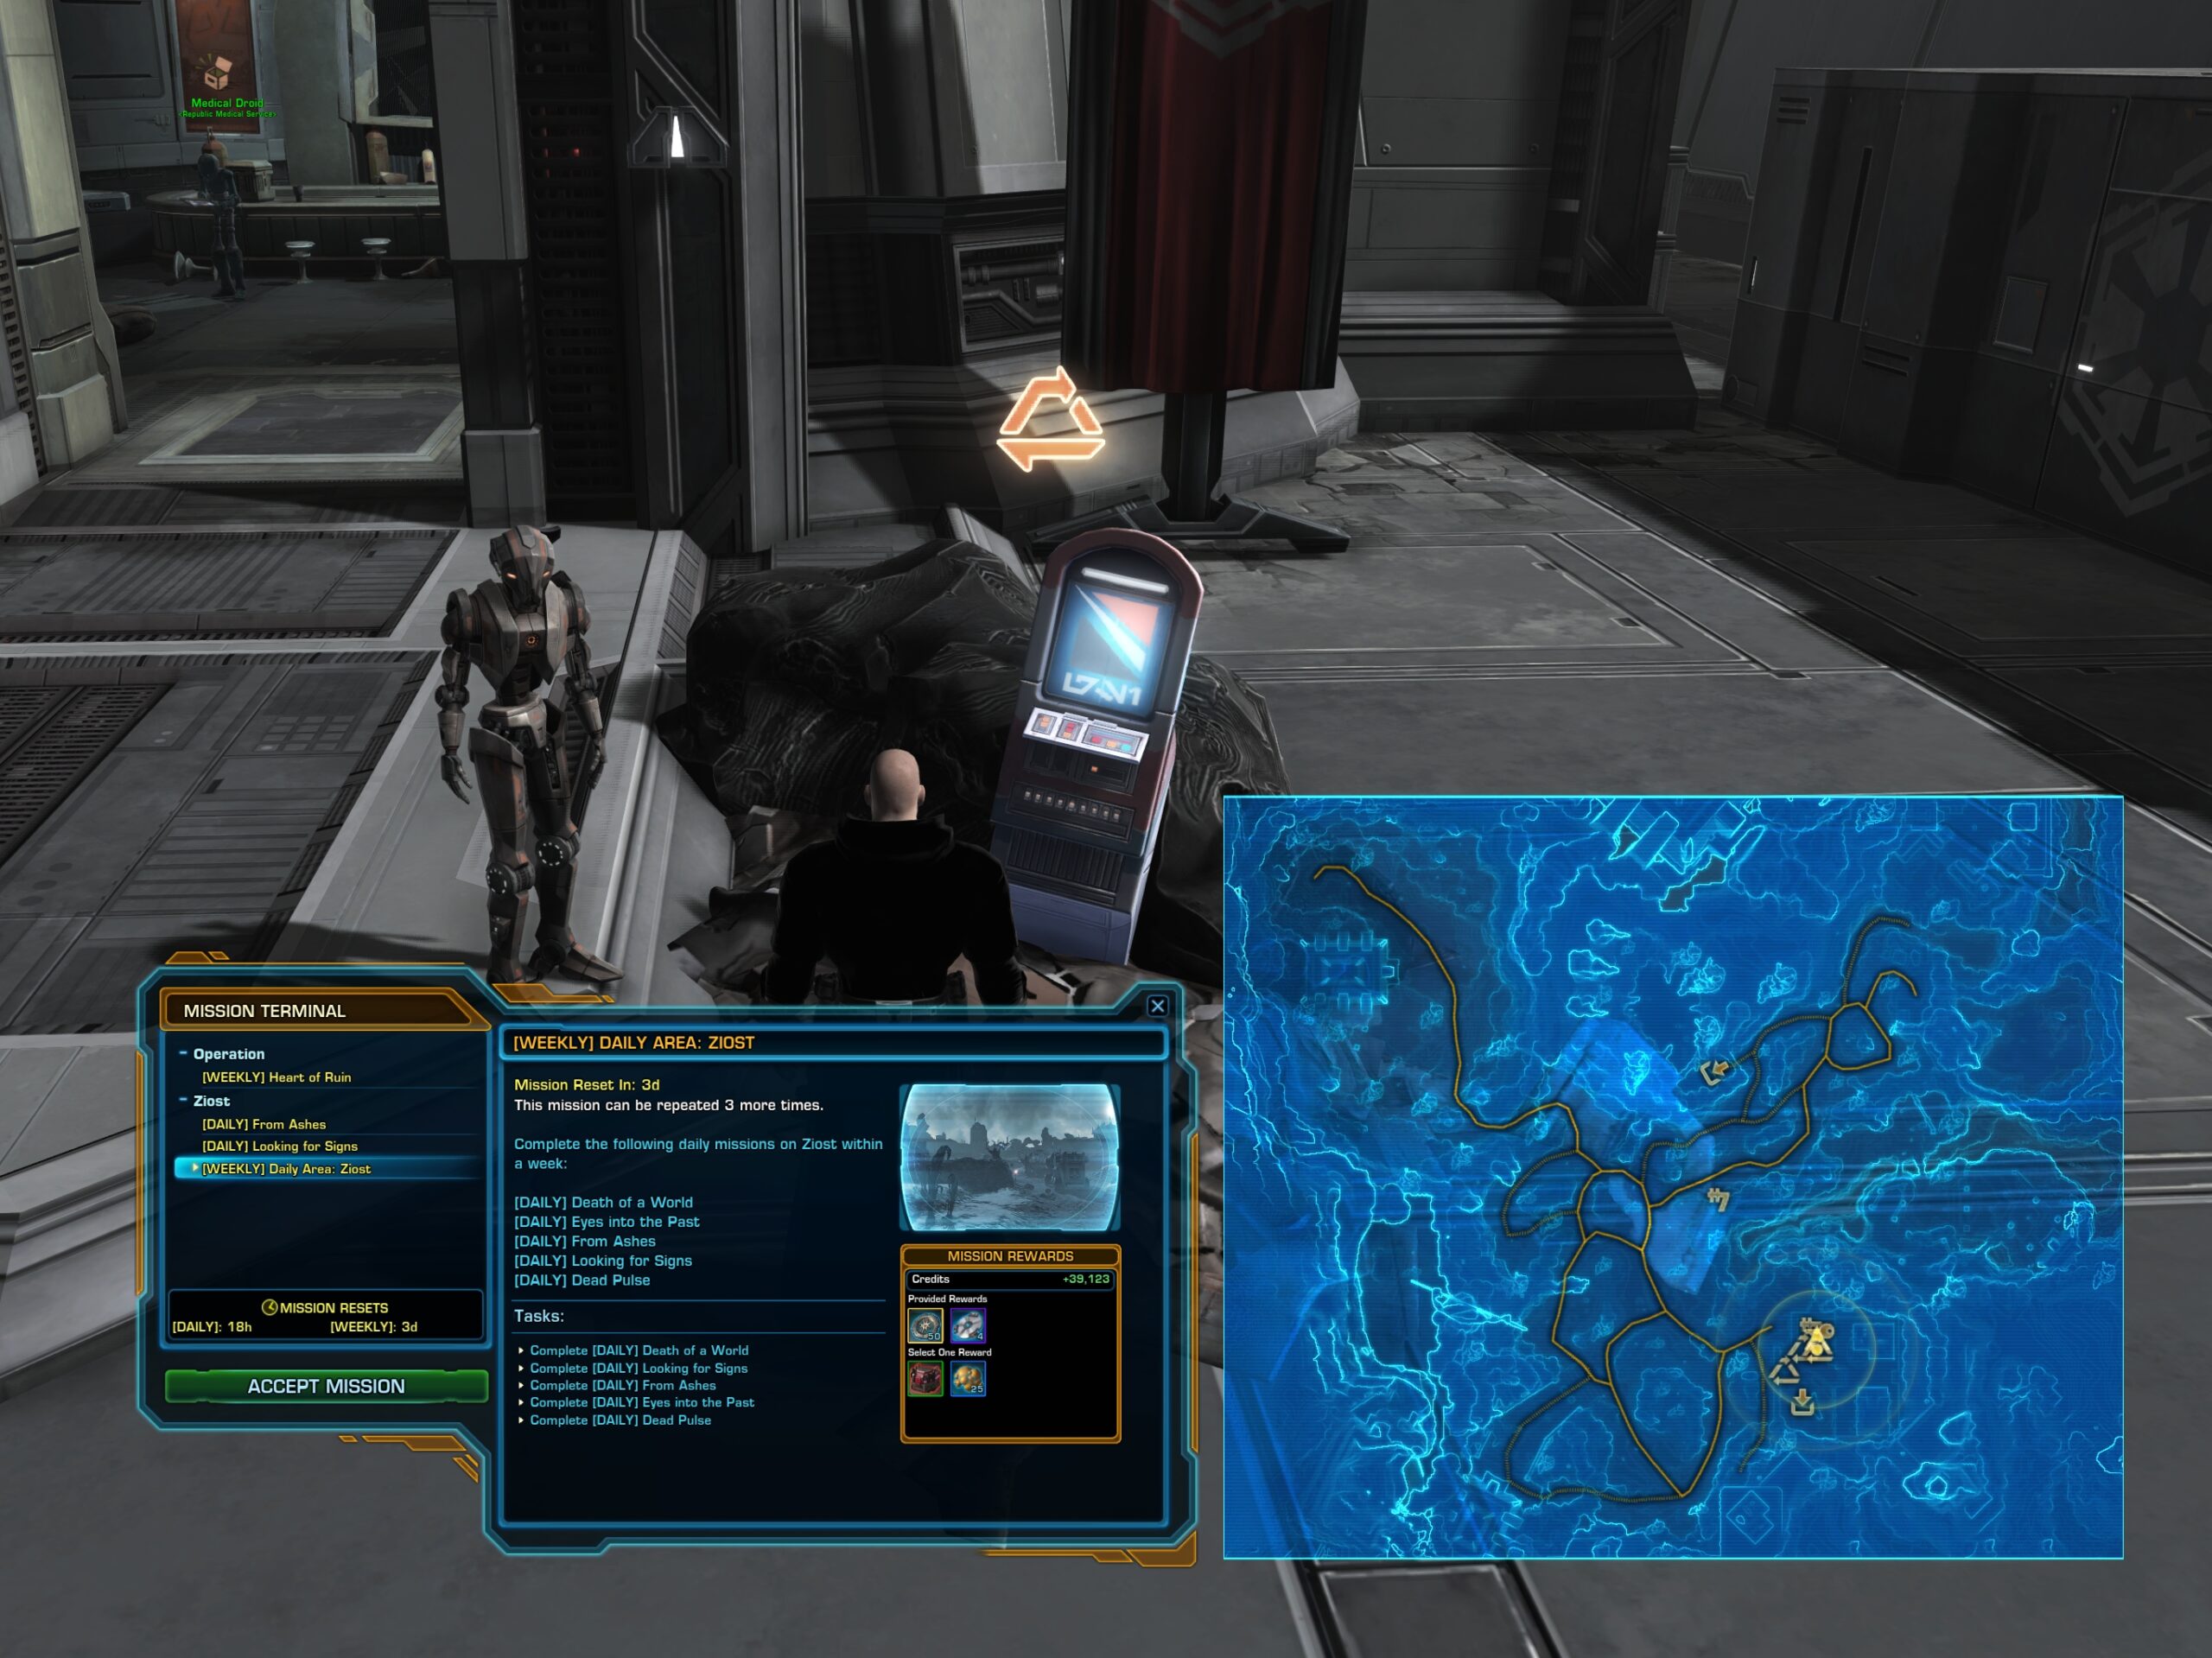
[WEEKLY] Daily Area: Ziost
The weekly mission requires you to complete all daily missions. It is available for pick up at the Mission Terminal in the starting area.
Death of a World
Death of a World is available in the starting area. Pick it up from a datapad, next to a broken droid.
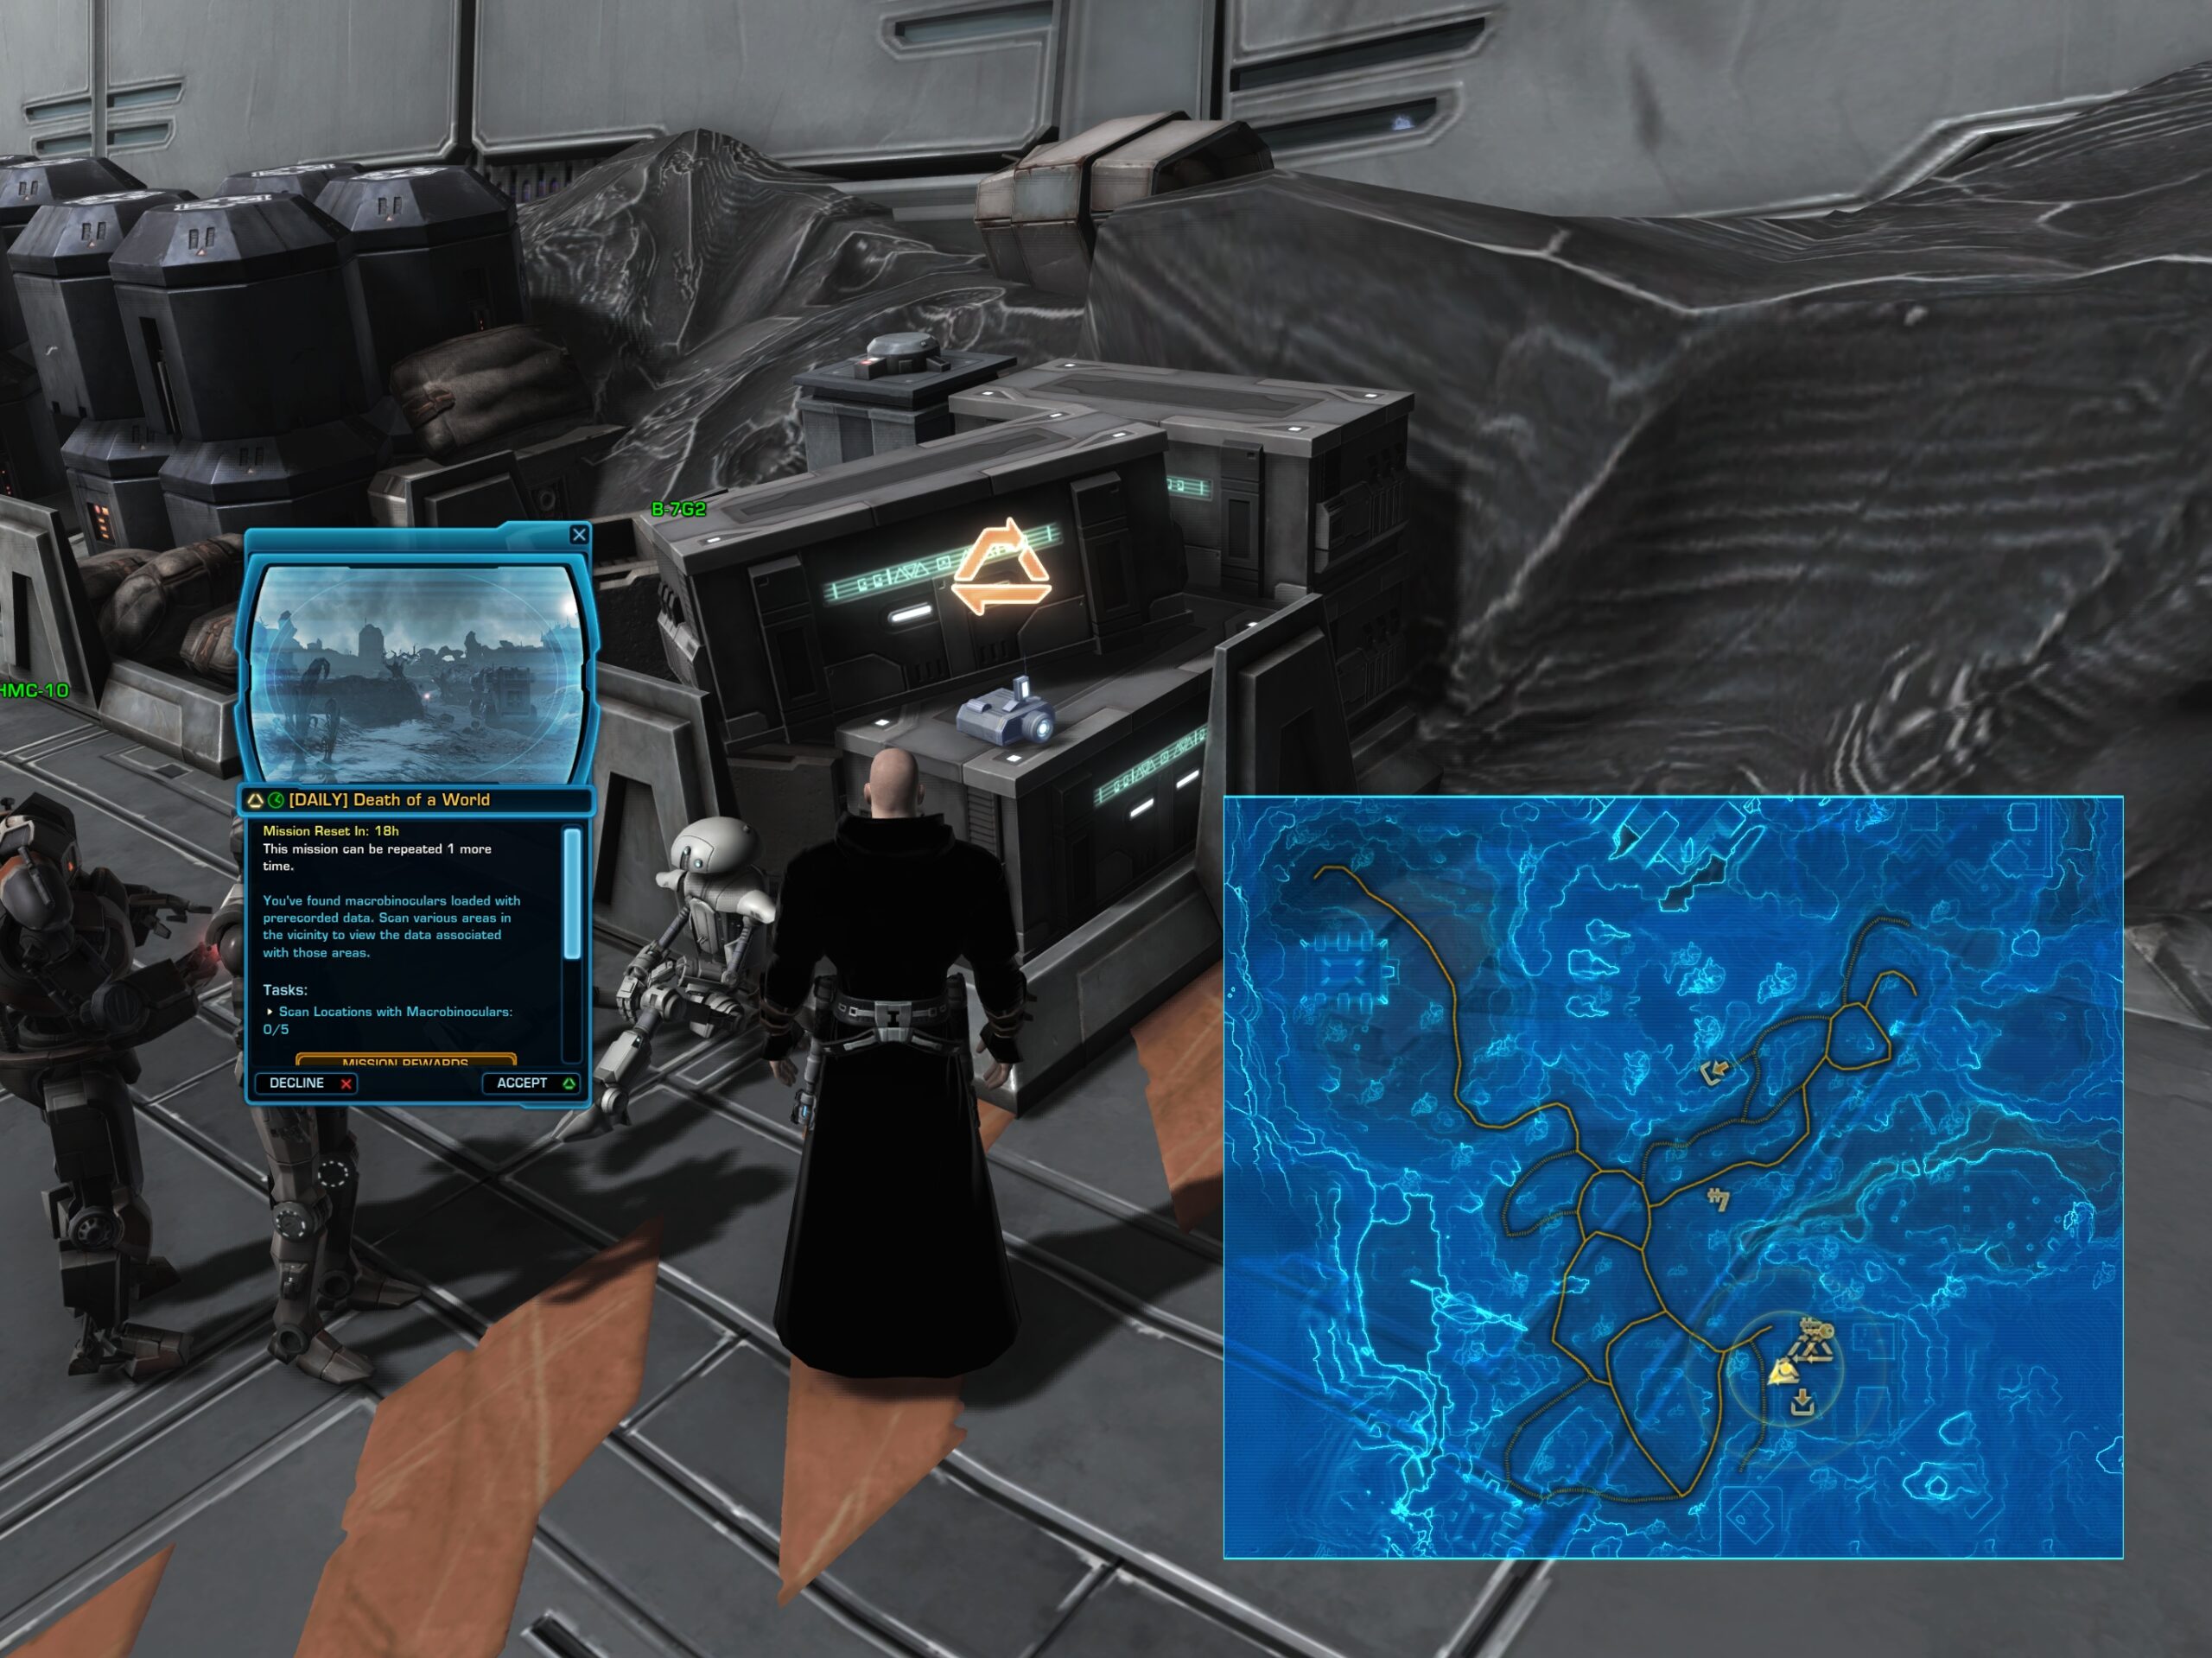
To complete this one, you have to check the 5 locations marked on your map, go to them and look in the direction they are telling you to with the microbinoculars.
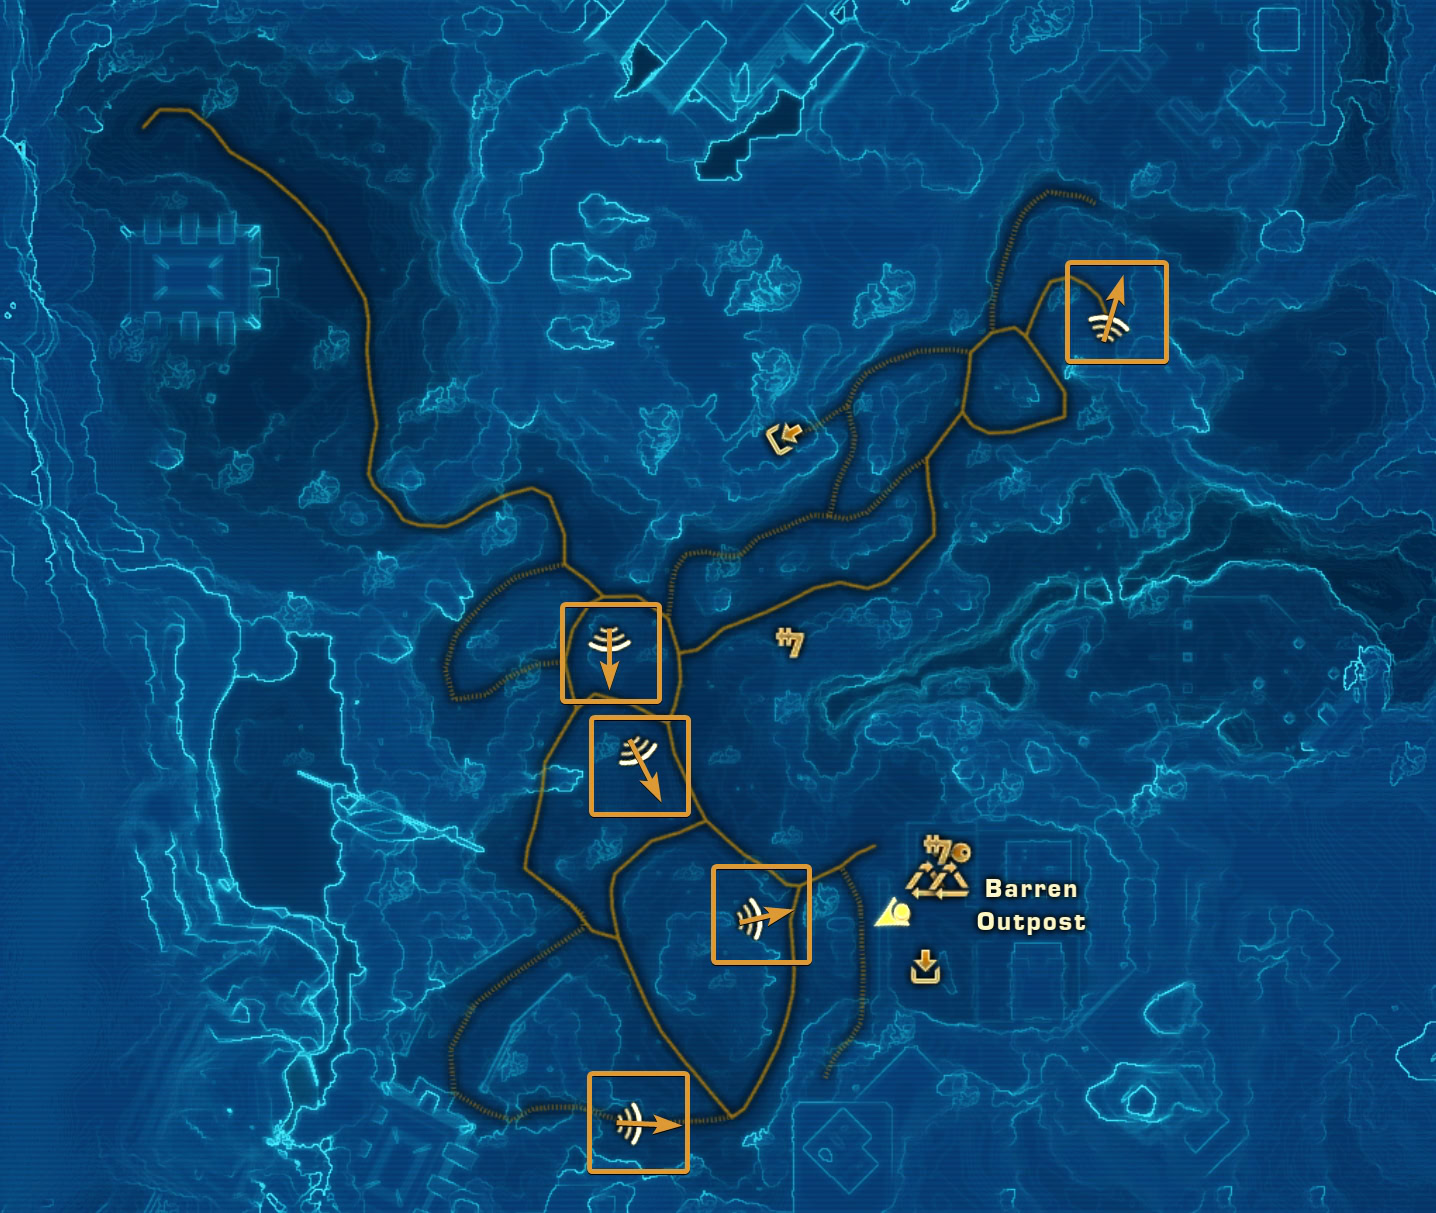
Once in position, just click the microbinoculars icon next to the mission objective in your Mission Tracker.
All 5 objects are clearly visible and some of them you can even spot from multiple distances, no need to stay exactly on top of the marker.
Looking for Signs
Looking for Signs is available at the starting area. Click on the Crashed Orbital Recon Probe Droid. It is also found on the Mission Terminal.
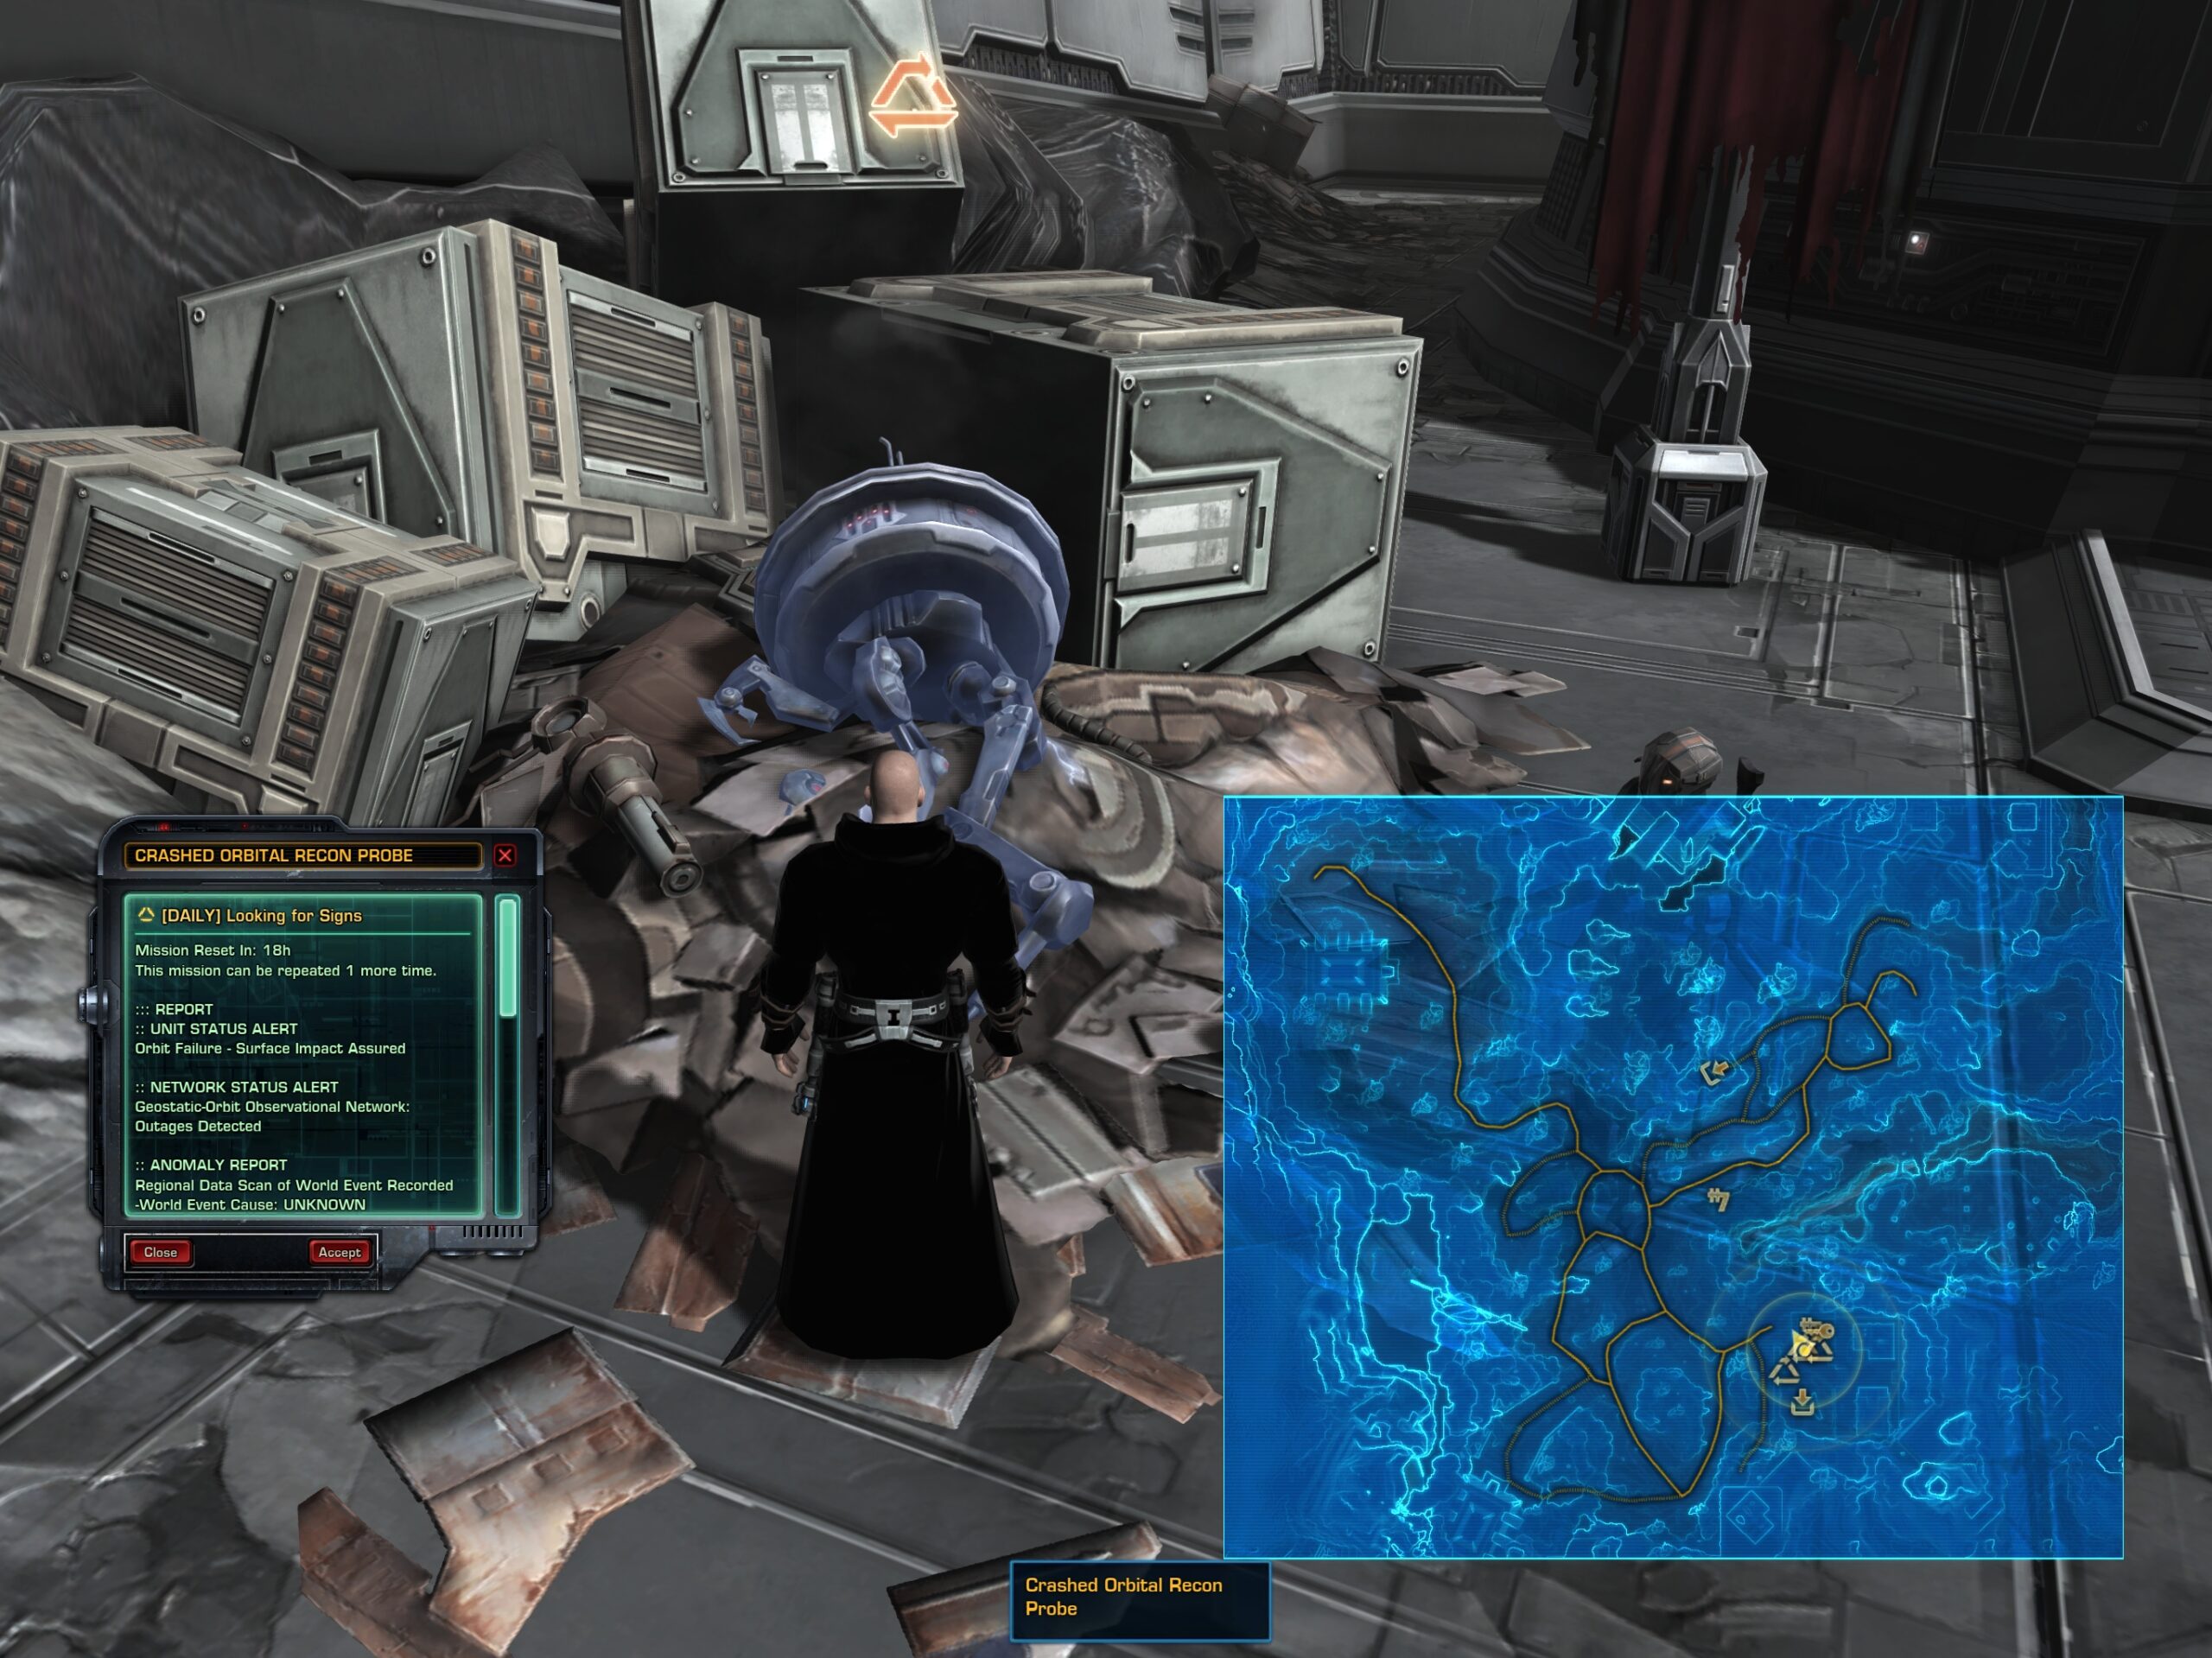
You need to find various crashed orbital recon probes around Ziost and loot their Memory Cores.
Some times a normal Recon Probe droid will spawn and you have to defeat it to loot its Memory Core. Rarely, a special named Droid will spawn.
These are part of a hidden achievement. More on that in the Achievements section of the guide. The nodes respawn quick enough if the area is heavily populated with other players.
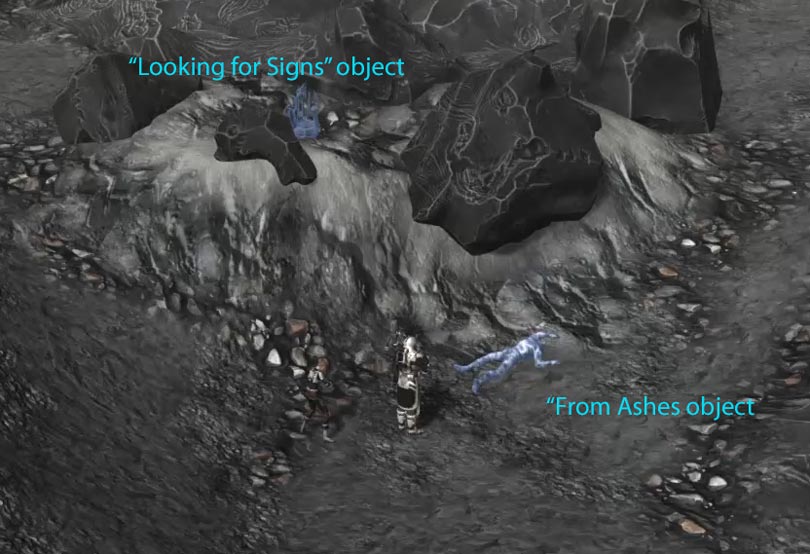
From Ashes
From Ashes is available on the mission terminal in the starting area.
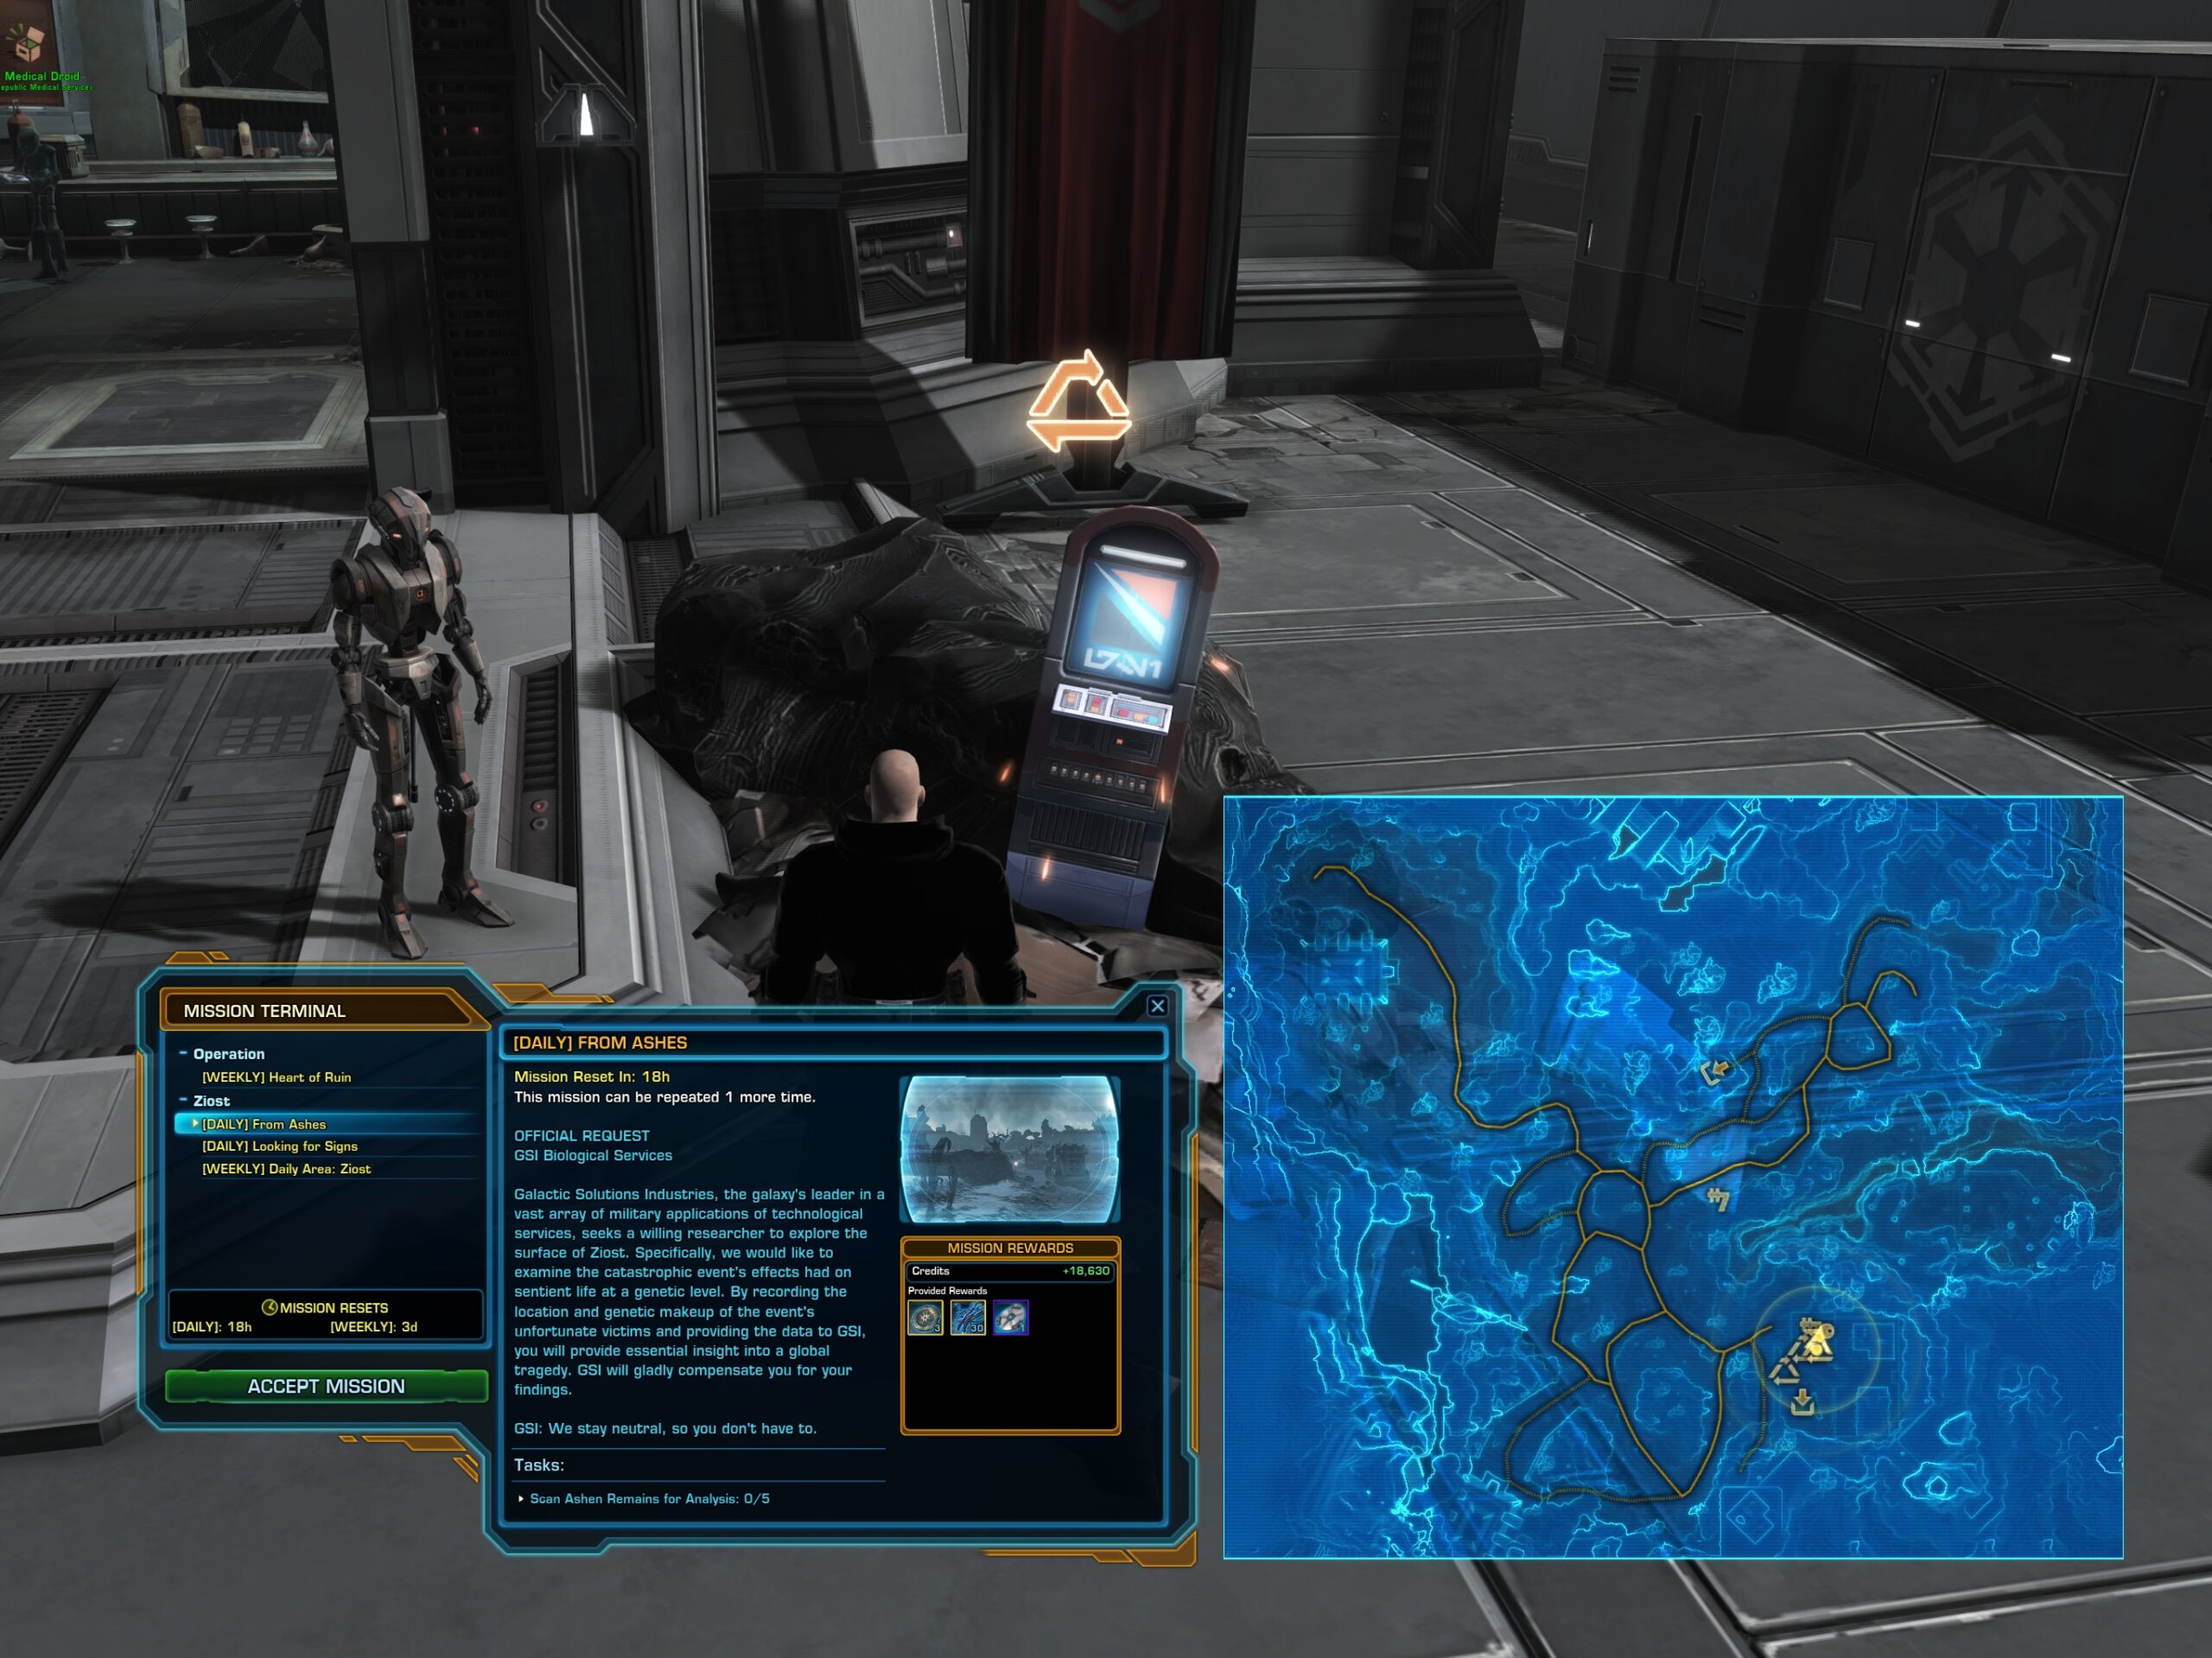
Find and scan as many corpses as needed until you have enough data. Not every scan will yield results to progress the mission.
Eyes into the Past
To start Eyes into the Past, you need to pick up a Datapad. The entrance to the instanced area is right next to the Datapad.
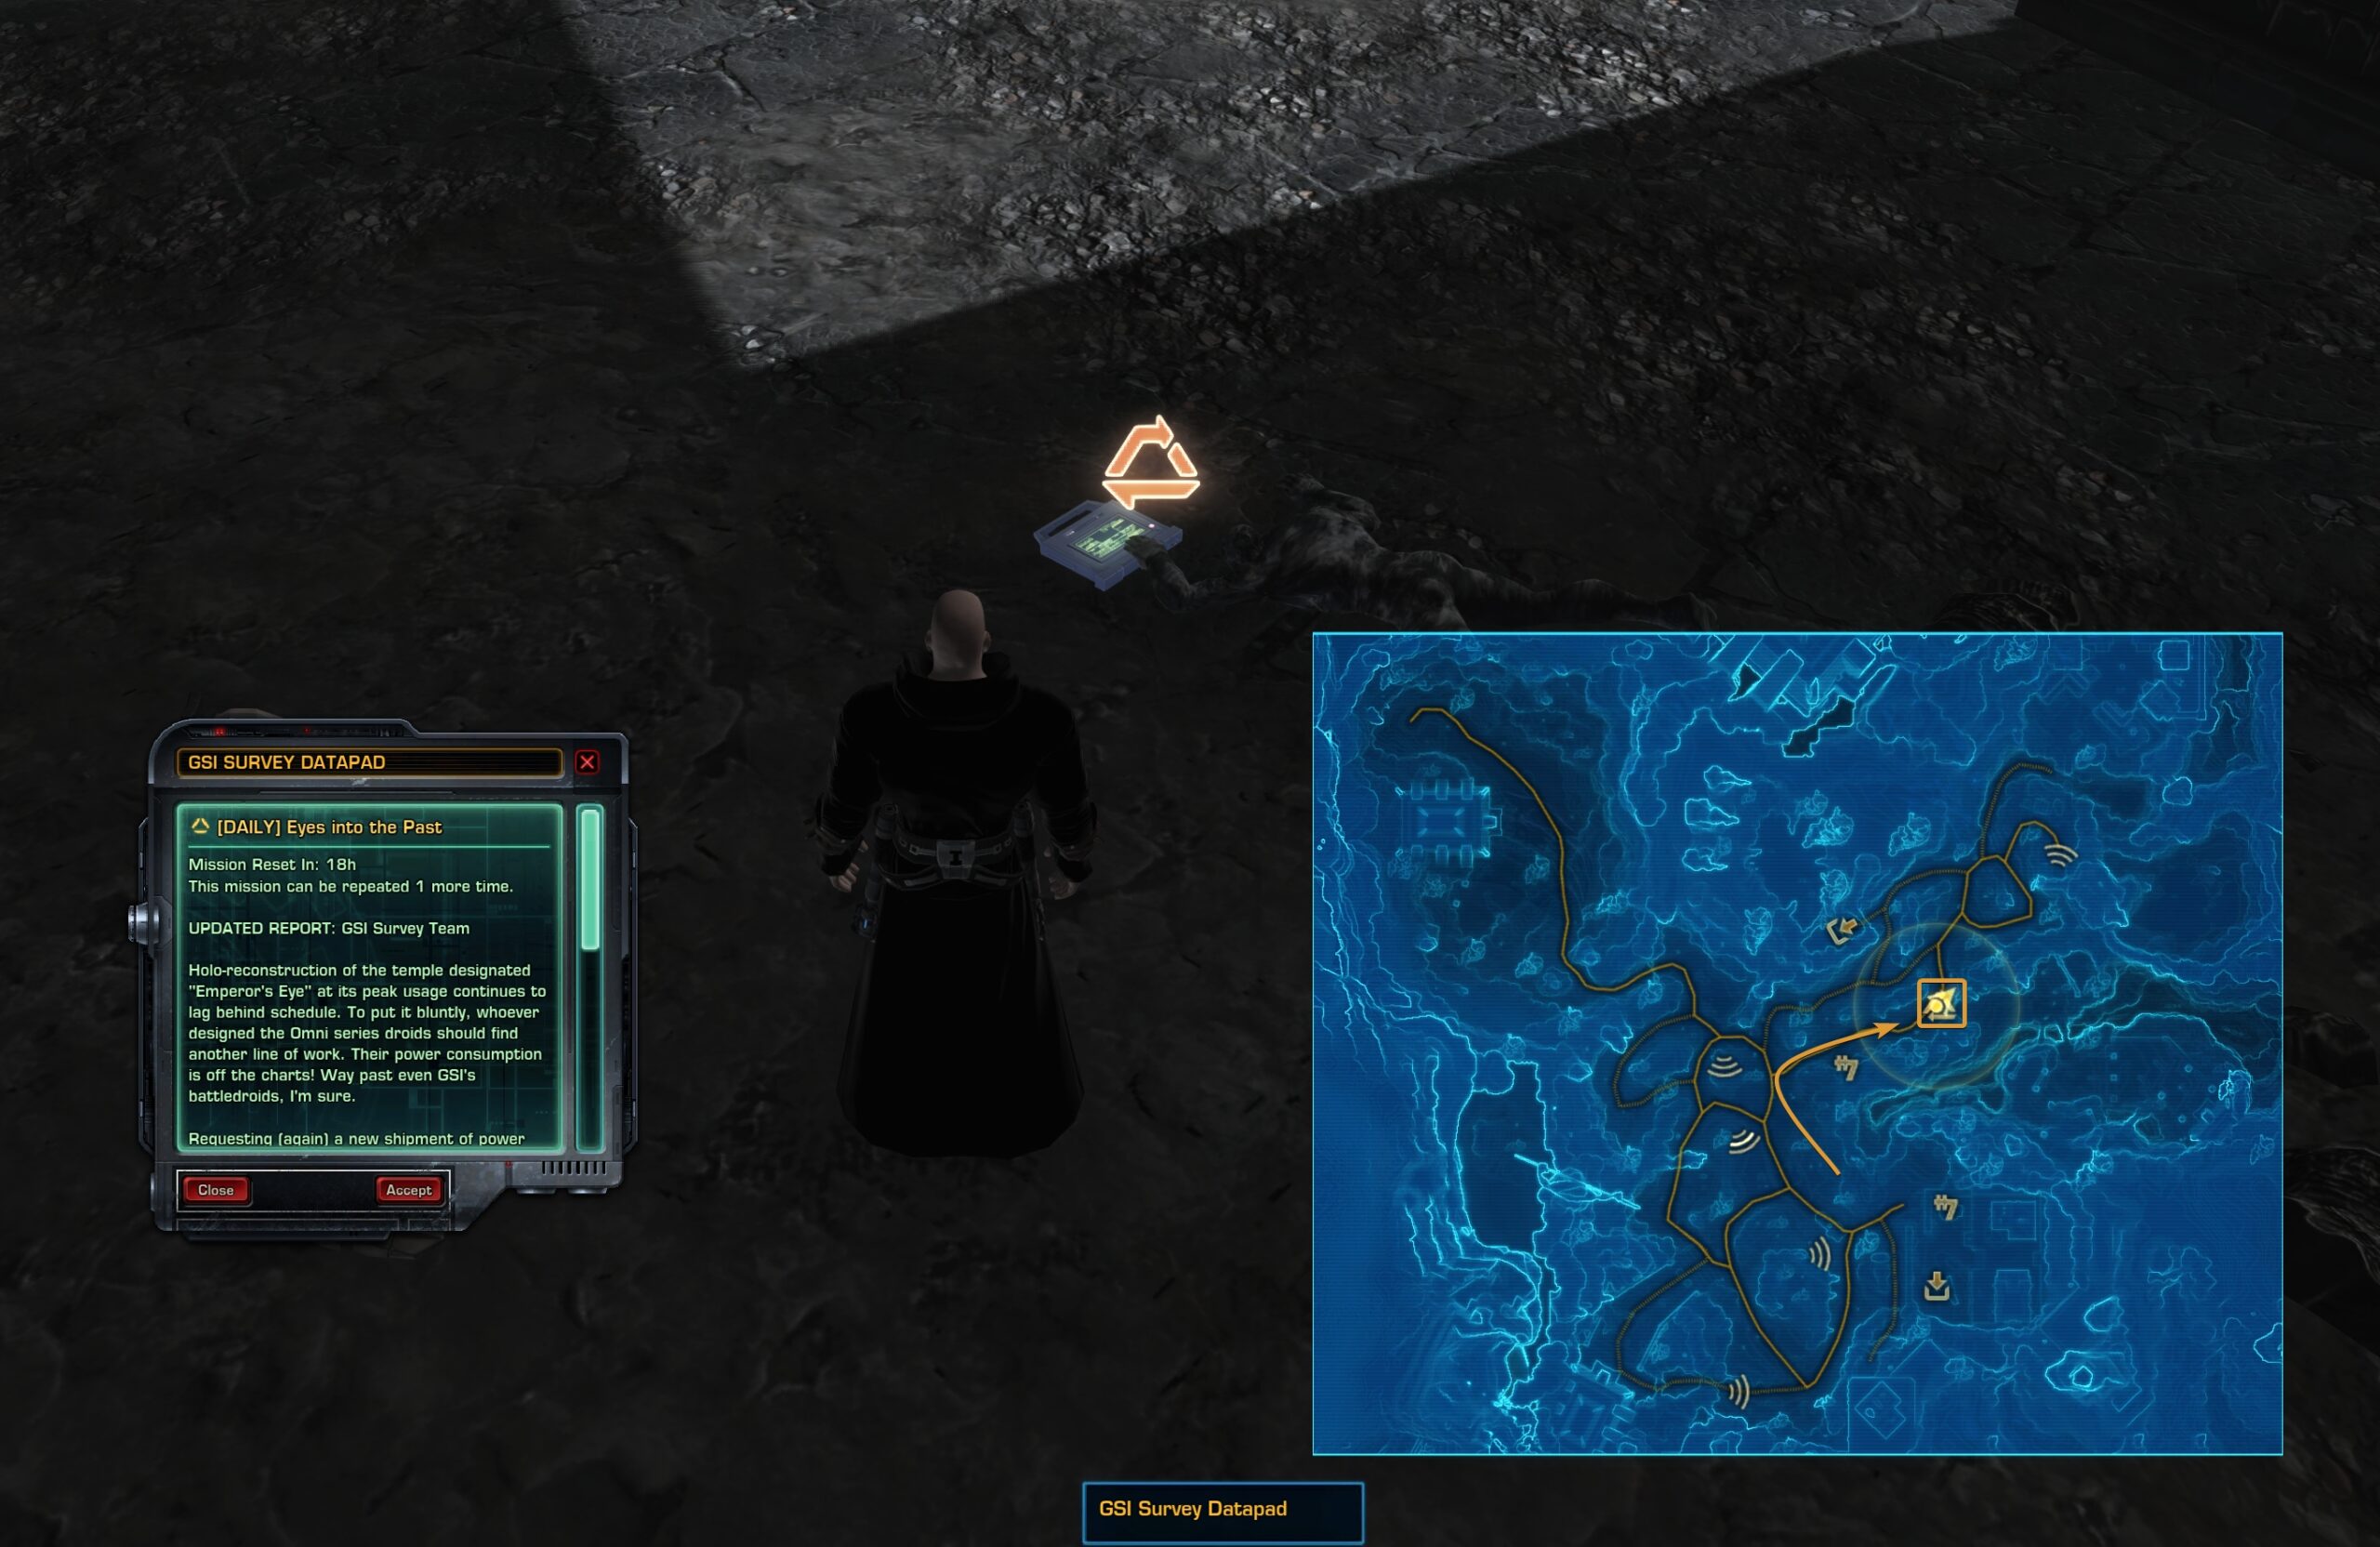
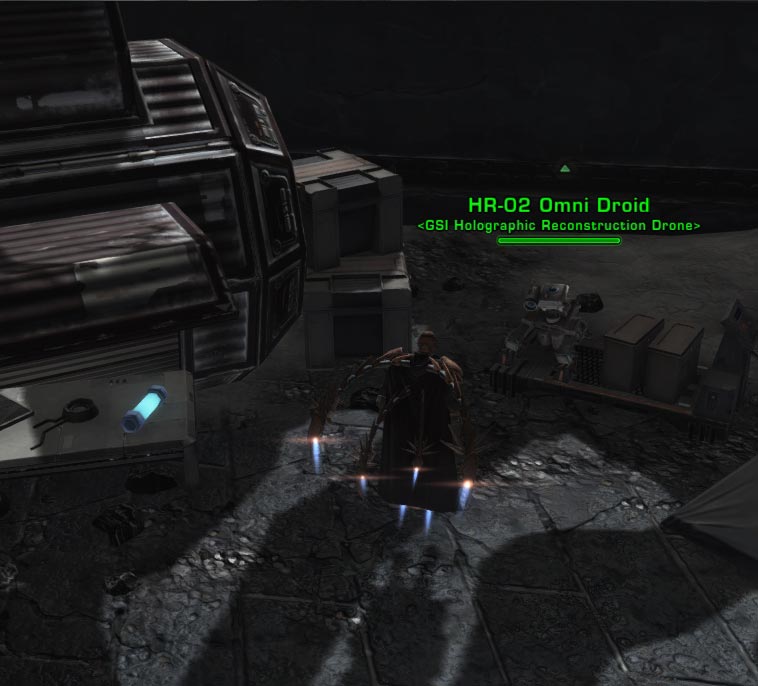
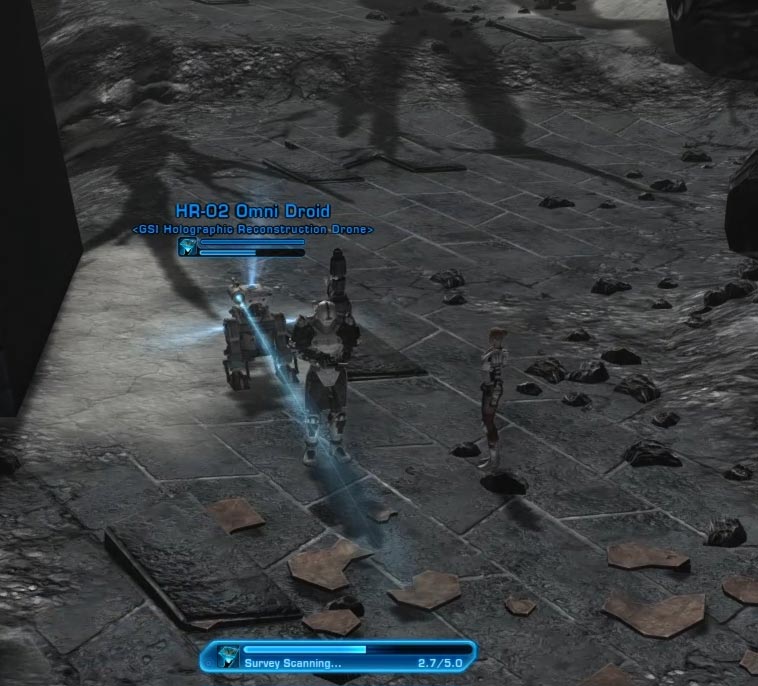
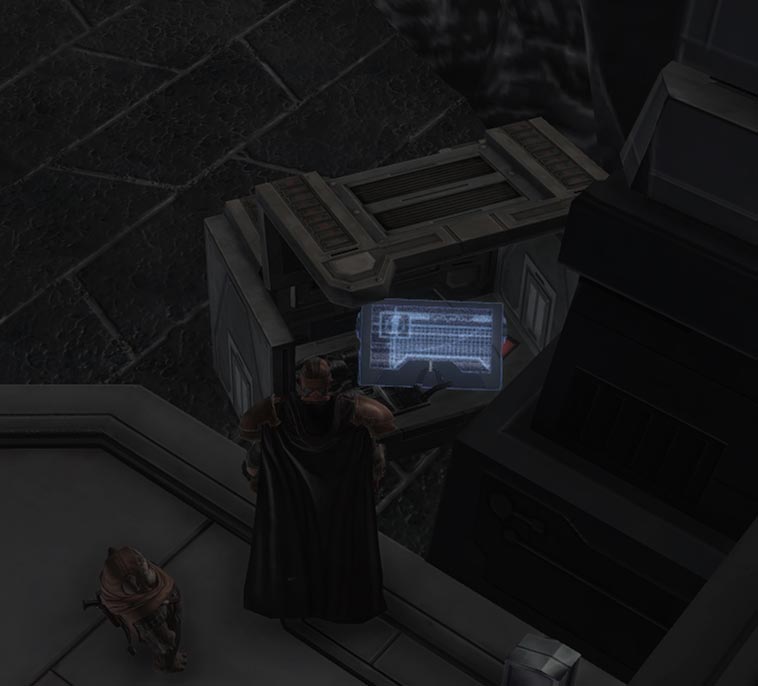
You can progress From Ashes too while inside the instance. Once inside, head left and find the Hr-02 Omni Droid. Next to it on the table there is a Droid Power Cell (more of these are scattered all around the area too).
Pick up the Power Cell, then click on the Droid to activate it. Now go to the locations I have shown you in the images below to discover ancient secrets about the Sith in the ruins nearby
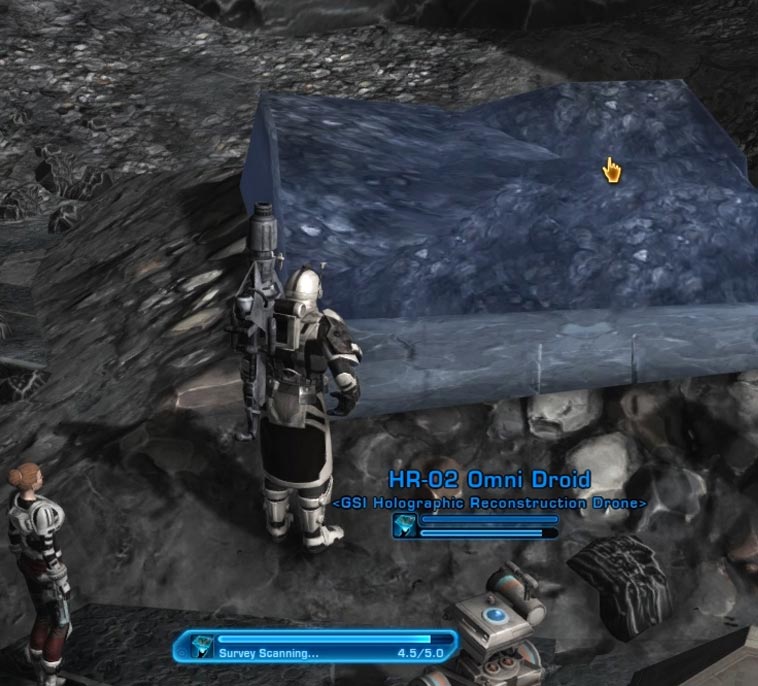
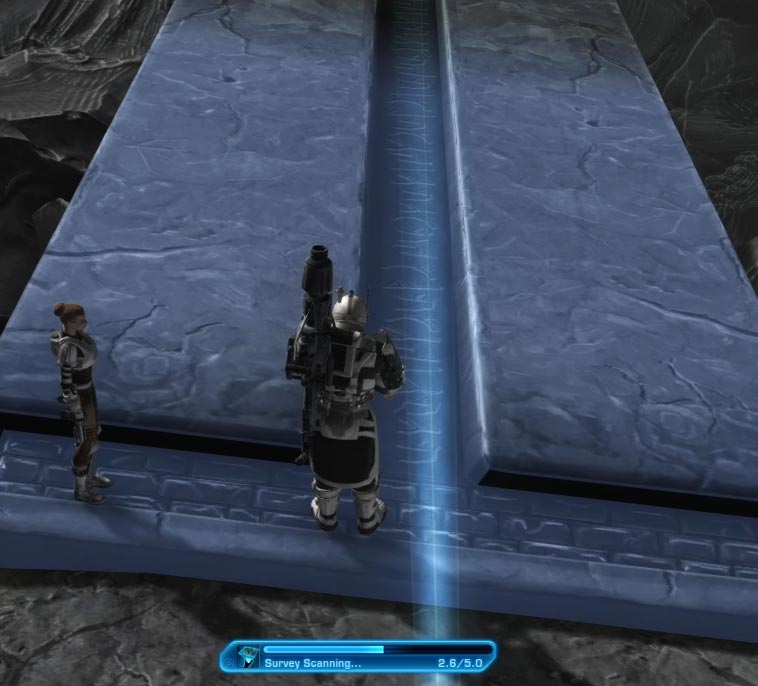

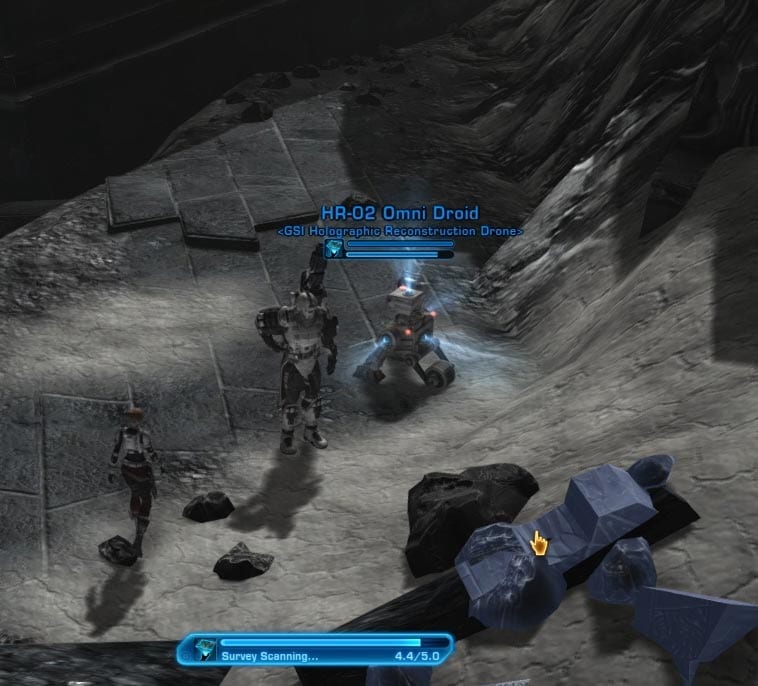
When you find all 5, head to the marked area on the map and click on the terminal (you will have to kill the droid that is guarding it first). This completes the mission.
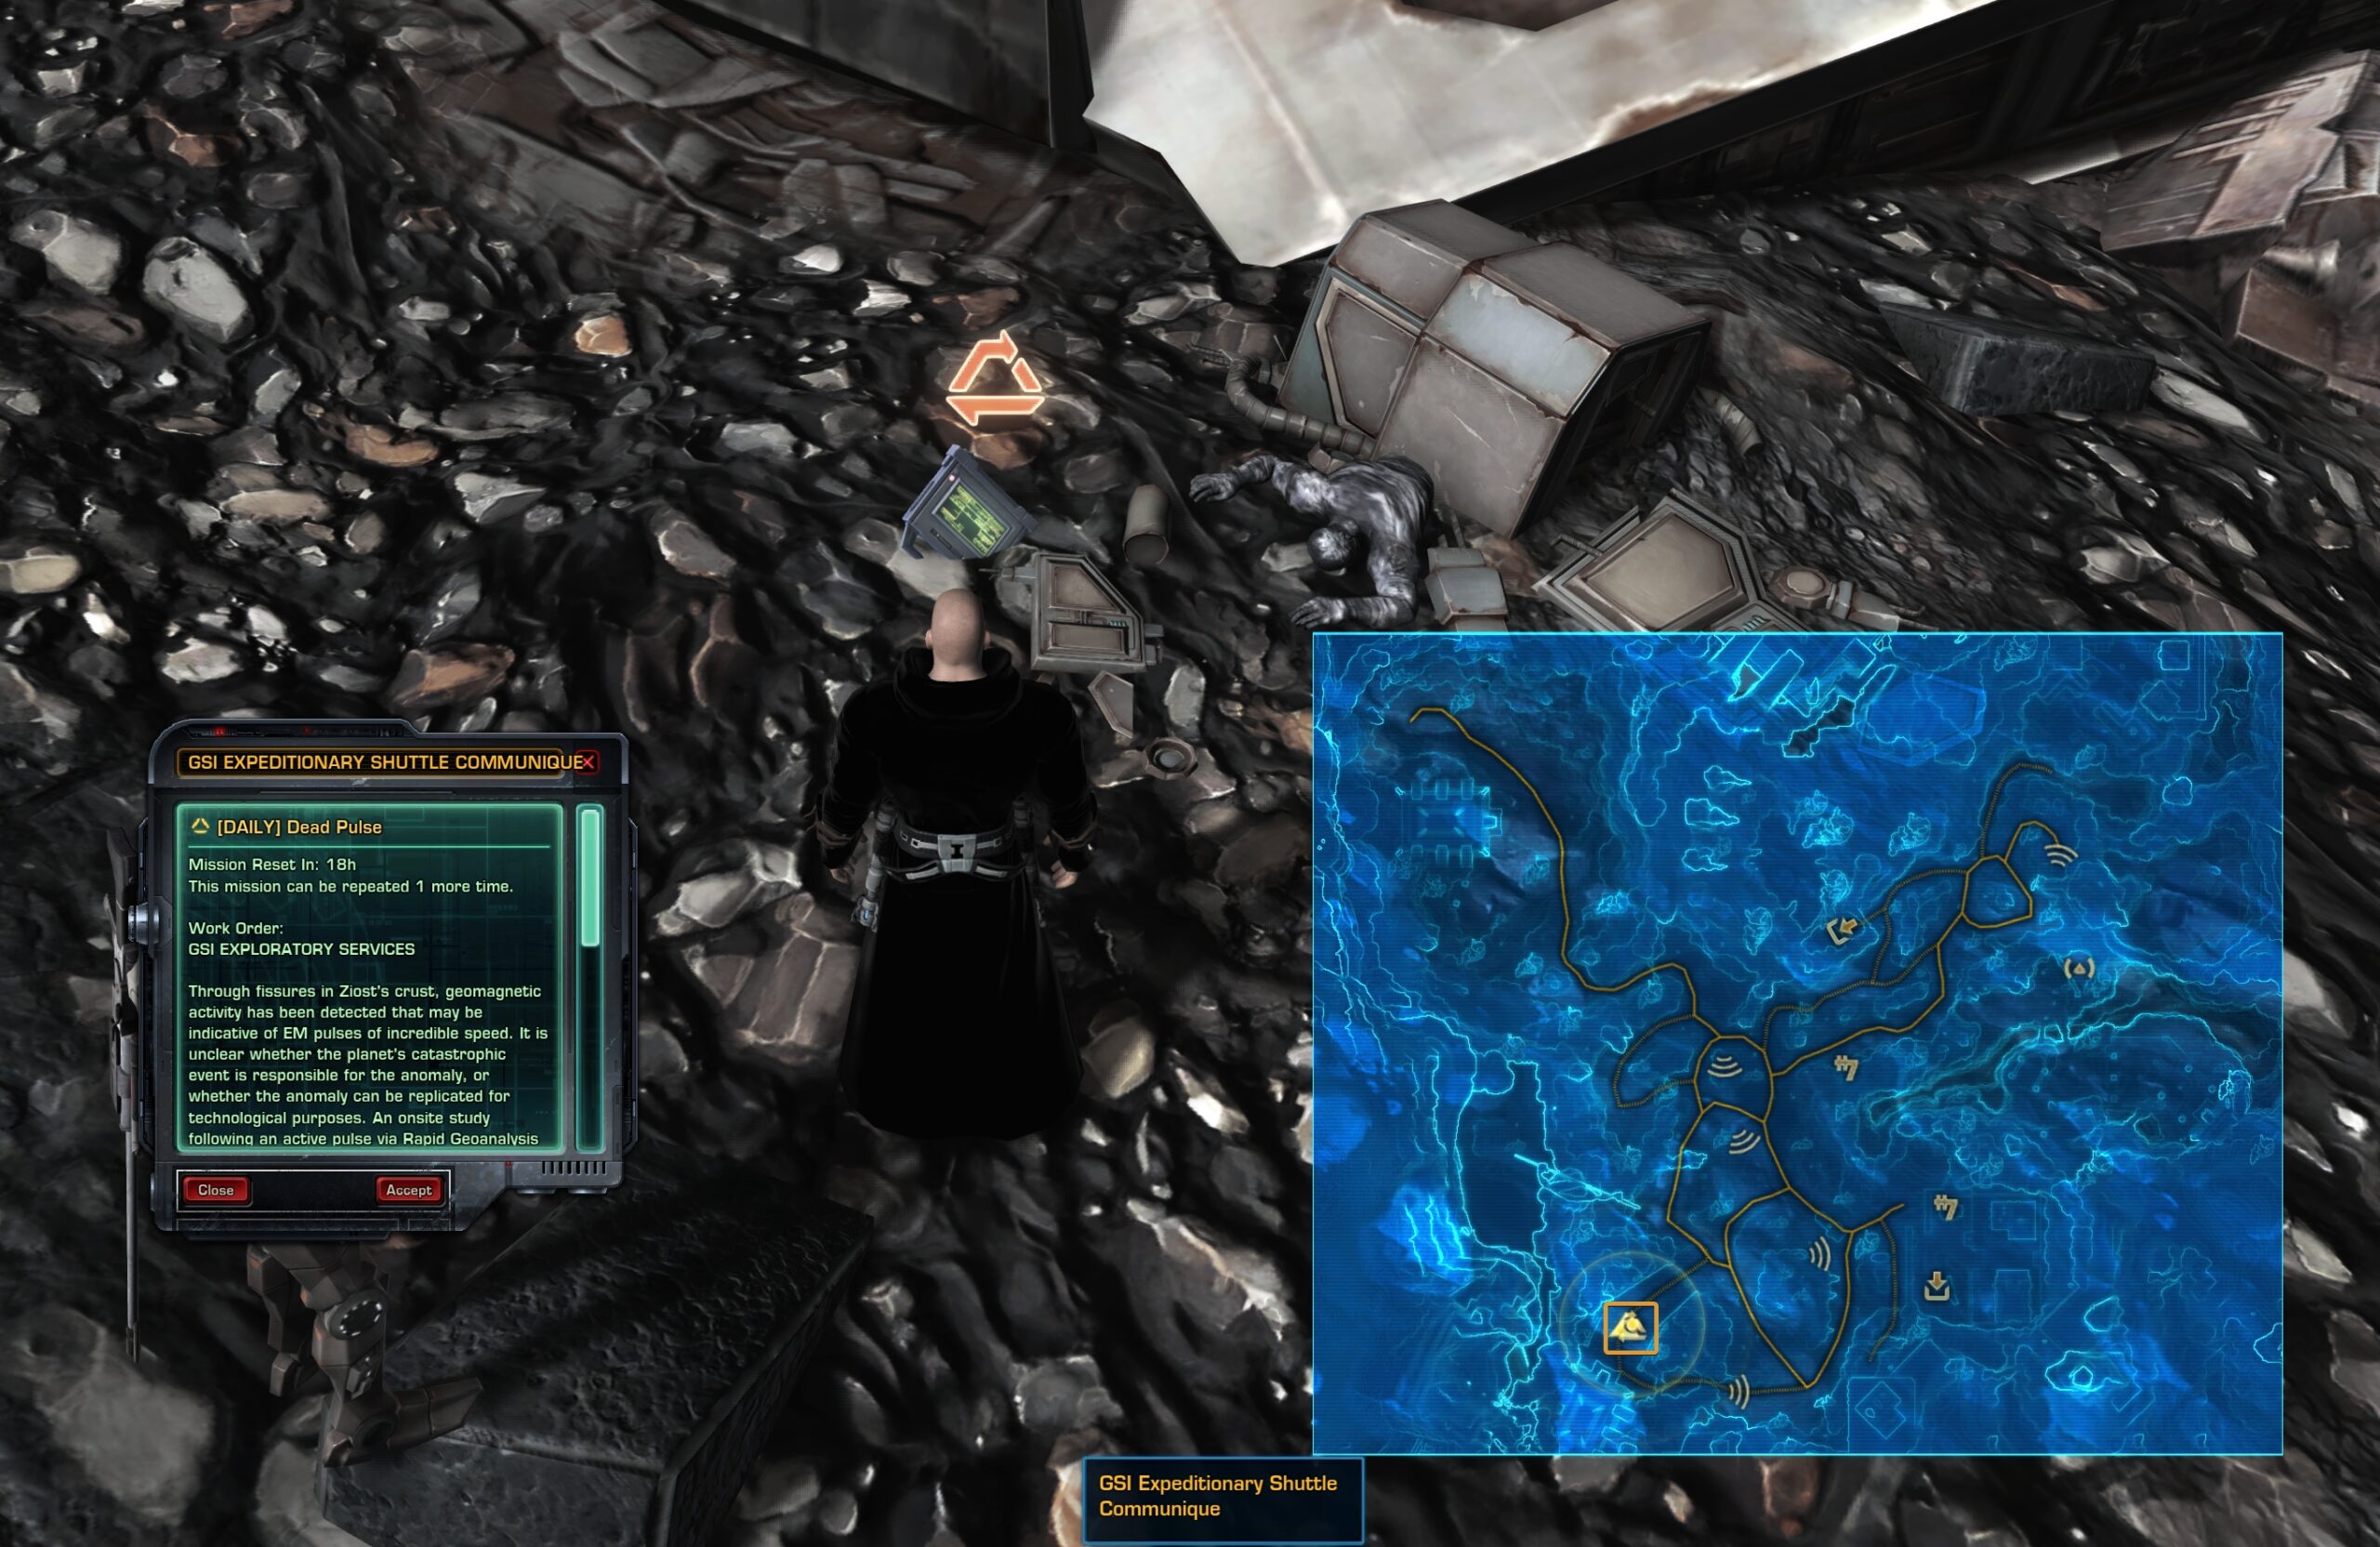
Dead Pulse
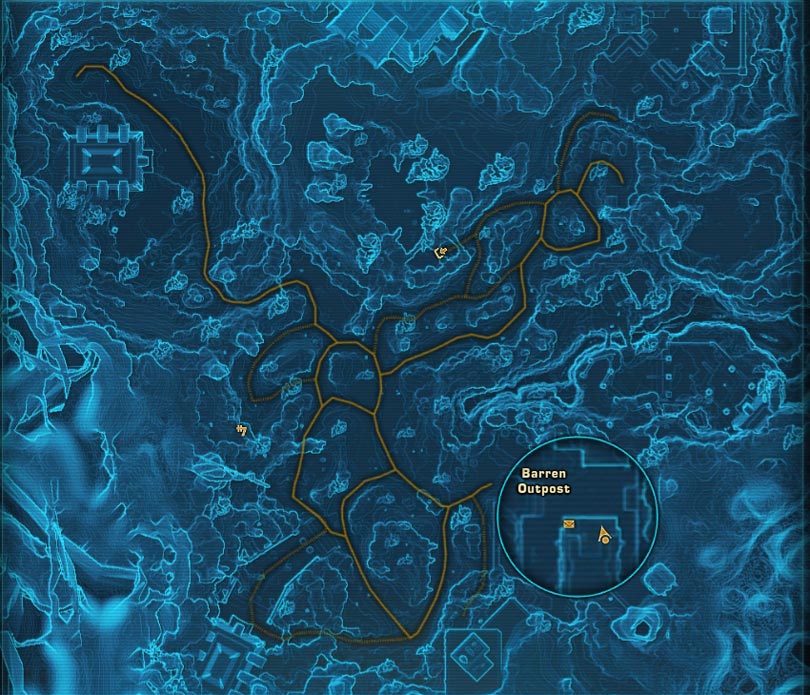
Dead Pulse is the second mission available from a datapad. It’s located in the southwest end of the Daily Area.
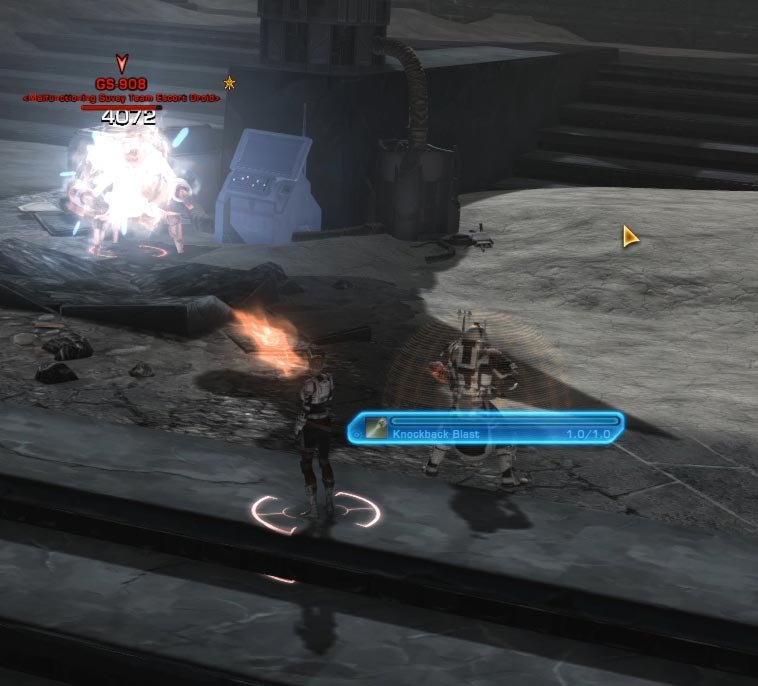
Once you get the mission, you need to pick up the nearby speeder and follow the green arrows in a timely fashion until you reach the broken bridge all the way into the north-east corner of the area.
The speeder will then self-destroy and you will dismount automatically. While on the speeder, you can take a left turn and jump over the Davastator Monolith to earn another hidden achievement. More on that in the Achievements section below.
Recommended Order
Time to complete a full run: 15 minutes
The full run should take you 12-15 minutes. Maybe 20, if you have to wait for respawns. The Daily Area is not as populated today as it was when it was first released, so waiting on respawns is highly unlikely.
- Start Southwest:
Head down to the south-western corner of the map, where Dead Pulse is and on your way there, complete as many of the objectives for From Ashes and Looking for Signs as you can. Keep an eye for nearby location(s) for Death of a World.
- Move Northeast:
After you complete Dead Pulse, you will find yourself in the north-eastern corner of the area.
- Enter Eyes into the Past:
Head south until you reach the entrance to the Eyes into the Past. While inside, continue your progress with objectives for From Ashes.
- Finish remaining Objectives:
After you complete Eyes into the Past, exit the instance, and finish up the remaining objectives for Looking for Signs and From Ashes.
- Hand in at the camp
Return to the starter area. Hand in From Ashes at the terminal located inside the building at the back of the camp.
Mission Rewards
Although the Daily Area was created many years ago, the developers have done a good job keeping things updated and organized so that you can always find value in farming Yavin 4 dailies.
Below is the full table of rewards for each type of mission based on your current level:
| Icon | Item Name | Requirements |
|---|---|---|
 | Experience Points | Under Level Cap |
| Credits | – | |
| Tech Fragments | At Level Cap | |
| Conquest Commendations | At Level Cap | |
| Ziost Memory Holograph (Vendor Token) | All Missions | |
| Gear Chest (Choice 1 of 2) | Weekly, At Level Cap | |
| FP-1 Stabilizer (Gear Currency) (Choice 1 of 2) | Weekly, At Level Cap |
Reputation
Ziost does not feature a Reputation Track.
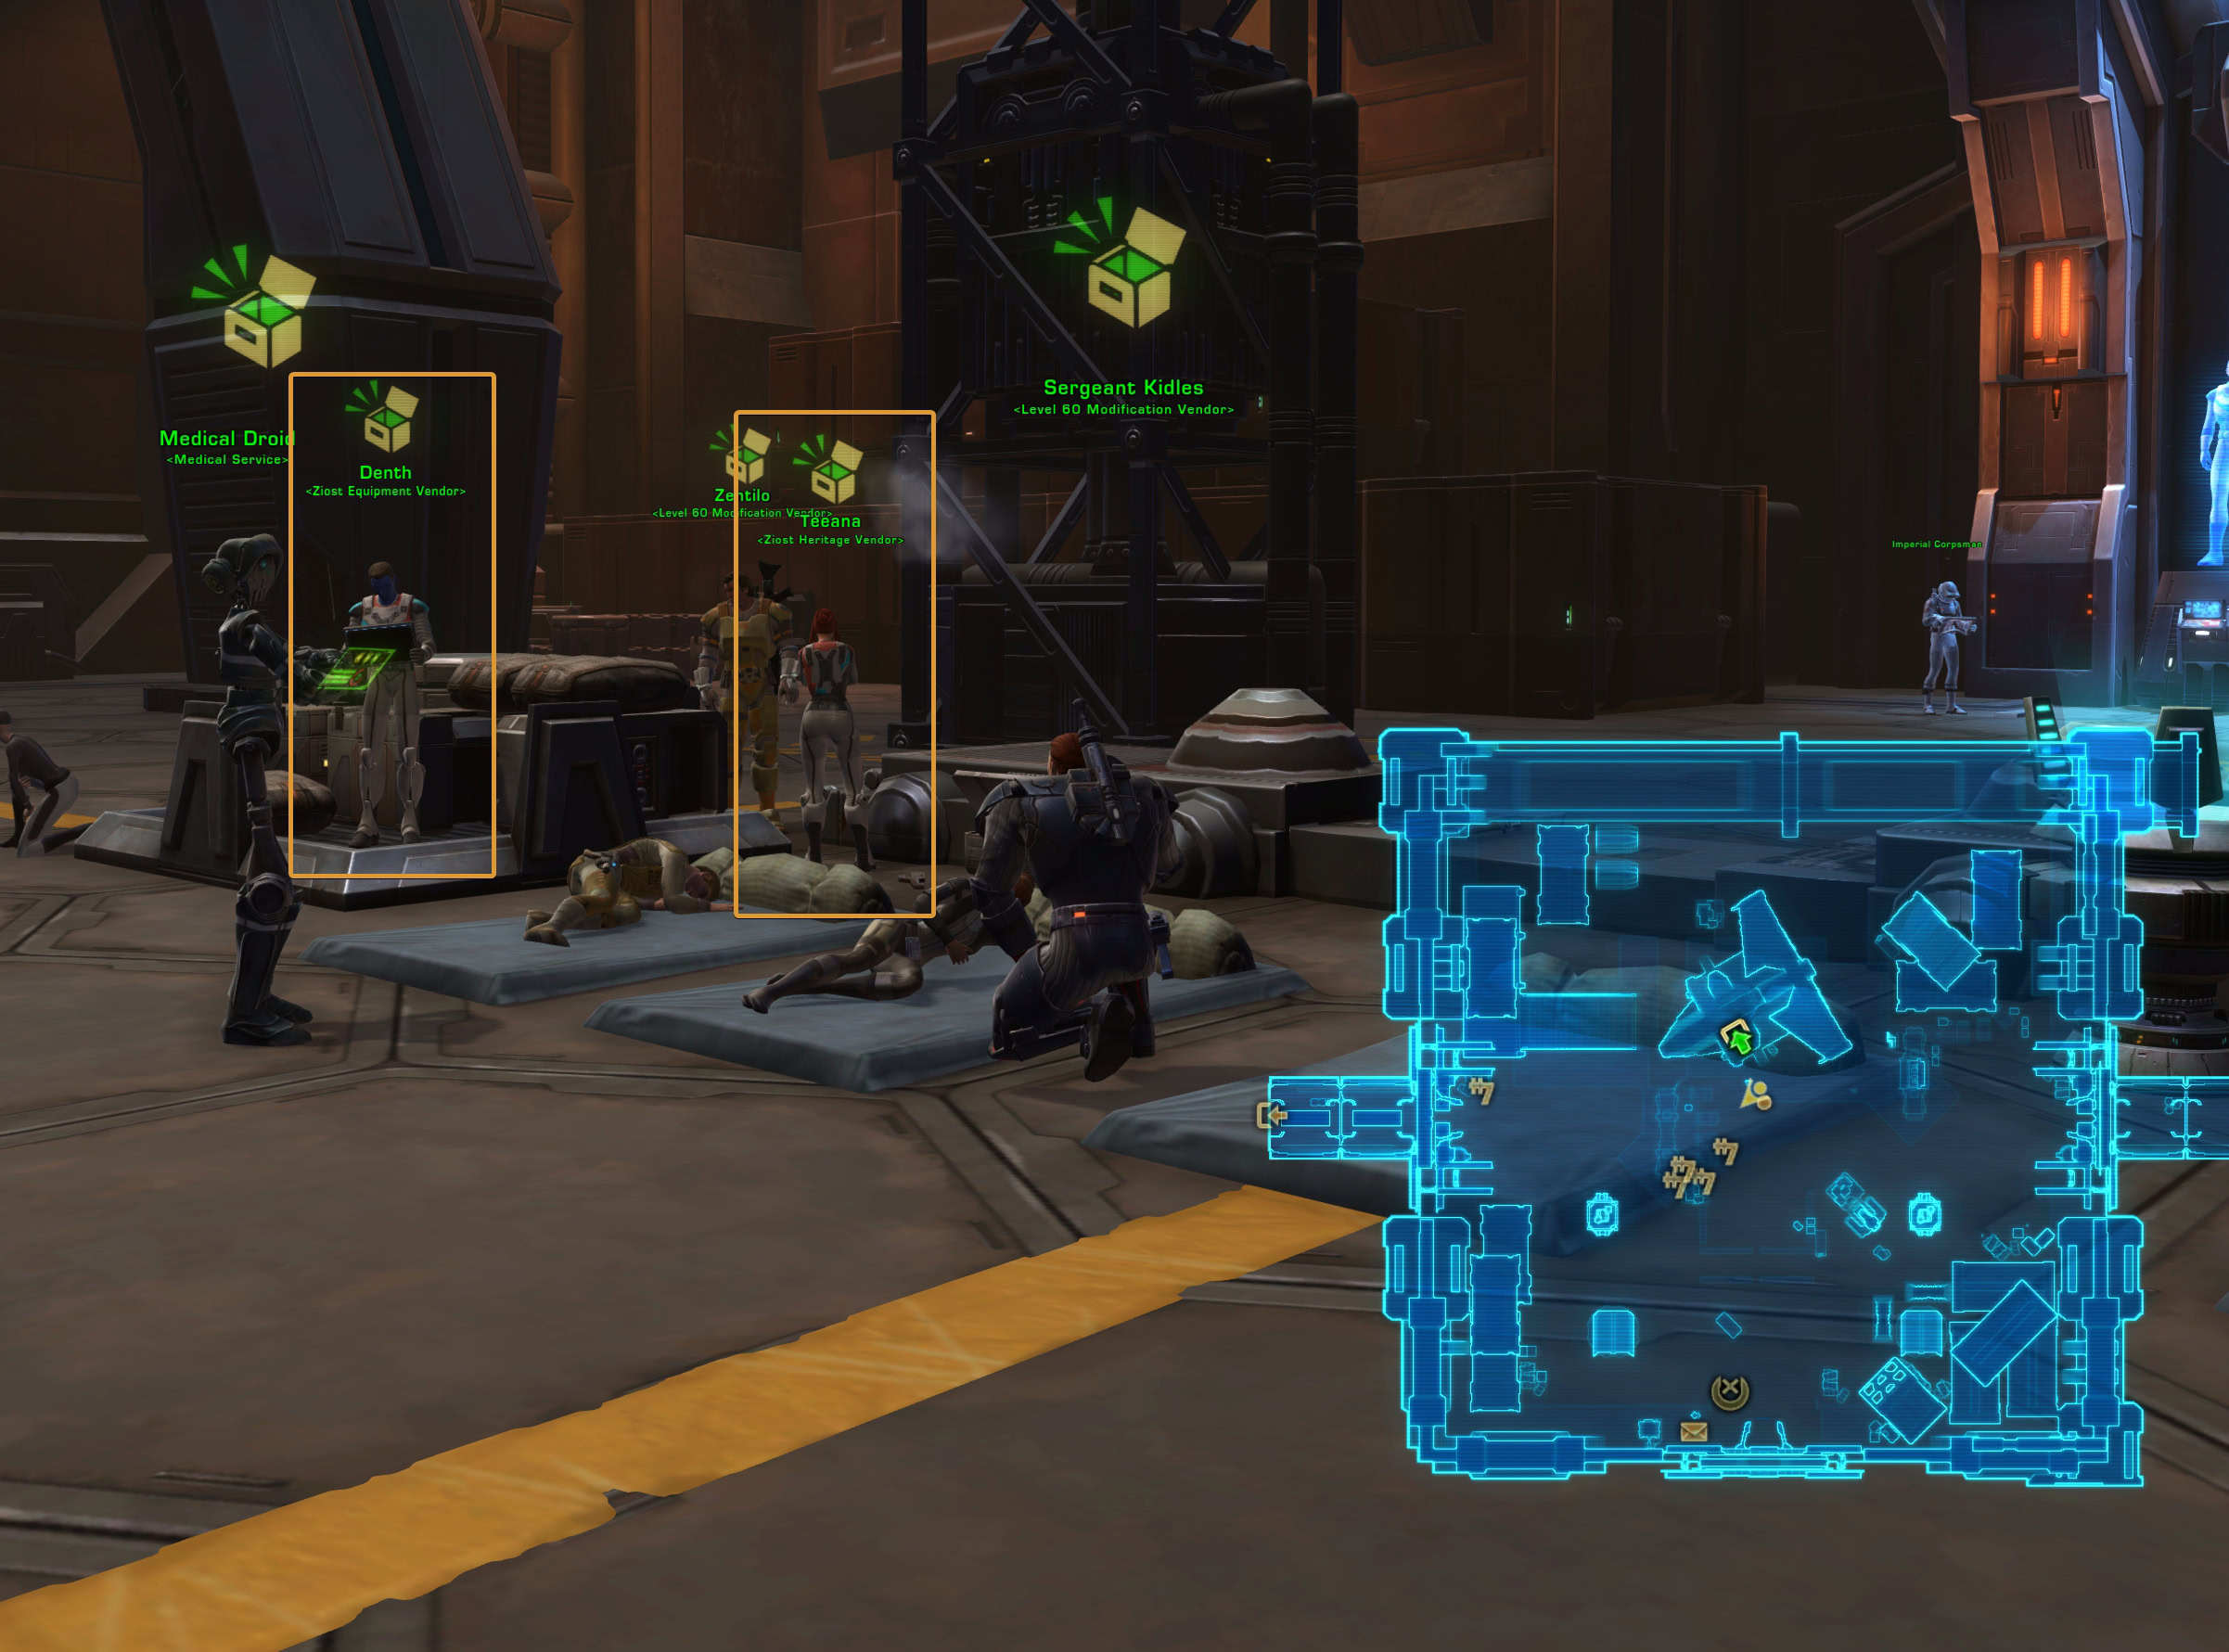
Vendors
The vendors for Ziost are all located on the GSI Orbital Station. They offer various items in exchange for Credits and Ziost Memory Holograph tokens.
Teeana offers a mount and two decorations. Denth is the star of the… Orbital Station. His offerings include ten full armor sets for all combat styles and disciplines for level 60. Ziost used to be a level 60 endgame daily area when it first came out.
At this stage of the game, the armor sets’ included mods are not optimal and you will out-level them very quickly.
The biggest value the sets bring, are the ear and implants, which are more rare to obtain outside of crafting while leveling. And, of course, the visual appearance of each set, despite all of them showing their age. They were all developed and added to the game years ago.
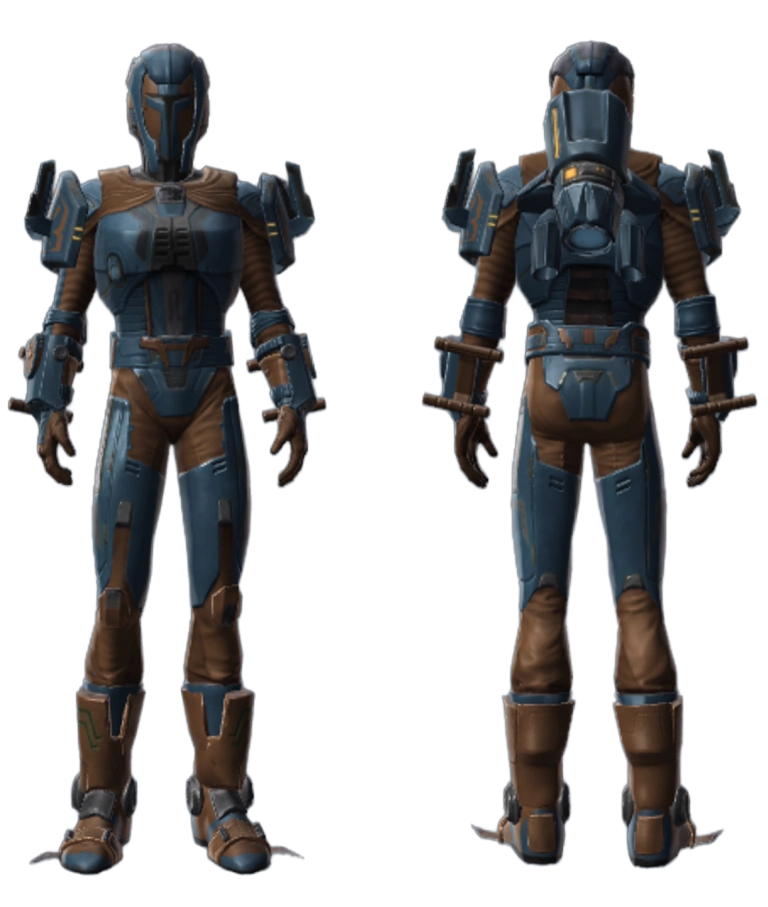
Armor Set Type 1
The following armor sets look identically. They all have mods for level 60 with no set bonuses:
- Citadel Boltblaster MK-2
- Citadel Demolisher MK-2
- Citadel Med-Tech MK-2
Armor Set Type 2
The following armor sets look identically. They all have mods for level 60 with no set bonuses:
- Citadel Bulwark MK-2
- Citadel Pummeler MK-2

Armor Set Type 3
The following armor sets look identically. They all have mods for level 60 with no set bonuses:
- Citadel Duelist MK-2
- Citadel Force-healer MK-2
- Citadel Force-lord MK-2

Armor Set Type 4
The following armor sets look identically. They all have mods for level 60 with no set bonuses:
- Citadel Mender MK-2
- Citadel Targeter MK-2

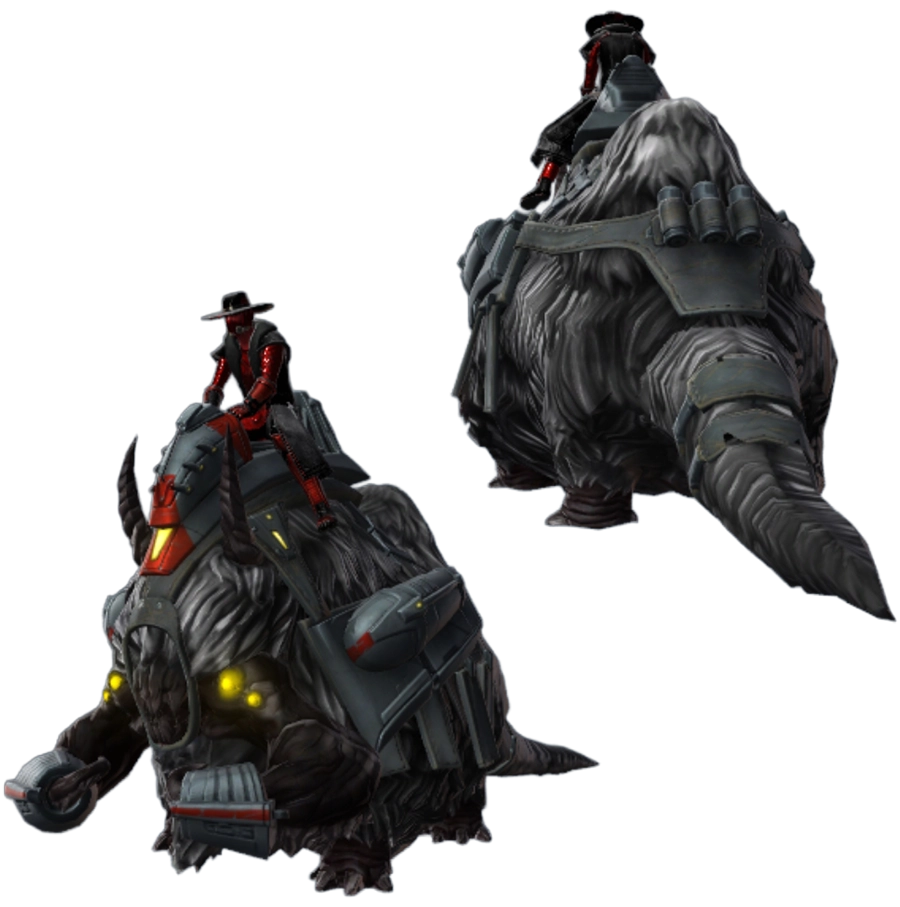
Armored Ziost Ice Tromper
The mount is available for the same price at both Denth, the Ziost Equipment Vendor, and Teeana, the Ziost Heritage Vendor.
Decorations
The Decorations are available for purchase from Teeana, the Ziost Heritage Vendor.

Achievements
The Achievements for Ziost are not located in the Daily Area section in your Legacy window. They are under Location ► Ziost.
This results in the achievement for the daily area being mixed with the achievements from the story on Ziost, preceding the daily area. The achievements are structured in three categories: Daily Bosses, Missions, and General.
There are three hidden achievements in the Daily Area.You can easily earn two of them while doing your Solo Missions.
The other Hidden achievements, listed in the table below, are part of the story and you will not have too much trouble unlocking them all.
| Icon | Name | Category | Legacy Points | Visibility | Description: | Reward: | Has Reward? |
|---|---|---|---|---|---|---|---|
| Defeated Aegis Squadron ZX-1 | Daily Bosses | 5 | Normal | Defeated the Aegis Squadron ZX-1 on Ziost. | No | No | |
| Defeated Aegis Squadron ZX-2 | Daily Bosses | 5 | Normal | Defeated the Aegis Squadron ZX-2 on Ziost. | No | No | |
| Defeated Aegis Squadron ZX-3 | Daily Bosses | 5 | Normal | Defeated the Aegis Squadron ZX-3 on Ziost. | No | No | |
| Defeated Aegis Squadron ZX-4 | Daily Bosses | 5 | Normal | Defeated the Aegis Squadron ZX-4 on Ziost. | No | No | |
| Defeated Aegis Squadron ZX-5 | Daily Bosses | 5 | Normal | Defeated the Aegis Squadron ZX-5 on Ziost. | No | No | |
| Defeated Aegis Squadron | Daily Bosses | 50 | Normal | Defeated the Aegis Squadron on Ziost: – Defeated Aegis Squadron ZX-I – Defeated Aegis Squadron ZX-2 – Defeated Aegis Squadron ZX-3 – Defeated Aegis Squadron ZX-4 – Defeated Aegis Squadron ZX-5 | Legacy Title: Aegist of Ziost | Yes | |
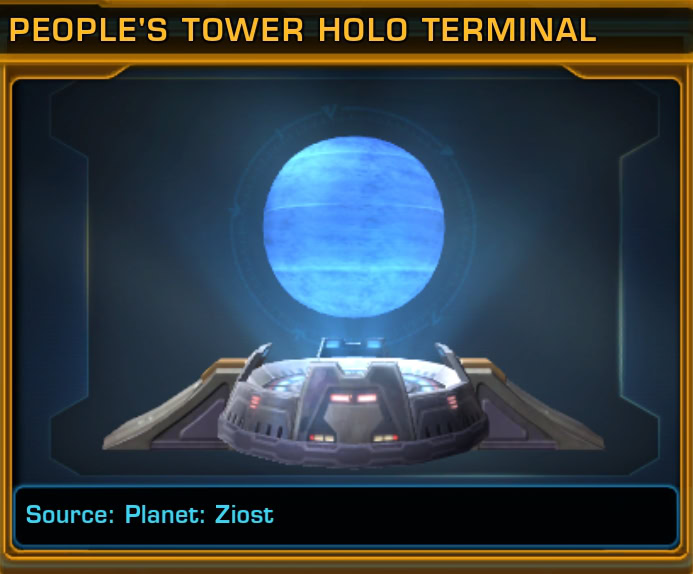
| Gunned Down Grundorsen | Daily Bosses | 10 | Hidden | Defeated Grundorsen Maelo in the People’s Tower on Ziost. | No | No | |
| Destroyed X-R37T | Daily Bosses | 5 | Hidden | Defeated the Advanced Orbital Recon Probe X-R37T on Ziost. | No | No | |
| Destroyed X-361D | Daily Bosses | 5 | Hidden | Defeated the Advanced Orbital Recon Probe X-361D on Ziost. | No | No | |
| Destroyed X-662J | Daily Bosses | 5 | Hidden | Defeated the Advanced Orbital Recon Probe X-662J on Ziost. | No | No | |
| Destroyed X-124D | Daily Bosses | 5 | Hidden | Defeated the Advanced Orbital Recon Probe X-124D on Ziost. | No | No | |
| Network Outage | Daily Bosses | 25 | Hidden | Defeated all four of the Advanced Orbital Recon Probes crashed on the surface of Ziost: – Destroyed X-124D – Destroyed X-361 D – Destroyed X-662J – Destroyed X-R37T | Legacy Title: Surveilance Smasher | Yes | |
| Evacuation Expert | Missions | 25 | Normal | Followed all evacuation protocols in the Military Outpost on Ziost: – Evacuation Protocols: Escape Route – Evacuation Protocols: Invasion Defense – Evacuation Protocols: Landing Zone | No | No | |
| Evacuation Protocols: Landing Zone | Missions | 10 | Hidden | Secured the landing zone so civilians can escape the humanitarian crisis on Ziost: – Evacuation Protocols: Landing Zone | No | No | |
| Evacuation Protocols: Invasion Defense | Missions | 10 | Hidden | Activated automated defenses so civilians can safely escape the humanitarian crisis on Ziost: – Evacuation Protocols: Invasion Defense | No | No | |
| Evacuation Protocols: Escape Route | Missions | 10 | Hidden | Deployed Emergency Facilitator Droids to direct civilians to their escape route from the humanitarian crisis on Ziost: – Evacuation Protocols: Escape Route | No | No | |
| New Adasta Veteran | Missions | 25 | Normal | Completed all additional objectives in New Adasta’s Central District on Ziost: – Free the Minds – Megalomania – Not-So-Hidden Stash – They Will Survive | No | No | |
| Not-So-Hidden Stash | Missions | 10 | Hidden | Successfully accessed the cantina stash in New Adasta’s Central District on Ziost: – Hidden Lockbox | No | No | |
| Megalomania | Missions | 5 | Hidden | Defeated the former Emperor’s puppets in New Adasta’s Central District on Ziost: – The Possessed | No | No | |
| Free the Minds | Missions | 5 | Hidden | Saved citizens of New Adasta from the former Emperor’s influence in the Central District on Ziost: – Saving New Adasta | No | No | |
| They Will Survive | Missions | 10 | Hidden | Found survivors in New Adasta’s Central District on Ziost: – Searching for Survivors | No | No | |
| Dead On | Missions | 25 | Normal | Found and completed all objectives in and around the People’s Tower in the heart of New Adasta on Ziost: – I Want to Fly Fast – Shut Them Down – Time to Movew | 1x Potted Plant: Bloomind Bud Decoration | Yes | |
| Shut Them Down | Missions | 5 | Hidden | Powered down the deadly security turrets in the People’s Tower on Ziost: – Dead-End Security | No | No | |
| Time to Move | Missions | 5 | Hidden | Saved helpless civilians from the former Emperor’s puppets on Ziost: – Temporary Residence | No | No | |
| I Want to Fly Fast | Missions | 10 | Hidden | Put Theb Orten’s key to good use in Ziost’s New Adasta: – On the House | No | No | |
| Ziost Completionist | Missions | 100 | Normal | Completed all additional story quest content on Ziost: – Dead On – Evacuation Expert – New Adasta Veteran | Park K-133T Mount | Yes | |
| Mountains of Rubble | General | 25 | Normal | Defeated 50 Monoliths on Ziost. | Legacy Title: Rockcrusher | Yes | |
| Ziost Archivist | General | 10 | Hidden | Recovered the lost fragments of Galactic History from the Ziost Archive remnants: – Galactic History 94: The Sacking of Coruscant – Galactic History 95: A Cold War Begins | No | No | |
| Jump the Rock Shark | General | 10 | Hidden | Demonstrated your reckless disregard for the safety manual by using the GSI SJ-4 Rapid Geoanalysis Scout to vault a Monolith on Ziost” – Jumped the Monolith | No | No |
Network Outage (Hidden Achievement)
To gain this achievement, you need to spawn and kill 4 special Droids with unique names. This can be done during the Looking for Signs Daily Mission.
Most of the time a normal Recon Probe will spawn, but when one of the special-named ones spawns, it will grant you the appropriate individual hidden achievement for each Probe.
Taking out all four, will reward you with the meta hidden achievement, Network Outage, and a new Legacy Title: Surveilance Smasher. Here are the names of the Recon Probes:
- X-R37T
- X-361D
- X-662J
- X-124D
They spawn randomly some times instead of the normal ones. Don’t pick up the Memory Cores from the regular Probes until you finish the achievement or you will complete the Daily Mission.
You are not able to click and spawn a probe unless you have the mission active. The locations, as I said previously, are all around the Daily Area. The nodes respawn quick.
Ziost Archivist (Hidden Achievement)
Completing this one will grant you 2 Galactic History Lore Updates – Numbers 94 and 95.
Galactic History 94: The Sacking of Coruscant
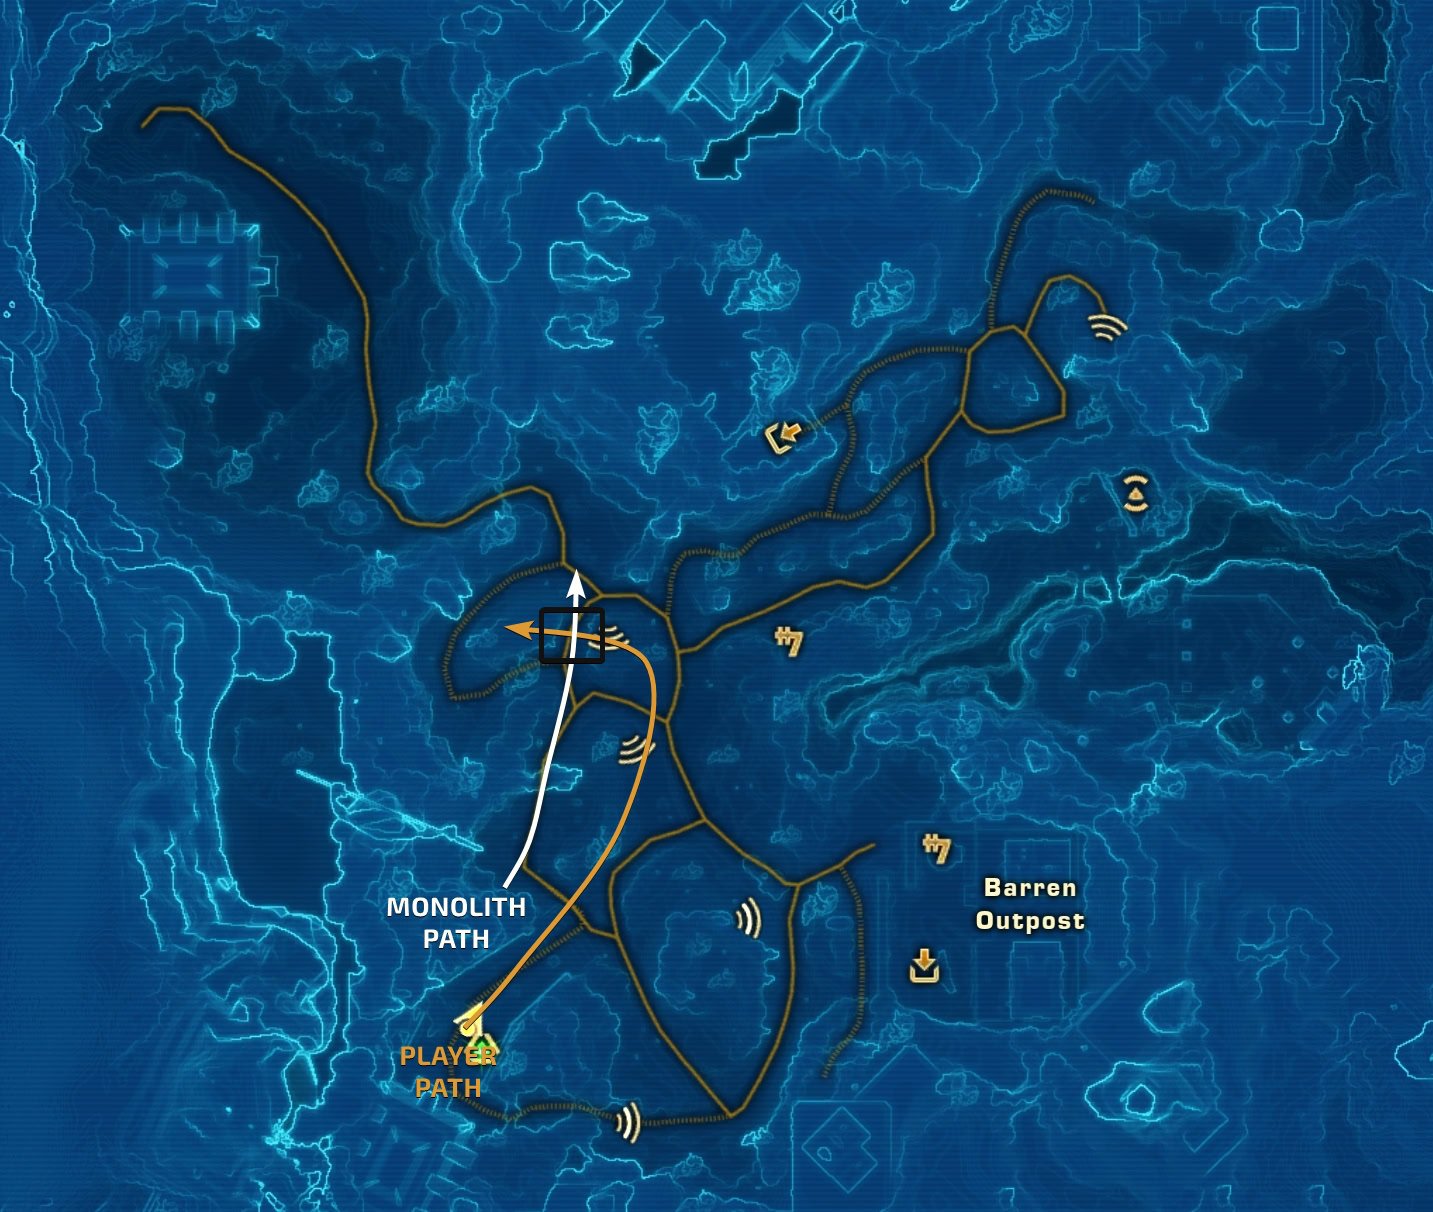
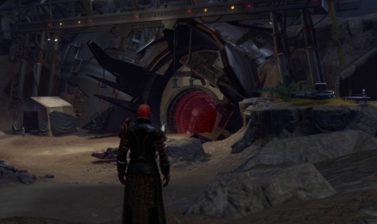
Go to the north-west section of the map, find the destroyed Walker and click on the Exposed Walker Wiring.
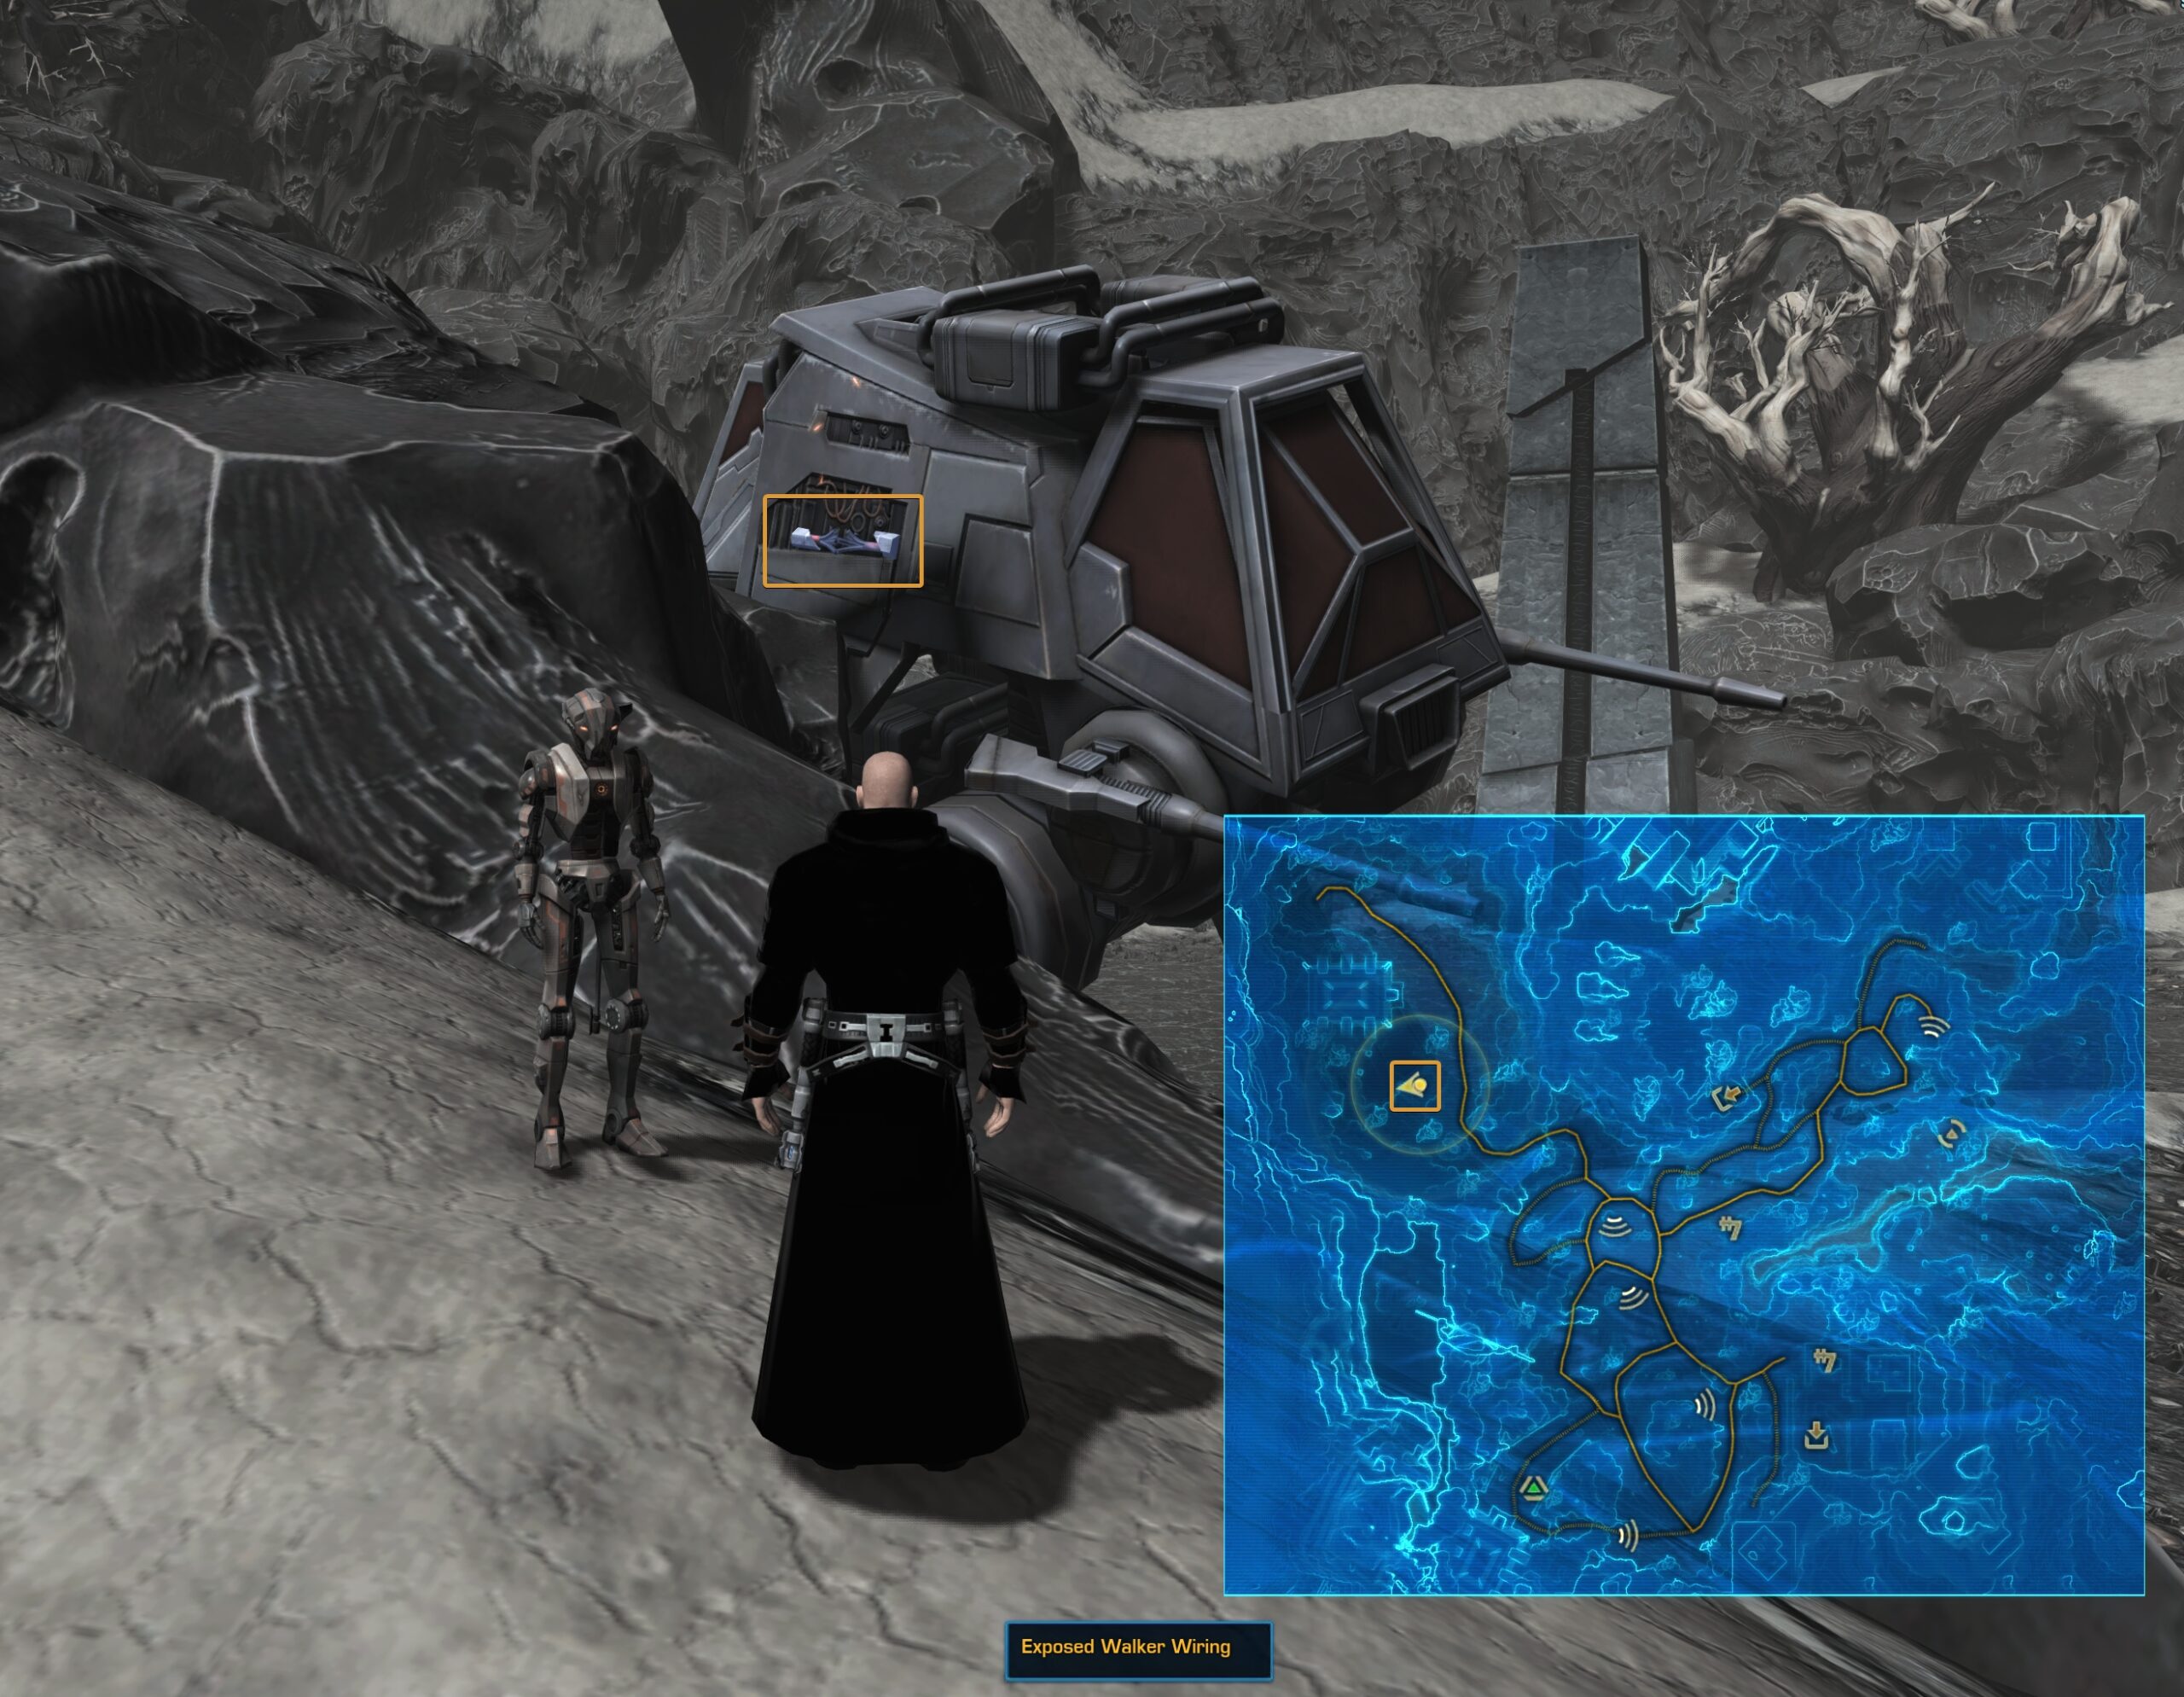
After the Walker fires a shot, a new Holocron will be revealed. Click it to earn the Galactic History 94.
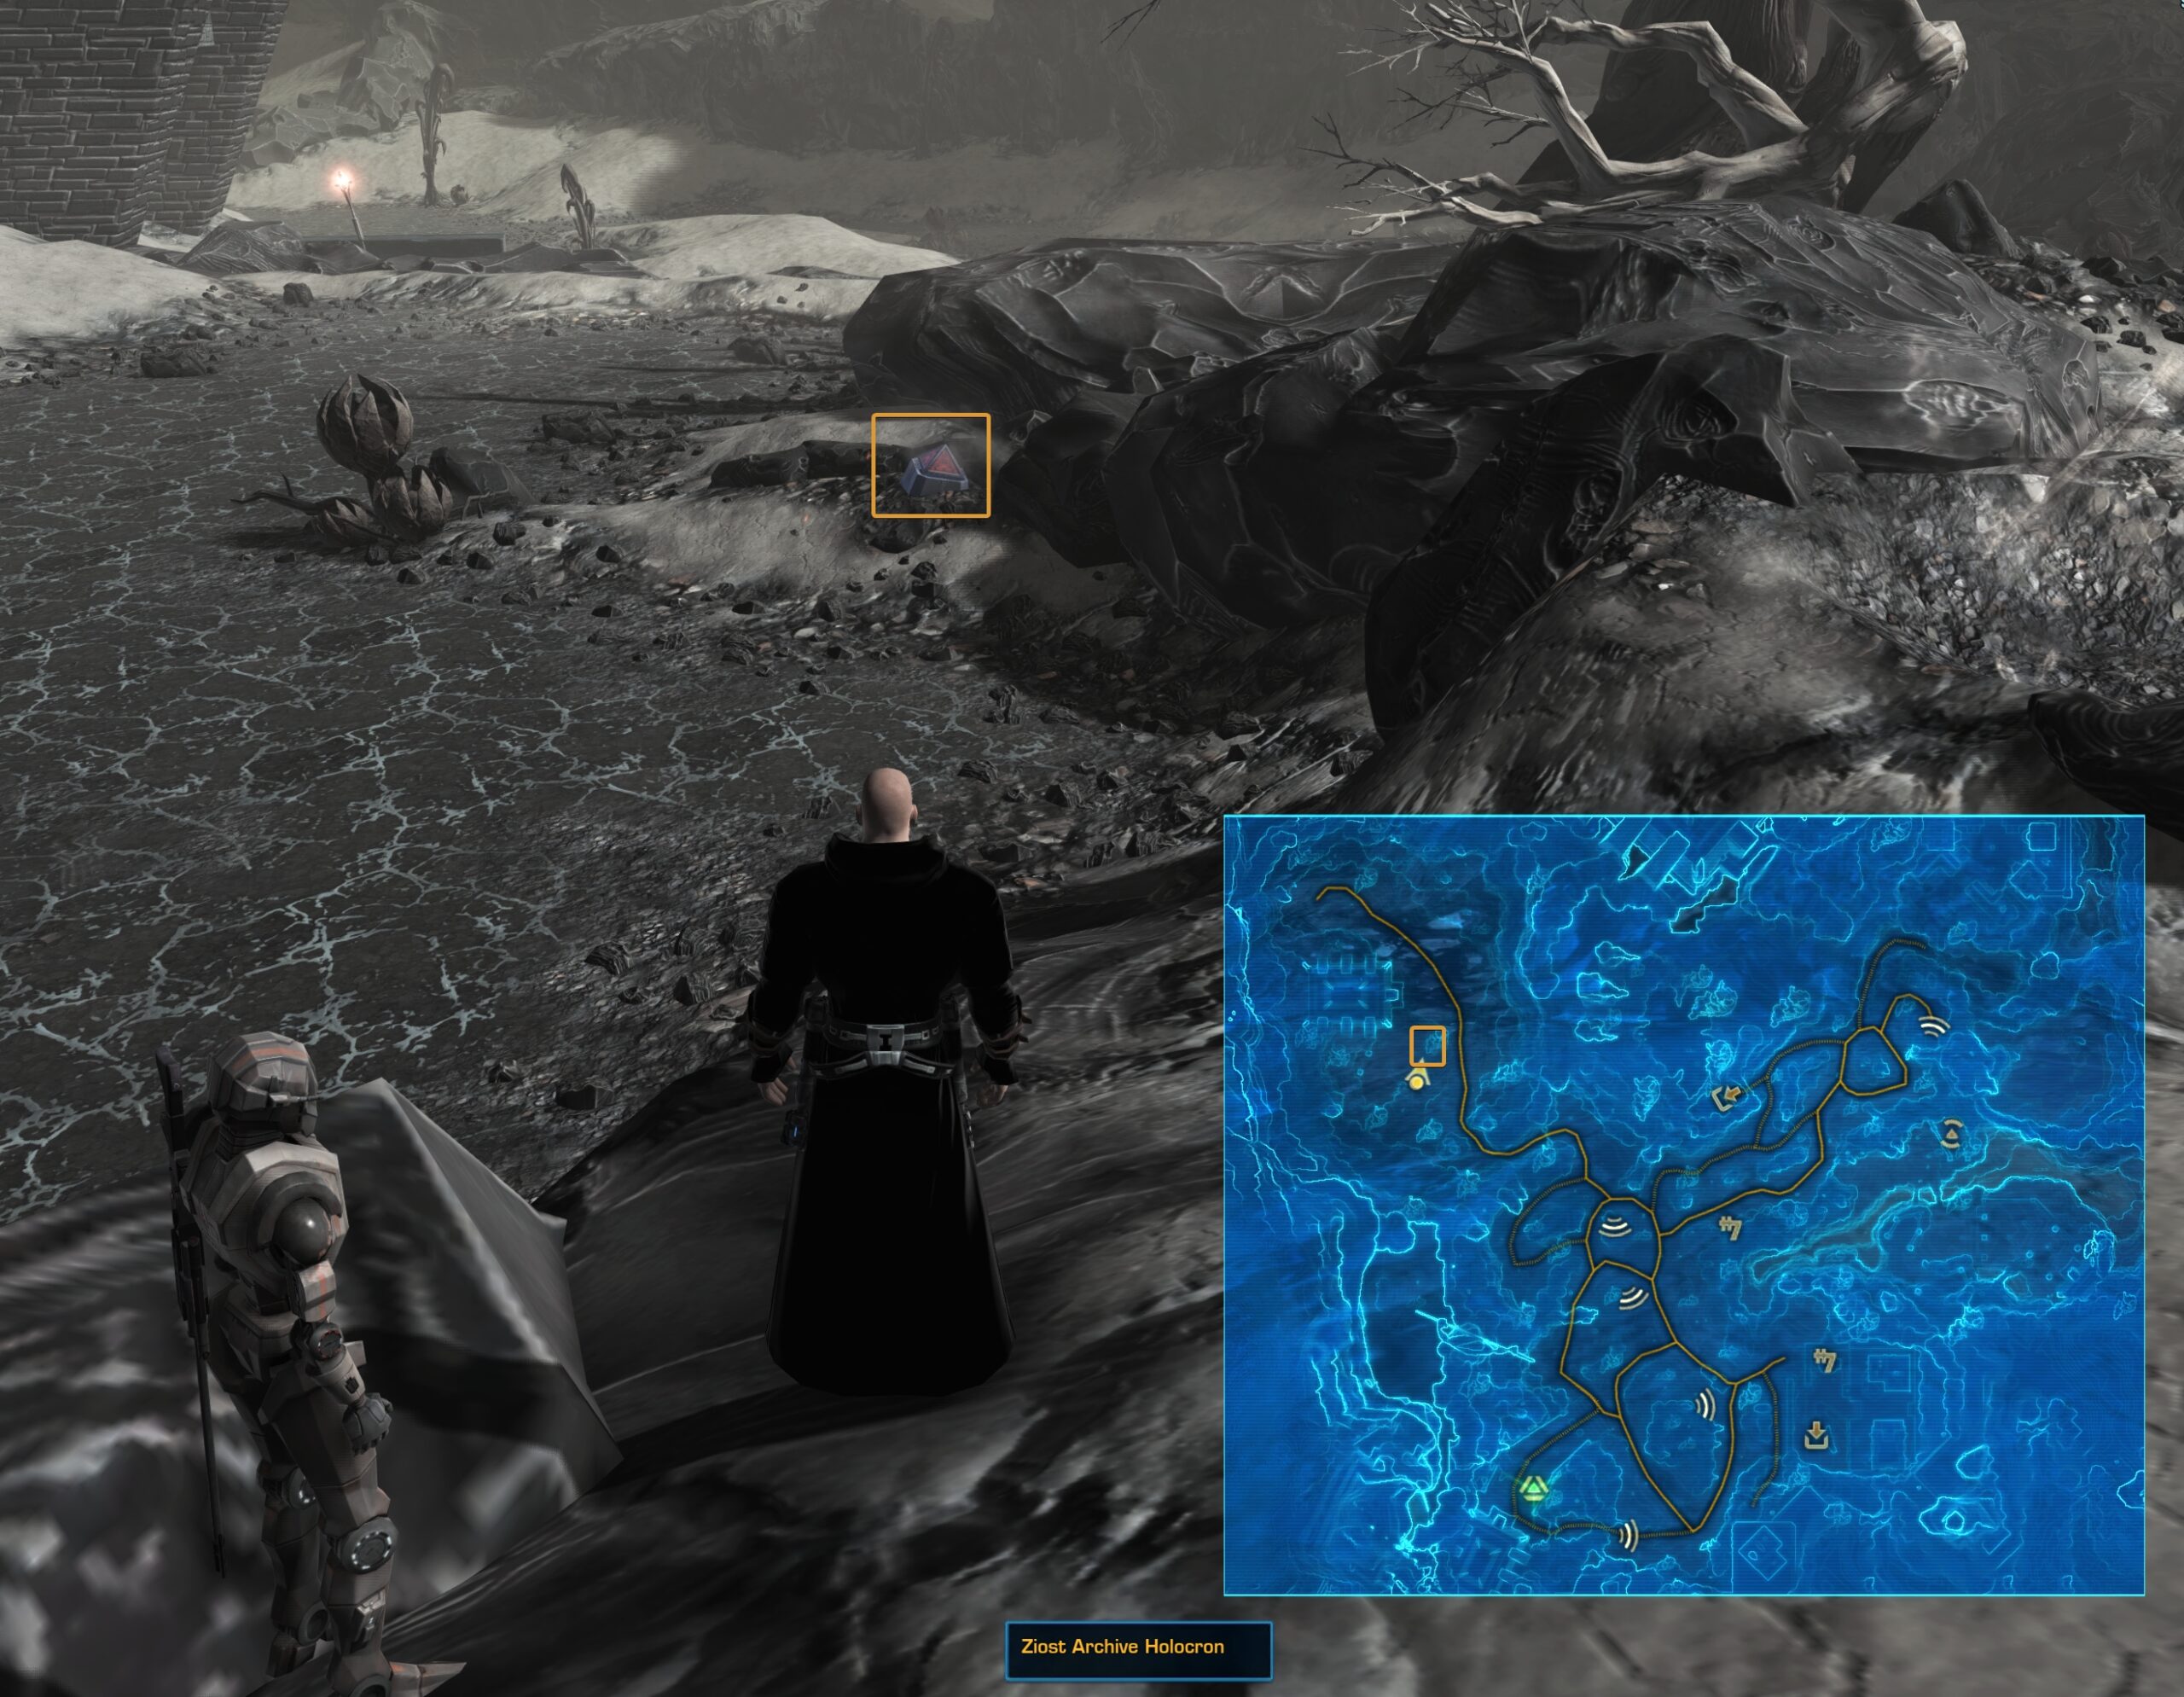
Galactic History 94: The Sacking of Coruscant
The rise of the Sith Empire seemed unstoppable, The Republic had suffered vast losses; many worlds were even rebelling to save themselves. So when the Sith Empire suddenly offered to discuss a peace treaty, the Galactic Senate was suspicious—but the Supreme Chancellor could not ignore a chance to end the war.
Delegations from both sides travelled to Alderaan, but in a daring strike, the Empire attacked Coruscant and held the planet hostage. The Supreme Chancellor was forced to sign the Treaty of Coruscant dictated by the Empire, ending hostilities and handing over several apparently insignificant planets.
Many Sith, including Darth Malgus, were furious. They had believed the treaty was a cunning ruse; it made no sense to actually agree to peace. Many in the Republic, too, believed the treaty was only a delaying tactic before the killing blow. The Treaty of Coruscant had been signed; whether the peace would be kept was a different matter.
Galactic History 95: A Cold War Begins
This is a bit longer. You need to find two pieces of data:
The first one is located in the northeast corner of the area, inside the hut.
The second is down in the southeast corner of the area inside an open container.

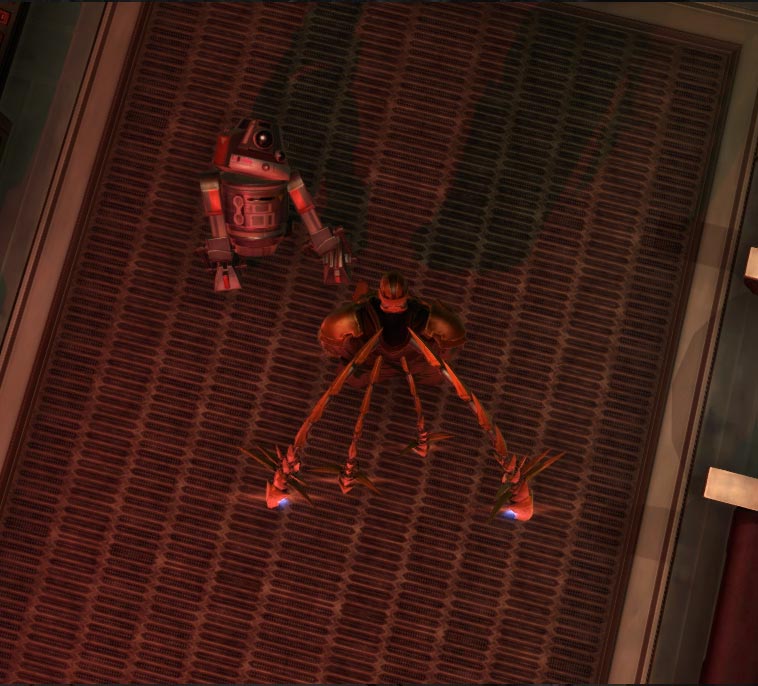
Once you pick them up (in any order you wish), go to the building in the back of the base camp and click on the inactive droid to receive the Galactic History 95 Lore Update and with this you will also complete the Ziost Activist Achievement.
Galactic History 95: A Cold War Begins
With the Treaty of Coruscant signed, the war was officially over. But recalling vast armies took time. Meanwhile, many individuals on both sides either didn’t believe the treaty was real, or refused to accept it. Skirmishes continued for months, including a bombing attack on the Senate tower.
The Republic had earned a reprieve. Although the war had crippled its military, the Republic quietly poured resources into training small but elite Special Forces squads, Blamed in part for not preventing the Sacking of Coruscant, the Jedi Order left for its ancient homeworld, Tython. There, in secret, the order could rebuild.
With its resources no longer stretched by galactic conquest, the Sith Empire began to secure its new holdings, its citizens jubilant at their victory. However, questions still lingered about why the Empire had not destroyed the Republic when it had the chance, The galaxy settled into an uncertain peace, with both sides watching for any betrayal,
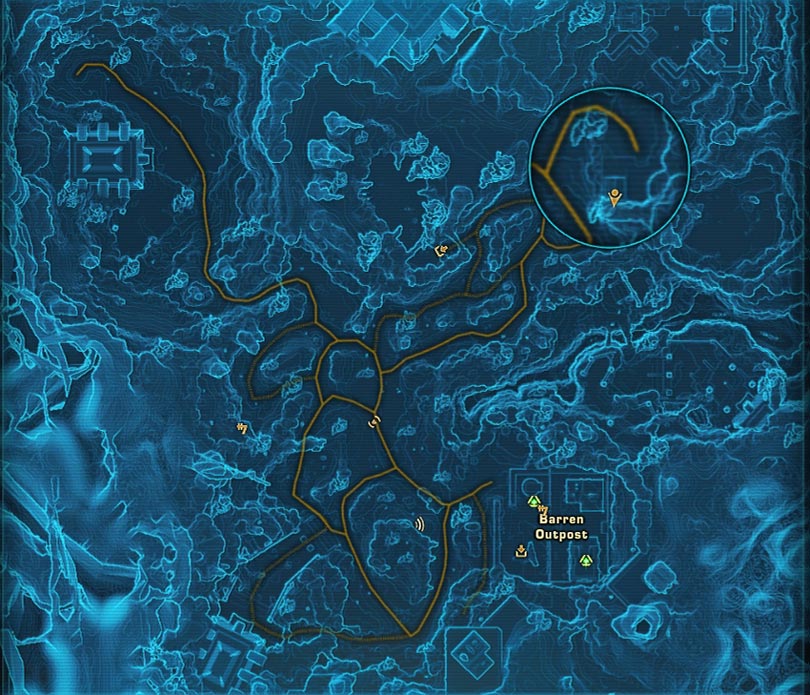
Jump the Rock Shark (Hidden Achievement)
For this one, you will need to have the Dead Pulse Daily Mission active. There is a Devastator Monolith that spawns from a cave in the most southwestern corner of the map and walks very slowly around the western alley.
The creature seems to only start moving when there are players nearby. Otherwise, it stops and waits.
You can mount up on the speeder provided for that quest near the cave.
Time it well and have the creature positioned near the marked spot on the map I have shown you below and simply drive through the cliff, it will automatically jump over the Monolith and grant you the achievement.