Legacy Reborn is the finale of Legacy of the Sith storyline in SWTOR. This guide will show you how to start and complete it, along with all meaningful dialogue options and variations.
Use the Table of Contents, located in the left panel (top left button on the mobile menu) to navigate through this long guide more easily and quickly.
Please note that this guide is a work-in-progress. We still have a few characters to bring through the story and explore possible hidden or surprising outcomes. If you experienced something before us, please, share it via email or in the comments below so we can add it!
How to start Legacy Reborn
To unlock the Legacy Reborn storyline, you need a character at level 80, who has completed all previous main story missions from the two most recent expansions, Onslaught and Legacy of the Sith.
This is a solo story experience and you do not need any special gear or preparation. The mission has the same name for both factions, Republic and Empire with small variations in cinematic scenes with unique dialogue lines and characters appearing and participating based on your origin story and active faction alliance.
How to unlock Legacy Reborn storyline in SWTOR
This is the final quest in the 7.0 Legacy of the Sith expansion. The next story chapter will be part of the 8.0 era, expected to release around the end of 2026.
Additional Recommended Content outside of SWTOR
While not mandatory or required, the following recommendations will enhance your experience not only with this chapter, but they will broaden and expand your knowledge of the SWTOR lore significantly. There are characters and mentions in Legacy Reborn directly taken out of this additional content.
Star Wars: Tales of the Jedi – The Golden Age of the Sith (Comics)
A collection of six issues following the adventures of Gav and Jori Daragon, two sibling explorers who discover Korriban, and get captured and exploited by Naga Sadow in his fight for power and dominance.
Star Wars: Tales of the Jedi – The Fall of the Sith Empire (Comics)
Picks up right where The Golden Age of the Sith ends and details the ultimate defeat of Naga Sadow, his final clash with his opponent Ludo Kressh and Sadow’s retreat to Yavin 4.
The Comics series are from the 90s and are available digitally with Marvel Unlimited subscription along with almost every other Star Wars comics ever released. Depending on where you live, it may be difficult or expensive to obtain physical copies of the two series.
Deceived (Novel)
This is the second novel based on SWTOR. It focuses on Darth Malgus and his participation in the Sacking of Coruscant (from the trailer) while giving us a much better picture of this character and his past. The book is available in Kindle, Audio, Paperback and Hardcover.
This is an Amazon Affiliate link. Learn what this means.
Last Road to Khar Shian (Short Story)
Broadsword released the short story, Last Road to Khar Shian, a few days prior to the launch of the Legacy Reborn storyline. The short story takes place right before Legacy Reborn, describing Malgus and Shae’s arduous trek to reach the planet.
Into the Shadows
Into the Shadows is the first mission that will appear in your Mission log after you complete Master’s Enigma. This mission is part of the Legacy Reborn storyline and serves as a prelude to the main event on Khar Shian.
It starts exactly where Last Road to Khar Shian ends, with Malgus and Shae approaching Khar Shian and Malgus breaking his promise to help Shae.
Meanwhile, on Khar Shian, Jadus, Heta Kol and her suppoeters, have gathered around the finished machine and are planning to make the first tests.
Regardless of your faction and origin story, the cinematics so far are identical for every player. Here comes the first difference. Tau is present in all cases, but Rivix’s words to her are slightly different.
If Tau is the traitor in your story (Republic), Rivix tells her that she played her part well, but she should remain silent and just watch now. If Rivix has betrayed you (Empire), he tells her she should be grateful she still has her life after her foolish rescue attempt.
We actually don’t literally see what happens to Tau at the end of this cinematic when Sa’har and Ri’kan escape.
In the next scene, your character and their accompanying companion (Arn for Republic, Anri for Empire) arrive to Khar Shian to be met by their allied Faction. The characters participating in this scene are different, but the dialogue and outcome are the same for everyone.
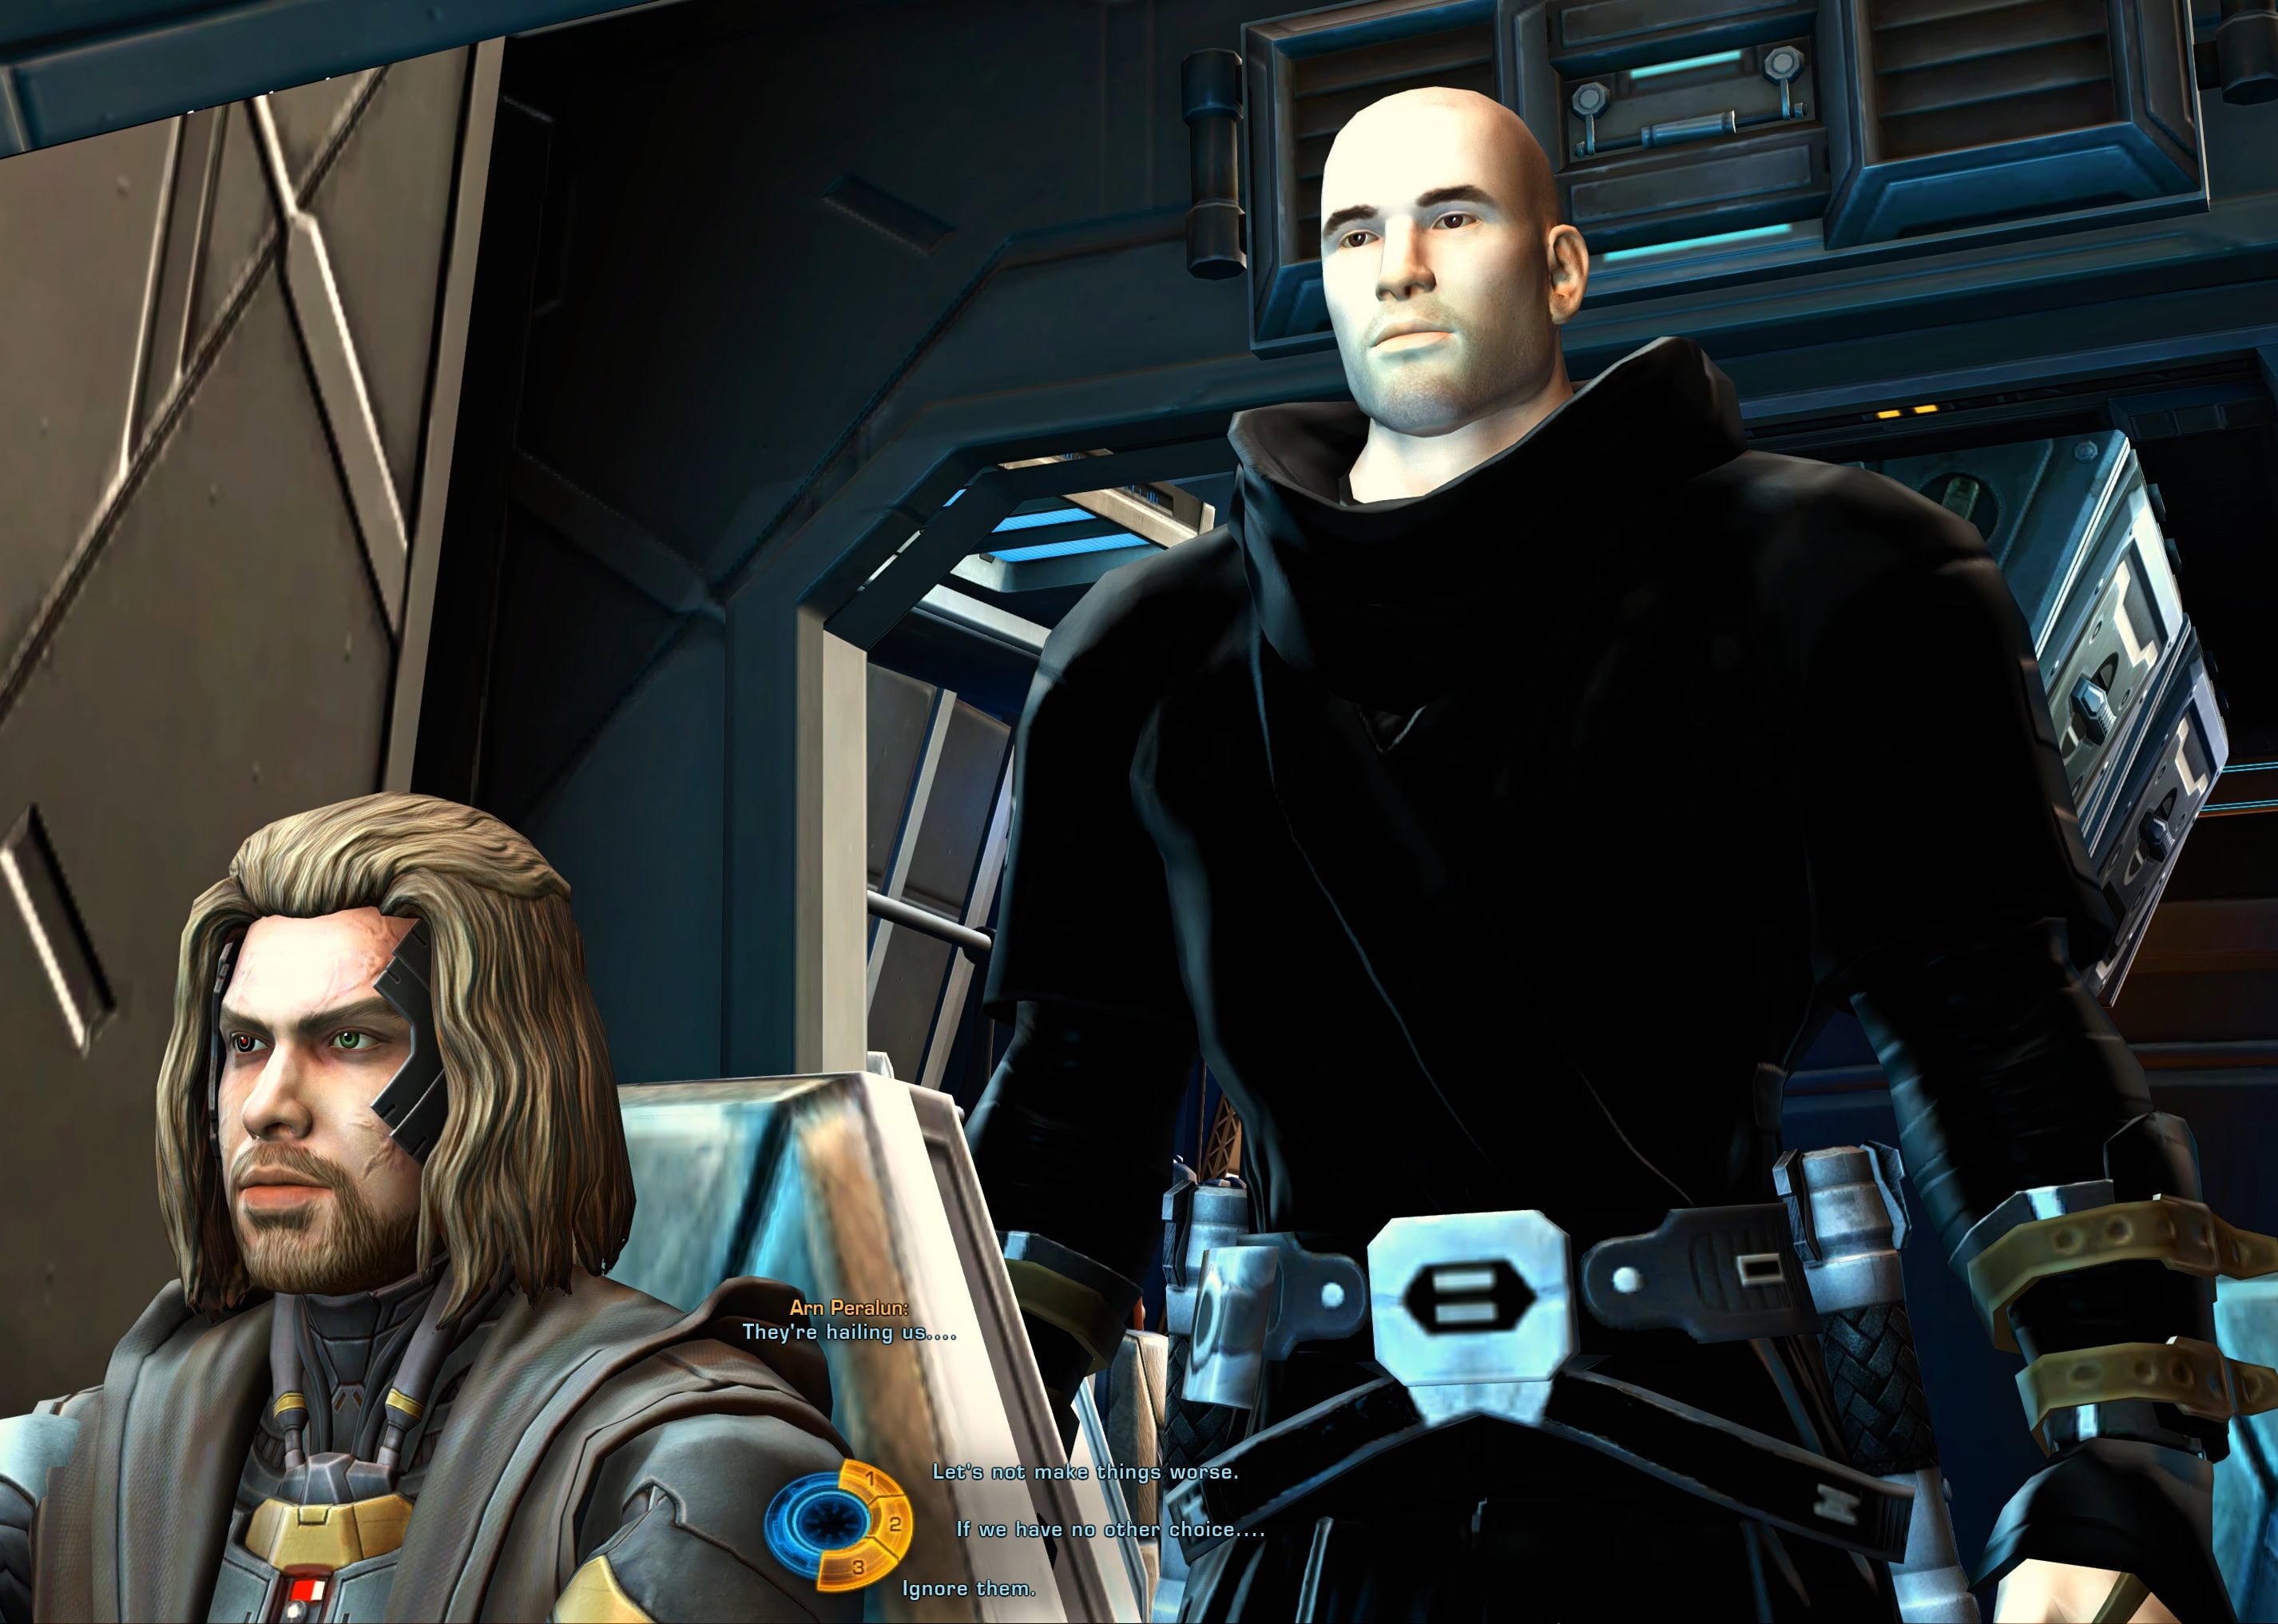
Whatever you choose here and in the following conversation with faction leadership, the outcome is always the same with no consequences. They agree to let things go and work together with you to take down Jadus, Heta, and Malgus.
After the cinematic, you have to move to the next location, the Mission Briefing room. During the short trip, Rass Ordo accompanies you for a bit of chit-chat. I personally love these little chats that Broadsword has been inserting lately out of cinematics. They improve immersion.
During the Briefing, you can opt to tell them the story of how Jadus betrayed you or not, but this doesn’t change anything.
The next choice also has a few unique lines you will hear, but will not change the mission plan and gameplay order. You will still be controlling the same characters, in the same order, doing the same things.
If you play as Saboteur, during this cinematic, your faction leadership will confront you, telling you they have discovered your true allegiances. You will not be given a choice to admit or reject this statement. Despire this big reveal, they will agree to work with you. The mission continues down the same path for everyone. This may have larger implications in 8.0.
After we played through the mission as Saboteur and can confirm it too. This information was originally sourced from the SWTOR Forums, posted by Agentofchaosfish.
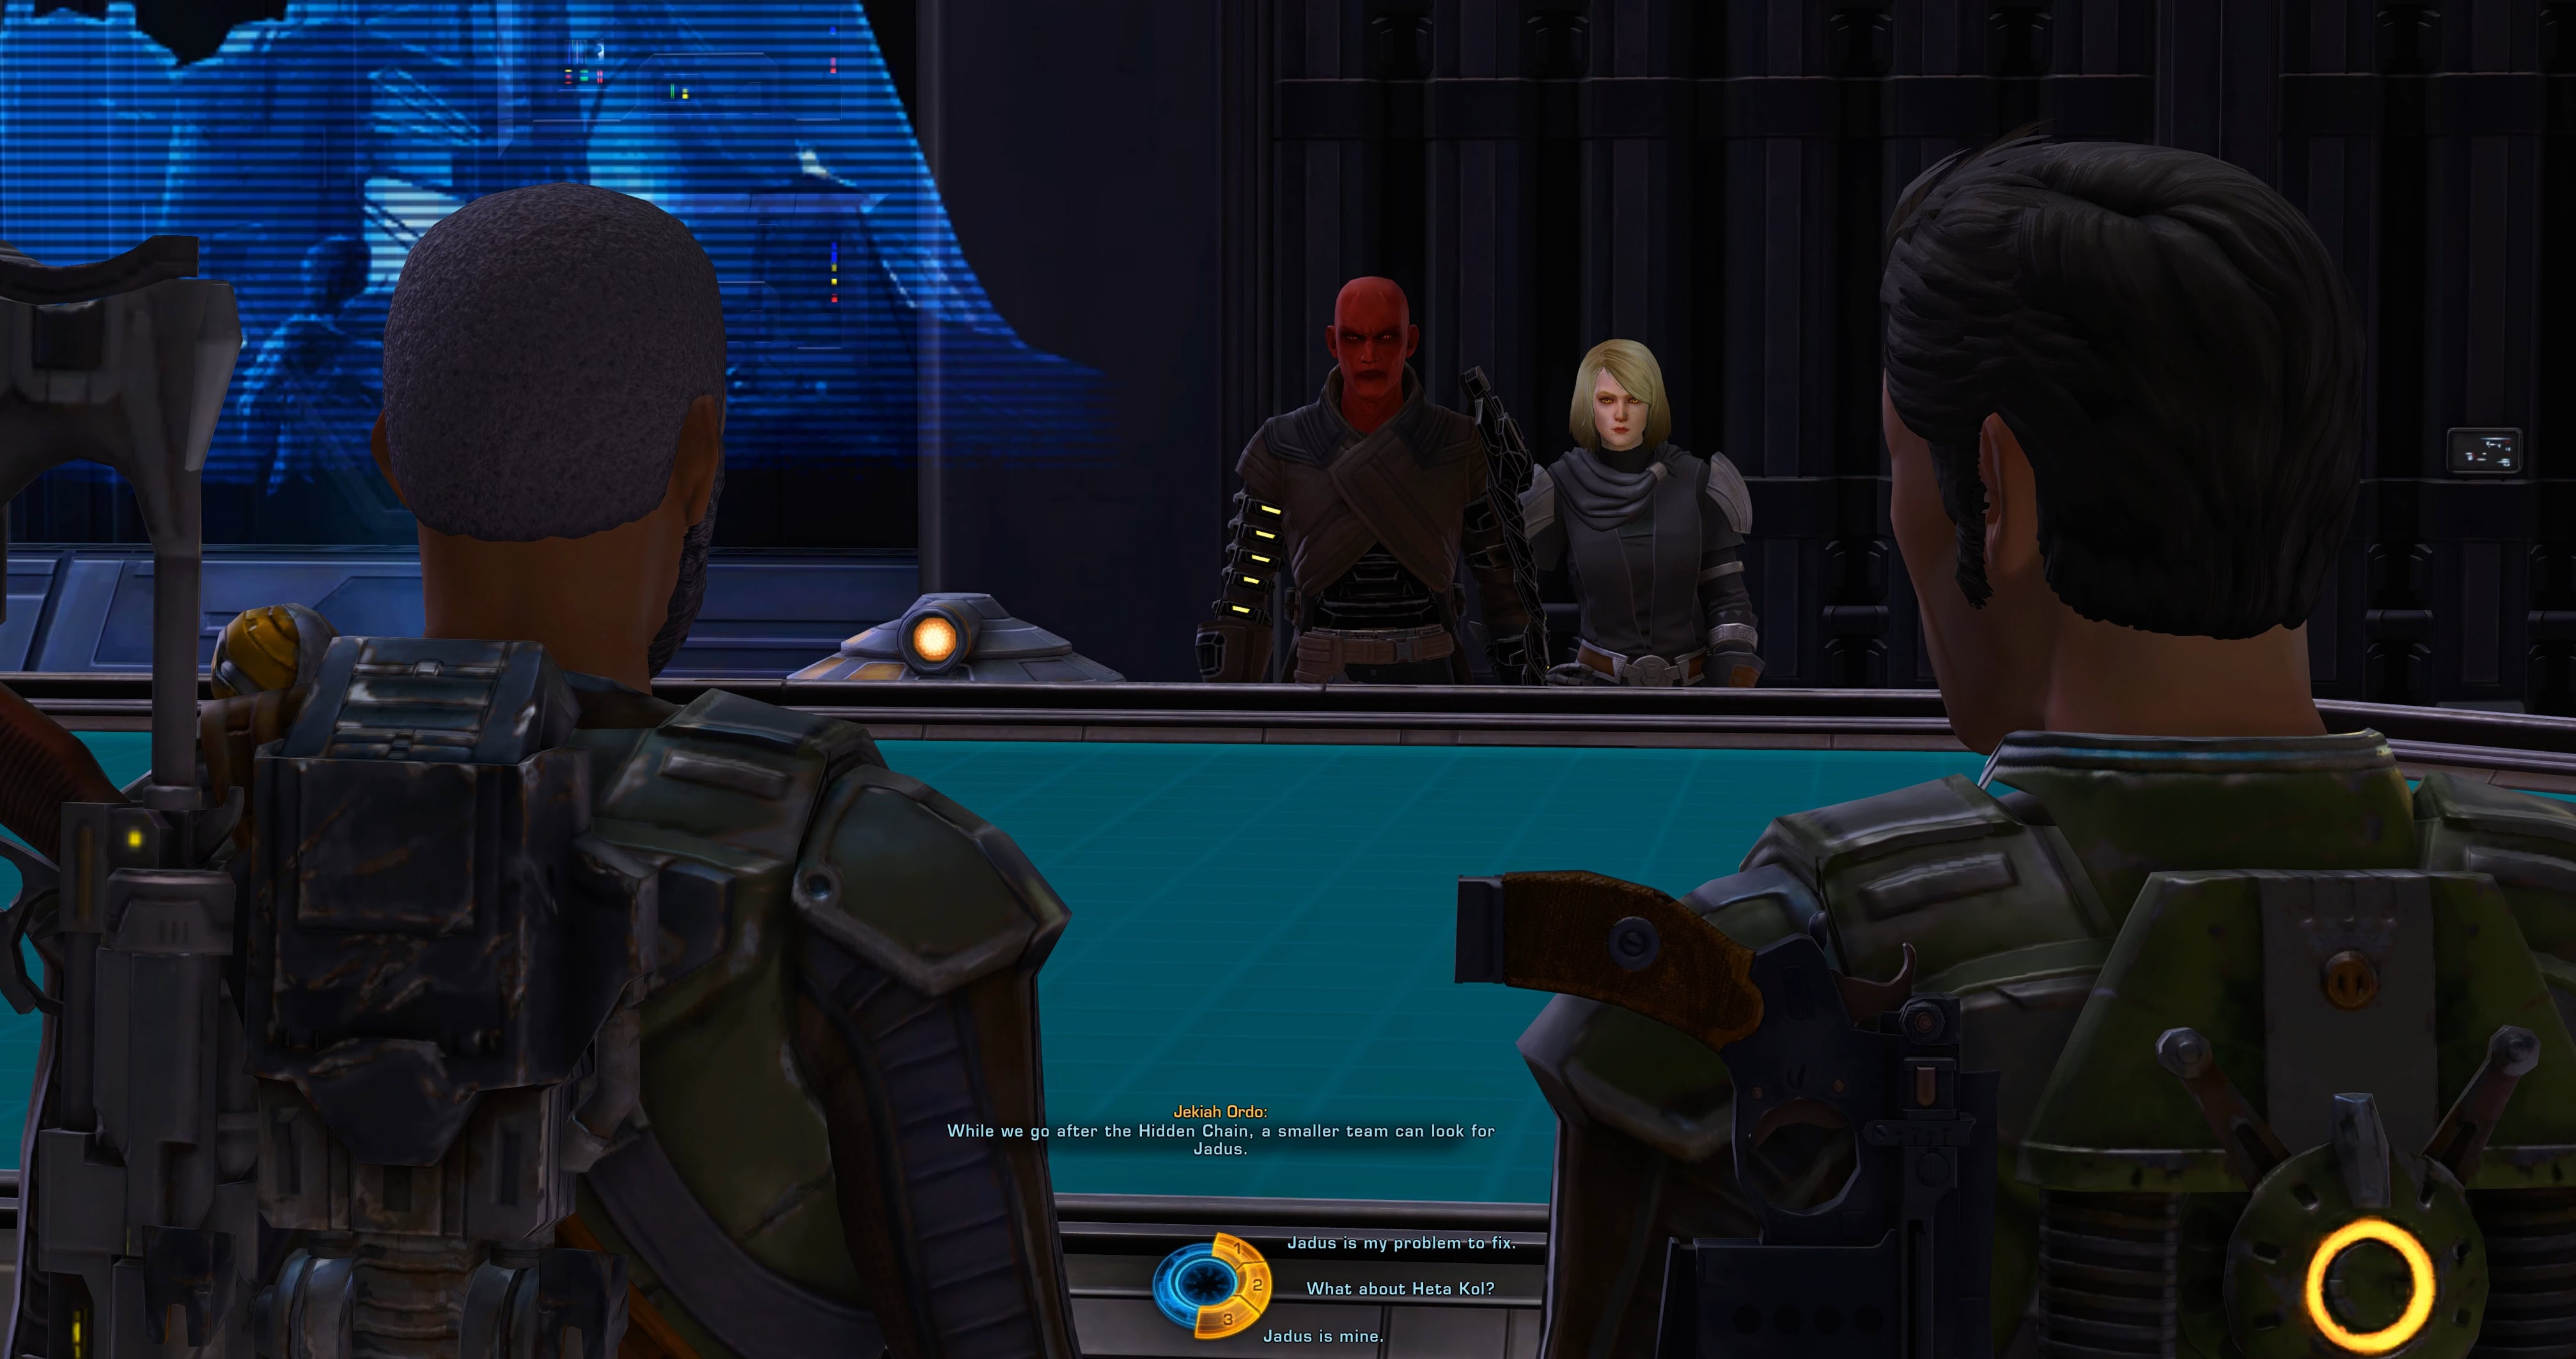
Your team will split in groups, each with unique objectives. You can ask or argue about Heta Kol, Malgus, or Jadus, but your role in this mission will always be the same.
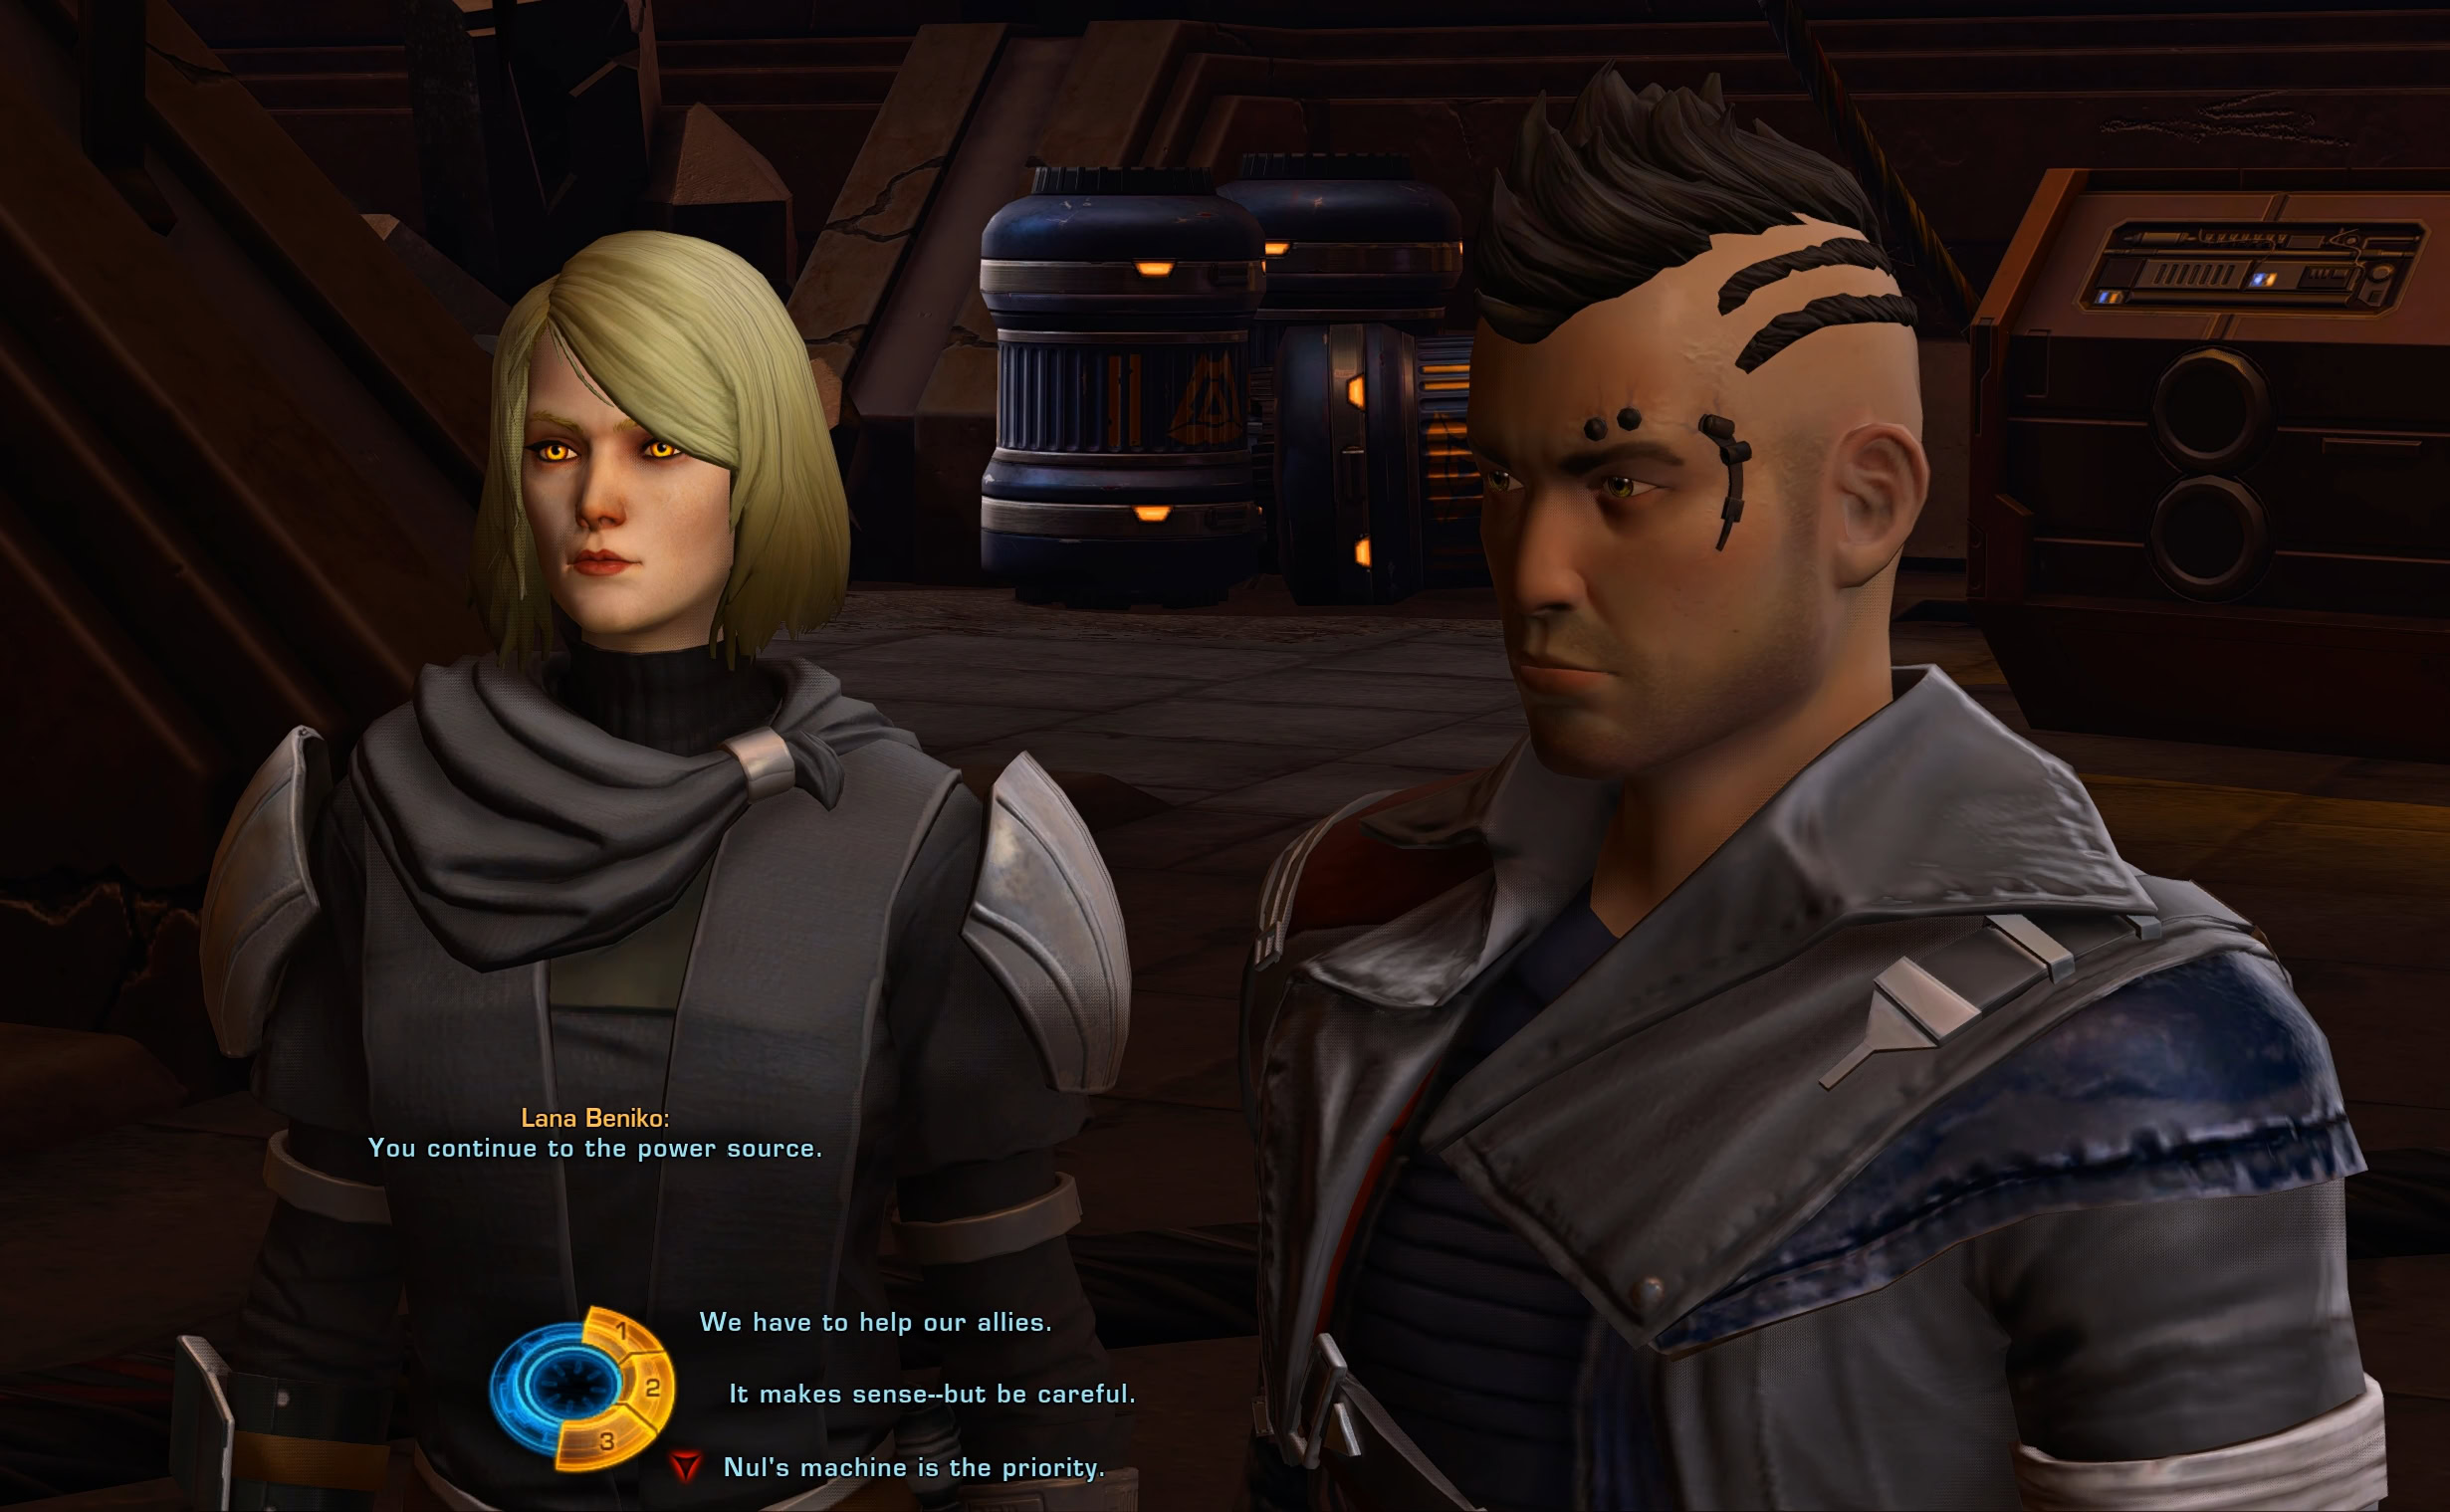
After the Briefing is over, talk to Lana Beniko to complete this mission.
If Theron is part of your team, he will be present in this and future sections of the mission with Lana. If you left him on Nathema, he will be replaced by T7-O1. If Theron is present, he has dialogue lines and a role to play in the mission ahead.
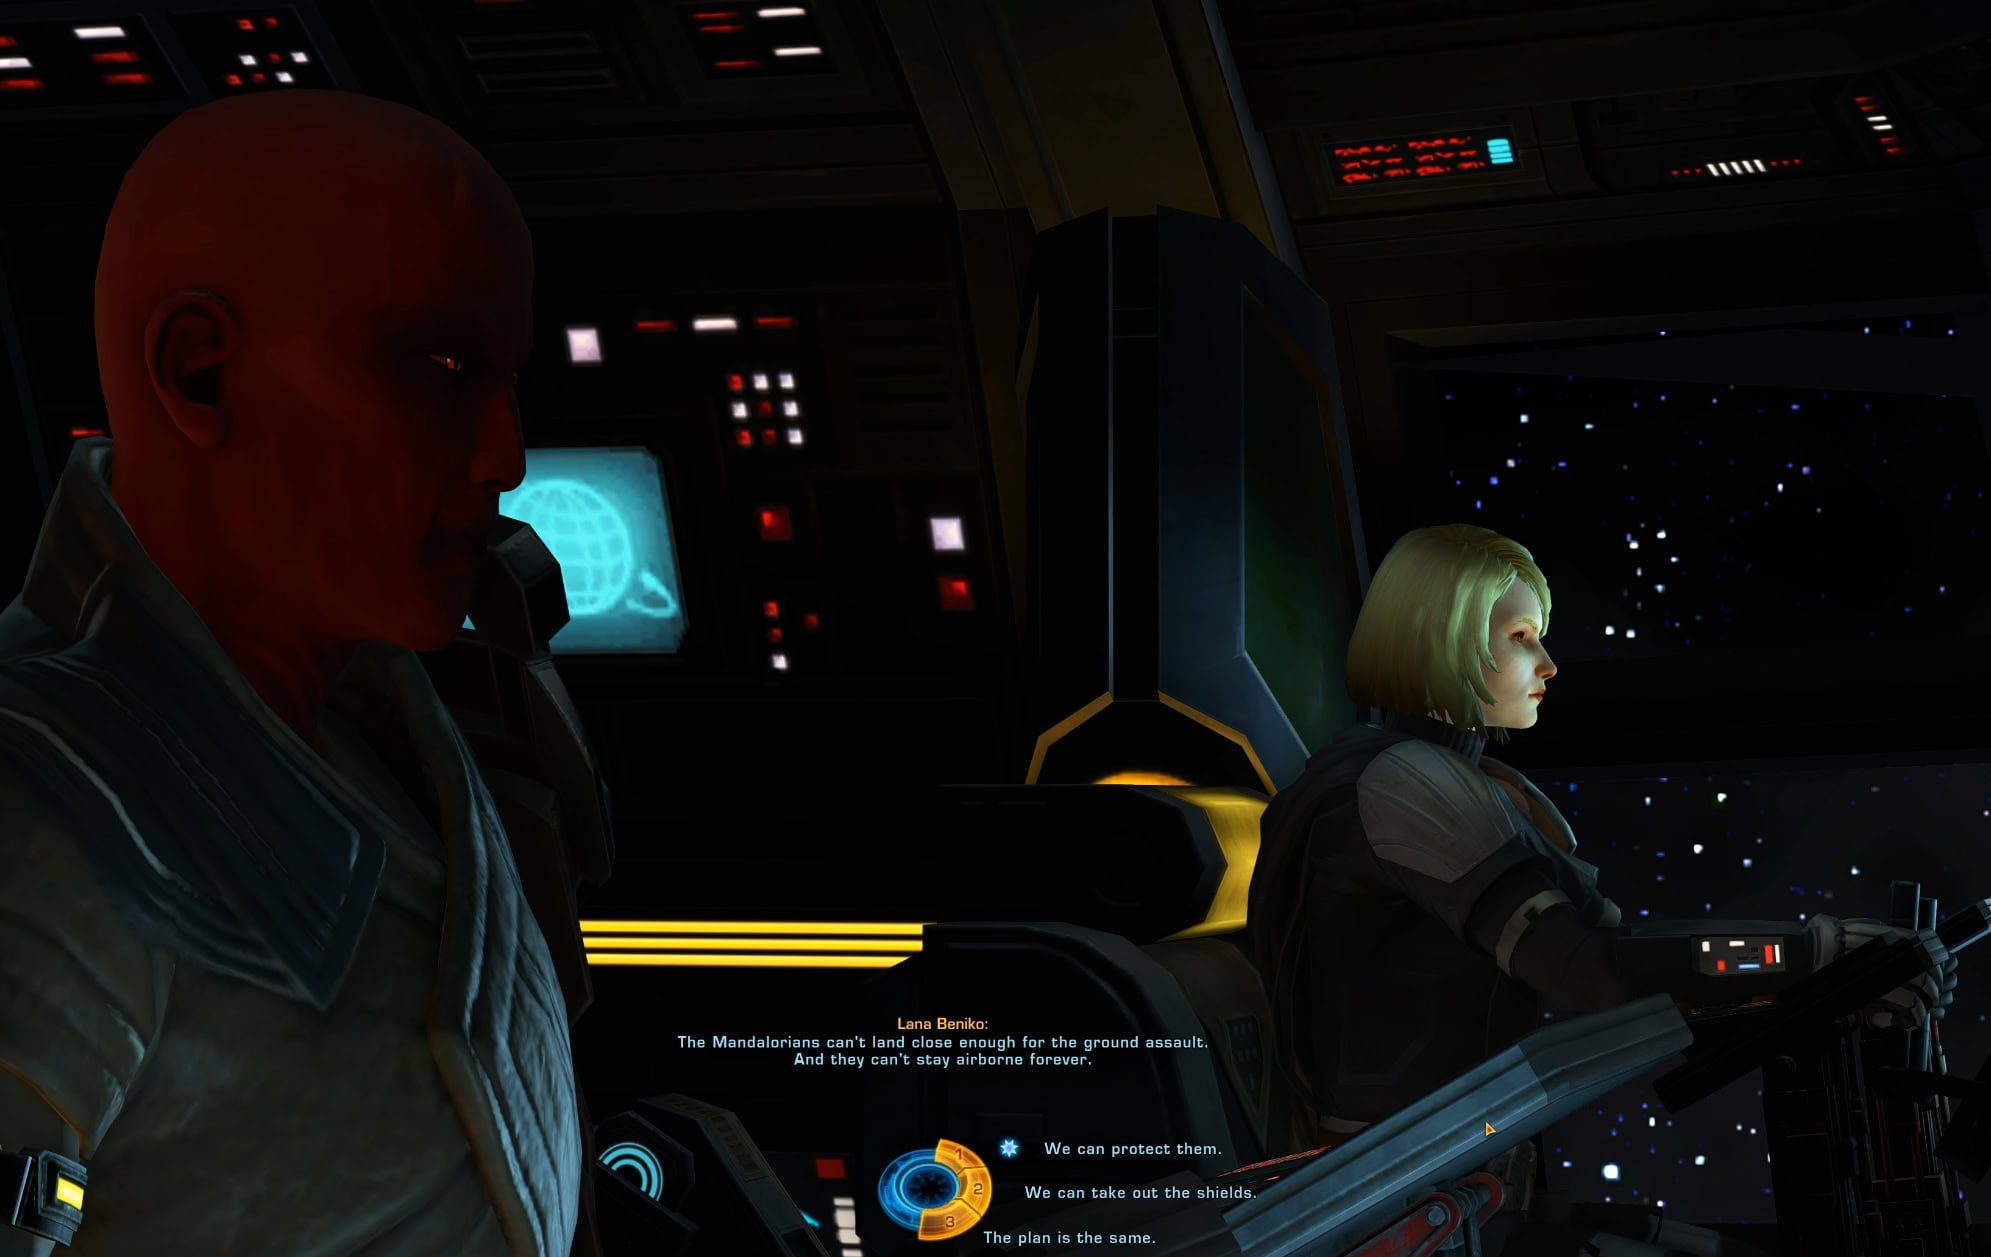
In space, when you talk to Lana on the way to the Khar Shian, the Mandalorians will get in trouble, and Lana will offer to help them. You can earn Light Side Points if you help them, but it will not change anything in the mission. If you offer to help them, they will refuse the help anyway.
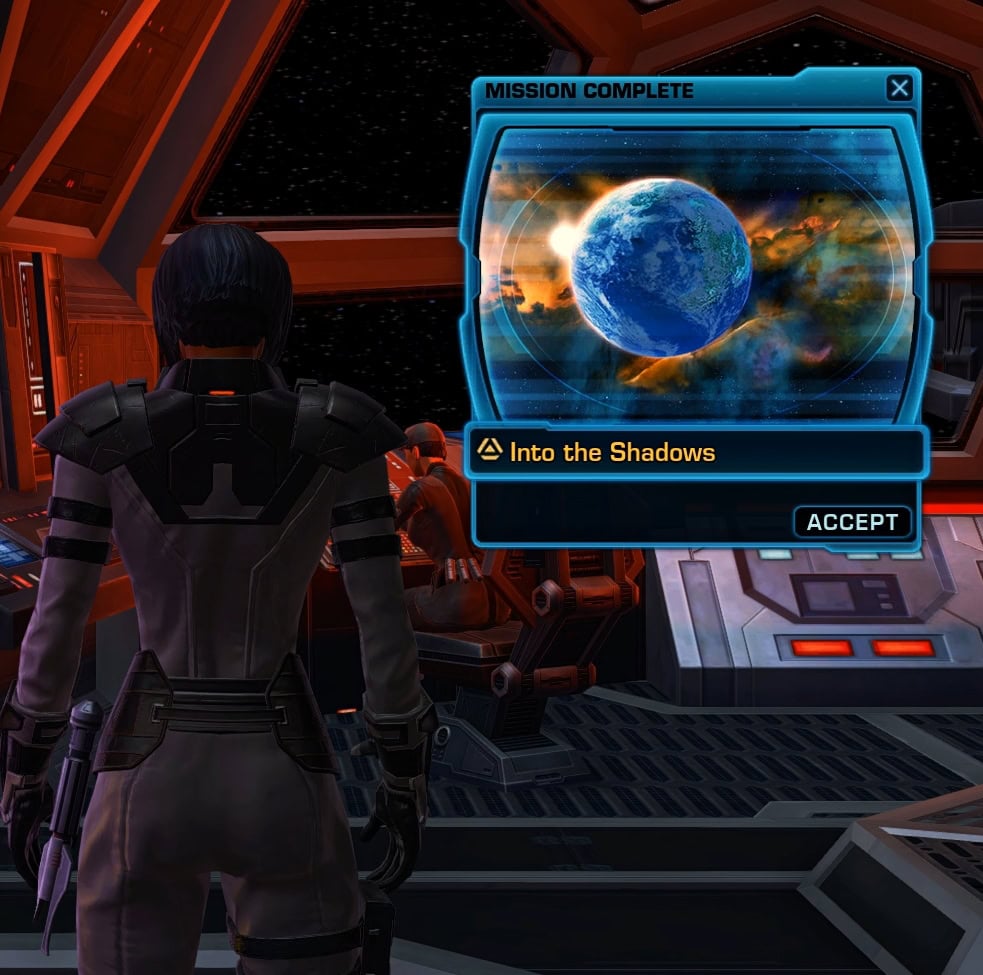
At the end of this conversation, you will complete the mission, Into the Shadows. and immediately start the next one, The First Hurdle.
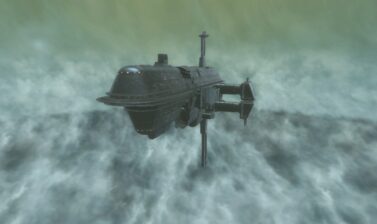
The First Hurdle
In this one, you take command of the Gatalentan Dawn (Republic) or Styguan Talon (Empire) ship. What follows is a very linear experience and you have minimal controls over the action. This segment is also the reason why Broadsword made a note about Motion Sickness.
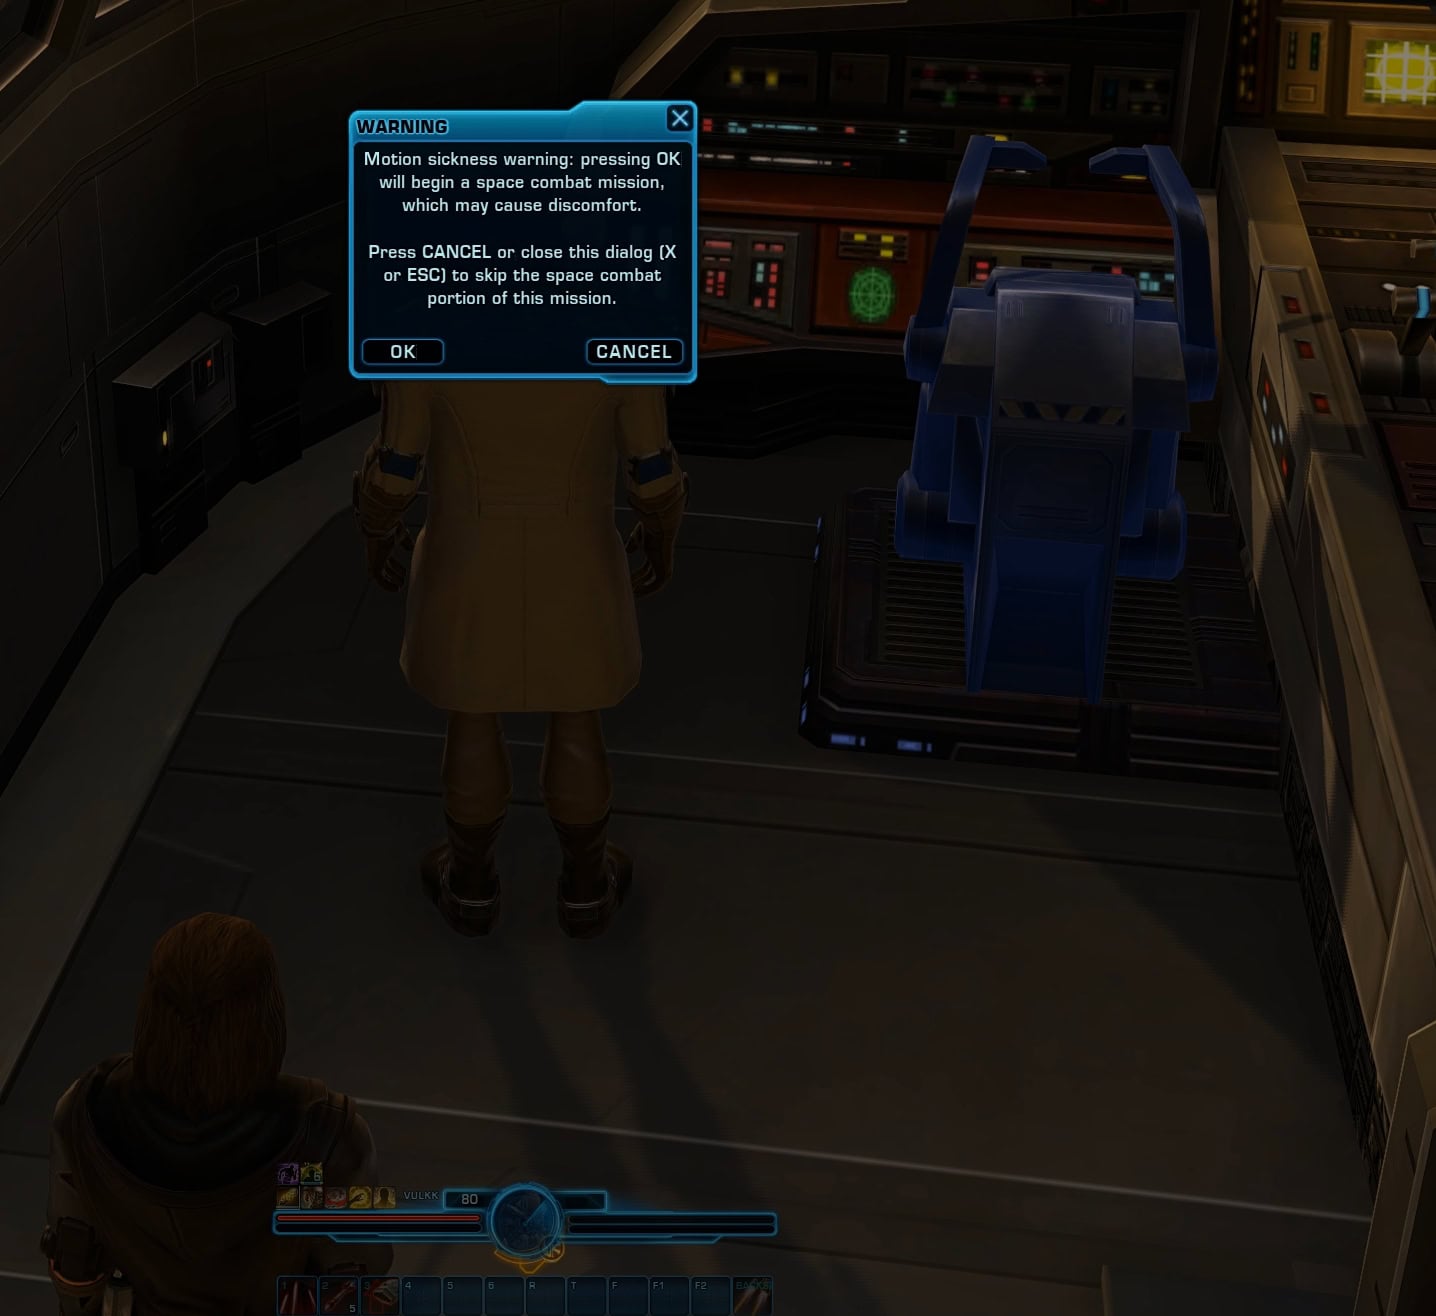
If you click OK, you will start the gameplay segment in space. If you hit ESC or Cancel, it will bypass the segment entirely. If you are not worried about having a problem with motion sickness, you should probably do this once, but there’s no reason to do it in subsequent playthroughs. It’s just not very fun next to the original space missions.
The segment has you watch a ship fly on rails around enemy command ships. You will have three active abilities and one button that allows you to return back to your ship’s deck for a break. You can also opt to cancel or continue this segment when you return.
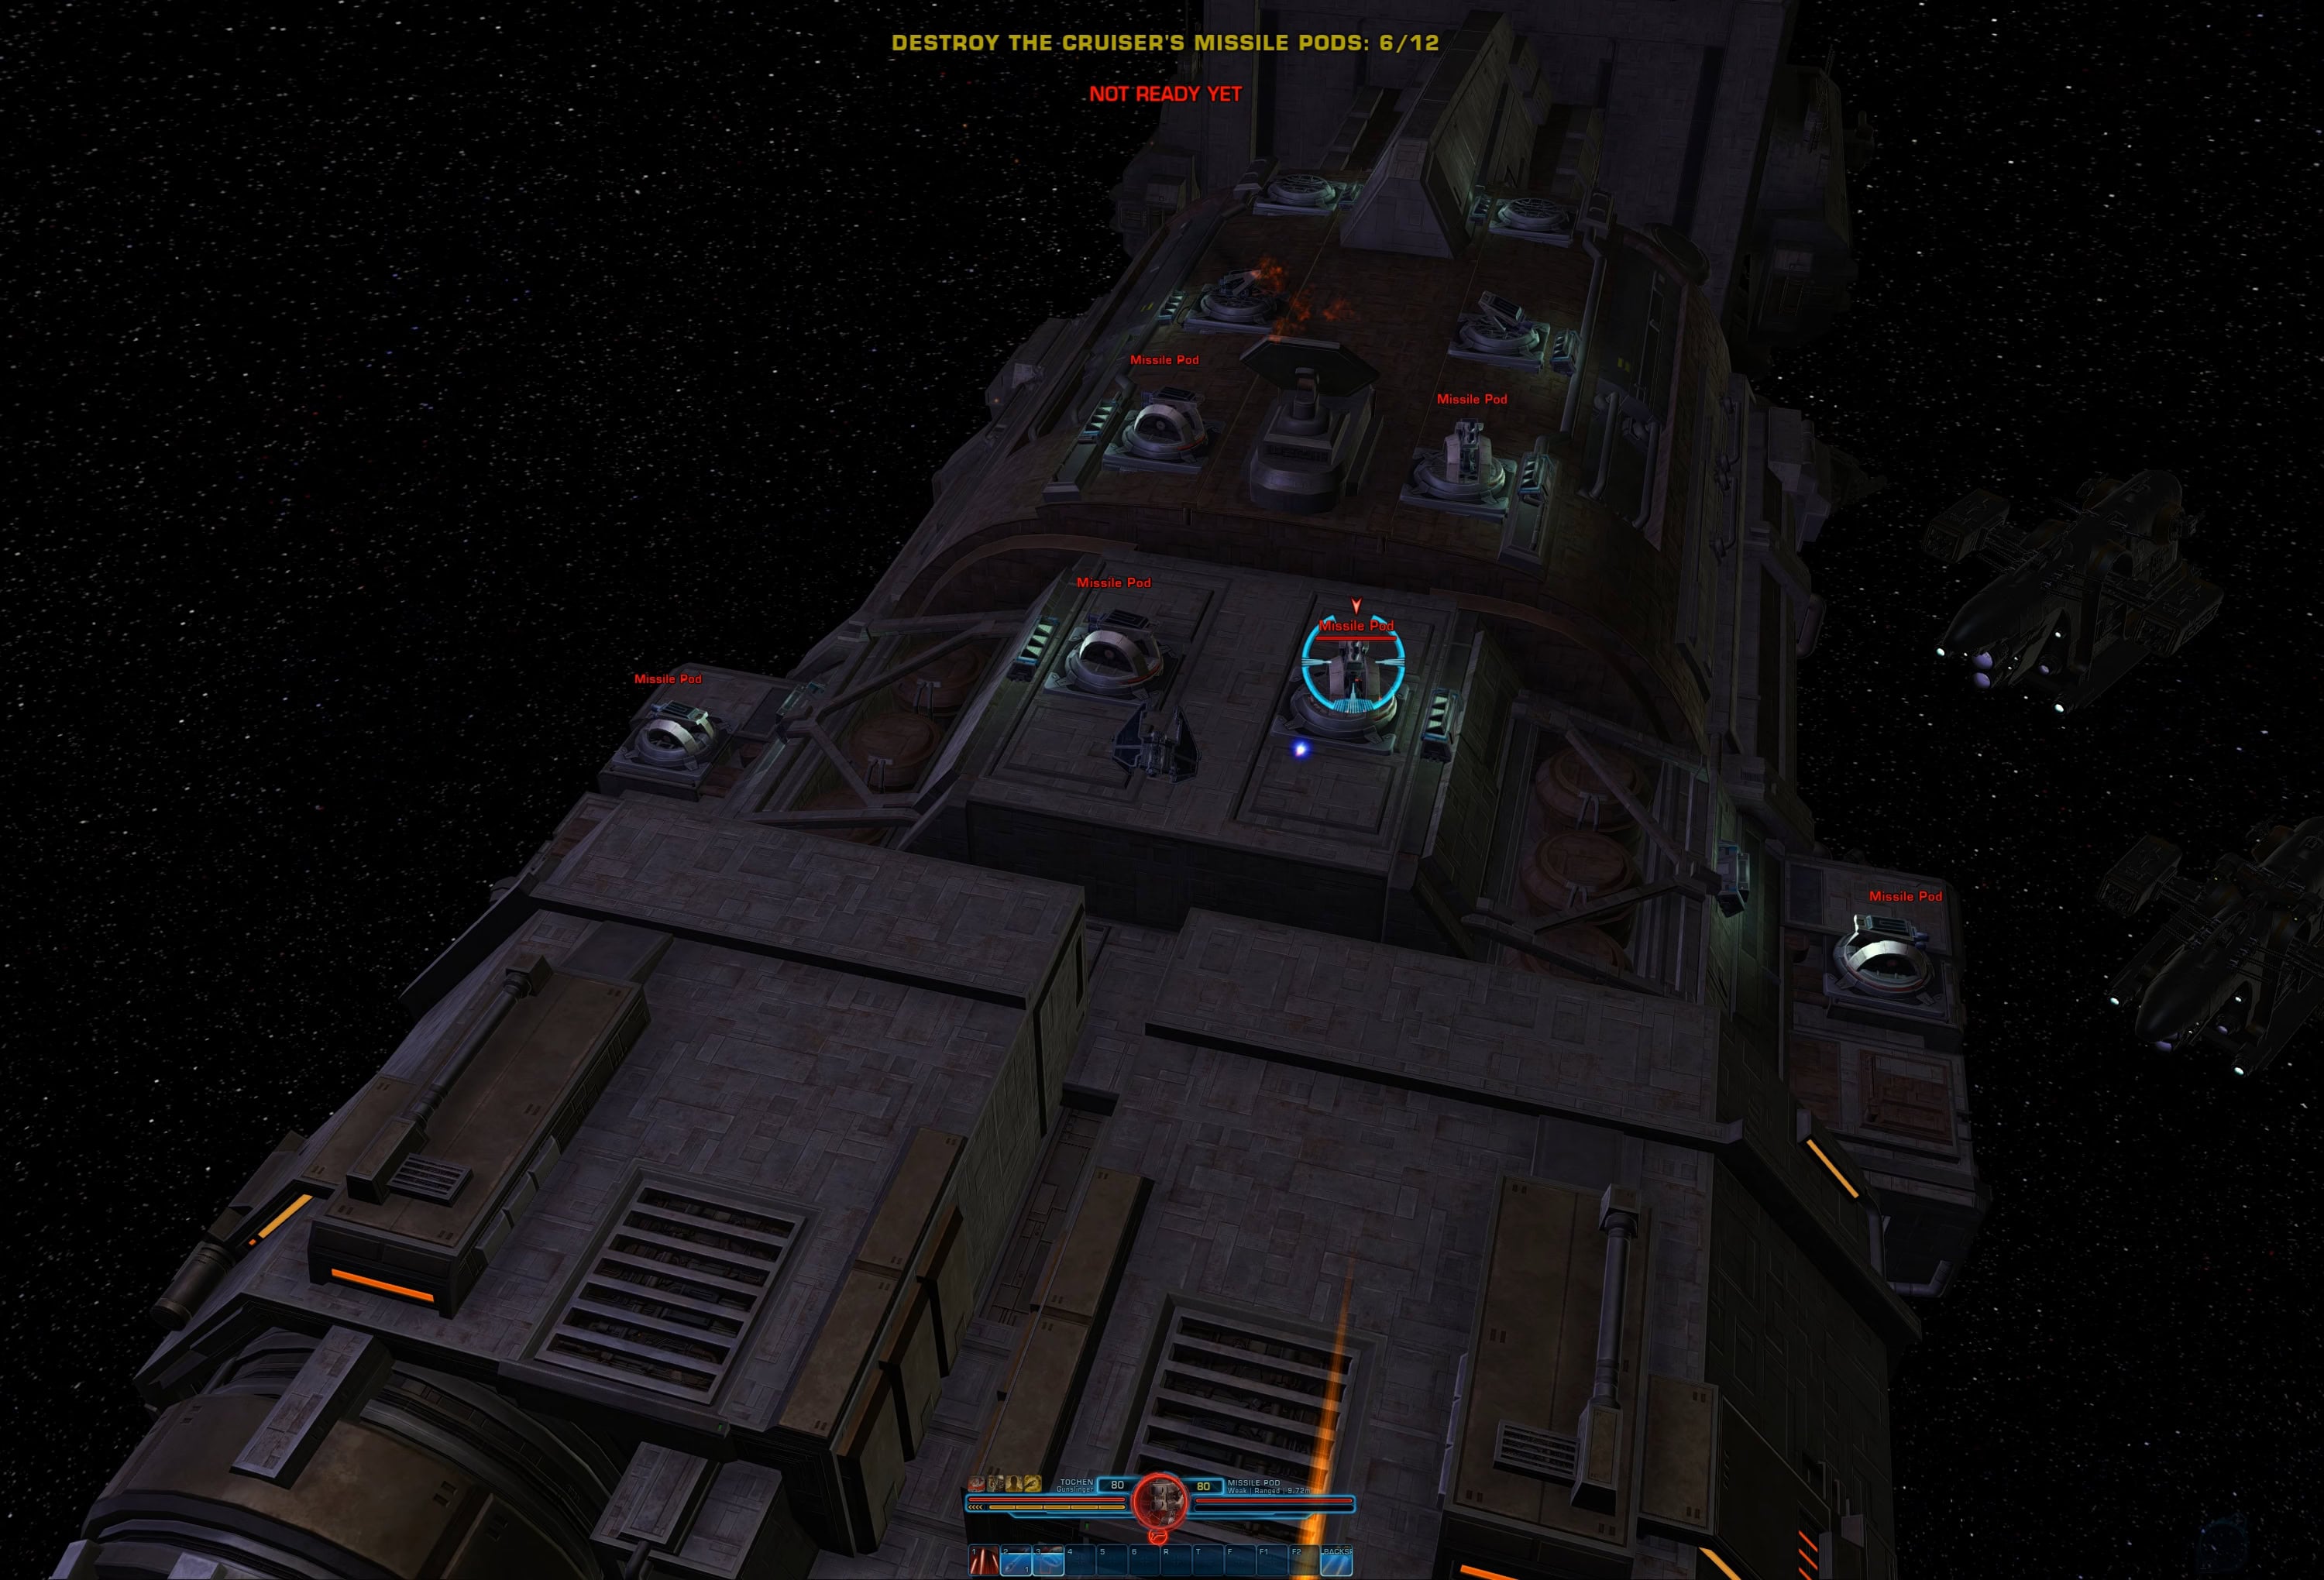
Here are the three abilities that you will use in the space “battle” ahead:
- Blasters – basic attack, you can spam this.
- Concussion Missile – your main ability to use against the marked targets.
- Reload Missiles – while reloading missiles, you can’t fire them.
Don’t waste your missiles. Hit the button after you see that your target is marked. The ship moves automatically and aims on its own as well, so you just have to wait for the target to be marked. You can freely spam the Blasters, though. It takes two Blaster shots to take out a target and only one hit with a Missile. Reload Missiles when you fly past the ship and are waiting for the turning.
You can pan the camera with the mouse buttons, but the camera is not entirely yours to control. The Left button will only temporarily rotate the camera and bring it back when you release the button. The Right button will rotate the camera around your ship and stay in the position you leave it.
After the space fight sequence, you will have a choice to fire at Sa’har and Ri’kan’s ship or shoot at the Hidden Chain chasing them.
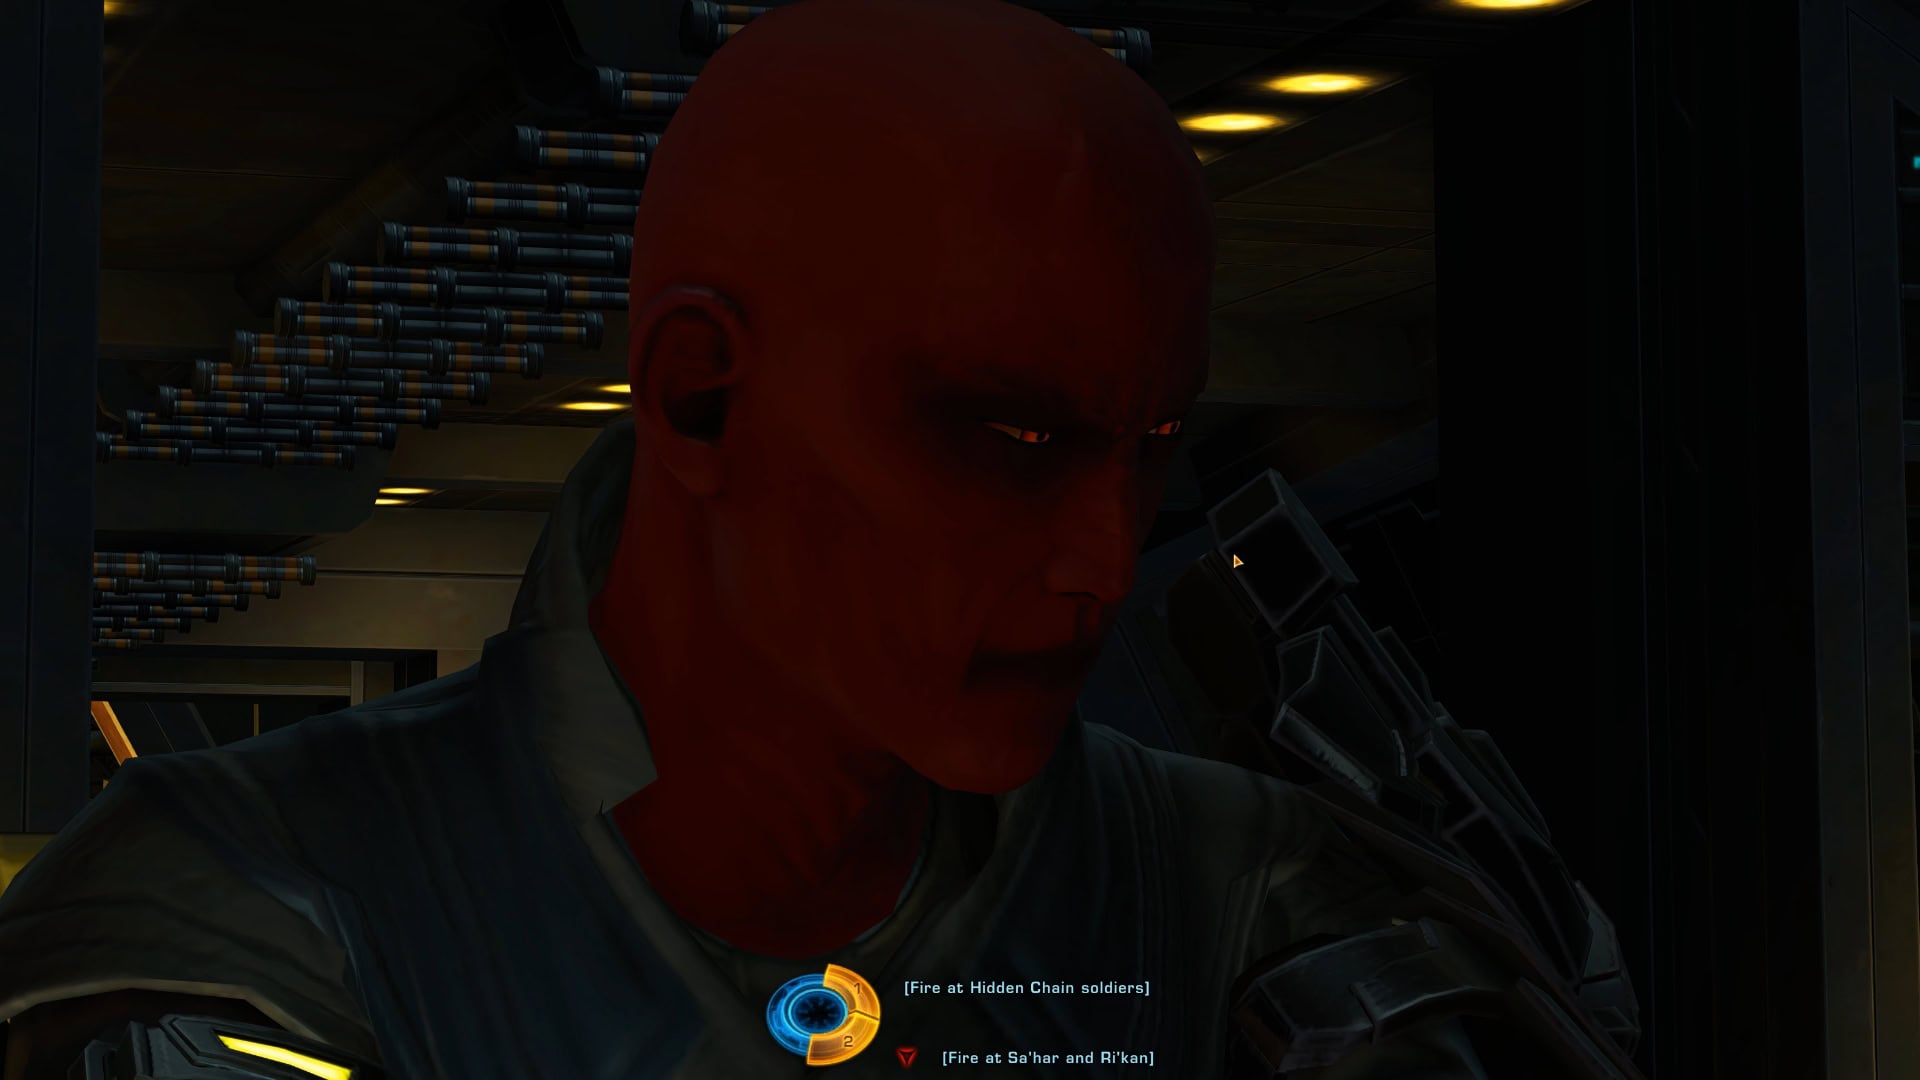
- If you shoot at Sa’har and Ri’kan, they will manage to run away anyway and you will miss out on a small conversation with Sa’har.
- If you chose to help them and shoot at Hidden Chain, Sa’har will help you against the first enemies on land and you will have a short conversation with her. Nothing big or even meaningful yet, but it will probably have implications on Ryloth in 8.0.
At the end of the mission, you will receive a Codex Entry for Naga Sadow’s Fortress.
Legacy Reborn
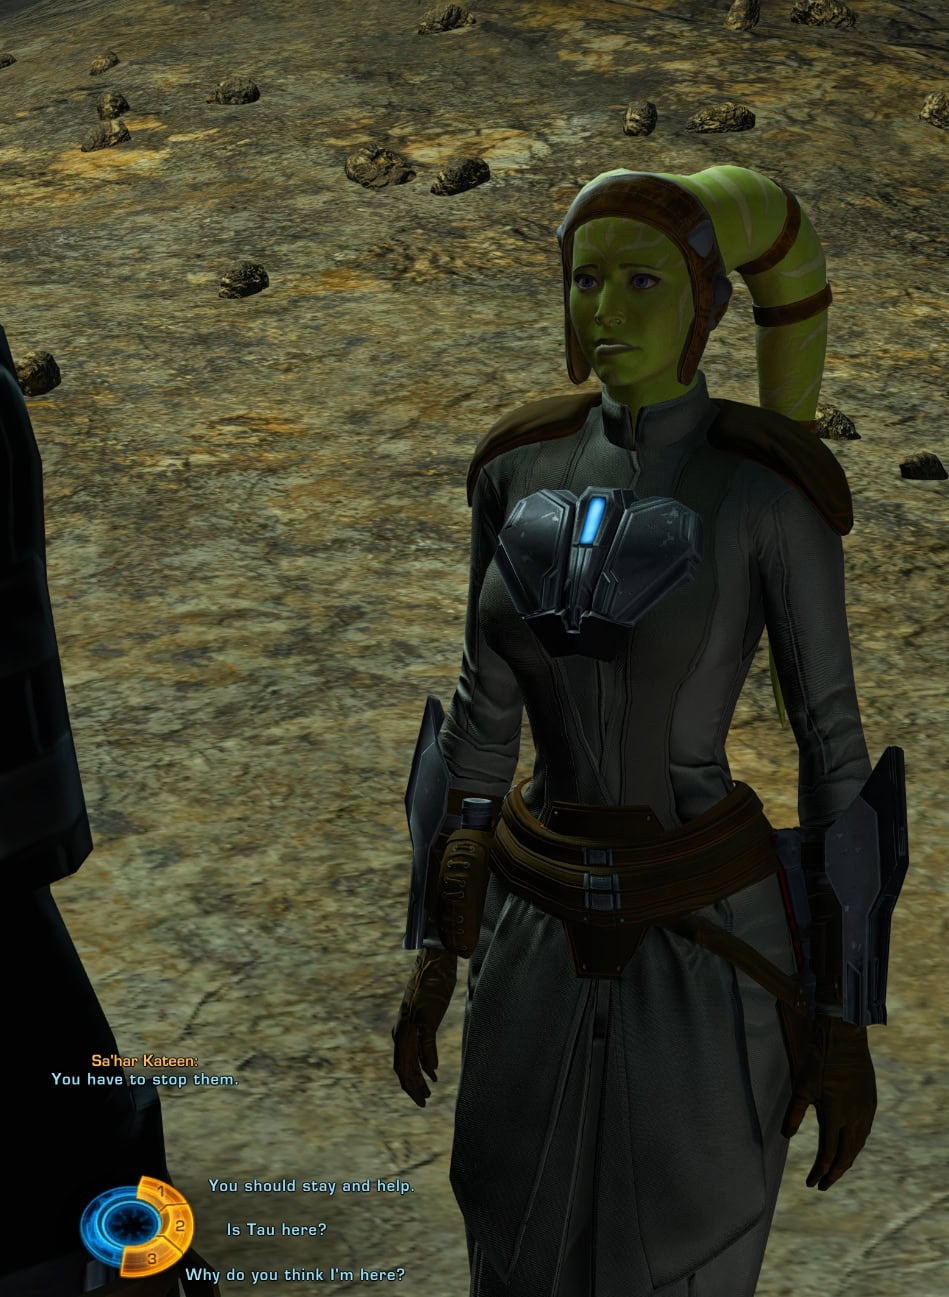
Now that you have landed on Khar Shian, the real mission can begin. Your first task is to take out Shauz Farr, a gold Hidden Chain NPC. If you helped Sa’har in space, she will join you for this flight before she runs away with her brother.
After the fight, if Sa’har is present, you can ask her for help navigating the ancient Fortress, but she will refuse and fly away with her brother.
Deactivate the Shield around the Fortress
This segment is very linear. You move forward through a tunnel, defeating some regular enemies with two companions assisting you. If Theron is in the Alliance, he will accompany you alongside Lana. If he is not, his place will be taken by T7-01.
Locate the Shield’s Manual Controls
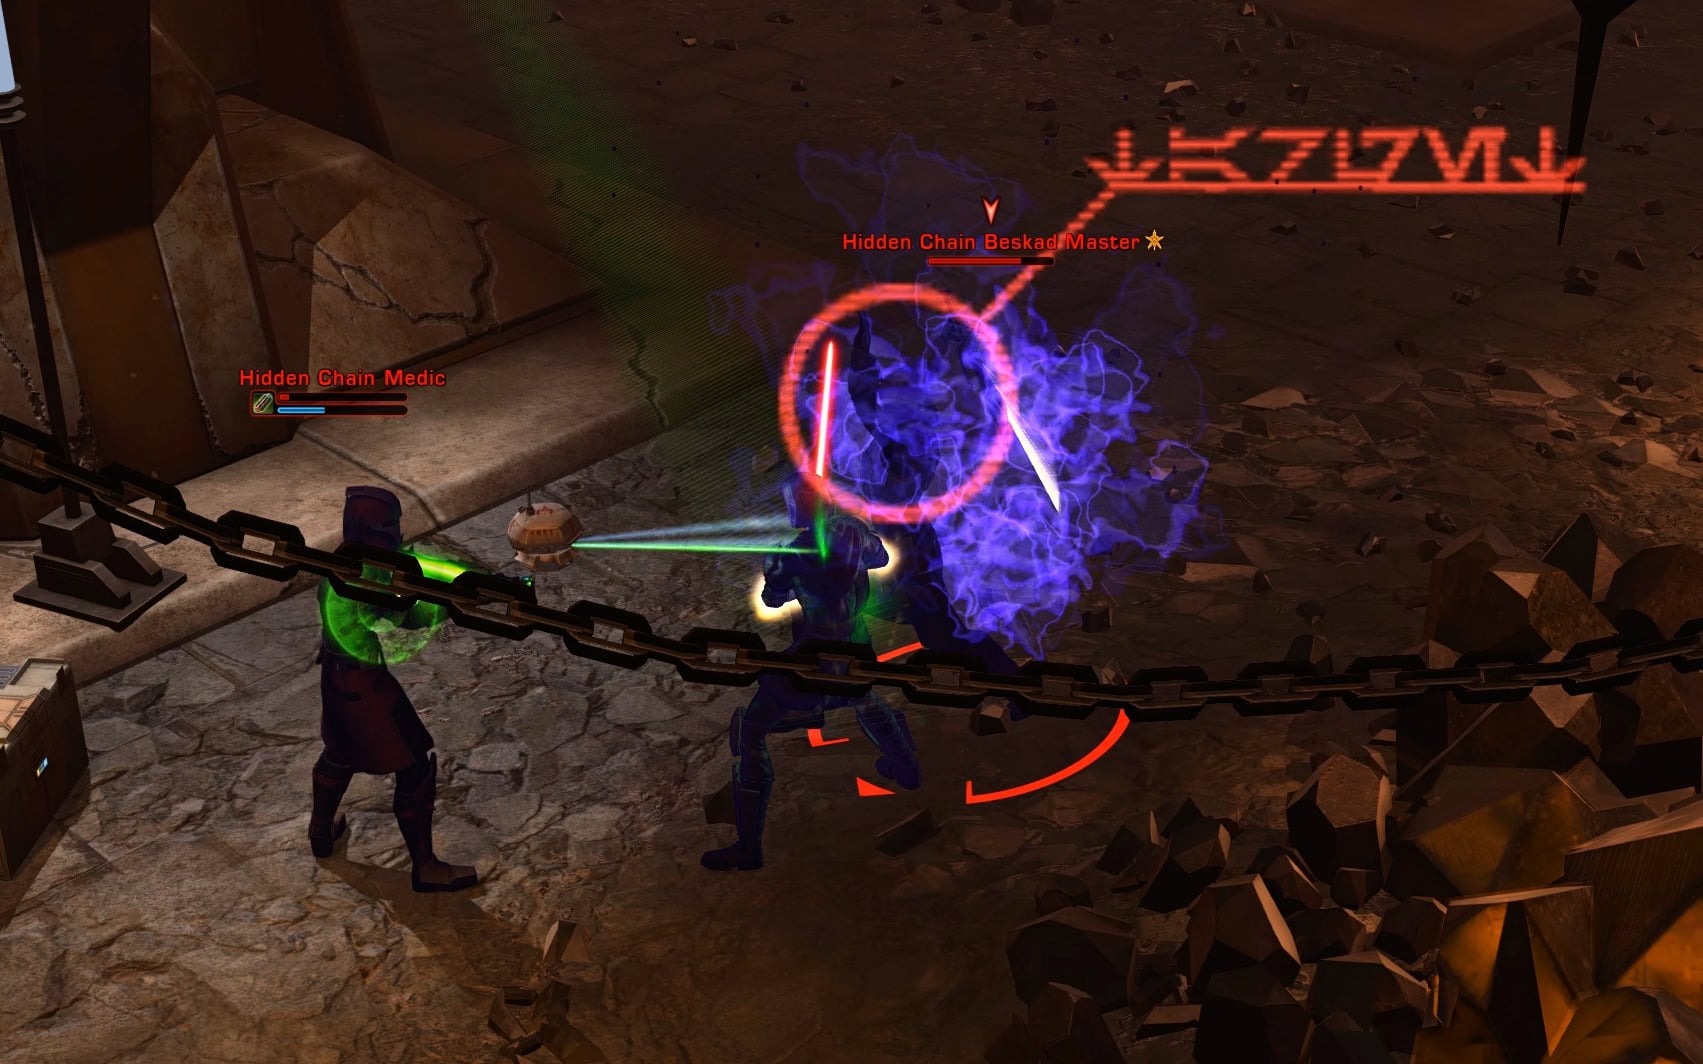
Following a short cinematic, you will continue down the path through the linear corridor, clearing out more of Heta Kol’s Hidden Chain forces.
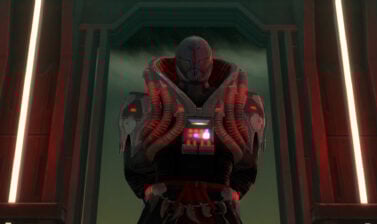
Defeat the Power Droid
The Droid looks scary and the little cables may seem like they would complicate the situation, but they don’t. You can continue focusing the droid until it is down. The cables don’t do much damage, and your companions will be enough of a distraction, so you don’t take all the attention.
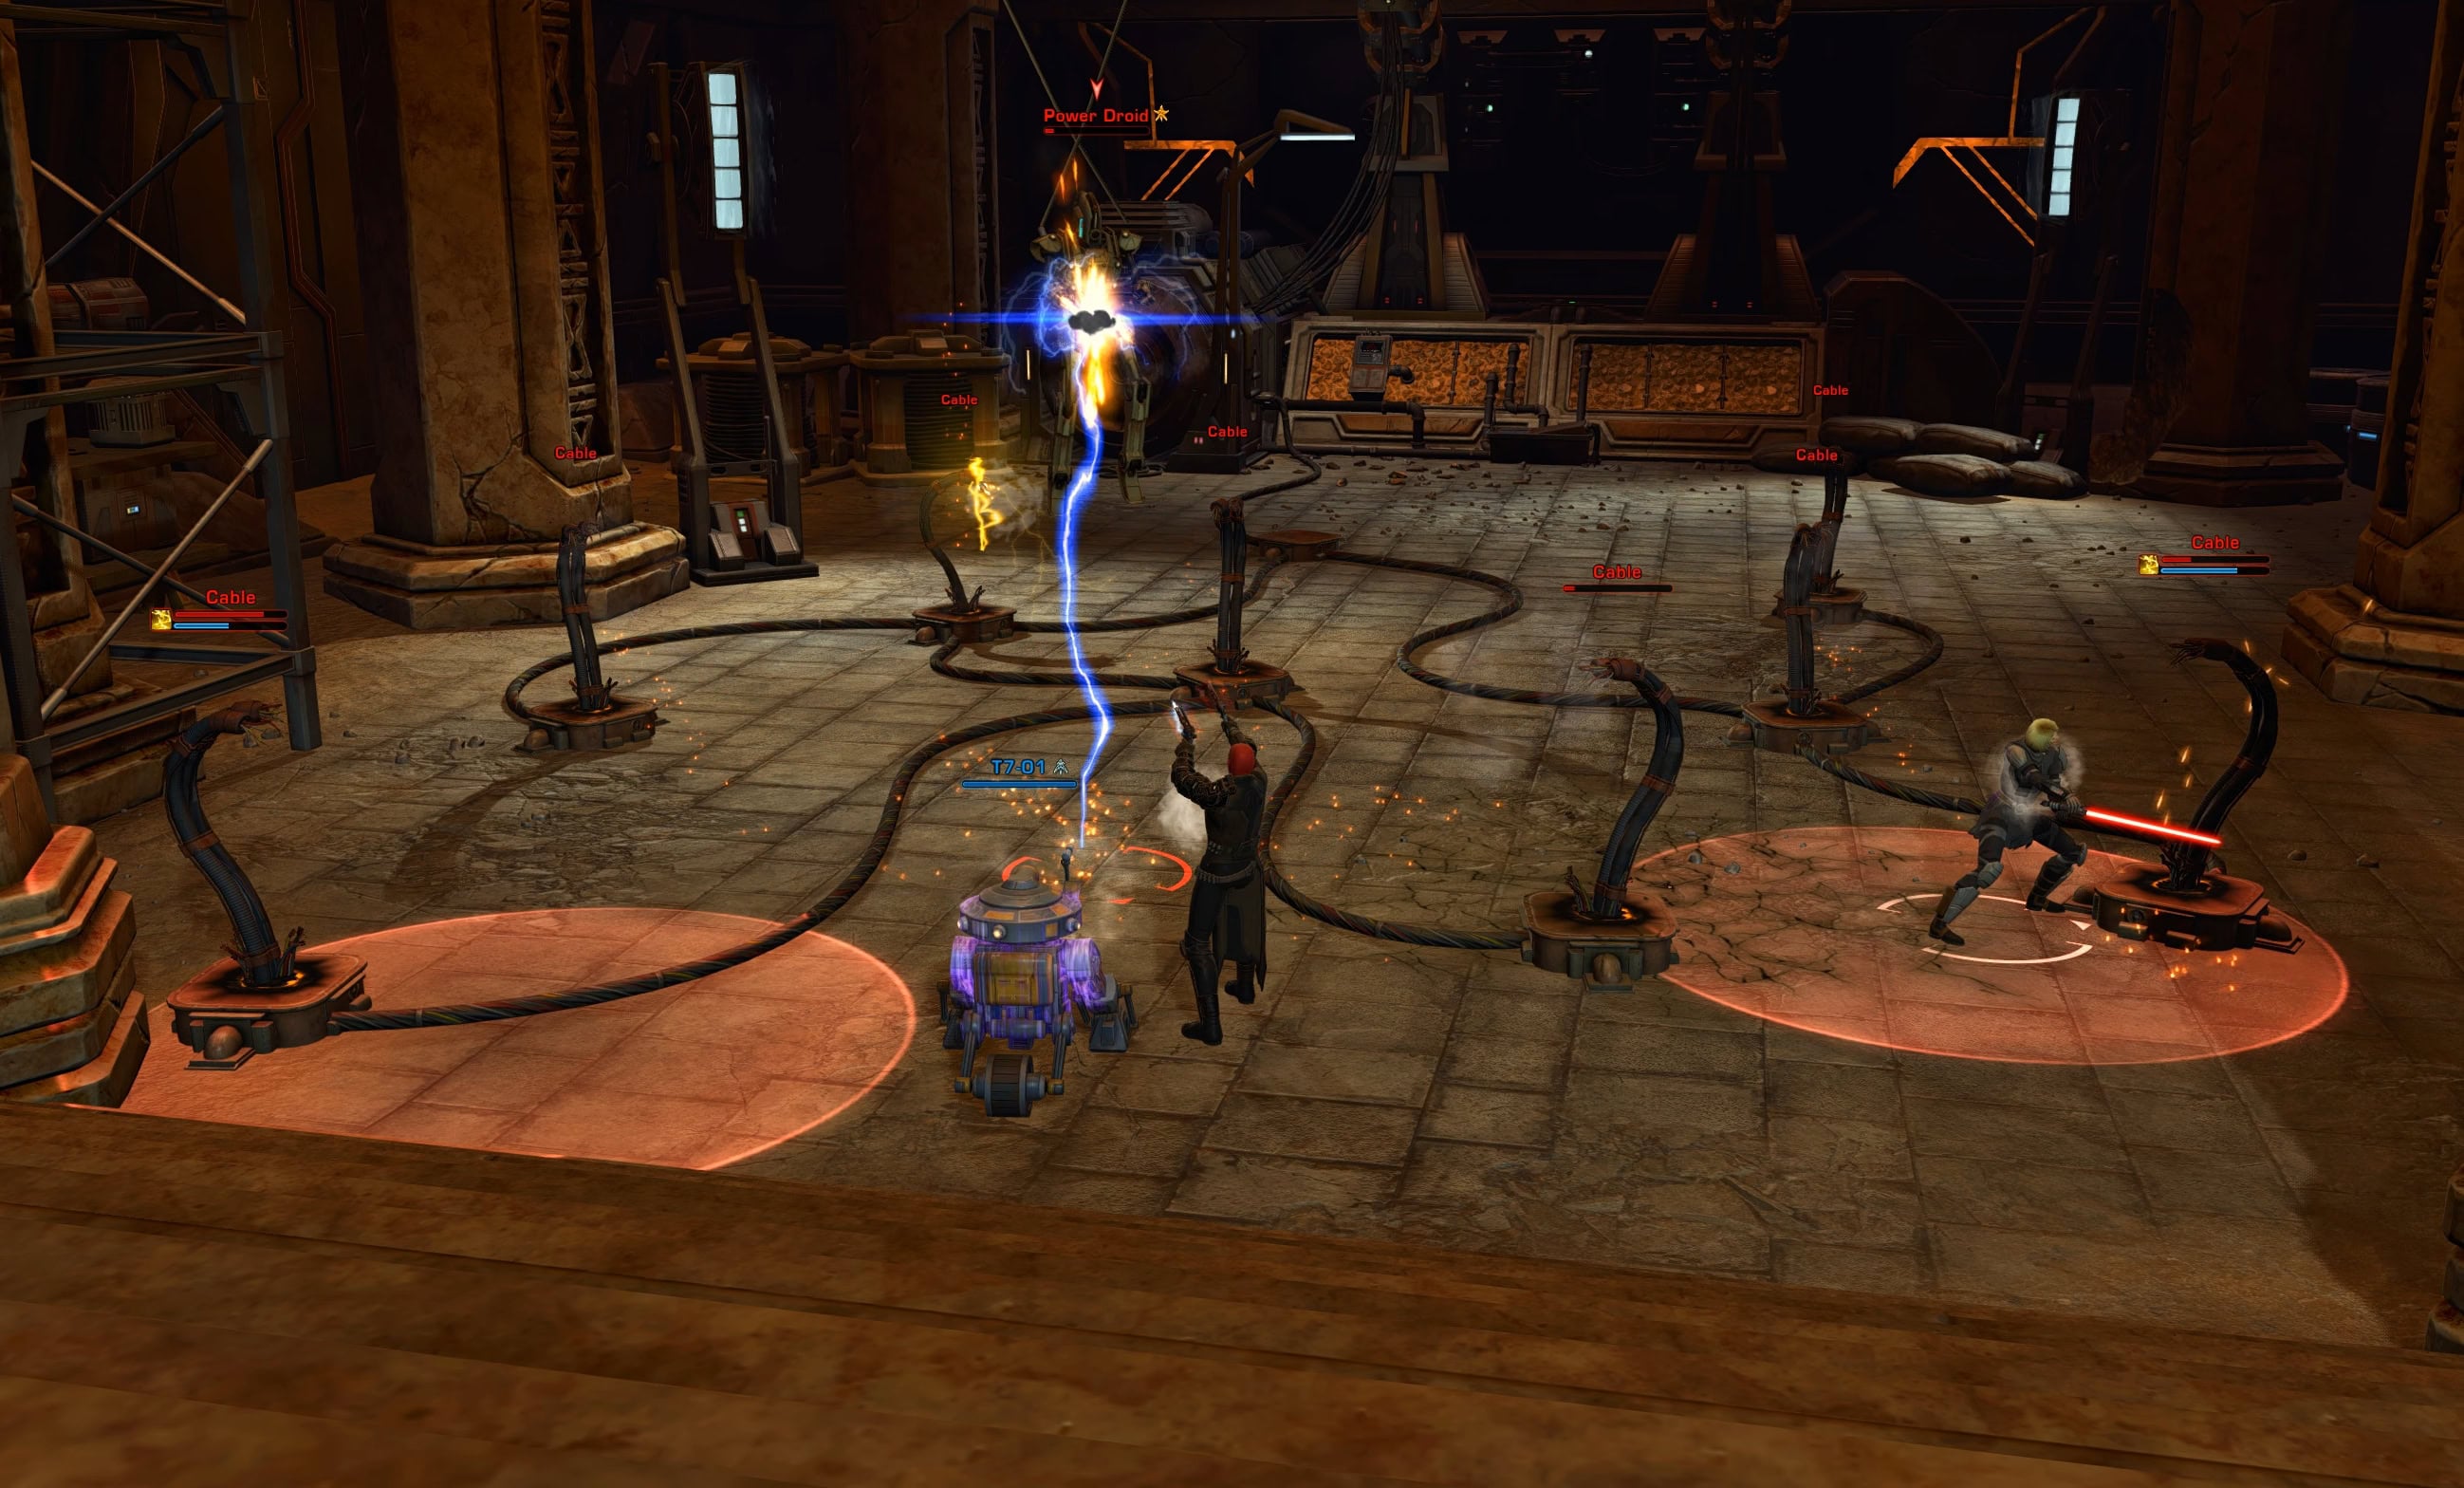
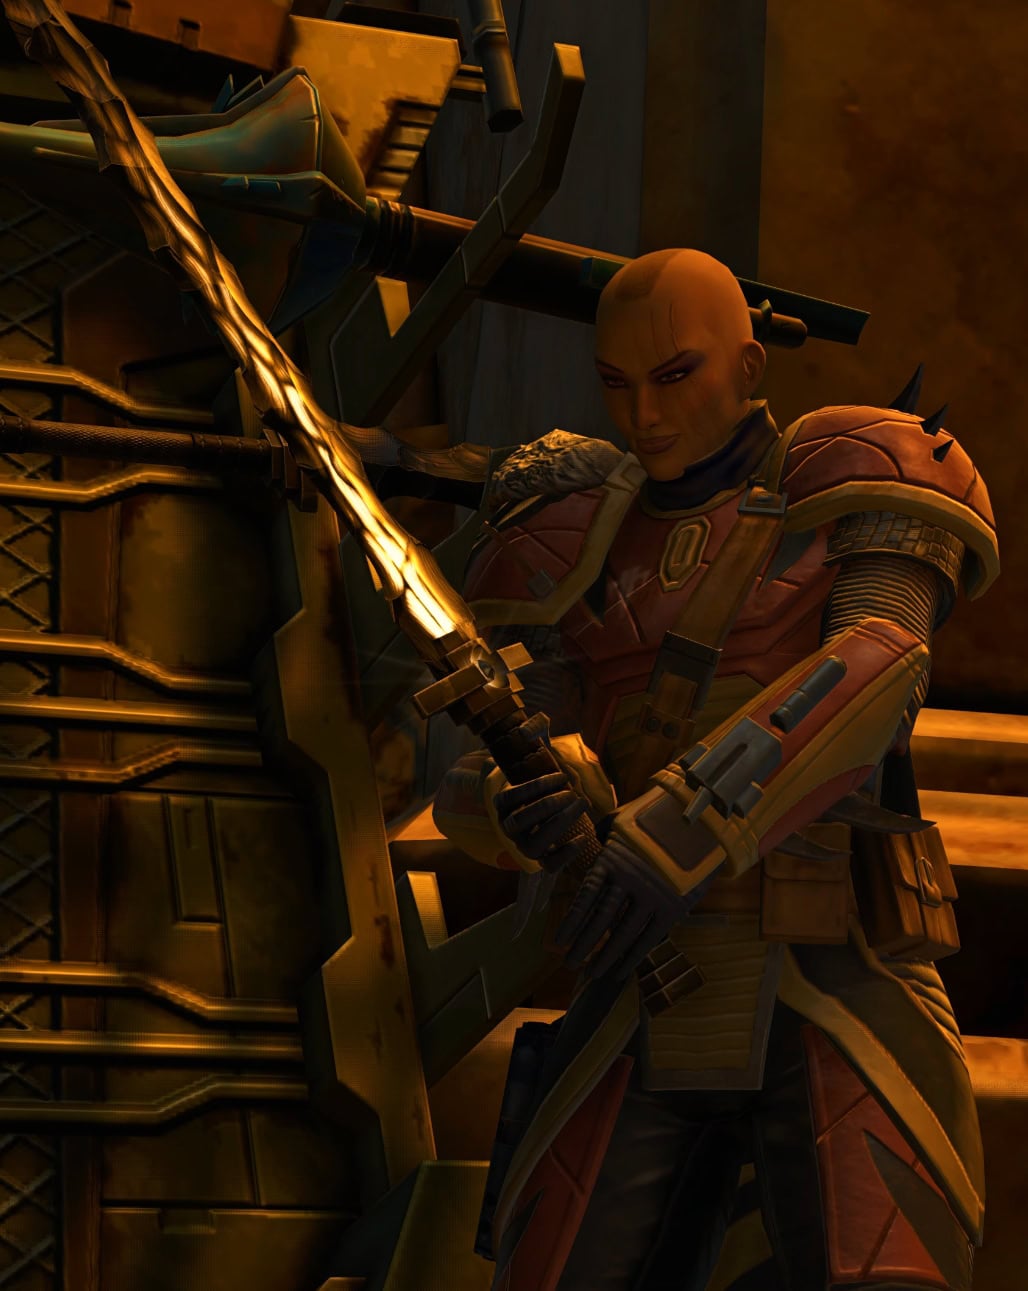
Disconnecting the droid lowers the shield surrounding Naga Sadow’s Fortress. A cinematic will follow showing Heta Kol’s reaction. Heta picks up Naga Sadow’s Fortress Blade (which is also available for purchase from the Cartel Market).
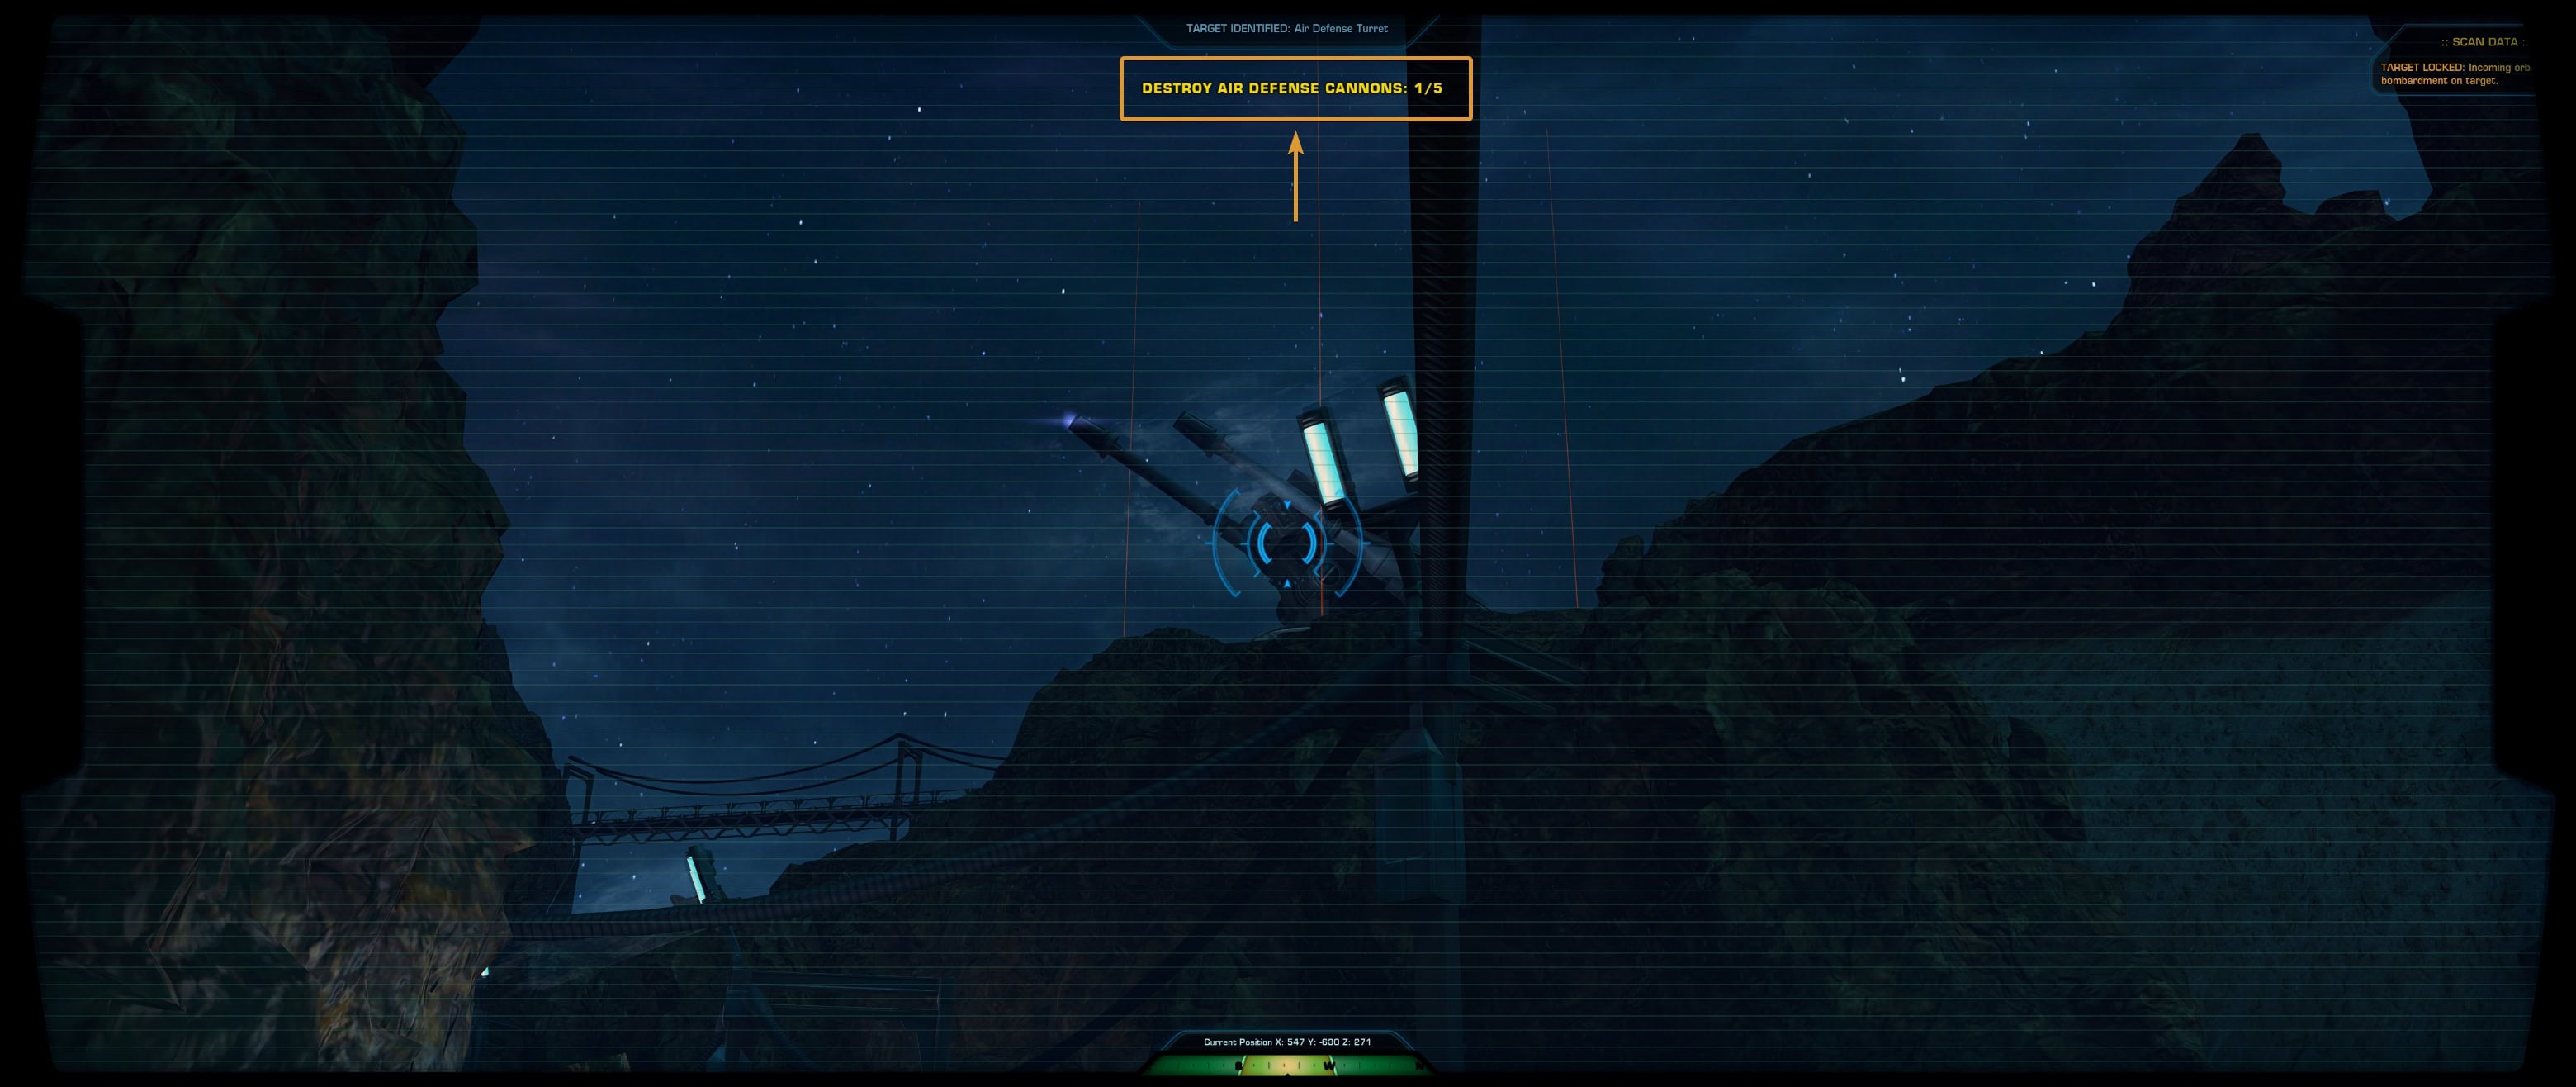
Controlling the Basilisk Droid
With the shield down, the Mandalorians can now bring their firepower to the game. In the next segment of the mission, you will play as Jekiah Ordo and will control the Basilisk Droid. This is a familiar experience as we have had an opportunity to pilot a number of machines similar to this.
Here is the list of abilities this droid has:
- Blast – standard weak single target spammable ability.
- Ricket Blast – more powerful single target ability.
- Rocket Storm – your primary ranged AoE attack against Hetta Kol’s forces.
- Stomp – an AoE melee that takes about half of a normal NPC’s health.
- Targeting Computer – ability required to mark the Air Defense Cannons.
- Strafe Left – an ability allowing you to strafe to the left.
- Charge – moves you faster in melee range to a target. Combine it with Stomp.
- Strafe Right – an ability allowing you to strafe to the right.
- Repair and Refuel – unlikely to need it, but this can heal you out of combat.
Use primarily Rocket Storm and Stomp to deal with the normal NPCs. Strafe Left and Right can be useful against the Hovertanks, but it’s not really required. The tanks don’t deal a lot of damage. You can opt to spam your attacks to take the tanks down quicker.
When you target the cannons, wait for the confirmation before you cancel it out and move onto the next one.
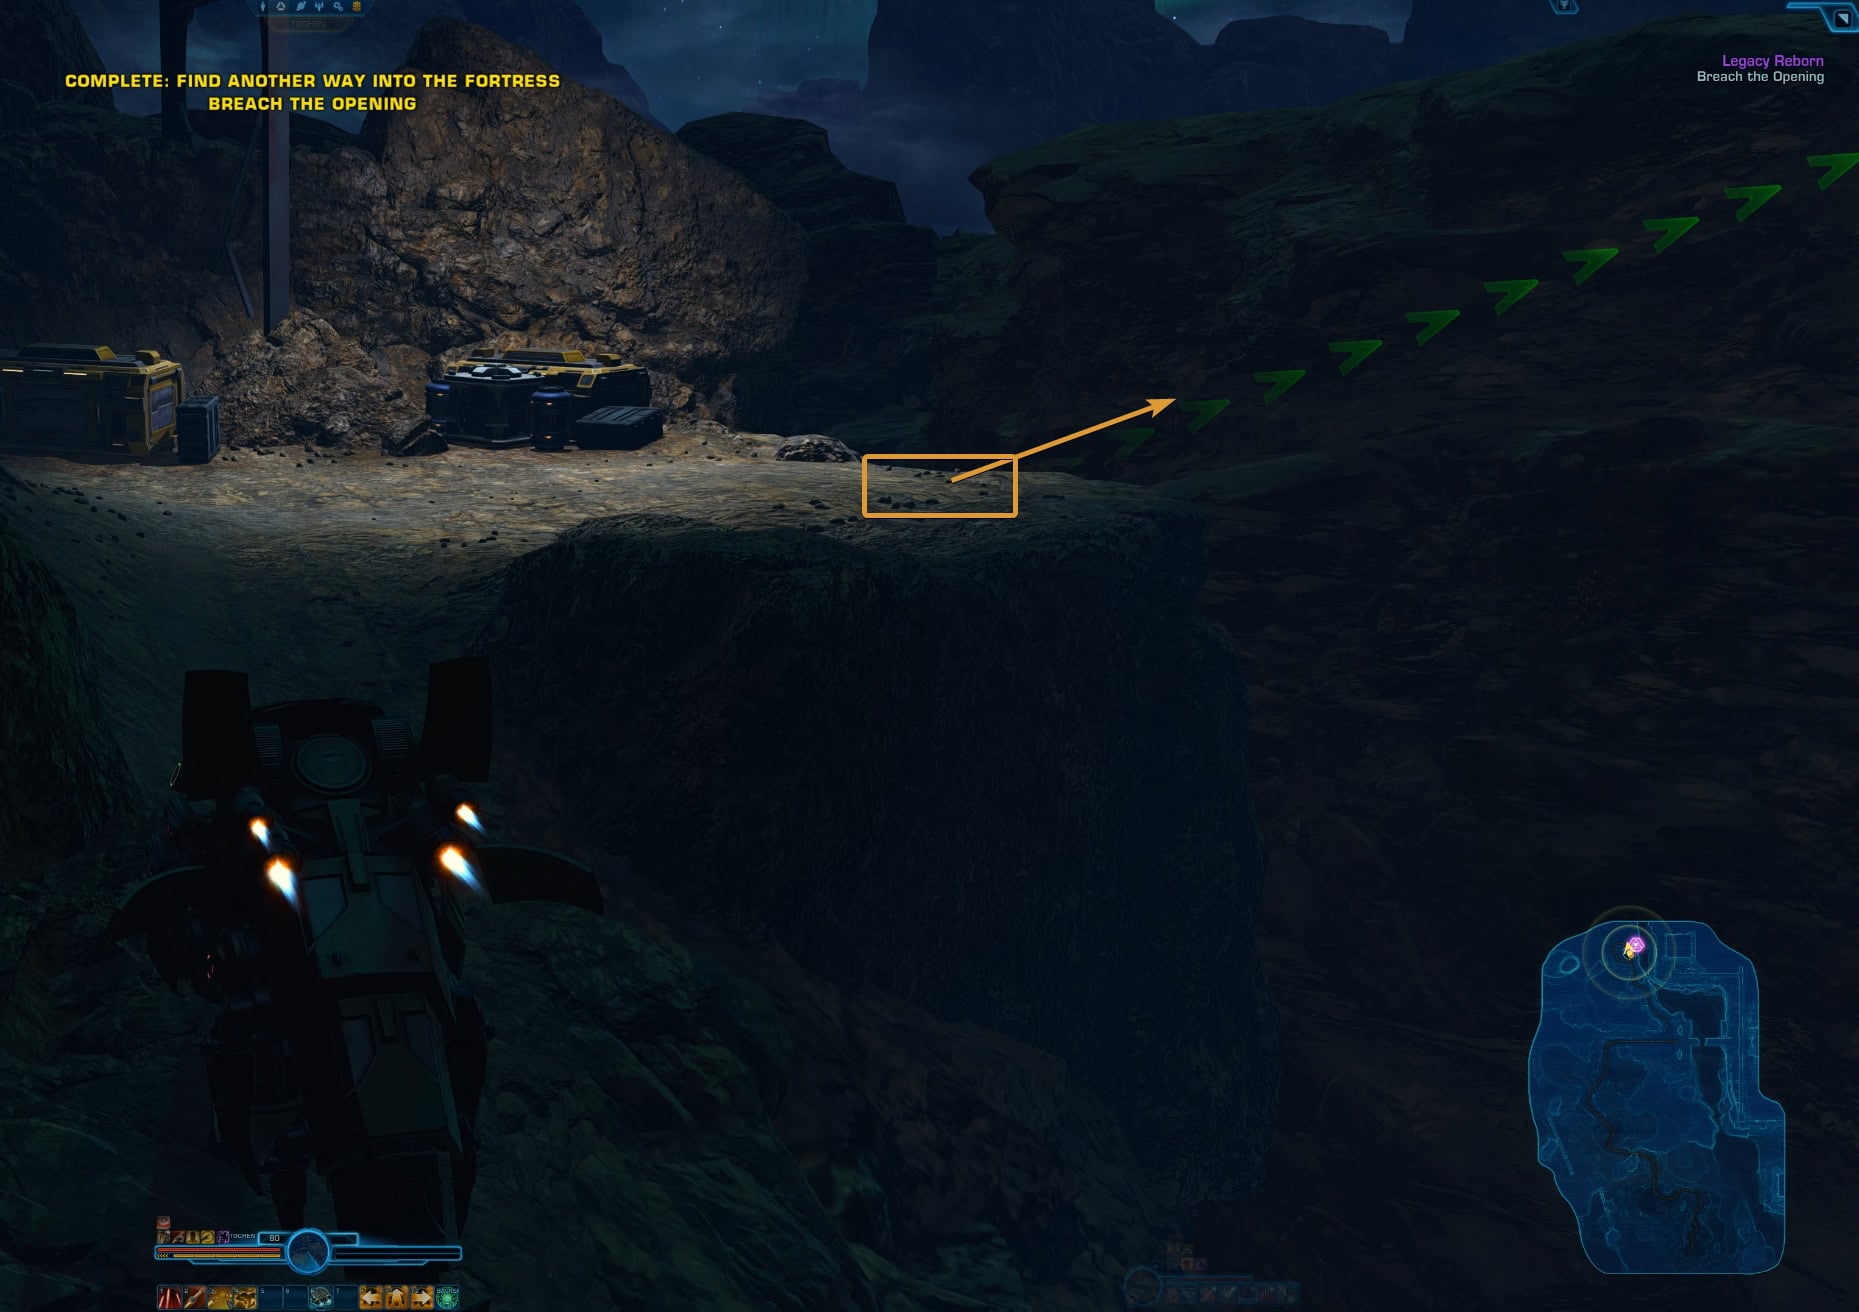
Find Another Way Into the Fortress
This one might be a bit buggy or tricky to complete. Your goal is to stand on the right ledge, where a green arrow should show and the game will “jump” you over to the other ledge.
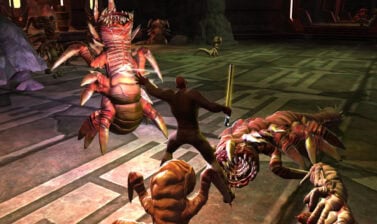
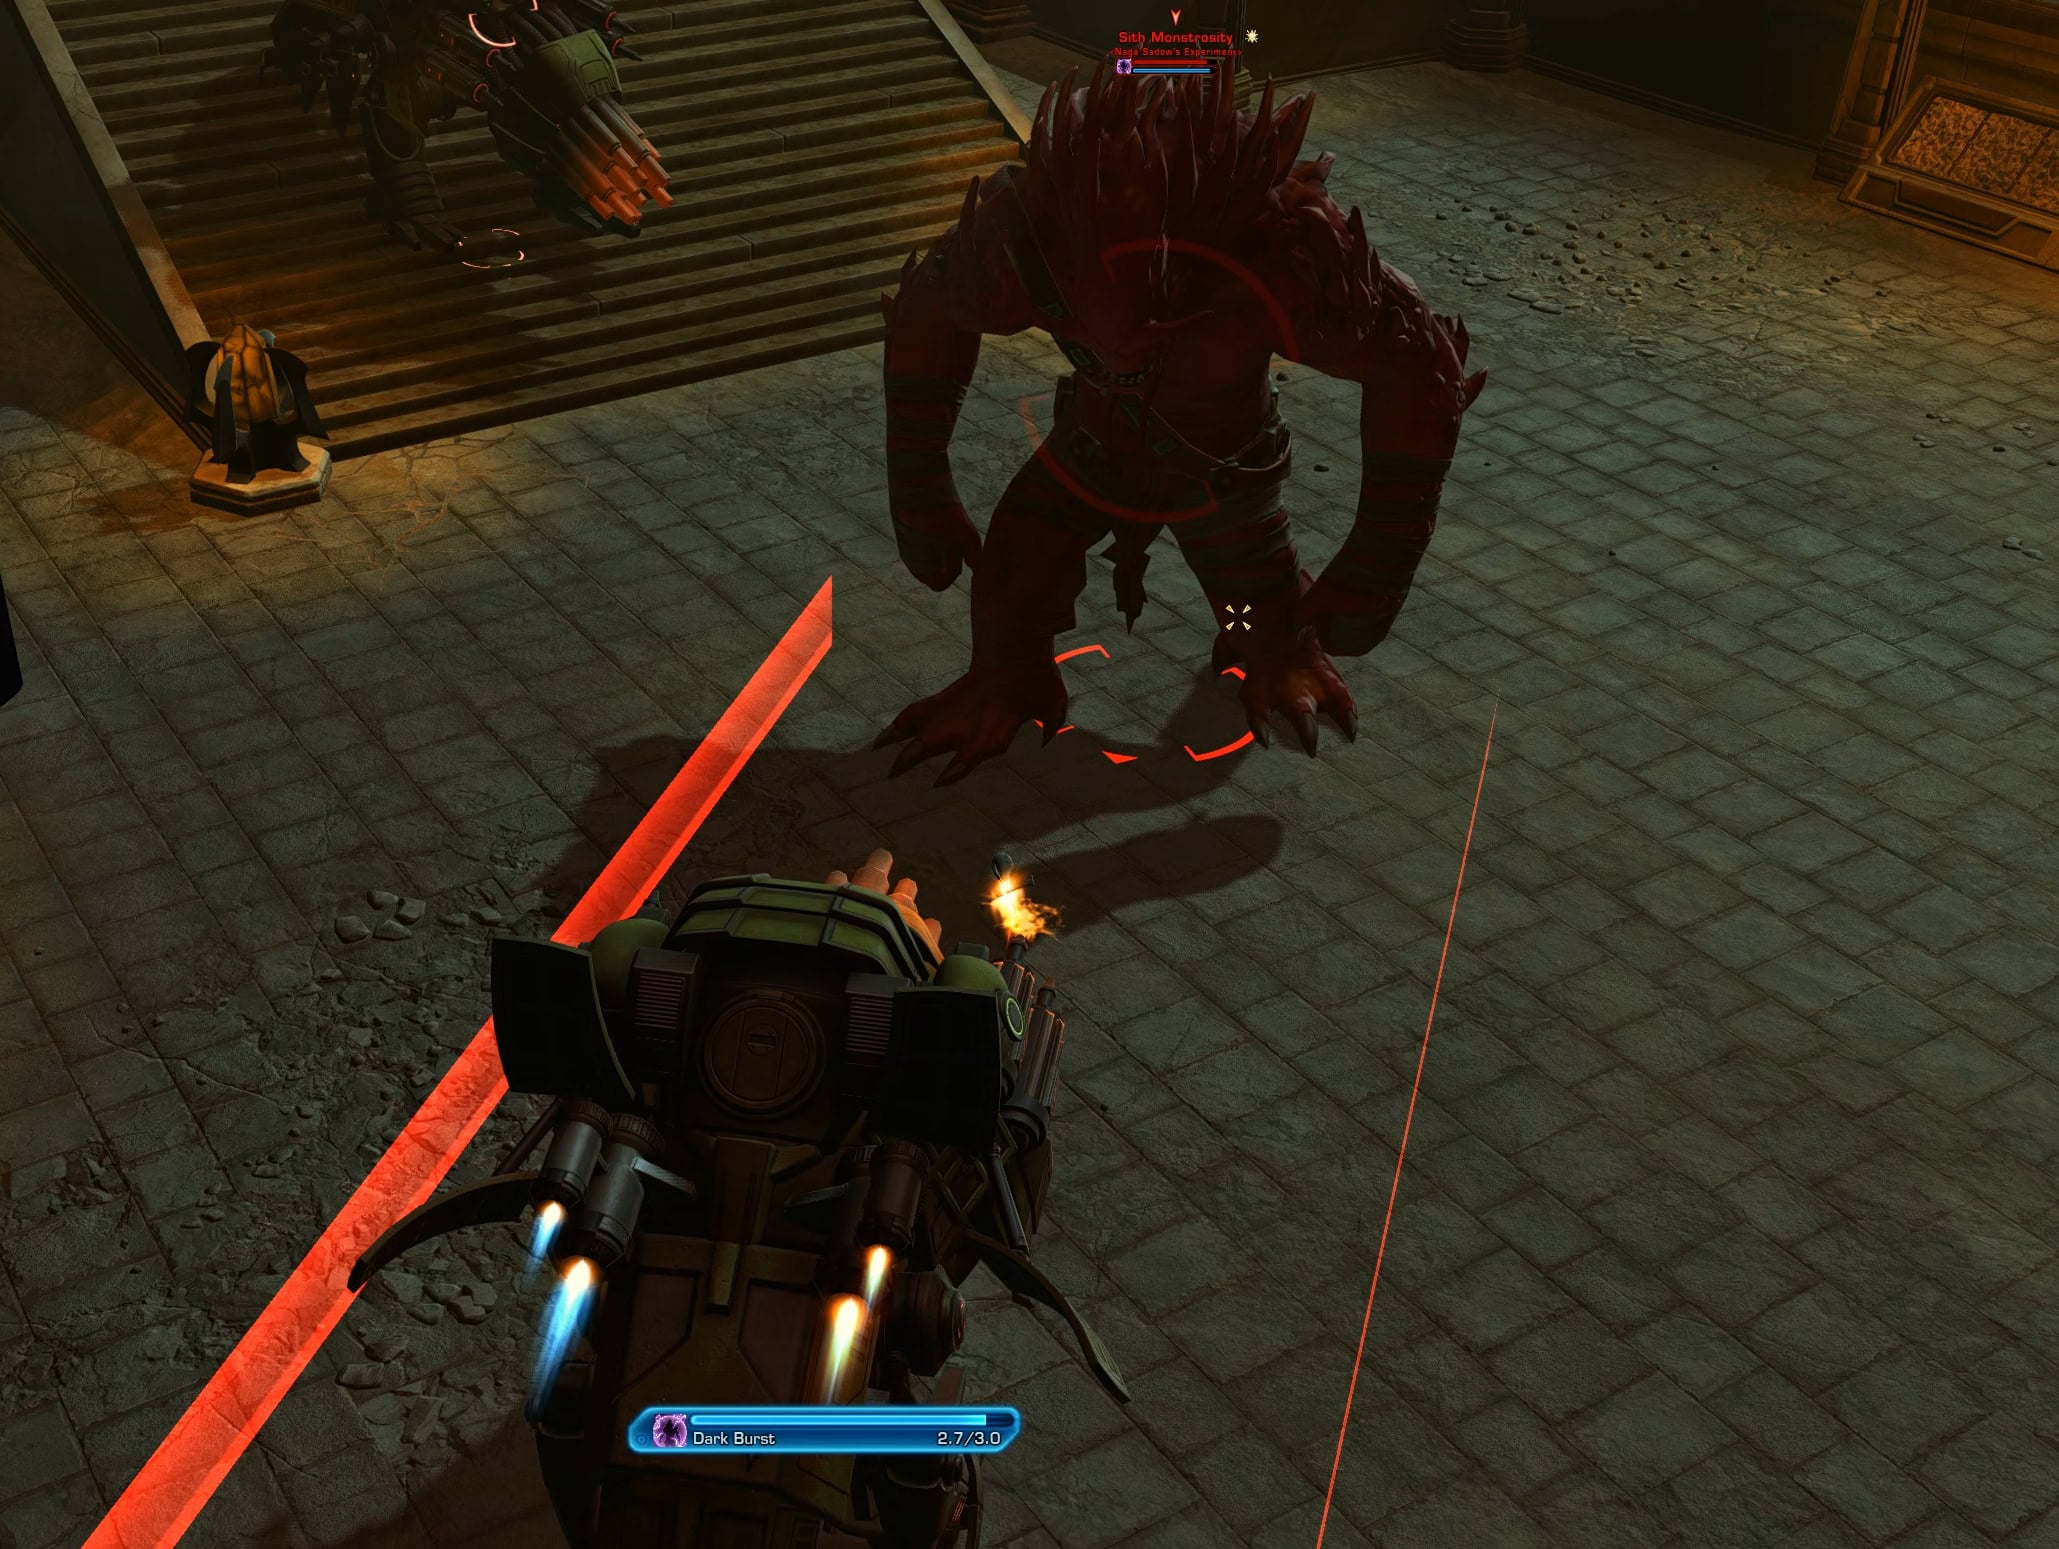
Defeat Naga Sadow’s Monstrosity
This one is likely taken straight from the Tales of the Jedi comic book series. You will get a Codex Entry after this objective is complete, which will help fill in some of the gaps if you have not read the ancient texts.
There is nothing unique to this encounter in terms of mechanics. If you want to, you can strafe or run around, but the boss does not hit too hard and you will be able to defeat it way before your health is in any danger.
After you complete the sequence with the Mandalorians and right before you split from Lana and Theron / T7-O1, there is a dialogue choice that can earn you some Dark Side points.
It doesn’t have any consequences, just a role-playing opportunity to confirm and express out loud your character’s priorities.
Get to the Orbital Defense Controls
In this sequence, you play as Lana. She will be accompanied by Theron (if his is in your Alliance) or T7-O1. Lana has the following abilities:
- Dash In – leaps to a target from distance.
- Mark Target – damage attack that marks the target, unlocking the next ability.
- Forceful Slash – only available on marked targets. One-shots weak enemies. Can stun.
- Culling Strike – powerful attack, only available on targets below 50% HP.
- Mass Leech – Steals HP from nearby enemies (AoE) and heals Lana.
For some reason, Lana’s Force Leach is better than ours and she does not keep these abilities when returning to be a companion.
Access the Ventilation Shaft
When you reach the large room with the red shields, look to your right. There is a glowing hatch grate. Click it to start the next sequence, where you control another companion.
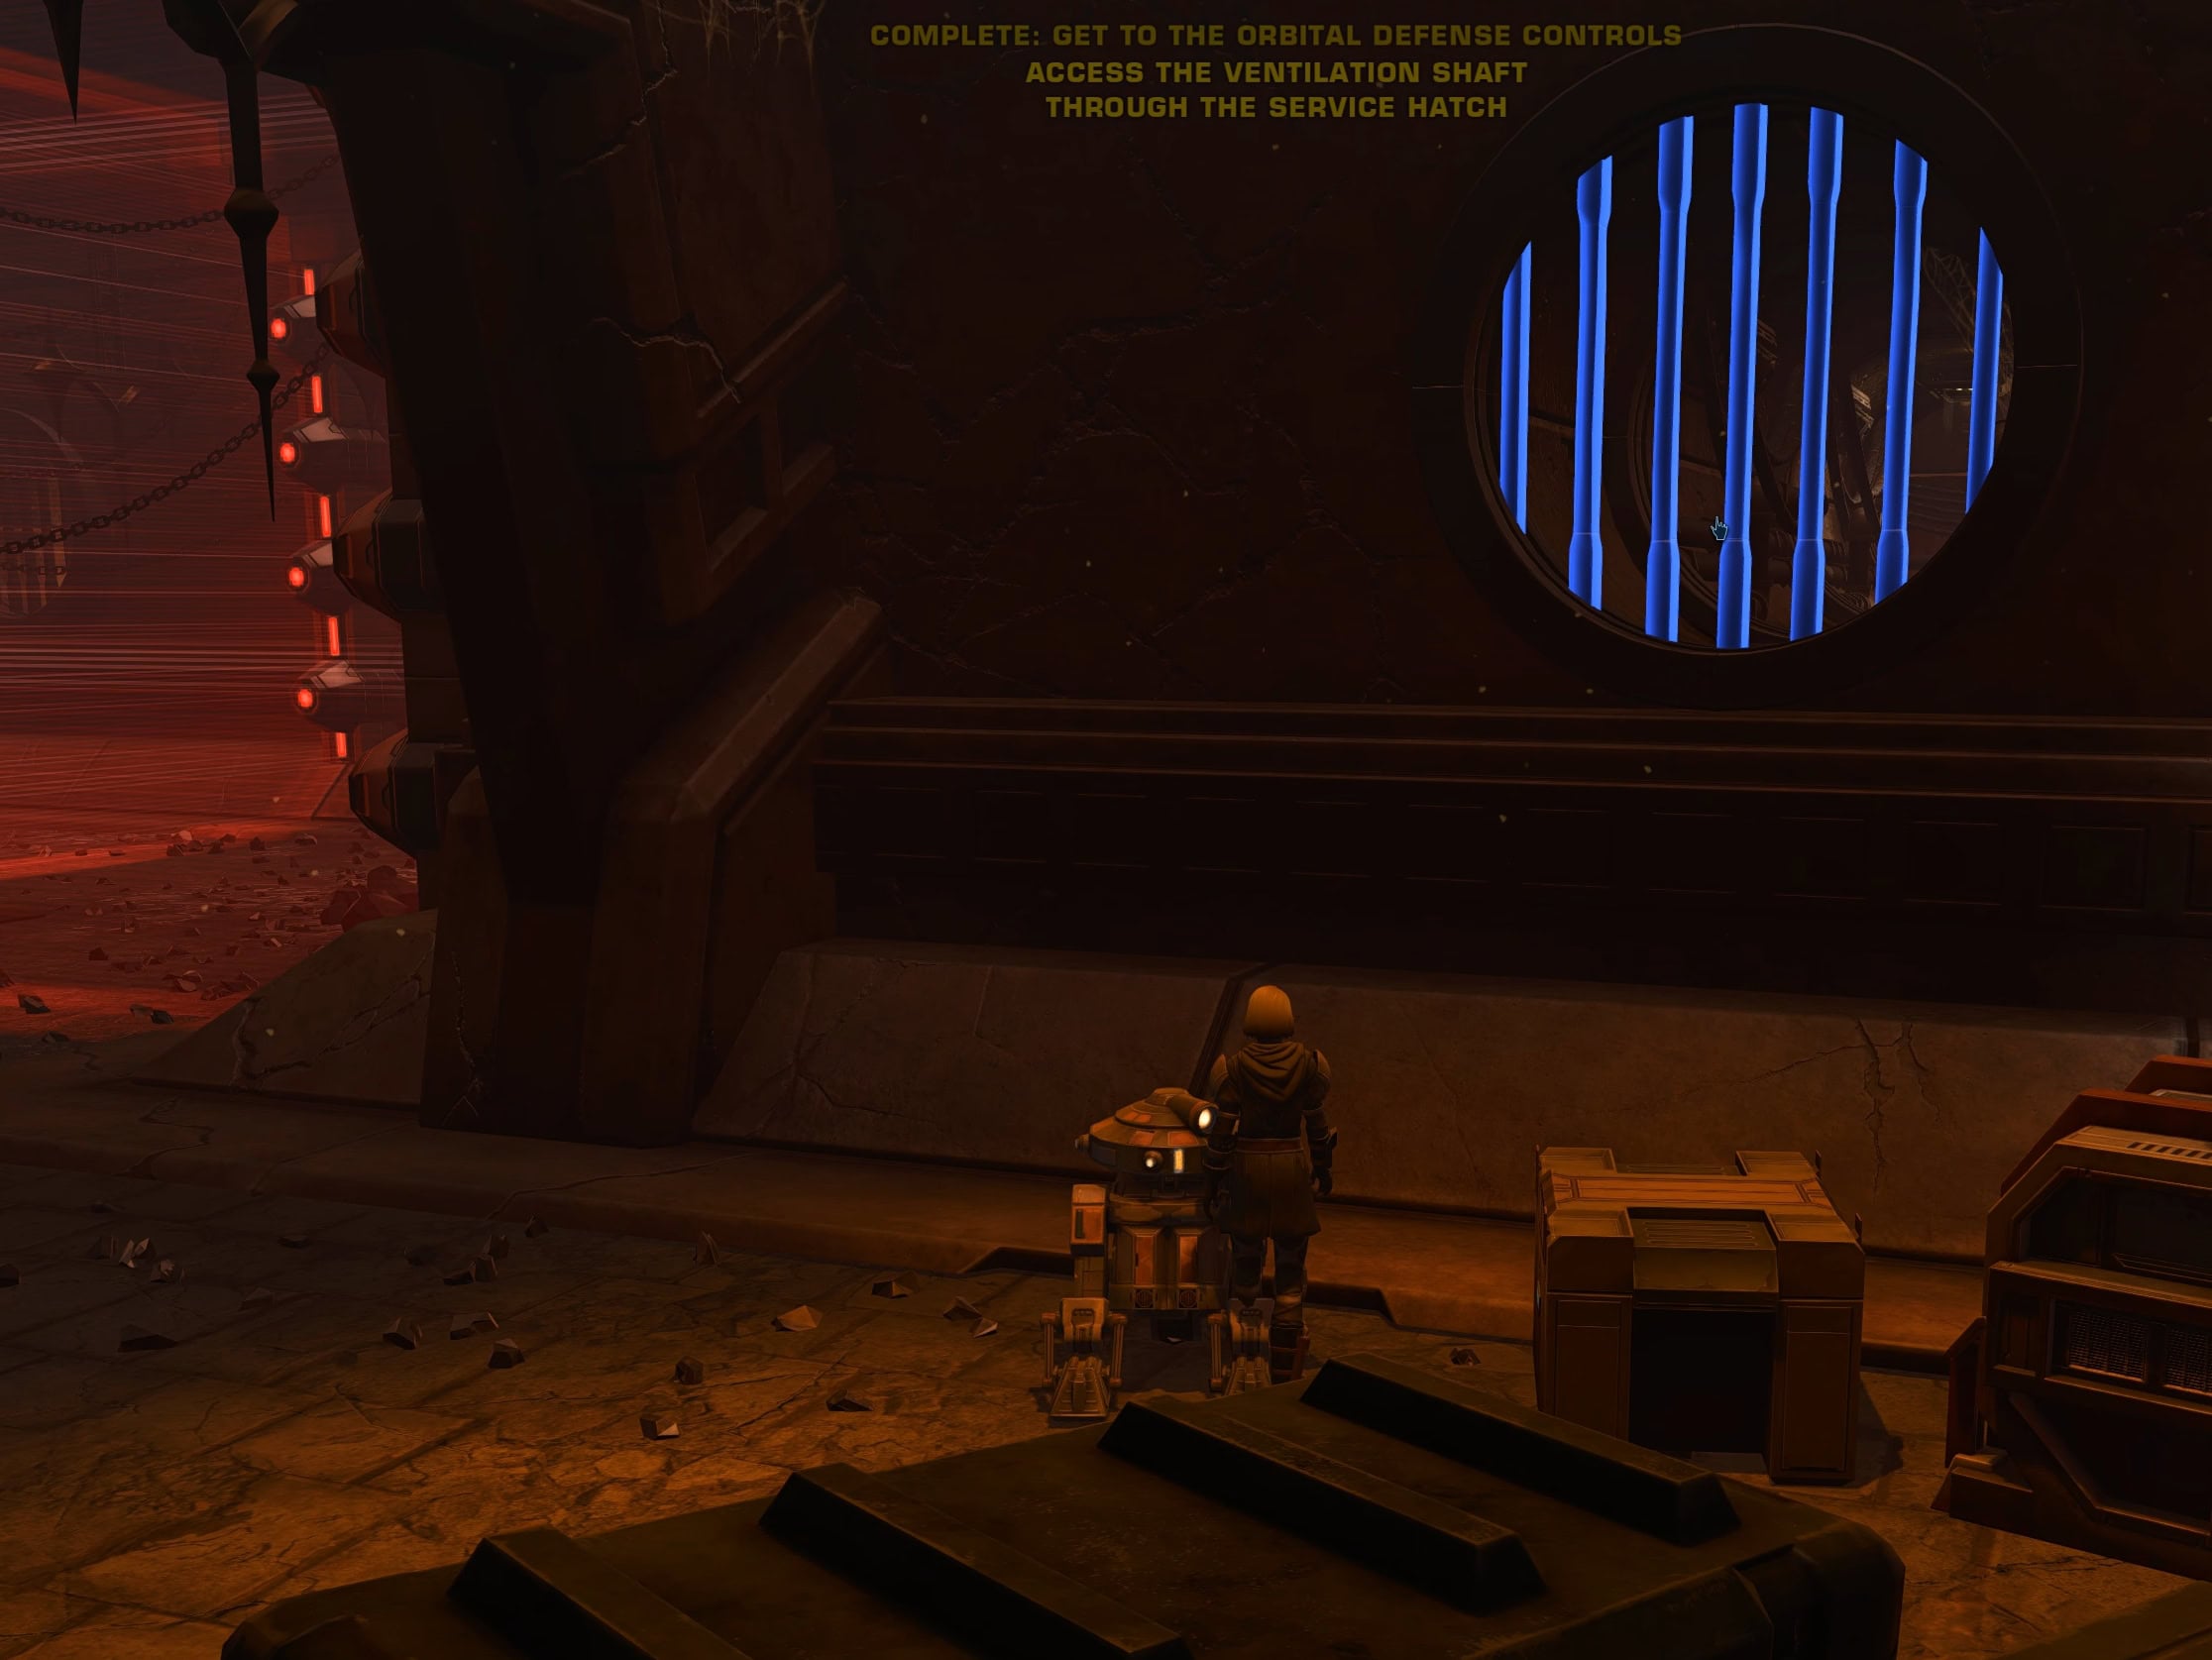
Disable Security Grid
Here, you take control of either Theron or T7-O1 and have to sneak through a vent and deactivate 4 Security Grid nodes.
Here are Theron’s abilities:
- Ion Grenade – Stuns the prime target and others nearby for a few seconds. Doesn’t deal damage.
- Flurry of Shots – standard spammable single-target ranged attack.
- Power Shot – More powerful single-target attack. Deals increased damage to Stunned targers.
- Quick Shot – Attacks a secondary target automatically if it is Stunned.
- Protocol Spike – converts a hostile Stunned droid to an ally.
And these are T7-O1’s abilities:
- Blast – standard single-target spammable attack.
- Draw Power – channel attack that drains HP from droids and gives you Overcharge stacks.
- Power Shot – A single-target attack that deals medium damage and costs 2 Overcharge Stacks.
- Blaster Volley – Strong ranged attack that requires 3 Overcharge Stacks.
- Reconfigure Circuit – converts an enemy droid to an ally. Only works on targets already affected by Draw Power.
You can only interact with the terminals when you are out of combat. Always use Ion Grenade / Draw Power first on a target, then follow up with Quick Shot / Blaster Volley. You can only have a single ally droid at a time, so the Protocol Spike / Reconfigure Circuit ability is not always available.
If you have applied a custom skin to alter Theron’s appearance, you may notice it changing to default for the gameplay segment. This is likely a bug. We expect it will get fixed shortly after release.
Go to the Orbital Defense Controls
In this sequence, you control Lana again and continue making your way through regular trash mobs on a linear path in the Fortress.
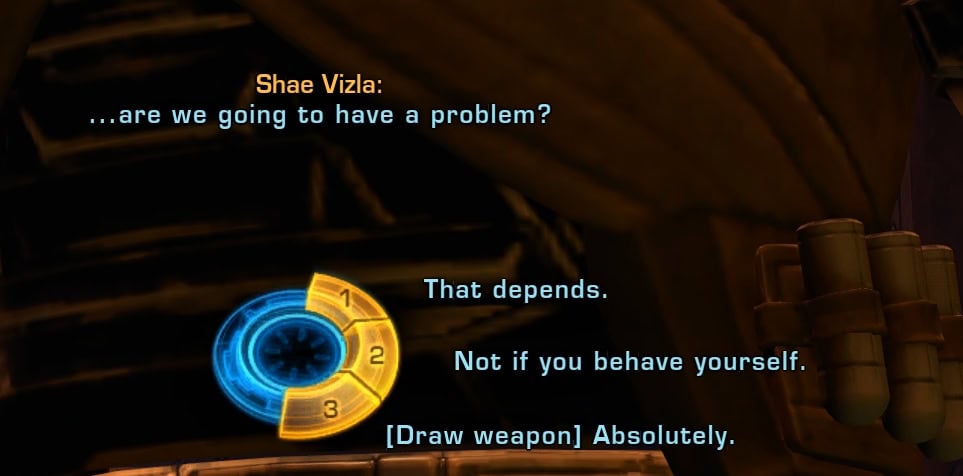
Meeting with Shae Vizla
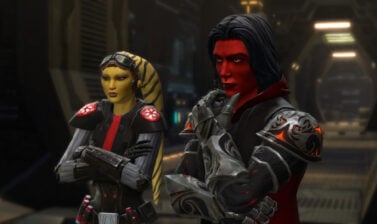
The action moves back to your character, and you stumble on Shae Vizla. In this cinematic, you have a cosmetic dialogue choice to make about your reaction to Shae’s presence. Whatever you choose, Rass and Jekiah will appear just in time to prevent any violence so the cinematic can continue down the planned path.
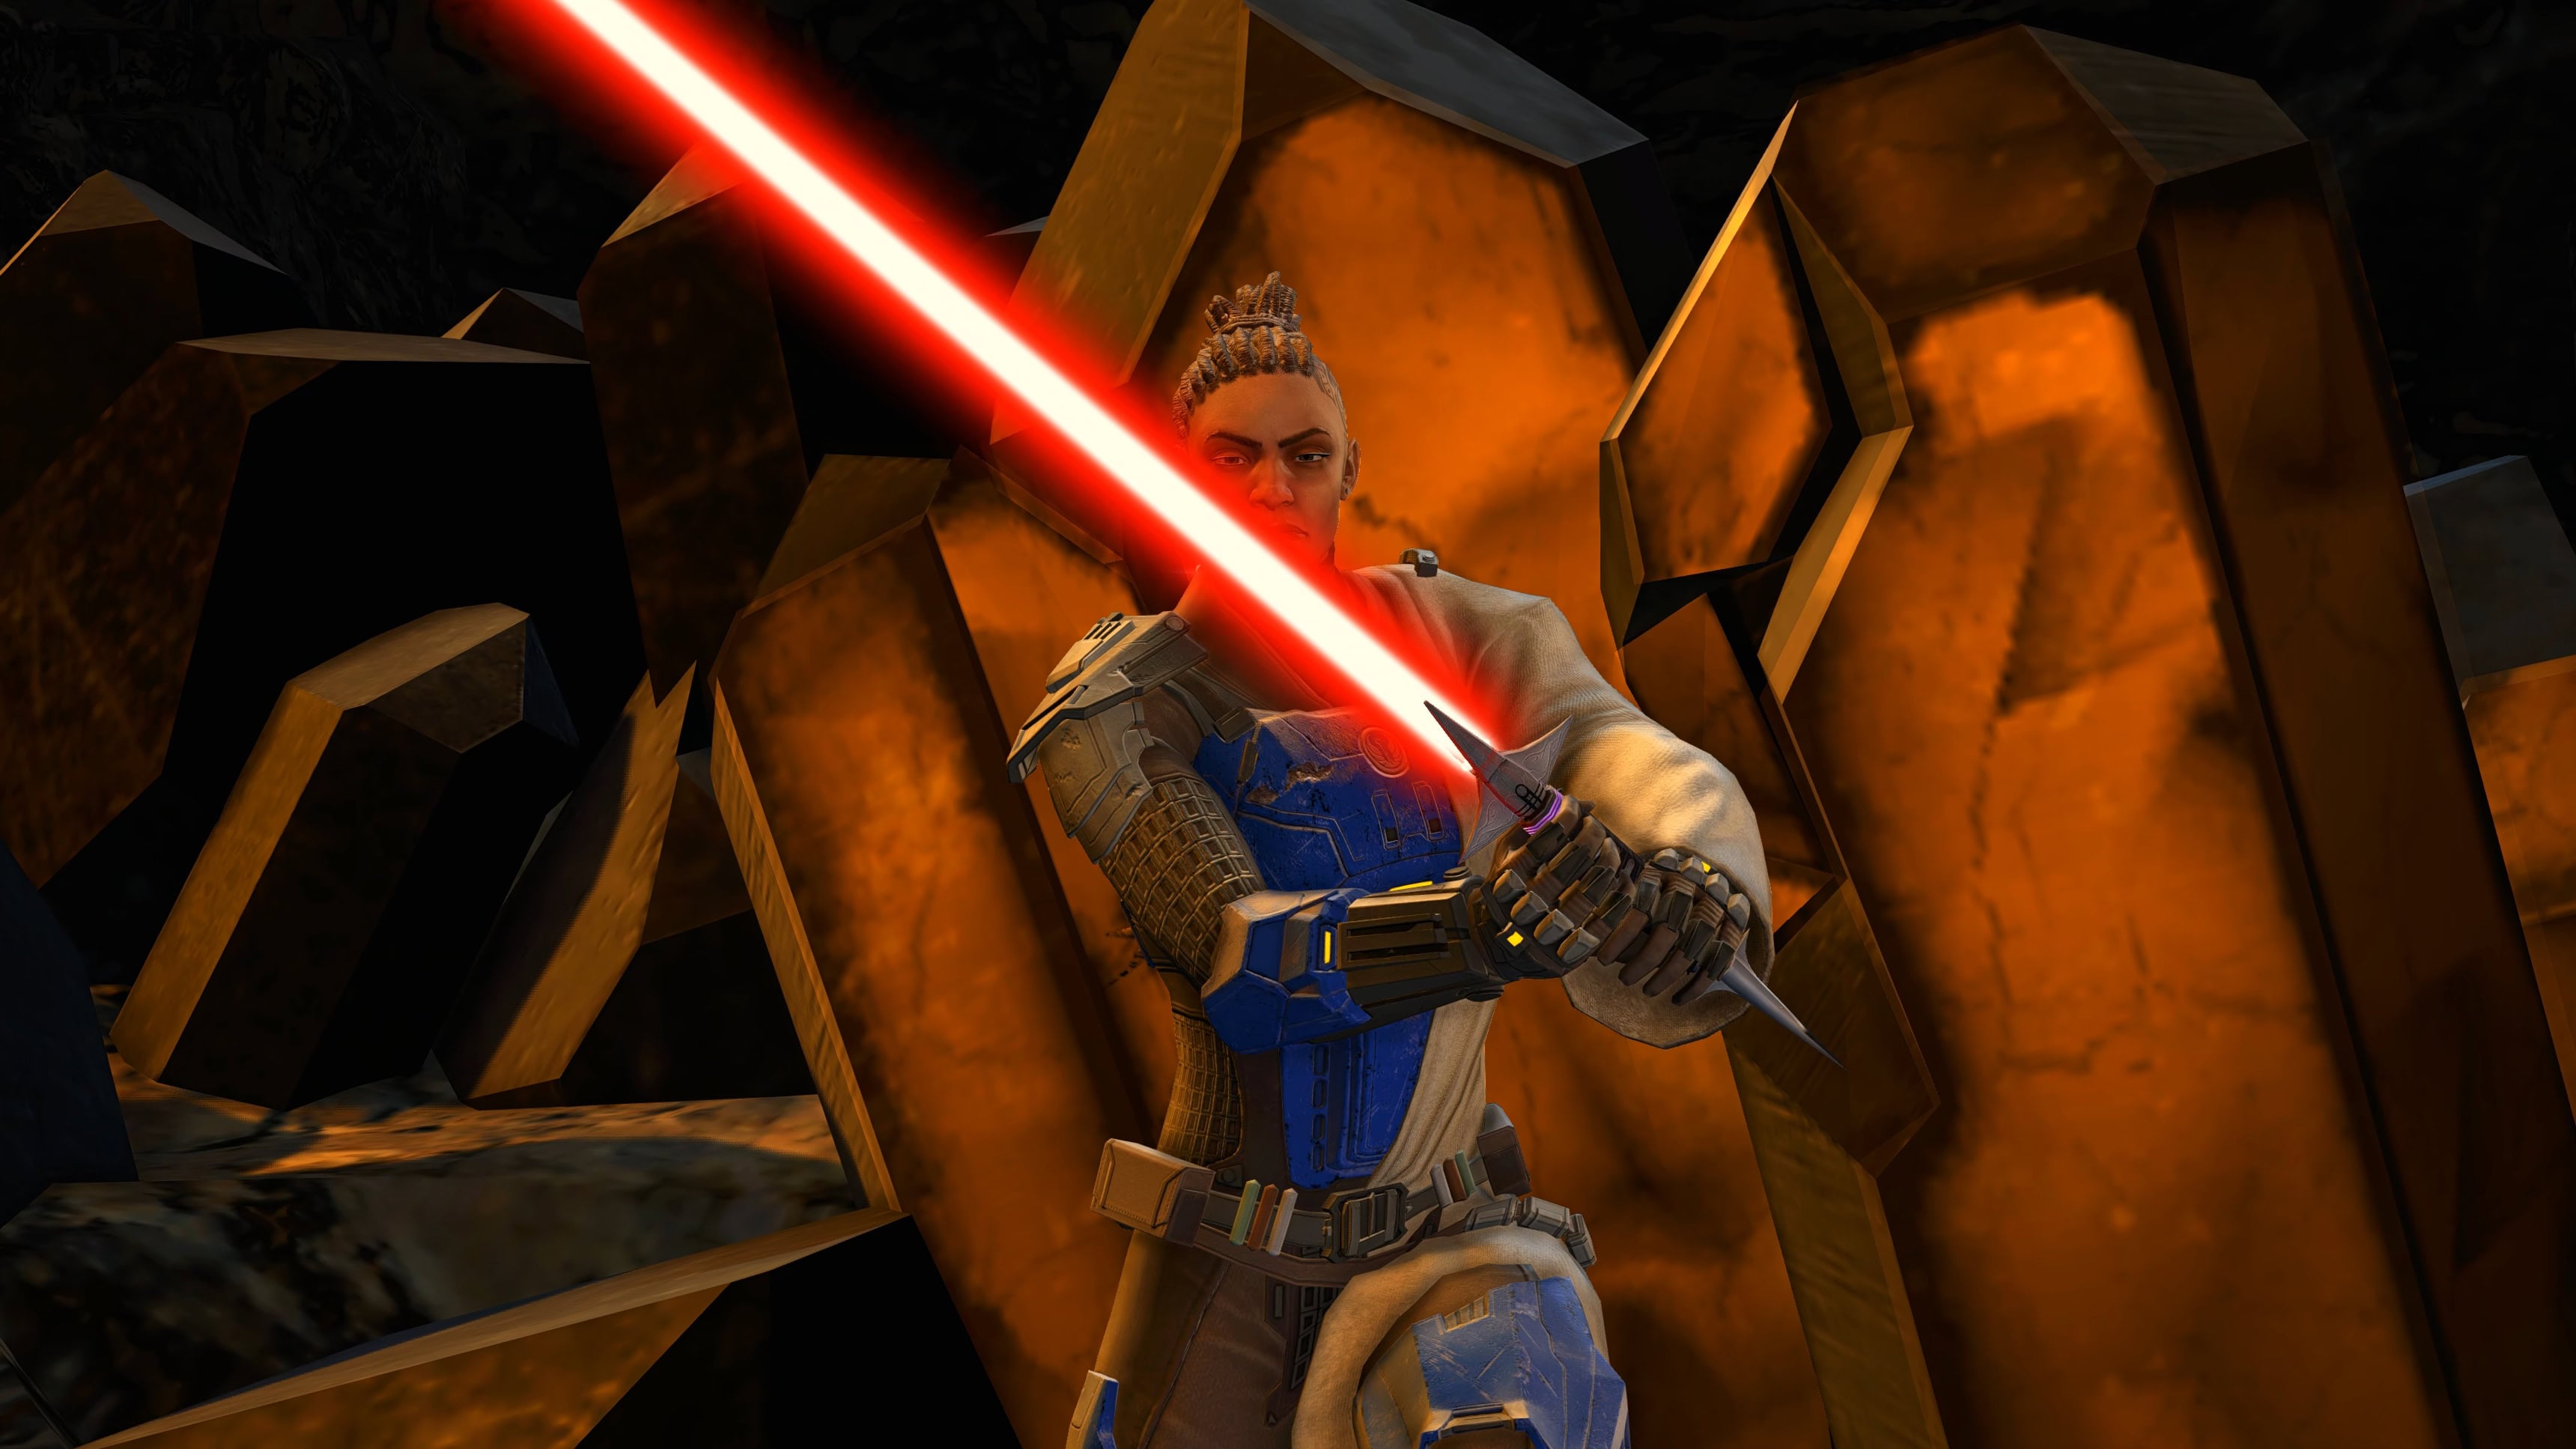
Defeat Field Marshal Heta Kol
Heta Kol will appear and engage in a boss encounter. During this encounter, you will fight from your own character’s perspective. You will have two temporary abilities, one from Shae, one from Jekiah. You can activate them freely on cooldown.
When Heta Kol activates a Crystal Shield, destroy the shield and then get back to her. Even if you target Heta all the time, when the shield is active, your attacks will actually damage the shield.
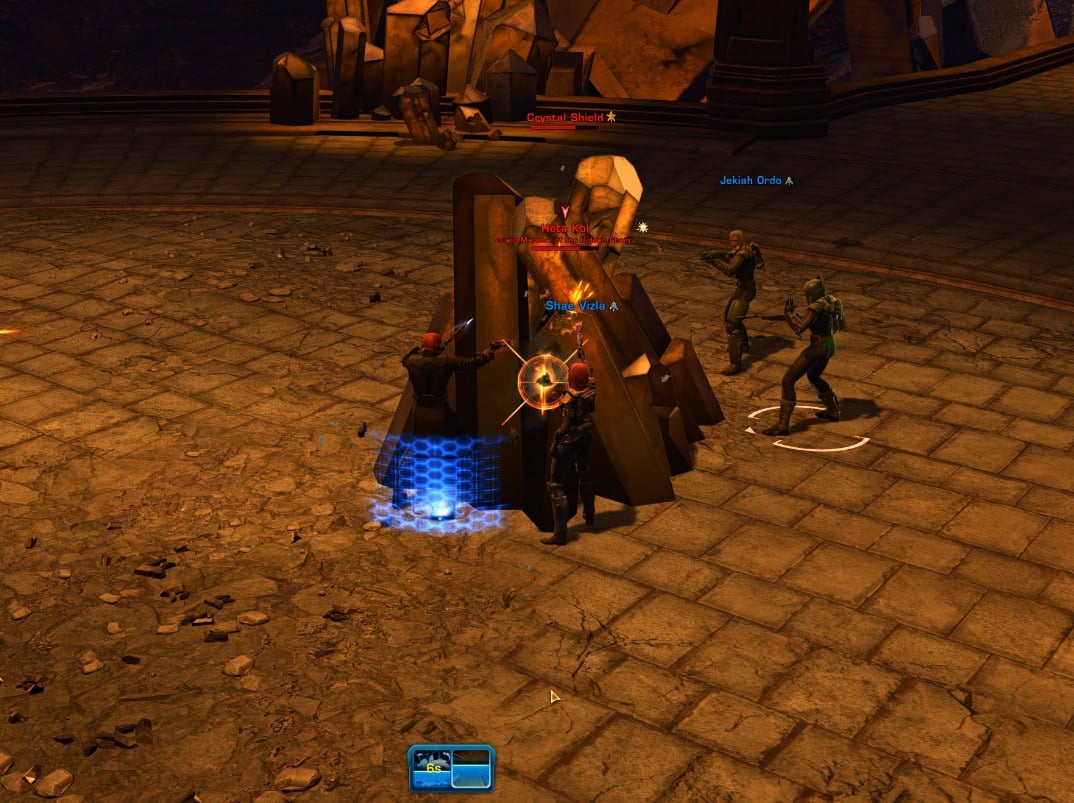
Hidden Chain NPCs will spawn around to help Heta, but you have plenty of companions around, so you can stay focused on Heta as she is the primary target.
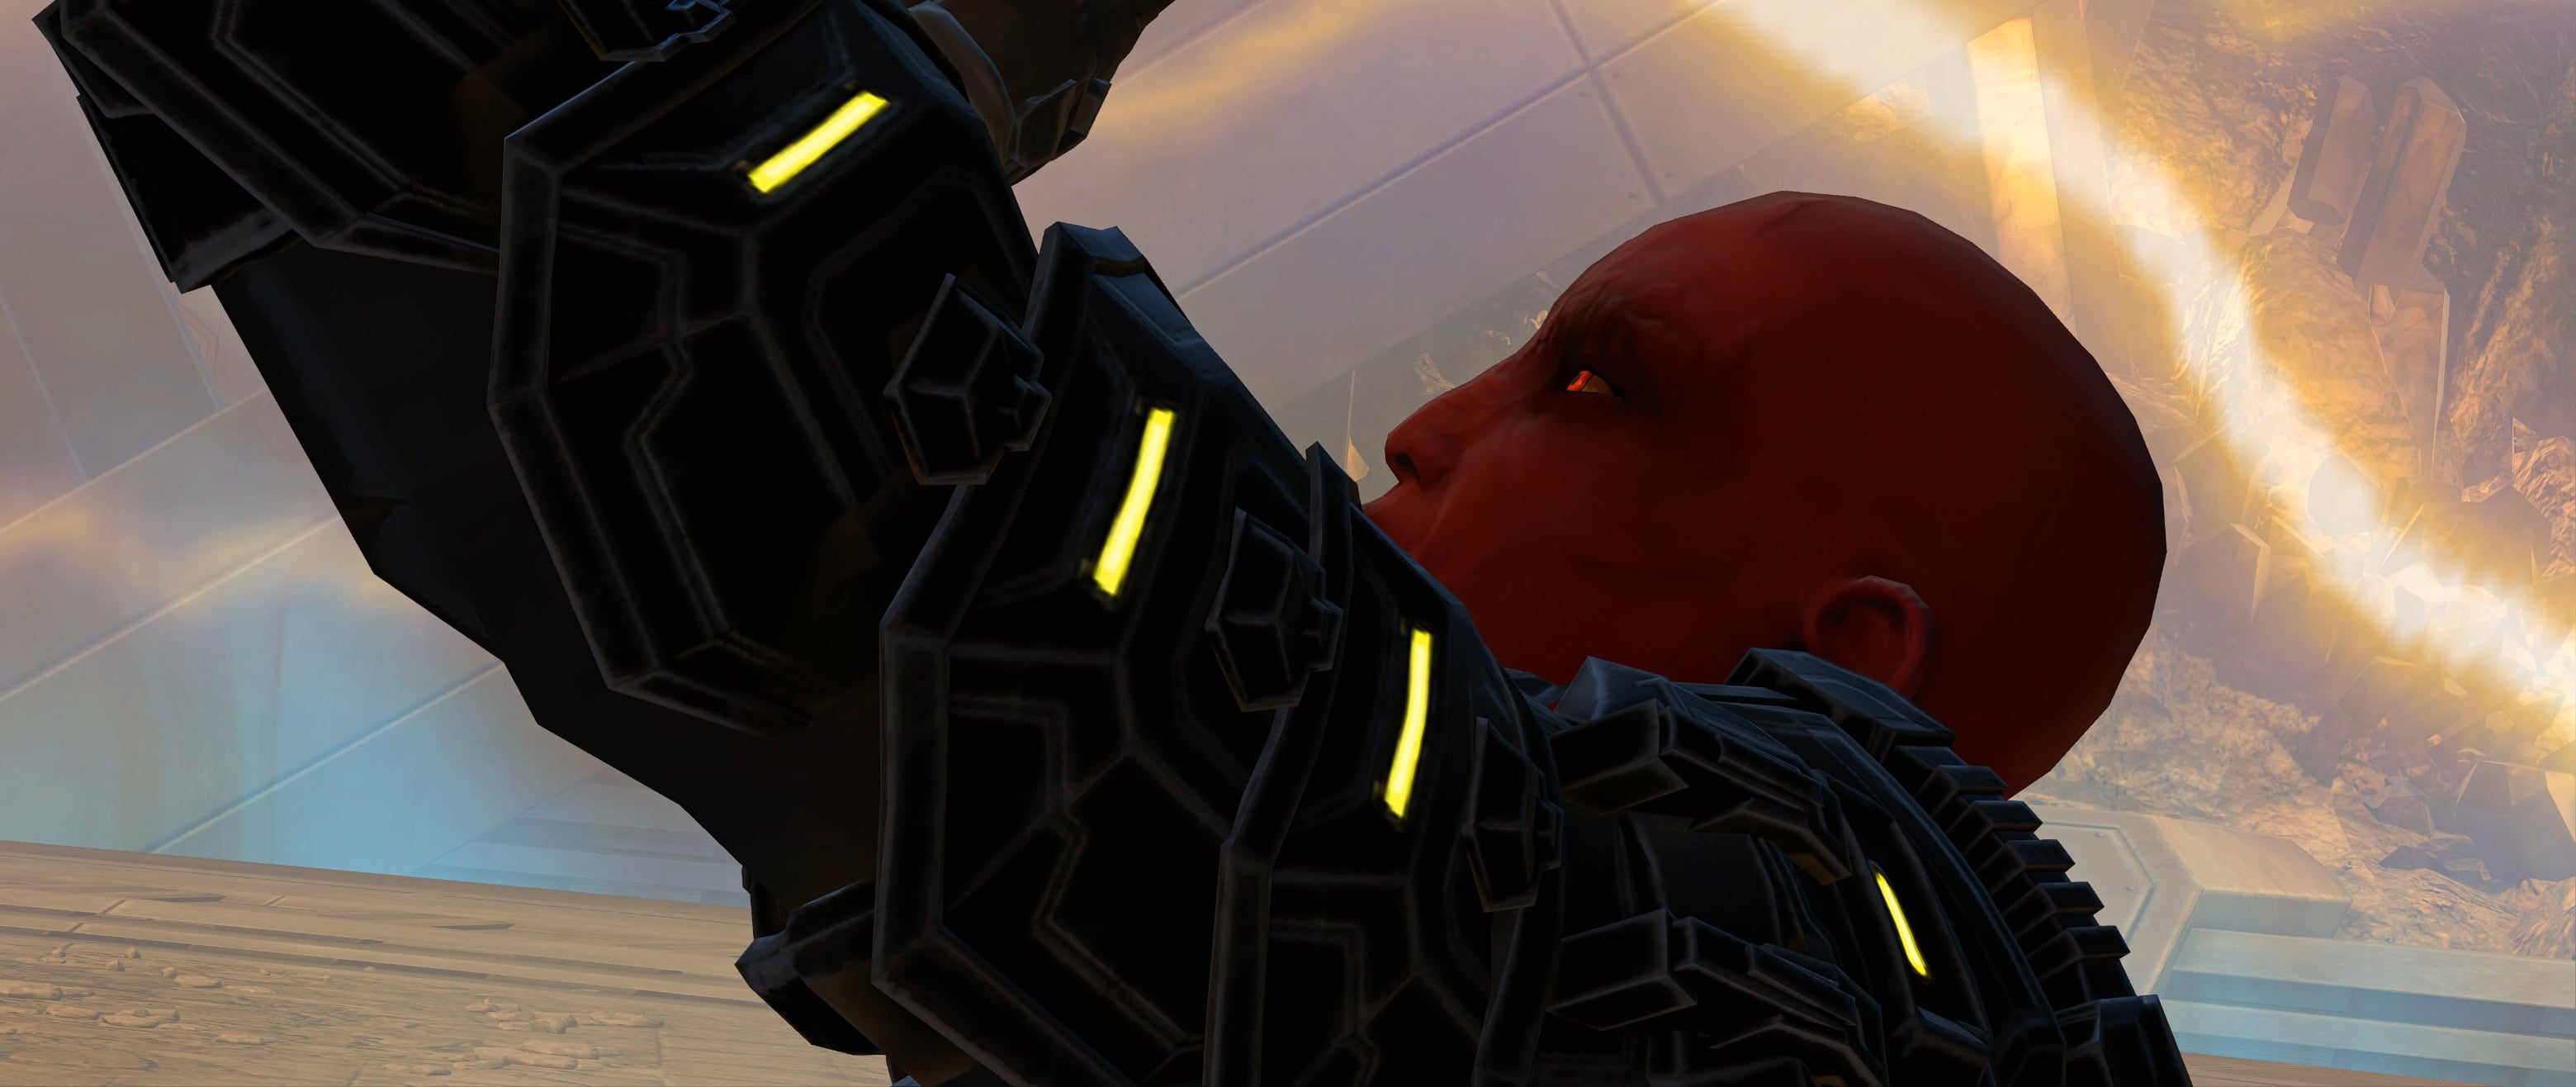
In the cinematic following the fight, Heta will reveal her face, which has been deformed by Crystals – a result of her being corrupted by Naga Sadow’s ancient Sith magicks.
There is a significant story element that happens during this cutscene and no matter what you opt to say during the cinematic, the outcome will always be the same.
Locate Darth Nul’s Machine
This is another linear sequence where you control your own character and defeat Mynocks in the ventilation shaft.
Fight Your Way to Darth Nul’s Machine
In this sequence, you play from Dartk Malgus’ perspective. I am a Malgus fan-boy, so I think his abilities are by far the most fun.
- Vicious Slash – standard spammable single-target melee ability.
- Murderous Assault – After you crit strike a target, this ability unlocks and deals large amount of damage + bleed to targets in front of you.
- Strength in Suffering – Lose a small portion of HP to damage and knock back enemies. This ability generates 3 charges of Pain buff.
- Enough! – Consumes 1 Pain charge to one-shot normal enemies around you. Has weaker effect on Silver and above. Medium range.
- Focused Storm – Consumes 1 Pain stack to deal AoE lightning, dealing high damage to targets in the affected area.
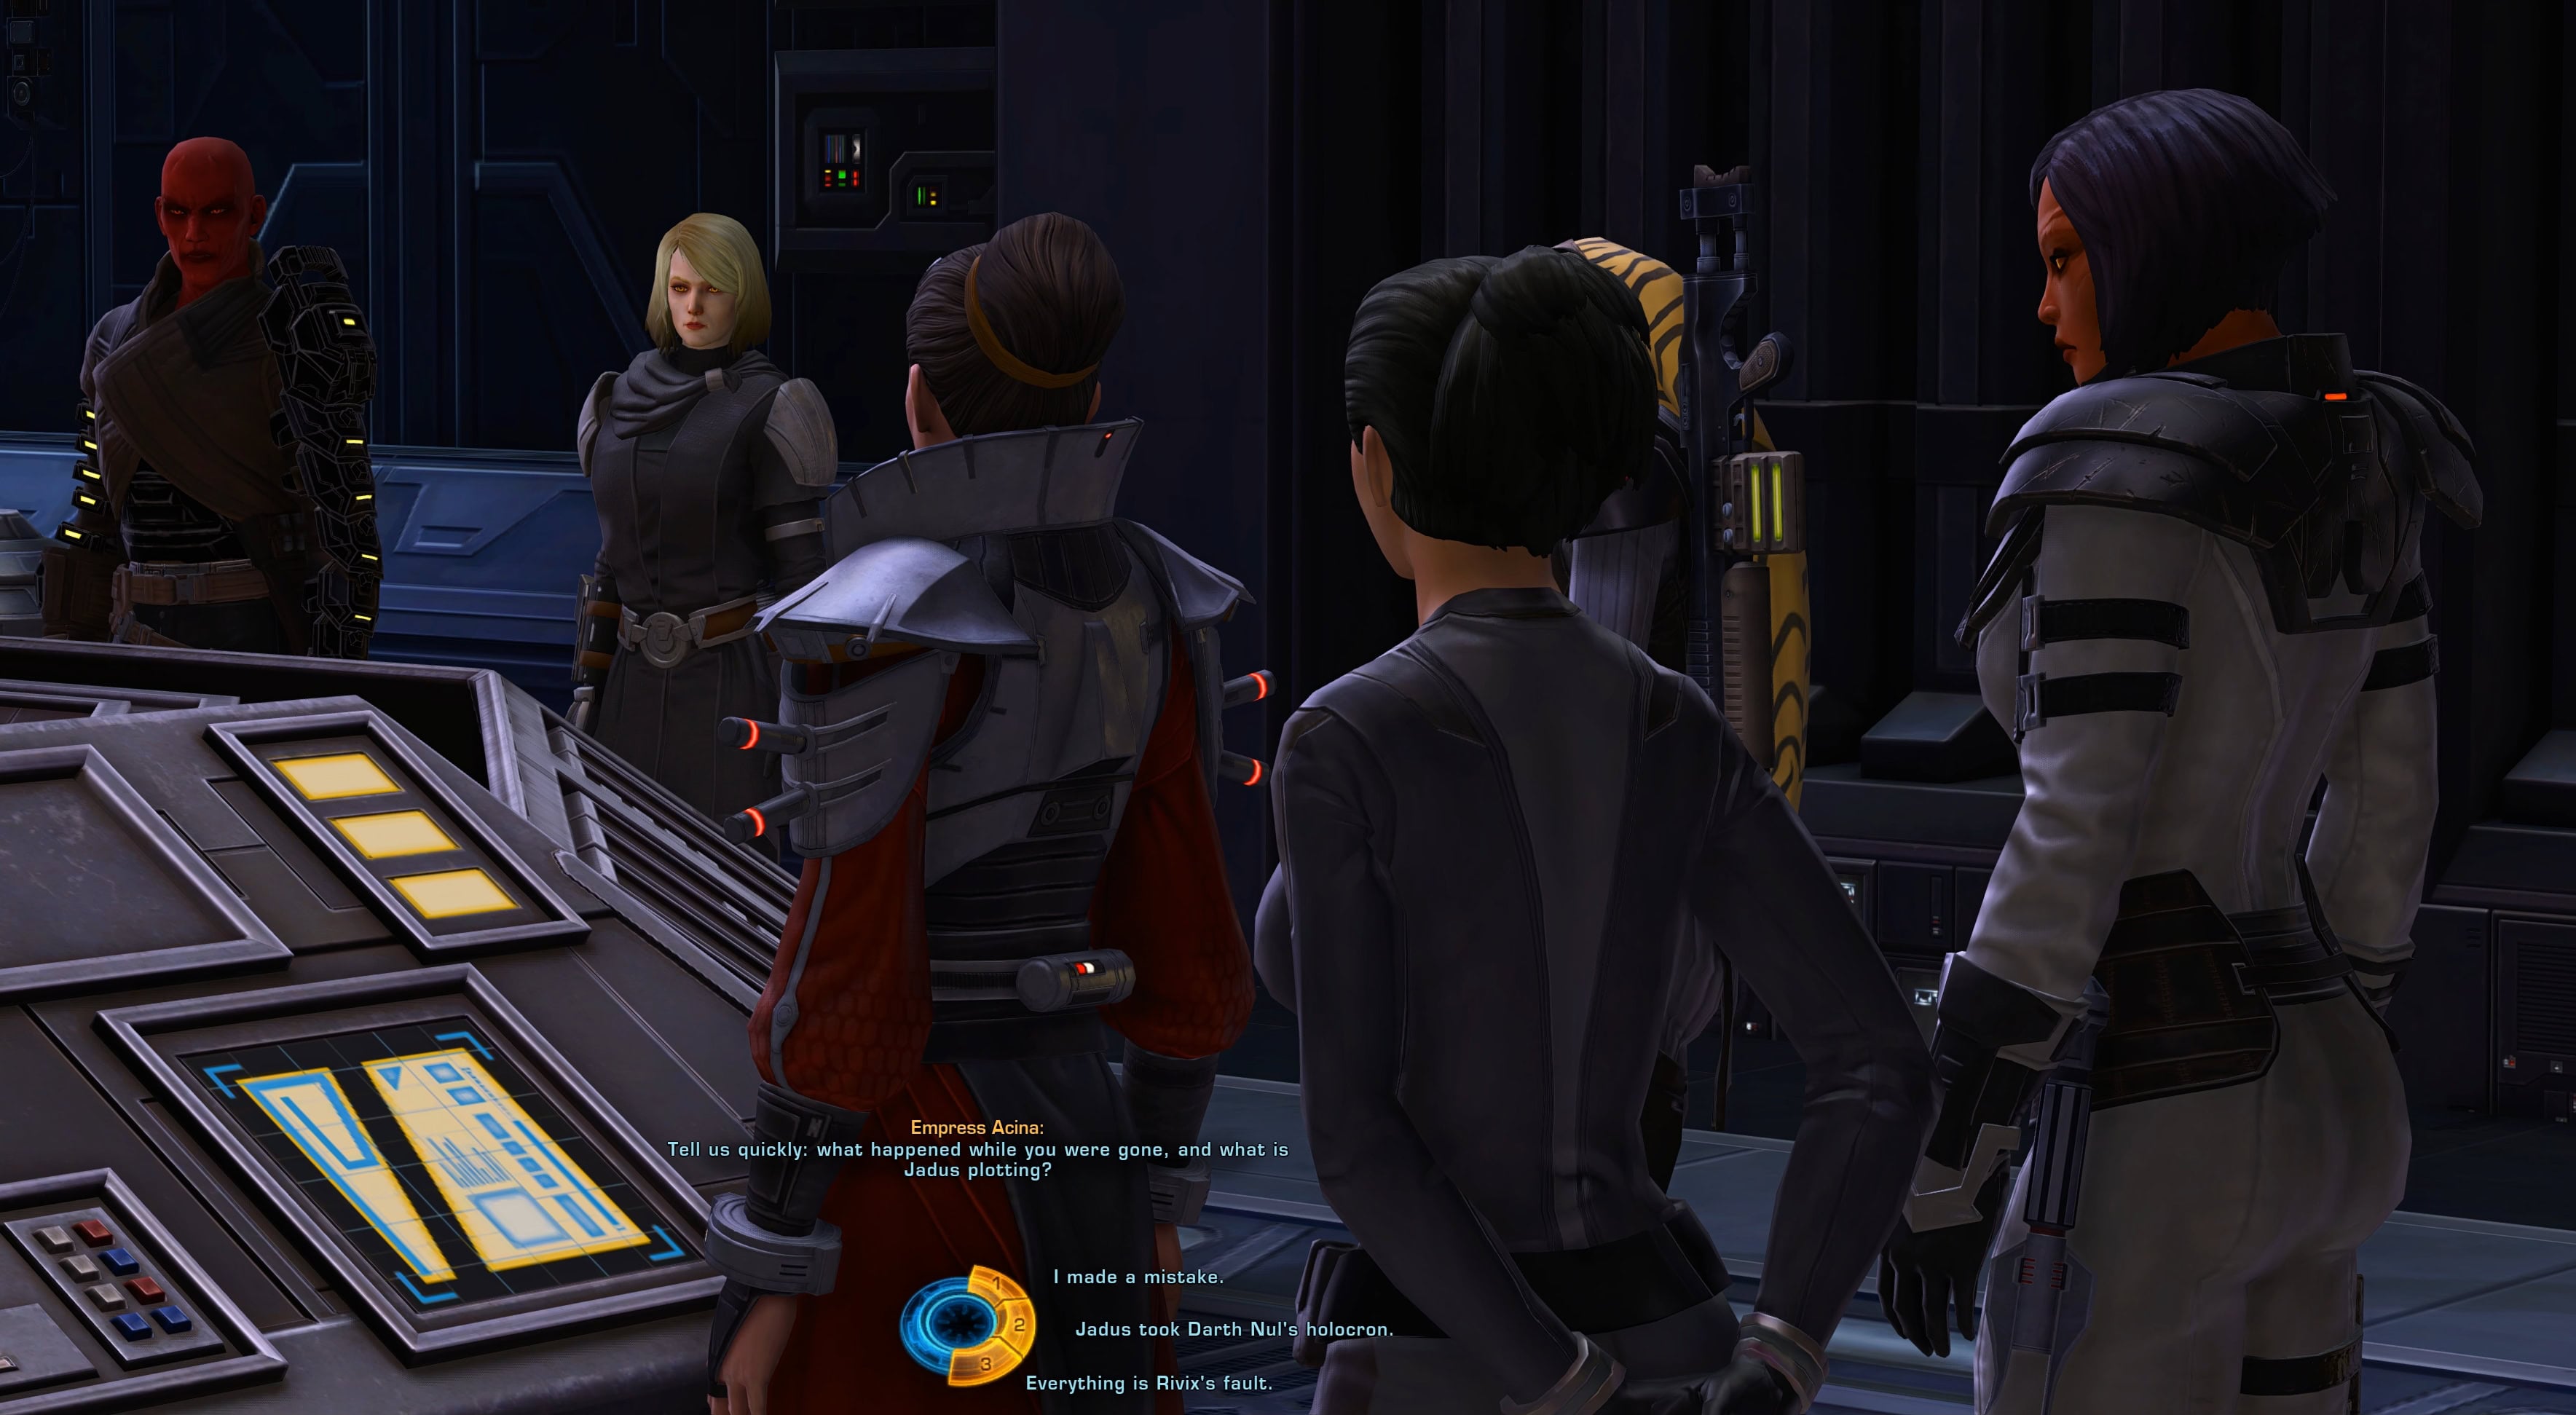
When you reach Darth Nul’s machine, Darth Malgus will start seeing illusions of people from his past, who have brought him pain, suffering, and anger, depending on the current leader of the Sith Empire, either Empress Acina or Emperor Vowrawn.
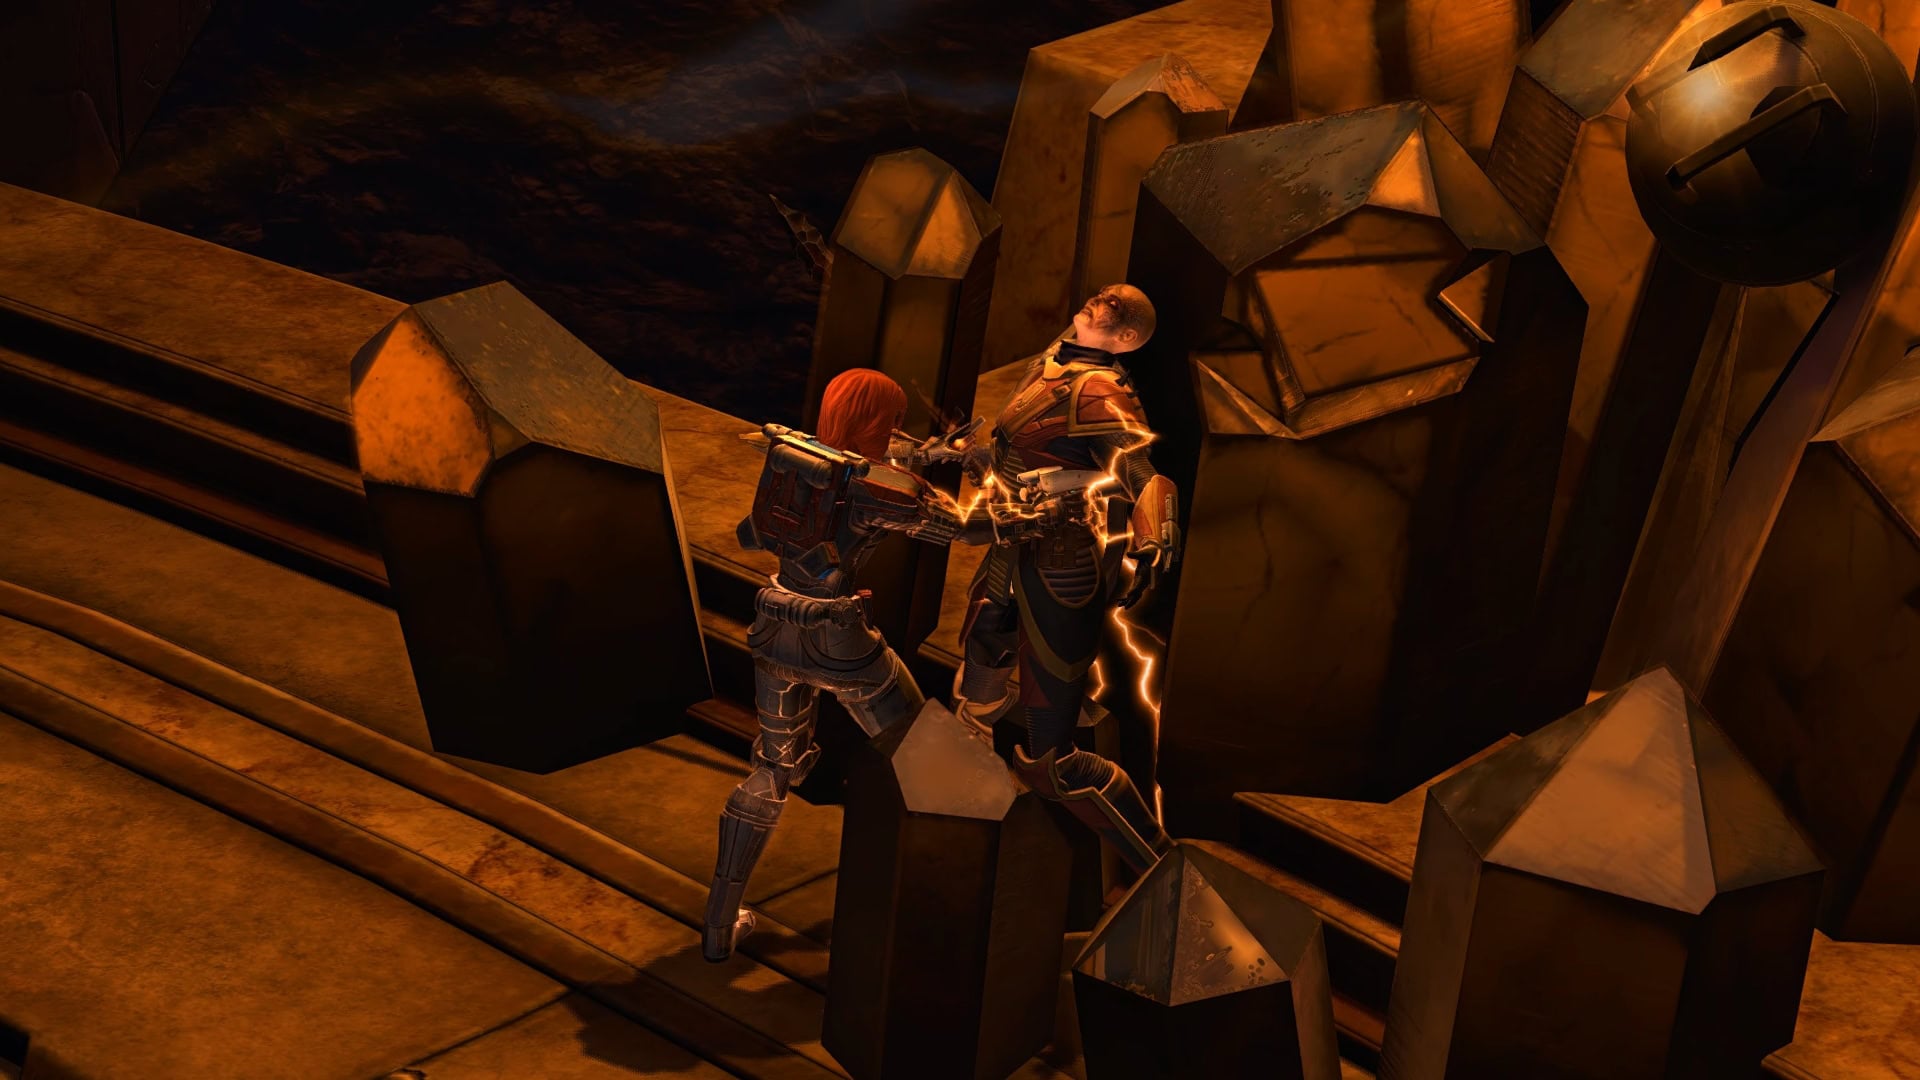
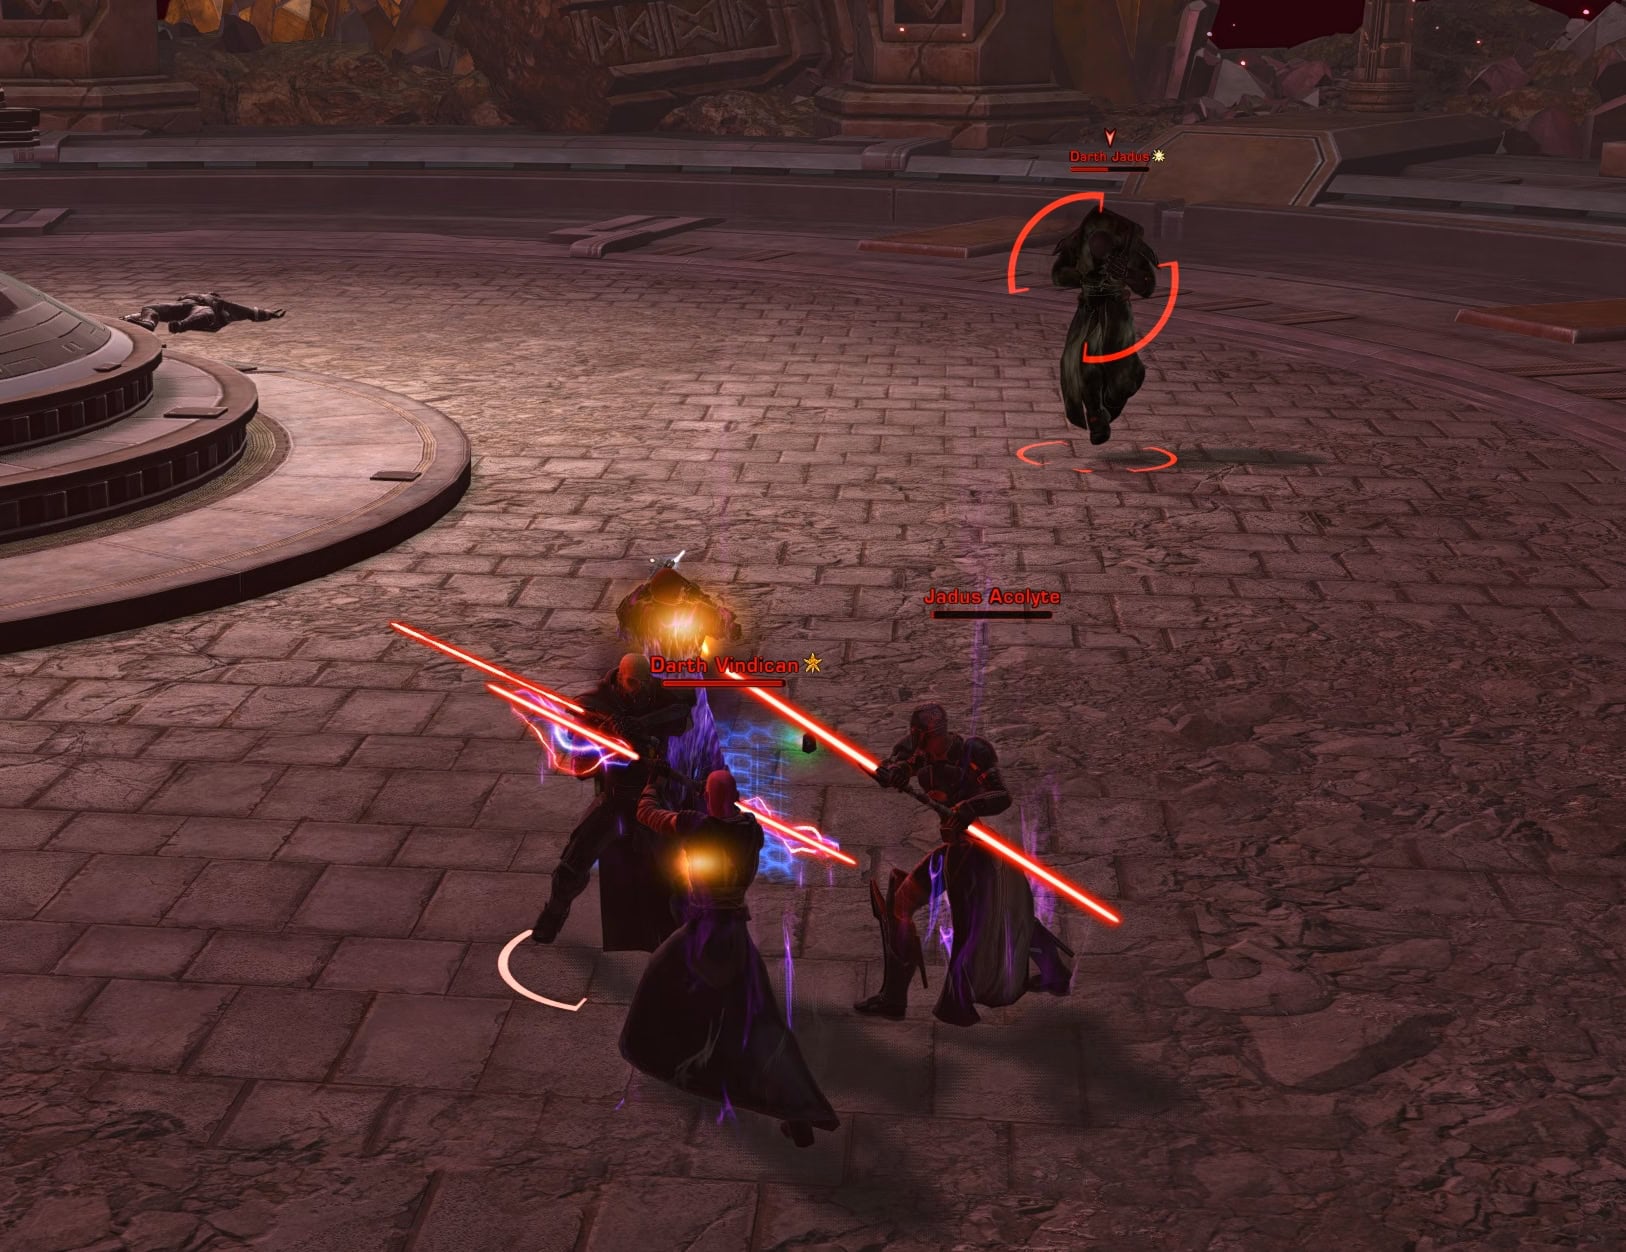
Defeat Darth Jadus as Malgus
You’ll learn that this is the doing of Darth Jadus’ Force Horrors. As Malgus states in the cutscene, he would easily overpower Jadus when it comes to raw power and strength. And with your help, he demonstrates this in a short fight sequence. Stay focused on Jadus, ignore the adds that will spawn.
Malgus thinks he has won, grabs the holocron, and sits on Nul’s throne. At this point, your character enters the room.
Should you allow Malgus to Continue (Dark vs Light)
You are presented with Dark and Light side options during the cutscene. This is more of a cosmetic choice. No matter what you chose, you will not change the chain of events.
You will both end up trapped inside another of Darth Jadus’ mind tricks. Following a couple more cosmetic dialogue options, you will end up teaming up with Malgus, trying to escape this Force nightmare.
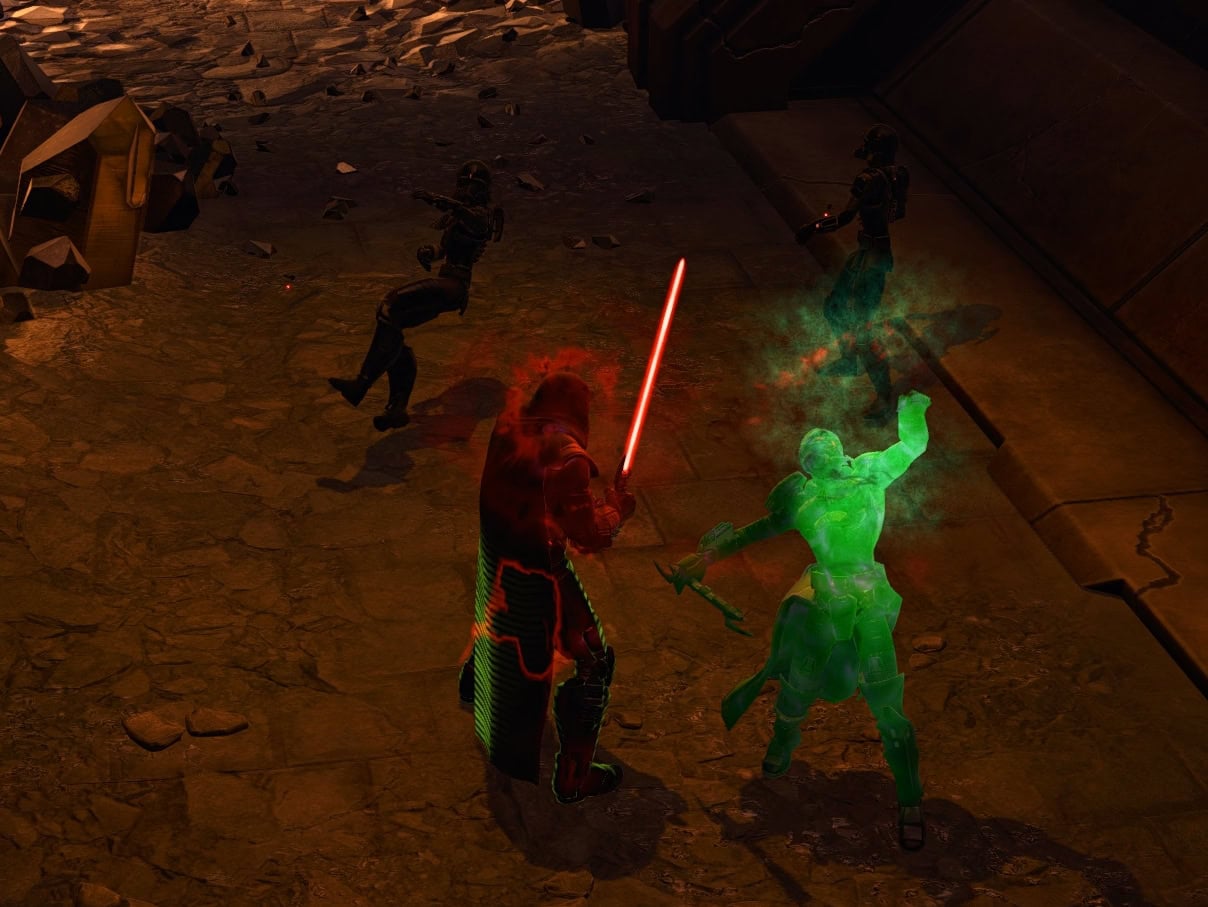
Malgus will see two key characters from his past. First, Darth Vindican, Malgus’ former master, will show up and start to taunt Malgus. He will even turn him against you, clouding his mind and vision.
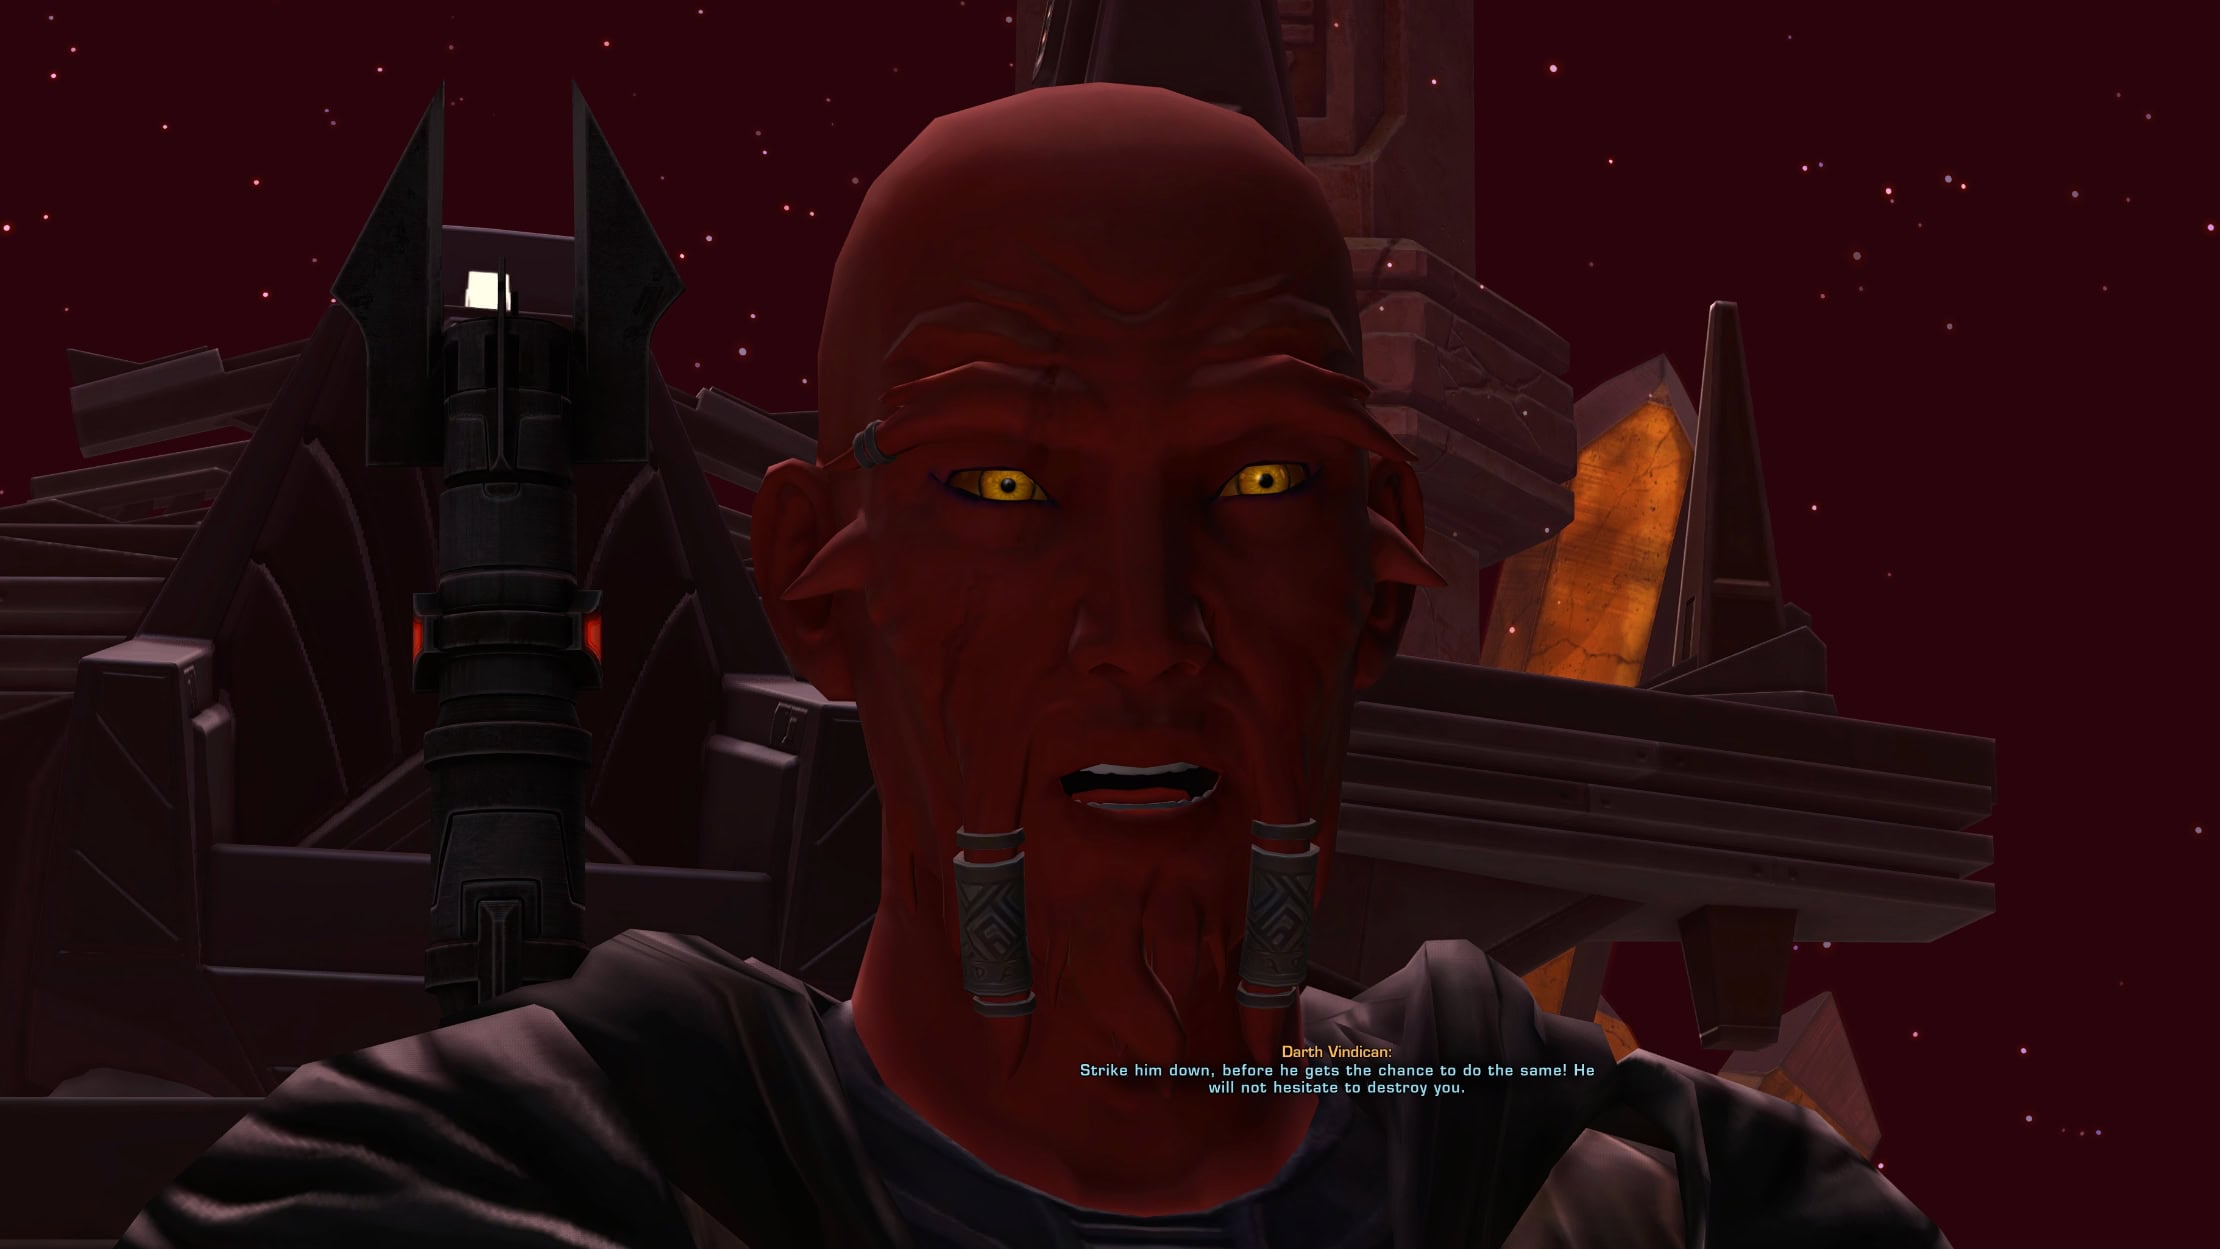
Darth Vindican was a powerful Sith Pureblood Inquisitor who served as the dark master to a young Darth Malgus during the Sith Empire’s return to known space. During their joint assault to recapture Korriban, Vindican was mortally wounded in a fierce duel against Jedi Master Kao Cen Darach. In true Sith fashion, Malgus executed his dying master for his failure and claimed his dual-bladed lightsaber, cementing his own brutal rise to power.
Break the Meditation Sphere’s Anchors
After the cinematic, there will be glowing pillars around the edge of the room. Get close enough and click on them so Malgus can destroy them. You don’t need to clear the room of NPC, but you will have to defeat the ones that engage with you near the pillars. After the fourth one is taken down, another cinematic will start.
During this cinematic, Malgus will be confronted by Lord Adraas. He will cloud Malgus’ vision and judgement so much that Malgus will attack you, thinking he is striking Adraas in his hatred.
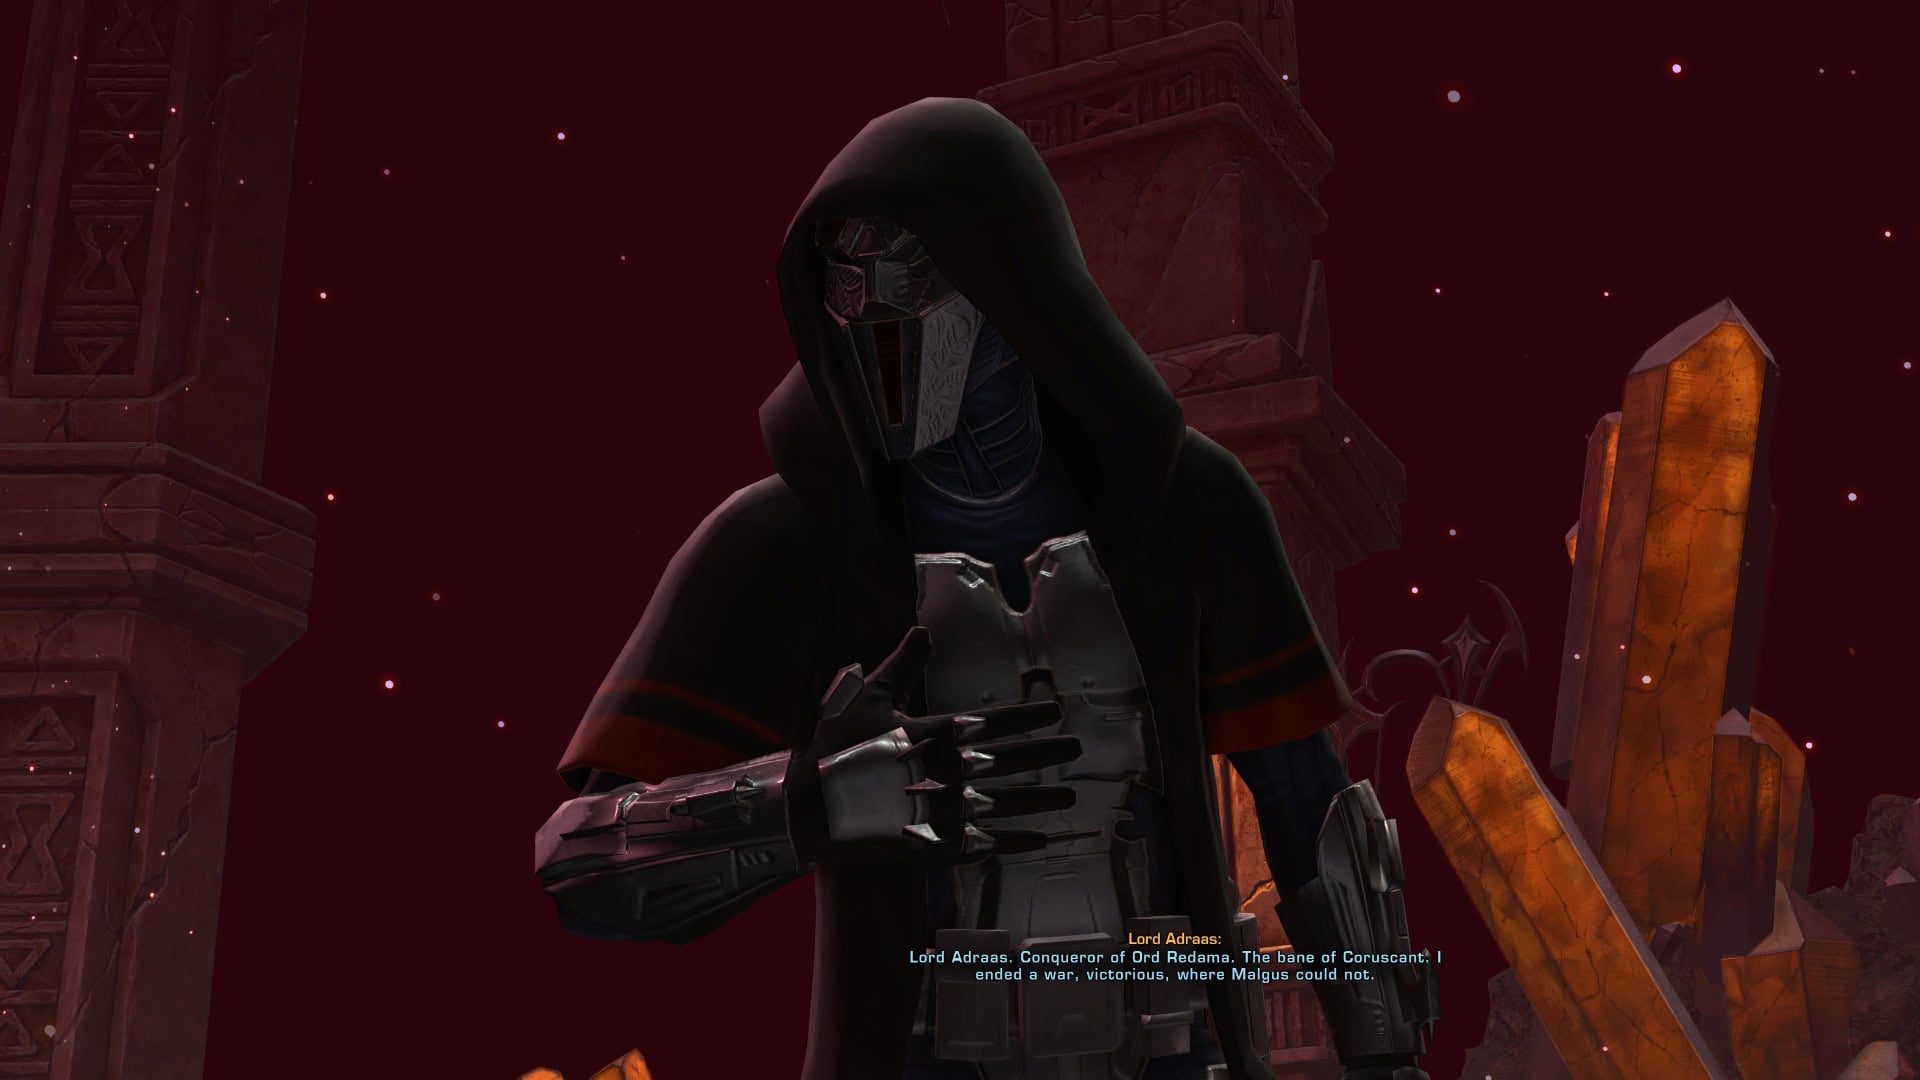
Lord Adraas was an ambitious Sith Lord and rival to Darth Malgus during the Great Galactic War. While Adraas relied on political maneuvering and the favor of superiors like Darth Angral to advance, Malgus utterly despised him as a weak, arrogant politician who lacked true martial strength. Their intense enmity ended shortly after the Sacking of Coruscant when Malgus infiltrated Adraas’ estate, defeated him in a lightsaber duel, and personally executed him.
After you “pacify” Malgus, the next scene is the most dramatic one if you have read the Deceived novel and know about Malgus’ relationship with Eleena Daru.

Eleena Daru was a Twi’lek former slave who became the fiercely loyal companion, battle partner, and secret lover of Darth Malgus during the Great Galactic War. Malgus cared deeply for her, a bond his political rivals frequently attempted to exploit as his only perceived weakness. Recognizing that his love for her was a vulnerability holding him back, Malgus ultimately killed her himself, using the profound grief and pain to fully bind his power to the dark side.
Shortly after these heavy scenes, the action switches up to space where faction leadership orders a strike on the Fortress while everyone is still inside. Somehow, Lana’s voice reaches you and warns you about what’s coming.
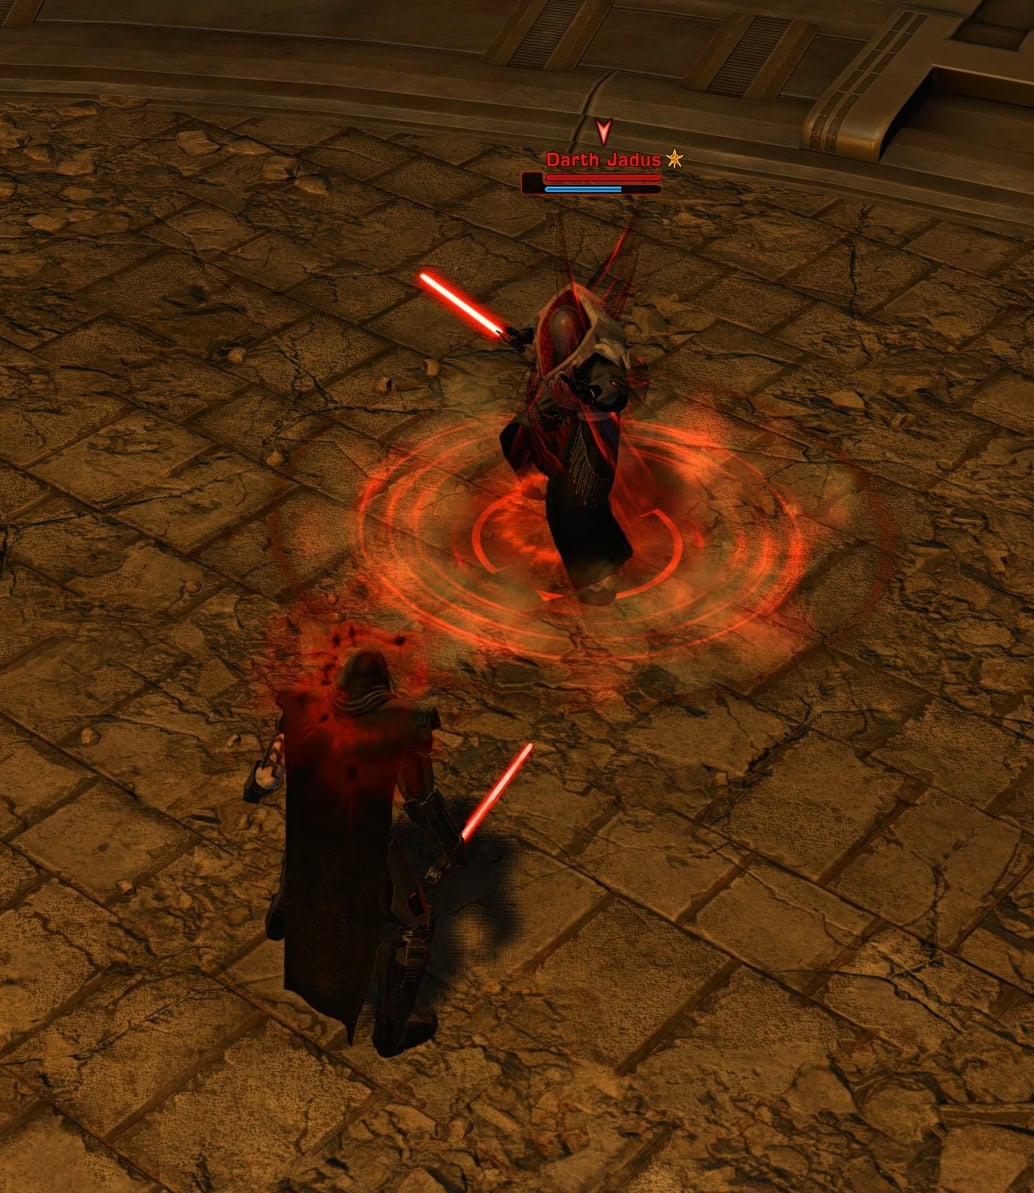
Defeat Darth Jadus (final boss fight)
After you break free, you face Jadus once more. This time it is you and Malgus against him. The fight has no complex mechanics. As long as don’t stay in circles, you will be fine.
The most dangerous and highest-damaging attack Jagus will use on you, is the Storm of Terrors channel. It creates a purple aura and Jadus will “slam” you repeatedly. Move out of the marked area.
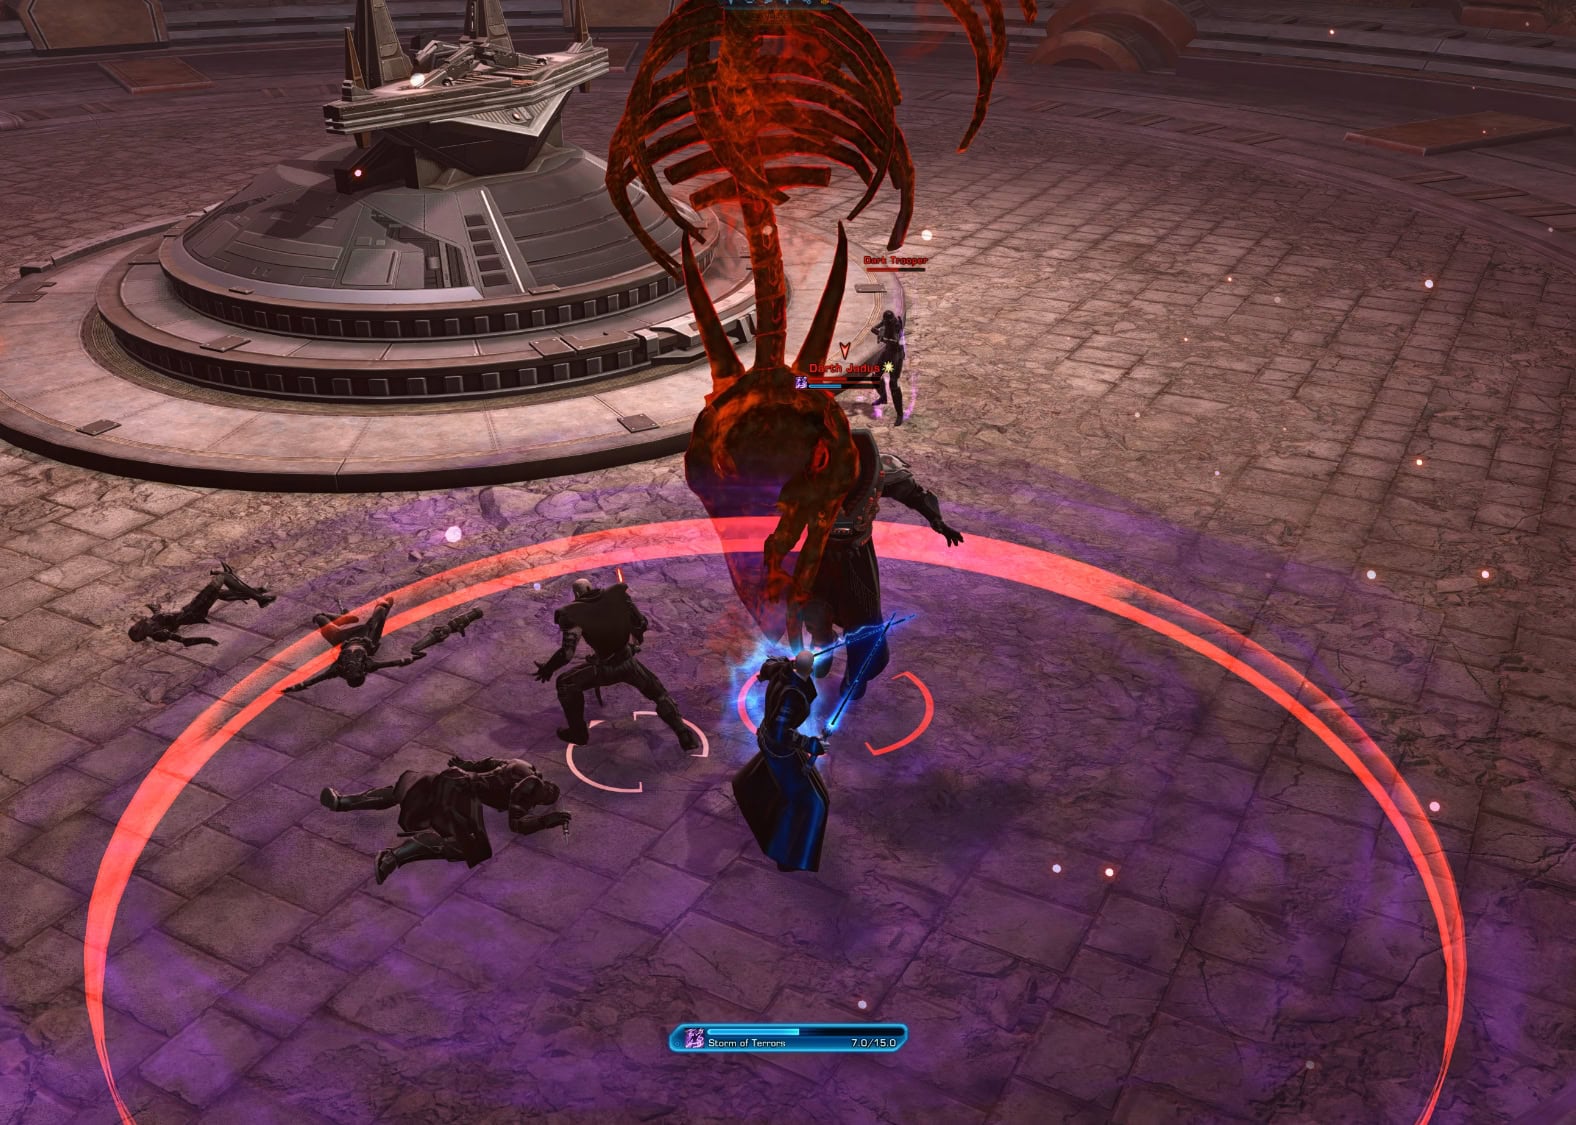
When Jadus activates his Shadow Form, he will absorb all incoming damage. At this point, Darth Vindican’s ghost will join the fight. Focus on him. As soon as you take him down, Jadus will exit his Shadow Form and you can resume attacking him.
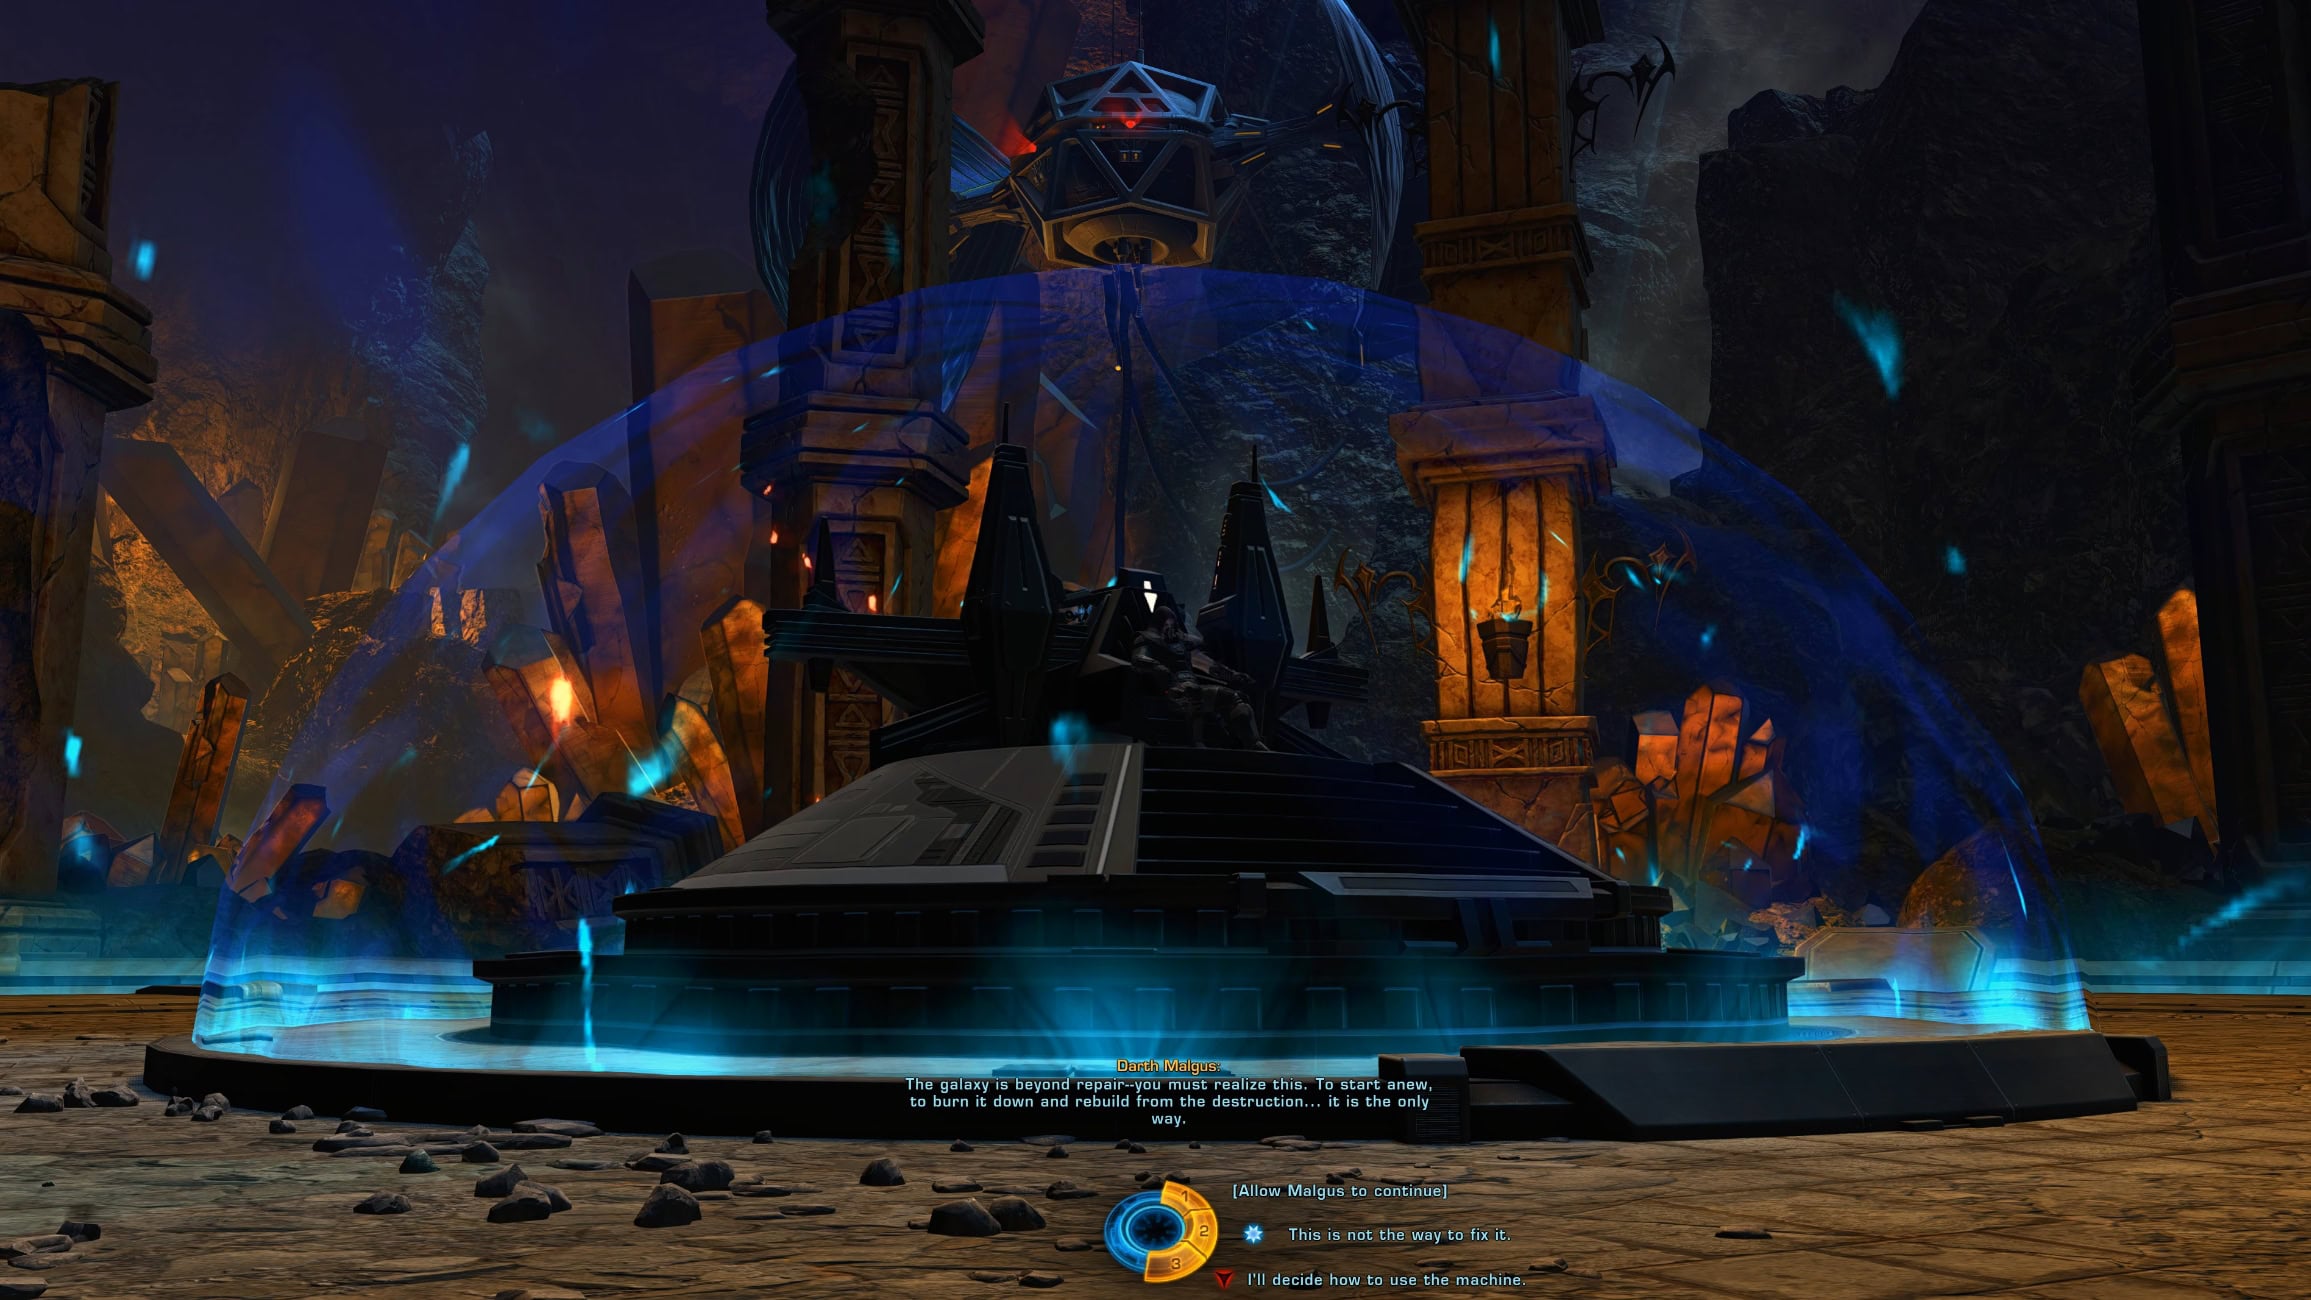
Should you let Malgus Talk through the Machine?
After the Jadus boss fight, the final cinematic will trigger. Malgus will sit on the Machine and reach out to all Force-sensitive individuals across the Galaxy.
It doesn’t look like there is any meaning in this final choice. Whatever you choose, Malgus will complete his speech. We may need more playthroughs to dig through possible secrets or elements we are missing here.
Since tech classes can also hear him and prevent this giant column from crushing them, it stands to reason that all tech classes might have some sort of latent Force sensitivity.
We don’t expect anything like Rey’s Force Awakening; you’re probably just like Ri’kan. It’s enough to justify why you have been at the center of galactic events for over a decade (and use Heroic Moment) and aren’t just staring off into the distance while everyone around you got a Force phone call.
It could also just be a smudge of Force lipstick from Valkorion’s kiss or something. We’ll have to wait and see!
Mission Rewards
While the two short missions you have to play through first don’t have meaningful or unique rewards, the Legacy Reborn Mission does offer three unique rewards:
| Item Name | Item Type | |
|---|---|---|
 | Malgus’s Legacy | Character Title |
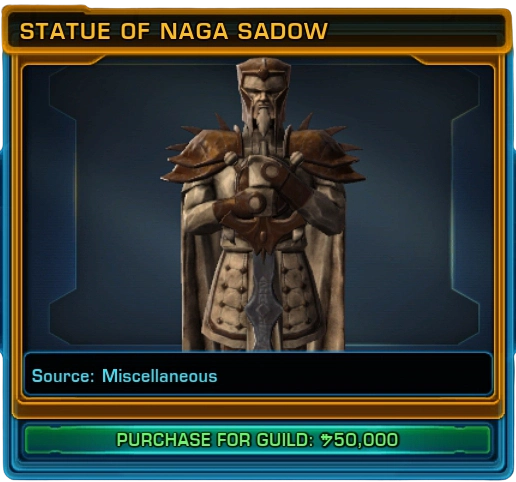
| Statue of Naga Sadow | Stronghold Decoration | |
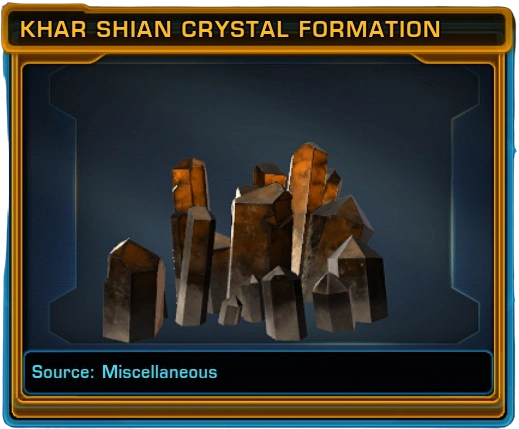
| Khar Shian Crystal Formation x5 | Stronghold Decoration |
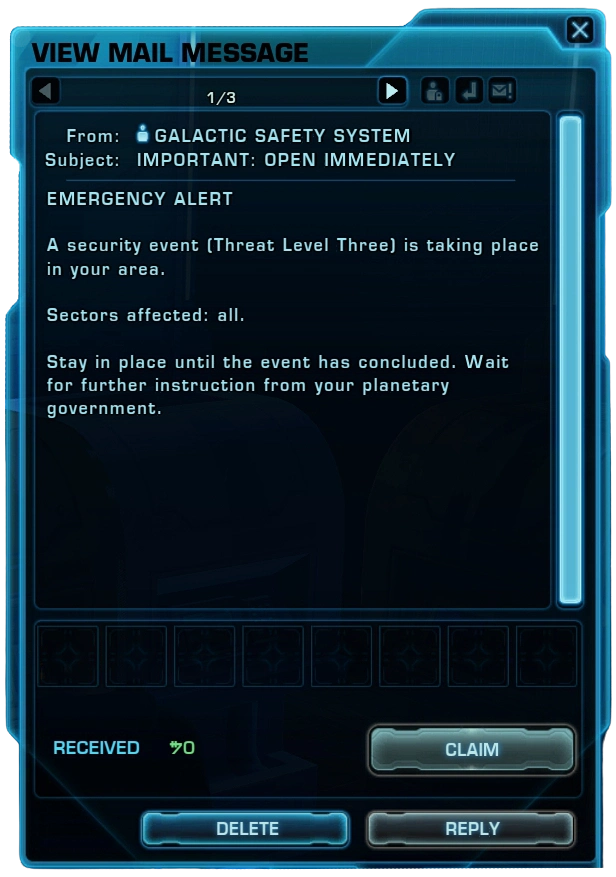
Post-Mission Mails
After some missions, the involved characters often send you letters with a recap, latest news or just feedback. After Legacy Reborn, we have only received one letter so far. It is the same, short, cryptic and with not 100% clear purpose. We believe it is a standard warning released after Malgus reached out to every Force sensitive soul.
Legacy Reborn FAQ
Getting Started and Prerequisites.
Legacy Reborn follows the same formula of all other storylines from Legacy of the Sith. It does not require active subscription to play it, but you need to have been subscribed to SWTOR for at least a month between now and February 2022, when the expansion released.
To unlock the Legacy Reborn storyline, your character must complete all main missions from the two most recent expansions: Onslaught and Legacy of the Sith.
While it is not a strict requirement, you will be level 80 long before you reach this mission.
No. The mission is a 100% solo experience, designed to be easily doable with whatever quest gear you have obtained on your journey so far. Using Endgame gear will speed up the fights and make things even easier. Gear does not have impact on the sequences where you control other characters or pilot the Basilisk.
The story is almost exactly two hours. It can take a few minutes less or more, depending on how comfortable you are playing all the various characters you get to control during this mission.
The mission takes place in the orbit around Khar Shian and on the ground of this moon. You will explore Naga Sadow’s ancient Fortress in pursuit of Heta Kol and Darth Jadus.
Choices and Consequences
Theron has a role to play and dialogue lines. Not impactful ones, but he is definitely present and active. You will get to control him briefly during one of the sequences. If Theron is not in the Alliance, T7-O1 will take his place.
Yes, there are several dialogue choices that offer Dark and/or Light options. The outcome is always the same, but you get to see and hear a slightly different voice lines and reactions from your character and others around.
Offering to help grants Light Side points, but the Mandalorians will refuse your assistance either way. It does not alter the mission’s trajectory or upcoming gameplay.
No. Regardless of your dialogue choices, the faction leadership will agree to set past grievances aside and collaborate to take down Jadus, Heta Kol, and Malgus.
While the dialogue allows you to argue about whether Jadus, Malgus, or Heta Kol should be the main target, your actual gameplay role, squad composition, and the order of events remain identical.
No, whatever dialogue options you pick before or during the cinematic following the duel, Shae’s fate is always the same.
No. The story is the same for every class and role with minor differences in dialogue options and participating characters. The plot is the same and the narrative moves in the same direction at the same time for everyone. Your choices don’t have immediate meaningful impact on the story, but some of them may have some impact later on in 8.0 perhaps.
Gameplay and Variations
No. The mission is almost exactly the same for both factions, Republic and Empire. It is also the same for all Force and Tech classes in the game. There are little variations depending on previous choices or origin stories, but nothing meaningful or impactful.
The cutscene ends abruptly with Tau holding a red Sith Lightsaber having just helped Sa’har and her broether escape captivity. It is unclear if Tau meets her end at this point. Her true fate may be revealed or confirmed in 8.0. In this cinematic, she ends up facing all of Heta Kol and Jadus’ followers and her chances of survival look slim. There is no confirmation of her death in any case.
If you made a choice to play as Saboteur, your true allegiances will be revealed during the conversation with your faction leadership at the end of the first mission, Into the Shadows. There are no immediate consequences from this and you are not given a chance to argue. This may be further explored in 8.0. At this point, we know nothing more on the topic.
Yes. When the Motion Sickness warning appears on your screen, clicking ESC or Cancel will bypass the entire space combat on-rails segment. You will skip straight to the next section without missing any critical story.
It dosn’t seem to have any impact whether you choose to stop him or let him talk. The majority of the cinematic remains the same and Malgus gets to say his full speech anyway.
Yes. The first out of three people Malgus will see during the Force Nitghmare, varies between Acina and Vowrawn. This is a direct result of your decision on Iokath. If Acina is dead, Vowrawn took her place and is Emperor now.
It looks like they can, yes. This happens at the very end of the mission and whether it’s true and what implications it may have, this is something we expect to learn in 8.0. It doesn’t mean every class will transform into a Force one. But it makes sense given your pivotal role in the Universe that you may be at least a little Force sensitive. Maybe similar to Ri’kan.
Yes, Legacy Reborn is the final storyline from the 7.0 Era. The expansion Legacy oif the Sith started in 2022 and ends with this mission. The next story will start the 8.0 era and is expected around the end of 2026.
Our Legacy Reborn Story Review will give you an in-depth look and analysis of the gameplay, choices, playable companions, level design and everything else.
SWTOR Legacy Reborn Story Review (Spoilers)