Everything you need to know about the Daily Area on Iokath. Learn how to navigate the planet, how to complete all dailies and weeklies, the available vendors and their offerings.
The Iokath Daily Area was introduced with SWTOR Game Update 5.2. It includes 14 Daily Missions and a Weekly Mission.
For the purposes of this guide, despite what you might read written in Aurebesh on top of the entrances to the Republic and Imperial bases, we will accept the 4 standard directions according to the map – north is pointing up, south is pointing down on the map and minimap.
Table of contents
How to access the Daily Area on Iokath
To be able to go to the Alliance Base on Iokath, first you need to complete the War for Iokath story line. This story takes place after the events of Knights of the Eternal Throne – Chapter 9. It begins from the terminal on your own ship and takes roughly an hour or so to complete.
Players with active subscriptions will be able to access the daily and weekly missions on Iokath without needing to have completed the story on their Legacy. This feature was introduced in Game Update 7.5.
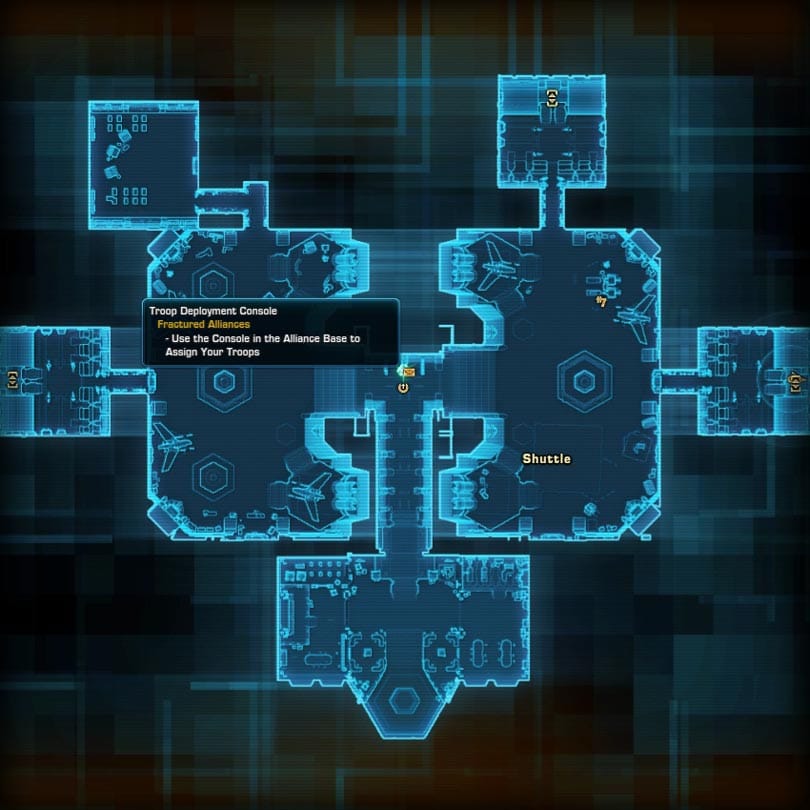
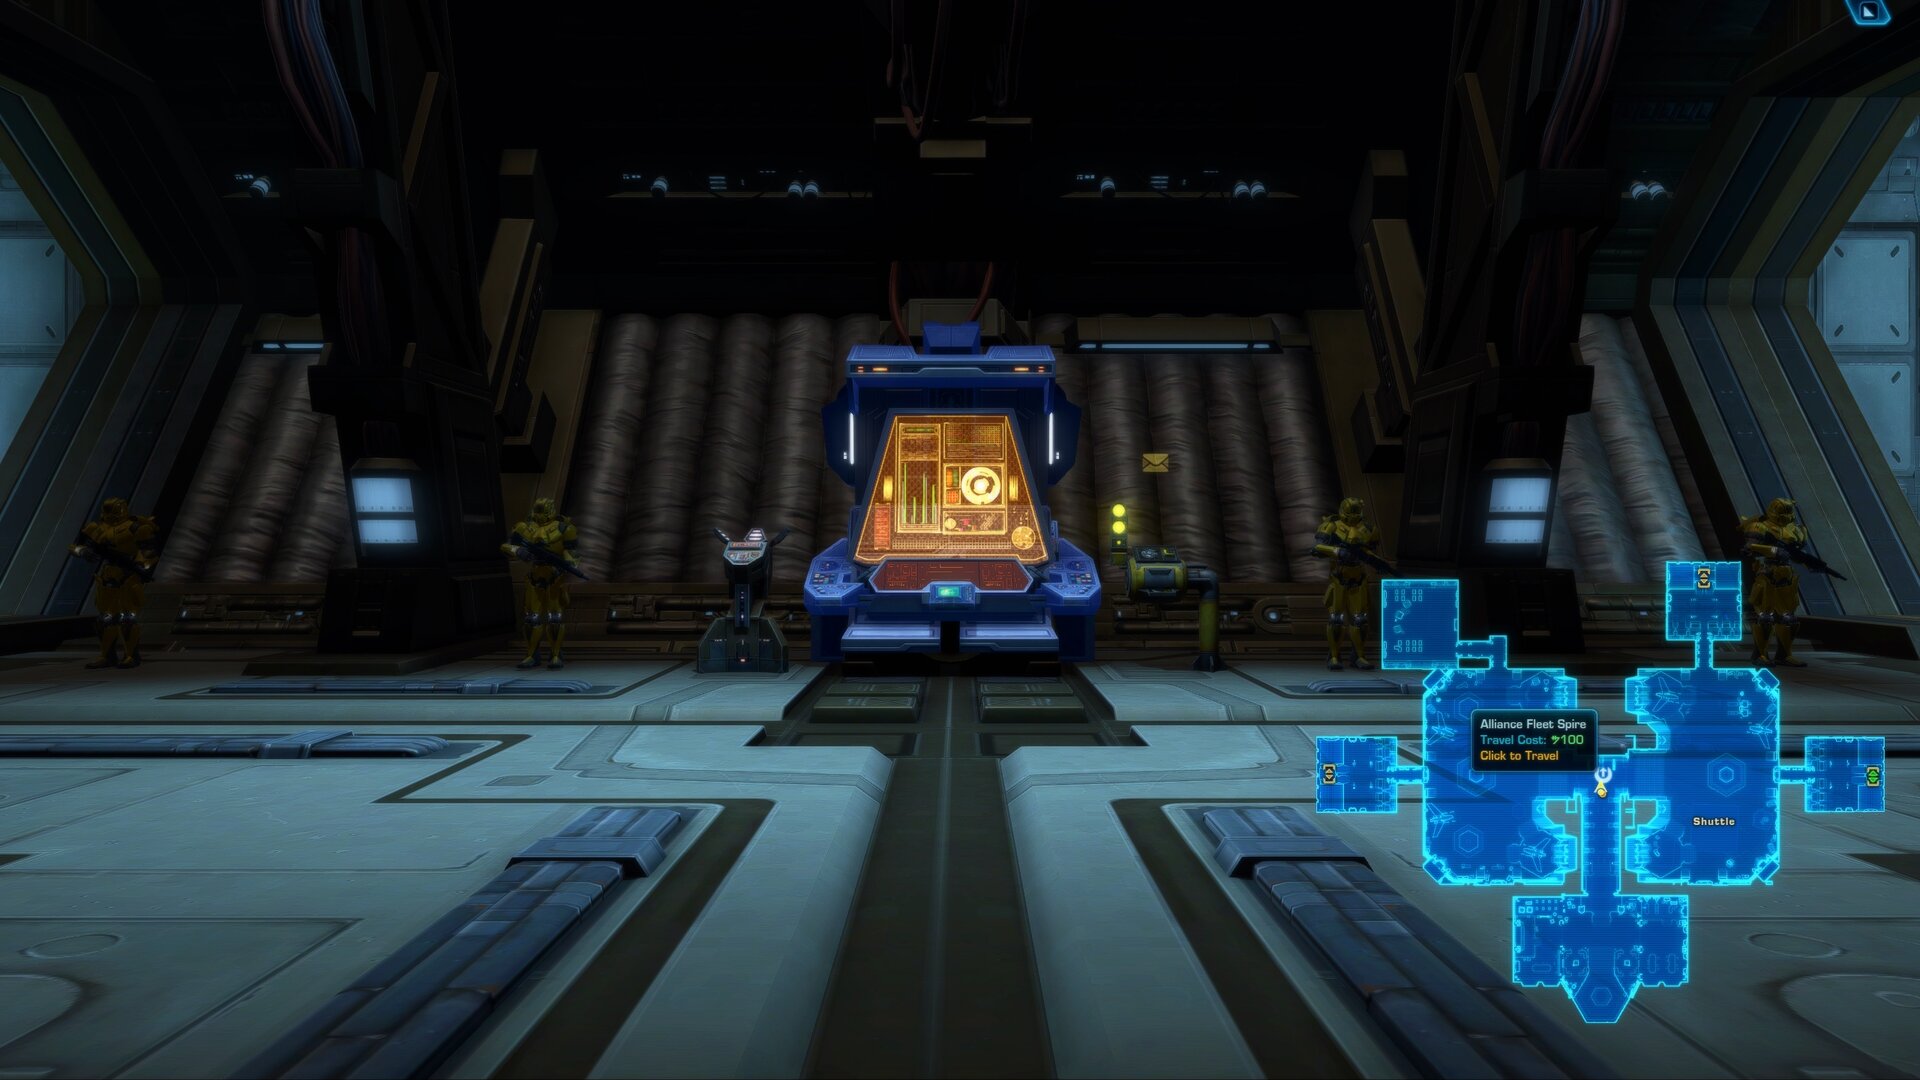
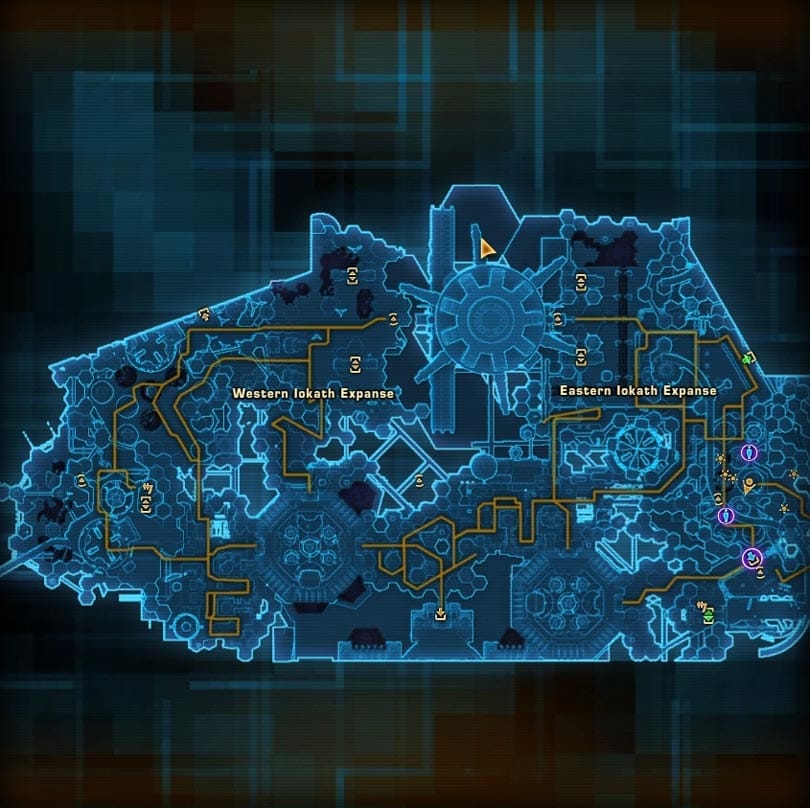
Before you use the Console to assign your troops (located in the Alliance Base – right where you spawn), your character has access to their faction’s base by default. Republic Base is to the West, Empire’s camp is to the East. The Alliance Base is between them. Click or tap on the map images below to enlarge them.

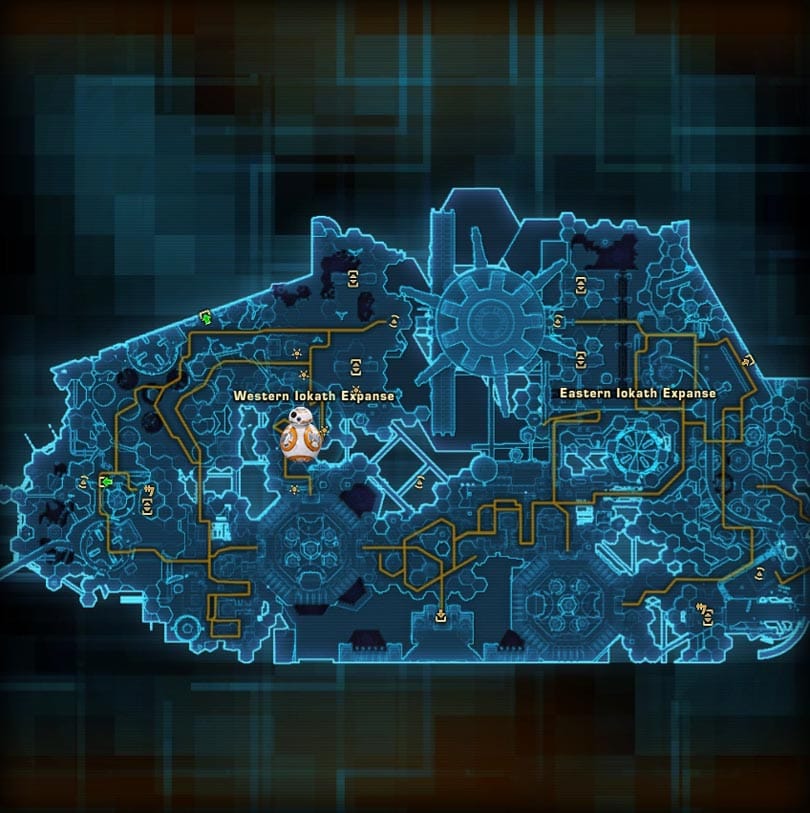
Navigating Iokath
Iokath is infamous as SWTOR’s worst daily area because its map is worthless and its landscape is pretty homogenous, there is a pretty straightforward route to finish all of the dailies. It’s really just as linear and easy to do as most of the other daily areas.
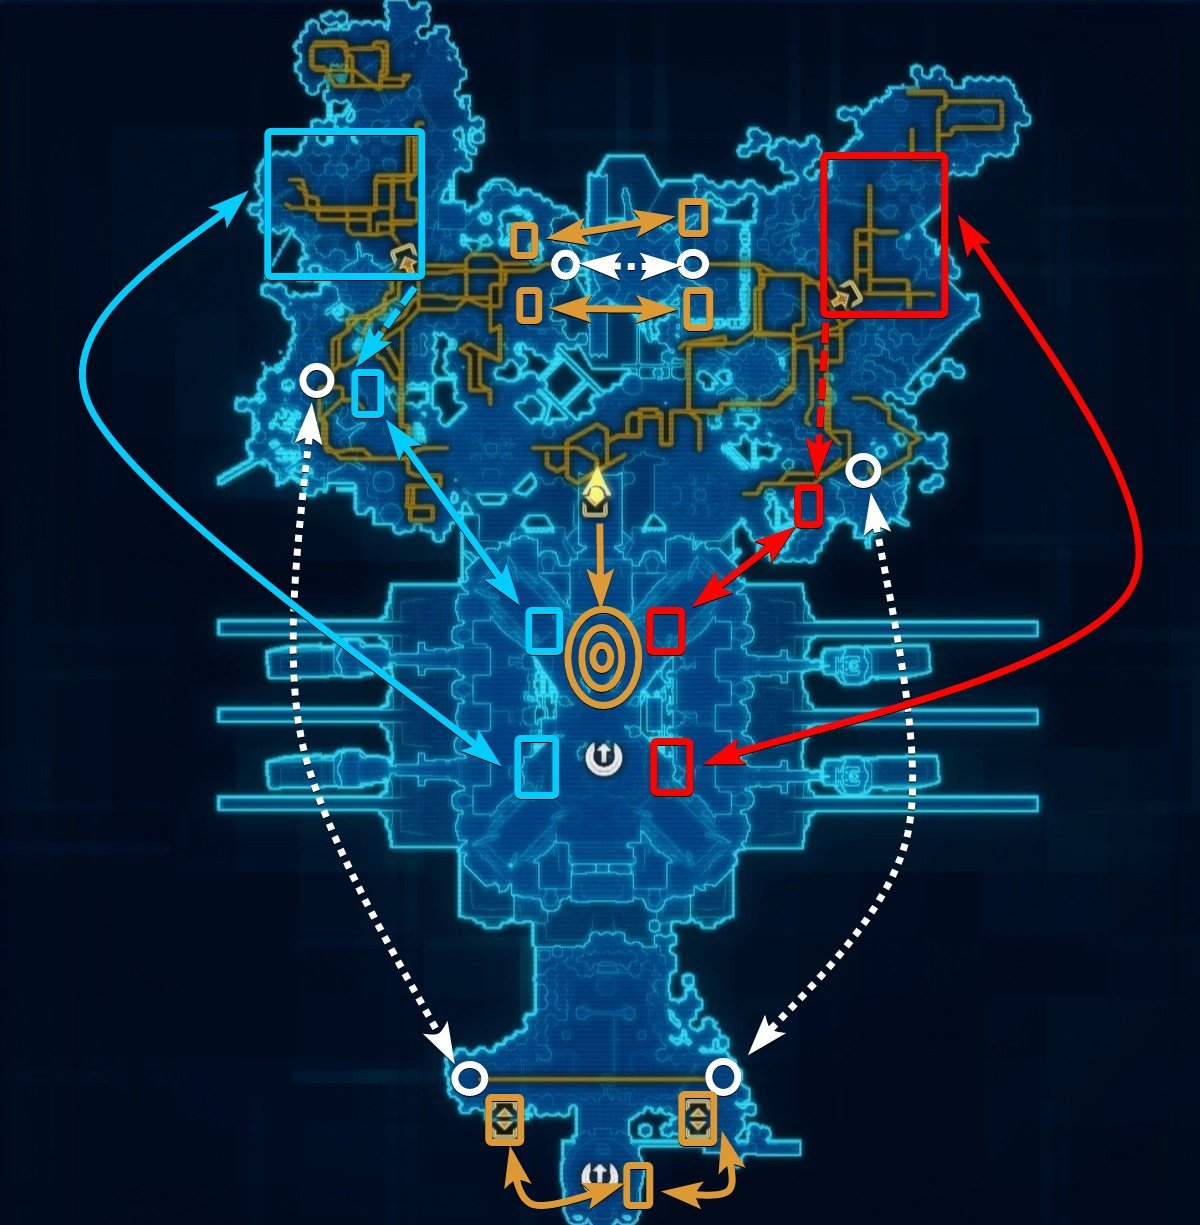
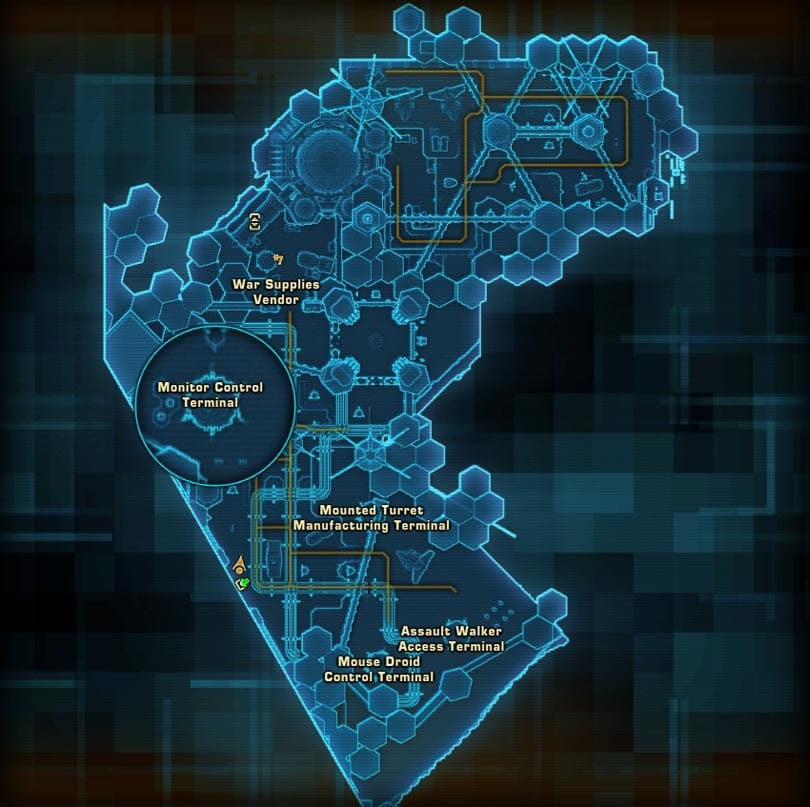
The core dailies themselves take place in 2 major areas, the Weapons Factory and a phased area called the Docking Ring.
There are also some dailies related to defeating enemies, clicking lasers, and piloting machines that take place in the corridor between your faction’s Foreward Base and the Weapons Factory Trams.
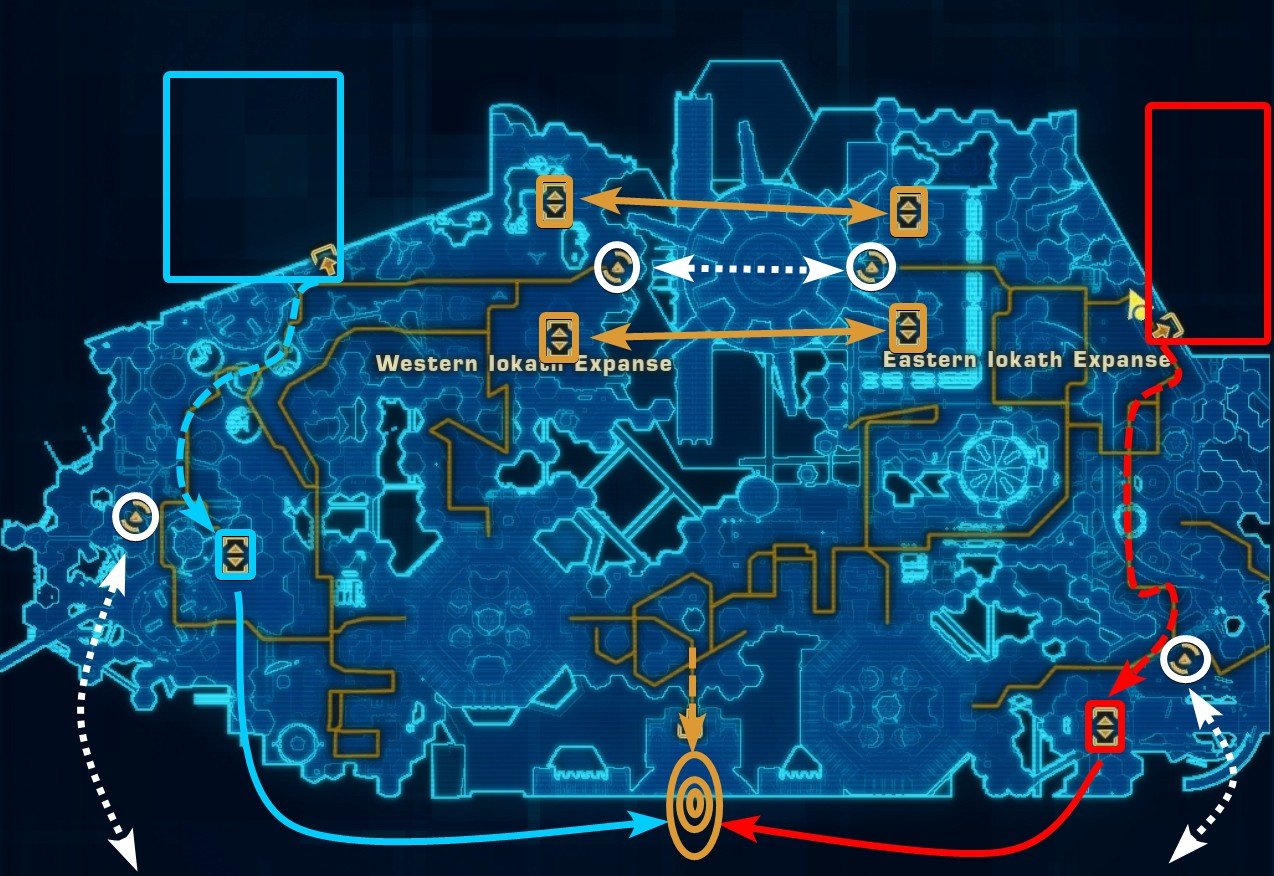
The devs obfuscated it with extra paths, but the majority of the map is mirrored. It’s roughly the same path on both the Republic (west) and Imperial (east) sides, with the gigantic Spire splitting it down the middle.
The teleporters and trams (pneumatic tubes) take you across the map, often to the complete opposite side. It’s really just a PvP map scaled up to the size of a planet, with support for such a thing coming from all the different machines you can pilot.
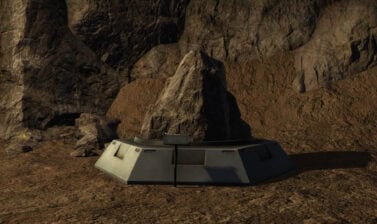
The Docking Ring elevator is back in the same region where you pick which faction you’re gonna support. It’s the third elevator in that area, but you have to go to the Iokath Expanse first to pick up your missions.
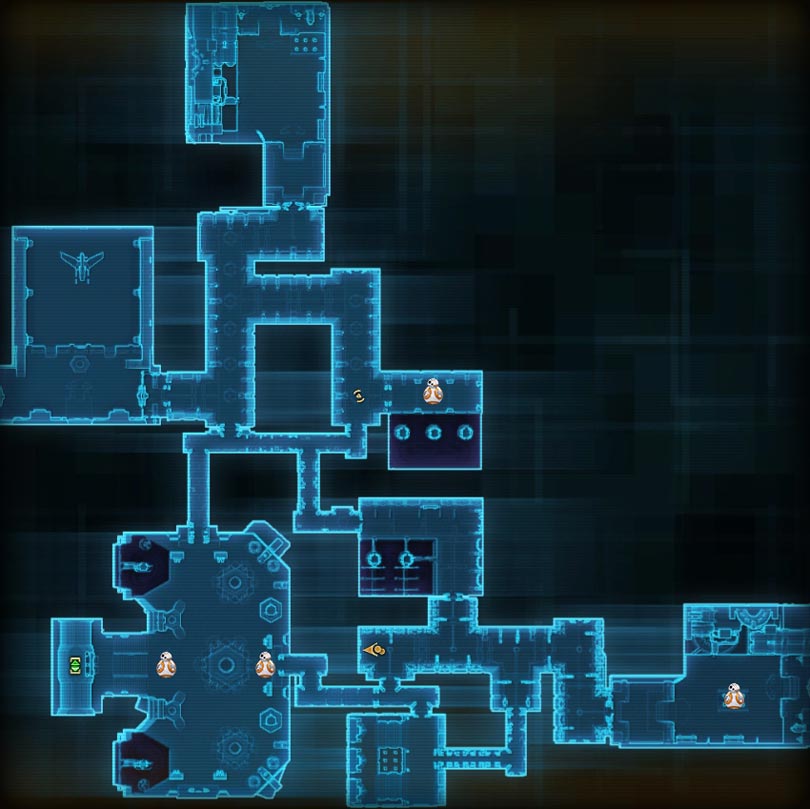
Once inside, you’ll need to head your way to the circled regions, depending on your objectives. All of the clickables are in the circled regions or on the way.
You always have 1 mission that you can decline and still get the weekly. I do not recommend doing the missions Scouting Iokath or Colossal Threat because they take you way too far off course.
Reputation Tracks and Choosing Sides
Unlike (almost) everywhere else in the game, Iokath has separate reputation tracks for the Empire and the Republic. You will earn the following legacy-wide titles while progressing through the reputation tracks:
| Faction | Rank | Title |
|---|---|---|
| Friend | Iokath Monitor | |
| Legend | Conqueror of the Sphere | |
| Friend | Iokath Purifier | |
| Legend | Champion of the Expanse |
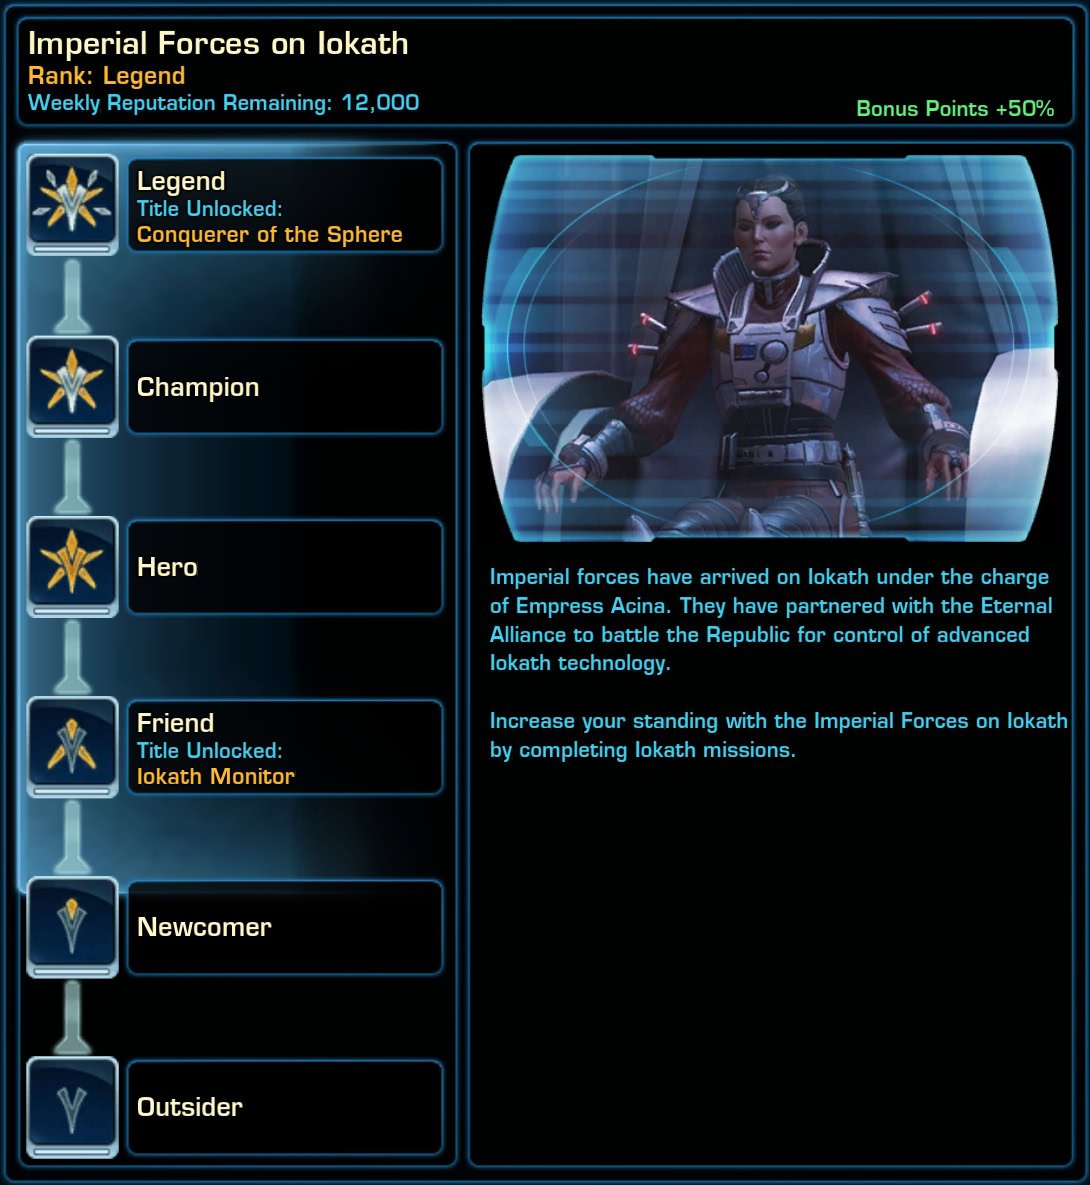
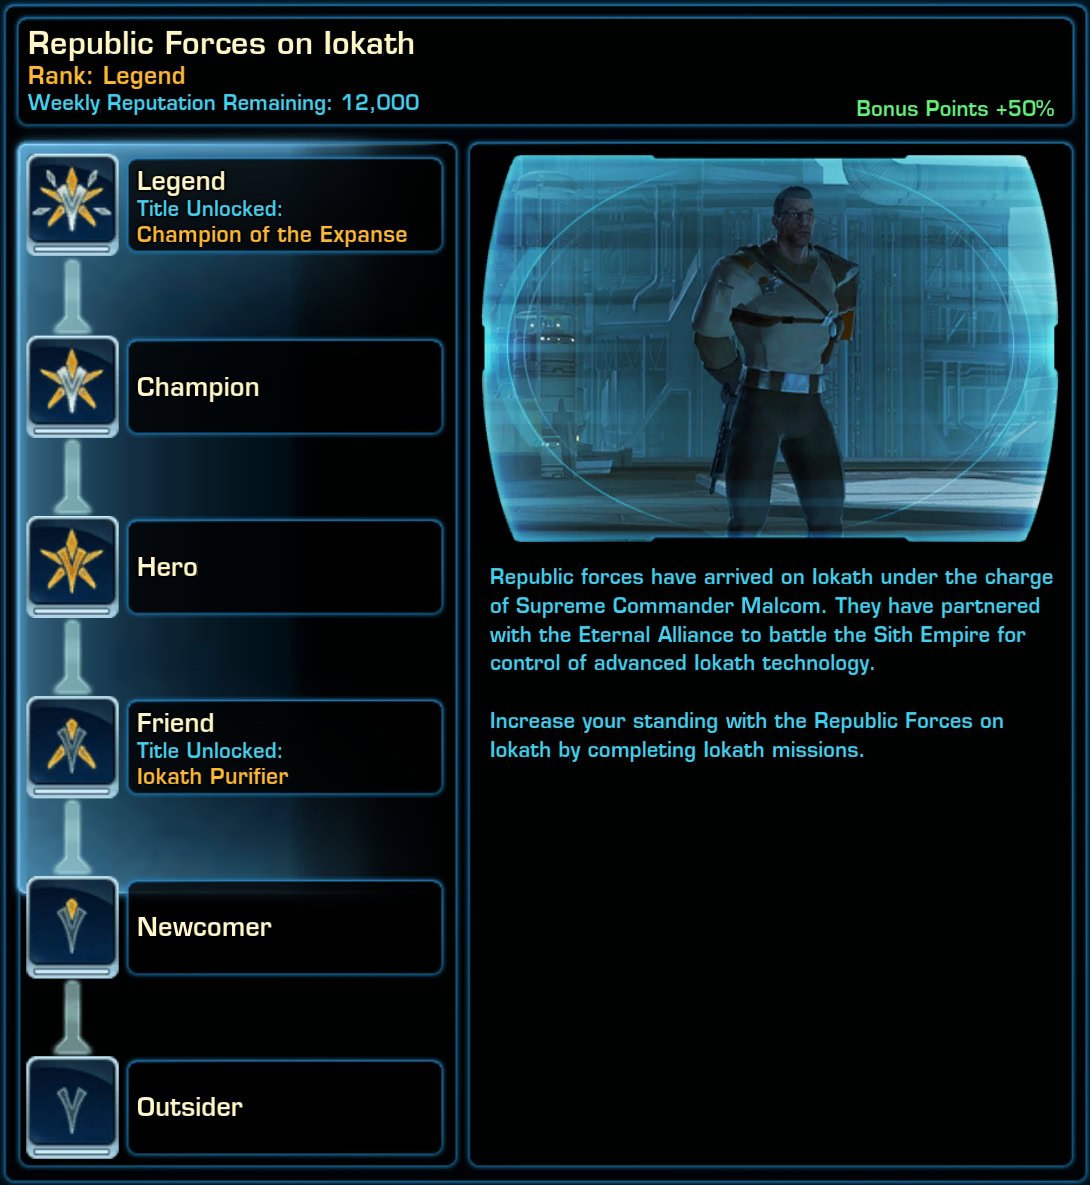
You can progress them both Reputations at the same time on the same character by picking the faction at the Troop Deployment Console next to the Alliance Fleet Spire.
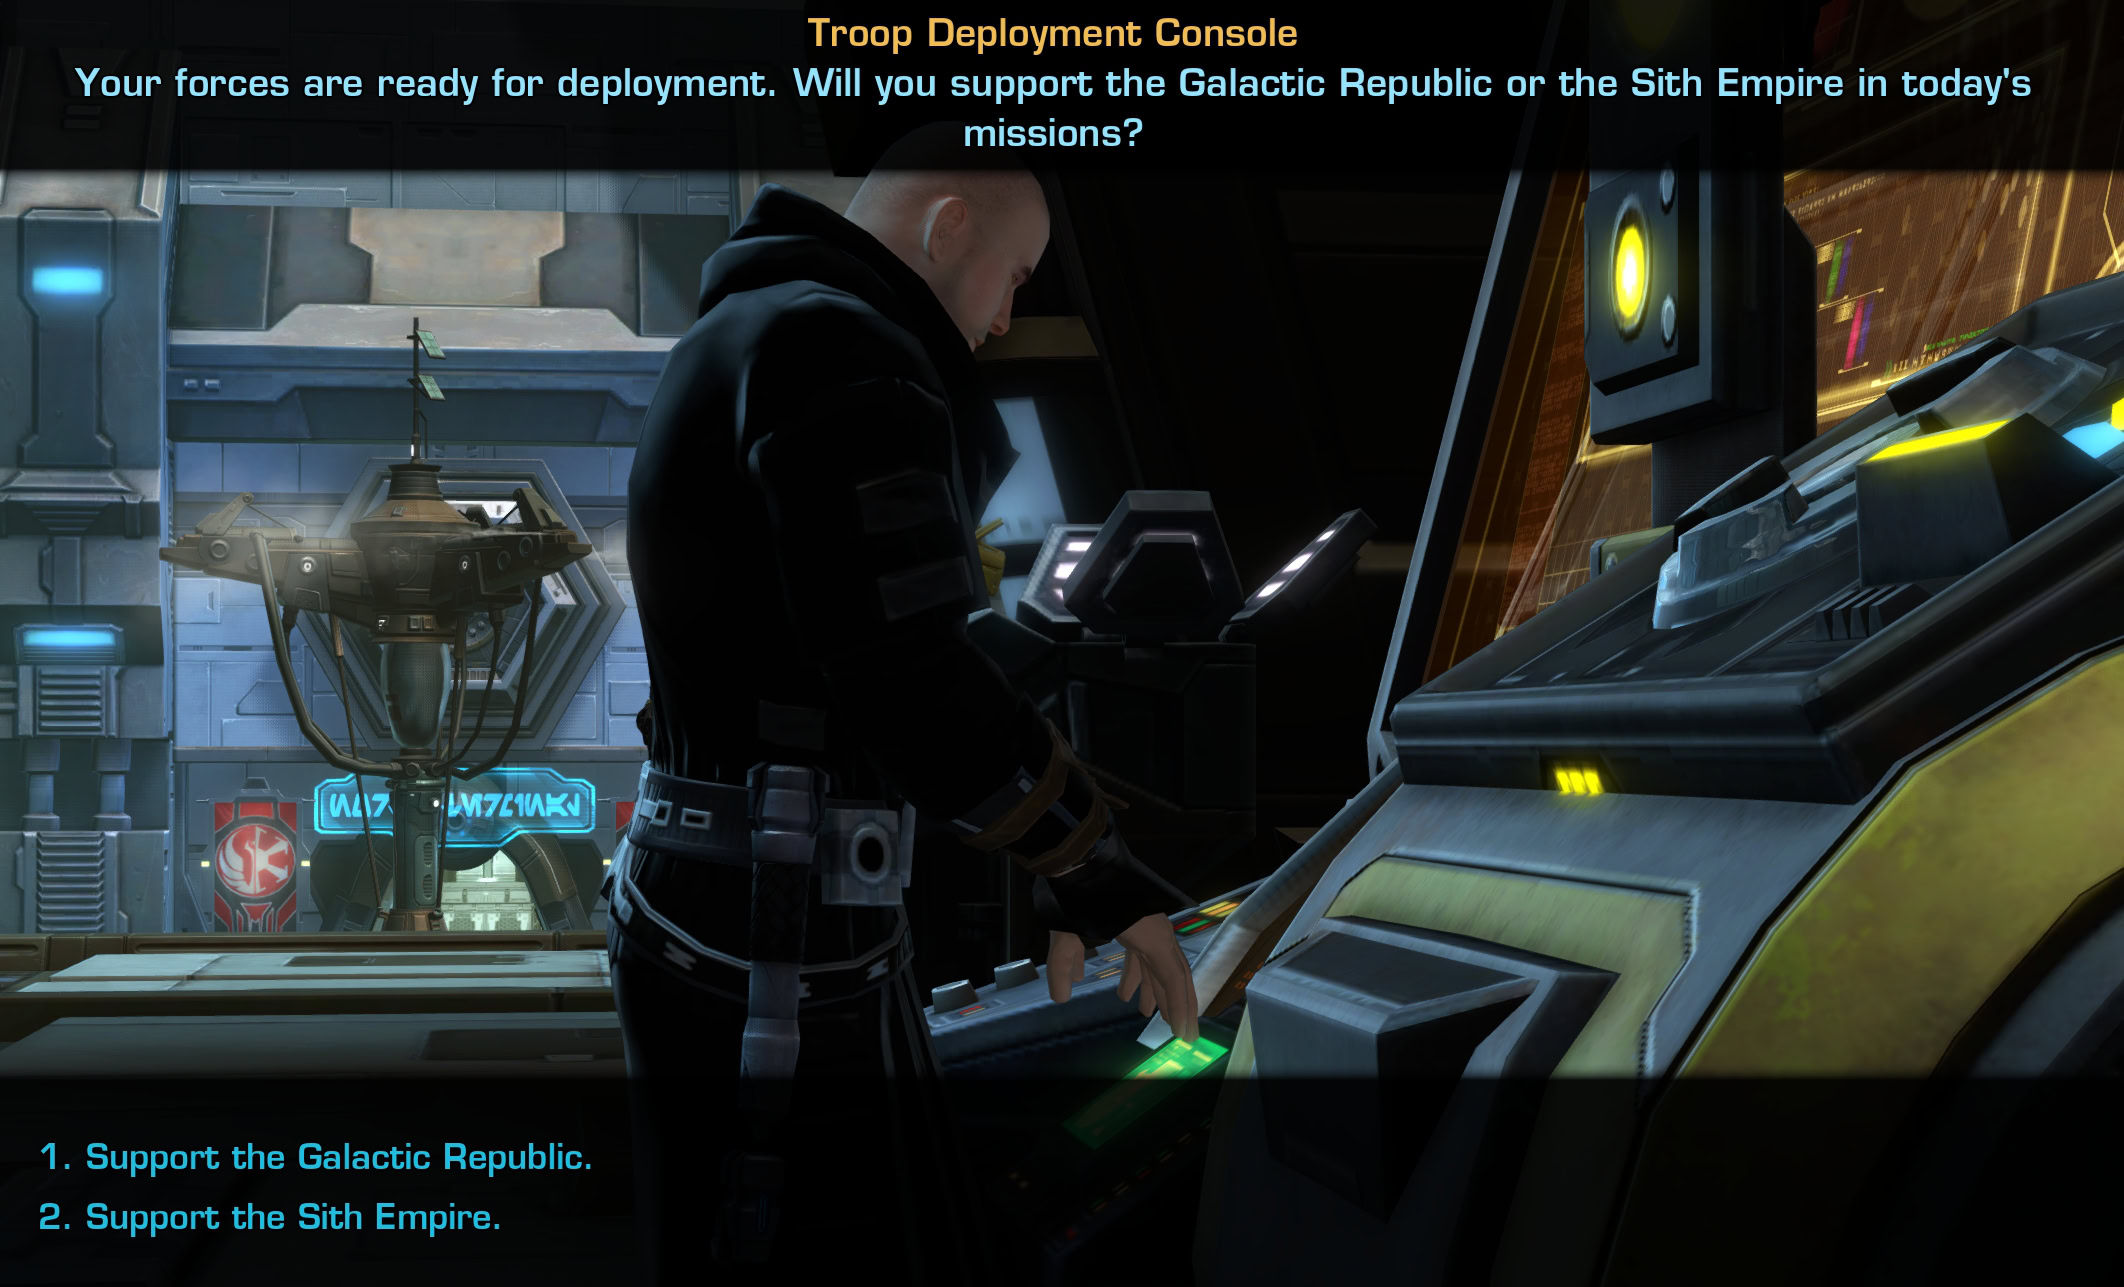
You can change your support once per day and will gain access to that faction’s vendors and missions. The missions are practically identical, though many of the reputation rewards are different.
 What are Iokath Power Shards
Everything on Iokath revolves around the planet’s unique currency, Iokath Power Shards. Enemies drop them, you get them from missions, and you can even purchase their crate form (Iokath Power Crystal Cluster) from other players on the GTN.
All reputation rewards and machine piloting cost a combination of Iokath Power Shards and credits, with the credit costs typically being 1000x the shard cost.
Piloting Terminals (Polymorph)
Iokath is unique in that you can pilot (polymorph) a handful of machines, some of which are required for specific dailies. It costs a small amount of credits and some Iokath Power Shards each time you want to use one.
Prices increase in proportion with the machine’s overall capabilities. For example, an Assault Walker is much more expensive than a Mouse Droid.
The dailies that require you to pilot a machine will reward you with extra credits and Iokath Power Shards to reimburse you for the purchase costs while still giving normal daily rewards.
Mouse Droid
3,750 Credits | 25 Iokath Power Shards
The Mouse Droid is basically a missile drone. You drive it to whatever you want to destroy and then make it self destruct to deal 500k damage.
Since it’s so tiny, the mouse droid has very little HP, but has a very high chance to avoid damage regardless of type. You can also send out an EMP every so often to temporarily stun nearby droids.
Mounted Turret
6750 Credits | 50 Iokath Power Shards
The Mounted Turret is not a turret that you can use while mounted; it’s basically just a slightly more interesting version of the turrets you use in Sith Inquisitor Colicoid War Game and Kaon Under Siege.
You have a weak laser, a heavy laser that deals as much damage as the weak laser but with a 3s cast, a flame projector, and a 360o knockback. In exchange for giving up mobility, you get +50% damage reduction.
I think it’s meant for the players who are more interested in chatting than participating in the open world PvP.
Iokath Monitor
10,000 Credits | 100 Iokath Power Shards
The Iokath Monitor is focused on area denial. Its main ability channels a nanite cloud that deals damage to enemies and heals allies nearby. It also has an immunity shield, an out of combat regen ability, and a shot that deals a decent bit of damage but stuns you for a little while.
Since it’s meant for support, it’s pretty squishy. You need to use the nanite cloud as often as possible and only use the rail shot to finish something off. The shield should be used to buy time while the nanite cloud comes off cooldown again if needed.
Assault Walker
140,000 Credits | 200 Iokath Power Shards
You’re most likely familiar with the Assault Walker from the multiple times you have to pilot one in the Chapters. They’re slow-moving but have the most offensive potential, though it’s not enough to make them as strong as your regular toon.
Abilities include:
- Basic Flurry
- Stomp PBAoE
- Heavy Shot
- Missiles
- Charge Beam
- Fire Charged Beam
- Trample (passive)
Machine Gods
[Boss] Control Module | 1,000 Iokath Power Shards
The first 4 bosses in the Gods from the Machine Operation all drop a boss-specific Control Module for someone in the group. The control module is an additional currency you need to spend alongside credits and exorbitant amount of Iokath Power Shards in order to pilot the associated Machine God.
- Tyth
- Aivela
- Esne
- Nahut
- Scyva
When you pilot one of these droids, you get to use a selection of abilities used by the boss in the Operation. Unfortunately, they aren’t nearly as powerful as they are when you fight them and can’t even enable you to take down the Colossus Droid on your own.
Daily Mission Walkthroughs
There are 14 Daily Missions in total available on Iokath. All of them are solo-able, except for Colossal Threat. The biggest difference between Iokath Dailies and all other Daily Areas is that here you cannot complete all Daily Missions in one day. They are given to you in chunks of 7 and randomly selected each day.
Once you side with the Republic or the Empire, you cannot resign and join the other faction until the reset on the next day and you need to complete or abandon all missions you have picked up.
If you don’t complete a mission on the day you have picked it up, you may not be able to do so until the next time it becomes available on the terminal.
The selection of Daily Missions available on the Daily Terminal is always random. You may end up having the same mission(s) on the next day. They still count towards your Weekly, though.
Each faction has their own Reputation for you to grind, so even if you have only one character, you will eventually have to do the missions for the other side if you want that Reputation.
Below is an in-depth look and guide to each one of the Daily Missions.
[Weekly] Daily Area: Iokath
The Weekly Mission’s objective is to complete 10 Daily Missions on Iokath.
Fortify the Defenses
This mission is the same for both factions, but is labeled “Republic” and “Empire”, because it’s instanced and the entrances are from the Republic or Empire bases – in the most northern areas of the Bases.
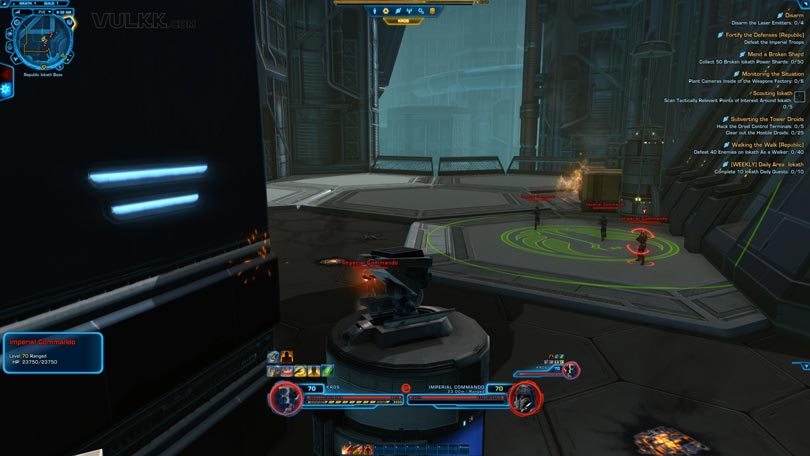
Your objective is to mount a turret and kill enemies of your faction. The turret has 3 abilities – single target attack, an AoE attack and a button to return back to your character. The starting point is right in the Republic Iokath Base, a little to the north from the Daily Missions Terminal.

Disarm
You have to disarm the laser 4 emitters. This mission can be completed at the same time together with Mend a Broken Shard and Subverting the Tower droids, if you have them active.
There are 2 emitters located right in the first area of the instance. If you want to, you can switch instance (via your Stronghold) and re-enter again to click the same 2 emitters and save yourself the trip.
For this you have to head north from the common area between the 2 factions’ bases – take the Fleet Spire to the Alliance Base area. The mission is in an instance, which stats at he Docking Ring area.
Subverting the Tower Droids
For this you have to head north from the common area between the 2 factions’ bases – take the Fleet Spire to the Alliance Base area.
The mission is in an instance, which stats at he Docking Ring area. You have to disarm the laser 4 emitters. This mission can be completed at the same time together with Mend a Broken Shard and Disarm.
Mend a Broken Shard
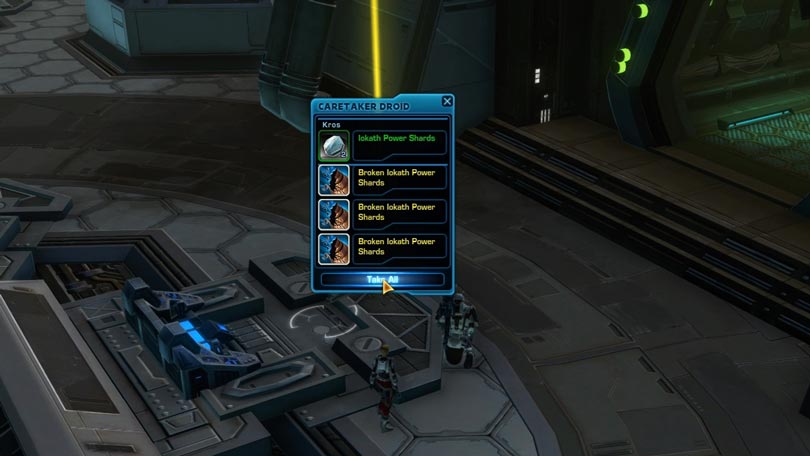
This is a simple mission, requiring you to kill droids and loot them for Broken Shards. You need 50 of those.
This mission can be completed anywhere in the Iokath Daily Area, including other instances. That is why it is easy to be combined with any other mission(s).
Once you have collected the 50 Broken Shards, you can return back to the base to the repair station to complete the mission. The repair station is near the Daily Mission Terminal.
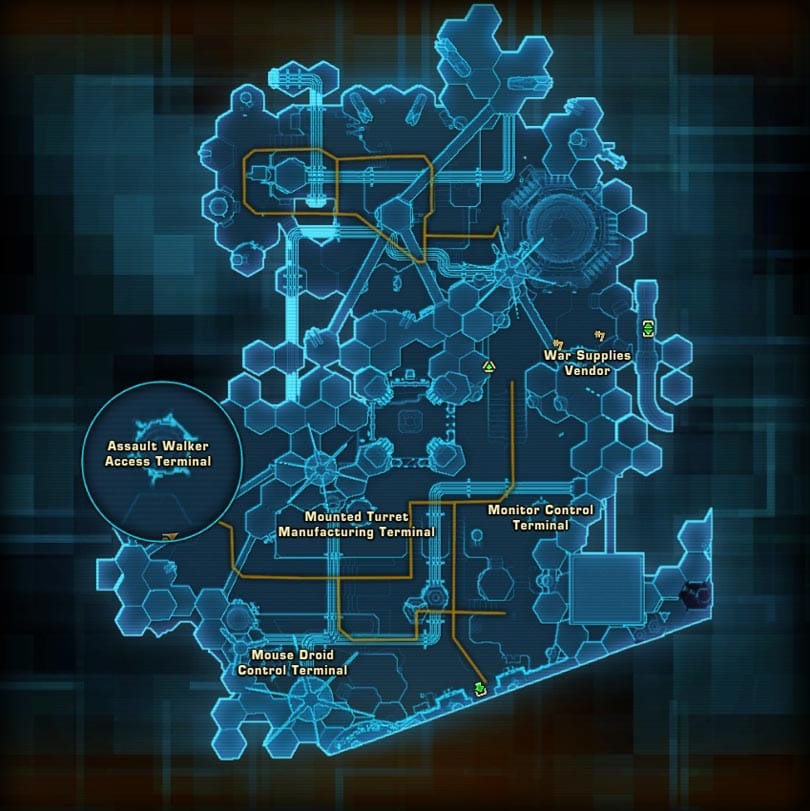
Walking the Walk
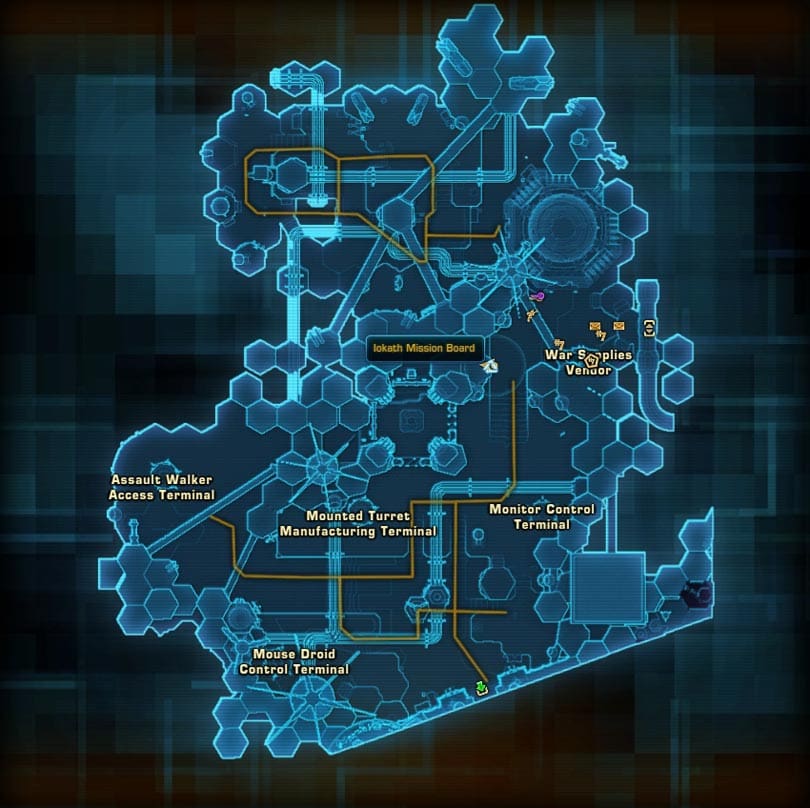
This mission starts from your Faction’s Base on Iokath. You need to find the Assault Walker Access Terminal and use it.
To be able to spawn a Walker, you will need Credits and Power Shards, which drop from random NPCs on Iokath as well as mission rewards. At the time of writing this Guide the requirements for the Walker are 14,000 Credits and 200 Iokath Shards.
Once you spawn as a Walker, your objective is to defeat 40 Enemies on Iokath. The cool thing is that you can complete other missions, while it the Walker as you are able to loot the remains of the mobs you defeat.
The Walker has a number of abilities for you to enjoy. The last button – Eject – is to leave the Walker. Be careful, though, as you would need to purchase another one at the terminal again to finish the mission if you haven’t. These Walkers are in the open world, so any other player can see you piloting it :)
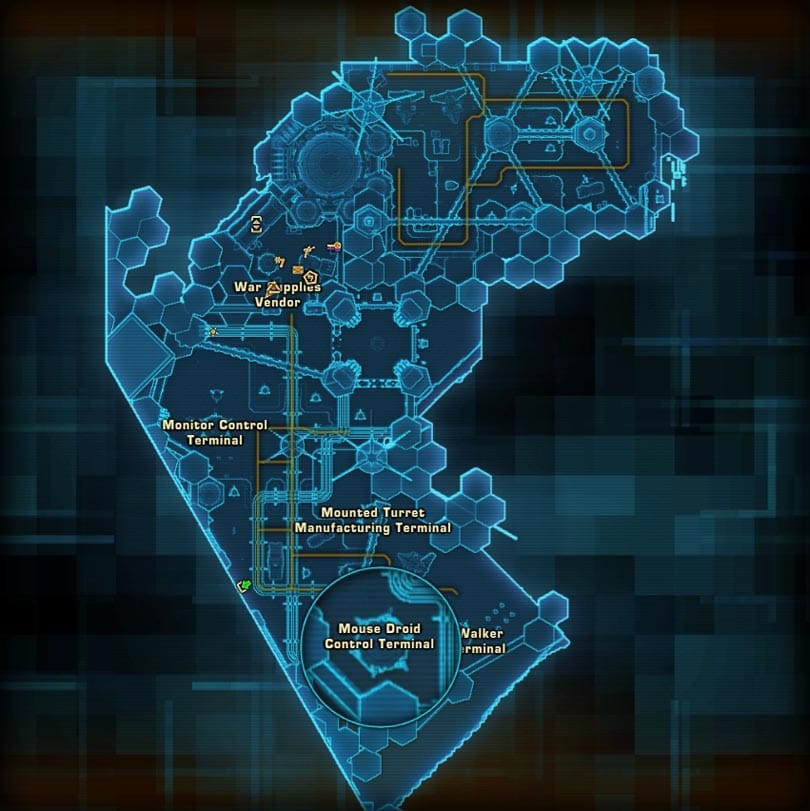
Monitoring the Situation

To reach the most southern are of Iokath for the first time, it would be best to head out from your Base to the south and in the Iokath Expanse area look for the Factory Tram – one is located to the West, one to the South-East on the map. Or you can use the entrance to the Factory, which is located in the most Southern part in the Iokath Expanse area.
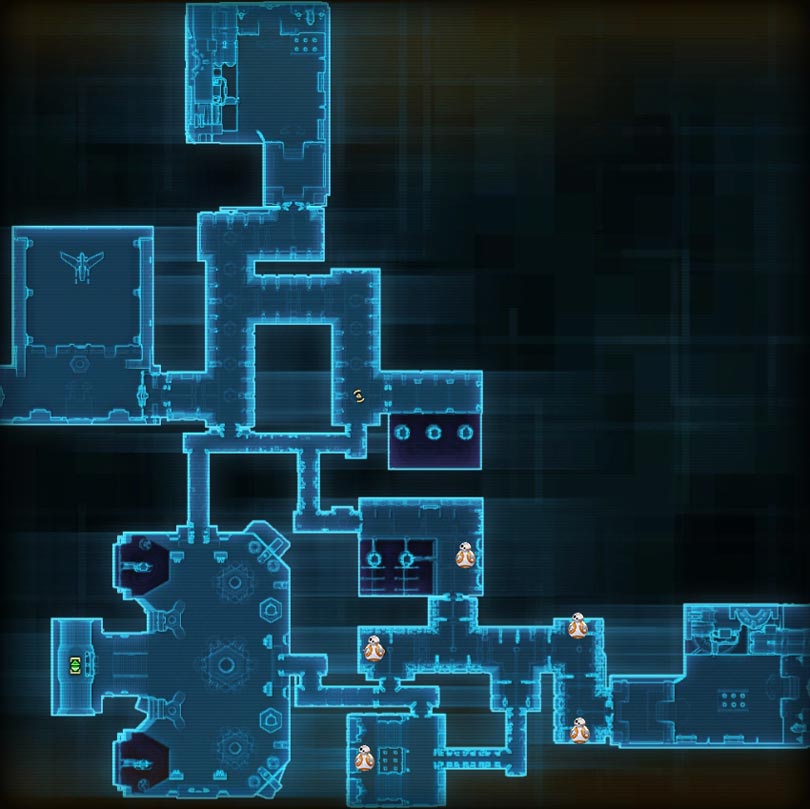
The terminals that you need to interact with are many, spread all over the place and re-spawn quite fast. I’ve marked some of the locations on the map for your convenience.
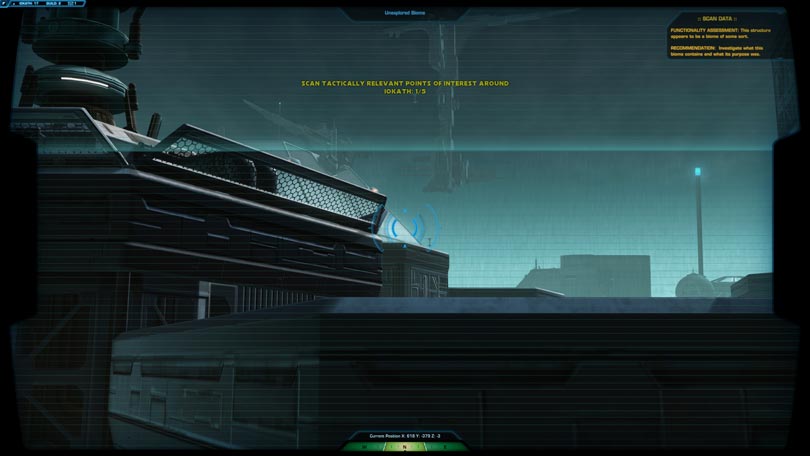
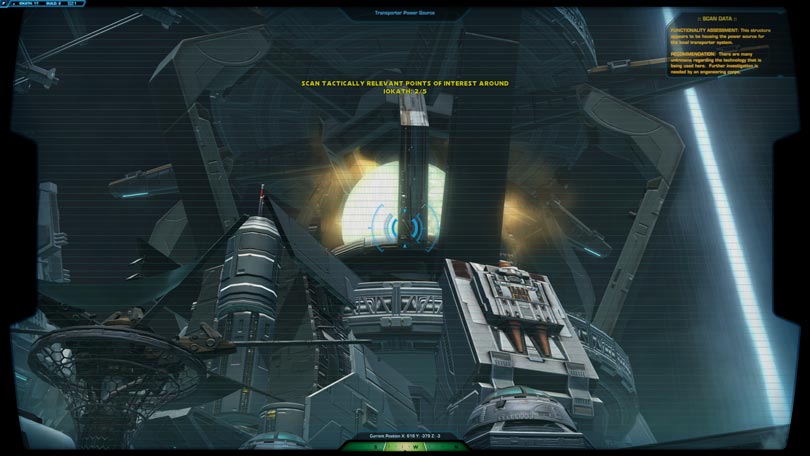
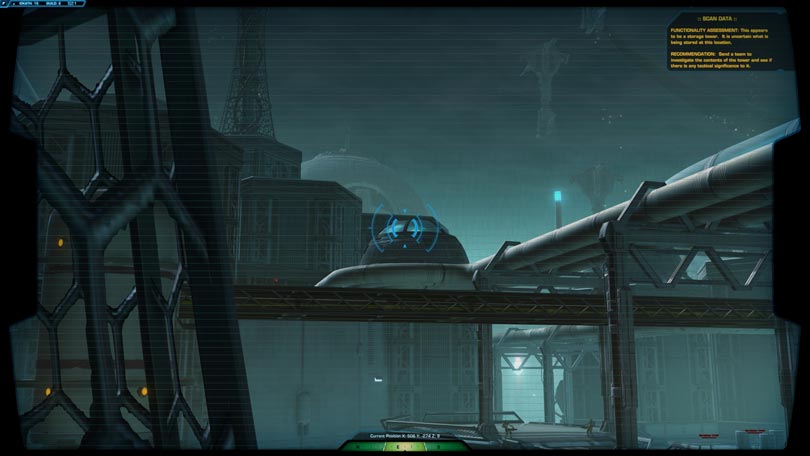
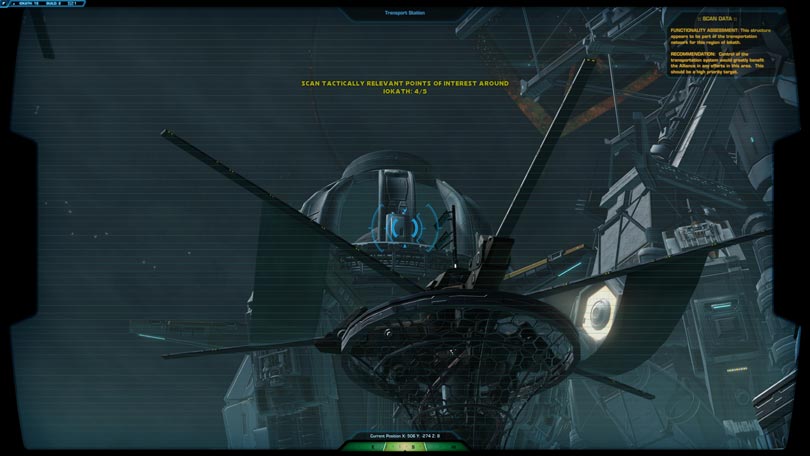
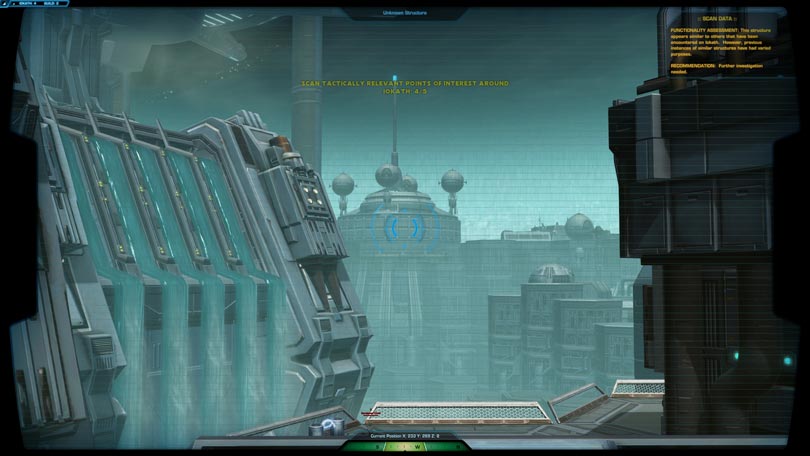
Scouting Iokath
There are 5 unique obects on Iokath that need to be inspected with the microbinoculars. They can be seen from various locations on Iokath, including the Republic and Imperial Bases and the Iokath Expanse area.
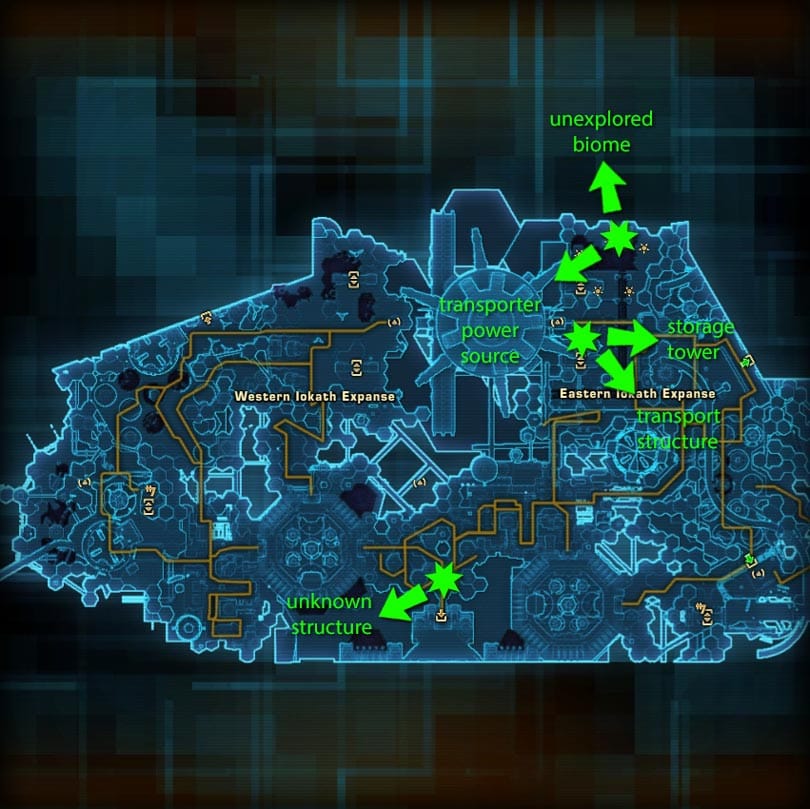
I have marked on the map the locations I consider best for both factions – they are easy to access and present minimum amount of enemy NPCs to be defeated on the way.
Empire players can quickly get to the 2 locations in the north section of the Iokath Expanse and inspect the objects. Republic players can use the “East to West Quick Tram”. The 5th location is far to the south.
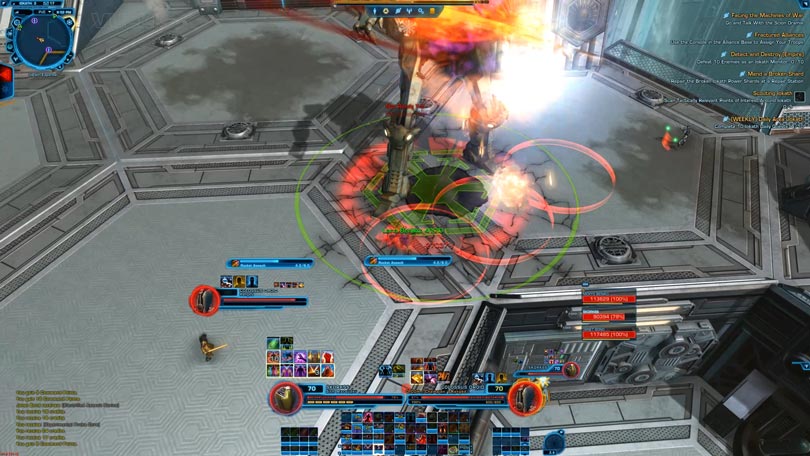
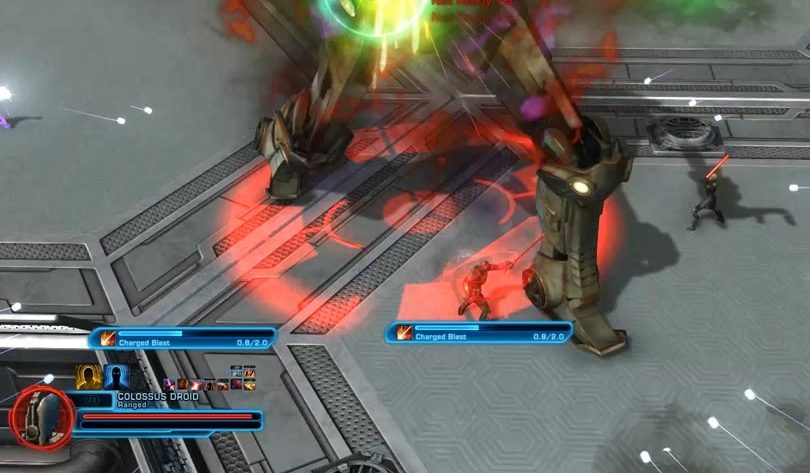
Colossal Threat
This mission tasks you with killing a giant droid, located in the Iokath Expanse area.
It has only 2 special mechanics:
- Rocked Assault (8s channel) – red circles on the targeted player, to avoid taking damage, keep moving and stay away from the main group
- Charged Blast (2s channel) – single target attack on the tank.
A small group of well geared players with at least 1 healer and preferably 1 tank can take it down. A large group of 8-10 or even more is suggested to speed up the process.
The Meek and the Mighty
In this mission you will need to remote pilot a mouse droid. It has a Stunn, Self-Destruct and Eject abilities.
You have to navigate over to the other faction’s area, just outside of their base, find a Walker and Self-Destruct on it to complete the mission. Purchasing a Mouse Droid requires Credits and Power Shards.
Defend the Docking Ring
This one is also in a separate instance. The entrance is at the north-east corner on the Alliance Base – the same area where Disarm and Subverting the Tower Droids missions are.
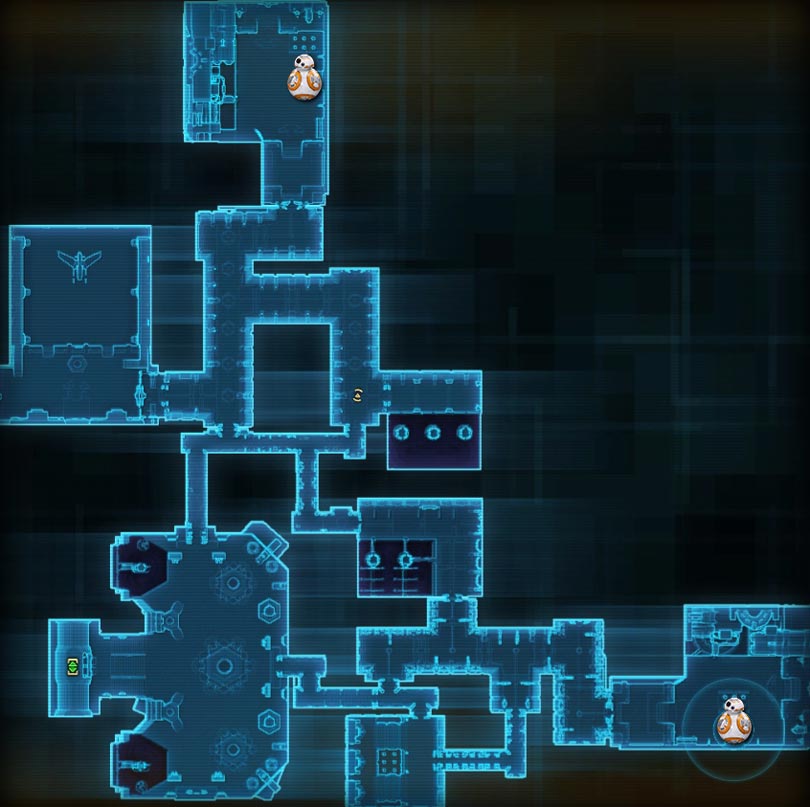
Disrupting the Network
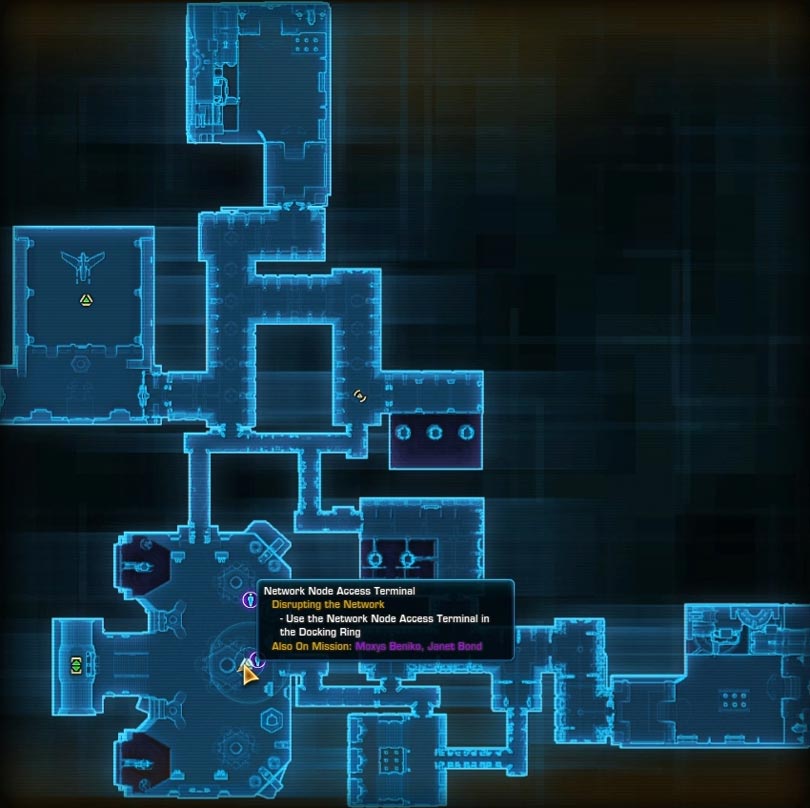
Another mission that takes place in the Docking Ring instance. The object here is to use the Network Node Access Terminal in the Docking Ring. It’s located in the first area after you enter. Clicking on it will trigger the next (real) objective – Defeat the Iokath Terminal Network Coordinator.
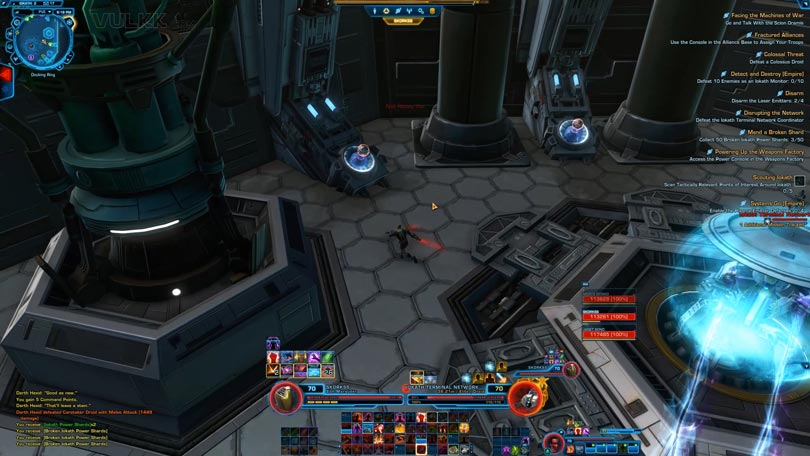
Start by attacking the Coordinator droid. When it shields up and the 2 additional droids spawn, look around the area – there are sphere nodes around the wall on the entrance side.
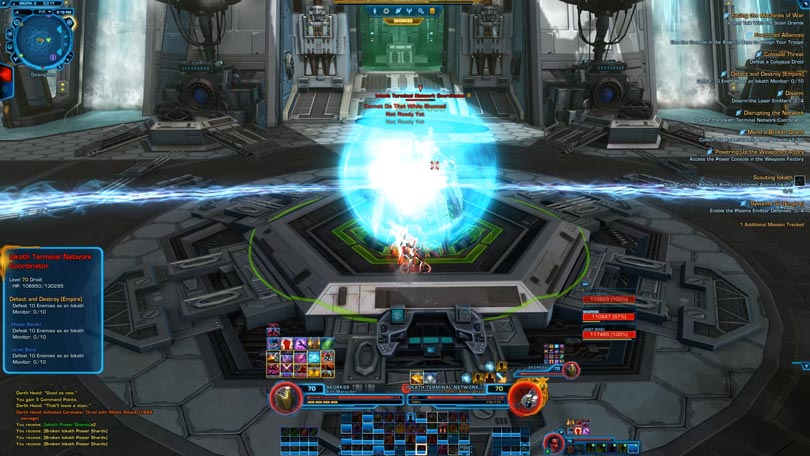
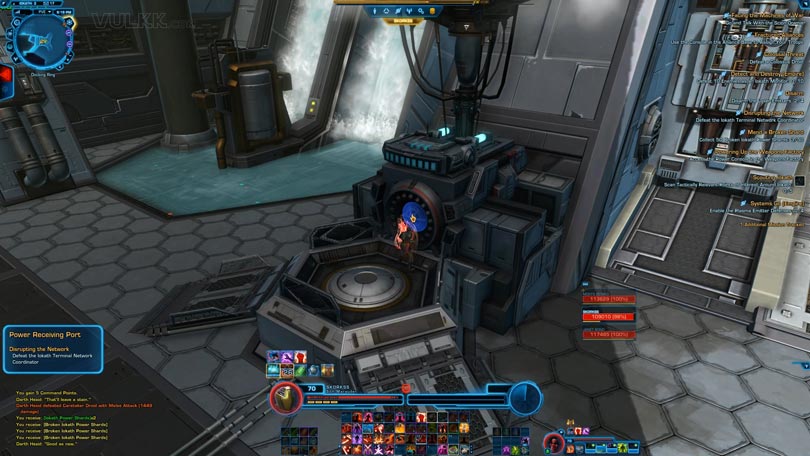
You need to pick up a sphere and bring it to the other wall on the other side. This will disable the shields on the 2 droids on the left and right. Kill them, then finish off the Coordinator.
Systems Go
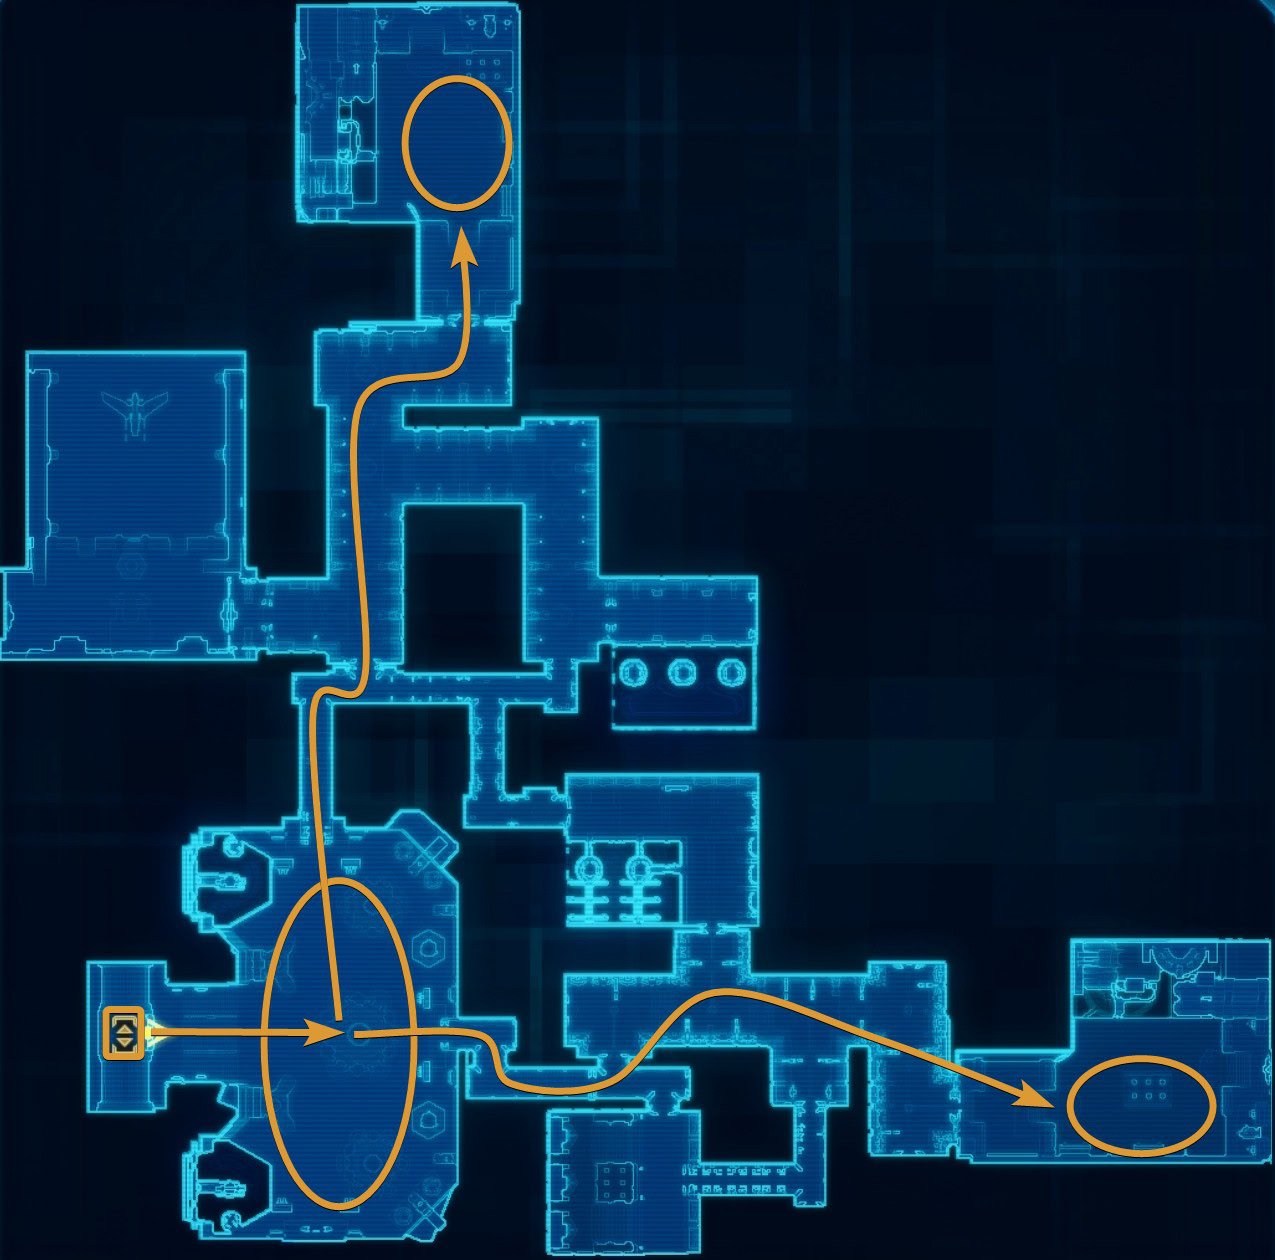
This mission takes place south from your Faction’s Base, in the Iokath Expanse area. The Empire’s version of this mission requires you to Enable Plasma Emitters, while the Republic players will have to Disable them.
They are all in the middle portion of the Iokath Expanse and you can find nodes both up on the ramps as well as on the ground floor, where all the spider droids are.
Powering Up the Weapons Factory
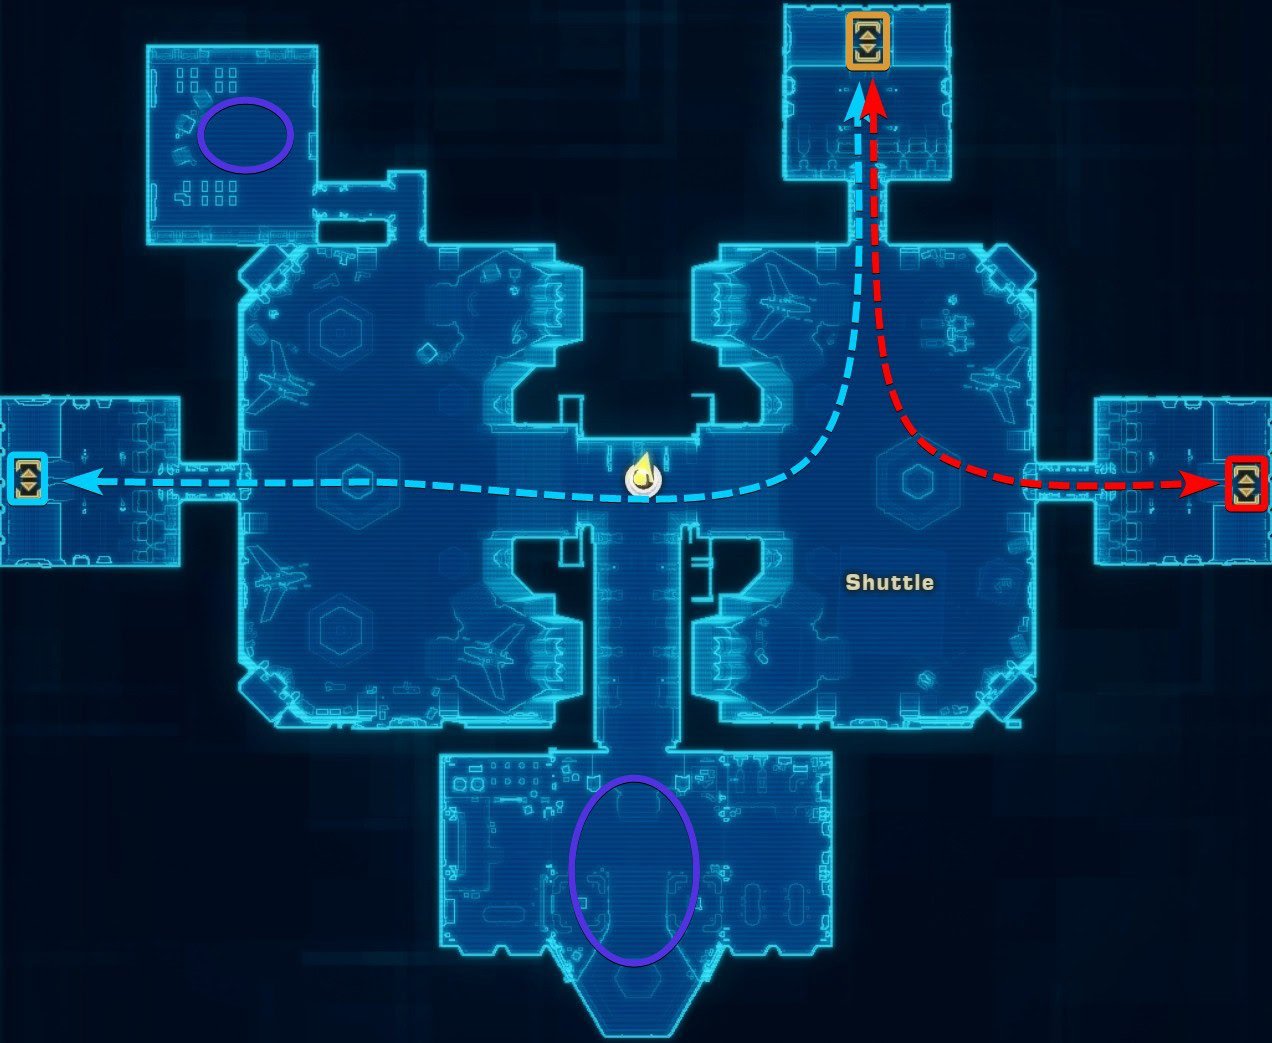
This mission will take you all the way down to the south – in the Weapons Factory. Clicking on the big blue terminal will transform you into a “Factory Remote” Obelisk.

You only have 1 active ability allowing you to steal the power spheres that other obelisks are carrying.
You can either steal theirs and place 5 Power Cores (the spheres) into the Receiving Port or you can go grab the spheres yourself and bring them over.
After you finish this, you will spawn back into the Factory. Check if your Sprint is active (it’s a known bug). If any of your abilities are not functioning properly during or after this mission, reset your UI (default: CTRL+U).
Detect and Destroy
Another mission that requires you to purchase and pilot a unique vehicle. This time you will be transforming into a Monitor. Once you spawn as a Monitor, you have to find and defeat 10 random enemies.
Be careful, though, as the Monitor has only 1 single target attack and after it you will be stunned for 6 seconds, unable to do anything. It’s unwise to pull more than 1 small group at a time if you are alone.
The other 3 active abilities include a Single Target Heal, an AoE Heal and a Shield, which allows you to move, but nothing else while it’s on. The last button on your toolbar is for when you are done and want to return back to your character.
Once again, like with the Walker mission, you can do other missions in the open world while piloting the Monitor.
Mission Rewards
Although the Daily Area was created many years ago, the developers have done a good job keeping things updated and organized so that you can always find value in farming Iokath dailies.
Below is the full table of rewards for each type of mission based on your current level:
| Icon | Item Name | Requirements |
|---|---|---|
 | Experience Points | Under Level Cap |
| Credits | – | |
| Tech Fragments | At Level Cap | |
| Conquest Commendations | At Level Cap | |
| Republic Famed Service Medal (Reputation Token, Republic Track) | Daily Missions | |
| Republic Distinguished Service Medal (Reputation Token, Republic Track) | Weekly | |
| Imperial Great Mark of Loyality Icon (Reputation Token, Empire) | Daily Missions | |
| Imperial Grand Mark of Loyality Icon (Reputation Token, Empire) | Weekly | |
| Iokath Power Crystal Cluster (Contains Iokath Power Shards) | All Missions | |
| Gear Chest (Choice 1 of 2) | At Level Cap | |
| FP-1 Stabilizer (Gear Currency) (Choice 1 of 2) | At Level Cap |
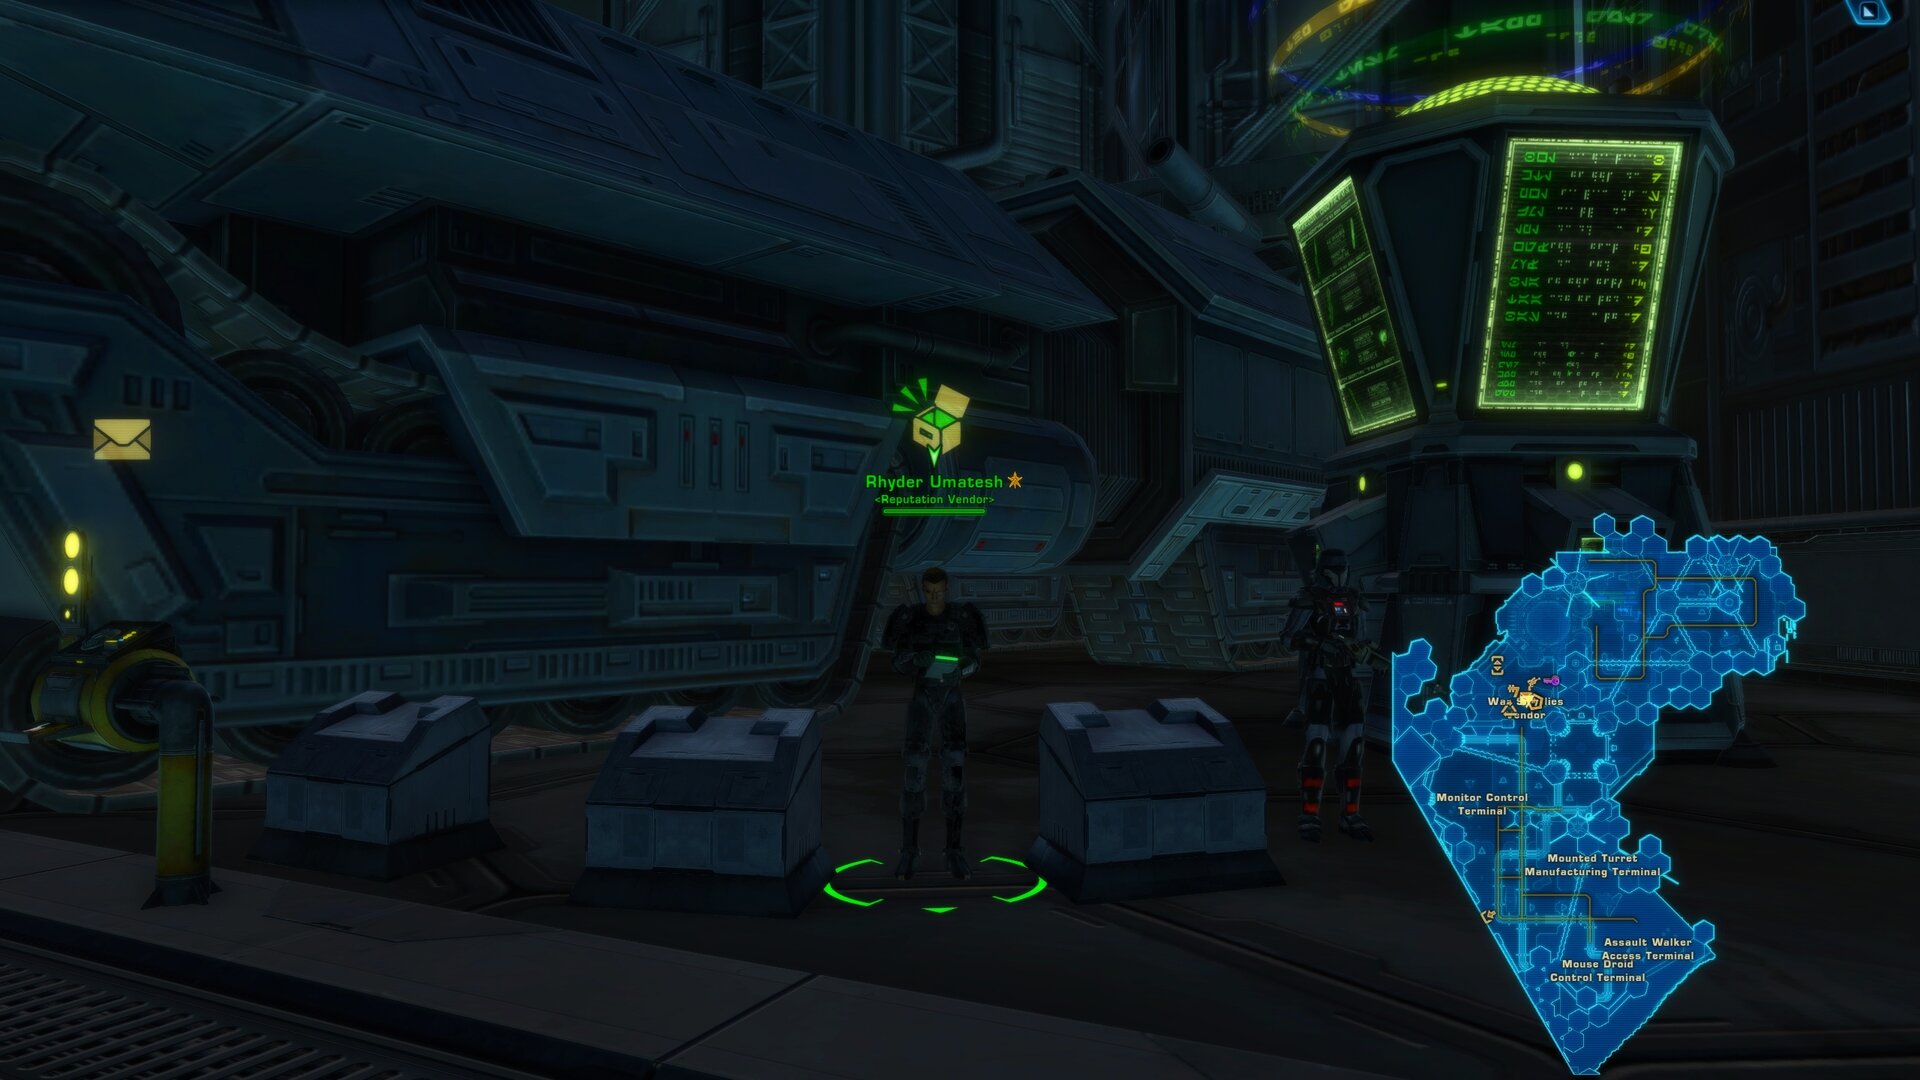
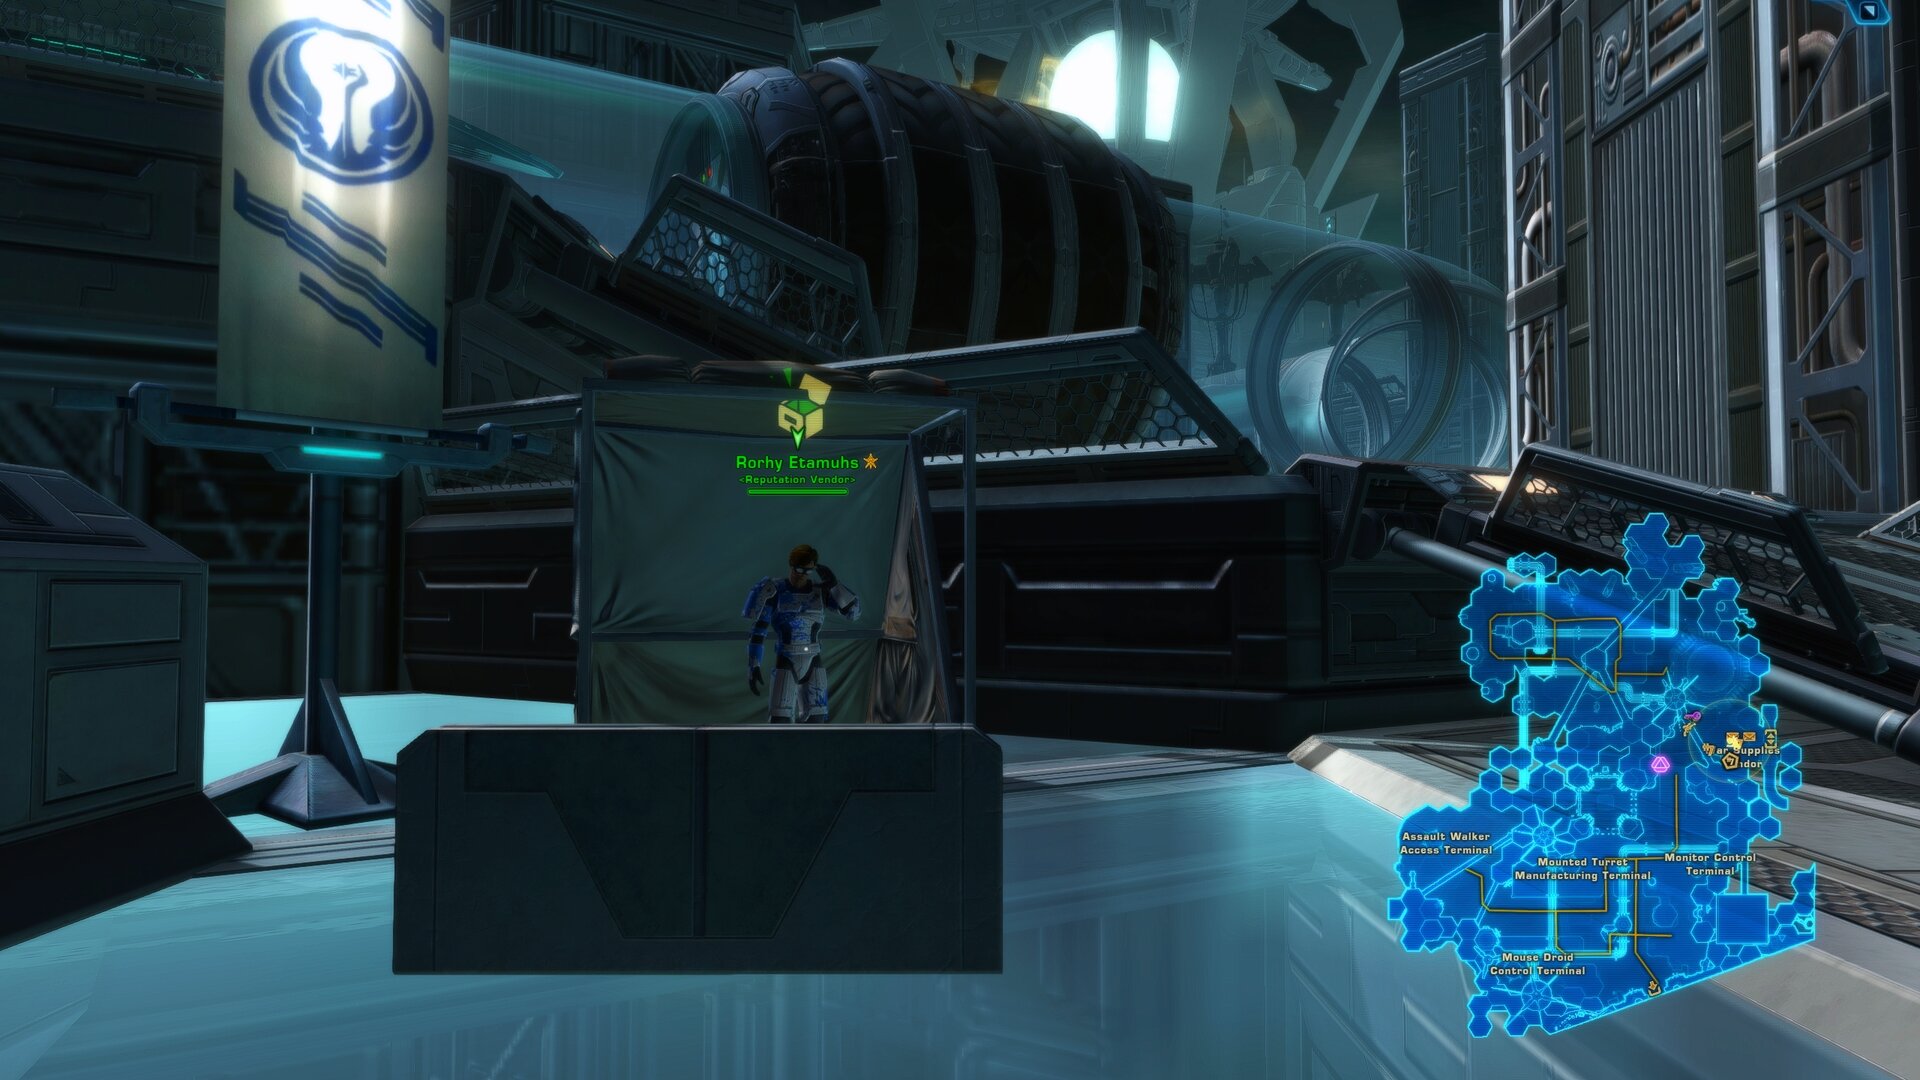
Reputation Vendors
Each reputation vendor is located close to the Fleet Spire Tram (pneumatic tube) and mission board at each faction’s Forward Base.
All Reputation Vendor Rewards and Prices
| Icon | Item Name | Reputation | Price | Side | Side | Item Type | |
|---|---|---|---|---|---|---|---|
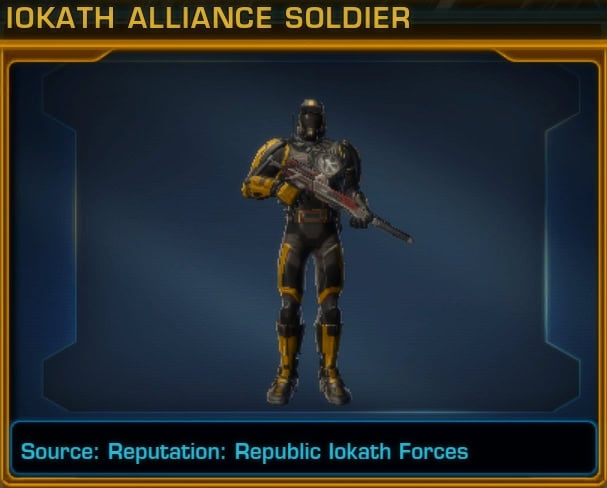
| Iokath Alliance Soldier | Friend | 100 | 100,000 | Republic | Decoration | ||
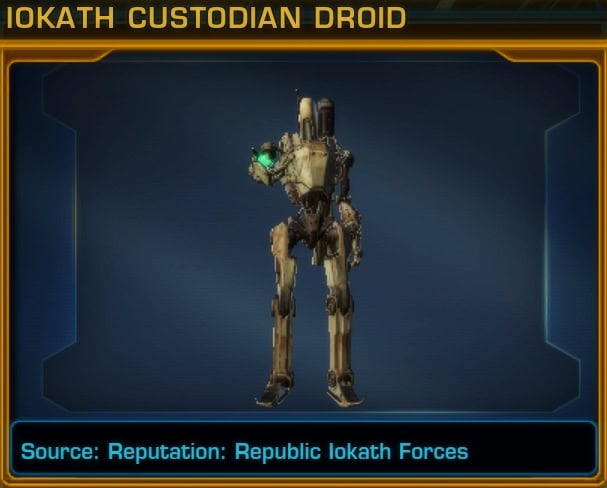
| Iokath Custodian Droid | Newcommer | 100 | 100,000 | Republic | Decoration | ||
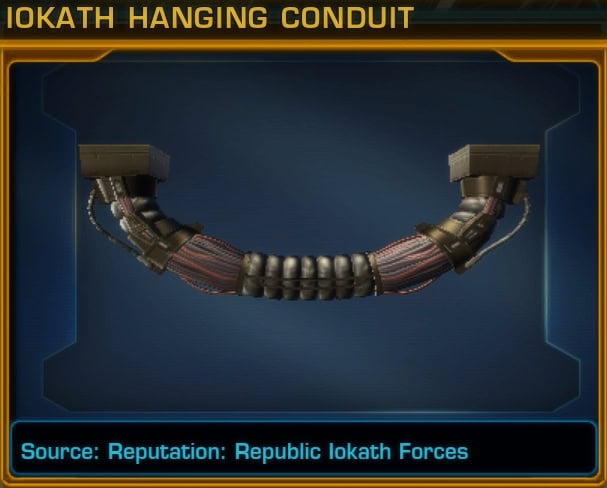
| Iokath Hanging Conduit | Hero | 150 | 150,000 | Republic | Decoration | ||
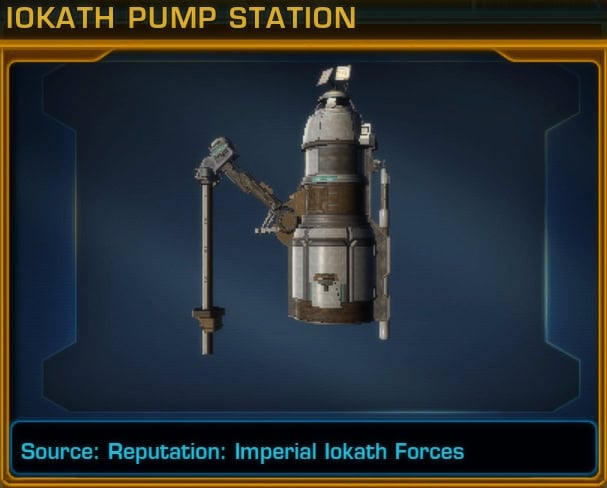
| Iokath Pump Station | Legend | 500 | 1,000,000 | Both | Decoration | ||
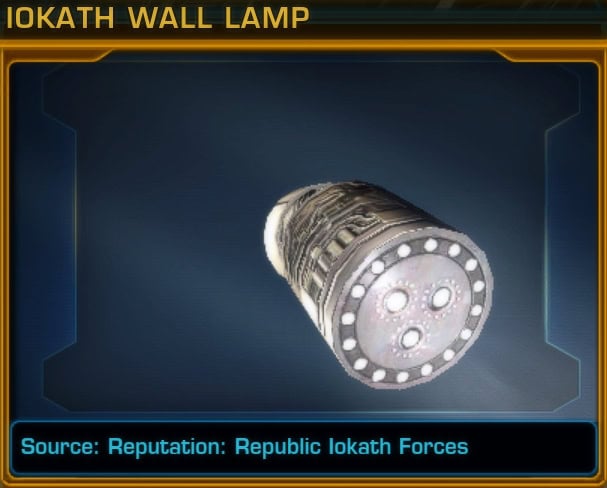
| Iokath Wall Lamp | Champion | 150 | 150,000 | Republic | Decoration | ||
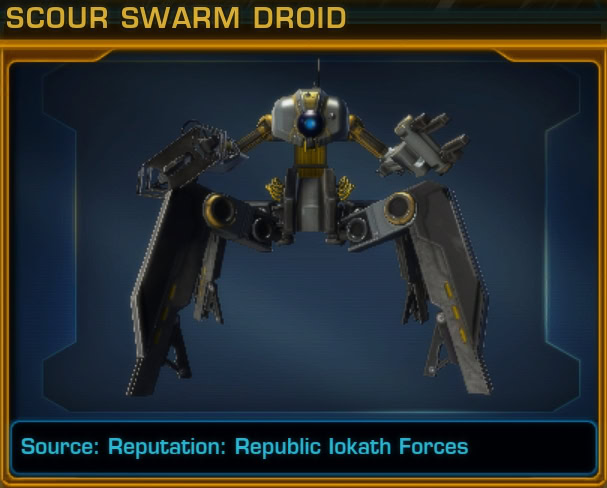
| Scour Swarm Droid | Hero | 100 | 100,000 | Republic | Decoration | ||
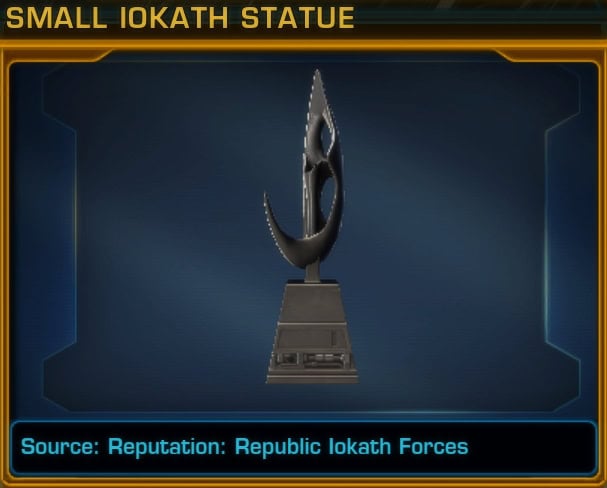
| Small Iokath Statue | Hero | 250 | 200,000 | Republic | Decoration | ||
| Scavenged Remote Miniprobe | Newcommer | 250 | 200,000 | Republic | Minipet | ||
| Iokath X1 Speeder | Legend | 500 | 1,000,000 | Republic | Mount | ||
| Iokath Technographer’s Belt | Outsider | 60 | 60,000 | Republic | Armor | ||
| Iokath Technographer’s Boots | Outsider | 100 | 100,000 | Republic | Armor | ||
| Iokath Technographer’s Harness | Hero | 150 | 150,000 | Republic | Armor | ||
| Iokath Technographer’s Helmet | Hero | 150 | 150,000 | Republic | Armor | ||
| Iokath Technographer’s Pants | Friend | 150 | 150,000 | Republic | Armor | ||
| Iokath Technographer’s Workgloves | Friend | 100 | 100,000 | Republic | Armor | ||
| Iokath Technographer’s Wraps | Newcommer | 60 | 60,000 | Republic | Armor | ||
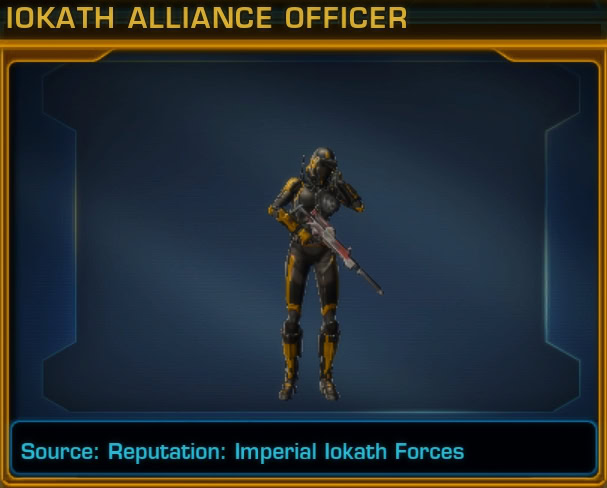
| Iokath Alliance Officer | Friend | 100 | 100,000 | Empire | Decoration | ||
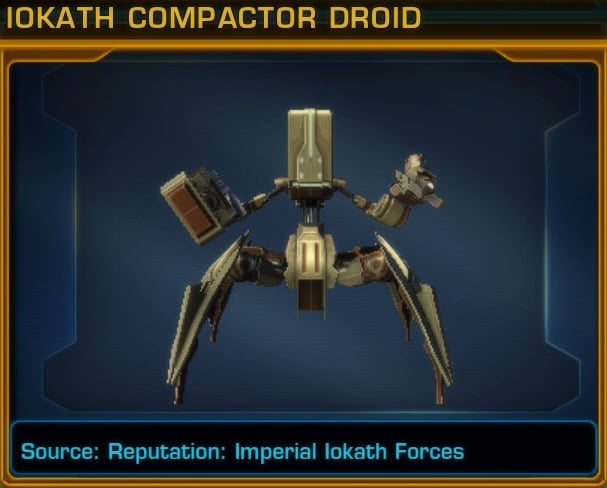
| Iokath Compactor Droid | Hero | 100 | 100,000 | Empire | Decoration | ||
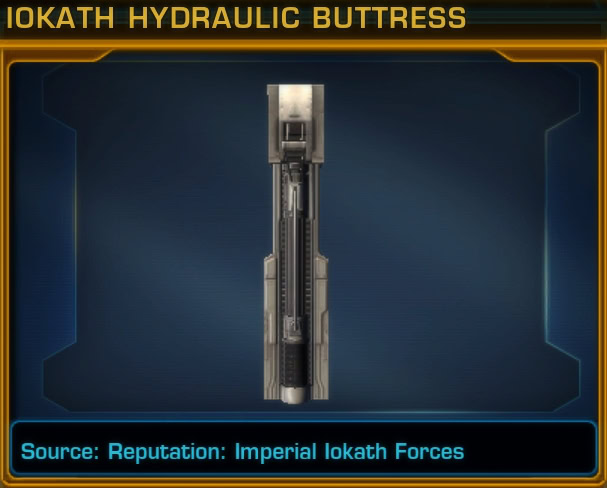
| Iokath Hydraulic Buttress | Hero | 150 | 150,000 | Empire | Decoration | ||
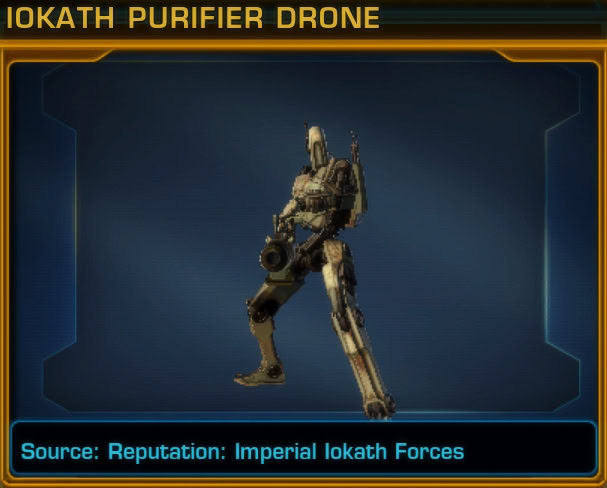
| Iokath Purifier Drone | Newcommer | 100 | 100,000 | Empire | Decoration | ||
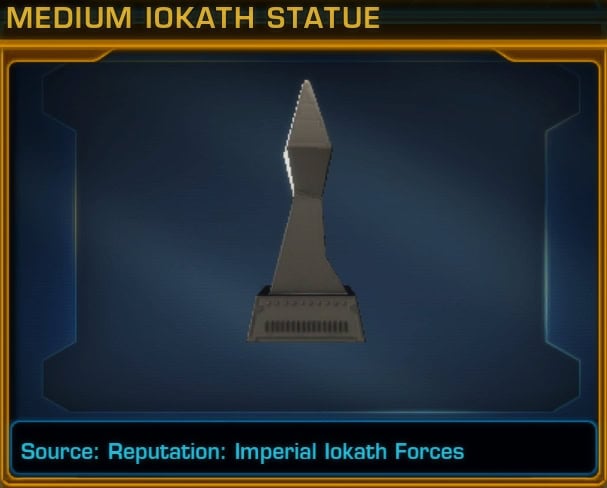
| Medium Iokath Statue | Hero | 250 | 200,000 | Empire | Decoration | ||
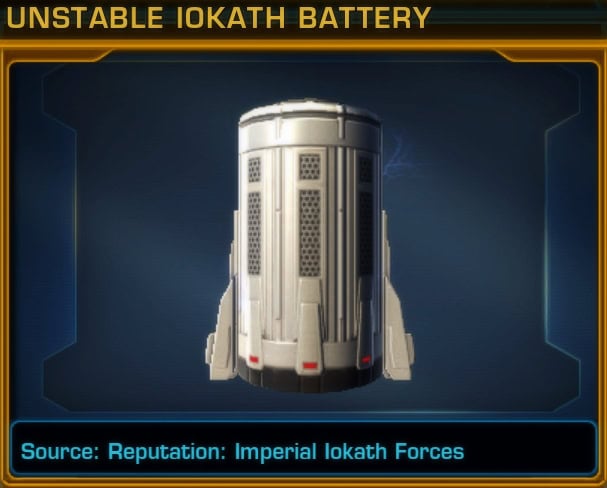
| Unstable Iokath Battery | Champion | 150 | 150,000 | Empire | Decoration | ||
| Refurbished Remote Miniprobe | Newcommer | 250 | 200,000 | Empire | Minipet | ||
| Iokath Z1 Speeder | Legend | 500 | 1,000,000 | Empire | Mount | ||
| Iokath Annihilator’s Bracers | Newcommer | 60 | 60,000 | Empire | Armor | ||
| Iokath Annihilator’s Chestplate | Hero | 150 | 150,000 | Empire | Armor | ||
| Iokath Annihilator’s Clasp | Outsider | 60 | 60,000 | Empire | Armor | ||
| Iokath Annihilator’s Gauntlets | Friend | 100 | 100,000 | Empire | Armor | ||
| Iokath Annihilator’s Greaves | Outsider | 100 | 100,000 | Empire | Armor | ||
| Iokath Annihilator’s Trousers | Friend | 150 | 150,000 | Empire | Armor | ||
| Iokath Annihilator’s Visage | Hero | 150 | 150,000 | Empire | Armor | ||
| Modified Iokath Armor Cell for Monitors | Outsider | 10 | 1,000 | Both | Consumable | ||
| Modified Iokath Armor Cell for Mouse Droids | Friend | 20 | 5,000 | Both | Consumable | ||
| Modified Iokath Armor Cell for Turrets | Friend | 20 | 5,000 | Both | Consumable | ||
| Modified Iokath Armor Cell for Walkers | Friend | 20 | 5,000 | Both | Consumable | ||
| Modified Iokath Movement Cell for Monitors | Champion | 40 | 10,000 | Both | Consumable | ||
| Modified Iokath Movement Cell for Mouse Droids | Champion | 40 | 10,000 | Both | Consumable | ||
| Modified Iokath Movement Cell for Walkers | Champion | 40 | 10,000 | Both | Consumable | ||
| Modified Iokath Range Cell for Turrets | Champion | 40 | 10,000 | Both | Consumable | ||
| Modified Iokath Repair Cell for Monitors | Friend | 20 | 5,000 | Both | Consumable | ||
| Modified Iokath Weapons Cell for Mouse Droids | Outsider | 10 | 1,000 | Both | Consumable | ||
| Modified Iokath Weapons Cell for Turrets | Outsider | 10 | 1,000 | Both | Consumable | ||
| Modified Iokath Weapons Cell for Walkers | Outsider | 10 | 1,000 | Both | Consumable | ||
Iokath Reputation Vendor Armor Sets
Each faction sells a unique armor set that costs a combined 770 Iokath Power Shards and 770,000 Credits. You can get the entire set by the time you reach Hero rank with the respective faction.
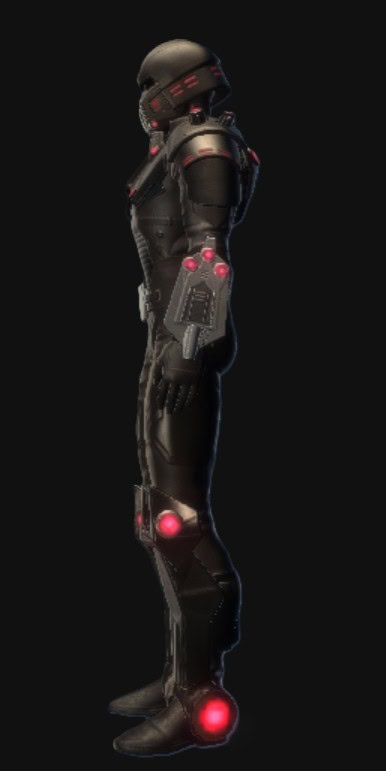
Iokath Annihilator Set (Imperial)
The Iokath Annihilator set is black angular Sith Warrior-style armor available on the Imperial Iokath reputation vendor. Notably, it shares the same belt and pants as a the Crimson Talon’s Armor set. The lights all over the set are magenta, not red, and do not dye.


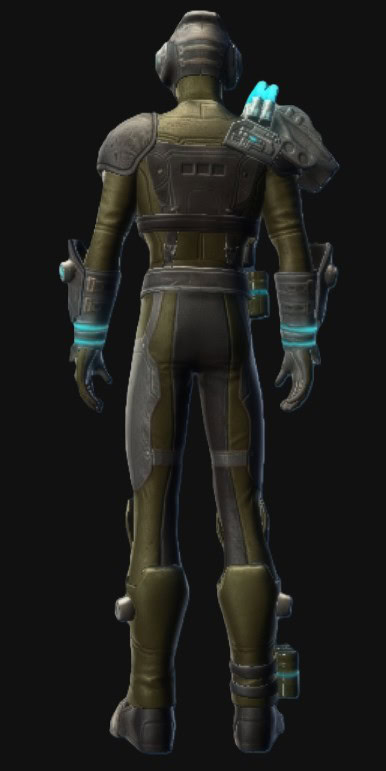
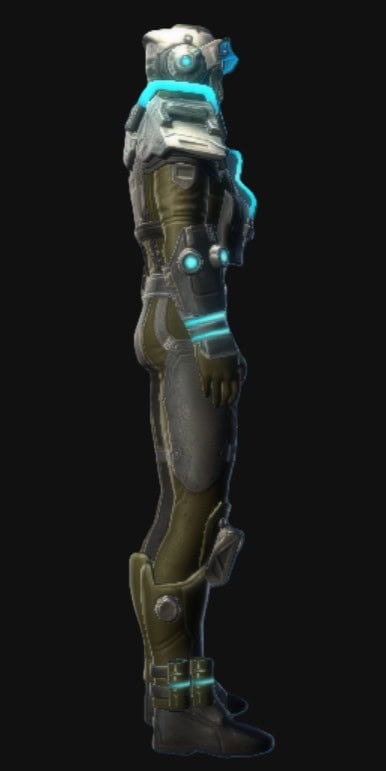
Iokath Technographer Set (Republic)
The Iokath Technographer Set is tubular tech-style armor available on the Republic Iokath reputation vendor. The visor comes down during combat. The metal and blue bits do not dye.


Iokath Reputation Vendor Decos
Below, you’ll find both the Imperial and Republic Iokath Decorations. They follow a similar schema, but each faction offers a different set of 6 decos, though the Iokath Pump Station is available from both, meaning there are 13 decos total.
Imperial Iokath Decorations
Republic Iokath Decorations
Iokath Reputation Mounts
Both Iokath mounts share the unique arrowhead model with different paint jobs. They require Legend standing with their respective faction and cost 500 Iokath Power Shards along with 1 million credits.
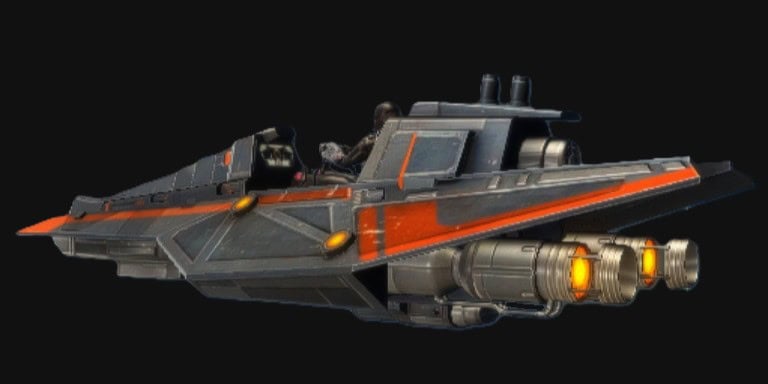
Iokath Z1 Speeder (Imperial)
The Iokath Z1 Speeder is mostly metallic dark gray with orange accents. It is available from the Imperial reputation vendor.

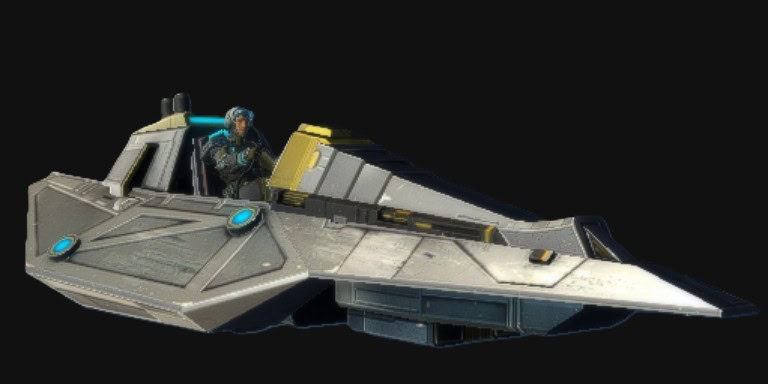
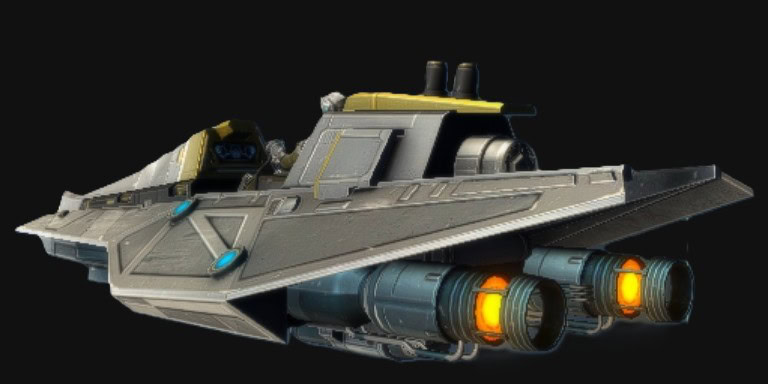
Iokath X1 Speeder (Republic)
The Iokath X1 Speeder is mostly metallic sliver with gold and blue accents. It is available from the Republic reputation vendor. The icon is incorrect.
Minipets
Each faction sells a nearly identical Remote Miniprobe minipet that costs 250 Iokath Power Shards and 200k credits and requires Newcomer standing with the associated faction.

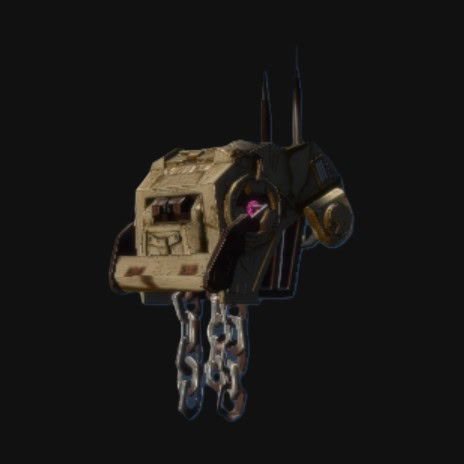
The only differences are the color of the chassis and the eye. Strangely, these colors do not match their associated speeders or armor sets. One would think the Refurbished probe would have a blue eye and be available on the Republic vendor while the Scavenged probe would be sold by the Imperial vendor.
Shared Consumables
Both reputation vendors sell a set of Modified Iokath [Type] Cell for [Vehicle] consumables that provide a +20% boost to HP, movement speed, or damage dealt for 30 mins in exchange for a small amount of credits and Iokath Power Shards.
These buffs work with each other but are not available for the Machine Gods you can pilot. The Turrets and Iokath Monitors have buffs to range and healing dealt in lieu of movement speed and damage dealt, respectively.
Other Iokath Vendors
Temporary Abilities Droid
In addition to the pilotable machinery, each faction has an astromech droid that lets you exchange a tiny amount of credits and Iokath Power Shards for additional abilities on your Temporary Ability Bar, similar to the ones you get in Uprisings and newer daily areas.
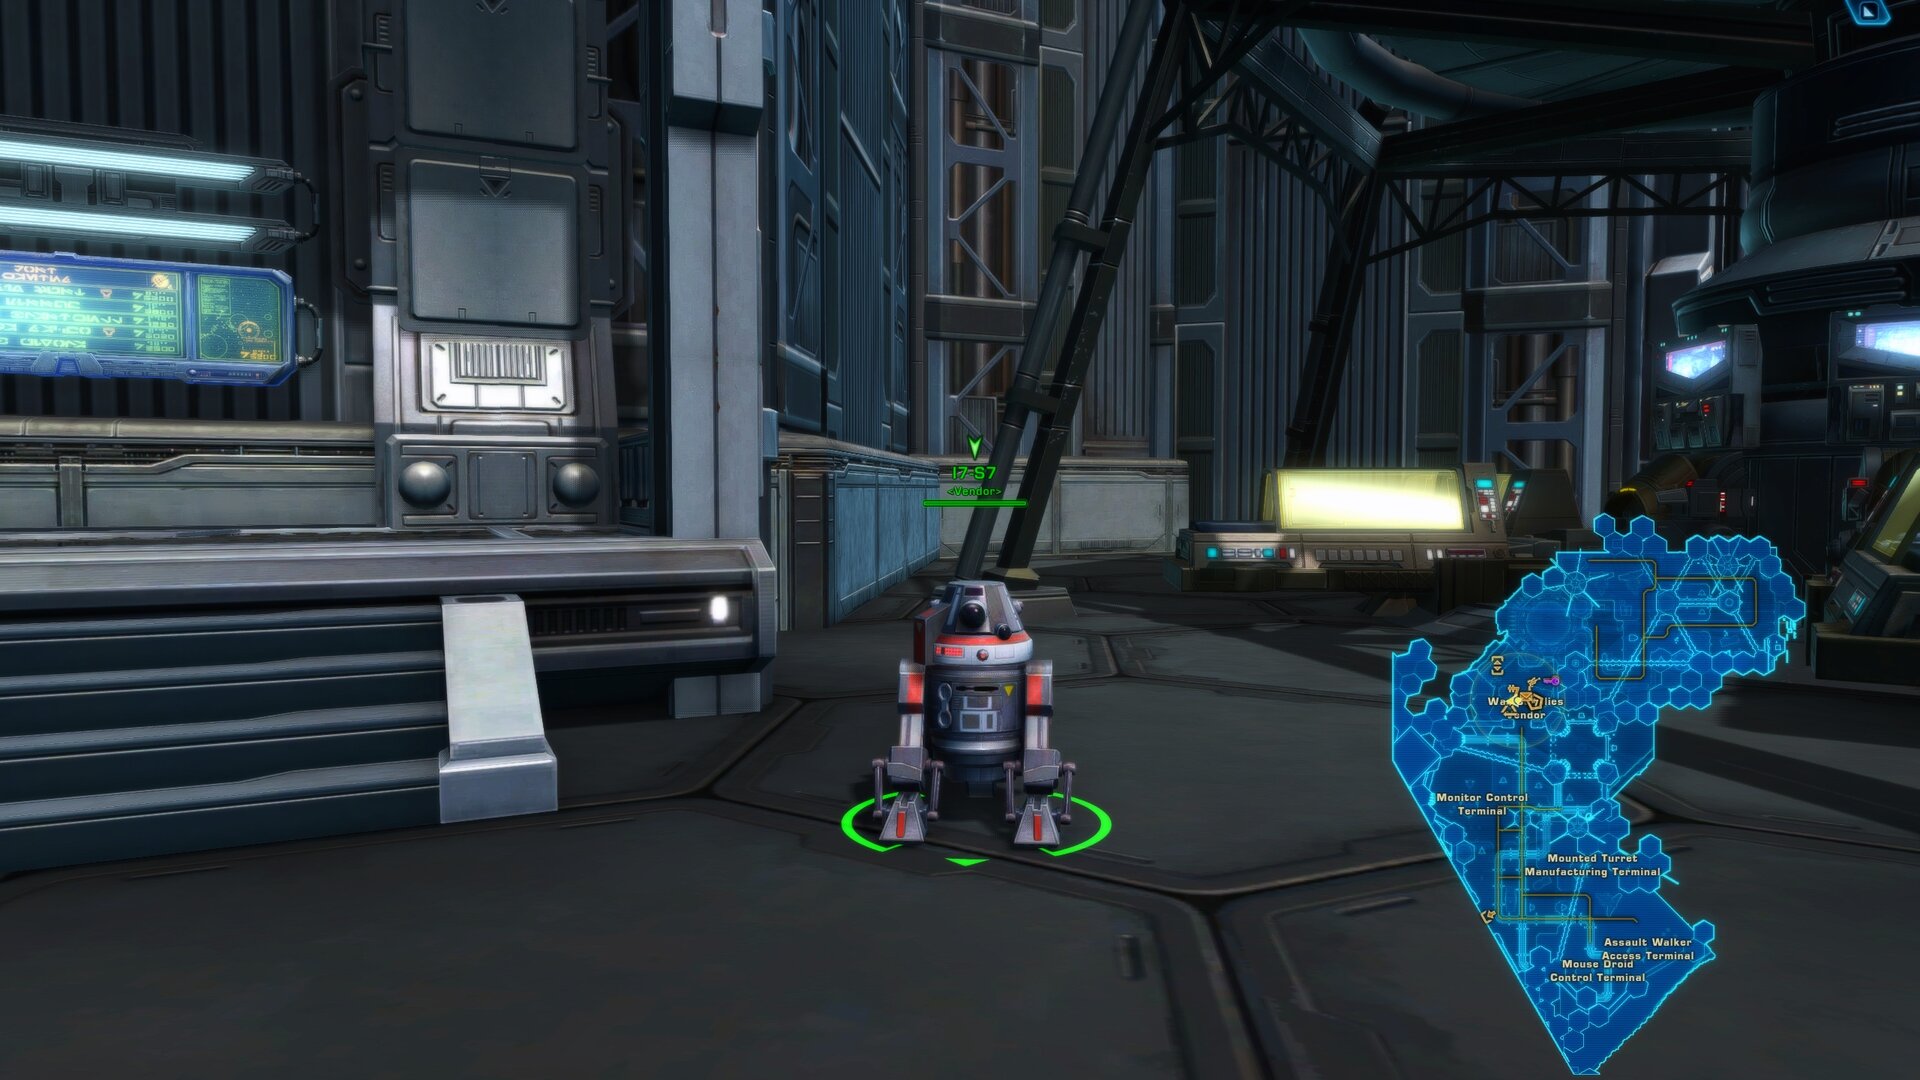

Each of the following temporary abilities can be used 2-3 times (2 for turrets, 3 for the others) before they disappear from your bar. You can obtain all 5 abilities at the same time, but you can’t buy the same one multiple times to stack more ammo.
- Stealth
- Armor Piercing Rocket
- Portable Sentry Turret (Tank)
- Portable Missile Turret (DPS)
- Portable Carbonite Turret (Support)

Those Armor Piercing Rockets are the key to defeating the Colossus Droid, as each chomps through 20% of the droid’s max HP, so you chew through 60% damage overall, making it possible to duo (too bad you have no friends). The turrets are practically worthless in this pursuit.
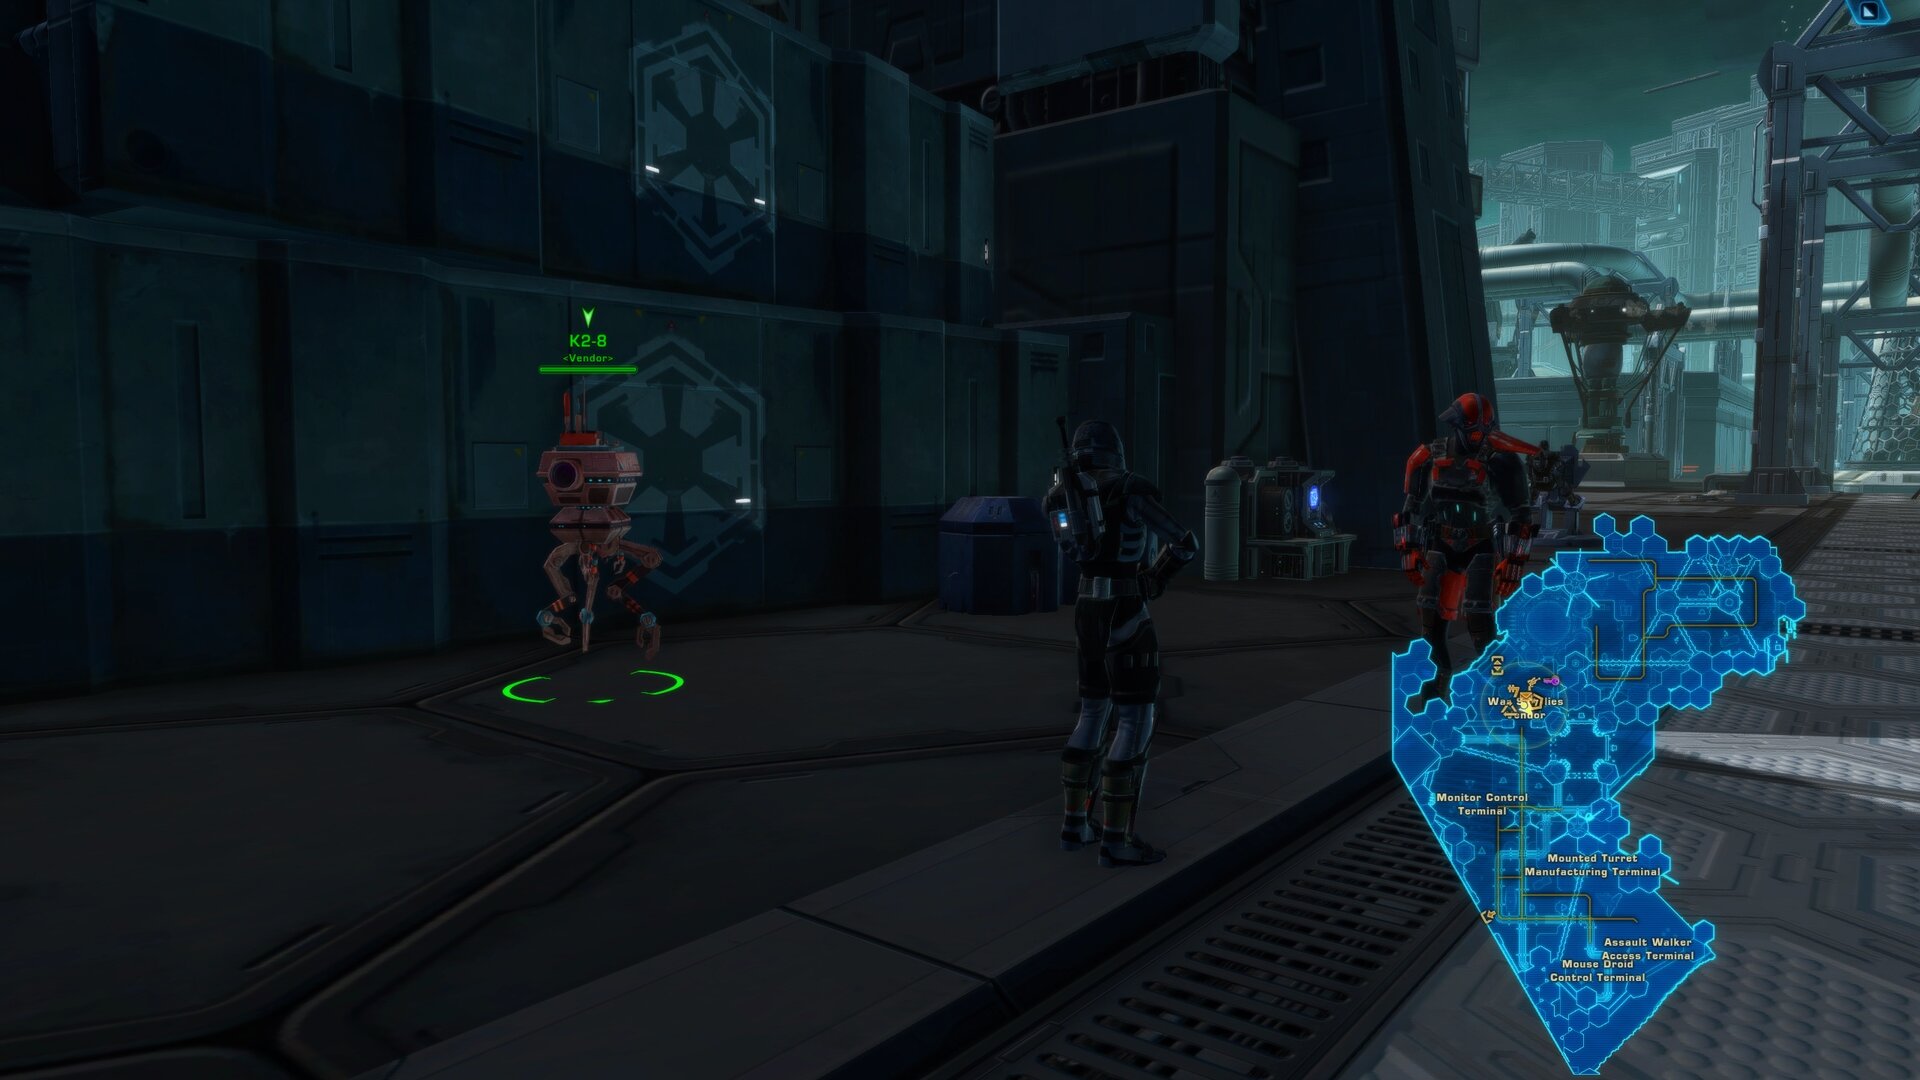
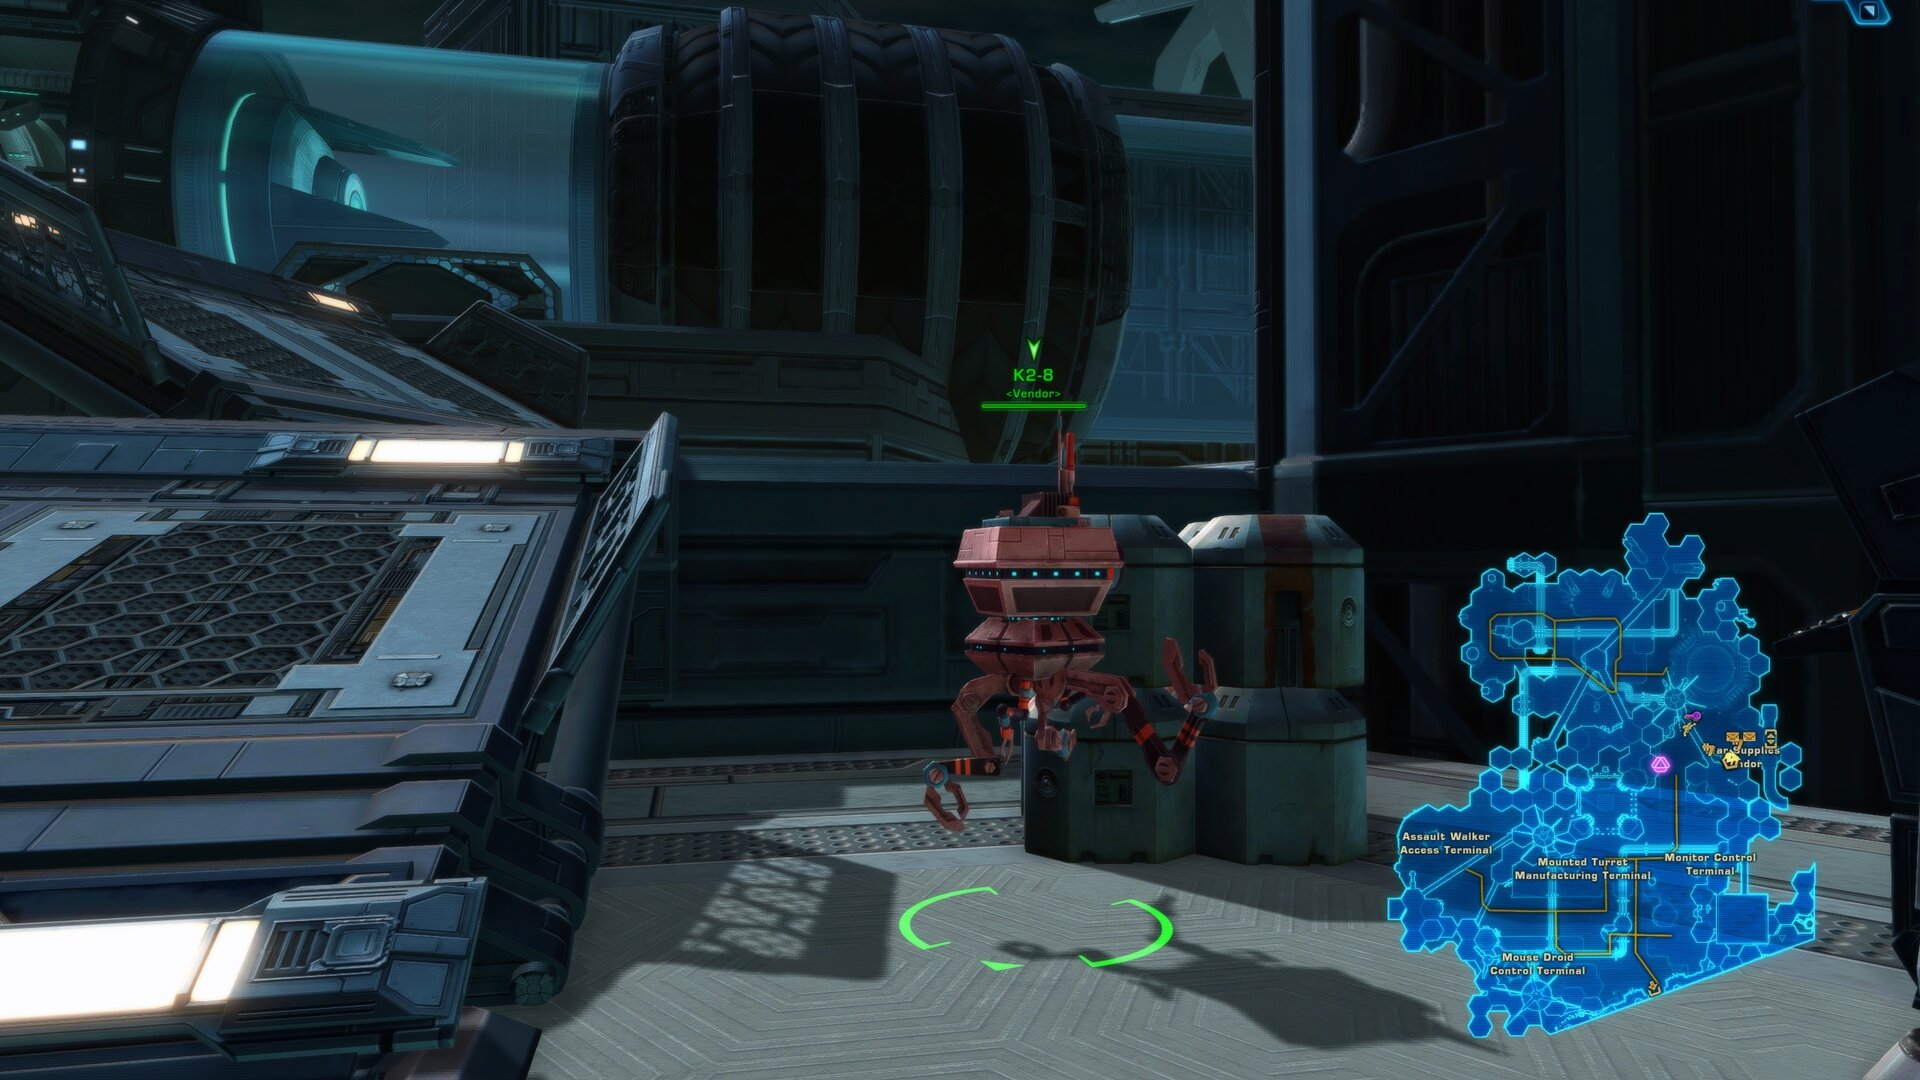
Crafting Materials to Power Shards Converter
A GSI Probe Droid named K2-8 will let you exchange Grade 10 Gathering materials (Slicing excluded) for Iokath Power Shards in denominations of 12, 36, 120, and 1,200 at a ~3.5:1 exchange rate that favors exchanging smaller amounts of materials for Iokath Power Shards.
Achievements
There are 53 achievements on Iokath. Spread across four categories, the achievements will ask that you complete the story of War of Iokath, all daily and weekly missions, pilot machines, complete the Gods From the Machine Operation on Iokath and participage in Player vs Player combat.
You can find the Iokath Achievements in your Legacy window:
Achievements ► Dailies ► Iokath
Unusual for most Daily Areas in SWTOR, here you can earn Cartel Coins for completing a few of the toughest and most demanding and time-consuming achievements.
The table below is interactive. You can search, sort and filter it. The achievements listed in bold are the ones you earn rewards from. Click on the “plus” symbol to see more details about each achievement and learn what you have to do to complete it.
| Icon | Name | Category | Legacy Points | Description: | Reward: | Has Reward? |
|---|---|---|---|---|---|---|
 | Iokath Slaughter | General | 10 | Defeated 1000 non-player opponents in the lokath daily area. | No | No |
 | Iokath Carnage | General | 25 | Defeated 2500 non-player opponents in the lokath daily area. | No | No |
 | Iokath Destruction | General | 50 | Defeated 5000 non-player opponents in the lokath daily area. | No | No |
 | Iokath Liquidation | General | 100 | Defeated 10000 non-player opponents in the lokath daily area. | No | No |
| Iokath: Droid Killer | General | 5 | Destroyed 150 lokath droids in the lokath daily area. | No | No | |
| Iokath: Droid Butcher | General | 10 | Destroyed 300 lokath droids in the lokath daily area. | No | No | |
| Iokath: Droid Assassin | General | 20 | Destroyed 600 lokath droids in the lokath daily area. | No | No | |
| Iokath: Droid Exterminator | General | 50 | Destroyed 1000 lokath droids in the lokath daily area. | No | No | |
| Iokath Conquest | General | 100 | Completed all combat achievements in the lokath daily area: – lokath Carnage – lokath Destruction – lokath Liquidation – lokath Slaughter – lokath: Droid Assassin – lokath: Droid Butcher – lokath: Droid Exterminator – Iokath: Droid Killer | Cartel Coins x20 | Yes | |
 | Explore Iokath | Exploration | 10 | Uncovered all map areas of lokath, in the lokath daily area: – Alliance Base – Docking Ring – Imperial lokath Base – lokath Expanse – Republic lokath Base – Superweapon Command Center – Weapons Factory | No | No |
 | Iokath Subduer | Player Vs. Player | 5 | Defeated 25 enemy players in the lokath daily area. | No | No |
| Iokath Vanquisher | Player Vs. Player | 10 | Defeated 75 enemy players in the lokath daily area. | No | No | |
| Iokath Subjugator | Player Vs. Player | 20 | Defeated 150 enemy players in the lokath daily area. | No | No | |
| Iokato Victor | Player Vs. Player | 50 | Defeated 500 enemy players in the lokath daily area. | No | No | |
| Iokath: Defending the Empire | Player Vs. Player | 5 | Defeated 10 Republic guards and defense turrets on lokath. | No | No | |
| Iokath: Safeguarding the Empire | Player Vs. Player | 10 | Defeated 25 Republic guards and defense turrets on lokath. | No | No | |
| Iokath: Preserving the Empire | Player Vs. Player | 20 | Defeated 50 Republic guards and defense turrets on lokath. | No | No | |
| Iokath: Defending the Republic | Player Vs. Player | 5 | Defeated 10 Imperial guards and defense turrets on lokath. | No | No | |
| Iokath: Safeguarding the Republic | Player Vs. Player | 10 | Defeated 25 Imperial guards and defense turrets on lokath. | No | No | |
| Iokath: Preserving the Republic | Player Vs. Player | 20 | Defeated 50 Imperial guards and defense turrets on lokath. | No | No | |
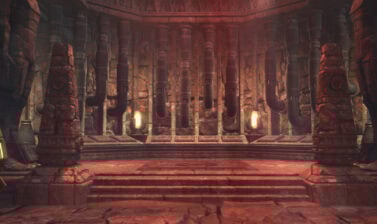
| The Fire of Aivela | Player Vs. Player | 10 | Defeated 50 enemy players in the lokath daily area while controlling Aivela. How to do it: Defeat the boss (Aivela) in Gods from the Machine Operation, obtain a Control Module. At the Suprerweapon Control Center, use the Control Seat (the throne at the top of the platform) to convert the Control Module along with 1,000 Iokath Power Shards into a Power Relay. Take it to the boss’ command console (there are three behind the throne). Play with it until you complete the achievement. | Cartel Coins x20 | Yes |
| The Jealousy of Esne | Player Vs. Player | 10 | Defeated 50 enemy players in the lokath daily area while controlling Esne. How to do it: Defeat the boss (Esne) in Gods from the Machine Operation, obtain a Control Module. At the Suprerweapon Control Center, use the Control Seat (the throne at the top of the platform) to convert the Control Module along with 1,000 Iokath Power Shards into a Power Relay. Take it to the boss’ command console (there are three behind the throne). Play with it until you complete the achievement. | Cartel Coins x20 | Yes |
| Tyths Rage | Player Vs. Player | 10 | Defeated 50 enemy players in the lokath daily area while controlling Tyth. How to do it: Defeat the boss (Tyth) in Gods from the Machine Operation, obtain a Control Module. At the Suprerweapon Control Center, use the Control Seat (the throne at the top of the platform) to convert the Control Module along with 1,000 Iokath Power Shards into a Power Relay. Take it to the boss’ command console (there are three behind the throne). Play with it until you complete the achievement. | Cartel Coins x20 | Yes |
| Walking All Over Them | Player Vs. Player | 10 | Defeated 50 enemy players in the lokath daily area while using a walker. How to do it:a Interact with the Assault Walker Access Terminal, available in each faction base. Purchase an Assault Walker for Credits and Iokath Power Shards and defeat 50 players while piloting it. | Cartel Coins x20 | Yes |
| Traitor To Your Own | Player Vs. Player | 20 | Defeat 50 Agent, Bounty Hunter, Inquisitor or Warrior players in the lokath daily area as an Agent, Bounty Hunter, Inquisitor or Warrior. | No | No | |
| Defeating Your Own | Player Vs. Player | 20 | Defeat 50 Consular, Knight, Smuggler or Trooper players in the lokath daily area as a Consular, Knight, Smuggler or Trooper. | No | No | |
| Hero of Iokath | Player Vs. Player | 100 | Completed all Player vs Player achievements in the lokath daily area: – lokath Subduer – lokath Subjugator – lokath Vanquisher – lokath Victor – lokath: Defending the Empire – lokath: Defending the Republic – lokath: Preserving the Empire – lokath: Preserving the Republic – lokath: Safeguarding the Empire – lokath: Safeguarding the Republic | Cartel Coins x20 | Yes | |
| Found and Remembered | Missions | 5 | Completed the mission: The Forgotten World. | No | No | |
| Take Cover | Missions | 10 | Completed the mission: Shots Fired. | No | No | |
| Power Up | Missions | 20 | Completed the mission: The Lost Arsenal. | No | No | |
| Superweapon Showdown | Missions | 50 | Completed the mission: Showdown on lokath. | No | No | |
| Shut it Down | Missions | 5 | Completed the daily mission: Systems Offline. | No | No | |
| Start it Up | Missions | 5 | Completed the daily mission: Systems Go. | No | No | |
| Tiny Scare | Missions | 5 | Completed the daily mission: The Meek and the Mighty. | No | No | |
| Walk Through | Missions | 5 | Completed the daily mission: Fractured Alliances. | No | No | |
| Sphere Monitor | Missions | 5 | Completed the daily mission: Detect and Destroy. | No | No | |
| I’m Walking Here | Missions | 5 | Completed the daily mission: Walking the Walk. | No | No | |
| Fortified | Missions | 5 | Completed the daily mission: Fortify the Defenses. | No | No | |
| On the Mend | Missions | 5 | Completed the daily mission: Mend a Broken Shard. | No | No | |
| Light Show | Missions | 5 | Completed the daily mission: Disarm. | No | No | |
| Factoring | Missions | 5 | Completed the daily mission: Powering Up the Weapons Factory. | No | No | |
| Droid Sauna | Missions | 5 | Completed the daily mission: Time to Vent. | No | No | |
| Dock Defense | Missions | 5 | Completed the daily mission: Defend the Docking Ring. | No | No | |
| Check It Out | Missions | 5 | Completed the daily mission: Scouting lokath. | No | No | |
| Subverted | Missions | 5 | Completed the daily mission: Subverting the Tower Droids. | No | No | |
| Networking | Missions | 5 | Completed the daily mission: Disrupting the Network. | No | No | |
| Situated | Missions | 5 | Completed the daily mission: Monitoring the Situation. | No | No | |
| Path Open | Missions | 5 | Completed the daily mission: Clearing the Path. | No | No | |
| Who Cares | Missions | 5 | Completed the daily mission: Taking Care of the Caretakers. | No | No | |
| Massive Destruction | Missions | 5 | Completed the daily mission: Colossal Threat. | No | No | |
| Mission Scrub | Missions | 5 | Completed the daily mission: Scrubbing Out the Scour Droids. | No | No | |
| Together | Missions | 50 | Completed the weekly mission: Alliance Divided. | No | No | |
| Sphere of Infuence | Missions | 100 | Completed all mission achievements in the lokath daily area: – Check It Out – Dock Defense – Droid Sauna – Factoring – Fortified – Found and Remembered – I’m Walking Here – Light Show – Massive Destruction – Mission Scrub – Networking – On the Mend – Path Open – Power Up – Shut it Down – Situated – Sphere Monitor – Start it Up – Superweapon Showdown – Take Cover – Tiny Scare – Together – Walk Through – Who Cares | Cartel Coins x20 | Yes |
Although this guide has been updated several times over the years, I want to thank Mox and JT for their help in the initial creation of the mission walkthroughs back in 2017!